
Ceramic vessels are basically the perfect playground: you get a simple form, then you can push it toward functional, sculptural, or totally whimsical. Here are my favorite ceramic vessel ideas—starting with the classics and drifting into the fun, unexpected stuff.
Classic Cylinder Vase With a Clean Rim
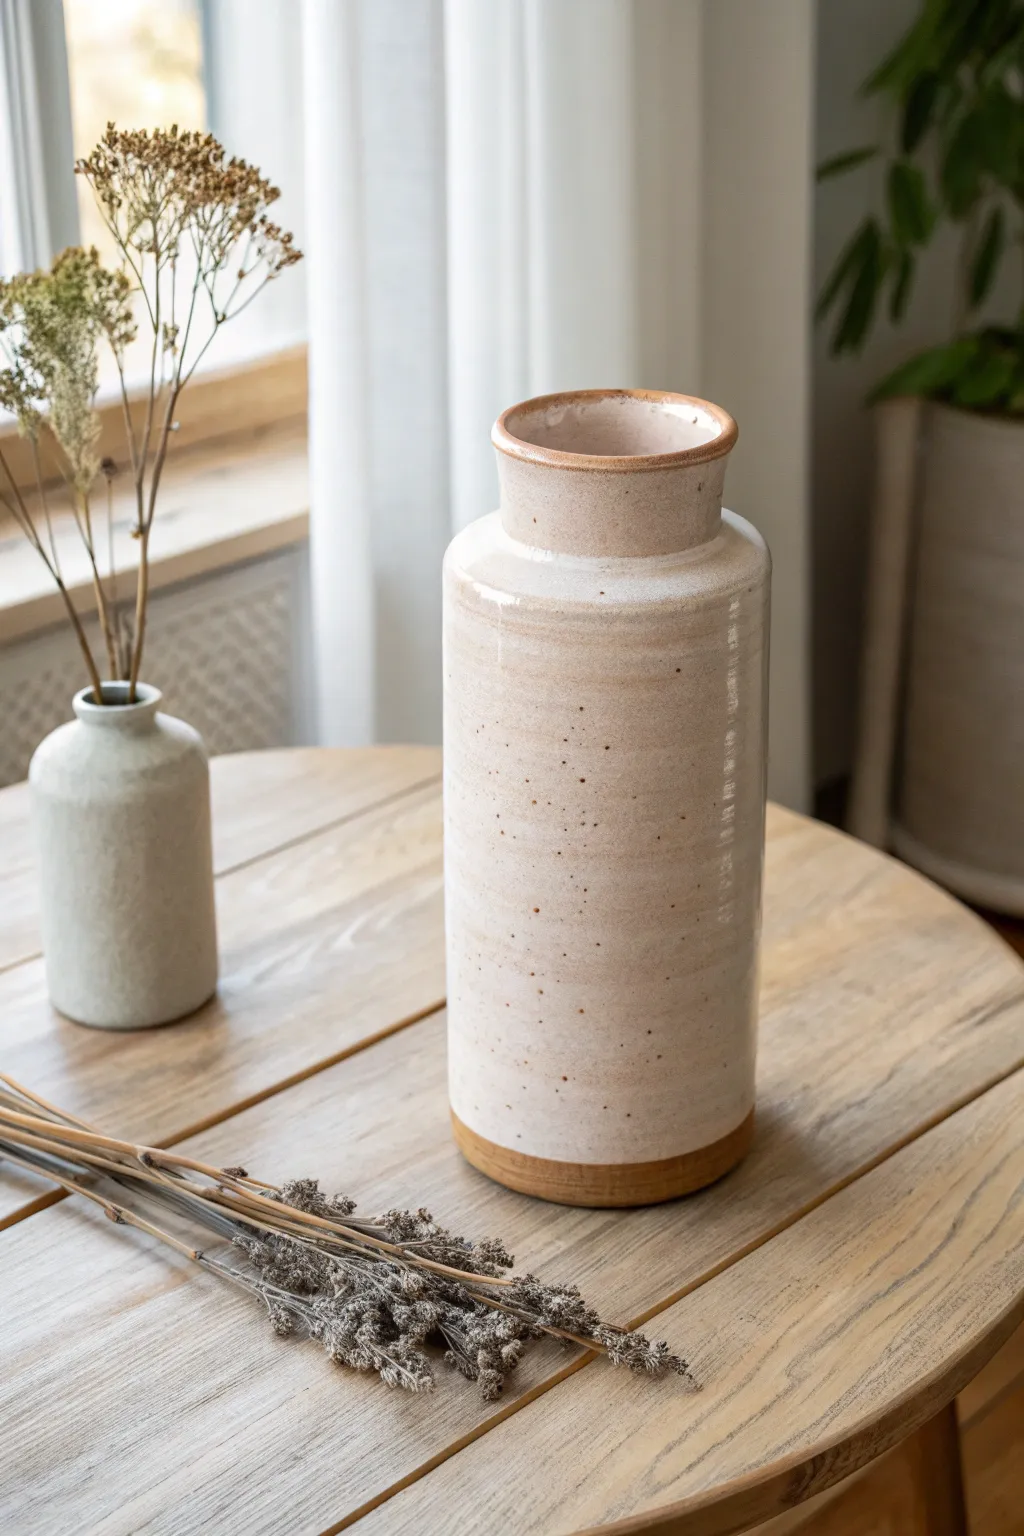
This elegant cylinder vase combines the rustic charm of speckled stoneware with a clean, modern silhouette. Its tall, straight sides are softened by a gently tapered neck and a distinctively flared rim, while the exposed raw clay base adds a beautiful textural contrast.
Step-by-Step Tutorial
Materials
- Speckled buff stoneware clay (approx. 3-4 lbs)
- Pottery wheel
- Medium bucket of water
- Sponge
- Wire cutter
- Needle tool
- Rib tool (wooden or metal)
- Trimming tools
- Garrity stick or chamois leather
- Creamy matte or satin white glaze
Step 1: Throwing the Base Form
-
Center the Clay:
Begin by slamming your wedged ball of speckled clay onto the center of the wheel head. Use steady pressure and water to cone the clay up and down until it is perfectly centered and spinning without wobbling. -
Open and Establish the Floor:
Drill your thumbs into the center to open the clay, leaving about a half-inch of thickness for the floor. Pull the floor outward towards your body to establish the inner width of the cylinder, compressing the bottom with a flat rib to prevent S-cracks later. -
Initial Pulls:
Begin pulling the walls upward. For a tall cylinder like this, focus on gaining height early rather than width. Keep your hands steady and move upwards at a consistent pace with the wheel speed. -
Refining the Cylinder Shape:
Continue pulling the walls until they are uniform in thickness, aiming for about 1/4 inch thick. Use a metal rib on the outside against your inside hand to scrape away slip and straighten the walls into a perfect vertical line. -
Create the Shoulder:
Once you have your height, gently collar the top 2-3 inches of the vessel inward. Do this slowly with wet hands, compressing the clay to thicken the neck slightly and create that subtle inward taper.
Wobbly Walls?
If the rim starts getting uneven during pulling, slice off the uneven top with a needle tool while the wheel spins. Re-compress the new edge immediately.
Step 2: Forming the Rim and Finishing
-
The Flared Rim:
Unlike a simple straight rim, this vase features a distinct flare. Gently press your thumb inside the very top edge and pull strictly outward while supporting the outside with your finger, creating a flat, ribbon-like lip. -
Smoothing the Edge:
Use a piece of chamois or a very wet sponge to compress the rim. This softens the angle and ensures it is pleasant to touch, while also preventing future chipping. -
Clean the Base:
Use a wooden knife tool to undercut the base of the pot while it’s still on the wheel. This creates a guideline for where your unglazed foot will eventually be. -
Wire Off:
Pull a taut wire through the bottom of the pot to release it from the wheel head. Carefully lift it off using pot lifters or dry hands and set it aside to dry to leather-hard.
Step 3: Trimming and Glazing
-
Trimming the Foot:
Once the piece is leather-hard, center it upside down on the wheel. Secure it with clay lugs. Trim the bottom and sides to refine the weight, creating a sharp 90-degree angle about an inch up from the bottom. -
Defining the Raw Line:
Carve a very shallow groove or line where the trimming ends. This will act as a ‘stop’ line for your glazing later, ensuring a crisp transition between glaze and raw clay. -
Bisque Fire:
Allow the vase to dry completely (bone dry) before loading it into the kiln for a bisque firing (typically Cone 04-06 depending on your clay body). -
Wax Resist:
Apply wax resist to the bottom of the foot and up the side wall to your defined line. This is crucial for achieving that clean, straight line of exposed clay shown in the image. -
Glazing:
Pour a creamy white glaze into the interior, swirl to coat, and pour out. Then, dip the exterior into the glaze bucket, holding it by the foot (or use tongs). The wax will repel the glaze at the bottom. -
Wipe and Fire:
Use a damp sponge to wipe away any stray droplets of glaze that may have beaded up on the waxed area. Load into the kiln for the final glaze firing to mature the clay and melt the glaze.
Iron Speckle Reveal
A slightly thinner glaze application will allow more of the clay’s natural iron speckles to burn through, creating that lovely speckled vanilla bean look.
Fill your new vessel with dried grasses or fresh blooms to complete the organic aesthetic


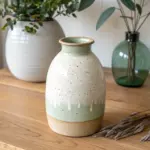
Bottle-Neck Bud Vase for Single Stems

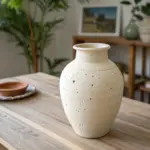
This charming bud vase features a satisfyingly round belly that tapers into a delicate, narrow neck, perfect for showcasing a single stem or a tiny posy. The creamy, speckled finish gives it an organic, handcrafted feel that adds warmth to any windowsill.
How-To Guide
Materials
- Speckled cream clay body (or standard stoneware with iron oxide)
- Pottery wheel
- Throwing sponge
- Pin tool
- Wire cutter tool
- Wooden throwing ribs
- Calipers (optional but helpful)
- Chamois leather strip
- Transparent or glossy white glaze
- Glaze bucket and tongs
- Kiln
Step 1: Throwing the Form
-
Prepare the Clay:
Start by wedging about 1 to 1.5 pounds of speckled clay thoroughly to remove air bubbles. Form it into a tight, smooth ball before slamming it onto the center of your wheel head. -
Center the Clay:
Get the wheel spinning at a good speed. Wet your hands and coning the clay up and down helps center the mass perfectly. Ensure the base is secure on the bat. -
Open the Form:
Press your thumbs into the center to open the clay, leaving about a half-inch thick floor at the bottom. Pull the floor out slightly, but remember this is a small-footed vase, so don’t go too wide. -
Establish the Cylinder:
Slow the wheel down slightly. Make your first pull to create a basic cylinder shape. Keep the walls even, but leave a bit more thickness at the top rim to account for the necking in later. -
Belly Out the Form:
Starting from the inside bottom, gently push the clay outward while supporting the outside with a rib or your sponge. Create a round, bulbous shape for the body, keeping the curve smooth and continuous. -
Collar the Neck:
This is the crucial step for the bottleneck. Wet your hands well and gently squeeze the upper third of the clay inward (collaring) to narrow it. Do this gradually in several passes to avoid buckling the clay. -
Refine the Narrow Neck:
As the neck gets narrower, use just your fingertips or a chopstick handle on the inside to pull the neck upward and thin it out. Aim for a delicate transition from the round body to the vertical neck. -
Flare the Rim:
Once the neck height is established, gently press the very top edge outward to create a small, inviting flare. Smooth the lip with a piece of chamois leather for a professional finish. -
Cut and Remove:
Use a wooden tool to undercut the base slightly, creating a slight shadow line. Run your wire tool underneath the vase to separate it from the wheel head and slide it onto a ware board.
Collaring Woes?
If the clay ripples or twists while narrowing the neck, you’re squeezing too hard or the clay is too dry. Add water, speed up the wheel slightly, and use gentler, evenly distributed pressure.
Step 2: Trimming and Finishing
-
Leather Hard Stage:
Allow the vase to dry until it reaches a leather-hard state. It should be firm enough to handle without deforming but soft enough to carve. -
Trim the Foot:
Place the vase upside down on the wheel (you may need a chuck or a foam bat due to the narrow neck). Trim away excess clay from the bottom to create a clean, defined foot ring that mirrors the top rim’s curve. -
Bisque Fire:
Once bone dry, load the vase into the kiln for a bisque firing. This initial firing hardens the clay and prepares it for glazing.
Speckle Magic
Don’t have speckled clay? Mix 1-2 teaspoons of granular illmenite or coarse iron oxide into your white clay pug for that authentic spotted look.
Step 3: Glazing
-
Wipe Down:
Use a damp sponge to wipe any dust off the bisque-fired vase. This ensures the glaze adheres properly without crawling. -
Glaze Application:
Dip the entire vase into a bucket of transparent or semi-opaque creamy white glaze. Shake gently to remove drips. I find holding it by the foot ring and dipping neck-first works best for coverage. -
Clean the Foot:
Once the glaze is dry to the touch, rigorously wipe the bottom foot ring clean with a sponge so it doesn’t fuse to the kiln shelf. -
Glaze Fire:
Fire the vase again to the temperature appropriate for your clay and glaze (likely Cone 5 or 6 for stoneware). This will bring out those lovely speckles from the clay body.
Your finished vase is now ready to hold its first bloom.


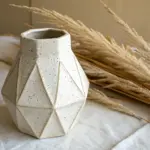
Rounded Moon Jar Style Vessel
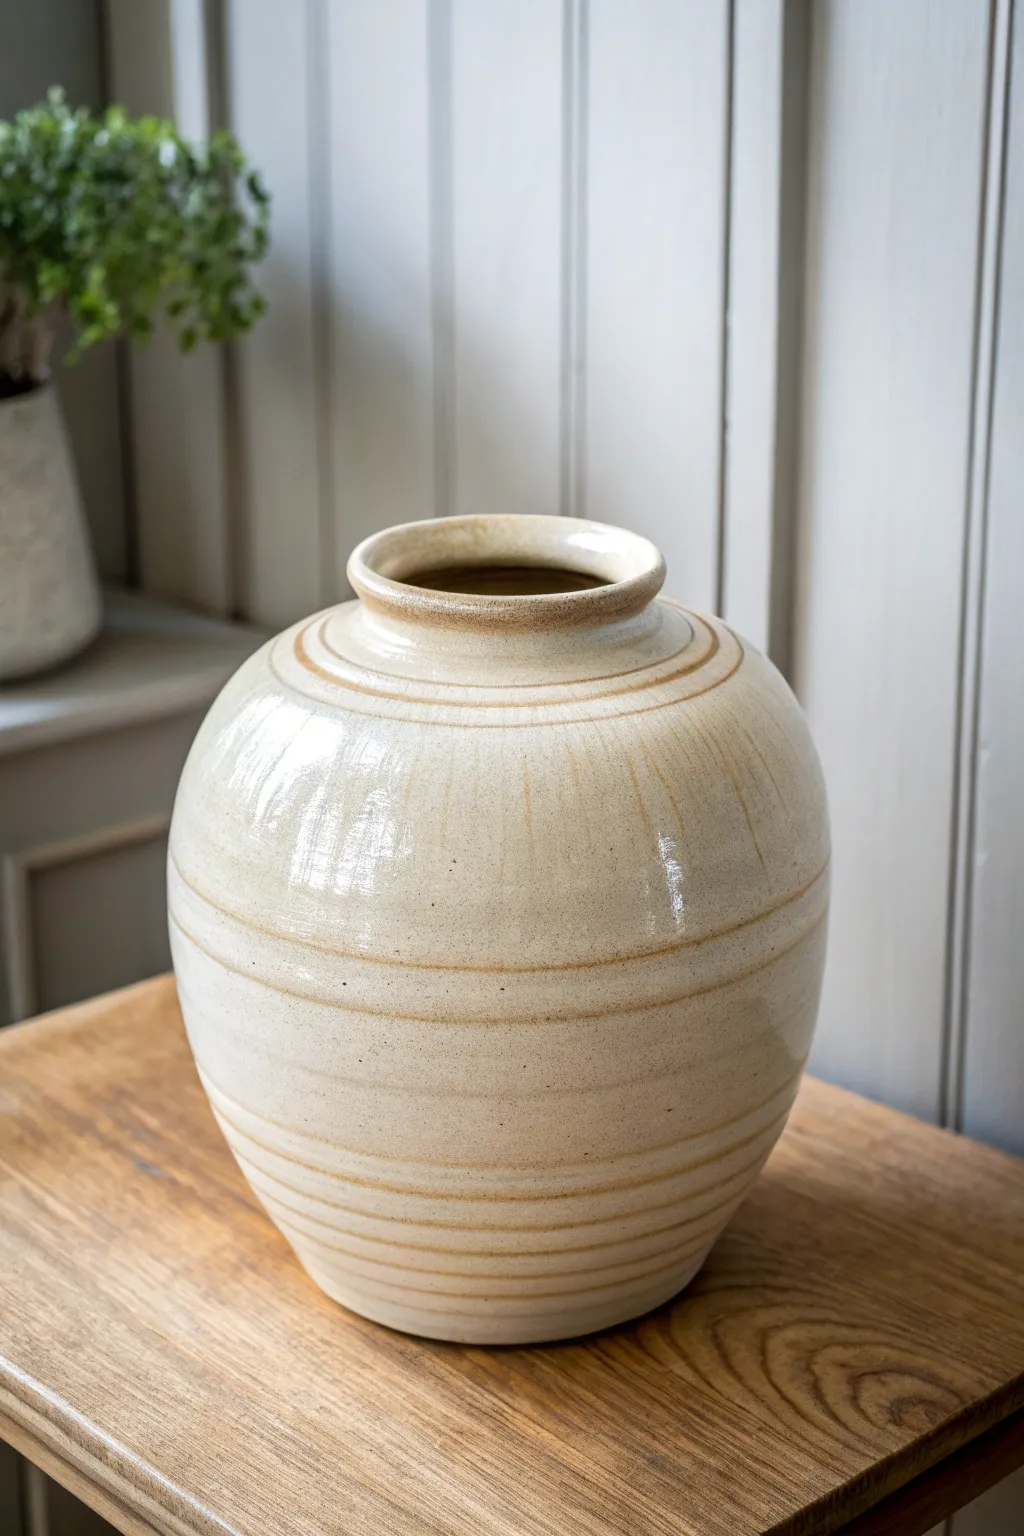
This project captures the serene beauty of a classic moon jar, featuring a bulbous, rounded form with subtle horizontal throwing lines. The creamy beige glaze highlights the texture, creating a warm, organic vessel that feels both rustic and refined.
Step-by-Step
Materials
- Stoneware clay (smooth or lightly grogged)
- Pottery wheel
- Throwing bucket and sponge
- Wire cutter
- Pin tool
- Wooden throwing ribs (various profiles)
- Metal kidney rib
- Trimming tools
- Cream or oatmeal satin-matte glaze
Step 1: Throwing the Base Form
-
Center the clay:
Start with a substantial ball of clay (around 3-4 lbs) on the wheel head. Cone it up and down to ensure the particles are aligned and the mass is perfectly centered before opening. -
Open the floor:
Press your thumbs into the center to open the clay, leaving a base thickness of about half an inch. Pull the floor out towards you to establish the width of the foot, compressing the bottom well to prevent S-cracks later. -
Establish the cylinder:
Begin pulling the walls upward into a tall, relatively straight cylinder. Don’t worry about the curve yet; just focus on getting even wall thickness and height. -
Belling out the belly:
Using a sponge on the inside and fingertips on the out, gently push the clay outward from the inside to create the voluminous belly. Support the outside to keep the curve controlled. -
Collaring the neck:
As you reach the shoulder area, use both hands to collar the clay inward. This narrows the opening significantly compared to the belly. Do this gradually to avoid buckling the walls.
Subtle Texturing Tip
Vary your finger pressure on the final pull to create natural, uneven spiraling ridges. These catch the glaze beautifully.
Step 2: Refining and Texture
-
Create the shoulder ridge:
Use the corner of a wooden rib or your thumbnail to define a crisp line just below the neck. This marks the transition from the shoulder to the rim. -
Form the rim:
Pull the remaining clay at the top into a sturdy, slightly flared rim. Use a chamois or a strip of plastic to compress and round the lip edge for a smooth finish. -
Accentuate throwing lines:
Instead of smoothing the exterior completely, use a soft rib or your finger to gently impress horizontal grooves into the clay as the wheel spins. Focus these lines on the lower half and shoulder for visual interest. -
Dry to leather hard:
Cut the pot from the bat with your wire tool and set it aside. Wait until the clay is leather hard—firm enough to handle without deforming but still cool to the touch.
Step 3: Trimming and Glazing
-
Set up for trimming:
Invert the jar onto the wheel head. Use a chuck if the neck is too narrow to support the weight stably. Center it perfectly and secure it with clay lugs. -
Trim the foot:
Carve away excess clay from the bottom to create a defined foot ring. This helps lift the rounded form off the table. Keep the foot proportional to the wide belly. -
Refine the curve:
I like to use a sharp trimming tool to clean up the lower curve, ensuring it flows seamlessly into the foot. Smooth any rough trimming marks with a damp sponge. -
Bisque fire:
Once bone dry, load the vessel into the kiln and bisque fire it to around Cone 04 to prepare it for glazing. -
Wax the foot:
Apply wax resist to the bottom of the foot ring and slightly up the side to prevent the glaze from running onto the kiln shelf. -
Dip into glaze:
Prepare a bucket of cream or oatmeal-colored glaze. Holding the jar by the foot, dip it swiftly into the bucket, pouring glaze inside first if needed. Aim for an even coat that will break nicely over the texture. -
Clean the rim:
If the glaze looks too thick on the rim, wipe it back slightly with a sponge to ensure the definition of the lip remains visible after firing. -
Glaze fire:
Fire the kiln to the maturity temperature of your clay and glaze (typically Cone 6 or 10). Allow the kiln to cool completely before unloading.
Fixing a Wobbly Rim
If the rim goes off-center while collaring, cut the uneven top off with a needle tool and re-compress a fresh edge.
Place your finished moon jar in a spot with natural light to highlight its gentle curves and ridges


Low Oval Centerpiece Bowl Vessel
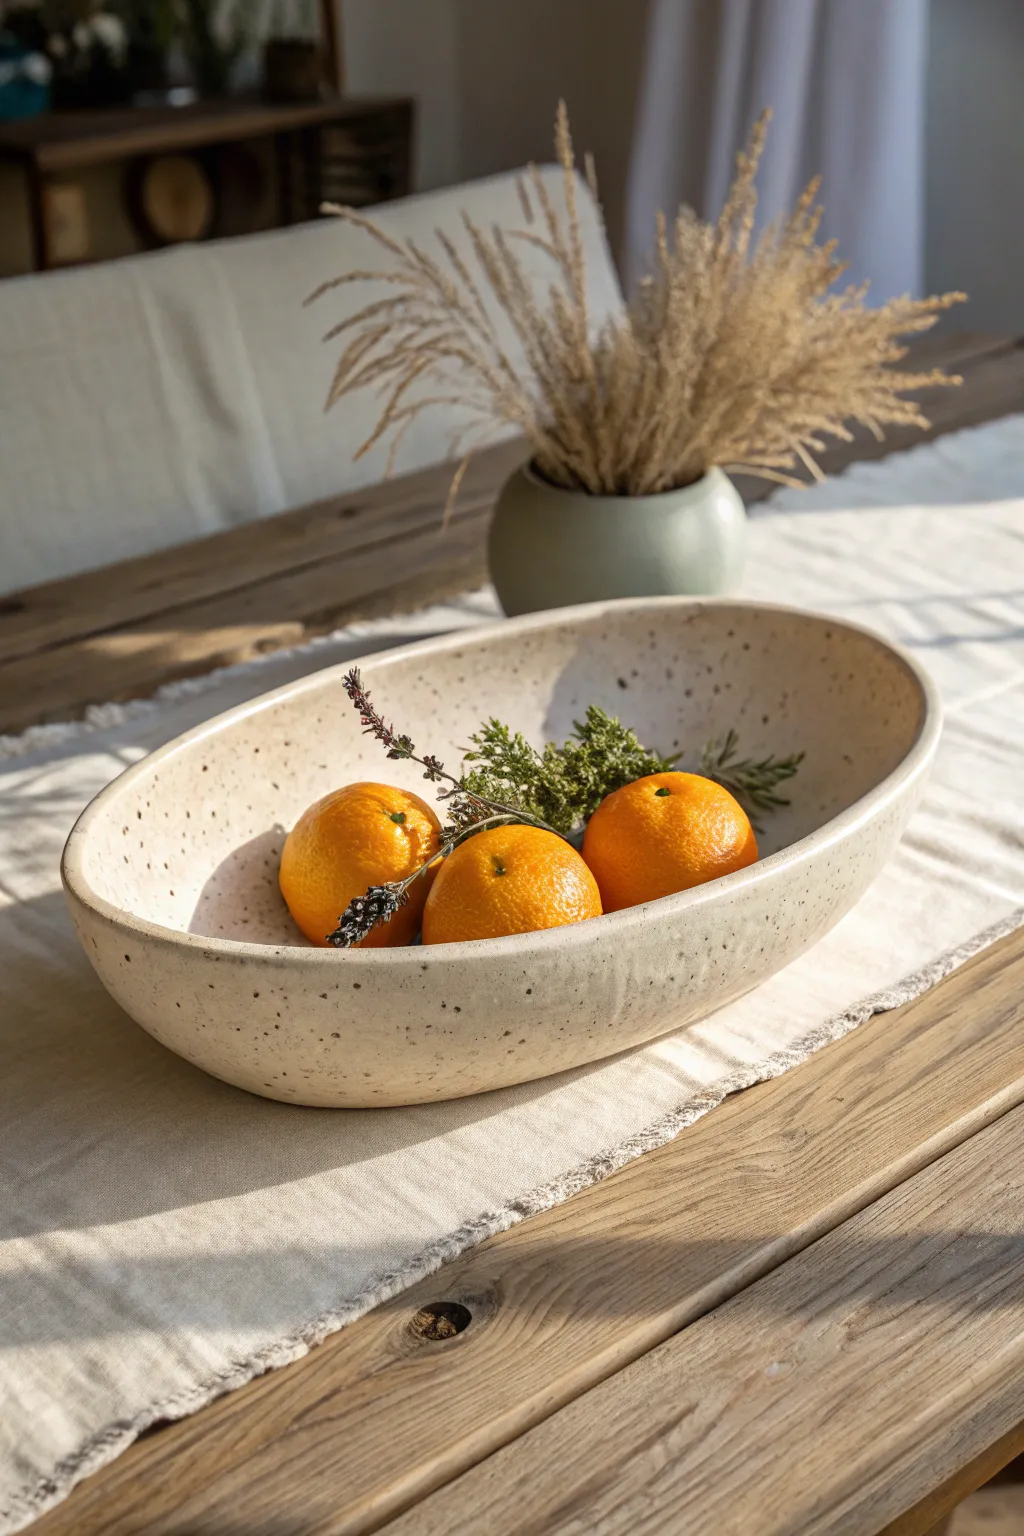
This low, elongated oval bowl serves as the perfect minimalist centerpiece, showcasing a natural speckled clay body and a smooth, creamy glaze. Its gentle curves and organic shape make it an ideal vessel for seasonal fruits or a simple branch arrangement.
Step-by-Step Tutorial
Materials
- Speckled stoneware clay (e.g., Laguna Speckled Buff or similar)
- Rolling pin
- Canvas work surface or slab mat
- Oval paper template (approx. 14 inches long)
- Needle tool
- Ribs (soft rubber and metal)
- Sponge
- Scoring tool or serrated rib
- Slip (made from the same clay body)
- Pottery knife
- Surform tool (cheese grater tool)
- Transparent or cream matte glaze
Step 1: Slab Preparation & Base
-
Roll the slab:
Begin by wedging your speckled clay to remove air bubbles. Roll it out into a large, even slab approximately 1/4 to 3/8 inch thick. I find flipping the slab occasionally helps keep the thickness consistent. -
Compress the clay:
Use a soft rubber rib to compress both sides of the slab. This aligns the clay particles, reducing the chance of warping later, and smooths out the canvas texture. -
Cut the base:
Place your oval paper template onto the slab. Using a needle tool held vertically, trace around the template to cut out the base shape. -
Prepare the wall strip:
From the remaining slab, cut a long strip of clay for the walls. It should be roughly 2.5 inches tall and long enough to wrap around the entire circumference of your oval base (plus a little overlap).
Iron Spot Magic
To enhance the speckling, wipe the bisque-ware with a damp sponge just before glazing. This reveals the iron pyrite spots so they burn through the glaze more clearly.
Step 2: Construction
-
Score the edges:
Take your scoring tool and roughen the outer edge of the oval base. Do the same along one long edge of the wall strip where it will attach to the base. -
Apply slip:
Generously apply slip to all the scored areas on both the base and the wall strip. -
Attach the wall:
Carefully lift the wall strip and place it onto the scored edge of the base. Gently press it down to secure the bond as you work your way around the oval. -
Join the overlap:
Where the ends of the wall strip meet, cut through both layers at a diagonal angle (a bevel cut). Score, slip, and join these ends together for a seamless connection. -
Reinforce the interior seam:
Roll a very thin coil of soft clay. Press this into the interior seam where the wall meets the floor to ensure a watertight seal. -
Smooth the seams:
Use your finger or a modeling tool to blend the coil completely into the wall and floor. Then use a spoon or rounded tool to blend the wall to the floor on the outside as well.
Step 3: Refining & Shaping
-
Use the rib:
Support the wall from the outside with one hand while using a rubber rib on the inside to smooth the surface and gently belly the walls outward, creating that soft curve. -
Clean the rim:
Use a damp chamois or sponge to compress and round off the top rim. It should look inviting to touch, not sharp. -
Dry slowly:
Loosely cover the piece with plastic and let it dry to a leather-hard state. This ensures the oval shape doesn’t warp as it shrinks. -
Refine the exterior:
Once leather hard, use a Surform tool or metal rib to scrape away any unevenness on the exterior walls, enhancing the speckled texture. -
Bisque fire:
Allow the bowl to become bone dry before loading it into the kiln for a bisque firing (typically Cone 04 or 06).
Rim Variation
For a more organic look, gently push the rim down at slightly intervals while the clay is wet to create a subtle undulating wave rather than a straight edge.
Step 4: Glazing
-
Wipe down:
After the bisque fire, wipe the bowl with a damp sponge to remove any kiln dust ensuring the glaze adheres properly. -
Apply glaze:
Pour a creamy matte or transparent glaze into the interior, swirl to coat, and pour out. Dip or brush the exterior. If using a transparent glaze, the natural speckles of the clay will shine through beautifully. -
Clean the foot:
Wipe the bottom of the bowl completely clean of glaze using a wet sponge to prevent it from fusing to the kiln shelf. -
Final fire:
Fire the piece to maturity (Cone 5, 6, or 10 depending on your clay body). Let the kiln cool completely before unloading.
Once cooled, fill your new handmade vessel with fresh produce or dried botanicals to enjoy the warmth it brings to your table

What Really Happens Inside the Kiln
Learn how time and temperature work together inside the kiln to transform clay into durable ceramic.
Footed Planter Vessel With Drainage
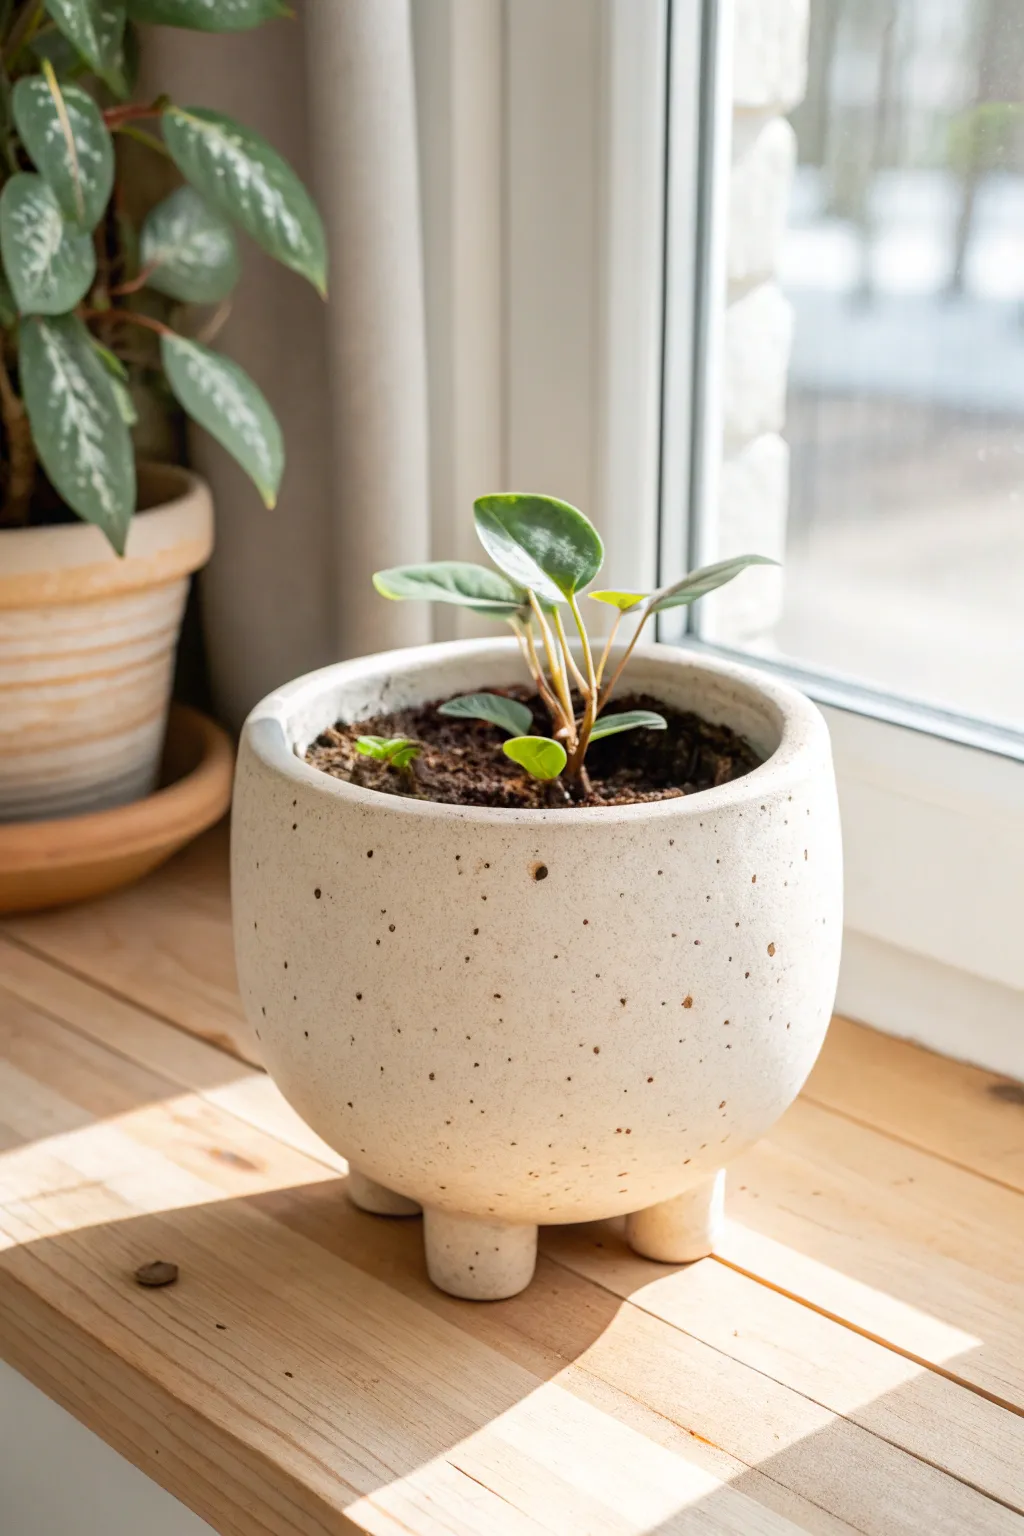
Create a charming home for your succulents with this rounded, footed planter featuring a creamy, speckled glaze. This simple hand-building project uses basic pinch pot techniques to form an organic, inviting vessel raised on three stubby feet.
Step-by-Step
Materials
- Stoneware clay (smooth or with grog)
- Speckled cream glaze or white glaze with speckles added
- Pottery wheel (optional, can be hand-built)
- Rib tool
- Pin tool
- Sponge
- Scoring tool or fork
- Slip (clay mixed with water)
- Loop tool for trimming
- Drill bit or hole cutter for drainage
Step 1: Forming the Body
-
Prepare the Clay:
Begin by wedging a softball-sized portion of stoneware clay to remove any air bubbles. This step is crucial for preventing cracks or explosions in the kiln later. -
Start the Pinch Pot:
If hand-building, press your thumb into the center of the ball and gently pinch the walls while rotating the clay. Aim for a consistent thickness of about 1/4 inch. -
Shape the Curve:
Gently gently push the walls outward from the inside to create a rounded, bulbous shape. The pot should curve inward slightly at the rim rather than flaring out. -
Smooth the Surface:
Use a flexible rib tool to compress the exterior walls. This removes your fingerprints and refines that perfect spherical curve seen in the photo. -
Define the Rim:
Smooth the rim with a damp sponge or piece of chamois leather. A rounded, soft rim complements the vessel’s overall organic shape. -
Dry to Leather Hard:
Set the pot aside until it reaches a leather-hard state. It should be firm enough to handle without warping but still cool to the touch.
Step 2: Adding Feet & Details
-
Create the Feet:
Roll a small coil of clay and cut it into three equal segments. Shape these into short, stout cylinders or slightly tapered cones for the feet. -
Mark Foot Placement:
Turn your pot upside down. Mark three equidistant points on the bottom where the feet will go, ensuring they are spaced widely enough for stability. -
Score and Slip:
Score the bottom of the pot at your marks and the tops of the feet. Apply a generous dab of slip to both surfaces. -
Attach the Feet:
Press the feet firmly onto the pot. Give them a little wiggle to ensure a tight bond and to release any trapped air. -
Blend the Seams:
Use a modeling tool or your finger to smooth the clay where the feet meet the body. The transition should be seamless. -
Level the Planter:
Flip the pot right-side up and gently tap it on a flat surface. This ensures all three feet touch the ground evenly so the pot won’t wobble. -
Add Drainage:
Using a hole cutter or drill bit, create a central drainage hole in the bottom of the pot. This is essential for plant health.
Wobbly Pot?
If the pot rocks after attaching feet, place a piece of sandpaper on a flat table and gently rub the feet against it in a circular motion to level them out perfectly before firing.
Step 3: Glazing & Firing
-
Bisque Fire:
Let the piece dry completely (bone dry) before loading it into the kiln for the first firing (bisque fire), usually to Cone 04. -
Clean the Bisque:
Wipe the fired pot down with a damp sponge to remove any kiln dust, which can prevent the glaze from adhering properly. -
Apply Glaze:
Dip the pot into a matte or satin cream glaze. If your clay body doesn’t have natural speckles, use a glaze specifically formulated with iron flecks to get that spotted look. -
Wipe the Feet:
Carefully wipe all glaze off the bottom of the three feet. If you leave glaze here, the pot will fuse to the kiln shelf during firing. -
Final Firing:
Fire the piece again to the maturation temperature of your specific clay and glaze (often Cone 5 or 6). Once cool, it’s ready for planting.
Rim Variation
For a more rustic look, leave the rim slightly uneven or unglazed to show the raw clay body, creating a nice contrast with the speckled glaze.
Now you have a charming, handmade vessel ready to showcase your favorite small plant
Lidded Jar Vessel With a Simple Knob
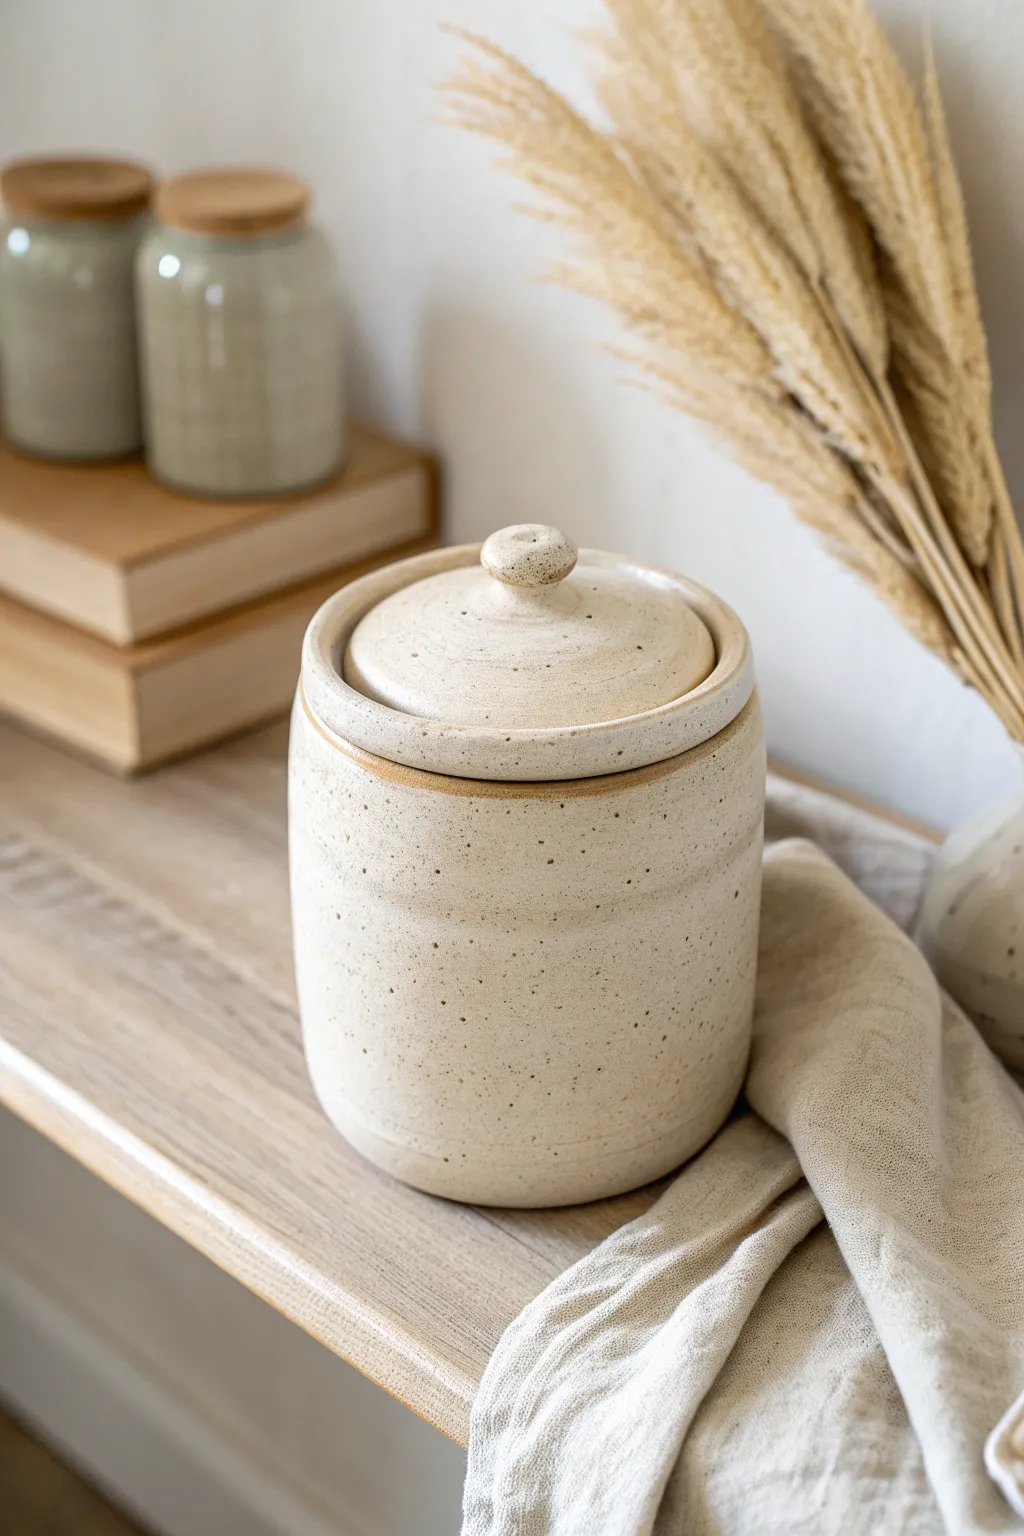
Embrace the rustic charm of speckled clay with this sturdy, functional lidded jar project. The creamy, matte glaze allows the natural iron spots to shine through, while the simple knob and generous form make it perfect for kitchen storage.
How-To Guide
Materials
- Speckled stoneware clay (approx. 2-3 lbs)
- Pottery wheel
- Throwing sponge
- Pin tool
- Wooden rib
- Metal rib
- Calipers
- Wire cutter
- Trimming tools
- Matte cream or white glaze
Step 1: Throwing the Gallery Jar Body
-
Center and open:
Begin with about 1.5 to 2 lbs of wedged speckled clay. Center it firmly on the wheel head and open the clay to create a flat floor, aiming for a width of about 4-5 inches depending on your desired final size. -
Pull the walls:
Pull the walls up into a cylinder. Keep the walls relatively thick at the rim to support the lid gallery later. Shape the belly slightly outward for a voluminous look, but keep the top vertical. -
Create the split rim:
At the rim, use your thumb or a wooden tool to split the clay thickness in half. Push the inner half down and flatten it to create a ‘gallery’ or shelf—this is where the lid will sit. -
Refine the gallery:
Smooth the gallery shelf with a damp sponge or chamois to ensure it is perfectly flat. Use calipers to measure the inner diameter of the gallery shelf precisely; lock this measurement in. -
Clean up the form:
Use a metal rib to smooth the outside of the pot, removing throwing slip but leaving faint, subtle finger ridges if you want to retain that handmade texture visible in the photo. -
Cut underneath:
Use a wooden knife to undercut the foot of the jar, creating a shadow line that makes trimming easier later. Wire the pot off the bat and set aside to leather hard.
Sticky Lids?
Even with wax, lids can stick. Dust the gallery with a mixture of alumina hydrate and wax resist, or simply just alumina powder, to create a kiln-safe non-stick barrier.
Step 2: Creating the Fitted Lid
-
Throwing off the hump:
I prefer to throw lids ‘off the hump’ using a larger mound of clay, centering just the top portion. Alternatively, center a small ball (approx. 0.5 – 0.75 lb) directly on the wheel head. -
Shape the lid:
Flatten the clay into a thick disk. Check your caliper measurement against the outer edge of this disk—it needs to fit inside the vertical wall of your jar’s gallery. -
Form the knob:
While the clay is still plastic, pinch and shape a small knob in the center. Give it a slightly mushroomed top for easy gripping, keeping the aesthetic simple and rounded. -
Refine the fit:
Use a rib to smooth the lid’s surface. Double-check the measurements with your calipers to ensure a snug but comfortable fit for the jar produced in the previous phase. -
Wire off:
Cut the lid from the hump or bat using your wire tool. Handle it gently to avoid warping the circle.
Step 3: Trimming and Finishing
-
Trim the jar foot:
Once the jar is leather hard, center it upside down on the wheel. Trim a clean foot ring, removing excess weight from the bottom while mirroring the internal curve. -
Trim the lid:
Place the jar right-side up on the wheel and place the lid into the gallery. You can actually trim the lid while it sits on the pot to ensure the profiles match perfectly, or trim it separately in a chuck. -
Checking the fit:
Ensure the lid doesn’t rattle or sit too tightly. If it’s too tight, carefully trim a hairline of clay off the lid’s edge. -
Bisque fire:
Let both pieces dry slowly and completely before loading them into the kiln for a bisque firing. -
Glazing:
Dip or pour a matte cream or oatmeal glaze over the entire piece. Wipe the foot ring and the contact points (the gallery shelf and resultantly the underside of the lid rim) completely clean of glaze. -
Wax resist:
Apply wax resist to the unglazed gallery and lid rim to prevent them from fusing together during the firing. -
Final Fire:
Fire the ceramic to cone 6 (or your clay’s maturation temperature) to bring out the speckles through the creamy glaze.
Pro Tip: Caliper Checks
Clay shrinks! Always measure your lid to be slightly looser than you think necessary when wet. It’s easier to deal with a slightly loose lid than one that won’t fit after drying.
Once cooled, fill your beautiful new jar with coffee beans, tea, or dry goods and display it proudly on your shelf.


The Complete Guide to Pottery Troubleshooting
Uncover the most common ceramic mistakes—from cracking clay to failed glazes—and learn how to fix them fast.
Slab-Built Box Vessel With a Fitted Lid

This elegant square vessel combines clean, modern lines with the rustic charm of speckled clay. Perfect for storing trinkets or dry goods, its beauty lies in the precise slab contraction and the warm, toasted accent at the rim.
Step-by-Step Guide
Materials
- Speckled stoneware clay (mid-fire)
- Rolling pin
- Guide sticks or slab roller (approx. 1/4 inch thick)
- Fettling knife or needle tool
- Serrated rib or scoring tool
- Slip (clay mixed with water)
- Square paper template (4×4 inches)
- Wooden paddle
- Sponge
- Soft bristle brush
- Cream matte glaze
- Iron oxide wash (optional)
Step 1: Preparing the Slabs
-
Roll the clay:
Begin by rolling out a generous amount of speckled stoneware clay to an even thickness of about 1/4 inch. If you are using guide sticks, ensure your rolling pin stays firmly on them to prevent uneven spots. -
Compress the slab:
Using a rubber rib, gently compress the surface of the clay on both sides. This aligns the clay particles, reducing the chance of warping later, and creates a smooth canvas for your glaze. -
Cut the components:
Using your square paper template, cut out six identical squares. You need four for the walls, one for the base, and one for the lid. Let these slabs stiffen to a ‘soft leather-hard’ state so they can hold their shape upright.
Step 2: Assembling the Box
-
Bevel the edges:
For the crispest corners, cut a 45-degree angle (miter) on the vertical edges of your four wall pieces. Leave the bottom edges flat to sit on the base slab. -
Score and slip:
Aggressively score the mitered edges and apply a generous amount of slip. Join two walls together first to form a corner, pressing firmly but supporting the shape so it doesn’t buckle. -
Complete the walls:
Attach the remaining walls to form a square tube. Use a small coil of soft clay on the interior seams to reinforce the joints, smoothing it out with a wooden modeling tool or your finger. -
Attach the base:
Score and slip the bottom edge of your wall structure and the perimeter of your base square. Press the walls onto the base. I prefer to use a wooden paddle against the outside to ensure the bond is tight and the walls are perfectly vertical.
Warping Woes?
If your lid rocks after drying, dry the box with the lid ON. Weight the lid gently with a sandbag during the drying phase to force them to dry straight together.
Step 3: Creating the Fitted Lid
-
Make the flange:
Roll a small coil or cut narrow strips from your leftover slab. Attach these to the underside of your lid square, inset about 1/4 inch from the edge, so they will sit snugly inside the box opening. -
Refine the fit:
Once the flange is attached, test the lid on the box. It should fit without forcing. If it’s too tight, shave down the flange slightly; if too loose, you can gently paddle the box rim inward. -
Form the knob:
Roll a small ball of clay and flatten it slightly into a button shape. Score the center of the lid and the bottom of the knob, then attach it securely. -
Refine the edges:
Smooth all sharp edges with a damp sponge. Pay special attention to the rim of the box where the lid sits—this area will be highlighted later.
Make it Yours
Instead of a simple button knob, sculpt a geometric shape like a pyramid or a small organic form like a pebble or twig to give the box a unique character.
Step 4: Glazing and Finishing
-
Bisque fire:
Allow the piece to dry slowly under plastic to prevent warping, then bisque fire to cone 04 (or your clay body’s recommendation). -
Wax the accents:
Apply wax resist carefully to the very rim of the box and the outer edge of the lid. This will prevent glaze from adhering here, exposing the raw clay body. -
Apply glaze:
Dip or brush your cream matte glaze over the entire piece (inside and out). Wipe away any stray droplets on the waxed areas or the foot of the box. -
Enhance the rim (Optional):
If your clay doesn’t naturally toast to a dark orange, paint a thin wash of iron oxide on the exposed raw clay rim for that warm, burned look shown in the image. -
Final firing:
Glaze fire to cone 5 or 6 to mature the clay and melt the glaze. Ensure the lid is fired separately from the box (or used with alumina wax) so they don’t fuse together.
Once cooled, this little box is ready to bring a touch of handmade warmth to your countertop or vanity
Pinch Pot Vessel With Soft Facets
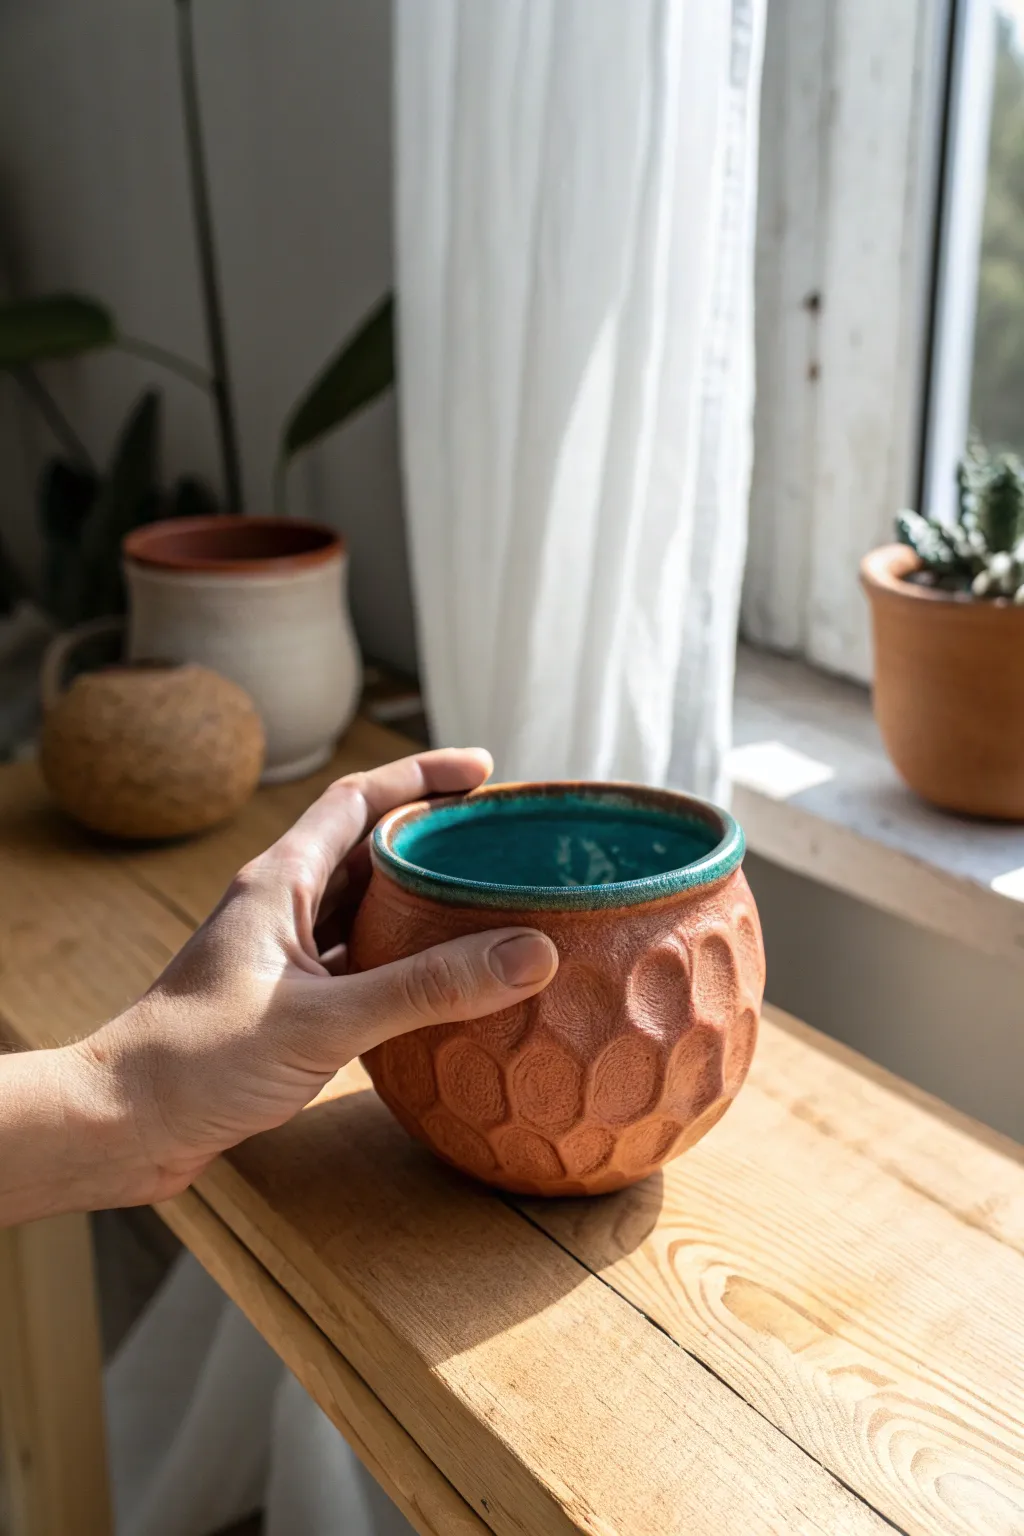
This charming vessel combines the organic roundness of a classic pinch pot with a structured, honeycomb-like texture. The contrast between the warm, unglazed terracotta exterior and the glossy turquoise interior creates a stunning visual pop that feels great in the hand.
Step-by-Step Tutorial
Materials
- Terracotta stoneware clay
- Loop tool (medium round or oval)
- Small sponge
- Water
- Scoring tool or fork
- Ceramic glaze (bright turquoise/teal)
- Soft bristle brush
- Kiln (or access to a firing service)
Step 1: Forming the Base
-
Wedge the clay:
Begin with a ball of terracotta clay roughly the size of a large orange. Wedge it thoroughly to remove air pockets and ensure an even consistency. -
Start the pinch:
Hold the clay ball in one hand and press your thumb into the center, stopping about a half-inch from the bottom. This establishes your base thickness. -
Open the form:
Gently pinch the clay between your thumb and fingers, rotating the ball as you go. Work from the bottom upward, gradually thinning the walls. -
Shape the curve:
Aim for a rounded, spherical shape rather than a straight-sided bowl. Curve the walls inward slightly at the rim to create that cozy, enclosed vessel feeling. -
Refine the rim:
Once the walls are even (about 1/4 to 3/8 inch thick), smooth the rim with a damp sponge or a strip of plastic for a polished look.
Uneven Facets?
If your carving tool drags, the clay is too dry. Spray it lightly with water and wrap in plastic for an hour. If it squishes, it’s too wet—wait longer.
Step 2: Carving the Texture
-
Let it stiffen:
Allow the pot to dry to a ‘leather hard’ state. It should be firm enough to hold its shape when handled, but soft enough to carve into easily. -
Plan your pattern:
Visualize a honeycomb or scale pattern. You don’t need to draw it first, but having a mental grid helps keep the texture consistent. -
Carve the first row:
Using a loop tool, scoop out a shallow, oval divot near the rim. Continue making these scoops all the way around the top edge. -
Offset the pattern:
For the second row, place your scoop directly below the ridge where two scoops from the first row meet. I find this brick-laying technique creates the best honeycomb effect. -
Continue downward:
Repeat this offset scooping pattern until you reach the bottom of the pot. As the pot curves underneath, your scoops might need to become slightly smaller. -
Clean up edges:
Once carved, use a slightly damp finger or sponge to very gently smooth any sharp clay crumbs or burrs left by the tool, keeping the facets crisp.
Enhance the Texture
After bisque firing, rub a dark iron oxide wash over the outside and wipe it back. The dark color will stay in the crevices, highlighting the honeycomb pattern.
Step 3: Glazing and Finishing
-
Bisque fire:
Let the pot dry completely until it is bone dry. Fire it in the kiln to bisque temperature (usually Cone 04 or 06). -
Wax the exterior:
Since we want the outside to remain raw clay, apply wax resist carefully to the exterior rim and the entire outer surface to prevent accidental glaze drips. -
Pour the glaze:
Pour your turquoise glaze inside the vessel. swirl it around to coat the entire interior surface evenly, then pour the excess back into your glaze bucket. -
Clean the rim:
Wipe the very top edge of the rim with a damp sponge if any glaze spilled over. A clean line between the glaze and the raw clay looks professional. -
Glaze fire:
Fire the piece again to the maturation temperature of your specific clay and glaze (likely Cone 5 or 6 for stoneware).
Once fired, you will have a wonderfully tactile vessel that contrasts earthy texture with smooth, vivid color

TRACK YOUR CERAMIC JOURNEY
Capture glaze tests, firing details, and creative progress—all in one simple printable. Make your projects easier to repeat and improve.
Coiled Vessel With Visible Coil Texture
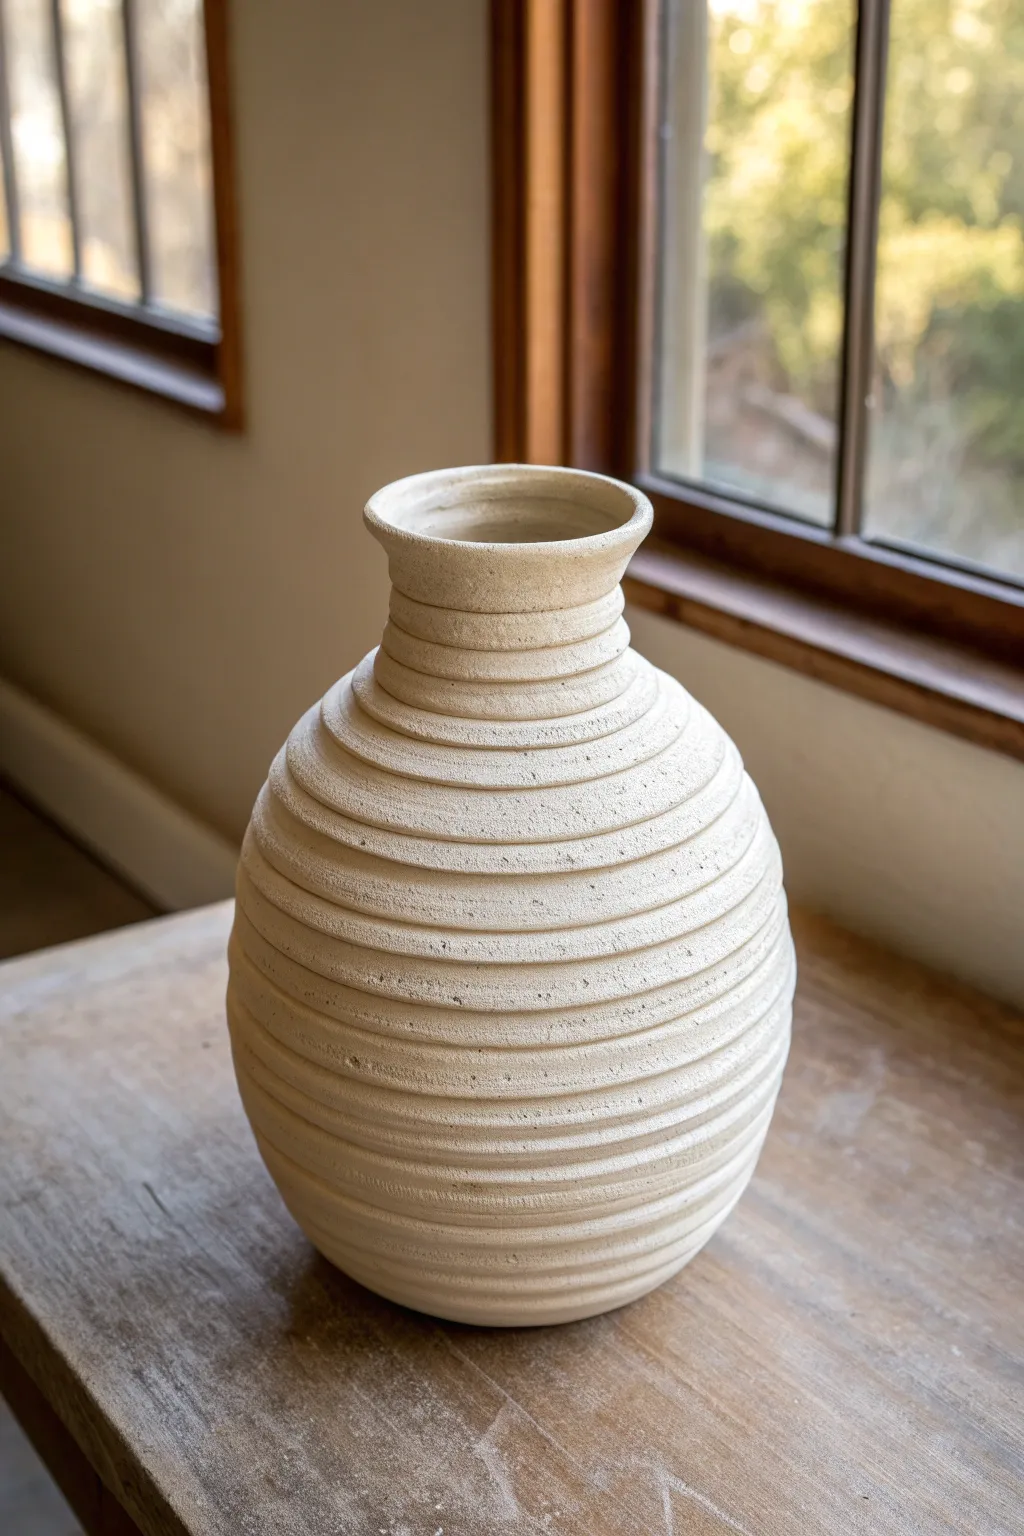
This project celebrates the process of construction by leaving the rhythmic texture of clay coils front and center. The result is a substantial, bulbous vessel with a warm, earthy presence and a tactile surface that invites touch.
Step-by-Step
Materials
- Stoneware clay (buff or white with grog)
- Small bat or ware board
- Pottery wheel (optional, for banding or initial base)
- Banding wheel
- Rolling pin or slab roller (optional)
- Canvas work surface
- Rib tool (metal or rubber)
- Scoring tool or serrated rib
- Slip (clay slurry)
- Sponge
- Wire cutter
- Wooden modeling tool
Step 1: Creating the Foundation
-
Prepare the Clay:
Begin by thoroughly wedging about 5-7 lbs of stoneware clay to remove air bubbles and ensure a uniform consistency. A clay body with fine grog works beautifully here, adding strength and microscopic texture to the finished surface. -
Form the Base:
Create a slab base for your vessel. Roll out a circular slab approximately 1/4 to 3/8 inch thick and about 5 inches in diameter. You can cut a perfect circle using a needle tool and a small plate as a template. -
Set Up Your Workspace:
Place your clay base securely onto a bat or a ware board on top of your banding wheel. Score the outer perimeter of the base thoroughly and apply a generous amount of slip.
Tip: Consistent Coils
Use a flattened hand and roll from fingertips to wrist to keep coils round. If they get flat, twist them slightly before rolling again.
Step 2: Building the Body
-
Roll Consistent Coils:
Roll out several long, even coils of clay. Aim for a thickness similar to a large marker or your pinky finger. Try to keep them consistent, as this dictates the evenness of the wall texture. -
First Layer:
Attach the first coil to the scored base. Overlap the ends slightly, cut through both at an angle, and join them seamlessly. -
Smoothing the Interior:
While we want the exterior texture visible, the interior needs strength. Use your thumb or a wooden tool to smudge the coil downward into the base on the *inside* only. Smooth this connection completely to ensure a watertight seal. -
Build Outward:
Continue adding coils, stacking each slightly towards the outside of the coil below it to expand the form. This creates the bulbous, round belly of the vase. Remember to score and slip between every single layer. -
Maintain the Exterior Texture:
When joining coils, resist the urge to smooth the outside. Instead, gently press the coils together to bond them without obliterating the definition. I lightly tap the outside with a paddle if the connection needs reinforcement, but usually, firm downward pressure is enough. -
Shape the Belly:
Once you reach the widest point of the vase (about halfway up), pause to check the silhouette. The curve should be gradual and organic, not sharp or angular. -
Taper Inward:
Begin stacking coils slightly towards the *inside* of the previous layer. This will pull the form in to create the shoulder of the pot. Do this gradually to avoid collapsing the wall.
Step 3: Neck and Finishing
-
Form the Neck:
Once the opening has narrowed significantly, stack 3-4 coils directly vertically (neither in nor out) to create the straight neck section. -
Flare the Rim:
For the final coil, attach it slightly outward to create a gentle flared rim. Smooth this top lip carefully with a chamois or sponge, as this is the visual termination of the piece. -
Refine the Lines:
Using a wet sponge or a soft rubber rib, run it very gently around the exterior while spinning the banding wheel. You don’t want to smooth it flat; just knock down any sharp burrs and unify the horizontal lines. -
Dry Slowly:
Cover the top loosely with plastic to let the rim dry at the same rate as the thicker bottom. Slow drying prevents cracking at the coil seams. -
Bisque Fire:
Once bone dry, bisque fire the vessel to Cone 04 (or your clay’s specific bisque temperature). -
Glazing:
Apply a matte white or cream glaze. A matte finish is crucial here because high-gloss glazes obscure the subtle texture. Dipping or spraying works best to get into the crevices of the coils. -
Final Fire:
Glaze fire to maturity (likely Cone 5/6 or 10 depending on your clay). The heat will fuse the form into a durable stone-like object.
Trouble: Wobbly Walls?
If the walls start slumping, the clay is too wet. Stop building, cover the rim with plastic, and let the bottom section firm up for an hour.
Now you have a stunning vessel that highlights the hand-building process in every line and curve
Drippy Glaze Statement Vessel
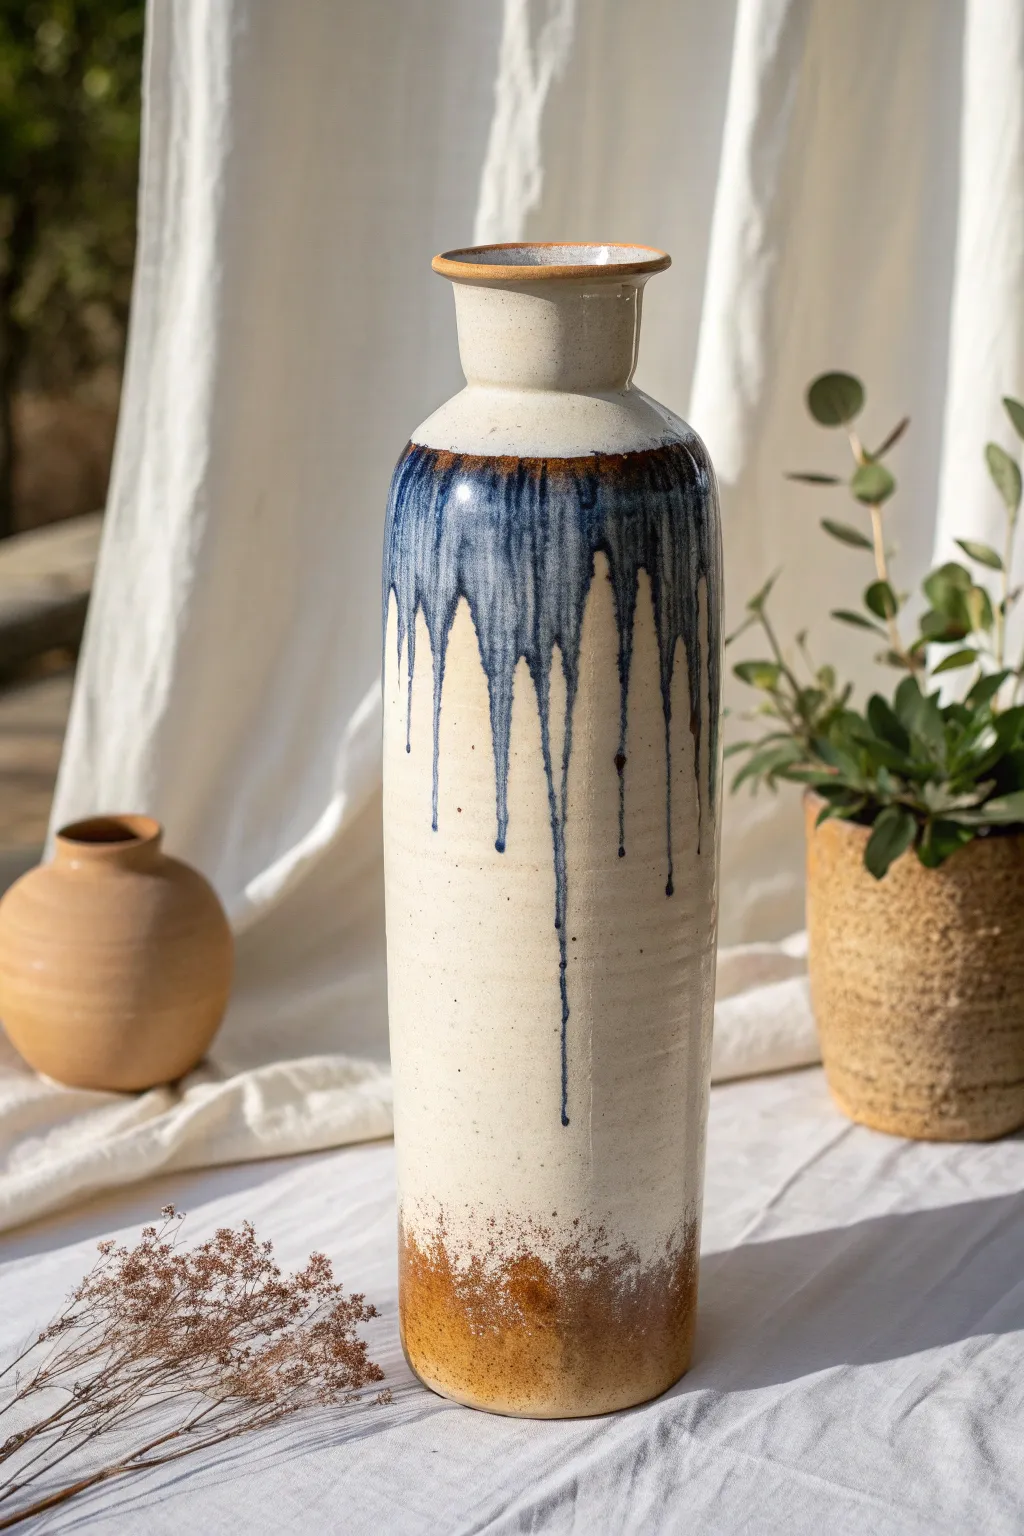
This striking ceramic project combines the rustic charm of speckled clay with the dramatic flair of fluid glazing. The contrast between the warm, textured base and the cool, cascading blue drips creates a captivating piece that brings an instant sense of artistry to any space.
Step-by-Step Tutorial
Materials
- Speckled stoneware clay (mid-fire range)
- Pottery wheel
- Throwing tools (sponge, loop tools, wire cutter, rib)
- Small banding wheel (optional)
- Liquid wax resist
- Satin cream or white matte glaze
- Glossy fluid cobalt blue glaze
- Iron oxide wash or rust-colored matte glaze
- Small glaze brushes
- Kiln
Step 1: Forming the Body
-
Prepare the clay:
Begin by thoroughly wedging about 3-4 pounds of speckled stoneware clay. You want to ensure it is completely de-aired and consistent to support the height of this vessel. -
Center and open:
Center the clay on your wheel head. This is crucial for a tall cylinder; make sure your base is perfectly stable before opening up the center hole. -
Pull the cylinder:
Pull the walls up vertically to create a tall, narrow cylinder. Aim for a height of at least 10-12 inches. Keep the walls even, slightly tapering inward as you go up to maintain structural integrity. -
Shape the neck:
Collar the top third of the cylinder inward to create the bottleneck shape seen in the image. Use your fingers to gently flare the very rim outward, creating a distinct, flat lip. -
Refine the surface:
Before removing it from the wheel, use a metal or rubber rib to smooth the exterior walls, compressing the clay surface while leaving the subtle throwing rings visible if desired. -
Dry to leather hard:
Cut the pot from the wheel and let it dry slowly until it reaches a leather-hard state. It needs to be firm enough to handle without warping.
Preventing Shelf Disaster
Running glazes are unpredictable. Always place a ‘cookie’ (a small sacrificial disk of bisque clay) under your pot during the glaze firing to catch any drips that travel too far.
Step 2: Trimming and First Fire
-
Trim the base:
Invert the vase onto a chuck or secure it to the wheel head. Trim away excess weight from the bottom third, creating a clean foot ring. -
Refine the lip:
While it’s spinning slowly, clean up the top lip with a sponge to ensure it’s smooth and inviting to the touch. -
Optional texture:
For the bottom section, rough up the surface slightly with a coarse sponge if you want to accentuate the earthy texture shown at the base of the image. -
Bisque fire:
Load the thoroughly dried vessel into the kiln for a bisque firing (usually cone 04 or 06). This prepares the clay to accept the glaze.
Layering for Movement
To get better drips, layer a fluid glaze over a stiff glaze. The stiff base coat acts like a slip-n-slide for the top coat once it melts.
Step 3: Glazing the Layers
-
Wax the foot:
Apply wax resist to the bottom foot ring to prevent glaze from sticking to the kiln shelf. -
Create the rustic base:
Dip a sponge or brush into an iron oxide wash or a dry rust-colored glaze. Dab this irregularly around the bottom 2 inches of the vase, letting it fade naturally upward. -
Apply the main body:
Pour your satin cream glaze inside the vessel first, swirl to coat, and pour out. Then, dip the exterior into the cream glaze, stopping just above your rust-colored bottom section so the two interact slightly. -
Clean the rim:
Very carefully, wipe the cream glaze off the very top lip of the vase to expose the raw clay color, creating that thin brown rim detail seen in the photo. -
Add the drip definition:
Using a smaller brush, paint a thin band of the rust or brown glaze right at the shoulder seam where the neck meets the body. -
Apply the dramatic blue:
I like to load a medium brush heavily with the fluid glossy cobalt blue glaze. Apply a thick band around the shoulder, right over the brown line you just painted. -
Encourage the drips:
Add extra dollops of the blue glaze at irregular intervals along that band. The gravity in the kiln will pull these thick spots down into long streaks. -
Glaze fire:
Fire the kiln to your clay body’s maturity temperature (likely Cone 5 or 6). Ensure you use a cookie or catch plate under the vase in case the blue glaze runs faster than expected.
Set your finished vase near a sunny window to let the light catch the glossy blue streaks against the matte cream surface
Sgraffito Botanical Patterned Vessel
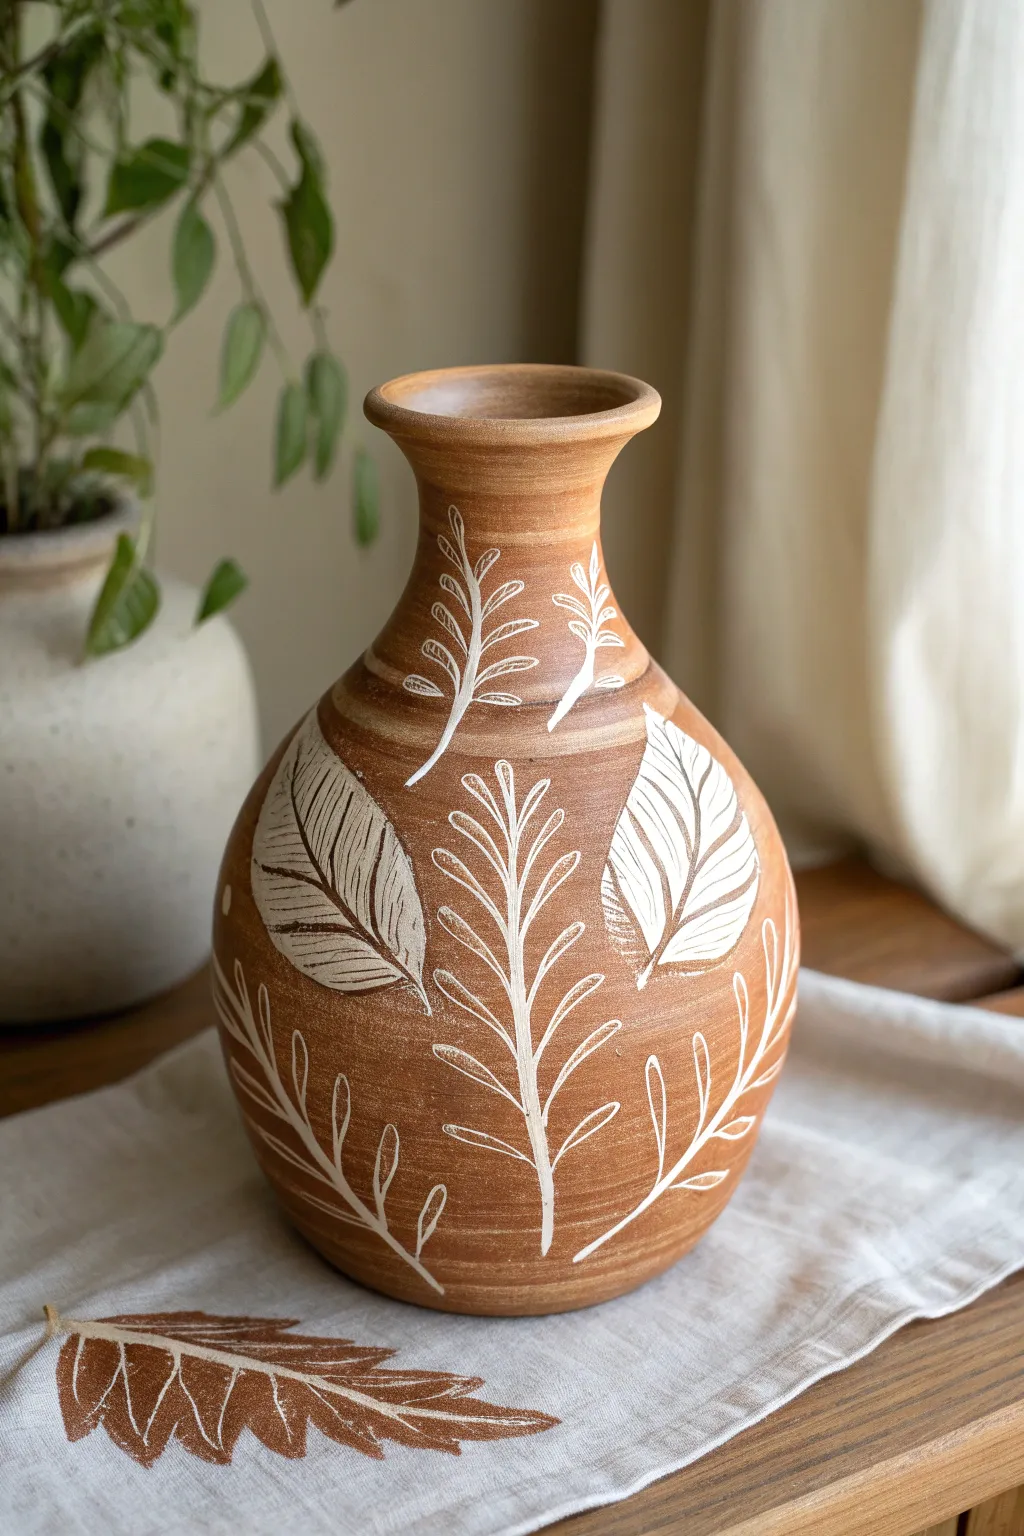
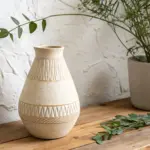
This elegant terracotta vase features a striking botanical design created using the sgraffito technique, where white slip is carved away to reveal the warm clay body beneath. The contrast between the organic leaf motifs and the rich, earthy background makes for a timeless piece perfect for holding fresh greenery.
Step-by-Step
Materials
- Red stoneware or terracotta clay body
- Pottery wheel
- Throwing tools (sponge, rib, wire cutter)
- White underglaze or white slip
- Soft fan brush or hake brush
- Sgraffito tool or small loop tool
- Needle tool
- Clear transparent glaze
- Pencil (optional)
Step 1: Throwing and Shaping
-
Center the clay:
Start with about 3-4 pounds of well-wedged terracotta clay. Slam it onto the center of your wheel head and use water and firm pressure to center the clay perfectly before opening. -
Open and pull up:
Open the clay to create the floor, leaving it about a half-inch thick. Begin pulling the walls upward into a cylinder, keeping your pulls steady to maintain an even wall thickness. -
Shape the belly:
Using a rib tool on the outside and your hand on the inside, gently push the clay outward from the inside to form a rounded, bulbous belly. Work gradually so the walls don’t collapse. -
Collar the neck:
As you move upward, gently collar the clay inward to create a distinct, narrower neck. This requires moistening your hands and compressing the clay carefully to avoid buckling. -
Form the rim:
Flare the very top of the neck outward slightly to create a graceful, wide lip. Use a chamois or sponge to smooth the rim completely. -
Trim the base:
Once leather hard, flip the vase over and trim the foot ring. This removes excess weight and gives the vessel a polished, professional lift.
Slip flaking off?
If your white slip flakes off while carving, it was applied when the pot was too dry. Apply slip only when the clay is leather hard for the best bond.
Step 2: Applying Slip and Design
-
Clean surface:
Wipe the vase down with a barely damp sponge to remove any dust from trimming. The surface should be smooth leather hard. -
Plan the layout:
Lightly sketch your large leaf shapes and vine placement using a pencil directly on the leather-hard clay. Don’t worry about marks; they will burn out in the kiln. -
Apply white slip:
Using a soft fan brush, paint the specific leaf shapes with white slip or underglaze. You aren’t coating the whole pot—just block in the large white leaf areas where you want the solid white shapes to be. -
Let it firm up:
Allow the painted slip to dry until it is no longer tacky but hasn’t become bone dry. It should feel cool to the touch. -
Carve leaf details:
Using a sharp needle tool or fine sgraffito tool, scratch lines into the painted white leaves to reveal the red clay underneath. Create veins by drawing a central line and branching outward. -
Carve the negative space vines:
For the vines that aren’t solid white shapes, use a small carving tool to incise the stems and leaves directly into the red clay body. I find that varying the depth slightly adds nice texture. -
Inlay slip (optional):
If you want the thin vines to be white rather than just incised lines, you can brush white slip into these carved lines and then scrape away the excess on the surface once dry (Mishima technique). -
Clean up burrs:
Once the pot is bone dry, very gently rub the surface with a green kitchen scouring pad or a stiff brush to remove any clay crumbs or sharp burrs left from carving.
Sharper Lines
Keep your carving tools sharp. A dull tool drags the clay rather than cutting it, resulting in ragged edges on your botanical illustrations.
Step 3: Firing and Glazing
-
Bisque fire:
Load the bone-dry vase into the kiln and fire to Cone 04 (or your clay’s specific bisque temperature). -
Rinse and dry:
After the bisque firing, quickly rinse the vase under water to remove dust and let it dry completely for 24 hours. -
Apply clear glaze:
Dip the entire vase into a clear, transparent glaze. Shake gently to remove excess drips. Ensure the foot ring is wiped clean of any glaze. -
Final firing:
Fire the kiln again to the maturity temperature of your clay and glaze (likely Cone 5 or 6). Allow the kiln to cool naturally before unloading.
Enjoy styling your handmade vessel with fresh flowers or dried branches to highlight your craftsmanship
Mishima Inlay Linework Vessel
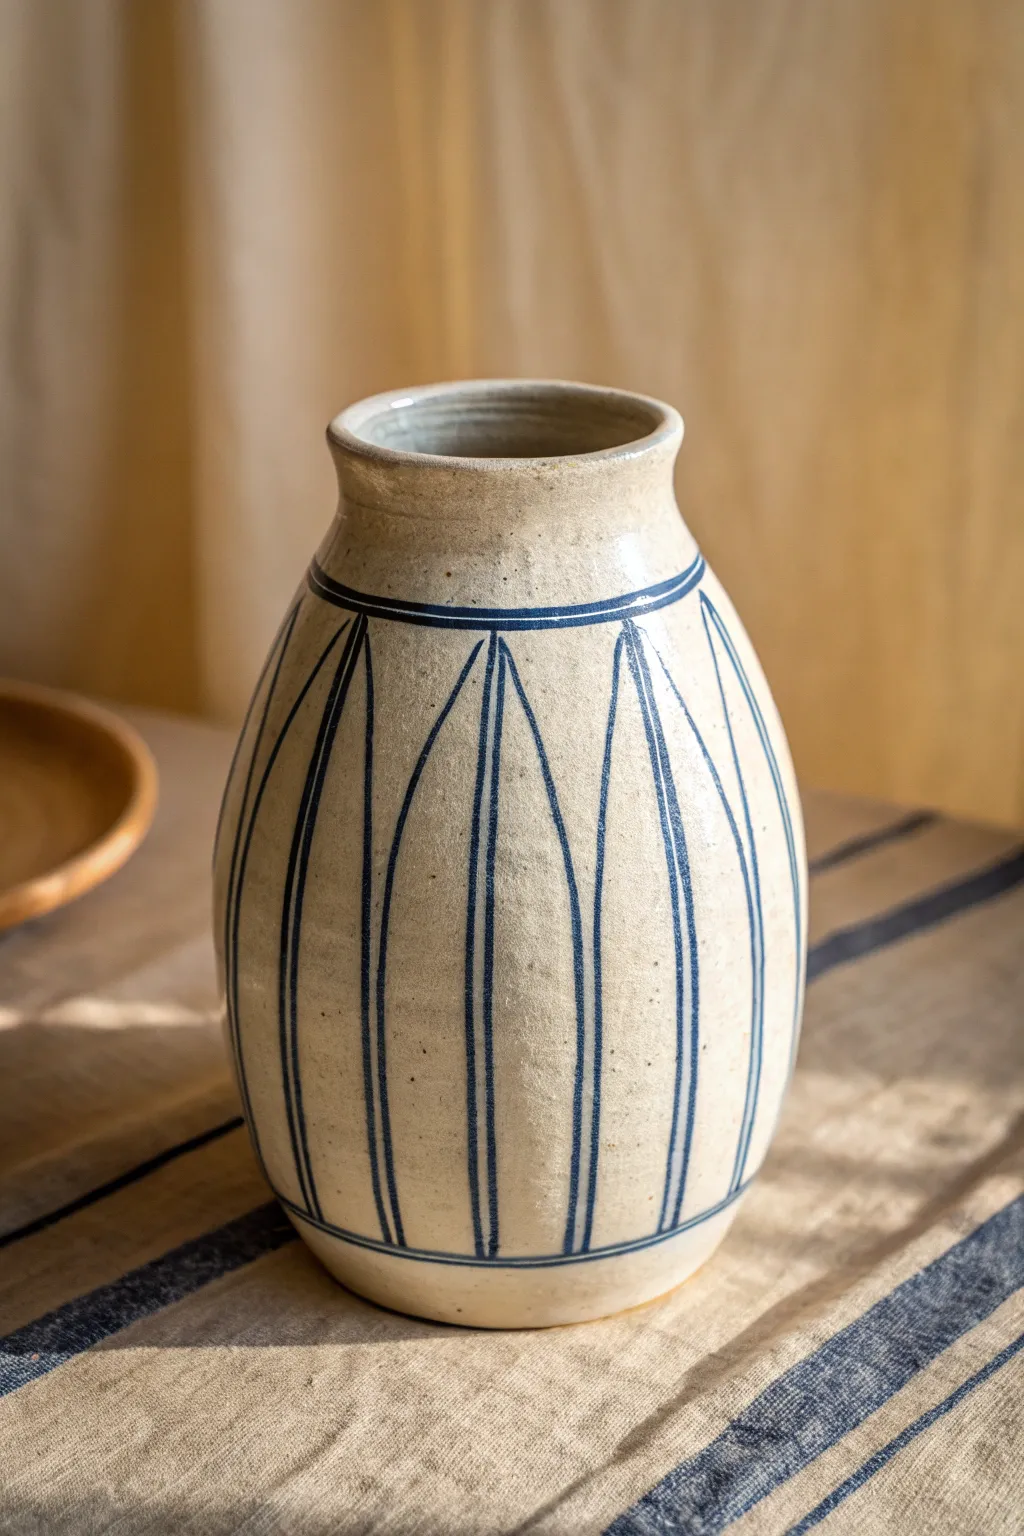
This elegant vessel highlights the Japanese technique of Mishima, where contrasting slip is inlaid into carved lines for a crisp, graphic finish. The design features a creamy stoneware body adorned with vertical navy arches that elongate the form, perfect for a minimalist floral arrangement.
How-To Guide
Materials
- Light-colored stoneware clay (smooth body)
- Pottery wheel
- Throwing tools (sponge, ribs, wire cutter)
- Trimming tools
- Sharp needle tool or X-Acto knife
- Carving tool (small loop or v-tip)
- Navy blue underglaze or slip
- Soft paintbrush
- Metal kidney rib (cambered)
- Clear transparent glaze
- Wax resist (optional)
Step 1: Throwing and Shaping
-
Center and Open:
Begin by centering about 3-4 pounds of light stoneware clay on the wheel. Open the center and pull up a tall, uniform cylinder, keeping the walls even to support the eventual curve. -
Belly Out the Form:
Gently push the clay from the inside to create a subtle, swelling belly. The widest point should be just below the center, giving the vase a grounded but lifted appearance. -
Collar the Neck:
Collar the top inwards significantly to create a narrow shoulder. Bring the rim back up into a short, straight neck, refining the lip so it is slighty rounded and durable. -
Refine the Surface:
Before removing it from the wheel, run a flexible metal or rubber rib over the entire exterior. This compresses the clay and removes throwing lines, providing a smooth canvas for your carving later. -
Leather Hard Stage:
Wire the pot off the bat and let it dry slowly to a firm leather-hard stage. It needs to be stiff enough to carve without warping, but soft enough to cut cleanly.
Smudged Lines?
If your blue slip is smearing across the white clay while scraping, the slip is too wet. Let it dry completely. If stains persist, sand the surface lightly after the pot is bone dry.
Step 2: Carving the Design
-
Mark Guidelines:
Place your pot on a banding wheel. Using a needle tool, lightly scratch two horizontal rings around the vessel: one just below the neck and one near the foot. -
Connect the Rings:
Lightly sketch your vertical divisions. You don’t need a ruler; draw freehand vertical lines that connect the top and bottom rings. Aim for pairs of lines that start apart at the bottom and meet at a point at the top ring. -
Refine Arches:
Adjust your sketch lines to create tall, narrow arch shapes or petal-like structures. The lines should be slightly curved to accentuate the roundness of the pot. -
Carve the Channels:
Using a small loop tool or V-tip carving tool, carefully carve out your sketched lines. You want a distinct trench, about 1-2mm deep. Keep your hand steady and maintain consistent pressure. -
Clean the Burrs:
Once all lines are carved, gently brush away the clay crumbs. Don’t sponge it yet, as you want crisp edges for the inlay.
Wax Resist Method
Apply wax resist to the whole surface *before* carving. When you paint the inlay, the slip will bead off the un-carved areas, making the final cleanup much faster and cleaner.
Step 3: Inlaying and Finishing
-
Apply Underglaze:
Generously paint the navy blue underglaze or slip into the carved lines. It’s okay to stay messy here; paint over the edges of the lines to ensure the recessed areas are completely filled. -
Let it Set:
Allow the underglaze to dry until it is no longer shiny. I usually wait until it looks chalky to prevent smearing during the next step. -
Scrape the Surface:
This is the satisfying part. Using a clean, sharp metal kidney rib, gently scrape the surface of the pot. Hold the rib at a steep angle and shave off the excess surface slip, revealing the clean clay body while leaving the blue color trapped inside the carved lines. -
Wipe Clean:
If there is any lingering blue haze on the white clay, wipe it very gently with a barely damp sponge. Be careful not to wash the color out of the grooves. -
Bisque Fire:
Once bone dry, bisque fire the vessel according to your clay body’s specifications (usually cone 04 or 06). -
Glaze Application:
Dip the entire piece into a clear, transparent glaze. This will make the clay body shine and deepen the navy blue inlay without obscuring the linework. -
Final Fire:
Glaze fire the piece to maturity (Cone 5/6 or Cone 10, depending on your clay). Ensure the foot is wiped clean or waxed before firing.
Once fired, you’ll have a stunning vessel that balances rustic texture with precise graphic lines, ready for your favorite blooms
Squiggle-Coil Decorated Vase
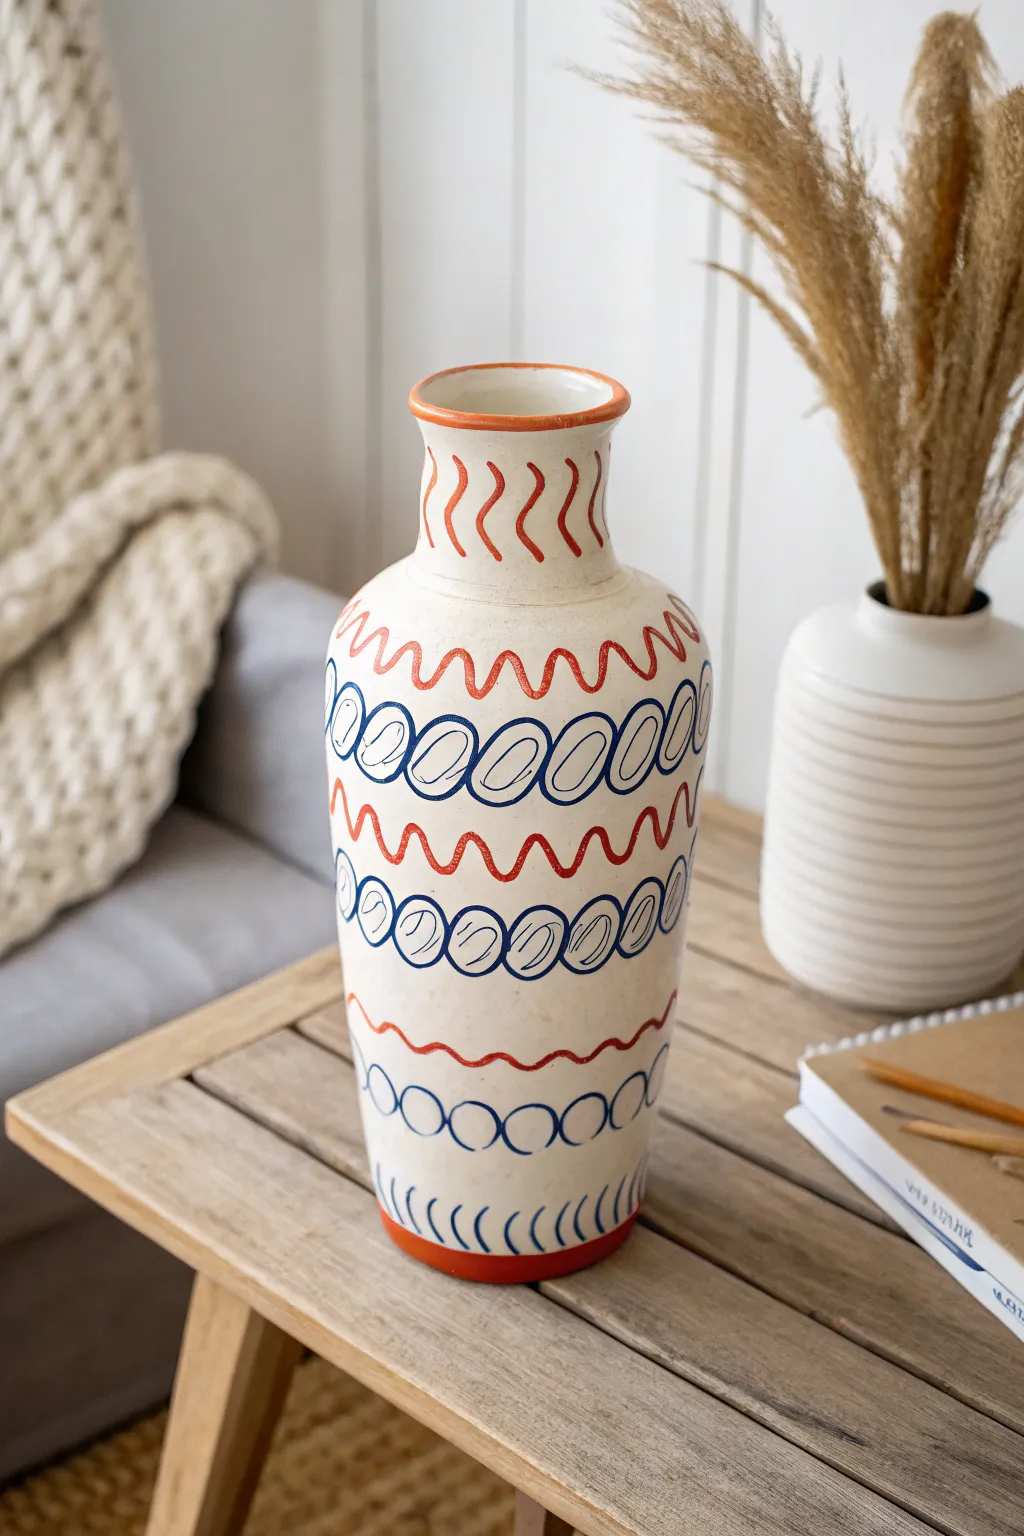
This rustic yet modern vase combines earthy terracotta tones with vibrant blue accents on a creamy white base. The playful pattern of squiggles and coiled loops creates a sense of movement, perfect for adding a touch of distinct, handcrafted charm to any corner of your home.
Step-by-Step
Materials
- Tall bisque-fired ceramic vase (cylindrical with tapered neck)
- Cream or off-white matte glaze
- Underglaze pencil or fine brush (for sketching)
- Terracotta/Red-orange underglaze
- Deep blue/Navy underglaze
- Small round detail brush (size 2 or 4)
- Fine liner brush
- Clear dipping glaze (optional, for glossy finish)
- Damp sponge
- Kiln access
Step 1: Base and Preparation
-
Clean the bisque:
Start with a clean, dust-free bisque-fired vase. Wipe it down gently with a damp sponge to remove any kiln dust or oils from handling, as these marks can resist glaze application. -
Apply base color:
Dip or brush on your cream-colored matte glaze. If brushing, apply three even coats, allowing each layer to dry until it’s no longer cool to the touch before adding the next. Aim for a smooth texture without visible brushstrokes. -
Map out the bands:
Once the base glaze is dry, lightly visualize the horizontal sections. You don’t need to draw heavy lines, but you can use a soft pencil to mark faint tick marks where each band of decoration will sit to ensure your pattern stays relatively level.
Step 2: Painting the Neck and Shoulders
-
Rim detail:
Using the terracotta underglaze and a small round brush, carefully paint the very top rim of the vase. Bring the color just slightly over the edge to create a defined lip. -
Neck squiggles:
On the neck section, paint vertical wavy lines using the terracotta color. These should look like loose ‘S’ curves or vertical squiggles, spaced evenly apart around the circumference. -
Shoulder transition:
Just below the neck where the vase widens, paint a horizontal separation line. Keep it thin and subtle, using the cream base color to clean up the edge if the neck squiggles went too low.
Wobbly Lines?
Don’t stress about perfect symmetry! If a line goes rogue, embrace it. This style mimics folk art, where slight imperfections add character rather than ruin the piece.
Step 3: Creating the Main Pattern
-
First red wave:
Paint a horizontal zigzag or continuous wave pattern in terracotta just below the neck. Let the lines be organic and hand-drawn rather than mathematically perfect. -
The blue loops:
Switch to your deep blue underglaze. Below the red wave, paint a row of slanted, connected loops. Think of them as a continuous coil trace, resembling cursive lowercase ‘e’s or ovals leaning to the right. -
Second red wave:
Create another horizontal wave pattern in terracotta below the blue loops. Try to mirror the intensity of the first wave, keeping the brush pressure consistent for a uniform line width. -
Second blue loops:
Paint a second band of blue loops. I find it helps to rotate the vase on a banding wheel while painting to keep the flow consistent, but moving your body around the table works too. -
Refining the blue:
Go back over the blue loops with a fine liner brush to add inner detail lines. These concentric oval strokes inside the main loops give the design that sketched, dimensional look shown in the image.
Texture Twist
Before the first firing, use a carving tool to physically incise the squiggle lines into the clay. When you glaze over them, the color will pool in the grooves for 3D depth.
Step 4: Lower Body Details
-
Lower wave:
Paint a wider, more relaxed terracotta wave near the bottom third of the vase. This wave can be slightly flatter than the ones near the top. -
Simple blue circles:
Below the lower red wave, paint a row of simple, connected blue circles. Unlike the slanted loops above, these should be more upright and open. -
Base ticking:
Near the very bottom, paint a series of small, curved blue hatch marks or parentheses shapes in a row. They should curve inwards, framing the bottom of the vessel. -
The weighted foot:
Finish the painting process by applying a solid band of terracotta underglaze around the very bottom foot of the vase. This grounds the design visually.
Step 5: Firing
-
Cleanup:
Check your work for any accidental smudges. You can gently scrape away mistakes with a craft knife or cover them with a tiny dab of the base cream glaze. -
Final dry:
Allow the vase to dry completely overnight to ensure all moisture has evaporated from the clay and glaze layers. -
Kiln firing:
Load the vase into the kiln and fire according to your clay and glaze specifications (typically Cone 5 or 6 for stoneware). Ensure it does not touch other pots during firing.
Once cooled, your vase is ready to hold dry botanicals and bring a warm, artistic energy to your living space.
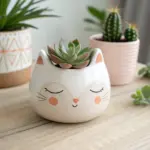
Animal Character Planter Vessel
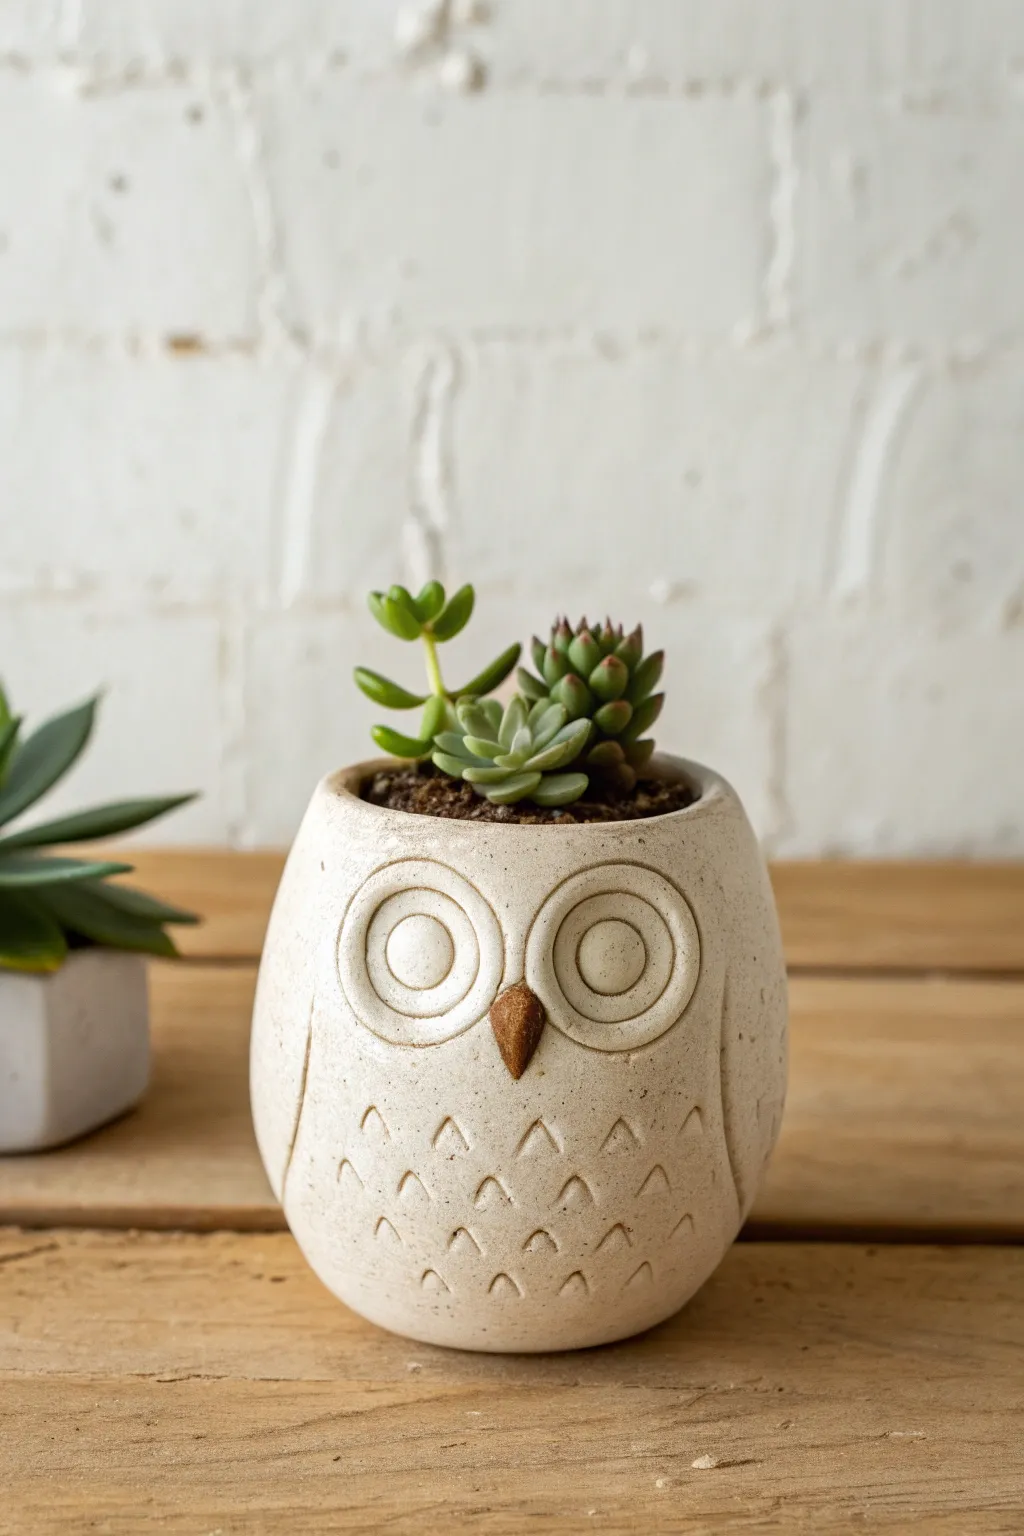
This charming little owl planter brings a touch of woodland magic to your succulent collection with its creamy speckled finish and simple, carved details. Its rounded form and wide, expressive eyes make it an approachable project for intermediate potters looking to practice texture and attachment techniques.
Step-by-Step Guide
Materials
- Speckled stoneware clay (white or buff)
- Pottery wheel (or slab roller for hand-building)
- Needle tool
- Loop carving tools (small)
- Sponge
- Slip (liquid clay)
- Scoring tool or serrated rib
- White semi-matte glaze
- Fine paintbrush
- Brown underglaze (optional)
Step 1: Forming the Body
-
Throwing the base:
Begin by centering a ball of speckled stoneware clay on the wheel. Open it up and pull the walls to create a basic cylinder, keeping the floor slightly thicker than usual to support the rounded shape. -
Belling the shape:
Use your inside hand to gently push the clay outward while collaring the top with your outside hand. You want to create a bulbous, egg-like shape that is wider at the bottom and slightly narrower at the rim. -
Finishing the rim:
Refine the rim with a chamois or sponge to ensure it is smooth and slightly rounded. I like to leave it a little thick to match the cozy, rustic aesthetic of the owl. -
Initial drying:
Wire the pot off the bat and let it dry to a leather-hard state. The clay needs to be firm enough to handle carving without warping, but soft enough to cut cleanly.
Clean Carving
When carving the ‘V’ feathers, wait until the clay is a firm leather-hard. If it’s too wet, the tool will drag and create burrs; too dry, and it might chip.
Step 2: Sculpting the Features
-
Defining the wings:
Using a needle tool, lightly sketch two large curved lines on the sides of the pot to outline the wings. These should curve downward from the ‘shoulder’ area to the base. -
Carving the wing separation:
Take a loop tool and carve a shallow groove along your sketched wing lines. Smooth the clay on either side of the groove with a damp sponge to soften the transition. -
Creating the eyes:
Roll out two small slabs of clay or flatten two balls into discs. Cut them into identical circles (about 1.5 inches diameter). Attaching these raised elements gives the face depth. -
Attaching the eyes:
Score the back of the eye discs and the corresponding spot on the planter body. Apply slip and press the discs firmly onto the pot. Clean up any oozing slip immediately. -
Adding pupils:
Roll two smaller balls of clay, flatten them slightly, and attach them to the center of the large eye discs using the score-and-slip method. -
Detailing the eyes:
Use a small loop tool to carve a concentric ring into the larger eye disc, surrounding the pupil. This creates that distinct ‘wide-eyed’ owl look. -
Forming the beak:
Shape a small piece of clay into a triangular, diamond-like beak. It should be slightly pointed at the bottom and thicker where it attaches to the face. -
Attaching the beak:
Score and slip the beak into place right between the lower edges of the eyes. Ensure a tight seal so it doesn’t pop off during firing.
Step 3: Adding Texture and Glazing
-
Carving feathers:
Using a V-tipped carving tool or a small loop tool, press small ‘V’ shapes into the belly area of the owl. Arrange them in staggered rows to mimic breast feathers. -
Carving wing details:
Add similar, perhaps slightly larger, V-shaped marks on the wing areas you defined earlier to suggest layered plumage. -
Bisque firing:
Once the piece is bone dry, fire it to cone 04 (or your clay body’s bisque temperature). -
Wax resist application:
Apply wax resist to the beak if you want it to remain the raw clay color like the example. Alternatively, paint the beak with a brown underglaze. -
Glazing:
Dip or brush the entire owl (except the beak and bottom) in a creamy white semi-matte glaze. The glaze should be thin enough to break over the texture, revealing the speckles underneath. -
Cleaning up:
Wipe away any glaze that may have gotten onto the beak or the foot of the pot with a damp sponge. -
Final firing:
Fire the piece to cone 5/6 (oxidation) to mature the clay and melt the glaze.
Make it a Set
Make two more owls in graduating sizes to create a nesting family. Vary the position of the pupils (looking left, right, or up) to give each one unique personality.
Once fired, fill your new feathered friend with potting soil and a cluster of succulents to complete the look
Sea Creature Wraparound Vessel
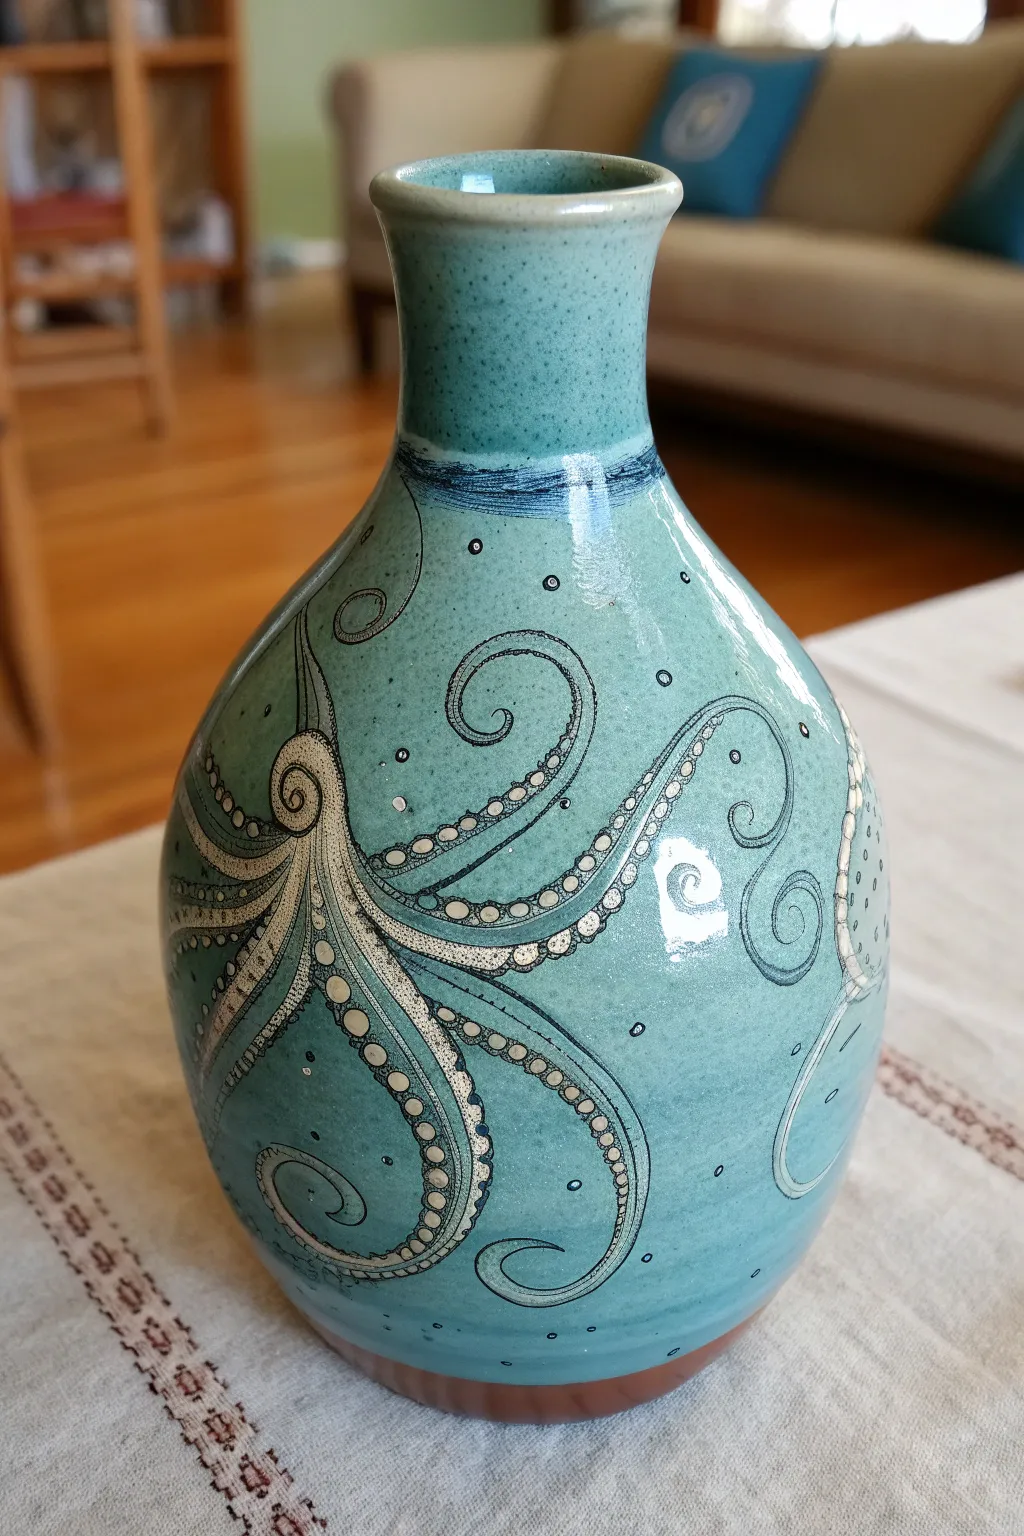
This stunning ceramic project transforms a simple wheel-thrown bottle into a dynamic oceanic scene. Using a vibrant teal underglaze and intricate sgraffito-style carving, you will bring a swirling octopus to life that wraps endlessly around the form.
How-To Guide
Materials
- Red stoneware or earthenware clay
- Pottery wheel and throwing tools
- Turquoise or teal underglaze
- Clear transparent glaze
- Sgraffito tool (small loop tool)
- Needle tool
- Small round paintbrush
- Sponge
- Pencil (optional)
- Wax resist (optional)
Step 1: Throwing and Shaping
-
Center and open:
Begin with about 2-3 lbs of red clay. Center it firmly on the wheel and open the clay, keeping a slightly narrower base than you would for a bowl. -
Pull the walls:
Pull the walls up into a tall cylinder. As you pull, gently shape the belly of the pot by applying pressure from the inside, creating a rounded, bulbous form. -
Collar the neck:
Slowly collar the top third of the clay inward to create a narrow, elegant neck. Use both hands to compress the clay so the walls don’t buckle. Flare the rim slightly for a finished look. -
Trim and dry:
Once thrown, let the piece dry to leather-hard. Trim the foot ring to give the vessel a visual lift, revealing that beautiful red clay body at the bottom.
Clean Lines
Work on the clay when it is a stiff leather-hard. If it’s too wet, the carving tools will drag and create messy ragged edges rather than crisp lines.
Step 2: Surface Decoration
-
Background application:
While the pot is leather-hard, apply 2-3 smooth coats of turquoise underglaze to the entire exterior, stopping just above the foot ring. Leave the rim and foot natural if preferred, or glaze the rim. -
Initial sketching:
Lightly sketch your octopus design directly onto the dry underglaze using a soft pencil. The pencil lines will burn off in the kiln. -
Carving outlines:
Using a needle tool or specialized sgraffito tool, carefully carve through the teal underglaze to reveal the red clay beneath for the main outlines of the octopus body and tentacles. -
Detailing the suckers:
For the tentacles, carve small circles to represent suckers. Inside these circles, carve away a dot of underglaze, or leave the underglaze and carve around it, creating variations in texture. -
Adding texture:
I like to add small stippled dots or tiny circles in the negative space around the octopus to create the illusion of bubbles or ocean currents. -
Cleaning up:
Gently brush away any clay burrs with a soft, dry brush. Don’t use water here, or you might smudge the crisp carved lines.
Step 3: Painting and Finishing
-
Bisque firing:
Allow the piece to dry completely (bone dry) and fire it to a bisque temperature (usually cone 04 or 06). -
Washing:
Wipe the bisque-fired vessel with a damp sponge to remove any dust that might interfere with glazing. -
Black inlay (Optional):
To make the lines pop like the photo, wash a thin black underglaze or oxide wash over the carved areas and wipe it back with a sponge, leaving dark pigment only in the recessed lines. -
Clear glazing:
Dip the entire vessel (or pour over) into a clear, glossy glaze. This will seal the clay and make the teal color vibrant and shiny. -
Wipe the foot:
Thoroughly wipe the glaze off the bottom foot ring to prevent it from sticking to the kiln shelf. -
Final firing:
Fire the piece to the maturation temperature of your specific clay and glaze combination.
Dynamic Tentacles
Wrap tentacles around the curve of the pot so the viewer has to turn the vessel to see the whole creature. This encourages interaction with the piece.
Now you have a stunning aquatic vessel ready to hold fresh blooms or stand alone as art
Hanging Wall Pocket Vessel for Dried Florals

This charming ceramic wall pocket features a distinctive three-band design combining deep indigo glaze with raw, speckled stoneware. Suspended by a simple leather cord, it serves as a perfect rustic-modern home for your favorite dried floral arrangements.
Step-by-Step
Materials
- Speckled stoneware clay (approx. 2-3 lbs)
- Pottery wheel (or slab roller for hand-building)
- Needle tool
- Rib tool (metal and rubber)
- Wire cutter
- Sponge
- Trimming tools
- Hole punch tool (or drill bit)
- Deep blue/indigo glaze (glossy)
- Wax resist emulsion
- Leather cord or thin rope (approx. 2 feet)
- Wooden wall hook (for display)
- Dried flowers for styling
Step 1: Shaping the Form
-
Prepare the Clay:
Begin by thoroughly wedging your speckled stoneware clay to remove air bubbles and ensure uniform consistency. Center a ball of clay on the wheel head. -
Open and Pull:
Open the centered clay and pull up the walls to create a tall, cylindrical form. Aim for a slightly tapered shape that is wider at the top and gently rounds toward the bottom. -
Shape the Belly:
Use a rib tool on the inside while supporting the outside to gently push the belly of the pot out, creating a soft, rounded curve similar to a large tumbler. -
Smooth the Rim:
Compress the rim with a piece of chamois or your finger to ensure it is smooth and strong. This prevents chipping later. -
Flatten the Back:
While the clay is still plastic but firm enough to handle, gently press one side of the cylinder against a flat board. This creates the flat back needed for hanging against a wall. -
Refine the Profile:
Use a rubber rib to smooth the transition between the rounded front and the flattened back. The shape should look seamless.
Slumping Shapes?
If the flat back starts to curve out during drying, place a small wooden board inside the pot against the back wall to hold its shape until leather hard.
Step 2: Details & Firing
-
Leather Hard Stage:
Allow the piece to dry to a leather-hard state. It should be firm to the touch but still carveable. -
Trim the Foot:
If you threw the piece with a thick bottom, trim away the excess clay to create a rounded bottom profile that matches the main body. -
Punch Hanging Holes:
Using a hole punch tool or a small drill bit, create two holes on the sides near the rim. Ensure they are aligned with each other and large enough to accommodate your leather cord after shrinkage. -
Bisque Fire:
Once bone dry, load the vessel into the kiln for a bisque firing (typically Cone 04). This hardens the clay for glazing.
Texture Play
Before firing, gently tap the unglazed band with a stiff toothbrush to enhance the speckled clay texture, making the contrast with the smooth glaze even stronger.
Step 3: Glazing & Assembly
-
Apply Wax Resist:
To create the central raw clay band, carefully paint a strip of wax resist around the middle of the vessel. Let the wax utilize the natural speckled texture of the clay as a design element. -
Clean Edges:
Wait for the wax to dry completely. If any wax dripped outside your intended band, scrape it off gently with a tool. -
Dip Glaze Top:
Holding the vessel by the base, dip the top section into your deep blue glaze. The wax will repel the glaze, creating a crisp line. I find dipping quickly prevents the glaze from getting too thick. -
Dip Glaze Bottom:
Once the top is dry to the touch, hold the vessel by the rim and dip the bottom section into the blue glaze, meeting the bottom edge of the wax line. -
Clean the Holes:
Use a small brush or twisted paper towel to ensure no glaze has clogged the hanging holes. -
Glaze Fire:
Fire the piece again to the maturity temperature of your clay and glaze (often Cone 5 or 6 for stoneware). -
Attach the Cord:
Thread your leather cord through the side holes from the outside in. Tie secure knots on the inside of the vessel so they remain hidden. -
Final Styling:
Hang the vessel on a sturdy wall hook and arrange your dried florals, letting taller stems lean against the wall for support.
Enjoy the interplay of glossy blue and raw earth tones on your new handmade wall décor