Cute clay charms are my favorite kind of project because you can finish one in a short studio session and still get that big “I made this!” feeling. Below are my go-to easy cute clay charms ideas that keep the shapes simple, the faces sweet, and the results totally giftable.
Kawaii Smiley Face Discs
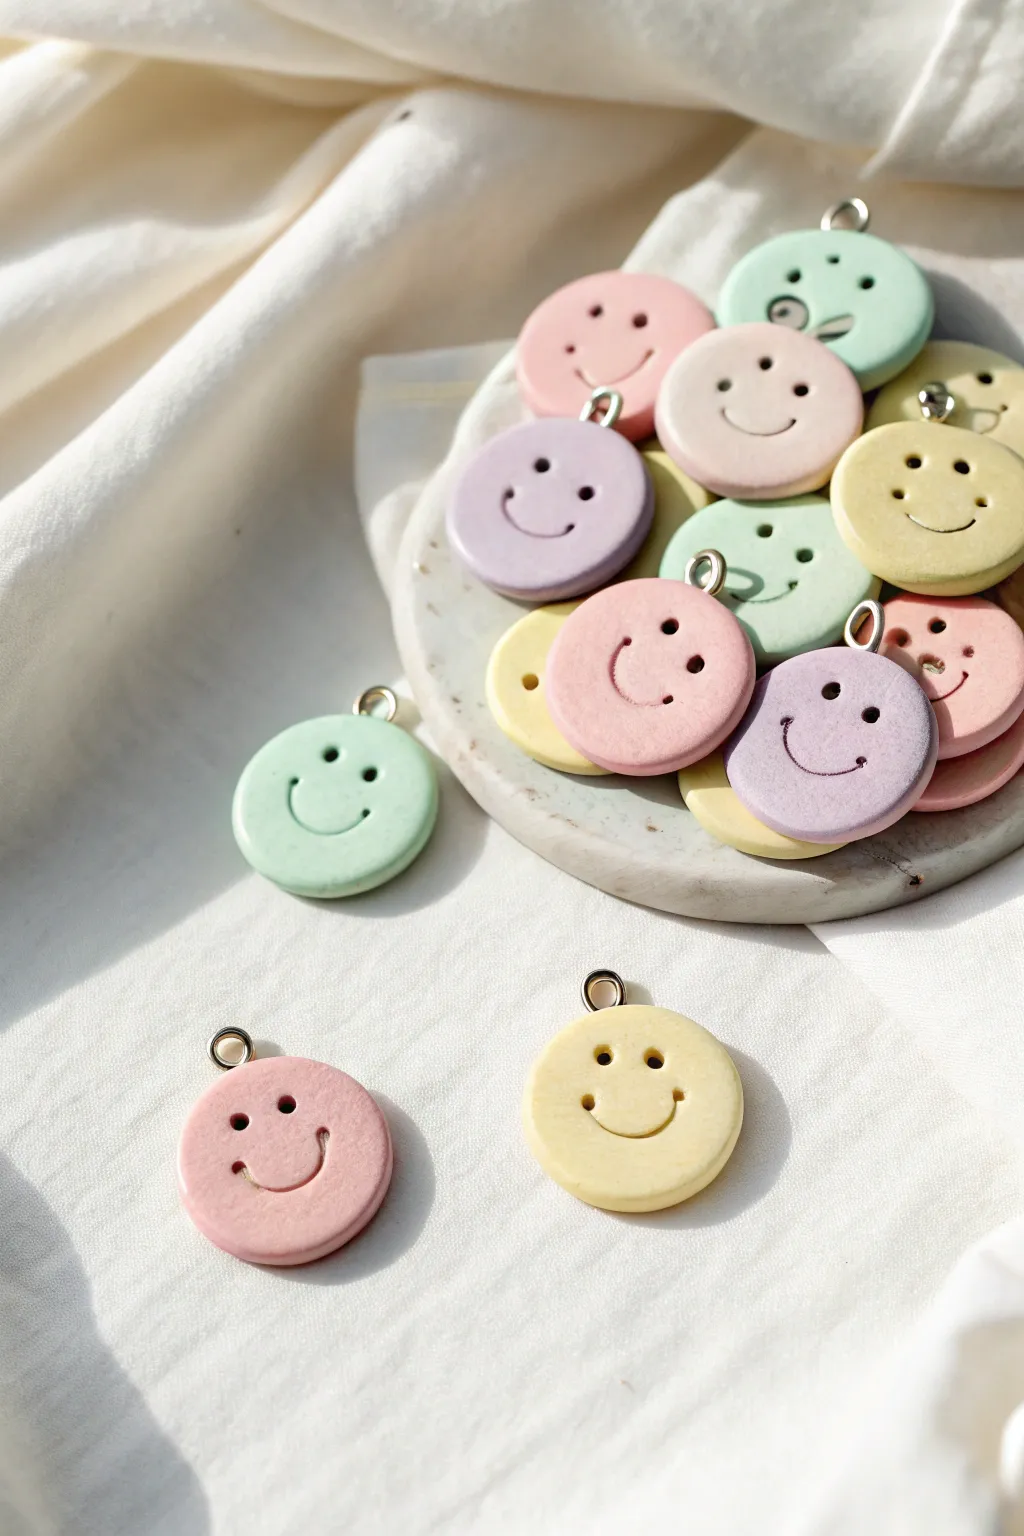
These cheerful little discs bring a touch of kawaii happiness to any jewelry project or zipper pull. With their soft, matte pastel colors and simple carved expressions, they capture a sweet and trendy aesthetic that is wonderfully easy to recreate at home.
How-To Guide
Materials
- Polymer clay in pastel colors (pink, yellow, mint green, lavender)
- Small circle cutter (approx. 1 inch diameter)
- Acrylic rolling pin or clay machine
- Small dotting tool or toothpick
- Small U-shaped carving tool or a cut straw
- Small metal jump rings (6mm or 8mm)
- Baking sheet
- Parchment paper
- Ceramic tile (optional, for working on)
Step 1: Prepping and Shaping
-
Condition the Clay:
Begin by taking small amounts of your pastel polymer clay colors. Knead each color in your hands until it becomes soft, pliable, and warm to the touch. -
Roll Smooth Sheets:
Using an acrylic rolling pin or a pasta machine, roll out your conditioned clay into flat sheets of even thickness. Aim for about 3mm to 4mm—thick enough to hold a smiley face but thin enough to be lightweight. -
Cut Out Circles:
Press your round circle cutter firmly into the clay sheet to create your discs. Try to make clean cuts and lift the cutter straight up to avoid distorting the circle shape. -
Soften the Edges:
Gently run your finger around the circumference of each cut circle. This smooths out any sharp ridges left by the cutter and gives the charm a softer, more finished look.
Smiley Shaping Trick
If you don’t have a U-shaped tool, the cap of a small marker or pen pressed at an angle creates a perfect crescent smile every time.
Step 2: Creating the Faces
-
Mark Eye Placement:
Visualize where the face should sit. Using a very light touch with a needle tool, mark two tiny guide points for the eyes so you ensure they are level before committing. -
Create the Eyes:
Take your dotting tool (or a blunt toothpick) and press straight down into the clay at your marked spots. Rotate the tool slightly to widen the hole if you want a bolder expression. -
Form the Smile:
For the mouth, use a small U-shaped tool or cut a plastic straw in half lengthwise. Press this curved edge gently into the clay below the eyes to imprint a perfect, consistent smile. -
Add Dimples (Optional):
If you want extra cuteness, use the smallest dotting tool to make tiny indentations at the ends of the smile line.
Step 3: Hardware and Baking
-
Insert Jump Rings:
While the clay is still raw, gently press a metal jump ring into the top edge of the circle. You want it embedded deep enough (about halfway) so the clay grips the metal. -
Secure the Ring:
Use a silicone tool or your finger to smooth a tiny bit of the surrounding clay over the base of the jump ring to lock it in place. -
Final Inspection:
Check your charms for any lint or fingerprints. A tiny bit of baby oil or rubbing alcohol on a q-tip can gently wipe away surface imperfections before baking. -
Prepare for Baking:
Arrange the charms on a baking sheet lined with parchment paper. Make sure they aren’t touching each other. -
Bake the Charms:
Bake according to your specific polymer clay brand’s instructions (usually roughly 275°F or 135°C for 15-30 minutes). I tend to bake slightly longer at a lower temp to prevent scorching the pastels. -
Cool Down:
Allow the charms to cool completely on the baking sheet. They will be slightly soft when hot but will harden fully as they cool.
Clean Edges Pro Tip
Place a piece of plastic wrap over the clay before using your circle cutter. The plastic creates a soft, domed edge instantly, saving you sanding time later.
Step 4: Finishing Touches
-
Check Stability:
Once cool, gently wiggle the jump ring to ensure it is secure. If any feel loose, a tiny drop of superglue at the connection point can fix it. -
Matte Finish (Optional):
The image shows a lovely matte texture. If your clay is naturally shiny, you can lightly sand the surface with very fine-grit sandpaper for that soft, stone-like feel.
Now you have a handful of happy charms ready to be strung onto necklaces or shared with friends


Mini Donut Charms With Sprinkles
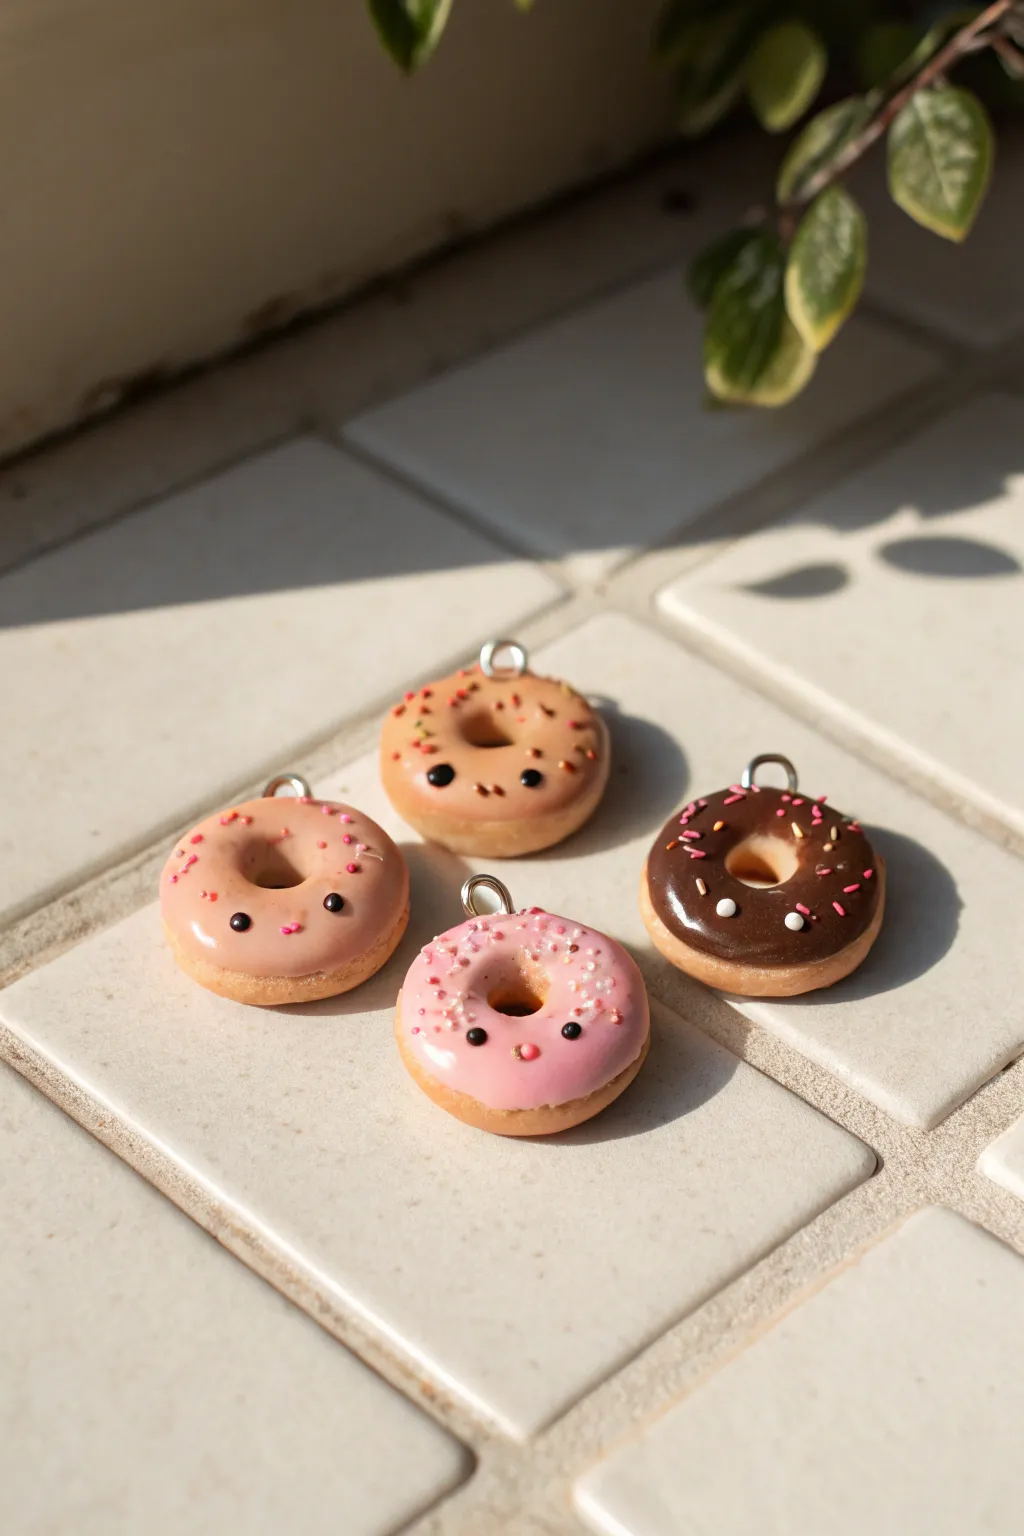
These adorable polymer clay donut charms feature tiny smiling faces and realistic-looking icing in various flavors. Perfect for beginners, this project combines simple shaping techniques with delicate facial details for a kawaii finish.
Detailed Instructions
Materials
- Polymer clay (tan/beige for dough)
- Polymer clay (pink, light brown/caramel, dark brown for icing)
- Liquid polymer clay (translucent or white)
- Black and pink acrylic paint
- Fine detail paintbrush or dotting tool
- Needle tool or toothpick
- Metal eye pins
- Small circle cutter (optional)
- Pastel chalks (orange/brown) for shading
- Gloss glaze (polyurethane or UV resin)
- Soft paintbrush for shading
Step 1: Shaping the Dough Base
-
Condition the Clay:
Begin by thoroughly conditioning your tan or beige polymer clay until it is soft and pliable. This prevents cracking later on. -
Form the Circles:
Roll the clay into four equal-sized balls, each about the size of a large marble (approximately 1.5 cm diameter). Gently flatten them slightly into thick discs. -
Create the Donut Hole:
Take a needle tool or the rounded end of a paintbrush and press entirely through the center of each disc to create the donut hole. Wiggle the tool slightly to widen the hole to your preference. -
Refine the Edges:
Smooth out any fingerprints and gently round the outer edges of the donut with your fingertips so it looks like a puffy, baked pastry. -
Add Baked Effect:
Scrape some orange and brown pastel chalk into a fine powder. Use a soft, dry brush to lightly dust the edges and bottom of the donuts to give them a golden-brown baked appearance.
Texturing Tip
Before baking the dough base, gently roll a clean toothbrush or a ball of aluminum foil over the tan clay. This imitates the airy texture of real fried dough.
Step 2: Adding Icing and Details
-
Mix the Icing:
To make realistic icing, mix a small amount of solid colored clay (pink, brown, etc.) with liquid polymer clay in a small cup or on a tile. Continue mixing until you achieve a consistency similar to frosting or heavy cream. -
Apply the Base Frosting:
Carefully dab or spread the liquid clay mixture onto the top of each donut. Guide it slightly over certain edges using a needle tool to simulate natural drips, but keep the center hole clear. -
Create Sprinkles:
Roll out very thin snakes of various colored clays. Bake these snakes for just 5 minutes to harden them slightly, then chop them into tiny bits with a blade to make realistic sprinkles. -
Decorate:
While the liquid clay icing is still wet, gently press your pre-made clay sprinkles onto the surface. Alternatively, you can use store-bought microbeads or nail art decorations. -
Insert Hardware:
Trim your metal eye pins to the correct length (about 5-7mm). Dip the end in a tiny bit of liquid clay or translucent liquid sculpey for extra grip, and push it securely into the top edge of the donut. -
Bake the Charms:
Place your donuts on a ceramic tile or baking sheet. Bake according to your brand of polymer clay instructions (usually 275°F/135°C for 15-30 minutes). Let them cool completely.
Step 3: Bringing Faces to Life
-
Paint the Eyes:
Once cool, use a very fine detail brush or a dotting tool dipped in black acrylic paint to create two small, widely spaced eyes on the lower half of the donut. -
Add Cheeks:
Using a tiny dotting tool, add small pink ovals slightly below and outside the eyes for blushing cheeks. For some, like the pink donut, you can paint a tiny nose or mouth in the center. -
Highlight the Eyes:
Dip a needle tip into white paint and add a minuscule white dot to the top corner of each black eye. This reflection makes the character look alive and cute. -
Seal Everything:
Paint a coat of gloss glaze or UV resin over the icing area and the painted face. This seals the paint and gives the frosting a delicious, wet shine while leaving the dough part matte.
Make it a Keychain
After baking, attach a jump ring to the eye pin, then connect a lobster clasp or keychain loop. Add a colorful tassel or a secondary bead charm for extra flair.
Your miniature bakery is now open for business, ready to be worn as earrings or hung on a zipper pull


Tiny Heart Charms With Blush Cheeks
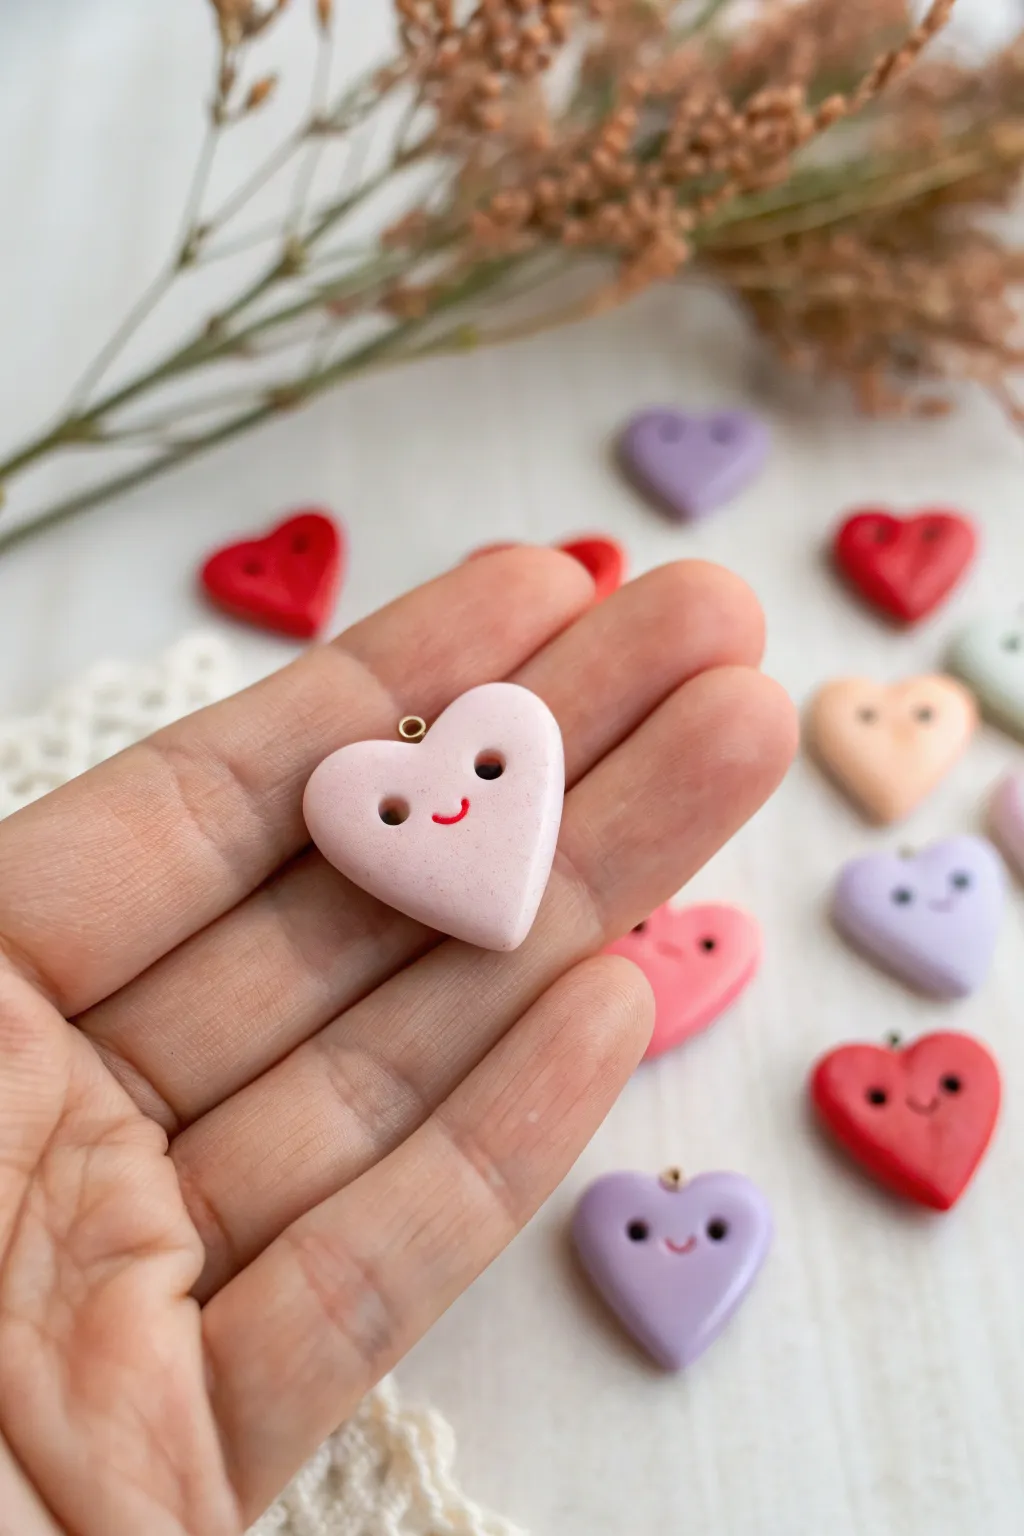
These miniature polymer clay heart charms are bursting with personality, featuring sweet little smiles and adorable button eyes. Their soft, pastel colors and smooth finish make them perfect for dainty jewelry or cheerful zipper pulls.
How-To Guide
Materials
- Polymer clay in pastel pink, purple, red, and peach
- Small heart-shaped cutter (approx. 1 inch)
- Dotting tool or small ball stylus
- Needle tool or toothpick
- Small gold screw eye pins
- Acrylic paint (black and red)
- Fine detail paintbrush (size 000)
- Gloss glaze or UV resin (optional)
- Rolling pin or pasta machine
- Ceramic tile or glass work surface
- Oven for baking
Step 1: Shaping the Base
-
Condition the clay:
Start by taking a small amount of your chosen pastel clay color. Knead it thoroughly in your hands until it becomes soft, warm, and pliable to prevent cracks later. -
Roll out a slab:
Place the conditioned clay on your work surface. Use a rolling pin to flatten it into an even sheet. Aim for a thickness of about 1/4 inch (6mm) so the charm feels substantial and rounded, not flat. -
Cut the shape:
Press your heart-shaped cutter firmly into the clay slab. Give it a tiny wiggle before lifting to ensure a clean cut. -
Soften the edges:
Gently lift the heart from the surface. Use your fingertip to lightly tap and smooth the sharp edges created by the cutter, giving the heart a pillowy, rounded look. -
Create eye sockets:
Take your dotting tool or a ball stylus. Press two indentations into the upper half of the heart to create the sockets for the eyes. Space them somewhat widely for a cute, kawaii appearance. -
Add the hardware:
Take a small gold screw eye pin. Gently twist it into the center of the top dip of the heart. Screw it in until only the loop is visible.
Step 2: Bringing It to Life
-
Bake the pieces:
Arrange your hearts on a tile or parchment-lined baking sheet. Bake according to your brand of polymer clay instructions (usually around 275°F/135°C for 15-30 minutes). -
Cool completely:
Once baked, let the charms cool down completely before painting. Warm clay will make the paint dry too fast and become clumpy. -
Paint the eyes:
Dip your fine detail brush or a toothpick into black acrylic paint. Carefully fill the two indentations you made earlier. A tiny dot is all you need. -
Draw the smile:
Using red or dark pink acrylic paint and your finest brush, paint a tiny, curved ‘U’ shape between and slightly below the eyes. -
Add blushing cheeks:
Mix a tiny amount of red paint with water to create a translucent wash, or use soft pastels. Dab a very faint amount on the cheeks near the smile for a rosy glow. -
Clean up stray marks:
If your hand slips while painting, quickly wipe the mistake away with a damp cotton swab or a bit of rubbing alcohol before it dries. -
Glazing (Optional):
For a shiny finish like the hearts in the background, apply a thin coat of gloss glaze or UV resin over the entire charm. I prefer to use a soft brush to avoid streaks. -
Cure the glaze:
Allow the glaze to air dry according to the bottle instructions, or cure under a UV lamp if you used resin.
Uneven Clay Surface?
If your clay has fingerprints before baking, lightly brush the raw clay with a little baby oil or cornstarch. This smooths out ridges instantly.
Make it Sparkle
Mix a pinch of ultrafine iridescent glitter into your translucent clay or glaze. It adds a magical shimmer without overpowering the cute face.
You now have a handful of sweet, smiling charms ready to be turned into a bracelet or necklace

Mini Star Charms in Pastel Colors
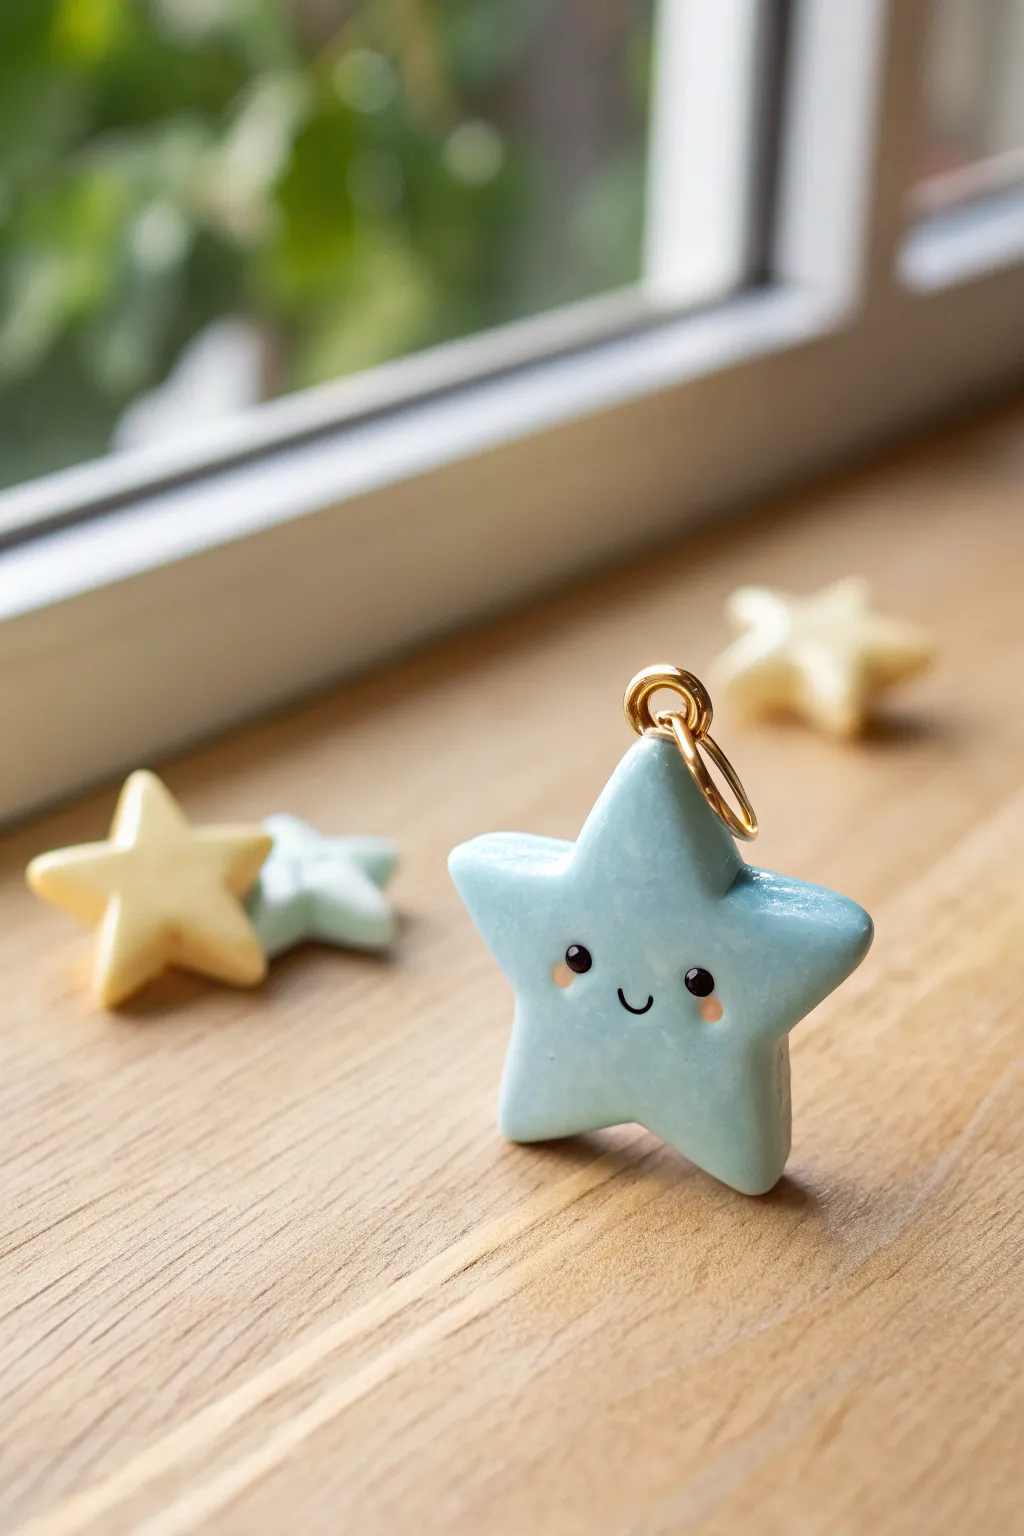
Brighten up your keyring or necklace with this adorable smiling star charm. Crafted from polymer clay in a soft baby blue, it features a sweet, hand-painted expression and a durable glossy finish that makes it sparkle.
Step-by-Step Guide
Materials
- Light blue polymer clay (pastel shade)
- Black acrylic paint
- Pink soft pastel chalk or blush
- Glossy polyurethane varnish or UV resin
- Gold screw eye pin
- Gold jump ring
- Star-shaped cookie cutter (approx. 1 inch)
- Clay roller or pasta machine
- Needle tool or fine detail brush
- Ball stylus tool
- Sandpaper (fine grit, optional)
- Oven for baking
Step 1: Shaping the Star
-
Condition the clay:
Start by kneading your light blue polymer clay until it is soft, pliable, and free of air bubbles. If the clay feels too firm, warm it in your hands for a few minutes. -
Roll out the slab:
Roll the clay out on a smooth surface to a uniform thickness of about 1/4 inch (6mm). You want it thick enough to hold an eye pin securely without bulging. -
Cut the shape:
Press your star-shaped cookie cutter firmly into the clay slab. Wiggle it slightly to ensure a clean cut, then gently remove the excess clay from around the cutter before lifting the shape. -
Soften the edges:
After removing the star from the cutter, gently run your finger along the edges to smooth out any sharp ridges or cutting seams. This gives the charm a soft, puffy look rather than a sharp, cookie-cutter finish. -
Refine the points:
Check the five points of the star. If they got squashed during handling, gently reshape them with your fingertips to make them slightly rounded but distinct.
Fixing Painted Mistakes
Did the mouth go crooked? Don’t panic. If the paint is wet, wipe specifically with a damp q-tip. If dry, gently scratch it off with a needle tool.
Step 2: Adding Hardware & Baking
-
Insert the eye pin:
Take a gold screw eye pin and carefully twist it into the center of the top point of the star. Ensure it goes in straight and doesn’t poke out the back or front faces. -
Secure the pin:
For extra security, I like to remove the pin, add a tiny dab of liquid clay or bake-and-bond to the threads, and screw it back in. -
Clean surface:
Inspect the clay for any fingerprints or dust specks. Use a little rubbing alcohol on a q-tip or baby oil to smooth these imperfections away before baking. -
Bake the clay:
Place the star on a baking sheet lined with parchment paper. Bake according to your brand of clay’s instructions—usually around 275°F (130°C) for 15-20 minutes. -
Cool down:
Allow the star to cool completely in the oven with the door cracked, or on a cooling rack. Do not paint or glaze while the clay is still warm.
Make It Sparkle
Mix ultra-fine holographic glitter into your gloss glaze or resin before applying topcoat. It creates a magical galaxy effect perfect for star themes.
Step 3: Detailing the Face
-
Map out the face:
Visualize where the eyes will go. They should be wide-set and positioned roughly halfway down the star’s body for maximum cuteness. -
Paint the eyes:
Dip a fine ball stylus or the handle end of a paintbrush into black acrylic paint. Dot two small, solid circles onto the clay for the eyes. -
Draw the mouth:
Using an extremely fine detail brush or a needle tool dipped in black paint, carefully draw a tiny ‘u’ shape between the eyes for a smiling mouth. -
Add rosy cheeks:
Scrape a little powder from a pink pastel chalk. Use a dry Q-tip or soft brush to gently dust this pink powder underneath the eyes to create blushing cheeks. -
Let paint dry:
Wait for the acrylic paint to dry completely. If you rush this step, the glaze applied next might smear the face details.
Step 4: Finishing Touches
-
Apply varnish:
Brush a coat of glossy polyurethane varnish or UV resin over the entire front and sides of the star. This seals the paint and gives it that professional ceramic-like shine. -
Cure or dry:
If using resin, cure it under a UV lamp for a few minutes. If using varnish, let it air dry according to the bottle instructions, usually 30-60 minutes. -
Attach the jump ring:
Once the finish is hard and dry, use two pliers to twist open your gold jump ring. Loop it through the eye pin loop on top of the star. -
Close the ring:
Twist the jump ring back into a closed position, ensuring the ends meet perfectly flush so your charm doesn’t slip off.
Your little star is now ready to shine on your bag, keys, or jewelry collection

The Complete Guide to Pottery Troubleshooting
Uncover the most common ceramic mistakes—from cracking clay to failed glazes—and learn how to fix them fast.
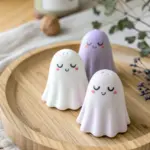
Cloud Charms With Sleepy Faces
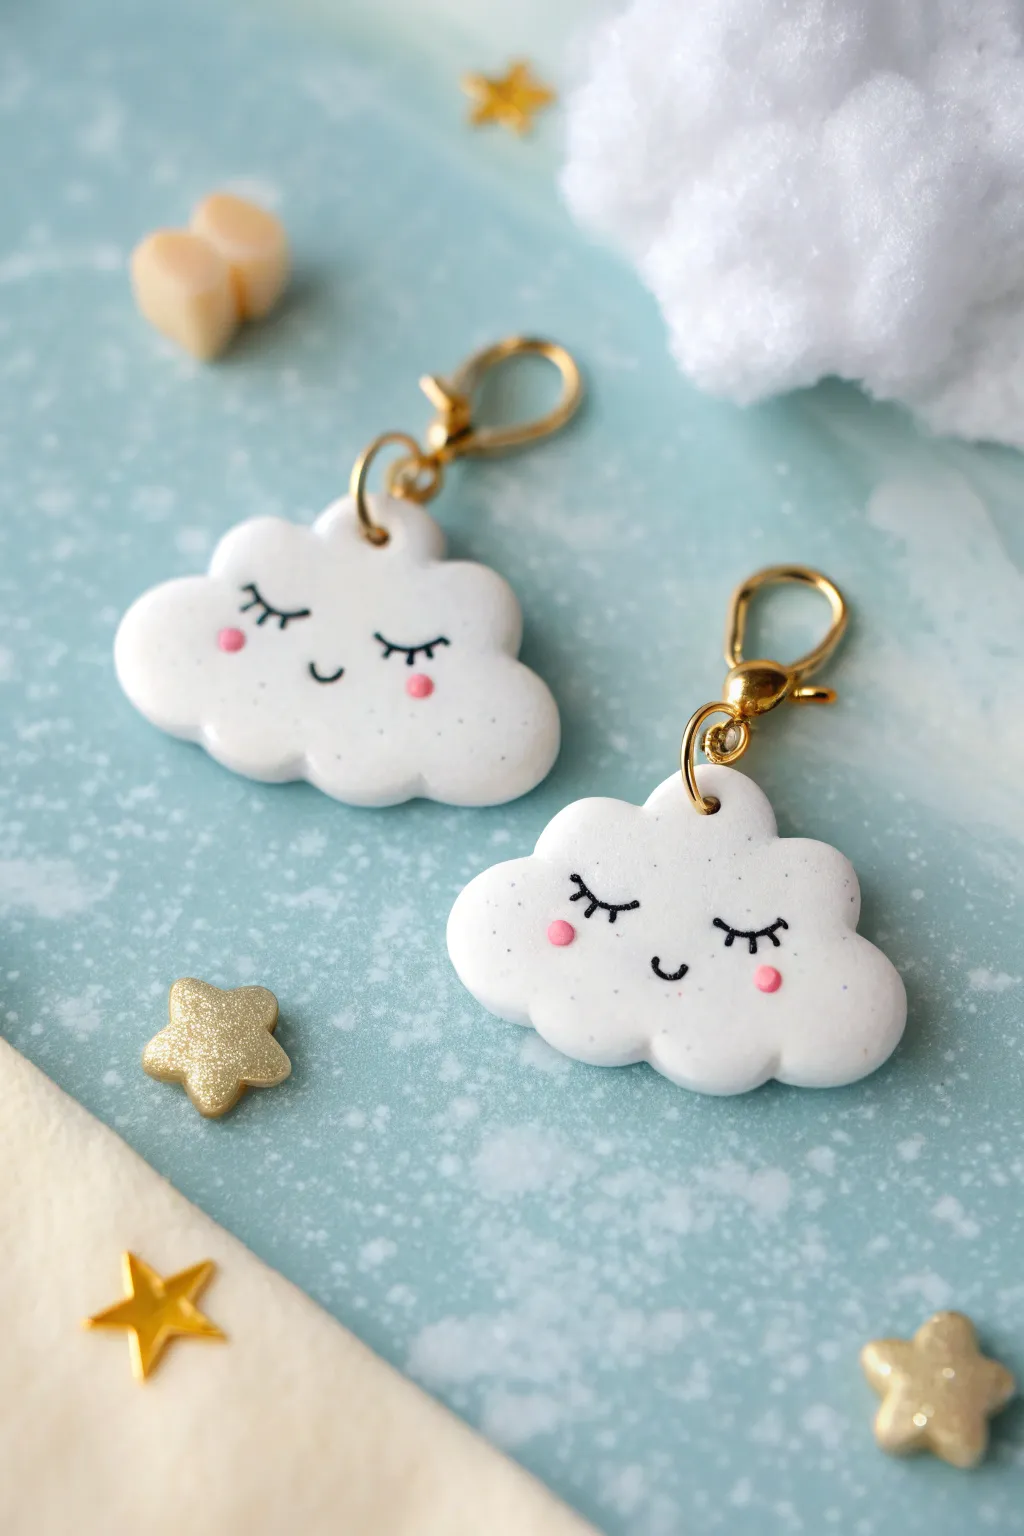
These adorable cloud charms feature sweet, sleepy faces and soft, billowy edges that make them perfect for zipper pulls or stitch markers. With their gentle expressions and subtle rosy cheeks, they add a touch of whimsy to any accessory.
How-To Guide
Materials
- White polymer clay (optionally with glitter or white granite effect)
- Black acrylic paint or fine-tip permanent marker
- Pink acrylic paint or pink chalk pastel
- Gold lobster clasps (small)
- Gold jump rings (6-8mm)
- Eye pins or screw eye pins (gold)
- Small dotting tool or toothpick
- Fine detail paintbrush
- Clay rolling pin
- Small cloud cookie cutter (approx. 1 inch in width)
- Gloss or matte varnish (optional)
- Pliers (round nose and flat nose)
- Needle tool
Step 1: Shaping the Clouds
-
Condition the Clay:
Begin by warming up your white polymer clay in your hands. Knead it thoroughly until it is soft, pliable, and free of cracks. If you want a sparkly look like the example, mix in a tiny pinch of white glitter. -
Roll It Out:
Using your rolling pin, flatten the clay into a slab. You want it to be relatively thick, aiming for about 4mm to 5mm, so the charm feels sturdy and has a nice rounded edge later. -
Cut the Shape:
Press your cloud-shaped cutter firmly into the clay slab. Wiggle it slightly before lifting to ensure a clean cut. -
Soften the Edges:
Use your finger to gently tap and smooth the cut edges of the cloud. You want to remove the sharp ‘cookie cutter’ look and make the cloud puffier and friendlier.
Smooth Moves
Before baking, gently wipe the clay surface with a little rubbing alcohol on a brush or your finger. This removes lint and fingerprints effortlessly.
Step 2: Adding Hardware & Baking
-
Insert the Eye Pin:
Take a gold eye pin or screw eye. I find it helpful to trim the stem if it’s too long. -
Secure the Attachment:
Carefully screw or push the pin into the center top bump of the cloud. Ensure it goes in straight so it doesn’t poke out the front or back. -
Check for Distortions:
Inserting the pin might have slightly warped the cloud’s shape. Give it a final gentle reshape with your fingers to ensure it’s perfectly fluffy. -
Bake the Clay:
Place your clouds on a ceramic tile or baking sheet lined with parchment paper. Bake according to your specific clay brand’s instructions (usually around 230°F – 275°F for 15-30 minutes). -
Cool Completely:
Allow the clouds to cool fully before handling them. The clay hardens as it cools, so touching them while hot might leave fingerprints.
Rainy Day Remix
Attach three tiny blue glass beads on short chains to the bottom of the cloud to create dangling raindrops for a stormy weather version.
Step 3: Painting the Face
-
Draw the Eyelashes:
Using a very fine detail brush and black acrylic paint (or a fine-tip marker), paint two small, downward-curving arcs for the closed eyes. Add three tiny lashes to the outer corner of each eye. -
Add the Smile:
Paint a tiny, shallow ‘U’ shape right between and slightly below the eyes to create a content little smile. -
Create Rosy Cheeks:
Dip a small dotting tool into pink paint. Gently dab a perfect circle onto the clay just below the outer corner of each eye. -
Dry the Paint:
Let the painted details dry completely. If you used marker, wait at least an hour to ensure it’s set before sealing. -
Seal the Charm:
Apply a thin coat of varnish over the face (or the whole cloud) to protect the paint from scratching off. A matte finish looks soft and dreamy, while gloss makes it pop.
Step 4: Assembly
-
Open the Jump Ring:
Using two pairs of pliers, twist a gold jump ring open sideways (don’t pull it apart). -
Connect the Clasp:
Loop the open jump ring through the eye pin embedded in your cloud, and then slide on the gold lobster clasp. -
Close and Finish:
Twist the jump ring closed again securely with your pliers, ensuring the gap is completely shut so the clasp doesn’t slip off.
Clip your new sleepy cloud onto your planner or bag for a comforting reminder to keep your head in the clouds
Mushroom Cap Charms With Dot Eyes
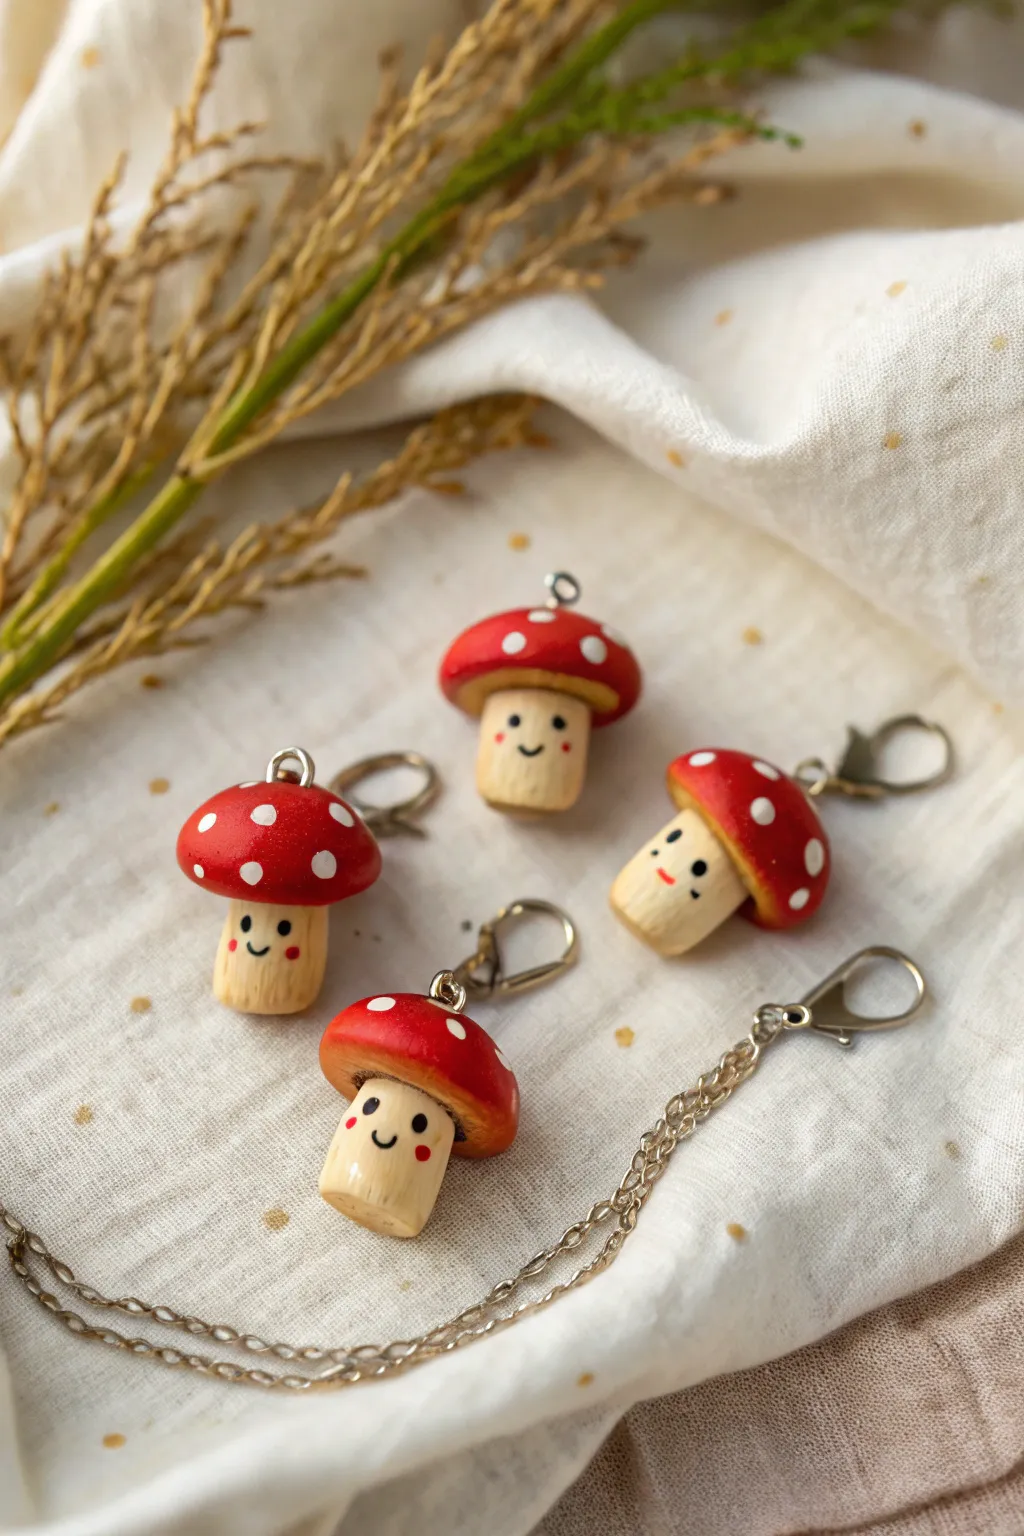
Bring a touch of the forest to your accessories with these adorable mushroom charms, featuring cheerful painted faces and classic polka-dot caps. Whether attached to a delicate chain or a zipper pull, these tiny clay creations are perfect for beginners looking to practice simple sculpting and detailing.
Step-by-Step Tutorial
Materials
- Polymer clay (white or beige for stems, red for caps)
- Dotting tools or toothpicks
- Acrylic paints (red, white, black)
- Small paintbrush
- Eye pins or screw eyes
- Jump rings and lobster clasps
- Chain (optional, for necklace)
- Clay sculpting tools (knife tool, smoothing tool)
- Texturing tool (stiff bristle brush or fine needle)
- Gloss glaze or polyurethane varnish
- Oven for baking
Step 1: Sculpting the Shapes
-
Form the stalks:
Start by conditioning a small amount of beige clay until it is soft and pliable. Roll it into a thick cylinder shape, slightly wider at the base than at the top, to form the stalk. -
Add texture:
Before attaching the cap, use a stiff bristle brush or a fine needle tool to scratch vertical lines up and down the stalk. This mimics the fibrous texture of a real mushroom stem. -
Create the caps:
Take a piece of clay roughly the same volume as the stalk and roll it into a ball. Flatten the bottom slightly and shape the top into a smooth dome. -
Join the parts:
Press the domed cap gently onto the top of the textured stalk. If the clay isn’t sticking, you can use a tiny drop of liquid clay or bake-and-bond as an adhesive. -
Insert hardware:
Push an eye pin or screw eye directly into the center top of the mushroom cap. Ensure it goes deep enough to be secure but doesn’t poke through the stem. -
Bake the clay:
Place your mushrooms on a baking sheet or ceramic tile. Bake according to your specific brand of polymer clay’s instructions—usually around 275°F (135°C) for 15-20 minutes.
Sticky Textures?
If your texturing tool drags the clay instead of indenting it, dip the tool in a bit of cornstarch or baby powder before scratching the surface.
Step 2: Painting and Assembly
-
Base coat the cap:
Once the charms have cooled completely, paint the mushroom cap with a solid coat of bright red acrylic paint. You may need two thin layers for full opacity. -
Add the dots:
Dip a dotting tool or the flat end of a toothpick into white acrylic paint. Carefully press dots onto the red cap, spacing them randomly for a natural look. -
Paint the face:
Using a very fine detail brush or a toothpick, paint two small black dots for eyes and a tiny U-shape for the smile on the upper part of the stalk. -
Add rosy cheeks:
I like to add two tiny red dots just below the eyes to give the mushroom a shy, blushing expression. -
Seal the charm:
Protect your paint job by applying a coat of gloss glaze or varnish over the entire charm. This also gives the red cap a lovely, shiny finish resembling a real toadstool. -
Connect hardware:
Using pliers, open a jump ring and thread it through the eye pin at the top of your mushroom. -
Attach the clasp:
Before closing the jump ring, slide on a lobster clasp or attach it directly to your chosen chain. -
Close the ring:
Securely close the jump ring with your pliers, ensuring there are no gaps where the charm could slip off.
Natural Tint Trick
Before baking, lightly dust the very bottom of the stalk with soft brown pastel chalk to make it look like it was just plucked from the dirt.
Enjoy wearing your new forest friends or stash them away for a sweet handmade gift


What Really Happens Inside the Kiln
Learn how time and temperature work together inside the kiln to transform clay into durable ceramic.
Watermelon Slice Charms
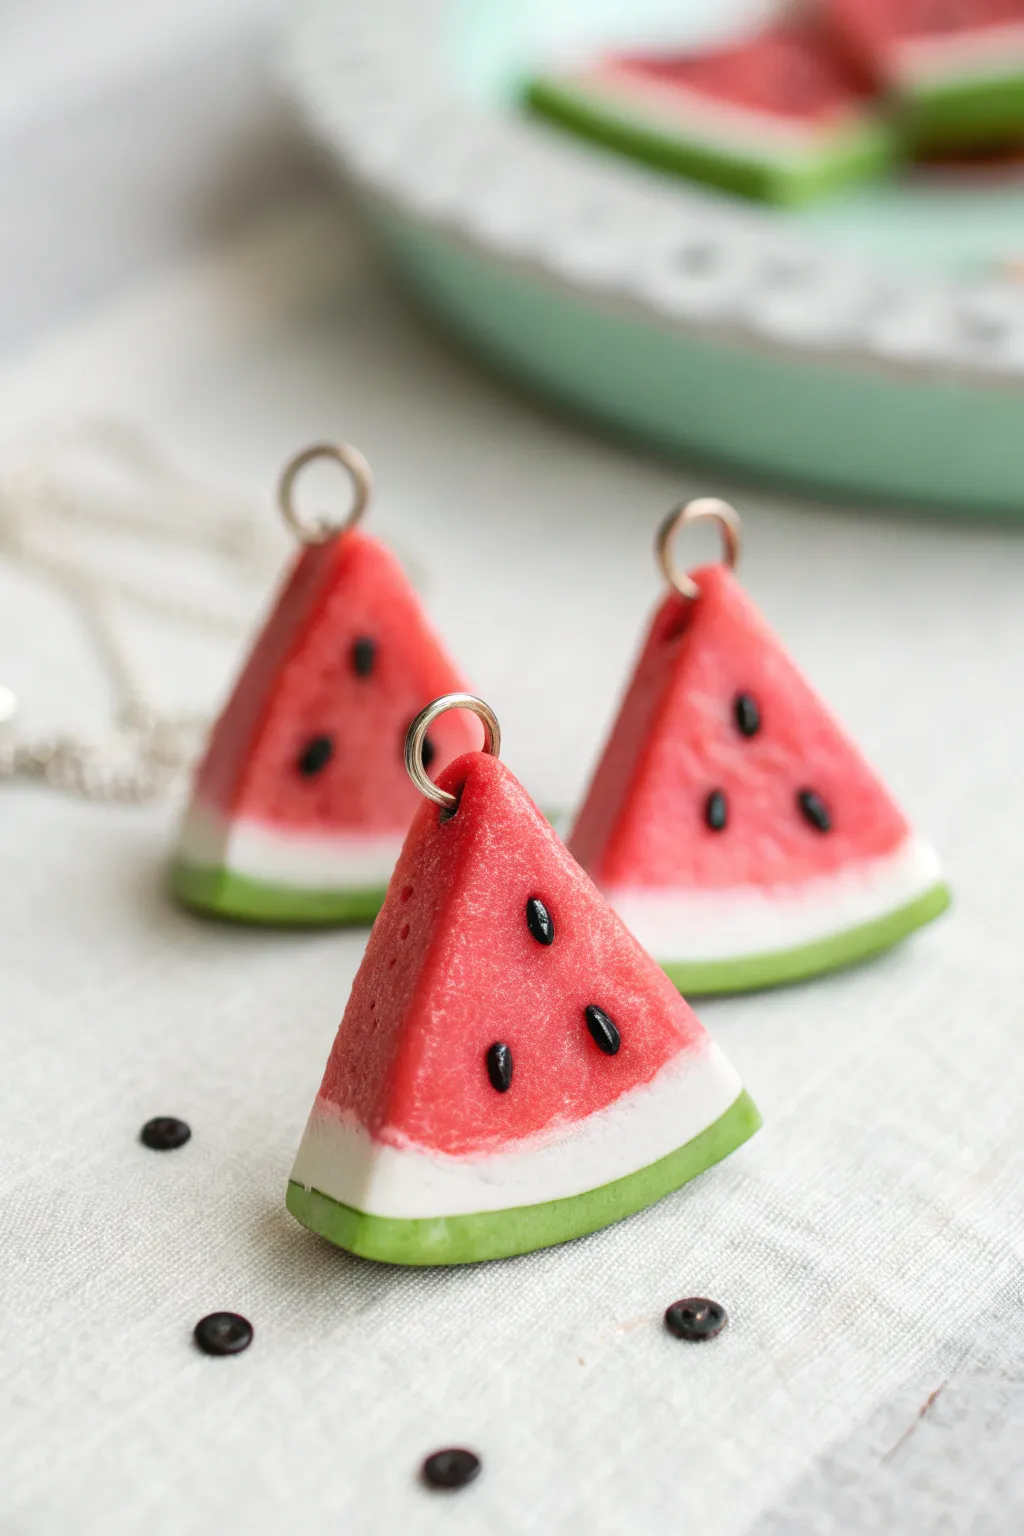
Capture the essence of summer with these delightful, bite-sized watermelon slice charms. Their realistic layers and tiny seeds make them perfect for earrings, friendship necklaces, or sweet zipper pulls.
Detailed Instructions
Materials
- Red polymer clay (translucent red mixed with solid red works best)
- White or translucent white polymer clay
- Green polymer clay (lime or leaf green)
- Black polymer clay
- Metal eye screws (silver or gold tone)
- Clay cutting blade or craft knife
- Acrylic rolling pin or pasta machine
- Needle tool or toothpick
- Sandpaper or nail buffer (optional)
- Gloss glaze or polyurethane varnish
- Small paintbrush
Step 1: Creating the Cane
-
Prepare the Red Core:
Start by conditioning your red clay until it is soft and pliable. Roll it into a thick log or cylinder shape, about 1 inch in diameter; this will form the juicy center of your watermelon. -
Roll the Rind Layers:
Condition the white clay and roll it into a flat sheet about 2-3mm thick. Do the same with the green clay, aiming for a similar thickness. I personally like to use a pasta machine here to ensure the thickness is perfectly even. -
Wrap with White:
Trim the white sheet so its width matches the length of your red log. Carefully wrap the white sheet around the red cylinder, smoothing the seam with your finger so it disappears. Trim any excess. -
Wrap with Green:
Repeat the previous process with the green clay sheet, wrapping it over the white layer. Ensure there are no air bubbles trapped between the layers by rolling the entire log gently on your work surface. -
Reduce the Cane:
Begin to reduce the cane by gently squeezing and rolling it from the center outwards. Elongate the log until it reaches your desired diameter (about 0.75 inches works well for charms). -
Chill the Cane:
Pop the log into the refrigerator for about 15-20 minutes. Firming up the clay makes it much easier to slice without distorting the round shape.
Step 2: Slicing and Shaping
-
Slice Discs:
Remove the cane from the fridge. Using your sharpest clay blade, slice off discs that are approximately 1/4 inch thick. -
Cut Wedges:
Lay a disc flat and cut it into equal wedges. You can usually get 4 to 6 nice wedges from a single disc depending on how wide you want your slices to be. -
Texture the Red:
Use a toothbrush or a crumpled ball of aluminum foil to gently tap texture onto the red part of the slice. This mimics the fibrous look of real fruit flesh.
Smudged Colors?
If red clay smears onto the white rind while cutting, use a cotton swab dipped in a tiny bit of rubbing alcohol or nail polish remover to wipe the white section clean before baking.
Step 3: Adding Details & Hardware
-
Make the Seeds:
Roll a tiny snake of black clay, extremely thin. Slice off tiny bits and roll them into small teardrop shapes between your fingers. -
Attach Seeds:
Press 3 or 4 seeds onto both sides of each watermelon wedge. Use your needle tool to gently nudge them into the clay so they sit securely. -
Insert Eye Screws:
Take a metal eye screw and carefully twist it into the center of the green rind at the top of the wedge. If the clay distorts, gently reshape it with your fingers. -
Bake:
Place your charms on a baking sheet lined with parchment paper. Bake according to your brand of clay’s instructions (usually around 275°F for 15-30 minutes). -
Cool and Finish:
Let the charms cool completely. Once cool, apply a coat of gloss glaze to the red area and the seeds to make them look juicy and wet, leaving the rind matte for contrast.
Bite Mark Detail
Before baking, use a small round cutter or a straw to remove a curved piece from the tip of the watermelon slice. It creates an adorable ‘bitten’ effect.
Now you have a refreshing set of fruit charms ready to wear or gift to a friend
Boba Cup Charms With Straw Detail
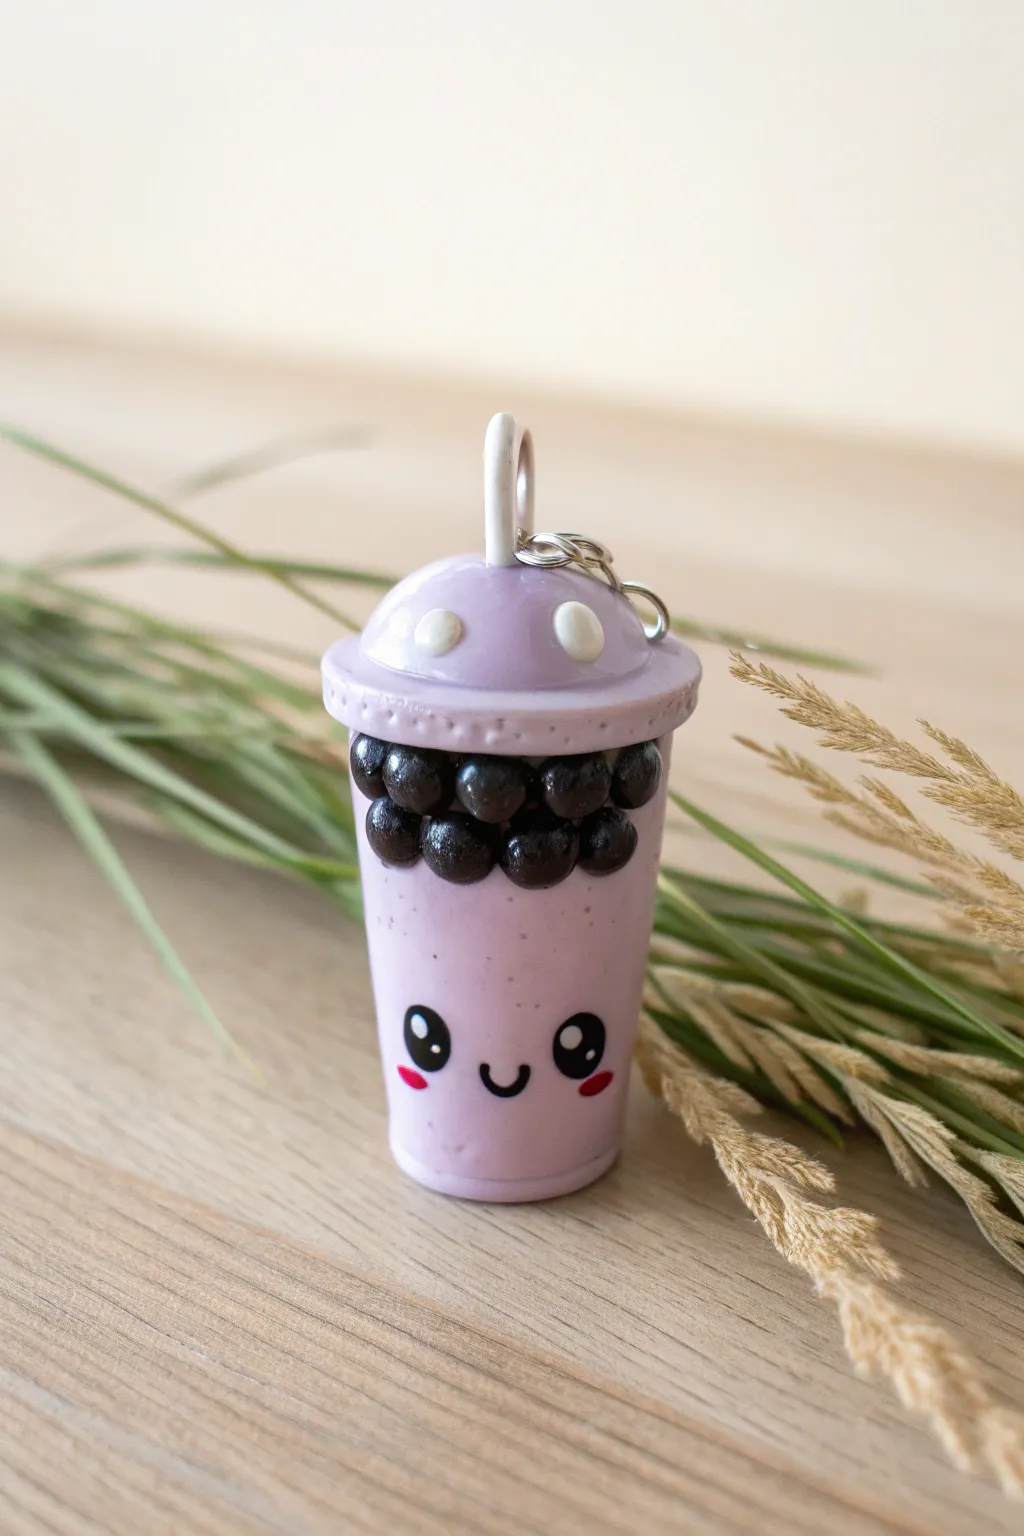
This adorable polymer clay boba cup charm features a sweet kawaii face and realistic-looking tapioca pearls peeking out from the top. The soft lavender color gives it a dreamy, pastel aesthetic perfect for keychains or stitch markers.
Step-by-Step Tutorial
Materials
- Polymer clay (Lavender, Black, White)
- Acrylic paint (Black, Pink)
- Small dotting tool or toothpick
- Eye screw or eye pin
- Gloss glaze or UV resin
- Rolling pin or clay machine
- Blade or X-Acto knife
- Circle cutter (small)
- Sculpting tool (needle tool)
Step 1: Forming the Cup Base
-
Condition the clay:
Start by conditioning your lavender clay until it is soft and pliable. This prevents cracks later on. -
Shape the cylinder:
Roll the lavender clay into a smooth cylinder about 1.5 inches tall. Gently taper the bottom so it is slightly narrower than the top, mimicking a real cup shape. -
Flatten ends:
Tap the top and bottom of your cylinder on your work surface to create flat, sturdy ends.
Glazing Tip
Only glaze the boba pearls and the eyes/mouth. Leaving the cup body matte creates a great texture contrast!
Step 2: Adding the Boba Pearls
-
Create pearls:
Take a small amount of black clay and roll it into a thin snake. Cut tiny, equal-sized pieces and roll them into small balls to create the tapioca pearls. -
Attach pearls:
Press these black balls gently onto the upper rim of your lavender cylinder. Arrange them in two staggered rows all the way around the cup so they look like they are floating at the top of the drink.
Flavor Variations
Swap the lavender clay for pastel green (matcha), creamy beige (milk tea), or pink (strawberry) to make a whole menu.
Step 3: Making the Lid & Straw
-
Cut the lid base:
Roll out a sheet of lavender clay. Use a circle cutter slightly larger than the top of your cup to cut a disc. -
Shape the dome:
Take a separate ball of lavender clay and flatten one side to create a dome shape. Place this dome on top of the flat disc you just cut. -
Attach lid to cup:
Place the assembled lid structure on top of the boba pearls. Press down gently to secure it, ensuring the overhang covers the top of the pearls slightly. -
Add detail dots:
Roll two tiny balls of white clay and flatten them slightly onto the dome of the lid for highlighted accents. -
Create the straw:
Roll a small snake of white clay. Cut a short segment and press it vertically into the center of the dome lid. -
Insert hardware:
Carefully screw an eye pin into the top of the dome, right next to the straw. If you want it extra secure, add a dab of liquid clay on the threads before inserting.
Step 4: Painting the Face
-
Pre-bake (Optional):
I sometimes like to bake the piece for 10 minutes at this stage so the clay is hard before painting, but you can also paint on raw clay if you have a steady hand. -
Paint eyes:
Using black acrylic paint and a fine dotting tool, dab two oval shapes near the bottom third of the cup for eyes. -
Add sparkles:
Once the black paint is dry, use a smaller tool to add two white dots inside each black eye for that classic kawaii sparkle. -
Draw the mouth:
Paint a tiny, shallow ‘U’ shape between the eyes for a smile. -
Add blush:
Dab two tiny pink ovals underneath the eyes for rosy cheeks.
Step 5: Finishing Touches
-
Final Bake:
Bake your charm according to the package directions for your specific brand of clay (usually 275°F/135°C for 15-30 minutes). -
Cool down:
Let the charm cool completely before handling. -
Glaze:
Apply a coat of gloss glaze or UV resin, focusing especially on the black pearls to make them look wet and shiny. -
Attach hardware:
Once the glaze is dry, use pliers to attach a jump ring and keychain clasp to the eye pin.
Now you have a sweet little tea companion to brighten up your bag or keys

TRACK YOUR CERAMIC JOURNEY
Capture glaze tests, firing details, and creative progress—all in one simple printable. Make your projects easier to repeat and improve.
Ice Cream Scoop Charms
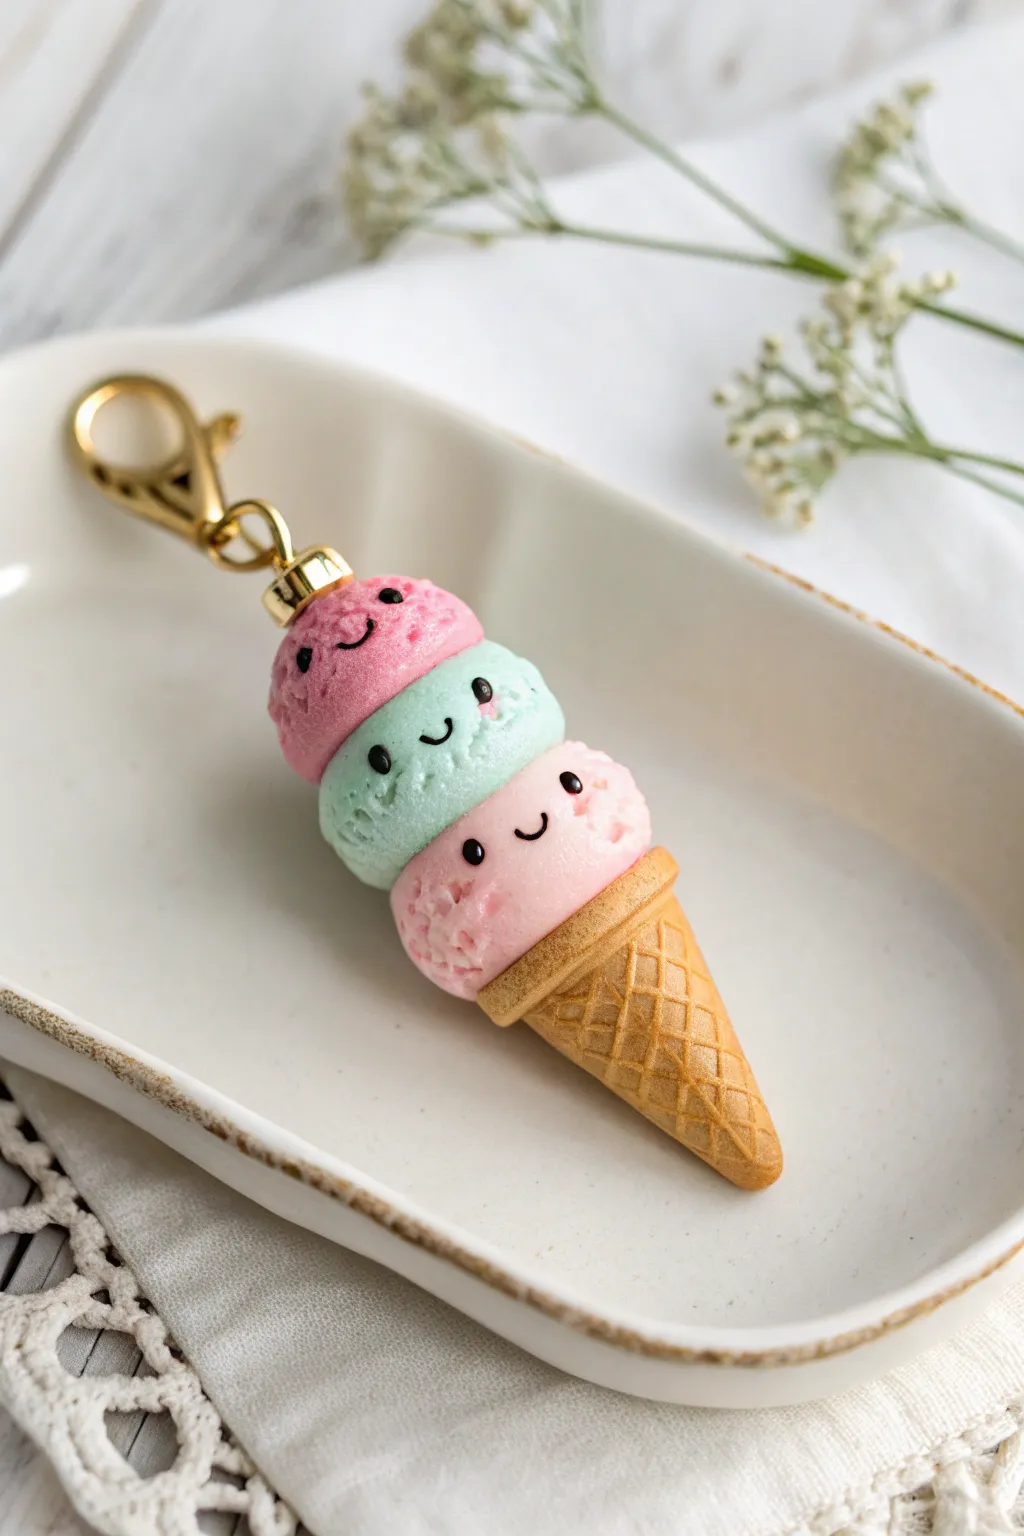
This adorable polymer clay charm features three happy scoops of ice cream stacked on a classic waffle cone. With sweet little faces and realistic textures, it makes a perfect keychain or zipper pull for anyone who loves summer sweets.
Detailed Instructions
Materials
- Polymer clay (dark pink, mint green, light pink, biscuit/tan)
- Black polymer clay or acrylic paint
- Ball stylus tool or toothpick
- Old toothbrush or stiff bristle brush
- Needle tool or X-acto knife
- Gold eye screw pin
- Gold lobster clasp keychain
- Gloss glaze or UV resin (optional)
- Oven for baking
Step 1: Creating the Cone
-
Shape the Base:
Start by conditioning a small ball of biscuit or tan-colored clay. Roll it into a smooth sphere, then gently roll one end against your work surface to form a carrot-like cone shape. Flatten the top slightly so the ice cream can rest on it. -
Add Texture:
Using a needle tool or an X-acto knife, gently score diagonal lines across the cone in one direction. Then, score diagonal lines in the opposite direction to create a classic waffle grid pattern. -
Create the Rim:
Roll out a very thin snake of the same tan clay. wrap it around the top edge of the cone where the ice cream will sit. Press it gently to adhere, smoothing the seam.
Sticky Situation?
If your clay gets too soft and fingerprints are showing, pop the unbaked charm in the fridge for 10 minutes to firm it up before adding the final texture.
Step 2: Forming the Scoops
-
Roll the Scoops:
Condition your dark pink, mint green, and light pink clay. Roll three equal-sized balls, slightly larger than the width of your cone’s rim. -
Create the ‘Feet’:
To give the ice cream that realistic scooped look, take small irregular pinches of clay from the bottom of each ball and rough up the edges slightly. You want the bottom to look uneven, like melting ice cream, rather than a perfect sphere. -
Stacking:
Place the light pink scoop onto the cone first, pressing gently so the rough bottom edge overlaps the cone’s rim. Press the green scoop on top of that, and finally the dark pink scoop on top. -
Texturing:
Using an old toothbrush or a stiff brush, tap the surface of all three scoops firmly. I find that rotating the brush as I tap creates the best semi-frozen, aerated texture. Avoid the very front centers where the faces will go. -
Insert Hardware:
Before baking, screw the gold eye pin into the center of the top pink scoop. You can add a dab of liquid clay or ‘Bake and Bond’ to the threads to ensure it stays secure.
Step 3: Adding the Kawaii Faces
-
Pre-Bake Indentations:
Use a small ball stylus to make tiny indentations where the eyes will go on each scoop. This helps guide your placement later. -
Making Tiny Eyes:
Roll incredibly tiny balls of black clay. Place two into the indentations on each scoop. Alternatively, you can paint these on after baking, but clay eyes add dimension. -
Adding Mouths:
Roll a microscopically thin thread of black clay. Cut tiny sections and curve them into ‘U’ shapes for smiles. Gently press one between the eyes on each scoop using a needle tool. -
Baking:
Bake the charm according to your clay manufacturer’s instructions (usually 275°F/135°C for 15-30 minutes). Let it cool completely.
Pro Tip: Blush Cheeks
Before baking, use a soft brush to dust a tiny bit of pink soft pastel chalk under the eyes for adorable rosy cheeks that won’t fade.
Step 4: Finishing Touches
-
Secure the Pin:
If the eye pin feels loose after baking, unscrew it, add a drop of superglue, and screw it back in immediately. -
Glazing:
For a ‘wet’ ice cream look, apply a coat of gloss glaze or UV resin to just the ice cream scoops, leaving the cone matte. This contrast makes the texture pop. -
Assembly:
Open the jump ring on your gold lobster clasp using pliers and attach it to the eye pin on top of your charming new creation.
Attach your sweet new triple-scoop charm to your bag and enjoy the summer vibes all year round
Toast Slice Charms With Butter Patch
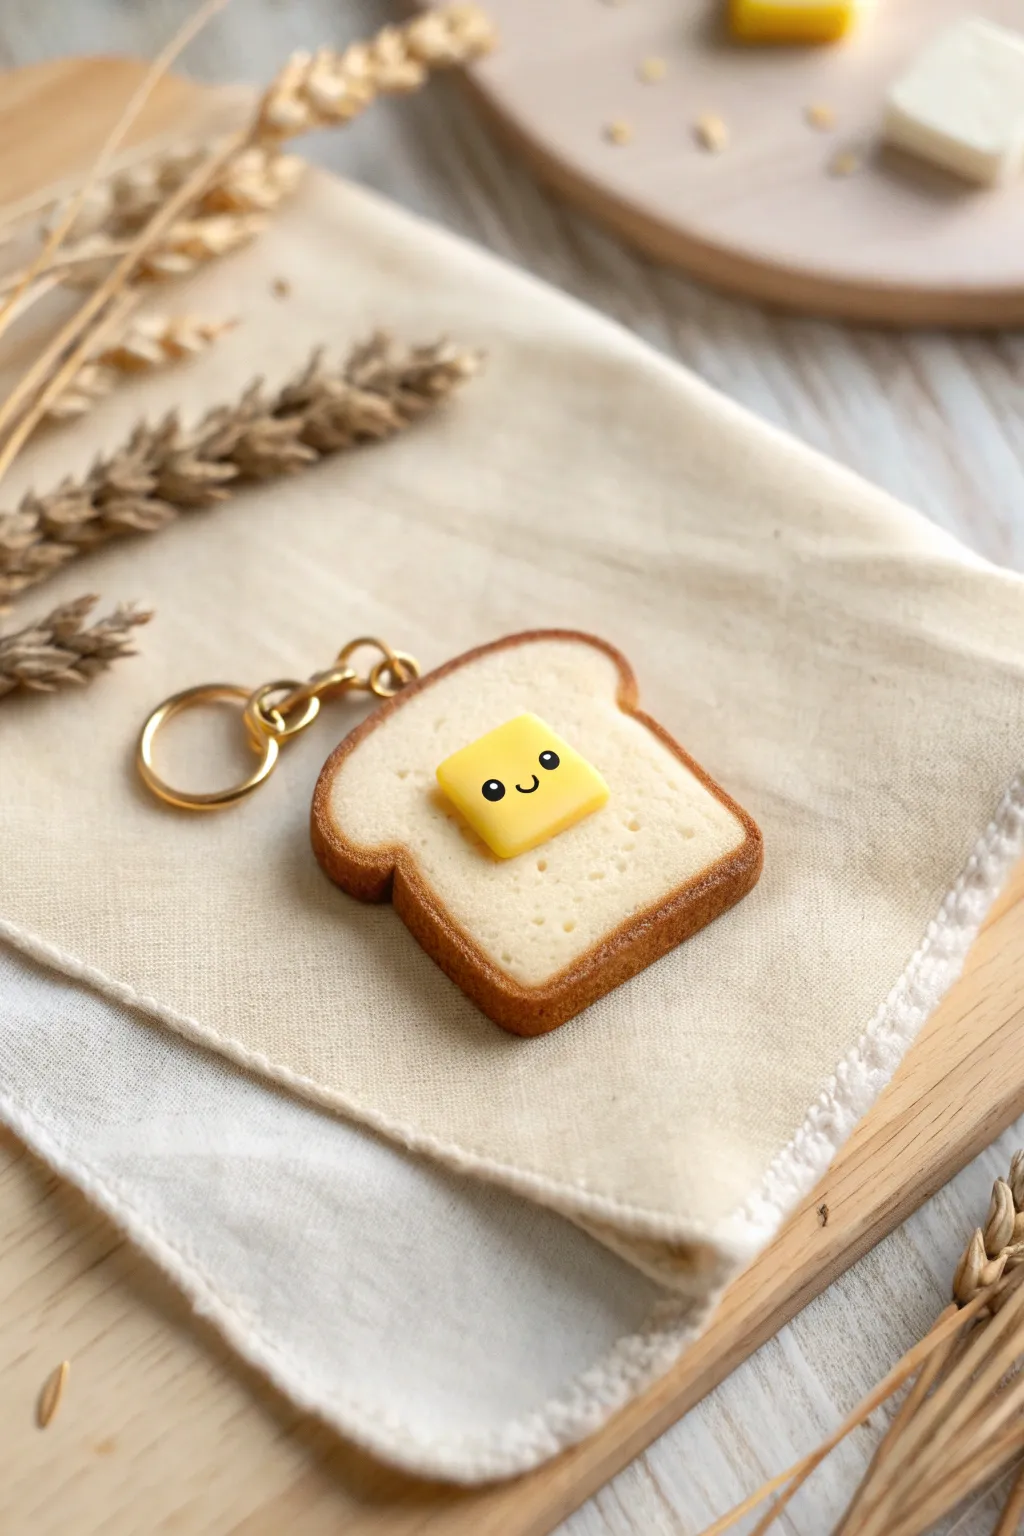
This adorable polymer clay charm transforms a simple breakfast staple into a kawaii accessory complete with a smiling pat of butter. The realistic bread texture and golden-brown crust make it look good enough to eat, right down to the tiny pores in the surface.
Step-by-Step Guide
Materials
- White or translucent polymer clay
- Yellow ochre polymer clay (or soft pastels)
- Bright yellow polymer clay
- Black acrylic paint or clay for the face
- Soft pastels (various browns and oranges)
- Toothbrush or crumpled aluminum foil
- Needle tool or toothpick
- Eye pin or screw eye
- Gold keychain finding and jump rings
- Gloss glaze (optional)
- Small paintbrush
- Blade or craft knife
Step 1: Shaping the Bread
-
Mix the dough color:
Start by mixing a large amount of white clay with a tiny speck of yellow ochre or translucent clay. You want an off-white, doughy color rather than a stark, bright white. -
Cut the basic shape:
Roll the clay out into a thick slab, about a quarter-inch thick. Use a blade to cut a square shape, then gently round off the bottom two corners with your fingers. -
Create the crust ridge:
Pinch the top two corners slightly to create the signature indentation of a loaf slice. Smooth the edges so they are rounded and organic, not sharp. -
Texture the surface:
Take an old toothbrush or a ball of crumpled aluminum foil and press it firmly all over the front and back flat surfaces of the bread. This creates that fluffy, aerated bread texture. -
Add deep pores:
For extra realism, use a needle tool or the tip of a toothpick to poke slightly larger, deeper holes randomly across the surface, mimicking larger air bubbles in baked bread.
Realism Trick
Mix translucent clay into your yellow ‘butter’ color. This makes the butter look slightly see-through and greasy, just like real dairy butter.
Step 2: Baking the Crust
-
Prepare your pastels:
Scrape some yellow ochre, light brown, and dark brown soft pastels into fine powders on a piece of scrap paper. -
Shade the edges:
Using a soft brush, pick up the yellow ochre powder first and dust it around the entire outside edge of the clay (the crust). Blend it slightly inward onto the face of the bread. -
Deepen the color:
Layer the darker brown pastel over the ochre, concentrating heavily on the very rim of the crust. This gradient gives it that perfectly toasted look. -
Insert hardware:
If you are using an eye pin, carefully twist it into the top corner of the toast now before baking. I find adding a drop of liquid clay or bake-and-bond helps secure it.
Texture Help
If your toothbrush texture isn’t showing up well, the clay might be too soft. Pop it in the fridge for 10 minutes to firm it up, then texture again.
Step 3: The Butter Buddy
-
Make the butter pat:
Take a small amount of bright yellow clay and flatten it into a thick square. It should be significantly smaller than your toast slice. -
Soften the edges:
Gently press the corners of the yellow square so they aren’t sharp; we want the butter to look slightly softened, not frozen solid. -
Add the face:
Use a needle tool or dotting tool with black acrylic paint to make two tiny eyes and a small U-shaped smile. Alternatively, roll impossibly thin snakes of black clay to create the features. -
Attach the butter:
Place the butter square in the center of your textured toast. Press it down gently so it adheres to the texture below. -
Melting effect:
To make the butter look like it’s melting into the hot toast, use your finger or a smoothing tool to smear the bottom edges of the square slightly onto the white bread surface.
Step 4: Finishing Up
-
Bake carefully:
Bake the piece according to your clay manufacturer’s instructions. Watch closely to ensure the white bread doesn’t brown unintentionally. -
Cool down:
Let the charm cool completely before handling. Polymer clay is fragile while hot. -
Add shine:
Once cool, brush a coat of gloss glaze specifically over the butter pat to make it look oily and melted. Leave the bread matte for contrast. -
Assemble keychain:
Use pliers to open a jump ring, attach your gold keychain loop to the eye pin, and close the ring securely.
Now you have a charming little breakfast buddy ready to hang on your keys or bag
Pizza Slice Charms With Simple Toppings
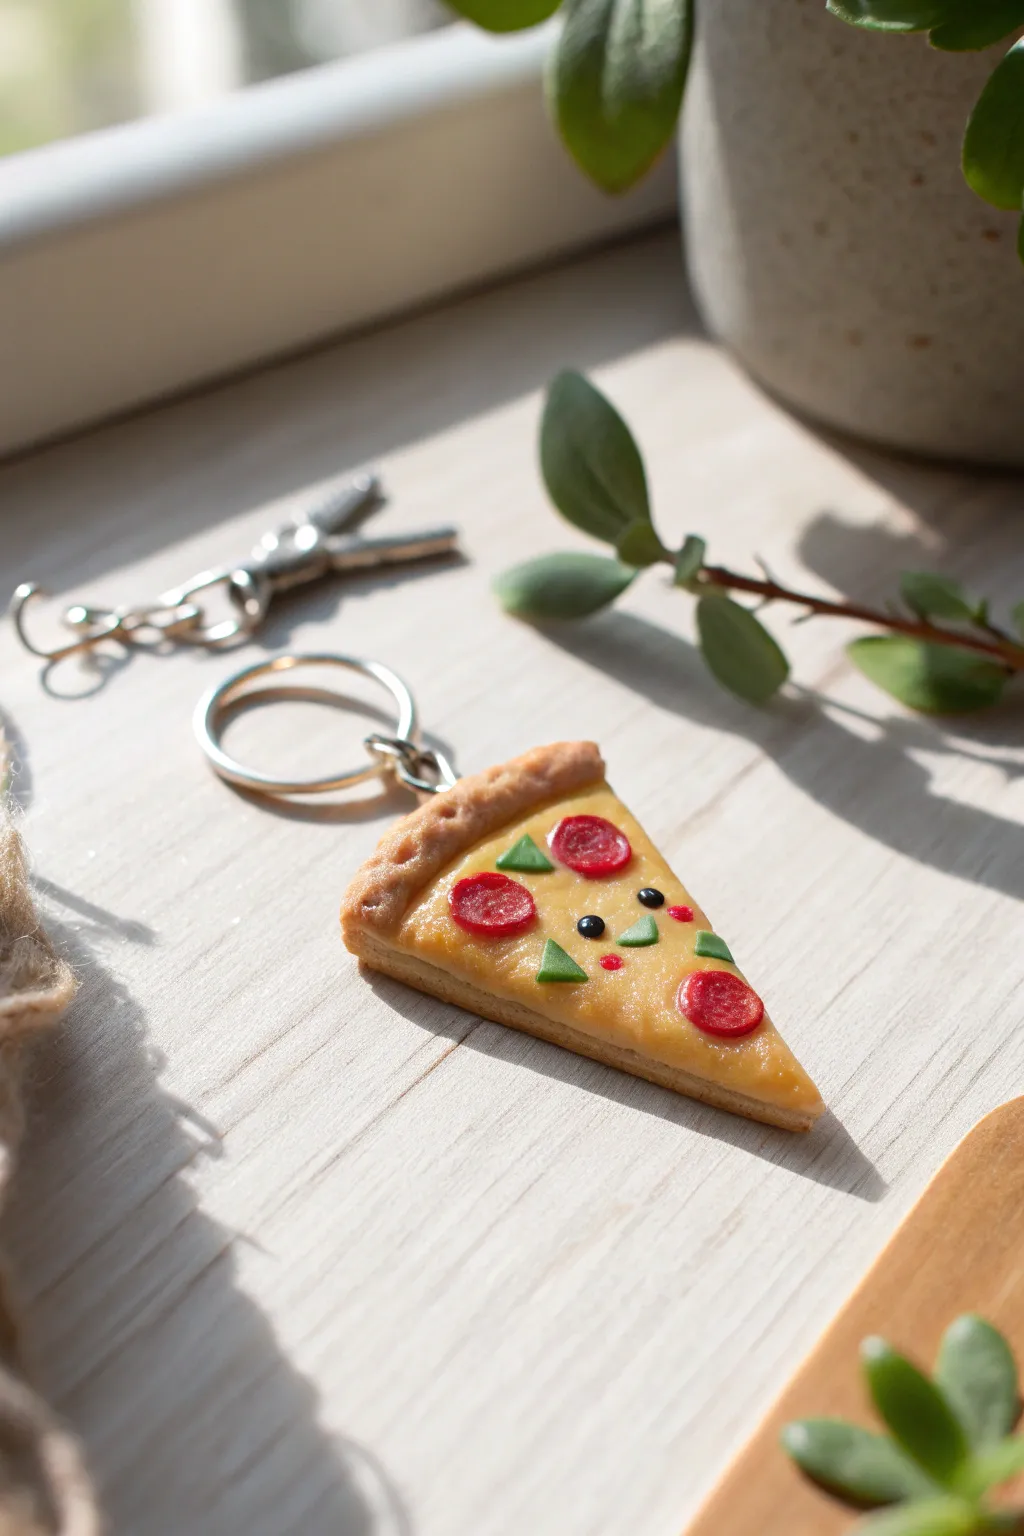
This adorable pizza slice charm captures all the cheesy goodness of the real thing in miniature form, complete with tiny pepperoni and veggie toppings. It features a realistic textured crust and a cute, subtle smiley face that adds personality without overwhelming the design.
Step-by-Step
Materials
- Polymer clay (beige/tan for crust, yellow-orange for cheese, red for pepperoni, green for peppers, black for eyes)
- Translucent liquid polymer clay (optional, for realistic cheese effect)
- Pastel chalks (brown, orange) for shading
- Soft paintbrush for shading
- Needle tool or toothpick
- Ball stylus (small)
- Eye pin or screw eye
- Keychain hardware
- Gloss glaze (polyurethane or resin based)
- Clay roller or pasta machine
- Craft blade or X-Acto knife
Step 1: Forming the Dough
-
Mix the crust color:
Start by mixing a beige or tan clay. If you only have white and brown, mix a large amount of white with a tiny pinch of brown until you get a dough-like color. -
Shape the triangle:
Roll the clay into a ball, flatten it slightly, and cut it into a classic triangular pizza slice shape. Keep it relatively thick, about 4-5mm, so it’s sturdy enough for a keychain. -
Build the crust edge:
Creating the crust rim involves taking a small snake of the same tan clay and pressing it along the curved top edge of your triangle. Blend the seam on the bottom/back so it attaches firmly, but leave the top distinct. -
Texture the crust:
Use a toothbrush or a ball of aluminum foil to gently tap texture onto the raised crust edge and the sides of the slice. This mimics the look of baked bread. -
Pre-bake shading:
To make the crust look golden brown, brush some shaved orange and brown soft pastel chalk onto the textured crust rim and the very edges of the slice.
Fixing “Flat” Cheese
If your cheese layer looks too flat or plastic, mix liquid polymer clay with yellow chalk shavings. Drip this over your solid clay base before adding toppings for an ultra-realistic melted look.
Step 2: Cheese and Toppings
-
Apply the cheese base:
Mix yellow and a touch of orange clay to make a cheese color. Roll it out very thinly, cut a triangle slightly smaller than your base, and press it onto the dough, stopping right before the raised crust. -
Create melted texture:
Gently poke and drag at the yellow clay with a needle tool to simulate the uneven texture of melted mozzarella. -
Make the pepperoni:
Roll a very thin snake of translucent red clay (or regular red). Slice tiny discs from it. Place three or so slices randomly on the cheese. -
Texture the pepperoni:
Use a needle tool to gently stipple the surface of each pepperoni slice, giving it that meaty texture. -
Add veggie toppings:
Flatten a small piece of green clay and use your blade to cut tiny triangles or squares to represent green peppers. Scatter them between the pepperoni.
Step 3: The Cute Face & Finishing
-
Mark the eye sockets:
Decide where the face will go—usually in the center where it won’t be covered by toppings. Use a small ball tool to make two tiny indentations for the eyes. -
Add the eyes:
Roll two minuscule balls of black clay. Pick them up with your needle tool and gently press them into the sockets you just made. -
Create the blushing cheeks:
I like to add a tiny touch of color here; use the smallest dab of red clay or a dot of pink acrylic paint (after baking) underneath the eyes for cheeks. -
Insert the hardware:
Trim an eye pin to an appropriate length and insert it into the center of the crust at the top. You can secure it with a dab of liquid clay for extra hold. -
Bake the charm:
Bake according to your clay manufacturer’s instructions, usually around 275°F (135°C) for 15-20 minutes. -
Glaze for realism:
Once cooled, apply a coat of gloss glaze specifically to the cheese and toppings (avoid the crust rim) to give them a greasy, delicious Shine. -
Assemble:
Use jump rings to attach your shiny new pizza slice to the keychain hardware.
Level Up: Scented Charm
Before baking, mix a drop of savory pizza or oregano fragrance oil into the clay. It adds a surprising sensory element that makes the charm even more fun to carry around.
Now you have a charming slice of pizza that looks good enough to eat but is durable enough to hold your keys
French Fry Box Charms
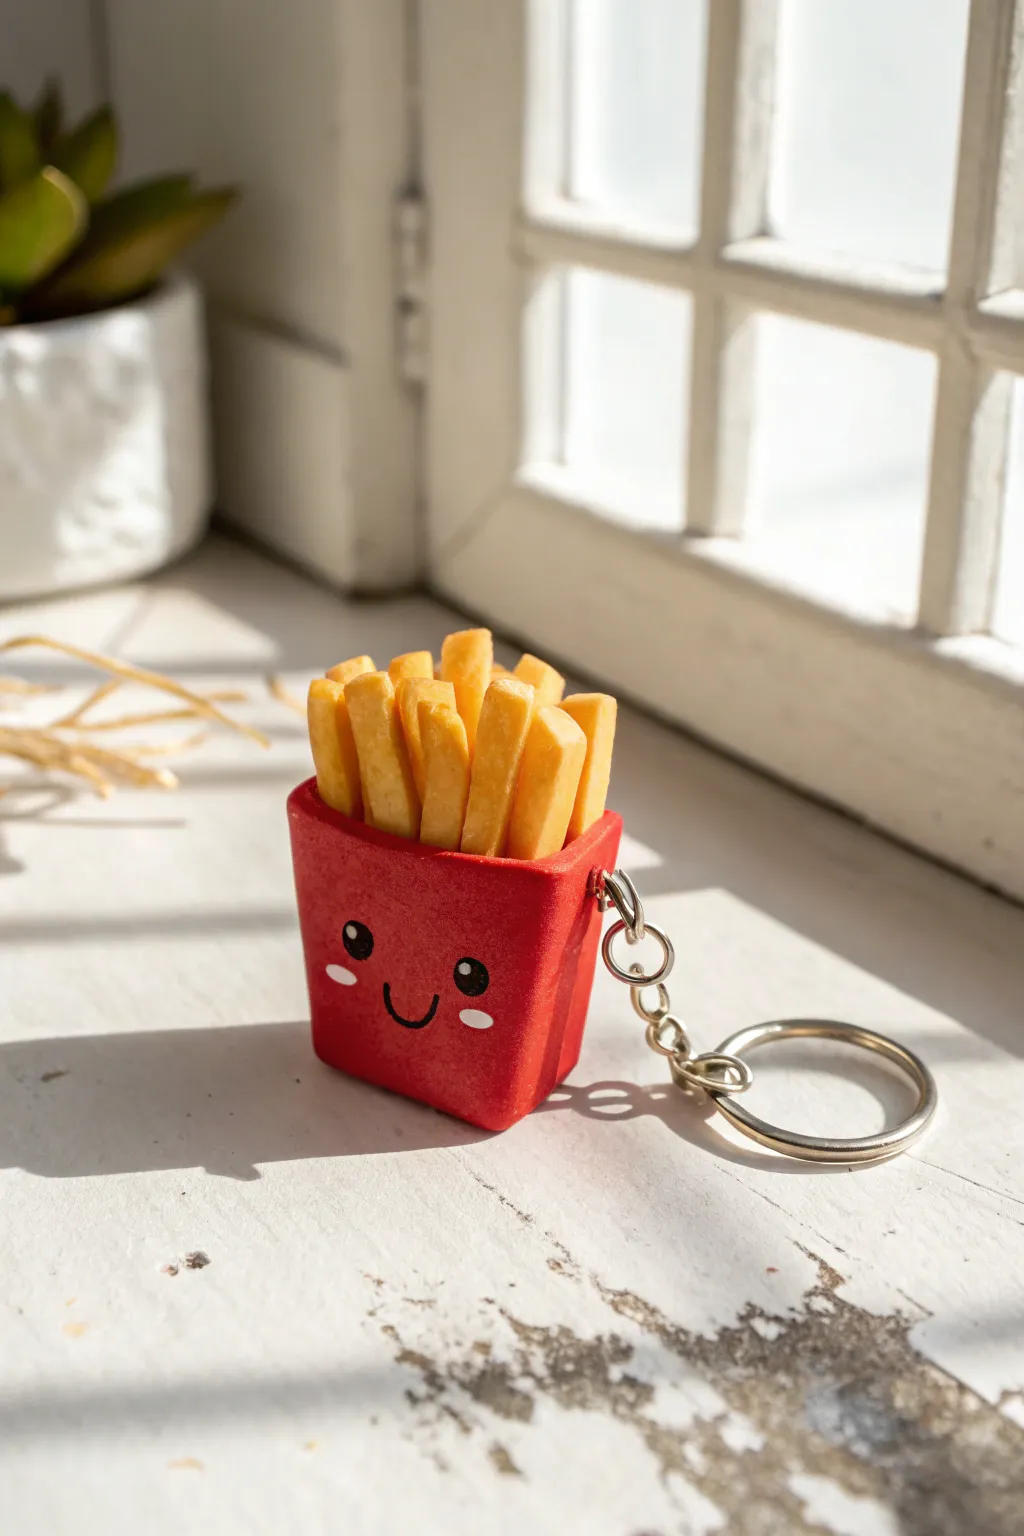
This adorable keychain transforms a classic fast-food favorite into a charming accessory complete with a sweet, blushing face. Using polymer clay, you’ll sculpt crisp, golden fries nestled in a bright red container that’s perfect for hanging on your bag or keys.
Detailed Instructions
Materials
- Red polymer clay
- Yellow polymer clay
- Translucent or Orange polymer clay (for shading)
- Black acrylic paint
- White acrylic paint
- Pink acrylic paint or blush chalk pastel
- Rolling pin or pasta machine
- Craft knife or clay blade
- Needle tool or dotting tool
- Texture brush or old toothbrush (optional)
- Soft pastel chalks in yellow-orange/brown
- Eye pin
- Jump ring and keychain hardware
- Gloss or matte glaze (optional)
Step 1: Sculpting the Fry Box
-
Condition the Clay:
Start by manipulating the red polymer clay in your hands until it is soft, pliable, and free of cracks. -
Form the Base Shape:
Roll the red clay into a smooth block, roughly rectangular but slightly tapered toward the bottom to mimic a carton shape. -
Refine the Carton:
Flatten the front and back surfaces gently. Use a blade to trim the top edge so it is perfectly straight and horizontal. -
Create the Opening:
Using a modeling tool or the end of a paintbrush, make a deep indentation in the top of the red block. This hollow space doesn’t need to be perfect inside, as it will be filled with fries. -
Shape the Back Rim:
If you want extra detail, add a thin, slightly taller sheet of red clay to the back interior edge of the box so it peeks up behind where the fries will go.
Step 2: Making the Fries
-
Mix the Fry Color:
Combine a large amount of yellow clay with a tiny pinch of orange or translucent clay. This creates a more realistic, deep-fried golden tone rather than a neon yellow. -
Roll the Sheets:
Roll your mixed yellow clay into a thick slab, approximately 3mm to 4mm thick so the fries look chunky and substantial. -
Cut the Strips:
Use your clay blade to slice the slab into long, even strips. Vary the lengths slightly, as real fries are never perfectly uniform. -
Texturing:
Gently tap the sides of the fry strips with a clean toothbrush or texture brush. This gives them that delicious, crispy potato texture. -
Shading for Realism:
Shave some yellow-orange and light brown chalk pastel into a powder. Brush this lightly onto the edges and tips of the unbaked clay strips to simulate browning.
Unwanted Fingerprints?
If you see fingerprints on the smooth red box before baking, lightly brush the surface with a tiny amount of baby oil or cornstarch to smooth them away instantly.
Step 3: Assembly and Detailing
-
Fill the Box:
Begin arranging the fries into the red carton. Place taller fries in the back and shorter ones in the front, pressing them gently so they stick to the red clay and each other. -
Secure the Fries:
Make sure the fries are packed tightly enough that they won’t wiggle loose later. You can create a slightly fanned-out arrangement for a pleasing look. -
Add the Eye Pin:
Trim an eye pin to an appropriate length. Dip the end in a tiny bit of liquid clay or bake-and-bond, then insert it into the center of the fry cluster, ensuring it goes deep into the red base. -
Bake the Charm:
Place your creation on a baking tile or parchment paper. Bake according to your brand of clay’s instructions (usually 275°F/135°C for 15-30 minutes). -
Cool Down:
Allow the piece to cool completely before handling. I usually wait at least an hour to ensure the clay is fully hardened.
Texture Tip
For ultra-crispy looking fries, try using a crumpled ball of aluminum foil to gently texture the yellow clay strips. It creates random, organic dents.
Step 4: Drawing the Face
-
Paint the Eyes:
Using a dotting tool or the back of a small paintbrush dipped in black acrylic paint, stamp two solid circles onto the front of the red box for the eyes. -
Add Expression:
With a very fine liner brush and black paint, draw a small ‘U’ shape between the eyes for a happy smile. -
Sparkle Highlights:
Once the black paint is dry, use a toothpick to add a tiny white dot specifically in the upper right corner of each eye. This ‘catchlight’ brings the character to life. -
Rosy Cheeks:
Dab two small horizontal ovals of pink paint (or use dry pink pastel applied with a Q-tip) right under the eyes for a blushing effect. -
Final Assembly:
Optionally glaze the piece for protection. Finally, open a jump ring with pliers, loop it through the eye pin, and attach your keychain hardware.
Now you have a happy little snack companion to brighten up your keyring whenever you head out
Blob-Style Bear Charms
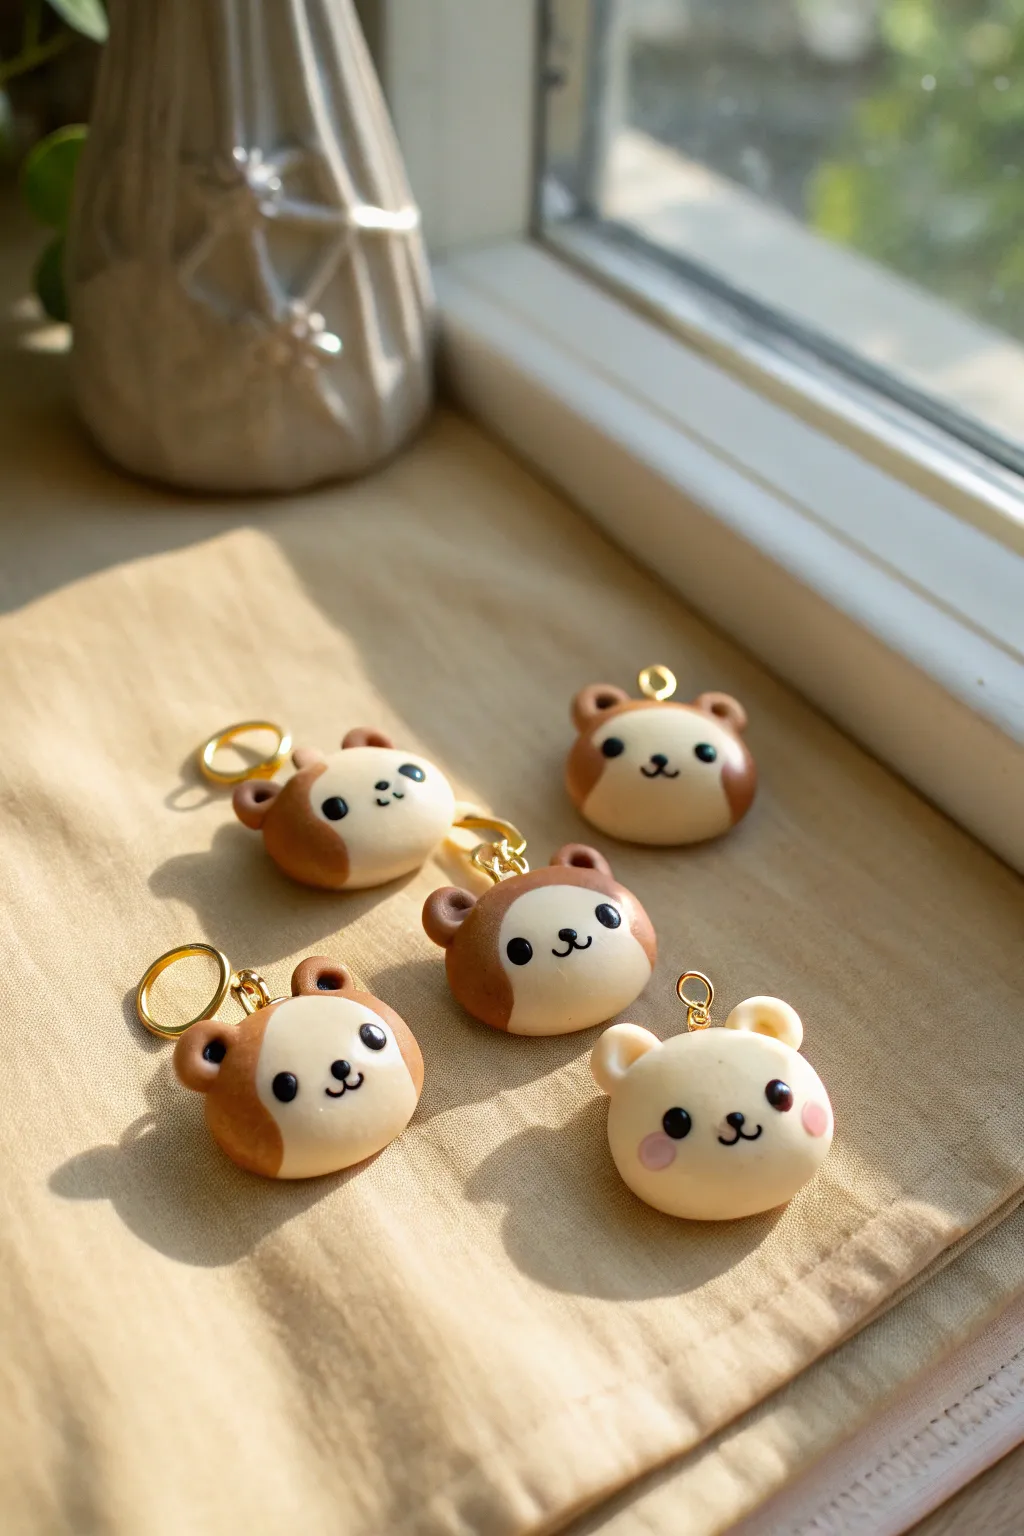
These adorable blob-style bear charms feature a smooth, simple design that’s perfect for beginners working with polymer clay. Their rounded faces and tiny features make for sweet keychains or jewelry pieces that fit right in the palm of your hand.
How-To Guide
Materials
- Light brown polymer clay (tan or caramel)
- Cream or off-white polymer clay
- Black polymer clay (very small amount)
- Pink polymer clay or soft pastels (for cheeks)
- Small ball stylus tool
- Needle tool or toothpick
- Gold screw eye pins
- Gold jump rings
- Oven for baking
- Glaze or varnish (optional)
Step 1: Shaping the Base
-
Mix your colors:
Begin by conditioning your light brown and cream clay separately until they are soft and pliable. If the brown is too dark, mix in a little white or translucent clay to soften the tone. -
Form the head shape:
Roll a ball of light brown clay about the size of a large grape or small walnut. Flatten it slightly so it sits stable like a dome rather than rolling away. -
Create the face mask:
Take a smaller amount of cream clay and roll it into a ball. Flatten this into a thin, oval-shaped disk. -
Attach the face:
Gently press the cream oval onto the lower front half of the brown dome. Smooth the edges with your finger so the cream clay merges seamlessly onto the brown base without leaving a harsh ridge. -
Make the ears:
Roll two small balls of brown clay for the ears. Press them gently onto the top corners of the head. -
Indent the ears:
Use a medium-sized ball tool to press an indentation into the center of each ear, creating a cute, cupped shape.
Clean Clay Pro-Tip
Keep baby wipes or hand sanitizer nearby. Clean your hands thoroughly before touching the cream clay to avoid transferring dark lint or brown pigment onto the light face.
Step 2: Adding Details
-
Create eye sockets:
Using a small ball tool, make two shallow dents in the cream face area where you want the eyes to sit. This helps position the clay balls securely. -
Add the eyes:
Roll two tiny specks of black clay into balls. Place them into the eye sockets and press gently to adhere. -
Form the nose and mouth:
Roll an even smaller speck of black clay for the nose and place it between the eyes, slightly lower. For the mouth, I find it easiest to roll a microscopic snake of black clay and curve it into a ‘w’ or anchor shape. -
Optional polar bear variant:
To make the all-cream bear shown in the photo, skip the brown base and use a solid cream ball for the head. Add soft pink clay circles for cheeks instead of the face mask. -
Insert hardware:
Screw a gold eye pin into the top center of the head. If the clay distorts, gently reshape it with your fingers.
Fixing Fingerprints
Before baking, lightly brush the surface of the clay with a little baby oil or cornstarch. This smooths out any accidental fingerprints or dust specks.
Step 3: Finishing Up
-
Bake the charms:
Preheat your oven according to the clay manufacturer’s instructions (usually around 275°F or 130°C). Bake the charms on a ceramic tile or baking sheet lined with parchment. -
Cool down:
Let the bears cool completely inside the oven or on the counter before handling to prevent cracks. -
Secure the hardware:
Once cool, gently unscrew the eye pin, add a dab of superglue to the threads, and screw it back in for a permanent hold. -
Glaze (Optional):
For a glossy finish like the photo, apply a thin coat of polyurethane varnish or UV resin to the eyes and nose to make them shine. -
Attach findings:
Use pliers to open a large gold jump ring and loop it through the eye pin to finish your charm.
Now you have a set of charming little bears ready to decorate your keychain or zippers
Chubby Cat Face Charms
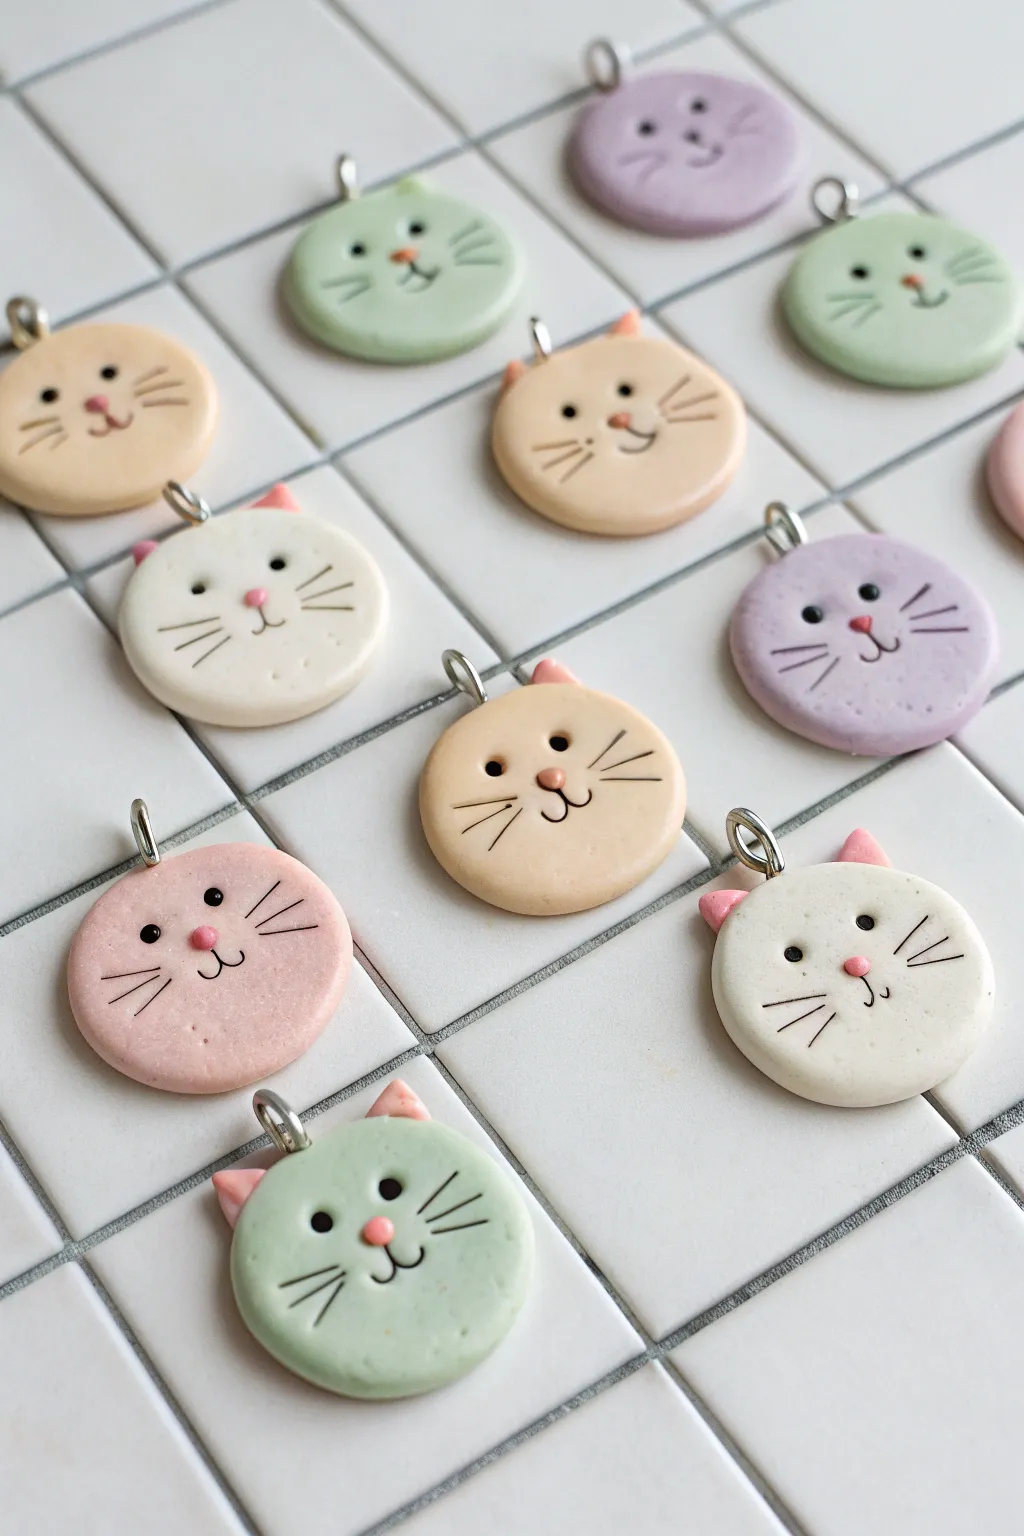
These delightfully chubby cat face charms are perfect for beginners looking to create a sweet collection of accessories. With their soft pastel colors and simple painted details, they make adorable pendants, zipper pulls, or keychain additions.
Detailed Instructions
Materials
- Polymer clay (white, peach, mint green, lavender, soft pink)
- Acrylic rolling pin
- Small round circle cutter (approx. 1 inch)
- X-acto knife or clay blade
- Ball stylus tool
- Black acrylic paint or fine-point permanent marker
- Small eye screws or jump rings
- Clear gloss glaze (optional)
- Fine detail paintbrush
- Baking sheet and parchment paper
- Oven
Step 1: Shaping the Base
-
Condition the clay:
Start by kneading your chosen pastel clay colors until they are soft and pliable. If the clay feels too stiff, warm it in your hands for a few minutes. -
Roll it out:
Using your acrylic rolling pin, flatten the clay on a clean surface to an even thickness of about 1/4 inch (6mm). You want them thick enough to be sturdy but light enough for jewelry. -
Cut the circles:
Press your round circle cutter firmly into the clay sheet to create perfect discs. Gently push them out of the cutter, smoothing any rough edges with your fingertip. -
Add the hardware:
Insert a small eye screw into the top edge of each circle. If you don’t have eye screws, poke a hole near the top using a needle tool so you can add a jump ring after baking.
Uneven Surfaces?
If your clay has fingerprints after baking, you can lightly sand the surface with high-grit sandpaper under water before painting the face.
Step 2: Adding Ears and Baking
-
Shape the ears:
Take a tiny amount of pink clay (or a contrasting color) and form very small triangles. These should be petite compared to the round face to maintain the chubby look. -
Attach the ears:
Gently press the triangles onto the top curve of your clay circle, just to the left and right of the eye screw. Blend the seam slightly at the back with a sculpting tool to secure them. -
Smooth the surface:
Before baking, give the surface one last check for fingerprints. I like to lightly brush a little cornstarch over the top to smooth it out, then dust it off. -
Bake the charms:
Place your unbaked cats on a parchment-lined baking sheet. Bake according to your polymer clay manufacturer’s instructions (usually around 275°F/135°C for 15-30 minutes). -
Cool down completely:
Once baked, remove the tray from the oven and let the charms cool completely. The clay hardens as it cools, so don’t handle them while hot.
Add Texture
Before baking, use an old toothbrush to gently tap the surface of the clay. This creates a soft, fuzzy texture that mimics fur perfectly.
Step 3: Painting the Details
-
Paint the nose:
Using a tiny dot of pink paint or a very small ball of pink clay applied before baking, create a small nose right in the center of the face. -
Dot the eyes:
Dip a small ball stylus or the handle end of a paintbrush into black acrylic paint. Dot two eyes wide apart on the face, slightly higher than the nose level. -
Draw the mouth:
With a super fine detail brush or a fine-point marker, draw a small ‘w’ shape extending down from the nose to create the mouth. -
Add whiskers:
Paint three short, straight lines on each cheek area for whiskers. Keep your hand steady and playful; they don’t need to be perfectly symmetrical. -
Seal the charm:
If you used paint, protect your work by brushing on a thin coat of clear gloss or matte glaze. This prevents the face from scratching off over time.
Now you have a whole litter of colorful clay kittens ready to bring charm to your accessories
Tiny Duckling Charms
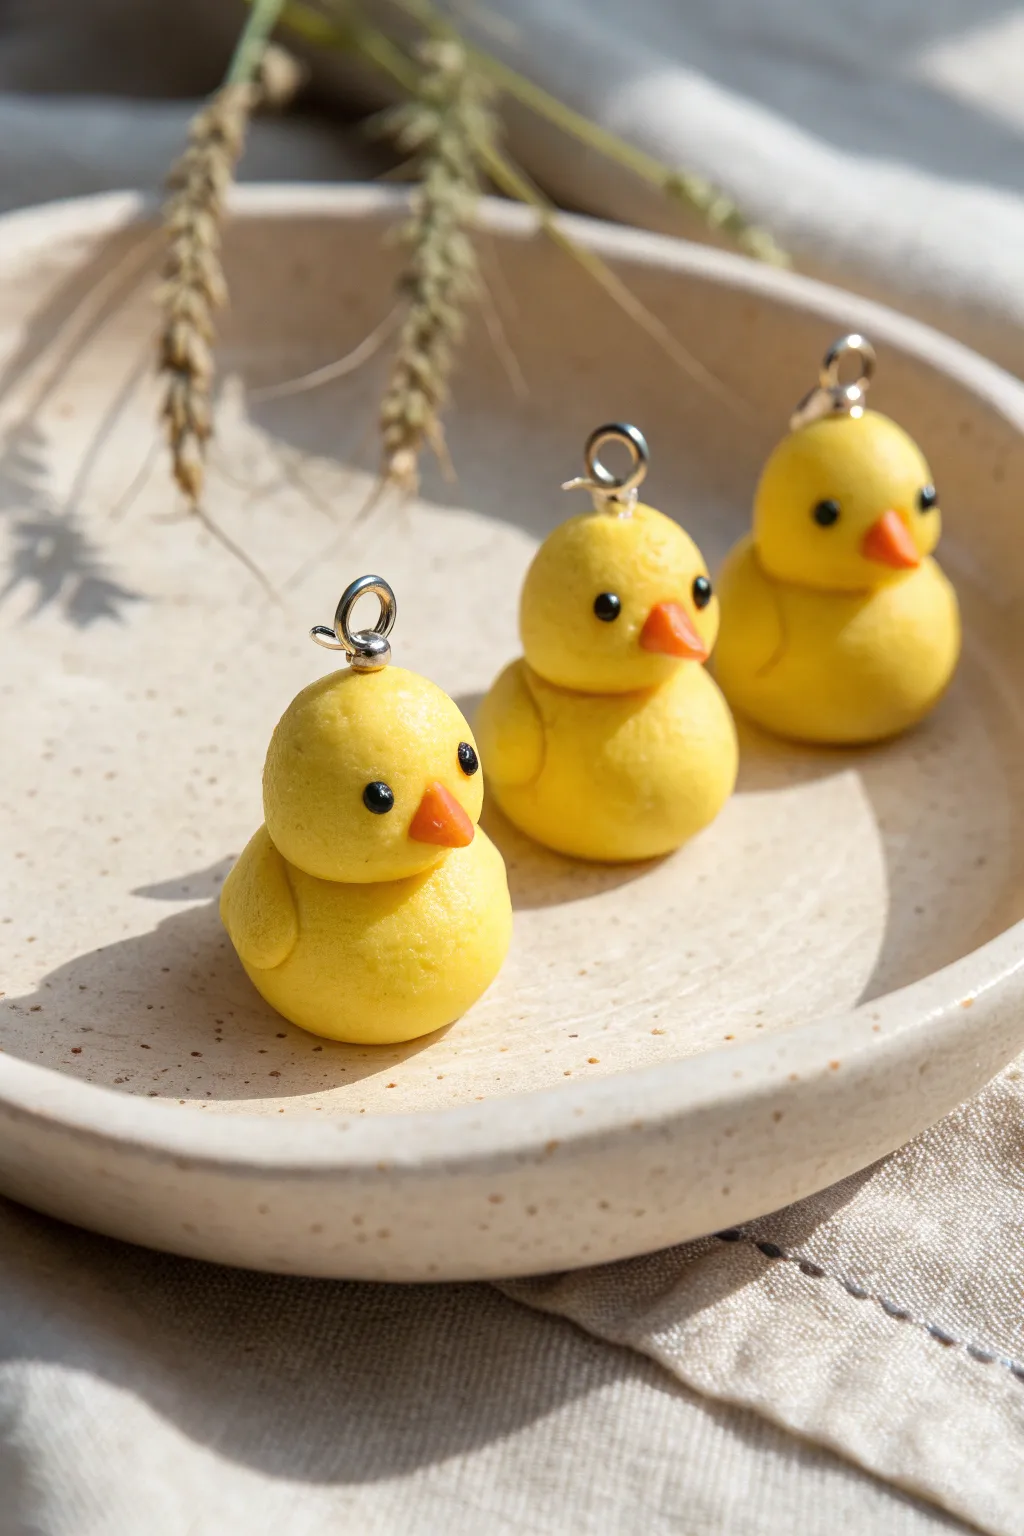
These miniature yellow ducklings are the epitome of simple charm, with their rounded bodies and tiny orange beaks bringing immediate cheer. Perfect for beginners, this project turns basic clay spheres into adorable jewelry pieces that look fantastic dangling from a bracelet or necklace.
How-To Guide
Materials
- Bright yellow polymer clay
- Orange polymer clay
- Black polymer clay (or black acrylic paint)
- Silver screw eye pins (approx. 8mm)
- Gloss glaze or polyurethane varnish
- Small ball stylus tool
- Needle tool or toothpick
- Clean ceramic tile or baking sheet
- Soft paintbrush
Step 1: Shaping the Bodies
-
Prepare the yellow clay:
Begin by conditioning your yellow polymer clay until it is soft and pliable. Since lighter colors show dust easily, wash your hands thoroughly or use baby wipes before starting this color. -
Form the main body:
Roll a small amount of yellow clay into a smooth ball about the size of a marble (roughly 1.5 cm or 0.5 inches in diameter). This will be the duckling’s body. -
Flatten the base:
Gently press the ball onto your work surface just enough to create a slightly flattened bottom. This ensures your charm will sit upright without rolling away. -
Create the head:
Roll a second, slightly smaller ball of yellow clay for the head. It should be proportional—think of it as being about two-thirds the size of the body. -
Attach the pieces:
Place the head on top of the body. To ensure a good bond without squishing the shapes, I like to gently twist the head back and forth as I press it down.
Step 2: Adding Details & Hardware
-
Shape the wings:
Create two tiny teardrop shapes from yellow clay, each no bigger than a grain of rice. Flatten them slightly between your fingers. -
Attach the wings:
Press one teardrop onto each side of the body, curving them slightly to follow the roundness of the duckling. Smooth the edges gently with your finger or a tool so they look integrated. -
Make the beak:
Take a minuscule amount of orange clay and roll it into a tiny cone shape. -
Position the beak:
Press the wide end of the cone onto the center of the face. Use your needle tool to gently nudge it into place if your fingers are too large for this detail. -
Create eye sockets:
Using a small ball stylus, make two tiny indentations on the face where the eyes will go. This helps the eyes sit securely rather than just resting on the surface. -
Add the eyes:
Roll two microscopic balls of black clay. Use the tip of your needle tool to pick them up and deposit them into the indentations you just made. -
Secure the eye pin:
Take your silver screw eye pin. If the stem is too long, trim it with wire cutters. Press it firmly into the top center of the duckling’s head. -
Refine the connection:
Once the pin is inserted, use your needle tool to gently push the clay back around the base of the metal loop to secure it.
Clean Clay Tip
Yellow clay dirties easily. Keep a piece of scrap white clay nearby to roll in your hands periodically—it pulls off dust and lint before you touch your yellow project.
Step 3: Baking & Finishing
-
Final inspection:
Check your duckling for any fingerprints. Gently smooth them out with your finger or a drop of baby oil. -
Bake the clay:
Place your ducklings on a ceramic tile or baking sheet. Bake according to your clay manufacturer’s instructions (usually 275°F/135°C for 15-30 minutes per 1/4 inch of thickness). -
Cool down:
Allow the charms to cool completely in the oven with the door cracked open. This gradual cooling makes the clay stronger. -
Reinforce the pin:
If the screw eye feels loose after baking, unscrew it, add a tiny drop of superglue to the threads, and screw it back in. -
Glaze:
Apply a coat of gloss glaze or polyurethane varnish to the finished charm. This gives it that shiny, ceramic-like finish seen in the photo and protects the details.
Make It a Flock
Create variety by tilting the heads slightly differently on each duck, or position the wings as if one is flapping. You can even add tiny flower hats!
Once the glaze is dry, your little duckling is ready to be strung onto a chain or added to your charm bracelet
Octopus Charms With Curled Tentacles
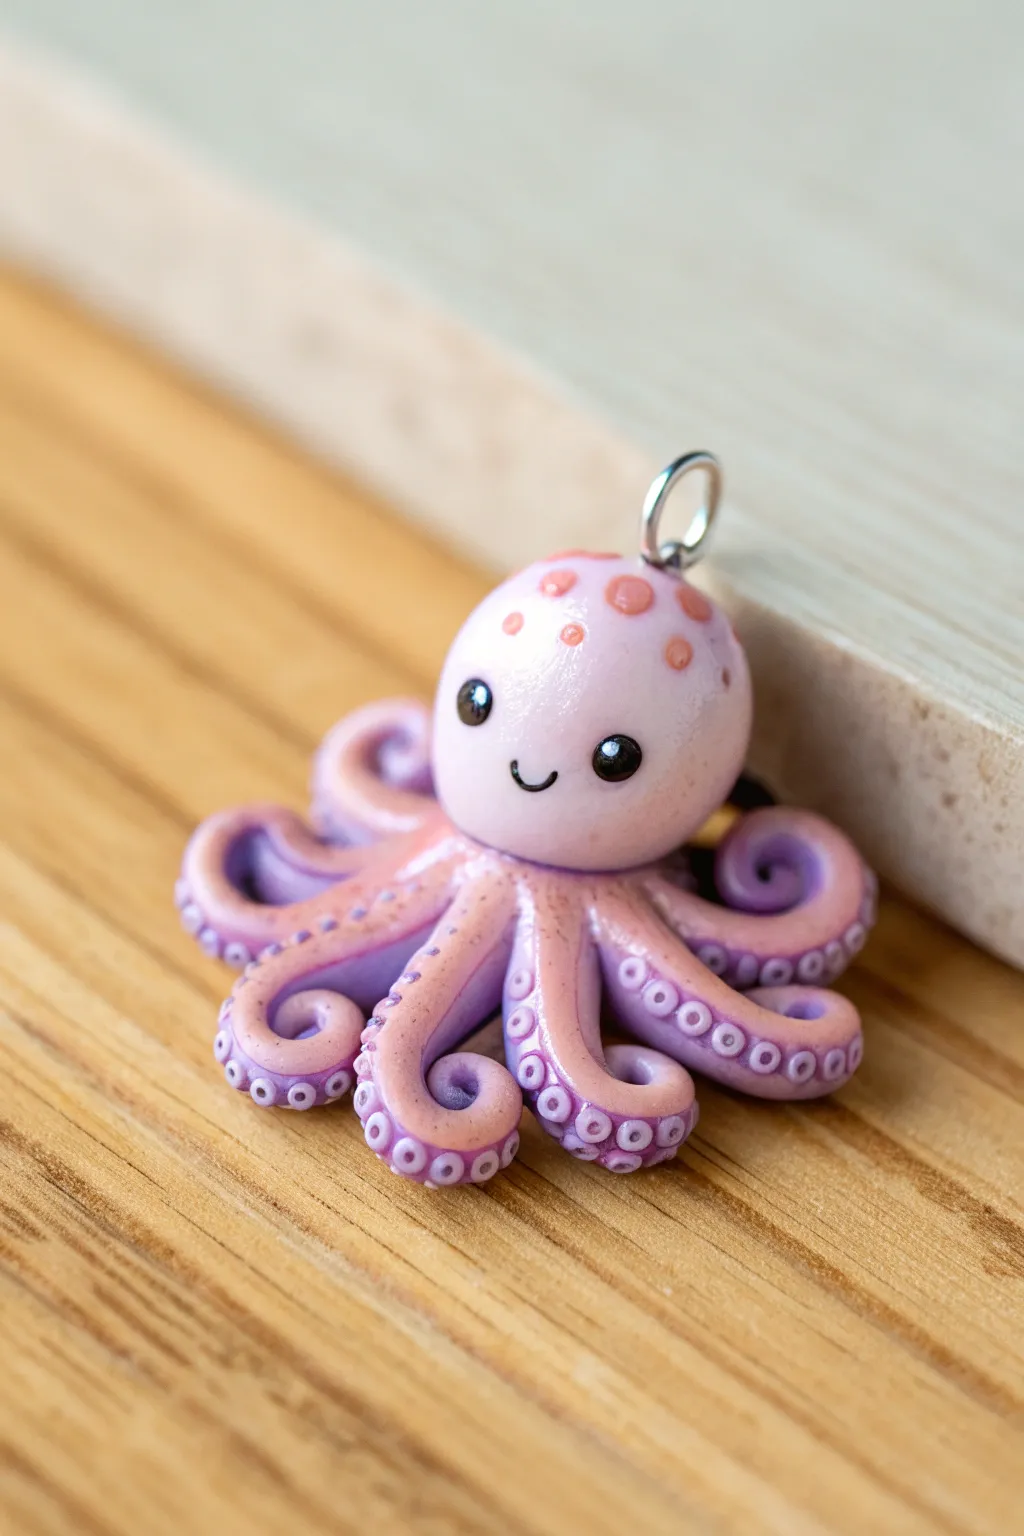
This adorable polymer clay octopus features a smooth, pastel lilac body speckled with cute pink spots and eight distinctively curled tentacles. Its tiny size and sturdy metal loop make it perfect for jewelry, zipper pulls, or a sweet handmade gift.
Step-by-Step
Materials
- Polymer clay (lilac/light purple)
- Polymer clay (darker purple for underside/suckers)
- Polymer clay (pink for spots)
- Polymer clay (black and white for eyes)
- Basic sculpting tools (needle tool, ball tool)
- Flexible blade or craft knife
- Metal eye pin for hanging
- Gloss glaze or polyurethane varnish
- Small paintbrush
- Oven for baking
Step 1: Shaping the Head
-
Mix your base color:
Start by conditioning your lilac clay until it is soft and pliable. If you don’t have the perfect shade, mix a little white into a violet clay to achieve that soft pastel look. -
Form the sphere:
Roll a smooth, crack-free ball of lilac clay about the size of a large marble. This will become the main head of the octopus. -
Add pink spots:
Take tiny pinches of pink clay and roll them into very small balls. Press these flattened spots gently onto the top of the head sphere in a random pattern. -
Smooth the spots:
Gently roll the head between your palms again. This embeds the pink spots into the lilac surface so they are flush with the head rather than bumping out.
Clean Clay Tip
Keep baby wipes or hand sanitizer nearby. Clean your hands thoroughly before switching from the dark purple clay back to the light lilac to avoid dirty smudges on the pastel body.
Step 2: Creating the Tentacles
-
Prepare the tentacle base:
Roll eight small, equal-sized logs of lilac clay. Each should be tapered at one end to form a teardrop or cone shape. -
Create the underside color:
Roll out a thin sheet of the darker purple clay. Cut small strips or triangles that match the size of your lilac tentacle logs. -
Layer the colors:
Press the dark purple strips onto the bottom side of each lilac tentacle. Smooth the edges so the two colors fuse together seamlessly. -
Make the suckers:
I prefer to use a very small ball tool or a needle tool for this. Gently press a row of tiny indentations into the dark purple underside of each tentacle to simulate suckers. -
Curl the tips:
Take each tentacle and tightly curl the tapered end upward. Vary the tightness of the curls slightly to give the octopus a natural, organic movement. -
Attach tentacles to the body:
Arrange the eight curled tentacles in a starburst circle on your work surface. Place the head ball firmly in the center, blending the clay slightly underneath where they meet to ensure a strong bond.
Make It Sparkle
Mix a tiny amount of mica powder or fine glitter into the lilac clay before sculpting to give the octopus a shimmering, magical underwater effect.
Step 3: Face and Finishing Details
-
Add the eyes:
Roll two tiny black balls of clay and press them onto the front of the face. Flatten them slightly against the curve of the head. -
Add the highlights:
Place an excessively tiny dot of white clay onto the upper right corner of each black eye. This ‘catchlight’ brings the character to life. -
Create the smile:
Roll an incredibly thin thread of black clay. Cut a tiny U-shape and gently press it between the eyes to form a sweet little smile. -
Insert the hardware:
Trim a metal eye pin to the right length. Dip the end in a tiny bit of liquid clay (or bake-and-bond) and insert it straight down into the top of the head. -
Bake the charm:
Bake your octopus according to the temperature and time instructions on your specific package of polymer clay. Let it cool completely before handling. -
Glaze for shine:
Once cool, apply a coat of gloss glaze to the octopus. This protects the details and gives it that polished, wet-look finish seen in the photo.
Now you have a charming little sea creature ready to be worn or gifted
Planet Charms With Cute Faces
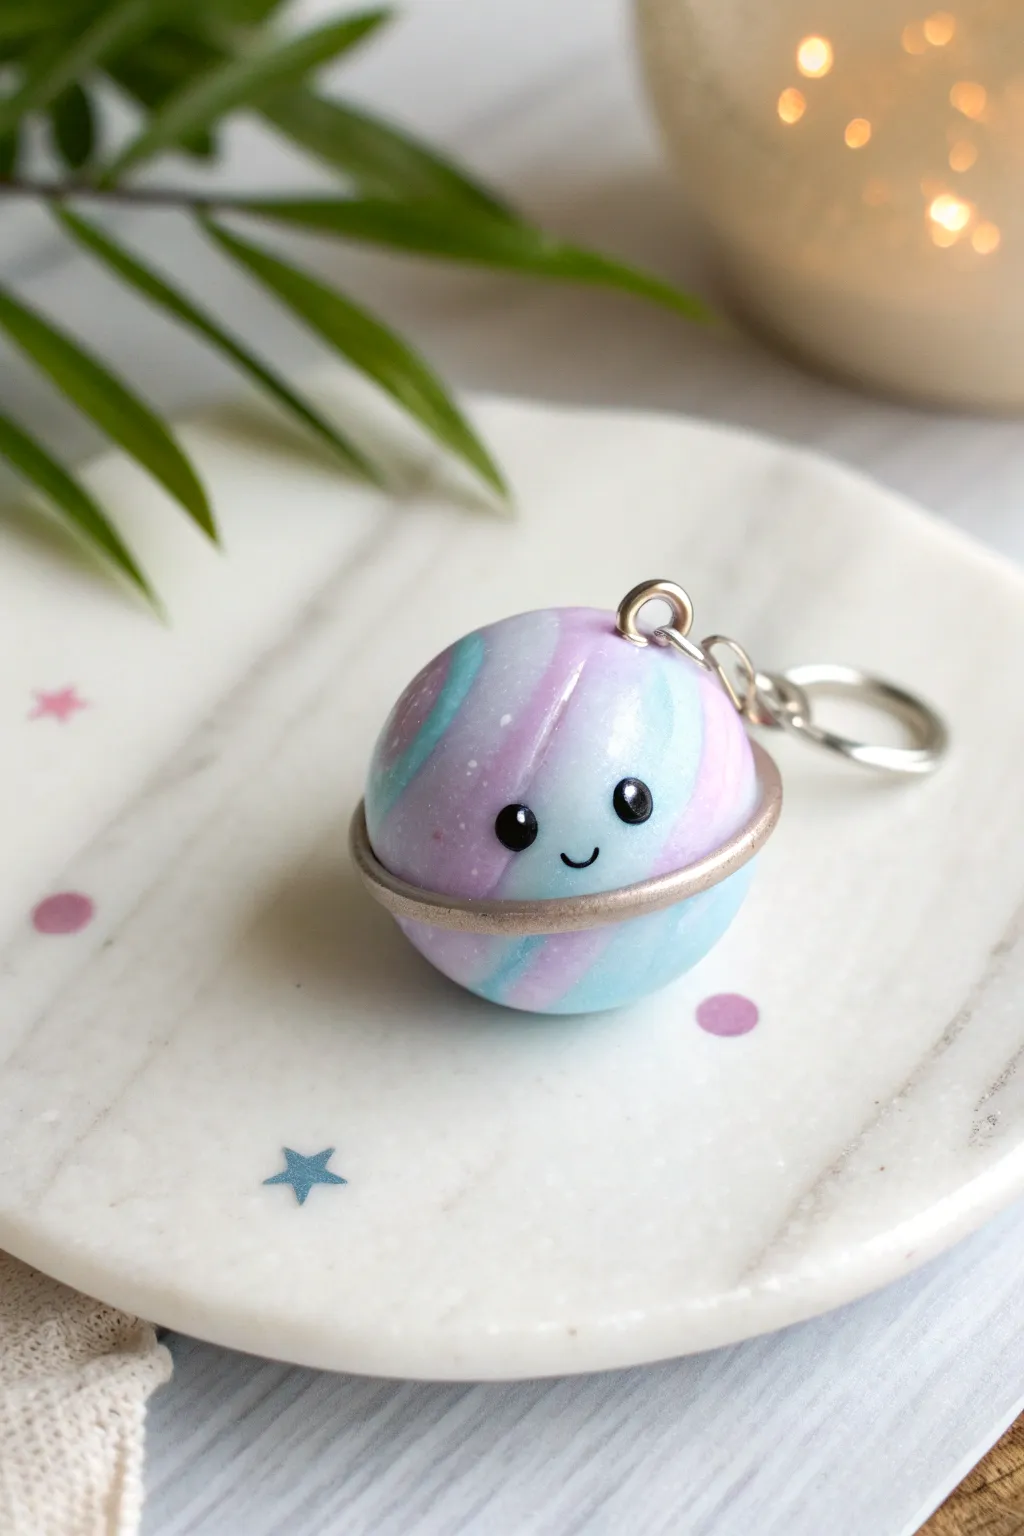
Blast off into crafting fun with this adorable marbled planet charm, featuring a sweet kawaii face and a shimmering metallic ring. The swirled galaxy palette of soft pastels and gentle glitter makes this a perfect accessory for keychains or necklaces.
Step-by-Step Guide
Materials
- Polymer clay in pastel blue, light pink, and lilac
- Polymer clay in metallic gold or silver (for the ring)
- Black liquid clay or acrylic paint
- Fine glitter (iridescent or white)
- Headpin or eye pin
- Jump rings and keyring attachment
- Gloss glaze or UV resin
- Blade or craft knife
- Dotting tool or toothpick
- Small rolling pin
Step 1: Marbling the Planet
-
Condition the clay:
Start by kneading your pastel blue, pink, and lilac clays separately until they are soft and pliable. -
Form logs:
Roll each color into a thin, snake-like log of equal length. -
Twist together:
Gather the three logs and twist them together into one thick rope. -
Fold and roll:
Fold the twisted rope in half and roll it out again to blend the colors further, but stop before they become muddy. -
Add some sparkle:
Sprinkle a tiny amount of fine glitter onto the clay and fold it in once more to incorporate the shimmer throughout the ‘galaxy’. -
Shape the sphere:
Roll the mixed clay between your palms to form a smooth, perfect sphere. I like to check at this stage to ensure the prettiest swirl pattern is facing front.
Muddy Colors?
If your colors turn gray or brown, you’ve over-mixed them. Stop rolling as soon as you see distinct swirls. Each color should still be visible on its own.
Step 2: Adding the Ring and Details
-
Create the planetary ring:
Roll a very thin snake of your metallic gold or silver clay. -
Attach the ring:
Gently wrap the metallic snake around the center of your planet sphere. -
Flatten slightly:
Press the ring down very gently so it adheres to the sphere without completely losing its rounded profile. -
Blend the join:
Where the two ends of the ring meet, trim the excess carefully and smooth the seam with your finger or a tool so it looks continuous. -
Insert the hardware:
Push an eye pin or headpin straight down into the top of the planet. Make sure it goes deep enough to be secure.
Pro Tip: Seamless Ring
Cut the ends of your metallic ring at a diagonal angle before joining them. This increases the surface area for the bond and makes the seam nearly invisible.
Step 3: Face & Finishing
-
Paint the eyes:
Using a dotting tool dipped in black liquid clay or acrylic paint, place two small, oval-shaped dots for the eyes on the upper half of the planet. -
Add the smile:
Use a very fine needle tool or a thin brush to draw a tiny ‘U’ shape between the eyes for the mouth. -
Add eye highlights:
Once the black is slightly set, add a tiny speck of white paint to each eye to give it life. -
Bake:
Bake the charm according to your specific polymer clay’s package instructions (usually around 275°F/135°C for 15-30 minutes). -
Cool down:
Let the charm cool completely before handling it further to avoid fingerprints. -
Glaze:
Apply a coat of gloss glaze or UV resin to the entire charm to protect the paint and make those marbled colors pop. -
Assemble:
Once dried or cured, attach your jump ring and keychain hardware to the eye pin loops.
Now you have a tiny celestial friend ready to travel with you on your keys or bag
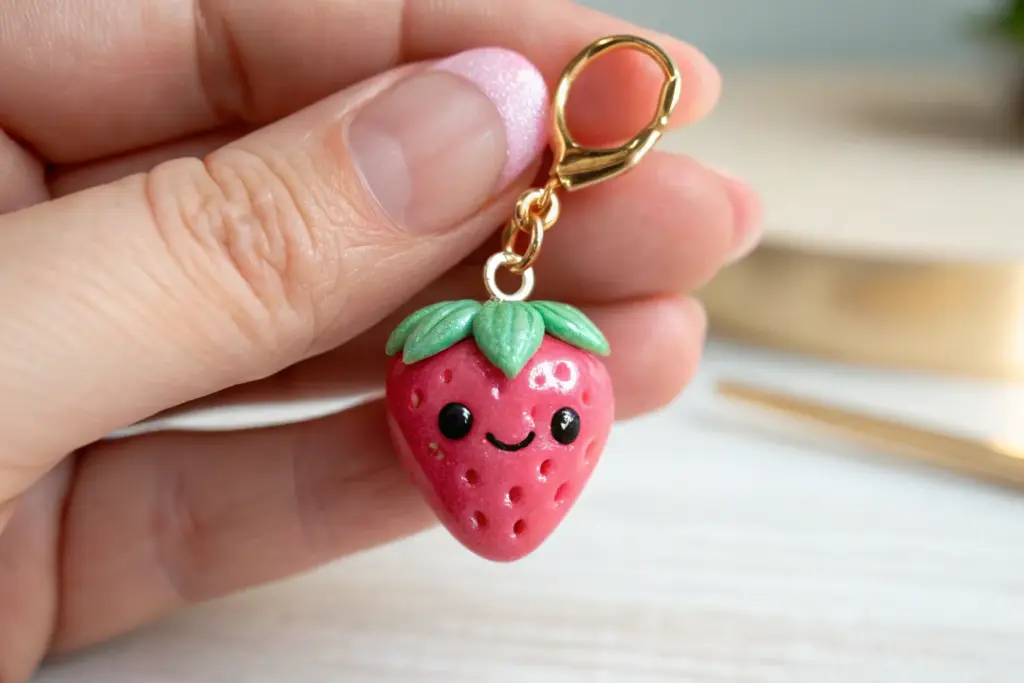
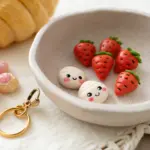
Mini Fruit Charms With Leaf Tops
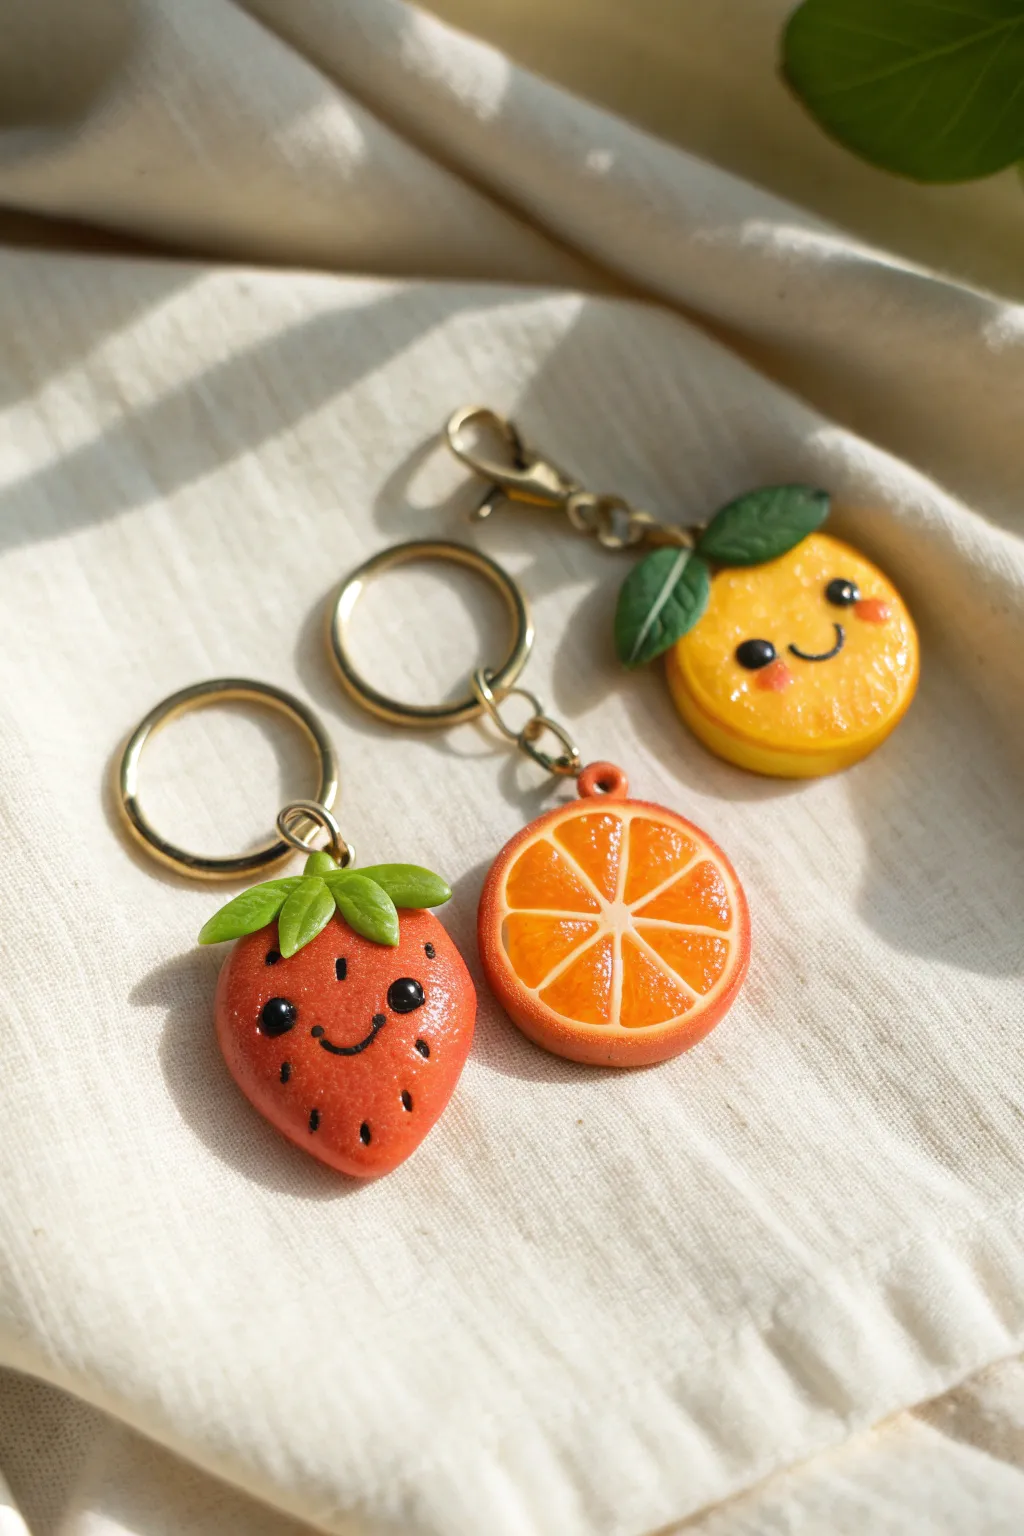
These miniature fruit charms are bursting with personality, featuring glossy finishes and adorable expressions. You’ll create a trio of a classic strawberry, a vibrant orange slice, and a cheeky whole orange with leafy hats.
Step-by-Step Tutorial
Materials
- Polymer clay (red, orange, green, white, black, pink)
- Acrylic rolling pin or clay machine
- Ball stylus tools (various sizes)
- Needle tool or toothpick
- X-acto knife or craft blade
- Small circle cutter (approx. 1 inch)
- Eye pins
- Gloss glaze or UV resin
- Soft paintbrush
- Jump rings and keychains or lobster clasps
- Oven (for baking according to clay package)
- Acrylic paint (black/white) if not using clay for faces
Step 1: Prepping the Shapes
-
Mix your colors:
Condition your clay by kneading it until soft. Ensure your orange is bright and your red is deep and saturated. If the colors feel too flat, I sometimes mix a tiny dot of translucent clay in to make them look more like real fruit flesh. -
Form the strawberry base:
Roll a medium-sized ball of red clay. Gently pinch and roll the bottom half between your fingers to create a tapered strawberry shape with a rounded top and pointed bottom. -
Form the whole orange base:
Roll a similarly sized ball of yellow-orange clay. Flatten it just slightly into a thick disc—it shouldn’t be a perfect sphere, but rather a chubby, round puck shape. -
Create the orange slice:
This requires a ‘cane’ technique. Roll a cylinder of orange clay for the segments. Wrap it in a thin sheet of white clay. Slice this cane into 8 wedges. -
Assemble the slice:
Arrange the 8 wedges in a circle, separated by thin strips of white clay to mimic the pith. Wrap the entire circle in a thin layer of white, followed by a slightly thicker layer of dark orange for the rind. Slice a clean cross-section about 5mm thick.
Pro Tip: Seamless Textures
To texture the orange skin without flattening the shape, put the clay on your finger and gently roll the sandpaper over it, rather than pressing the clay down onto the table.
Step 2: Adding Textures & Details
-
Texture the peel:
For the whole orange and the rind of the slice, gently tap a sandpaper sheet or a clean toothbrush over the surface to create that pitted citrus skin texture. -
Create translucent pulp:
On the orange slice face, use a needle tool to gently scratch tiny radiating lines into the orange segments. This mimics the juicy pulp texture. -
Add strawberry seeds:
Use a small dotting tool to press shallow indentations all over the red strawberry body. Don’t go too deep; just mark the surface. -
Optional seed coloring:
If you want clearer seeds later, you can bake first and paint them, or press tiny teardrops of black clay into the indentations now.
Step 3: Leafy Tops & Hardware
-
Make the leaves:
Roll small teardrop shapes from green clay. Flatten them with your finger. Use a knife/needle tool to press a central vein down the middle of each leaf. -
Attach strawberry greens:
Press 3-4 leaves onto the top of the strawberry, curving them slightly downward to hug the fruit. -
Attach orange greens:
For the whole orange, place two overlapping leaves on the top edge. Add a tiny brown snake of clay for a stem if desired. -
Insert eye pins:
Trim eye pins to about 1cm long. Dip the end in liquid clay or bake-and-bond for extra security, then push them vertically into the top center of each fruit charm.
Troubleshooting: Fingerprints
If you see fingerprints on your clay before baking, lightly brush the surface with a tiny bit of baby oil or clay softener to smooth them away instantly.
Step 4: Faces & Finishing
-
Shape the eyes:
Roll tiny specks of black clay into balls. Press them onto the strawberry and whole orange. Keep them wide-set for maximum cuteness. -
Add the smile:
Roll an incredibly thin snake of black clay—thinner than a thread. Cut a tiny U-shape and gently press it between the eyes using a silicone tool or needle. -
Rosy cheeks:
For the blush, apply a tiny dusting of pink chalk pastel with a brush, or press on microscopic flattened discs of pink clay under the eyes. -
Bake carefully:
Place charms on a ceramic tile or baking sheet. Tent with foil to prevent scorching. Bake according to your brand’s specific temperature instructions (usually 275°F/135°C for 15-30 mins). -
Glazing:
Once fully cooled, brush a coat of gloss glaze or UV resin over the fruit parts to make them look juicy. Leave leaf parts matte for contrast. -
Assembly:
Use pliers to open a jump ring, thread it through the eye pin loop, and attach your keychain or lobster clasp.
Now you have a sweet set of vitamin-C packed accessories to brighten up your keys or bags
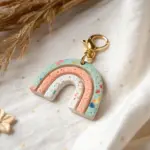
Lucky Charm Rainbow Sets
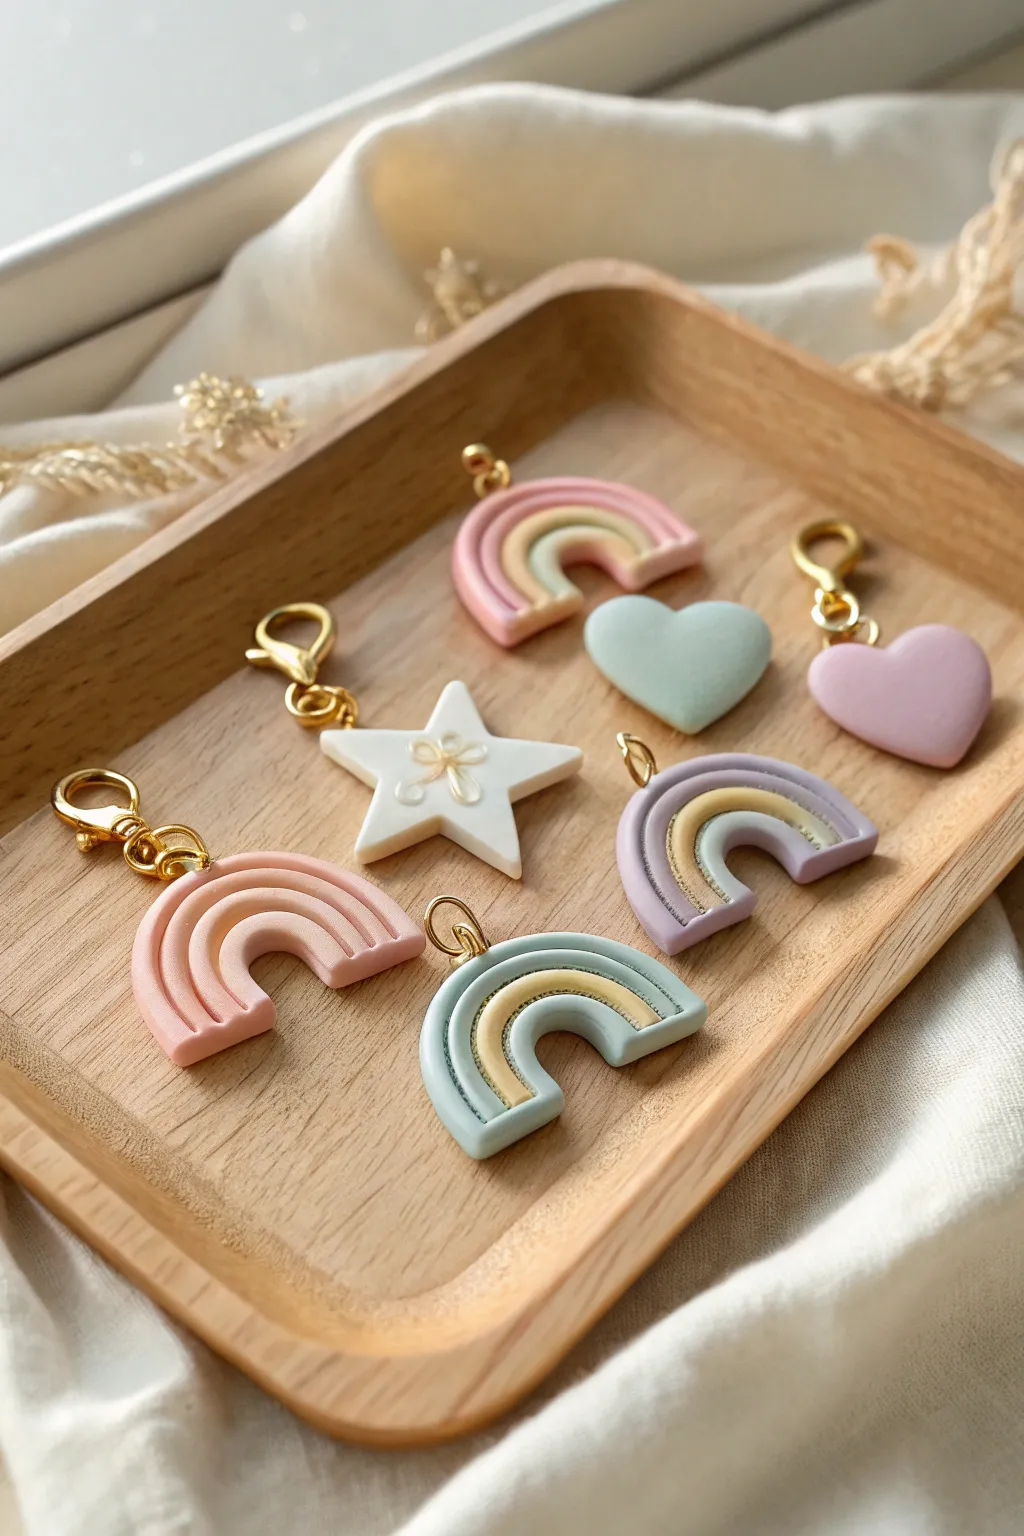
Soft pastels and gentle curves define this whimsical collection of clay charms, perfect for zippers, bags, or keychains. This project guides you through creating sweet rainbows, puffy hearts, and an embellished star with a smooth, matte finish.
Step-by-Step
Materials
- Polymer clay (pastel pink, light teal, lavender, white, pale yellow)
- Acrylic rolling pin and clay machine (pasta machine) for even sheets
- Clay extruding tool (optional) or flat smooth surface for rolling snakes
- Small heart and star cookie cutters
- X-Acto knife or tissue blade
- Needle tool or toothpick
- Gold jump rings (6mm or 8mm)
- Lobster clasps or lanyard clips (gold finish)
- Jewelry pliers (round nose and flat nose)
- Liquid polymer clay (optional, for bonding)
- Gloss glaze (optional, for finding accents only)
- Oven and baking tray
Step 1: Prepping the Clay
-
Condition the Clay:
Begin by warming the polymer clay in your hands to condition it. Knead each color separately until soft and pliable to prevent cracking later. -
Mix Custom Shades:
If your clay colors are too bright, mix in a small amount of white clay to achieve those muted, vintage pastel tones shown in the photo. -
Roll Flat Sheets:
Roll out a portion of white, teal, and lavender clay into smooth, thick sheets (about 4mm thick) to be used for the base shapes like the hearts and star.
Clean Slate Trick
Keep baby wipes or rubbing alcohol nearby. Wipe your hands and tools between colors, especially before touching white clay, to avoid transferring lint or dye.
Step 2: Sculpting the Rainbows
-
Create Uniform Snakes:
Roll out three long, even snakes of clay for each rainbow. I find using an acrylic block to roll them creates a smoother surface than just using my hands. -
Curve the First Arch:
Take the smallest snake (for the inner arch) and gently curve it into a U-shape on your work surface. -
Layer the Arches:
Add the middle and outer snakes, pressing them gently against the inner arch so they adhere without smashing the round shape. -
Add Texture Details:
For the grooved look seen on some rainbows, use a needle tool to gently score lines along the length of the arch before bending it. -
Trim the Ends:
Once your rainbow stack is assembled, use a sharp tissue blade to cut straight across the bottom, creating clean, flush feet for the rainbow. -
Insert Eye Pins:
Carefully push a gold eye pin or a screw eye into the top center of the rainbow arch. Ensure it goes in straight so it doesn’t poke out the side.
Step 3: Making Hearts and Stars
-
Cut Out Shapes:
Use your cookie cutters on the rolled-out sheets to stamp out the heart and star shapes. -
Smooth the Edges:
Gently rub the cut edges with your fingertip to soften the sharp angles left by the cutter, giving the charms a puffier, softer look. -
Embellish the Star:
For the star charm, roll infinitesimal threads of pale yellow or gold-colored clay. Shape them into a tiny bow design and press onto the center of the white star. -
Add Hanging Holes:
Use a needle tool or small straw to poke a hole near the top of the hearts and the star, or insert screw eyes like you did for the rainbows.
Fixing Fingerprints
If you notice fingerprints on your raw clay, brush a tiny amount of baby oil or cornstarch over the surface and gently rub it out before baking.
Step 4: Baking and Assembly
-
Baking the Clay:
Place all your pieces on a ceramic tile or baking sheet lined with parchment paper. Bake according to your clay manufacturer’s specific temperature and time instructions. -
Cooling Down:
Let the pieces cool completely inside the oven or on the counter. Do not handle them while hot, as polymer clay is fragile until fully cool. -
Inspect and Sand:
Check for rough edges. You can lightly sand the bottom or sides with fine-grit sandpaper if needed for a professional finish. -
Attach Jump Rings:
Using two pairs of pliers, twist open a gold jump ring. Thread it through the hole or eye pin on your charm. -
Add Clasp:
Before closing the jump ring, slide on the gold lobster clasp or lanyard clip. Twist the jump ring closed securely so there is no gap.
Clip these adorable accessories onto your day bag or keys for an instant pop of pastel joy