
When I’m craving that cozy December feeling, I reach for air-dry clay or polymer clay and make something I’ll actually want to display in my home. These Christmas clay ideas for adults are all about clean lines, pretty textures, and handmade pieces that feel a little elevated without getting fussy.
Botanical-Imprint Christmas Ornaments
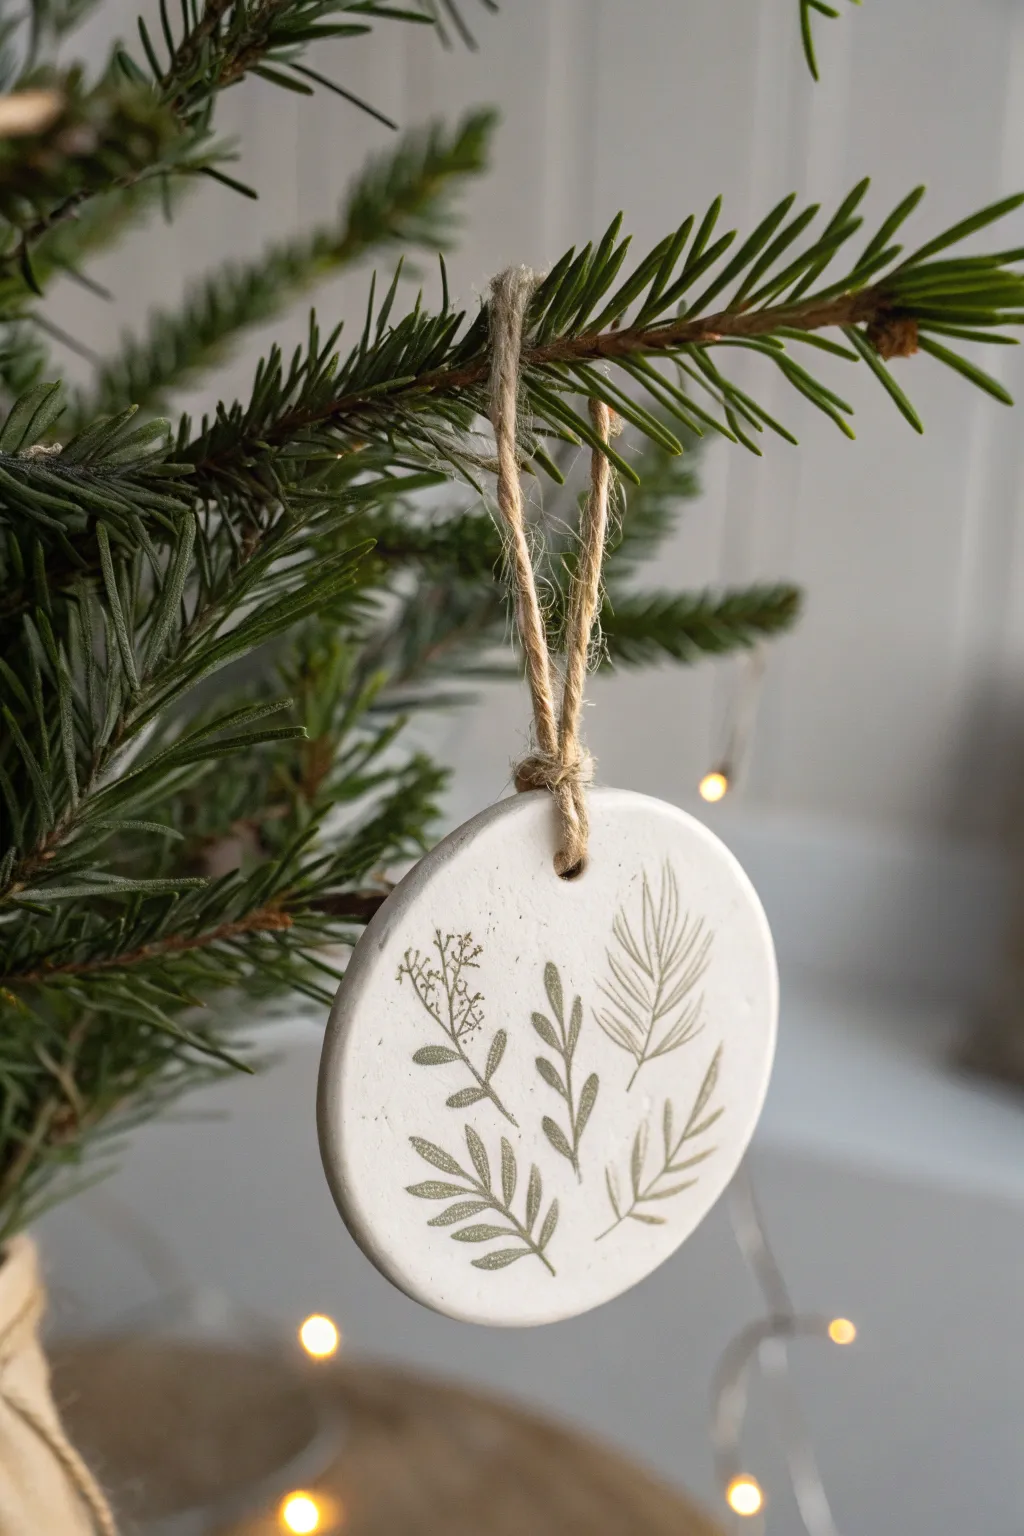
Capture the delicate beauty of winter flora with these elegant white clay ornaments. Featuring subtle, sage-green botanical imprints and rustic jute twine, they add a natural, minimalist touch to your holiday tree.
Detailed Instructions
Materials
- White creative air-dry clay (or polymer clay)
- Small rolling pin
- Circular cookie cutter (approx. 2.5 – 3 inches)
- Fresh or dried botanical sprigs (thyme, rosemary, or faux greenery)
- Sage green acrylic paint
- Small foam pouncer or sponge
- Fine-grit sandpaper
- Plastic straw or small hole punch tool
- Jute twine
- Wax paper or craft mat
- Paper towel
Step 1: Preparation & Rolling
-
Prepare your workspace:
Lay down a sheet of wax paper or a craft mat to prevent the clay from sticking to your table. Clean hands are essential here, as white clay picks up dust easily. -
Condition the clay:
Take a handful of air-dry clay and knead it in your hands for a minute until it feels soft, pliable, and free of cracks. -
Roll out the slab:
Use your rolling pin to flatten the clay into an even slab. Aim for a thickness of about 1/4 inch; if it’s too thin, it may crack, and if it’s too thick, it will be heavy. -
Smooth the surface:
Gently run a slightly damp finger over the top of the rolled clay to smooth out any tiny texture marks or fingerprints.
Smudged Print?
If the paint smudges or the print isn’t clear, quickly wipe it away with a damp baby wipe while the clay is still wet, smooth the surface, and try again.
Step 2: Imprinting & Cutting
-
Select your botanicals:
Choose small sprigs of greenery that have distinct leaf patterns. Thyme, rosemary, or small fern pieces work beautifully for this scale. -
Apply paint to the plant:
Squeeze a small amount of sage green acrylic paint onto a palette. Using a foam pouncer or sponge, lightly dab paint onto the *front* side of your botanical sprig. You want a thin, even coat, not globs of paint. -
Test the print (optional):
I like to do a quick test press on a scrap piece of paper just to ensure I haven’t overloaded the leaves with paint. -
Press onto clay:
Carefully place the painted side of the sprig down onto the rolled clay. Press gently but firmly with your fingertips to transfer both the color and the texture. -
Create a composition:
Lift the sprig straight up to reveal the print. Repeat this process with different leaf shapes to create a pleasing arrangement, leaving some negative space for balance. -
Cut the shape:
Position your circular cookie cutter over the stamped design to frame it perfectly. Press down firmly to cut the circle, then gently lift the cutter away. -
Add the hanging hole:
Use a plastic straw or a small hole punch tool to create a hole near the top edge of the circle. Make sure it’s not too close to the edge to prevent tearing later. -
Refine the edges:
Dip your finger in water and smooth the outer rim of the circle to remove any ragged edges left by the cutter.
Sharper Impressions
Use a rolling pin to gently roll OVER the botanical sprig once it’s placed on the clay. This embeds the plant deeper for a more embossed, professional texture.
Step 3: Finishing Touches
-
Dry completely:
Place the ornament on a flat surface to dry. Air-dry clay typically takes 24-48 hours depending on humidity. Flip it over halfway through to ensure even drying. -
Sand for perfection:
Once fully hard, inspect the edges. If there are any rough spots, very gently buff them with fine-grit sandpaper. -
Cut the twine:
Cut a piece of jute twine approximately 8 inches long. -
Thread the loop:
Thread the twine through the hole in the ornament. Bring the ends together and tie a simple overhand knot at the top to create a loop. -
Secure the hanger:
Pull the knot tight and trim any excess fraying if desired. Alternatively, you can tie a lark’s head knot directly onto the ornament for a different look. -
Thread separation:
For the look in the photo, gently untwist the jute fibers near the ornament base slightly to give it a more rustic, raw appearance.
Your finished ornament is now ready to bring a touch of woodland charm to your home decor


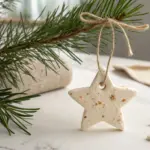
Minimal Star and Circle Tree Ornaments
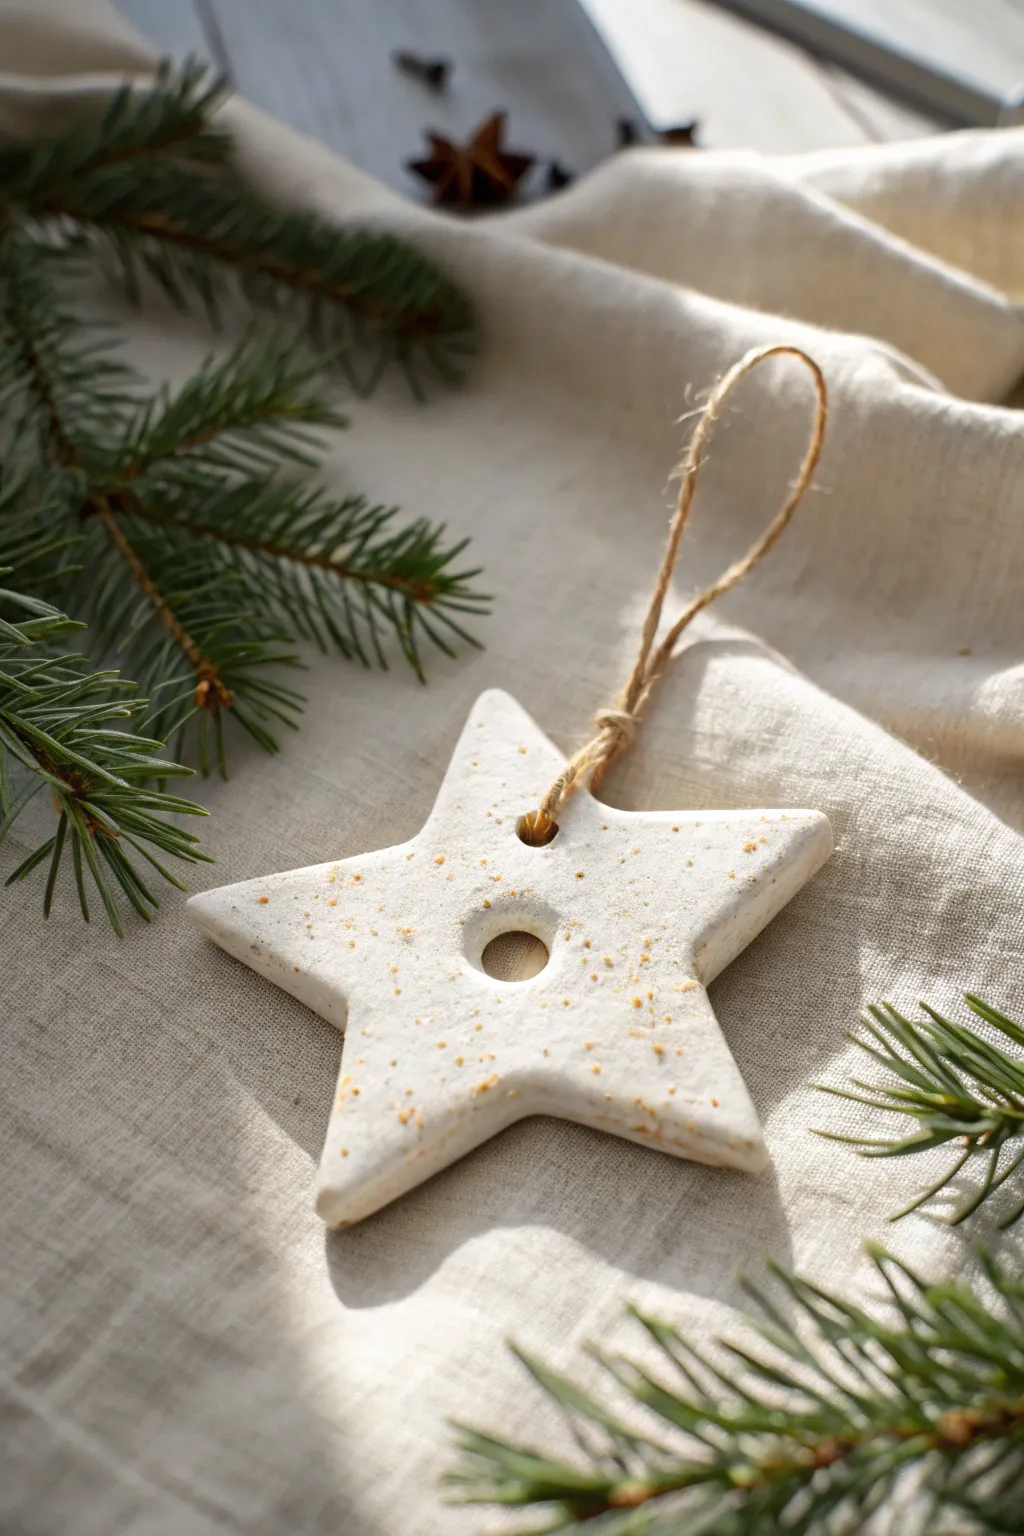
Capture the serene beauty of a Scandinavian winter with this minimalist star ornament. Made from simple white clay and accented with warm golden speckles, this piece adds an elegant, natural touch to your holiday decor.
How-To Guide
Materials
- White air-dry clay (or polymer clay)
- Small rolling pin
- Star-shaped cookie cutter (approx. 3-4 inches)
- Parchment paper or non-stick mat
- Straw or small circular cutter (for the hanging hole)
- Small round cutter (approx. 1/2 inch) for center cutout
- Fine sandpaper (optional)
- Gold glitter (fine) or cinnamon/nutmeg for natural speckles
- Jute twine or natural cord
- Clear matte varnish (optional)
Step 1: Mixing and Rolling
-
Prepare the workspace:
Begin by laying down a sheet of parchment paper or a non-stick craft mat. This ensures your clay won’t stick and makes cleanup much easier. -
Condition the clay:
Take a handful of white air-dry clay and knead it gently in your hands until it becomes soft, pliable, and free of cracks. The warmth of your hands helps make it workable. -
Add the speckles:
Flatten the clay slightly and sprinkle your chosen speckling material over it. For a natural look like the photo, a pinch of cinnamon works beautifully; for sparkle, use fine gold glitter. -
Incorporate the texture:
Fold the clay over the speckles and knead again until they are evenly distributed throughout the dough. I like to do this thoroughly so the texture looks organic rather than patchy. -
Roll it out:
Place the ball of clay onto your parchment paper. Using the rolling pin, roll the clay out to an even thickness of about 1/4 inch (approx. 5-6mm). Avoid rolling it too thin, as you want the star to be sturdy.
Step 2: Cutting and Shaping
-
Cut the star shape:
Press your star-shaped cookie cutter firmly into the rolled clay. Wiggle it very slightly to ensure a clean cut before lifting it away. -
Remove excess clay:
Carefully peel away the excess clay from around the star shape. You can ball this up to use for another ornament later. -
Create the center hole:
Using a small round cutter (about 1/2 inch in diameter), punch a hole directly in the geometric center of the star. This creates that modern negative space look seen in the photo. -
Punch the hanging hole:
Take a plastic drinking straw or a very small circular cutter and press it into one of the star’s points to create the hole for the twine. Make sure it isn’t too close to the edge to prevent tearing. -
Smooth the edges:
Dip your finger in a tiny bit of water and gently run it along the cut edges of the star and the inner circles. This softens any sharp ridges left by the cutters for a more refined finish.
Natural Scents
Knead actual ground spices like cloves or nutmeg into the clay. Not only does it create beautiful speckles, but your ornaments will smell amazing.
Step 3: Drying and Finishing
-
Let it dry:
Leave the star on the parchment paper to dry in a cool, dry place. Air-dry clay typically takes 24-48 hours to fully harden. Flip the star over halfway through the drying process to ensure the back dries evenly and to prevent warping. -
Sand for perfection:
Once fully dry and hard, inspect the edges. If there are any rough spots, lightly buff them with fine-grit sandpaper until smooth. -
Seal the surface (Optional):
To protect your ornament, you can brush on a thin layer of clear matte varnish. This seals the clay and keeps the speckles in place without adding an unnatural shine. -
Prepare the twine:
Cut a length of natural jute twine, approximately 8-10 inches long. This rustic material complements the natural look of the clay perfectly. -
Loop the twine:
Thread one end of the twine through the small hanging hole at the star’s point. -
Tie the knot:
Bring the two ends of the twine together and tie a secure overhand knot near the ends to create a loop. -
Secure the hanger:
Pull the loop so the knot rests near the top or bottom, depending on your preference. For the look in the image, create a lark’s head knot directly on the ornament instead: verify you fold the string in half, push the loop through the hole, and pull the tails through the loop.
Stamp It Up
Before drying, gently press a sprig of evergreen or a rubber stamp into the clay surface to leave an embossed botanical impression.
Hang your beautiful new star on a branch and enjoy the simple, handmade charm it brings to your holiday season


Candy Cane Marble Ornaments
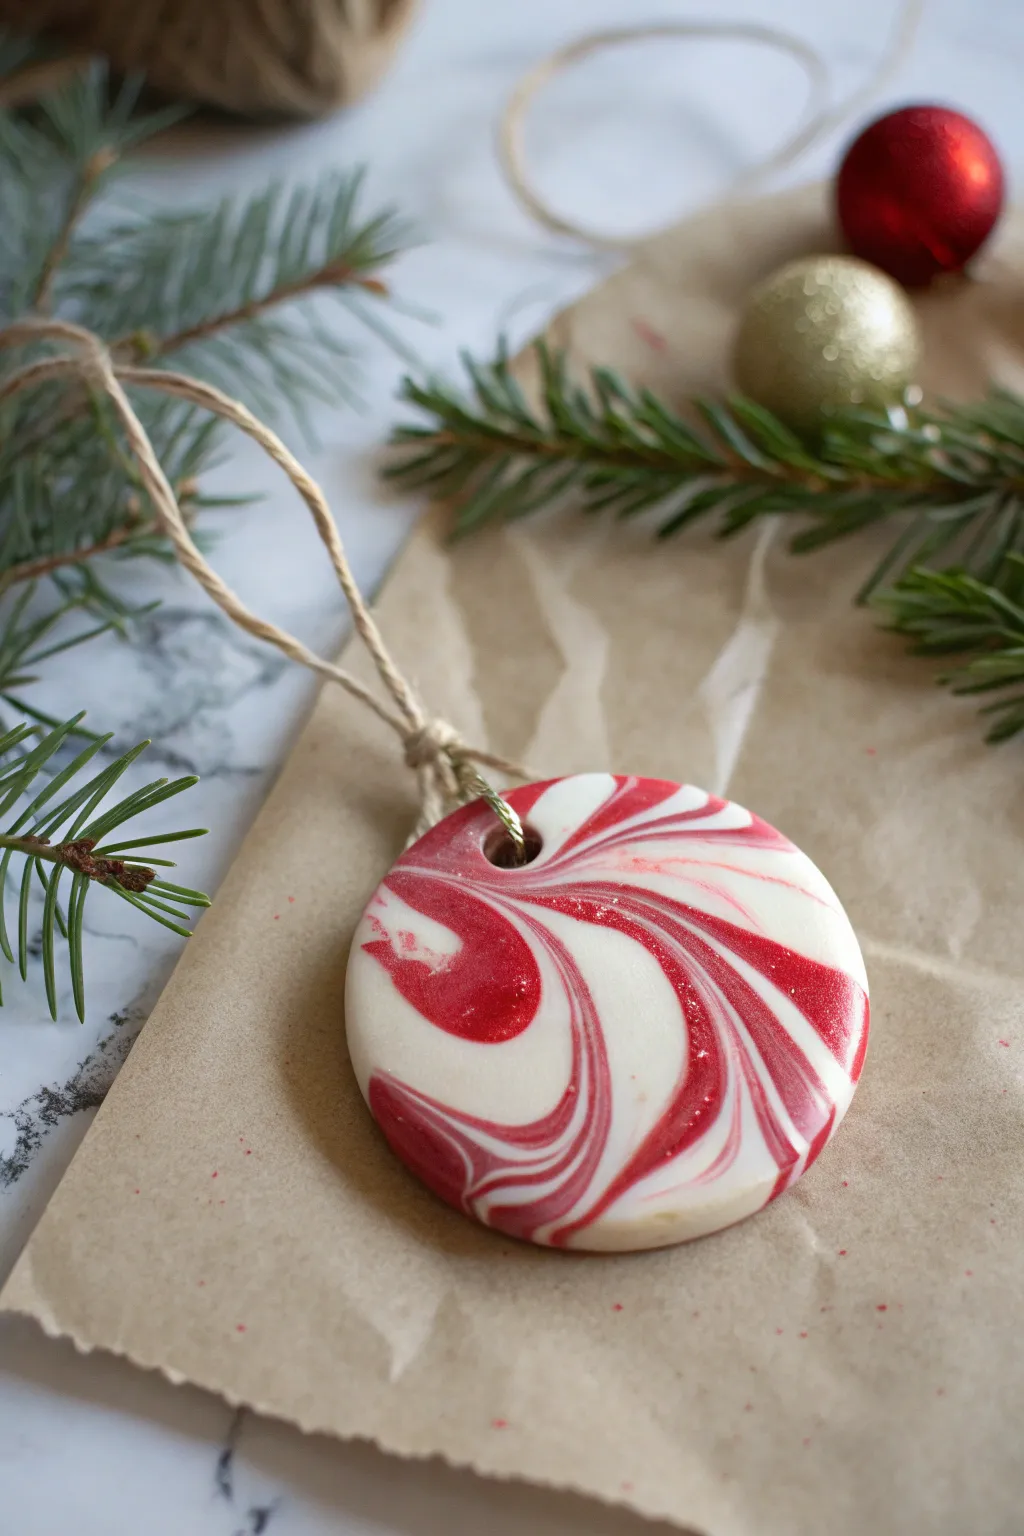
Capture the nostalgic sweetness of the season with these elegant, marbled clay ornaments that look just like giant peppermint candies. The red and white polymer clay swirls together to create a unique, mesmerizing pattern for every single piece you make.
Step-by-Step Guide
Materials
- White polymer clay
- Red polymer clay (e.g., standard red or a glitter red for extra sparkle)
- Acrylic rolling pin
- Round cookie cutter (approx. 3 inches)
- Straw or small circular tool for hole punching
- Parchment paper or baking mat
- Baking sheet
- Glossy polymer clay glaze or varnish (optional)
- Soft paintbrush
- Twine or ribbon for hanging
Step 1: Prepping and Mixing the Clay
-
Condition the base colors:
Begin by thoroughly conditioning your white and red polymer clay separately. Knead each ball until it is soft, pliable, and free of any cracks. -
Roll out snakes:
Roll the white clay into a thick log, about 4 inches long. Then, roll the red clay into a similar log of the same length but slightly thinner thickness. -
Combine the logs:
Twist the red log and the white log together like a rope. This is the beginning of your marbling process. -
Fold and twist:
Fold the twisted rope in half, and twist it again. Repeatedly rolling the combined log on your work surface until it is smooth again helps blend the seams. -
Create the marble effect:
Continue to fold, twist, and roll the clay snake. Do this 3-4 times to create thinner stripes, but be careful not to over-mix, or you will end up with pink clay instead of distinct red and white swirls. -
Form a ball:
Once you are happy with the stripe density, squish the clay snake into a tight ball. I like to manually adjust the ball so the swirls look interesting on the top surface.
Step 2: Shaping and Baking
-
Roll out the slab:
Place your marbled ball onto a piece of parchment paper. Using your acrylic rolling pin, flatten the ball into a slab approximately 1/4 inch thick. Rotate the clay as you roll to keep the shape even. -
Check the pattern:
Inspect your slab. If the swirl pattern isn’t quite right, you can fold the clay over once more and re-roll it, though this will make the lines finer. -
Cut the shape:
Position your round cookie cutter over the section of the clay with the most pleasing swirl pattern. Press down firmly to cut out your ornament shape. -
Smooth the edges:
Lift the excess clay away. Gently run your finger along the cut edge of the circle to smooth out any rough texture left by the cutter. -
Punch the hole:
Use a drinking straw or a small circular cutter to punch a hole near the top edge for the string. Make sure the hole isn’t too close to the edge to prevent breakage later. -
Bake the ornaments:
Transfer the parchment paper with the ornaments onto a baking sheet. Bake according to your specific polymer clay manufacturer’s instructions (usually around 275°F or 135°C for 15-30 minutes). -
Cool down:
Remove from the oven and allow the ornaments to cool completely on a flat surface. They will harden as they cool.
Clean Hands, Bright White
Red clay pigment is notorious for staining hands. Always wash your hands or use baby wipes after handling the red clay before touching the white clay to keep the white parts pristine.
Step 3: Finishing Touches
-
Apply varnish (optional):
For a glossy, candy-like finish similar to the photo, apply a thin coat of polymer clay glaze using a soft brush. Let this dry fully according to the bottle directions. -
Add glitter (optional):
If you want extra sparkle on the surface, you can sprinkle a tiny pinch of fine glitter into the wet glaze before it dries. -
Clean the hole:
If any glaze dripped into the hanging hole, clear it out carefully with a toothpick before it hardens completely. -
Attach the hanger:
Cut a length of rustic twine or ribbon, thread it through the hole, and tie a secure knot to create a loop for hanging on your Christmas tree.
Air Bubble Trouble
If you see a small air bubble after rolling out your slab, pierce it gently with a needle or craft knife and smooth the air out with your finger before baking.
Hang these on your tree or wrap them as unique gift toppers for friends and family


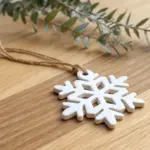
Metallic-Detail Snowflake Medallions
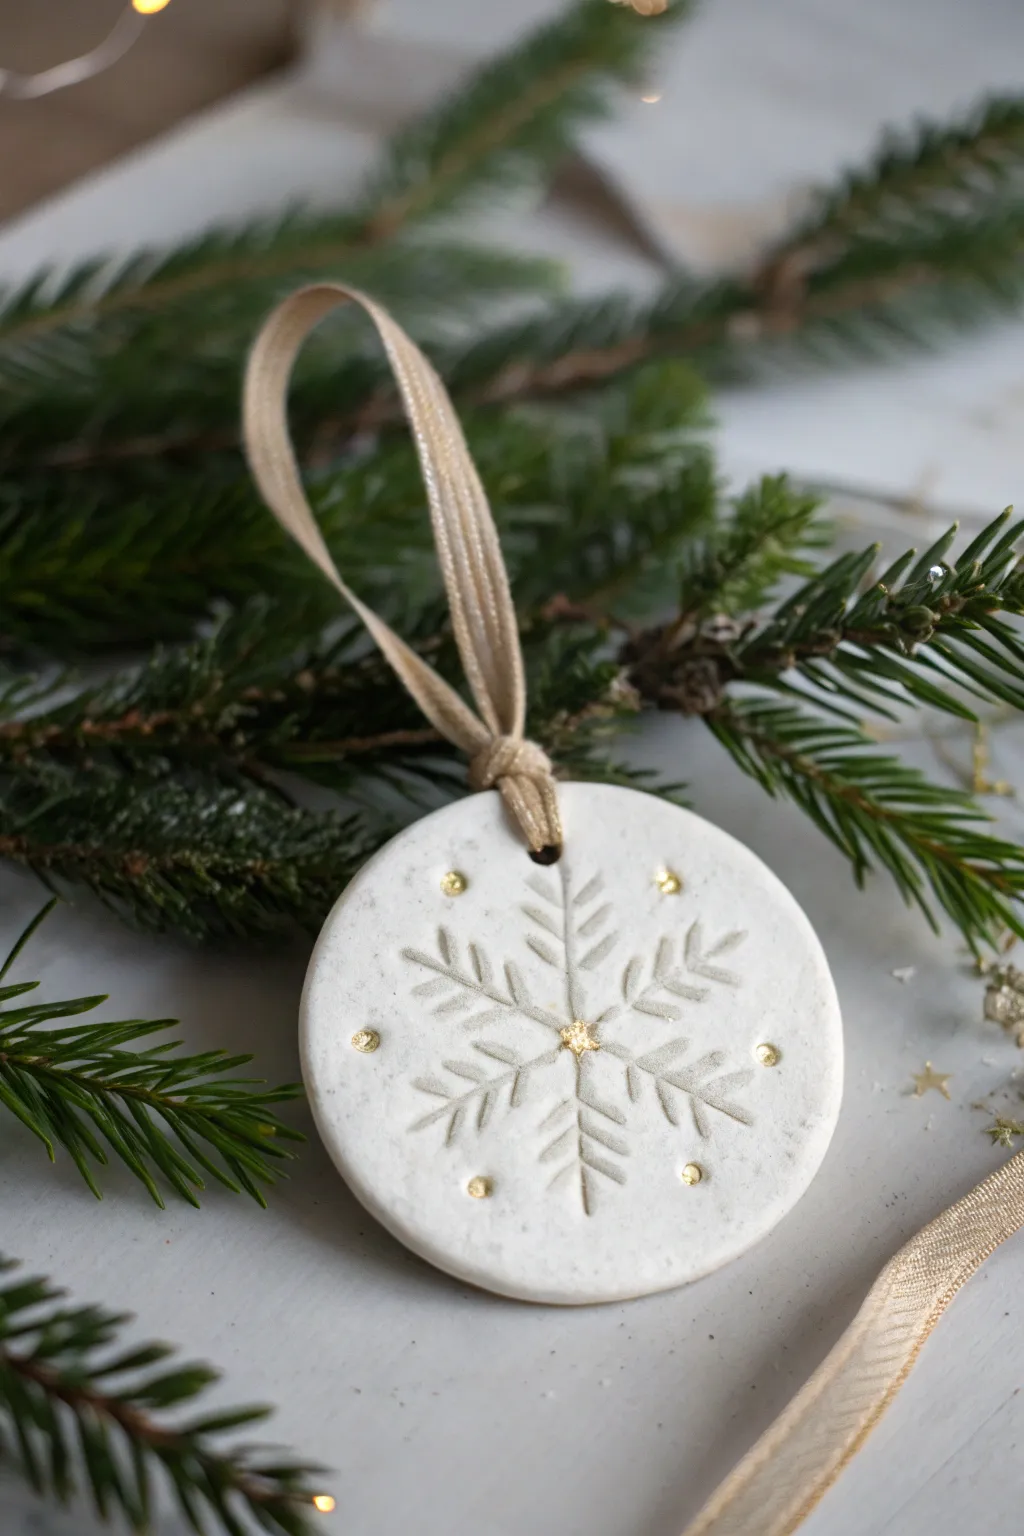
Capture the delicate beauty of winter with this elegant clay ornament, featuring a crisp snowflake impression and subtle metallic highlights. The contrast between the matte white clay and the shimmering gold accents creates a sophisticated finish perfect for a modern holiday tree.
Step-by-Step
Materials
- White beautiful air-dry clay or polymer clay
- Rolling pin
- Circle cookie cutter (approx. 3-inch diameter)
- Snowflake stamp or texture tool (alternatively: a toothpick or sculpting tool)
- Gold metallic paint or gold leaf pen
- Fine-point paintbrush
- Straw or small circle cutter (for the ribbon hole)
- Sandpaper (fine grit)
- Beige or gold sheer ribbon (approx. 1/4 inch wide)
- Clear varnish or sealant (optional)
- Wax paper or silicone mat
Step 1: Shaping the Base
-
Prepare your workspace:
Lay down a piece of wax paper or a silicone mat to prevent the clay from sticking to your table. If using air-dry clay, keep a small bowl of water nearby for smoothing edges. -
Condition the clay:
Take a handful of white clay and knead it in your hands until it becomes soft, pliable, and free of cracks. This ensures a smooth surface later. -
Roll it out:
Use your rolling pin to flatten the clay into an even slab. Aim for a thickness of about 1/4 inch (6mm)—thick enough to be sturdy but thin enough to not look bulky. -
Cut the circle:
Press your circle cookie cutter firmly into the clay slab. Wiggle it slightly to ensure a clean cut, then remove the excess clay from around the shape. -
Smooth the edges:
Dip your finger in a tiny bit of water (for air-dry clay) and gently run it along the cut edge to soften any sharp ridges left by the cutter. -
Create the hanging hole:
Use a drinking straw to punch a hole near the top edge of the circle. Make sure it’s not too close to the edge to prevent breaking later.
Clean Lines Pro-Tip
To prevent your stamp from sticking and ruining the design, lightly dust the clay surface with cornstarch or brush the stamp with a tiny bit of oil before pressing.
Step 2: Impressing the Design
-
Stamp the snowflake:
Center your snowflake stamp over the clay circle. Press down firmly and evenly to create a deep, crisp impression. If you don’t have a stamp, I like to use a simple sculpting tool to hand-carve lines radiating from the center. -
Add carved details:
If hand-carving, draw a vertical line, crossed by two diagonal lines to form a six-pointed star. Add small ‘V’ shapes to the ends of each line to create the feathery branches of the snowflake. -
Create surrounding accents:
Use the back end of a small paintbrush or a dotting tool to press small indentations around the snowflake tips, adding extra texture to the negative space. -
Allow to dry:
Let the ornament dry completely according to your clay package instructions. For air-dry clay, turning it over halfway through the drying time helps prevent warping. -
Sand for perfection:
Once fully cured and hard, gently sand the edges and surface with fine-grit sandpaper to remove any fingerprints or rough spots.
Step 3: Gilding and Finishing
-
Paint the center star:
Using a fine paintbrush and gold metallic paint, carefully fill in just the very center intersection of the snowflake. A gold leaf pen also works wonderfully here for control. -
Highlight the accents:
Dab a tiny dot of gold paint into the small circular indentations you made around the snowflake. Keep the hand steady to avoid smudging onto the flat surface. -
Let the paint set:
Allow the metallic accents to dry completely. This usually takes just 15-20 minutes depending on the paint thickness. -
Seal the piece (Optional):
If you want extra durability or a slight sheen, apply a thin coat of clear matte or semi-gloss varnish over the entire front of the ornament. -
Attach the ribbon:
Cut a length of sheer beige ribbon. Fold it in half, thread the loop through the hole, and pull the tails through the loop to create a lark’s head knot. Tie the ends securely.
Texture Twist Level-Up
Before cutting your circle, press a piece of lace or a textured fabric into the raw clay slab. This adds a subtle, fascinating background texture behind the snowflake.
Hang your finished medallion on a prominent branch where the lights can catch those beautiful gold details

The Complete Guide to Pottery Troubleshooting
Uncover the most common ceramic mistakes—from cracking clay to failed glazes—and learn how to fix them fast.
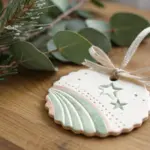
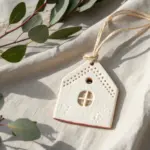
Modern Clay Wreath Ornament

This delicate holiday ornament swaps traditional bright reds and greens for a sophisticated palette of muted sage and cream. Using simple leaf layering techniques, you’ll create a modern laurel wreath that looks porcelain-perfect but is surprisingly durable.
Detailed Instructions
Materials
- Polymer clay (Sage Green)
- Polymer clay (White)
- Circle cutter (approx. 3 inches diameter)
- Smaller circle cutter (approx. 2 inches diameter)
- Small teardrop cutter (approx. 0.75 inch)
- Exacto knife or clay blade
- Mod Podge or liquid clay adhesive
- Needle tool or toothpick
- Rolling pin or pasta machine
- Satin ribbon (champagne or rose gold, 1/4 inch width)
- Baking sheet and parchment paper
- Matte varnish (optional)
Step 1: Creating the Base & Leaves
-
Condition the base clay:
Begin by conditioning a portion of your sage green clay until it is soft and pliable. Use a rolling pin or pasta machine to roll it out to a medium thickness, about 1/4 of an inch. -
Cut the wreath form:
Use your larger circle cutter to stamp a round shape. Without moving the clay, center your smaller circle cutter inside the first one and cut to create a perfectly even ring. Remove the center and excess clay. -
Smooth the edges:
Before moving on, gently run your finger along the inner and outer raw edges of your ring to bevel them slightly. This ensures no harsh lines show through later. -
Prepare leaf clay:
Roll out the remaining sage green clay, but this time go much thinner—aim for cardstock thickness (approx 1-2mm). You want the leaves to look delicate, not chunky. -
Cut the foliage:
Using your small teardrop cutter, punch out approximately 40-50 small leaf shapes. I always cut a few extra just in case some get squashed during handling. -
Create the center vein:
Take a single leaf and lightly press the side of a needle tool or the dull back of your knife down the center. Do not cut all the way through; you just want a subtle indentation for realism. -
Shape the leaves:
Gently pinch the pointed end of each leaf to give it a slight curve and dimension. Repeat the veining and pinching process for all your cutouts.
Leaves Falling Off?
If your unfired clay is too dry, leaves might not stick to the base. Use a tiny dab of liquid clay (like Bake & Bond) as ‘glue’ between the raw clay layers for a permanent hold.
Step 2: Assembling the Wreath
-
Start the bottom layer:
Apply a tiny amount of liquid clay or adhesive to the base ring. Place your first leaf on the ring, angling it slightly outward. -
Establish the pattern:
Place a second leaf next to the first, angling it slightly inward. This alternating ‘V’ pattern creates that luscious, full laurel look. -
Continue layering:
Work your way around the circle, overlapping the bottom of the previous pair with the tips of the new pair to hide the stems. Keep the overlap tight so no base ring shows through. -
Check for gaps:
As you near the end of the circle, lift the tips of your very first leaves to tuck the final stems underneath, creating a seamless, infinite loop. -
Form the berries:
Condition a small amount of white clay. Roll tiny balls between your thumb and forefinger, varying the sizes slightly for a natural look. You’ll need two clusters of about 5-6 berries each. -
Attach the berries:
Choose two spots on the wreath—roughly at the 4 o’clock and 8 o’clock positions—to attach your berry clusters. Press them gently into the leaves so they adhere well. -
Pierce the hanging hole:
Use a straw or a large needle tool to punch a clean hole at the top of the wreath for the ribbon. Ensure it goes through the base layer cleanly between the leaves.
Step 3: Baking & Finishing
-
Bake the project:
Place your wreath on a parchment-lined baking sheet. Bake according to your specific clay manufacturer’s instructions (usually 275°F for 15-30 minutes). -
Cool down:
Allow the ornament to cool completely on the baking sheet. Moving it while warm can cause the thin leaves to crack or warp. -
Seal (Optional):
If you want extra protection or a specific sheen, lightly brush a matte varnish over the cooled piece. Avoid glossy finishes if you want to maintain the modern matte ceramic look. -
Tie the bow:
Cut a length of satin ribbon. Thread it through the hole you created and tie a simple, small bow right at the base of the loop, ensuring the tails hang neatly downwards. -
Create the hanger loop:
Take the two long ends of the ribbon extending from the bow and knot them together near the top to create the hanging loop for the tree branch.
Level Up: Texture
Before cutting your leaves, gently roll a piece of sandpaper or canvas over the green clay slab. This transfers a subtle grainy texture that mimics real stone or unglazed ceramic.
Hang this elegant piece on a sturdy branch where the light can catch the soft curves of the leaves
Personalized Clay Gift Tags
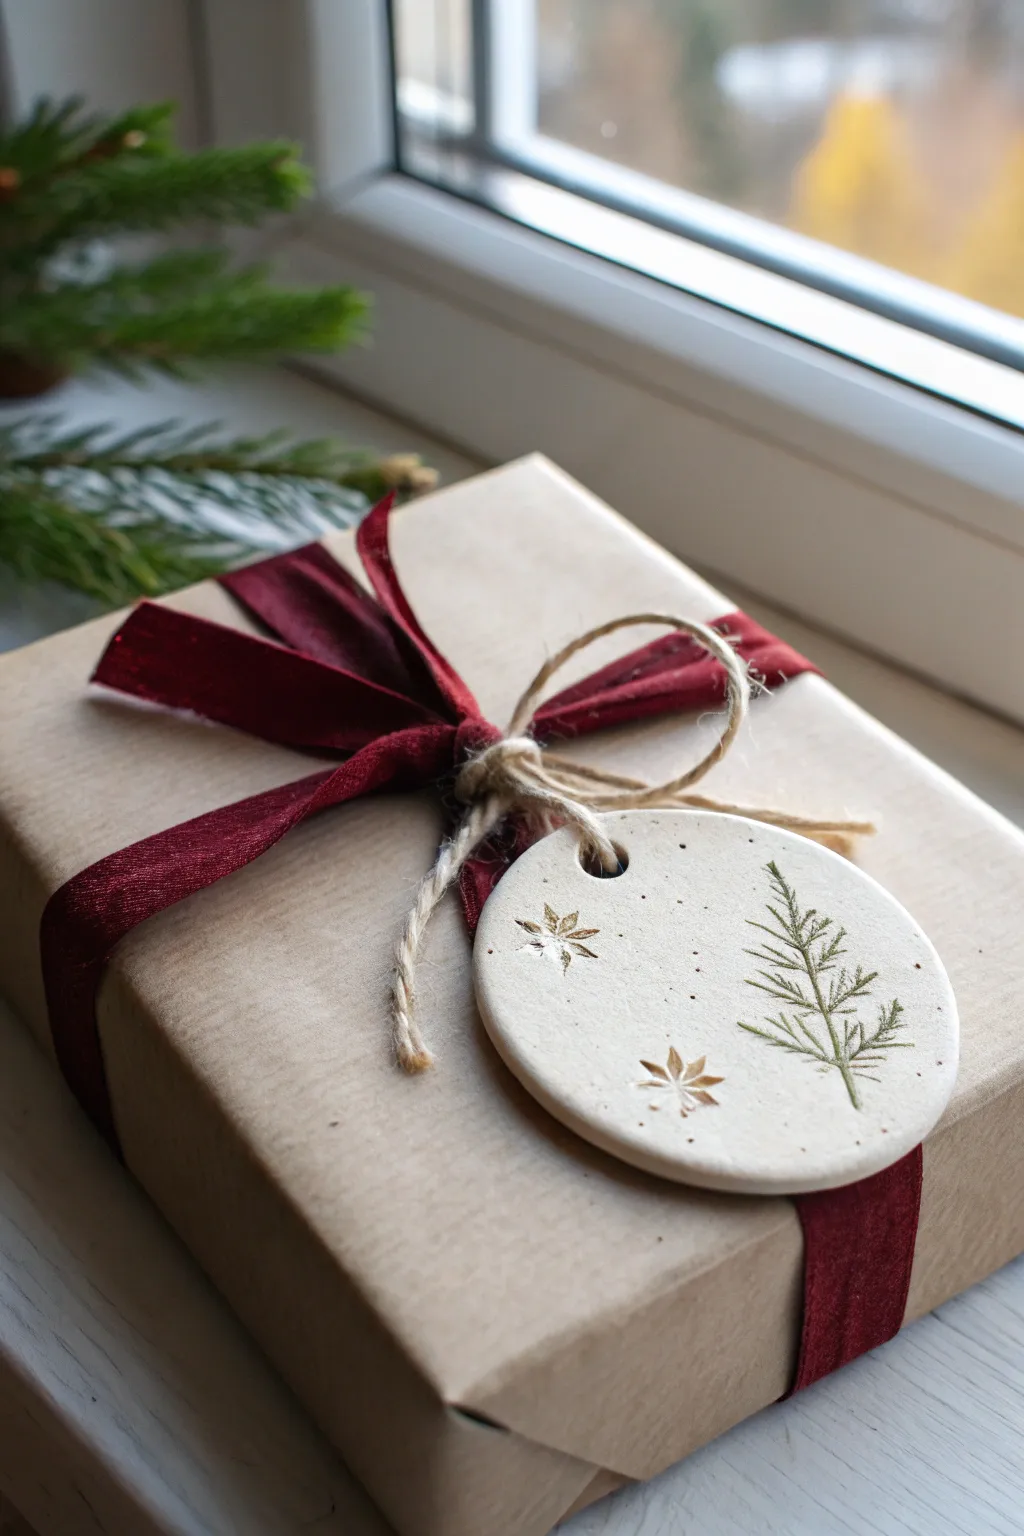
These elegant clay gift tags add a sophisticated, handcrafted touch to your holiday wrapping with their organic textures and subtle botanical imprints. Using simple air-dry clay and stamps, you can create durable, ceramic-like tags that double as keepsake ornaments long after the gift is opened.
Step-by-Step Tutorial
Materials
- White or beige air-dry clay (or polymer clay)
- Rolling pin
- Parchment paper or canvas mat
- Round cookie cutter (approx. 3 inches)
- Botanical fern or pine branch stamp
- Snowflake or starburst mini stamps
- Green and gold pigment ink pads (or acrylic paint)
- Straw or small circular cutter for the hole
- Fine-grit sandpaper
- Twine
- Wide burgundy velvet ribbon
- Brown kraft wrapping paper
Step 1: Preparation & Cutting
-
Prepare your workspace:
Lay down your parchment paper or canvas mat on a flat surface. This prevents the clay from sticking and picking up unwanted textures from your table. -
Condition the clay:
Take a handful of air-dry clay and knead it gently in your hands until it becomes pliable and smooth. If it feels too dry, you can dampen your fingers slightly with water. -
Roll out the slab:
Using your rolling pin, roll the clay out to an even thickness of about 1/4 inch. Try to keep the pressure consistent so one side isn’t thinner than the other. -
Cut the shape:
Press your round cookie cutter firmly into the clay slab. Wiggle it slightly before lifting to ensure a clean cut, then carefully peel away the excess clay from the edges. -
Smooth the edges:
Dip your finger in a tiny bit of water and run it along the cut edge of the circle to smooth out any roughness or sharp ridges left by the cutter.
Stamp Smudging?
If your stamped image looks blurry, your clay might be too wet or sticky. Let the clay slab sit for 10-15 minutes to ‘leather hard’ before pressing the stamp.
Step 2: Stamping Design
-
Ink the botanical stamp:
Check that your stamp is clean. Tap your pine or fern branch stamp onto the green ink pad. Ensure the ink coverage is even but not gloopy. -
Make the main impression:
Position the stamp on the right side of the clay circle. Press down firmly and evenly without rocking the stamp, then lift straight up to leave a crisp green impression. -
Add gold accents:
Take your small snowflake or starburst stamp and ink it with gold or bronze ink. Stamp two or three accents randomly in the open space on the left side of the tag. -
Create the hanging hole:
Use a drinking straw or a small circular fondant cutter to punch a hole near the top edge of the tag. Make sure it’s centered above the design but not too close to the rim to prevent cracking. -
Create speckle texture (Optional):
To mimic the speckled stoneware look in the photo, you can flick a stiff toothbrush dipped in diluted brown paint over the wet clay, or gently press coarse ground pepper into the surface before it dries.
Make it Scented
Add a few drops of cinnamon or pine essential oil into the clay while kneading. The porous material holds scent well, making your gift smell like the holidays.
Step 3: Drying & Finishing
-
Let it dry completely:
Place the tag on a drying rack or a fresh sheet of parchment paper. Air-dry clay usually takes 24-48 hours to cure fully. I recommend flipping it over halfway through so both sides dry evenly. -
Sand imperfections:
Once the tag is bone dry and hard, take fine-grit sandpaper and very gently go over the edges to perfect the round shape. -
Seal the tag:
Apply a thin layer of matte varnish or workable fixative spray to protect the ink and clay from moisture, though this is optional if the tag won’t be handled much. -
Attach the twine:
Cut a 6-inch piece of rustic twine. Fold it in half, push the loop through the tag’s hole, and pull the tails through the loop to create a lark’s head knot. -
Assemble the gift:
Wrap your gift box in brown kraft paper. Wrap the burgundy velvet ribbon around the box and tie a simple knot. -
Final placement:
Slide one end of the velvet ribbon through the twine loop (or tie the twine around the velvet knot) and finish tying your bow so the tag rests beautifully on top.
Your beautifully wrapped gift is now ready to impress with its unique artisanal charm


What Really Happens Inside the Kiln
Learn how time and temperature work together inside the kiln to transform clay into durable ceramic.
Gingerbread House Mini Ornaments
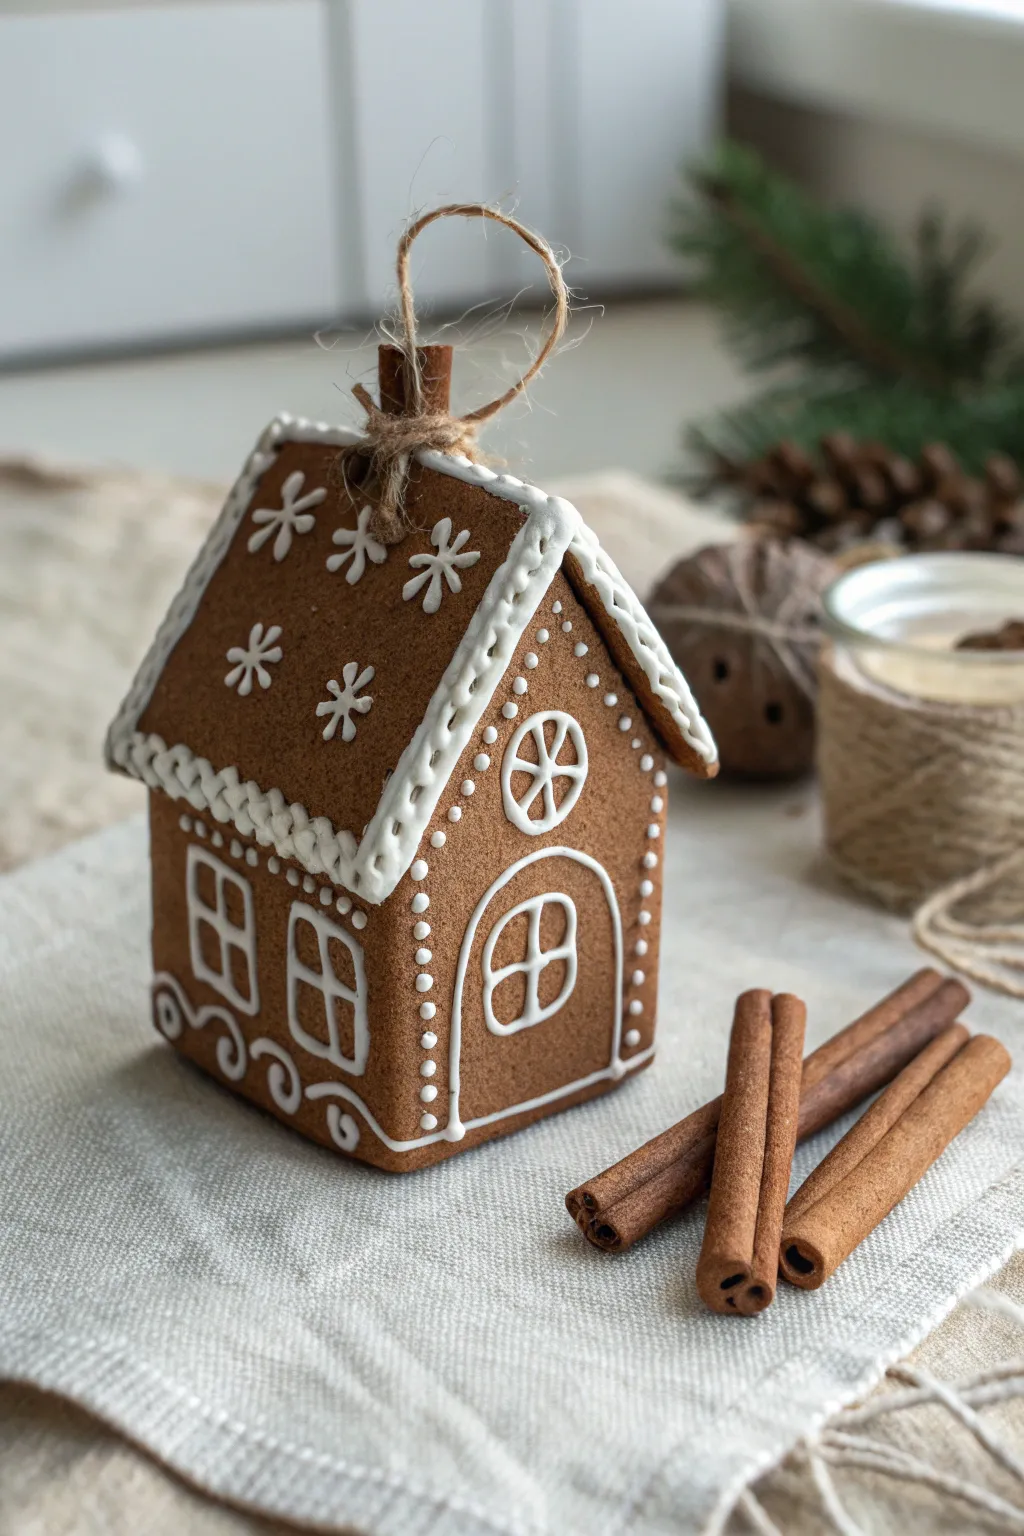
Capture the magic of holiday baking without the crumbs by crafting this adorable miniature gingerbread house ornament. Made from polymer clay textured to look like real spiced dough, it features delicate “royal icing” details that will last for years to come.
Step-by-Step Guide
Materials
- Polymer clay (terracotta or gingerbread color)
- Liquid polymer clay (white)
- White acrylic paint (optional, merely for mixing)
- Clay rolling pin
- Sharp craft knife or clay blade
- House template (cardstock)
- Needle tool or toothpick
- Clean toothbrush or aluminum foil ball
- Jute twine or thin cord
- Cinnamon stick (small piece)
- Baking tile or parchment paper
- Oven
Step 1: Creating the Dough
-
Prepare the Clay:
Condition your terracotta-colored polymer clay until it is soft and pliable. If you don’t have a pre-mixed gingerbread color, mix brown, translucent, and a tiny touch of red clay together. -
Roll the Sheets:
Roll the clay out onto your work surface to an even thickness of about 1/4 inch (6mm). You want the walls to be sturdy enough to hold their shape. -
Texture the Surface:
Before cutting, gently press a clean toothbrush or a crumpled ball of aluminum foil over the entire surface of the clay. This creates that realistic, baked cookie texture.
Sticky Situation?
If your liquid clay text is too runny and spreading, mix in a tiny amount of cornstarch to thicken it instantly. This gives you crisp, frosting-like lines.
Step 2: Constructing the House
-
Cut the Pieces:
Using a simple paper template you’ve sketched beforehand, use your craft knife to cut out two pentagon shapes (front and back walls), two rectangles (side walls), and two slightly larger rectangles (roof panels). -
Texture the Edges:
Don’t forget the cut sides! Lightly tap your texturing tool along the cut edges of every piece so they look like baked dough rather than sliced plastic. -
Partial Bake (Optional):
I like to bake the flat wall pieces for about 10 minutes first. This hardens them just enough to make assembly easier without them sagging, though you can assemble them raw if you are careful. -
Assemble Walls:
Apply a thin line of liquid clay (acting as glue) to the vertical edges of your side walls. Press them against the front and back panels to form a box. Smooth the seams on the inside with an extra bit of clay for stability. -
Add the Roof:
Apply liquid clay to the top peaks of your house walls. Place the two roof panels on top, ensuring they meet at the peak and overhang slightly on the sides. -
Insert Chimney Attachment:
While the clay is still uncured (or by drilling later), create a hole at the roof peak. Insert a small piece of a real cinnamon stick or a clay cylinder to act as a chimney, which will also hold the twine later. -
Final Cure:
Bake the assembled house according to your clay package instructions (usually 275°F/135°C for 15-30 minutes). Let it cool completely.
Step 3: Decorating with “Icing”
-
Prepare the Icing:
Use thick white liquid polymer clay. If it’s too runny, let it sit open for a while or mix in a tiny bit of white raw clay to thicken it into a paste that holds its shape. -
Pipe the Roof Details:
Transfer your liquid clay to a small squeeze bottle with a fine tip. Carefully pipe a zigzag line along the very edge of the roof to mimic piped buttercream. -
Enhance the Roof:
Pipe simple star shapes or snowflakes onto the flat surfaces of the roof panels for a festive touch. -
Outline the Architecture:
Pipe thin, steady lines along the corners of the house walls and under the eaves where the roof meets the walls. -
Create Windows and Door:
On the front panel, pipe an arched outline for the door and divided squares for the windows. Do the same for windows on the side walls. -
Add Decorative Flourishes:
Add small dots or swirls near the bottom of the house walls to mimic fancy piping work. -
Secure the Icing:
Once decorated, bake the house again for roughly 15 minutes to set the liquid clay frosting. Watch closely to ensure the white doesn’t brown. -
Finishing Touches:
Once cool, tie a piece of rustic jute twine around the cinnamon stick chimney for hanging.
Scent-sational
Mix real cinnamon, ginger, and clove spices directly into your raw clay dough. It will smell faintly like real cookies when warmed by holiday lights.
Hang this charming miniature on your tree to add a touch of handmade warmth to your holiday decor
Classic Snowman Figurines in Neutral Tones
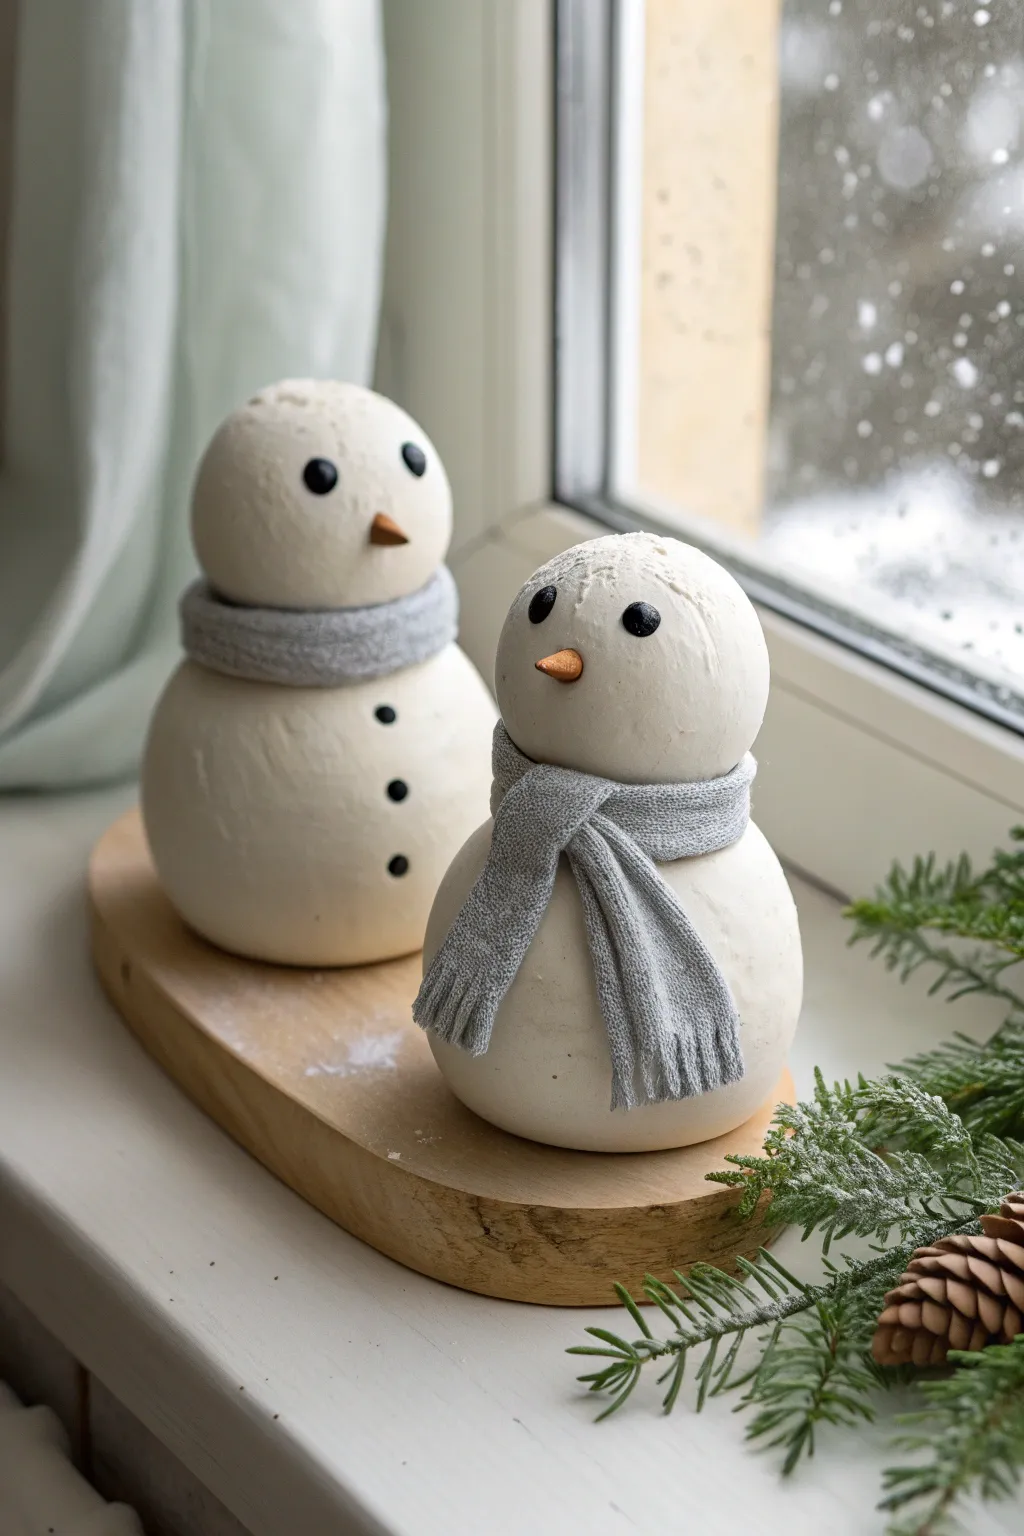
Embrace the Nordic-style charm of winter with these serene and simple snowman figurines. Their matte white finish and textured grey scarves create a cozy, sophisticated look perfect for a modern holiday display.
Step-by-Step
Materials
- Air-dry clay (white)
- Small wooden slice or coaster (for display)
- Sculpting tools (needle tool and ball stylus)
- Acrylic paints (black, orange, light grey)
- Fine grit sandpaper
- Water bonding adhesive (or just water)
- Small rolling pin
- Texture sheet or piece of rough fabric (like linen)
- Fine detail paintbrush
Step 1: Sculpting the Base Forms
-
Condition the clay:
Begin by kneading a good-sized chunk of white air-dry clay until it is warm, pliable, and free of cracks. -
Roll the body segments:
Divide your clay to make four spheres in total: two large ones for the bases and two slightly smaller ones for the heads. Roll them in your palms until perfectly smooth. -
Flatten the bases:
Gently tap the bottom of the larger spheres against your work surface. This creates a flat area so your snowmen won’t roll away. -
Connect the parts:
Score the top of the body sphere and the bottom of the head sphere with a needle tool. Apply a dab of water or slip, then press the head firmly onto the body, twisting slightly to secure the bond.
Keep it Clean
Keep a pack of wet wipes nearby. Clay dust accumulates on your hands and can muddy the white clay. Wipe your hands often to keep the snowmen pristine.
Step 2: Adding Facial Features
-
Inset the eyes:
Using a small ball stylus, press two shallow divots into the face area where the eyes will go. This adds subtle dimension rather than just painting them on the surface. -
Create the eyes:
Roll two distinct tiny balls of clay for the eyes and press them into the sockets you just created. Flatten them slightly so they look like buttons. -
Form the carrot nose:
Roll a small cone shape for the nose. I like to keep the point slightly dull to maintain the soft aesthetic. -
Attach the nose:
Score the center of the face and the back of the nose, use a drop of water, and attach it firmly. Smooth the join line just a little with your thumb. -
Add chest buttons:
For the taller snowman, roll three tiny spheres and press them vertically down the front of the body to mimic coat buttons.
Step 3: Crafting the Scarves
-
Roll a clay strip:
Roll out a fresh piece of clay into a thin, long rectangle, about 3-4mm thick. -
Add fabric texture:
Press a piece of rough fabric, linen, or a texture sheet firmly onto the clay strip to imprint a realistic woven pattern. -
Cut the scarf shape:
Use a craft knife to cut a clean, straight strip from the textured clay. Ensure the width matches the scale of your snowmen’s necks. -
Draping the scarf:
Wrap the strip around the neck of the snowman. For the shorter one, cross one end over the other in the front to simulate a loose knot. -
Create fringe details:
Use your needle tool to cut small vertical slits at the very ends of the scarf to mimic fringe tassels. -
Dry completely:
Allow the figurines to dry in a cool, dry place for at least 24-48 hours. Turn them occasionally to ensure the bottoms dry evenly.
Winter Sparkle
Before the paint is fully dry on the scarf, sprinkle ultra-fine iridescent glitter over it to mimic fresh snowfall on wool.
Step 4: Finishing Touches
-
Sand imperfections:
Once bone dry, lightly sand any fingerprints or rough spots on the white body areas with fine-grit sandpaper. -
Paint the details:
Using a fine detail brush, paint the eyes and buttons matte black. Carefully paint the nose a muted orange. -
Color the scarf:
Water down grey acrylic paint slightly (making a wash) and paint the scarf. The wash will settle into the texture lines, highlighting the ‘fabric’ look. -
Final assembly:
Place your finished figurines onto the wooden slice for a complete, rustic presentation.
Place these charming little characters on a windowsill to watch the snow fall outside

TRACK YOUR CERAMIC JOURNEY
Capture glaze tests, firing details, and creative progress—all in one simple printable. Make your projects easier to repeat and improve.
Simple Nativity Silhouette Ornaments
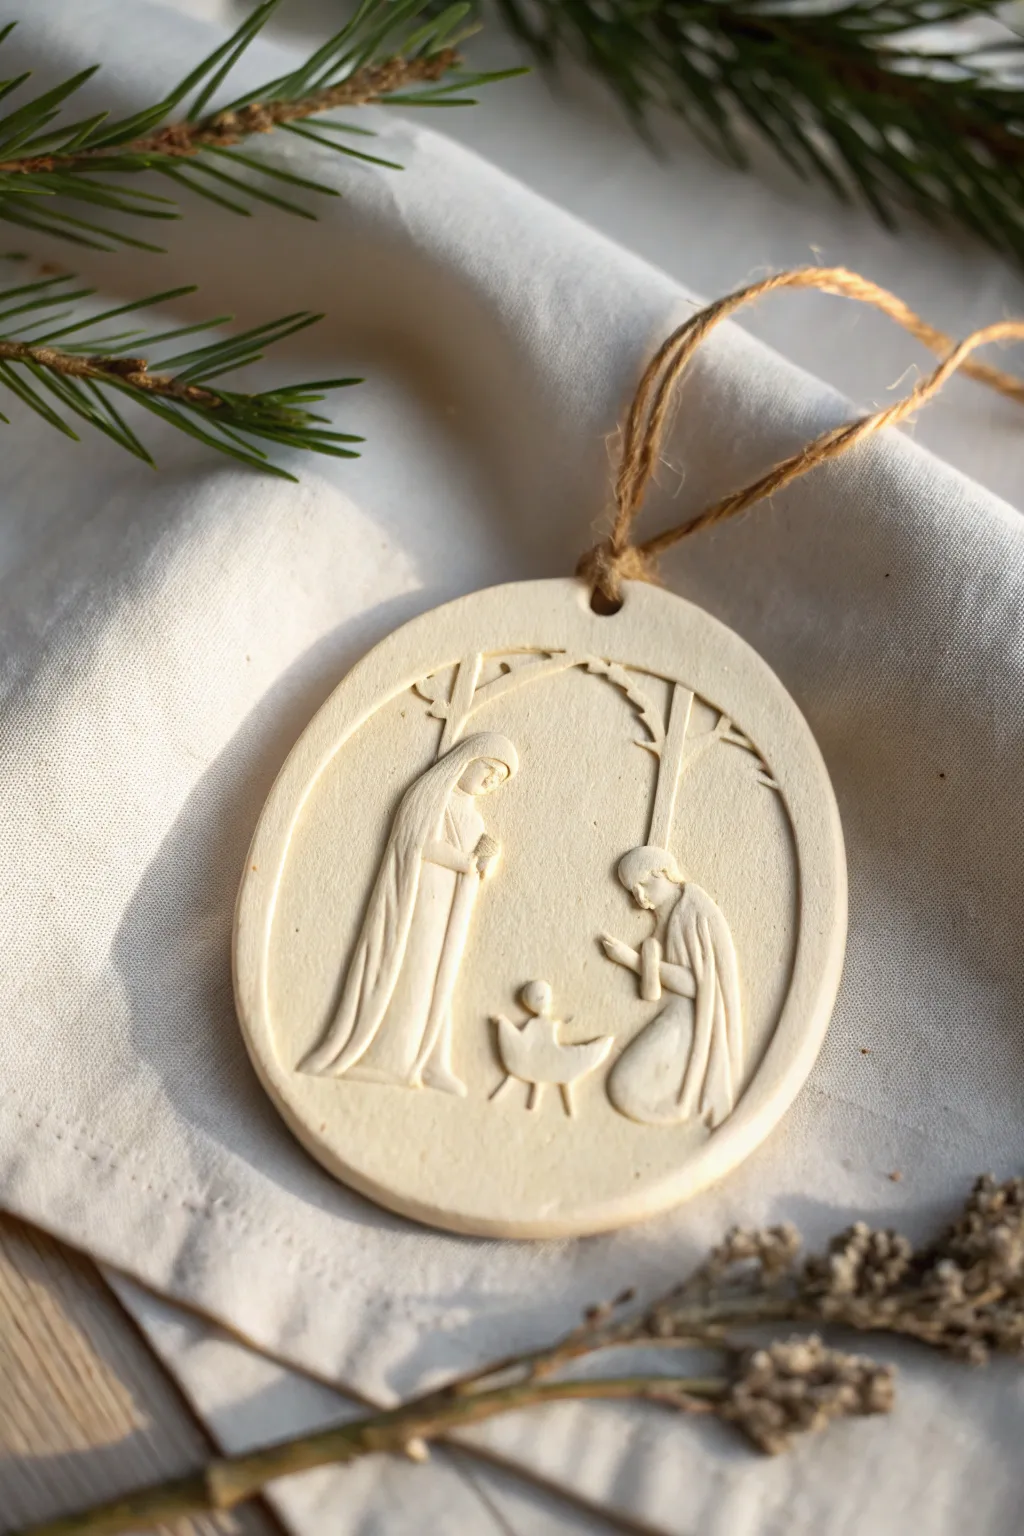
Capture the essence of the Christmas story with this serene, minimalist clay ornament. By layering simple cutouts and creating gentle relief details, you can craft a sophisticated piece that looks like classic stoneware.
Detailed Instructions
Materials
- White polymer clay or air-dry ceramic clay
- Rolling pin
- Oval cookie cutter (approx. 3-4 inches tall)
- X-acto knife or fine clay scalpel
- Needle tool or toothpick
- Ball stylus tool (small)
- Small straw or punch (for the hanging hole)
- Smooth work surface (ceramic tile or silicone mat)
- Jute twine
- Fine grit sandpaper (optional)
Step 1: Preparing the Base
-
Condition the clay:
Start by warming a chunk of white clay in your hands, kneading it until it is soft, pliable, and free of cracks. -
Roll the slab:
Roll the clay out onto your work surface to an even thickness of about 1/4 inch. It needs to be thick enough to support the relief work without warping. -
Cut the shape:
Press your oval cookie cutter firmly into the clay slab. Remove the excess clay from around the edges before lifting the cutter to keep the shape perfectly symmetrical. -
Smooth the edges:
Dip your finger in a tiny bit of water (or baby oil if using polymer) and run it gently around the cut rim to soften any sharp angles left by the cutter. -
Create the hanger:
Use a small straw or a punch tool to create a clean hole at the very top center of the oval. Make sure it’s not too close to the edge, or the clay might snap later.
Clean Cuts Pro Tip
Keep your tools clean! Wipe your knife or needle tool with a damp paper towel between cuts. Clay buildup on the blade causes dragging and ragged edges on your tiny figures.
Step 2: Sculpting the Figures
-
Draft the outline:
Using a needle tool, very lightly sketch the placement of Mary, Joseph, and the manger onto the clay surface. This faint guide will help you keep the proportions correct as you add clay. -
Form Mary’s silhouette:
Roll a very thin, small sheet of clay. Cut a draped, elongated triangle shape for Mary’s robe and a smaller oval for her head. Generally, I like to assemble the figure on the table first before transferring it to the ornament. -
Attach and blend:
Place the Mary figure onto the left side of your oval. Use a modeling tool to gently press the edges of her robe down, blending the bottom hem into the background so it looks like a relief carving rather than a sticker. -
Create the manger:
Form a tiny crescent or U-shape for the cradle and place it in the lower center. Add a tiny ball of clay for the baby’s head and a small oval for the swaddled body. -
Form Joseph’s silhouette:
Similar to Mary, cut a kneeling shape for Joseph. Place him on the right side, facing the center. Position his arms so they appear bent in prayer. -
Add dimension:
Use your needle tool to gently carve fold lines into the robes of both figures. These vertical indentations create the illusion of flowing fabric.
Step 3: Refining Details and Finishing
-
Sculpt the archway:
Roll extremely thin ‘snakes’ of clay to act as the stylized trees or stable arch. Press these gently into the background clay, framing the family figures. -
Detail the faces:
Keep facial features abstract. Simply ensure the heads are tilted downward towards the manger to convey reverence. -
Clean up texture:
Check the background space for fingerprints. Use a slightly damp brush to smooth out the negative space around the figures, ensuring the focus remains on the family. -
Dry or bake:
If using polymer clay, bake according to the package instructions (usually 275°F for 15-30 minutes). If using air-dry clay, allow it to dry flat for 24-48 hours, flipping halfway through to prevent curling. -
Sand edges:
Once fully cured and cooled, use fine-grit sandpaper to buff the outer rim of the oval for a professional, stone-like finish. -
Add the hanger:
Cut a length of jute twine, thread it through the top hole, and secure it with a simple loop knot. The rustic twine provides a lovely contrast to the smooth white clay.
Level Up: Vintage Wash
Mix burnt umber acrylic paint with water (1:10 ratio). Brush over the baked ornament and wipe off immediately. The dark pigment stays in the crevices, highlighting the relief details.
Hang this peaceful scene on your tree or wrap it as a heartfelt handmade gift for a loved one
Tea Light Holders With Star Cutouts
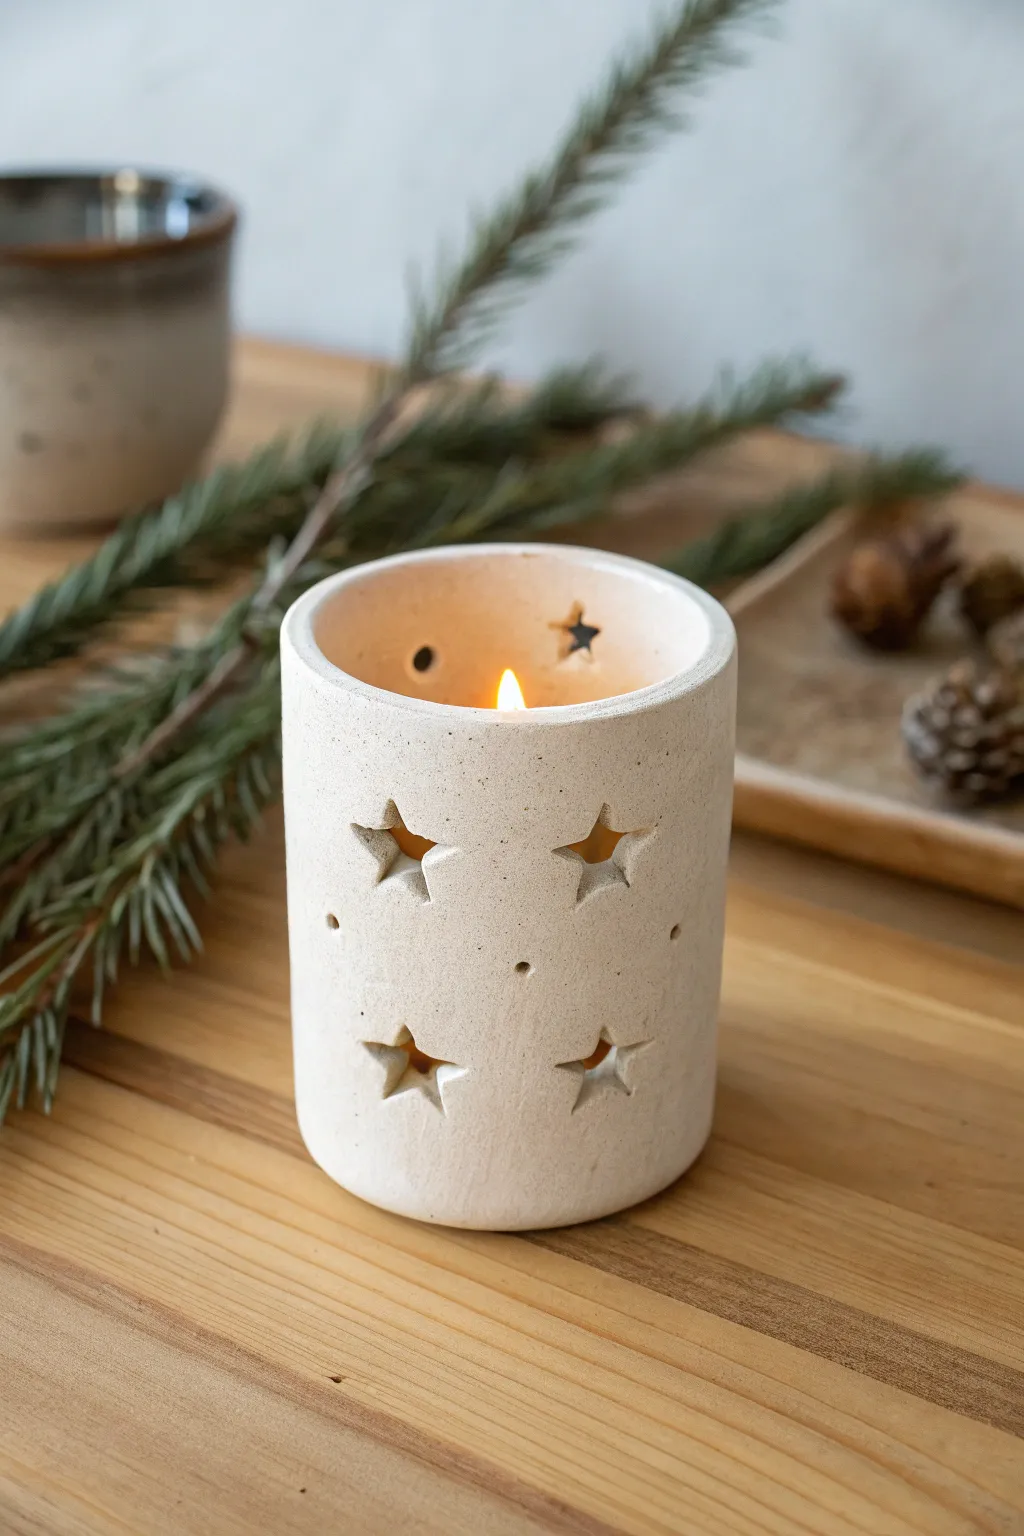
These charming cylindrical tea light holders bring a cozy, star-filled glow to your holiday decor. Crafted from speckled clay with precision cutouts, they cast magical shadows that dance on your walls when a candle is lit inside.
Step-by-Step
Materials
- Speckled stoneware clay (white or cream)
- Rolling pin
- Canvas mat or slab roller
- Cylindrical form (e.g., PVC pipe or rolling pin) approx. 3-4 inches diameter
- Small star-shaped cookie cutters (approx. 0.75-1 inch)
- Needle tool or fettling knife
- Serrated rib tool or fork
- Slip (clay mixed with water)
- Smoothing sponge
- Small straw or drill bit (for circular holes)
- Clear matte glaze (optional)
Step 1: Preparing the Slab
-
Roll the clay:
Begin by wedging your speckled clay to remove air bubbles, then roll it out into a consistent slab. Aim for a thickness of about 1/4 inch; if it’s too thin, the walls won’t support themselves. -
Smooth the surface:
Use a damp sponge or a soft rib to gently compress the clay on both sides. This removes the canvas texture and aligns the clay particles to prevent warping later. -
Measure the circumference:
Take your cylindrical form and wrap a piece of paper around it to determine the length needed. Add about half an inch to this measurement for the overlap seam. -
Cut the rectangle:
Using your paper template and a needle tool, cut a clean rectangle from your clay slab. Keep the edges as straight as possible.
Step 2: Forming the Cylinder
-
Bevel the edges:
Cut a 45-degree bevel on the two short ends of your rectangle. Bevel one side facing up and the opposite side facing down so they will overlap flush. -
Score and slip:
Rough up the beveled edges with your serrated rib tool and apply a generous amount of slip. This ‘glue’ is crucial for a strong seam. -
Join the seam:
Wrap the clay carefully around your cylindrical form. Bring the scored edges together and press firmly to bond them. -
Smooth the connection:
While the clay is still on the form, use a modeling tool or your thumb to blend the seam until it disappears completely, both inside and out. -
Remove the form:
I prefer to let the clay stiffen for just a few minutes on the form, then gently slide the form out before the clay shrinks and gets stuck. -
Add a base:
Roll a small piece of slab for the bottom. Place your cylinder on top, trace around it, score and slip the contact points, and attach the base.
Clean Cuts Hack
Cover the clay area with a thin piece of plastic wrap before pressing your cutter down. This softens the edges immediately and prevents sticky, ragged clay burrs.
Step 3: Adding the Stars
-
Wait for leather-hard:
This is the most critical step for clean cuts. Let the cylinder dry until it is ‘leather-hard’—firm enough to handle without deforming, but soft enough to cut. -
Plan your pattern:
Lightly mark where you want your stars to go. A staggered pattern usually looks best, leaving at least an inch of clay between cutouts for structural integrity. -
Cut the stars:
Press your small star cutter gently into the wall of the cylinder. Support the wall from the inside with your other hand to prevent it from collapsing. -
Remove the cutouts:
Carefully push the star shapes out. If the cutter doesn’t go all the way through, finish the cut with a fine scalpel or needle tool. -
Add accent holes:
Using a small straw or a hole punch tool, create tiny circular holes between the stars to add extra ventilation and visual interest. -
Clean the edges:
Once the clay is bone dry, take a slightly damp sponge or a sanding pad to gently smooth the sharp edges of your star cutouts.
Customize the Glow
Try geometric shapes like triangles or diamonds instead of stars, or vary the size of the holes to create a ‘constellation’ effect on your wall.
Step 4: Firing
-
Bisque fire:
Fire the piece to cone 04 (or your clay’s specific bisque temperature). -
Glazing:
To maintain the natural, rustic look shown in the image, apply a clear matte glaze, or leave the exterior raw and only glaze the interior for safety. -
Final fire:
Fire the piece again to the maturity temperature of your clay body (likely cone 5 or 6 for stoneware).
Place a tea light inside and watch your beautiful handcrafted galaxy come to life
Evergreen-Stamped Napkin Rings
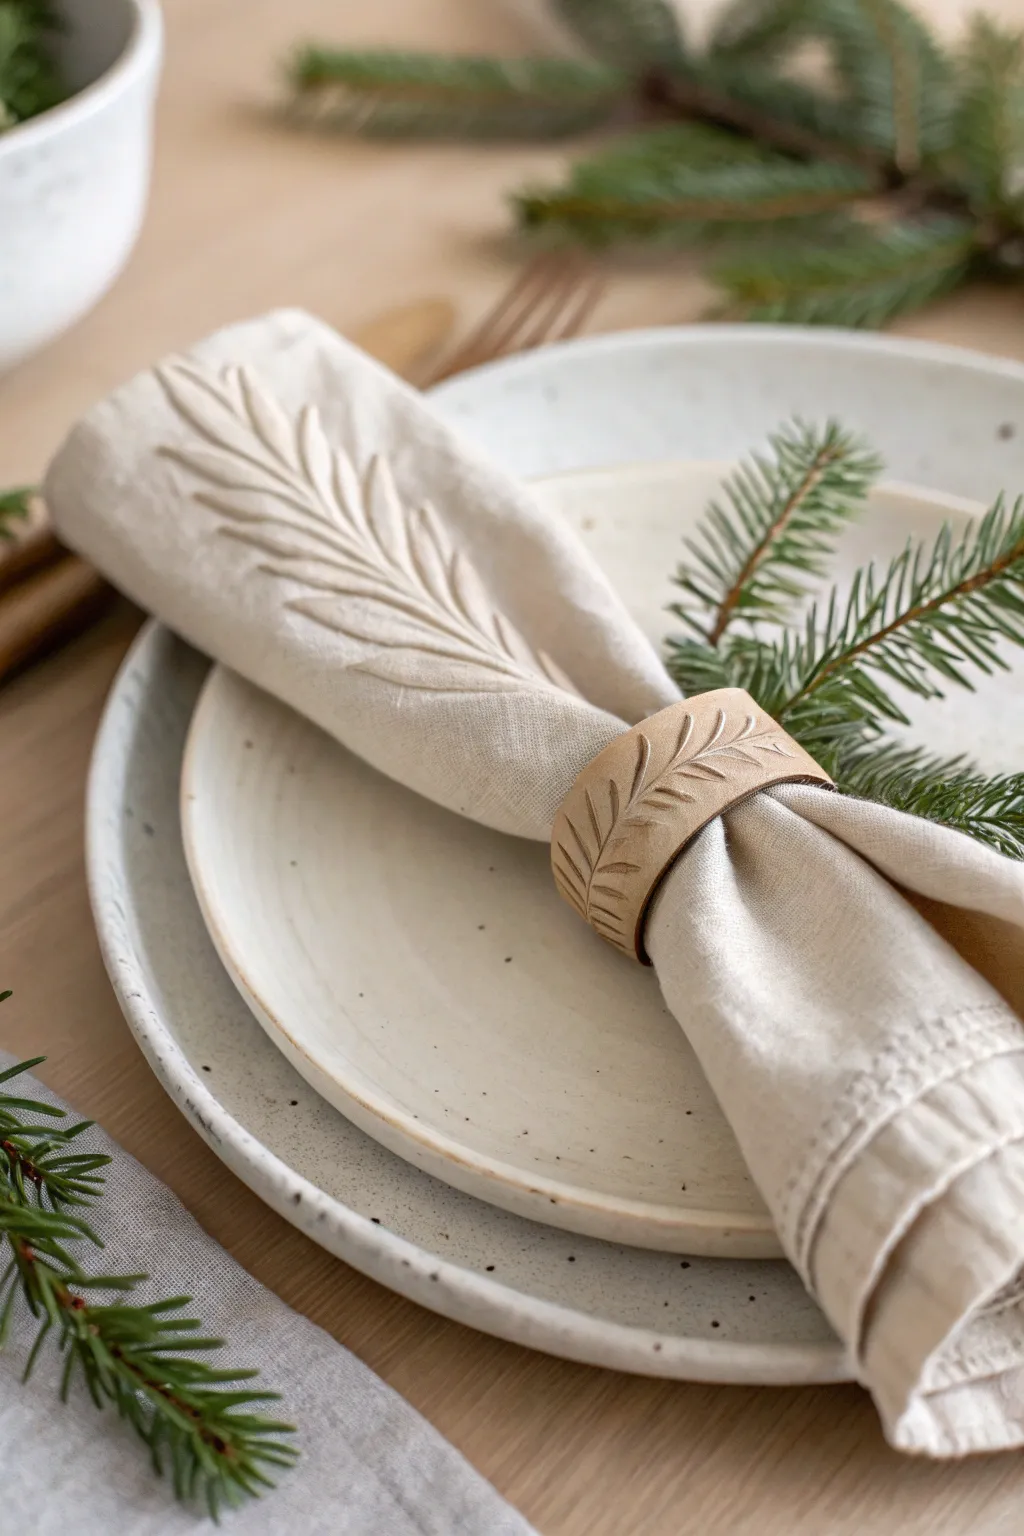
Bring a touch of the winter forest to your holiday table with these sophisticated clay napkin rings. Featuring a delicate, realistic evergreen textural stamp, they add a handcrafted, organic warmth to any place setting.
Step-by-Step Tutorial
Materials
- Air-dry clay (white or light beige stone color)
- Small rolling pin
- Fresh evergreen sprig (fir or spruce works best)
- Craft knife or scalpel
- Ruler
- Empty toilet paper roll or small cardboard tube
- Parchment paper
- Fine-grit sandpaper (optional)
- Matte sealant or varnish (optional)
Step 1: Preparation & Rolling
-
Prepare your workspace:
Lay down a sheet of parchment paper to protect your table and prevent the clay from sticking. This also makes it easier to lift your delicate strips later. -
Condition the clay:
Take a ball of air-dry clay roughly the size of a clementine. Knead it in your hands until it feels soft, warm, and pliable, removing any air bubbles. -
Roll out the slab:
Using your rolling pin, flatten the clay into a long, even strip. Aim for a thickness of about 1/8 to 1/4 inch—thick enough to hold the impression but thin enough to look elegant.
Step 2: Stamping & Cutting
-
Position the evergreen:
Select a small sprig of fresh evergreen. I find that stiffer needles, like blue spruce or fir, create a cleaner impression than softer pine. Place it lengthwise along the center of your clay strip. -
Create the impression:
Gently roll over the sprig with your rolling pin. Press firmly enough to embed the needles into the clay surface, but be careful not to roll it completely through the slab. -
Reveal the design:
Carefully lift the evergreen sprig away from the clay. Use the tip of your craft knife or tweezers to pick out any tiny needles that might have detached. -
Measure the strip:
Using a ruler, mark out a rectangle around your stamped design. A standard size is approximately 1.5 inches wide by 6 inches long. -
Cut the shape:
Use your craft knife and the ruler as a straight edge to slice clean, straight lines along your markings. Remove the excess clay.
Clean Impressions
If the clay is too sticky, dust the evergreen sprig very lightly with cornstarch before pressing it down. This prevents the needles from pulling up the clay.
Step 3: Forming & drying
-
Shape the ring:
Lift the clay strip carefully. Wrap it around the empty toilet paper roll or cardboard tube to create a perfect circle. -
Join the ends:
Where the two ends of the clay strip meet, press them together. You can score the overlapping edges slightly and use a drop of water as ‘glue’ to ensure a strong bond. -
Smooth the seam:
Use your finger and a tiny bit of water to smooth the seam on the inside and outside, blending the clay so the join is nearly invisible. -
Initial drying phase:
Let the napkin ring sit on the cardboard tube for at least 3-4 hours. This ensures it holds its round shape while the clay begins to set. -
Remove support:
Gently slide the napkin ring off the cardboard tube. Be very gentle as the clay may still be slightly pliable. -
Complete drying:
Place the ring on its side on a drying rack or parchment paper. Allow it to dry completely for 24-48 hours, turning it occasionally for even airflow.
Color Wash
Mix a tiny drop of brown or green acrylic paint with water to create a wash. Brush it into the grooves and wipe the surface clean to highlight the texture.
Step 4: Finishing Touches
-
Check edges:
Once fully bone-dry, check the edges for any sharpness. You can lightly sand the rims with fine-grit sandpaper for a professional finish. -
Seal (optional):
To protect against food stains or oil, apply a thin coat of matte varnish. This keeps the natural look while adding durability.
Set your table with these beautiful handmade pieces and enjoy the natural charm they bring to your gathering
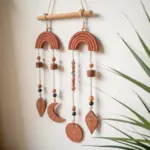
Clay Bead Garland With Stars and Bells
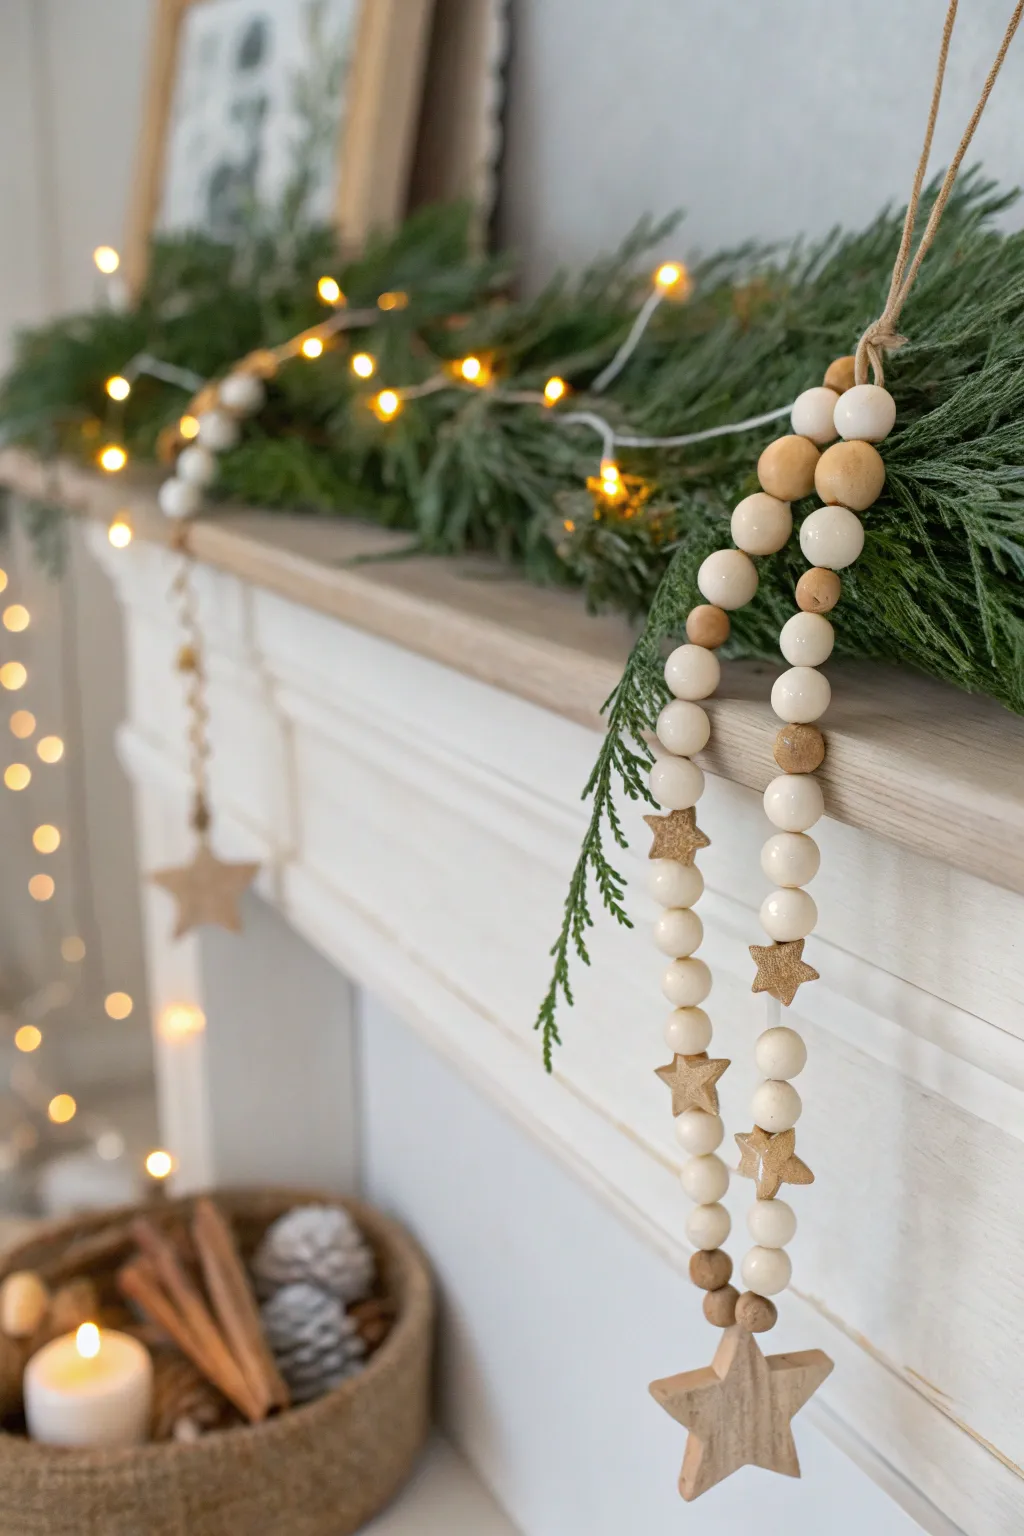
Bring a touch of Scandinavian simplicity to your holiday mantel with this elegant beaded garland. Featuring handmade clay stars and natural wooden beads, this project combines rustic charm with modern minimalism for a cozy, festive accent.
Step-by-Step Tutorial
Materials
- Air-dry clay (white or light terracotta)
- Rolling pin
- Star-shaped cookie cutters (small and medium sizes)
- Sandpaper (fine grit)
- Acrylic paint (white or cream)
- Gold metallic paint (optional)
- Paintbrushes
- Wooden beads (assorted sizes: 12mm, 16mm, 20mm)
- Jute twine or heavy-duty cotton string
- Skewer or toothpick
- Scissors
- Clear matte varnish (optional)
Step 1: Crafting the Clay Stars
-
Condition the Clay:
Begin by taking a chunk of air-dry clay and kneading it in your hands until it becomes soft, pliable, without any cracks. -
Roll It Out:
Roll the clay out on a smooth surface to an even thickness of about 1/4 inch (6mm). If the clay sticks, you can lay down a piece of parchment paper first. -
Cut Your Shapes:
Use your cookie cutters to punch out several star shapes. For the look in the photo, you’ll need a mix of small stars for the strand and a larger star for the bottom pendant. -
Make the Holes:
While the clay is still wet, carefully poke a hole through the center of each small star using a skewer. For the large pendant star, make the hole near the top point so it hangs correctly. -
Smooth the Edges:
Dip your finger in a little water and gently run it along the cut edges of each star to smooth out any roughness. -
Let Them Dry:
Place all the clay stars on a flat surface to dry completely. This usually takes 24-48 hours depending on humidity, and flipping them halfway through helps prevent warping.
Hole Too Small?
If your clay dried and the holes shrank too much to fit the twine, gently twist a small drill bit by hand into the hole to widen it without cracking the star.
Step 2: Finishing and Painting
-
Sand for Smoothness:
Once fully dry, lightly sand the edges and surfaces of your stars with fine-grit sandpaper to ensure a professional finish. -
Paint the Stars:
Paint some of your stars with a creamy white acrylic paint to match the white wooden beads. Leave others raw if you used a colored clay, or paint them a light beige. -
Add Metallic Accents:
For a bit of sparkle, paint a few of the smaller stars with gold metallic paint. This adds a lovely contrast against the natural wood tones. -
Seal (Optional):
If you want extra durability, apply a coat of clear matte varnish to the stars and let them dry completely before stringing.
Texture Play
Before the clay dries, press a piece of lace or a textured fabric into the wet stars. This stamps a subtle, intricate pattern into the surface for extra detail.
Step 3: Assembling the Garland
-
Prepare the String:
Cut a long length of jute twine or heavy cotton string. It’s better to cut more than you think you need; you can always trim it later. -
Tie the Pendant:
Thread your large pendant star onto the bottom of the string. Secure it with a sturdy double knot so it won’t slip off. -
Start Beading:
Begin threading your beads. I like to alternate between white painted beads and natural wood beads to create a rhythmic pattern. -
Add the Stars:
Every 8 to 10 beads, thread one of your small clay stars onto the garland. This creates visual breaks and adds texture. -
Vary Bead Sizes:
Don’t be afraid to mix different bead sizes randomly; having a larger bead next to a smaller one adds organic charm. -
Create a Loop:
Once you reach your desired length, tie a secure loop at the top end of the twine for hanging. -
Secure Knots:
For extra security, you can add a tiny dab of glue to the final knot to ensure it never comes undone. -
Hang and Style:
Drape your finished garland over your mantelpiece, weaving it through greenery or fairy lights for the full festive effect.
Enjoy the calm, natural beauty this handmade garland brings to your holiday decor
Scented Clay Diffuser Ornaments
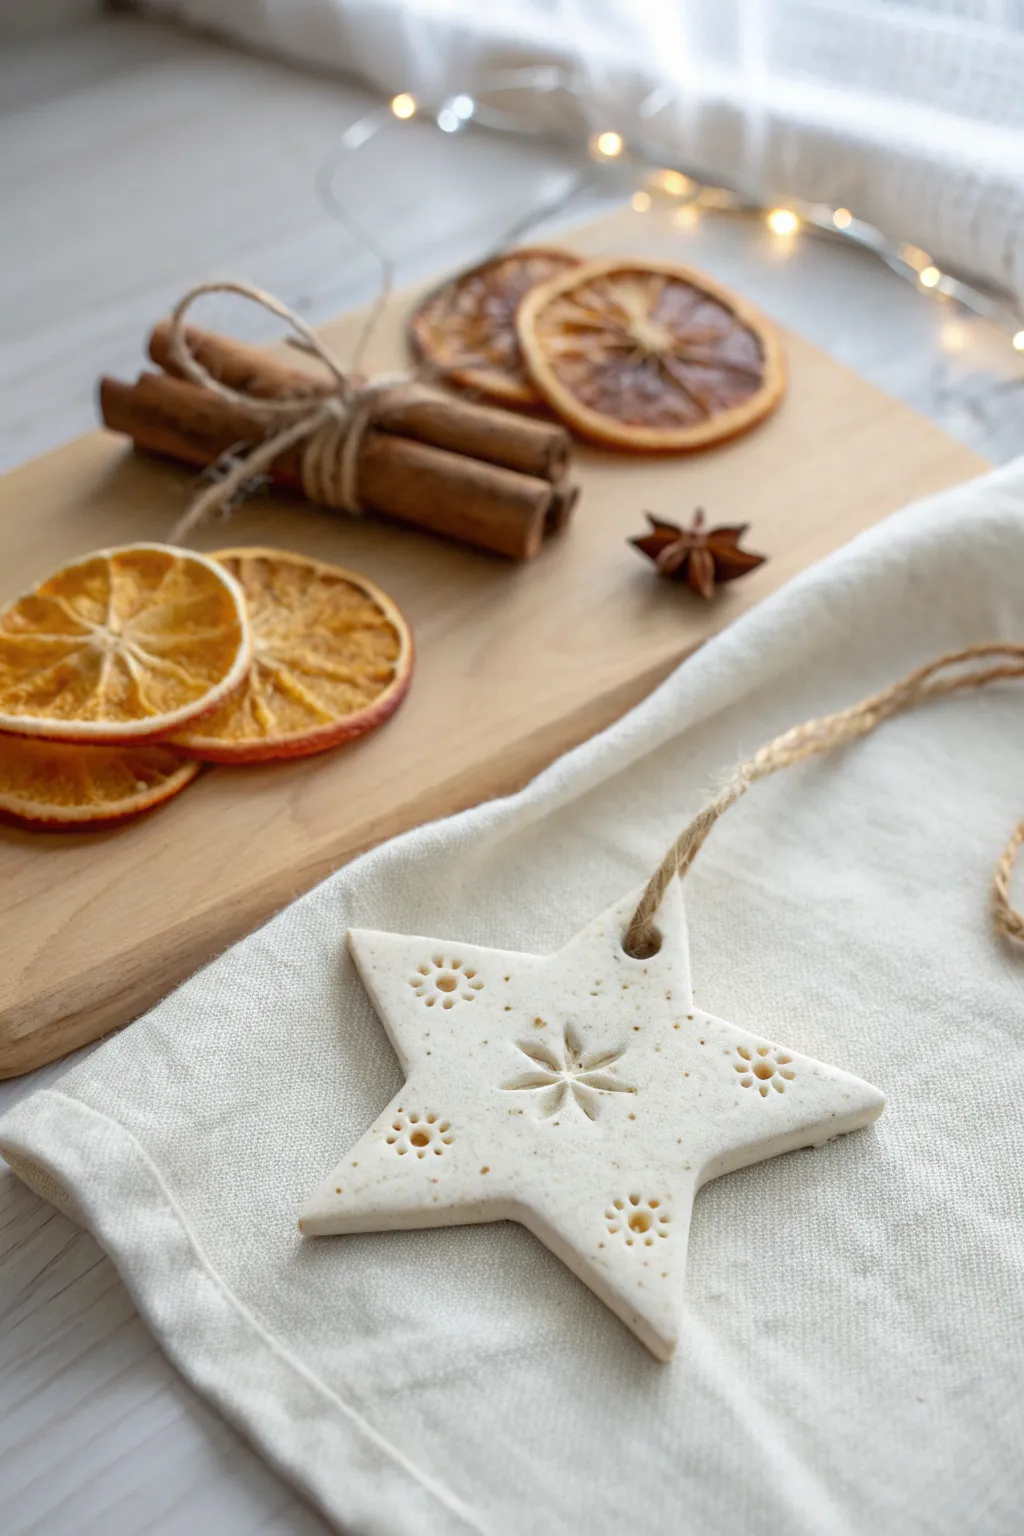
These elegant star-shaped diffusers bring the warmth of holiday baking into your décor without the calories. Speckled with real spices and stamped with delicate floral patterns, they not only look charming but act as passive diffusers for your favorite essential oils.
Step-by-Step Tutorial
Materials
- Air-dry clay (white)
- Small rolling pin
- Baking parchment or wax paper
- Star-shaped cookie cutter
- Ground cinnamon and cloves
- Small bowl for mixing
- Various stamps or textural tools (e.g., marker caps, patterned buttons)
- Drinking straw or skewer
- Fine-grit sandpaper (optional)
- Jute twine
- Essential oils (like cinnamon, orange, or clove)
Step 1: Prepping and Shaping the Clay
-
Prepare the workspace:
Begin by laying down a sheet of baking parchment or wax paper on a flat surface. This prevents sticking and makes cleanup much easier. -
Mix in the spices:
Take a handful of white air-dry clay and knead it until soft. Create a small well in the center and sprinkle in a pinch of ground cinnamon and cloves. I like to fold the clay over and knead repeatedly until the spices are evenly distributed, creating a beautiful speckled effect. -
Roll out the slab:
Place your spiced clay ball on the parchment paper. Using a small rolling pin, roll the clay out evenly until it is about 1/4 inch thick. Try to keep the thickness consistent so it dries without warping. -
Check surface texture:
Run your finger lightly over the surface to smooth out any cracks or rolling marks before cutting. -
Cut the star shape:
Press your star-shaped cookie cutter firmly into the clay. Give it a tiny wiggle to ensure it cuts all the way through, then lift it straight up. -
Clean up edges:
Gently peel away the excess clay around the star. If the edges of your star look slightly ragged, dip your finger in a little water and smooth them down gently.
Warping Woes?
If your stars curl up while drying, weigh them down gently with a heavy book (place parchment in between!) once they are leather-hard but not fully rigid.
Step 2: Adding Details and Finishing
-
Stamp the center design:
Find a tool with a starburst or floral pattern—this could be a specialized clay stamp or even the textured end of a vintage button. Press it firmly into the exact center of the star to leave a deep, clear impression. -
Create the point details:
For the designs on the star’s points, use a smaller tool. A hollow tube, like a small straw or the cap of a fine-liner pen, works perfectly to create small circular indents. Press five or six tiny circles in a cluster to mimic a flower shape near each point. -
Make the hanging hole:
Use a drinking straw or a skewer to punch a hole near the top point of the star. Make sure the hole is not too close to the edge to prevent the clay from cracking later. -
Let it dry completely:
Leave the ornament on the parchment paper to air dry. This typically takes 24-48 hours depending on humidity. Flip the star over halfway through the drying process to ensure the back dries evenly. -
Sand for smoothness:
Once fully hardened, inspect the edges. If there are any sharp bits or roughness, very lightly sand them with fine-grit sandpaper. -
Add the twine:
Cut a length of jute twine, about 8 inches long. Thread one end through the hole you created. -
Secure the hanger:
Bring the two ends of the twine together and tie a simple overhand knot. You can tie it close to the clay for a loop, or tie just the ends together for a longer hanging drop. -
Infuse with scent:
To activate the diffuser, place the finished ornament on a protected surface. Add 2-3 drops of your chosen essential oil directly onto the unglazed clay surface (the back is a good spot if you want to keep the front pristine). -
Let the oil absorb:
Allow the oil to soak into the porous clay for a few minutes before hanging the ornament on your tree or around the house.
Pro Tip: Texture Tools
Raid your kitchen drawer! A meat tenderizer, citrus reamer end, or even cut crystal glass bottoms make incredible, unique stamped patterns on clay.
Now your home will smell as delightful as it looks with these charming clay accents
Layered Shadowbox Ornament Scenes
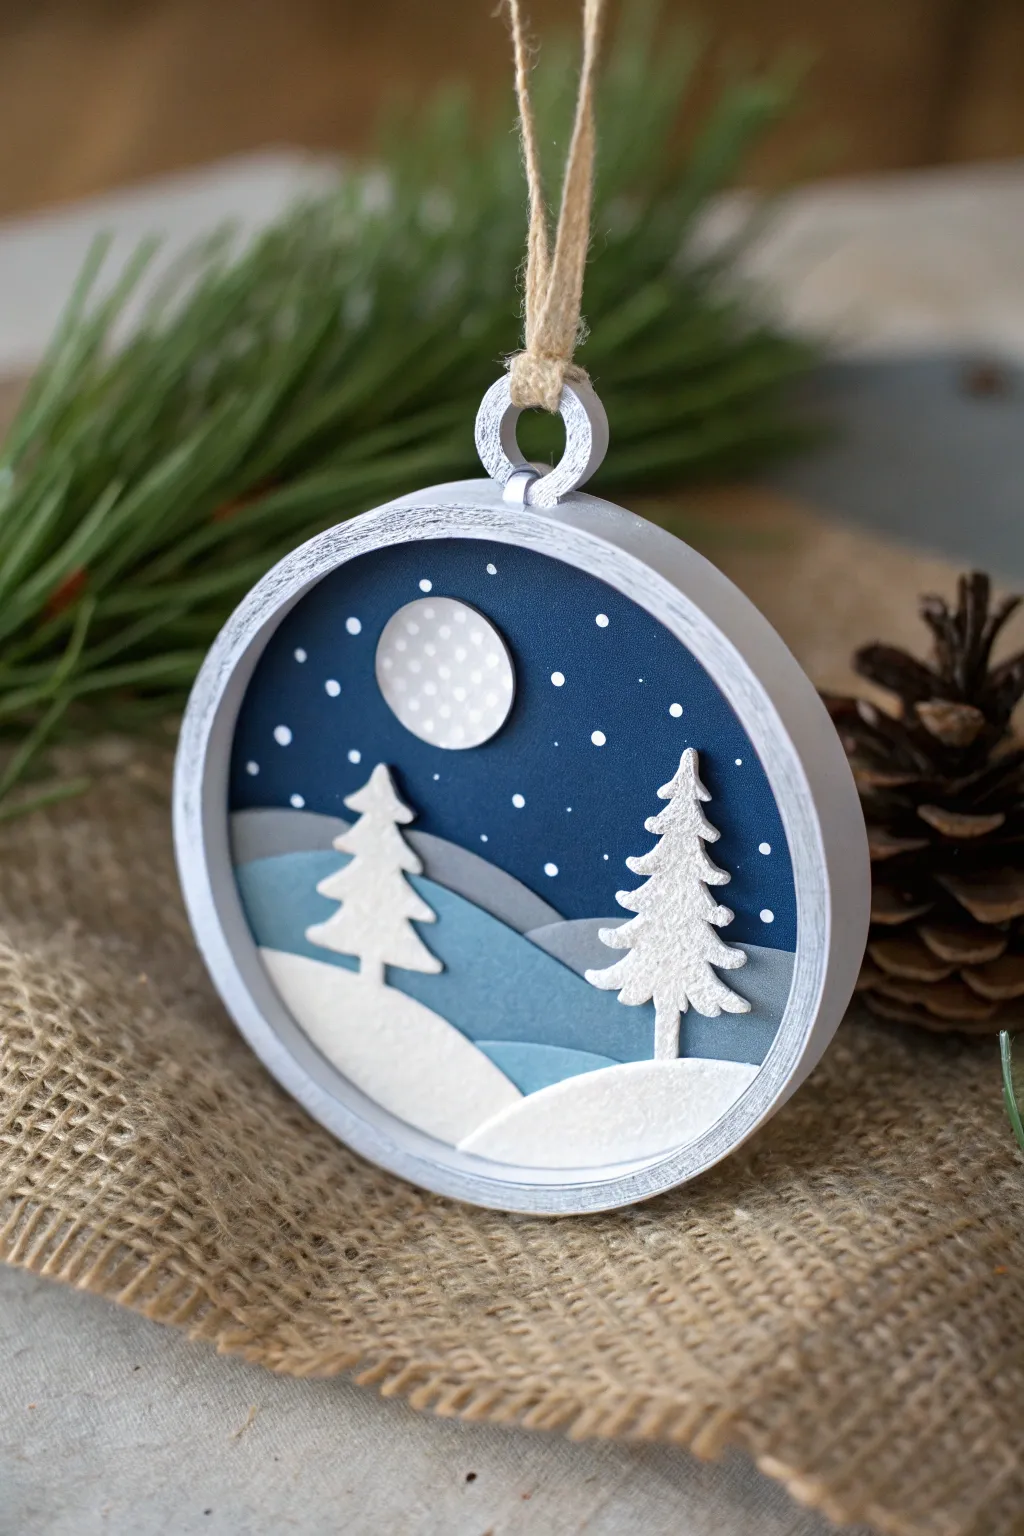
Capture the serene beauty of a silent winter night with this layered polymer clay ornament that mimics the depth of a traditional shadowbox. By stacking thin slabs of clay in cool, wintry tones, you’ll build a charming 3D scene that pops beautifully against the deep blue sky.
How-To Guide
Materials
- Polymer clay (midnight blue, white, slate grey, dusty blue)
- Circle cutters (various sizes)
- Clay roller or pasta machine
- Precision craft knife or scalpel
- Liquid polymer clay (clear or white)
- Needle tool or detailing pin
- Texture sponge or stiff brush
- White acrylic paint
- Old toothbrush
- Jute twine
Step 1: Prepping the Canvas
-
Condition the sky:
Begin by thoroughly conditioning your midnight blue clay until it is soft and pliable. Roll it out into a smooth slab about 3mm thick. -
Cut the base:
Use your main circle cutter (approx. 3-4 inches diameter) to punch out the background disc. This will serve as the base for all other layers. -
Smooth the edges:
Gently run your finger around the cut edge of the blue circle to soften any sharp ridges left by the cutter.
Clean Cut Pro Tip
To get ultra-sharp edges without distortion, chill your rolled clay sheets in the fridge for 10 minutes before cutting. The stiff clay cuts cleanly and won’t drag under the knife.
Step 2: Layering the Landscape
-
Create hill colors:
Roll out the slate grey and dust blue clays into very thin sheets—much thinner than your base, roughly 1mm or a thin setting on your pasta machine to keep the ornament light. -
Cut the back hill:
Use the same large circle cutter on the slate grey sheet, but don’t lift it yet. Use your craft knife to freehand a gentle wavy line across the top third of the circle, creating a hill shape. -
Attach the first layer:
Lift the grey hill piece and gently press it onto the blue background base. Align the bottom curved edges perfectly. I like to add a tiny smear of liquid clay between layers to ensure a strong bond. -
Add the middle hill:
Repeat the cutting process with the dusty blue clay, cutting a slightly lower, rolling hill shape. Layer this on top of the grey hill, offsetting the peak slightly for visual interest. -
Form the foreground:
Finally, roll out a thin sheet of white clay. Cut a hill shape that covers the bottom third of the scene and press it into place as the snowy foreground.
Step 3: Sculpting Details
-
Cut the trees:
From the remaining thin white sheet, use your craft knife to carefully cut out two triangular pine tree shapes with jagged, stylized branches. -
Texture the foliage:
Before attaching them, lightly tap the surface of the trees with a stiff brush or texture sponge to give them a snowy, organic look that isn’t perfectly smooth. -
Place the forest:
Position the trees on the hills, overlapping the layers to enhance the depth effect. Secure them with a dot of liquid clay. -
Make the moon:
Use a small straw or round micro-cutter to punch a tiny circle from white clay. Press a piece of sandpaper or fabric against it gently to create a cratered texture, then adhere it to the upper sky area.
Troubleshooting Bubbles
Trapped air between layers can cause bubbles during baking. To prevent this, gently roll a round toothpick over each new layer as you apply it to push out any hidden air pockets.
Step 4: Framing and Baking
-
Create the heavy frame:
Roll a thicker slab of white clay (approx. 4mm). Use your main large cutter to cut a circle, and then a slightly smaller cutter inside that one to create a ring. -
Attach the frame:
Apply a thin line of liquid clay around the perimeter of your layered scene and press the white ring on top. This hides the layer edges and creates the shadowbox effect. -
Add the loop:
Fashion a small, sturdy loop from white clay. Attach it securely to the very top of the frame, blending the clay seams on the back so it won’t snap off. -
Bake the piece:
Place the ornament on a ceramic tile or baking sheet. Bake according to your clay manufacturer’s instructions (usually 275°F/130°C for 15-30 minutes). -
Cool down:
Allow the ornament to cool completely inside the oven or on a wire rack before handling.
Step 5: Finishing Touches
-
Snow splatter:
Dip an old toothbrush into slightly watered-down white acrylic paint. Run your thumb over the bristles to flick tiny speckles of ‘snow’ across the blue sky area. -
Clean the frame:
Immediately wipe any stray paint speckles off the white outer frame with a damp cloth or cotton swab to keep it crisp. -
Strung up:
Once the paint is dry, thread a length of jute twine through the top loop and knot it securely.
Now you have a peaceful winter scene preserved forever in clay.