Summer is basically the perfect excuse to make jewelry that’s bright, lightweight, and a little bit playful. Here are my favorite clay bead necklace ideas that give instant beach-day energy—especially when you lean into heishi beads and sunny color palettes.
Classic Rainbow Heishi Strand
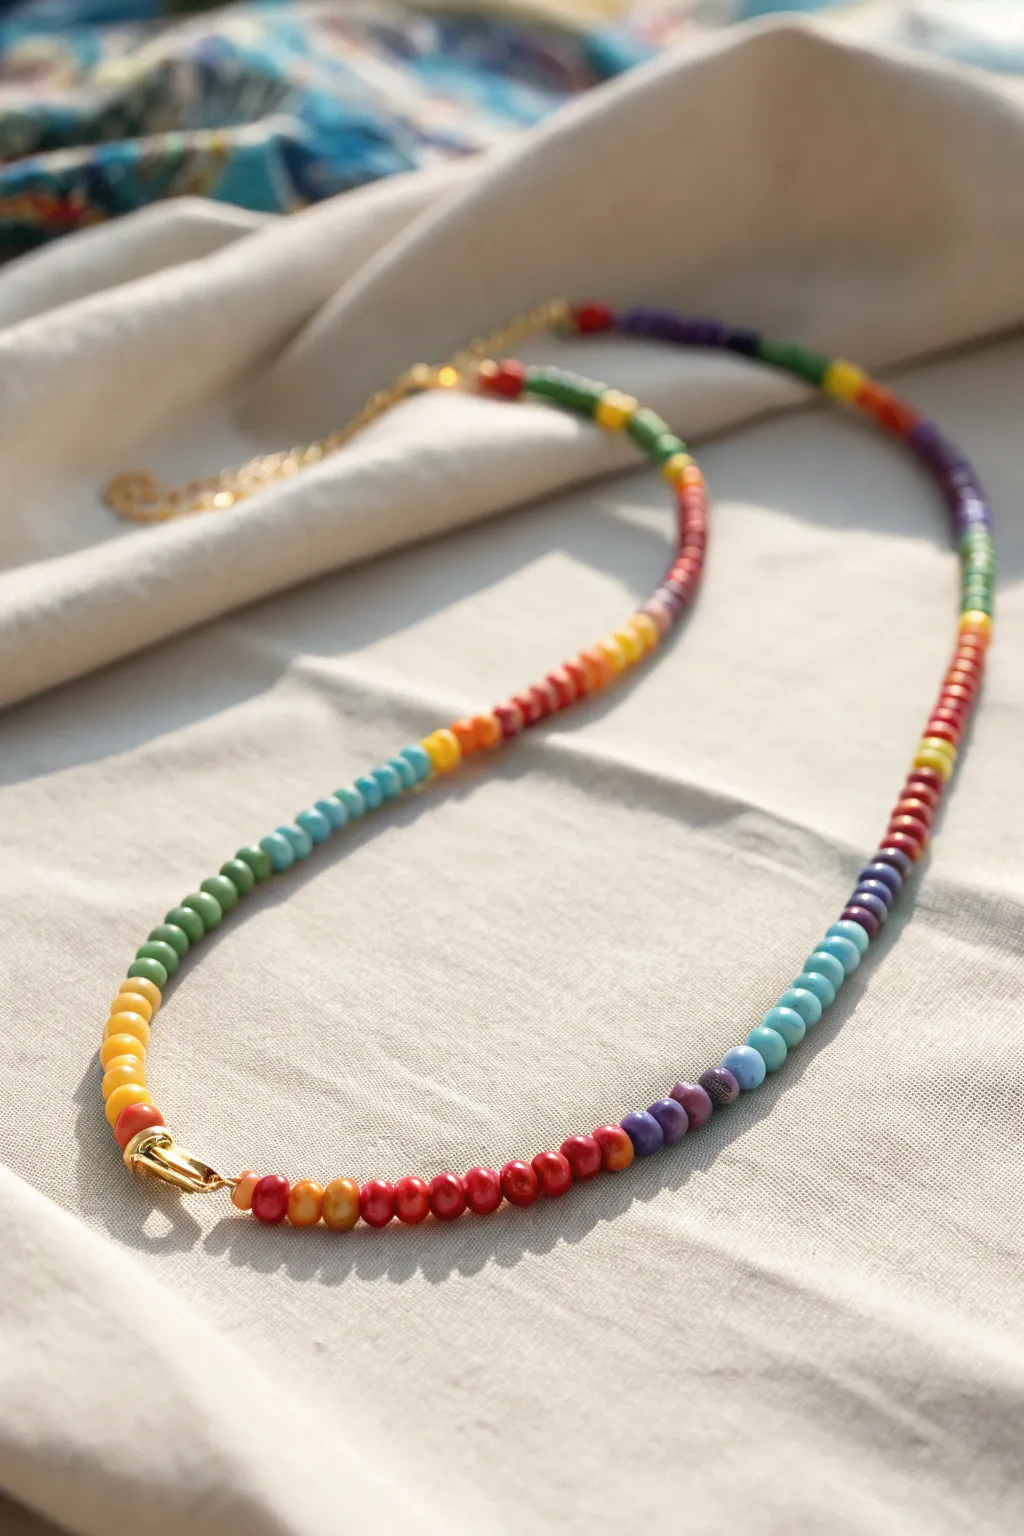
Embrace the carefree spirit of summer with this vibrant, easy-to-wear necklace that cycles through a joyful spectrum of colors. Featuring smooth, round beads in a classic rainbow gradient, this piece adds a pop of playful elegance to any warm-weather outfit.
Step-by-Step Guide
Materials
- 4mm-6mm round polymer clay or wood beads in rainbow colors (red, orange, yellow, green, blue, purple)
- Gold-plated lobster clasp
- Gold-plated jump rings (4mm or 5mm)
- Gold-plated extender chain (approx. 2 inches)
- Gold bead tips or clam shell knot covers
- Flexible beading wire (e.g., 7-strand or 19-strand)
- 2mm crimp beads (gold or silver)
- Chain nose pliers
- Wire cutters
- Bead design board (optional but helpful)
Step 1: Planning Your Palette
-
Analyze the pattern:
Take a close look at the reference image. Notice that the beads aren’t randomly mixed but are arranged in disciplined blocks of color that transition smoothly: red to orange, yellow to green, blue to purple, and back again. -
Layout your design:
Before restringing, lay your beads out on a bead board or a soft towel. Create repeating segments of color. For this specific look, aim for about 5-8 beads of a single color before switching to the next hue in the rainbow sequence. -
Check the transitions:
Ensure your transitions make sense visually. A standard ROYGBIV (Red, Orange, Yellow, Green, Blue, Indigo, Violet) progression works best to mimic the natural flow seen in the photo.
Loosey Goosey?
If your necklace is stiff and won’t drape in a smooth circle, you crimped too tightly! Leave a tiny hair’s breadth of slack on the wire before the final crimp.
Step 2: Starting the Strand
-
Cut the wire:
Measure a length of beading wire approximately 20 inches long. This gives you plenty of slack for a standard 16-18 inch necklace plus room to work on the clasp ends. -
Attach the first crimp:
Thread a crimp bead onto one end of the wire, followed by a bead tip (clam shell). The wire should go up through the hole in the bottom of the bead tip. -
Secure the end:
Flatten the crimp bead securely near the very end of the wire using your pliers. Trim any tiny excess wire tail sticking out past the crimp if necessary. -
Close the bead tip:
Slide the bead tip down so the flattened crimp sits inside its ‘cup’. Gently close the two halves of the shell over the crimp using your pliers to hide the mechanics.
Step 3: Beading the Rainbow
-
Begin the sequence:
Start threading your beads. Following the image, you might begin with a block of red beads. Thread about 6 to 8 red beads onto the wire. -
Transition to orange:
Add your next block of color—orange. Keep the number of beads consistent with your red block to maintain rhythm. -
Add the yellow:
Continue with a segment of bright yellow beads. Push them down snugly against the orange ones so there are no gaps. -
Continue the spectrum:
Proceed through green, blue, and purple blocks. I like to momentarily hold the strand up against my neck to check how the colors will lay. -
Repeat the pattern:
Once you finish a full rainbow cycle, start over again with red. Repeat this full sequence until the necklace reaches your desired length (usually around 16 inches for a short necklace). -
Check for consistency:
Periodically pause to count the beads in your blocks. While slight variations are charming, keeping them roughly equal (e.g., all 6-8 beads long) creates that polished, intentional look shown in the photo.
Golden Hour Glow
Add a single tiny gold spacer bead between every color block transition. This defines the segments and gives the piece a more expensive, boutique finish.
Step 4: Finishing Touches
-
Prepare the final end:
Once all beads are strung, thread the end of the wire up through the bottom hole of your second bead tip. -
Secure the second crimp:
Slide on a crimp bead. Pull the wire taut so the beads sit flush against each other, but not so tight that the necklace becomes stiff and won’t curve naturally. -
Flatten and trim:
Flatten the crimp bead securely. Trim the excess wire as close to the crimp as possible without cutting the main strand. -
Close the final shell:
Slide the bead tip over the crimp and gently clamp it shut with your chain nose pliers, just like you did at the start. -
Attach the clasp:
Open a jump ring with your pliers. Hook it through the loop on one of the bead tips and attach the lobster clasp. Close the jump ring securely. -
Add the extender:
On the other end, use another jump ring to attach individual chain links or a pre-made extender chain, allowing for adjustable sizing.
Now you have a cheerful accessory ready to brighten up any summer day


Sunset Ombre Color Fade
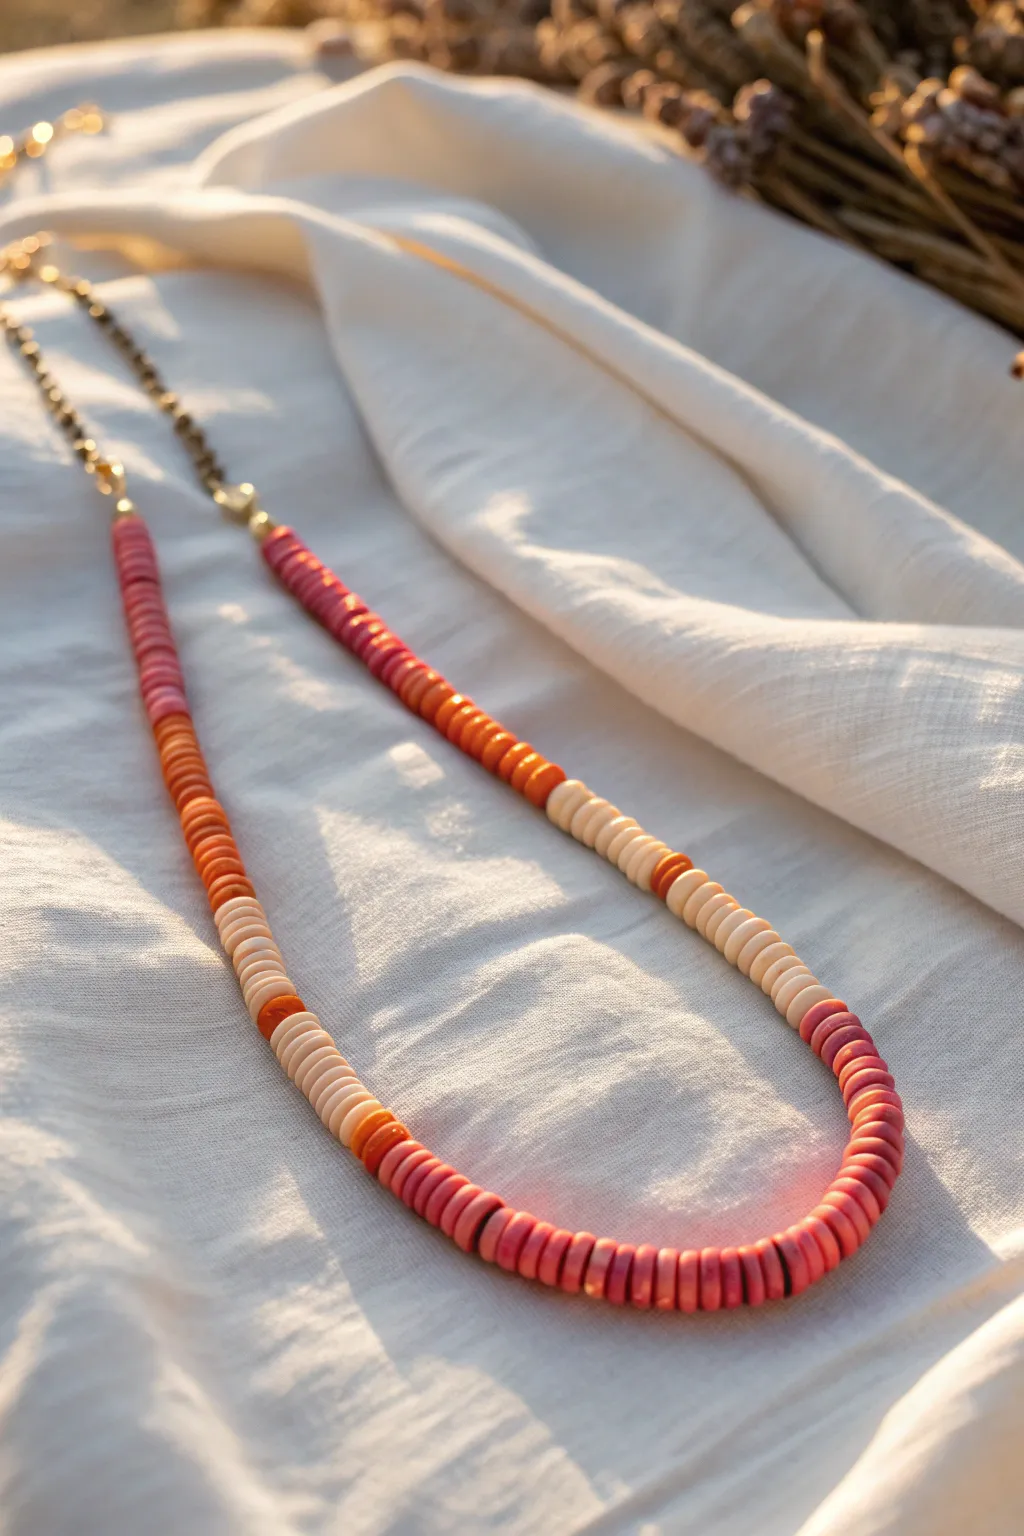
Capture the warmth of a summer evening with this stunning polymer clay heishi necklace featuring a seamless ombre fade. The transition from deep raspberry pinks to creamy whites mimics the glowing hues of a sunset, making it the perfect accessory for golden hour.
Step-by-Step Tutorial
Materials
- 6mm flat disc polymer clay beads (Heishi beads) in: deep raspberry, coral pink, bright orange, light peach, and cream/off-white
- Gold-plated cable chain (fine link)
- Gold beading wire or coated jewelry wire (0.38mm or 0.45mm)
- 2 Gold crimp beads
- 2 Gold crimp covers (3mm or 4mm)
- 2 Gold wire guards (optional, but recommended)
- Flat nose pliers
- Crimping pliers
- Wire cutters
- Bead design board or masking tape
Step 1: Planning the Gradient
-
Lay out the palette:
Before stringing anything, pour small piles of your bead colors onto a bead board or a flat surface. Arrange them in the order of the gradient: Raspberry – Coral – Orange – Peach – Cream. -
Establish the pattern:
The key to this look is the symmetrical fade. The center of the necklace consists of the raspberry pink section, fading outwards towards the cream, and eventually transitioning to the chain. Lay out a test strip to visualize the length of each color block; about 2-3 inches per color usually works well. -
Measure your wire:
Cut a piece of beading wire approximately 16 inches long. This will give you plenty of slack to work with, even though the beaded section itself might only be 10-12 inches.
Step 2: Stringing the Ombre
-
Start with the center:
To ensure perfect symmetry, I prefer to start stringing from the very middle. Thread on your central block of deep raspberry beads first. Aim for about 3 inches of this darkest shade. -
Transition to coral:
On the right side of the raspberry block, begin adding the coral pink beads. Thread on about 1.5 to 2 inches of beads. -
Add the orange tones:
Continue strictly on the right side, adding your bright orange beads next. Keep this section the same length as the coral section to maintain balance. -
Fade to light:
Add the peach or light orange beads next. Following that, finish this side with the cream/off-white beads. You should now have half of your gradient complete. -
Secure the end temporarily:
Place a piece of masking tape or a bead stopper on the end of the wire you just finished so the beads don’t slide off while you work on the other side. -
Mirror the left side:
Return to the center raspberry block. On the left/empty side of the wire, repeat the exact sequence in reverse: Coral, then Orange, then Peach, and finally Cream. -
Check the balance:
Hold the two ends of the wire together and let the beads hang. Ensure that the color transition points line up perfectly on both sides. Adjust by adding or removing a bead or two if needed.
Uneven Gradients?
If a color block feels too abrupt, mix the beads at the transition point. Alternate one bead of the old color with one of the new color for half an inch to create a softer blur.
Step 3: Attaching the Chain
-
Cut the chain:
You will need two equal lengths of gold chain to finish the necklace length. Decide on your total desired necklace length (e.g., 20 inches). Subtract the length of your beaded section, divide the remainder by two, and cut two pieces of chain to that measurement. -
Prepare the crimp:
On one end of the beading wire, thread on a gold crimp bead. -
Add the connection:
Thread the wire through a wire guard (if using) and then through the last link of one of your chain pieces. Loop the wire back down through the crimp bead. -
Secure the crimp:
Pull the wire snug so the loop is small but the chain moves freely. Use crimping pliers to flatten the crimp bead secure. Trim the excess wire tail close. -
Cover the mechanics:
Place a gold crimp cover over the flattened crimp bead. Using your flat nose pliers, gently close the cover until it looks like a round gold bead, hiding the crimp inside. -
Repeat on the other side:
Remove your tape or bead stopper from the other end. Repeat the crimping process to attach the second piece of gold chain to the other side of the beaded strand. -
Add the closure:
Finally, attach a jump ring and a lobster clasp to the open ends of the gold chains to complete the necklace.
Pro Tip: Drape Check
Before crimping, hold the necklace up to your neck in a mirror. Heishi beads sit differently when worn than flat. Ensure the curve is smooth and not too stiff before locking it in.
Now you have a beautiful, sun-drenched accessory ready to wear with your favorite summer whites


Ocean Blues And Seafoam Mix
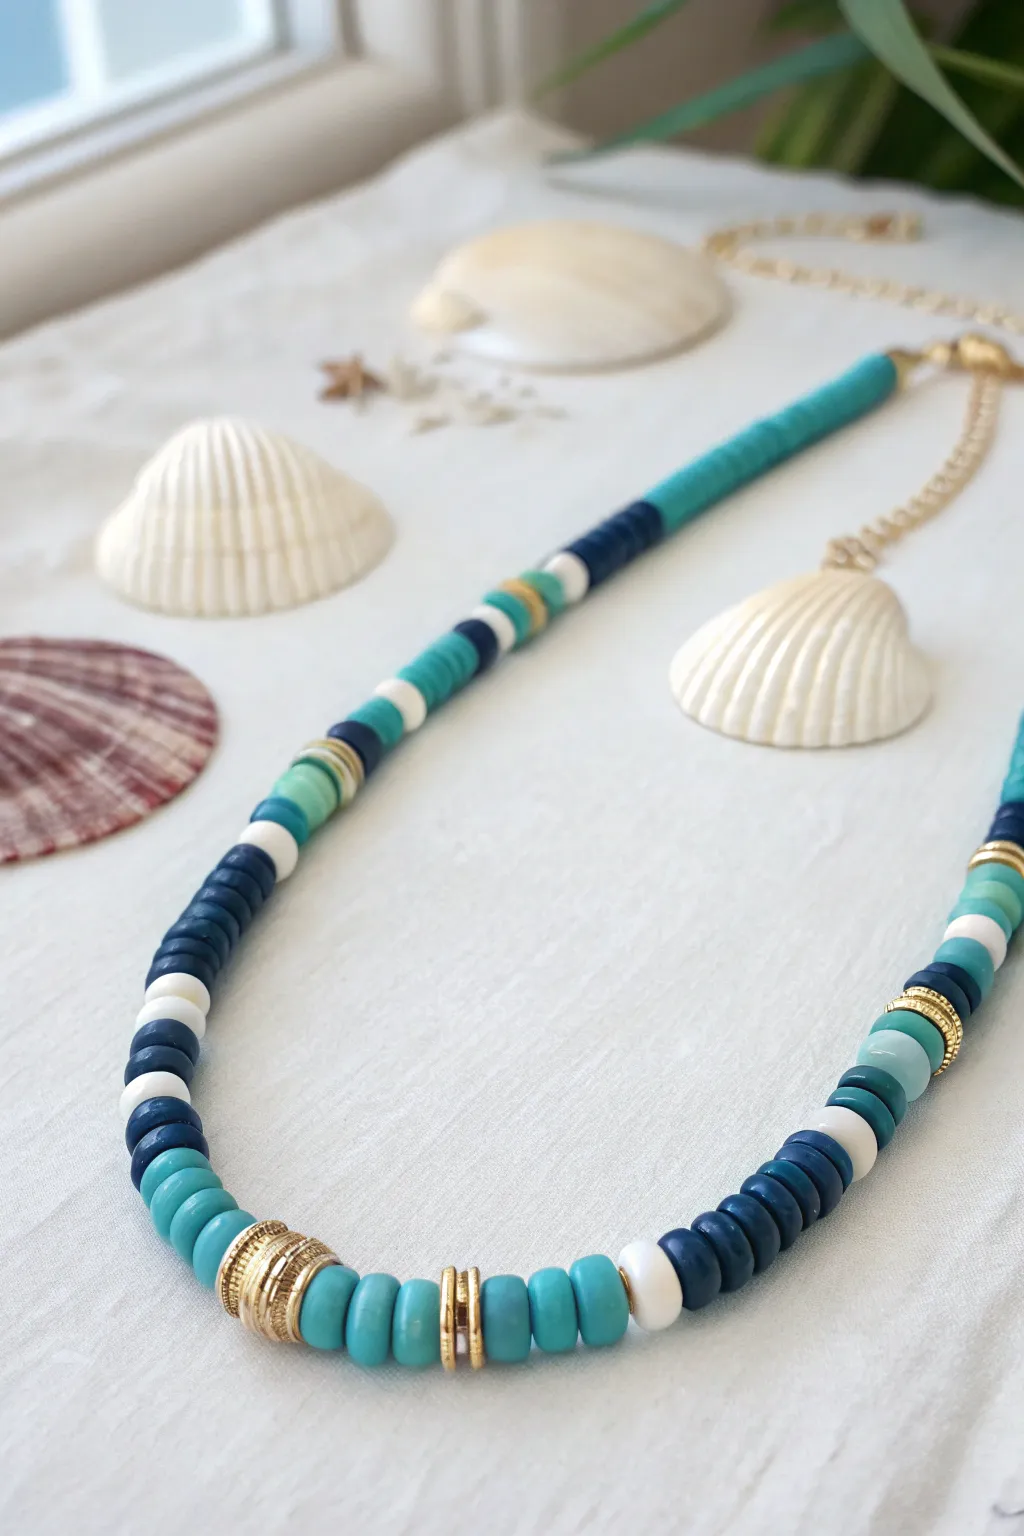
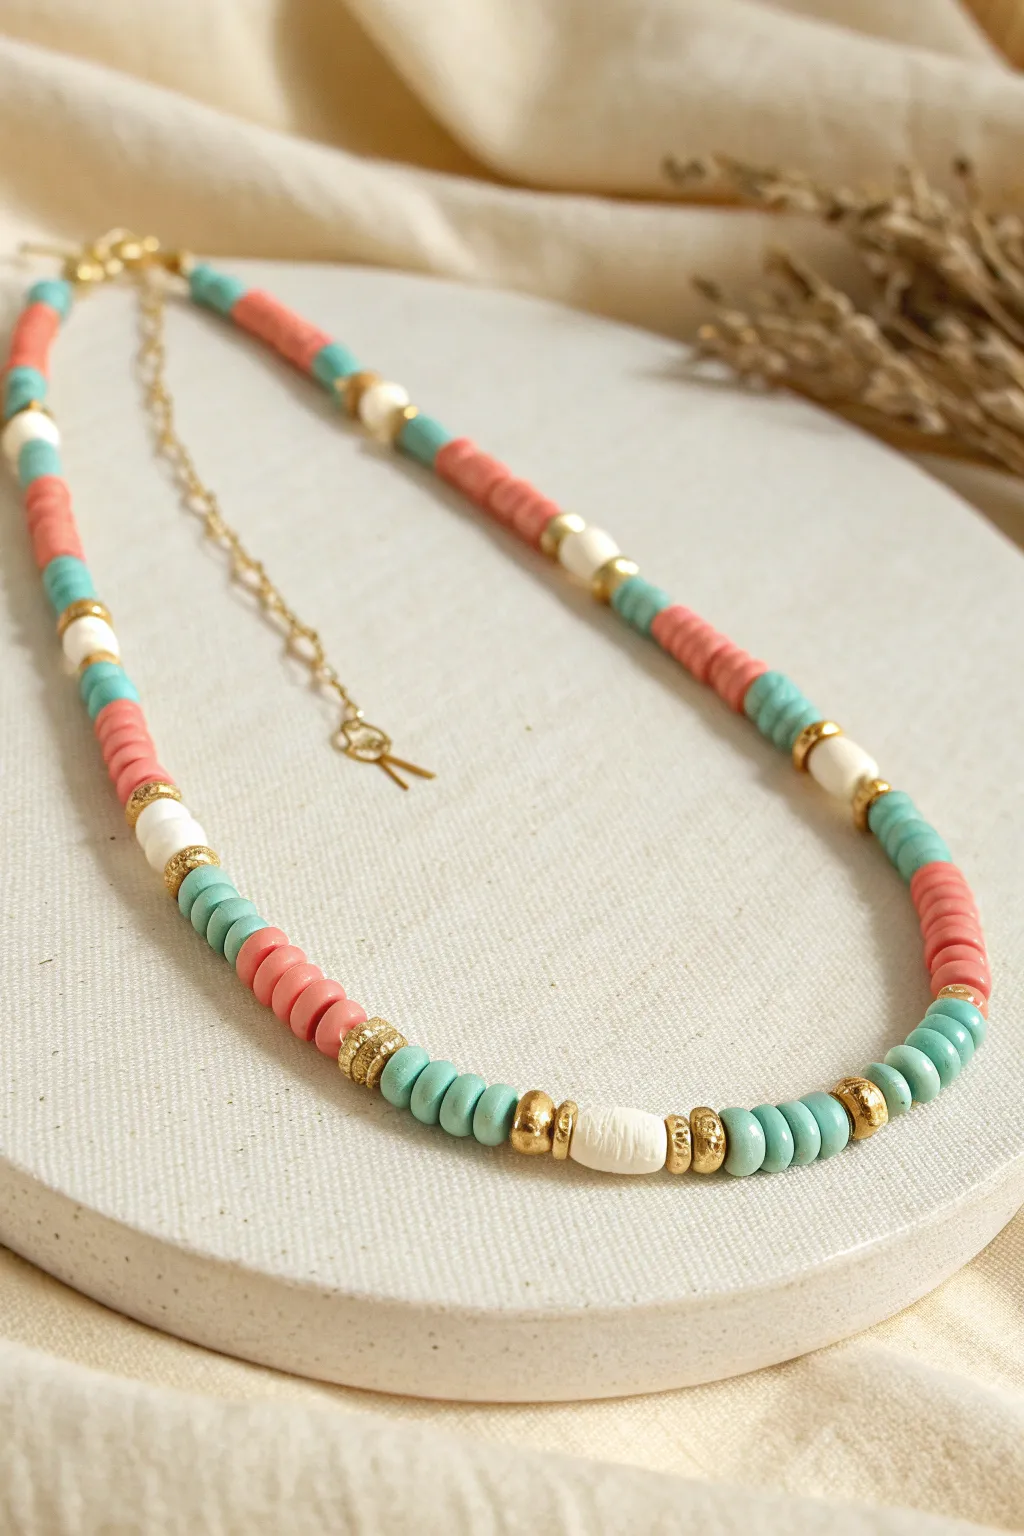
Capture the essence of a tranquil beach day with this ocean-inspired heishi bead necklace. Featuring a soothing palette of navy, teal, and turquoise punctuated by crisp white and gleaming gold accents, this accessory brings a touch of coastal elegance to any summer outfit.
Step-by-Step
Materials
- Polymer clay heishi beads (6mm disc) in navy blue
- Polymer clay heishi beads (6mm disc) in turquoise/teal
- Polymer clay heishi beads (6mm disc) in light blue or seafoam
- Polymer clay heishi beads (6mm disc) in white
- Gold tone spacer beads (various shapes: textured drums, thin rings, faceted spacers)
- Beading wire (nylon coated steel, 7-strand or 19-strand)
- 2 Crimp beads
- 2 Crimp covers (gold)
- 2 Wire guardians (gold)
- Jump rings (gold)
- Lobster clasp (gold)
- Extension chain (gold)
- Crimping pliers
- Wire cutters
- Masking tape or bead stopper
Step 1: Planning the Pattern
-
Measure your wire:
Cut a length of beading wire approximately 20-22 inches long. This gives you plenty of room for a standard 16-18 inch necklace plus extra length for finishing the ends comfortably. -
Secure the end:
Place a piece of masking tape or a bead stopper on one end of the wire. This simple step prevents your carefully arranged beads from sliding off while you work. -
Establish the color palette:
Separate your heishi beads into piles by color: navy, turquoise, light blue, and white. Having them organized makes the random-but-structured patterning much easier to execute.
Step 2: Stringing the Design
-
Start the back section:
Begin stringing with long, solid sections of color for the back of the neck. Thread on about 2-3 inches of just the turquoise beads. This creates a solid foundation that sits comfortably fast against the skin. -
Transition the colors:
Introduce a color block transition. Add a small section of navy blue beads (about 1 inch), followed by a single white bead to act as a crisp divider. -
Create the first mixed section:
String a pattern of: 3 turquoise beads, 1 gold spacer, 3 navy beads, 1 white bead. This starts to break up the solid blocks. -
Build the pattern rhythm:
Continue down the wire, creating sections that alternate between solid blocks of navy (approx. 15 beads) and mixed sections featuring white and lighter blues. -
Add gold accents:
Intersperse gold spacer beads irregularly. Place a thin gold ring between color changes, or use a larger textured drum bead as a focal point in the middle of a color block. -
Form the center focal point:
As you reach the center (the bottom curve of the necklace), use your boldest beads. String a large gold textured drum bead, followed by 5 turquoise beads, 2 thin gold rings, 5 turquoise beads, and another thin gold ring. -
Continue the center design:
Follow the gold rings with a section of navy blue, then a large white bead, and transition back into a mix of navy and lighter blues. The asymmetry here is key to the organic look. -
Plan the second half:
You don’t need to mirror the first side perfectly. Instead, aim for visual balance. If the left side has a lot of navy, ensure the right side has a corresponding weight of dark color, even if the exact pattern differs. -
String the remaining length:
Finish the second half of the strand, ending with a solid block of turquoise to match the beginning, ensuring the necklace looks cohesive at the clasp. -
Check the length:
carefully lift the wire by both ends to drape it around your neck or a sizing cone. Ensure it sits at your desired length (usually collarbone level) before crimping.
Stiff necklace?
If your finished necklace feels stiff or kinks, you likely crimped it too tightly. Leave a tiny gap (1-2mm) of bare wire at the end before crimping to allow the beads to rotate and drape.
Step 3: Finishing Touches
-
Prepare the first crimp:
Remove the tape from the start of the wire. Thread on a crimp bead, followed by a wire guardian. -
Attach the clasp component:
Loop the wire through the guardian and back down through the crimp bead. If you aren’t using a guardian, just loop through a jump ring and back down. -
Secure the crimp:
Slide the crimp bead up snug against the loop (but not too tight, or the wire gets stiff). Use crimping pliers to flatten or fold the crimp bead securely. -
Hide the crimp:
Place a gold crimp cover over the flattened crimp bead. Gently squeeze it closed with pliers so it looks like a round gold bead. -
Finish the other end:
Repeat the crimping process on the other end of the necklace. Be sure to pull out any slack in the wire before crimping, but leave just a tiny bit of wiggle room so the necklace drapes naturally. -
Add hardware:
Open a jump ring with your pliers. Attach the lobster clasp to one end loop. Open another jump ring and attach the extension chain to the opposite end.
Add a pendant
Before finishing, slide a gold seashell charm or a freshwater pearl pendant onto the center of the wire to transform this from a simple strand into a true statement piece.
Now you have a stunning, beach-ready accessory to wear all season long.


White And Gold Spacer Classic

Capture the effortless elegance of a summer getaway with this minimalist white and gold beaded choker. The crisp white beads paired with gleaming gold spacers create a versatile accessory that looks just as good with a bikini as it does with a linen sundress.
Detailed Instructions
Materials
- 4mm or 6mm white Heishi clay beads (or white glass seed beads)
- 4mm gold-plated round spacer beads
- Gold beading wire (0.38mm or 0.45mm)
- Gold lobster clasp
- Gold extension chain (approx. 2 inches)
- 2 Gold crimp beads
- 2 Gold wire guards (optional but recommended)
- Beading pliers (chain nose and flat nose)
- Wire cutters
- Tape or bead stopper
Step 1: Preparation and Pattern Design
-
Measure your wire:
Cut a piece of beading wire approximately 18-20 inches long. This gives you plenty of slack for a standard 14-16 inch choker plus room for finishing knots or crimps. -
Secure the end:
Place a piece of masking tape or a bead stopper on one end of your wire to prevent your beads from sliding off while you work. I always double-check this hold before starting. -
Establish the pattern:
This design relies on a specific repeating rhythm. The core pattern is a long section of white beads followed by a single gold accent. -
Determine count:
Count out approximately 12 to 15 white disk beads for every segment. This creates the clean, spaced-out look seen in the photo.
Keep it tight
When closing the second end, form the necklace into a circle shape before crimping. If you crimp it straight, the necklace will be stiff and won’t drape naturally on the neck.
Step 2: Stringing the Beads
-
Start the first segment:
Begin threading your white clay beads onto the wire. You’ll want to start with a full segment of white to keep the ends looking neat near the clasp. -
Add the gold accent:
Slide on one gold round spacer bead. Make sure the gold bead is slightly larger or thicker than the flat clay beads to create that nice dimension. -
Repeat the sequence:
Thread on another set of 12-15 white beads, followed by one gold spacer. Continue this pattern. -
Check for consistency:
Periodically pause to look at your strand. Ensure you haven’t accidentally skipped a gold bead or made a white section too short. -
Measure length:
Wrap the unfinished strand around your neck to check the fit. Remember that the clasp and extension chain will add about an inch or two to the final length, so stop beading just short of your desired fit. -
Finish the beading:
End the strand with a final segment of white beads to mirror the beginning of the necklace.
Step 3: Finishing Touches
-
Prepare the first crimp:
Remove the tape/stopper. Slide a crimp bead onto one end of the wire, followed by a wire guard (if using) and the jump ring of your lobster clasp. -
Loop back:
Thread the wire back through the crimp bead. Pull it tight, but leave just a tiny bit of wiggle room so the clasp can move freely. -
Secure the crimp:
Use your pliers to flatten the crimp bead firmly. Give a gentle tug to ensure it’s secure. -
Hide the tail:
Thread the excess wire tail back through the first few white beads, then trim it closely with your flush cutters. -
Attach the extension chain:
Repeat the crimping process on the other end of the necklace, this time attaching the extension chain instead of the clasp. -
Final trim:
Tuck the remaining tail into the beads on this side as well, trim the excess wire, and your necklace is ready to wear.
Mix your metals
For a modern twist, alternate the spacer beads between gold and silver, or use rose gold spacers with cream-colored clay beads for a softer, romantic aesthetic.
Now you have a chic, beach-ready accessory that captures the golden hour glow perfectly

The Complete Guide to Pottery Troubleshooting
Uncover the most common ceramic mistakes—from cracking clay to failed glazes—and learn how to fix them fast.
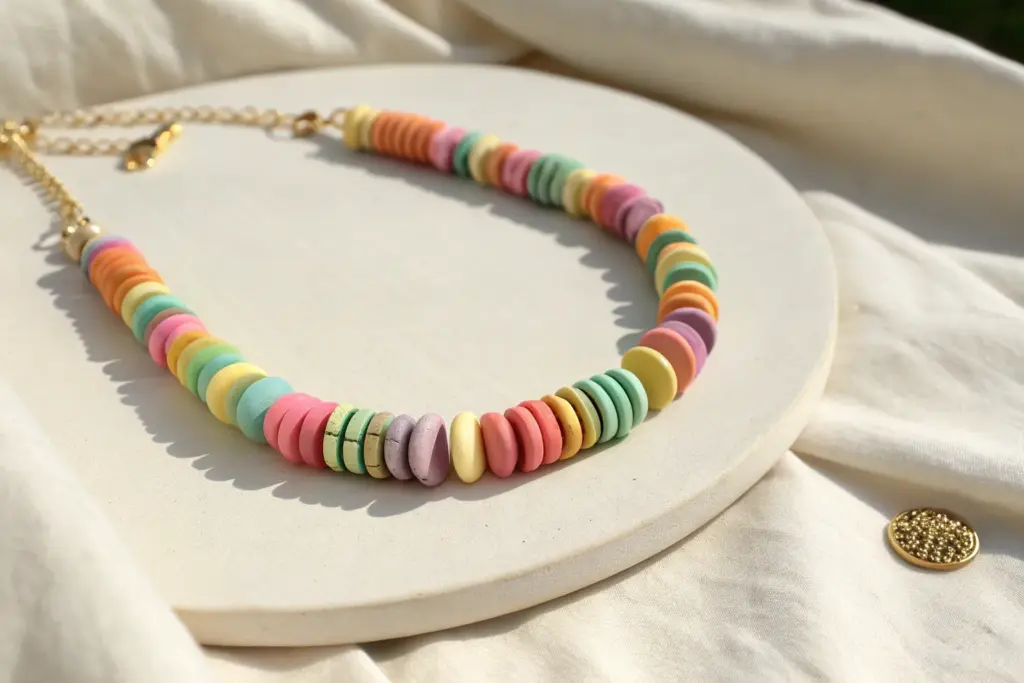
Candy Pastel Summer Stack Necklace
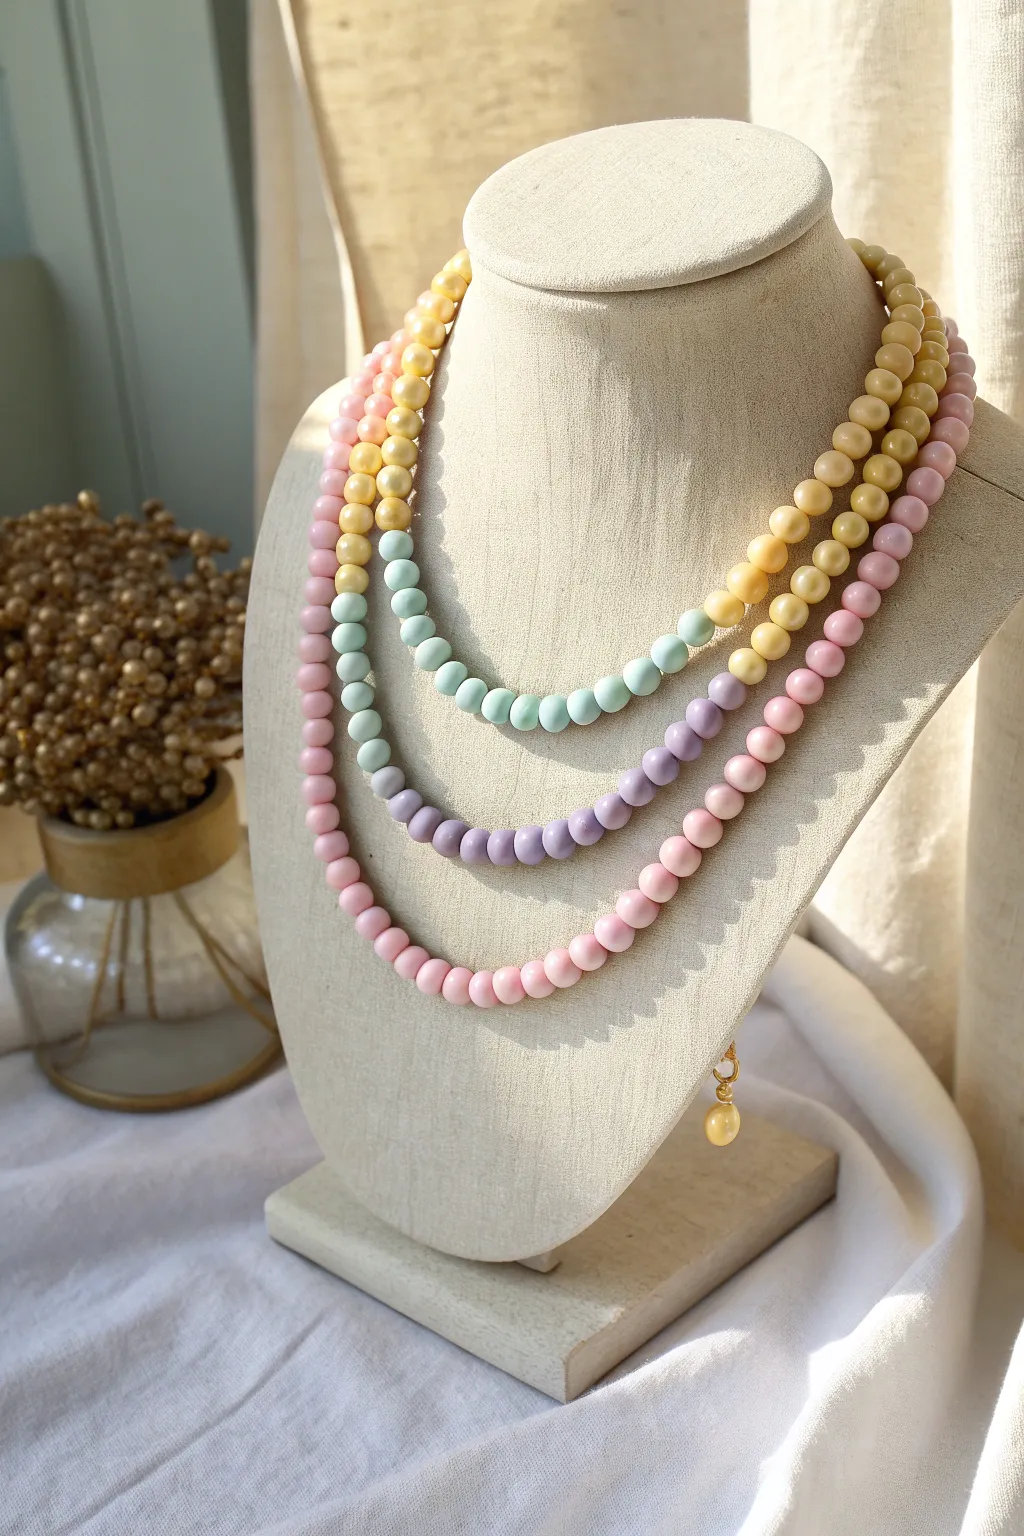
Embrace the soft, dreamy hues of summer with this tiered necklace design featuring a gradient of candy-colored beads. This project combines creamy yellows, mint greens, lilacs, and pinks into a cohesive statement piece that feels both nostalgic and fresh.
Step-by-Step Tutorial
Materials
- 6mm or 8mm round acrylic or ceramic beads in matte pastel finishes (pale yellow, cream yellow, mint green, lavender, soft pink)
- Beading wire (flexible, 7-strand or 19-strand, usually .015 or .018 inch diameter)
- 2 crimp beads (gold or silver tone)
- 2 crimp bead covers (gold or silver tone, optional)
- 2 wire guards (optional but recommended for durability)
- Gold-tone lobster clasp
- Gold-tone closed jump ring
- Gold-tone eye pin (for the pearl charm)
- 1 faux pearl or matching bead for the dangle charm
- Flush cutters
- Crimping tool or flat nose pliers
- Round nose pliers
- Bead design board (highly recommended for planning the gradient)
Step 1: Planning the Gradient
-
Lay out the design:
Begin by using a bead design board to visualize your three layers. This necklace relies on a subtle color shift, so planning is crucial before stringing. -
Design the top tier:
Arrange your shortest layer (approximately 16 inches) using the pale yellow and cream yellow beads. You want this layer to sit highest on the neck, like a collar. -
Create the middle tier transition:
For the second layer (approximately 18-20 inches), start planning a transition. Move from the yellow tones into the mint green beads, then slowly shift into a soft lavender purple near the center. -
Design the bottom tier:
Layout the longest strand (approximately 22-24 inches) primarily with your soft pink beads, perhaps carrying over a few lavender ones at the edges to blend the transition from the tier above. -
Refine the ombre effect:
Step back and look at your board. Swap beads around to ensure the colors bleed into each other naturally rather than having harsh blocks of color.
Sticky Beads?
If acrylic beads have burrs or are stuck together from manufacturing, use a bead reamer or a thick needle to gently clear the hole before stringing.
Step 2: Stringing the Layers
-
Cut the wire:
Cut three separate lengths of beading wire, adding about 4-5 inches of extra length to each measurement (16″, 20″, 24″) to account for crimping and handling. -
Secure one end (Layer 1):
Starting with your shortest yellow strand, thread a crimp bead and a wire guard onto one end. -
Attach to jump ring:
Loop the wire guard through a large, closed gold jump ring. Thread the wire back through the crimp bead. -
Crimp firmly:
Use your crimping tool to flatten the crimp bead securely, locking the wire to the jump ring. I like to give a gentle tug here to ensure it holds. -
String the beads:
Thread your yellow beads onto the wire, following the pattern you laid out. Hide the short tail of wire inside the first few beads. -
Repeat for all layers:
Repeat this process for the middle (green/purple) and bottom (pink) strands, attaching all three to the *same* jump ring on one side. This creates a multi-strand connection point.
Pro Tip: Flexibility is Key
Don’t string the beads too tightly. Leave a millimeter of slack near the clasp so the necklace drapes fluidly over the collarbone instead of remaining stiff.
Step 3: Finishing the Necklace
-
Prepare the other side:
The other side of the necklace will attach to the lobster clasp. You will group all three strand ends together again. -
Close the strands:
Thread a crimp bead and wire guard onto the end of the yellow strand. Loop the wire guard through the loop of your lobster clasp. -
Secure the clasp:
Thread the wire back through the crimp bead, pull tight (leaving a tiny bit of wiggle room for flexibility), and crimp shut. Trim excess wire. -
Attach remaining strands:
Repeat the crimping process for the middle and bottom strands, attaching them to the same lobster clasp loop. Now all three strands meet at the clasp. -
Cover crimps:
If you want a polished look, gently close a crimp cover over each flattened crimp bead using your pliers to make them look like gold beads.
Step 4: Adding the Charm Detail
-
Create the charm:
Slide one pearl or a leftover yellow bead onto a gold eye pin. -
Form a loop:
Use round nose pliers to bend the excess wire at a 90-degree angle, trim it to about 1cm, and roll it into a simple loop. -
Attach the dangle:
Open the loop slightly and hook it onto the large jump ring (the one opposite the lobster clasp), or attach it to an extender chain if you used one. This adds that delicate finishing touch seen in the photo.
Now you have a beautifully layered pastel accessory ready to brighten up any summer outfit
Tropical Color-Block Segments
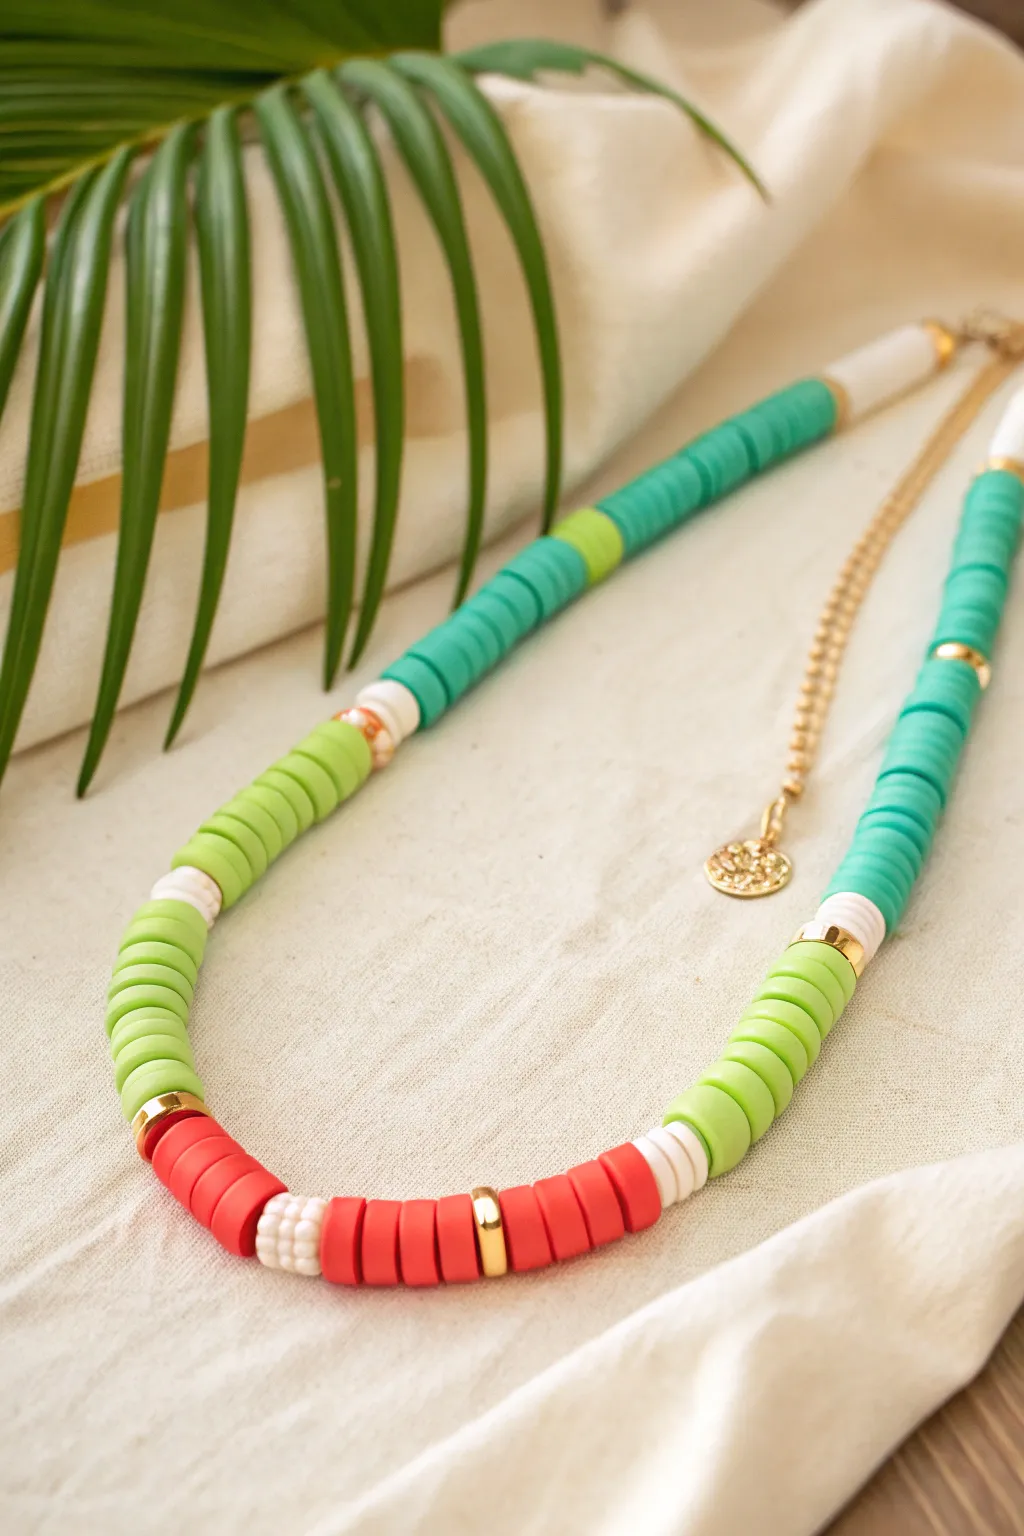
Brighten up your summer wardrobe with this vibrant color-blocked necklace featuring bold segments of teal, lime, and coral. The flat polymer clay discs create a smooth, modern texture, while golden accents add just the right amount of shine.
Step-by-Step Guide
Materials
- 6mm Polymer clay disc beads (Heishi) in teal, lime green, coral red, and white
- Gold spacer beads (small discs or rondelles)
- Gold tube beads (curved or straight)
- Small white seed beads or textured accent beads
- Beading wire (e.g., Tiger Tail or clear nylon)
- Crimp beads
- Gold lobster clasp
- Gold extender chain with charm (optional)
- Wire cutters
- Flat nose pliers
- Mini bead stopper or tape
Step 1: Preparation & Design
-
Measure your length:
Standard necklace length is usually around 16 to 18 inches, but decide where you want this to sit. Cut a piece of beading wire about 4 inches longer than your desired finished length to leave room for finishing. -
Secure the end:
Attach a bead stopper or a piece of masking tape to one end of the wire so your distinctive beads don’t slide off while you work. -
Plan the pattern:
Lay out your bead strands on a mat to visualize the color blocking. This design features long sections of teal, transitioning to lime, and finding a focal point with coral red.
Step 2: Stringing the Teal & Lime Sections
-
Start with white:
Begin by feeding a small section of white clay discs onto the wire; about half an inch creates a nice neutral start near the clasp. -
Add gold accent:
Slide on a single gold spacer bead to separate the white from the main color. -
String the teal blocks:
Thread on a long segment of teal clay beads. Aim for about 2-3 inches of length here. If you want variety, interrupt the teal block with a single lime green bead or a gold spacer occasionally. -
Transition to lime:
After the teal section, add a small stack of white beads (about 3-4 discs) sandwiched by gold spacers. -
Create the lime segment:
String approximately 2 inches of lime green clay beads. This fresh color bridges the gap between the cool teal and the warm coral center.
Uneven Hanging?
If the necklace hangs stiffly or crookedly, you may have crimped the wire too tightly against the beads. Leave a tiny 1-2mm gap of bare wire near the clasp to allow the beads to drape naturally.
Step 3: Building the Focal Point
-
Prepare the center:
Before the main focal color, add a decorative element. Slide on a gold spacer, a small white textured bead (or stack of white seed beads), another gold spacer, and then start your coral section. -
Begin the coral block:
Thread about an inch of coral red clay beads. This vibrant hue acts as the centerpiece of the necklace. -
Insert gold tube detail:
In the middle of your coral section, slide on a gold tube bead. This breaks up the texture and adds a sleek metallic flash right at the front. -
Finish the coral block:
Continue with another inch of coral red beads to mirror the side before the tube. -
Add symmetry markers:
Close the focal section with a gold spacer, a small white textured bead, and another gold spacer, mirroring the start of the focal point.
Layer Up!
Make a second, slightly shorter necklace using only gold chain or small white seed beads. Wear them together for a trendy, curated layered look that highlights the colors.
Step 4: Finishing the Second Half
-
Repeat the pattern in reverse:
Now work backwards through your design. String another 2-inch segment of lime green beads. -
Add the transition:
Place your gold spacer, short stack of white beads, and another gold spacer. -
Complete with teal:
Finish the main beading with a long 2-3 inch segment of teal beads, matching the length of your first side exactly. -
Final white end:
End the strand with a gold spacer and a final half-inch of white clay discs.
Step 5: Attaching the Clasp
-
Add crimp bead:
Slide a crimp bead onto the end of the wire, followed by one half of your clasp or a jump ring. -
Loop and secure:
Thread the wire back through the crimp bead and pull tight, leaving a tiny bit of slack so the necklace moves fluidly. Flatten the crimp bead firmly with your flat nose pliers. -
Finish the other end:
Remove your bead stopper. Repeat the crimping process on this side, attaching the other half of the clasp or an extender chain. -
Trim excess wire:
Use wire cutters to snip off any remaining tail wire close to the crimp bead for a neat finish.
Now you have a stunning, summery accessory that brings a pop of tropical color to any outfit


What Really Happens Inside the Kiln
Learn how time and temperature work together inside the kiln to transform clay into durable ceramic.
Shell Centerpiece Heishi Necklace
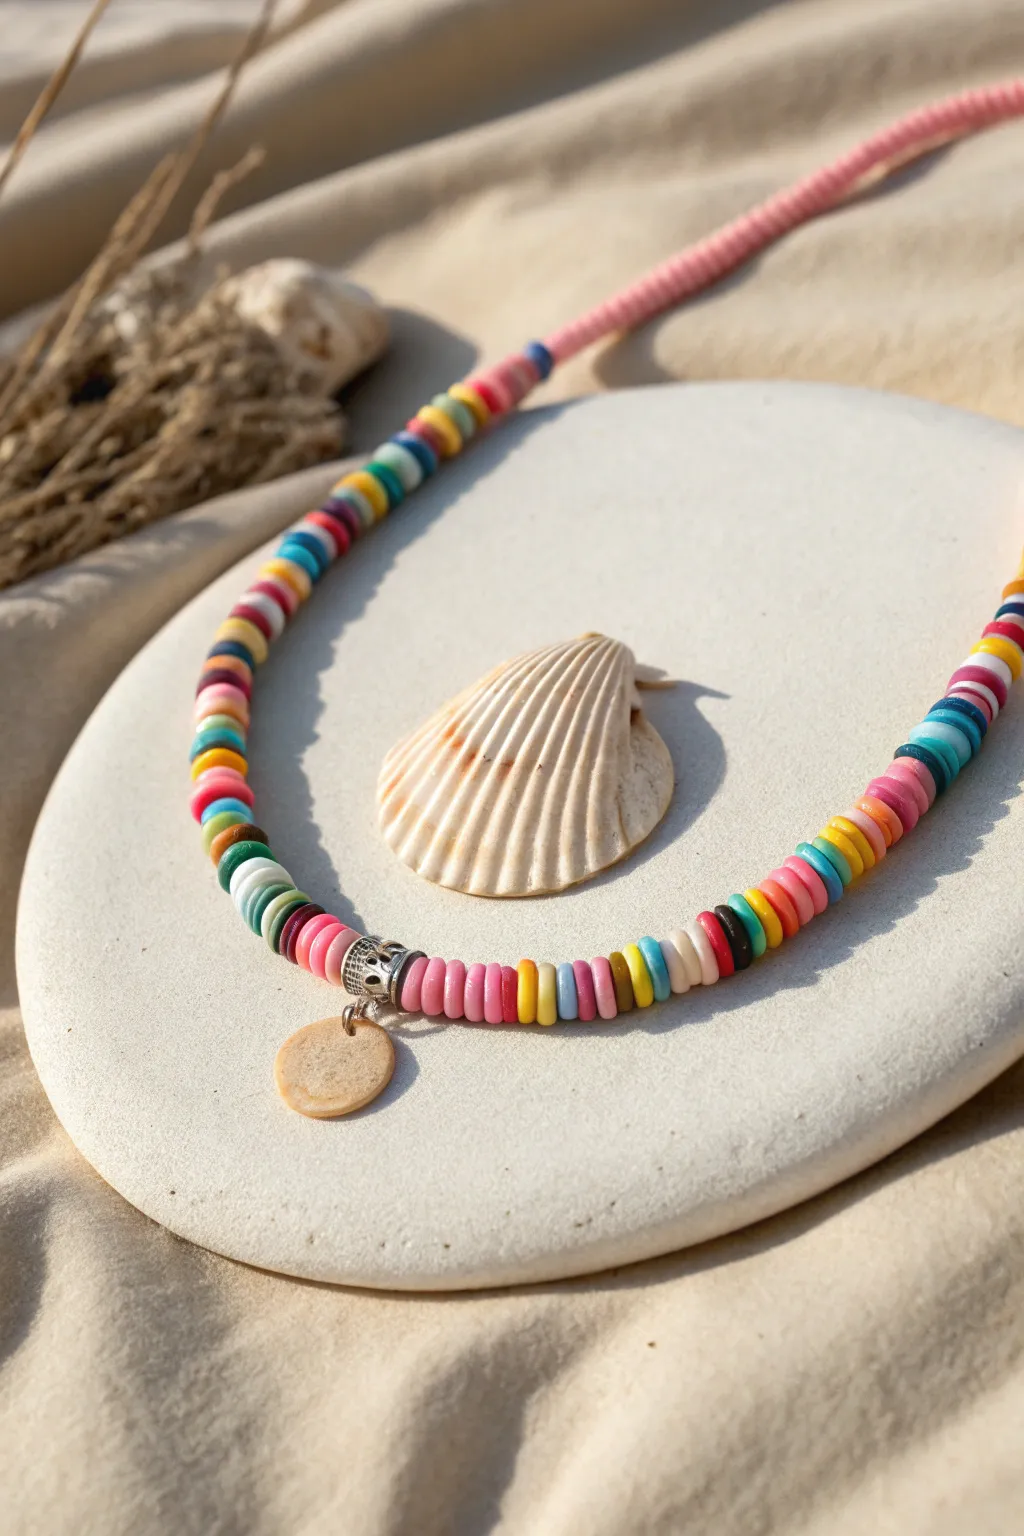
Capture the laid-back vibe of a beach day with this vibrant heishi bead necklace. Featuring a playful mix of colorful polymer clay discs and a delicate shell charm, it’s the perfect accessory to carry a piece of summer with you anywhere.
Step-by-Step
Materials
- Polymer clay heishi beads (6mm or 4mm flat discs) in assorted colors (pink, blue, yellow, turquoise, white, black, brown)
- Beading wire or strong nylon cord (approx. 20 inches)
- Silver-tone bail bead or jump ring connector
- Small round shell or mother-of-pearl disc charm
- 2 crimp beads
- 2 crimp covers (optional)
- Clasp (lobster claw or spring ring) and jump ring
- Flat nose pliers
- Wire cutters
- Bead stopper or tape
Step 1: Preparation & Planning
-
Measure your wire:
Cut a length of beading wire approximately 18-20 inches long. This gives you plenty of room for a choker-style fit plus extra length for finishing the ends comfortably. -
Secure the end:
Attach a bead stopper to one end of the wire to prevent your colorful creations from sliding off while you work. If you don’t have a stopper, a piece of masking tape works in a pinch. -
Sort your palette:
Pour small piles of your heishi beads onto a tray. The beauty of this design is its randomized look, but having colors separated helps you grab alternating hues quickly without fumbling.
Stiff Necklace?
If your necklace feels rigid or kinks up, you strung the beads too tightly. Leave a millimeter of slack before the final crimping to let the beads drape naturally.
Step 2: Creating the Pattern
-
Start the sequence:
Begin stringing your beads. The pattern in the image relies on ‘color blocking’ mixed with random pops. Try stringing 3-5 pink beads, followed by a single contrasting bead like yellow or blue. -
Build the first half:
Continue adding beads until you reach the halfway point of your desired necklace length. Vary the block sizes—sometimes use just one bead of a color, sometimes a stack of four. -
Incorporate neutrals:
Don’t forget to sprinkle in white, black, or brown beads occasionally. These neutral tones ground the bright candy colors and give the necklace that sophisticated surf-shop look.
Step 3: Adding the Centerpiece
-
Prepare the charm:
If your shell charm doesn’t have a jump ring attached, carefully open a small jump ring using pliers, slide on the shell disc, and close it securely. -
Attach the bail:
Slide your decorative silver bail bead onto the necklace wire. This should sit exactly in the center of your bead strand. -
Hang the charm:
Open the jump ring on your shell charm and loop it onto the bottom loop of the silver bail bead. Close the jump ring tightly so the charm dangles freely.
Randomness Hack
Struggling to make a pattern look random? Put a mix of colors in a bowl and scoop them onto the needle without looking. Edit only if you get 4 of the same color.
Step 4: Finishing the Necklace
-
Complete the beading:
Continue stringing beads on the second half of the wire. I try to roughly mirror the color density of the first side, but avoid making it perfectly symmetrical to keep that relaxed, bohemian feel. -
Check the length:
Wrap the strand around your neck to check the fit. Add or remove beads until it sits exactly where you want it. -
Add first crimp:
Thread a crimp bead onto the end of the wire, followed by one half of your clasp. -
Secure the loop:
Loop the wire back through the crimp bead and pull it taut, leaving just a tiny bit of slack so the beads can move. -
Crimp it down:
Use your flat nose pliers to smash the crimp bead flat, securing the wire. Trim the excess wire tail close to the bead. -
Repeat on the other side:
Remove your bead stopper. Thread a crimp bead and a jump ring onto this end. -
Final secure:
Loop the wire back through the crimp bead and a few of the heishi beads. Pull tight to remove gaps, flatten the crimp bead, and trim the wire. -
Apply crimp covers:
For a polished professional finish, place a crimp cover over each flattened crimp bead and gently squeeze it shut with pliers to look like a round silver bead.
Wear your handmade creation with a simple tee or floaty dress to bring a touch of coastal charm to your outfit
Puka-Style Shell And Clay Mix
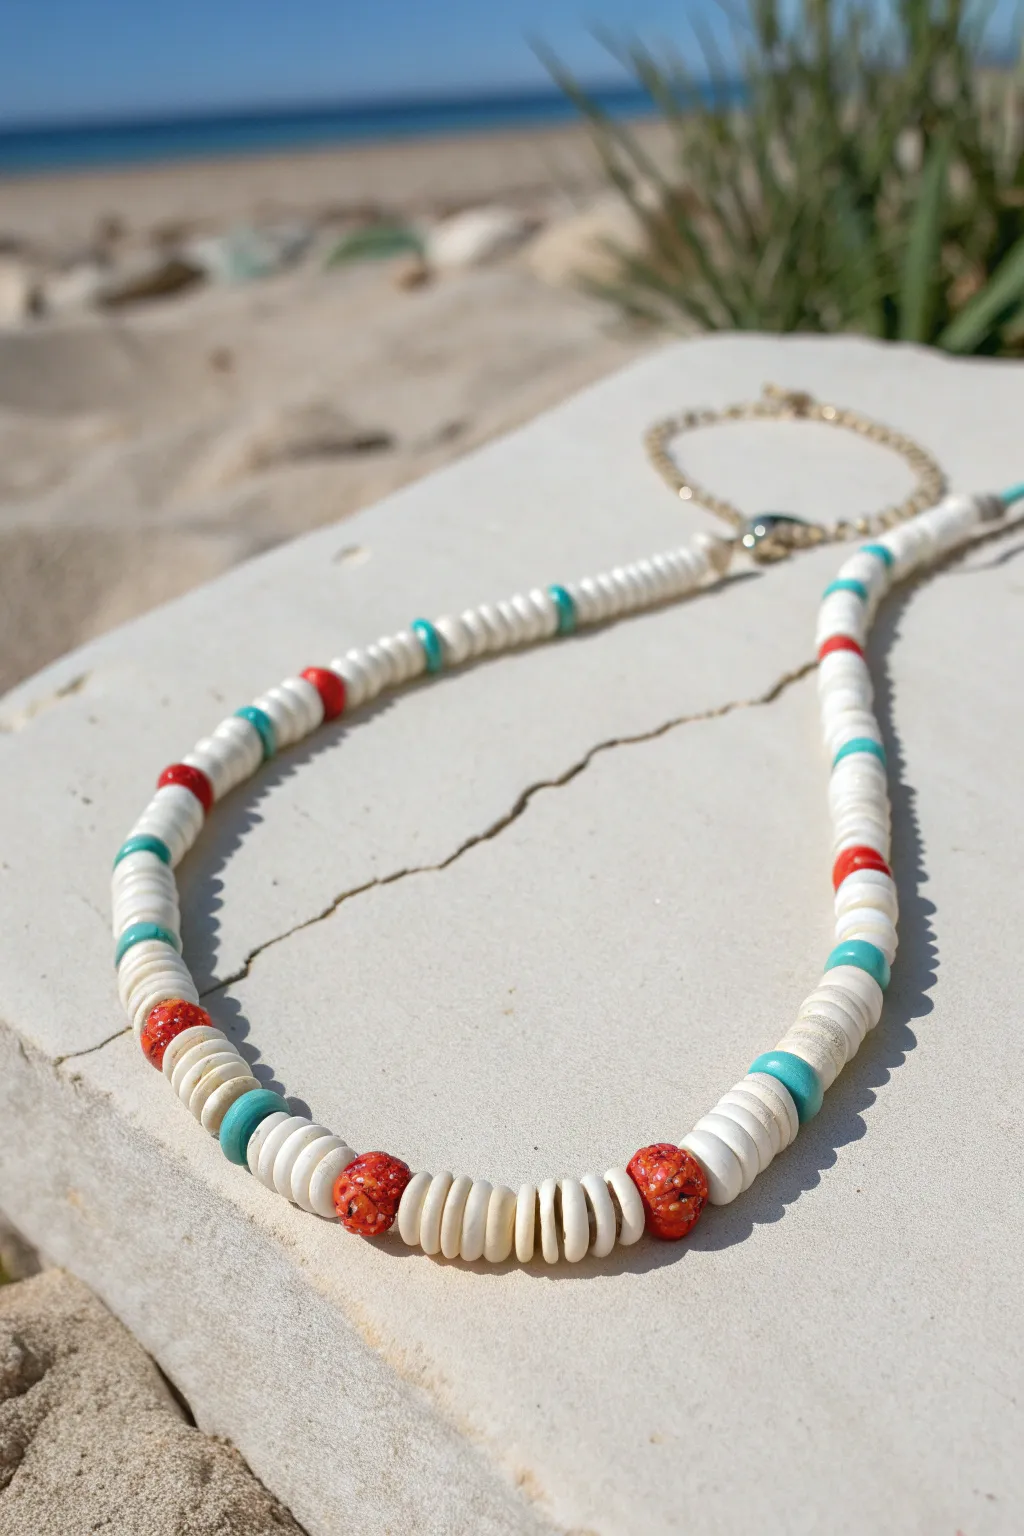
Capture the essence of a beach day with this laid-back necklace that blends classic white disc beads with vibrant splashes of turquoise and coral red. The mix of textures, from smooth heishi discs to rougher organic accents, creates an effortless, sun-soaked aesthetic perfect for summer layering.
Detailed Instructions
Materials
- White heishi beads (approx. 4-6mm, shell or polymer clay)
- Turquoise blue heishi spacer beads (same diameter)
- Coral red round spacer beads (small)
- Textured coral/sponge coral round beads (approx. 6-8mm)
- Beading wire (nylon-coated work best)
- 2 Crip beads
- 2 Crimp covers (optional)
- 2 Wire guardians (optional but recommended)
- Clasp (lobster claw or spring ring)
- Extension chain
- Crimping pliers
- Wire cutters
Step 1: Planning and Prep
-
Measure your length:
Decide on your desired necklace length. A choker style sits around 14-16 inches, while a standard length is 18 inches. Cut your beading wire about 4 inches longer than this measurement to allow room for finishing. -
Secure the first end:
Thread a crimp bead onto one end of your wire, followed by a wire guardian. Loop the wire through the last link of your extension chain, then back through the guardian and crimp bead. -
Crimp it tight:
Use your crimping pliers to flatten the crimp bead securely. Give the wire a gentle tug to ensure it holds firm before trimming the short excess tail.
Natural Variation
Don’t fret if your white shell beads vary in thickness. Mixing thinner and thicker discs adds authentic beach-combed charm to the final piece.
Step 2: Creating the Pattern
-
Establish the white base:
Begin stringing your white heishi beads. Start with a solid section of about 1.5 to 2 inches of just white discs to create a clean neckline transition. -
First color accent:
Add a single turquoise blue heishi spacer bead. This introduces that first pop of ocean color. -
Spacing section:
Thread on roughly 8 to 10 white heishi beads. I like to vary this number slightly between sections to keep the look organic rather than perfectly machine-made. -
Introduce the red:
Slide on a small, smooth coral red spacer bead, followed immediately by another section of 8-10 white heishi beads. -
Add texture:
Now for the focal point of the pattern: add the large, textured coral bead. These rougher beads mimic natural sea sponge or coral and add great visual weight. -
Repeat the sequence:
Continue your pattern. A good rhythm is: White section -> Turquoise spacer -> White section -> Red spacer -> White section -> Textured Coral bead. Repeat this until you reach the center, then mirror it or continue linearly depending on your preference. -
Check the symmetry:
Occasionally lift the necklace by the ends to see how the beads drape. Ensure your pattern looks balanced, even if the spacing isn’t mathematically perfect.
Step 3: Finishing Touches
-
End with white:
Finish the beading sequence with a final 1.5 to 2-inch section of plain white heishi beads to match the start. -
Prepare the closure:
Slide on a crimp bead and your second wire guardian. Loop the wire through the loop of your lobster clasp. -
Loop back:
Thread the wire back down through the wire guardian and into the crimp bead. Pull everything snug, but leave a tiny bit of slack so the necklace remains flexible and doesn’t get stiff. -
Final crimp:
Flatten the crimp bead securely with your pliers. Ensure the wires are parallel inside the crimp for the strongest hold. -
Trim and cover:
Trim the excess wire tail close to the crimp bead. If you are using crimp covers, gently close them over the flattened crimps now for a professional, polished metal look.
Stiff Necklace?
If the necklace feels rigid like a hoop, you strung it too tight. Leave a millimeter of slack before the final crimp so beads can rotate and drape.
Now you have a breezy accessory ready to pair with your favorite summer outfit

TRACK YOUR CERAMIC JOURNEY
Capture glaze tests, firing details, and creative progress—all in one simple printable. Make your projects easier to repeat and improve.
Starfish Charm Pop Necklace
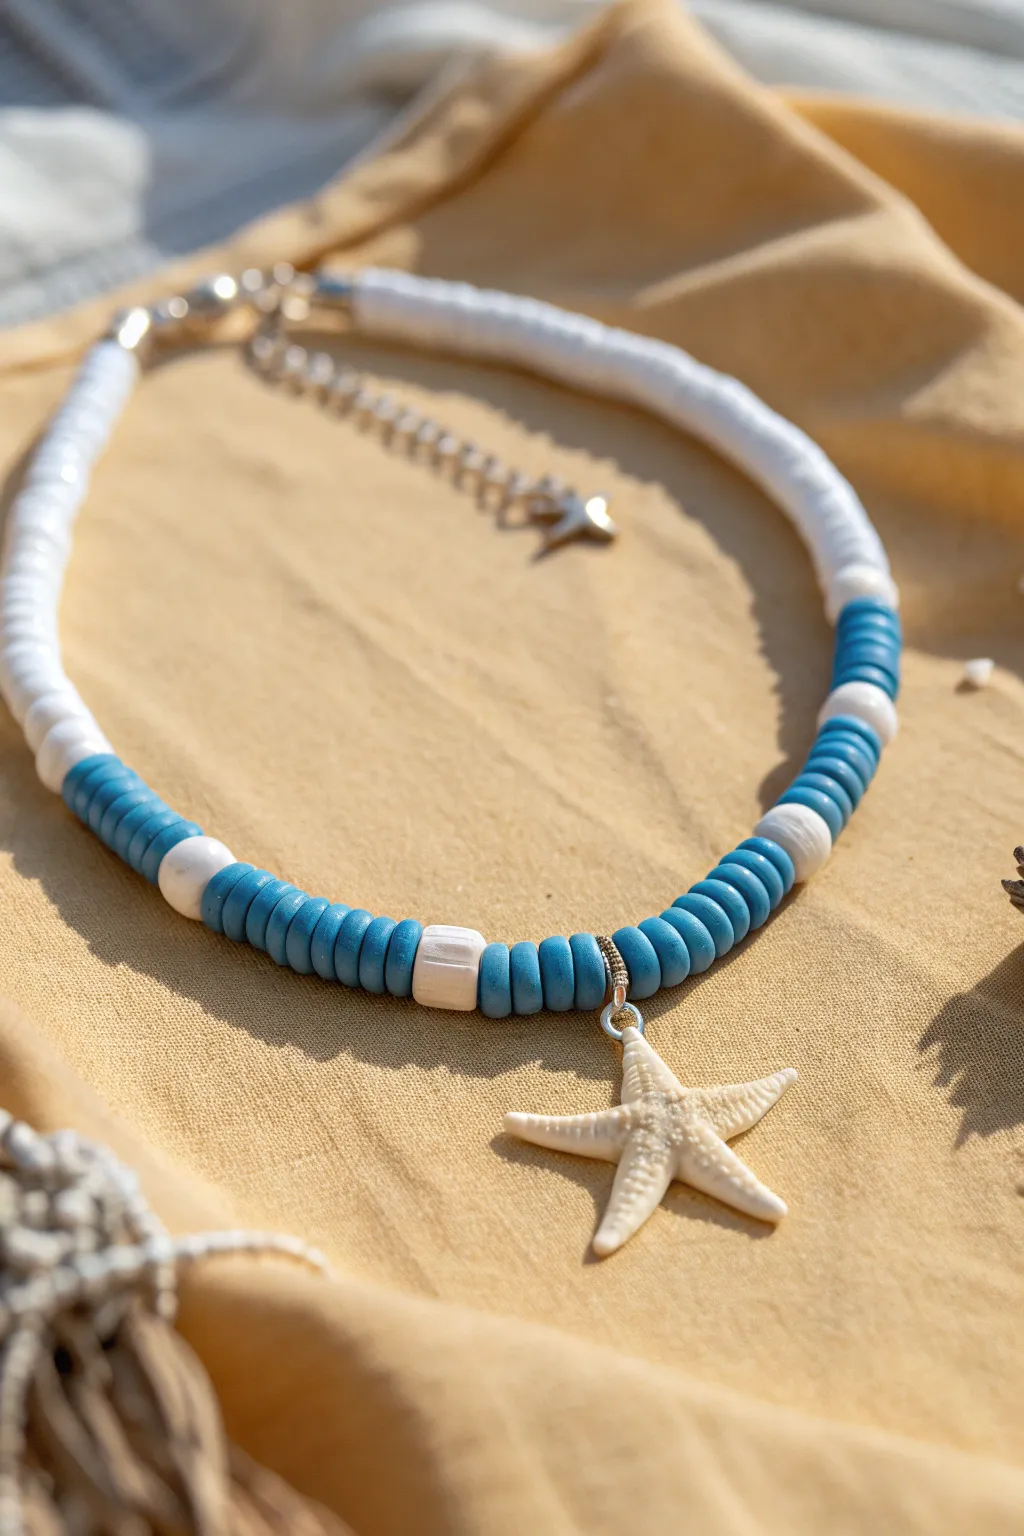
Capture the essence of a beach day with this beautiful, easy-to-make necklace. Featuring crisp white and ocean-blue clay beads centered around a natural starfish charm, this piece is the ultimate summer accessory.
Step-by-Step Guide
Materials
- 6mm flat round polymer clay beads (White)
- 6mm flat round polymer clay beads (Ocean Blue)
- White round accent beads (acrylic or wood, approx. 6-8mm)
- White square accent bead (optional)
- Small natural starfish charm with bail
- Beading wire (flexible nylon-coated steel wire)
- 2 Crimp beads
- 2 Crimp bead covers (silver)
- 2 Wire guards (silver)
- Silver lobster clasp
- Silver extension chain (optional but recommended)
- Jump rings (silver)
- Jewelry pliers (flat nose and crimping tool)
- Wire cutters
Step 1: Preparation and Centerpiece
-
Measure your wire:
Cut a length of beading wire approximately 18-20 inches long. This gives you plenty of slack to work with for a standard choker or princess-length necklace. -
Secure one end:
To prevent beads from sliding off while you work, place a bead stopper or a piece of tape on one end of your wire. Alternatively, you can attach the first half of your clasp now if you prefer working from one fixed end. -
Prepare the starfish:
Ensure your starfish charm has a jump ring or bail attached to the top. If not, carefully drill a tiny hole or glue a bail onto the back. -
Start the center sequence:
We will build the necklace from the center out to keep it symmetrical. Slide the starfish charm onto the middle of the wire. -
Add first blue sections:
On the right side of the charm, thread on about 6-8 blue clay disc beads. Repeat this exact number on the left side of the charm.
Natural Texture
Mix different white accent beads—like wood, shell, or irregular pearls—instead of perfect spheres to give it an authentic washed-up-on-the-shore look.
Step 2: Creating the Pattern
-
Place accent beads:
Slide a larger white round accent bead onto the right side followed by another set of blue clay beads (about 6-8). Do the same on the left side. -
Add variance:
On the left side, after the second blue section, add the white square bead if you are using one, followed by a few more blue discs. Mirror this spacing on the right side using a round bead to keep the eclectic, beachy feel. -
Transition to white:
Once you have about 2-3 inches of the blue pattern established on both sides of the center charm, switch to your white clay beads. -
Fill the length:
Continue threading white clay beads onto both sides until the necklace reaches your desired length. I usually aim for about 14-16 inches of total beaded length for a choker style. -
Check symmetry:
Hold the two ends of the wire up together, letting the starfish hang down, to ensure your color transitions are even on both sides.
Make It a Set
Use the leftover blue and white beads to create a matching anklet. Simple alternating color blocks without a charm look great around the ankle.
Step 3: Finishing Touches
-
Prepare the crimp:
Remove your tape or bead stopper. Slide a crimp bead onto one end of the wire, followed by a wire guard. -
Loop the clasp:
Thread the wire through the wire guard and loop it back down through the crimp bead. Attach your lobster clasp into the loop created by the wire guard before tightening. -
Secure the crimp:
Pull the wire tight so the loop is small but flexible. Use your crimping pliers to flatten the crimp bead securely. -
Cover the hardware:
Place a crimp bead cover over the flattened crimp bead and gently close it with your pliers to make it look like a smooth silver bead. -
Finish the other side:
Repeat the crimping process on the other end of the necklace, attaching an extension chain or a closed jump ring instead of a clasp. -
Trim excess wire:
Thread the tail of the beading wire back through the first few beads for extra security, then snip off any remaining wire close to the beads.
Now you have a stunning, ocean-inspired piece ready for your next seaside adventure
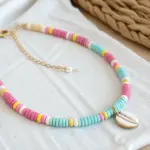
Smiley Face Summer Bead Moment
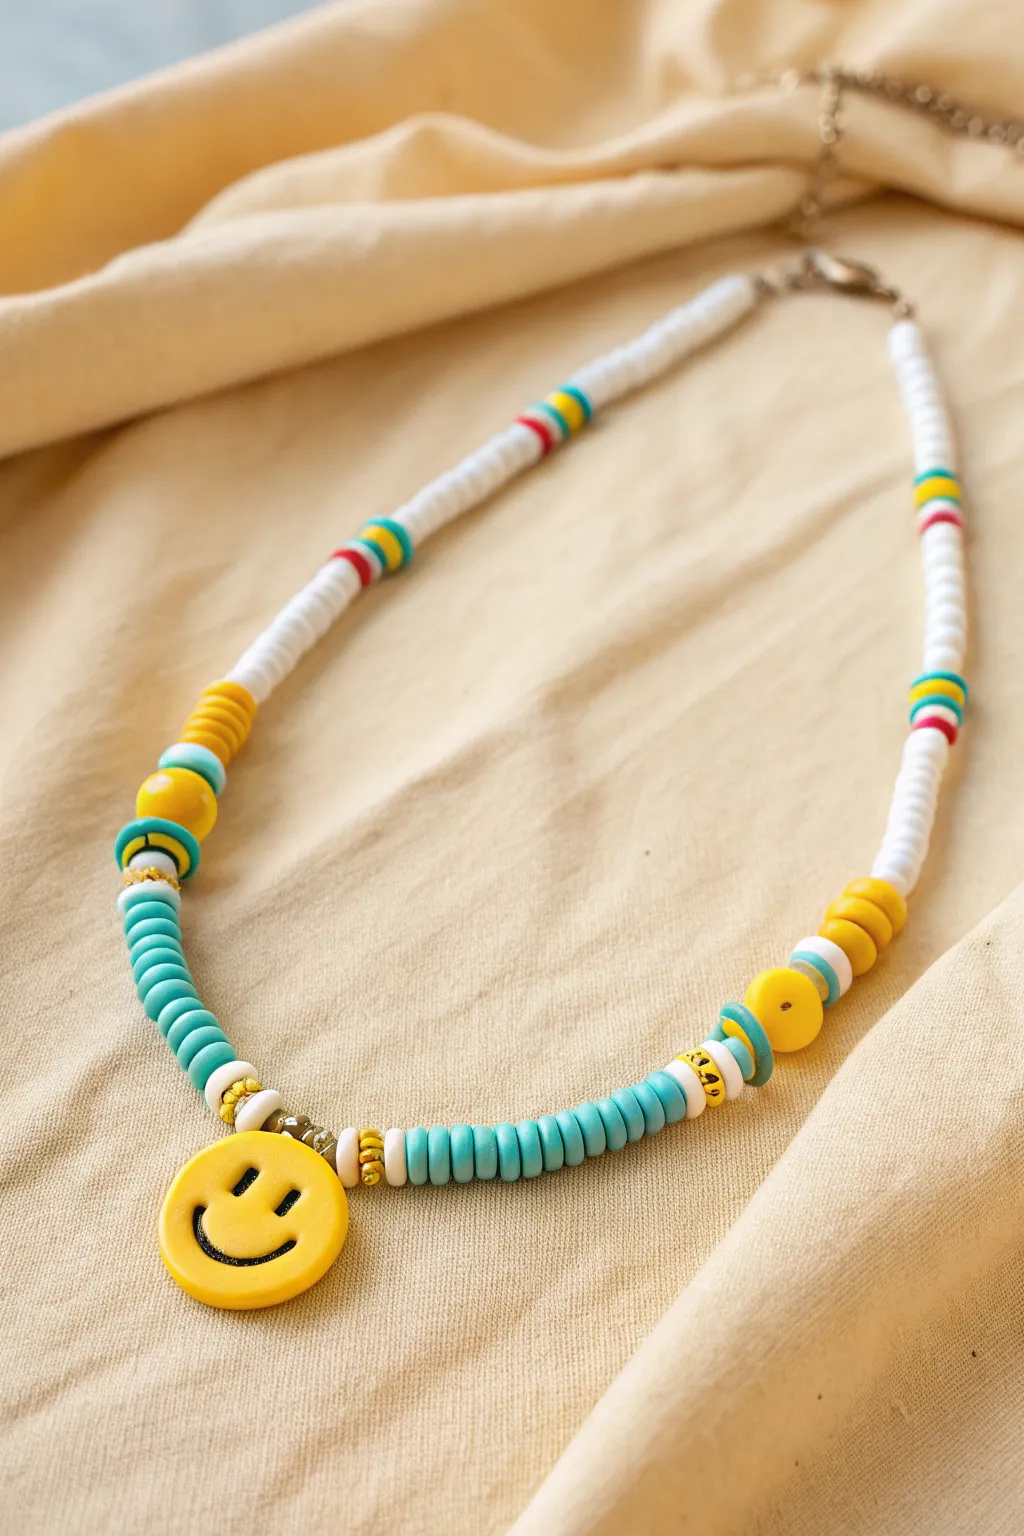
Capture the carefree spirit of summer with this cheerful beaded necklace, featuring a classic yellow smiley face charm as its centerpiece. Combining vibrant turquoise, sunny yellow, and crisp white clay discs, this accessory brings a pop of playful color to any outfit.
Step-by-Step Tutorial
Materials
- Flat round polymer clay beads (turquoise/teal)
- Flat round polymer clay beads (canary yellow)
- Flat round polymer clay beads (white)
- Flat round polymer clay beads (red)
- Flat round polymer clay beads (bright blue)
- Yellow smiley face charm (acrylic or polymer clay)
- Small gold spacer beads (round)
- Small gold spacer beads (daisy/flower shape)
- Beading wire or strong elastic cord
- 2 Crimp beads
- 2 Jump rings
- Lobster clasp and extender chain
- Jewelry pliers (flat nose and wire cutters)
Step 1: Planning and Centerpiece
-
Measure your length:
Cut a piece of beading wire approximately 18-20 inches long. This gives you plenty of room for a standard choker length plus extra for finishing the ends comfortably. -
Secure the start:
Attach a piece of tape to one end of the wire to act as a stopper so your beads don’t slide off while you work. Alternatively, you can crimp one end now if you are confident in your sizing. -
String the smiley face:
Start by threading your yellow smiley face charm onto the wire, sliding it to the center. This will be the focal point that we build the pattern out from.
Uneven Tension?
If the necklace feels stiff or kinks, you’ve strung the beads too tightly. Leave a tiny 1-2mm gap of exposed wire near the clasp before crimping to let the beads drape naturally.
Step 2: Creating the Central Pattern
-
Add gold accents:
On both sides of the smiley charm, thread one small gold round spacer, followed by a white clay disc bead, and then a gold daisy spacer for a touch of texture. -
Begin the turquoise section:
On the right side of the charm, string about 10-12 turquoise clay disc beads. Repeat this exact step on the left side to maintain symmetry. -
Transition with white:
After the block of turquoise, add a small single white bead, a gold daisy spacer, and another white bead on both sides. -
Add a pop of yellow:
String a single larger yellow round bead (or a stack of 2-3 yellow discs) as a highlight. Follow this immediately with a thin dark blue or black accent bead if you have one, or simply move to the next step. -
Create a yellow block:
Add a sequence of about 4-5 yellow clay disc beads on each side. The pattern is now moving from cool tones to warm tones.
Make It Personal
Swap the smiley face charm for a letter bead with your initial, or use a fruit charm like a strawberry or lemon to keep the summery vibe but add a unique twist.
Step 3: Building the Neck Strap
-
Start the white base:
The rest of the necklace relies heavily on white beads to make the colors pop. Thread about 15-20 white clay discs on both sides. -
Insert color stations:
To break up the white, create a small ‘station’ of color. Thread one red bead, one yellow bead, and one bright blue bead. Repeat this on the other side. -
Continue the white strap:
Add a long section of white beads (roughly 1.5 – 2 inches) on each side. -
Second color station:
Add another color trio station: red, blue, then yellow this time for slight variation, or stick to the previous pattern. -
Finish beading:
Fill the remaining length of the wire with white clay beads until you reach your desired total necklace length, usually leaving about 1 inch of wire bare on each end.
Step 4: Finishing Touches
-
Prepare the first end:
Remove the tape. Slide a crimp bead onto the end of the wire, followed by a jump ring or the loop of your clasp. -
Create the loop:
Thread the wire back through the crimp bead to create a small loop. Pull it tight, but ensure the clasp can still wiggle freely. -
Crimp it shut:
Use your flat nose pliers to smash the crimp bead flat, securing the wire. I like to tug completely firmly here to ensure nothing slips. -
Finish the second end:
Repeat the crimping process on the other end, attaching the other half of the clasp or an extender chain. Trim any excess wire close to the crimp bead.
Wear your new smiley necklace layered with gold chains for the perfect summer festival look
Fruit Slice Focal Bead Necklace
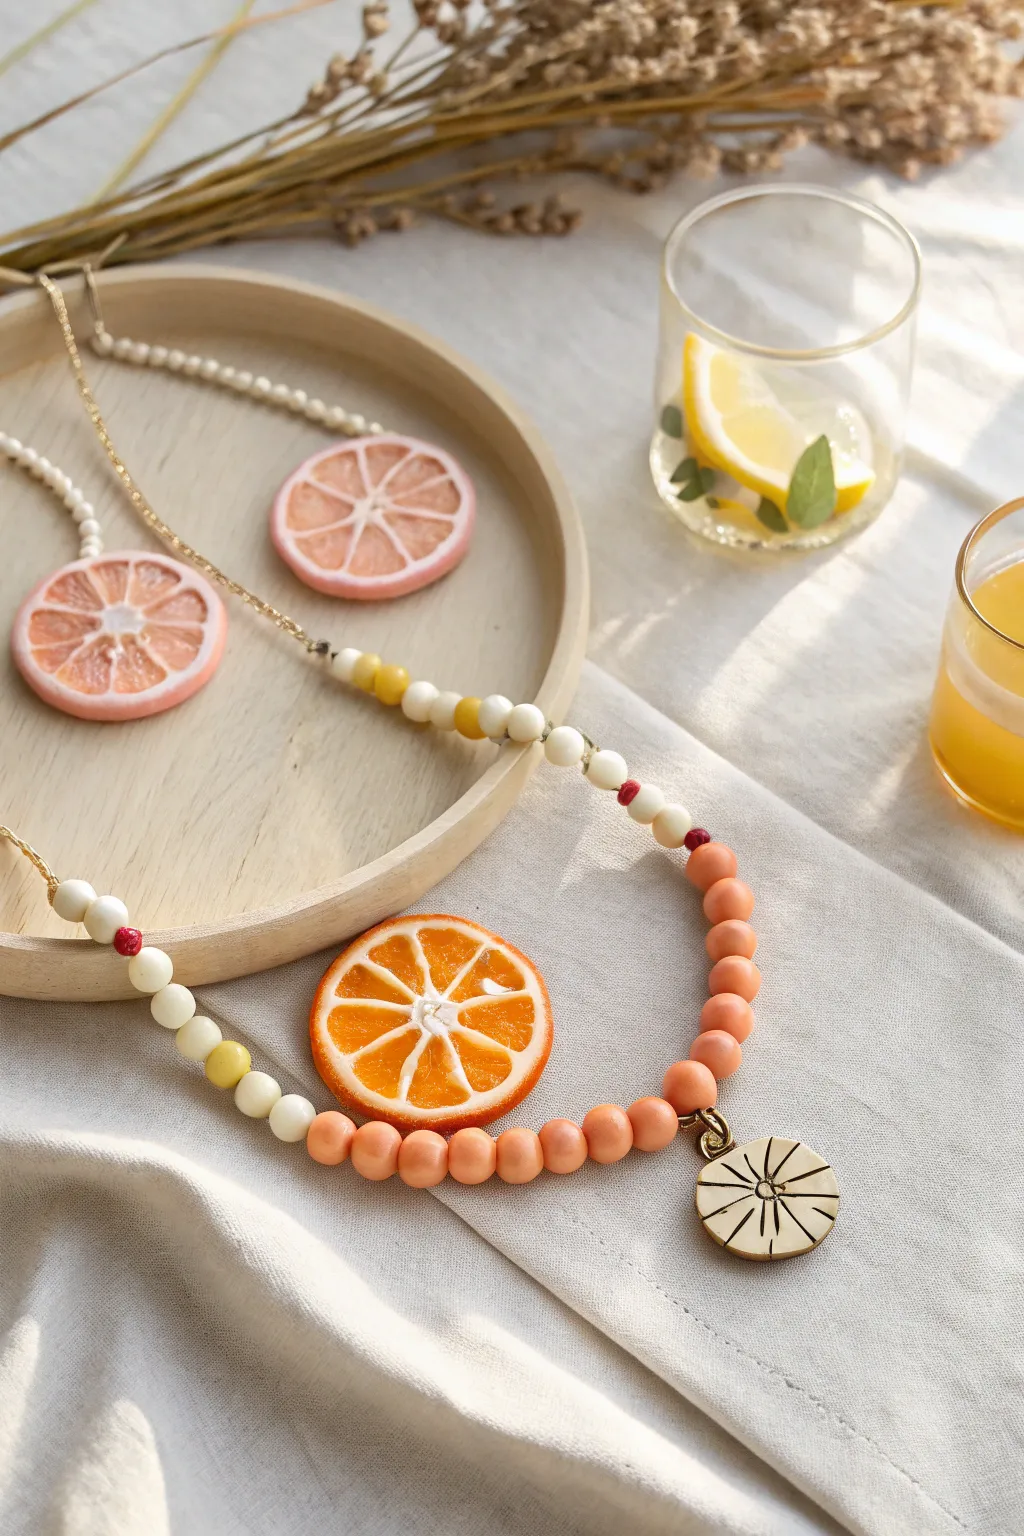
Capture the essence of summer with this delightful beaded necklace. Featuring a handmade clay pendant that mimics a stylized citrus slice and a gradient of warm, sunset-hued beads, this accessory is perfect for sunny days.
How-To Guide
Materials
- Polymer clay (creamy white)
- Acrylic paint (black or dark brown)
- Round wood or polymer clay beads (8mm, coral/salmon pink)
- Round beads (6mm, cream/off-white)
- Round beads (6mm, yellow)
- Small seed beads (red/cranberry)
- Gold jewelry wire or headpins
- Gold finish chain (fine link)
- Jump ring (gold finish)
- Jewelry pliers (round nose and flat nose)
- Needle tool or toothpick
- Rolling pin or pasta machine
- Small round cutter (approx. 1 inch)
- Beading wire or string
- Crimp beads and clasp
Step 1: Creating the Pendant
-
Condition the clay:
Start by conditioning your creamy white polymer clay until it is soft and pliable. Use a rolling pin or pasta machine to roll it out into a smooth sheet, roughly 3-4mm thick. -
Cut the shape:
Using your small round cutter, punch out a clean circle. If desired, soften the edges slightly with your finger to remove any sharp cut marks. -
Impress the design:
Using a needle tool, gently press a line directly across the center diameter. Then, press two more lines to divide the circle into six equal pie-slice sections. -
Add details:
Within each ‘slice’ section, press a small, V-shape or line near the outer edge to mimic the segments of a fruit. Create a small hole near the top edge for your jump ring. -
Bake the pendant:
Bake the clay piece according to the manufacturer’s instructions for your specific brand. Let it cool completely before handling. -
Highlight the grooves:
To make the design pop, brush a small amount of diluted black or dark brown acrylic paint into the grooves you created. I find it helpful to wipe away the excess immediately with a damp paper towel so the paint only remains in the recessed lines.
Clean Lines
If your carved lines look messy after baking, gently sand the surface of the pendant with fine-grit sandpaper after the paint dries to crisp up the design.
Step 2: Assembling the Beaded Strand
-
Prepare your wire:
Cut a length of beading wire approximately 20 inches long (or your desired length plus a few inches for finishing). -
Start the center:
Thread your finished clay pendant onto a gold jump ring, and then slide the jump ring onto the center of your beading wire. -
String the coral beads:
On both sides of the pendant, string about 8-10 of the larger salmon/coral pink beads. This creates the heavy, colorful focal point at the bottom of the necklace. -
Add the accent beads:
Next, add a single small red seed bead to each side as a separator. -
Begin the gradient:
Transition to the cream-colored beads. Add 2-3 cream beads, followed by one red seed bead on each side. -
Continue the pattern:
Add 2-3 more cream beads, then transition to a few yellow beads to hint at citrus colors. Continue this pattern, mixing cream and yellow beads, until you have about 3-4 inches of beading on each side. -
Attach to chain:
Secure the ends of your beaded section using crimp beads. Create a small loop with the beading wire, thread it through the crimp, back through the crimp, and flatten it with pliers. Attach these loops to lengths of gold chain to finish the necklace’s length. -
Add the clasp:
At the very ends of the gold chain, attach your clasp setup using jump rings to ensure the necklace is easy to wear.
Uneven Hanging?
If the pendant won’t lay flat, ensure the jump ring hole is centered and the jump ring itself is large enough to move freely on the beading wire.
Enjoy wearing your fresh, beach-ready accessory with your favorite summer outfits
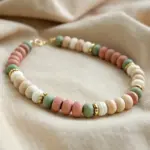
Daisy-Inspired Bead Accent Strand
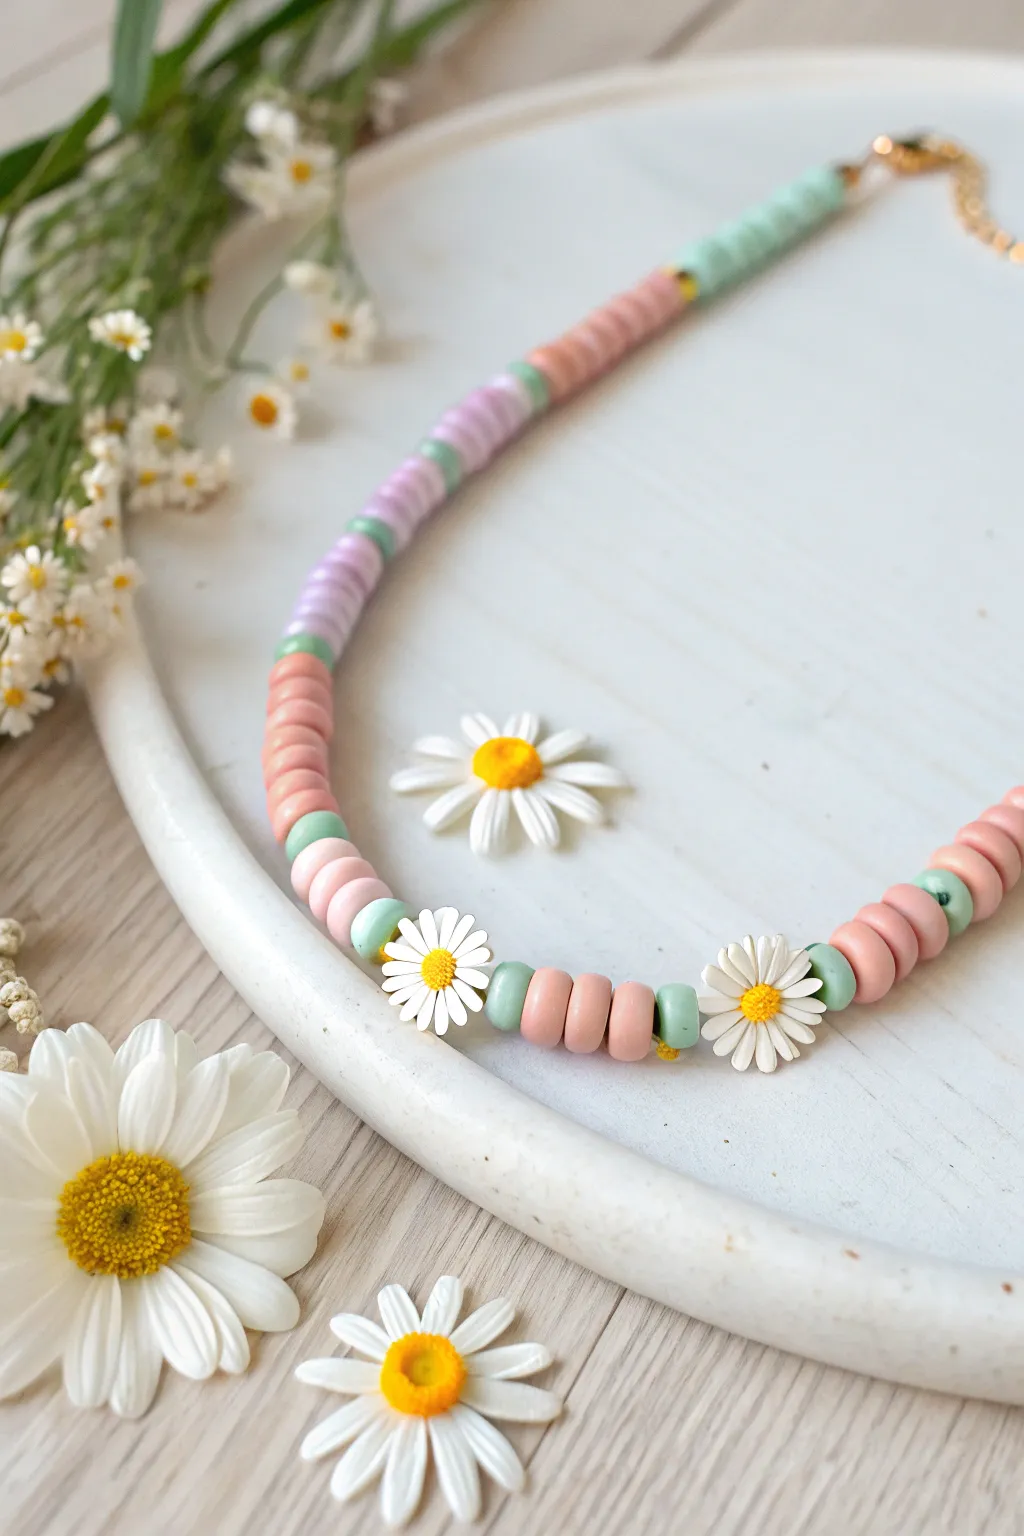
Capture the essence of a sunny cottage garden with this delightful polymer clay bead necklace. Featuring soft pastel segments interspersed with cheerful daisy charms, this accessory adds a touch of whimsy to any summer outfit.
Detailed Instructions
Materials
- Polymer clay disc (heishi) beads in warm pink
- Polymer clay disc (heishi) beads in lavender or lilac
- Polymer clay disc (heishi) beads in mint green
- White daisy flower charm beads (approx. 10mm)
- Beading wire (flexible nylon-coated steel wire)
- 2 Crimp beads
- 2 Crimp covers (gold finish)
- 2 Wire guards (gold finish)
- Jump rings (gold finish)
- Lobster clasp and extension chain (gold finish)
- Crimping pliers
- Wire cutters
- Measuring tape
Step 1: Planning and Preparation
-
Determine Length:
Measure your neck or a favorite necklace to decide on the total length. For this choker style, 14-16 inches is standard, but you’ll want to cut your beading wire about 4 inches longer than your desired finished length to allow room for finishing. -
Secure the End:
Before you start stringing, place a piece of tape or a bead stopper on one end of your wire. This prevents your carefully arranged beads from sliding off while you work. -
Lay Out the Pattern:
This design relies on color blocking. Plan your pattern on a bead board or soft cloth. The sequence shown uses a repeating pattern of color blocks separated by single mint green spacer beads.
Loose Daisies?
If the daisy charms spin around and face backward, thread them on a slightly tighter section or sandwich them snugly between two specific mint beads.
Step 2: Stringing the Beads
-
Start the First Section:
Begin by stringing a section of mint green beads near the clasp area. About 1 inch of solid mint green works well to taper the design near the neck. -
Transition Spacer:
Add a small gold spacer bead or a single contrasting bead if you wish, though the image shows clean transitions. Move directly into the next color block. -
Create the Pink Block:
String approximately 15-20 warm pink clay beads. The beauty of these beads is their slight irregularity, so focus on length rather than exact visible count. -
Add a Mint Accent:
Slide on a single mint green bead. This acts as a visual palate cleanser between the larger color blocks. -
Lavender Section:
String a block of lavender beads, aiming for the same length as your pink section (about 1.5 inches). Follow this with another single mint green bead. -
Center Daisy Placement:
Once you approach the center third of the necklace, introduce the flowers. Thread on a daisy charm bead so it faces outward. -
Pattern Between Daisies:
Between the flower charms, create a specific pattern: Single mint bead, three pink beads, single mint bead. I like to keep this section short so the flowers sit relatively close together. -
Add Second Daisy:
Thread on your second daisy charm. Repeat the short pattern (mint, 3 pink, mint) and add a third daisy if desired, or return to the main color blocking pattern. -
Mirror the Design:
Continue stringing the rest of the necklace, mirroring the color blocks (lavender, mint spacer, pink, mint spacer) until you reach the other side. -
Check the Length:
carefully lift the wire by the ends and drape it around your neck to check the fit and symmetry. Adjust beads now if one side looks uneven.
Step 3: Attaching the Clasp
-
Thread the Crimp:
Remove the tape from the end. Slide on a crimp bead followed by a wire guard. -
Loop the Hardware:
Thread the wire up through one side of the wire guard, hook on your jump ring (attached to the clasp), and go down through the other side of the guard. -
Secure the Crimp:
Pass the wire back through the crimp bead. Pull tight, but leave a tiny bit of slack so the necklace moves fluidly. Use crimping pliers to flatten the crimp bead securely. -
Hide the Crimp:
Place a crimp cover over the clear, flattened crimp bead. Gently squeeze it closed with pliers until it looks like a round gold bead. -
Repeat on Other Side:
Repeat the crimping process on the other end of the necklace, attaching the extension chain instead of the clasp. -
Trim Excess Wire:
Use flush cutters to trim the remaining tail of the wire as close to the bead as possible without cutting your main strand.
Make it Sparkle
Replace the single mint spacer beads with tiny 3mm gold-filled round beads. This adds a hint of luxury and separates the pastel colors beautifully.
Now you have a charming, garden-inspired accessory ready to wear for brunch or a beach day
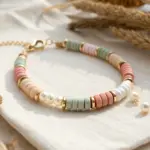
Surf Necklace With Chunky Spacers
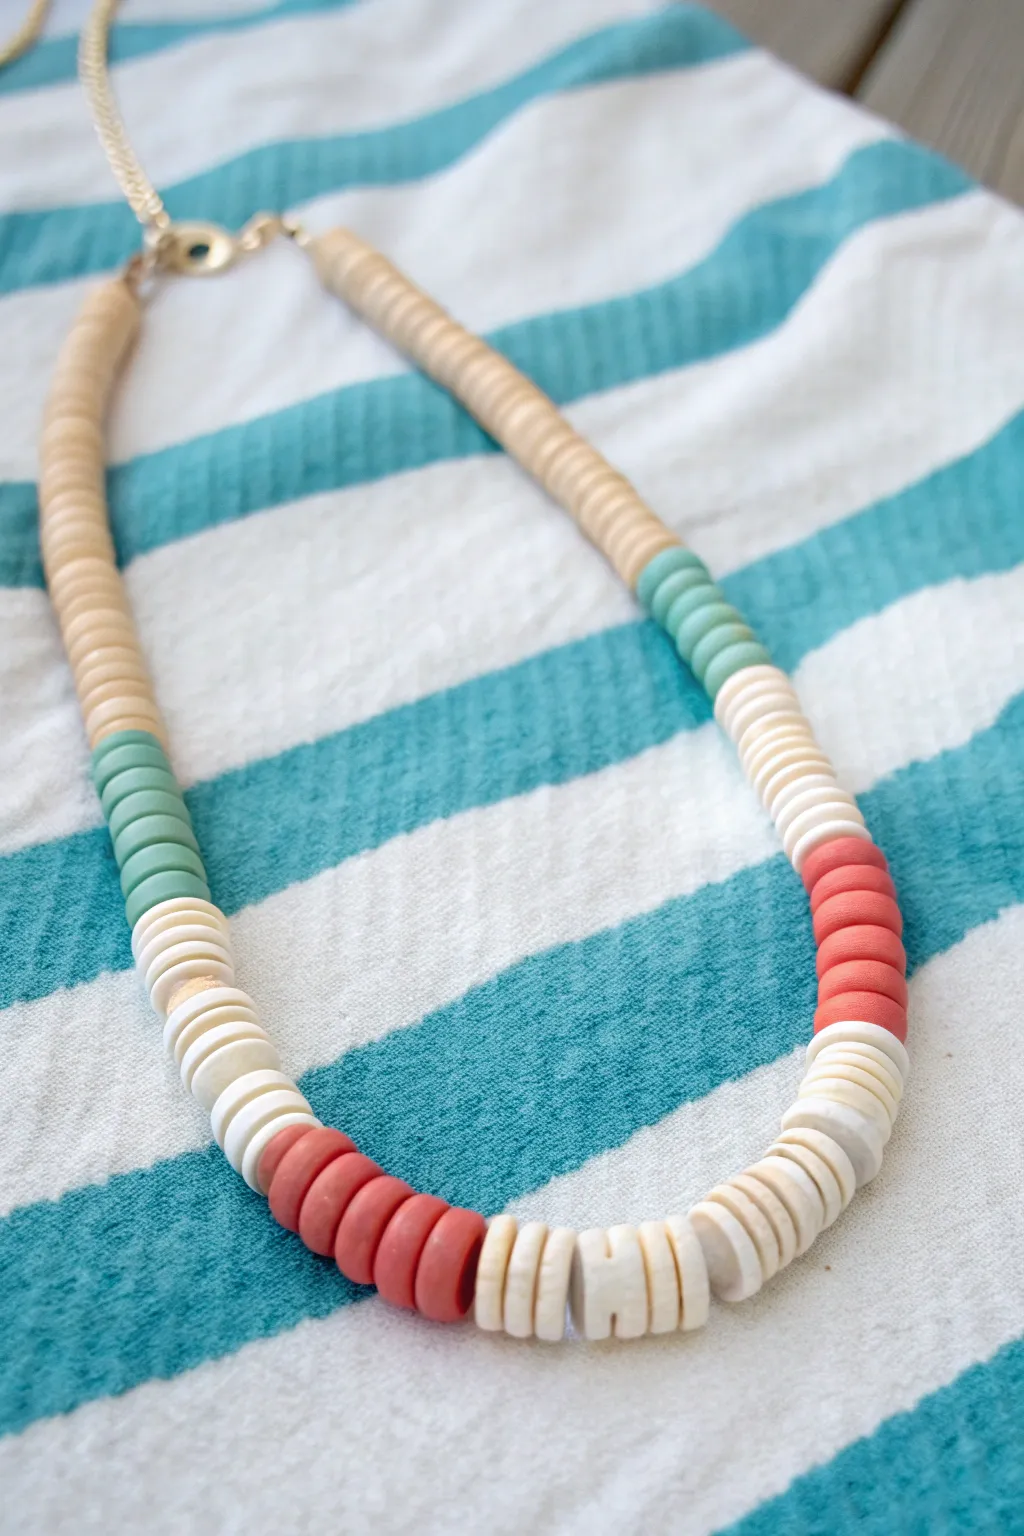
Capture the laid-back vibe of summer with this stylish heishi bead necklace, featuring a classic surf-style color palette. The mix of natural wood tones with pops of mint and coral creates a versatile accessory perfect for beach days or casual outings.
How-To Guide
Materials
- Beige polymer clay heishi beads (flat disc beads, approx. 6mm)
- Mint green polymer clay heishi beads
- Coral/salmon polymer clay heishi beads
- White polymer clay heishi beads
- Chunky white spacery beads (irregular or slightly larger disc shape)
- Gold tone chain (small link)
- Gold tone lobster clasp
- Gold tone jump rings
- Beading wire (flexible, nylon-coated)
- Crimp beads (gold or silver)
- Crimping pliers
- Wire cutters
- Chain nose pliers
- Ruler or tape measure
Step 1: Preparation & Planning
-
Measure your length:
Decide on the desired length of your necklace. A standard collarbone length is usually around 16-18 inches, but measuring a necklace you already love is a great way to be sure. -
Cut the wire:
Cut a piece of beading wire about 4-6 inches longer than your finished necklace length. This extra slack is crucial for attaching the clasp comfortably at the end. -
Pre-sort your pattern:
Lay out your beads on a bead board or a soft towel to visualize the pattern. This specific design uses color blocking rather than a strict alternating pattern, so group your colors accordingly.
Stiffness Fix
Does the necklace stay rigid instead of draping? You likely crimped too tight. Leave a tiny gap (1-2mm) of bare wire at the end before crimping to let beads move.
Step 2: Starting the Strand
-
Secure the first end:
Thread a crimp bead onto one end of your wire, followed by a jump ring or the loop of your clasp. Loop the wire back through the crimp bead to create a small, secure loop. -
Crimp firmly:
Use your crimping pliers to flatten the crimp bead securely; I always give a gentle tug to ensure it’s locked tight before proceeding. -
Begin with neutrals:
Start threading the beige or tan heishi beads. Thread a long section, approximately 3-4 inches, to serve as the back portion of the necklace that sits against the neck. -
Add a color pop:
Transition into your first color block by stringing about 1 inch of the mint green beads. This creates a fresh contrast against the neutral tan.
Shell Seekers
Replace the center white chunky beads with a real puka shell or a small cowrie shell bead to amplify the genuine surfer girl aesthetic.
Step 3: Building the Focal Section
-
Introduce white accents:
After the mint green section, add a short segment of standard white heishi beads, roughly 0.5 to 0.75 inches long. -
Create texture variability:
For the center focal point, alternate slightly larger, chunkier white spacer beads with your standard flat discs if available, or simply switch to a distinct section of white to break up the rhythm. -
Add the coral block:
Thread on your coral or salmon-colored beads. Make this section roughly equal in length to the mint green section (about 1 inch) to balance the visual weight. -
Center detailing:
Finish the bottom center curve of the necklace with a mix. Use white chunky spacers or irregular disc beads here to give it that organic, beach-combed feel shown in the photo. -
Mirror or mismatch:
As you work up the other side, decide if you want symmetry. The example shows an asymmetrical charm where the color blocks don’t perfectly mirror each other, which adds to the casual surf aesthetic. -
Finish the second side:
Complete the strand with another long section of the beige/tan beads until you reach your total desired length.
Step 4: Finishing Touches
-
Prepare the second end:
Thread a crimp bead onto the open end of the wire, followed by a jump ring. -
Thread back:
Pass the wire back through the crimp bead and through a few of the adjacent beige beads. Pull the wire until the loop is small and snug against the jump ring, but not so tight that the necklace is stiff. -
Crimp and trim:
Flatten the crimp bead with your pliers to secure the strand. Use flush wire cutters to trim the excess wire tail close to the beads so it doesn’t poke out. -
Attach the closure:
Open a jump ring using two pairs of pliers (twist sideways, don’t pull apart) and attach your lobster clasp to one side. On the other side, attach a short length of gold chain to serve as an extender. -
Detail the extender:
For a pro finish, you can attach a tiny single bead to the end of the extender chain using a headpin, though a simple chain works perfectly well too.
Now you have a breezy, beach-ready accessory to wear all summer long
Half Chain, Half Heishi Statement
Embrace the effortless vibes of summer with this mixed-media necklace that blends the cool touch of metal with vibrant pops of color. This design features an elegant gold chain interrupted by segments of white, coral, and turquoise heishi beads for a sophisticated yet playful look.
Step-by-Step Tutorial
Materials
- Gold-plated or brass link chain (fine gauge)
- Gold-plated extender chain (larger links)
- White polymer clay heishi beads (4-5mm)
- Coral/Salmon polymer clay heishi beads (4-5mm)
- Turquoise polymer clay heishi beads (4-5mm)
- Small gold spacer beads (round or nugget style)
- Beading wire (gold or clear nylon)
- 2 Crimp beads
- 2 Crimp covers (gold)
- 2 Jump rings (4-5mm, gold)
- 1 Lobster clasp (gold)
- Wire cutters
- Flat nose pliers
- Crimping pliers
Step 1: Planning the Pattern
-
Measure your length:
Decide on the total length of your necklace. Since this is a choker style, 14 to 16 inches is standard, but you’ll add an extender chain for versatility. -
Cut the chain segments:
Unlike a full beaded necklace, the back half of this piece is purely chain. Cut two equal lengths of your fine gold chain, each about 4-5 inches long, depending on how much beaded section you want in front. -
Layout your bead design:
On a bead board or flat surface, lay out your Heishi pattern. For this specific look, start with a section of white beads, transition to coral, and finish with a longer section of turquoise. -
Add the sparkle:
Insert a gold spacer bead after every 3-5 heishi beads. This breaks up the solid blocks of color and ties the clay section visually to the gold chain.
Uneven Spacing?
If your gold spacers look uneven, stick to a strict counting rule (e.g., exactly 5 clay beads between every spacer) rather than eyeing it. Uniformity is key here.
Step 2: Stringing the Centerpiece
-
Prepare the wire:
Cut a piece of beading wire approximately 10 inches long. This gives you plenty of extra room to work with the crimps without struggling. -
Secure the first side:
Thread a crimp bead onto the wire, followed by one end of your first chain segment. Loop the wire back through the crimp bead. -
Crimp firmly:
Use your crimping pliers to flatten the crimp bead, securing the wire to the chain. Give it a gentle tug to ensure it holds. -
Cover the mechanics:
Place a gold crimp cover over the flattened crimp bead and gently close it with flat nose pliers until it looks like a round gold bead. -
Start beading:
Thread your beads onto the wire, following the pattern you laid out. I find it easiest to scoop the heishi beads directly with the wire end. -
Check the pattern:
Pause occasionally to ensure your gold spacers are evenly distributed between the color blocks—typically four white, a gold spacer, three white, a spacer, then switching to coral. -
Finish the bead string:
Continue until all your white, coral, and turquoise sections are strung. The beaded portion should be roughly 5-6 inches long.
Step 3: Assembly and Finishing
-
Connect the second chain:
Slide a crimp bead onto the open wire end, followed by the end link of your second chain segment. -
Create tension:
Thread the wire back through the crimp bead and pull tight so there are no gaps between the beads and the chain, but not so tight the wire stiffens. -
Secure the end:
Flatten the crimp bead with your pliers and trim the excess wire tail close to the crimp. -
Add the final cover:
Apply the second crimp cover over this connection point for a professional finish. -
Attach the clasp:
On the far end of one chain segment, use your pliers to open a jump ring. Slide on the lobster clasp and the chain link, then close the ring securely. -
Add the extender:
On the end of the *other* chain segment, attach the heavier gauge extender chain using a jump ring. -
Final inspection:
Check all your jump rings to ensure they are fully closed so the fine chain doesn’t slip out.
Charm It Up
Attach a small gold seashell or pearl charm to the very end of the extender chain. It adds a cute design detail that looks great when your hair is up.
Now you have a stunning, high-contrast accessory ready to pair with your favorite white tee or summer dress
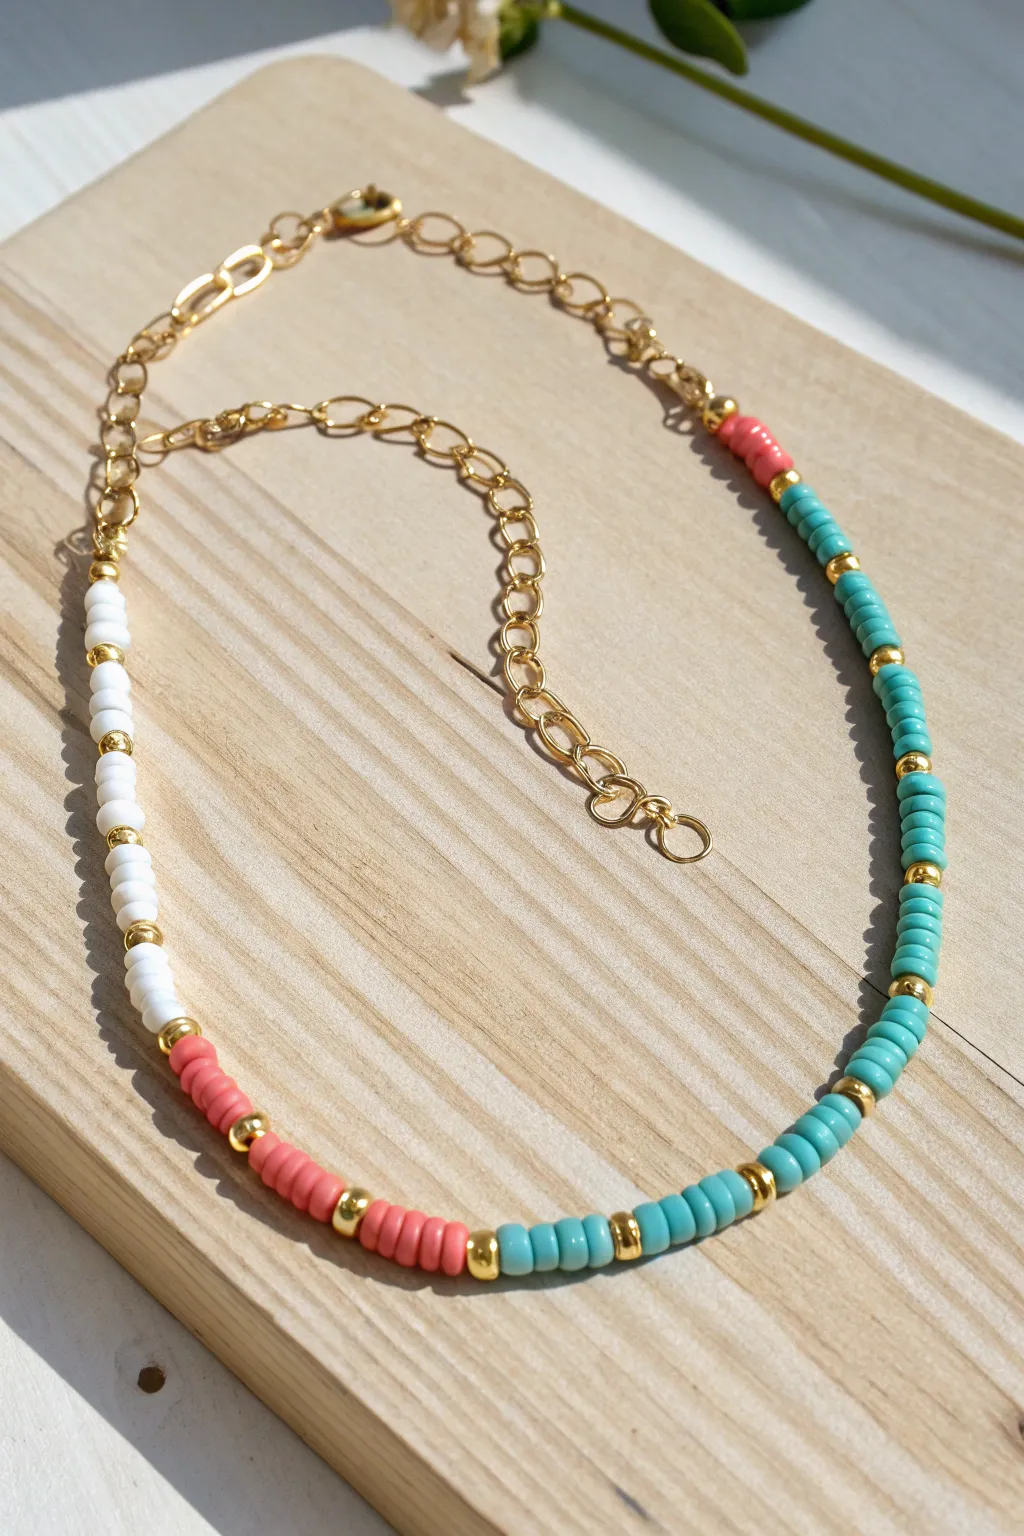
Linked Heishi Segments Necklace
This breezy necklace captures the essence of summer with its rhythmic pattern of coral, turquoise, and cream heishi beads. By separating blocks of color with gleaming gold accents, you create a sophisticated, segmented look perfect for layering.
Step-by-Step Guide
Materials
- 6mm Polymer clay heishi beads (Salmon/Coral)
- 6mm Polymer clay heishi beads (Turquoise/Teal)
- 6mm Polymer clay heishi beads (White/Cream)
- Gold nugget spacer beads (rough texture, approx. 4mm-6mm)
- Gold ring spacer beads (flat texture)
- Flexible beading wire or tigertail wire
- Gold crimp beads (2mm)
- Gold finish lobster clasp
- Gold finish extension chain
- Jump rings
- Crimping pliers
- Wire cutters
Step 1: Planning and Prep
-
Sort your palette:
Begin by separating your bead colors into piles. This design relies heavily on counting, so having your coral, turquoise, cream, and varied gold spacers easily accessible will make the stringing process much smoother. -
Establish the pattern:
The pattern follows a segmentation rhythm. The primary repeating unit involves a block of color (about 5-7 beads), bracketed by gold spacers, followed by a contrasting single cream bead or another color block. Take a moment to lay out a small 3-inch test section on your bead board to confirm you like the sequence. -
Cut the wire:
Measure a piece of beading wire approximately 20-22 inches long. This gives you ample room for a standard 16-18 inch necklace plus extra length for maneuvering the clasp and finishing the ends comfortably.
Uneven Blocks?
Don’t stress about exact bead counts per block. Clay heishi beads vary slightly in thickness. Aim for equal measurement (e.g., 1/2 inch blocks) rather than counting individual discs.
Step 2: Stringing the Beads
-
Secure the first end:
Before stringing any beads, thread one crimp bead onto the wire, followed by a jump ring or the loop of your extension chain. -
Loop and crimp:
Thread the wire back through the crimp bead to create a small loop securing the chain. Use your crimping pliers to flatten the crimp bead firmly, ensuring it’s secure. I like to double-check this connection by giving it a gentle tug. -
Start with turquoise:
Slide on about 5 to 7 turquoise heishi beads. This creates your first solid block of cooler color. -
Add first gold accents:
Place a textured gold nugget bead, followed immediately by a single cream heishi bead, and then another gold nugget bead. This little trio acts as a separator between the main color blocks. -
Add the coral segment:
String approximately 7 coral/salmon heishi beads. These warmer tones provide a vibrant contrast to the turquoise. -
Place the second separator:
Add a flat gold ring spacer, a single cream bead, and another flat gold ring spacer. Notice how alternating between the ‘nugget’ spacers and the ‘ring’ spacers adds visual interest. -
Continue the sequence:
Repeat the pattern: Turquoise block, nugget separator, coral block, ring separator. Continue this until you have reached approximately 16 to 17 inches of beaded length, or your desired size. -
Center focus:
As you string, ensure the pattern stays consistent. However, if you run out of a specific spacer, it’s okay to improvise slightly near the back of the neck where it’s less visible.
Wire Guard Trick
Use wire guards (horseshoe-shaped metal pieces) where the wire loops onto the clasp. They protect the wire from friction wear and give the ends a much more polished, high-end look.
Step 3: Finishing Touches
-
Check the fit:
Carefully lift the wire by the ends to drape it around your neck. The tension naturally loosens when hung, so ensure no large gaps of wire appear between beads. -
Prepare the final crimp:
Thread a crimp bead onto the unfinished end of the wire. Then, slide on the jump ring attached to your lobster clasp. -
Create the final loop:
Pass the wire tail back down through the crimp bead and into the first few beads of your design (the last turquoise or coral block you strung). -
Tighten the slack:
Pull the wire tail tight so the loop closes up near the clasp, but leave just a tiny bit of wiggle room (about 1mm) so the necklace remains flexible and drapes naturally rather than stiffly. -
Secure the strand:
Use your crimping pliers to flatten the final crimp bead securely. Ensure it is fully crushed so the wire cannot slip out. -
Trim excess wire:
Using your flush cutters, trim the remaining tail of wire as close to the beads as possible without nicking your work. -
Add charm detail (Optional):
If your extension chain has a plain end, you can attach a tiny gold charm or a single leftover bead to the very end link for a professional, boutique-style finish.
Enjoy styling your new necklace with a crisp white shirt or a beachy sundress for that perfect summer vibe
Beach Charm Cluster Center Drop
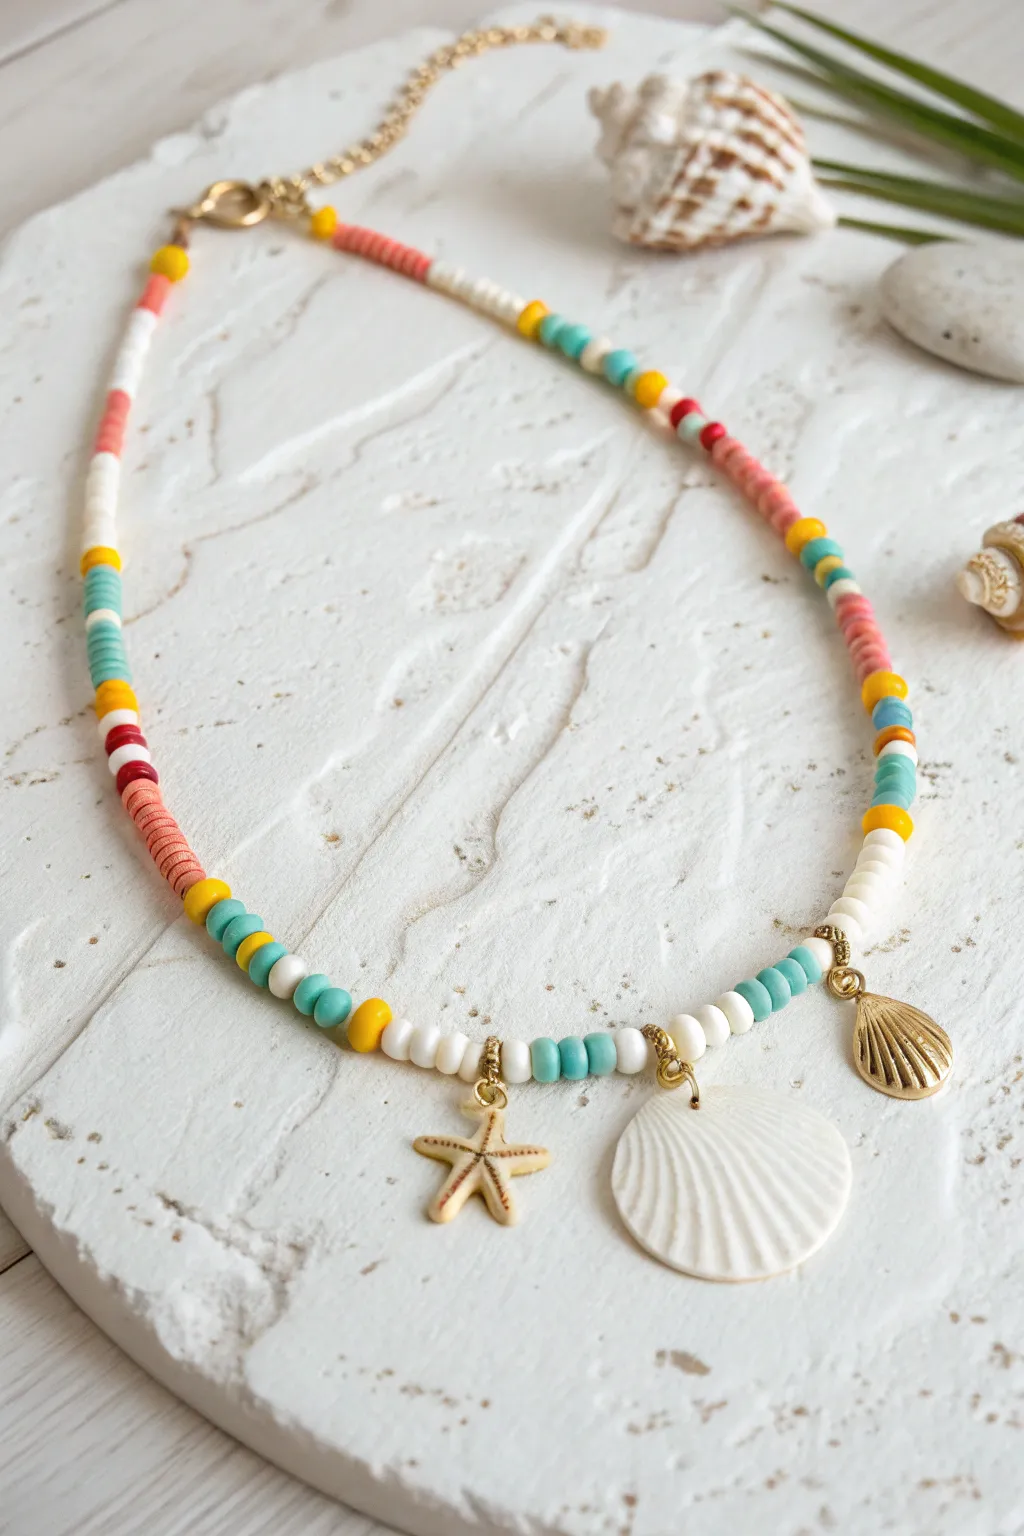
Capture the essence of a sun-soaked afternoon with this vibrant clay bead necklace. Featuring a delightful mix of heishi beads and a central trio of ocean-inspired charms, it’s the perfect accessory for beach days and boardwalk strolls.
How-To Guide
Materials
- Polymer clay heishi beads (white, teal/light blue, yellow, coral pink, red)
- Small round seed beads (gold)
- Gold-plated jewelry wire or tiger tail beading wire
- Gold-plated lobster clasp
- Gold-plated extension chain
- 2 Gold-plated crimp beads
- 2 Gold-plated wire guardians (optional but recommended)
- Gold-plated jump rings (4-6mm)
- Charm 1: Small gold starfish
- Charm 2: Large white scallop shell (flat disc style) with hole
- Charm 3: Small gold clam shell charm
- Jewelry pliers (flat nose and cutting pliers)
Step 1: Setting the Pattern
-
Prepare the workspace:
Lay out your bead mat or a soft cloth to prevent beads from rolling away. Sort your clay heishi beads by color: white, teal, yellow, coral, and the occasional red accent. -
Cut the wire:
Measure a length of beading wire approximately 20-22 inches long. This gives you plenty of room for the design and finishing the ends without feeling cramped. -
Secure the first end:
Thread a crimp bead and a wire guardian onto one end of the wire. Loop the wire through the last link of your extension chain, back through the guardian, and into the crimp bead. Flatten the crimp bead securely with pliers. -
Establish the color rhythm:
Begin stringing your beads. The pattern in the image relies on color blocking rather than a strict ABC pattern. Start with a section of coral beads, about 10-15 discs. -
Transition colors:
Add a single yellow bead, then switch to white beads for a short segment (about 8-10 beads). -
Add cool tones:
Introduce the teal beads. String a small block of 5-8 teal beads, followed by a single yellow separator.
Fixing Stiff Wire
If the necklace hangs stiffly instead of draping, you pulled the wire too tight before crimping. Leave a 1-2mm gap of slack near the clasp to allow flexibility.
Step 2: Building the Strand
-
Continue the irregular pattern:
Continue stringing, alternating block sizes. Notice how some sections have a pop of red followed by white, then teal. Keep the pattern playful and asymmetrical as you work towards the center. -
Check the length:
Periodically hold the necklace up to your neck to gauge where the center point will land. You want to stop the random pattern just before the main focal area. -
Prepare the center segment:
As you reach the middle, switch to a specific repeating pattern: 2 white, 2 teal, 1 yellow. Do this for about an inch to create a cohesive backdrop for the charms.
Pro Design Tip
For a truly organic look, vary the thickness of your color blocks. Let some be 1 inch long and others just 3 beads wide to mimic random beach finds.
Step 3: Creating the Charm Cluster
-
Attach the starfish:
Using your flat nose pliers, open a jump ring and attach the small gold starfish charm. Slide this jump ring directly onto the beading wire between two beads in your center segment. -
Space the charms:
Add approximately 4-6 more beads (a mix of white and teal) after the starfish to create space. -
Add the central shell:
Attach the large white scallop shell charm using a jump ring. This should sit at the very lowest point of the necklace curve. -
Finish the cluster:
String another small group of beads (matching the spacing on the other side), then slide on the gold clam shell charm using its jump ring.
Step 4: Finishing Touches
-
Complete the beading:
Resume your playful, asymmetrical color blocking pattern (coral, white, teal, yellow, red pops) on the second half of the necklace until you reach the desired length. -
Add the clasp:
Thread a crimp bead and wire guardian onto the remaining wire end. Loop the wire through the ring of your lobster clasp. -
Secure the end:
Thread the wire back through the crimp bead and pull tight, leaving just a tiny bit of slack so the necklace drapes naturally. I find crushing the crimp bead gently works best here. -
Trim excess:
Snip off the excess tail of the wire with your cutting pliers. If possible, tuck the very tip into the adjacent beads for a polished look.
Enjoy wearing your new seaside treasure or gift it to a friend who loves the ocean
Unexpected Neon Nights Summer Necklace
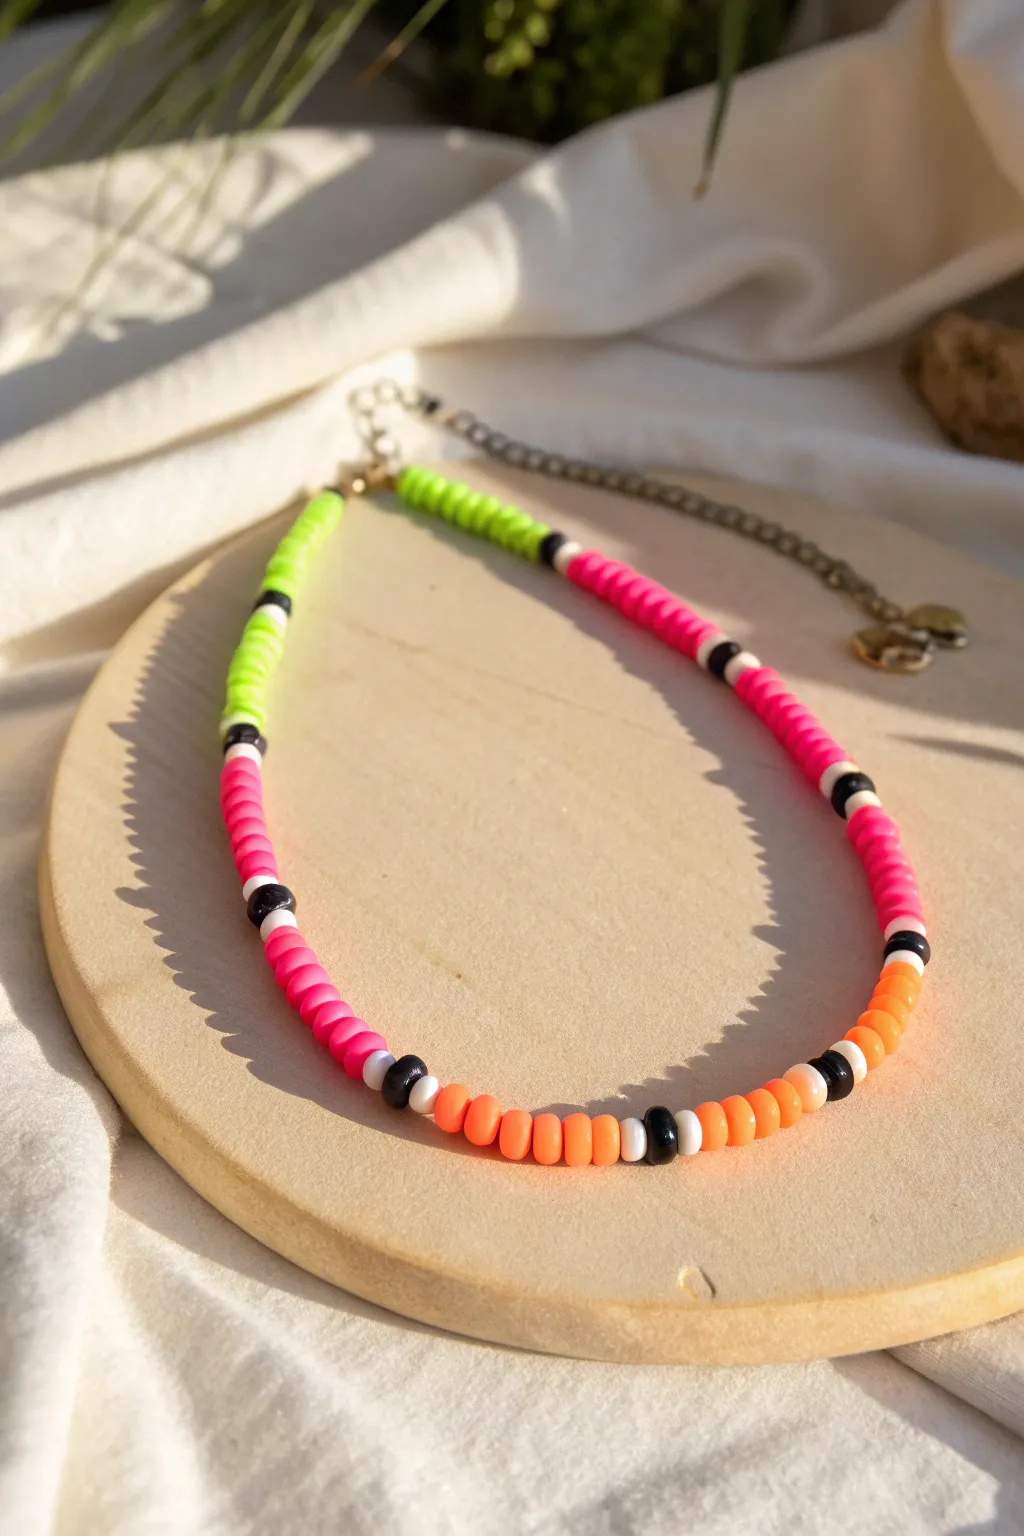
Bring the electric energy of summer evenings to your jewelry collection with this vibrant polymer clay necklace. Featuring bold blocks of neon green, hot pink, and sunset orange separated by striking monochrome accents, this piece is the perfect accessory for both beach days and night outs.
Step-by-Step Guide
Materials
- 6mm Polymer clay heishi beads (neon green, neon pink, neon orange)
- 6mm Polymer clay heishi beads (black, white)
- Beading wire (preferably nylon-coated stainless steel, 0.38mm or 0.45mm)
- 2 Gold-tone crimp tubes (2mm size)
- 2 Gold-tone crimp covers (3mm size)
- 2 Gold-tone wire guardians
- Gold-tone lobster clasp
- Gold-tone extender chain with charm
- Flat nose pliers
- crimping pliers
- Wire cutters
- Bead layout board (optional)
Step 1: Planning and Prep
-
Measure the wire:
Cut a piece of beading wire approximately 20 inches long. This gives you plenty of slack to work with for a standard 16-18 inch necklace. -
Plan your pattern:
Lay out your beads on a board to visualize the spacing. The key to this design is asymmetry in the color blocks. Notice how the pink sections are longer than the orange or green sections. -
Secure the first end:
Thread a crimp tube onto one end of the wire, followed by a wire guardian. Loop the wire through the guardian and back down into the crimp tube. -
Add the clasp:
Before crimping, slide the jump ring of your lobster clasp into the curve of the wire guardian. -
Crimp and cover:
Use your crimping pliers to flatten the crimp tube securely. Trim the short tail of the wire, then place a crimp cover over the flatted tube and gently close it with flat nose pliers to make it look like a gold bead.
Stiff Necklace?
If your necklace won’t lay flat or forms a rigid circle, you’ve strung it too tightly. Always leave a tiny bit of wiggle room (about 1mm) before the final crimp.
Step 2: Stringing the Neon Blocks
-
Start with green:
Begin stringing your neon green heishi beads. Aim for a section about 1.5 to 2 inches long. -
Create the first separator:
To create the signature ‘break’ in the color, slide on one black bead, followed by one white bead, and then another black bead. This monochrome trio makes the neons pop. -
Transition to pink:
String a long section of neon pink beads. This is the dominant color in this specific design, so make this section roughly 2.5 to 3 inches long. -
Add the second separator:
Repeat the monochrome pattern: one black bead, one white bead, one black bead. -
Switch to orange:
String a block of neon orange beads. I like to keep this section slightly shorter, perhaps around 1.5 inches, to balance the design. -
Repeat the pattern:
Add your black-white-black separator trio again.
Level Up: Mixed Textures
Replace the monochrome heishi separators with small gold filled spacer beads or freshwater pearls to add a touch of unexpected elegance to the casual clay.
Step 3: Completing the Strand
-
Continue the sequence:
Go back to neon green beads for another block. Continue alternating your color blocks and monochrome separators until the beaded portion reaches your desired length (usually about 15-16 inches). -
Check for gaps:
Hold the necklace up by the un-crimped end. Let gravity help settle the beads so there are no large gaps between them. -
Prepare the final crimp:
Thread a crimp tube onto the remaining wire tail, followed by a wire guardian. -
Attach the extender:
Loop the wire through the guardian and attach the loop of your extender chain before threading the wire back down into the crimp tube and through the first few beads. -
Tighten the tension:
Pull the wire snug. You want the beads to touch, but not be so tight that the necklace becomes stiff and loses its drape. -
Final crimp:
Flatten the crimp tube with your pliers, trim the excess wire close to the beads, and finish by applying the final gold crimp cover.
Enjoy styling your new neon accessory, letting these bright colors amplify your summer glow