If you’ve got a birthday coming up and a block of air-dry clay or polymer clay on your table, you’re already halfway to a gift that feels truly personal. These clay birthday gift ideas are beginner-friendly, super customizable, and full of that handmade “I made this just for you” energy.
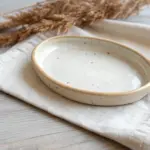
Personalized Birthday Trinket Dish
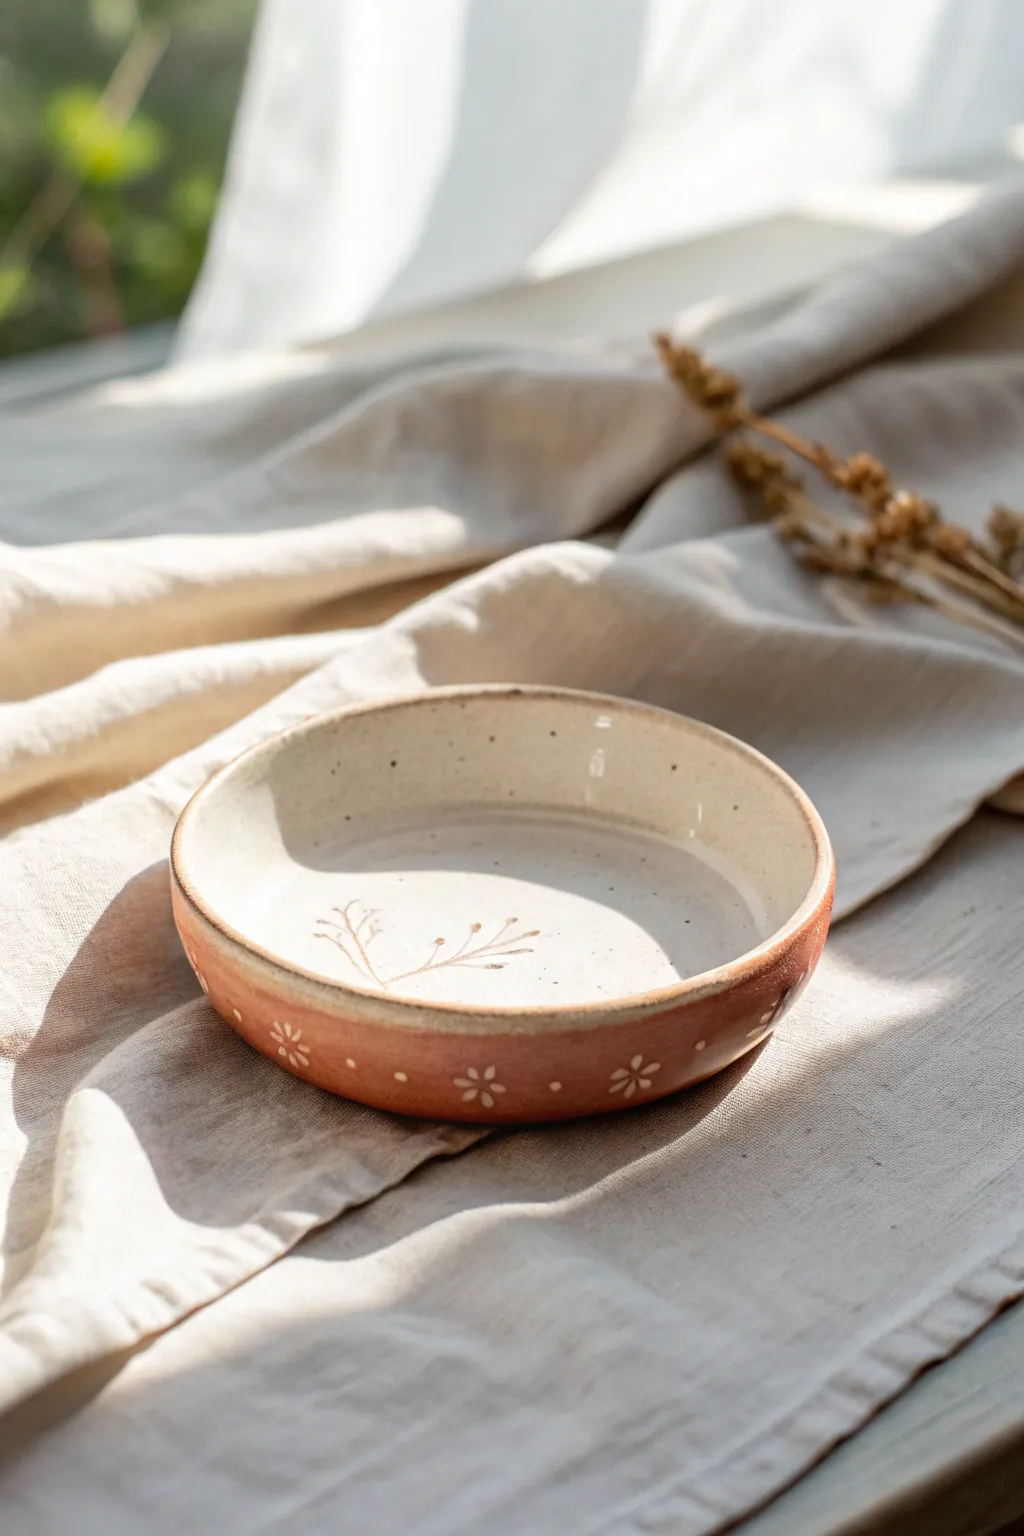
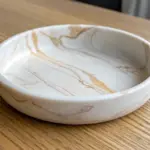
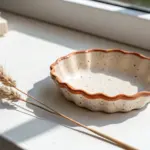
Capture the warmth of a sunny afternoon with this charming terracotta-style trinket dish. Featuring delicate white floral details and a smooth, creamy interior glaze, this piece makes a thoughtful and functional bedside or vanity accessory.
Step-by-Step Tutorial
Materials
- Red earthenware clay (or air-dry terracotta clay)
- White underglaze (or white acrylic paint if using air-dry)
- Clear glossy glaze (or gloss varnish for air-dry)
- Small round paintbrush
- Fine detail brush
- Rolling pin
- Canvas mat or cloth to roll on
- Circle template (approx. 5-6 inches)
- Needle tool or craft knife
- Small bowl or hump mold for shaping
- Sponge
- Water
Step 1: Shaping the Form
-
Prepare the clay:
Begin by wedging a handful of red clay to remove any air bubbles. If you are using real pottery clay, ensure it is pliable but firm. For air-dry clay, knead it briefly to warm it up. -
Roll the slab:
Place your clay on a canvas mat or cloth to prevent sticking. Use a rolling pin to flatten the clay into an even slab, aiming for a thickness of about 1/4 inch. -
Cut the circle:
Lay your circle template (a paper cutout or a cereal bowl works perfectly) onto the slab. Trace around it with a needle tool or craft knife and remove the excess clay. -
Smooth the edges:
Dip your finger or a small sponge in a little water and run it along the cut rim of the circle. This rounds off the sharp edge and prevents future chipping. -
Create the curve:
Gently lift the clay circle and place it inside a shallow bowl or over a hump mold to give it a gentle curve. Press lightly so it takes the shape without thinning the walls. -
Define the rim:
While it’s in the mold, use your fingers to slightly flatten the very top edge of the rim, giving it a sturdy, finished look similar to the photo. -
Initial drying:
Allow the dish to dry until it is leather hard—firm enough to hold its shape but still workable. This usually takes a few hours depending on humidity.
Warping Worries?
If the rim warps while drying, place a small, light beanbag or weight in the center to hold it down gently. Dry slowly away from direct drafts.
Step 2: Decorating and Finishing
-
Paint the interior base:
Using a soft round brush, apply two to three coats of white underglaze (or white acrylic) to the inside of the bowl. Stop right at the inner rim, leaving the beautiful red clay exposed on the edge. -
Sketch the center design:
With a very fine brush and brown underglaze (or diluted brown paint), paint delicate, thin stems radiating from one side of the white center. Keep the lines wispy and organic. -
Add rim flowers:
Along the outside vertical edge of the dish, paint small, simple daisy shapes using the white color. Space them evenly around the circumference. -
Add dot details:
Between each painted flower on the rim, add three tiny dots in a straight line. I find a toothpick or the back end of a paintbrush makes the most perfect, uniform dots. -
Speckle the interior:
To mimic the speckled stoneware look, load a toothbrush with a tiny bit of watered-down black or brown paint. Run your thumb over the bristles to flick tiny specks into the white interior. -
Final drying or firing:
If using kiln-fire clay, let the piece bone dry completely before bisque firing. If using air-dry clay, wait 24-48 hours until it is fully hard and light in color. -
Glazing:
Apply a clear glossy glaze over the entire interior to seal the design and make it food-safe (if using kiln clay). For air-dry clay, use a high-gloss varnish to simulate the ceramic shine. -
Final touch:
Ensure the bottom remains unglazed if firing in a kiln so it doesn’t stick to the shelf. If using varnish, coat the outside lightly for protection but keep the matte texture if possible.
Make It Personal
Instead of flowers on the rim, paint the recipient’s name, birth date, or a short phrase. Gold luster over the rim adds a luxe finish.
Wrap this lovely handmade dish in tissue paper for a gift that feels both rustic and refined


Happy Birthday Keepsake Tag Ornament
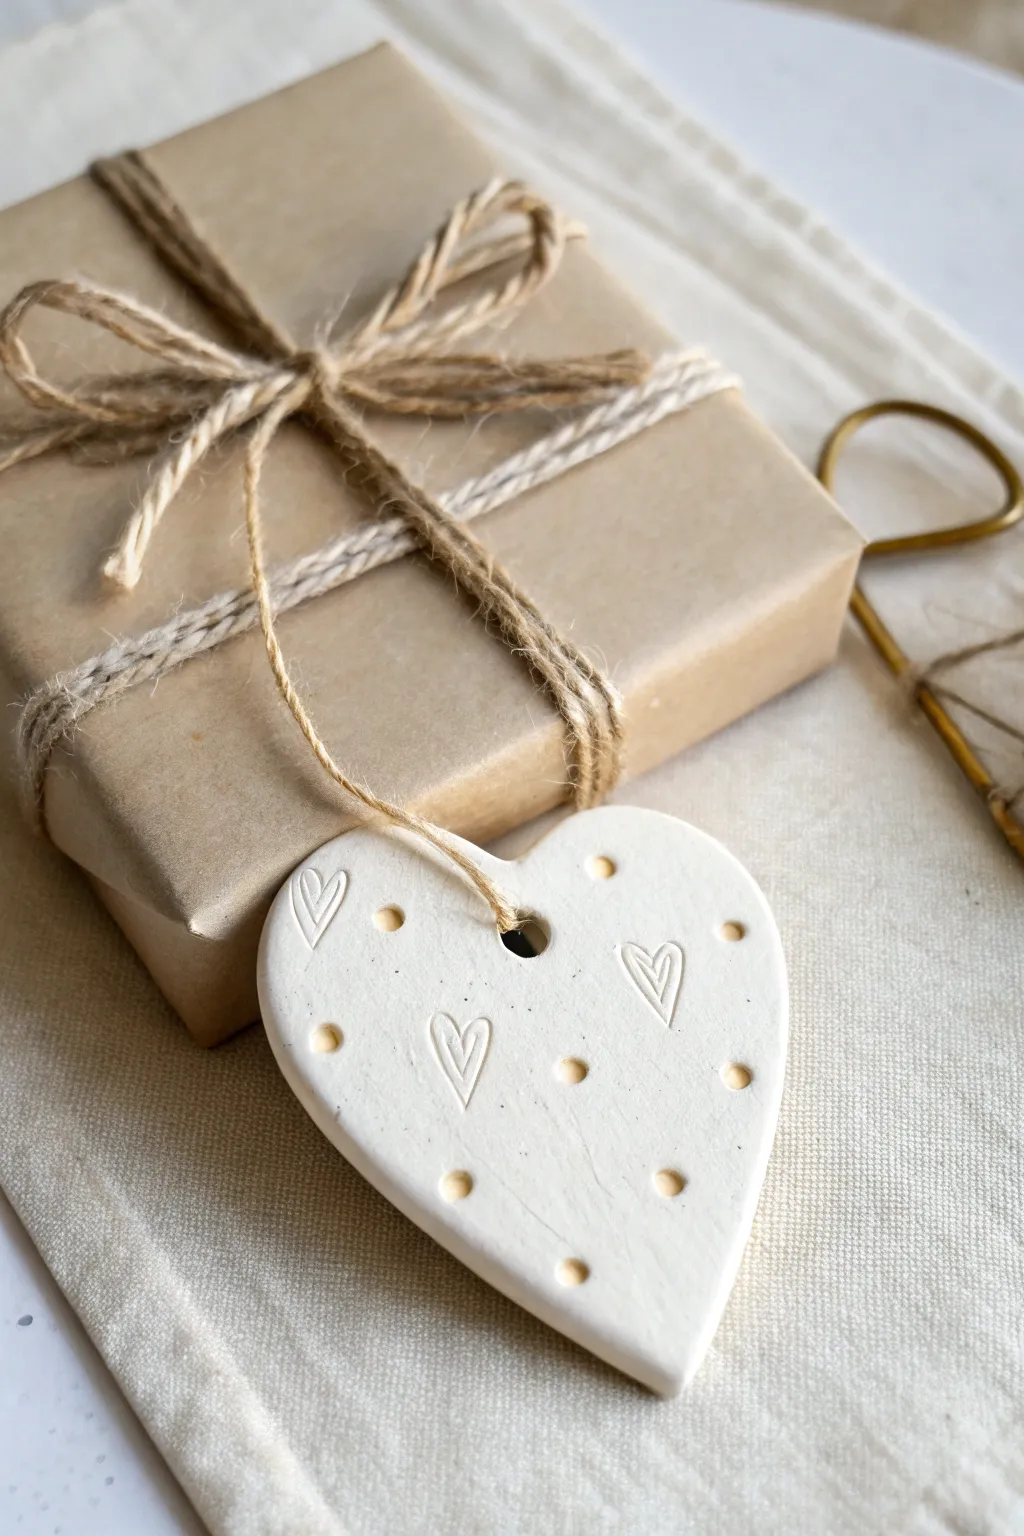
Add a handmade touch to any present with this charming yet simple air-dry clay heart tag. Featuring stamped heart motifs and delicate dimpled dots, this keepsake ornament doubles as a gift wrap embellishment and a lasting memento.
Detailed Instructions
Materials
- White stone-effect air-dry clay
- Rolling pin
- Heart-shaped cookie cutter (approx. 2.5 – 3 inches)
- Small heart stamp (a metal jewelry stamp or small rubber stamp)
- Small round tool (like the end of a paintbrush, a mechanical pencil tip without lead, or a dotting tool)
- Drinking straw or small circular cutter (for the string hole)
- Fine-grit sandpaper (optional)
- Jute twine
- Scissors
Step 1: Preparation and Shaping
-
Prepare the Clay:
Take a handful of white air-dry clay and knead it gently in your hands to warm it up. This ensures the texture is pliable and prevents cracking during the rolling process. I find working it for about a minute is usually sufficient. -
Roll It Out:
Place the clay on a clean, smooth surface or a silicone mat. Using your rolling pin, roll the clay out to an even thickness of approximately 1/4 inch (about 5-6mm). You want it thick enough to be sturdy but not bulky. -
Cut the Shape:
Position your heart-shaped cookie cutter over the smoothest part of the rolled clay. Press down firmly and evenly to cut out the heart shape. Wiggle it slightly before lifting to ensure a clean separation. -
Smooth the Edges:
Carefully remove the excess clay from around the heart. Dip your finger in a tiny bit of water and gently run it along the cut edges of the heart to smooth out any roughness or sharp ridges left by the cutter.
Step 2: Adding texture and details
-
Create the Hanging Hole:
Before the clay creates a crust, use a drinking straw or a small circular tool to punch a hole near the top center of the heart (the energetic ‘v’ dip). Make sure it’s not too close to the edge to prevent breakage later. -
Stamp the Heart Motifs:
Take your small heart stamp. Press it gently but firmly into the clay surface. Create three distinct impressions: one on the upper left, one on the upper right, and one slightly lower in the center. Don’t press all the way through; just create a clear embossment. -
Create the Dotted Pattern:
Using the blunt end of a paintbrush or a specialized dotting tool, press small circular indentations into the clay. Scatter them somewhat randomly around the stamped hearts to create a playful polka-dot effect. -
Refine the Dots:
Check your dots to ensure they are relatively uniform in depth. If any clay pushed up around the edges of the holes, gently tap it back down with your finger for a polished look.
Fixing Cracks
If tiny cracks appear while drying, don’t panic. Mix a tiny bit of fresh clay with water to make a paste (slip) and smooth it into the cracks with a wet finger.
Step 3: Finishing Touches
-
Initial Drying:
Place your clay heart onto a wire cooling rack or a flat piece of cardboard. Let it dry in a cool, dry place away from direct sunlight. -
Flip for Even Drying:
After about 12 hours, flip the heart over carefully. This helps the back side dry evenly and prevents the shape from curling or warping as moisture evaporates. -
Final Sanding (Optional):
Once the clay is bone dry (usually 24-48 hours depending on humidity), check the edges. If there are any rough spots, lightly buff them with fine-grit sandpaper for a professional finish. -
Prepare the Twine:
Cut a length of jute twine, approximately 10-12 inches long. This rustic material complements the natural stone look of the clay perfectly. -
Thread the Ornament:
Fold the twine in half to create a loop. Push the folded end through the hole in the heart from front to back. -
Secure the Knot:
Pass the loose ends of the twine through the loop you just pushed through the hole (a lark’s head knot). Pull tight to secure the twine against the top of the heart. -
Attach to Gift:
Tie the loose ends of the twine around the bow of your wrapped gift, letting the white heart hang as a beautiful focal point against the kraft paper.
Stamp Tip
If you don’t feature a metal stamp, you can hand-draw the hearts using a toothpick or a needle tool. Just use light pressure and scratch the design into the damp clay.
This simple yet thoughtful addition transforms simple brown paper wrapping into something truly special to be saved and cherished


Confetti-Inspired Clay Coaster Set
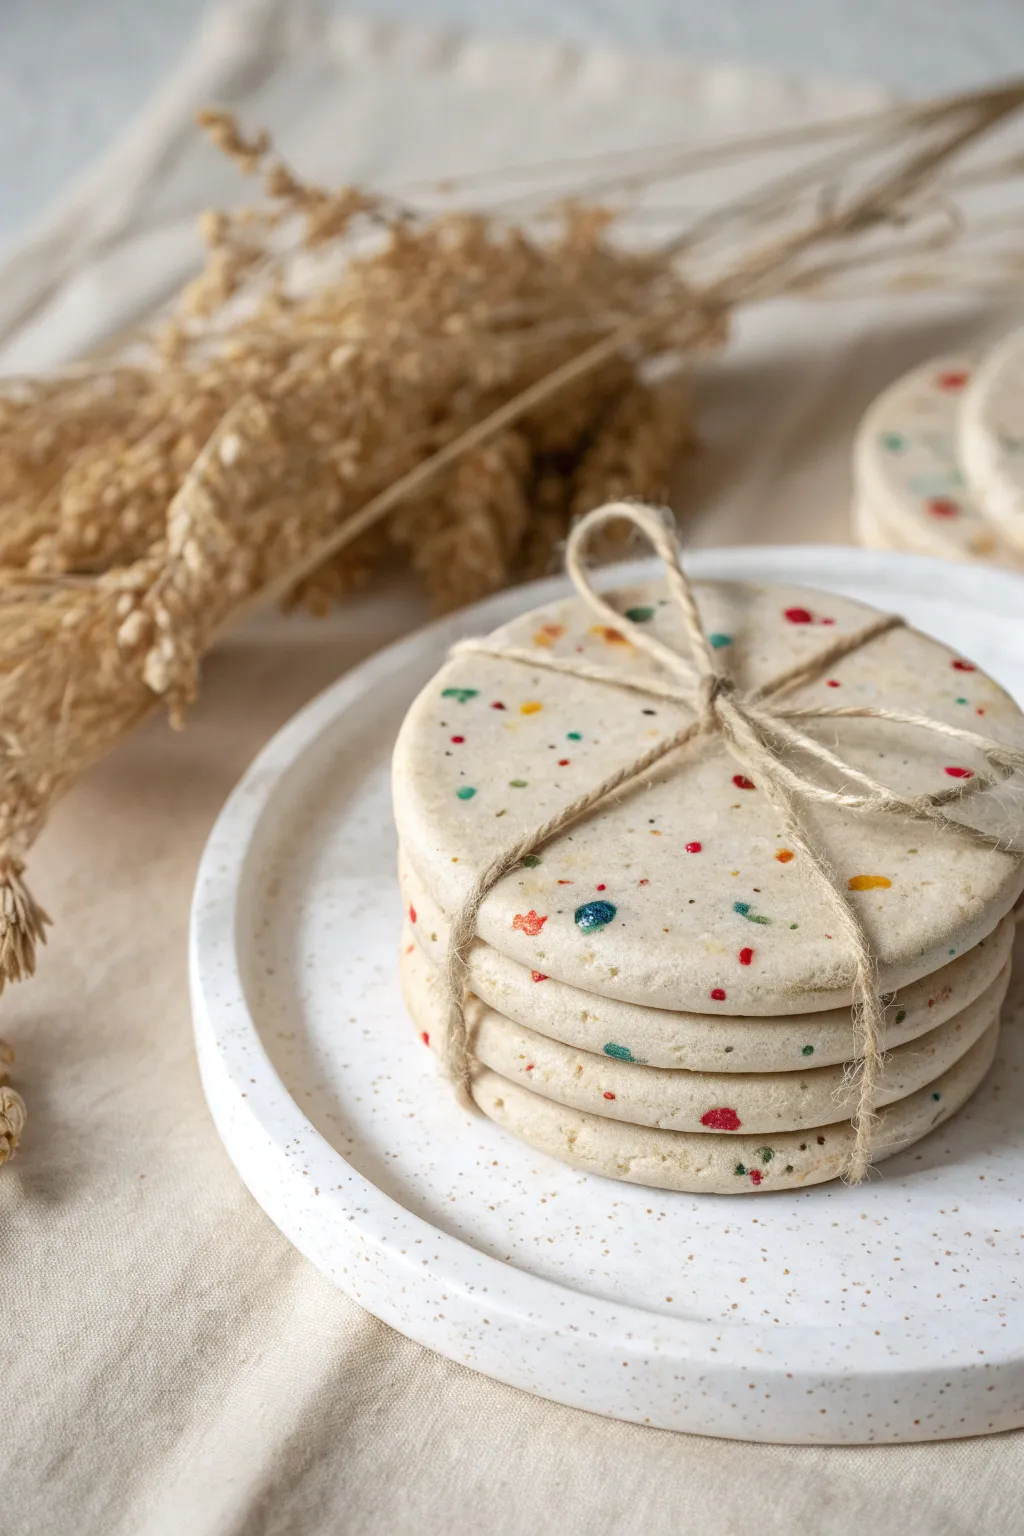
Bring the party to your coffee table with these charming, minimalist clay coasters featuring a playful confetti finish. Their smooth, matte texture and brightly colored specks create a modern yet festive look that makes for a perfect handmade birthday gift.
Step-by-Step Guide
Materials
- White air-dry clay (or polymer clay)
- Acrylic rolling pin
- Parchment paper or silicone mat
- Round cookie cutter (approx. 3.5 – 4 inch diameter)
- Fine-grit sandpaper (400-600 grit)
- Acrylic paints (red, blue, yellow, green)
- Stiff-bristled toothbrush or fan brush
- Clear matte acrylic sealer (spray or brush-on)
- Jute twine for packaging
- Bowl of water (for smoothing)
Step 1: Shaping the Base
-
Prepare your workspace:
Lay down a sheet of parchment paper or a silicone mat on a flat surface to prevent the clay from sticking and picking up unwanted texture. -
Condition the clay:
Take a large chunk of white air-dry clay and knead it thoroughly in your hands until it becomes warm, soft, and pliable without cracks. -
Roll it out:
Using your acrylic rolling pin, flatten the clay into an even slab. Aim for a thickness of about 1/4 inch (6mm) to ensure the coasters are durable but not too heavy. -
Cut the circles:
Press your round cookie cutter firmly into the clay slab. Wiggle it slightly to ensure a clean cut, then lift the cutter. Repeat this process to make a set of four. -
Smooth the edges:
Dip your finger into a small amount of water (just a drop!) and run it gently along the cut edges of the circles. This smooths out any harsh lines or jagged bits left by the cutter.
Clean Edges Pro Tip
Before drying, dip your finger in water and gently round off the top edge of the clay circle. This prevents sharp ‘lips’ that fracture easily.
Step 2: Creating the Confetti Effect
-
Prepare your palette:
Squeeze small dots of your acrylic paints onto a palette. You’ll want bright primary colors like red, blue, yellow, and green to match the confetti look. -
Apply the specks:
This is the fun part. Dip a stiff toothbrush or a fan brush into a single color. Hold the brush over the wet clay circles and flick the bristles with your thumb to spray tiny droplets onto the surface. -
Layer the colors:
Repeat the flicking process with each different color. Allow a minute or two between colors so they don’t muddy together on the surface. -
Control the spray:
While most specks should be tiny, you can manually add a few slightly larger ‘chips’ of color using a fine-tip paintbrush for variety, just like real confetti. -
Embed the color:
Here I like to take the rolling pin and very gently roll over the painted surface one final time. This presses the paint into the clay so the surface remains perfectly flat rather than bumpy.
Level Up: Terrazzo Style
Instead of paint, mix tiny chunks of dried colored clay into your wet white clay before rolling for an authentic embedded terrazzo stone look.
Step 3: Finishing Touches
-
Allow to dry:
Set the coasters aside in a cool, dry place. Let them air dry completely for 24-48 hours. Start by drying them flat, but flip them over halfway through so the bottom dries evenly. -
Sand for smoothness:
Once fully cured and hard, gently sand the edges and the surface with fine-grit sandpaper. This removes any final imperfections and gives the clay a professional, stone-like feel. -
Dust off:
Wipe the coasters down with a slightly damp cloth or dry brush to remove all the sanding dust before sealing. -
Seal the coasters:
Apply two thin coats of clear matte acrylic sealer. This protects the clay from moisture and stains, which is essential for coaster functionality. -
Package the set:
Stack your set of four finished coasters and wrap a length of natural jute twine around them multiple times. Tie it off in a simple bow to complete the rustic gift presentation.
Now you have a thoughtful, handcrafted gift set ready to brighten up anyone’s special day


Name And Initial Clay Keychain
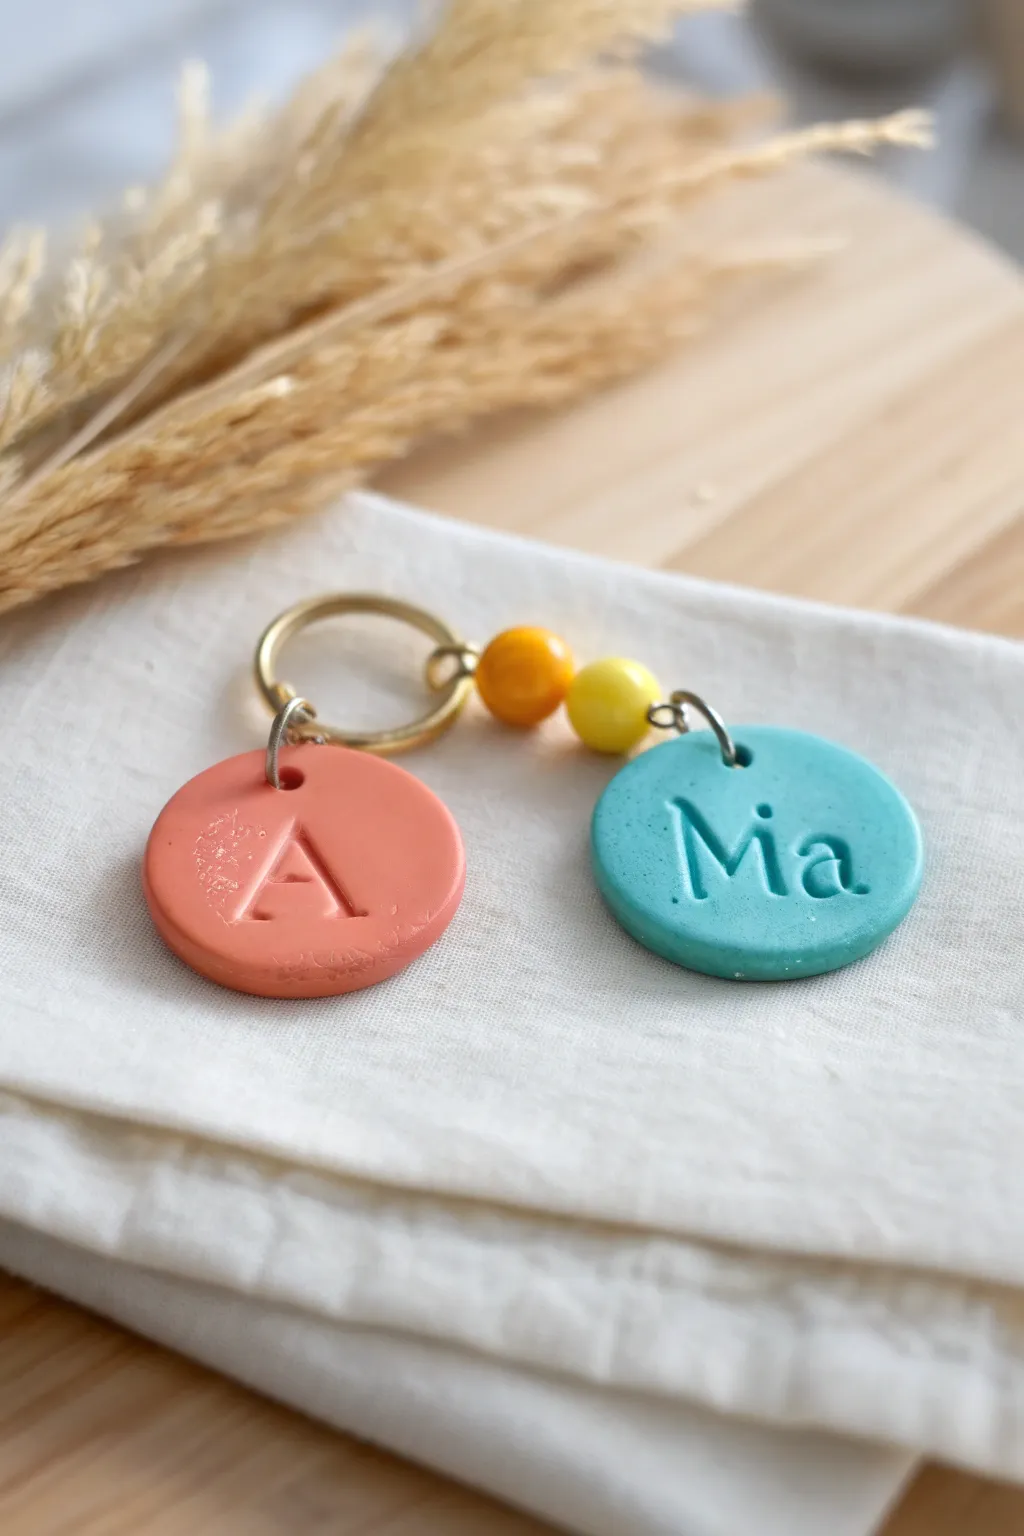
These personalized polymer clay keychains preserve names and initials in a delightful, chunky style that feels wonderful to hold. With their soft, earthy color palette and simple stamped lettering, they make a thoughtful and durable gift for birthdays.
Detailed Instructions
Materials
- Polymer clay (terracotta/coral color and teal/turquoise color)
- Small rolling pin or acrylic roller
- Round clay cutter (approx. 1.5 inch diameter)
- Letter stamps (serif font)
- Small plastic beads (yellow and orange)
- Gold-tone keyring
- Gold-tone jump rings (medium size)
- Eye pins or wire for beads
- A poking tool (awl or toothpick)
- Baking sheet and parchment paper
- Needle nose pliers
- Sandpaper (optional, fine grit)
Step 1: Shaping the Discs
-
Condition the clay:
Begin by warming the terracotta-colored clay in your hands. Knead and fold it repeatedly until it is soft, pliable, and free of any cracks. -
Roll it out:
Use your rolling pin or acrylic roller to flatten the clay. Aim for a thickness of about 1/4 inch (6mm) to give the keychain a nice, quality weight. -
Cut the circles:
Press your round clay cutter firmly into the rolled slab. Wiggle it slightly to ensure a clean cut, then lift the cutter. Repeat this process with the teal clay. -
Smooth the edges:
Gently run your finger around the perimeter of the cut circles to soften any sharp ridges left by the cutter. This makes the finished piece tactile and friendly. -
Create the hole:
Use a toothpick or a small awl to poke a hole near the top edge of each circle. Make the hole slightly larger than your jump ring, as clay doesn’t shrink much but you want ease of movement.
Step 2: Stamping and Baking
-
Align the stamps:
Select the letters you wish to use. For the name charm, line up the letters on your work surface first to gauge the spacing. -
Press the initial:
For the terracotta disc, take a large ‘A’ stamp and press it firmly into the center. Apply confusing even pressure to get a deep, legible impression. -
Stamp the name:
carefully stamp the name ‘Mia’ onto the teal disc. Start with the middle letter to help center the word, then add the outer letters. -
Texure check:
Inspect the surface. If you see fingerprints, gently buff them out with a tiny drop of baby oil or simply smooth them lightly with your finger. -
Bake the pieces:
Place the clay discs on a baking sheet lined with parchment paper. Bake according to your brand’s specific package directions (usually around 275°F or 135°C for 15-30 minutes). -
Cool down:
Allow the pieces to cool completely on the baking sheet. They will harden fully as they return to room temperature.
Clean Stamping Tip
To prevent the stamps from sticking to the raw clay, lightly dust the stamp face with cornstarch or dip it in water before pressing it down.
Step 3: Assembly
-
Open the jump rings:
Using two pairs of pliers (or pliers and your thumb ring), twist a gold jump ring open sideways. Never pull it apart effectively, as this weakens the metal. -
Attach the discs:
Slide the jump ring through the hole in the terracotta ‘A’ disc and hook it onto the main keyring loop. Close the jump ring securely. Repeat for the ‘Mia’ disc. -
Prep the beads:
Thred your plastic yellow and orange beads onto a gold eye pin. If you just have loose beads, use a piece of wire to create a small looped link. -
Connect the bead strand:
Create a loop at the top of your bead stack using pliers. Attach this component to the keyring using an additional jump ring if needed. -
Final check:
give everything a little shake to make sure all jump rings are closed tight and the charms dangle freely without catching.
Paint Fill Technique
After baking, paint inside the stamped letters with white acrylic paint. Wait a moment, then wipe the surface with a damp cloth to leave paint only in the grooves.
Now you have a charming, personalized set of keys ready to be wrapped up for a special birthday surprise.

The Complete Guide to Pottery Troubleshooting
Uncover the most common ceramic mistakes—from cracking clay to failed glazes—and learn how to fix them fast.
Birthday Balloon Charm Necklace
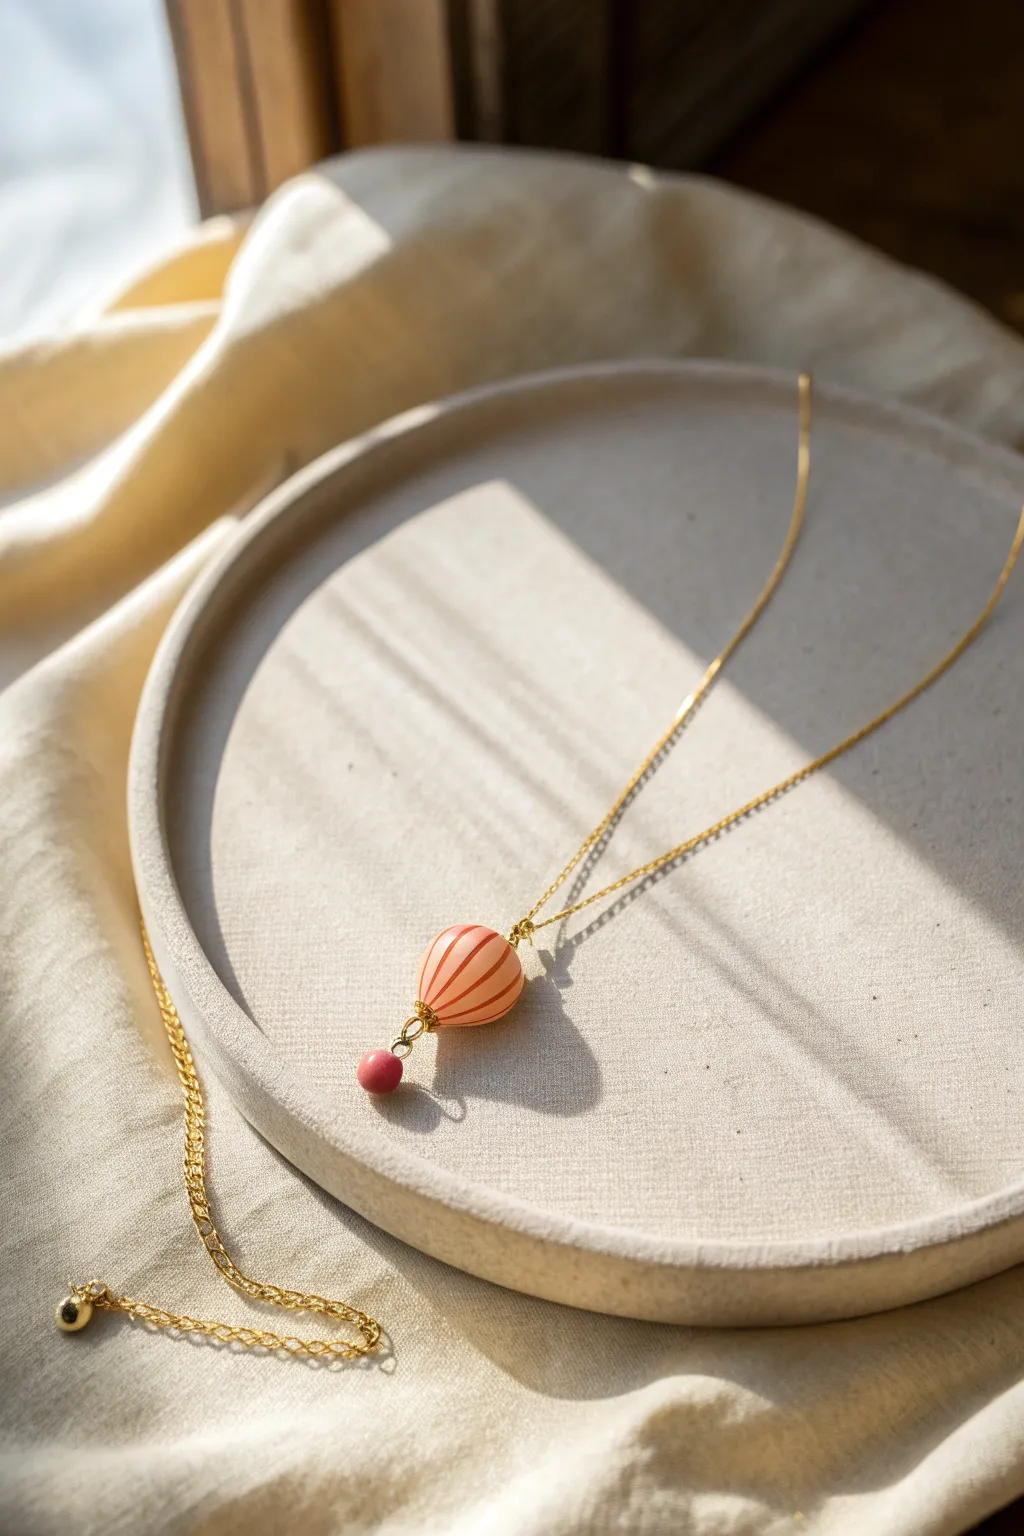
Capture the whimsy of flight with this delicate hot air balloon necklace, perfect for a quirky birthday surprise. This tutorial guides you through sculpting a striped balloon charm with a tiny basket bead, finished with gold hardware for a polished look.
Step-by-Step
Materials
- Polymer clay (peach, terracotta/dark orange, and rose pink)
- Gold eye pins (2 small)
- Small gold jump ring
- Gold chain necklace with clasp
- Liquid polymer clay or bake-and-bond
- Gloss varnish or resin (optional)
- Needle tool or toothpick
- Blade or X-Acto knife
- Round nose pliers
- Wire cutters
- Small paintbrush
- Ceramic tile or baking surface
Step 1: Forming the Balloon Core
-
Condition the Clay:
Start by conditioning your peach-colored clay until it is soft and pliable. Roll it into a smooth ball free of cracks. -
Shape the Teardrop:
Gently roll one side of the ball between your palms to taper it, creating a teardrop or pear shape. This forms the main body of the hot air balloon. -
Flatten the Bottom:
Tap the wider, rounder end of the teardrop lightly on your work surface to flatten the very top slightly, though we want to keep the overall rounded dome shape intact. -
Insert the Eye Pin:
Take a small gold eye pin. If it’s too long for your clay shape, trim it with wire cutters. Dip the straight end into a little liquid clay or glue for extra security. -
Position the Hardware:
Insert the eye pin into the center of the ‘top’ (the domed end) of the balloon, pushing it down until the eyelet sits flush against the clay.
Step 2: Adding the Stripes
-
Prepare the Stripe Color:
Condition a small amount of the terracotta or dark orange clay. Roll this into an extremely thin, even snake or log. -
Flatten the Snake:
Use an acrylic roller or glass jar to gently flatten the thin snake into a narrow ribbon. Using your blade, cut thin, consistent strips from this ribbon. -
Apply the First Stripe:
Pick up a strip and carefully lay it vertically down the side of your balloon shape, starting from the top center near the eye pin and ending at the tapered bottom. -
Place Remaining Stripes:
Continue placing strips around the circumference of the balloon. I usually place them in a cross pattern first (top, bottom, left, right) to ensure even spacing before filling in the gaps. -
Smooth the Seams:
Gently roll the entire balloon shape in your palms again. This pressure will embed the stripes into the base clay so they look painted on rather than sitting on top. -
Define the Texture:
Using a needle tool, you can very gently press slight indentations between the stripes to enhance the ‘inflated’ look of the balloon panels.
Sticky Situation?
If your clay gets too soft and fingerprints are showing, pop the modeled piece in the fridge for 10 minutes before smoothing. Use a bit of baby oil to buff out prints.
Step 3: Creating the Basket
-
Form the Basket Bead:
Roll a very small ball of rose pink clay. This will serve as the abstract ‘basket’ for the balloon. -
Attach Hardware to Basket:
Take a second eye pin, trim it short, dip in liquid clay, and insert it into this small pink ball. -
Bake the Components:
Place both clay pieces (the balloon and the basket bead) on a ceramic tile. Bake according to your clay package instructions (usually 275°F/135°C for 15-30 minutes).
Stripe Precision
Can’t get even stripes? Extrude the contrasting clay through a clay extruder with a small round disc, flatten the strands, and you’ll have perfectly uniform ribbons every time.
Step 4: Assembly and Finishing
-
Cool and Varnish:
Let the pieces cool completely. If you want a shiny, glass-like finish similar to the photo, apply a coat of gloss varnish or UV resin to the balloon and cure/dry it. -
Connect the Pieces:
The balloon needs to connect to the basket. However, looking closely at the design, the basket hangs from the bottom. Insert a screw eye or glue a cut eye pin into the *bottom* (narrow end) of the baked balloon. -
Link with Jump Ring:
Open a small gold jump ring using two pairs of pliers. Thread it through the loop on the pink basket bead and the loop you just added to the bottom of the balloon. Close the ring securely. -
String the Necklace:
Finally, thread your gold chain through the top loop of the main balloon pendant.
Now you have an uplifting, handmade piece of jewelry ready to be boxed up for a special birthday
Birthday Candle Ring Holder
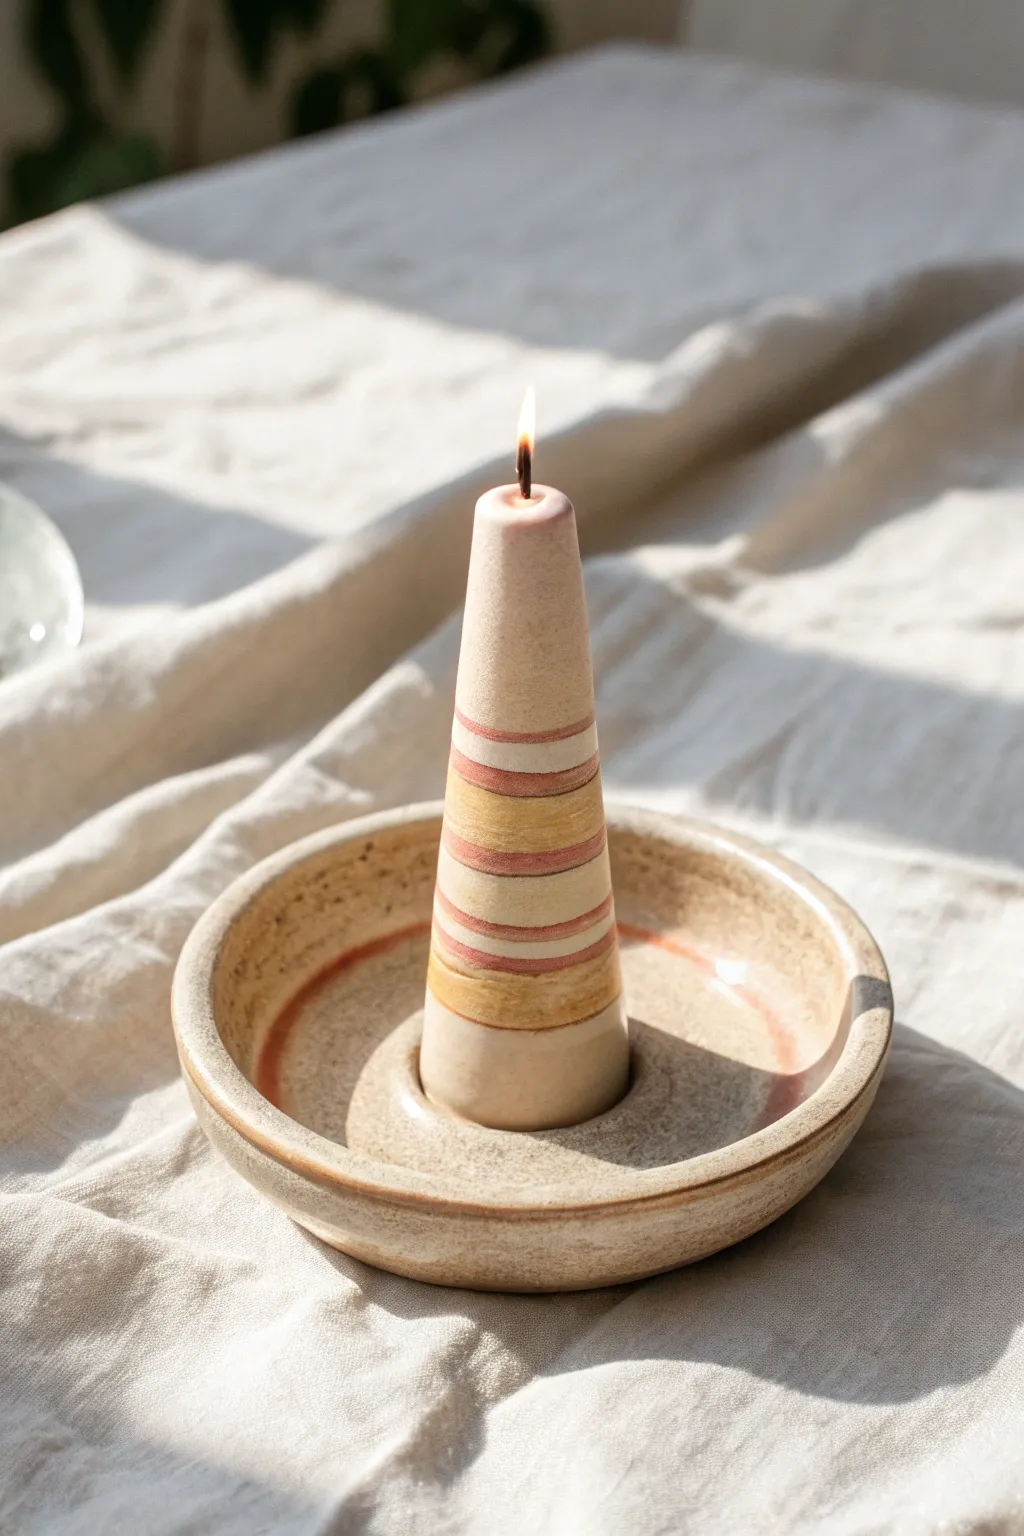
This charming ceramic candle holder features a wide, shallow catch dish perfect for catching drips and a central column designed to snugly hold a taper candle. The piece showcases the natural beauty of speckled clay with subtle glazed accents, creating a warm, artisanal feel for any birthday celebration.
Step-by-Step Guide
Materials
- Speckled stoneware clay (mid-fire recommended)
- Pottery wheel (or slab roller/rolling pin for hand-building)
- Needle tool
- Wire cutter
- Trimming tools (loop tool, rib)
- Small sponge
- Taper candle (for sizing)
- Clear or transparent glossy glaze
- Reddish-brown underglaze or oxide wash (optional for rim detail)
- Kiln for firing
Step 1: Forming the Base Dish
-
Prepare the Clay:
Begin with about 1.5 to 2 pounds of well-wedged speckled stoneware clay. Center it firmly on the wheel head, ensuring a wide, low puck shape rather than a tall cone. -
Open the Form:
Open the clay to create a wide, flat floor, leaving about a 1/2-inch thickness for the bottom. This thickness is crucial because you will later attach the candle cup directly to the center. -
Pull the Walls:
Gently pull up a short wall, curving it slightly inward to create a shallow bowl or saucer shape. The rim should be rounded and smooth. Aim for a total diameter of about 5-6 inches. -
Define the Center:
Using a rib or a slightly damp sponge, compress the floor of the dish perfectly flat. This ensures a stable surface for the candle holder attachment.
Wobbly Candle?
If the candle hole shrinks too much after firing, use a small piece of creating wax or melt a few drops of candle wax into the bottom of the holder to secure the taper in place.
Step 2: Creating the Candle Cup
-
Throwing the Cup (Option A):
If you are comfortable throwing off the hump, center a small ball of clay and throw a small cylinder about 1.5 inches tall and wide. -
Hand-building the Cup (Option B):
Alternatively, roll a thick coil of clay. Flatten one end and hollow out the center with your thumb or a tool to create a cup shape. -
Size the Opening:
Bring your taper candle over to test the fit. The opening should be slightly larger than the candle base (about 15% larger) to account for clay shrinkage during drying and firing. I like to check this twice to be safe. -
Shape the Exterior:
Smooth the outside of the cup so it tapers slightly upward, mimicking the shape seen in the image. Keep the walls thick enough for stability.
Make it a Set
Create 3-4 of these in varying dish diameters but identical cup sizes. They look stunning arranged as a centerpiece cluster with candles of different heights.
Step 3: Assembly and Refining
-
Score and Slip:
Once both pieces are leather-hard (firm but still cool to the touch), score the center of the dish and the bottom of the candle cup heavily with a needle tool. Apply slip generously. -
Attach the Cup:
Press the cup firmly into the center of the dish. Give it a small wiggle to seat it, then smooth the seam where the two pieces meet. You can use a small coil of clay to reinforce this join if needed. -
Smooth the Transition:
Use a modeling tool or your fingertip to create a smooth, concave transitions from the cup to the floor of the dish, ensuring it looks like one cohesive piece. -
Trim the Foot:
If the base is heavy, flip the leather-hard piece over and trim a foot ring into the bottom of the dish. This adds elegance and separates the piece from the table surface.
Step 4: Glazing and Finishing
-
Bisque Fire:
Let the piece dry slowly and completely under loose plastic to prevent cracking at the join. Fire to bisque temperature (usually cone 04). -
Clean the Surface:
Wipe the bisqued piece with a damp sponge to remove any dust. This step prevents glaze crawling. -
Accent the Rim (Optional):
To mimic the warm tone on the rim shown in the inspiration, brush a thin band of iron oxide wash or reddish-brown underglaze along the outer rim of the dish. -
Apply Glaze:
Dip the entire piece into a clear or transparent glossy glaze. This will seal the clay and make the natural speckles pop without obscuring the clay body’s character. -
Wipe the Foot:
Carefully wipe all glaze off the bottom foot ring with a sponge. Any glaze left here will fuse the piece to the kiln shelf. -
Glaze Fire:
Fire the piece to the maturity temperature of your clay (likely Cone 5 or 6 for stoneware). Allow the kiln to cool completely before opening.
Once cooled, place a hand-painted candle inside for a personalized gift that glows with warmth


What Really Happens Inside the Kiln
Learn how time and temperature work together inside the kiln to transform clay into durable ceramic.
Birthday Cupcake Trinket Box
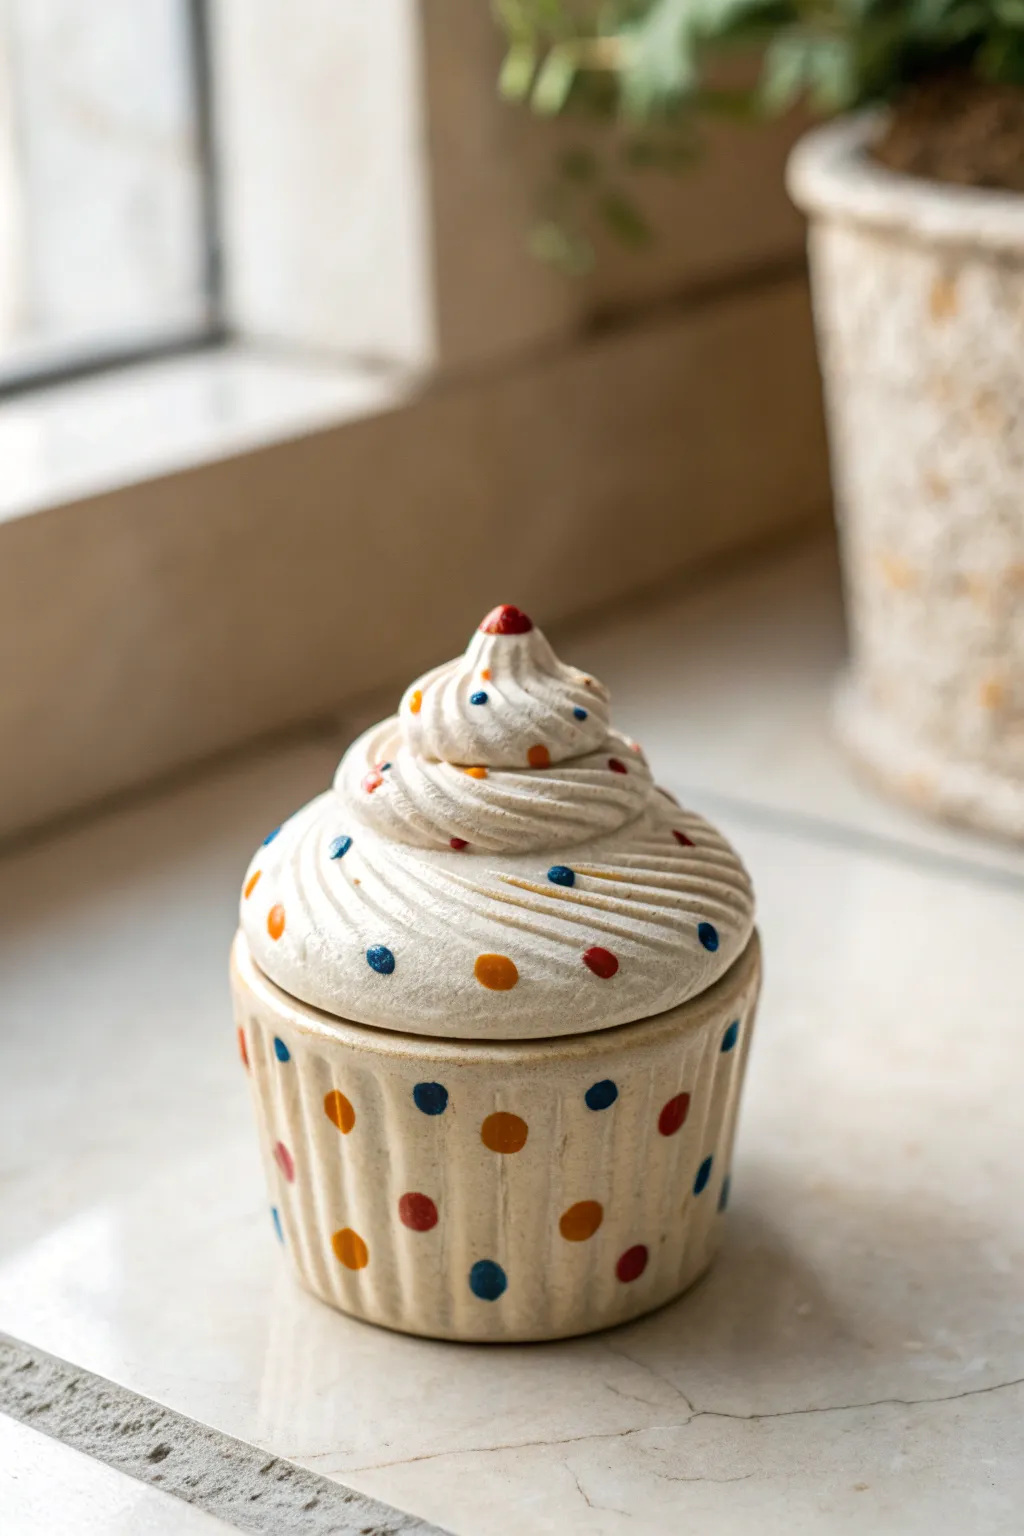
This adorable trinket box mimics a frosted birthday cupcake complete with colorful sprinkles. With its texturized liner base and swirled frosting lid, it’s the perfect hiding spot for small treasures or jewelry.
How-To Guide
Materials
- Air-dry clay or polymer clay (white or cream)
- Clay rolling pin
- Circle cutters (two sizes)
- Sculpting tools (needle tool, rib tool)
- Small bowl or ramekin (for molding)
- Acrylic paints (cream, red, blue, orange)
- Gloss varnish or glaze
- Fine-grit sandpaper
- Water (for smoothing)
Step 1: Shaping the Base
-
Create the heavy base:
Start by rolling a ball of clay roughly the size of a tennis ball. Flatten it slightly to create a thick disk. This will be the bottom of your cupcake liner. -
Form the walls:
Using the pinch pot method, gently press your thumb into the center and pinch the walls upward. I like to keep the walls relatively thick (about 1/4 inch) for stability. -
Shape the liner:
Gradually flare the walls outward slightly so the opening is wider than the base, mimicking a baking cup shape. Use a straight edge or ruler to flatten the top rim so it’s perfectly level. -
Add ribbing texture:
Take a flat modeling tool or the handle of a paintbrush. Press vertical indentations all around the exterior of the cup, spacing them evenly to create the fluted look of a paper liner. -
Smooth the interior:
Use a slightly damp sponge or finger to smooth out the inside of the pot. Ensure the rim is clean so the lid will sit flush later.
Keep it Slick
Use a little baby oil on your fingertips when smoothing the final clay surface. It eliminates fingerprints better than water and prevents the clay from getting muddy.
Step 2: Sculpting the Frosting Lid
-
Size the lid base:
Roll out a slab of clay about 1/4 inch thick. Cut a circle that is just slightly larger than the opening of your base pot. -
Create the lip:
On the underside of this circle, add a smaller ring of clay. This flange will sit inside the pot to keep the lid from sliding off. Test the fit frequently. -
Form the frosting coil:
Roll a long, thick snake of clay. It should be thicker at one end and taper gradually toward the other. -
Construct the swirl:
Starting at the outer edge of your lid base, coil the clay snake inward and upward, spiraling like soft-serve ice cream. Blend the bottom of the coil onto the flat base so it becomes one solid piece. -
Refine the peak:
Continue swirling until you reach the center, pulling the clay up into a soft peak. Use a damp brush to smooth the seams between the coils just enough so they stick, but keep the definition of the swirl visible. -
Texture the frosting:
Use a stiff brush or a crumpled piece of foil to gently tap texture onto the frosting surface if you want a more realistic, sugary look, or keep it smooth for a stylized ceramic feel. -
Initial Drying:
Allow both the base and the lid to dry until leather hard before refining further.
Step 3: Decorating and Finishing
-
Sand and prep:
Once fully dry, use fine-grit sandpaper to smooth any sharp edges on the rim or the bottom of the base. Wipe away all dust. -
Base coat:
Paint the entire piece (lid and base) with a warm cream or off-white color. You may need two coats for full opacity. -
Add the polka dots:
Using the back end of a paintbrush, dot ‘sprinkles’ onto the base liner. Use a pattern of alternating red, dark blue, and orange dots. -
Decorate the frosting:
Add smaller, random dots of the same colors scattered across the swirled frosting lid. Don’t overthink the placement; randomness looks more natural. -
Paint the cherry:
Paint the very tip of the frosting peak with a dab of red to simulate a cherry or a dollop of jam. -
Seal the piece:
Apply a high-gloss varnish or glaze over the entire exterior. This mimics the shiny finish of glazed ceramic and protects the paint.
Hidden Wonder
Before baking or drying, embed a tiny magnet into the rim of the base and the underside of the lid (covering them with thin clay) for a snapping closure.
Now you have a sweet, calorie-free container ready to hold your favorite little trinkets
Age Number Keepsake Ornament
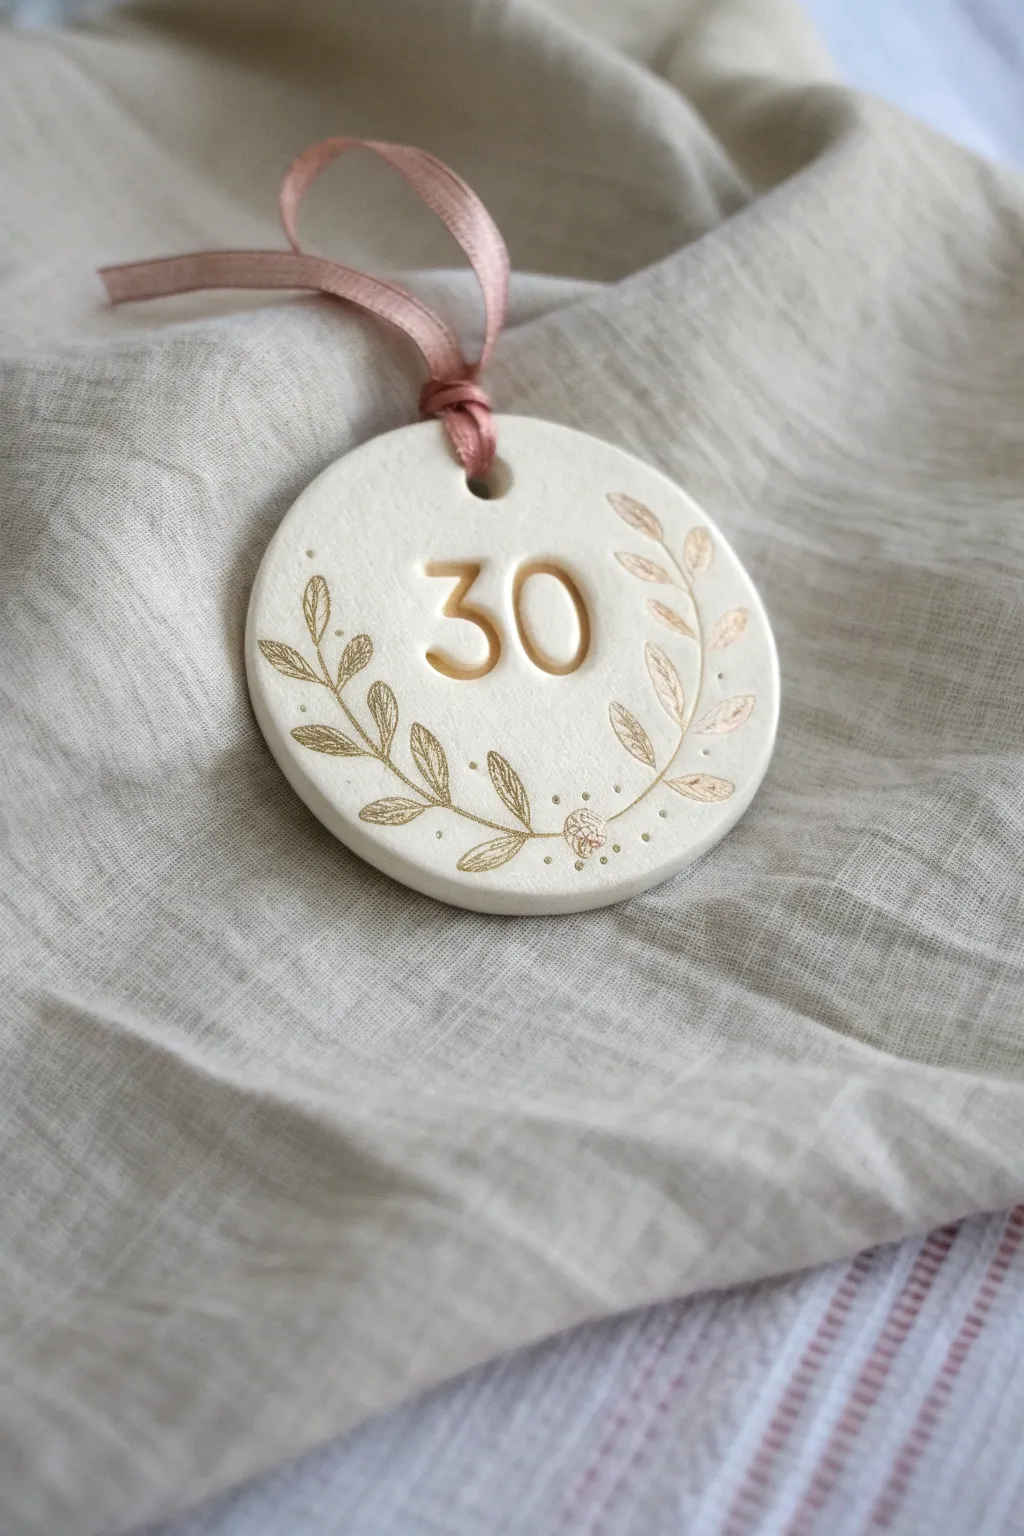
Celebrate a landmark birthday with this elegant, minimalist keepsake. Featuring a clean white clay base with stamped numbers and delicate gold leaf detailing, it’s a sophisticated memento that doubles as beautiful decor.
Step-by-Step Guide
Materials
- White air-dry clay or polymer clay
- Rolling pin
- Parchment paper or smooth work mat
- Round cookie cutter (approx. 3-4 inches)
- Small number stamps (approx. 0.5 – 0.75 inch height)
- Drinking straw or small hole punch tool
- Fine grit sandpaper (400-600 grit)
- Gold acrylic paint or liquid gold leaf
- Very fine detail paintbrush (size 0 or 00)
- Clear matte varnish (optional)
- Pink silk or satin ribbon (1/4 inch width)
Step 1: Shaping the Clay Base
-
Prepare your workspace:
Lay down a sheet of parchment paper or a non-stick craft mat to prevent the clay from sticking to your table. Take a handful of white clay and knead it briefly in your hands until it becomes pliable and warm, which helps prevent cracking later. -
Roll the clay slab:
Place the ball of clay on your mat and use the rolling pin to flatten it. Aim for a consistent thickness of about 1/4 inch (6mm). If you go too thin, the ornament becomes fragile; too thick, and it looks bulky. -
Cut the circle:
Firmly press your round cookie cutter into the clay slab. Wiggle it slightly before lifting to ensure a clean cut. Peel away the excess clay from the outside of the ring and set it aside for other projects. -
Smooth the edges:
Dip your finger in a tiny bit of water and gently run it around the cut edge of the circle. This smooths out any harsh ridges left by the cutter giving it a polished look right from the start. -
Create the hanging hole:
Using a drinking straw or a dedicated clay hole punch, press a hole near the top edge of the circle. Make sure it’s centered and not too close to the very edge—leave at least 1/4 inch of clay above the hole for structural integrity.
Cracking Up?
If you see tiny cracks forming while air-drying, mix a small amount of fresh wet clay with water to make a paste (slip) and smooth it into the cracks with a brush.
Step 2: Stamping and Drying
-
Stamp the number:
Select your number stamps (in this case, ‘3’ and ‘0’). Locate the exact center of the disc. Press the stamps firmly and evenly into the clay. Be careful not to rock the stamp, as this can leave an impression of the stamp’s square edges. -
Clean up imperfections:
If the stamping process pushed up little ridges of clay around the numbers, use a soft, dry brush or your finger to gently pat them down. -
Allow to dry:
Let the ornament dry completely. For air-dry clay, this usually takes 24-48 hours. I suggest flipping it over halfway through the drying process to ensure both sides dry evenly and to prevent curling. -
Sand for smoothness:
Once fully cured and hard, take your fine-grit sandpaper and very gently sand the edges and the surface. This removes fingerprints and creates a professional, porcelain-like finish.
Add Texture
Before cutting the circle, gently roll a piece of lace or textured fabric over the clay slab. It adds a subtle, vintage background pattern behind the gold painting.
Step 3: Gilding and Finishing
-
Paint the numbers:
Load a fine detail brush with gold acrylic paint or liquid gold leaf. Carefully paint the inside of the impressed numbers. If you get paint on the surface, wipe it immediately with a damp cotton swab. -
Outline the vines:
Starting from the bottom center, paint thin, curving vine stems reaching upwards on the left and right sides. Keep your wrist loose to create organic, flowy lines rather than stiff ones. -
Add the leaves:
Along the vine stems, paint small, simple leaf shapes. Use a ‘press and lift’ motion with your brush: press down to make the wider part of the leaf, then lift as you pull away to create a sharp point. -
Detail with dots:
Add tiny gold dots scattered near the vines and especially in the bottom center where the vines meet, resembling small berries or pollen for a delicate texture. -
Seal the piece:
Once the gold paint is fully dry, apply a thin coat of clear matte varnish over the entire front of the ornament to protect it from moisture and scratches. -
Attach the ribbon:
Cut a length of pink silk ribbon. Thread it through the hole at the top. Bring the ends together and tie a secure knot or bow, creating a loop for hanging.
Hang this lovely keepsake on a dedicated display stand or gift it wrapped in tissue for a personal touch

TRACK YOUR CERAMIC JOURNEY
Capture glaze tests, firing details, and creative progress—all in one simple printable. Make your projects easier to repeat and improve.
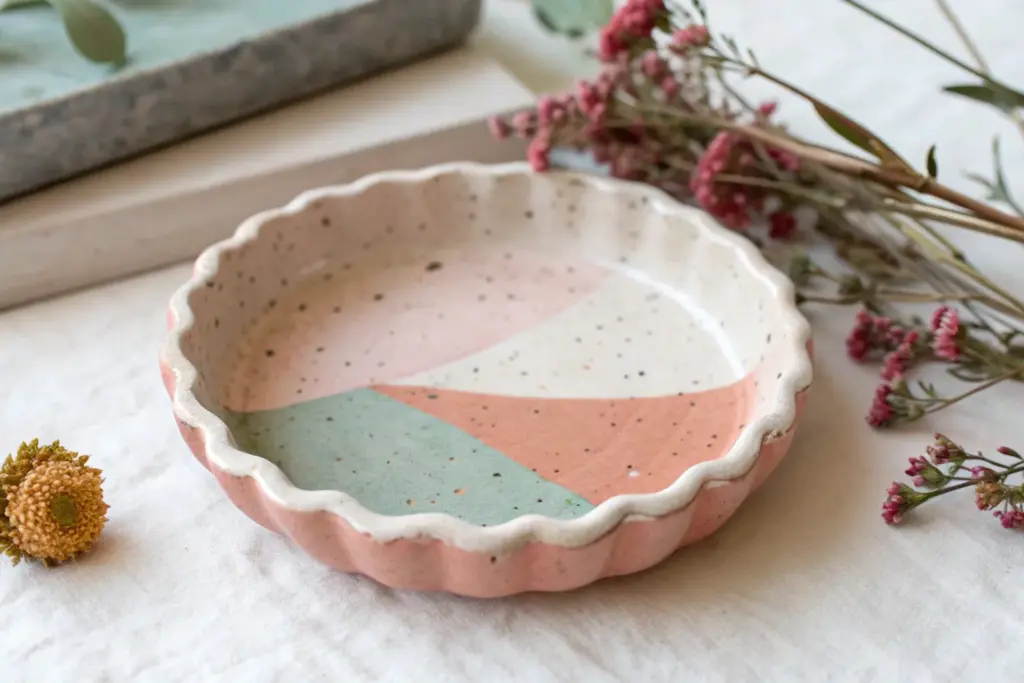
Birth Month Flower Jewelry Dish
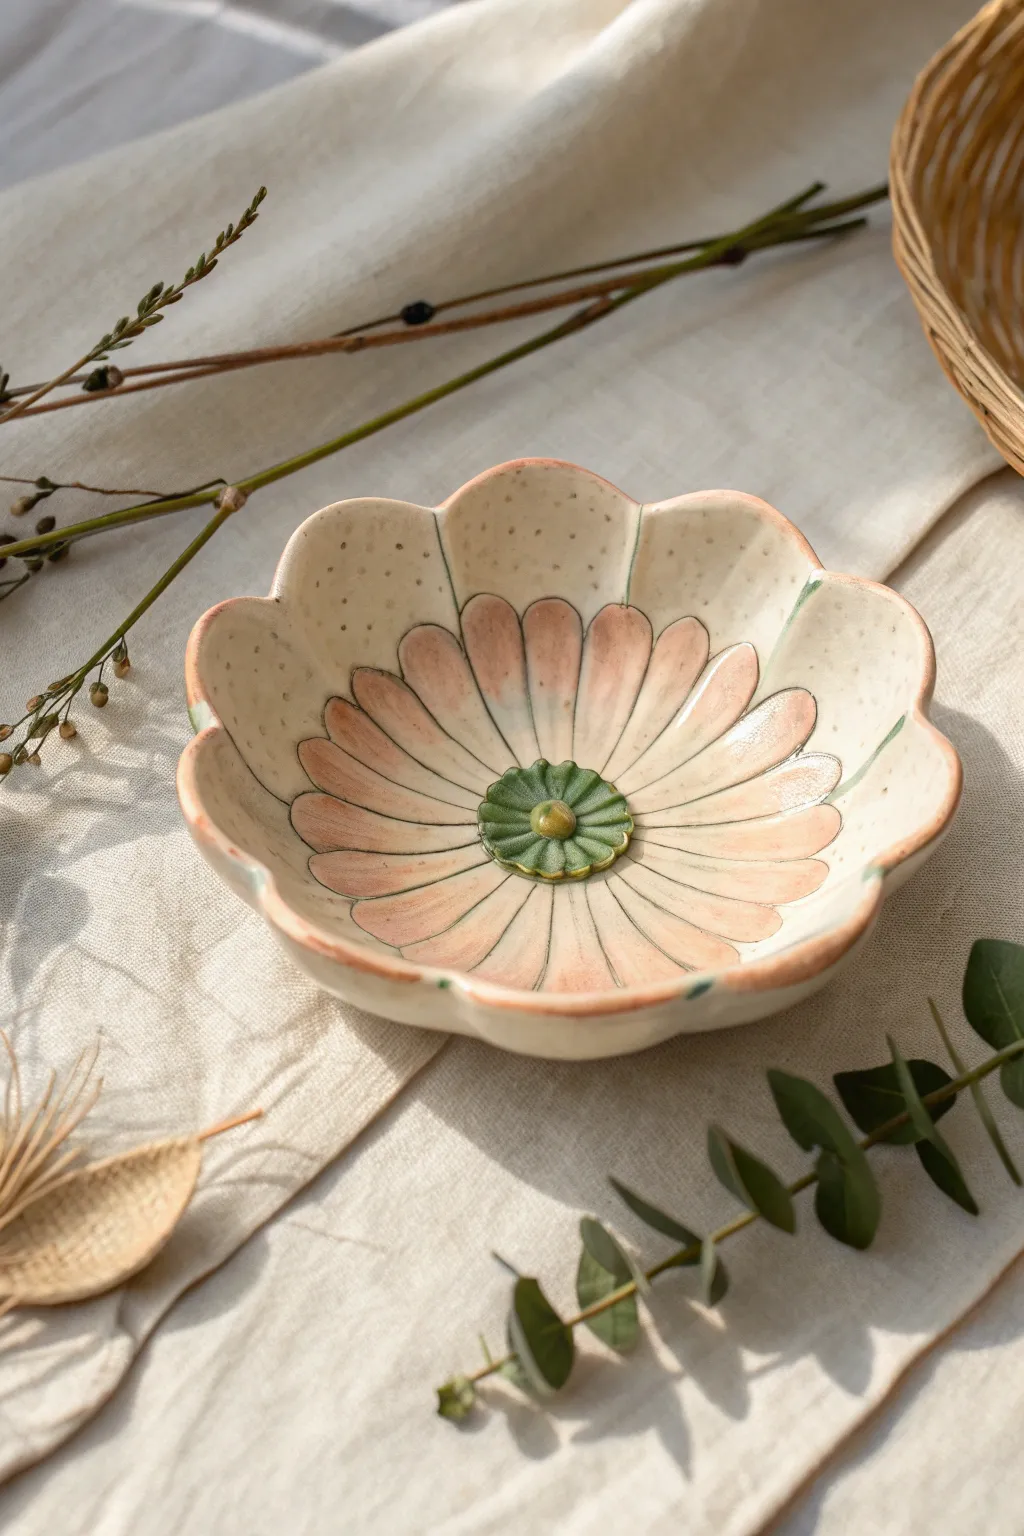
This charming jewelry dish captures the delicate beauty of a blooming flower with a sculpted scallop rim and hand-painted petal details. Its speckled clay body and soft pink gradients make it a thoughtful and personalized birthday keepsake.
Step-by-Step
Materials
- Speckled stoneware clay or white air-dry clay with speckles added
- Rolling pin
- Scalloped circle cookie cutter (approx. 4-5 inches)
- Small round clay cutter or fondant plunger (for center)
- Modeling tool or dull knife
- Bowl for shaping (slump mold)
- Sponge
- Underglazes or acrylic paints (pale pink, sage green, dark green)
- Clear gloss glaze or varnish
- Fine detail paintbrush
- Soft round paintbrush
Step 1: Shaping the Flower
-
Roll the clay slab:
Begin by rolling out your speckled clay to an even thickness of about 1/4 inch. If you are using plain clay, knead in some ground pepper or dry tea leaves to mimic the ceramic speckle effect shown in the photo. -
Cut the base shape:
Use your large scalloped cookie cutter to punch out the main flower shape. If you don’t have a cutter, print a flower template, place it onto the clay, and carefully trace the wavy outline with a needle tool. -
Sculpt the petals:
With a modeling tool or the back of a dull knife, gently press indentations radiating from the center of the dish out to the ‘valleys’ between the scallops. This defines the separation between each petal. -
Lift and shape:
Carefully lift the clay slab and place it into a small bowl lined with plastic wrap or cheesecloth. Gently press the center down so the petals curve upward, taking the shape of the bowl. -
Refine the rim:
With a slightly damp sponge, smooth the edges of the scallops to ensure they are rounded and soft, not sharp. This gives the piece a professional, finished look. -
Create the center rosette:
Roll a small ball of clay and flatten it into a thick coin. Use a small knife to score radiating lines around the edge to create a textured, button-like center. Attach this to the middle of your bowl using the score-and-slip method (scratching both surfaces and adding a drop of water). -
Add center detail:
Roll a tiny bead of clay and press it directly into the depressed center of your rosette to finish the stamen structure.
Step 2: Painting and Finishing
-
Initial drying:
Allow the clay to dry to a leather-hard state if firing, or fully dry if using air-dry clay, before applying color. -
Base petal wash:
Dilute your pale pink paint or underglaze with a little water. Paint the petals starting from the center and fading out before you reach the rim, creating a soft, watercolor-like gradient. -
Outline the petals:
Using a very fine liner brush and a slightly darker pink or diluted brown, carefully trace the indented lines you sculpted earlier between the petals to add definition. -
Paint the center:
Paint the textured rosette in the center with a sage green. Use a darker green wash in the crevices of the texture to make the details pop, and dot the very center bead with a subtle yellow-green. -
Rim accents:
Dip your brush in the sage green again and extremely lightly brush just the very edge of the rim. I like to do this with a fairly dry brush to keep the line organic and broken. -
Drying and firing/sealing:
If using ceramic clay, bisque fire the piece now. If using air-dry clay, ensure the paint is fully dry. -
Glazing:
Apply a clear, high-gloss glaze over the entire interior to make the colors vibrant and the surface easy to clean. If using air-dry clay, use a high-gloss varnish or resin coating. -
Final cure:
Glaze fire your ceramic piece according to your clay’s instructions, or let your varnish cure completely in a dust-free area for 24 hours.
Smooth Operator
To get perfectly smooth petals without finger marks, use a soft, damp makeup sponge to gently wipe the clay surface before shaping it into the bowl.
Warping Woes?
If your dish warps while drying, weigh down the center with a small bag of rice or sand during the first few hours to keep the bottom flat and stable.
This blooming dish is now ready to hold everyday treasures or debut as a stunning handmade gift.
Birthday Photo Holder Stand
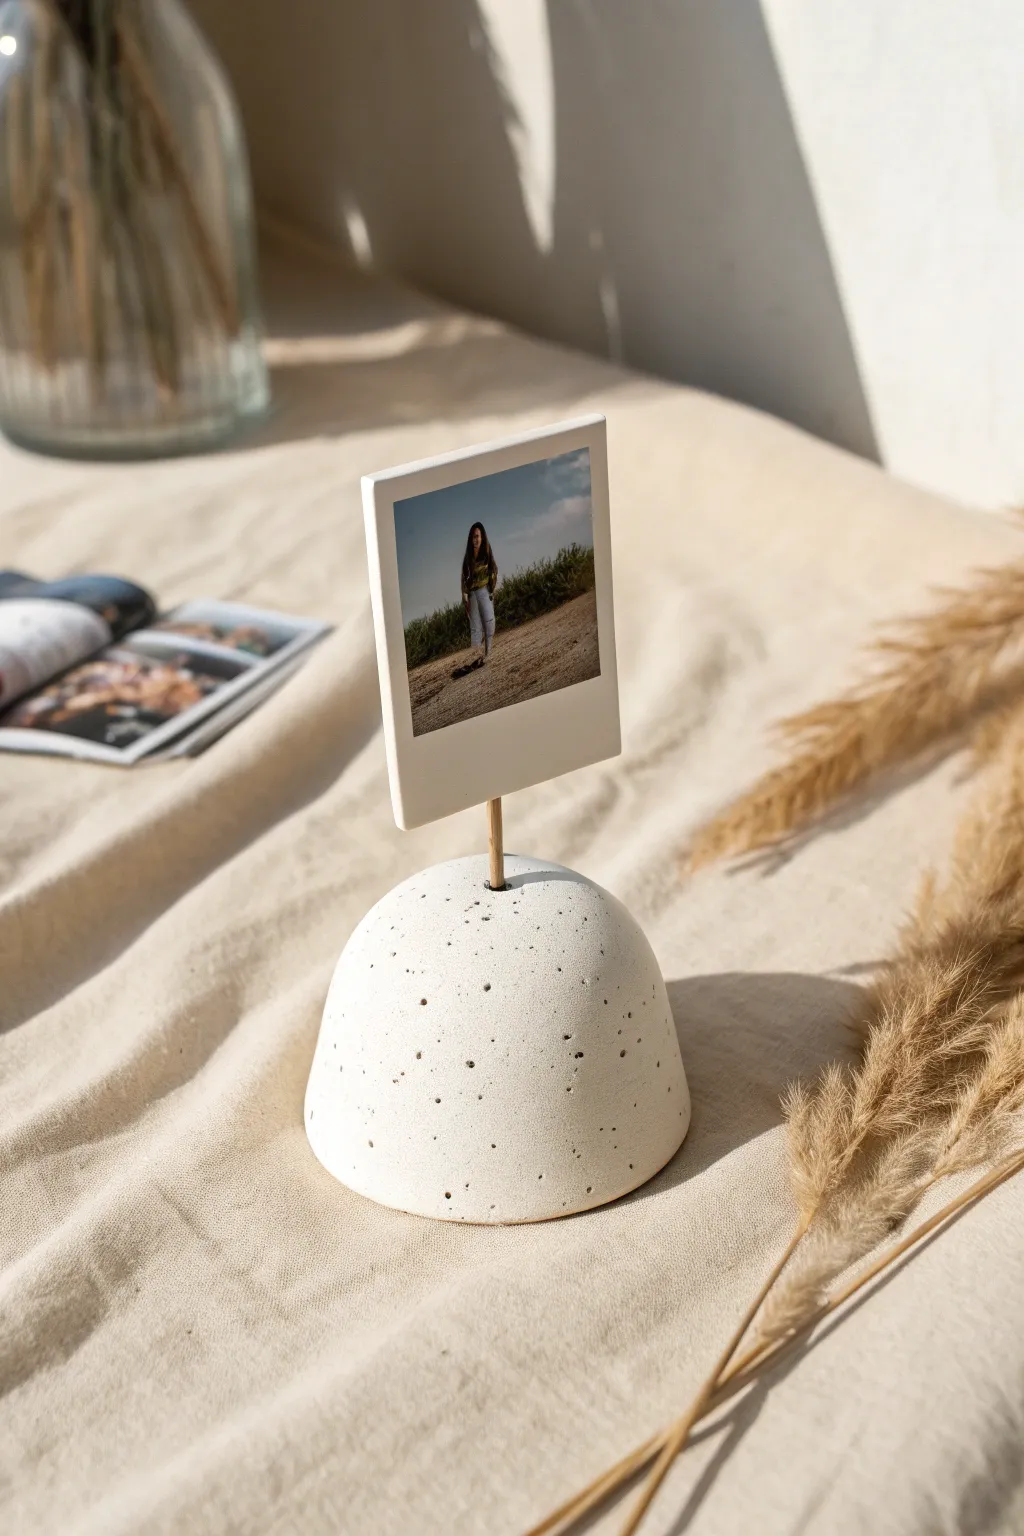
Create a minimalistic and modern way to display your favorite memories with this speckled clay photo holder. Its clean, dome-like shape and subtle granite texture make it a stylish addition to any desk or shelf, perfect for showcasing mini prints.
How-To Guide
Materials
- White air-dry clay or polymer clay (granite effect preferred)
- Black acrylic paint (if not using speckled clay)
- Old toothbrush (for speckling)
- Thin wooden dowel or stiff craft wire
- Sandpaper (fine grit)
- Small bowl or half-sphere mold (optional)
- Rolling pin
- Craft knife
- Clear matte sealant or varnish
- Strong craft glue
Step 1: Shaping the Base
-
Prepare the Clay:
Start by conditioning your clay. If you are using polymer clay, knead it in your hands until it is soft and pliable. For air-dry clay, ensure it is moist enough to work with without cracking. -
Add Texture (Optional):
If you are using plain white clay but want the look in the photo, you can knead in some black pepper or dried tea leaves now for an organic speckled look, or wait to paint speckles later. -
Form a Ball:
Roll a generous amount of clay into a smooth ball about the size of a tangerine. Roll it between your palms to smooth out any major seams or cracks. -
Create the Dome Shape:
Place the ball on a flat surface and gently press down to flatten the bottom. Use your cupped hands to smooth the sides upward, refining it into a perfect half-sphere or dome shape. -
Refine the Surface:
Dip your finger in a little water (for air-dry clay) or baby oil (for polymer) and gently run it over the surface to remove fingerprints and ensure a flawlessly smooth finish.
Step 2: Creating the Holder Mechanism
-
Insert the Support:
Take your wooden dowel or wire. Insert it vertically into the exact center of the dome’s top. Push it down about halfway into the clay so it is secure. -
Check the Fit:
Wiggle the dowel very slightly to ensure the hole is large enough, but not loose. If using air-dry clay, remove the dowel now so the clay can shrink as it dries. If using polymer clay, you can bake it with the wood in place. -
Splitting the Dowel:
If you are using a wooden dowel, use a craft knife to carefully cut a slit down the center of the top end. This slit needs to be wide enough to hold a photo. -
Alternative Wire Option:
If using wire instead of a dowel, coil the top of the wire into a double loop (like a paperclip shape) that can pinch a photo between the metal strands.
Fixing Loose Dowels
If the hole is too big after drying, wrap masking tape around the bottom of the dowel until it fits snugly, then glue it in place
Step 3: Finishing Touches
-
Drying or Baking:
Follow the manufacturer’s instructions for your specific clay. Bake polymer clay in the oven; let air-dry clay sit for 24-48 hours until fully hardened. -
Sanding:
Once fully cured, use fine-grit sandpaper to gently smooth any rough spots, especially around the base and the hole at the top. -
Create Speckles:
If you didn’t use speckled clay, mix a tiny bit of water with black acrylic paint. Dip an old toothbrush in the mix and flick the bristles with your thumb to spray tiny speckles over the white dome. -
Secure the Dowel:
Put a drop of strong craft glue into the hole on top of the dome and re-insert your wooden dowel or wire. Hold it straight for a minute while the glue sets. -
Seal the Piece:
Apply a coat of clear matte varnish or sealant over the entire clay base. This mimics the stone texture and protects the speckles from rubbing off. -
Final Assembly:
Let the varnish dry completely. Once dry, slide your favorite Polaroid or photo print into the slit or wire coil.
Go Geometric
Instead of a smooth dome, use a knife to slice facets off the sides of the clay ball for a gem-like, polygonal shape
Now you have a chic, modern display for your favorite snapshots that looks like expensive stone art
Personal Message Pocket Token
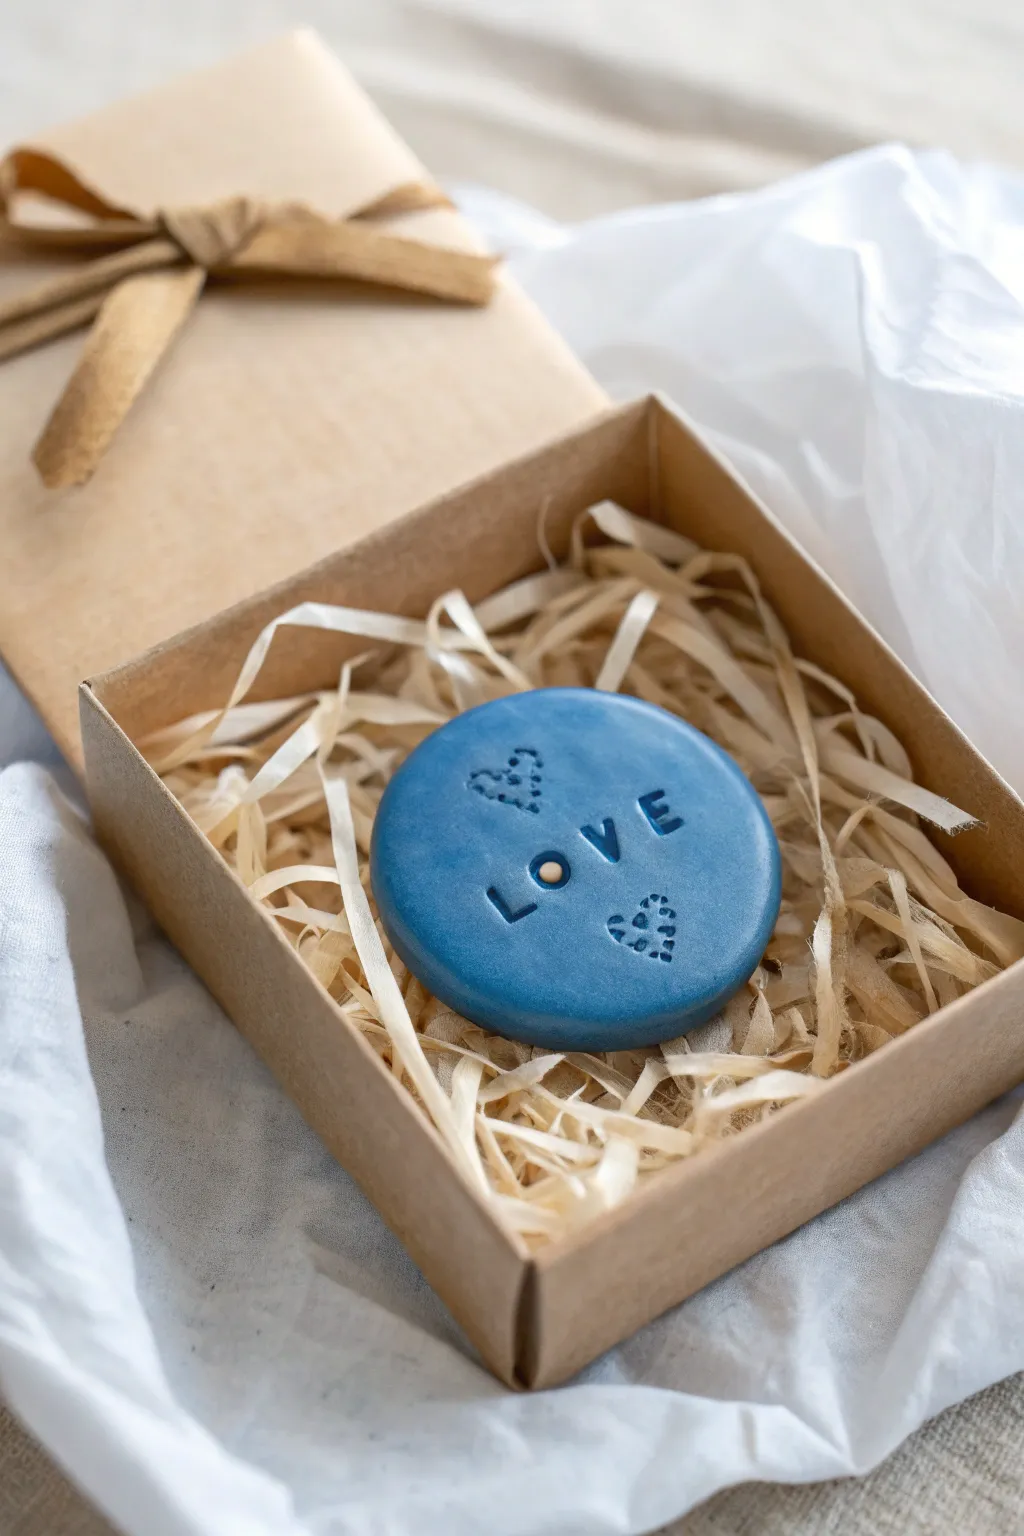
Create a meaningful keepsake that fits right in the palm of your hand. This serene blue clay token features a stamped message and delicate heart motifs, making it a perfect little reminder of affection to tuck into a gift box.
Step-by-Step Guide
Materials
- Polymer clay (blue)
- Small rolling pin
- Circular clay cutter (approx. 2 inches)
- Alphabet stamp set (small sans-serif font)
- Needle tool or toothpick
- Baking sheet
- Parchment paper
- Oven (for baking polymer clay)
- Sandpaper (fine grit, optional)
- Gold acrylic paint (optional, for the ‘O’ center)
Step 1: Shaping the Base
-
Condition the clay:
Start by kneading the blue polymer clay in your hands until it becomes soft, pliable, and warm. This conditioning step prevents cracks later on. -
Roll it out:
Place the clay on a clean, smooth surface. Using your rolling pin, flatten the clay to an even thickness of about 1/4 inch (6mm). You want it substantial enough to feel like a stone. -
Cut the circle:
Press your circular cutter firmly into the clay sheet to create a clean, round shape. If the clay sticks inside the cutter, gently push it out from the back. -
Smooth the edges:
Dip your finger in a tiny bit of water (or baby oil) and gently run it around the circumference of the cut circle to look over any sharp edges left by the cutter.
Stamp Stuck?
If your stamps are sticking to the raw clay, dust the stamp face very lightly with cornstarch or dip it in water before pressing it down.
Step 2: Stamping and Detailing
-
Plan your spacing:
Before stamping, lightly hover your letter stamps over the clay to visualize the spacing. The word ‘LOVE’ should be centered horizontally. -
Stamp the letters:
Press the ‘L’, ‘O’, ‘V’, and ‘E’ stamps into the clay one by one. Apply firm, even pressure to get a deep impression, but be careful not to push through the other side. -
Create heart outlines:
Using a needle tool, very lightly trace a small heart shape above the ‘L’ and another below the ‘E’ to serve as your guides. -
Stipple the hearts:
Instead of drawing lines, press the tip of your needle tool repeatedly into the clay along your traced heart shapes. This creates the charming, dotted texture seen in the example. -
Fill the hearts:
Add a few more dots inside the heart outlines to give the design more weight and visibility. -
Final smooth:
Check the surface for any accidental fingerprints. If you find any, lightly buff them away with a soft brush or your finger.
Make it a Magnet
Before baking, firmly press a strong round craft magnet into the back of your token, then bake as usual to turn this keepsake into fridge decor.
Step 3: Baking and Finishing
-
Prepare for baking:
Preheat your oven according to the manufacturer’s instructions on your specific package of clay (usually around 275°F or 130°C). -
Transfer to sheet:
Place your stamped token onto a baking sheet lined with parchment paper. -
Bake the token:
Bake the clay for the recommended time, typically 15-30 minutes per 1/4 inch of thickness. Don’t rush this part; proper curing ensures durability. -
Cool down:
Remove the tray from the oven and let the token cool completely. It will harden fully as it returns to room temperature. -
Add a gold accent:
For a tiny pop of detail, dip the very tip of a toothpick into gold acrylic paint and dab it into the center of the letter ‘O’. -
Let paint dry:
Allow the paint accent to dry completely before handling. -
Package it up:
Nestle the finished token into a small kraft box filled with shredded paper or wood wool for a professional gift presentation.
Now you have a durable, handmade token ready to help someone feel loved
Party Hat Mini Sculpture
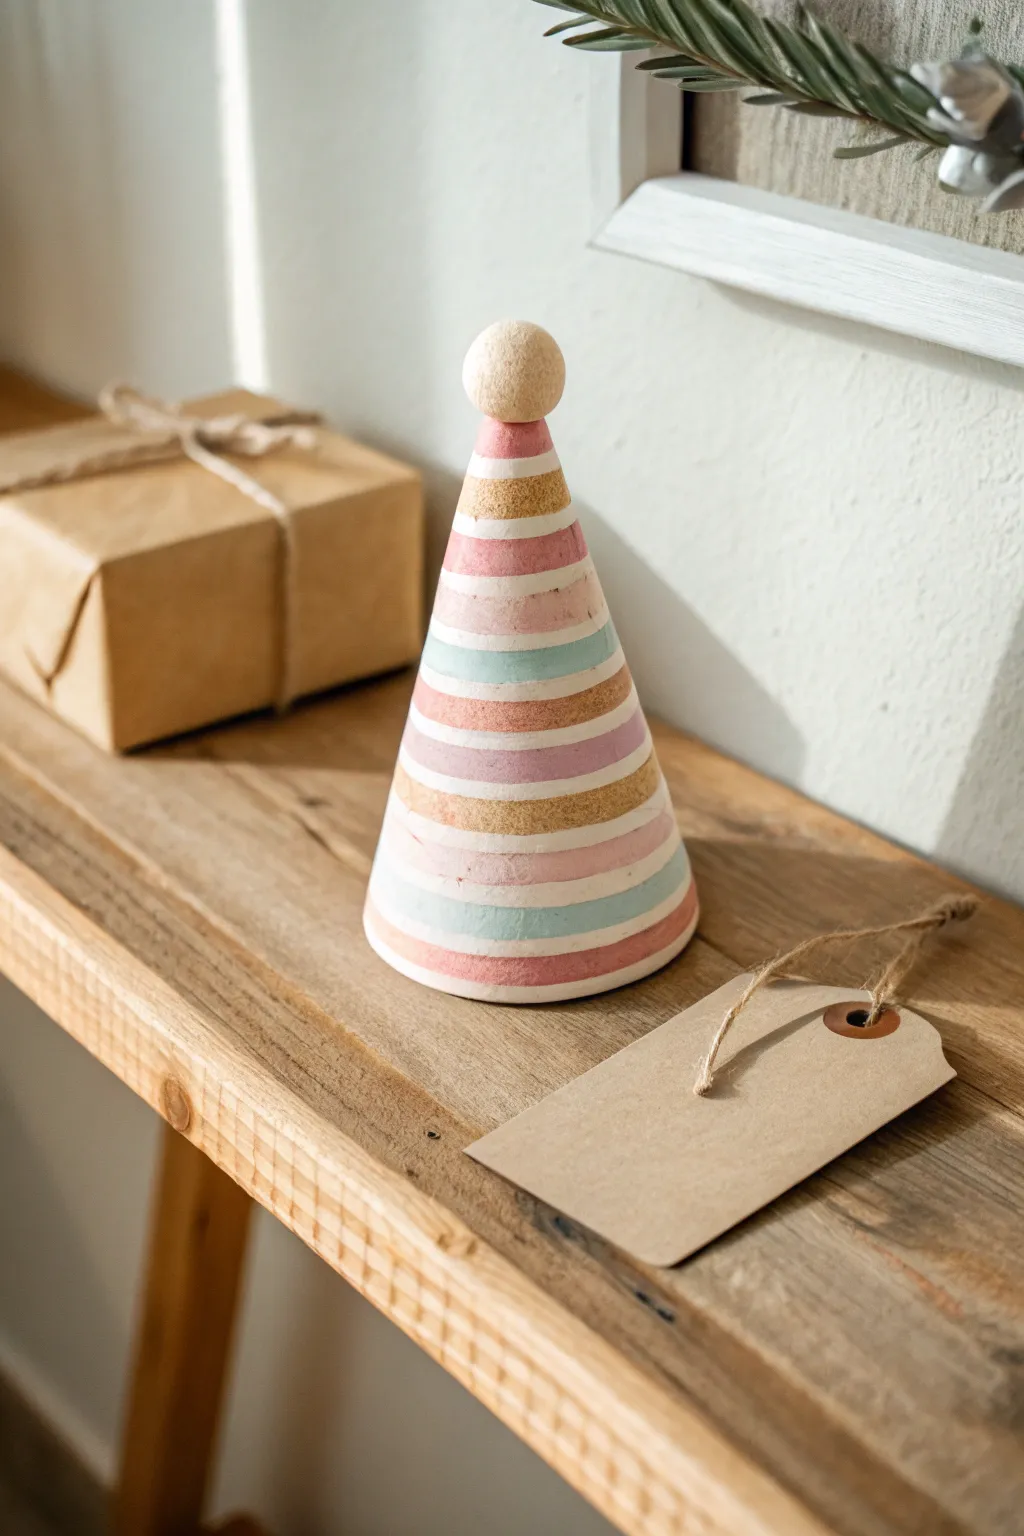
Celebrate a special birthday with this charming, minimalist sculpture that captures the joy of a party hat in permanent form. Its soft pastel stripes and rustic wooden topper make it a delightful keepsake or a unique cake topper substitute.
Step-by-Step Tutorial
Materials
- Air-dry clay or polymer clay (white)
- Small wooden ball (approx. 1 inch)
- Rolling pin
- Craft knife or clay blade
- Cone form (cardboard or foil)
- Acrylic paints (pale pink, dusty rose, light blue, metallic gold)
- Fine-grit sandpaper
- Glazing medium or matte varnish
- Fine liner brush
- Flat shader brush
- Water cup and palette
Step 1: Shaping the Form
-
Prepare your clay:
Begin by conditioning your clay. If using polymer, knead it until soft and pliable. For air-dry clay, ensure it is moist but not sticky. -
Create a base slab:
Roll out a portion of the clay to a uniform thickness of about 1/4 inch. This will ensure your cone walls are sturdy and even. -
Form the cone:
Gently drape the clay sheet over your cone form. If you don’t have a form, you can shape a cone from aluminum foil and cover it. Smooth the seam where the clay meets, blending it with your finger or a clay tool so it becomes invisible. -
Trim the bottom:
Use your craft knife to slice the bottom edge straight across as you rotate the cone. This ensures the hat will stand perfectly flat on a shelf. -
Add the topper:
Take your small wooden ball and press it partially into the top point of the clay cone to create an indentation. Remove the ball for now; you will glue it in place after painting. -
Dry or bake:
Follow the manufacturer instructions for your specific clay. Bake the polymer clay in the oven or let the air-dry clay sit for 24-48 hours until fully hardened.
Clean Lines Hack
For perfectly straight stripes, apply thin masking tape or washi tape around the cone before painting each color section
Step 2: Refining and Painting
-
Sand for smoothness:
Once hardened, gently sand the surface with fine-grit sandpaper to remove any fingerprints or bumps. Wipe away the dust with a slightly damp cloth. -
Apply the base coat:
Paint the entire cone with a coat of white acrylic paint. This primes the surface and ensures your pastel colors will pop. -
Plan the stripes:
Lightly sketch horizontal rings around the cone with a pencil to guide your painting. Keep the widths somewhat organic; they don’t need to be mathematically perfect. -
Paint the pink bands:
Using a flat shader brush, fill in the wider bands with your dusty rose and pale pink shades. I find it helpful to rotate the cone on a lazy susan or a piece of paper to keep the lines steady. -
Add blue accents:
Fill in the thinner alternating stripes with a soft, light blue paint. Use a finer brush here to keep the edges crisp against the pink. -
Use white space:
Leave several thin bands unpainted (white) between the colors to act as a separator and add brightness to the design. -
Paint gold details:
With a fine liner brush and metallic gold paint, add thin accent stripes or fill in remaining bands, adding a touch of festive sparkle. -
Attach the topper:
Use a dab of strong craft glue or superglue day to attach the wooden ball to the indentation you made at the peak of the cone. -
Seal the piece:
Finish by applying a matte varnish over the painted clay area. Avoid varnishing the raw wooden ball to keep the textural contrast.
Rustic Texture
Before baking, gently press a textured fabric or sandpaper sheet against the raw clay to give the ‘hat’ a stonewear look
Now you have a timeless little decoration that captures the feeling of a celebration
Birthday Bouquet Mini Vase
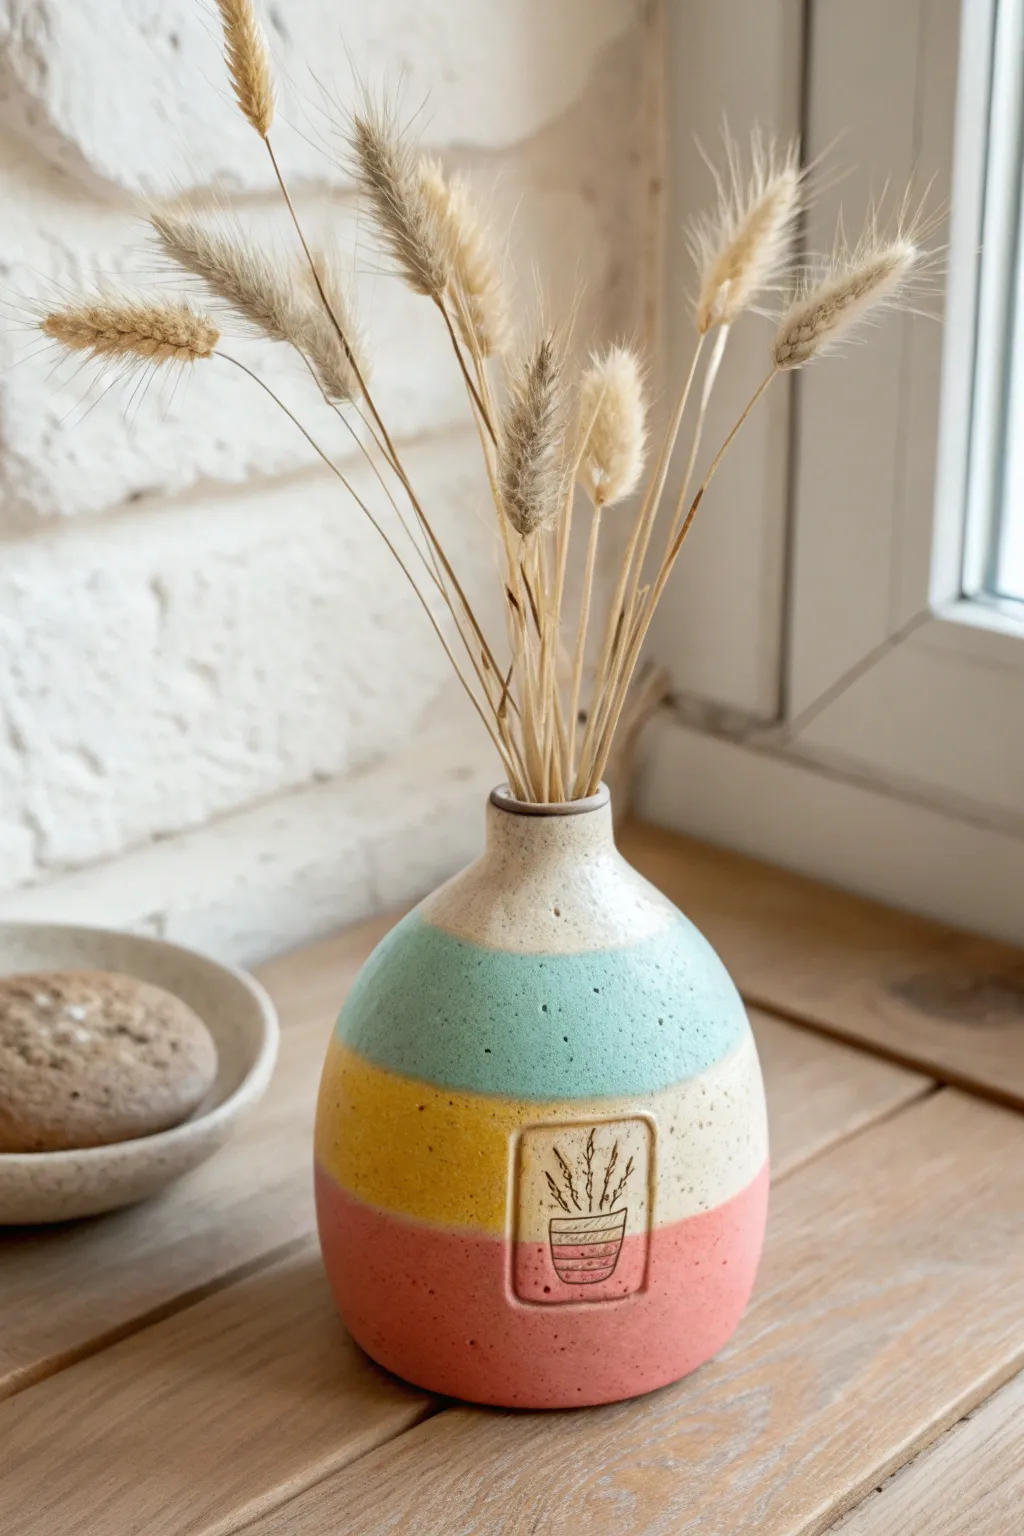
This charming mini vase combines soft, playful pastel stripes with a raw ceramic texture for a piece that feels both modern and handmade. The focal point is a sweet, stamped illustration celebrating the dried bouquet it holds, making it a perfect personalized birthday keepsake.
Step-by-Step Guide
Materials
- White stoneware or porcelain clay body (smooth)
- Small rolling pin
- Pottery wheel (or coil/pinch tools for hand building)
- Rubber kidney rib
- Underglazes: Mint Green, Butter Yellow, Coral Pink
- Thin carving tool or needle tool
- Black underglaze pencil or very fine detail brush with black underglaze
- Clear matte or satin glaze
- Small rectangular stamp or linoleum carving block
- Sponge
Step 1: Forming the Vessel
-
Prepare the Clay:
Begin by wedging about 1-1.5 lbs of white stoneware clay to remove any air bubbles. Center the clay on the wheel head. -
Open and Pull:
Open the clay and pull up a cylinder, aiming for a consistent wall thickness. Since this is a mini vase, keep your movements delicate. -
Shape the Belly:
Gently push the walls outward from the inside to create a rounded, bulbous belly shape. The widest point should be in the lower third of the form. -
Narrow the Neck:
Collar the top inward significantly to create a narrow, elegant bottleneck. This helps hold the dried stems upright later. -
Smooth the Surface:
Use a rubber kidney rib to smooth the exterior, removing throwing lines to create a clean canvas for your stripes. -
Trim the Foot:
Once leather hard, trim a neat foot ring at the base to give the vase a slight lift and refined look.
Step 2: Adding the Emblem
-
Define the Stamp Area:
While the clay is leather hard, gently press a small rectangular cookie cutter or linoleum block into the lower side of the belly to indent a frame. -
Prepare the Surface:
Using a modeling tool, smooth the inside of this rectangle so it is slightly recessed compared to the rest of the vase body. -
Sketch the Design:
Lightly trace a simple pot and plant design inside the rectangle using a needle tool. I find sketches transfer best when the clay is still slightly cool to the touch. -
Black Line Work:
Using a sharp black underglaze pencil or a liner brush, carefully draw over your traced lines to create the potted plant illustration. -
Add Accent Color:
Dab a tiny amount of diluted pink underglaze onto the pot within your illustration to tie it into the larger design.
Uneven Stripes?
If freehand painting is tricky, place the vase on a banding wheel. Spin the wheel slowly while holding your brush steady in one spot to get perfectly level color bands.
Step 3: Glazing and Finishing
-
Map the Stripes:
Lightly etch horizontal circular lines around the vase to mark where your color bands will start and stop. You want three distinct sections plus the natural neck. -
Apply Coral Base:
Paint the bottom section with Coral Pink underglaze. Apply 2-3 coats for opacity, carefully painting around the rectangular emblem. -
Apply Yellow Middle:
Paint the middle band with Butter Yellow underglaze. Let the edges meet the pink cleanly without overlapping too much to keep the colors distinct. -
Apply Mint Top:
Finish with the Mint Green underglaze on the upper shoulder section, stopping before the neck to leave the natural speckle of the clay exposed at the top. -
Bisque Fire:
Fire the piece to cone 04 (or your clay’s bisque temperature) to set the design. -
Clear Glaze Application:
Dip the entire vase into a clear matte or satin glaze. A matte finish gives it that soft, stone-like texture shown in the photo. -
Wipe the Foot:
Clean off any glaze from the bottom foot ring with a damp sponge so it doesn’t fuse to the kiln shelf. -
Final Fire:
Glaze fire to cone 6 (or appropriate temp for your clay body). Once cool, fill with dried bunny tails or wheat grass.
Custom Stamp Idea
Instead of drawing, carve a custom linoleum stamp for the center icon. You can make matching sets with different symbols like hearts, stars,, or initials for friends.
Place your finished vase on a sunny windowsill where the light can catch the soft texture of the glaze
Cake Topper Keepsake Plaque
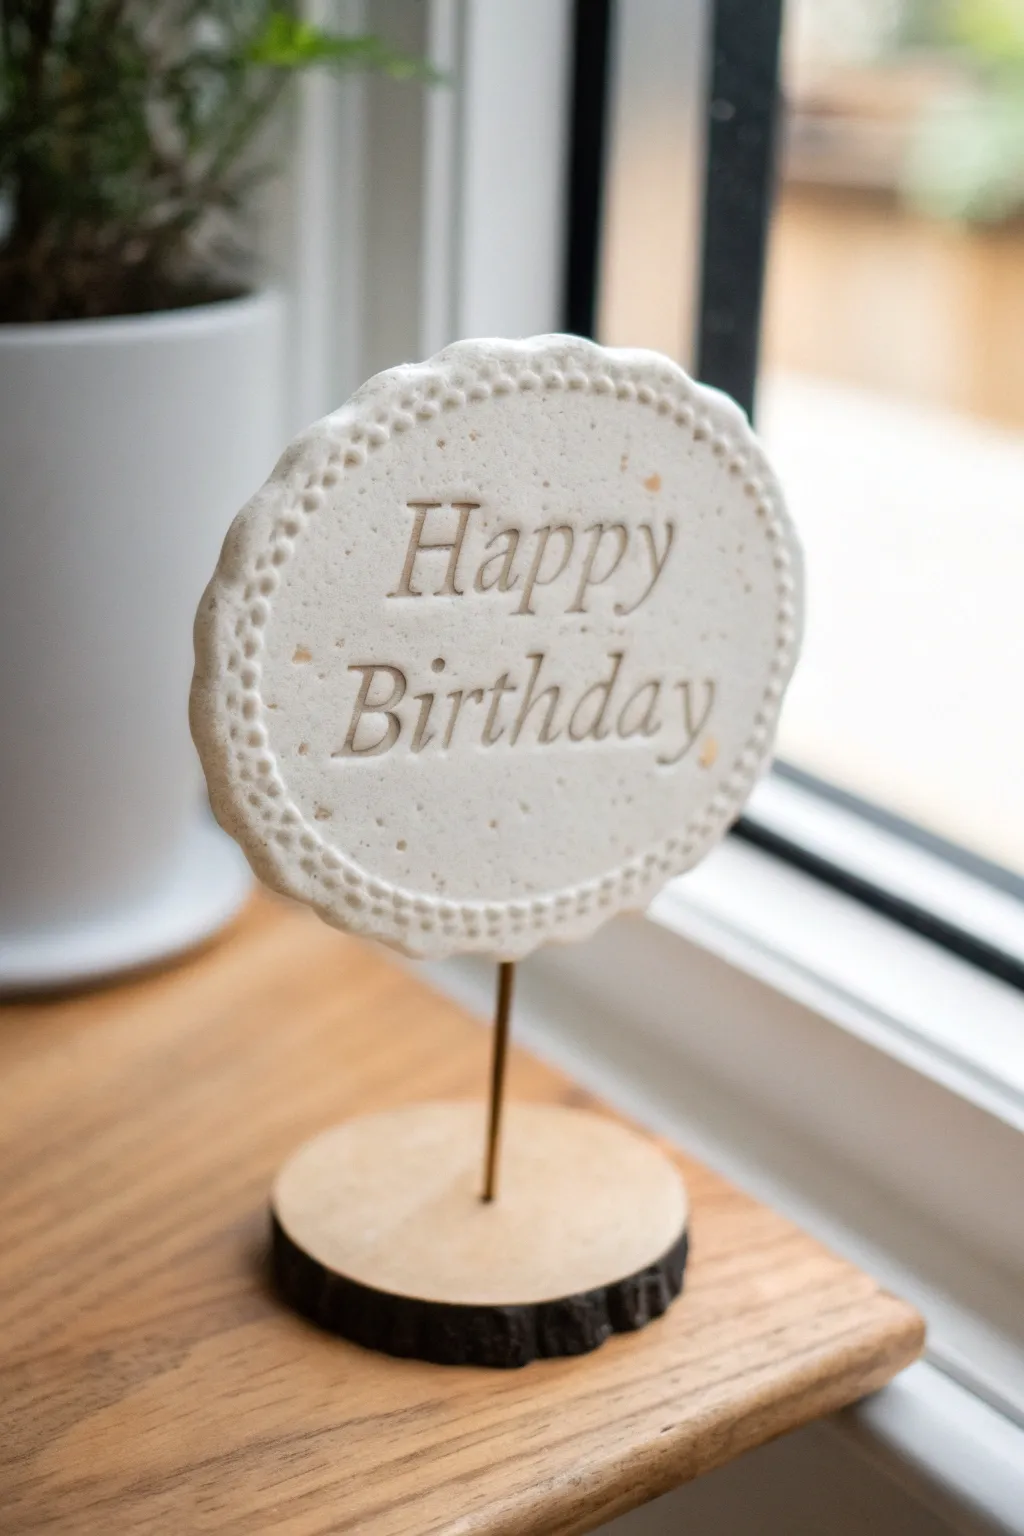
This charming keepsake elevates a simple birthday wish into a permanent display piece. With its scalloped edge, speckled texture, and rustic wooden base, it serves as a sophisticated photogenic topper or a standalone desk decoration.
Step-by-Step Tutorial
Materials
- White or cream air-dry clay
- Dried coffee grounds or fine speckling sand
- Rolling pin
- Scalloped oval cookie cutter
- Letter stamp set (serif font)
- Small dotting tool or toothpick
- Thin brass or gold-colored metal rod (approx. 2mm)
- Small wood slice (approx. 2-3 inches diameter)
- Drill with bit matching the metal rod size
- Strong craft glue or epoxy
- Fine sandpaper
- Clear matte varnish (optional)
Step 1: Preparing the Clay
-
Condition the Clay:
Take a handful of air-dry clay and knead it until it is soft and pliable. If the clay feels too dry, add a tiny drop of water to your fingers. -
Create the Speckled Effect:
Sprinkle a pinch of dried used coffee grounds or fine speckling sand into the clay. Knead thoroughly again until the specks are evenly distributed throughout the white base. -
Roll the Slab:
Roll the clay out onto a clean, non-stick surface to a thickness of about 1/4 inch (6mm). Ensure the surface is smooth and free of major bubbles.
Step 2: Shaping and Stamping
-
Cut the Shape:
Press your scalloped oval cutter firmly into the rolled clay. Remove the excess clay from around the edges before lifting the cutter to keep the shape distorted. -
Smooth the Edges:
Dip your finger in a little water and gently run it along the scalloped edge to soften any sharp cuts left by the metal cutter. -
Add Decorative Dots:
Using a small dotting tool or the blunt end of a toothpick, press small indentations into each scallop bump around the perimeter to mimic a beaded border. -
Position the Text:
Plan your spacing for ‘Happy Birthday’ by lightly hovering the stamps over the clay surface without pressing down. -
Stamp the Message:
Press the letter stamps firmly into the center of the oval. I find rocking the stamp very slightly helps get a clean impression of the serif details. -
Insert the Rod:
Carefully insert the metal rod into the bottom edge of the oval, pushing it in about 1/2 inch deep. Ensure it goes in straight so the plaque won’t lean. -
Remove the Rod for Drying:
Gently pull the rod back out. Drying the clay with the heavy metal rod attached can sometimes cause cracking, so it is safer to glue it in later.
Fixing Cracks
If tiny hairline cracks appear as the clay dries, mix a smallAmount of fresh clay with water to make a paste and fill them in.
Step 3: Assembly and Finishing
-
Dry the Clay:
Allow the clay piece to dry flat on a wire rack for 24-48 hours. Carefully flip it halfway through to ensure even drying on both sides. -
Prepare the Base:
While the clay dries, take your small wood slice. Mark the center point. -
Drill the Base:
Drill a hole into the center of the wood slice using a bit that is the same diameter as your metal rod. Drill about halfway through the wood depth. -
Clean Up:
Once the clay is fully dry and hard, use fine sandpaper to gently buff away any rough spots on the back or edges. -
Attached the Rod to Clay:
Dip one end of the metal rod into strong craft glue or epoxy and insert it back into the hole at the bottom of the clay oval. -
Mount to Base:
Apply a small dab of glue to the bottom end of the rod and insert it firmly into the drilled hole in the wood slice. -
Final Seal:
Optional: Brush a coat of clear matte varnish over the clay to protect it from moisture and dust, keeping that natural stone look.
Go for Gold
After the clay dries, use a fine detail brush to paint liquid gold leaf inside the impressed letters for an elegant, high-contrast finish.
Now you have a timeless birthday decoration ready to grace a cake table or shelf
Milestone Year Memory Tile
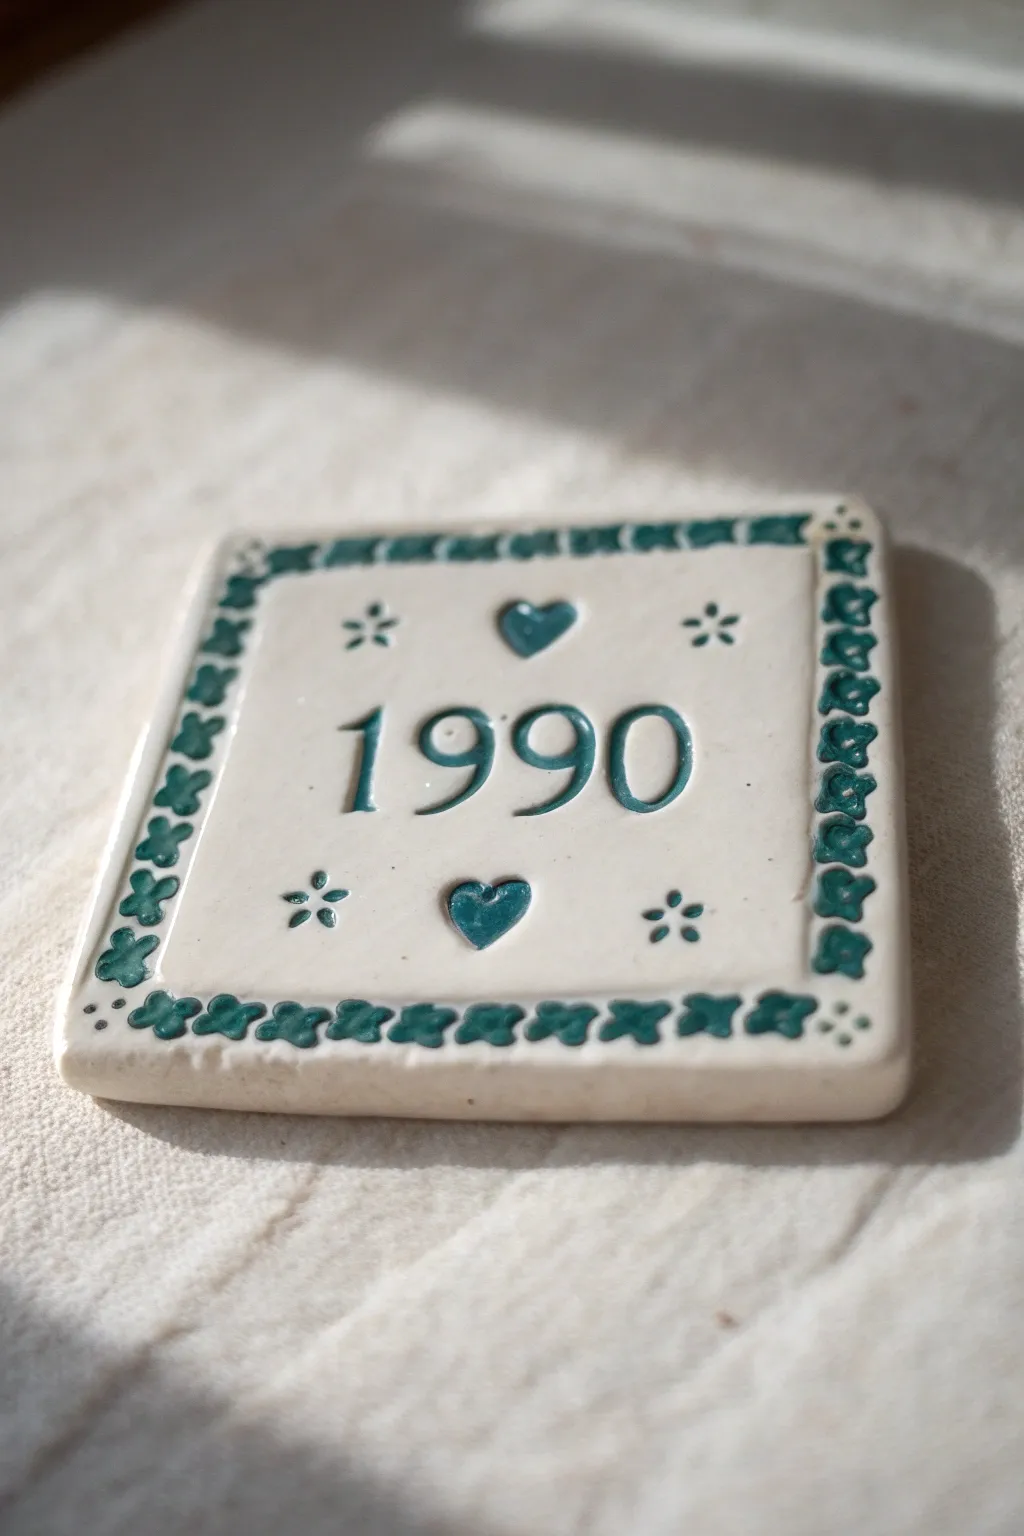
Celebrate a special year with this charming, handcrafted ceramic tile featuring a stamped date and delicate painted motifs. Its glossy finish and teal accents give it a timeless, folk-art appeal perfect for marking a significant birthday or anniversary.
Detailed Instructions
Materials
- White polymer clay (or low-fire ceramic clay if you have kiln access)
- Square cookie cutter (approx. 3-4 inches) or craft knife
- Rolling pin
- Number stamps (serif font)
- Small heart-shaped stamp or cutter
- Small flower/star stamp
- Teal or deep green acrylic paint (if using polymer clay)
- High-gloss polyurethane varnish
- Fine-point paintbrush (size 0 or 00)
- Sandpaper (fine grit)
- Parchment paper
Step 1: Shaping the Tile base
-
Condition the clay:
Begin by thoroughly kneading your white polymer clay until it is soft, pliable, and free of air bubbles, which is crucial for a smooth surface. -
Roll the slab:
Roll the clay out onto a clean surface or parchment paper to an even thickness of about 1/4 inch. I like to use depth guides or wooden stats on the sides to ensure the tile is perfectly level. -
Cut the square:
Using your square cutter or a ruler and craft knife, cut out a clean square shape. Smooth the raw edges gently with your finger to remove any sharpness. -
Soften the corners:
Gently tap the four sharp corners of the square to round them off slightly, giving the tile a softer, more handmade appearance.
Uneven Paint?
If the paint wip-away method smears too much, let the paint dry completely inside the grooves first. Then, use a cotton swap dipped in rubbing alcohol to clean just the surface.
Step 2: Creating the Impressions
-
Mark the center:
Lightly mark the center of your tile to help you align the date. -
Stamp the year:
Press your number stamps firmly into the center of the clay to create the ‘1990’ (or your chosen year). Make sure the depth is consistent for all figures. -
Add central icons:
Press a small heart stamp directly above and below the date, centering them vertically. -
Stamp the flowers:
Add small four-petaled flower impressions to the left and right of the hearts, creating a balanced diamond shape around the date. -
Create the border:
Using a small patterned stamp or a sculpting tool, create a repeating border design along all four edges. The example uses a repeating clover or ‘x’ motif. -
Corner details:
Add three small dots or distinct marks in the very corners of the border to join the sides seamlessly. -
Bake the clay:
Transfer the tile to a baking sheet and bake according to the manufacturer’s instructions for your specific brand of polymer clay. Let it cool completely.
Step 3: Painting and Finishing
-
Prepare the paint:
Mix a teal or deep green acrylic paint with a tiny drop of water to improve its flow. -
Fill the impressions:
Using your fine-point brush, carefully paint into the indented numbers, hearts, and border patterns. Don’t worry if you get some paint on the surface. -
Wipe away excess:
Before the paint fully dries, take a slightly damp paper towel or cloth and gently wipe the surface of the tile. This removes paint from the raised areas while leaving it inside the stamped depressions. -
Refining the clean-up:
If stubborn paint remains on the white surface, let it dry and then verify gently sand it away with fine-grit sandpaper. -
Cleaning dust:
Wipe the tile with a lint-free cloth to remove any sanding dust or residue. -
Apply varnish:
Apply a thick, even coat of high-gloss polyurethane varnish to the entire top surface and sides. -
Second coat:
allow the first coat to dry, then apply a second coat to achieve that ceramic-like, glassy finish shown in the photo.
Pro Tip: Liquid Clay
To make the finish look even more like glazed ceramic, top the baked piece with a layer of clear liquid polymer clay (like Fimo Liquid) and re-bake for a glass-like dome.
Now you have a permanent keepsake that beautifully commemorates a milestone year
Birthday Wish Jar Topper
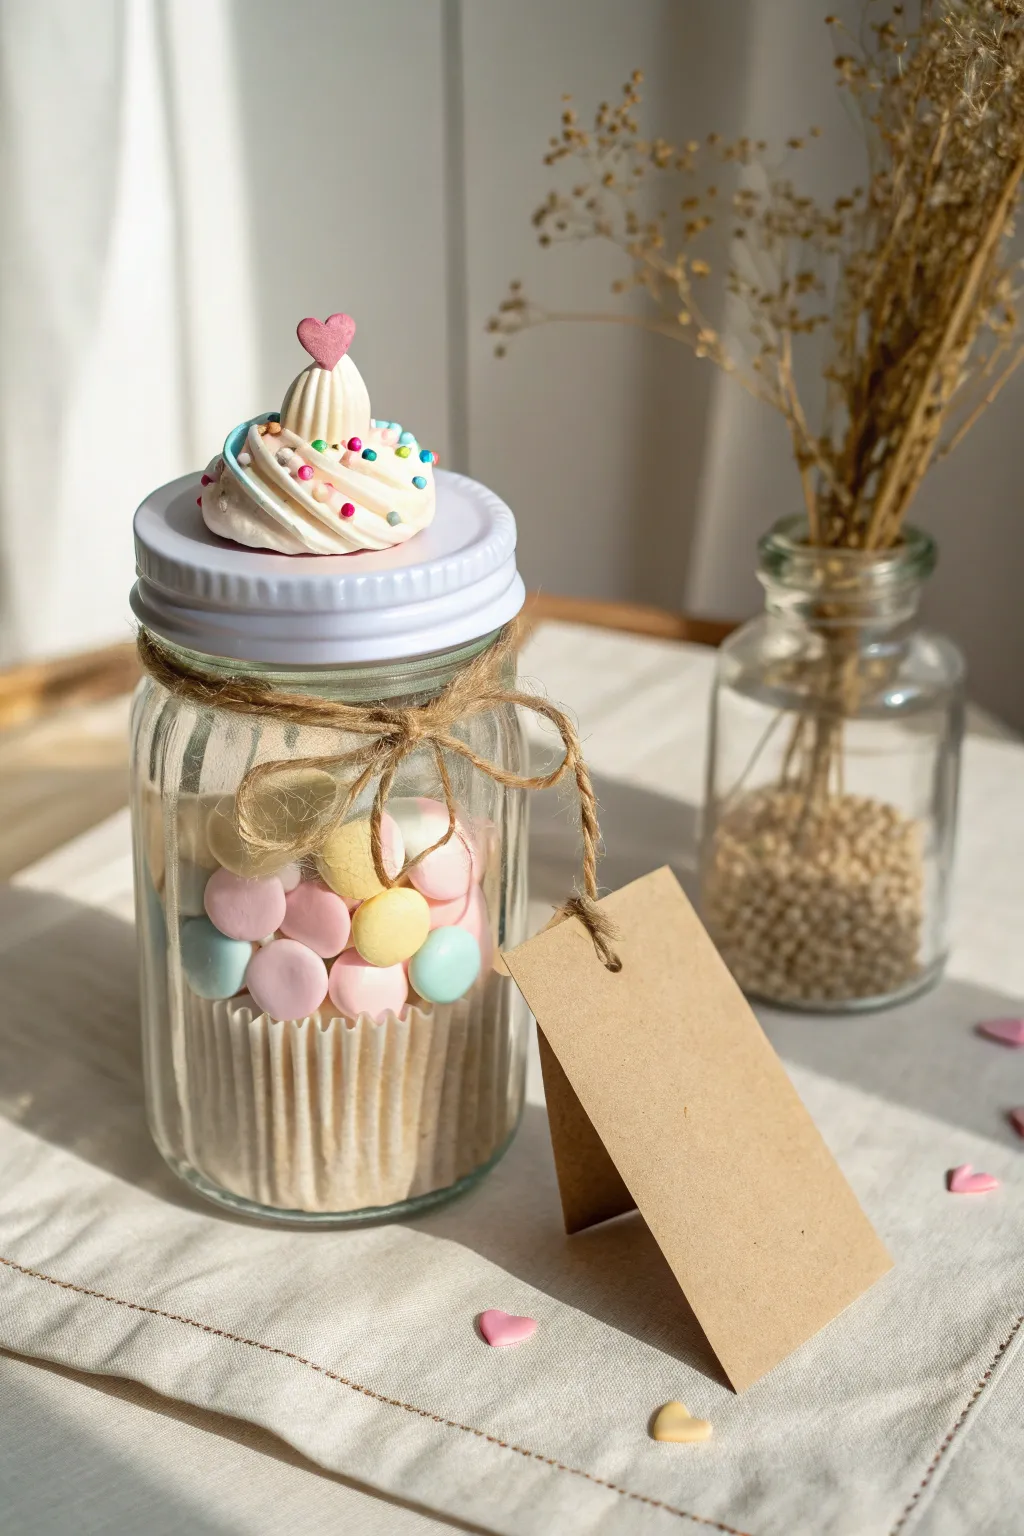
This charming gift combines a keepsake jar with a handmade clay topper that looks good enough to eat. The sculpted frosting swirl mimics real meringue, creating a whimsical and sweet birthday surprise.
How-To Guide
Materials
- White air-dry clay or polymer clay (oven-bake)
- Glass mason jar with metal screw-top lid
- Small heart-shaped cutter or pink clay
- Assorted small round sprinkles (real or clay)
- Mod Podge or strong craft glue
- Piping bag with star tip (disposable is best)
- Twine or jute string
- Kraft paper tag
- Pastel colored candies or meringues for filling
Step 1: Preparing the ‘Frosting’
-
Soften the clay:
Begin by conditioning your white clay until it is extremely soft and pliable. If using air-dry clay, you may need to mix in a very small amount of water to get a consistency resembling stiff buttercream frosting. -
Prepare the piping bag:
Cut the tip off a disposable piping bag and insert a large open star piping tip. This is the secret to getting those realistic ridges. -
Load the clay:
Pack your softened clay into the bag. Push it down firmly to eliminate air pockets, which can cause breaks in your swirl later. -
Clean the lid:
Wipe the top of your metal jar lid with alcohol to ensure it is clean and grease-free so the clay adheres properly. -
Apply base adhesive:
Smear a thin layer of strong craft glue or liquid clay (if using polymer) onto the center of the lid where the swirl will sit.
Clay Consistency
For realistic piping, mix a few drops of baby oil or clay softener into polymer clay until it’s sticky and gooey, almost like chewing gum.
Step 2: Sculpting the Topper
-
Pipe the base:
Squeeze the piping bag firmly to extrude the clay onto the center of the lid. Create a wide circle first for the base layer. -
Build the height:
Continue piping in a spiral motion, moving inward and upward to create a second, slightly smaller tier on top of the base. -
Form the peak:
Finish the swirl by pulling the piping bag straight up quickly to create a classic peaked top, just like real soft-serve ice cream. -
Add the heart:
Take a tiny piece of pink clay and shape it into a heart (or use a premade charm). Gently press this into the very top peak of your white clay swirl while it’s still wet. -
Decorate with sprinkles:
While the clay is fresh, carefully drop colorful spherical sprinkles onto the ridges of the swirl. I find tweezers help place them exactly where you want them without denting the clay.
Cracking Clay?
If air-dry clay cracks while drying, smooth the cracks with a tiny bit of water and fresh clay, then sand gently once completely dry.
Step 3: Finishing Touches
-
Dry or bake:
If using polymer clay, bake the lid according to the package instructions (usually 275°F for 15-20 minutes). If using air-dry clay, let it sit undisturbed for 24-48 hours until fully hardened. -
Seal the topper:
Once fully cured or dry, brush a coat of gloss varnish or Mod Podge over the clay swirl to give it a shiny, sugary finish and protect the sprinkles. -
Fill the jar:
Place a cupcake liner inside the glass jar and fill it with pastel candies, meringues, or small notes. -
Close the jar:
Screw the decorated lid onto the jar carefully. -
Add the tag:
Wrap a length of jute twine around the neck of the jar several times to create a rustic band. -
Tie the bow:
Thread a blank kraft paper tag onto the twine and tie a simple bow to secure it in place.
This sweet jar is now ready to be filled with treats and gifted to someone special
Mini Pinch Pot Surprise Box
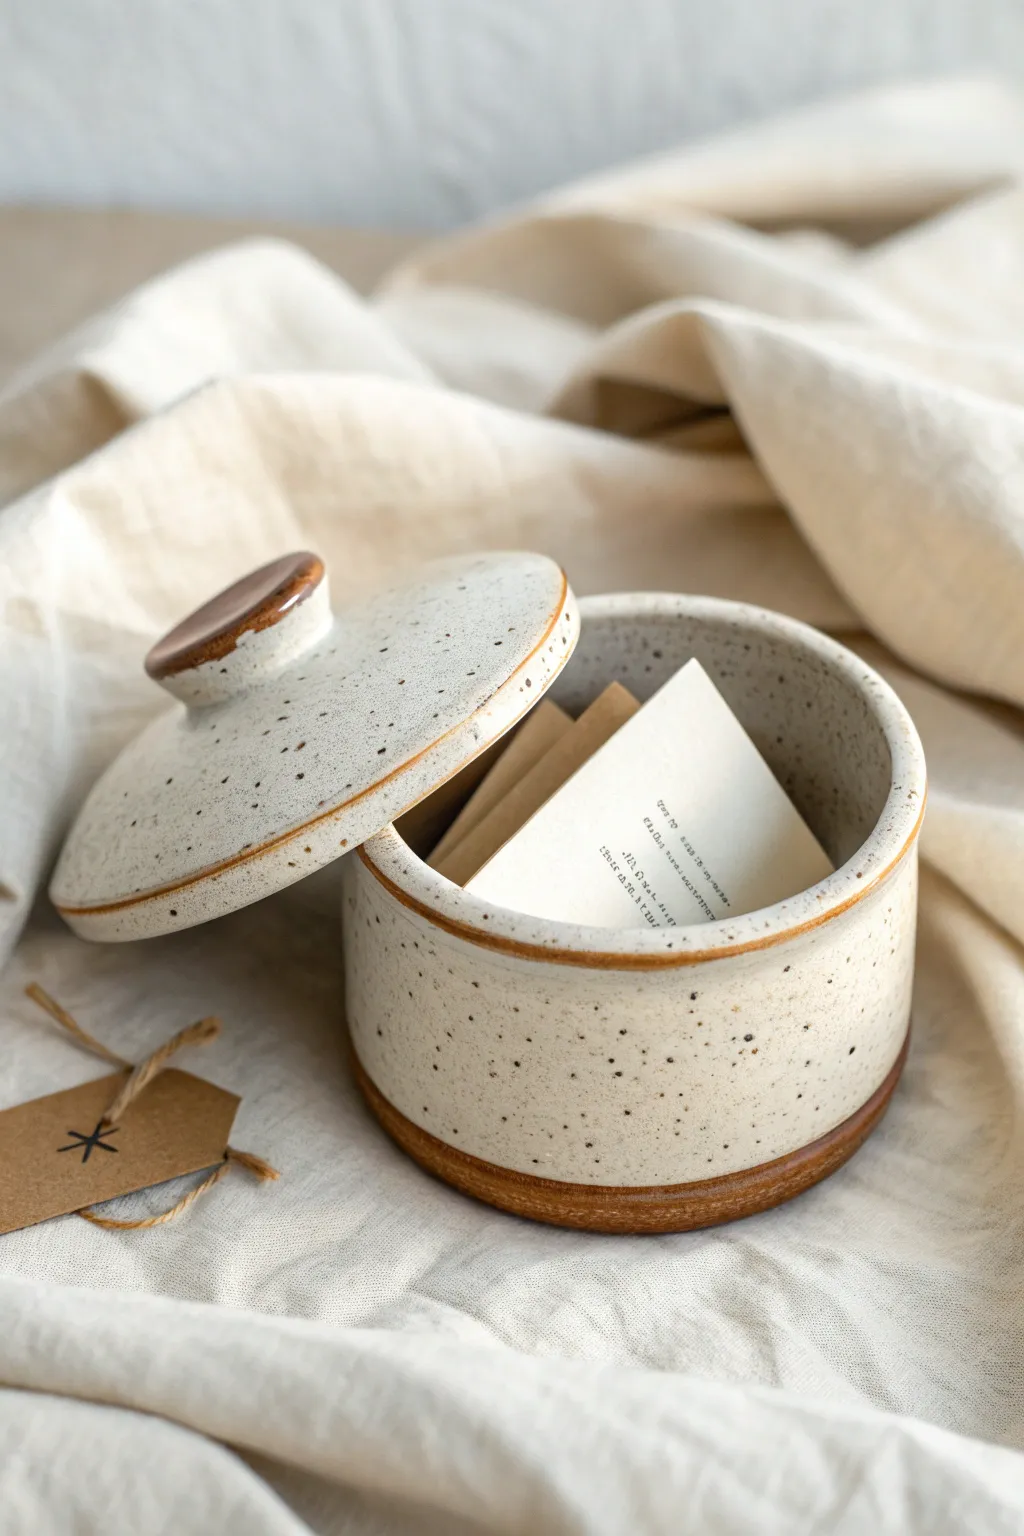
Create a charming, rustic vessel perfect for hiding away secret messages or tiny treasures. Using speckled stoneware clay, this wheel-thrown or hand-built pot features a warm, earthy finish with defined brown rims that frame the simple form.
Step-by-Step Guide
Materials
- Speckled buff stoneware clay
- Pottery wheel (optional, can be hand-built)
- Needle tool
- Rib tool (metal or wood)
- Trimming tools
- Sponges
- Iron oxide wash or dark brown underglaze
- Clear gloss or satin glaze
- Small paintbrush
- Kiln
Step 1: Forming the Main Vessel
-
Center the Clay:
Begin with a small ball of speckled stoneware clay, about 1 pound. Center it firmly on the wheel head if throwing, or create a symmetrical ball for pinch-potting. -
Open the Floor:
Open the clay to create a flat floor, leaving about half an inch of thickness at the bottom for trimming later. Compress the floor well to prevent cracking. -
Pull the Walls:
Pull the walls straight up to form a cylinder. Aim for vertical sides rather than a bowl shape. Keep the walls even, approximately 1/4 inch thick. -
Refine the Rim:
Use a chamois or sponge to smooth the rim, ensuring it is flat and level to accept the lid later. -
Create the Gallery (Optional):
If you want the lid to sit inside, split the rim to create a small shelf (gallery). Alternatively, for this specific look, keep the rim flat; the lid will have a flange that sits inside the pot.
Clean Rims
Wax resist the touching surfaces (bottom of lid flange and inside rim of pot) before glazing so the lid doesn’t fuse shut during firing.
Step 2: Creating the Lid
-
Measure the Opening:
Before making the lid, use calipers to measure the inside diameter of your pot’s rim accurately. -
Throw the Lid:
Using a smaller ball of clay, throw a low, shallow dome shape upside down (like a small plate). Leave enough clay in the center to trim a knob later. -
Form the Flange:
On the underside of the lid (currently facing up), create a ridge or flange that matches your caliper measurement. This flange will drop into the pot to keep the lid secure. -
Check the Fit:
I always double-check the fit while the clay is still leather hard; you want a snug fit that still allows for glaze thickness.
Step 3: Trimming and Assembly
-
Trim the Pot Base:
Once leather hard, flip the main pot over and trim the bottom. Carve a distinct foot ring that separates the wall from the table surface. -
Trim the Lid Knob:
Place the lid on the wheel (right side up) and trim the excess clay from the top to create a simple, rounded button knob. -
Smooth Surfaces:
Using a damp sponge or a soft rib, go over both pieces to bring the grog (speckles) to the surface and smooth out any throwing lines.
Wobbly Lid?
If the lid rattles, your flange might be too loose or the rim unlevel. Use grinding paste after the final firing to sand them for a perfect fit.
Step 4: Glazing and Firing
-
Bisque Fire:
Fire both pieces to cone 04 (or your clay’s specific bisque temperature). -
Apply Oxide Detail:
Using a small brush, apply a band of iron oxide wash or dark brown underglaze to the foot ring of the pot, the rim of the pot, the rim of the lid, and the top of the knob. -
Clean Lines:
Wipe away any uneven drips of oxide with a damp sponge to ensure the brown bands are crisp and deliberate. -
Clear Glaze:
Dip or brush a clear gloss glaze over the entire piece (except the very bottom of the foot where it sits on the shelf). -
Final Fire:
Glaze fire to cone 6 (or appropriate temperature for your clay body) to melt the glaze and bring out the natural speckles.
Fill your finished pot with handwritten notes or small gifts and present it to someone special
Framed Birthday Balloon Shadow Art
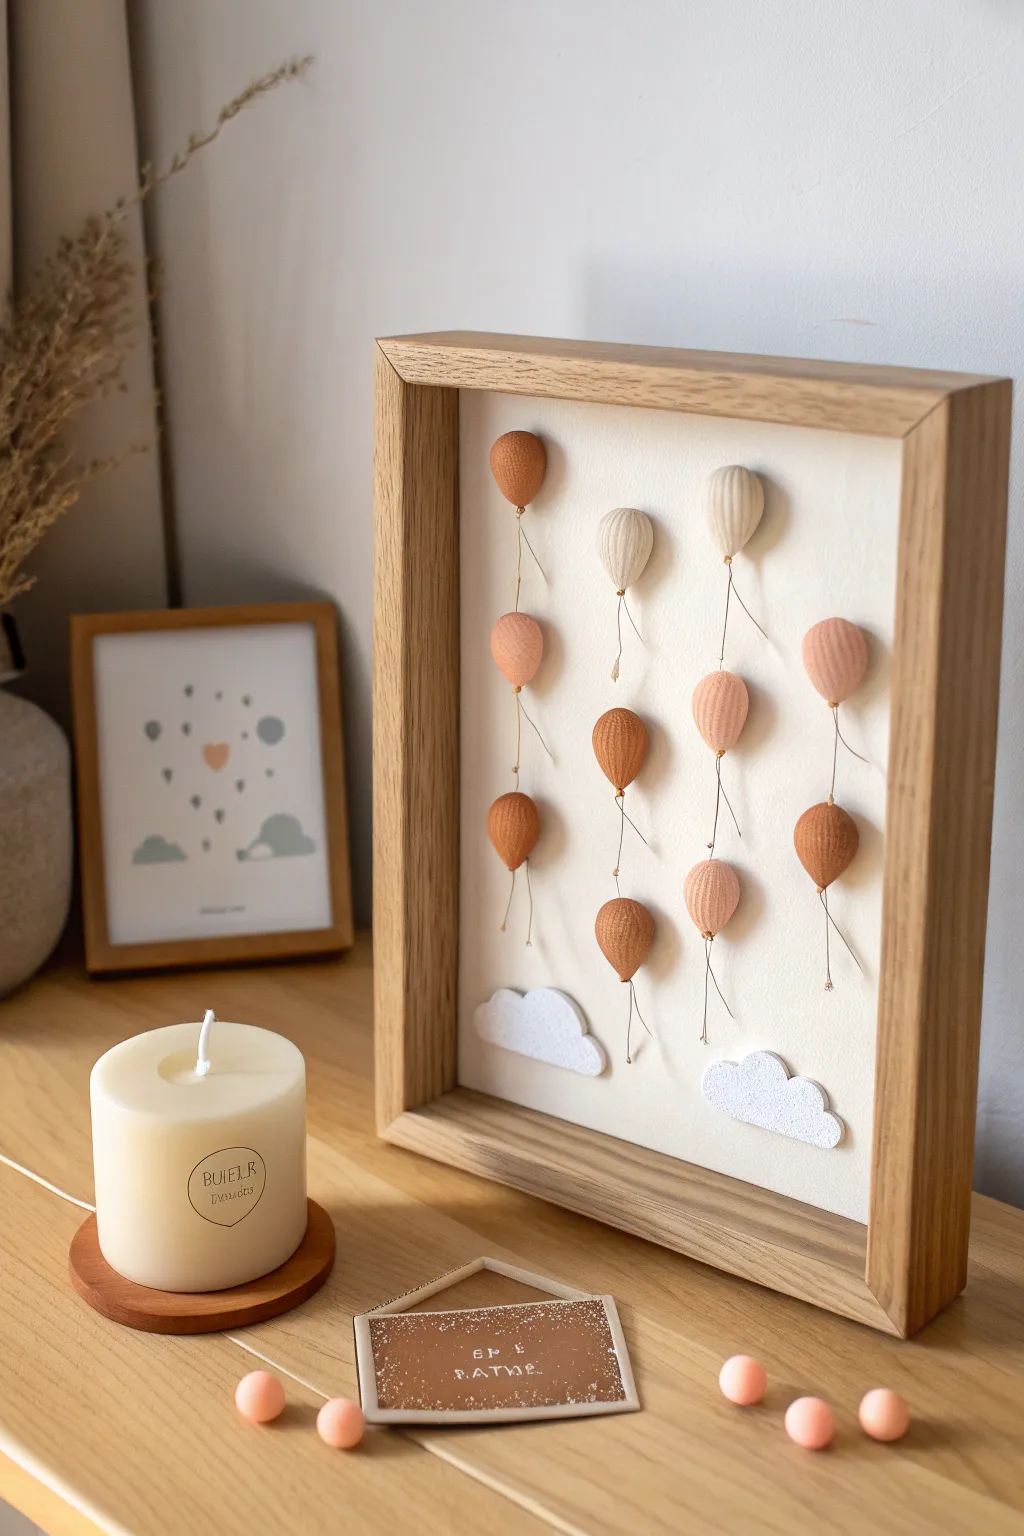
Capture the lightness of a celebration with this charming shadow box, featuring textured clay balloons drifting over fluffy clouds. Its warm palette of terracotta, peach, and cream brings a gentle, nostalgic feel to any nursery or bedroom shelf.
How-To Guide
Materials
- Polymer clay (terracotta, peach, beige/cream, white)
- Deep shadow box frame (wooden finish)
- Rigid backing card or mat board
- Fine silver or gold jewelry wire (24 gauge)
- Texturing tool (clean toothbrush or sandpaper)
- Detail needle tool or toothpick
- Super glue or strong craft adhesive
- Wire cutters
- Pliers
- White glitter (optional)
Step 1: Sculpting the Balloons
-
Color Mixing:
Start by conditioning your polymer clay blocks. To achieve the soft gradient look seen in the photo, mix your earthy terracotta with varying amounts of white delicately, creating distinct shades of rust, soft peach, and cream. -
Shaping the Bodies:
Roll small balls of clay appearing approximately 1.5 to 2 cm in diameter. Gently taper one end of each ball by rolling it between your fingers to create a classic teardrop or lightbulb balloon shape. -
Adding Texture:
Before the clay hardens or is baked, gently press a clean toothbrush or piece of sandpaper against the surface of each balloon. This gives it a matte, fabric-like finish rather than a shiny plastic look. -
Creating the Knots:
Roll very tiny, flattened spheres of matching clay colors. Attach these to the tapered bottom of each balloon to mimic the tied knot where the string would attach. -
Inserting Wire anchors:
Cut short lengths of your jewelry wire (about 1 inch). Insert one end into the bottom knot of each balloon. This will act as the ‘string’ later. -
Baking:
Arrange your balloons on a baking sheet lined with parchment paper. Bake according to your specific clay package instructions (usually 275°F/135°C for 15-30 minutes). Let them cool completely.
Step 2: Making the Clouds
-
Rolling the White Clay:
Roll out a sheet of white polymer clay to about 4mm thickness. -
Cutting shapes:
Use a craft knife to freehand cut two simple, fluffy cloud shapes. Keep the edges soft and rounded. -
Sparkle Finish:
If you want the glittery texture shown in the bottom clouds, press the raw clay gently into a shallow dish of fine white glitter, or sprinkle it on top and press lightly so it adheres. -
Bake Clouds:
Bake the cloud pieces separately following the same temperature guidelines, then allow to cool.
Uneven Texture?
If the clay texture looks too rough after baking, lightly buff the surface with a very fine-grit sanding sponge to soften the peaks while keeping the matte look.
Step 3: Assembly and Framing
-
Prepare the Backing:
Cut your rigid backing card to fit exactly inside your shadow box frame. A textured cream cardstock works beautifully for a premium look. -
Dry Layout:
Lay the backing board flat and arrange your balloons and clouds without glue first. Stagger heights to create a sense of movement and floating. -
Shaping the Wires:
Using pliers, gently bend the wires coming from the balloons. Create subtle waves or kinks in the wire to make them look like drifting strings. -
Anchoring Wires:
Poke tiny pilot holes in the backing board where the bottom of each wire ‘string’ should end. Feed the wire tip through and tape it securely on the back side of the board for a clean look. -
Gluing the Balloons:
Apply a dab of strong adhesive to the back of each baked clay balloon and press firmly onto the backing board. -
Adding Clouds:
Glue the two white clouds at the bottom of the composition, slightly overlapping the wire ends of the lowest balloons to integrate the scene. -
Final Framing:
Once the glue is fully cured and no fumes remain, place the backing board into the shadow box frame and secure the back panel.
Level Up: 3D Effect
Make the balloons pop by using thick foam mounting tape instead of glue. This lifts them off the backing board, creating real cast shadows inside the box.
Now you have a heartwarming piece of dimensional art ready to be gifted or displayed
Custom Birthday Portrait Figurine
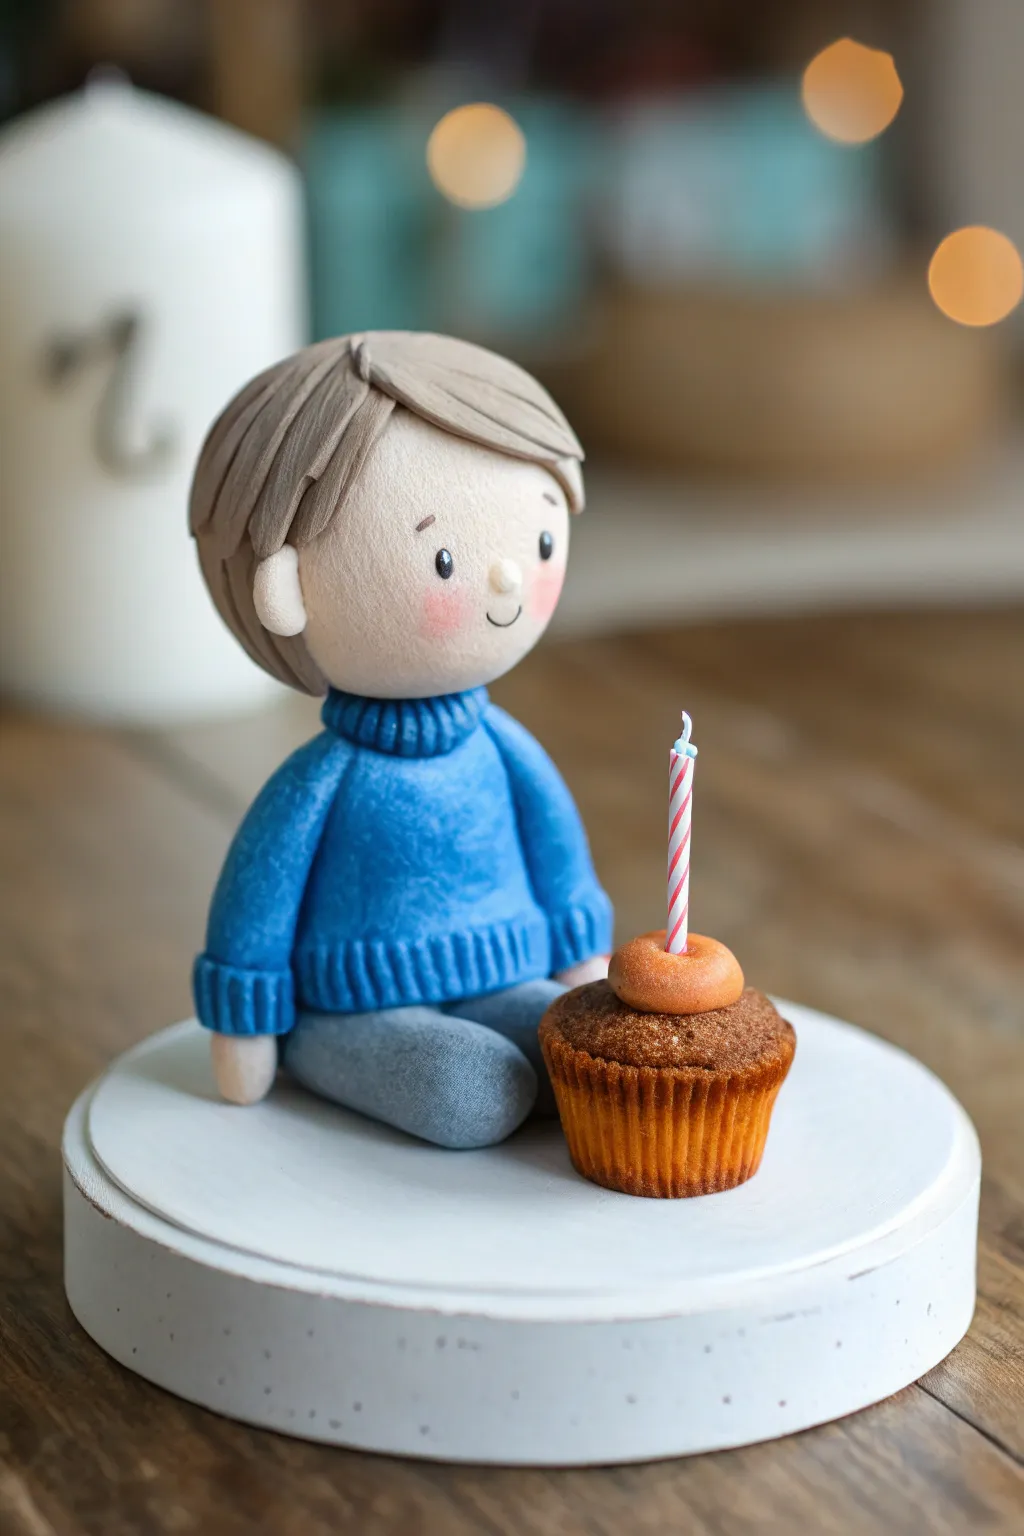
Capture a special moment with this adorable polymer clay keepsake featuring a stylized birthday boy and his tiny cupcake. With its soft textures and sweet expression, this miniature sitter makes for a heartwarming personalized topper or shelf decoration.
Step-by-Step
Materials
- Polymer clay (beige/flesh tone, light brown, denim blue, grey, chocolate brown, orange-brown, white, red)
- Set of clay sculpting tools (needle tool, ball stylus, silicone shaper)
- Acrylic rolling pin
- Small circle cutter
- Liquid clay (TLS or Fimo Liquid)
- Soft pastel chalks (pink/blush)
- Small soft paintbrush
- Armature wire or toothpick (for internal support)
- Oven and baking sheet
Step 1: Sculpting the Head and Body
-
Forming the head base:
Start by conditioning a sphere of beige or flesh-tone clay about the size of a walnut. Roll it until completely smooth, then gently press it into a slightly rounded oval shape for the head. -
Adding facial features:
Using a small ball tool, make shallow indentations for the eyes. Insert tiny balls of black clay into these sockets and flatten slightly. Use a needle tool to scratch a small, curved smile below the eyes. -
Blushing the cheeks:
Before baking, scrape a little pink soft pastel into a powder. With a soft, dry brush, gently dust rosy circles onto the cheeks for that sweet, innocent look. -
Creating the torso:
Shape a cone of blue clay for the body. Flatten the top slightly where the neck will attach. I find it helpful to insert a piece of wire or toothpick here to connect the head securely later. -
Sculpting the legs:
Roll two equal logs of grey clay for the legs. Bend them slightly at the ‘knee’ offering a relaxed, seated pose, and attach them to the bottom of the blue torso, smoothing the seams.
Fixing Fingerprints
Before baking, lightly brush your figurine with a little baby oil or clay softener. This smooths out accidental fingerprints and removes lint.
Step 2: Dressing and Hair Details
-
Adding the sweater texture:
Roll a thin sheet of blue clay equal to the torso color. Use a needle tool to score vertical lines close together to mimic a knitted ribbing texture. Cut a strip and wrap it around the bottom of the torso. -
Making the arms and collar:
Create two small blue logs for sleeves and attach them to the shoulders. Add ‘ribbed’ cuffs using the same technique as the hem. Create a thick ring of blue clay, texture it vertically, and place it around the neck area for a cozy turtleneck collar. -
Attaching the hands:
Form two tiny balls of flesh-tone clay and attach them inside the sleeve cuffs to represent hands peaking out. -
Adding the hair base:
Flatten a disc of light brown clay and drape it over the back of the head. Smooth it down so it adheres well to the skull shape. -
Styling the strands:
Roll several small, flattened teardrop shapes of brown clay. Layer these over the front of the head to create varied bangs and side-swept hair. Use a sculpting tool to press hair strands into the clay for natural texture. -
Adding ears:
Add two tiny semi-circles of flesh-tone clay on the sides of the head, just peeking out from under the hair.
Make It Personal
Swap the cupcake for a different hobby item like a tiny soccer ball, book, or pet dog to match the birthday child’s real-life interests.
Step 3: The Tiny Cupcake
-
Forming the cupcake base:
create a cylinder of orange-brown clay. Use a needle tool or a ribbed modeling tool to press vertical ridges all around the side to simulate a baking liner. -
Adding the cake top:
Shape a dome of dark brown clay for the chocolate muffin top. Texture the surface by tapping it gently with a toothbrush or stiff brush to look like sponge cake. -
Adding the donut topper:
Roll a small ring of light caramel-colored clay to look like a donut or frosting ring and place it on center of the muffin top. -
Creating the candle:
Twist a very thin snake of white clay with an even thinner snake of pink or red clay to create the striped candle. Insert a tiny snip of blue wire or nylon at the top for the wick. -
Assembly and Baking:
Press the candle into the donut frosting. Place the finished cupcake next to the boy figure on your baking tile. Bake according to your polymer clay manufacturer’s instructions (usually 275°F/130°C for 15-30 minutes).
Once cooled, you can glue your figure onto a wooden base for a permanent display piece