If you love clay projects that are actually useful, a perpetual desk calendar is such a satisfying make. I’m sharing my favorite clay calendar ideas—from classic cute block-holders to a few unexpected designs that still keep those interchangeable date blocks front and center.
Classic Animal Hug Perpetual Calendar
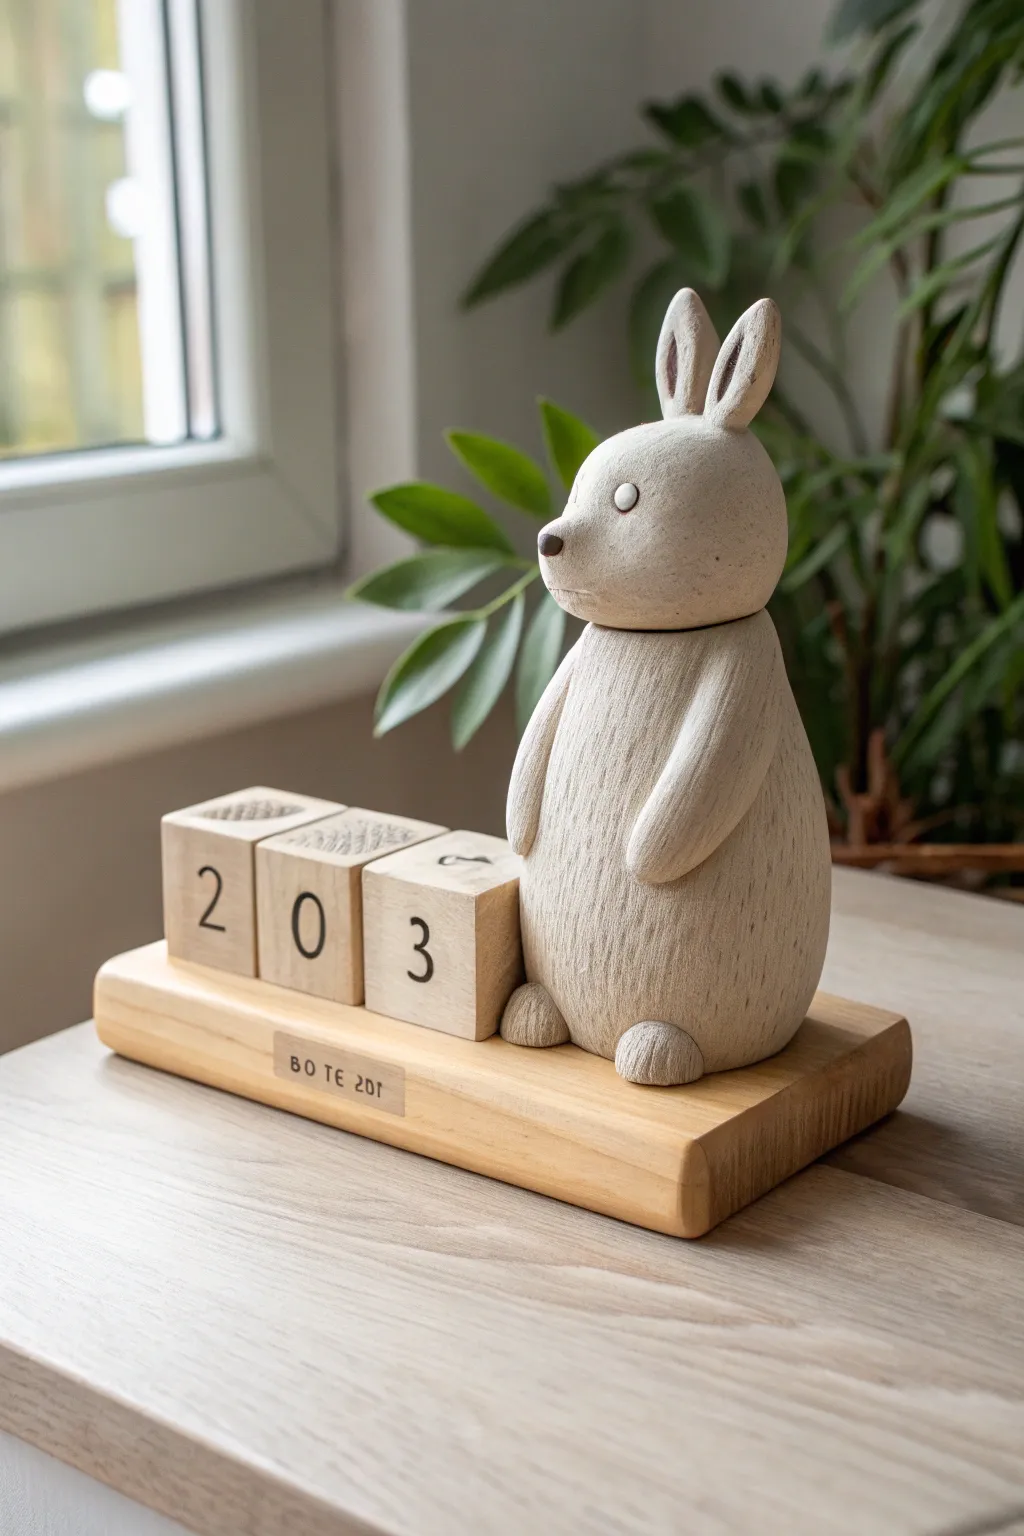
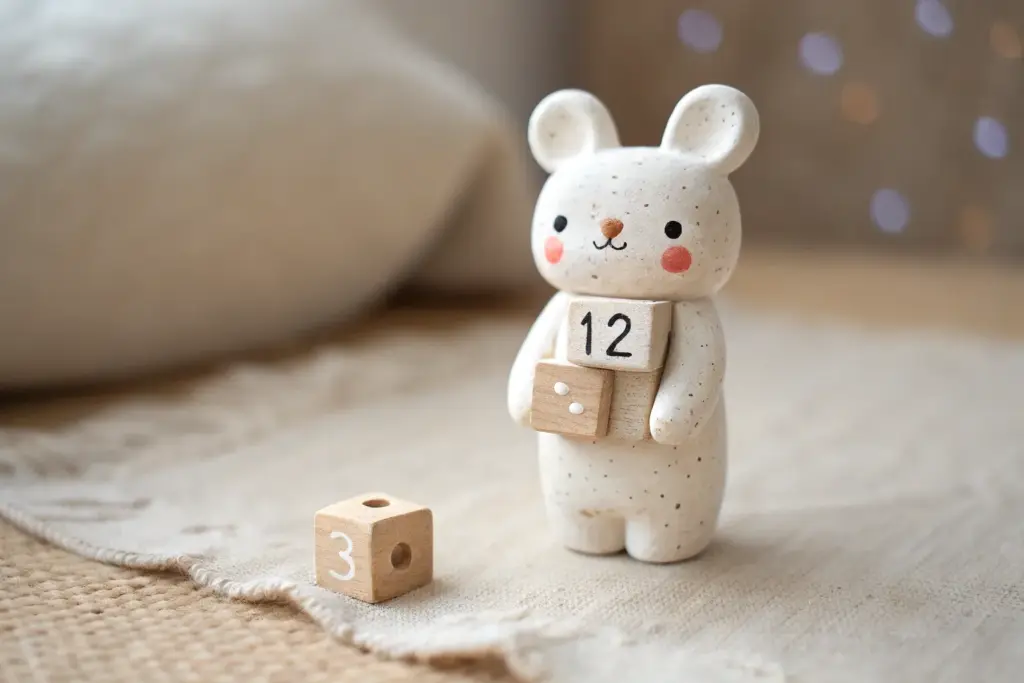
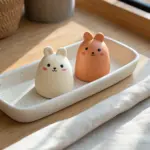
Bring a touch of serene woodland charm to your desk with this cream-colored perpetual calendar. Featuring a stylized, smooth-finish rabbit standing guard over simple date blocks, this project combines functional decor with minimalist clay sculpting.
Step-by-Step Tutorial
Materials
- Polymer clay (cream, beige, or white granite effect)
- Wooden base (approx. 6” x 2.5” x 0.75”)
- Three square wooden blocks (1.25” cubes)
- Black acrylic paint or fine-tip permanent marker
- Numeric stamps (optional)
- Small dotting tool or stylus
- Clay sculpting tools (wire loop, needle tool)
- Fine-grit sandpaper (400 and 800 grit)
- Matte varnish or sealant
- Strong craft glue or epoxy
- Small letter stamps (optional, for the base text)
Step 1: Sculpting the Rabbit Figure
-
Forming the Body:
Start with a large ball of cream polymer clay, rolling it into a smooth, upright teardrop shape for the body. Flatten the bottom gently so it stands securely on its own. -
Shaping the Head:
Create a slightly smaller, separate sphere for the head. Flatten the back slightly and attach it to the narrower top of the body, blending the seam underneath so the head appears to rest naturally. -
Adding Ears:
Roll two small logs of clay and taper them at the ends. Attach them vertically to the top of the head, pressing them on firmly. Use a clay tool to create the inner ear depression, painting a faint darker beige tone inside if desired for depth. -
Refining the Face:
Press a small, dark brown bit of clay onto the tip of the muzzle for the nose. For the eyes, I like to press shallow circular indentations with a tool, then fill them with slightly lighter clay or paint them later to look wide and curious. -
Adding Arms:
Roll two sausage shapes for arms. Flatten them slightly and attach them to the sides of the body, curving them forward as if the bunny is holding its belly. Use a needle tool to scratch subtle fur texture vertically along the clay. -
Creating Feet:
Form two small, rounded mounds for feet. Press vertical lines into them to denote toes and attach them at the very base of the body, just peeking out. -
Texturing:
Before baking, use a stiff bristle brush or a texture tool to gently stroke the entire surface of the clay, giving it that matte, carved-wood appearance seen in the photo.
Step 2: Creating the Calendar Components
-
Preparing the Blocks:
Sand your three wooden cubes until they are perfectly smooth. Ensuring the corners are slightly rounded will match the soft aesthetic of the rabbit. -
Adding Numbers:
Using black acrylic paint and a steady hand (or stamps), apply numbers to the faces. Typically, block one needs 0-1-2-3-4-5, and block two needs 0-1-2-6-7-8 (where 6 doubles as 9). The third block can feature weather symbols or months. -
Preparing the Base:
Take your rectangular wooden base and sand it smooth. If you want the small text detail seen in the image (like ‘Bo Te 201’ or a personal date), stamp it into the wood or use a fine-tip pen on a small piece of veneer glued to the front edge. -
Sealing the Wood:
Apply a thin coat of matte varnish to the wooden base and the blocks. This protects the numbers from rubbing off during daily handling.
Uneven Clay Surface?
If your clay surface looks bumpy, wipe it gently with baby oil or clay softener before baking. The fluid helps smooth out fingerprints and tool marks.
Step 3: Assembly and Finishing
-
Baking the Clay:
Bake the rabbit figure according to your polymer clay package instructions. Let it cool completely inside the oven to prevent cracking. -
Sanding the Sculpture:
Once cool, lightly sand any fingerprints or rough seams with fine-grit sandpaper. This step is crucial for achieving that faux-ceramic look. -
Mounting:
Arrange the rabbit on the right side of the wooden base to ensure there is enough room for the three blocks on the left. Mark the position lightly with a pencil. -
Final Glue:
Apply a strong epoxy or wood glue to the bottom of the rabbit and press it firmly onto the marked spot on the base. Hold it in place for a minute to ensure a good bond. -
Placement:
Set the three numbered blocks onto the base next to the rabbit. They should sit freely so you can rotate them each day.
Level Up: Seasonal Icons
On the third block, instead of numbers, paint icons for seasons (leaf, snowflake, sun, flower) so your bunny can track the weather too.
Now you have a timeless, handcrafted calendar that makes changing the date a delightful daily ritual


Duck With Tucked-In Month Tiles
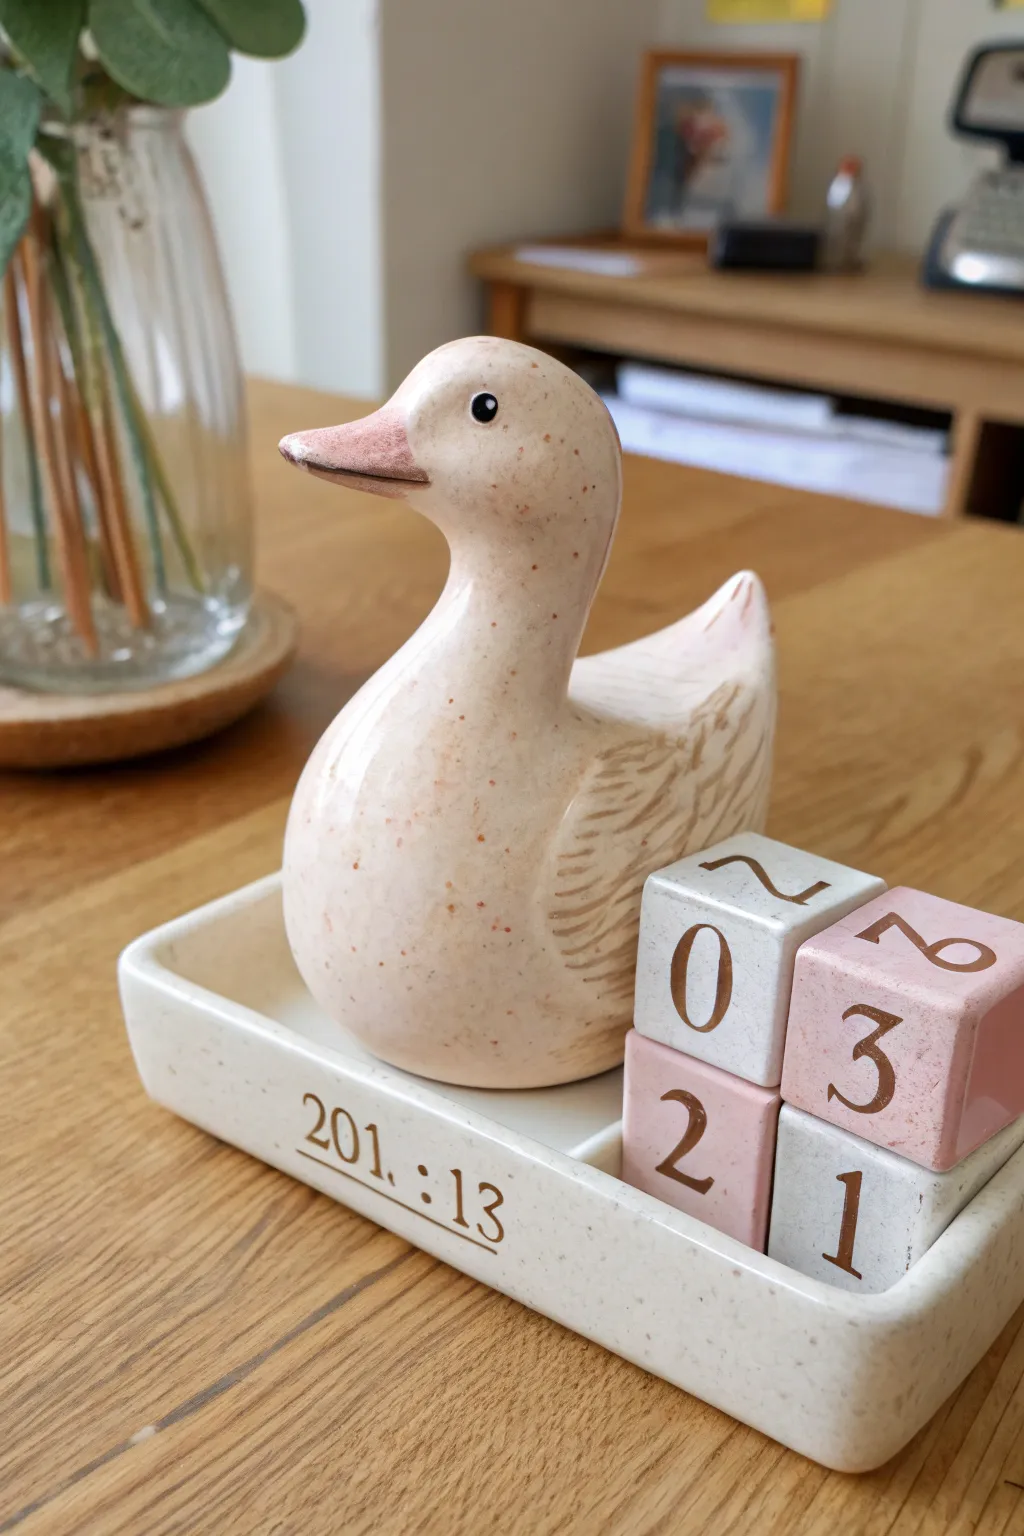
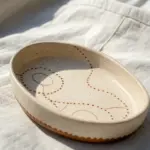
Bring a touch of farmhouse charm to your desk with this adorable ceramic-style duck calendar. Featuring a speckled finish and interchangeable date blocks, this functional sculpture doubles as sweet decor.
Step-by-Step
Materials
- White air-dry clay or polymer clay
- Rolling pin
- Clay carving tools (needle tool, loop tool)
- Water and sponge (for smoothing)
- Acrylic paints (pale pink, cream, beige, brown)
- Glazing medium or gloss varnish
- Fine-grit sandpaper
- Small letter stamps (optional)
- Four 1-inch wooden cubes (or make from clay)
Step 1: Sculpting the Duck
-
Form the body base:
Start by conditioning a large ball of clay until pliable. Roll it into a smooth, teardrop shape, slightly flattening the bottom so it sits securely without tipping. -
Shape the neck and head:
Pull the narrower end of the teardrop upwards to form the neck. Gently pinch and smooth the clay to create a rounded head, ensuring a seamless transition from body to neck. -
Detail the beak and tail:
Pinch a small amount of clay at the front of the face to pull out a beak shape. At the opposite end, gently curve the tail upwards to a point, reminiscent of a rubber duck silhouette. -
Refine the wings:
Using a loop tool or modeling stick, lightly carve wing shapes into the sides of the body. Add texture by scoring feather lines that swoop backward toward the tail. -
Smooth the surface:
dip your finger or a small sponge in water and run it over the entire sculpture to remove fingerprints and bumps. This is crucial for that smooth, ceramic look later.
Uneven Drying?
If your tray curves upward while drying, place a light book on top of it (with parchment paper in between) once it’s leather-hard to keep it flat.
Step 2: Creating the Base Tray
-
Roll out the slab:
Roll a slab of clay to about 1/4 inch thickness. Cut a rectangle approximately 6 inches by 3 inches. -
Build the walls:
Roll thin coils of clay and score-and-slip them onto the perimeter of your rectangular base to build up the walls. Smooth the seams so the walls and base look like one solid piece. -
Add the divider:
Place your duck sculpture and the four cubes onto the wet clay tray to measure spacing. Add a small clay wall to separate the duck’s area from the calendar block area. -
Personalize the rim:
If desired, use small letter stamps to press numbers or initials into the side of the tray while the clay is still soft. -
Dry and sand:
Allow both the duck and the tray to dry completely (24-48 hours depending on clay type). Once dry, gently sand any rough edges with fine-grit sandpaper.
Step 3: Painting and Finishing
-
Base coat the duck:
Paint the entire duck with a cream or off-white acrylic paint. Apply two thin coats for opaque coverage. -
Add blushing details:
Mix a tiny amount of brown into pale pink paint. Lightly brush this onto the beak, the tail tip, and the wing highlights to create a soft, warm gradient. -
Paint the eyes:
Use a fine-point brush or a dotting tool to add two small black dots for eyes. Add a tiny speck of white inside the black dot for a lifelike glint. -
Create the speckled effect:
Dip an old toothbrush into diluted brown paint. Run your thumb over the bristles to flick tiny speckles across the duck’s body and the tray, mimicking stoneware pottery. -
Prepare the date blocks:
Paint two cubes in a soft pink and two in a creamy white. Let them dry completely. -
Number the blocks:
Carefully paint numbers onto the faces of the cubes using brown paint. Ensure you have a combination that allows for all dates (0-3 usually on the first block, 0-9 on the second). -
Painting the tray details:
Highlight any stamped numbers on the tray with brown paint to match the blocks. I like to wipe away excess paint immediately so the color stays only in the crevices. -
Seal the project:
Apply a coat of high-gloss varnish or glazing medium to the duck and the tray to achieve a shiny, ceramic-like finish. Leave the blocks matte for contrast.
Seasonal Swap
Make extra cubes with symbols like hearts, pumpkins, or snowflakes painted on them to swap in for holidays or special events during the year.
Now you have a charming daily companion to help you keep track of time with a smile

Frog Pond Desktop Calendar Stand
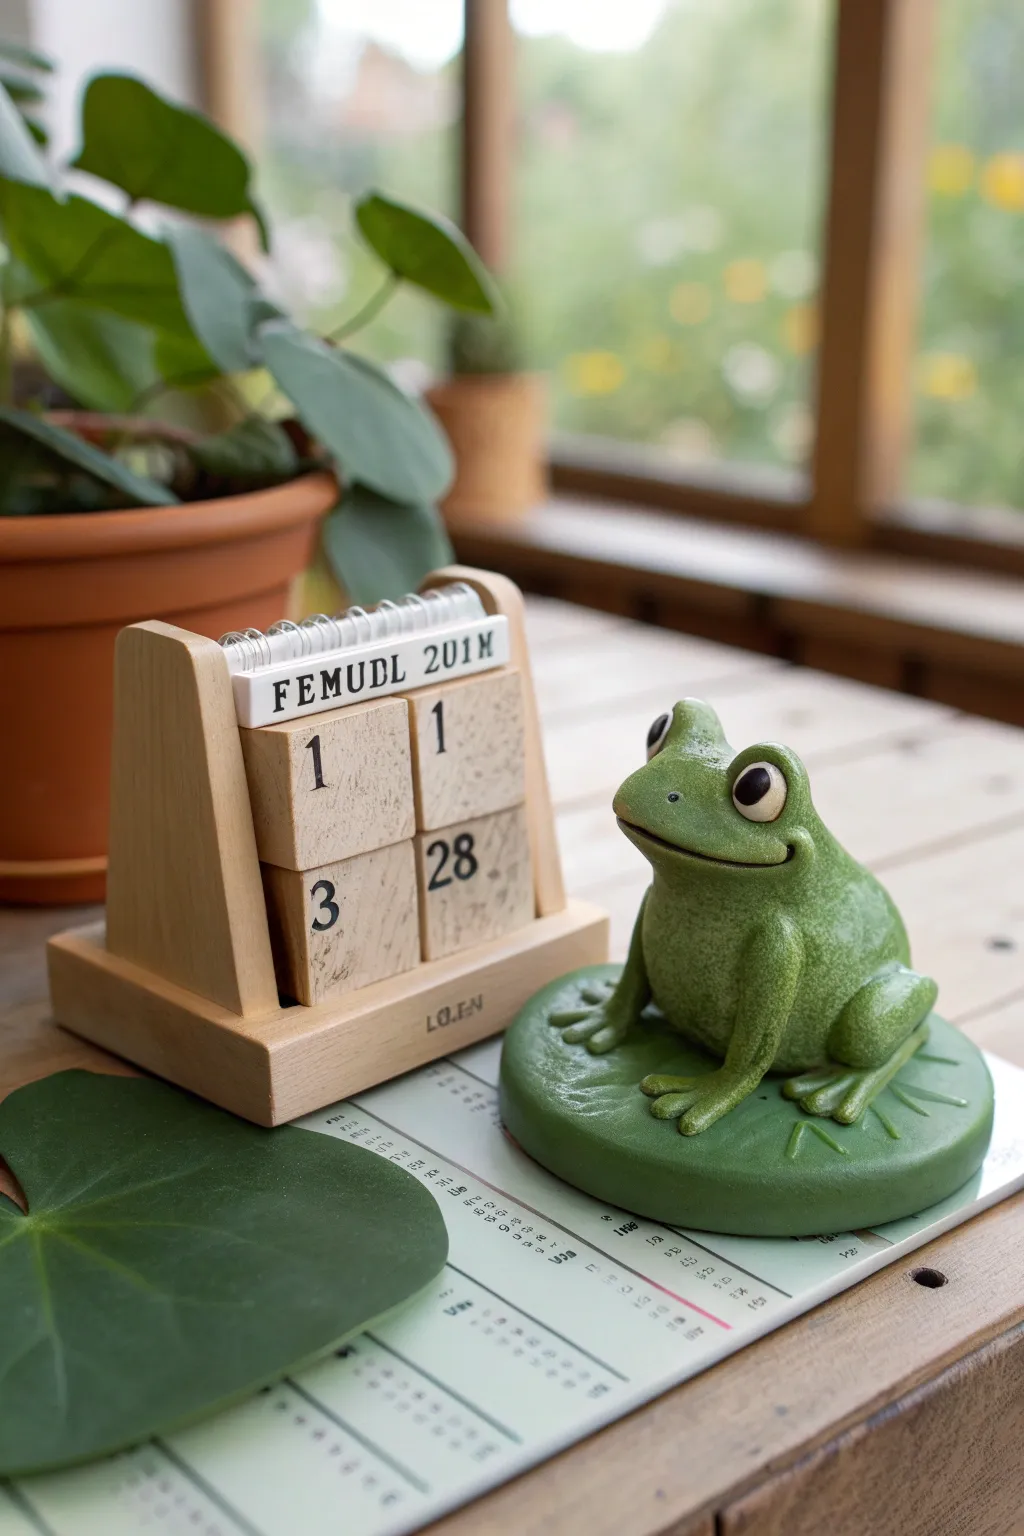
Brighten your desk with this charming clay project that captures a friendly frog resting on a lush lily pad. The textured green finish and oversized eyes give this functional calendar base a delightful, mossy stone appearance.
How-To Guide
Materials
- Polymer clay (forest green, lime green, white, black)
- Wooden block perpetual calendar kit
- Aluminum foil
- Texturing tools (stiff bristle brush, sponge)
- Clay sculpting tools (needle tool, ball stylus)
- Acrylic paints (dark green wash, lighter green for dry brushing)
- Matte sealant or varnish
- Rolling pin
- Circle cutter or template (approx. 4 inches)
Step 1: Sculpting the Lily Pad Base
-
Condition the base clay:
Start by conditioning a large chunk of forest green polymer clay until it is soft and pliable. Mix in a small amount of lime green to create a natural, varied tone rather than a flat color. -
Create the pad form:
Roll the clay into a ball, then flatten it into a thick disc, approximately 1/2 inch thick and 4 inches wide. You can use a rolling pin for an even surface, but keep the edges slightly rounded. -
Add lily pad details:
Using a needle tool, gently press a ‘V’ notch into one side of the circle to create the classic lily pad shape. Extending from the center point, lightly score vein lines radiating outward toward the edges. -
Texture the surface:
To get that realistic organic look, press a stiff-bristles brush or a coarse sponge gently over the entire surface of the lily pad.
Slumping Clay?
If the frog’s legs sag while working, prop them up with bits of cardstock or extra foil during baking. Remove these props only after the clay has fully cooled and hardened.
Step 2: Forming the Frog Character
-
Prepare the armature:
Crumple a small ball of aluminum foil into a pear shape to serve as the core for the frog’s body. This saves clay and ensures the thickest part bakes evenly. -
Cover the core:
Roll a sheet of green clay (a slightly lighter shade than the base) and wrap it completely around the foil core. Smooth out any seams with your fingers until you have a clean pear shape. -
Shape the head:
Gently pinch and mold the top narrower part of the pear to define the frog’s head. Push the clay slightly forward to create a snout area. -
Attach the legs:
Roll two thick sausages of green clay for the hind legs. Bend them into a ‘Z’ shape and press them firmly against the sides of the body. Blend the seams at the hips using a sculpting tool so they look like one continuous piece. -
Add front arms:
Roll two smaller logs for the front arms. Position them so they extend downward from the chest, resting on where the lily pad will be. Flatten the ends slightly to prepare for toes. -
Sculpt fingers and toes:
Use a needle tool or small knife to cut distinct toes into the flattened ends of the feet and hands. Gently round off each toe tip so they look soft, not sharp. -
Position on the base:
Place your frog onto the lily pad. Press down firmly to ensure a bond. I like to scratch the contact surfaces slightly before joining to help the clay grip.
Level Up: Magnetize It
Embed a strong neodymium magnet inside the frog’s paw and glue a small washer to the wooden calendar. Now the frog can ‘hold’ the calendar in place instead of just sitting beside it.
Step 3: Facial Features & Baking
-
Sculpt the mouth:
Use a needle tool or a thin blade to carve a wide, curved smile across the snout. Deepen the corners slightly to give him a happy expression. -
Create the eyes:
Roll two balls of white clay and place them on top of the head. Add tiny black clay pupils to the center of each white ball. -
Add eyelids:
Roll distinct snakes of green clay and drape them over the top halves of the white eyes to create eyelids, blending them back into the head. -
Final texturing:
Revisit your texture tool (sponge or brush) and tap it over the frog’s skin (avoiding the eyes) to create a stone-like, bumpy texture that matches the style of the base. -
Bake the piece:
Bake the sculpture according to your clay package’s instructions. Usually, this is around 275°F (135°C) for 15-30 minutes depending on thickness.
Step 4: Finishing Touches
-
Apply a wash:
Once cool, mix a very dark green or black acrylic paint with water. Brush this wash over the entire piece, letting it settle into the textures. -
Wipe back:
Immediately wipe the high points with a damp paper towel. The dark paint will stay in the recesses, highlighting the texture. -
Dry brush highlights:
Dip a dry brush into a very light lime green paint. Offload most of the paint, then lightly dust the tops of the frog’s knees, brows, and the lily pad veins. -
Seal just the eyes:
Apply a drop of gloss varnish or UV resin just to the eyes to make them look wet and alive, keeping the rest of the body matte. -
Setup:
Place your finished frog sculpture next to your wooden perpetual calendar block set to complete the display.
Enjoy the company of your new little green friend as you mark the passing days


Mushroom House Perpetual Desk Calendar
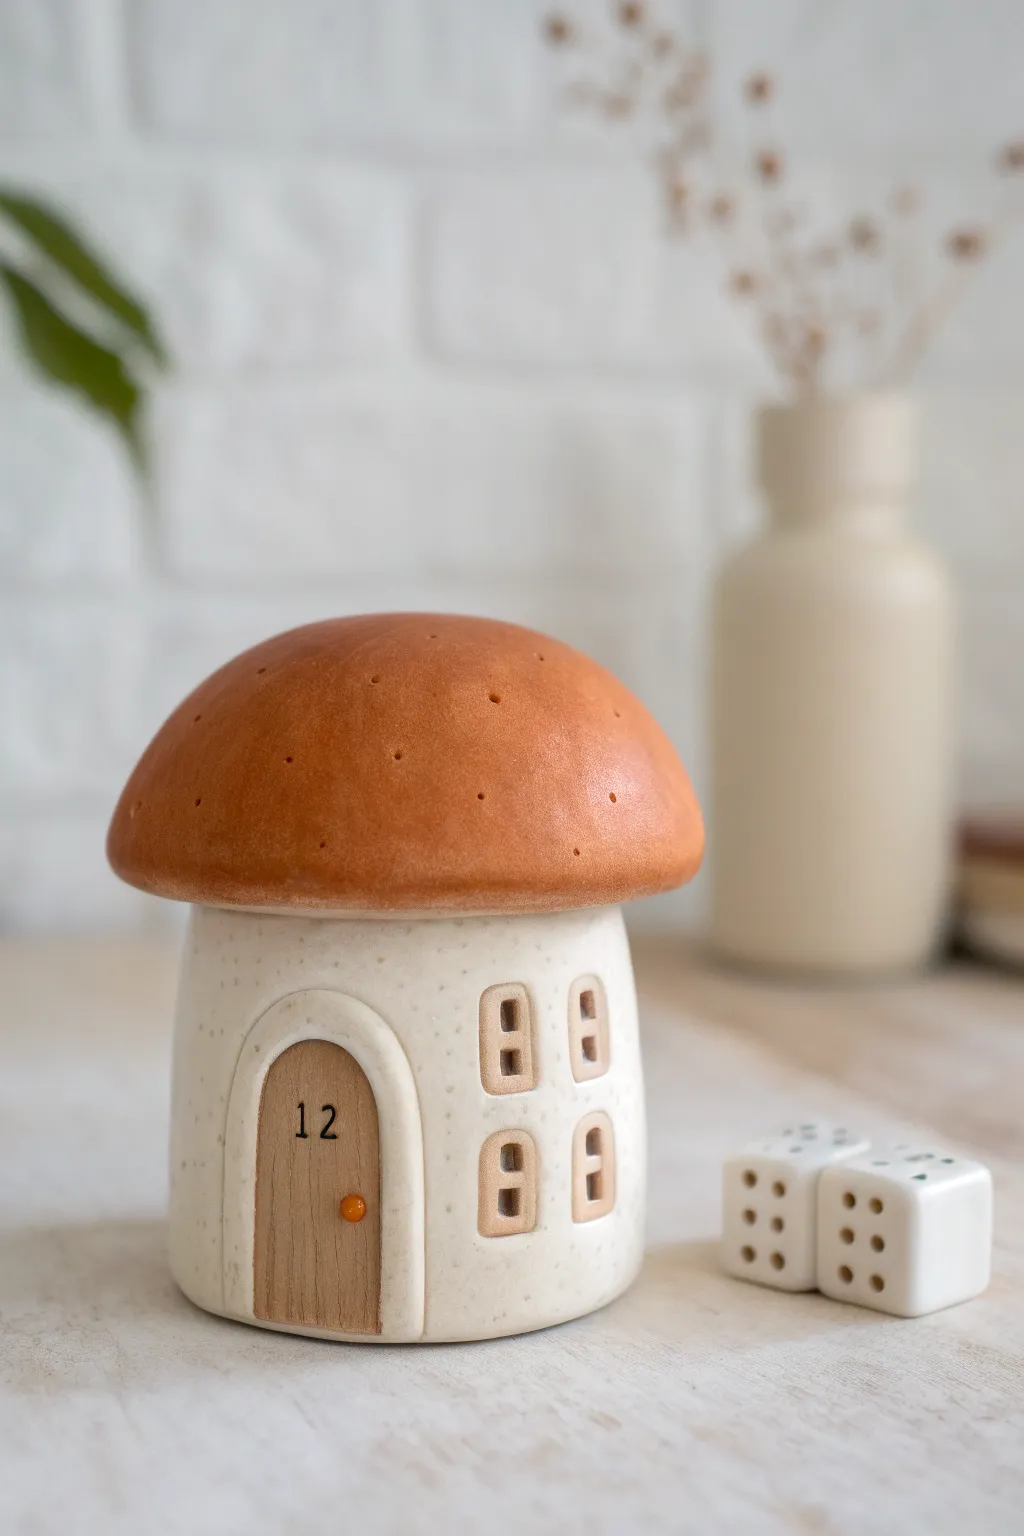
Sculpt a charming desktop companion that tracks the days with a rustic, storybook feel. This ceramic-style polymer clay mushroom house hides a clever secret: it’s perfectly sized to frame a pair of numbered dice for a perpetual calendar display.
Step-by-Step Tutorial
Materials
- White polymer clay (preferably a speckled ‘granite’ variety)
- Terracotta or warm brown polymer clay
- Light wood-colored polymer clay (or beige mixed with a touch of brown)
- Two six-sided dice (standard size, roughly 16mm)
- Rolling pin or pasta machine
- Circle cutter (approx. 3-4 inches diameter)
- Needle tool or toothpick
- Small craft knife (X-Acto)
- Rubber clay shaper or blending tool
- Small number stamps (optional, for ’12’)
- Orange clay (tiny amount for doorknob)
- Gloss glaze (optional)
- Aluminum foil
- Oven
Step 1: Forming the Mushroom Stalk
-
Prepare the core:
Create a cylindrical armature using crumpled aluminum foil. This saves clay and ensures the structure isn’t too heavy. However, make sure the width is generous enough to house your two dice side-by-side eventually, or make the bottom hollow. -
Roll the stalk clay:
Condition your speckled white clay until soft. Roll it out into a thick sheet, about 1/4 inch thick. This thickness gives the walls a sturdy, ceramic look. -
Wrap the cylinder:
Cut a rectangular strip of the speckled clay and wrap it around your foil armature or a temporary form (like a jar) to create the house base. Smooth the seam carefully with your finger or a clay tool so it disappears. -
Shape the doorway:
Using a craft knife, cut an arched doorway at the front. The opening shouldn’t be a hole yet; instead, define the arch shape where the wooden door will sit. Use a needle tool to gently impress a border around the arch.
Clean Texture Trick
To get the authentic speckle without buying special clay, mix cracked black pepper or dried tea leaves into plain white clay.
Step 2: Adding Details
-
Construct the windows:
Roll out small, thin squares of the light wood-colored clay. Place four of these on the side of the house in a 2×2 grid pattern. -
Define window frames:
Roll tiny snakes of the wood-colored clay to create frames around the window squares. Use a needle tool to press indentations into the center, making them look like recessed panes. -
Create the door:
Roll a slab of the wood-colored clay. Cut it to fit exactly inside the arched outline you made earlier. Press a wood grain texture into it using a needle tool, drawing vertical lines. -
Number the door:
If you are making the specific ’12’ date shown, stamp or hand-paint the number ’12’ onto the upper part of the door using black acrylic paint or a tiny bit of black clay. Add a tiny ball of orange clay for the doorknob.
Step 3: Sculpting the Mushroom Cap
-
Form the cap shape:
Take a large ball of aluminum foil and shape it into a dome. Cover this dome with a sheet of the terracotta-colored clay. I find smoothing it with a little baby oil on my finger helps remove fingerprints. -
Refine the edges:
Curve the bottom edges of the cap inward slightly so it looks thick and fleshy, rather than just a thin sheet. The cap needs to be slightly wider than the stalk base. -
Add texture:
Using a needle tool, poke random small holes all over the top of the cap to mimic organic textures found in nature. Vary the depth slightly for realism. -
Check the fit:
Before baking, gently place the cap onto the stalk to ensure it sits level and looks proportional. You can bake them separately or urge the clay together to bond them into one solid piece.
Make it Functional
Cut a rectangular slot in the back or bottom base large enough to slide two dice in, so the numbers peek through a hole in the front door.
Step 4: Baking and Finishing
-
Bake the structure:
Bake the house according to your clay manufacturer’s instructions (usually 275°F/130°C for 15-30 minutes per 1/4 inch thickness). Use an oven thermometer to prevent scorching. -
Cool it down:
Let the piece cool completely in the oven with the door cracked. This gradual cooling helps prevent cracking in thicker clay pieces. -
Remove foil:
If you left the bottom open to house the dice, carefully pick out the aluminum foil from underneath using tweezers. If it’s a solid sculpture, leave the foil inside. -
Final polish:
If you want that shiny ceramic look on the cap, apply a coat of polymer clay gloss glaze or water-based polyurethane varnish. Leave the stalks matte to contrast with the shiny roof.
Place your dice near your new little home and enjoy tracking the days in style

The Complete Guide to Pottery Troubleshooting
Uncover the most common ceramic mistakes—from cracking clay to failed glazes—and learn how to fix them fast.
Minimal Terrazzo Perpetual Calendar Base
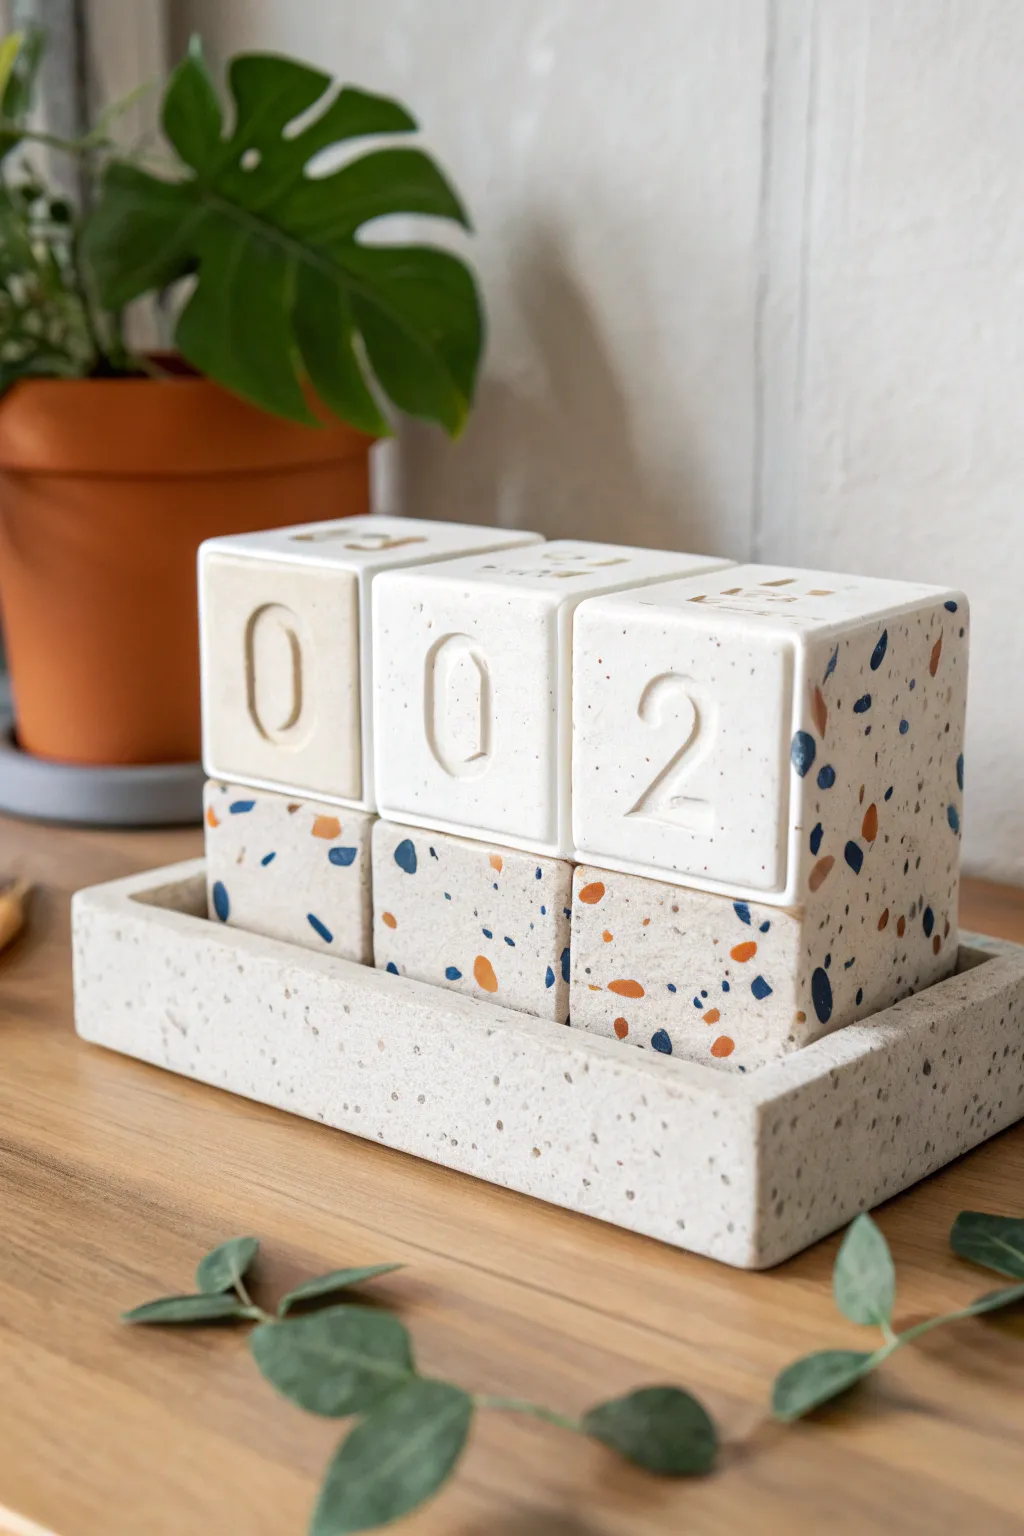
Create a sleek and functional desk accessory that blends minimalist design with a playful speckle pattern. This perpetual calendar uses simple cube geometry and faux-terrazzo techniques to make date-keeping a tactile art form.
Step-by-Step
Materials
- White polymer clay (approx. 4 blocks)
- Small amounts of colored polymer clay (orange, navy blue, beige/terracotta)
- Clay roller or pasta machine
- Square clay cutter or sharp craft knife
- Number stamps or small clay sculpting tools
- Ruler
- Sandpaper (various grits from 400 to 1000)
- Clay varnish (matte or satin finish)
- Oven/toaster oven for baking
Step 1: Preparing the Terrazzo Base
-
Condition the base clay:
Start by thoroughly conditioning your white polymer clay until it is soft and malleable. Roll it out into a thick, even slab, roughly 1/4 inch thick. -
Create color chips:
Take your small amounts of colored clay (orange, navy, beige). Roll each color into a extremely thin sheet—almost paper-thin. -
Bake the chips:
Bake these thin colored sheets for just 5-10 minutes according to package instructions. You want them hard enough to crumble. -
Crumble the colors:
Once cooled, break the thin baked sheets into tiny, irregular shards. These will become your terrazzo aggregate. -
Mix the terrazzo:
Scatter the colored shards over your raw white slab. Fold the clay over and roll lightly to embed the chips, but don’t over-mix or the colors might streak.
Step 2: Forming the Cubes
-
Measure your dimensions:
Decide on the size of your cubes. A 2-inch cube is standard completely manageable. You will need enough clay for three solid cubes. -
Build the core:
To save weight and clay, you can form a core using scrap clay or aluminum foil tightly packed into a cube shape, slightly smaller than your final dimensions. -
Cover with terrazzo sheet:
Wrap your prepared white terrazzo slab around the core like a present. Smooth the seams together with your thumb until they disappear completely. -
Sharp corners:
Gently press the clay block against a flat work surface on all six sides to sharpen the edges and corners. Use an acrylic block to ensure perfectly flat faces. -
Apply the front face:
For the specific look in the photo, cut a separate, clean white square (non-terrazzo) slightly smaller than the cube face. Center it and press it onto the front of each block.
Clean Cuts Only
Pop your raw clay forms in the fridge for 15 minutes before final trimming. Cold clay gets firm, allowing for much sharper, cleaner cuts without distortion.
Step 3: Adding the Details
-
Emboss the numbers:
Use large number stamps to press the digits into the clean white face. If you lack stamps, carefully carve the outline of the numbers (0-9) using a needle tool. -
Smooth the impressions:
Use a ball stylus tool or a rubber-tipped shaper to smooth out the inside of the impressed numbers so they look molded rather than scratched. -
Make the tray base:
Roll out a long, thick strip of your remaining terrazzo clay. Cut a rectangular base that is wide enough to hold all three cubes comfortably with a small border. -
Add tray walls:
Cut strips about 1/2 inch high and attach them around the perimeter of the base rectangle. Blend the seams on the inside and outside so it becomes a solid dish. -
Final baking:
Bake all components—the three cubes and the tray—according to your clay’s specific temperature instructions. Since these are thick pieces, bake for at least 45–60 minutes to ensure durability. -
Sanding and sealing:
Once fully cooled, wet sand the terrazzo surfaces. This step is crucial; sanding removes the top layer of white clay to reveal the bright colored chips underneath. -
Varnish:
Wipe away all dust and apply a thin coat of matte varnish to protect the surface and seal the terrazzo pattern.
Sticky Situation
If the clay sticks to your roller or work surface, lightly dust the area with cornstarch or baby powder. It acts as a release agent and bakes off invisibly.
Now you have a timeless calendar that you can reset every morning with a satisfying click
Monstera Leaf Desktop Calendar Tray
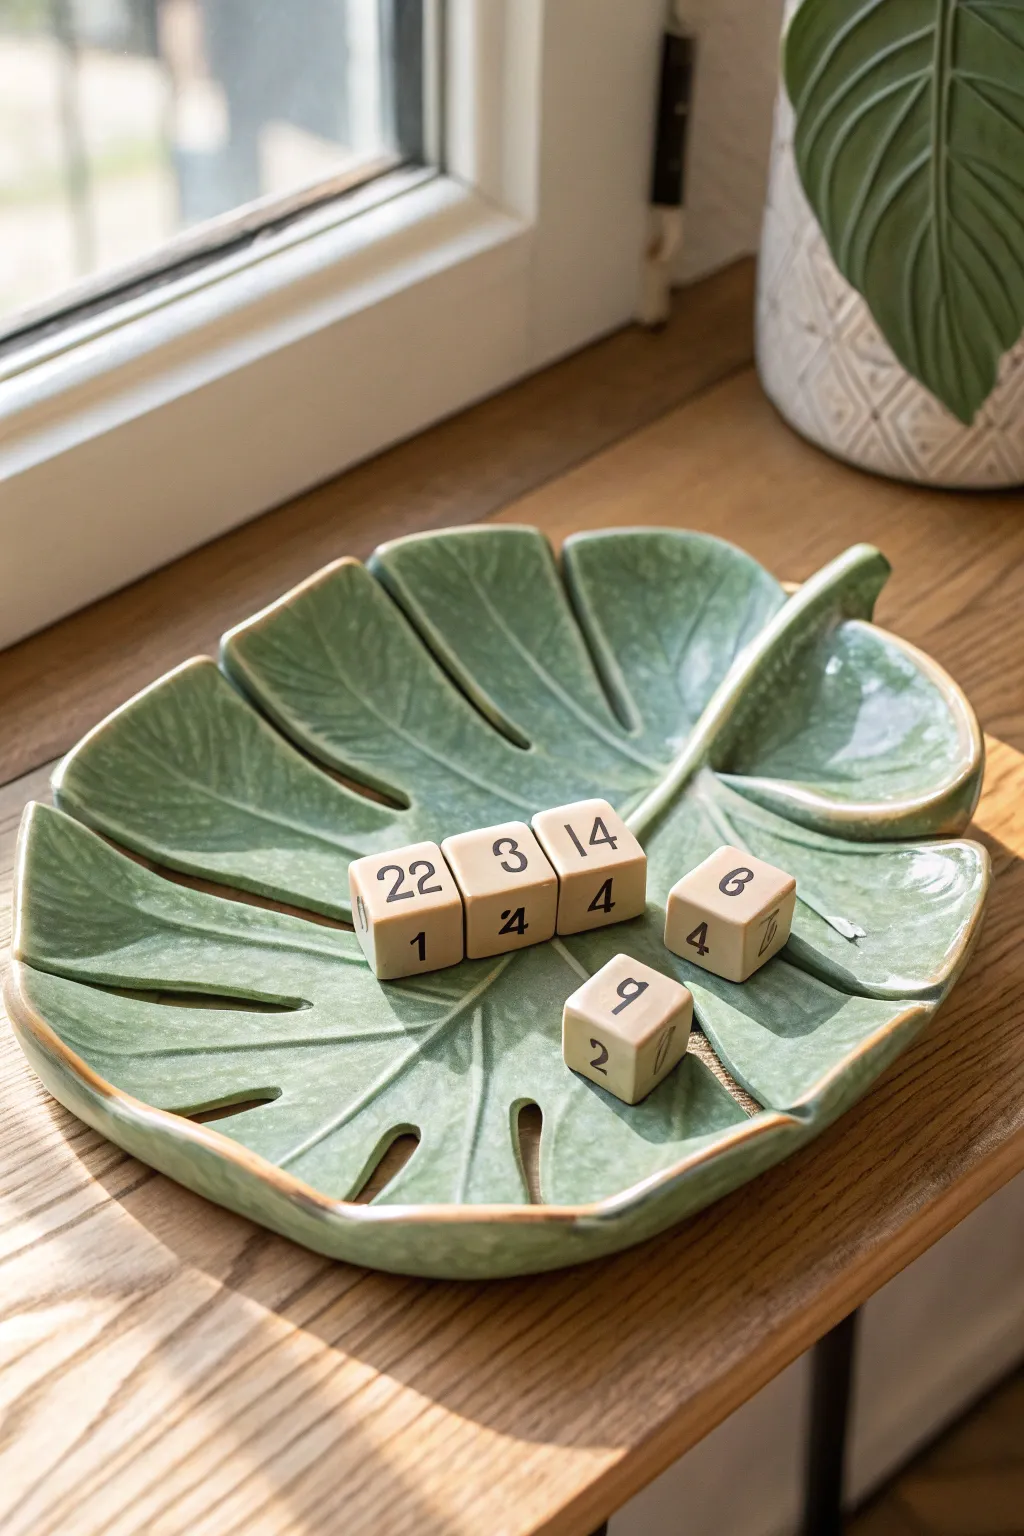
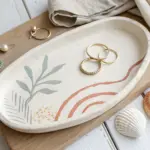
Bring a touch of botanical charm to your desk with this functional Monstera leaf tray that doubles as a perpetual calendar. The gentle green glaze and organic shape cradle handmade date cubes, making timekeeping feel like a peaceful ritual.
Step-by-Step Tutorial
Materials
- Air-dry clay (white or terra cotta)
- Wooden craft cubes (approx. 2cm)
- Acrylic paints (sage green, dark green, brown, black)
- High-gloss varnish or glaze medium
- Rolling pin
- Monstera leaf template (printed or hand-drawn)
- Craft knife or scalpel
- Modeling tools or a dull pencil
- Fine grit sandpaper
- Paintbrushes (flat shader and fine liner)
- Small bowl of water
- Sponge
Step 1: Sculpting the Leaf Base
-
Prepare the clay:
Begin by kneading a large ball of air-dry clay until it is warm and pliable. This conditioning prevents cracking later on. -
Roll the slab:
Roll the clay out on a smooth surface to an even thickness of about 1/4 inch (6mm). Lift and flip the clay occasionally so it doesn’t stick to your work surface. -
Shape the leaf:
Place your Monstera leaf template over the clay slab. Using a craft knife, carefully trace around the perimeter, cutting out the iconic split-leaf shape. Peel away the excess clay. -
Curve the edges:
Gently lift the edges of the leaf upwards to create a shallow bowl shape. You can prop up the sides with crumpled paper towels or small pieces of sponge to hold the curve while it dries. -
Smooth the rim:
Dip your finger in water and run it along the cut edges to smooth out any sharpness or roughness from the knife cut. The rim should feel soft and rounded.
Smooth Surface Trick
To get a truly ceramic-smooth finish, lightly wet your fingers and smooth the clay surface repeatedly before it starts to dry.
Step 2: Adding Details and Drying
-
Carve the veins:
Using a modeling tool or a dull pencil, gently impress the center vein and the branching side veins into the clay. Don’t cut through; just create indented lines for texture. -
Define the stem:
At the base of the leaf, pinch and shape a small raised section to resemble the stem connection, blending it smoothly into the main dish. -
Initial drying:
Allow the clay to dry according to the package instructions, usually 24-48 hours. I find flipping it carefully halfway through helps the bottom dry evenly. -
Sand for smoothness:
Once fully cured and hard, use fine-grit sandpaper to buff away any minor bumps on the surface or rough spots on the rim.
Make It Marble
Mix a tiny bit of white clay into your green clay but don’t fully blend it. Roll it out for a beautiful marbled stone effect.
Step 3: Painting and Finishing
-
Base coat:
Paint the entire leaf, front and back, with a sage green acrylic paint. You may need two coats for full opacity. -
Create depth:
Mix a slightly darker green wash (paint diluted with water) and brush it into the carved veins. Wipe the surface gently with a damp sponge so the dark color stays only in the crevices. -
Detail the rim:
Using a fine brush and brown paint, carefully paint a thin line along the very edge of the rim to mimic the natural browning of a ceramic glaze. -
Glazing:
Apply two coats of high-gloss varnish to the entire tray. This gives it that ceramic-like shine and protects the paint from scratches.
Step 4: Creating the Calendar Cubes
-
Base the cubes:
Take your wooden craft cubes and paint them a warm beige or cream color. Let them dry completely. -
Plan your numbers:
You will need cubes for the months and dates. For the date cubes, ensure you have digits 0-3 on one, and a mix of remaining digits on the others to cover all combinations (01-31). -
Stenciling digits:
Using a fine liner brush and black or dark brown paint, carefully hand-letter the numbers onto the faces of the cubes. Alternatively, use small number stamps or stickers. -
Seal the wood:
Finish the cubes with a matte or satin varnish to seal the paint without making them too slippery to stack.
Place your finished tray on your desk and arrange the cubes to mark the start of a productive day


What Really Happens Inside the Kiln
Learn how time and temperature work together inside the kiln to transform clay into durable ceramic.
Flower Bouquet Vase Date Block Stand
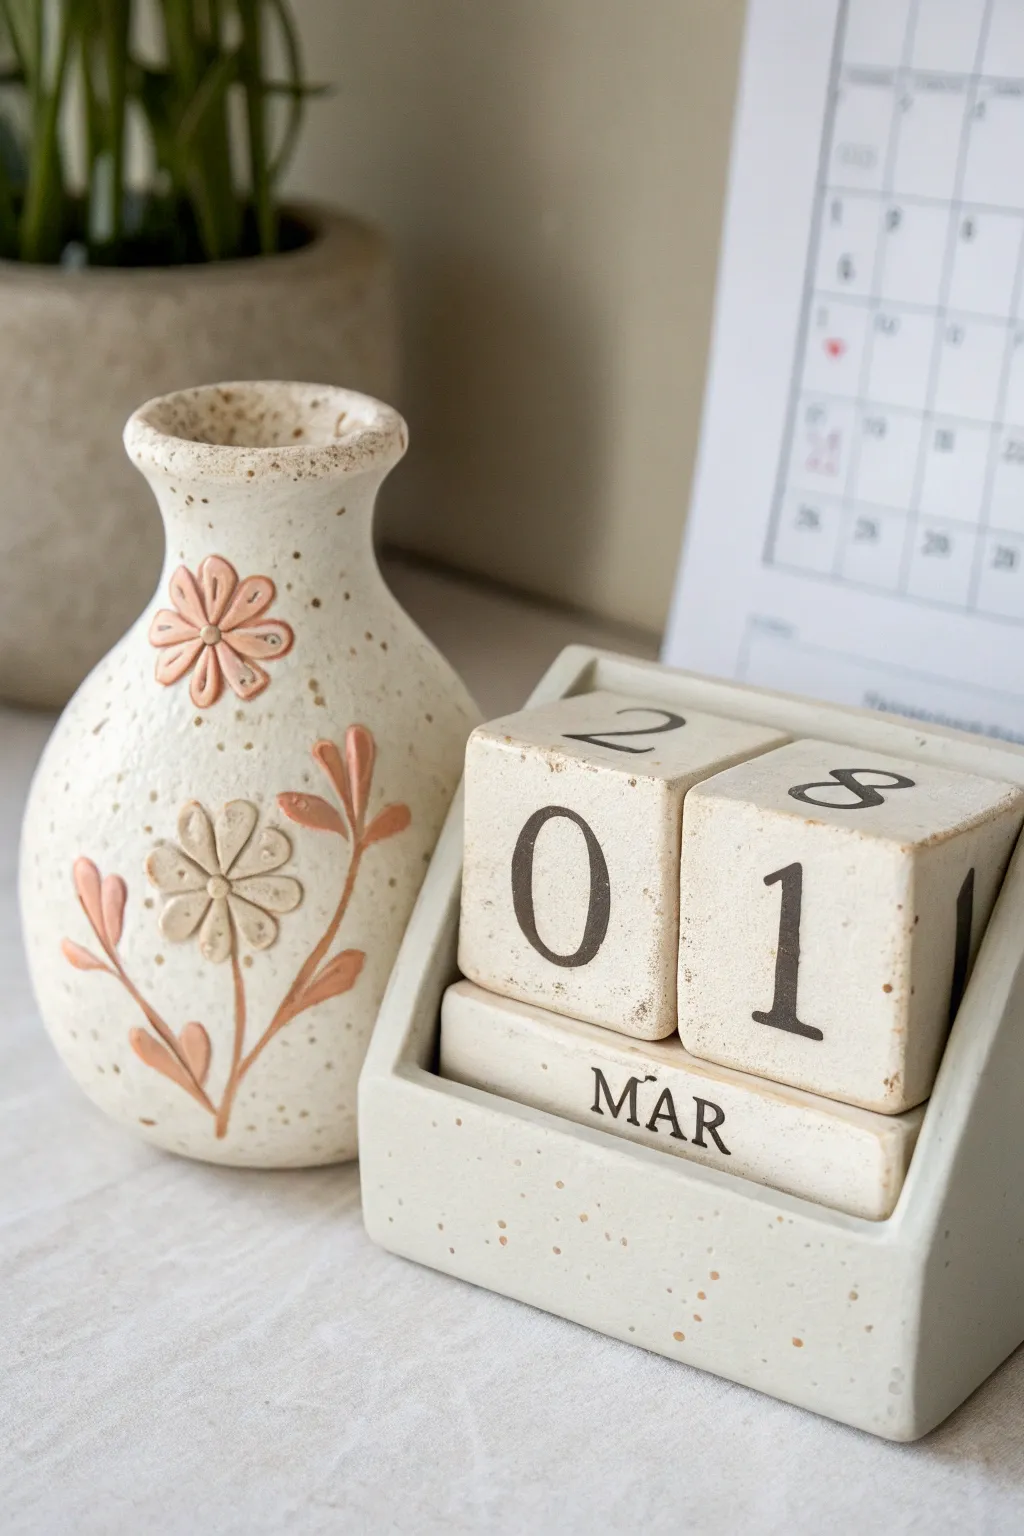
Create a charming, rustic desk accessory that blends functionality with handcrafted beauty. This speckled clay block calendar features a built-in stand and interchangeable date cubes, perfect for keeping track of the days in style.
Step-by-Step
Materials
- Air-dry clay or polymer clay (creamy white)
- Speckled clay additive (e.g., ground pepper or faux granite embossing powder) if clay isn’t pre-speckled
- Rolling pin with guide rings
- Sharp crafting knife or clay blade
- Square cookie cutter or ruler
- Letter and number stamp set (small)
- Dark brown or black acrylic paint
- Fine-grit sandpaper
- Matte varnish or sealant
- Small flat paintbrush
- Ruler
Step 1: Forming the Cubes
-
Prepare the clay:
Begin by conditioning your clay until it is soft and pliable. If you are using plain white clay, mix in a small amount of speckled additive or ground pepper to achieve that natural, stony look shown in the photo. -
Roll out the slab:
Roll a portion of the clay into a slab that is approximately 1.5 inches thick. I find using guide rings on my rolling pin ensures the thickness remains perfectly consistent for uniform cubes. -
Cut the cubes:
Using a sharp blade or square cutter, cut two identical cubes. The dimensions should be roughly 1.5 x 1.5 inches. Smooth the sharp edges slightly with your finger to give them a softened, ceramic feel. -
Stamp the numbers:
You will need to stamp specific numbers on the six faces of each cube to cover all dates. Cube 1: 0, 1, 2, 3, 4, 5. Cube 2: 0, 1, 2, 6, 7, 8 (use the 6 as a 9). Press your stamps gently but firmly into the center of each face.
Stamp Sinking?
If your stamps are sticking or sinking too deep, dust them lightly with cornstarch before pressing. If the clay is too soft, let it sit for 15 minutes to firm up before stamping.
Step 2: Creating the Month Bars
-
Measure the bars:
Roll out a slab slightly thinner than your cubes, about 0.5 inches thick. The length needs to match the combined width of your two cubes (approx. 3 inches). -
Cut the rectangles:
Cut three long rectangular bars. These rectangular prisms will have four faces each, allowing you to stamp 12 months total distributed across the three bars. -
Stamp the months:
Stamp the three-letter abbreviations for the months (JAN, FEB, MAR, etc.) onto the long faces of the bars. Ensure the orientation matches so the text reads correctly when the bar lies flat.
Step 3: Building the Stand
-
Roll the base slab:
Roll out a larger slab of clay about 0.25 inches thick. This will form the L-shaped holder for the blocks. -
Cut the base and back:
Cut a rectangle for the base that is slightly wider and deeper than your two cubes plus the month bar. Cut a second rectangle of the same width to serve as the back support. -
Assemble the L-shape:
Score and slip (crosshatch and wet) the edges where the back piece meets the base piece. Press them together firmly to create an ‘L’ shape. Reinforce the seam with a small coil of clay on the inside corner. -
Add side walls:
Cut two triangular or trapezoidal pieces to act as side walls. These should slope down from the back wall to the front, framing the calendar area. Attach them to the base and back using the score and slip method. -
Smooth the seams:
Use a damp sponge or your finger to smooth all connection points until the stand looks like one solid piece. Add some extra speckles to the surface if they were lost during smoothing. -
Dry completely:
Let all components (cubes, bars, and stand) dry completely. For air-dry clay, this may take 24-48 hours. Turn the cubes occasionally to ensure even drying on all sides.
Make it Match
Create a matching vase like the one in the photo by rolling a clay slab around a glass jar and adding simple relief flowers using small teardrop shapes of clay.
Step 4: Finishing Touches
-
Sand imperfections:
Once bone dry, lightly sand any rough edges or fingerprints with fine-grit sandpaper. Wipe away the dust with a barely damp cloth. -
Darken the text:
Dilute a small amount of dark brown or black acrylic paint with water. Paint into the stamped grooves of the numbers and letters. -
Wipe excess paint:
Immediately wipe the surface with a damp paper towel or cloth. The paint will remain in the recessed letters while the surface stays clean, creating a crisp, legible contrast. -
Seal the project:
Apply a coat of matte varnish or sealant to all pieces. This protects the clay from moisture and handling while maintaining that natural, unglazed pottery appearance.
Place your finished cubes into the stand and enjoy a timeless piece of decor that keeps you organized every day
Stacked Totem Perpetual Calendar

This charming, nature-inspired perpetual calendar stacks functionality with whimsical design. Featuring faux-stone numbered blocks topped with a rustic mushroom and a watchful frog, it’s a delightful way to track the days on your desk or windowsill.
Step-by-Step Guide
Materials
- Polymer clay (white, beige, bronze/green mixes)
- Two 1.5-inch wooden cubes (as armatures)
- Small wooden dowel (optional, for stability)
- Sculpting tools (needle tool, ball stylus)
- Number stamps or small clay cutters
- Acrylic paints (brown antiquing medium, moss green, black, white)
- Matte varnish or sealant
- Aluminum foil
- Texture sponge or stiff brush
Step 1: Sculpting the Date Cubes
-
Prepare the Base Clay:
Condition white polymer clay and mix in a very small amount of beige or translucent clay to achieve a natural, stony off-white color. Roll this out into a uniform sheet about 1/8 inch thick. -
Cover the Cubes:
Cut squares from your clay sheet and press them onto the faces of your two wooden blocks. Smooth the seams where the clay edges meet using your thumb or a flat modeling tool until the cube looks like a solid block of stone. -
Add Texture:
Gently tap the surface of the clay cubes with a texture sponge or even crumpled aluminum foil. This removes fingerprints and creates a realistic limestone or sandstone texture. -
Create the Framed Edges:
Use a needle tool or a blunt knife to lightly score a square border on each face of the cubes, inset slightly from the edge. This creates the recessed ‘frame’ effect seen in the reference. -
Impress the Numbers:
Using clay number stamps, press the digits 0-3 on the first cube and 0-9 on the second cube (you may need a third cube for all combinations, or paint extra numbers on the hidden sides). Alternatively, carve the numbers by hand for a more rustic look. -
Pre-Bake the Cubes:
Bake the cubes according to your clay manufacturer’s instructions to set them hard before assembling the tower. This prevents you from squishing the numbers later.
Clean Impressions
Dust your number stamps with cornstarch or baby powder before pressing them into the clay. This prevents the sticky clay from clinging to the stamp and ensures a crisp, clean number.
Step 2: Crafting the Mushroom
-
Form the Stem:
Roll a thick cylinder of the same off-white clay for the mushroom stem. It should be wide at the base and slightly tapered toward the top. Texture it vertically with a needle tool to mimic fibrous stalk texture. -
Shape the Cap:
Create a ball of clay and flatten it into a dome shape. Press the center underneath to create a socket for the stem. The cap should be wider than the stem and have a smooth, rounded top. -
Texturing the Cap:
Use a ball stylus to press small, random indents into the top of the mushroom cap. These little craters add organic character to the stoneware look. -
Assemble the Mushroom:
Attach the cap to the stem. Use a small piece of wire or a toothpick inside the joint for extra strength. Smooth the clay where they connect underneath. I like to score this underside connection to ensure a tight bond.
Seasonal Toppers
Don’t glue the mushroom to the blocks! Make extra toppers like a pumpkin, a snowman, or a flower so you can swap them out as the seasons change throughout the year.
Step 3: Sculpting the Frog Topper
-
Body Basics:
Mix green, bronze, and a touch of brown clay to get a swampy, metallic frog color. Form a teardrop shape for the body and position it sitting atop the mushroom cap. -
Adding Limbs:
Roll two small snakes for legs. Fold them into a ‘Z’ shape for the hind legs and press them against the body and mushroom cap. Add two shorter tubes for the front legs, splaying the toes slightly. -
Facial Features:
Add two small balls of clay for the eyes, pressing a tiny black bead or clay dot into the center for pupils. Use a modeling tool to carve a wide, slight smile. -
Final Bake:
Place the mushroom with the frog on top into the oven. You can support the mushroom cap with crumpled foil so it doesn’t droop while baking. Bake fully and let cool.
Step 4: Antiquing & Assembly
-
Apply an Antiquing Wash:
Dilute brown acrylic paint with water until it’s very runny. Brush this liberally over the cooled cubes, mushroom, and frog, making sure it gets into the recessed numbers and textures. -
Wipe Back:
Immediately wipe the wet paint off the raised surfaces with a paper towel or damp sponge. The dark paint will remain in the cracks, deeper numbers, and textures, highlighting the ‘stone’ effect. -
Enhance the Frog:
Dry brush a little pale bronze or gold paint onto the frog’s back and knees to give it a slight sheen, separating it visually from the stone mushroom. -
Seal the Project:
Once all paint is completely dry, coat the entire set with a matte varnish. This protects the finish and unifies the sheen of the clay and paint.
Now you have a timeless, handcrafted calendar that brings a bit of the garden indoors

TRACK YOUR CERAMIC JOURNEY
Capture glaze tests, firing details, and creative progress—all in one simple printable. Make your projects easier to repeat and improve.
Mini Book Stack Perpetual Desk Calendar
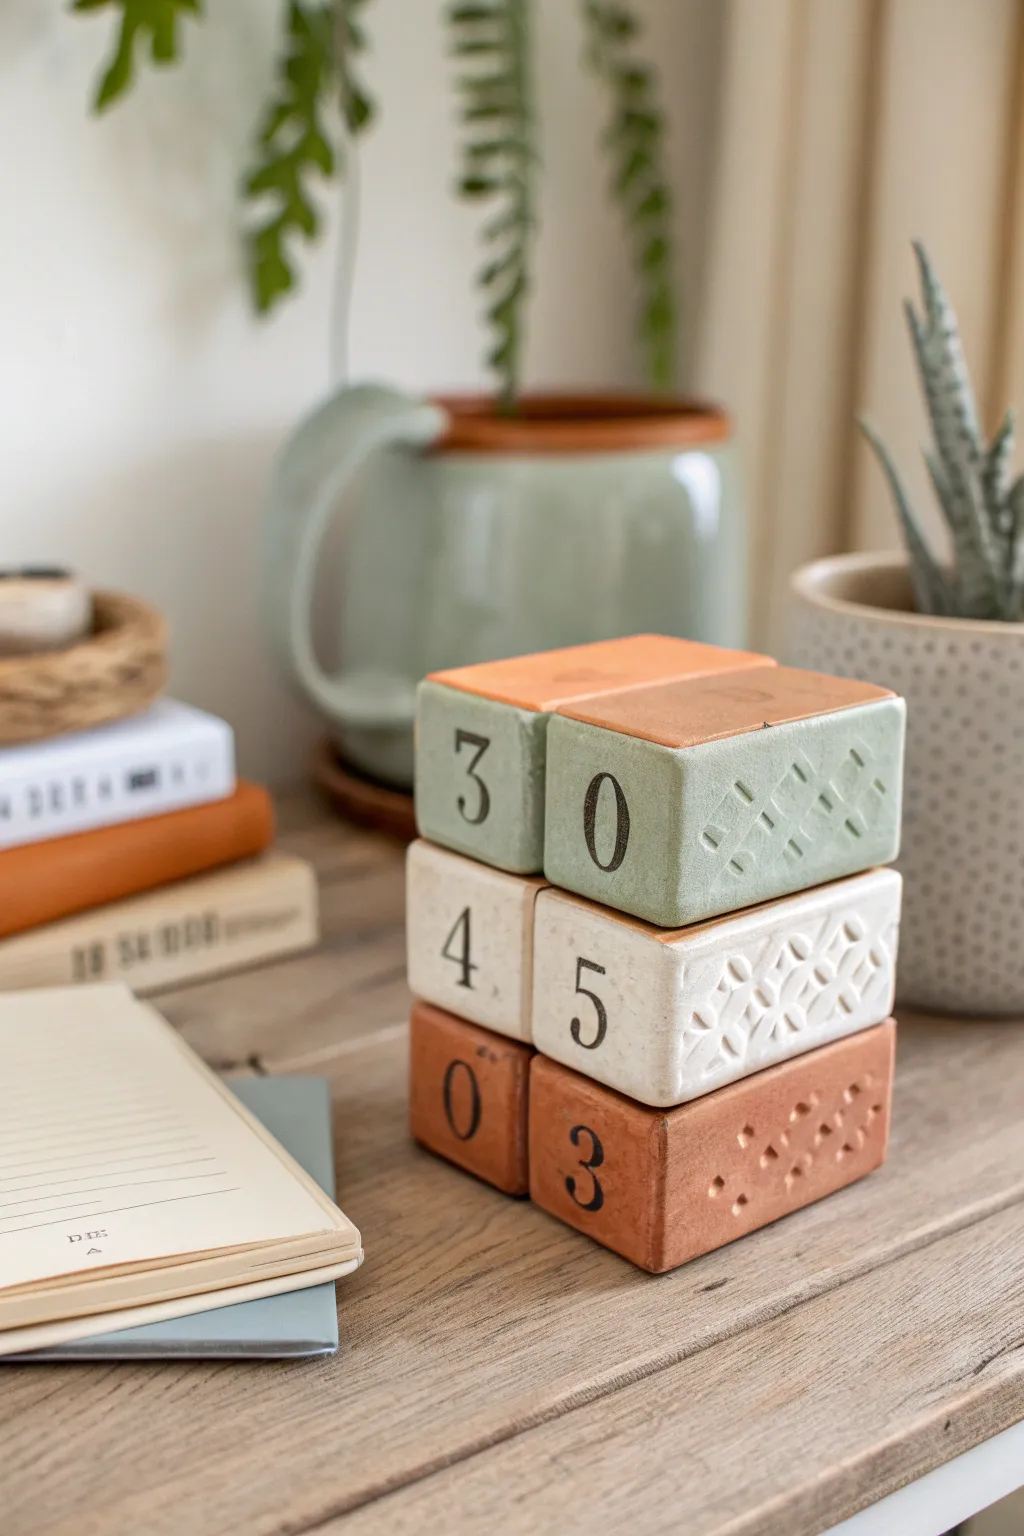
Reimagine the classic desk calendar with this charming stack of faux miniature books made from polymer clay. The subtle, earthy tones and textured spines give it a sophisticated artisanal feel, perfect for a cozy reading nook or minimalist office.
Detailed Instructions
Materials
- Polymer clay in three colors: terracotta/brick red, cream/white, and sage green
- Rolling pin or pasta machine
- sharp craft knife or tissue blade
- Ruler
- Fine-grit sandpaper
- Number stamps (small serif font works best)
- Black acrylic paint
- Small paintbrush or cotton swab
- Geometric texture tools (or household items like toothpicks, lace, or clay embossing sheets)
- Damp paper towel or baby wipes
- Matte varnish (optional)
Step 1: Planning and Prepping the Clay
-
Condition the clay:
Start by warming up your polymer clay in your hands. Knead each color—terracotta, cream, and sage—separately until they are soft and pliable. This step prevents cracking later on. -
Determine dimensions:
Visualize three rectangular blocks. The bottom and middle blocks need to be wide enough to support the ones above. Aim for blocks approximately 2.5 inches wide, 1 inch tall, and 1.5 inches deep, though slight variations add character. -
Create the base shapes:
Roll your clay into thick logs, then squash and shape them into sharp-edged rectangular prisms. You will need two blocks of each color so you can swap them out to make any date combination.
Step 2: Forming the Book Blocks
-
Refine the edges:
Using your flat blade or a ruler, press against the sides of your clay rectangles to sharpen the corners. The cleaner the edges, the more they will resemble hardbound books. -
Add the spine detail:
On the right side of each block (the short end), gently round the corners just slightly compared to the left side. This subtle curve mimics the spine of a book. -
Create page textures:
For the left side and the back of the blocks (the ‘pages’ part), use your craft knife to lightly score fine, straight parallel lines. This creates the illusion of stacked paper pages. -
Texture the covers:
Select the face of the block that will point to the right. Take your geometric texture tool or a toothpick and press a pattern into the clay. In the reference, a cross-hatch or diamond pattern adds a nice tactile element.
Clean Stamping
Dust your rubber stamps with a tiny bit of cornstarch or baby powder before pressing into the clay. This prevents the stamp from sticking and ruining the impression.
Step 3: Stamping and Baking
-
Plan your numbering:
You need to stamp numbers on the front face (the long side) and top of the blocks. Remember to include enough zeros, ones, and twos to form all dates from 01 to 31. -
Stamp the primary dates:
Press your number stamps firmly into the clay. Create two ‘day’ blocks (0-3 for the first digit, 0-9 for the second), and perhaps months on separate blocks if you choose to expand the set. -
Double check positions:
Before you bake, stack them as a trial run to ensure the numbers align visually and the ‘spines’ are all facing the correct direction. -
Bake the blocks:
Place your clay blocks on a ceramic tile or baking sheet lined with parchment paper. Bake according to your specific clay manufacturer’s instructions—usually around 275°F (135°C) for 30 minutes per quarter-inch of thickness. -
Cool down completely:
Allow the blocks to cool slowly in the oven with the door cracked, or leave them on the counter until they are completely room temperature. Moving them while hot can cause warping.
Fixing Smears
If acrylic paint stains the clay surface while antiquing, use a cotton swab dipped in rubbing alcohol to gently lift the stubborn pigment without removing it from the groove.
Step 4: Finishing Touches
-
Sand rough spots:
Once cool, use fine-grit sandpaper to smooth out any fingerprints or sharp burrs on the corners. A quick wipe with a damp cloth removes the dust. -
Apply the antiquing:
To make the numbers pop, dab black acrylic paint into the stamped impressions. I like to work one number at a time so the paint doesn’t dry too fast. -
Wipe away excess:
Immediately wipe over the surface with a damp paper towel or baby wipe. The paint will stay inside the indented numbers but wipe clean from the flat surface. -
Enhance the texture:
Repeat the paint-and-wipe technique on the textured ‘spine’ ends. This highlights the geometric patterns you created earlier. -
Seal the project:
For longevity, brush a thin coat of matte varnish over the blocks. This protects the acrylic paint and keeps the clay looking fresh without adding unnatural shine.
Stack your new perpetual calendar on your desk and enjoy flipping the dates every morning
Tiny Camper Date Block Garage
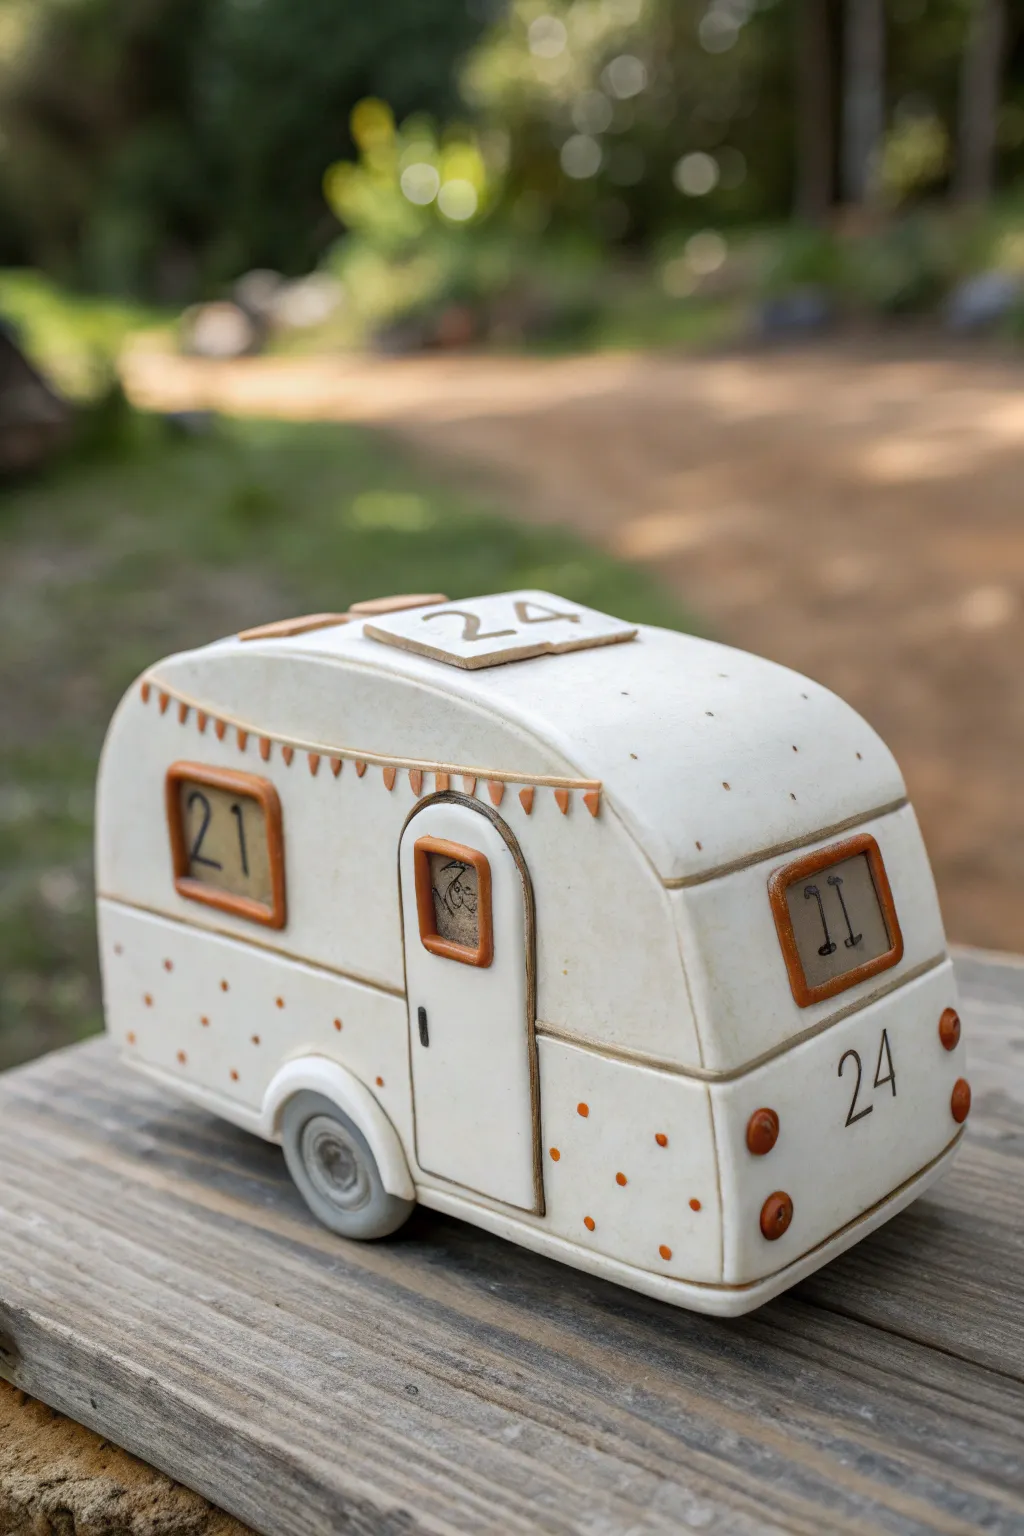
Sculpt a charming vintage caravan that serves double duty as a whimsical perpetual calendar. With removable date blocks tucked inside standard windows, this retro camper brings adventurous spirit to your desk or mantelpiece.
Step-by-Step Guide
Materials
- White bake-able polymer clay (approx. 4-6 oz)
- Rolling pin or pasta machine
- Clay knife or blade
- Small square wooden beads or pre-made clay cubes (sized to fit windows)
- Needle tool or toothpick
- Small circle cutter
- Soft detail brushes
- Acrylic paints (burnt orange, black, grey)
- Indelible fineliner pen (black)
- Satin or matte varnish
Step 1: Forming the Body
-
Create the base shape:
Condition your white clay until soft and pliable, then form it into a smooth rectangular block. Gently round off the top front and back edges to mimic that classic aerodynamic vintage caravan silhouette. -
Define the panels:
Using the back of your knife blade or a needle tool, lightly score a horizontal line around the entire mid-section of the camper. This creates the separation between the top and bottom panels. -
Carve the wheel wells:
Use a small circle cutter to gently impress half-circles at the bottom sides where the wheels will go. Carefully scoop out a little clay here to create a recessed area for the tires.
Blocks stick?
Make the window holes slightly larger than the blocks before baking. Clay shrinks slightly when cured, and you want the date cubes to slide in and out easily without scratching the paint.
Step 2: Windows and Door
-
Measure the windows:
Take your wooden cubes (or pre-made clay date blocks) and press them gently into the clay to mark the window sizes—one on the side and one on the front or back. Cut these squares out cleanly; they need to be just large enough for the blocks to slide in and out. -
Sculpt the door:
Roll a thin slab of clay and cut a rectangle with a rounded top. Attach this to the side of the camper. Smooth the edges down so it looks integrated but slightly raised. -
Add window frames:
Extrude or roll very thin snakes of clay. Flatten them slightly and wrap them around your window cutouts and the small window within the door to create raised frames. -
Attach the wheelbase:
Create two small grey discs for tires and add smaller white discs for hubcaps. Place these into the recessed wheel wells you carved earlier, ensuring the camper still sits flat.
Step 3: Decorative Details
-
Add the bunting:
I love adding tiny details like this: create a very thin string of clay and press it near the roofline. Cut tiny triangles and attach them along the string to create a festive bunting banner. -
Sculpt the lights:
Form tiny spheres of clay for the tail lights and indicators. Press them gently onto the rear and sides of the camper. Don’t worry about color yet; we will paint them later. -
Create the roof hatch:
Cut a thin square of clay and place it on the roof to represent a vent or skylight. This adds a little extra dimension to the top profile. -
Baking:
Bake the main camper body according to your clay package instructions. If you made clay date blocks instead of using wood, bake those separately now too.
Go Seasonal
Create extra sets of blocks with seasonal icons instead of numbers—like pumpkins for October or snowflakes for December—to display in the door’s window.
Step 4: Finishing Touches
-
Paint the details:
Once cool, use burnt orange acrylic paint for the window frames, door window, bunting, and tail lights. Use a grey wash for the tires and a solid grey or black for the door handle. -
Add the dots:
Dip the end of a toothpick or a dotting tool into the orange paint. Apply a pattern of polka dots to the lower half of the camper and the roof for a retro texture. -
Inking the dates:
Paint your date cubes in a coordinating color or leave them natural. Use a fine-liner pen to write numbers 0-9 on the faces. You’ll need two cubes for the days of the month. -
Antique the piece:
To make the camper look vintage and traveled, dilute some brown paint with water. Brush it over the entire piece and immediately wipe it off with a paper towel, leaving pigment only in the crevices. -
Add graphic numbers:
Using your fine-liner or a steady hand with paint, adding a large year number (like ’24’) on the rear or roof adds a nice customized touch. -
Seal the work:
Apply a coat of satin varnish to protect the paint and give the camper a finished, ceramic-like sheen.
Park your finished camper on your desk and flip the blocks daily to keep your calendar rolling along
Crystal Geode Desktop Calendar Nook
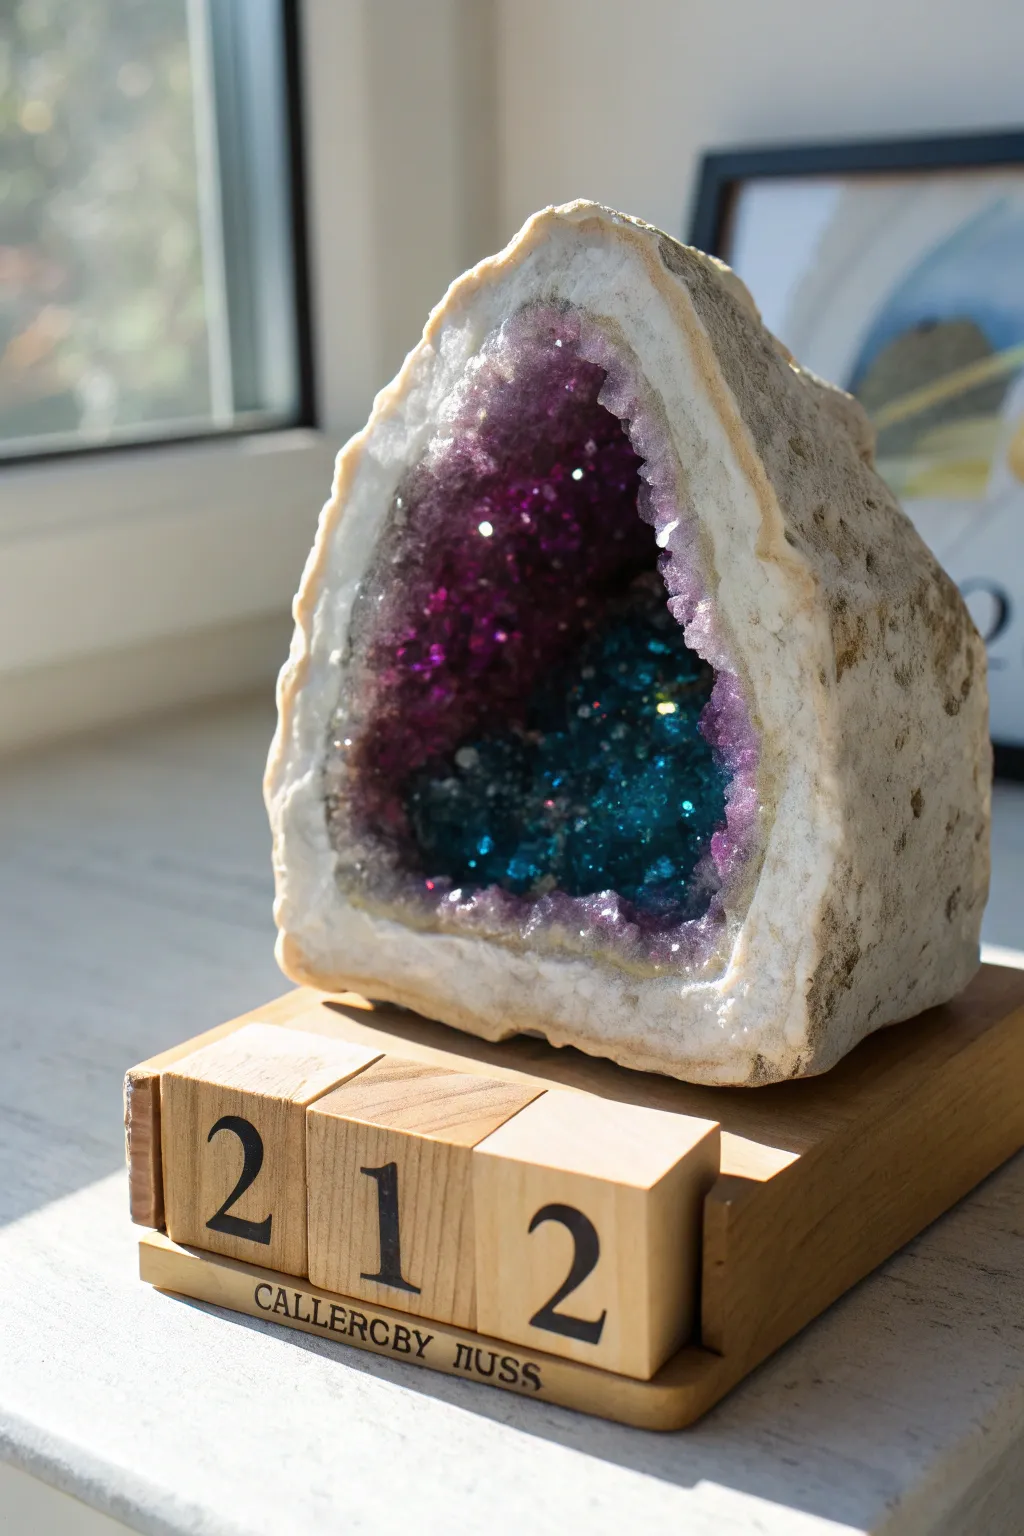
Transform ordinary materials into a stunning, mystical desktop accessory that combines practical timekeeping with the natural beauty of crystals. This project uses polymer clay and glass glitter to simulate a hollow rock geode perched atop a custom wooden calendar base.
Step-by-Step Guide
Materials
- Air-dry clay or white polymer clay
- Aluminum foil
- PVA glue or Mod Podge
- Glass glitter or coarse chunky glitter (purple, teal, clear)
- Acrylic paints (white, grey, beige, deep purple, teal)
- Small wooden perpetual calendar blocks (blank)
- Balsa wood strip (for the base tray)
- Wood stain (light oak)
- Black ink stamp set or fine tip marker
- High-gloss varnish or UV resin
- Hot glue gun
Step 1: Sculpting the Geode Shell
-
Form the armature:
Crumple aluminum foil into a large, rough cone shape with a flat bottom. Creates a deep hollow depression in the front center using your thumb; this will become the crystal cavern. -
Apply the clay:
Roll out your clay to about 1/4 inch thickness. Wrap it entirely around the foil form, smoothing the seams. -
Texture the exterior:
Before the clay hardens, use a crumpled ball of foil or a stiff-bristled brush to aggressively texture the outside surface. You want it to look like rough, sedimentary rock, not smooth plastic. -
Refine the opening:
Trim the clay around the front opening to create a jagged, natural-looking rim. Make sure the depression is deep enough to hold the crystals. -
Dry or Cure:
Allow the clay to dry completely (24-48 hours for air-dry) or bake according to package instructions if using polymer clay.
Step 2: Creating the Crystal Interior
-
Base coat the interior:
Paint the inside of the cavern with a dark purple acrylic paint. This provides depth and ensures no white clay shows through the crystals later. -
Apply adhesive:
Generously brush a thick layer of PVA glue or Mod Podge inside the painted cavern. Work in sections if you’re worried about it drying too fast. -
Add first crystal layer:
Pour coarse purple glass glitter into the upper and outer edges of the cavern. Tilt the geode to distribute it, pressing gently to adhere. -
Create the gradient:
While the glue is wet, add teal or blue glass glitter to the deeper, central part of the hollow to create that magical color shift seen in the photo. -
Seal the crystals:
Once the first glue layer is dry, carefully drip a clear high-gloss varnish or a thin layer of resin over the crystals. This binds them permanently and amps up the wet-look shine.
Sparkle Booster
Mix a tiny pinch of holographic fine glitter into your clear varnish topcoat. It catches the light differently than the glass shards for extra depth.
Step 3: Finishing the Rock Exterior
-
Base coat the exterior:
Paint the outside of the rock with an off-white or cream acrylic paint. -
Add mineral details:
Mix a watery wash of beige and light grey paint. Dab this over the textured surface and immediately wipe most of it off with a paper towel. The darker color will stay in the crevices, enhancing the texture. -
Highlight the rim:
Dry brush pure white paint along the jagged rim of the opening to simulate the quartz edge often found on real geodes.
Loose Crystals?
If glitter sheds after drying, create a 50/50 mix of water and PVA glue. Drip it carefully over the loose areas with a pipette to lock them in without fogging.
Step 4: Assembling the Calendar Base
-
Prepare the wood blocks:
Take your wooden cubes. If they are rough, give them a light sanding for a smooth finish. -
Stamp the numbers:
Using your stamp set and black ink, stamp numbers onto the cube faces. Ensure you follow standard perpetual calendar numbering patterns so every date is possible. -
Build the tray:
Cut your balsa wood strip to create a simple tray that fits the cubes snugly plus space on top for the geode. Glue the strips together with wood glue. -
Stain and personalize:
Apply a light oak stain to the tray and cubes. Once dry, you can stamp a phrase or name along the front edge of the tray like the ‘CALLERCBY HUSS’ text in the example. -
Final Assembly:
Using a strong adhesive or hot glue, mount the finished faux geode firmly onto the top platform of your wooden base.
Place your completed geode calendar near a window to let the sunlight catch those beautiful crystal facets everyday
Tiny Plant Pot Month Bar Slot
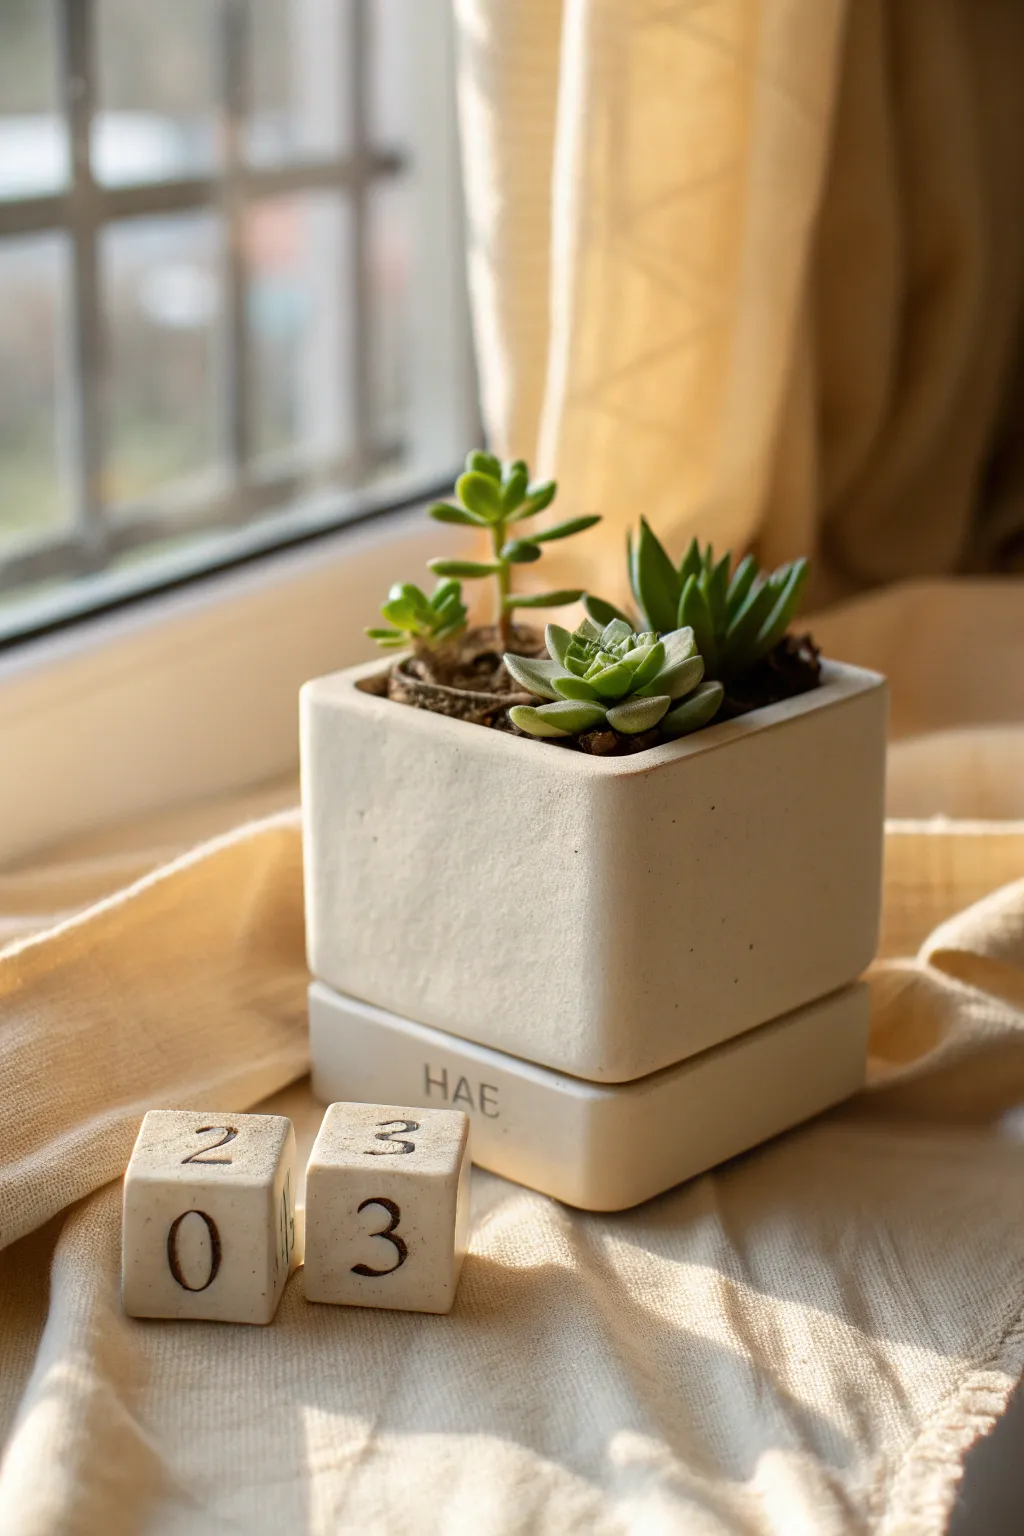
This clever dual-purpose project combines a minimalist succulent planter with a perpetual calendar system. By sculpting a custom base with a dedicated slot, you create a permanent home for interchangeable clay month tiles and date cubes.
How-To Guide
Materials
- White air-dry clay or polymer clay
- Square cookie cutter (approx. 3-4 inches)
- Acrylic rolling pin
- Clay knife or craft blade
- Letter and number stamp set (small)
- Ruler
- Slip and score tool (or toothbrush)
- Fine-grit sandpaper
- Matte spray sealant
- Small succulents and potting soil
Step 1: Sculpting the Components
-
Roll the base slab:
Begin by rolling out a distinct slab of white clay to about 1/4 inch thickness. This will form the bottom tray that holds the entire calendar structure. -
Cut the tray shape:
Cut a rectangle that is slightly wider than your intended planter box. The front edge needs to be deep enough to eventually accommodate your date cubes, but the primary focus here is the planter seat. -
Form the planter walls:
Roll out a second slab for the main pot. Use your square cutter or a ruler to cut four equal square walls and one square base that fits inside them. -
Assemble the pot box:
Score the edges of the base square and the bottom edges of your walls. Apply a little water or liquid clay as glue, then press the walls onto the base to form a cube. -
Smooth the seams:
Reinforce the inside corners with small snakes of clay. On the outside, blend the seams together using your finger or a clay tool until the box looks like a solid block. -
Create the month tray lip:
Roll a thin strip of clay and attach it to the front face of the original rectangular base tray. This creates the ‘lip’ or bar where month names will go. I find smoothing this connection vital for a clean look.
Clean Lines Shortcut
Instead of freehand cutting, wrap your clay slab around a small cardboard box covered in parchment paper. This ensures perfectly straight 90-degree corners.
Step 2: Adding Details and Drying
-
Stamp the month code:
On the front vertical face of the tray base, use your letter stamps to deboss a month abbreviation (like ‘HAE’ as seen, or ‘JAN’). You can make multiple trays for different months if you’re feeling ambitious. -
Make the date cubes:
Shape two solid cubes of clay. Ensure they are small enough to sit comfortably in front of the planter without blocking the view of the plants. -
Stamp the numbers:
Stamp digits 0-3 on the first cube (for the tens place) and 0-9 distributed across faces of the second cube (for the ones place). Use a light touch so you don’t distort the cube shape. -
Create drainage (optional):
If using live plants, poke a small hole in the center of the main pot box. Skip this if using faux succulents. -
Initial drying phase:
Let all components sit for 24-48 hours. Turn them occasionally to ensure even drying and prevent warping.
Step 3: Finishing Touches
-
Sand for smoothness:
Once fully dry (and bone white), gently sand the edges of the pot, the tray, and the cubes. You want to soften any sharp corners for that stone-like texture. -
Enhance the text:
Mix a tiny amount of diluted brown or gray acrylic paint. Brush it into the stamped letters and numbers, then immediately wipe the surface clean, leaving color only in the grooves. -
Seal the piece:
Spray all clay parts with a matte sealant to protect them from moisture, which is crucial since this will hold soil. -
Planting:
Fill the pot with succulent soil. Arrange a mix of small succulents—a mix of tall and rosette shapes works best—and place the pot onto the base tray. -
Set the date:
Place your numbered cubes in front of the pot on the table surface or extended tray lip to mark the current date.
Make it Modular
Create a shallow slot on the front of the tray instead of stamping directly. Then, make thin interchangeable tiles for all twelve months to slide in.
Now you have a charming, living calendar that brings a bit of nature to your daily schedule.
Picture Frame Style Perpetual Calendar
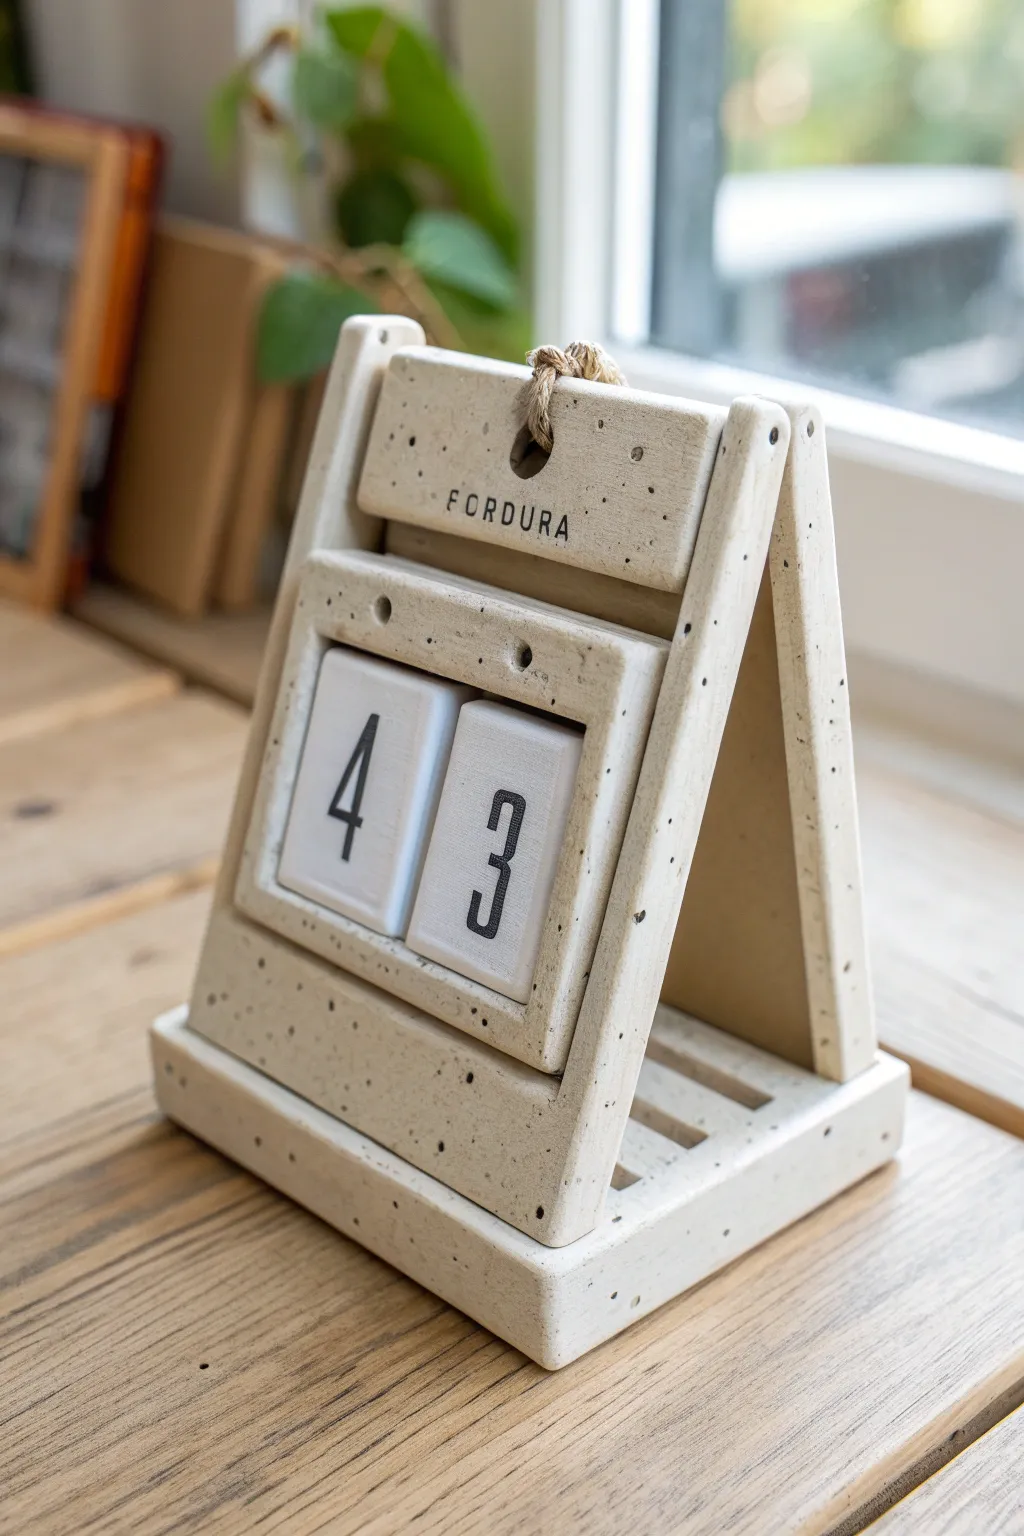
This minimalist perpetual calendar evokes the serene look of speckled sandstone while providing a functional and stylish way to track the days. The A-frame easel design holds swinging number tiles within a central window, creating a modern desk accessory with a handmade touch.
Detailed Instructions
Materials
- White polymer clay (approx. 3-4 blocks)
- Black pepper or dried coffee grounds (for speckling)
- Acrylic rolling pin
- Craft knife or clay blade
- Ruler
- Cardboard or cardstock (for templates)
- Small square cookie cutter (optional, for number tiles)
- Small letter stamps
- Black acrylic paint
- Small detail paintbrush
- Short length of jute twine or rustic cord
- Two small metal eye pins (optional, for hinge)
- Strong craft glue (E6000 or similar)
- Oven for baking
Step 1: Preparing the Clay
-
Mix the faux stone:
Begin by conditioning the white polymer clay until it is soft and pliable. To achieve that beautiful speckled stone effect, knead in a small pinch of coarse black pepper or dried coffee grounds. Fold and roll the clay repeatedly until the speckles are evenly distributed throughout the block. -
Roll out the slabs:
Use your acrylic rolling pin to flatten the clay into a large, even sheet about 1/4 inch (6mm) thick. Typically, I like to use depth guides or stack playing cards on either side of the roller to ensure the thickness is perfectly uniform.
Step 2: Creating the Components
-
Cut the side frames:
Create a paper template for the A-frame legs: you need two tall, narrow trapezoids (wider at the bottom, narrower at the top). Trace and cut two sets of these from your clay slab using the craft knife. These will form the upright sides of the easel. -
Create the central window frame:
Cut a square or rectangular slab that fits between your side frames. Inside this slab, cut out a smaller window where the numbers will hang. The remaining border should be about 1/2 inch thick to provide stability. -
Make the base:
Cut a solid rectangular base piece that is slightly wider and deeper than the A-frame footprint. You can add a decorative ‘slatted’ effect by lightly scoring parallel lines across the center, mimicking a wooden pallet texture. -
Form the header:
Cut a rectangular strip to serve as the top header connecting the two sides. This piece should be the same width as your window frame. Use a hole punch or straw to create a small hole in the top center for the decorative twine knot. -
Cut the number tiles:
Cut two identical rectangles or squares that fit comfortably inside your window frame with a little gap for movement. Make sure they are thick enough to hang straight. -
Add holes for hanging:
carefully poke two holes through the top edge of each number tile and corresponding holes into the top interior edge of the window frame. These will be used to wire or tie the tiles in place later.
Uneven Texture?
If your ‘stone’ speckles are clumping, mix the pepper into a small ball of clay first, then combine that concentrate with the main block.
Step 3: Adding Details & Baking
-
Stamp the text:
Using your small letter stamp set, gently press your chosen word (like the month, a brand name, or a phrase like ‘TODAY’) into the header piece. Use gentle pressure to avoid distorting the clay shape. -
Smooth the edges:
Before baking, dip your finger in a little baby oil or water and smooth down all cut edges to remove sharp corners and fingerprints. This gives a professional, finished look. -
Bake the components:
Arrange all pieces on a parchment-lined baking sheet. Bake according to your polymer clay package instructions (usually 275°F/135°C for 15-30 minutes, depending on thickness). Let them cool completely before handling.
Level Up: Magnetic Tiles
Instead of hanging tiles, embed small magnets into the frame and the back of the tiles. This allows you to snap numbers on/off easily.
Step 4: Assembly and Finish
-
Paint the numbers and text:
Paint the stamped letters on the header with black acrylic paint. For the number tiles, paint digits 0-3 on the first block and 0-9 on the second block (you may need extra blocks for all combinations, or paint double-sided). Use a fine brush for crisp lines. -
Clean up paint:
If paint gets outside the lines, quickly wipe the surface with a damp paper towel. The paint will stay in the recessed stamped areas while wiping clean from the raised surface. -
Assemble the easel:
Use strong craft glue to attach the side legs to the base. Then, glue the header piece between the top of the legs and the window frame directly below the header. Support the structure with props (like jars or books) while the glue cures. -
Add the decorative twine:
Thread a short piece of jute twine through the hole in the header. Tie a bulky knot on the front side and trim the ends short for a rustic accent. -
Hang the tiles:
Using small jump rings or bent wire, attach the number tiles to the top bar of the window frame so they swing freely. Double-check that they hang straight and don’t rub against the bottom.
Now you have a timeless, handcrafted calendar ready to organize your days with stone-like elegance.
Seasonal Swap Topper Date Block Calendar
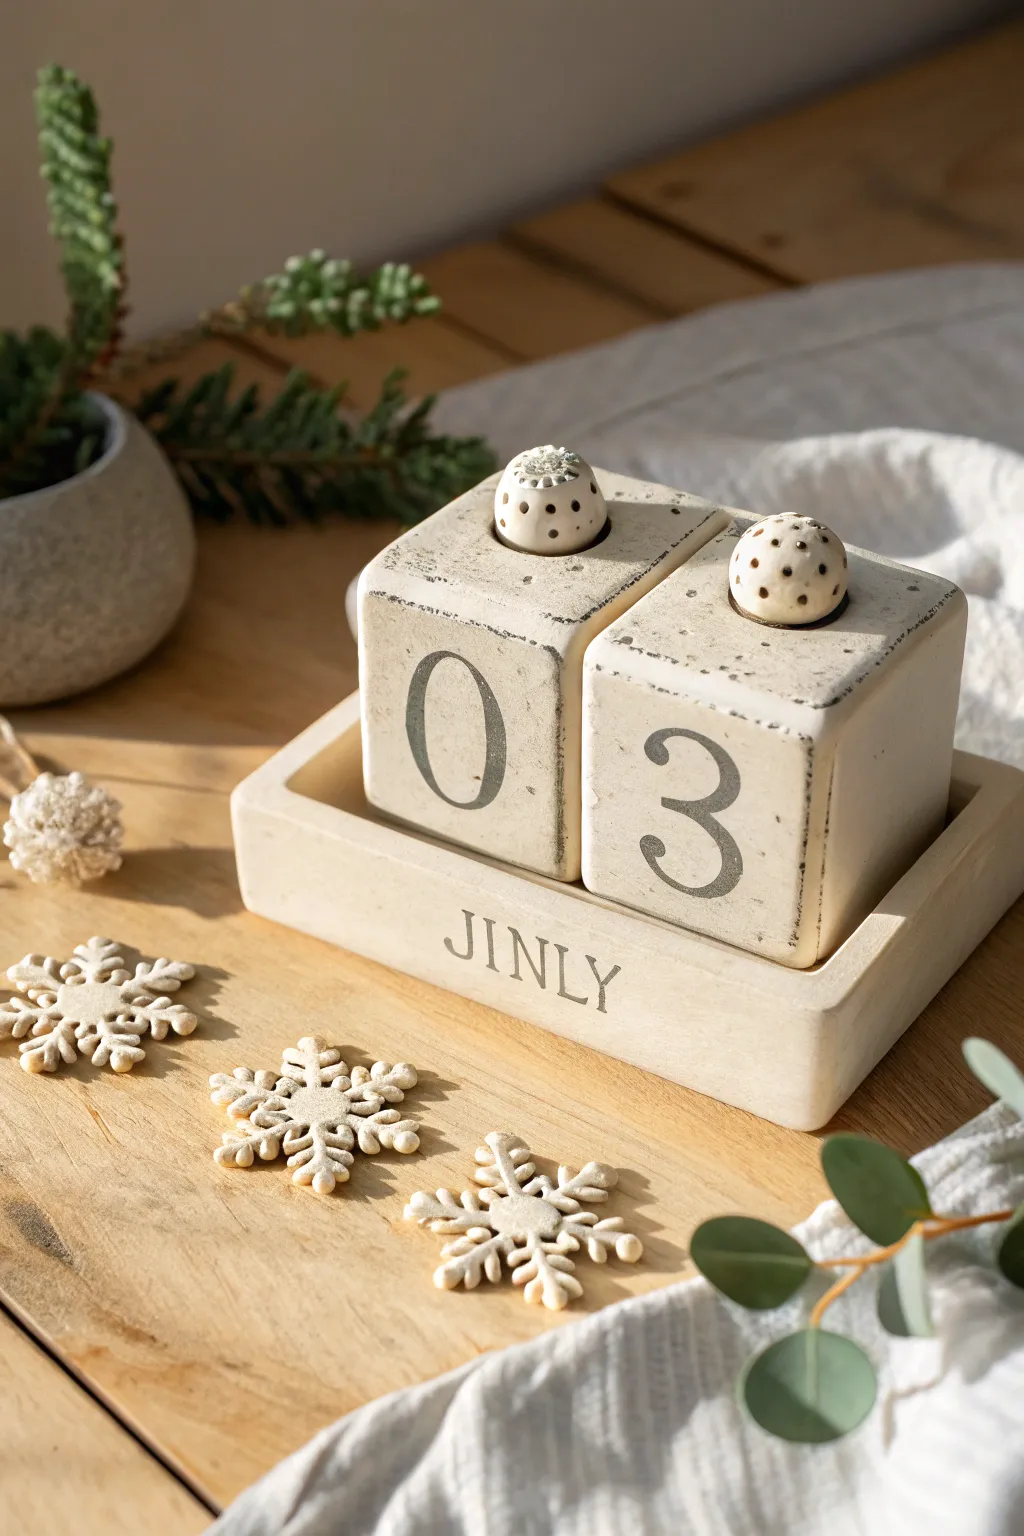
Create a timeless display for your desk with this weathered block calendar featuring interchangeable seasonal toppers. The rustic white-washed finish and stamped typography give it a charming farmhouse aesthetic that works year-round.
Step-by-Step Guide
Materials
- Air-dry clay (white or cream)
- Small wooden cubes (approx 2 inches) as core forms (optional but recommended for weight savings)
- Square cookie cutter or sharp craft knife
- Rolling pin with depth guides (1/4 inch)
- Rubber alphabet and number stamps
- Grey acrylic paint
- Cream or off-white acrylic paint
- Matte spray sealant
- Sandpaper (fine grit)
- Small spherical mold or hand-shaping tools
- Detail paintbrush
- Water and sponge
- Parchment paper
Step 1: Forming the Base & Blocks
-
Roll the base slab:
Begin by rolling out a thick slab of air-dry clay, about 1/2 inch thick, to form the tray base. Cut a rectangle large enough to hold two of your blocks side-by-side with a small border. -
Build the tray walls:
Create a small lip around the base by rolling thin snakes of clay and attaching them to the perimeter using the score-and-slip method. Alternatively, create a solid block base and carve out the center depression. -
Smooth the edges:
Use a damp sponge or finger to smooth the join lines and edges of your tray, giving it a slightly softened, worn look rather than sharp, rigorous corners. -
Create the date blocks:
You can form solid clay cubes, but I prefer wrapping thin slabs of clay around wooden blocks to prevent cracking and reduce drying time. Ensure the seams are completely smoothed over. -
Add topper indents:
While the clay is still wet, gently press a small, shallow depression into the top face of each block. This will act as the resting place for your seasonal toppers later.
Step 2: Sculpting the Details
-
Stamp the month:
On the front face of the base tray, press your letter stamps into the wet clay to spell out the month. Press firmly enough to leave a clear impression but not so deep that it distorts the shape. -
Create the toppers:
Form two small domes or spheres that fit largely into the depressions you made on the blocks. Texture them with a dotting tool or toothpick to create the mushroom-cap style holes seen in the reference. -
Cut decorative snowflakes:
Roll out leftover clay thinly and use small snowflake cutters or a knife to create accompanying seasonal scatter decorations. -
Dry completely:
Allow all pieces to dry on parchment paper for 24-48 hours. Turn the pieces occasionally to ensure even drying and prevent warping.
Clean Impressions
Dust your rubber stamps with a tiny bit of cornstarch before pressing them into the wet clay. This ensures they release cleanly without pulling up sticky clay bits.
Step 3: Decorating & Finishing
-
Sand for texture:
Once bone dry, lightly sand the surfaces. Don’t aim for perfection; scuffing the edges slightly helps achieve that vintage, worn-stone appearance. -
Apply base coat:
Paint all pieces with a cream or off-white acrylic paint. Two thin coats are better than one thick coat to maintain the clay’s texture. -
Add the numbers:
Using grey acrylic paint and a steady hand (or stencils), paint large serif numbers on the faces of the blocks. Remember to plan your number layout so all dates 01-31 are possible. -
Fill the stamped text:
Paint into the stamped letters on the base with the same grey paint. Immediately wipe away excess surface paint with a damp paper towel, leaving the color only inside the depressed letters. -
Distress the edges:
Using a very dry brush with a tiny amount of grey or brown paint, lightly dab the corners and edges of the blocks and base to simulate wear and weathering. -
Seal the project:
Finish everything with a coat of matte spray sealant to protect the paint and clay from moisture and handling over time.
Cracked Clay?
If small hairline cracks appear during drying, create a ‘slip’ paste by mixing a little wet clay with water and fill the cracks. Let it dry again, then sand smooth.
Now you have a charming, perpetual calendar that’s ready to track your days in style.