Whenever I need an instant mood-lift at the clay table, I make a little clay cat—they’re quick, forgiving, and full of personality. These clay cat ideas are the kind you can actually finish in an afternoon, even if you’re keeping the shapes nice and simple.
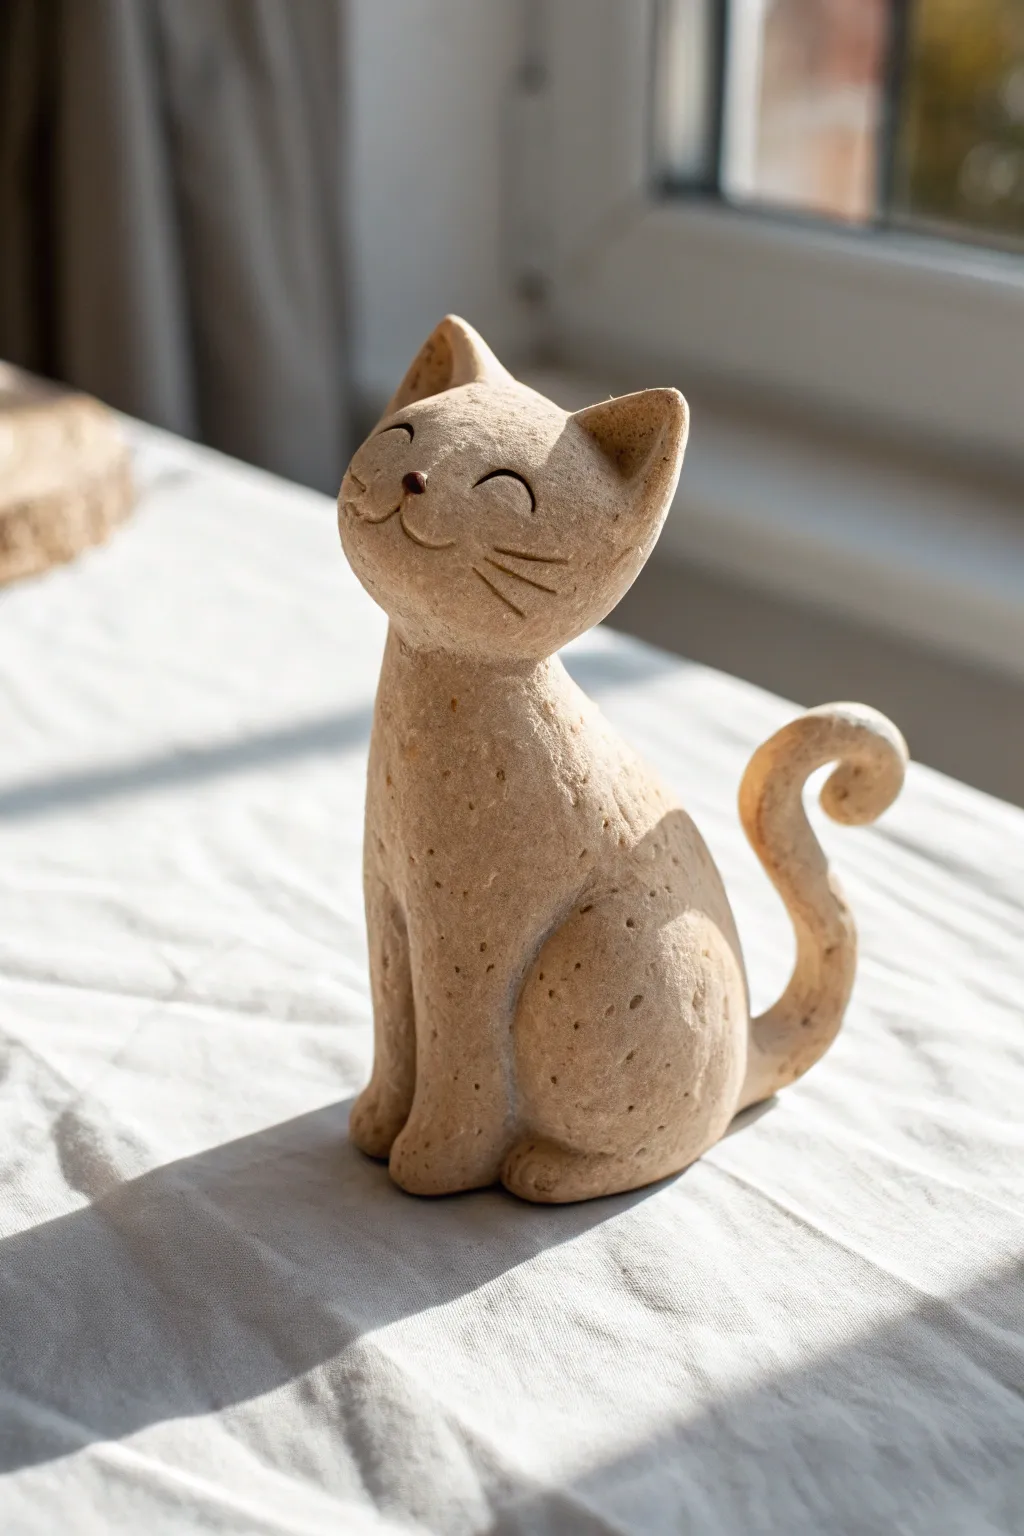
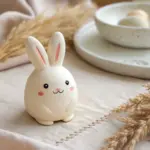
Chibi Kitty Figurine
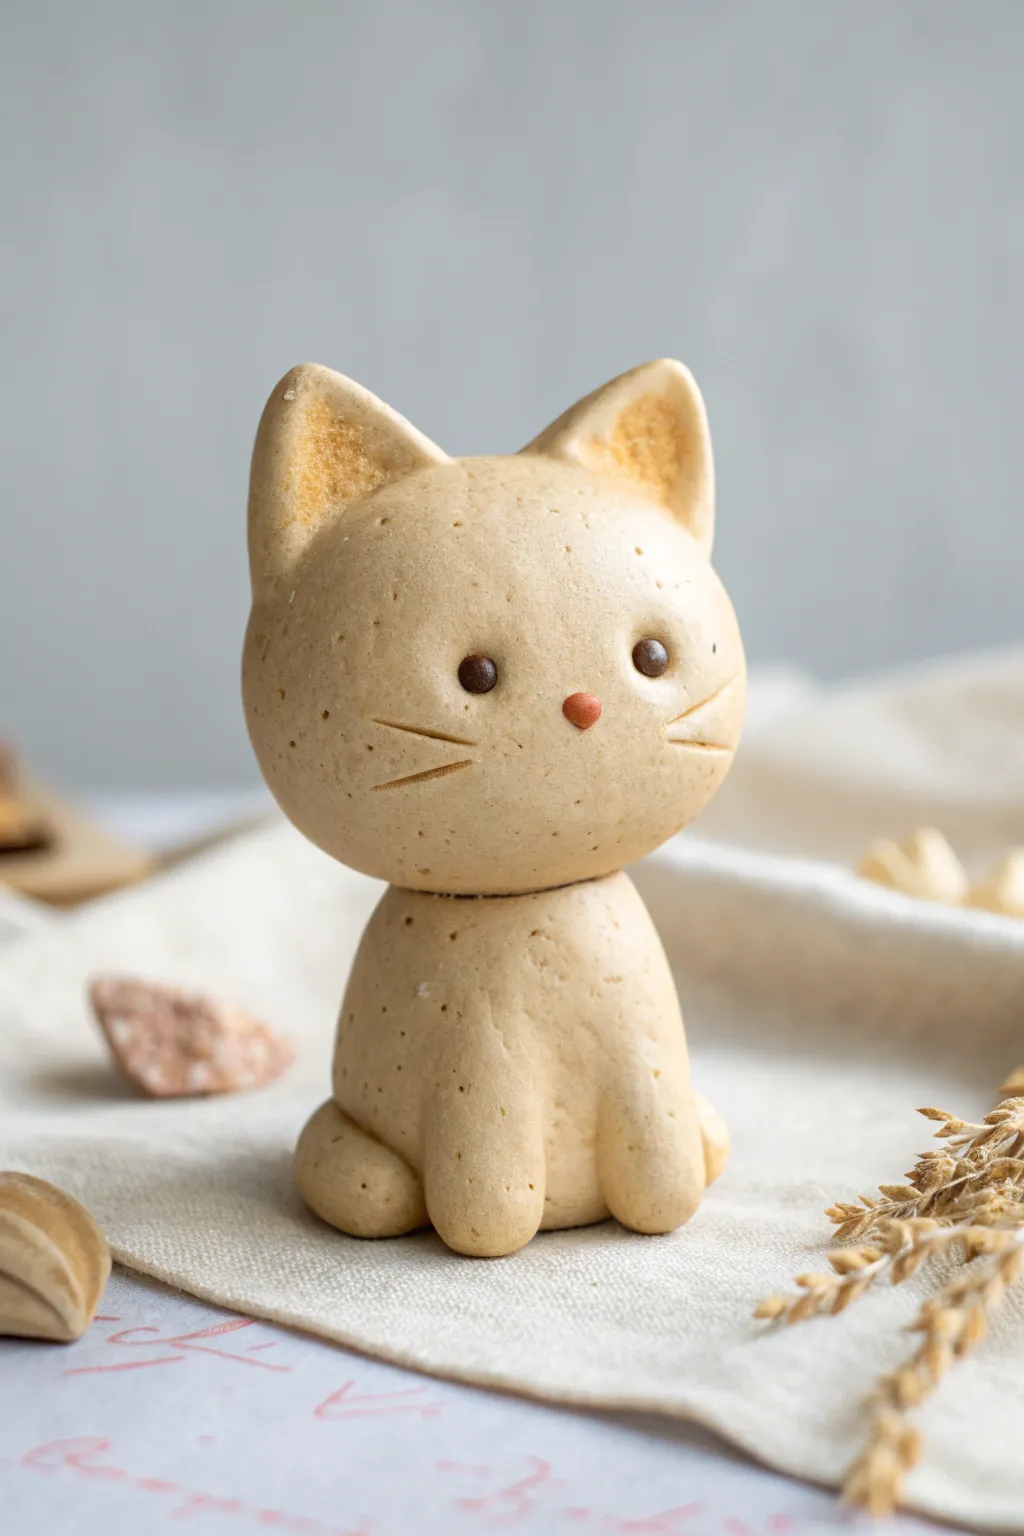
This charming, minimalist figurine features a warm beige finish and simple geometric shapes that evoke the cozy feel of a freshly baked biscuit. Its oversized head and tiny paws create that classic chibi silhouette perfect for desk companions.
Step-by-Step Guide
Materials
- Light beige or ‘ecru’ polymer clay
- Chocolate brown polymer clay (tiny amount)
- Terracotta or orange-red polymer clay (tiny amount)
- Soft pastel chalks in orange/ocre (for shading)
- Needle tool or toothpick
- X-Acto knife or clay blade
- Soft round paintbrush
- Aluminum foil (for core)
- Oven for baking
Step 1: Shaping the Head
-
Prepare the Core:
Crumple a small tightness of aluminum foil into a ball about 1 inch in diameter. This keeps the figurine light and prevents baking cracks. -
Condition the Clay:
Knead your beige clay until it is soft and warm. If it feels too stiff, mixing in a tiny drop of clay softener or baby oil can help smooth it out. -
Cover the Core:
Flatten a large portion of the beige clay into a patty. Wrap it completely around the foil ball, smoothing out all seams until you have a perfect sphere. -
Refine the Shape:
Gently roll the sphere between your palms to remove fingerprints. slightly flatten the front face area just a tiny bit to give the features a place to sit.
Clay Cracking?
If you see tiny cracks before baking, smooth them with a finger dipped in baby oil. If cracks appear after baking, fill them with a mix of liquid clay and raw clay, then rebake.
Step 2: Creating the Body
-
Form the Torso:
Roll a second ball of beige clay, slightly smaller than the head—about two-thirds the size. Shape it into a soft teardrop or gumdrop shape with a flat bottom for stability. -
Connect Head and Body:
Insert a short piece of wire or a toothpick into the top of the body, then press the head firmly onto it. The neck connection should be seamless but distinct. -
Shape the Front Paws:
Roll two small, elongated logs of beige clay. Press them vertically onto the front of the body, merging the top of the logs into the chest so they look like standing legs. -
Shape the Back Paws:
Create two small, flattened ovals. Attach these to the lower sides of the body to represent the haunches of a sitting cat.
Add a Scarf
Give your kitty personality! Roll a thin snake of red or blue clay, flattened slightly, and wrap it around the neck before baking for a cozy accessory.
Step 3: Ears and Details
-
Make the Ears:
Form two small triangles of beige clay. Gently pinch the sides to curve them slightly, creating a concave inner ear. -
Attach the Ears:
Place the ears on top of the head, spaced widely apart for maximum cuteness. Blend the connection points at the back of the ears into the head using a clay tool. -
Initial Shading:
Scrape some orange or ocre soft pastel into a powder. Using a soft, dry brush, I like to gently dust the inside of the ears to give them a warm, baked inner glow. -
Add Texture:
If you want that porous, biscuit-like texture shown in the photo, gently tap the entire surface with a clean toothbrush or a ball of crinkled foil.
Step 4: Facial Features
-
Create Eye Sockets:
Use a ball tool or the rounded end of a paintbrush to make two small indentations where the eyes will go. This helps them sit flush. -
Insert the Eyes:
Roll two tiny spheres of chocolate brown clay. Press them gently into the sockets you just created. -
Add the Nose:
Roll a microscopic amount of terracotta clay into a tiny oval. Place it centered below the eyes. -
Carve Whiskers:
Using a needle tool or the back of an X-Acto knife, gently press three horizontal lines into each cheek. Don’t drag the tool; simply press to get clean indentations. -
Final Bake:
Bake the figurine according to your clay manufacturer’s instructions (usually 275°F/135°C for 15-30 minutes). Let it cool completely before handling.
Place your finished biscuit kitty on a shelf or gift it to a cat-loving friend as a sweet handmade token


Loaf Cat Mini
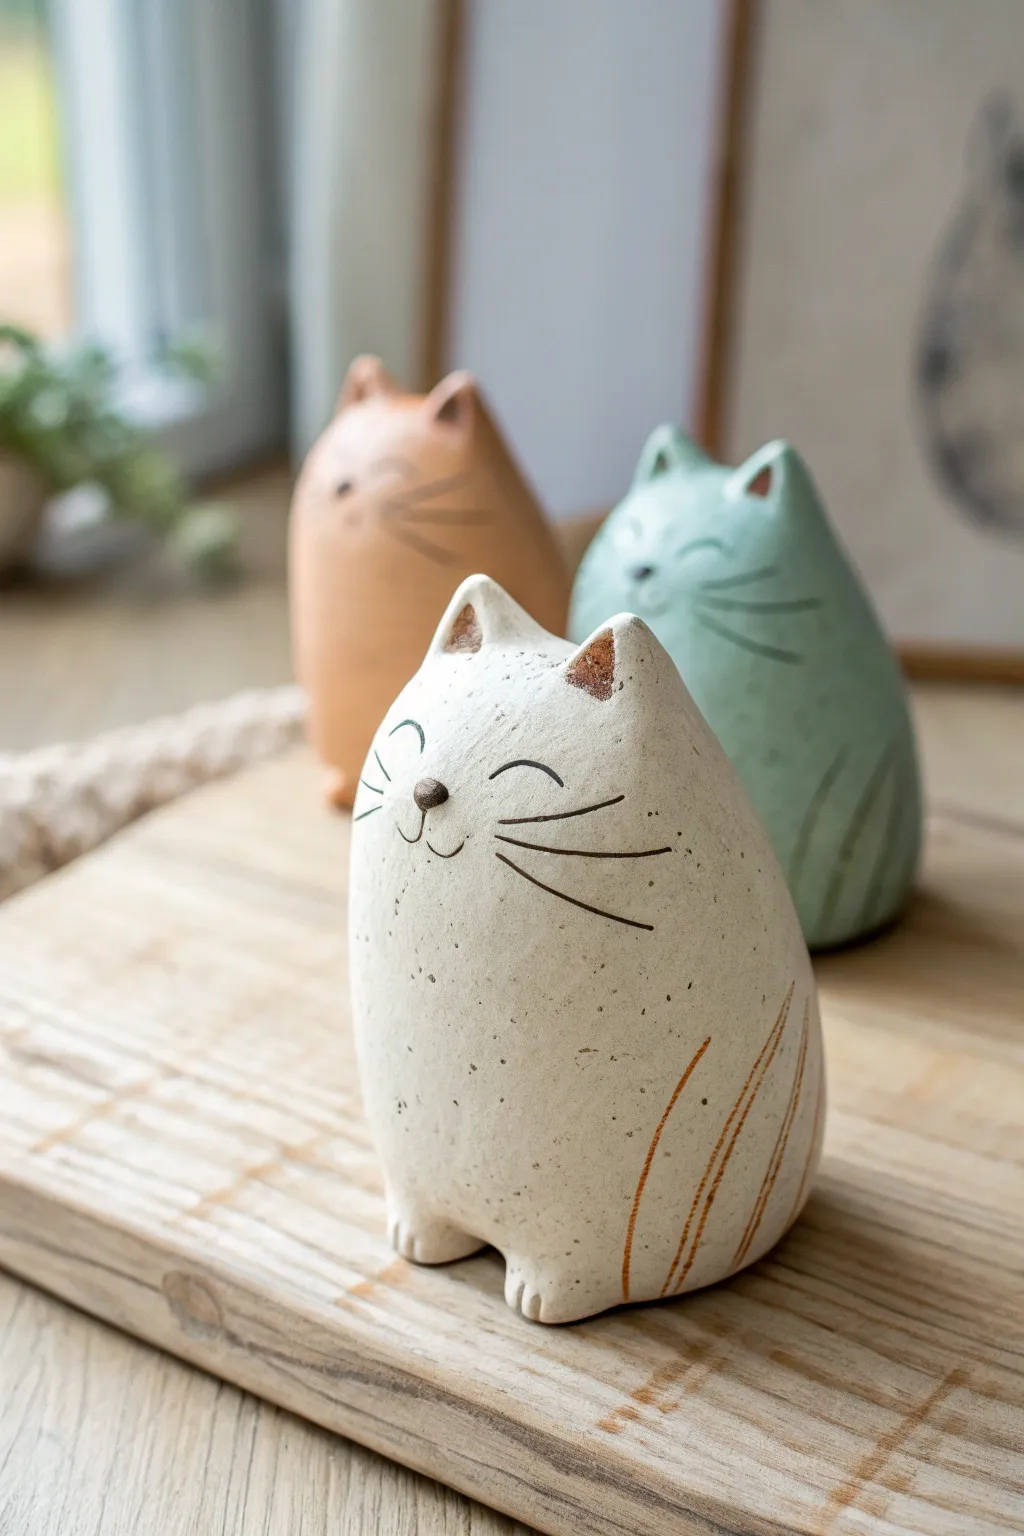
These charming, minimalist figurines capture the cozy essence of a cat in its classic loaf position. With their smooth, rounded forms, speckled clay texture, and simple etched details, these little sculptures bring a touch of earthy warmth to any shelf.
Detailed Instructions
Materials
- White or light buff stoneware clay (ideally with fine grog or speckles)
- Pottery tools (wire cutter, needle tool, sponge)
- Wooden modeling tool or popsicle stick
- Small loop tool involved (for hollowing, optional)
- Underglazes: Charcoal or Black (for details), Terracotta/Rust (for stripes and ears), Sage Green, Peach
- Clear matte or satin glaze
- Paintbrushes (fine liner and small round)
- Kiln (or air-dry clay alternatives if not firing)
Step 1: Shaping the Base Body
-
Portion the clay:
Start by cutting a lump of clay roughly the size of a large orange. Wedge it thoroughly to remove air bubbles and ensure a consistent texture. -
Form the loaf shape:
Roll the clay into a smooth ball first, then begin to taper it slightly towards the top to create a teardrop or pear shape. The base should be wider than the top. -
Flatten the bottom:
Gently tap the wider bottom end onto your work surface to create a flat, stable base so the cat sits upright without wobbling. -
Define the head:
Instead of attaching a separate head, use your thumb and forefinger to gently squeeze the upper third of the form, distinguishing the head area while keeping it seamlessly connected to the body.
Cracking at the Neck?
If the neck area cracks during drying, handle the clay less to avoid drying it out. You can also wrap the join tightly with plastic for a day to equalize moisture.
Step 2: Sculpting Features
-
Pinch the ears:
At the very top of the head, pinch two small triangular sections of clay upwards to form the ears. Shape them to be slightly rounded at the tips rather than distinctively sharp. -
Round the body contours:
Smooth over the entire form with a damp sponge or your fingers. The transition from neck to body should be subtle, emphasizing that continuous ‘loaf’ silhouette. -
Add tiny feet:
Roll two very small, pea-sized balls of clay. Flatten them slightly and score/slip them onto the bottom front edge of the body to suggest tucked-in paws. Blend the seams well. -
Refine the surface:
Once you are happy with the shape, use a soft rib or a smooth stone to compress the surface, removing fingerprints and creating a nice canvas for the face.
Step 3: Adding Details
-
Attach the nose:
Roll a tiny triangular or oval piece of clay. Score the center of the face and attach this nose with a dab of slip, pressing it gently so it protrudes slightly. -
Carve the mouth:
Use a needle tool to carefully incise a small ‘w’ shape directly beneath the nose. Keep the lines thin and delicate. -
Draw the eyes:
For that sleepy look, use your needle tool to carve two shallow, downward-curving crescents above the nose. Placing them slightly wide apart adds to the charm. -
Etch the whiskers:
Carve three long, sweeping lines on each cheek. Press slightly deeper near the nose and let the line trail off as you move outward. -
Define the paws:
Use the needle tool to press two or three small vertical lines into the little nubbin feet you added earlier to represent toes. -
Create texture (Optional):
If your clay doesn’t have natural speckles, I like to flick a stiff toothbrush dipped in iron oxide or diluted brown underglaze over the raw clay for that organic, speckled eggshell look.
Tail Variation
Instead of a smooth back, roll a thin coil of clay and attach it in a spiral or curve on the back of the figurine to create a curled-up tail detail.
Step 4: Painting & Glazing
-
Bisque fire:
Let the piece dry slowly and completely before bisque firing it to cone 04 (or according to your clay’s specifications). -
Paint the details:
Using a fine liner brush and black underglaze, fill in the carved lines of the eyes, whiskers, and mouth. Wipe away excess with a damp sponge so the color remains only in the recesses. -
Add color accents:
Apply a rust or terracotta underglaze to the inside of the ears and the nose. Add swooping brushstrokes on the side of the body to mimic tabby stripes. -
Apply the main glaze:
Dip or brush the entire cat in a clear matte or satin glaze. This seals the piece while preserving the raw, earthy look of the clay beneath. -
Final firing:
Fire the piece again to the maturation temperature of your glaze (usually cone 5 or 6 for stoneware). Let the kiln cool completely before retrieving your new friend.
Now you have a serene little ceramic companion ready to sit quietly on your desk or windowsill


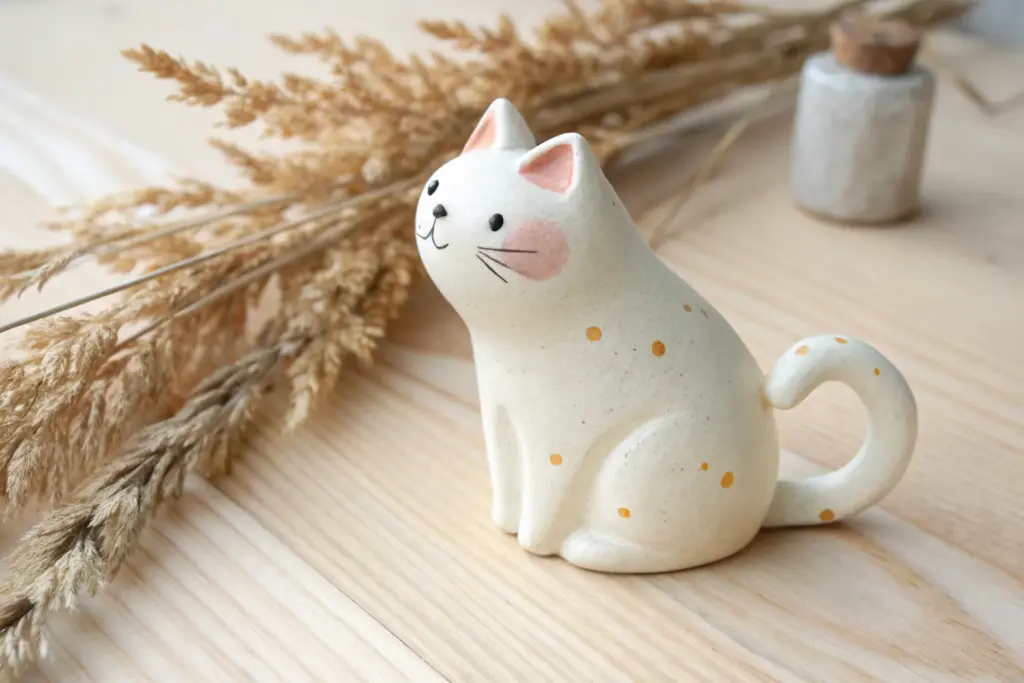
Sitting Cat With Curled Tail
Capture the serene contentment of a sunbathing feline with this charming sitting cat sculpture. The project features a lovely rustic texture and a stylized form that highlights a sweet, upturned face and a playfully curled tail.
Step-by-Step Tutorial
Materials
- Speckled stoneware clay (or polymer clay in ‘Granite’ or ‘Beige’)
- Basic sculpting tools (needle tool, rib tool)
- Small cup of water (for smoothing)
- Scoring tool or old toothbrush
- Rolling pin
- Sponge
Step 1: Forming the Body
-
Base Cone:
Start with a handful of well-conditioned clay. Roll it into a thick ball, then gently taper the top half to create a rounded cone shape. This will serve as the combined torso and neck of the cat. -
Shape the Chest:
Using your thumbs, gently press into the front of the cone to define a chest area, ensuring the bottom remains wide and stable so the figure sits upright without wobbling. -
Add the Head:
Roll a smaller ball of clay for the head. It should be slightly oval-shaped. Place it on top of the tapered neck to check proportions before attaching. -
Attach and Smooth:
Score the top of the neck and the bottom of the head, adding a dab of water or slip. Press them firmly together. Use a modeling tool or your finger to smooth the clay across the seam at the back of the neck until the join is invisible.
Step 2: Refining the Pose
-
Creating Haunches:
Roll two medium-sized balls of clay for the rear legs. Flatten them slightly into thick discs and press them onto the lower sides of the body. -
Blend the Hips:
Blend the edges of these discs into the main body, leaving the rounded center protruding to simulate the muscular curve of the cat’s seated haunches. -
Definition Lines:
Use a wooden modeling tool to carve deep, vertical grooves separating the front legs from the chest, and distinguishing the front paws from the rear paws. -
The Curled Tail:
Roll a snake of clay that tapers at one end. Attached the thicker end to the lower back of the cat using the score-and-slip method. Curl the tip into a tight spiral, lifting it slightly away from the body for distinct silhouette.
Fixing Cracks
If you see cracks forming while the clay dries (air-dry/ceramic), score the crack, add a tiny bit of water/vinegar mix, and patch with fresh soft clay immediately.
Step 3: Details & Texture
-
Perky Ears:
Shape two small triangles of clay. Gently curve them to give them depth. Score and attach them to the top of the head, smoothing the back seam so they look like they grew naturally from the skull. -
Face Sculpting:
With a needle tool, gently carve two upward-curving arches for the closed, happy eyes. Press a tiny bit of clay in the center for the nose, or just carve a small triangle. -
Whiskers and Mouth:
Carve a simple ‘w’ shape for the mouth under the nose. Add three short, horizontal lines on each cheek to represent whiskers. -
Surface Texture:
To mimic the stone-like finish shown in the photo, take a stiff-bristled brush or crumpled foil and gently tap it over the entire surface of the cat (avoiding the face) to create a pitted, matte texture. -
Final Smoothing:
Dip a sponge in water and wring it out almost completely. Lightly wipe the sculpture to soften any sharp carving ridges, giving it a weathered, soft appearance. -
Firing or Baking:
If using ceramic clay, dry partly slowly before firing to the clay manufacturer’s cone specifications. If using polymer clay, bake according to the package directions.
Rustic Speckles
Using plain white clay? Knead in some cracked black pepper or dried used coffee grounds before sculpting to achieve that natural speckled stoneware look.
Place your finished feline on a windowsill where the light can catch the subtle textures of the clay


Sleeping Cat With Wrapped Tail
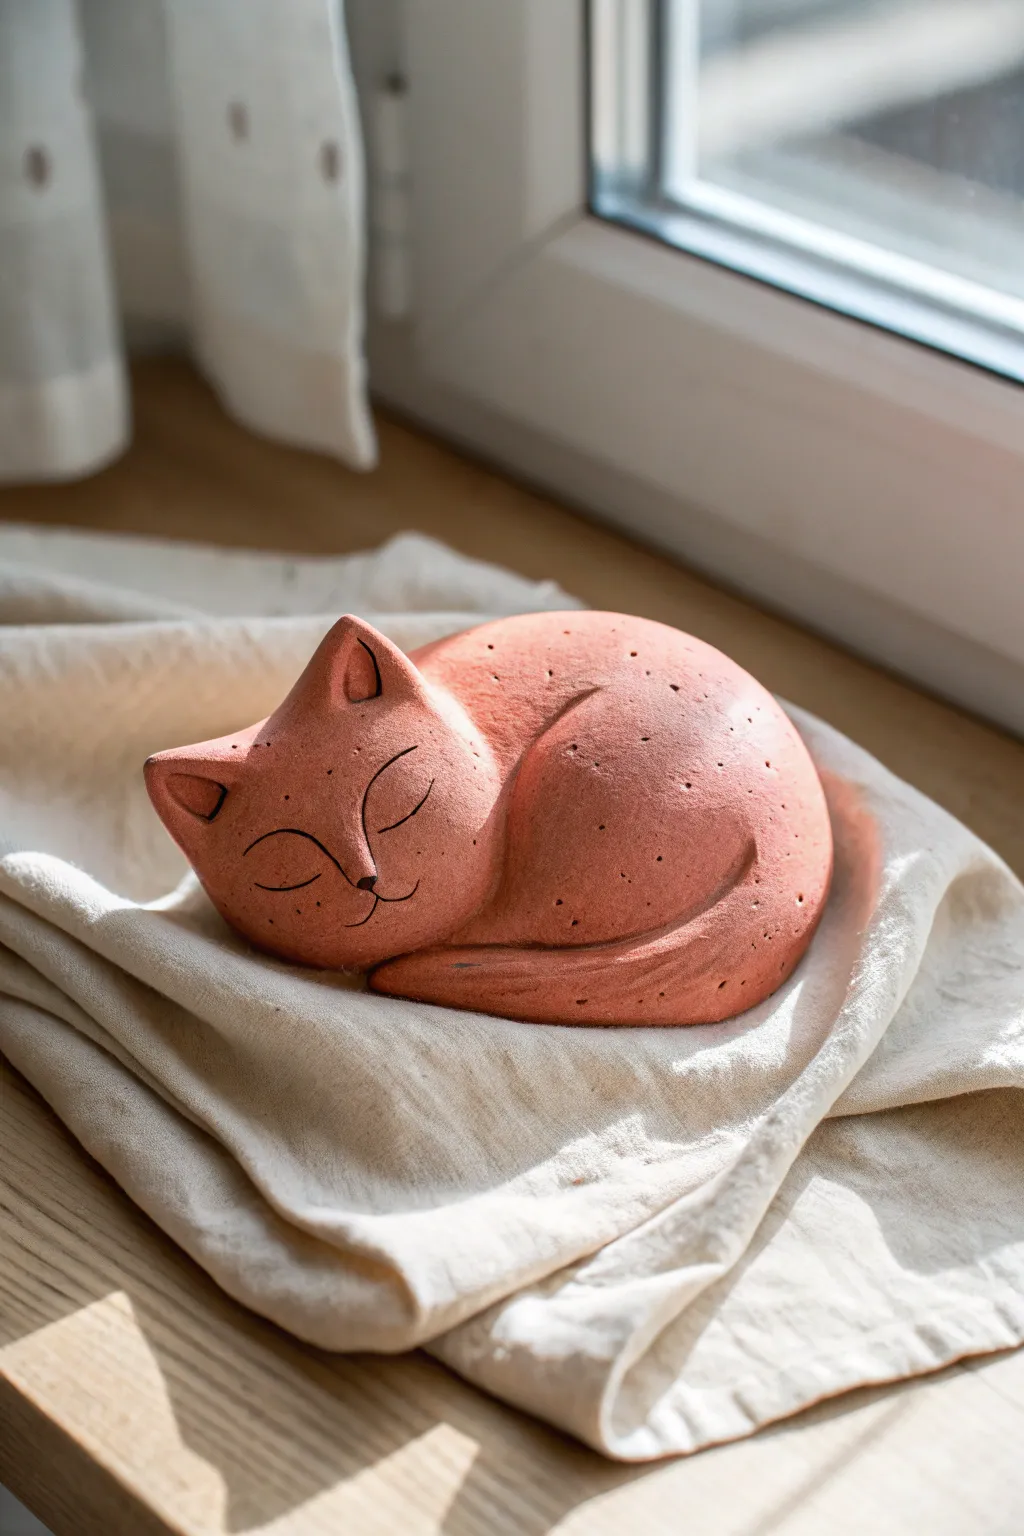
This charming, curled-up cat sculpture captures the peaceful essence of a feline nap with its smooth, rounded curves and warm terracotta tones. It’s a perfect beginner sculpting project that relies on simple spherical forms and gentle detailing to create a heartwarming piece of decor.
Detailed Instructions
Materials
- Red earthenware or terracotta air-dry clay
- Small cup of water
- Needle tool or toothpick
- Wooden modeling tool (spoon shape)
- Fine-grit sandpaper
- Damp sponge
- Black acrylic paint (optional, for details)
- Fine liner brush (optional)
Step 1: Forming the Body
-
Create the base sphere:
Start with a handful of clay roughly the size of a large orange. Roll it firmly between your palms to create a smooth, tight ball, ensuring there are no air pockets hidden inside. -
Shape the kidney bean:
Gently press and roll the ball on your work surface to elongate it slightly into an oval. Then, curve the oval slightly to create a thick kidney bean shape, which forms the curled posture of the sleeping cat. -
Define the head:
Visualize the head area on one end of your bean shape. Use your thumb to gently smooth and define a rounded, slightly distinct section for the head, creating a subtle neck indentation without separating the clay.
Hollow it out!
For sculptures thicker than 1 inch, hollow out the bottom with a loop tool before drying. It prevents cracking and speeds up dry time.
Step 2: Sculpting the Features
-
Pull the ears:
Instead of attaching separate pieces, create stronger ears by pinching the clay at the top of the head. Gently pull two triangles upward, smoothing the base where they join the skull. -
Detail the ears:
Use the rounded end of a small tool or your pinky finger to press gentle indentations into the front of the ears to create depth. -
Form the tail:
Take a separate coil of clay about the thickness of your finger. Attach it to the back of the body, curving it around the side so the tip rests near the cat’s chin. -
Blend the seams:
This is crucial for a unified look: use a modeling tool or your finger to firmly blend the edges of the tail into the main body until the seam disappears and it looks like one solid mass. -
Define the legs:
Use a wooden tool to carve a deep, curved line on the side of the body, just above the tail. This line creates the illusion of the cat’s haunch or curled back leg.
Cracks Appearing?
If hairline cracks appear while drying, mix a tiny bit of clay with water to make a paste (slip) and fill them in immediately, then smooth.
Step 3: Refining and Drying
-
Smooth the surface:
Dip a sponge lightly in water—squeeze it out well so it’s just damp—and wipe over the entire sculpture. This erases fingerprints and creates that soft, matte finish. -
Add texture:
I like to take a toothbrush or a stiff bristle brush and gently tap it over the surface while the clay is still wet to create a subtle, stone-like texture that mimics the photo. -
Carve the face:
Using your needle tool, carefully draw two downward-curving crescents for the sleeping eyes. Add a small ‘Y’ shape for the nose and mouth. -
Initial drying:
Place your cat on a piece of parchment paper in a cool, dry place. Let it dry slowly for 24-48 hours, turning it occasionally to ensure the bottom dries evenly. -
Sanding:
Once fully dry and hard, use fine-grit sandpaper to smooth out any rough patches or sharp tool marks, paying special attention to the ear tips.
Step 4: Finishing Touches
-
Optional painting:
If you want the facial features to pop like in the example, mix a very watery black acrylic paint. Carefully paint into the carved lines of the eyes and nose. -
Wiping back:
Immediately wipe the surface with a damp cloth. The dark paint will remain trapped in the crevices, highlighting the expression while keeping the surface clean. -
Adding speckles:
To mimic the speckled clay look if your clay is plain, flick a very small amount of watered-down dark brown paint onto the surface using a toothbrush.
Now you have a serene little companion perfect for a sunny windowsill

The Complete Guide to Pottery Troubleshooting
Uncover the most common ceramic mistakes—from cracking clay to failed glazes—and learn how to fix them fast.
Belly-Up Cat With Toe Beans
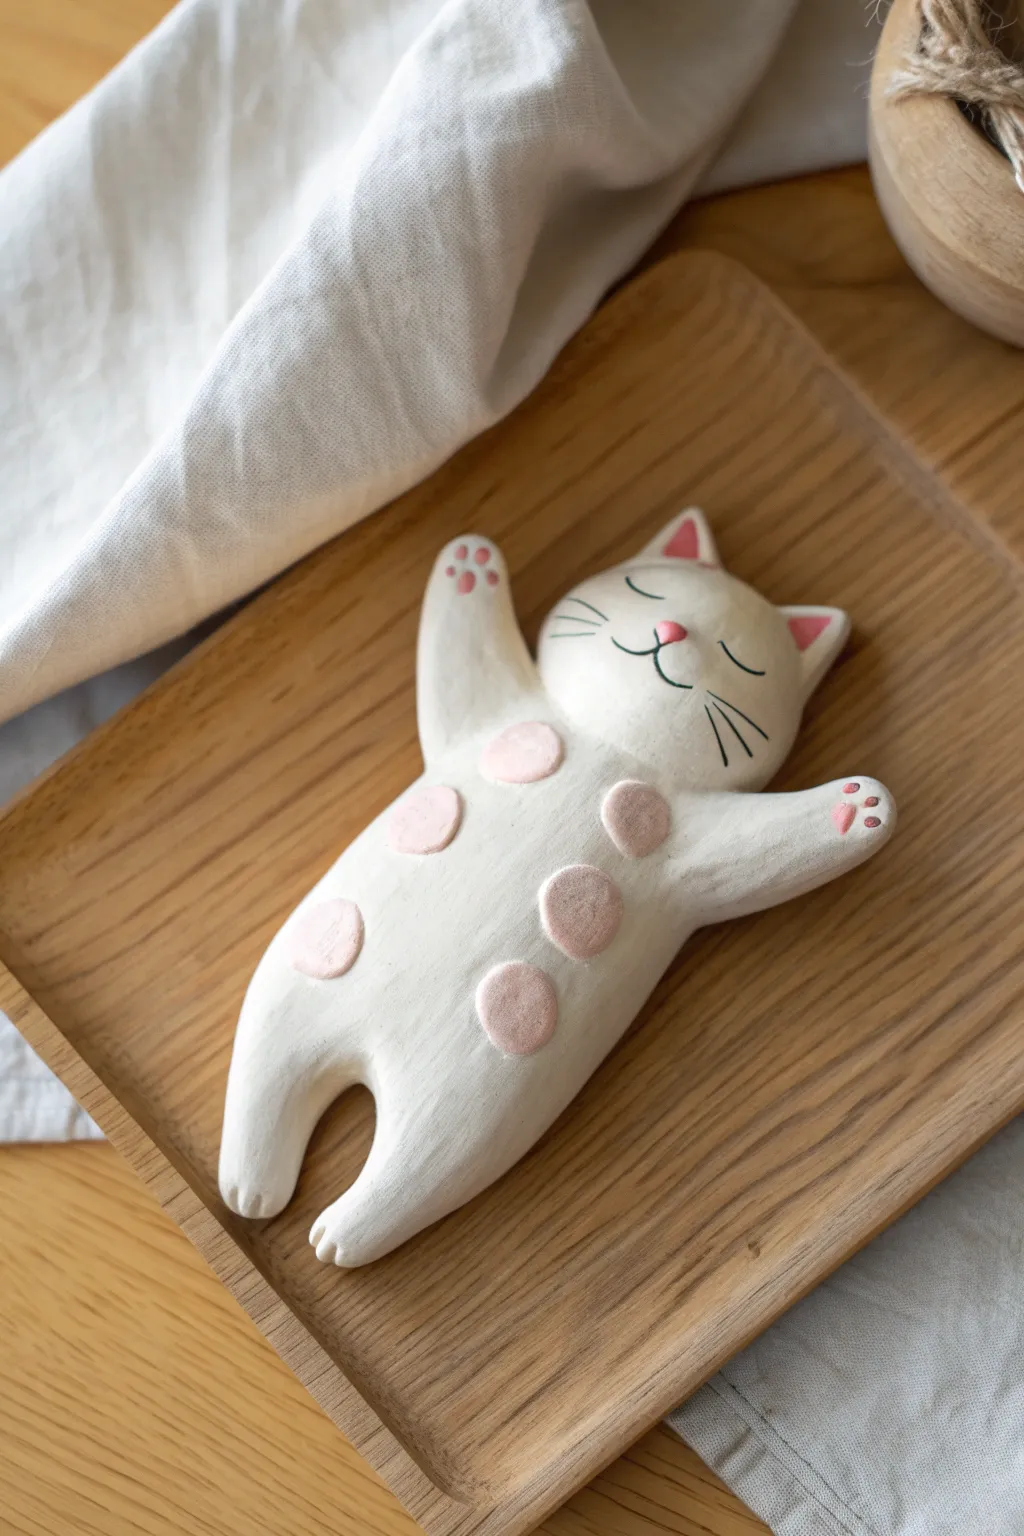
This adorable clay project captures a cat in its most vulnerable and relaxed state—belly up and fast asleep. With its sweet pink spots and tiny toe beans, this figurine is a perfect beginner-friendly sculpt that radiates calmness.
Step-by-Step
Materials
- White polymer clay or air-dry clay
- Soft pink clay (or pink acrylic paint)
- Black fine-liner pen or black acrylic paint
- Needle tool or toothpick
- Small ball stylus tool
- Rolling pin
- Smooth work surface
Step 1: Shaping the Base Body
-
Roll the main form:
Start with a generous ball of white clay. Roll it into a smooth, thick oval shape, roughly the size of a small potato, tapering slightly at one end for the neck area. -
Flatten the body:
Gently press the oval onto your work surface to flatten the back. You want the top, belly-side to remain rounded and plump while the back sits flat against the table. -
Form the legs:
At the bottom of the oval, use your thumb or a modeling tool to create an indentation, separating the clay into two stubby legs. Smooth the edges so they look like soft, rounded paws rather than sharp cuts.
Step 2: Adding the Head and Arms
-
Create the head:
Roll a smaller ball of white clay for the head. Press it gently to flatten it into a thick disc shape, then attach it firmly to the top of the body. -
Blend the seams:
Take a moment to smooth the clay where the chin meets the chest. I find that blending the clay here ensures the head doesn’t pop off later. -
Shape the arms:
Roll two small sausages of white clay. Taper one end of each piece to attach to the shoulder area. -
Position the pose:
Attach the arms to the sides of the body, angling them upwards in a “surrender” or sleeping stretch pose. Press the seams into the body until seamless. -
Add the ears:
Shape two tiny triangles of white clay. Press these onto the top of the head, blending the base of the triangle into the skull.
Smooth Seams
When attaching the head and limbs, scoring the clay surfaces (making tiny scratches) before pressing them together creates a much stronger bond.
Step 3: Details & Decoration
-
Add pink ear inners:
Take extremely tiny triangles of pink clay and press them into the center of the white ears. -
Create the spots:
Roll five or six small balls of pink clay and flatten them into thin discs. Press these randomly onto the belly area to create soft, pastel spots. -
Sculpt the toe beans:
Using tiny specks of pink clay, add three small dots and one larger pad to the bottom of each uplifted paw. Press them gently so they adhere but stay raised. -
Facial features:
Roll a tiny pink triangle for the nose and place it in the center of the face. Use a needle tool to gently impress a curved ‘W’ shape underneath for the mouth. -
Final texture check:
Look over the sculpture for any fingerprints. Gently rub them away with a drop of water (if using air-dry) or baby oil (if using polymer).
Accessories
Before the clay dries, sculpt a tiny clay ball of ‘yarn’, a fish bone, or a small pillow to place next to your sleeping cat for a complete scene.
Step 4: Finishing Up
-
Dry or bake:
Follow the instructions for your specific clay type. If baking, ensure you support the arms with foil if they seem prone to drooping. -
Draw the details:
Once hardened and cool, use a fine black pen or a very thin brush with black paint to draw two curved lines for sleeping eyes and long whiskers on the cheeks. -
Seal (Optional):
Apply a matte varnish if you want to protect the painted details, or leave it raw for a natural matte ceramic look.
Now you have a peaceful feline companion to keep you company on your desk
Stretching Cat Pose
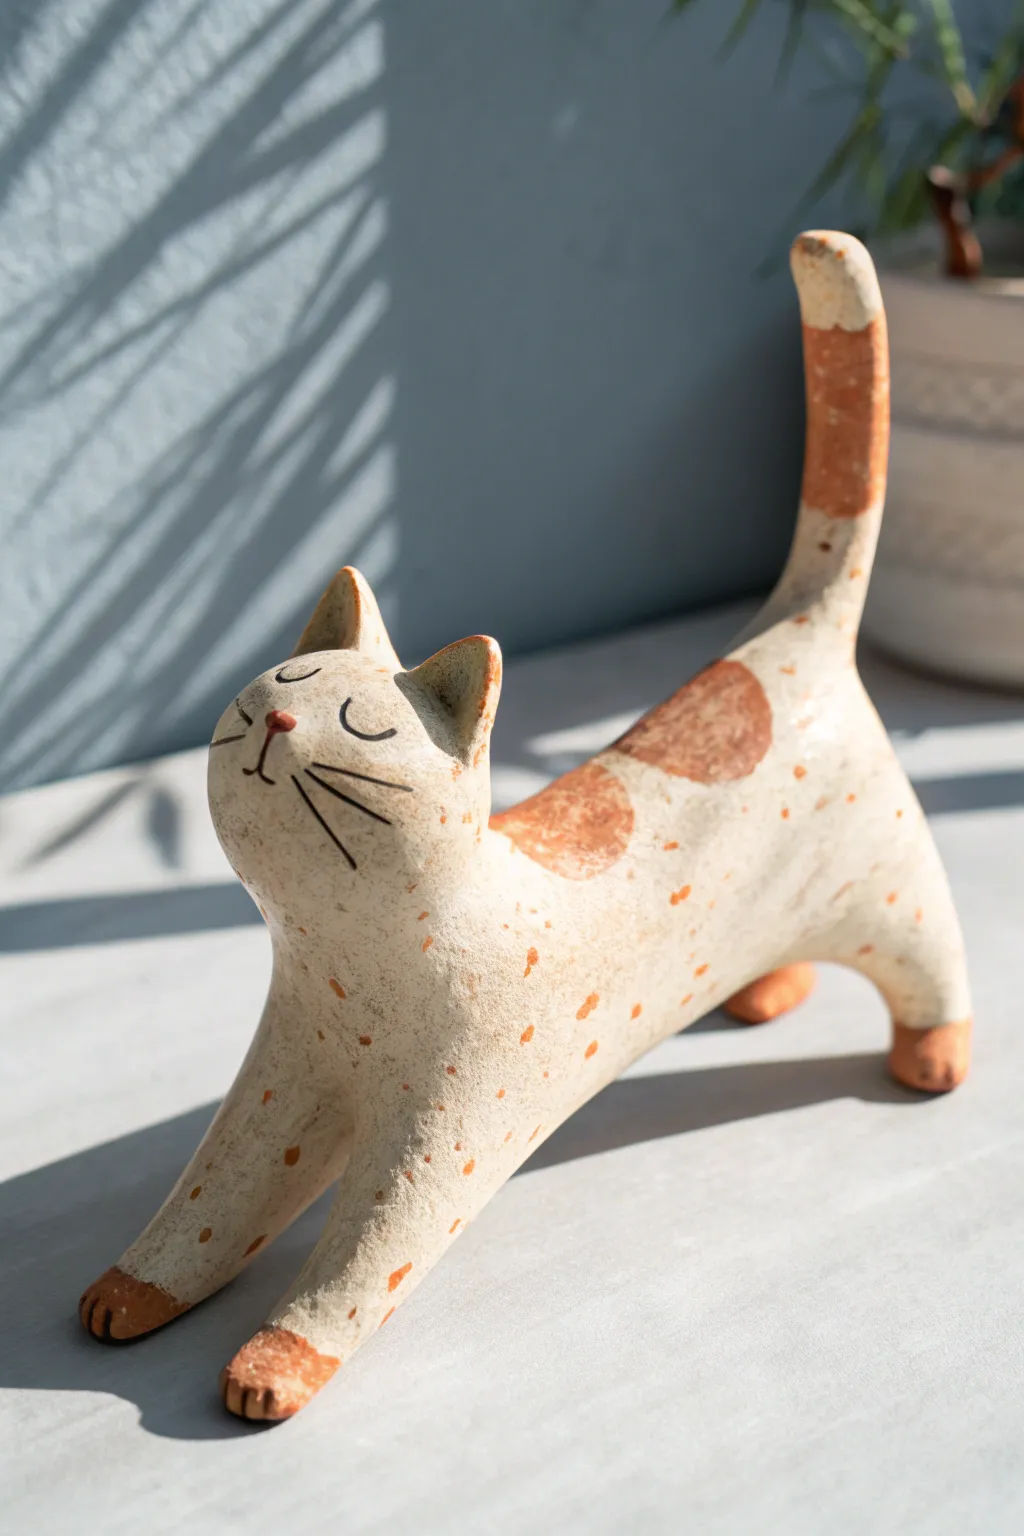
This charming ceramic cat captures the satisfying feeling of a big morning stretch, complete with a speckled cream finish and rusty-orange spots. Its elongated pose and whimsical expression make it a delightful addition to any shelf or windowsill.
Step-by-Step Tutorial
Materials
- Stoneware clay (white or light buff)
- Pottery tools (needle tool, rib tool, sponge)
- Slip (clay mixed with water)
- Underglaze (Red Iron Oxide or Rust Orange)
- Fine liner brush
- Clear or speckled cream glaze
- Black underglaze pencil or fine black underglaze
- Kiln access
Step 1: Forming the Body
-
Prepare the Torso:
Start with a distinct log of clay about the thickness of a large carrot. Gently bend it into a gentle U-shape to mimic the arch of a stretching cat’s spine. -
Shape the Rear:
Pinch and smooth the back end of the log down towards the surface to create the two back legs. These should be sturdy and grounded, slightly thicker at the hips. -
Extend the Front:
Pull the clay forward for the front legs, extending them long and flat against the table surface. The chest area should dip low, almost touching the ground. -
Create the Head:
Roll a separate, slightly flattened sphere of clay for the head. Shape it into a soft oval, ensuring the chin area is slightly rounded. -
Attach the Head:
Score and slip the neck area of your body and the base of the head. Press them firmly together, blending the clay with a modeling tool so the seam disappears completely. I find blending downwards from the head to the neck creates the smoothest transition. -
Add the Tail:
Roll a tapered coil for the tail. It should be thick at the base and taper to a rounded point. Score and slip it onto the rear, positioning it to point straight up or slightly curved for balance.
Hollow or Solid?
If your cat is thicker than 1 inch, hollow out the body from underneath when leather-hard to prevent explosions in the kiln. Use a loop tool to scoop out the belly.
Step 2: Refining and Detailing
-
Detail the Paws:
Use a needle tool to gently press indentations into the ends of the front and back legs to suggest toes. -
Sculpt the Ears:
Pinch two small triangles of clay for ears. Hollow them slightly with a tool, then score and slip them onto the top of the head, blending the back edges smooth. -
Smooth the Surface:
Use a slightly damp sponge to wipe down the entire sculpture. This removes fingerprints and creates that smooth, organic finish seen in the photo. -
Draw the Face:
Using a needle tool, very lightly sketch the placement of the eyes, nose, and whiskers. This will act as a guide for your underglaze later. -
Dry to Leather Hard:
Allow the piece to dry slowly until it reaches the leather-hard stage. This is crucial before painting so the moisture doesn’t ruin the shape.
Step 3: Decorating and Glazing
-
Apply Base Color:
If your clay isn’t naturally speckled, you can flick a stiff toothbrush dipped in iron oxide wash lightly over the raw clay to create the tiny speckles. -
Paint the Spots:
Using the rust orange underglaze, paint irregular circular patches on the back. Paint the tips of the ears, the very tip of the tail, and the feet (creating ‘socks’). -
Define the Face:
With a fine liner brush and black underglaze (or a black underglaze pencil), carefully draw the closed eye crescents, the nose triangle, mouth line, and long whiskers. -
Bisque Fire:
Load the bone-dry piece into the kiln for a bisque firing according to your clay body’s specifications (usually Cone 04). -
Glaze Application:
Once cooled, dip or brush a clear glaze over the entire piece. If you want a more matte, natural look, you can leave the colored areas unglazed, but dipping the whole cat ensures durability. -
Final Firing:
Fire the piece a second time to the glaze temperature required (often Cone 5 or 6 for stoneware). Let it cool completely in the kiln before removing.
Wobbly Legs?
If the front legs sag while building, prop them up with cosmetic sponges or crumpled newspaper. Remove these supports only once the clay has stiffened.
Place your finished stretching cat in a sunny spot to enjoy its playful silhouette


What Really Happens Inside the Kiln
Learn how time and temperature work together inside the kiln to transform clay into durable ceramic.
Cat Head Planter Buddy
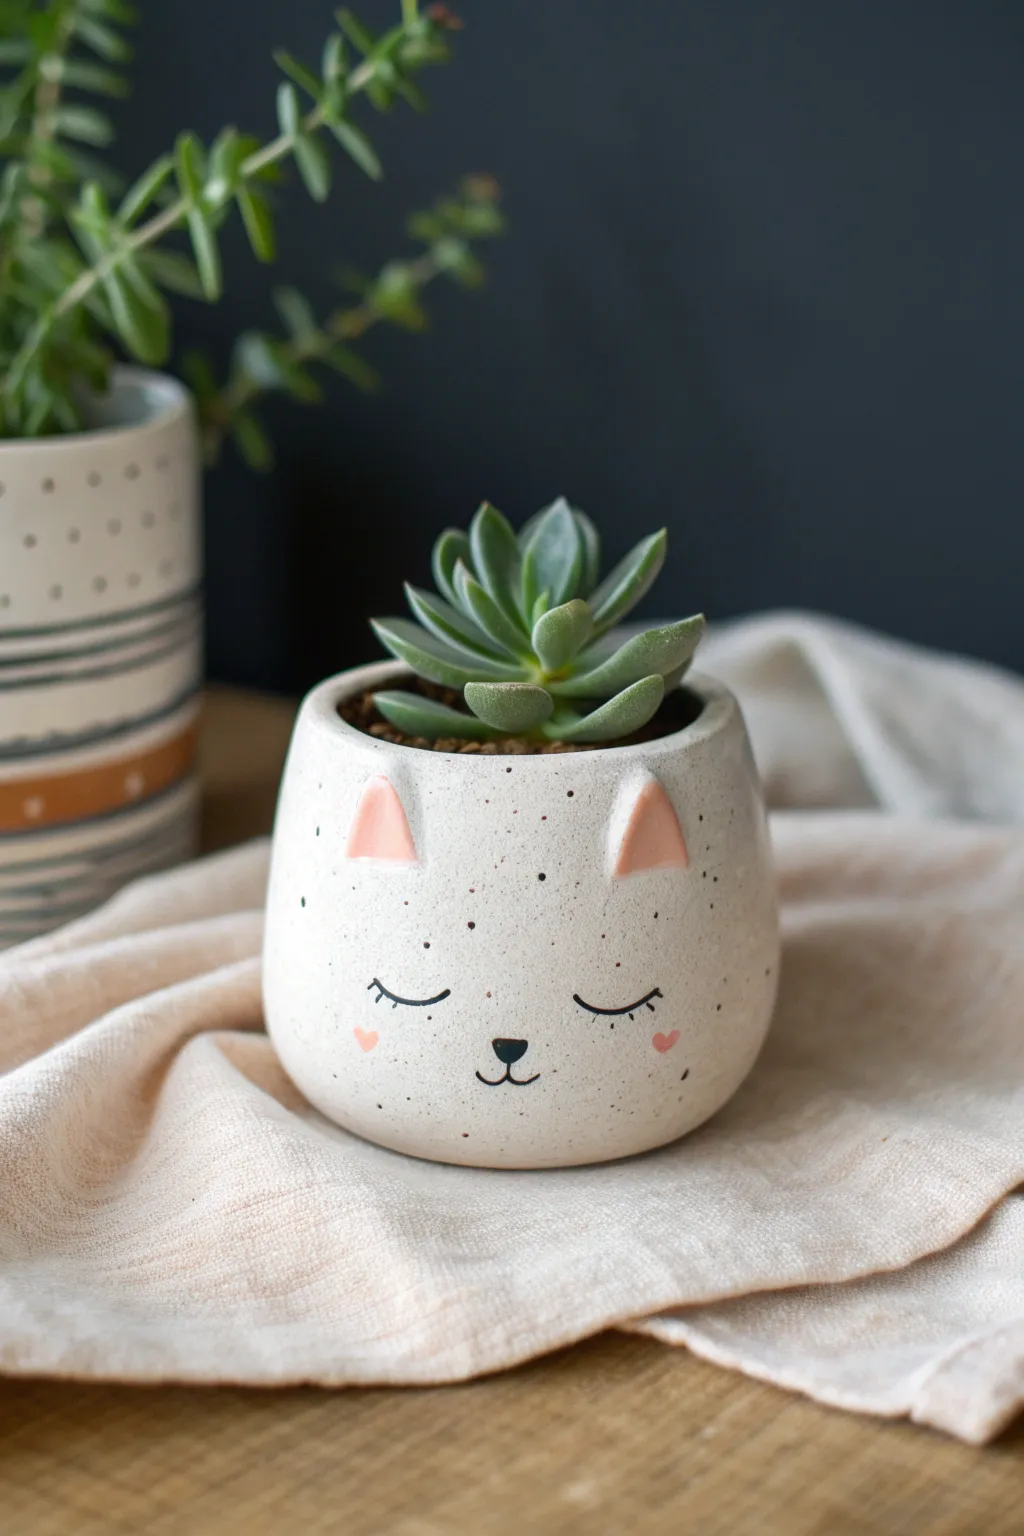
This adorable planter combines functional pottery with charming character design to create the perfect home for your favorite succulent. Its speckled stoneware finish and sweetly painted face make it a cozy addition to any windowsill.
How-To Guide
Materials
- White or speckled stoneware clay (approx. 1 lb)
- Small rolling pin
- Potter’s needle tool or craft knife
- Water and slip (clay slurry)
- Pottery sponge
- Small paintbrush (detail round size 0 or 1)
- Black underglaze (or acrylic if non-fired)
- Pink underglaze (or acrylic)
- Clear matte glaze (food-safe recommended)
- Clay rib tool or old credit card
- Small circular template (about 3-4 inches diameter)
Step 1: Forming the Base
-
Prepare the slab:
Start by wedging your clay to remove air bubbles, then roll it out into an even slab about 1/4 inch thick. Aim for a consistent thickness to ensure the pot dries evenly. -
Cut the components:
Using your needle tool, cut out a rectangle that will form the walls of the pot (roughly 10 inches long by 3 inches high) and a circle for the base. -
Join the walls:
Score the short ends of your rectangle and apply slip. Gently curve the rectangle into a cylinder, pressing the scored ends together firmly to create a seam. -
Attach the bottom:
Score the bottom edge of your cylinder and the outer edge of your circular base. Slip both surfaces and press the cylinder onto the base. -
Smooth the seams:
Use a wooden tool or your finger to blend the clay across the interior and exterior seams until they disappear completely. I like to run a damp sponge over this to ensure it’s seamless.
Specs Appeal
If you don’t have speckled clay, mix dried coffee grounds or coarsely ground black pepper into white clay before rolling. It burns out, leaving cute dark spots!
Step 2: Shaping the Character
-
Create the rounded shape:
With the cylinder on a banding wheel or turntable, gently press the walls outward from the inside while supporting the outside with a rib tool to create a slightly bulged, rounded bowl shape. -
Form the ears:
Pinch two small triangles of scrap clay. Score and slip the placement area near the top rim of the pot, then attach the ears firmly. Smooth the clay downward so the ears look like they grow out of the rim. -
Refine the rim:
Use a damp chamois or sponge to compress and round off the top rim of the pot, making sure there are no sharp edges. -
Slow drying:
Cover the pot loosely with plastic and let it dry slowly to the leather-hard stage. This prevents cracking and makes the surface better for painting.
Make it a Gift Set
Create a whole litter of kittens in different sizes—a tiny thumb-pot sized one for a baby succulent and a larger one for a full fern.
Step 3: Decorating and Finishing
-
Smooth the surface:
Once leather hard, use a slightly damp sponge to wipe away any fingerprints or rough textures on the surface. -
Paint the ears:
Using pink underglaze, carefully paint a small triangle inside each sculpted ear. -
Add the face details:
With a very fine brush and black underglaze, paint two curved lines for sleepy eyes flowing into eyelashes. Add a tiny inverted triangle nose and a simple ‘w’ mouth just below it. -
Add blushing cheeks:
Dip the tip of your brush in pink underglaze and add two tiny hearts or dots on the cheeks, aligned with the outer corners of the eyes. -
Bisque fire:
Allow the piece to dry completely (bone dry) before firing it in a kiln to bisque temperature (usually cone 04). -
Glaze application:
Dip the bisque-fired pot into a clear matte or satin glaze. Ensure the glaze isn’t too thick so it doesn’t obscure the delicate face painting. -
Final firing:
Fire the piece a second time to the glaze temperature appropriate for your clay body (often cone 5 or 6).
Once cooled, fill with potting soil and your chosen succulent to bring your kitty friend to life
Cat Face Trinket Dish
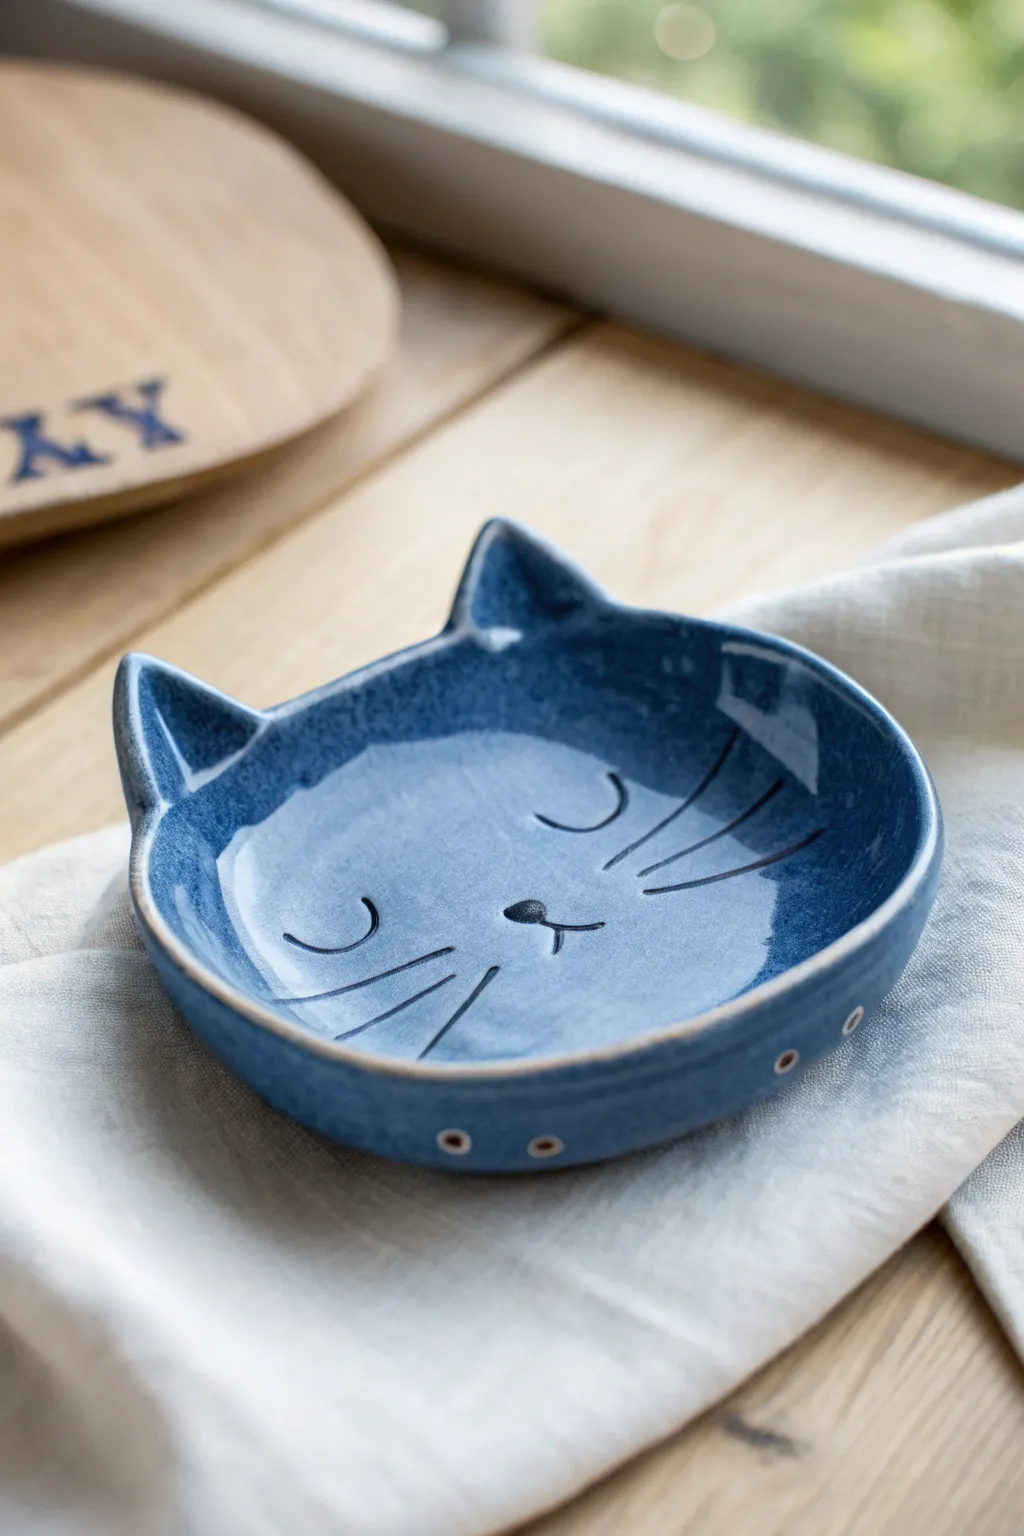
This adorable shallow dish features a serene, sleeping cat face with perky ears, perfect for holding rings or small treasures. The design uses a classic blue finish with simple, carved details that bring the feline personality to life.
Step-by-Step Guide
Materials
- Air-dry clay or polymer clay (white)
- Rolling pin
- Clay carving tools or needle tool
- Small sponge
- Sandpaper (fine grit)
- Acrylic paints (deep blue, black, white/cream)
- Glossy varnish or resin
- Small paintbrushes (fine tip and flat)
- Small bowl (to use as a mold)
- Water cup
Step 1: Shaping the Base
-
Roll the slab:
Begin by conditioning your clay until it’s pliable, then use your rolling pin to create a smooth, even slab about 1/4 inch thick so it’s sturdy but not chunky. -
Cut the outline:
Using a needle tool, lightly sketch a rounded oval shape with two triangular ears sticking up at the top directly onto the clay. Once you’re happy with the symmetry, cut along the line to remove the excess clay. -
Smooth the edges:
Dip your finger in a little water and run it along the cut edges to round them off, ensuring there are no sharp or jagged bits left from cutting. -
Create the curve:
Gently lift your clay cutout and place it inside a small shallow bowl or over a curved object. Press it lightly so the clay takes on a concave, dish-like shape without losing the definition of the ears.
Step 2: Adding Details
-
carve the face:
With the clay still in the mold (if possible) or resting gently, use a needle tool or small carving loop to Incise the facial features. Carve two ‘U’ shapes for sleeping eyes, a small triangle nose, a mouth, and three whiskers on each cheek. -
Add decorative rim dots:
Around the lower outer rim of the dish, use the blunt end of a small paintbrush or a dotting tool to impress small, evenly spaced circles into the clay for extra texture. -
Final smoothing:
Take a slightly damp sponge and very gently wipe over the surface to remove any tiny clay crumbs created during carving, being careful not to erase your lines. -
Drying time:
Allow the clay to dry completely according to the package instructions. I find waiting an extra few hours ensures the core is solid before sanding. -
Sand it smooth:
Once fully cured, use fine-grit sandpaper to buff out any fingerprints or uneven spots on the rim and back of the dish.
Smooth Operator
Use a baby wipe instead of sandpaper on dry air-dry clay to smooth imperfections without creating dust.
Step 3: Painting and Finishing
-
Base coat:
Paint the entire dish, front and back, with a deep, denim-blue acrylic paint. You may need two coats for full opacity, letting each layer dry in between. -
Highlighting the carving:
Paint inside the carved facial lines (eyes, whiskers, mouth) with black acrylic paint. If you get messy, quickly wipe the surface with a damp paper towel so the paint stays only in the grooves. -
Defined rim:
Using a steady hand and a very small amount of cream or white paint on a dry brush, highlight the very top edge of the rim and the decorative dots on the bottom to make the shape pop. -
Glossy finish:
To mimic the ceramic look in the photo, apply a thick coat of high-gloss varnish or a layer of UV resin over the entire piece. -
Cure the finish:
Let the varnish dry completely in a dust-free area until it is rock hard and shiny, protecting your paint job and giving it that professional glazed appearance.
Make it Functional
Before drying is complete, press a ring into the center to create a custom indentation specifically for jewelry storage.
Place your finished dish on a sunny windowsill or bedside table to add a touch of whimsy to your room

TRACK YOUR CERAMIC JOURNEY
Capture glaze tests, firing details, and creative progress—all in one simple printable. Make your projects easier to repeat and improve.
Cat Spoon Rest
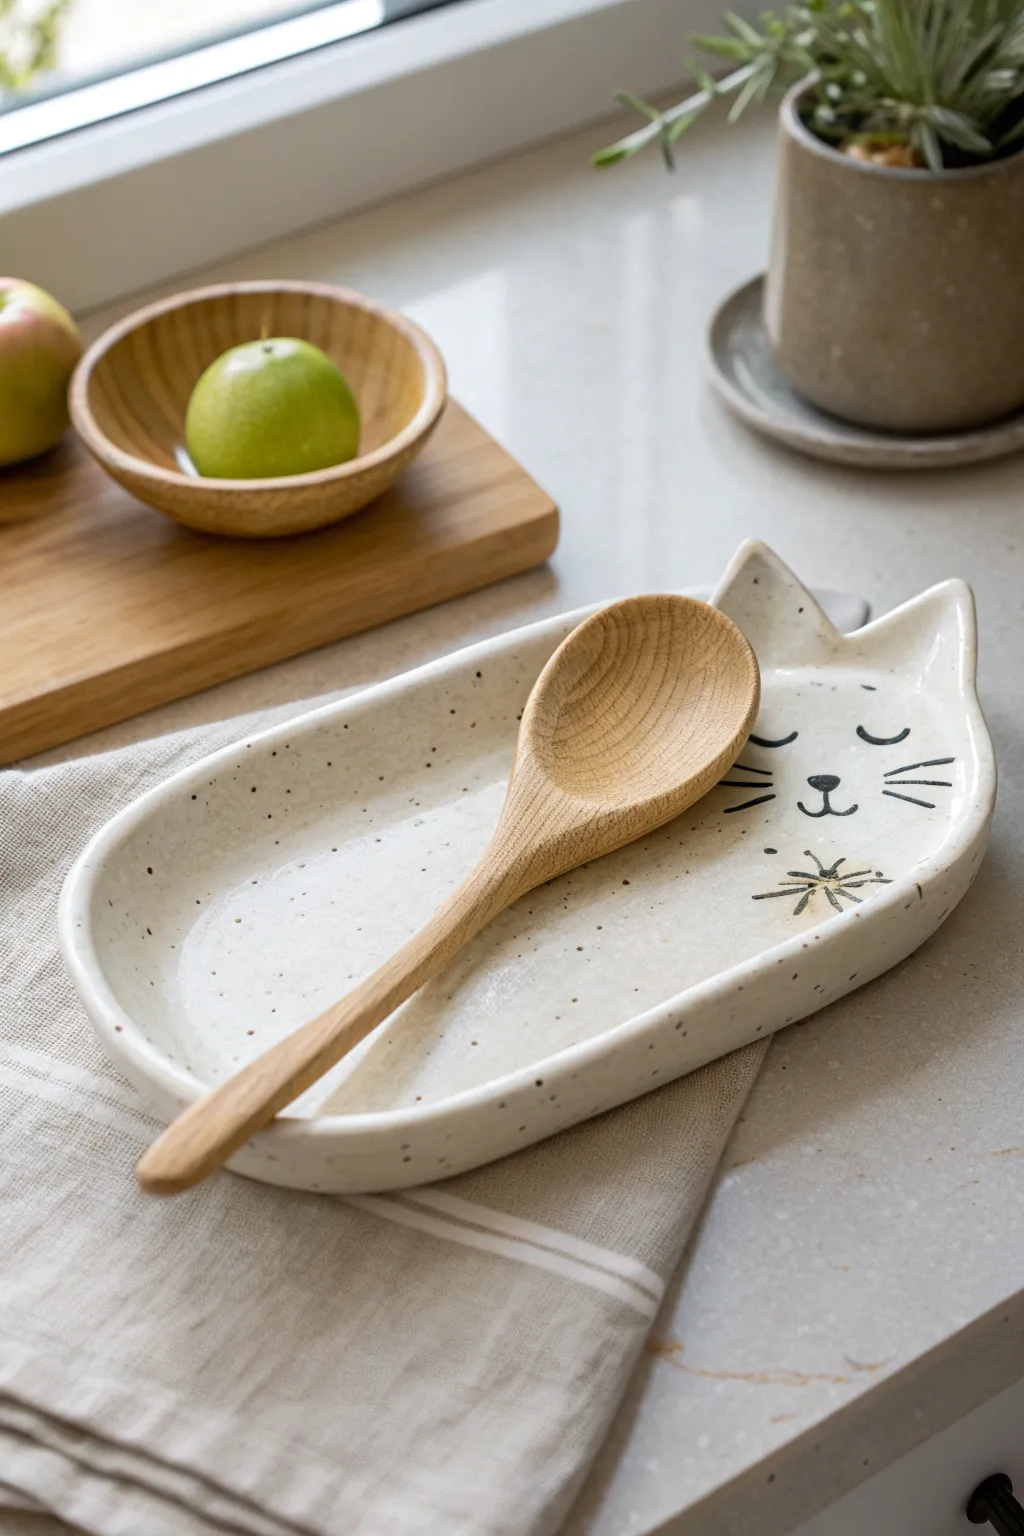
This charming spoon rest combines functional pottery with feline flair, featuring a slumbering cat face and a speckled cream finish. It’s an ideal beginner project for slab building, resulting in a gentle, scooped shape perfect for cradling your kitchen utensils.
How-To Guide
Materials
- Speckled stoneware clay (about 1 lb)
- Rolling pin
- Canvas work surface or clay mat
- Needle tool
- Rib tool (rubber or silicone)
- Sponge
- Small paintbrush (for slip)
- Underglaze pencil or fine liner brush (black)
- Clear or transparent white glaze
- Kiln
- Paper template (oval shape)
Step 1: Shaping the Clay Body
-
Roll the Slab:
Begin by wedging your speckled stoneware clay to remove air bubbles. Roll it out on your canvas into an even slab approximately 1/4 inch thick. Keep the pressure consistent so the thickness doesn’t vary. -
Cut the Base Shape:
Using a needle tool, cut a long oval shape from your slab. You can freehand this or use a paper template for symmetry. The shape should be roughly 8-9 inches long and 4-5 inches wide. -
Bevel the Edges:
Smooth the cut edges with a damp sponge or your finger. Gently compress the rim to prevent future cracking. I like to run a soft rubber rib over the entire surface at this stage to erase any canvas texture. -
Create the Ears:
From your leftover clay slab, cut two small triangles for the ears. They should be proportional to one end of the oval, roughly 1 inch tall. -
Attach the Ears:
Score the bottom of the triangles and the corresponding spots on the top edge of the oval. Apply a little slip and press the ears firmly onto the rim. Smooth the seams on both the front and back so they look like one continuous piece. -
Form the Curve:
To give the spoon rest its concave shape, place the oval onto a piece of foam or a shallow mold. Gently press the center down and lift the edges up slightly. The ‘chin’ area of the cat and the sides should curve upward to hold any liquid drips.
Warping Worries?
If your slab curls up while drying, weight the center gently with a small sandbag during the leather-hard stage to keep the base flat.
Step 2: Decorating and Firing
-
Dry to Leather Hard:
Let the piece dry slowly until it reaches the leather-hard stage. This is when the clay is stiff enough to hold its shape but still cool to the touch and carvable. -
Refine the Form:
Do a final pass with a damp sponge to smooth out any sharp edges on the rim or the ears. Check the connection points of the ears to ensure no cracks are forming. -
Draw the Face:
Using a black underglaze pencil or a very fine liner brush dipped in black underglaze, draw the facial features. Paint two closed, curved eyelids near the ears, a small triangular nose, and a simple ‘w’ mouth. -
Add Whiskers and Details:
Paint three straight whiskers radiating from each cheek. Below the mouth, add a stylized starburst or flower design to act as a decorative accent on the chest area. -
Bisque Fire:
Allow the spoon rest to dry completely—this may take several days. Once bone dry, fire the piece in a kiln to cone 04 (or your clay body’s specified bisque temperature). -
Glazing:
Wipe the bisqueware with a damp sponge to remove dust. Dip the entire piece into a clear or transparent white glaze. This will seal the clay while letting the natural speckles and your underglaze drawing show through. -
Wipe the Foot:
Carefully wipe the glaze off the very bottom of the spoon rest where it will touch the kiln shelf. This prevents it from sticking during the final firing. -
Glaze Fire:
Process the piece in a final glaze firing, usually to cone 5 or 6 depending on your stoneware clay. Let the kiln cool completely before retrieving your finished cat.
Pro Tip: Smoother Lines
If painting the face is tricky, use a needle tool to lightly scratch the design into the leather-hard clay first, then trace over grooves with heavy underglaze.
This delightful kitchen helper is now ready to keep your counters clean with a touch of purr-sonality
Tiny Cat Magnets Set
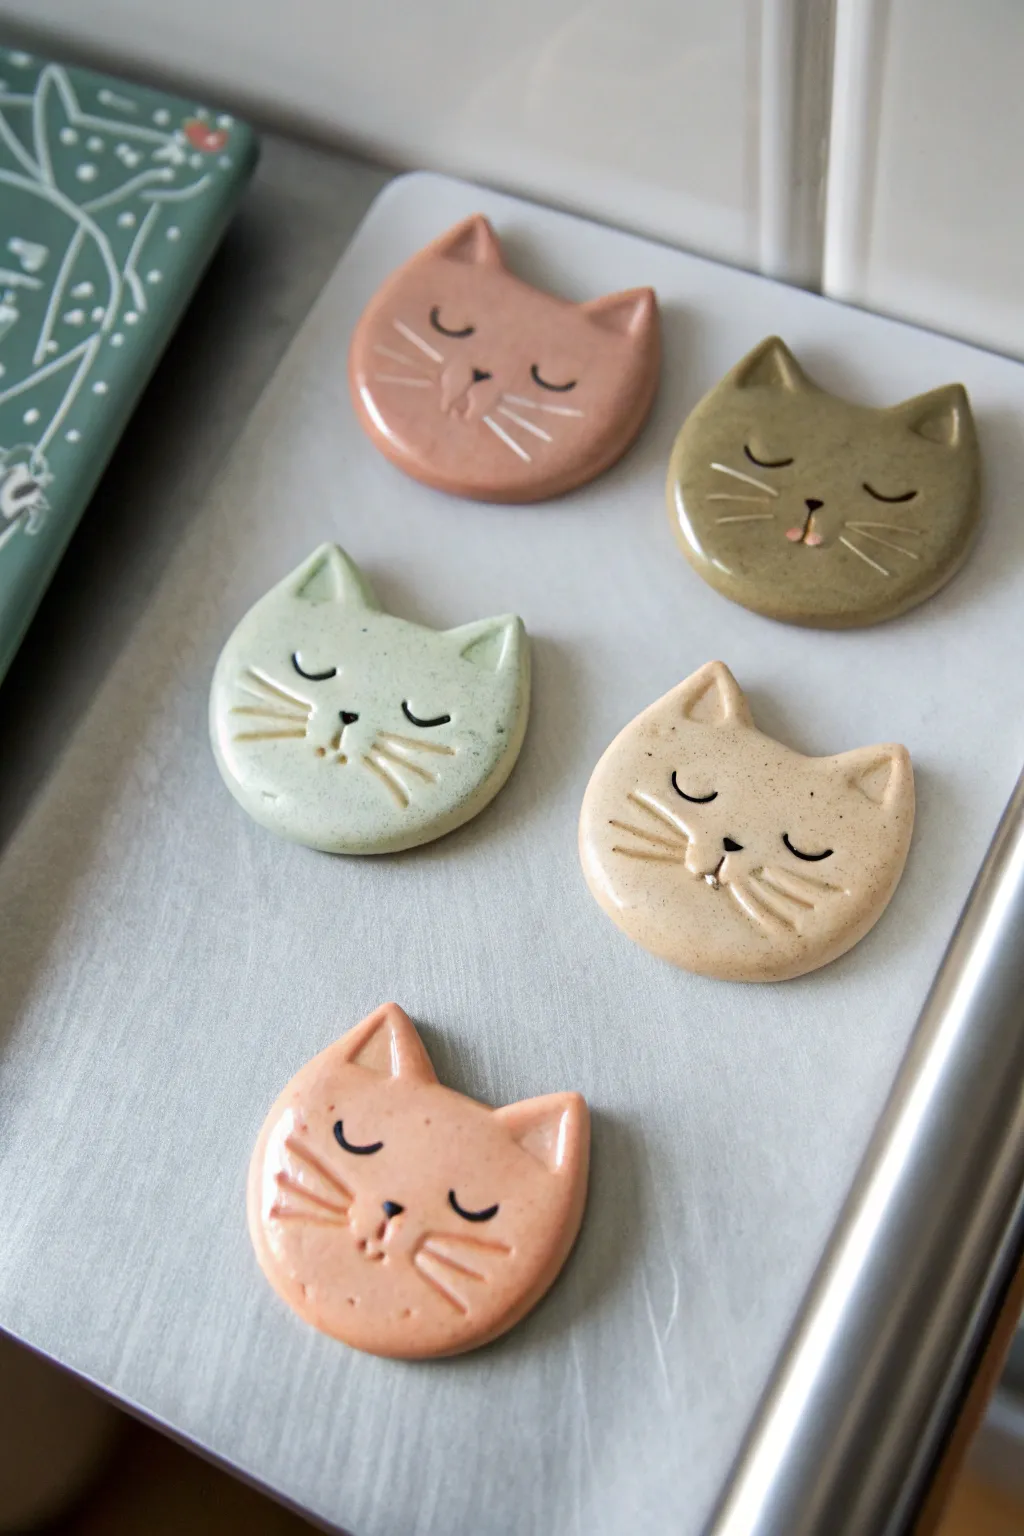
Create a charming set of feline faces that look like high-end ceramic pieces but can be made right at home. These smooth, glossy magnets feature earthy glaze-like colors and sweet, sleepy expressions perfect for brightening up your fridge.
Step-by-Step
Materials
- Polymer clay (terracotta, beige, sage green, olive green, light peach)
- Cat head cookie cutter (small size, roughly 1.5 – 2 inches)
- Ceramic tile or glass work surface
- Rolling pin or pasta machine
- Small ball stylus tool
- Needle tool or toothpick
- Black acrylic paint
- Fine tip paintbrush
- Glossy polyurethane varnish or UV resin
- Strong craft magnets (neodymium recommended)
- Superglue or E6000 adhesive
Step 1: Shaping the Base
-
Condition the clay:
Begin by thoroughly kneading your polymer clay colors until they are soft and pliable. This warmth prevents cracking later. -
Roll out the slab:
Roll your clay out on a smooth ceramic tile to a uniform thickness of about 1/4 inch (6mm). Using a slightly thicker slab gives that substantial ‘ceramic’ feel. -
Cut the shapes:
Press your cat head cookie cutter firmly into the clay. If you don’t have a cutter, you can trace a template and cut carefully with a craft knife. -
Soften the edges:
Once cut, gently tap the edges of the clay with your finger to round them off. You want to remove that sharp ‘cookie cutter’ look so it resembles molded pottery.
Sticky Situation?
If clay sticks to your cutter, dip the cutter in cornstarch before pressing it down. This acts as a release agent and brushes off easily later.
Step 2: Sculpting the Features
-
Indent the ears:
Use a small ball stylus or the round end of a paintbrush to press triangular indentations into the ears. Do not poke all the way through, just create a sunken area. -
Mark the whiskers:
Take your needle tool or a toothpick and gently press three lines into each cheek for whiskers. Pressing is better than dragging, as dragging can create burrs in the clay. -
Create the nose and mouth:
Use the needle tool to make a tiny vertical line for the mouth cleft and a small dot for the nose. Keep these features centered and low on the face. -
Clean up imperfections:
Dip your finger in a tiny bit of rubbing alcohol or cornstarch and smooth over the surface to remove any fingerprints before baking. -
Bake the pieces:
Bake the clay pieces according to your specific brand’s package instructions. Usually, this is around 275°F (130°C) for 15-30 minutes.
Pro Tip: Rounded Look
Place a sheet of cling film over the clay BEFORE using the cutter. Pressing the cutter through the plastic rounds the edges automatically for a puffy look.
Step 3: Painting and Finishing
-
Cool completely:
Let the cats cool down fully after baking. They are fragile when warm. -
Detail the eyes:
Using a very fine paintbrush and black acrylic paint, carefully paint two small curved lines for sleepy closed eyes. Add a tiny dot on the nose if you like. -
Fill the grooves (optional):
If you want the whiskers to pop, you can run a wash of diluted brown paint over them and quickly wipe the surface clean, leaving paint only in the grooves. -
Seal for shine:
To get that high-gloss ceramic look, apply a thick coat of gloss glaze or UV resin. I prefer UV resin for a glass-like finish, cured under a UV lamp for 2 minutes. -
Attach the magnet:
Flip the finished cat over and glue a strong magnet to the back using superglue or E6000. Let the adhesive cure fully before sticking it to your fridge.
Now you have a full litter of adorable, glossy cats ready to hold up your grocery lists and photos
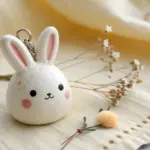
Mini Cat Keychain Charms
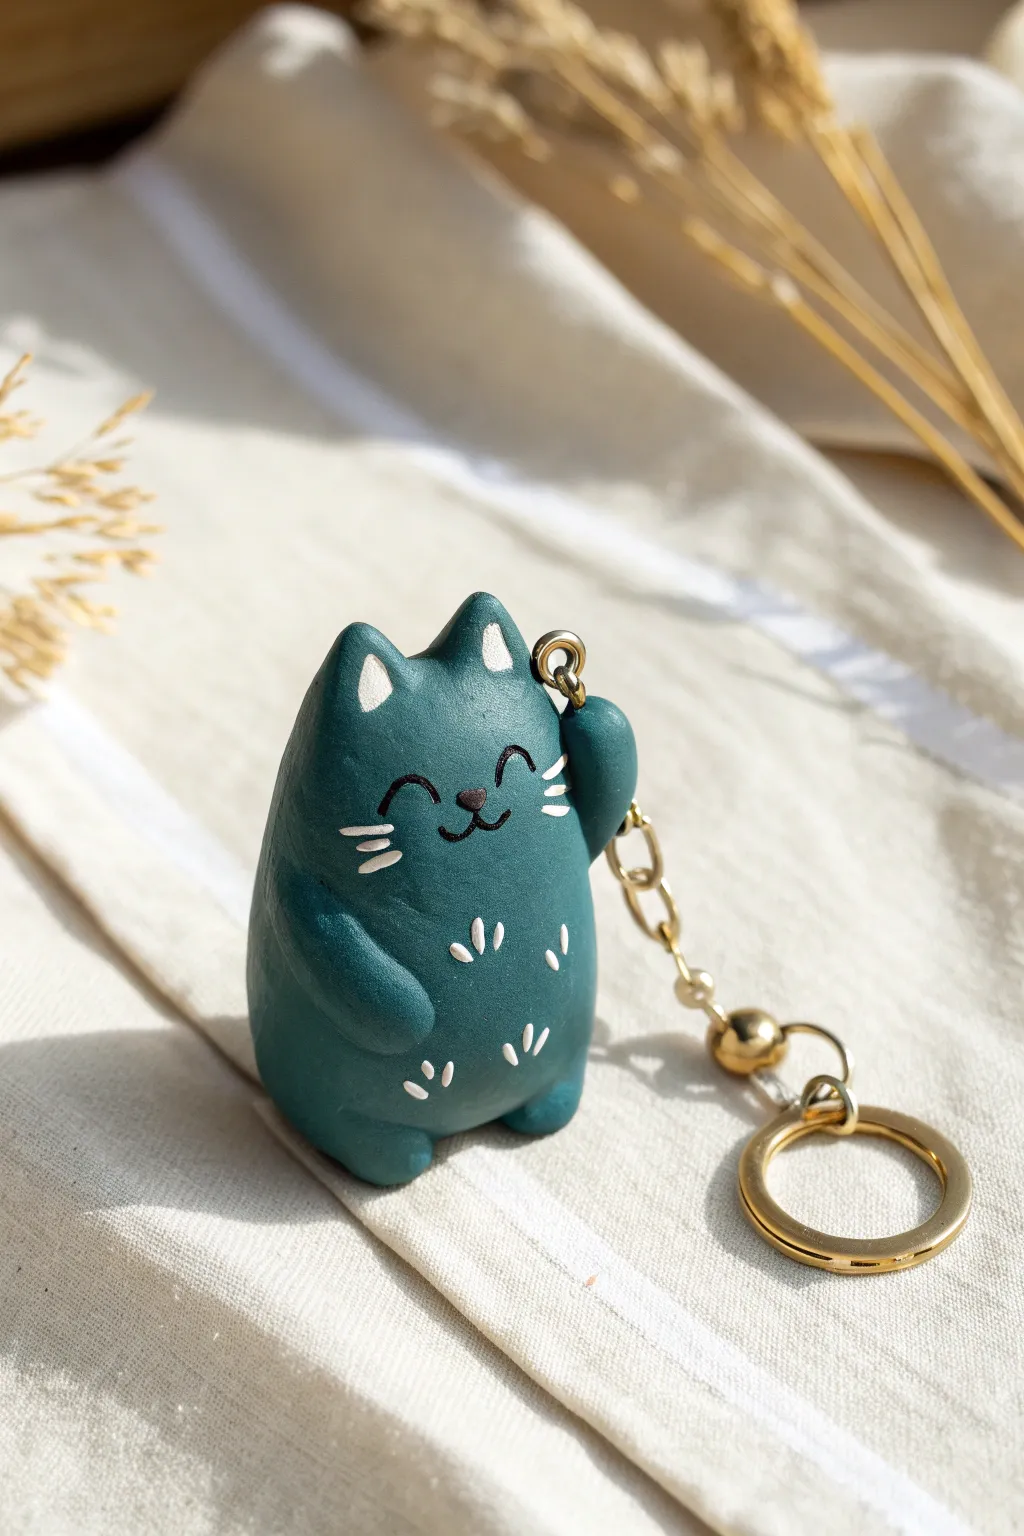
This adorable mini cat keychain features a smooth, rounded body and a sweet waving pose that’s perfect for beginners. Its minimalist design relies on simple shapes and delicate painted details to create a charming, durable accessory for your keys or bag.
Step-by-Step Guide
Materials
- Polymer clay (teal or dark turquoise)
- White or light cream polymer clay
- Acrylic paint (black and white)
- Fine detail paintbrush (size 000 or 0000)
- Headpin or eye pin (gold)
- Jump rings and keyring hardware (gold)
- Clay sculpting tools (needle tool, small ball tool)
- Oven for baking
Step 1: Sculpting the Body
-
Form the base:
Start with a ball of teal clay about the size of a large walnut. Roll it until it’s completely smooth and free of cracks. -
Shape the silhouette:
Gently shape the ball into an oval or gumdrop shape. Flatten the bottom against your work surface so the cat stands upright securely. -
Pinch the ears:
At the top of the head, gently pinch upwards on the left and right sides to pull out two small triangles. Smooth the clay between them to create the curve of the forehead. -
Refine the ears:
Use your fingers or a flat tool to gently blunt the tips of the ears so they aren’t dangerously sharp, matching the soft aesthetic of the figure.
Smooth Operator
Before baking, use a drop of baby oil or clay softener on your finger to gently buff away fingerprints for a professional, seamless finish.
Step 2: Adding Clay Details
-
Attach the feet:
Roll two very tiny balls of teal clay. Press them gently onto the bottom front of the body to form little stubby feet, blending the seams slightly at the back. -
Create the arm:
Roll a small sausage shape for the left arm. Press it against the body in a curving ‘waving’ motion, blending the shoulder area into the main body so it looks attached. -
Add the waving paw:
Curve the end of the arm slightly upward. You can use a needle tool to impress a tiny line if you want to suggest a paw bend, though the reference keeps it smooth. -
Make the inner ears:
Take extremely tiny amounts of white clay and shape them into triangles. Press these into the front of the teal ear shapes to create contrast. -
Insert the hardware:
Insert a gold eye pin into the top center of the head, or slightly to the side near the raised arm. If the pin is long, trim it or twist the end into a corkscrew shape before inserting for better grip.
Loose Eye Pin?
If the eye pin pulls out after baking, put a tiny drop of super glue on the pin’s shaft and reinsert it into the hole. Let it set instantly.
Step 3: Baking and Painting
-
Bake the charm:
Bake the figure according to your polymer clay manufacturer’s instructions (usually 230°F – 275°F for 15-30 minutes). I prefer to tent foil over it to prevent scorching. -
Cool down:
Let the piece cool completely before handling. It will be slightly soft when hot but hardens as it cools. -
Paint the face:
Using your finest brush and black acrylic paint, carefully draw two small arcs for closed, smiling eyes. -
Add nose and mouth:
Paint a tiny upside-down triangle for the nose and a small ‘w’ shape for the mouth directly beneath it. -
Draw whiskers:
Switch to white paint. Carefully paint three short, horizontal whiskers on each cheek. -
Add body markings:
Using the white paint, create small clusters of three dashes on the belly area to represent fur texture. -
Seal the piece:
Once the paint is fully dry, apply a matte or satin varnish to protect the surface and the paint details from chipping. -
Assemble the keychain:
Use pliers to open a jump ring, thread it through the eye pin on the cat’s head, attach your gold chain and keyring, and close the jump ring securely.
Clip this smiling companion onto your keys to bring a little wave of happiness to your daily routine
Tuxedo Cat Color Block
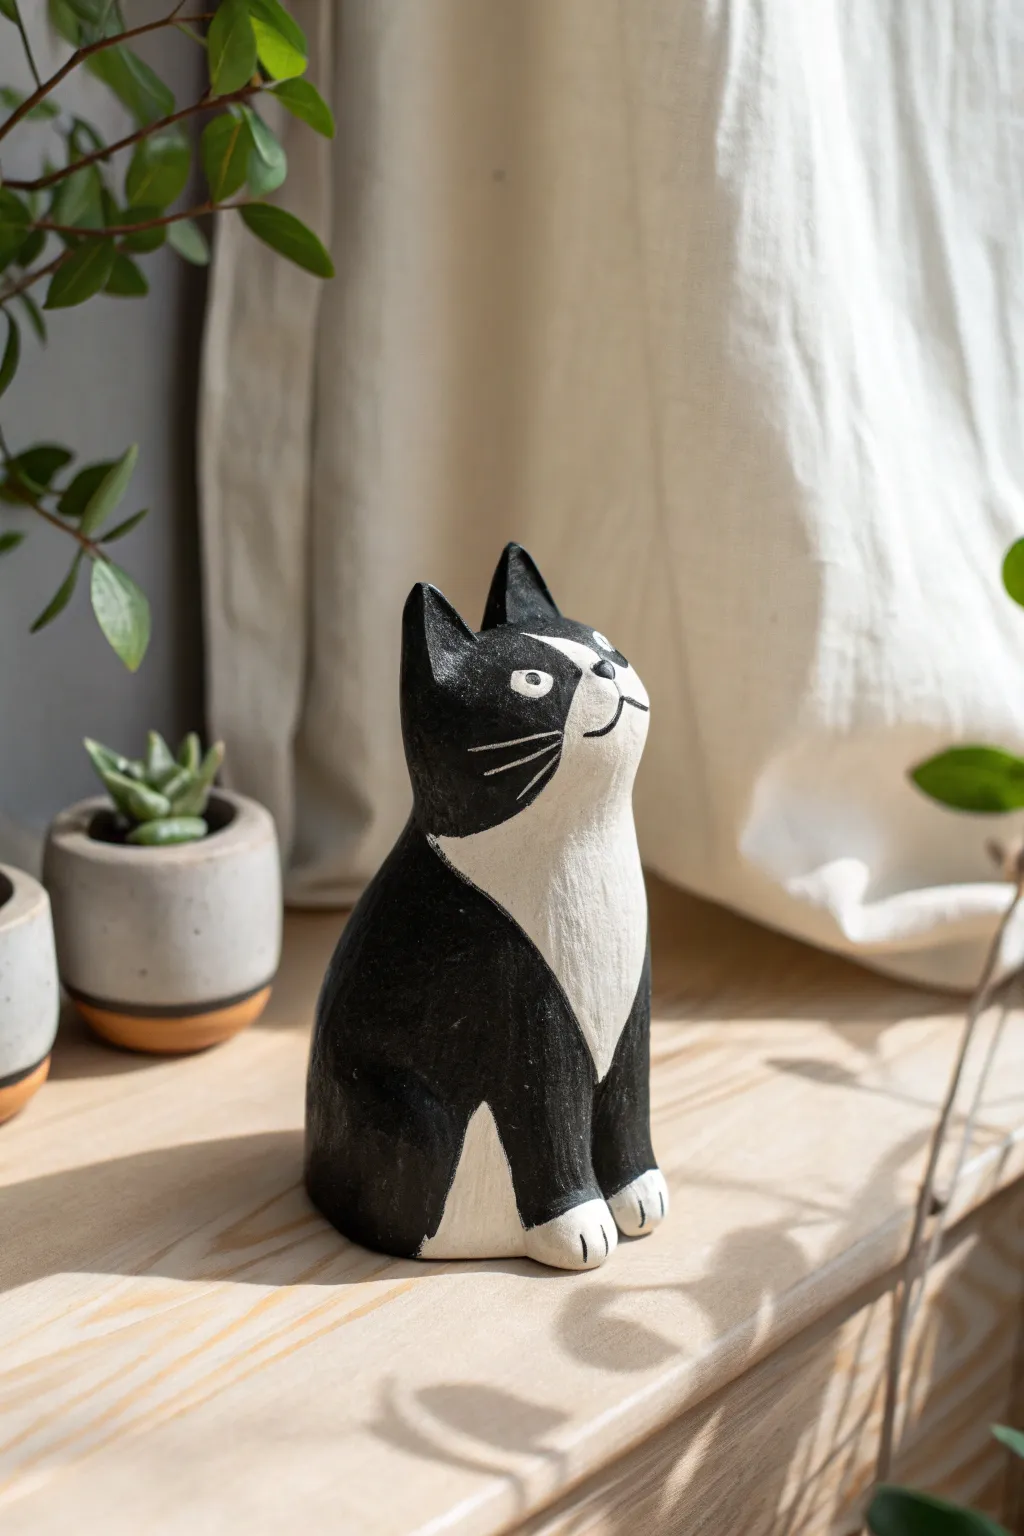
This charming tuxedo cat project captures the sweet gaze of a curious feline using simple clay sculpting techniques. With its bold black and white color blocking and stylized features, it makes for a delightful and modern desk companion.
Step-by-Step
Materials
- Air-dry clay (white or grey)
- Acrylic paints (Mars Black, Titanium White)
- Set of clay sculpting tools
- Small cup of water
- Fine-grit sandpaper
- Paintbrushes (medium flat and fine liner)
- Matte varnish or sealant
Step 1: Sculpting the Form
-
Base Shape:
Start by conditioning a large handful of clay until it’s pliable. Roll it into a smooth, thick cylinder that is flat on the bottom so it stands securely. This will form both the body and the neck. -
Forming the Head:
Pinch the top portion of your cylinder and gently mold it upwards and slightly backwards to create the head. The head should be seamlessly connected to the body, tilted slightly upward as if the cat is looking at something above. -
Adding Ears:
Pinch two triangles of clay from the top of the head to form the ears. Shape them to be perky and triangular, blending the seams down into the skull so they look integral rather than attached. -
Defining the Face:
Use your thumbs to slightly flatten the front of the face area. Add a very small, subtle bump for the nose and muzzle area, keeping the features minimalist and smooth. -
Shaping the Body:
Refine the body shape by tapering it slightly towards the neck and widening it at the base for stability. Use a modeling tool to gently impress the curve of the back legs into the sides of the clay, suggesting a seated posture without fully sculpting detached limbs. -
Refining Texture:
Instead of smoothing the clay perfectly with water, use a flat modeling tool to scrape lightly downwards. This creates a subtle, faceted texture that mimics the look of carved wood. -
Drying:
Let your sculpture dry completely in a cool, dry place. Depending on the thickness, this may take 24-48 hours. Rotate it occasionally to ensure even drying.
Uneven Seams?
If the transition between black and white paint is messy, wait for it to dry fully. Then, use a fine liner brush with the correcting color to carefully tidy up the edge for a crisp line.
Step 2: Painting & Details
-
Sanding:
Once fully dry, lightly sand any sharp burrs or rough patches, but preserve the hand-sculpted texture you created earlier. -
Base Coat:
Paint the entire chest, belly, and muzzle area with Titanium White. Don’t worry about perfect edges yet; apply two thin coats for opaque coverage. -
Mapping the Tuxedo:
Using a pencil, very lightly sketch the boundary line where the black fur meets the white. Draw the classic tuxedo ‘V’ on the chest and the mask shape on the face. -
Applying Black:
Paint the rest of the body with Mars Black acrylic. Carefully follow your pencil lines. I find using a flat brush for the body and a smaller round brush for the face edges gives the best control. -
Paw Details:
Paint the tips of the front paws white if you painted over them. Use a fine liner brush with black paint to draw two small vertical lines on each white paw tip to define the toes. -
Face Details:
Using your finest liner brush or a dotting tool, paint the nose black. Add two white circles for eyes, and once dry, add tiny black pupils looking upward. Paint a thin black line for the mouth. -
Whiskers:
With a very steady hand and thin white paint (add a drop of water to improve flow), paint three long whiskers on the black cheeks and three short black whiskers on the white muzzle area. -
Sealing:
Finish the piece with a coat of matte varnish to protect the paint and give it a unified, professional finish without excessive shine.
Add a Collar
Before the clay dries, roll a tiny snake of clay and wrap it around the neck to create a collar. Paint it red or gold later for a pop of color.
Now you have a quiet, contemplative little friend to keep you company on your bookshelf
Calico Patchwork Kitty
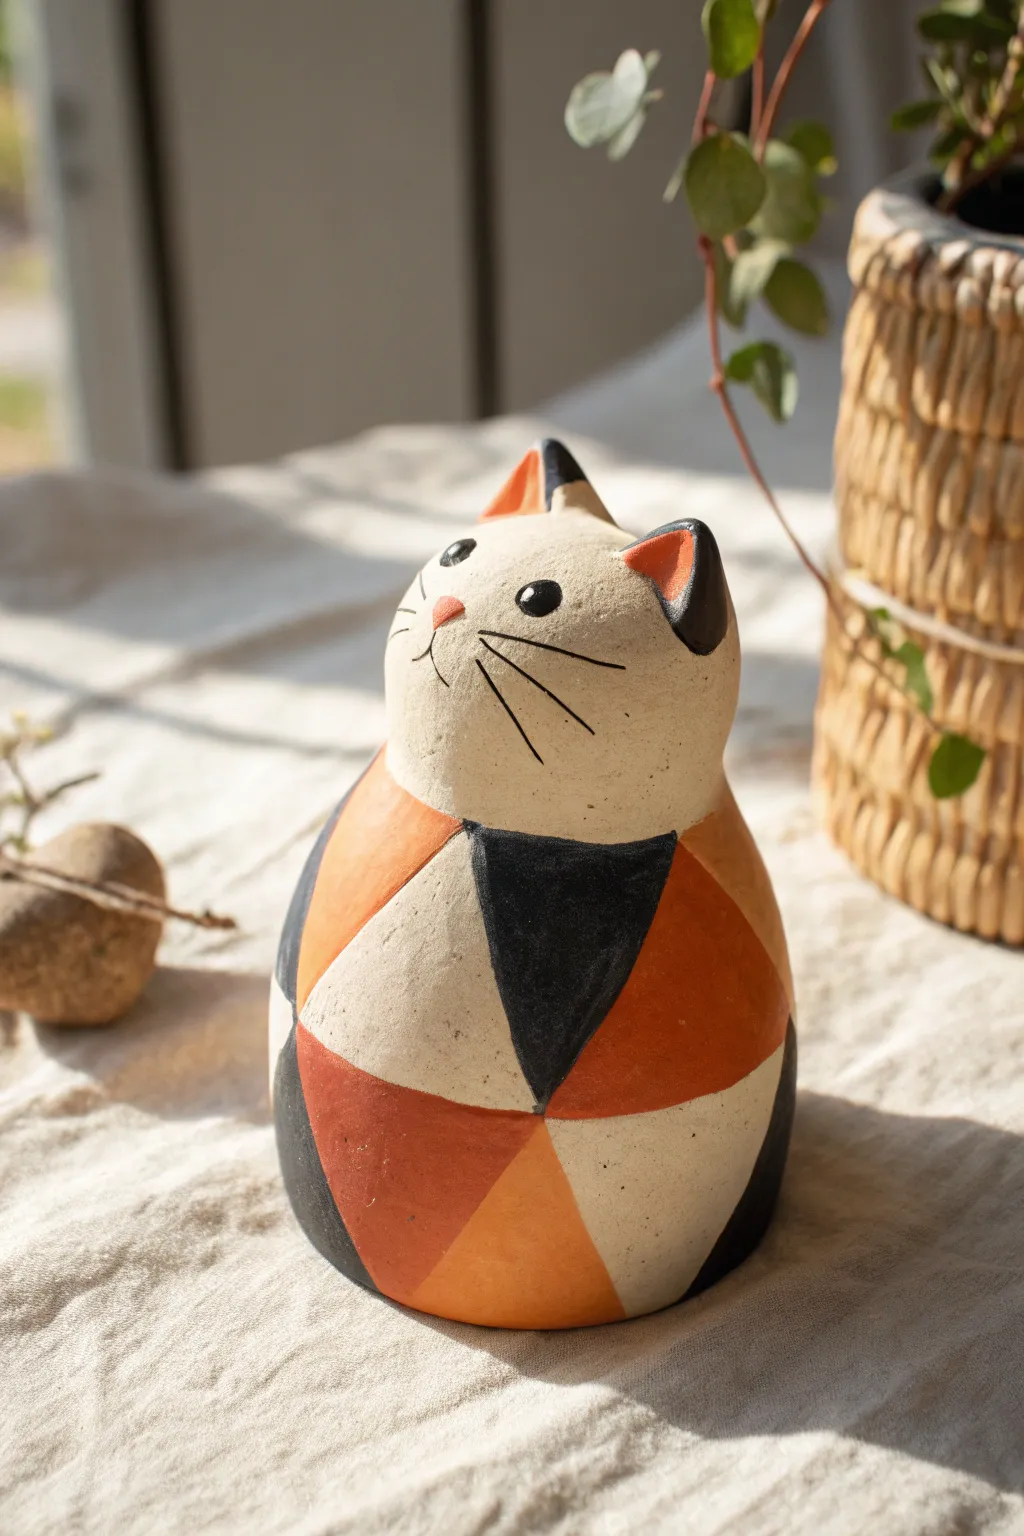
This charming figurine combines the classic warmth of a calico cat with a modern, geometric twist. Its simple pear-shaped form serves as the perfect canvas for a bold patchwork design of interlocking triangles in earthy black, orange, and cream tones.
How-To Guide
Materials
- Air-dry clay or polymer clay (white or beige base)
- Acrylic paints (matte black, terracotta orange, warm cream/beige)
- Small flat synthetic brush (for triangles)
- Fine detail brush (0 or 00 size)
- Pencil
- Water cup and paper towels
- Sandpaper (fine grit)
- Matte spray varnish (optional)
Step 1: Sculpting the Form
-
Shape the body:
Start with a ball of clay roughly the size of a tennis ball. Roll it into a smooth pear shape, slightly wider at the bottom to ensure stability. -
Refine the surface:
Using a tiny bit of water on your fingertips, smooth out any cracks or bumps on the clay surface. The smoother the base, the sharper your painted lines will look later. -
Form the ears:
Pinch two small triangles of clay from the top of the head. Gently shape them into pointed ears, ensuring they blend seamlessly into the skull without leaving a visible seam. -
Flatten the base:
Tap the bottom of your pear shape firmly against your work surface. This creates a flat base so the kitty stands upright without wobbling. -
Dry and sand:
Allow the clay to dry completely according to the package instructions. once fully cured, use fine-grit sandpaper to buff away any fingerprints or imperfections.
Step 2: Drafting the Design
-
Mark the face:
Lightly sketch the position of the eyes and nose with a pencil. Place them somewhat high on the ‘head’ portion to give the cat an inquisitive, upward-looking expression. -
Grid the body:
Beginning at the neck area, lightly draw intersecting diagonal lines across the body to create a network of triangles. I find it helpful to vary the sizes slightly to keep the pattern organic. -
Plan the colors:
Mark each triangle with a tiny letter (‘B’ for black, ‘O’ for orange, ‘C’ for cream) to plan your calico distribution. Try to avoid having two of the same color touching.
Wobbly Lines?
If painting straight lines on a curved surface is difficult, use thin strips of washi tape or painter’s tape to mask off the triangles before painting.
Step 3: Painting the Patchwork
-
Paint the cream base:
Using a flat brush, fill in all the sections marked for the cream color first. You may need two coats for solid opacity. -
Add the orange triangles:
Paint the terracotta orange sections next. Use the edge of your flat brush to create crisp, straight lines where the triangles meet the cream sections. -
Fill the black sections:
Finish the geometric body pattern by filling in the remaining triangles with matte black paint. Take your time near the edges to keep the intersections sharp. -
Paint the ears:
Paint the back of the ears black and the inner triangles orange (or vice versa) to match the patchwork theme, leaving a small rim of the base clay color if desired. -
Detail the face:
Switch to your finest detail brush. Paint two solid black circles for eyes, adding a tiny white dot in each for a highlight once dry. -
Add whiskers and nose:
Paint a small, inverted pink or orange triangle for the nose. Using quick, confident strokes with thin black paint, add three long whiskers on each cheek and a small mouth line. -
Seal the piece:
Once all paint is completely dry, apply a coat of matte varnish spray to protect the finish without making it too shiny.
Texture Twist
Before the clay dries, gently press a piece of linen fabric into the surface to give the cat a woven, textile-like texture that complements the patchwork look.
Place your geometric kitty near a sunny window or a houseplant to enjoy its modern, artistic vibe
Tabby Stripe Cat
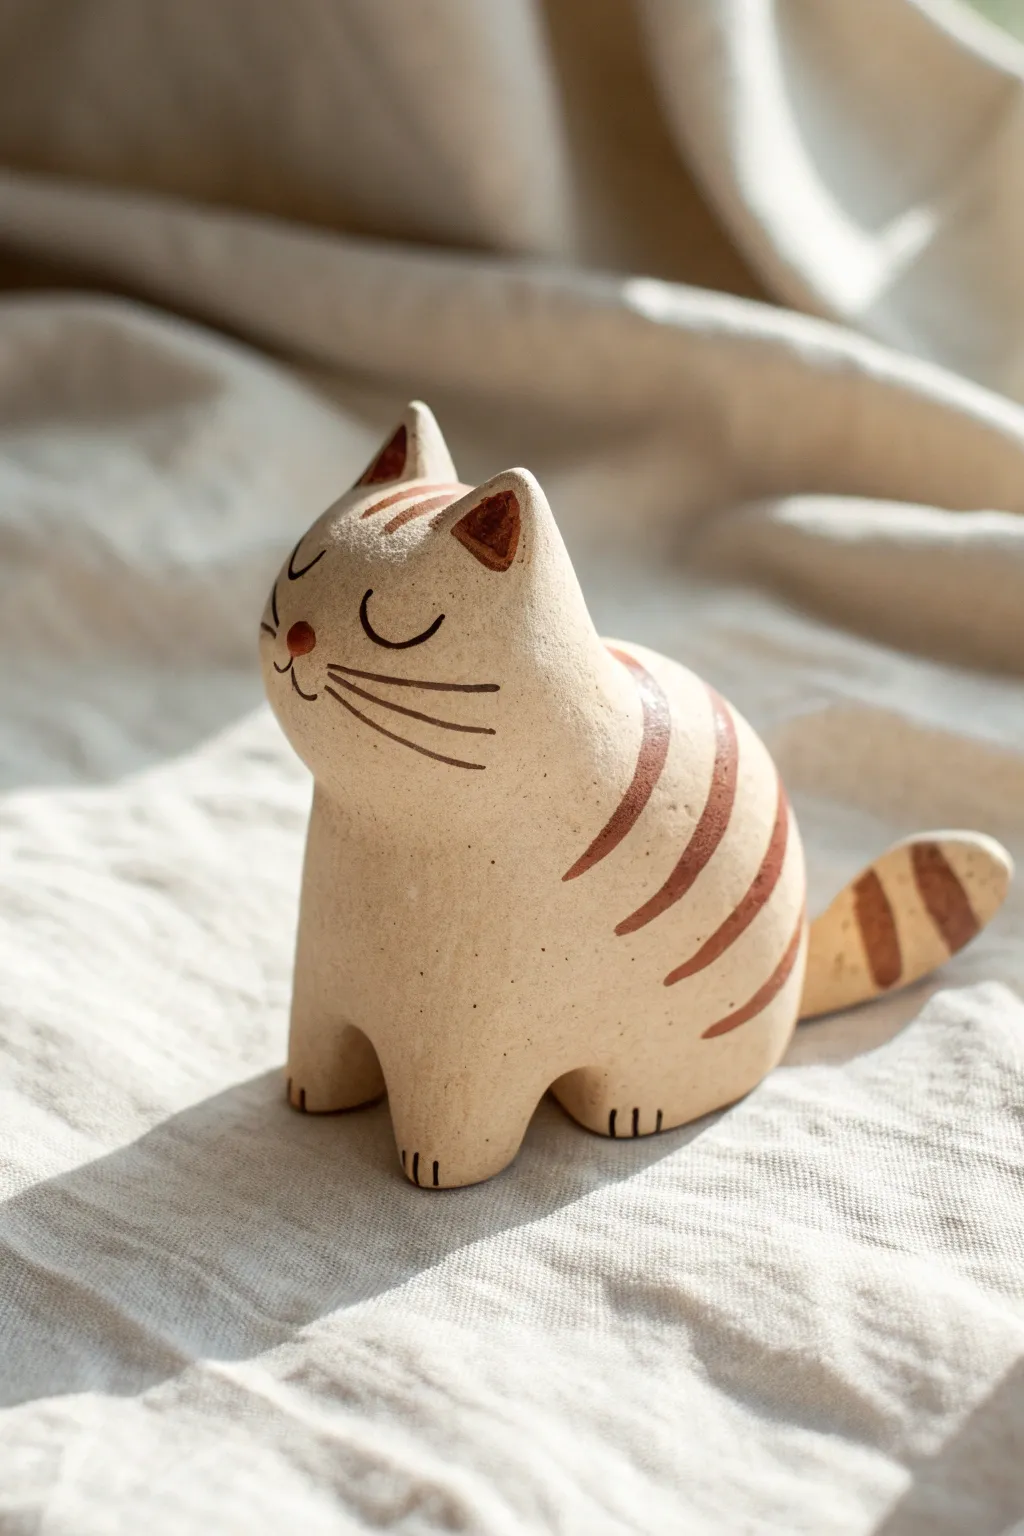
This charming ceramic-style cat figurine captures the peaceful essence of a sleeping kitty with simple, bold lines and a warm, speckled finish. Its smooth, rounded form and distinctly painted copper-brown stripes make it a perfect project for polymer or air-dry clay enthusiasts looking for a piece with personality.
Detailed Instructions
Materials
- Beige or oatmeal-colored polymer clay (speckled effect optional)
- Acrylic paint (burnt sienna or copper-brown)
- Black fine-tip permanent marker or acrylic paint pen
- Sculpting tools (needle tool, smoothing tool)
- Rolling pin
- Aluminum foil (for armature core)
- Small fine-point paintbrush
- Matte varnish or sealant
Step 1: Sculpting the Form
-
Prepare the core:
Crumple a small ball of aluminum foil into a vague egg shape. This will serve as the lightweight core of the body and helps save clay. -
Condition the clay:
Warm up your beige or oatmeal clay in your hands until it is soft and pliable. If you want that natural ceramic look, mix in a tiny pinch of black pepper or sand for texture, though pre-made ‘granite’ style clay works best. -
Cover the armature:
Flatten a sheet of clay capable of covering your foil core. Wrap it around the foil, smoothing the seams completely so you have a solid, oval-shaped lump. -
Shape the body:
Gently massage the clay into a seated cat posture. The front should sit slightly higher for the chest, tapering down towards where the tail will be. Flatten the bottom so it sits securely on your work surface. -
Form the head:
Pull a portion of clay upwards from the front of the body to distinguish the head, or attach a separate ball of clay and blend the neck seam seamlessly. The head should be rounded but slightly flattened on the face area. -
Pinch the ears:
Using your thumb and forefinger, gently pinch two triangles at the very top of the head to form the ears. Keep them short and slightly rounded at the tips for a soft look. -
Define the legs:
At the base of the front, use a modeling tool to create a vertical indentation that separates the two front legs. Don’t separate them fully; just suggest the form. -
Create the tail:
Roll a small snake of clay that tapers at one end. Attach the thicker end to the rear right side of the body, curving it upward so the tip points towards the back or slightly up. -
Add detail:
Use a needle tool or knife to press three small vertical lines into the bottom of each front paw and the visible rear paw to create toes.
Uneven Clay Surface?
If fingerprints are stubborn, brush a tiny amount of baby oil (for polymer) or water (for air-dry) over the raw clay to smooth it instantly before drying.
Step 2: Painting and Finishing
-
Bake or dry:
If using polymer clay, bake according to package instructions. If using air-dry clay, allow it to dry completely (24-48 hours) until hard and white/beige. -
Sand for smoothness:
Once hardened, lightly sand any fingerprints or rough bumps with fine-grit sandpaper. I find this step crucial for achieving that faux-ceramic finish. -
Paint the stripes:
Using your burnt sienna acrylic paint and a fine brush, paint three to four bold, curved stripes on the cat’s back. Taper the ends of the strokes so they look natural. -
Detail the tail and ears:
Paint thick rings around the tail and fill in the inner triangles of the ears with the same brown paint. Don’t forget a tiny smudge for the nose. -
Draw the face:
With a fine black marker or paint pen, carefully draw two ‘U’ shapes for closed sleeping eyes, a small mouth line, and three whiskers on each cheek. -
Forehead details:
Add three small vertical dashes between the ears to mimic the classic ‘M’ tabby marking found on foreheads. -
Seal the piece:
Apply a coat of matte varnish to protect the paint and give the clay a finished, high-quality ceramic texture.
Make it a Planter
Before drying, hollow out the top of the cat’s back deeply to create a space for a tiny air plant or succulent to sit inside.
Place your new ceramic-style friend on a sunny windowsill to enjoy its peaceful nap
Minimal Cat Face Tile
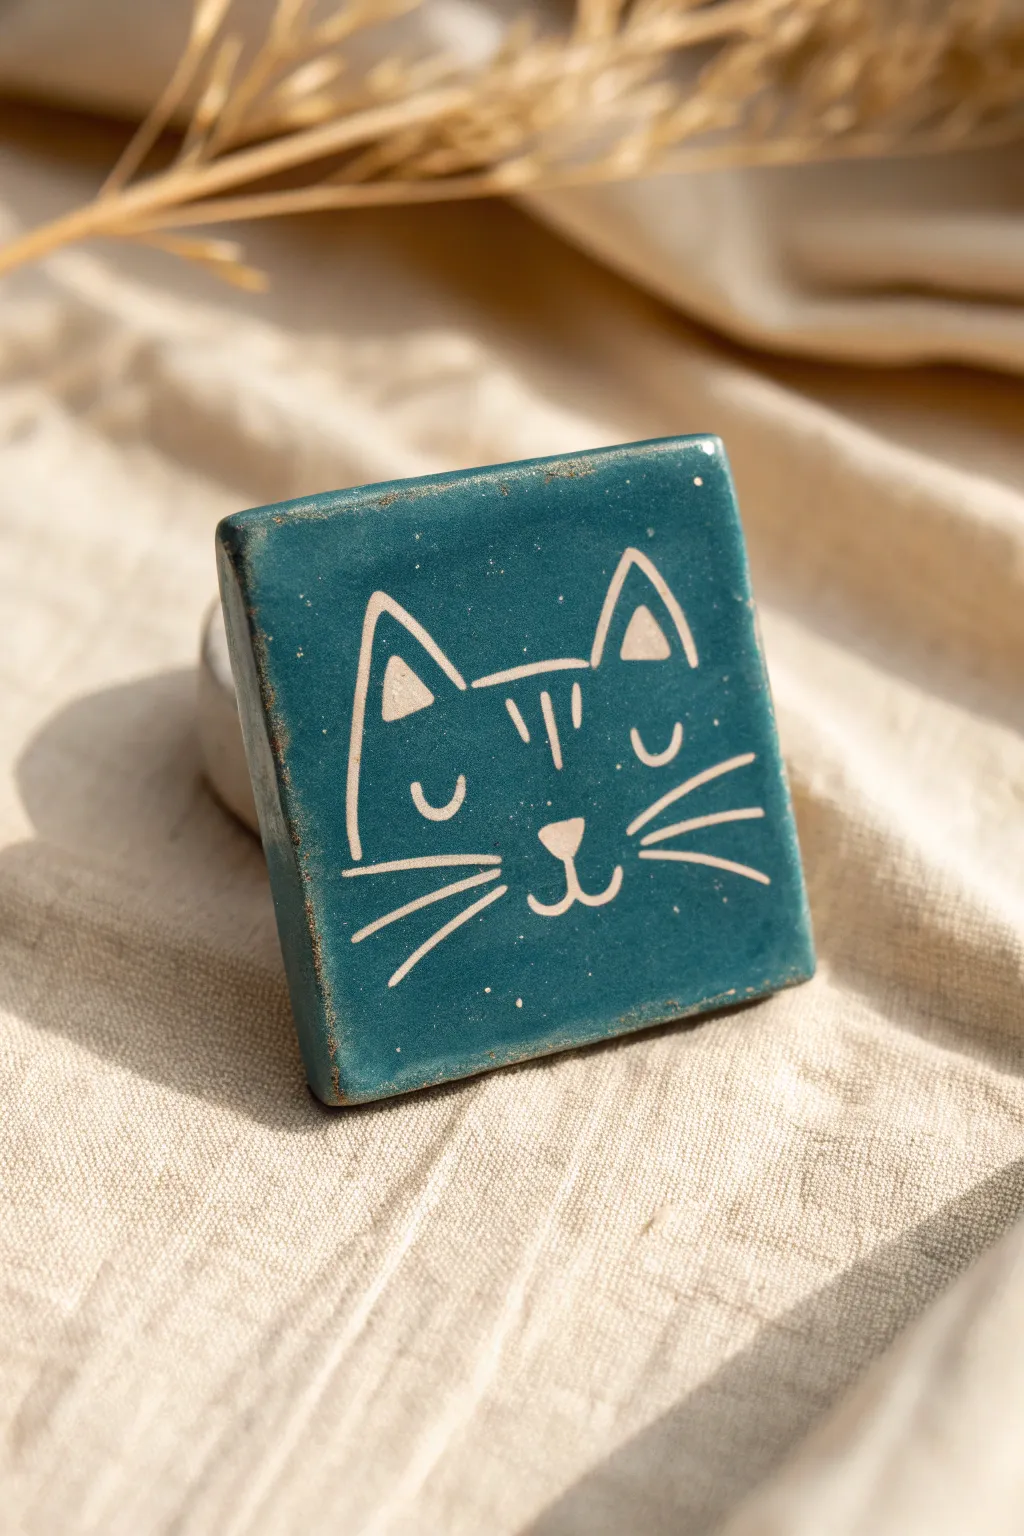
Embrace the charm of simplicity with this handcrafted ceramic tile, featuring a minimalist cat face carved through deep teal underglaze. The contrast between the rich matte surface and the raw clay lines creates a timeless, folk-art aesthetic perfect for a coaster or wall accent.
Step-by-Step Tutorial
Materials
- White or light buff stoneware clay
- Rolling pin
- Wooden guide strips (1/4 inch thick)
- Square cookie cutter or knife and ruler
- Deep teal or petrol blue underglaze
- Soft synthetic fan brush
- Needle tool or sgraffito loop tool
- Sponge
- Clear matte glaze (optional)
- Kiln access
Step 1: Prepping and Glazing the Base
-
Roll the Slab:
Begin by wedging your clay to remove air bubbles. Place the clay between two 1/4 inch wooden guide strips and roll it out smoothly with your rolling pin to ensure an even thickness. -
Cut the Shape:
Using a square cookie cutter or a ruler and fettling knife, cut out a square approximately 4×4 inches. Don’t worry about perfect geometric precision; a slightly organic shape adds to the handmade charm. -
Refine the Edges:
Once cut, run a slightly damp sponge or your finger along the sharp edges to soften them. This prevents sharp burrs after firing and gives that worn, vintage look seen in the photo. -
Leather Hard Stage:
Set the tile aside on a porous surface (like wood or plaster) to dry slowly. Wait until it reaches the leather-hard stage—stiff enough to hold its shape without bending, but still cool to the touch. -
Apply Underglaze:
Using a soft fan brush, apply three even coats of deep teal underglaze to the top surface. Allow each coat to dry until it’s no longer shiny before applying the next coat in a cross-hatch direction.
Clean Lines
If your carving tool is dragging lumps of clay, the tile is too wet. If the clay chips or flakes off, it’s too dry. Wait for the perfect ‘leather hard’ window.
Step 2: Carving the Design
-
Initial Sketching:
If you’re nervous about freehanding, you can lightly scratch the design onto the dried underglaze with a soft pencil. The pencil lead will burn off in the kiln. -
Carve the Ears:
Start with the ears. Using your needle tool or a fine sgraffito tool, carve two triangles near the top corners. Add smaller triangles inside them to suggest depth, pressing firmly enough to reveal the raw clay body. -
Outline the Forehead:
Connect the inner corners of the ears with a horizontal line. Add three small vertical dashes in the center of the forehead for stripes. -
Create the Eyes:
Carve two U-shapes for closed, sleeping eyes about midway down the face. Keep them symmetrical and centered under the ears. -
Add the Nose and Mouth:
Below the eyes, carve a small inverted triangle for the nose. Extend a ‘J’ curve from the bottom point to the left, and a mirrored ‘J’ curve to the right to form the mouth. -
Draw Whiskers:
Add three long, sweeping lines on each cheek area for whiskers. Vary the lengths slightly, making the middle one the longest for a natural look. -
Clean Up Crumbs:
As you carve, little clay ‘burrs’ will accumulate. Do not wipe them with your hand, or you might smear the blue color into the white lines. Instead, use a large, soft, dry brush to gently sweep them away.
Color Contrast
For the brightest white lines, use a white stoneware or porcelain clay body. Darker clays will result in brown or grey lines, reducing the pop of the sgraffito.
Step 3: Finishing and Firing
-
Slow Drying:
Place the tile between two pieces of drywall or under loose plastic to let it dry very slowly to the bonedry stage. This prevents the corners from curling up. -
Bisque Fire:
Fire the completely dry tile to cone 04 (or your clay’s specific bisque temperature). -
Optional Glazing:
For a glossy finish, dip the bisqued tile in clear glaze. For the matte look shown in the image, you can leave the underglaze raw (if it’s a decorative piece) or apply a thin matte clear glaze. -
Final Fire:
Fire the piece again to the maturity temperature of your clay body (likely cone 5 or 6). I always use a stilt or ensure the bottom is wiped clean to save my kiln shelves.
Display your charming tile on a small easel or use it as a coaster to brighten your coffee table
Stacked Cat Totem
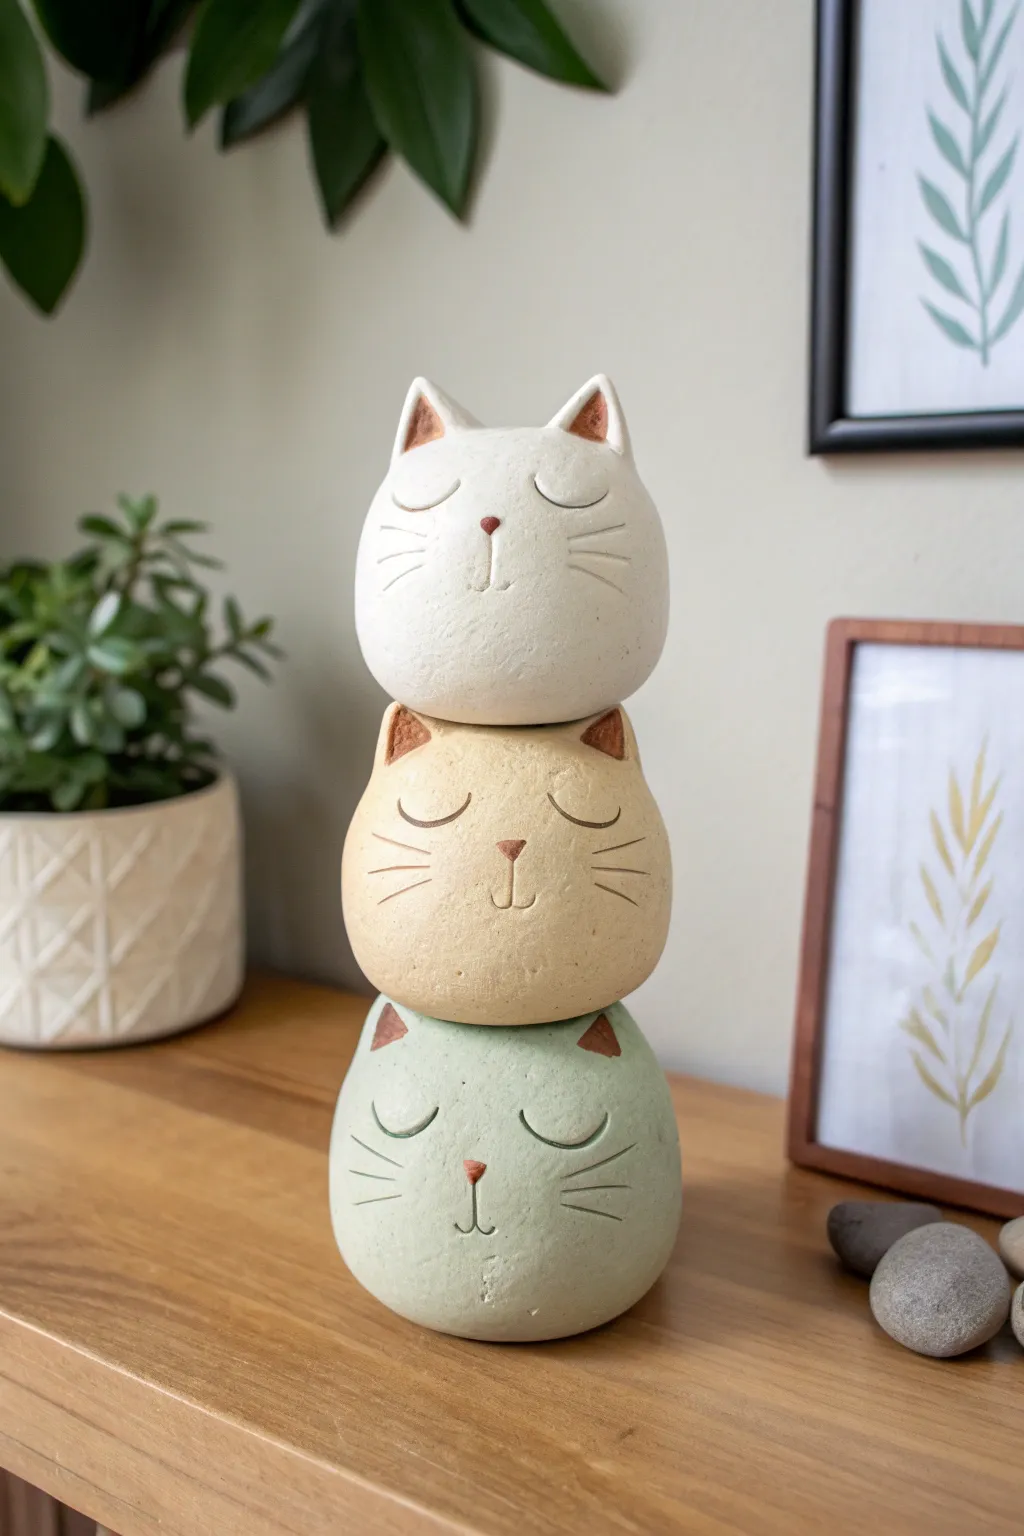
Create a peaceful corner in your home with this adorable stack of sleeping cat faces. This serene totem combines simple spherical forms with charming minimalist details, making it a perfect project for getting comfortable with hand-building techniques.
Step-by-Step Guide
Materials
- Air-dry clay or polymer clay (approx. 1.5 lbs)
- Acrylic paints (White, Beige/Yellow Ochre, Sage Green, Terracotta/Brown)
- Fine grit sandpaper
- Small rolling pin
- Needle tool or toothpick
- Loop tool (optional, for hollowing)
- Water and sponge (for smoothing)
- Strong craft glue or epoxy
- Matte spray varnish
Step 1: Forming the Base Shapes
-
Divide your clay:
Cut your clay into three roughly equal portions. You might want the bottom piece to be slightly larger for stability, so adjust your portions to have a subtle size gradation if desired. -
Roll spheres:
Take the first portion and roll it firmly between your palms to create a smooth, tight ball. Repeat this for the other two portions. -
Shape the ovals:
Gently tap the top and bottom of each sphere against your work surface to flatten them slightly. You want a rounded, pebble-like oval shape rather than a perfect circle. -
Smooth the surface:
Dip your finger in a little water and run it over the clay to remove any cracks or fingerprints. A smooth canvas is essential for these minimalist faces.
Weight Matters
If making large heads, hollow out the bottom two spheres before drying. This reduces weight and prevents the structure from becoming top-heavy.
Step 2: Adding Features
-
Create ears:
For each head, pinch off two small triangles of extra clay. Score the bottom of the ears and the top of the head, apply a dab of water or slip, and press them firmly into place. -
Blend the seams:
Use a modeling tool or your finger to blend the clay from the back of the ears down into the head so they are seamless. Leave the front definition sharp. -
Sketch the face:
Lightly trace the facial features with a needle tool before committing to the cut. Position the nose in the center and the eyes as relaxed, downward-curving crescents on either side. -
Carve the details:
Using your needle tool, carve deeper lines for the closed eyelids and the simple mouth curve. Don’t forget three whiskers on each cheek. -
Refine the lines:
I find that running a damp brush over the carved lines helps soften any jagged clay crumbs, giving it that professional ceramic look. -
Level the stacking points:
To ensure they stack safely later, gently press the bottom of the top two heads and the top of the bottom two heads against a flat surface to create a small, stable contact area.
Step 3: Finishing and Assembly
-
Dry completely:
Allow the clay pieces to dry according to the manufacturer’s instructions. For air-dry clay, this usually takes 24-48 hours. Rotate them occasionally for even drying. -
Sand for smoothness:
Once fully cured, use fine-grit sandpaper to buff away any remaining imperfections or fingerprints, aiming for a stone-like texture. -
Base coat painting:
Paint the top cat pure white, the middle cat a soft beige (mix white with a drop of ochre), and the bottom cat a muted sage green. -
Detail painting:
Use a fine brush and terracotta or reddish-brown paint to fill in the inner ears and paint the small triangular noses. This adds warmth to the palette. -
Highlight the carving:
If the paint filled your carved lines too much, use a dark grey wash or a very fine marker to re-define the eyes and whiskers. -
Assembly:
Apply a strong adhesive or epoxy to the flattened contact points between the heads. Stack them carefully: green on bottom, beige in the middle, white on top. -
Seal:
Once the glue is set, spray the entire tower with a matte varnish to protect the paint and unspoil the natural, earthy finish.
Functional Twist
Skip the glue and flatten the tops more significantly to create a modular desk organizer where each cat head acts as a small lidded bowl.
Now you have a charming, handcrafted sculpture to watch over your desk or shelf
Mood Cats With Expressions
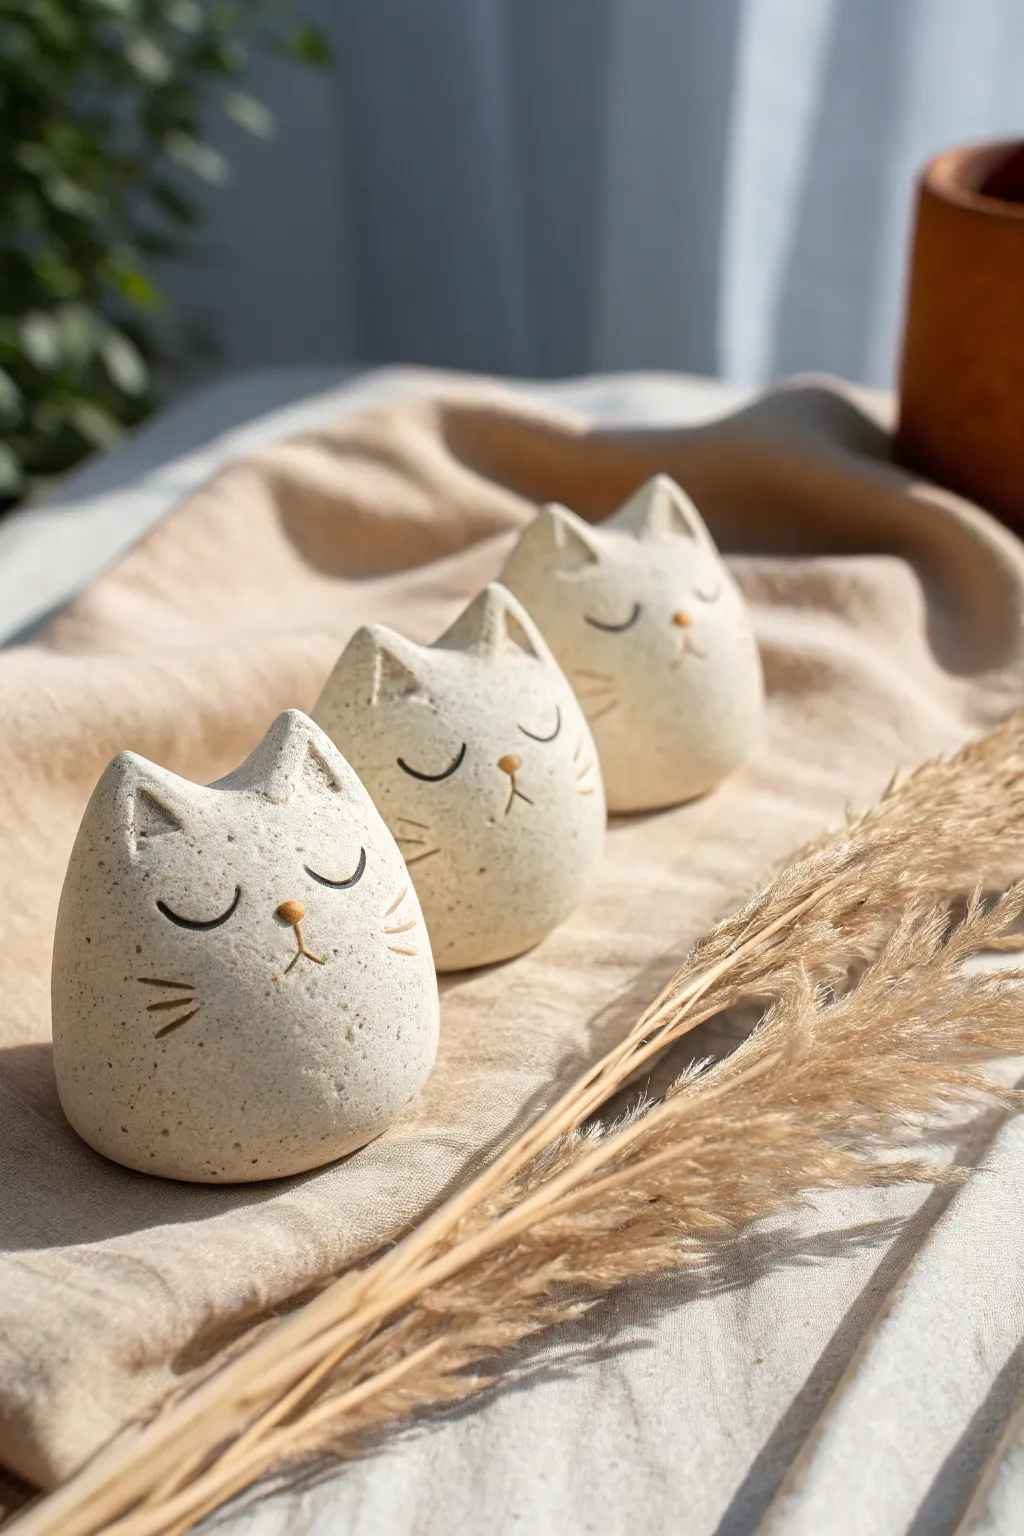
These charming, egg-shaped kitties are perfect for holding small notes or simply bringing a serene vibe to your desk. With their minimalist features and speckled finish, they capture a sense of calm contentment.
Step-by-Step Tutorial
Materials
- Speckled cream polymer clay (or air-dry clay with added sand)
- Black acrylic paint
- Gold or mustard yellow acrylic paint
- Fine-grit sandpaper
- Fine detail paintbrush (size 00 or 000)
- Clay carving tools (needle tool and small flexible blade)
- Smooth work surface (ceramic tile or glass)
- Aluminum foil (for core, optional)
Step 1: Shaping the Base
-
Prepare the clay:
Begin by conditioning your speckled clay until it is soft and pliable. If using plain air-dry clay, you can knead in clean, fine sand or dried coffee grounds to achieve that faux-stone texture. -
Form the body:
Roll a palm-sized amount of clay into a smooth ball. Gently taper the top slightly so it resembles a large, rounded egg shape. The bottom should be wide enough to keep it stable. -
Flatten the base:
Tap the bottom of your egg shape firmly against your work surface. This creates a flat seat so the cat stands upright without wobbling. -
Pinch the ears:
At the narrower top of the egg, use your thumb and forefinger to gently pinch up two triangular shapes. These will be the ears. Keep them integrated with the body rather than attaching separate pieces for a seamless look. -
Refine the ear shape:
Smooth the area between the ears to create a gentle curve for the top of the head. Use your fingers to soften the tips of the ears so they aren’t dangerously sharp. -
Smooth the surface:
Go over the entire figurine with your slightly dampened finger (for air dry) or a touch of baby oil (for polymer) to eliminate fingerprints. The goal is a matte, stone-like calm.
Wobbly Cat?
If the cat tips over after baking, use coarse sandpaper to grind the base flat again. You can also glue a piece of felt to the bottom for extra stability.
Step 2: Adding Details & Finishing
-
Carve the inner ear:
Using a small carving tool or the back of a needle tool, gently press an indentation into the front of each ear triangle to suggest depth. -
Bake or Dry:
If using polymer clay, bake according to the package directions (usually 275°F/135°C for 15-30 minutes). If using air-dry clay, loosely cover with plastic and let it dry slowly for 24-48 hours to prevent cracking. -
Light sanding:
Once fully cured or dry, inspect your cat. Use fine-grit sandpaper to gently buff away any remaining imperfections or sharp ridges on the base. -
Paint the nose:
Dip your fine detail brush into the gold or mustard yellow paint. Paint a small, soft inverted triangle or oval in the center of the face for the nose. -
Draft the eyes:
Before painting the black lines, I sometimes lightly sketch the placement with a pencil to ensure symmetry. The eyes should be closed, happy curves. -
Paint the features:
Using the black acrylic paint and a steady hand, paint two U-shaped curves for the closed eyes. Add a small vertical line dropping from the nose, splitting into two curves for the mouth. -
Add whiskers:
Paint three short, floating whiskers on each cheek. Keep the lines thin and tapered at the ends for a delicate expression. -
Seal (Optional):
For longevity, you can apply a matte varnish. Avoid glossy finishes as they detract from the natural, stone-like aesthetic of this particular project.
Level Up: Incemse Holder
Before drying, poke a small angled hole near the paw area or back. This turns your cute figurine into a functional incense stick holder.
Group these little felines in threes for a cozy display on your bookshelf
Cat in a Box Diorama
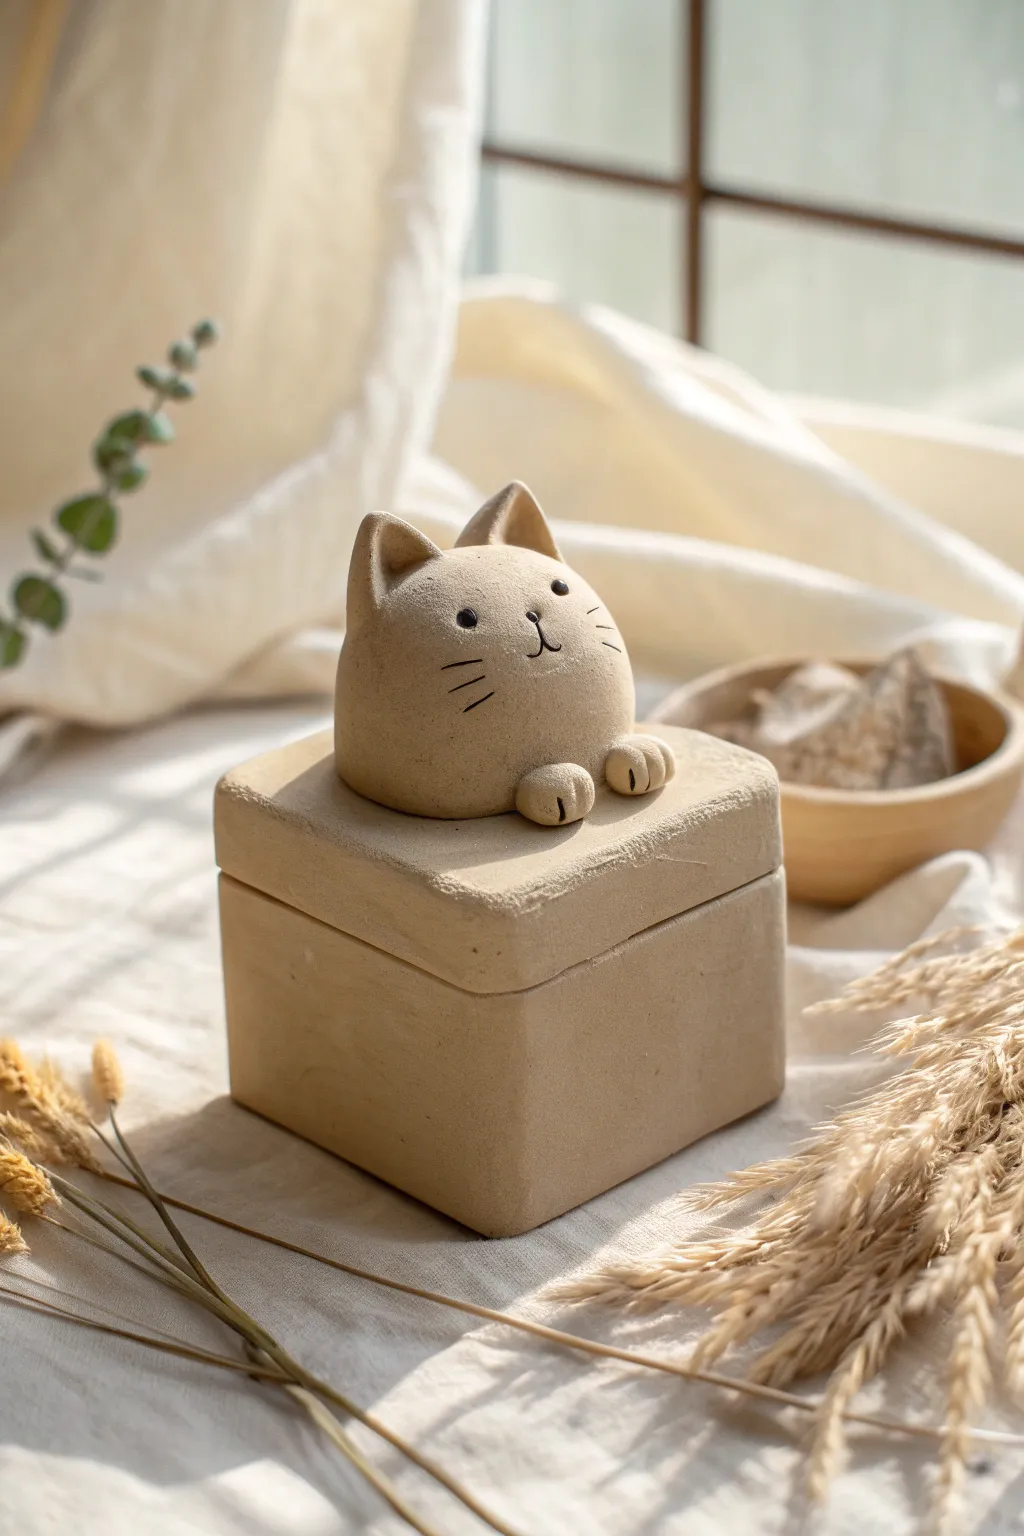
This charming project combines functional storage with adorable design, featuring a minimalist cat peeking over the edge of a square clay box. Its natural, unglazed finish gives it a warm, organic feel perfect for holding rings or small treasures.
How-To Guide
Materials
- Air-dry clay or polymer clay (beige/sand color)
- Square clay cutter (approx. 3-4 inches)
- Rolling pin
- Clay knife or craft blade
- Slip (water/clay mixture) or liquid polymer clay for joining
- Fine-grit sandpaper
- Needle tool or toothpick
- Black acrylic paint
- Fine detail brush
- Ruler
- Sponge
Step 1: Constructing the Box Base
-
Roll the Slabs:
Begin by rolling out your clay to a consistent thickness of about 1/4 inch. You’ll need enough surface area to cut five identical squares for the base and one slightly larger square for the lid. -
Cut the Base Pieces:
Using your square cutter or a ruler and knife, cut out five equal squares. Let these pieces sit for about 15-20 minutes to firm up slightly; this makes assembly much easier as the walls won’t sag. -
Join the Walls:
Score the edges of your base square and the bottom edges of your four wall squares. Apply a small amount of slip (or liquid clay) to the scored areas. -
Assemble the Cube:
Press the walls onto the base and join the vertical seams where the walls meet. Use your finger or a clay tool to smooth the seams on both the inside and outside so the join becomes invisible. -
Smooth the Form:
Take a slightly damp sponge and gently wipe down the sides to ensure they are perfectly straight and the texture is uniform.
Cracking Seams?
If cracks appear at the box corners while drying, fill them immediately with a paste made of your clay and a little water (slip), then smooth over.
Step 2: Creating the Lid and Cat
-
Cut the Lid:
Cut a square that is slightly larger than your box base so it creates a nice overhang. If you want a secure fit, you can add a smaller square of clay to the underside that fits inside the box rim. -
Form the Cat Head:
Roll a smooth ball of clay, roughly the size of a tangerine, and gently flatten the bottom so it sits flush against the lid. -
Shape the Head:
Refine the ball shape, making it slightly more oval horizontally. Smooth out any fingerprints immediately. -
Add the Ears:
Shape two small triangles of clay for the ears. Gently press your thumb into the center of each to create the inner ear depth, then score and slip them onto the top of the head. -
Create the Paws:
Roll two smaller balls of clay for the paws. Flatten them slightly and use a knife or needle tool to press three vertical lines into each one to define the toes. -
Attach the Clay Parts:
Position the head in the center of the lid and the paws resting directly in front of it. Score and slip all contact points thoroughly to ensure the cat doesn’t pop off later. -
Smooth Connections:
Use a modeling tool to verify the connection points between the neck area and the lid are seamless, blending the clay where necessary.
Step 3: Finishing Touches
-
Refine the Surface:
Using your damp sponge again, gently smooth the cat’s face and paws. I always double-check the ears here to make sure they aren’t sharp or brittle. -
Add Facial Features:
Using a needle tool, very lightly scribe the position of the eyes, nose, and whiskers. This gives you a guide for painting later. -
Dry the Piece:
Allow the clay to dry completely. If using air-dry clay, this may take 24-48 hours; for polymer, bake according to package directions. -
Sand for Texture:
Once hardened, grab fine-grit sandpaper and gently buff the box edges and the cat to achieve that matte, stone-like texture shown in the image. -
Paint the Details:
Dip a fine detail brush into black acrylic paint. carefully fill in the eyes, the small nose, the mouth line, and the whiskers. Keep the lines thin and delicate for that minimalist look. -
Final Seal (Optional):
If you want to protect the paint, apply a matte varnish over the eyes and whiskers, though leaving the clay raw preserves the dusty, natural aesthetic.
Make it Cozy
Line the inside of the box with a small square of felt or velvet in a contrasting color to protect delicate jewelry placed inside.
Place this sweet little guardian on your windowsill and enjoy the calm vibe it brings to your space
Starry Night Galaxy Cat
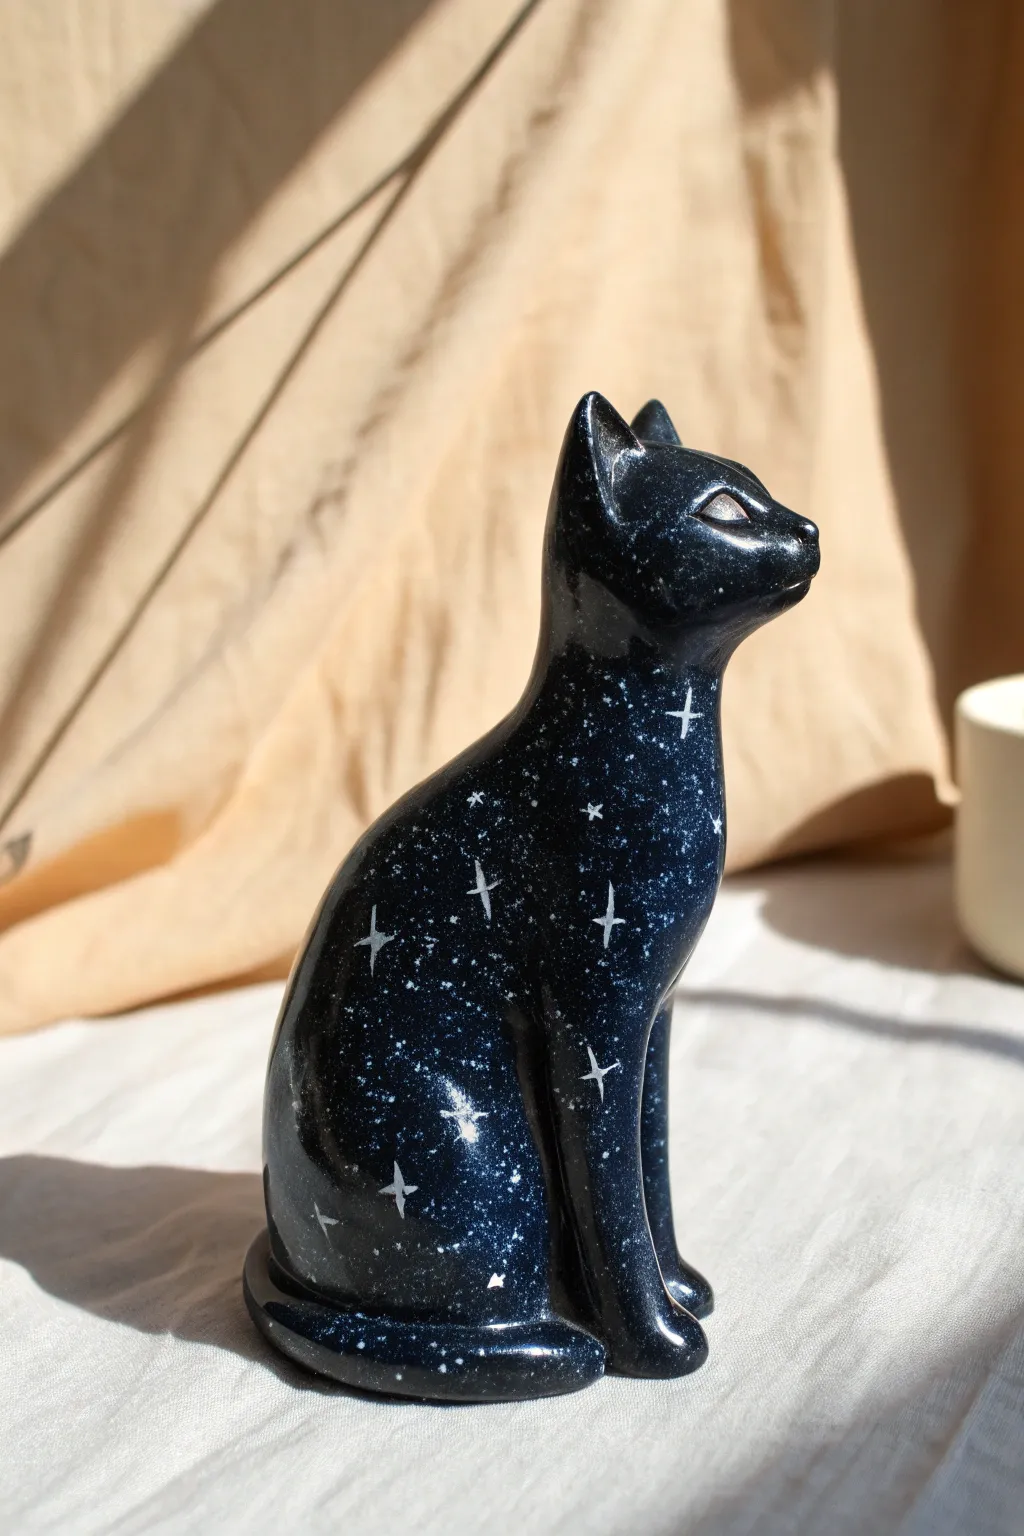
Transform a simple lump of clay into a celestial feline that embodies the magic of a starry night. This project features a deep, glossy midnight blue finish scattered with nebulous speckles and bright, hand-painted stars, creating a stunning galaxy effect.
Step-by-Step Tutorial
Materials
- Polymer clay (black or dark blue)
- Acrylic paints (black, phthalocyanine blue, purple, white, silver)
- High-gloss polyurethane varnish or resin
- Fine detail paintbrush (size 000)
- Old toothbrush (for speckling)
- Sculpting tools (needle tool, smoothing tool)
- Aluminum foil (for armature core)
- Baking sheet and oven
Step 1: Sculpting the Form
-
Form the Core:
Creating a solid core uses less clay and helps prevent cracking. Crumple a piece of aluminum foil into a rough pear shape for the body and a smaller sphere for the head. -
Condition the Clay:
Knead your dark polymer clay until it is soft and pliable. Using black clay as a base creates a perfect depth for the galaxy effect later. -
Cover the Armature:
Flatten sheets of clay and wrap them around your foil shapes. Smooth the seams completely with your thumbs to create a unified surface. -
Attach Head to Body:
Press the head onto the tapered top of the pear-shaped body. Blend the clay at the neck downwards so no seam remains visible, maintaining a sleek, elongated neck profile. -
Shape the Ears:
Pinch two small triangles of clay for ears. Attach them to the top of the head using a small blending tool to curve them seamlessly into the skull. -
Refine the Silhouette:
Smooth the back into a gentle curve. Elongate the chest slightly, giving the cat a proud, seated posture. -
Form the Legs:
Roll two thick coils for the front legs. Attach them vertically to the front of the body, blending the top into the chest and smoothing the bottom into paw shapes. -
Add the Tail:
Roll a tapered snake of clay for the tail. Wrap it snugly around the base of the cat’s body, blending the attachment point at the back. -
Detail the Face:
Use a sculpting tool to gently press indentations for the eyes and refine the snout. Keep the features subtle and stylized rather than hyper-realistic. -
Bake:
Bake the figurine according to your clay manufacturer’s instructions (usually 275°F/135°C for 15-30 minutes). Let it cool completely before painting.
Step 2: Painting the Galaxy
-
Base Coat:
Mix a small amount of black with deep blue acrylic paint. Apply two thin coats to the entire cat to ensure a rich, consistent dark background. -
Nebula Sponging:
Using a tiny piece of sponge or a dry brush, lightly dab faint patches of purple and lighter blue in random areas. This adds dimension without overpowering the dark base. -
Create the Starfield:
Dilute white acrylic paint with a little water until it’s milky. Dip an old toothbrush into the paint. -
Splatter Technique:
Hold the toothbrush near the figurine and run your thumb across the bristles to flick tiny specks of white paint onto the surface. I like to practice on paper first to control the spray. -
Paint Major Stars:
Using your finest detail brush and white paint, carefully draw several four-pointed stars (cross shapes) on the chest and flanks. -
Highlight the Stars:
Add a tiny dot of silver or pure white to the center of your four-pointed stars to make them glow. -
Paint the Eyes:
Paint the eyes silver or pale gold. Once dry, add a thin vertical slit pupil in black for a mysterious look. -
Ultra-Gloss Finish:
Once all paint is fully dry, apply two to three coats of high-gloss polyurethane varnish. This step is crucial to achieve the deep, glass-like look of the reference image.
Cosmic Depth
Mix a tiny drop of glitter into your glossy varnish coat. This mimics the shimmer of distant stars suspended in space.
Zodiac Customization
Arrange the larger hand-painted stars to match a real constellation, like Orion or Cassiopeia, for a personalized touch.
Place your finished galaxy cat in a sunny spot to watch the light reflect off its starry coat