
Every year I swear I’ll keep it simple, and then I end up making a whole batch of clay Christmas ornaments because they’re just too satisfying. Here are my favorite ideas that look festive on the tree, feel doable at the kitchen table, and make the sweetest little gifts.
Classic Cookie-Cutter Shapes
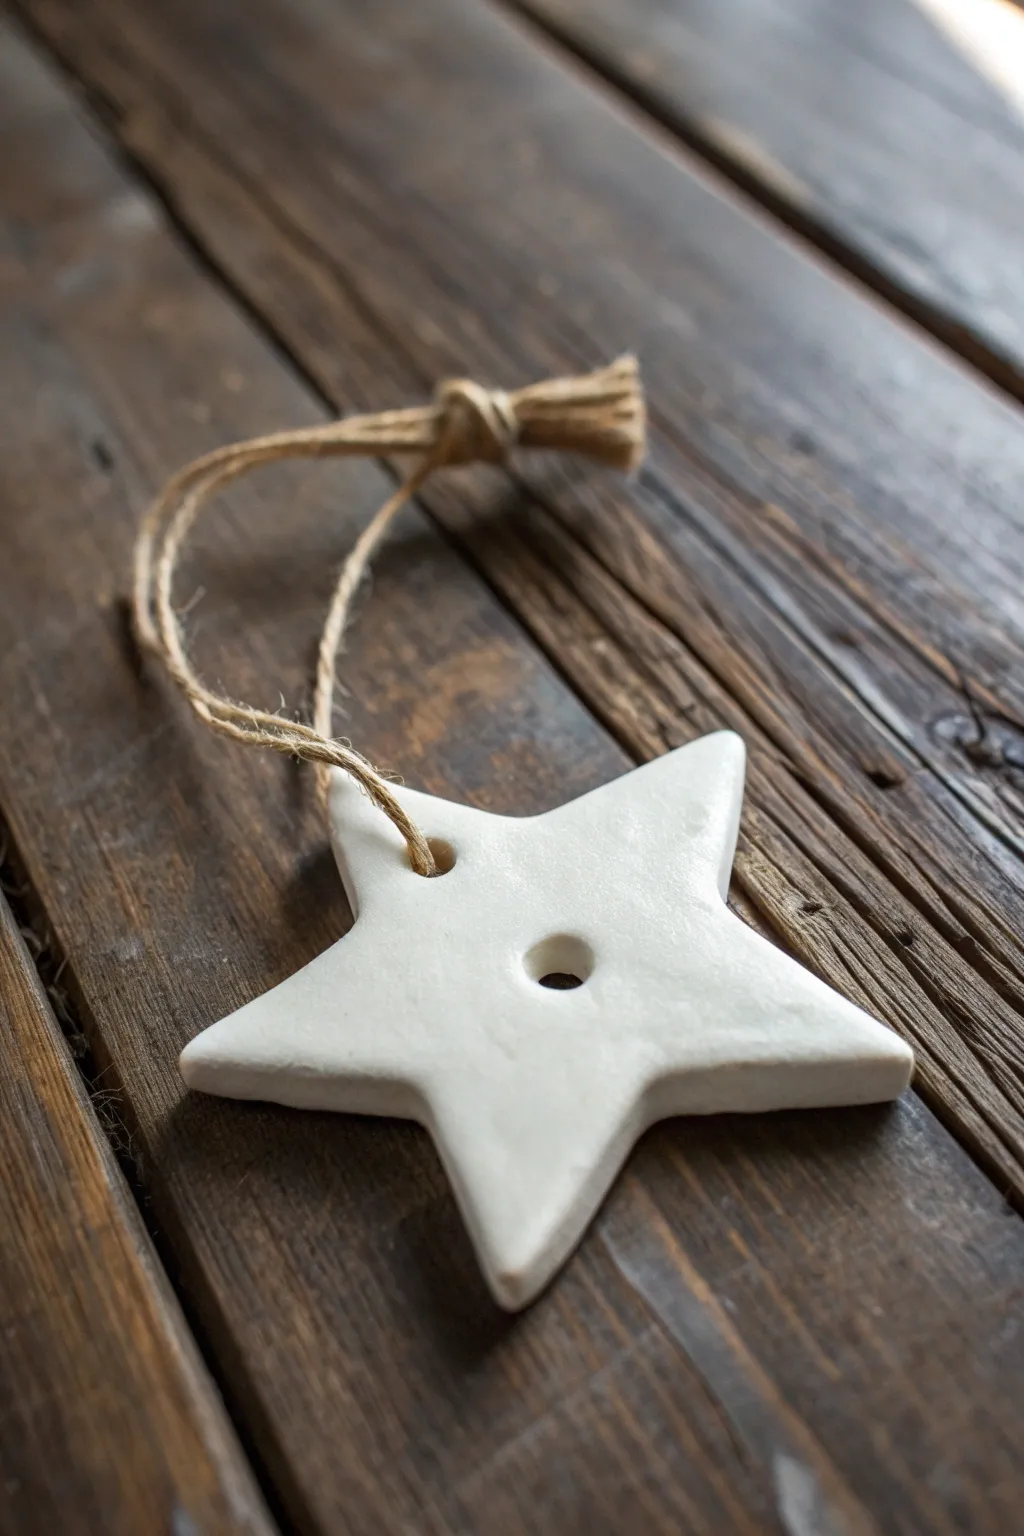
Capture the essence of Nordic simplicity with this elegant star ornament. Its bright white finish and natural jute tassel create a charming contrast that looks beautiful against rustic wood or evergreen branches.
How-To Guide
Materials
- White air-dry clay (or polymer clay)
- Star-shaped cookie cutter (medium size)
- Rolling pin
- Parchment paper or non-stick craft mat
- Drinking straw or small circular cutter
- Fine-grit sandpaper (400 or 600 grit)
- Jute twine or hemp cord
- Gloss or matte varnish (optional)
- Brush for sealing
- Water in a small bowl
Step 1: Shaping the Clay
-
Prepare the Clay:
Begin by taking a handful of white air-dry clay and kneading it in your hands until it feels soft, warm, and pliable. This conditioning step prevents cracks from forming later. -
Roll It Out:
Place the clay between two sheets of parchment paper or directly on a non-stick mat. Using your rolling pin, roll the clay out to an even thickness of about 1/4 inch (6mm). Avoid going too thin, as the ornament needs some sturdiness. -
Cut the Shape:
Position your star-shaped cookie cutter on the smoothest part of the rolled clay. Press down firmly and wiggle slightly to ensure a clean cut all the way through. -
Remove Excess Clay:
Gently peel away the excess clay from around the outside of the star shape first, then carefully lift the cutter. If the clay sticks to the cutter, gently push it out from the top edges. -
Smooth the Edges:
Dip your finger lightly into a bowl of water. Gently run your damp finger along the cut edges of the star to smooth out any roughness or jagged bits left by the cutter.
Cracks Appearing?
Mix a tiny amount of fresh clay with water to create a paste (slip). Fill any cracks with this paste, smooth it over with a finger, and let it dry again.
Step 2: Adding Details & Drying
-
Create the Top Hole:
Using a drinking straw or a small crafting tool, punch a hole near the top point of the star. This will be for the hanging loop. Ensure it isn’t too close to the edge to prevent breakage. -
Create the Center Feature:
To match the reference photo, punch a second hole directly in the geometric center of the star. Twist the straw slightly as you pull it out to get a clean removal. -
Initial Drying Phase:
Transfer the star carefully to a clean, flat surface lined with parchment paper. Let it sit indisturbed for about 24 hours in a dry room away from direct sunlight. -
Flip for Even Drying:
After the first day, gently flip the star over. This allows air to reach the bottom side and prevents the ornament from curling up at the points during the final drying phase. -
Sand for Perfection:
Once the star is bone dry and hard (usually 48 hours total), take your fine-grit sandpaper and very lightly sand the edges and surface. This removes any fingerprints and gives it that smooth, ceramic finish.
Step 3: Finishing Touches
-
Dusting Off:
Wipe the star down with a dry, soft cloth or a dry paintbrush to remove all the sanding dust. -
Sealing (Optional):
If you want extra durability or a specific sheen, apply a thin coat of matte or gloss varnish now. I find a matte finish keeps the look natural and rustic. -
Prepare the Twine:
Cut a length of jute twine approximately 12 inches long. Fold it in half to create a loop at one end. -
Thread the Ornament:
Push the folded loop end through the top hole of the star, going from the front to the back. -
Secure the Loop:
Pull the two loose tail ends of the twine through the loop you just pushed through the hole (a lark’s head knot). Pull tight to secure it against the clay. -
Knot the Top:
Bring the two loose ends up to your desired hanging length and tie an overhand knot to close the loop. -
Create the Tassel End:
Trim the loose ends a small distance past the knot (about half an inch) and fray the fibers slightly with your fingers to create the tassel look seen in the image.
Textured Variation
Before cutting the star shape, gently press a lace doily or a textured fabric into the rolled clay to emboss a subtle pattern onto the surface.
Hang your new handcrafted star on the tree or use it as a special gift topper for the holidays


Stamped Snowflake Medallions
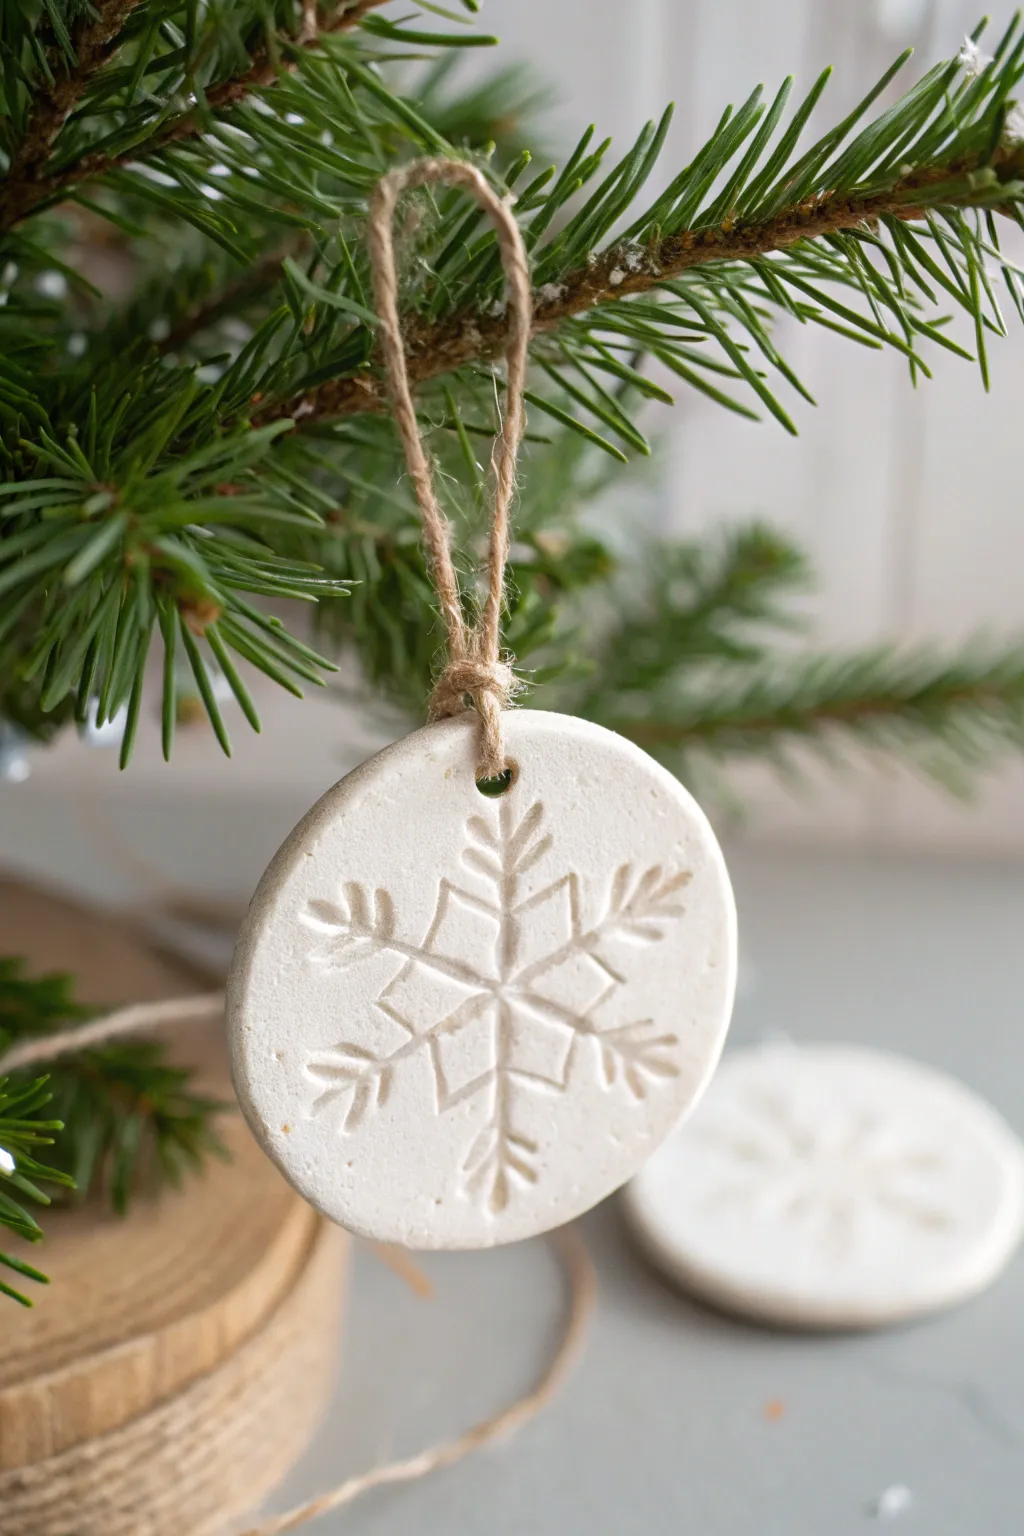
Create rustic farmhouse charm with these elegant clay medallions featuring a simple embossed snowflake. The smooth white clay surface contrasts beautifully with the textural jute hanger, making these ornaments a timeless addition to any evergreen tree.
Step-by-Step Tutorial
Materials
- White original Sculpey or air-dry clay
- Rolling pin
- Parchment paper or non-stick craft mat
- Circle cookie cutter (approx. 2-3 inches)
- Snowflake rubber stamp (unmounted or mounted)
- Straw or small dowel
- Fine-grit sandpaper (optional)
- Jute twine
- Scissors
Step 1: Preparing the Base
-
Condition the clay:
Begin by working a chunk of white clay in your warm hands. Knead it thoroughly until it feels soft, pliable, and free of any stubborn lumps, which prevents cracking later. -
Set up your workspace:
Lay down a sheet of parchment paper or a silicone craft mat on a flat surface. This key step ensures your ornaments won’t stick to the table as you roll them out. -
Roll out the slab:
Place your conditioned clay on the mat and use a rolling pin to flatten it. Aim for an even thickness of about 1/4 inch; too thin and it might break, too thick and it will be heavy. -
Smooth the surface:
Check the rolled slab for any air bubbles or fingerprints. I like to gently run a slightly damp finger over the top to create a perfectly pristine canvas for stamping.
Stamp Release Trick
Dust your rubber stamp lightly with cornstarch or baby powder before pressing it into the clay. This acts as a release agent and prevents the detailed snowflake design from sticking.
Step 2: Stamping and Cutting
-
Position the cutter:
Take your circle cookie cutter and gently place it on the clay to plan your layout, but don’t press down just yet. This helps visualize where the design will go. -
Stamp the design:
Press your snowflake stamp firmly into the center of the area you just visualized. Apply even pressure to ensure all the delicate branches of the snowflake make a clear impression. -
Lift the stamp:
Pull the stamp straight up to avoid smudging the design. If the clay pulls up slightly, use a fingernail to gently hold the clay down while separating them. -
Cut the shape:
Center your cookie cutter over the stamped snowflake. Press straight down firmly to cut the circle, then give it a tiny wiggle to separate it from the excess clay. -
Create the hanging hole:
Using a plastic straw or a small wooden dowel, punch a clean hole near the top edge of the circle. Make sure it’s centered above the snowflake design and not too close to the very edge. -
Clean the edges:
Carefully lift the circle from the mat. Gently rub your finger along the cut edge to smooth down any rough ridges or clay crumbs left by the cutter.
Step 3: Finishing Touches
-
Dry or bake:
If using polymer clay, bake according to the package instructions (usually 275°F for 15-30 minutes). If using air-dry clay, let it sit on a flat drying rack for 24-48 hours until stark white and hard. -
Sand imperfections:
Once fully cured and cooled, inspect the edges. If there are any sharp spots, very lightly buff them away with fine-grit sandpaper for a professional finish. -
Cut the twine:
Snip a length of jute twine, approximately 8 to 10 inches long, depending on how low you want the ornament to hang. -
Thread the loop:
Fold the twine in half and push the folded loop end through the hole in the ornament from front to back. -
Secure the hanger:
Pass the two loose tail ends of the twine through the loop you just pushed through. Pull the tails tight to create a secure lark’s head knot right at the top of the clay. -
Tie the ends:
Bring the two loose ends together and tie a simple overhand knot to close the loop, trimming any excess fuzz if desired.
Add a Frosty Shimmer
Before baking or drying, lightly brush a clear mica powder or fine white glitter over the embossed snowflake. It will catch the light beautifully on the tree.
Hang your new handcrafted medallion on a prominent branch and enjoy the simple, wintry elegance it brings to your holiday decor
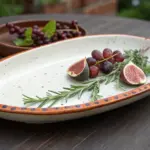


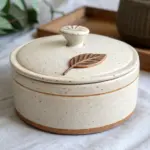
Evergreen Leaf-Imprint Ornaments
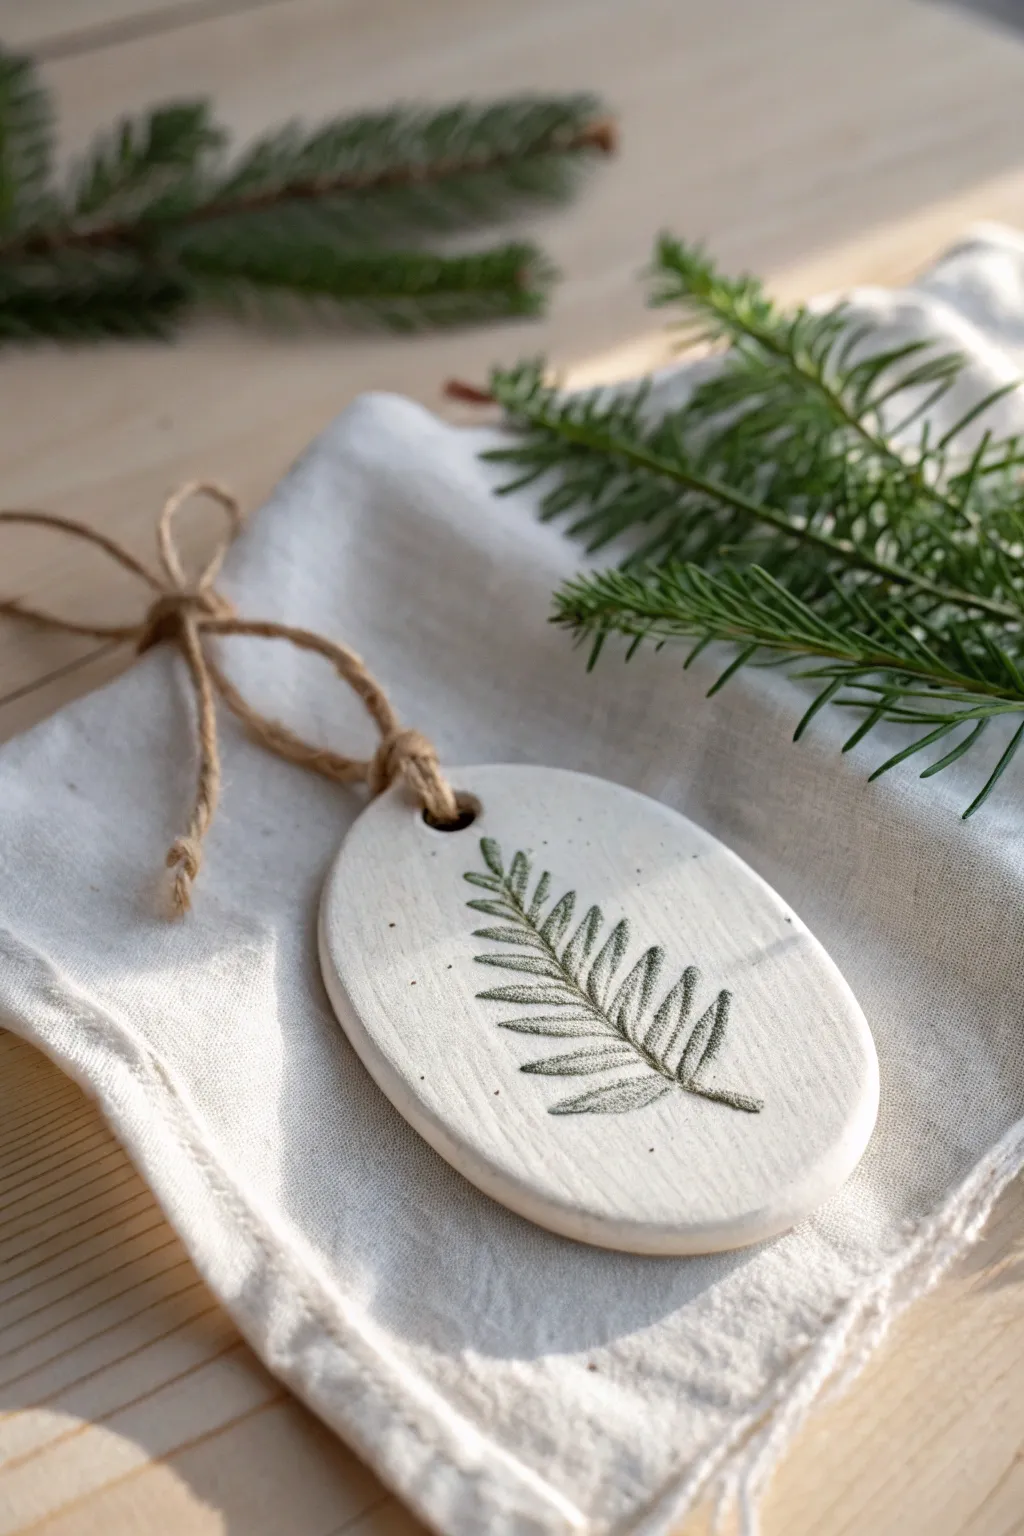
Capture the delicate details of winter foliage with these understated clay ornaments. Their smooth, stone-like finish and deeply grooved botanical impressions make them a timeless addition to any holiday tree.
How-To Guide
Materials
- White air-dry clay (or polymer clay)
- Small evergreen sprig or fern tip
- Rolling pin
- Oval cookie cutter (or knife/template)
- Dark green acrylic paint
- Water
- Small paintbrush
- Paper towel or sponge
- Drinking straw or cocktail stick
- Jute twine
- Sandpaper (fine grit)
- Matte sealant (optional)
Step 1: Preparing the Clay Base
-
Condition the Clay:
Begin by taking a handful of white air-dry clay and kneading it in your hands until it becomes soft, pliable, and free of cracks. -
Roll it Out:
On a clean, flat surface, use your rolling pin to flatten the clay to a uniform thickness, aiming for about 1/4 inch thick to ensure durability without being too heavy. -
Check for Imperfections:
Inspect the surface for any air bubbles or lint. Smooth these out gently with a damp finger if needed to ensure a pristine canvas for your print.
Step 2: Creating the Impression
-
Select Your Botanicals:
Choose a fresh sprig of evergreen or a small fern tip. The freshest leaves tend to be stiffer and leave a cleaner, deeper impression than wilted ones. -
Position the Foliage:
Lay the sprig carefully onto the rolled clay. Press it down lightly with your fingers first to secure it in place so it doesn’t shift. -
Roll the Impression:
Take your rolling pin and roll firmly directly over the sprig. Apply even pressure to embed the foliage into the clay surface. -
Remove the Leaf:
Carefully pick the stem of the foliage and peel it away from the clay. You should see a detailed, negative relief of the needles and stem. -
Cut the Shape:
Center your oval cookie cutter over the impression and press down firmly to cut out the ornament shape. If you don’t have a cutter, trace an oval template with a craft knife. -
Smooth the Edges:
Lift the ornament and gently smooth the cut edges with a finger dipped in a little water to soften any harsh lines. -
Create the Hanging Hole:
Use a drinking straw or a thick cocktail stick to punch a hole near the top center of the oval. Make sure it’s roughly 1/4 inch from the edge to prevent breakage.
Sticky Situation?
If the clay sticks to your roller or table, roll it out on a piece of parchment paper or lightly dust your work surface with cornstarch before beginning.
Step 3: Finishing Touches
-
Allow to Cure:
Set the ornament on a wire rack or clean paper to dry completely. For air-dry clay, this usually takes 24-48 hours. Flip it halfway through to ensure even drying. -
Sand for Smoothness:
Once fully rigid, use fine-grit sandpaper to briefly buff the edges and surface, removing any remaining roughness. -
Prepare the Wash:
Mix a small amount of dark green acrylic paint with water to create a thin, fluid wash. Dealing with washes gives you more control over the intensity. -
Apply the Paint:
Paint the wash liberally over the indented leaf impression, making sure the liquid sinks deep into the crevices of the design. -
Wipe the Surface:
Immediately take a damp paper towel or sponge and wipe across the surface of the clay. This removes paint from the raised areas while leaving the dark pigment inside the grooves. -
Optional Sealant:
If you want extra protection, brush on a coat of matte varnish once the paint is dry, though leaving it raw mimics a natural stone look. -
Add the Hanger:
Cut a length of natural jute twine. Thread it through the hole and tie a simple loop knot at the top for hanging. -
Tie the Bow:
To finish perfectly, tie a separate small bow with another piece of twine and glue it over the loop knot, or tie the main hanging loop directly into a bow shape.
Level Up: Gilded Edge
For a subtle hint of luxury, use a small brush to paint the very outer rim of the oval with liquid gold leaf or metallic gold paint.
Hang your new botanical treasures where they can catch the light and show off their natural texture


Gingerbread-Style Faux Cookies

Capture the nostalgic charm of classic holiday baking without turning on the oven. This realistic faux gingerbread man ornament uses polymer clay and dimensional paint to create a decoration that looks good enough to eat.
Step-by-Step
Materials
- Light brown polymer clay (e.g., Sculpey or Fimo)
- Black or dark brown acrylic paint (optional, for shading)
- Gingerbread man cookie cutter (standard size)
- Rolling pin or clay roller
- Parchment paper
- Toothbrush or textured sponge
- White 3D fabric paint or puffy paint (fine tip)
- Dark teal satin ribbon (1/4 inch wide)
- Jute twine
- Small straw or skewer
- Baking sheet
- Sandpaper (fine grit)
Step 1: Creating the Base
-
Condition the clay:
Begin by kneading your light brown polymer clay until it is soft and pliable. If the brown is too flat, I like to mix in a tiny pinch of translucent clay to give it that realistic, slightly waxy cookie depth. -
Roll the dough:
Roll out the clay onto a sheet of parchment paper. Aim for a thickness of about 1/4 inch, similar to a real cookie, to ensure it doesn’t look frail. -
Cut the shape:
Press your gingerbread man cookie cutter firmly into the clay. Wiggle it slightly before lifting to ensure a clean cut, then gently remove the excess clay from around the shape. -
Add texture:
To mimic a baked texture, gently tap the surface of the clay with a clean toothbrush or a textured sponge. Do not drag the tool; just tap up and down to create tiny pores. -
Create the hanging hole:
Use a small straw or a skewer to poke a hole at the very top of the head. Make sure the hole is large enough for your twine to pass through later, as it may shrink slightly during baking. -
Shade the edges (optional):
For a ‘perfectly baked’ look, gently brush real cocoa powder or crushed soft pastels onto the edges and feet of the raw clay using a soft paintbrush.
Step 2: Baking and Decorating
-
Bake the ornament:
Transfer the parchment paper with the clay shape onto a baking sheet. Bake according to your package instructions (usually 275°F for 15-30 minutes depending on brand). -
Cool down:
Let the ornament cool completely on the tray. It helps to place a heavy book on it while cooling if it appears to be curling slightly. -
Smooth the edges:
Once cool, inspect the edges. If there are any sharp bits of clay, gently gently sand them down with fine-grit sandpaper so the ‘cookie’ looks soft. -
Pipe the face:
Using the white 3D puffy paint with a fine tip nozzle, squeeze two small dots for eyes and a curved line for the smile. Keep the pressure steady to mimic royal icing. -
Add buttons:
Pipe three distinct dots down the center of the chest for the buttons. Try to keep them vertically aligned. -
Detail the limbs:
Pipe a squiggle or zigzag pattern across the wrists and ankles. This classic decoration adds immediate character to the figure. -
Dry the paint:
Let the 3D paint dry completely flat. This can take several hours, so be patient to avoid smudging your hard work.
Sticky Situation
If your clay sticks to the cookie cutter, dust the cutter with a little cornstarch or flour before pressing it down. This acts as a release agent just like with real dough
Step 3: Assembly
-
Attach the hanger:
Cut a length of jute twine (about 6 inches). Thread it through the hole in the head and tie a secure knot to form a loop. -
Create the bow:
Cut a piece of dark teal satin ribbon. Tie a small, neat bow separate from the ornament first to get the shape right. -
Secure the bow:
Tie or glue this teal bow onto the base of the twine loop, right where it meets the clay head. Trim the ribbon tails at an angle for a polished finish.
Scented Secret
Mix cinnamon and nutmeg spices directly into the polymer clay during the conditioning phase. Simply knead them into the material for an authentic gingerbread scent
Hang your timeless creation on a branch or use it as a delightful gift topper for the holidays

The Complete Guide to Pottery Troubleshooting
Uncover the most common ceramic mistakes—from cracking clay to failed glazes—and learn how to fix them fast.
Mini Wreath Ring Ornaments
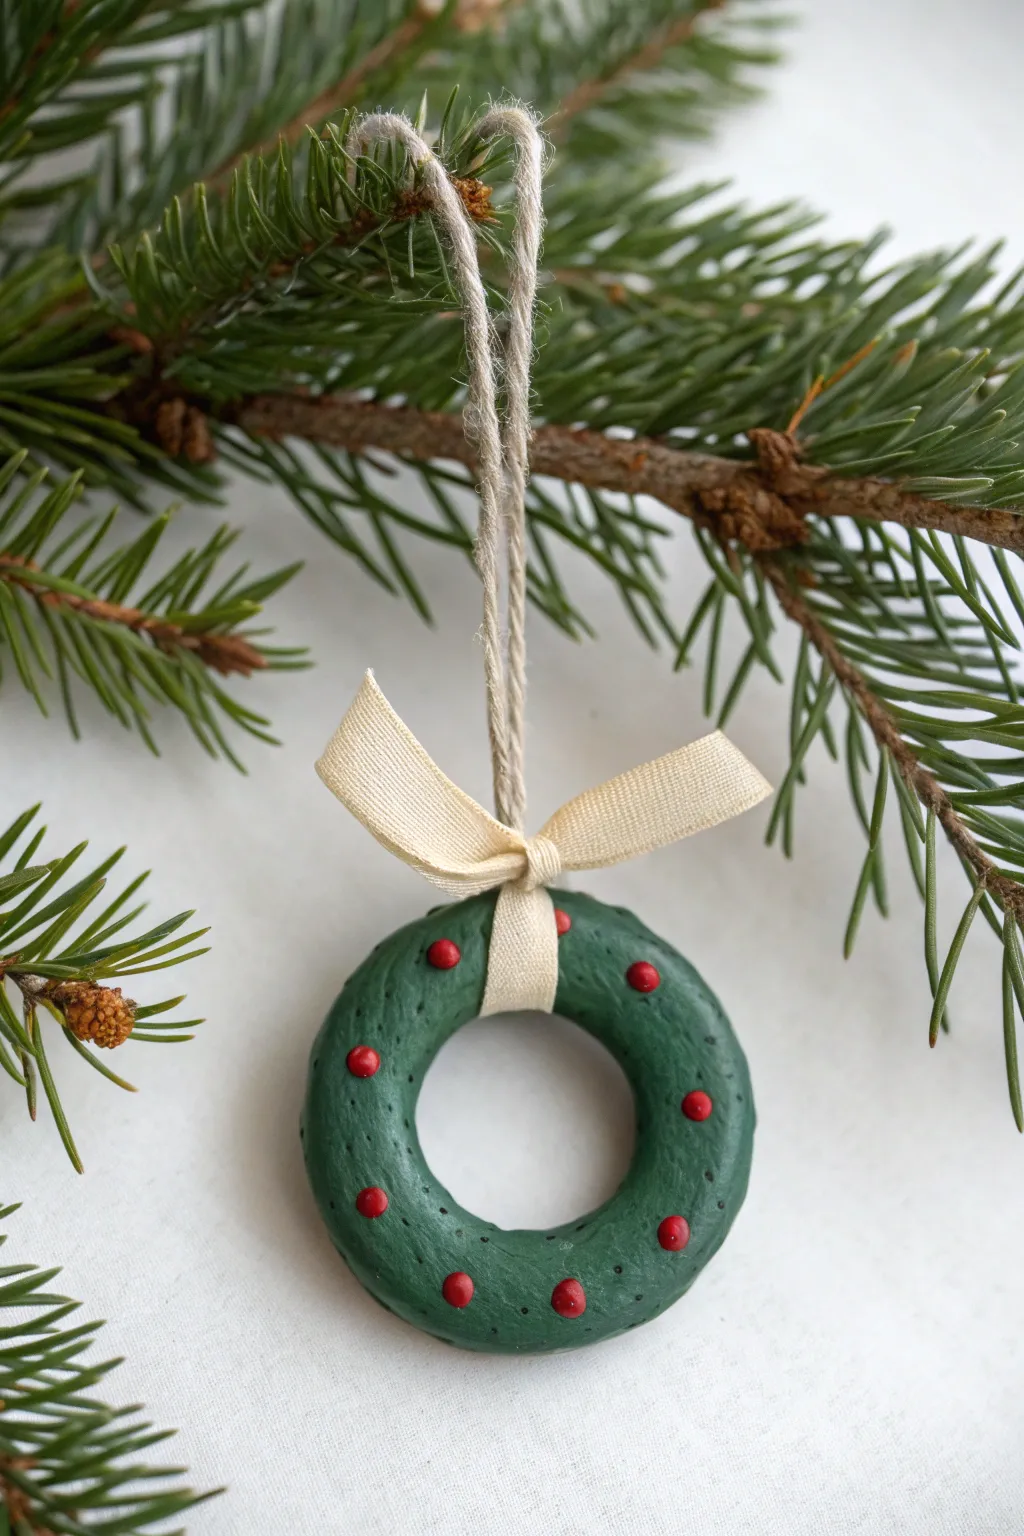
Elegantly simple and charmingly festive, these mini donut-shaped wreath ornaments bring a touch of handmade warmth to your holiday decor. With their classic green finish and delicate berry details, they add a timeless look to any tree.
Step-by-Step Guide
Materials
- Air-dry clay or polymer clay (white)
- Acrylic paint (forest green and bright red)
- Small paintbrush
- Jute twine or hemp cord
- Cream-colored cotton or grosgrain ribbon (1/2 inch wide)
- Clay roller or smooth jar
- Small circular cookie cutter (approx. 2 inches)
- Smaller circular cutter (approx. 1 inch – a bottle cap works)
- Toothpick or needle tool
- Sandpaper (fine grit)
- Mod Podge or clear sealant (matte or satin)
Step 1: Shaping the Clay Wreaths
-
Condition the Clay:
Begin by taking a chunk of your clay and kneading it in your hands until it becomes soft, pliable, and free of cracks. If using polymer clay, this warms it up; for air-dry clay, it ensures even consistency. -
Roll It Out:
On a clean, flat surface, roll the clay out to a thickness of about 1/4 inch (6-7mm). You want it sturdy enough to hang but not overly heavy. -
Cut the Outer Circle:
Use your larger circular cookie cutter to punch out the main shape of the ornament. -
Cut the Inner Ring:
Take the smaller cutter or bottle cap and carefully center it within the larger circle. Press down to remove the center, creating a donut or wreath shape. -
Smooth the Edges:
Dip your finger in a little water (for air-dry clay) or baby oil (for polymer) and run it along the cut edges to smooth out any sharpness or roughness. -
Add Texture (Optional):
For the subtle, organic look seen in the photo, gently tap a crumpled piece of aluminum foil or a stiff bristle brush over the front surface to create a light texture. -
Dry or Bake:
Follow the instructions for your specific clay. If using air-dry clay, let it sit for 24-48 hours until completely hardened. If using polymer, bake according to the package temperature and time.
Cracked Clay Fix
If you notice small cracks in your air-dry clay as it dries, mix a tiny bit of fresh clay with water to make a paste and fill the gaps. Smooth it over and let dry again.
Step 2: Painting and Detailing
-
Sand Imperfections:
Once fully cured or dry, inspect the wreath. If there are any sharp jagged edges, gently sand them down with fine-grit sandpaper. -
Base Coat:
Paint the entire wreath—front, back, and sides—with deep forest green acrylic paint. You may need two coats for opaque coverage, allowing the first to dry completely before applying the second. -
Add Texture Details:
To enhance the texture, use a toothpick to poke extremely tiny, shallow indentations randomly around the green surface, mimicking the look of pine foliage. You can also do this with a darker green wash if you prefer a painted illusion. -
Paint the Berries:
Dip the non-brush end (the handle) of a small paintbrush into bright red acrylic paint. Gently dot the paint onto the wreath surface to create uniform, raised red berries. -
Seal the Ornament:
Once the paint is thoroughly dry, apply a coat of matte or satin sealant. This protects the paint and gives the ornament a finished, professional sheen.
Step 3: Assembly
-
Attach the Hanger:
Cut a length of jute twine, about 8 inches long. Loop it through the center hole of the wreath ornament. -
Knot the Twine:
Bring the two ends of the twine together and tie a knot near the ends to create a hanging loop. I usually like to hide this knot behind the branch when hanging or glue it to the back of the bow. -
Create the Bow:
Cut a piece of cream ribbon roughly 6 inches long. Tie a classic bow around the bunched-up twine at the very top of the wreath ring. -
Secure the Bow:
Adjust the loops so they are symmetrical and trim the tails at an angle. If the bow slides around too much, a tiny dot of glue on the back of the knot will keep it fixed in place right against the clay ring.
Make It Sparkle
For a frosty winter morning effect, mix a tiny pinch of white iridescent glitter into your final clear sealant coat before brushing it onto the wreath.
Now you have a classic, homemade keepsake that looks perfect nestled among evergreen branches
Holly Berry Relief Ornaments
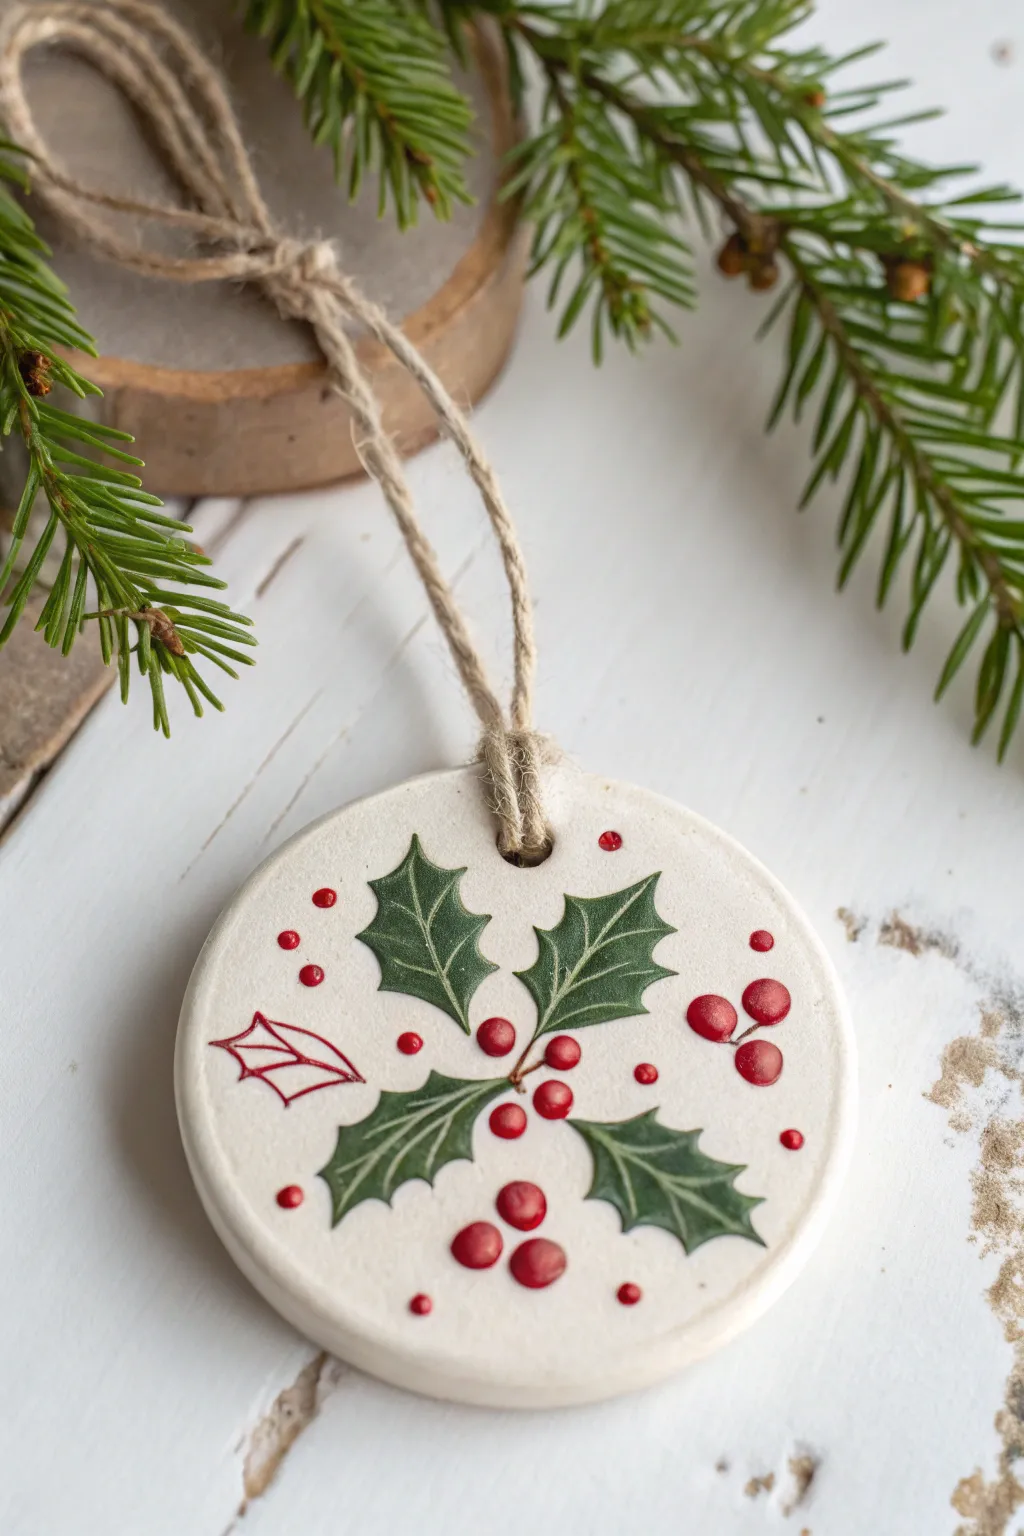
Capture the classic beauty of winter foliage with these elegant polymer or air-dry clay ornaments. The raised berry details and hand-painted holly leaves create a sophisticated, slightly dimensional look that feels perfectly festive against the smooth white clay.
How-To Guide
Materials
- White polymer clay or air-dry clay
- Rolling pin
- Circle cookie cutter (approx. 3 inches)
- Straw or small circular cutter (for the hanging hole)
- Fine-grit sandpaper
- Acrylic paints (dark green, deep red, bright red)
- Fine detail paintbrush (size 0 or 00)
- Small dotting tool or toothpick
- Matte or satin varnish/sealer
- Jute twine for hanging
Step 1: Shaping the Base
-
Prepare the Clay:
Condition your white clay by kneading it in your hands until it is soft, pliable, and free of cracks. If using polymer clay, ensure your workspace is clean to avoid trapping lint. -
Roll it Out:
Use a rolling pin to flatten the clay to an even thickness of about 1/4 inch. I find that using rolling guides or two stacks of playing cards on either side helps keep the thickness perfectly uniform. -
Cut the Shape:
Press your circular cookie cutter firmly into the clay to create the ornament base. lift the excess clay away carefully. -
Smooth the Edges:
Dip your finger in a little water (for air-dry clay) or baby oil (for polymer clay) and gently run it along the cut edge to smooth out any roughness. -
Create the Hanging Hole:
Use a drinking straw or a small circular cutter to punch a hole near the top edge of the circle. Make sure it’s not too close to the edge to prevent tearing later. -
Dry or Bake:
Follow the manufacturer’s instructions for your specific clay. Bake in the oven if using polymer, or let it air dry completely (usually 24-48 hours) on a flat surface. -
Sand for Perfection:
Once fully cured or dry, use fine-grit sandpaper to gently buff the surface and edges. Wipe away all dust with a slightly damp cloth.
Paint Consistency Pro-Tip
If you don’t have gel medium, let a dollop of red acrylic paint sit on your palette for 10-15 minutes before using it. As the water evaporates, it naturally thickens for better relief dots.
Step 2: Painting the Design
-
Outline the Holly:
Using a very fine detail brush and watered-down dark green paint, lightly sketch the outline of four holly leaves meeting in the center. Aim for a symmetrical cross shape. -
Fill the Leaves:
Fill in your leaf outlines with the dark green acrylic paint. You may need two thin coats for opaque coverage. Let this base layer dry completely. -
Add Vein Details:
Mix a tiny amount of white or light green into your dark green paint. Use your finest brush to paint the central vein and side veins on each leaf. Keep these lines extremely thin for a delicate look. -
Create the Outline Leaf:
To the left of the main cluster, use deep red paint and a steady hand to draw a simple outline of a single holly leaf. This open line-work adds a modern artistic touch. -
Add Small Dots:
Dip the tip of a toothpick or a small dotting tool into red paint. Place tiny red dots scattered randomly around the leaves to fill the negative space.
Step 3: Adding the Relief Berries
-
Mix Thick Paint:
For the berries, you want dimension. If your red acrylic paint is thin, mix it with a small amount of heavy body gel medium or texture paste. Alternatively, you can use puffy fabric paint. -
Form the Central Berries:
Using a larger dotting tool or the back end of a paintbrush, deposit generous drops of this thick red mixture in the center where the leaves meet. Allow the paint to mound up slightly. -
Add Accent Berries:
Place a few additional larger raised berries near the outer tips of the leaves or mixed in with the smaller dots. -
Highlight the Berries:
Once the red paint is dry to the touch, add a minuscule dot of white paint to the top right of each large berry to create a ‘shine’ effect. -
Seal the Ornament:
Apply a coat of matte or satin varnish over the entire front of the ornament to protect your painting. Be gentle over the raised berries. -
String it Up:
Cut a length of jute twine, fold it in half, pass the loop through the hole, and pull the tails through the loop to secure it essentially creates a classic lark’s head knot.
Level Up: Glossy Berries
After sealing the whole ornament with matte varnish, go back and add a drop of dimensional glaze (like Mod Podge Dimensional Magic) or clear UV resin just on top of each berry for a wet, glass-like shine.
Now hang your handcrafted holly ornament on the tree and enjoy the charming texture it adds to your holiday decor


What Really Happens Inside the Kiln
Learn how time and temperature work together inside the kiln to transform clay into durable ceramic.
Candy Cane Swirl Plaques
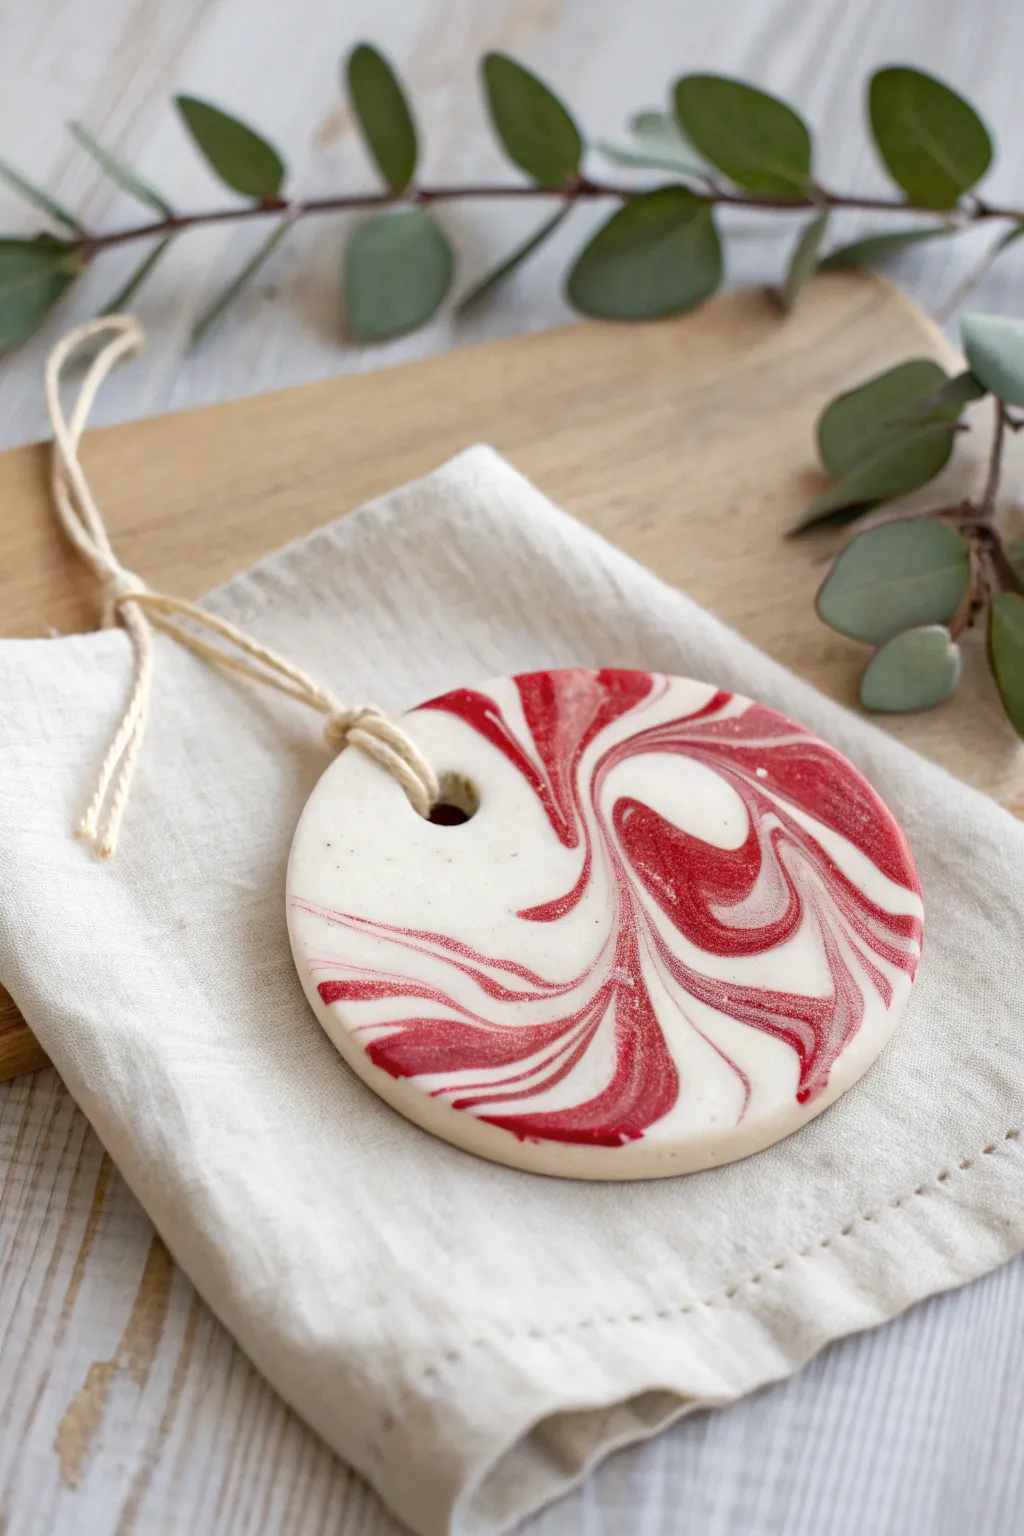
Capture the nostalgic sweetness of peppermint treats with this marbled clay masterpiece. The elegant swirls of red and white create a unique, mesmerizing pattern that evokes the feeling of vintage candy shops.
Step-by-Step Guide
Materials
- White polymer clay
- Red polymer clay (e.g., translucent ruby or classic Christmas red)
- Rolling pin (acrylic roller works best)
- Round cookie cutter (approx. 3-4 inches)
- Parchment paper or baking mat
- Small straw or drinking straw
- Fine grit sandpaper (400-600 grit)
- Natural twine, jute, or ribbon
- Gloss glaze or polyurethane (optional)
- Soft paintbrush (for glaze)
Step 1: Preparing the Clay
-
Condition the white clay:
Begin by taking a generous amount of white polymer clay and kneading it in your hands until it becomes soft, pliable, and warm. -
Condition the red clay:
Repeat the conditioning process with a smaller amount of red clay, ensuring it is equally workable to prevent cracking later. -
Create base logs:
Roll the white clay into a thick log, roughly the width of a marker. Roll the red clay into a thinner snake, about half the thickness of the white log.
Step 2: Creating the Marbling
-
Twist the colors:
Lay the thin red snake alongside the thick white log and twist them together tightly to form a single, two-tone rope. -
Fold and roll:
Fold the twisted rope in half and roll it out again into a snake. Repeat this folding and twisting process 3-4 times, but stop before the colors blend into pink. -
Form a ball:
Roll the twisted clay into a smooth ball in the palms of your hands. You should see distinct stripes swirling around the sphere. -
Flatten the marble:
Place the ball on your parchment paper and use the acrylic roller to flatten it into a sheet about 1/4 inch thick. Roll in different directions to stretch the swirl pattern organically.
Muddy Colors?
If your red and white are turning pink, you are over-mixing. Stop twisting sooner! You want distinct streaks, not a uniform blend. Chill the clay briefly if it gets too soft.
Step 3: Shaping and Baking
-
Cut the shape:
Position your round cookie cutter over the section of the clay with the most pleasing swirl pattern and press down firmly to cut the circle. -
Smooth the edges:
Gently run your fingertip along the cut edge of the circle to soften any sharp ridges left by the cutter. -
Add the hanging hole:
Using a small straw, punch a clean hole near the top edge of the ornament. Twist the straw slightly as you pull it out to remove the clay plug cleanly. -
Bake the ornament:
Transfer the parchment paper to a baking sheet. Bake according to your specific clay package instructions (usually 275°F/135°C for 15-30 minutes). -
Cool completely:
Remove from the oven and allow the ornament to cool completely on a flat surface. Don’t handle it while hot, as the clay is still fragile.
Add Some Sparkle
Before baking, lightly press gold leaf flakes into the white sections or brush pearl mica powder over the surface for a shimmering, high-end finish.
Step 4: Finishing Touches
-
Sand for perfection:
Once cool, lightly wet the sandpaper and gently buff the edges and surface of the ornament to remove any fingerprints or lint. -
Apply gloss (optional):
For a ‘wet candy’ look, brush on a thin layer of gloss glaze. I find this really makes the red pop, though a matte finish looks lovely too. -
Let it dry:
Allow the glaze to dry completely according to the manufacturer’s timeframe. -
Prepare the hanger:
Cut a length of natural twine or jute, about 8-10 inches long. -
Secure the loop:
Thread the twine through the hole and tie a secure knot at the base near the ornament, or double it over for a loop-through method.
Hang this sweet decoration on your tree and enjoy the handmade charm it brings to your holiday season
Monogram Letter Ornaments
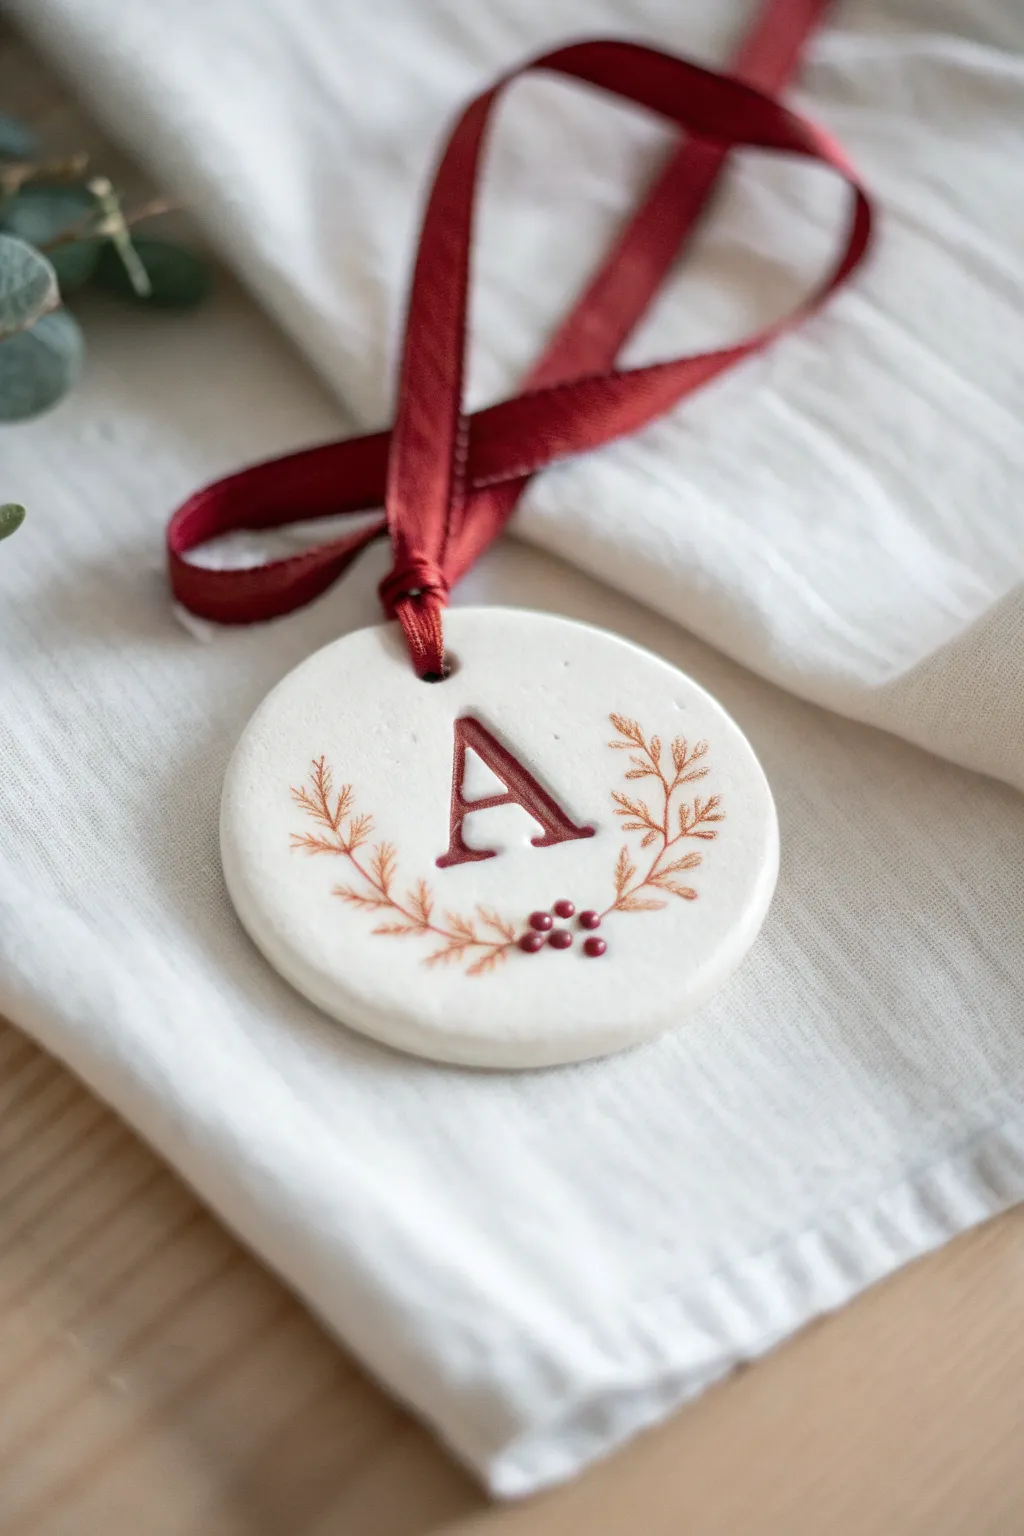
This personalized ornament combines the clean, minimal look of white clay with delicate painted details for a truly classic Christmas feel. Perfect as a bespoke gift tag or a treasured keepsake, it features a deeply embossed monogram surrounded by a shimmering gold laurel.
Detailed Instructions
Materials
- White air-dry clay or polymer clay
- Rolling pin
- Circle cookie cutter (approx. 3-inch diameter)
- Letter stamp or embossing tool
- Fine-point detail paintbrush
- Gold metallic acrylic paint
- Deep red acrylic paint
- Burgundy acrylic paint
- Straw or small circular cutter (for the ribbon hole)
- Sandpaper (fine grit)
- Gloss glaze or sealant (optional)
- Dark red velvet or satin ribbon (approx. 1/4 inch wide)
Step 1: Shaping the Base
-
Prepare the Clay:
Start by kneading a handful of white clay until it is soft, pliable, and free of any air bubbles. If you are using polymer clay, ensure it is fully conditioned to prevent cracking later. -
Roll it Out:
Roll the clay out on a smooth surface to an even thickness of about 1/4 inch. If you want a perfectly flat surface, I like to place thin wooden dowels on either side of the clay to guide the rolling pin. -
Cut the Circle:
Press your circle cookie cutter firmly into the clay. Give it a slight wiggle before lifting to ensure a clean cut, then peel away the excess clay from the outside. -
Smooth the Edges:
Dip your finger in a little bit of water and gently run it around the circumference of the circle to smooth down any sharp or ragged edges created by the cutter. -
Create Hanging Hole:
Using a straw or a small circular tool, punch a clean hole near the top edge of the ornament. Position it centered above where your design will go, leaving enough border so the clay won’t break.
Step 2: Imprinting and Design
-
Center the Stamp:
Position your letter stamp directly in the center of the circle. Take a moment to eye it up carefully before committing to the pressure. -
Emboss the Letter:
Press the stamp down firmly and evenly. You want a deep impression that creates a distinct shadow, but be careful not to push all the way through the clay. -
Lift and Clean:
Gently wiggle the stamp upward to remove it without distorting the clay. If the edges of the letter dragged up slightly, tap them down gently with a flat tool. -
Drying Time:
Allow the ornament to dry completely according to your clay manufacturer’s instructions. For air-dry clay, flip it occasionally to keep it flat; for polymer, bake as directed. -
Sanding:
Once fully cured and hard, gently sand the edges and surface with fine-grit sandpaper to achieve a porcelain-like finish. Wipe away all dust with a slightly damp cloth.
Clean Lines Hack
If your hand shakes while painting the embossed letter, wipe mishaps instantly with a damp Q-tip. The indentation acts as a barrier, keeping paint inside.
Step 3: Painting the Details
-
Paint the Monogram:
Using a fine brush, carefully fill the embossed letter ‘A’ with a mix of deep red and burgundy paint. The indented area makes it easier to stay inside the lines. -
Start the Foliage:
Squeeze out a small amount of gold metallic paint. Load your finest detail brush, ensuring the tip is sharp and not overloaded. -
Paint the Stems:
Draw two thin, curved lines stemming from the bottom center, curving upward to cradle the letter. These will be the main stems for your wreath. -
Add Gold Leaves:
Using very light pressure, paint short, feathery strokes extending outward from the main stems to create fern-like leaves. Taper them so they are thicker at the base and pointy at the tip. -
Create the Berries:
Dip the non-brush end (the handle) of your paintbrush into the deep red paint. Dot a small cluster of three to five berries at the bottom center where the gold stems meet. -
Add Highlights:
If desired, add a tiny dot of white or a lighter red to one side of each berry to give them dimension and make them look round and shiny. -
Sealing:
Once all paint is completely dry, apply a thin coat of matte or gloss varnish to protect the surface, paying special attention to sealing the painted areas. -
Attaching the Ribbon:
Cut a length of dark red ribbon. Thread it through the top hole, acting carefully so you don’t chip the paint, and loop it through itself to create a secure hanging mechanism.
Rustic Texture
Before cutting your circle, roll a piece of linen or lace over the clay slab. This imprints a subtle fabric texture that looks amazing under the glaze.
Now you have a sophisticated, personalized ornament ready to hang on the tree or give to a loved one.

TRACK YOUR CERAMIC JOURNEY
Capture glaze tests, firing details, and creative progress—all in one simple printable. Make your projects easier to repeat and improve.
Year-Stamped Keepsake Ornaments
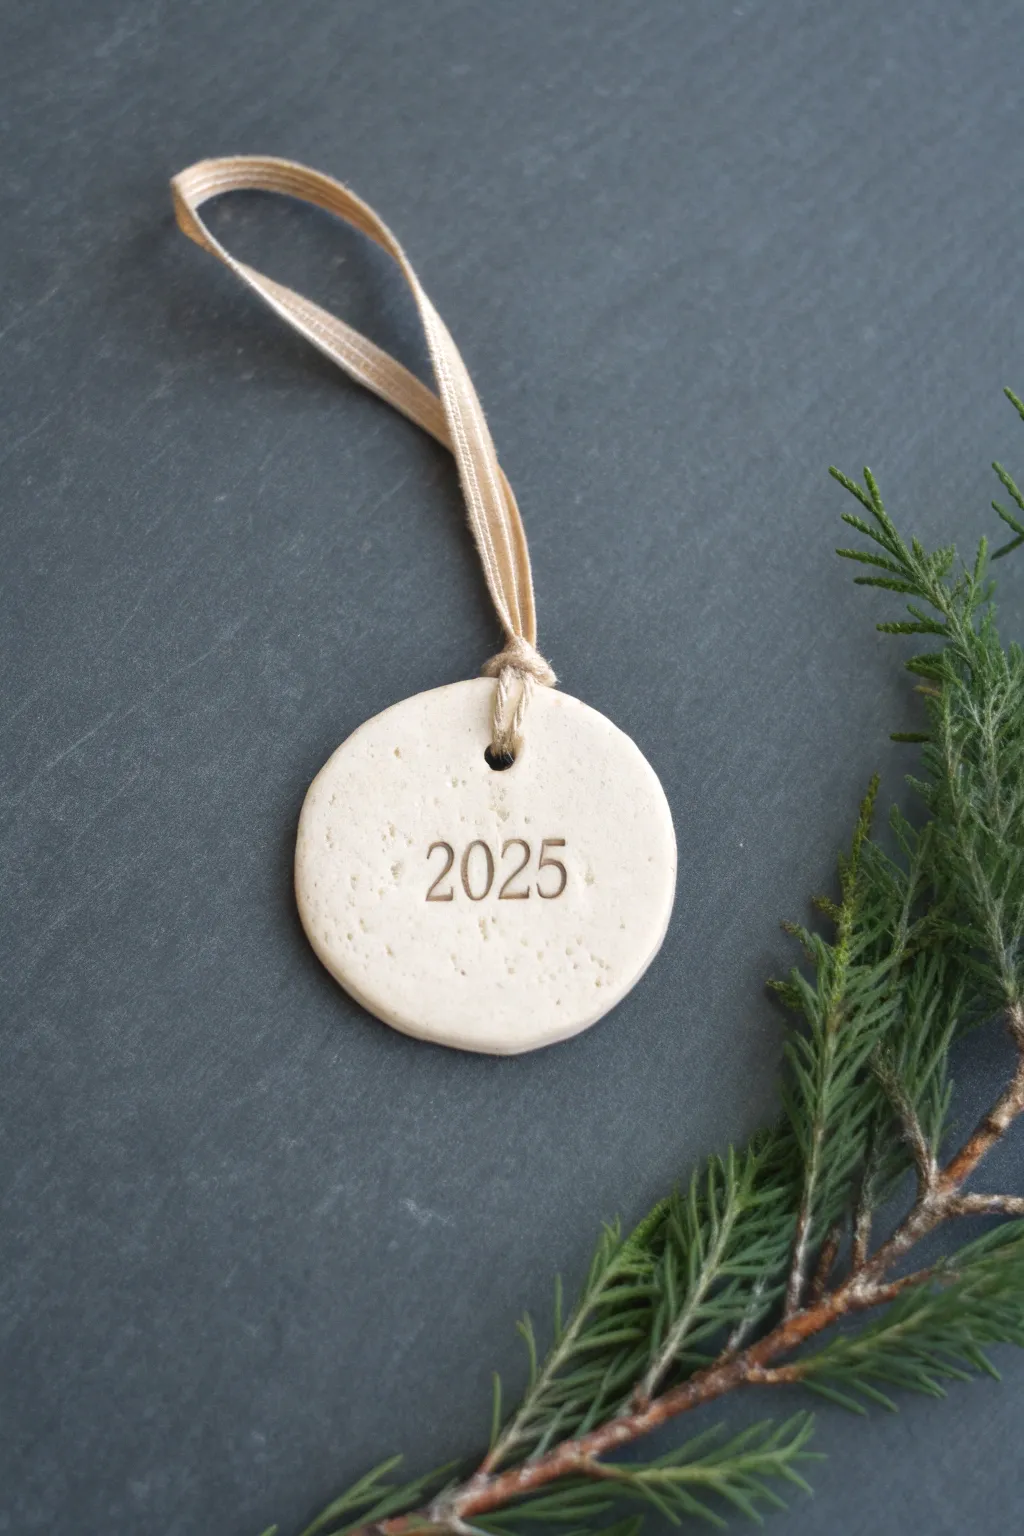
Capture the year with elegant simplicity using this handmade clay keepsake. With its organic texture and clean typography, this ornament serves as a minimalist memento that marks the passage of time beautifully.
Step-by-Step
Materials
- White or cream air-dry clay (or polymer clay)
- Rolling pin
- Circle cookie cutter (approx. 2.5 – 3 inches)
- Number stamps (small serif font recommended)
- Drinking straw or skewer
- Fine-grit sandpaper
- Beige or tan fabric ribbon
- Parchment paper or craft mat
- Water (for smoothing)
- Clear matte sealant (optional)
Step 1: Preparation and Shaping
-
Prepare your workspace:
Lay down a piece of parchment paper or a silicone craft mat to prevent the clay from sticking to your table. This also makes moving the wet clay much easier later on. -
Condition the clay:
Take a handful of your air-dry clay and knead it in your hands for a minute. You want it warm and pliable to reduce the chance of cracking. -
Roll the slab:
Place the clay ball on your mat and use the rolling pin to flatten it. Aim for a thickness of about 1/4 inch; if it’s too thin, it becomes fragile, but too thick can look clunky. -
Cut the circle:
Press your circle cookie cutter firmly into the clay. Give it a tiny wiggle to ensure it separates cleanly, then lift the cutter. Peel away the excess clay from around the circle. -
Smooth the edges:
Dip your finger in a tiny bit of water and run it gently around the rim of your clay circle. This removes any harsh lines from the cutter and gives that soft, handmade look seen in the photo.
Step 2: Stamping and Detailing
-
Create the texture (optional):
The original ornament has a slightly pitted, organic surface. Just tap the flat side of a slightly crumpled ball of aluminum foil or a textured stone gently against the clay’s surface. -
Center the date:
Arrange your number stamps (‘2’, ‘0’, ‘2’, ‘5’) in order. Before stamping the clay, I always do a practice press on a scrap piece to check the spacing. -
Stamp the year:
Press the stamps into the exact center of the circle. Apply even pressure so the numbers are legible but not so deep that they distort the back of the ornament. -
Create the hanging hole:
Use a drinking straw or a thick skewer to punch a hole near the top edge. Make sure it’s centered above the numbers and at least 1/4 inch away from the rim to prevent tearing. -
Final inspection:
Check the surface one last time for lint or fingerprints. Smooth them out gently with a damp fingertip if needed.
Stamp Alignment Hack
Tape your number stamps together with masking tape before pressing. This ensures perfect spacing and keeps the numbers in a straight line.
Step 3: Finishing and Assembly
-
Let it dry:
Place the ornament on a clean sheet of parchment paper in a cool, dry place. Let it air dry for 24-48 hours. Flip it over halfway through the drying process to ensure both sides dry evenly and stay flat. -
Sand the imperfections:
Once fully cured and hard, use fine-grit sandpaper to briefly buff the edges or any rough spots on the surface. Wipe away the dust with a dry cloth. -
Seal (optional):
To protect against humidity, you can brush on a thin layer of matte varnish. This will keep the clay white and prevent yellowing over time. -
Prepare the ribbon:
Cut a length of beige fabric ribbon, roughly 8-10 inches long. The ribbon in the image is simple and flat, adding to the rustic aesthetic. -
Thread the loop:
Fold the ribbon in half. improper the folded end through the hole from front to back, creating a small loop. -
Secure the hanger:
Pass the two loose ends of the ribbon through the loop you just created and pull tight. This creates a lark’s head knot that sits flush against the clay.
Fixing Cracks
If small hairline cracks appear while drying, make a paste of clay and water (slip) and smooth it into the crack, then let it dry again.
Hang this simple keepsake on your tree to remember the year fondly
Handwritten Message Tag Ornaments
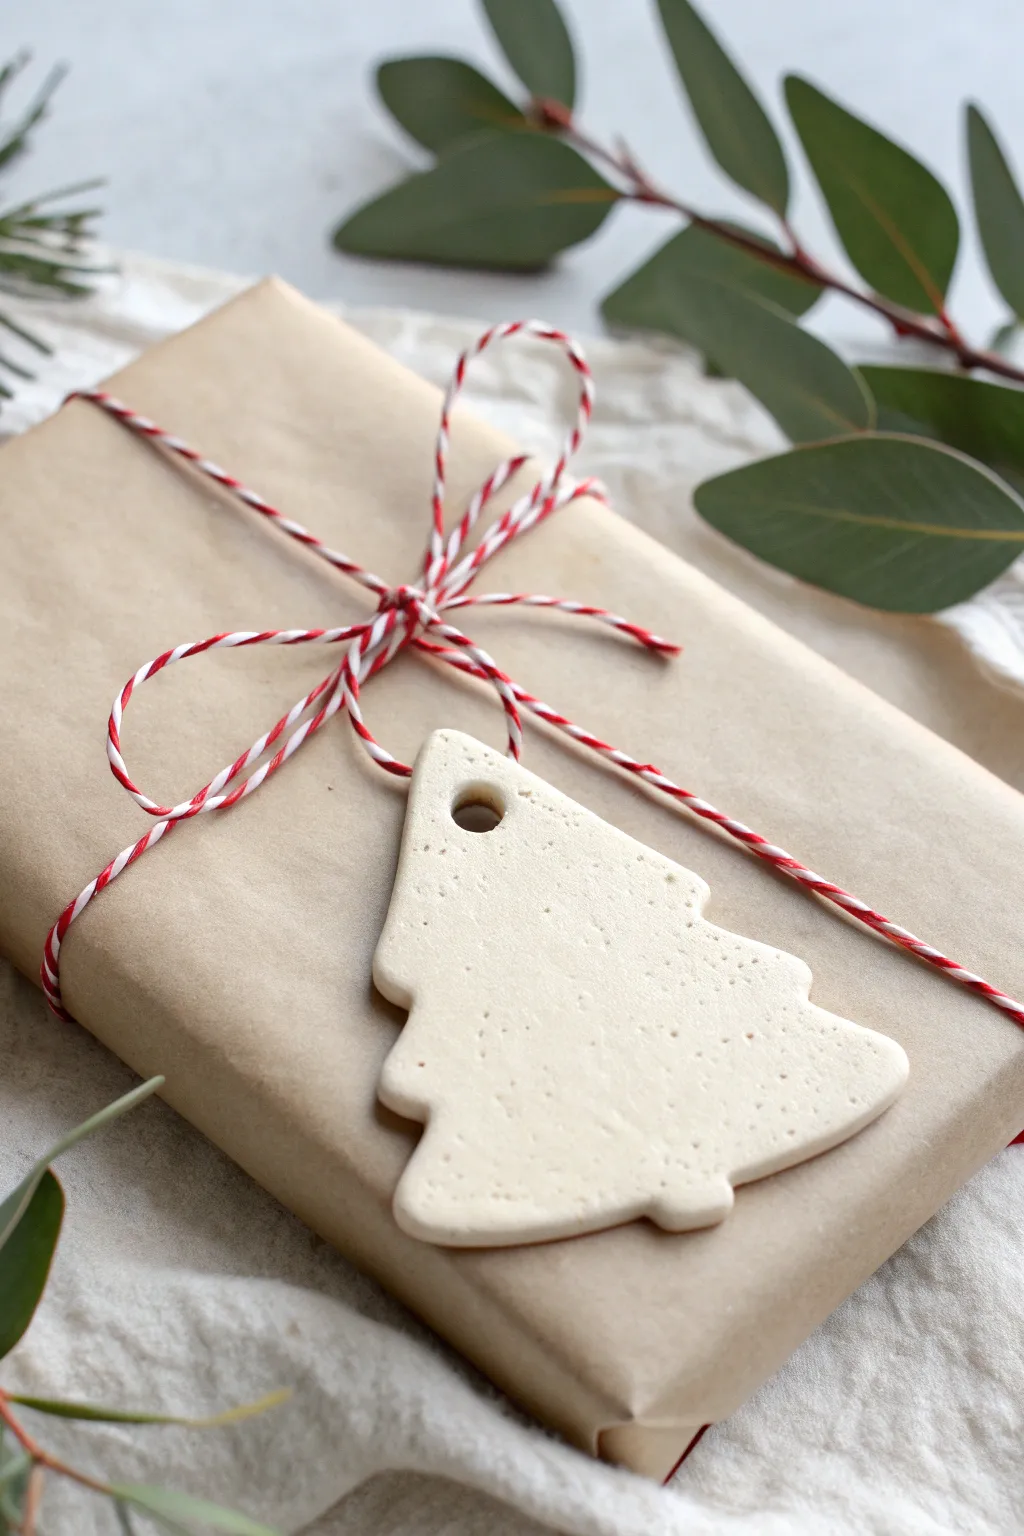
Add a simple, rustic touch to your holiday wrapping with these charming tree-shaped clay tags. Made from homemade baking soda clay or air-dry clay, they feature a lovely speckled texture and a classic matte finish that pairs perfectly with kraft paper and baker’s twine.
Detailed Instructions
Materials
- 1 cup baking soda
- 1/2 cup cornstarch
- 3/4 cup warm water (plus more if needed)
- Small Christmas tree cookie cutter
- Rolling pin
- Parchment paper
- Drinking straw or skewer
- Medium grit sandpaper (optional)
- Red and white baker’s twine
- Pot and spoon for mixing
Step 1: Making the Clay Dough
-
Combine dry ingredients:
In a medium saucepan, whisk together the baking soda and cornstarch until they are thoroughly evenly mixed and free of any large clumps. -
Add water and heat:
Pour in the warm water and stir immediately. Place the pot over medium heat, stirring constantly to ensure the mixture doesn’t burn on the bottom. -
Cook until thickened:
Continue stirring as the mixture bubbles and thickens. You are looking for a consistency similar to mashed potatoes or playdough. It should pull away cleanly from the sides of the pot. -
Cool the dough:
Remove the dough from the pot and place it in a glass bowl. Cover it with a damp cloth or plastic wrap and let it cool until it is comfortable to handle.
Step 2: Shaping the Ornaments
-
Knead the dough:
Once cool, turn the dough out onto a clean surface and knead it gently until it becomes smooth and pliable. If it feels too sticky, a light dusting of cornstarch can help. -
Roll it out:
Place the dough between two sheets of parchment paper. Roll it out to an even thickness, roughly 1/4 inch thick. I find using dowels on either side helps keep the thickness uniform. -
Cut the shapes:
Press your Christmas tree cookie cutter firmly into the rolled clay. Try to fit as many shapes as possible to minimize re-rolling scrap dough. -
Punch a hole:
While the clay is still wet, use a drinking straw or a thick skewer to punch a small hole at the very top of each tree. Make sure the hole goes all the way through. -
Smooth the edges:
Dip your finger in a tiny bit of water and gently run it along the cut edges of each tree to soften any sharp ridges or loose bits left by the cutter.
Preventing Cracks
Avoid drying your ornaments in direct sunlight or near a heater. Rapid drying causes uneven shrinkage, which leads to major cracking.
Step 3: Drying and Finishing
-
Let them dry:
Arrange the cutouts on a parchment-lined baking sheet or drying rack. Let them air dry at room temperature for 24-48 hours. Carefully flip them over halfway through so the bottom dries evenly. -
Optional baking method:
To speed up the process, you can bake them in an oven at 175°F (80°C) for about an hour, flipping them once during the process. Watch closely to prevent browning. -
Sand for texture:
Once fully rock-hard and dry, creating that speckled, stone-like look is easy. Gently rub the surface with medium-grit sandpaper to reveal the natural grain and smooth out any bumps. -
Dust off:
Wipe the ornaments down with a dry cloth or soft brush to remove any sanding dust. -
String the tag:
Cut a long length of red and white baker’s twine. Thread one end through the hole at the top of the tree. -
Tie the bow:
Wrap the twine around your gift box and tie it securely, finishing with a classic bow right above the tree ornament so it hangs nicely centered.
Scented Tags
Knead a few drops of cinnamon or pine essential oil into the cooled dough before rolling. The recipient will get a festive whiff when opening the gift.
Enjoy the simple beauty of your handmade tags as you give your gifts this season
Fingerprint Christmas Light Bulbs
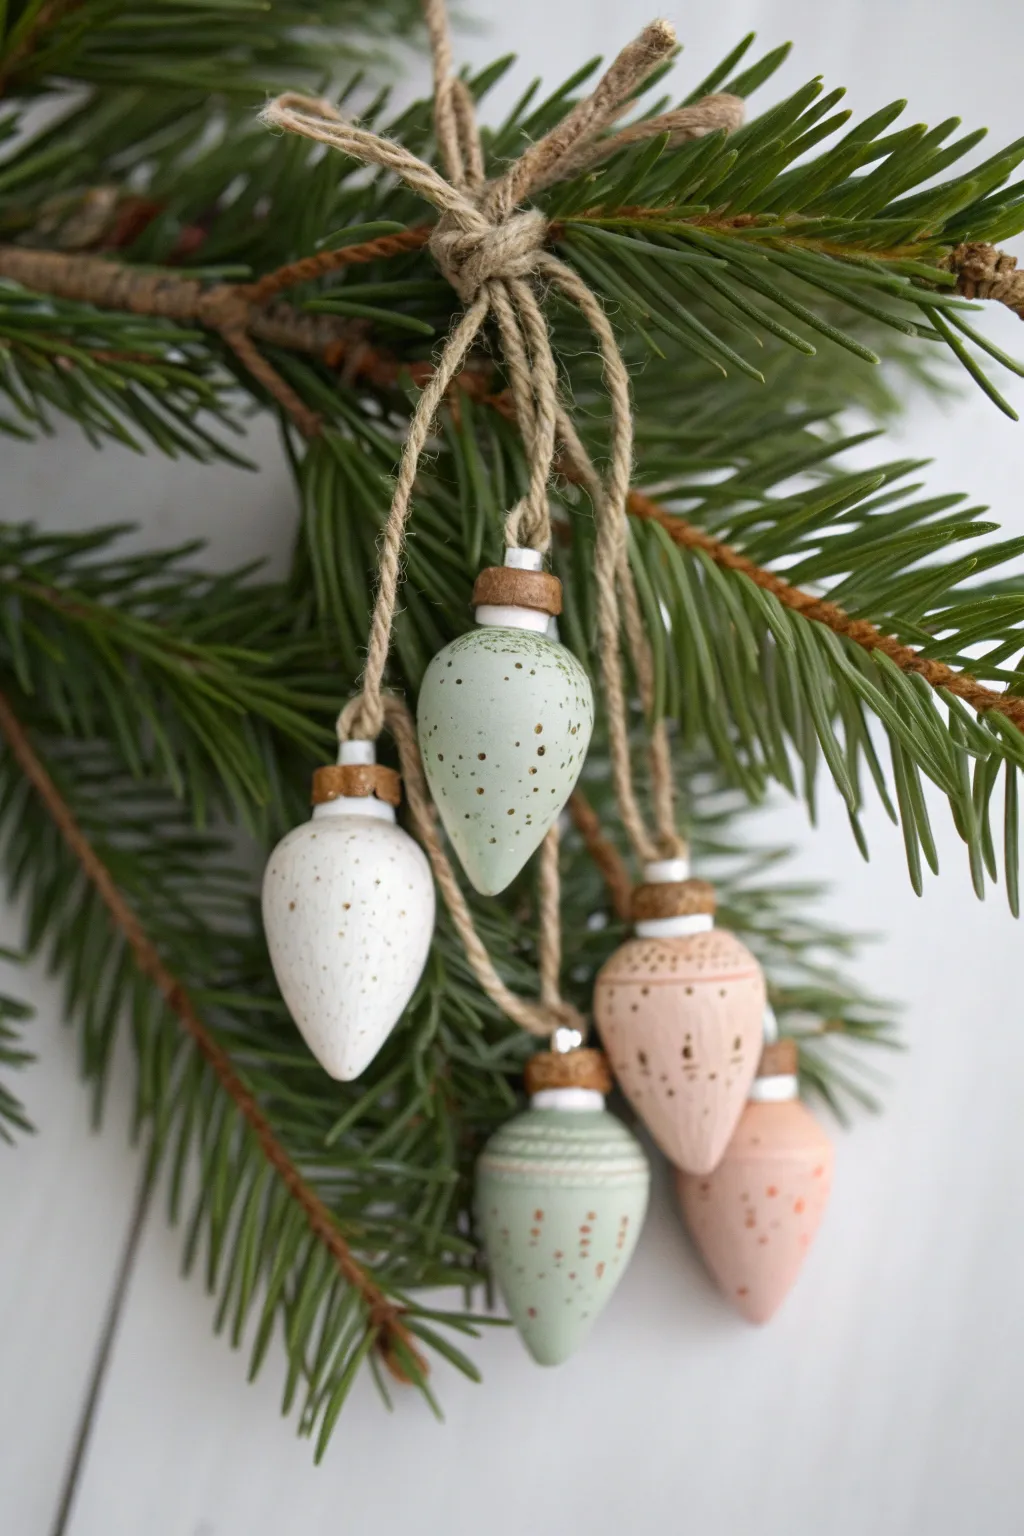
These miniature ceramic-style ornaments bring a touch of vintage charm to your tree with their classic lightbulb shape and soft pastel finish. The subtle speckling and natural jute twine give them an organic, handmade feel that looks beautiful nestled among pine needles.
Step-by-Step
Materials
- White air-dry clay or polymer clay
- Rolling pin
- Small teardrop cookie cutter (or a sharp craft knife)
- Sandpaper (fine grit)
- Acrylic paints (mint green, pale pink, white, dark metallic bronze/brown)
- Old toothbrush or stiff bristle brush
- Small flat paintbrush
- Detail paintbrush
- Wooden beads or small cylinder wood pieces
- Strong craft glue (e.g., E6000 or super glue)
- Jute twine
- Scissors
- Water based sealant (matte or satin)
Step 1: Shaping the Bulbs
-
Prepare the Clay:
Begin by conditioning your clay. If using polymer clay, knead it until soft; if using air-dry clay, ensure it’s moist and pliable. Roll a ball of clay in your palms to smooth out any cracks. -
Form the Base Shape:
Roll the clay into a smooth, thick log, then pinch and roll one end to create a tapered teardrop shape. You are aiming for a classic C7 or C9 Christmas lightbulb silhouette. -
Refine the Size:
Compare your shapes as you work to keep them relatively uniform. Each bulb should be roughly 1.5 to 2 inches long. Smooth the surface with a little water if using air-dry clay to erase fingerprints. -
Clean the Edges:
Once you are happy with the teardrop form, gently tap the wide bottom on your work surface to ensure it isn’t too pointy, though you want to maintain the overall rounded curve. -
Dry or Bake:
If using polymer clay, bake according to the manufacturer’s instructions. For air-dry clay, set the pieces aside on a wire rack for 24-48 hours until completely hardened and white. -
Sand for Smoothness:
Once full cured, take a piece of fine-grit sandpaper and gently buff the surface of the bulbs. Focus on removing any small bumps or ridges to achieve a porcelain-like finish.
Step 2: Painting and Speckling
-
Apply Base Colors:
Paint each bulb in your chosen pastel shades—I find that two thin coats of mint, pale pink, or creamy white work better than one thick coat. Let the paint dry fully between layers. -
Add Decorative Details:
Using a very fine detail brush, add simple patterns to a few of the bulbs. You might paint delicate horizontal stripes or rows of tiny dots in a slightly darker shade or white for variety. -
Create the Speckles:
Dilute a small amount of dark metallic bronze or brown paint with water. Dip an old toothbrush into this mixture, aim it at your ornaments, and run your thumb across the bristles to flick tiny specks of paint onto the surface. -
Protect the Finish:
Once all paint is completely dry, apply a coat of matte or satin water-based sealant. This protects the clay and gives the ornaments a professional sheen.
Splatter Safety
Prepare a ‘splatter box’ by placing your bulbs inside a cardboard box before using the toothbrush technique. This keeps the speckles on your art and off your kitchen table.
Step 3: Assembly and Hanging
-
Prepare the Caps:
Paint your small wooden beads or cylinder pieces with a copper or metallic bronze paint if they aren’t already a natural wood tone that you like. These will serve as the electrical ‘screw base’ of the bulb. -
Attach the Caps:
Apply a dot of strong craft glue to the narrow, tapered top of each clay bulb. Press the wooden bead firmly onto the tip and hold it for a moment until it sets. -
Cut the Twine:
Cut lengths of jute twine, approximately 8-10 inches long for each ornament. -
Thread The Loops:
Fold a piece of twine in half to create a loop. Thread the loose ends through the hole in the wooden bead (if applicable) or glue the loop ends directly into the top hole of the bead if the hole is large enough. -
Bundle Them Up:
Gather the tops of all your twine loops together. Use a separate long piece of jute to tie a knot around the entire bundle, grouping the ornaments so they hang at slightly staggered lengths. -
Create the Bow:
Tie the securing piece of jute into a messy, rustic bow to finish the cluster. Trim the ends of the bow as desired.
Vintage Patina
For an aged look, mix a tiny drop of brown paint into your clear sealant. Wiping most of it off immediately creates an antique glaze that settles into the textures.
Hang your cluster of speckled bulbs on a sturdy branch and enjoy their timeless, crafty appeal
Salt Dough Lookalike Star Ornaments
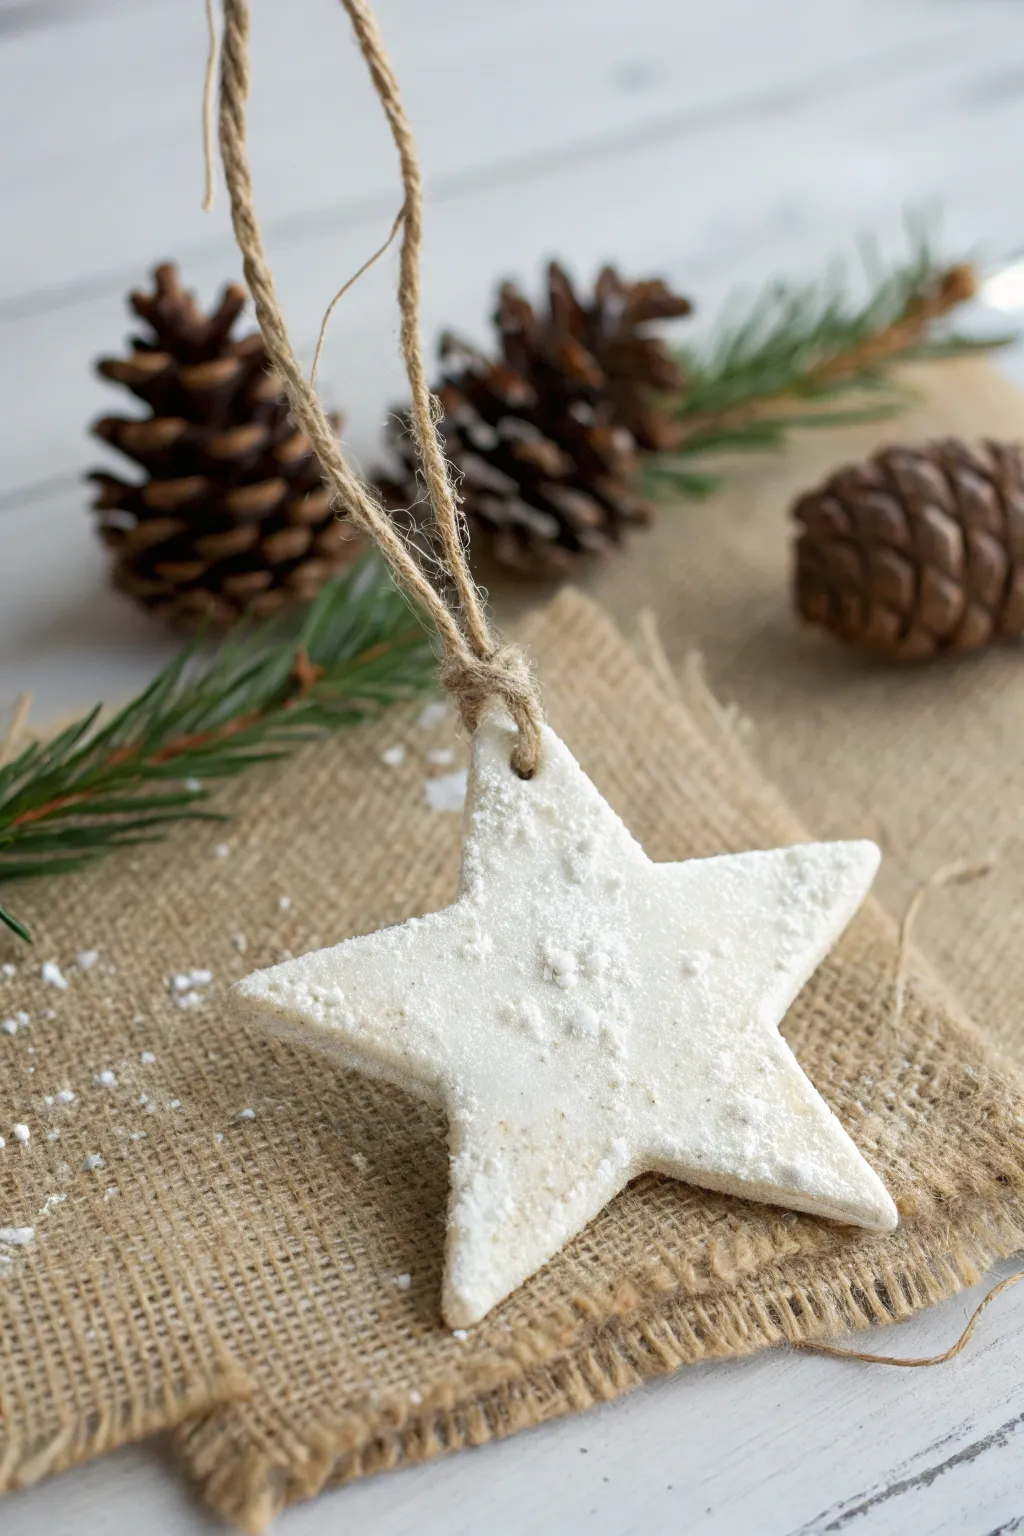
Create the cozy, rustic charm of salt dough without the yellowing or puffiness using a simple baking soda clay recipe. These ornaments dry to a brilliant, porcelain-like white and mimic the look of sugar-dusted cookies straight from the oven.
Step-by-Step Guide
Materials
- 1 cup Baking soda
- 1/2 cup Cornstarch
- 3/4 cup Water
- Star-shaped cookie cutter
- Non-stick rolling pin
- Parchment paper
- Straw or skewer (for poking holes)
- Jute twine
- White glitter or fine salt (for dusting)
- Mod Podge or white craft glue
- Small saucepan
- Mixing spoon
- Damp cloth
- Sandpaper (fine grit)
Step 1: Making the Clay
-
Mix dry ingredients:
Combine your baking soda and cornstarch in a medium saucepan before adding any heat. -
Add water:
Pour in the water and stir until the mixture is completely smooth and free of lumps. -
Cook the dough:
Place the saucepan over medium heat. Stir constantly—this is crucial because the mixture will thicken suddenly. -
Watch for texture change:
Keep stirring until the mixture bubbles and pulls away from the sides of the pan, resembling the consistency of mashed potatoes. -
Cool down:
Remove the dough from the pot and transfer it to a glass bowl. Cover it immediately with a damp cloth or plastic wrap touching the surface to prevent a skin from forming while it cools to room temperature.
Cracks Appearing?
If small cracks form while drying, smooth a tiny bit of fresh water over them with your finger. If it’s already dry, fill cracks with a white glue and baking soda paste.
Step 2: Shaping and Drying
-
Knead the clay:
Once cool enough to handle, knead the dough on a silicone mat or parchment paper until it is completely smooth and pliable. -
Roll it out:
Roll the dough to about 1/4 inch thickness. I find that going much thinner makes the stars too fragile, while thicker ones take ages to dry. -
Cut the shapes:
Press your star cookie cutter firmly into the dough. Wiggle it slightly to ensure clean edges before lifting. -
Create the hanging hole:
Using a drinking straw or a skewer, punch a hole near the top point of the star. Make it slightly larger than your twine, as the clay can shrink a tiny bit. -
Air dry:
Place the stars on a wire rack or parchment paper. Let them air dry for 24-48 hours. Flip them over halfway through the drying process to ensure the bottoms dry evenly and don’t curl. -
Smooth the edges:
Once fully hard and white, use fine-grit sandpaper to gently smooth away any rough jagged edges left by the cutter.
Step 3: Decorating and Hanging
-
Apply glue base:
Brush a very light, uneven layer of Mod Podge or watered-down white glue over the surface of the star. You don’t want it fully coated; just enough to catch the ‘snow’. -
Add the frost:
While the glue is tacky, sprinkle a pinch of baking soda, fine salt, or white glitter over the top to imitate the snowy, sugar-dusted look shown in the photo. -
Thread the twine:
Cut a length of jute twine—about 8 inches usually works well. Fold it in half to create a loop at one end. -
Secure the loop:
Feed the folded loop end through the hole in the star from front to back. -
Finish the knot:
Pull the loose tails of the twine through the loop and tug gently to tighten (a lark’s head knot), creating that rustic hanging style. -
Tie the top:
Knot the two loose ends of the twine together at the top to complete the hanger.
Sparkle Tip
For extra shimmer, mix a pinch of mica powder directly into the dough before cooking. It gives a subtle, pearlescent glow throughout the ornament, not just on top.
Hang these delicate snowy stars on your tree or use them as elegant gift toppers for a handmade touch
Gold-Edged Minimalist Ornaments
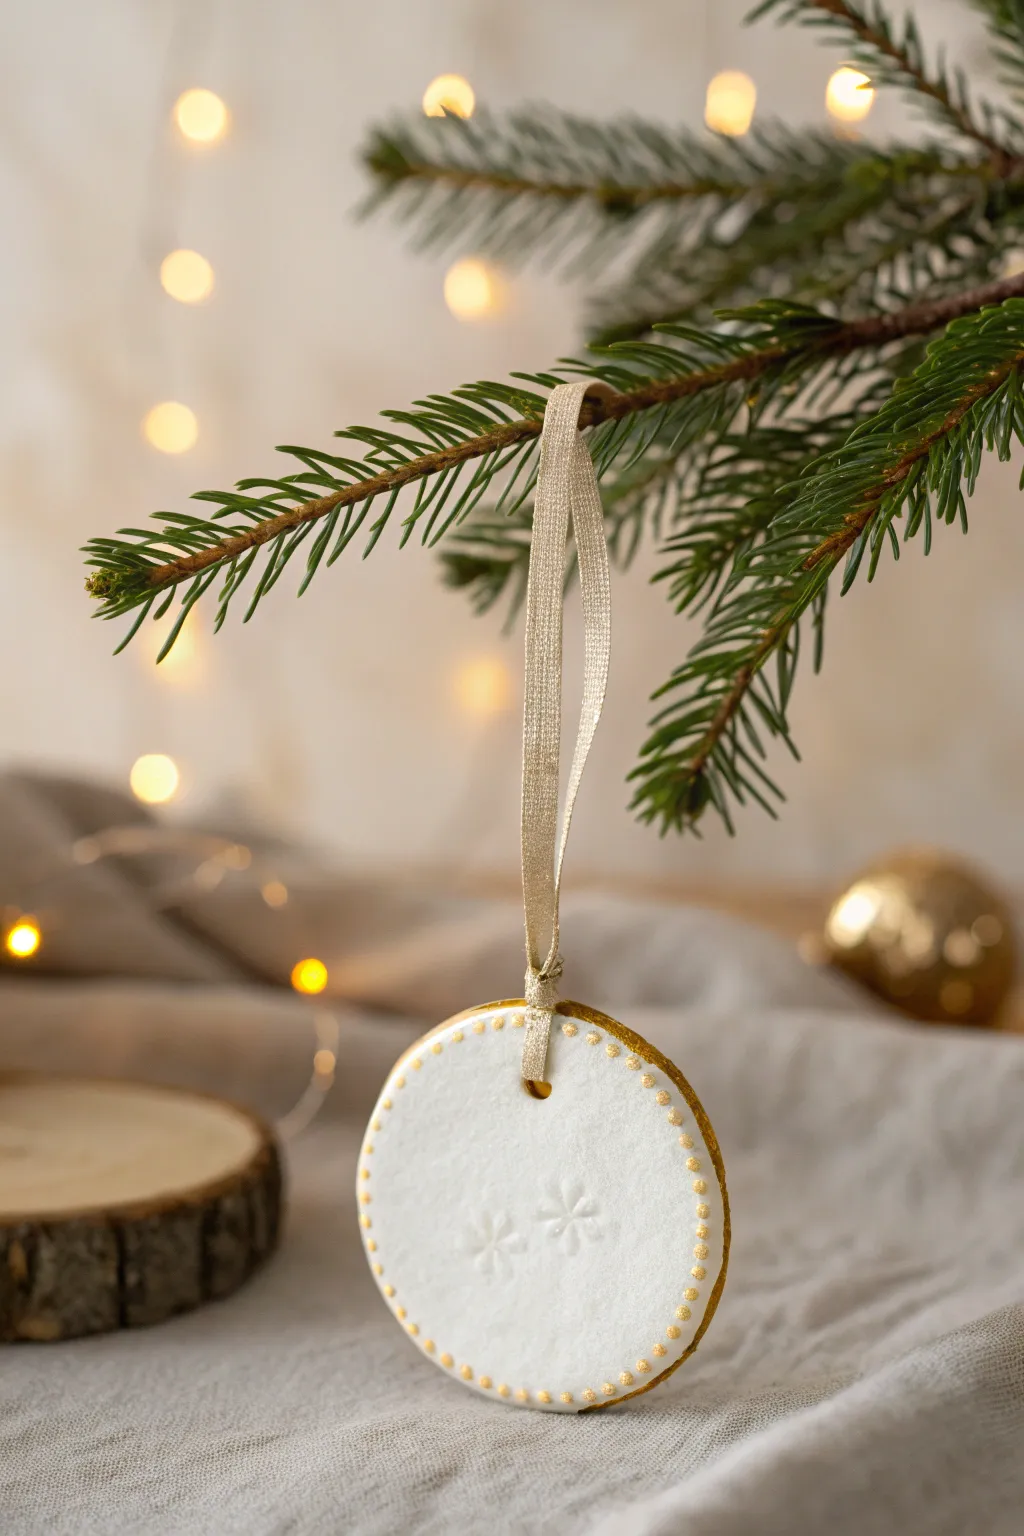
Embrace simplicity this holiday season with these refined clay ornaments that blend minimalist white surfaces with luxurious gold accents. The subtle snowflake embossing and delicate beaded edge create a sophisticated look perfect for modern farmhouse or Scandinavian decor themes.
Step-by-Step
Materials
- White polymer clay or air-dry clay
- Rolling pin (dedicated for clay)
- Circular cookie cutter (approx. 3 inches)
- Parchment paper or baking mat
- Gold acrylic paint (metallic finish)
- Fine-point paintbrush
- Small dotting tool or toothpick
- Snowflake stamp or embossing tool
- Drinking straw or skewer (for the hole)
- Gold ribbon (approx. 1/4 inch wide)
- Sandpaper (fine grit, optional)
- Clear matte sealant (optional)
Step 1: Shaping the Base
-
Condition the Clay:
Begin by kneading your white clay until it is soft, pliable, and free of air bubbles. If using white polymer clay, ensure your hands are very clean to avoid transferring lint. -
Roll Smoothly:
Roll the clay out onto parchment paper to an even thickness of about 1/4 inch. I like to use depth guides or wooden rulers on either side to ensure the surface is perfectly flat. -
Cut the Circle:
Press your circular cutter firmly into the clay. Give it a gentle wiggle before lifting to ensure a clean cut, then carefully pull away the excess clay. -
Smooth the Edges:
Dip your finger in a little bit of water (for air-dry clay) or baby oil (for polymer clay) and gently run it along the cut edge to soften any sharp ridges left by the cutter. -
Create the Hanger Hole:
Use a straw to punch a clean hole near the top edge of the circle. Position it about half an inch down to ensure there is enough clay strength to hold the ribbon later.
Uneven Clay Surface?
If your clay looks bumpy after rolling, place a sheet of parchment paper over it and lightly roll again. This smooths imperfections without leaving tool marks.
Step 2: Embossing and Texture
-
Plan placement:
Visualize where you want your snowflakes. The example shows two small flakes placed slightly off-center in the lower half for a balanced but asymmetrical look. -
Stamp the Design:
Gently press your snowflake stamp into the damp clay. Apply even pressure so the impression is distinct but doesn’t distort the overall shape of the ornament. -
Add Decorative Dots:
To create the beaded rim texture, you can gently press a small dotting tool around the circumference to make indentations now, or wait to paint them on later. The image shows raised painted dots, so we will focus on painting them in the next phase. -
Dry or Bake:
Follow the manufacturer’s instructions for your specific clay. Bake polymer clay in the oven as directed, or let air-dry clay sit undisturbed for 24-48 hours until fully chalky and hard. -
Refine the Surface:
Once fully cured and cooled, inspect the edges. If there are any rough spots, lightly sand them with fine-grit sandpaper for a professional finish.
Make it Sparkle
For extra festive flair, sprinkle ultra-fine iridescent white glitter over the snowflake impressions while the paint or sealant is still slightly wet.
Step 3: Gilding and Assembly
-
Paint the Edge:
Load a fine brush with metallic gold acrylic paint. Carefully paint the outer rim of the circle, wrapping the color slightly onto the front face to create a thin border. -
Create Gold Dots:
Dip the tip of a dotting tool or the blunt end of a toothpick into the gold paint. Apply small, evenly spaced dots just inside the painted rim, following the curve of the ornament. -
Seal the Work:
If desired, apply a thin coat of clear matte sealant over the clay to protect it from moisture and dust, being careful not to smear the fresh gold paint. -
Thread the Ribbon:
Cut a length of gold ribbon, approximately 8-10 inches long. Fold it in half and thread the loop through the hole from front to back. -
Secure the Loop:
Pass the tail ends of the ribbon through the loop and pull gently to tighten, creating a lark’s head knot that sits neatly at the top of your ornament.
Hang your finished ornament on the tree and enjoy the subtle shimmer it brings to your holiday decor
Mini House Village Ornaments
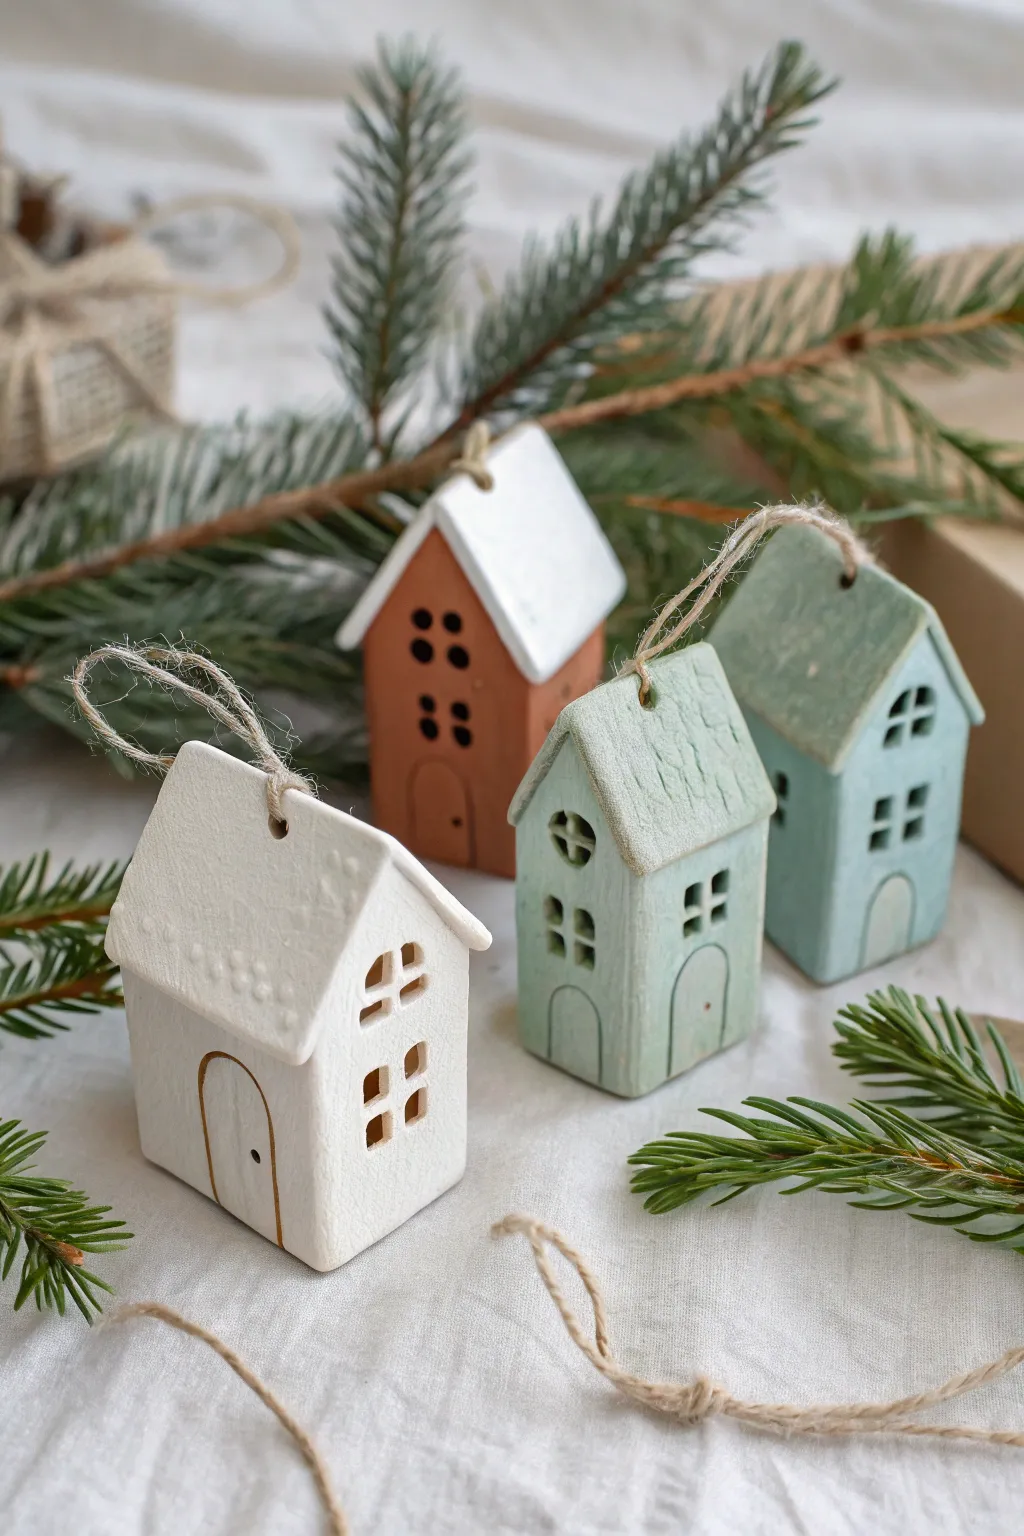
Create a charming miniature village for your Christmas tree with these textured clay house ornaments. Featuring a muted, chalky color palette and rustic jute twine, they bring a cozy Scandinavian feel to your holiday decor.
Step-by-Step Guide
Materials
- White specialized air-dry modeling clay (or polymer clay)
- Rolling pin
- House-shaped cookie cutter (or craft knife and ruler)
- Texture tools (or old toothbrush/sandpaper)
- Needle tool or toothpick
- Small straw or cocktail stick (for hanging hole)
- Acrylic paints (White, Sage Green, Terracotta, Slate Blue)
- Fine detail paintbrush
- Gold paint pen or gold acrylic paint
- Matte varnish (optional)
- Medium-thickness jute twine
Step 1: Shaping the Houses
-
Roll out the slab:
Begin by conditioning your clay slightly so it’s pliable, then roll it out to an even thickness of about 1/4 inch (6mm). This thickness ensures the houses are sturdy enough to hang. -
Cut the basic shapes:
Using a house-shaped cookie cutter, press firmly into the clay to create your blanks. If you don’t have a cutter, use a ruler and craft knife to cut rectangles, then slice off the top corners to create the roof pitch. -
Smooth the edges:
Dip your finger in a tiny bit of water and gently run it along the cut edges of each house to smooth out any roughness or loose clay bits. -
Create the hanging loop:
Using a small straw or a cocktail stick, poke a hole through the top peak of the roof. Make sure it goes all the way through and wiggle it slightly to ensure the hole is wide enough for your twine.
Preventing Curled Corners
Clay shrinks as it dries, causing curling. Flip your houses every 6-8 hours while drying. Placing a light book on them once they are semi-dry helps keep them perfectly flat.
Step 2: Adding Texture and Detail
-
Detail the roof:
I like to create a distinct roofline by gently pressing a ruler or flat tool horizontally across the house where the roof meets the walls. For texture, gently stipple the roof section with an old toothbrush or a crumpled ball of foil to mimic shingles or snow. -
Carve the windows:
Use a sharp craft knife or a small square cutter to completely remove clay for the windows. For the multi-pane look, you can either cut four tiny squares or cut a larger square and leave a cross-shaped piece of clay in the middle. -
Sketch the door:
Instead of cutting the door out, use a needle tool to etch the outline of an arched door at the base. Press gently; you only want to create a groove for the paint to settle into later. -
Add side details:
Don’t forget the sides if your clay is thick enough. Using your needle tool, add small window indentations or simple line work on the vertical edges for extra dimension. -
Dry completely:
Place the houses on a flat surface lined with baking paper. Let them air dry for 24-48 hours, flipping them occasionally to prevent curling. If using polymer clay, bake according to the package instructions.
Step 3: Painting and Finishing
-
Apply the base colors:
Once fully dry, paint the body of the houses. Use matte acrylics in terracotta, soft sage green, and slate blue. Leave the roof sections unpainted if you used white clay, or paint them a stark white. -
Create a washed effect:
To achieve that chalky, rustic look seen in the photo, allow the first coat to dry, then dry-brush a tiny amount of white paint over the colored walls to highlight the clay’s texture. -
Paint the roofs:
Paint the textured roof sections with a solid coat of white paint. Ensure you get into the stippled texture, which will make the ‘snow’ look pop. -
Highlight the door:
Using a very fine brush or a gold paint pen, carefully trace the etched groove of the door arch. Add a tiny dot for the doorknob. -
Clean up window edges:
If paint got into the window cutouts, use a clean, slightly damp brush to wipe the inside edges, or repaint the inside edges with a dark grey to create depth. -
Attach the twine:
Cut a 6-inch length of jute twine for each ornament. Thread it through the hole in the roof and tie a simple overhand knot at the ends to create a loop.
Vintage Patina Trick
Mix a drop of brown paint with water to make a thin wash. Brush it over the dried house and immediately wipe it off with a paper towel. The dark pigment stays in the cracks for an aged look.
Hang your finished houses on the tree or group them on a mantle for a festive village display
Nordic Knit Texture Ornaments
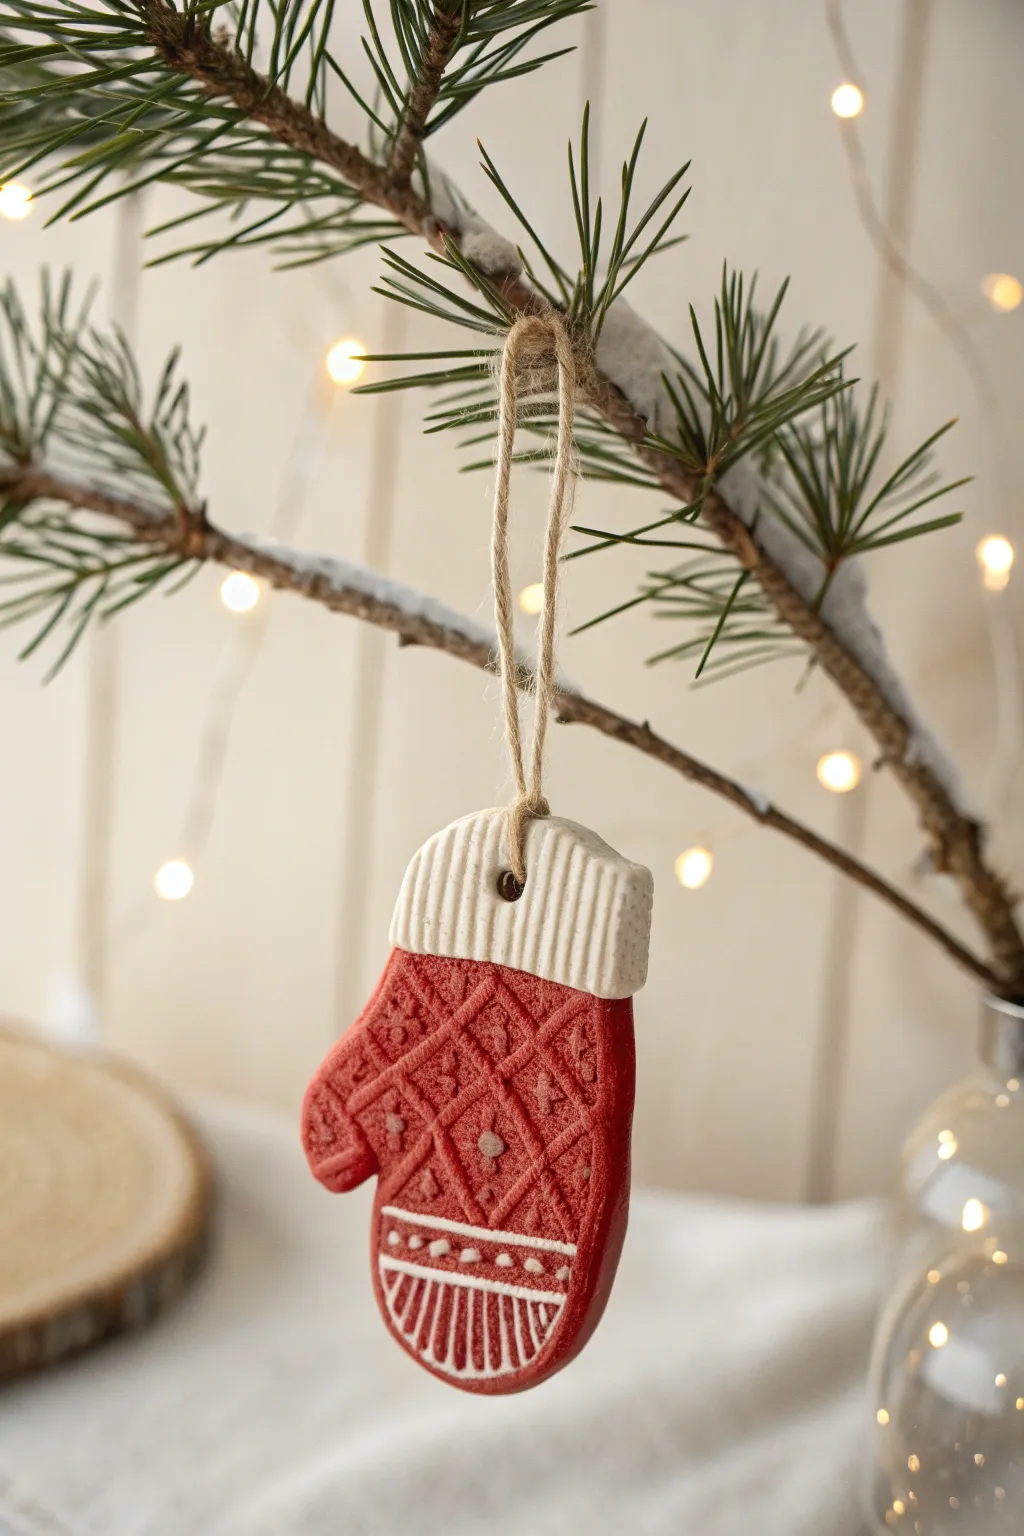
Capture the cozy charm of winter knitwear in clay form with this delightful mitten ornament. Using simple impression techniques and two-tone clay, you’ll create a texturedkeepsake that looks just like a tiny, knitted glove waiting for snow.
Step-by-Step Tutorial
Materials
- Polymer clay (Red and White)
- Mitten-shaped cookie cutter
- Rolling pin or clay machine
- Clean fabric or sweater scrap (cable knit)
- Textured rolling pin (diamond lattice pattern)
- Craft knife or clay blade
- Needle tool or toothpick
- White acrylic paint
- Fine detail paintbrush (size 0 or 00)
- Small straw or specialized clay hole punch
- Jute twine
- Baking sheet and parchment paper
- Oven (for baking polymer clay)
Step 1: Forming the Mitten Base
-
Condition the Clay:
Begin by thoroughly conditioning your red polymer clay in your hands until it is soft and pliable. Do the same with a smaller amount of white clay for the cuff. -
Roll the Red Sheet:
Roll out the red clay on a clean surface to a thickness of approximately 1/4 inch (6mm). This sturdy thickness ensures the ornament won’t crack easily. -
Add Texture:
Lightly dust your textured rolling pin or stamp with cornstarch to prevent sticking. Press a diamond lattice or ‘knit’ pattern firmly into the red clay sheet. If you don’t have a specific tool, I like to gently press a scrap of coarse fabric or an actual sweater onto the clay to transfer the weave. -
Cut the Shape:
Position your mitten cookie cutter over the textured area. Press down firmly to cut out the main shape, then gently wiggle it to release the clay from the cutter. -
Trim the Top:
Using your clay blade, carefully slice off the top wrist portion of the red mitten. We will replace this section with white clay to create the contrasting cuff.
Clean Edges Tip
If your white clay picks up red lint or smudges from your hands, use a cotton swab dipped in rubbing alcohol or acetone to gently wipe the unbaked white clay clean.
Step 2: Creating the Ribbed Cuff
-
Roll the White Sheet:
Roll out your white conditioned clay to the same thickness as the red piece. It’s crucial they match so the join is seamless. -
Create Ribbing:
Use the dull back edge of your craft knife or a needle tool to press vertical, parallel lines into the white clay. Space them evenly to mimic the ribbed elasticity of a knit cuff. -
Fit the Cuff:
Cut a strip of this white, ribbed clay that matches the width of the red mitten top. Place it directly against the cut red edge. -
Bond the Seams:
Gently press the white and red seams together on the back side of the ornament. You can use a small amount of liquid polymer clay or ‘Bake and Bond’ if you want extra security. -
Final Shaping:
Run your finger along the outer edges to smooth any rough spots where the cutter lifted the clay.
Step 3: Finishing Details
-
Punch the Hole:
Use a small straw or a clay hole punch tool to create a clean hole centered in the white cuff. Make sure it’s not too close to the edge to prevent tearing. -
Add Faux Stitching:
Using your needle tool, lightly press small dots or indentations into the red clay surface, particularly within the diamond patterns, to enhance the ‘stitched’ look. -
Bake:
Transfer the ornament to a parchment-lined baking sheet. Bake according to your specific clay manufacturer’s instructions (usually around 275°F/135°C for 15-30 minutes). -
Cool Down:
Allow the ornament to cool completely on the baking sheet to harden fully before handling.
Add a Frosty Look
Before baking, lightly dust the surface of the clay with clear or iridescent mica powder. This gives the ‘knit’ fabric a subtle, frosty winter shimmer.
Step 4: Painting and Stringing
-
Paint the Lower Detail:
Dip your fine brush into white acrylic paint. Carefully paint the horizontal lines and vertical hash marks on the lower curved section of the mitten, as shown in the reference photo. -
Dry Brushing (Optional):
If you want the texture to pop more, lightly dry brush a tiny amount of white paint over the raised red diamond pattern. -
Seal the Paint:
Let the paint dry fully. You can add a matte varnish over the painted areas to protect them, though acrylic usually bonds well to baked clay on its own. -
Attach the Hanger:
Cut a 6-inch length of jute twine. Thread it through the hole in the cuff and tie a simple knot at the top to create a loop.
Hang this charming little mitten on your tree and enjoy the warmth it adds to your holiday decor
Plaid and Buffalo Check Ornaments

This rustic yet modern ornament captures the cozy essence of the holiday season with a classic red and black buffalo check pattern. Using a clever decoupage technique on clay, you can achieve crisp plaid lines that look professionally printed rather than hand-painted.
How-To Guide
Materials
- White polymer clay or air-dry clay
- Rolling pin
- Round cookie cutter (approx. 3 inches)
- Plaid or Buffalo Check patterned fabric or heavy paper
- Mod Podge (Matte or Gloss finish)
- Foam brush or soft bristle brush
- Scissors
- Straw or small circular cutter (for the hole)
- Fine-grit sandpaper (optional)
- Jute twine for hanging
Step 1: Preparation and Clay Work
-
Condition the clay:
Begin by kneading your white clay in your hands until it becomes soft, pliable, and free of cracks. If usage feels stiff, warm it up with your palms for a minute or two. -
Roll it out:
Use a rolling pin to flatten the clay to a uniform thickness, ideally about 1/4 inch thick. A consistent thickness ensures the ornament won’t be too fragile. -
Cut the shape:
Press your round cookie cutter firmly into the rolled clay. Wiggle it slightly to ensure a clean cut, then remove the excess clay from around the circle. -
Create the hanging hole:
Before the clay hardens, use a straw or a small circular tool to punch a hole near the top edge. Ensure it’s not too close to the rim to prevent tearing later. -
Smooth the edges:
Dip your finger in a little water (for air-dry clay) or baby oil (for polymer) and gently run it along the cut edges to smooth out any roughness. -
Cure the clay:
Follow the manufacturer’s instructions to cure your clay. Bake it in the oven for polymer clay or let it sit in a dry, ventilated area for 24-48 hours if using air-dry clay.
Step 2: Applying the Plaid Pattern
-
Prepare the fabric or paper:
Ideally, use a thin cotton fabric or decoupage paper with the buffalo check print. Lay your cured clay ornament on top of the material and trace lightly around it with a pencil. -
Cut the material:
Cut out the circle you just traced, but trim it slightly (about 1-2mm) smaller than the actual clay circle. This leaves a tiny border of white clay visible, which creates a nice finished look. -
Match the hole:
Hold the cut fabric up to the clay ornament to align it, and use your scissors or a craft knife to cut a matching hole for the twine. -
Apply base adhesive:
Using your foam brush, apply a thin, even layer of Mod Podge directly onto the surface of the clay ornament. -
Position the pattern:
Carefully place your fabric or paper onto the wet adhesive. Start from the center and gently press outwards to eliminate any trapped air bubbles.
Fabric Selection Tip
Choose a thin, tightly woven cotton fabric. Thick fabrics won’t adhere flatly to the clay and may fray at the edges, spoiling the clean circular shape.
Step 3: Sealing and Finishing
-
Smooth it down:
Use your fingers or a brayer tool to firmly press the material onto the clay, paying special attention to the edges so they don’t curl up as they dry. -
Apply top coat:
Once the base layer is slightly tacky, brush another coat of Mod Podge over the top of the fabric. This seals the fibers and protects the design. -
Clear the hole:
If any adhesive has pooled in the hanging hole, use a toothpick to clear it out while it is still wet to avoid a clogged opening. -
Let it dry completely:
Allow the ornament to dry undisturbed. Mod Podge creates a milky look when wet but will dry clear, usually within 1-2 hours depending on humidity. -
Sand edges (optional):
If your fabric edges feel rough after drying, I like to gently run a fine-grit sandpaper block around the rim for a buttery smooth finish. -
Add the hanger:
Cut a length of jute twine, thread it through the hole, and secure it with a simple knot or a lark’s head knot to complete the rustic vibe.
Wrinkles in the Plaid?
If bubbles appear under the fabric, use a pin to prick the center of the bubble and press the air out, then re-seal with a dab of Mod Podge.
Hang this charming checked piece on your tree or use it as a festive gift topper to spread holiday cheer
Dimensional Bauble Ornaments
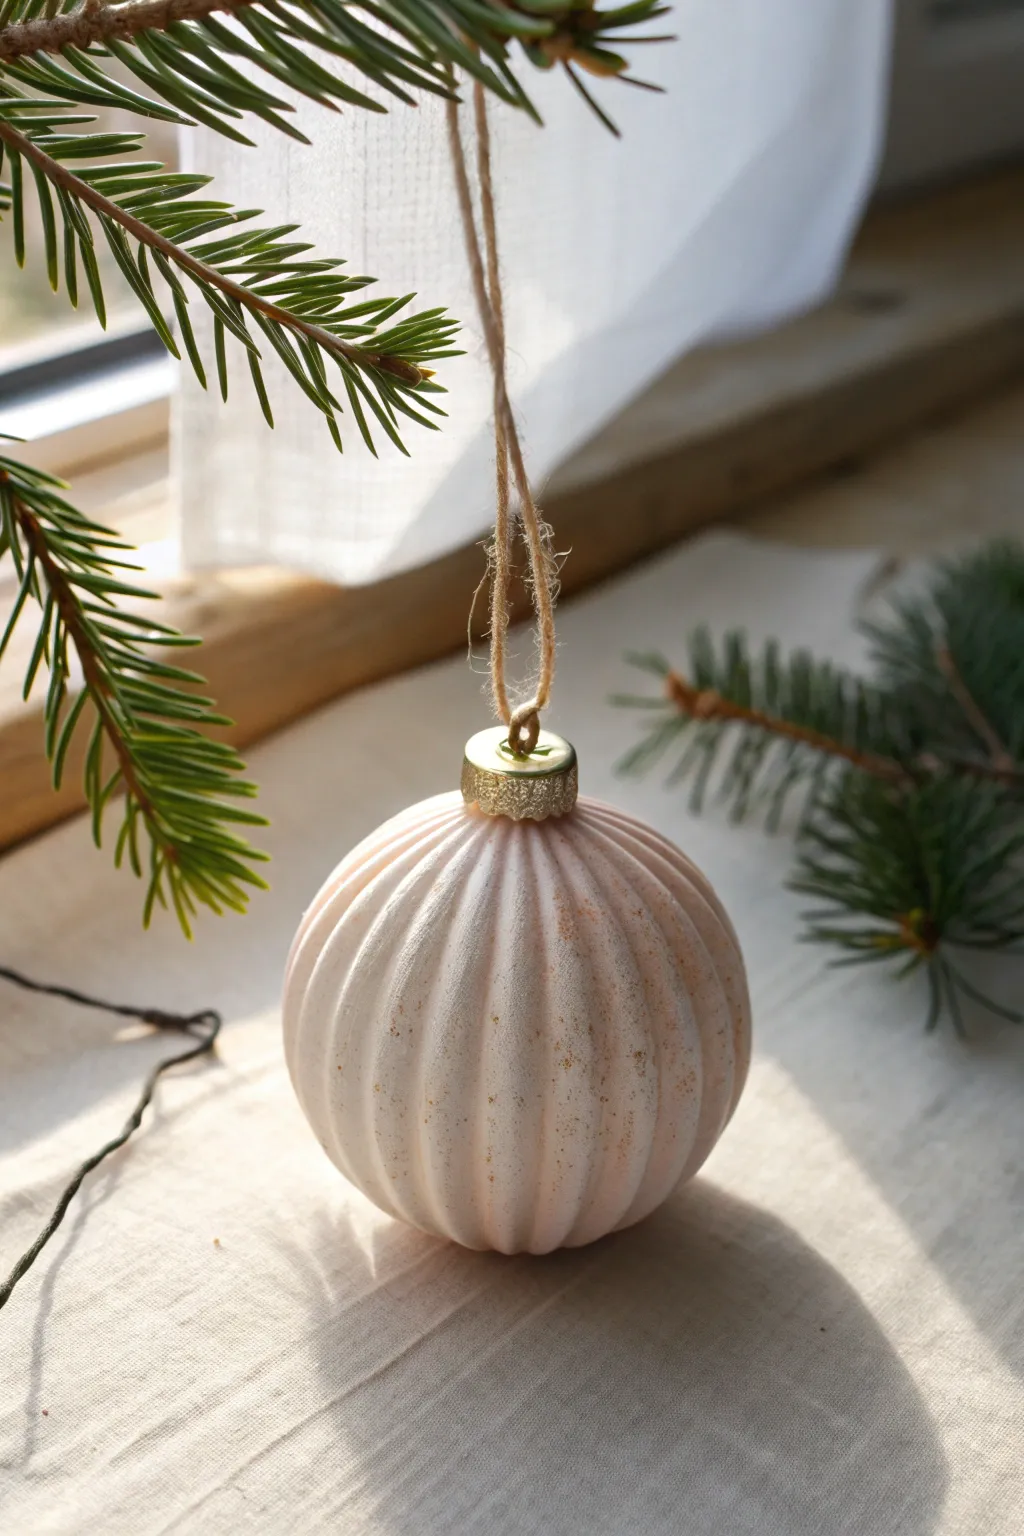
Capture the essence of vintage elegance with this handcrafted fluted bauble ornament. Its ribbed clay texture and subtle, dusted finish create a sophisticated dimensional piece that looks beautiful hanging against pine needles.
Step-by-Step
Materials
- Polymer clay (white or pale beige)
- Styrofoam ball (2.5 – 3 inches)
- Liquid polymer clay (Bake & Bond)
- Clay carving tools or a wooden skewer
- Rolling pin
- Gold acrylic paint
- Very fine translucent glitter or mica powder
- Cornstarch (for release)
- Gold ornament cap with loop
- Jute twine
- Super glue
- Soft brush (for dusting)
Step 1: Preparing the Base
-
Prepare the core:
Since a solid clay ball is too heavy, start with a styrofoam ball core. Apply a thin layer of liquid polymer clay or plain craft glue over the entire surface of the styrofoam ball to help the clay adhere. -
Condition the clay:
Warm up your polymer clay by kneading it thoroughly in your hands until it becomes soft and pliable. This prevents cracks later on. -
Roll the sheet:
Roll your conditioned clay out onto a clean surface into a consistent sheet, roughly 1/8 inch thick. If the clay is sticky, dust your surface lightly with cornstarch. -
Cover the form:
Drape the clay sheet over the sticky styrofoam ball. Gently smooth it down around the form, cutting away excess clay with a knife and smoothing the seams with your fingers until you have a seamless sphere.
Keep it Even
To ensure your vertical ribs are perfectly spaced, use a rubber band stretched around the ball as a movable guide before making your first marks.
Step 2: Sculpting the Design
-
Mark the poles:
Identify the top and bottom center points of your sphere. Mark them lightly with a needle tool to guide your lines. -
Create guide lines:
Using the back of a knife or a clay tool, lightly impress four vertical lines connecting the top and bottom poles, effectively quartering the ball. -
Subdivide sections:
Divide each of those quarters in half with another vertical line, and then divide those sections again until you have evenly spaced vertical segments around the entire sphere. -
Deepen the grooves:
Use a rounded modeling tool or the side of a wooden skewer to press firmly into your marked lines. I find rolling the tool slightly creates a smoother, more uniform indentation. -
Round the ribs:
Once the grooves are deep, use your fingers or a smoothing tool to gently round over the clay between the grooves, creating that puffy, ribbed ‘pumpkin’ shape. -
Refine the top:
Ensure the area at the very top is slightly flattened and clear of debris so the ornament cap can sit flush later.
Faux Ceramic Look
Before adding glitter, whitewash the baked clay with diluted white acrylic paint. Wipe most of it off immediately to leave white residue deep in the texture.
Step 3: Finishing and Assembly
-
Add surface texture:
Before baking, lightly tap a toothbrush or coarse sponge over the surface to give it a stone-like, organic texture rather than smooth plastic. -
Apply the shimmer:
Dip a soft, dry brush into fine translucent glitter or mica powder. Dust it over the raw clay, concentrating slightly more in the grooves to accentuate the depth. -
Bake the ornament:
Bake the ornament according to your specific brand of clay’s instructions. Usually, this is around 275°F (130°C) for 15-30 minutes. Let it cool completely. -
Prepare the cap:
Take a standard gold ornament cap. If the metal looks too shiny and new, you can dab it with a tiny bit of brown paint and wipe it off to antique it. -
attach the hardware:
Apply a drop of super glue to the rim of the ornament cap and press it firmly onto the top of the cooled clay ball. -
String it up:
Cut a length of natural jute twine, roughly 8 inches long. Thread it through the metal loop. -
Tie the knot:
Tie the ends of the twine securely. For a rustic look, leave the knot visible; for a cleaner look, pull the knot down inside the metal cap.
Hang this charming textured ornament on a branch near a window to let the light catch the subtle fluting
Mini Character Faces (Santa and Friends)
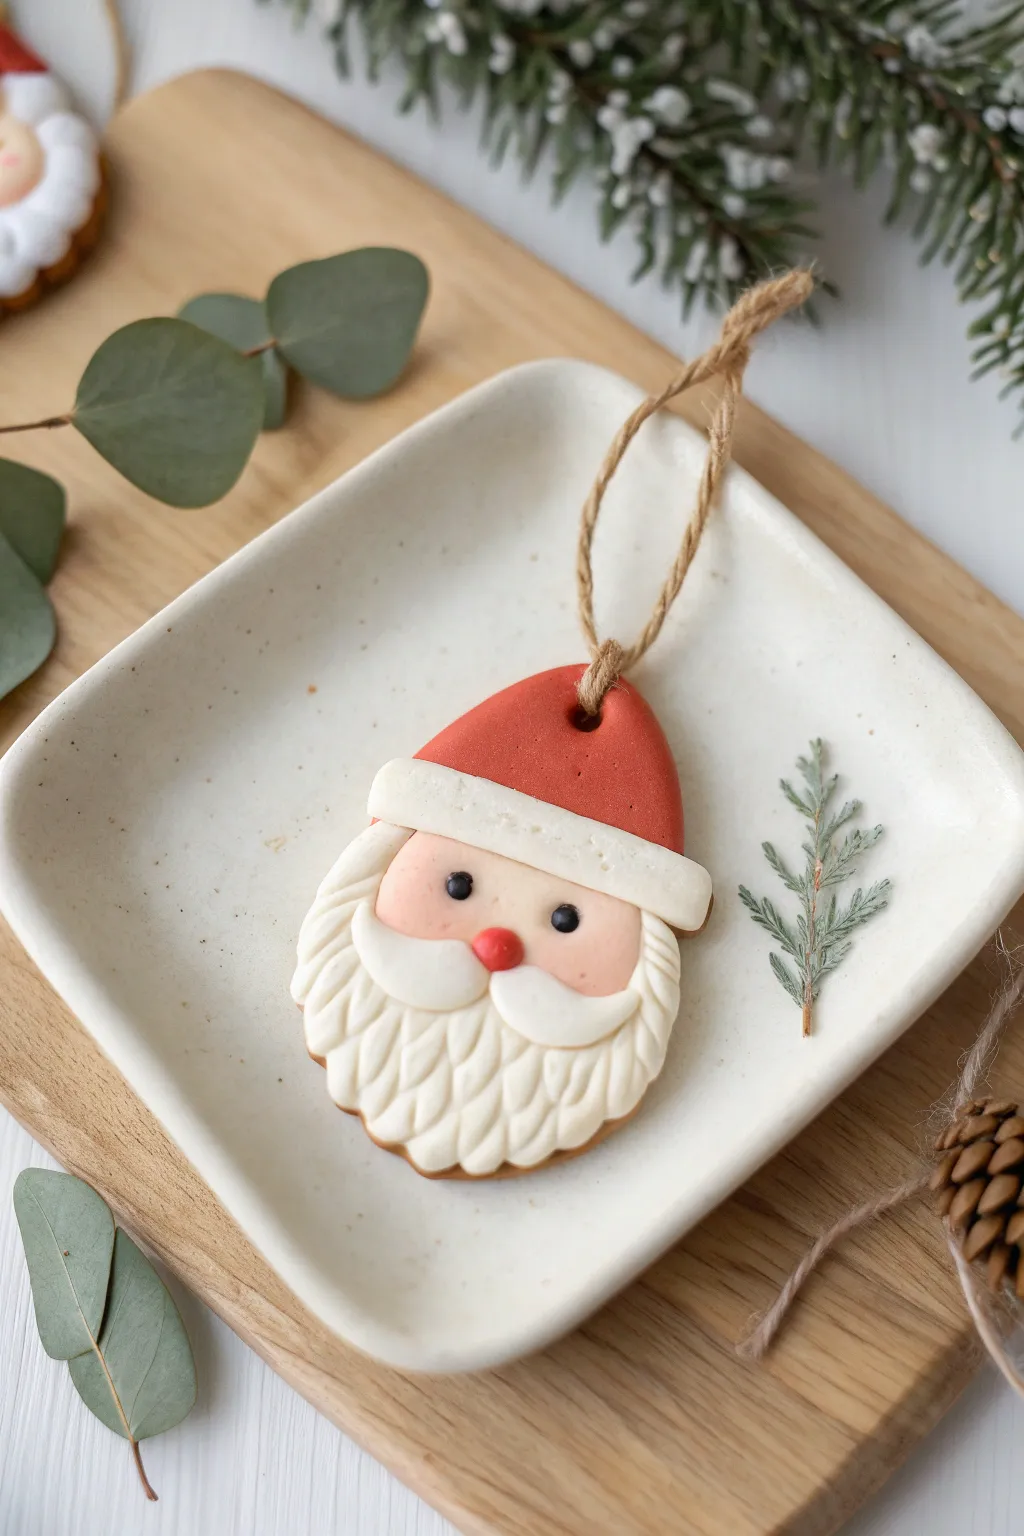
This adorable Santa face ornament brings a touch of classic Christmas charm with its beautifully textured beard and rosy cheeks. The clean lines and minimal color palette make it a standout piece that looks both modern and traditional on any tree.
Detailed Instructions
Materials
- Polymer clay (White, Red, Peach/Flesh tone, Black)
- Rolling pin or pasta machine
- Santa face cookie cutter (or a teardrop cutter + knife)
- Needle tool
- Ball tool (small)
- Liquid polymer clay (Bake and Bond)
- Jute twine
- Baking sheet with parchment paper
- Gloss glaze (optional)
Step 1: Base Construction
-
Prepare the clay:
Condition your white and red clay separately until soft and pliable. Use a rolling pin to flatten a sheet of white clay to about 1/4 inch thickness for the sturdy base. -
Cut the primary shape:
Use your Santa-shaped cookie cutter to punch out the main silhouette from the white clay. If you don’t have a specific cutter, cut a large teardrop shape, then trim the top to be slightly pointed for the hat area. -
Create the hanging hole:
while the clay is still raw, use a straw or a large needle tool to punch a clean hole at the very peak of the hat. Ensure it’s wide enough for your jute twine to pass through later. -
Add the face layer:
Roll out the peach-colored clay very thinly. Cut a rounded rectangle or oval shape that fits the middle section of your base (where the face will be) and press it gently onto the white base.
Dirty Clay?
White clay picks up dust easily. Keep a pack of baby wipes or rubbing alcohol nearby to clean your hands and tools before handling the white sections.
Step 2: The Hat and Trim
-
Form the red hat:
Roll out your red clay. Cut a triangle shape that matches the top portion of your base silhouette. Lightly apply liquid clay to the back and press it over the top area, overlapping the upper edge of the peach face slightly. -
Re-punch the hole:
Since you covered the base with red clay, use your tool to poke through the hole again to clear the path for the string. -
Add the hat brim:
Roll a thick snake of white clay and flatten it into a rectangular strip. Place this over the seam where the red hat meets the peach face. -
Texture the brim:
Use a toothbrush or a ball of crumpled foil to tap texture onto the white hat brim, giving it a fluffy, fur-like appearance.
Blush Effect
Before baking, lightly brush a tiny amount of pink chalk pastel dust onto the peach clay cheeks for a soft, rosy glow that won’t fade.
Step 3: Facial Features
-
Sculpt the beard base:
Layer a fresh piece of white clay over the bottom half of the ornament to form the beard area. Smooth the edges so it merges seamlessly with the sides of the base. -
Create beard texture:
Using a needle tool, draw deep, curving lines into the white beard clay. Start from the center and curve outwards to the left and right to mimic flowing hair. -
Add eyes:
Roll two tiny spheres of black clay. Press them gently into the peach face area, spaced evenly apart. You can use a small ball tool to make divots first so the eyes sit flush. -
Make the mustache:
Shape two small teardrops of white clay. Join the rounded ends in the center just below the eyes, curling the pointed tips slightly upward. -
Add the nose:
Roll a small ball of red clay. Place it directly in the center of the mustache where the two teardrops meet, pressing gently to secure it.
Step 4: Finishing
-
Bake the ornament:
Place your Santa on a parchment-lined baking sheet. Bake according to your polymer clay package instructions (usually 275°F/135°C for 15-30 minutes depending on thickness). -
Cool down:
Allow the ornament to cool completely on the baking sheet to prevent warping. -
String it up:
Cut a length of jute twine, thread it through the hole in the hat, and tie a secure knot to create the hanger.
Hang this cheerful Santa on your tree and enjoy the handmade festive spirit he brings to your decor
Stained-Glass Cutout Ornaments
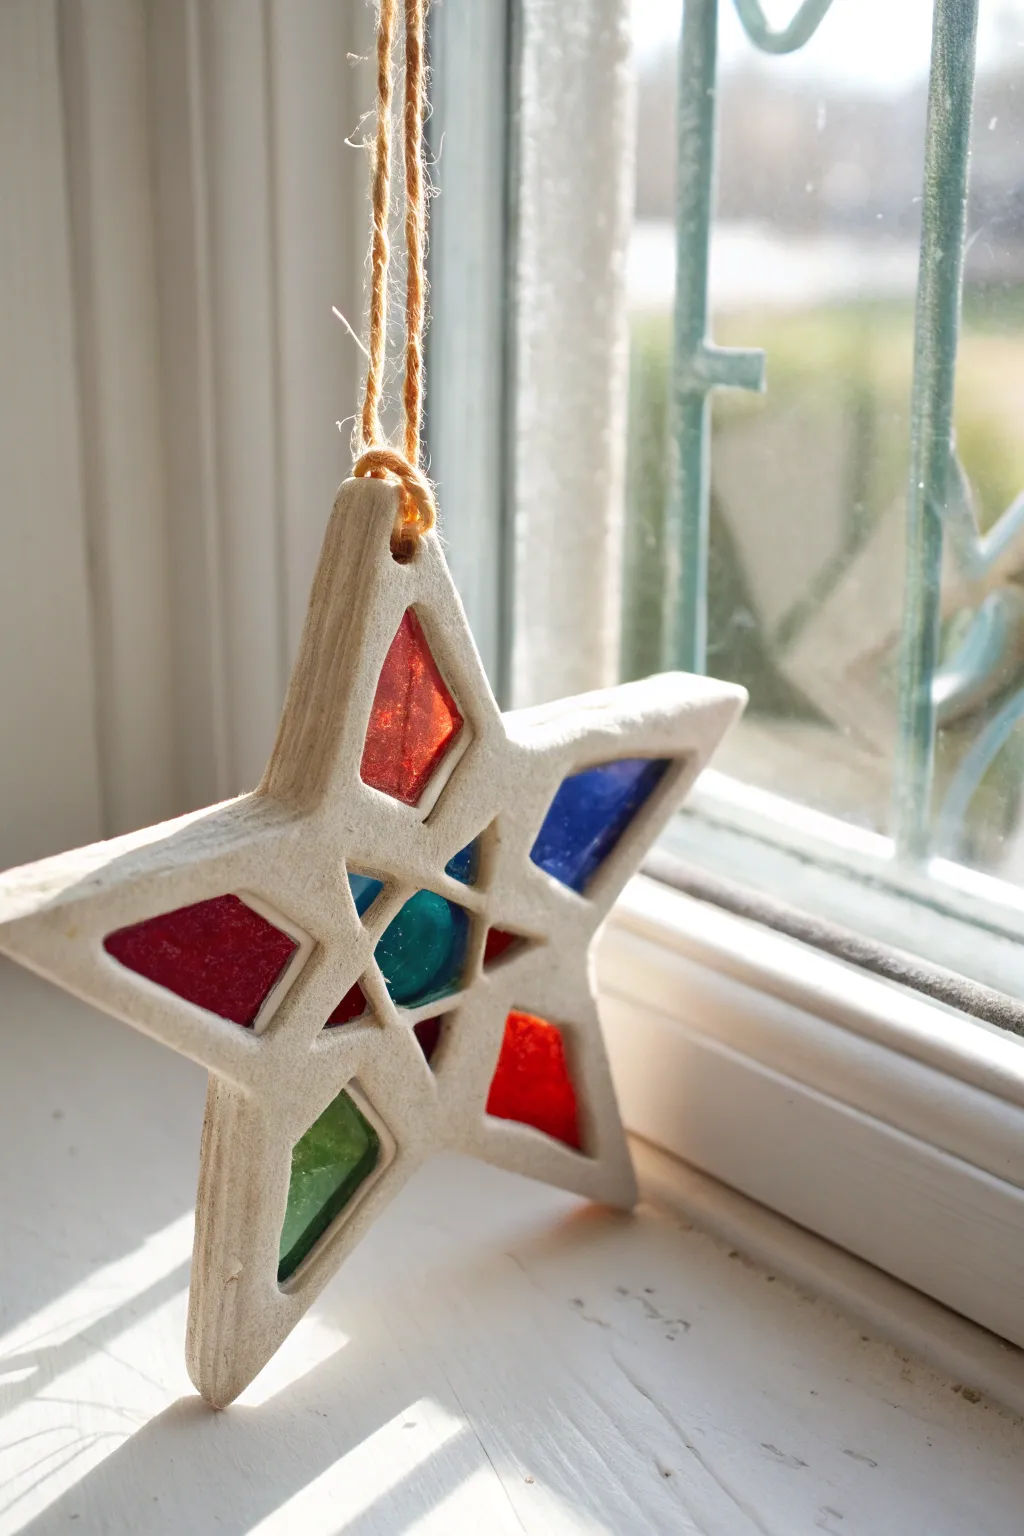
Capture the magic of holiday light with this rustic star ornament that mimics the glow of real stained glass. By combining simple white clay with melted transparent inserts, you’ll create a sun-catching decoration perfect for hanging in a bright window.
How-To Guide
Materials
- White polymer clay or air-dry clay (salt dough also works)
- Hard transparent plastic beads (pony beads) in red, blue, and green
- Rolling pin
- Star-shaped cookie cutter (medium size)
- Small craft knife or smaller geometric cutters
- Parchment paper
- Baking sheet
- Straw or toothpick
- Jute twine for hanging
- Sandpaper (fine grit)
Step 1: Shaping the Clay Frame
-
Prepare the workspace:
Begin by laying down a sheet of parchment paper on your work surface or directly onto your baking sheet. This ensures you won’t have to move the delicate raw clay later. -
Roll the clay:
Take a handful of white clay and knead it until soft. Roll it out to an even thickness of about 1/4 inch. If it’s too thin, the frame might crack; too thick, and it will look chunky. -
Cut the main star:
Press your main start-shaped cookie cutter firmly into the clay. Wiggle it slightly to ensure a clean cut, then lift the cutter away. Remove the excess clay from around the star. -
Create the inner windows:
Using a craft knife, carefully cut out geometric shapes inside the star. For this design, cut a diamond shape inside each of the five points and a small hexagon or circle in the very center. Leave sturdy bridges of clay between each cutout so the star holds its shape. -
Smooth the edges:
Dip your finger in a little water and gently run it over any rough clay edges to smooth them down. I find this extra minute of effort makes the final piece look much more professional. -
Add a hanging hole:
Use a straw to punch a clean hole at the top point of the star. Make sure it’s not too close to the edge to prevent tearing when hanging.
Cloudy Glass?
If your melted beads look cloudy or bubbly rather than clear, try baking slightly longer to release trapped air, or use transparent high-quality pony beads.
Step 2: Creating the Stained Glass Effect
-
Prepare the plastic beads:
Sort your hard plastic beads by color. You will need red, dark blue, green, and perhaps a teal or light blue for the center. -
Fill the cutouts:
Place the beads into the empty spaces you cut out of the clay. You generally need one bead per small space. If the space is large, you might need two. -
Arrange the colors:
Follow the alternating pattern shown in the image: distinct red points, a blue point, a green point, and a contrasting color for the center window. -
Adjust the beads:
Make sure the beads are touching the clay edges of their respective windows. As they melt, they need to bond to the clay frame.
Step 3: Baking and Finishing
-
Preheat the oven:
Set your oven to roughly 375°F (190°C). Note: If using polymer clay, follow the manufacturer’s max temperature, but know that plastic beads typically need nearly 400°F to melt fully. Salt dough is often safer for high heat. -
Bake the ornament:
Place the baking sheet in the oven. Bake for approximately 15-20 minutes. Watch closely! You want the beads to melt completely flat and the clay to harden, but you don’t want the white clay to scorch. -
Cool completely:
This is crucial: Let the ornament cool effectively on the baking sheet until the melted plastic is rock hard again. If you lift it too early, the ‘glass’ will warp or detach. -
Inspect the back:
Once cool, peel the parchment paper off the back. The side that was touching the paper usually has a smoother, glassier finish and often becomes the front. -
Sand rough spots:
If there are any sharp edges on the clay or stray plastic bits, lightly buff them with fine-grit sandpaper. -
Attach the hanger:
Cut a length of jute twine. Thread it through the hole at the top point of the star. -
Secure the loop:
Tie a simple overhand knot at the ends of the twine to create a rustic loop, ready to hang on your tree or window latch.
Crushed Candy Variant
Swap beads for crushed hard candies (like Jolly Ranchers) for a temporary, edible-safe version. Keep it away from moisture as it will get sticky!
Hang your finished star in a sunny spot to enjoy the beautiful play of colored light through the season