If you’re in the mood to make something cozy and festive, a clay Christmas tree is one of those projects that always feels magical. I love how you can go super simple or add all the tiny details—either way, you end up with a handmade piece you’ll want to pull out every December.
Classic Cone Clay Christmas Trees
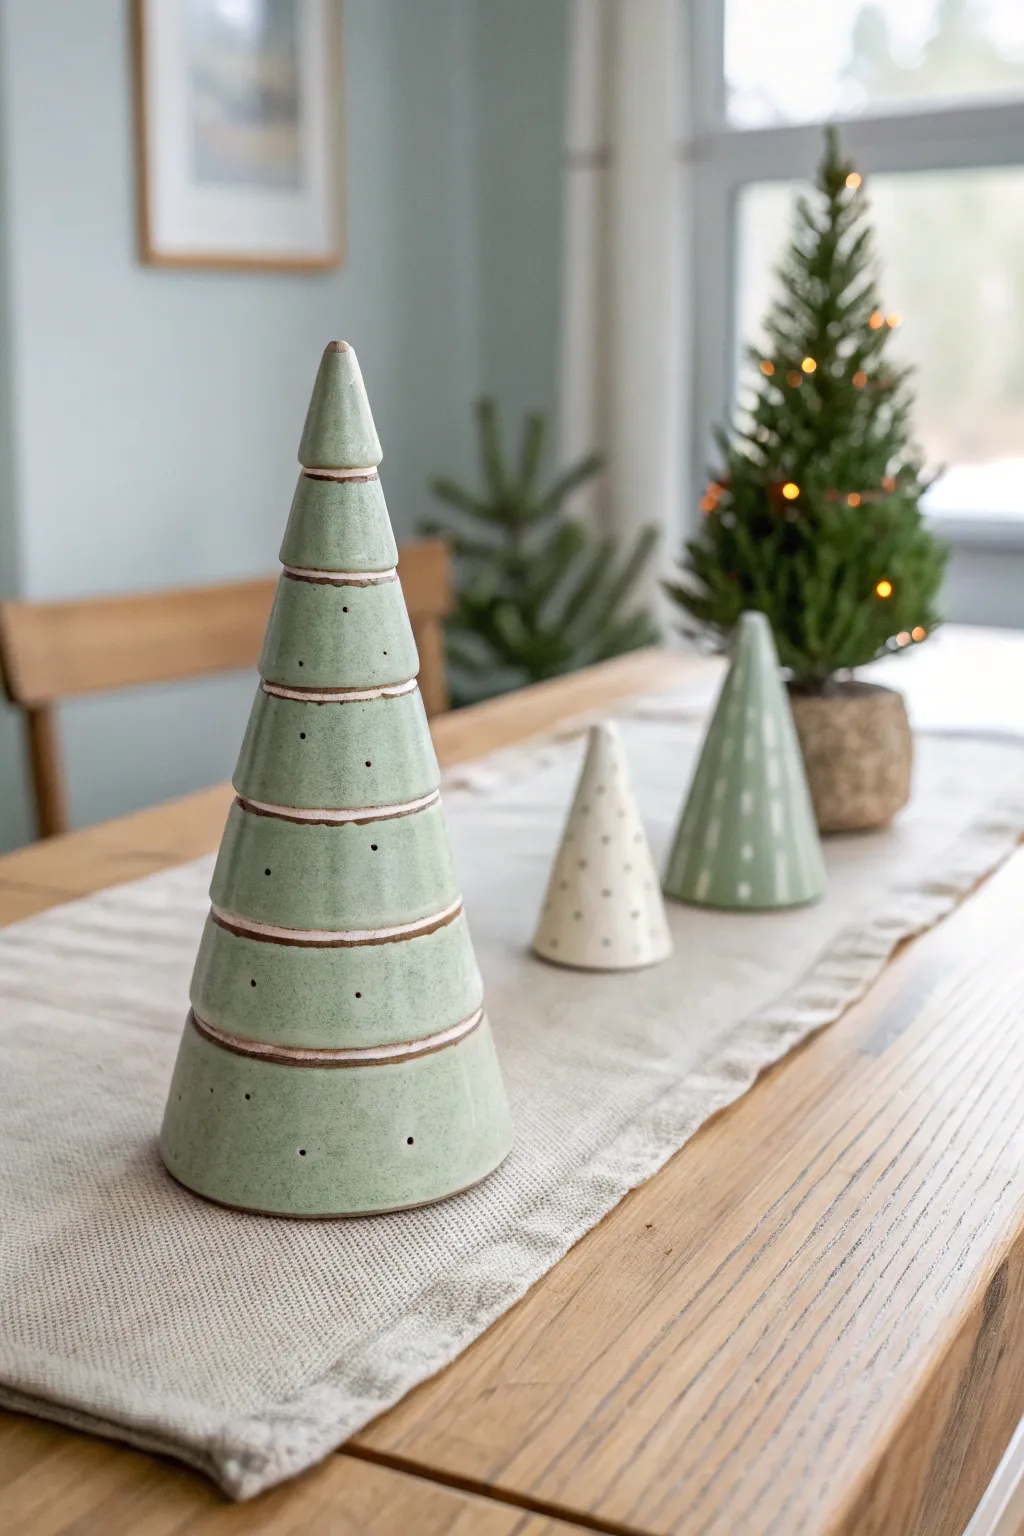
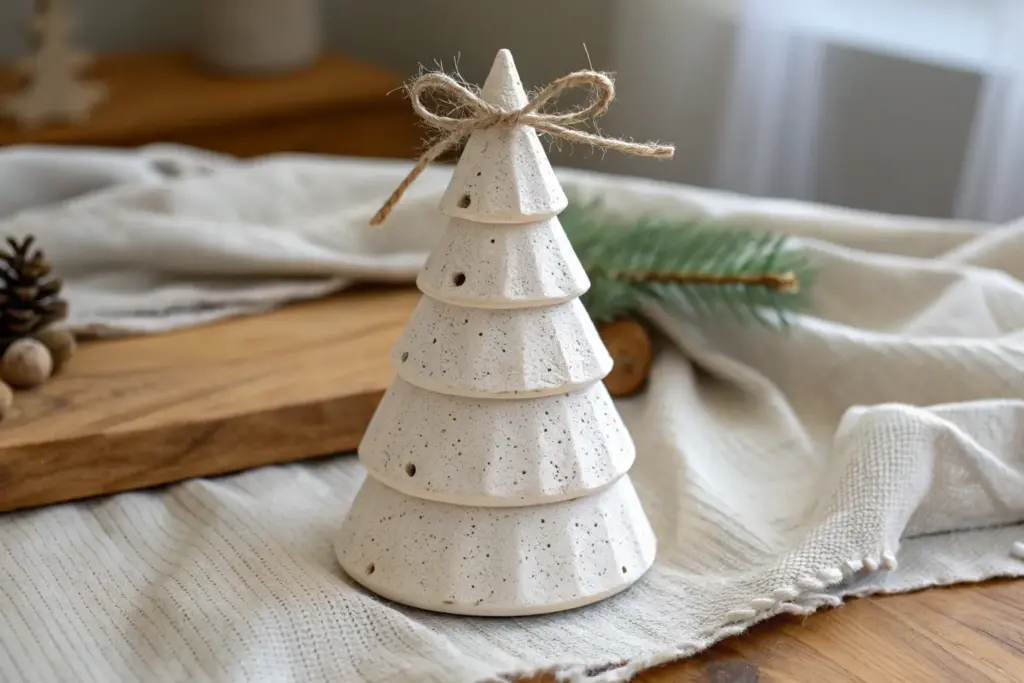
These charming, minimalist trees bring a touch of Nordic elegance to your holiday table with their distinct segmented layers and glossy green finish. The beauty lies in their slight imperfections and the warmth of the exposed clay peeking through the glaze.
Step-by-Step
Materials
- Stoneware clay (buff or speckled)
- Rolling pin
- Canvas work surface
- Needle tool
- Cardstock or manila folder (for templates)
- Slip and scoring tool
- Sponge
- Sea green cone 5/6 glaze
- Small round paintbrush
- Kiln access
Step 1: Shaping the Segments
-
Create templates:
Cut five semi-circle strips from cardstock, each slightly smaller than the last. These will form the tiered cones. The largest strip should be about 2 inches deep, getting progressively shallower. -
Roll the slabs:
Roll your stoneware clay out on canvas to an even thickness of about 1/4 inch. Smooth out any canvas texture with a rib tool. -
Cut the clay:
Using your needle tool and cardstock templates, cut out five arched strips. You will also need one small solid cone for the very top peak. -
Form the base cone:
Take the largest strip and curve it into a cone shape. Score the connecting edges, apply slip, and press firmly to join. Smooth the seam inside and out. -
Stack the tiers:
Form the remaining strips into cones. Each cone should overlap slightly with the one below it. Test the fit before joining permanently. -
Join the segments:
Score the top rim of the base cone and the inside bottom of the next cone. Slip and press them together. Repeat this stacking process until you reach the top. -
Add the peak:
Hand-mold a small solid cone of clay and attach it to the very top to close the form.
Step 2: Refining and Detailing
-
Define the lines:
Use a modeling tool to gently press into the horizontal seams between layers. You want a distinct groove that separates the segments visually. -
Smooth the surface:
Take a slightly damp sponge and wipe down the entire tree to remove fingerprints and soften sharp edges. -
Add texture:
Using a small needle tool or the tip of a bamboo skewer, poke random scatterings of tiny holes into the clay surface. Don’t go all the way through; just create small divots. -
Dry slowly:
Tent the tree loosely with plastic for the first day to ensure the seams dry evenly, then uncover to bone dry. -
Bisque fire:
Fire the piece to cone 04 (or your clay’s specific bisque temperature).
Fixing Wobbly Stacks
If your tiers slide while stacking, insert a temporary coil of clay inside the lower cone to act as a support shelf while the join sets.
Step 3: Glazing and Finishing
-
Wax resist (optional):
If you want the horizontal lines between segments to remain raw clay like the photo, carefully paint a thin line of wax resist into those grooves. -
Apply glaze:
Pour a sea foam green glaze over the exterior, or brush on three smooth coats. Ensure the glaze gets into the tiny pinholes. -
Wipe the grooves:
If you didn’t use wax, take a damp sponge and carefully wipe the glaze away from the horizontal grooves to expose the clay body. -
Clean the bottom:
Wipe the very bottom rim of the tree completely clean of glaze so it doesn’t stick to the kiln shelf. -
Glaze fire:
Fire the tree to the maturation temperature of your glaze (typically cone 5 or 6). I personally love seeing how the glaze breaks over the textured pinholes after firing.
Glow Up
Make the tree hollow and punch the small holes all the way through. Place a battery-operated tea light underneath for a glowing luminary effect.
Once cooled, your handmade tree is ready to serve as a festive centerpiece for years to come


Minimalist White Tree Luminaries
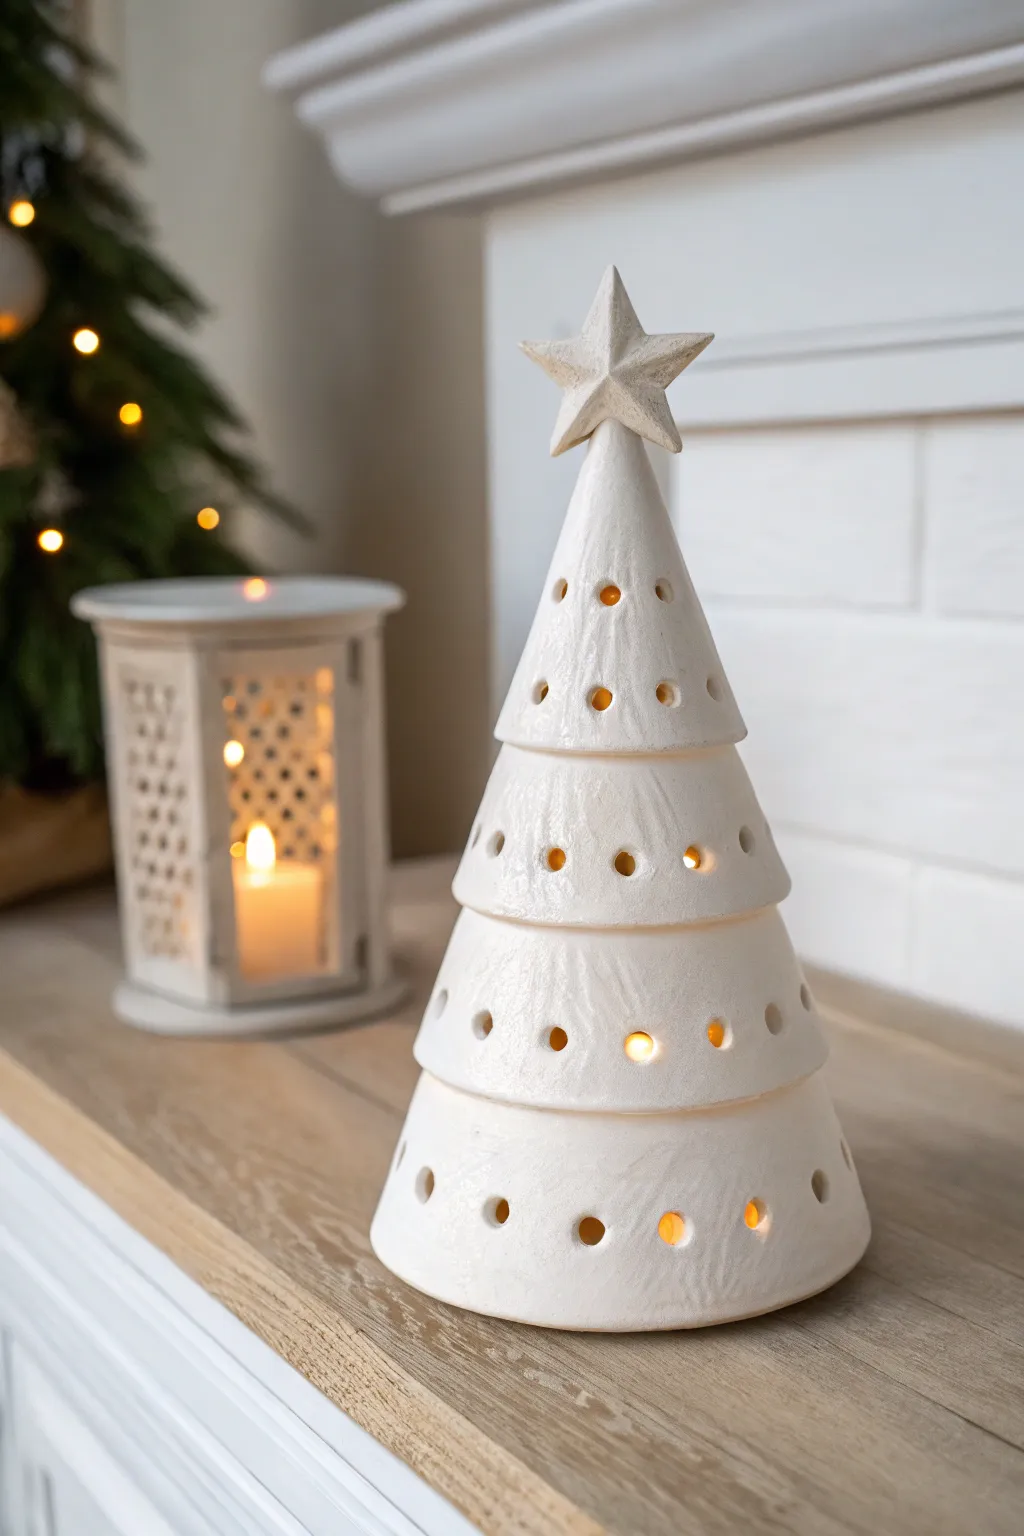
Create a cozy winter atmosphere with this elegant ceramic-style tree luminary, featuring pierced tiers that let warm candlelight glow through. This minimalist white design combines modern simplicity with a touch of handmade rustic charm perfect for a mantle or holiday table.
Step-by-Step Tutorial
Materials
- White polymer clay or air-dry clay (approx. 1 lb)
- Rolling pin
- Cardstock or thick paper (for templates)
- Craft knife or scalpel
- Small circular clay cutters or a straw
- Clear slip (liquid clay) or clay scoring tool
- Sandpaper (fine grit)
- White acrylic paint (if using air-dry clay)
- Star-shaped cookie cutter (small)
- Battery-operated LED tea light
Step 1: Creating the Cone Templates
-
Design the tiers:
To get that tiered ‘skirt’ look, you need to create paper templates first. Draw four arc shapes on your cardstock. Imagine them as rainbow arches or semi-circles of decreasing sizes. -
Size the arcs:
The bottom tier needs the largest arc (approx. 8 inches wide), while the top tier should be the smallest (approx. 3 inches wide). Cut these shapes out. -
Test the fit:
Roll your paper templates into cones to check their scale. Stack them loosely to ensure they graduate in size pleasantly before committing to clay.
Seam Smoother Secret
Use a small amount of baby oil (for polymer) or vinegar (for air-dry) on your finger to make seams disappear instantly without over-wetting the clay.
Step 2: Forming the Clay Tiers
-
Prepare the clay slab:
Roll out your white clay on a clean, smooth surface until it is about 1/4 inch thick. Try to keep the thickness consistent for a uniform glow. -
Cut the shapes:
Place your cardstock templates onto the clay. Using your craft knife, carefully trace around each arc to cut out your four tier pieces. -
Add texture:
For that subtle organic finish seen in the photo, gently press a piece of canvas or a textured sponge against the surface of the clay while it’s flat. -
Create the light holes:
Using a small circular cutter or a plastic drinking straw, punch holes randomly around the bottom edge of each clay arc. Leave enough space between them for structural strength. -
Form the cones:
Take the largest arc and curl it into a cone shape. Overlap the straight edges slightly. -
Seal the seam:
Blend the overlapped seam together on the inside and outside using your fingers or a smoothing tool. It needs to be a strong bond to support the upper layers. -
Repeat for all tiers:
Form the remaining three arcs into cones, smoothing their seams. You should now have four separate hollow cone shapes of graduating sizes.
Add Metallic Magic
After baking, paint the inside rims of the holes with gold leaf liquid. When the light shines through, it will cast a warm, golden sparkle.
Step 3: Assembly and Detail
-
Stack the tiers:
Place the largest cone on your work surface. Score the top rim and apply a little liquid clay (or water for air-dry clay) as glue. -
Attach the second tier:
Gently place the second-largest cone on top of the first, ensuring it overlaps enough to bond but still shows the tier below. Smoothing the clay from the inside can help secure it. -
Complete the stack:
Continue stacking and bonding the third and fourth tiers until the tree structure is complete. I usually give the whole piece a gentle wiggle to make sure nothing is loose. -
Create the star topper:
Roll a small piece of clay slightly thicker than the tiers. Use your star cutter to make a star shape. -
Attach the star:
Score the top point of your tree and the bottom of the star. Press the star firmly onto the peak of the tree, blending the clay at the connection point so it stands upright.
Step 4: Finishing Touches
-
Final smoothing:
Check your seams and edges. Dip your finger in a little water or baby oil to smooth out any fingerprints or harsh cut marks. -
Baking or drying:
If using polymer clay, bake according to package instructions (usually 275°F for 15-30 mins). If using air-dry clay, let it dry naturally for 24-48 hours away from direct heat. -
Sanding:
Once fully cured or dry, use fine-grit sandpaper to buff away any rough spots on the rims or the star topper. -
Painting (Optional):
If your clay isn’t bright white, apply two thin coats of matte white acrylic paint for a pristine snowfall look.
Place your finished tree over a battery-operated LED candle and watch it illuminate your winter evenings with a soft glow

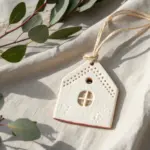

Tree-Shaped Clay Ornaments
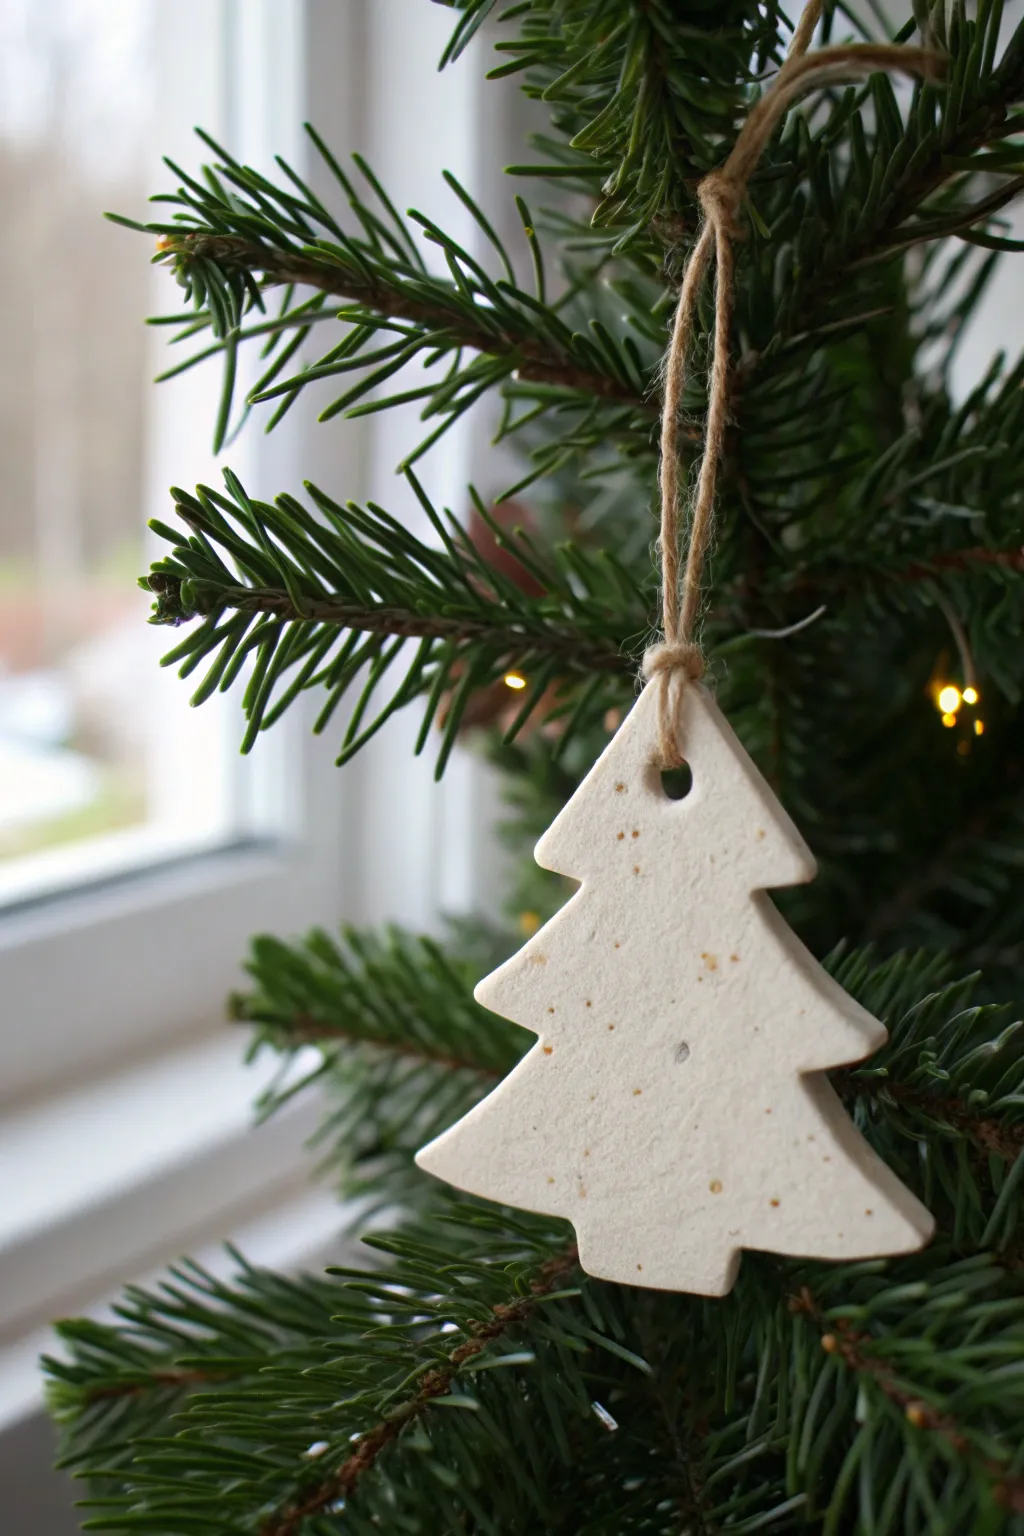
Embrace a minimalist Scandinavian aesthetic with these charming, rustic tree ornaments. The natural speckled finish gives them the cozy look of stone or ceramic without the need for a kiln, making for a perfect holiday afternoon project.
Step-by-Step
Materials
- White air-dry clay or homemade baking soda dough
- Ground cinnamon or nutmeg (for speckles)
- Small Christmas tree cookie cutter
- Rolling pin
- Parchment paper or silicone mat
- Drinking straw or small circular tool
- Fine grit sandpaper
- Jute twine or hemp cord
- Clear matte sealant (optional)
Step 1: Preparing the Clay
-
Condition the dough:
Begin by taking a handful of your white air-dry clay. Knead it in your hands for a minute or two to warm it up and make it pliable. -
Add the texture:
Flatten the clay slightly and sprinkle a small pinch of ground cinnamon or nutmeg directly onto the surface. This is the secret to getting that lovely organic, speckled stone look. -
Incorporate the spices:
Fold the clay over the spices and continue kneading thoroughly. You want the specks to be distributed evenly throughout the entire ball of clay so the pattern isn’t blotchy. -
Set up your workspace:
Lay down a sheet of parchment paper or a silicone mat. This prevents sticking and makes it easier to move the ornaments later without warping them.
Step 2: Shaping the Ornaments
-
Roll it out:
Place your spiced clay ball on the mat and use a rolling pin to flatten it. Aim for a consistent thickness of about 1/4 inch (6mm) to ensure they are sturdy but not too heavy. -
Check for smoothness:
Run your finger lightly over the surface. If you see any major cracks, smooth them out with a tiny bit of water on your finger before cutting. -
Cut the shapes:
Press your Christmas tree cookie cutter firmly into the clay. Give it a tiny wiggle to ensure it cuts all the way through to the mat. -
Release the shape:
Lift the cutter straight up. Peel away the excess clay from around the outside of the tree shape first, leaving the tree on the mat. -
Create the hanging hole:
Using a drinking straw or a small circular tool, punch a hole near the top point of the tree. Make sure the hole isn’t too close to the edge to prevent the clay from snapping later. -
Smooth the edges:
Dip your finger in a little water and gently trace the outline of the tree to soften any sharp ridges left by the cookie cutter.
Natural Scents
Add a drop of pine or cinnamon essential oil into the clay while kneading. As the clay dries on the tree, it will release a subtle holiday scent.
Step 3: Drying and Finishing
-
Let them dry:
Allow the ornaments to air dry on a flat surface for 24 to 48 hours. I find flipping them over gently halfway through the drying process helps them stay perfectly flat. -
Sand for perfection:
Once fully hard, take fine-grit sandpaper and lightly buff the edges. This removes any final burrs and gives the ornament a professional, clean finish. -
Seal the surface:
If you want to protect them from humidity, apply a thin coat of clear matte sealant. This is optional but helps the ornaments last for years. -
Prepare the hanger:
Cut a length of jute twine, roughly 8 inches long. Thread one end through the hole you created earlier. -
Tie the knot:
Bring the ends of the twine together and tie a secure overhand knot. Trim any excess twine if necessary. -
Final adjustment:
Rotate the loop so the knot sits just above the drilled hole, giving it that rustic, handmade appearance seen in the photo.
Curling Edges?
If your ornament edges start curling up while drying, place a lightweight book on top of them (sandwich them in parchment paper first) to weigh them down.
Now you have a set of timeless, minimalist ornaments ready to hang or gift to a friend


Evergreen Imprint Tree Ornaments
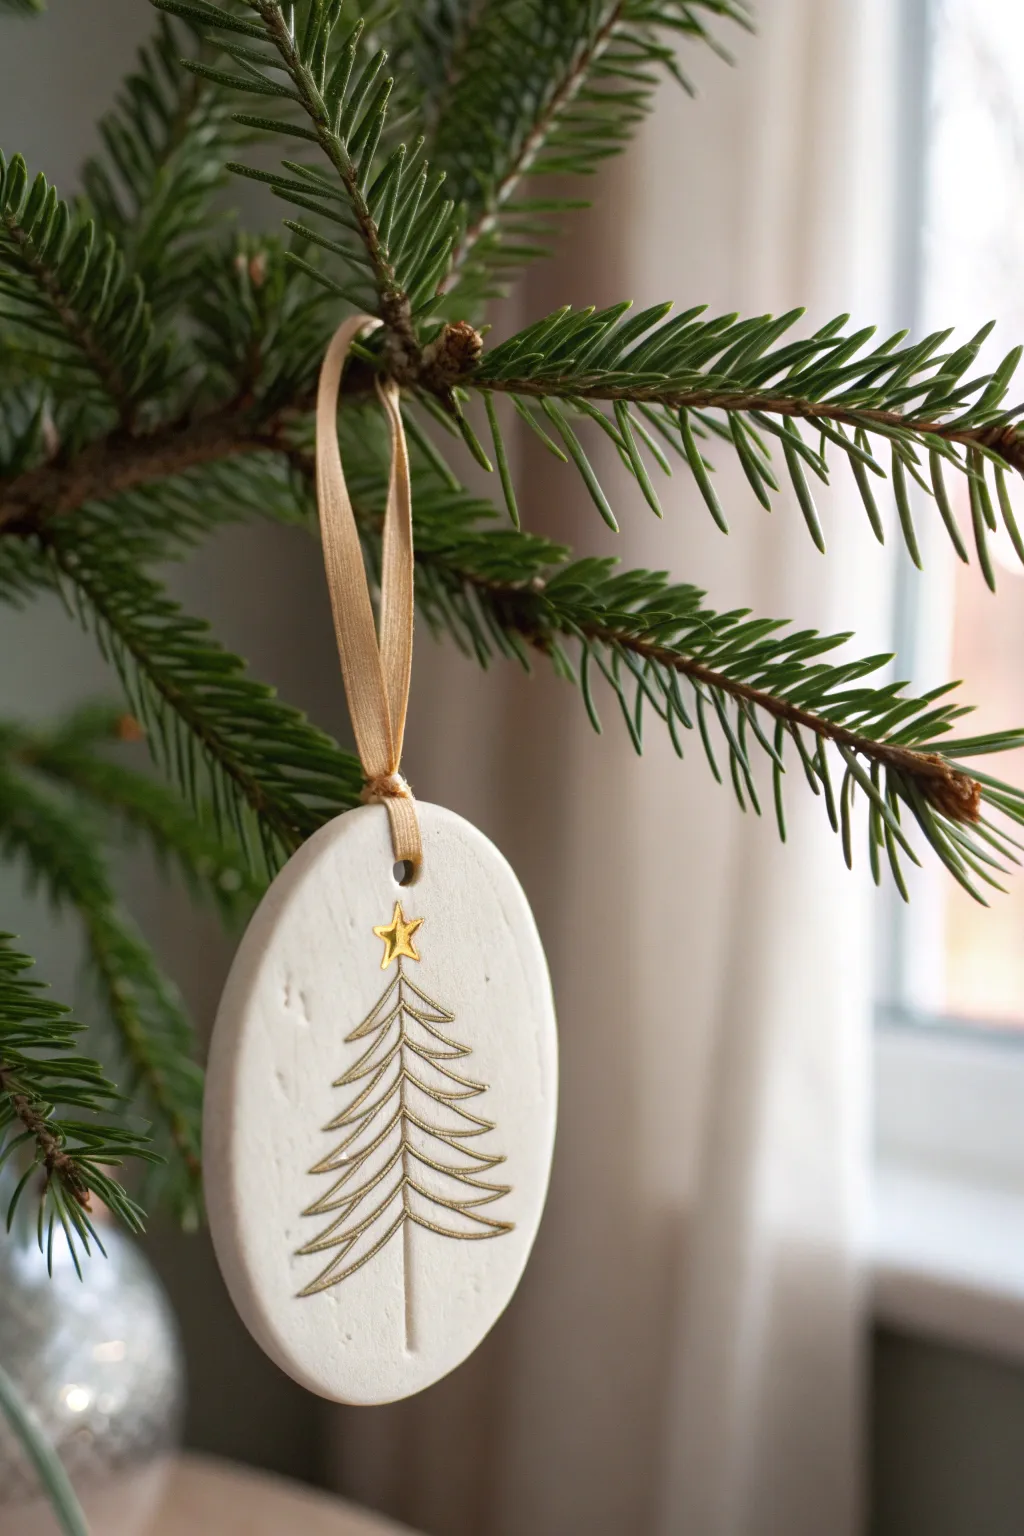
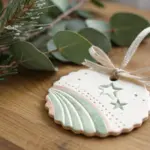
These sophisticated oval ornaments combine the rustic texture of white modeling clay with the festive shimmer of metallic gold. The clean, minimalist pine tree design makes them a timeless addition to any holiday decor style, from Scandi-chic to traditional.
How-To Guide
Materials
- White air-dry clay or polymer clay
- Rolling pin
- Oval cookie cutter (approx. 3-4 inches tall)
- Evergreen tree stamp (wire or linocut style)
- Fine-point gold paint pen or gold gilding wax
- Small gold star stickers or gold paint
- Drinking straw or small circular tool
- Fine-grit sandpaper (optional)
- Gold satin ribbon (1/4 inch width)
- Parchment paper or silicone mat
Step 1: Shaping the Base
-
Prepare your workspace:
Lay down a sheet of parchment paper or a silicone mat to prevent the clay from sticking to your table. If you’re using air-dry clay, keep a small bowl of water nearby for smoothing edges. -
Condition the clay:
Take a handful of white clay and knead it in your hands until it becomes soft, pliable, and warm. This prevents cracking later on. -
Roll out the slab:
Use your rolling pin to flatten the clay into an even slab. Aim for a thickness of about 1/4 inch—too thin and it might break, too thick and it will be heavy. -
Cut the shape:
Press your oval cookie cutter firmly into the clay. Give it a gentle wiggle before pulling it up to clear the edges. -
Create the hanging hole:
Use a drinking straw to punch a hole near the top of the oval about half an inch from the edge. Twist the straw as you pull it out for a clean cut. -
Smooth the edges:
Dip your finger in a little water (for air-dry clay) and gently run it around the rim of the oval to soften any sharp cuts left by the cutter.
Step 2: Designing the Tree
-
Position the stamp:
Take your wire-style evergreen tree stamp and center it visually on the clay oval, leaving room at the top for the star. -
Make the impression:
Press the stamp down evenly. You want a clear indentation, but don’t press so hard that you distort the shape of the oval. -
Add the star intent:
If you plan to paint the star, use a small tool or toothpick to lightly sketch a star shape at the apex of the tree. If using a sticker later, you can skip this. -
Allow to dry:
Let the clay dry completely according to package instructions. For air-dry clay, I usually carefully flip them over after 12 hours to ensure the back dries evenly too. -
Sand imperfections:
Once fully cured and hard, use fine-grit sandpaper to gently buff away any rough spots on the edges or surface.
Stamp Stuck?
If your stamp sticks to the wet clay, dust the stamp surface lightly with cornstarch or baby powder before pressing it down. This acts as a release agent.
Step 3: Gilding and Finishing
-
Trace the design:
Shake your gold paint pen well. skillfully trace inside the indented lines of your tree imprint. -
Steady your hand:
Work slowly from the top down to avoid smudging the metallic ink with your palm as you work. -
Apply the star:
Fill in your sketched star with the gold pen, or firmly press a small gold star sticker at the top of the tree. -
Let the ink set:
Allow the gold paint to dry completely. This usually takes only a few minutes, but give it 15 to be safe. -
Prepare the ribbon:
Cut a 10-inch length of gold satin ribbon. Fold it in half to create a loop. -
Attach the hanger:
Feed the folded end through the hole from front to back, then pass the loose ends through the loop and tighten gently to create a lark’s head knot.
Add a Glossy Finish
For a ceramic look, coat the white areas (avoiding the gold lines) with a water-based glossy varnish or Mod Podge after the paint dries.
Hang your finished ornament on a sturdy branch where it can catch the holiday lights

The Complete Guide to Pottery Troubleshooting
Uncover the most common ceramic mistakes—from cracking clay to failed glazes—and learn how to fix them fast.
Fingerprint Lights Tree Keepsakes
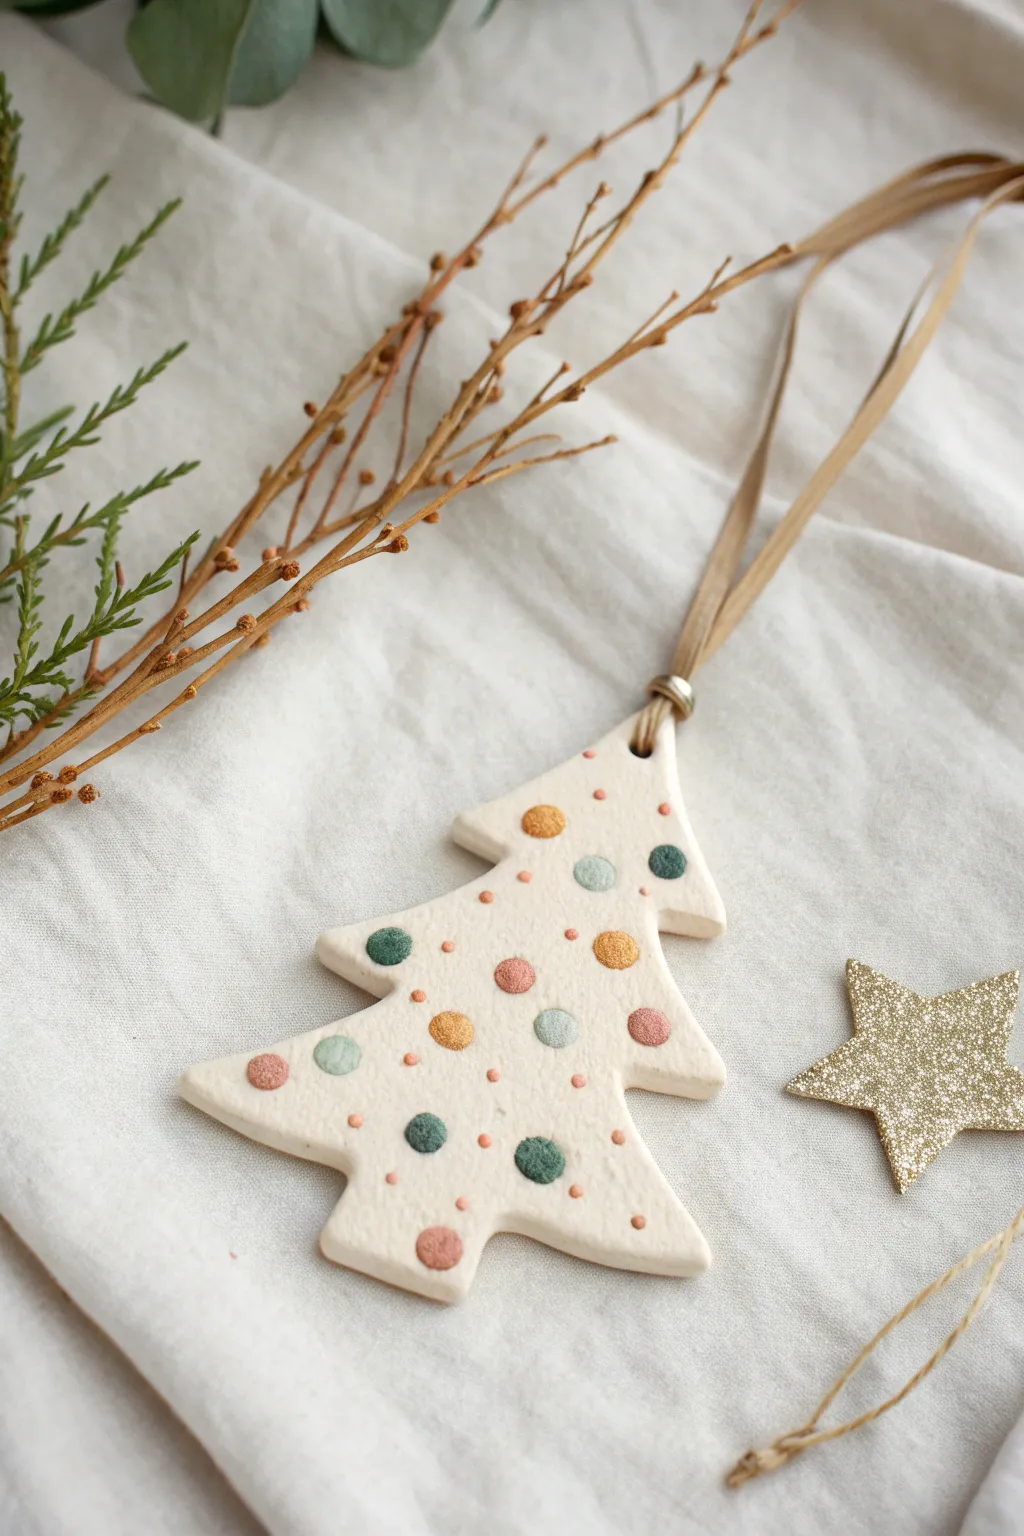
This charming handmade ornament brings a festive pop of color to your tree with its textured white clay and vibrant, dot-patterned design. It combines the simplicity of Scandinavian style with a playful, homemade touch that looks like colorful Christmas lights.
Step-by-Step Tutorial
Materials
- White or cream-colored air-dry clay
- Rolling pin
- Christmas tree cookie cutter (approx. 4-5 inches)
- Parchment paper or non-stick craft mat
- Sandpaper (fine grit)
- Acrylic paints (pastel pink, sage green, mustard yellow, dusty blue, coral)
- Small round detail brush or dotting tools
- Drinking straw or small circular cutter for hole punch
- Natural raffia or hemp twine
- Matte finish acrylic sealer (optional)
Step 1: Shaping the Base
-
Preparing the clay:
Begin by kneading a handful of air-dry clay until it becomes soft, pliable, and warm in your hands. This conditioning prevents cracks from forming later. -
Rolling flat:
Place the clay between two sheets of parchment paper. Use your rolling pin to flatten it to a uniform thickness of about 1/4 inch. Avoid making it too thin, as you want a substantial, durable ornament. -
Cutting the shape:
Press your Christmas tree cookie cutter firmly into the rolled clay. Wiggle it slightly to ensure a clean cut before lifting the cutter away. -
Creating the hanging hole:
While the clay is still wet, use a straw or a small circular tool to punch a hole at the very top tip of the tree. Make sure the hole is not too close to the edge to prevent breakage later. -
Smoothing edges:
Dip your finger in a little bit of water and run it gently along the cut edges of the tree to smooth out any roughness or loose clay bits. -
Adding texture:
To mimic the organic look in the photo, lightly dab the surface with a crumpled piece of aluminum foil or a stiff paintbrush to create a subtle, stony texture. -
Drying phase:
Set the clay tree aside on flat parchment paper to dry completely. This typically takes 24-48 hours depending on humidity. Flip it over halfway through I usually find helps it dry evenly without curling.
Clean Lines Tip
If your hand isn’t steady for painting circles, use the eraser end of a pencil as a stamp. Dip it in paint and press down for perfect, uniform dots every time.
Step 2: Adding Color & Pattern
-
Sanding:
Once fully cured and hard, check the edges again. If there are any sharp points, gently sand them down with fine-grit sandpaper. -
Planning the dots:
Visualize a random distribution of dots, similar to ornaments on a tree. You want a mix of larger ‘statement’ dots and tiny accent dots. -
Painting large dots:
Using your acrylic paints and a small round brush, paint medium-sized circles in alternating colors (mustard, sage green, and pastel pink). Keep the paint relatively thick to add a slight raised texture. -
Adding small accents:
Switch to a smaller brush or a dotting tool. Fill in the empty spaces with tiny micro-dots in coral and light blue to create density and visual interest. -
Drying paint:
Allow the paint to dry completely. Acrylics usually dry fast, so 20–30 minutes should be sufficient. -
Sealing (Optional):
For longevity, you can brush on a coat of matte varnish. This dull finish preserves the natural clay look whereas a gloss would make it look plastic.
Level Up: Impressed Texture
Instead of painting, press small beads or the ends of different sized paintbrushes into the wet clay before drying to create indented dots, then paint inside the depressions.
Step 3: Final Assembly
-
Preparing the tie:
Cut a length of natural raffia or hemp twine, approximately 8-10 inches long. -
Threading:
Fold the raffia in half to create a loop. Push the folded end through the hole from the front to the back. -
Securing the loop:
Pass the loose ends of the raffia through the loop you just pushed through the hole (a lark’s head knot) and pull tight gently against the clay. -
Knotting the top:
Tie the two loose ends of the raffia together in a simple overhand knot at the top to create the hanger.
Hang your beautiful creation on a branch near a light source to let those cheerful colors really stand out
Coil-Built Spiral Christmas Trees
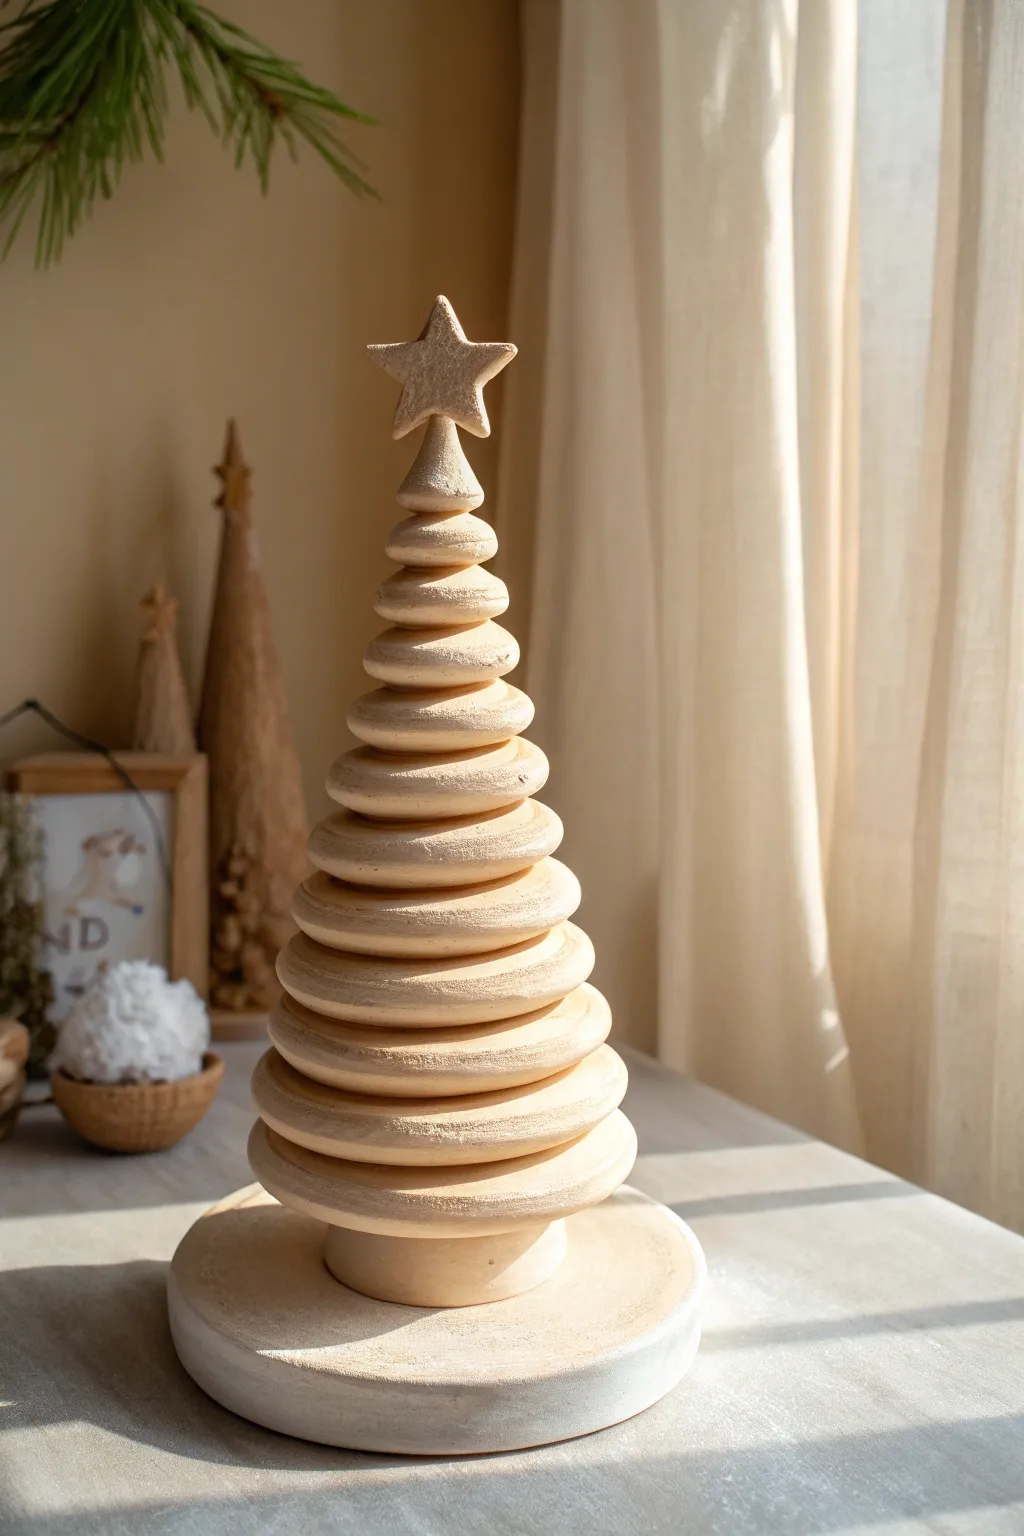
Capture the elegant simplicity of Scandinavian design with this stacked clay tree, featuring smooth, graduated discs that create a soothing rhythmic silhouette. The natural, unglazed finish gives it a warm, organic feel perfect for a modern holiday mantelpiece.
Step-by-Step
Materials
- White or beige air-dry clay (or light stoneware clay)
- Rolling pin
- Circle cutters (graduated set) or round templates
- Wooden dowel (approx. 1/4 inch thick)
- Clay knife or needle tool
- Slip (clay mixed with water)
- Small star cookie cutter
- Sanding sponge or fine-grit sandpaper
- Potter’s sponge
Step 1: Creating the Base and Structure
-
Prepare the central support:
Begin by determining the height of your tree. Cut a wooden dowel to your desired length, leaving an extra inch at the bottom for stability. -
Form the heavy base:
Roll out a thick slab of clay, roughly 3/4 inch thick. Cut out a large circle, about 4-5 inches in diameter, to serve as the sturdy foundation. -
Insert the dowel:
While the base is still workable, press the wooden dowel firmly into the center. You want it to go almost all the way through but not puncture the bottom. -
Secure the joint:
Add a small coil of clay around the base of the dowel where it meets the large disc. Smear this clay down and up to create a strong, invisible anchor. -
Add a riser:
Create a small, thick cylinder of clay—about 1.5 inches tall—and slide it over the dowel to rest on the base. This lifts the first ‘branches’ off the ground.
Slumping Discs?
If the bottom discs start to sag under the weight of the top ones, slide small pieces of cardboard or spacers between the layers to support them while they dry.
Step 2: Forming the Tiered Discs
-
Roll your clay slabs:
Roll out a large amount of clay to a consistent thickness of about 1/2 inch. I like to use guide sticks here to ensure every disc is perfectly even. -
Cut graduated circles:
Using your cutters or templates, cut out a series of clay circles. You will need about 12-15 circles, each slightly smaller than the last. -
Smooth the edges:
Before assembling, take a wet finger or a damp potter’s sponge and smooth the cut edges of every single disc. Rounded edges give that soft, turned-wood appearance. -
Create center holes:
Use a tool perfectly matched to your dowel’s width to punch a center hole in every disc. Find the true center to keep the tree symmetrical. -
Refine the shapes:
If the discs warped during cutting or hole-punching, gently pat them back into perfect flat circles on your work surface.
Texture Trick
To mimic the ‘wood grain’ look in the photo, lightly drag a stiff-bristled brush horizontally around each disc while the clay is still wet.
Step 3: Assembly and Finishing
-
Stack the layers:
Apply a small dab of slip to the top of your riser. Slide the largest disc down the dowel. Repeat this process, adding slip between each layer, working from largest to smallest. -
Shape the profile:
As you stack, step back occasionally. If the taper looks too steep or too wide, gently squeeze the clay discs to slightly adjust their diameter while they are flexible. -
Form the topper:
Roll a small slab and cut out two identical star shapes. Place the tip of the dowel (which should be protruding slightly) between the two stars. -
Seal the star:
Use slip to sandwich the two star halves together over the dowel tip. Smooth the seams with your finger so it looks like one solid solid star. -
Initial drying:
Let the tree dry slowly away from direct heat or drafts. Rapid drying might cause the thick discs to crack. -
Sanding for texture:
Once bone dry, take your sanding sponge and rigorously sand the edges of the discs. You want to remove any tool marks and create a dusty, stone-like texture. -
Clean up:
Wipe away the sanding dust with a slightly damp cloth or a dry brush to reveal the clean, matte surface.
Place your finished tree near a window where the natural light can play across the graduated ridges


What Really Happens Inside the Kiln
Learn how time and temperature work together inside the kiln to transform clay into durable ceramic.
Layered Ruffle Tree Sculptures
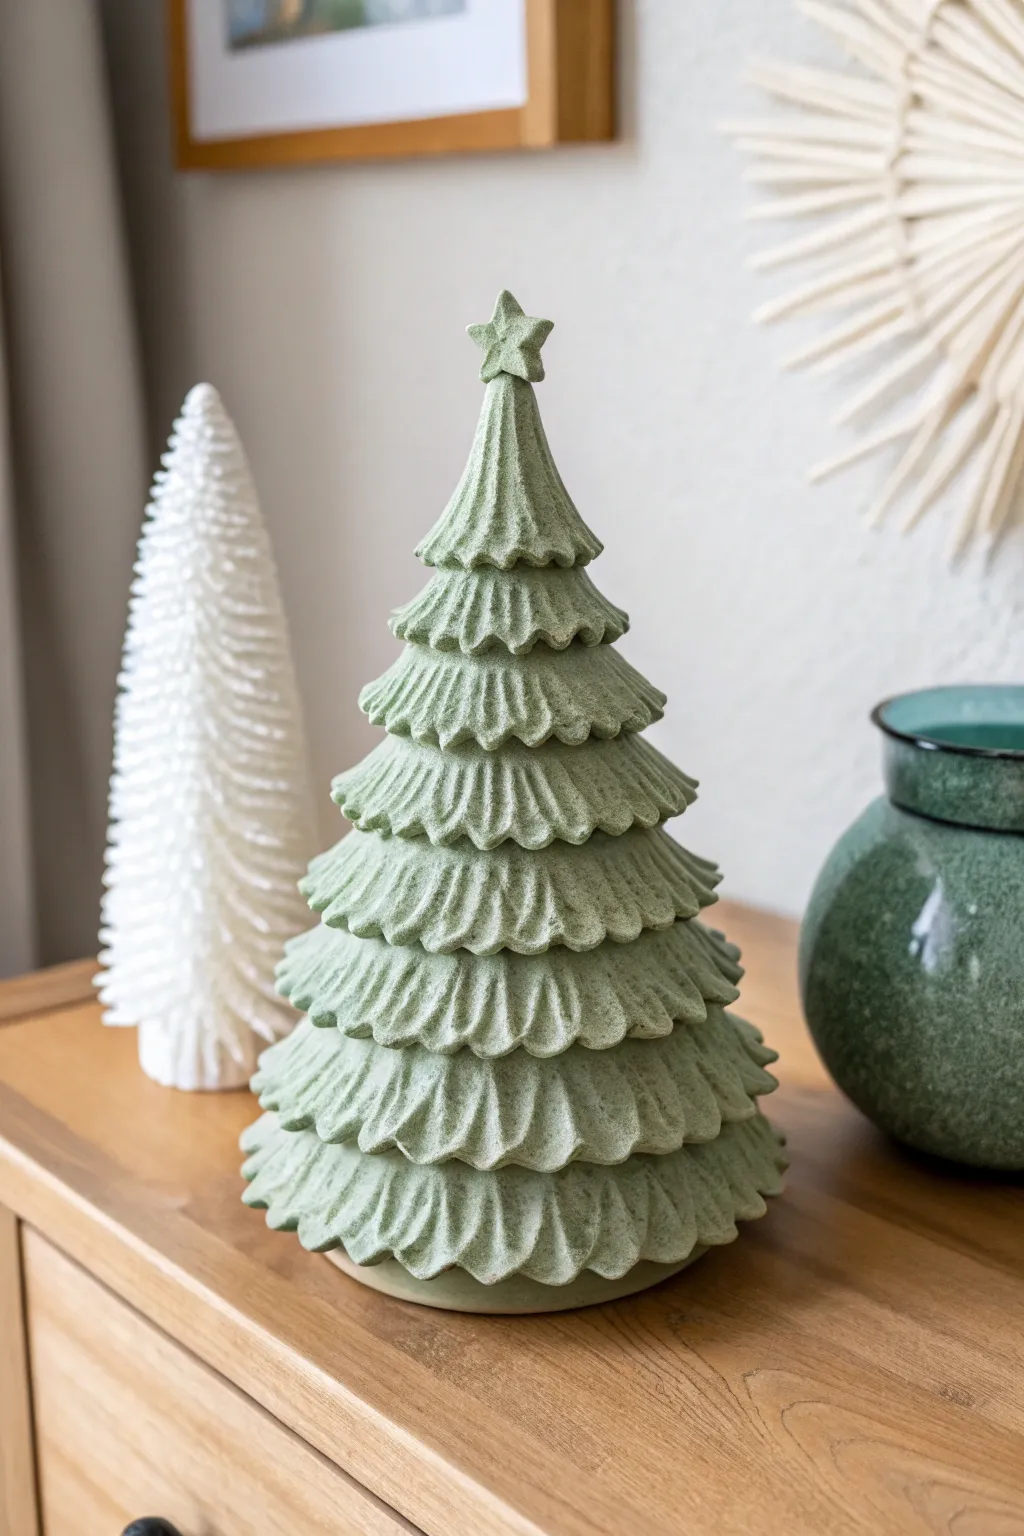
Embrace a sophisticated holiday aesthetic with this sculptural clay tree, featuring cascading ruffled layers that mimic the organic fullness of a real evergreen. The muted sage green finish and subtle texture give it a high-end, artisan pottery look perfect for a modern mantel.
Detailed Instructions
Materials
- Air-dry clay or polymer clay (white or terracotta)
- Acrylic paints (sage green, dark green, white)
- Sponge or stiff bristle brush
- Rolling pin
- Circle cutters (graduated sizes) or scalloped cookie cutters
- Cardboard cone or aluminum foil (for the armature)
- Modeling tools (or a toothpick)
- Parchment paper
- Clear matte sealant spray
Step 1: Building the Core
-
Create the support cone:
Start by fashioning a solid cone shape to act as the base. You can tightly scrunch aluminum foil into a cone shape and cover it with a thin layer of clay, or simply roll a solid cone of clay if you want a heavier, sturdier piece. -
Smooth the foundation:
Work the clay surface of your cone until it is relatively smooth. It doesn’t need to be perfect since it will be covered, but ensuring symmetry here helps the final tree stand straight. -
Mark layer guides:
Using a toothpick or a modeling tool, lightly score horizontal lines around the cone every inch or so. These will serve as placement guides for your ruffled tiers.
Natural Texture
Mix baking soda into your acrylic paint before applying the final coat. It creates a gritty, grainy texture that looks exactly like stone or rough pottery.
Step 2: Creating the Ruffles
-
Roll out the clay:
Roll a sheet of clay to a consistent thickness, about 1/4 inch. If the clay is too thin, the ruffles won’t hold their shape; too thick, and the tree will look bulky. -
Cut the circles:
Cut out several circles or flower shapes. If using circle cutters, you’ll need smaller circles for the top and larger ones for the bottom. Scalloped edges work great here, but plain circles can be manipulated too. -
Texture the edges:
Before attaching, gently pinch and pull the edges of your clay cutouts to thin them slightly. This creates a delicate, organic edge rather than a blunt cut. -
Form the ruffles:
Take a clay circle and cut a hole in the center (like a donut) or cut a slit to the center so you can wrap it. Use your fingers or the handle of a paintbrush to gently press indentations into the edge, creating a wavy, pleated effect.
Step 3: Assembly
-
Attach the bottom layer:
Starting at the very bottom of your cone, wrap your largest ruffled strip around the base. Press the upper edge of the strip firmly onto the cone to blend it in, leaving the ruffled bottom edge flaring out. -
Work upwards:
Continue adding layers, moving up the cone. Ensure each new layer slightly overlaps the top of the one below it to hide the seams. I find that offsetting the ‘waves’ of the ruffles creates a more natural, pine-needle look. -
Adjust the drape:
As you place each tier, pause to push the ruffled edges slightly downward. You want them to droop like heavy pine boughs rather than stick straight out. -
Cap the top:
When you reach the peak, shape a small, final cone of clay to blend the uppermost ruffles together neatly. -
Add the star:
Hand-mold a simple five-point star or use a small cutter. Attach it securely to the tip of the tree using a dab of water or liquid clay (slip) as glue. -
Texture the surface:
While the clay is still damp, take a stiff-bristled brush or a balled-up piece of foil and gently tap it all over the ruffles. This mimics the porous texture seen in the photo. -
Let it dry:
Allow the sculpture to dry completely. For air-dry clay, this might take 24-48 hours depending on humidity.
Level Up: Snow Dusted
For a winter vibe, mix white paint with glitter or sand and dab it strictly on the tops of the ruffles and the star to simulate freshly fallen snow.
Step 4: The Stone Effext Finish
-
Base coat:
Mix a sage green acrylic paint. Paint the entire tree, ensuring you get into the deep crevices under the ruffles. -
Create depth:
Mix a slightly darker shade of green. Dilute it with water to create a wash, and apply it over the tree. Let it settle into the grooves and wipe the raised areas gently with a paper towel. -
Stipple for stone texture:
Using a dry sponge or stipple brush, dab a very light, minty green or off-white paint onto the tips and raised ridges of the ruffles. This dry-brushing technique highlights the texture and gives that matte, ceramic feel. -
Seal the work:
Finish with a spray of matte clear sealant to protect the paint and unify the sheen.
Now you have a timeless holiday sculpture that brings earthy elegance to your seasonal decor
Scalloped Scale Texture Trees
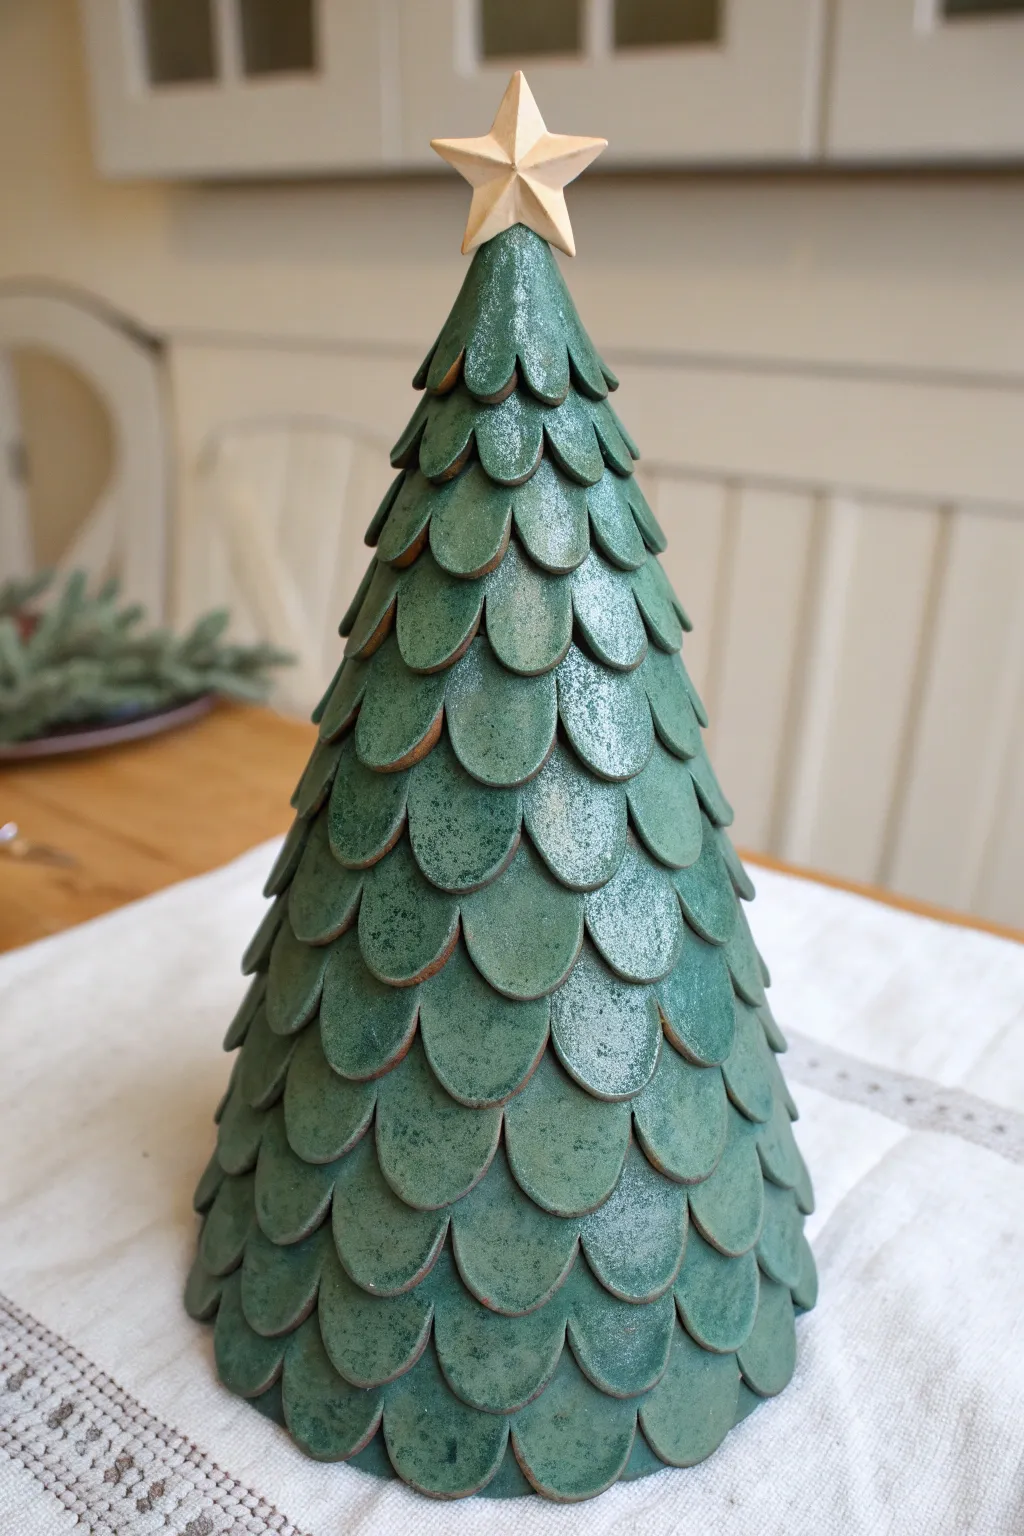
This elegant clay tree features a mesmerizing pattern of overlapping scalloped scales that mimic a natural pinecone texture. Finished with a metallic teal glaze and a simple star topper, it brings a sophisticated, handcrafted touch to your holiday mantel.
Step-by-Step
Materials
- Air-dry clay or polymer clay (white or light grey)
- Cardstock or thin cardboard (for the cone form)
- Small round cookie cutter or a bottle cap (approx. 1 inch diameter)
- Rolling pin
- Parchment paper
- Acrylic craft paints: Forest Green, Teal, Metallic Silver, Metallic Gold
- Sponge dabber or soft paintbrush
- Strong craft glue or hot glue gun
- Precision craft knife
- Clear sealant spray (gloss or satin)
- Small wooden star or extra clay to sculpt one
Step 1: Base Construction
-
Prepare the core:
Create a cone shape using cardstock or thin cardboard to serve as your armature. Tape it securely so it holds its shape. The height is up to you, but 8-10 inches works well for this design. -
Support the structure:
If using air-dry clay, loosely stuff the inside of the cone with crumpled newspaper or foil to prevent it from caving in while you work.
Loose Scales?
If a dried clay scale pops off the cardboard form, don’t panic. Use a strong superglue or 2-part epoxy to reattach it. White craft glue contains water and might soften the dried clay too much.
Step 2: Creating the Scales
-
Roll the clay:
Roll out your clay on a sheet of parchment paper to a uniform thickness, aiming for about 1/8th of an inch. An even thickness ensures the scales look consistent. -
Cut the circles:
Using your small round cutter or bottle cap, punch out numerous circles from the clay. You will need roughly 60-80 circles depending on your cone size. -
Modify the shape:
Take each circle and gently elongate it slightly by pressing or rolling one side to create an subtle oval or teardrop shape. This helps the scales hang better. -
Initial drying:
Let the clay scales sit for about 15-20 minutes. This “leather hard” stage makes them easier to handle without leaving fingerprints, but they should still be flexible.
Step 3: Assembly
-
Start at the bottom:
Apply a small dab of glue to the top back of a clay scale and press it onto the bottom edge of your cardboard cone. The bottom of the scale should hang slightly off the edge. -
Complete the first row:
Continue attaching scales around the entire bottom circumference, overlapping them slightly side-by-side so no cardboard shows through. -
Layer upwards:
Begin the second row. Place these scales so they sit in the “valleys” between the scales on the row below, creating a brick-lay pattern. -
Continue layering:
Work your way up the cone row by row. As you get higher, the circumference shrinks; you may need to overlap the scales more aggressively to make them fit. -
Finish the peak:
When you reach the very top, use smaller clay pieces or trim your scales to create a neat, tapered point. Smooth the clay at the apex to create a flat spot for the star. -
Full dry time:
Allow the entire tree to dry completely. For air-dry clay, this usually takes 24-48 hours. I prefer to rotate the tree occasionally for even drying.
Level Up: Texture
Before cutting your circles, roll a piece of lace or a textured rolling pin over the clay slab. This adds a subtle embossed pattern to every scale, making the glaze catch the light even more.
Step 4: Painting & Finishing
-
Base coat application:
Mix forest green with a touch of teal paint. Apply a solid base coat over the entire tree, ensuring you get the brush under the edges of the scales for depth. -
Adding the shimmer:
Once the base is dry, mix a metallic silver paint with a small amount of the teal. Using a sponge dabber, lightly pounce this onto the center and bottom, leaving the edges darker for contrast. -
Highlighting edges:
Use a dry-brush technique with pure metallic silver or a lighter teal to very gently highlight just the scalloped tips of each scale. -
Vintage effect:
To mimic the look in the photo, you can dilute a tiny bit of brown or black paint with water and wash it over the tree, wiping it off immediately creates an aged look in the crevices. -
The star topper:
Paint a wooden star in a soft gold or leave it natural wood for a rustic look. Glue it securely to the flat apex of the tree. -
Seal the work:
Finish with a light coat of semi-gloss or satin spray sealer to protect the paint and give it a ceramic-like sheen.
Place your shimmering tree near a light source to really show off that metallic finish and enjoy the festive atmosphere

TRACK YOUR CERAMIC JOURNEY
Capture glaze tests, firing details, and creative progress—all in one simple printable. Make your projects easier to repeat and improve.
Cutout Star and Snowflake Trees
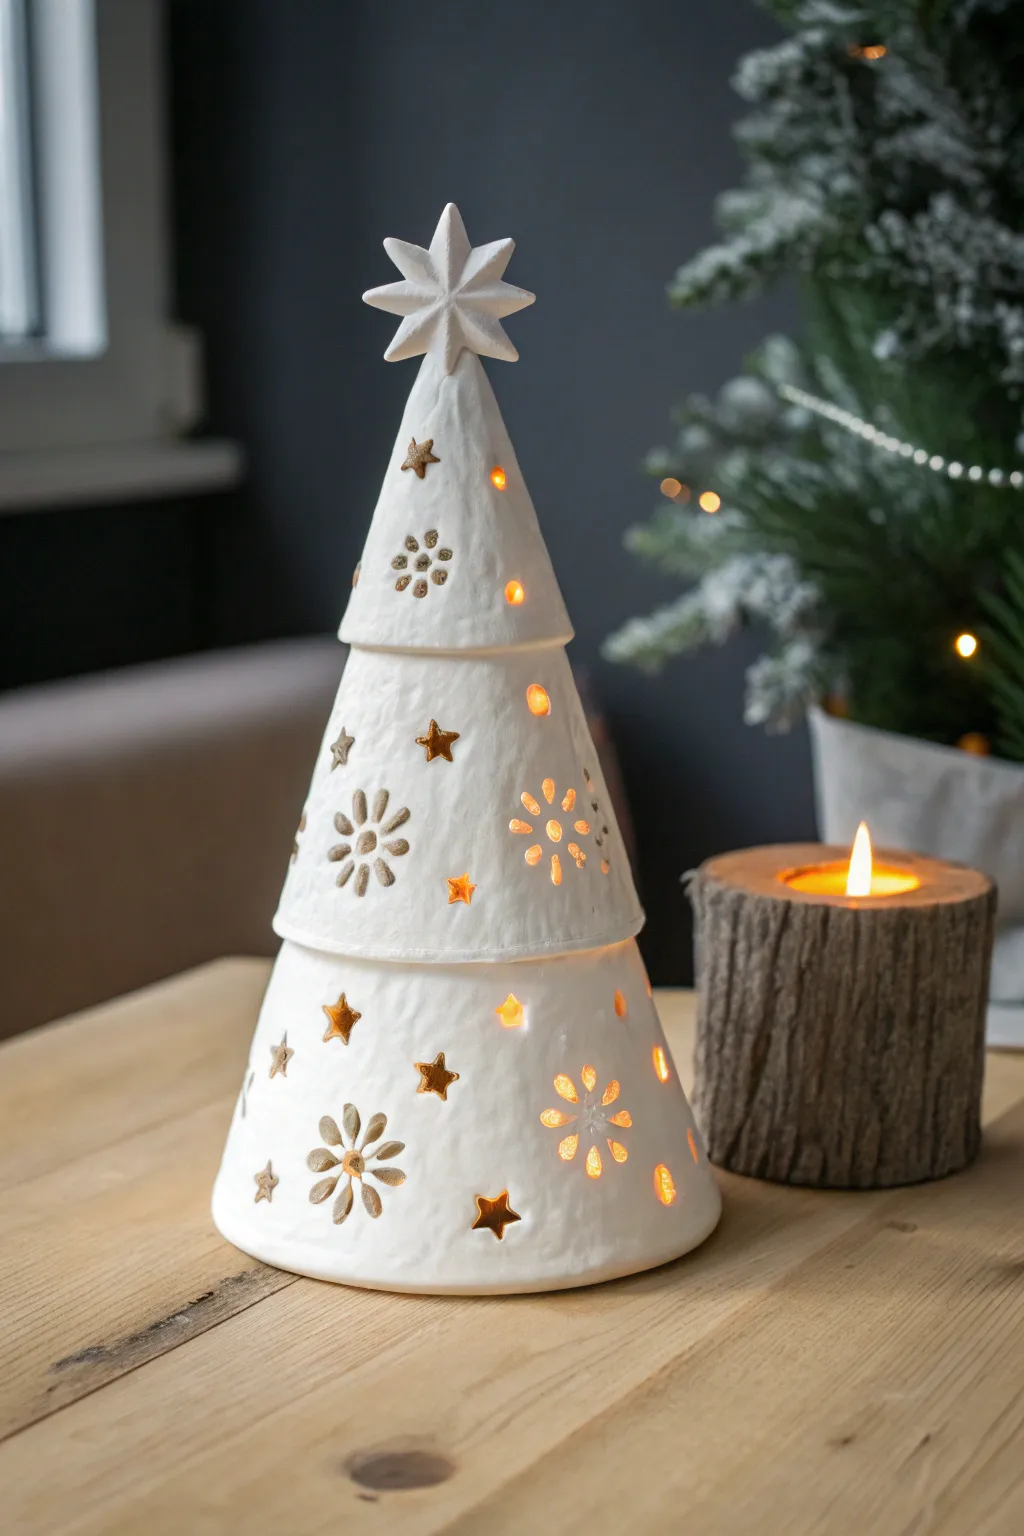
This charming project features a three-tiered white clay tree that softly glows from within, thanks to delicate cutouts of stars and snowflakes. Its organic, hand-built texture and matte finish give it a cozy, modern farmhouse aesthetic perfect for a winter mantelpiece.
Step-by-Step Guide
Materials
- White polymer clay or air-dry clay (approx. 1-2 lbs)
- Cardstock or thin cardboard for cone templates
- Rolling pin
- Smooth work surface or silicone mat
- Craft knife or scalpel
- Small star-shaped cookie cutters (various sizes)
- Small flower/snowflake plunger cutters
- Clay texture sponge or crumpled foil
- Slip (clay/water slurry) or liquid clay adhesive
- Sanding sponge (fine grit)
- Battery-operated LED tea light or fairy lights
Step 1: Planning and Forming the Cones
-
Create templates:
Begin by making three conical templates from cardstock. You will need a large base cone, a medium middle cone, and a small top cone. Ensure the bottom diameter of the medium cone is slightly wider than the top opening of the base cone so they stack nicely. -
Roll out the clay:
Condition your clay until soft, then roll it out into a large, even slab approximately 1/4 inch thick. I find using guides keeps the thickness consistent. -
Texture the surface:
Before cutting, gently press a texture sponge or a ball of crumpled aluminum foil over the entire slab to give it that subtle, stone-like organic finish seen in the photo. -
Cut the shapes:
Using your paper templates as a guide, cut out the three fan-shaped pieces of clay that will roll up to form your cones. -
Form the tiers:
Carefully roll each clay piece into a cone shape. Dampen/score the joining edges (or use liquid clay for polymer) and press the seam together firmly inside the cone so the exterior looks seamless.
Clean Cuts Pro Tip
Let the clay dry to a ‘leather hard’ state for 30 minutes before cutting shapes. It prevents the cone from collapsing under the pressure of the cutter.
Step 2: Adding Details and Cutouts
-
Plan the cutouts:
Lightly mark where you want your stars and retro snowflake patterns to go. Stagger them randomly around the circumference, ensuring they aren’t too close to the structural edges. -
Cut the openings:
Use your smallest star cutters and a craft knife to remove the clay shapes. For the flower/snowflake designs, press a plunger cutter gently to emboss the shape, then cut through selected petals to create light holes. -
Smooth the edges:
Dip your finger in a little water (or clay softener) and gently rub the raw edges of your cutouts to remove any sharp burrs or crumbs. -
Add surface elements:
Save the tiny clay stars you punched out. Score the back of a few and attach them to the surface of the tree for raised relief details, alternating between cutouts and raised shapes. -
Craft the topper:
Hand-mold two identical 8-point stars. Sandwich them together at the peak of the smallest cone, blending the clay at the base so the star sits securely on the very top tip.
Level Up: Metallic Glow
Paint the INSIDE of the tree with gold or copper acrylic paint. When unlit, it’s hidden, but when lit, it casts a significantly warmer, golden light.
Step 3: Assembly and Finishing
-
Initial drying/baking:
If using air-dry clay, let the cones dry until leather hard. If using polymer, you may want to bake parts separately if you lack internal support, but stacking raw clay is usually fine if the walls are thick enough. -
Stacking the tiers:
Place the largest cone on your work surface. Apply slip or adhesive to the top rim, then gently place the medium cone over it. Repeat for the top cone. Wiggle them slightly to ensure a good bond without squishing the shape. -
Final cure:
Allow the fully assembled tree to dry completely (24-48 hours for air-dry) or bake according to the polymer clay package instructions. -
Sanding:
Once hardened, use a fine-grit sanding sponge to gently smooth the bottom edge so the tree sits perfectly flat. -
Painting (Optional):
The clay itself is likely white enough, but for a uniform look, apply a coat of matte white acrylic paint. If you want the ‘gold’ star look, carefully paint inside the cutouts with metallic gold paint. -
Light it up:
Place a battery-operated LED light underneath your finished tree to see the warm glow shine through your hand-carved details.
Set your finished tree on a wooden base or beside some pine branches to complete the cozy winter scene
Paint-Dipped Modern Trees
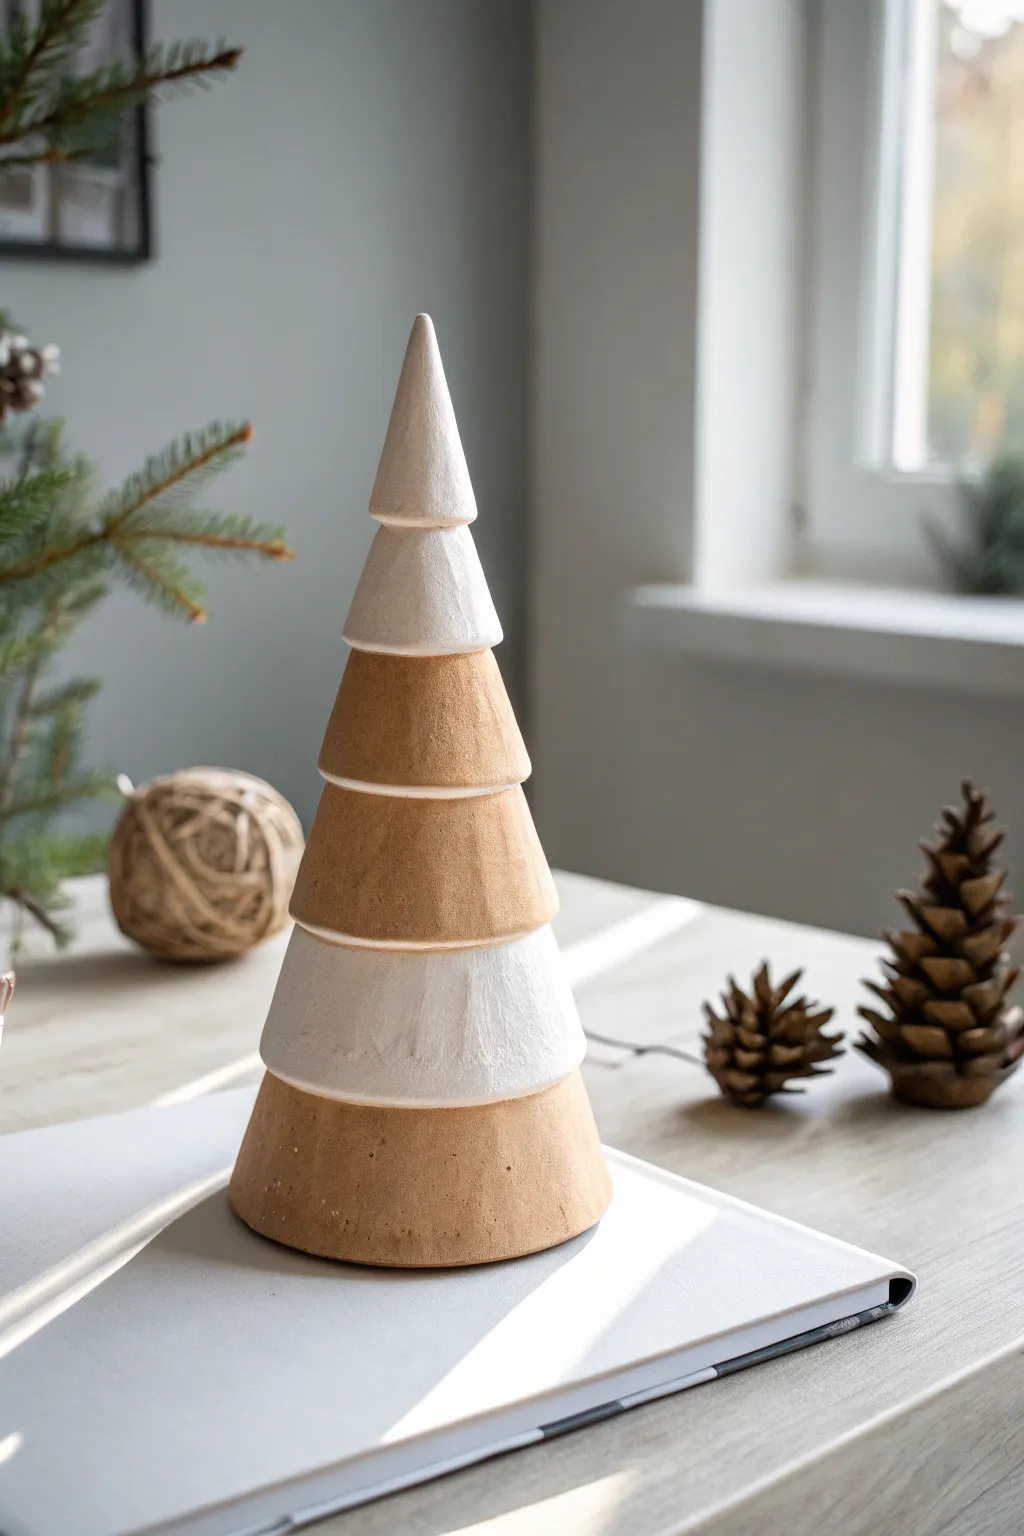
Capture the essence of Scandinavian design with this sleek, segmented clay tree that balances raw earth tones with crisp white accents. Its modern, stacked conical shape creates a sophisticated holiday centerpiece that feels both rustic and refined.
Step-by-Step
Materials
- Air-dry clay (terracotta color)
- Air-dry clay (white) or white acrylic paint
- Rolling pin
- Clay knife or craft knife
- Circle cutters (graduated sizes) or paper templates
- Cardstock (for making cone molds)
- Tape
- Fine-grit sandpaper (220-400 grit)
- Small bowl of water
- Sponge or brush
Step 1: Forming the Cone Base Structure
-
Plan your segments:
Decide on the height of your tree. For the look in the photo, you will need approximately six distinct segments. Sketch a rough triangle on paper and divide it horizontally into six sections to gauge the size of each tier. -
Create cardstock molds:
Cut strips of cardstock or stiff paper. You will need to curl these into shallow cones or tapered rings to serve as the internal support for your clay. Each ring needs to be slightly smaller than the one below it. -
Secure the forms:
Tape your cardstock forms securely. They shouldn’t be perfect cones, but rather tapered cylinders (like a lampshade shape), except for the very top piece which will be a true cone. -
Test the stack:
Before adding clay, stack your paper forms to ensure they nestle correctly and create a pleasing tree silhouette. Adjust the tapers now if the tree looks too skinny or too wide.
Cracking Clay?
If small cracks appear as the clay dries, mix a small amount of fresh clay with water to make a paste (slip) and fill the cracks. Smooth over with a finger.
Step 2: Sculpting the Clay Segments
-
Condition the terracotta clay:
Take your terracotta-colored air-dry clay and knead it until it is pliable and smooth. I find warming it in my hands for a minute makes it much easier to roll out. -
Roll slabs:
Roll the clay out to a consistent thickness, roughly 1/4 inch (about 5-6mm). Uniform thickness ensures the segments look cohesive when stacked. -
Wrap the forms:
Cut strips of clay and wrap them around your cardstock forms. Smooth the seam where the clay meets by using a little water on your finger to meld the edges together seamlessly. -
Refine the shape:
Gently roll the clay-covered form on your work surface to smooth out fingerprints. Use a knife to trim the top and bottom edges so they are sharp and flat. -
Repeat for all tiers:
Continue this process for all six segments. Ensure the top piece is formed into a sharp point. -
Initial Drying:
Allow the clay segments to dry for about 24-48 hours. Keep them on the cardstock forms initially to prevent sagging, but remove the forms once the clay is leather-hard to speed up interior drying.
Step 3: Finishing and Painting
-
Sand for smoothness:
Once fully dry, use fine-grit sandpaper to gently smooth the outside of each ring. Pay special attention to the bottom edges to ensure they sit flat. -
Select your white segments:
Looking at the reference image, alternate your tiers. The top tip, third ring down, and fifth ring down will be white. The others remain raw terracotta. -
Paint application:
Use a flat brush to apply white acrylic paint to the selected segments. To mimic the texture in the photo, use a fairly dry brush technique or dab the paint slightly rather than long, slick strokes. -
Apply second coat:
Let the first coat dry, then add a second layer if the terracotta color is showing through too much. For a chalky look, you can mix a tiny bit of baking soda into the paint. -
Dry and assess:
Allow the paint to cure completely. Check the unpainted terracotta sections; if they look too dull, you can wipe them with a barely damp sponge to enrich the color without making them shiny. -
Final assembly:
Stack your dried rings. You can glue them together with a strong craft adhesive for a permanent decoration, or leave them loose to store flat after the holidays.
Pro Tip: Texture
For that authentic matte finish seen in the photo, avoid glossy sealers. If you must seal it, use an ultra-matte spray varnish to keep the raw look.
Now you have a stunning, architectural holiday piece that brings a touch of modern warmth to your shelf
Speckled Stoneware-Look Trees
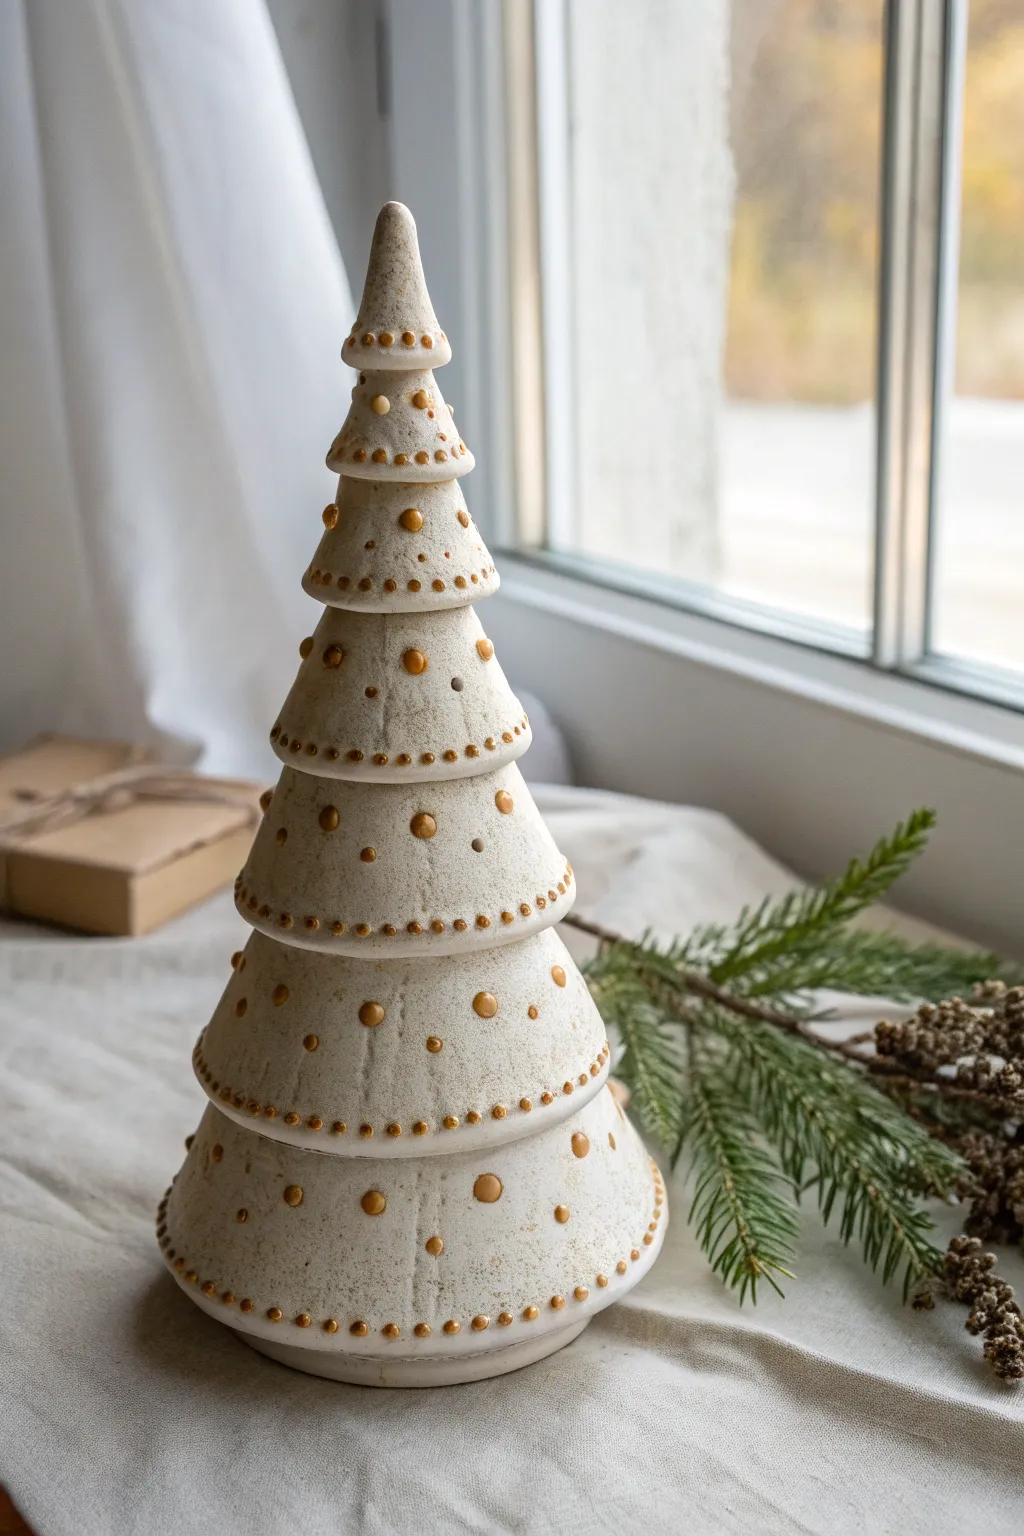
Achieve the high-end look of speckled ceramic pottery without a kiln using air-dry clay and clever painting techniques. This segmented tree features warm cream tones and delicate gold accents that catch the light beautifully.
How-To Guide
Materials
- White or light grey air-dry clay (approx. 500g)
- Rolling pin
- Circle cutters (graduated sizes) or paper templates
- Modeling tool or butter knife
- Water and slip (clay mixed with water)
- Sandpaper (fine grit)
- Acrylic paint: Cream/Off-White, Deep Brown/Black (for speckling)
- Gold multidimensional fabric paint or puff paint (in a fine-tip applicator bottle)
- Stiff bristle brush (e.g., old toothbrush)
- Matte spray varnish
Step 1: Shaping the Tiers
-
Prepare the Clay:
Begin by kneading your air-dry clay until it is smooth and pliable. If it feels too dry, mist it lightly with water, but keep it firm enough to hold a shape. -
Roll and Cut:
Roll the clay out to a uniform thickness of about 1/4 inch. Using graduated circle cutters or paper templates, cut out 6-7 circles ranging from large (base) to small (top). -
Form the Cones:
Cut a wedge (like a pizza slice) out of each circle—roughly a quarter of the circle. Bring the straight cut edges together to form a shallow cone shape. -
Secure the Seams:
Score the cut edges with a needle tool or toothpick, apply a little water or slip, and press them firmly together. Smooth the seam inside and out with your finger so it becomes invisible. -
Create the Top:
For the very top piece, shape a small solid cone of clay by hand rather than rolling it flat, creating a pointed tip for the tree’s apex.
Step 2: Stacking the Tree
-
Test the Fit:
Stack your hollow cones from largest to smallest to check height and proportions. If a tier sits too low and disappears into the one below it, you’ll need to add internal support. -
Add Spacers:
Roll small balls or cylinders of clay and attach them to the inside top of each cone. This acts as a pedestal for the tier above to rest on, ensuring each segment is visible. -
Join the Tiers:
Once satisfied with the height, score and slip the contact points (where the spacer touches the cone above) and gently press the stack together. While I often leave them separate for painting, joining them now creates a sturdier single sculpture. -
Dry Completely:
Allow the tree to dry for at least 24-48 hours. Turn it occasionally if possible to ensure even airflow. It should be chalky white and hard to the touch when ready. -
Refine the Surface:
Gently sand any rough seams or sharp edges with fine-grit sandpaper. Wipe away all clay dust with a slightly damp cloth.
Uneven Seams?
If your cone seams are bumpy, wait until the clay is leather-hard. Use a slightly damp sponge to buff the area in circular motions for a pottery-smooth finish.
Step 3: Faux-Ceramic Finish
-
Base Coat:
Paint the entire tree with two coats of warm cream or off-white acrylic paint. Let the first coat dry fully before applying the second for opaque coverage. -
Create the Speckles:
Dilute a tiny amount of dark brown or black paint with water until it’s very runny. Dip a stiff toothbrush into the mix. -
Splatter Technique:
Run your thumb over the toothbrush bristles to flick tiny droplets of paint onto the tree. Practice on a paper towel first to control the spray density. You want a subtle, random stoneware effect. -
Seal the Surface:
Once the splatter is dry, spray the tree with a matte varnish. This seals the ‘stoneware’ look and provides a non-porous surface for the gold details.
Make it Light Up
Before drying, use a straw to punch holes where the large gold dots would go. After firing/drying, place an LED tea light underneath for a glowing luminary.
Step 4: Gold Detailing
-
Dot the Rims:
Using the gold dimensional paint securely in its applicator bottle, carefully squeeze tiny, uniform dots along the bottom edge of every tier. -
Add Large Accents:
Place larger, scattered gold dots randomly across the surface of the cones. Keep the spacing open to avoid cluttering the minimalist look. -
Flatten Slightly:
If the paint peaks too much like a Hershey’s kiss, gently tap the bottom of the tree on the table (if the paint is stiff enough) or lightly touch the peaks with a wet finger to round them out. -
Final Cure:
Let the dimensional paint dry according to the bottle instructions—usually overnight—before handling your new festive heirloom.
Place your finished tree on a windowsill or mantle where the natural light can play off the textured speckles and gold accents
Marbled Clay Christmas Trees
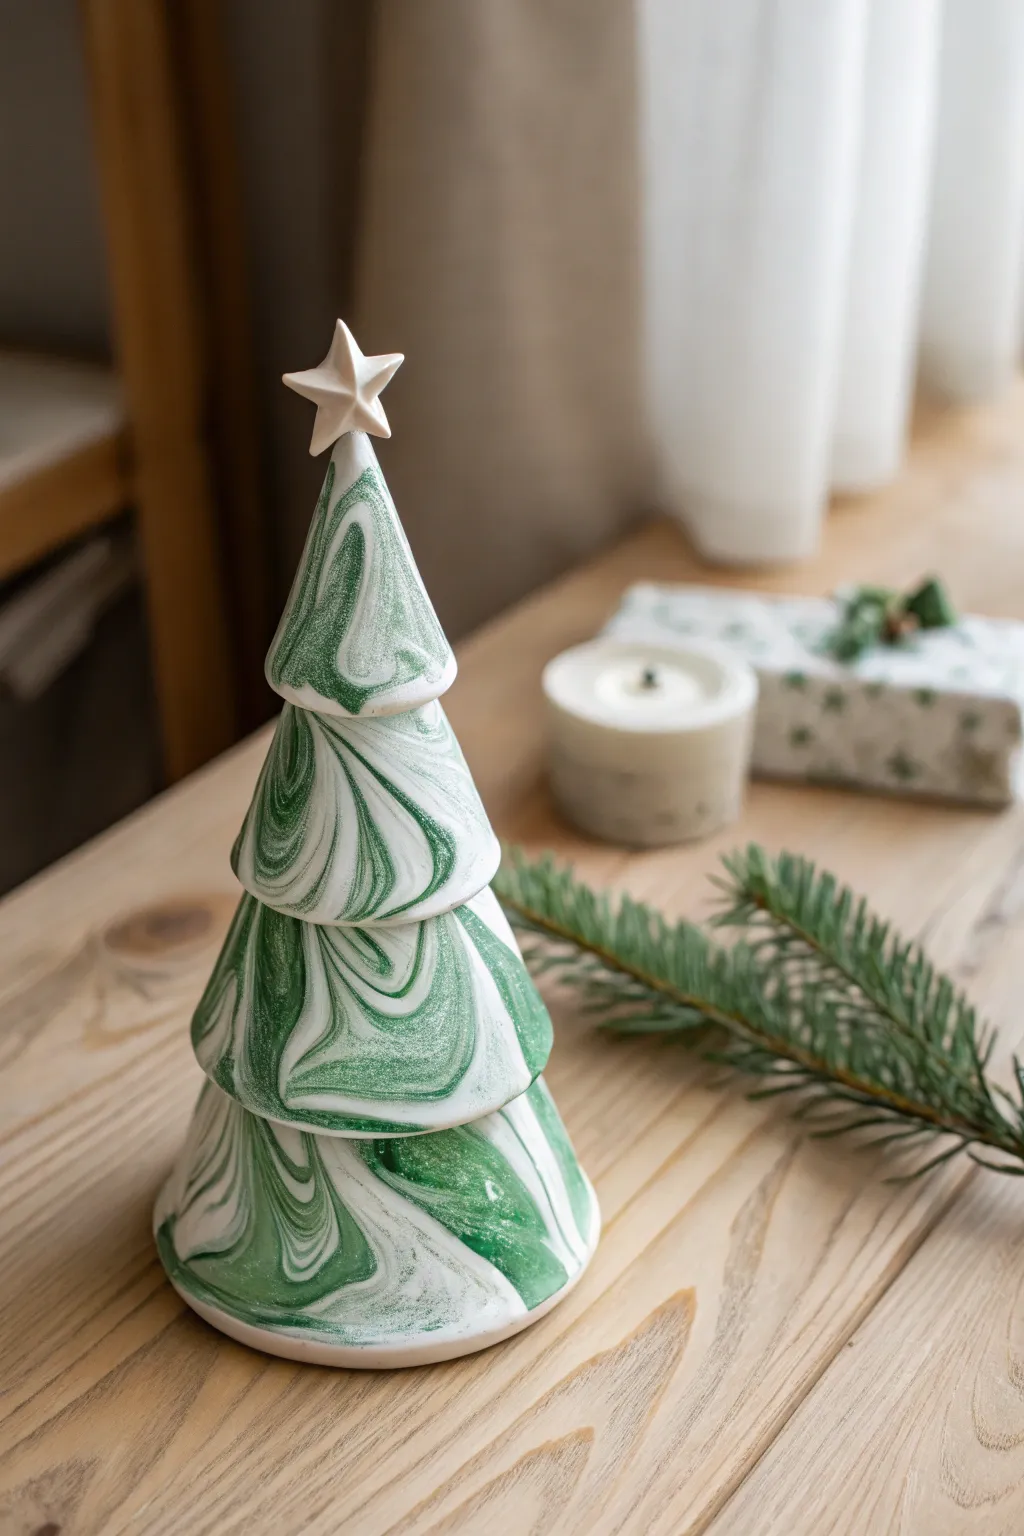
This elegant tabletop tree brings a swirl of winter magic to your decor with fluid green and white marbling. Using polymer clay and a clever stacking technique, you’ll create a seamless, flowing pattern that mimics expensive ceramic art.
Detailed Instructions
Materials
- White polymer clay (approx. 200g)
- Deep green polymer clay (approx. 50-70g)
- Small star cookie cutter
- Rolling pin or pasta machine
- Cardstock or thick paper (for templates)
- Craft knife or scalpel
- Aluminum foil
- Gloss glaze or varnish
- Soft paintbrush
- Oven (for baking)
- Parchment paper
Step 1: Marbling the Clay
-
Conditioning:
Begin by thoroughly conditioning your white polymer clay until it is soft and malleable. Do the same with the green clay in a separate pile. -
Create logs:
Roll the white clay into two thick logs. Roll the green clay into several thinner snakes. -
Combine clays:
Twist the green clay snakes around the white clay logs. Fold the combined log in half and twist it again vigorously. -
Marbling technique:
Continue to twist, fold, and roll the clay. Be careful not to over-mix; you want distinct ribbons of color, not a solid light green paste. Stop when you see beautiful veining similar to the photo. -
Flattening:
Roll your marbled clay out into a flat sheet, approximately 3mm to 4mm thick. I like to check both sides of the sheet and choose the one with the most dramatic swirls as my ‘face’ side.
Step 2: Forming the Cone Layers
-
Draft templates:
Cut three semi-circle templates from cardstock in graduating sizes. The largest should form the base, the medium for the middle, and the smallest for the top. You just need curved fan shapes that can roll into cones. -
Cut the clay:
Place your templates on the clay sheet and use your craft knife to trace and cut out your three shapes. -
Create support:
Crumple aluminum foil into cone shapes that fit inside your clay layers. This provides internal structure during baking so the hollow tiers don’t collapse. -
Shape the tiers:
Wrap each clay cutout around its foil core to form a cone. Gently pinch and smooth the seam where the edges meet so it becomes invisible. -
Refine the edges:
Use your finger to smooth the bottom rim of each cone slightly so they aren’t sharp. -
Make the star:
Use a small amount of leftover clean white clay (or a very lightly marbled section) and cut out a star shape. Smooth the edges.
Muddy Colors?
If your white and green are blending into a single mint color, you are over-mixing. Stop twisting sooner. Keep the colors distinct for high contrast.
Step 3: Assembly and Baking
-
Pre-bake alignment:
Stack your cones gently while raw to ensure they sit nicely on top of one another. The tip of the bottom cone should nestle inside the middle cone, and so on. -
Separate for baking:
Unstack the pieces. It is safer to bake them individually with their foil supports to prevent them from sticking together permanently in the oven. -
Baking:
Place the three cones and the star on a baking sheet lined with parchment paper. Bake according to your clay manufacturer’s instructions (usually 275°F/135°C for 15-30 minutes). -
Cooling:
Allow the pieces to cool completely in the oven before removing them. This helps prevent thermal shock cracking. -
Final Assembly:
Once cool, remove the foil carefully. Stack the layers using a dab of strong super glue or liquid clay between them. Glue the star to the very top point. -
Glazing:
Finish by brushing a coat of gloss glaze over the entire tree to give it that shiny, ceramic-like finish seen in the photo.
Pro Seam Hiding
When smoothing the seam on your cones, use a tiny drop of baby oil on your finger. It melts the clay surface just enough to erase the join line perfectly.
Place your finished tree near a window to let the light play off those glossy, elegant swirls
Tiny Ornament-Dot Tree Details
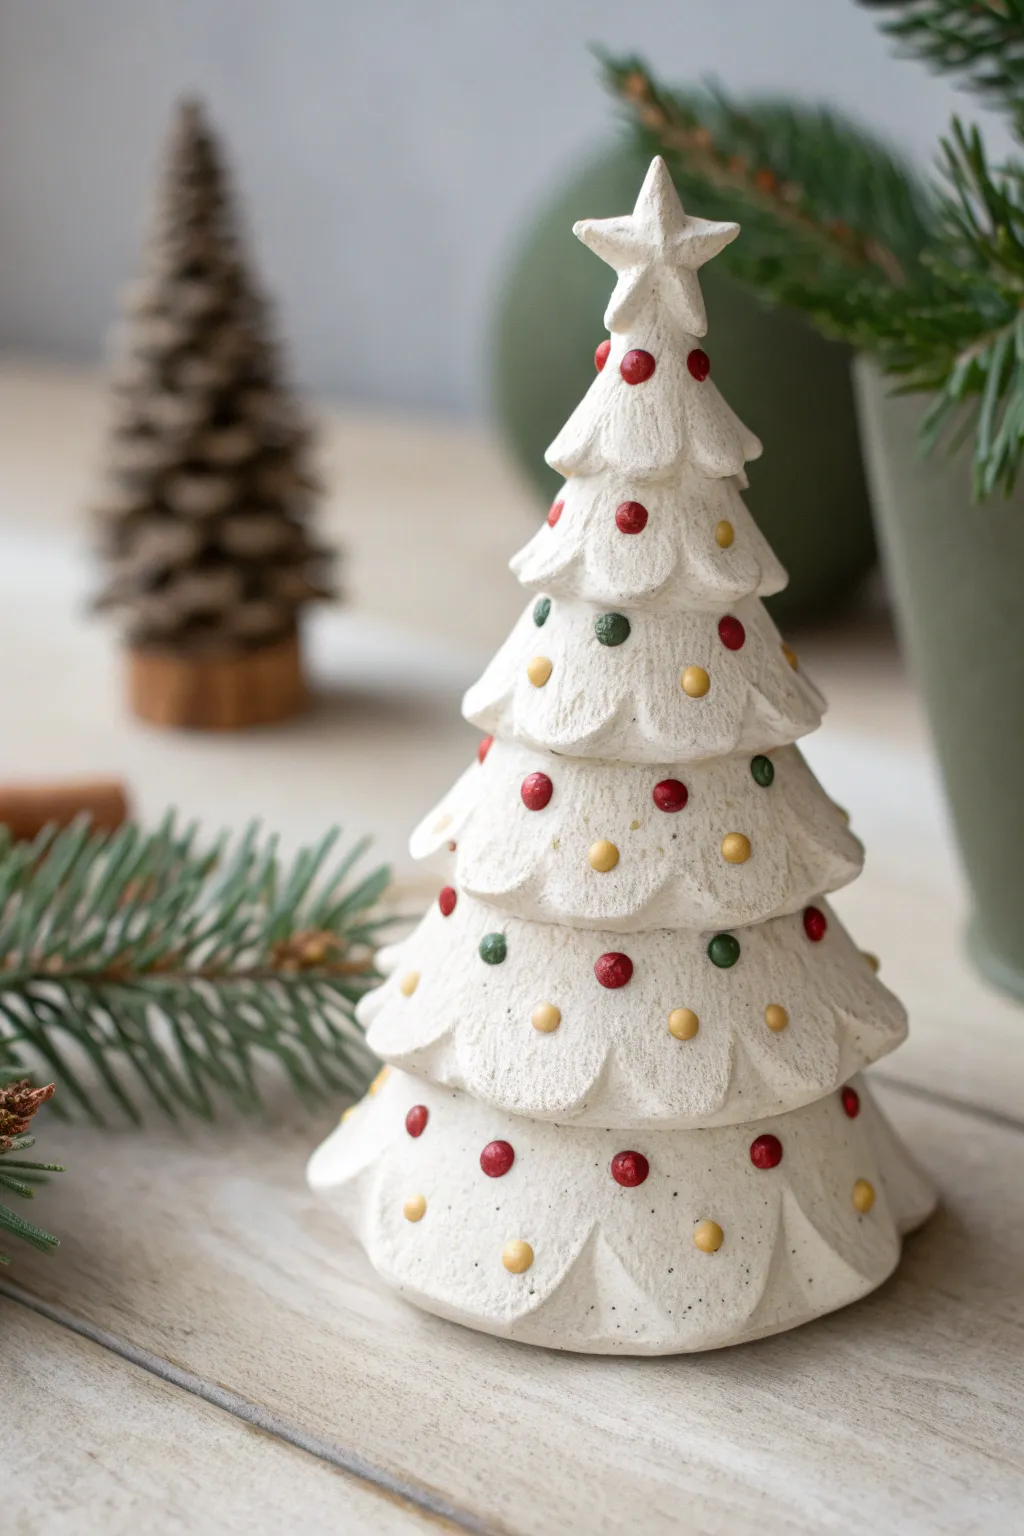
This elegant tabletop decoration features a unique tiered design with scalloped edges that mimic the boughs of a fir tree. The speckled white finish and tiny, colorful ornament dots give it a charming, rustic ceramic look without needing a kiln.
How-To Guide
Materials
- White baking clay (polymer) or air-dry clay
- Rolling pin
- Circle cookie cutters (graduated sizes)
- Scalloped edge cookie cutters (graduated sizes, optional)
- Small craft knife or clay blade
- Tiny ball stylus tool
- Acrylic paints: Holiday Red, Forest Green, Gold, Deep Yellow
- Fine-grit sandpaper
- Toothbrush or stiff bristle brush
- Flecking medium or black acrylic paint (watered down)
- Matte spray varnish
- Strong craft glue (if baking separate pieces)
Step 1: Shaping the Base and Tiers
-
Prepare the Clay:
Condition your white clay by kneading it until it is soft and piable. If you want a speckled stone effect straight away, mix in a tiny pinch of black pepper or dried used coffee grounds. -
Roll the Sheets:
Roll out the clay on a smooth surface to a uniform thickness of about 1/4 inch. You want the tiers to be sturdy but not overly heavy. -
Cut the Circles:
Using your graduated circle cutters, punch out five or six circles of decreasing size. These will form the foundation of each tree tier. -
Form the Centers:
create small, thick cylinders or balls of clay to act as spacers between your tiers. These won’t be visible in the end but provide the necessary height.
Step 2: Sculpting the Scalloped Boughs
-
Create the Foliage Shape:
Take your largest circle base. If you have scalloped cutters, use them now. If not, use your craft knife to cut gentle semi-circle curves around the perimeter to create a flower-like shape. -
Refine the Edges:
Use your finger to gently smooth the cut edges of the scallops so they look soft and molded rather than sharp and sliced. -
Dome the Tiers:
Gently press each scalloped circle over a rounded object (like a lightbulb or a small bowl) to give it a slight conical, draping shape. -
Texture the Surface:
I prefer to tap a coarse toothbrush or sandpaper all over the surface of the clay at this stage. This micro-texture creates that lovely stone-like finish visible in the photo. -
Stack the Tree:
Assemble your tree by placing the largest tier at the bottom, adding a spacer, and stacking the next size up. Press firmly to bond them. -
Add the Top Cone:
For the very top, roll a small solid cone of clay and shape the bottom edge with the same scalloped pattern to blend seamlessly with the tiers below.
Clean Texture Tip
To prevent fingerprints while smoothing the scallops, dip your finger in a little cornstarch (for polymer) or water (for air-dry) before touching.
Step 3: Adding Details and Finishing
-
Top with a Star:
Hand-mold a small, five-pointed star. It doesn’t need to be geometrically perfect; a slightly organic shape adds character. -
Attach the Star:
Fix the star vertically to the very peak of the top cone, blending the clay at the seam so it feels secure. -
Impress the Ornaments:
Use a small ball stylus to gently press shallow indentations into the scallops where you want your ornaments to sit. This makes painting easier later. -
Roll the Tiny Ornaments:
Roll extremely tiny balls of clay between your fingers. Place these tiny spheres into the indentations you just made, pressing gently so they adhere. -
Cure or Dry:
Bake your polymer clay according to the package instructions, or let your air-dry clay sit for 24-48 hours until completely hard. -
Create the Stone Appearance:
Once hard, dilute a tiny amount of black paint with water. Dip a toothbrush in it and flick the bristles to spatter tiny specks across the white surface for texture. -
Paint the Dots:
Use a fine-point brush to carefully paint the raised ornament dots. Alternate between red, forest green, yellow, and gold for a balanced distribution. -
Seal the Project:
Finish by spraying the entire tree with a matte varnish. This removes any plastic shine from the clay and unifies the painted and unpainted areas.
Drooping Tiers?
If your clay tiers sag while working, prop the edges up with crumpled aluminum foil or plastic wrap until the clay is baked or fully dried.
Now you have a timeless, handcrafted heirloom to display on your mantle this season
Stamped Pattern Christmas Tree Tiles
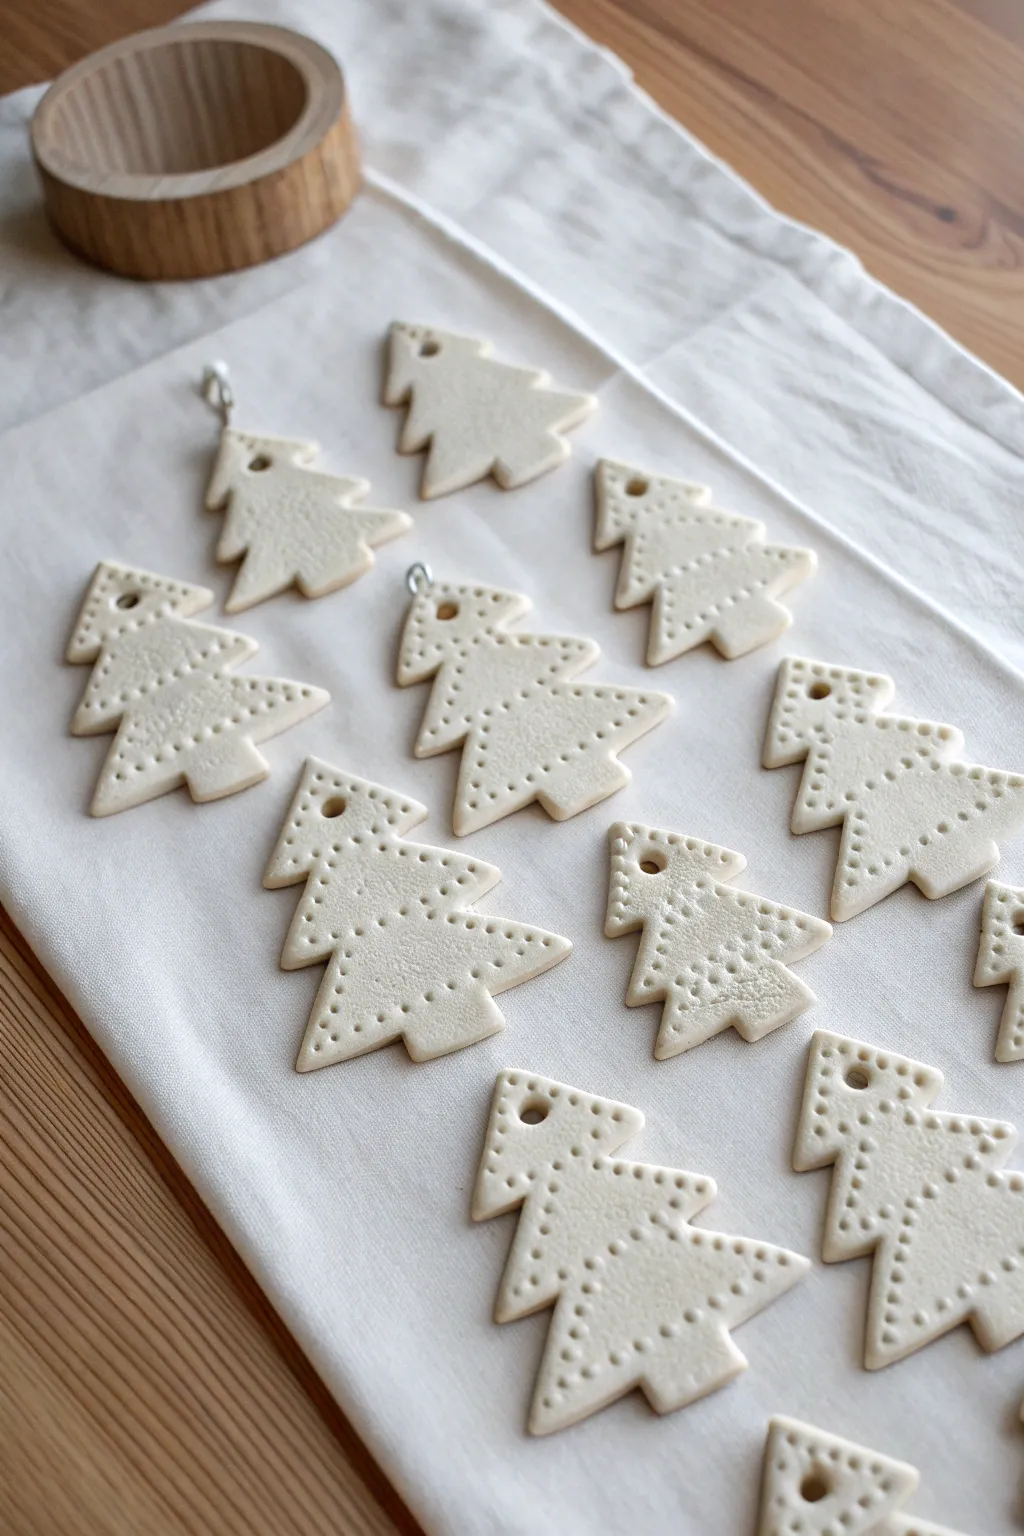
These minimalist white clay ornaments rely on texture rather than color for their charm, featuring a classic evergreen silhouette and a delicate dotted border. The result is a clean, modern holiday decoration that looks beautiful against dark pine needles or strung as a garland.
Step-by-Step Guide
Materials
- White air-dry clay or polymer clay (white)
- Rolling pin
- Parchment paper or canvas mat
- Christmas tree cookie cutter (approx. 3 inches)
- Small blunt tool for dotting (e.g., end of a paintbrush, knitting needle, or dotting tool)
- Small straw or cocktail stick (for the hanging hole)
- Fine grit sandpaper (optional)
- Jump rings or ribbon for hanging
- Clear matte sealant (optional)
Step 1: Preparing the Shapes
-
Condition the clay:
Begin by taking a handful of your white clay and kneading it in your hands until it becomes warm, pliable, and smooth. This conditioning step prevents cracks from forming later. -
Roll out the slab:
Place the clay between two sheets of parchment paper or directly onto a canvas mat to prevent sticking. Roll it out to an even thickness of about 1/4 inch. -
Cut the trees:
Press your Christmas tree cookie cutter firmly into the clay slab. Give it a tiny wiggle to ensure it cuts all the way through, then lift it straight up. -
Remove excess clay:
If I’m making a large batch, I carefully peel away the excess clay from around the tree shapes first, rather than trying to lift the soft trees immediately. This keeps their edges sharp. -
Smooth the edges:
Dip your finger in a tiny bit of water and gently run it along the cut edges of each tree to smooth out any roughness or loose bits of clay.
Step 2: Adding texture and details
-
Plan the border:
Visualize a line running parallel to the edge of the tree, inset about 1/8th of an inch. This is where your pattern will go. -
Stamp the main dots:
Using your chosen blunt tool, press gently into the clay to create a small indentation. Start at the top point of the tree and work your way down one side. -
Maintain spacing:
Continue pressing dots along the perimeter, trying to keep the spacing between each dot consistent. Don’t press all the way through; you just want a clear impression. -
Complete the outline:
Follow the zigzag shape of the tree branches all the way around until you meet back at the top point. -
Texturize the center (optional):
For added interest as seen in some variations, you can lightly tap the surface of the clay inside the dotted border with a piece of textured fabric or a sponge to create a microscopic graininess. -
Create the hanging hole:
Use a small straw or a cocktail stick to punch a hole near the very top of the tree. Make sure the hole is big enough for your jump ring or ribbon but not so close to the edge that it tears.
Clay sticking?
If your clay sticks to the cookie cutter, dip the cutter into a small bowl of cornstarch or flour before each press. This acts as a release agent for clean cuts.
Step 3: Finishing Touches
-
Dry the ornaments:
Transfer the trees to a clean wire rack or a flat, dry cloth. Let them air dry according to the package instructions, usually 24-48 hours. Flip them halfway through to ensure even drying. -
Sand imperfections:
Once fully cured and hard, check the edges. If there are any sharp points or burrs, gently buff them away with fine-grit sandpaper. -
Seal the surface:
To protect the pristine white finish from dust and fingerprints, apply a thin coat of clear matte sealant or varnish. -
Attach hardware:
Open a metal jump ring using pliers and loop it through the hole you created earlier. Close the ring securely. -
Add ribbon:
Alternatively, thread a piece of twine or thin velvet ribbon through the hole or jump ring to complete the hanger.
Pro Tip: Depth Control
To keep all your dots identical in depth, wrap a piece of masking tape around your dotting tool. Stop pressing when the tape touches the clay surface.
Hang these delicate snowy trees on your branches for a sophisticated, handcrafted touch this season
Snowy Frosted Trees With Texture Paste Look
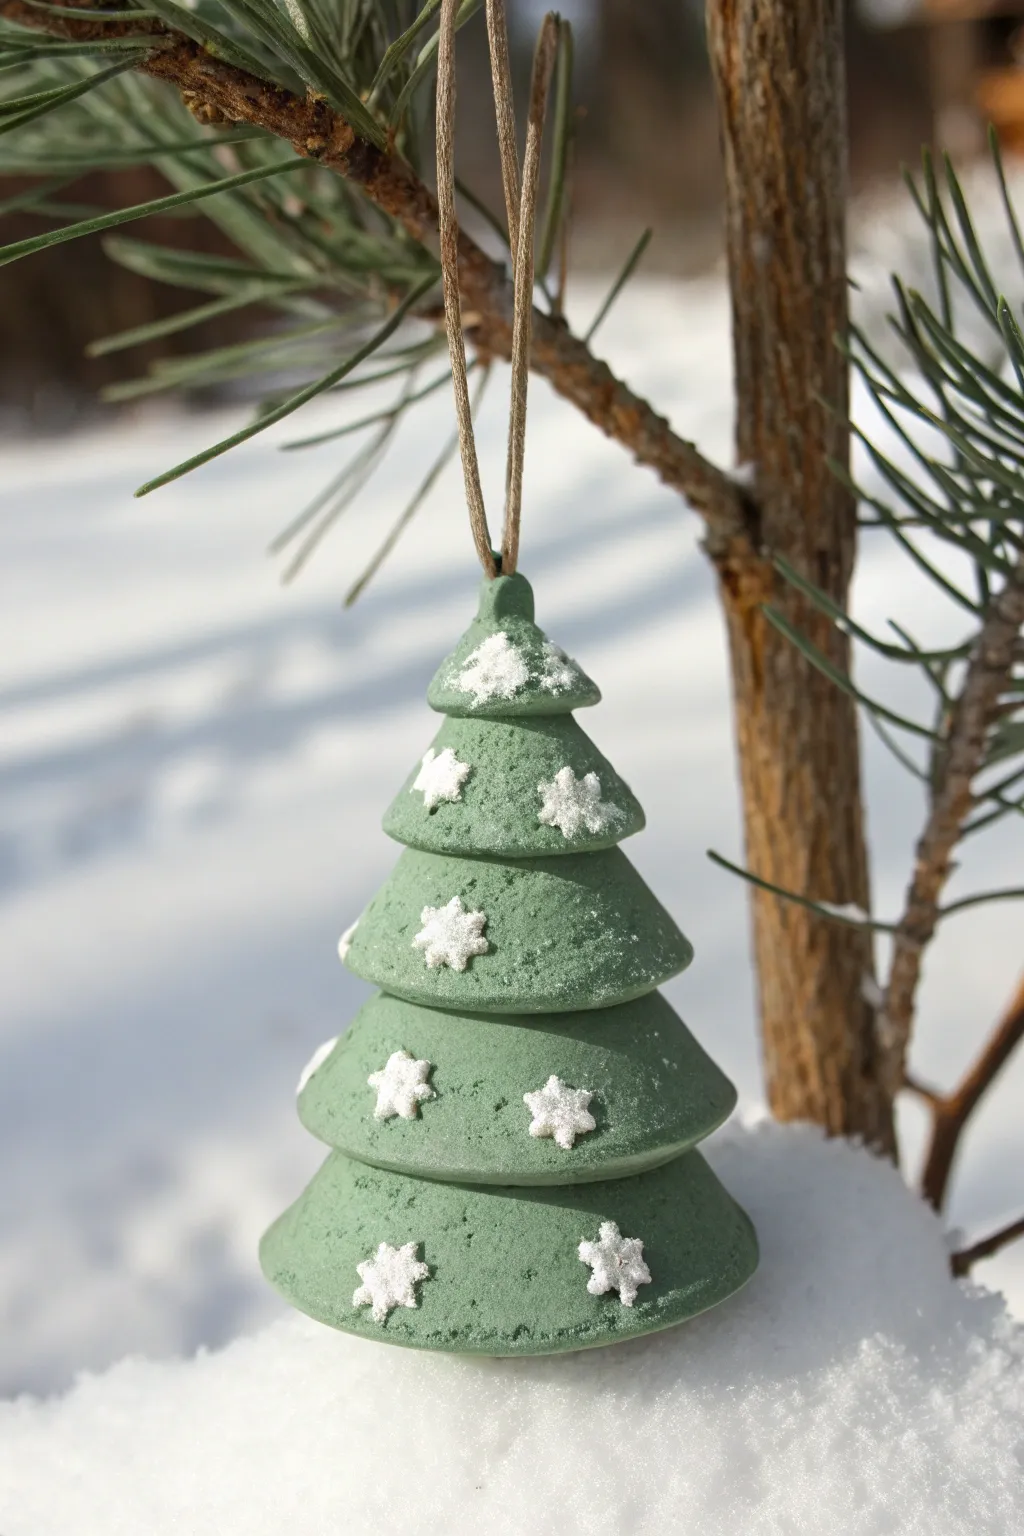
Capture the stillness of a snowy forest with this delightful tiered clay ornament. Its matte green finish and textured snowflake details create a cozy, rustic look perfect for winter decor.
How-To Guide
Materials
- Green polymer clay (a muted forest or sage green)
- White polymer clay or texture paste
- Cone-shaped cutter set or circle cutters in graduating sizes
- Small snowflake plunger cutter or mold
- Pointed sculpting tool or toothpick
- Texture sponge or sandpaper (optional)
- Eye screw pin
- Twine or jute cord for hanging
- Glossy white glitter or faux snow powder
- Liquid clay or strong craft glue
- Rolling pin
- Oven (if using polymer clay)
Step 1: Shaping the Tree Base
-
Condition the Green Clay:
Start by kneading your green clay until it is soft and pliable, ensuring there are no air bubbles trapped inside. -
Form the Tiers:
Roll the clay into a thick log and slice it into five pieces, each slightly larger than the last. -
Shape the Cones:
Take each piece and roll it into a ball, then flatten the bottom and pinch the top to create a squat cone shape. -
Refine the Edges:
Press the bottom of each cone against your work surface to create a sharp, flat edge. The tops should be somewhat flat as well to accommodate stacking. -
Create Texture:
For that stone-like, matte look seen in the photo, gently pat the surface of each green cone with a texture sponge or a piece of crumpled foil. -
Stack the Tree:
Beginning with the largest cone as the base, stack the pieces upward in decreasing size. Press them gently together to bond the clay. -
Secure the Stack:
To ensure stability, you can insert a toothpick or wire down the center through all layers before baking, trimming any excess from the top. -
Refine the Shape:
Once stacked, smooth any fingerprints and make sure the tree stands straight without leaning.
Step 2: Adding Snowy Details
-
Make the Snowflakes:
Roll out a thin sheet of white clay. Use a very small snowflake plunger cutter to create several miniature flakes. -
Texture the Snowflakes:
If using a plain cutter, use a needle tool to add tiny indentations to the flakes to mimic the crystalline structure of snow. -
Attach the Flakes:
Apply a tiny dot of liquid clay to the back of each snowflake and press them randomly onto the green tiers. -
Add the Frosting:
Mix a small amount of liquid clay with white clay to make a paste, or use store-bought texture paste. Dab this onto the very top tip of the tree and lightly on the snowflakes. -
Apply Glitter:
While the white paste or clay is still wet/tacky, sprinkle fine white glitter or faux snow powder over the snowflakes and the tree top for that sugary, frosted effect. -
Insert Hardware:
Screw an eye pin into the very top of the tree. I prefer to add a dab of liquid clay to the threads first for extra grip. -
Bake the Ornament:
Bake the clay according to the manufacturer’s instructions for the specific brand you are using. Usually, this is around 275°F (135°C) for 15-30 minutes. -
Cool Down:
Allow the ornament to cool completely inside the oven or on a wire rack before handling to prevent cracking. -
Add the Hanger:
Thread a piece of rustic twine or jute cord through the eye pin loop and tie a knot to finish the ornament.
Make It Sparkle
For realistic snow sparkle, use clear embossing powder on the white parts. Heat it with a heat gun after application for a bubbly, icy texture.
Scented Ornament
If using air-dry clay instead of polymer, mix a drop of pine or cinnamon essential oil into the clay body before shaping for a scented holiday treat.
Hang your new frosty creation on a branch and enjoy the winter charm it brings to your home
Stacked Disc Christmas Trees
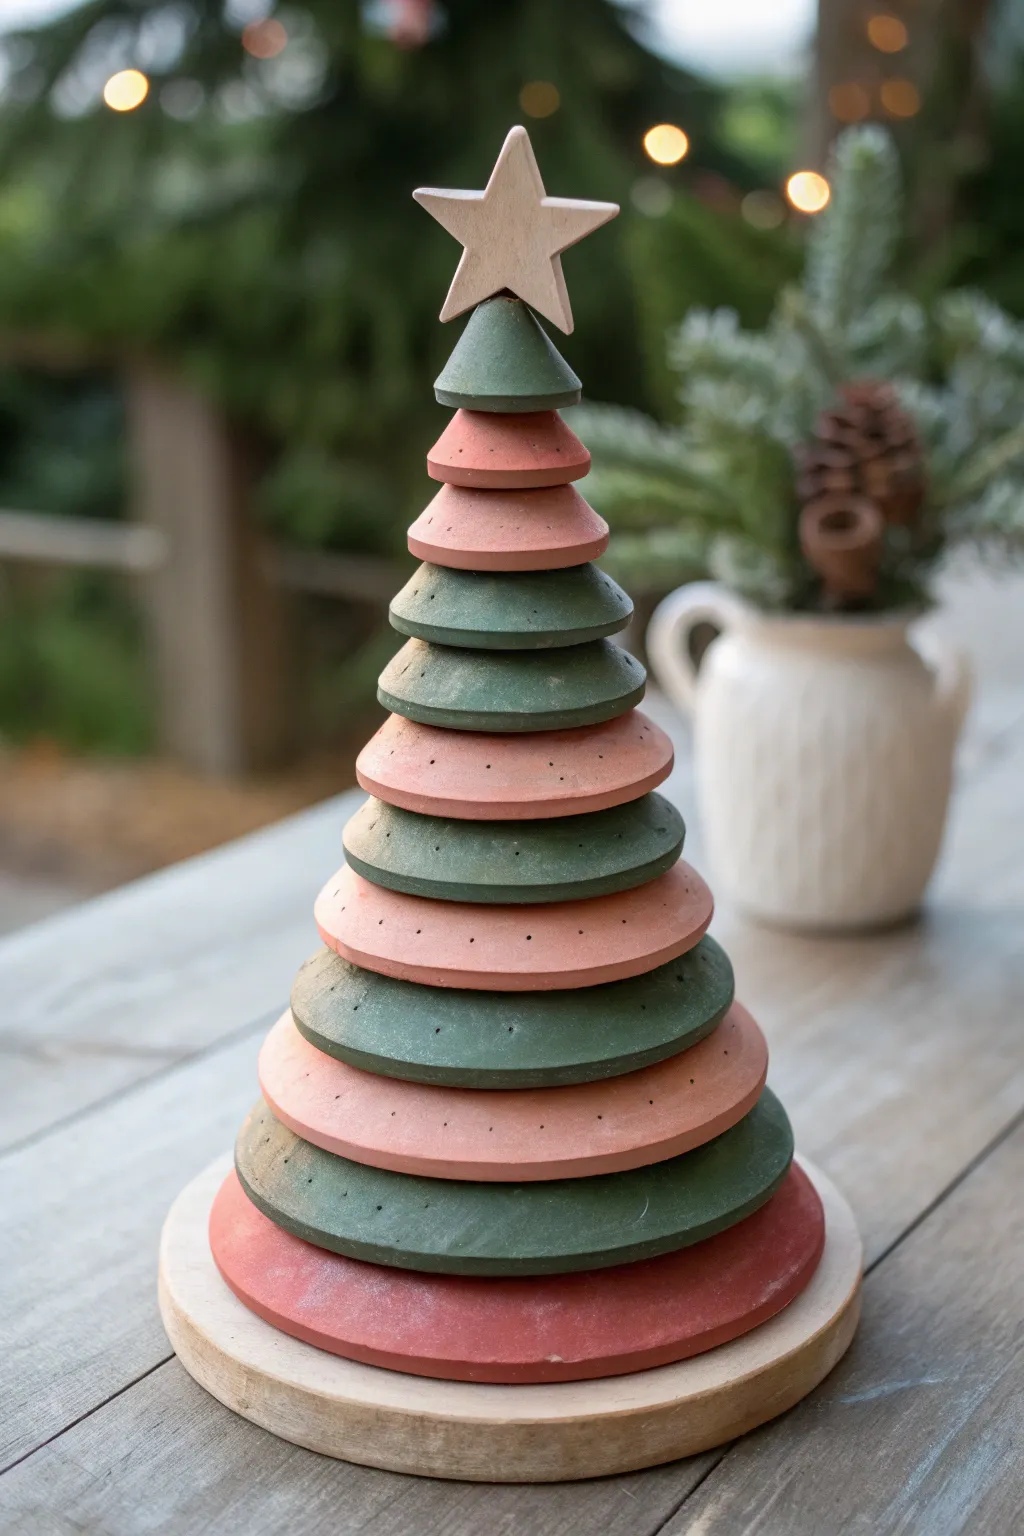
This contemporary holiday centerpiece features alternating layers of sage green and terracotta pink discs, creating a stylized pine tree shape. The perforated edges and matte finish give it a sophisticated, handcrafted look perfect for a mantel or table setting.
Step-by-Step Tutorial
Materials
- Air-dry clay or polymer clay (white or neutral base)
- Rolling pin
- Circle cutters (graduated sizes from 1 inch to 6 inches)
- Conical clay shaper or small funnel (for forming the cone tops)
- Wooden dowel (approx. 1/4 inch diameter)
- Wooden craft star (approx. 2 inches)
- Acrylic paints (Sage Green, Terracotta/Dusty Rose)
- Matte sealant spray or varnish
- Wooden round base (approx. 6 inches)
- Strong craft glue (e.g., E6000)
- Needle tool or toothpick
- Sandpaper (fine grit)
Step 1: Creating the Clay Discs
-
Prepare the Clay:
Condition your clay by kneading it until it is smooth and pliable. This prevents cracks from forming later during the drying process. -
Roll Out Sheets:
Roll the clay out onto a flat surface to an even thickness of about 1/4 inch. If you are rolling a large amount, work in batches to keep the thickness consistent. -
Cut the Circles:
Using your graduated circle cutters, cut out approximately 10 to 12 discs. You need a sequential range of sizes, starting from your largest base circle up to the smallest top circle. -
Form the Conical Shape:
Gently press the center of each disc upwards to create a shallow cone or ‘coolie hat’ shape. I find it helpful to drape the clay over a conical mold or even a small upside-down bowl to get a uniform curve. -
Create the Center Hole:
While the clay is still soft, use your wooden dowel to punch a hole directly through the center peak of every disc. Wiggle the dowel slightly to ensure the hole is large enough for assembly later. -
Shape the Top Cap:
For the very top piece (below the star), mold a small, solid cone of clay about 1.5 inches tall without a hole going all the way through. -
Add Decorative Texture:
Take your needle tool or toothpick and gently poke small, evenly spaced holes around the rim of each disc. These perforations add a lovely texture but shouldn’t go all the way through the clay.
Clean Edges Pro-Tip
To get perfectly smooth rims on your clay circles, dip your finger in a little bit of water (or baby oil for polymer clay) and run it along the cut edge before drying.
Step 2: Finishing and Assembly
-
Dry the Components:
Allow all clay pieces to dry completely according to the manufacturer’s instructions. For air-dry clay, this usually takes 24-48 hours. Rotate them occasionally for even drying. -
Sand Imperfections:
Once fully cured, use fine-grit sandpaper to smooth out any rough edges on the rims or bumps on the surface. -
Mix Your Palette:
Prepare your acrylic paints. You want a dusty, matte finish, so mix a sage green and a warm terracotta pink. Test the colors on a scrap piece of dried clay first. -
Paint the Layers:
Paint the discs in an alternating pattern: one green, one pink. Be sure to get into the small perforated holes for a clean look, but don’t let paint pool in them. -
Seal the Clay:
Protect your paint job with a coat of matte spray sealant. This preserves the ‘raw clay’ aesthetic while making the piece durable. -
Prepare the Base:
Take your wooden round base and drill a hole in the center matching the diameter of your dowel. Verify the dowel stands straight when inserted. -
Secure the Spine:
Apply a dab of strong glue into the hole of the wooden base and insert the dowel firmly. Let this bond set before stacking. -
Stack the Tree:
Thread the painted discs onto the dowel, starting with the largest at the bottom and working up to the smallest. -
Attach the Top:
Glue the solid clay cone cap to the top of the stack, covering the tip of the dowel. -
Final Star:
Glue your wooden star to the very top point of the clay cone. Hold it in place for a few moments to ensure it doesn’t slide while the glue grabs.
Fairy Light Upgrade
Make the holes on the rim slightly larger and thread micro-LED copper wire lights through the perforations during assembly for a tree that actually glows.
Place your finished tree near a window or amid fresh greenery to let the natural colors shine
Mini Tree Scene Under a Glass Dome
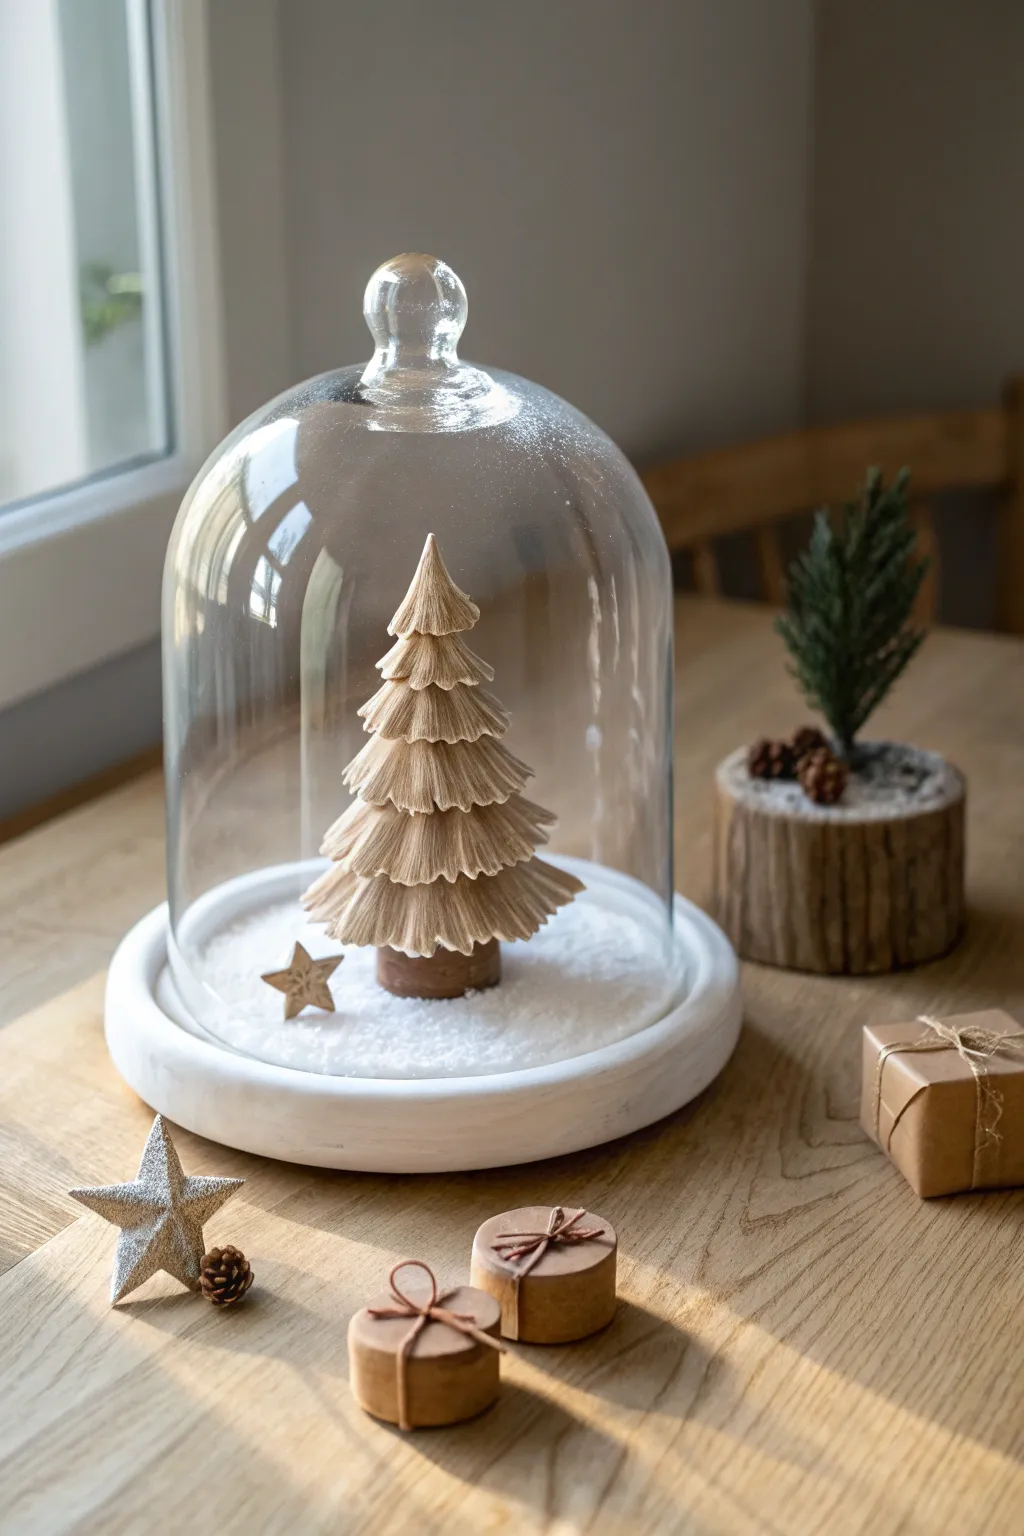
Create a serene holiday vignette by crafting a delicate clay pine tree and encasing it within a classic glass dome. The textured branches and snowy base invite a cozy, miniature world right onto your tabletop.
Detailed Instructions
Materials
- Air-dry clay (white or light beige)
- Wooden dowel (approx. 3-4 inches tall)
- Glass cloche with wooden base
- Rolling pin
- Pointed sculpting tool or toothpick
- Small scalloped cookie cutter (various sizes if available) or craft knife
- Faux snow powder or coarse white glitter
- White craft glue (PVA)
- Small piece of sandpaper
- Tiny wooden star (optional)
- Brown acrylic paint (optional for trunk)
Step 1: Crafting the Tree Structure
-
Prepare the trunk:
Cut your wooden dowel to the desired height, making sure it fits comfortably inside your glass dome with room to spare at the top. You can paint the bottom inch brown if you want a visible trunk, though much will be covered by the clay branches later. -
Anchor the base:
Take a small ball of clay and press it onto the center of the wooden cloche base to act as an anchor. Insert your dowel into this clay mound so it stands upright and secure. -
Roll out the clay:
Roll your air-dry clay into a thin, even sheet, aiming for about 1/8 inch thickness. A smooth surface works best here to mimic the clean look of the photo.
Step 2: Creating the Foliage Layers
-
Cut the tiers:
Using a craft knife or graduated scalloped cutters, create a series of circles. You’ll need about 7-9 circles, ranging from large for the bottom to very small for the top. -
Add texture:
Before assembling, take your pointed tool or toothpick and gently score vertical lines from the center of each circle outward to the edge. This mimics pine needles and adds that beautiful, detailed texture seen in the image. -
Shape the branches:
Gently pinch the edges of your textured circles to create a wavy, draped effect. They shouldn’t be flat; you want them to look like heavy pine boughs. -
Cut center holes:
Poke a hole in the exact center of each circle, sized just right to slide over your wooden dowel.
Drooping Branches?
If clay layers droop too much while wet, place small balls of foil or plastic wrap between the tiers to support them until they stiffen up.
Step 3: Assembly and Finishing
-
Stack the layers:
Apply a tiny dot of glue to the dowel where the bottom layer will sit. Slide your largest circle down. Repeat this process, moving up in size, spacing them slightly closer together as you reach the top. -
Refine the shape:
I like to gently press the edges of the upper layers down slightly while the clay is still damp, ensuring the tree has a natural, conical silhouette. -
Form the peak:
For the very top, shape a tiny cone of clay by hand, texture it vertically to match the branches, and cap off the dowel so no wood is visible. -
Dry completely:
Let the tree sculpture dry for at least 24 hours. Air-dry clay shrinks slightly, which actually helps tighten the fit around the dowel. -
Prepare the snowy ground:
Once the tree is dry and secure on the base, brush a generous layer of white craft glue over the clay anchor and the surrounding wooden base. -
Add the snow:
While the glue is wet, sprinkle your faux snow or coarse white glitter heavily over the base. Gently pat it down to ensure adherence. -
Optional star detail:
Place a small wooden or clay star loosely on the ‘snow’ near the base of the tree for a whimsical touch, similar to the reference photo. -
Encase the scene:
Clean the inside of your glass dome thoroughly to remove conflicting fingerprints. Carefully place the dome over your winter scene, settling it into the groove of the base.
Make It Glow
Hide a tiny battery-operated fairy light wire inside the foliage layers during assembly to make the tree glow warmly from within.
Place your finished cloche near a window to catch the natural light and enjoy the peaceful simplicity of your creation