
If you’ve been craving some fresh clay pottery ideas, you’re in the right headspace—messy hands, calm brain, cute results. I pulled together a mix of classic favorites and playful twists that keep the focus on clay, clay, and more clay—from simple hand-built wins to quirky statement pieces.
Classic Pinch Pot Bowls
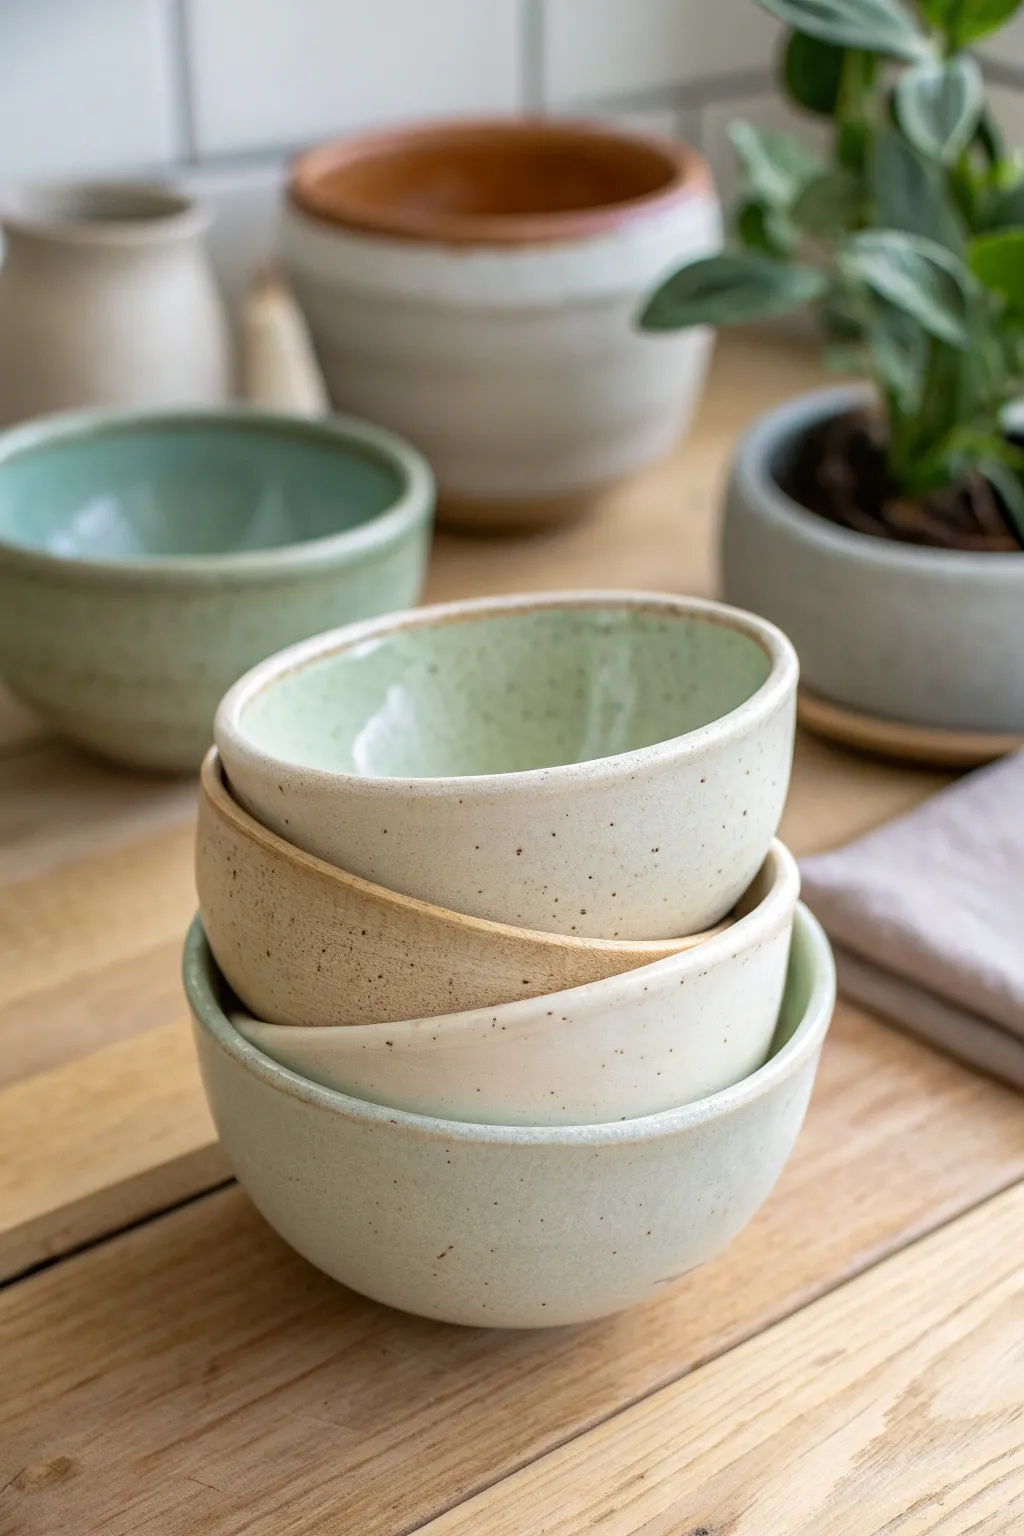
These charming, stackable bowls embrace the organic beauty of hand-built pottery with their gentle curves and earthy, speckled finish. By using simple pinch pot techniques, you can create a cohesive set perfect for mise en place or serving small snacks.
Step-by-Step Tutorial
Materials
- Speckled buff stoneware clay (cone 5/6)
- Wooden modeling tool or rib
- Metal kidney rib
- Sponge
- Pin tool or clay knife
- Bucket of water
- Soft satin matte glaze (pale celadon or mint)
- Soft satin matte glaze (warm sand or oatmeal)
- Kiln (or access to a firing service)
Step 1: Forming the Bowls
-
Prepare clay balls:
Start by wedging your speckled clay to remove air bubbles. Divide the clay into three or four balls of slightly increasing sizes, roughly ranging from a tangerine to a tennis ball. -
Open the clay:
Hold the smallest ball in your non-dominant hand. Press your thumb firmly into the center of the ball, stopping about a half-inch from the bottom. -
Pinch the walls:
Begin pinching the clay between your thumb and fingers, rotating the ball rhythmically as you go. Focus on keeping the wall thickness consistent from bottom to rim. -
Shape the curve:
As you pinch upwards, gently press the walls outward to create a wider, open bowl shape rather than a tall cup. Aim for a wall thickness of about a quarter-inch. -
Refine the interior:
Use a damp sponge or a wooden rib to smooth out the fingerprint marks on the inside of the bowl, compressing the clay to prevent cracks. -
Repeat for the set:
Repeat this pinching process with your larger balls of clay. As you work, test fit them by gently setting the smaller bowls inside the larger ones to ensure they will nest comfortably. -
Flatten the bottoms:
Gently tap the base of each bowl on your work surface to create a small flat spot so the bowl sits stable without wobbling.
Rim Perfection
Don’t ignore the rim! I like to spend extra time smoothing it with a barely damp chamois cloth. A rounded, compressed rim feels much better on the lips and resists chipping.
Step 2: Refining and Drying
-
Leather hard stage:
Allow the bowls to dry slowly until they reach a leather-hard state. They should be firm enough to handle without deforming but still feel cool to the touch. -
Smooth the exterior:
Take a metal kidney rib and scrape away any unwanted lumpy areas on the exterior. This process tightens the form and highlights the organic shape. -
Rim compression:
Run a damp sponge or a piece of chamois leather over the rim of each bowl. This crucial step prevents sharp edges after firing and gives the rim a professional finish. -
Final drying:
Let the bowls dry completely to the bone-dry stage. This usually takes a few days depending on humidity. They should look chalky and feel room temperature. -
Bisque fire:
Load your bowls into the kiln for a bisque fire (usually cone 04 or 06). This initial firing turns the fragile clay into durable ceramic ready for glazing.
Texture Play
Leave the lower third of the bowl unglazed for a ‘dipped’ look. The raw, toasted clay creates a beautiful tactile contrast against the smooth satin glaze.
Step 3: Glazing and Final Fire
-
Wipe down:
Once cool, wipe the bisque-fired bowls with a clean, damp sponge to remove any kiln dust, which helps the glaze adhere properly. -
Wax the bottoms:
Apply a coat of wax resist to the bottom of each bowl and about 1/8 inch up the side. This prevents the glaze from fusing your bowl to the kiln shelf. -
Dip the glaze:
Stir your pale celadon glaze thoroughly. Dip the bowls using tongs or your hand, holding them submerged for about 3 seconds for an even coat. -
Accent color:
For the variety shown in the image, glaze one of the middle-sized bowls in the warm sand or oatmeal color instead of the green to create visual interest in the stack. -
Check the speckled effect:
If your glaze is semi-translucent, the iron specks in the clay body will naturally show through after firing. Avoid double-dipping, which might make the glaze too opaque. -
Clean up:
Use a sponge to wipe away any stray drips of glaze from the waxed bottom area. -
Glaze fire:
Fire the bowls to the maturity temperature of your clay and glaze (typically cone 5 or 6 for stoneware).
Enjoy using your custom nesting bowls for everything from holding spices to organizing your desk


Coil-Built Planter Pots
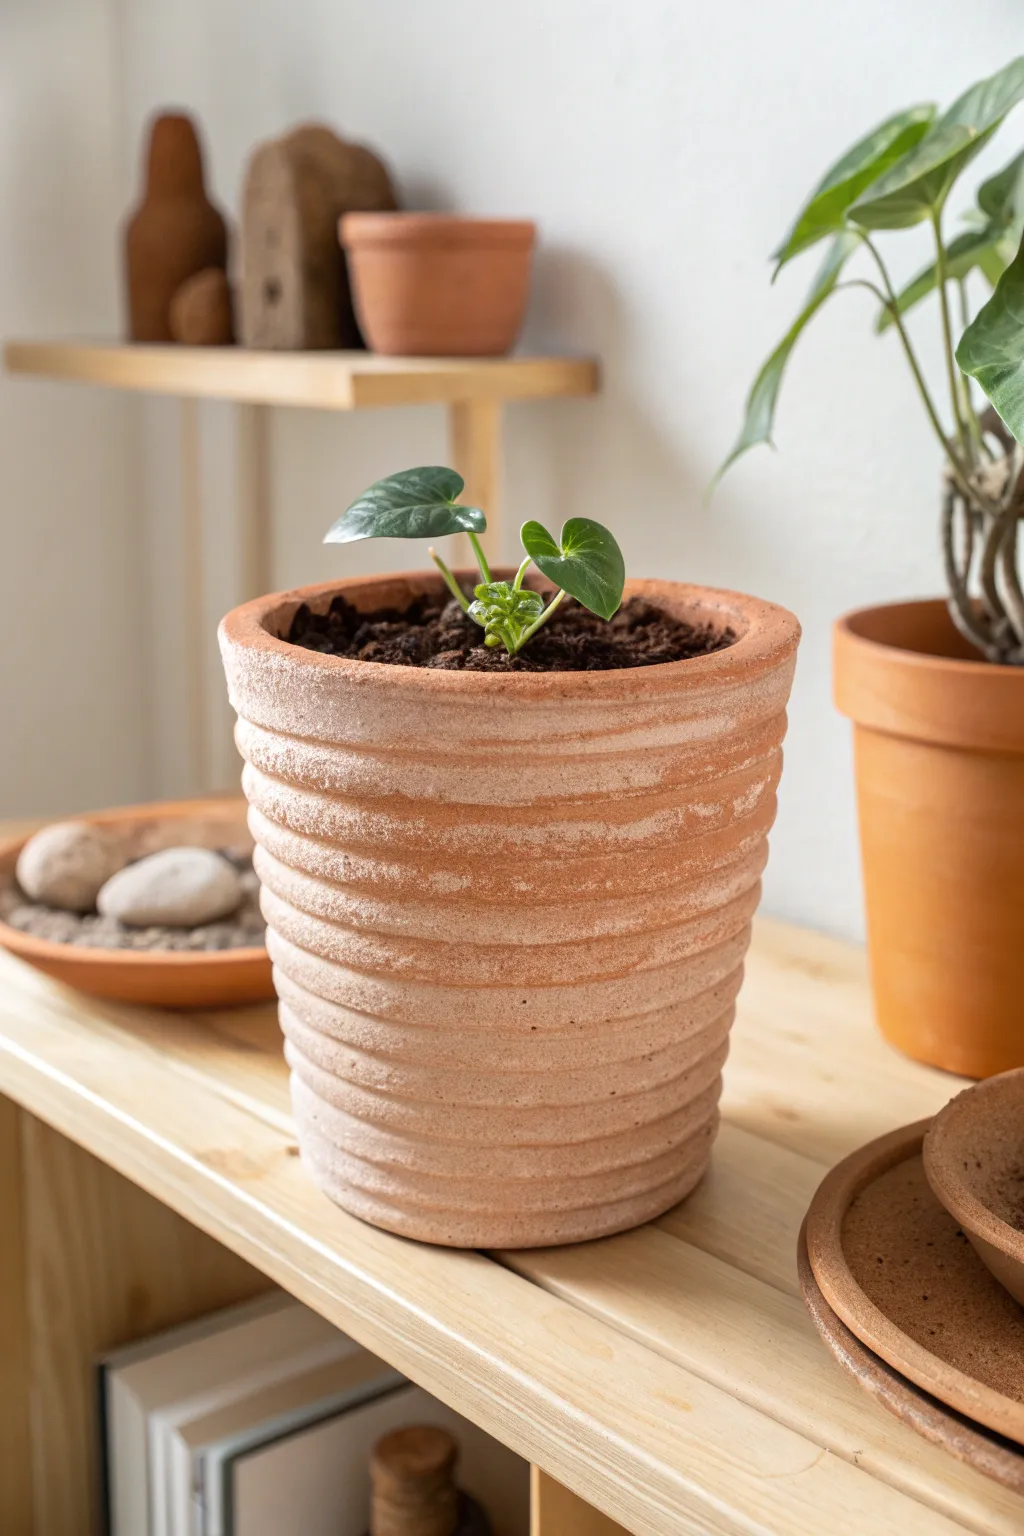
This rustic planter captures the organic beauty of classic terracotta with a modern, hand-built twist. Its distinct horizontal ridges are created using a simple coil technique, offering a tactile finish that beautifully contrasts with fresh greenery.
Step-by-Step Guide
Materials
- Terracotta air-dry clay or kiln-fire clay
- Rolling pin
- Canvas mat or wooden board
- Score and slip tool (or toothbrush and water)
- Small wooden rib or scraper
- Sponge
- Circle template (or household bowl)
- Fettling knife
- Plastic bag (for slow drying)
Step 1: Creating the Base
-
Prepare your clay:
Begin by wedging a softball-sized amount of terracotta clay to remove air bubbles and ensure it has an even consistency. -
Roll the slab:
Using a rolling pin, flatten a portion of the clay into a slab that is approximately 1/4 inch thick. I find turning the clay over periodically helps keep the thickness uniform. -
Cut the base:
Place your circle template or a small bowl (about 4 inches in diameter) onto the slab and cut around it with a fettling knife to create the pot’s floor. -
Score the edge:
Rough up the outer rim of your circular base using your scoring tool or a fork. Apply a small amount of slip (clay mixed with water) to the scored area.
Uneven Walls?
If your pot starts leaning, let the lower coils stiffen for 30 minutes before adding more height. This gives the base strength to support the top.
Step 2: Building the Walls
-
Roll the first coil:
Take a chunk of clay and roll it between your hands or on the table until it forms a long snake. Aim for a thickness similar to your pinky finger. -
Attach the first layer:
Place the coil directly onto the scored rim of the base. Gently press it down to ensure good contact without squashing the round shape of the coil too much. -
Blend the interior:
To strengthen the pot, use your thumb or a modeling tool to smudge the clay from the coil downwards onto the base on the *inside* of the pot only. Keep the outside distinct for that ribbed look. -
Continue coiling:
Roll more coils. Before adding each new one, score and slip the top of the previous coil. Stack them neatly, joining the ends of each coil by overlapping slightly and blending together. -
Shape the profile:
As you stack roughly 8 to 10 coils high, slightly flare the placement outward to create a gentle V-shape. The pot should be wider at the rim than at the base. -
Refine the interior:
Periodically stop to smooth the interior walls completely. A smooth inner surface makes it easier to clean later, even if the outside remains textured.
Step 3: Finishing Touches
-
Clean the exterior:
Use a damp sponge to gently wipe the exterior coils. You want to soften any sharp jagged bits but maintain the distinct ridges. -
Fix the rim:
On the final top coil, flatten the rim slightly with a wooden rib to create a finished, professional look. -
Add texture (Optional):
To mimic the worn look in the photo, you can lightly drag a stiff brush horizontally across the coils or dab with a textured sponge. -
Create drainage:
Don’t forget to poke a hole in the center of the bottom slab if you intend to plant directly into the pot. -
Slow drying process:
Cover the pot loosely with a plastic bag. Let it dry slowly over several days to prevent the coils from separating or cracking. -
Finalize:
Once bone dry, fire the pot in a kiln or finish with a sealant if using air-dry clay.
White Wash Effect
To get the dusty look in the photo, brush on a watered-down white acrylic paint after firing, then wipe most of it off with a rag.
Now you have a charming vessel ready for your favorite seedling or succulent.


Slab-Built Trinket Trays
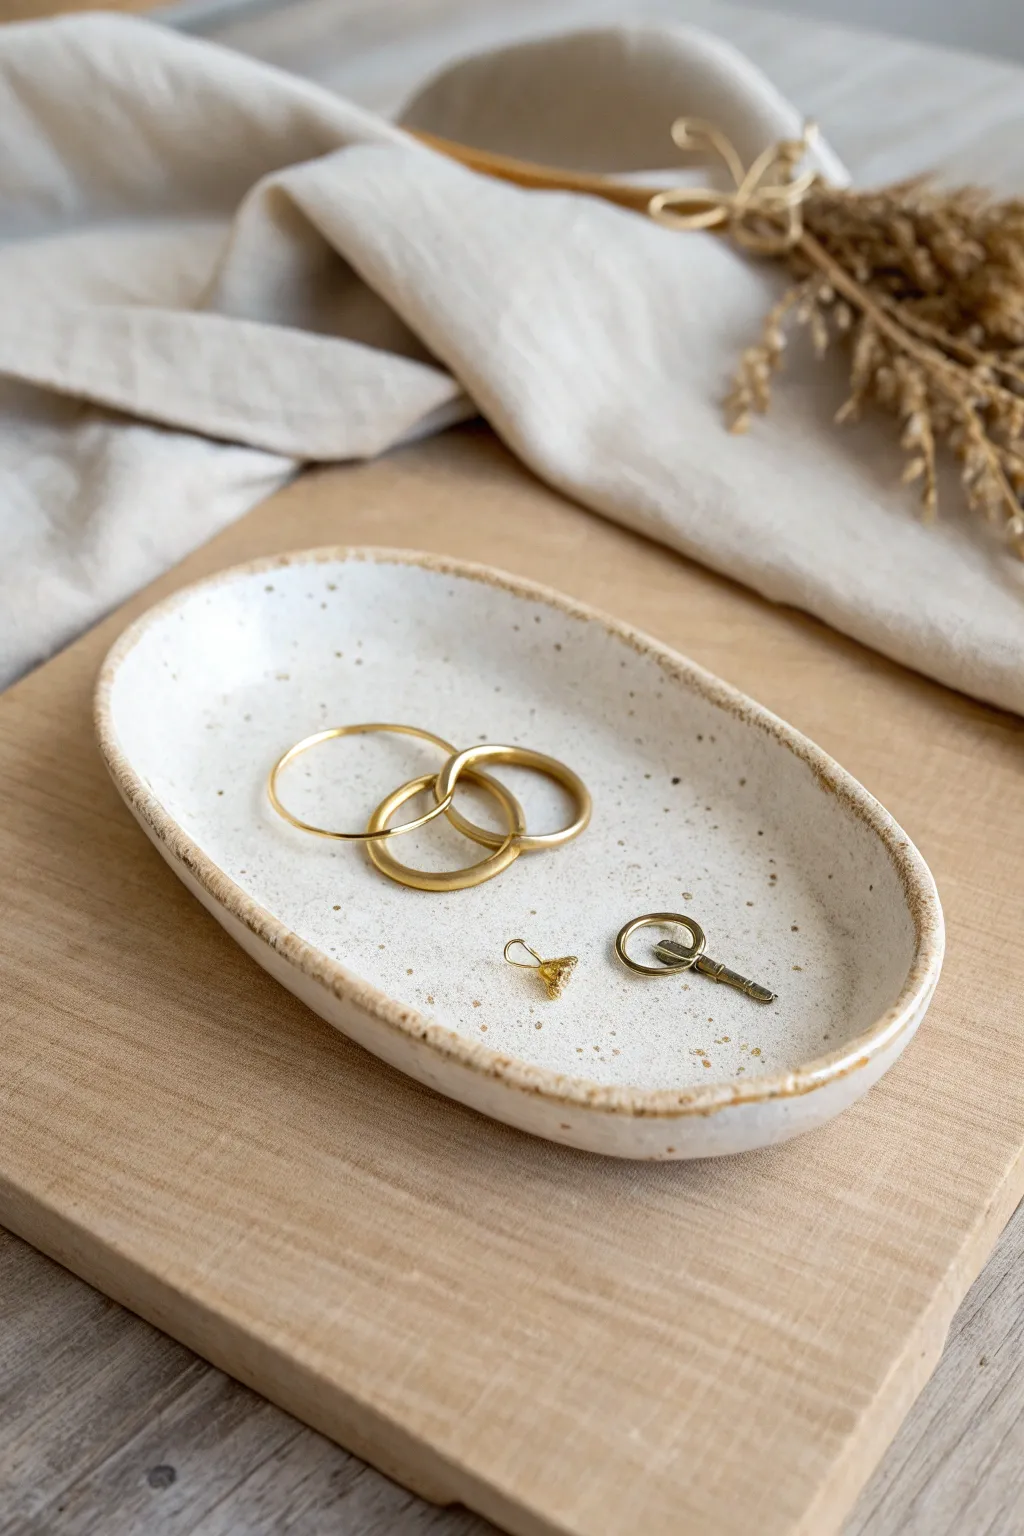
This charming, organically shaped trinket dish balances rustic warmth with modern simplicity. Crafted from speckled clay and featuring a soft, curved rim, it serves as the perfect minimalist home for your rings and small keepsakes.
Detailed Instructions
Materials
- Speckled cone 6 stoneware clay
- Rolling pin
- Canvas covered board or slab mat
- Oval paper template (approx. 5×7 inches)
- Fettling knife or needle tool
- Wooden modeling tool
- Sponge
- Small bowl of water
- Smooth white glaze (preferably zinc-free clear or semi-opaque white)
- Kiln
Step 1: Creating the Slab Base
-
Prepare the Clay:
Begin by wedging a baseball-sized amount of speckled clay to remove air bubbles and align the particles. -
Roll the Slab:
On your canvas board, use the rolling pin to flatten the clay into an even slab. Aim for a consistent thickness of about 1/4 inch. -
Smooth the Surface:
Before cutting, take a damp rib or a slightly moist sponge and compress the clay surface. This removes the canvas texture and prevents future warping. -
Cut the Shape:
Place your oval paper template onto the slab. Using a fettling knife held vertically, carefully trace around the template to cut out your oval shape. -
Soften the Edges:
Once the shape is cut, run a damp finger along the sharp cut edge to soften it slightly before moving to the forming stage.
Iron Spot Magic
Use a clay body with heavy iron flecks or ‘speckles.’ A semi-opaque white glaze allows these iron spots to bleed through, creating the signature spotted look.
Step 2: Forming the Dish
-
Set the Curve:
Gently lift the edges of the oval slab. I usually like to place the slab on a piece of soft foam to naturally encourage a curved bottom, or you can carefully pinch the sides upwards. -
Refine the Rim:
Using your thumb and forefinger, pinch the rim lightly to thin it out just a bit, creating that delicate, organic lip seen in the photo. -
Smooth the Interior:
Use a damp sponge to wipe the interior curve, ensuring there are no sharp angles where the floor meets the wall. It should be a continuous, shallow scoop. -
Level the Unevenness:
Look at the dish from eye level. If one side is dipping too low, gently nudge it up. The beauty of this piece is its ‘wabi-sabi’ feel, so it doesn’t need to be mathematically perfect. -
Slow Drying:
Cover the dish loosely with plastic and let it dry slowly to the leather-hard stage. This prevents the rim from warping as it shrinks.
Step 3: Finishing and Glazing
-
Bisque Fire:
Once the piece is bone dry, fire it in the kiln to bisque temperature (usually Cone 04) to prepare it for glazing. -
Wipe Down:
After the kiln cools, wipe the bisque ware with a damp sponge to remove any kiln dust that might resist the glaze. -
Apply Glaze:
Pour a smooth white glaze inside the dish, swirl it to coat the entire interior and rim, and pour out the excess. Leave the underside unglazed for a nice textural contrast. -
Clean the Foot:
Use a sponge to wipe away any glaze drips on the bottom or the very edge of the foot ring area. -
Rim Detail:
To get that toasted edge effect, wipe a tiny bit of the glaze off the very sharpest point of the rim, allowing the clay’s natural iron to show through during firing. -
Glaze Fire:
Fire the piece again to the maturation temperature of your clay and glaze (typically Cone 5 or 6 for stoneware).
Texture Twist
Press a piece of linen or lace into the slab while rolling it out. The glaze will break beautifully over the subtle fabric texture for a vintage feel.
Once cooled, your tray is ready to hold your favorite jewelry pieces with elegant simplicity


Ruffled-Edge Plates And Dishes
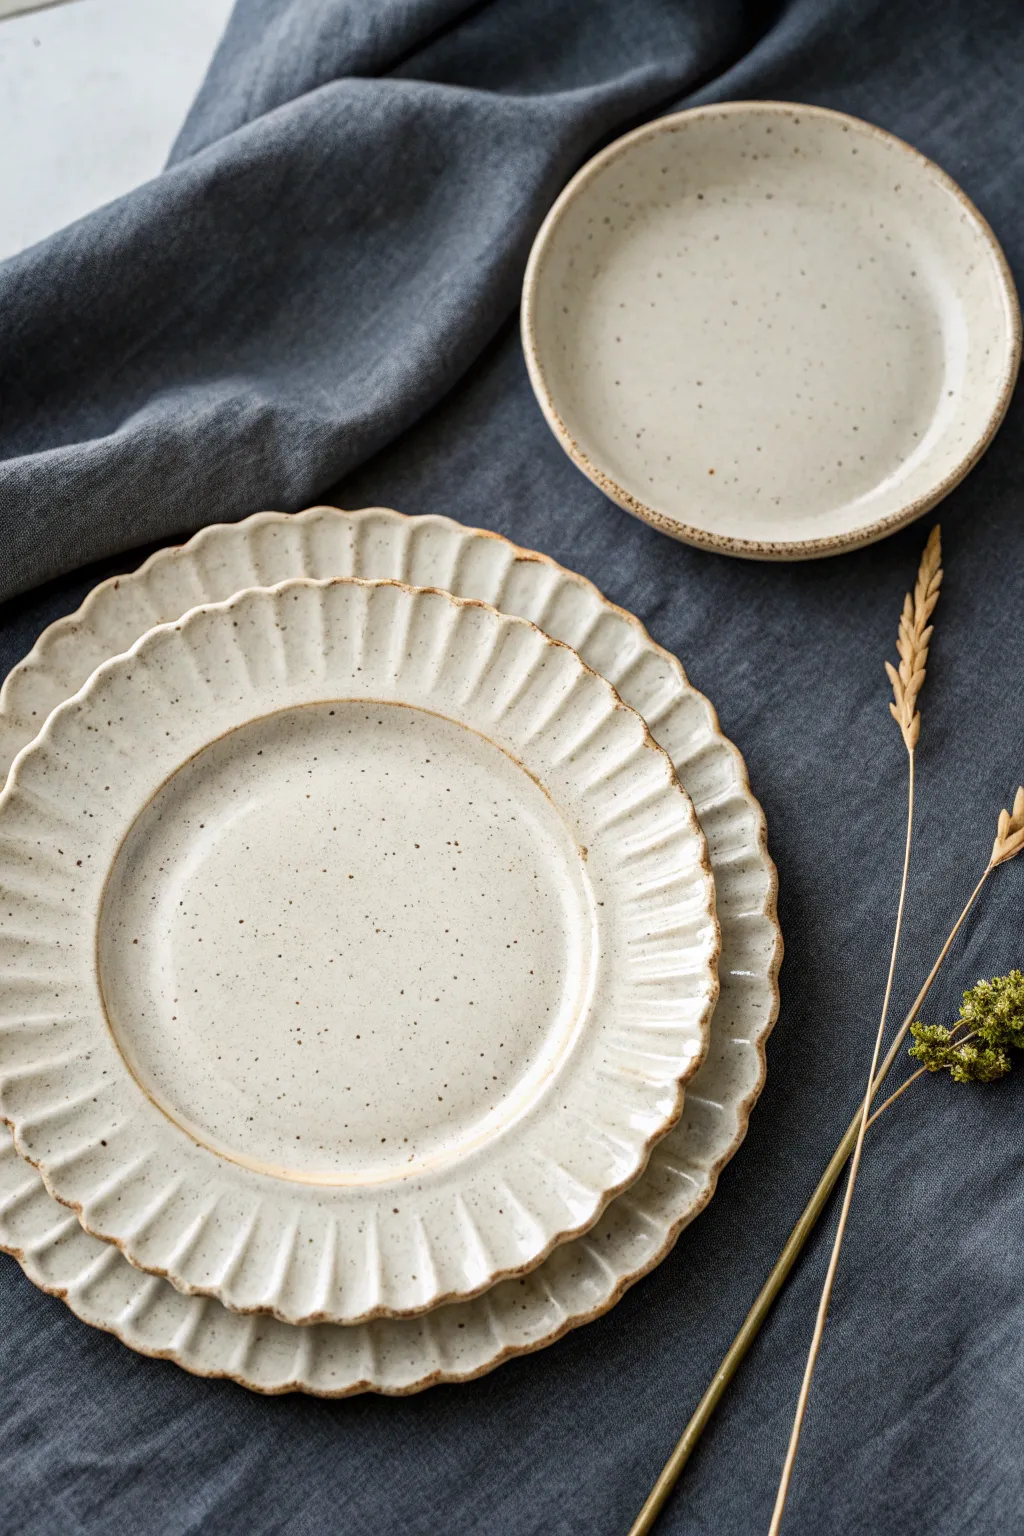
Capture the rustic elegance of handmade tableware with this tutorial for creating fluted, ruffled-edge plates. The speckled cream finish and subtle scalloped texture create a timeless look perfect for elevating your everyday meals.
Step-by-Step Guide
Materials
- Stoneware clay body (smooth, preferably buff or white)
- Rolling pin and guide strips (approx. 1/4 inch)
- Canvas or slab mat
- Circle templates (paper or plastic) or GR Pottery Forms
- Fettling knife or needle tool
- Rib tool (smooth wood or silicone)
- Modeling tool (rounded end)
- Sponge
- Speckled Cream Glaze (commercial stoneware glaze)
- Kiln
Step 1: Preparing the Slabs
-
Wedge the clay:
Begin by thoroughly wedging your clay to remove air bubbles and ensure particle alignment. This foundational step is crucial for plates to prevent warping later. -
Roll out the slab:
Place the clay on your canvas between two guide strips. Roll the clay out firmly and evenly until it is approximately 1/4 inch thick. Compress the slab on both sides with a rib to smooth the surface and align the clay particles. -
Cut the circles:
Using your circle templates, trace and cut out two sizes for the dinner and salad plates. If you are making the small bowl, cut a third, smaller circle. Keep the knife straight up and down for a clean edge.
Rim Prevention
To stop the rims from warping upward during drying, place a lightweight wooden bat directly on top of the rim while the plate is leather-hard.
Step 2: Creating the Ruffles
-
Smooth the edges:
Before texturing, use a slightly damp sponge to compress and round the sharp cut edges of your clay circles. This prevents chipping after firing. -
Form the rim:
Place your clay circle on a foam pad or a simple work board. Using your thumb or a rounded modeling tool, gently press down at regular intervals along the very edge of the slab to create the ‘valleys’ of the scallops. -
Refine the fluting:
Between each pressed valley, gently pinch or push the clay upward to emphasize the ‘peaks.’ Aim for a consistent rhythm, but embrace small irregularities that mark it as handmade. -
Extend the texture:
Use the side of your finger or a wide modeling tool to extend the fluting slightly inward toward the center of the plate. This creates the radiant, sunburst-like texture seen on the rim.
Rustic Iron Oxide
For a darker rim, brush a very light wash of iron oxide or red slip onto just the edge of the rim before applying your main cream glaze.
Step 3: Shaping and Drying
-
Shape the plate form:
Carefully transfer your textured slab onto a shallow curved mold or a slump mold to give the plate its dish shape. Gently press the center down to conform to the mold without crushing your beautiful rim texture. -
Define the foot (optional):
If you prefer a foot ring, wait until the clay is leather hard, flip it over, and attach a coil or trim a foot. However, for these rustic plates, a simple flat bottom works beautifully. -
Slow drying:
Cover the plates loosely with plastic to ensure slow, even drying. The rims will want to dry faster than the center, which causes warping, so I like to weigh down the center with a small sandbag during the initial drying phase. -
Bisque fire:
Once bone dry, load the pieces into the kiln for a bisque fire according to your clay body’s specifications (usually Cone 04).
Step 4: Glazing and Finishing
-
Clean the bisque:
Wipe the bisque-fired plates with a damp sponge to remove any dust that might resist the glaze. -
Apply the base glaze:
Dip or brush on a speckled cream stoneware glaze. Apply 2-3 even coats, ensuring full coverage while avoiding the very bottom where it sits on the shelf. -
Highlight the rim:
The brown rim effect in the image often happens naturally where the glaze breaks over the texture. To enhance this, you can wipe the glaze slightly thinner on the very high points of the scalloped edge. -
Fire the glaze:
Load the kiln carefully, ensuring plates aren’t touching. Fire to the maturity temperature of your clay and glaze (typically Cone 5 or 6). Let the kiln cool completely before opening.
Now you have a stunning set of heirloom-quality dishes ready for your next dinner party

What Really Happens Inside the Kiln
Learn how time and temperature work together inside the kiln to transform clay into durable ceramic.
Simple Slab Mug With Handle
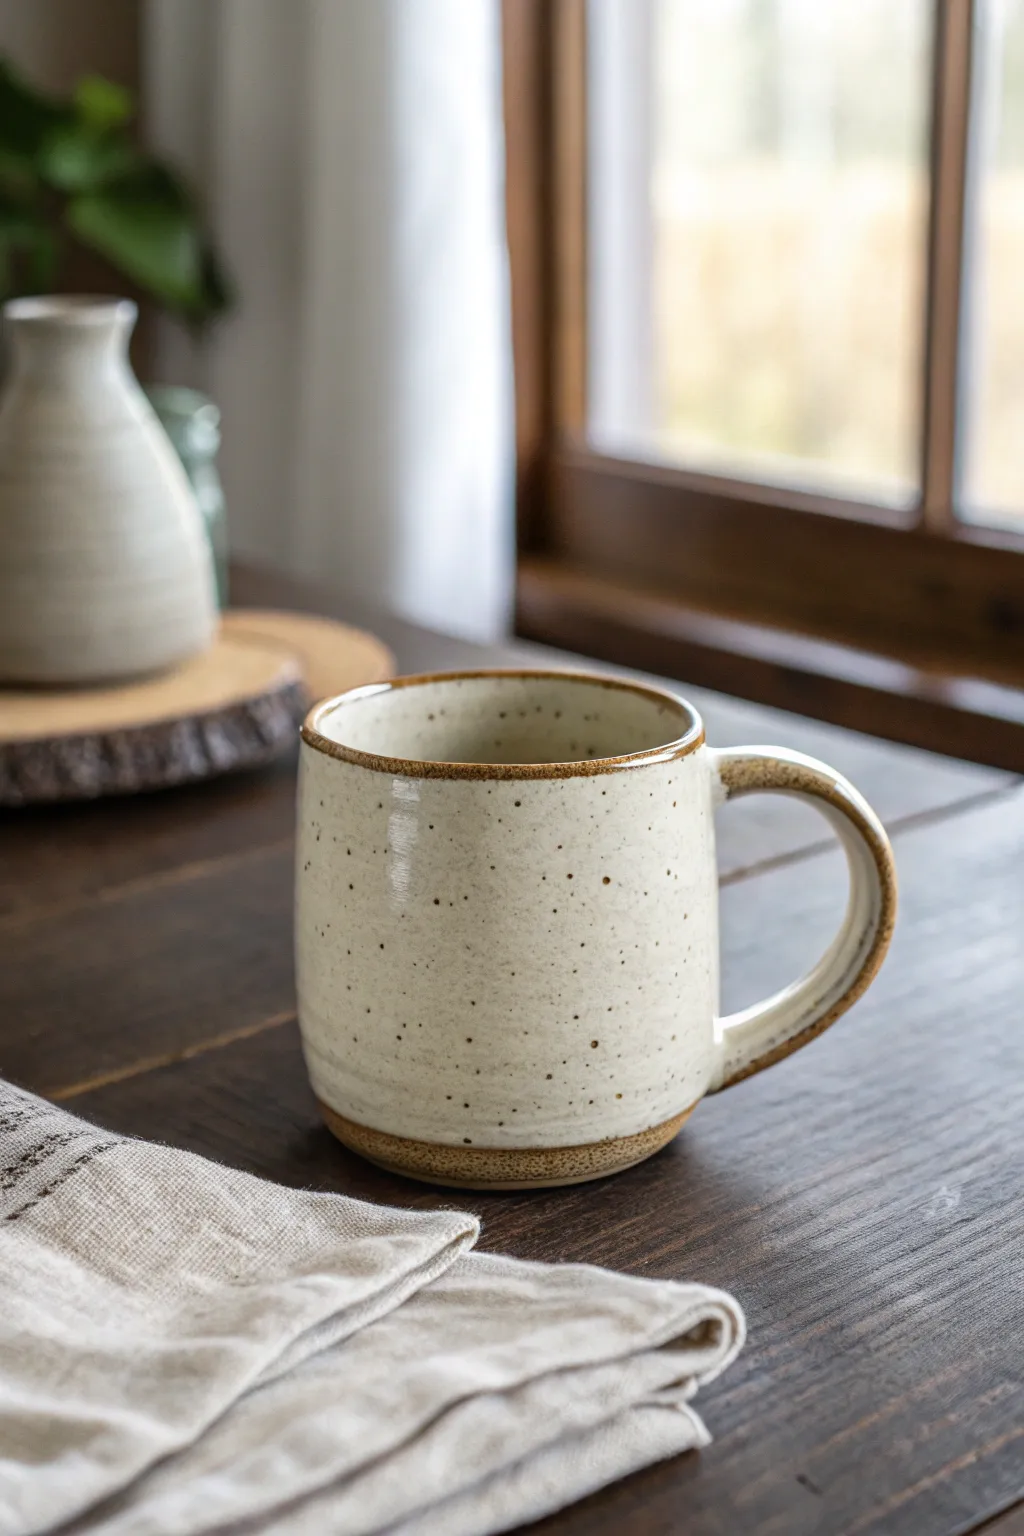
Create a cozy, farmhouse-style mug using simple slab-building techniques that highlight the natural beauty of clay. This project features a classic cylindrical form with a warm, speckled glaze and exposed raw clay accents for an earthy finish.
Step-by-Step
Materials
- Speckled Stoneware Clay (cone 5/6)
- Rolling pin
- Canvas ware board or cloth
- Guide sticks or slat rails (approx. 1/4 inch thick)
- Fettling knife or needle tool
- Scoring tool or serrated rib
- Slip (clay mixed with water)
- Wooden modeling tool
- Sponge
- Creamy white speckle glaze (food safe)
- Wax resist
- Kiln
Step 1: Preparing the Slab
-
Wedging:
Begin by wedging a ball of speckled stoneware clay thoroughly to remove any air bubbles and ensure the clay particles are aligned, which prevents cracking later. -
Rolling out:
Place the clay on your canvas board between two guide sticks. Roll the clay out into a long, even rectangle. The guide sticks ensure your mug walls have a consistent thickness. -
Smoothing texture:
Use a soft rib tool to compress the slab on both sides immediately after rolling. This removes the canvas texture and aligns the clay platelets for a stronger finished piece. -
Measuring the body:
Cut a rectangular strip for the mug body. A standard size is roughly 4 inches high by 10-11 inches long, but you can adjust depending on your desired mug size. Save the excess for the base and handle.
Rim Comfort
Always double-check your rim smoothness with your eyes closed. If it feels rough to your finger, it will feel rough to your lips.
Step 2: Building the Form
-
Forming the cylinder:
Carefully pick up the rectangular slab and curve it into a cylinder. Bevell the short edges at a 45-degree angle to create a stronger, seamless join where the clay overlaps. -
Scoring and slipping:
Score the beveled edges aggressively and apply a generous amount of slip. Press the edges together firmly to bond them. -
Sealing the seam:
Use a wooden tool to smudge the clay across the seam on both the inside and outside, then smooth it over with a rib so the join becomes invisible. -
Creating the base:
Rolled out a small piece of leftover clay. Place your cylinder on top and trace around the bottom with a needle tool, leaving a tiny bit of extra width. -
Attaching the bottom:
Score and slip both the bottom edge of the cylinder and the new base circle. Press the cylinder onto the base firmly. I like to use a small coil of clay on the interior seam for extra reinforcement if the wall feels thin.
Step 3: Handle and Details
-
Making the handle strap:
Cut a strip of clay for the handle, roughly 1 inch wide. Smooth the edges with a damp sponge to round them off so they are comfortable to hold. -
Shaping the handle:
Curve the strap into a ‘C’ or ear shape. Hold it up to the leather-hard cylinder to check proportions—it should accommodate at least two or three fingers. -
Attaching the handle:
Score and slip the attachment points on both the mug body and handle. Press the handle on firmly, blending the clay into the mug body with a modeling tool. -
Refining the rim:
Check the rim of the mug. Use a piece of chamois leather or a damp sponge to compress and round the lip, ensuring it will be smooth for drinking. -
Drying:
Cover the mug loosely with plastic to let it dry slowly and evenly to the bone-dry stage. This prevents the handle from pulling away as it shrinks.
Iron Oxide Wash
For a darker, more defined rim and base, brush a thin layer of iron oxide wash onto the exposed raw clay areas before the final glaze firing.
Step 4: Glazing and Firing
-
Bisque fire:
Fire the bone-dry mug in a bisque kiln (usually to cone 04) to prepare it for glazing. -
Waxing the accents:
To achieve the look in the photo, apply wax resist to the bottom 1/2 inch of the exterior and a thin line along the very top rim if you want that exposed clay detail. -
Glazing:
Dip the mug into a creamy white speckled glaze. Shake off excess gently and check that the wax resisted the glaze properly; wipe any stray drips off the waxed areas with a sponge. -
Final firing:
Fire the mug to maturity (cone 5 or 6, depending on your clay). The heat will interact with the iron speckles in the clay, bleeding them through the white glaze.
Enjoy your morning coffee in a mug that feels as grounded and authentic as the clay it came from
Tiny Espresso Cups Set
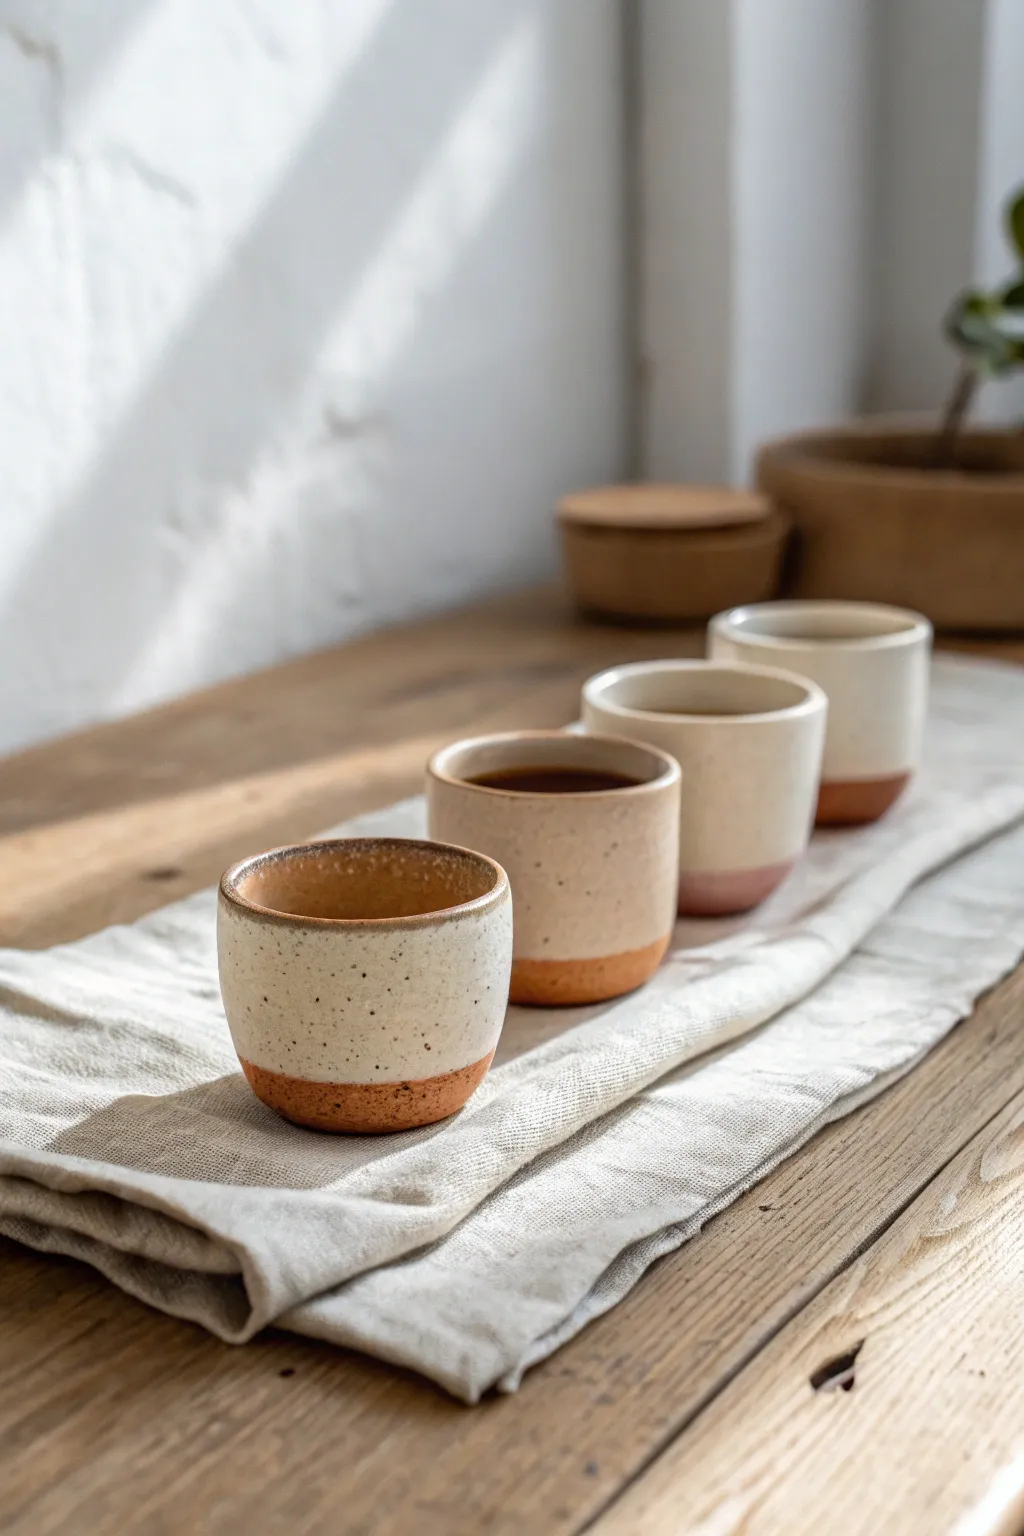
These charming, petite espresso cups showcase the natural beauty of speckled clay bodies by leaving the base unglazed for a delightful textural contrast. The creamy white glaze drips just enough to create an organic, handmade feel perfect for your morning coffee ritual.
Detailed Instructions
Materials
- Speckled stoneware clay (mid-fire or high-fire)
- Pottery wheel
- Throwing sponge
- Wire cutter
- Needle tool
- Trimming tools (loop tool)
- Wooden rib
- Cream or oatmeal colored dipping glaze
- Wax resist (optional)
- Kiln
Step 1: Throwing on the Wheel
-
Prepare the Clay:
Wedge your speckled clay thoroughly to remove air bubbles. Since these are tiny cups, weigh out small balls of clay, approximately 200g to 250g each, to ensure consistent sizing across your set. -
Center the Clay:
Secure a clay ball to the wheel head. Using moistened hands and steady pressure, cone the clay up and down until it is perfectly centered and running smooth. -
Open the Form:
Press your thumbs into the center to create the opening, stopping about a half-inch from the bottom to leave enough material for a trimmed foot later. -
Pull the Walls:
Gently pull the clay upwards between your fingers. Aim for a cylindrical shape with straight vertical sides. Keep the walls even, but leave the rim slightly thicker for durability. -
Refine the Shape:
Use a wooden rib on the outside while supporting the inside with your hand to smooth the surface and establish that classic straight-sided espresso cup profile. -
Clean the Rim:
Compress the rim gently with a sponge or a piece of chamois leather. This makes the drinking edge smooth and pleasant against the lips. -
Cut and Remove:
Run a wire tool under the base of the cup to separate it from the wheel head. Carefully lift it off using pot lifters or dry hands and set it aside to reach leather-hard consistency.
Uneven Glaze Lines?
If you don’t use wax resist, hold the cup upside down for 5 seconds after dipping. This lets excess glaze drip off the rim rather than running down unevenly onto the raw clay area.
Step 2: Trimming and Finishing
-
Center for Trimming:
Once leather hard, flip the cup upside down on the wheel. Secure it with small coils of soft clay (lugs) spaced evenly around the rim. -
Trim the Profile:
Using a sharp loop tool, shave away excess clay from the bottom third of the exterior wall. I find this connects the weight of the cup to its visual appearance nicely. -
Carve the Foot:
Trim the very bottom to create a neat foot ring. Smooth any sharp edges with a damp sponge or your finger to ensure it won’t scratch table surfaces. -
Bisque Fire:
Let the cups dry completely until bone dry. Load them into the kiln for a bisque firing according to your clay body’s specifications (usually Cone 04 or 06).
Step 3: Glazing
-
Clean the Bisqueware:
Wipe the fired cups with a damp sponge to remove any dust, which can prevent glaze from adhering properly. -
Apply Wax Resist:
Paint a line of wax resist around the bottom third of the cup, exactly where you want the raw clay to remain exposed. Or, skip this if you have a steady dipping hand. -
Dip the Cups:
Hold the cup by the foot and dip it upside down into your cream glaze. Submerge it until the glaze reaches your wax line or desired height, usually leaving the bottom 1/3 unglazed. -
Clean the Foot:
Immediately wipe away any glaze drips on the wax or the raw clay bottom with a sponge. The foot must be perfectly clean to prevent it sticking to the kiln shelf. -
Glaze Fire:
Fire the cups a second time to the maturation temperature of your clay and glaze (typically Cone 5 or 6 for stoneware). This reveals the speckles through the creamy glaze.
Make it a Stack
Design the foot ring slightly narrower than the rim diameter during trimming. This allows the finished cups to nest securely into one another for stackable storage.
Now brew a shot of espresso and enjoy the warmth of your handmade creation in your hands


The Complete Guide to Pottery Troubleshooting
Uncover the most common ceramic mistakes—from cracking clay to failed glazes—and learn how to fix them fast.
Textured Soap Dish With Drain Holes
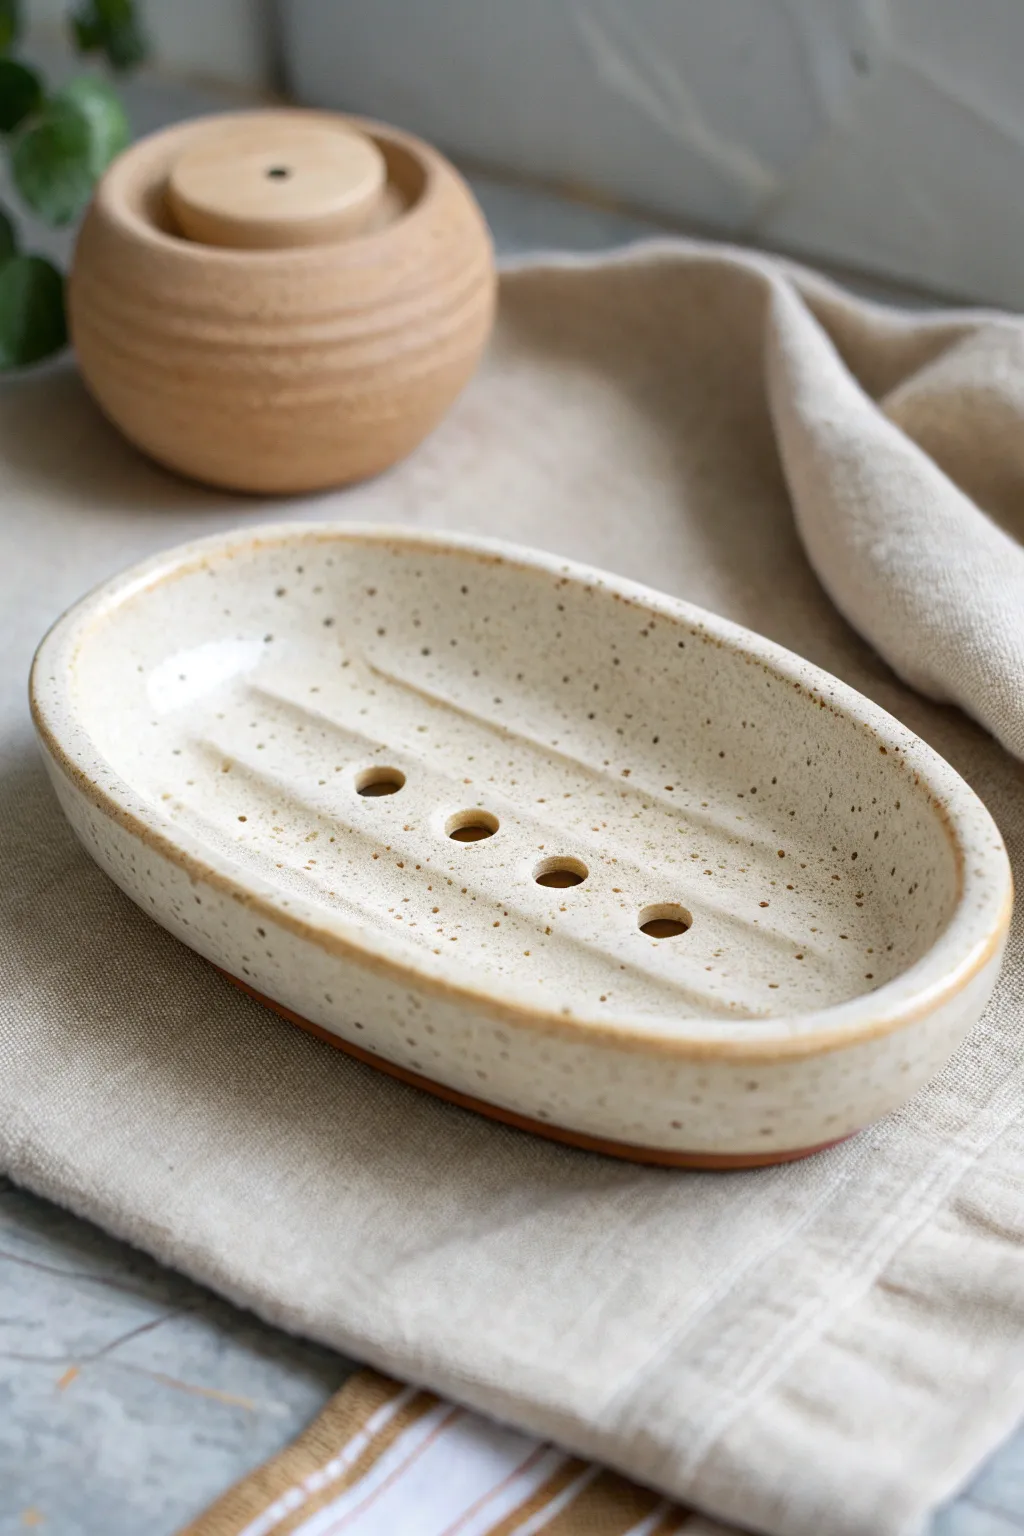
This charming ceramic soap dish features a classic oval shape with functional drainage holes and ridges to keep your soap dry. The speckled cream glaze gives it a warm, rustic feel that fits perfectly in any bathroom or kitchen setting.
How-To Guide
Materials
- Stoneware clay (speckled or buff)
- Rolling pin
- Guide sticks or canvas boards (approx. 1/4 inch thick)
- Oval template (paper or flexible plastic)
- Needle tool or fettling knife
- Rib tool (kidney shaped, soft rubber)
- Small hole cutter or drill bit
- Modeling tool or back of a paintbrush (for ridges)
- Sponge
- Speckled cream or oatmeal glaze
- Kiln
Step 1: Forming the Base
-
Wedging:
Begin by wedging a ball of stoneware clay thoroughly to remove any air bubbles and ensure an even consistency. -
Rolling the slab:
Place the clay between two guide sticks on a canvas surface. Roll the clay out into a smooth slab, roughly 1/4 inch thick, ensuring it is large enough for your oval template. -
Compressing:
Use a soft rubber rib to compress the surface of the slab. Drag the rib across both sides of the clay to align the particles, which helps prevent warping later. -
Cutting the shape:
Lay your oval template onto the clay slab. Using a needle tool or fettling knife, carefully cut around the template. Hold the tool perpendicular to the table for a clean, straight edge. -
Smoothing edges:
Once the oval is cut, pick it up gently and smooth the sharp cut edges with a damp sponge or your finger to round them off slightly.
Warping Warning
If your oval turns into a wobbly shape while drying, try drying it slowly between two pieces of drywall or wooden boards to keep the rim flat.
Step 2: Adding Texture and Function
-
Creating the curved form:
To give the dish its gentle bowl shape, place the oval slab onto a piece of foam or a shallow plaster hump mold. Gently press the center down or lift the edges up, smoothing out any finger marks as you shape the curve. -
Indenting ridges:
While the clay is still soft but holding its shape, use a rounded modeling tool or the handle of a paintbrush to press long, linear indentations into the center of the dish. These channels allow water to flow away from the soap bar. -
Refining the ridges:
Run a damp finger along the pressed indentations to soften any sharp angles created by the tool. -
Adding drainage holes:
Using a small hole cutter or a drill bit, punch 3 to 4 holes directly in the center line of the indentations. Space them evenly to ensure good drainage. -
Cleaning the holes:
Flip the dish over carefully and clean up any clay burrs or jagged bits surrounding the holes on the underside. I usually wait until the clay is leather-hard for the cleanest cut here.
Raised Feet Option
Add four small balls of clay to the underside as feet. This lifts the dish, allowing air to circulate underneath and keeping the counter drier.
Step 3: Finishing and Glazing
-
Drying:
Cover the dish loosely with plastic and allow it to dry slowly to the leather-hard stage. Once firm, you can do a final sponge wipe to ensure supreme smoothness before letting it dry completely to bone dry. -
Bisque fire:
Load the bone-dry piece into the kiln and bisque fire it to the appropriate cone (usually Cone 04 or 06, depending on your clay body). -
Waxing the foot:
Apply wax resist to the very bottom of the dish or wipe it clean after dipping to prevent the glaze from fusing it to the kiln shelf. -
Glazing:
Dip the bisque-fired dish into a speckled cream or oatmeal glaze. Ensure the glaze isn’t too thick inside the small drain holes; if it clogs them, clear them out with a needle tool while the glaze is wet. -
Rim detail:
For the subtle contrast seen in the project image, gently wipe a tiny bit of glaze off the very top rim with a sponge, allowing the natural clay body to show through slightly after firing. -
Glaze fire:
Fire the piece again to the maturity temperature of your clay and glaze (often Cone 5 or 6 for stoneware).
Once cooled, your durable new soap dish is ready to add a touch of handmade elegance to your sink side
Spoon Rest With A Notch

This charming spoon rest combines form and function with its warm, terracotta-toned glaze and clever notched rim. The organic, slightly asymmetrical shape adds a handmade touch to your kitchen counter while keeping messy spoons contained.
Step-by-Step
Materials
- Stoneware clay (smooth or speckled)
- Pottery wheel (optional) or rolling pin and canvas for hand-building
- Rib tool
- Sponge
- Wire cutter
- Needle tool
- Grommet tool or rounded trimming tool (for notch)
- Earth-tone orange/terracotta speckled glaze
- Cobalt blue underglaze or glaze
- Small paintbrush
- Kiln
Step 1: Shaping the Form
-
Prepare the clay:
Begin by wedging about 1 pound of stoneware clay to remove air bubbles. This ensures your spoon rest won’t crack during firing. -
Create the base:
If using a wheel, center the clay and open it into a low bowl shape. If hand-building, roll a slab to about 1/4 inch thickness and gently press it into a shallow mold or form the curve by hand. -
Refine the curve:
Use a damp sponge or a soft rib to smooth out the interior curve. You want a gentle slope that will cradle a spoon bowl without it sliding around. -
Create the notch:
Identify one side of the rim where the handle will rest. Gently press this section down with your thumb or use a round tool to create a distinct dip or ‘notch’ in the wall. -
Smooth the edges:
Run a damp sponge or chamois leather over the rim, paying special attention to your new notch to ensure there are no sharp edges. -
Dry to leather hard:
Set the piece aside until it is leather hard. This makes it sturdy enough to trim without warping the shape.
Step 2: Trimming and Bisque Firing
-
Trim the foot:
Flip the piece over and trim a clean foot ring. This lifts the spoon rest slightly off the counter and gives it a finished look. -
Refine the shape:
While trimming, you can emphasize the organic, slightly oval shape if desired, rather than forcing a perfect circle. -
Final smoothing:
Check the entire surface one last time for rough spots and smooth them with a barely damp sponge. -
First firing:
Place the bone-dry piece in the kiln for the bisque fire (typically Cone 04 or 06). Let it cool completely before unloading.
Rim Perfection
When creating the notch, compress the clay downwards rather than cutting it away. This maintains the rim’s strength and prevents future chipping.
Step 3: Glazing
-
Clean the bisque:
Wipe the bisque-fired piece with a damp sponge to remove any dust that might prevent the glaze from adhering properly. -
Apply base glaze:
Pour or dip your earthy orange glaze. Ensure even coverage inside and out, but wipe the foot ring clean so it doesn’t stick to the kiln shelf. -
Add the rim detail:
Using a small brush, carefully paint a thin strip of cobalt blue glaze or underglaze along the rim section near the notch. -
Extend the blue line:
Let the blue line taper off naturally as it moves away from the notch area, creating a subtle accent rather than a full circle. -
Check density:
I like to verify that the orange glaze isn’t too thick near the notch, so the blue detail remains crisp and visible. -
Final firing:
Load the piece into the kiln for the glaze firing (temperature depends on your specific clay and glaze, often Cone 5 or 6).
Texture Twist
Before glazing, lightly sand the outside of the bowl to expose the natural grog or speckles in the clay body for a more rustic, tactile finish.
Now you have a durable, custom spot to rest your favorite wooden spoon while cooking your next meal

TRACK YOUR CERAMIC JOURNEY
Capture glaze tests, firing details, and creative progress—all in one simple printable. Make your projects easier to repeat and improve.
Lace-Imprinted Clay Bowls
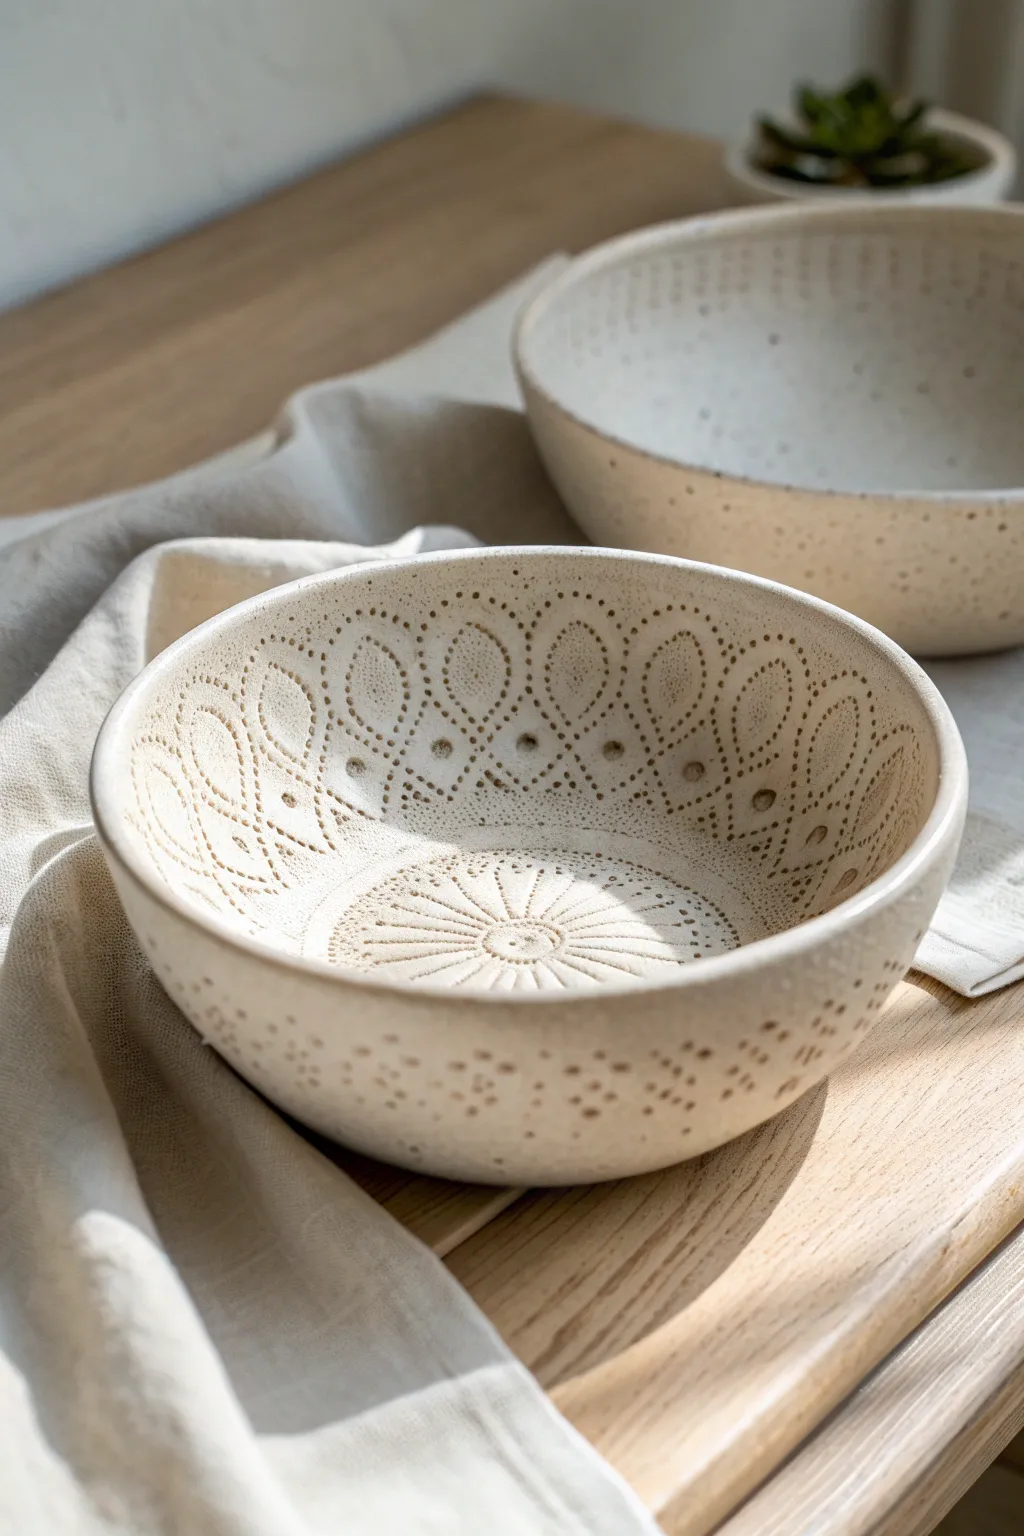
Create stunning, heirloom-quality pottery with this simple technique that blends modern form with vintage texture. By pressing lace or intricate fabric into soft clay, you’ll produce delicate relief patterns that look incredibly professional yet require very little sculpting skill.
Detailed Instructions
Materials
- White stoneware clay (mid-fire or air-dry depending on kiln access)
- Vintage lace doily or textured silicone mat (teardrop/dot pattern)
- Rolling pin
- Wooden guide slats (approx 1/4 inch thick)
- Slump mold (or a smooth bowl to use as a form)
- Canvas cloth or heavy cotton fabric (for rolling)
- Sponge
- Fettling knife or needle tool
- Rib tool (smooth wood or rubber)
- Sandpaper (fine grit)
Step 1: Preparation and Rolling
-
Prepare your workspace:
Lay down your canvas cloth on a sturdy table. This prevents the clay from sticking to your work surface and absorbs some moisture. -
Wedge the clay:
Take a generous ball of white stoneware clay and wedge it thoroughly. This removes air bubbles and ensures an even consistency, which is crucial for preventing cracks later. -
Set up guides:
Place your wooden guide slats on either side of the clay ball. These will help your rolling pin maintain a uniform thickness across the entire slab. -
Roll the slab:
Roll the clay out into a smooth, even pancake. It should be wide enough to accommodate your chosen bowl mold plus a little extra for trimming. -
Smooth the surface:
Take your rib tool and gently compress the clay surface. Swipe in multiple directions to align the clay particles and create a pristine canvas for your texture.
Sticky Situation?
If the lace sticks to the clay, dust the clay surface very lightly with cornstarch before laying down your fabric to ensure a clean release.
Step 2: Adding Texture and Forming
-
Position the lace:
Carefully place your lace doily or textured mat onto the center of the clay slab. If using the specific teardrop design shown, center the ‘sunburst’ motif. -
Impress the pattern:
Roll over the lace with your rolling pin firmly. You want to press the fabric deep enough to leave a crisp impression, but not so deep that it thins the clay dangerously. -
Reveal the design:
Lift one corner of the lace and slowly peel it back to reveal the imprinted pattern. I always find this moment the most satisfying part of the process. -
Cut the circle:
Place your slump mold upside down loosely over the pattern to gauge size. Use a needle tool to cut a large circle around the pattern, leaving about an inch of excess clay beyond the design’s edge. -
Prepare the mold:
Cover your slump mold (or kitchen bowl) with a thin layer of plastic wrap or a piece of pantyhose to prevent sticking. -
Slump the clay:
Gently lift your clay circle and drape it *pattern-side down* into the bowl if using a slump mold, or drape it *pattern-side up* over a hump mold. Gravity will help it settle. -
Shape the vessel:
Press the clay gently against the mold’s walls. Be careful not to smudge your beautiful lace texture while doing this; use a soft sponge if needed.
Color Wash
Apply a dark oxide wash (like iron oxide) into the crevices and wipe back the surface with a sponge to make the lace pattern really pop against the white clay.
Step 3: Finishing Touches
-
Trim the rim:
Once the clay is in the mold, run your needle tool along the edge to create a uniform rim height. Alternatively, you can leave it slightly organic for a rustic look. -
Initial drying:
Let the clay sit in the mold until it is leather-hard. This means it holds its shape firmly but is still cold to the touch and slightly flexible. -
Remove from mold:
Carefully pop the clay bowl out of the mold. Invert it so it sits on its rim. -
Smooth the edges:
Dip your finger or a small sponge in water and run it along the rim to smooth out any sharp cutting marks or roughness. -
Texture the exterior:
The image shows texture on the outside too. If you used a slump mold (pattern inside), you can now use a small tool to hand-poke dots on the exterior to echo the interior design. -
Final drying:
Allow the bowl to dry completely (bone dry). It will turn a chalky white color and feel room temperature. -
Firing or sealing:
If using kiln clay, bisque fire, apply a clear matte glaze, and glaze fire. If using air-dry clay, sand lightly once dry and seal with a waterproof varnish.
Place your finished bowl on a wooden table or linen cloth to highlight its natural, earthen beauty
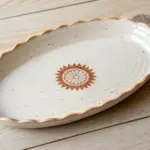
Stamped Botanical Clay Plates
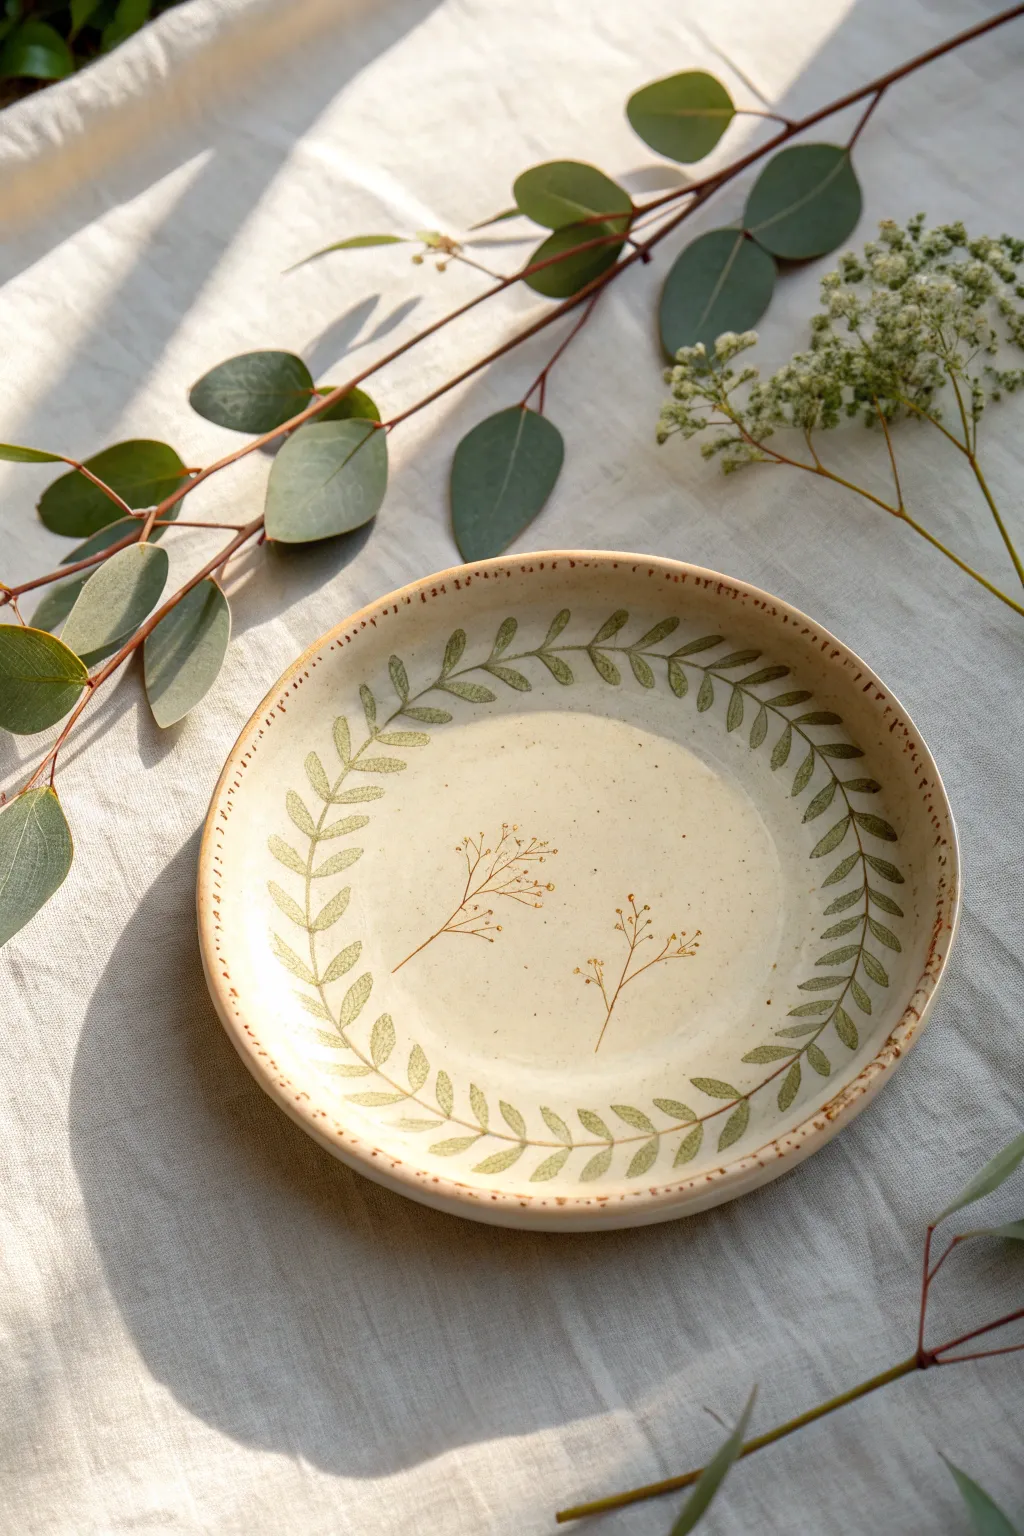
Capture the delicate beauty of nature with this organic, botanical-themed plate featuring a graceful wreath of fern leaves and subtle central sprigs. The result is a piece of functional art that feels both rustic and refined, perfect for showcasing your favorite meals.
How-To Guide
Materials
- Speckled stoneware clay (buff or light tan)
- Rolling pin
- Canvas work surface
- Pottery sponge
- Sharp needle tool
- Shallow bowl mold or plaster hump mold
- Soft rubber rib
- Green underglaze (forest green)
- Brown underglaze (warm sienna)
- Clear matte pottery glaze
- Fine-detail paintbrush
- Small foam roller or sponge applicator
- Fern leaf rubber stamp (flexible polymer works best)
- Delicate twig or sprig rubber stamp
- Kiln
Step 1: Forming the Plate
-
Roll the Slab:
Begin by wedging your speckled stoneware clay to remove air bubbles. Roll it out on your canvas into an even slab, aiming for a thickness of about 1/4 inch. -
Smooth the Surface:
Before cutting, take a soft rubber rib and gently compress the clay surface. This aligns the clay particles and creates a perfectly smooth canvas for your stamping. -
Cut the Circle:
Place your mold or a circular template onto the slab. Using your needle tool, cut a clean circle around the perimeter. Remove the excess clay. -
Shape the Plate:
Gently drape your clay circle into your shallow bowl mold. Use the sponge to press it softly into the curve, starting from the center and working outward to ensure no air remains trapped underneath. -
Refine the Rim:
At this leather-hard stage, smooth the rim with a damp chamois or sponge. I always take a moment here to slightly round the edges so the final plate feels comfortable to hold.
Step 2: Adding the Botanical Design
-
Wait for Firming:
Allow the plate to dry until it is firm leather-hard. It needs to be stiff enough to handle the pressure of stamping without warping, but soft enough to accept the underglaze transfer. -
Prep the Fern Stamp:
Apply a thin, even layer of green underglaze onto your fern stamp using a foam roller or sponge. Do not over-ink, or the lines will smudge. -
Stamp the Border:
Starting at the top edge of the inner curve, press the stamp firmly onto the clay. Carefully lift it straight up. -
Continue the Pattern:
Repeat the stamping process, rotating the plate as you go. Angle the fern leaves so they follow the curvature of the rim, creating a continuous wreath effect. Reload underglaze every few stamps to maintain consistent color. -
Add Central Details:
Using the brown underglaze and your delicate twig stamp, place two small, intersecting impressions slightly off-center in the middle of the bowl for an airy, balanced composition. -
Enhance with Hand-painting:
Once the stamped ink is dry to the touch, use a fine detail brush to gently touch up any faint areas of the green leaves or brown twigs. You can add tiny dots to the twig ends to mimic buds.
Smudged Stamps?
If your stamp slips, wait for the underglaze to dry completely. Then, gently scrape the mistake off with a sharp tool or stiff brush before trying again.
Step 3: Glazing and Firing
-
Bisque Fire:
Let the plate dry completely (bone dry) before loading it into the kiln for a bisque fire (usually Cone 04). -
Clean the Bisque:
After firing, wipe the plate down with a damp sponge to remove any kiln dust which could prevent glaze adhesion. -
Wax the Rim (Optional):
For a rustic look similar to the inspiration image, apply a thin line of brown iron oxide wash to the very edge of the rim and wipe it back slightly with a sponge. -
Apply Clear Glaze:
Dip or brush a coat of clear matte glaze over the entire interior of the plate. This seals the clay while letting the natural speckles and underglaze design shine through. -
Final Fire:
Load the plate into the kiln for the final glaze firing (often Cone 5 or 6, depending on your clay body). Ensure the foot is wiped clean of glaze before firing.
Clean Impressions
Use a flexible polymer stamp rather than a rigid wood block. This allows the stamp to bend and conform to the concave ‘bowl’ shape of the plate.
Once cooled, your plate is ready to bring a touch of woodland charm to your table setting
Animal Pinch Pot Planters
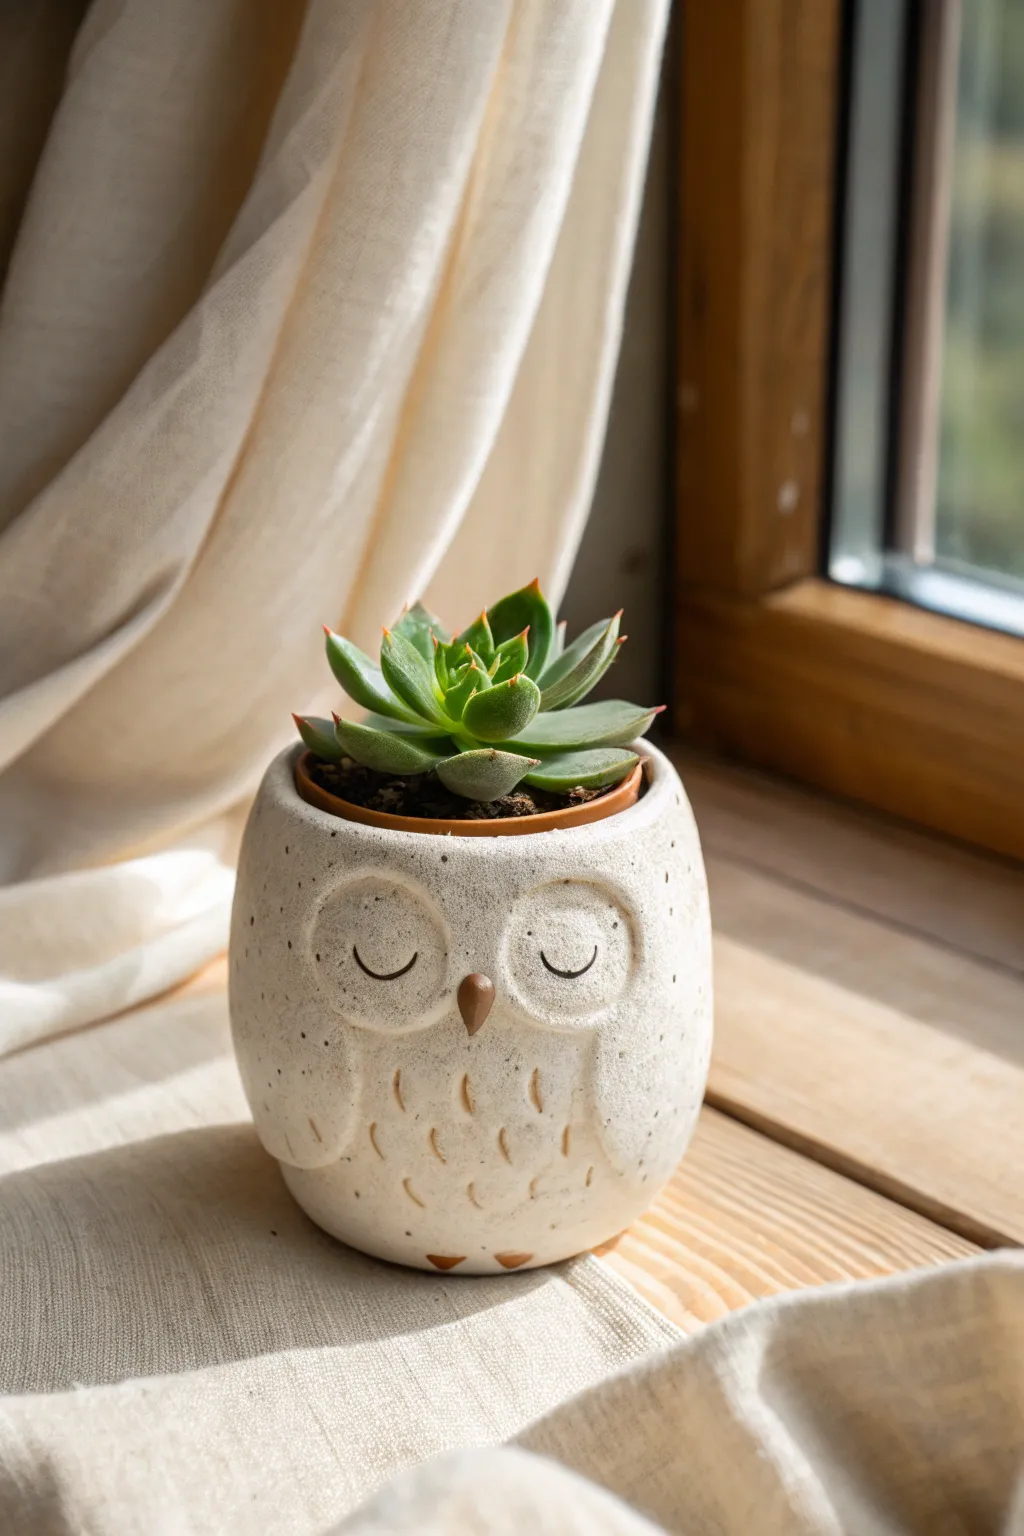
This charming little owl planter is perfect for holding small succulents and adding a touch of whimsy to your windowsill. With its textured features and peaceful expression, it transforms a simple pinch pot into a delightful clay companion.
Detailed Instructions
Materials
- White stoneware or polymer clay
- Small rolling pin
- Needle tool or toothpick
- Small loop tool (optional)
- Slip (clay slurry) for joining
- Small sponge
- Brown underglaze or acrylic paint
- Clear matte glaze (or varnish if using polymer)
- Fine paintbrush
Step 1: Forming the Base
-
Prepare the Clay:
Start with a ball of clay roughly the size of a tennis ball. Wedge it well to remove air bubbles, ensuring the consistency is smooth and pliable. -
Open the Pot:
Hold the ball in one hand and press your thumb into the center, leaving about a half-inch of thickness at the bottom for the base. -
Pinch the Walls:
Gently pinch the clay between your thumb and fingers, rotating the ball as you go. Aim for an even wall thickness of about a quarter-inch all the way around. -
Shape the Cylinder:
Instead of flaring outward like a bowl, gently guide the walls upward to create a more cylindrical, cup-like shape. Tap the base lightly on your table to flatten the bottom. -
Smooth the Surface:
Use a damp sponge or your finger to smooth out any fingerprints or cracks on the exterior. The surface should be relatively clean before adding details.
Pro Tip: Consistent Texture
Mix sand or grog into your clay body before sculpting. This creates that natural, speckled stoneware look automatically without needing to paint speckles later.
Step 2: Sculpting the Owl Features
-
Define the Eyes:
Roll two small, flat discs of clay about the size of large coins. Score and slip the back of these discs, then attach them securely to the front of the pot. -
Outline the Eyes:
Using a needle tool, gently press a circular outline around the attached discs to define the large eye sockets typical of owls. -
Add the Beak:
Form a tiny, tear-drop shape of clay. Attach this pointy-side down right between the bottom edges of the two eye discs. -
Create the Wings:
I like to use a small loop tool or the side of a popsicle stick here. Carve two subtle, curved protruding lines on the sides of the pot to suggest wings folded against the body. -
Texture the Feathers:
Using your needle tool or a small carving tool, make small, repetitive ‘U’ or ‘V’ shaped indentations on the belly area to mimic chest feathers. -
Add Sleeping Eyelids:
Carve two simple, downward-curved semi-circles in the center of the eye discs to give the owl a peaceful, sleeping expression. -
Refine the Rim:
Check the top rim of the pot. It should be slightly rounded and smooth. If it’s uneven, trim it carefully with a knife or smooth it with a damp chamois. -
Add Feet Details:
At the very bottom front edge, press small triangles or carve tiny notches to represent the owl’s feet peeking out.
Step 3: Finishing and Decoration
-
Speckling the Clay:
To mimic the stone-like texture in the photo, dip an old toothbrush in watered-down brown underglaze (or brown paint). Flick the bristles to spatter tiny dots across the surface. -
Painting Details:
Using a fine brush, carefully paint the beak brown. Then, trace the sleeping eyelid curves with a thin line of brown to make them pop. -
Highlighting Features:
Lightly brush a diluted brown wash into the feather indentations on the chest, then wipe the surface clean so the color remains only in the recesses. -
Dry and Bisque Fire:
Let your piece dry slowly under plastic to prevent cracking. Once bone dry, fire it to cone 04 (bisque) in a kiln. -
Glazing:
Apply a clear matte glaze to the entire piece (except the bottom) or use a satin finish varnish if working with polymer clay. -
Final Firing:
Fire the piece again to the appropriate cone for your clay body (usually cone 06 or cone 6 depending on your materials). -
Planting:
Once cool, place a small plastic nursing pot with a succulent inside the owl planter. Avoid planting directly unless you added a drainage hole in step 4.
Troubleshooting: Cracking Joints
If the beak or eyes pop off while drying, you likely didn’t score deeply enough. Use a serrated rib to scratch both surfaces thoroughly before applying slip.
Now your sleepy owl is ready to cradle a plant on your brightest windowsill
Elephant-Inspired Mini Pot
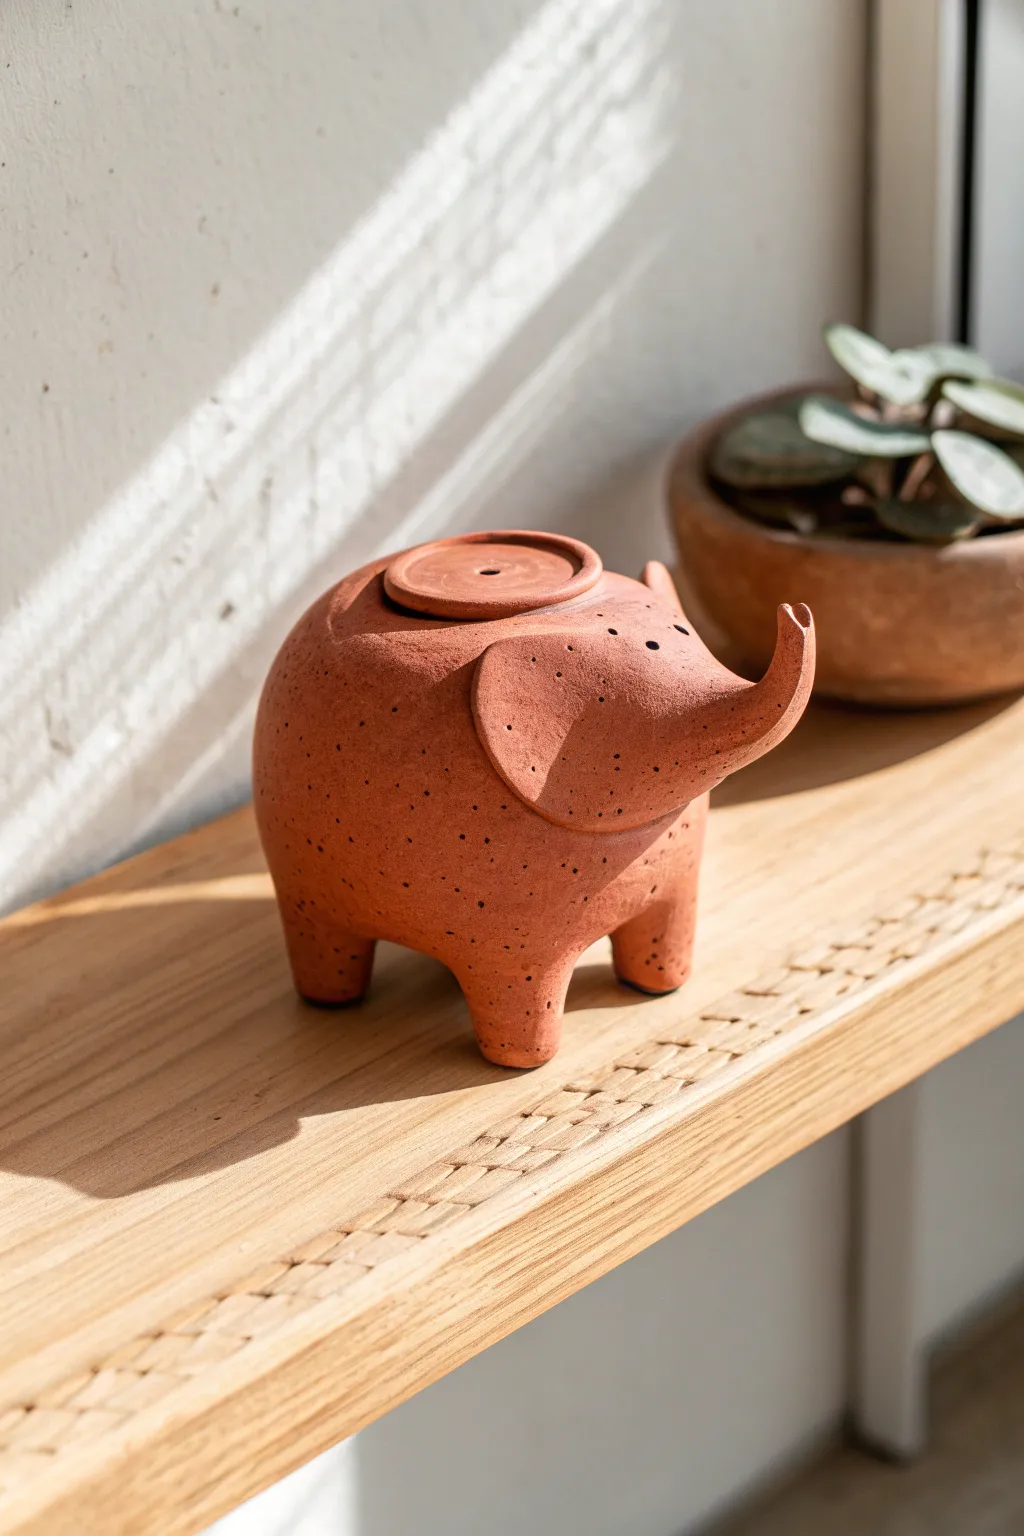
This charming, terracotta-style elephant vessel brings a touch of whimsy to any shelf with its rounded belly and cheerful, upturned trunk. The speckled clay body and simple geometric forms make it an approachable project that results in a sophisticated, minimalist piece of décor.
How-To Guide
Materials
- Red stoneware clay with grog or speckles
- Rolling pin
- Wooden modeling tool
- Needle tool
- Serrated rib or scoring tool
- Slip (clay mixed with water)
- Sponge
- Small circle cutter (2-3 inches)
- Small paintbrush
Step 1: Forming the Body
-
Pinch the base:
Start with a ball of clay roughly the size of a large orange. Insert your thumb into the center and gently pinch outwards while rotating the ball to create a hollow, even-walled pinch pot. This will serve as the elephant’s main body. -
Close the form:
Instead of leaving the pot fully open, gently collar the rim inward until the opening is smaller, about 2 inches wide. Smooth the outside surface with a rib to refine that perfect, round belly shape. -
Create the top opening:
Before closing it completely, ensure the top is flat. Roll a small coil and attach it to the rim to create a crisp, raised collar for the lid area. -
Shape the lid:
Roll out a small slab of clay. Use your circle cutter to punch out a disc that sits perfectly atop the collar you just made. Add a tiny knob or recessed detail in the center if desired, but keep it flat and minimal like the reference.
Step 2: Constructing the Features
-
Roll the legs:
Roll a thick coil of clay and cut it into four equal segments, about an inch long each. Tap them on the table to flatten the bottoms. -
Attach the legs:
Score the bottom of the body and the top of each leg deeply. Apply slip, then press the legs firmly onto the body. Use a wooden tool to blend the seams completely so the legs look like they are growing out of the pot. -
Form the trunk:
Roll a tapered coil, thicker at one end and narrower at the tip. Gently curve it upwards into a ‘J’ shape to mimic a happy, trumpeting trunk. -
Attach the trunk:
Score and slip the front of the body and the thick base of the trunk. Press them together, blending the clay smoothly. Ensure the angle points upward. -
Hollow the spout:
If you want this to be a functional pouring vessel, use a long needle tool or small drill bit to carefully create a channel through the trunk into the body.
Air Escape Route
If you make the body fully enclosed and hollow, you MUST poke a tiny hidden hole (perhaps under the belly) to let expanding air escape during firing, or it will explode.
Step 3: Refining Details
-
Create the ears:
Roll a small sphere of clay and flatten it into a pancake. Cut it in half to create two semi-circles. These will be the large, flapping ears. -
Attach the ears:
Score the side of the head area and the straight edge of the ear. Press the ear onto the body, blending the seam on the back side but leaving the front edge distinct to create depth. -
Poke the eyes:
I usually wait until the clay is leather hard for this step. Use a small, blunt tool or the back of a paintbrush to gently press two small indentations for the eyes. -
Add texture:
If your clay isn’t naturally speckled, you can flick iron oxide wash or a dark underglaze onto the surface using a stiff toothbrush to mimic the spotted texture seen in the photo. -
Smooth the surface:
Take a slightly damp sponge and wipe down the entire piece to remove any harsh fingerprints or rough tool marks, softening the edges of the ears and trunk.
Sagging Trunk?
If the trunk droops while wet, prop it up with a small piece of sponge or a wad of paper towel until the clay stiffens to leather hard.
Step 4: Finishing
-
Dry slowly:
Loosely cover the elephant with plastic for the first 24 hours to let the moisture equalize, especially where the thick legs join the body. -
Bisque fire:
Once bone dry, fire the piece to bisque temperature (usually cone 04). -
Glaze or wash:
To maintain the raw clay look, apply a matte clear glaze or simply rub an oxide wash onto the exterior and wipe it back, leaving color in the pores. Glaze the interior if it needs to hold water. -
Final firing:
Fire to the maturation temperature of your specific clay body (e.g., cone 5 or 6 for stoneware) to finish the piece.
Place your little elephant near a sunny window where the speckles can catch the light
Mini House Tea Light Holders
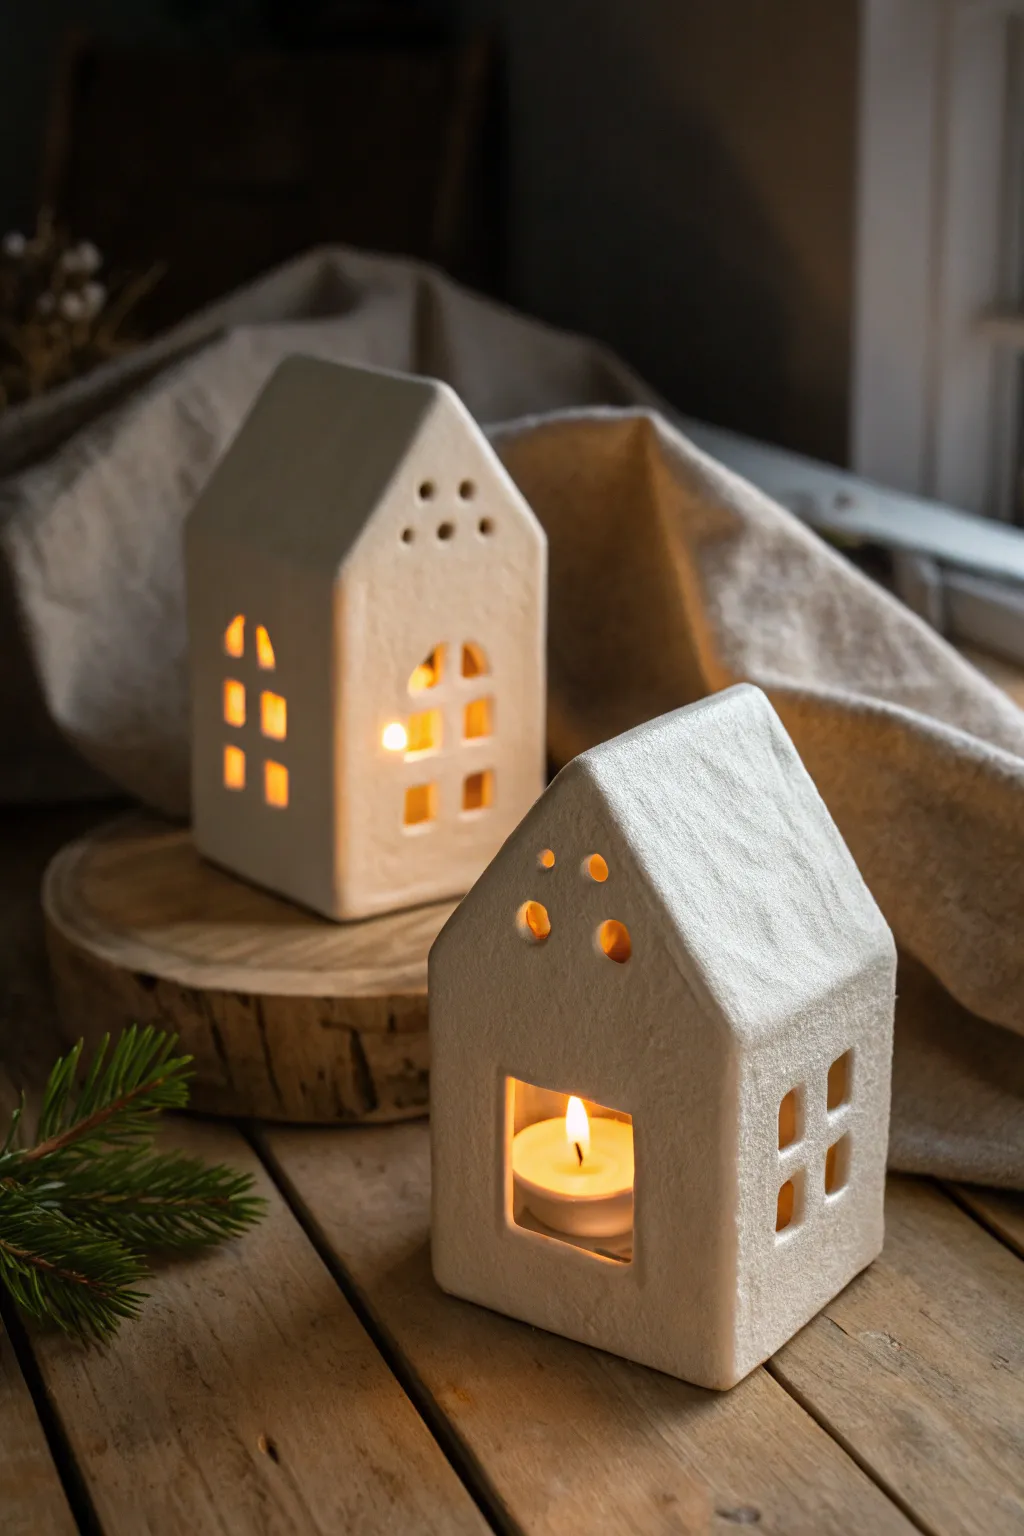
These charming white ceramic houses bring the warmth of a Scandinavian village right onto your windowsill. With their textured clay finish and warm glowing windows, they make perfect minimalist holiday decor or year-round accents.
Step-by-Step Tutorial
Materials
- White firing clay (stoneware or earthenware)
- Rolling pin
- Two wooden guide strips (approx. 5mm thickness)
- Ruler
- Fettling knife or craft knife
- Needle tool
- Small square clay cutter (optional, for windows)
- Small round piping tip or straw (for roof dots)
- Slip (clay mush)
- Scoring tool or serrated rib
- Smoothing sponge
- Matte white glaze (optional, or leave raw if firing high enough)
- Kiln
Step 1: Preparing the Slab
-
Wedge the clay:
Start by thoroughly wedging your white clay to remove any air bubbles and ensure an even consistency, which is crucial for slab building. -
Set up guides:
Place your wooden guide strips on either side of your clay ball on a canvas work surface. These will ensure your walls are perfectly uniform. -
Roll the slab:
Roll the clay out firmly until the rolling pin rests on the guide strips. You want a slab that is roughly 5mm thick—sturdy enough to stand but delicate enough to let light through. -
Smooth the surface:
Before cutting, run a soft rib or a damp sponge over the surface to compress the clay particles and create that smooth, slightly stucco-like texture seen in the photo.
Clean Corner Pro-Tip
After joining walls, roll a thin ‘snake’ of soft clay and press it deep into the interior corners. Smooth it out to reinforce the seams and prevent cracking during firing.
Step 2: Cutting the Components
-
Create templates:
Sketch a simple paper template for the front/back pieces (a rectangle with a peaked roof) and the side walls (simple rectangles). Choose differing heights for variety. -
Cut the shapes:
Lay your paper templates onto the slab and carefully cut around them using a fettling knife or craft knife. You will need two gable ends and two side walls for each house. -
Leather hard stage:
Allow these flat pieces to dry until they are ‘leather hard’—stiff enough to hold their shape without flopping, but still workable. This usually takes a few hours. -
Cut the windows:
Using your needle tool or a small square cutter, cut out window panes. For the arched window look, cut a rectangle and round off the top with your knife. -
Add roof details:
Use a small circular tool, like a piping tip or a straw, to punch out small decorative holes near the peak of the gable. This adds ventilation for the candle heat.
Warping Walls?
If your walls are buckling during assembly, the clay is too wet. Let the pieces sit flat on a wooden board for another 30-60 minutes to stiffen up before trying to stand them up.
Step 3: Assembly & Finishing
-
Bevel the edges:
Cut the side edges of your walls at a 45-degree angle. This mitering technique creates a stronger joint and a cleaner corner than simply butting them together. -
Score surfaces:
Rough up the beveled edges with a scoring tool or a serrated rib to create texture for the joining slip to grab onto. -
Apply slip:
Dab a generous amount of slip onto the scored edges. I find applying it to both sides of the joint ensures the best bond. -
Join the walls:
Press the walls together firmly to form the house box. Use your thumb to smooth the clay on the inside seam to reinforce it. -
Attach the roof:
Cut two rectangular slabs for the roof. Bevel the top meeting point, score, slip, and attach them to the house structure. -
Refine the surface:
Once assembled, use a slightly damp sponge to smooth any sharp edges or fingerprints. You can gently tap the surface with a stiff brush if you lost too much texture during handling. -
Dry slowly:
Cover the houses loosely with plastic for the first day to equalize moisture, then uncover to dry completely before firing. -
Firing:
Bisque fire the pieces. For the finish shown, apply a very thin matte white glaze or leave the clay raw if it’s vitrified stoneware.
Place a tea light inside your new ceramic cottage and watch the windows glow with warmth
Draped Wavy-Edge Serving Bowls
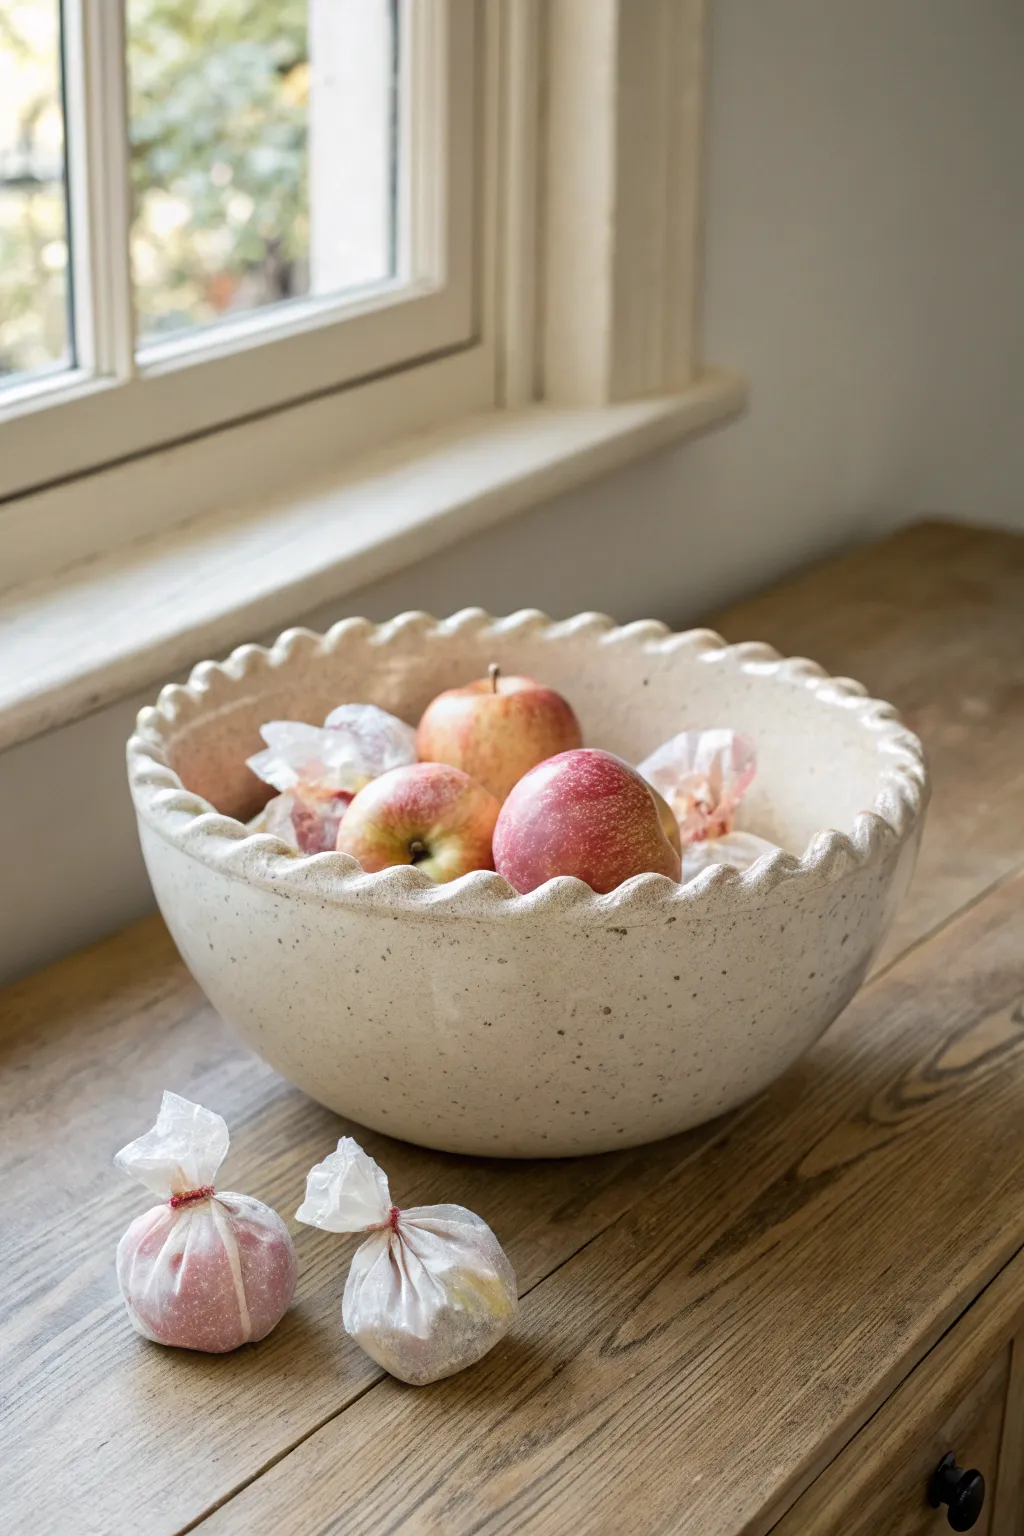
Capture the charm of farmhouse pottery with this handcrafted serving bowl, featuring a distinctive scalloped edge and a speckled cream finish. By using a simple drape mold technique, you can easily achieve this organic, flowing shape that feels both elegant and sturdy.
Step-by-Step
Materials
- Stoneware clay body (speckled buff recommended)
- Large plaster or bisque hump mold (bowl shaped)
- Rolling pin
- Canvas mat or slab roller
- Needle tool
- Metal rib
- Soft kidney rib
- Sponge
- Fettling knife
- Creamy matte glaze (food safe)
- Scoring tool
- Slip
- Banding wheel (optional)
Step 1: Preparing the Slab
-
Wedge the clay:
Begin by thoroughly wedging about 3-4 pounds of stoneware clay to remove air bubbles and ensure particle alignment, which helps prevent warping later. -
Roll out the slab:
On your canvas mat, roll the clay out into a large, even circle. Aim for a thickness of approximately 3/8 inch. Turn the clay periodically to ensure it doesn’t stick to the canvas. -
Compress the surface:
Using a soft kidney rib, compress the clay slab on both sides holding the rib at a 45-degree angle. This aligns the clay particles and creates a smooth starting surface. -
Texture application (optional):
If you want the outside of your bowl to have any subtle texture, you can roll a fabric or texture mat over the slab now before draping.
Fixing a Warped Rim
If the rim warps during drying, place a flat board gently on top of the rim with a small weight while the clay is still leather hard to encourage it back into alignment.
Step 2: Shaping the Bowl
-
Prepare the mold:
Dust your hump mold lightly with cornstarch or place a thin layer of plastic wrap over it to ensure the clay releases easily. -
Drape the slab:
Carefully lift your clay circle and center it over the mold. Allow gravity to pull the sides down gently. -
Form the shape:
Using soft downward strokes with your hands or a sponge, press the clay against the mold, working from the top center down to the rim to avoid trapping air pockets. -
Trim the excess:
Use a needle tool or fettling knife to trim the bottom edge of the clay so it circles the mold evenly. Don’t worry about the perfect rim yet; just establish the general depth.
Step 3: Creating the Wavy Rim
-
Define the rim:
Remove the bowl from the mold once it is leather hard enough to hold its shape but still soft enough to manipulate. -
Roll a coil:
Roll a long, even coil of clay, roughly the thickness of your pinky finger. This will reinforce and thicken the rim. -
Attach the coil:
Score the top edge of your bowl and apply slip. Place the coil along the rim, blending it seamlessly into the bowl wall on the inside and outside using your thumb or a wooden tool. -
Sculpt the scallops:
This is the fun part. Using your thumb and forefinger, gently pinch the thickened rim at regular intervals to create the undulating, wavy pattern. I like to use a rhythmic motion to keep the waves consistent. -
Refine the edge:
Go back over the scallops with a damp sponge to round off any sharp edges and smooth the transition between the peaks and valleys.
Add a Foot Ring
Before taking the bowl off the mold, attach a coiled foot ring to the bottom. This adds height and gives the bowl a floating appearance on the table.
Step 4: Finishing and Firing
-
Dry slowly:
Loosely cover the bowl with plastic to let it dry very slowly. This is crucial for wide bowls to prevent the rim from warping as it shrinks. -
Bisque fire:
Once bone dry, fire the piece to bisque temperature (usually Cone 04) to prepare it for glazing. -
Glaze application:
Pour a creamy white glaze inside the bowl, swirl to coat, and pour out the excess. Dip or brush the exterior to match. -
Reveal the speckles:
If using a speckled clay body, choose a translucent or semi-opaque glaze so the natural iron spots in the clay show through, mimicking the look in the photo. -
Final fire:
Fire correctly to your clay body’s maturity temperature (e.g., Cone 5 or 6). Allow the kiln to cool completely before opening.
Fill your new centerpiece with seasonal fruit and enjoy the handmade warmth it brings to your kitchen table
Raised “Noodle” Texture Vases

This project combines the rustic warmth of exposed terracotta with a modern, tactile blue wave pattern. By applying precise clay coils and stamping them into scallops, you create a rhythmic texture that feels wonderful to hold and beautiful to display.
How-To Guide
Materials
- Red stoneware or terracotta clay (smooth)
- Blue slip or engobe (or blue underglaze)
- Pottery wheel (or coil building tools)
- Needle tool
- Small loop tool
- Sponge
- Soft rib tool (silicone or rubber)
- Scoring tool or serrated rib
- Slip (made from your main clay body)
- Clear matte glaze (optional)
- Small detail brush
Step 1: Forming the Base Vessel
-
Wedging the Clay:
Begin with about 2-3 lbs of well-wedged terracotta clay to ensure there are no air bubbles, which is crucial for a smooth throwing experience. -
Centering and Opening:
Center your clay firmly on the wheel bat. Open the clay to create a flat floor, approximately 3 inches wide, establishing the base of your vase. -
Throwing the Belly:
Pull the walls up, gently applying pressure from the inside to bulb out the form. You want a distinct spherical shape, so focus on expanding the belly while keeping the rim controlled. -
Collaring the Neck:
Once the belly is round, collar the top inward significantly to create a narrow, elegant neck. Keep this area thicker at first to prevent twisting, then pull it vertically to finish. -
Refining the Surface:
Use a soft rib to smooth the entire exterior surface while the wheel is spinning slowly, removing throwing lines from the belly area to prepare it for the textured appliques.
Step 2: Creating the Needle Texture
-
Trimming the Foot:
Allow the vase to dry to leather-hard. Flip it over and trim a clean foot ring to give the spherical shape some lift. -
Detailing the Neck:
While the pot is spinning slowly on the wheel, take your needle tool and gently press it into the neck. Create a series of tight, parallel horizontal rings from the rim down to the shoulder.
Crack Control
If the blue coils start cracking as they wrap around the curve, your coil clay is too dry. Sprritz them or wrap them in a damp paper towel for 10 minutes.
Step 3: Applying the Scalloped Coils
-
Preparing the Coils:
Roll out several very thin, even coils of the same clay body. They should be roughly the thickness of spaghetti pasta. Keep them under plastic so they don’t dry out. -
Applying Blue Color:
Paint your thin coils with blue slip or engobe before attaching them. I find it easier to color the coil now than to try painting it neatly after it’s on the pot. -
Marking Guidelines:
Lightly scratch horizontal guidelines around the belly of the vase where you want your wave rows to sit, spacing them about half an inch apart. -
Attaching the First Coil:
Score the first guideline and apply a tiny amount of slip. Lay a blue coil onto the line, encircling the pot completely. Join the ends seamlessly. -
Creating the Scallops:
Using the rounded end of a small modeling tool or your thumb (depending on scale), press down on the coil at regular intervals. Drag the clay slightly downward to create the ‘U’ shaped scallop effect. -
Repeating the Pattern:
Continue attaching coils and stamping the scallop pattern. Offset the scallops on each new row so the bottom of one ‘U’ sits between the two ‘U’s below it, like scales. -
Cleaning Up:
Once all rows are applied, use a small damp brush to clean up any excess slip that squeezed out, ensuring the terracotta background remains clean and contrasting.
Level Up: Gradient Waves
Mix three shades of blue slip. Start with the darkest value at the bottom rows and transition to the lightest blue near the shoulder for an ombre effect.
Step 4: Finishing
-
Slow Drying:
Cover the vase loosely with plastic to dry very slowly. The added coils have a higher moisture content than the pot, and rushing this stage can steeper crackers. -
Bisque Firing:
Bisque fire the piece to the appropriate cone for your clay body (usually Cone 04 or 06). -
Glazing or Sealing:
For the look in the photo, leave the exterior unglazed to maintain the matte texture. Apply a clear liner glaze to the inside only to make it waterproof. -
Final Firing:
Fire the piece one last time to mature the clay and set the interior glaze.
Now you have a stunning vessel where tactile texture meets classic form, ready for your favorite dried stems