If you can roll a few even clay “snakes,” you can build a gorgeous coil-built vase—and you don’t have to keep it basic unless you want to. Here are my favorite clay coil vase ideas, starting with the classic forms and working up to the fun, studio-showstopper twists.
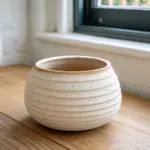
Classic Stacked Coil Cylinder Vase
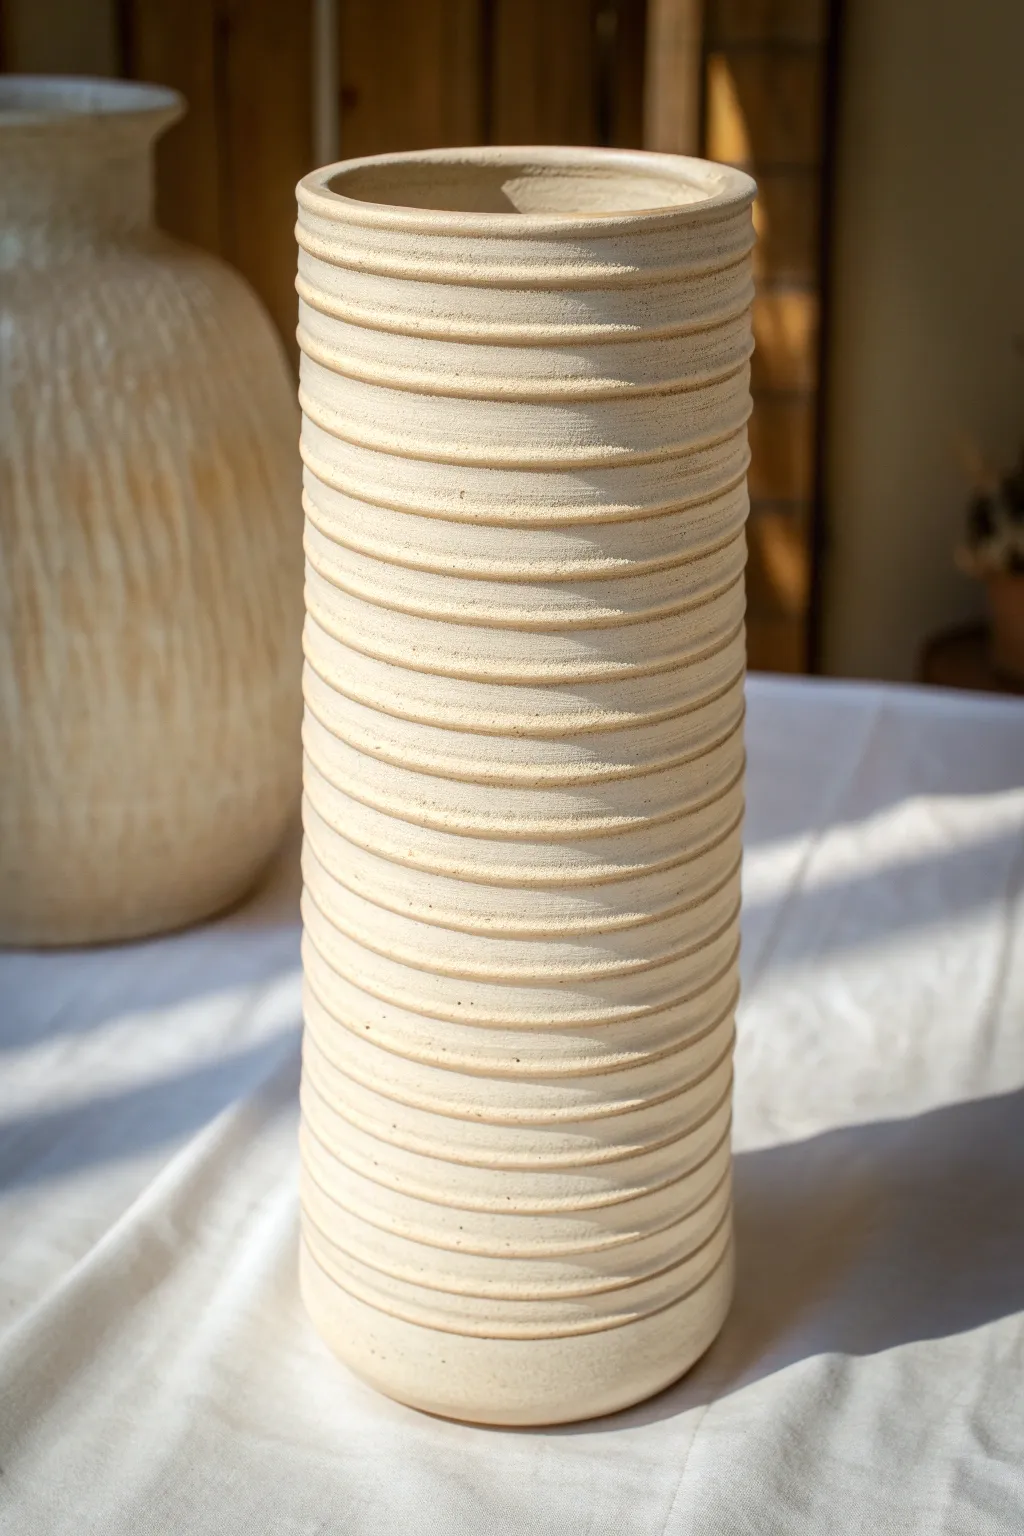
This classic stacked coil cylinder vase features a stunningly consistent ribbed texture that celebrates the rhythmic nature of hand-building. Its light, matte finish and clean architectural lines make it a timeless vessel for dried grasses or minimalist floral arrangements.
Step-by-Step Tutorial
Materials
- Light-colored stoneware clay (with fine grog for stability)
- Clay slab roller or rolling pin
- Guide strips (1/4 inch thick)
- Clay extruder (circular die) or table for rolling coils
- Slip and scoring tool (or serrated kidney)
- Wooden modeling tool
- Sponge
- Potter’s wheel or banding wheel (essential for evenness)
- Wire cutter
- Rectangle wooden rib
Step 1: Preparation and Base
-
Prep your clay:
Begin by thoroughly wedging your stoneware clay to remove air bubbles and ensure a consistent texture. This project relies on uniform coils, so a homogenous clay body is crucial. -
Create the base connection:
Roll out a slab of clay to about 1/4 inch thickness. Cut a perfect circle roughly 4 to 5 inches in diameter to serve as the floor of your vase. -
Score the edge:
Place the base on your banding wheel. Use a serrated tool to score the outer perimeter of the circle where the first coil will sit, and apply a generous amount of slip.
Use an Extruder
For perfectly identical ribs like the photo, a hand-held clay extruder is superior to hand-rolling. It ensures every single coil has the exact same diameter.
Step 2: Building the Cylinder
-
Roll consistent coils:
For the most precise look similar to the photo, use a clay extruder with a medium-sized circular die. If rolling by hand, strive for snakes that are exactly the same thickness (about equal to a pinky finger). -
Lay the first ring:
Place your first coil directly onto the slipped edge of the base. Cut the ends at an angle to overlap them seamlessly, blending the join so it becomes invisible. -
Blend the interior:
While we want to keep the ribbed texture on the outside, the inside needs to be smooth for structural integrity. Use your thumb or a wooden tool to smear the clay from the coil down onto the base on the interior side only. -
Stack upwards:
Add the next coil on top of the first. Score and slip the top of the previous row before placing the new one. Ensure you are stacking directly vertical to create a straight cylinder rather than a bowl shape. -
Smooth as you go:
Every 3-4 coils, stop to blend the interior seams completely smooth. It becomes difficult to reach the bottom with your hand once the cylinder gets tall. -
Maintain the exterior ridges:
Unlike typical coil pots where you blend both sides, here you leave the exterior coils largely distinct. Gently press them together to seal, but don’t smear the outer surface flat. -
Check for straightness:
Spin the banding wheel and hold a ruler or straight-edge vertically against the side. This helps you spot if your walls are flaring out or caving in.
Go Ombré
Use three slightly different shades of clay (white, beige, tan). Start with the darkest coils at the bottom and transition to lighter clay as you build up.
Step 3: Refining the Ribbed Texture
-
Deepen the grooves:
Once built to full height, use the rounded end of a wooden modeling tool to gently run along the horizontal grooves between coils. This emphasizes the shadow lines and neatens the ‘stacked’ look. -
Flatten the faces:
I like to take a damp rectangle sponge or a flat wooden rib and very gently press it against the outer face of the coils while spinning the wheel. This knocks down the roundness just slightly, creating that uniform, architectural profile seen in the image. -
Finish the rim:
For the top rim, add one final coil or flatten the existing top edge. Use a damp chamois or sponge to compress the lip, making it smooth and pleasant to touch. -
Dry slowly:
Tall straight cylinders can warp if dried unevenly. Loosely cover the vase with plastic for the first 24 hours to let moisture equalise, then uncover gradually. -
Bisque fire:
Fire the piece to bisque temperature (usually Cone 04) once bone dry. -
Glazing strategy:
To match the reference image, apply a matte white or clear matte glaze. Alternatively, leave the exterior unglazed if using a beautiful white stoneware, glazing only the interior for waterproofing.
Enjoy the meditative process of building this structured piece and watching the simple lines come together


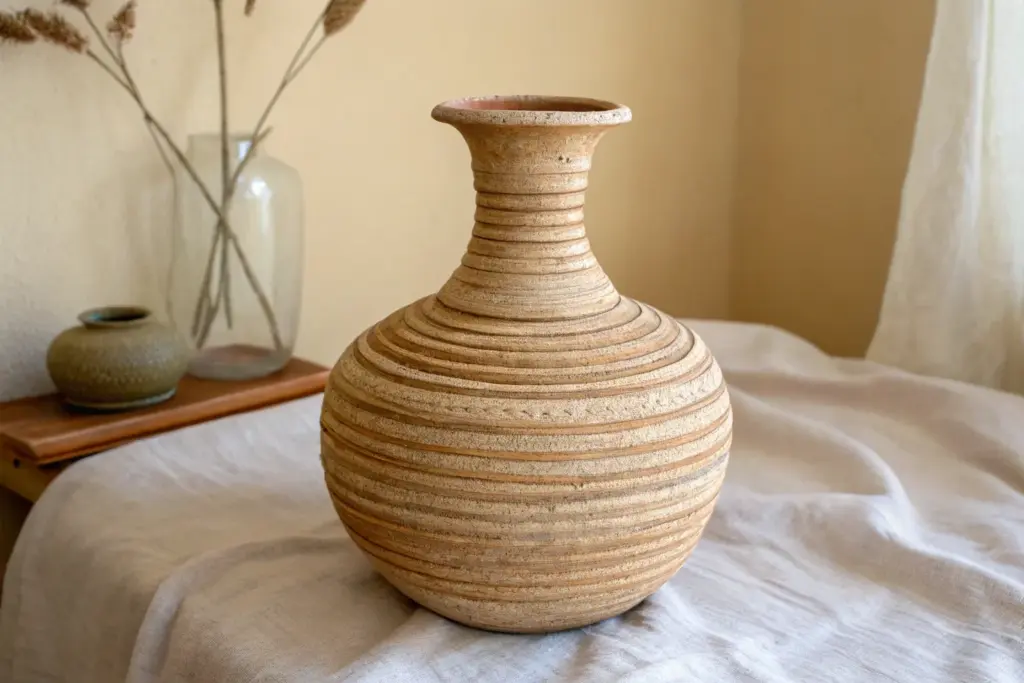
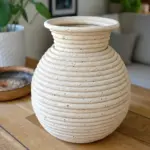
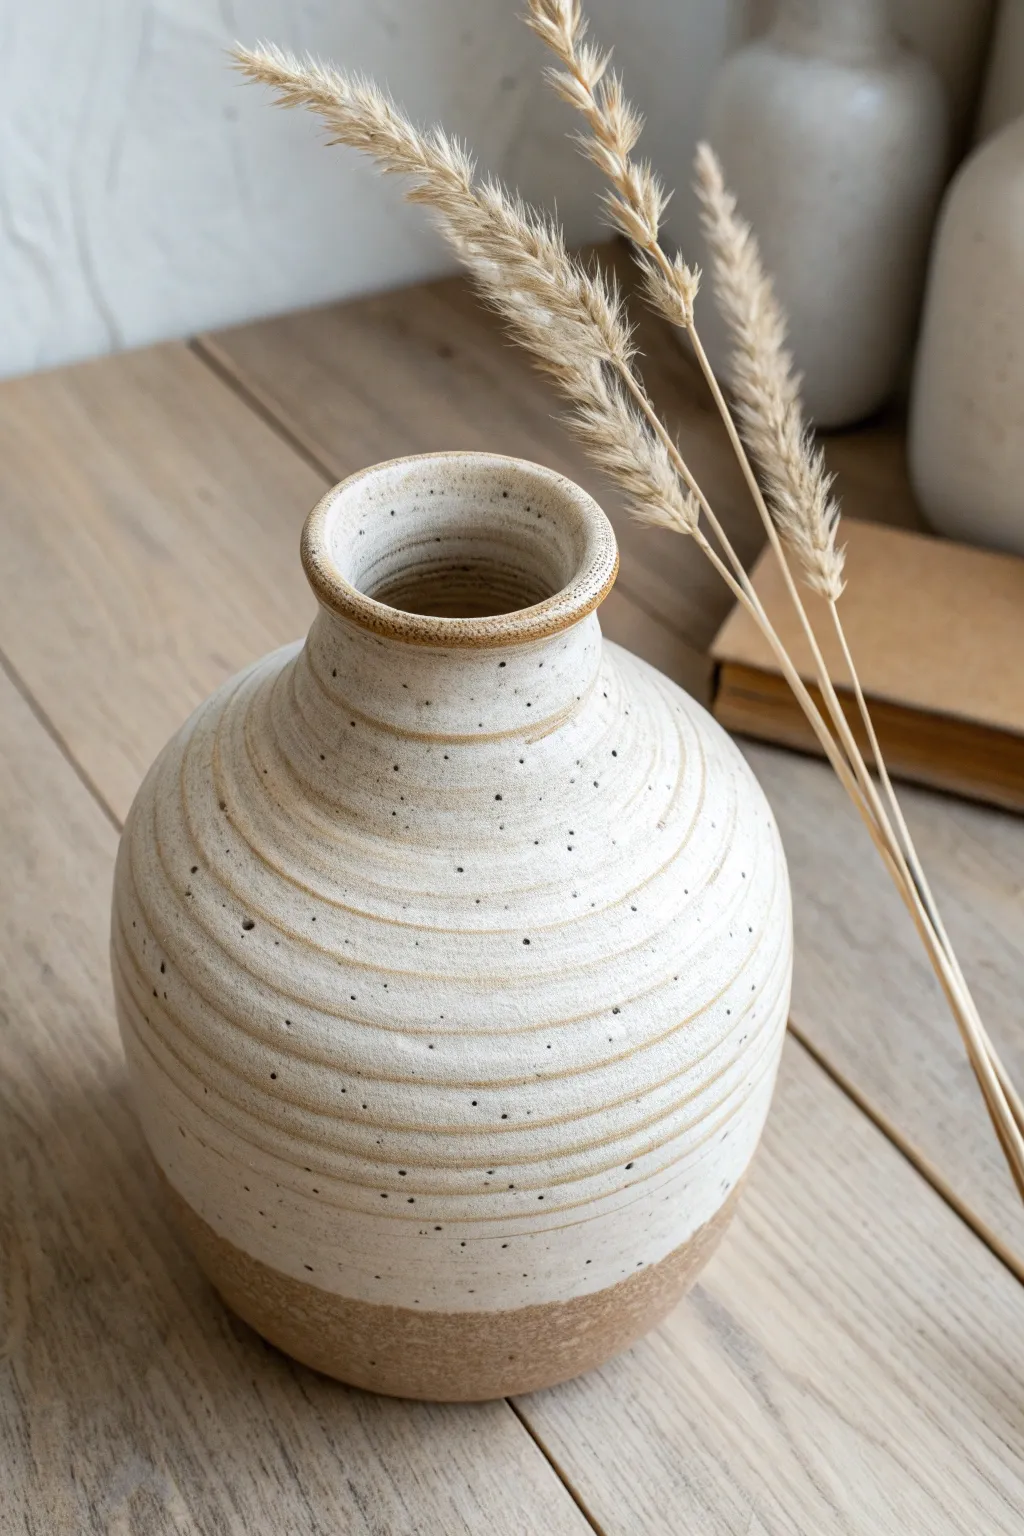
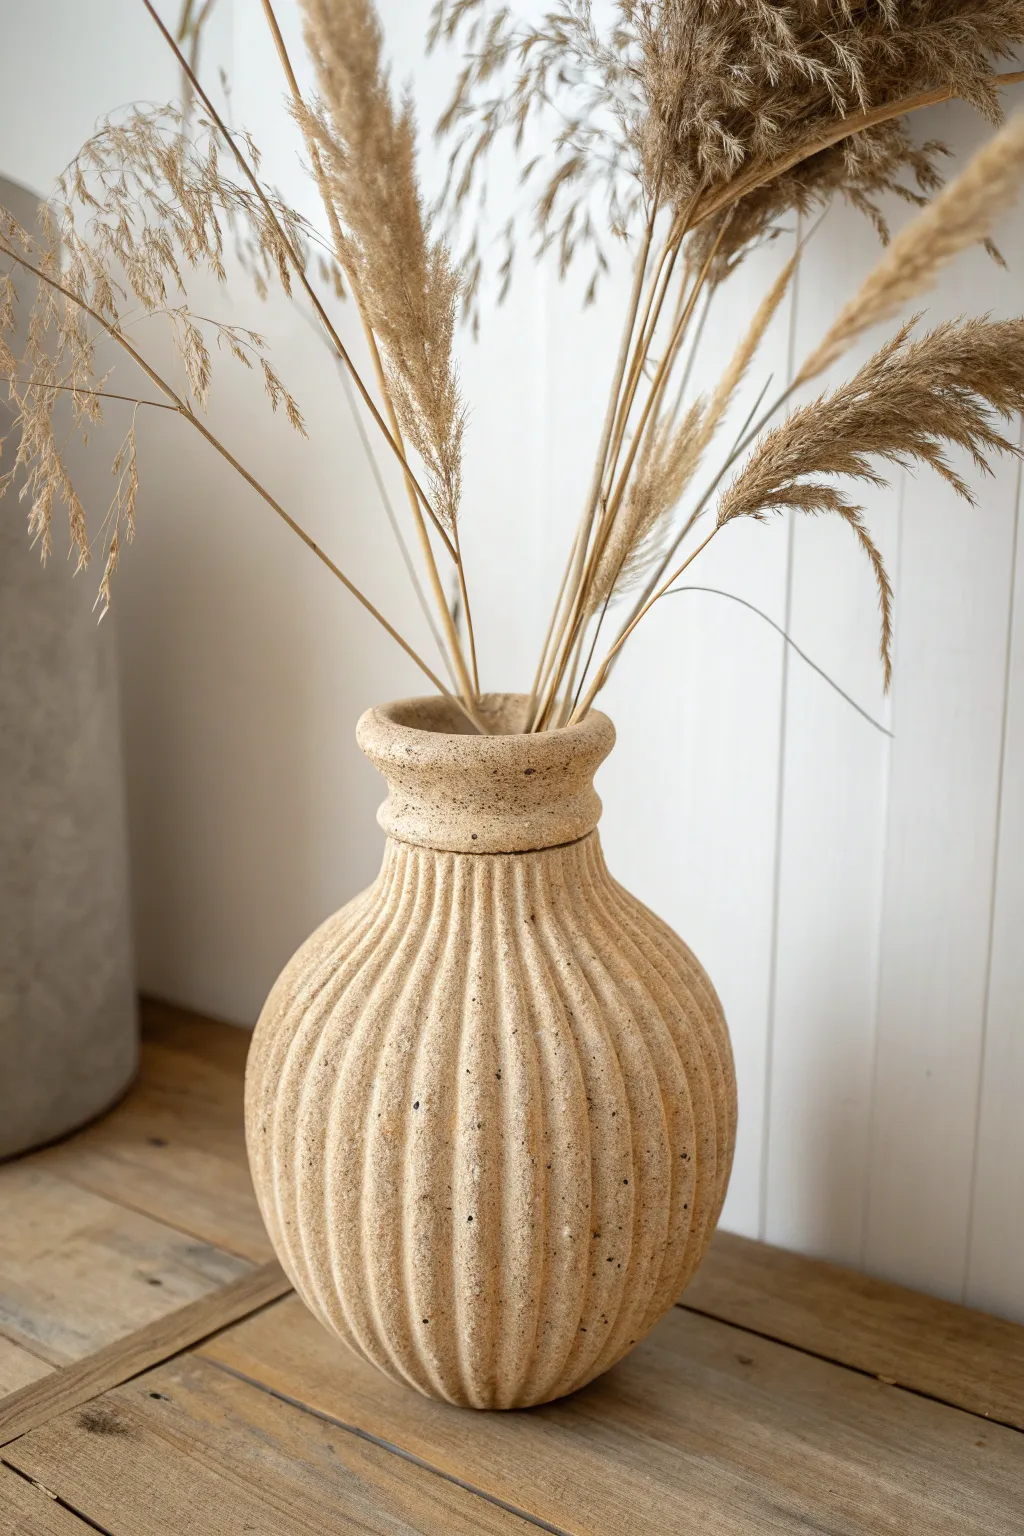
Belly-Shaped Coil Vase With Narrow Neck
Capture the earthy elegance of traditional pottery with this textured, belly-shaped vase. Featuring a distinct spiraled finish and a graceful narrow neck, this piece celebrates the natural speckle of raw clay for a timeless, organic look.
Step-by-Step Guide
Materials
- Speckled stoneware clay (approx. 3-4 lbs)
- Potter’s wheel or turntable
- Rolling pin or coil extruder
- Serrated metal rib (kidney tool)
- Wooden modeling tool
- Sponge
- Needle tool
- Slip (clay and water mixture)
- Scoring tool
- Matte transparent glaze (optional)
Step 1: Forming the Base
-
Prepare your clay:
Begin by wedging your speckled stoneware clay thoroughly to remove any air bubbles. This clay body is essential for achieving those beautiful dark spots seen in the final piece. -
Create a slab base:
Roll out a small slab about ¼ inch thick. Use a needle tool to cut a perfect circle, approximately 4-5 inches in diameter, to serve as the footprint of your vase. -
Roll the first coils:
Roll out several snake-like coils of clay. Try to keep them consistent in thickness, roughly the width of your index finger. I like to roll many at once and keep them under plastic so I don’t break my rhythm later. -
Attach the first layer:
Score the outer edge of your base and apply a dab of slip. Lay your first coil onto the base, gently pressing it down to ensure a strong bond.
Step 2: Building the Belly
-
Build outwards:
Stack successive coils on top of the previous ones. To create the expanding ‘belly’ shape, create each new ring slightly larger than the one below it, placing the coil on the outer edge of the previous row. -
Blend the interior:
As you build up, use a wooden modeling tool or your thumb to smear the coils together on the *inside* of the vase only. This provides structural integrity while keeping the exterior texture intact. -
Define the texture:
The charm of this vase lies in the visible coil lines. Gently press the coils together on the outside just enough to stick, but don’t smooth them flat. Run a finger or a lightly damp sponge along the grooves to soften sharp edges without erasing the distinctive ridges. -
Reach maximum width:
Continue building outward until the belly of the vase reaches your desired width—roughly 8-9 inches for a substantial centerpiece. -
Begin tapering in:
Now, reverse the process. Place each new coil slightly toward the *inner* edge of the row below it. This will start closing the form and creating the shoulder.
Coil Collapse?
If the belly starts sagging as you build, stop immediately. Stuff the interior loosely with crumpled newspaper for support, or use a heat gun to stiffen the lower walls before adding more weight.
Step 3: Shaping the Neck
-
Gradual reduction:
Continue stepping your coils inward drastically to form the steep slope of the shoulder. Be patient here; moving too fast can cause the walls to collapse. -
Create the vertical neck:
Once the opening is narrowed to about 2-3 inches, stack the next few coils directly on top of each other vertically to build the neck height. -
Add the rim flare:
For the final coil, place it slightly outward again to create the flared lip. Smooth this top rim carefully with a sponge so it looks finished and refined. -
Refine the surface:
Use a serrated metal rib to gently scrape horizontal lines around the belly if your coil definition needs enhancement. This mimics the wheel-thrown look while keeping the hand-built charm.
Level Up: Texture Wash
Before the final firing, rub black iron oxide or a dark stain into the coil grooves and wipe away the excess. This will dramatically highlight the horizontal ridge texture.
Step 4: Finishing Touches
-
Slow drying:
Cover the vase loosely with plastic. Because the neck is narrow and the belly is wide, you want it to dry slowly to prevent cracking at the stress points. -
Bisque fire:
Once bone dry, fire the piece in a kiln to bisque temperature (usually cone 04 or 06, depending on your clay). -
Apply a wash or glaze:
To keep the raw look shown in the photo, skip a heavy glaze. Instead, wipe a thin matte transparent glaze over it, or leave the exterior raw to let the speckled clay shine through. -
Final firing:
Fire the vase a final time to the maturity temperature of your stoneware (often Cone 5 or 6). This vitrifies the clay and brings out those lovely iron speckles.
Place your finished vase near a window where natural light can accentuate the rhythmic shadows of the coils


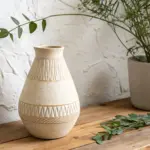
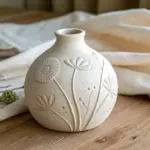
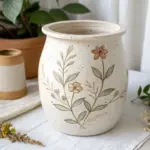
Simple Coil Bud Vase Trio
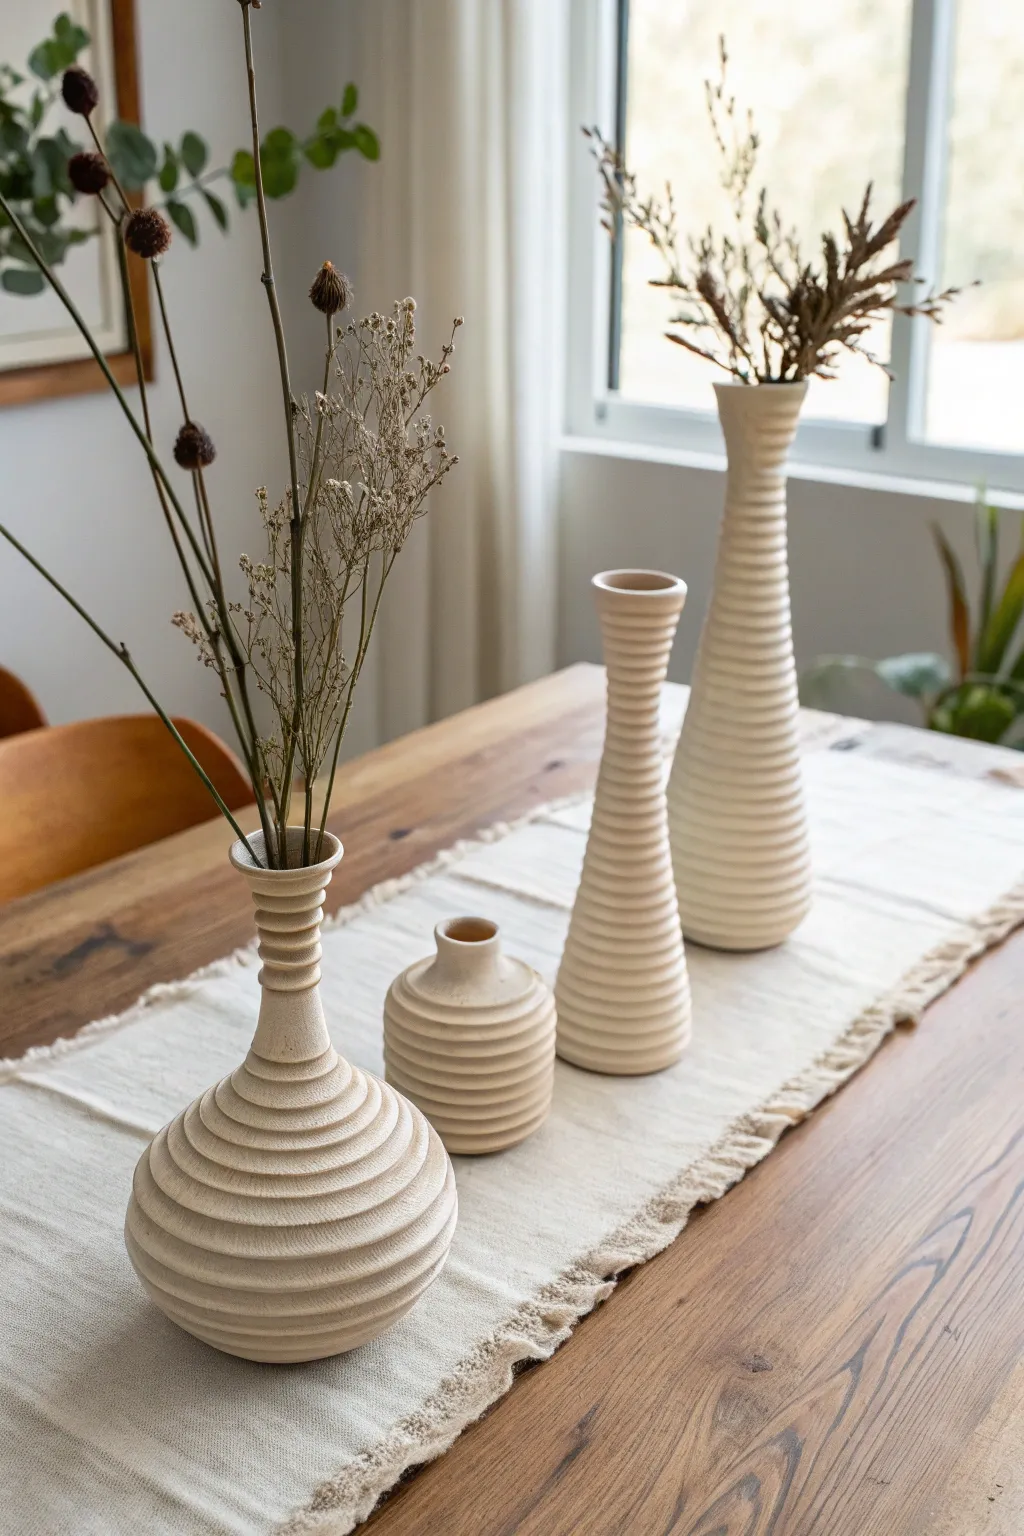
Capture the serene beauty of modern pottery with these textured coil vases, featuring a distinctively ribbed surface and soft cream finish. This project guides you through building varied silhouettes that look stunning whether grouped together or standing alone.
Step-by-Step Tutorial
Materials
- White stoneware or polymer clay
- Clay extruder with circular die (optional, for uniform coils)
- Scoring tool or old toothbrush
- Slip (clay slurry) or liquid clay adhesive
- Pottery wheel or banding wheel
- Wooden modeling tool
- Sponge
- Wire cutter
- Clear matte glaze or satin varnish
Step 1: Base Preparation
-
Roll the base slab:
Begin by rolling out a small slab of clay to about 1/4 inch thickness. This will form the sturdy bottom for your vase. -
Cut the footprint:
Use a round cookie cutter or a needle tool to cut a perfect circle for your base. For the bulbous vase, make a slightly wider base to support the weight; for the taller flutes, a smaller footprint works well. -
Prepare the connection:
Score the outer edge of your base circle thoroughly with a toothbrush or scoring tool and apply a liberal amount of slip (or liquid clay if using polymer).
Slumping Walls?
If the tall vase starts to wobble or lean, stop building and embrace the pause. Let the lower section stiffen up (leather hard) for an hour before adding more weight.
Step 2: Coiling & Shaping
-
Create uniform coils:
Extrude or hand-roll long, even snakes of clay. Aim for a thickness of about 1/4 inch to achieve that distinct ribbed look seen in the photo. -
Lay the first ring:
Place your first coil directly onto the scored edge of the base. Cut the ends at a diagonal angle to create a seamless join where the coil creates a full circle. -
Stack and secure:
Continue stacking coils one on top of the other. Unlike traditional coil pots where you blend the clay smooth, leave the outer rounded edges visible to maintain the ribbed texture. -
Blend the interior:
While keeping the outside textured, it is crucial to smudge the *inside* coils together downwards with your thumb or a wooden tool. This ensures the vase is watertight and structurally sound. -
Forming the bulbous shape:
To create the round, gourd-like vase, lay each subsequent coil slightly further outward than the last. Once you reach the widest point, reverse the process by placing coils slightly inward to taper the neck. -
Building the tall flutes:
For the taller vases, stack the coils directly vertically or with a very gradual inward taper. I find using a banding wheel helps keep the silhouette symmetrical as you rotate and build. -
Refining the rim:
Finish the top rim by gently smoothing the final coil with a damp sponge. You want a soft, rounded lip that mimics the rest of the coil texture.
Step 3: Finishing Touches
-
Smooth the ribs:
Run a barely damp sponge over the exterior ribs to remove any sharp crumbles or fingerprints, softening the lines without erasing the definition. -
Dry slowly:
Cover your vases loosely with plastic to let them dry slowly. Uneven drying can cause cracks between the coils, especially on the taller forms. -
Bisque fire:
If using ceramic clay, fire the pieces to bisque temperature once bone dry. For polymer, bake according to the package instructions. -
Apply finish:
For that matte, stone-like appearance, apply a clear matte glaze to the interior for functionality and a very thin wash on the exterior. Alternatively, leave the exterior unglazed raw clay if fully vitrified. -
Final firing:
Fire the glaze according to your clay body’s requirements to seal the vessel.
Textural Depth
Before firing, gently rub the dry surface with fine steel wool. It enhances the matte texture and makes the ribs feel exquisitely soft to the touch.
Arrange your finished trio with dried botanicals to complete the warm, organic aesthetic

Beehive-Inspired Ribbed Coil Vase
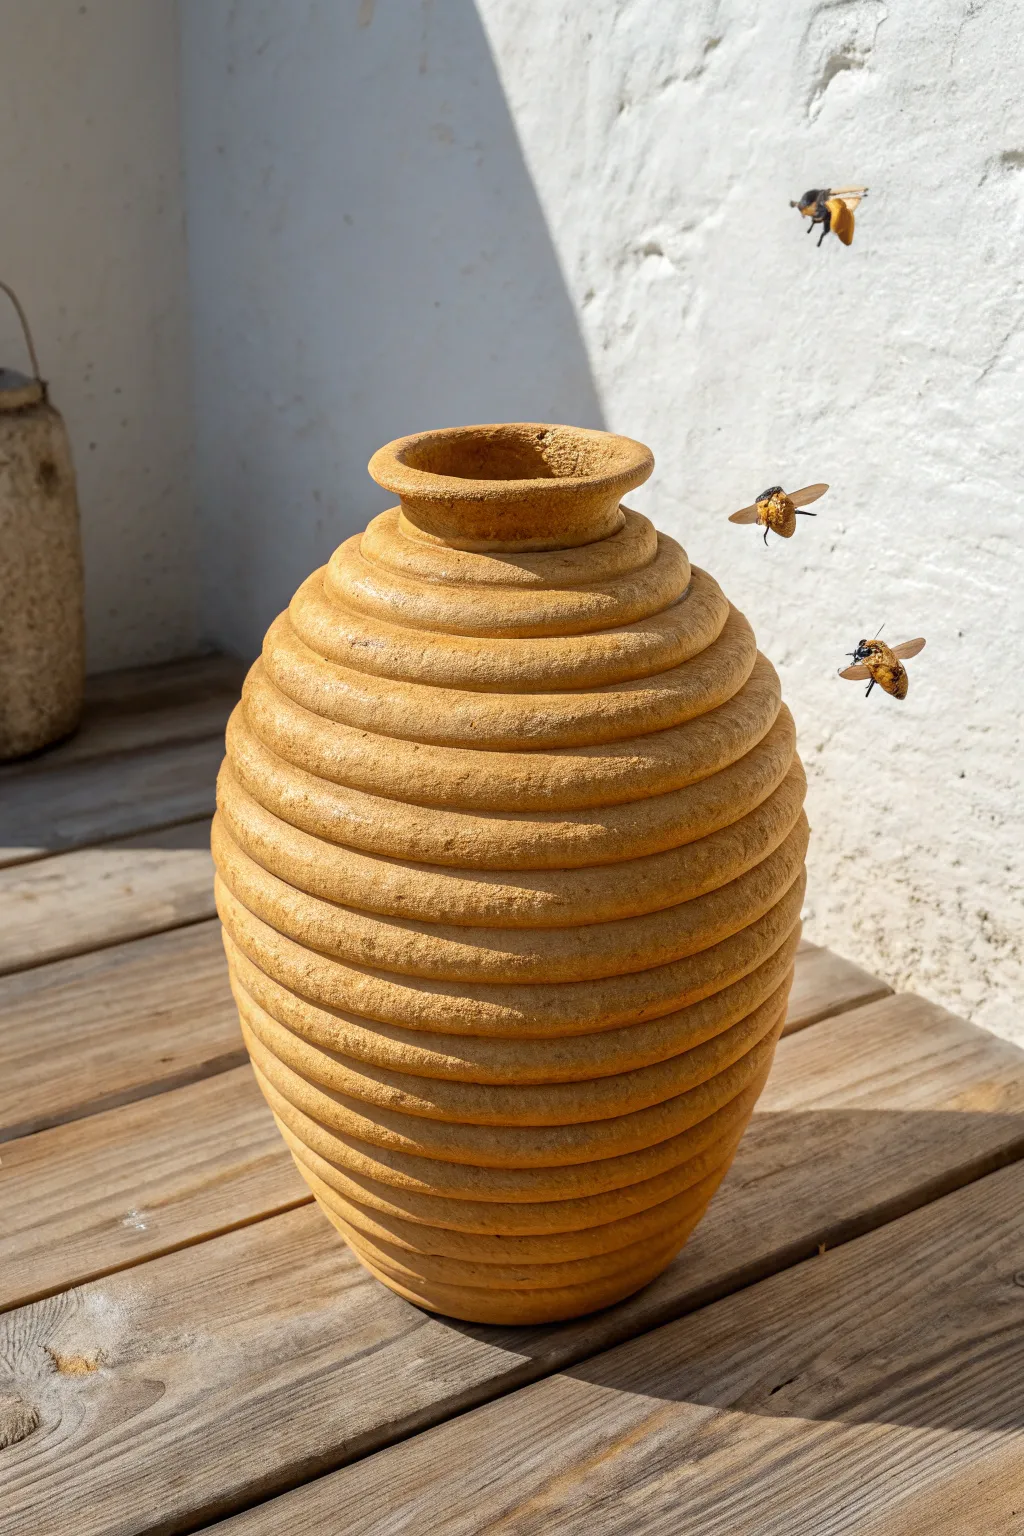
This charming vessel mimics the organic structured beauty of a natural beehive with its ribbed texture and warm, earthy hues. Using the traditional coil building technique, you will construct a sturdy form that celebrates the tactile nature of clay rather than hiding it.
Step-by-Step Guide
Materials
- Stoneware clay (smooth or with fine grog)
- Scoring tool or serrated rib
- Slip (clay mixed with water)
- Wooden modeling tool
- Sponge
- Cutting wire
- Lazy Susan or banding wheel (optional but recommended)
- Iron oxide wash or dark stoneware glaze
- Matte yellow-ochre glaze
Step 1: Building the Base
-
Create the Foundation:
Start by rolling out a slab of clay about 1/2 inch thick. Cut a circle roughly 4 inches in diameter to serve as the sturdy base of your vase. -
Prepare the First Coils:
Roll out several snake-like coils of clay. Aim for a consistent thickness, roughly the width of your thumb or slightly thinner, as these will form the visual ribs of the hive. -
Attach the First Ring:
Score the outer edge of your base and apply a generous amount of slip. Lay your first coil on top of this scored edge. -
Secure the Coil:
Using your thumb or a wooden tool, smear the clay from the *inside* of the coil down onto the base to lock it in place. Crucially, leave the outside rounded and untouched to maintain that ribbed beehive look.
Sagging Walls?
If the belly sags, your clay is too wet. Let the lower section stiffen for 30 minutes (leather hard) before adding the heavy upper coils.
Step 2: Creating the Volume
-
Stack and Widen:
Score and slip the top of your previous coil. Add the next coil slightly towards the outer edge of the one below it. This stepping-out technique creates the swelling belly of the vase. -
Blend the Interior:
After every single coil, smooth the interior seam downward. This strengthens the wall while keeping the exterior texture distinct. I find using a damp sponge on the inside helps keep the surface clean. -
Continue Expanding:
Repeat this process for approximately 8-10 coils, stepping each one out slightly further until you reach the widest point of the vase. -
Refining the Form:
Step back occasionally to check the silhouette. If the vase looks lopsided, gently pat the clay walls or adjust the placement of your next coil to correct the symmetry.
Bee Embellishments
Before firing, sculpt tiny bees from clay scraps. Score and slip them onto the exterior, painting their stripes with dark underglaze.
Step 3: Tapering and Finishing
-
Begin the Taper:
Once you have reached the desired width, start placing each new coil slightly further *inward* than the one below it. This creates the upper slope of the hive shape. -
Close the Gap:
Continue stacking inward-stepping coils until the opening narrows to about 3 inches across. The shape should now resemble a large egg or oval. -
Construct the Rim:
For the neck, add two or three final coils stacked vertically or slightly flared outward to create a distinct rim. Smooth this rim well for a finished look. -
Clean Up Texture:
Use a damp finger to gently smooth the horizontal grooves on the exterior, softening sharp edges without erasing the deep recesses between coils. -
Dry and Bisque Fire:
Allow the piece to dry slowly under plastic to prevent cracking, then bisque fire it according to your clay body’s specifications.
Step 4: Glazing
-
Apply Oxide Wash:
Brush an iron oxide wash into the deep crevices between the coils. Wipe away the excess with a sponge, leaving the dark color only in the recesses to accentuate the depth. -
Apply Base Color:
Dip or spray the exterior with a matte yellow-ochre or honey-colored glaze. The goal is a stony, dry finish rather than a high gloss. -
Final Fire:
Glaze fire the piece to the appropriate cone temperature for your stoneware. This will fuse the clay and glaze into a durable, stone-like object.
Place your finished vase in a sunny spot where the light can catch the ridges and mimic a busy hive

The Complete Guide to Pottery Troubleshooting
Uncover the most common ceramic mistakes—from cracking clay to failed glazes—and learn how to fix them fast.
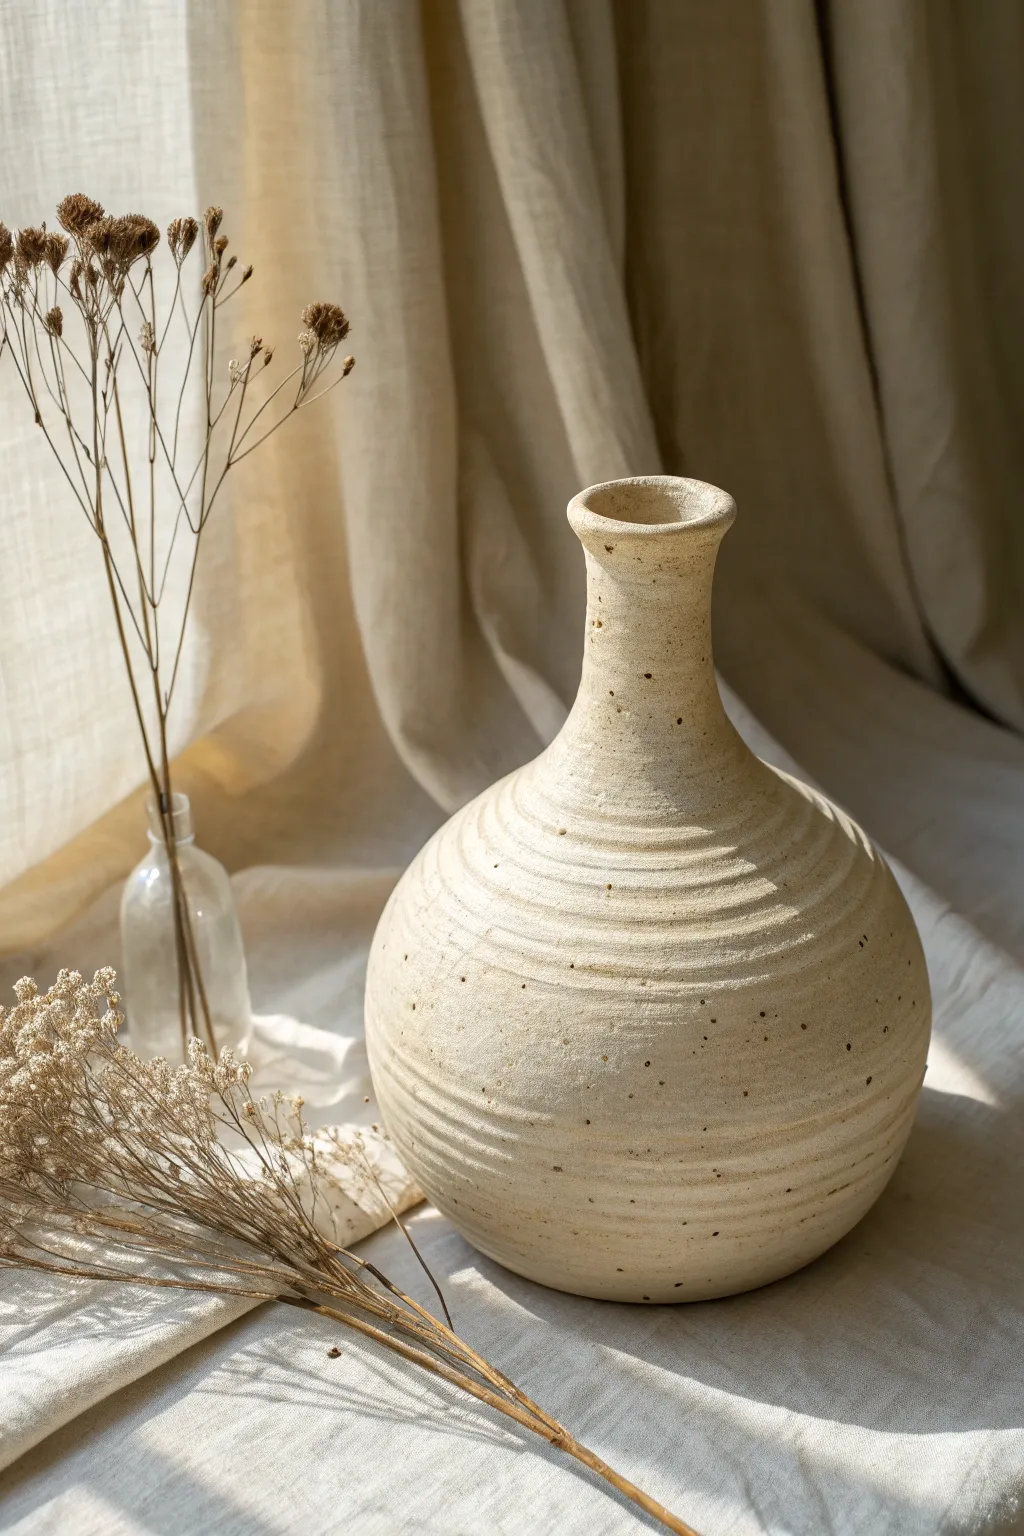
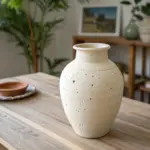
Smooth Outside, Ribbed Inside Coil Vase
Bring warmth to any room with this handmade stoneware vase that celebrates the beauty of clay’s natural texture. Featuring exposed concentric ridges and a lovely speckled glaze, this project perfectly balances rustic charm with modern form.
Detailed Instructions
Materials
- Stoneware clay with grog/speckles (e.g., Speckled Buff)
- Pottery wheel
- Throwing sponge
- Pin tool
- Wooden rib tool
- Wire cutter
- Matte white glaze
- Clear glaze (optional for inside)
- Kiln
- Wax resist (optional)
Step 1: Throwing the Base Form
-
Prepare the Clay:
Begin by thoroughly wedging about 2-3 pounds of speckled stoneware clay to remove air bubbles and ensure consistency. -
Center on the Wheel:
Slam the clay onto the center of the wheel head and use water and pressure to center it perfectly before opening. -
Open the Cylinder:
Open the clay to create the floor of your vase, leaving about a half-inch thickness at the bottom for stability. -
Pull the Walls:
Start pulling the walls upward into a tall cylinder. Don’t worry about the curve yet; height and even thickness are your goals here. -
Shape the Belly:
Using a rib tool on the inside and your fingers on the outside, gently push the belly of the vase outward to create that rounded, bulbous shape. -
Collar the Neck:
Slowly collar (constrict) the top third of the clay inward to form a narrower neck, being careful not to buckle the walls.
Collaring Collapse?
If the neck starts buckling while collaring, speed up the wheel slightly and support the inside wall with a sponge on a stick. Always keep the clay lubricated.
Step 2: Texturing and Refining
-
Create the Spiral Ridge:
Instead of smoothing the outside with a rib, use your fingertips or a specialized texturing tool while the wheel spins slowly to accentuate the spiral throwing lines from bottom to top. -
Refine the Rim:
Compress the rim with a piece of chamois or a sponge to make it smooth and rounded, creating a finished look that contrasts with the textured body. -
Trim the Base:
Use a wooden modeling tool to undercut the foot of the vase slightly while it’s still on the wheel, cleaning up excess slip. -
Wire Off:
Run a wire cutter underneath the vase to separate it from the wheel head. -
Leather Hard Trimming:
Allow the piece to dry to a leather-hard state. I find it safest to flip it over onto a foam bat to trim the bottom, revealing the raw clay foot. -
Bisque Fire:
Place your bone-dry vase into the kiln for a bisque firing (usually cone 04 or 06) to prepare it for glazing.
Step 3: Glazing and Finishing
-
Wax the Foot:
Apply wax resist to the bottom inch of the vase and the underside. This creates the distinct two-tone line where the raw clay meets the glaze. -
Glaze the Interior:
Pour a liner glaze (often clear or white) inside the vase, swirl it around to coat completely, and pour out the excess. -
Apply Exterior Glaze:
Dip the top portion of the vase into a matte white glaze. The wax resist will prevent glaze from sticking to the bottom, but you can wipe any drips with a sponge for a crisp line. -
Check the Ridges:
Ensure the glaze isn’t too thick; you want it to break over the ridges you created earlier so the brown speckles show through. -
Glaze Fire:
Load the kiln for the final glaze firing (often cone 5 or 6). Make sure the piece doesn’t touch others. -
Final Polish:
Once cool, use fine-grit sandpaper to smooth only the unglazed bottom foot so it won’t scratch your furniture.
Highlight the Specks
To get more speckling like the photo, gently wipe the glazed surface with a damp sponge before firing. This thins the glaze on the high points, exposing the clay grit.
Now you have a stunning, artisanal centerpiece ready to hold dried grasses or fresh blooms
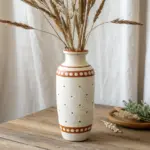
Two-Texture Coil Band Vase

Embrace the meditative rhythm of hand-building with this elegant coil vase project. The naturally textured surface highlights the construction method, creating a piece that feels both rustic and refined in a soft creamy glaze.
Step-by-Step Guide
Materials
- Stoneware clay (buff or white)
- Scoring tool or serrated rib
- Slip (clay and water slurry)
- Wooden modeling tool
- Loop tool (for interior scraping)
- Sponge
- Turntable or banding wheel
- Matte cream or satin beige glaze
Step 1: Creating the Base
-
Roll the slab:
Start by rolling out a circular slab of clay about 1/4 inch thick. This will serve as the sturdy footprint for your vase. -
Cut the circle:
Place your intended template or a small bowl on the clay and cut around it to create a perfect circle, roughly 4-5 inches in diameter. -
Prepare the edge:
Score the outer edge of your base thoroughly and apply a generous amount of slip to prepare it for the first coil.
Step 2: Building the Form
-
Roll your coils:
Roll out several long, even ropes/snakes of clay. Aim for a thickness similar to a sharpie marker or your ring finger. -
Attach the first layer:
Lay the first coil onto the scored base. Press it down firmly gently to ensure a secure connection. -
Blend the interior:
Using a wooden modeling tool or your thumb, drag the clay from the coil *down* onto the base on the inside of the vessel. Smooth this interior seam completely so it disappears. -
Build outward:
Continue stacking coils. To widen the belly of the vase, place each new coil slightly toward the outer edge of the coil below it. -
Maintain the ridge:
Crucially, do *not* smooth the outside seams flush. Instead, gently press the coils together to seal them, but leave that distinctive rounded ridge visible. I like to run a damp finger along the groove to soften it without erasing it. -
Check the profile:
Spin your banding wheel regularly. Step back and ensure the vase is expanding symmetrically on all sides. -
Taper inward:
Once the belly reaches its widest point (about halfway up), begin placing your coils slightly toward the inner edge of the previous row to narrow the form.
Seamless Strength
Even though you aren’t smoothing the outside, ensure the internal walls are thoroughly blended. This hidden fusion provides the structure’s integrity.
Step 3: Neck and Rim
-
Form the neck:
Continue tapering inward until you have a narrower opening. Build upward vertically for 2-3 inches to create the distinctive neck section. -
Flare the rim:
For the final coil, gently flare the clay outward to create the trumpet-like rim shown in the image. -
Refine the lip:
Use a damp sponge or a chamois cloth to compress and smooth the very top edge of the rim, making it comfortable to the touch.
Two-Tone Texture
Try glazing only the inside and the rim, leaving the raw clay exposed on the ribbed exterior for a stunning contrast between smooth and rough.
Step 4: Refining and Finish
-
Internal clean-up:
Once the clay is leather hard, use a loop tool to carefully scrape away excess weight from the inside walls if the bottom feels too heavy. -
External smoothing:
Go over the exterior ridges with a slightly damp sponge. You just want to knock off any sharp crumbs or burrs, keeping that rhythmic, ribbed texture intact. -
Bisque fire:
Allow the vase to dry slowly and completely before firing it to bisque temperature (usually cone 04 or 06, depending on your clay). -
Glaze application:
Apply a satin or matte cream glaze. Using a spray gun or dipping helps get the glaze into the deep grooves without it pooling too thickly, which might obscure the texture. -
Final wipe:
Wipe the foot of the vase clean with a sponge to prevent it from sticking to the kiln shelf. -
Final firing:
Fire for a second time to the maturation temperature of your specific clay and glaze body.
Place your finished vase near a window where the natural light can play across the beautiful horizontal ridges you created

What Really Happens Inside the Kiln
Learn how time and temperature work together inside the kiln to transform clay into durable ceramic.
Twisted Helix Coil Vase
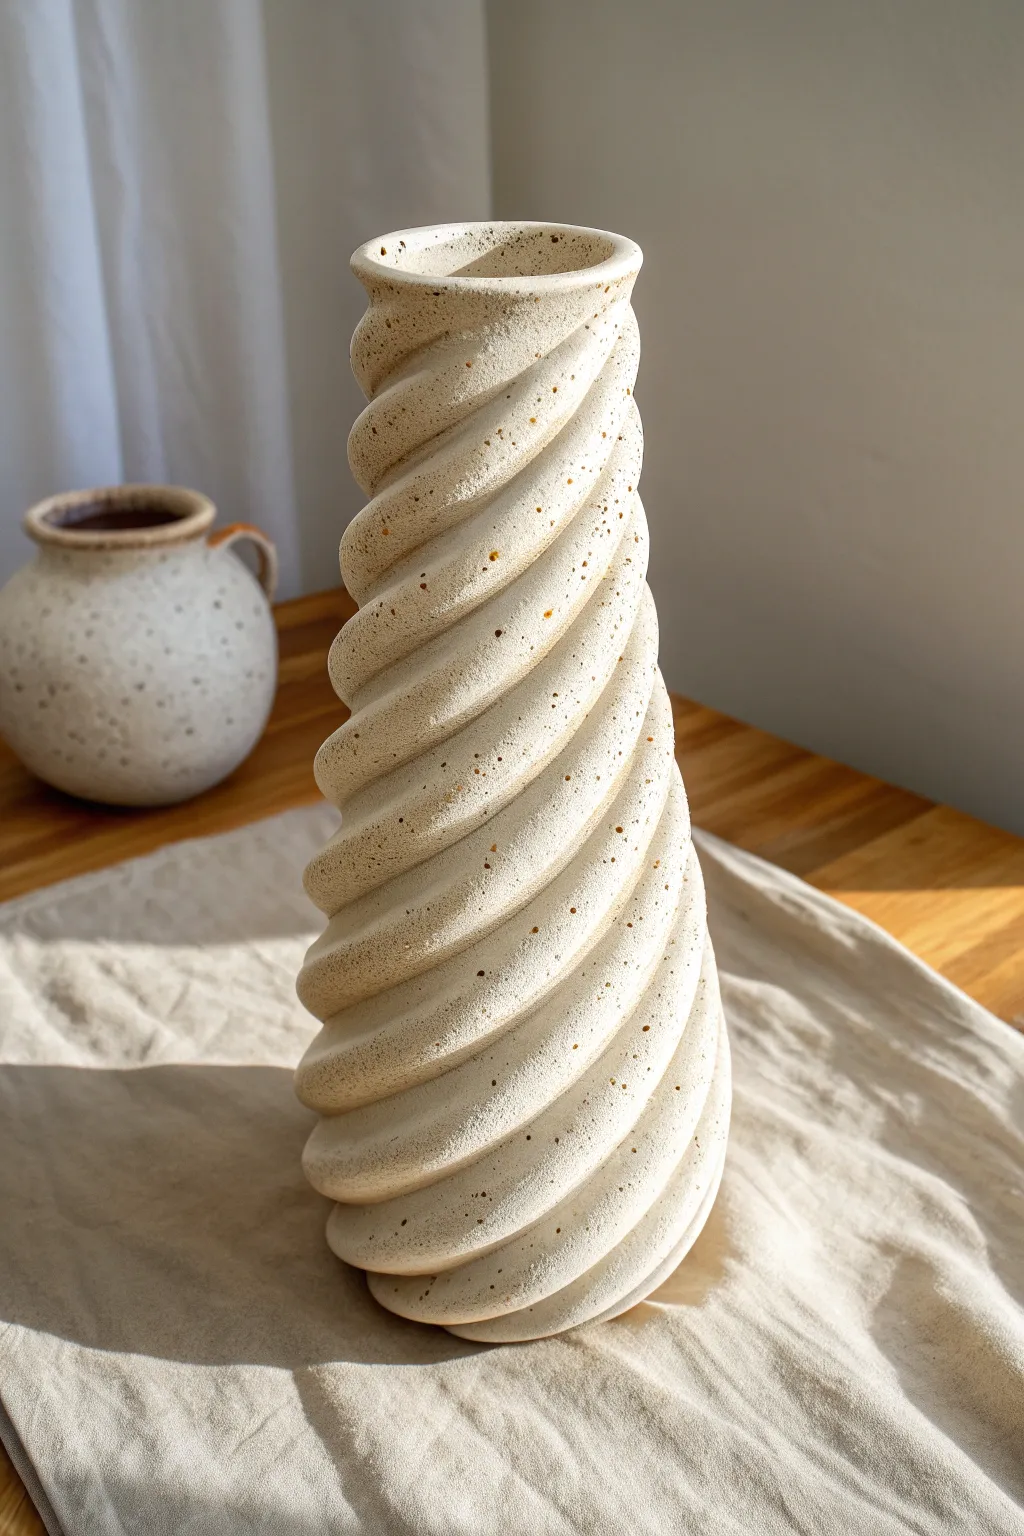
Capture the graceful movement of a twisted helix in this stunning coil-built vase. Made with speckled stoneware, its rhythmic spirals and smooth texture create a mesmerizing sculptural piece perfect for displaying dry stems or standing alone.
Step-by-Step Guide
Materials
- Speckled stoneware clay (groggy for strength)
- Pottery wheel or banding wheel
- Rolling pin or slab roller
- Needle tool
- Serrated rib or scoring tool
- Slip (clay mixed with water)
- Wooden modeling tool
- Sponge
- Rubber kidney rib
- Cutting wire
Step 1: Creating the Base
-
Prepare the slab:
Begin by rolling out a small amount of speckled clay into a smooth slab, roughly 6mm thick. A rolling pin works well, but ensure the thickness is consistent to support the vase. -
Cut the circle:
Place a circular template or a jar lid on the slab and cut around it with your needle tool to create a perfect circle base, about 8-10cm in diameter. -
Score the edge:
Use your serrated rib or needle tool to thoroughly scratch up the outer rim of this circular base. Apply a generous dab of slip to the scored area.
Step 2: Forming the Helix Coils
-
Roll consistent coils:
Roll out several long, thick snakes of clay. Aim for a thickness of about 2cm—thicker than usual coil pots essentially, as this thickness allows for the deep spiral grooves later. -
Attach the first ring:
Place the first coil onto the slipped base edge. Cut the ends at a diagonal angle and join them smoothly so the ring is distinct. Blend the clay downwards onto the base on the inside and outside to secure it. -
Stack for height:
Continue stacking coils one directly on top of the other to build a straight cylinder. Score and slip between every single layer. As you stack, blend the coils together on the *inside* of the vase only, leaving the outside rounded and distinct for now. -
Refining the cylinder:
Build the cylinder to your desired height, keeping the walls straight. The vase in the image tapers slightly inward toward the top, so gently guide your coils inward for the last few layers.
Uneven Twist?
If your spirals look wobbly, lightly sketch the intended diagonal lines onto the cylinder with a needle tool before you start deep carving. This acts as a guide.
Step 3: Sculpting the Twist
-
Map the spiral:
This is where the magic happens. Look at your stack of rounded coils. Instead of smoothing them flat, you will use a wooden modeling tool to drag clay across the coil seams at a diagonal angle. -
Define the grooves:
Press a rounded modeling tool or your thumb into the clay, starting at the bottom and moving diagonally upward and to the right. You are essentially pushing the midpoint of one coil into the seam of the next, creating a continuous diagonal channel. -
Deepen the helix:
Work your way around the pot, creating parallel diagonal grooves that mimic a giant screw thread. I find it helpful to rotate the banding wheel slowly while dragging my tool upwards to keep the angle consistent. -
Smooth the ridges:
Once the deep spiral grooves are established, use a damp sponge or a soft rubber rib to round over the ridges between the grooves. You want soft, pillowy curves rather than sharp edges. -
Refine the surface:
Gently sponge the entire surface to reveal the speckles in the clay (grog) and remove any tool marks. The texture should look uniformly sandy and matte.
Use a Rib
Use a flexible rubber rib to compress the clay while sculpting the spirals. This aligns the clay particles and significantly reduces the chance of cracking later.
Step 4: Finishing Touches
-
Secure the rim:
Compress the very top rim with a damp piece of chamois or plastic to make it smooth and pleasant to touch. Ensure the spiral pattern resolves neatly at the lip. -
Slow drying:
Because the walls vary in thickness due to the sculpting, cover the vase loosely with plastic to let it dry very slowly. This prevents the spiral seams from cracking open. -
Bisque fire:
Once bone dry, fire the piece to bisque temperature (usually cone 04 or 06 depending on your clay body). -
Glaze application:
To match the reference, apply a simple clear matte glaze or leave the exterior raw if the clay is vitrified. If glazing, pour the glaze inside, swirl, and pour out. Dip the outside quickly or spray to avoid filling those beautiful deep grooves. -
Final firing:
Fire to the maturation temperature of your stoneware clay (typically cone 5/6 or cone 10) to vitrify the piece and bring out the toasty speckles.
Enjoy the rhythmic process of carving these spirals and watching your vase come to life
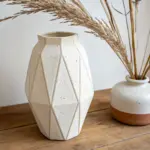
Corrugated Pinched-Coil Vase
Capture the essence of organic modern design with this heavily textured, ribbed vase. The vertical corrugation mimics the look of found artifacts, while the speckled clay body adds a natural, earthy finish perfect for dried botanicals.
How-To Guide
Materials
- Speckled stoneware clay (buff or sand colored)
- Wooden modeling tool or unwanted credit card
- Loop tool for sculpting
- Scoring tool or fork
- Slip (clay mixed with water)
- Sponge
- Wire cutter
- Banding wheel (optional but recommended)
- Kiln for firing (or oven if using oven-bake clay)
Step 1: Building the Base Form
-
Create the Base:
Start by rolling a slab of clay about 1/2 inch thick. Cut a circle roughly 4 inches in diameter to serve as the sturdy footprint of your vase. -
Roll Your Coils:
Prepare a large batch of coils. Roll them out on a table to be roughly the thickness of your thumb. Try to keep them consistent, as this helps with the even walls later. -
Begin Stacking:
Score the outer edge of your base and apply a little slip. Place your first coil ring on top. Gently pinch the clay downwards to blend it onto the base on both the inside and outside. -
Build the Belly:
Continue stacking coils. To create the spherical ‘belly’ shape, place each new coil slightly closer to the outer edge of the coil below it. Blend the coils together purely on the *inside* first to maintain structural integrity. -
Close the Form:
Once you reach the widest point of the vase, reverse the stacking direction. Place each new coil slightly inward to taper the neck. Continue until the opening is about 3 inches wide. -
Smooth the Exterior:
Using a flexible rib or your fingers, blend the exterior coils together until the surface is relatively smooth and the wall thickness is even. Don’t worry about perfection; we will texturize it soon.
Step 2: Sculpting the Ridge Texture
-
Add the Neck Detail:
For the distinct collar, roll a thicker coil and attach it to the top rim. Instead of smoothing it flush, leave it slightly bulbous. Flatten the very top edge to create a finished lip. -
Mark Vertical Guidelines:
Lightly sketch vertical lines from the bottom of the neck to the base using a needle tool. Spacing them about an inch apart helps ensure your ridges stay straight as you work. -
Carve the Corrugation:
This is the defining step. Use a loop tool to carve out vertical channels between your guidelines. You aren’t adding clay here; you are removing the negative space to reveal the ridges. -
Refine the Ridges:
After carving, use a damp sponge to soften the sharp edges of the ridges. You want them to look worn and organic, not mechanically precise. -
Texture the Surface:
To get that sandy, stone-like appearance, take an old toothbrush or a stiff stippling brush and tap it all over the surface. This creates a pitted micro-texture that catches the glaze later.
Uneven Ridges?
If your carving looks too messy, let the clay firm up to ‘leather hard’ before using the loop tool. Soft clay drags and tears; firm clay carves like butter.
Step 3: Finishing and Firing
-
Dry Slowly:
Cover the vase loosely with plastic for a day or two. This slow drying prevents the thick neck and the thinner carved walls from separating or cracking. -
Bisque Fire:
Once bone dry, fire the piece to bisque temperature (usually Cone 04/06 depending on your clay body). -
Choosing a Glaze:
Select a matte, stone-colored glaze. Semi-opaque glazes work best here because they pool slightly in the carved channels, highlighting the texture. -
Glaze Application:
Dip or brush your glaze onto the vase. Wipe back the glaze slightly with a sponge on the high points of the ridges to mimic varying coloration in natural stone. -
Final Fire:
Fire the vase a second time to the maturation temperature of your specific clay and glaze.
Two-Tone Effect
Apply a dark oxide wash (like iron oxide) into the carved grooves before glazing. Sponge off the high points for dramatic, antique-looking contrast.
Fill your new vessel with tall dried grasses to complete the rustic look

TRACK YOUR CERAMIC JOURNEY
Capture glaze tests, firing details, and creative progress—all in one simple printable. Make your projects easier to repeat and improve.
Fluted Wave Coil Vase
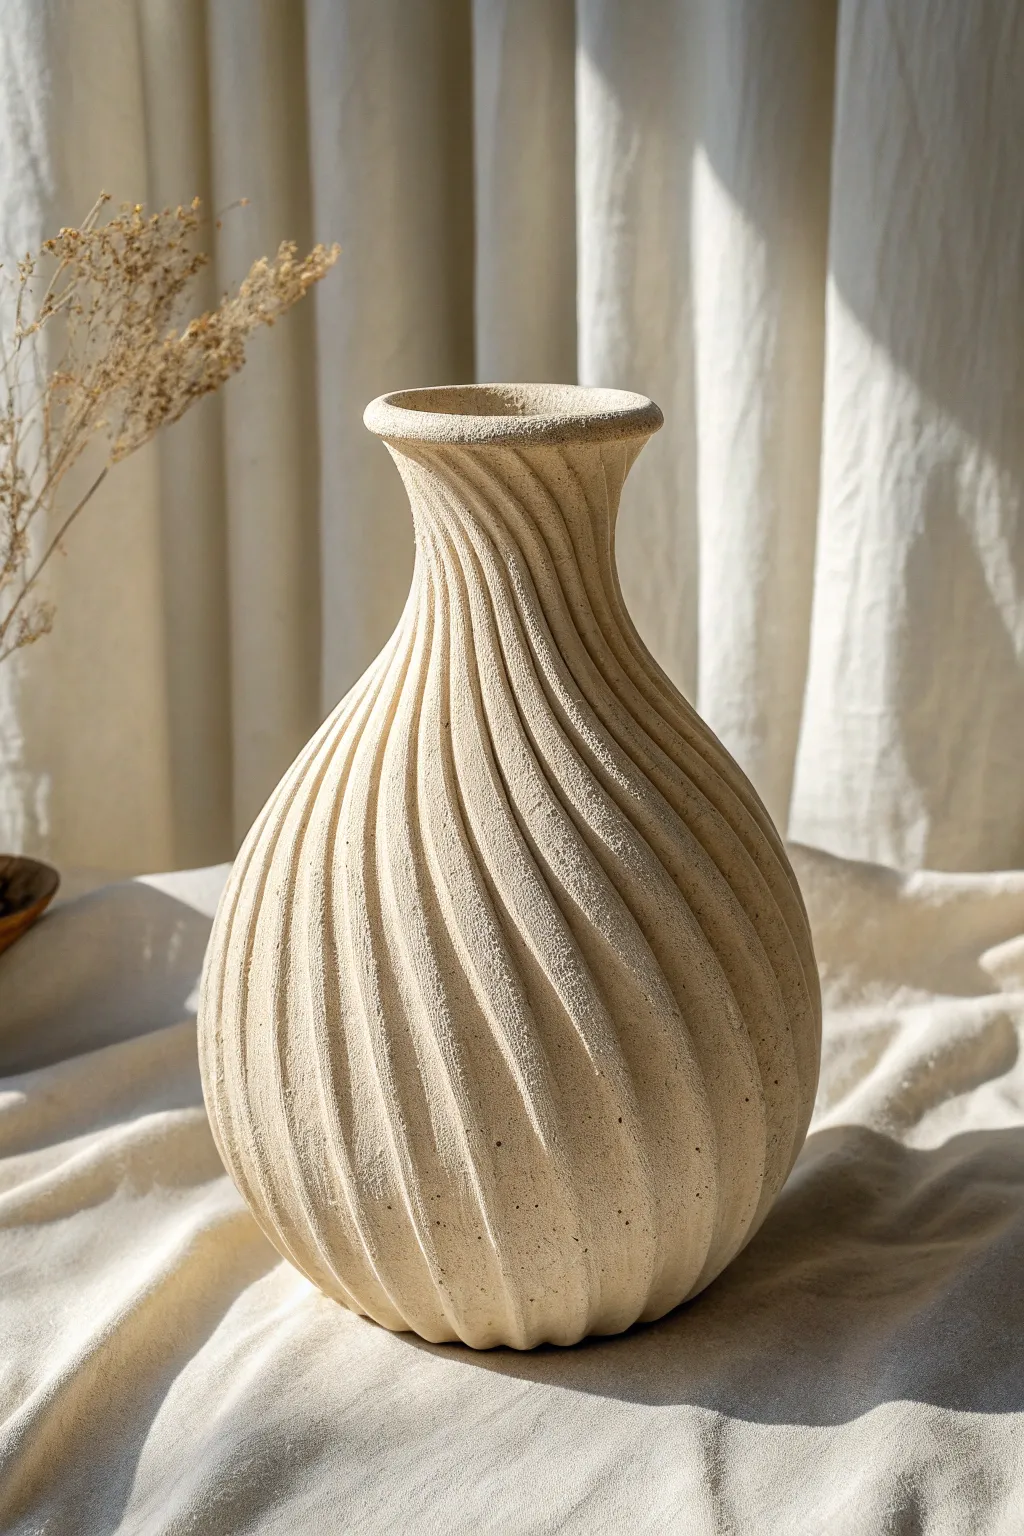
This project focusses on creating a classic bottleneck vase with a dynamic twist using a carving technique rather than traditional coiling patterns. The result is a stunning, stone-like vessel with rhythmic, spiraling grooves that catch the light beautifully.
Step-by-Step Tutorial
Materials
- Stoneware clay with grog (for that sandy texture)
- Potter’s wheel (optional, can be hand-built)
- Wire clay cutter
- Metal kidney rib
- Serrated rib tool
- Wooden modeling tool or fluting tool
- Loop tool (small radius)
- Sponge and water
- Calipers (for symmetry checks)
Step 1: Building the Form
-
Prepare the Clay:
Start by wedging your stoneware clay thoroughly to remove air bubbles. Since we want that rough, sandy look shown in the photo, a clay body with grog works best. -
Base Construction:
Whether throwing on a wheel or building with coils, create a cylindrical base that flares out into a bulbous shape. Aim for the widest point to be about one-third of the way up. -
Shaping the Belly:
Push the belly of the vase outward gently. If coiling, blend your coils seamlessly on both inside and outside to ensure the wall is thick enough to carve into later, approximately 1/4 to 1/2 inch thick. -
Forming the Neck:
Collar the clay inward as you move up past the belly to create the narrow neck. Flare the very top rim slightly outward for a trumpet-like opening, ensuring the rim is smooth and rounded. -
Refining the Surface:
Before carving, use a metal kidney rib to smooth the outer surface. You want a uniform canvas, though it doesn’t need to be perfectly polished since we’ll be adding texture. -
Leather Hard Stage:
Allow the vase to dry to a leather-hard state. This is crucial; if it’s too soft, the carving will drag, and if too dry, it will chip.
Step 2: Carving the Flutes
-
Visualize the Spiral:
Lightly sketch a few guide lines with a needle tool starting from the bottom and curving upward in a spiral towards the neck to establish the angle of your twist. -
First Incision:
Using a loop tool or a specialized fluting tool, make your first deep groove. Start at the very bottom edge and pull the tool upwards, following your spiral curve all the way to underneath the rim. -
Establish Depth:
The grooves in the image are deep and defined. Apply steady pressure to remove a consistent ribbon of clay. It helps to support the wall from the inside with your other hand. -
Repeat the Pattern:
Rotate the vase slightly and begin the next flute next to the first one. Leave a high ridge (the ‘negative space’) between the two grooves. -
Consistency Check:
Continue this process around the entire circumference. I find it helpful to stand up while doing this to get a better view of the overall flow of the lines. -
Navigating the Neck:
As you reach the bottleneck, your lines will naturally converge and get closer together. Use a smaller tool here if needed to maintain separation between the ridges.
Uneven Ridges?
If your carved lines are wobbling, don’t fuss over one line. Step back and look at the whole; rhythm often hides minor imperfections. Use a damp finger to smooth out major hiccups.
Step 3: Finishing Touches
-
Soften the Edges:
Once all grooves are carved, the edges might be sharp. Use a slightly damp sponge to gently wipe down the ridges, rounding them off just enough to look organic but not blurry. -
Enhance the Texture:
To mimic the speckled, stone-like finish, you can gently dab a stiff-bristled brush or a serrated rib over the surface to bring the grog to the forefront. -
Drying:
Cover the vase loosely with plastic to let it dry slowly. Because we’ve altered the wall thickness by carving, uneven drying could cause cracks. -
Bisque Fire:
Fire the piece to bisque temperature once fully bone dry. -
Glazing:
For the look in the photo, apply a matte, dry-stone glaze or a textural slip. Avoid thick, glossy glazes that would fill in the flutes and hide your carving work.
Accentuate the Twist
After glazing, gently wipe the raised ridges with a damp sponge before firing. This exposes the raw clay body on the high points, creating a higher contrast against the glaze in the grooves.
Enjoy the tactile quality of your finished vase as the light plays across those spiraling grooves
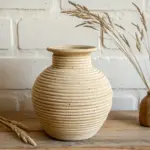
Multi-Chamber Flower Coil Vase
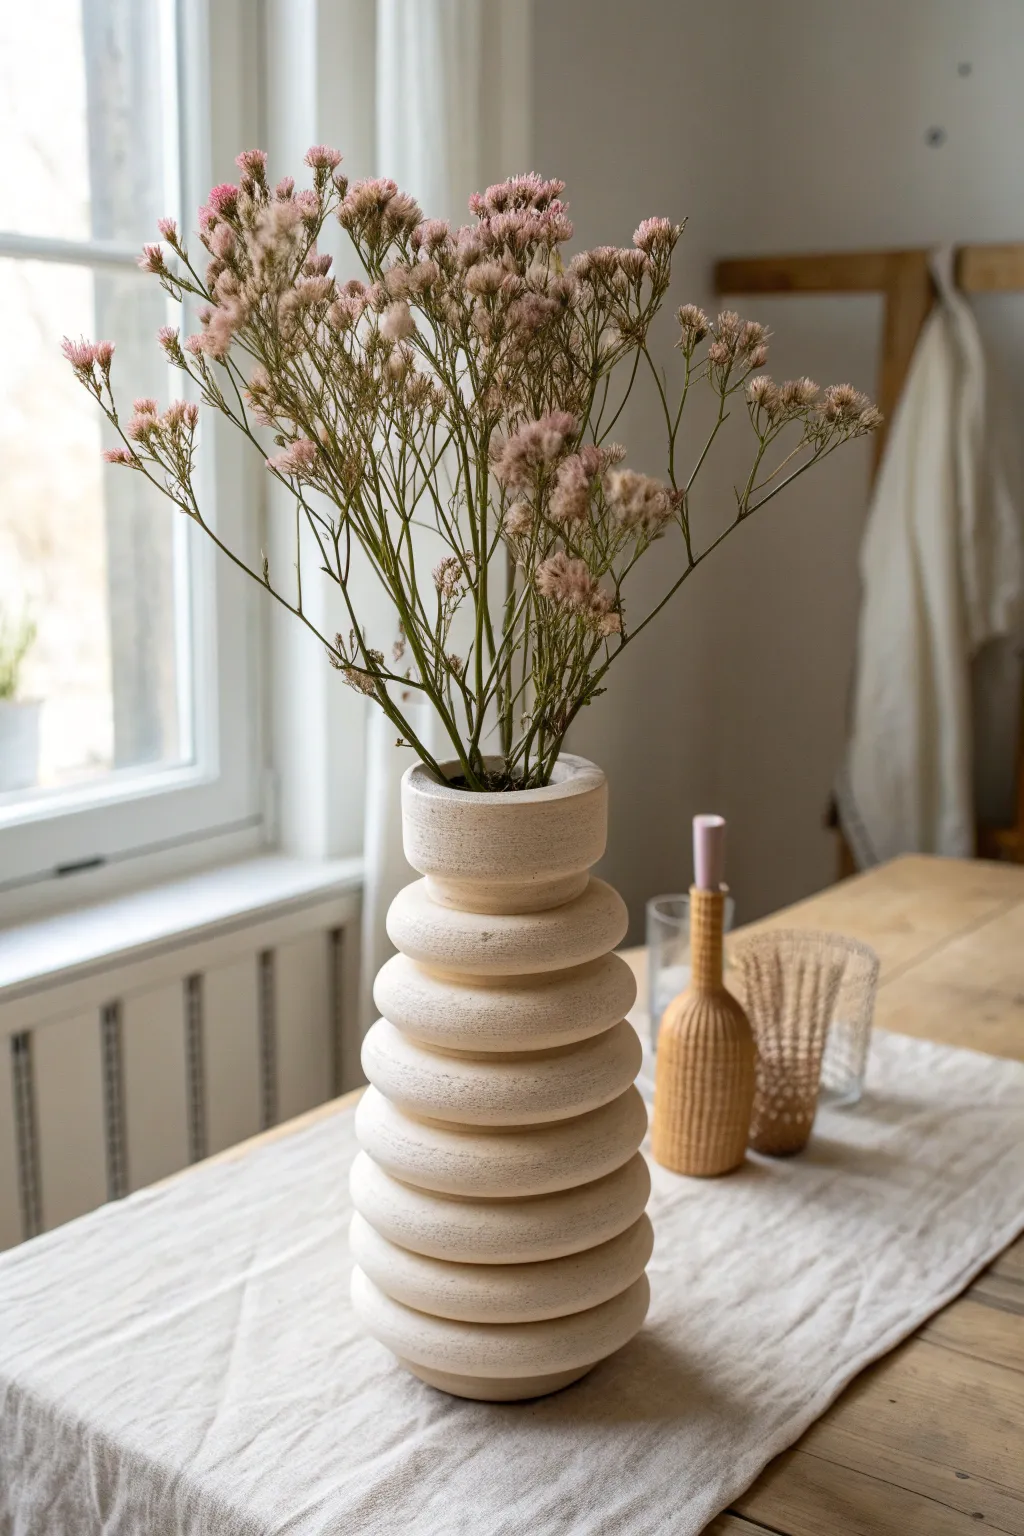
Embrace a sculptural, modern aesthetic with this striking coil-built vase that mimics the look of stacked stones or a turned wooden totem. Its repetitive, ribbed structure creates a satisfying visual rhythm while maintaining an organic, handmade warmth perfect for displaying dried botanicals.
Step-by-Step Guide
Materials
- Stoneware clay (smooth or with fine grog)
- Clay extruder (optional but helpful for consistency)
- Rolling pin and guide strips (if not using an extruder)
- Scoring tool or serrated rib
- Slip (clay and water slurry)
- Wooden modeling tool
- Rubber kidney rib
- Sponge
- Canvas work surface
- Wire cutter
- Matte cream or white glaze
Step 1: Preparation & Base
-
Prepare your clay:
Begin by thoroughly wedging your clay to remove air bubbles. This is crucial for a project with this much height to ensure stability during firing. -
Create the base:
Roll out a slab of clay approximately 3/8 inch thick. Use a circular template or a jar lid to cut a perfect circle for the base, about 4 inches in diameter. -
Score the foundation:
Take your serrated tool and score the outer perimeter of your base circle where the first coil will sit. Apply a generous amount of slip to the scored area.
Keep it Straight
Use a right-angle triangle or a ruler held vertically against the table as you build. Rotate the vase frequently to check that your stack isn’t leaning to one side.
Step 2: Forming the Coils
-
Extrude or roll coils:
For that precise, uniform look seen in the photo, I recommend using a clay extruder with a large round die (about 3/4 to 1 inch thick). If rolling by hand, strive for extreme consistency in thickness. -
The first ring:
Place your first coil onto the scored base. Cut the ends at a 45-degree angle where they meet to increase the surface area for the join. -
Blend the interior:
While the outside will remain distinct rings, the inside must be smooth for strength. Use your thumb or a wooden tool to smear the clay from the coil down onto the base on the interior only. -
Building the stack:
Continue adding rings one by one. Score and slip between every single layer. Unlike traditional coil pots where you blend the outside, here you want to preserve the deep groove between rings.
Step 3: Shaping the Silhouette
-
Create the taper:
The vase in the image has a gentle curve—wider at the bottom, slightly narrower in the middle, and varying again at the top. Adjust the diameter of your rings slightly as you build upward to mimic this ‘stacked donut’ silhouette. -
Reinforce the interior:
After every 2-3 rings, stop to blend the interior seams thoroughly. You can use a long-handled wooden spoon or a throwing stick if your hand no longer fits inside. -
Refining the distinctive neck:
Notice the top section changes; there is a distinct vertical collar. For the final two inches, stack the rings directly vertically or use a small slab cylinder to create that flat, wide rim section. -
Smoothing the rings:
Once the full height is reached, use a damp sponge to smooth the rounded face of each individual ring. Soften any sharp edges but be careful not to fill in the crevices between them.
Slumping Issues?
If the bottom rings start to bulge under the weight of the new clay, stop immediately. Use a heat gun gently to stiffen the lower section before continuing.
Step 4: Finishing Touches
-
Drying slowly:
Because the joints are thick, cover the piece loosely with plastic to let it dry very slowly. This helps prevent cracks from forming in the deep grooves between the coils. -
Bisque firing:
Once bone dry, fire the piece to bisque temperature (usually cone 04 or 06). Handle the greenware carefully, as the connections between rings are stress points. -
Glazing:
Apply a matte cream or ‘sand’ glaze. Pour the glaze inside and swirl to coat the interior, then pour it out. For the exterior, dipping or careful spraying works best to get into the deep grooves. -
Wipe back (optional):
If you want to highlight the texture, you can gently wipe the outer curves with a sponge, leaving more glaze in the crevices to accentuate the stacked form. -
Final firing:
Fire to the maturation temperature of your specific clay and glaze body.
Fill your new architectural vase with dried wildflowers to complete the organic, earthy look
Coil Wall Pocket Vase
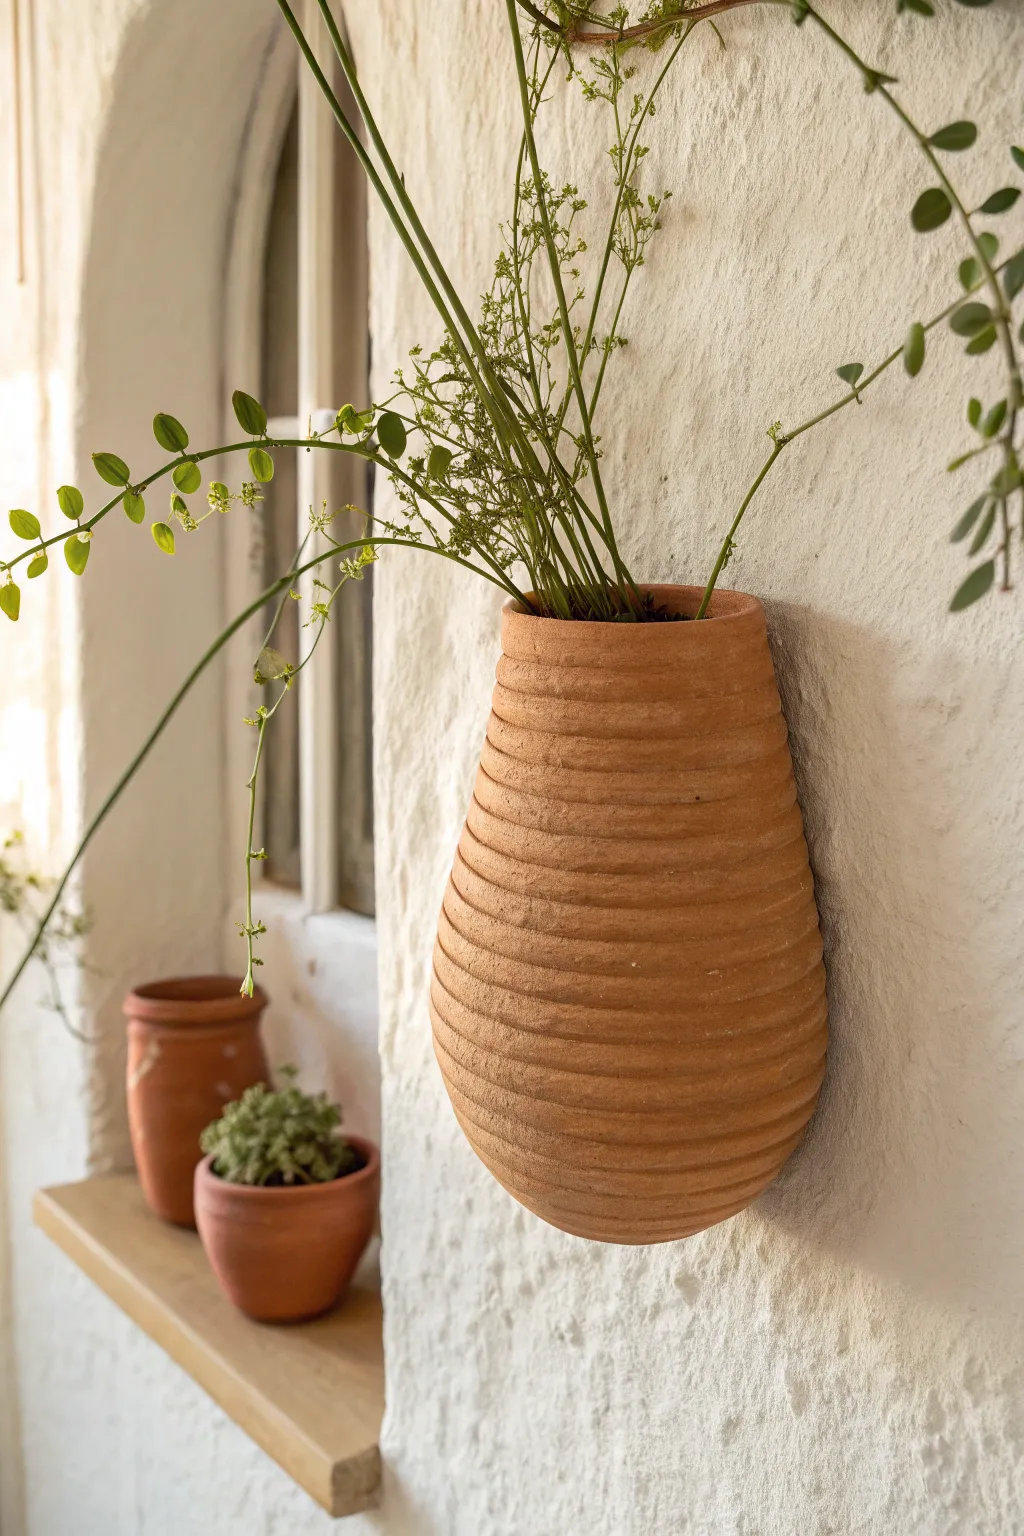
Bring earthy charm to your vertical spaces with this coil-built wall pocket that mimics the shape of a rustic beehive. Its warm terracotta tone and textured ribs create a perfect organic home for trailing vines or dried stems.
Step-by-Step
Materials
- Terracotta-colored stoneware clay (approx. 2-3 lbs)
- Slip (clay mixed with water)
- Scoring tool or fork
- Wooden modeling tool
- Sponge
- Rolling pin (optional)
- Canvas work surface
- Cutting wire
- Small hole punching tool (for mounting hole)
Step 1: Base Construction
-
Prepare the back slab:
Start by rolling out a flat slab of clay approximately 1/4 inch thick. This will serve as the flat back of the vase that rests against the wall. -
Cut the back shape:
Cut a tall, elongated oval shape from your slab. Aim for about 8-10 inches in height and 4-5 inches in width. Smooth the edges with a damp sponge. -
Make the mounting hole:
Near the top center of this slab, punch a clean hole. Ensure it is large enough to fit over a screw or hook, remembering that the hole will shrink slightly during firing. -
Roll your coils:
Take a chunk of clay and roll it between your hands or on the table to create long, even snakes. Aim for coils that are roughly the thickness of your pinky finger. -
Score the foundation:
Using your scoring tool, scratch up the perimeter of your back slab where the coils will attach. Apply a generous amount of slip to these scored areas.
Sticky Situation
Make sure your slip is the consistency of heavy cream. If it’s too runny, the coils will slide; too thick, and they won’t bond properly.
Step 2: Building the Form
-
Lay the first coil:
Press your first coil onto the slipped edge of the slab. Since this is a wall pocket, you aren’t making a full circle; you are making a convenient ‘U’ shape that attaches to the slab on both sides. -
Blend the interior:
Use your wooden tool or thumb to smear the clay from the coil downward onto the slab *on the inside only*. This creates a strong bond while leaving the exterior coil texture visible. -
Build outward:
Add the next few layers of coils. For the bottom third of the vase, place each new coil slightly further outward than the last to create a bulbous, widening belly. -
Score and slip between layers:
Always score and slip between each coil layer to ensure structural integrity as the vase grows. -
Create the taper:
Once you pass the widest point (about halfway up), begin placing coils slightly inward. This creates the gentle upward slope that narrows toward the neck. -
Refine the texture:
I like to gently run a damp sponge over the exterior coils occasionally. You want to smooth them just enough to remove sharp edges, but keep the definition of the ridges distinct.
Step 3: Finishing and Drying
-
Finish the rim:
When you reach the desired height, add one final coil. You can smooth this one slightly more for a finished look, or leave it distinct. -
Reinforce the back seam:
Turn the piece over very carefully. Check the seam where the coil wall meets the flat back slab. Add a tiny thin coil along this exterior seam and smooth it flat to ensure no water leaks out. -
Slow drying:
Because the back is a slab and the front is coiled, tensions can vary. Cover the piece loosely with plastic for the first 24 hours to let humidity equalize. -
Bisque fire:
Once bone dry, bisque fire the piece to the appropriate cone for your clay body (usually Cone 04 or 06). -
Glazing or leaving raw:
To match the image perfectly, leave the exterior unglazed to show off the raw terracotta texture. You may choose to use a clear matte glaze on the inside to make it watertight. -
Final firing:
Fire the piece a final time to maturity. If you glazed the interior, ensure no glaze dripped onto the textured exterior.
Make It Grow
Vary the project scale! Make a trio of these in small, medium, and large sizes to create a dynamic ‘living vertical garden’ installation on a single wall.
Hang your finished pocket near a window and watch the light play across those beautiful clay ridges
Cutout Window Coil Vase
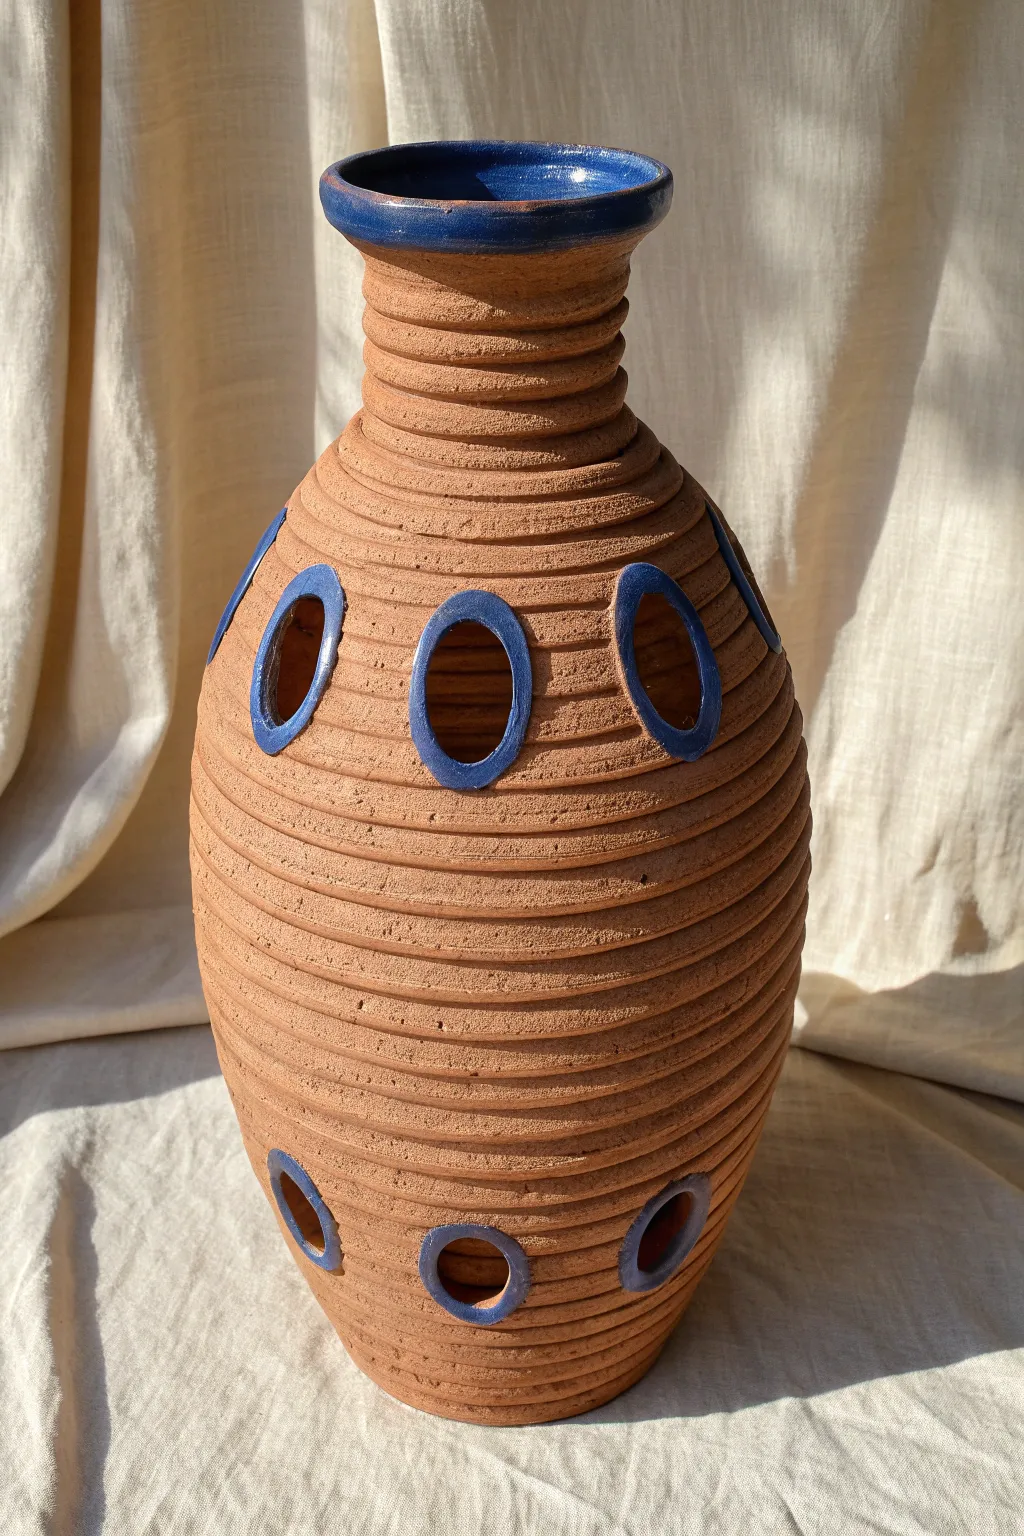
This striking vessel combines the ancient texture of exposed coils with modern, playful peek-a-boo windows. The contrast between the raw, warm terracotta clay and the glossy electric blue glaze accents creates a piece that feels both rustic and refined.
Step-by-Step Guide
Materials
- Red stoneware or terracotta clay (medium grog)
- Pottery wheel (for the base) or rolling pin (for slab base)
- Extruder (optional for consistent coils) or table space for hand-rolling
- Scoring tool or serrated rib
- Slip (clay and water slurry)
- Fettling knife or X-Acto blade
- Small oval cookie cutter (optional)
- Smoothing tool or wooden rib
- Sponge
- Electric blue glossy glaze
- Small detail paintbrush
- Medium glaze brush
Step 1: Planning and Base Construction
-
Prepare the clay:
Begin by thoroughly wedging your red stoneware or terracotta clay to remove air bubbles. Since this is a coil pot, consistent texture is key, so ensure the clay is pliable but firm enough to hold its shape. -
Form the base:
Create a round flat slab for the bottom, about 4-5 inches in diameter. You can roll this out with a pin and cut a circle, or throw a simple disk on the wheel. Score the outer edge of this disk deeply to prepare it for the first coil. -
Roll your coils:
You’ll need a lot of coils. Roll out several long snakes of clay, aiming for a thickness of about 1/2 inch. Try to keep them as uniform as possible; using a clay extruder can save time and ensure perfect consistency if you have one.
Coil Consistency
Work in batches of 4-5 coils. If you roll them all at once, the last ones will dry out and crack before you attach them. Keep spare coils under plastic.
Step 2: Building the Form
-
Layer the first coils:
Score the bottom of your first coil and apply slip to the base. Lay the coil onto the base edge. Unlike traditional smoothing where you blend the coils entirely, here we want to preserve the exterior ridges. Only blend the *interior* seams downward for structural integrity. -
Build outward:
Gradually stack coils, placing each slightly to the outside of the one below it to widen the belly of the vase. Continue smoothing only the inside surface to bond the layers. -
Create the belly:
Once you reach the widest point (about 6-7 inches up), begin placing coils slightly inward to taper the form back toward the neck. Keep checking the silhouette visually to ensure it remains symmetrical. -
Form the neck and rim:
Narrow the neck significantly, then flare the very top coil outward slightly to create a distinct rim. Use your fingers to compress and smooth the rim lip, making it rounded and comfortable to the touch. -
Refine the texture:
Once the full height is built (around 12-14 inches), let the pot firm up to leather-hard. Use a damp sponge to gently wipe the exterior coils, softening any sharp edges without erasing the defining horizontal lines.
Add Texture
Before rolling your coils, sprinkle a little sand or grog onto your work surface. As you roll the clay, it will pick up a gritty, stone-like texture.
Step 3: Carving and Glazing
-
Map the windows:
I prefer to lightly sketch the oval placements with a needle tool before cutting. Plan for a row of larger ovals around the upper shoulder and a row of slightly smaller ovals near the base. -
Cut the openings:
Using a sharp fettling knife or X-Acto blade, carefully cut out the oval shapes. Be mindful of the wall thickness. Support the clay from the inside with your other hand to prevent the wall from warping as you cut. -
Refine the cutouts:
Once the holes are cut, use a damp fingertip or chamois to smooth the raw edges of the clay windows. They should look deliberate and finished, not jagged. -
Bisque fire:
Allow the vase to dry completely slowly to prevent cracking, especially around the thin coil connections. Fire to bisque temperature (usually Cone 04/06 depending on your clay body). -
Glaze the rim:
Apply the electric blue glaze to the top rim. Pour a small amount inside the neck for partial coverage, and paint the exterior of the flared rim, stopping cleanly where the coil texture begins. -
Accent the windows:
Using a smaller detail brush, carefully outline each oval window with the blue glaze. Paint the inside edge of the cut—the thickness of the wall—so the blue frames the opening completely. -
Final firing:
Glaze fire the piece according to your glaze instructions. The unglazed terracotta will fire to a rich matte finish, contrasting beautifully with the glossy blue accents.
Place your finished vase near a window where sunlight can pass through the cutouts, casting playful shadows across your table.