I love setting kids up with clay projects that feel like pure play, but still end in something they’re proud to keep. These clay design ideas for kids are all about simple shapes, cute details, and big creative wins.
Pinch Pot Monsters
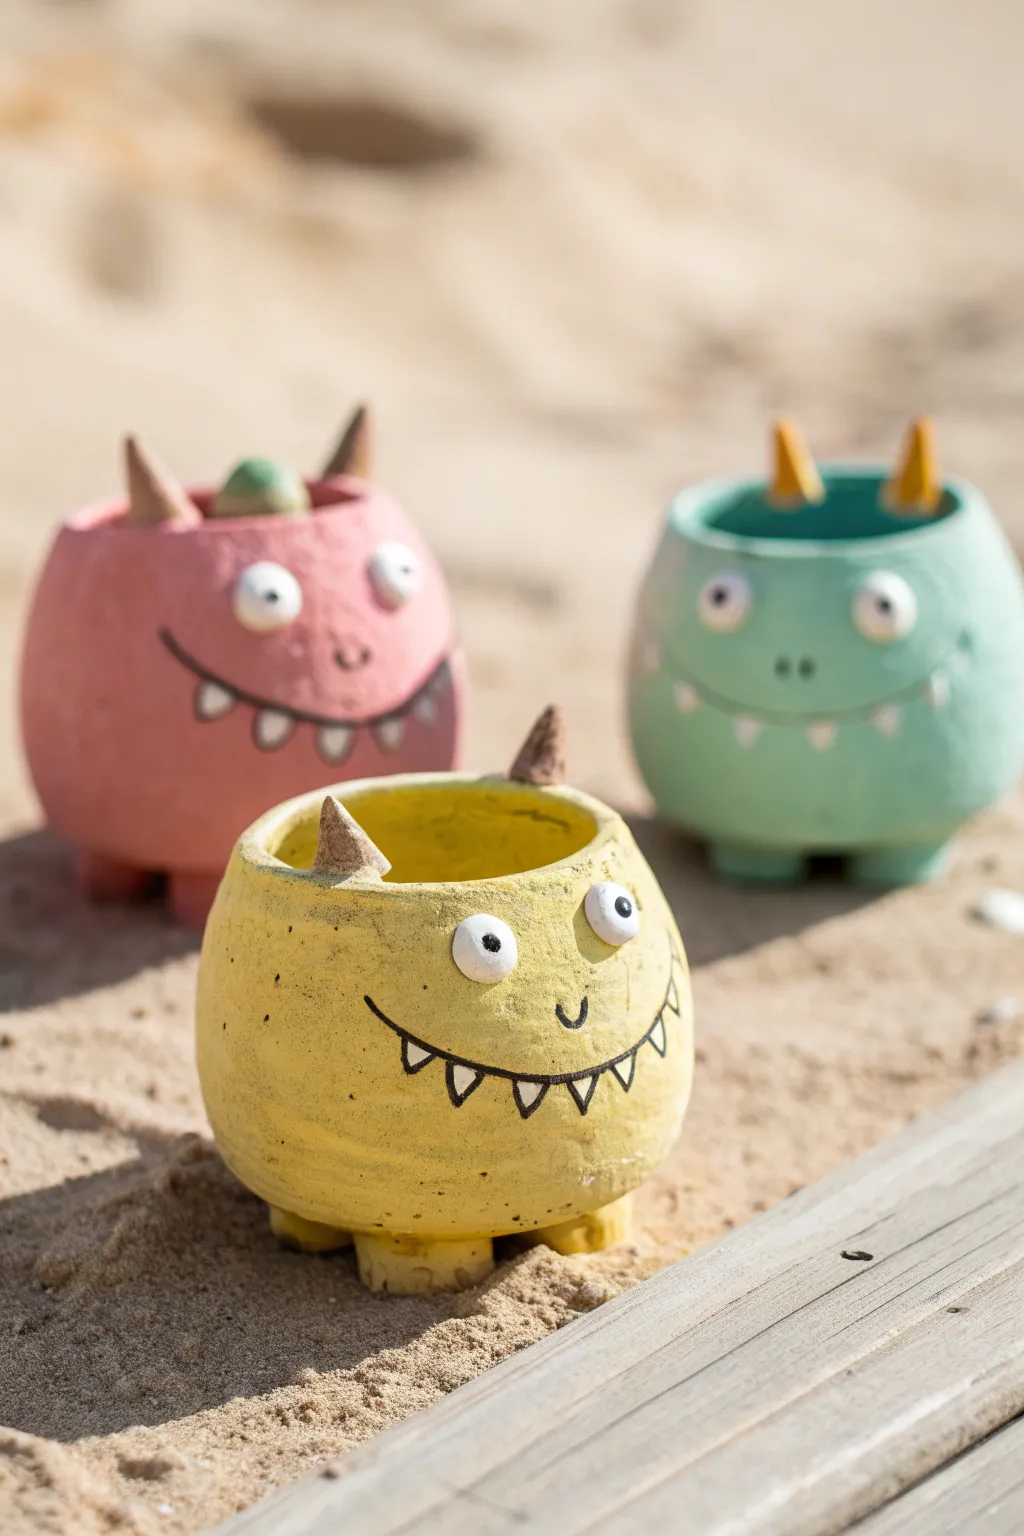
These adorable little vessels turn the basic pinch pot technique into a trio of friendly monsters with big personalities. Featuring pastel finishes, toothy grins, and perky little horns, they are perfect for holding tiny treasures or baby succulents.
How-To Guide
Materials
- Air-dry clay (white or terracotta)
- Acrylic paints (pastel yellow, pink, teal, white, black)
- Small paintbrushes (fine tip for details, medium flat for body)
- Clay sculpting tools (or a toothpick and a popsicle stick)
- Small bowl of water
- Spray sealant or matte varnish
- Sandpaper (fine grit)
Step 1: Shaping the Base
-
Prepare the clay:
Start by taking a chunk of air-dry clay about the size of a tennis ball. Roll it in your hands until it forms a smooth, crack-free sphere. -
Start the pinch:
Push your thumb deep into the center of the ball, stopping just before you poke through the bottom. This creates the initial opening. -
Form the walls:
Gently pinch the clay between your thumb (inside) and fingers (outside), turning the ball as you go. Aim for an even thickness of about a quarter-inch all around. -
Flatten the rim:
Instead of leaving the rim jagged, gentle tap it against your work surface or smooth it with a wet finger to create a flat, lip-like edge. -
Create the feet:
Roll four tiny balls of clay, roughly marble-sized. Attach these to the bottom of the pot in a square formation to act as feet. -
Score and slip:
If I want a secure hold, I always scratch the attachment points with a toothpick and add a drop of water before pressing the feet on. Smooth the seams with your finger.
Step 2: Adding Personality
-
Make the eyes:
Roll two small spheres of clay for the eyeballs. Press them firmly onto the upper front of the pot, spacing them slightly apart for a goofy look. -
Form the horns:
Shape two small cones for horns. Attach these to the rim of the pot or just inside the opening, pointing upwards. -
Refine the details:
Dip your finger in water and smooth out any fingerprints or cracks on the surface of the monster. A smooth surface makes painting much easier later. -
Dry completely:
Let your monster sit in a safe, dry place for at least 24-48 hours. The clay will turn white and feel hard when it is fully cured.
Cracking Clay?
If you see tiny cracks forming while the clay dries, mix a tiny bit of fresh clay with water to make a paste (slip) and fill them in immediately.
Step 3: Painting & Decoration
-
Sand for smoothness:
Once fully dry, lightly gently sand the surface with fine-grit sandpaper to remove any rough bumps. -
Base coat:
Paint the entire body of the monster in your chosen pastel color—yellow, pink, or teal. You may need two coats for opaque coverage. -
Paint the horns:
Use a contrasting color or a natural brown tone for the horns to make them stand out from the body. -
Whiten the eyes:
Paint the clay eyeballs pure white. Let this dry before adding the tiny black pupils with a fine-tip brush or a dotting tool. -
Draw the smile:
Using a very fine brush or a black paint marker, draw a sweeping, curved line for the mouth beneath the eyes. -
Add the teeth:
Paint small downward-pointing triangles along the black mouth line. Outline them in black if needed to make them pop against the pastel body. -
Seal carefully:
Finish with a coat of matte varnish or spray sealant to protect the paint and give the monster a unified finish.
Go Green
Turn these into planters! Poke a drainage hole in the bottom center before drying, then plant a small succulent inside for ‘hair’.
Group your monsters together on a shelf or windowsill to create a colorful little family


Round Animal Buddies
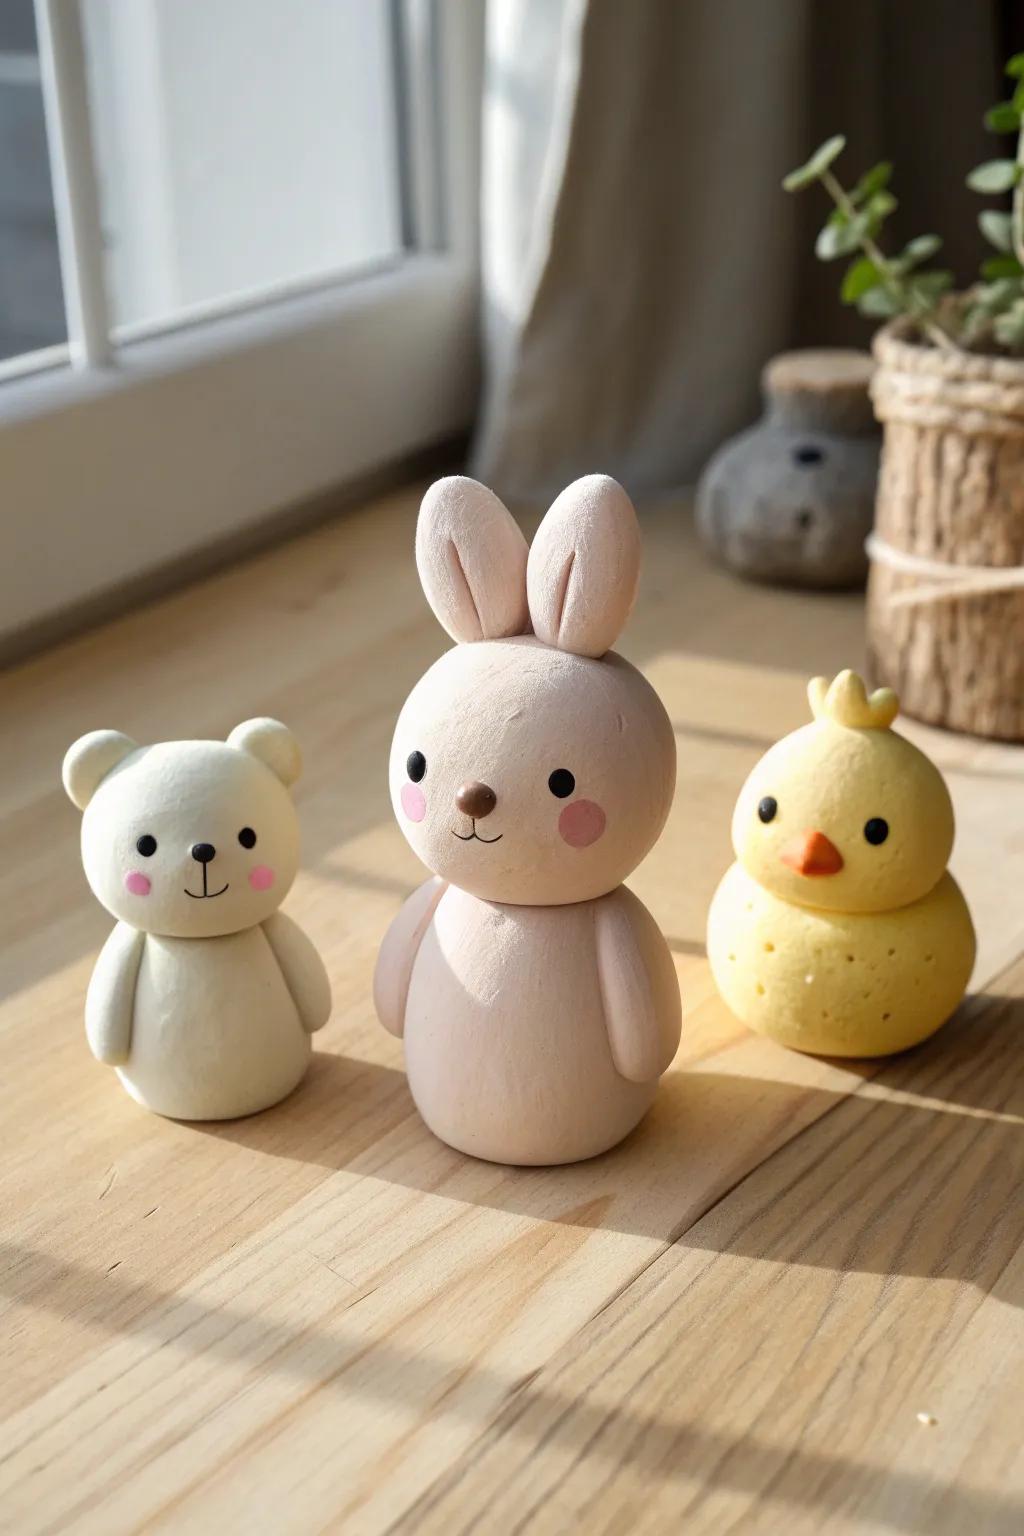
These adorable, smooth-finished animal figurines are perfect for beginners, featuring simple spherical shapes and gentle pastel colors. The trio—a bear, a rabbit, and a chick—sits beautifully on a windowsill, bringing a touch of gentle sweetness to any room.
Step-by-Step
Materials
- Air-dry clay (white)
- Acrylic paints (pale pink, butter yellow, black, orange, white)
- Fine-grit sandpaper (220-400 grit)
- Small bowl of water
- Sculpting tools (or a toothpick)
- Fine detail paintbrush (0 or 00 size)
- Medium soft paintbrush
- Matte varnish (optional)
Step 1: Shaping the Bodies
-
Base Spheres:
Start by rolling three large balls of white air-dry clay for the bodies. These should be roughly egg-shaped but with a flattened bottom so they stand securely on their own. -
Head Shapes:
Roll three slightly smaller spheres for the heads. For the chick, merge the head and body slightly more to create that singular, blob-like bird shape. -
Connecting Pieces:
Score the top of the body and the bottom of the head with a toothpick (making crisscross scratches). Dab a little water on the scored areas and press the head firmly onto the body to bond them. -
Smoothing Seams:
Wet your finger slightly and gently rub the neck seam where the head meets the body until the transition is smooth and seamless.
Cracks while drying?
Mix a small amount of fresh clay with water to create a paste (slip). Fill the crack with this paste using a toothpick, smooth it over, and let it dry again.
Step 2: Adding Animal Features
-
Rabbit Ears:
Form two long, teardrop shapes for the rabbit’s ears. Press these onto the top of one head, smoothing the clay downward to attach them securely. Use a sculpting tool to create a subtle indentation inside each ear. -
Bear Ears:
Create two small, half-circle buttons for the bear ears and attach them to the sides of the second head. -
Chick Topknot:
Roll a tiny, three-pointed crown shape or a small tuft of clay and attach it to the very top of the chick’s head. -
Arms and Wings:
Roll four small sausage shapes for the bear and rabbit arms. Attach them vertically along the sides of their bodies. For the chick, you can keep it smooth or add tiny molded wings flush against the body. -
Drying Time:
Allow the figures to dry completely. This usually takes 24-48 hours depending on humidity. I like to rotate them occasionally so the bottoms dry evenly too.
Velvet Finish Secret
After sanding but before painting, wipe the dried clay with a barely damp sponge. This removes dust and creates a porcelain-smooth surface for painting.
Step 3: Refining and Painting
-
Sanding:
Once bone dry, gently sand the figures with fine-grit sandpaper. Focus on removing any fingerprints or bumps to get that velvet-smooth finish seen in the photo. -
Base Coating:
Paint the rabbit with a very pale, dusty pink acrylic. Paint the chick a soft butter yellow. Leave the bear the natural white of the clay, or give it a coat of fresh white paint for consistency. -
Cheek Blush:
Mix a diluted pink paint. Using your finger or a dry brush, gently dab round rosy cheeks onto the bear and the rabbit. The paint should be very subtle and soft-edged. -
Bear Face Details:
Using the finest paintbrush and black paint, add two small dots for eyes and an inverted triangle nose connected to a simple mouth anchor for the bear. -
Rabbit Face Details:
Paint the rabbit’s eyes black and add a tiny brown or dark pink nose with a small vertical line beneath it. -
Chick Face Details:
Paint two black eyes on the chick. Then, using orange paint, draw a small diamond shape for the beak centered between the eyes. -
Texture Accents:
For the chick, you can use a needle tool to add very faint, tiny dots sparingly around the bottom half to simulate fluffy texture before sealing. -
Final Protection:
Finish the project by applying a coat of matte varnish to protect the paint without making the animals too shiny.
Place your new friends on a sunny shelf and enjoy their quiet company


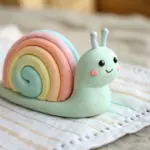
Coil Snakes and Caterpillars
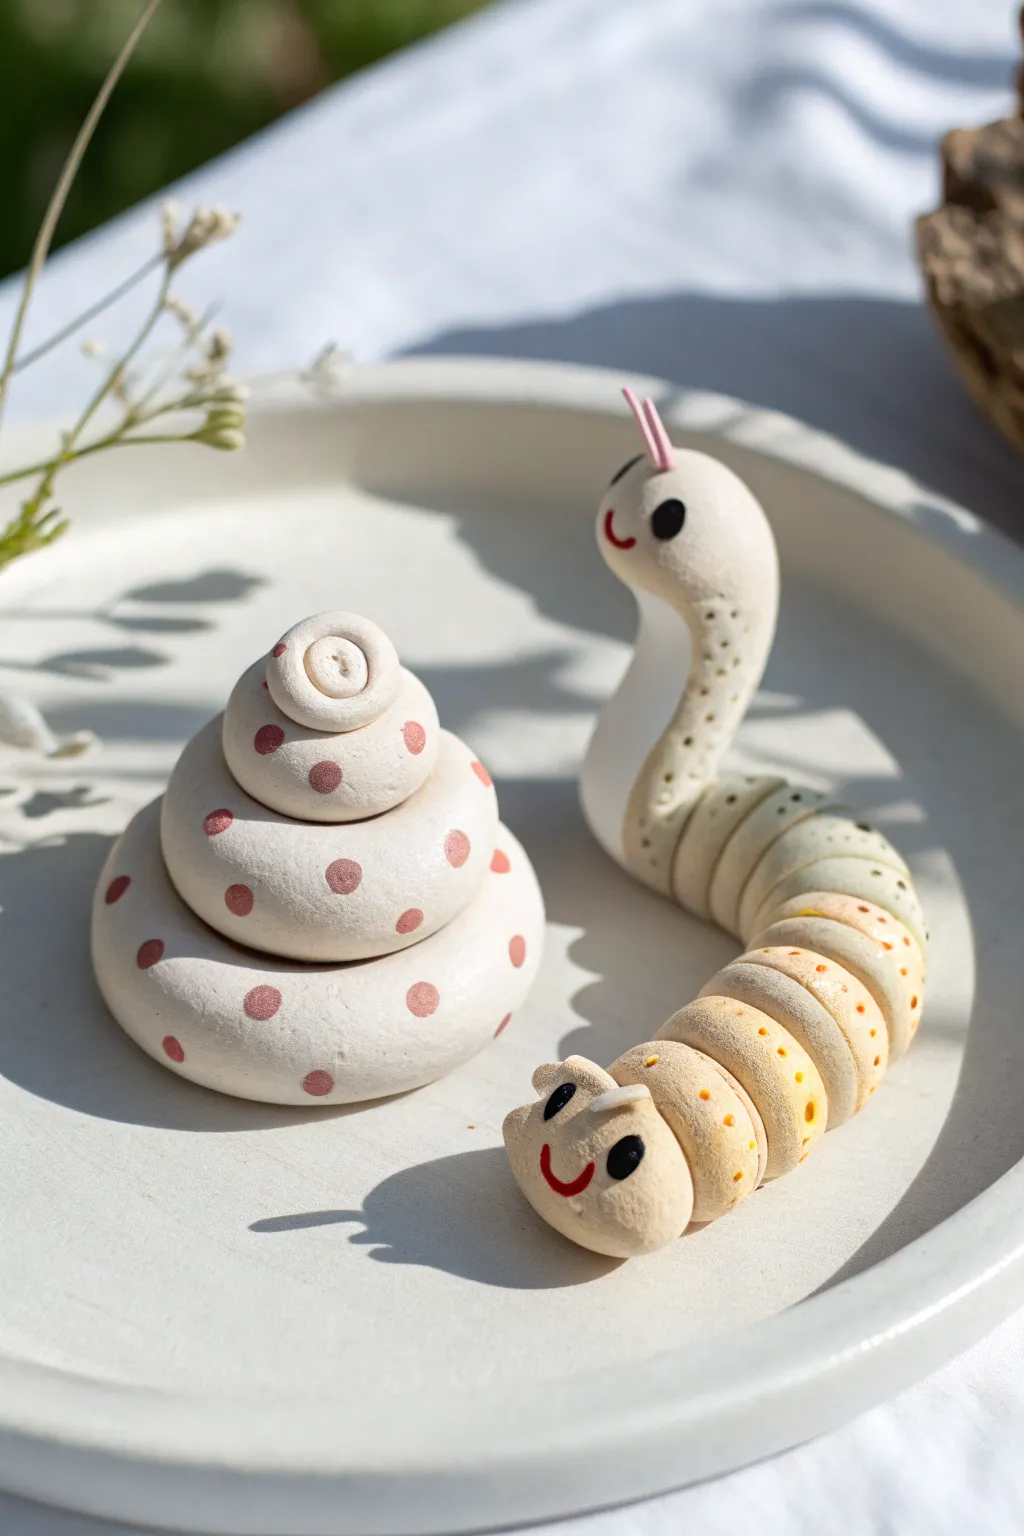
These two adorable garden friends are crafted from simple white air-dry clay and brought to life with minimalistic painted details. The pair consists of a charming coiled pile, resembling a swirl of soft-serve ice cream or a sleeping snake, and a segmented, arching caterpillar with a sweet smile.
Step-by-Step Tutorial
Materials
- White polymer clay or air-dry clay (smooth texture)
- Acrylic paints (black, pale red/pink, light orange, yellow)
- Fine-grit sandpaper (optional)
- Needle tool or toothpick
- Small detail paintbrush (size 0 or 00)
- Rolling pin (acrylic or wooden)
- Pink craft wire or heavy-duty thread (for antennae)
Step 1: Creating the Coiled Swirl
-
Roll the base coil:
Start by conditioning a large chunk of clay until it is soft and pliable. Roll it into a long, even snake that is roughly 1/2 inch thick and about 8-10 inches long. -
Form the base layer:
Take the end of your clay snake and curl it into a tight circle to create the bottom tier. Smooth the seam where the end joins the circle so it sits flat. -
Stack and taper:
Continue coiling the clay upward, making each subsequent ring slightly smaller than the one below it. This creates a conical, beehive shape. You want about three distinct layers. -
Finish the peak:
Terminate the coil at the very top with a small, button-like spiral. Gently press the layers together to ensure they adhere, smoothing out any accidental fingerprints with a damp fingertip. -
Add the spots:
Once the shape is set, use the back of a paintbrush or a dotting tool dipped in pale red paint. Apply evenly spaced polka dots around the rings. Let this piece dry completely.
Cracking Clay?
If your clay starts cracking while you coil it, it’s too dry. Knead in a tiny drop of water or baby oil to recondition it before rolling your shapes.
Step 2: Sculpting the Segmented Caterpillar
-
Prepare the segments:
Roll out a cylinder of clay about 3/4 inch thick. Instead of leaving it smooth, use a knife or a needle tool to gently mark deeply indented rings every half-inch along the body to create that segmented look. -
Shape the arch:
Gently bend the cylinder into an ‘S’ shape. Lift the middle section slightly so the caterpillar looks like it is inching along, with its back arched upward. -
Form the head:
Smooth out one end into a rounded bulb shape for the head. Lift this head section up so the creature appears to be looking forward attentively. -
Create the tail:
At the opposite end, create a second, smaller head-like shape. Interestingly, this design features a face on both ends! Add a small curl at the tail end to mimic a second character. -
Detail the faces:
Using a tiny ball tool or the end of a paintbrush handle, press small indentations where you want the eyes to go on both the main head and the tail. -
Insert antennae:
Cut two tiny pieces of pink wire or stiff thread. carefully poke them into the top of the main head while the clay is still wet. -
Dry and refine:
Allow the clay to dry according to package directions (usually 24 hours). Once dry, you can lightly sand any rough patches.
Smoother Joins
When stacking clay coils, score (scratch) the touching surfaces and add a dab of water or liquid clay to act as glue, ensuring your sculpture won’t fall apart later.
Step 3: Painting and Finishing
-
Paint the gradient:
For the caterpillar, mix a very watered-down yellow and light orange paint. Apply this as a wash over the back segments, letting it fade into the white clay near the belly. -
Add speckles:
Using your smallest brush, dot tiny orange freckles along the spine of the caterpillar, concentrating them on the top of the arch. -
Paint facial features:
With black acrylic paint, carefully fill in the eyes. I find a toothpick works better than a brush for these tiny dots. Add a small, curved red line for the smile on both faces. -
Seal the pieces:
Once the paint is fully dry, apply a matte varnish to protect your work without making it too shiny, preserving the natural clay look.
Now you have a whimsical pair of clay buddies ready to decorate a shelf or planter


Tiny Turtles With Textured Shells
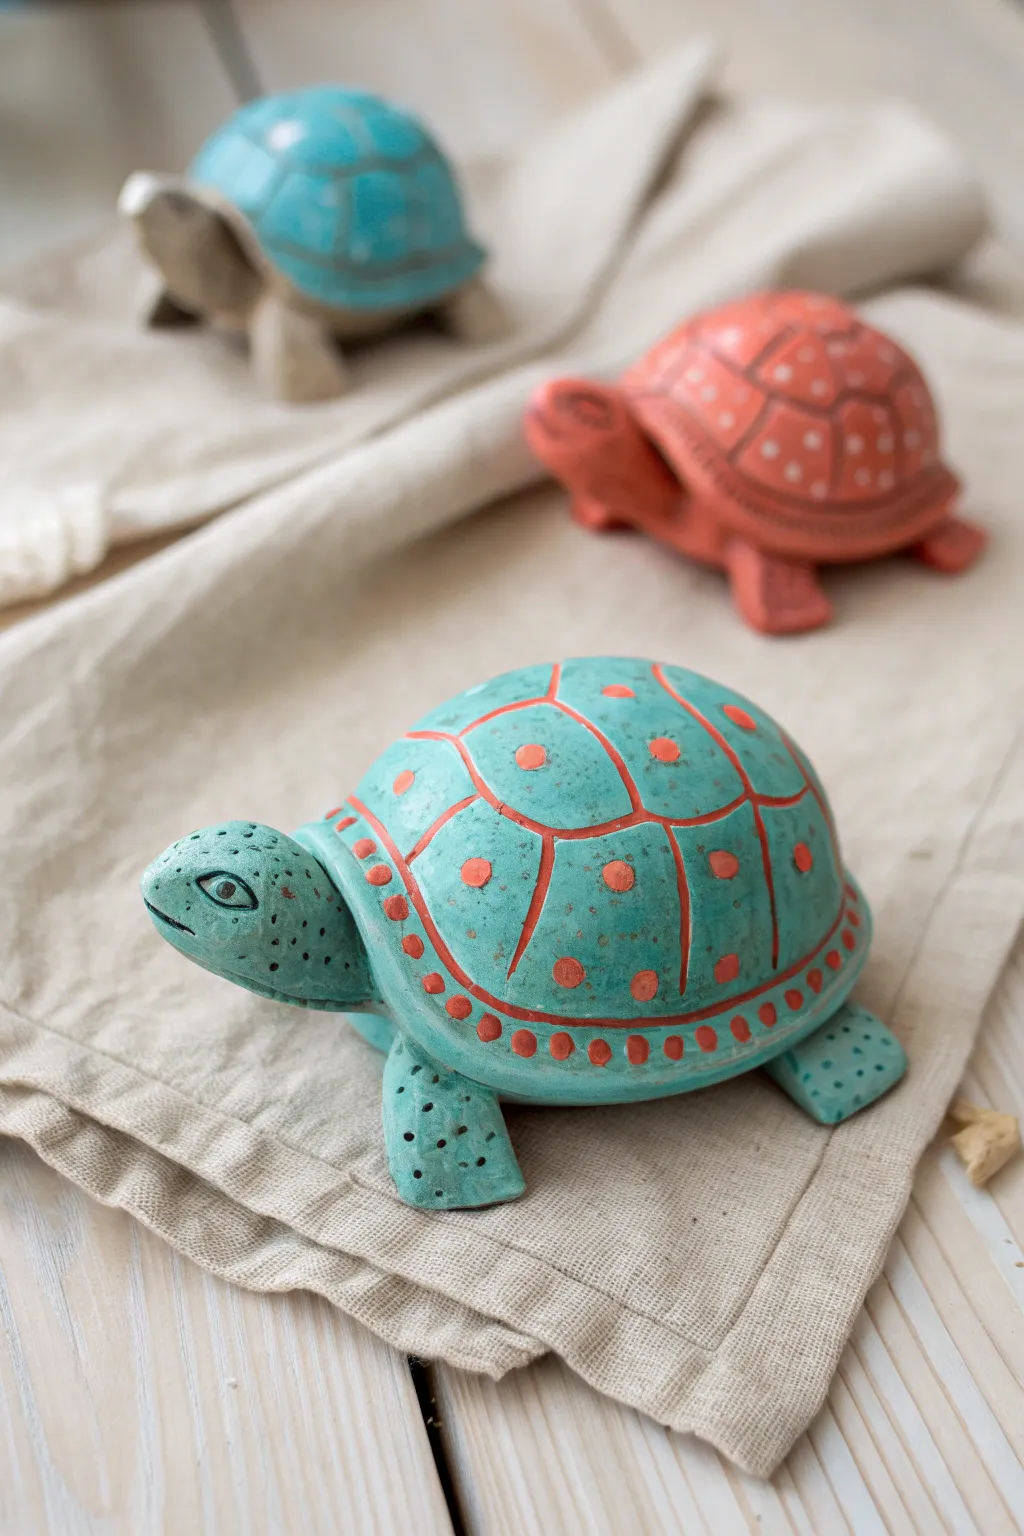
These charming clay turtles feature wonderfully smooth, rounded shells adorned with vibrant, contrasting details that give them a playful folk-art feel. The project balances simple sculpting with precise decorative painting, resulting in a durable and cheerful keepsake perfect for a desk or shelf.
Step-by-Step Guide
Materials
- Air-dry clay (or polymer clay)
- Acrylic paints (turquoise/teal, terracotta/orange, black)
- Fine-grit sandpaper
- Small round paintbrush (size 0 or 1)
- Dotting tool or toothpick
- Sculpting tools (or a butter knife)
- Water cup (for smoothing)
- Matte finish varnish or sealant
Step 1: Sculpting the Base Form
-
Form the shell:
Start with a ball of clay about the size of a tangerine. Gently press it onto your work surface to flatten the bottom while keeping the top domed and smooth, creating a classic half-sphere shape. -
Create the head:
Roll a smaller piece of clay into a thick teardrop shape. Use a little water or slip (liquid clay) to attach the wider end firmly to the underside of the shell’s front edge, angling it slightly upward. -
Shape the flippers:
Make four small, flat petal shapes for the legs. Attach two near the front and two near the back on the underside of the shell, blending the seams with your finger or a tool so they stick securely. -
Add a tail:
Roll a tiny cone of clay and attach it to the rear center of the underside, blending it in just like the legs. -
Refine the surface:
Dip your finger in water and gently rub over the entire turtle to smooth out any fingerprints or cracks. The smoother the clay now, the better the paint will look later. -
Define the face:
Using a needle tool or toothpick, gently scribe a curved line for the mouth and make slight indentations where the eyes will go.
Step 2: Adding Texture and Detail
-
Texture the skin:
Take a toothpick or a small, stiff bristle brush and gently poke the head and flippers repeatedly. This stippling effect creates a rough, skin-like texture that contrasts nicely with the smooth shell. -
Scribe the shell plates:
Lightly draw the shell pattern into the wet clay using a needle tool. Draw a central shape on top, surrounded by a ring of polygon shapes, followed by a border around the rim. -
Deepen the lines:
Go over your sketched lines with a slightly thicker tool to create distinct grooves. These channels will help guide your painting later. -
Dry completely:
Set the turtle aside in a dry, airy spot. Let it cure fully—this usually takes 24 to 48 hours for air-dry clay depending on thickness.
Smooth Operator
To get perfectly smooth lines on the shell, wipe your carving tool with a damp sponge after every few strokes to remove clay buildup.
Step 3: Painting and Finishing
-
Sand imperfections:
Once bone dry, use fine-grit sandpaper to briefly buff the shell if there are any rough spots. Wipe away the dust with a damp cloth. -
Base coat:
Paint the entire turtle with your main color—the example uses a lovely matte turquoise. You may need two thin coats for opaque coverage. -
Outline the shell segments:
Using a very fine brush and orange or terracotta paint, carefully fill in the grooved lines you carved earlier. It’s okay if it’s not perfect; it adds to the handmade charm. -
Add decorative dots:
Dip the end of a paintbrush or a dotting tool into the orange paint. Place a single large dot in the center of each shell segment. -
Create the border:
Add a series of smaller orange dots around the bottom rim of the shell to frame the design. -
Detail the eyes:
Paint the eye indentations black. Once dry, create a defined eye shape by outlining it with a thin black line and adding a tiny white reflection dot if desired. -
Antique the skin (optional):
Dilute a tiny bit of black paint with water to make a wash. Brush it over the textured head and legs, then immediately wipe it off with a paper towel. The dark paint will stay in the tiny holes, emphasizing the texture. -
Seal the piece:
Finish by applying a coat of matte varnish. I find this protects the paint from chipping and gives the clay a professional, finished look without being too shiny.
Color Swap
Try reversing the color scheme like the background turtle: paint the body terracotta and fill the grooves with white or cream for an earthy look.
Now you have a delightful little reptile friend ready to slowly make its way across your table

The Complete Guide to Pottery Troubleshooting
Uncover the most common ceramic mistakes—from cracking clay to failed glazes—and learn how to fix them fast.
Hedgehog Texture Critters
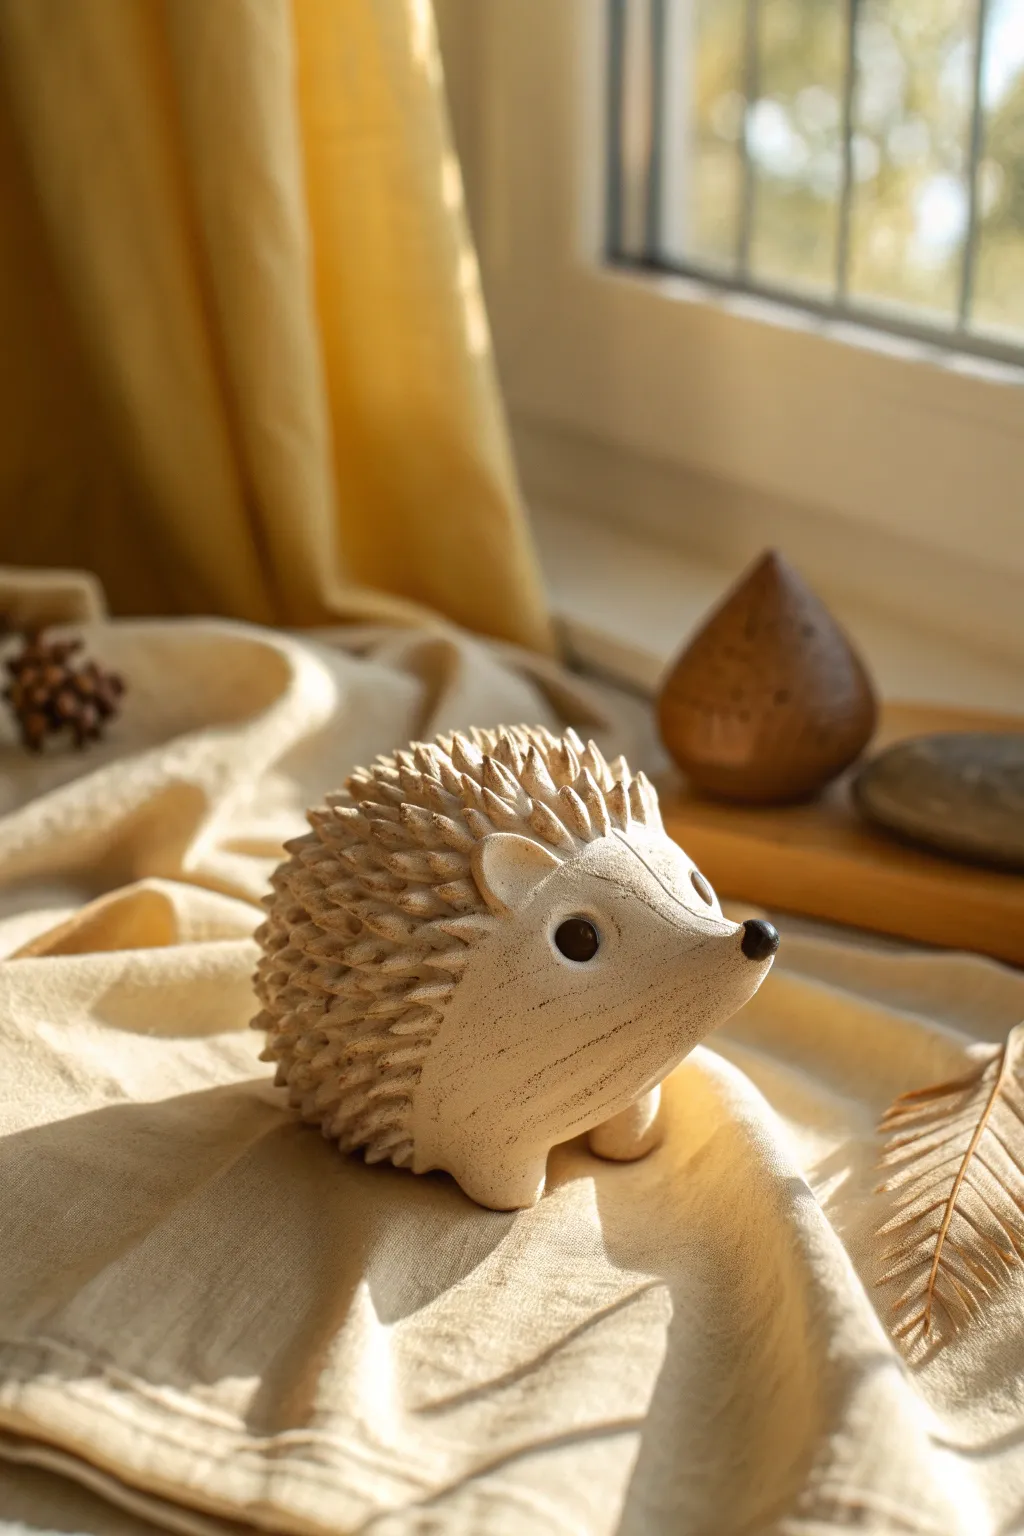
Bring a little woodland charm into your room with this adorable clay critter, featuring a gentle, upward gazing expression and a wonderfully tactile, spiky body. Its cream-colored finish gives it a timeless, modern look that fits perfectly on any windowsill.
Step-by-Step
Materials
- Air-dry clay (white or cream) or polymer clay
- Sculpting tools (needle tool, small loop tool)
- Small rolling pin
- Water in a small cup (for smoothing)
- Sponge or soft cloth
- Black acrylic paint
- Small detail paintbrush
- Toothpick (optional)
- Small wooden board or parchment paper (work surface)
Step 1: Forming the Base Body
-
Condition the Clay:
Start by taking a fist-sized ball of clay and kneading it in your hands until it feels warm and pliable. This prevents cracks later on. -
Shape the Teardrop:
Roll the clay into a smooth sphere first, then gently roll one side against your work surface to elongate it into a teardrop shape. This will be the hedgehog’s body. -
Define the Snout:
At the pointed end of the teardrop, gently pinch and lift the clay slightly upward to create an upturned snout. The hedgehog should look like it’s sniffing the air. -
Flatten the Bottom:
Tap the bottom of your shape firmly on the table to create a flat base so your hedgehog sits securely without rolling over. -
Smooth the Surface:
Dip your finger in a little water and run it over the entire shape to erase any fingerprints or bumps. A smooth canvas is key for the next steps.
Step 2: Adding Details & Feet
-
Create the Ears:
Roll two tiny pea-sized balls of clay. Flatten them slightly and press a small indentation into the center of each specific ball to make a cup shape. -
Attach the Ears:
Score the clay (make tiny scratches) where the ears will go, just behind where the face starts. Add a drop of water and press the ears on firmly. -
Make the Feet:
Create four small balls of clay for the feet. Place the body on top of them to position them correctly, then blend the clay of the feet upward into the body using your thumb or a modeling tool so they are securely attached. -
Refine the Face:
Use a modeling tool to smooth the transition between the forehead and the snout, creating a gentle slope.
Spikes Falling Flat?
If the clay is too soft, the spikes might slump. Let the sculpted body sit for 15-20 minutes to firm up slightly before carving the texture.
Step 3: Creating the Spiky Texture
-
Mark the Boundary:
Lightly trace a curved line with a needle tool around the face area. Everything behind this line will become the spiky coat, while the face stays smooth. -
Start the Spikes:
Using a small loop tool or a specialized clay sculpting tool, press into the clay and drag backward slightly to lift up small, triangular sections of clay. -
Work in Rows:
I prefer to start at the top of the head near the ears and work my way back. Keep the spikes close together for a dense, fluffy look. -
Vary the Direction:
While most spikes should point backward, angle a few slightly left or right to make the texture look more natural and organic. -
Detail the Sides:
Continue the texture down the sides of the body, stopping just above the feet. The bottom tummy area should remain smooth.
Pro Tip: Eye Shine
After painting the black eyes, add a tiny dot of white paint or gloss varnish to the pupil. It creates a lifelike reflection.
Step 4: Finishing Touches
-
Add the Nose:
Roll a tiny, distinct ball of clay and attach it to the very tip of the snout. You can dampen the join area to ensure it sticks well. -
Create Eye Sockets:
Use the rounded end of a paintbrush handle to press two indentations where the eyes will go. Deep sockets add character. -
Shape the Eyes:
Roll two small balls of clay that fit perfectly into the sockets you just made. Press them in gently; they should protrude slightly. -
Let it Dry:
Allow your creation to dry completely according to your clay package instructions. This usually takes 24 to 48 hours for air-dry clay. -
Paint the Details:
Once dry, use a small detail brush and black acrylic paint to color specifically the nose tip and the round eyes. This high contrast brings the character to life.
Place your new woodland friend in a sunny spot to enjoy the cheerful vibes it brings to your space
Thumbprint Heart Bowls
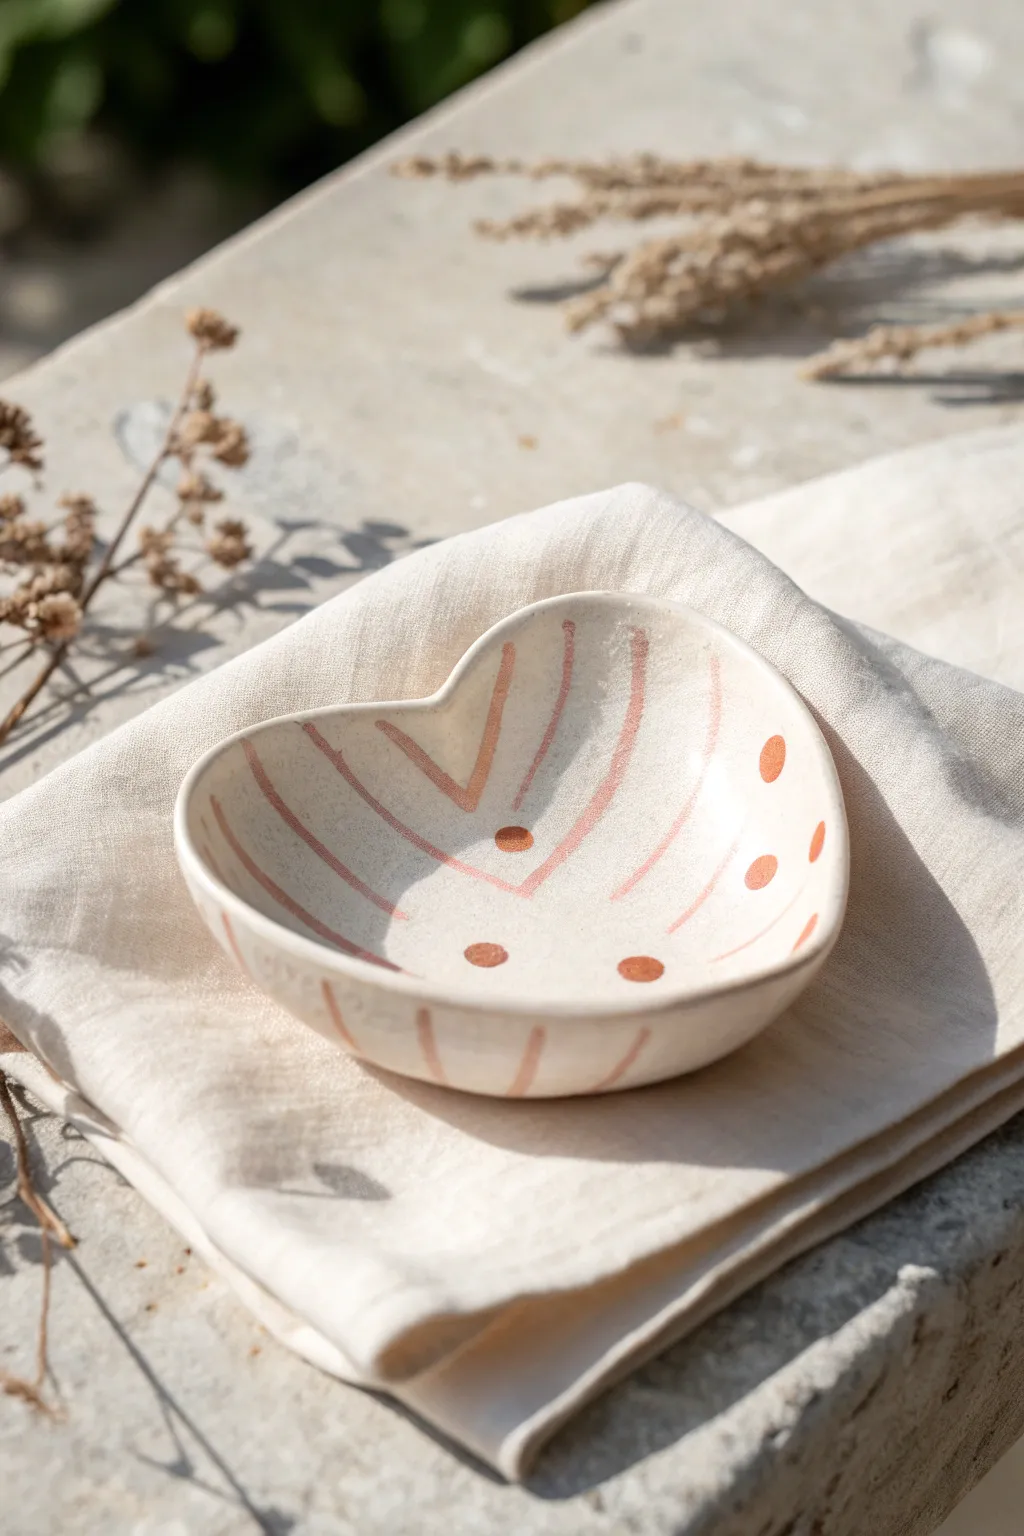
This sweet, heart-shaped catchall dish balances organic charm with structured design. Featuring soft terracotta pink accents against creamy white clay, it uses simple thumb-pressing techniques to create a delightful, functional keepsake.
How-To Guide
Materials
- White or cream-colored air-dry clay (or polymer clay)
- Terracotta or dusty rose acrylic paint
- Rolling pin
- Small heart-shaped template (paper or cookie cutter)
- Clay knife or plastic cutting tool
- Small bowl of water (for smoothing)
- Fine-point paintbrush (size 0 or 1)
- Sandpaper (fine grit)
- Gloss or matte varnish (optional)
Step 1: Shaping the Base
-
Condition the clay:
Start by taking a handful of your white clay and kneading it thoroughly until it’s soft, pliable, and free of cracks. -
Roll the slab:
Place the clay on a clean, flat surface. Use a rolling pin to flatten it into an even slab, aiming for a consistent thickness of about 1/4 inch. -
Cut the heart:
Place your heart template or cookie cutter onto the slab. Carefully cut around the shape using your clay knife, then lift away the excess material. -
Form the curve:
Gently lift the flat heart into your palm. I like to slowly cup my hand, pressing the center of the heart down slightly while encouraging the edges to curve upward to form a bowl shape.
Smooth Moves
Use a barely damp sponge during the smoothing phase to erase fingerprints without over-wetting the clay, which can weaken it.
Step 2: Refining and Smoothing
-
Smooth the edges:
Dip your finger into a little water and run it along the rim of the bowl. This softens any sharp cuts and prevents future cracking. -
Define the dip:
Press your thumb firmly but gently into the top dip of the heart to emphasize the indentation, ensuring the ‘lobes’ of the heart remain distinct. -
Check the walls:
Work your way around the bowl, pinching and smoothing the walls to ensure they are even in height and thickness all around. -
Initial drying:
Set the bowl aside to dry. If creating a curved bottom, rest it inside a slightly larger bowl lines with plastic wrap to help it hold its cupped shape while hardening. -
Full cure:
Let the clay dry completely according to package instructions, usually 24-48 hours for air-dry clay.
Step 3: Painting the Design
-
Sand imperfections:
Once fully hard, inspect the bowl for rough spots. Use fine-grit sandpaper to buff the rim and surface until smooth and velvety. -
Mix your color:
Prepare your dusty rose or terracotta paint. If the paint is too thick, thin it slightly with water to get a fluid, ink-like consistency for fine lines. -
Paint interior stripes:
Using a fine-point brush, paint thin stripes radiating from the center of the heart outward. On the left side, paint straight lines; on the right, curve them slightly to follow the bowl’s form. -
Connect the center:
Create the V-shape near the heart’s cleft by painting two diagonal lines that meet in the middle, mirroring the heart’s upper shape. -
Add the dots:
Dip the back end of your paintbrush handle into the paint. Stamp three distinct dots in the center (forming a small triangle) and three dots up the right-hand wall near the rim. -
Paint exterior details:
Don’t forget the outside! Extend the stripes over the rim and down the exterior walls of the bowl so the pattern flows continuously. -
Seal the piece:
Once the paint is totally dry, apply a coat of varnish to protect the design and give the clay a finished, professional look.
Gilded Touch
For a luxe finish, paint the very rim of the bowl with metallic gold paint after the pink design dries to add a shimmering border.
Fill your new heart bowl with trinkets or gift it to someone special to brighten their day


What Really Happens Inside the Kiln
Learn how time and temperature work together inside the kiln to transform clay into durable ceramic.
Rainbow Clay Beads
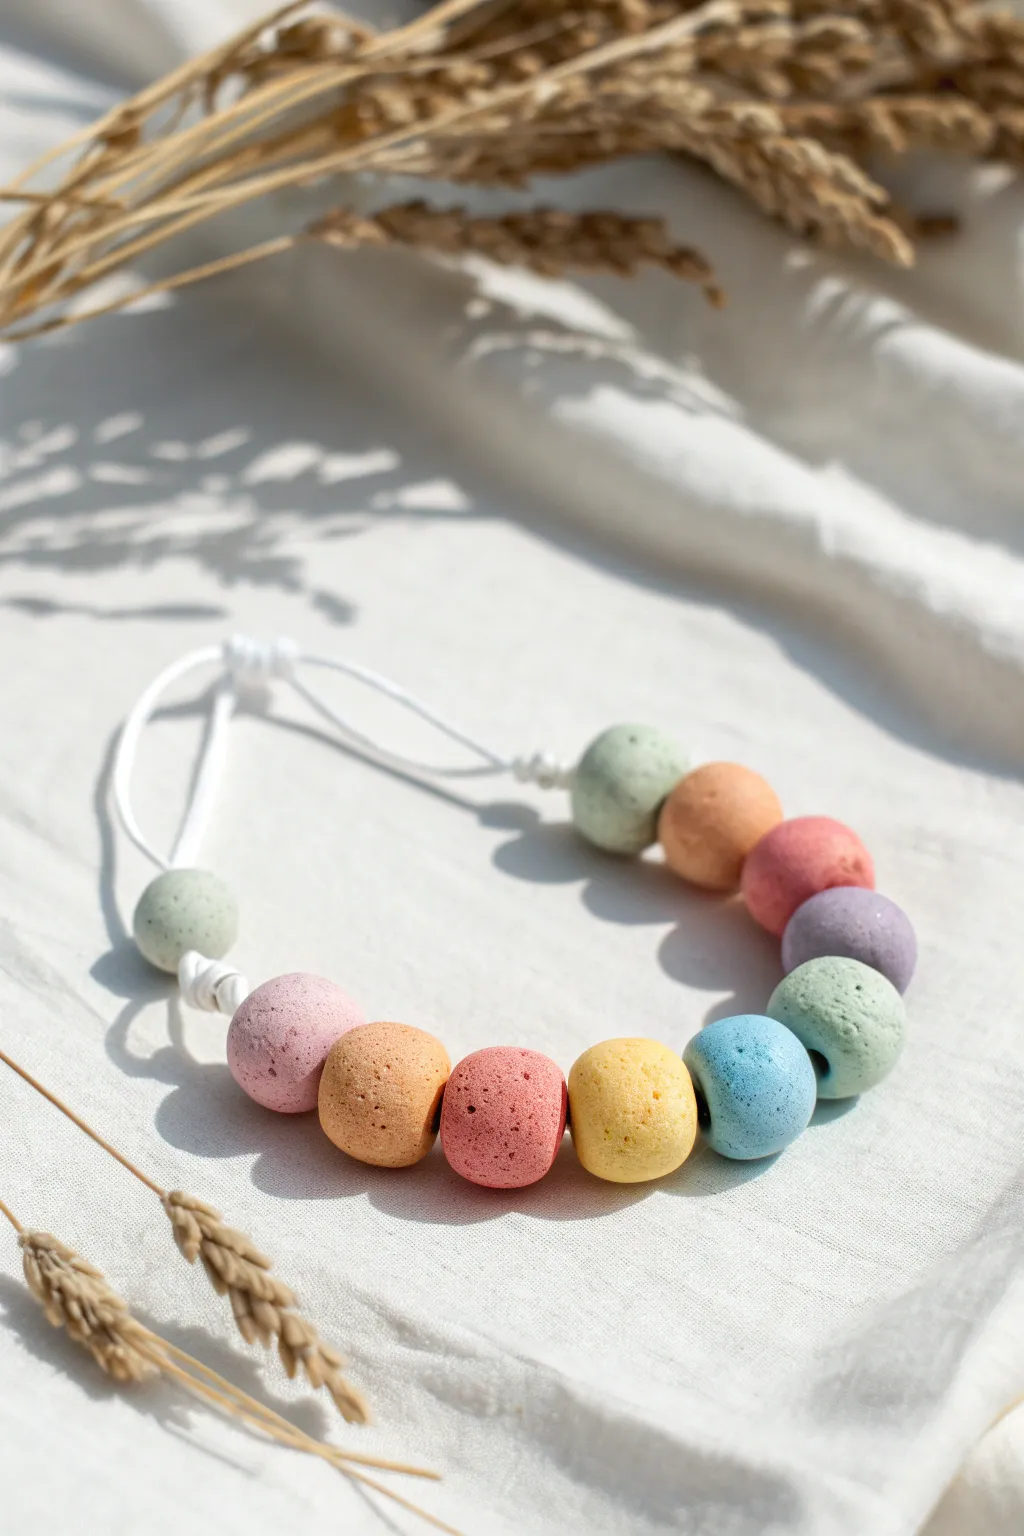
Create a charming, beach-inspired accessory using rough-textured clay beads in soft, rainbow sherbet hues. These beads have a unique, porous finish that mimics natural sea stones or pumice, making for a delightfully tactile sensory necklace.
Step-by-Step Tutorial
Materials
- Air-dry clay (white) or polymer clay
- Acrylic paints (pastel sets: light pink, peach, coral, yellow, blue, green, purple)
- Old toothbrush or stiff bristle brush
- Toothpick or bamboo skewer
- Sea salt or coarse sand (for texture)
- White cotton cord or waxed string
- Sandpaper (optional)
- Matte sealant spray
Step 1: Preparing the Clay
-
Mix the Texture:
To achieve that signature porous, stone-like look, start by kneading a small amount of coarse sea salt or clean sand directly into your white clay. You want the clay to feel gritty but still moldable. -
Portion Control:
Divide your textured clay into roughly 10 to 12 equal portions. Aim for balls about the size of a large marble or a gumball. -
Shape the Beads:
Roll each portion between your palms to form a sphere. Don’t worry about them being perfectly round; a slight organic imperfection adds to the natural pebble aesthetic. -
Enhance the Surface:
Take an old toothbrush and gently tap the surface of each bead. This creates tiny pits and divots, enhancing the porous effect created by the salt mix.
Step 2: Creating the Holes
-
Pierce the Center:
While the clay is still soft, use a toothpick or bamboo skewer to poke a hole through the center of each bead. -
Widen the Path:
Gently wiggle the skewer in a circular motion to widen the hole slightly. This ensures your cord will fit through easily later, especially since clay shrinks slightly when drying. -
Smooth the Openings:
Check the entrance and exit of the hole. If the clay has pushed out, gently pat it back down with your finger to keep the bead shape tidy. -
Dry Completely:
Set the beads aside on a piece of parchment paper to dry. If using air-dry clay, this usually takes 24-48 hours. If using polymer clay, bake according to package instructions.
Sticky Situation?
If the clay is sticking to your hands while mixing in the sand or salt, dust your palms with a little cornstarch or baby powder to keep things smooth and workable.
Step 3: Adding Color
-
Prepare the Palette:
Squeeze out small amounts of your pastel acrylic paints. You’ll need a range of soft colors: mint green, peach, warm pink, deep coral, sunshine yellow, sky blue, and lavender. -
Paint the Base:
Paint each bead a solid color. You might need two thin coats for full coverage, letting them dry in between. -
Reveal the Texture:
Once the base coat is dry, I like to take a piece of fine sandpaper and very lightly scuff the surface. This removes paint from the highest points of the texture, revealing white flecks and emphasizing the stone look. -
Seal (Optional):
To protect the paint without making it shiny, spray the beads with a matte sealant. Avoid glossy sprays, as they will ruin the natural, earthy vibe.
Scented Sensory Beads
Add a drop of essential oil to the air-dry clay before rolling. The porous texture of the dried beads will hold the scent, turning this into a calming aromatherapy necklace.
Step 4: Assembly
-
Cut the Cord:
Cut a length of white cotton cord about 24 inches long (or longer if you want an adjustable sliding knot). -
Start Stringing:
Thread your beads onto the cord. Arrange them in a rainbow gradient—green, peach, pinks, yellow, blue, then purple—or mix them up randomly. -
Secure the Lone Bead:
Notice the single green bead separated from the main group in the photo? To do this, tie a simple overhand knot on the cord, thread one bead, and tie another knot immediately after it to lock it in place. -
Group the Rest:
String the remaining large group of beads onto the cord. They can float freely or be knotted in place depending on your preference. -
Final Knots:
Finish the necklace by tying the ends of the cord together. For an adjustable fit, like the one shown, use a sliding square knot or simply tie a bow.
Now you have a beautiful, touchable piece of wearable art that captures the colors of a perfect summer day
Animal Pencil Cup Faces
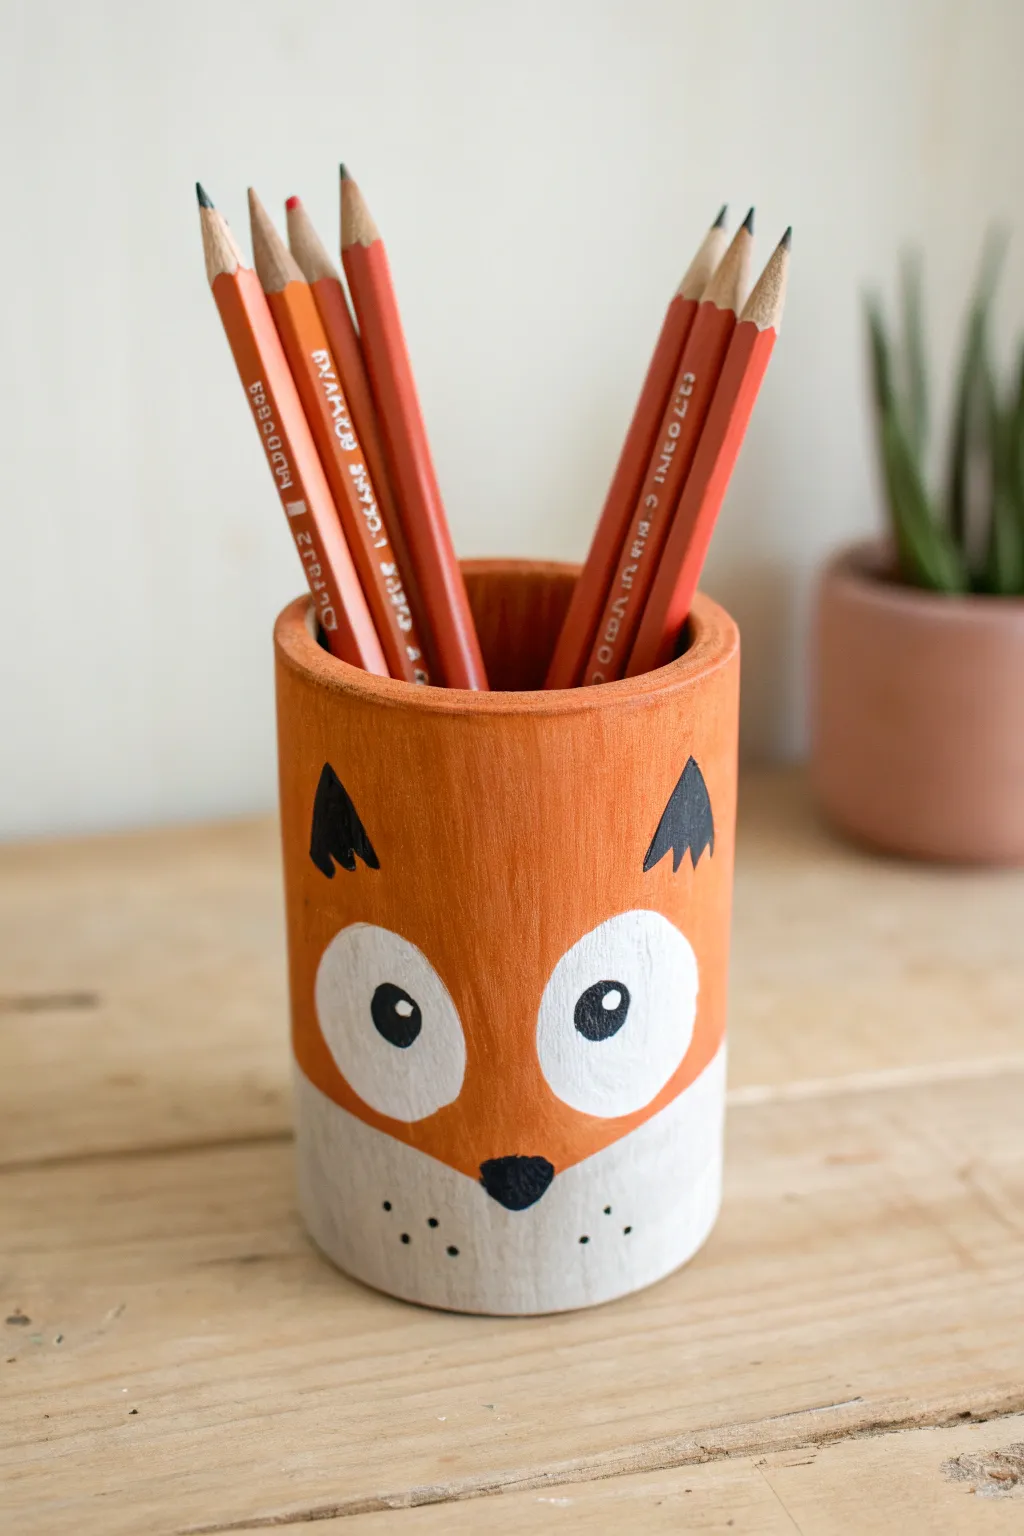
Transform a simple cylindrical container into a woodland friend with this adorable fox pencil cup. Using warm acrylic paints and simple geometric shapes, you’ll create a charming desk accessory perfect for holding your favorite art supplies.
How-To Guide
Materials
- Cylindrical pencil cup (unfinished wood, bisque ceramic, or air-dry clay)
- Acrylic paint (orange, white, black)
- Flat paintbrush (medium size)
- Round paintbrush (small size for details)
- Pencil for sketching
- Water cup
- Paper towels
- Matte sealant or varnish (optional)
Step 1: Preparation & Base Coat
-
Clean surface:
Ensure your pencil cup is clean and dry. If you are using wood, lightly sand any rough spots to create a smooth painting surface. -
Sketch the face:
Lightly use a pencil to map out the fox’s face. Draw a curved line across the lower third for the snout area and two large, tilted oval shapes for the eyes. -
Mark the ears:
Near the top rim, sketch two small triangles for the ears. Make the tips pointy and the base wide enough to look proportional.
Uneven Lines?
If your hand shakes while painting lines, rest your pinky finger on a dry part of the cup for stability. You can also use painter’s tape to mask off the horizontal line between colors.
Step 2: Painting the Fur
-
Apply orange base:
Using your flat brush, paint the upper portion of the cup with bright orange acrylic paint. Carefully paint around the ovals you sketched for the eyes. -
Refine the edges:
Go right up to the line marking the lower snout area, keeping a clean division between the orange fur and the bottom section. I find it helpful to turn the cup as I go to keep the line steady. -
Paint the bottom section:
Rinse your brush thoroughly and paint the bottom third of the cup with white paint. This section represents the fox’s muzzle and chin. -
Let it dry:
Allow these base layers to dry completely. If the wood grain or clay color shows through, apply a second coat for opacity.
Make It a Set
Create a whole woodland team! Try painting a grey raccoon or a brown bear on other cups using similar geometric shapes for their faces.
Step 3: Adding Facial Features
-
Fill the eyes:
Paint the large tilted ovals with white paint. Ensure the white paint meets the orange paint cleanly without leaving gaps. -
Create the nose:
Switch to your small round brush and black paint. Paint an inverted triangle or rounded nose right where the white muzzle meets the orange face. -
Paint the pupils:
Inside the white eye patches, paint two solid black circles for pupils. Leave a tiny white dot in each (or add it later) for a sparkle effect. -
Add ear details:
Using the small brush and black paint, fill in the triangle shapes near the rim. Add a few tiny jagged lines at the bottom of the triangles to mimic fur texture. -
Whisker spots:
Dip the very tip of your small brush (or use a toothpick) into black paint. Gently dot three small spots on each side of the white muzzle area.
Step 4: Finishing Touches
-
Double-check details:
Look over your work for any messy edges. You can use the original orange or white paint to touch up lines where colors meet. -
Paint the rim:
Paint the top rim and a little bit of the inside edge with orange paint to give it a finished, professional look. -
Seal (optional):
Once the paint is fully dry, apply a coat of matte sealant/varnish to protect your artwork from scratches and wear.
Now your workspace has a friendly guardian ready to organize your pencils and brushes

TRACK YOUR CERAMIC JOURNEY
Capture glaze tests, firing details, and creative progress—all in one simple printable. Make your projects easier to repeat and improve.
Story Stones in Clay
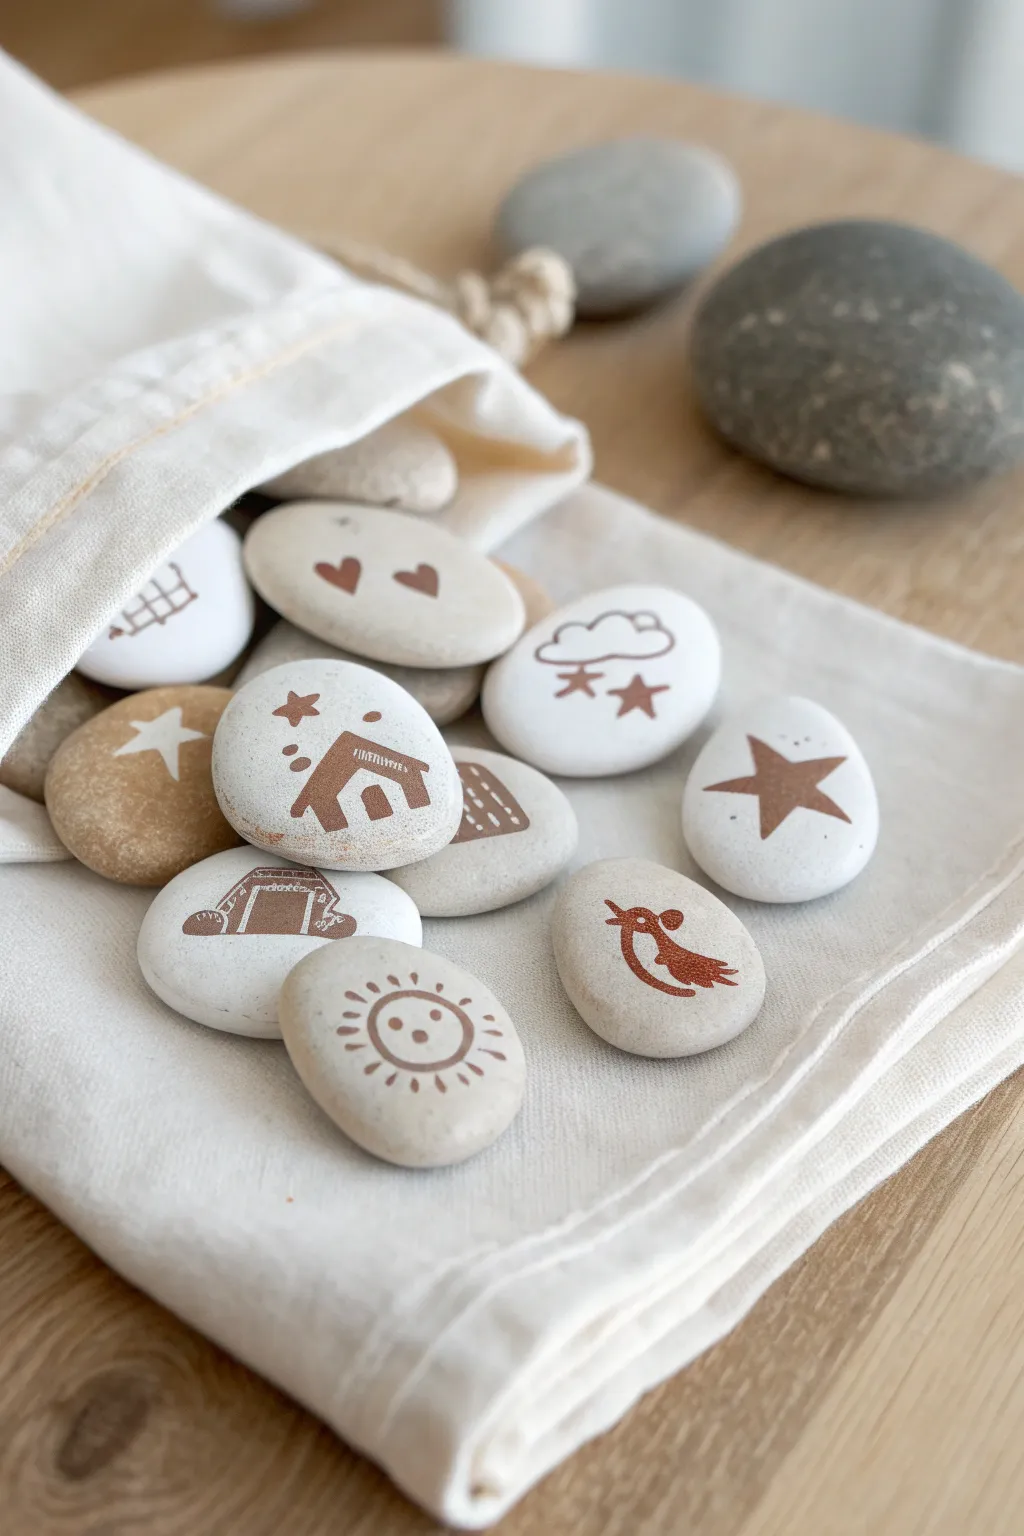
These charming, smooth story stones are a wonderful way to spark imagination without needing to hunt for the perfect rocks outdoors. Using white air-dry or polymer clay, you can craft uniform, tactile pebbles and decorate them with simple, rustic symbols to create endless narrative possibilities.
Detailed Instructions
Materials
- White air-dry clay or polymer clay (white and tan/beige)
- Acrylic rolling pin
- Fine-grit sandpaper (optional)
- Brown acrylic paint or ink pad
- Small rubber stamps (nature & home themes)
- Fine detail paintbrush (0 or 00 size)
- Matte spray varnish or sealant
- Small linen drawstring bag
- Wax paper or craft mat
Step 1: Shaping the Stones
-
Condition the clay:
Begin by kneading your white clay until it is warm, soft, and pliable. If you want some variation like in the photo, mix a small amount of beige clay into a portion of the white clay to create a subtle tan marbling or solid tan stones. -
Portioning:
Pinch off small pieces of clay, roughly the size of a walnut or a little larger. Aim for variety in size but consistency in volume so they feel like a set. -
Rolling spheres:
Roll each piece of clay between your palms to form a smooth ball. Ensure there are no deep cracks or seams, as these will show in the final stone. -
Flattening into pebbles:
Gently press the ball onto your work surface using the palm of your hand or an acrylic roller. You aren’t making a pancake; you want a thick, rounded disk that mimics a river rock. -
Smoothing edges:
Dip your finger in a tiny bit of water (for air-dry clay) or baby oil (for polymer) and run it around the perimeter of the stone to soften the edges. The goal is an organic, tumbled look. -
Drying or baking:
If using air-dry clay, let the stones dry on a wire rack for 24-48 hours, flipping halfway through. If using polymer clay, bake according to the package instructions (usually 275°F/135°C for 15-30 minutes).
Stamp Smudging?
If your stamp slides on the curved surface, try stamping on tissue paper first. Then, use decoupage glue to adhere the tissue paper image onto the stone for a seamless look.
Step 2: Adding the Imagery
-
Sanding (Optional):
Once fully dry or cooled, inspect your stones. I sometimes like to briefly rub them with fine-grit sandpaper to remove any fingerprints or sharp ridges. -
Choosing icons:
Select a theme for your story. In the example, we see simple weather elements (sun, clouds), nature (bird, stars), and home icons. Keep the designs simple and graphic. -
Stamping technique:
For the cleanest look, use small rubber stamps. Press the stamp into a brown ink pad (or brush a thin layer of brown acrylic paint onto the raised stamp). -
Applying the stamp:
Gently rock the stamp onto the center of the stone. Because the surface is curved, you need to be careful to apply even pressure so the whole image transfers. -
Hand-painting option:
If you don’t have stamps, use your fine detail brush and brown acrylic paint. Dilute the paint slightly with water to make it flow like ink. -
Painting the sun:
For the sun stone, paint a small circle in the center. Add short, radiating lines around the perimeter. Simplicity is key here—it should look like a child’s drawing. -
Painting the bird:
Create the bird shape with a simple swooping tear-drop body and a smaller circle head. Add a tiny beak and feet. -
Painting houses and stars:
For the house, outline a square with a triangle roof. Block it in with solid color or leave it as an outline. Add stars by drawing simple five-point shapes or crossing lines. -
Drying the design:
Allow the paint or ink to dry completely. This usually takes about 20-30 minutes depending on how thick the application was.
Make it Sensory
Add texture to your clay stones before baking! Press a piece of burlap or lace into the wet clay surface to give the ‘rocks’ a tactile, patterned grippiness.
Step 3: Finishing Touches
-
Sealing the stones:
To protect your artwork from sweaty palms and play, apply a coat of matte spray varnish. A matte finish keeps them looking like natural stone rather than shiny plastic. -
Final cure:
Let the varnish cure in a well-ventilated area for the time recommended on the can. -
Storage:
Place your finished stones into a small linen or cotton drawstring bag to keep the set together and ready for storytime.
Now you have a durable, custom set of storytelling tools ready for your next creative adventure
Face Mini Planters
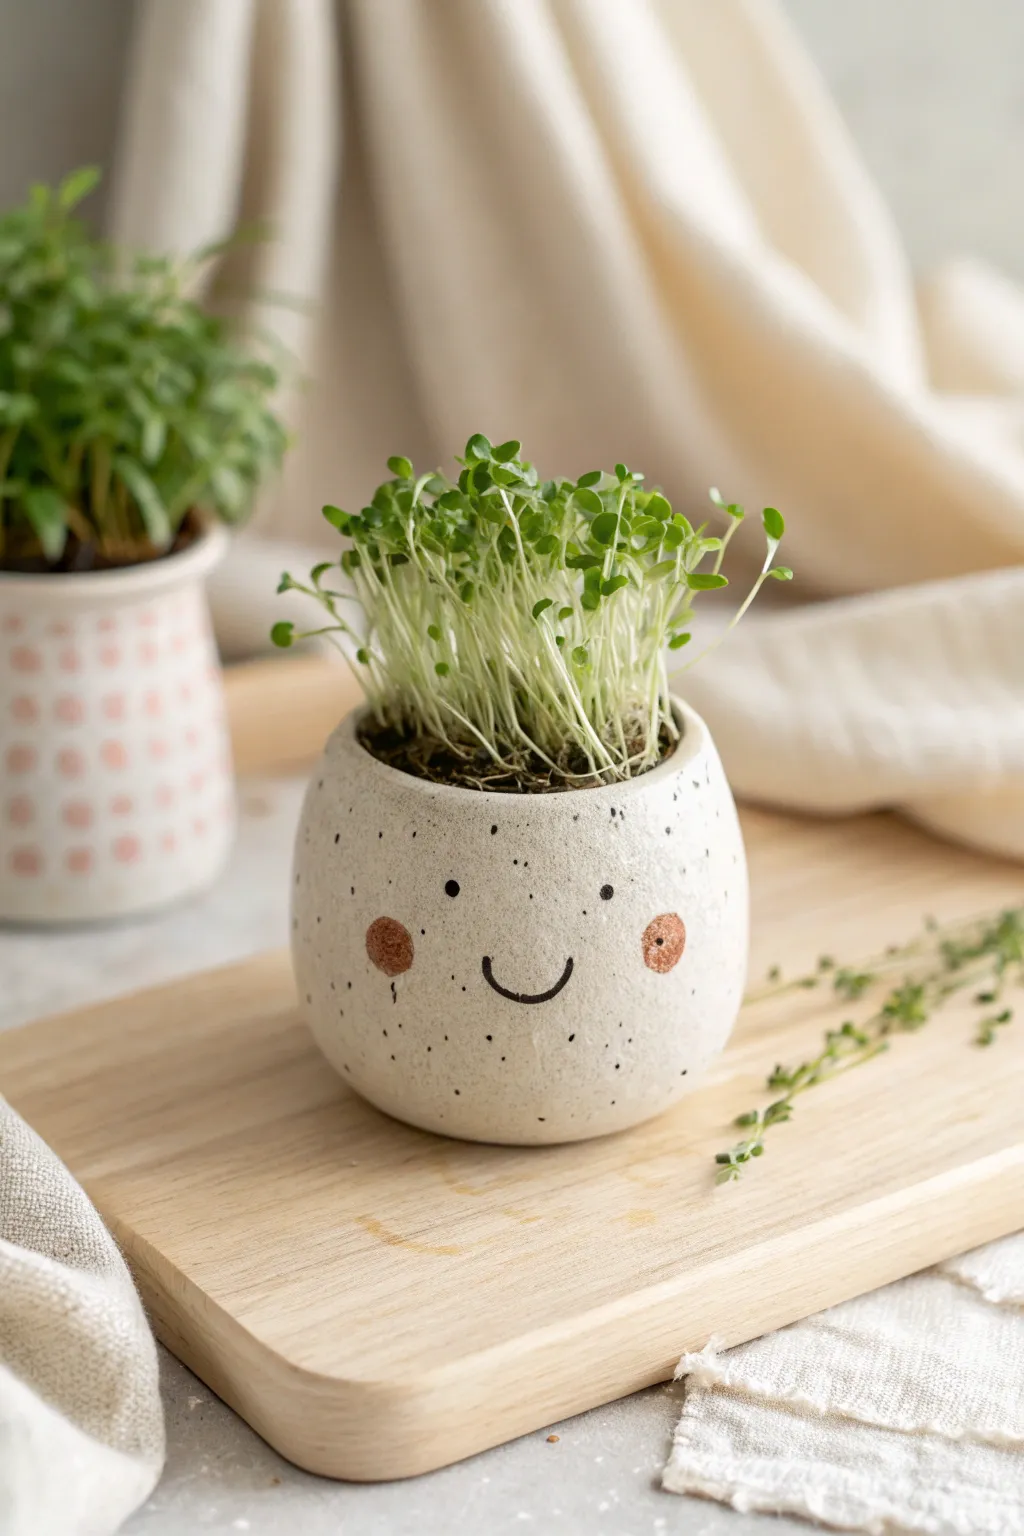
Bring your windowsill to life with these adorable mini planters that look like they’re grinning right back at you. Molded from air-dry clay and finished with a speckled ceramic look, these little pots are the perfect home for growing cress or chia seeds as funky green hair.
Step-by-Step Guide
Materials
- White cosmetic-grade air-dry clay
- Small rolling pin
- Small bowl relative to pot size (for molding shape)
- Sandpaper (fine grit)
- Acrylic paints: Black, Terra Cotta/Pink
- Old toothbrush (for speckling)
- Black acrylic paint watered down (for speckling)
- Fine detail paintbrush
- Cotton swab or small round sponge dauber
- Matte sealant or Mod Podge (waterproof if planting directly)
- Potting soil and seeds (cress or chia)
Step 1: Shaping the Pot
-
Prepare the clay:
Start by taking a generous handful of white air-dry clay and kneading it in your hands until it is smooth, pliable, and free of any large cracks. -
Form a ball:
Roll the clay into a smooth, tight sphere between your palms to ensure even consistency. -
Create the opening:
Using your thumb, press gently into the center of the ball to create a hollow space. Pinch and turn the clay walls between your thumb and fingers to thin them out and widen the pot. -
Refine the shape:
For this specific look, you want a rounded, slightly bulbous shape that tapers in just a little bit at the top rim. Gently cup the bottom in your palm while smoothing the sides upwards. -
Level the bottom:
Tap the bottom of your pot firmly against your table surface to create a flat base so it stands up safely without wobbling. -
Check density:
Make sure the walls aren’t too thin; about a quarter-inch thickness is ideal for sturdiness, especially for a kid’s project.
Step 2: Drying and Smoothing
-
Let it dry:
Set your pot aside in a safe spot. Air-dry clay usually takes 24-48 hours to fully cure, depending on humidity and thickness. Rotate it occasionally for even drying. -
Sand the surface:
Once fully hard and white, use fine-grit sandpaper to gently buff away any fingerprints or lumps on the outside, creating a silky smooth surface that mimics ceramic. -
Wipe clean:
Use a slightly damp cloth or paper towel to remove all the sanding dust before you start decorating.
Fixing Cracks
If small cracks appear as the clay dries, mix a tiny bit of fresh clay with water to make a paste (slip) and conduct a ‘surgery’ by filling the cracks and smoothing them over.
Step 3: Painting the Face
-
Speckle technique:
To get that trendy stoneware look, dip an old toothbrush into watered-down black acrylic paint. Run your thumb over the bristles to flick tiny speckles all over the white pot. -
Paint the smile:
I usually sketch lightly with a pencil first. Then, using a fine detail brush and black paint, create a simple, small ‘U’ shape in the lower center for the mouth. -
Add the eyes:
Dip the non-brush end of your paintbrush into black paint and dot two wide-set eyes just above the smile line. -
Create rosy cheeks:
Using a cotton swab or a small sponge dauber, gently press circles of terracotta or soft pink paint onto the cheeks, placing them wider than the eyes for a cute, kawaii effect. -
Seal the pot:
Apply a coat of matte sealant or waterproof varnish inside and out. This step is crucial if you plan to put wet soil directly into the clay pot.
Hair Stylist
Use different seeds for different hairstyles! Wheatgrass grows tall and straight for a spiky punk look, while thyme creates a messy, spilling-over curly hair effect.
Step 4: Planting the Hair
-
Add soil:
Fill the pot almost to the top with standard potting soil, leaving just a little room below the rim. -
Sow the seeds:
Sprinkle a generous layer of cress or chia seeds on top of the soil. These grow quickly and densely. -
Water and wait:
Keep the seeds moist with a spray bottle daily. Within a few days, your pot will grow a wild green hairstyle.
Watching the green hair sprout day by day is a rewarding experience for little gardeners
Sea Creature Paperweights
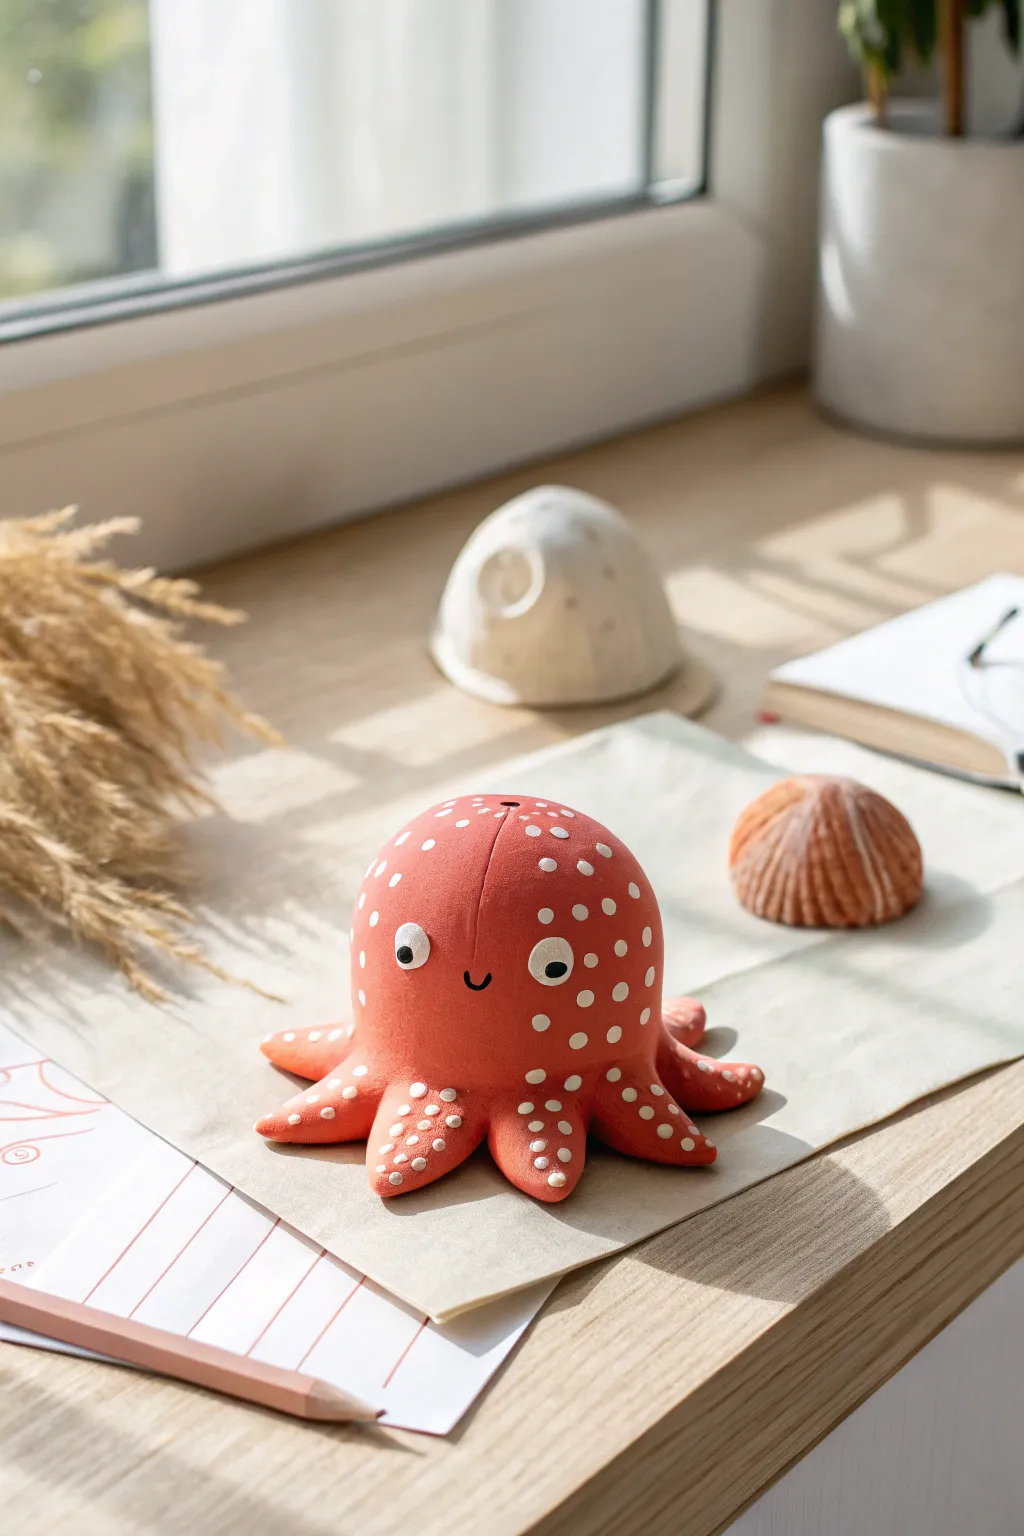
Brighten up your desk with this adorable coral-red clay octopus, perfect for guarding your papers from seaside breezes. With its cheerful polka dots and gently curled tentacles, this solid little figurine makes a functional paperweight that’s as fun to sculpt as it is to display.
Step-by-Step Tutorial
Materials
- Red or coral-colored polymer clay (2-3 blocks)
- White polymer clay (small amount)
- Black polymer clay (tiny amount)
- Clay sculpting tools (needle tool, ball stylus)
- Smooth work surface or silicone mat
- Baking sheet and parchment paper
- Oven (for baking polymer clay)
- Optional: Satin varnish for a glossy finish
Step 1: Sculpting the Base
-
Condition the Clay:
Start by warming up your coral-red clay in your hands. Knead and roll it until it’s soft, pliable, and free of any cracks. -
Form the Main Body:
Roll the clay into a large, smooth sphere about the size of a tennis ball. This will be the main head and body of the octopus, giving it the weight needed for a paperweight. -
Flatten the Bottom:
Gently press the sphere onto your work surface to flatten the bottom slightly so it sits stable and won’t roll away. -
Divide the Tentacles:
I like to take a separate chunk of red clay and divide it into eight equal portions. Roll each portion into a tapered log shape—thick at one end and pointy at the other. -
Attach the Tentacles:
Press the thicker end of each tentacle log underneath the base of your sphere. Blend the clay seams upward into the body using your thumb or a smoothing tool until the transition is invisible. -
Curl the Tips:
Arrange the tentacles so they spread out like a star. Gently lift the very tips of some tentacles and give them a slight upward curl to add movement and personality.
Cracks Appearing?
If you see tiny cracks while smoothing the body, dab a tiny drop of baby oil or clay softener on your finger and rub it into the crack in circular motions.
Step 2: Adding Details & Pattern
-
Create Polka Dots:
Roll out a thin snake of white clay. Slice tiny, uniform pieces off the snake and roll them into miniature balls. -
Apply the Spots:
Press these tiny white balls gently onto the red body and tentacles. Flatten them with your finger so they become flush with the surface, creating the polka-dot pattern shown. -
Make the Eyes:
For the eyes, flatten two slightly larger balls of white clay and press them onto the front of the face. Add a tiny black pupil to the center of each white circle. -
Add a Smile:
Using a needle tool or a small curved clay tool, press a simple ‘U’ shape between the eyes to create a happy little smile. -
Smooth Everything Out:
Give the entire piece a final check. Use your finger to gently rub out any fingerprints on the smooth red surfaces, being careful not to smudge the white dots. -
Create the Top Vent:
Use the handle of a paintbrush or a large ball tool to make a small indentation at the very top center of the head, giving it an authentic cephalopod look.
Make it Heavy
For a heavier paperweight feel, scrunch a ball of aluminum foil tightly and build the clay body around it. This saves clay and adds structure.
Step 3: Baking and Finishing
-
Prepare for Baking:
Transfer your octopus carefully to a baking sheet lined with parchment paper. -
Bake the Clay:
Bake the project according to the specific temperature and time instructions on your package of clay. Thicker pieces like this usually require 30-45 minutes. -
Cool Down:
Allow the octopus to cool completely in the oven with the door slightly ajar to prevent cracking from sudden temperature changes. -
Optional Protection:
If you want extra durability or shine, apply a coat of glaze or varnish once the clay fits fully cooled.
Place your heavy little sea creature on your desk to bring a splash of ocean fun to your workspace
Butterfly and Bug Wall Hangings
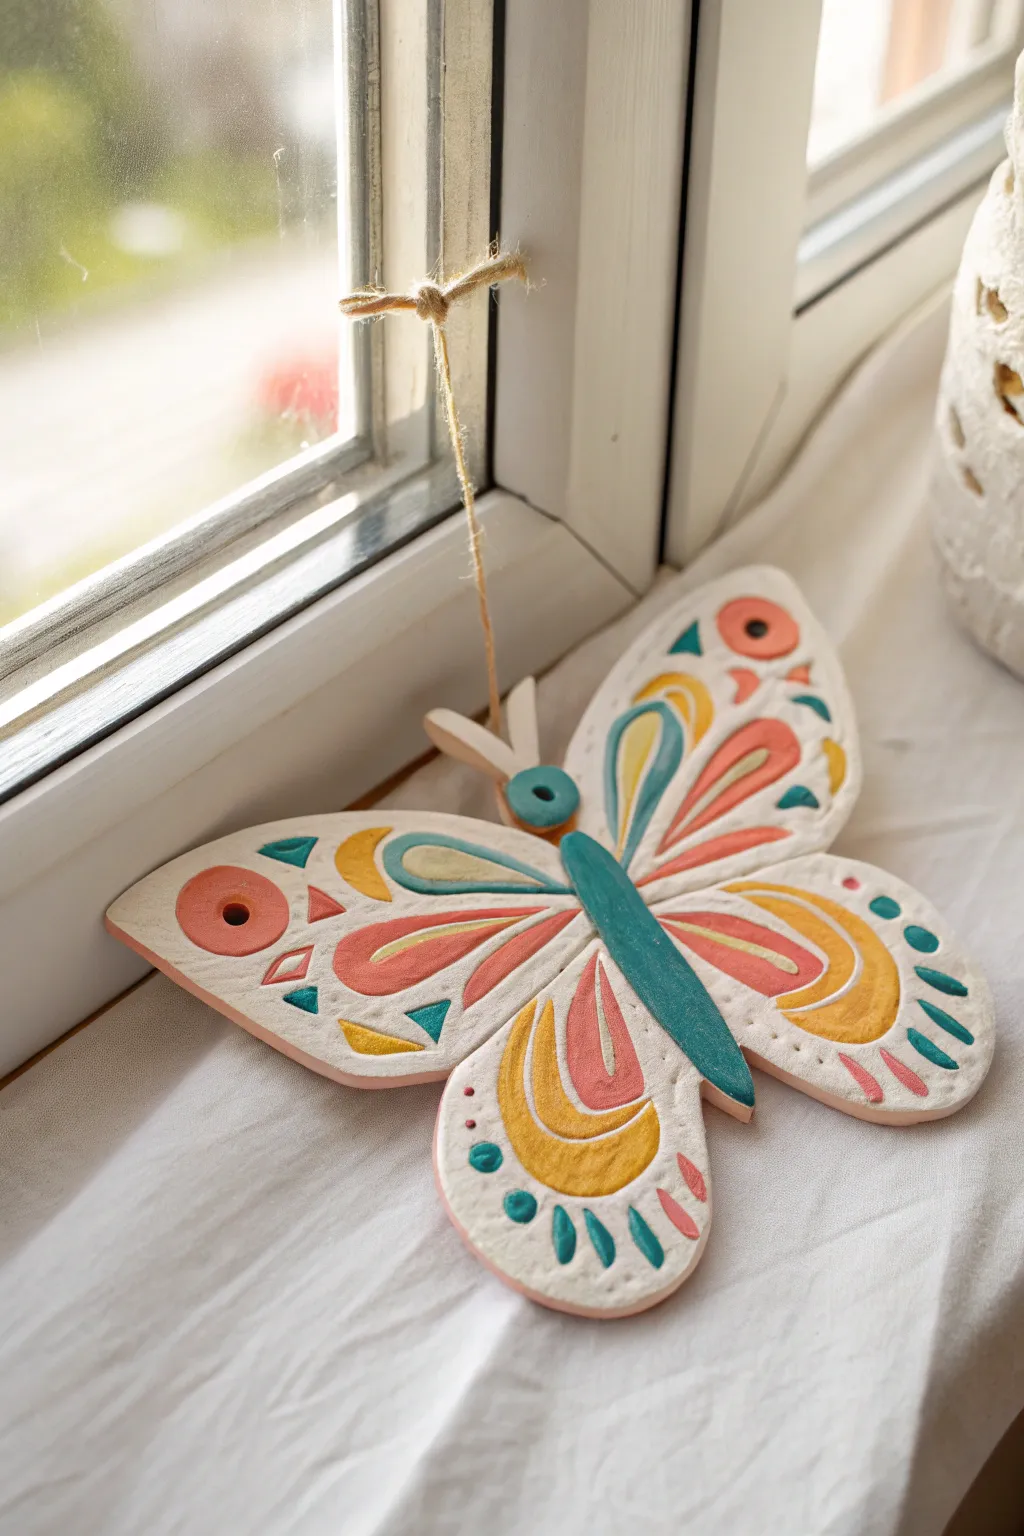
Brighten up any window or wall with this charming, handcrafted butterfly featuring raised relief details and cheerful colors. Made from air-dry clay, this project combines simple sculpting techniques with vibrant painting to create a lovely keepsake that looks just like ceramic.
Step-by-Step Guide
Materials
- White or terracotta air-dry clay (smooth texture)
- Rolling pin
- Parchment paper or craft mat
- Clay carving tools (needle tool, small loop tool)
- Small cup of water
- Acrylic paints (teal, coral pink, mustard yellow, white)
- Fine detail paintbrushes
- Jute twine or rustic string
- Sandpaper (fine grit)
- Clear matte varnish (optional)
Step 1: Shaping the Clay Base
-
Roll out the slab:
Start by kneading your clay to remove air bubbles, then roll it out to a uniform thickness of about 1/4 inch on your parchment paper. -
Cut the outline:
Using a needle tool, lightly sketch a butterfly shape with four wings—two large upper wings and two smaller lower wings. Once happy with the shape, cut firmly through the clay to release the outline. -
Smooth the edges:
Dip your finger in a little water and run it along the cut edges of the butterfly to round them off and remove any sharp clay burrs. -
Add the body:
Roll a small coil of clay for the body and press it gently onto the center junction of the wings. Add a small ball for the head and two tiny flattened teardrops for the antennae at the top. -
Create the hanging hole:
Before the clay starts to dry, use a straw or the back of a paintbrush to poke a clean hole through the top of the body or between the upper wings for the string.
Step 2: Sculpting the Details
-
Carve the wing patterns:
This is where the magic happens. Use a small loop tool to carve shallow channels into the wings. Focus on teardrop shapes radiating from the center and smaller circles near the wing tips. -
Emphasize depth:
I find it helpful to go over the carved lines twice to ensure they are deep enough to hold paint later without overflowing. -
Add impressed textures:
Use the rounded end of a paintbrush handle to press small dots or divots into the outer edges of the wings for extra texture. -
Refine the surface:
Take a moment to lightly smooth the raised areas between your carvings with a slightly damp finger, ensuring the relief looks soft and pillowy. -
Dry completely:
Let the butterfly dry for at least 24-48 hours. Flip it over halfway through the drying process to prevent warping.
Smooth Surface Secret
Before painting, lightly sand the dried clay with fine-grit sandpaper. It removes fingerprints and makes the paint apply much more evenly.
Step 3: Painting and Finishing
-
Base coat the white areas:
If your clay isn’t naturally white, or if you want a brighter base, paint the entire surface with white acrylic paint. This makes the top colors pop. -
Paint the body:
Paint the central body structure and the antennae in a deep teal or blue-green shade. -
Fill the carved channels:
Carefully paint inside the carved teardrop shapes. Use coral pink for the larger sections and mustard yellow for the accents. The depressions make it easier to stay in the lines. -
Add wing accents:
Paint the smaller impressed dots: teal for the tiny circles and coral pink for the dashes along the wing edges. -
Highlight the relief:
Once the colored sections are dry, you can very lightly dry-brush a bit of white over the raised ridges to define the separation between colors. -
Seal the piece:
Apply a coat of matte varnish to protect the paint and give the clay a finished, durable look. -
Attach the string:
Cut a length of jute twine, thread it through the hole you made earlier, and tie a secure knot to create a loop for hanging.
String Stuck?
If paint clogged your hanging hole, carefully twist a small drill bit or a metal skewer through it by hand to clear the dried paint without cracking the clay.
Now you have a cheerful butterfly ready to catch the light in your favorite window
Mini Habitat Landscape Discs
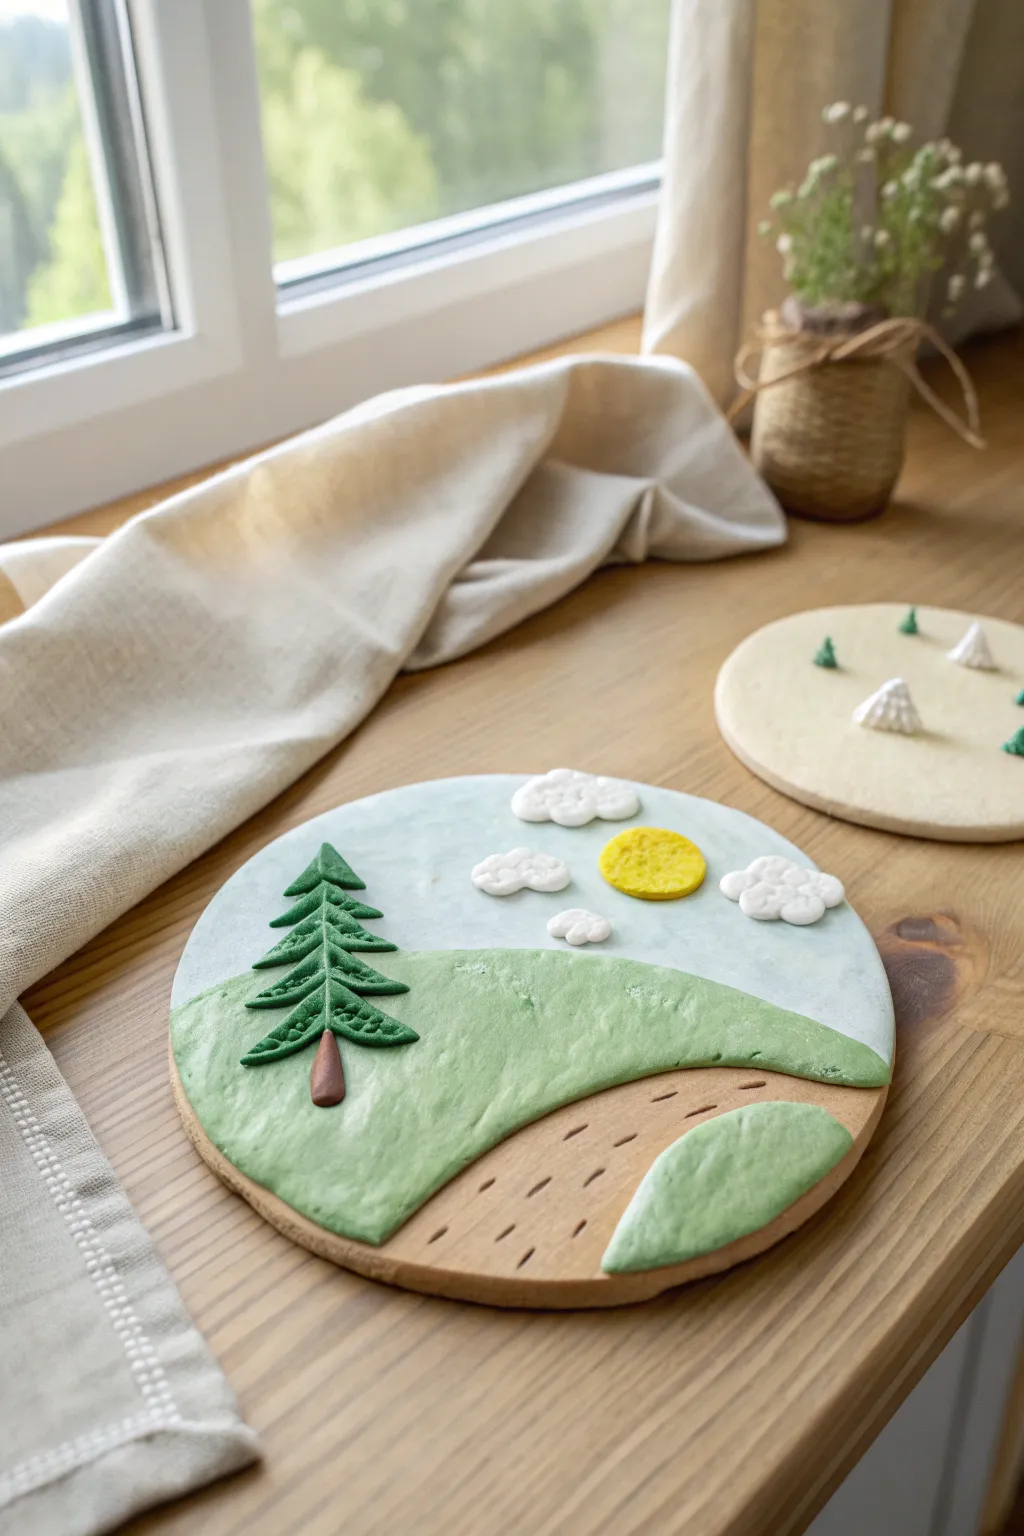
Capture the beauty of the outdoors on a simple round canvas with this charming clay landscape project. Perfect for beginners, this design layers soft greens and blues to create a peaceful meadow scene complete with a dimensional pine tree and fluffy clouds.
Step-by-Step Tutorial
Materials
- Air-dry clay (white)
- Acrylic paints or pre-colored clay (light blue, grass green, darker green, brown, yellow)
- Rolling pin
- Round cookie cutter or bowl (approx. 4-6 inches diameter)
- Plastic knife or clay sculpting tools
- Small paintbrush and water (for joining pieces)
- Parchment paper or craft mat
Step 1: Base Preparation
-
Roll the Base:
Start by rolling out a ball of neutral-colored or light beige clay until it is about 1/4 inch thick. This will be the sturdy foundation for your landscape. -
Cut the Circle:
Use a round cookie cutter or trace around a small bowl to cut a perfect circle from your rolled clay. Smooth the edges with your finger to remove any rough bits. -
Create the Sky:
Take a portion of light blue clay and roll it very thin. Cut it into a semi-circle that fits the top half of your base disc and gently press it onto the background to form the sky.
Clean Cuts
If your clay drags while cutting the hills, apply a tiny amount of lotion or oil to your plastic knife. This helps the blade glide through the clay for smoother lines.
Step 2: Building the Landscape
-
Form the Rolling Hills:
Roll out a sheet of soft grass-green clay. Use your plastic knife to cut a wavy, organic shape that mimics a sloping hill. -
Attach the First Hill:
Place this green shape over the bottom half of the disc, overlapping the bottom edge of the blue sky slightly. If the clay feels dry, dab a tiny bit of water on the back to help it stick. -
Add a Foreground Path:
Create a distinct area for the ground by using a beige or light brown clay. Cut a curved sliver to place at the very bottom right, creating the look of a dirt path or open field. -
Add a Foreground Hill:
Cut a smaller, curved piece of green clay and place it on the bottom right corner, partially covering the beige path. This creates a sense of depth and perspective. -
Texture the Ground:
Using a toothpick or a small needle tool, gently press tiny dashes into the beige clay area to simulate tufts of grass or texture in the dirt.
Step 3: Sculpting Details
-
Make the Sun:
Roll a small ball of bright yellow clay and flatten it into a disc. Press this onto the upper right side of the sky. -
Texture the Sun:
Take a stiff-bristled brush or a textured tool and dab the surface of the yellow sun to give it a rough, sparkling appearance. -
Form Cloud Shapes:
Create several tiny balls of white clay. Cluster three or four together and flatten them slightly to make puffy cloud shapes. -
Attach Clouds:
Press your cloud clusters onto the blue sky. I like to place a larger one near the sun and smaller ones lower down to balance the scene. -
Sculpt the Tree Trunk:
Roll a tiny log of brown clay for the tree trunk. Press it vertically onto the left side of the green hill. -
Create Tree Branches:
Fashion the pine tree by cutting small triangles of dark green clay. Layer them starting from the bottom of the trunk and working your way up, getting smaller as you reach the top. -
Detail the Branches:
Use a needle tool or toothpick to press small holes or indentations into the green tree triangles, giving them a leafy, needled texture. -
Final Smoothing:
Check all edges of your circle. If the layers have distorted the round shape, gently roll the edge on your work surface to make it perfectly circular again. -
Drying:
Let the project dry flat on a piece of parchment paper for at least 24 hours, keeping it away from direct heat to prevent cracking.
Magnetic Magic
Turn this art into functional decor by gluing a strong magnet to the back once it is fully dry. It makes a perfect stylized refrigerator magnet.
Now you have a serene little pocket of nature to display on your shelf or desk
Mix-and-Match Clay Robots
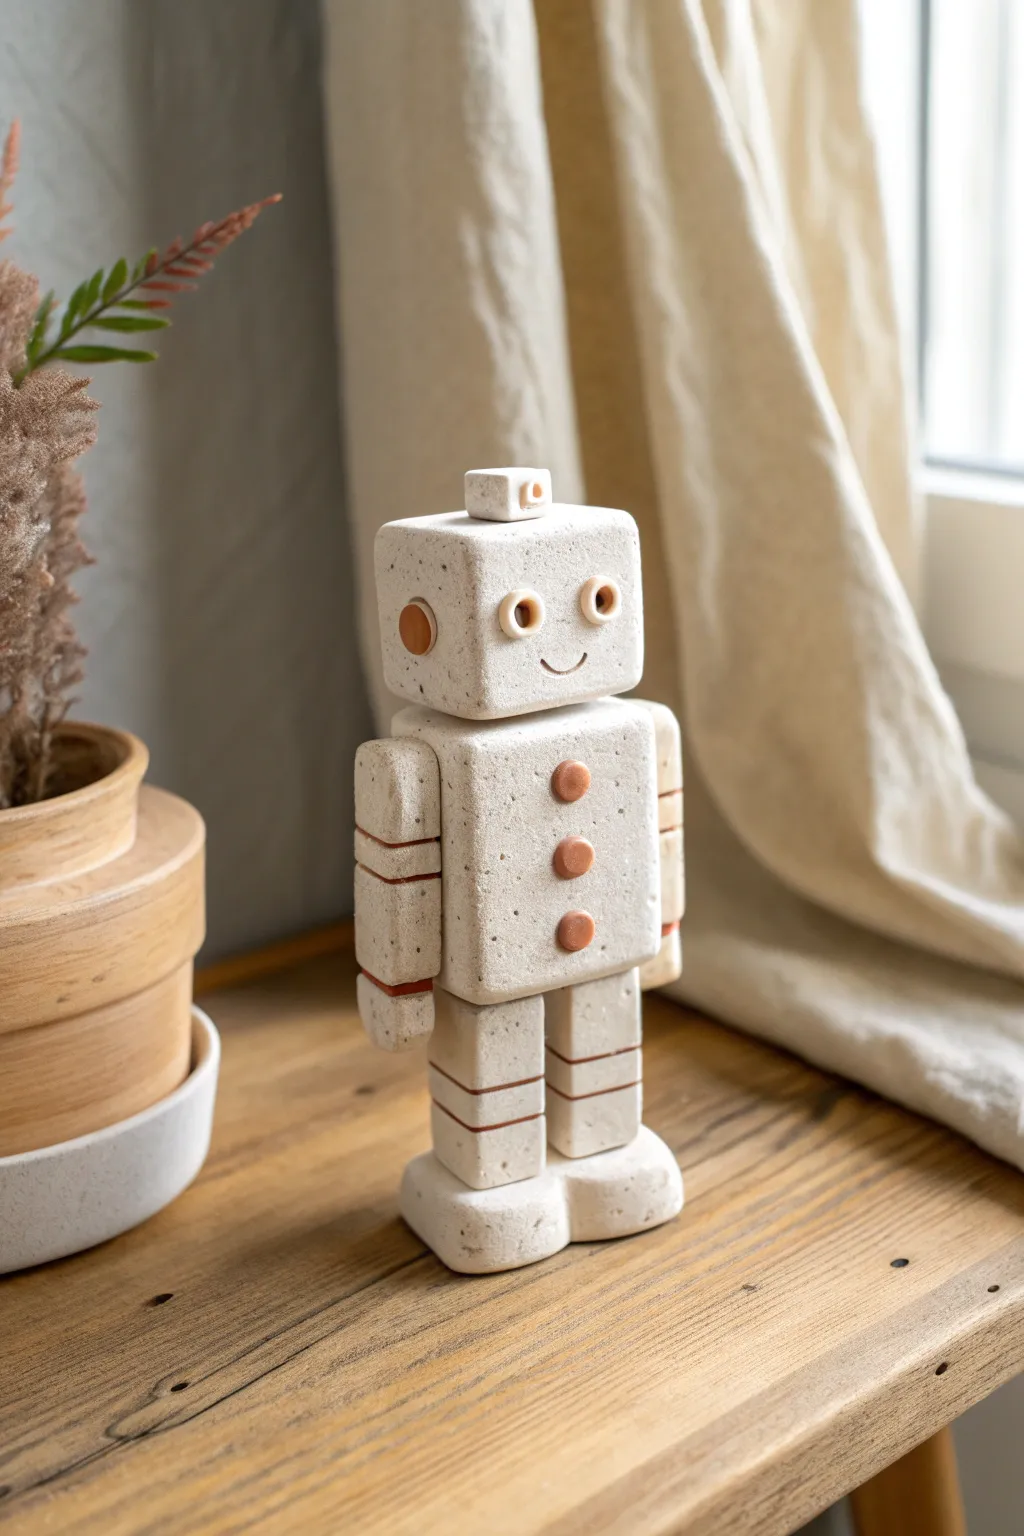
Create a charming, minimalist robot figure using stone-effect polymer clay for a modern, textured look. This sturdy little friend features simple geometric shapes and warm terracotta accents, making it a perfect decorative piece for a shelf or desk.
Step-by-Step Guide
Materials
- Stone-effect polymer clay (granite or sandstone)
- Terracotta or rust-colored polymer clay
- Ceramic tile or work surface
- Clay blade or craft knife
- Acrylic roller
- Needle tool or toothpick
- Small circle cutters (various diameters)
- Liquid polymer clay (clay adhesive)
- Oven for baking
Step 1: Forming the Core Blocks
-
Condition the stone clay:
Start by thoroughly kneading your stone-effect clay until it is soft and pliable. This particular clay can be crumbly at first, so warm it up well in your hands. -
Shape the body block:
Roll a large portion of clay into a smooth ball, then press it against your work surface to flatten the sides. Use your acrylic roller or a block to square off the edges, creating a rectangular prism for the main torso, approximately 2 inches tall. -
Create the head:
Using a slightly smaller amount of clay, form a cube shape about 1.5 inches wide. Soften the sharp corners slightly by tapping them gently with your finger to give it that friendly, rounded look. -
Make the connector piece:
Roll a small, flat square of stone clay to serve as the neck. This will sit between the head and body to give the robot some height and separation.
Clean Stone Effect
To keep the stone clay looking clean, wipe your hands with a baby wipe before handling it, as the light color picks up dust easily.
Step 2: Legs and Arms
-
Roll the limb logs:
Roll out two thick snakes of clay for the legs and two slightly thinner ones for the arms. Ensure they are uniform in thickness. -
Cut to size:
Slice the leg logs into two equal lengths (about 1.5 inches) and the arm logs into shorter lengths. Keep the cuts clean and straight using your clay blade. -
Form the feet:
Take two medium balls of clay and flatten them into rounded rectangular pads. These need to be wide enough to support the leg columns so the robot can stand independently. -
Add stripe details:
Roll tiny snakes of the terracotta-colored clay. Press these thin lines into the stone clay on the arms and legs to create joint details. gently roll the limb over the work surface to embed the stripe flush with the stone clay.
Magnetic Personality
Embed small rare-earth magnets inside the head and body before baking. This lets you turn the head or swap it with other designs later.
Step 3: Face and Details
-
Create the eyes:
Punch out two small circles of stone clay. Using a smaller tool or the back of a paintbrush, make an indentation in the center of each. Fill this center with a tiny dot of terracotta clay for the pupil. -
Add ear details:
Add small circular discs of terracotta clay to the sides of the head block to simulate bolts or auditory sensors. -
Sculpt the smile:
Use a needle tool or a small curved clay tool to impress a simple, curved smile onto the lower half of the face block. -
Make the antenna:
Form a very small cube or cylinder of stone clay. Make a tiny indentation on top and place this square right in the center of the head’s top surface. -
Add chest buttons:
Roll three small balls of terracotta clay. Flatten them slightly into discs and press them vertically down the center of the body block.
Step 4: Assembly and Baking
-
Stack the main structure:
Apply a drop of liquid polymer clay to the top of the feet and press the legs onto them. I like to twist them slightly as I press down to ensure a tight bond. -
Attach body to legs:
Add liquid clay to the top of the legs and position the body block on top. Check from all angles to ensure the robot is standing straight. -
Secure arms and head:
Use liquid clay to attach the arms to the sides of the body and the neck/head assembly to the top. Press everything firmly but gently to avoid distorting your square shapes. -
Final texture check:
Before baking, look over the robot for any fingerprints. You can gently buff them out or use a toothbrush to texturize any smooth spots so they match the stone finish. -
Bake carefully:
Bake according to your clay package instructions. Since this is a thick piece, you might want to bake it for a longer duration at a slightly lower temperature to prevent cracking, or tent it with foil.
Once cooled, your sturdy stone robot is ready to stand guard on your shelf
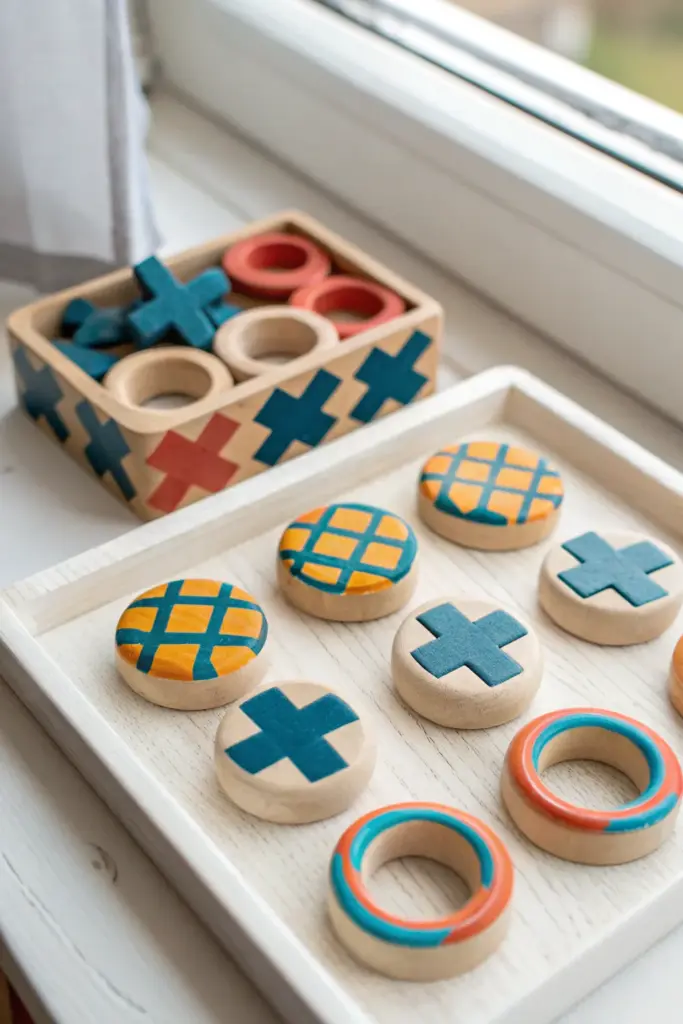
DIY Game Pieces Kids Can Make
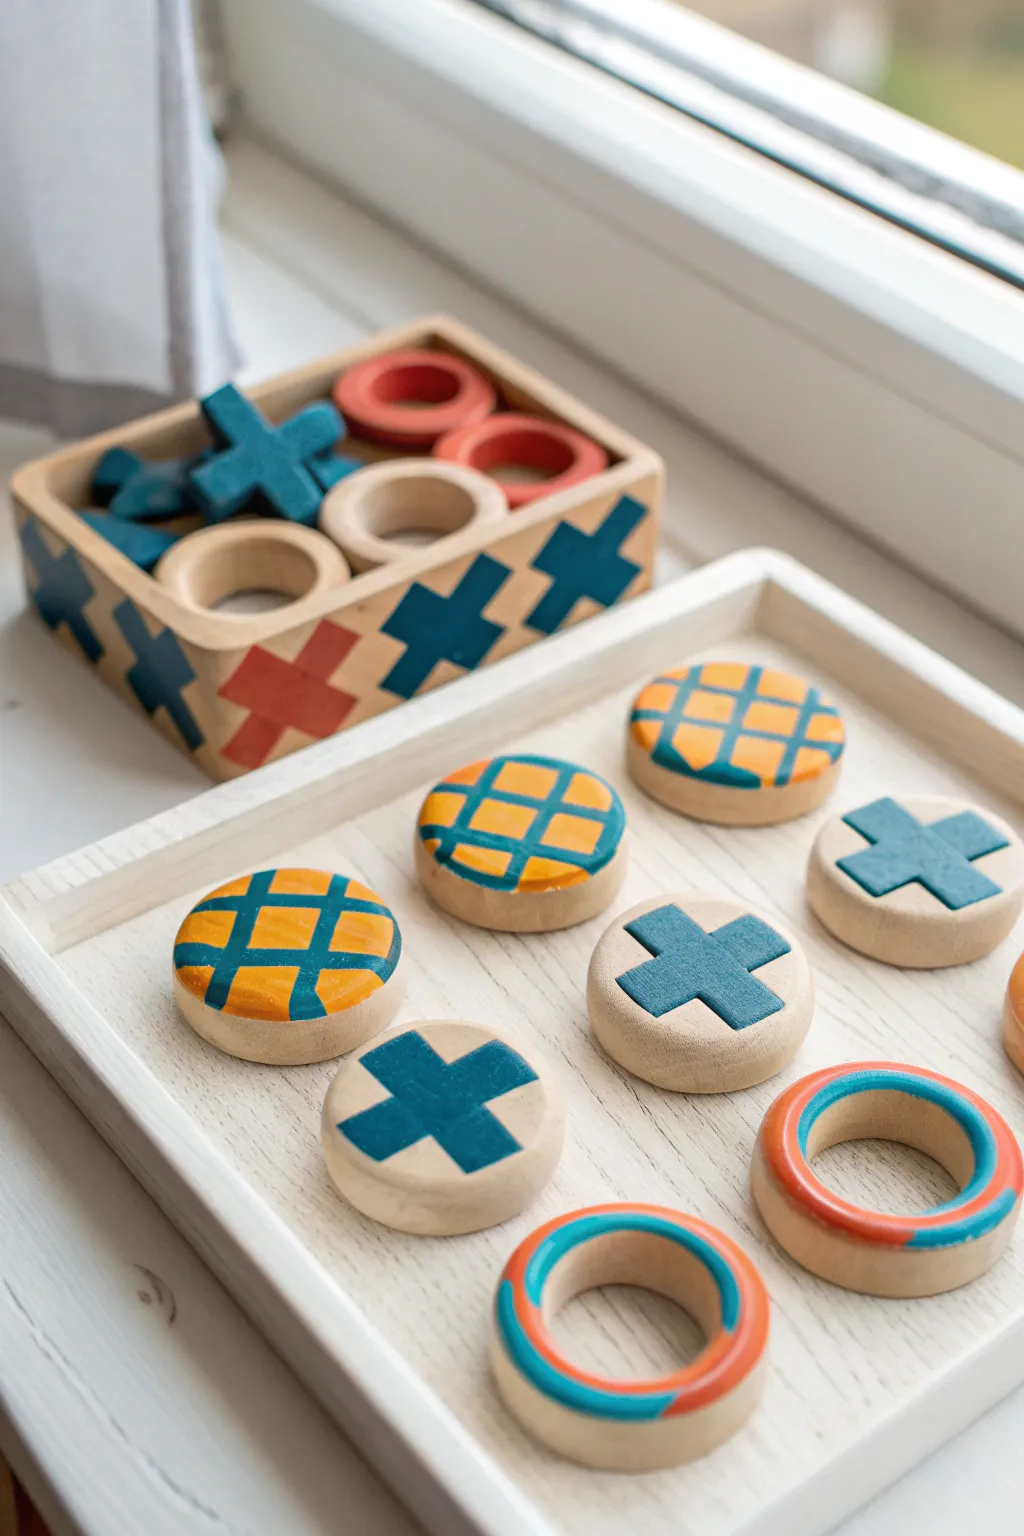
Transform simple clay into a charming, bespoke Tic-Tac-Toe set that serves as both a fun game and delightful decor. This project features chunky, satisfyingly tactile game pieces painted with bold Xs, grid patterns, and colorful rings, all housed in a custom tray.
How-To Guide
Materials
- Air-dry clay (white or natural)
- Small round cookie cutter or a small jar lid
- Rolling pin
- Acrylic paints (Teal blue, deep orange/terracotta, mustard yellow)
- Small flat paintbrush and fine detail brush
- Sandpaper (fine grit)
- Mod Podge or matte acrylic sealer
- Small shallow wooden tray (store-bought or DIY)
- Pencil
- Ruler
Step 1: Shaping the Tokens
-
Prepare the Clay:
Begin by kneading your air-dry clay until it is smooth and pliable. This warms it up and prevents cracks from forming later as it dries. -
Roll It Out:
Roll the clay out on a flat, non-stick surface to a thickness of about 1/2 inch. You want these tokens to feel substantial and chunky in the hand. -
Cut the Circles:
Use your round cutter to stamp out 10 circles. If you don’t have a cutter, a small glass jar or bottle cap works perfectly as a makeshift mold. -
Create the ‘O’ Rings:
Take 5 of your clay circles. Use a smaller circular cutter (like a marker cap) to punch a hole directly in the center, turning them into ring shapes for the ‘O’ team. -
Smooth the Edges:
Dip your finger in a little water and gently run it around the cut edges of all pieces to smooth out any roughness or loose clay bits. -
Dry Completely:
Lay the pieces flat on parchment paper to differ throughout the drying process. Let them air dry for at least 24-48 hours, flipping them occasionally to ensure even drying.
Cracked Clay Crisis?
Cracks happen! Make a ‘slip’ by mixing a tiny bit of clay with water into a paste. Fill the crack, smooth it over with a finger, and let it dry again before sanding.
Step 2: Sanding and Base Work
-
Sand for Smoothness:
Once fully dry, lightly sand the surface and edges of each piece using fine-grit sandpaper. Wipe away the dust with a slightly damp cloth. -
Base Coat (Optional):
If you want a uniform look, paint all pieces with a thin coat of white acrylic paint. Alternatively, leave the natural clay color exposed for a wonderful organic feel like in the example.
Step 3: Painting the Designs
-
Paint the ‘X’ Tokens:
For the solid round tokens, pencil in your designs first. Draw a large, bold ‘X’ in the center of three tokens. On the remaining two, draw a simple grid pattern like a tic-tac-toe board. -
Block in the Grid Color:
For the grid-patterned tokens, paint the background sections with mustard yellow first. Let this dry completely before adding the lines. -
Add Grid Lines:
Using a fine detail brush and teal paint, carefully paint the intersecting lines over the yellow background to create the grid effect. -
Fill in the ‘X’ Shapes:
Paint the penciled ‘X’ shapes on the other three tokens using trailing teal blue paint. Two coats will ensure the color is opaque and crisp. -
Paint the ‘O’ Rings:
For the ring-shaped pieces, use a color-blocked style. Paint half of the ring’s face in teal and the other half in terracotta orange, blending them slightly or leaving a clean line where they meet. -
Detail the ‘O’ Rings:
I like to add a thin line of contrasting color (like teal on the orange section) along the center to give the rings extra dimension.
Make It Magnetic
Glue small round magnets to the back of each piece and paint a metal baking sheet as your board. Now you have a travel-friendly travel set for the fridge or car
Step 4: Finishing the Set
-
Seal the Pieces:
Protect your hard work by brushing a layer of matte sealer or Mod Podge over every piece. This prevents the paint from chipping during intense gaming sessions. -
Prepare the Tray:
Take your wooden tray and lightly sand the bottom surface. If it’s unfinished wood, you can give it a quick whitewash to match the light aesthetic of the photo. -
Mark the Grid:
To make the tray functional, use a ruler to lightly pencil a 3×3 grid on the inside bottom of the tray. This guides where pieces will be placed. -
Paint the Board Lines:
Paint over your grid lines with a very pale grey or white paint for a subtle look, or leave the texture of the wood tray as the guide itself.
Set out your newly crafted game on the coffee table and get ready for a stylish match