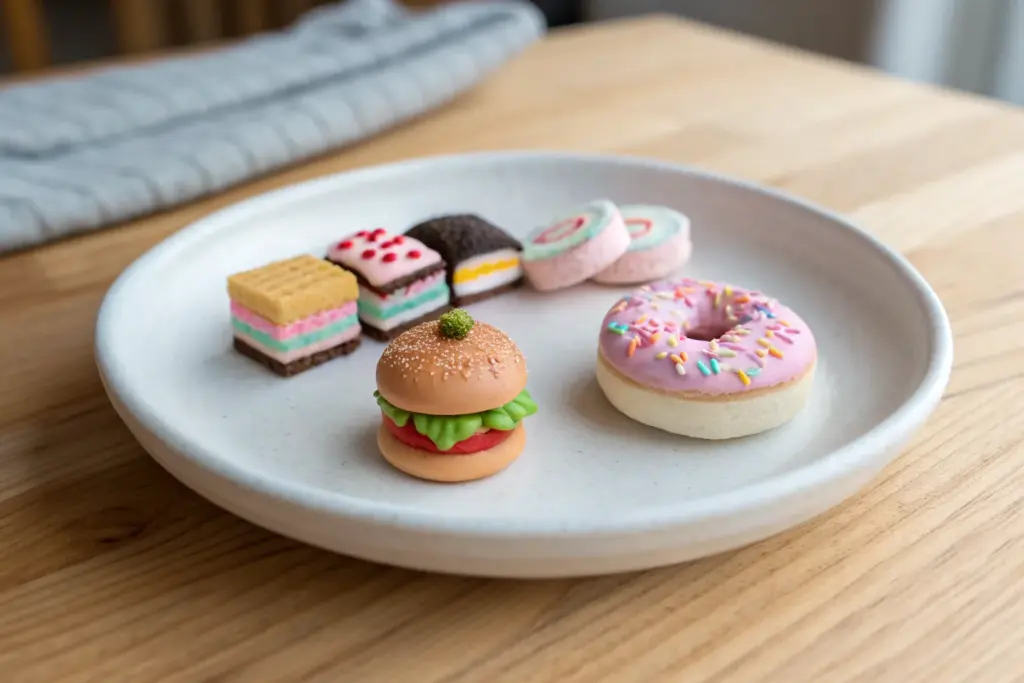
Whenever I need a quick creativity boost, I start making miniature clay food—it’s basically snack time for my imagination. Here are my go-to clay food ideas that range from super simple, cute classics to the kind of tiny details that make people do a double-take.
Classic Mini Burger, Fries, and Soda Combo
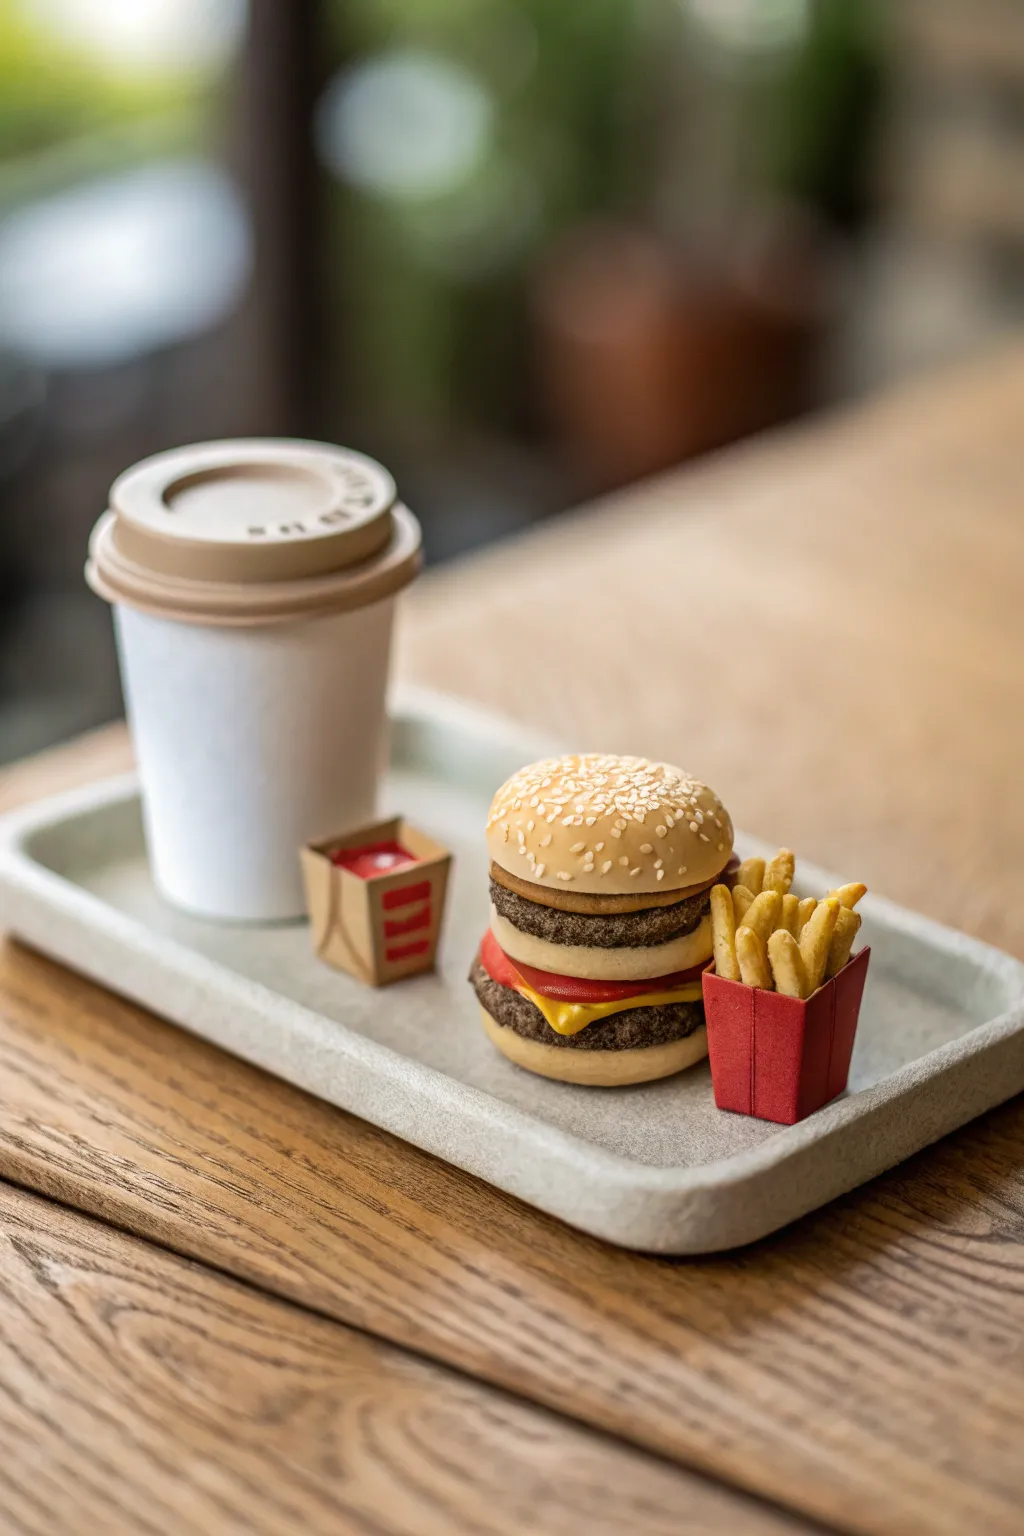
Recreate the charm of a classic drive-thru meal in adorable miniature form using polymer clay. The realistic textures of the sesame seed bun and golden fries make this tiny set practically mouth-watering.
Detailed Instructions
Materials
- Polymer clay (beige, dark brown, red, yellow, white)
- Liquid polymer clay (translucent)
- Soft pastel chalks (orange, brown, yellow ochre)
- Needle tool and dotting tool
- Small square cutter (for cheese)
- Round cutters (various small sizes)
- Toothbrush or texturing tool
- Gloss glaze
- Cardstock (red and tan)
- Craft glue or superglue
- Hobby knife
Step 1: Building the Burger
-
Shape the Buns:
Start by mixing beige clay with a tiny touch of white for the bun color. Roll a ball and slice it in thirds horizontally. Use the top dome for the lid, the bottom slice for the heel, and save the middle slice for the ‘club’ middle bun layer found in double-decker burgers. -
Texture the Surfce:
Gently tap the surface of all bun pieces with a clean toothbrush or texturing tool to create a realistic baked bread texture. This subtle roughness is key to making it look like bread rather than plastic. -
Shade the Bread:
Shave some yellow ochre and orange soft pastels into a powder. Dust the tops and edges of your buns with a dry brush to mimic that golden-brown baked finish. -
Add Sesame Seeds:
Roll incredibly tiny teardrops of white or light beige clay. Press them gently onto the top bun dome; I find using a needle tool helps position them without squashing the bun’s shape. -
Create the Patties:
Texture dark brown clay discs with a needle tool or a crumpled ball of aluminum foil to simulate ground meat. Make two patties for this double-stack design. -
Cheese and Tomato:
Roll out yellow clay thinly and cut a square for the cheese giving it slightly droopy corners. Make a flattened red disc for the tomato slice. -
Assemble and Bake:
Stack your burger: bottom bun, patty, cheese, middle bun, patty, tomato, and top bun. Press gently to adhere layers and bake according to your clay package instructions.
Sticky Situation
If your unbaked clay layers aren’t sticking together during assembly, apply a tiny smear of liquid polymer clay between the parts to act as a bonding agent before baking.
Step 2: Fries and Accessories
-
Cut the Fries:
Roll yellow clay into a thin sheet and use a blade to cut uneven, thin strips. Gently texture them with a toothbrush to look like fried potato. -
Season the Fries:
Dust the raw clay strips with yellow ochre pastel powder to create crispy edges. Bake these separately on a tile. -
Drink Cup Base:
Form a tapered cylinder from white clay for the cup. Keep the top perfectly flat. -
Crafting the Lid:
Mix a light tan color for the cardboard sleeve and lid. Create a flat disc slightly larger than the cup rim, and add a raised rim and a tiny sipping hole detail on top. -
Assembly of Cup:
Attach the lid to the white cup base. You can also wrap a thin strip of tan clay around the middle for a heat sleeve. Bake the cup unit.
Make it combo
Use translucent liquid clay mixed with brown chalk dust to create a ‘soda’ effect inside the cup if you choose to make it without a lid.
Step 3: Packaging and Finishing
-
Fry Box Construction:
Cut a small template from red cardstock to make the iconic fry scoop shape. Fold and glue the sides, leaving the top open. -
Fill the Fry Box:
Glue a scrap piece of clay inside the bottom of the box as a filler, then arrange your baked fries sticking out the top, securing them with a dab of glue. -
Nugget Box:
Fold a tiny takeout box shape from tan cardstock. Add a small red square of cardstock or paint a logo on the front for branding. -
The Tray:
Roll out a slab of speckled grey or beige clay (granite effect clay works well). Form a rectangular lip around the edge to create a serving tray and bake it. -
Final Presentation:
Once everything is cooled and assembled, arrange the burger, drink, fries, and nugget box on the tray. Use a tiny dot of superglue to keep them permanently in place if desired.
Display your miniature meal proudly on a shelf or use it as a dollhouse accessory.


Pizza Slice With Melted Cheese and Toppings
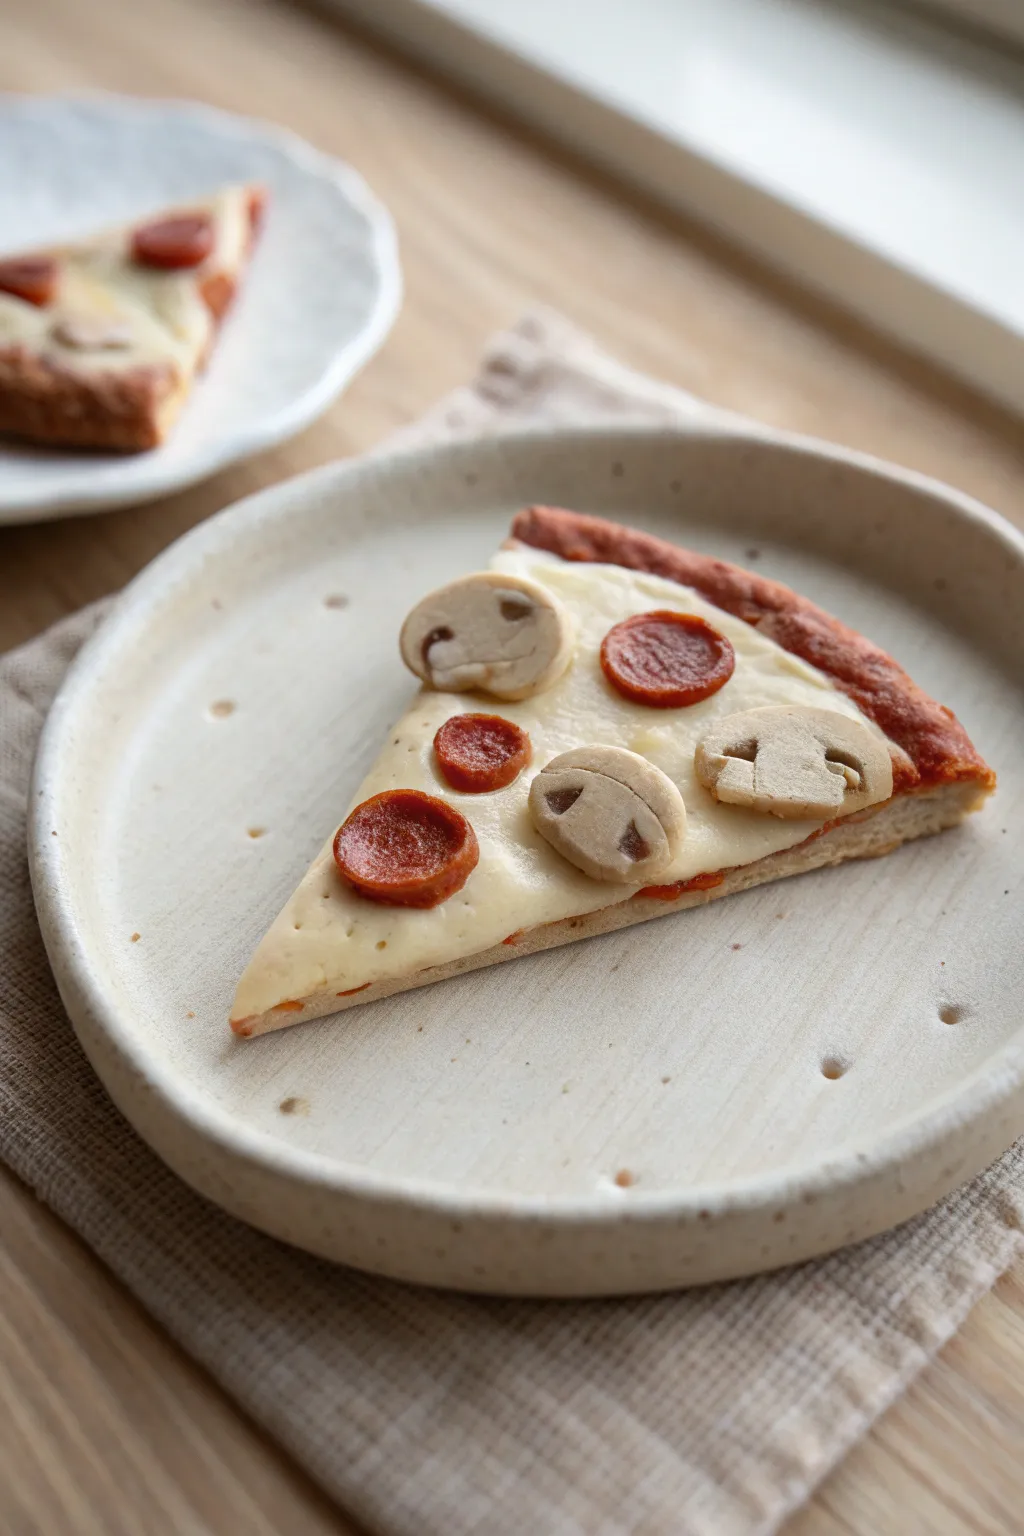
This project creates a charmingly realistic slice of pizza using polymer clay, featuring melted cheese, savory pepperoni, and earthy mushroom toppings. The soft, matte finish gives it a delightful, stylized look perfect for dollhouse miniatures or fridge magnets.
How-To Guide
Materials
- Polymer clay (beige/tan, translucent white, red-brown, cream)
- Blade or X-Acto knife
- Texturing tool or toothbrush
- Soft pastel chalks (orange, brown, red)
- Liquid polymer clay (translucent)
- Small dotting tool
- Rolling pin or pasta machine
- Gloss varnish (optional)
Step 1: Forming the Crust
-
Mix the Dough Color:
Start by mixing beige clay with a tiny amount of white and translucent clay. You want a color that resembles unbaked pizza dough—light and slightly warm. -
Shape the Triangle:
Roll the mixed clay into a thick sheet, about 4-5mm thick. Use your blade to cut a clean, isosceles triangle shape to form the base of the slice. -
Texture the Bottom:
Gently press a toothbrush or a crumpled ball of aluminum foil against the bottom and sides of the slice to give it a convincing baked bread texture. -
Add the Crust Rim:
Roll a snake of the same dough-colored clay. Attach it to the short, wide end of the triangle, blending the seam onto the bottom so it looks like a puffed-up crust rim. -
Pre-shade the Crust:
Using a soft brush, dust a mix of orange and light brown pastel chalks over the rim and the very edges of the slice to mimic a golden-baked finish.
Step 2: Adding Sauce and Cheese
-
Create the Sauce Layer:
Mix a small amount of red clay with liquid polymer clay to make a thick paste. Spread a thin layer of this ‘sauce’ over the triangular base, leaving the crust rim clean. -
Mix the Cheese:
Combine white clay with a significant amount of translucent clay. This mixture ensures the cheese looks melted and slightly sheer once baked, rather than opaque white. -
Apply the Cheese:
Flatten the cheese mixture into an irregular shape that fits over the sauce. Lay it on top, letting it drape naturally over the edges to simulate melting. -
Texturing the Cheese:
Use a dotting tool to gently dimple the surface of the cheese, creating those lovely melted pockets and uneven surfaces found on real pizza.
Realistic Grease
Mix a drop of liquid clay with orange oil paint or pastel. Dab tiny spots onto the pepperoni and cheese valleys after baking for a greasy look.
Step 3: Creating the Toppings
-
Make the Pepperoni Cane:
Roll a log of dark red-brown clay. Wrap a very thin sheet of lighter orange-red clay around it to simulate the skin. Reduce the cane by rolling it until it is the desired diameter. -
Slice and Texture Pepperoni:
Slice thin rounds from your cane. Gently press the edges of each slice inward to cup them slightly, and texture the surface with a needle tool to look meaty. -
Form Mushroom Caps:
For the mushrooms, use a cream or off-white clay. Shape small domes and flatten them slightly. I find pressing them gently against my finger gives a nice organic curve. -
Detail the Mushrooms:
Use a needle tool or small blade to carve out the stem shape and slice a straight line across the bottom. If you want a sliced mushroom look, carve the distinctive ‘T’ shape of the cross-section. -
Arrange Toppings:
Place the pepperoni and mushrooms onto the cheese. Press them down firmly so they look embedded in the melted cheese layer rather than just sitting on top. -
Final Shading:
Dust the tops of the mushrooms and the edges of the pepperoni with a tiny bit of brown pastel powder to add roasted depth. -
Bake the Piece:
Bake the pizza slice according to your polymer clay manufacturer’s instructions, usually around 275°F (135°C) for 15-30 minutes.
Spice It Up
Grate baked green clay into fine dust. Sprinkle this ‘oregano’ over the cheese layer before adding toppings for extra detail.
Once cooled, your miniature culinary masterpiece is ready to serve as a magnet or charm


Breakfast Set: Pancakes, Butter, and Syrup
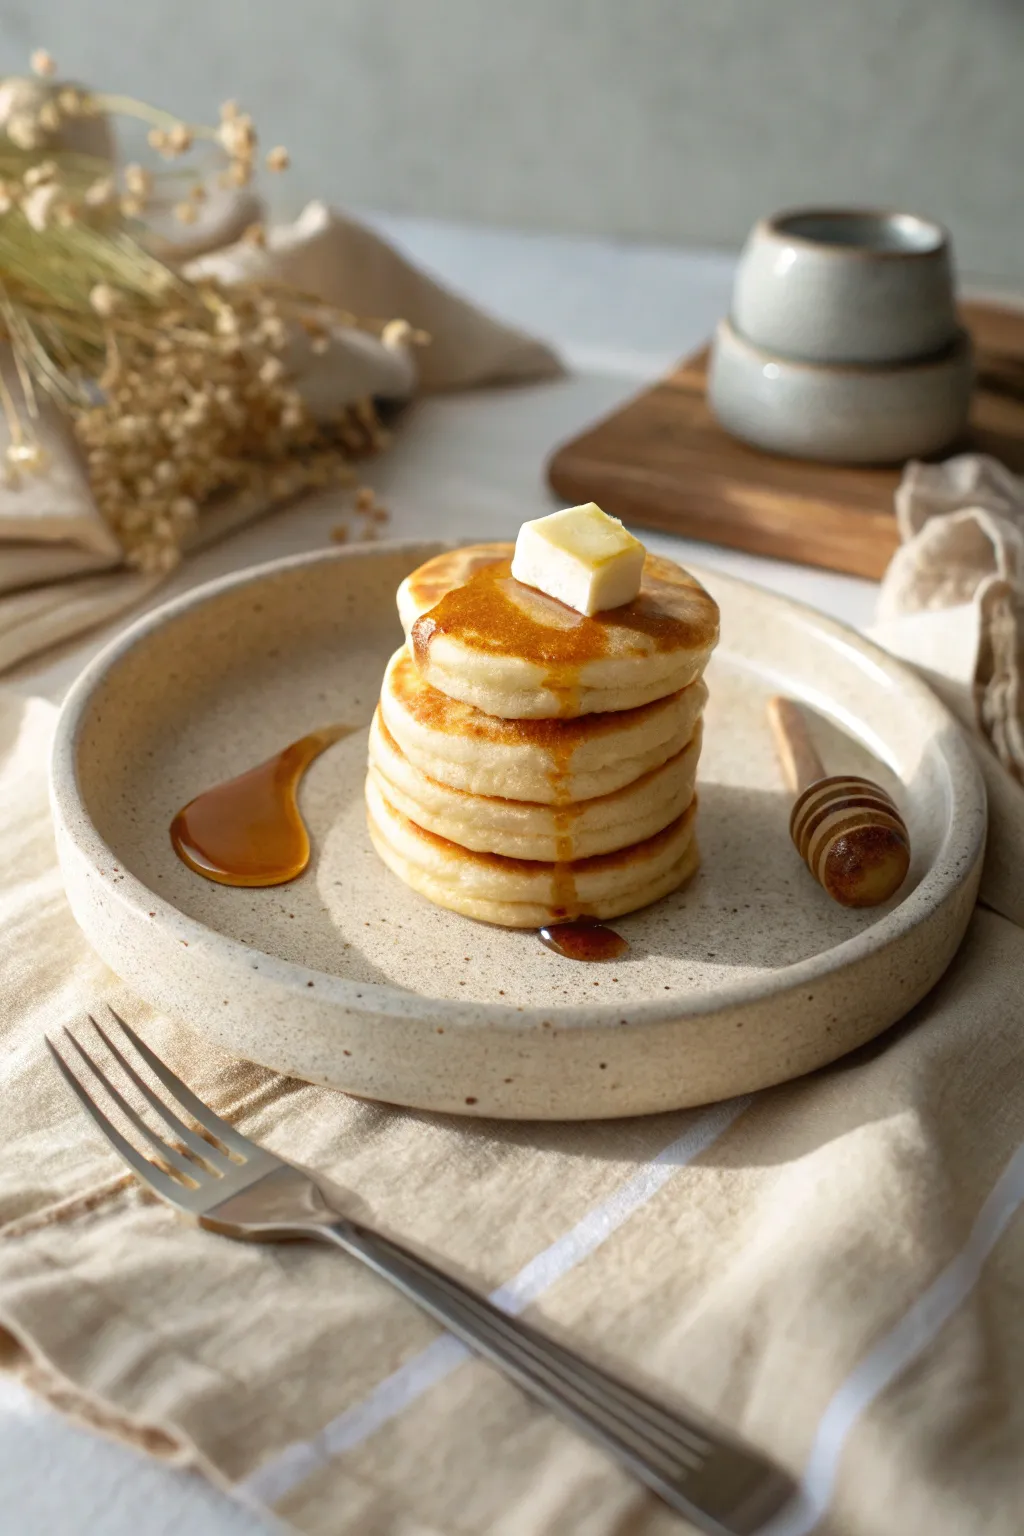
Recreate the cozy warmth of a Sunday morning with this hyper-realistic polymer clay pancake stack. You will learn to texturize the fluffy edges and create a translucent liquid syrup effect that brings the entire plate to life.
Step-by-Step Guide
Materials
- Polymer clay (white, translucent, yellow, ochre)
- Liquid polymer clay (translucent)
- Chalk pastels (orange, brown, burnt sienna)
- UV resin (optional for extra shine)
- Soft paintbrush
- Toothbrush or texturing tool
- Needle tool
- Rolling pin or pasta machine
- Small round cutter (approx. 1-1.5 inches)
- Gloss varnish
- Ceramic tile or baking surface
- Oven
Step 1: Mixing and Shaping the Batter
-
Create the base color:
Start by mixing a large portion of white clay with a small amount of yellow and a tiny touch of ochre. You want a pale, creamy batter color that looks like uncooked pancake dough. -
Sheet the clay:
Roll your mixed clay out to a medium thickness, about 3-4mm. These are meant to be fluffy pancakes, so don’t roll it too thin. -
Cut the rounds:
Using your round cutter, punch out four identical circles. If the edges are too sharp from the cutter, gently soften them with your fingertip to give them that natural, rounded cooked look. -
Texturize the edges:
Take a clean toothbrush and firmly tap it all around the vertical edges of each pancake disc. This replicates the airy bubbles found in real pancake batter.
Step 2: Baking and Shading
-
Pre-shade the raw clay:
Before stacking, use a soft brush to dust the top and bottom edges with light yellow pastel powder. This adds depth that will show through later layers. -
The golden brown effect:
Mix orange and brown chalk pastels to create a golden-brown powder. Gently brush this onto the flat top and bottom surfaces of each pancake, concentrating on the center and fading out toward the textured rim. -
Add ‘cooked’ spots:
For realism, take a slightly darker brown pastel and dab a few random spots on the surface. Real pancakes are rarely perfectly uniform in color. -
Stack the pancakes:
Arrange the four pancakes into a stack. I like to offset them just slightly rather than making a perfect tower; it makes the food look more casual and homemade. -
Press gently:
Press down lightly on the center of the stack to ensure the layers adhere to each other without squishing the textured edges.
Winning Texture
For ultra-realistic aeration holes, poke a needle tool randomly into the textured sides after you’ve used the toothbrush. It creates larger air pockets.
Step 3: Buttering and Syruping
-
Form the butter pat:
Mix a small amount of translucent clay with yellow clay (about 1:1) to get a pale buttery tone. Shape this into a small square or rectangle with slightly softened corners. -
Place the butter:
Position the butter pat on the very top pancake. Use a tool to slightly indent the pancake beneath it, as if the butter has some weight. -
Mix the syrup:
In a small cup or on a bit of foil, mix liquid translucent polymer clay with scraped brown and orange chalk pastels. Stir until you have a rich, amber syrup color. -
Apply the drizzle:
Carefully pour or drip the liquid clay mixture over the butter pat, letting it flow naturally down the sides of the stack. Use a needle tool to guide the drips so they pool realistically in the crevices between pancakes. -
Create a plate puddle:
Add a solitary pool of ‘syrup’ on the plate surface next to the stack (if you are baking it directly on a mini ceramic plate) to mimic the spillover shown in the reference. -
Partial Bake:
Bake the project according to your clay manufacturer’s instructions (usually 275°F/130°C for 15-20 minutes). Let it cool completely.
Flavor Variations
Mix tiny specks of blue clay into the batter for blueberry pancakes, or use dark brown clay bits for chocolate chips.
Step 4: Finishing Touches
-
Enhance the shine:
Once cool, coat only the syrup areas with a high-gloss varnish or a thin layer of UV resin (cure under a UV lamp if using resin). -
Matte the cake:
If the pancake sponge parts look too shiny from handling, dab a tiny bit of cornstarch or matte varnish on the non-syrup areas to restore a fluffy texture. -
Final inspection:
Check your butter pat; adding a tiny touch of gloss just on the corners suggests it is starting to melt from the heat of the cakes.
Now your delicious miniature breakfast is ready to be displayed on a tiny plate or turned into a charming magnet


Cheese Wedge Trio With Holes and Rinds
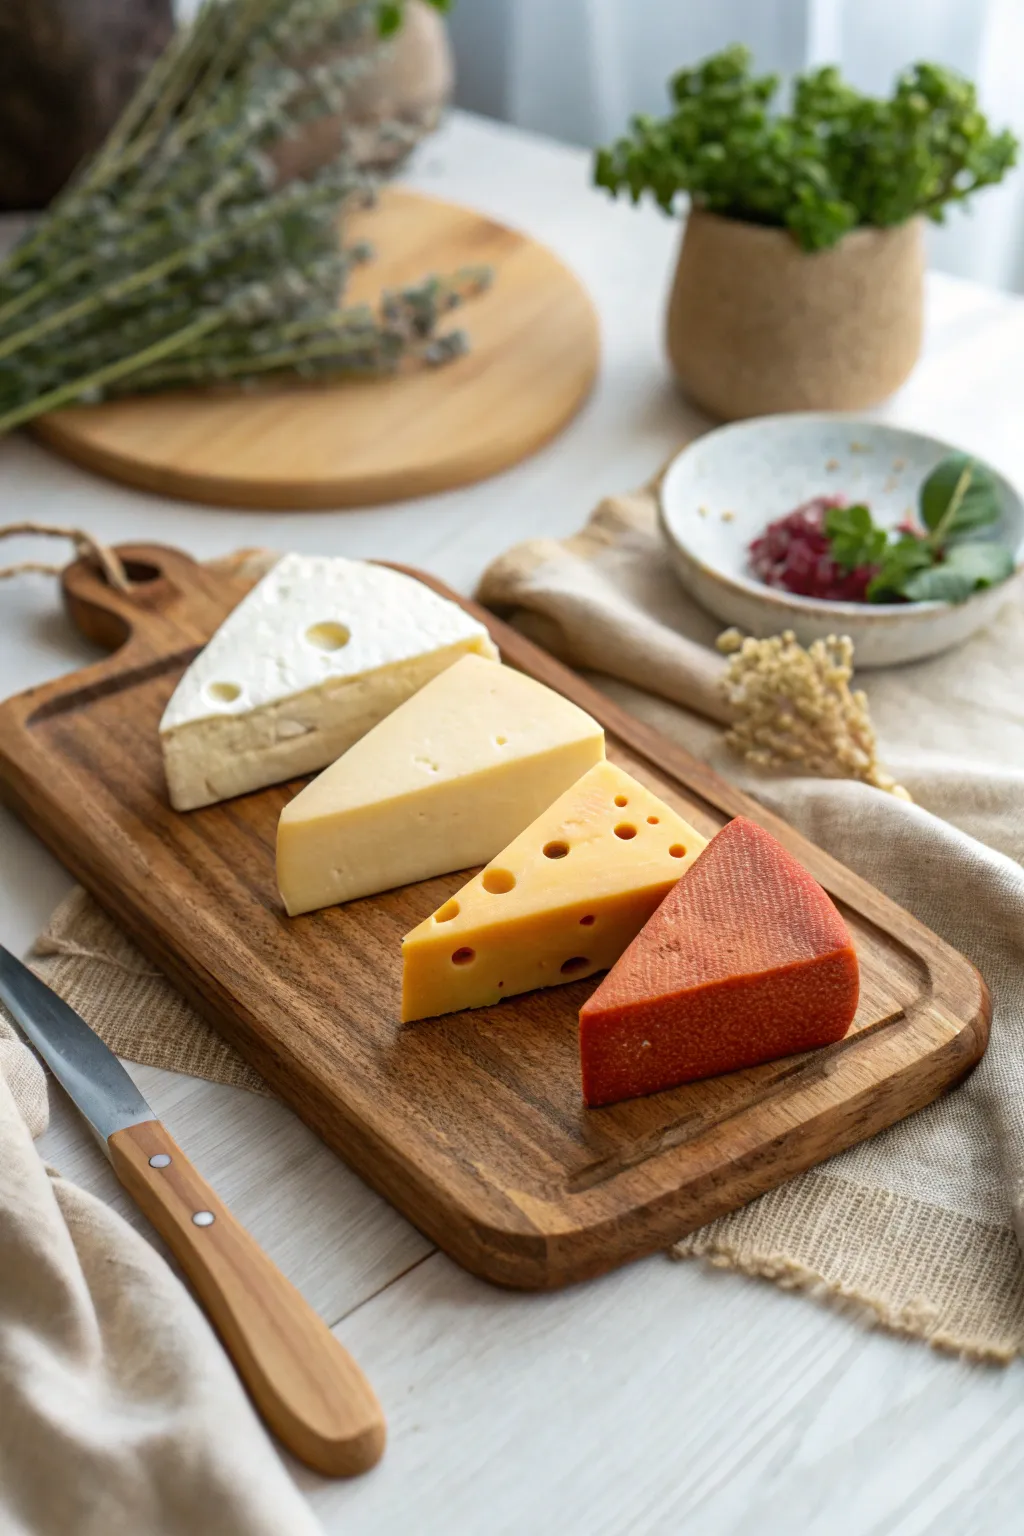
Master the art of texture with this delightful set of four distinct clay cheese wedges, ranging from creamy brie to sharp cheddar and aged gouda. You will create a stunningly realistic display piece perfect for miniature scenes or faux food props by layering colors and sculpting unique rinds.
Detailed Instructions
Materials
- Polymer clay (white, translucent, yellow, orange, red, brown)
- Blade or craft knife
- Needle tool
- Ball stylus tools (various sizes)
- Old toothbrush or stiff bristle brush
- Soft pastels (yellow ochre, burnt sienna, dark brown, red)
- Paintbrush for pastels
- Liquid polymer clay (optional for texture)
- Baking tile or parchment paper
- Oven for curing
Step 1: Shaping the Base Wedges
-
Mix the colors:
Prepare four distinct clay mixes: pure white for the brie, pale yellow for the Swiss, a deeper golden-orange for the cheddar, and an orange-red for the mimolette/gouda. Add a touch of translucent clay to the yellow and orange mixes to give them a realistic waxy finish. -
Form the wheel segments:
Roll each color into a thick disk about 3/4 inch high. Imagine these are slices from a full wheel of cheese. -
Cut the wedges:
Using your blade, cut a distinct triangular wedge from each colored disk. Ensure the sides are straight and the back edge is slightly curved, mimicking a cut from a round wheel. -
Refine the edges:
Gently tap the cut sides of each wedge on your work surface to flatten them slightly, removing any drag marks from the blade while keeping the corners relatively sharp.
Texturing Secret
Use a crumpled ball of aluminum foil to roll over the rinds. This creates a more organic, random pattern than commercial texture sheets.
Step 2: Texturing the Brie (White)
-
Create the bloomy rind:
For the white wedge, texture the curved back edge and the top surface heavily with an old toothbrush. This mimics the soft, fuzzy mold rind found on brie. -
Add character indents:
Use a medium ball tool to press a few shallow, soft indentations into the top surface and the cut sides. Brie is soft, so these shouldn’t look like drilled holes, but rather like gentle collapses in the pate. -
Dusting the rind:
Lightly brush the textured rind areas with white powder or starch to enhance the matte, chalky look, contrasting with the slightly smoother interior handling.
Step 3: Detailing the Hard Cheeses
-
Sculpting Swiss holes:
Take the darker yellow wedge (the Swiss). Use ball tools of varying sizes to press holes into the cut sides and top. Make some holes deep and others shallow for variety. -
Add the Swiss rind:
On the curved back edge of the Swiss wedge, press a darker, firmer texture using a crumpled piece of aluminum foil to simulate a harder outer layer. -
Texture the Parmesan-style wedge:
For the pale yellow wedge, use a needle tool to pick and drag at the cut surfaces. You want a crumbly, granular texture that looks like it would break into shards. -
Create the red wax rind:
For the fourth wedge (the gouda style), roll a very thin sheet of red clay. Wrap this strip specifically around the curved back edge, blending the seam underneath so it looks like a wax coating. -
Texture the red rind:
Use a toothbrush or stiff brush to stipple the red wax layer vigorously. This gives it that distinct, slightly pitted texture seen on aged cheese rinds.
Make it a Scene
Create a tiny knife from scrap clay and silver paint, and scatter some dried crushed tea leaves around the board to mimic herbs.
Step 4: Shading and Finishing
-
Pre-shading preparation:
Shave your soft pastels into fine powders. You will need a palette of yellow ochre, burnt sienna, and a touch of reddish-brown. -
Age the Swiss:
Dip a small dry brush into yellow ochre and brush it gently inside the holes of the Swiss cheese and along the rind edge. This adds depth and simulates oxidation. -
Toast the crumbly cheese:
On the pale, crumbly wedge, brush heavier amounts of yellow ochre near the rind, fading to the center. I find this gradient makes the ‘aging’ look much more convincing. -
Deepen the red rind:
Apply a dark brown or dark red pastel powder over the textured red rind. Wipe the surface lightly with your finger so the dark powder stays only in the crevices of the texture. -
Final cure:
Arrange your cheeses on a baking tile. Bake according to your polymer clay manufacturer’s instructions, usually at 275°F (130°C) for about 15-20 minutes depending on thickness. -
Post-bake seal:
Once cool, apply a satin varnish only to the cut sides of the Swiss and Gouda to make them look slightly moist and fatty, leaving the rinds matte.
Arrange your freshly cured cheese wedges on a wooden coaster for the perfect rustic presentation.

The Complete Guide to Pottery Troubleshooting
Uncover the most common ceramic mistakes—from cracking clay to failed glazes—and learn how to fix them fast.
Dim Sum Dumplings in a Steamer Basket
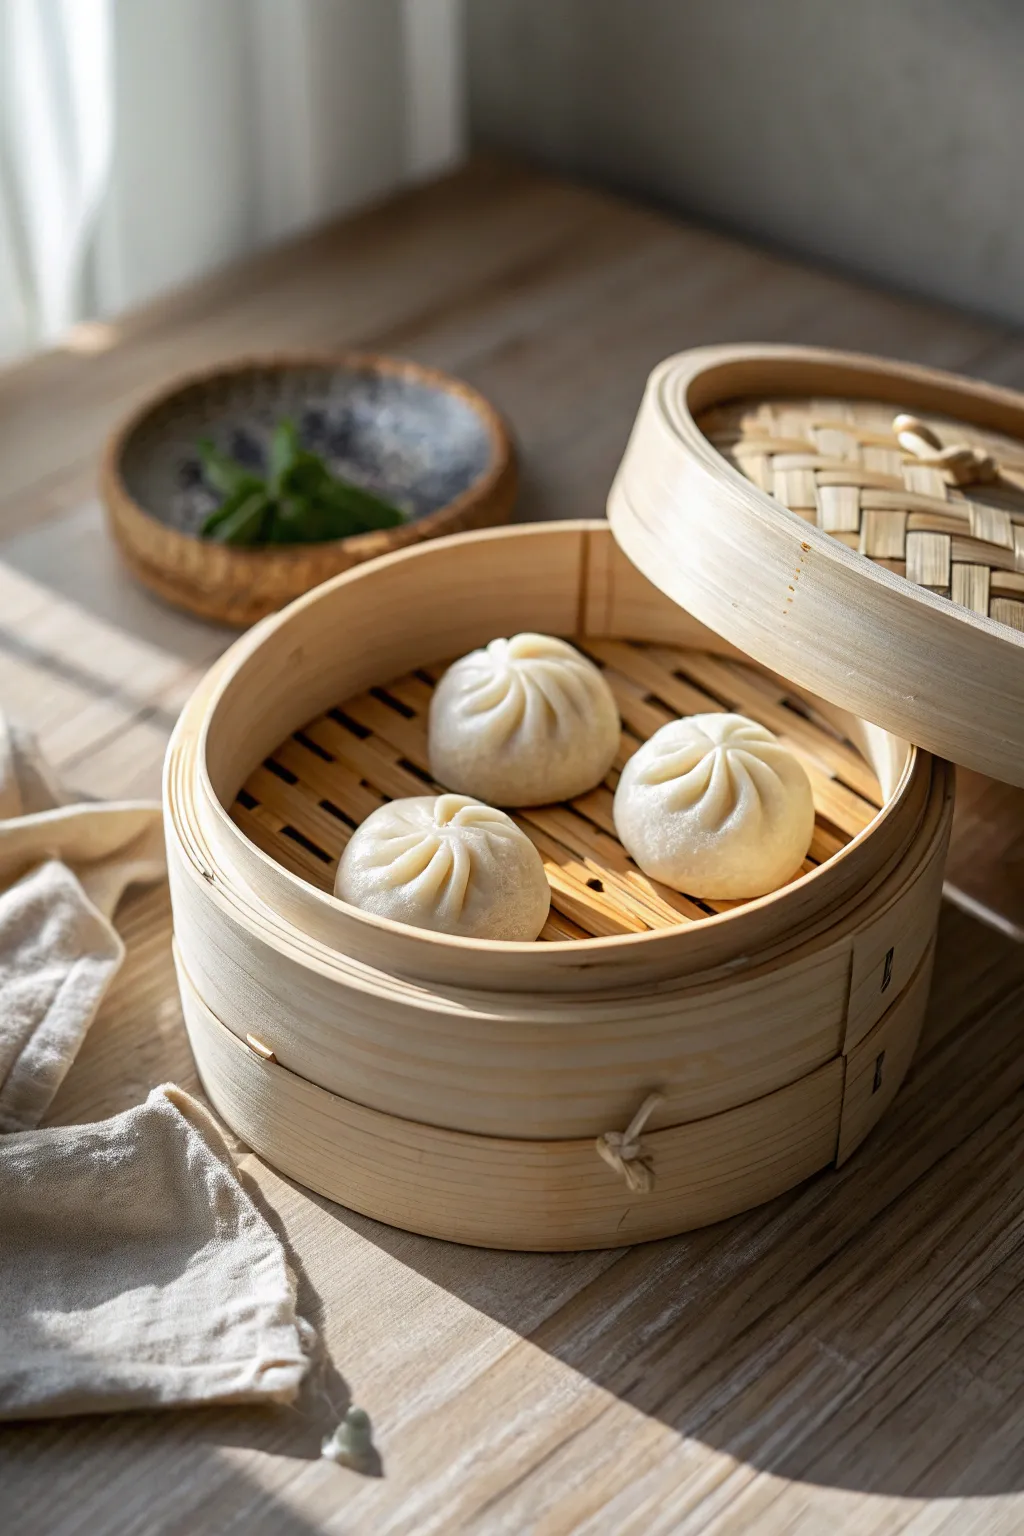
Create a cozy, realistic set of dim sum dumplings nestled in a handcrafted bamboo steamer using polymer clay. The soft, pillowy texture of the buns and the rustic grain of the basket make for a charming display piece that looks good enough to eat.
Step-by-Step
Materials
- White or translucent white polymer clay
- Beige or tan polymer clay
- Soft pastels (chalk) in yellow, orange, and light brown
- Liquid polymer clay (Fimo liquid or TLS)
- Needle modeling tool
- Ball stylus tool
- Round cutting mold (cookie cutter)
- Textured sandpaper or a toothbrush (for texturing)
- Craft knife
- Matte varnish
- Rolling pin
Step 1: Sculpting the Steamer Buns
-
Mix the dough color:
Begin by conditioning white polymer clay. To get that realistic, slightly translucent steamed effect, mix in a tiny amount of translucent clay—about a 3:1 ratio of white to translucent work best. -
Form the base shapes:
Roll three balls of clay, each about the size of a large marble. Flatten the bottom slightly on your work surface so they sit stable without rolling away. -
Create the pleated top:
Using a needle tool or a thin blade, gently press indentations starting from the center top of the bun down the sides. You want these lines to curve slightly to mimic the folding technique used in real dumplings. -
Refine the folds:
Go back over your indented lines and pinch the clay gently between them to create raised ridges. Use a ball tool to soften the very center where all the pleats meet, giving it a characteristic twist. -
Add texture:
Gently dab the surface of the buns with a clean toothbrush or piece of sandpaper. Real dough has pores, and this step removes the artificial smoothness of the clay. -
Shade for realism:
Shave a tiny bit of yellow and light brown chalk pastel into a fine powder. With a soft brush, very lightly dust the crevices of the pleats and the bottom edges to simulate shadows and cooked dough.
Sticky Situation?
If the clay is too soft and your pleats are collapsing, pop the clay in the fridge for 10 minutes to firm it up before sculpting the details.
Step 2: Crafting the Bamboo Steamer
-
Prepare the wood color:
Mix beige clay with a tiny touch of white and yellow to get a light bamboo wood color. Roll this out into a long, flat strip about 3mm thick. -
Make the steamer walls:
Cut two long strips. Wrap the first strip around a cylindrical object (like a small jar) to form the inner wall. Wrap the second strip around the first, but slightly higher, to create the rim where the lid sits. -
Add wood grain texture:
Before the clay hardens or is baked, drag a needle tool or stiff brush horizontally along the strips to create deep wood grain lines. -
Construct the floor:
Roll out thin ‘slats’ of the beige clay. Lay them across the bottom of your steamer ring, leaving small gaps between them to mimic the ventilation slats of a real steamer. -
Form the lid:
Create a ring the same diameter as your steamer base. Create a flat circle for the top, and then gently texture a woven pattern onto the top surface using a needle tool to simulate bamboo weaving. -
Assemble the lid handle:
Make a small loop of clay and attach it to the center of the lid using a drop of liquid clay as glue. Texture this to look like twisted rope or bent bamboo.
Step 3: Assembly and Finishing
-
Pre-bake shading:
Dust the edges of the bamboo steamer heavily with brown pastel chalk to give it an aged, used look. Focus on the rim and the connection points. -
Bake the pieces:
Bake all components according to your clay manufacturer’s instructions. I usually tent foil over the white buns to prevent them from scorching or yellowing too much. -
Stack the setup:
Once cool, place the three dumplings inside the steamer basket. Apply a tiny dot of liquid clay or strong glue to the bottom of each bun to secure them in place. -
Final varnish:
Coat the bamboo steamer with a matte varnish to protect the chalk pastels. Leave the buns unvarnished, as their natural matte clay texture looks most like soft dough.
Flour Power
Dust the finished raw buns with real cornstarch or baby powder before baking. This mimics the look of flour on fresh dough perfectly.
Now you have a delightful dim sum serving that captures the warmth of a morning meal.