
Clay holders are my favorite kind of project because they’re equal parts cute and actually useful. If you’re trying to tame rings, earrings, candles, keys, or desk clutter, these clay holder ideas will give you plenty to make (and plenty to gift).
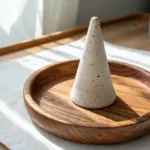
Classic Ring Cone Holder

This elegant ring cone serves as both a functional jewelry organizer and a sculptural accent for your dresser. The beauty lies in its simplicity, utilizing a speckled neutral clay to mimic the look of natural stone or ceramic without the need for a kiln.
Step-by-Step Tutorial
Materials
- Polymer clay (white or beige)
- Black pepper or dried coffee grounds (for speckles)
- Acrylic rolling pin
- Flexible clay blade or craft knife
- Cone template (paper or cardstock)
- Fine-grit sandpaper (400-600 grit)
- Baking sheet
- Parchment paper
- Ceramic tile or glass work surface
- Matte spray varnish (optional)
Step 1: Preparing the Clay
-
Condition the clay:
Start by warming the polymer clay in your hands. Knead and fold it repeatedly until it becomes soft, pliable, and easy to work with. Proper conditioning helps prevent cracks later on. -
Create the faux-stone look:
Flatten your conditioned clay into a pancake shape. Sprinkle a small pinch of ground black pepper or dried used coffee grounds over the surface. I like to start with less than I think I need—you can always add more. -
Incorporate the texture:
Fold the clay over the speckles and knead thoroughly again. Continue folding and kneading until the specks are evenly distributed throughout the entire ball of clay.
Keep it Straight
If your cone leans while baking, insert a toothpick into the bottom center before baking. Stick the other end into a crumpled ball of foil to act as a structured stand.
Step 2: Shaping the Cone
-
Form the initial shape:
Roll your speckled clay into a smooth ball between your palms, ensuring there are no visible seams or air pockets. -
Create a teardrop:
Place the ball on your work surface. Using the side of your hand or a flat tool, roll one side of the ball back and forth to elongate it into a thick teardrop shape. -
Refine the cone:
Stand the teardrop up on its fat end. Using your fingers and palms, gently roll and smooth the clay upward to create a tapered point. Aim for a height of about 3 to 4 inches. -
Flatten the base:
Press the cone firmly onto your work surface to create a flat, stable bottom. The cone should stand straight without wobbling. -
Smooth the surface:
Inspect the cone for fingerprints. Lightly roll the cone on your smooth work surface or use a gentle touch with your fingertips to buff away any imperfections. A little baby oil on your finger can help glide over stubborn marks.
Pro Tip: Seamless Base
Slice a very thin sliver off the bottom of the cone with your flexible blade before baking. This creates a perfectly flush base that is much flatter than pressing alone can achieve.
Step 3: Baking and Finishing
-
Prepare for baking:
Preheat your oven according to the manufacturer’s instructions on your specific package of clay (usually around 275°F or 130°C). -
Cover the clay:
Place your cone upright on a parchment-lined baking sheet. To prevent scorching the tip, you can create a small tent of aluminum foil to place over the cone. -
Bake the piece:
Bake for approximately 30 minutes per 1/4 inch of thickness. Since cones are thick, baking for 45-60 minutes ensures the core cures completely. -
Cool down:
Remove from the oven and let the cone cool completely on the baking sheet. It will harden fully as it returns to room temperature. -
Sand for smoothness:
Once cool, take a piece of fine-grit sandpaper (400-600 grit) and wet-sand the surface under running water. This removes any final bumps and gives it that professional, matte stone feel. -
Seal (Optional):
If you want extra durability or a specific sheen, apply a light coat of matte spray varnish. Let it dry completely before organizing your rings.
Place your new sculptural holder on your vanity to showcase your favorite pieces in style


Trinket Dish With Built-In Ring Post
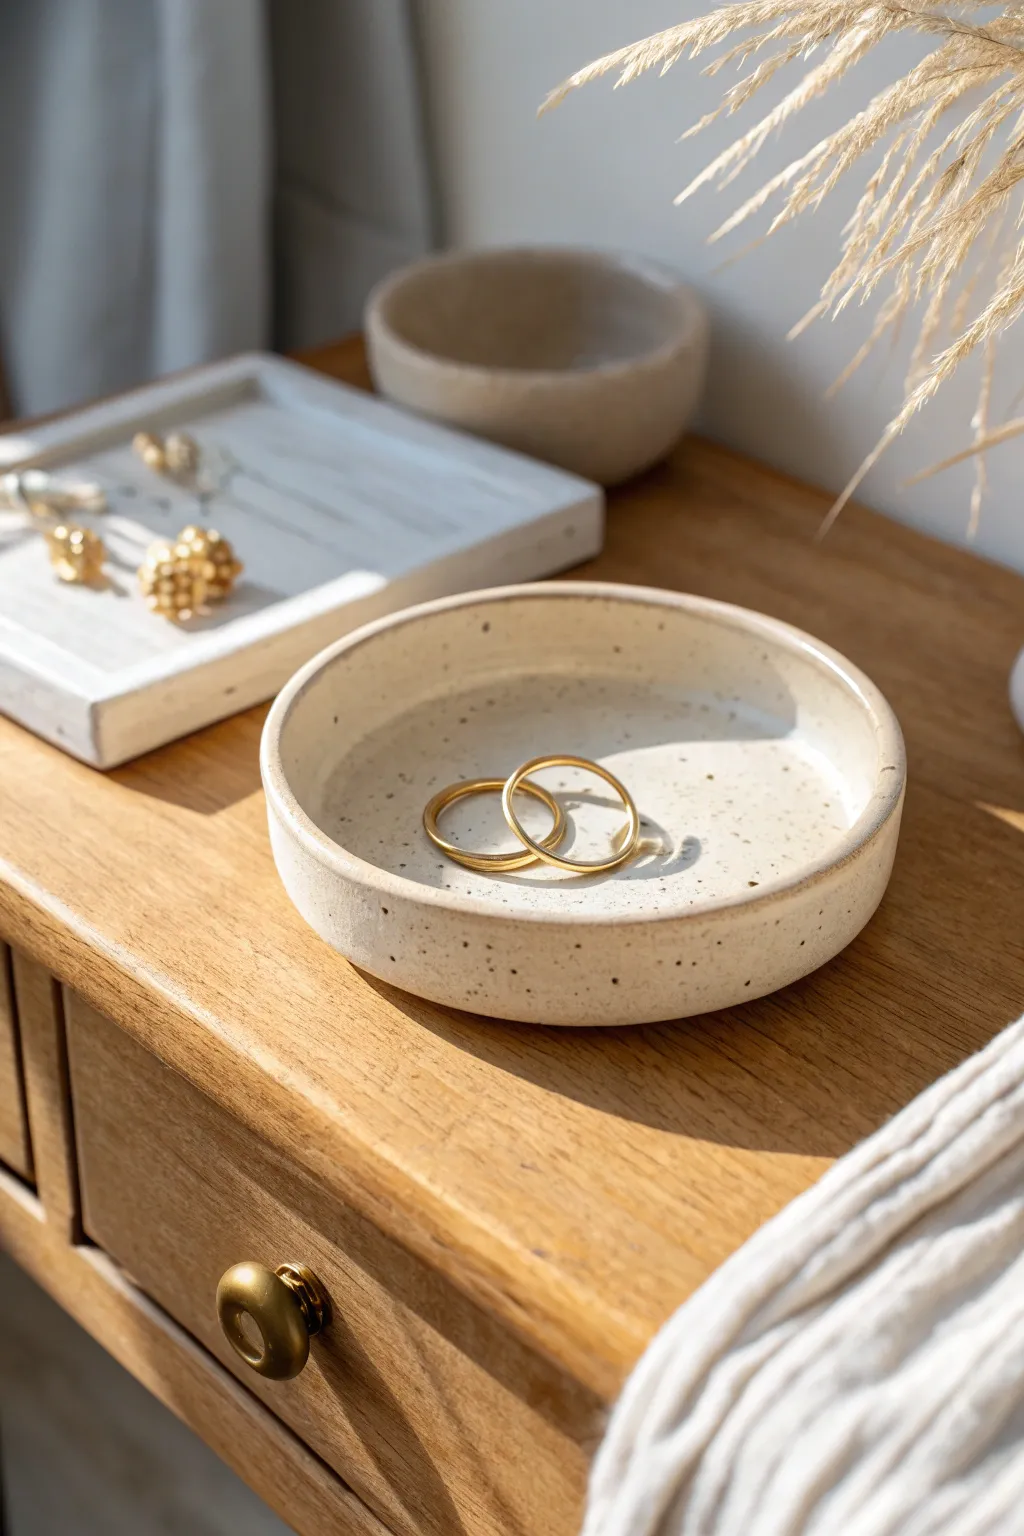
This minimalist jewelry dish mimics the high-end look of speckled stoneware pottery using accessible air-dry or polymer clay. Its clean, upright rim and faux-ceramic finish create a sophisticated resting place for your favorite rings and small treasures.
How-To Guide
Materials
- Air-dry clay (white or cream)
- Acrylic rolling pin
- Rolling guides or wooden slats (approx. 1/4 inch thick)
- Circle cutter or a round bowl
- Craft knife
- Small bowl or cup (for molding)
- Fine grit sandpaper
- Cream acrylic paint
- Brown or black acrylic paint (for speckles)
- Old toothbrush
- Gloss or satin varnish
Step 1: Forming the Base
-
Condition the clay:
Start by taking a handful of clay and kneading it in your hands until it becomes warm, soft, and pliable. This prevents cracks from forming later. -
Roll out the slab:
Place your clay on a smooth work surface. Using your rolling pin and guides, roll the clay out to an even thickness of about 1/4 inch. -
Cut the base circle:
Press your circle cutter or place a bowl upside down on the clay and trace around it with a craft knife to cut out a perfect circle. -
Smooth the edges:
Dip your finger in a little water and run it gently along the cut edge of the circle to smooth out any roughness or loose bits of clay.
Step 2: Building the Rim
-
Create a long coil:
Roll a remaining piece of clay into a long snake. Flatten this slightly with your rolling pin to create a long, rectangular strip that is the same thickness as your base. -
Measure and cut:
Use a ruler or the edge of your rolling pin to cut the strip so it has straight, parallel edges. The height should be about 3/4 to 1 inch. -
Attach the wall:
Score the outer edge of your base circle and the bottom edge of your clay strip. Add a little water or slip to the scored areas. -
Wrap the rim:
Carefully wrap the strip around the top edge of the base circle. Cut off any excess length where the ends meet. -
Blend the seams:
Using a modeling tool or your finger, blend the clay strip into the base on both the inside and outside until the seam disappears completely. -
Join the ends:
Blend the vertical seam where the two ends of the strip meet. Smooth it thoroughly so the wall looks seamless. -
Final shaping:
Check that the walls stand straight up. You can gently press a flat object against the rim to ensure it is level all the way around.
Cracks while drying?
If small fissures appear as the clay shrinks, mix a tiny bit of fresh clay with water to make a paste and fill the cracks. Let dry again, then sand smooth.
Step 3: Finishing and Painting
-
Dry thoroughly:
Let the dish dry completely for 24-48 hours. Keep it away from direct heat to prevent warping. -
Sand for smoothness:
Once fully dry, use fine-grit sandpaper to sand the entire piece. Focus on the rim and the outside walls to get that professional ceramic feel. -
Apply base coat:
Paint the entire dish with a creamy off-white acrylic paint. You may need two coats for full opacity. -
Create the speckles:
Dilute a small amount of dark brown paint with water. Dip an old toothbrush into this mixture. -
Splatter technique:
Hold the toothbrush over the dish and run your thumb across the bristles to flick tiny specks onto the surface. I like to practice on paper first to control the density. -
Seal the piece:
Once the paint is dry, apply two coats of gloss or satin varnish to protect the dish and give it a glazed look.
Level Up: Ring Post
Add a small cone of clay in the center of the dish before drying. This creates a dedicated ‘mountain’ or post specifically for stacking rings.
Place this on your nightstand or vanity for an elegant touch of handmade organization

Cactus Ring Holder Stand
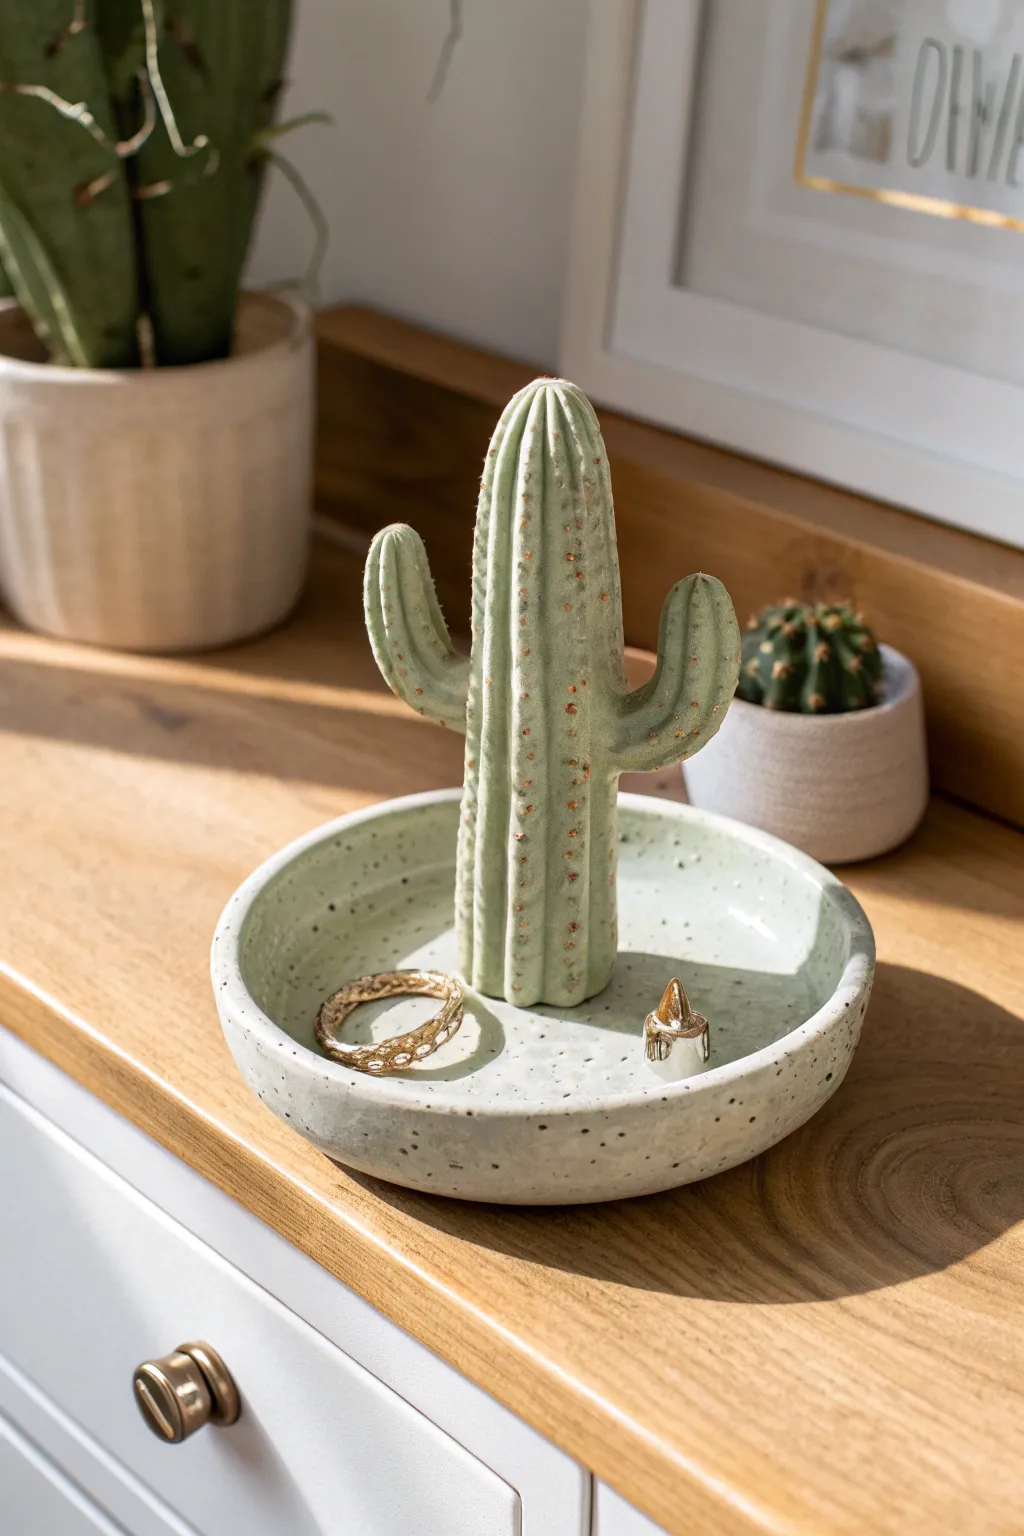
This charming ring holder combines functionality with desert style, featuring a sage green cactus centerpiece rising from a speckled trinket dish. It’s the perfect spot to keep your favorite rings safe while adding a touch of nature-inspired decor to your dresser.
Step-by-Step
Materials
- Polymer clay (white and sage green)
- Acrylic rolling pin
- Clay knife or craft blade
- Needle tool or toothpick
- Small round cookie cutter or bowl (approx. 4-5 inches)
- Liquid clay adhesive (e.g., Bake and Bond)
- Speckled pottery spray paint or finish (optional for texture)
- Gold or copper acrylic paint
- Fine detail paintbrush
- Gloss or matte varnish
- Oven and baking sheet
Step 1: Forming the Base Dish
-
Condition the Clay:
Begin by kneading your light sage green polymer clay until it is soft and pliable. If you want the speckled look to be built-in rather than painted later, you can mix in a small amount of granite-effect clay or cracked black pepper at this stage. -
Roll the Slab:
Roll out the clay on a clean, flat surface to a thickness of about 1/4 inch. Aim for a consistent thickness to ensure even baking later. -
Cut the Circle:
Use your round cookie cutter or trace around a small bowl to cut a perfect circle from the slab. This will be the foundation of your dish. -
Create the Rim:
Gently lift the edges of the clay circle to create a shallow rim. Smooth out any fingerprints or cracks with your fingertips or a little bit of water. I find using a smooth stone or the back of a spoon helps curve the inside edge perfectly.
Step 2: Sculpting the Cactus
-
Shape the Main Stem:
Roll a cylinder of clay approximately 3 inches tall and 1 inch wide. Round off the top into a dome shape. -
Add Texture Lines:
Using the back of your knife or a modeling tool, press vertical indentations running from the base to the center of the top dome. These ribs give the cactus its classic segmented look. -
Form the Arms:
Create two smaller cylinders for the cactus arms. Bend each slightly into an ‘L’ shape to mimic natural growth. Ensure one arm is slightly larger or positioned higher than the other for severeal assymetry. -
Attach the Arms:
Score the attachment points on the main stem and the arms with your needle tool. Apply a drop of liquid clay adhesive and press the arms firmly onto the stem. Smooth the seams with a modeling tool so they look like one continuous piece. -
Match the Texture:
Continue the vertical rib lines from the main stem onto the arms so the texture flows uninterrupted.
Seamless Seams
To make the cactus arms virtually inseparable, insert a small piece of toothpick or wire inside the join for an internal skeleton before baking.
Step 3: Assembly and Finishing
-
Attach Cactus to Base:
Score the center of your dish and the bottom of the cactus. Apply liquid adhesive and press the cactus firmly into the center of the bowl. -
Reinforce the Seam:
Roll a very thin snake of clay and wrap it around the base of the cactus where it meets the dish. Blend this clay upwards into the cactus and downwards into the dish to secure the bond. -
Add Surface Texture:
To mimic the prickly surface, take your needle tool and make tiny, shallow stippling marks all over the raised ridges of the cactus. This texture catches the paint beautifully later. -
Bake the Piece:
Place your creation on a baking sheet lined with parchment paper. Bake according to your clay package instructions (usually 275°F/135°C for 15-30 minutes per 1/4 inch thickness). Let it cool completely. -
Apply Speckled Finish:
If you didn’t mix speckles into the clay, you can now lightly flick thinned black or dark grey acrylic paint onto the piece using a toothbrush to achieve that stone-pottery look. -
Paint the Spines:
Using a fine detail brush and copper or gold metallic paint, carefully dab small dots along the vertical ribs of the cactus. These metallic accents represent the spines and add a bit of sparkle. -
Seal the Holder:
Once the paint is fully dry, coat the entire piece with a matte or satin varnish to protect the clay and give it a professional ceramic feel.
Creative Twist
Make a desert trio! Instead of one large cactus, sculpt three tiny succulents of different shapes and sizes to cluster in the center of the dish.
Now you have a stylish and functional piece of art ready to hold your treasures


Mushroom Jewelry Holder
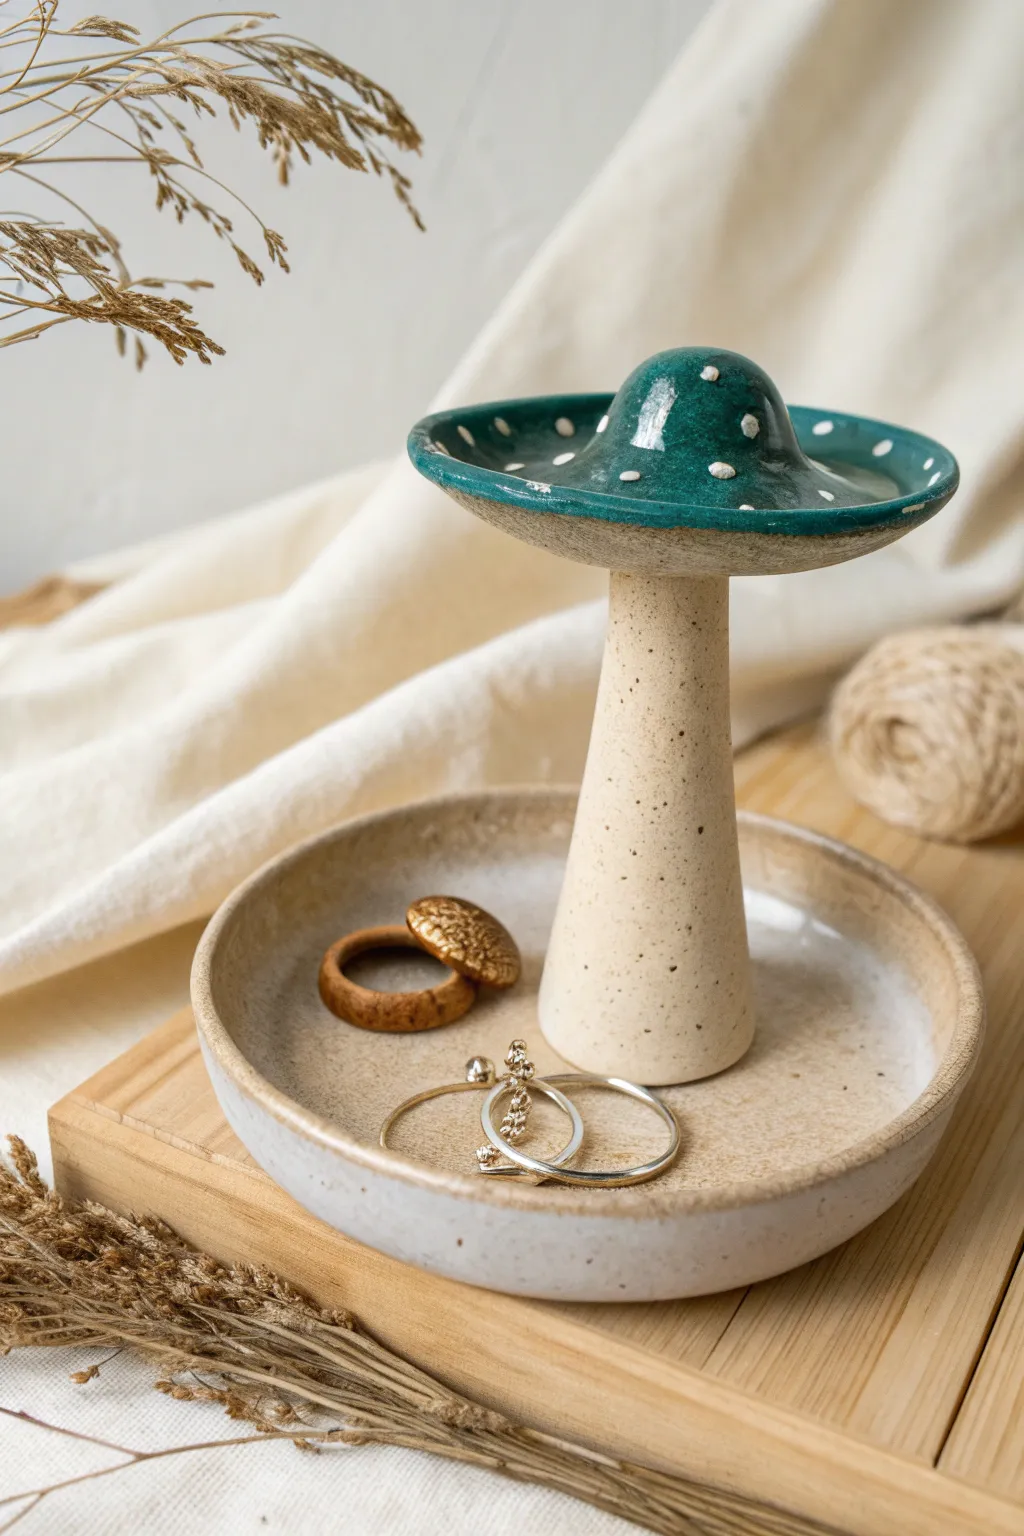
Create a functional piece of art with this ceramic mushroom jewelry holder, featuring a dual-dish design perfect for organizing rings and earrings. The speckled clay body contrasts beautifully with a glossy teal cap adorned with playful white polka dots, bringing a touch of forest magic to your dresser.
Step-by-Step Tutorial
Materials
- Speckled stoneware clay (or polymer clay with faux speckles)
- Pottery wheel (optional, can be hand-built)
- Needle tool
- Sponge
- Wire cutter
- Rib tool
- Slip and scoring tool
- Teal ceramic glaze (glossy)
- White underglaze or glaze
- Fine detail brush
- Kiln (if using ceramic clay)
Step 1: Forming the Base Dish
-
Prepare the Clay:
Begin by wedging a medium ball of speckled stoneware clay to remove air bubbles. If you are hand-building, roll this into a thick slab; if throwing, center it on the wheel. -
Shape the Main Dish:
Form a shallow, wide dish with straight vertical walls about 1 inch high. The bottom should be flat to hold jewelry. Smooth the rim with a sponge or chamois. -
Define the Center:
Use a needle tool or your finger to mark the exact center of the dish’s interior floor. This is crucial for attaching the stem later. Set this piece aside to firm up to a leather-hard state.
Step 2: Crafting the Mushroom Stem
-
Shape the Stem:
Roll a coil or throw a tall cylinder that tapers slightly toward the top. The base needs to be wide enough to be stable, roughly 1.5 inches in diameter, narrowing to about 1 inch. -
Check Height:
Ensure the stem is tall enough (around 4-5 inches) to allow hanging room for jewelry, but not so tall that it becomes top-heavy. -
Level the Ends:
Cut both the top and bottom of the stem to be perfectly flat and parallel to ensure the mushroom stands straight.
Keep it Steady
Make the stem slightly wider at the bottom than the top. A conical shape adds significant stability so the jewelry holder won’t tip over when loaded with items.
Step 3: Creating the Mushroom Cap
-
Form the Inverted Cap:
Create a second, smaller bowl shape. Instead of a standard dome, this cap is inverted like a saucer to hold loose items. Gently curve the edges upward. -
Create the Center Bump:
In the center of this small bowl, push the clay upward from beneath to create a rounded protrusion or ‘hump’ in the middle. This mimics the growing tip of a mushroom and adds visual interest. -
Refine the Edges:
Smooth the lip of the cap so it feels soft to the touch. I prefer to keep the edges slightly organic rather than perfectly machine-round for a natural look.
Glaze Crawling?
If your teal glaze pulls away from the clay spots, your bisque ware might have been dusty. Wipe the piece with a damp sponge before glazing to ensure adhesion.
Step 4: Assembly and Firing
-
Score and Slip the Base:
Once all pieces are leather-hard, score the bottom of the stem and the marked center of the base dish. Apply slip generously. -
Attach Stem to Base:
Press the stem firmly into the base dish. Use a small coil of clay around the connection point to reinforce it, smoothing it out completely with a modeling tool. -
Attach the Cap:
Score the top of the stem and the underside of the mushroom cap. Join them securely, ensuring the cap is level. Clean up any excess slip with a damp brush. -
Bisque Fire:
Allow the entire assembly to dry slowly and completely to prevent cracking. Fire it in the kiln to bisque temperature (usually cone 04).
Step 5: Glazing
-
Wax Resist:
Apply wax resist to the bottom of the base dish and the exposed clay parts of the stem and base interior, as we want the beautiful speckled clay body to remain unglazed on the bottom half. -
Apply Base Color:
Dip or brush a glossy teal glaze onto the entire mushroom cap (top and underside/lip). Ensure an even coat. Wipe away any drips that run down the unglazed stem. -
Add Polka Dots:
Using a fine detail brush or a slip trailer, carefully dot white glaze or underglaze onto the teal cap. Vary the spacing slightly for an organic feel. -
Final Fire:
Place the piece back in the kiln for the glaze firing (consult your clay package for the specific cone temperature, typically cone 5 or 6 for stoneware).
Once cooled, your mushroom stand is ready to keep your favorite trinkets safe and organized

The Complete Guide to Pottery Troubleshooting
Uncover the most common ceramic mistakes—from cracking clay to failed glazes—and learn how to fix them fast.
Minimal Geometric Catchall Tray
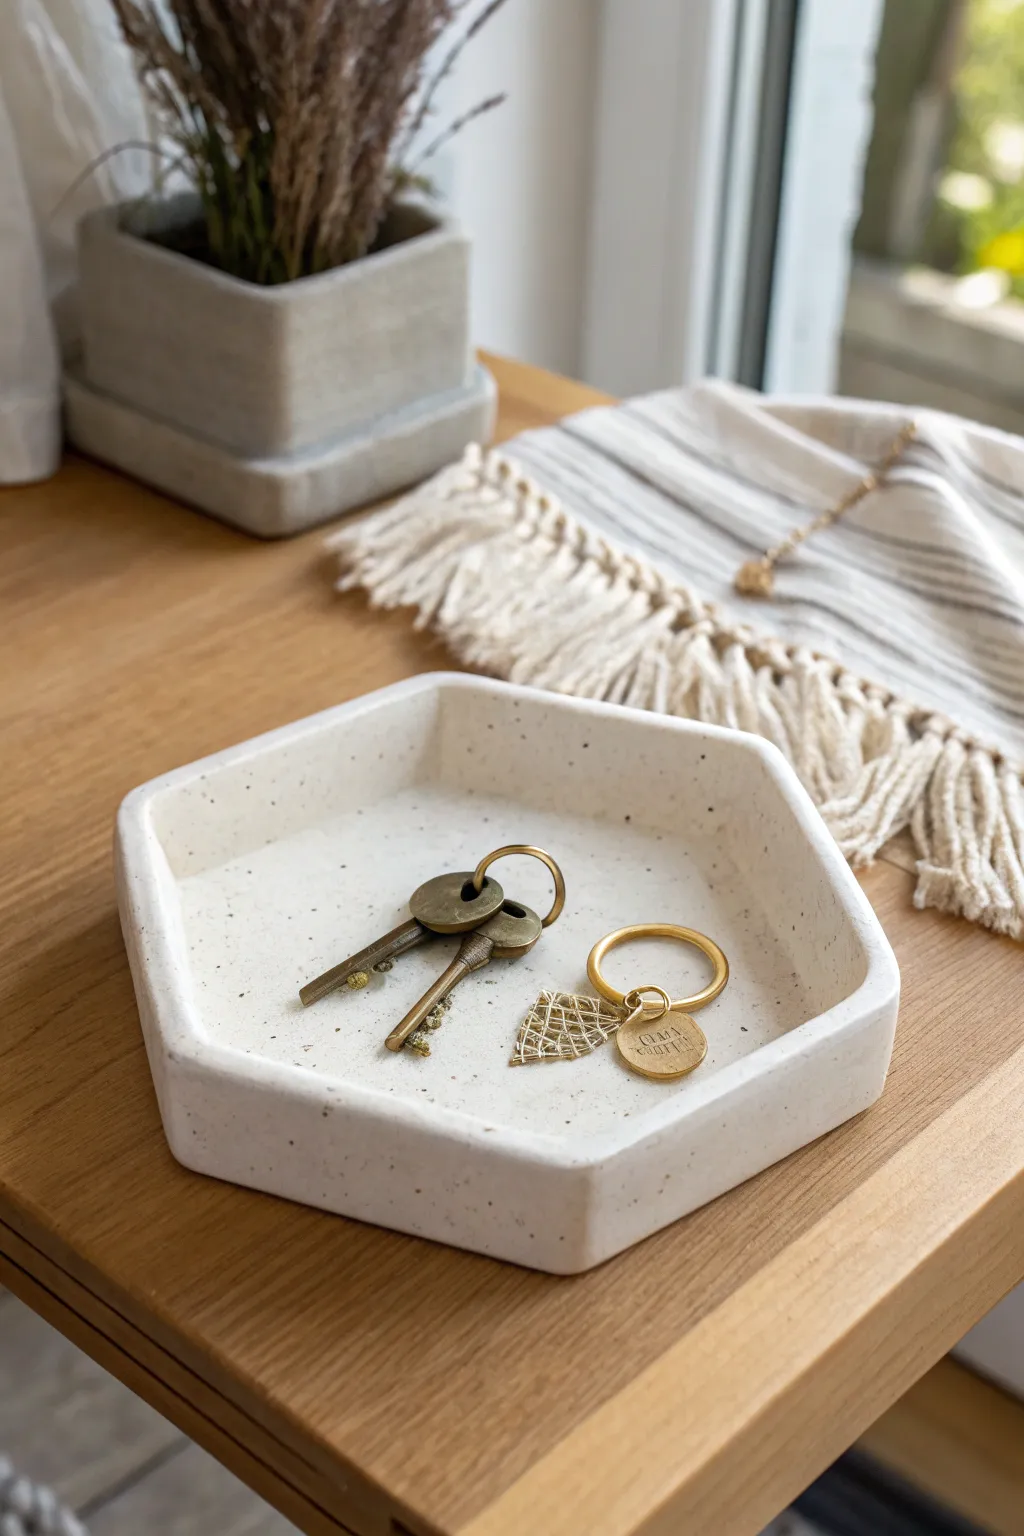
This minimal geometric catchall tray combines sleek lines with a rustic, speckled finish, perfect for organizing keys or jewelry. The clean hexagon shape offers a modern touch while the subtle texture adds organic warmth to your entryway table.
Step-by-Step
Materials
- White air-dry clay or polymer clay
- Rolling pin
- Two wooden guide sticks (approx. 1/4 inch thick)
- Parchment paper or non-stick craft mat
- Sharp crafting knife or X-Acto blade
- Paper template of a hexagon (printed and cut out)
- Dried coffee grounds or coarse black pepper (for speckling)
- Small bowl of water
- Fine-grit sandpaper (220-400 grit)
- Matte sealant or varnish
- Acrylic roller
- Ruler
Step 1: Preparation & Mixing
-
Prepare your workspace:
Lay down your parchment paper or craft mat on a flat, stable surface. This prevents the clay from sticking and picking up unwanted dust from your table. -
Create the speckled effect:
Take a handful of white clay and flatten it slightly. Sprinkle a pinch of dried coffee grounds or coarse black pepper onto the surface. Fold the clay over and knead until the speckles are evenly distributed throughout the block.
Step 2: Shaping the Base
-
Roll out the base:
Place your clay between two wooden guide sticks to ensure an even thickness. Roll the clay out until the rolling pin rests on the guides, creating a smooth slab about 1/4 inch thick. -
Cut the hexagon shape:
Place your paper hexagon template gently onto the rolled clay. Using your sharp crafting knife and a ruler for stability, carefully trace around the template to cut out your base shape. -
Smooth the edges:
Dip your finger into a small amount of water (or baby oil if using polymer clay) and run it along the cut edges of your hexagon base to soften any sharp corners or drag marks left by the knife.
Fixing Cracks
Make a ‘slip’ paste by mixing a tiny bit of clay with water (or liquid clay for polymer). Fill any cracks, smooth over, let dry, and sand again.
Step 3: Creating the Walls
-
Cut the wall strips:
Gather the remaining clay scraps and re-roll them into a long strip, maintaining the same 1/4 inch thickness. Use your ruler to cut long, straight strips that are approximately 3/4 inch to 1 inch wide. -
Prepare for attachment:
Score the outer edge of your hexagon base using a needle tool or knife tip. Do the same to one side of your long clay strip. This rough texture helps the pieces bond securely. -
Attach the first wall segment:
Apply a tiny bit of water or liquid clay to the scored areas. Place the strip along one edge of the hexagon, pressing firmly to adhere it to the base. -
Shape the corners:
When you reach a corner of the hexagon, gently bend the clay strip to follow the angle. If the clay is too stiff, you can cut the strip at a bevel and join a new piece, but bending creates a cleaner look. -
Complete the perimeter:
Continue attaching the strip around the entire hexagon. Trim any excess length where the ends meet, creating a seamless vertical seam. -
Reinforce the seams:
On the inside of the tray, use a modeling tool or your finger to smooth the clay from the wall down onto the base, blending the seam so it disappears. Repeat this on the outside vertical seam where the wall ends met.
Level Up: Color Pop
After sanding, paint just the very top rim or the outer walls with a gold metallic acrylic paint for a chic, high-contrast detail.
Step 4: Refining & Finishing
-
Level the rim:
Turn the tray upside down gently. This uses gravity to help flatten the top rim of the walls, ensuring they are level. -
Final smoothing:
Inspect the tray for any fingerprints or uneven spots. Use a slightly damp sponge or finger to smooth the entire surface. I like to pay special attention to the rim here to make sure it’s nice and rounded. -
Allow to dry:
If using air-dry clay, let the piece dry for 24-48 hours away from direct heat. If using polymer clay, bake according to the package instructions. -
Sand for perfection:
Once fully cured or dry, take your fine-grit sandpaper and gently buff the entire piece. This removes any final imperfections and makes the surface feel professional and smooth. -
Seal the piece:
Apply a coat of matte varnish or sealant to protect the clay from moisture and dirt, preserving the beautiful speckled look.
Enjoy your stylish new organizer that keeps your essentials right where you need them
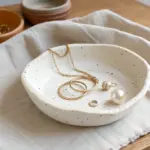
Scalloped Jewelry Dish Holder
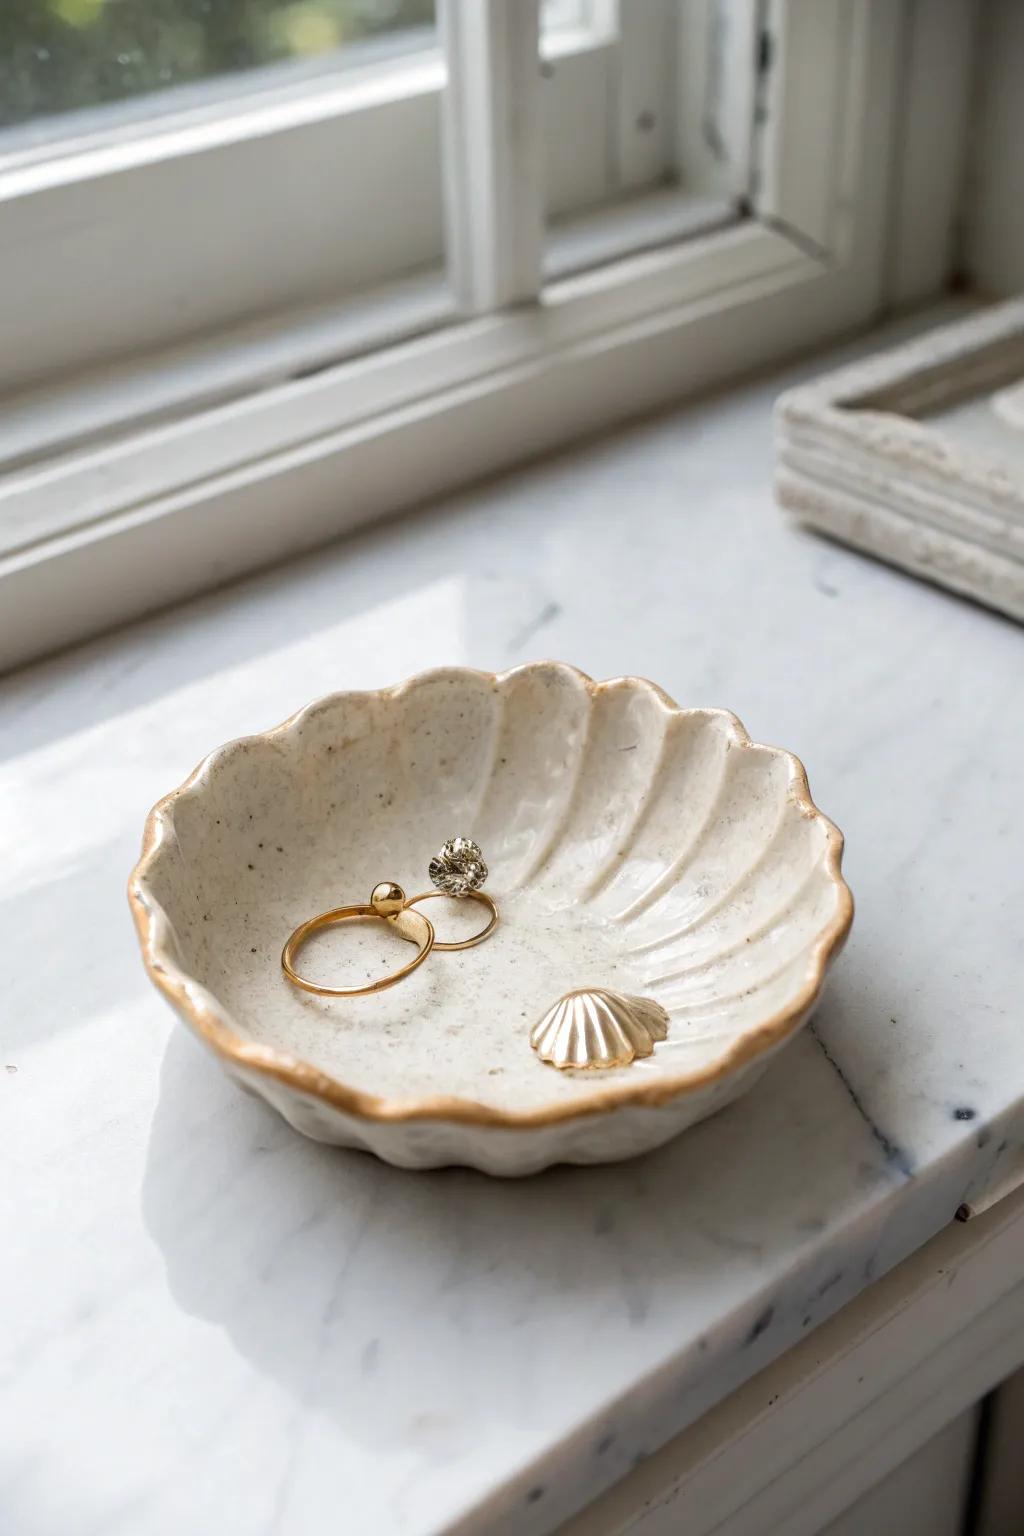
This elegant trinket tray captures the organic beauty of a seashell with its gentle ridges and sophisticated gold edging. The creamy, speckled finish gives it a high-end ceramic look that is perfect for holding your most treasured rings.
Detailed Instructions
Materials
- Air-dry clay (white or cream)
- Real scallop shell (medium size) for template
- Rolling pin
- Clay knife or craft blade
- Modelling tool with a rounded tip
- Small bowl or curved surface (for drying)
- Sandpaper (fine grit)
- Acrylic paint (creamy white)
- Speckle medium or brown paint + toothbrush
- Liquid gilding or gold leaf pen
- High-gloss varnish or resin
- Small paintbrush
Step 1: Shaping the Shell
-
Condition the Clay:
Begin by taking a handful of air-dry clay and kneading it thoroughly until it is soft, pliable, and free of air bubbles. -
Roll it Out:
Roll the clay into a slab that is roughly 1/4 inch thick. Aim for an even thickness throughout to prevent cracking during the drying process. -
Trace the Shape:
Place your real scallop shell lightly onto the slab to act as a template. Using your craft knife, carefully cut around the perimeter of the shell to create loose scallop shape. -
Refine the Edges:
Remove the excess clay. Dip your finger in a little water and smooth out the cut edges to soften any harsh angles or jagged bits left by the knife. -
Create the Ridges:
Using a rounded modeling tool or the handle of a paintbrush, press indentations into the clay that radiate from the bottom center point outward to the scalloped edges. -
Deepen the Texture:
Go over the lines again to ensure they are distinct, mimicking the natural ribs of a shell. I like to gently pinch the outer edge of each ‘rib’ to emphasize the curve. -
Form the Curve:
Carefully lift the clay shell and place it inside a small bowl or on a curved object. This will ensure it dries in a concave, bowl-like shape rather than completely flat.
Cracked Edges?
If small cracks appear while the clay dries, make a ‘slurry’ paste by mixing a tiny bit of clay with water. Fill the cracks, smooth over, and let dry again.
Step 2: Finishing Touches
-
Allow to Dry:
Let the dish dry completely for 24-48 hours. Drying time will vary based on humidity and clay thickness. Don’t rush this step or the piece may crack. -
Sand Smooth:
Once fully dry, take fine-grit sandpaper and gently sand the edges and surface to remove any fingerprints or rough spots. -
Base Coat:
Paint the entire dish with a creamy white acrylic paint. You may need two coats for full opacity. -
Add Speckles:
To achieve the stone-like effect, dilute a tiny bit of dark brown paint with water. Load a toothbrush with it and flick the bristles with your thumb to mist tiny speckles over the dish. -
Seal the Dish:
Apply a coat of high-gloss varnish to the entire piece. This protects the paint and gives it that shiny, fired-ceramic appearance. -
Apply the Gold Rim:
Once the varnish is dry, use a small brush and liquid gilding (or a gold leaf pen) to carefully paint the very edge of the rim. -
Final Cure:
Allow the gold detailing to dry completely according to the manufacturer’s instructions before placing any jewelry inside.
Smooth Operator
For the smoothest surface possible, lightly wet your fingertips and rub the clay in circular motions just before shaping. It removes fingerprints instantly.
Place your favorite rings in the dish and enjoy this functional piece of art on your vanity


What Really Happens Inside the Kiln
Learn how time and temperature work together inside the kiln to transform clay into durable ceramic.
Earring Grid Holder Tile
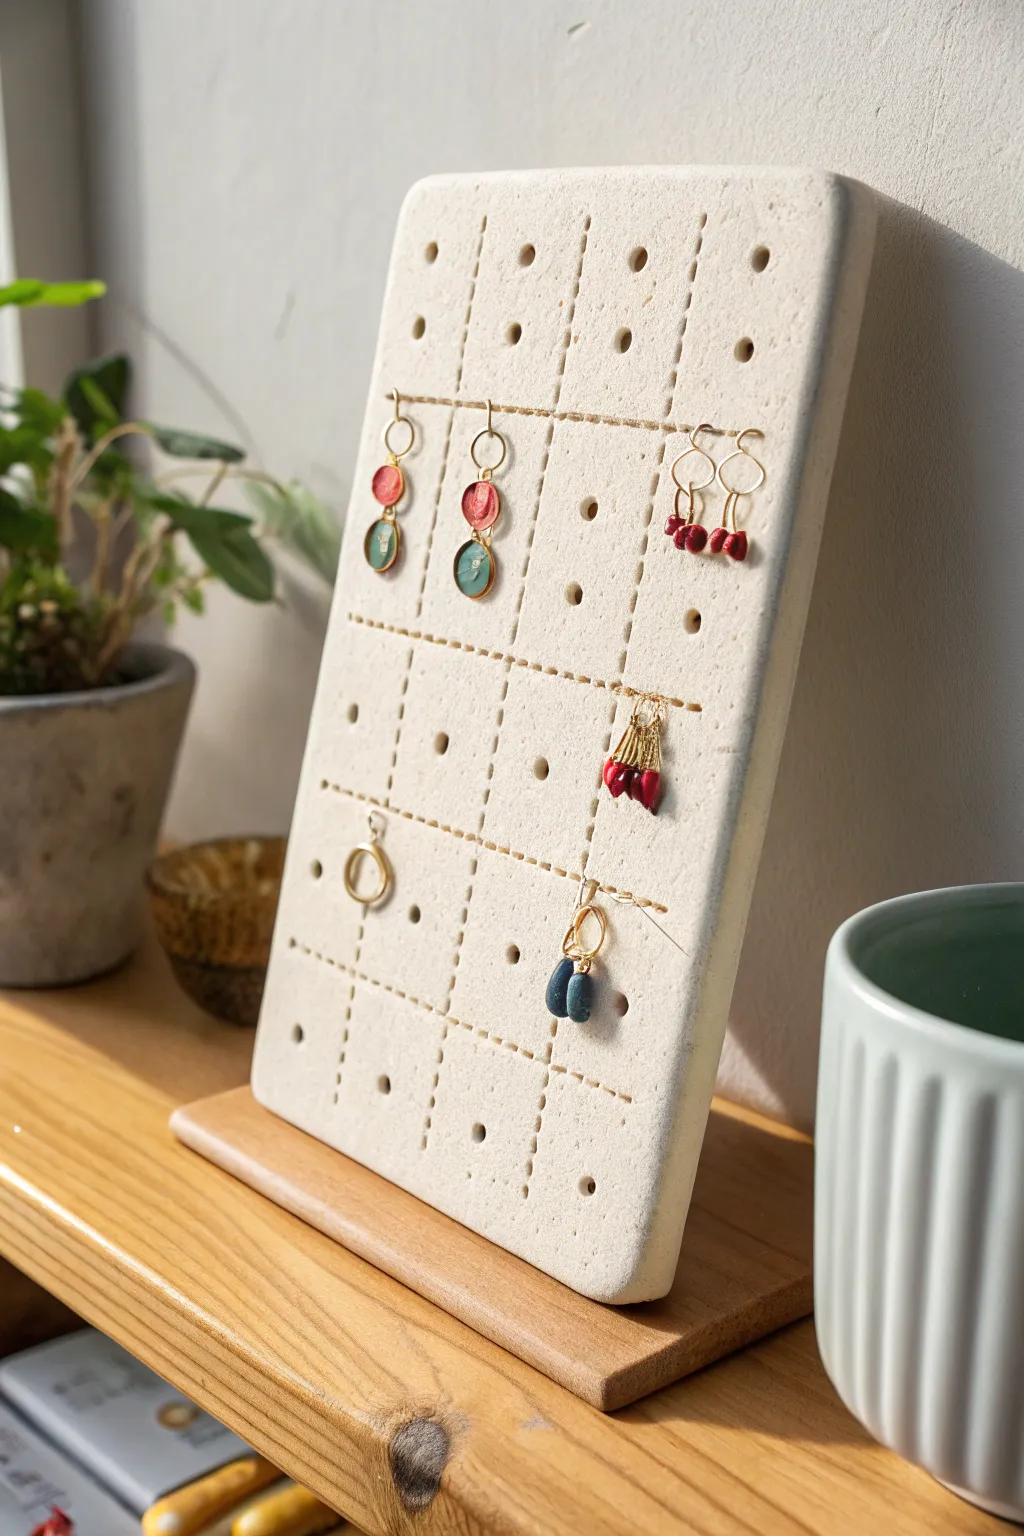
This minimalist earring holder combines rustic stoneware texture with clean, geometric precision. The dotted grid pattern not only adds visual interest but creates organized zones for displaying your favorite collection of studs and dangles.
Step-by-Step Tutorial
Materials
- White or speckled stoneware clay (approx. 1 lb)
- Rolling pin
- Two wooden guide strips (approx. 1/4 inch thick)
- Ruler
- Needle tool or toothpick
- Tracing wheel or spur tool (for dotted lines)
- Small coffee stirrer straw or drinking straw (for holes)
- Rectangular sponge
- Piece of hardwood or pine (for the base)
- Saw (if cutting wood base yourself)
- Strong craft glue or ceramic-safe adhesive
- Sandpaper (medium to fine grit)
Step 1: Shaping the Tile
-
Prepare the Clay:
Begin by kneading your clay to remove any air bubbles. If you want that speckled look but only have plain white clay, you can knead in some dried coffee grounds or coarsely ground pepper. -
Roll the Slab:
Place your clay between the two wooden guide strips on a canvas or cloth surface. Roll the clay out until the rolling pin rests on the guides, ensuring a perfectly even thickness of about 1/4 inch. -
Cut the Rectangle:
Using a ruler and a needle tool or knife, cut a clean rectangle. For the stand shown, aim for approximately 5 inches wide by 8 inches tall. Smooth the cut edges with a damp finger to remove sharpness. -
Texture the Surface:
To achieve the stone-like texture, take a dry rectangular sponge and gently pat the entire surface of the clay slab. This removes the shiny, smooth finish and gives it a matte, natural look.
Step 2: Creating the Grid
-
Measure the Grid:
With your ruler, lightly mark a 3×4 or 4×5 grid pattern on the surface. Don’t press hard; these are just guides for where your dotted lines will go. -
Imprint Dotted Lines:
Using a tracing wheel or by methodically pressing a blunt tool, create the dotted lines that form the grid. Press firm enough to leave a clear impression but not so hard that you warp the slab. -
Add Piercings:
Inside each grid square, punch one or two holes using your straw. These holes need to be large enough for earring posts to pass through, even after the clay shrinks during drying. -
Clean Up:
Check the back of the slab where the straw poked through. Use a finger to smooth down any rough clay burrs so the back is as neat as the front. -
Dry Slowly:
Place the slab on a flat board to dry. Cover it loosely with plastic for the first day to prevent the corners from curling up. Let it dry completely until bone dry. -
Fire or Bake:
If using polymer clay, bake according to package instructions. For ceramic clay, bisque fire it in a kiln. The piece shown is unglazed, preserving the raw texture.
Warp-Free Drying
If the corners of your clay slab start lifting while drying, gently weigh them down with small pieces of drywall or wood to keep everything perfectly flat.
Step 3: The Wooden Base
-
Cut the Base:
Cut a piece of wood slightly wider than your clay tile (about 6 inches long and 3 inches deep). Sand the edges and corners until they are smooth and rounded. -
Finish the Wood:
Apply a natural oil or wax to the wood to seal it and bring out the grain. Let it cure fully before assembly. -
Create a Slot (Optional):
If you have woodworking tools, routing a shallow groove for the tile to sit in adds stability. If not, don’t worry—the glue method works well too. -
Attach the Tile:
Run a bead of strong adhesive along the bottom edge of your fired clay tile. Press it firmly onto the center of the wooden base. -
Support While Drying:
Prop the tile up using heavy books or jars on either side to keep it perfectly vertical while the glue sets completely. I like to leave this overnight just to be safe.
Color Wash
For a pop of color, rub a diluted acrylic paint or oxide wash into the dotted grid lines and wipe away the excess, leaving the color only in the recesses.
Once the adhesive cures, your display is ready to showcase your jewelry collection beautifully
Toothbrush And Vanity Cup Holder
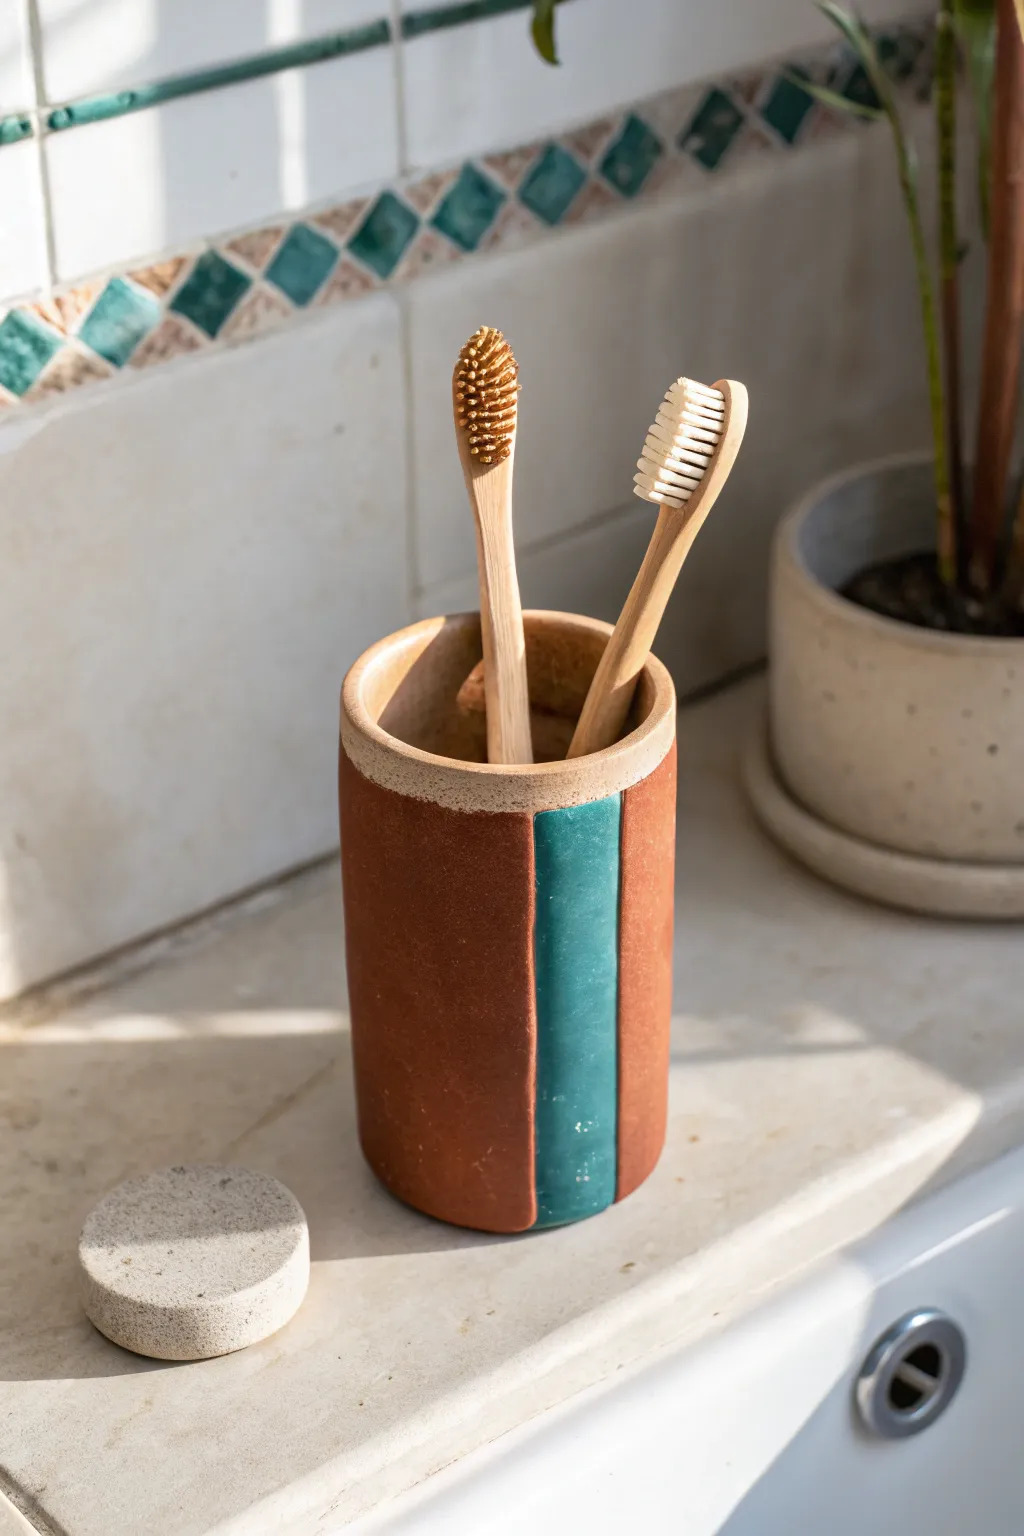
Bring an earthy, grounded feel to your bathroom counter with this simple terracotta toothbrush holder. Featuring a raw clay body contrasted by a single vertical stripe of vibrant teal glaze, this piece perfectly balances organic warmth with modern design.
How-To Guide
Materials
- Terracotta clay body (low fire or mid fire)
- Rolling pin
- Canvas work surface or textured mat
- Cylindrical form (like a PVC pipe or rolling pin) for shaping
- Fettling knife or needle tool
- Scoring tool (or fork)
- Slip (clay mixed with water)
- Sponge
- Teal or turquoise glaze
- Clear matte glaze (optional for interior)
- Small flat brush
Step 1: Forming the Cylinder
-
Prepare the slab:
Begin by wedging your terracotta clay to remove air bubbles. Roll it out into a rectangular slab approximately 1/4 inch thick. Aim for a height of about 4-5 inches and a length that matches the desired circumference of your cup. -
Cut to size:
Using a ruler and fettling knife, trim the clay slab into a clean rectangle. Save the excess clay for the base. -
Bevel the edges:
Cut the two shorter ends of the rectangle at a 45-degree angle. This beveling allows for a stronger, seamless join when you roll the clay into a cylinder. -
Score and slip:
aggressively score the beveled edges with your tool and apply a generous amount of slip to act as glue. -
Construct the wall:
Wrap the slab around your cylindrical form or simply curl it by hand to join the beveled edges. Press them firmly together. -
Blend the seam:
Use your thumb or a wooden tool to smudge the clay across the seam line on both the inside and outside until the join is invisible. I usually smooth this area with a damp sponge afterwards to ensure it’s seamless.
Tape Trick
Burnish the edges of your masking tape with a fingernail or spoon before glazing. This prevents the glaze from bleeding underneath and ensures a razor-sharp line.
Step 2: Adding the Base & Refining
-
Cut the base:
Roll out a small portion of the remaining clay to the same thickness. Place your cylinder on top and trace around it lightly, then cut out the circle. -
Attach the bottom:
Score and slip both the bottom rim of the cylinder and the edge of the circular base. Press them firmly together. -
Smooth the connection:
Blend the clay from the outside wall down onto the base to seal it completely. You can use a wooden modeling tool to make sure there are no gaps where water could leak. -
Refine the rim:
Use a damp chamois or a very slightly wet sponge to round over the top lip of the cup. It should feel smooth to the touch. -
Initial drying:
Let the piece dry slowly under plastic for a day to equalize moisture, then uncover it to dry completely to the bone-dry stage. -
Bisque fire:
Fire the piece in a kiln to cone 04 (or according to your clay body’s specifications) to harden it for glazing.
Texture Twist
Before rolling your slab into a cylinder, press a piece of lace or burlap into just the stripe area for a tactile, patterned accent under the colorful glaze.
Step 3: Glazing the Design
-
Tape the stripe:
Once the bisque piece is cool and wiped clean of dust, use painter’s tape or masking tape to mark off a vertical section on the outside. This will define the edges of your colored stripe. -
Glaze the interior:
Pour a clear glaze or a liner glaze inside the cup, swirl to coat, and pour out the excess. This makes the inside waterproof and easy to clean. -
Apply the color:
Using a flat brush, apply 2-3 coats of teal or turquoise glaze within the taped area. Allow each coat to dry just until the shine disappears before adding the next. -
Remove tape:
Carefully peel away the tape while the final coat is still slightly damp to keep the edges crisp. -
Clean up:
Sponge the bottom of the cup to ensure no glaze is on the foot, which would stick to the kiln shelf. -
Final firing:
Fire the piece again to the maturation temperature of your glaze (e.g., cone 05 or cone 6).
Place your brushes inside and admire how the natural clay warms up your bathroom vanity

TRACK YOUR CERAMIC JOURNEY
Capture glaze tests, firing details, and creative progress—all in one simple printable. Make your projects easier to repeat and improve.
Incense Stick Holder Dish
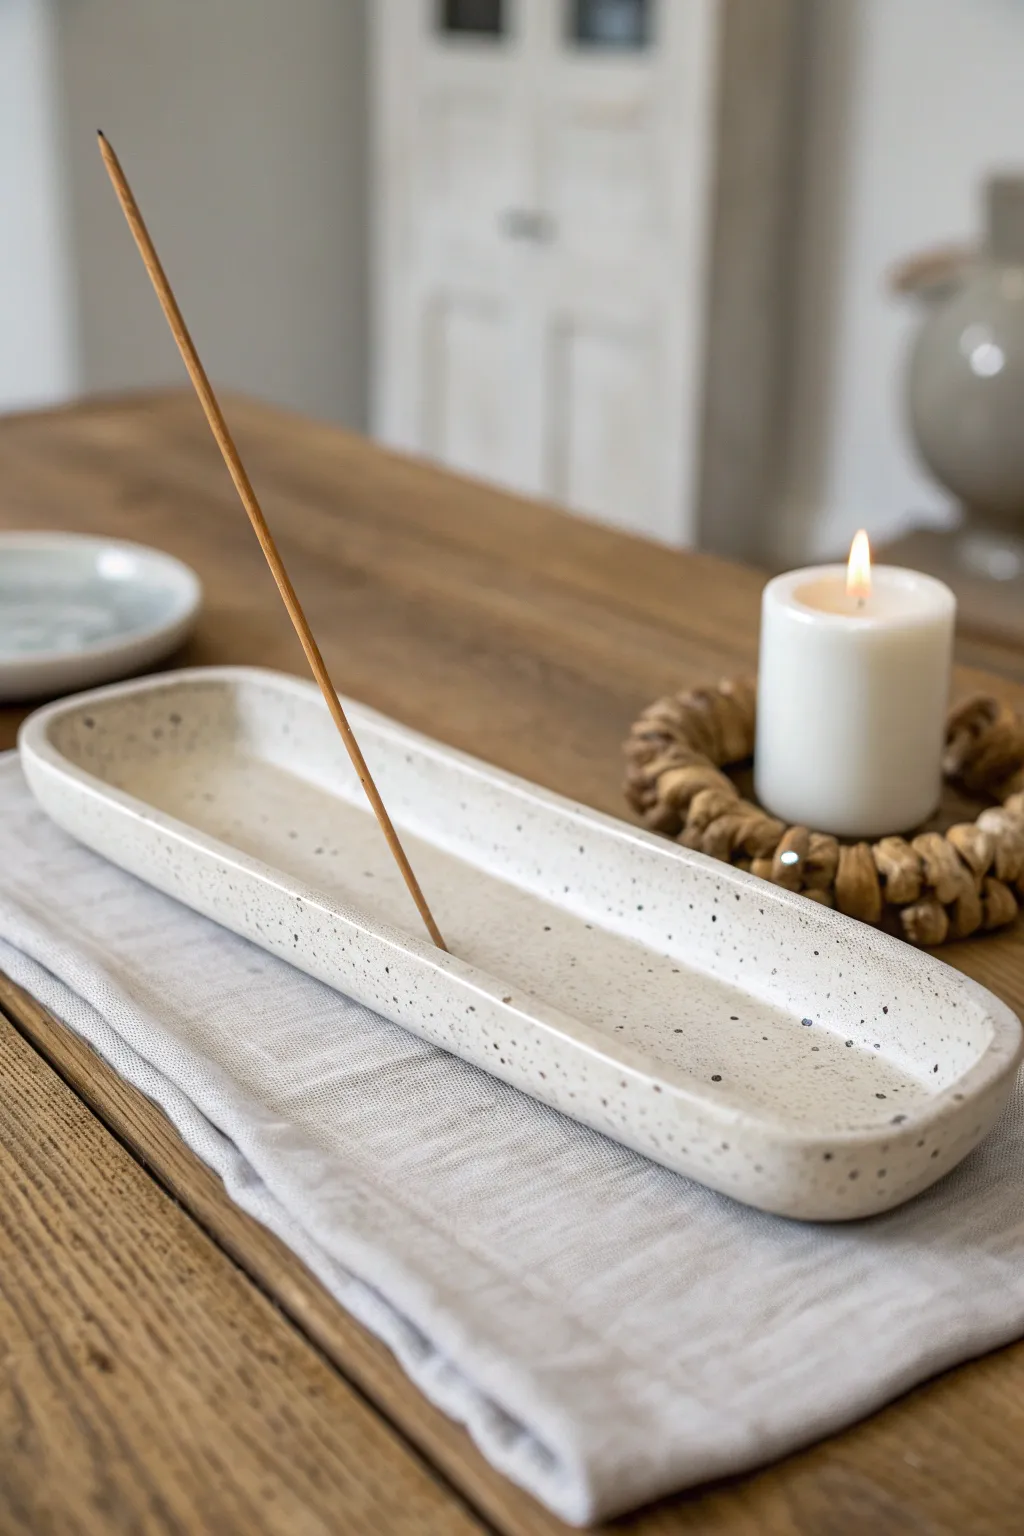
This elegant incense holder combines minimalist design with functional beauty, featuring a long, oval dish shape perfect for catching falling ash. The speckled cream finish gives it sophisticated stoneware look that complements any modern rustic decor.
Step-by-Step Guide
Materials
- White air-dry clay or polymer clay (approx. 200g)
- Acrylic rolling pin
- Fettling knife or craft knife
- Oval paper template
- Small bowl of water
- Sponge or smoothing tool
- Wooden skewer or incense stick
- Sandpaper (fine grit)
- Cream acrylic paint
- Black acrylic paint (or dark brown)
- Old toothbrush
- Matte or satin varnish
Step 1: Shaping the Base
-
Prepare the Clay:
Start by conditioning your clay. Knead it in your hands until it becomes warm, pliable, and free of any air bubbles. This ensures a smooth surface later. -
Roll out a Slab:
Using your acrylic rolling pin, roll the clay out onto a clean work surface or canvas mat. Aim for an even thickness of about 1/4 inch (6mm). -
Cut the Shape:
Place your elongated oval paper template on top of the slab. Use your fettling knife to trace around the edge, cutting out the main base shape cleanly. -
Create the Walls:
Roll out a long, thin snake or coil of clay, roughly the thickness of a pencil. This will become the raised rim of your dish. -
Attach the Coil:
Score the outer edge of your oval base and the bottom of your coil using a needle tool or knife. Dab a little water (or slip) on the scored areas to act as glue. -
Secure the Rim:
Gently press the coil onto the edge of the base. I like to start at one end and work my way around, trimming off any excess coil where the ends meet. -
Blend the Seams:
Using your thumb or a wooden modeling tool, pull the clay from the coil down onto the base on the inside, and from the base up onto the coil on the outside. Blend until the seam is invisible.
Step 2: Refining and Drying
-
Smooth the Surface:
Dip a sponge or your finger in a tiny bit of water and rub it over the entire piece to smooth out fingerprints and tool marks. Pay special attention to rounding the top lip of the rim. -
Add the Holder Angle:
Create a small mound of clay inside the dish at one end, blending it seamlessly into the floor. This provides a thicker area to safely hold the incense stick. -
Poke the Hole:
While the clay is still soft, use an actual incense stick or a skewer to poke a hole into that mound. Insert it at a 45-degree angle pointing toward the center of the dish so the ash will fall inside. -
Check the Fit:
Wiggle the stick simply a tiny bit to widen the hole slightly, as clay shrinks when it dries. Ensure the angle is correct before removing the stick. -
Let it Dry:
Place the piece on a flat surface away from direct heat. Let it air dry completely for 24-48 hours until it is hard and turns a lighter color. -
Sanding:
Once bone dry, take your fine-grit sandpaper and gently sand away any rough edges or bumps on the rim and sides for a professional finish. Wipe away the dust with a damp cloth.
Uneven Drying?
If the edges curl up while drying, gently weigh the center down with a small bag of rice or sand during the first few hours of the drying process.
Step 3: The Speckled Finish
-
Base Coat:
Paint the entire dish, including the bottom, with two coats of cream acrylic paint. Let the first coat dry fully before applying the second for opaque coverage. -
Prepare the Speckles:
Dilute a small dollop of black or dark brown paint with a few drops of water until it has an inky, fluid consistency. -
Splatter Technique:
Dip the bristles of an old toothbrush into the diluted dark paint. Hold the brush over the dish and run your thumb across the bristles to flick tiny specks onto the surface. -
Seal the piece:
Allow the paint to dry completely. Finally, apply a coat of matte or satin varnish to protect the finish and make it easier to wipe away ash later.
Glazed Look
Use a high-gloss Mod Podge or a thick layer of resin instead of matte varnish to mimic the look of high-fired ceramic glaze.
Enjoy the calm atmosphere your new handmade creation brings to your space
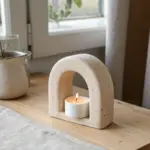
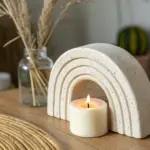
Tea Light Holder With Cutouts
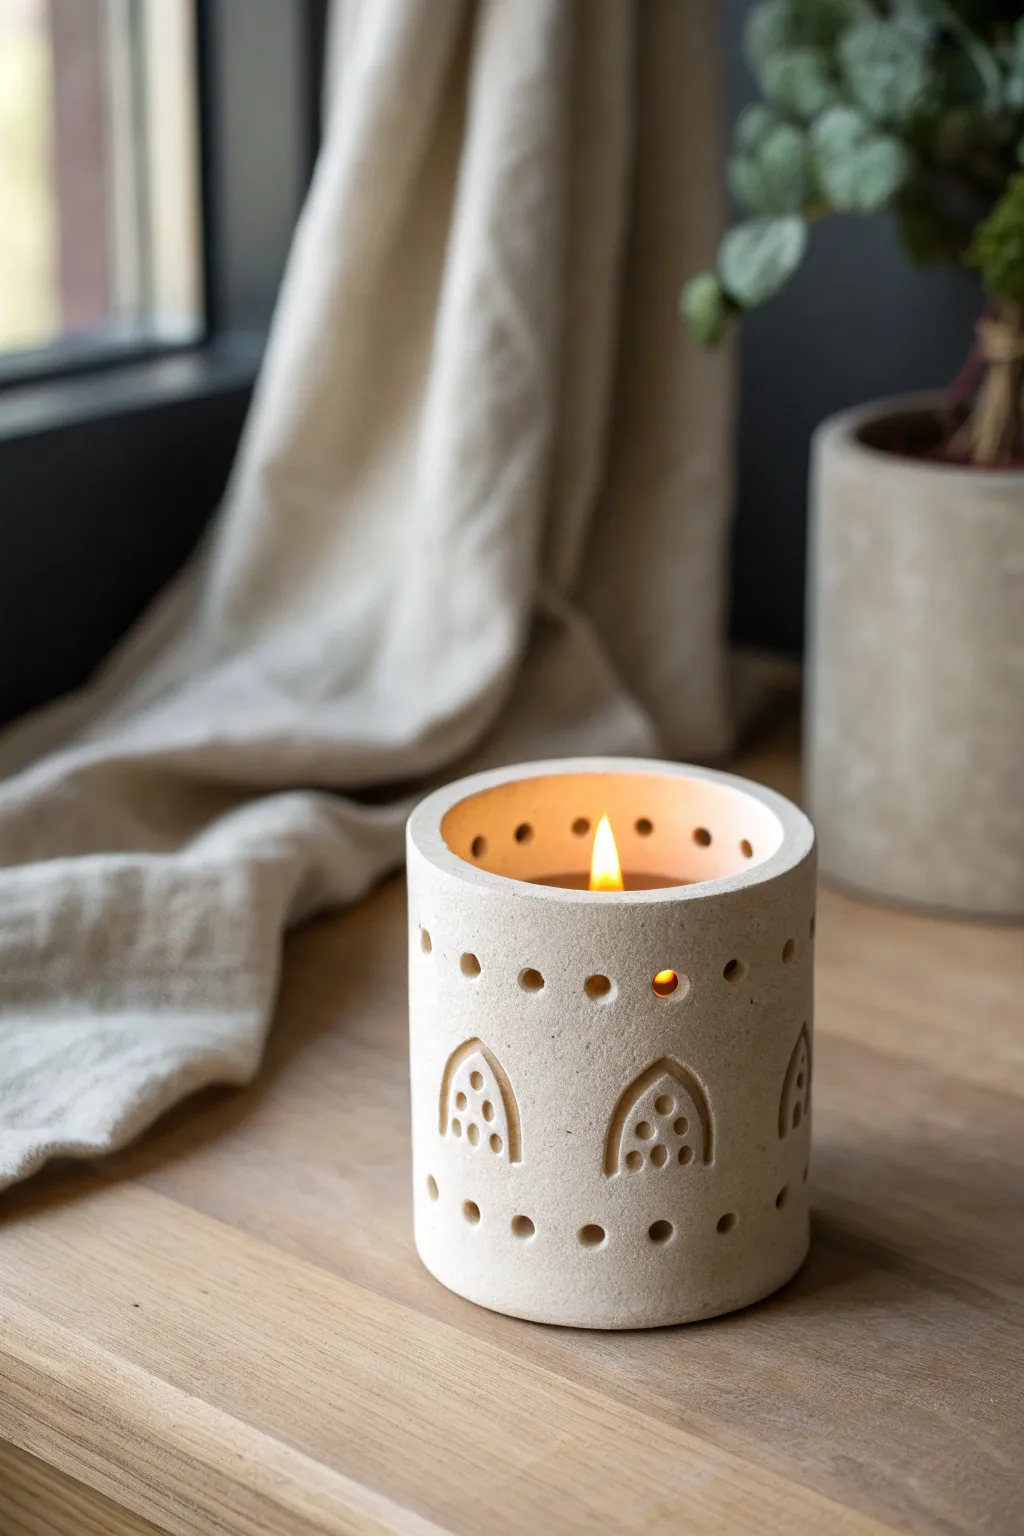
This charming, rustic cylinder transforms soft candlelight into a patterned glow through delicate cutouts. The natural speckled clay finish and arched motifs give it an architectural yet handmade feel perfect for cozy evenings.
Step-by-Step
Materials
- White or speckled stoneware clay (or air-dry clay)
- Rolling pin
- Canvas mat or cloth
- Sharp knife or clay needle tool
- Cylindrical form or mandrel (approx. 3-4 inch diameter)
- Small circular hole punch or straw
- Small carving loop tool
- Slip (clay and water mixture)
- Scoring tool or fork
- Sponge
- Sandpaper (fine grit)
Step 1: Forming the Cylinder
-
Roll the Slab:
Begin by rolling out your clay on a canvas mat to a uniform thickness of about 1/4 inch. It needs to be sturdy enough to stand but thin enough for light to pass through the top. -
Measure and Cut:
Determine the circumference of your cylindrical form and add half an inch for the overlap. Cut a long rectangular strip of clay based on these measurements, aiming for a height of roughly 4-5 inches. -
Wrap the Form:
Wrap your paper or plastic-covered cylindrical form with the clay strip. Bring the two short ends together to meet. -
Score and Slip:
Rough up the edges where the clay will join using a scoring tool or fork. Apply a dab of clay slip to both scored areas to act as glue. -
Seal the Seam:
Press the edges together firmly. Use your thumb or a wooden tool to smudge the clay across the seam line, blending it until the join is invisible on both the outside and inside. -
Smooth the Surface:
Run a damp sponge lightly over the surface to remove any fingerprints or canvas texture, ensuring the cylinder is perfectly round.
Step 2: Detailing and Carving
-
Mark the Grid:
Lightly sketch horizontal guidelines with a needle tool to ensure your patterns stay straight. You’ll want a line for the top holes, a middle band for the arches, and a bottom line for the base holes. -
Punch the Top Row:
Using a small circular clay cutter or a drinking straw, punch a row of evenly spaced holes about half an inch below the top rim. Remove the little clay plugs as you go. -
Outline the Arches:
In the middle band, lightly draw evenly spaced arched shapes resembling gothic windows. I find it helpful to use a paper template here to keep them identical. -
Carve the Arch Depth:
Instead of cutting all the way through, use a small loop tool to carve out the interior of the arch shape, recessing it slightly to create a relief effect. -
Detail the Arches:
Inside each recessed arch, use a smaller tool or noodle cutter to press three or four small indentations or holes in a triangular pattern. -
Punch the Bottom Row:
Repeat the circular hole motif near the bottom edge of the cylinder, aligning them vertically with the top row if possible for symmetry.
Slumping Walls?
If the clay is too soft and the cylinder sags, let the slab stiffen for 20 minutes before rolling, or keep the support form inside until it reaches the leather-hard stage.
Step 3: Finishing Touches
-
Refine Edges:
Once the clay is leather-hard (firm but cool to the touch), use a slightly damp sponge to soften the sharp edges of your cutouts and the rim. -
Create a Base (Optional):
If you want a bottom attached, cut a clay circle the same diameter as your cylinder. Score and slip it onto the bottom edge, blending the seam thoroughly. -
Dry Slowly:
Loosely cover the piece with plastic to let it dry slowly over a few days. This prevents the seam from cracking as the clay shrinks. -
Baking or Firing:
If using kiln-fire clay, bisque fire and then glaze (or leave raw for a stone look) and fire again. If using air-dry clay, allow to fully cure before sealing with a matte varnish.
Glow Up
Apply a translucent white glaze only on the inside. This will reflect the candlelight brighter while keeping the exterior raw and earthy.
Place a tea light inside and enjoy the dancing shadows cast by your handcrafted luminary
Taper Candle Holder Trio
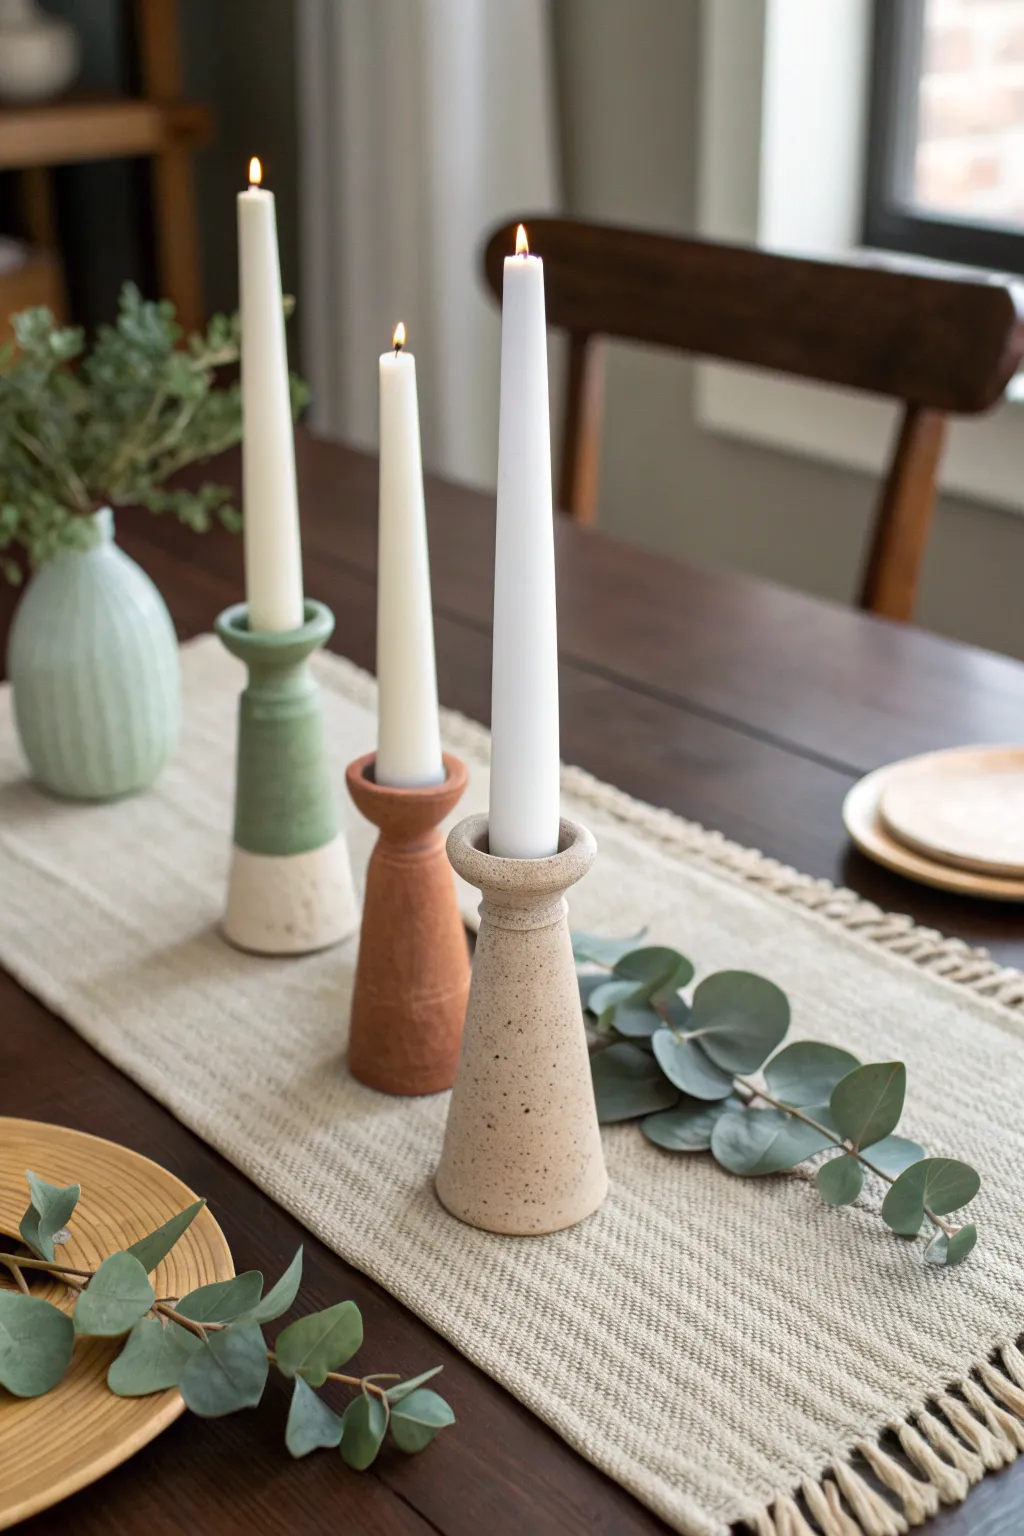
Create a calming, artisanal atmosphere with this set of three distinct yet cohesive taper candle holders. Featuring textured matte finishes in sage, terracotta, and speckled oatmeal, these conical beauties are surprisingly simple to sculpt from air-dry or polymer clay.
How-To Guide
Materials
- Air-dry clay (white) or polymer clay (neutral color)
- Rolling pin
- Cutting mat or smooth work surface
- Ruler
- Craft knife or clay blade
- Taper candle (for sizing)
- Cardstock or thick paper (for templates)
- Tape
- Small bowl or cup of water (for smoothing)
- Clay sculpting tools (sponge, needle tool)
- Sanding block or fine-grit sandpaper
- Acrylic paints (Sage Green, White, Terracotta/Rust, Beige, Black/Brown)
- Old toothbrush (for speckling)
- Matte varnish or sealant
Step 1: Planning and Shaping the Base cones
-
Create the cone template:
Cut three semicircles from cardstock to serve as templates for your cones. Vary the sizes slightly if you want height differences, or keep them uniform. A radius of about 5-6 inches works well for the main body. -
Roll out the clay:
Knead your clay until it’s pliable and warm. Roll it out on your mat to an even thickness of about 1/4 inch. If you are using air-dry clay, keep a damp cloth handy to cover pieces you aren’t currently working on. -
Cut the forms:
Place your cardstock templates onto the rolled clay and use your craft knife to trace and cut out three semi-circle shapes. -
Form the cones:
Gently curve each clay semi-circle into a cone shape. Bring the straight edges together to form a seam. It’s crucial to score (scratch) and slip (wet) these edges before pressing them together to ensure a strong bond. -
Blend the seams:
Use your fingers or a smoothing tool to blend the seam line until it is invisible on both the outside and inside of the cone. Sometimes I like to use a slightly damp sponge here to erase any fingerprints. -
Level the bottom:
Stand the cone upright. If it wobbles or leans, gently tap the base against the table to flatten it, or trim the bottom edge with your knife until the cone stands perfectly vertical.
Uneven Wobble?
If your cone rocks after drying, don’t restart. Glue a circle of felt or cork to the bottom. It absorbs the unevenness and protects your table surface simultaneously.
Step 2: Adding the Candle Cup
-
Create the cup donut:
Roll a thick snake of clay, about 3/4 inch thick. Cut three segments that are long enough to form a ring roughly the same diameter as the top of your cone. -
Form the rings:
Curve these segments into rings (donuts). Take an actual taper candle and press it into the center of the ring to ensure the opening is the correct size. The candle should fit snugly but not stretch the clay to breaking point. -
Attach the cup to the base:
Score the top rim of your cone and the bottom of your clay ring. Apply a little water or slip, then press the ring firmly onto the top of the cone. -
Refine the transition:
Support the neck from the inside with a finger while you use a tool on the outside to seamlessly blend the clay from the ring down onto the cone body. You want it to look like one continuous piece, not two parts glued together. -
Flare the lip:
Gently flare the top edge of the ring outward slightly to give it that elegant, wide-mouthed look seen in the photo. Smooth the rim with a wet finger to remove sharp edges.
Faux Stone Effect
Mix dry used coffee grounds into your beige paint or directly into the wet clay. It provides an authentic, organic speckled texture that looks just like expensive stoneware.
Step 3: Finishing and Painting
-
Dry thoroughly:
Let your holders dry completely. For air-dry clay, this takes 24-48 hours. Turn them occasionally to ensure even airflow. If using polymer clay, bake according to package instructions. -
Sand for smoothness:
Once hardened, take your sanding block to the surface. Smooth out any bumps or uneven areas, particularly around the seam and the rim. Wipe away all dust with a barely damp cloth. -
Mix your colors:
Prepare your palette. You’ll need a sage green, a warm rust/terracotta mixed with a bit of brown for depth, and a creamy beige. -
Paint the base coats:
For the two-toned holder, use masking tape to create a crisp line across the bottom third. Paint the top sage and the bottom a creamy white. Paint the second holder solid rust, and the third solid beige. Apply 2-3 thin coats for odd coverage. -
Create texture:
To mimic the stone look, mix a tiny bit of baking soda into your paint for the rust and beige holders before the final coat. This adds a subtle, rough grit. -
Add speckles:
For the beige holder, dilute a small amount of dark brown or black paint with water. Dip an old toothbrush into it, point it at the holder, and run your thumb across the bristles to flick tiny speckles onto the surface. -
Seal:
Finish with a matte aesthetic varnish to protect the paint without making it shiny, preserving that raw clay appearance.
Place your favorite candles inside and enjoy the warm, handmade glow at your next dinner gathering
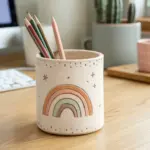
Modern Desk Organizer Holder Set
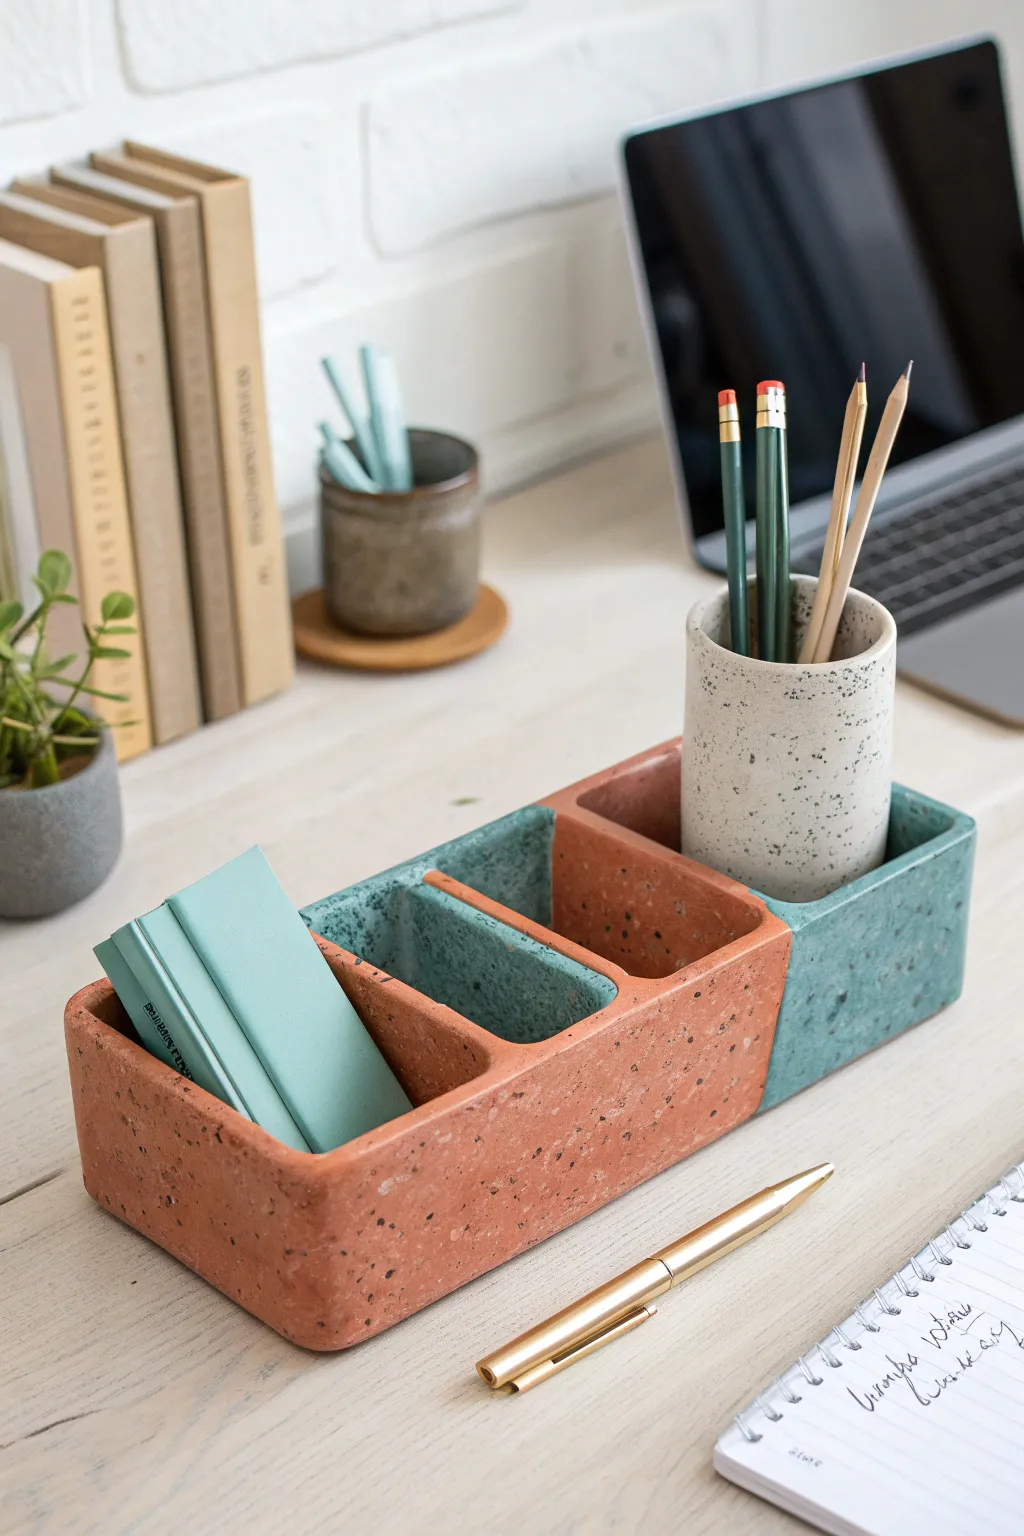
Elevate your workspace with this chic, color-blocked desk organizer that mimics the look of trendy terrazzo stone. By combining two complementary clay colors and a simple speckled technique, you can create a durable and stylish home for your pens, notebooks, and office essentials.
Step-by-Step Guide
Materials
- Polymer clay (terracotta or rust orange)
- Polymer clay (teal or sage green)
- Polymer clay (creamy white or beige)
- Fine black pepper or dried coffee grounds (for speckling)
- Acrylic rolling pin
- Clay slicer or craft knife
- Ruler
- Cardboard or cardstock (for templates)
- Liquid polymer clay (or Bake & Bond)
- Fine-grit sandpaper (400 and 800 grit)
- Matte varnish (optional)
- Parchment paper
Step 1: Preparing the Faux Stone Clay
-
Condition the base colors:
Begin by thoroughly conditioning your terracotta and teal polymer clay blocks separately until they are soft and pliable. You want a smooth consistency that won’t crack when folded. -
Add the speckled texture:
Flatten your conditioned clay slightly. Sprinkle a small pinch of ground black pepper or dried coffee grounds onto each color. Fold the clay over the specks and knead repeatedly until the particles are evenly distributed throughout the material, creating a convincing stone effect. -
Roll out slabs:
Using your acrylic roller or pasta machine, roll both the terracotta and teal clays into thick, even slabs. Aim for a thickness of about 1/4 inch (6mm) to ensure the walls of your organizer are sturdy enough to hold heavy items. -
Create the white cup clay:
Repeat the conditioning and speckling process with the creamy white clay. Roll this out to the same thickness, as this will eventually form the removable cup insert.
Seamless Bonding
Use ‘Liquid Polymer Clay’ (like Bake & Bond) as a glue between raw clay pieces. It creates a chemical bond during baking that is far stronger than just pressing the clay together.
Step 2: Constructing the Base Structure
-
Prepare templates:
Sketch and cut out cardboard templates for your organizer components. You will need a long rectangular base, side walls, and divider pieces. Plan for two main compartments: one for the terracotta section and one for the teal section. -
Cut the clay panels:
Place your templates onto the rolled clay slabs. Use a sharp clay slicer to cut out your shapes cleanly. You’ll need base pieces and wall pieces for both colors. Keep the edges as straight as possible. -
Join the color blocks:
To create the two-tone look, take the base piece of the terracotta clay and the base piece of the teal clay. Press their edges together firmly. I like to score the joining edges slightly with a needle tool and apply a thin line of liquid polymer clay before pressing them together to ensure a permanent bond. -
Smooth the seam:
Gently smooth the seam where the two colors meet on the base using your finger or a rubber clay shaper, blending the clay just enough to bond it without blurring the distinct color line.
Step 3: Assembling the Compartments
-
Attach the walls:
Begin building the walls. Apply a small amount of liquid clay to the edges of your base. Stand the terracotta walls up on the terracotta side of the base, and do the same for the teal walls. Press the corners together firmly. -
Install the dividers:
Insert your divider pieces to create the internal sections. This organizer features a split design, so place a terracotta divider within the orange section to create a narrow slot for notebooks. -
Reinforce the joints:
Roll a very thin snake of clay in the matching color for each internal corner. Press this snake into the interior seams and smooth it down with a sculpting tool to reinforce the structure. -
Create the cylindrical cup:
Cut a rectangular strip of the speckled white clay and a circular base. Wrap the strip around a glass jar or rolling pin (covered in parchment paper) to form a cylinder. Join the seam vertically and attach the circular base. Ensure this cylinder fits loosely into the square teal compartment. -
Final smoothing:
Check all exterior surfaces. Use a little baby oil on your finger to smooth away any fingerprints or accidental textures before baking.
Avoiding Sagging Walls
If your walls are sagging before baking, support them with cardstock or scrunched aluminum foil placed inside the compartments until the clay hardens in the oven.
Step 4: Finishing Touches
-
Baking:
Preheat your oven according to the clay manufacturer’s instructions (usually around 275°F or 130°C). Bake the organizer and the cup on a parchment-lined baking sheet for 45-60 minutes. Tent with foil to prevent scorching the light colors. -
Cooling:
Allow the pieces to cool completely in the oven with the door strictly closed. This gradual cooling tempers the clay and makes it stronger. -
Sanding for stone effect:
Once cool, wet sand the piece under running water using 400-grit sandpaper. This removes the ‘plastic’ sheen and reveals more of the speckled texture, enhancing the stone look. Finish with 800-grit for a velvety smooth touch. -
Seal (Optional):
If you prefer a sealed finish, apply a thin coat of matte varnish. This protects the faux stone surface from ink stains and dust over time.
Now you have a stunning, heavy-weight organizer that brings a touch of modern art to your daily tasks
Phone Stand Holder With Cable Notch
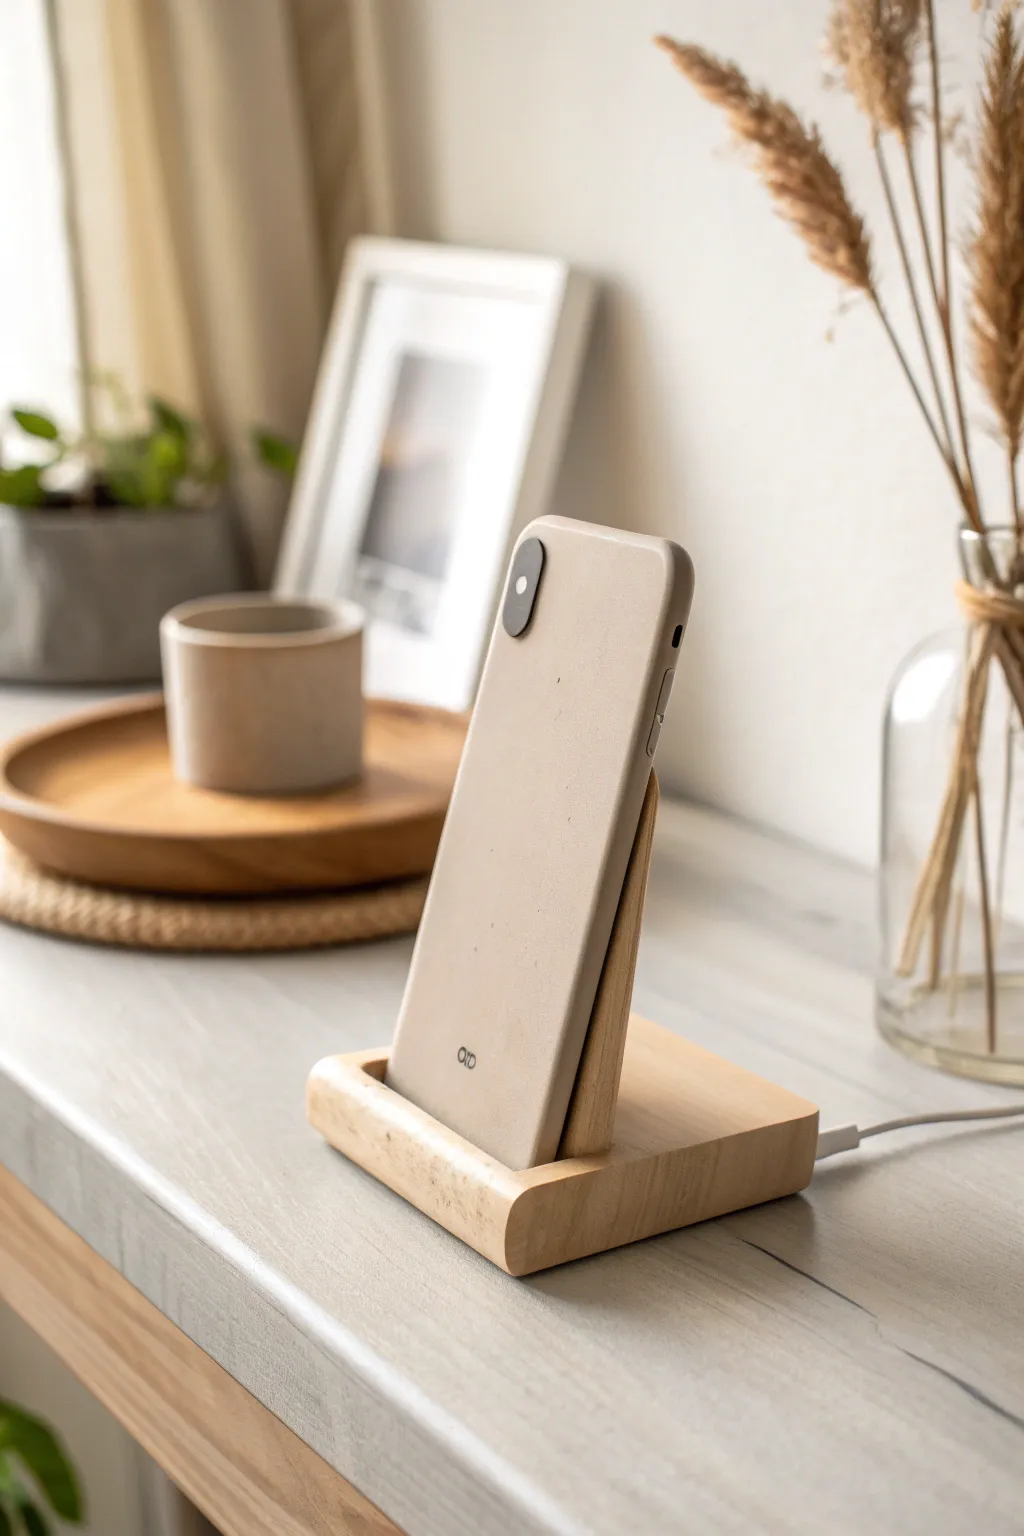
Recreate the sleek, minimalist look of a wooden phone dock using accessible polymer clay. This project results in a functional, weighted stand with a convincing timber texture that brings warmth to any desk setup.
Step-by-Step Tutorial
Materials
- Polymer clay (beige/tan and translucent)
- Acrylic rolling pin
- Clay blade or craft knife
- Ruler
- Coarse sandpaper (80 grit)
- Fine sandpaper (400 grit)
- Brown acrylic paint (burnt umber)
- Paper towels or sponge
- Matte polyurethane varnish
- Soft brush
- Oven
Step 1: Creating the Faux Wood Grain
-
Mix the clay base:
Start by conditioning your beige polymer clay until it is soft and pliable. Mix in a small amount of translucent clay (about a 4:1 ratio); this gives the ‘wood’ a more realistic, organic depth rather than looking like flat plastic. -
Roll out the slab:
Roll your conditioned clay into a thick slab, approximately 1/4 inch thick. Aim for a rectangular shape that is slightly larger than the final dimensions you need for the base. -
Texture application:
Take your coarse 80-grit sandpaper and press it firmly into the wet clay slab. Drag it lengthwise across the surface in one direction. This creates deep striations that mimic wood grain. -
Deepen the grain:
Use a needle tool or an old toothbrush to add occasional deeper grooves or ‘knots’ to the texture, ensuring the lines follow the same general direction as your sandpaper scratches.
Slumping Support
If the back support sags while baking, prop it up with a wedge of crumpled aluminum foil or a cardboard triangle until the clay sets hard in the oven.
Step 2: Shaping the Components
-
Cut the base:
Using your blade and ruler, cut a clean rectangle for the main base (approx. 3.5 inches x 4 inches). Ensure the ‘grain’ runs lengthwise. -
Form the back support:
Cut a second, taller rectangle for the backrest. This should be about the same width as the base but roughly 4-5 inches tall. I like to bevel the bottom edge at a 15-degree angle to help it lean back slightly. -
Create the front stopper:
Cut a small, thick strip of clay (about 0.5 inches tall and wide) to serve as the front lip that holds the phone in place. -
Add the cable notch:
Before assembling, use your craft knife to carve a small U-shaped channel into the bottom-center of the back support piece. Test fit a charging cable to ensure it sits flush. -
Assemble the structure:
Score the connection points (where the back and front pieces meet the base) with a needle tool. Apply a tiny amount of liquid clay or ‘Bake & Bond’ and press the pieces firmly together. -
Reinforce seams:
Roll a very thin snake of clay and press it into the interior seams where the back support meets the base. Smooth this out completely with a sculpting tool to ensure structural integrity.
Make it Heavy
To give the stand a premium ‘heavy’ feel, embed a few large metal washers inside the base slab of clay before you bake it. It adds stability and realism.
Step 3: Refining and Finishing
-
Initial bake:
Bake the assembled stand according to your clay package instructions. Since the piece is thick, tent it with aluminum foil to prevent scorching. -
Cool and sand:
Allow the piece to cool completely. Lightly sand any sharp edges or fingerprints with fine 400-grit sandpaper, being careful not to sand away your wood grain texture. -
Apply the wash:
Dilute burnt umber acrylic paint with water until it is very runny. Brush this liberally over the entire piece, making sure it gets into all the textured grooves. -
Wipe back:
Immediately wipe the wet paint off the surface with a damp paper towel. The dark paint will stay trapped in the grain lines while the raised areas remain lighter, instantly creating a realistic wood timber effect. -
Seal the piece:
Once the paint is bone dry, apply two thin coats of matte polyurethane varnish. This protects the paint and removes the ‘clay’ feel, leaving a soft, satin finish like sanded wood.
Place your phone on your new stand and enjoy the organized, natural aesthetic it brings to your workspace
Key Bowl Holder For The Entryway
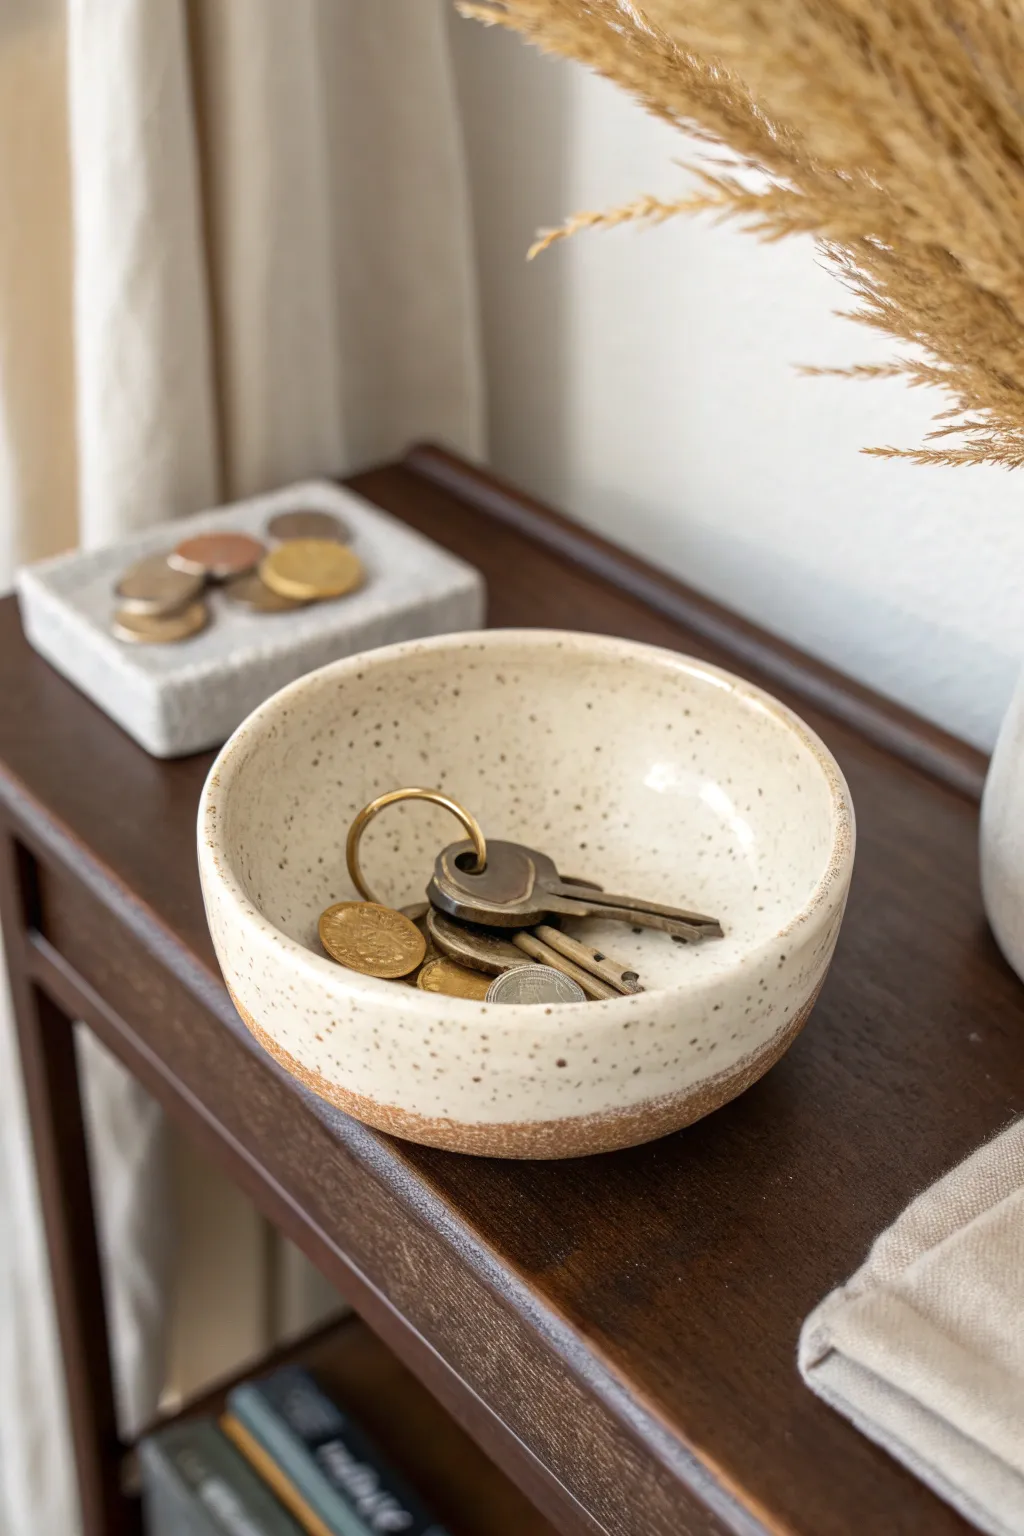
This charming, rustic key bowl brings a touch of organic warmth to your entryway with its speckled cream glaze and exposed clay base. The gentle curve and sturdy weight make it the perfect landing spot for daily essentials like keys and loose change.
Step-by-Step Guide
Materials
- Speckled stoneware clay body (e.g., buff with manganese speckles)
- Potter’s wheel (or hand-building tools for pinch method)
- Wooden rib tool
- Metal kidney scraper
- Sponge
- Wire cutter
- Trimming tools (loop tool)
- Cream or oatmeal semi-opaque glaze
- Kiln access
Step 1: Forming the Bowl
-
Prepare the Clay:
Start by wedging about 1 to 1.5 pounds of speckled stoneware clay. Thorough wedging removes air bubbles and ensures the clay is consistent, which is crucial for a smooth throwing experience. -
Center on the Wheel:
Secure the clay ball to the center of the wheel head. Use wet hands and firm pressure to center the clay, pushing it up into a cone and then pressing it back down into a puck shape. -
Open the Form:
Press your thumbs into the center of the spinning puck to create an opening, stopping about a half-inch from the bottom to ensure a sturdy base for your key bowl. -
Pull the Walls:
Gently pull the clay upward and outward to create the wall height. Aim for a relatively thick, sturdy wall—about a quarter-inch—since this bowl needs to withstand the daily toss of metal keys. -
Shape the Curve:
Use a wooden rib tool on the inside of the bowl while supporting the outside with your hand. Press gently to create a continuous, smooth curve from the bottom floor up to the rim. -
Refine the Rim:
Compress the rim with a small piece of chamois or your sponge to round it off. A smooth rim prevents chipping later on. -
Cut from Wheel:
Run a wire cutter underneath the base of the bowl to separate it from the wheel head, then carefully lift it onto a ware board to dry to a leather-hard state.
Step 2: Trimming and Finishing
-
Center for Trimming:
Once leather-hard, place the bowl upside down on the wheel. Secure it with small coils of clay. Tap it gently to ensure it is perfectly centered. -
Define the Foot:
Use a sharp loop tool to trim away excess clay from the bottom. Carve a defined foot ring, which gives the bowl a slight lift and professional finish. -
Smooth the Exterior:
Run a smooth metal kidney scraper over the exterior surface while the wheel spins slowly to remove any grog or drag marks left by the trimming tools. -
Bisque Fire:
Allow the bowl to dry completely (bone dry). Load it into the kiln for a bisque firing, typically to Cone 04 or 06 depending on your clay instructions.
Fixing a Warped Rim
If your rim looks oval after drying, the clay likely dried unevenly. Next time, rotate your bowl daily while it dries, or cover the rim loosely with plastic to slow the process down.
Step 3: Glazing and Final Fire
-
Wax the Base:
Apply wax resist to the bottom foot and up the side of the bowl about one inch. This creates the distinctive two-tone look where the raw, toasted clay meets the glaze. -
Mix the Glaze:
Stir your cream or oatmeal-colored glaze thoroughly. If the glaze is too thick, slight dipping marks might show, so ensure it has a heavy cream consistency. -
Dip the Bowl:
Hold the bowl by the foot and dip it straight down into the glaze bucket, submersing it fully up to the waxed line. Hold for 3 seconds and lift straight out. -
Clean Up:
Once the glaze is dry to the touch, use a damp sponge to wipe away any stray glaze droplets that might be sitting on top of the wax resist area. -
Glaze Fire:
Load the bowl into the kiln for the final glaze firing (usually Cone 5 or 6 for stoneware). This high heat will melt the glaze and bring out the iron speckles in the clay body. -
Cool and Sand:
After the kiln cools, remove the bowl. I like to briefly sand the unglazed bottom foot with 400-grit sandpaper to ensure it won’t scratch your wooden furniture.
Add Texture
Before the clay dries, press a stamp or piece of burlap into the exterior clay near the base. The glaze will break over the texture, highlighting the exposed raw clay section.
Place your new ceramic bowl on the console table and enjoy a clutter-free space with handmade style
Place Card Holder Blocks
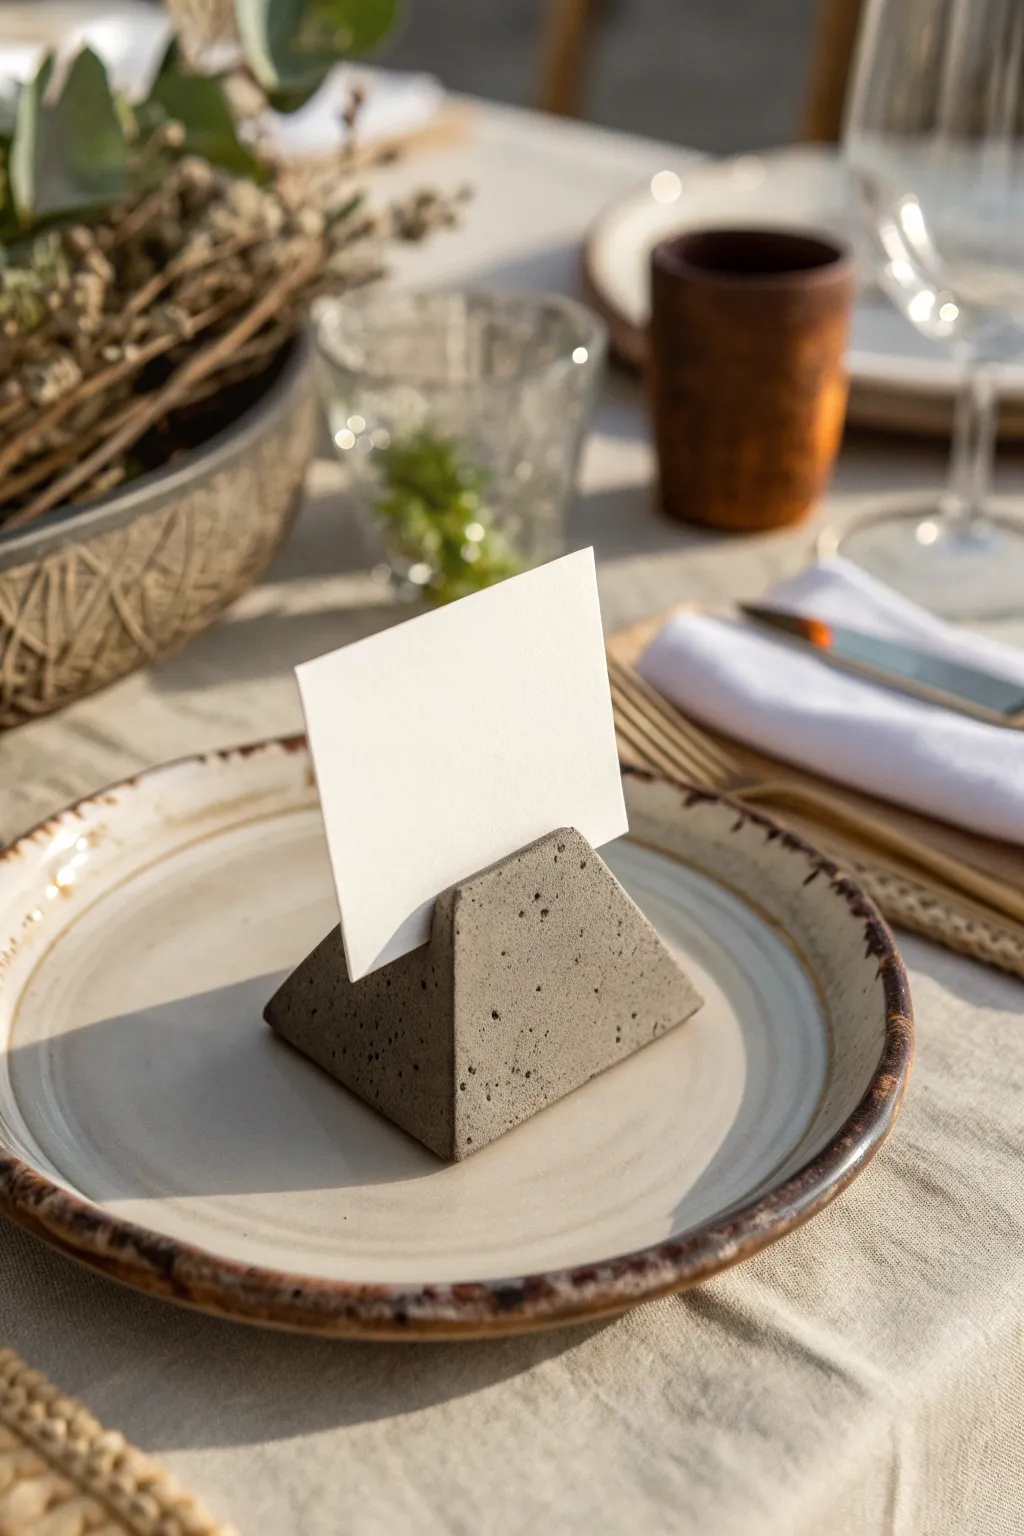
Achieve a sleek, industrial aesthetic for your table setting with these minimalist pyramid blocks that mimic the look of cast concrete using polymer clay. The subtle speckled texture and geometric sharpness make them a sophisticated addition to any wedding or dinner party.
Detailed Instructions
Materials
- Gray polymer clay (granite or stone effect)
- Black pepper or black embossing powder (if using plain gray clay)
- Acrylic rolling pin
- Sharp tissue blade or X-Acto knife
- Ruler
- Cardstock (for making a template)
- Fine grit sandpaper (400-600 grit)
- Oven for baking
- Parchment paper
Step 1: Preparation and Shaping
-
Condition the Clay:
Begin by thoroughly conditioning your gray polymer clay until it is soft and pliable. If you are using plain gray clay and want that realistic concrete texture, knead in a small pinch of cracked black pepper or black embossing powder at this stage. -
Form a Cube:
Roll the clay into a ball and then press it against your work surface to begin forming a rough cube shape. You aim for a solid, thick block. -
Refine the Measurements:
Use your acrylic roller and ruler to square off the edges. The base should be approximately 1.5 inches square, though you can adjust this depending on how large you want the final pyramid. -
Create the Angles:
Instead of cutting, gently press the top four corners of your cube inward with your fingers to start suggesting a pyramid shape. The goal is a truncated pyramid (flat on top) rather than a sharp point. -
Slice the Sides:
Take your sharp tissue blade. Align it at an angle against one side of the block and slice downward to create a clean, slanted face. Repeat this on the opposite side. -
Finish the Geometric Cut:
Turn the block and slice the remaining two sides. You should now have a four-sided pyramid shape with a flat top. -
Create the Card Slot:
Use the back of your blade or a rigid ruler to press a groove into the very top of the pyramid. Rock it back and forth slightly to widen the gap just enough to hold a piece of thick cardstock. -
Smooth Imperfections:
Use your finger to gently rub away any fingerprints. I find that lightly tapping the sides with the flat of the blade helps maintain the sharp geometric planes without adding smudges.
Stone Effect Pro Tip
For a hyper-realistic concrete look, mix a tiny amount of translucent clay into your gray block. This adds depth that mimics the porosity of real cement.
Step 2: Texturing and Baking
-
Add Surface Texture:
To enhance the concrete look, take an old toothbrush or a piece of crumpled aluminum foil and tap it very lightly against the clay surfaces. This creates tiny pits resembling cast stone. -
Check the Slot:
Texturing might have closed your card slot slightly, so re-insert your blade or ruler to ensure the opening remains clear and straight. -
Bake the Clay:
Place the holder on a baking sheet lined with parchment paper. Bake according to your brand of clay’s instructions—usually around 275°F (130°C) for 30 minutes per 1/4 inch of thickness. -
Cool Completely:
Allow the pyramid to cool completely inside the oven initially (cracking the door slightly) to prevent thermal shock, then move it to a counter. -
Sanding for Finish:
Once cool, wet-sand the flat sides very lightly with fine-grit sandpaper. This removes the ‘plastic’ sheen of the clay and reveals the speckled inclusions. -
Polish the Edges:
Pay special attention to the bottom edges to ensure the holder sits perfectly flat on the plate without wobbling. -
Clean Up:
Wipe the piece down with a damp cloth to remove any sanding dust. Let it dry completely before inserting your place card.
Fixing a Tight Slot
If the card slot closed up during baking, carefully use a folded piece of sandpaper to widen the gap. Don’t force a card in, or the clay might snap.
Place these sturdy little pyramids on each setting for a timeless, modern touch to your gathering
Photo Or Postcard Slot Holder
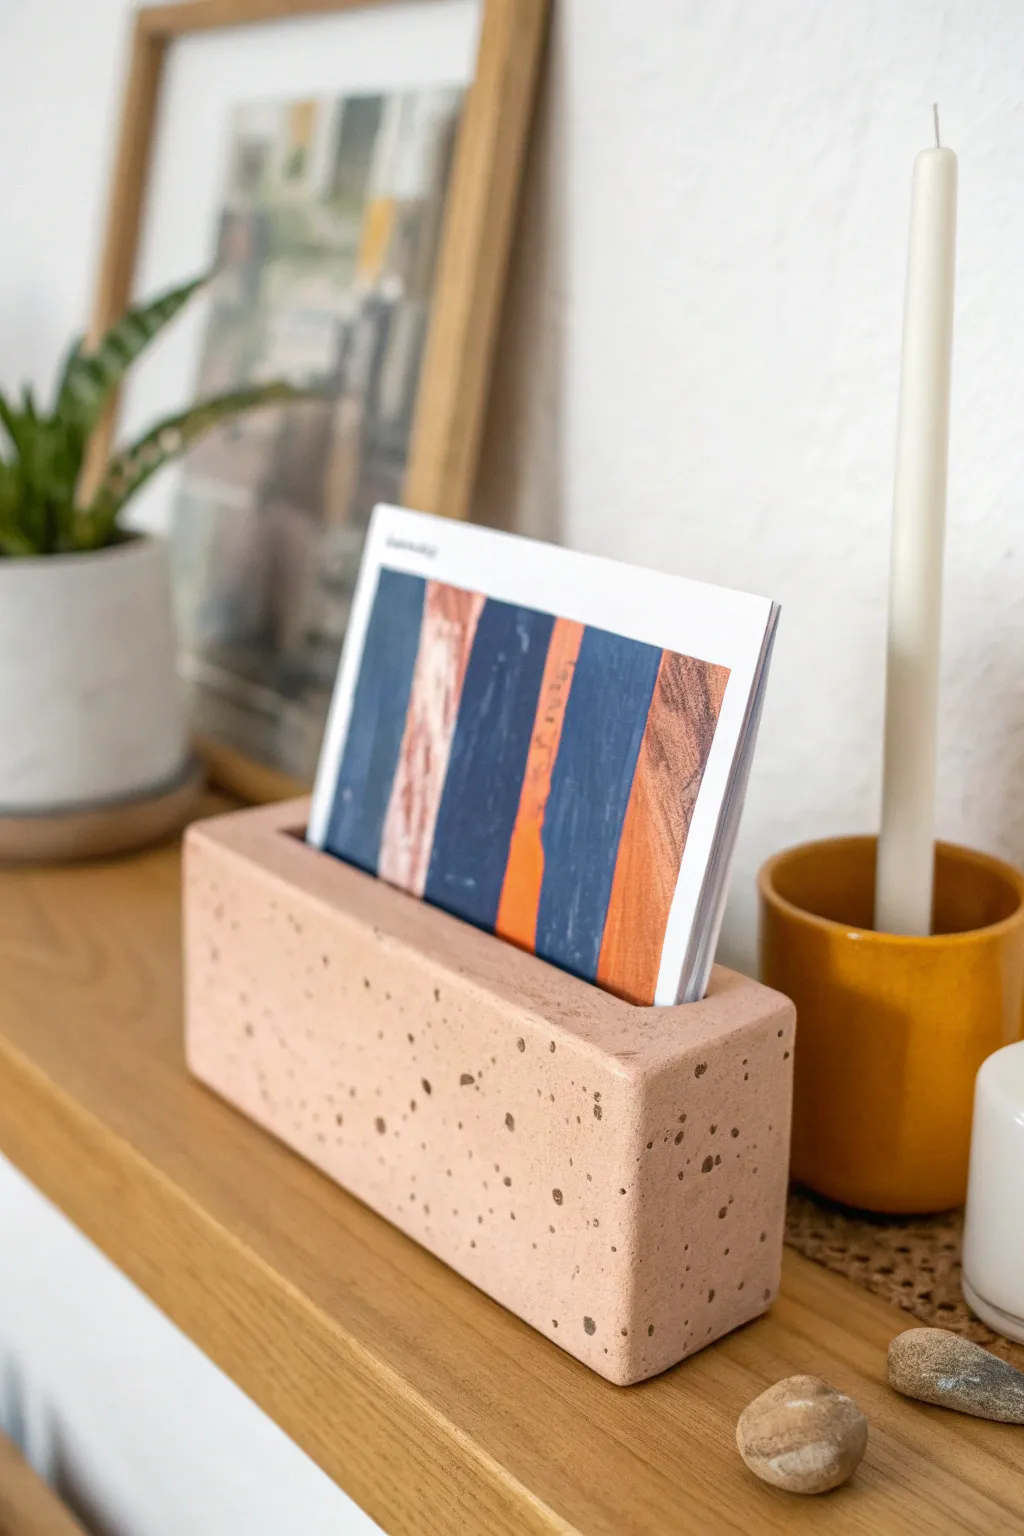
This minimalist, monolithic photo holder features a warm, sandy-pink tone dotted with charming irregular speckles, mimicking the look of terrazzo stone. It offers a sturdy and stylish way to display your favorite prints or postcards on a desk or shelf.
Step-by-Step Tutorial
Materials
- Polymer clay (beige/sand color)
- Polymer clay (dark brown or black for speckles)
- Rolling pin or clay machine
- Sharp tissue blade or craft knife
- Ruler
- Cardstock or thick cardboard (for the slot template)
- Parchment paper
- Baking sheet
- Oven
- Fine-grit sandpaper (400-800 grit)
- Matte varnish (optional)
Step 1: Preparing the Clay Body
-
Condition the base clay:
Begin by thoroughly conditioning your main beige or sand-colored polymer clay. Knead it in your hands until it is soft, pliable, and free of any air bubbles. -
Create the speckles:
Take a very small amount of your dark brown or black clay. flatten it into a paper-thin sheet. -
Chop the speckles:
Using your tissue blade, chop the dark clay sheet into tiny, irregular crumbs. You want a mix of fine dust and slightly larger chunks to achieve a natural stone look. -
Incorporate the texture:
Sprinkle the dark crumbs over your conditioned beige clay. Fold the clay over and knead it gently to distribute the speckles throughout the block, but stop before they streak or blend completely into the base color.
Clean Cutting
Chill the clay block in the fridge for 20 minutes before making your final cuts. Firm clay slices much cleaner and won’t distort under the pressure of the blade.
Step 2: Forming the Block
-
Shape the rough brick:
Form the speckled clay into a thick, rectangular log using your hands. Aim for a shape slightly larger than your desired final dimensions. -
Refine the sides:
Using a flat surface and a ruler or acrylic block, press against the sides of the clay log to create sharp, definition right angles. The goal is a clean, geometric brick. -
Trim the ends:
Slice off the uneven ends of the block with your sharp tissue blade to create perfectly flat, vertical faces. This ensures the block looks professional and finished. -
Create the slot insert:
Cut a strip of cardstock that matches the length of your clay block. It should be thick enough to create a gap for photos but thin enough not to distort the clay. -
Impress the slot:
Press the cardstock strip firmly into the center of the top face of the block. If necessary, wiggle it slightly to widen the opening, then remove it carefully to check the depth. I leave the cardstock inside during baking to prevent the slot from closing up.
Step 3: Baking and Finishing
-
Prepare for baking:
Place the block on a parchment-lined baking sheet. Double-check that the bottom is flat so it will sit steadily on a shelf. -
Bake the clay:
Bake according to the manufacturer’s instructions for the specific brand of polymer clay you are using. Since this is a thick block, ensure you bake it long enough to cure the center fully. -
Cool completely:
Allow the clay to cool completely in the oven with the door slightly ajar. Sudden temperature changes can cause cracking in thick pieces. -
Remove the spacer:
Once cool, carefully pull out the cardstock strip from the slot. -
Sand for stone effect:
Using fine-grit sandpaper, gently wet-sand the surfaces of the block. This reveals the dark speckles more clearly and smooths out any fingerprints. -
Seal the surface:
If you prefer a sealed finish, apply a thin coat of matte varnish. However, leaving it raw maintains that authentic, dry stone texture shown in the photo.
Weight It Down
Add a hidden core of crumpled aluminum foil or a small metal nut inside the clay block. This saves clay and adds a satisfying heaviness to the final holder.
Now you have a chic, modern display piece ready to showcase your latest memories
Stackable Beaded Trinket Holders
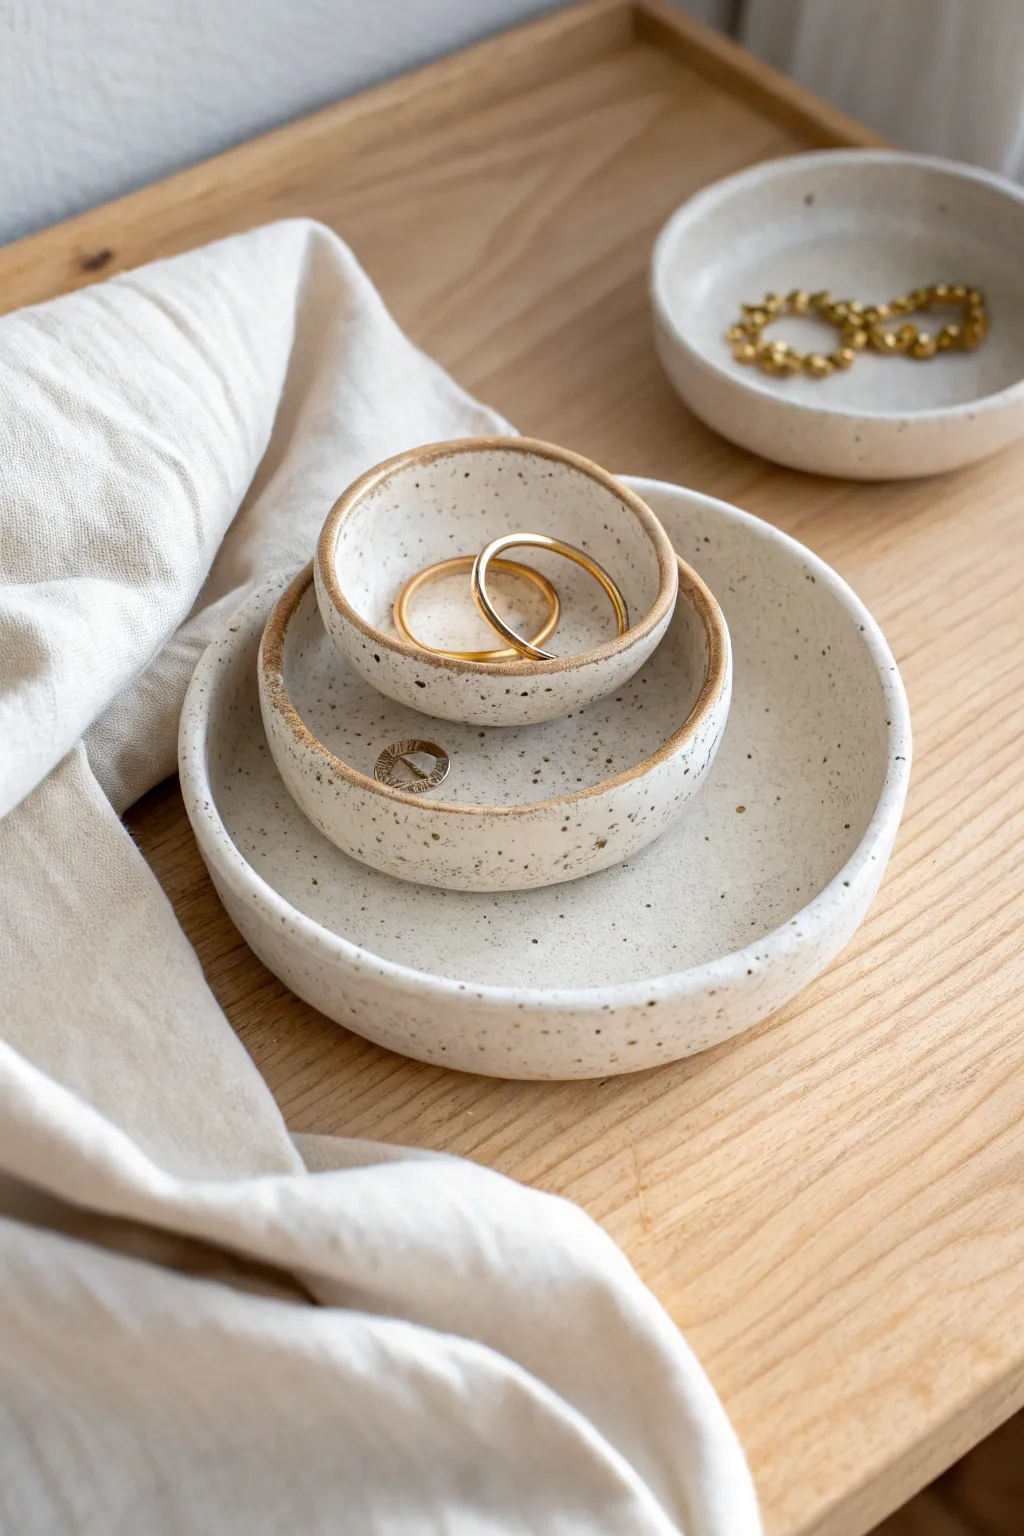
Create the look of high-end speckled ceramic pottery using accessible polymer clay. These nesting dishes feature a rustic, unglazed texture with a charming faux-stone finish and warm, contrasting rims, perfect for organizing your everyday jewelry.
Step-by-Step
Materials
- White polymer clay (e.g., Sculpey or Fimo)
- Black pepper or dried coffee grounds (for speckling)
- Acrylic rolling pin
- Circle cutters or bowl templates (3 nesting sizes)
- Small oven-safe bowls (for shaping)
- Brown acrylic paint
- Paintbrush (fine tip)
- Matte varnish or glaze
- Sandpaper (fine grit)
- Cornstarch (to prevent sticking)
Step 1: Preparing the Clay
-
Condition the clay:
Begin by warming the white polymer clay in your hands. Knead it thoroughly until it is soft, pliable, and free of any cracks. -
Add the speckles:
Flatten the conditioned clay into a pancake shape. Sprinkle a generous pinch of cracked black pepper or dried coffee grounds onto the surface. I prefer pepper for a more subtle, natural stone look. -
Incorporate the texture:
Fold the clay over the speckles and knead again. Continue folding and rolling until the particles are evenly distributed throughout the entire block of clay.
Step 2: Shaping the Dishes
-
Roll it out:
Dust your work surface and rolling pin lightly with cornstarch to prevent sticking. Roll the clay out into a slab that is approximately 1/4 inch thick for a sturdy, ceramic-like feel. -
Cut the circles:
Using circle cutters or paper templates, cut out three circles of descending sizes. These will form the three nesting tiers of your set. -
Smooth the edges:
Dip your finger in a little water or baby oil and run it along the cut edge of each circle to smooth out any sharpness or roughness left by the cutter. -
Form the shallow curve:
Gently drape each clay circle into a corresponding oven-safe bowl. Press lightly so the clay takes the shape of the bowl’s interior, creating a gentle curve. Do not press too hard or you might thin the clay unevenly. -
Refine the lip:
While the clay is in the mold, gently uneven the rim slightly with your thumb if you want an organic, handmade wabi-sabi aesthetic.
Natural Speckle Tip
For varied texture, mix both fine ground pepper and coarser cracked pepper. This mimics the irregular grit found in real stoneware pottery.
Step 3: Baking and Finishing
-
Bake carefully:
Place the oven-safe bowls containing the clay onto a baking sheet. Bake according to your brand of clay’s specific instructions (usually around 275°F or 130°C for 15-30 minutes). -
Cool down:
Allow the clay to cool completely inside the molds. Removing them while hot can cause warping. -
Sand for stone texture:
Once cool, remove the dishes. Use fine-grit sandpaper to gently buff the entire surface. This removes fingerprints and exposes more of the speckles, enhancing the stonewaere effect. -
Paint the rim:
Mix a small amount of brown acrylic paint with a drop of water to create a wash. Using a fine brush, paint the very edge of the rim. Let the brush skip slightly for a rustic, imperfect line. -
Blot the paint:
I like to quickly tap the painted rim with a paper towel before it dries. This softens the line and makes it look like fired glaze rather than paint. -
Seal the piece:
Apply a coat of matte varnish to the entire dish. This protects the faux speckles and gives the ‘ceramic’ a finished, professional quality without making it too shiny. -
Let it cure:
Allow the varnish to dry completely for at least 24 hours before placing any jewelry inside to ensure the finish is hard and non-tacky.
Air Bubble Trouble?
If you see a bubble while rolling, pierce it gently with a needle tool or pin, then smooth the air out with your finger and roll over it again.
Now you have a stunning set of nesting dishes that look like they came straight from a pottery studio wheel
Leaf-Imprint Candle Holder Wrap
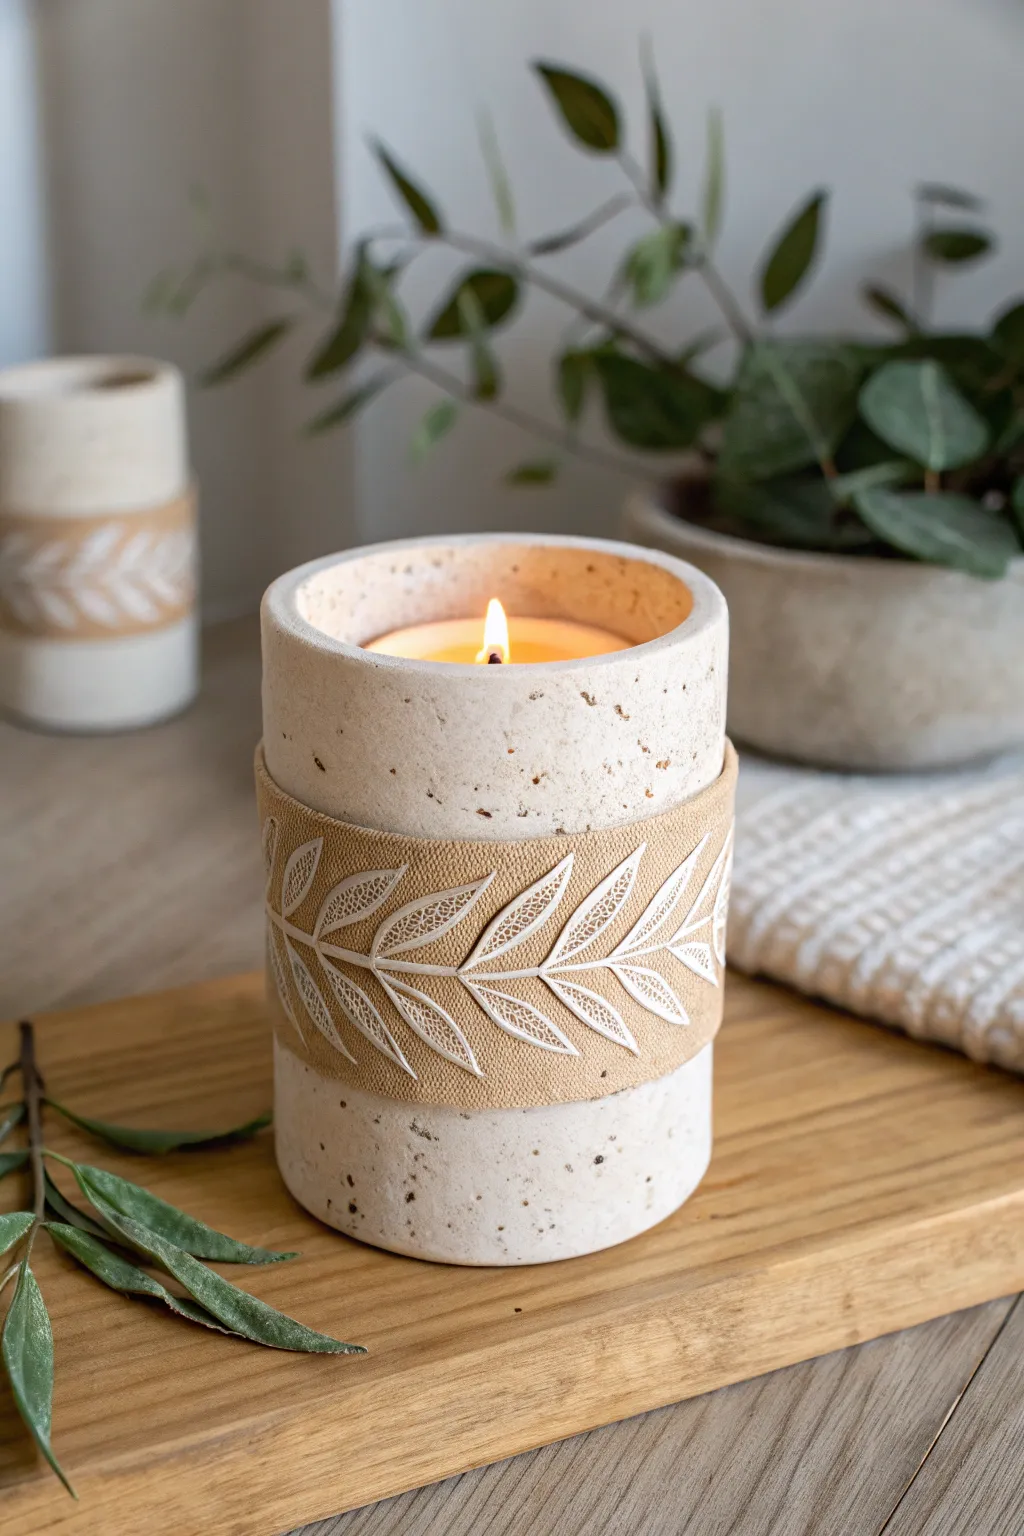
This elegant candle holder combines the raw beauty of speckled stoneware with delicate sgraffito details to create a cozy, nature-inspired centerpiece. The contrast between the chunky, stone-like body and the intricate leaf band makes it a sophisticated addition to any mantle.
Step-by-Step Guide
Materials
- Speckled white stoneware clay (groggy texture)
- Tan/buff stoneware clay or slip
- White underglaze or slip
- Rolling pin and guide sticks (about 3/8 inch)
- Cylindrical form or PVC pipe (3-4 inch diameter)
- Fettling knife
- Scoring tool or serrated rib
- Slip (clay glue)
- Needle tool or fine loop tool for carving
- Smooth sponge
- Matte clear glaze
- Kiln
Step 1: Forming the Main Cylinder
-
Prepare the speckled clay:
Wedge your speckled white stoneware clay thoroughly to remove air bubbles. This clay should have some grog or speckles in it to achieve that natural stone look seen in the final piece. -
Roll out the slab:
Using a rolling pin and guide sticks, roll the clay into a long rectangular slab about 3/8 inch thick. Ensure the surface is even. -
Cut to size:
Measure the circumference of your cylindrical form/mold. Cut the clay slab to the appropriate length (plus a little extra for the seam) and the desired height, roughly 5-6 inches. -
Create the texture:
Before assembling, I like to gently roll a slightly textured fabric or a coarse sponge over the surface to enhance the stone-like quality of the clay body. -
Form the cylinder:
Wrap the slab around your cylindrical form. Be sure to wrap a piece of newspaper or paper around the form first so the clay doesn’t stick. -
Join the seam:
Score the overlapping edges deeply and apply slip. Press the edges together firmly. Use a wooden tool to blend the seam so it becomes invisible, both inside and out.
Step 2: Applying the Decorative Band
-
Create the band recess:
Instead of adding a raised band, this design works best if you gently compress the middle section of your cylinder with a flat tool while it’s still soft, creating a very slight depression where the tan lay will go, or you can simply apply the band directly on top for a raised look. -
Roll the accent clay:
Roll out a thin strip of the tan/buff clay. This should be thinner than the main body, perhaps 1/8 inch thick. -
Attach the band:
Score the middle of your main cylinder and the back of the tan strip. Apply slip and wrap the tan strip around the center of the holder. Smooth it down carefully to remove trapped air. -
Apply white underglaze:
Once the clay is leather hard, paint a layer of white underglaze or white slip specifically over the tan band area. A single, solid coat usually suffices. -
Sketch the leaf pattern:
Lightly trace your vine and leaf design onto the band using a dull pencil or a tool that barely scratches the surface.
Cracking Seams?
If your cylinder seam splits during drying, you didn’t score deep enough. In the future, scratch the clay until it looks like distinct fringe before adding slip.
Step 3: Carving and Finishing
-
Sgraffito carving:
Using a fine carving tool or loop tool, carefully carve away the negative space around the leaves, or carve into the leaves themselves to reveal the white clay beneath. For this specific look, carve fine lines to outline the leaves and create the interior veins, exposing the white slip against the tan background. -
Refine the edges:
Use a damp sponge to gently clean the top and bottom rims of the cylinder. Slightly round them off so they aren’t sharp to the touch. -
Dry thoroughly:
Cover the piece loosely with plastic for a day to equalize moisture, then uncover and let it dry completely until bone dry. -
Bisque fire:
Fire the piece in the kiln to bisque temperature (usually cone 04). -
Glaze application:
Dip the entire piece in a clear matte glaze. Avoid glossy glazes, as they will obscure the raw stone texture. Wipe the bottom free of glaze. -
Final firing:
Fire the piece again to the maturation temperature of your specific clay and glaze (likely cone 5 or 6).
Level Up: Texture Pop
Add colored grog or sand to your white clay body before rolling it out. When you sponge it after firing, these specks will dark and create a stunning granite effect.
Place a simple pillar candle inside and enjoy the warm, earthy glow of your handmade creation.
Sculptural Hand Jewelry Holder
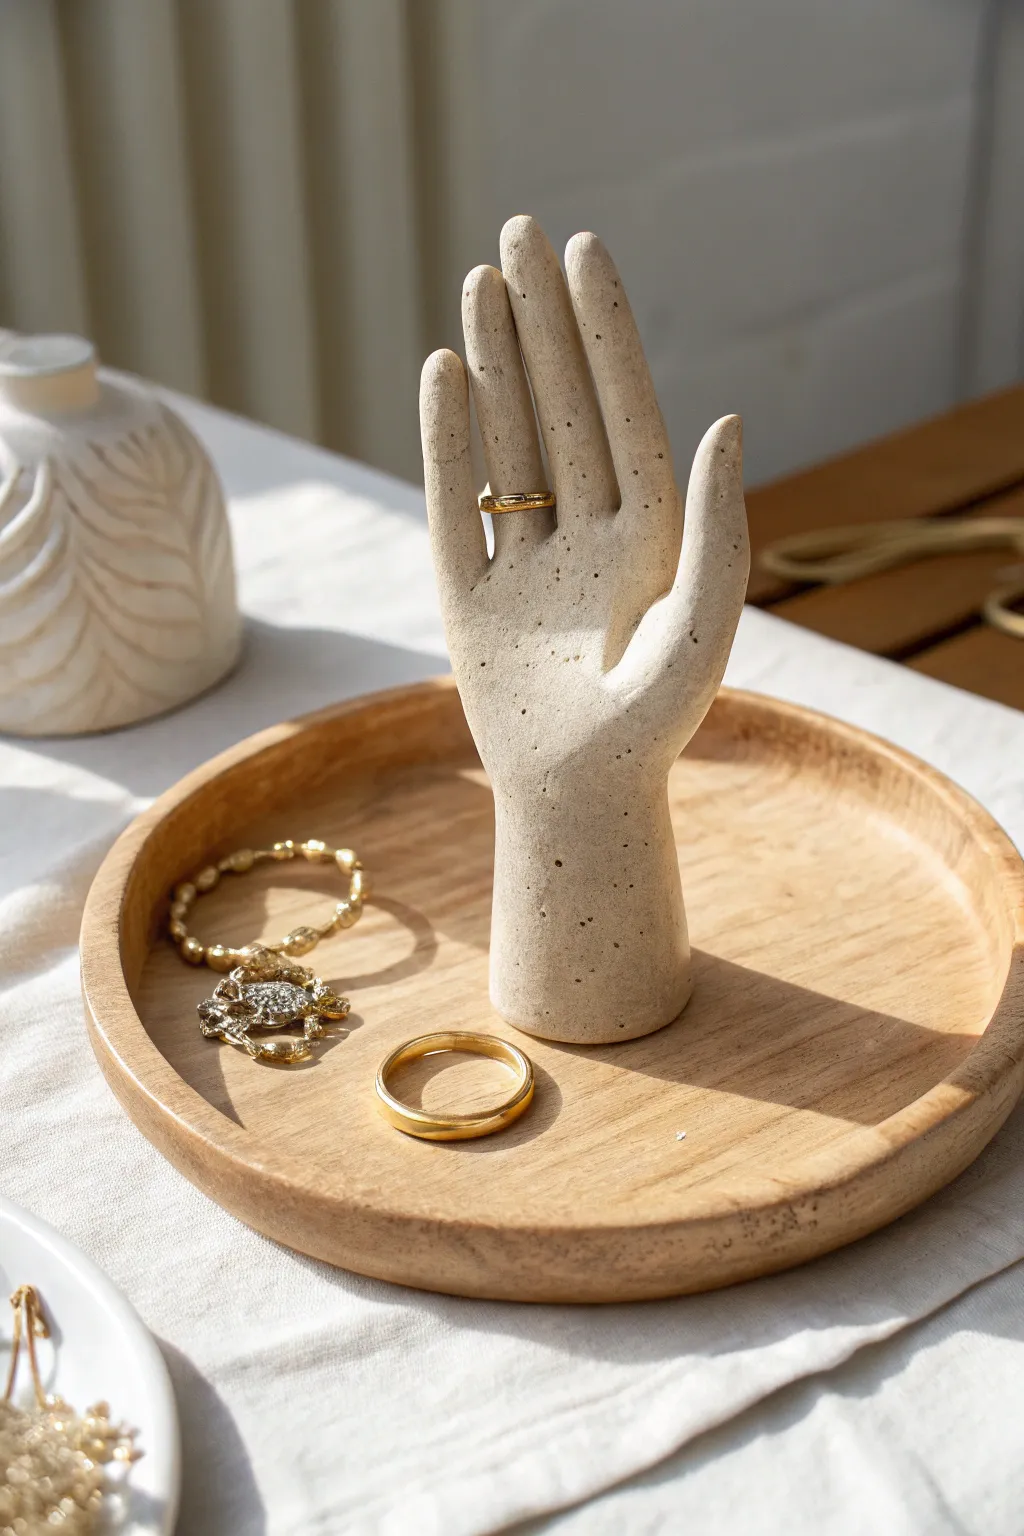
Elevate your vanity with this sophisticated sculptural hand that doubles as functional decor for your favorite rings. The subtle speckled finish gives it the look of high-end ceramic stoneware without the need for a kiln.
Step-by-Step
Materials
- White air-dry clay (approx. 500g)
- Aluminum foil
- Rolling pin
- Clay sculpting tools (or a butter knife and toothpick)
- Small cup of water
- Sponge or soft brush
- Fine-grit sandpaper
- Acrylic paint (black or dark brown)
- Old toothbrush
- Matte sealant spray or varnish
- Craft knife
Step 1: Forming the Armature
-
Create a foil core:
Crumple aluminum foil into a cylinder shape for the wrist and a flattened palm shape. Keep this slightly smaller than your desired final size, as the clay will go over it. This saves clay and helps the piece dry evenly. -
Roll out the clay:
Roll your air-dry clay into a sheet about 1/4 inch thick. You want it substantial enough to be sturdy but not so thick that it takes weeks to dry. -
Cover the base:
Wrap the clay sheet around your foil wrist/palm structure. Use a little water on your fingertips to smooth the seams where the clay edges meet until they disappear completely.
Smooth Operator
For the smoothest possible finish, keep a small bowl of water nearby and constantly wet your smoothing tool. Friction causes drag marks on air-dry clay.
Step 2: Sculpting the Fingers
-
Roll coils for fingers:
Roll out five snakes of clay for the fingers. Make them slightly longer than you think you need, as you can trim them later. Try to taper the tips slightly for a natural look. -
Attach the fingers:
Score the top of the palm and the bottom of each finger (make scratch marks), brush with a little water, and press them firmly onto the hand base. -
Blend the seams:
Use a sculpting tool or your thumb to drag clay from the fingers down onto the palm, smoothing the joint until it’s seamless. This connection needs to be strong. -
Position the thumb:
Attach the thumb lower down on the side of the palm, angling it slightly outward. I prefer to look at my own hand for reference on exactly where it should sit. -
Pose the hand:
Gently shape the fingers into an upright, slightly curved position. Avoid spreading them too wide; keeping them somewhat vertical ensures rings can slide down easily.
Make it Heavy
Before sealing the wrist bottom, push a heavy stone or washer inside the foil core. This adds weight and prevents the tall hand from tipping over easily.
Step 3: Refining and Drying
-
Smooth the surface:
Dip a sponge or soft brush in water and go over the entire piece. This removes fingerprints and creates that sleek, modern finish seen in the photo. -
Check stability:
Stand the hand up on a flat surface. If it wobbles, gently press the base down to flatten it, or add a small coil of clay around the bottom for a wider footprint. -
Let it dry:
Allow the sculpture to air dry for 24-48 hours. Keep it away from direct heat sources to prevent cracking. Turn it occasionally if possible. -
Sand imperfections:
Once fully dry and hard, use fine-grit sandpaper to buff away any remaining bumps or rough patches, focusing on the fingertips and the base.
Step 4: Finishing Touches
-
Prepare the speckle paint:
Dilute a small amount of black or dark brown acrylic paint with water until it has an inky consistency. -
Apply the speckles:
Dip an old toothbrush into the watery paint. Hold it near the sculpture and run your thumb across the bristles to flick tiny droplets onto the clay. Practice on paper first to control the spray. -
Seal the piece:
After the paint flecks are dry, coat the entire hand with a clear matte sealant. This protects the clay from moisture and gives it that finished stoneware appearance.
Set your new sculpture on your dresser and start stacking your favorite gold bands