When you’re making clay human figures, the magic is in simple shapes, clear poses, and a silhouette that reads from across the room. I’m sharing my favorite human figure sculpture ideas that feel doable at a kitchen table but still look intentional and expressive when they’re finished.
Simple Standing Figure With Oversized Feet
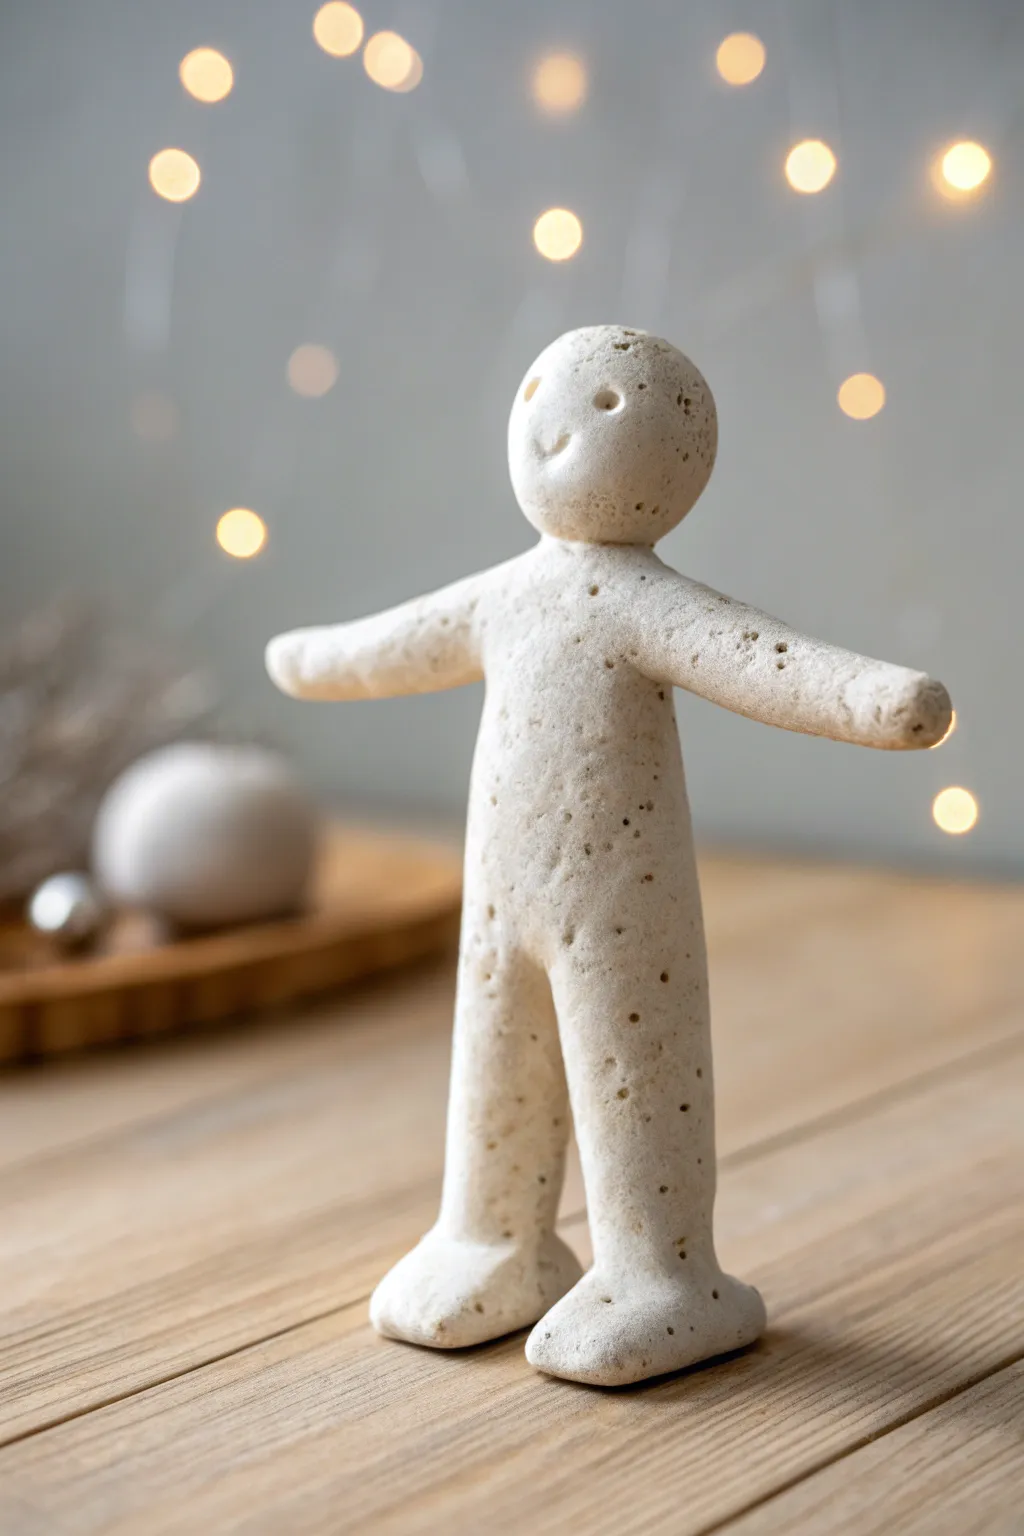
Embrace simplicity with this charming, simplified human figure that relies on oversized feet for playful proportions and rock-solid stability. Its speckled, off-white finish mimics the look of carved sandstone, making it a perfect neutral accent for a cozy shelf arrangement.
Step-by-Step
Materials
- White stoneware clay with grog (or air-dry clay with added sand)
- Small bowl of water
- Modeling tool or popsicle stick
- Sponge
- Needle tool or toothpick
- Fine-grit sandpaper (optional)
- Clear matte varnish (optional)
Step 1: Forming the Base Structure
-
Prepare the clay:
Start by wedging a fist-sized ball of clay to remove any air bubbles. If you want that specific grainy texture shown in the photo, kneading in a teaspoon of clean, fine sand or used coffee grounds now is a great trick. -
Divide the mass:
Separate your clay into three distinct parts: one medium ball for the head, one larger cylinder for the body/legs, and a smaller amount set aside for the arms. -
Shape the torso:
Roll the largest piece into a thick sausage shape about 4 inches long. This will form the main trunk of the body and the legs combined. -
Create the leg split:
Using a modeling tool or a knife, slice halfway up the bottom of the cylinder to create two legs. Gently pull them apart slightly to define the separation. -
Form the feet:
Instead of adding separate feet, press the bottom of each leg firmly against your work surface. Use your fingers to flare the clay outwards, creating large, exaggerated ‘shoes’ that anchor the figure. -
Refine the stance:
Stand the figure up to ensure it balances on its own. The feet should look almost like flattened river stones—wide and stable.
Make It Look Like Stone
Mix black pepper or fine sand into white clay before sculpting. When dry, these speckles create a convincing faux-granite texture without needing paint.
Step 2: Assembling the Features
-
Attach the head:
Take the medium ball you set aside earlier for the head. Score the top of the torso and the bottom of the head with a needle tool, dab with a little water, and press them firmly together. -
Blend the neck:
Use your thumb or a modeling tool to smooth the clay across the seam where the head meets the body. You want a continuous line rather than a distinct, skinny neck. -
Prepare the arms:
Roll a long, thin coil of clay for the arms. It should be roughly the same thickness as the upper torso. -
Attach the arms:
Cut the coil to the desired arm span. Score the back of the shoulder area and press the arm coil onto the figure ensuring the arms stick straight out horizontally. -
Smooth the connections:
Blend the arm clay into the main body at the shoulders. I find it helpful to drag the clay from the shoulder down towards the chest to make the join invisible. -
Round the hands:
Blunt the ends of the arms. You aren’t making fingers here; just rounded nubs to keep the minimalist aesthetic consistent.
Arms Keep Drooping?
If the arms sag while wet, prop them up with crumpled paper towels or small sponges underneath until the clay stiffens enough to hold its own weight.
Step 3: Adding Character & Finish
-
Create the face:
Use the rounded end of a small paintbrush or a toothpick to poke two simple holes for eyes. They should be spaced somewhat wide apart for a friendly look. -
Add a smile:
Press a small, curved indentation below the eyes to suggest a subtle smile. Keep it shallow to maintain the stone-like appearance. -
Texture the surface:
To mimic the pitted texture in the photo, gently tap the entire surface of the figure with a stiff-bristled toothbrush or a crumpled ball of aluminum foil. -
Final balancing:
Do one last check to ensure the figure stands straight. If it’s leaning, gently press down on the opposite foot to correct the posture. -
Drying:
Let the figure dry slowly away from direct heat to prevent cracking. Depending on the thickness, this may take 24 to 48 hours. -
Finishing touches:
Once fully dry (or fired, if using kiln clay), you can leave it raw for that natural look, or apply a very matte varnish to protect it without adding shine.
Now you have a serene little clay companion ready to watch over your bookshelf or desk


Seated Figure on a Block Base
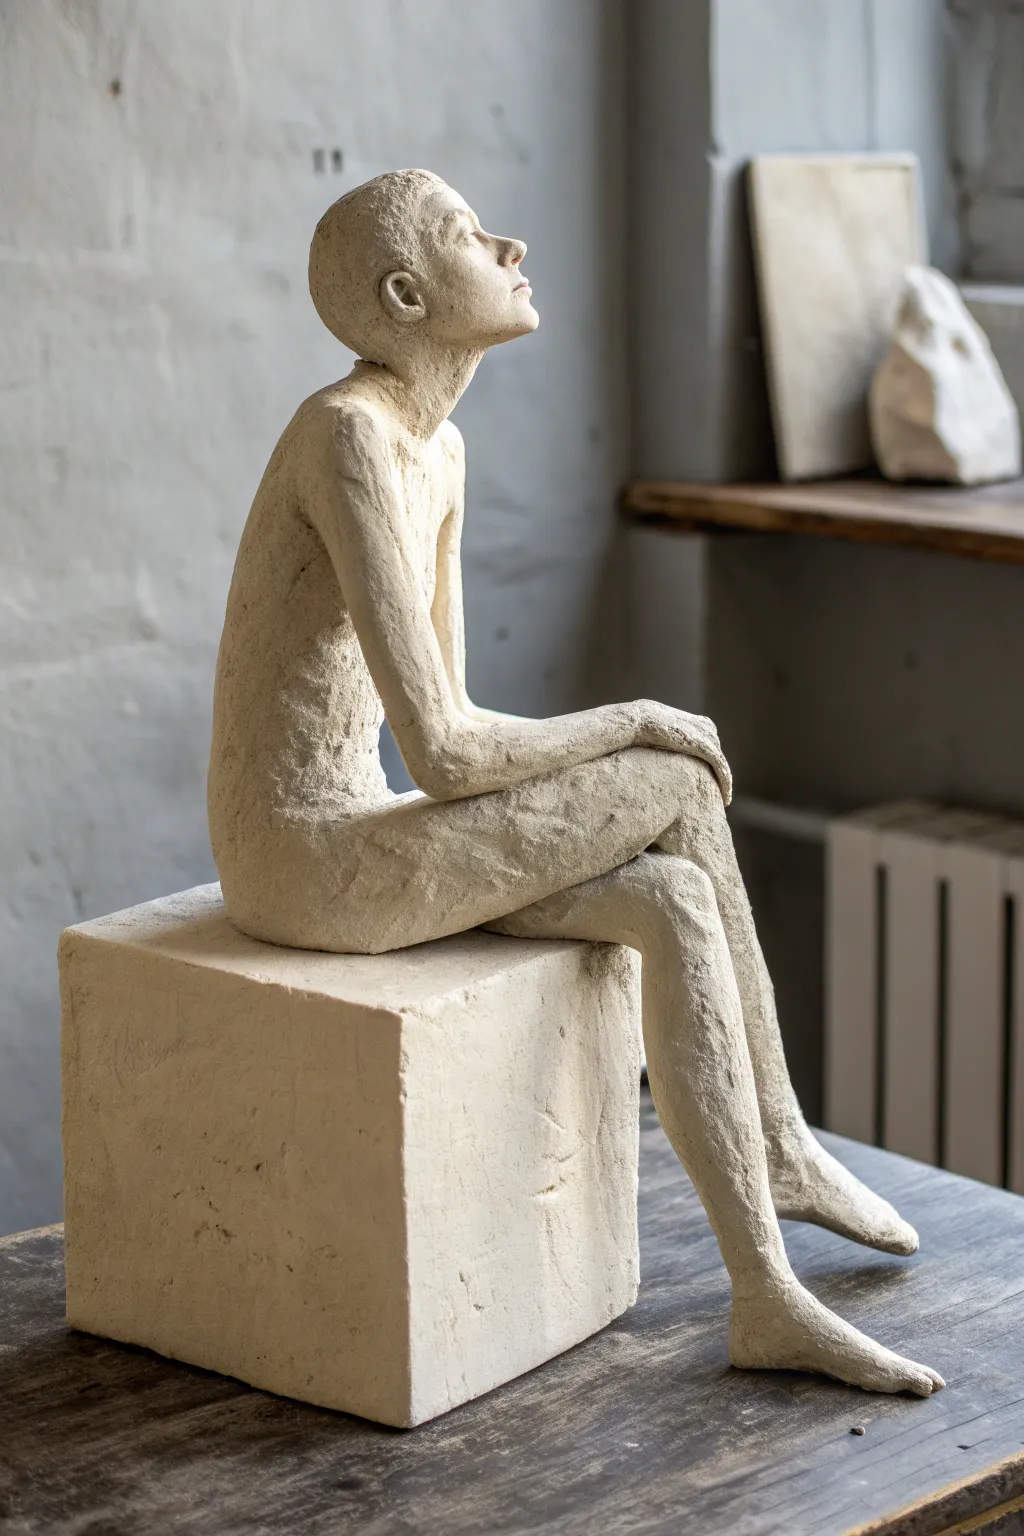
This project captures a sense of quiet introspection through an elongated, textured human figure seated comfortably on a geometric pedestal. The rough, grogged clay surface adds profound character to the piece, creating a stunning contrast between the organic form and the solid block.
Step-by-Step Guide
Materials
- White or light beige stoneware clay (preferably with grog for texture)
- Wooden modeling tools
- Metal kidney scraper
- Needle tool
- Wire clay cutter
- Serrated rib or scoring tool
- Spray water bottle
- Wooden board or batt
- Sponge
Step 1: Forming the Base
-
Construct the Cube:
Begin by rolling out or cutting a solid block of clay to create the pedestal. You can also build a hollow box using slab construction if you want to reduce weight, but ensure the walls are thick enough to support the figure. -
Refine the Shape:
Use a wooden board or a flat paddle to tap the sides of your block, creating sharp, geometric corners. The top surface needs to be perfectly flat. -
Prepare the Surface:
Score the top area where the figure will sit. I like to make the scoring quite deep here to ensure a very strong bond for the buttocks and thighs.
Support Strategy
If the back curves significantly, place a temporary clay prop or wooden dowel under the spine while working. Remove it once the clay stiffens to leather-hard.
Step 2: Building the Core Anatomy
-
Shape the Torso:
Roll a thick coil or rounded rectangle of clay for the torso. Pinch the waist slightly to differentiate the ribcage from the hips. -
Attach the Legs:
Form two long cylinders for the legs. Score and slip them to the hips of your torso, bending them at the knees to create a seated posture. -
Seat the Figure:
Place the torso and leg assembly onto the scored block. Press firmly so the clay of the buttocks melds with the block. One leg should drape down slightly lower or be positioned differently to add naturalism. -
Elongate the Form:
Gently pull the clay of the torso upward to give the figure a slightly elongated, elegant look. This isn’t about perfect realism, but artistic expression.
Step 3: Adding Arms and Head
-
Draft the Head and Neck:
Create a small oval for the head and a cylinder for the neck. Attach the neck to the shoulders, lifting the chin upwards to suggest the figure is looking into the distance or daydreaming. -
Position the Arms:
Roll slimmer coils for the arms. Attach at the shoulders, blending the clay smoothly. Arrange the arms so they rest casually on the legs or knees. -
Check the Angles:
Walk around your sculpture. Ensure the tilt of the head matches the line of the spine and that the elbows feel weighted and natural.
Creative Twist
Experiment with the block’s height. An overly tall pedestal creates a sense of isolation or height, while a broad, low block feels grounded.
Step 4: Refining and Texturing
-
Define Key Muscles:
Use a wooden tool to suggest the shoulder blades, the curve of the spine, and the calf muscles. Don’t overwork it; leave the marks visible. -
Facial Suggestions:
Press lightly to create eye sockets and pinch a small nose. Focusing on the profile silhouette rather than detailed eyes or lips often creates a more powerful mood. -
Create Texture:
Take a serrated rib or a rough tool and drag it across the skin of the sculpture in various directions. This ‘shredded’ texture catches light beautifully. -
Refine the Hands and Feet:
Suggest fingers and toes with simple cuts or elongated shapes. They blend into the overall rough aesthetic, so individual knuckles aren’t necessary. -
Final Surface Treatment:
Use a slightly damp sponge to soften just the sharpest burrs of clay, but leave the majority of the texture raw and gritty. -
Drying:
Loosely cover the piece with plastic to let it dry slowly over several days. This prevents the limbs from cracking where they join the torso.
Once fired, the textured surface will interact beautifully with light and shadow in your space


Reclining Figure on a Slab
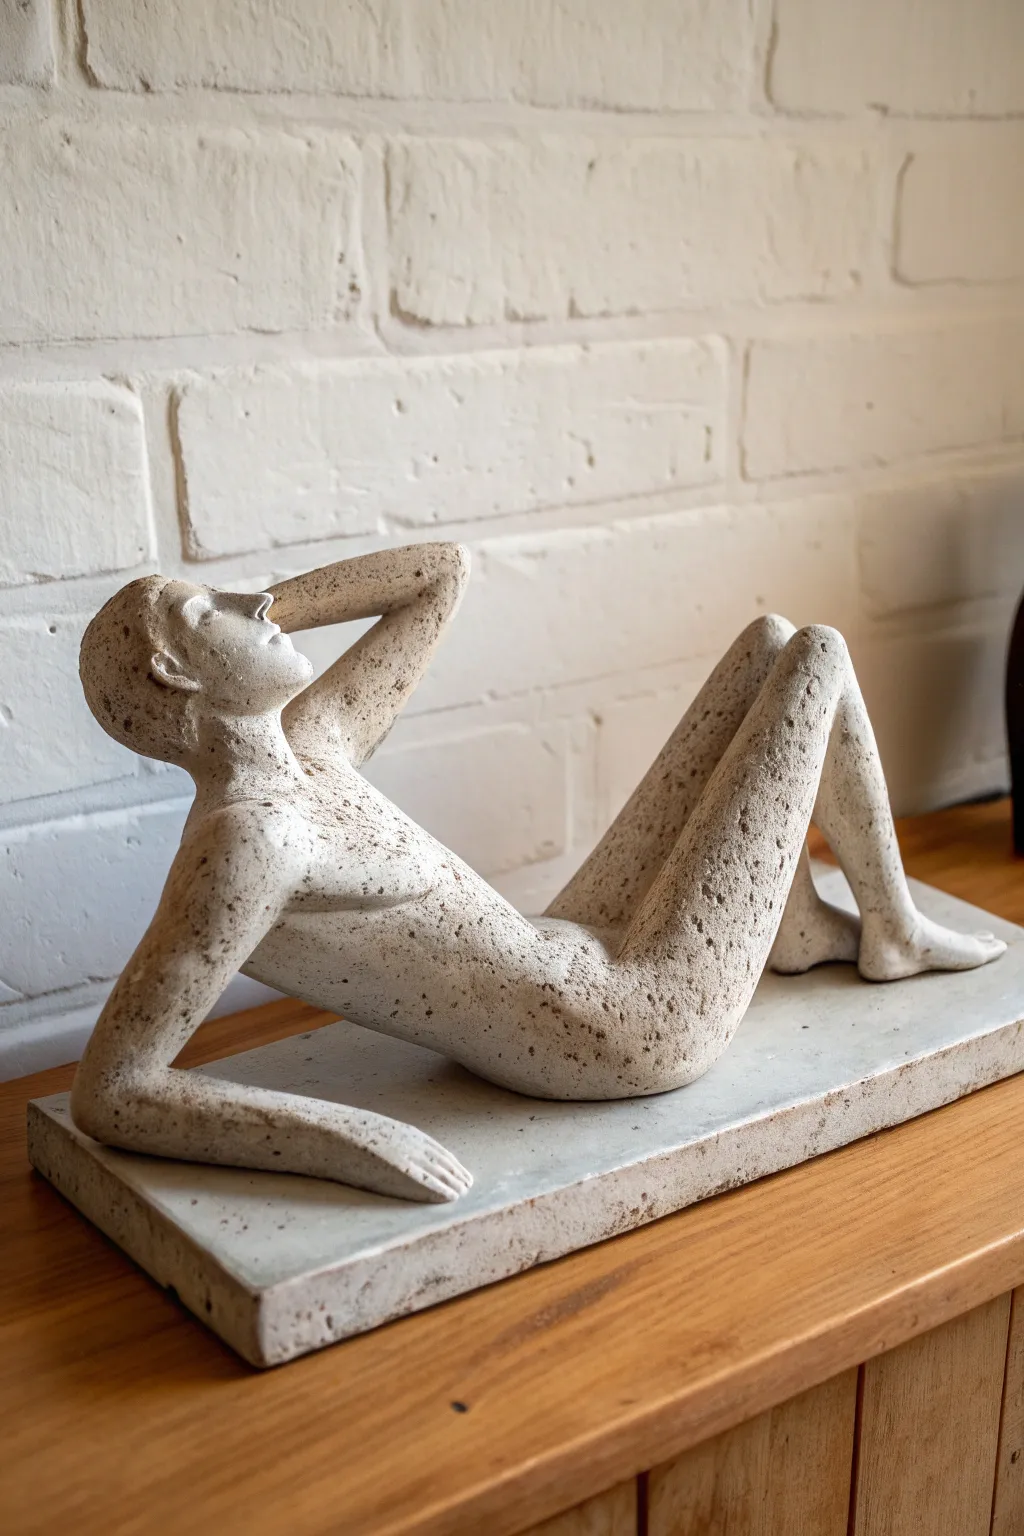
This elegant reclining figure celebrates the gentle curves of the human form, rendered in speckled stone-like clay for a timeless, classical appearance. Resting on a sturdy slab base, this project focuses on smooth transitions and a relaxed, natural pose.
How-To Guide
Materials
- Speckled buff stoneware clay (or polymer clay with granite effect)
- Wooden modeling tools
- Loop tool for carving
- Needle tool
- Slip and scoring tool (if using ceramic clay)
- Sponge and water
- Rolling pin
- Canvas mat or work surface
- Plastic wrap
Step 1: Forming the Base Slab
-
Roll the foundation:
Begin by rolling out a thick slab of clay, approximately 3/4 inch thick. Aim for a rectangular shape large enough to accommodate the full length of your figure. -
Refine the edges:
Cut the slab into a clean rectangle using a knife. Smooth the sharp edges with a damp finger or sponge to give it a finished, professional look, similar to a museum pedestal. -
Initial setting:
Place the slab on a board where it can remain undisturbed. If using ceramic clay, cover it loosely with plastic so it stiffens slightly but doesn’t dry out completely while you sculpt the figure.
Cracking at joints?
If you see cracks forming where limbs attach, the clay might be too dry. Score the area deeply, add generous slip (clay water), and press firmly to re-bond.
Step 2: Blocking out the Figure
-
Create the torso:
Start with two lumps of clay: a larger oval for the ribcage and a slightly smaller oval for the hips. Join them together to form the torso, creating a slight twist or arch to imply the reclining posture. -
Add the legs:
Roll two coils for the legs. Attach the right leg so the knee bends sharply upward, and the foot will eventually rest flat on the slab. Extend the left leg in a more relaxed, gentle bend. -
Position on the slab:
Place your rough figure onto the prepared slab to check the proportions. ensure the entire length fits comfortably without hanging over the edges. -
Secure the contact points:
Mark where the hip, back of the left leg, and right foot touch the base. Score and slip these areas thoroughly to ensure a permanent bond between the figure and the slab.
Stone effect
If using plain clay, gently press coarse sand or crushed dried clay into the surface before firing to mimic the speckled stone texture seen here.
Step 3: Modeling the Limbs and Head
-
Form the arms:
Attach a coil for the right arm, bending the elbow so the hand supports or rests near the head. Position the left arm to support the upper body, with the forearm resting flat on the slab. -
Sculpt the head and neck:
Form an egg shape for the head. Attach a sturdy cylinder for the neck, blending the clay smoothly into the shoulders. Tilt the head slightly back as if the figure is gazing upward. -
Refine the hands and feet:
Shape the hands and feet simply. You don’t need distinct, separated fingers; suggesting the form of a hand or foot aligns better with the stylized aesthetic.
Step 4: Refining and Smoothing
-
Establish muscle flow:
Use your thumbs to smooth the clay where limbs join the body. Focus on the flow of the muscles, particularly the thigh and the curve of the torso. -
Check the profile:
Rotate your work or walk around it. Ensure the figure looks natural from all angles, especially the arch of the back and the lift of the chest. -
Smooth the surface:
Using a slightly damp sponge, wipe over the entire sculpture. This blends minor bumps and brings out the grit or grog in the clay, giving it that stone texture. -
Define facial features:
Use a small modeling tool to gently press in the eye sockets and shape the nose. keep features subtle and impressionistic rather than hyper-realistic. -
Final polish:
Go over the piece one last time with a rib tool or your finger to remove any fingerprints. Ensure the connection between the figure and the slab is seamless. -
Drying:
Cover the sculpture loosely with plastic for the first few days to ensure the figure and the slab dry at the same rate. This prevents cracking.
Once fired or cured, this sculpture will bring a sense of calm sophistication to any shelf or table


Walking Pose With a Clear Weight Shift
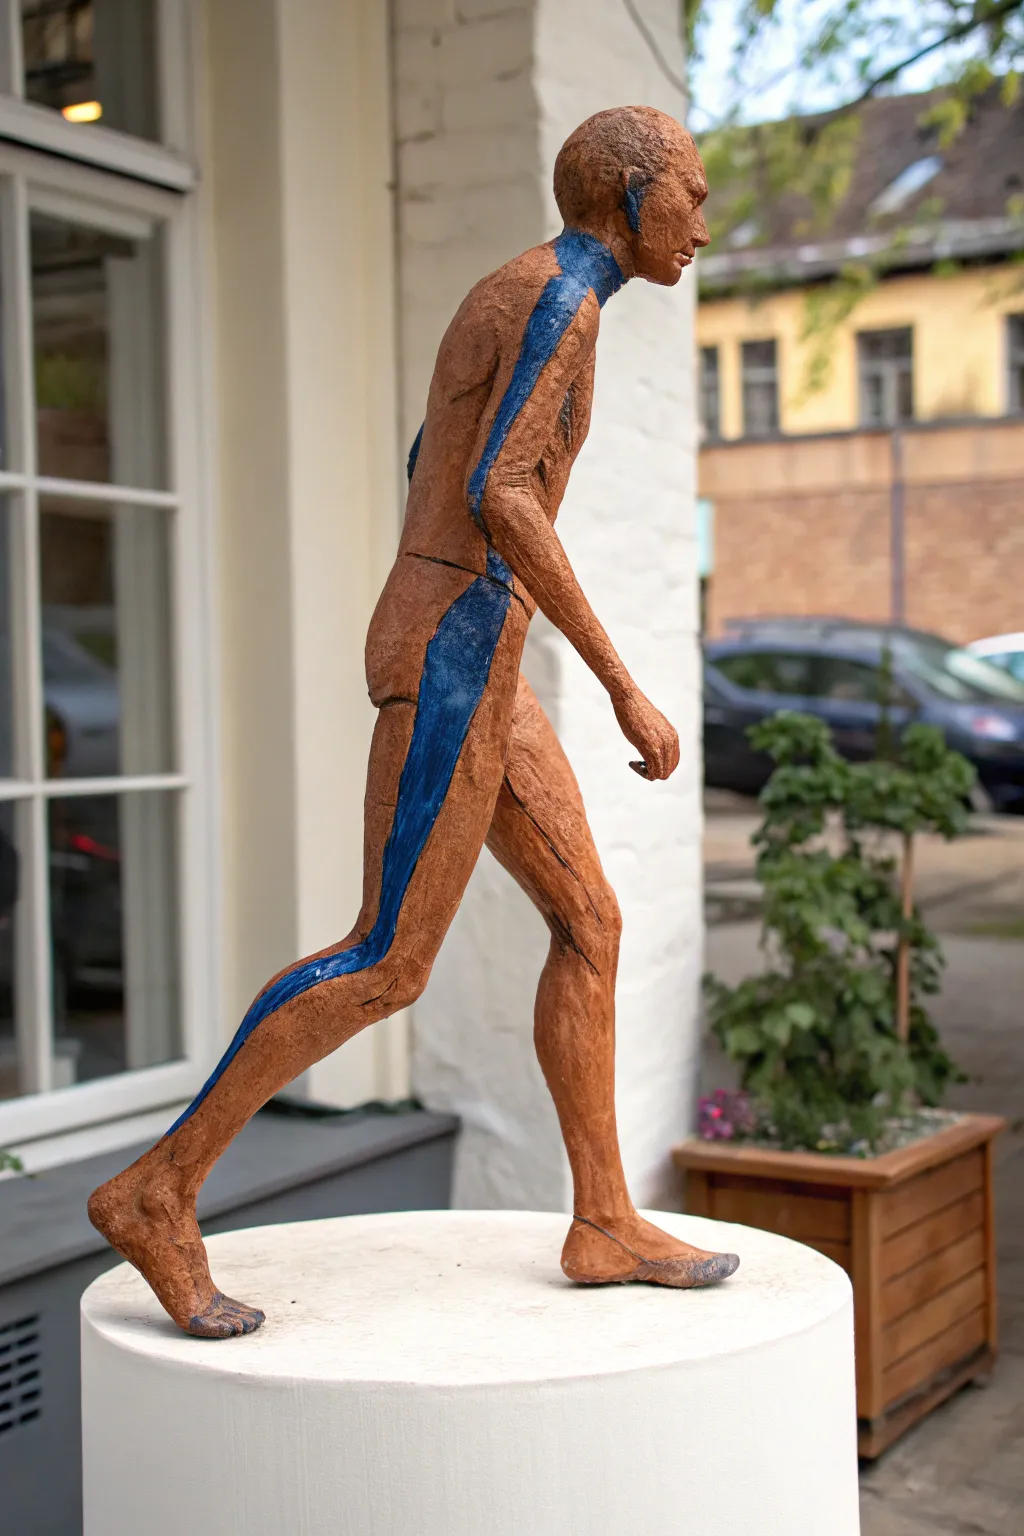
Capture the fluid motion of a casual stroll with this expressive clay sculpture. The piece features a rugged, textured finish and a bold cobalt blue stripe that accentuates the body’s dynamic curve as weight shifts forward.
Step-by-Step Tutorial
Materials
- Terracotta or red stoneware clay (grogged for strength)
- Strong armature wire (aluminum or heavy gauge galvanized)
- Wooden base for armature support
- Sculpting tools (loop tools, wooden modeling tools, needle tool)
- Serrated kidney or rib tool
- Cobalt blue underglaze or acrylic paint
- Flat paintbrush
- Sponge and water
- Kiln (if firing) or air-dry sealant (if using air-dry clay)
Step 1: Building the Core Structure
-
Construct the Armature:
Create a wire skeleton for your figure. Secure two heavy-gauge wires into a temporary wooden base. Bend the legs to mimic a walking motion—one leg planted straight, the other bent at the knee trailing behind. -
Establish the Spine:
Twist the wires together at the hip level to form the torso and spine. Ensure the spine has a slight forward lean to indicate momentum, preventing the figure from looking static. -
Bulk Out the Form:
Begin adding small chunks of clay to the wire. Squeeze the clay firmly around the wire to remove air pockets, building up the general mass of the legs, torso, and head. -
Define the Major Planes:
Use a wooden modeling tool to flatten the chest, back, and thighs. Don’t worry about details yet; focus on getting the proportions correct, ensuring the head isn’t too large for the body.
Use Grogged Clay
Choose a clay body with “grog” (sand). It holds vertical shapes better, won’t slump easily, and adds that gritty texture automatically.
Step 2: Refining the Anatomy
-
Sculpt the Legs:
Add muscle definition to the thighs and calves. The planting leg should look engaged and weight-bearing, while the trailing leg should look more relaxed. Refine the ankles and feet. -
Shape the Torso:
Build up the chest and shoulders. Notice how the figure in the photo has a somewhat elongated, stylized torso. Smooth the clay over the ribcage area. -
Attach the Arms:
Roll coils for arms and attach them. Position the arms to counterbalance the legs—left arm forward if the right leg is forward. Keep the hands simple, perhaps just indicating the bulk of a fist or open palm. -
Sculpt the Head and Neck:
Refine the neck muscles leading into the jaw. Keep the facial features impressionistic rather than hyper-realistic; focus on the brow ridge, nose, and chin profile.
Slumping Legs?
If the ankles bend under the clay’s weight, prop the torso up with a wooden dowel or specifically designed armature stand until the clay stiffens.
Step 3: Creating Texture and Separation
-
Texture the Surface:
Take a serrated kidney or a rough sculpting tool and drag it across the entire surface. This cross-hatching technique gives the piece its distinct, rough, aged appearance. -
Slice for Reassembly (Hollow Building):
If you plan to fire this in a kiln, the clay must be hollow. Carefully slice the figure apart at the waist, arms, and legs. Remove the wire armature from inside. -
Hollow the Pieces:
Use a loop tool to scoop out the insides of the limbs and torso, leaving the walls about half an inch thick. -
Reassemble the Figure:
Score and slip the cut edges, then rejoin the pieces. I like to leave the seam lines slightly visible or even accentuated, as seen at the waist and shoulder of the example project. -
Final Surface Check:
Go back over your join lines with the texturing tool to blend them partially, ensuring the ‘skin’ looks consistent.
Step 4: Finishing and Color
-
Dry the Piece:
Let the sculpture dry slowly under plastic for several days to prevent cracking, then uncover it until bone dry. -
Bisque Fire:
Fire the piece in the kiln to bisque temperature (usually cone 04) to harden the clay. -
Apply the Blue Stripe:
Using a flat brush, paint a bold, continuous strip of cobalt blue underglaze from the neck, down the side of the torso, along the thigh, and ending at the shin. Do not paint the foot. -
Second Fire or Seal:
If using glaze, fire again to set the color. If using acrylic paint on fired clay or air-dry clay, simply let the paint dry and apply a matte varnish for protection. -
Mounting:
Secure the finished figure to a clean white cylindrical plinth or base using epoxy or a mounting rod drilled into the foot.
Step back and admire how a simple colored line can transform a static sculpture into a figure full of movement and life

The Complete Guide to Pottery Troubleshooting
Uncover the most common ceramic mistakes—from cracking clay to failed glazes—and learn how to fix them fast.
Kicking Pose With a Hidden Support
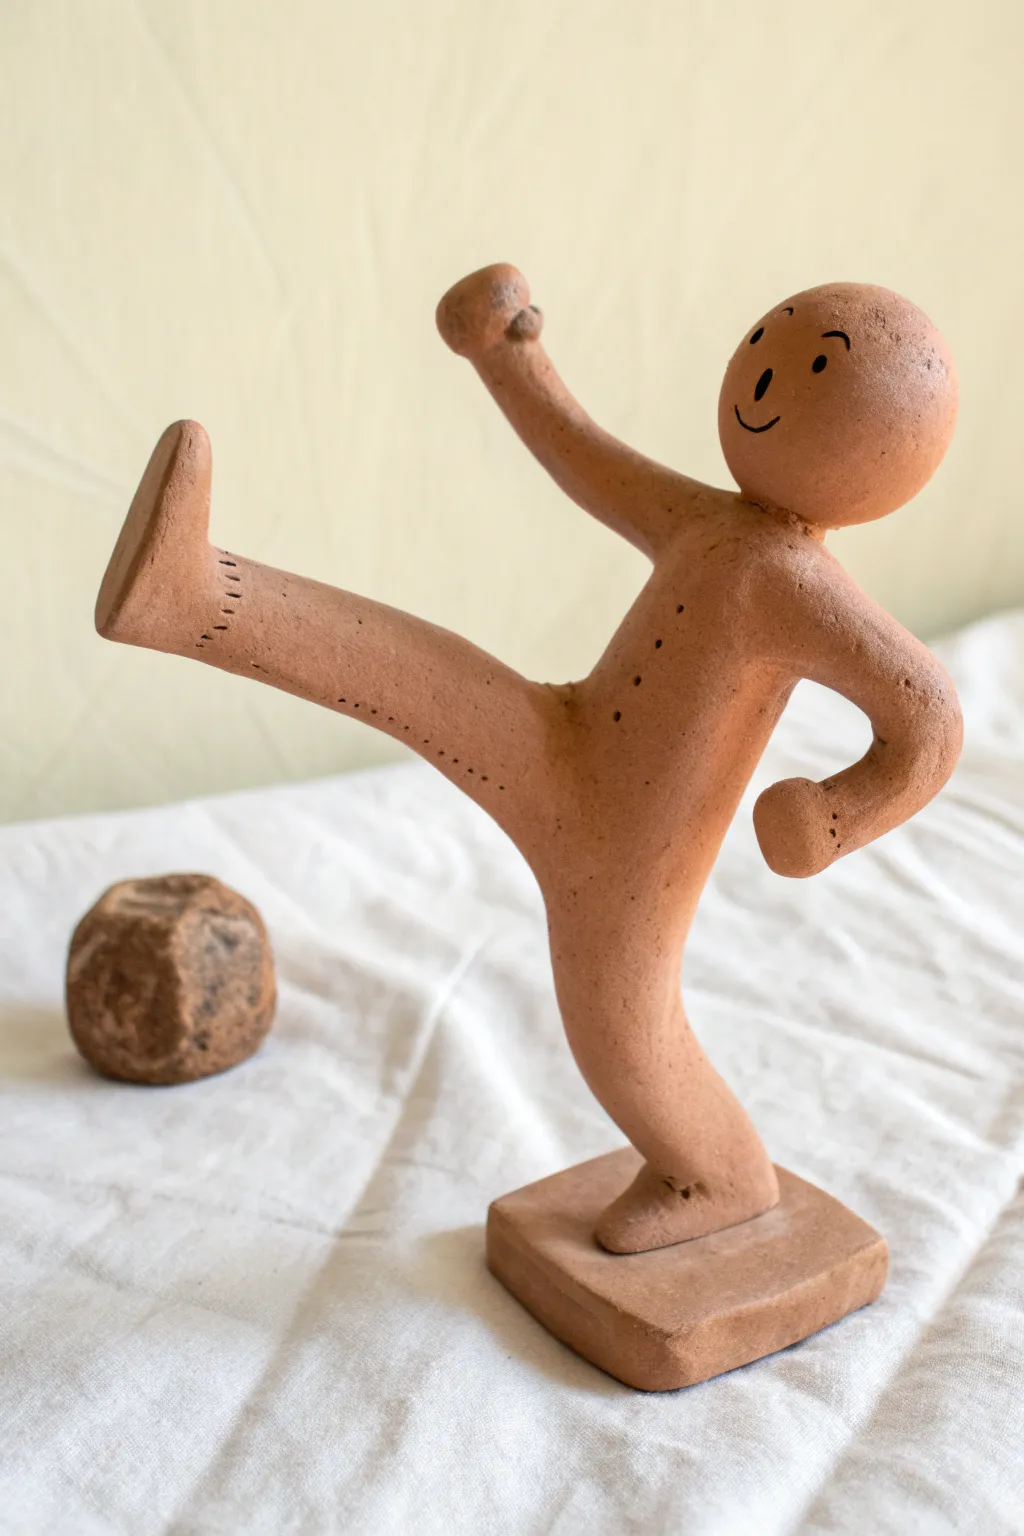
Capture the energy of motion with this joyful terracotta clay figure celebrating a triumphant high kick. This project focuses on balance and simple, expressive forms to create a dynamic sculpture that defies gravity.
Detailed Instructions
Materials
- Terracotta-colored air-dry clay or polymer clay
- Sturdy armature wire (14 or 16 gauge)
- Pliers and wire cutters
- Clay modeling tools (or a toothpick and spoon)
- Small cup of water (for smoothing)
- Fine-point black permanent marker or acrylic paint
- Small rolling pin
- Sandpaper (optional, for finish)
Step 1: Building the Armature
-
Cut the wire:
Cut a length of heavy-gauge wire about 12 inches long. This will form the spine and the two legs. -
Form the legs:
Bend the wire in half to create a ‘V’ shape. Twist the top inch together to create a short torso section. -
Pose the kick:
Bend one wire leg straight down—this will be the standing leg. Bend the other wire leg sharply upward at a 90-degree angle to mimic the high kick. -
Add arm wires:
Cut a separate 5-inch piece of wire. Wrap it tightly around the twisted ‘torso’ section of your first wire so you have two arms extending outward. -
Secure the base:
Create a loop or foot shape at the bottom of the standing leg wire. This will eventually be embedded in the clay base for stability.
Balance Strategy
If the figure keeps tipping over while sculpting, temporarily prop the kicking leg up with a stack of books or a sponge until the clay hardens enough to support itself.
Step 2: Sculpting the Body
-
Create the base:
Roll a square slab of clay about 1/2 inch thick. Press the looped foot of your armature firmly into the center so the wire stands upright on its own. -
Bulk out the legs:
Roll snakes of clay and wrap them around the wire legs. Use your fingers to merge the clay together, keeping the limbs tubular and roughly equal in thickness. -
Add the torso:
Pack a solid ball of clay around the twisted wire intersection. Smooth this downward to join with the legs seamlessly. -
Form the arms:
Add clay to the arm wires. Pose the left arm reaching toward the kicking toe and the right arm bent back for balance. -
Shape the hands and feet:
Mold the standing foot to merge smoothly with the base. For the kicking foot, create a flat, boot-like sole. Round off the ends of the arms to form simple, mitt-like fist shapes.
Step 3: Refining and Detailing
-
Add the head:
Roll a perfect sphere of clay for the head. Insert a small piece of toothpick or wire into the neck area, then press the head firmly onto the torso. -
Blend the neck seam:
Use a modeling tool or your finger with a little water to drag clay across the seam between the head and body until it disappears completely. -
Smooth the surface:
Dip your finger in water and gently rub the entire figure to remove fingerprints and bumps. I find this meditative step crucial for that clean, professional look. -
Add textural details:
Using a toothpick or needle tool, press small dots down the center of the chest to mimic buttons. Add tiny dashed lines on the ankles and wrists to suggest cuffs. -
Construct the prop:
Roll a separate, rough cube of clay to create the ‘rock’ or block shown in the background. Texture it by pressing a crumpled foil ball against it.
Smoothing Cracks
Surface drying too fast? Keep a small spray bottle of water nearby. Mist the clay lightly to keep it workable and prevent surface cracks from forming while you sculpt.
Step 4: Finishing Touches
-
Dry the figure:
Allow the sculpture to dry completely. If using air-dry clay, this may take 24-48 hours. If using polymer, bake according to package instructions. -
Sand imperfections:
Once hardened, use fine-grit sandpaper to gently smooth out any rough patches, especially around the base. -
Draw the face:
Using a fine-point black marker or a thin brush with black acrylic, draw two small dots for eyes and a simple U-shape for the smile. -
Add the nose:
Place a single dot or a tiny vertical dash between the eyes for the nose.
Place your spirited figure on a shelf where its energetic pose can bring a smile to your face every day
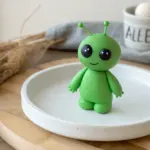
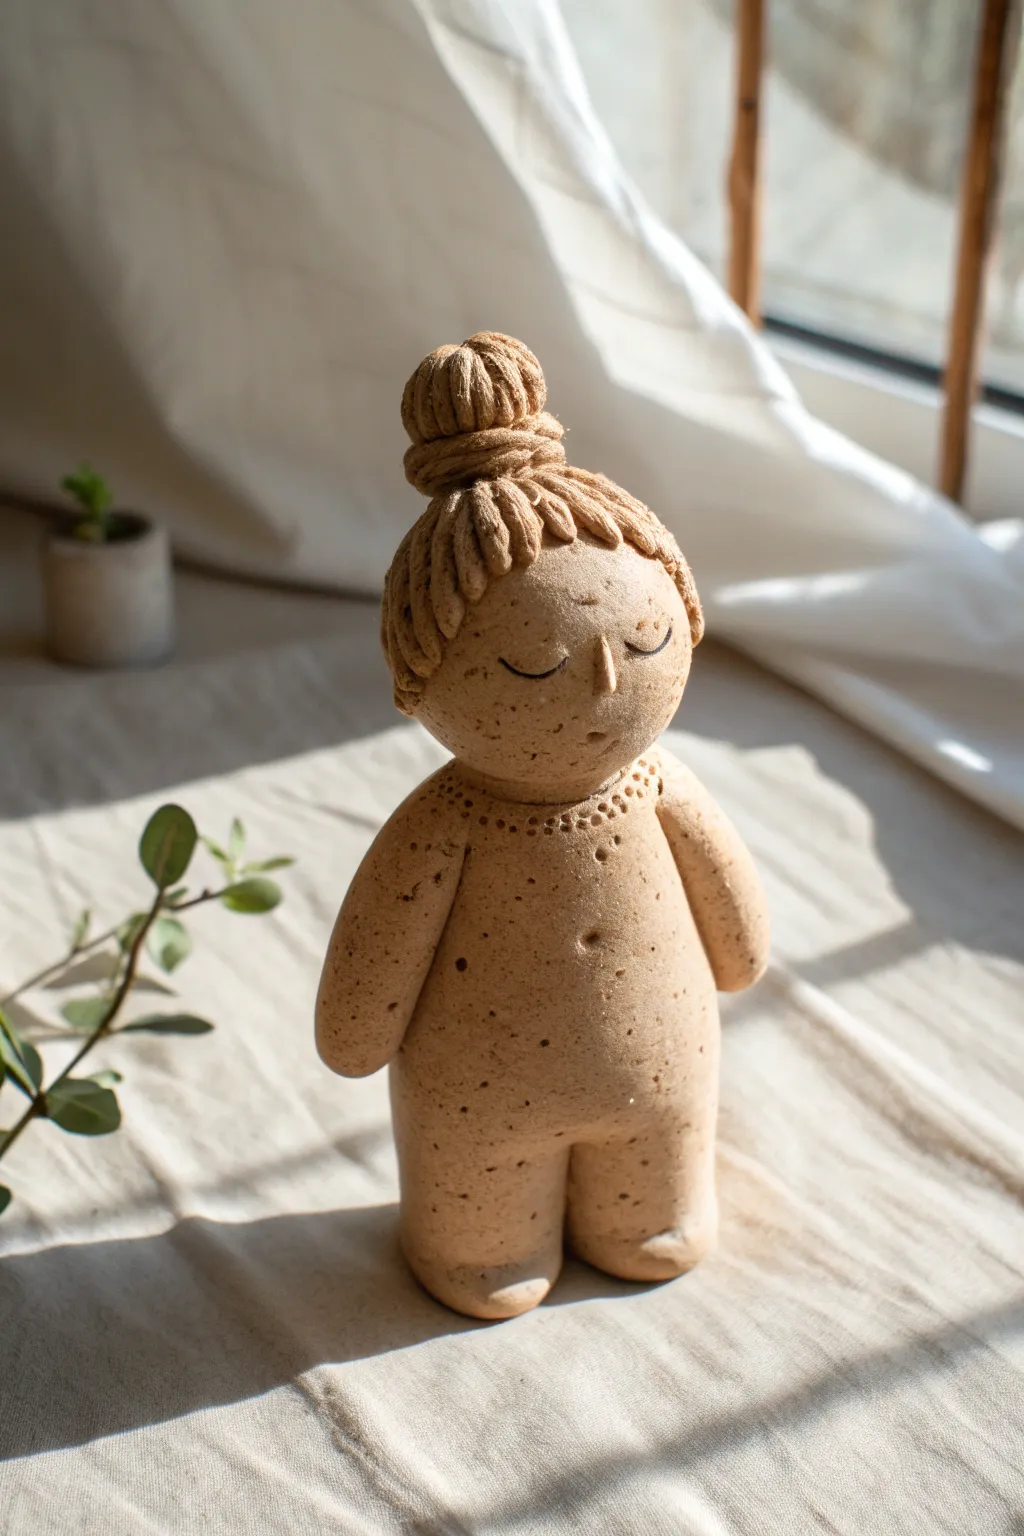
Chibi-Inspired Big-Head Figure
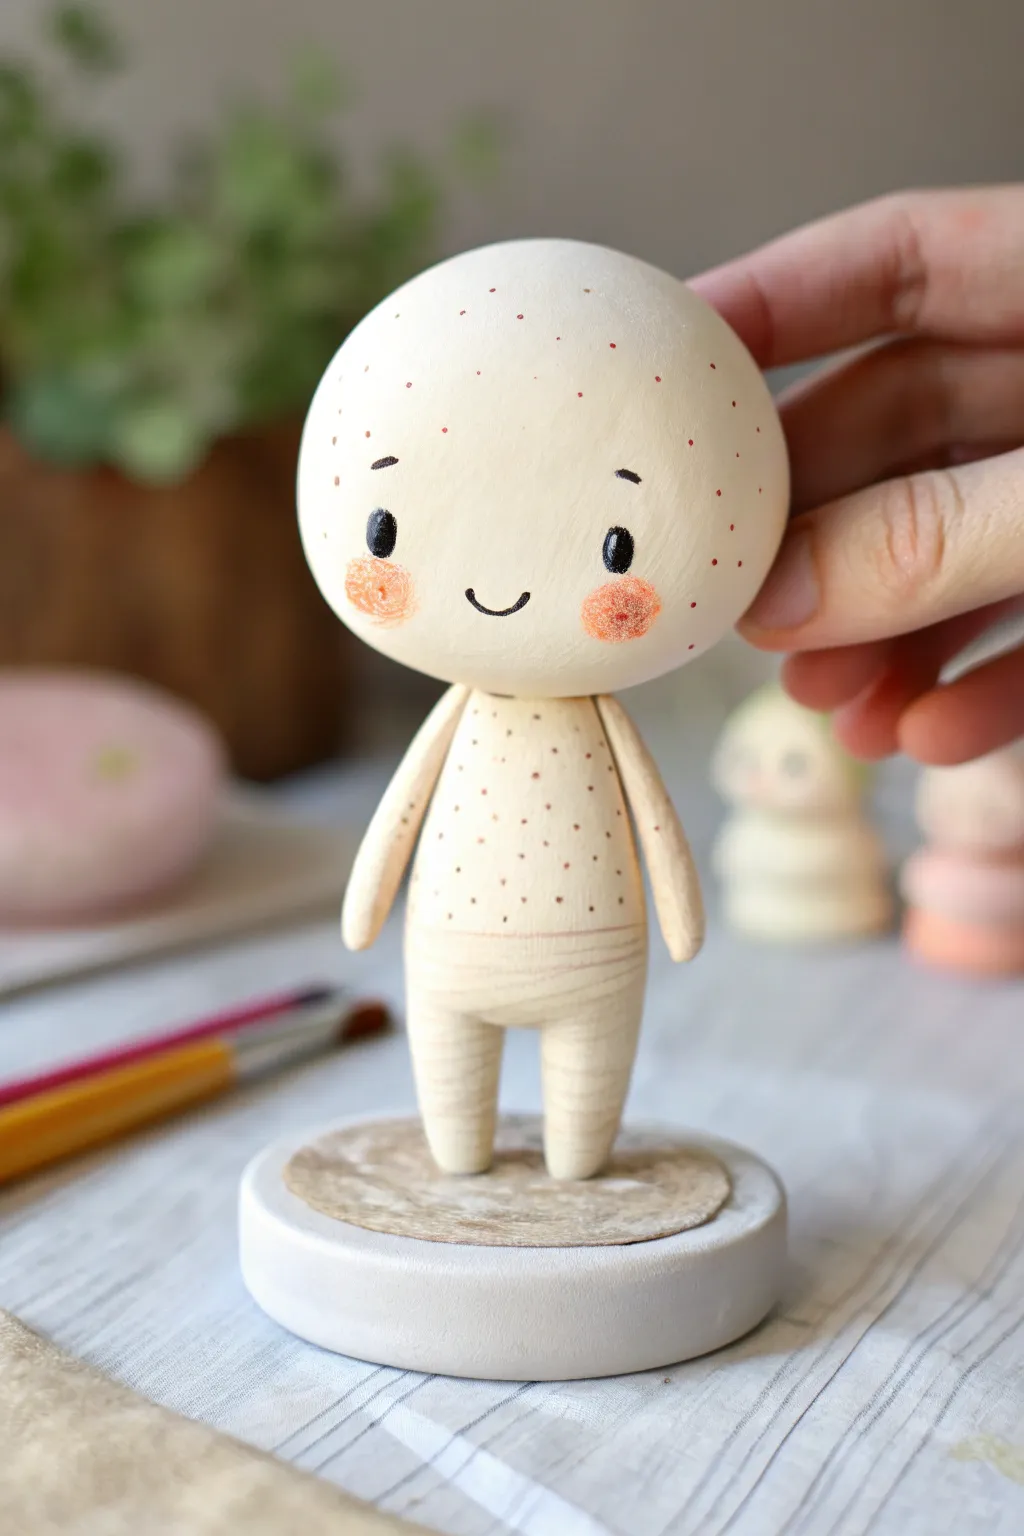
Embrace the charm of simplicity with this adorable chibi-style figure characterized by its oversized head and minimalist features. Though it mimics the texture of light wood, we’ll sculpt this little character from polymer clay for an accessible and durable finish.
Step-by-Step Tutorial
Materials
- Beige or light wood-effect polymer clay
- Aluminum foil
- Armature wire (18 or 20 gauge)
- Acrylic paints (black, pink/coral, brownish-red)
- Fine detail paintbrush (size 0 or 00)
- Round sponge applicator or cotton swab
- Sculpting tools (needle tool, smoothing tool)
- Sandpaper (fine grit)
- Circle cutter or jar lid (for base)
- Toothpicks
- Matte varnish
Step 1: Armature & Base Structure
-
Prepare the Core:
Ball up a piece of aluminum foil tightly until it is slightly smaller than the desired size of the figure’s head. This saves clay and keeps the head lightweight. -
Wire Support:
Cut a length of armature wire, fold it in half, and twist it to create a spine. Insert the top of the twisted wire deeply into your foil ball. -
Create the Base:
Roll out a thick slab of clay (about 1/2 inch) and cut a circle for the stand. Insert the bottom ends of the wire legs into this base to hold the figure upright while you work.
Head Too Heavy?
If the head keeps tilting during sculpting, bake the foil core and wire armature first to stiffen it before adding the clay layer.
Step 2: Sculpting the Body
-
Wrap the Head:
Sheet your beige clay to a medium thickness. Wrap it completely around the foil ball, smoothing the seams carefully until you have a perfect, seamless sphere. -
Form the Torso:
Roll a cylinder of clay for the body. It should be significantly smaller than the head. Slide this up the wire armature until it meets the bottom of the head. -
Shape the Legs:
Divide the bottom of the cylinder into two short legs. Smooth these down to rounded stumps for feet, ensuring the figure stands flat. -
Attach the Arms:
Roll two thin tapered sausages of clay for arms. Attach them to the sides of the torso, blending the shoulder seams so they look like one continuous piece of wood. -
Add Texture Details:
Using a needle tool, lightly score horizontal lines around the hips to simulate a ‘diaper’ or underwear line, and add faint vertical texture if you want to enhance the wood-grain effect. -
Bake:
Bake the figure according to your clay manufacturer’s instructions (usually 275°F/135°C for 15-30 minutes). Let it cool completely.
Step 3: Painting & Finishing
-
Sand for Smoothness:
Once cool, lightly sand the surface with fine-grit sandpaper. This is crucial to mimic that smooth, turned-wood toy appearance. -
Draft the Face:
Very lightly mark the position of the eyes and mouth with a pencil. Place the eyes wide apart and low on the face for maximum cuteness. -
Paint the Features:
Using your fine detail brush and black acrylic, paint two solid black ovals for eyes and a tiny ‘u’ shape for the smile. Add small eyebrows high on the forehead. -
Add Highlights:
Dip the very tip of a toothpick into white paint and add a tiny reflection dot to the top corner of each black eye. -
Apply Blush:
Dip a dry sponge or cotton swab into pink paint, dab almost all of it off on a paper towel, and gently press rosy cheeks onto the figure. The texture should look soft and stippled. -
Create Freckles:
Dilute a bit of brownish-red paint. Use a toothpick or fine brush to dot tiny freckles all over the head and body. Vary the spacing—some clustered, some isolated. -
Seal the Work:
Finish by applying a coat of matte varnish. This protects the paint and unifies the surface sheen, making it look even more like a wooden carving.
Wood Grain Trick
Mix a tiny amount of translucent or darker beige clay into your main color but don’t blend fully. This creates subtle marbling streaks like real wood.
Now you have a charming, minimalist figure that adds a touch of sweetness to any shelf


What Really Happens Inside the Kiln
Learn how time and temperature work together inside the kiln to transform clay into durable ceramic.
Mini Portrait Bust Study
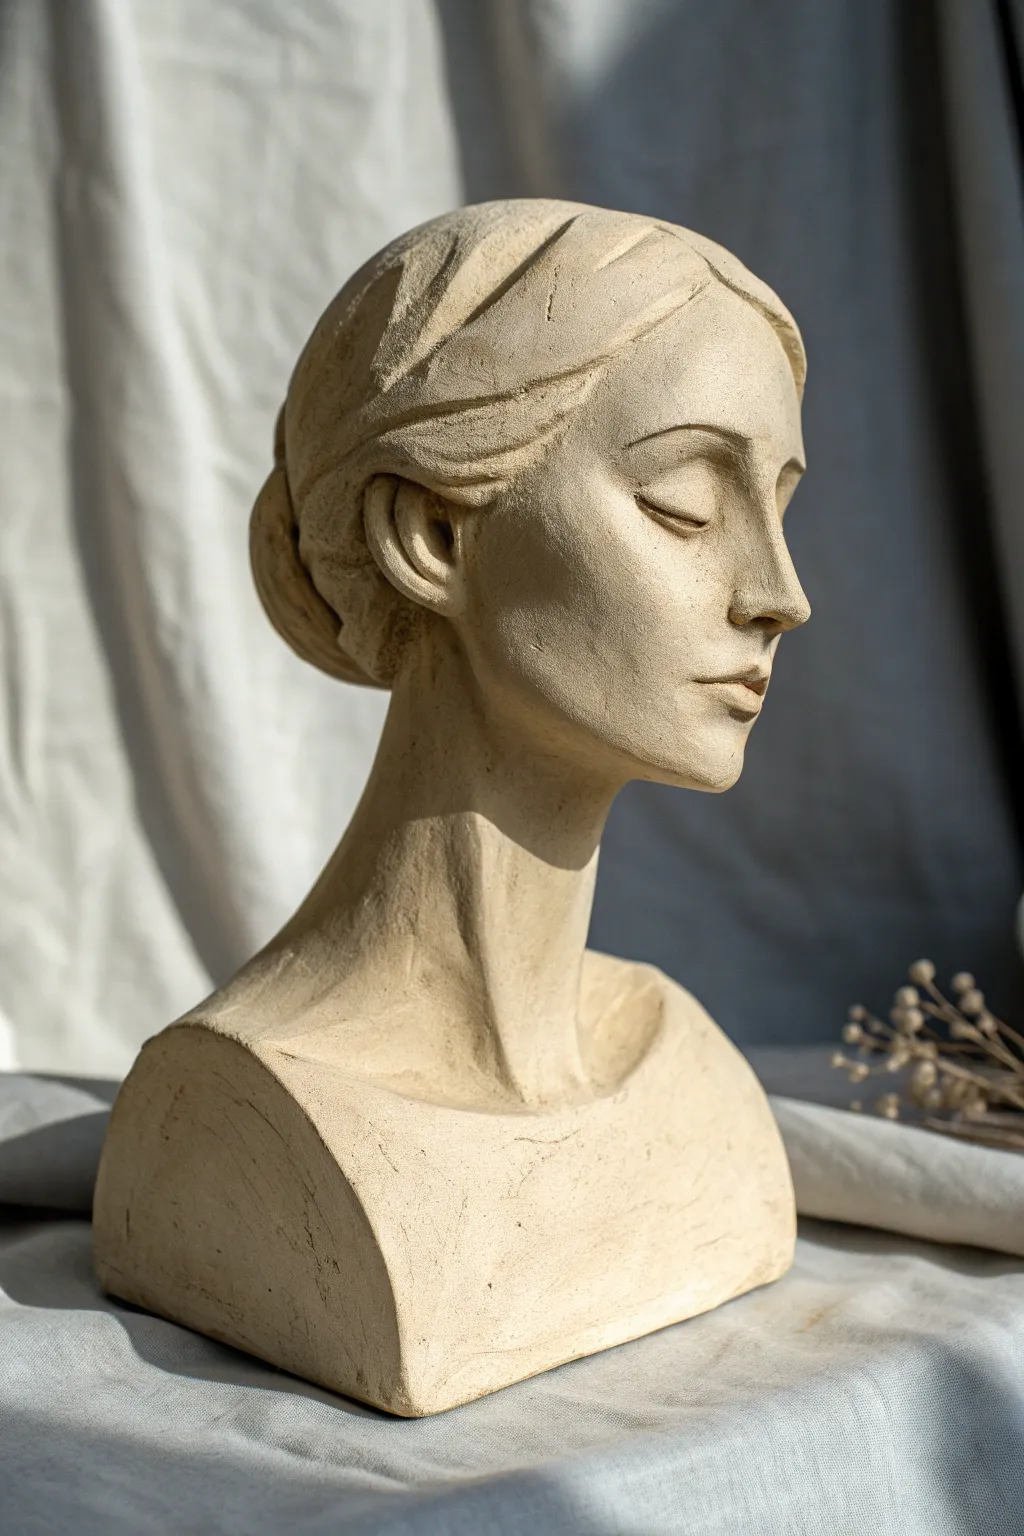
Capture quiet emotion with this elegant mini-bust study, featuring a stylized female profile with closed eyes. The unglazed finish and visible tool marks give it a timeless, classical feel perfect for refining your anatomical modeling skills.
How-To Guide
Materials
- Stoneware or earthenware clay (groggy for structure)
- Wooden armature stand
- Wire armature loop
- Modeling tools (wire loops, wooden ribs, needle tool)
- Sponge and water
- Lazy Susan or turntable
- Plastic bag for covering
Step 1: Building the Foundation
-
Armature setup:
Begin by securing your wooden armature to a turntable. Ensure the wire loop at the top is roughly the shape of a lightbulb, representing the skull’s core. -
Bulking out the neck:
Pack clay firmly around the vertical post of the armature to form the neck. Make this cylinder slightly wider at the base where it will meet the shoulders. -
Forming the skull:
Add slabs or chunks of clay to the wire loop to form the basic egg shape of the head. Score and slip your clay pieces to ensure no air pockets remain. -
Shoulder shelf:
Create the base of the bust by building out the shoulders. For this specific study, keep the chest area blocky and stylized rather than anatomically perfect, focusing on the connection between the neck and collarbone.
Keep it Fresh
Don’t over-smooth every surface. Leaving some designated tool marks on the base and hair creates a wonderful ‘sketchy’ quality that contrasts beautifully with the smooth face.
Step 2: Refining the Form
-
Establishing planes:
Use a flat wooden rib to plane off the face. Define the front plane (face), side planes (cheeks and ears), and the underside of the jaw to get a geometric structure before detailing. -
Marking feature lines:
With a needle tool, lightly sketch the centerline of the face. Mark horizontal lines for the brow, the base of the nose, and the mouth. -
Adding the nose:
Roll a small wedge of clay and score it onto the nose marker. Blend the bridge smoothly into the forehead and carve out the nostrils underneath for a distinct profile. -
Sculpting the closed eyes:
Add small clay orbs into the eye sockets, then layer thin sheets of clay over them for eyelids. Smooth the seam downwards to create the peaceful, sleeping look seen in the photo. -
Cheekbones and jaw:
I prefer to use a thumb to press gently under the cheekbones to create a shadow. Sharpen the jawline definition using a wire loop tool to remove excess clay.
Step 3: Hair and Details
-
Building the hair volume:
Add clay mass to the back and top of the head. Don’t worry about individual strands yet; focus on the silhouette of the bun and the way the hair pulls back from the forehead. -
Defining hair sections:
Use a modeling tool to carve deep grooves that suggest sections of hair being pulled back. Keep these lines fluid and sweeping. -
Refining the ear:
Attach a ‘C’ shaped piece of clay for the ear. Sculpt the basic helix and lobe, ensuring it sits behind the jawline, roughly between the height of the brow and nose base. -
Neck structure:
Carve slight depressions on either side of the front neck to suggest the sternocleidomastoid muscles, which run from behind the ear to the collarbone area. -
Surface texture:
Go over the skin areas with a slightly damp sponge to smooth out rough patches, but leave some of the rake marks in the hair and base for artistic contrast.
Shadow Play
To check your anatomy, turn off your main lights and use a single lamp to cast strong shadows across the face. This instantly reveals lumpy planes or asymmetrical features.
Step 4: Final Touches
-
Mouth refinement:
Ensure the lips are full but sealed. Use a small tool to create a slight dip in the center of the upper lip (the cupid’s bow). -
Hollowing out:
If firing this piece, allow it to become leather hard. Then, slice off the top of the head (like a lid) and carefully hollow out the inside until the walls are about 1/2 to 3/4 inch thick. -
Reattachment:
Score and slip the ‘lid’ back onto the head. Smooth the seam completely so it becomes invisible. -
Drying:
Cover the piece loosely with plastic to let it dry very slowly over several days to prevent cracking.
Once fired, the natural color of the clay allows the light to play across your sculpted forms beautifully
Gesture Figure That Shows an Emotion
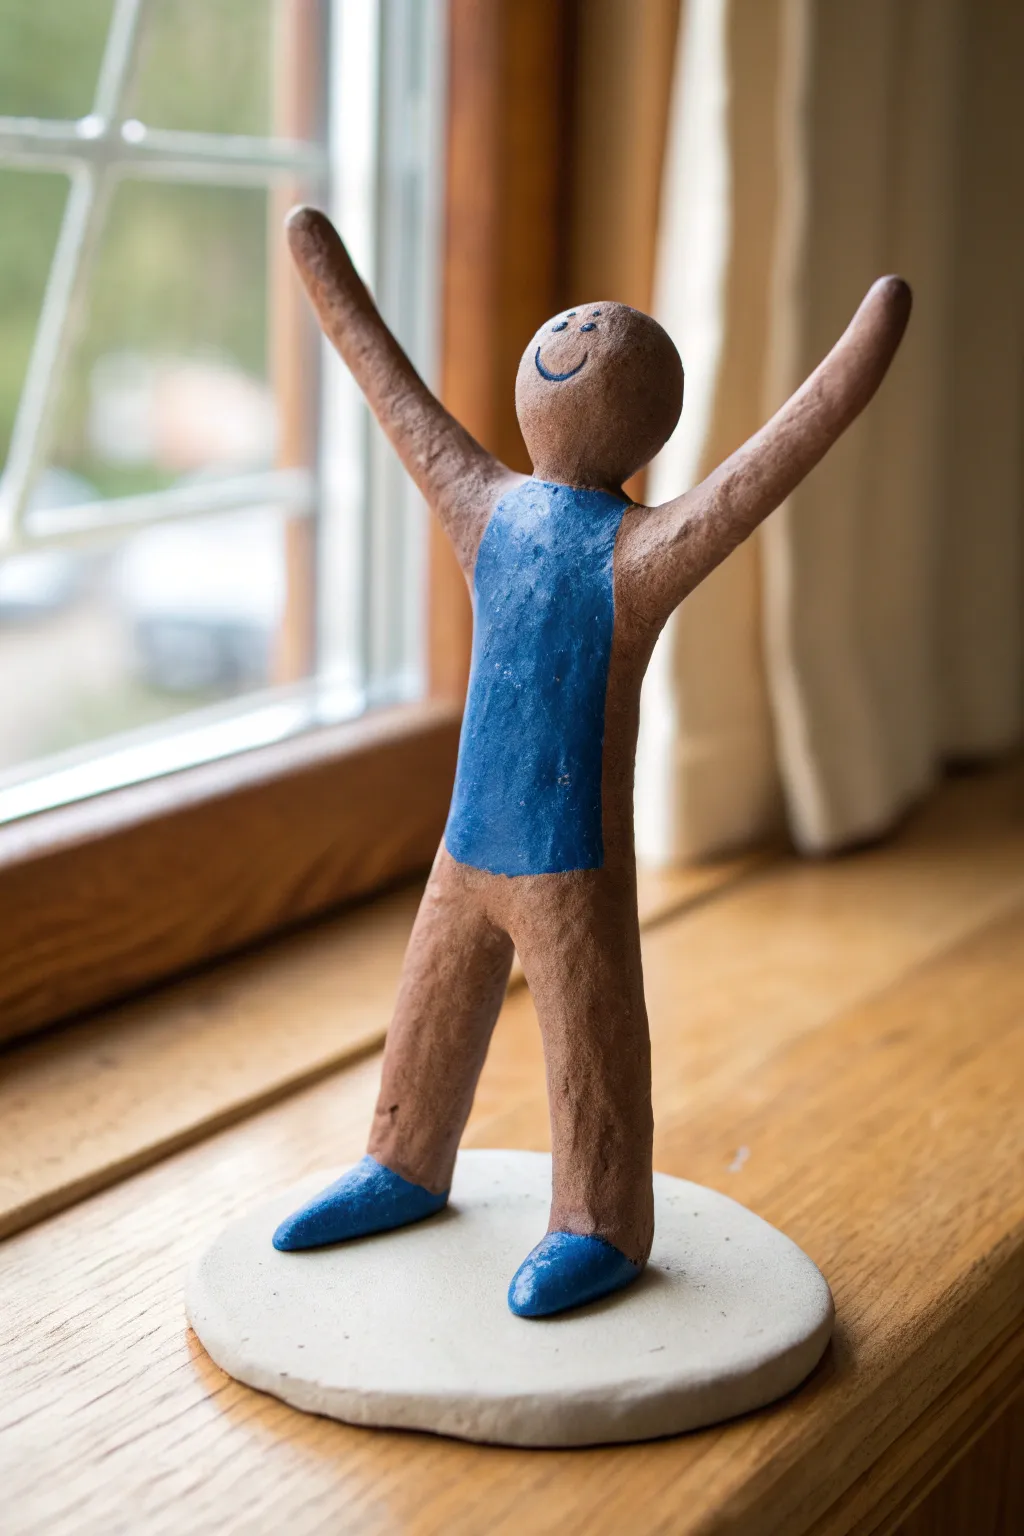
Capture unbridled happiness with this charmingly rustic clay figure, whose arms stretch high in a celebration of life. The piece features a textured, earthy finish paired with striking blue accents, creating a simple yet emotionally resonant sculpture perfect for a windowsill.
Detailed Instructions
Materials
- Air-dry clay or polymer clay (terracotta or brown color)
- White air-dry clay (for the base)
- Acrylic paint (bright blue)
- Fine-point black permanent marker or detail paint brush
- Sculpting tools (needle tool, smoothing tool)
- Wire armature wire (about 16-18 gauge)
- Wire cutters
- Small flat paintbrush
- Water cup (for smoothing)
- Sandpaper (fine grit)
Step 1: Building the Armature & Body
-
Wire Skeleton:
Cut two lengths of armature wire. Twist them together at the center to form a torso, leaving two long ends for legs and two for arms. Create a small loop at the top for the head support. -
Base Connection:
Take a lump of white clay and flatten it into a rough disc about 3-4 inches wide. This will be your sturdy base. -
Anchoring:
Push the wire ‘feet’ loops securely into the white clay disc while it is still wet. Add a little extra clay over the wire at the connection points to ensure the figure stands upright without wobbling. -
Bulking the Body:
Switch to your brown clay. Roll a sausage shape for the torso and press it around the twisted wire center, blending the clay downwards. -
Leg Formation:
Wrap clay around each wire leg, keeping them relatively uniform in thickness. Smooth the join where the legs meet the torso so there are no visible seams.
Armature Stability
Twist a second, thinner wire around the hip area where the legs diverge. This reinforce the ‘pelvis’ and prevents the clay from cracking at the crotch during drying.
Step 2: Sculpting the Details
-
Arm Construction:
Add clay to the arm wires one by one. I find it easiest to roll small snakes of clay and sleeve them over the wire, then smooth them into the shoulder area. -
Creating the Head:
Roll a smooth sphere of brown clay about the size of a large grape. Press this firmly onto the top loop of your armature wire. -
Neck Blending:
Use a small modeling tool or your finger to drag a little clay from the bottom of the head down onto the shoulders, securing the head in place. -
Refining the Shape:
Go over the entire figure with a slightly damp finger to smooth out major fingerprints, but leave a bit of surface texture to maintain that rustic, handmade look. -
Adding the Smile:
While the clay is soft, use a needle tool to gently etch a wide, U-shaped smile and two small indentations for eyes onto the face. -
Drying Time:
Let the sculpture dry completely. If using air-dry clay, this might take 24-48 hours depending on thickness. If using polymer, bake according to package instructions.
Make it a Team
Make a set of three figures in graduating sizes to represent a family. Paint each one’s shirt a different primary color for a vibrant, cohesive display.
Step 3: Painting and Finishing
-
Torso Painting:
Dip your flat brush into bright blue acrylic paint. Paint a rectangular ‘shirt’ shape on the torso, starting from the neckline down to the hips. -
Painting the Shoes:
Paint the feet of the figure with the same bright blue to create simple shoes, being careful not to get blue paint on the white base. -
Face Details:
Once the clay is dry (and cool, if baked), use a fine-point black marker or a very thin brush with black paint to trace over the etched smile and fill in the eye dots. -
Base Cleanup:
If the white base picked up any dust or brown clay smudges during sculpting, lightly sand the surface with fine-grit sandpaper for a clean finish. -
Sealing (Optional):
For longevity, apply a matte varnish over the figure, particularly over the painted areas, to protect the color.
Place your joyful figure in a sunny spot where its celebratory pose can brighten your day

TRACK YOUR CERAMIC JOURNEY
Capture glaze tests, firing details, and creative progress—all in one simple printable. Make your projects easier to repeat and improve.
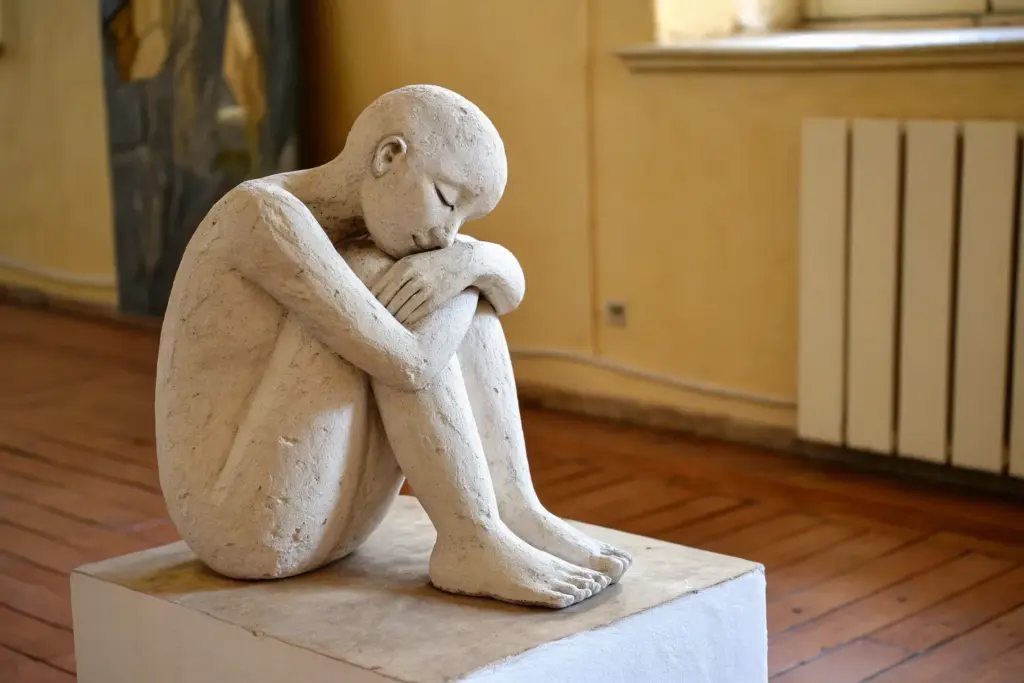
Hands-to-Face “Overwhelmed” Pose
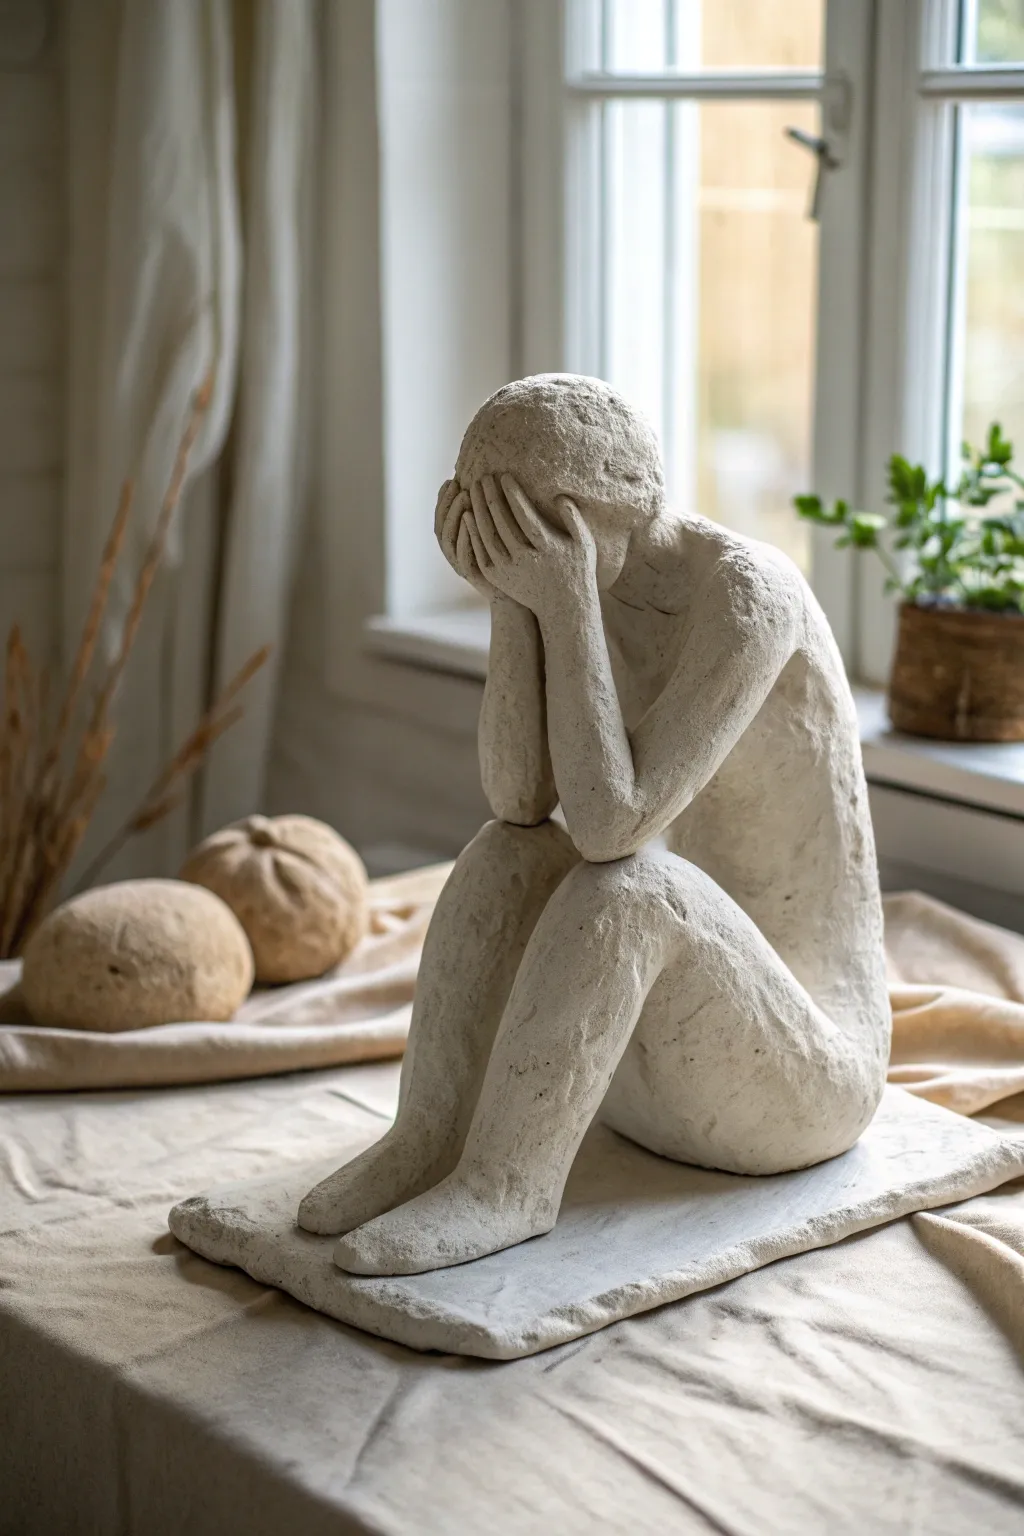
This deeply expressive sculpture captures a moment of overwhelming emotion through a minimalist seated figure with its face hidden in its hands. The rough, unfinished texture of the clay emphasizes the raw feeling of the piece, making it a powerful addition to any sculptural collection.
Step-by-Step Tutorial
Materials
- Stoneware clay (groggy for texture) or air-dry clay
- Sculpting tools (loop tool, needle tool, wooden rib)
- Small wooden board or bat
- Water and slip container
- Sponge
- Rolling pin (optional)
- Canvas mat (for working surface)
Step 1: Forming the Base and Lower Body
-
Prepare the slab base:
Start by flattening a medium-sized lump of clay into a rough, rectangular slab about 1/2 inch thick. This will serve as the plinth. You can leave the edges organic and uneven to match the rustic aesthetic of the figure. -
Shape the torso block:
Create a solid oval cylinder of clay for the torso. It should be slightly narrower at the top for the shoulders and wider at the bottom for the hips. Ensure it is proportionate to the size of your base. -
Form the legs:
Roll two thick coils of clay for the legs. Bend them at the ‘knees’ to create a seated angle. The thighs should angle upward, while the shins will rest somewhat vertically. -
Attach legs to torso:
Score and slip the hip area of your torso block and the top of the thighs. Press them firmly together, blending the clay with your thumb or a wooden tool so there are no visible seams. -
Secure the figure to the base:
Place the seated lower body onto the slab base. Score the underside of the buttocks and feet, apply slip, and press down firmly. Drag a little clay from the figure onto the base to lock it in place.
Step 2: Sculpting the Upper Body
-
Add the head:
Roll an egg-shaped ball of clay for the head. Secure it to the top of the torso. Since the face will be covered, you don’t need to sculpt detailed facial features, but ensure the chin area is defined. -
Elongate the neck:
Add small bits of clay to build up the neck, blending it smoothly into the shoulders and the base of the skull. The neck should be bent slightly forward to enhance the mood. -
Create the arms:
Roll two long coils for the arms. Measure them against the body to ensure they are long enough to reach from the shoulder, down to the knees (for the elbows to rest), and back up to the face. -
Position the arms:
Attach the arms at the shoulders using the score and slip method. Bend the elbows so they rest naturally on top of the knees. This connection point adds structural stability to the sculpture. -
Sculpt the hands:
Flatten the ends of the arm coils slightly to form hands. Press these palm-side in against the face. I find it helpful to curve the fingers around the forehead and cheeks to really sell the ‘hiding’ gesture.
Structural Integrity
Resting the elbows on the knees isn’t just an artistic choice; it provides crucial support for the arms and head while the wet clay dries.
Step 3: Refining and Texturing
-
Check proportions:
Step back and look at the figure from all angles. The back should have a gentle curve (kyphosis) to emphasize the slumped posture. Add or remove clay as needed to correct the silhouette. -
Define the feet:
Shape the feet at the end of the legs. Keep them simple and blocky rather than detailing every toe, extending them flat along the base slab. -
Add texture:
Using a serrated rib or a stiff brush, scratch and roughen the surface of the entire figure. This ‘toothed’ texture gives the piece its raw, emotive quality and catches the light beautifully. -
Smooth selective areas:
Use a slightly damp sponge to soften just the sharpest ridges of the texture you created, but don’t smooth it out completely. The goal is a time-worn, stone-like appearance. -
Hollow out (if necessary):
If your figure is solid and thicker than an inch, use a wire tool to hollow out the sculpt from the bottom (through the base) once it is leather hard to prevent explosions in the kiln. If using air-dry clay, you can skip this. -
Final drying:
Let the piece dry slowly under a loose plastic bag for the first few days to prevent cracking, especially at the joints where the arms meet the knees.
Color Washes
Once fired or fully dried, apply a diluted wash of dark acrylic or oxide. Wipe it back with a sponge to leave dark shadows in the textures.
Allow your sculpture ample time to dry completely before displaying or firing it to preserve the delicate balance
Easy Yoga Stretch Figure
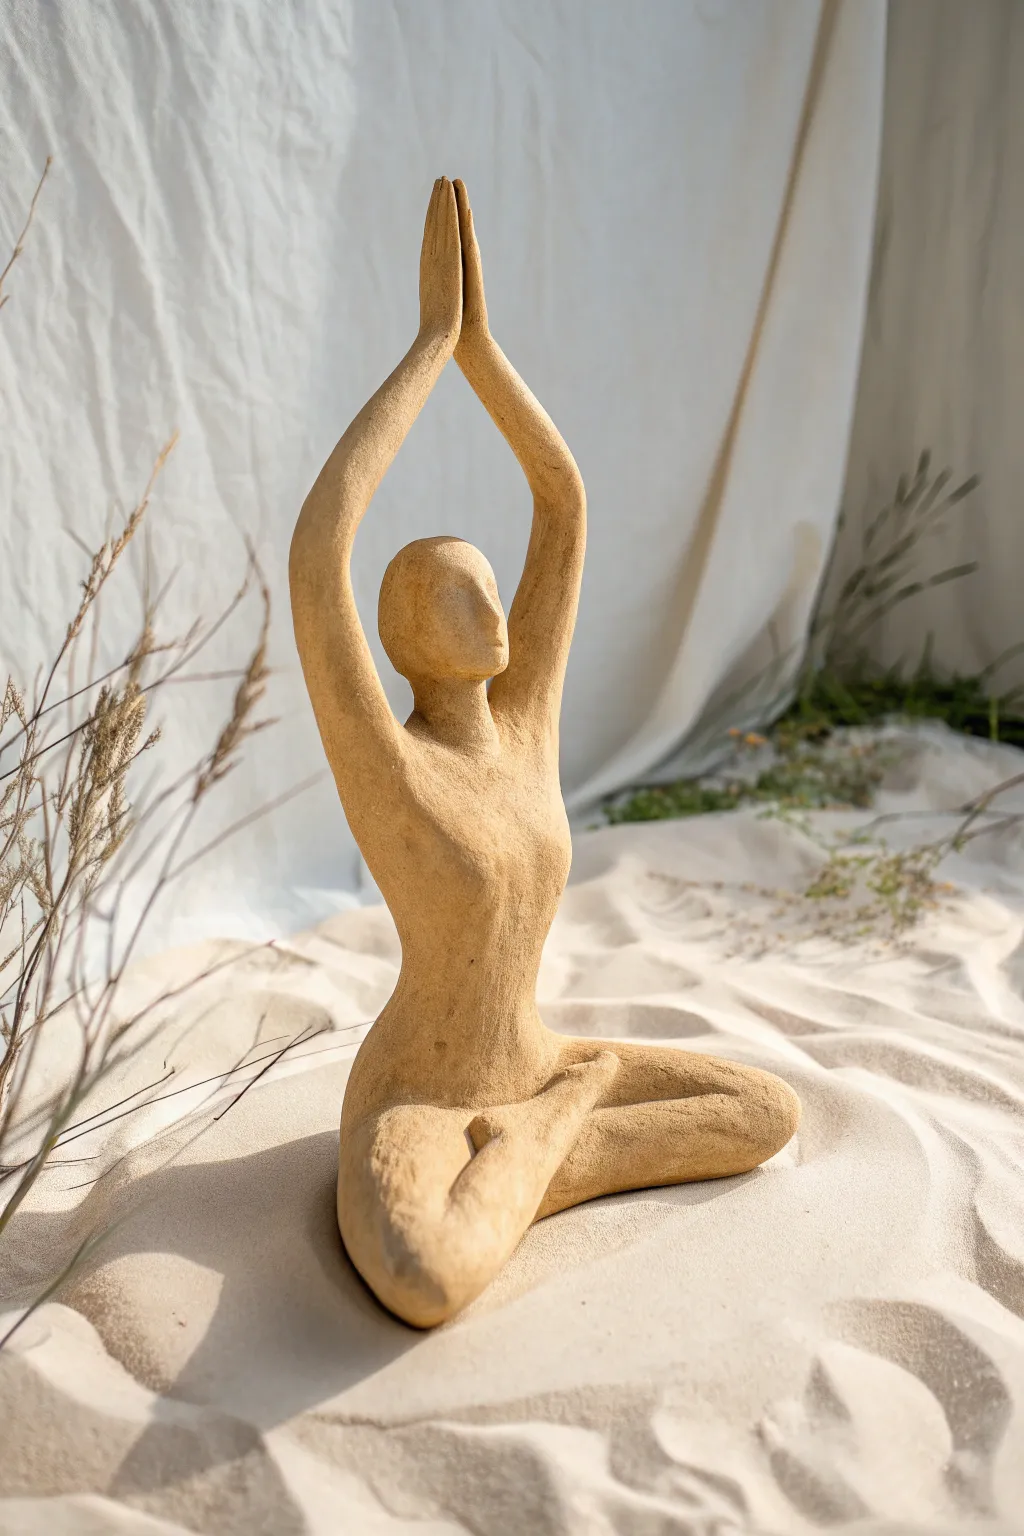
Capture the peaceful essence of yoga with this stylized human figure sculpted from textured clay. Its simplified, elongated forms and sandy finish create a calming presence perfect for any relaxation space.
Step-by-Step Tutorial
Materials
- Sandstone or grogged clay (tan or light terracotta)
- Modeling tools (wooden knife, loop tool)
- Small cup of water
- Score and slip tool (or a needle tool)
- Sponge
- Rough sandpaper or texture brush
- Aluminum foil (for armature core, optional)
Step 1: Forming the Base
-
Prepare the base form:
Begin by wedging a baseball-sized amount of clay to remove air bubbles. Shape it into a smooth, slightly flattened oval that will serve as the hips and crossed legs section. -
Create the legs:
Roll two thick coils of clay for the legs. Instead of detailing feet and knees perfectly, keep them abstract and smooth. Gently bend each coil into a ‘V’ shape to mimic the crossed leg position. -
Assemble the seat:
Arrange the leg coils against your base oval. Score the clay surface (scratch it up) and add a little water or slip where the pieces meet, then press them firmly together to create that grounded, seated posture. -
Blend the seams:
Use a wooden modeling tool or your thumb to drag clay across the seams between the legs and hips, smoothing them until the transition is seamless and organic.
Step 2: Building the Torso
-
Shape the torso pillar:
Roll a thick cylinder of clay for the torso. Taper it slightly at the bottom where it meets the waist and widen it gently at the top for the shoulders. -
Attach the torso:
Score the top of your hip base and the bottom of the torso cylinder. Apply slip and press the torso onto the base, ensuring it sits upright with a slight, natural curve for the spine. -
Refine the waist:
I find it helpful to gently squeeze the waist area to create an elegant curve. Use a damp sponge to smooth out the connection point so the figure looks like one solid piece of stone.
Arm Support Tip
If the arms keep sagging while you work, prop them up with crumpled paper towels or small pieces of foam until the clay stiffens enough to hold its own weight.
Step 3: Sculpting the Upper Body
-
Form the head:
Roll a smaller oval of clay for the head. Keep the features minimalist—no eyes or mouth are needed. Just suggest a nose bridge and chin for a peaceful, stylized look. -
Connect the head:
Attach the head to the shoulders without a distinct long neck. In this abstract style, the head flows almost directly into the upper torso for stability and grace. -
Create the arms:
Roll two long, tapered snakes of clay for the arms. They need to be long enough to reach from the shoulders to a point high above the head. -
Position the arms:
Score and attach the thicker ends to the shoulder area. Carefully sweep them upward, creating a gentle arch with the elbows slightly bent outward. -
Join the hands:
Bring the tapered ends of the arms together above the head in a prayer position. Press the palms together firmly; this connection point adds crucial structural support to the raised arms.
Faux Stone Finish
If using air-dry clay instead of ceramic, paint the dried figure with a mix of beige acrylic paint and baking soda to create a realistic gritty sandstone texture.
Step 4: Texturing and Finishing
-
Check the balance:
Walk around your sculpture. Ensure the spine is straight and the arms are symmetrical. Gently nudge any leaning parts back into alignment while the clay is still pliable. -
Add surface texture:
To mimic the sandy look of the reference image, take a rough sponge or a stiff-bristled brush and dab it all over the surface. This stippling effect hides fingerprints and gives it a stone-like quality. -
Refine the silhouette:
Look for any sharp angles that look unnatural. Smooth them down with your finger, maintaining that soft, eroded aesthetic. -
Drying process:
Let the figure dry slowly under a loose plastic bag for the first day to prevent the thin arms from cracking. Then, uncover it to dry completely before firing or sealing.
Place your finished sculpture in a spot where the light can catch its texture and enjoy the quiet vibe it brings to the room
Twist Pose With a Flowing Skirt Shape
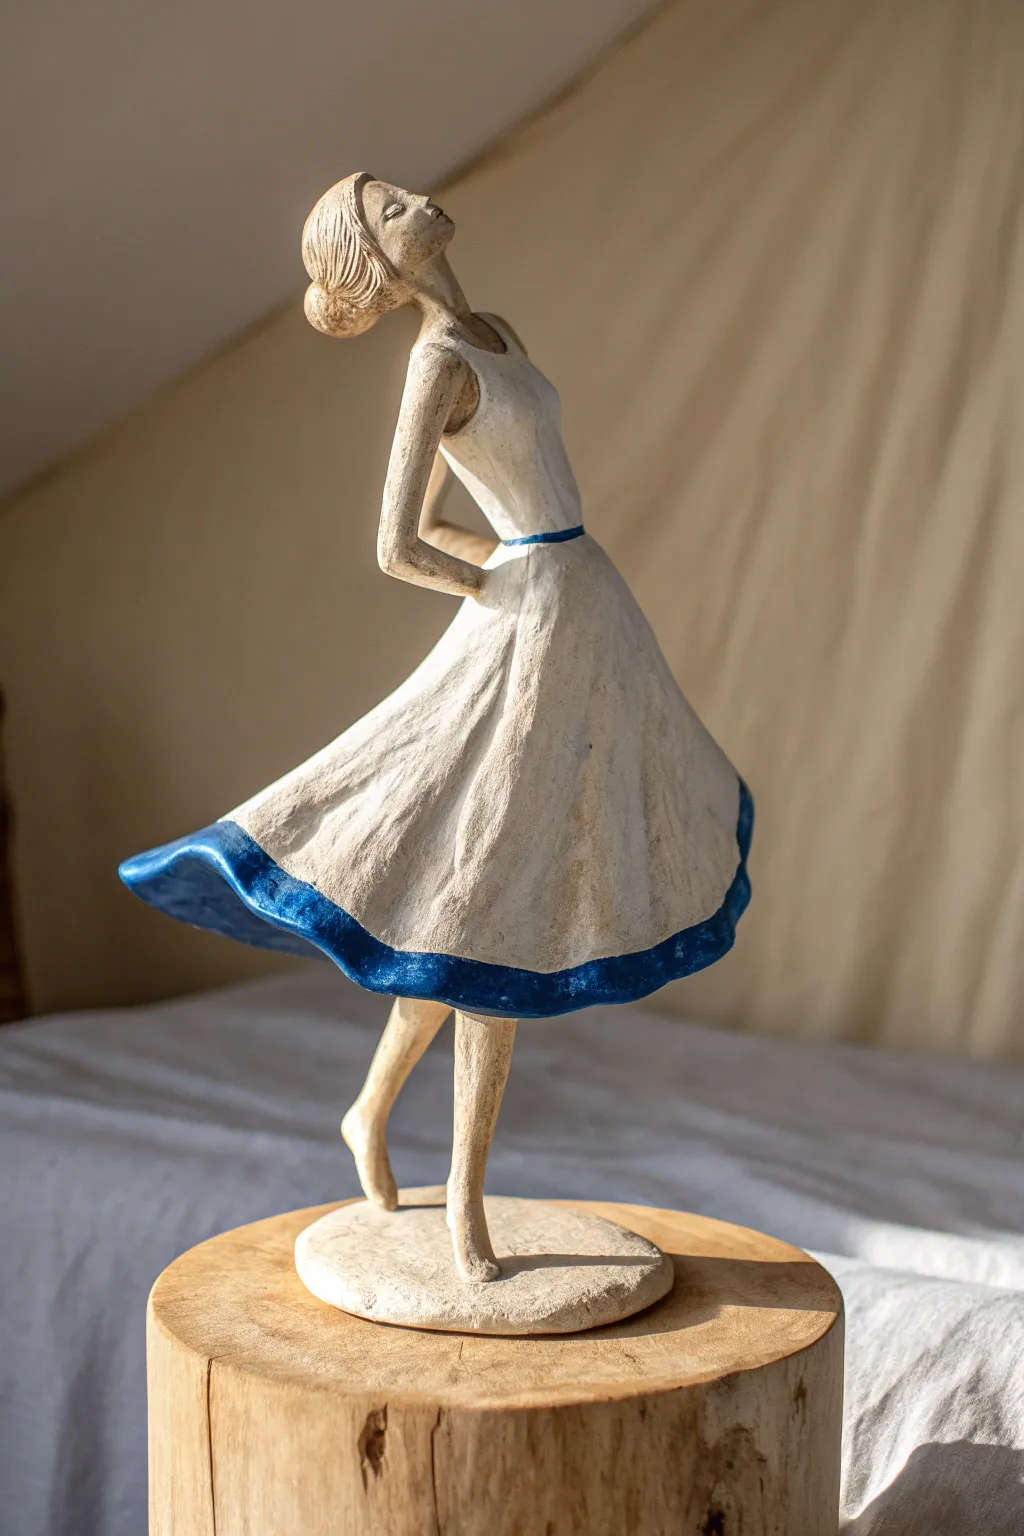
Capture the feeling of a carefree spin with this stylized clay figure featuring an elongated form and a dramatically swaying skirt. The textured, slightly distressed finish gives it a timeless, hand-carved appearance perfect for displaying on a shelf or pedestal.
Step-by-Step
Materials
- Air-dry clay or polymer clay (stone or white color recommended)
- Strong wire for armature (approx. 12-14 gauge)
- Aluminum foil
- Sculpting tools (needle tool, loop tool, smoothing tool)
- Wooden rolling pin
- Water and a slip brush (if using air-dry clay)
- Acrylic paints (White, Deep Blue, Cream/Beige for antiquing)
- Stiff bristle brush
- Matte varnish or sealant
Step 1: Building the Armature
-
Form the wire skeleton:
Cut a length of heavy-gauge wire, about twice the height of your intended figure. Fold it in half to create a loop for the head, twisting the two ends together to form the torso, then separating them for the legs. -
Add the arm structure:
Wrap a shorter piece of wire horizontally around the ‘neck’ area to create arms. Bend the wire torso backward into a gentle arch to mimic the leaning-back pose. -
Bulk up with foil:
Crumple aluminum foil tightly around the wire frame. Focus on creating an elongated torso shape and thin legs. Don’t add foil for the skirt yet; we want the underlying body shape defined first. -
Secure the pose:
Bend the foil-covered legs. One leg should be straight and bearing weight, while the other is slightly bent at the knee, creating a sense of lift. Secure the feet into a temporary base or block of clay to keep it upright while you work.
Skirt Support Trick
While the skirt dries, prop up the flowing, gravity-defying hem using crumpled balls of paper towel or cling film. This keeps the shape without leaving hard dents in the soft clay.
Step 2: Sculpting the Body
-
Cover the armature:
Roll out sheets of clay and wrap them around the foil form. Use your thumbs to meld the seams together until the surface is relatively smooth. -
Define the torso:
Refine the upper body. Keep the neck long and elegant. For the head, sculpt a simple oval shape, tilting it upward as if she is looking at the sky. -
Add facial features:
Keep the face stylized. Suggest a nose and closed eyes with small additions of clay, but don’t worry about hyper-realism; the texture is key here. -
Position the arms:
Add clay to the arm wires. Bend the left arm so the hand rests on the lower back/hip area, and let the right arm hang or tuck slightly behind, following the twist of the body.
Make It Sparkle
Mix a tiny pinch of fine silver mica powder into your white dry-brush paint. It gives the dress a subtle, magical shimmer that catches the light when the figure is displayed near a window.
Step 3: Creating the Flowing Skirt
-
Prepare the skirt slab:
Roll out a large, triangular slab of clay. It should be thinner at the edges to look like fabric. -
Drape the skirt:
Attach the top of the slab to the waistline. Allow the clay to fan out, supporting the bottom edges with crumpled paper or extra clay chunks so it flares outward dramatically to the left. -
Model folds and movement:
Using your fingers, create deep vertical folds in the skirt. Curve the bottom hem upwards on one side to simulate the centrifugal force of a spin. -
Refine the bodice:
Add a thin layer of clay to form the sleeveless top, blending it seamlessly into the skirt at the waistline. -
Add final texture:
Before the clay dries, use a stiff brush or a textured sponge to lightly tap and drag across the surface. This creates the rough, stone-like texture visible in the photo.
Step 4: Finishing Touches
-
Dry or cure:
Follow the instructions for your specific clay. If using air-dry clay, let it dry slowly over 2-3 days away from direct heat to prevent cracking. -
Base coat painting:
Once fully cured, paint the entire figure with a creamy off-white or light beige acrylic paint. This acts as a primer and base tone. -
Dry brushing white:
Dip a dry, stiff brush into pure white paint, wipe most of it off on a paper towel, and lightly brush over the raised textures of the dress and skin. This highlights the ‘fabric’ folds. -
Painting the hem detail:
Carefully paint a thick band of deep blue along the bottom hem of the skirt. I prefer to keep the upper edge of this blue line slightly uneven to maintain the hand-painted look. -
Adding the waistband:
Paint a thin, matching blue line around the waist. -
Mounting the figure:
Glue the figure’s feet firmly to a flat, circular clay disk or a wooden base to ensure stability.
Now step back and admire the elegant movement you’ve captured in a static form.
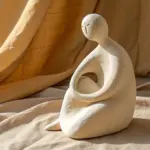
Parent-and-Child Pair on One Base
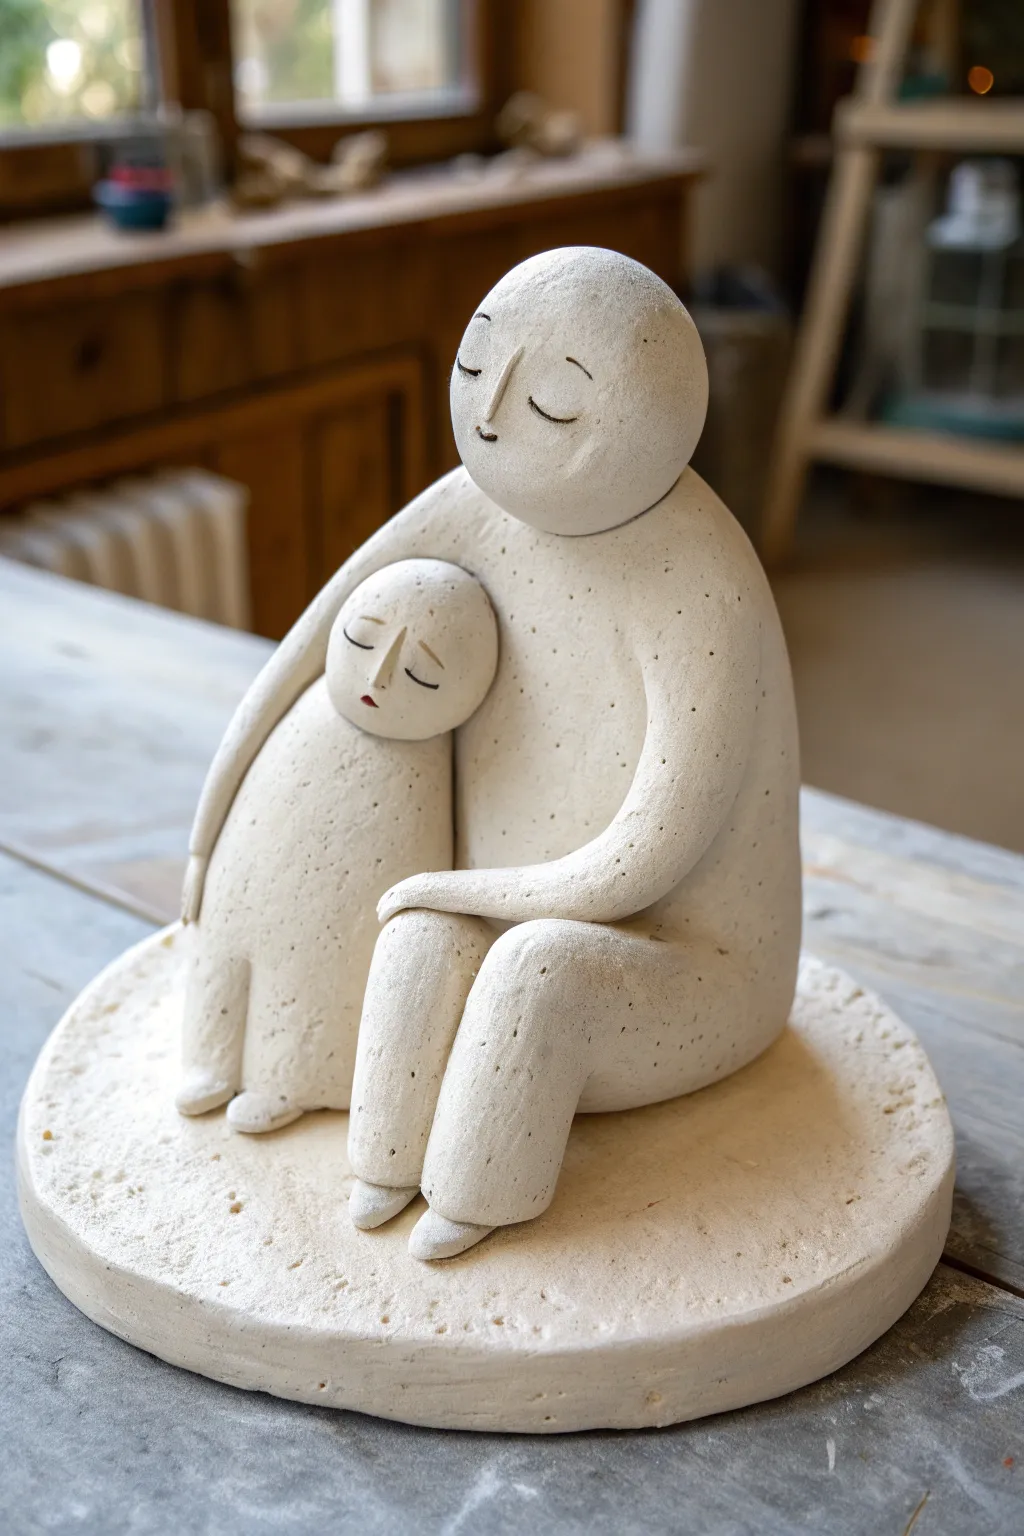
Capture a moment of quiet connection with this minimalist clay sculpture featuring a larger figure protectively embracing a smaller companion. The rounded, organic forms and speckled stoneware finish give the piece a timeless, soothing quality perfect for a mantelpiece display.
Step-by-Step Guide
Materials
- Speckled stoneware clay (mid-fire or air-dry with texture)
- Scoring tool or old toothbrush
- Slip (clay and water slurry)
- Wooden modeling tools
- Rubber kidney rib
- Sponge
- Needle tool
- Black underglaze (or acrylic for air-dry clay)
- Fine detail brush
- Work board or bat
Step 1: Forming the Base & Bodies
-
Create the foundation:
Begin by rolling out a thick slab of clay, roughly 1/2 inch thick, and cut it into an organic circle about 6-8 inches in diameter. Smooth the edges with a damp sponge to soften the look. -
Shape the parent’s torso:
Take a large handful of well-wedged clay and form a solid, rounded cone shape. The bottom should be wide for stability, tapering slightly towards the shoulders. Flatten the back slightly so it sits naturally. -
Position the parent figure:
Score the center of your base and the bottom of the parent’s torso aggressively. Apply slip, press the torso down firmly, and wiggle it slightly to create a vacuum seal. -
Form the child’s body:
Create a smaller, similar cone shape for the child. It should be roughly half the volume of the parent. Test the fit by nesting it against the parent’s left side before attaching. -
Join the figures:
Score and slip the contact points where the child leans into the parent. Press them together, blending the clay at the seams on the back side so they become one structural unit.
Step 2: Adding Limbs & Heads
-
Sculpt the legs:
For the parent’s legs, roll two thick coils. Bend them at the ‘knee’ and attach them to the front of the torso so the figure appears seated. Repeat with two smaller coils for the child’s legs, blending them seamlessly into the body. -
Create the embrace:
Roll a long, tapered coil for the parent’s arm. Attach it at the shoulder, curving it around the child’s back and resting the hand gently on the child’s arm or lap. I find using a rubber rib here helps keep the curve smooth and continuous. -
Add the second arm:
Add the parent’s other arm (the one on the right side), resting it on their own leg. Keep the hand simple—just a suggestively rounded shape without individual fingers. -
Form the heads:
Roll two smooth spheres of clay. The parent’s head should be slightly oval-shaped. Flatten the bottom of each sphere slightly where it will join the neck area. -
Attach the heads:
Score and slip the tops of the torsos. Press the heads into place. For the child, tilt the head sideways so it rests lovingly against the parent’s chest or shoulder. -
Smooth the surfaces:
Use a damp sponge and a soft rubber kidney to go over the entire sculpture. You want to remove fingerprints and create that soft, ‘pebble-like’ texture seen in the photo. Don’t over-wet the clay.
Cracking at the Seams?
If cracks appear where the figures join during drying, score the crack, add a little vinegar-based slip, and compress the clay again. Wrap tightly to re-equalize moisture.
Step 3: Facial Details & Finishing
-
Sculpt the noses:
Take a tiny pinch of clay and shape a small, triangular wedge for the nose. Score and attach it to the center of the face, blending the edges until it looks like it emerges naturally from the head. -
Refine the connection:
Use a wooden modeling tool to gently define the separation between the arms and the body, ensuring the shapes remain distinct but cohesive. -
Dry slowly:
Cover the sculpture loosely with plastic. Because the bodies are solid (unless you hollowed them carefully), slow drying is crucial to prevent cracking. Let it dry for several days. -
Bisque fire:
Once bone dry, fire the piece to a bisque temperature (usually centered around cone 04, depending on your clay). -
Add facial features:
Using a very fine liner brush and black underglaze (or acrylic paint if not firing), paint simple curved lines for sleeping eyes and tiny dots or lines for eyebrows. A tiny dot of red creates the mouths. -
Final texture check:
If using speckle clay, wipe the surface with a damp sponge after firing to reveal the grit. Leave the piece unglazed for that raw, matte stone look, or apply a clear matte glaze if functional durability is needed.
Make it Personal
Instead of a plain base, stamp a texture into the ‘ground’ or carve a short message, date, or initials into the underside of the base before the clay hardens.
Place your finished sculpture in a well-lit spot where the gentle shadows can highlight the tender embrace.
Layered Clothing for Instant Personality
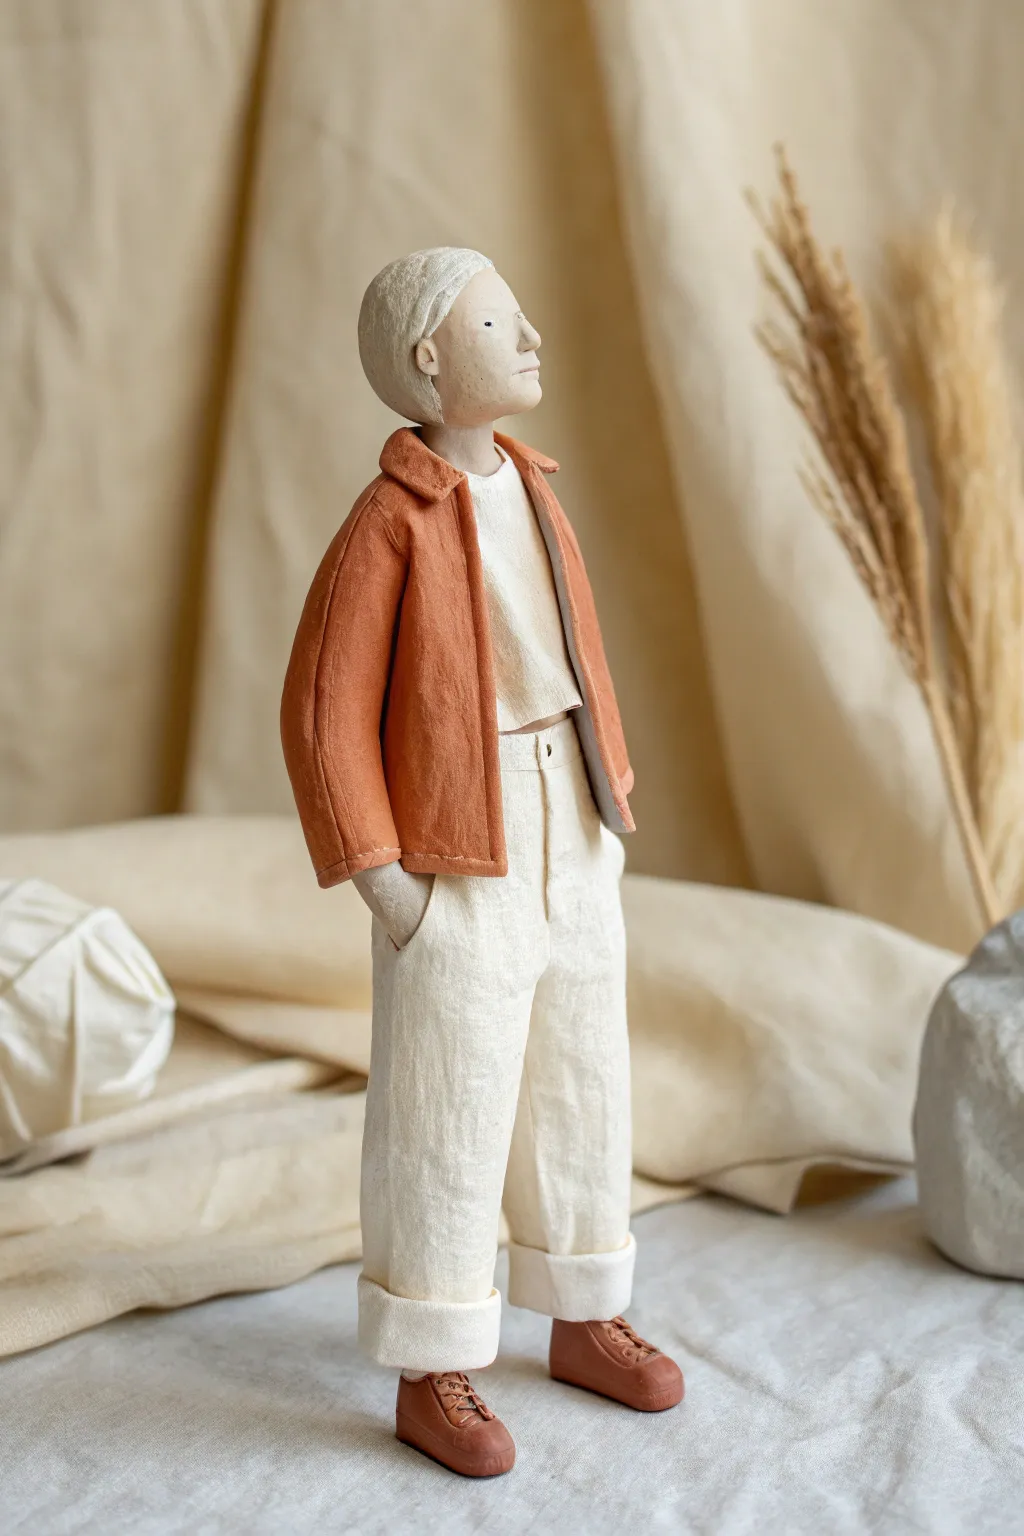
Bring character to life with this mixed-media sculpture that combines the malleability of clay with the texture of fabric for a truly unique look. This project focuses on building a stylized human figure wearing a layered, textural outfit that mimics real linen and denim.
How-To Guide
Materials
- Air-dry clay (stone or paper varieties work best)
- Strong wire for armature (approx. 14-16 gauge)
- Aluminum foil for bulking
- Thin cotton or linen fabric scraps (white and terracotta)
- PVA glue or fabric stiffener
- Acrylic paints (skin tones, brown, terracotta)
- Fine-grit sandpaper
- Sculpting tools (needle tool, smoothers)
- Matte varnish
Step 1: Building the Foundation
-
Form the Armature:
Cut a length of wire about double the desired height of your figure. Fold it in half and twist the top to create a loop for the head. Twist the strands together for the torso, then separate them for the legs. Bend the ends to form feet loops. -
Pose the Figure:
Before adding bulk, decide on the stance. Bend one knee slightly and tilt the hips to give the figure a relaxed, natural posture like the one in the photo. Create a separate wire loop for the arms and twist it around the shoulder area. -
Bulk the Body:
Wrap aluminum foil tightly around the wire frame. Focus on the torso and thighs, keeping the ankles and wrists thin to allow for detailing later. The foil should be slightly smaller than the final body shape. -
Apply the Base Clay Layer:
Roll out thin sheets of air-dry clay. Wrap these around the foil armature to smooth out the surface. Ensure the connections between limbs and torso are seamless. -
Sculpt the Head and Face:
Form an egg shape for the head. Use a small ball of clay for the nose and carve shallow indentations for the eyes. Keep the features minimalist and stylized. Attach small half-circles for ears. -
Refine the Hands:
Add small amounts of clay to the ends of the arm wires. Sculpt simple mitten shapes or basic fingers. Since the hands will be tucked into pockets, you only need to detail the wrist area and the curve of the hand entering the pocket.
Fabric Won’t Stiffen?
If your clothes remain floppy, your PVA mix is too watery. Try a 70% glue to 30% water ratio, or switch to a commercial fabric stiffener for rock-hard results.
Step 2: Dressing the Figure
-
Create the Trousers:
Instead of sculpting clothes directly from clay, use fabric dipped in watered-down PVA glue. Cut wider strips of white fabric for the trousers. Wrap them around the legs, creating loose folds. -
Add Trouser Details:
Fold the bottom edge of the fabric up to create thick cuffs at the ankles. Pinch the waist area to simulate a waistband and fly. Let this stiffen until hard. -
Form the T-Shirt:
Cut a simple T-shape from white fabric. Dip it in glue and drape it over the torso, tucking it slightly into the waistband of the trousers but leaving it loose enough to look relaxed. -
Construct the Jacket:
Using the terracotta-colored fabric (or white fabric you plan to paint later), cut a back panel and two front panels. Apply them over the T-shirt using the glue mixture. I like to flare the front open to show off the layers underneath. -
Sculpt the Jacket Collar:
Roll a small strip of clay or use a folded strip of fabric stiffened with extra glue. Attach this around the neck area to create a structured collar that stands up slightly. -
Add Clay Shoes:
Sculpt the shoes directly onto the feet using clay. Shape them like high-top sneakers or boots. Use a needle tool to impress tiny holes for laces and define the sole.
Natural Hair Texture
Instead of smooth clay hair, scour the wet clay surface with a stiff toothbrush before painting to create a subtle, buzzed hair texture.
Step 3: Finishing Touches
-
Sand and Smooth:
Once the clay parts (face, hands, shoes) are fully dry, gently sand them with fine-grit paper to remove fingerprints and bumps. Be careful not to sand the stiffened fabric. -
Paint the Skin:
Mix a pale, natural skin tone using acrylics. Apply thin layers to the face and any visible neck area. Add very subtle blushing to the cheeks and nose if desired. -
Detail the Face:
Using a very fine brush or a toothpick, dot black paint for the eyes. Paint the hair area with a solid color, perhaps a light grey or blonde, keeping the edges soft. -
Paint the Clothing (If Needed):
If you used white fabric for everything, now is the time to paint the jacket terracotta and the pants cream. Use watered-down acrylics so the paint soaks into the fabric texture rather than sitting on top. -
Paint the Shoes:
Paint the clay shoes a warm brown. Once dry, you can use a fine liner brush to paint the laces in a lighter tan color. -
Seal the Work:
Apply a matte varnish over the clay parts to protect the paint. You can leave the fabric unvarnished to maintain the textile contrast, or give it a very light coat for durability.
Place your stylish figure in a well-lit spot to admire the interplay of textures you have created
Coil-Built Braids and Textured Hair
This serene clay figurine features a beautifully simple body shape topped with an intricate, coil-built hairstyle that adds wonderful texture and height. The speckled stoneware clay gives it a natural, earthy finish that highlights the gentle curves and tranquil expression.
Detailed Instructions
Materials
- Speckled stoneware clay (or polymer clay with granite effect)
- Scoring tool or needle tool
- Slip (clay and water mixture)
- Small wooden modeling tool
- Sponge
- Water cup
- Wire cutter
- Fine-point needle tool
Step 1: Body Construction
-
Form the Base:
Start with a handful of well-wedged clay roughly the size of a lemon. Roll it into a smooth cylinder that is slightly wider at the bottom than the top to create the torso and legs area. -
Shape the Legs:
Using a wire cutter or knife, make a vertical cut up the center of the bottom third of your cylinder. Gently pull the two halves apart and round them off with your fingers to form two sturdy, stubby legs. -
Refine the Torso:
Smooth the area between the legs using a modeling tool so the transition is seamless. Gently pat the torso to ensure it stands upright on its own without wobbling. -
Add the Arms:
Roll two thick, short sausages of clay for the arms. They shouldn’t be too defined; aim for simple, rounded shapes that taper slightly at the ‘hand’ end. -
Attach the Arms:
Score the sides of the torso and the flat side of the arms. Apply slip, press them firmly against the body, and smooth the seams completely so the arms look like they emerge naturally from the shoulders. -
Create the Head:
Roll a sphere of clay slightly smaller than the torso width. Gently flatten the bottom where it will attach to the neck area.
Cracks in the Neck?
If a crack appears at the neck seam while drying, score it open, add vinegar-heavy slip, and path with fresh soft clay immediately.
Step 2: Facial Features and Details
-
Attach the Head:
Score the top of the torso and the bottom of the head vigorously. Apply a generous amount of slip and wiggle the head onto the body to create a strong bond. Smooth the neck seam, blending the clay downward. -
Sculpt the Nose:
Take a tiny pinch of clay and roll it into a small cone. Score the center of the face, add a dot of slip, and attach the nose. Smooth the edges so it rises gently from the face. -
Carve the Eyes:
Using your finest needle tool or a dull knife edge, gently press two curved, crescent-shaped lines into the clay to create the sleeping eyes. Keep the pressure light to avoid deep gouges. -
Add Neck Texture:
Using a needle tool, poke a row of shallow dots around the neckline to mimic a simple necklace or collar detail. -
Create the Belly Button:
Press a small, rounded tool into the center of the torso to create a subtle navel indentation.
Step 3: Creating the Coiled Hair
-
Make Thin Coils:
Roll out several long, thin snakes of clay, roughly the thickness of a shoelace. Try to keep them consistent in thickness for a uniform look. -
Form the Bangs:
Cut short segments of your coil and lay them vertically across the forehead, curving slightly to frame the face. Score and slip underneath them to secure. -
Build the Base Bun:
Add a small mound of clay to the top of the head to valid as a structural support for the bun, scoring it well. -
Wrap the Bun:
Take a long coil and wrap it spirally around the support mound, building upward. I usually twist the coil slightly as I wrap to give it that rope-like texture. -
Secure the Bun:
Where the coil ends, tuck the tail underneath the previous loop and smooth it down with a tool so it doesn’t unravel during drying. -
Detail the Hair:
Use a needle tool or knife to gently press texture lines into the hair coils to emphasize the strands, making sure not to flatten the coils. -
Final Smoothing:
Use a very slightly damp sponge to gently wipe the skin areas of the figure, removing fingerprints while leaving the clay’s natural grit intact.
Make it a Vase
Before attaching the head, hollow out the body and leave the top open to turn this figure into a tiny bud vase for dried flowers.
Allow your figure to dry slowly under plastic before firing or sealing to keep those delicate details crisp
Face Mapping With Simple Guideline Marks
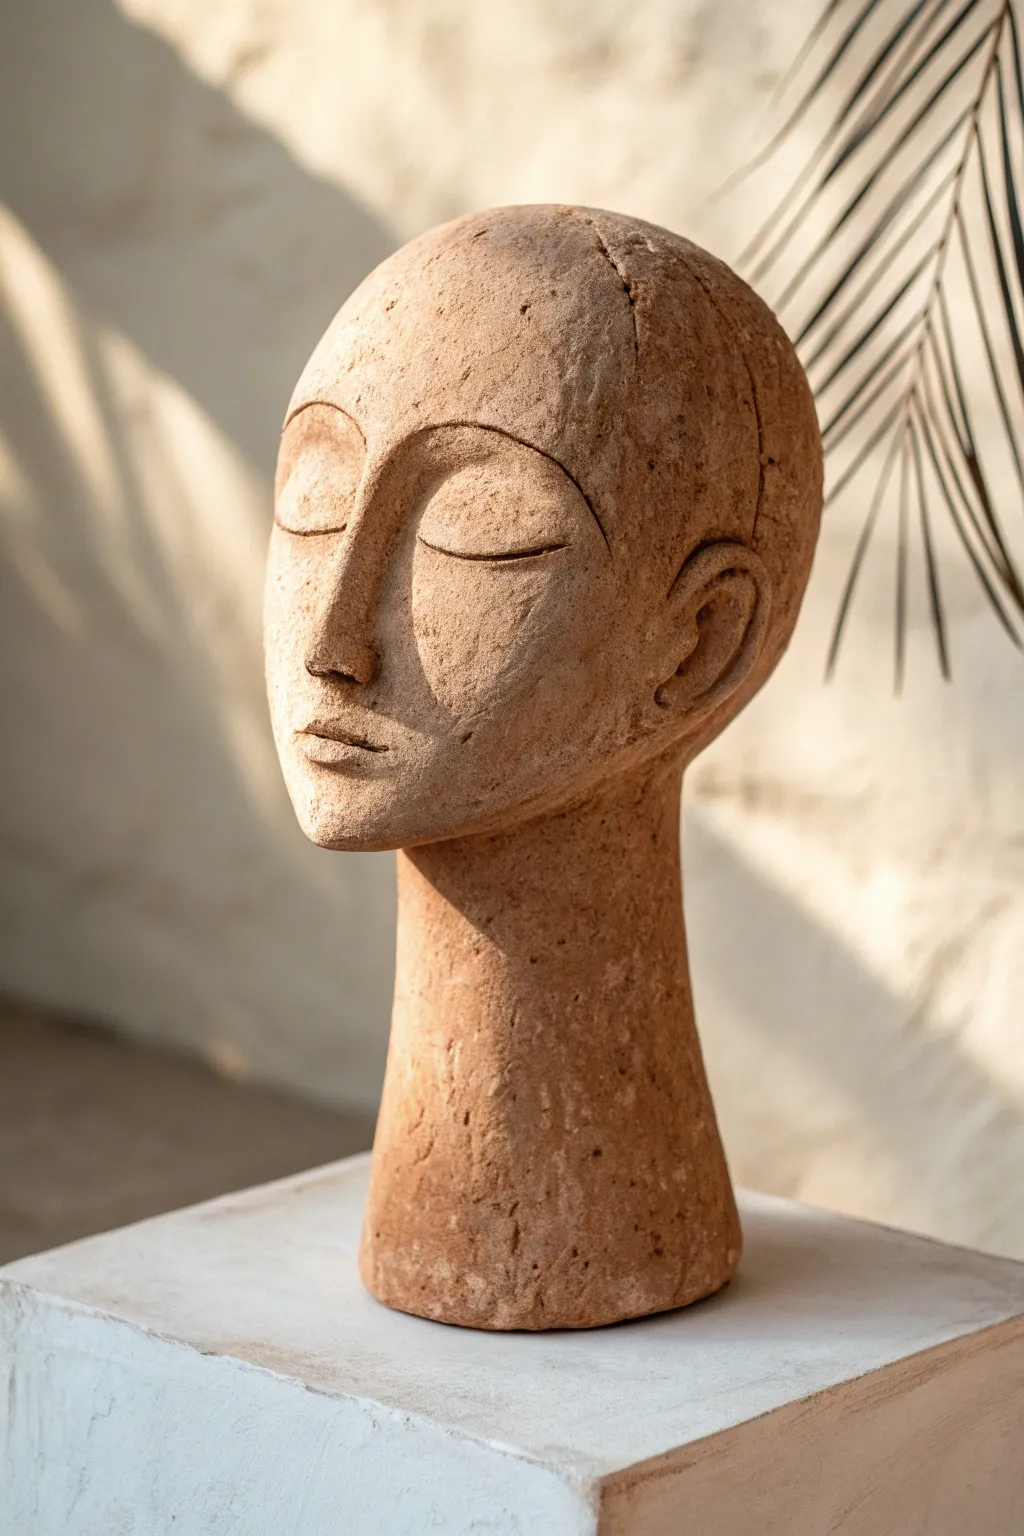
Create a sense of timeless calm with this stylized clay bust, featuring elegant, sleeping features and a raw, earthy texture. This project focuses on simplifying anatomy into graceful planes and using raw clay to mimic the look of ancient artifacts.
Step-by-Step Guide
Materials
- Stoneware or earthenware clay (terracotta color recommended)
- Armature wire and stand
- Wooden modeling tools
- Loop tools for trimming
- Needle tool
- Serrated kidney rib or metal scraper
- Spray bottle with water
- Plastic bag (for covering)
Step 1: Building the Foundation
-
Prepare the Armature:
Secure your armature wire to a wooden base. Create a generous loop or bulb shape with aluminum foil at the top to support the weight of the clay head, ensuring it is slightly smaller than the final skull size. -
Establish the Neck:
Begin adding clay around the base of the armature to form a sturdy, cylindrical neck. Make this slightly thicker than a realistic neck to support the head’s weight, tapering it gently upwards. -
Form the Cranium:
Pack clay firmly around the foil bulb to create the basic egg shape of the head. Ensure there are no air pockets between the layers and the foil. -
Refine the Silhouette:
Using a wooden paddle or flat tool, shape the clay into a smooth, elongated oval. The chin should be slightly narrower than the cranium, giving it a balanced, classical appearance.
Step 2: Mapping the Features
-
Mark the Guidelines:
With a needle tool, lightly draw a vertical line down the center of the face for symmetry and a horizontal line where the eyes will sit (roughly halfway down the head). -
Define the Brow Line:
Carve a deep, curved shelf just below the forehead to establish the eye sockets. This deep recess is key to the stylized, sculpted look shown in the image. -
Add the Nose Bridge:
Attach a wedge of clay for the nose. Blend it seamlessly into the forehead, keeping the bridge long, straight, and distinctively geometric. -
Sculpt the Eyelids:
Roll two semi-flattened spheres of clay and place them in the sockets. Smooth them into the surrounding skin, then use a tool to carve a clear, curved line across the middle to separate the upper and lower lids for that ‘sleeping’ effect.
Chamois Smoothing
For soft transitions around the eyes and lips without losing texture, drag a damp chamois leather strip lightly over specific areas to blur tool marks.
Step 3: Refining and Texturing
-
Shape the Mouth:
Add a small mound of clay below the nose. Use a fine tool to slice the separation line for the lips, keeping the mouth small and slightly pouty to maintain the serene expression. -
Construct the Ears:
Form two ‘C’ shaped pieces of clay and attach them to the sides of the head, aligned roughly between the eye line and the base of the nose. Keep the details simple, focusing on the outer rim and the lobe. -
Accentuate the Planes:
I like to use a flat wooden tool here to sharpen the edges around the nose and brow. This creates the planar, chiseled aesthetic rather than a soft, realistic look. -
Add Texture:
Gently stipple the surface with a coarse sponge or a serrated rib. Don’t over-smooth; the beauty of this piece lies in its tactile, slightly rough stone-like finish. -
Enhance the Crack:
To mimic the artifact vibe, you can intentionally score a deeper line or ‘fissure’ running from the top of the forehead down the side, emphasizing the constructed nature of the piece. -
Hollow Out (If Firing):
If you plan to kiln fire this, slice the top of the head off once leather-hard, remove the armature and foil, hollow out the neck and head to an even wall thickness, and reattach the top carefully. -
Final Surface Treatment:
Let the clay dry slowly under plastic to reach a uniform bone-dry state. The matte, dusty surface is the final goal, so no glaze is required unless you want a specific color wash.
Ancient Patina
After firing, rub a diluted mix of dark acrylic paint or iron oxide into the textures and wipe away the excess to highlight the cracks and rough spots.
Place your finished bust in natural light to let the shadows play across the simplified planes you’ve created
Low-Relief Human Figure Wall Plaque
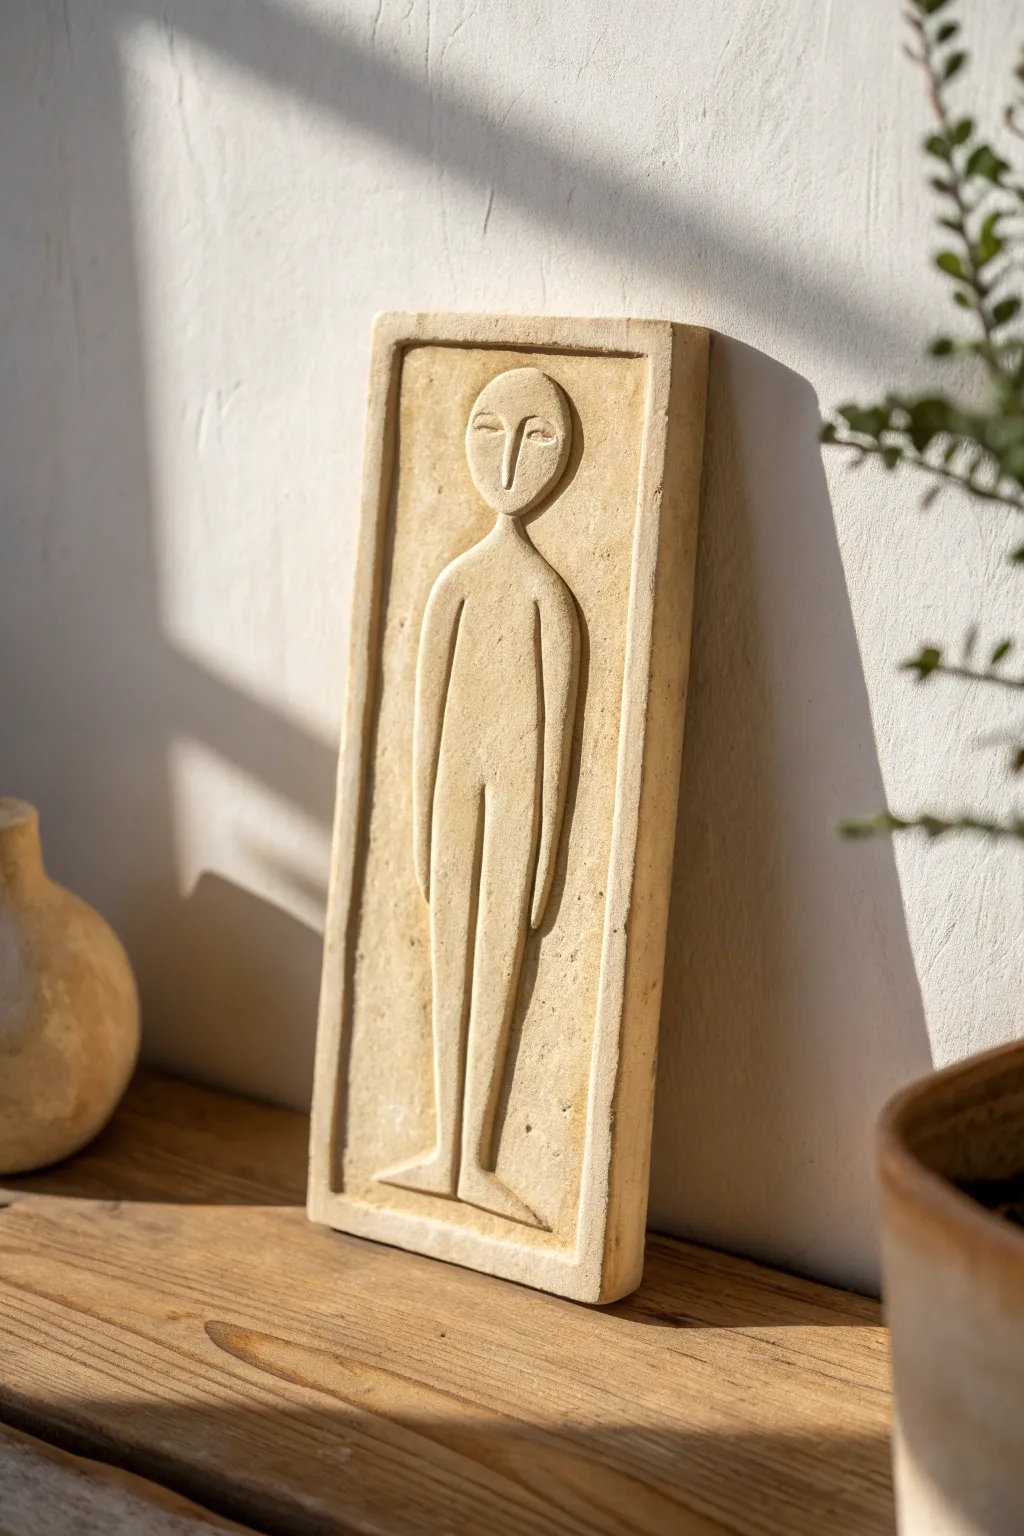
Capture the essence of ancient tranquility with this low-relief rectangular plaque. The highly stylized, elongated human form, seemingly carved from weathered stone, brings a modern yet timeless aesthetic to any shelf or wall.
How-To Guide
Materials
- Light-colored stoneware clay (with fine grog)
- Rolling pin
- Two wooden guide strips (approx. 1/2 inch thick)
- Fettling knife or X-Acto knife
- Loop tool (small to medium size)
- Needle tool
- Wooden modeling tool with a slightly curved edge
- Ruler or straight edge
- Slip (clay mixed with water)
- Sponge
- Optional: Texture tool or stiff bristle brush
Step 1: Preparing the Canvas
-
Roll the slab:
Begin by wedging your clay to remove air bubbles. Place your wooden guide strips on either side of the clay and use the rolling pin to create a smooth, even slab about 1/2 inch thick. -
Cut the rectangle:
Using a ruler and your fettling knife, measure and cut a long, narrow rectangle. Dimensions of approximately 4 inches wide by 10 inches tall work beautifully for this elongated figure. -
Define the frame:
Lightly incise a border about 1/4 inch from the outer edge all the way around. This will act as your ‘frame’ and guide where the background depth begins.
Warping Worries?
If the corners curl up while drying, flip the slab over daily. Drying it on a wire rack or sandwiched between plasterboards helps moisture leave evenly.
Step 2: Sculpting the Relief
-
Outline the figure:
With a needle tool, very lightly sketch the simplified human form onto the slab. Focus on an oval head, a thin neck, sloped shoulders, and a long, seamless torso that splits into legs near the bottom. -
Carve the background:
Using a loop tool, carefully carve away the negative space between your figure outline and the inner border line. I usually aim to remove about 1/8 to 1/4 inch of depth, leaving the figure standing proud. -
Refine the background texture:
Once the bulk of the clay is removed, smooth the recessed background. It doesn’t need to be perfectly glass-smooth; a little texture adds to the stone-carved look. -
Shape the body:
Use a wooden modeling tool or your thumb to gently round over the sharp edges of the figure’s body. The transition from the high relief to the background should be soft but distinct. -
Detail the arms:
Instead of carving separate arms, define them by pressing a deep, long groove down each side of the torso. These grooves separate the arms from the body while keeping the silhouette sleek.
Ancient Artifact Look
Mix crushed dry clay dust into a thin slip and spatter it over the surface before firing. This creates a pitted, aged texture like real eroded stone.
Step 3: Refining the Face
-
Sculpt the nose:
The face relies on minimalism. Create a T-shape by gently carving away the eye sockets, leaving a raised vertical bridge for the long nose. -
Define the eyes:
Within the recessed eye sockets, make two small, horizontal indentations for the eyes. Keep the expression neutral and abstract. -
Smooth the chin:
Ensure the chin tapers gently into the neck. The head should feel like a smooth, oval pebble resting on the shoulders.
Step 4: Finishing Touches
-
Create the sandstone texture:
If your clay is too smooth, gently tap the entire surface (including the frame) with a stiff bristle brush or a rough stone to simulate a weathered, sandstone-like grain. -
Clean the edges:
Run a damp sponge along the outer rim of the frame to soften any sharp cutting marks. This makes the finished piece feel more like an artifact. -
Dry slowly:
To prevent warping of the flat slab, sandwich the plaque between two pieces of drywall or place weight on the corners while it dries slowly over several days. -
Fire appropriately:
Bisque fire the piece. If you want the raw stone look shown in the image, you can leave it unglazed or apply a very thin matte wash of iron oxide before the final firing.
Once fired, display your relief sculpture where the light can rake across the surface to highlight those elegant shadows
Mini Story Scene With Three Interacting Figures
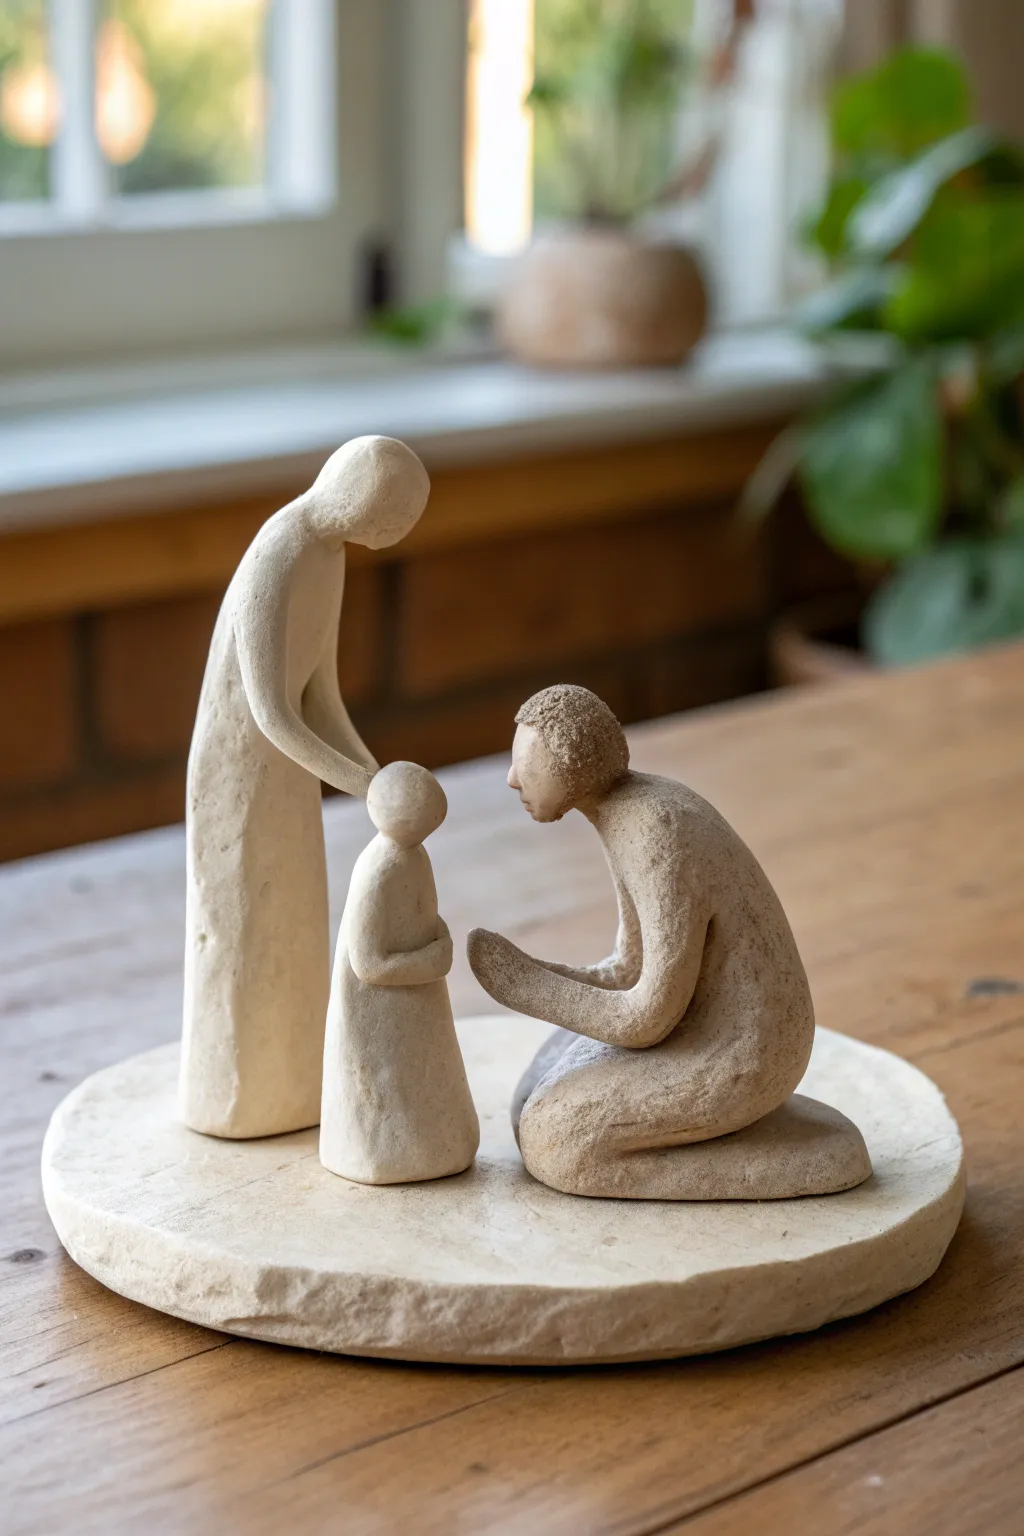
Capture a tender moment of family connection with this minimalist clay tableau featuring three interacting figures on a textured base. The finish mimics the look of carved sandstone, offering a timeless, rustic elegance suitable for display anywhere in the home.
Step-by-Step
Materials
- Air-dry stoneware clay (stone or oatmeal colored)
- Round wooden banding wheel or turntable
- Thick wooden disk or plaster mold (for the base)
- Basic sculpting tools (wire loop, needle tool, wooden rib)
- Rough sponge or piece of burlap
- Aluminum foil (for armature)
- Slip (clay mixed with water)
- Acrylic paints (sand, beige, raw sienna)
- Matte sealant spray
Step 1: Forming the Foundation
-
Prepare the base:
Begin by rolling out a thick slab of clay, roughly 1 inch thick. Cut it into a circle using a bowl or guide, aiming for a diameter of about 8-10 inches. This will serve as the ground for your figures. -
Texture the edge:
Use a rough sponge or a crumpled piece of foil to press texture into the sides of the circular base. You want it to look like a rough-hewn stone slab rather than a perfect cylinder. -
Create the foil armatures:
Crumple aluminum foil into three distinct shapes: a tall column for the standing adult, a shorter column for the child, and an L-shape for the kneeling adult. Compact the foil tightly so it provides firm support. -
Initial positioning:
Place your foil shapes onto the clay base to check the composition. Ensure they are close enough to interact—leaning in towards the center creates emotional intimacy.
Cracks Appearing?
If hairline cracks appear while drying, mix a small amount of vinegar into your slip (clay paste) and fill the crack. The vinegar helps the new clay bond to the dry clay.
Step 2: Sculpting the Figures
-
Covering the standing figure:
Flatten sheets of clay and wrap the tallest foil armature completely. Smooth the seams with your thumb, creating a long, flowing robe-like shape that tapers slightly towards the top. -
Defining the standing posture:
Gently curve the upper torso of the tall figure downward, as if they are looking at the child. Attach a smooth oval of clay for the head, keeping it featureless for that signature minimalist style. -
Adding the arm:
Roll a coil of clay for the standing figure’s arm. Attach it so it reaches down, with the hand resting gently on where the child’s head will be. Smooth the clay at the shoulder to integrate it seamlessly. -
Building the child figure:
Wrap the smallest foil core in clay. Create a bell shape for the body and a small round sphere for the head. Position the child so they are facing the kneeling figure. -
The kneeling figure:
Cover the L-shaped foil core with clay. Focus on defining the bent knees and the lower legs tucked underneath. The back should have a gentle curve. -
Adding interaction:
Sculpt arms for the kneeling figure reaching forward, palms up or hands clasped, towards the child. This gesture is crucial for the storytelling of the piece. -
Attaching to the base:
Score the bottom of each figure and the corresponding spot on the base with a needle tool. Apply a generous amount of slip (clay glue) and press the figures firmly onto the stone slab.
Make It Personal
Customize the sculpture by gently carving initials or a significant date into the uneven side edge of the base before the clay fully hardens to mimic carved stone graffiti.
Step 3: Refining and Finishing
-
Smoothing contours:
Use a damp sponge to smooth out any fingerprints. I find it helpful to look at the piece from all angles here to ensure the clothes drape naturally. -
Adding subtle texture:
Gently press a piece of burlap or rough fabric onto parts of the clothing to give it a woven appearance. For the hair of the kneeling figure, use a needle tool to stipple the surface for a cropped texture. -
Initial drying:
Loosely cover the sculpture with plastic wrap to let it dry slowly over 2-3 days. This prevents cracking, especially where the figures join the base. -
Sanding imperfections:
Once bone dry, use fine-grit sandpaper to soften any sharp edges or uneven bumps, particularly on the smooth, faceless heads. -
Surface wash:
Dilute raw sienna acrylic paint with water until it’s very thin. Brush this wash over the entire piece, then immediately wipe it back with a rag. This leaves pigment in the textures and crevices. -
Seal the work:
Finish with a light coat of matte spray sealant to protect the surface without adding unnatural shine.
Place your finished sculpture on a mantel or a sunny windowsill where the light can play across the textured surfaces