When I want to say thanks to a teacher, I reach for clay—it turns a simple message into something they can keep on their desk every day. Here are my favorite teacher gift ideas that stay small, doable, and full of heart.
Mini Chalkboard Desk Sign
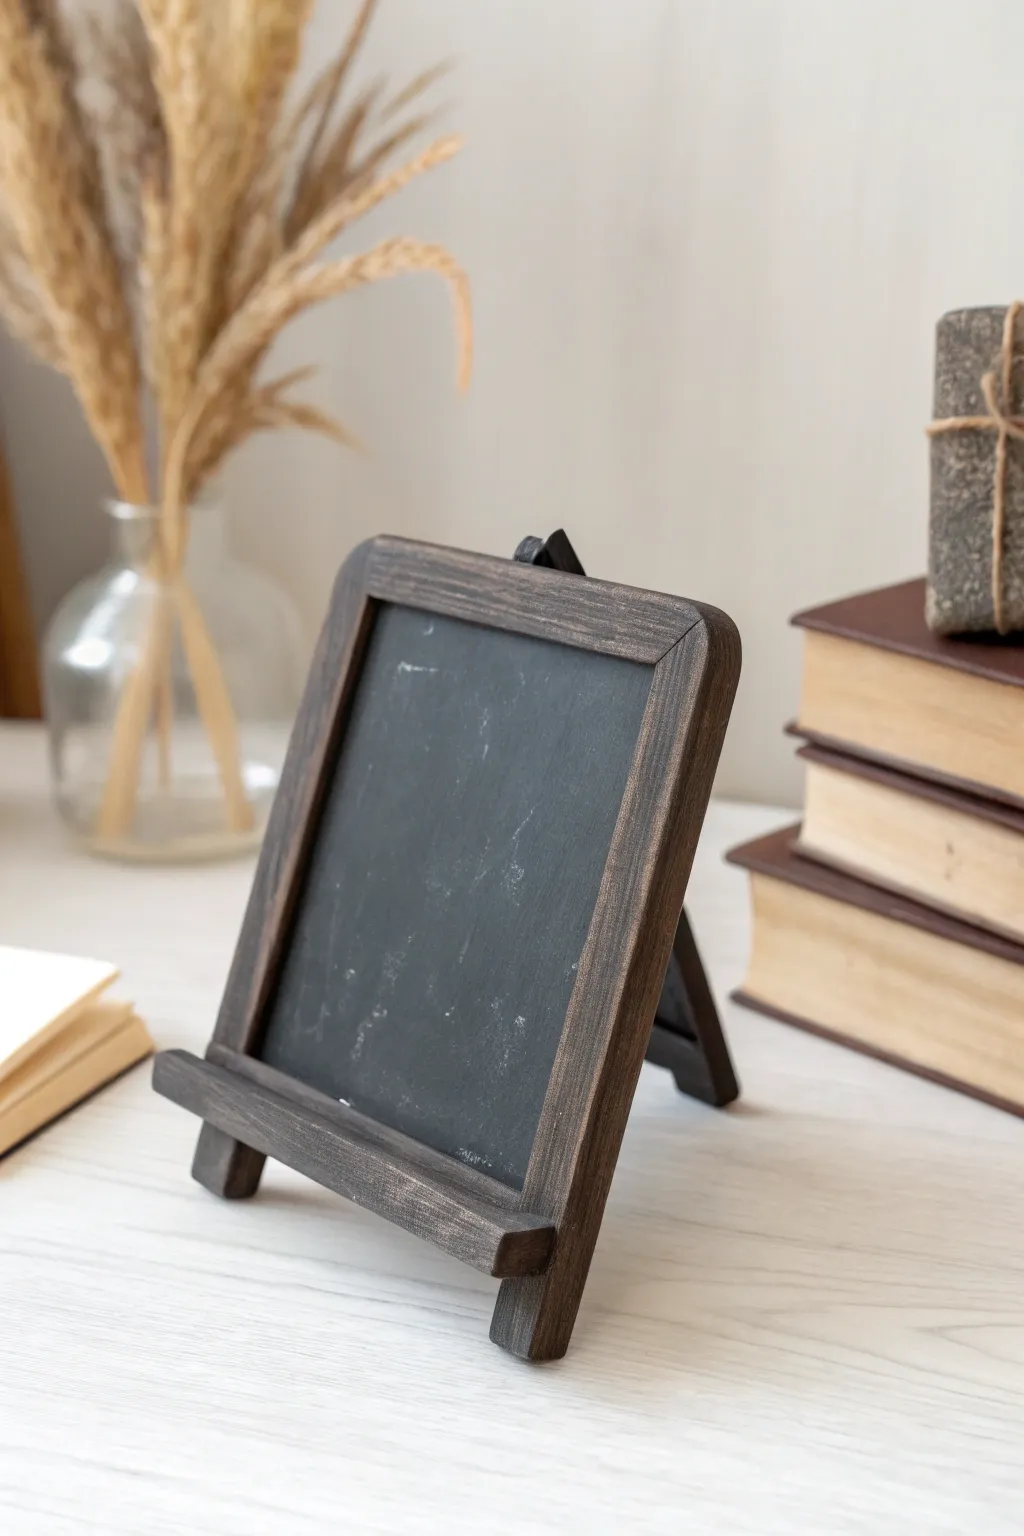
Create a charming, rustic desk accessory that looks like stained wood but is crafted entirely from clay. This functional mini chalkboard is perfect for leaving reminders or motivational notes for your students.
Step-by-Step
Materials
- Air-dry clay (white or terracotta)
- Clay rolling pin
- Ruler and craft knife
- Clay sculpting tools (specifically a needle tool)
- Black chalkboard paint
- Acrylic paint (dark brown, black, grey)
- Paintbrushes (flat shader and fine detail)
- Strong craft glue or clay slip
- Sandpaper (fine grit)
- Gloss or satin varnish (optional for wood parts only)
Step 1: Creating the Frame and Backing
-
Roll the backing slab:
Start by rolling out a smooth slab of air-dry clay to about 1/4 inch thickness. Use your ruler and craft knife to cut a rectangle approximately 4 inches by 5 inches. This will be the main board. -
Cut the frame strips:
Roll out more clay to a slightly thicker 1/3 inch. Cut four strips: two long ones for the sides and two shorter ones for the top and bottom. aim for about 3/4 inch width for a chunky frame look. -
Texture the wood grain:
Before assembling, use a needle tool or a stiff wire brush to scratch long, uneven lines into the frame strips. This mimics the grain of real wood. Add a few knots by making small swirls for authenticity. -
Assemble the frame:
Score the edges of your backing rectangle and the backs of your frame strips. Apply a little water or clay slip, then press the strips onto the backing to create a raised border. I like to cut the corners at a 45-degree angle for a classic mitered joint look. -
Smooth the seams:
Gently blend the clay where the frame pieces meet the backing on the reverse side, ensuring a strong bond. Check that your rectangle is still square.
Wood Grain Pro Tip
For ultra-realistic wood texture, lightly drag a clean, stiff toothbrush along the wet clay strips. The multiple bristles create perfect parallel grain lines instantly.
Step 2: Building the Easel Stand
-
Form the ledge:
Cut a thick strip of clay the same width as your frame. Adhere this to the bottom front of the frame, sticking out slightly to create a ledge where chalk can rest. -
Create the rear leg:
Fashion a sturdy, thick strip of clay for the back leg. It should be slightly shorter than the frame height. Create a hinge-like block near the top back of the frame and attach the leg so it angles outward. -
Support and dry:
Prop up the easel with crumpled paper or a sponge so it dries in the correct standing position. Allow the entire piece to dry completely, which may take 24-48 hours depending on humidity.
Help! Warping Clay
If your flat backing starts curling as it dries, gently weigh down the corners with small bean bags or turn the piece over halfway through the drying process.
Step 3: Painting and Finishing
-
Sand imperfections:
Once fully dry, lightly sand any sharp edges or unwanted bumps, being careful not to smooth away your wood grain texture. -
Paint the chalkboard area:
Apply 2-3 coats of black chalkboard paint to the flat center rectangle. Let each coat dry thoroughly before adding the next. Use a flat brush for even coverage. -
Base coat the wood:
Paint the frame, ledge, and back leg with a dark brown acrylic paint. Ensure you get paint into all the deep wood grain grooves. -
Dry brush highlights:
Dip a dry brush into a lighter grey or tan paint, wipe most of it off, and lightly drag it over the wood grain texture. This highlights the raised areas and enhances the faux wood effect. -
Add a wash:
To deepen the shadows, mix a tiny bit of black paint with water to create a thin wash. Brush this over the frame and wipe away the excess immediately with a paper towel. -
Seal the wood:
Protect the ‘wood’ parts with a coat of matte or satin varnish. Be very careful to keep the varnish off the chalkboard surface, as it will ruin the writing ability. -
Season the board:
Once everything is cured, take a piece of chalk and rub the side of it over the entire black surface, then wipe it off creates that classic dusty chalkboard look.
Now your custom mini-sign is ready to display the encouraging word of the day.


Pencil and Ruler Keychain Charm Set

Celebrate the educators in your life with this charming set of miniature classroom essentials made from polymer clay. This project features a tiny ruler, a realistic pencil stub, and a classic pink eraser, all assembled on brass hardware for a sophisticated finish.
How-To Guide
Materials
- Polymer clay in beige/light tan, terracotta/pink, yellow-ochre, teal, and wood-brown
- Liquid polymer clay or bake-and-bond
- Acrylic paint (black)
- Small jump rings (brass or gold tone)
- Keyring and keychain clasp components (brass)
- Small chain segment
- Jewelry pliers (needle nose and round nose)
- Rolling pin or pasta machine
- Craft knife or tissue blade
- Needle tool or awl
- Fine-grit sandpaper
- Eye pins (gold tone)
- Small alphabet stamps or a steady hand with a fine liner
- Gloss glaze (optional)
Step 1: Crafting the Ruler
-
Prepare the base:
Condition and roll out your beige or light tan polymer clay into a slab approximately 3mm thick. Cut a neat rectangle about 1.5 cm wide and 5 cm long. -
Add the hardware mount:
Insert a small eye pin into the top center of the rectangle. To secure it permanently, I like to dip the end in a tiny bit of liquid clay before pushing it in. -
Create the markings:
Using a very fine needle tool or a dull knife edge, gently press the measurement hash marks along one long edge. Vary the lengths to mimic millimeters and centimeters. -
Add detail:
If you have tiny letter stamps, press an ‘N’ or numbers onto the face. Alternatively, smooth the surface for now and add these details with paint after baking. -
Pre-bake shading:
Optional: Use a dry brush with a tiny amount of brown pastel chalk to lightly dust the edges for a vintage wood look.
Uneven Pencil Shape?
If your pencil hex shape keeps squishing while you work, try refrigerating the clay log for 10 minutes before slicing or pressing the sides to firm it up.
Step 2: Sculpting the Blue Pencil
-
Form the body:
Roll a log of teal clay approximately 1 cm thick. Cut a segment about 3-4 cm long. -
Shape the hexagon:
Gently press the log against your work surface on six sides to create a hexagonal prism shape, mimicking a real pencil barrel. -
Create the wood tip:
Take a small ball of light wood-colored clay and shape it into a cone. Attach this to one end of the teal barrel. -
Create the lead:
Roll a tiny speck of teal clay into a point and attach it to the very tip of the wood cone. -
Texture the wood:
Use a needle tool or a stiff toothbrush to vigorously texture the light wood cone area. This roughness mimics sharpened wood shavings. -
Add the end cap:
Add a small disk of yellow-orange clay to the top flat end of the pencil. Insert an eye pin firmly into this end.
Mix Your Own ‘Wood’
For the most realistic sharpened wood color, mix translucent clay with a tiny pinch of tan and white. The translucency mimics real wood grain perfectly.
Step 3: Making the Eraser Charm
-
Shape the ferrule:
Roll out yellow-ochre clay into a flat slab. Cut a rectangle shape, then carve shallow vertical grooves into the bottom half to simulate the crimped metal shading. -
Detail the ferrule:
Use a needle tool to draw scalloped lines where the ‘metal’ meets the ‘wood’ portion. -
Add the eraser:
Mold a rounded rectangle from terracotta or pink clay. Attach this firmly to the top of your yellow-ochre piece. -
Attach hardware:
Pierce the top of the pink eraser section with a jump ring or leave a hole large enough to thread one through after baking.
Step 4: Finishing and Assembly
-
Bake everything:
Bake all three pieces according to your clay manufacturer’s instructions (usually around 275°F/135°C for 15-30 minutes). Let them cool completely. -
Enhance details:
Dilute a small amount of black acrylic paint with water. Wash it over the ruler markings and the eraser grooves, then quickly wipe away the excess so the paint stays only in the crevices. -
Link the chain:
Cut a short length of chain (about 3-4 links) for the eraser charm to give it a slightly different hanging height. -
Assemble the keychain:
Using your jewelry pliers, open the large keyring. Slide on the ruler directly via its eye pin. -
Final attachments:
Attach the pencil using a jump ring to the main ring. Attach the eraser charm to the end of the small chain segment, and link that chain to the main ring.
Clip this set onto a lanyard or backpack for a thoughtful, handmade gift that any teacher will cherish


Bookworm on Books Figurine
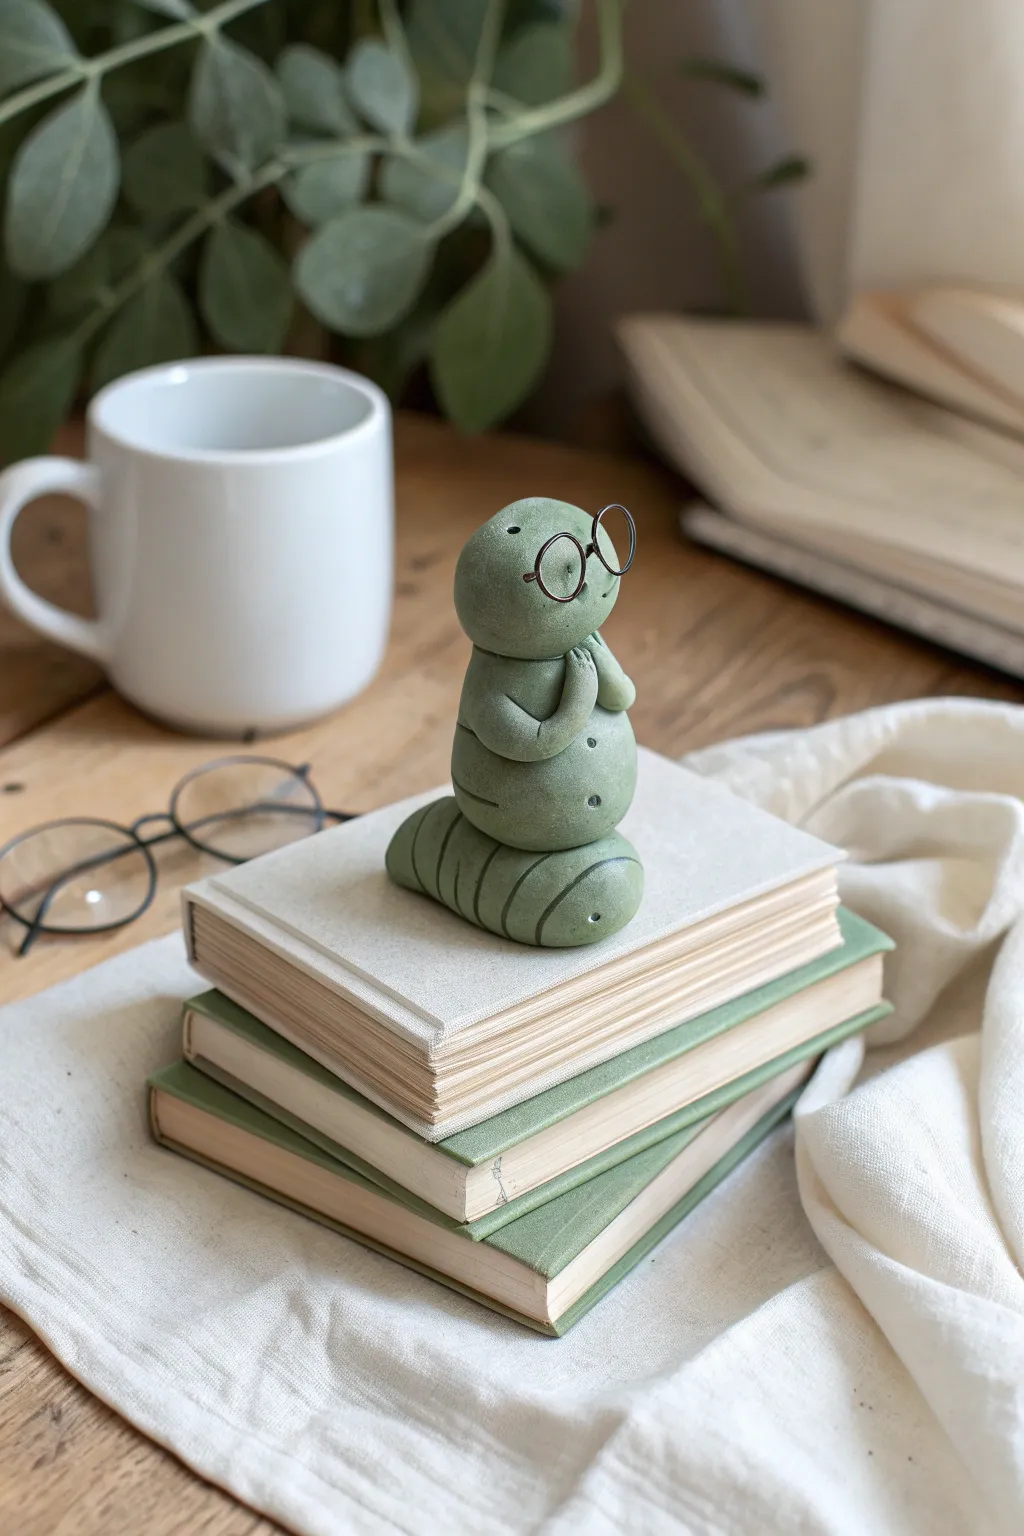
This charming clay figurine captures the essence of a dedicated reader, complete with tiny wire spectacles and a thoughtful pose. Perched atop a stack of miniature books, this green bookworm makes for a delightful desk companion or a special gift for an English teacher.
Step-by-Step Guide
Materials
- Polymer clay (Sage green or olive green)
- Black wire (20 or 22 gauge) for the glasses
- Pliers (needle-nose and wire cutters)
- Small ball stylus tool or a toothpick
- Needle tool or craft knife
- Baking sheet and foil
- Oven (for curing)
- Optional: Thin wire for internal armature support
Step 1: Sculpting the Body
-
Form the Base:
Start by conditioning a medium-sized ball of sage green clay until it is soft and pliable. Roll it into a thick log shape, roughly 2.5 inches long, tapering slightly at one end to form the tail. -
Curve the Tail:
Gently bend the tapered end of the log into a ‘U’ shape or a slight curve so the worm looks like it is resting comfortably. Flatten the bottom slightly so the figurine sits securely without wobbling. -
Create Segments:
Using the side of a needle tool or a dull knife, press horizontal indentations along the length of the tail section. These lines create the classic segmented look of a worm’s body. -
Shape the Torso:
Take a separate, slightly smaller ball of clay for the upright body section. Roll it into a rounded shape that is slightly taller than it is wide, resembling a gumdrop. -
Attach the Torso:
Press the torso piece firmly onto the thicker end of the tail base. You may want to insert a small piece of wire or a toothpick between the two pieces to act as an internal spine, ensuring the head stays upright during baking. -
Blend the Seams:
Use a modeling tool or your finger to gently smudge the clay downward where the torso meets the tail, blending the seam so it looks like one continuous creature. Re-add segmentation lines if they get smoothed out.
Wire Woes?
If the wire for the glasses keeps slipping out of the raw clay, add a tiny drop of liquid clay or ‘Bake & Bond’ to the wire ends before inserting them into the head.
Step 2: Adding Character Details
-
Form the Head:
Roll a final ball of clay for the head, slightly smaller than the torso. Flatten the bottom slightly and press it onto the top of the torso section. Smooth the connection point gently. -
Create Arms:
Roll two small, thin logs of green clay for the arms. They should be just long enough to reach from the worm’s ‘shoulders’ to its chin. -
Pose the Arms:
Attach the arms to the sides of the torso. Bend them upward at the ‘elbow’ so the ends of the arms (the hands) rest just under the chin, creating a thoughtful, daydreaming pose. -
Define the Hands:
Using a needle tool, make tiny indentations on the ends of the arms to suggest fingers resting against the face. -
Add Facial Features:
Use a small ball stylus or the tip of a needle tool to poke two small eyes near the top of the head. Add a tiny, subtle smile if desired, though the glasses will do most of the expression work. -
Detail the Body:
Add a few more horizontal crease lines on the front of the torso and near the neck area to continue the segmented pattern. You can also add three tiny dots or buttons down the front belly for extra whimsy.
Step 3: Finishing and Baking
-
Make the Glasses:
Cut a small piece of black wire. Wrap the wire around a small cylindrical object (like the handle of a paintbrush) to create two loops. Leave a small bridge between the loops for the nose piece. -
Trim the Frames:
Trim the ends of the wire so you have two short ‘arms’ that can stick into the clay head. I find it helpful to test the fit against the clay face before doing the final placement. -
Place the Glasses:
Gently press the arms of the wire glasses into the sides of the worm’s head. The lenses should sit just over where the eyes would be. Ensure they are secure but avoid squishing the head shape. -
Final Texture Check:
Inspect the entire figurine for fingerprints. Lightly brush the surface with a tiny bit of baby oil or cornstarch if you need to smooth out imperfections before baking. -
Bake:
Place the worm on a foil-lined baking sheet. Bake according to your polymer clay package instructions (usually 275°F/135°C for about 15-30 minutes depending on thickness). -
Cool Down:
Allow the figurine to cool completely in the oven or on a wire rack before handling, as polymer clay is fragile while hot.
Level Up: Texture
Before baking, gently press a piece of coarse sandpaper or a stiff toothbrush against the clay surface. This creates a stone-like, matte texture instead of a shiny plastic finish.
Now you have a studious little companion ready to guard your favorite novels.


Desk Pencil Cup With Teacher Quote
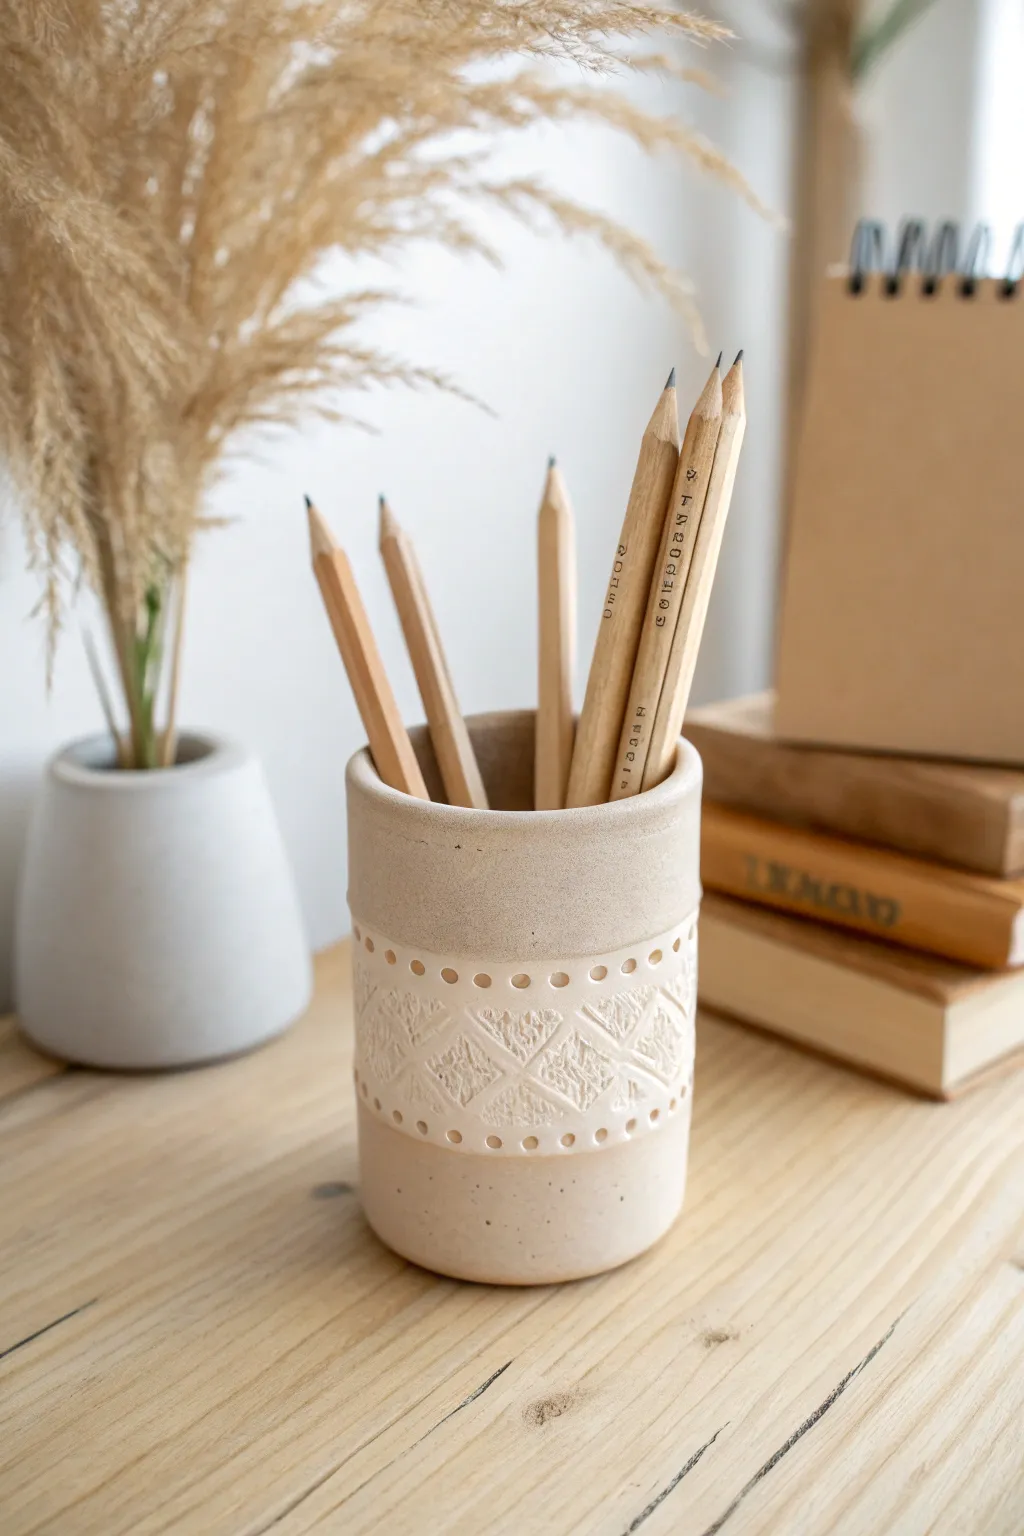
Create a sophisticated and functional desk accessory that blends natural ceramic textures with delicate patterns. This project results in a creamy, stoneware-like pencil holder featuring intricate stamped detailing and a smooth, unglazed finish that feels wonderfully tactile.
Step-by-Step
Materials
- White or speckled stoneware clay body (approx. 1-1.5 lbs)
- Rolling pin
- Two wooden guide strips (approx. 1/4 inch thick)
- Circular cookie cutter or template (approx. 3.5 inches diameter)
- Fettling knife
- Slip (clay slurry)
- Scoring tool or fork
- Lace trim or a textured fabric remnant
- Small round piping tip or coffee stirrer (for dot impressions)
- Straight edge ruler
- Sponge
- Pottery wheel (optional – can be hand-built)
- Matte transparent glaze (optional, for interior)
Step 1: Preparing the Slab
-
Wedge the clay:
Begin by thoroughly wedging your clay to remove any air bubbles. This is crucial for preventing cracks during firing. You’ll need a ball about the size of a grapefruit. -
Roll out the base:
Place your clay between the two wooden guide strips on a canvas or cloth surface. Roll the clay out into a long, even slab. The guides ensure the thickness is perfectly consistent, which is key for a stable cylinder. -
Create the texture zone:
Before cutting your shape, decide where your patterned band will go. Lay your strip of lace or textured fabric horizontally across the middle-lower section of the slab. Gently roll over it with the rolling pin just enough to imprint the pattern without thinning the clay too much. -
Add the dot border:
Using the small round piping tip or a coffee stirrer, carefully stamp a row of circles immediately above and below your lace texture. Press gently to create a clean impression without punching all the way through.
Step 2: Forming the Cylinder
-
Cut the wall rectangle:
Measure the circumference needed for your base (approx. 11-12 inches for a standard cup) and the desired height (around 4-5 inches). Use the straight edge and fettling knife to cut a clean rectangle, preserving your textured band in the center. -
Cut the base:
Use your circular cutter or template to cut a round base from the remaining slab scraps. -
Score the edges:
Score the short ends of your rectangle where they will join to form the tube. Also, score the bottom edge of the rectangle and the outer perimeter of your circular base. -
Apply slip:
Dab a generous amount of slip onto all the scored areas. This acts as the glue for your clay ceramic pieces. -
Construct the tube:
Stand the rectangle up and curl it into a cylinder. Press the two scored short ends together firmly. I like to reach inside the cylinder to support the wall while smoothing the seam on the outside with a rib or finger to make it invisible. -
Attach to base:
Place the cylinder onto the scored base. Gently press the walls down onto the base floor. Smooth the interior seam where the wall meets the floor using a modeling tool or your finger to ensure a watertight seal.
Seam Smoothing
Work the seam from the inside first. If you over-smooth the outside, you might erase your texture. Use a tool inside to push the clay outward into the seam.
Step 3: Refining and Finishing
-
Refine the rim:
Use a slightly damp sponge to smooth the top rim of the cup. It should be rounded and comfortable to the touch, not sharp. -
Clean up the exterior:
Check the exterior seam again. If the texture was interrupted at the join, use your tools to manually touch up the pattern so it looks continuous around the entire cup. -
Create the indented detail:
About an inch below the top rim, use a modeling tool to create a subtle, recessed ring around the circumference, giving the piece a finished, professional look. -
Dry slowly:
Cover the piece loosely with plastic for the first day to let humidity equalize, then uncover to dry completely to the bone-dry stage. This helps prevent warping. -
Bisque fire:
Fire the piece in a kiln to cone 04 (or your clay’s specific bisque temperature). -
Glaze interior:
Pour a matte transparent or white glaze inside the cup, swirl to coat, and pour out the excess. Leave the exterior unglazed to highlight the raw clay texture, or apply a very thin matte wash if desired. -
Final firing:
Glaze fire the piece to the maturity temperature of your clay body (likely cone 6 for stoneware).
Customize It
Before drying, stamp a teacher’s name or a short quote like ‘Teach, Love, Inspire’ vertically along the smooth upper section for a personalized gift.
Once fired, this durable cup becomes a timeless addition to any teacher’s desk, ready to hold grading pencils for years to come

The Complete Guide to Pottery Troubleshooting
Uncover the most common ceramic mistakes—from cracking clay to failed glazes—and learn how to fix them fast.
Pinch-Pot Trinket Dish for Grading Clips
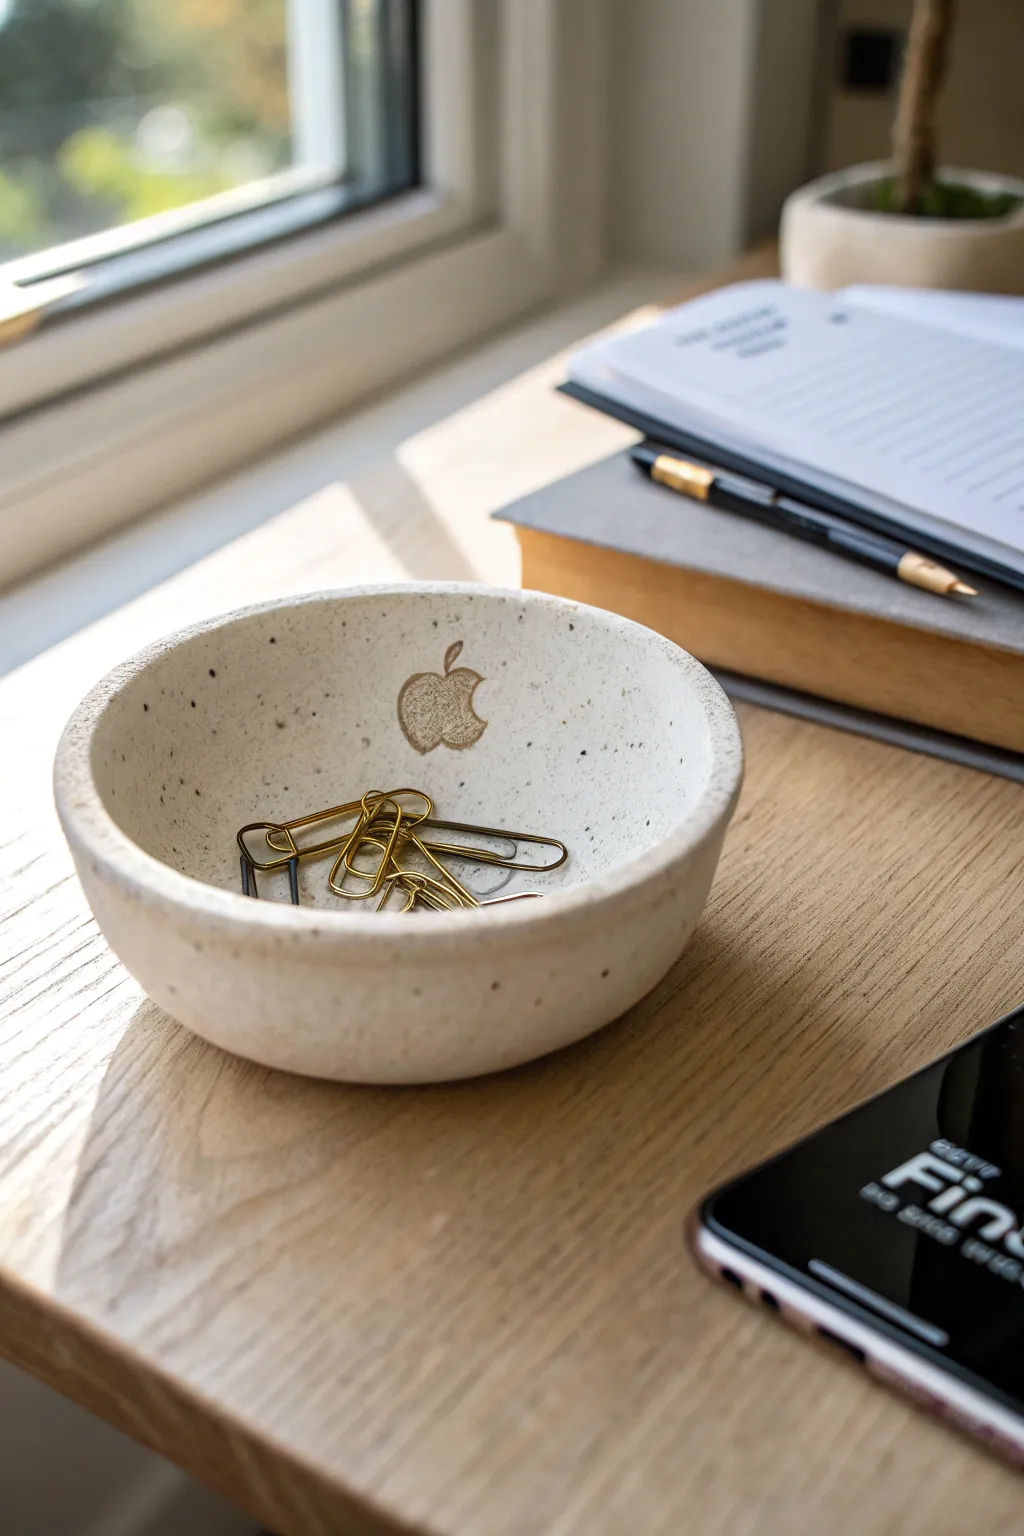
This charming, speckled trinket dish is the perfect addition to any teacher’s desk, offering a stylish home for loose grading clips. With its subtle earthy texture and a delicate metallic apple icon, it balances rustic warmth with a classic symbol of education.
Detailed Instructions
Materials
- White stoneware clay or air-dry clay (speckled variety preferred)
- Small bowl or water for smoothing
- Basic clay tools (needle tool, sponge)
- Small stamp or stencil of an apple/fruit shape
- Gold acrylic paint or gold luster (if firing)
- Fine detail paintbrush
- Sandpaper (fine grit)
- Clear matte varnish or glaze
Step 1: Forming the Base
-
Prepare your clay:
Start with a ball of clay roughly the size of a tennis ball. Knead it briefly to work out any air bubbles, ensuring the texture is consistent throughout. -
Start the pinch pot:
Hold the clay ball in one palm and press your thumb into the center, stopping about a half-inch from the bottom to leave a sturdy base. -
Shape the walls:
Gently pinch the clay between your thumb and fingers, rotating the ball as you go. Work your way from the bottom up, thinning the walls evenly until they are about a quarter-inch thick. -
Refine the curve:
Once the basic bowl shape is established, place it on a flat surface. Gently cup your hands around the exterior to smooth out any lumpy areas, creating a nice, continuous curve. -
Level the rim:
If the rim has become uneven during pinching, you can gently tap the bowl upside down on your table to flatten it, or trim the excess with a needle tool. -
Smooth the surface:
Dip a small sponge or your finger in water—just a tiny amount—and run it over the interior and exterior to erase fingerprints and create a silky finish.
Step 2: Adding the Apple Detail
-
Create the impression:
While the clay is still leather-hard (firm but not dry), decide on the placement for your apple. You can lightly press a stencil into the clay or freehand a light outline with a needle tool. -
Carve lightly:
I prefer to use a small loop tool or needle to gently scratch the outline of the apple if you aren’t using a specific stamp. Don’t go too deep; you just want a guide for the paint later. -
Dry the piece:
Allow the pot to dry completely. If using air-dry clay, this takes 24-48 hours. If using ceramic day, follow your kiln firing schedule for the bisque fire. -
Sand for perfection:
Once fully dry (or bisque fired), take your fine-grit sandpaper and gently gently smooth the rim and any rough patches on the outside walls.
Uneven Rim?
If the rim looks wavy after pinching, let the clay firm up for an hour. Then, flip the bowl upside down and gently slide it back and forth on a flat board to level it naturally.
Step 3: Finishing Touches
-
Apply gold detail:
Using a fine detail brush, carefully paint the apple shape with metallic gold acrylic paint. If you are doing a ceramic glaze fire, use a gold luster overglaze instead. -
Seal the interior:
If using air-dry clay, apply a coat of clear matte varnish to the inside to protect the clay from scratches caused by metal clips. -
Seal the exterior:
Continue painting the varnish over the exterior and the rim. This seals the speckled texture and gives the piece a finished, professional look. -
Final dry:
Let the varnish or glaze cure completely according to the manufacturer’s instructions before placing it on your desk.
Make It Personal
Instead of an apple, stamp your initials or a classroom number into the clay. You can also mix actual dried coffee grounds into white clay to create a custom speckled effect.
Fill your new handmade dish with paperclips and enjoy a tidy, stylish workspace
Photo Holder Stand for a Class Picture
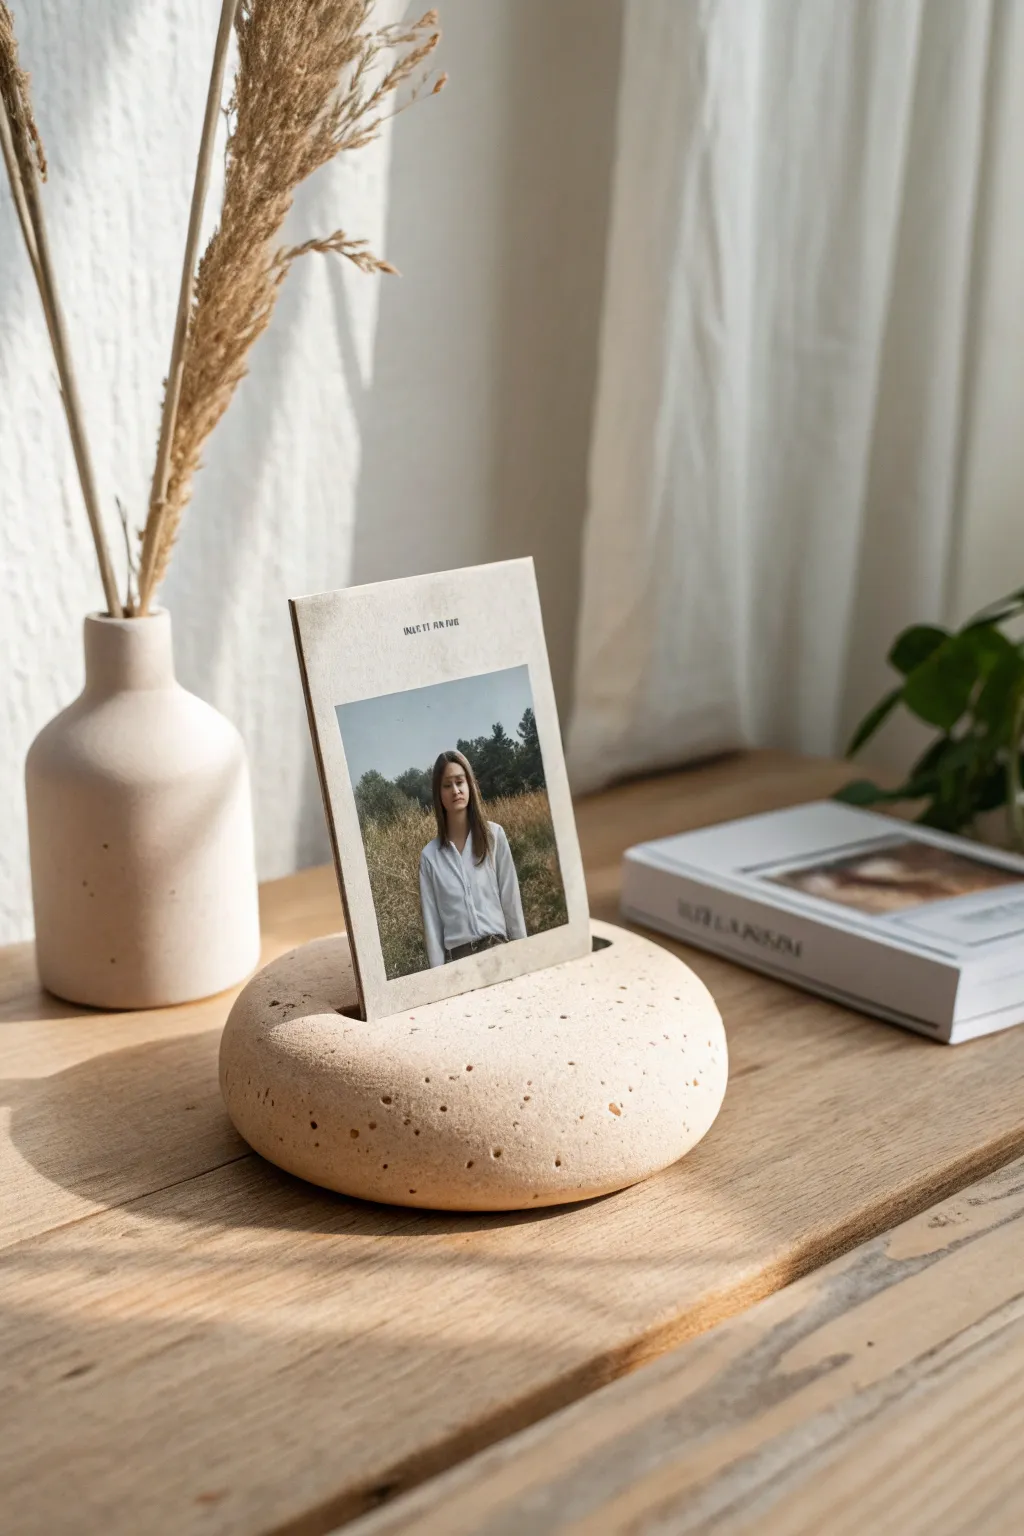
Create a sophisticated and organic display for your favorite class memories with this faux-stone photo holder. Its smooth, rounded form and speckled texture mimic natural sandstone, offering a sturdy yet elegant base for polaroids or cardstock prints.
How-To Guide
Materials
- Air-dry clay (white or light cream)
- Acrylic paint (beige, light ochre, and dark brown)
- Baking soda (for texture)
- Craft knife or metal spatula
- Old toothbrush
- Fine-grit sandpaper
- Rolling pin or smooth jar
- Clear matte varnish
- Cardstock or existing photo for sizing
Step 1: Shaping the Base
-
Condition the clay:
Begin by taking a generous handful of air-dry clay. Knead it thoroughly in your hands for several minutes until it becomes warm, pliable, and free of any initial cracks. -
Form a sphere:
Roll the clay between your palms or on your work surface to create a smooth ball. Aim for a size slightly larger than a tennis ball to ensure it has enough weight to hold a photo. -
Flatten into a pebble:
Place the ball on your work surface and gently press down with the palm of your hand. You want to flatten it into a thick disc, about 1.5 to 2 inches tall, keeping the edges rounded and organic like a river stone. -
Smooth the surface:
Dip your finger in a little water and run it over the clay to smooth out any fingerprints or small fissures. The surface should be as seamless as possible before moving on.
Stone Effect Tip
Mix coffee grounds or fine sand directly into your white air-dry clay before shaping. This creates internal texture that looks like real granite when dry.
Step 2: Creating the Slot & Texture
-
Measure the slot:
Take a piece of cardstock or a sample photo to gauge the width needed. Ideally, the slot should be centered and span about 70% of the pebble’s diameter. -
Cut the groove:
Using a craft knife or a thin metal spatula, press firmly straight down into the center of the clay disc. Rock the tool creatively back and forth to widen the gap just enough so a photo can slide in easily without being loose. -
Clean the edges:
Run a slightly damp finger along the rim of the cut you just made. This ensures the clay won’t dry with sharp, jagged edges that could scratch your photo later. -
Adding the porous texture:
To mimic the porous look of sandstone seen in the photo, take an old toothbrush or a stiff-bristled brush and gently tap it all over the surface of the clay. Vary your pressure to create random depths. -
Deepen specific pores:
Use the tip of a toothpick or a needle tool to poke individual, deeper holes scattered randomly around the form. Focus on the sides for a realistic stone appearance. -
Allow to dry:
Let the piece dry completely in a cool, dry place. Depending on the thickness, this can take 24 to 48 hours. Rotate the piece occasionally so the bottom dries evenly.
Step 3: Painting and Finishing
-
Sand for perfection:
Once fully dry, lightly sand the surface with fine-grit sandpaper. You don’t want to remove your texture, just knock down any overly sharp ridges. -
Mix the base color:
Mix white acrylic paint with a tiny drop of ochre and beige. The goal is a very pale, warm sand color. I find adding a pinch of baking soda to the paint here adds a lovely gritty realism. -
Apply the base coat:
Paint the entire stone, including inside the slot. Use a dabbing motion rather than long strokes to help the paint settle naturally into the texture you created. -
Create the speckles:
Dilute a small amount of dark brown paint with water until it is inky. Dip an old toothbrush into this mixture. -
Splatter technique:
Hold the toothbrush over the clay piece and run your thumb across the bristles to flick tiny droplets of brown paint onto the surface. Practice on paper first to control the spray size. -
Seal the piece:
After the paint is bone dry, apply a coat of clear matte varnish. This protects the finish without making the ‘stone’ look unnaturally shiny or plastic.
Color Match Idea
Instead of a natural stone look, paint the pebble in bright school colors or pastel tones to match a specific classroom theme or season.
Slide your class photo into the slot and enjoy this timeless piece of handmade decor on your desk


What Really Happens Inside the Kiln
Learn how time and temperature work together inside the kiln to transform clay into durable ceramic.
Coaster Set With School Symbols
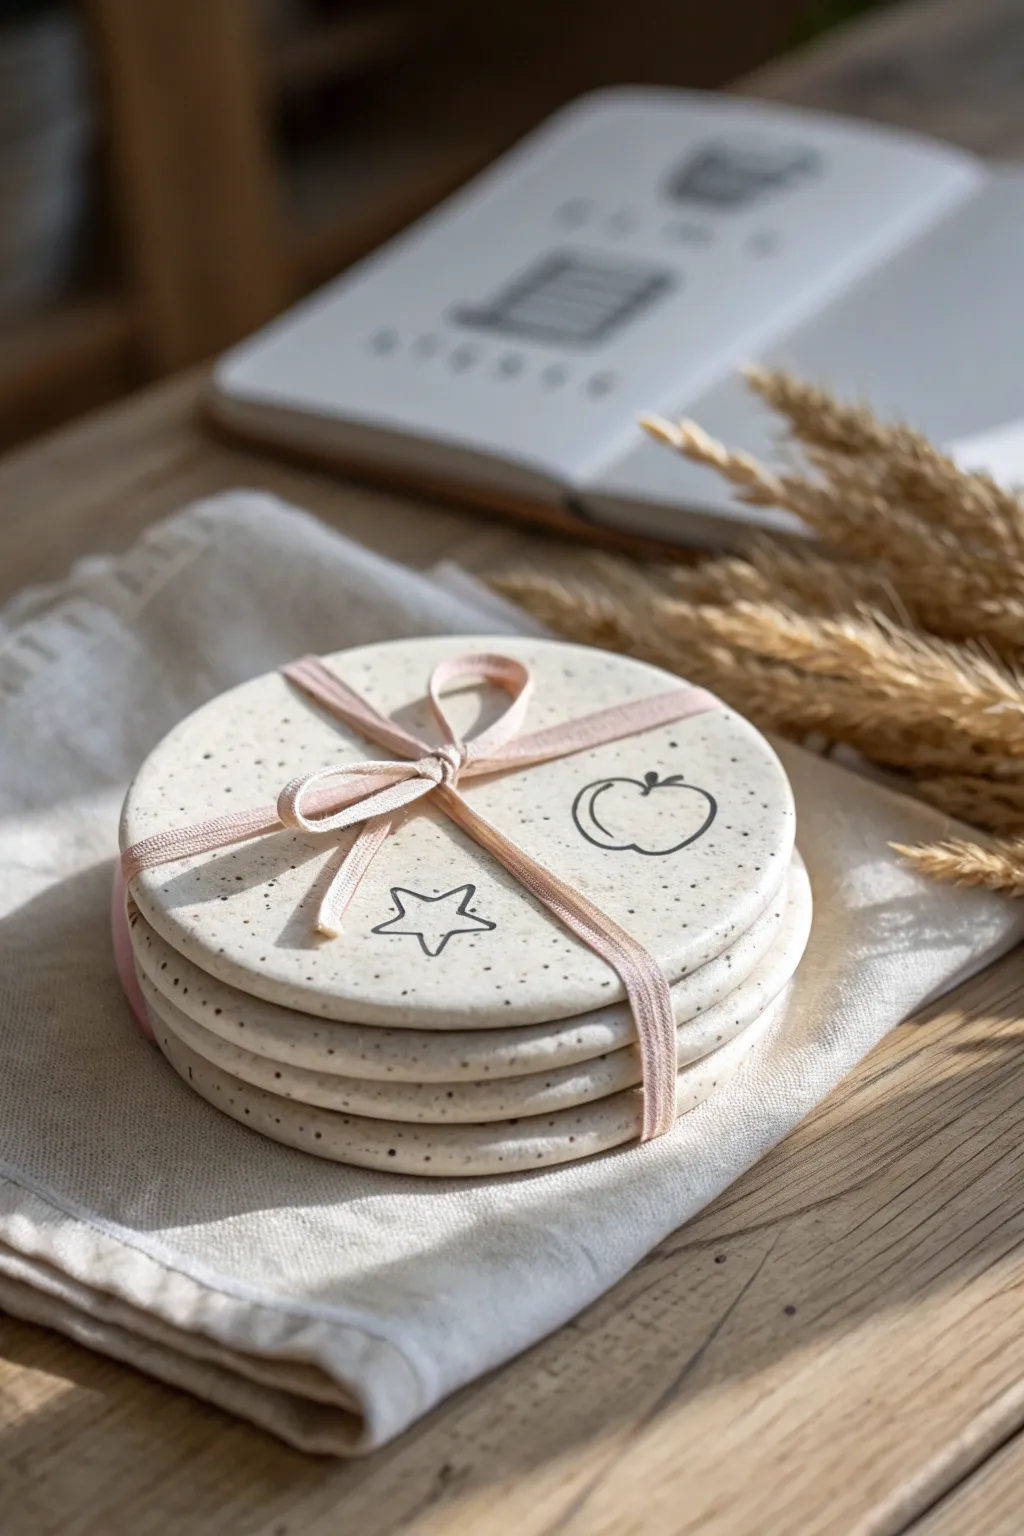
These charming, durable coasters feature a lovely speckled finish that mimics natural stone, making them a sophisticated yet personal gift for any educator. The simple line drawings of apples and stars add a sweet, thematic touch without overwhelming the minimalist design.
Detailed Instructions
Materials
- Speckled cream polymer clay (or plain white mixed with black pepper/sand)
- Round cookie cutter (approx. 3.5 – 4 inches)
- Acrylic rolling pin
- Fine-point black permanent marker or black acrylic paint pen
- Parchment paper
- Baking sheet
- Sandpaper (fine grit, 400-600)
- Matte varnish or sealant (compatible with polymer clay)
- Pale pink fabric ribbon
- Oven (for baking polymer clay)
Step 1: Preparation & Shaping
-
Condition the clay:
Begin by warming the speckled polymer clay in your hands. Knead it thoroughly until it is soft, pliable, and free of any air bubbles. -
Roll it out:
Place the clay between two sheets of parchment paper to prevent sticking. Use your acrylic roller to flatten the clay into a slab that is an even 1/4 inch thick. I sometimes use playing cards stacked on either side as guide rails to ensure consistent thickness. -
Cut the circles:
Press your round cookie cutter firmly into the clay slab. Create four separate circles for a complete set. -
Smooth the edges:
Lift the circles carefully. Dip your finger in a little water (or cornstarch for polymer clay) and gently run it along the cut edge to soften any sharpness left by the cutter. -
Bake the coasters:
Arrange the clay discs on a parchment-lined baking sheet. Bake according to the manufacturer’s instructions on your specific package of clay (usually around 275°F for 15-30 minutes). -
Cool down:
Once baked, remove the tray from the oven and let the coasters cool completely. Do not attempt to work on them while they are still warm, as they can be brittle.
DIY Speckles
Can’t find pre-speckled clay? Knead coarse black pepper or clean crafting sand into plain white or cream clay to mimic the stone effect perfectly.
Step 2: Finishing & Decorating
-
Sand the surface:
Once cool, take your fine-grit sandpaper and lightly buff the top surface and the edges. This creates a beautifully smooth canvas for your drawing. -
Wipe clean:
Use a slightly damp cloth to wipe away any sanding dust. Let the surface dry completely before moving on. -
Draft the designs:
Lightly sketch your school symbols—an apple and a star are classic choices—with a pencil first if you are nervous about freehanding. Keep the lines simple and open. -
Draw the symbols:
Go over your pencil lines with a fine-point black paint pen or permanent marker. Use steady, confident strokes to create the outline style shown in the image. -
Seal the deal:
Apply a thin layer of matte varnish over the top of the coaster. This protects the drawing from condensation and wear. Let it dry according to the bottle instructions. -
Stack and wrap:
Stack the four finished coasters neatly on top of one another. -
Add the ribbon:
Cut a length of pale pink fabric ribbon. Wrap it around the stack twice, crossing it over itself to keep the pile secure. -
Tie the bow:
Finish the presentation by tying a small, neat bow on top. Trim the ends of the ribbon at an angle to prevent fraying.
Add Dimension
Instead of drawing, use small alphabet stamps to impress the teacher’s name or the school year into the wet clay before baking for a tactile look.
This simple yet thoughtful set is now ready to be gifted to a favorite teacher to brighten up their desk area
Little Plant Pot or Planter Tag for Teachers
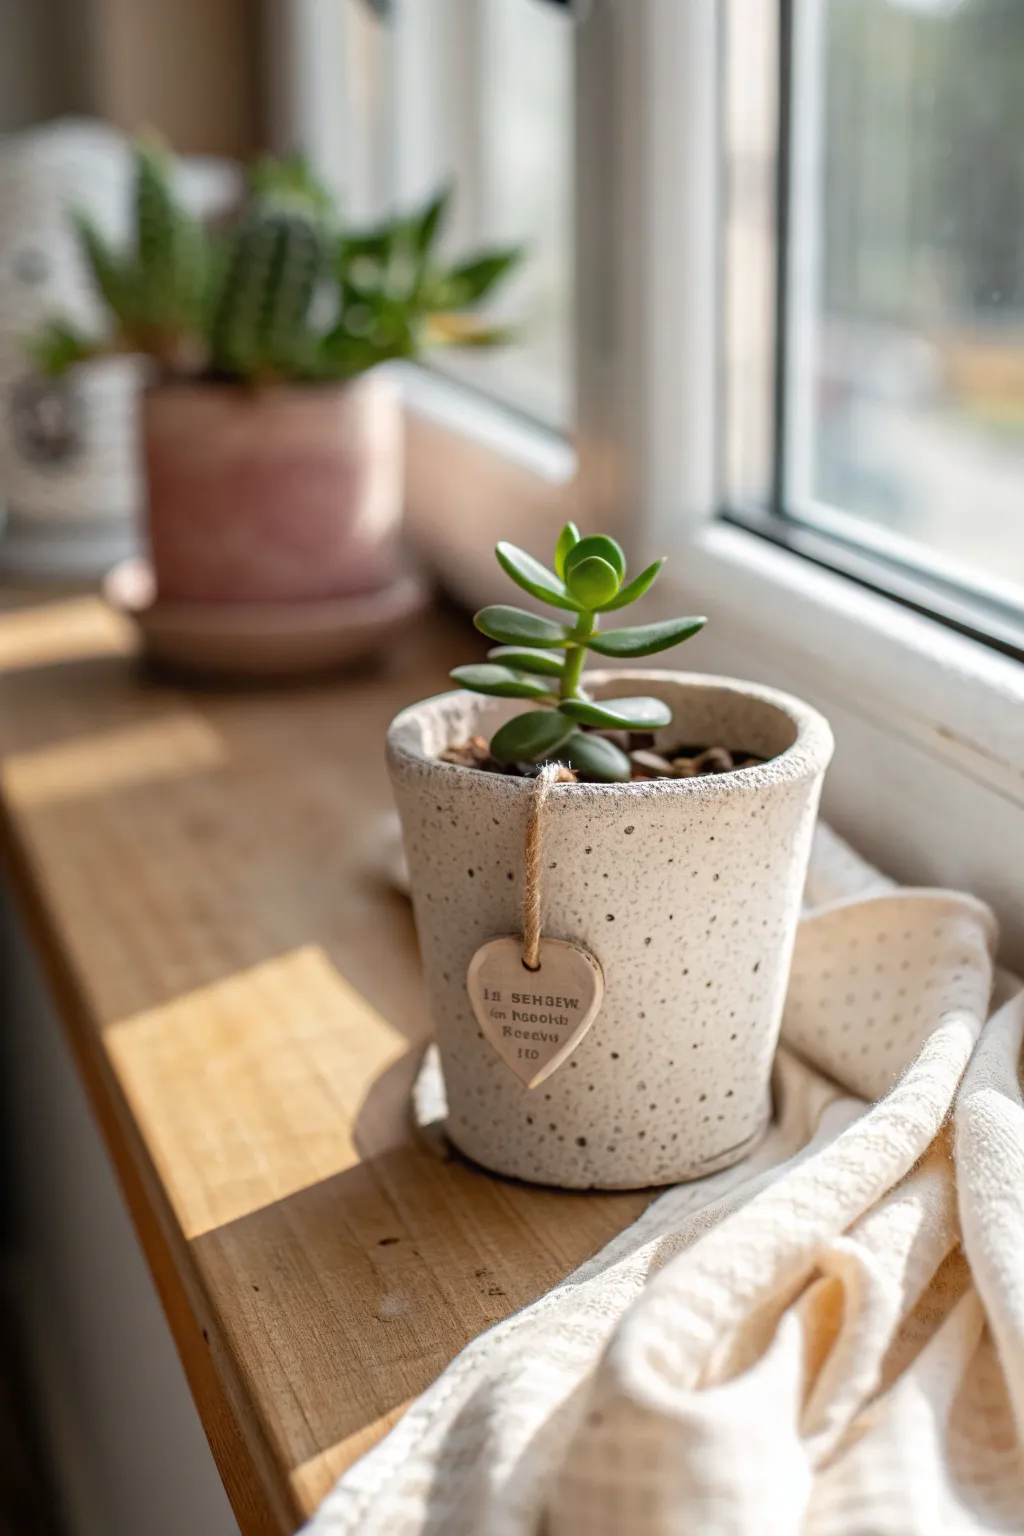
This charming, rustic planter features a wonderful speckled texture and a personalized heart tag that makes it an extra special gift for a favorite teacher. Its minimalist white clay finish contrasts beautifully with a simple jute string for a clean, organic look.
Step-by-Step Tutorial
Materials
- White polymer clay or air-dry white stoneware clay
- Rolling pin
- Coarse black pepper or dark speckle inclusion (if not utilizing pre-speckled clay)
- Small cylindrical mold (like a can or sturdy cup)
- Small heart-shaped cookie cutter
- Letter stamp set (small font)
- Needle tool or toothpick
- Water and sponge (for smoothing)
- Natural jute twine
- Sandpaper (fine grit)
- Craft knife
- Matte varnish (optional)
Step 1: Preparing the Clay Body
-
Condition the clay:
Begin by kneading your white clay until it is soft and pliable. If you are using standard white clay and want that organic speckled look, knead in a small pinch of coarse black pepper or dried coffee grounds now. -
Roll the slab:
Roll out a large slab of clay to a uniform thickness of about 1/4 inch. Ensure it’s wide enough to wrap around your chosen cylindrical mold and tall enough for your desired pot height. -
Cut the base pieces:
Using your mold as a guide, cut a circle for the base of the pot. Then, cut a long rectangle that will serve as the walls. Measure the circumference of your base to get the rectangle’s length correct.
Step 2: Constructing the Pot
-
Form the walls:
Wrap the rectangular slab around your mold form. You might want to wrap the mold in parchment paper first to prevent sticking. -
Join the seams:
Where the two ends of the rectangle meet, score the edges with a needle tool and add a dab of water or slip. Press them firmly together. -
Blend the join:
Use your thumb or a modeling tool to smooth the vertical seam until it is invisible, blending the clay across the line. -
Attach the base:
Score the bottom edge of your cylinder wall and the outer edge of your circular base. Press the cylinder onto the base. -
Reinforce the bottom:
Take a thin coil of clay and press it into the interior seam where the wall meets the floor to strengthen the bond. Smooth it out with your curved finger. -
Create the rough rim:
Instead of smoothing the top rim perfectly, tap it gently with the flat of your blade or fingers to create a slightly uneven, organic texture similar to the reference photo. -
Pierce the rim:
Using a needle tool, poke a small hole near the top rim where you want the tag to hang. Make sure the hole is large enough for your jute twine.
Cracks Appearing?
If you see hairline cracks while air-drying, mix a tiny bit of fresh clay with water to make a paste and fill them in immediately before they widen.
Step 3: Making the Heart Tag
-
Cut the shape:
Roll out a small scrap of clay slightly thinner than the pot walls. Use your small heart cutter to punch out a tag shape. -
Add text:
Press your letter stamps into the wet clay heart. You can write a teacher’s name or a short phrase like ‘thank you’ or ‘to grow’. -
Add the hanging hole:
Pierce a small hole at the top center of the heart, ensuring it aligns nicely for hanging. -
Apply texture:
If I feel the surface is too smooth, I gently press a piece of sandpaper or a rough stone against the exterior of the pot and tag to enhance the rustic feel.
Add Gold Accents
For a luxe twist, paint the stamped letters on the heart tag with liquid gold leaf or rub a bit of gold wax over the rim of the pot.
Step 4: Finishing Touches
-
Dry the project:
Let the pot and tag dry completely according to your clay’s instructions. If using air-dry clay, rotate the pot occasionally for even airflow. -
Sand edges:
Once bone dry or baked, use fine-grit sandpaper to soften any sharp edges on the rim or the heart tag. -
Seal (optional):
Apply a coat of matte varnish to the inside of the pot if you plan to put a real plant inside, to protect it from moisture. -
Assemble:
Thread a piece of jute twine through the hole in the pot and the heart tag. Tie a simple knot to secure the tag so it dangles just below the rim.
Now slide a small succulent into your hardened pot and you have a thoughtful handmade gift ready for the classroom

TRACK YOUR CERAMIC JOURNEY
Capture glaze tests, firing details, and creative progress—all in one simple printable. Make your projects easier to repeat and improve.
Classroom Door Nameplate Ornament
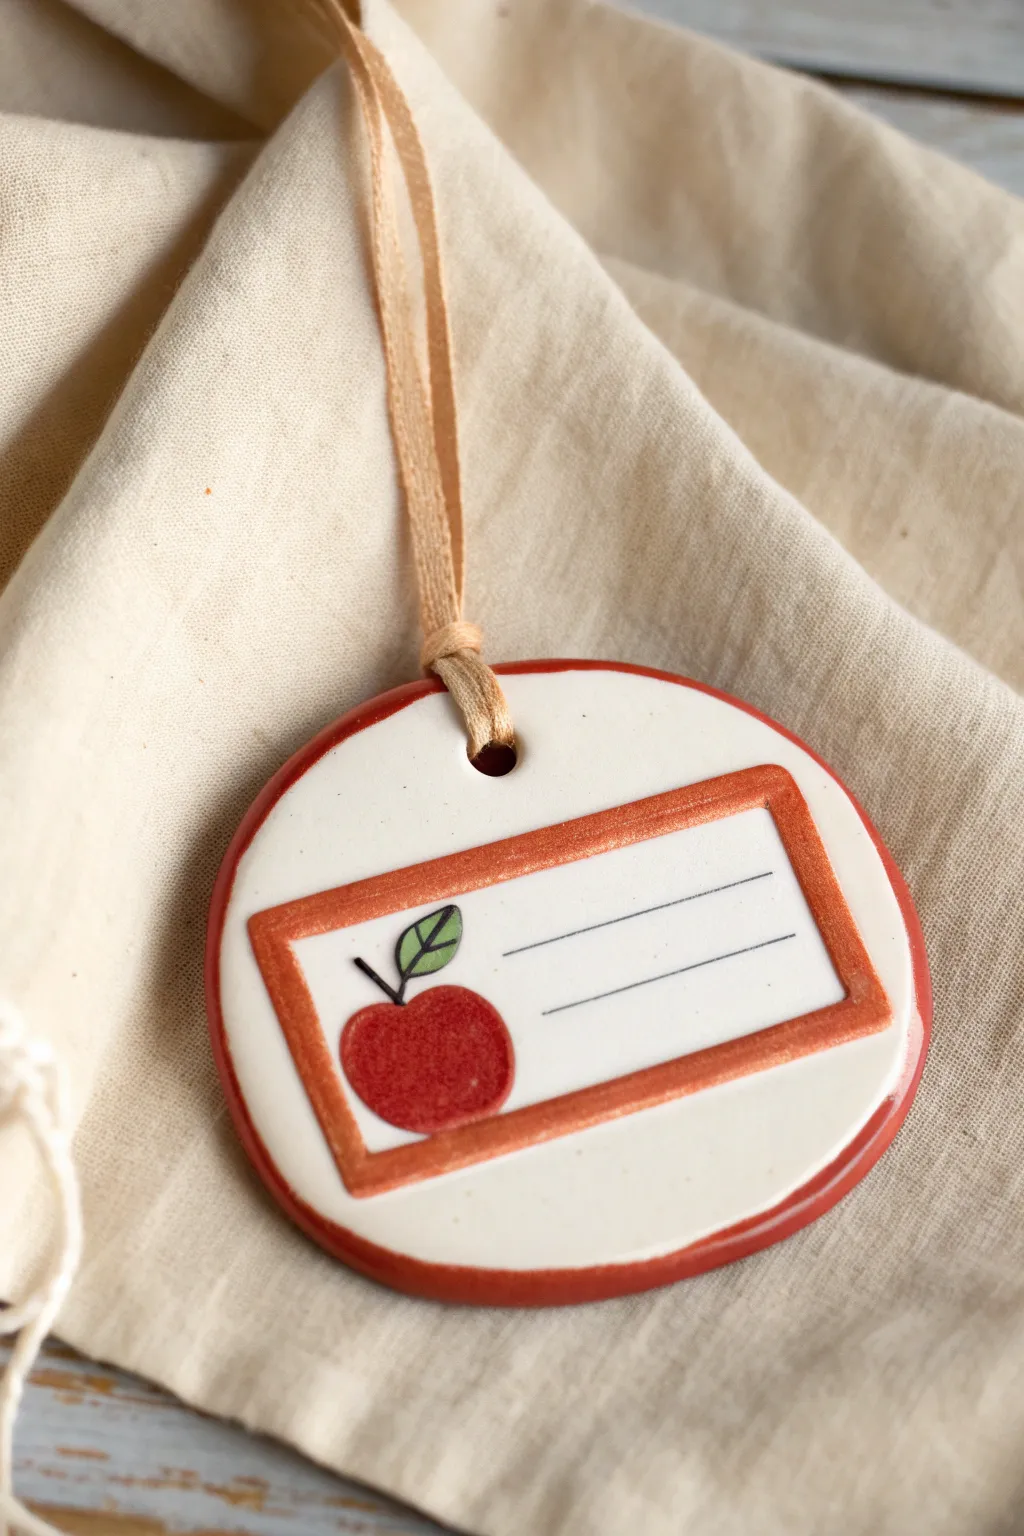
This charming ceramic ornament combines a classic teacher motif with a personalized touch, perfect for classroom doors or holiday gifts. Using simple slab-building techniques and underglazes, you will create a polished, functional nameplate that captures a sweet, nostalgic schoolroom vibe.
Step-by-Step Guide
Materials
- White low-fire earthenware clay or polymer clay (if kiln unavailable)
- Rolling pin
- Canvas mat or cloth for rolling
- Round cookie cutter (approx. 3-4 inches diameter)
- Fettling knife or X-Acto knife
- Small hole punch or straw
- Slip (clay and water slurry)
- Underglazes: Bright Red, Leaf Green, Rust/Orange, Black
- Clear transparent glaze
- Small detail paintbrushes
- Needle tool
- Beige satin ribbon or twine
Step 1: Shaping the Base
-
Roll the slab:
Begin by wedging your white clay to remove air bubbles, then roll it out on your canvas mat to an even thickness of about 1/4 inch. Smooth the surface with a rubber rib to remove any canvas texture. -
Cut the circle:
Use your round cookie cutter to stamp out the main base of the ornament. If the edges are sharp, gently tap them down with your finger or a damp sponge. -
Create the hanging hole:
While the clay is still soft, use a straw or a small hole punch tool to create a clean hole near the top edge for the ribbon. Center it carefully.
Step 2: Adding Dimension
-
Make the frame coil:
Roll a very thin, consistent coil (snake) of clay. You can also cut thin strips from a slab if you prefer sharper edges, but a flattened coil works well for the rounded look shown in the photo. -
Form the rectangle:
Cut four pieces of your coil to form a rectangle that fits comfortably inside the circle, leaving space at the top and bottom. Angle the ends at 45 degrees to make mitered corners. -
Score and slip:
Use a needle tool to scratch (score) the surface of the circle where the frame will go, and the back of the coil pieces. Apply a dab of slip to join them securely. -
Refine the frame:
Press the frame gently into place. Use a modeling tool to smooth the joined corners so they look seamless, creating a continuous raised border.
Warped Disc?
Flat clay circles like to warp while drying. Dry your ornament slowly under a loose sheet of plastic, or sandwich it between two pieces of drywall to keep it perfectly flat.
Step 3: Decorating and Glazing
-
Bisque fire (Method A):
If using ceramic clay, let the piece dry slowly until bone dry, then bisque fire it in the kiln to cone 04. If using polymer clay, bake according to package instructions now and proceed to painting with acrylics instead of glaze. -
Paint the apple base:
Using a bright red underglaze, paint a simple, rounded apple shape in the lower left corner inside the rectangular frame. It should slightly overlap the bottom frame edge for a cute, dimensional look. -
Add apple details:
Paint a small stem using black or dark brown underglaze. Add a single leaf using a bright leaf green underglaze, outlining it thinly with black if desired for clarity. -
Color the frame:
Carefully paint the raised rectangular frame with a rust or orange underglaze. I find a flat-headed shader brush helps keep the color only on the raised top surface without messy edges. -
Rim the edge:
Apply a band of the same red used for the apple around the very outer rim of the circular disc to tie the color scheme together. -
Add writing lines:
With a very fine liner brush and black underglaze, paint two straight, horizontal lines inside the rectangle to the right of the apple. Using a ruler as a guide (hovering above the clay) can help keep your hand steady. -
Clear glaze application:
Apply 2-3 coats of clear transparent glaze over the entire front of the ornament. Ensure the underglaze is completely dry so the image doesn’t smear. -
Final firing:
Stilt the ornament in the kiln and glaze fire to cone 05/06 (or your specific clay body’s temperature). -
Finishing touches:
Once cool, thread a length of beige satin ribbon through the hole. Tie a knot at the ends to create a loop for hanging.
Sharp Lines
For the crispest black writing lines, consider using an underglaze pencil or a needle-tip applicator bottle instead of a brush. It gives you much more control.
Now you have a durable, personalized nameplate that adds a handcrafted warmth to any classroom entrance.
Mini Teacher Avatar Holding a Sign
Create a personalized, adorable tribute to a favorite educator with this stylized clay figure. Standing proudly on a rustic wood slice, this mini-teacher holds a sweet dedication sign, making it a perfect desk companion or handmade gift.
How-To Guide
Materials
- Air-dry clay (white) or polymer clay
- Small wood slice (approx. 2-3 inches diameter)
- Acrylic paints (brown, skin tone, white, black, red, pink)
- Small square variety of wood or sturdy cardboard (for the sign)
- Strong craft glue or E6000
- Fine-grit sandpaper
- Sculpting tools (needle tool, smoothing tool)
- Fine detail paintbrush (0 or 00 size)
- Matte varnish or sealant
- Toothpick or wire armature
Step 1: Sculpting the Body and Head
-
Form the armature:
Start by inserting a toothpick or a small piece of wire into a small ball of clay. This will act as the neck and spine to keep the head stable on the body. -
Shape the dress:
Roll a cone shape from white clay for the body. Flatten the bottom so it stands independently, ensuring it’s roughly 2-2.5 inches tall. Insert the toothpick armature into the top of the cone. -
Create the head:
Roll a sphere of clay for the head. Gently press it onto the exposed toothpick at the top of the cone, blending the clay slightly underneath to secure the neck area. -
Add arms:
Roll two thin sausage shapes for the arms. Attach them to the sides of the body near the shoulder area, bending them forward at the fake ‘elbow’ so the hands meet in the center of the chest. -
Sculpt tiny hands:
Form two tiny, pea-sized balls for hands. Attach them to the ends of the sleeves. Don’t worry about fingers; a simple mitten shape works perfectly for this style.
Wire Confidence
Use actual craft wire for the glasses instead of painting them! Bend thin black wire into two circles and a bridge, then glue onto the face for 3D realism.
Step 2: Hairstyling and Details
-
Add the hair base:
Flatten a disc of clay and drape it over the back and top of the head to form the main hair. Use a sculpting tool to press in vertical lines to mimic hair strands. -
Create the bun:
Roll a separate ball of clay for the top knot. Score it with spiral or vertical lines for texture and attach it firmly to the very top of the head. -
Add bangs:
Shape a flat, crescent-like piece of clay for the bangs. Attach it to the forehead, using your tool to carve deep grooves for the parted hair look shown in the photo. -
Sculpt the feet:
Create two small oval shapes for shoes. Attach them to the bottom of the dress cone so they peek out slightly from the front. -
Dry the figure:
Allow the figure to dry completely. If using air-dry clay, this may take 24-48 hours. If using polymer, bake according to package instructions.
Classroom Decor
Customize the wood base by adding miniature clay books, a tiny apple, or a chalkboard eraser next to the teacher’s feet to set the scene.
Step 3: Painting and Assembly
-
Paint the skin and hair:
Paint the face, hands, and tiny strip of legs with a skin-tone acrylic. Paint the hair and bun a rich brown (or the teacher’s hair color). You might need two coats for opacity. -
Paint the dress and shoes:
Paint the dress a clean white or cream. I prefer adding a little texture by dabbing the paint to look like fabric. Paint the shoes brown with thin darker straps. -
Draw facial features:
Using your finest brush or a fine-tip paint marker, carefully draw the glasses, small dot eyes, and a tiny curved smile. Add soft pink circles for rosy cheeks. -
Create the sign:
Take your small wood square or cardboard. Paint a white background square in the center, leaving a brown border. Paint a red heart and your chosen message (like ‘I [heart] 4E’) in black. -
Assemble the base:
Paint a soft pink or red wash circle on the center of your wood slice. Once dry, glue the clay figure onto the center of the painted circle. -
Attach the sign:
Glue the finished sign to the figure’s hands so it looks like she is holding it against her chest. -
Seal the project:
Apply a coat of matte varnish to the entire clay figure to protect the paint and give it a finished, professional look.
Now you have a charming, pocket-sized teacher ready to brighten up any classroom desk