When I’m making clay with preschoolers, I stick to big, simple shapes that little hands can actually manage—and I let the “imperfections” be the whole charm. These clay modelling ideas for preschoolers are all about quick wins, bright color, and sneaky fine motor practice wrapped up in play.
Rainbow Coil Snakes
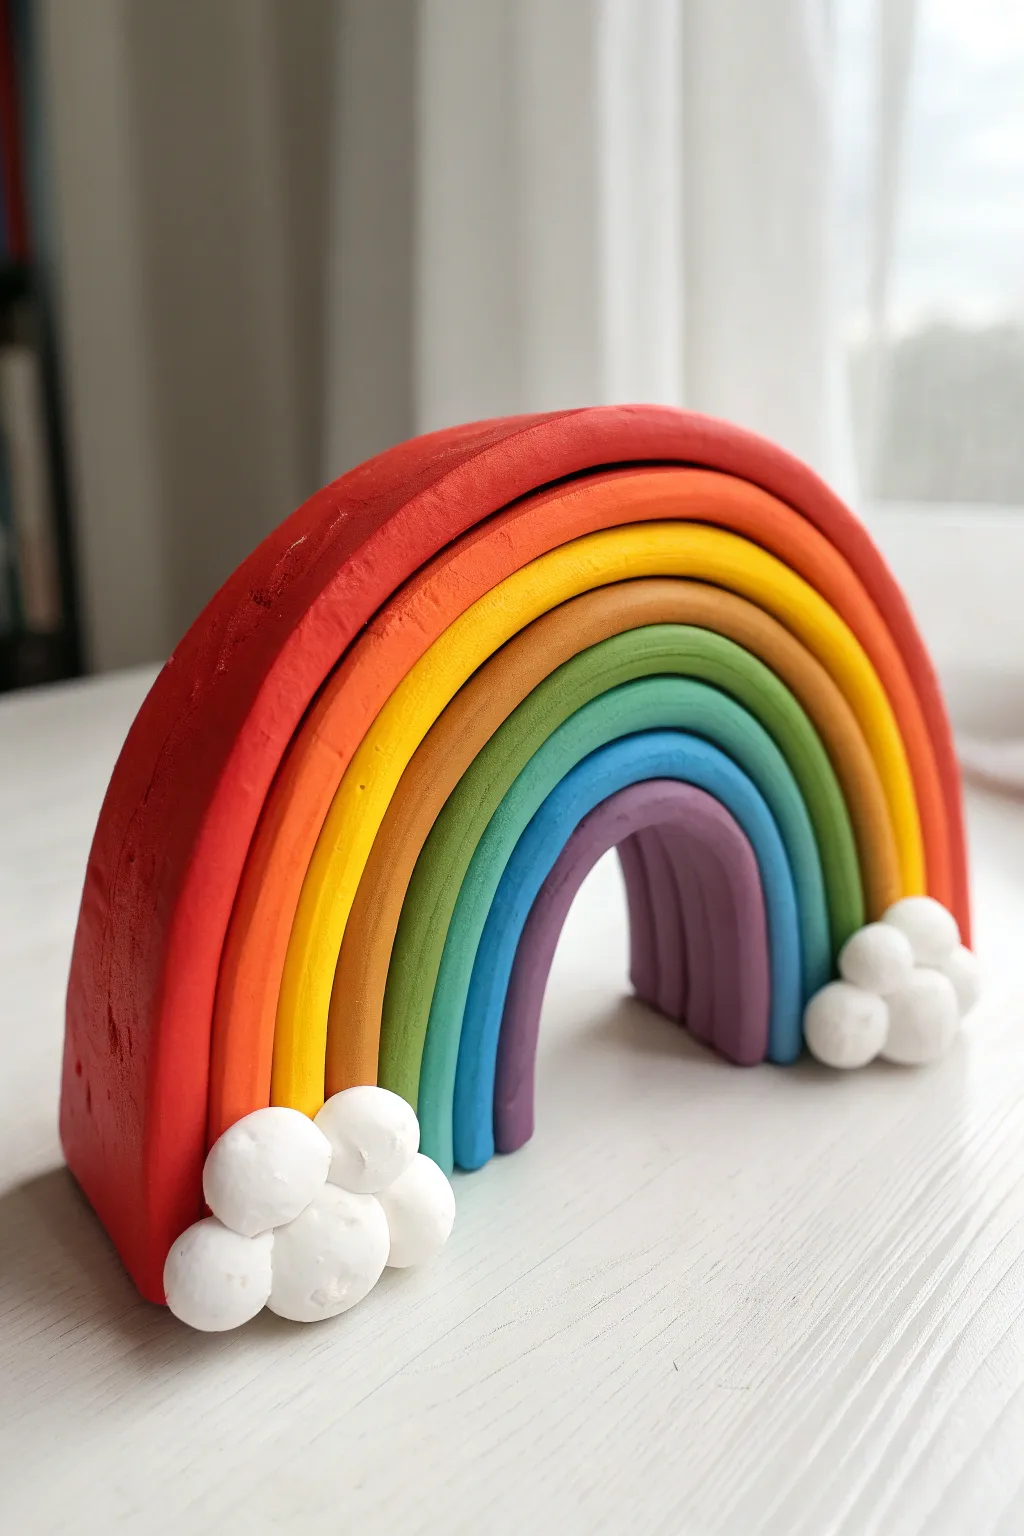
Brighten up any rainy afternoon with this vibrant, standing clay rainbow project. This simple yet striking sculpture teaches color sequencing and fine motor skills as little hands roll perfect colorful coils.
Step-by-Step
Materials
- Modeling clay or playdough (Red, Orange, Yellow, Light Brown/Ocher, Green, Light Blue, Purple, White)
- Clean flat surface or rolling mat
- Plastic knife or clay cutter tool
- Ruler (optional)
Step 1: Forming the Arches
-
Start with the smallest arch:
Begin with the purple clay. Pinch off a medium-sized chunk and roll it between your palms to warm it up. -
Roll the first coil:
Place the purple clay on your table and roll it back and forth to create a thick, even snake about 4 inches long. Try to keep the thickness consistent, roughly the width of a marker. -
Shape the center:
Bend the purple snake into a tight ‘U’ shape. Stand it up on your work surface to ensure it balances; if the legs are uneven, trim the bottom ends with your plastic knife so they sit flat. -
Create the blue layer:
Take a slightly larger piece of light blue clay. Roll it into a snake slightly longer than the purple one. -
Fit the blue arch:
Gentle curve the blue snake over the purple arch to measure the fit. It should hug the purple curve snugly without gaps. -
Trim and secure:
Once fitted, slice the bottom of the blue legs so they are perfectly flush with the purple ones. Press the two colors gently together along the seam so they stick. -
Green comes next:
Repeat the process with the green clay, rolling a snake slightly longer than the blue one. -
Stack the green:
Place the green coil over the blue arch, pressing gently to adhere them. I find trimming the bottoms *after* arching the clay helps keep the height uniform. -
Add the middle layers:
Continue this pattern with the light brown (or dark yellow) clay, followed by the bright yellow clay. Remember, each snake needs to be longer than the last to make it all the way around. -
Roll the orange:
Roll out a long orange snake. This one will need to be quite substantial to cover the growing rainbow. -
Attach the orange arch:
Drape the orange coil over the yellow layer. Smooth it down with your thumb to ensure there are no lumps or bumps. -
Finish with red:
Create the final, longest coil using red clay. This is the heavy outer shell, so make sure it’s thick enough to support the shape. -
Final smooth:
Place the red arch on top. Use the flat side of your ruler or knife to gently tap the bottom of all the legs at once, ensuring the whole rainbow stands straight.
Smooth Seams Trick
To make the arches stick together better, very lightly score (scratch) the touching sides of the coils with a toothbrush before pressing them together.
Step 2: Adding the Clouds
-
Prepare the white clay:
Takes a good amount of white clay and divide it into about 8-10 small pieces of varying sizes. -
Roll cloud balls:
Roll each small white piece into a ball. They don’t need to be perfect spheres; slightly organic shapes look more like real clouds. -
Build the left cloud base:
Cluster 4 or 5 white balls together at the base of the left side of the rainbow. -
Secure the clouds:
Press the white balls firmly against the red and orange legs of the rainbow, and against each other, to create a bubbly cloud cluster that helps stabilize the structure. -
Build the right cloud base:
Repeat the clustering process on the right side with the remaining white balls. -
Final check:
Stand back and check if the rainbow is leaning. If it is, press the cloud clusters down harder onto the table to act as supportive feet.
Texture Time
Use a toothpick to poke tiny holes or draw swirls into the white cloud balls to give them a fluffy, aerated texture instead of a smooth finish.
Set your rainbow on a windowsill to enjoy the colors all day long


Easy Clay Pets From Basic Shapes
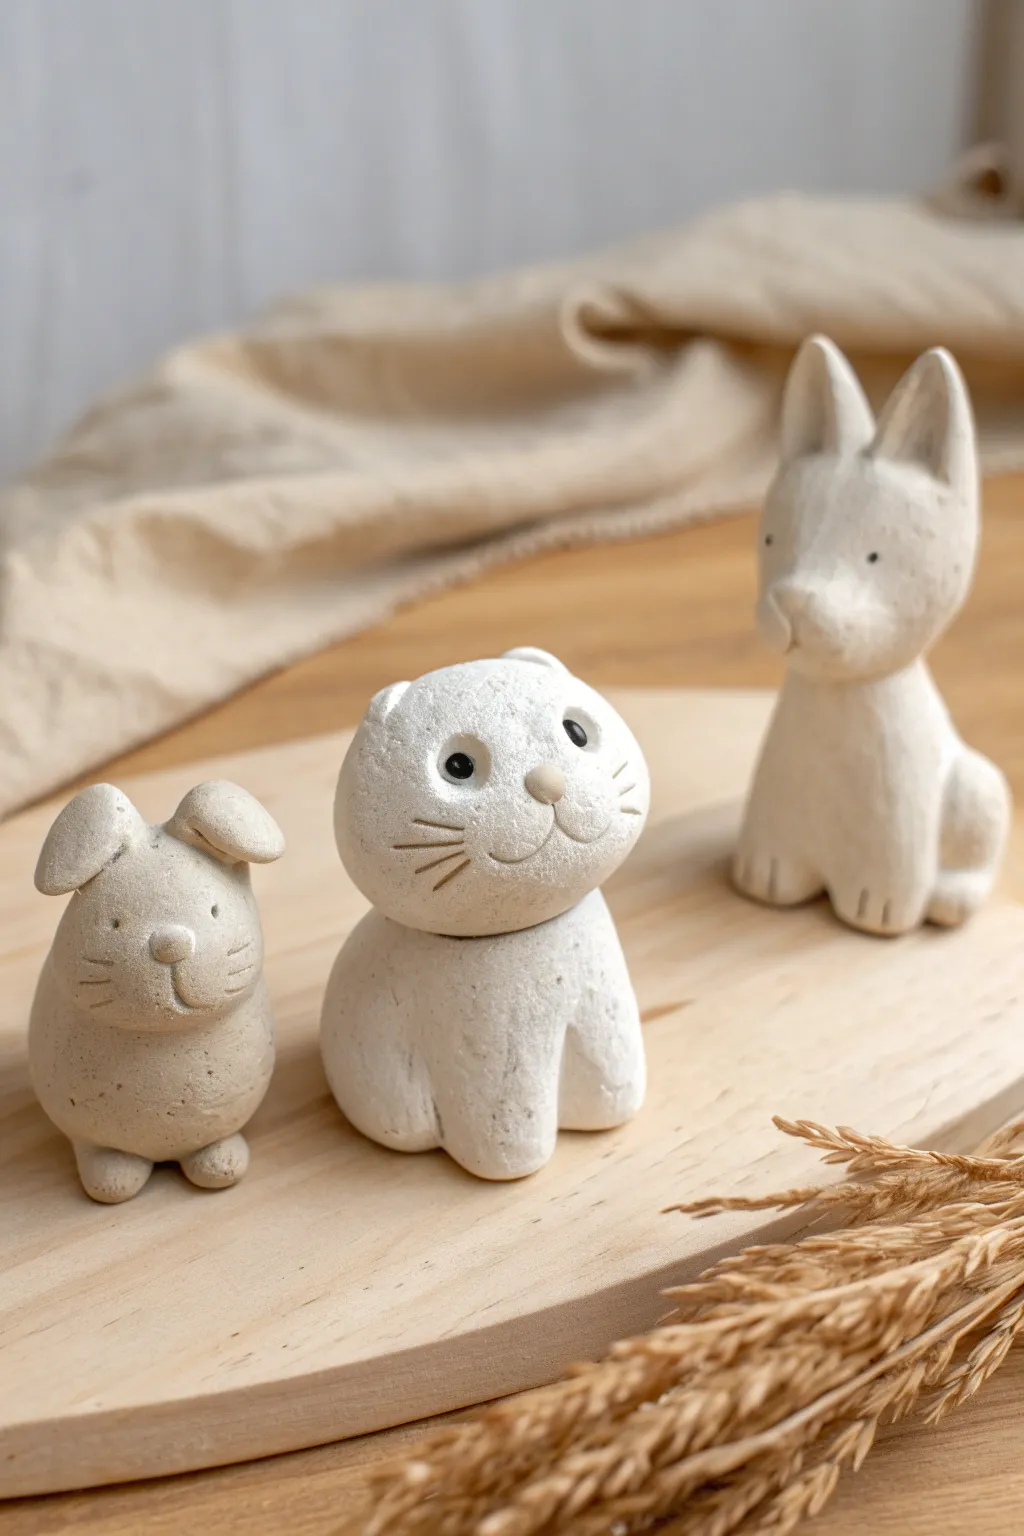
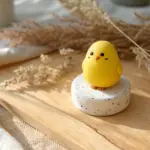
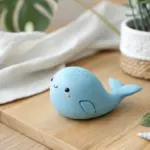
These charming, minimalist animal figurines are the perfect introduction to sculpting, using fundamental spheres and cylinders to build recognizable pets. The textured white clay gives them a lovely natural stone look that fits perfectly with any decor.
Step-by-Step Tutorial
Materials
- White air-dry clay (stone texture preferred) or salt dough
- Small bowl of water
- Pointed sculpting tool or toothpick
- Smooth wooden board or mat for working
- Black acrylic paint (tiny amount)
- Fine-tipped paintbrush or pin
Step 1: Shaping the Bodies
-
Prepare the Clay:
Start by kneading your white clay until it is soft and pliable. If it feels too crumbly, add a drop of water; if it’s too sticky, leave it exposed to air for a minute. -
Form the Base Spheres:
Roll three balls of clay for the bodies. Use a larger ball for the dog and cat, and a slightly squatter, rounder ball for the bunny. Tap the bottoms on your table to flatten them so they stand securely. -
Create the Heads:
Roll three separate spheres for the heads. The cat needs a large, slightly flattened sphere. The bunny needs an oval shape, and the dog needs a sphere with a bit more height. -
Attach Heads to Bodies:
Score (scratch) the top of the body and the bottom of the head, dab a little water on the rough areas, and press the heads firmly onto the bodies. Gently smooth the seam with your finger or a tool to join them.
Cracks Appearing?
If you see tiny cracks forming while the clay dries, mix a tiny bit of fresh clay with water to make a paste and smooth it over the crack like spackle.
Step 2: Sculpting the Bunny (Left)
-
Make the Ears:
Roll two small sausage shapes for the bunny ears. Flatten them slightly and attach them to the top of the head, bending one slightly forward for a cute, floppy look. -
Add the Muzzle:
Create a tiny, rounded triangle of clay and press it onto the center of the face for the nose. Use your tool to draw a vertical line straight down from the nose to make the mouth. -
Texture the Whiskers:
Using a toothpick or sharp tool, gently press horizontal lines on either side of the cheeks to create simple whiskers. -
Form the Feet:
Roll two tiny balls and press them onto the bottom front of the bunny’s body to create little paws.
Add Accessories
Personalize the pets by sculpting tiny clay accessories like a collar, a bow tie, or a ball of yarn for the cat before the clay hardens.
Step 3: Sculpting the Cat (Center)
-
Create the Ears:
Pinch two small, triangular pieces of clay and attach them to the top of the round head. Keep them small and spaced widely apart. -
Shape the Face:
Roll two small balls and press them side-by-side on the face for the muzzle cheeks. place a tiny triangle nose right above where they meet. -
Carve the Eyes:
Use the rounded end of a paintbrush handle or a sculpting tool to press two deep indentations above the muzzle for the large eyes. -
Add Front Legs:
Roll two thick cylinders for the front legs. Attach them vertically to the front of the body, merging the top of the legs into the chest area so it looks like the cat is sitting tall.
Step 4: Sculpting the Dog (Right)
-
Form the Snout:
Instead of a flat face, add a small cylinder of clay to the front of the head to create a projecting snout. Smooth the edges onto the face. -
Attach the Ears:
Shape two tall, pointed triangles for the ears. Attach them high on the head, ensuring they stand upright and alert. -
Add Hind Legs:
For the sitting dog posture, create haunch shapes by rolling balls and flattening them against the sides of the rear body. Add small paws at the bottom front. -
Define the Paws:
Use your sharp tool or toothpick to press vertical lines into the paws of all three animals to suggest toes.
Step 5: Final Details
-
Painting the Eyes:
Once the clay has dried completely (usually 24 hours), use a fine-tipped brush or a pin dipped in black acrylic paint to carefully fill in the eye indentations. -
Refining the Surface:
I like to gently rub the surface with a barely damp sponge before the clay fully dries to remove fingerprints and give it that unified stone texture.
Group your new clay friends together on a shelf or gift them individually to brighten someone’s day


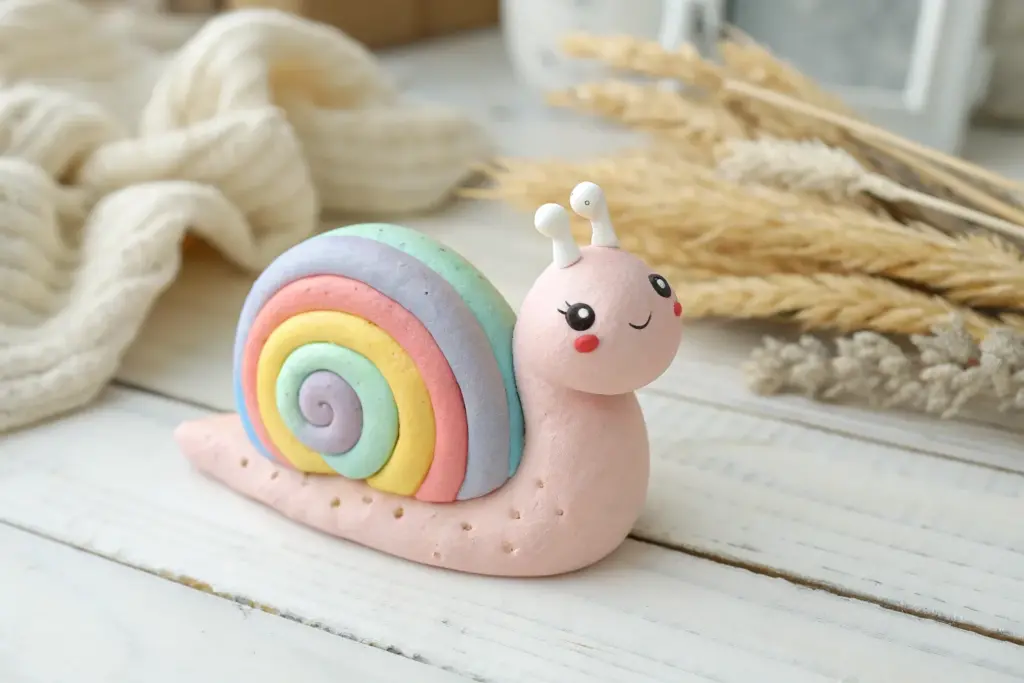
Snail Swirl Shells
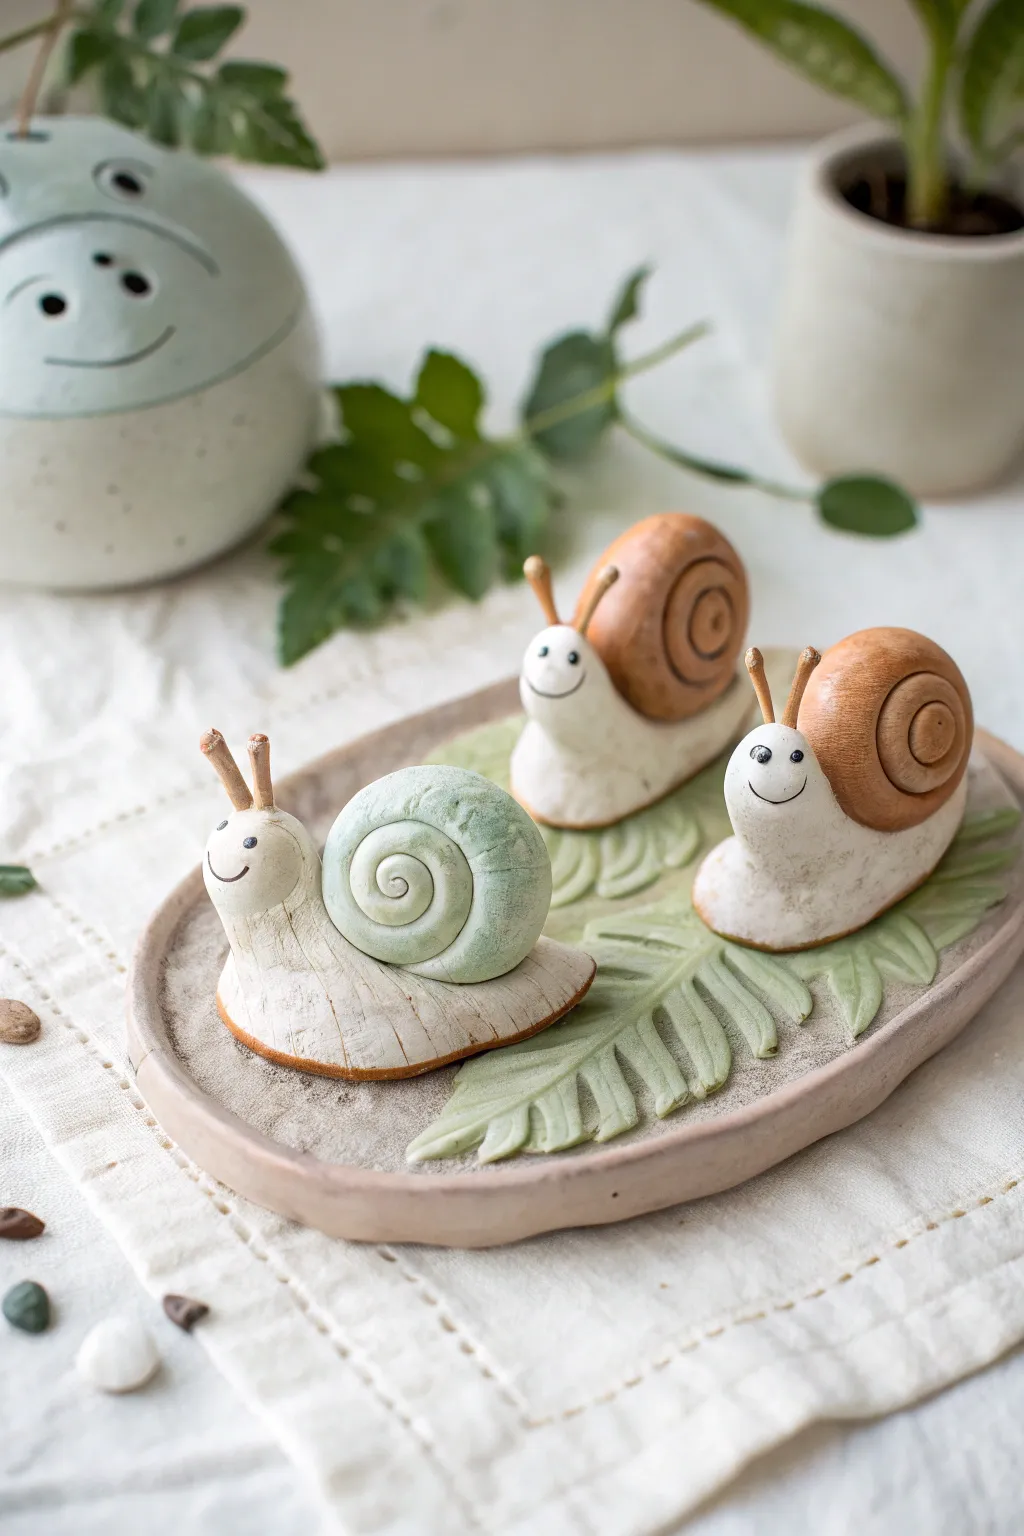
These adorable garden visitors aren’t just cute; they are a fantastic way to teach preschoolers about coiling and simple shapes. The finished project features three charming snails resting on a textured display tray that mimics a forest floor.
Detailed Instructions
Materials
- Polymer clay or air-dry clay (White, Light Brown/Terracotta, Pale Sage Green)
- Clay rolling pin
- Real fern leaves or plastic leaf texture stamps
- Sculpting tools or toothpicks
- Small black beads or black clay for eyes
- Brown acrylic paint (optional, for aging)
- Clear matte varnish
- Small stiff brush (like an old toothbrush)
Step 1: Crafting the Leafy Tray
-
Prepare the Base:
Start by rolling out a medium-sized ball of light brownish-grey clay into an oval slab about 1/4 inch thick. This will be the ground for your snails. -
Raise the Rim:
Gently pinch and lift the edges of your oval slab upward to create a shallow rim, forming a tray shape. -
Create Texture:
Using a stiff brush or a crumpled ball of aluminum foil, tap the surface of the tray to give it a speckled, sandy texture. -
Add Greenery:
Roll out a thin sheet of pale sage green clay. Cut out rough leaf shapes or use a cutter. -
Impress Details:
Press a real fern leaf or a texture tool into your green clay leaves to create realistic veins. Peel the leaf away to reveal the print. -
Assemble the Tray:
Lay two or three clay leaves flat onto the textured tray base, pressing them down gently so they bond with the ‘ground’ layer.
Sticky Situation?
If clay sticks to your table or rolling pin, dust the surface lightly with cornstarch or baby powder before rolling. It works like flour for dough
Step 2: Sculpting the Snails
-
Shape the Bodies:
Roll three balls of white clay. Gently reshape each into a teardrop or slug shape, flattening the bottom so they will sit stably. -
Curve the Tails:
Slightly curve the tail end of each body to suggest movement. I like to lift the head end slightly to give them an alert posture. -
Texture the Skin:
Use a sculpting tool or toothpick to draw faint lines lengthwise along the slug bodies to mimic wrinkly snail skin. -
Form the Shells:
Roll snakes of clay—two in terracotta/brown and one in pale sage green. The snakes should be thicker at one end and tapered at the other. -
Coil the Shells:
Starting from the tapered end, roll each snake into a tight spiral coil to form the classic snail shell shape. -
Attach Shells:
Place a coherent shell onto the back of each body. Press down firmly to adhere, or use a dab of water/clay slip as glue if the clay is dry. -
Make the Faces:
Press two tiny black beads into the head for eyes. Use a tool to carve a simple, curved smile. -
Add Antennae:
Roll tiny, thin logs of brown clay for antennae. Attach two to the top of each head. -
Final Placement:
Arrange your three snails onto the leafy tray you created earlier.
Step 3: Finishing Touches
-
Dry or Bake:
Follow the instructions for your specific clay type to bake or air-dry the entire piece. -
Antique Effect (Optional):
For a rustic look, mix a little brown paint with water. Brush it over the dried piece and immediately wipe it off with a cloth, leaving color only in the crevices. -
Seal:
Apply a coat of clear matte varnish to protect your artwork.
Variation Idea
Make tiny ladybugs or mushrooms from red clay scraps to hide among the leaves on the tray for extra discovery details
You now have a charming little nature scene to display on a shelf or use as a playful desk organizer


Small World Play: Tiny Houses And Trees
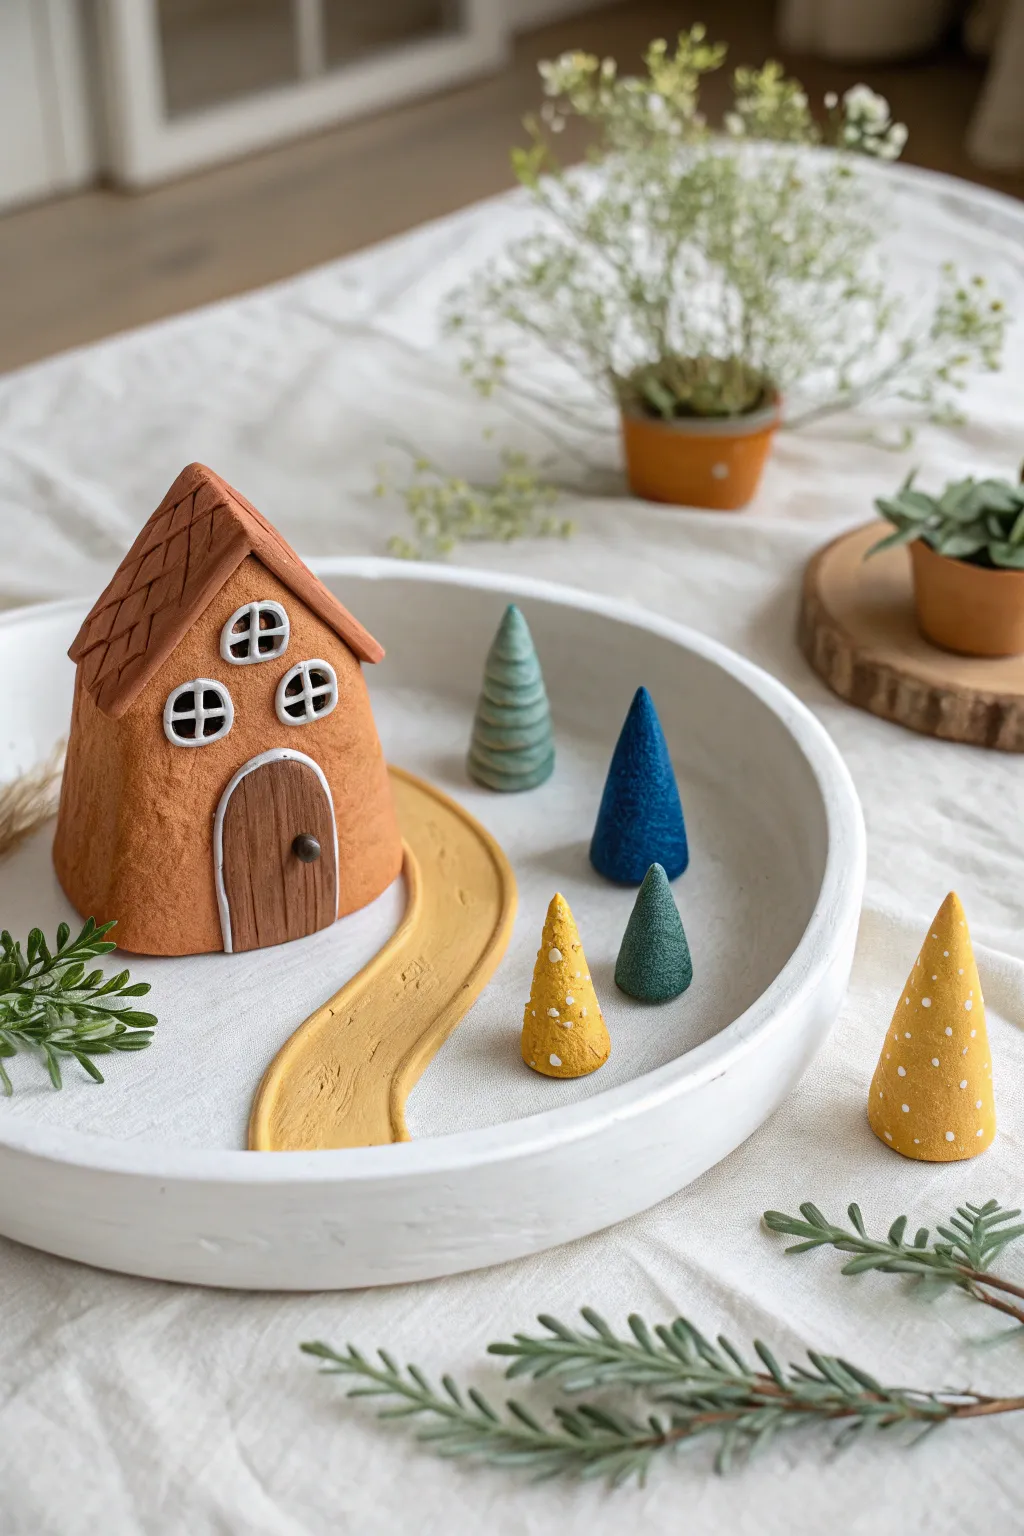
Create a charming miniature world featuring a rustic little cottage and an enchanted forest of cone trees. This contained small world play set sits nestled in a shallow dish, perfect for storytelling and imaginative play.
Detailed Instructions
Materials
- Air-dry clay (terracotta/brown and white)
- Acrylic paints (mustard yellow, forest green, sage green, teal blue, white, brown)
- Shallow round bowl or tray (ceramic or sturdy cardboard)
- Rolling pin
- Clay sculpting tools or a butter knife
- Fine grit sandpaper
- Small paintbrush
- Craft glue or clear tacky glue
- Water in a cup
Step 1: Building the Cottage
-
Shape the base:
Start with a large ball of terracotta-colored clay. Flatten the bottom against your work surface and gently squeeze the sides to form a thick, rounded cylinder that tapers slightly toward the top. -
Form the roof:
Take a second piece of brown clay and flatten it into a thick sheet. Cut a triangle that is slightly wider than your house base to act as the front gable, then mold a pitched roof shape to sit on top of your cylinder. -
Add roof texture:
Using a clay tool or the edge of a ruler, press horizontal lines across the roof. Then, make small vertical indentations between the lines to mimic the look of shingles. -
Create the windows:
Roll tiny snakes of white clay. Form three small circles for the windows—two lower ones and one in the gable. Press these firmly onto the front of the house. -
Add window panes:
Roll even thinner pieces of white clay to create crosses inside each circular window frame. -
Sculpt the door:
Shape a small arch from dark brown clay (or paint clear clay brown later). Press it onto the bottom center of the house. Use a needle tool to score vertical wood grain lines and add a tiny ball handle.
Smooth Operator
Before drying, dip your finger in a little water and gently rub the clay surface. This smooths out fingerprints and cracks for a professional porcelain-like finish.
Step 2: The Magical Forest
-
Roll the cones:
Take lumps of clay in varying sizes and roll them into smooth cone shapes. You’ll want about 5-6 trees of different heights to create visual interest. -
Create texture (Optional):
For the green spiral tree, roll a long snake of clay and coil it upward around a central cone core. For others, keep them smooth for a modern look. -
Dry the pieces:
Set the house and all tree cones aside in a dry, warm spot. Depending on your clay brand and thickness, this may take 24-48 hours. Turn them occasionally so the bottoms dry evenly.
Cracked Clay?
If small cracks appear as the clay dries, mix a tiny bit of fresh clay with water to make a paste (slip) and fill in the cracks, then smooth it over.
Step 3: Setting the Scene
-
Prepare the base:
If your shallow bowl isn’t already white, give it a coat of white acrylic paint or line it with white clay pressed flat. -
Create the path:
Roll a long, flat strip of clay. Cut it into a winding, curved shape. Paint this strip a warm mustard yellow. -
Install the path:
Glue the yellow path directly onto the floor of your bowl, leading from the edge toward the center where the house will sit. -
Paint the trees:
Once hard, paint your trees. Use deep blue, sage green, forest green, and mustard yellow. I like to apply two thin coats for better coverage. -
Add details:
Use the tip of a toothpick dipped in white paint to add tiny dots to the yellow and blue trees for a magical texture. -
Final Assembly:
Arrange the house at the end of the yellow path. Place the trees around the bowl to frame the scene. You can glue them down for a permanent display or leave them loose for interactive play.
Now you have a quaint little village scene ready for tiny adventures