Whenever I need a quick creative win, I grab some air-dry clay or polymer clay and turn it into an object I can actually use. These clay objects ideas start with the go-to classics and wander into more playful, unexpected little studio favorites.
Easy Trinket Dishes
These charming, minimalist trinket dishes showcase the natural beauty of speckled clay under a milky glaze. Perfect for holding rings or small jewelry, they add a touch of handmade warmth to any bedside table with their organic, slightly irregular shapes.
Step-by-Step
Materials
- Speckled stoneware clay (white or buff)
- Rolling pin
- Canvas mat or cloth (to prevent sticking)
- Circle cookie cutters or a small bowl rim
- Needle tool or fettling knife
- Small sponge
- Smooth rib tool (wood or rubber)
- Small soup bowl or mold (for shaping)
- White satin or glossy glaze
- Kiln access (or use air-dry clay alternatives for a decorative-only version)
Step 1: Shaping the Clay Body
-
Prepare your clay:
Cut a manageable chunk of speckled stoneware clay. Wedge it thoroughly on your canvas surface to remove any air bubbles and ensure particle alignment. -
Roll the slab:
Using your rolling pin, roll the clay out into a smooth slab. Aim for an even thickness of about 1/4 inch; you don’t want it too thin or the edges might warp. -
Smooth the surface:
Take a rubber rib tool and gently compress the surface of the slab. This removes canvas texture and aligns the clay platelets to prevent cracking later. -
Cut the forms:
Using a large circle cutter or tracing around a small bowl, cut out your circles. Vary the sizes slightly if you want a nesting set like the photo. -
Soften the edges:
At this flat stage, run a damp sponge or your finger around the cut edge to round it off. Sharp edges become razor-sharp after firing, which we want to avoid.
Step 2: Forming and Drying
-
Create the curve:
Gently lift your clay circle and place it into a shallow bowl or mold lined with a piece of cloth or plastic wrap. This slumped method gives it that gentle, cupped shape. -
Refine the rim:
Once in the mold, gently press the clay to ensure it takes the shape. I like to run a damp sponge around the rim one last time to ensure it looks organic but intentional. -
Let it stiffen:
Allow the clay to dry to a ‘leather-hard’ state inside the mold. This usually takes a few hours depending on humidity. -
Remove and dry:
Carefully remove the dishes from the molds. Place them rim-down on a flat board to dry completely. This helps keep the rim level as moisture evaporates. -
Bisque fire:
Once fully bone dry, load the greenware into the kiln for a bisque firing (usually cone 04 or 06) to prepare them for glazing.
Uneven Rims?
If your rims warp during drying, place a small wooden board lightly on top of the rim while they dry upside down. The gentle weight keeps them perfectly flat.
Step 3: Glazing and Finishing
-
Wipe down:
After the bisque firing, use a clean, slightly damp sponge to wipe any dust off the dishes. Dust can cause the glaze to crawl or not adhere properly. -
Apply wax resist:
Paint a coat of wax resist on the very bottom foot or base of the dish. This prevents the dish from fusing to the kiln shelf. -
Dip or pour glaze:
Dip the dish into a white satin or semi-gloss glaze. A quick dip is best for an even coat that still allows the clay’s dark speckles to show through. -
Clean the foot:
Even with wax, double-check the bottom. Use a sponge to wipe away any stray drips of glaze on the underside. -
Glaze fire:
Load the glazed pieces into the kiln for the final glaze firing (temperature depends on your specific clay and glaze, often cone 6 for stoneware).
Gold Accents
For extra luxury, apply a ring of ceramic gold luster to the rim after the glaze firing. This requires a third, very low-temperature firing to set the metal.
Enjoy styling these lovely little dishes around your home or gifting them as a handmade treasure


Pinch Pot Mini Planters
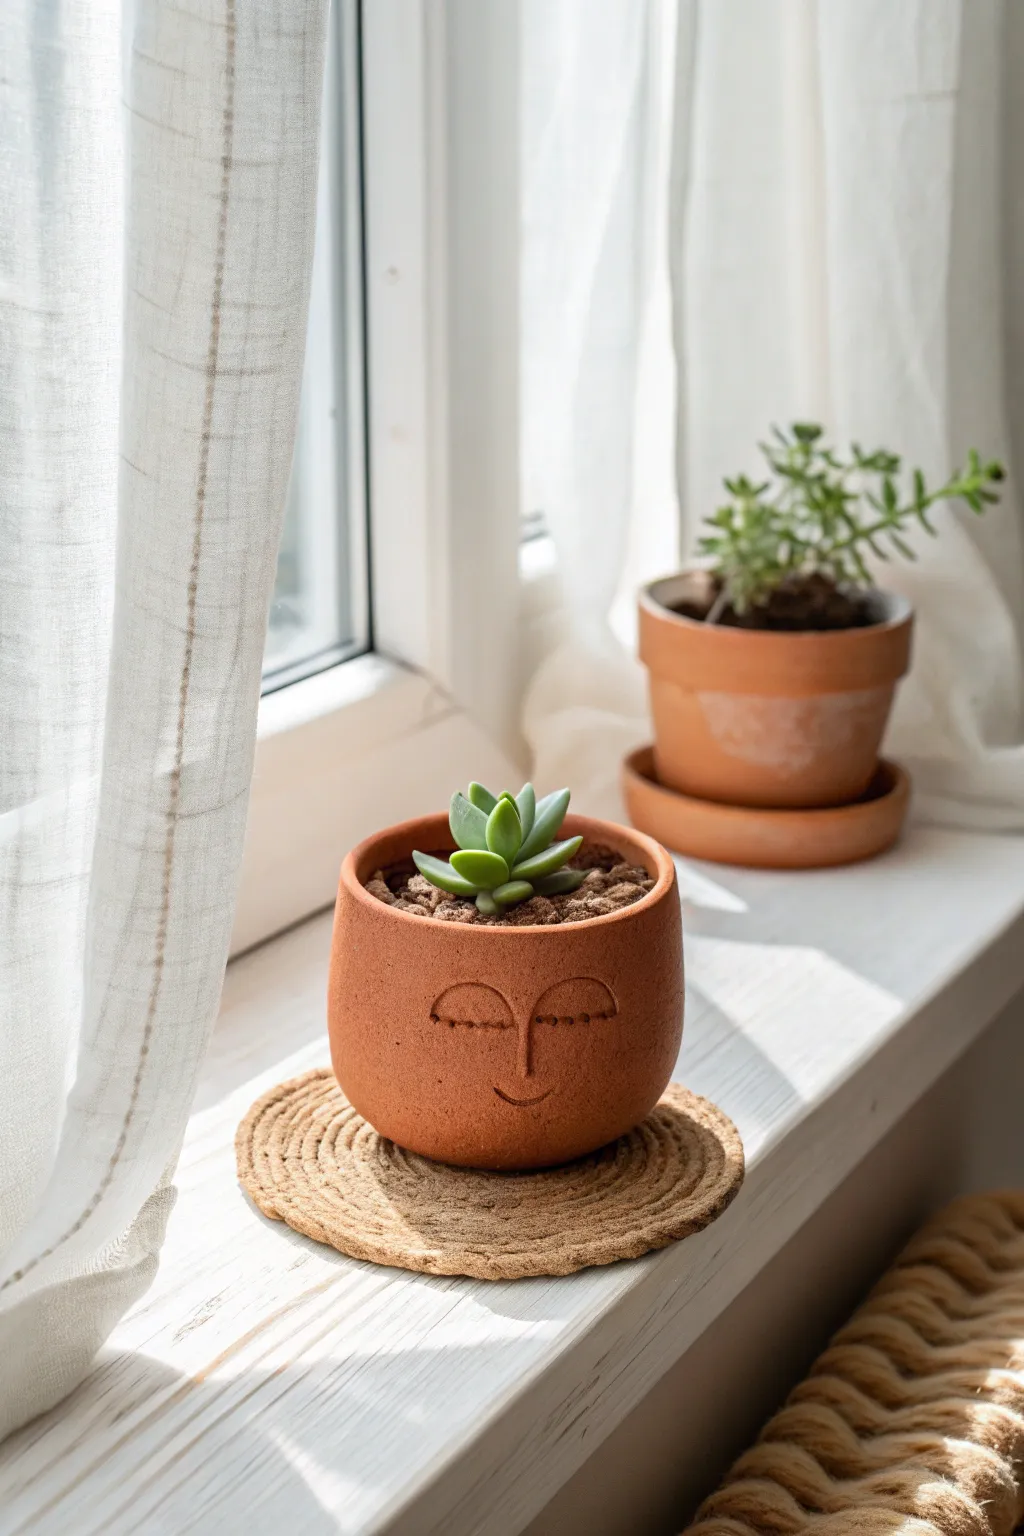
This charming little planter brings a serene personality to your windowsill with its peaceful, sleeping face design. Crafted from terra cotta-colored clay, its simple cylindrical shape and gentle carved details make it a perfect home for your favorite small succulent.
Step-by-Step Guide
Materials
- Terra cotta colored air-dry clay or polymer clay
- Rolling pin
- Clay needle tool or toothpick
- Small loop tool (optional, for carving)
- Sponge
- Water bowl
- Small succulent meant for potting
- Potting soil
Step 1: Forming the Base
-
Prepare the clay:
Begin with a ball of clay roughly the size of a tennis ball. Knead it in your hands to warm it up and ensure there are no air bubbles trapped inside, which is crucial for structural integrity. -
Create the pinch pot:
Push your thumb into the center of the ball, stopping about a half-inch from the bottom. Gently pinch the clay between your thumb and fingers, rotating the ball as you go to thin out the walls. -
Shape the cylinder:
Instead of flaring the walls outward like a bowl, gently guide them upwards to create a straight-sided cylinder. Aim for walls that are approximately 1/4 inch thick all the way around. -
Flatten the bottom:
Tap the base of your pot firmly against your work surface to create a flat, stable bottom. Check that it sits level and doesn’t wobble. -
Smooth the surface:
Dip your finger or a small sponge into a little bit of water and run it over the exterior and rim. You want to erase any fingerprints or cracks, creating a smooth canvas for the face.
Step 2: Adding the Personality
-
Plan the face:
Before carving, use the very tip of your needle tool to lightly sketch where you want the features. I suggest placing the nose in the lower third of the pot to leave room for the plant above. -
Carve the nose:
Using a needle tool or small loop tool, carve a simple ‘U’ shape for the nose. Go deep enough to create a shadow but be careful not to puncture through to the inside. -
Create the eyes:
Draw two downward-curving crescents on either side of the nose for closed, sleeping eyes. Make these sweeping lines smooth and symmetrical. -
Add the eyelashes:
Make small, delicate tick marks extending downward from the eye crescents. three or four lashes per eye usually look best. -
Carve the mouth:
Just below the nose, carve a small, subtle upward curve for a gentle smile. Keep it small to maintain the sweet expression. -
Refine the edges:
Use a damp finger to gently soften the ridges of clay created by your carving scratches. This makes the features look molded rather than just scratched in.
Smooth Operator
To get that matte, sand-like texture shown in the photo, gently dab the wet clay with a rough sponge or a crumpled ball of aluminum foil before it dries.
Step 3: Finishing Up
-
Dry the pot:
Let your planter dry completely according to the clay manufacturer’s instructions. If using air-dry clay, this usually takes 24-48 hours; rotate it occasionally for even drying. -
Add drainage (optional):
If you plan to plant directly inside and used polymer clay, you might drill a small hole in the bottom after baking. For air-dry clay, it’s safer to use this as a cachepot (decorative cover) for a plastic nursery pot. -
Prepare for planting:
Once fully cured or dried, fill the bottom inch with potting soil. -
Plant the succulent:
Gently remove your succulent from its nursery container, massage the roots slightly, and place it into your new clay home. -
Top up:
Fill in the remaining space around the roots with more soil, pressing down gently to secure the plant. Brush off any loose dirt from the rim.
Blush Effect
Before the clay dries, dust a tiny bit of pink soft pastel chalk or blush powder onto the ‘cheeks’ of the face for a rosy, adorable flush.
Place your new friend on a sunny windowsill and enjoy the peaceful vibe it adds to your room


Textured Clay Coasters
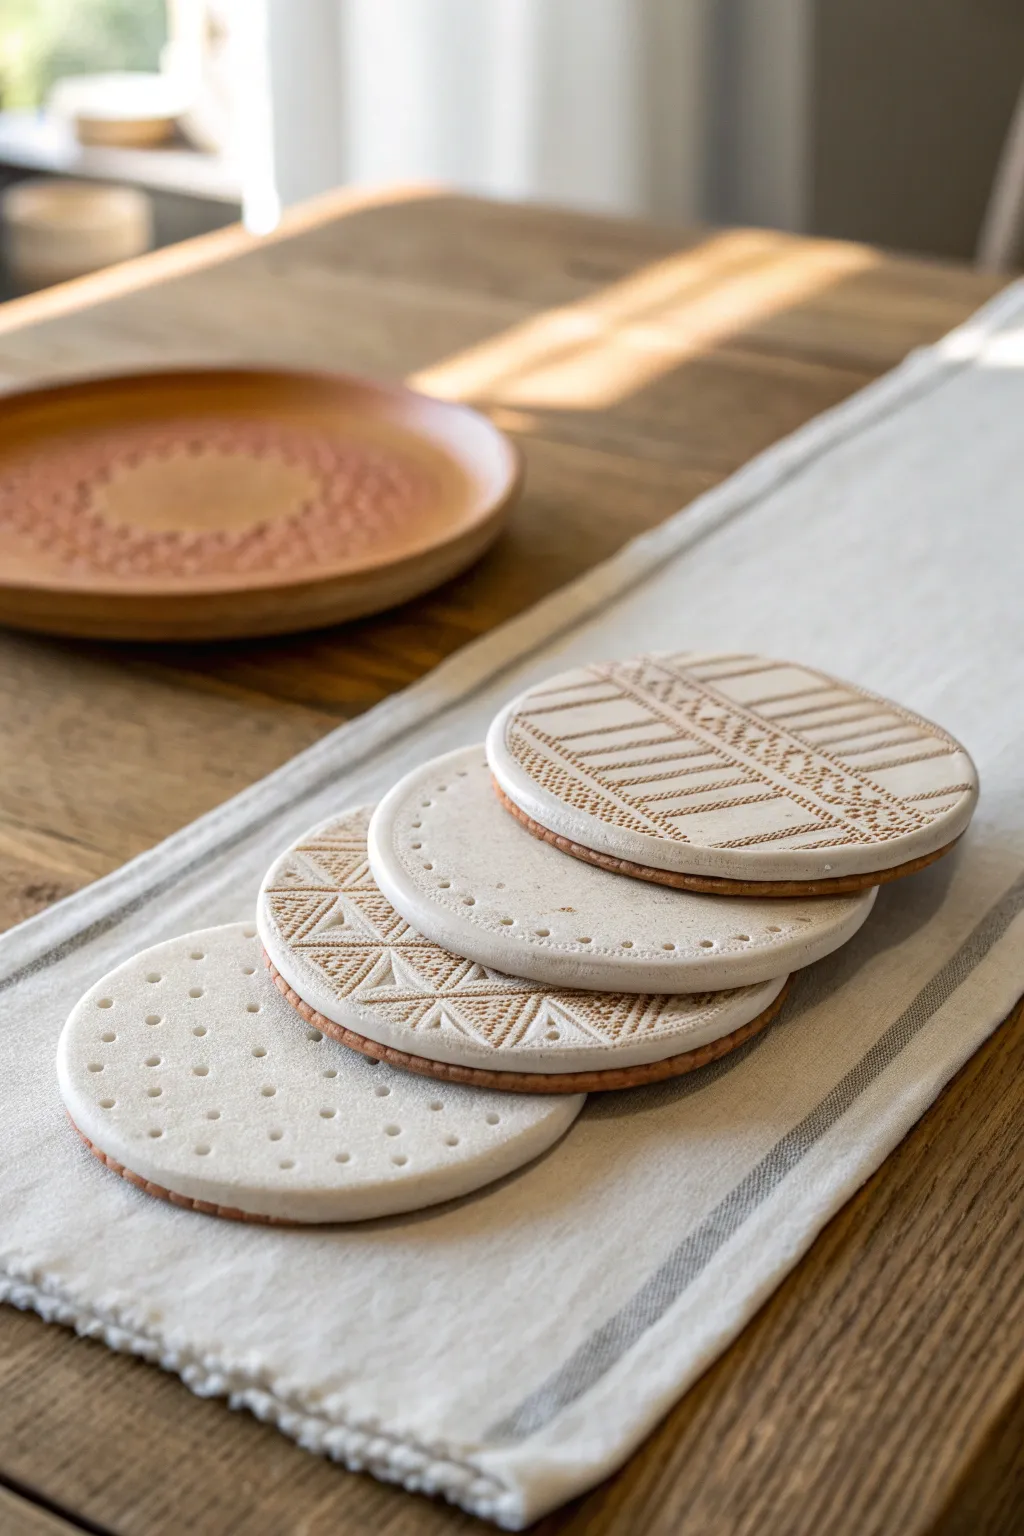
These elegant two-toned coasters blend rustic warmth with modern geometric patterns. By layering white clay over a terracotta base and adding simple textures, you can create a sophisticated set that looks far more complex than it actually is.
Step-by-Step
Materials
- Terracotta-colored air-dry or polymer clay
- White air-dry or polymer clay (must be compatible with the terracotta)
- Circular cookie cutter (approx. 4 inches)
- Rolling pin
- Parchment paper or non-stick mat
- Texture tools (stylus, clay needles, back of a paintbrush)
- Textured rolling pin or stamp pads (optional)
- Clean sponge and water
- Sandpaper (fine grit)
- Matte sealant or varnish
Step 1: Preparing the Base
-
Condition the clay:
Begin by kneading your terracotta-colored clay until it is soft, pliable, and free of any air bubbles. If you are using air-dry clay, keeping your hands slightly damp can help prevent cracking. -
Roll the base layer:
Roll out the terracotta clay on a non-stick surface to a consistent thickness of about 1/8 to 1/4 inch. I like to use guide rails or stacked playing cards on either side of the rolling pin to ensure it’s perfectly even. -
Cut the circles:
Using your circular cutter, punch out round discs for the bottom layer of your coasters. Clean up any rough edges with a fingertip smoothing tool. -
Create the top layer:
Repeat the conditioning and rolling process with the white clay. Roll this layer slightly thinner than the base, perhaps closer to 1/8 inch. -
Cut matching white circles:
Using the same cutter, create an equal number of white discs. -
Laminate the layers:
Gently place a white disc directly on top of a terracotta disc. Lightly roll over them with your rolling pin just enough to bond the layers without distorting the round shape.
Step 2: Texturing and Finishing
-
Plan your patterns:
Decide on a different geometric theme for each coaster to create a cohesive but varied set. Think about concentric circles, radiating triangles, or linear stripes. -
Create the dotted design:
For the first coaster, use a ball stylus or the back of a small paintbrush to press indentations into the white clay. Create concentric rings of dots, spacing them evenly. -
Impress triangle motifs:
For the second design, use a triangular stamp or carefully draw triangles with a clay needle tool. Press a rough texture inside the triangles using the tip of a stiff toothbrush or a textured stamp. -
Add rim details:
On the third coaster, use a needle tool to create a simple border of small dots around the very edge, leaving the center smooth or lightly textured. -
Form the striped pattern:
For the final coaster, create parallel lines across the surface. Alternate between solid etched lines and lines made of small pressed dots or dashes for visual interest. -
Refine the edges:
Check the edges where the two clays meet. If the terracotta layer has squished out too much, gently tap the edge on your work surface to realign them. -
Dry or bake:
Follow the instructions for your specific clay type. If baking polymer clay, ensure you don’t overcook the white clay to keep it bright. If air drying, place a light weight (like a book) on them after a few hours to prevent curling. -
Sand for smoothness:
Once fully cured or dry, lightly sand the white surface and the edges with fine-grit sandpaper to remove any burrs or fingerprints. -
Seal the surface:
Because coasters handle moisture, apply 2-3 coats of a matte, waterproof sealant. This protects the porous clay from drink condensation stains. -
Add felt backing:
Glue a felt circle or small felt feet to the bottom of the terracotta layer to protect your furniture surfaces.
Clean Lines Secret
Wipe your tools with a baby wipe between every single impression. This prevents clay residue from building up and ensures every dot and line remains crisp and defined.
Level It Up
Before sealing, apply a very diluted wash of brown acrylic paint into the textured white areas, then wipe it off immediately. The dark paint will stay in the grooves, making the pattern pop.
Now you have a stunning set of handmade coasters ready to guard your table in style


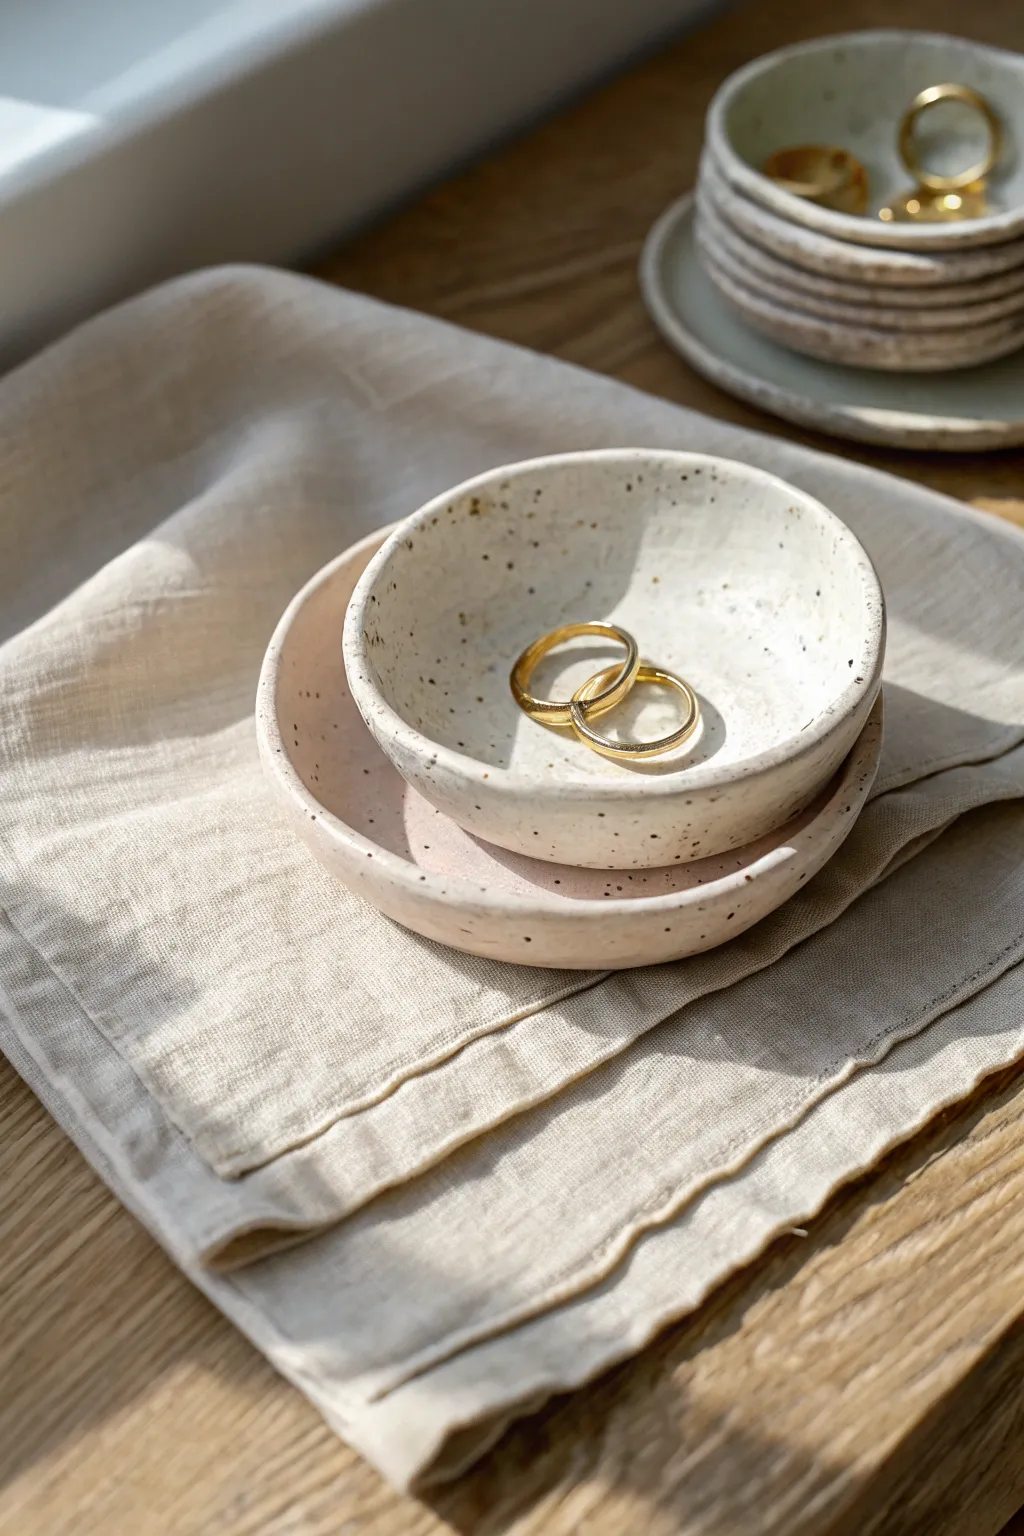
Ring Cones and Holders
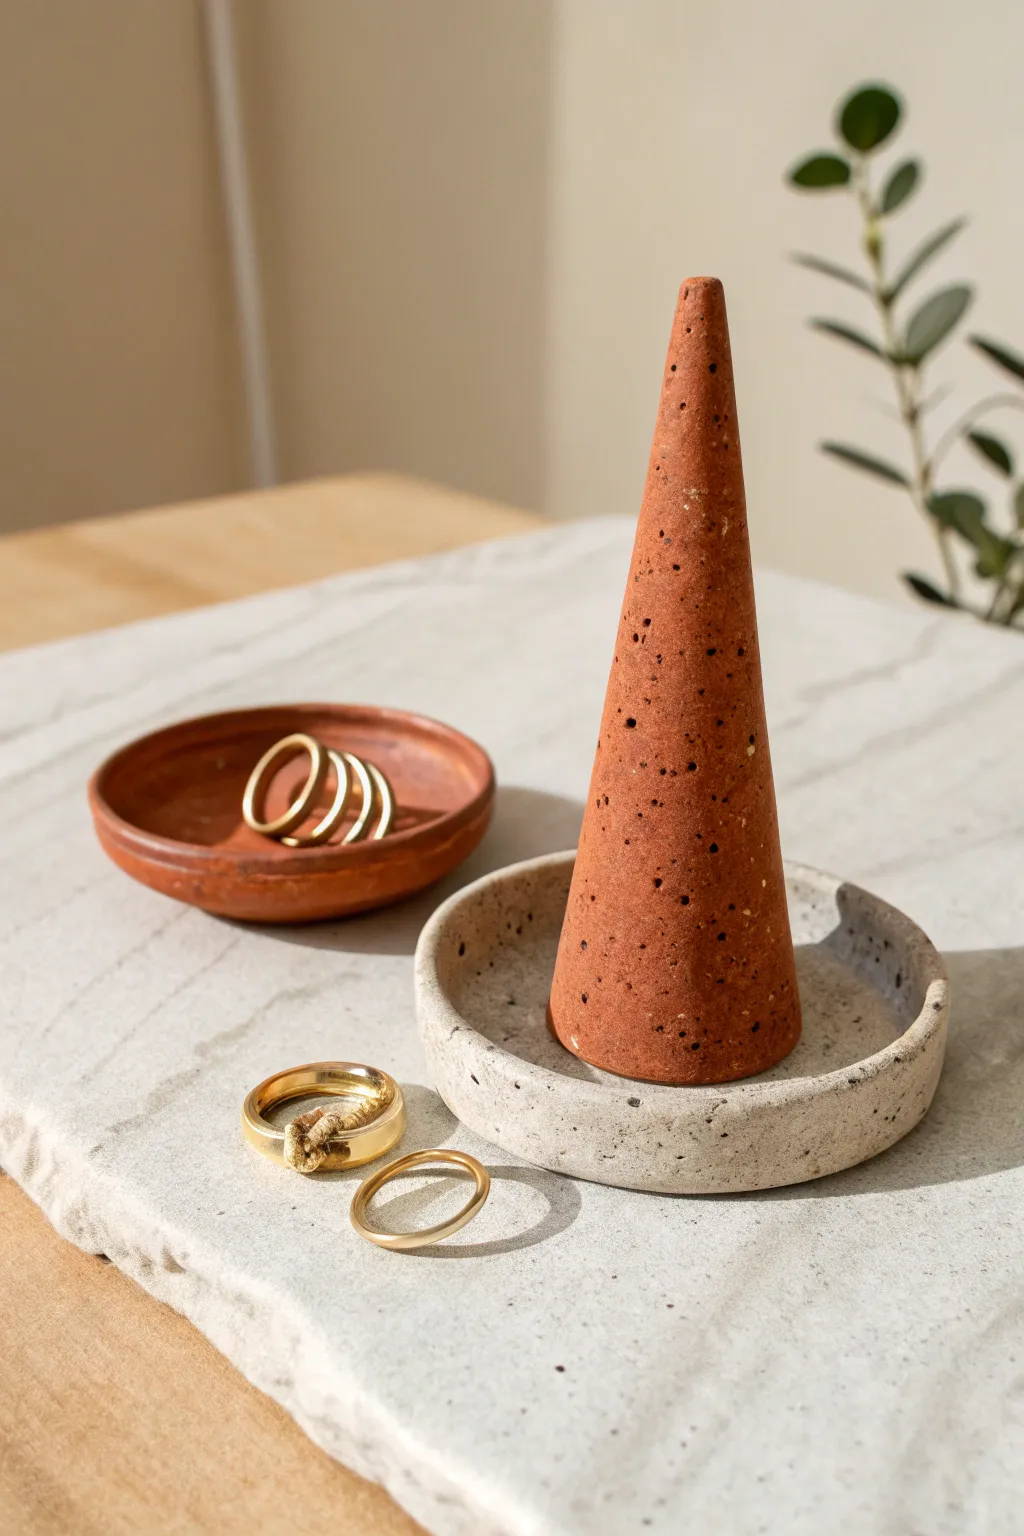
Create a modern, two-piece jewelry display featuring a striking terracotta cone and a matching speckled catch-all dish. This project combines geometric simplicity with organic textures to keep your favorite rings accessible and beautifully organized.
How-To Guide
Materials
- Terracotta polymer clay
- Granite or speckled stone effect polymer clay
- Rolling pin or pasta machine
- X-acto knife or clay blade
- Sandpaper (various grits)
- Small round cookie cutter (approx. 3-4 inches)
- Rubbing alcohol
- Baking sheet
- Cardstock or thick paper (for template)
Step 1: Forming the Cone
-
Condition the clay:
Start by taking a block of terracotta-colored polymer clay and kneading it in your hands until it becomes soft and pliable. Warm clay is essential for preventing cracks during shaping. -
Roll a snake:
Roll the conditioned clay into a thick cylinder on your work surface, ensuring it is solid with no air pockets trapped inside. -
Shape the rough cone:
Begin tapering one end of the cylinder by rolling it back and forth while applying more pressure to one side with your palm. Aim for a height of about 3 to 4 inches. -
Refine the tip:
Stand the clay up on its flat base. Use your fingers to gently smooth the sides upward, refining the point at the top so it is sharp but not brittle. -
Flatten the base:
Firmly tap the base of the cone against your table to ensure it stands perfectly straight. If it leans, adjust the pressure while rolling or carefully slice the bottom with your blade for a flat surface. -
Add surface texture:
To mimic the natural, pitted look in the photo, you can gently press a coarse sponge or even an old toothbrush against the surface. I like to do this lightly so it looks like stone rather than just damaged clay. -
Final smoothing:
Use a finger dipped lightly in rubbing alcohol (or baby oil) to smooth out any distinct fingerprints while leaving the intentional texture intact.
Step 2: Creating the Speckled Dish
-
Prepare the stone clay:
Condition your speckled or granite-effect clay just as you did the terracotta. This clay can be stiffer, so take your time warming it up. -
Roll a slab:
Roll the clay out into an even slab, approximately 1/4 inch thick. A consistent thickness prevents the base from warping in the oven. -
Cut the base:
Use your round cookie cutter to punch out a clean circle from the slab. This will be the floor of your dish. -
Make the rim coil:
Roll a long snake of the same speckled clay. It needs to be long enough to wrap around the circumference of your base circle. -
Attach the rim:
Place the snake on top of the outer edge of your base circle. Gently press it down to adhere. -
Blend the seams:
Using a modeling tool or your thumb, drag the clay from the coil down onto the base on the *inside* of the dish to fuse them together. Repeat this on the outside for a seamless wall. -
Shape the wall:
Pinch the wall gently to create a vertical rim that stands up about half an inch. Flatten the top edge with your finger for a polished look. -
Level the rim:
Place the dish upside down gently on your work surface to ensure the top rim is perfectly level.
Adding Faux Grit
If you don’t have speckled clay, mix plain beige clay with black pepper or dried coffee grounds before rolling. It mimics the stone look perfectly.
Step 3: Baking and Finishing
-
Prepare for baking:
Place both the cone and the dish on a baking sheet lined with parchment paper or cardstock to prevent shiny spots on the bottom. -
Bake:
Bake according to the manufacturer’s instructions for your specific brand of clay—usually 275°F (135°C) for about 30 minutes per 1/4 inch of thickness. -
Cool down:
Allow the pieces to cool completely in the oven with the door slightly ajar. Sudden temperature changes can cause thermal shock and cracking. -
Wet sand:
Once cool, take some wet/dry sandpaper and sand the pieces under running water to remove any rough edges or fingerprints, giving it that professional matte finish. -
Final assembly:
Dry the pieces thoroughly. You can now place the cone inside the dish or keep them separate as a modular set.
Uneven Cone Tips?
If the cone tip keeps drooping while you work, chill the clay in the fridge for 10 minutes to firm it up, then do your final smoothing.
Place your new sculptural set on your nightstand to enjoy a functional piece of art every day

The Complete Guide to Pottery Troubleshooting
Uncover the most common ceramic mistakes—from cracking clay to failed glazes—and learn how to fix them fast.
Wavy Jewelry Catch-All Bowl
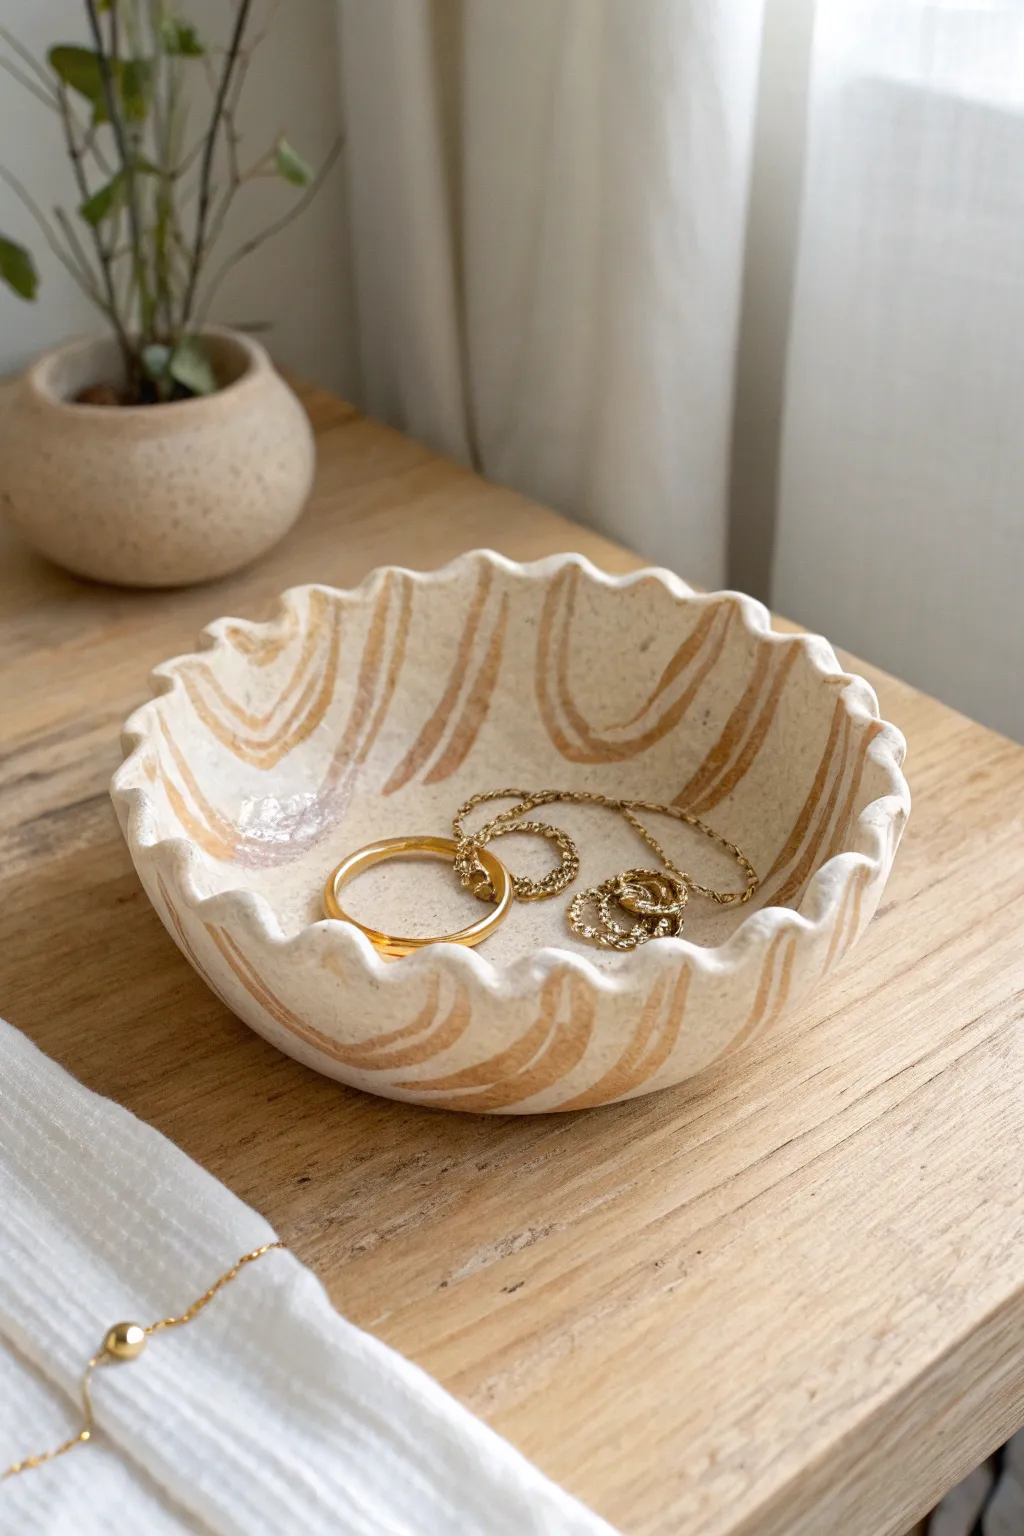
This charming catch-all combines organic forms with a playful ruffled edge, perfect for keeping your everyday jewelry organized. The natural speckled clay and warm, sweeping brushstrokes give it a modern bohemian feel that looks lovely on any bedside table.
Step-by-Step Tutorial
Materials
- Speckled stoneware clay (or polymer clay with faux speckles)
- Rolling pin
- Canvas mat or slab roller mat
- Round bowl or plate (approx. 5-6 inches) for a template
- Needle tool or craft knife
- Small sponge
- Slump mold (or a small bowl covered in plastic wrap)
- Terracotta or warm tan underglaze
- Medium round paintbrush
- Clear glaze (glossy or satin)
- Kiln (if using stoneware) or Oven (if using polymer)
Step 1: Forming the Base
-
Prepare your clay:
Begin by wedging your speckled clay thoroughly to remove any air bubbles. If you are using polymer clay, condition it in your hands until it becomes pliable and soft. -
Roll the slab:
Place the clay on your canvas mat. Using a rolling pin, roll out a slab that is roughly 1/4 inch thick. Try to keep the thickness consistent across the entire surface so the bowl dries evenly. -
Cut the circle:
Place your round template (a small dessert plate works well) onto the slab. Using your needle tool or knife, trace around the edge to cut out a perfect circle, then peel away the excess clay. -
Soften the rim:
Dip your finger or a small sponge in a tiny bit of water and run it gently along the cut edge. This smooths out the sharp corner left by the knife and gives the piece a more finished look.
Cracking Clay?
If the rim cracks while pinching waves, the clay is too dry. Dab the cracks with water-vinegar mix (slip) and smooth with a soft rib or finger.
Step 2: Creating the Wave
-
Initial shaping:
Gently lift your clay circle and drape it into your slump mold or over your covered bowl form. Press it lightly so the bottom flattens out, but leave the sides free. -
Pinch the ruffles:
Working your way around the rim, use your thumb and forefinger to gently pinch the edge into waves. I like to push the clay slightly outward with my thumb while supporting it from behind to create a distinct fluted shape. -
Refine the curves:
Go around the rim a second time to ensure the waves are evenly spaced. You aren’t looking for geometric perfection; slight irregularities add to the handmade charm. -
Dry slightly:
Let the bowl sit in the mold until it is leather-hard. This means it’s firm enough to hold its shape without slumping but still retains some moisture for painting.
Step 3: Decorating & Finishing
-
Mix your color:
Prepare your terracotta or tan underglaze. If the consistency is too thick, thin it with a drop of water so it flows smoothly like watercolor. -
Paint the first stroke:
Load your medium round brush. Starting from the bottom center of the bowl, sweep the brush upward toward one of the high points of the wavy rim. -
Create the pattern:
Continue painting curved, swooping lines around the interior. Notice how the lines in the example mimic the curve of the bowl itself—some are ‘U’ shapes, others are simple arches. -
Double check coverage:
If the underglaze looks transparent, let the first layer dry for a minute and apply a second coat over your strokes to get that rich, opaque color. -
Bisque fire:
Once the piece is bone dry, fire it in the kiln to bisque temperature (usually cone 04). If using polymer clay, bake according to the package instructions now. -
Apply clear glaze:
After the first firing (for ceramic), dip the entire bowl into a clear glaze. Shake off any excess drips gently. -
Final fire:
Place the glazed bowl back in the kiln for the final glaze firing (often cone 5 or 6 depending on your clay body). This will seal the clay and make the surface shiny and durable.
Add Gold Accents
For a luxe touch, apply gold luster to the very edge of the wavy rim after the glaze firing. It requires a third, low-temperature firing.
Place your finished bowl on your dresser and protect your favorite rings in style
Minimal Incense Holders
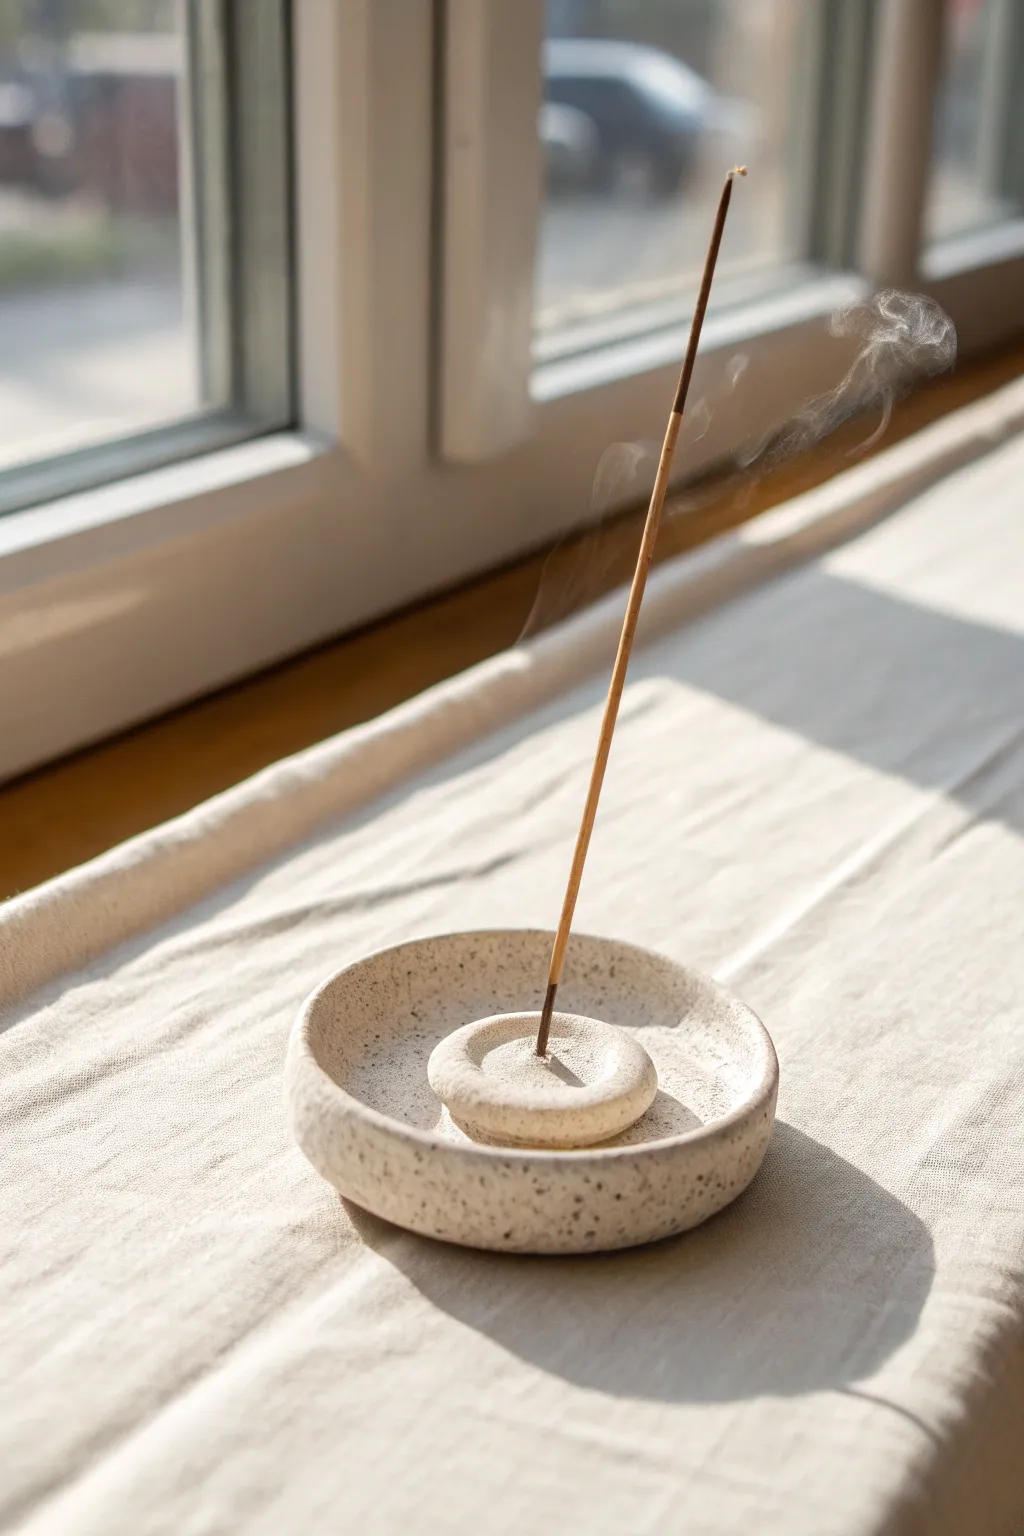
This elegant two-piece incense holder combines organic texture with modern simplicity, creating a serene focal point for any room. The design features a shallow catch-dish and a separate donut-shaped holder, both crafted from speckled clay that mimics the look of natural stone.
Step-by-Step
Materials
- Speckled stoneware clay (white or cream with iron flecks)
- Rolling pin
- Canvas mat or cloth for rolling
- Round cookie cutters (approx. 4-inch and 1.5-inch)
- Sponge
- Wooden sculpting tool or needle tool
- Incense stick (for sizing)
- Small bowl of water
- Clear matte glaze (optional)
- Kiln (or air-dry clay alternative if not firing)
Step 1: Forming the Base Dish
-
Prepare the clay slab:
Begin by wedging a baseball-sized amount of speckled clay to remove air bubbles. Flatten it onto your canvas mat and use a rolling pin to create an even slab that is approximately 1/4 inch thick. -
Cut the primary circle:
Using your larger round cookie cutter (or a bowl as a template), press firmly into the slab to cut out a perfect circle. Remove the excess clay around the edges. -
Smooth the rim:
Dip your finger or a small sponge into water and gently run it along the cut edge of the circle. This softens the sharp angle left by the cutter, giving it a more finished, stone-like appearance. -
Shape the curvature:
Place the clay circle on a piece of foam or cup it gently in your palm. Press your thumbs into the center and work outwards, slightly lifting the edges to create a shallow, concave bowl shape. -
Refine the surface:
Use a damp sponge to wipe away any fingerprints or tool marks on the interior and exterior of the dish. The goal is a smooth, matte finish that highlights the clay’s natural speckles.
Stone Texture Tip
To enhance the organic feel, gently press a real stone or coarse sandpaper against the damp clay surface before drying. This adds subtle pitting.
Step 2: Creating the Donut Holder
-
Roll a thick coil:
Take a smaller piece of clay and roll a short, thick coil. Alternatively, roll a small slab that is slightly thicker than the base dish, perhaps 3/8 inch thick. -
Cut the inner piece:
Use the smaller 1.5-inch round cutter to create the central base piece. If you want softer edges immediately, I recommend gently patting the clay down a bit more after cutting. -
Round the edges:
Unlike the sharp edges of the base, this smaller piece should look like a pebble. Use your wet fingers to aggressively round over the top and bottom corners until it resembles a flattened stone or donut shape. -
Indent the center:
Press your thumb firmly into the center of this small pebble to create a shallow depression. This concave area will help catch any ash that falls extremely close to the stick. -
Create the insertion hole:
Take an actual incense stick or a needle tool and pierce the very center of the indentation. Go all the way through, then wiggle it slightly to ensure the hole is just loose enough to hold a stick without it getting stuck. -
Check the angle:
Insert your test incense stick and ensure it stands at your desired angle (usually slightly off-vertical). Make sure the stick doesn’t tip the small holder over; if it does, flatten the bottom of the holder slightly for stability.
Step 3: Drying and Finishing
-
Slow drying:
Place both the large dish and the small donut holder on a board covered with plastic wrap. Loosely cover them to let them dry slowly over 2-3 days, which prevents warping. -
Bisque fire:
Once bone dry, load the pieces into the kiln for a bisque firing according to your clay body’s specifications (usually Cone 04). -
Glazing decision:
For the look in the photo, the raw clay texture is key. You can leave the outside unglazed and apply a very thin clear matte glaze only to the inside of the dish for easier cleaning. -
Final firing:
Fire the pieces a second time to the maturation temperature of your clay (e.g., Cone 5 or 6). This vitrifies the clay, making it durable and bringing out the dark iron speckles. -
Assembly:
Once cooled, simply place the small donut holder into the center of the larger dish. The two-piece design allows you to easily pick up the small part to shake off ash.
Level Up: Color Contrast
Use a dark charcoal or black clay for the small donut holder while keeping the base dish light. The contrast makes the piece feel structural.
Light your favorite scent and watch the smoke drift upward from your handcrafted creation.


What Really Happens Inside the Kiln
Learn how time and temperature work together inside the kiln to transform clay into durable ceramic.
Modern Pen and Brush Cups
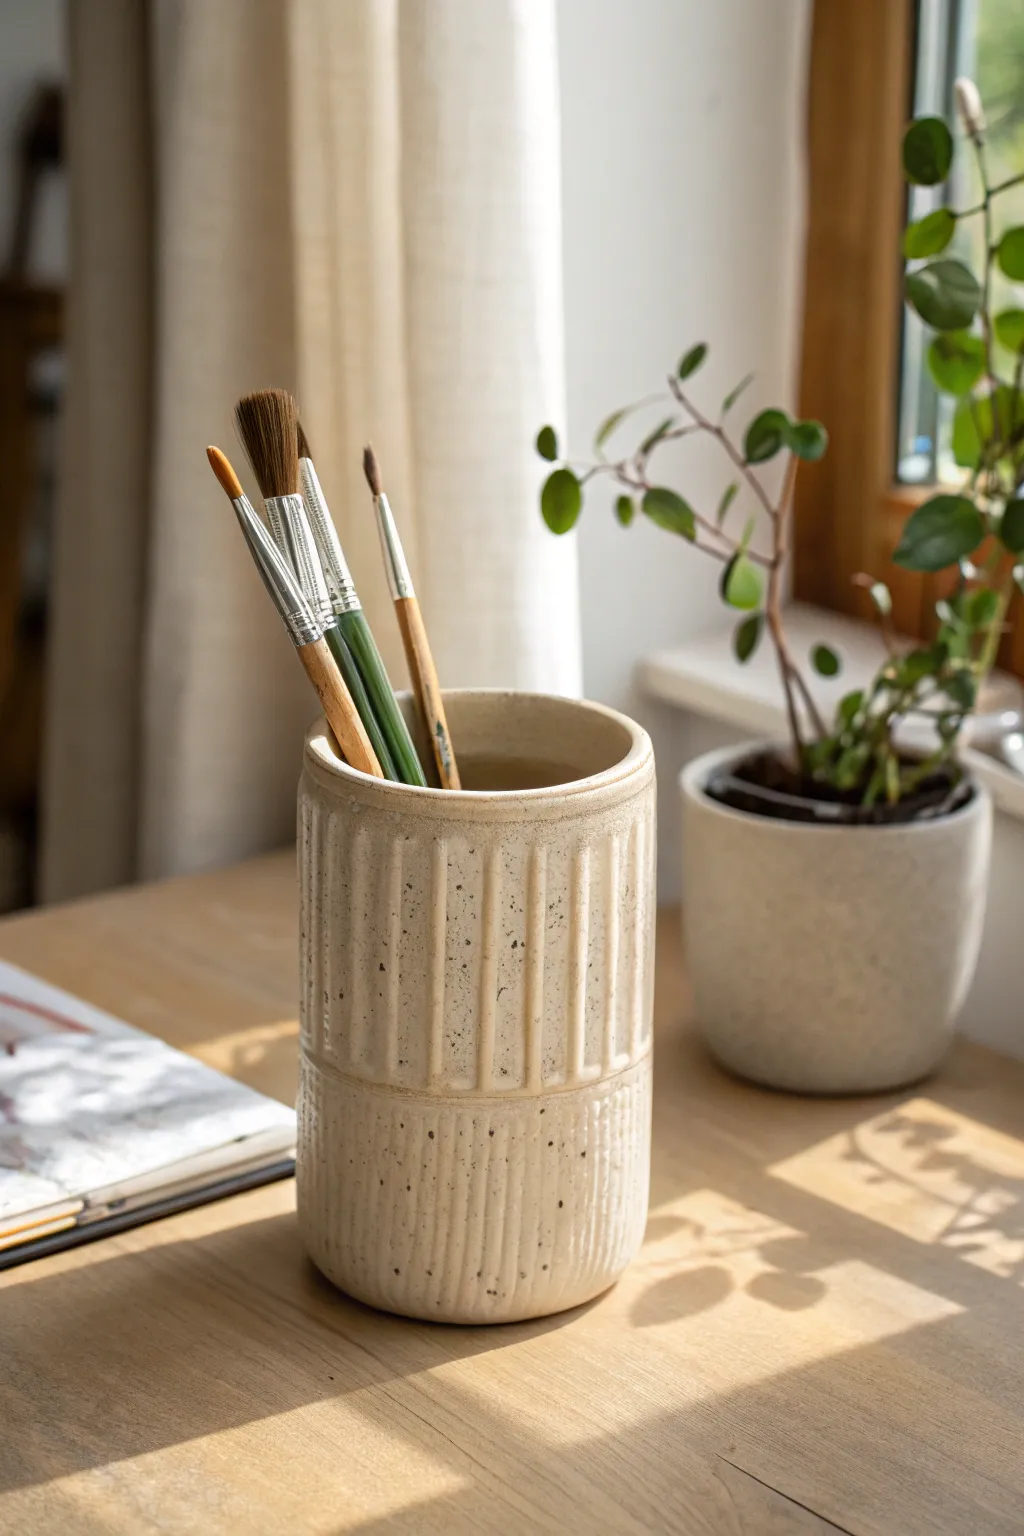
This elegant brush holder combines modern lines with rustic charm, featuring a split-texture design that adds visual interest to any studio space. The speckled cream glaze gives it a warm, stoneware feel perfect for organizing your favorite creative tools.
How-To Guide
Materials
- White stoneware clay with speckles (or plain white clay + speckled glaze)
- Rolling pin
- Canvas mat or slab roller
- Rectangular template (approx. 10×6 inches)
- Circle cutter or template (approx. 3.5 inches)
- Scoring tool (serrated rib or needle tool)
- Slip (clay mixed with water)
- Wooden modeling tool with a flat edge
- Needle tool
- Sponge
- Matte cream or oatmeal glaze
Step 1: Slab Construction
-
Prepare the slab:
Begin by rolling out your clay on a canvas mat to a consistent thickness of about 1/4 inch. Ensure the slab is large enough to accommodate your rectangular template and the base circle. -
smooth the surface:
Take a rubber kidney or a slightly damp sponge and compress the clay slab on both sides. This removes the canvas texture and aligns the clay particles to prevent warping later. -
Cut the components:
Place your templates on the slab. Using a needle tool, cut out one large rectangle for the body and one circle for the base. Keep the knife upright and steady for clean 90-degree edges. -
Bevel the edges:
On the rectangle, bevel the two short ends at contrasting 45-degree angles. This will allow them to overlap seamlessly when you form the cylinder.
Clean Lines
When creating the vertical fluting, lay a piece of plastic wrap over the clay before pressing your tool in. This softens the edges and prevents little clay crumbs.
Step 2: Texturing and Forming
-
Mark the halfway point:
Lightly draw a horizontal line across the middle of your rectangular slab using a ruler. This will serve as the guide to separate your two different textures. -
Create the upper ribbing:
For the top half, use the rounded handle of a paintbrush or a wooden modeling tool. Press vertical indentations into the clay, spacing them about a half-inch apart to create deep, distinct fluting. -
Create the lower texture:
On the bottom half, use a finer tool, like the edge of a ruler or a serrated rib, to create thinner, more frequent vertical lines. The contrast between wide and narrow lines is key to this look. -
Define the separation:
Use a modeling tool to press a distinct horizontal groove exactly where your two textures meet. This creates a ‘belt’ that visually separates the sections. -
Form the cylinder:
Carefully lift the rectangle and curve it into a cylinder. Score the beveled edges aggressively and apply a generous amount of slip. -
Join the seam:
Press the scored edges together firmly. I find it helpful to reach inside with one hand to support the wall while smoothing the seam on the outside with a wooden tool. -
Prepare the base:
Score the bottom edge of your cylinder and the top perimeter of your circular base piece. Apply slip to both areas. -
Attach the base:
Place the cylinder onto the base. Press down gently to secure the bond. Use a modeling tool to smooth the clay from the base up onto the wall to seal the joint completely.
Step 3: Finishing and Glazing
-
Refine the rim:
Use a damp chamois or sponge to round over the top rim of the cup. It should be smooth to the touch and slightly tapered. -
Check the interior:
Look inside the cylinder and smooth out the inner seam with a long wooden tool or a sponge on a stick. A watertight seal is important if you plan to use this for wet brushes. -
Slow drying:
Loosely cover the piece with plastic to let it dry slowly. This prevents the vertical seam from cracking as the clay shrinks. -
Bisque fire:
Once bone dry, fire the piece to the appropriate bisque temperature for your specific clay body (usually Cone 04 or 06). -
Apply the glaze:
Dip the cup into a matte cream or oatmeal glaze. If you used plain white clay, choose a glaze with iron speckles suspended in it to achieve the spotted effect shown in the photo. -
Wipe the foot:
Use a wax resist solely on the bottom creation, or carefully sponge away any glaze from the very bottom of the piece so it doesn’t fuse to the kiln shelf. -
Final firing:
Glaze fire the piece to maturity (often Cone 5 or 6 for stoneware). The heat will interact with the speckles, causing them to bleed slightly through the white glaze.
Warping Walls?
If your cylinder keeps slumping into an oval shape, stuff the inside loosely with crumpled newspaper or foam keeps the shape round while it firms up.
Now you have a custom, minimalist vessel that elevates your workspace simply by holding your tools
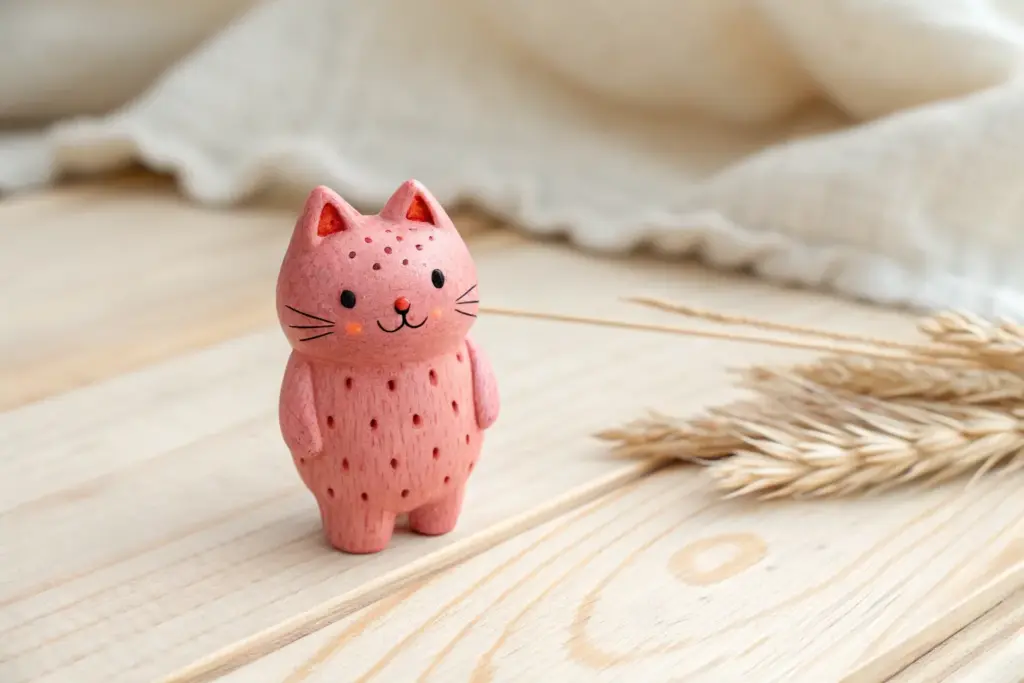
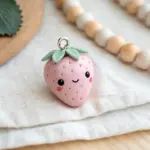
Happy Fruit Magnets

Brighten up your kitchen with these adorable happy fruit magnets that are sure to make you smile every time you reach for a snack. This project features a cheerful lemon, a sweet cookie, and a pair of strawberries, all sculpted from polymer clay with charming hand-painted expressions.
Step-by-Step
Materials
- Polymer clay (yellow, tan/beige, red, green)
- Acrylic rolling pin
- Circle cookie cutters (various sizes)
- Heart-shaped cookie cutter (optional for strawberries)
- X-Acto knife or clay blade
- Ball stylus tool
- Black acrylic paint
- White acrylic paint
- Pink acrylic paint or blush
- Fine detail paintbrush or toothpick
- Strong craft glue (E6000 recommended)
- Round ceramic or neodymium magnets
- Matte or glossy glaze (optional)
Step 1: Shaping the Base Forms
-
Prepare the lemon:
Start by conditioning the yellow polymer clay until it’s soft and pliable. Roll it out to a thickness of about 1/4 inch. -
Cut the lemon circle:
Use a medium-sized circle cutter to punch out a perfect round shape for the lemon body. Smooth the edges with your finger to remove any sharp cuts. -
Form the cookie:
Repeat the process with the tan or beige clay. Roll it out and cut a similar-sized circle. I like to gently texture the surface by tapping it lightly with a toothbrush to simulate a baked texture. -
Shape the strawberries:
Condition the red clay. You can either use a heart-shaped cutter and round off the bottom point, or hand-sculpt a rounded triangular shape that is wider at the top and tapers gently to a soft point at the bottom. Make two of these.
Sticky Situation?
If fingerprints are visible on your raw clay, lightly brush them with a little baby oil or cornstarch before baking to smooth them out perfectly.
Step 2: Adding Leaves and Details
-
Create the lemon leaf:
Take a small piece of green clay and shape it into a tear-drop. Flatten it slightly and use a knife tool or toothpick to indent a central vein line. -
Attach the lemon leaf:
Press the leaf firmly onto the top center of the yellow circle. You can add a tiny drop of liquid clay or translucent sculpey for extra bond if you have it. -
Make strawberry stems:
For the strawberries, create a small green stem base. Then, shape 3-4 tiny teardrops for the leaves. Arrange these leaves radiating from the stem center. -
Attach strawberry greens:
Press the leaf cluster onto the top flat edge of your red strawberry shapes. Ensure the connection is secure by blending the clay slightly on the back side. -
Add cookie chips:
Roll tiny balls of dark brown or black clay and press them randomly into the tan cookie surface to look like chocolate chips. Flatten them flush with the surface.
Step 3: Baking and Painting
-
Bake the pieces:
Place all your shapes on a parchment-lined baking sheet. Bake according to your polymer clay package instructions (usually 275°F/135°C for 15-30 minutes). -
Cool down:
Allow the clay pieces to cool completely before handling. They are fragile while warm. -
Paint the eyes:
Dip the handle end of a paintbrush or a ball tool into black acrylic paint. Dot two eyes onto each fruit face. Position them wide apart for that cute ‘kawaii’ look. -
Draw the smiles:
Using a very fine detail brush or a toothpick, paint a thin, U-shaped smile between the eyes. For the lemon, make it a wide curve. -
Add rosy cheeks:
Dip a Q-tip or a small dry brush into pink paint (or scrape some real powder blush). Gently dab round pink spots completely outside the corners of the smile. -
Highlight the eyes:
Once the black paint is dry, add a tiny white dot to the upper corner of each eye to bring the character to life. -
Strawberry seeds and cookie freckles:
For the strawberries, use a white paint pen or fine brush to add small ‘V’ shapes or dots for seeds. On the cookie, you can add tiny white stars or dots for extra whimsy.
Glitter & Glam
Mix a pinch of iridescent glitter into the clay before rolling, or coat the finished fruit with UV resin for a durable, glass-like high gloss finish.
Step 4: Assembly
-
Seal the surface:
If desired, apply a coat of matte or satin glaze to protect the paint. This is helpful for kitchen items that might get wiped down. -
Apply glue:
Squeeze a pea-sized amount of strong adhesive like E6000 onto the back center of each fruit. -
Attach magnets:
Press your round magnet into the glue. Let the magnets sit face-down undisturbed for at least 24 hours to ensure a permanent hold.
Now your fridge is ready to greet you with a friendly smile every morning

TRACK YOUR CERAMIC JOURNEY
Capture glaze tests, firing details, and creative progress—all in one simple printable. Make your projects easier to repeat and improve.
Simple Candle Holders
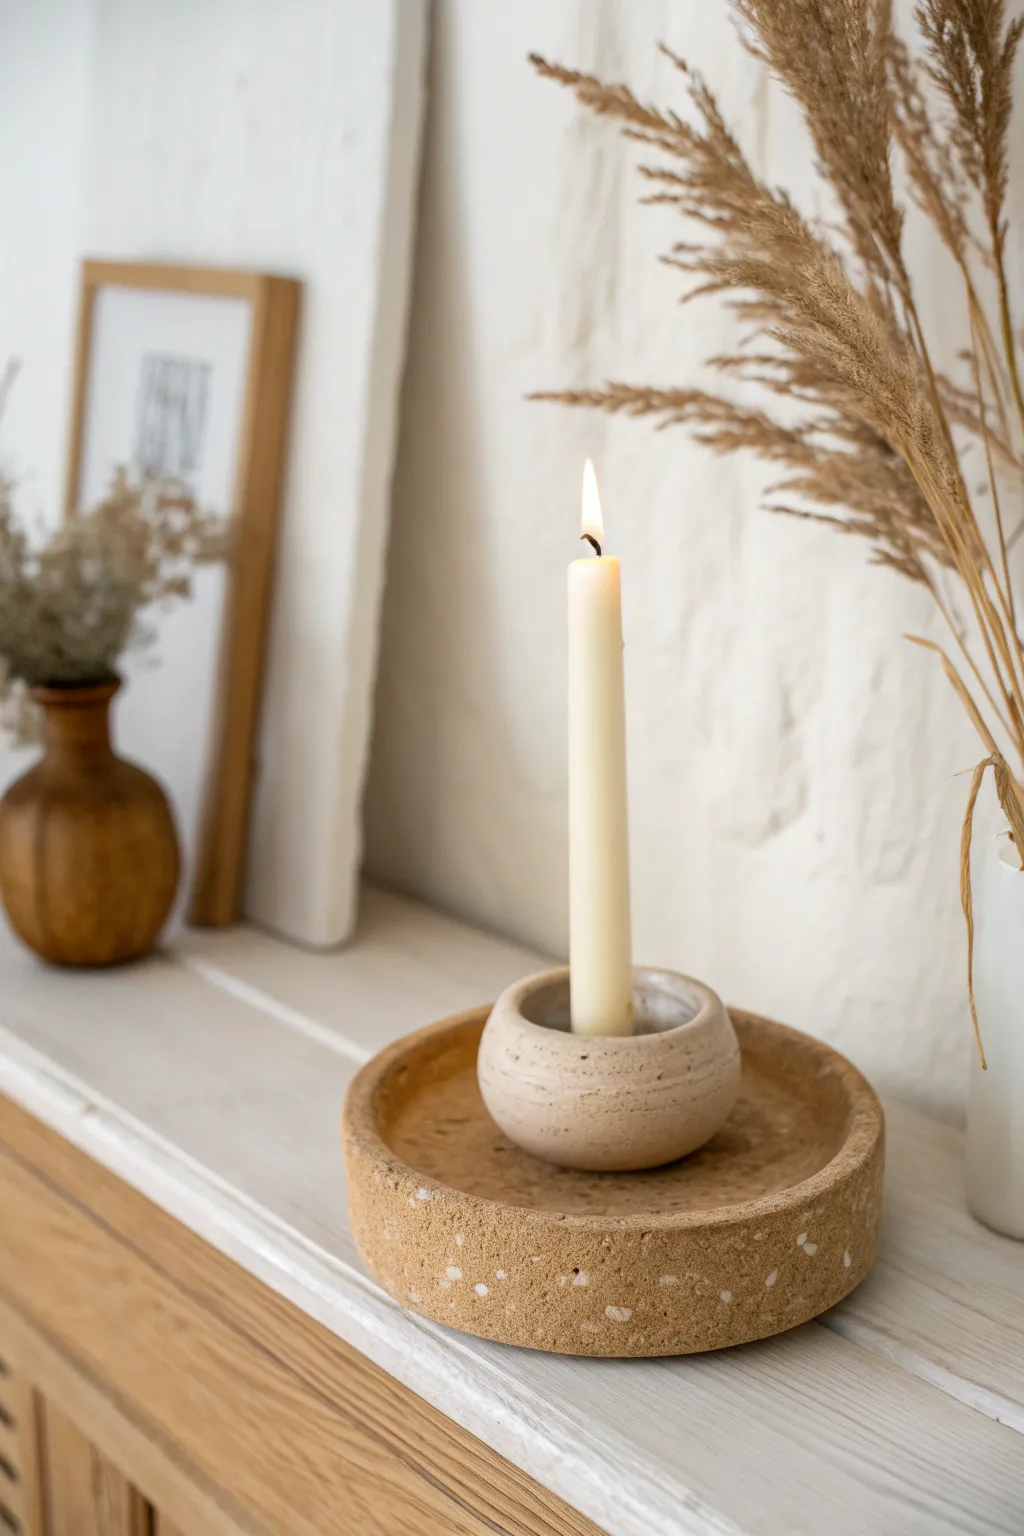
Embrace earthy textures with this beautiful two-piece set featuring a speckled clay tray and a smooth, rounded candle cup. This project combines a simple pinch pot technique with slab building to create a serene, minimalist display for your tapered candles.
How-To Guide
Materials
- Speckled buff stoneware clay (or polymer clay with terrazzo effect)
- White grog or crushed dried clay bits (for texture)
- Rolling pin
- Circle cutter or bowl (approx. 5-6 inches diameter)
- Clay knife or needle tool
- Smoother rib or sponge
- Taper candle (for sizing)
- Score and slip tools
Step 1: Creating the Speckled Tray
-
Prepare the clay:
Start by taking a large chunk of your buff clay. To get that distinct gritty texture seen in the photo, knead in a generous amount of coarse white grog or small chips of dried white clay. -
Roll the slab:
Roll your prepared clay out into a uniform slab, aiming for about 1/4 inch thickness. Keep your rolling pin steady to ensure an even surface. -
Cut the base:
Use a circle cutter or place a small bowl upside down on the clay as a template. Cut a perfect circle for the base of your tray, approximately 5 to 6 inches across. -
Make the wall strip:
Roll out a long, narrow strip of clay from the remaining slab. This needs to be long enough to wrap around the circumference of your base and about 1 inch tall. -
Score and slip:
Score the outer edge of your circular base and one long edge of your strip. Apply slip generously to both scored areas to act as glue. -
Attach the wall:
Carefully wrap the strip around the base, pressing the scored edges together firmly. I like to overlap the ends of the strip slightly and slice through both layers for a seamless vertical join. -
Blend the seams:
Use a modeling tool or your finger to smooth the inside seam where the wall meets the floor. Do the same for the vertical seam on the wall. -
Refine the rim:
Gently smooth the top rim of the tray with a damp sponge or piece of chamois leather to remove sharp edges, keeping the form thick and substantial.
Fixing Cracks
If the tray wall cracks while drying, patch it immediately with a mix of vinegar and slip. Keep drying very slow.
Step 2: Forming the Candle Cup
-
Start a pinch pot:
Take a smaller ball of clay, roughly the size of a tangerine. Press your thumb into the center, but not all the way through to the bottom. -
Shape the walls:
Pinched gently while rotating the ball in your hand to thin the walls and create a rounded, donut-like shape. Keep the walls thick and sturdy. -
Check the fit:
Insert your taper candle into the center hole to ensure it fits snugly. Wiggle it slightly to create just enough clearance for shrinkage, depending on your clay type. -
Flatten the base:
Tap the bottom of the spherical pot on your work surface to create a small flat spot so it sits stable without wobbling. -
Smooth the surface:
Use a damp sponge to smooth out any fingerprints. For the look in the photo, you can leave subtle horizontal throwing lines or smooth it completely. -
Detail the rim:
Clean up the top opening of the holder. It should curve inward slightly to hug the candle. -
Final drying:
Place the small cup inside the tray or beside it. Let both pieces dry slowly under loose plastic to prevent the thick tray walls from warping. -
Fire or finish:
Once bone dry, fire the pieces according to your clay’s instructions. If using air-dry clay, allow 24-48 hours before sealing with a matte varnish.
Level Up: Color Contrast
Use a lighter, cream-colored clay for the candle cup and a darker, grittier clay for the tray to add visual depth.
Place your finished set on a mantle or coffee table for an instant touch of calm elegance
Whimsical Animal Toothbrush Holders

Brighten up your morning routine with this adorable bear-inspired toothbrush holder, perfect for adding a touch of handmade charm to your bathroom counter. Crafted from clay with a lovely speckled finish and earthy tones, this functional piece is as delightful to make as it is to use.
Step-by-Step
Materials
- White or cream polymer clay (approx. 1 block)
- Speckled clay or fine black pepper/sand for texture
- Terracotta or brown colored polymer clay
- Rolling pin
- Clay blending tools
- Circular cookie cutter or jar (for base)
- Black acrylic paint
- Fine detail paintbrush
- Matte or satin varnish
- Oven for baking
- Toothbrushes (for sizing)
Step 1: Shaping the Base Form
-
Prepare the speckled clay:
Start by conditioning your white clay until it is soft and pliable. To achieve that beautiful speckled look, mix in a tiny amount of specialized speckled clay or knead in a pinch of ground black pepper or dried coffee grounds. -
Create the main body:
Roll the clay into a large, smooth ball, then gently shape it into a thick cylinder. It should be slightly taller than it is wide, resembling a large egg with a flattened bottom and top. -
Hollow out the center:
Using your thumb or a rounded tool, press into the center of the top to create the cavity. Widen it gently, ensuring the walls remain thick enough (about 1/4 inch) to support the toothbrushes without collapsing. -
Checking the size:
I like to test the opening with an actual toothbrush at this stage to ensure the fit is loose enough for easy removal but snug enough to keep them upright. -
Smooth the surface:
Roll the form gently on your work surface to smooth out any fingerprints. Use a little baby oil on your finger to buff away imperfections.
Seamless Blending
Use a silicone sculpting tool to smooth clay seams. A strong blend prevents parts like ears from popping off after baking.
Step 2: Adding Character Details
-
Form the belly patch:
Take a portion of the terracotta-colored clay and roll it into a thin sheet. Cut a wide semi-circle shape that will serve as the contrasting belly. -
Attach the belly:
Press the terracotta semi-circle onto the lower front of your white cylinder. Blend the edges seamlessly into the main body so it looks like a continuous surface rather than a sticker. -
Create the ears:
Roll two small balls of terracotta clay and flatten them slightly. Shape them into small rounded triangles or semi-circles. -
Attach the ears:
Score the top rim of the holder where the ears will go. Press the ears firmly onto the rim, blending the clay at the back for a strong bond. -
Make the nose:
Roll a tiny ball of the terracotta clay and flatten it into an oval. Press this into the center of the face area, slightly above the belly line. -
Add little feet:
Create three or four small, flattened balls of white clay. Attach these to the bottom of the holder to act as feet, lifting it slightly off the counter for drainage and style.
Step 3: Finishing Touches
-
Bake the piece:
Place your creation on a baking sheet lined with parchment paper. Bake according to your clay manufacturer’s instructions (usually 275°F/135°C for 15-30 minutes per 1/4 inch of thickness). -
Cool down:
Allow the piece to cool completely in the oven with the door slightly ajar to prevent cracking from sudden temperature changes. -
Paint the face:
Using a very fine brush and black acrylic paint, carefully dot two eyes above the nose. Paint a simple, curved smile line underneath the nose. -
Add speckles (optional):
If you want the brown belly section to have texture, you can use a toothbrush to flick tiny specks of darker brown paint onto the terracotta area. -
Seal the holder:
Since this will live in a bathroom, apply two coats of waterproof matte or satin varnish to protect the paint and clay from moisture.
Leaning Toothbrushes?
If your brushes lean too much, the hole is too wide. Add a clay divider inside before baking to create separate slots for each brush.
Once sealed and dried, your charming bear is ready to keep your bathroom organized with a smile
Minimal Duck or Bird Figurines
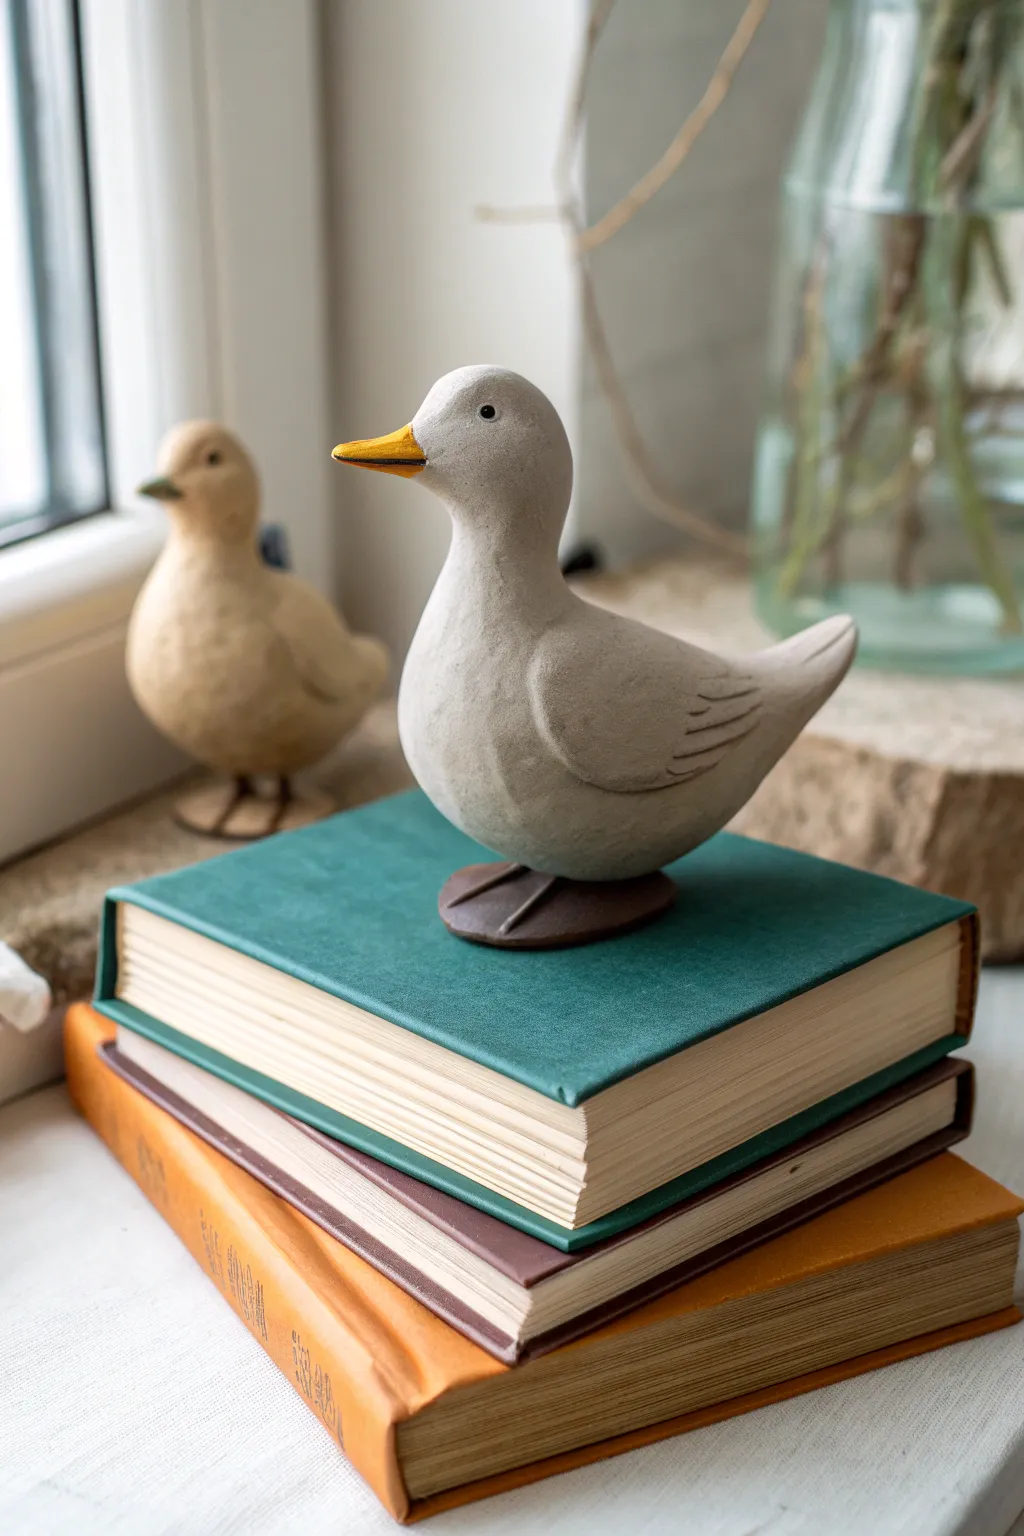
Capture the charm of farm life with a sleek, contemporary twist using this simple sculpting project. This minimalist duck figurine features smooth lines, muted colors, and a wonderfully tactile matte finish that looks right at home on a bookshelf or windowsill.
How-To Guide
Materials
- Air-dry clay (stone or white color)
- Aluminum foil
- Water in a small cup
- Needle tool or toothpick
- Small sculpting spatula or knife
- Fine-grit sandpaper (220-400 grit)
- Acrylic paints (White, Grey, Golden Yellow, Black, Dark Brown)
- Detail paintbrush
- Soft flat paintbrush
- Matte varnish or sealant
Step 1: Forming the Body
-
Prepare the armature:
Begin by scrunching a piece of aluminum foil into a compact egg shape. This will serve as the core of the duck’s body, saving clay and reducing drying time. -
Shape the foil neck:
Create a smaller, cylinder-like foil piece for the neck and head, then attach it securely to the body piece. You want a distinct ‘S’ curve implied in the form. -
Cover with clay:
Roll out a slab of clay about 1/4 inch thick. Wrap this entirely around your foil armature, pressing firmly to remove air bubbles and merge the seams. -
Refine the silhouette:
Using water on your fingertips, smooth the clay over the form. Pinch the clay gently at the tail end to create an upturned point, ensuring a graceful curve from back to tail. -
Sculpt the head:
Add a small ball of clay to the top of the neck if needed to round out the head. Smooth it downward into the neck so there are no visible joins.
Smooth Operator
Use a slightly damp sponge (not dripping wet!) on the raw clay before it dries to remove fingerprints. This saves tons of sanding time later.
Step 2: Adding Details
-
Form the beak:
Take a tiny, cone-shaped piece of clay and attach it to the face. Blend the clay at the base of the beak into the head for a seamless transition, keeping the beak itself sharp and minimal. -
Create the wings:
Roll two tear-drop shapes of clay and flatten them slightly. Press one onto each side of the body. -
Define the feathers:
Using your needle tool or a sculpting knife, carve three or four simple, curved lines into the wing to suggest flight feathers without getting too realistic. -
Add the feet base:
Form a small, flat oval disc of clay. Score the bottom of the duck and the top of this disc, add a drop of water, and press the duck firmly onto this base so it stands securely. -
Carve the webbing:
Use your knife to indent a line down the center of the foot base and two diagonal lines to suggest webbed feet peeking out.
Flock Together
Make a second duck in a contrasting earth tone (like warm beige or terracotta) and position the head differently so they look like they are interacting.
Step 3: Finishing Touches
-
Dry thoroughly:
Allow the figurine to dry completely. This usually takes 24-48 hours depending on humidity; the clay should feel room temperature, not cold to the touch. -
Sand for smoothness:
Take your fine-grit sandpaper and gently buff the surface. Focus on the chest and head to get that ultra-smooth, matte look seen in the photo. -
Base coat painting:
Mix a very light grey using white with a tiny drop of black. Paint the entire body, excluding the beak and feet. Apply two thin coats for opaque coverage. -
Paint the accents:
Use a golden yellow for the beak. For the feet base, mix a dark, warm brown and apply carefully. -
Add the eyes:
Dip the back end of a paintbrush or a toothpick into black paint. Dot a tiny eye on each side of the head, placing it slightly high for a cute expression. -
Antique the finish:
I like to dilute a tiny bit of brownish-grey paint with water to make a wash. Brush it over the wing grooves and body, then immediately wipe most of it off with a paper towel to create subtle depth. -
Seal the work:
Finish with a coat of matte varnish to protect the paint while maintaining the non-shiny, stone-like aesthetic.
Now your charming little duck is ready to bring a sense of calm and nature to your favorite reading nook
Sitting Blob Frog Friends
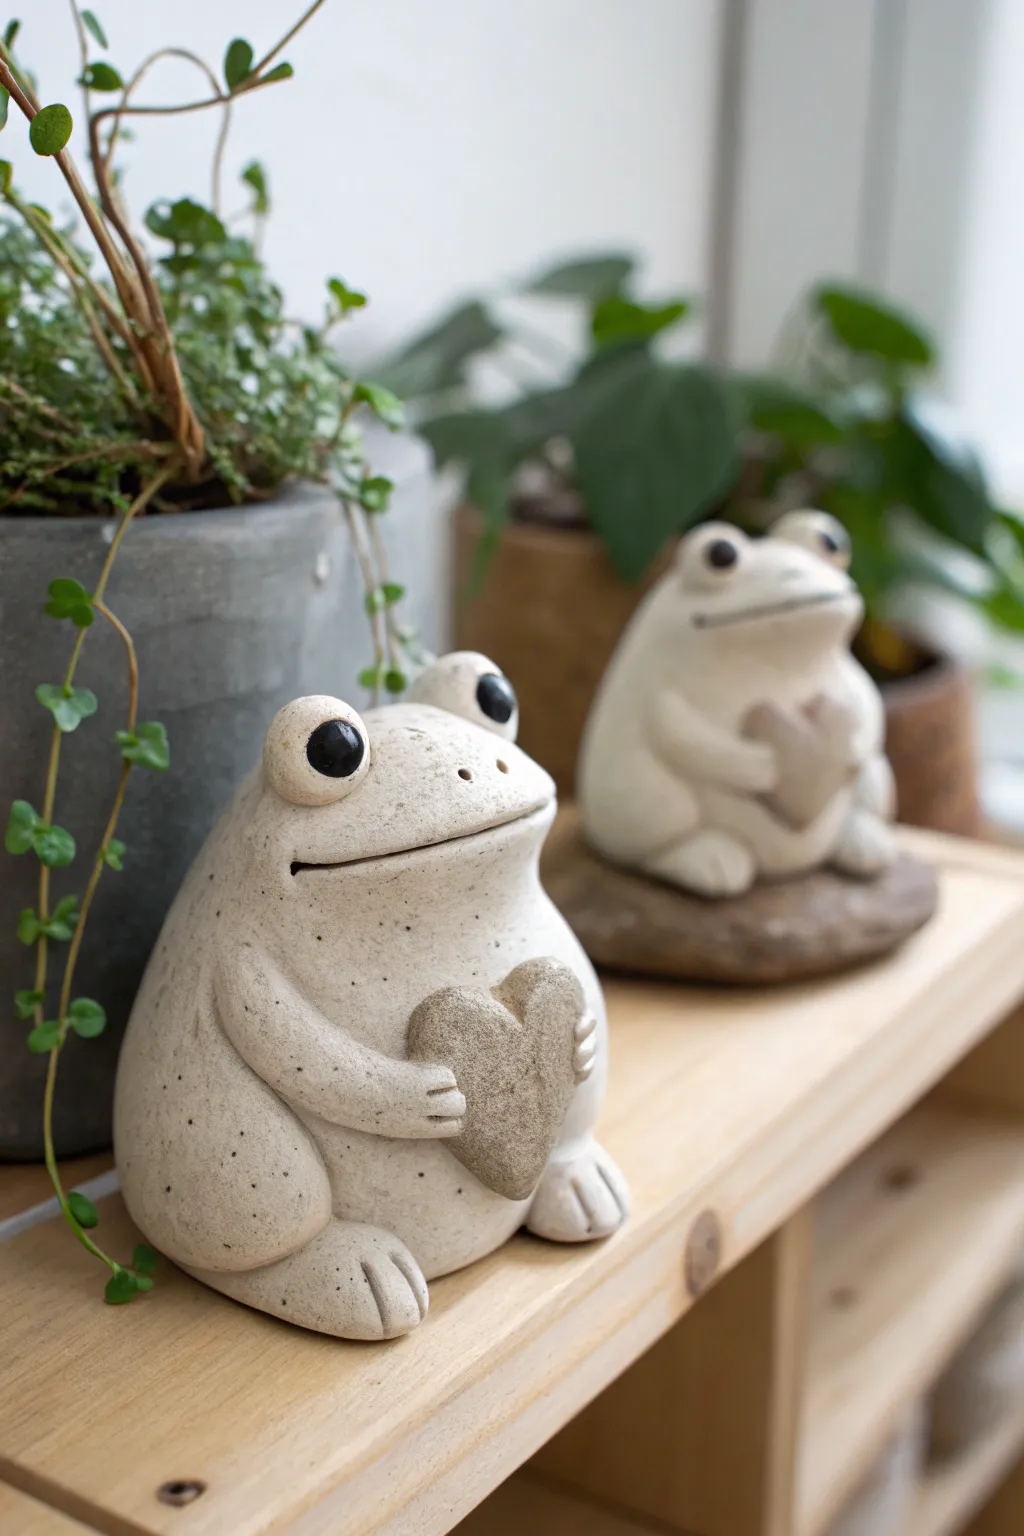
These endearing little blob frogs are full of personality, featuring a speckled stone-like finish and sweet, simple expressions as they clutch tiny hearts. Their rounded, bottom-heavy shape makes them sturdy and perfectly suited for beginner sculptors looking to add charm to a shelf or planter.
Step-by-Step Guide
Materials
- Light-colored polymer clay (beige or off-white)
- Granitex clay or pepper/sand for speckling
- Small amount of darker grey/brown clay for the heart
- Glossy black beads or black clay for eyes
- Needle tool or toothpick
- Small ball stylus tool
- Sculpting spatula
- Clear gloss varnish (optional)
- Aluminum foil for core (optional)
- Baking sheet and oven
Step 1: Shaping the Base Body
-
Prepare the clay:
Start by conditioning your beige clay until it’s soft and pliable. To achieve that lovely speckled pottery look, knead in a small amount of specialty granite-effect clay or a pinch of black pepper and sand. -
Form the main blob:
Roll a large ball of clay about the size of a tangerine. If you want to save clay or reduce weight, you can use a tightly crumpled ball of aluminum foil as a core. -
Shape the pyramid:
Gently taper the ball so it is slightly narrower at the top and wider at the bottom, creating a soft, rounded pyramid shape. Flatten the bottom against your work surface so the frog sits stably. -
Define the head:
Unlike realistic frogs, these guys don’t have necks. Just smooth the top of your shape into a gentle dome where the eyes will eventually go.
Crumbly Clay?
If your clay cracks while shaping the round body, it needs more conditioning. Mix in a drop of baby oil or clay softener and knead until it stretches without breaking.
Step 2: Adding Feet and Features
-
Create the back legs:
Roll two medium-sized balls of clay and flatten them slightly into ovals. Press these firmly onto the lower sides of the body to form the large thigh muscles of the frog. -
Sculpt the feet:
Form two smaller, flattened teardrop shapes for the feet. Attach them under the thigh pieces, sticking out forward. -
Detail the toes:
Using a needle tool or the edge of a spatula, press two indentations into the front of each foot to create three distinct, rounded toes. Smooth the edges so they look soft, not sharp. -
Make the arms:
Roll two snake-like cylinders for the arms. They should be thick enough to look chubby but thinner than the legs. Attach them high on the shoulders, curving them forward toward the belly. -
Make the hands:
Flatten the ends of the arm coils slightly where the hands will be. Like the feet, use your needle tool to mark out three little fingers on each hand.
Step 3: The Heart and Face
-
Form the heart:
Take your darker grey or brown clay and shape a rustic heart. I like to texture this piece slightly with a toothbrush or sandpaper to make it look like a little stone. -
Position the accessory:
Place the heart largely against the frog’s belly. Gently bend the frog’s arms and hands so they appear to be clutching the heart tightly. -
Create eye sockets:
Use a large ball stylus or your thumb to press two distinct hollows on top of the head for the eyes. These frogs have prominent, high-set eyes. -
Insert the eyes:
Press two solid black glossy beads into the sockets. Alternatively, roll smooth balls of black clay. If using clay eyes, make sure they protrude slightly for that buggy look. -
Carve the mouth:
Using a thin blade or needle tool, cut a long, wide slit for the mouth. Curve it slightly upwards at the corners to give a gentle, contented smile. -
Add nostrils:
Poke two tiny holes with a needle tool right between the eyes and the mouth line for nostrils.
Garden Variation
Instead of a heart, sculpt a tiny mushroom, a flower, or a sign offering ‘free hugs’ for the frog to hold to customize the theme for different holidays.
Step 4: Finishing Touches
-
Texture the skin:
If you want an extra weathered look, gently tap the entire surface (except the eyes) with a stiff bristle brush to dull any fingerprints. -
Bake the project:
Bake the frog according to your polymer clay package instructions. Usually, this is around 230°F to 265°F (110°C – 130°C) for 30 minutes per 1/4 inch of thickness. -
Cool down:
Let the sculpture cool completely in the oven to prevent cracking. -
Gloss the eyes:
Once cool, paint a layer of high-gloss varnish over the black eyes (if you used clay) to make them look wet and lively. Leave the body matte for a stony effect.
Place your new ceramic-style friend near a potted plant to keep your greenery company
Rainbow Arch Desk Decor
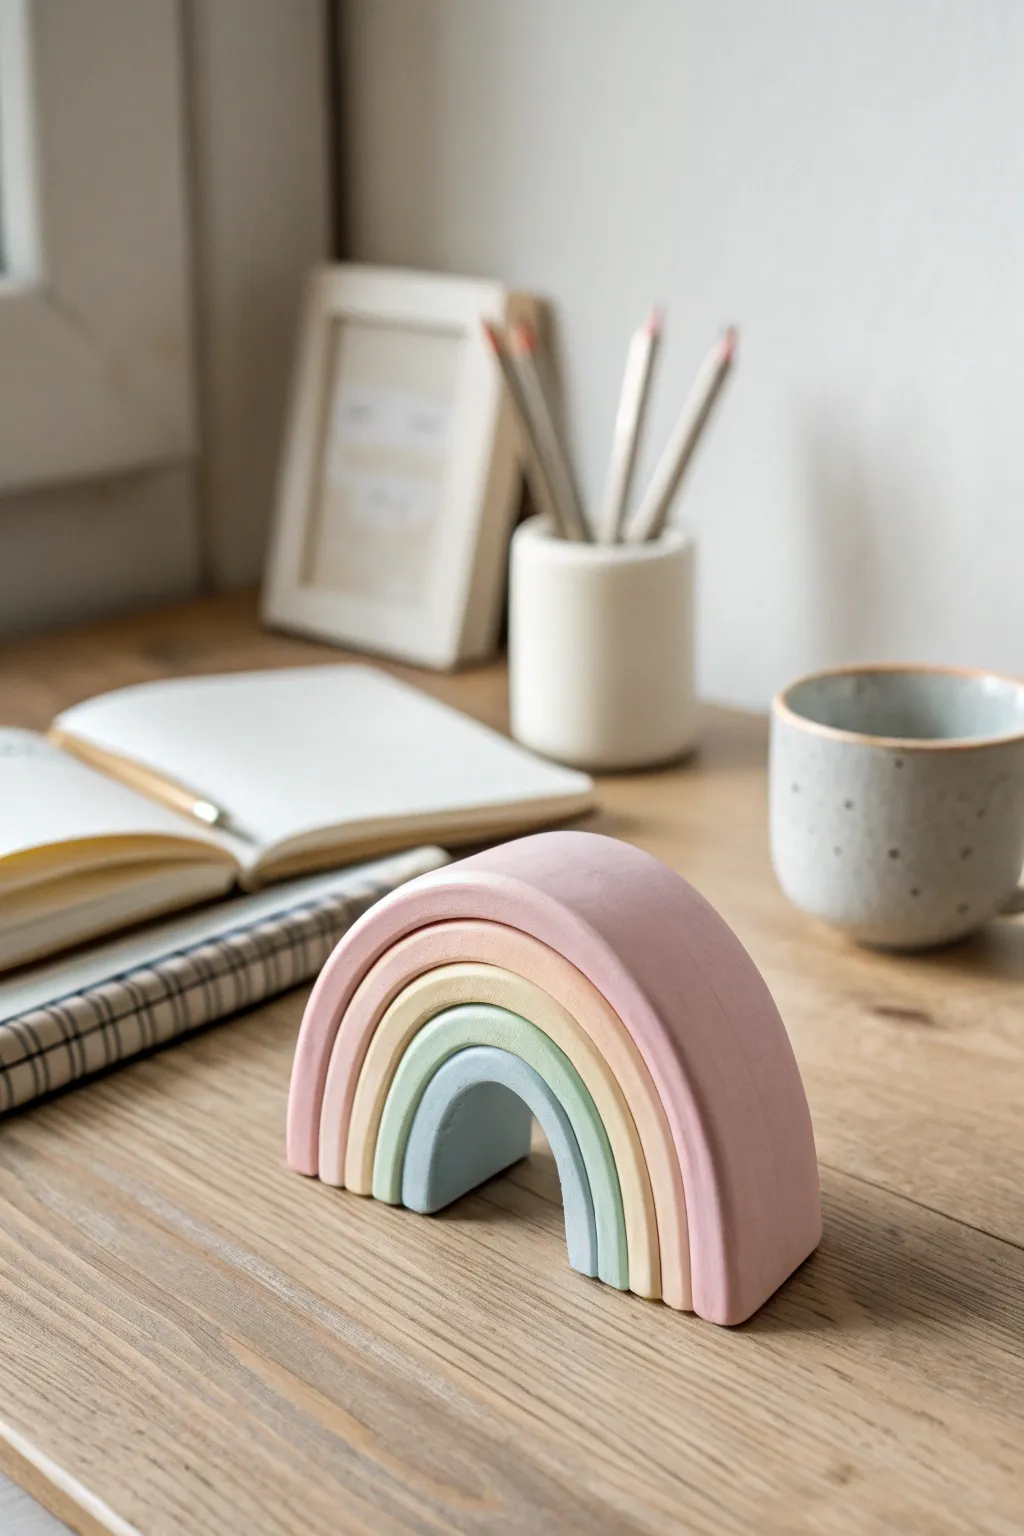
Bring a sense of calm and structure to your workspace with this minimalistic rainbow arch sculpture. Featuring soft pastel hues and a smooth, matte finish, this five-piece stackable desk accessory combines playful charm with modern design.
Step-by-Step
Materials
- Polymer clay (pastels: dusty pink, light peach, cream yellow, sage green, slate blue)
- Clay rolling pin or acrylic roller
- Flexible tissue blade or craft knife
- Large circular cookie cutters (nesting set) or jars of varying sizes
- Creating a template (thick cardstock and scissors)
- Fine-grit sandpaper (400 and 600 grit)
- Baking sheet/ceramic tile
- Oven (if using polymer clay)
Step 1: Planning and Prep
-
Assess your colors:
Select five complementary pastel shades. If you are mixing your own colors from primaries, add plenty of white clay to achieve that soft, chalky look seen in the photo. You want a gradient from a dusty pink outer arch to a slate blue center. -
Condition the clay:
Start with the innermost color (blue). Knead the clay thoroughly until it is soft, pliable, and free of air bubbles. This is crucial for preventing cracks during baking. -
Create a rolling guide:
To ensure every arch has the uniform thickness shown in the image (roughly 3/4 inch or 2cm), I like to use depth guides or stacks of playing cards on either side of my roller.
Clean Cuts Pro Tip
Chill your clay in the fridge for 15 minutes before doing the final trims with your blade. Firm clay distorts much less when sliced, giving you crisp, vertical edges.
Step 2: Shaping the Arches
-
Form the center arch:
Roll your blue clay into a thick log, then flatten it slightly into a rectangular block. Bend this gently over your smallest circular form (like a small spice jar or a DIY cardstock form) to create the U-shape. -
Refine the shape:
Use your flexible blade to slice off the bottom ends so the arch stands perfectly flat. Smooth the sides with your finger to remove fingerprints. -
Prepare the second layer:
Condition the green clay. Roll it into a thick slab of the same thickness. Drape this layer directly over the blue arch (or a form that matches the blue arch’s outer dimension) to ensure they nest perfectly. -
Check the fit:
The arches need to stack without gaps. Gently press the green layer onto the blue one to mold the curve, then separate them carefully so they don’t stick permanently. -
Trim the excess:
Once the curve is established, use your blade to trim the bottom of the green arch so it aligns in height with the blue one. Trim the width so the front and back faces are flush. -
Repeat for the middle layer:
Move to the cream-yellow clay. Repeat the process: roll a thick slab, drape it over the green arch to get the curve right, then separate and trim. -
Create the outer layers:
Continue this building process with the peach and finally the dusty pink clay. As the arches get larger, you may need to join two logs of clay together to get enough length before rolling.
Sagging Arches?
If the larger arches droop while you work, support the hollow space underneath with a wad of crumpled aluminum foil or batting while the clay is raw.
Step 3: Refining and Baking
-
Final smoothing:
Before baking, inspect each individual arch. Use a touch of baby oil on your finger to buff out any stubborn fingerprints or lint specks. -
Arrangement for baking:
Place the arches on a ceramic tile or baking sheet lined with parchment paper. Lay them on their sides (flat) rather than standing up, which helps them maintain their shape without sagging. -
Bake the clay:
Bake according to your polymer clay package instructions. Usually, this is around 265°F (130°C) for 30–45 minutes given the thickness of these pieces. -
Cool down:
Allow the clay to cool completely in the oven with the door slightly ajar. Sudden temperature changes can sometimes cause thermal shock cracks.
Step 4: Finishing Touches
-
Initial specific sanding:
Once cool, grab your 400-grit sandpaper. Wet the paper slightly to keep dust down and sand the flat faces of the arches to make them perfectly flush and smooth. -
Round the edges:
Gently sand the sharp corners where the face meets the side. The image shows a soft, slightly rounded edge rather than a sharp 90-degree angle. -
Final polish:
Finish with 600-grit sandpaper for a velvety touch. Wipe away all dust with a damp cloth. -
Optional matte sealing:
The project in the image looks unvarnished or matte. If you want protection, apply a very thin layer of matte varnish, but raw sanded polymer clay mimics this look best.
Stack your finished arches on your desk for a moment of colorful zen anytime you need it
Geometric Wall Hanging Tiles
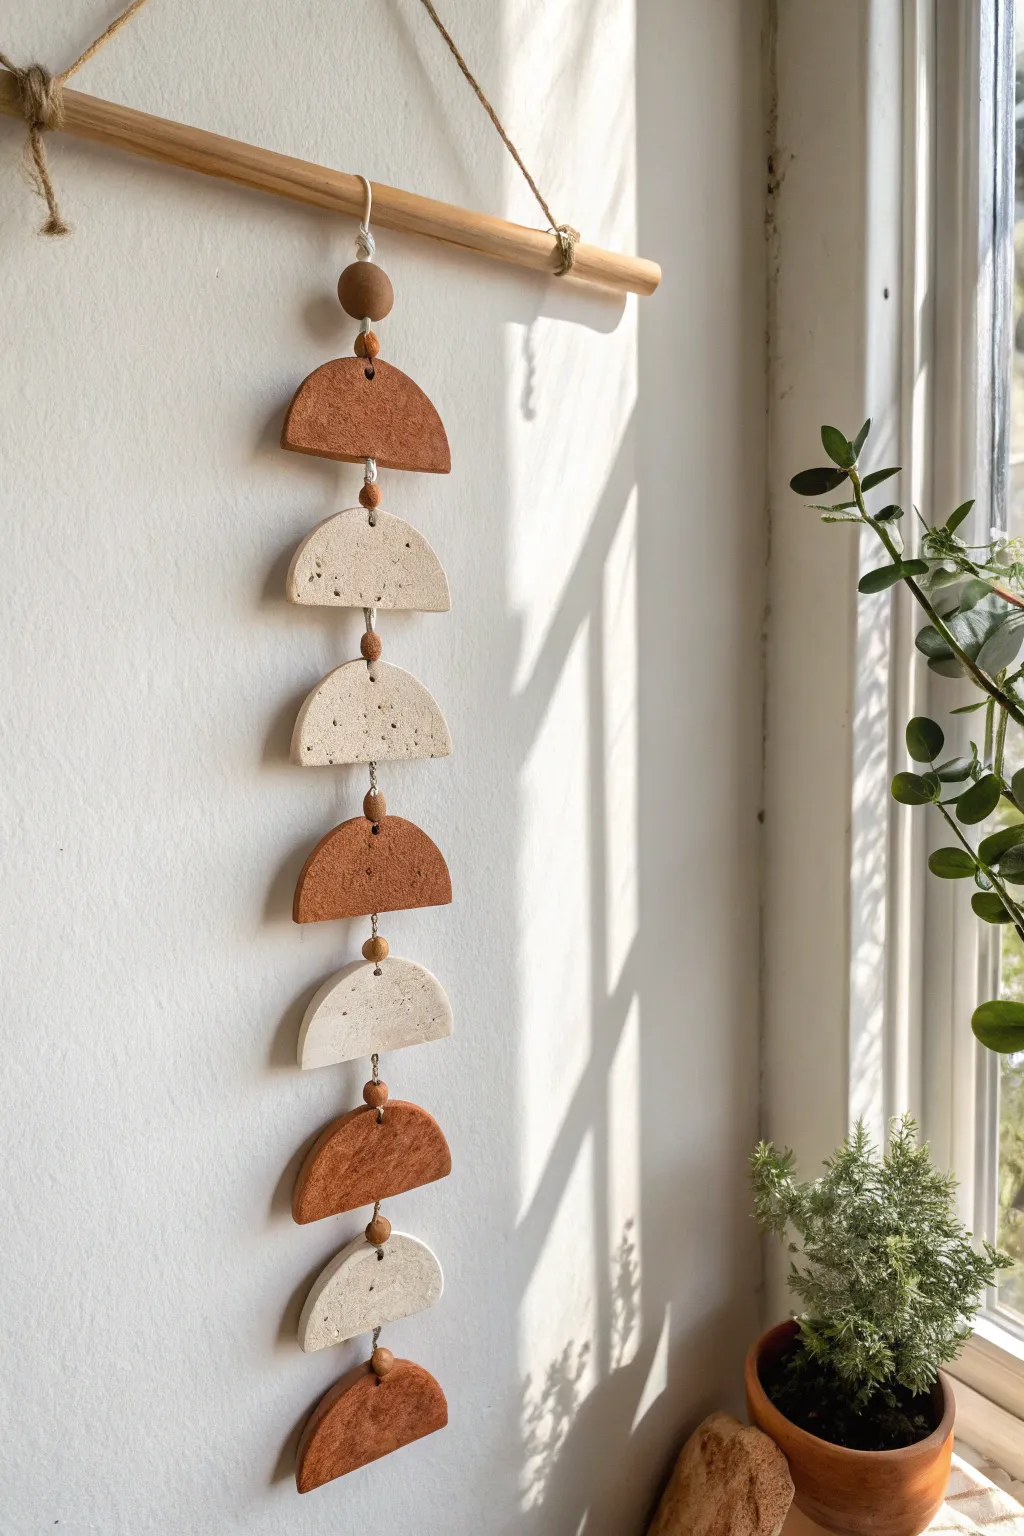
Bring earthy warmth to your walls with this sculptural hanging made from simple clay semicircles. Alternating between rich terracotta and speckled stone textures creates a calming rhythm that perfectly captures modern bohemian style.
Step-by-Step Guide
Materials
- Terracotta air-dry or polymer clay
- Speckled white/stone effect air-dry or polymer clay
- Rolling pin or clay machine
- Circle cutters (approx. 3-4 inches diameter)
- Sharp crafting knife or tissue blade
- Wooden dowel (approx. 12 inches)
- Natural jute twine or heavy cotton cord
- Small wooden beads (approx. 8mm)
- Large wooden bead (approx. 20mm) for top
- Toothpick or skewer
- Fine-grit sandpaper
Step 1: Shaping the Clay Arcs
-
Condition the clay:
Begin by kneading your terracotta clay until it is soft and pliable. If you are using polymer clay, the warmth of your hands is essential here to prevent cracking later. -
Roll out the slab:
Roll the clay out onto a smooth surface to an even thickness of about 1/4 inch (6mm). Using a glossy tile or silicone mat underneath helps prevent sticking. -
Cut the circles:
Press your large circle cutter firmly into the clay to create four perfect discs from the terracotta color. Remove the excess clay from around the circles. -
Repeat for the second color:
Clean your rolling pin and surface, then repeat the process with the speckled white clay to create another four discs. -
create the semicircles:
Using your sharp crafting knife or tissue blade, slice each circle exactly in half. You will need 8 semicircles total for the design shown (4 terracotta, 4 speckled), but having spares is wise. -
Pierce the holes:
Use a toothpick or skewer to poke a hole vertically through the center of each semicircle’s straight edge. Ensure the hole goes all the way through to the center of the arc’s curve. -
Smooth the edges:
Dip your finger in a little water (for air-dry) or baby oil (for polymer) and gently run it along the cut edges to soften any sharpness or burrs.
Cracking Up?
If your air-dry clay cracks while drying, mix a tiny bit of fresh clay with water to make a paste (slip) and fill the cracks. Smooth it over and let dry again.
Step 2: Firing and Assembly
-
Dry or bake:
Follow the manufacturer’s instructions for your specific clay. Bake in the oven if using polymer, or let air-dry clay sit for 24-48 hours until fully hardened. -
Sand for perfection:
Once fully cured, use fine-grit sandpaper to lightly buff the edges of your semicircles. This step gives that professional, finished look. -
Prepare the hanger:
Tie a piece of jute twine to one end of your wooden dowel, leaving enough slack for hanging, and tie it to the other end. Secure with double knots. -
Start the center cord:
Cut a long piece of cord (about 3 feet) and tie it securely to the center of the dowel using a lark’s head knot or simple double knot. -
Thread the top bead:
Thread the large wooden bead onto the hanging cord first. I find wrapping a bit of tape around the cord tip makes threading much easier. -
Add the first arc:
Thread the cord through the hole of a terracotta semicircle. Push it up until it sits snugly against the large bead. -
Secure and space:
Thread a small wooden bead onto the cord right underneath the terracotta arc. Tie a knot in the cord immediately below this small bead to hold the first section in place. -
Continue the pattern:
Thread a speckled white arc next, followed by a small bead and a knot. Continue alternating colors—terracotta, then white—until all eight pieces are hung. -
Finish the bottom:
After the final terracotta arc at the bottom, tie a decorative double knot or add a final bead to secure the entire strand. Trim any excess cord.
Hole Alignment Hack
Instead of eyeballing it, lightly fold a paper circle in half to find the center line, lay it over your clay circle, and use that as a guide for your piercing hole.
Hang your new geometric art in a sunny spot where the shadows can play off the textured surfaces
Tiny Miniature Bakery Set
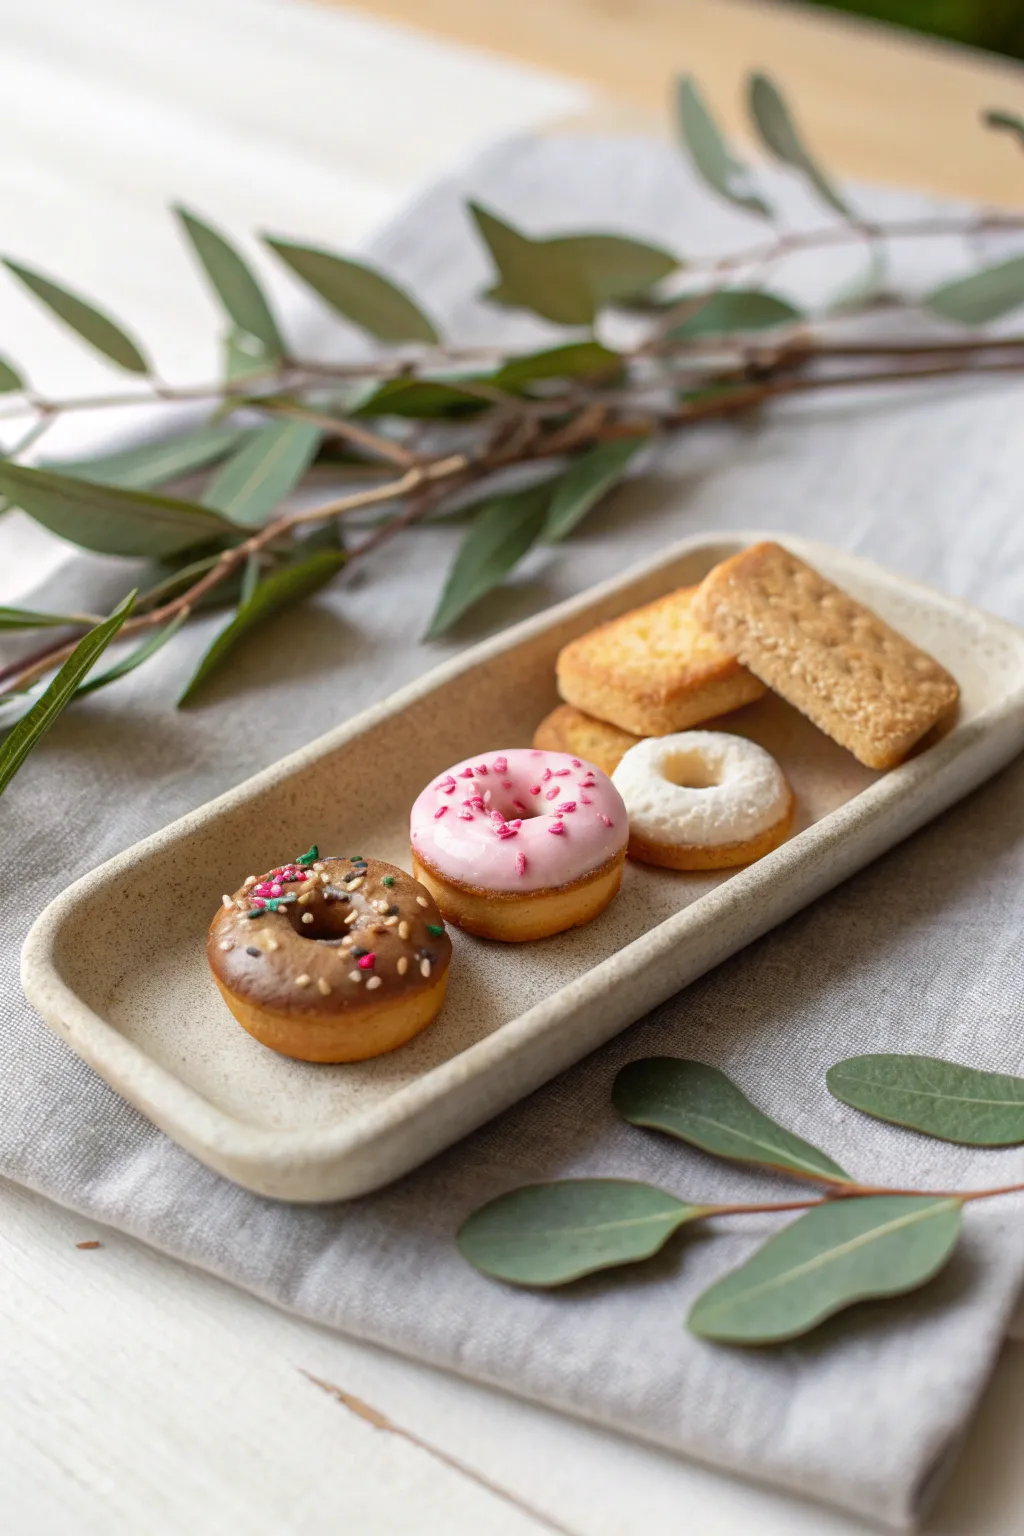
Create a delightful spread of tiny sweets that looks good enough to eat but is designed for display. This project guides you through sculpting realistic miniature donuts, sugar cookies, and a rustic rectangular serving tray using polymer clay.
Step-by-Step Tutorial
Materials
- Polymer clay (white, beige/ecru, chocolate brown, pink)
- Speckled or granite-effect polymer clay (for the tray)
- Liquid polymer clay (various colors or translucent mixed with chalk pastels)
- Needle tool or toothpick
- Ball stylus tool
- Soft pastel chalks (browns, oranges, yellows for shading)
- Small soft paintbrush
- Sandpaper (fine grit)
- Polymer clay glossy glaze or UV resin (optional)
- Eucalyptus leaves (real or faux) for staging
Step 1: Sculpting the Tray
-
Condition the Clay:
Start by warming up your speckled or granite-effect clay in your hands until it is pliable. This ensures the tray won’t crack during baking. -
Shape the Base:
Roll the clay into a slab, approximately 3-4mm thick. Cut a long rectangle with rounded corners, measuring about 3 inches by 1 inch. -
Form the Rim:
Gently pinch up the edges of the rectangle to create a shallow rim. Smooth the transition between the base and the rim with your finger or a silicone tool so it looks like a continuous piece of ceramic. -
Texture the Surface:
To give it a handmade ceramic feel, lightly tap the surface with a fine-grit sandpaper or a toothbrush. This removes fingerprints and adds a matte, stone-like texture.
Sticky Situation?
If clay gets too soft or sticky, briefly pop it in the fridge. This firms it up, making it easier to cut clean cookie shapes or smooth donut edges.
Step 2: Baking the Shortbread
-
Mix the Dough Color:
Blend beige clay with a tiny amount of translucent and yellow to get a realistic ‘baked dough’ color. -
Cut the Shapes:
Roll the clay out to 2mm thickness. Cut two small rectangles for the shortbread cookies and one small circle for a butter cookie. -
Texture the Cookies:
Using a stiff toothbrush, firmly press onto the tops of the cookie shapes. This stippling effect mimics the crumbly texture of shortbread. -
Add Details:
For the rectangular shortbread, use a needle tool to poke a grid of tiny holes across the surface. -
Shade for Realism:
Shave some yellow ochre and light brown soft pastel chalk into a powder. With a dry brush, gently dust the edges of the cookies to make them look perfectly golden-baked.
Level Up: Scent
Mix a tiny drop of vanilla or chocolate fragrance oil into the clay before sculpting. Your mini bakery will smell as realistic as it looks.
Step 3: Creating the Donuts
-
Form the Bases:
Roll three small balls of beige clay (slightly lighter than the cookies). Flatten them slightly into thick discs. -
Make the Holes:
Use a ball stylus or the end of a paintbrush to press a hole through the center of each disc, widening it slightly while keeping the doughnut shape rounded. -
Create the Texture Line:
Use a needle tool to gently indent a horizontal line around the middle of the donut sides. This represents the ‘fry line’ where the dough expands. -
Shade the Dough:
Like the cookies, dust the donuts with orange-brown pastel powder, focusing on the top and bottom but leaving the center ‘fry line’ lighter.
Step 4: Decorating and Assembly
-
Pink Glaze:
Mix pink clay with a drop of liquid clay (or use pre-made pink liquid clay). Carefully apply a ring of this mixture onto one donut using a needle tool, letting it drip naturally. -
Chocolate Glaze:
Repeat the process with brown liquid clay for the chocolate donut. While wet, sprinkle on tiny bits of chopped colored clay to act as sprinkles. -
Powdered Sugar Donut:
For the third donut, paint the top with a thin layer of white liquid clay. While sticky, dab on white pastel powder or white flocking powder for a sugary texture. -
Final Arrangement:
Arrange the cookies and donuts on the raw tray. While I sometimes bake pieces separately, placing them now helps them settle naturally onto the plate. -
Final Bake:
Bake the entire set according to your clay manufacturer’s instructions (usually 275°F/135°C for 15-30 minutes). Let cool completely before handling.
Display your new miniature masterpiece on a shelf or adhere a magnet to the back for whimsical kitchen decor