If you love the look of painted art but want that extra pop of texture, clay on canvas is such a satisfying combo. I’m sharing my favorite 3D relief canvas ideas that feel totally doable, even if you’re just getting comfortable with clay.
3D Floral Bouquet Relief
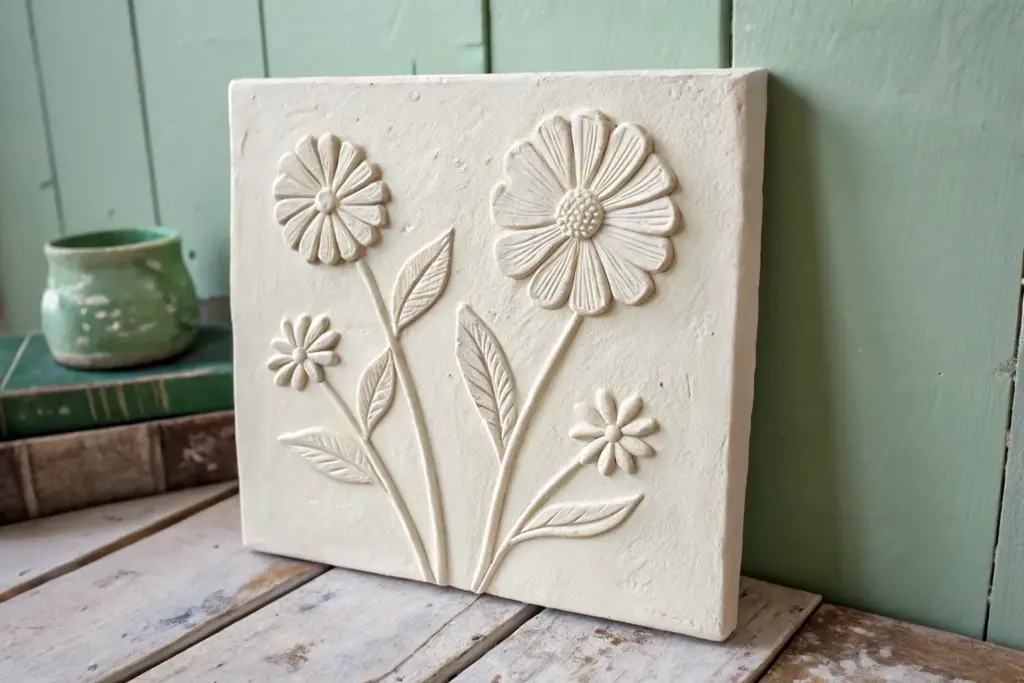
Bring the elegance of a classic botanical illustration into three dimensions with this textured clay relief project. Using air-dry clay on a simple canvas, you’ll sculpt delicate petals, winding stems, and layered leaves to create a sophisticated piece of wall art that pops right off the surface.
How-To Guide
Materials
- Small rectangular stretched canvas (approx. 8×10 inches)
- White air-dry clay (smooth texture preferred)
- Acrylic paints (Vintage Pink, Cream, Sage Green, Olive Green, Warm Brown, Metallic Gold)
- Clay sculpting tools (ball stylus, needle tool, small knife)
- Rolling pin
- PVA glue or heavy body gel medium
- Small paintbrushes (detail and flat shader)
- Small cup of water
- Parchment paper or silicone mat
Step 1: Planning and Preparation
-
Prime the Surface:
Begin by painting your canvas with a coat of cream or off-white acrylic paint to ensure a uniform background color. Let this dry completely while you prepare your clay. -
Sketch the Composition:
Lightly sketch a rough oval or diamond shape in the center of the canvas with a pencil to guide where your flowers will sit. Mark the positions of the three main blooms: a rose at the bottom right, a daisy-like flower in the center, and a textured bloom on the left.
Crack Control
If small cracks appear as the clay dries, mix a tiny amount of fresh clay with water to make a paste and fill them in with a brush before painting.
Step 2: Sculpting the Foliage
-
Roll Clay Sheets:
Roll out a portion of your clay on parchment paper to about 1/8 inch thickness. You want it thin enough to be delicate but thick enough to handle without tearing. -
Cut Leaf Shapes:
Use your knife tool to cut out various leaf shapes. Make long, slender leaves for the top left, and smaller, rounded leaves for the bottom right. -
Add Veining Texture:
Before attaching them, gently press a needle tool or knife edge into each leaf to create a central vein. For the darker leaves, add angled side veins for realistic detail. -
Attach the Base Layer:
Apply a small dab of PVA glue to the back of the largest background leaves. Press them onto the canvas, starting at the top left corner of your sketched area. Allow the tips to lift slightly off the canvas for a 3D effect.
Step 3: Creating the Blooms
-
Form the Rose Base:
For the bottom-right rose, roll a small coil of clay and spiral it tightly to make the center bud. Flatten several small balls of clay into petal shapes. -
Build the Rose:
Wrap these flattened petals around the center coil, overlapping them slightly. Glue this assembly directly onto the canvas in its designated spot, pressing gently so it adheres well. -
Sculpt the Center Flower:
For the white flower, create five teardrop-shaped petals. Arrange them in a circle on the canvas. Use a ball tool to press into the center of each petal, creating a cupped shape. -
Detail the Center:
Roll tiny balls of clay and cluster them in the middle of your white flower to form the stamen. Texture these with a needle tool by poking small holes. -
Create the Left Bloom:
This flower is flatter. Cut a circle of clay and use a tool to imprint radiating lines from the center outward. Pinch the edges slightly to give it a ruffled look and glue it to the left of the center flower.
Pro Tip: Depth Check
Don’t glue every leaf flat! Place tiny balls of scrap clay under the tips of some leaves while the glue dries to freeze them in a lifted, dynamic position.
Step 4: Isolating Details
-
Add Filler Stems:
Roll very thin snakes of clay to create stems. Attach these flowing out from the floral cluster towards the top and bottom. Add tiny teardrop bits of clay along these stems to mimic buds or small leaves. -
Dry Time:
Allow the entire composition to dry fully. This usually takes 24 hours depending on humidity. The clay will turn opaque and feel hard to the touch.
Step 5: Painting and Finishing
-
Base Colors:
Paint the leaves first. Use Sage Green for the lighter leaves and mix a bit of Warm Brown into Olive Green for the darker foliage. I like to water down the paint slightly for a watercolor-like effect on the clay. -
Flower Tones:
Paint the rose a soft peachy-brown. The left bloom gets a dusty pink shade (Vintage Pink mixed with a touch of brown). Leave the center flower mostly cream but darken the center stamens with brown. -
Highlighting:
Once the base colors are dry, use a dry-brush technique with cream paint to highlight the raised edges of the petals and leaf veins. -
Gilded Accents:
Finally, use a fine detail brush to apply Metallic Gold paint to the thin filler stems and the very edges of a few select leaves. This adds that elegant shimmer seen in the inspiration image.
Hang your textured masterpiece in a spot where natural light can catch the relief and cast beautiful, changing shadows throughout the day


Coiled Rose Cluster on Canvas
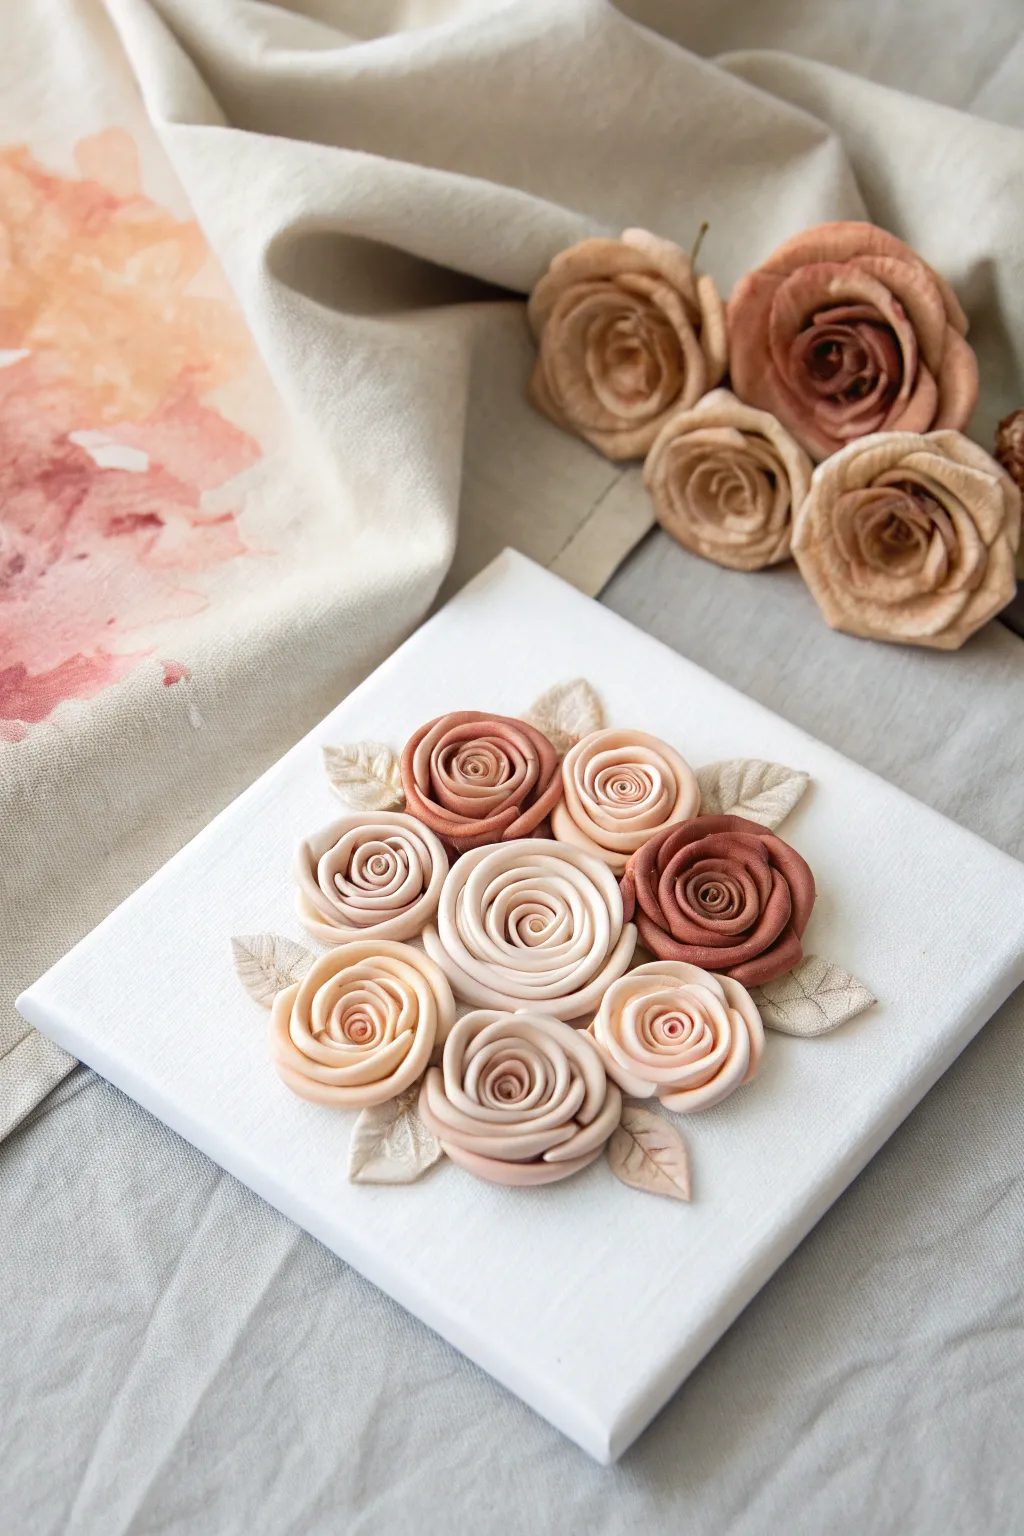
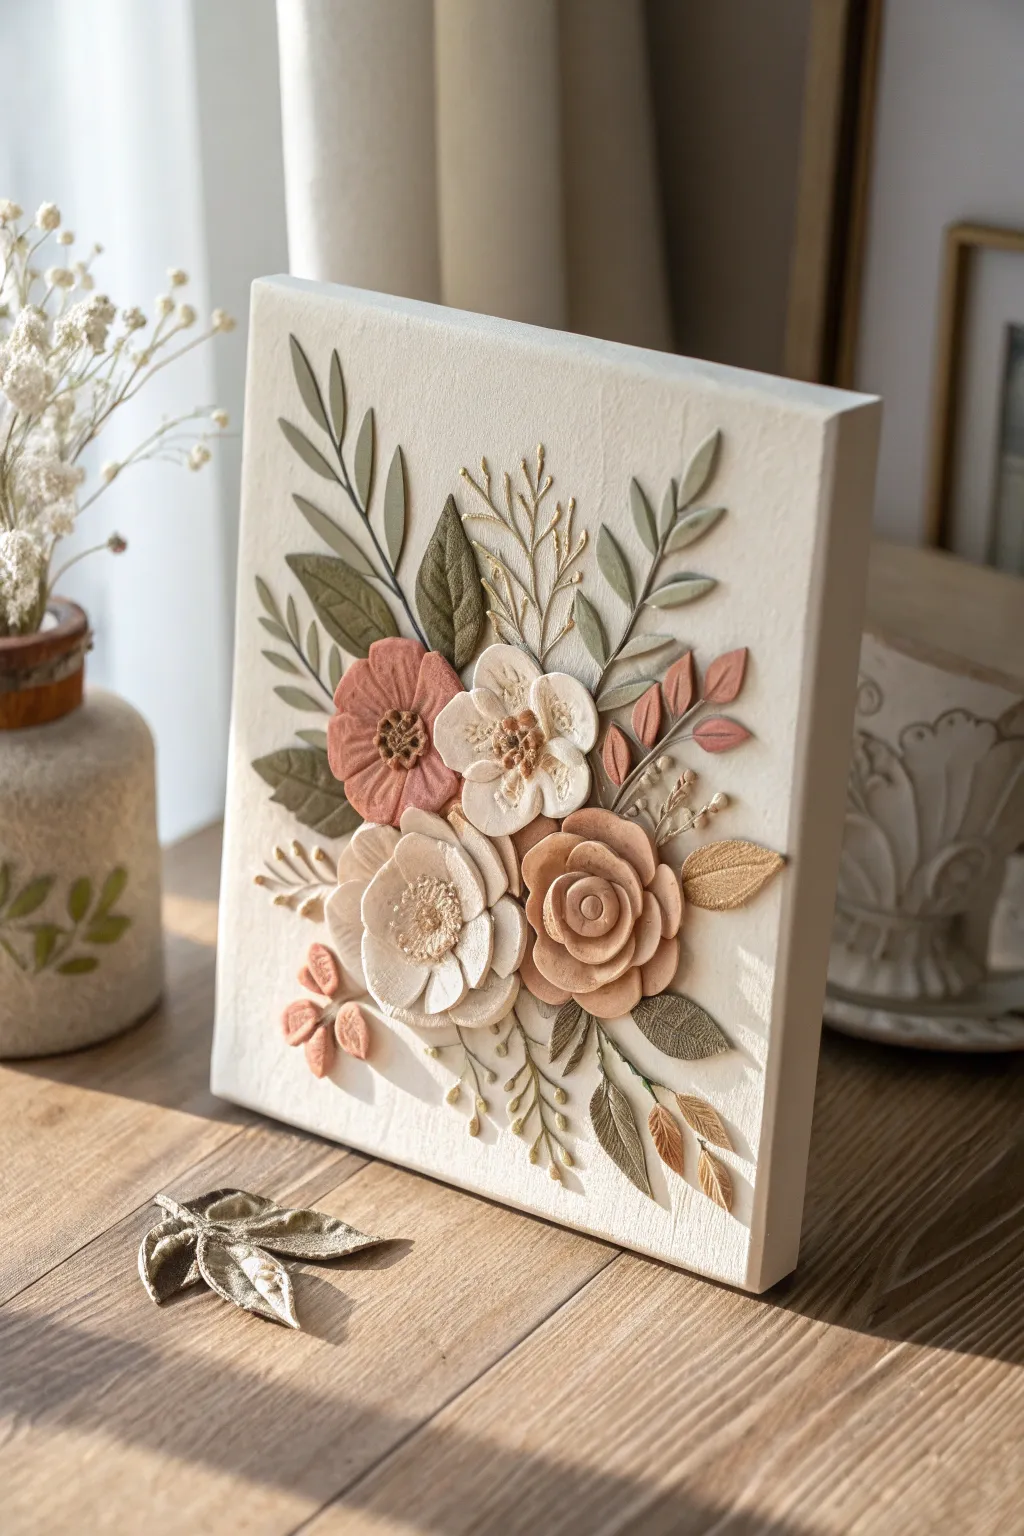
Transform a simple white canvas into a blooming dimensional art piece with this elegant clay rose project. This design features a central bouquet of handcrafted polymer clay flowers in a soothing gradient of earthy nudes, creams, and terracotta tones, creating a soft and sophisticated 3D effect.
Detailed Instructions
Materials
- Small square stretched canvas (e.g., 6×6 or 8×8 inch)
- Polymer clay in beige, white, peach, and reddish-brown
- Liquid polymer clay or strong craft glue (like E6000)
- Clay roller or pasta machine
- Small round clay cutter (roughly 1 inch)
- Needle tool or toothpick
- Sculpting tool with a ball end
- Clean work surface (ceramic tile or glass mat)
- Oven for baking
Step 1: Preparing the Clay Palette
-
Condition the clay:
Begin by kneading your polymer clay blocks until they are soft, pliable, and warm to the touch. This prevents cracks when you start coiling the petals. -
Mix your custom shades:
To achieve a cohesive gradient like the photo, don’t just use colors straight from the package. Mix a little white into your brown to soften it, or blend peach with beige. Aim for about 4-5 distinct but related shades ranging from pale cream to deep terracotta. -
Roll out sheets:
Roll your conditioned clay into thin, even sheets, approximately 2mm thick. A pasta machine is perfect for consistency, but a hand roller works just fine if you’re careful.
Step 2: Sculpting the Roses
-
Process the petals:
Use your small round cutter to punch out multiple circles from your clay sheets. For one medium-sized rose, you will need approximately 7-10 circles. -
Flatten the edges:
Take a clay circle and gently press or roll the very edges between your thumb and finger to thin them out. This makes the petals look delicate and realistic rather than chunky. -
Form the center bud:
Take your first thinned circle and roll it up tightly like a sleeping bag. This coil becomes the central bud of your rose. -
Add first petals:
Wrap a second circle around the center bud, placing the seam of the bud in the middle of the new petal. Gently flare the top edge outward slightly. -
Build the bloom:
Continue adding petals in an overlapping spiral pattern. As you move outward, place each new petal slightly lower than the center to create an open bloom shape. -
Cut the base:
Once the rose is the size you want, use a sharp blade to slice off the excess clay at the bottom. This creates a flat surface so the flower sits flush against the canvas. -
Create variation:
Repeat the process to make about 8 roses of varying sizes and colors. Make a large central rose in a light cream, surrounded by smaller ones in darker shades.
Fixing Fingerprints
Smudged a petal? Lightly brush the raw clay with a tiny bit of baby oil or cornstarch before baking. It smooths out fingerprints instantly.
Step 3: Making Leaves & Assembly
-
Shape the leaves:
Form small teardrop shapes from light beige clay. Flatten them gently onto your work surface. -
Add texture:
Use a needle tool to gently score a central vein and small side veins into each leaf. I find that subtle texture here contrasts beautifully with the smooth rose petals. -
Pre-arrange on work surface:
Before baking, arrange your roses and leaves in a circle to ensure you like the composition. The largest rose should sit slightly off-center for a natural look. -
Bake the components:
Bake your clay pieces according to the manufacturer’s instructions (usually 275°F/135°C for 15-30 minutes). Place them on a tile or parchment-lined baking sheet. -
Cool down:
Allow the pieces to cool completely. They are fragile when warm, so patience is key here to avoid breaking a petal. -
Plan placement on canvas:
Lay your cooled pieces onto the clean white canvas. Start with the central rose and place the supporting flowers around it, tucking the leaves into the gaps. -
Secure the artwork:
Lift one piece at a time, apply a small amount of strong glue or liquid clay to the flat back, and press it firmly onto the canvas. Hold for a few seconds to ensure initial adhesion. -
Final cure (optional):
If you used liquid polymer clay as glue, you will need to bake the entire canvas (if it’s a standard cotton canvas on wood, it is generally oven-safe at low clay temps). If you used E6000 or glue, simply let it cure for 24 hours.
Level_up: Floral Scent
Add a hidden sensory element by putting a drop of rose essential oil on the canvas fabric underneath the central flower cluster.
Hang your dimensional floral canvas in a well-lit spot to let the shadows play across the petals


Textured Clay Leaf Wreath
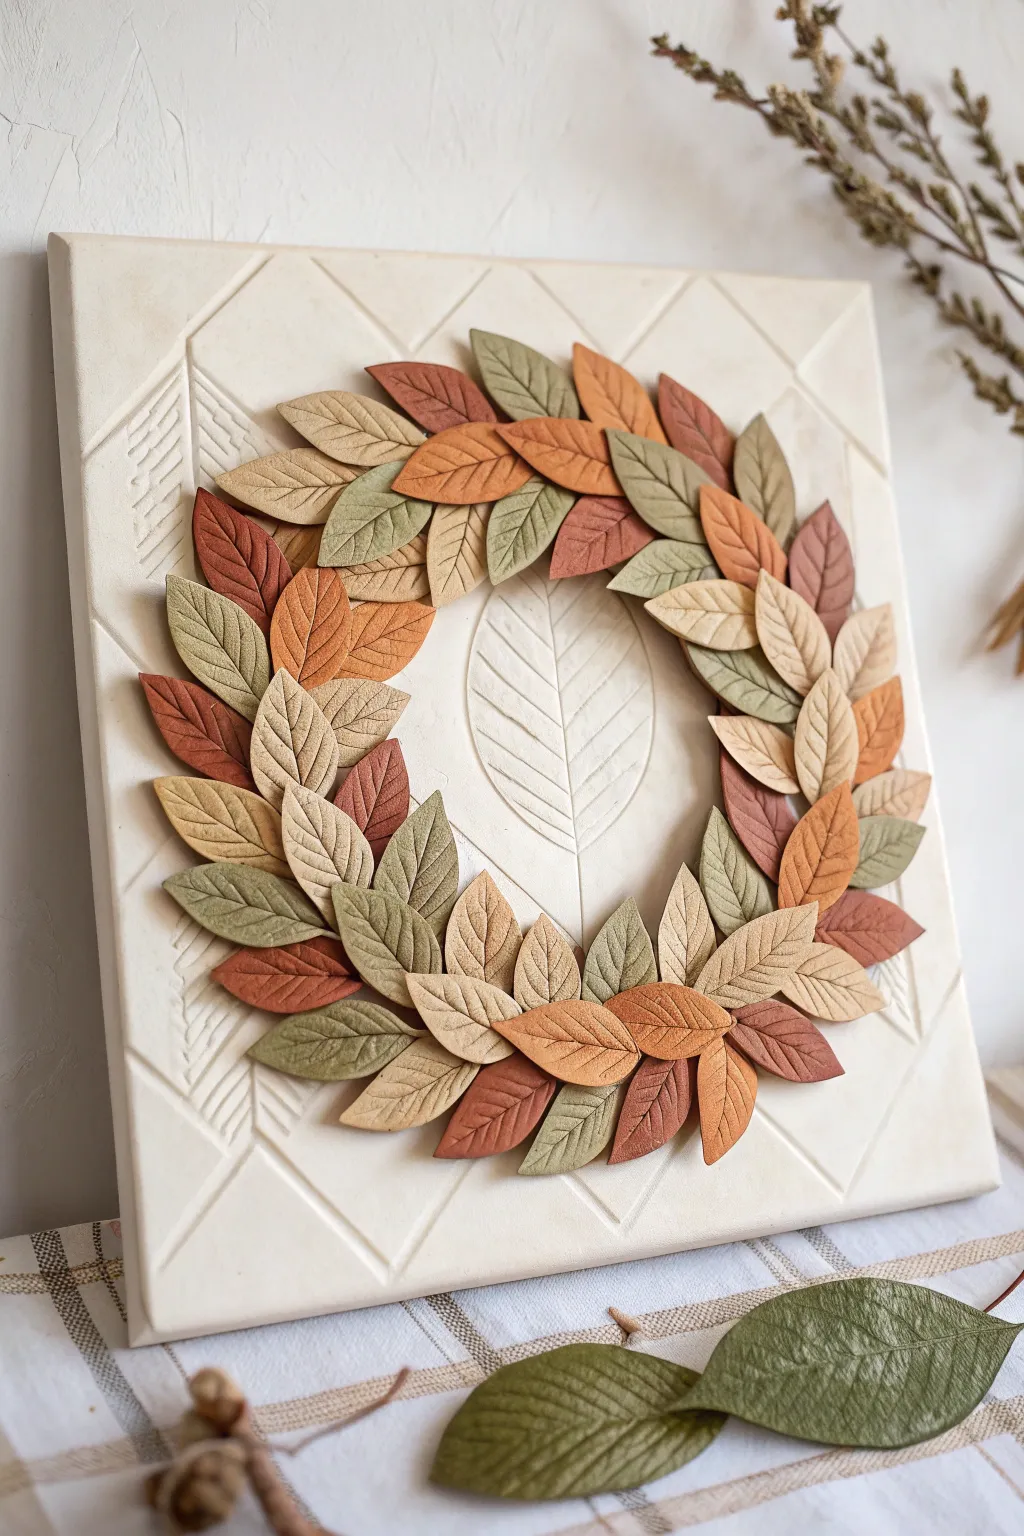
This elegant project combines the stark beauty of a geometric relief background with the organic warmth of an autumn wreath. You will learn to sculpt delicate clay leaves and arrange them into a dimensional masterpiece perfect for seasonal decor.
Step-by-Step Guide
Materials
- White or cream air-dry clay (or polymer clay)
- Square wooden panel or stretched canvas (approx. 10×10 inches)
- Acrylic paints (muted greens, terracotta, ochre, dark brown)
- Rolling pin
- Leaf-shaped cutter or craft knife
- Needle tool or toothpick
- Textured fabric or sandpaper (optional used for texture)
- Strong craft glue (like E6000 or heavy gel medium)
- Ruler
- Sandpaper (fine grit)
- Matte varnish
Step 1: Preparing the Textured Base
-
Roll out the base:
Begin by rolling out a large slab of white clay to about 1/4 inch thickness. It needs to be large enough to cover the entire surface of your square canvas or wooden panel. -
Transfer and trim:
Carefully lift your clay slab and drape it over the front of your canvas. Gently smooth it down, then use a craft knife to trim the excess clay flush with the edges of the panel. -
Carve the geometric grid:
Using a ruler and a needle tool or the back of a knife, lightly score a large diamond grid pattern across the surface. Don’t cut all the way through; simply create visible indentations. -
Add detail lines:
Inside specific sections of your grid, carve additional smaller textures. Create vertical hatch marks in the corners and a large, simplified leaf skeleton in the very center circle where the wreath will sit. -
Dry the base:
Allow this base layer to dry completely. Since it is a large flat piece, I recommend weighting the corners slightly as it dries to prevent curling, or using a wooden panel which minimizes warping.
Step 2: Sculpting the Leaves
-
Color mixing:
Mix your clay with acrylic paints to create four or five distinct shades: a sage green, a deep forest green, a warm terracotta, a light beige, and a soft brown. Knead the color in thoroughly until uniform. -
Roll and cut:
Roll out your colored clays to a thinner consistency, about 1/8 inch. Use a leaf-shaped cutter to punch out approximately 40-50 leaves, ensuring a good mix of all your colors. -
Add vein details:
Take each individual leaf and use your needle tool to score a central vein down the middle. Then, make angled hatch marks extending from the center to the edges to mimic leaf veins. -
Texturize the surface:
For extra realism, gently press a piece of sandpaper or textured fabric onto the leaves to give them a grainy, organic surface rather than a perfectly smooth finish. -
Shape while drying:
As you set the leaves aside to dry, don’t lay them perfectly flat. Bend the tips slightly or curl the edges to give them movement and life.
Real Leaf Texture
Instead of freehanding veins, press actual leaves from your garden into the clay. The natural veins transfer perfectly and save sculpting time.
Step 3: Assembly
-
Plan the arrangement:
Once your leaves are dry or leather-hard, arrange them loosely on your base board in a circle, avoiding the very center leaf carving you made earlier. -
Glue the first layer:
Begin gluing the bottom layer of leaves. Use a strong adhesive and place leaves of alternating colors in a circle, making sure the stems point inward. -
Layering for volume:
Apply the second layer of leaves on top of the first, slightly offset so they cover the gaps. Angle them slightly outward or inward to create a jagged, natural silhouette. -
Filling gaps:
Add a final few leaves in any spots that look sparse. The goal is a dense, lush look where the bottom layer creates shadows for the top layer. -
Final touches:
Inspect the wreath for any visible glue blobs and remove them. You can lightly dry-brush a tiny bit of white paint on the high points of the leaves to highlight the texture. -
Seal the artwork:
Finish the piece by applying a coat of matte varnish over both the background and the leaves to protect the surface and unify the sheen.
Add Metallic Accents
After the clay dries, brush a tiny amount of gold leaf or metallic wax onto the edges of the beige leaves for a touch of elegance.
Hang your textured masterpiece on a wall that gets side lighting to truly show off the depth of the carving and the leaves


Raised Clay Heart With Tiny Florals
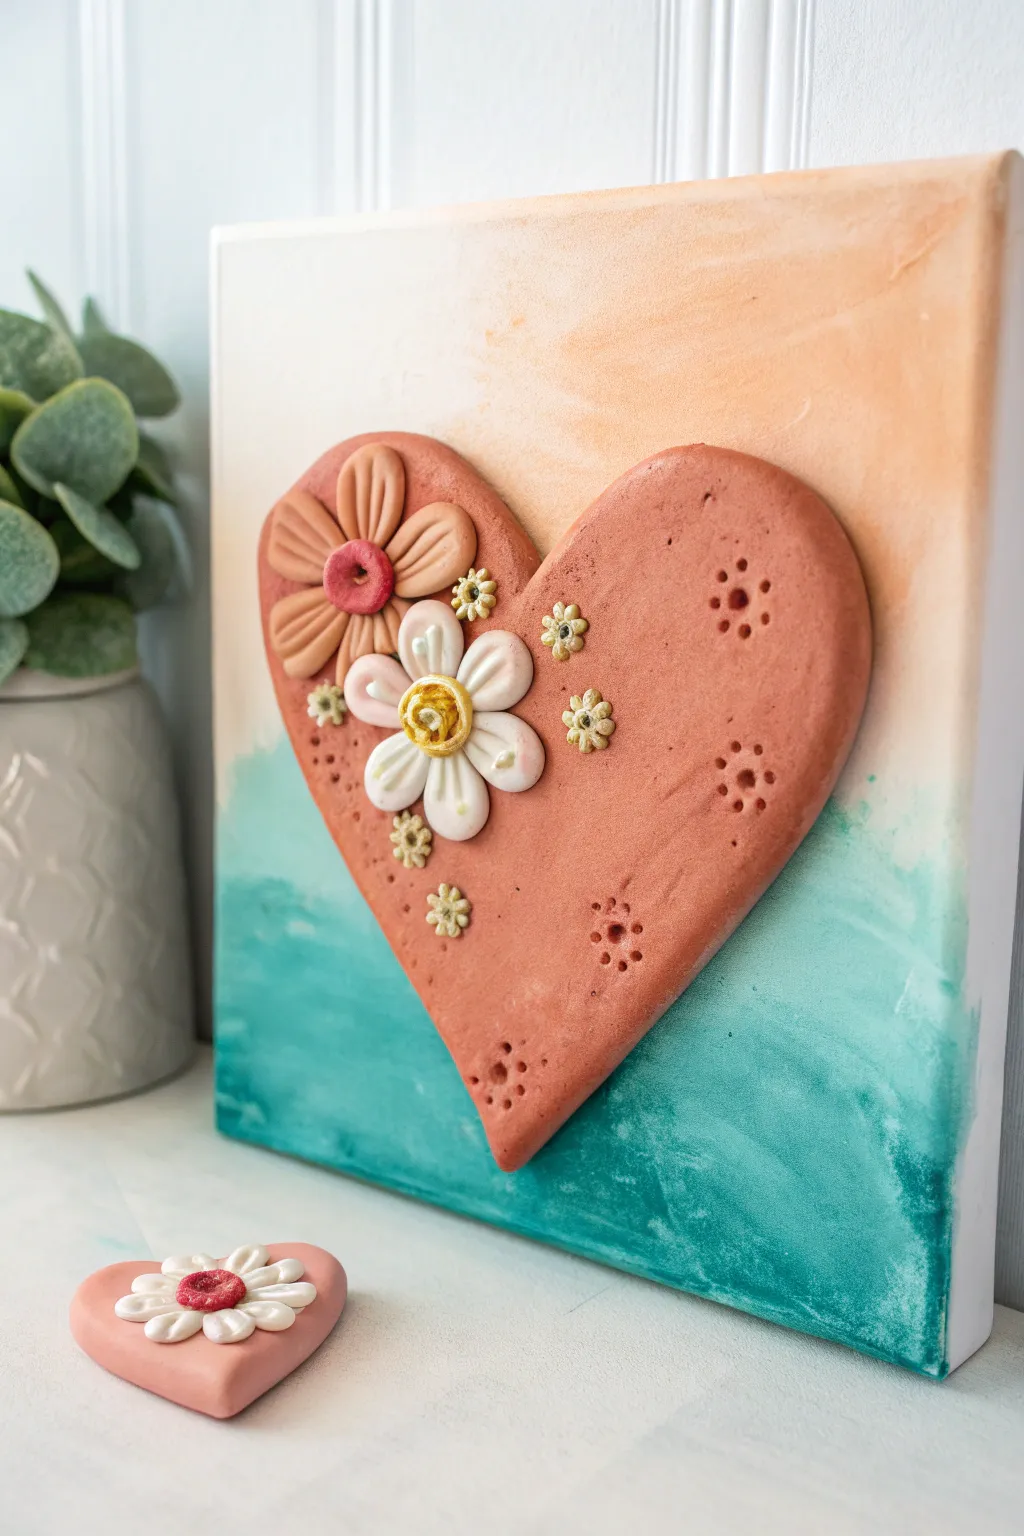
Blend the tactile charm of air-dry clay with a dreamy painted background in this mixed-media piece. The focal point is a dimensional, earthy-toned clay heart adorned with delicate floral details, resting on a softly blended sunset-inspired canvas.
Step-by-Step
Materials
- Small square canvas (e.g., 8×8 or 6×6 inches)
- Air-dry clay (terra cotta color and white)
- Acrylic paints (peach/creamy orange, teal/aqua, white)
- Paintbrushes (flat wash brush and small detail brush)
- Sculpting tools or toothpicks
- Rolling pin
- Heart-shaped cookie cutter (large) or paper template
- Small flower fondant cutters or molds (optional)
- Strong craft glue (e.g., E6000 or Tacky Glue)
- Water for smoothing clay
Step 1: Preparing the Background
-
Prime the Base:
Start with a clean canvas. If you want a smoother texture, apply a thin coat of gesso, but for this rustic look, painting directly on the canvas works perfectly well. -
Apply the Top Gradient:
Mix a soft peach or creamy orange shade. Paint the top half of the canvas using horizontal strokes, aiming for a semi-opaque look that keeps some texture visible. -
Add the Bottom Gradient:
While the top is still slightly wet, paint the bottom third with a teal or aqua acrylic. Bring the color upwards to meet the peach tone. -
Blend the Horizon:
Where the peach and teal meet, use a slightly damp brush to blend the two colors together. You want a soft, washed transition rather than a hard line. Let this dry completely.
Step 2: Sculpting the Clay Elements
-
Roll the Main Heart:
Take a large chunk of terra cotta-colored air-dry clay. Roll it out to an even thickness of about 1/4 inch. -
Cut the Shape:
Use a large heart cutter or trace around a paper template with a sharp knife to cut your main heart shape. Smooth the rough edges with a little water on your finger. -
Create the Large Petals:
Using a slightly lighter clay (or mixing white into your terra cotta), form five small teardrop shapes. Press these onto the upper left of the heart to form the base flower. -
Add the Flower Center:
Roll a tiny ball of dark pink or red clay. Press it into the center of your petals and use a tool to make a small indentation in the middle. -
Sculpt the White Daisy:
Using white clay, form smaller teardrop petals and arrange them below the first flower. Add a yellow center made from a small coil or ball of yellow clay. -
Detail the Petals:
Use a toothpick or sculpting tool to gently press a line down the center of each white petal for added definition. -
Add Tiny Filler Flowers:
Roll tiny balls of yellow or light green clay. Press them onto the heart in scattered clusters and use a star-shaped tool or toothpick to indent them into flower shapes. -
Texture the Heart Surface:
To give the terracotta heart a rustic feel, use a toothpick to poke clusters of dots around the open spaces. I find grouping them in sets of five or six creates a nice pattern. -
Dry the Clay:
Let the decorated clay heart dry fully on a flat surface. This usually takes 24 hours depending on humidity. Turning it over halfway through helps the back dry evenly.
Clay Cracking?
If small cracks appear as the clay dries, mix a tiny bit of fresh clay with water to make a paste and fill them in. Smooth with a damp finger.
Step 3: Assembly and Finishing
-
Check the Fit:
Once the clay is rock hard, place it on your dry painted canvas to determine the best positioning. Center it or offset it slightly for artistic flair. -
Apply Adhesive:
Apply a generous amount of strong craft glue to the back of the clay heart. Make sure to get glue near the edges but not so close that it squishes out. -
Mount the Heart:
Press the heart firmly onto the canvas. Hold it in place for a minute or two to ensure the bond starts to set. -
Optional Mini Heart:
If you have leftover clay, make a tiny matching heart with a single white flower to display alongside your canvas. -
Seal the Project (Optional):
If you want a glossy finish or extra protection, brush a coat of matte or satin varnish over the clay heart once the glue is completely dry.
Pro Tip: Texture Trick
Before the clay dries, gently press a piece of lace or textured fabric onto parts of the heart’s surface for an instant intricate pattern.
Hang your dimensional heart art in a sunny spot to let the shadows play off the raised textures

The Complete Guide to Pottery Troubleshooting
Uncover the most common ceramic mistakes—from cracking clay to failed glazes—and learn how to fix them fast.
Minimal Clay Arch and Sun Motif
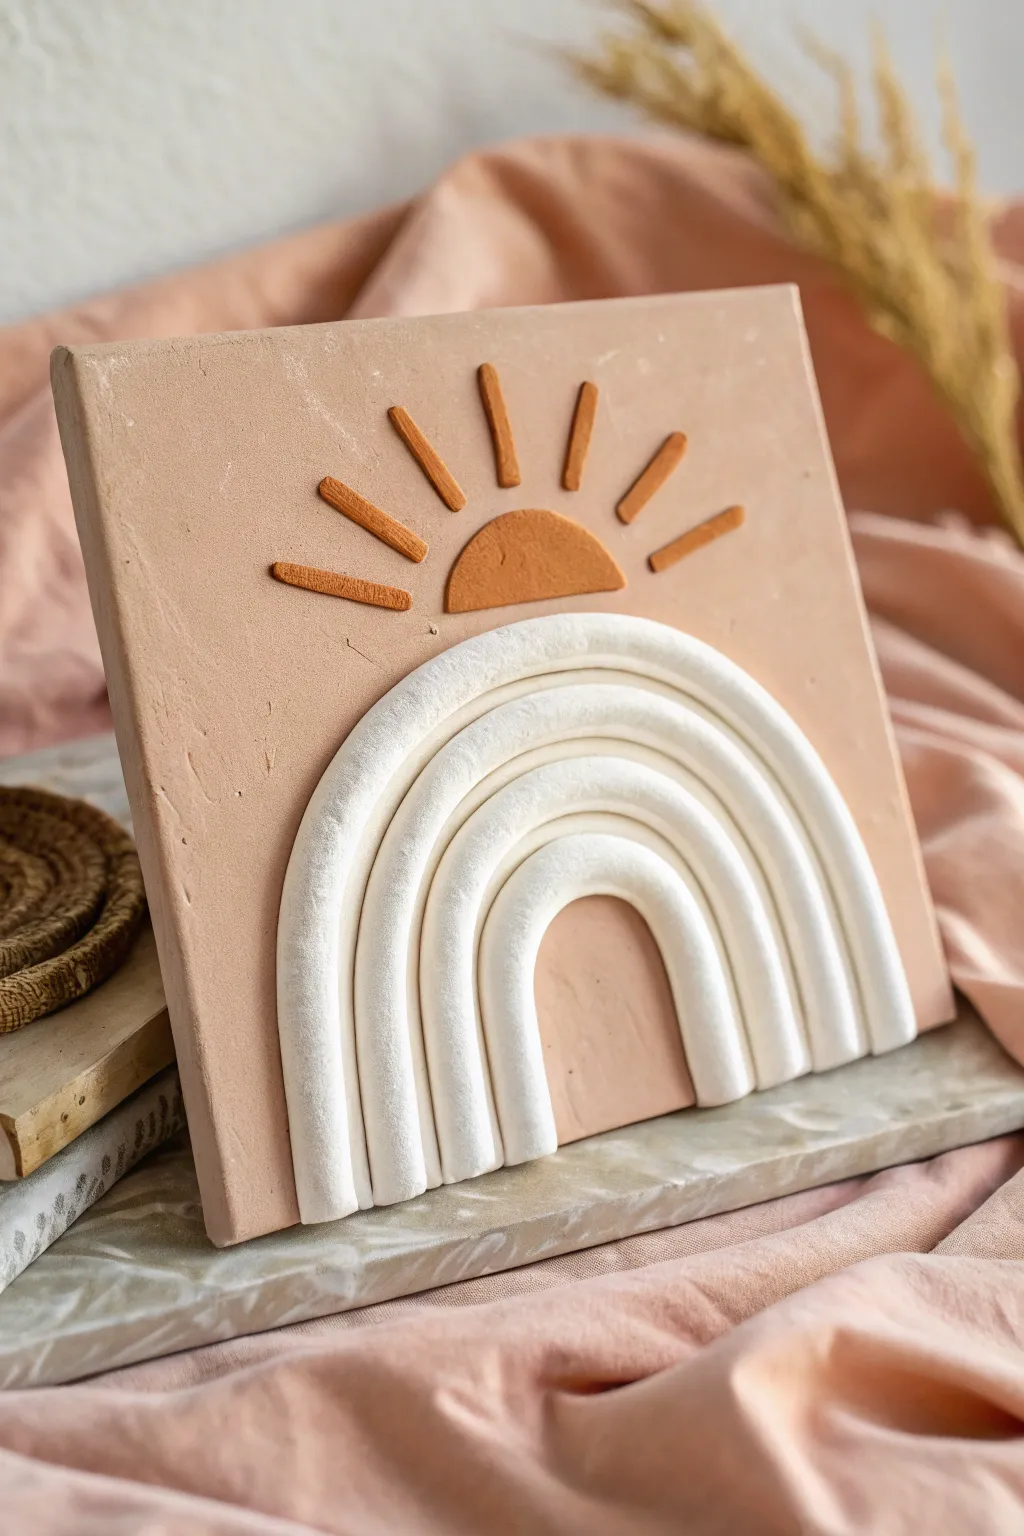
Embrace the textured warmth of bohemian decor with this stunning clay relief art piece. Combining smooth, white arches with earthy terracotta tones creates a calming, minimalist design perfect for adding dimension to your walls.
How-To Guide
Materials
- White air-dry clay (or polymer clay)
- Terracotta colored air-dry clay (or polymer clay)
- Square wooden canvas panel or sturdy backing board (approx. 8×8 inches)
- Rolling pin
- Clay knife or craft blade
- Beige or pale terracotta acrylic paint (for the background)
- Paintbrush (flat)
- Strong craft glue (e.g., E6000 or Aleene’s Tacky Glue)
- Sandpaper (fine grit)
- Water cup (for smoothing)
Step 1: Preparing the Base
-
Surface Prep:
Begin by ensuring your wooden panel or backing board is clean and free of dust. If the wood grain is very rough, give it a quick sanding. -
Paint the Backdrop:
Mix a soft, pale terracotta or beige acrylic paint. Apply an even coat over the entire front surface of the board. Let it dry completely, then apply a second coat for full opacity.
Crack Control
If your air-dry clay cracks while drying, don’t panic. Mix a small amount of fresh clay with water to make a paste and fill the cracks, then sand smooth once dry.
Step 2: Creating the Rainbow Arches
-
Condition the White Clay:
Take your white air-dry clay and knead it thoroughly until it is soft and pliable. This prevents cracking later on. -
Roll the Coils:
Roll out four long, even snakes (coils) of white clay. Aim for a thickness of about 1/2 inch (1.2 cm). Try to keep the pressure consistent so the coil doesn’t get lumpy. -
Form the First Arch:
Take the longest coil and gently curve it into an arch shape directly on your table to test the size. It should be wide enough to fill the bottom half of your board comfortably. -
Nest the Arches:
Place the subsequent three coils inside the first one, trimming the ends so they sit flush at the bottom. You want them to nestle together tightly without gaps. -
Cut to Size:
Once you are happy with the nesting, use your clay knife to make a straight cut across the bottom of all four arches so they stand perfectly flat. -
Smooth the Surface:
Dip your finger in a little water and gently smooth out any fingerprints or cracks on the surface of the coils. I find this step crucial for that professional, polished look.
Textured Twist
For a more organic look, press a piece of canvas fabric or sandpaper onto the wet clay rays before cutting them to imprint a subtle, rugged texture.
Step 3: Crafting the Sun Motif
-
Original Sun Color:
Switch to your terracotta-colored clay. If you don’t have colored clay, you can mix a dab of burnt sienna acrylic paint into white clay, but be prepared for messy hands. -
Roll Surface Slab:
Roll a small portion of the clay flat with your rolling pin to a thickness of about 1/8 inch. -
Cut the Semicircle:
Use your knife or a round cookie cutter to cut a semi-circle shape. This will sit directly on top of the outermost white arch. -
Create the Rays:
From the remaining flat terracotta clay, cut 7 small, thin rectangular strips. They should be roughly 1 inch long. -
Refine the Edges:
Gently tap the cut edges of the rays and the sun semi-circle to soften them slightly, removing any sharp drag marks from the knife.
Step 4: Assembly and Finishing
-
Dry Fit:
Before gluing, place all your clay pieces partially onto the painted board to finalize their position. Ensure the sun rays radiate evenly. -
Glue the Arches:
Apply a generous amount of strong craft glue to the back of the white arches. Press them firmly onto the bottom center of the board. -
Attach the Sun:
Glue the terracotta semi-circle directly above the center of the top white arch. -
Place the Rays:
Glue the rays around the sun in a fan pattern. Start with the center ray, then the outer two, and fill in the gaps for spacing accuracy. -
Allow to Cure:
Let the entire piece dry flat for at least 24 hours. If using air-dry clay, keep it away from direct heat to prevent warping. -
Final Touch:
Once fully dry, if you notice any small cracks in the clay, you can patch them with a tiny bit of fresh clay mixed with water (slip) and smooth it over.
Hang your new clay relief art in a sunny spot to enjoy how the shadows play across the textured surface
Butterflies in Clay on a Painted Sky
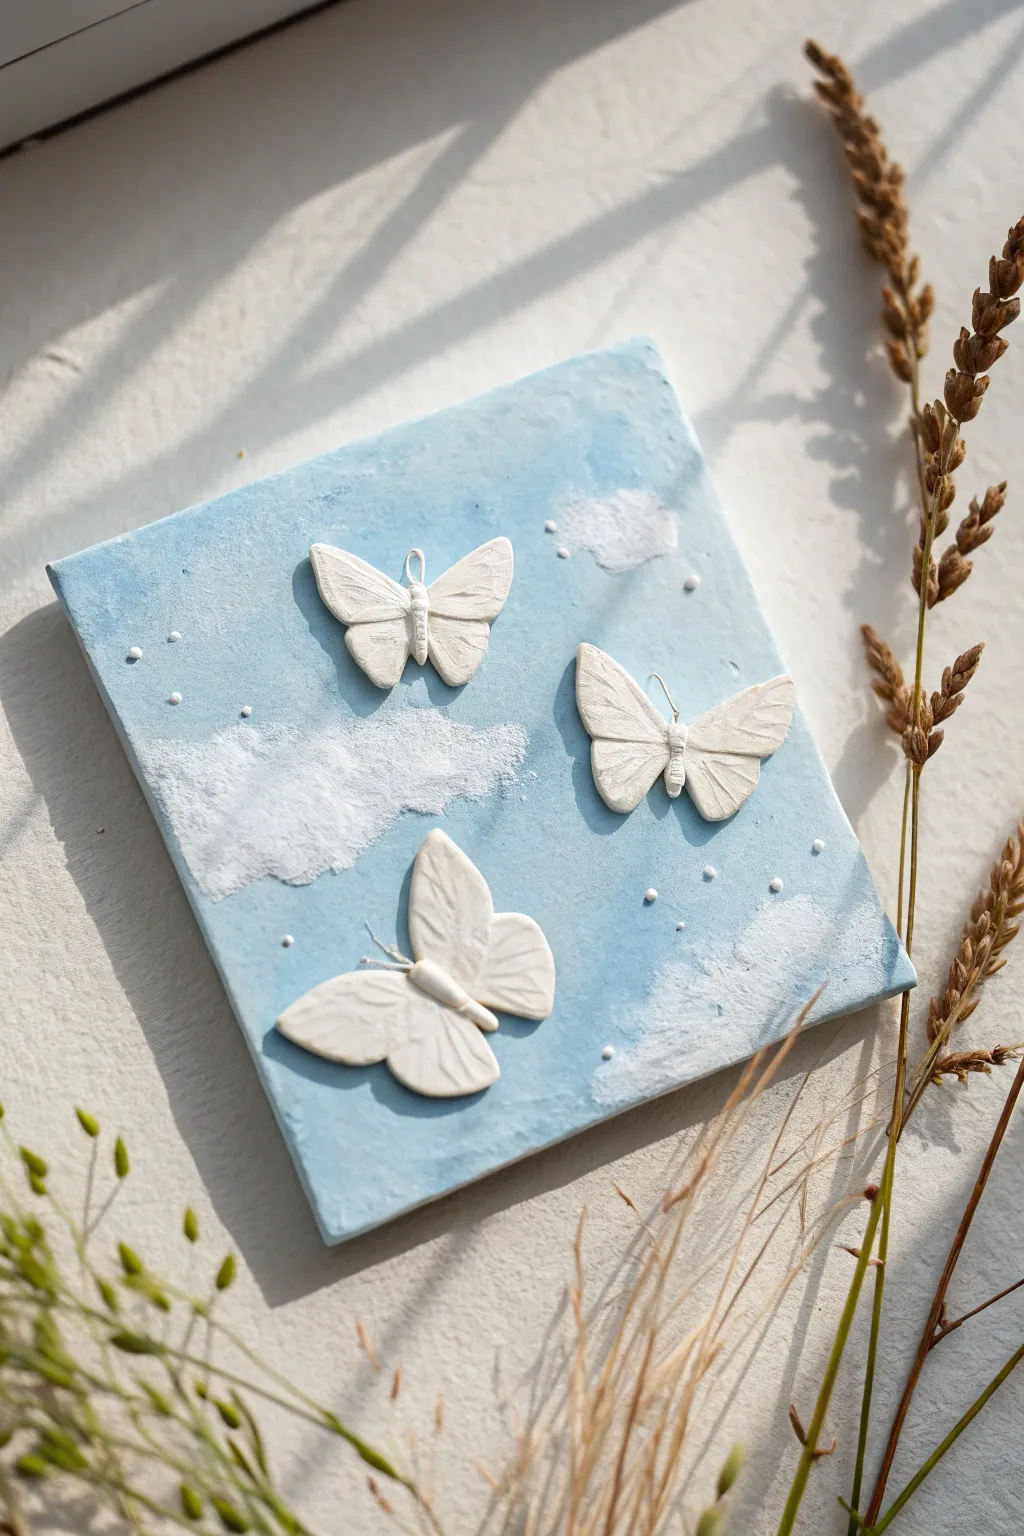
Capture the lightness of a summer day with this serene mixed-media project. By combining a dreamy painted sky background with sculpted clay butterflies, you’ll create a dimensional piece of art that feels like a window into the clouds.
Step-by-Step Guide
Materials
- Small square canvas (e.g., 6×6 inches)
- Air-dry clay (white) or polymer clay
- Acrylic paints: Light blue, White
- Paintbrushes: Flat brush for background, small round brush or sponge for clouds
- Sculpting tools (needle tool or toothpick, small blade)
- White craft glue or heavy gel medium
- Rolling pin or smooth glass jar
- Wax paper or craft mat
Step 1: Sculpting the Butterflies
-
Condition the Clay:
Start by kneading a small amount of white air-dry clay until it is soft, pliable, and free of cracks. -
Roll It Out:
On a piece of wax paper, roll the clay out to a thickness of about 1/8 inch. You want it thin enough to be delicate but sturdy enough to handle. -
Cut the Basic Shapes:
Use a needle tool or small craft knife to cut out three butterfly silhouettes. They don’t need to be identical; vary the sizes slightly for a natural look. -
Form the Bodies:
Roll three tiny, thin logs of clay for the butterfly bodies and press them gently down the center of each silhouette to secure them. -
Add Wing Details:
Using a needle tool or toothpick, gently press lines into the wings radiating from the body to the edges to mimic veins. Don’t cut all the way through; just create texture. -
Create Antennae:
Roll incredibly thin threads of clay and curve them slightly. Attach them to the head of each butterfly. If the clay is too dry, a tiny dab of water acts as glue. -
Shape for Dimension:
Before the clay hardens, create movement by gently lifting figures off the flat surface. Place a small roll of paper or cardboard under the wings so they dry in an uplifted, ‘flying’ position. -
Create Tiny Sprinkles:
With leftover clay, roll several tiny spheres, varying from pinhead size to small beads. These will become the textural dots on the canvas. -
Dry Completely:
Let all your clay components dry fully according to the package instructions—usually 24 hours for air-dry clay.
Pro Tip: Seamless finish
If your clay butterflies crack slightly while drying, fill the cracks with a mix of white paint and baking soda, then smooth over for a flawless porcelain look.
Step 2: Painting the Sky
-
Base Coat:
Mix a soft, sky-blue acrylic paint. Cover the entire canvas surface, using horizontal strokes for a smooth finish. Don’t forget to paint the edges. -
Create Cloud Textures:
While the blue is dry, mix white paint with a tiny drop of the blue. I find using a dry sponge or a stiff stippling brush works best here to dab on fluffy, irregular cloud shapes. -
Define the Clouds:
Go back in with pure white paint on the tops of the clouds to create highlights, blending downwards into the softer blue-white mix. -
Add Texture Paste (Optional):
For extra dimension on the clouds, you can mix baking soda into your white paint or use modeling paste to create raised, fluffy areas. -
Let Dry:
Allow the painted background to dry completely before attaching any heavy elements.
Level Up: Glossy wings
Apply a coat of high-gloss varnish only to the butterflies after the glue sets. This makes them pop against the matte background.
Step 3: Assembly
-
Arrangement:
Place your dried clay butterflies onto the canvas to find a composition you like. Positioning them diagonally often creates a nice sense of movement. -
Glue the Butterflies:
Apply a strong white craft glue or heavy gel medium to the underside of the butterfly bodies (not the wings, keep those floating) and press them firmly onto the canvas. -
Add the Dots:
Dip the tiny clay spheres into glue and scatter them around the butterflies using tweezers. Place them randomly to mimic distant stars or pollen. -
Final Touchups:
If the clay dried a slightly different shade of white than you prefer, you can carefully paint over the butterflies with white acrylic to match the clouds perfectly.
Hang your new dimensional artwork near a window to let the natural shadows emphasize the flight of your butterflies


What Really Happens Inside the Kiln
Learn how time and temperature work together inside the kiln to transform clay into durable ceramic.
Clay Clouds on an Ombre Sunset
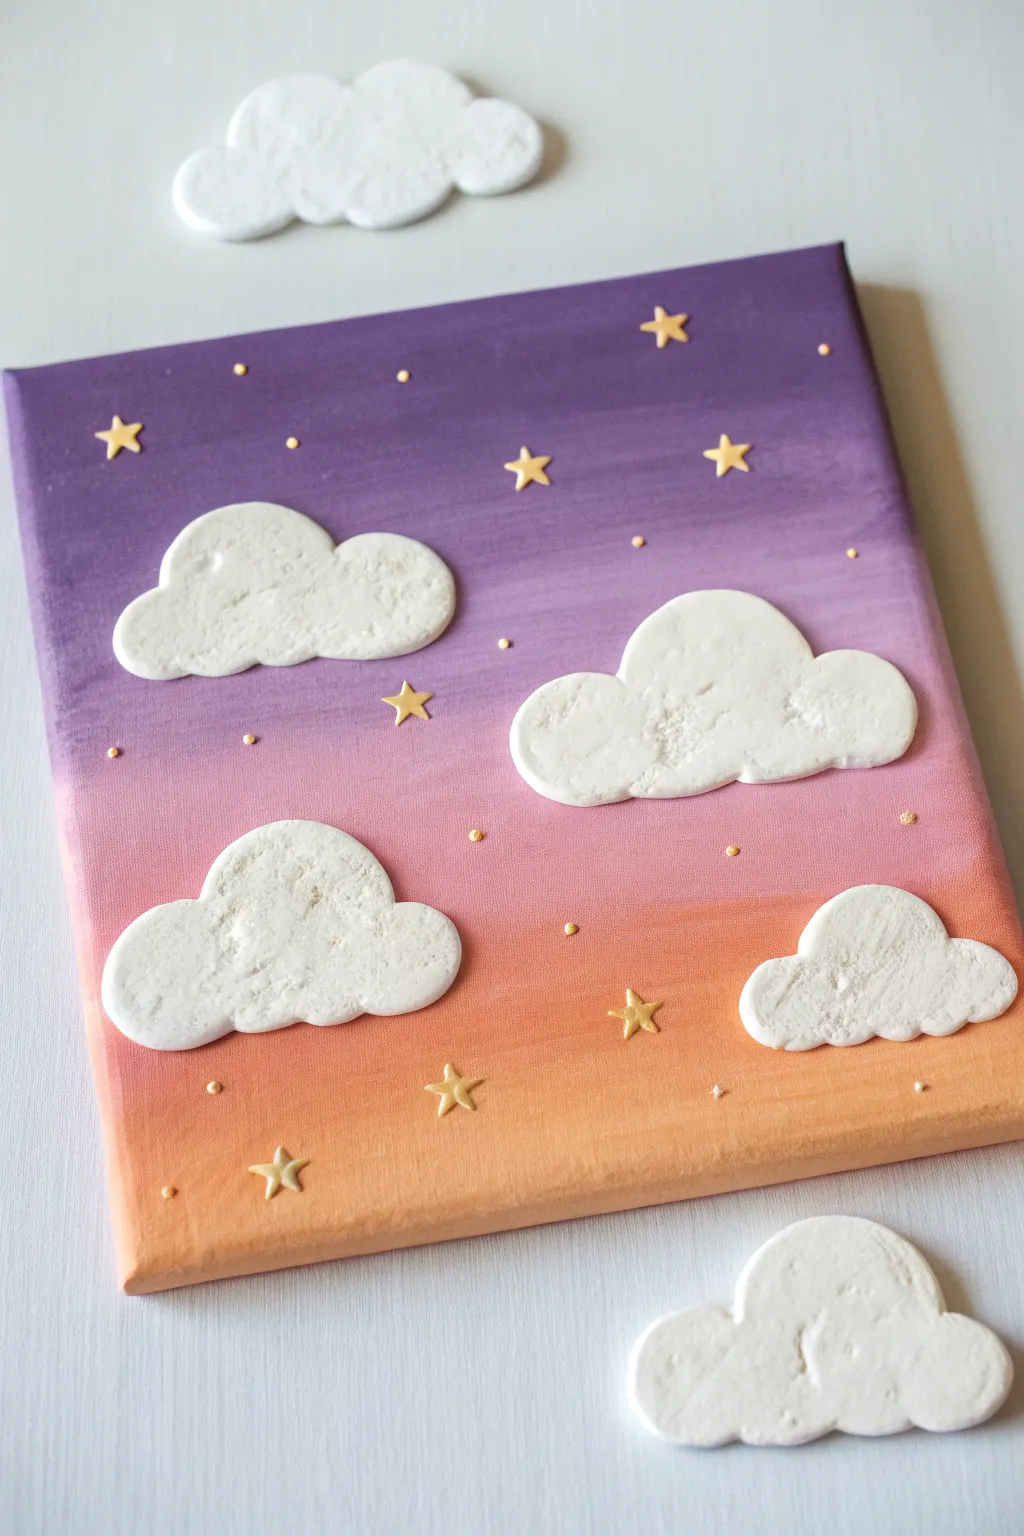
Bring a touch of whimsy to your walls with this mixed-media masterpiece that combines acrylic painting with air-dry clay textures. The soft gradient background creates the perfect sunset canvas for fluffy, 3D clouds and twinkling golden stars.
Step-by-Step
Materials
- Square stretched canvas (approx. 10×10 or 12×12 inches)
- White modeling clay (air-dry clay or lightweight polymer clay)
- Acrylic craft paints (Deep Purple, Lavender, Soft Pink, Peach, Light Orange)
- Wide flat paintbrush (for the background)
- Detailed paintbrush
- Rolling pin or smooth round marker
- Small star-shaped cookie cutter (optional)
- Craft knife or clay sculpting tool
- Super glue or strong craft adhesive
- Gold metallic paint or gold leaf pen
- Parchment paper
Step 1: Sculpting the Sky Elements
-
Condition the clay:
Begin by taking a handful of white air-dry clay and kneading it in your hands until it becomes soft, pliable, and free of cracks. -
Roll out the slab:
On a clean surface or over parchment paper, roll the clay out to an even thickness of about 1/4 inch. You want it thick enough to have dimension but light enough to stay on the canvas. -
Shape the clouds:
Using a craft knife or a cloud-shaped cutter, cut out four to five distinct cloud shapes. Vary the sizes—make one large “hero” cloud and several smaller supporting ones for a natural look. -
Soften the edges:
Dip your finger in a tiny bit of water and gently rub the sharp cut edges of your clay clouds to round them off, giving them a puffy, soft appearance. -
Add texture:
Lightly crumble a piece of aluminum foil into a ball and gently press it into the surface of the damp clay clouds. This adds a subtle, realistic rocky texture. -
Cut the stars:
Roll a small amount of clay slightly thinner and use a mini star cutter or knife to create about 8-10 small stars. Roll tiny balls for ‘distant’ star dots as well. -
Dry the pieces:
Set all your clay components on parchment paper to dry completely. Depending on your clay type, this usually takes 24 hours. Flip them halfway through to ensure even drying.
Sticky Situation?
If the clay clouds feel too heavy to stick instantly, lay the canvas flat on a table while glue dries. weight the clouds down gently with a book if needed.
Step 2: Painting the Ombre Background
-
Prepare your palette:
Squeeze out your acrylic paints: deep purple, lavender, pink, peach, and light orange. Keep them separate but ready for blending. -
Paint the top tier:
Using a wide flat brush, paint the top third of the canvas with the deep purple, blending into lavender as you move down. Ensure you paint the sides of the canvas too for a finished look. -
Create the middle transition:
While the purple edge is still wet, introduce the pink paint in the middle section. Brush back and forth where the colors meet to create a seamless blur. -
Finish with the horizon:
Apply the peach and light orange paint to the bottom third. Blend the orange up into the pink section carefully using horizontal strokes. -
Smooth the gradient:
I like to take a clean, slightly damp brush and run it horizontally across the entire canvas one final time to soften any harsh lines between the color distinct zones. -
Let it cure:
Allow the painted canvas to dry completely before attempting to attach any heavy elements.
Step 3: Assembly and Details
-
Gild the stars:
Once your clay stars are fully dry, paint them with gold metallic paint. Two coats will give the best shimmer. -
Plan the layout:
Before gluing, lay your dry white clouds and gold stars onto the dry canvas to experiment with the composition until you find a balance you love. -
Attach the clouds:
Apply a generous amount of strong adhesive to the back of the largest cloud and press it firmly onto the canvas. Repeat for the remaining clouds. -
Adhere the stars:
Glue the gold stars and the tiny clay dots into the empty spaces around the clouds, creating a twinkling constellation effect. -
Add painted sparkles:
For extra magic, dip the handle end of a paintbrush into the gold paint and dot a few extra tiny stars directly onto the canvas surface.
Pro Tip: Blending
Working quickly while acrylics are wet is key for a smooth ombre. If the paint dries too fast, mist the canvas lightly with water to keep the colors movable.
Hang your beautiful new sky scene in a spot that catches the light so those golden stars can really shine
Ocean Waves With Clay Foam Texture
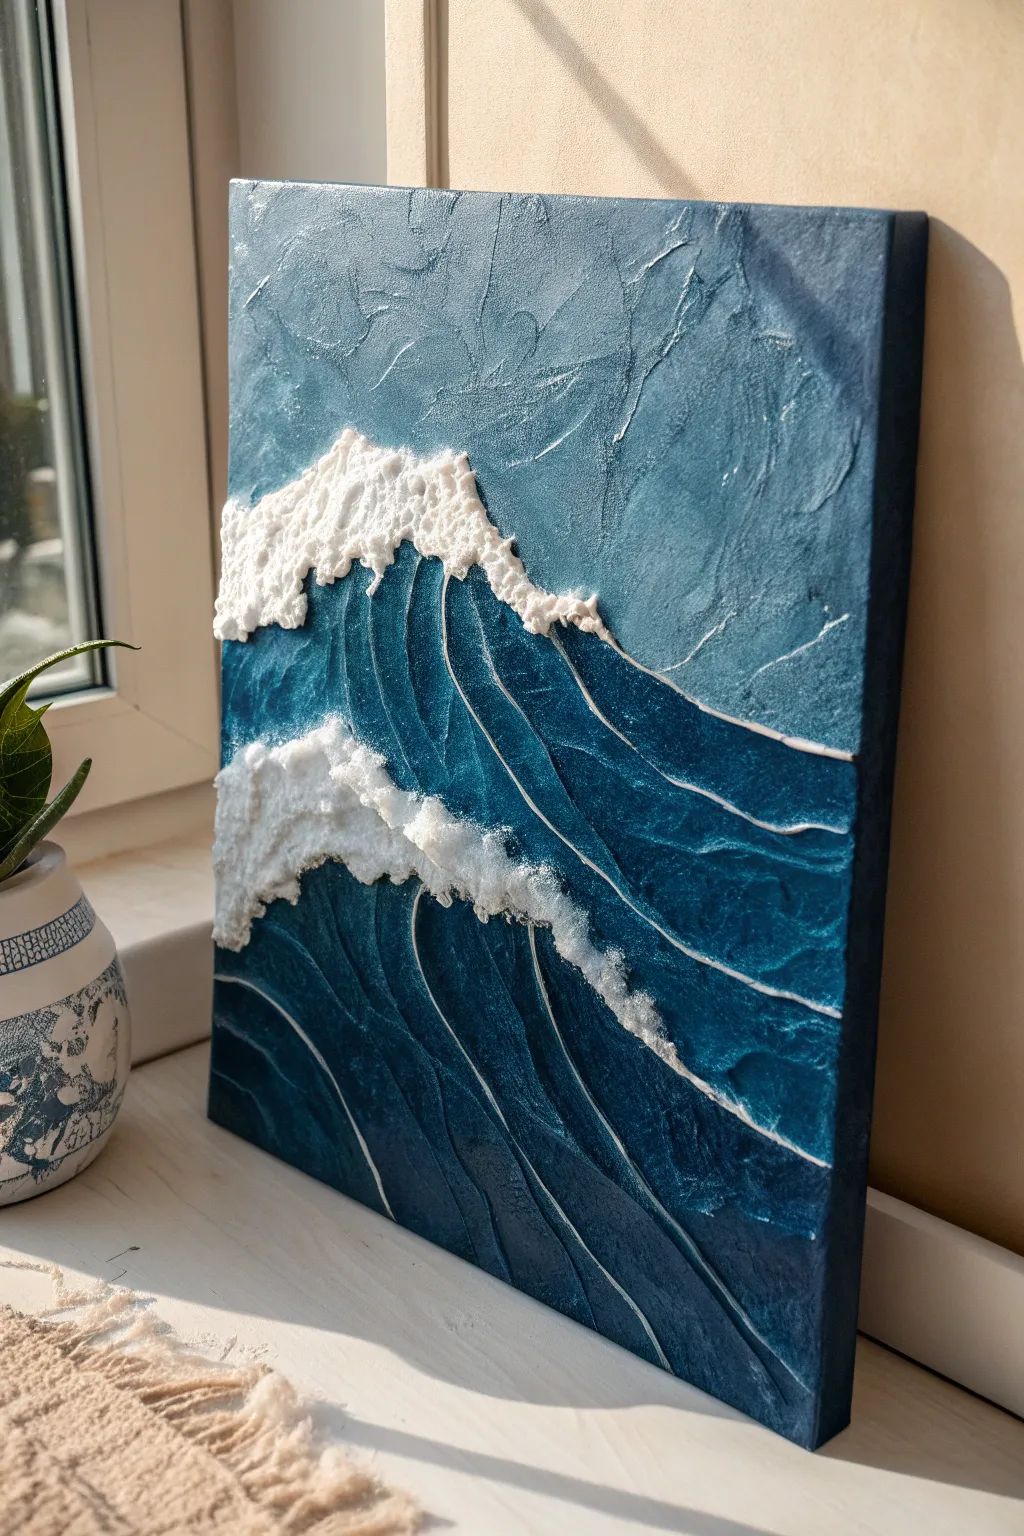
Capture the raw power of the ocean with this dimensional canvas art, featuring sweeping deep blue currents and striking, frothy white crests. The combination of textured paste and clay creates a tangible, 3D effect that brings the movement of water to life right on your wall.
Step-by-Step Guide
Materials
- Stretched canvas (rectangular)
- Texture paste or modeling paste
- Air-dry foam clay (white)
- Palette knives (varying sizes, including a wide scraper)
- Acrylic paints: Phthalo Blue, Prussian Blue, Titanium White, Teal
- Metallic acrylic paint (Silver or Pearl)
- Small pottery tools or toothpicks
- High-gloss varnish
- Disposable plate or palette
- Pencil
Step 1: Planning and Foundation
-
Sketch the Flow:
Begin by lightly sketching the outline of your waves onto the blank canvas with a pencil. You want two main sections for the water body and distinct jagged lines where the white foam crests will sit. -
Prepare the Texture Paste:
Scoop a generous amount of modeling paste onto your palette. Divide it into three sections for mixing colors. -
Mix the Deepest Blues:
Mix the first pile of paste with a combination of Prussian Blue and a touch of Phthalo Blue. You want a very dark, rich navy color for the deepest parts of the wave. -
Create a Mid-Tone:
For the second pile, mix Phthalo Blue with a tiny bit of Teal and White. This will represent the water catching more light. -
Mix the Sky Tone:
The third pile should be a lighter blend, primarily white with a hint of blue and metallic silver, intended for the sky area in the upper right.
Cracked Clay?
If the foam clay shrinks and pulls away from the canvas as it dries, simply fill the gap with a little white acrylic paint or heavy body gel medium to bridge the seam invisibly.
Step 2: Sculpting the Color
-
Apply the Dark Base:
Using a palette knife, spread the darkest blue paste mixture at the bottom of the canvas and effectively ‘under’ where your wave crests will go. Don’t worry about being smooth; texture is key here. -
Add Flow Lines:
While the dark paste is wet, use the edge of your palette knife to carve sweeping, curved lines that mimic the upward motion of water rising. -
Layer the Mid-Tones:
Apply the mid-tone blue paste in the center sections of the waves, blending slightly where it meets the dark blue but keeping distinct bands of color. -
Detail the Currents:
I like to use a finer tool or the very tip of a knife to scratch deeper grooves into the wet paste, emphasizing the directional flow towards the wave peaks. -
Fill the Sky:
Spread your lightest, silvery paste mixture in the top right corner. Use a crisscross motion with the knife to create a chaotic, wind-swept sky texture. -
Define the Crevices:
Use a thin brush or tool to paint thin lines of pure white or silver acrylic into the grooves you carved earlier, adding definition and sparkle to the water’s surface. -
Initial Drying Time:
Allow this base layer of colored paste to dry until it is firm to the touch. This usually takes 2-4 hours depending on thickness.
Step 3: The Foam Crests
-
Prepare the Foam Clay:
Take your white air-dry foam clay and knead it until soft and pliable. Tear off irregular, jagged chunks rather than rolling smooth snakes. -
Position the Crests:
Press the clay chunks firmly onto the canvas along the top ridges of your blue wave forms. The clay serves as the thick, heavy sea foam. -
Texturize the Foam:
Using a rough tool, stiff brush, or even a crumpled ball of foil, press into the clay to create a pitted, sponge-like texture that resembles aerated water. -
Drag the Clay Down:
Smear small bits of the clay downwards into the blue sections to make it look like foam is cascading down the face of the wave. -
Highlighting:
Once the clay has set slightly, dry-brush a tiny amount of pure Titanium White paint onto the highest points of the clay to make them pop. -
Final Varnish:
After the clay is fully hardened (usually 24 hours), apply a coat of high-gloss varnish over the *blue water sections only* to give them a wet, glass-like shine, leaving the white clay matte.
Sparkle finish
Mix fine iridescent glitter into your high-gloss varnish before applying it to the blue sections. It mimics the sun hitting the ocean spray.
Hang your seascape near a window to let natural light play across the deep textures you’ve created

TRACK YOUR CERAMIC JOURNEY
Capture glaze tests, firing details, and creative progress—all in one simple printable. Make your projects easier to repeat and improve.
Simple Mountain Range in Clay Relief
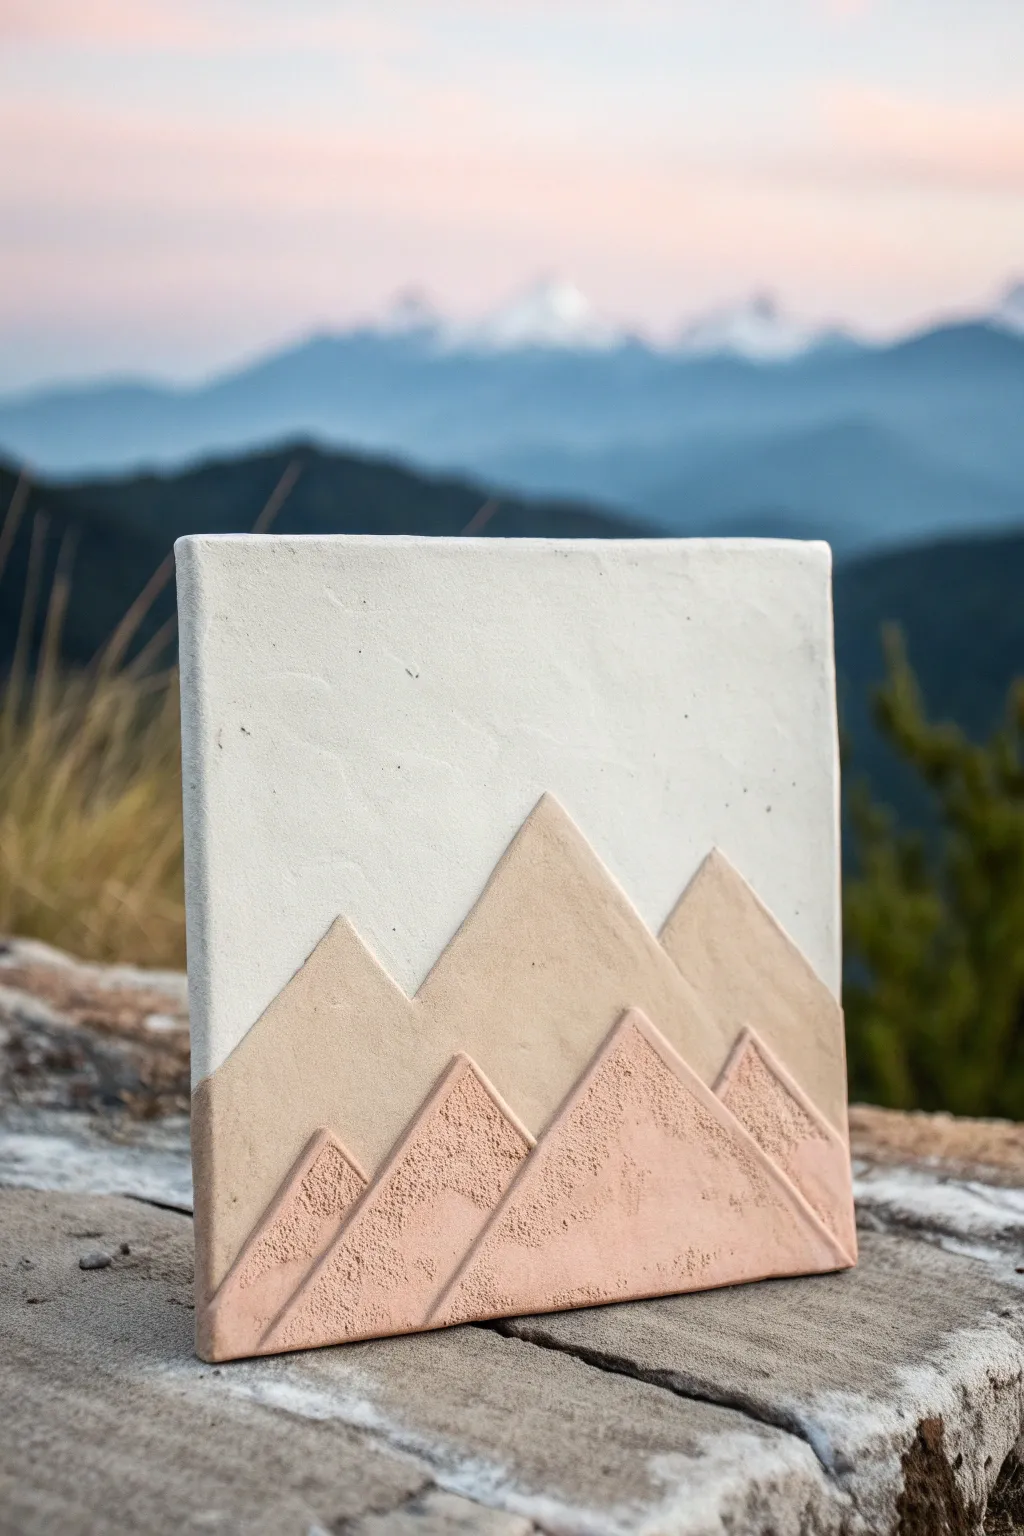
Capture the stillness of a mountain vista with this minimalist clay relief project. Using layers of textured and smooth clay in warm earth tones, you’ll build a dimensional landscape that feels both modern and grounded.
Step-by-Step Tutorial
Materials
- Air-dry clay or polymer clay (white or neutral base)
- Square wooden panel or sturdy canvas board (6×6 inch)
- Acrylic rolling pin
- Clay knife or X-acto blade
- Ruler
- Sandpaper (fine grit)
- Acrylic paints (White, Beige, Terracotta/Rose)
- Texture sponge or stiff bristle brush
- Strong craft glue (like E6000) or heavy body gel medium
- Matte varnish (optional)
Step 1: Base Preparation
-
Prepare the substrate:
Begin with your square wooden panel or canvas board. If the surface is very slick, give it a light sanding to help the clay adhere better later on. -
Roll the background slab:
Roll out a slab of clay to approximately 1/4 inch thickness. Ensure it is large enough to cover the entire surface of your board. -
Trim to size:
Place your board on top of the clay slab as a template. Use your clay knife to cut around the edges, creating a perfect square of clay that matches your base. -
Texture the sky:
For the background sky area (the top half), leave the clay relatively smooth but add subtle organic marks by lightly dabbing with a crumpled paper towel or sponge. This prevents it from looking too manufactured.
Step 2: Sculpting the Range
-
Draft the design:
Lightly sketch three distinct mountain layers onto your clay base with a needle tool. You want a background range, a middle range, and a foreground range. -
Cut the background mountains:
Roll out a second, slightly thinner slab of clay. Cut out large triangles for your furthest mountain peaks. These should be the tallest and widest shapes. -
Attach the first layer:
Score the back of these triangles and the corresponding area on your base slab. Apply a tiny bit of water or slip (liquid clay) and press them firmly onto the base. -
Create the middle layer:
Roll out more clay and cut a second set of triangles. These should be slightly smaller and positioned to overlap the bottom of your first layer. -
Add the foreground:
For the frontmost mountains, cut smaller, sharper triangles. Before attaching them, press a stiff bristle brush or a piece of coarse sandpaper into the clay to create a rocky, pitted texture. This texturing distinguishes the foreground from the smoother background peaks. -
Attach and refine:
Score, slip, and attach these textured foreground pieces at the very bottom. Use your knife to clean up the side edges so the layered slabs are flush with the sides of the square base. -
Drying or Baking:
If using air-dry clay, let the piece dry flat for 24-48 hours away from direct heat to prevent warping. If using polymer clay, bake according to the package instructions.
Clean Cuts Pro Tip
Chill your rolled clay slab in the fridge for 10 minutes before cutting. Cooler clay is stiffer and cuts much cleaner, giving you those sharp geometric mountain peaks without dragging.
Step 3: Finishing Touches
-
Sanding edges:
Once fully dry or cured, use fine-grit sandpaper to smooth the outer edges of the square, creating a clean, professional border. -
Mixing the palette:
Prepare your paints. You need a stark white or cream for the sky, a soft beige or taupe for the middle mountains, and a warm terracotta or dusty rose for the textured foreground. -
Painting the sky:
Paint the top sky section first. I like to bring the white paint slightly down over the top edge of the first mountain range to ensure no gap shows, then paint over it later. -
Painting the smooth peaks:
Paint the background and middle mountain layers with your beige mix. Use a flat brush to get crisp lines where the mountains meet the sky. -
Highlighting texture:
Paint the textured foreground mountains with the terracotta color. To enhance the texture, you can do a very light dry-brushing with a slightly lighter pink shade over the raised bumps. -
Sealing the work:
Apply a coat of matte varnish to protect the surface without adding unwanted shine, keeping the natural, earthy look intact. -
Final assembly:
Glue your finished clay relief onto the wooden panel or canvas board using strong craft adhesive. Weight it down with a heavy book while the glue sets.
Fixing Cracks
If small cracks appear as air-dry clay shrinks, don’t panic. Mix a tiny bit of fresh clay with water to make a paste and fill the cracks, then sand smooth once dry.
Display your mounted relief on a shelf or wall to bring a touch of outdoor tranquility into your home
Little Cottage With Clay Roof Tiles
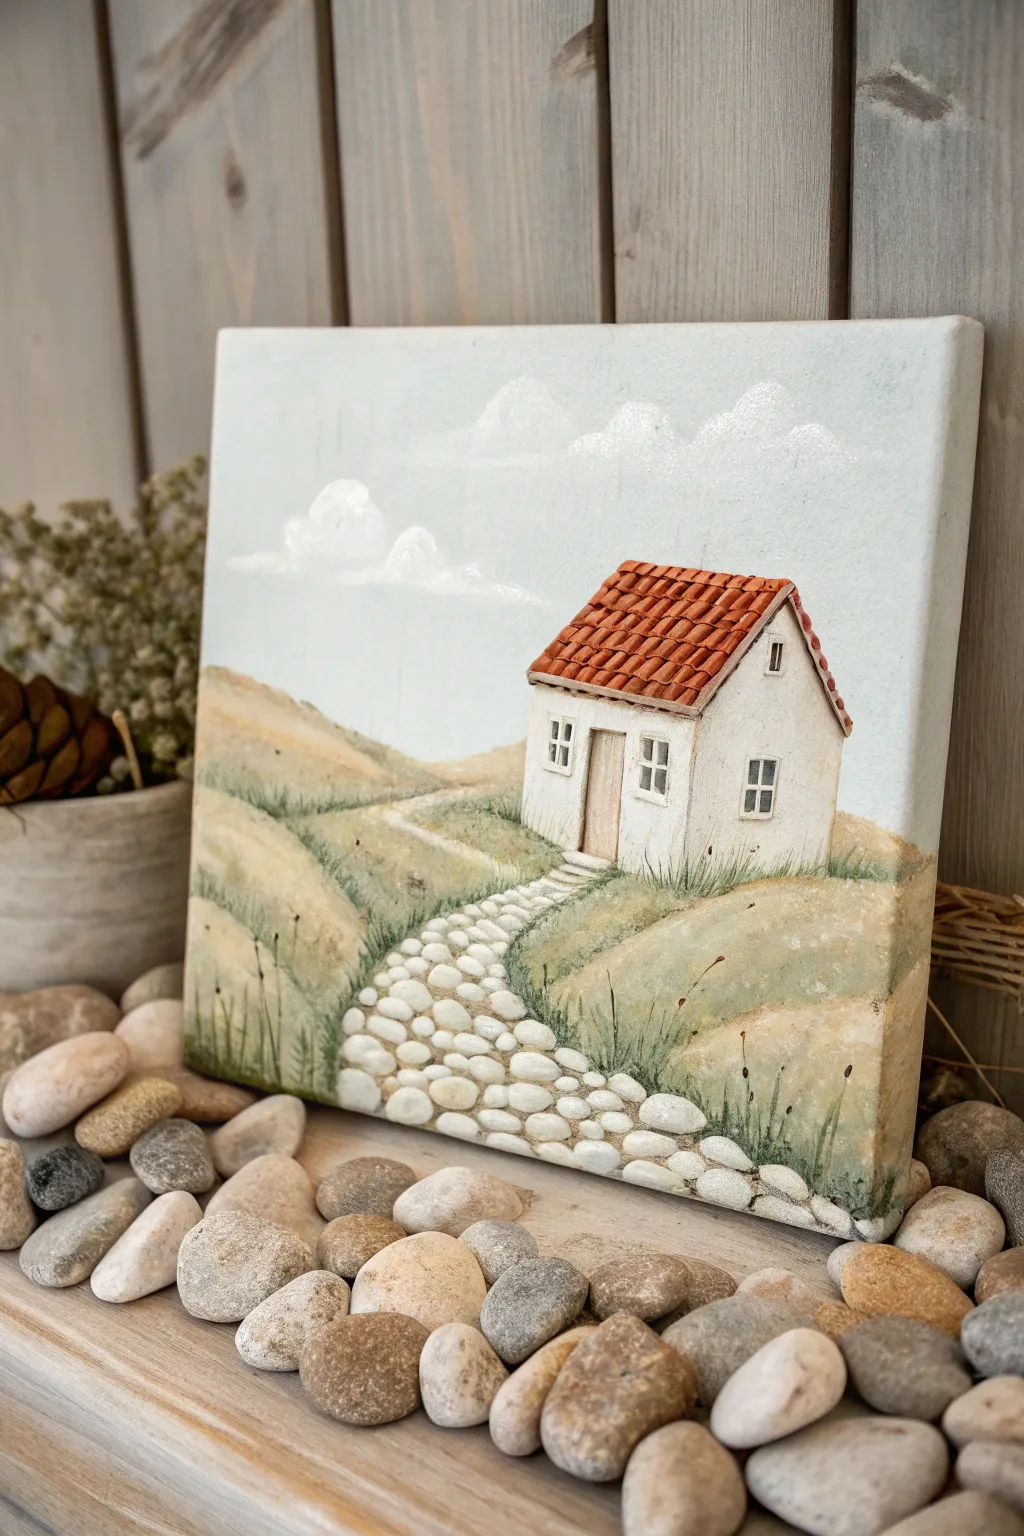
This charming mixed-media project combines acrylic painting with 3D elements for a wonderfully tactile finish. By using air-dry clay for the roof tiles and garden path, you create a cozy little cottage that literally stands out from the canvas.
Detailed Instructions
Materials
- Small square canvas (e.g., 8×8 or 10×10 inches)
- White air-dry clay
- Acrylic paints: White, Sky Blue, Raw Sienna, Burnt Sienna, Olive Green, Grey
- Paintbrushes: Flat blending brush, fine detail liner, small round brush
- Clay sculpting tool or craft knife
- PVA glue or heavy body gel medium
- Rolling pin
- Water cup and palette
Step 1: Painting the Background
-
Sky gradient:
Begin by painting the upper two-thirds of the canvas with a soft gradient. Mix white and a touch of sky blue, keeping it lightest at the horizon line and slightly deeper blue at the top edge. -
Cloud details:
While the sky is still tacky, use a small round brush with pure white paint to stipple in fluffy clouds. Create soft edges by lightly blending the wet white paint into the blue background. -
Rolling hills:
Sketch a horizon line about one-third up from the bottom. Paint the distant hills using a wash of raw sienna mixed with plenty of white to push them into the background. -
Foreground terrain:
Fill in the foreground hills using deeper olive greens and raw sienna. Use sweeping, curved brushstrokes to suggest the slope of the land leading toward where the house will sit.
Sticky Situation
If your clay won’t stick to the painted canvas, score the canvas surface lightly with a craft knife before gluing. This roughness gives the adhesive more grip.
Step 2: Constructing the Cottage
-
House base:
Sketch the outline of the cottage in the center right of the canvas. Paint the main structure white, adding subtle grey shading on the left side to give it dimension. -
Preparing the roof:
Roll out a thin sheet of air-dry clay, about 1/8 inch thick. Cut out a rectangle shape that matches the dimensions of your painted roof. -
Applying the clay base:
Apply a generous layer of PVA glue or gel medium to the roof area on the canvas and press your clay rectangle firmly onto it. -
Creating tiles:
Using a sculpting tool or the back of a knife, press horizontal lines across the clay roof, then short vertical dashes between them to mimic individual terracotta tiles. I find pressing slightly harder at the bottom of each ’tile’ creates nice depth. -
Stone path foundation:
Roll tiny balls of clay, varying from pea-sized to smaller pebbles. Flatten them slightly with your thumb. -
Laying the path:
Glue these flattened clay pebbles onto the canvas, forming a winding path that leads from the bottom center up to the cottage door. Pack them closely together but leave tiny gaps for grout lines.
Mossy Effect
For an aged look, dab a tiny bit of watered-down green paint into the crevices of the roof tiles or between the path stones to simulate moss growth.
Step 3: Finishing Details
-
Painting the roof:
Once the clay is fully dry (refer to package instructions), paint the roof tiles with burnt sienna. Let some of the paint pool in the indented lines to naturally shade the gaps. -
Windows and door:
Using your finest liner brush and grey paint, carefully draw the window frames and mullions. Mix a pale beige for the door, adding a thin vertical line for the handle. -
Painting the pebbles:
Paint the clay path stones with a mix of white and warm grey. Highlight the center of each stone with pure white to make them look rounded and smooth. -
Grass textures:
With a rigger or liner brush and watered-down olive green paint, flick upward strokes around the base of the house and along the path edges to create tall grasses. -
Shadows:
Add a thin wash of dark grey or brown under the eaves of the roof and along the right side of the cottage to anchor it to the ground. -
Final highlights:
Add tiny white highlights to the window panes and the very tops of the roof tiles to catch the imaginary light source.
Step back and admire your peaceful countryside create, now complete with wonderful texture you can feel
Underwater Coral Garden on Canvas
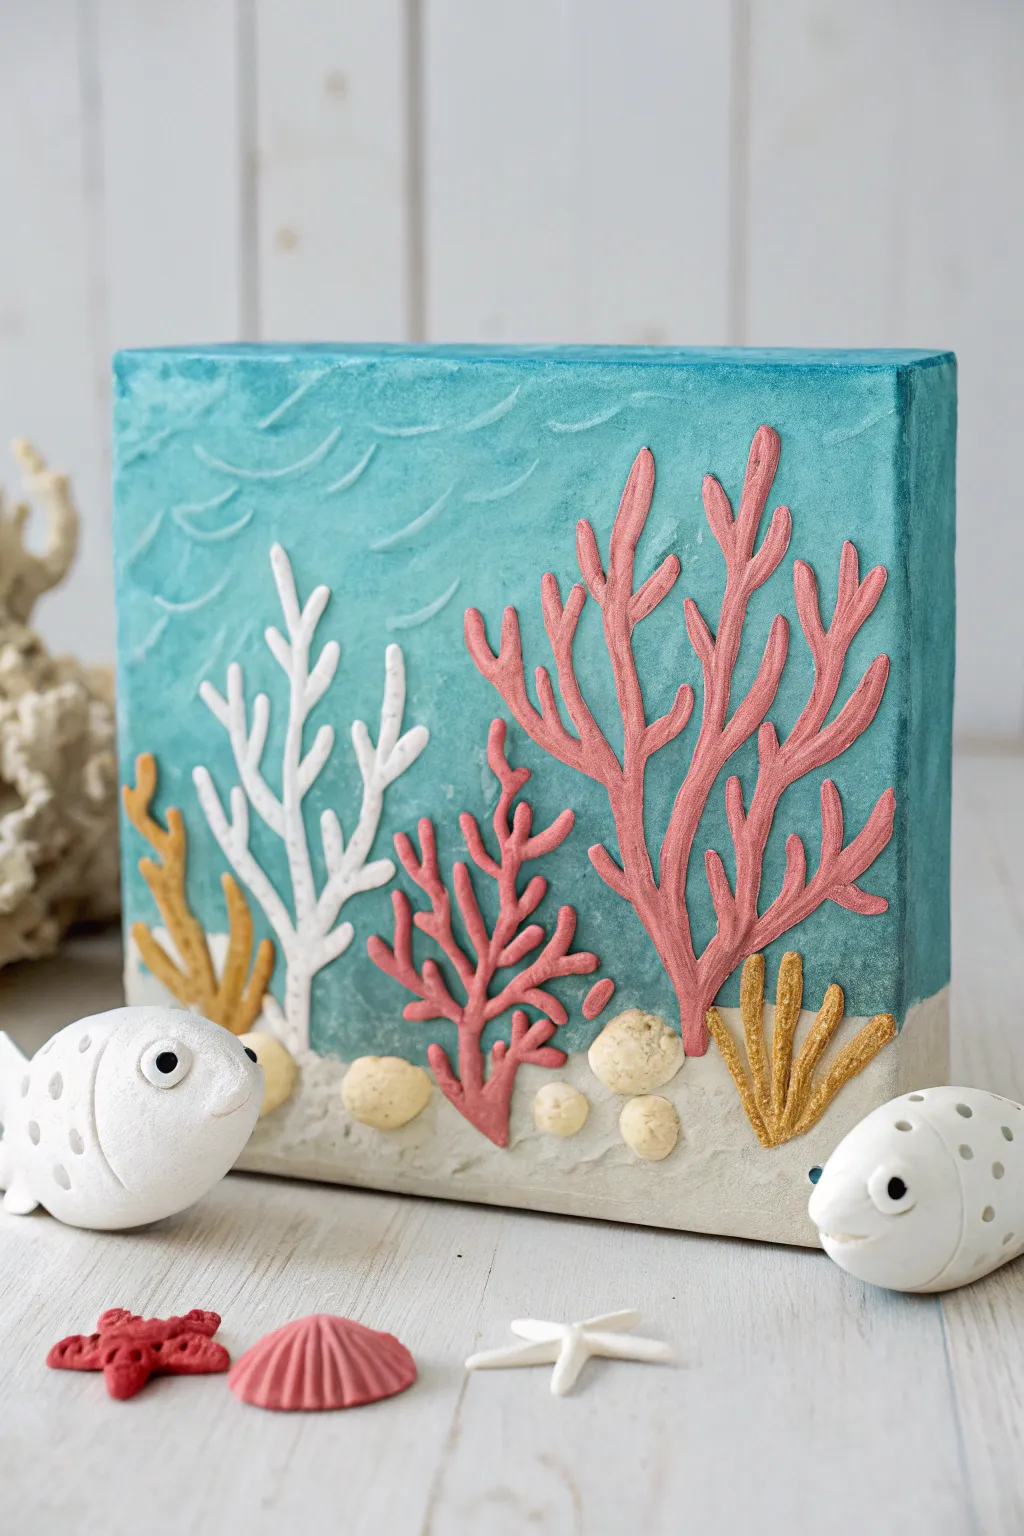
Bring the ocean’s depths to your wall with this stunning mixed-media project that combines canvas painting with raised clay relief. The result is a tactile, dimensional piece featuring elegant coral branches swimming in a textured turquoise sea.
Step-by-Step Tutorial
Materials
- Square canvas (deep edge preferred)
- Air-dry modeling clay (white)
- Acrylic paints: turquoise, teal, white, coral pink, mustard yellow, beige/sand
- Gesso or texture paste (optional but helpful)
- Clay sculpting tools or a craft knife
- Rolling pin
- Plastic wrap or silicone mat
- Strong craft glue (PVA or tacky glue)
- Paintbrushes (flat shader and fine liner)
- Palette for mixing
- Clear matte varnish sealant
Step 1: Creating the Textured Backdrop
-
Prep the canvas:
Start by laying your canvas flat. To achieve the grainy texture seen in the seabed area, mix a little coarse sand or texture paste into your beige acrylic paint. -
Paint the seabed:
Apply the sandy beige mixture to the bottom quarter of the canvas. Don’t worry about being perfectly smooth; dabbing the brush creates a nice, organic sandy look. -
Paint the ocean water:
For the upper three-quarters, mix turquoise with a touch of white to create a soft, watery blue. Apply this generously, blending it slightly into the beige line for a natural transition. -
Add water texture:
While the blue paint is still tacky, use the handle end of a paintbrush to gently carve small, wavy ‘C’ shapes into the paint layer near the top left. This mimics sunlight refracting on waves.
Clay Cracking?
If your air-dry clay cracks while drying, mix a tiny bit of fresh clay with water to make a paste (slip) and fill in the cracks. Smooth it out with a damp finger.
Step 2: Sculpting the Clay Elements
-
Roll out clay strands:
Pinch off small pieces of air-dry clay and roll them into thin snakes or coils on your silicone mat. You’ll need various thicknesses for the different coral types. -
Form the large pink corals:
Create the main coral structures by laying down a thicker central stem first. Attach smaller clay branches coming off it in a V-shape pattern, pressing the joints gently to fuse them. -
Create the white fan coral:
For the white coral on the left, roll thinner, more delicate strands. Arrange them in a fanned-out shape, ensuring the tips taper off to points. -
Sculpt the yellow sea sponges:
Make small, thicker clusters of clay for the yellow tube sponges. I find it helpful to use a needle tool to poke a tiny indentation in the top of each tube for realism. -
Make ocean pebbles:
Roll several small balls of clay and flatten them slightly into irregular stone shapes. These will sit on the seabed floor. -
Texture the clay:
Before the clay dries, use a stiff brush or a piece of textured sponge to gently tap the surface of your clay corals. This removes fingerprints and adds a calcified, rocky texture.
Texture Trick
Press a real piece of coral, a rough stone, or coarse sandpaper into the wet clay surface to instantly create realistic organic pores and ridges.
Step 3: Assembly and Finishing
-
Glue the elements:
Once the background paint is fully dry, apply strong craft glue to the back of your damp clay pieces and press them onto the canvas. Alternatively, let the clay dry completely off-canvas first, then glue. -
Paint the large coral:
Paint the largest coral structure in a dusty coral pink. Use a small brush to get into the crevices where the branches meet. -
Paint the accent corals:
Paint the smaller branching corals in a deeper pink or reddish tone to add depth and variety to the reef. -
Highlight the white coral:
Paint the white coral branches with pure white acrylic. If you want more dimension, mix a tiny drop of grey into the base and highlight the tips with bright white. -
Paint sponges and stones:
Color the tube sponges with mustard yellow. Paint the pebbles in shades of cream and light beige to match the sandy floor. -
Dry brush details:
Dip a dry brush into a lighter shade of pink and very lightly skim it over the raised textures of the pink coral. This highlights the ‘sculpted’ feel. -
Seal the artwork:
Once all paint is completely leveled and dry, apply a coat of matte varnish over the entire canvas to protect the clay from moisture and dust.
Now you have a calm, sculpted piece of the ocean to display on your shelf or wall
Moon Phases in Clay on a Dark Canvas
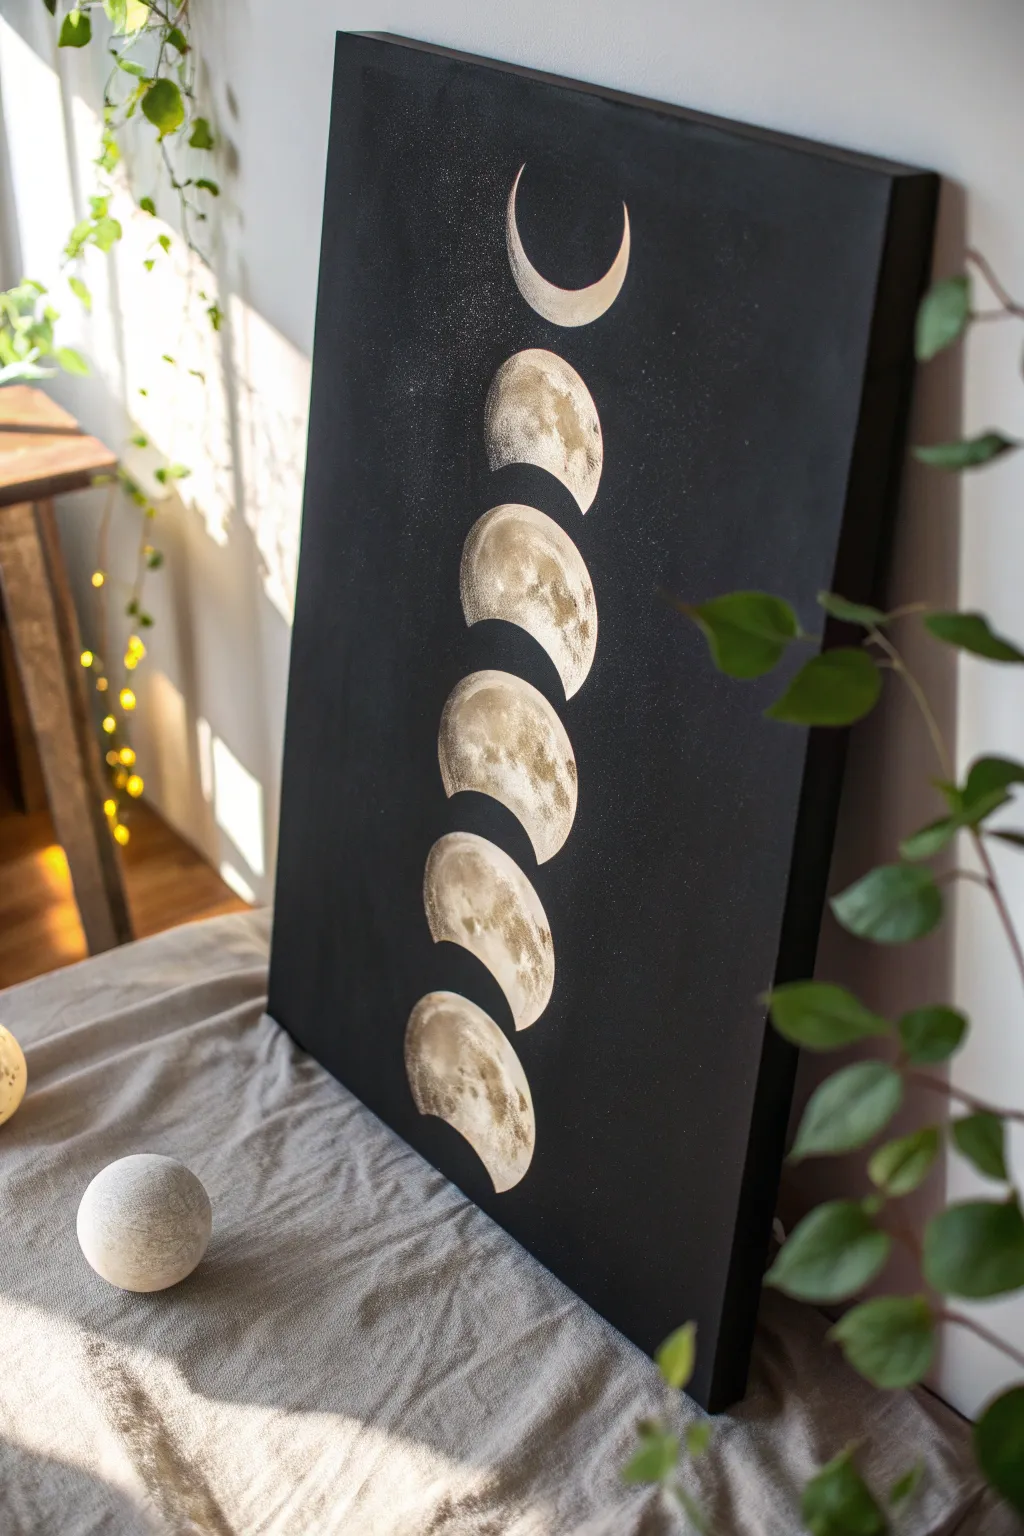
This striking wall art combines the depth of textured modeling paste with the stark contrast of a matte black background. The result is a tactile, celestial display where each moon phase rises from the canvas with realistic craters and shadows.
Detailed Instructions
Materials
- Rectangular stretched canvas (around 12×24 inches or similar vertical orientation)
- Air-dry modeling clay or texture paste (white)
- Matte black acrylic paint
- Metallic silver or pearl acrylic paint (optional for highlights)
- Grey acrylic paint (diluted for shadows)
- Set of circular cookie cutters or a compass
- Palette knives or sculpting tools
- Sponge or textured foam
- Fine-grit sandpaper
- Pencil
- Ruler
- Matte varnish spray (optional)
Step 1: Preparing the Night Sky
-
Prime the canvas:
Before creating your galaxy, ensure your canvas is clean and ready. Apply a base coat of matte black acrylic paint over the entire surface, including the sides. This ensures no white canvas peeks through later. -
Create a starry effect:
While the black base is drying, you can add a subtle starry background. Dip a stiff brush or toothbrush into watered-down white or silver paint and gently flick the bristles to create a fine mist of stars. Let this dry completely before moving on.
Clean Edges Pro-Tip
For ultra-crisp crescents, lay down masking tape or a stencil cut from acetate before applying your paste. Peel it off while the paste is still wet.
Step 2: Mapping the Phases
-
Mark the center line:
Using a ruler and a pencil, lightly draw a vertical line down the exact center of your canvas. This will act as the spine for your moon phases to ensure they align perfectly. -
Determine spacing:
Decide how many moon phases you want to capture—usually five or seven depending on your canvas height. Mark even intervals along your center line where the center of each moon will sit. -
Outline the moons:
Use a circular object or compass to trace your circles. For this specific crescent design, you won’t need full circles for every phase. Draw the crescent shapes lightly with a pencil, starting with the thinnest crescents at the top and bottom, moving toward fuller shapes in the middle.
Step 3: Sculpting the Textures
-
Apply base clay:
Take your air-dry clay or thick texture paste. Using a palette knife, carefully fill in the pencil outlines you created. Don’t worry about being perfectly smooth; the goal is to build up a raised surface about 1/8 to 1/4 inch thick. -
Refine the edges:
Use the edge of your palette knife or a clean sculpting tool to neaten up the curves of the crescents. Sharp, clean edges against the black background create the crispest look. -
Create crater texture:
While the clay is still wet, press a coarse sponge or a crumpled piece of aluminum foil gently into the surface. This imitates the moon’s uneven, cratered landscape. -
Add deep craters:
For larger craters, like the distinctive Tycho crater, use the rounded end of a paintbrush handle to press divots into the clay. Vary the pressure to create different depths. -
Let it cure:
This is the patience test. Allow the clay to dry completely according to the package instructions. This usually takes 24 hours depending on thickness and humidity. I prefer to let it sit an extra few hours just to be safe.
Level Up: Gold Leaf
Add a touch of magic by applying small flakes of gold or silver leaf to the crescent edges or inside deep craters for a shimmering, luxurious finish.
Step 4: Painting and Finishing
-
Clean up borders:
Once fully dry, check the edges. If any clay strayed outside the lines, use a fine brush with black paint to tidy up the borders, making the moons pop against the dark void. -
Apply base color:
Paint the textured dried clay with a coat of off-white or very light cream paint. This seals the clay and provides a uniform base for shading. -
Add shadows:
Mix a very watery wash of grey paint. dab it onto the textured surface and immediately wipe the high points with a paper towel. The dark paint will settle into the craters and texture you created, highlighting the relief. -
Highlight the peaks:
Using a dry-brush technique with bright white or a subtle pearl metallic paint, lightly whisk over the very tops of the texture. This emphasizes the 3D effect and makes the moons glow. -
Seal the artwork:
To protect your textured masterpiece from dust, give the entire canvas a light coat of clear matte varnish spray once all paint is dry.
Hang your lunar cycle in a spot with side lighting to really let those crater shadows dance
Clay Mandala Dots and Petals
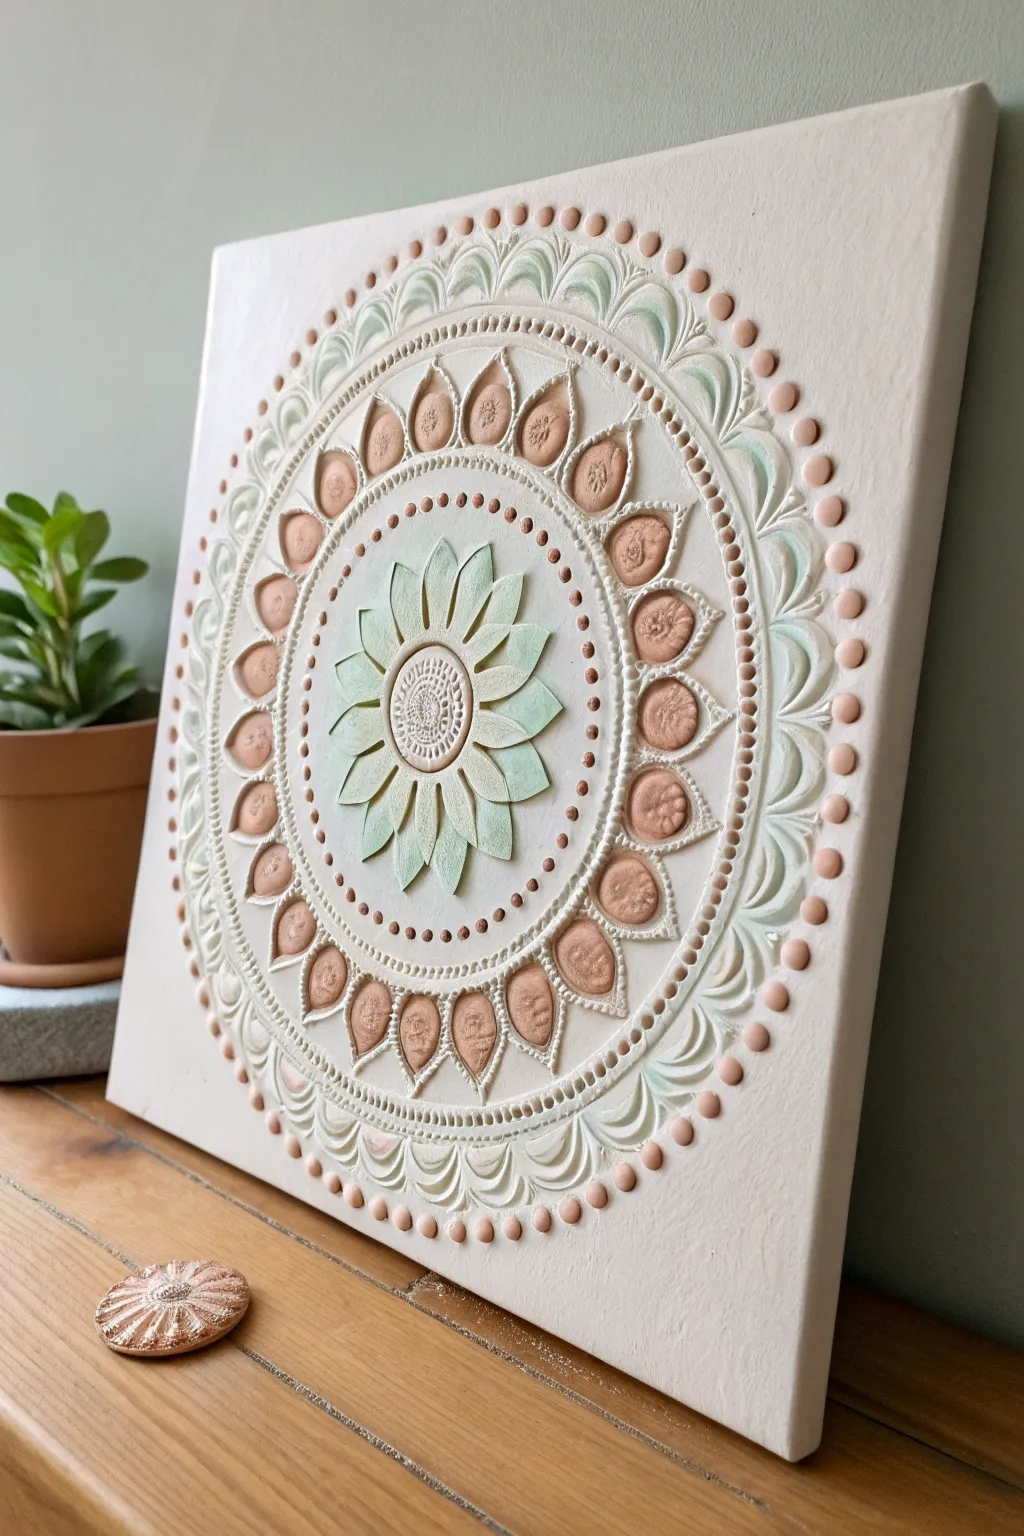
This elegant mixed-media piece combines the crisp texture of relief paste with the warmth of clay detailing to create a soothing, tactile mandala. Its starburst center and rhythmic outer rings feature soft mint greens and earthy terracotta tones set against a clean white background.
How-To Guide
Materials
- Square stretched canvas (approx. 12×12 inches)
- White texture paste or modeling paste
- Air-dry clay (white or terracotta)
- Palette knife
- Small pottery carving tools or a toothpick
- Acrylic paints (Mint green, White, Copper/Terracotta)
- Fine liner brush
- Round sponge applicator or stencil brush
- Compass and pencil
- Piping bag with a fine round tip (optional)
- Matte varnish
Step 1: Planning the Structure
-
Map the center:
Begin by finding the exact center of your square canvas. Use your compass to lightly draw a series of concentric circles: a small central circle (about 1 inch wide), a larger petal zone (3 inches), a decorative ring zone (5 inches), and two outer rings for the border details. -
Mark the segments:
Using a protractor or a ruler, divide your circle into even segments (12 or 16 slices work best) to ensure your mandala stays symmetrical as you build the layers.
Cracking Clay?
If your air-dry clay cracks while drying, mix a tiny bit of fresh clay with water to make a slip paste and fill in the fissures. Smooth with a wet finger.
Step 2: Sculpting the Central Relief
-
Create the central button:
Roll a small ball of air-dry clay, flatten it into a disc, and press it firmly onto the center of the canvas. Use a toothpick or needle tool to stipple an intricate seed texture into the surface while the clay is still wet. -
Form the petals:
Mix a small amount of modeling paste with a drop of mint green acrylic paint, or paint the paste after it dries. Using a palette knife or stencil, apply the paste in leaf shapes radiating from the center. Create distinct central ridges on each petal for extra dimension. -
Refine the petal edges:
While the paste is still slightly malleable, use a clean, damp brush to smooth any jagged edges on your mint leaves, making them sharp and defined.
Level Up: Metallic Pop
Mix a small amount of gold mica powder into your varnish before applying it to just the terracotta seeds for a subtle, shimmering luster.
Step 3: Building the Clay Rings
-
Shape the clay seeds:
Roll approximately 20-24 small, uniform almond shapes out of your air-dry clay. These will be the primary decorative ring. Place them onto the canvas using a dab of paste or PVA glue to secure them. -
Texture the clay:
Press a small floral or textured stamp into the wet clay almonds. If you don’t have a stamp, use the end of a paintbrush to create divots and organic textures. -
Pipe the dotted borders:
Fill a piping bag (or a sturdy plastic bag with a tiny corner snipped) with white texture paste. Carefully pipe tiny dots in concentric circles: one ring immediately surrounding the mint petals, and another outlining the clay almonds. -
Outer scallop detailing:
Using the texture paste and a brush or palette knife, created the scalloped arches on the outermost ring. I find a swooping motion with a small round brush works best here to get that fluid, draped look.
Step 4: Painting and Finishing
-
Base coat the clay:
Once the clay elements are completely dry (this may take overnight), paint the almond shapes with a matte terracotta or copper acrylic paint. Ensure full coverage, getting into the textured crevices. -
Dry brush highlights:
Dip a dry brush into white paint, wipe almost all of it off on a paper towel, and gently feather it over the tops of the terracotta clay seeds and the mint petals. This brings out the relief texture. -
Add pastel accents:
Dilute your mint green paint with water to make a glaze. Carefully tint the white scalloped edges on the outer rim, letting the color fade into the white canvas for an ombré effect. -
Final dotting:
Using your terracotta paint and the back end of a small paintbrush, add the final ring of large dots around the very outer edge of the design to frame the piece. -
Protective seal:
Allow the entire piece to cure for 24 hours. Finish with a light coat of spray matte varnish to protect the clay and paste from dust and moisture.
Hang your finished mandala in a spot with good natural light to let the shadows play across the textures
Abstract Geometric Clay Shapes
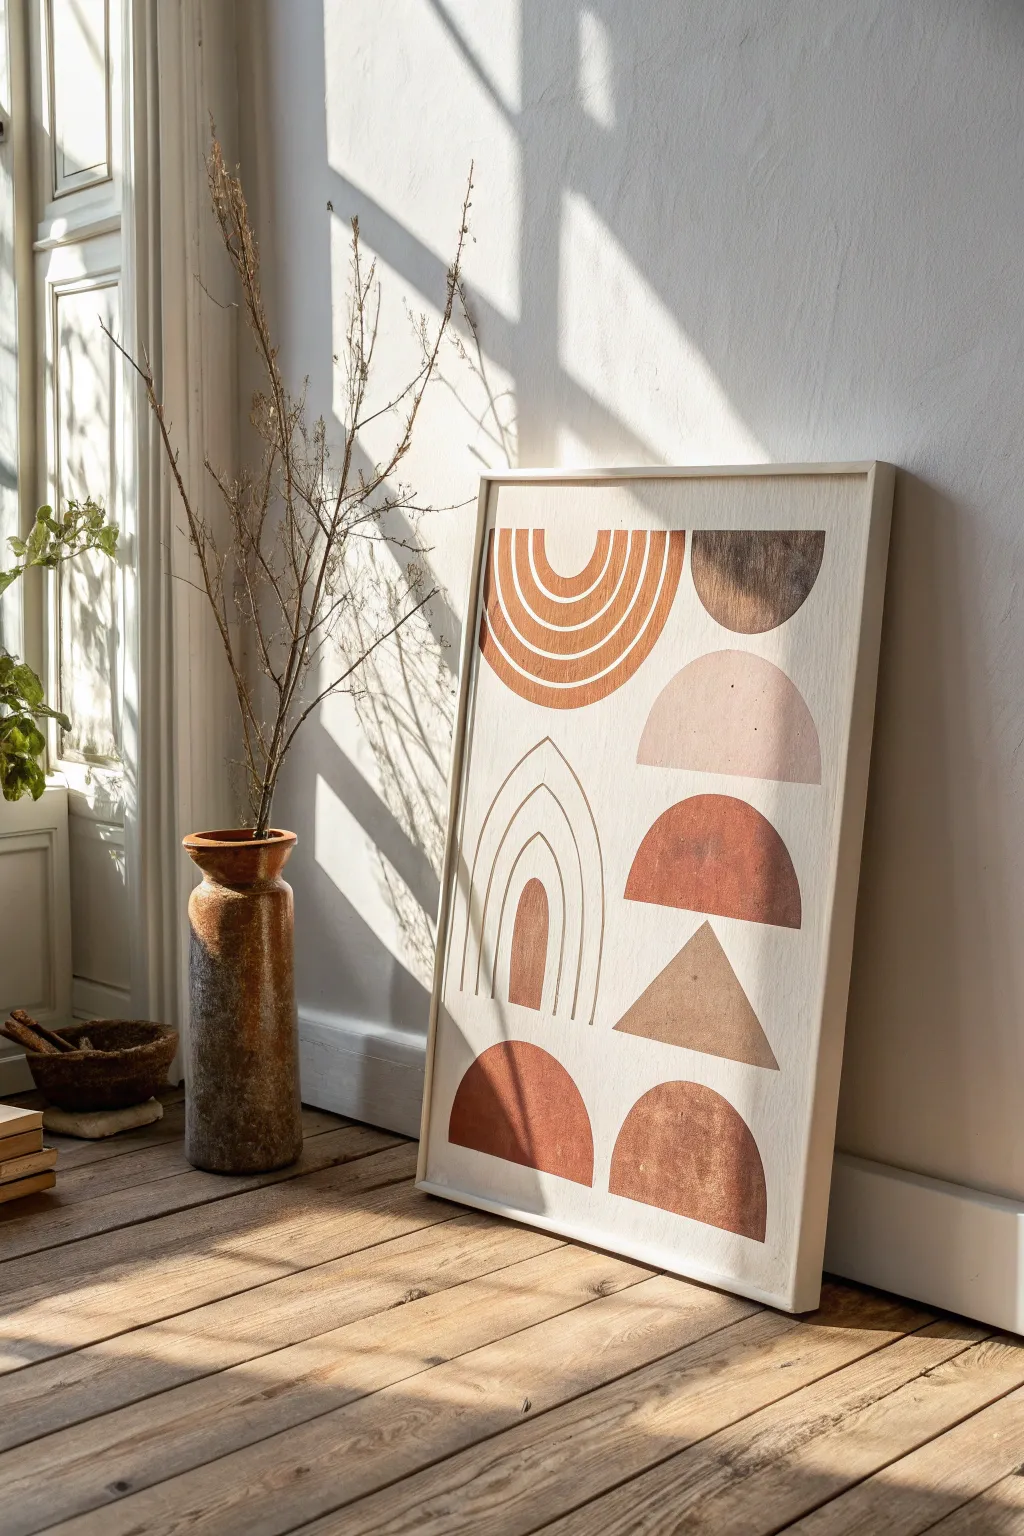
Bring the warmth of terracotta pottery to your walls with this dimensional clay-on-canvas art piece. Using air-dry clay or texture paste, you’ll create raised geometric shapes in soothing earth tones that add a modern bohemian touch to any room.
Step-by-Step
Materials
- Large rectangular canvas (approx. 18×24 inches)
- Wooden floating frame (optional)
- Air-dry modeling clay or heavy body texture paste
- Rolling pin (if using clay)
- Craft knife or clay loop tools
- Acrylic paints (terracotta, burnt sienna, dark walnut brown, beige, cream)
- Palette knives (varying sizes)
- Flat paintbrushes (1-inch and fine liner)
- Fine-grit sandpaper
- Matte varnish spray
- Pencil and ruler
Step 1: Planning and Prep
-
Prime the Surface:
Ensure your canvas is clean and taunt. If it’s a raw canvas, apply a coat of gesso to prime it. Paint the entire background a soft, warm off-white or cream color to serve as your neutral base. -
Sketch the Grid:
Lightly use a pencil and ruler to mark out your composition. This design relies on balance, so sketch the placement of the large arch, the stacked semicircles, and the central triangle first to ensure everything fits harmoniously. -
Draft the Curves:
For the perfect semicircles and arches, trace around household objects like bowls or plates, or use a compass to get those clean, curved lines.
Crush Creating
Mix a little baking soda into your acrylic paint. This creates a grainy, stone-like texture that mimics real pottery without needing clay for every single shape.
Step 2: Creating the Clay Elements
-
Roll out the Clay:
If using air-dry clay, roll a portion out onto a flat surface until it is about 1/8 inch thick. Try to keep the thickness consistent for a uniform look. -
Cut Out Shapes:
Place your clay sheet over your sketches (or use templates) and cut out the solid geometric shapes: the two bottom semicircles, the triangle, and the semi-circle on the right. -
Adhere Clay to Canvas:
Apply a strong craft glue or heavy gel medium to the back of your clay cutouts and press them firmly onto the canvas in their designated spots. Smooth the edges down gently with your finger. -
Sculpt the Arches:
For the ribbed arch design at the top left, roll thin ‘snakes’ or coils of clay. Arrange them in concentric semi-circles, pressing them onto the canvas with glue. -
Create the Line Work:
For the thin, sketched archway in the middle left, you can either paint it later or use extremely thin clay coils for a subtle 3D effect. If using texture paste instead of clay, pipe the paste using a fine nozzle to create these raised lines. -
Dry Completely:
Allow the clay or texture paste to dry fully. This usually takes 24 hours depending on thickness and humidity. I advise checking for cracks periodically as it dries; you can smooth them out with a damp finger before it hardens.
Step 3: Painting and Finishing
-
Sand Rough Edges:
Once hard, gently run fine-grit sandpaper over the clay shapes to remove any sharp burrs or uneven textures. -
Mix Earth Tones:
Prepare your palette. You need a mix of terracotta (orange-brown), a deep dark brown for the top right shape, a soft blush pink for the middle right, and a sandy beige for the triangle. -
Paint the Top Arch:
Paint the coiled arch in the top left with your vibrant terracotta color. Ensure the paint gets into the crevices between the coils. -
Block in Solids:
Paint the solid clay shapes. Use dark walnut for the top-right semi-circle and the distinct terracotta shade for the middle-right semi-circle. -
Detail the Line Arch:
Using a fine liner brush and thinned terracotta paint, carefully trace the thin arch decoration on the middle left, ensuring the lines are crisp. -
Add Texture Details:
To mimic the weathered look in the photo, dry-brush a slightly lighter shade over the terracotta shapes to highlight the texture of the clay. -
Final Retouches:
Check the background paint. If you got any earth tones on the cream background, touch it up now for a clean, professional finish. -
Seal the Art:
Spray the entire piece with a matte varnish. This seals the clay, protects the paint from fading, and unifies the finish. -
Frame and Hang:
Install your canvas into a light wood floating frame to complete the organic, minimalist aesthetic.
Crack Control
If your clay shapes crack significantly while drying, fill the cracks with a mixture of white glue and clay dust (or fresh soft clay) before painting.
Enjoy the calm, grounded energy this textured artwork brings to your newly decorated space
Raised Clay Quote Letters
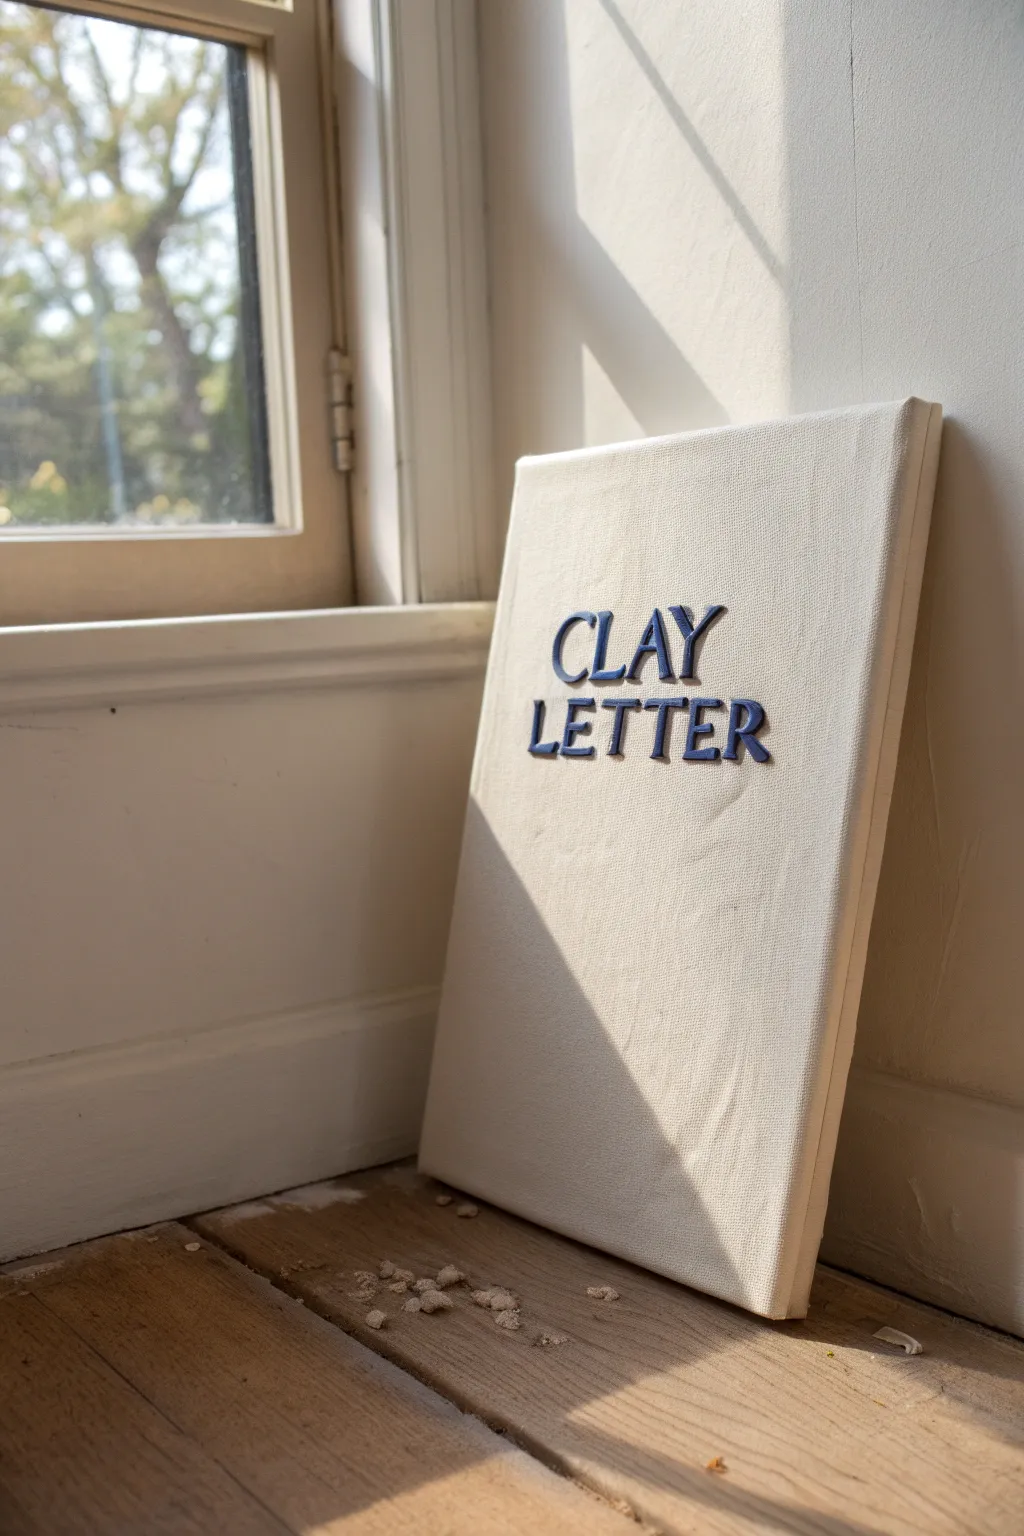
Transform a simple stretched canvas into a statement piece by adding raised, sculptural typography. Using air-dry clay to form crisp serif letters creates a sophisticated, tactile effect that pops against the minimalist background.
Step-by-Step Tutorial
Materials
- Stretched canvas (12×16 inch or similar size)
- Air-dry clay (white or terracotta)
- Rolling pin
- Parchment paper or silicone mat
- Printed text template (serif font)
- X-acto knife or craft scalpel
- Fine-grit sandpaper (220 grit)
- Acrylic paint (Navy Blue/Indigo)
- Small flat paintbrush
- Fine detail paintbrush
- Strong craft glue (E6000 or similar)
- Ruler
- Pencil
Step 1: Preparation and Cutting
-
Prepare your template:
Choose a bold serif font on your computer and type your desired phrase—in this case, ‘CLAY LETTER’. Print it out at the exact size you want it to appear on the canvas to use as your cutting guide. -
Roll out the clay:
Take a generous chunk of air-dry clay and knead it briefly to make it pliable. Roll it out on parchment paper to a consistent thickness of about 1/4 inch. If you have rolling guide rings, use them to ensure the surface is perfectly flat. -
Transfer the design:
Place your printed paper template gently on top of the rolled clay. You don’t need to press hard yet; just ensure it’s positioned where you have enough clay for all the letters. -
Trace the letters:
Using a blunt tool like a knitting needle or the back of a pen, trace the outline of each letter firmly enough to leave a slight impression in the clay underneath, then remove the paper. -
Cut the letters:
With a sharp X-acto knife, carefully cut along the impressed lines. Keep the knife vertical to ensure square edges. I find it helpful to cut the inner shapes (like the triangle in the ‘A’) first before cutting the outer perimeter. -
Smooth the edges:
Dip your finger in a little bit of water and run it gently along the cut edges of each wet letter to smooth out any ragged bits or knife drag marks.
Step 2: Drying and Refining
-
Initial drying:
Leave the clay letters flat on the parchment paper to dry. To prevent warping, place a light book or flat board on top of them once they are leather-hard (after about 2–3 hours). -
Full cure time:
Allow the clay to dry completely for 24–48 hours. The letters will turn a chalky white and feel lighter when fully cured. -
Sanding imperfections:
Once bone dry, take your 220-grit sandpaper and very gently sand the edges and surface of each letter to remove any burrs or sharp points.
Fixing Broken Letters
If a dried clay letter snaps, don’t panic. Apply a tiny amount of PVA glue or clay slip to the break, press together, and sand the seam smooth once dry before painting.
Step 3: Painting and Assembly
-
Paint the letters:
Using a small flat brush, paint the face of each letter with navy blue acrylic paint. Paint the sides as well to give it that finished, dimensional look from all angles. -
Apply a second coat:
Let the first coat dry, then apply a second layer to ensure the color is opaque and rich. Use a fine detail brush to catch any missed spots in the tight corners. -
Map out the canvas:
While the paint dries, use a ruler to lightly mark a horizontal guideline on your canvas with a pencil where the bottom of the letters will sit. Find the visual center to keep things balanced. -
Dry fit the layout:
Arrange your painted, dry letters on the canvas without glue first. Check the kerning (spacing) between letters to ensure the text looks natural. -
Glue in place:
Apply a strong craft glue to the back of each letter. Press them firmly onto the canvas, holding each one for 10–15 seconds to grab. Wipe away any excess glue immediately. -
Erase guidelines:
Wait for the glue to fully cure, then gently erase any visible pencil marks from your alignment guide.
Level Up: Texture
Before the clay dries, press a piece of rough linen or a texture stamp into the surface to give the letters a patterned, stone-like finish.
Prop your finished canvas against a wall where the light can catch the raised letters and cast those beautiful shadows
Clay Mosaic Tiles on Canvas
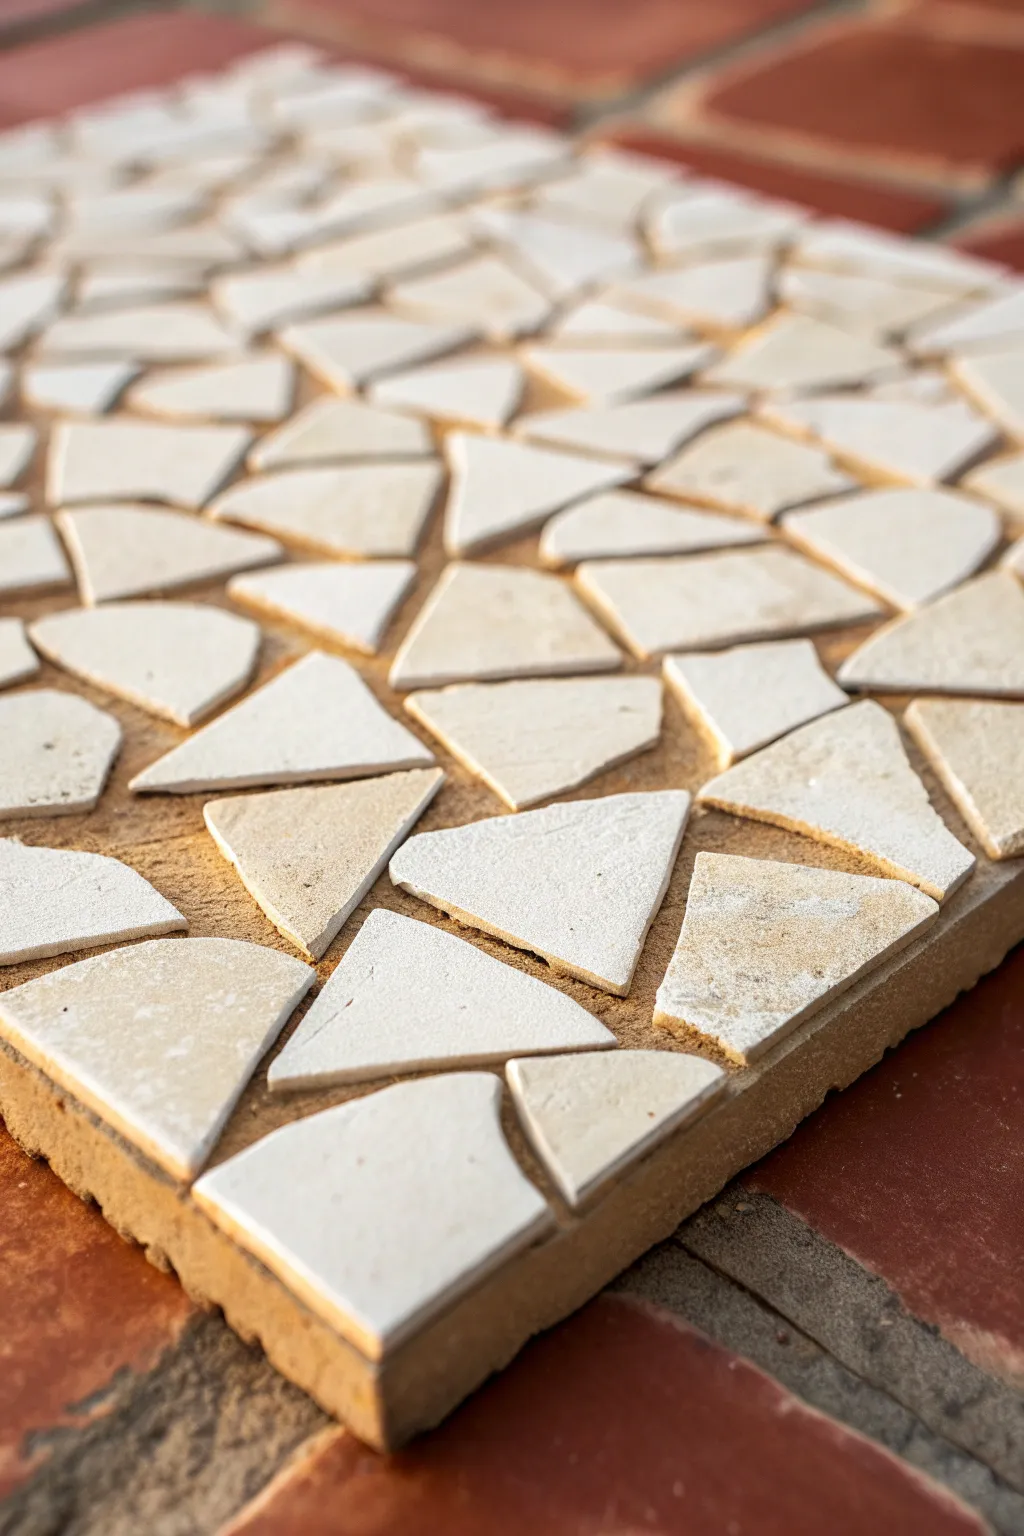
Create a striking textural piece that mimics the rustic charm of ancient stone mosaics using nothing but clay and a sturdy base. This project combines creamy white polygon shards with a gritty, sandy grout for a sophisticated, earthy aesthetic.
Detailed Instructions
Materials
- Air-dry clay (white or cream)
- Thick wood panel or heavy-duty canvas board (approx. 8×8 inches)
- Textured grout paste or sandy-colored clay
- Rolling pin
- Clay knife or craft blade
- Fine-grit sandpaper
- Palette knife
- Clear matte varnish (optional)
- Strong craft glue (e.g., PVA or heavy gel medium)
Step 1: Creating the ‘Stones’
-
Condition the clay:
Start by kneading your white air-dry clay thoroughly until it is soft, pliable, and free of air bubbles. -
Roll the slab:
Roll the clay out onto a clean surface to an even thickness of about 1/4 inch. I like to use thickness guides or wooden slats on either side to ensure it’s perfectly level. -
Cut geometric shapes:
Using your clay knife, cut the slab into various irregular triangles, trapezoids, and polygons. They should look like shattered stone fragments rather than perfect squares. -
Soften the edges:
Gently tap the sharp cut edges of each piece with your finger or the flat side of your knife to round them slightly, giving them a weather-worn appearance. -
Dry the pieces:
Lay all your clay shapes on a flat surface to dry completely. Depending on your humidity, this usually takes 24-48 hours. Inspect them periodically to ensure they remain flat. -
Sand for finish:
Once fully dry, lightly sand the tops and sharp corners of the clay pieces with fine-grit sandpaper to create a smooth, stone-like surface.
Stone Texture Trick
Before the clay dries, gently press a crumpled ball of aluminum foil onto the surface of the ‘stones’ to create realistic pits and texture.
Step 2: Assembling the Mosaic
-
Prepare the base:
Clean your wood panel or canvas board to ensure it’s free of dust. If using wood, you might want to prime it first to prevent warping. -
Dry fit the design:
Arrange your dried clay ‘stones’ onto the base without glue first. Leave gaps of varying widths (about 1/8 to 1/4 inch) between them to mimic the grout lines in the reference image. -
Glue the pieces:
Pick up each piece one by one, apply a strong craft glue to the back, and press it firmly back into its spot on the board. -
Let the adhesive set:
Allow the glue to cure completely according to the manufacturer’s instructions before starting the grouting phase.
Step 3: Grouting
-
Mix the grout:
Prepare your textured grout or sandy clay paste. It should be a warm, sandy-beige color. If your grout is too white, mix in a tiny drop of yellow ochre or brown acrylic paint. -
Apply material:
Using a palette knife, scoop the grout mixture onto the mosaic surface. -
Push into gaps:
Press the grout firmly into the spaces between the clay tiles using the palette knife or your fingers. -
Level the surface:
Ideally, the grout should sit slightly lower than the surface of the white clay tiles to create dimension. -
Clean the tiles:
Before the grout sets fully, use a slightly damp sponge or cloth to wipe away any excess paste from the top of the white clay pieces. -
Final wipe:
Do a second pass with a clean, damp cloth to ensure the white tiles are crisp and bright against the sandy background. -
Final drying:
Allow the entire piece to dry for another 24 hours. -
Seal (Optional):
Brush a light coat of clear matte varnish over the entire piece if you want to protect the surface from dust and handling.
Color Wash Upgrade
Dilute brown acrylic paint with water and brush it over the dried grout, then wipe it back immediately to accentuate the gritty texture.
Display your new textured mosaic on a shelf or wall to bring a touch of earthy calm to your space
Peek-Through Canvas Window With Clay Scene
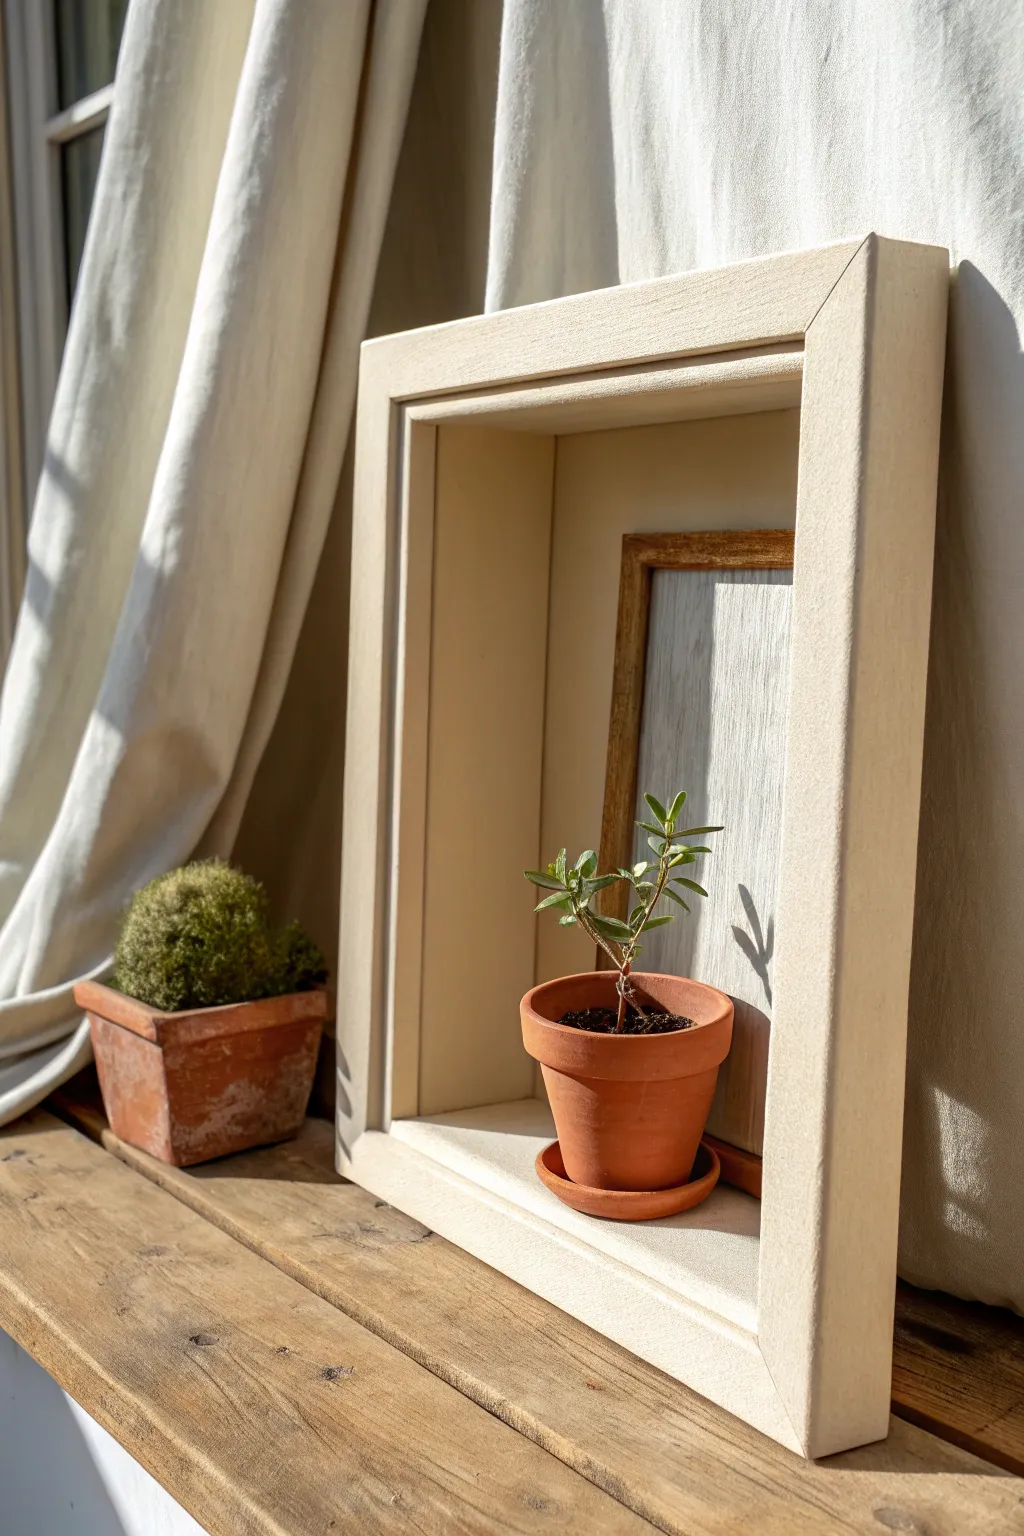
Transform a standard stretched canvas into a minimalist architectural niche with this clever reverse-framing technique. The result creates a deep, textured shelf perfect for displaying small treasures like a miniature terracotta pot.
How-To Guide
Materials
- Deep-edge stretched canvas (stapled on back)
- Utility knife or craft scalpel
- Staple gun and heavy-duty staples
- Pliers (flat nose)
- Wood glue
- Cream or off-white acrylic paint
- Matte gel medium (optional)
- Small terracotta pot (2-3 inch diameter)
- Air-dry clay or polymer clay (for faux plant)
- Florist wire
- Acrylic paints (greens, browns)
- Small wood trim or balsa wood strip
Step 1: Reverse the Canvas
-
Remove the canvas:
Begin by carefully removing the staples from the back of your stretched canvas using a flat screwdriver or staple remover. Peel the canvas fabric off the wooden frame completely, but keep the fabric intact. -
Inspect the frame:
Once stripped, look at the wooden stretcher bars. You will be using the ‘back’ side (the side that usually faces the wall) as the new front to create a deep recess. -
Re-stretch the canvas:
Lay the canvas fabric face down. Place the wooden frame on top, but flipped so the flat side is down and the beveled side (usually the front) is facing up. You are essentially wrapping the frame inside out to expose the deep inner cavity. -
Secure the corners:
Pull the canvas tight around the frame. You will need to fold the corners neatly, tucking the excess fabric inside the recess. Use a staple gun to secure the canvas to what is now the back of your shadow box. -
Create the inner lining:
I find that cutting the excess canvas away leaves a messy edge, so instead, fold the excess fabric into the inner sides of the frame. Glue it down with wood glue or strong craft glue to clad the interior walls with canvas texture.
Step 2: Paint and Finish the Structure
-
Prime the surface:
The canvas likely has a raw or white gesso finish. To get that cohesive, plaster-like look, apply a coat of cream or off-white acrylic paint over the entire piece—front frame, inner walls, and the back panel. -
Add texture:
For a stone-like effect, mix a little baking soda or fine sand into your paint before applying a substantial second coat. Let this dry completely. -
Install the back panel:
If your frame is open at the back, cut a piece of sturdy cardboard or thin plywood to fit the opening. Cover it with leftover canvas or paint it to match, then glue it securely to the back of the frame to create the rear wall. -
Add the wooden accent:
Take a small strip of balsa wood or trim. Stain it a dark walnut color. Glue this vertically against the back wall, slightly off-center, to act as a decorative framing element within the shadow box.
Clean Corner Folds
When re-stretching the canvas inside out, fold the corners like a present. Use a tiny dab of superglue inside the fold to keep it crisp before stapling.
Step 3: Craft the Miniature Scene
-
Prepare the pot:
Use a standard miniature terracotta pot. If it looks too new, dry-brush a little white paint on the exterior to give it an aged, saline look. -
Form the plant stem:
Twist two lengths of florist wire together to create a small tree trunk. Leave the bottom ends loose to anchor into the pot. -
Sculpt the leaves:
Roll tiny balls of air-dry clay and flatten them into teardrop shapes. Press these onto the wire branches. Use a craft knife to score a central vein on each leaf. -
Paint the foliage:
Once the clay is dry, paint the leaves a muted olive green. I like to add a touch of yellow to the tips for a sun-kissed appearance. -
Assemble the planter:
Fill the terracotta pot with a small mount of brown clay to simulate soil. Push the wire trunk into the center. Texture the ‘soil’ with a toothbrush before it hardens. -
Final placement:
Place the potted plant inside the canvas shadow box onto the bottom ledge. You can secure it with a dot of museum wax if you want it to stay permanently.
Lighting Effect
Paint the back wall a slightly lighter shade than the inner side walls. This artificial gradient mimics natural light hitting the back of the niche.
Display your new structural art piece on a mantel or deep windowsill to catch the changing shadows