If you can roll clay flat and smooth it out, you can make a plate—and honestly, that’s where the fun starts. These clay plate ideas are my go-to projects for turning air-dry clay, polymer clay, or handbuilt ceramic clay into pieces you’ll actually use and love seeing around the house.
Classic Round Trinket Plate
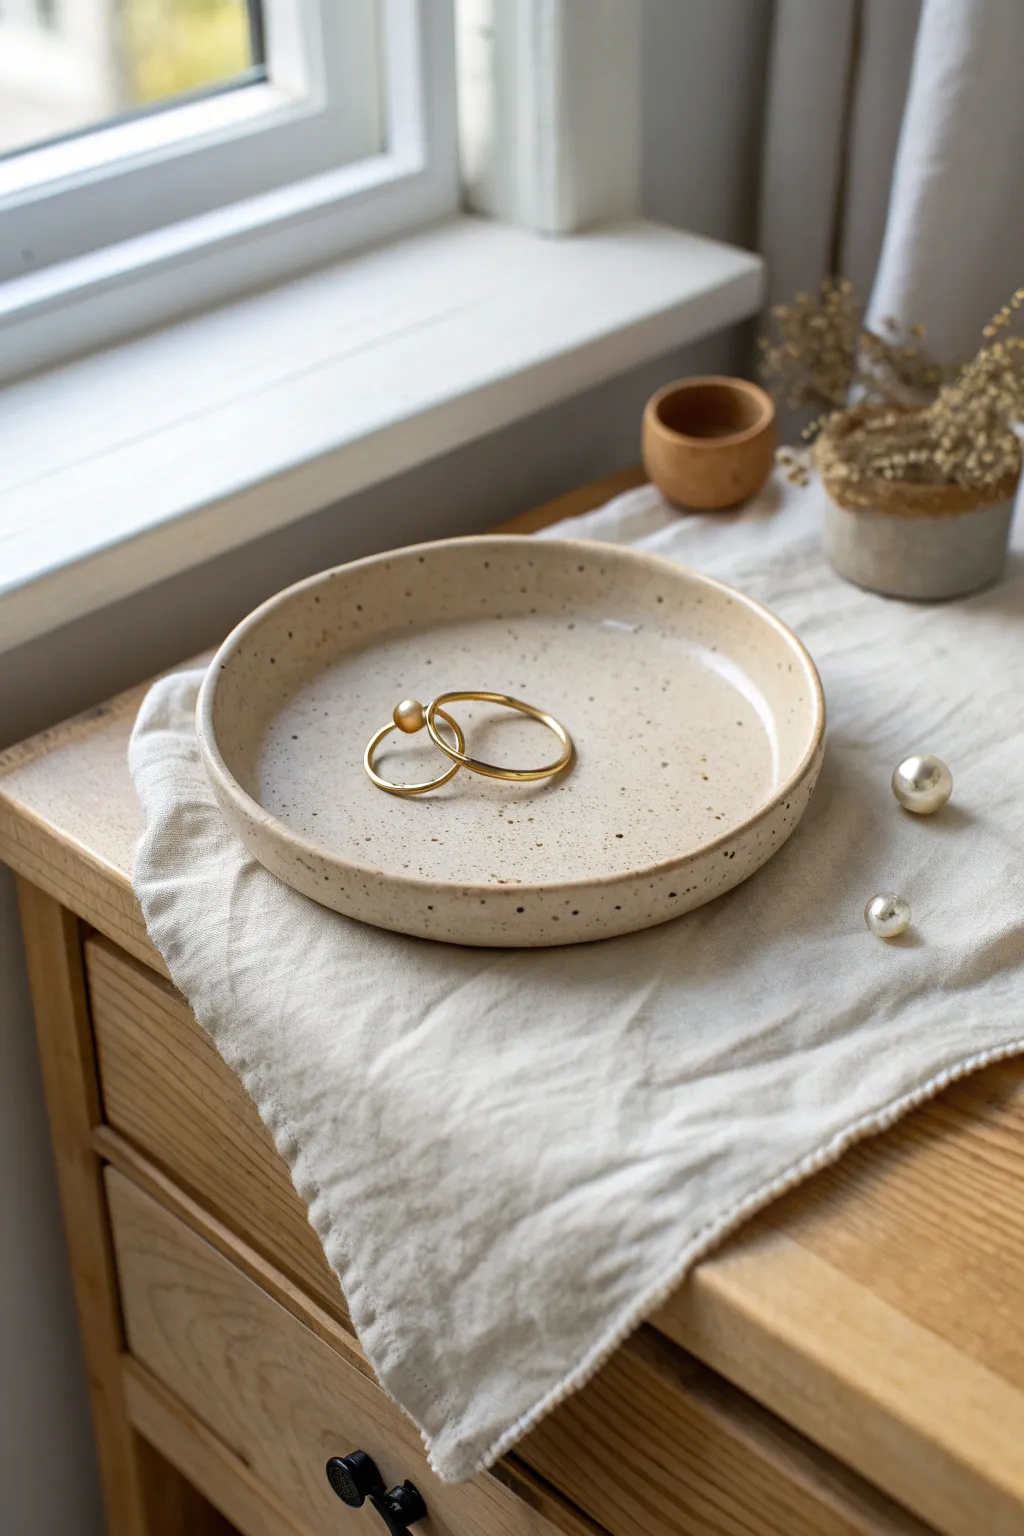
This minimalist trinket dish features a classic round form with a gentle, upturned rim perfect for holding everyday jewelry. Its charm lies in the natural speckled clay body and a smooth, milky glaze that lets the character of the earth shine through.
Step-by-Step Guide
Materials
- Speckled stoneware clay (e.g., Laguna Speckled Buff)
- Circle template or bowl (approx. 5-6 inches diameter)
- Rolling pin
- Canvas mat or wooden board (for rolling)
- Needle tool or fettling knife
- Modeling tool or rib (wood or rubber)
- Sponge
- Clear or semi-transparent white glaze
- Kiln (or access to a firing service)
Step 1: Shaping the Clay Body
-
Prepare the clay:
Begin with a ball of speckled stoneware clay about the size of a large orange. Wedge it thoroughly on your canvas mat to remove air bubbles and ensure a uniform consistency. -
Roll the slab:
Using your rolling pin, flatten the clay ball into an even slab. Aim for a thickness of about 1/4 inch. Turn the slab occasionally as you roll to prevent it from sticking to the canvas. -
Cut the circle:
Place your circle template or an inverted bowl gently onto the clay slab. Use a needle tool to trace around the edge, cutting vertically through the clay to create a clean, perfect circle. -
Refine the edges:
After removing the excess clay, run a wet finger or a damp sponge around the cut edge to smooth out any sharp corners or roughness. I always take extra time here, as smoothed edges make the final piece feel much more professional. -
Form the rim:
Gently lift the edges of the clay circle upward. You aren’t building a wall, but rather curving the existing slab. Use your thumb on the inside and fingers on the outside to pinch and guide the clay up slightly (about 1/2 inch). -
Smooth the interior:
Use a rubber or wood rib to compress the inside floor of the plate. This removes fingerprints and strengthens the base against warping during drying. -
Check the profile:
Set the dish on a flat surface and spin it slowly. Look for any dips or unevenness in the rim height and gently adjust closely with your fingers until symmetrical.
Warped Rim?
If your rim warps, you likely lifted it too aggressively. Next time, try drying it with a light bag filled with rice or beans in the center to weigh down the floor.
Step 2: Drying and Bisque Firing
-
Slow drying:
Place the formed dish on a clean board. Cover it loosely with plastic wrap for the first 24 hours to let it dry slowly; this prevents the rim from warping as the clay shrinks. -
Bone dry stage:
Remove the plastic and let the piece air dry completely until it is bone dry. The clay should feel room temperature to the touch, not cool. -
Final smooth:
Take a slightly damp sponge (not wet!) and very gently wipe the rim one last time to remove any dust or sharp bits before firing. -
Bisque fire:
Load the dish into the kiln for a bisque firing (usually Cone 04). This hardens the clay into ceramic but leaves it porous enough to accept glaze.
Rim Accent
For a vintage look, paint a thin line of gold luster on the very edge of the rim after the glaze firing, then re-fire at a lower temperature (Cone 018).
Step 3: Glazing and Final Fire
-
Wipe down:
Once the bisque piece is cool, wipe it with a damp sponge to remove any kiln dust. This ensures the glaze adheres properly without pinholes. -
Apply glaze:
Pour a clear or milky semi-transparent glaze into the center of the dish. Swirl it around quickly to coat the entire interior and rim, then pour out the excess. -
Clean the foot:
Flip the dish over. Use a sponge to wipe away valid glaze drips from the bottom. The underside of the plate must be completely free of glaze so it doesn’t fuse to the kiln shelf. -
Glaze fire:
Fire the piece again, this time to the maturity temperature of your clay body (likely Cone 5 or 6 for stoneware). This melts the glaze and vitrifies the clay. -
Cool down:
Allow the kiln to cool completely before opening. Thermal shock from opening too early can crack flat pieces like plates.
Place your finished dish on a vanity or dresser to catch your favorite jewelry pieces


Pinch-Rim Mini Catchall Plate
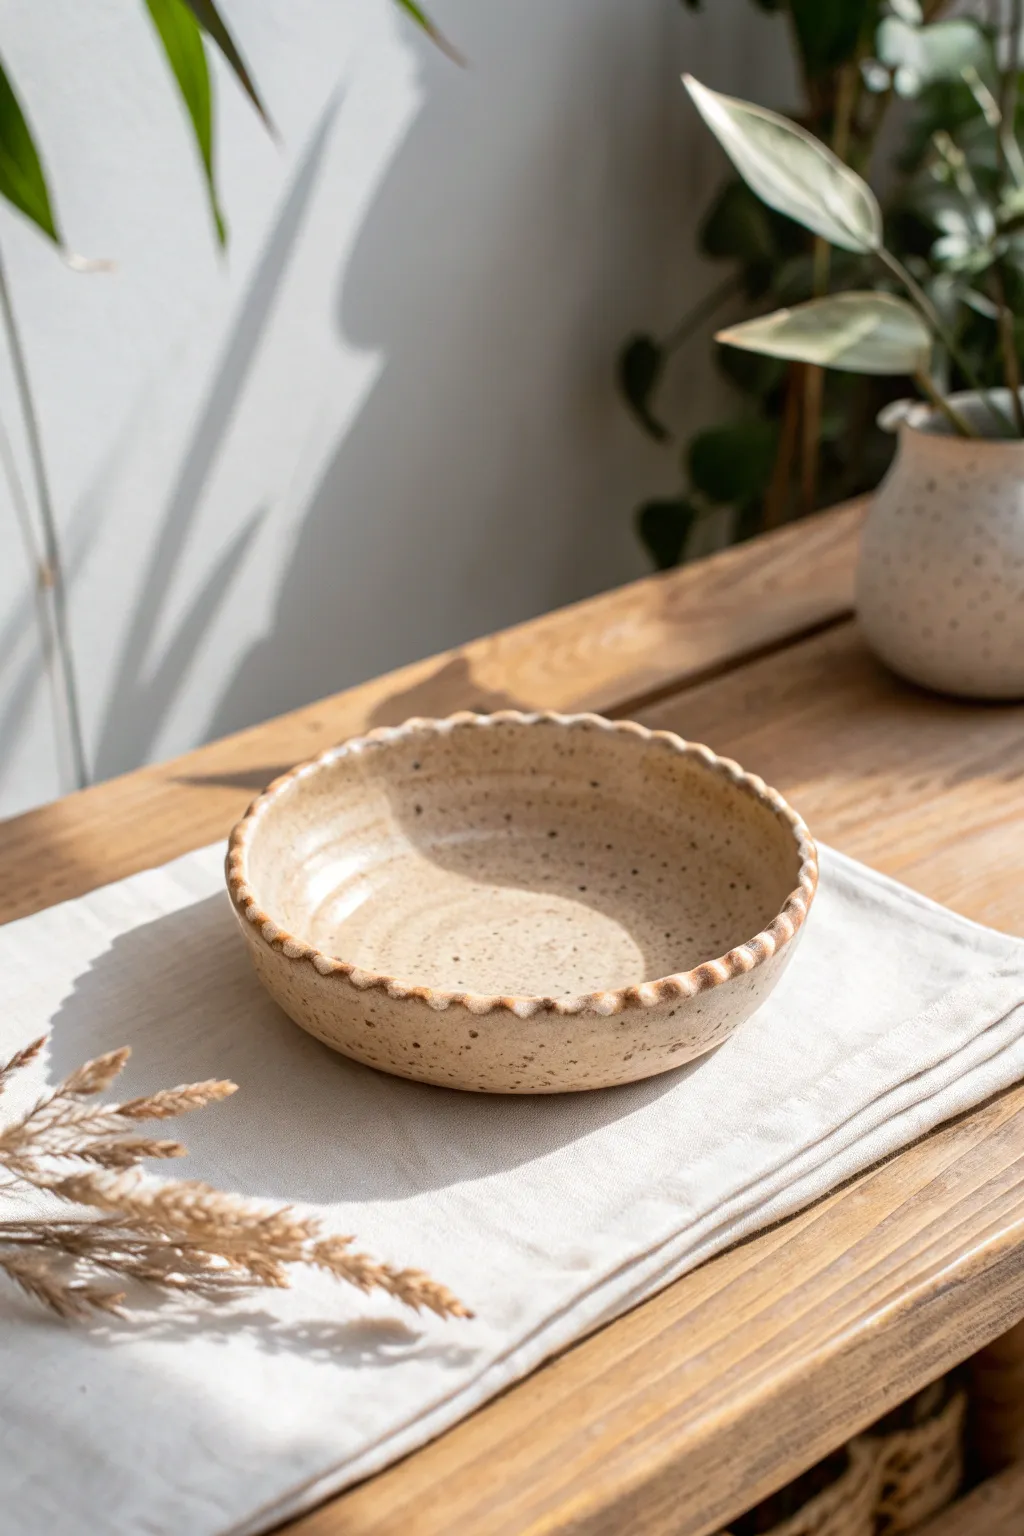
This charming catchall plate features a warm, sandy-speckled glaze and a distinctive scalloped rim that gives it a rhythmic, handmade feel. Perfect for holding keys or acting as a small serving dish, its organic vibes are achieved through a simple finger-pinching technique.
How-To Guide
Materials
- Speckled buff stoneware clay (or white clay with speckles)
- Rolling pin
- Canvas mat or wooden board (for rolling)
- Round template (paper plate or bowl)
- Needle tool or fettling knife
- Yellow pottery sponge
- Rib tool (wooden or silicone)
- Shallow slumped mold or foam pad
- Clear or gloss oatmeal glaze
- Kiln access
Step 1: Forming the Base
-
Wedge the clay:
Begin by thoroughly wedging about 1 to 1.5 lbs of speckled stoneware clay to remove any air bubbles. This ensures a consistent texture and prevents cracking later. -
Roll the slab:
Place the clay on your canvas mat. Use your rolling pin to roll out a slab that is an even 1/4 inch thickness. Rotate the clay occasionally to keep it circular. -
Compress the slab:
Take your rib tool and gently drag it across the surface of the slab on both sides. This compression aligns the clay particles, strengthening the base and preventing warping during firing. -
Cut the circle:
Lay your round template (about 6-7 inches in diameter) onto the clay. Using the needle tool held vertically, trace around the template to cut out your perfect circle. -
Smooth the edges:
Dip your finger or a sponge in a tiny bit of water and run it along the cut edge to soften the sharp angle created by the knife.
Step 2: Shaping and Pinching
-
Lift the rim:
Place the clay circle onto a shallow slump mold or a piece of foam. Gently press the center down so the edges curve upward naturally, creating a shallow bowl shape. -
Mark spacing:
Lightly mark small dots around the rim where you want your scallops to be, creating even intervals. This guide helps keep the pattern consistent before you commit to pinching. -
Pinch the first scallop:
Support the clay rim from the outside with your index finger. Use your thumb on the inside to press down gently while curling your index finger inward. -
Continue the pattern:
Move to the next marked spot and repeat the pinch. Try to use the same amount of pressure for each scallop to maintain a uniform look around the circumference. -
Refine the shape:
Once the rim is fully scalloped, inspect the form. If any pinch marks look too sharp, gently tap them with a slightly damp sponge to round them off, matching the soft aesthetic of the photo. -
Dry slowly:
Cover the plate loosely with plastic to let it dry slowly to the leather-hard stage. This prevents the rim from drying faster than the center, which can cause warping.
Rim Uniformity Tool
For perfectly even scallops, press the handle of a wooden spoon or a thick marker into the rim instead of your fingers. It creates identical indentations every time.
Step 3: Glazing and Firing
-
Bisque fire:
Once the piece is bone dry, load it into the kiln for a bisque firing (usually around Cone 04). This hardens the clay and prepares it for glaze. -
Wipe down:
After the kiln cools, remove the plate and wipe it with a damp sponge to remove any kiln dust. This ensures the glaze adheres properly without crawling. -
Apply glaze:
Dip the plate into a transparent or semi-opaque oatmeal glaze. If brushing, apply 2-3 even coats, letting each dry in between. The translucent nature is key to letting the clay’s natural speckles show through. -
Clean the foot:
Thoroughly wipe away any glaze from the bottom of the plate (the foot ring or flat bottom) to prevent it from fusing to the kiln shelf. -
Glaze fire:
Fire the piece again to the maturation temperature of your specific clay and glaze body (typically Cone 5 or 6 for stoneware).
Level Up: Dual Tone
Glaze the interior with a glossy finish but leave the exterior raw or use a matte glaze. This texture contrast highlights the scalloped rim beautifully.
Enjoy using your new handmade plate for trinkets or snacks, knowing each little curve was shaped by you


Scalloped Edge Dessert Plate
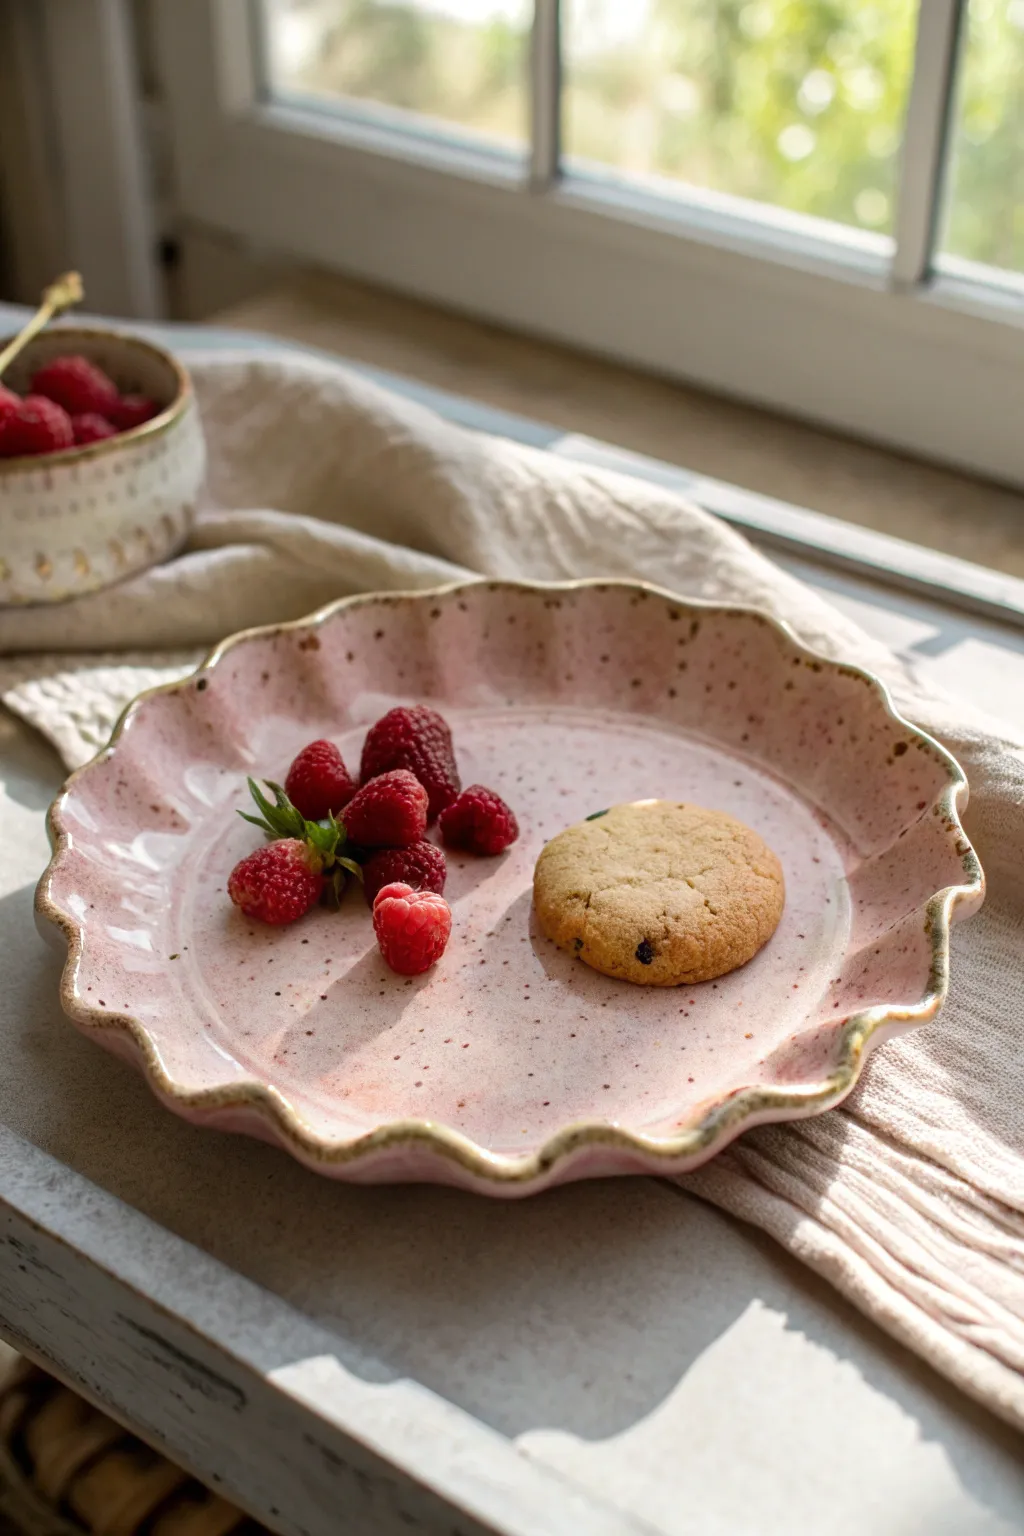
Create a charming dessert plate with a playful wavy rim and a soft, speckled pink finish. This project uses hand-building techniques to achieve a perfectly imperfect, organic look that highlights the beauty of the glaze.
Detailed Instructions
Materials
- Speckled stoneware clay (or white clay with speckles)
- Rolling pin
- Guide sticks (approx 1/4 inch thick)
- Circular plate template or large bowl
- Potter’s needle tool
- Sponge
- Soft rib tool (rubber or silicone)
- Fettling knife
- Pink satin or matte glaze
- Brown oxide wash or underglaze
- Small paintbrush
- Kiln
Step 1: Preparation and Rolling
-
Wedge the clay:
Begin by thoroughly wedging your speckled stoneware clay. This removes air bubbles and ensures the particles are aligned, which is crucial to preventing cracks during firing. -
Set up guides:
Place your guide sticks on either side of your canvas work surface. These will help you roll a slab of consistent thickness, which is key for a flat, even plate. -
Roll the slab:
Roll the clay out into a large slab using your rolling pin on top of the guide sticks. Roll in multiple directions to compress the clay, flipping the slab occasionally to prevent it from sticking to the canvas. -
Smooth the surface:
Take your soft rib tool and gently compress the surface of the slab. I like to do this on both sides to align the clay particles and create a pristine canvas for your future glaze.
Even Spacing
Mark the rim lightly at 12, 3, 6, and 9 o’clock before forming scallops. This ensures your waves are evenly distributed around the circle.
Step 2: Shaping the Form
-
Cut the circle:
Lay your circular template or an inverted bowl onto the slab. Using the needle tool held vertically, trace around the template to cut out a perfect circle. -
Soften the rim:
Run a damp sponge or your finger along the sharp cut edge of the circle. This rounds it off nicely so the finished plate won’t have sharp edges that chip easily. -
Create the lift:
Transfer the clay circle onto a shallow slump mold or a large foam sheet. Gently press the center down so the edges naturally rise up slightly, forming a shallow dish shape rather than a flat disc. -
Form the scallops:
Use your fingers to gently push the rim inward at regular intervals to create the wavy, scalloped edge. Support the clay from the outside with one hand while pushing from the inside with the other to form soft, consistent curves. -
Refine the scallops:
Go around the rim a second time to neaten the waves. Use a damp sponge to smooth any fingerprints or stress marks created during the shaping process.
Warped Rim?
If the rim warps during firing, try drying the next plate with a weighted bag of sand or rice in the center to keep it completely flat.
Step 3: Drying and Firing
-
Slow drying:
Loosely cover the plate with plastic to let it dry slowly to the leather-hard stage. This prevents warping, especially with wide, flat forms like plates. -
Bisque fire:
Once bone dry, load the plate into the kiln for a bisque firing (usually to cone 04). This hardens the clay and prepares it for glazing. -
Clean the bisque:
After the firing, wipe the bisqueware down with a damp sponge to remove any dust that might resist the glaze.
Step 4: Glazing and Finishing
-
Apply base glaze:
Pour or dip the plate in a soft pink glaze. A satin or matte finish works best here to mimic the soft texture in the photo. Ensure an even coat and wipe the foot ring clean. -
Detail the rim:
Using a small brush, carefully apply a thin line of brown oxide wash or brown underglaze along the very edge of the scalloped rim. This creates the dark, defining border seen in the inspiration image. -
Glaze fire:
Fire the plate again to the maturity temperature of your clay and glaze (typically cone 5 or 6 for stoneware). Ensure the plate is well-supported on the kiln shelf. -
Inspect and sand:
Once cool, inspect the plate. If the bottom feels rough, lightly sand it with wet-dry sandpaper under running water to protect your table surfaces.
Now you have a beautifully handmade plate ready for your favorite dessert


Oval Ring Dish Plate With Raised Lip
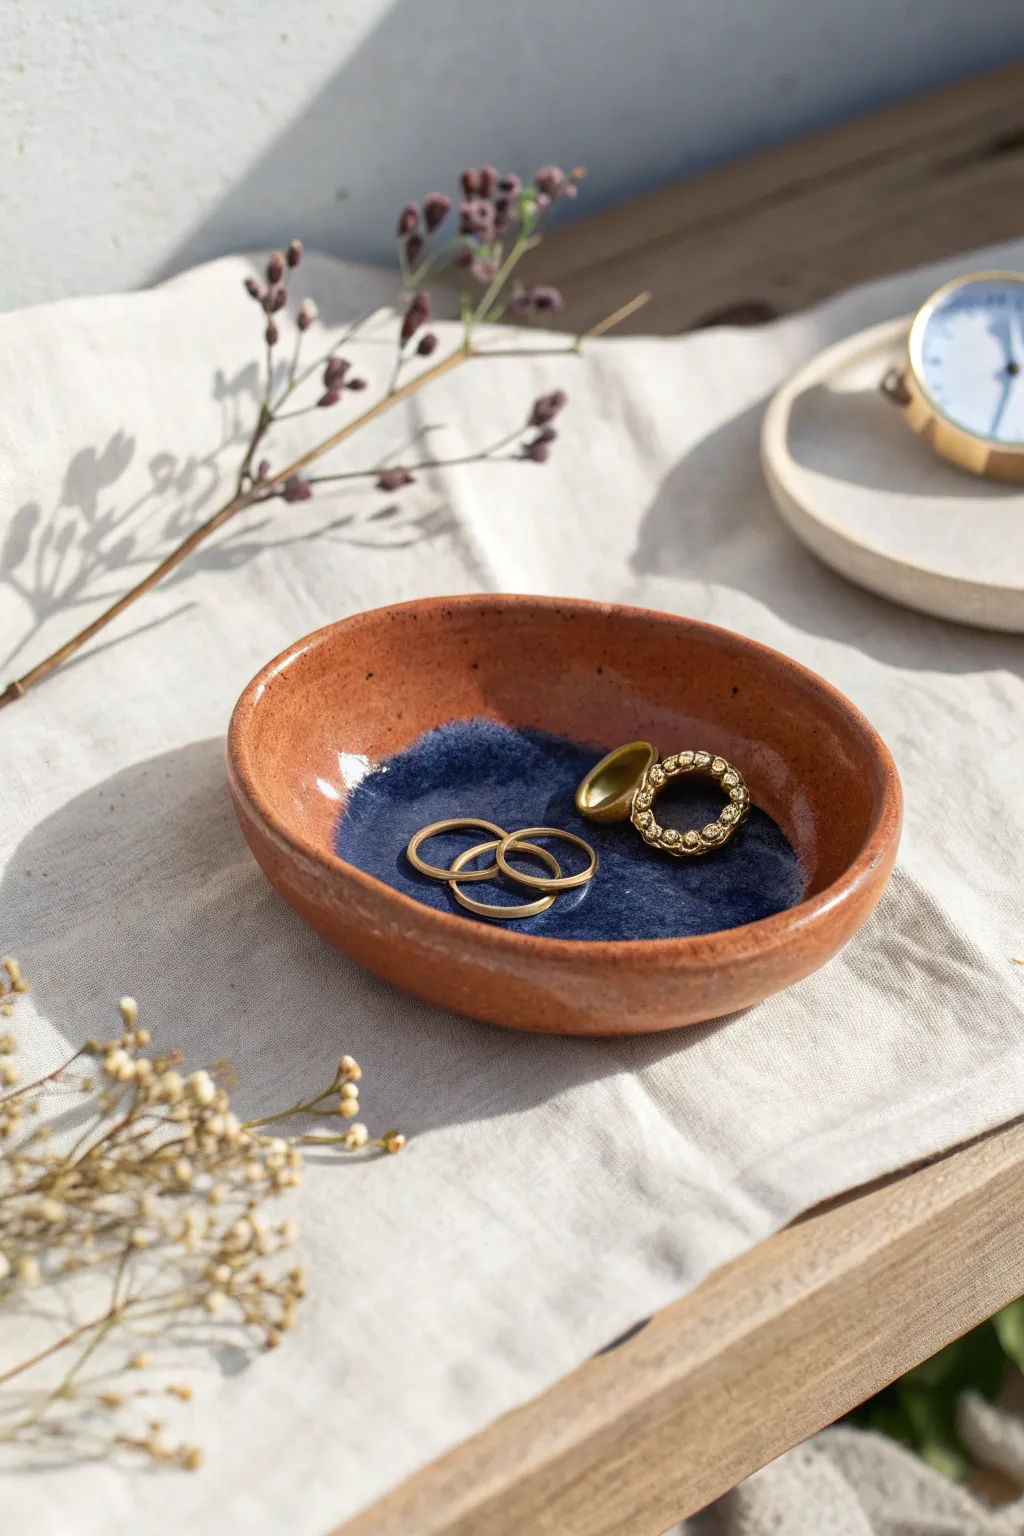
This charming oval catch-all features a beautiful contrast between raw, earthen terracotta and a deep, glossy indigo pool. With its raised imperfect rim and organic shape, it makes a perfect bedside keeper for your favorite jewlery pieces.
Step-by-Step Guide
Materials
- Red stoneware or terracotta clay (lowfire or midfire)
- Rolling pin
- Canvas mat or cloth
- Oval paper template
- Fettling knife or needle tool
- Small sponge
- Rib tool (wood or rubber)
- Scoring tool
- Deep blue/indigo glossy glaze
- Clear matte glaze (optional)
- Small soft bristle brush
Step 1: Forming the Base
-
Prepare the slab:
Start by wedging a baseball-sized amount of red stoneware clay to remove air bubbles. Roll it out on your canvas mat until it is an even slab, approximately 1/4 inch thick. I find turning the clay frequently helps keep the thickness consistent. -
Cut the shape:
Place your oval paper template onto the slab. Using a needle tool or fettling knife, trace around the template to cut out your base shape. -
Smooth the surface:
Run a rubber rib gently over the surface of your oval cutout to compress the clay particles and remove the canvas texture. -
Prepare the rim coil:
Roll out a separate coil of clay about the thickness of a pencil. It needs to be long enough to wrap around the entire perimeter of your oval base.
Rim Cracking?
If the rim coil cracks while shaping, your clay is too dry. Mist it with water and cover with plastic for 30 minutes before trying to smooth it again.
Step 2: Building the Walls
-
Score the connection points:
Using a serrated rib or needle tool, rough up the very edge of the oval base where the wall will sit. Do the same to one side of your clay coil. -
Apply slip:
Dab a small amount of water or clay slip onto the scored edge of the base. -
Attach the coil:
Place the coil onto the rim of the base. Press it down firmly to ensure a strong bond, overlapping the ends slightly and cutting through them for a seamless join. -
Blend the clay:
Using your thumb or a wooden modeling tool, smudge the clay from the coil down onto the base on the inside of the dish. This prevents separation later. -
Shape the lip:
Pinch the coil gently between your thumb and forefinger to raise the wall slightly. Aim for a slightly flared, organic look rather than a perfectly vertical wall. -
Refine the edges:
Use a damp sponge to smooth the rim and the transition point inside the bowl. The goal is to keep the hand-built character, so don’t over-perfect it.
Pro Tip: Liquid Glass
For that pooled glass effect, apply the glaze slightly thicker in the center than you normally would for a vertical surface, but keep it away from the walls.
Step 3: Firing and Glazing
-
Dry partially:
Allow the dish to dry slowly under loose plastic until it reaches leather-hard. This prevents warping. -
Bone dry:
Remove the plastic and let the piece dry completely until it is room temperature to the touch (bone dry). -
Bisque fire:
Fire the piece in a kiln to cone 04 (or your clay’s specific bisque temperature). -
Wipe down:
Once cool, wipe the bisque ware with a damp sponge to remove any dust that might resist the glaze. -
Apply the accent glaze:
Pour a small amount of deep indigo glossy glaze into the center of the dish. Swirl it slightly to create an organic puddle shape in the middle, leaving the walls and rim excessive. -
Clean edges:
If any glaze splashed onto the rim, wipe it away cleanly with a sponge. The contrast relies on the rim being raw clay. -
Final Fire:
Glaze fire the piece according to your clay and glaze instructions (likely cone 5 or 6 for stoneware).
Enjoy the beautiful contrast of bare clay and deep color on your new jewelry dish

The Complete Guide to Pottery Troubleshooting
Uncover the most common ceramic mistakes—from cracking clay to failed glazes—and learn how to fix them fast.
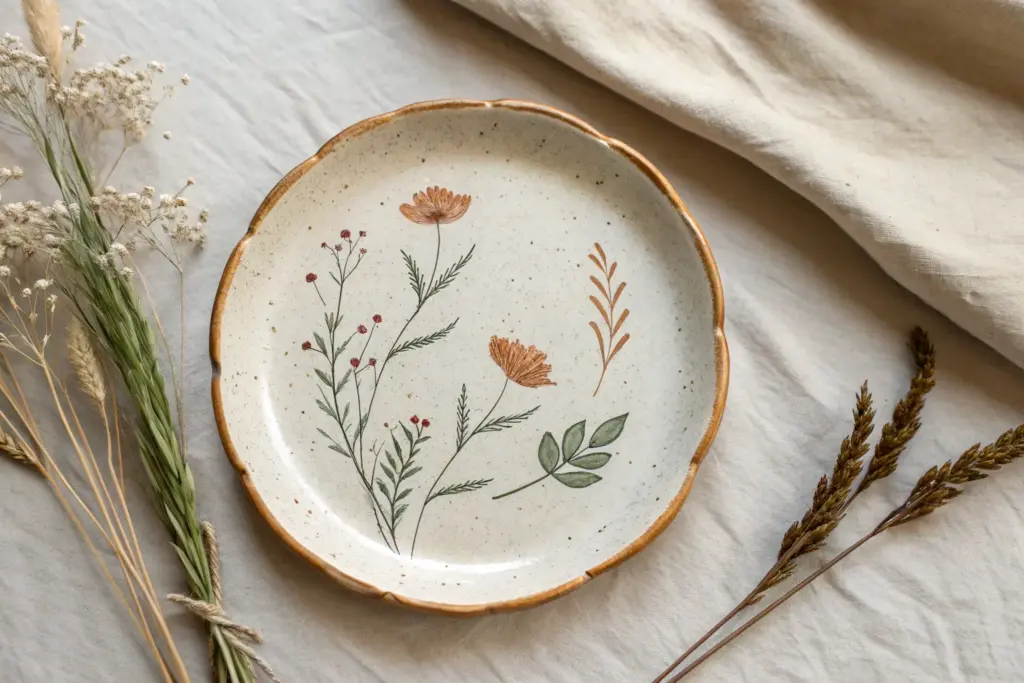
Botanical Leaf-Imprint Plate
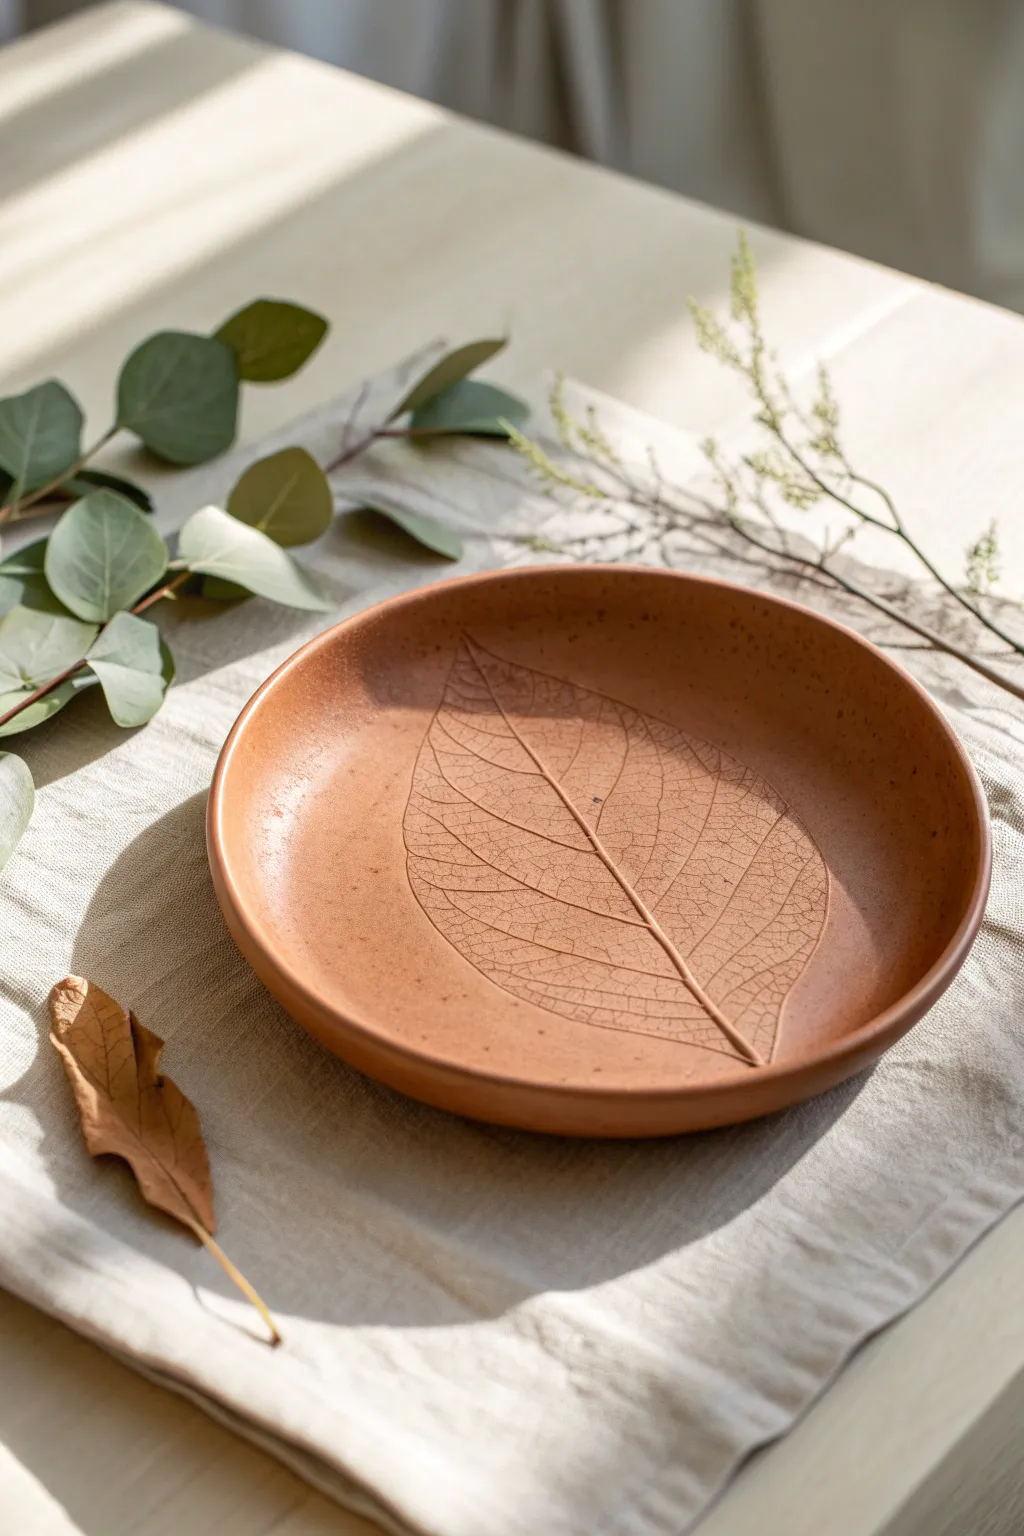
Capture the delicate beauty of nature forever with this earthy, leaf-imprinted clay plate. Using a real leaf as a stamp creates intricate veins and textures that stand out beautifully against the warm terracotta tones of the finished piece.
Step-by-Step
Materials
- Terracotta-colored air-dry clay or low-fire earthenware clay
- Rolling pin
- Two guide sticks (approx. 1/4 inch thick)
- A large, fresh leaf with prominent veins (like hydration or magnolia)
- Canvas mat or heavy cloth (to prevent sticking)
- Needle tool or sharp craft knife
- Small bowl or shallow slump mold
- smooth sponge
- Water
- Matte sealant or clear glaze (depending on clay type)
Step 1: Preparation and Rolling
-
Prepare your workspace:
Lay down a piece of canvas or heavy cloth on a flat table. This texture prevents the clay from sticking and adds a nice subtle texture to the underside of your plate. -
Work the clay:
Take a generous handful of terracotta clay and knead it well to remove air bubbles. You want it pliable but not sticky. -
Begin rolling:
Form the clay into a rough ball, then flatten it slightly with your palm into a puck shape. -
Roll to thickness:
Place your guide sticks on either side of the clay. Roll the clay out until the rolling pin rests on the guide sticks, ensuring a perfectly even slab about 1/4 inch thick. -
Smooth the surface:
Take a slightly damp sponge or a clay rib and gently smooth the top surface of the slab to remove any canvas texture or imperfections.
Step 2: Creating the Imprint
-
Select and place the leaf:
Take your fresh leaf and place it vein-side down onto the center of the clay slab. The vein side is usually the back of the leaf and provides the crispest impression. -
Roll the leaf:
Using the rolling pin, gently roll over the leaf once with firm, even pressure. Do not roll back and forth, as this can cause a double image or ‘ghosting’ effect. -
Check the impression:
Carefully lift one edge of the leaf to peek. If the impression isn’t deep enough, lay it back down and use your fingers to press firmly along the main veins. -
Remove the leaf:
Locate the stem and carefully peel the leaf away from the clay to reveal the skeleton-like imprint.
Sticky Leaf Fix
If the leaf sticks to the clay and tears, lightly dust the leaf’s underside with cornstarch before pressing. This acts as a release agent and burns off later.
Step 3: Shaping and Finishing
-
Cut the circle:
Place a round template (like a bowl or paper cutout) over the imprint, centering the leaf design. -
Trace and remove excess:
Use a needle tool to cut vertically around your template. Peel away the excess clay scraps. -
Refine the edges:
Dip your finger in a little water and run it along the cut edge of the circle to smooth out any sharpness or burrs. -
Shape the rim:
Gently lift the clay circle and place it into a shallow bowl or slump mold lined with a bit of loose plastic wrap or cloth. Press it gently so it takes the curved shape. -
Let it dry slowly:
Allow the clay to dry in the mold for at least 24 hours. I like to cover mine loosely with plastic for the first day to prevent warping. -
Unmold and final dry:
Once leather-hard, remove it from the mold and let it dry completely on a wire rack for air circulation. -
Seal the piece:
If using air-dry clay, apply a matte varnish to protect the surface. If using ceramic clay, bisque fire and apply a clear matte glaze before the final firing.
Vein Definition Tip
Use a fresh, stiff leaf rather than a dry or wilted one. Stiff veins cut into the clay much cleaner, giving you that sharp, professional definition.
Display your botanical plate on a stand or use it as a stunning catch-all tray for small treasures
Lace-Texture Pressed Pattern Plate
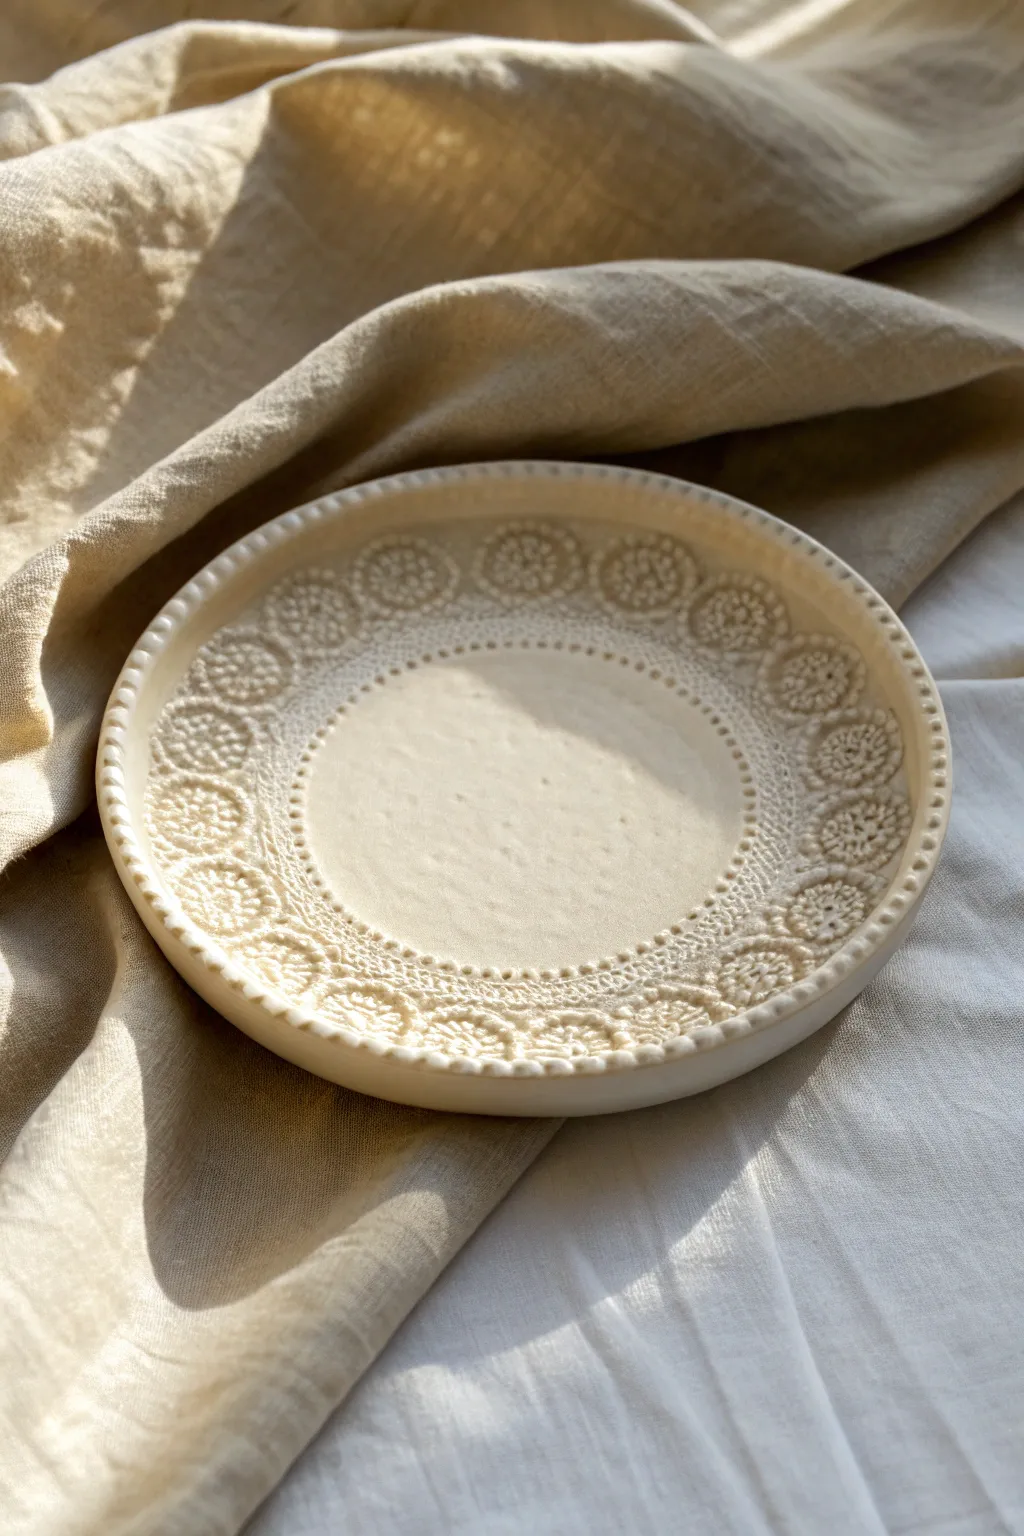
Capture the delicate beauty of vintage textiles forever in this handcrafted clay plate. By pressing real lace into soft clay, you’ll create an intricate, heirloom-quality border that feels both rustic and elegant.
Detailed Instructions
Materials
- Light-colored stoneware or porcelain clay body
- Rolling pin
- Two wooden guide slats (approx. 1/4 inch thick)
- Cotton crochet lace doily or wide lace trim with a distinct pattern
- Round plate template or cookie cutter (approx. 6-8 inches)
- Fettling knife or needle tool
- Small sponge
- Soft rib tool (silicone or rubber)
- Shallow bowl or curved slump mold
- Clear or transparent gloss glaze
- Modeling tool with a small round tip (for beading)
Step 1: Prepping the Clay Slab
-
Wedge the clay:
Begin by thoroughly wedging your clay to remove any air bubbles and ensure an even consistency, which is crucial for preventing cracks later. -
Set up guides:
Place your wooden guide slats on either side of your workspace. These will help you roll the clay to a perfectly uniform thickness. -
Roll the slab:
Roll the clay out between the slats until the rolling pin rests on the wood. Flip the slab occasionally to prevent it from sticking to the table. -
Smooth the surface:
Using a soft silicone rib, compress the clay surface gently. This removes canvas textures and aligns the clay particles, giving you a smooth canvas for the lace.
Sticky Lace?
If the lace sticks to the clay, dust the clay surface very lightly with cornstarch before laying the fabric down. This acts as a release agent and burns off in the kiln.
Step 2: Creating the Texture
-
Position the lace:
Lay your crochet doily or lace trim onto the slab. If you want the pattern only on the rim, ensure the center remains clear or choose a doily with an open center. -
Press the pattern:
Gently roll your rolling pin over the lace. Apply firm, even pressure to push the fabric threads deep into the clay, but be careful not to thin the slab too much. -
Reveal the design:
Carefully peel back the lace to reveal the imprinted texture. I love this moment—the detail captured in the clay always looks sharper than the fabric itself. -
Cut the shape:
Place your round template over the textured area. Using a fettling knife or needle tool, cut cleanly around the template to define your plate’s edge.
Highlight the Detail
After applying clear glaze, wipe the raised areas gently with a damp sponge. This thins the glaze on high points, creating more contrast with the pooled glaze in the recesses.
Step 3: Refining and Forming
-
Smooth the rim:
Run a slightly damp sponge or your finger along the cut edge to soften the sharpness left by the knife. -
Add the beaded edge:
Using the small round tip of a modeling tool, gently press indentations around the very outer perimeter of the plate to mimic the beaded look seen in the reference. -
Shape the plate:
Lift the clay slab carefully and drape it into a shallow bowl or slump mold. This gives the plate its curved, functional shape. -
Establish the foot:
Gently press the center of the plate into the mold to ensure the bottom is flat enough to sit on a table without wobbling. -
Slow drying:
Cover the plate loosely with plastic to let it dry slowly. This helps prevent warping, especially since the rim is thinner than the center.
Step 4: Finishing
-
Bisque fire:
Once bone dry, fire the piece to the appropriate bisque temperature for your specific clay body (usually Cone 04). -
Glaze application:
Dip or brush a clear or semi-transparent gloss glaze over the plate. A transparent glaze is essential here as it will pool in the lace recesses, highlighting the texture. -
Final firing:
Fire the plate for a final time to the glaze temperature (e.g., Cone 5/6). The glaze will turn the texture into a glossy, durable surface.
Once fired, you’ll have a stunning piece that forever captures the intricate geometry of your favorite lace


What Really Happens Inside the Kiln
Learn how time and temperature work together inside the kiln to transform clay into durable ceramic.
Speckled “Stoneware Look” Plate
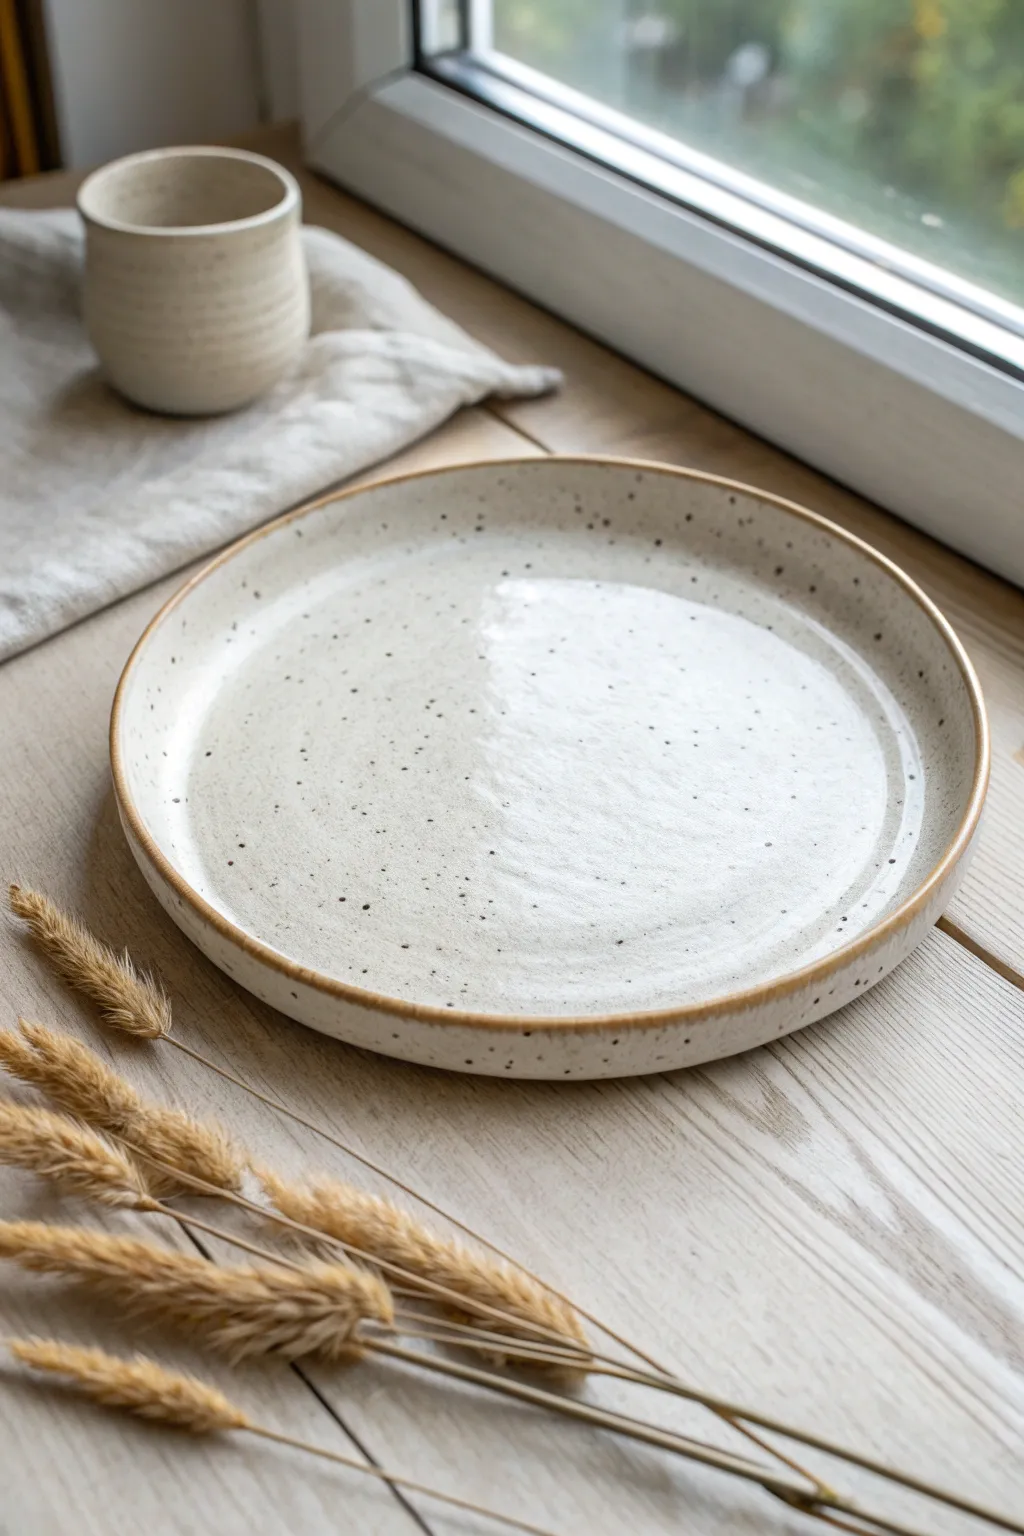
Capture the rustic charm of traditional pottery with this simple yet elegant speckled plate project. The creamy glaze combined with natural iron speckles creates a timeless piece that looks perfectly at home on any wooden table.
How-To Guide
Materials
- Speckled buff stoneware clay (cone 5-6)
- Pottery wheel
- Throwing sponge
- Wooden rib tool
- Wire cutter
- Loop trimming tools
- Soft fan brush
- Cream or antique white stoneware glaze (cone 5-6)
- Small shallow bowl of water
- Bat for wheel head
Step 1: Forming the Base
-
Prepare the Clay:
Begin by thoroughly wedging about 2-3 pounds of speckled stoneware clay to remove any air bubbles. Form it into a smooth, centered ball. -
Secure to Wheel:
Slam the clay ball onto the center of a dry bat attached to your wheel head. Seal the edges down firmly with your fingers. -
Center the Clay:
With the wheel spinning at medium-high speed, use wet hands to cone the clay up and down until it is perfectly centered and runs smooth against your palms. -
Open the Form:
Press your thumbs into the center, opening the clay outward to establish the floor width. Compress the floor with a flat tool or sponge to prevent future cracking. -
Establish the Rim:
Pull the clay outward horizontally, leaving a slightly thicker section at the outer edge to form the raised rim.
Iron Speckle Pop
To enhance the speckles, ensure your glaze is semi-transparent. An opaque white will hide the natural iron spots in the clay body.
Step 2: Shaping and Refining
-
Pull the Rim:
Gently pull the outer rim upward just slightly, about half an inch to an inch. Keep your movements slow and steady to maintain a circular shape. -
Define the Profile:
Using a wooden rib, compress the interior floor again, smoothing it outward until it transitions seamlessly into the gentle curve of the rim. -
Clean the Edge:
Use a chamois or a small strip of plastic to smooth the lip of the plate, softening any sharp edges for a comfortable feel. -
Cut and Dry:
Run a taut wire cutter under the plate to separate it from the bat. Leave it on the bat to dry until it reaches a leather-hard state.
Step 3: Trimming and Finishing
-
Center for Trimming:
Flip the leather-hard plate upside down onto the wheel head. Center it carefully and secure it with small lugs of fresh clay. -
Trim the Foot:
Use a sharp loop tool to carve away excess weight from the bottom, creating a defined foot ring that will elevate the plate slightly. -
Smooth the Surface:
Run a damp sponge or a flexible metal rib over the trimmed areas to erase any tool marks and bring the clay grit to the surface. -
Bisque Fire:
Allow the plate to dry completely to the bone-dry stage. Load it into the kiln for a bisque firing (usually to Cone 04).
Rim Variation
Instead of leaving the rim natural, wipe a tiny bit of iron oxide wash on the edge before glazing to guarantee a dark halo effect.
Step 4: Glazing
-
Clean the Bisqueware:
Wipe the fired plate with a damp sponge to remove any kiln dust, which can prevent glaze from adhering properly. -
Apply Glaze:
Using a soft fan brush, apply 2-3 even coats of a cream or antique white stoneware glaze. I prefer to brush in alternating directions for each coat to ensure full coverage. -
Detailed Rim Application:
Pay special attention to the rim; slightly thinner glaze application here will allow the darker clay body to break through, creating that toasted edge look. -
Wipe the Foot:
Use a wet sponge to completely wipe any glaze off the bottom foot ring so the plate doesn’t stick to the kiln shelf. -
Final Firing:
Fire the plate to the maturity temperature of your clay and glaze (typically Cone 5 or 6). This high heat will cause the iron specks in the clay to bleed through the creamy glaze.
Now you have a durable, restaurant-quality plate ready for your next meal
Two-Tone Dip-Color Plate
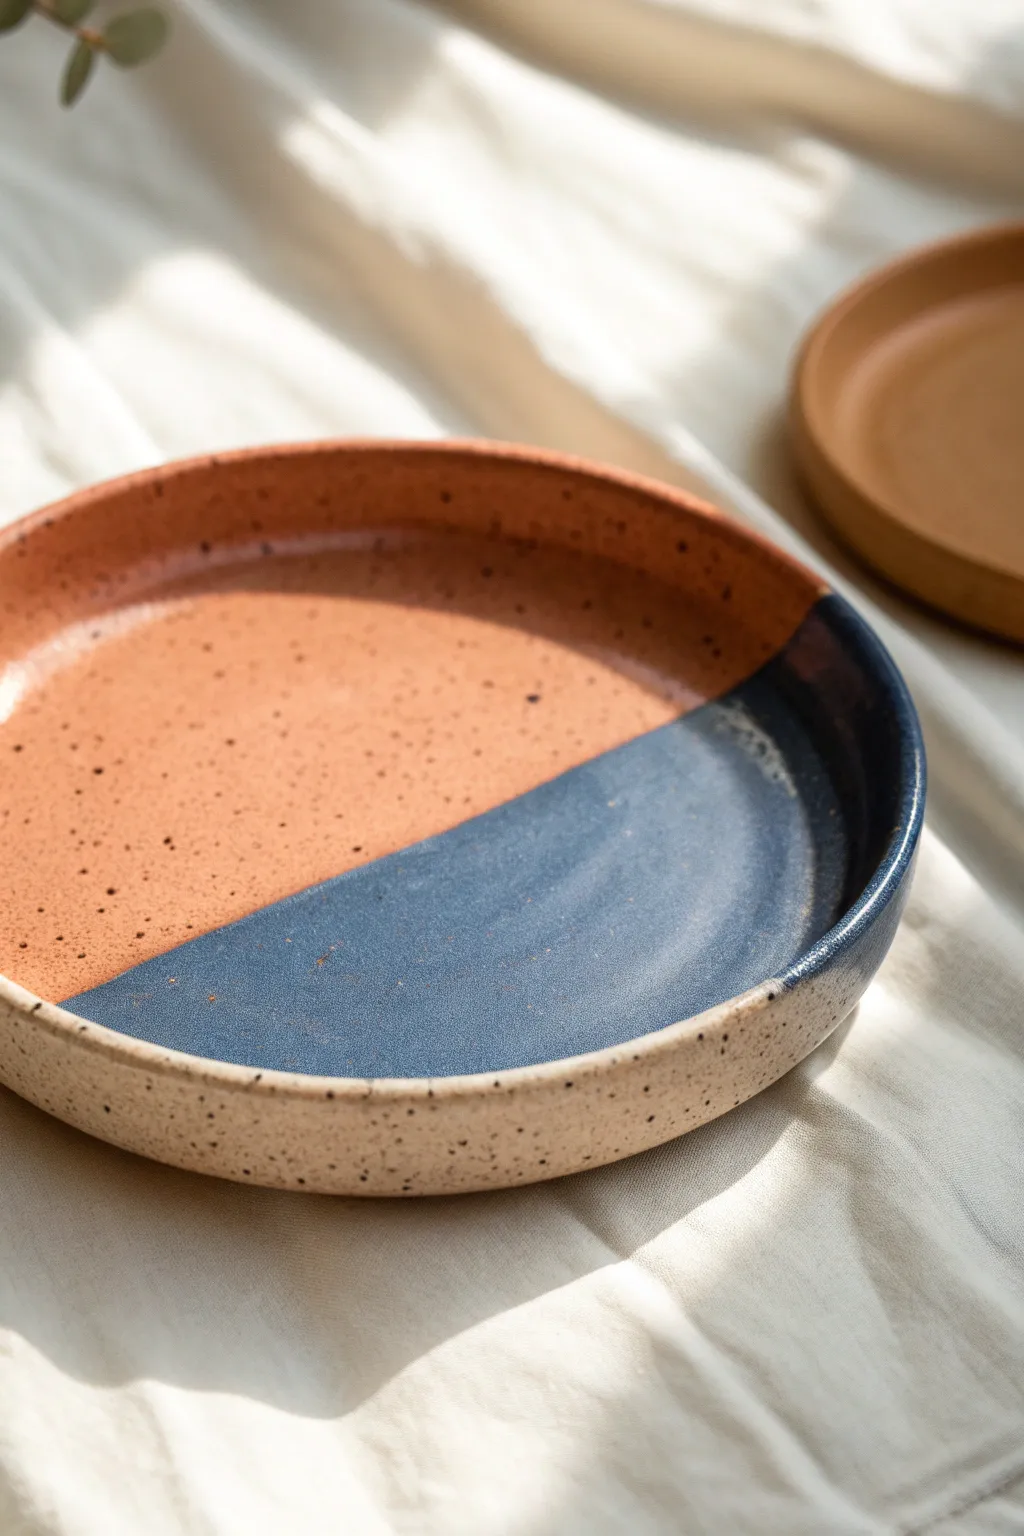
Embrace the beauty of contrast with this two-tone ceramic plate, featuring a warm terracotta glaze meeting a deep navy blue. The speckled stoneware body adds a rustic, tactile finish that ties the modern geometric design to its earthy roots.
Detailed Instructions
Materials
- Speckled stoneware clay (mid-fire)
- Pottery wheel
- Throwing tools (sponge, needle tool, rib)
- Wire cutter
- Trimming tools
- Wax resist
- Sponge or brush for wax
- Terracotta colored glaze (matte)
- Navy blue glaze (glossy)
- Clear glaze (optional for exterior)
- Kiln
Step 1: Throwing and Shaping
-
Center the clay:
Start with a well-wedged ball of speckled stoneware clay. Secure it firmly to the center of your wheel head and use steady pressure to center the mass. -
Open the form:
Press your thumbs into the center to open the floor, pulling outwards until you reach your desired diameter. Aim for a flat floor with an even thickness. -
Raise the walls:
Pull the walls up gently. For this design, you want a shallow height, somewhere between a plate and a low bowl. Keep the rim distinct and substantial. -
Refine the curve:
Use a rib tool on the interior to compress the floor and create a smooth transition from the base to the wall. This is crucial for avoiding S-cracks later. -
Finish the rim:
Chamois or sponge the rim to ensure it is smooth and rounded. Cut the plate from the wheel with a wire tool and set it aside to dry to a leather-hard state.
Clean Lines Pro-Tip
For a razor-sharp division between colors, use narrow masking tape across the center before your first dip. Peel it off, dry, then carefully dip the second side.
Step 2: Trimming and Bisque Firing
-
Center for trimming:
Once leather-hard, flip the plate over onto the wheel head. Use lugs of clay to secure it in place, ensuring it is perfectly centered. -
Define the foot:
Carve away excess clay to define a clean foot ring. I like to leave the exterior wall smooth to show off the speckles later. -
Smooth the surface:
Burnish the outer surface slightly with a smooth rib or the back of a spoon if you want the raw clay to feel extra soft to the touch after firing. -
Bisque fire:
Allow the piece to dry completely until it is bone dry. Load it into the kiln for a bisque fire (usually Cone 04 or 06).
Step 3: Glazing the Two-Tone Design
-
Clean the bisque:
Wipe the bisque-fired plate with a damp sponge to remove any dust, which can prevent glaze adherence. -
Wax the exterior:
Apply wax resist to the entire exterior of the plate and the foot ring. We want the outside to remain raw, unglazed clay to highlight the speckles. -
First dip: Terracotta:
Hold the plate vertically by the rim. Dip exactly half of the plate into your terracotta glaze. Hold it there for 3-5 seconds. -
Clean the line:
As you pull it out, let excess glaze drip off. If the dividing line isn’t perfectly straight, you can tidy it up with a damp sponge once the glaze is dry to the touch. -
Dry completely:
Wait for the terracotta side to create a powdery, dry surface. Patience here prevents the colors from bleeding. -
Second dip: Navy:
Rotate the plate 180 degrees. Dip the unglazed half into the navy blue glaze, bringing the fluid right up to the edge of the terracotta section. -
Create the overlap:
Carefully tilt the plate so the blue glaze barely kisses or slightly overlaps the terracotta line. This creates that dark fusion line seen in the image. -
Clean up drips:
Check the waxed exterior. The glaze should bead up on the wax, but use a sponge to wipe away any stubborn droplets that stuck. -
Glaze fire:
Load the plate into the kiln for the final glaze firing (match the temperature to your clay body, likely Cone 5 or 6).
Texture Twist
Try dipping the two halves at an angle rather than straight down. A diagonal split creates a dynamic, modern look that breaks away from traditional symmetry.
Unload your kiln to reveal a stunning contrast between the earthy clay and the rich, dipping glazes

TRACK YOUR CERAMIC JOURNEY
Capture glaze tests, firing details, and creative progress—all in one simple printable. Make your projects easier to repeat and improve.
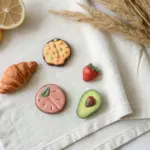
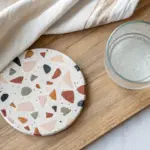
Terrazzo-Style Chip Plate
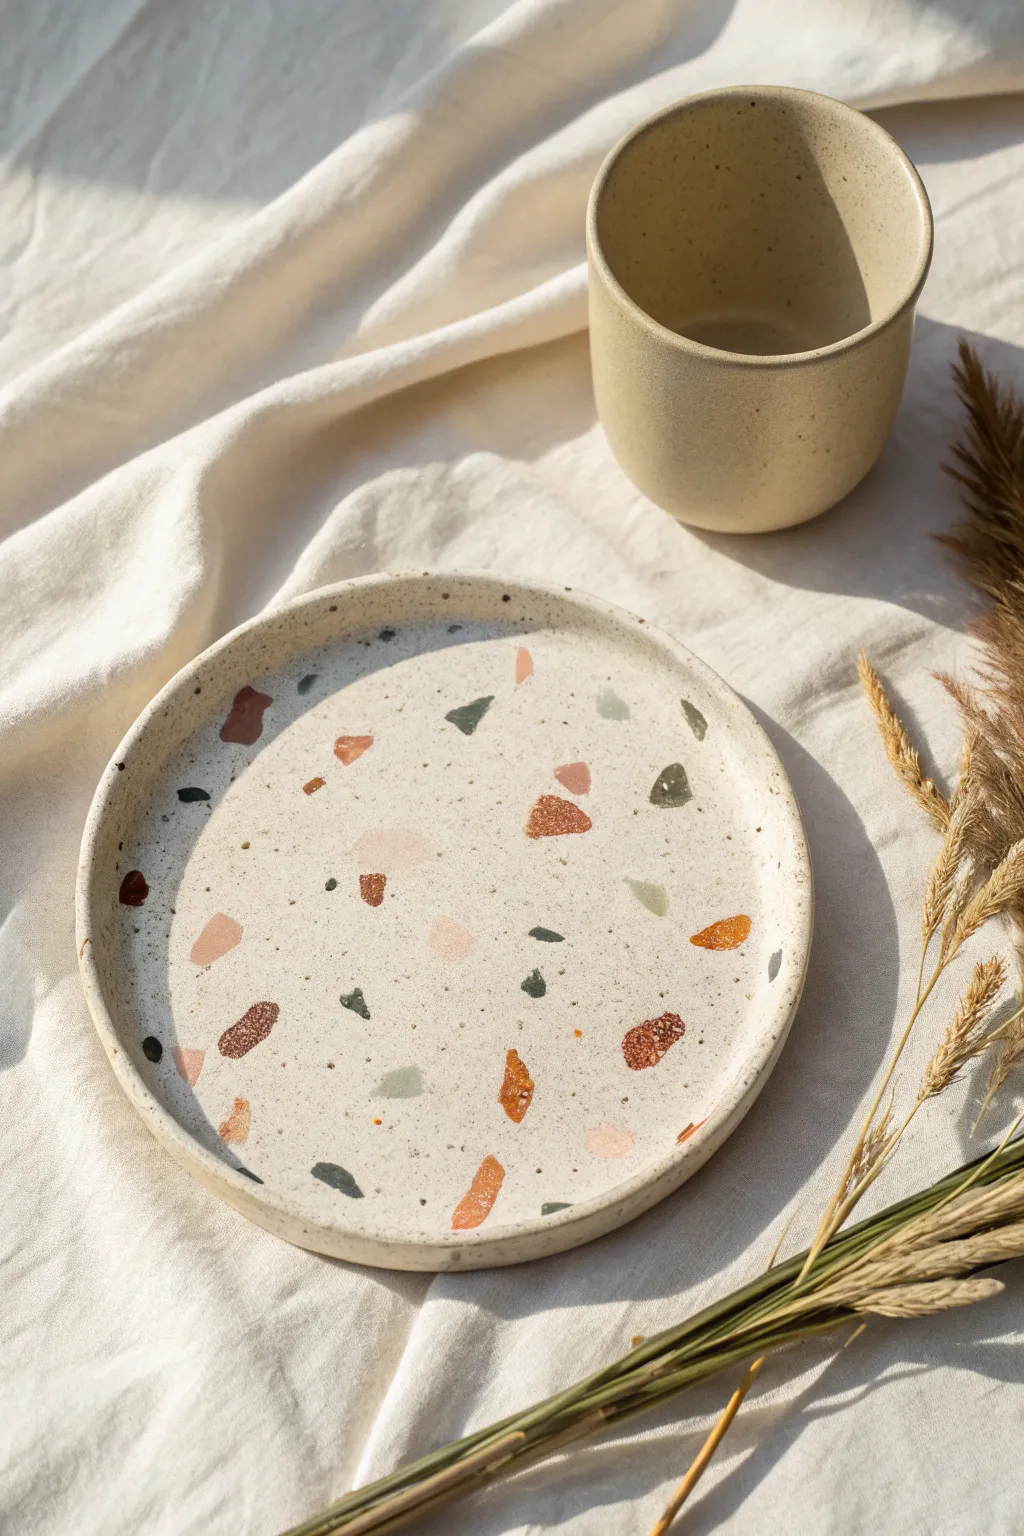
Bring the classic Italian flooring style to your tabletop with this handcrafted terrazzo-effect plate. By embedding colorful clay chips into a neutral base, you will create a modern, speckled piece that looks professionally ceramic but can be made right at home.
Step-by-Step Tutorial
Materials
- White or cream polymer clay (1 large block)
- Assorted colored polymer clay (terracotta, sage green, mustard, rust, black)
- Rolling pin or acrylic roller
- Circle cutter or circular template (approx. 6-8 inches)
- Craft knife
- Parchment paper
- Smooth work surface (ceramic tile or glass mat)
- Fine-grit sandpaper (400, 600, and 1000 grit)
- Oven for baking
- Gloss or matte glaze (optional)
- Soft brush
Step 1: Preparing the Terrazzo Chips
-
Condition the colors:
Start by conditioning your colored clay blocks individually. Take small amounts of terracotta, sage green, mustard, rust, and black clay and knead them until they are soft and pliable. -
Create thin sheets:
Roll each colored piece into a very thin sheet. You want these to be quite delicate, almost like paper, so they break apart easily later. -
Bake the sheets:
Place these thin colored sheets on parchment paper and bake them for a short period—about 10 minutes—according to the package instructions. Baking them first makes them hard and brittle. -
Cool and crush:
Once baked and fully cooled, break the colored sheets into irregular fragments. I like to chop some pieces with a blade for sharp edges and crumble others by hand for variety. -
Sort by size:
Separate your chips into piles of tiny specks and larger statement chunks to ensure an even distribution later.
Step 2: Forming the Plate Base
-
Condition the base clay:
Take your large block of white or cream clay. Knead it thoroughly until it is warm and completely smooth, ensuring there are no air bubbles trapped inside. -
Initial rolling:
Roll the white clay out into a thick slab, roughly 1/4 inch thick. Don’t worry about the perfect shape just yet. -
Adding the chips:
Scatter your pre-baked colored chips over the surface of the raw white clay. Press them down gently with your fingers so they stick. -
Embedding the pattern:
Use your acrylic roller to roll over the slab again. This will force the hard chips down into the soft clay and create a unified, flat surface. -
Repeat for density:
If the pattern looks too sparse, slice the slab in half, stack the pieces, and roll it out again. This disperses the chips throughout the clay body, not just on top.
Clean Cuts Matter
Wipe your blade with acetane or alcohol between cuts. This prevents the white base clay from smudging over your colorful chips.
Step 3: Shaping and Finishing
-
Final rollout:
Roll the clay slab to your final desired thickness, usually about 1/4 inch, ensuring the surface is level. -
Cut the circle:
Place your circle cutter or template onto the slab. Use a craft knife to cut a clean, perfect circle, removing the excess clay. -
Create the rim:
Gently lift the edges of the circle with your fingertips. Pinch and curve the clay upward slightly to create a shallow rim, giving it that classic plate profile. -
Smooth the edges:
Run your finger dipped in a little cornstarch or water along the rim to smooth out any harsh cutting marks. -
Bake the plate:
Place the shaped plate on a baking sheet lined with parchment paper. Bake according to your specific clay brand’s instructions (usually 275°F for 15-30 minutes). -
Cool completely:
Let the plate cool down slowly in the oven with the door cracked open to prevent thermal shock and cracking. -
Sanding for exposure:
This is the magic step. Wet sand the surface using 400 grit sandpaper under running water. This removes the top layer of white clay to fully reveal the crisp edges of the colored chips. -
Refine the finish:
Progress to 600 and then 1000 grit sandpaper to buff the surface until it feels smooth as glass. -
Optional sealing:
If you want a glossy ceramic look, apply a thin coat of glaze. For a natural stone look, you can leave it matte or buff it with a denim cloth.
Match Your Mug
Save your clay scraps! Roll remaining trimmings into a long snake to build a matching coil-pot mug or a small ring dish.
Enjoy your stylish new decor piece that brings a touch of artistic flair to your space.
Geometric Painted Linework Plate
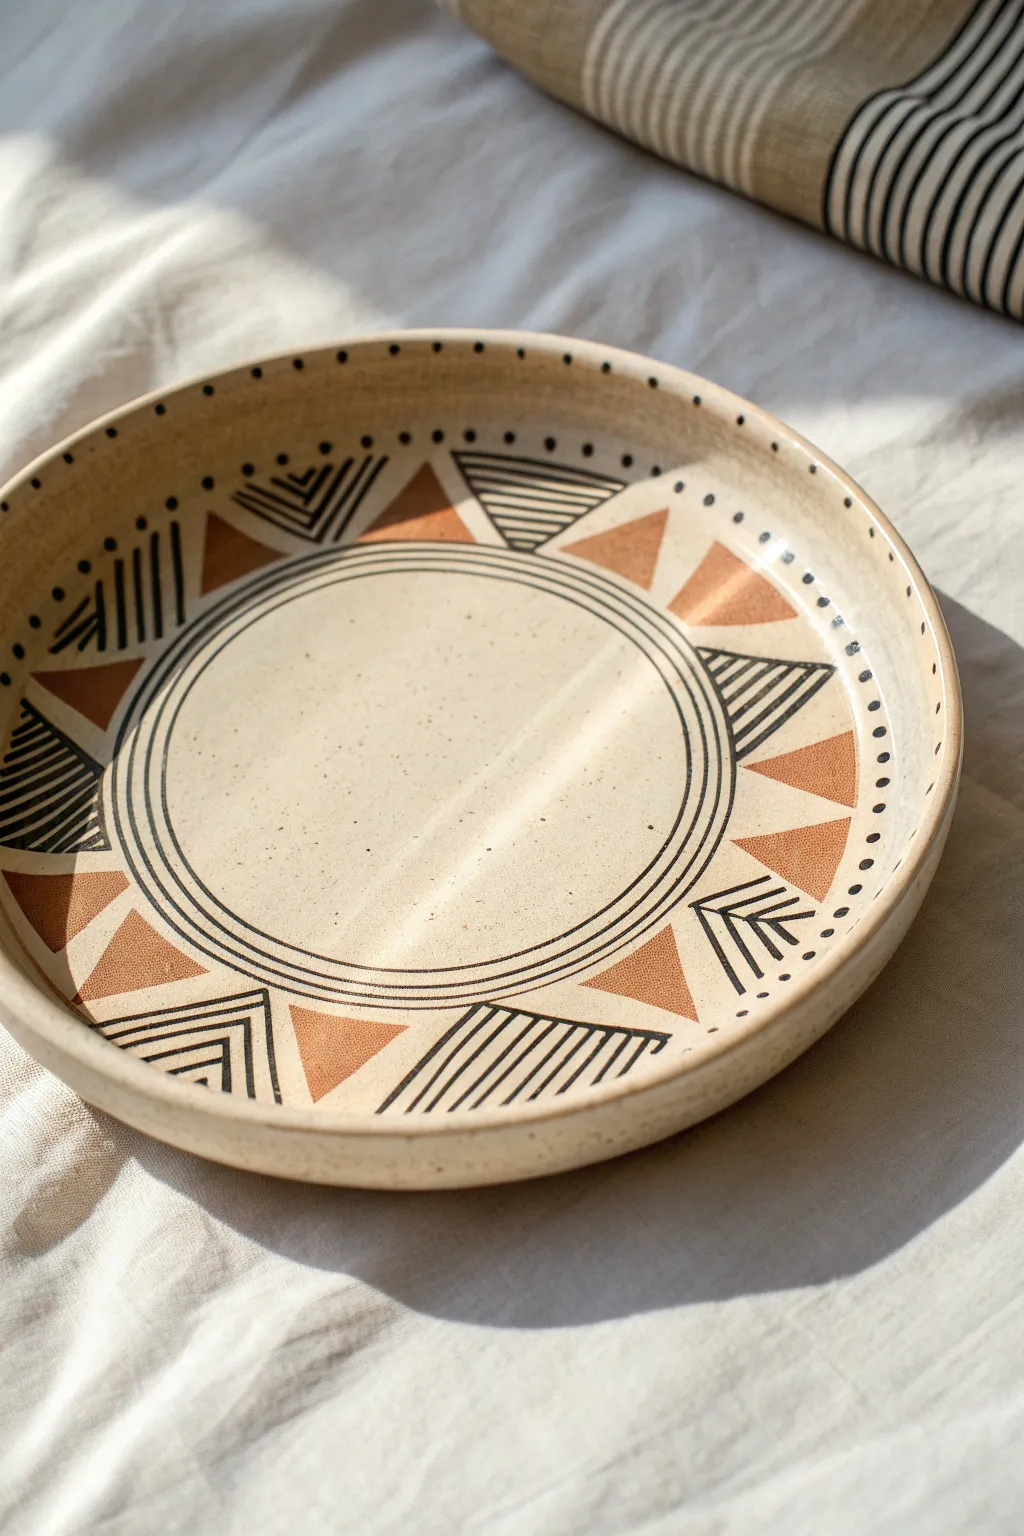
This stunning ceramic project combines earthy warmth with modern precision, featuring alternating triangles of rust-colored glaze and crisp black linework. The speckled clay body provides a beautiful organic canvas for the striking radial pattern.
How-To Guide
Materials
- Bisque-fired ceramic plate (speckled stoneware preferred)
- Underglaze pencil (black)
- Black underglaze
- Terracotta or rust-colored underglaze
- Fine liner brush (size 0 or 00)
- Small flat brush (size 2)
- Pottery wheel or banding wheel
- Clear transparent glaze
- Needle tool or pencil for sketching
- Ruler or flexible measuring tape
Step 1: Planning the Layout
-
Center the plate:
Place your bisque-fired plate onto a banding wheel or pottery wheel. Spin the wheel to ensure it is perfectly centered, which is crucial for the circular elements. -
Mark the center circles:
While the wheel draws spinning slowly, hold a pencil or needle tool steady to lightly etch three concentric circles in the center of the plate well. These will frame the empty center space. -
Divide the rim:
Using a ruler, lightly mark even intervals around the rim of the plate. You want to create a series of triangular sections, so plan for an even number of points to alternate the designs. -
Sketch the triangles:
Connect your rim marks to the outer edge of your concentric circles to form a ring of triangles. Don’t press too hard; these are just guidelines.
Step 2: Applying Color
-
Select your triangles:
Identify which triangles will receive the solid color. In this design, solid rust triangles alternate with geometric black-and-white triangles. -
Paint the rust sections:
Using the small flat brush and the rust underglaze, carefully fill in every other triangle. You may need 2-3 coats for full opacity, letting each coat dry for a few minutes in between. -
Clean up edges:
If any rust glaze went outside the lines, use a clean, damp stiff brush or a specialized cleanup tool to gently wipe away the excess before it sets completely.
Wobbly Lines?
If your hand shakes during linework, exhale while pulling the stroke. Alternatively, use a distinct underglaze decal sheet or transfer paper for perfect geometric lines.
Step 3: Detailed Linework
-
Outline the circles:
Dip your fine liner brush into the black underglaze. Spin the banding wheel and hold your hand steady to creating crisp black rings over your initial circular pencil marks. -
Outline the triangles:
Carefully trace the main outlines of the black-and-white patterned triangles. I find it helpful to brace my painting hand against my other hand for stability here. -
Create the striped pattern:
In roughly half of the uncolored triangles, paint a series of parallel lines filling the shape. Vary the direction; some can run parallel to one side, others can run horizontally. -
Add chevron details:
In the remaining open triangles, paint nested ‘V’ shapes or chevrons. This variation adds visual interest and breaks up the repetitiveness. -
Add the rim dots:
Using the tip of your brush or a small dotting tool, place small black dots evenly along the very top edge of the rim. -
Add inner details:
Complete the look by adding faint dots or tiny tick marks along the inner circle border if desired, matching the photo’s delicate detailing.
Underglaze Consistency
Your black underglaze should be the consistency of heavy cream or ink. If it’s too thick, it will drag and create rough lines; add a drop of water to thin it.
Step 4: Finishing
-
Bisque fire again (optional):
If you are worried about smudging your complex design, you can fire the piece to bisque temperature (Cone 04) again to set the underglaze permanently before glazing. -
Apply clear glaze:
Once the underglaze is fully dry (or fired), dip or brush a coat of clear transparent glaze over the entire plate. This will make the speckles in the clay pop and seal the design. -
Final wipe:
Wipe the foot of the plate clean with a sponge to prevent it from sticking to the kiln shelf. -
Glaze fire:
Fire the plate to the maturity temperature of your clay body (likely Cone 5 or 6 for stoneware).
Now you have a beautifully patterned plate ready for serving or display
Metallic Rim Accent Plate
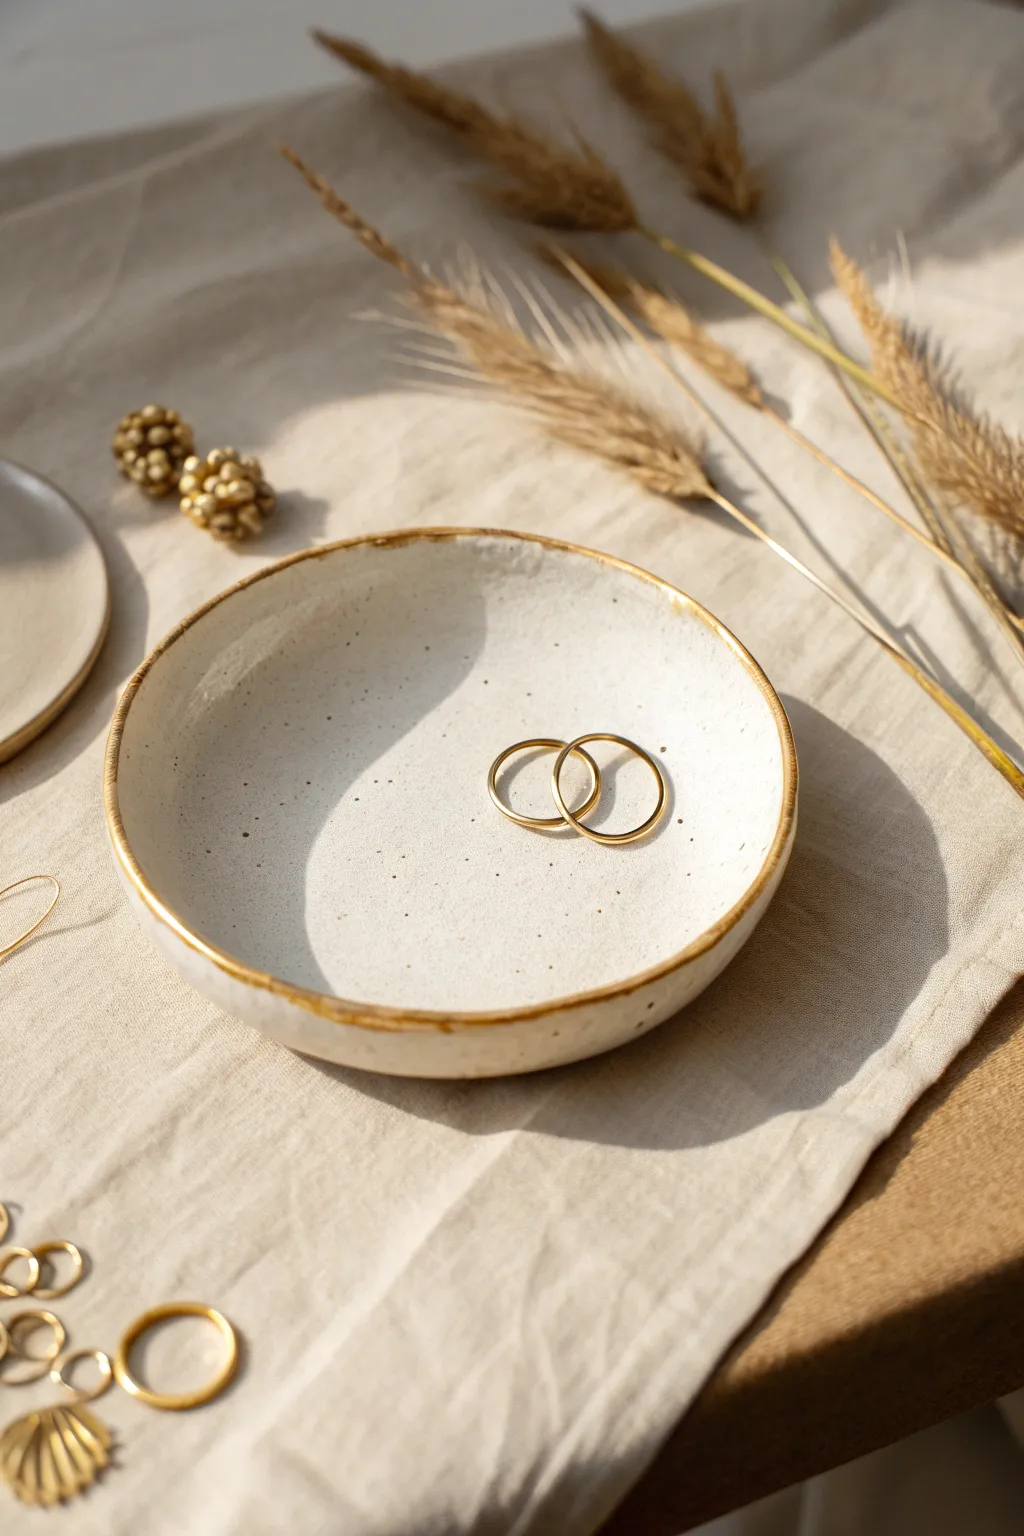
This project combines the rustic charm of speckled ceramic with a touch of modern luxury. By hand-forming a simple organic shape and finishing it with a striking metallic edge, you create an elegant home for your favorite rings and small treasures.
Step-by-Step Guide
Materials
- White polymer clay or air-dry clay
- Sandpaper (fine grit)
- Acrylic rolling pin
- Small bowl or circular cutter (approx. 4-5 inches)
- Craft knife
- Black pepper or dried coffee grounds (for speckling)
- Glossy white acrylic paint or glaze
- Gold leaf paint or metallic gilding wax
- Small fine-point paintbrush
- Sponge or foam brush
- Soft cloth
Step 1: Preparing and Shaping the Clay
-
Condition the clay:
Start by kneading your white clay until it is soft and pliable. If you want that authentic speckled pottery look shown in the photo, sprinkle in a small pinch of cracked black pepper or dried used coffee grounds and knead them thoroughly into the clay body. -
Roll it out:
Using your acrylic rolling pin, flatten the clay into an even slab. Aim for a thickness of about 1/4 inch (6mm). Rotate the clay occasionally to ensure it doesn’t stick to your work surface. -
Cut the circle:
Place your circular template or bowl upside down on the clay slab. Use your craft knife to trace around the edge, cutting out a perfect circle. -
Smooth the edges:
Dip your clean finger in a tiny bit of water and run it along the cut edge of the clay circle to smooth out any harsh angles or burrs left by the knife. -
Form the lip:
Gently curve the outer edges of the circle upward to create a shallow bowl shape. You can do this by pinching the edges slightly or by slumping the clay into a slightly larger bowl to help it hold its form. -
Add organic texture:
To match the handmade feel of the reference image, don’t worry about perfect symmetry. Gently press your thumbs into the inner curve to create slight undulations, giving it a natural, ‘wabi-sabi’ aesthetic.
Uneven Gold Line?
Don’t stress if the gold rim looks shaky. The organic style thrives on imperfection. If a splotch gets too big, let it dry, paint over it with white, and retry.
Step 2: Drying and Refining
-
Let it dry:
Allow the clay to dry completely according to the manufacturer’s instructions. Air-dry clay often needs 24-48 hours, while polymer clay will need to be baked in an oven. -
Sand for smoothness:
Once fully cured or dried, take your fine-grit sandpaper and lightly buff the entire surface. Focus on the rim to ensure it feels pleasant to the touch. -
Wipe clean:
Use a slightly damp soft cloth or tack cloth to remove every speck of sanding dust. This step is crucial for getting a smooth paint finish later.
Step 3: Glazing and Gilded Detailing
-
Apply the base glaze:
Using a sponge or foam brush, dab a coat of glossy white acrylic paint (or varnish) over the inside and outside of the dish. If you used speckled clay, a transparent glaze is better so the specks show through. If you used plain white clay, you can mix tiny black dots into your white paint now. -
Dry the base coat:
Wait for the white base coat to dry completely. I usually give this a little extra time to ensure the surface is hard and non-tacky. -
Prepare the gold:
Shake your liquid gold leaf or get a small amount of gilding wax on your palette. Liquid leaf tends to give that sharp, bright shine seen in the photo. -
Paint the rim:
Dip your fine-point brush into the gold. Carefully run the brush along the very top edge of the rim. You don’t need a steady machine hand here; a slightly wavering line adds to the organic charm. -
Thicken the accent:
Go back over the rim and intentionally pull the gold paint down just a millimeter or two onto the inner and outer face of the bowl in random spots to create a weathered, dipped look. -
Final cure:
Let the gold accent dry completely. If you plan to use this simply for jewelry storage, it is ready to go once dry.
Pro Tip: Liquid Gold
For the brightest shine, use solvent-based liquid gold leaf rather than standard metallic acrylic paint. The reflection is much stronger and looks like real metal.
Now you have a stunning, minimalist piece that looks like high-end boutique pottery.
Wavy Ripple “Wonky Chic” Plate
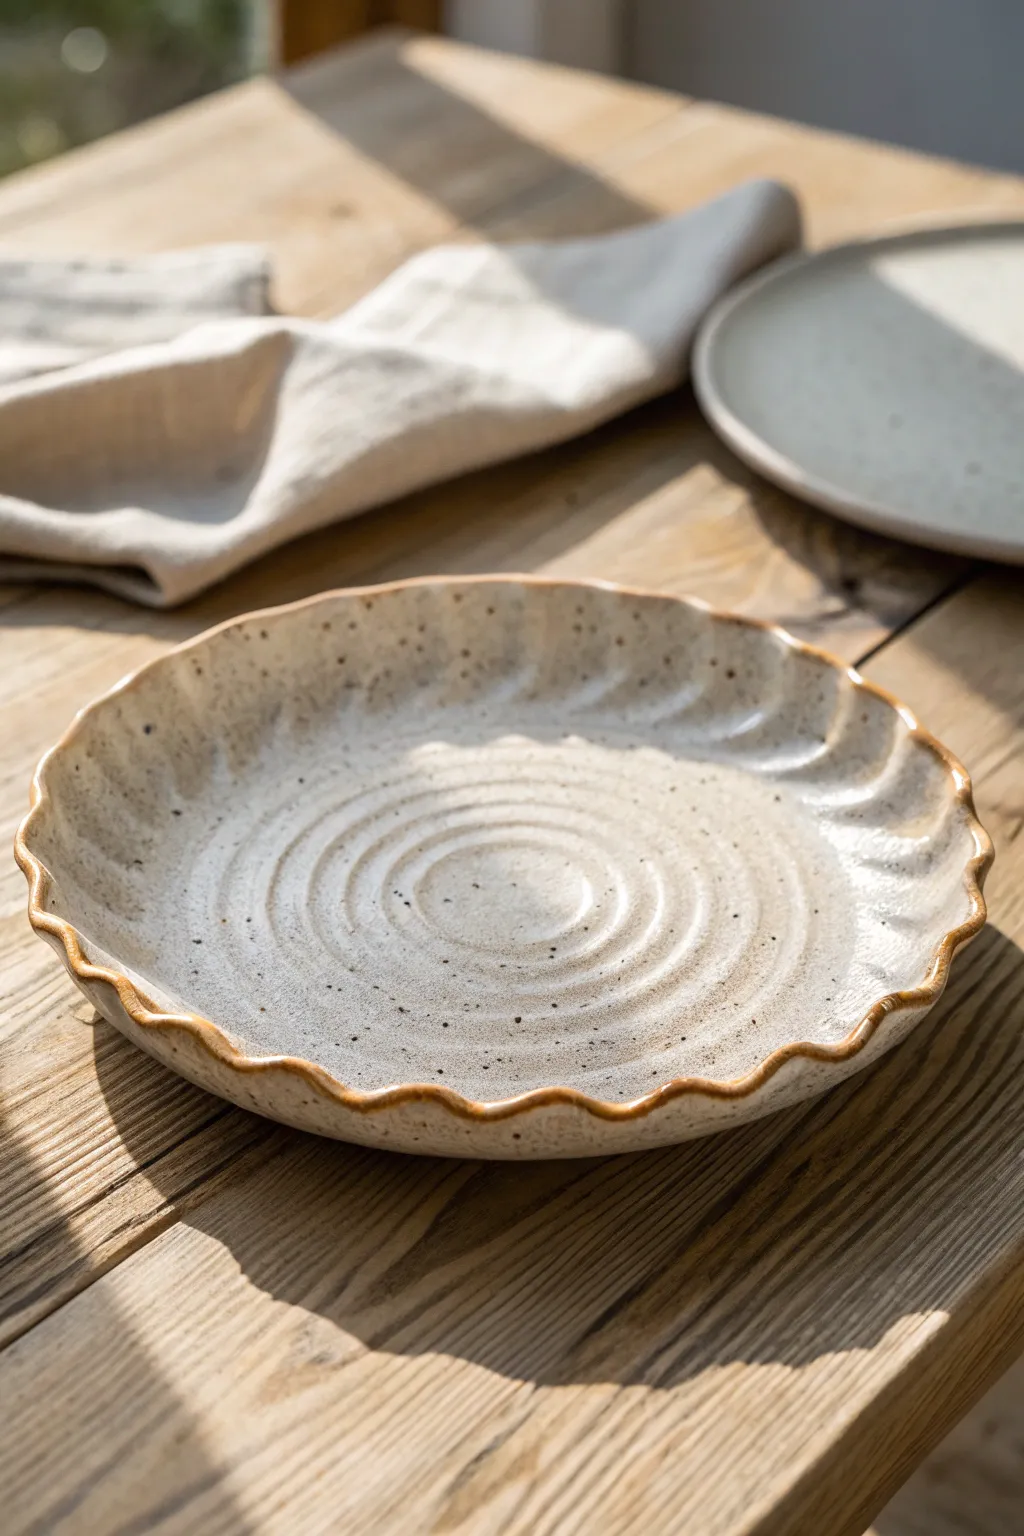
Embrace the charm of imperfection with this handmade ceramic plate, featuring a gentle spiral texture and a distinctively fluted rim. The speckled cream glaze and toasted edges give it a warm, rustic feel perfect for serving homemade meals.
Step-by-Step Tutorial
Materials
- Stoneware clay (speckled or buff)
- Rolling pin
- Canvas work surface or slab mat
- Pottery wheel (for throwing) OR foam drape mold (for hand-building)
- Rib tool (kidney shaped, smooth)
- Pin tool or needle tool
- Modeling tool or finger for fluting
- Sponge
- Cream/White speckled glaze
- Oxide wash (Iron oxide) or dark underglaze
Step 1: Forming the Base
-
Prepare the Clay:
Wedge a medium-sized ball of speckled stoneware clay until it is uniform and free of air bubbles. Aim for about 1.5 to 2 pounds of clay depending on your desired plate size. -
Center and Open:
If throwing on the wheel, center your clay firmly. Open it wide and low, compressing the base thoroughly to prevent S-cracks later. -
Pull the Floor:
Pull the clay outward to form a wide, flat floor. Leave the rim slightly thicker than usual to accommodate the fluting later. -
Create the Spiral:
With the wheel spinning at a moderate speed, press your fingers or a rounded rib tool gently into the exact center. Slowly drag it outward towards the rim to create continuous, raised concentric ridges. Don’t smooth these out; they are a key design feature. -
Lifting the Rim:
Gently pull up the outer edge of the plate to create a slight curve or gallery, lifting it about an inch off the bat. This defines the plate’s depth. -
Hand-building Alternative:
If you aren’t using a wheel, roll a uniform slab. Texture it by pressing a distinct object or coil into the surface in a spiral pattern, then drape the slab over a shallow humped mold to get the curved shape.
Step 2: Sculpting the Wavy Edge
-
Leather Hard Stage:
Allow the plate to dry to a soft leather-hard consistency. The clay needs to be firm enough to hold its shape but soft enough to bend without cracking. -
Marking Intervals:
Lightly mark even intervals around the rim where you want your waves to be. This ensures your spacing remains somewhat consistent, though ‘wonky’ is part of the charm. -
Fluting the Rim:
Use your thumb and forefinger to create the pie-crust edge. Place your thumb on the inside of the rim and two fingers on the outside. Gently press the rim outward with your thumb while supporting the adjacent sections. -
Refining the Curves:
Continue around the circumference. You can use the handle of a paintbrush or a wooden modeling tool instead of fingers for sharper, more dramatic waves. -
Smoothing:
Run a damp sponge lightly over the rim to soften any sharp burrs created during the fluting process. I find this creates a better tactile experience for the finished piece.
Consistent Spirals
Keep your arm tucked firmly into your body while creating the spiral floor. A steady hand creates clean ridges, while a shaky hand creates wobbles.
Step 3: Glazing and Finishing
-
Bisque Firing:
Let the plate dry slowly under loose plastic to prevent warping. Once bone dry, bisque fire it according to your clay body’s specifications (usually Cone 04/06). -
Apply Oxide to Rim:
Dip a brush into watered-down iron oxide or a dark brown underglaze. Paint a consistent line right along the wavy edge. -
Wipe Back:
Using a slightly damp sponge, wipe away the excess oxide. You want the dark color to remain only in the deepest crevices and faintly on the high points to accentuate the wave. -
Glazing the Body:
Pour or dip your main cream-colored speckled glaze. Ensure the glaze is thin enough to not obscure the spiral ridges on the floor of the plate. -
Rim Interaction:
Apply the cream glaze over the oxide-stained rim. As it fires, the oxide will bleed through slightly, creating that toasted, defined edge. -
Final Fire:
Glaze fire the piece to maturity (often Cone 5 or 6 for stoneware). Ensure the foot is wiped clean so it doesn’t stick to the kiln shelf.
Go Oval
Before the clay hardens, gently squeeze opposite sides of the plate to turn the circle into an oval. It makes a stunning serving platter for fish or bread.
Now you have a beautifully textured plate ready for your next dinner gathering
Celestial Moon-and-Stars Plate Set
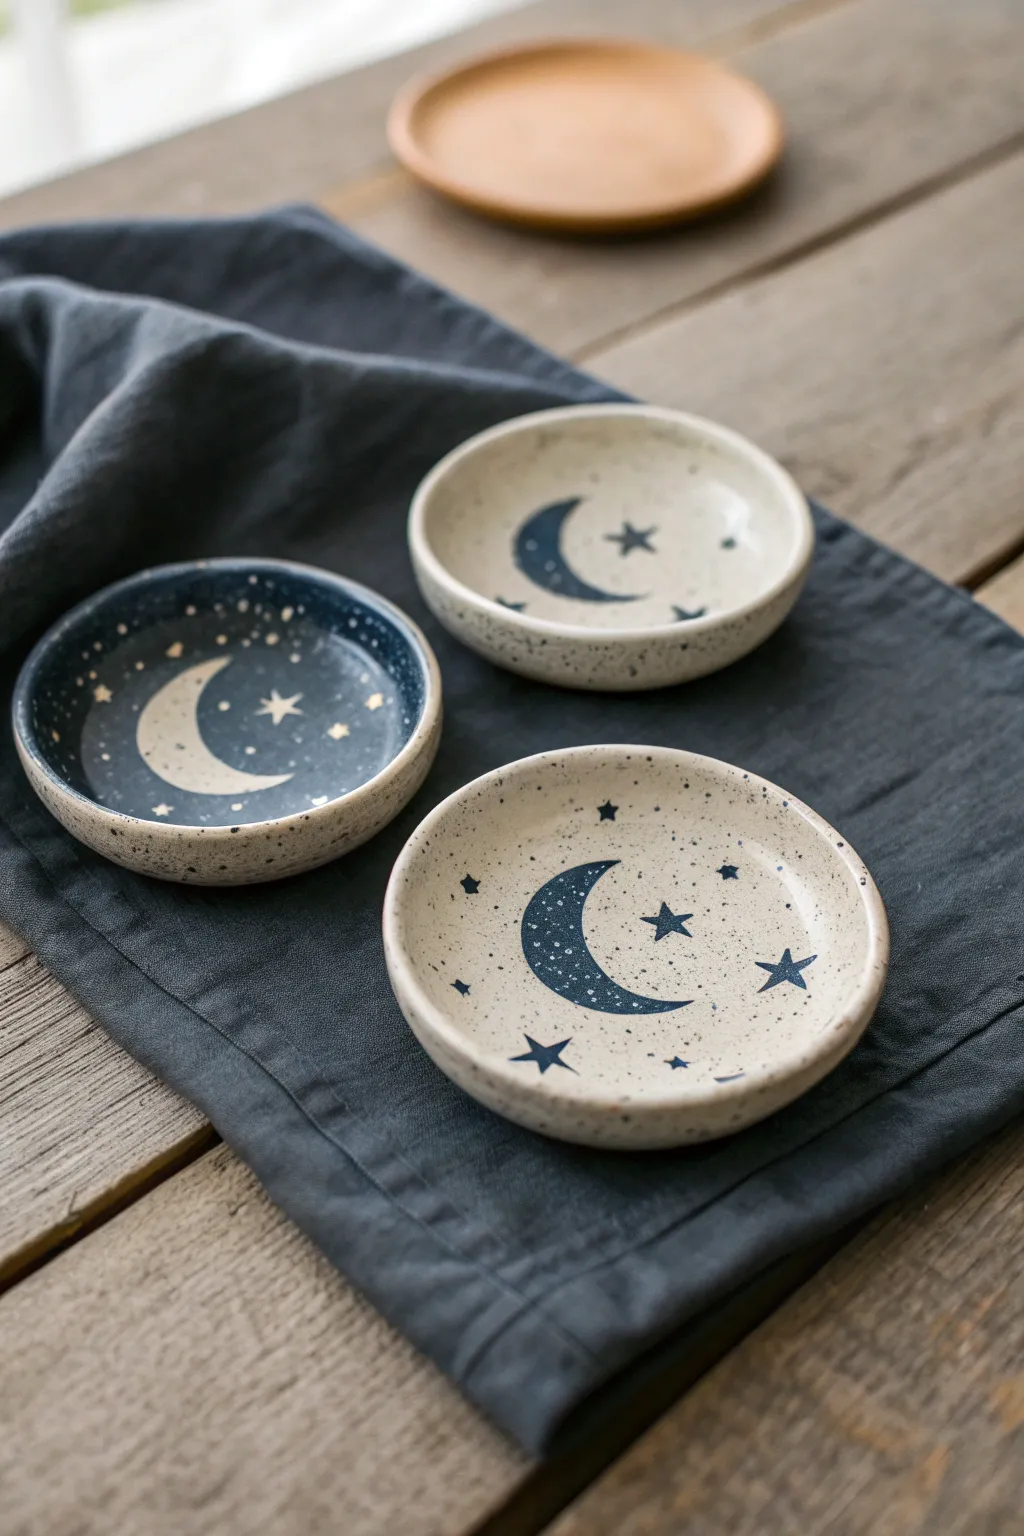
Capture the magic of a starry night with these charming celestial plates featuring contrasting moon and star motifs. The speckled clay lends an organic, handmade feel while the deep indigo glaze creates a striking focal point for jewelry or small treasures.
Step-by-Step
Materials
- Speckled stoneware clay (white or light buff)
- Rib tool
- Rolling pin
- Canvas mat or cloth
- Circle cookie cutter or small bowl template (approx 4-5 inches)
- Small sponges
- Modeling tool or dull pencil
- Underglaze (Deep Indigo/Dark Navy)
- Underglaze (White – optional for reverse design)
- Clear transparent glaze
- Fine detail paintbrushes
- Wax resist (emulsion)
- Kiln access
Step 1: Shaping the Clay Body
-
Roll out the slab:
Begin by wedging your speckled stoneware clay to remove air bubbles. Roll it out on a canvas mat to an even thickness of about 1/4 inch. I find using wooden guide strips helps keep the slab perfectly level. -
Cut the circles:
Using a large circle cutter or by tracing around a small bowl with a needle tool, cut out three identical circles from your clay slab. -
Smooth the edges:
Run a damp sponge or your finger along the cut edges of the circles. This softens the rim and prevents sharp edges after firing, which is crucial for a professional finish. -
Form the curve:
Gently lift the edges of the clay circles to create a shallow bowl shape. You can do this by pressing them into a slump mold or simply by pinching the edges upward and smoothing the interior with a rib tool. -
Dry to leather-hard:
Set the dishes aside on a ware board. Let them dry slowly until they reach the leather-hard stage, where they are firm enough to be handled without warping but still hold moisture.
Crisp Moon Edges
For the sharpest moon crescent, cut a paper stencil or use painter’s tape to block off the shape before applying underglaze.
Step 2: Painting the Celestial Designs
-
Plan the composition:
Lightly sketch your moon crescent shapes onto the leather-hard clay using a dull pencil. For the ‘negative space’ dish (the dark one), mark where the light moon will remain unpainted. -
Paint the dark moons:
For the light-colored dishes, use a fine brush to fill in the crescent moon shape with Deep Indigo underglaze. Apply 2-3 coats for solid opacity, letting each coat dry briefly. -
Add the dark stars:
Using the very tip of your detail brush, paint small five-point stars and tiny dots around the dark moon. Vary the sizes to create a sense of depth in your galaxy. -
Create the midnight dish:
For the dark dish, apply wax resist over the moon shape and the star shapes you sketched. This will protect the raw speckled clay color. -
Flood the background:
Once the wax is dry, paint the entire interior of the third dish with the Dark Navy underglaze. The wax will resist the paint, revealing the light clay body underneath as your moon and stars. -
Clean up the resist:
If any beads of dark glaze sit on top of the waxed areas, gently wipe them away with a barely damp sponge so the lines remain crisp. -
Bisque fire:
Allow all dishes to bone dry completely. This usually takes a few days. Once dry, load them into the kiln for a bisque firing (usually Cone 04).
Glaze Crawling?
If the clear glaze pulls away from the underglaze during firing, ensure your bisque ware was dust-free and not too dry when glazing.
Step 3: Glazing and Finishing
-
Apply clear glaze:
After the bisque firing, wipe the pieces with a damp sponge to remove dust. Dip or brush a coat of clear transparent glaze over the entire interior and rim of the dishes. -
Avoid the foot:
Ensure the bottom footing of the plate is free of glaze so it doesn’t fuse to the kiln shelf. Wipe the bottom clean with a sponge. -
Final firing:
Fire the pieces a second time to the maturation temperature of your specific clay and glaze (often Cone 5 or 6 for stoneware). -
Cool and inspect:
Once the kiln has cooled naturally, remove your dishes. Check that the clear glaze has fully melted and the speckles from the clay body are visible through both the raw and painted areas.
These little cosmic dishes are now ready to hold your rings or simply sparkle on your bedside table
Pressed Flower Keepsake Plate
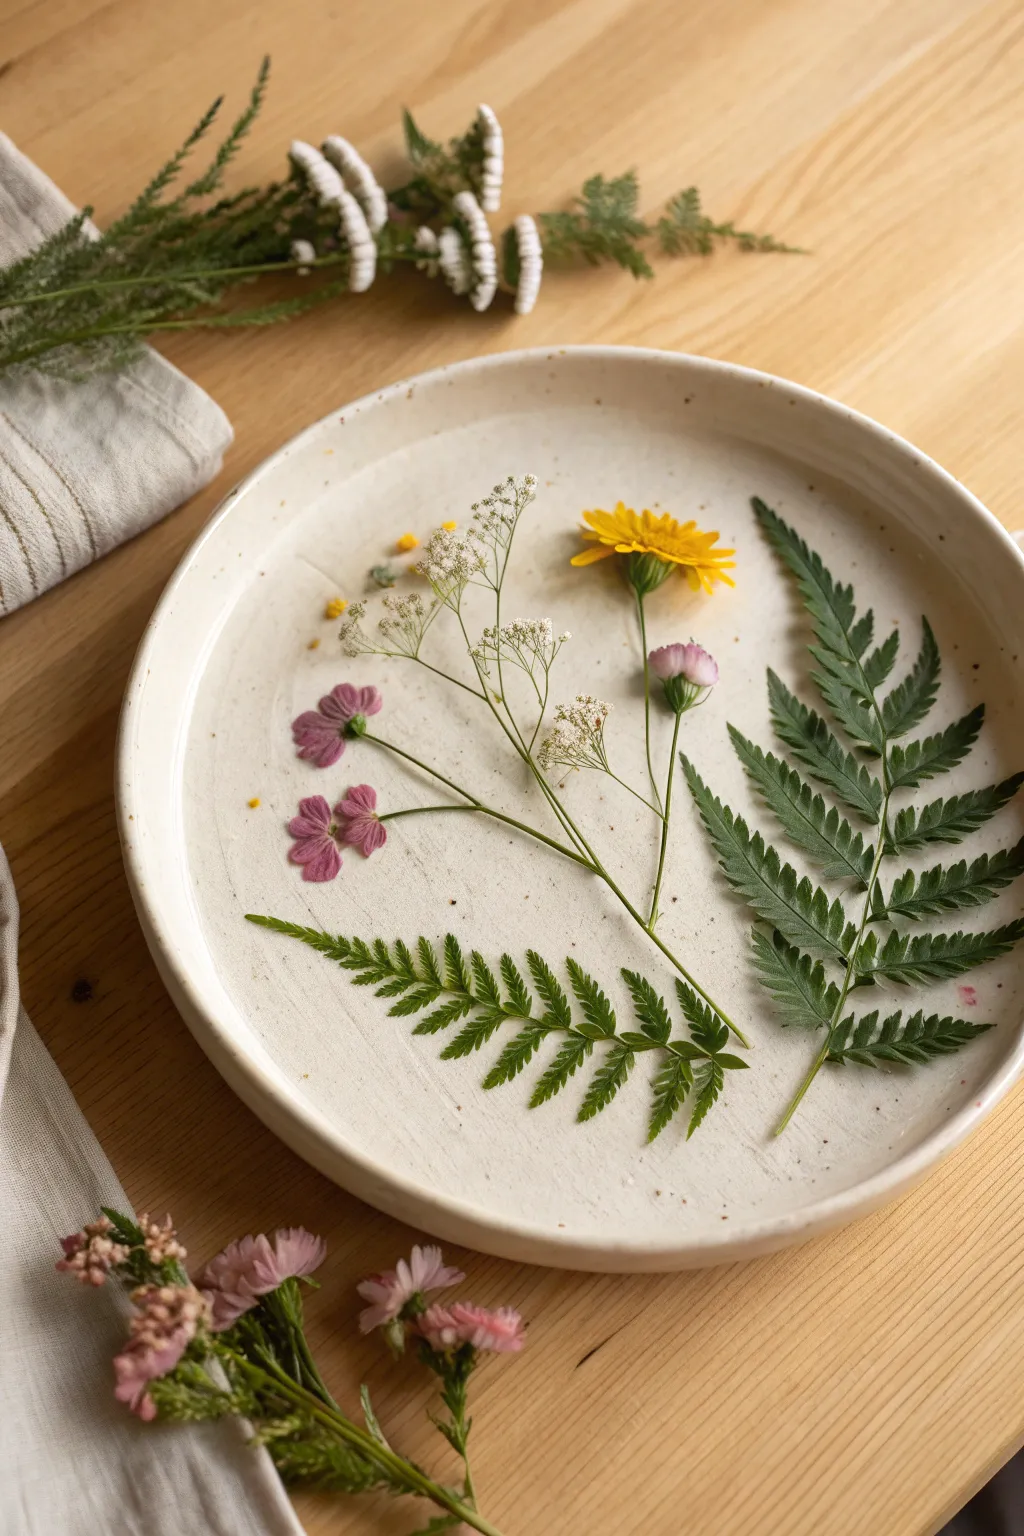
Capture the delicate beauty of a garden stroll with this lovely botanical keepsake plate. By pressing real fern fronds and small blooms directly into clay, you create a subtle, fossil-like relief that is highlighted with careful hand-painting.
Step-by-Step Guide
Materials
- Air-dry clay or polymer clay (white or cream)
- Rolling pin
- Flat, clean work surface (canvas or silicone mat)
- Circular template (like a bowl or plate)
- Knife or clay cutting tool
- Fresh or semi-pressed ferns and small wildflowers
- Tweezers
- Sponge and water
- Fine grit sandpaper
- Acrylic paints (yellow, soft pink, deep green)
- Fine detail paintbrush
- Clear matte or satin varnish/sealer
Step 1: Shaping the Base
-
Prepare the Clay:
Begin by taking a substantial ball of your chosen clay. Knead it in your hands until it becomes warm, soft, and pliable, ensuring there are no air bubbles trapped inside. -
Roll the Slab:
Place the clay on your work surface. Using a rolling pin, roll it out evenly until it is approximately a quarter-inch thick. If the clay sticks, you can lightly dust the surface with cornstarch. -
Cut the Circle:
Place your circular template over the rolled slab. Use a clay knife to cut around the edge cleanly, removing the excess clay. -
Create the Rim:
Gently lift the edges of your clay circle. Pinch and smooth the clay upwards to form a shallow rim, about half an inch high. I like to keep this slightly irregular for a handmade, organic feel. -
Smooth the Surface:
Dip a small sponge or your finger into water and run it over the surface and edges of the plate to smooth out any cracks or fingerprints.
Clean Impressions
For the crispest lines, use fresh ferns rather than dried ones. Dried plants can crumble into the clay and are harder to remove cleanly.
Step 2: Embedding the Botanicals
-
Arrange the Design:
Before pressing, lay out your ferns and flowers gently on the clay surface to check the composition. Aim for a balanced asymmetrical look, perhaps sweeping a large fern across one side. -
Press the Foliage:
Once satisfied with the placement, use the rolling pin to gently but firmly roll over the plants one time. You want to press them flush deeply into the clay surface without distorting the plate’s shape too much. -
Remove the Plants:
Carefully use tweezers to lift the plant material out of the clay. Pull slowly to ensure you leave a crisp impression and clean lines. -
Refining the Imprints:
If any bits of leaf or petal remain stuck in the crevices, use a needle tool or tip of a knife to gently pick them out. -
Drying:
Set the plate aside in a dry, safe place. Allow it to cure completely according to the clay package instructions (usually 24-48 hours).
Gilded Edges
After the sealant dries, run a liquid gold leaf pen along the very top edge of the rim for a touch of elegance that catches the light.
Step 3: Painting and Finishing
-
Sanding:
Once fully dry, lightly sand the rim and back of the plate to remove any sharp edges. Wipe away the dust with a barely damp cloth. -
Mix Your Palette:
Prepare watered-down acrylic paints. You want the consistency of a watercolor wash rather than thick opaque paint to maintain that delicate look. -
Paint the Ferns:
Load a fine brush with deep green wash. Carefully fill in the fern impressions, letting the paint pool slightly in the deepest recesses to emphasize the texture. -
Add Floral Color:
Using the yellow and soft pink washes, paint the flower impressions. Use a stippling motion for the center of the flowers to mimic pollen texture. -
Detailing Stems:
For fine stems that may not have left a deep impression, use the very tip of your brush to paint thin, connecting green lines. -
Sealing the Piece:
Allow the paint to dry completely. Apply two thin coats of clear matte or satin varnish to the entire plate to protect the surface and seal the clay.
Now you have a permanent record of your garden’s beauty to display or gift