Clay pots are basically the blank canvases of the garden world—cheap, sturdy, and ridiculously fun to dress up. Here are my favorite clay pot craft ideas that turn plain terracotta pots into cute decor, planters, and playful outdoor characters you’ll actually want to show off.
Painted Pattern Flower Pots
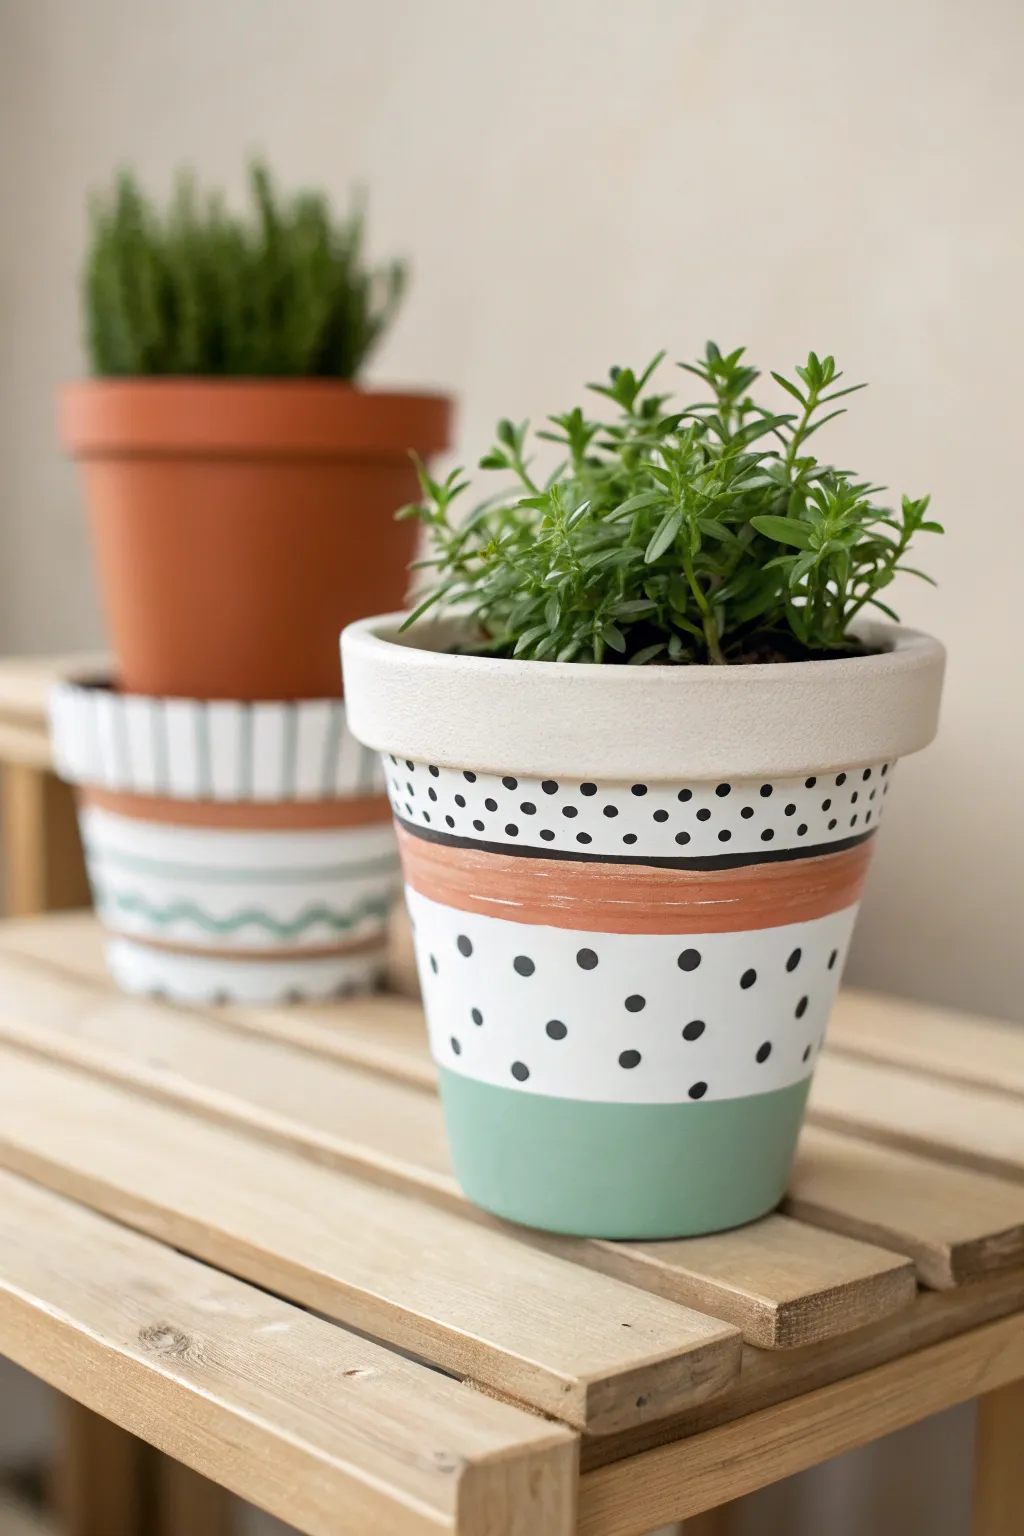
Transform a standard terracotta planter into a chic, modern piece with just a few stripes of paint and a steady hand. This design combines earthy terracotta tones with crisp white, sage green, and playful black polka dots for a fresh, bohemian look.
Step-by-Step Tutorial
Materials
- Terracotta pot (clean and dry)
- White acrylic craft paint
- Sage green acrylic craft paint
- Warm terracotta/burnt orange acrylic craft paint
- Black acrylic craft paint
- Flat paintbrush (medium width, around 1/2 inch)
- Fine tip round paintbrush (size 1 or 2)
- Painter’s tape or masking tape
- Pencil (optional)
- Water cup and paper towels
- Clear acrylic sealer (spray or brush-on)
Step 1: Base Coat & Blocking
-
Prep the surface:
Ensure your terracotta pot is completely clean and dry. Any dust will prevent the paint from adhering properly, so give it a good wipe down first. -
Paint the rim:
Using your medium flat brush, paint the entire rim of the pot with white acrylic paint. This usually takes two coats for opaque coverage, allowing 10-15 minutes of drying time between layers. -
Create the white mid-section:
Paint a wide band of white around the middle of the pot’s body. Don’t worry about perfect edges at the top or bottom yet, as we will refine those with other colors later. -
Apply the green base:
Once the white section is dry to the touch, paint the bottom third of the pot with sage green paint. Use the flat edge of your brush to create a clean horizontal line where the green meets the white. -
Refine the lines:
Go back over the white section if needed to crisp up the line where it meets the sage green. I find that rotating the pot on a lazy susan or a plate makes drawing straight lines much easier.
Use Tape for Crisp Lines
If freehand painting stripes feels daunting, use painter’s tape to mark off the sections. Seal the tape edge with a tiny bit of base color first to prevent bleeding.
Step 2: Adding the Stripes
-
Paint the terracotta stripe:
Load your flat brush with the warm terracotta or burnt orange paint. Paint a horizontal band roughly half an inch thick across the upper portion of the white section. -
Create the black dividing line:
Switch to your fine tip round brush and black paint. Carefully paint a thin, solid black line right above the terracotta stripe, separating it from the white area near the rim. -
Thicken the line if needed:
If your line looks shaky, you can thicken it slightly to smooth out wobbles, but try to keep it relatively delicate compared to the colored bands.
Step 3: Detailing & Finishing
-
Start the upper dots:
Using the tip of your small round brush (or the handle end of a paintbrush for varying sizes), dip it in black paint. Create a row of medium-sized dots just under the rim. -
Fill the upper section:
Continue adding black dots in the white space above the black line. Vary the pattern slightly to keep it organic, mixing slightly smaller dots in with the larger ones. -
Begin the lower polka dots:
Move to the white section below the terracotta stripe. Paint larger, more spaced-out black polka dots here. -
Stagger the pattern:
Place your dots in a staggered formation rather than a grid to maintain that loose, playful aesthetic shown in the photo. -
Add tiny fillers:
If there are large empty gaps in the lower white section, add a very small dot here and there to balance the visual weight. -
Dry completely:
Let the pot sit for at least an hour to ensure all paint layers, especially the thicker dots, are totally dry. -
Seal the pot:
Apply a coat of clear acrylic sealer (matte or satin finish works best) to protect your design from water damage and fading.
Fixing Wobbly Dots
If a dot turns out messy, wait for it to dry completely. Then, simply dab a bit of white paint over it to ‘erase’ the mistake before trying again.
Now your custom planter is ready to home a lovely succulent or herb


Stenciled Statement Clay Pots
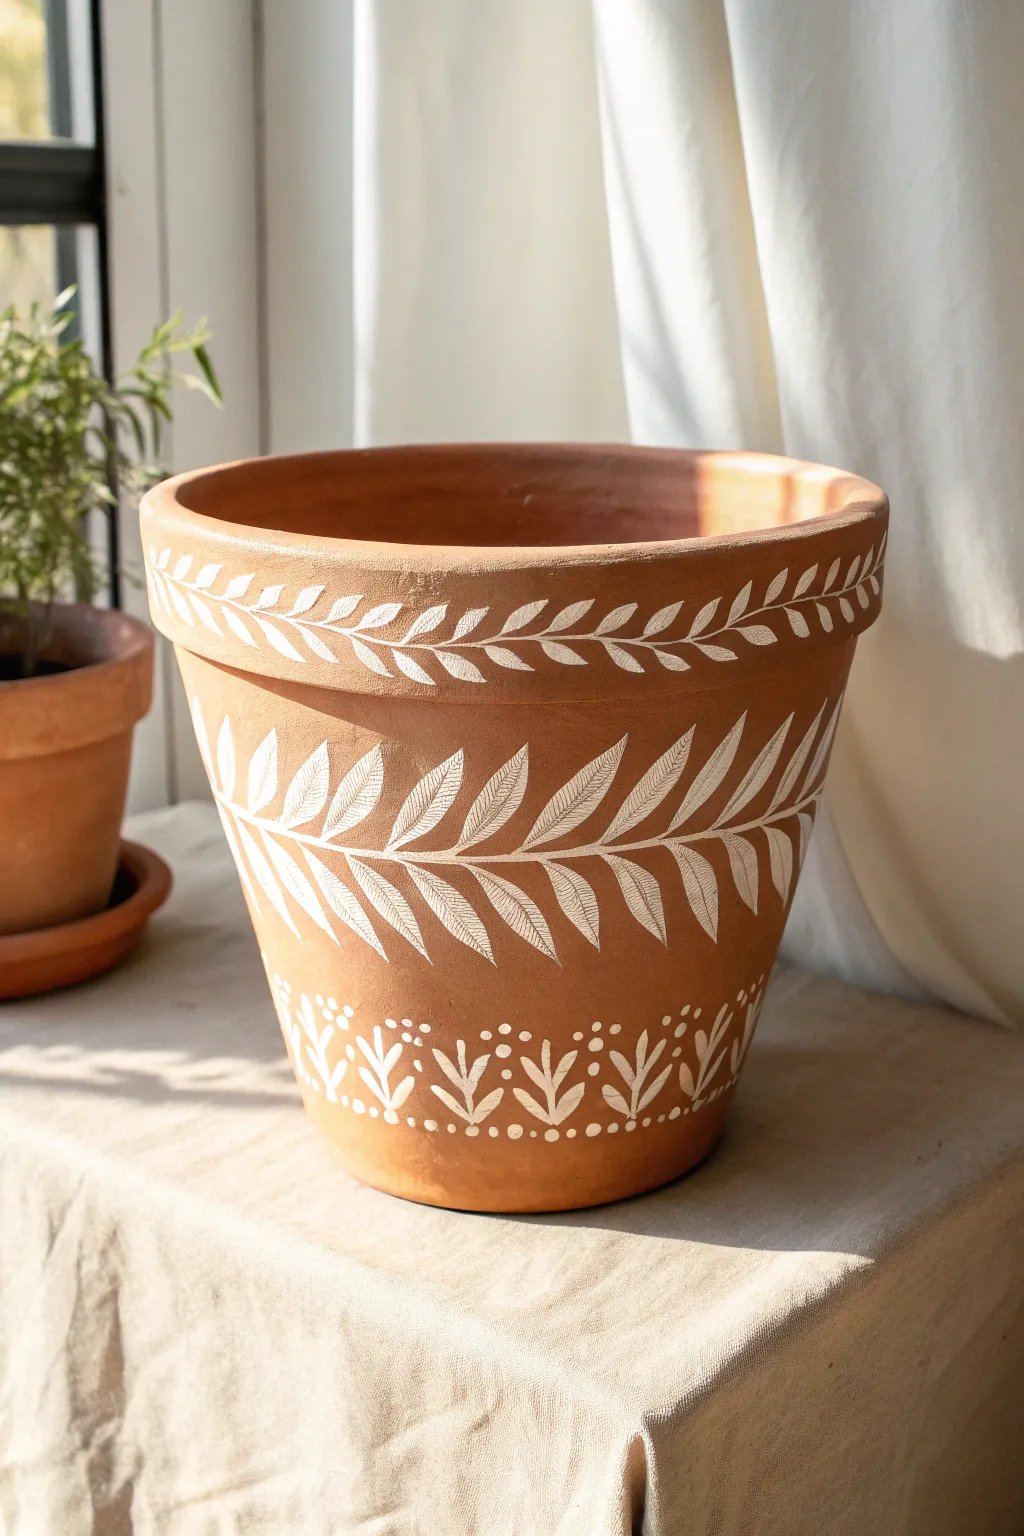
Transform a plain terracotta vessel into a sophisticated gardening statement with this delicate, white-on-clay design. Using simple vine motifs and clean linework, creates a timeless, hand-painted look that elevates any houseplant.
How-To Guide
Materials
- Terracotta pot (medium to large size)
- White acrylic paint (high pigment or outdoor formula)
- Round detail brushes (size 0 and 2)
- Flat brush (optional, for mixing)
- Pencil (HB or lighter)
- Water cups
- Paper towels
- Spray sealer (matte or satin finish)
Step 1: Preparation & Planning
-
Clean the surface:
Begin by wiping down your terracotta pot with a damp cloth to remove any dust or loose clay particles. Let it dry completely so the paint adheres properly. -
Sketch the rim guide:
Using a light pencil, lightly sketch a horizontal line horizontally around the center of the pot’s thick upper rim. This will serve as the spine for your first vine pattern. -
Map out the body pattern:
Move to the main body of the pot. Lightly draw a wavy, undulating line that wraps entirely around the middle section. This doesn’t need to be perfectly symmetrical, but keep the curves gentle and flowing. -
Mark the base design:
Near the bottom of the pot, just above where it curves strictly inward, sketch a faint horizontal guideline for the smaller floral border.
Clean Lines Hack
Work with a damp brush, not a soaking wet one. If your paint feels too thick and drags, add just a single drop of water to improve flow without losing opacity.
Step 2: Painting the Rim
-
Paint the rim spine:
Load a size 2 round brush with white acrylic paint. Carefully paint over your pencil guide on the rim, creating a smooth, medium-thickness line that circles the top. -
Add the first leaves:
Switch to a smaller brush (size 0) if needed for precision. Starting from one point on the spine, paint small, almond-shaped leaves branching off the top side of the line. -
Complete the rim vine:
Paint matching leaves on the bottom side of the spine. Aim for the leaves to alternate slightly or mirror the top ones, creating a dense, leafy border. Let this section dry before your hand rests near it.
Step 3: Creating the Main Vine
-
Paint the central stem:
Return to the main body of the pot. Using the size 2 brush, paint over your wavy guideline with a confident stroke. You may need to reload your brush often to keep the line opaque and crisp. -
Outline the large leaves:
I like to outline the shape of the large leaves first before filling them in. Along the wavy stem, paint elongated leaf outlines branching upward and downward. Make these significantly larger than the leaves on the rim. -
Add vein details:
Instead of filling the large leaves in solid white, paint diagonal lines inside each leaf outline to represent veins. This negative space technique gives the design an airy, etched quality. -
Refine the leaf tips:
Go back over the points of your leaves to ensure they are sharp and tapered. Crisp points make the botanical pattern look elevated and intentional.
Level Up: Aged Effect
After the white paint dries, lightly sand the design with fine-grit sandpaper. This distresses the pattern for a rustic, vintage garden look.
Step 4: Adding the Base Border
-
Paint vertical sprigs:
Along the bottom guideline you sketched earlier, paint small vertical lines spaced evenly apart—about an inch or so between each. -
Add side leaves:
On each small vertical line, paint two tiny leaves branching outward to create mini plant sprigs. -
Dot the details:
Dip the handle end of a paintbrush into the white paint. Use this tool to stamp a perfect dot at the top of each sprig and in the spaces between them for a whimsical finish. -
Add lower dots:
Stamp a final horizontal row of dots underneath the sprig border to ground the design.
Step 5: Finishing Touches
-
Erase guidelines:
Once the paint is thoroughly dry (give it at least an hour), use a clean eraser to gently remove any visible pencil marks. -
Seal the artwork:
Take the pot to a well-ventilated area and apply a light coat of matte spray sealer. This protects the acrylic from moisture when you water your plants.
Now your custom planter is ready to be the perfect new home for your favorite greenery


Decoupage Napkin Clay Pots
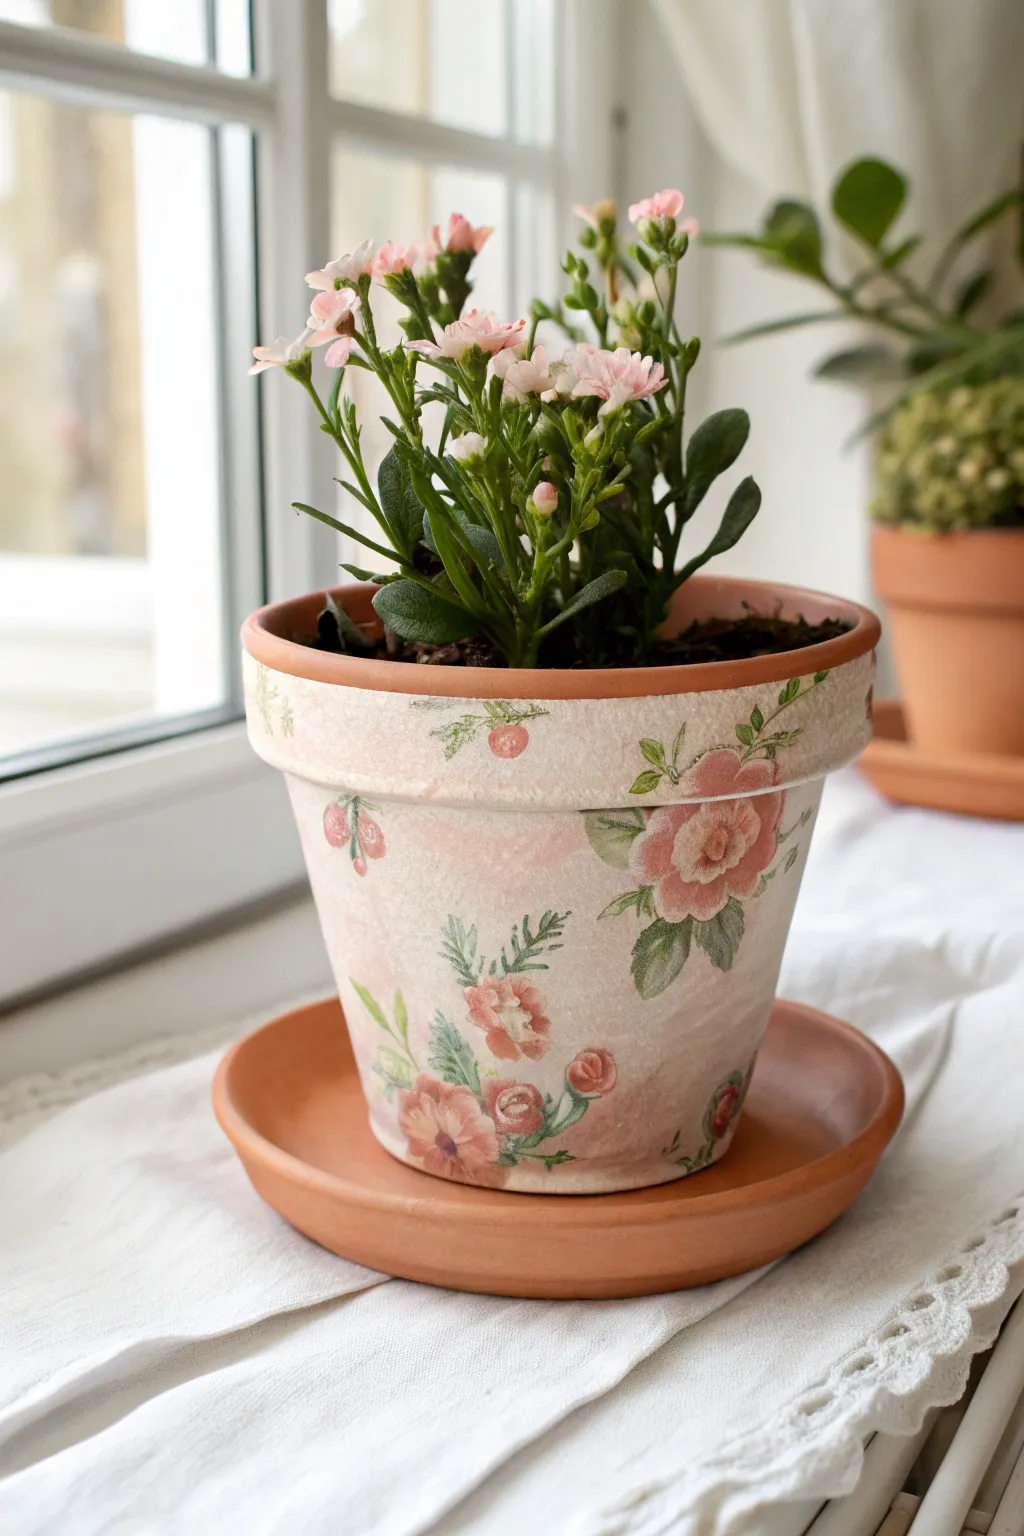
Transform a plain terracotta vessel into a charming, vintage-inspired planter featuring delicate pink florals on a whitewashed background. This decoupage technique creates a soft, hand-painted look that perfectly complements cottagecore or rustic home decor.
Step-by-Step Guide
Materials
- Standard terracotta pot and saucer
- White acrylic paint or chalk paint
- Paper napkins with vintage pink floral design
- Decoupage medium (like Mod Podge Matte)
- Small foam brush or flat paintbrush
- Fine-grit sandpaper (220 grit)
- Small detail scissors
- Cup of water
- Paper towels
- Clear acrylic sealer spray (matte finish)
Step 1: Preparing the Surface
-
Clean the Pot:
Begin by thoroughly wiping down your terracotta pot and saucer with a damp cloth to remove any dust or loose clay particles. Let it dry completely before starting. -
Create a Whitewash:
Mix a small amount of white acrylic paint with water in a 1:1 ratio. You want a milky consistency that is thinner than standard paint but not essentially colored water. -
Apply Base Coat:
Using a foam brush, apply the whitewash mixture over the exterior of the pot. Don’t worry about perfect coverage; a patchy application adds to the aged, vintage look. -
Paint the Rim:
Establish a slightly more solid white line around the rim of the pot, but feel free to let some terracotta show through for depth. -
Dry and Repeat:
Allow the first coat to dry for about 20 minutes. If you want a whiter background, apply a second thin coat of the whitewash, keeping the brush strokes loose.
Water Brush Trick
Instead of cutting with scissors, dip a small brush in water and trace the flower outline. The wet paper tears away easily for a soft, feathered edge that blends invisibly.
Step 2: Preparing the Designs
-
Select Napkin Motifs:
Unfold your floral napkin and identify the specific flower clusters, buds, and leaf patterns you want to feature on your pot. -
Separate Plies:
Most napkins are 2 or 3-ply. Carefully peel away the white backing layers until you are left with only the single, very thin top printed layer. This is crucial for seamless blending. -
Cut Out Designs:
Use your detail scissors to cut around the floral shapes. You don’t need to cut exactly on the line—leaving a tiny border is fine since it will disappear against the white background. -
Plan the Layout:
Without using glue yet, gently place your cutouts against the dry pot to find a pleasing arrangement. I like to group a large cluster on the front and scatter smaller buds around the sides.
wrinkled paper?
If you get wrinkles while smoothing, don’t panic. On a rustic pot, texture looks intentional. Just smooth them down firmly with the brush and move on.
Step 3: Decoupage Application
-
Apply Medium:
Brush a thin layer of decoupage medium onto the specific spot on the pot where your first flower will go. -
Place the Image:
Gently lay the napkin cutout onto the wet medium. Start from the center of the image and lightly tap it down. -
Smooth Out Air:
Dip your finger in a tiny bit of water or medium and very gently smooth the paper from the center outward to release air bubbles. Be extremely gentle as wet napkin tears easily. -
Seal the Image:
Wait about 5 minutes for the image to set, then brush a thin layer of decoupage medium directly over the top of the flower to seal it. -
Continue the Pattern:
Repeat the gluing process for the rest of your flowers, rotating the pot to ensure the design looks balanced from all angles. -
Address the Rim:
If you have small vine or leaf details, consider placing one or two near the upper rim to visually connect the top edge to the body of the pot.
Step 4: Finishing Touches
-
Distress (Optional):
Once the decoupage is fully dry (wait at least an hour), use fine-grit sandpaper to lightly scuff the painted areas or the edges of the rim for a more weathered appearance. -
Final Sealing:
Take the pot and saucer to a well-ventilated area and spray with a clear matte acrylic sealer. This protects the porous clay and paper from water damage when you water your plant. -
Saucer Touch-up:
While the saucer in the image is largely plain terracotta, you can dry-brush a tiny amount of your whitewash mixture onto it to tie the set together visually.
Now your vintage-style creation is ready to house a cheerful Kalanchoe or your favorite succulent


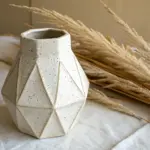
Ombre Wash Clay Pots
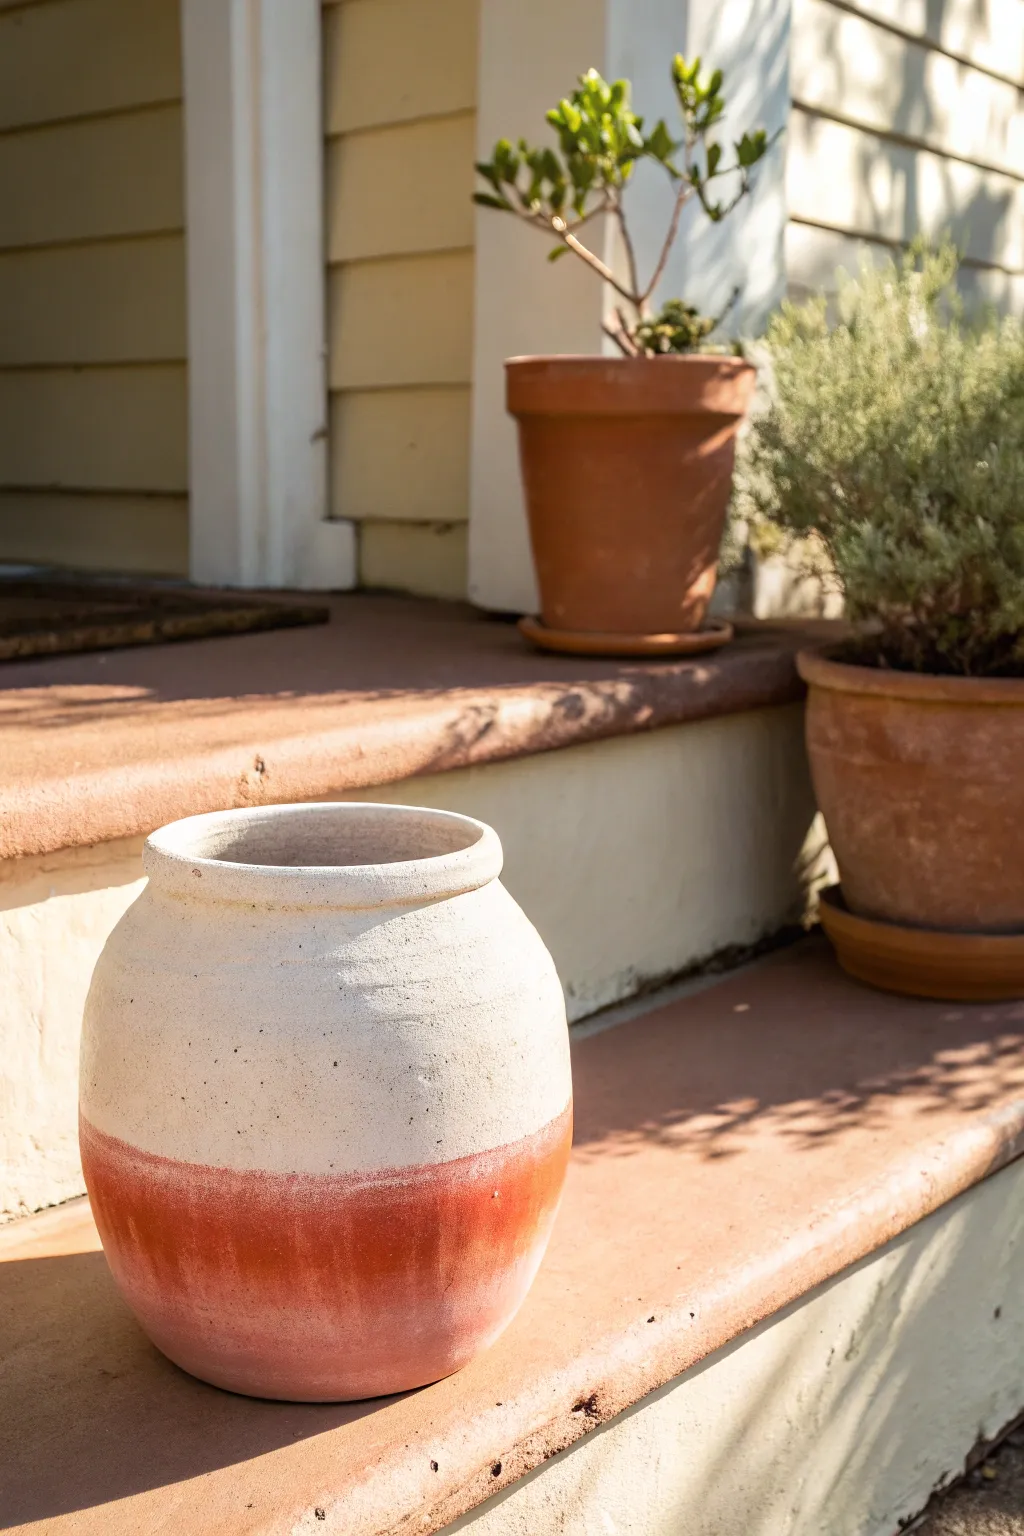
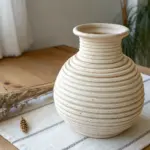
Transform a standard bulbous terracotta planter into a piece of modern, coastal-inspired decor with this subtle ombre wash technique. The result features a creamy, textured white top seamlessly blending into the raw warmth of the clay base.
Step-by-Step Tutorial
Materials
- Bulbous terracotta pot (urn or jar shape)
- White chalk paint or matte acrylic paint
- Water for thinning
- Medium-sized flat paintbrush
- Small mixing bowl
- Painter’s tape (optional)
- Sandpaper (medium grit)
- Clean rag or paper towels
- Clear matte sealer spray
Step 1: Preparation
-
Clean surface:
Begin by wiping down your terracotta pot with a damp cloth to remove any dust or debris. If the pot is old, give it a good scrub with water and a brush, then let it dry completely. -
Light sanding:
Scuff the surface gently with medium-grit sandpaper. This helps the paint adhere better and gives a slightly weathered texture right from the start. -
Mix the wash:
In your small mixing bowl, combine your white chalk paint with water. I usually aim for a 1:1 ratio to create a semi-translucent wash rather than a solid opaque coat.
Uneven Fade Fix
If your paint line looks too sharp, dampen a sponge and gently dab the transition line while the paint is still tacky to blur it effectively.
Step 2: Painting the Base
-
Apply first layer:
Start painting from the top rim downwards. Cover the top two-thirds of the pot with your diluted white paint mixture. -
Create the boundary:
Stop painting roughly one-third of the way up from the bottom. Don’t worry about a perfect line; a natural, slightly uneven edge looks more organic. -
Feather the edge:
While the paint is still wet, use a slightly damp, clean brush to gently feather the bottom edge of the white paint downwards, softening the transition so it doesn’t look like a harsh stripe. -
Check opacity:
Let this first coat dry for about 20 minutes. The terracotta absorbs moisture quickly, so it won’t take long. -
Add depth:
Apply a second coat of the wash to the top half of the painted section, leaving the feathered bottom area alone. This creates a gradient from solid white at the top to a misty fade.
Step 3: Creating Texture
-
Dry brush technique:
Dip your dry brush lightly into undiluted white paint. dab off the excess on a paper towel until almost no paint remains. -
Highlight the rim:
Lightly drag the dry brush over the thick rim of the pot. This catches the texture and emphasizes the pot’s shape. -
Distress the body:
Use the same dry brush technique sporadically over the white section to add opaque highlights, giving it that sun-baked, stucco-like appearance. -
Sand for age:
Once fully dry, take your sandpaper and gently distress areas of the white paint, specifically around the rim and the transition line, to reveal tiny specks of the clay underneath.
Color Wash Twist
Swap the white wash for a diluted terra cotta or soft sage green paint to create a subtle tone-on-tone effect suitable for different decor styles.
Step 4: Finishing Touches
-
Wipe down:
Use a dry cloth or soft brush to sweep away any sanding dust from the surface. -
Seal the work:
Take the pot to a well-ventilated area and apply a light coat of clear matte sealer spray. This protects the finish from moisture without adding unwanted shine. -
Final cure:
Allow the sealer to cure for at least 24 hours before planting anything inside or placing it outdoors.
Now you have a beautifully weathered vessel ready to showcase your favorite succulents or herbs

The Complete Guide to Pottery Troubleshooting
Uncover the most common ceramic mistakes—from cracking clay to failed glazes—and learn how to fix them fast.
Marbled Paint Dip Pots
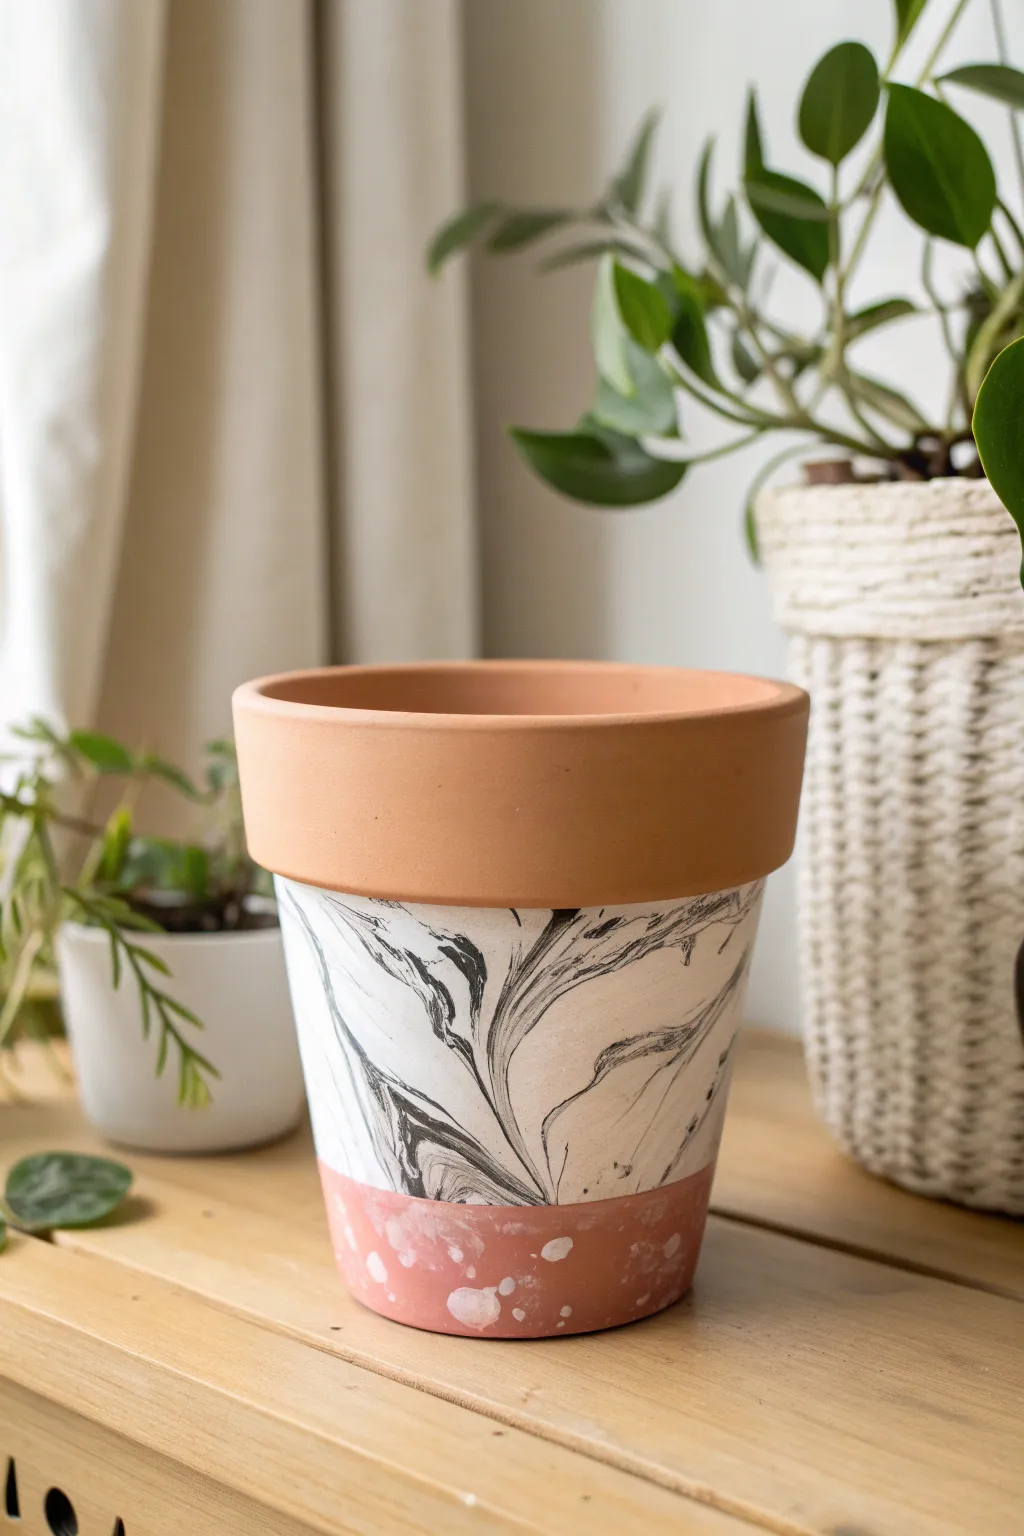
Transform a standard flower pot into a chic home accessory with this striking three-tone design. By combining crisp white marbling with a soft, speckled pink base and natural terracotta, you achievement a modern look that mimics high-end ceramic glaze.
Step-by-Step
Materials
- Standard terracotta pot (clean and dry)
- White acrylic paint
- Black acrylic paint
- Coral or dusty pink acrylic paint
- Large plastic container or bin (for marbling water)
- Painter’s tape or masking tape
- Clear spray sealant (matte or satin)
- Small paintbrush or toothbrush (for splattering)
- Disposable stirrer or toothpick
- Paper towels
- Sandpaper (optional)
Step 1: Preparation and Base Painting
-
Prep the pot:
Ensure your terracotta pot is completely clean and dry. If there are any rough spots or price tag residues, give them a quick rub with fine-grit sandpaper for a smooth surface. -
Mask the rim:
Apply a strip of painter’s tape tightly around the pot, just below the thickened rim. This will keep the top section natural terracotta, creating that beautiful contrast. -
Paint the middle section white:
Paint the entire body of the pot below the tape with white acrylic paint. You may need 2-3 coats to fully cover the orange clay color. Let it dry completely between coats.
Paint Sinking?
If your black paint sinks to the bottom instead of floating, your paint is too heavy. Try thinning it slightly with water or use nail polish for the swirl step.
Step 2: Marbling the Center
-
Prepare the marbling bath:
Fill a plastic container with room-temperature water. The container needs to be deep enough to dip the middle section of the pot. -
Add the marbling paint:
Gently drip several drops of black paint onto the surface of the water. I like to barely touch the water surface with the dropper or brush to keep the paint floating. -
Swirl the pattern:
Use a toothpick or skewer to gently swirl the floating black paint into the white spaces. Don’t overmix; you want distinct veins like real marble. -
Dip the pot:
Holding the pot by the rim and the inside bottom, careful dip the white-painted section into the water. Rotate it slowly as you submerge to catch the black swirls around the circumference. -
Remove and dry:
Pull the pot out smoothly and let the excess water drip off. Set it on a protected surface to dry completely. The black swirls will adhere to the white base coat.
Step 3: Creating the Speckled Base
-
Tape the marbling line:
Once the marbling is totally dry, apply a new line of painter’s tape around the pot, about one-third of the way up from the bottom. This defines the separation between the marbled area and the bottom color. -
Paint the bottom section:
Paint the area below the new tape line with your coral or dusty pink paint. Apply 2 coats for opaque coverage. -
Create the splatter effect:
Dip a toothbrush or stiff brush into white paint. Using your thumb, flick the bristles to spray fine droplets of white paint onto the pink section. Vary the pressure to get different sized spots. -
Remove tape:
Carefully peel off the tape from the middle section while the pink paint is still slightly tacky to ensure a clean line.
Metallic Accent
Paint a thin gold line between the marbling and the pink base using a fine liner brush for an extra touch of glamour.
Step 4: Finishing Touches
-
Final unveiling:
Remove the original tape from around the rim to reveal the natural terracotta top. -
Clean up lines:
If any paint bled under the tape onto the raw terracotta, use a damp Q-tip or a bit of sandpaper to gently remove it. -
Seal the deal:
Take the pot to a well-ventilated area and spray the entire exterior with a clear acrylic sealer. This protects the paint from water damage and scratches. -
Let it cure:
Allow the sealant to cure for at least 24 hours before putting soil or a plant inside.
Now step back and admire how a simple clay pot has become a modern art piece for your shelf
Distressed Vintage Clay Pots
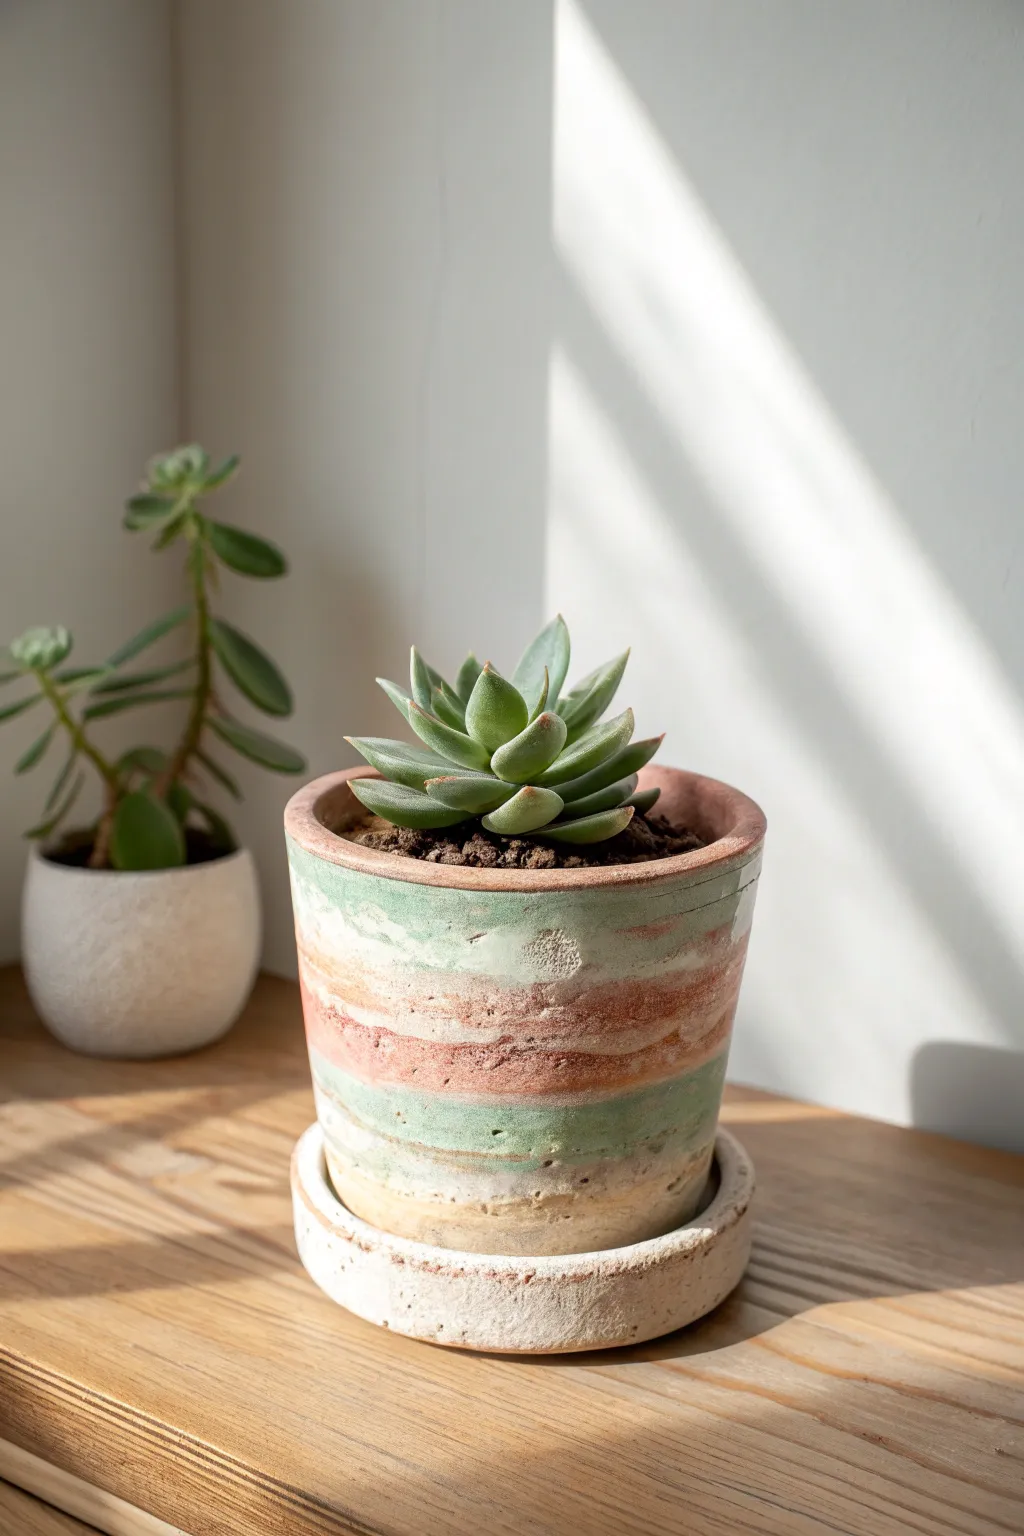
Transform a plain terracotta pot into a weathered, vintage-style find with soft, muted stripes. This project uses layering and distressing techniques to achieve that perfectly aged, chalky finish that adds character to any succulent display.
Detailed Instructions
Materials
- Terracotta pot and matching saucer
- Chalk paint (cream/off-white, sage green, muted coral/terra cotta)
- Medium-grit sandpaper (around 150-grit)
- Coarse sandpaper or steel wool (optional for heavy distressing)
- Painter’s tape (optional)
- Small flat synthetic paint brush
- Paper towels or clean rag
- Matte clear sealer spray
Step 1: Base Preparation
-
Clean the surface:
Ensure your terracotta pot is completely clean and dry. If it’s an old pot, scrub off any mineral deposits or dirt; if it’s new, wipe it down with a damp cloth to remove clay dust. -
Apply the base coat:
Load your brush with the cream or off-white chalk paint. Apply a thin, uneven layer over the entire exterior of the pot and the saucer rim. Don’t worry about perfect coverage; letting some raw clay peek through adds to the distressed look. -
Dry completely:
Allow this base layer to dry fully. Chalk paint dries quickly, but give it about 30 minutes to be safe.
Step 2: Creating the Stripes
-
visualize the bands:
Look at the pot’s shape and decide where your color bands will go. For this look, we want thick, imperfect horizontal stripes. -
Apply the green stripe:
Dip your brush into the sage green paint. Frehand a broad horizontal band near the top third of the pot. Keep the edges soft and feathered rather than sharp and taped. -
Add the coral stripe:
Clean your brush, then pick up the muted coral color. Paint a similar broad band below the green one. If the colors overlap slightly or mix, that’s actually perfect for this style. -
Repeat the pattern:
Continue alternating bands down the pot. I usually like to finish with a green band near the bottom to ground the design. -
Paint the saucer:
For the saucer, apply a wash of the cream paint first, then dab small amounts of green or coral along the rim for a cohesive look. -
Let colors set:
Allow all paint layers to dry completely, ideally for an hour.
Natural Texture
Before painting, apply a little joint compound or plaster randomly on the pot’s exterior. Once painted and sanded, this creates a crusty, truly antique texture.
Step 3: Distressing & Finishing
-
Initial sanding:
Take your medium-grit sandpaper and gently sand over the entire painted surface. Focus on the raised ridges of the pot where wear would naturally occur. -
Reveal the layers:
Sand a bit more aggressively in random spots to reveal the cream base coat or even the raw terracotta underneath the colored stripes. -
Soften the transitions:
Use the sandpaper to blur the lines between the colored stripes, making the transition look faded rather than painted on. -
Create a whitewash:
Mix a small amount of your cream paint with water (about 50/50 mix). -
Apply the wash:
Brush this watery mix over the entire pot. Before it dries, wipe most of it off with a paper towel. This leaves white pigment in the crevices and texture. -
Final dry:
Let the whitewash dry completely. -
Seal the pot:
Apply a coat of matte clear sealer spray to protect the finish from water damage without adding unwanted shine.
Mossy Patina
After sealing, dab a tiny bit of dark brown or moss green wax into the deepest crevices to simulate years of garden aging.
Your weathered pot is now ready to be the perfect home for a hardy succulent collection


What Really Happens Inside the Kiln
Learn how time and temperature work together inside the kiln to transform clay into durable ceramic.
Mossy Aged Garden Pots
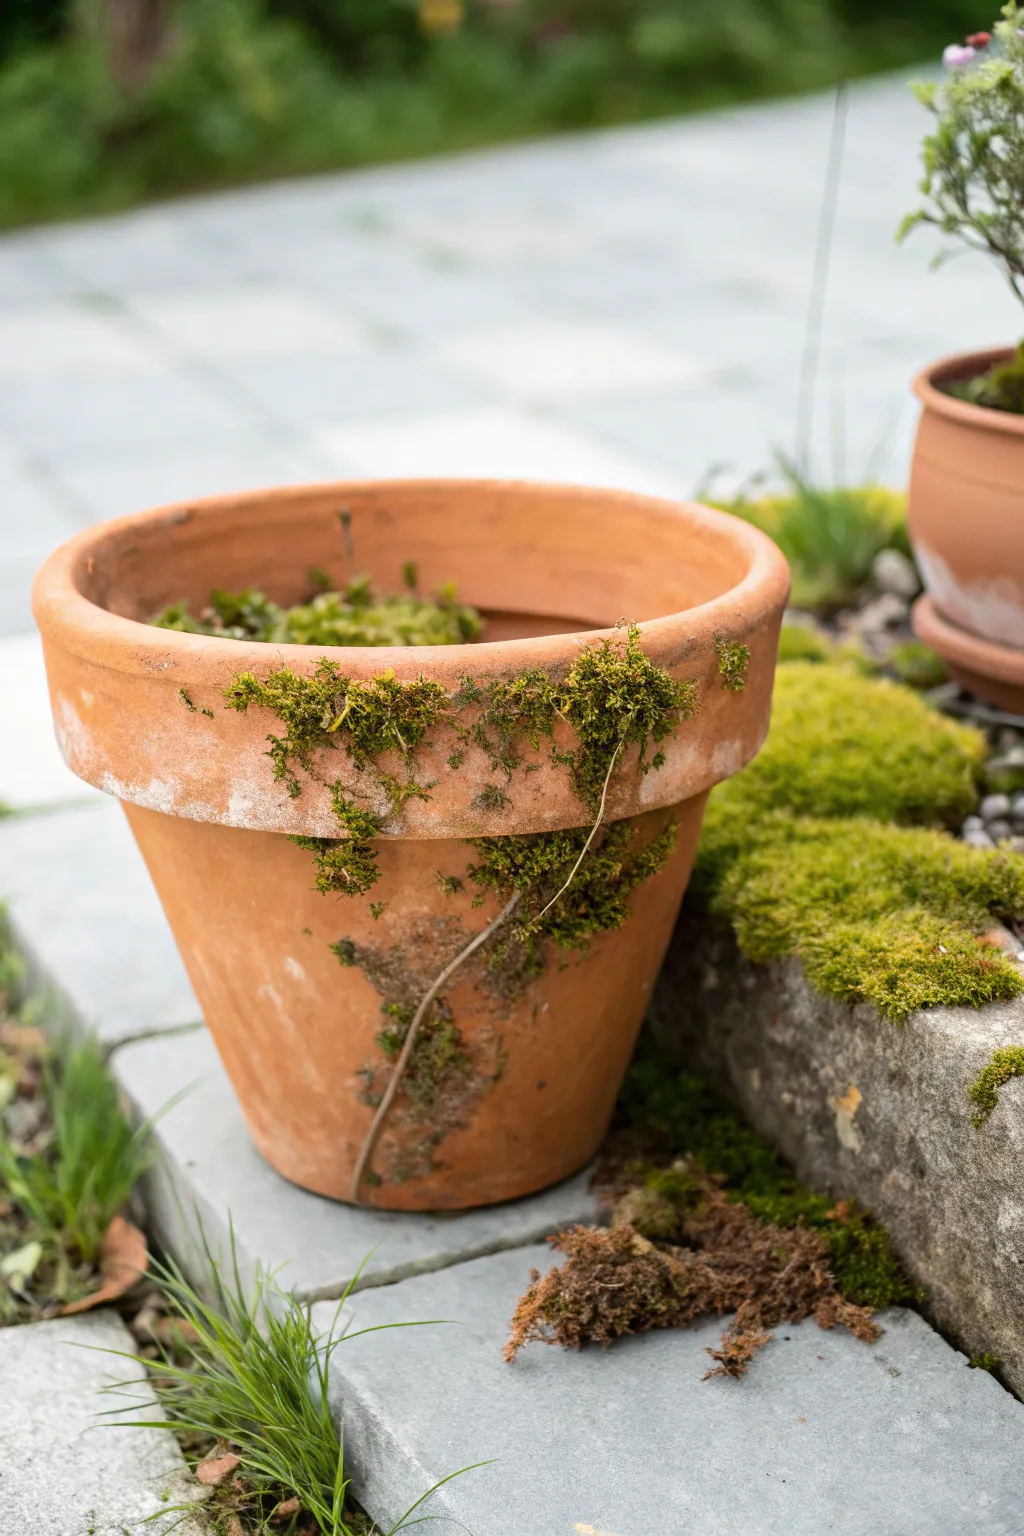
Transform a brand-new, bright orange clay pot into a seemingly ancient garden relic with this organic aging technique. Using live moss and natural elements, you’ll create an authentic, weathered patina that brings instant history to your patio setting.
Step-by-Step
Materials
- Standard terracotta pot (unglazed)
- Plain yogurt or buttermilk
- Live sheet moss or moss gathered from your yard
- Spray bottle with water
- Small paintbrush or foam brush
- Garden soil
- Blender (optional, for the moss slurry)
- Clear matte sealer (optional)
Step 1: Preparing the Aging Medium
-
Clean the surface:
Before starting, wipe down your terracotta pot with a damp cloth to remove any manufacturing dust or price tag residue. The surface needs to be porous for the moss to adhere. -
Gather your greenery:
Collect a handful of live moss. You can purchase sheet moss or scrape some off rocks or bricks in a shady part of your garden. Look for variety in texture. -
Create the slurry base:
In a blender (or a bowl you don’t mind getting messy), combine one cup of plain yogurt or buttermilk with your gathered moss. -
Mix the concoction:
Blend or vigorously stir the mixture until it resembles a thick, green milkshake. This dairy base provides the acidity and nutrients the moss spores need to propagate on the clay.
Speed Up The Spores
Add a teaspoon of sugar or a little beer to your yogurt mixture. The extra yeast and sugar act as a super-food for the moss spores.
Step 2: Applying the patina
-
Map out your design:
Look at the pot and decide where moss would naturally grow—usually around the rim, near the base, and creeping up the sides. -
Paint the slurry:
Using your foam brush, dab thick layers of the moss milkshake onto the pot. Don’t cover the entire surface; leave patches of bare clay exposed for a realistic, weathered look. -
Add texture manually:
For the areas where you want thicker growth, like the rim shown in the reference, press small clumps of whole live moss directly into the wet yogurt mixture. -
Simulate ‘cracks’ and vines:
Take a thin line of the mixture and drag it diagonally down the side of the pot to mimic a creeping vine or a weathered fissure where moss has settled. -
Rub in some soil:
To cut the bright orange of the new terracotta, take a small amount of garden soil and rub it gently onto the bare patches of the pot, smudging it into the clay pores.
Mold, Not Moss?
If you see white fuzz instead of green, it’s mold. Wipe it off gently with a damp cloth, move the pot to a spot with better air circulation, and reduce misting frequency.
Step 3: Cultivation and Care
-
Bag it up:
Place the painted pot inside a clear plastic bag or cover it loosely with plastic wrap. This creates a greenhouse effect to encourage spore growth. -
Find a shady spot:
Set your project in a cool, shaded area. Direct sunlight will dry out the mixture and kill the moss spores before they establish. -
Daily misting:
Open the bag daily and spray the pot heavily with water. It must stay consistently moist for the moss to take hold. -
Wait for growth:
Be patient. Within 10 to 14 days, you should see a green fuzz appearing. I usually remove the plastic fully once the green color deepens. -
Secure the look (optional):
If you don’t want the moss to continue growing or spreading, let it dry completely and spray a coat of clear matte sealer over the exterior to freeze the look in time. -
Final planting:
Once your exterior is perfectly aged, fill the pot with soil and add more moss inside the rim, just peaking over the edge, to connect the inside to the outside aesthetic.
Enjoy the timeless charm this simple organic process adds to your garden corner
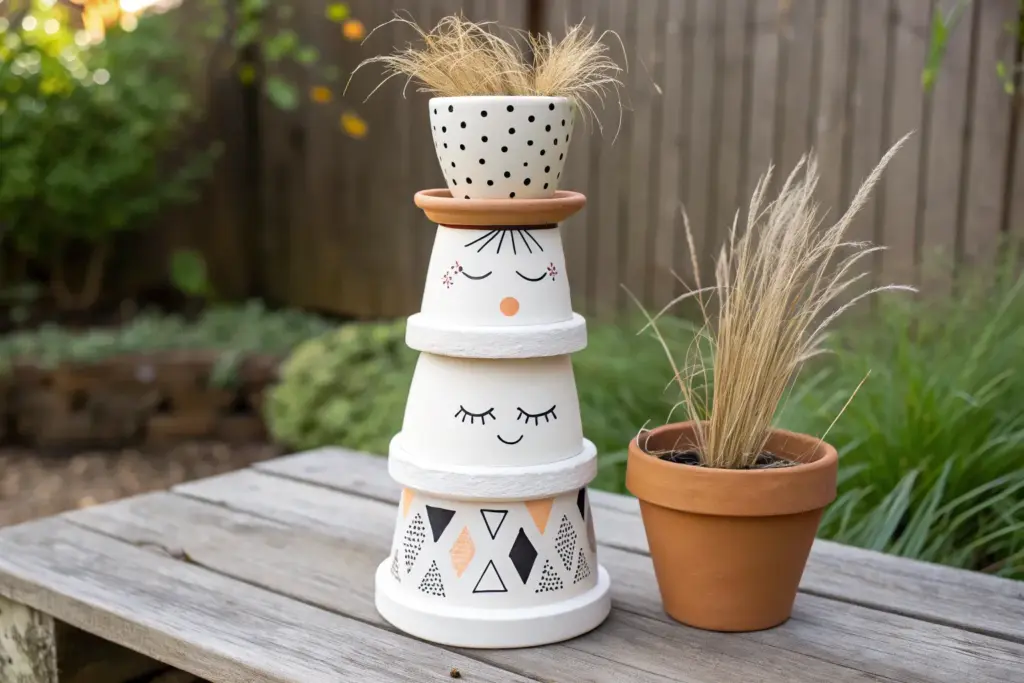
Tiered Stacked Clay Pot Planter
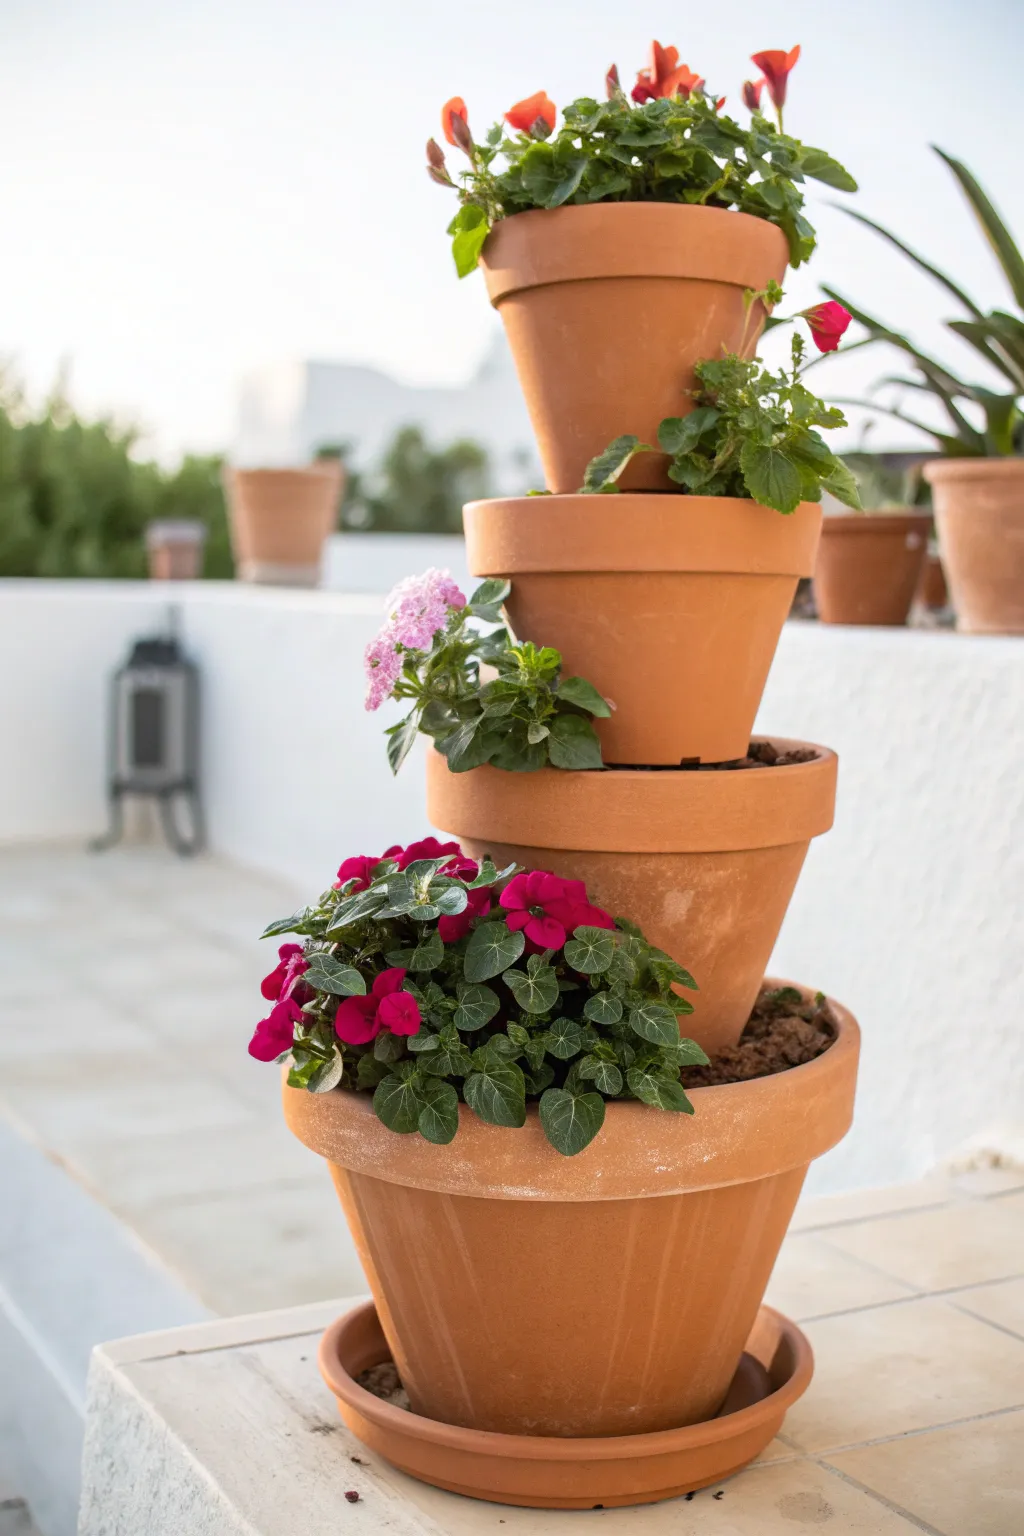
Transform ordinary terracotta pots into a striking vertical garden feature with this cleverly balanced planter. The angled stacking technique creates pockets for cascading blooms, making it perfect for brightening up a patio corner or balcony floor.
Step-by-Step Guide
Materials
- 4 terracotta pots in graduated sizes (e.g., 12-inch, 10-inch, 8-inch, 6-inch)
- 1 metal rebar rod or sturdy wooden stake (approx. 3-4 feet long)
- Potting soil mixed with slow-release fertilizer
- Assorted annual flowers (trailing petunias, verbena, or geraniums)
- Terracotta saucer (sized for the largest pot)
- Rubber mallet or hammer
- Small landscape fabric squares or coffee filters
Step 1: Base Preparation
-
Select your location:
Choose the final resting spot for your planter before you begin. Once filled with soil and stacked, this tower becomes extremely heavy and difficult to move without disassembling. -
Position the saucer:
Place the large terracotta saucer on a flat, stable surface where you want the tower to stand. -
Set the base pot:
Place the largest (bottom) pot into the center of the saucer. Ensure it sits level and isn’t rocking. -
Insert the rod:
Feed the metal rebar or wooden stake through the central drainage hole of the bottom pot. Drive it into the ground beneath the saucer if placing on dirt, or simply hold it steady if on a solid surface.
Uneven Tipping?
If pots adhere to the rod but won’t hold their tilt, the soil below is too loose. Pack soil firmly under the ‘low’ side of the pot to act as a wedge.
Step 2: Stacking the Structure
-
Fill the base:
Pour potting soil into the bottom pot until it is about 2 inches from the rim. Gently pat it down to create a firm foundation for the next layer. -
Thread the second pot:
Take the second-largest pot and thread it onto the rebar through its drainage hole. -
Tilt the second pot:
Slide the pot down until it rests on the soil of the base pot. Tilt it purposefully to the left so the rim rests against the rebar. -
Secure with soil:
Fill this second pot with soil, packing it slightly firmer on the lower side to help maintain the tilted angle. -
Thread the third pot:
Place the third-largest pot onto the rebar, sliding it down to meet the soil of the second pot. -
Tilt in opposition:
Tilt this third pot to the *right* (opposite the one below it). This alternating zig-zag pattern essentially locks the pots against the central rod for stability. -
Add soil to third tier:
Fill the third pot with soil, leaving just enough headspace for watering later. -
Place the final pot:
Thread the smallest pot onto the top of the rebar. Position it upright and centered, rather than tilted, to cap off the tower neatly. -
Check stability:
Give the tower a gentle nudge to ensure the soil is compacted enough to hold the pots at their angles. If they slip, add more soil underneath the tilted sides.
Pro Tip: Rod Length
Mark your rebar height before starting. It should end just below the rim of the top pot so it’s hidden by the soil and flowers once finished.
Step 3: Planting the Blooms
-
Select trailing plants:
Choose plants with a cascading habit for the lower tiers. I find that petunias or verbena work beautifully here as they spill over the edges. -
Plant the exposed pockets:
Tuck your plants into the exposed crescent-shaped soil areas on the lower, tilted pots. -
Plant the top tier:
Fill the top, centered pot with slightly taller or upright flowers, like the orange blooms seen in the example, to give the tower height. -
Water carefully:
Water each level gently, starting from the top. Use a watering can with a rose attachment to avoid washing out the soil from the tilted angles.
Enjoy watching your vertical garden fill in and overflow with color as the season progresses

TRACK YOUR CERAMIC JOURNEY
Capture glaze tests, firing details, and creative progress—all in one simple printable. Make your projects easier to repeat and improve.
Clay Pot Mushroom Garden Stakes

Transform ordinary terra cotta pots into a charming little mushroom patch that adds a pop of color to your garden path. These durable stakes use simple wooden dowels and bright acrylic paints to create a fairy-tale look that withstands the elements.
Step-by-Step Tutorial
Materials
- Small terra cotta pots (2-4 inch diameter)
- Wooden dowels or thick branches (1-1.5 inch diameter)
- Outdoor acrylic paint (bright red and white)
- Foam brushes
- Small round paintbrush
- Waterproof construction adhesive or heavy-duty outdoor glue
- Clear outdoor sealant spray (matte or satin)
- Saw (if dowels need cutting)
- Sandpaper (medium grit)
Step 1: Preparing the Components
-
Clean the pots:
Start by thoroughly cleaning your terra cotta pots to remove any dust or sticker residue. Let them dry completely, as moisture will trap inside the clay and cause the paint to bubble later. -
Cut the stems:
Determine the desired height for your mushrooms. Using a saw, cut your wooden dowels or branches to varying lengths—between 6 and 10 inches works well for a staggered look like the one in the photo. -
Sand the wood:
Smooth out the cut ends of your dowels with medium-grit sandpaper. I prefer to slightly round the top edge of the wood so it fits more snugly into the curve of the pot’s interior. -
Test the fit:
Turn a pot upside down and place a dowel inside to ensure it stands straight. The dowel should be wide enough to support the pot but narrow enough to look like a realistic stem.
Step 2: Painting the Caps
-
Base coat application:
Using a foam brush, apply a coat of bright red outdoor acrylic paint to the exterior of the upside-down pots. Don’t forget to paint the rim, which becomes the bottom edge of the mushroom cap. -
Dry and repeat:
Allow the first coat to dry for about 20 minutes. Apply a second or third coat until the terracotta color is completely covered and the red is vibrant and opaque. -
Adding the dots:
Once the red base is fully dry, dip a small round paintbrush or a foam pouncer into white paint. Create random polka dots all over the cap. -
Varying dot sizes:
To match the natural charm shown in the photo, try making the dots slightly different sizes. You can achieve this by using the back end of a paintbrush for tiny dots and a proper brush tip for larger ones. -
Painting the rim detail:
For the specific look in the image, carefully paint a very thin white line around the rim of the pot or add small dots along the edge to define the cap shape.
Sticky Situation?
If the dowel won’t stick to the pot interior, try sanding the inside bottom of the pot slightly to give the glue a rougher surface to grip onto.
Step 3: Assembly and Installation
-
Seal the caps:
Before assembly, take the dry painted pots outside and spray them with a clear outdoor sealant. This protects the paint from sun fading and rain damage. -
Apply adhesive:
Squeeze a generous mesmerizing mound of waterproof construction adhesive onto the top end of your wooden dowel. -
Attach the cap:
Flip the pot upside down and press the glued end of the dowel firmly into the center of the pot’s interior base. If the pot has a drainage hole, position the dowel to cover it, or fill the gap with extra glue. -
curing time:
Let the mushrooms cure upside down for at least 24 hours. The heavy pot needs to bond securely to the wood so it doesn’t fall off when placed in the garden. -
Seal the wood:
If you want the wooden stems to last longer in damp soil, apply a clear wood sealer to the bottom 3 inches of the dowels. -
Plant your garden:
Determine where your mushrooms will live. Use a trowel or a spare stake to create a pilot hole in the soil to avoid hammering directly onto your new craft. -
Final placement:
Push the wooden stems firmly into the ground at varying heights and angles to create a natural, clustered appearance.
Nature’s Touch
Instead of dowels, use sturdy fallen tree branches with the bark still on for a rustic, rugged look. Just ensure the wood is completely dry before gluing.
Step back and enjoy the pop of whimsical color these little fungi bring to your flower beds
Stacked Clay Pot Lighthouse Decor
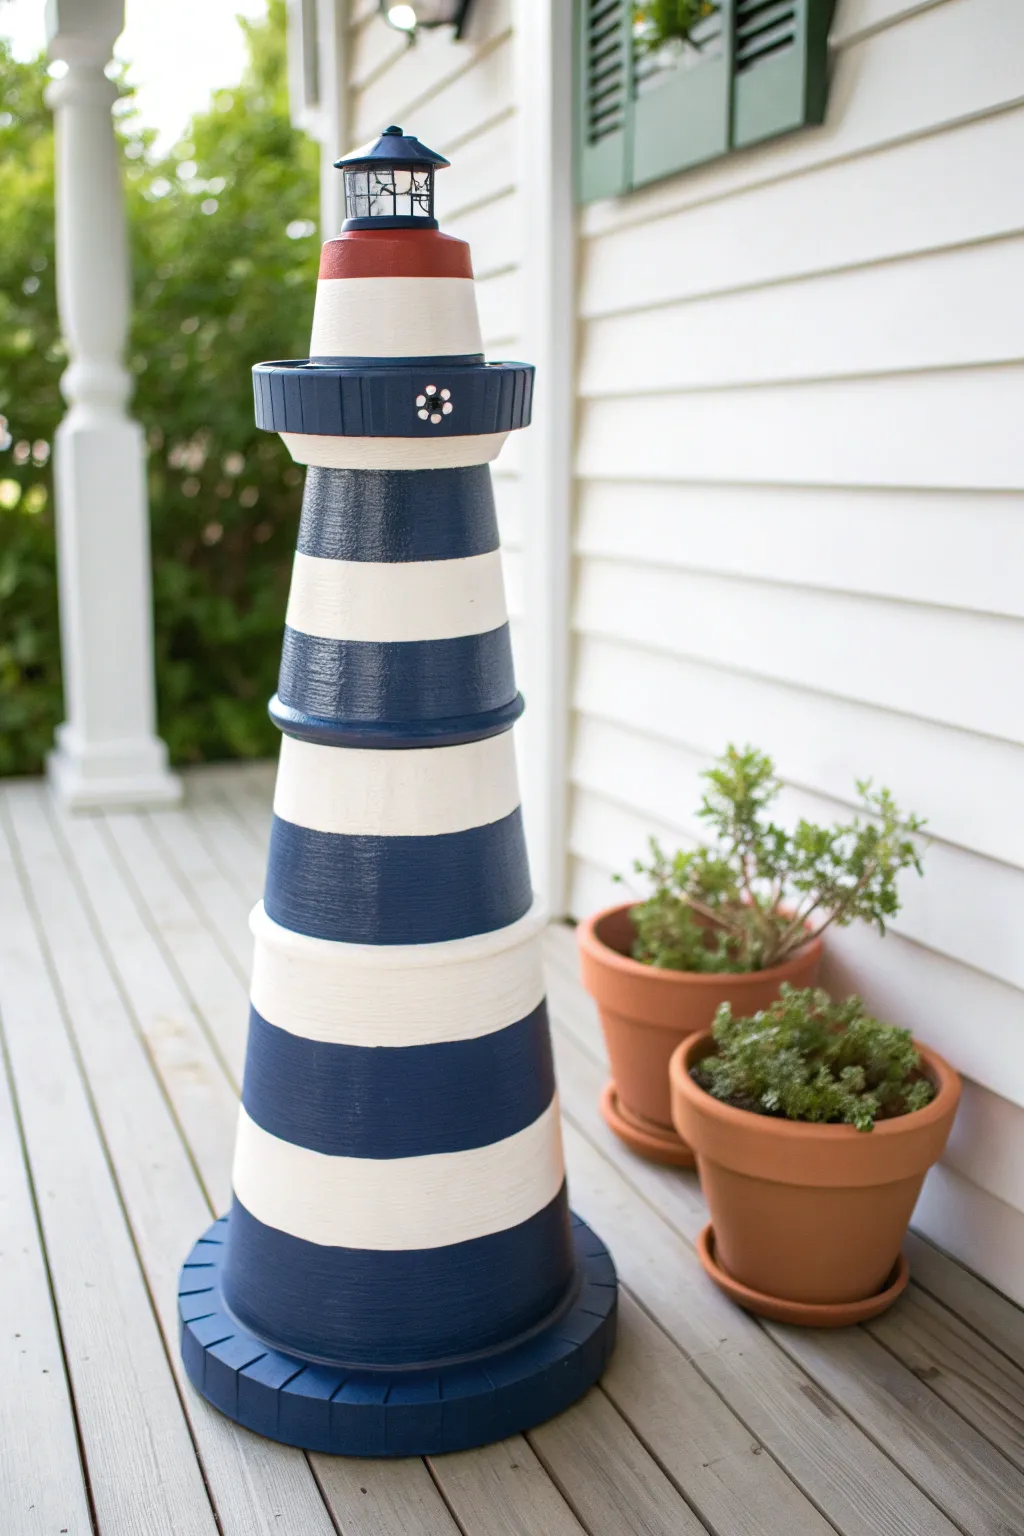
Bring the charm of the seaside to your porch with this impressive DIY lighthouse made from stacked terra cotta pots. This sturdy, towering decoration uses graduated pot sizes and bold navy stripes to create a classic coastal look, topped off with a functional lantern for a warm evening glow.
Step-by-Step
Materials
- 1 Large terra cotta pot (approx. 10-12 inch base)
- 1 Medium terra cotta pot (approx. 8 inch)
- 1 Small terra cotta pot (approx. 6 inch)
- 1 Extra-small terra cotta pot (approx. 4 inch)
- 2 Terra cotta saucers (one slightly larger than the large pot base, one sized for the small pot rim)
- Acrylic patio paint (Navy Blue, White, Red)
- Strong outdoor adhesive (e.g., E6000 or construction adhesive)
- Small solar lantern (to fit the smallest pot)
- Wide flat paintbrush (2-inch)
- Medium paintbrush (1-inch)
- Detail brush
- Painter’s tape (1-inch or 1.5-inch width)
- Clear outdoor sealant spray (matte or satin)
- Small decorative flower embellishment (optional)
Step 1: Base Painting
-
Clean the pots:
Before starting, wipe down all terra cotta pots and saucers with a damp cloth to remove any dust or nursery residue. Let them dry completely, as trapped moisture can cause the paint to bubble later. -
Prime the surface:
Apply a base coat of white acrylic patio paint to the exterior of all four pots and the two saucers. You likely won’t get full coverage on the first pass, and that’s okay. -
Apply second coat:
Once the first layer is dry to the touch, apply a second coat of white paint to ensure a solid, opaque finish. I like to let this cure for at least an hour so the surface is hard enough to handle. -
Paint the base saucer:
Take the largest saucer (the foundation) and paint it entirely Navy Blue. This grounded color adds visual weight to the bottom of your lighthouse. -
Paint the upper saucer:
Paint the smaller saucer Navy Blue as well. This one will eventually serve as the ‘balcony’ or walkway area near the top of the lighthouse.
Uneven Stacking?
If pots wobble when stacked, the manufacturing might be imperfect. Use small shims of craft foam or extra dabs of thickened construction adhesive to level them before the glue sets.
Step 2: Creating the Stripes
-
Stack for visualization:
Temporarily stack your pots upside down (largest on bottom, smallest on top) to see how much of each pot is visible. Mark the rim lines lightly with a pencil so you know where the pots overlap. -
Tape the white stripes:
Using painter’s tape, mask off the sections of the pots you want to remain white. Press the edges of the tape down firmly with your fingernail to prevent paint bleed. -
Paint the navy stripes:
Using your medium brush, paint the exposed clay areas with your Navy Blue paint. Apply thin, even layers to avoid drips running under the tape. -
Paint the rims:
Pay special attention to the thick rims of the pots. Paint the rim of the middle pot Navy Blue to create distinct separation between the levels. -
Remove the tape:
Carefully peel off the painter’s tape while the paint is still slightly tacky. This helps ensure a crisp, sharp line without clear chips. -
Touch up lines:
Use a small detail brush and the appropriate color to fix any spots where the paint might have bled or the line is uneven.
Level Up: Night Mode
Paint small black rectangles on the white stripes to mimic windows. At night, stick battery-operated tea lights under the glass of the solar lantern for extra brightness!
Step 3: Assembly and Details
-
Prepare the top ‘lantern room’:
Paint the very bottom rim of the smallest pot (which is currently sitting upside down at the top of your stack) with a band of Red paint. This adds a classic pop of color. -
Glue the foundation:
Apply a generous ring of strong outdoor adhesive to the inner center of the large blue saucer. Place the largest pot upside down onto the saucer and press firmly. -
Stack the tower:
Apply adhesive to the top (actually the bottom/flat surface) of the large pot, then center the medium pot upside down on top of it. Repeat this process with the small pot. -
Attach the balcony:
Glue the smaller blue saucer right-side up onto the flat bottom of the small pot. This creates the platform for the final light fixture. -
Add the crown:
On top of that blue saucer, glue the smallest, white-and-red painted pot upside down. -
Add decorative accents:
If desired, glue a small decorative flower or wood shape to the blue balcony saucer to mimic architectural detail. -
Seal the project:
Take the entire tower outside and spray it with several light coats of clear outdoor sealant. This creates a weather-resistant barrier against rain and sun. -
Install the lantern:
Once the sealer and glue are completely cured (usually 24 hours), place your solar lantern on the very top flat surface. Secure it with a dab of glue if you live in a windy area.
Set your new nautical masterpiece on the front steps and watch it welcome guests with its cheerful stripes.
Solar Light Clay Pot Lantern Towers
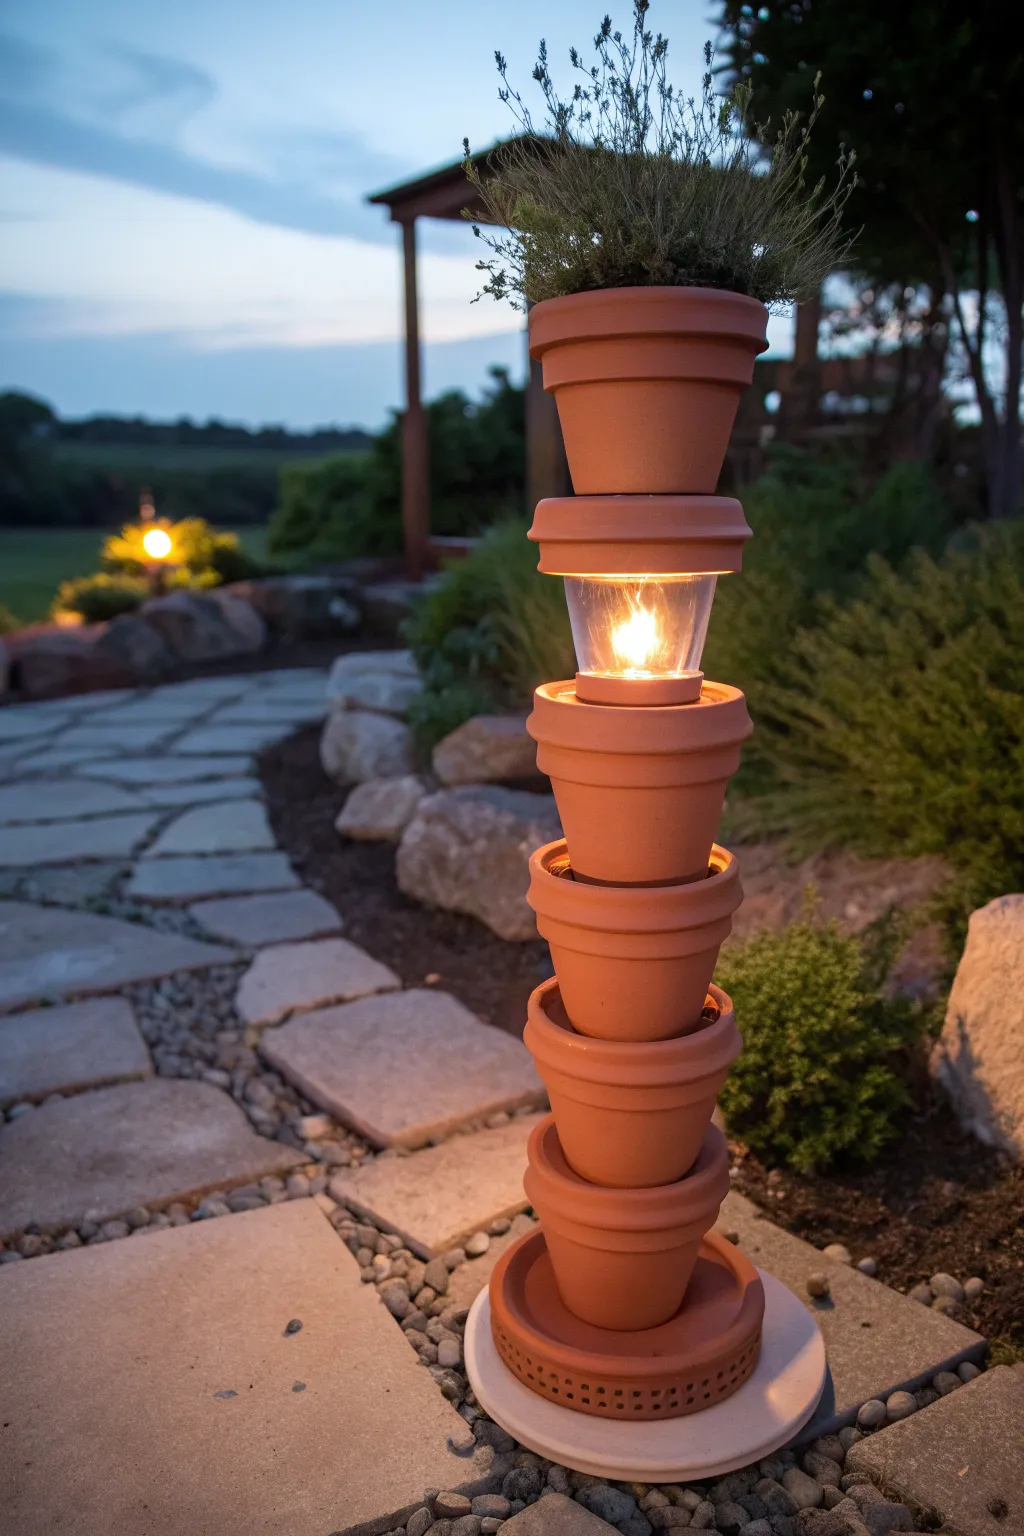
Transform humble clay pots into a charming garden beacon that adds a warm, inviting glow to your walkways. This sturdy vertical planter not only illuminates your evenings but also provides a lovely crown for your favorite herbs or trailing flowers.
Detailed Instructions
Materials
- 1 large terra cotta pot (base)
- 3 medium terra cotta pots
- 1 small terra cotta pot (top)
- 2 large terra cotta saucers
- 1 solar pathway light (disassembled stem)
- Outdoor craft adhesive (e.g., E6000 or construction adhesive)
- Potting soil
- Small plants or herbs (e.g., lavender, thyme)
- Rubber mallet (optional)
- Level
Step 1: Building the Base Structure
-
Prepare the foundation:
Begin by selecting a flat, solid surface to work on. Take your largest clay saucer and flip it upside down to serve as the sturdy footing for your tower. -
Secure the first pot:
Apply a generous ring of outdoor adhesive to the bottom rim of your largest terra cotta pot. -
Attach to the saucer:
Place the large pot right-side up onto the inverted saucer, centering it perfectly. Press down firmly to ensure a strong bond. -
Add the first tier:
Take one of your medium-sized pots and apply glue to its bottom rim. -
Create the first stack:
Invert this medium pot and place it on top of the base pot, creating a rim-to-rim connection. Ensure the edges align for a clean silhouette. -
Form the middle section:
Apply adhesive to the bottom of the inverted pot you just placed. Take the second medium pot and place it right-side up onto the adhesive, bottom-to-bottom.
Wobbly Tower?
If the pots slide while glue dries, use wide painter’s tape to hold them vertically aligned until the bond sets firm.
Step 2: Installing the Solar Element
-
Prepare the light fixture:
Disassemble your solar pathway light by removing the stake. You only need the top lantern portion and the clear lens. -
Check the fit:
Test fit the solar light into the opening of the top-most pot. If the pot is too wide, step down to a slightly smaller pot size or use adhesive foam tape to snug up the fit. -
Secure the housing:
Apply a bead of adhesive around the rim of the pot where the light will sit. Insert the lantern housing carefully. -
Cap the light:
Take your second terra cotta saucer. Apply adhesive to the top rim of the lantern housing (or the pot rim, depending on your light’s design) and center the saucer right-side up on top.
Step 3: Top Tier and Planting
-
Attach the final pot:
Apply adhesive to the bottom of your smallest terra cotta pot. -
Create the crown:
Place this small pot right-side up into the center of the top saucer. This will hold your plants. -
Allow to cure:
This is crucial: Let the entire tower sit undisturbed for at least 24 hours. The adhesive needs to fully cure before the tower can handle the weight of soil and water. -
Prepare for planting:
If your top pot has a large drainage hole, cover it with a small piece of mesh or a coffee filter to keep soil from falling onto the solar light below. -
Add soil:
Fill the top pot with good quality potting mix, leaving about an inch of space from the rim. -
Plant the greenery:
Gently nestle your chosen herbs or flowers into the soil. I find that drought-tolerant plants work best here since the small pot dries out quickly. -
Final placement:
Carefully move your finished tower to a sunny spot in the garden where the solar panel can charge fully during the day.
Upgrade Your Glow
Paint the inside of the pot holding the light with white or metallic silver paint to reflect the glow and make it brighter.
Enjoy the gentle ambiance of your handcrafted lighthouse as evening falls over your garden
Bumblebee Clay Pot Critters
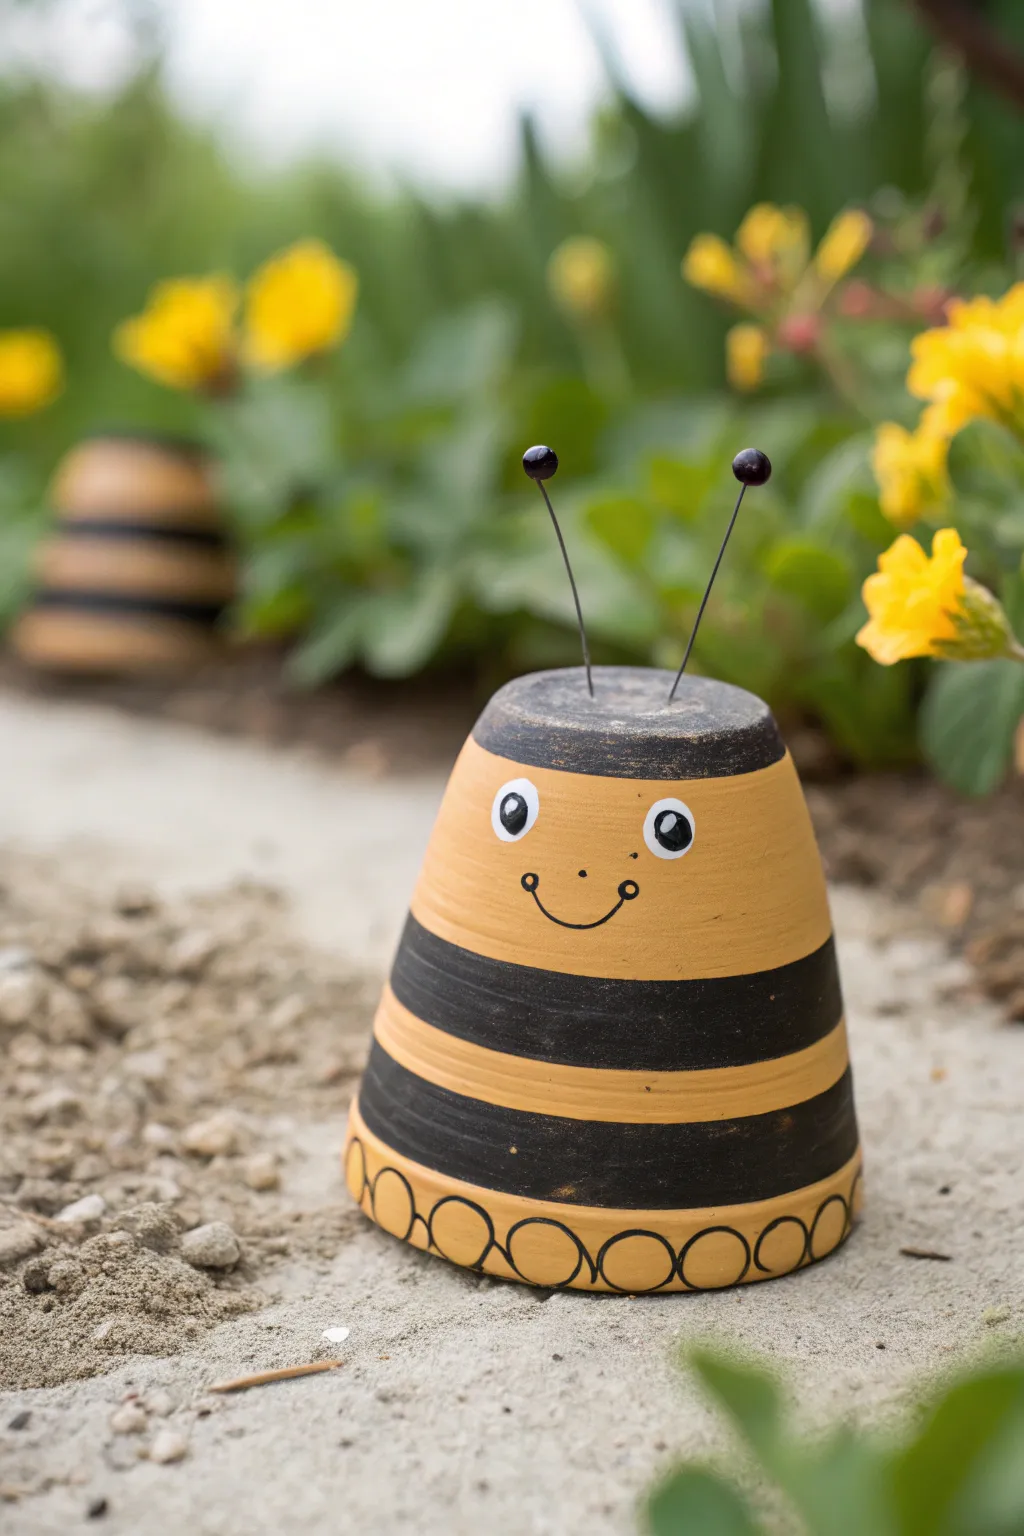
Transform a simple terra cotta pot into a buzzing garden companion with just a splash of paint and some wire. This cheerful bee features bold stripes, a sweet smiling face, and whimsical antennae that sway in the breeze.
How-To Guide
Materials
- Small terra cotta pot (standard 4-inch radius works well)
- Acrylic craft paint: Bright Yellow, Black, and White
- Paintbrushes: 1-inch flat brush, fine detail brush
- Black jewelry wire or crafting wire (20-gauge)
- Two black wooden beads
- Hot glue gun and glue sticks
- Pencil
- Wire cutters
- Needle-nose pliers (optional)
- Clear acrylic sealer spray (matte or gloss)
Step 1: Base Painting
-
Clean the surface:
Before starting, wipe down your terra cotta pot with a damp cloth to remove any dust or pottery residue. Let it dry completely so the paint adheres properly. -
Paint the yellow base:
Turn the pot upside down. Using your larger flat brush, coat the entire exterior of the pot with bright yellow acrylic paint. Terra cotta absorbs paint quickly, so I find apply two or three thin coats gives the most vibrant, solid coverage. Let each coat dry for about 15 minutes. -
Add the black head:
Once the yellow base is fully dry, paint the very bottom of the pot (which is now the top) black. Continue painting about half an inch down the sides to create the bee’s head cap. -
Create the stripes:
Use a pencil to lightly mark where your stripes will go. You’ll want two thick black stripes encircling the body. Paint these stripes carefully with black paint, leaving bands of yellow in between. -
Paint the decorative hem:
At the very rim of the pot (the bottom edge now), use a fine brush to paint a scalloped or looped line design in black. This creates a cute, finished look for the bottom of the bee.
Uneven Stripes?
If you struggle painting straight lines on a curved surface, wrap removeable painter’s tape or rubber bands around the pot as a guide before painting your black stripes.
Step 2: Face and Features
-
Paint the eyes:
Dip the handle end of a paintbrush into white paint to stamp two large circles on the upper yellow section for the eyes. Let these dry completely. -
Add pupils:
Once the white circles are dry, dip a smaller tool or brush handle into black paint and add the pupils inside the white circles. Add a tiny dot of white inside the black pupil for a ‘sparkle’ effect. -
Draw the smile:
Using your finest detail brush or a black paint pen, draw a simple curved smile between the eyes. Add little cheek dimples at the ends of the smile line. -
Seal the paint:
Take the pot outside and spray it with a coat of clear acrylic sealer. This is crucial if your bee will be living in the garden, as it protects the paint from sun and rain.
Step 3: Antennae Assembly
-
Cut the wire:
Cut two pieces of black wire, each about 4 to 5 inches long. These will become the antennae. -
Attach the beads:
Place a dab of hot glue inside the hole of a black wooden bead and insert one end of a wire piece. Repeat for the second wire and bead. -
Shape the wires:
Gently bend the wires slightly so they curve outward, giving them a bit of character rather than sticking straight up. -
Secure to the pot:
Apply a small bead of hot glue to the bare end of each wire. Press them onto the center of the black painted ‘top’ of the pot. Hold them steady for 30 seconds until the glue sets firmly.
Wing It
Make wings by twisting wire into loop shapes covered in old pantyhose, or cut teardrop shapes from a plastic milk jug and glue them to the back of the pot.
Place your buzzing bee on a porch step or nestle it among your flower beds for a charming garden accent
Clay Pot People With Personality
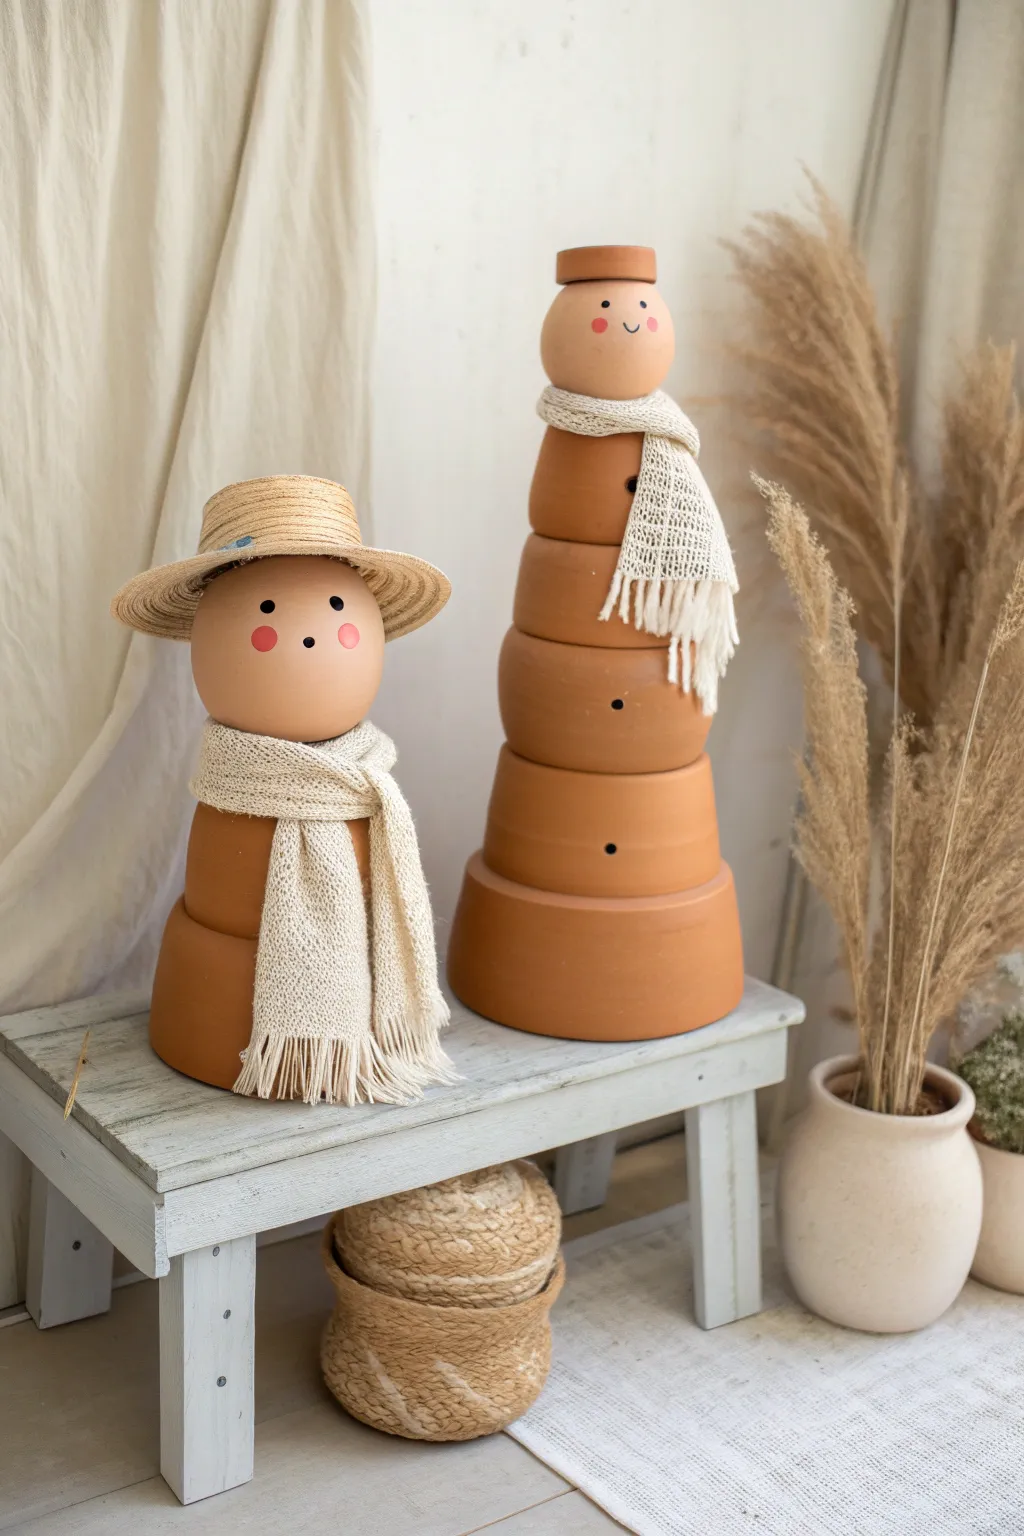
These adorable, minimalist clay pot figures offer a warm, rustic twist on traditional snowmen that can stay out all year round. With their cozy knit scarves and sweet, simple faces, they bring a touch of handcrafted whimsy to any porch or entryway.
How-To Guide
Materials
- Various sizes of terracotta pots (standard shape)
- Terracotta saucers (optional, for connecting)
- Wooden craft spheres or styrofoam balls (large enough to fit pot openings)
- Flesh-tone acrylic paint (peach or light beige)
- Black and pink acrylic craft paint
- Strong craft adhesive (E6000 or similar)
- Small straw doll hat
- Cream or beige knit fabric (or old sweater sleeves)
- Fine grit sandpaper
- Small round paintbrush
- Detail paintbrush
- Scissors
Step 1: Planning the Structure
-
Sizing Your Figures:
Begin by playing with the stacking order of your pots. For the taller figure, you’ll want 4-5 pots graduating from large at the bottom to small at the top. The shorter figure uses two larger pots for a stouter look. -
Checking the Head Fit:
Test your wooden sphere or styrofoam ball on the top pot of each stack. It should rest securely on the rim without falling inside. -
Surface Prep:
Wipe down all terracotta pots with a damp cloth to remove dust. If there are rough edges, give them a quick rub with fine-grit sandpaper.
Step 2: Painting and Assembly
-
Painting the Heads:
Coat the spherical heads with your flesh-tone acrylic paint. I like to do two thin coats rather than one thick one for a smoother finish. -
Adding Rosy Cheeks:
Once the base coat is dry, dip a round brush or sponge dauber into pink paint. Dab off most of the paint onto a paper towel, then gently press onto the cheeks to create soft, round circles. -
Painting the Features:
Using your smallest detail brush and black paint, add two small dots for eyes. For the mouth, paint a tiny dot (shorter figure) or a small curved smile (taller figure). -
Stacking the Bodies:
Invert the pots so the bottoms face up. Stack them from largest to smallest. Apply a rim of strong adhesive to the bottom of each pot before placing the next one on top. -
Button Details:
For the taller figure, simulate buttons by painting small black dots vertically down the front of the terracotta stack. -
Securing the Heads:
Apply adhesive to the rim of the topmost pot on each stack and firmly press the painted head into place. Allow the glue to cure completely.
Uneven Stacking?
If the pots wobble when stacked, use a washer or a generous amount of mounting putty between the layers to level them out before gluing permanently.
Step 3: Accessorizing
-
Creating the Scarves:
Cut strips of cream knit fabric or use the sleeves from an old sweater. You want them long enough to wrap around the ‘neck’ with tails hanging down. -
Fringing the Edges:
Use scissors to make small vertical snips along the ends of your fabric strips to create a classic fringed scarf look. -
Dressing the Figures:
Wrap the scarves around the connection point between the head and the top pot. Tie a simple knot and let the ends drape naturally. -
Adding the Hat:
For the shorter figure, place the straw hat on the head. You can tilt it slightly back for a cheerful expression or forward for a shy look. -
Final Glue Down:
Once you are happy with the scarf and hat placement, use a dab of hot glue or adhesive to secure them permanently so they don’t slip.
Seasonal Switch
Make the scarves removable using velcro dots instead of glue. Swap them out for red and green plaid in December or pastels in spring.
Step back and admire your charming new clay pot friends as they add personality to your home decor
Broken Clay Pot Fairy Garden Scenes
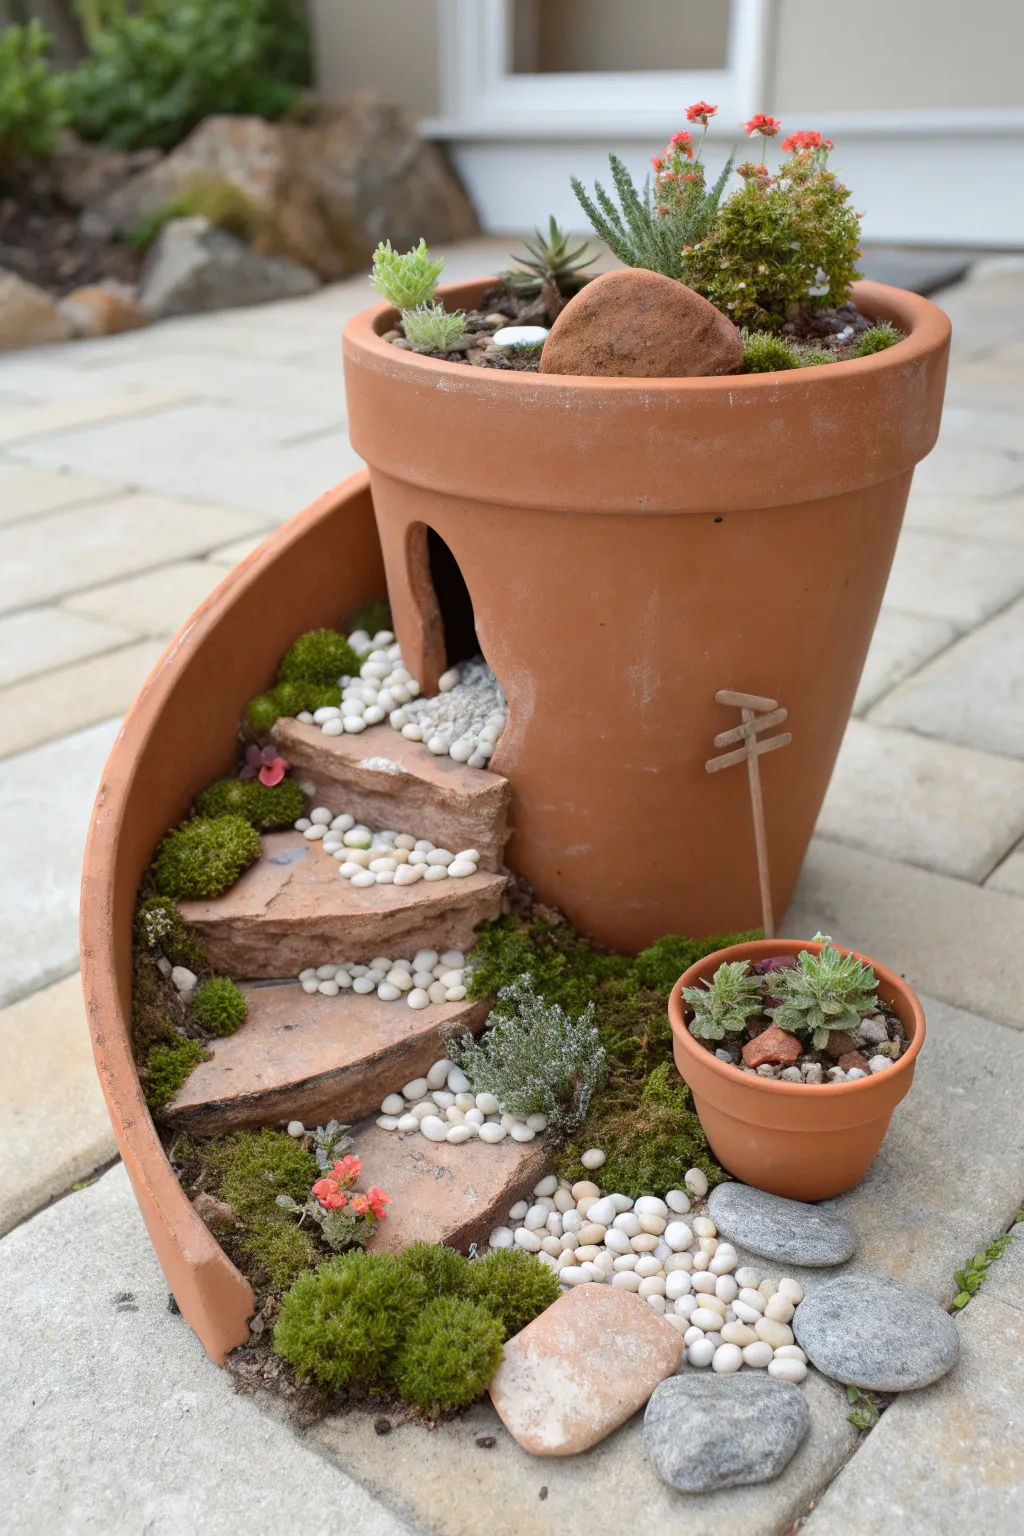
Transform a broken terracotta planter into an enchanting multi-level fairy garden that spirals upward like magic. This project turns garden mishaps into a cozy miniature world featuring mossy steps, tiny succulents, and a welcoming little pathway.
Step-by-Step Tutorial
Materials
- One large terracotta pot (approx 8-10 inches)
- Broken terracotta shards (curved pieces for the retaining wall, flat pieces for steps)
- Small 2-inch mini terracotta pot
- Potting soil (succulent/cactus mix is ideal)
- Assorted succulents (Sedum, Sempervivum, etc.)
- Live moss or preserved sheet moss
- White or cream-colored pea gravel or small stones
- Large grey river stones
- Small wooden craft sticks or twigs
- Hammer (for breaking pot shards)
- Safety glasses
- Pencil or marker
Step 1: Preparing the Base
-
Assess the Main Pot:
Examine your large terracotta pot. If it isn’t broken yet, you will need to create a specific break. Use a pencil to draw a diagonal line descending from the rim down to about 2-3 inches from the bottom on one side. -
Create the Opening:
Put on your safety glasses. Gently tap along your drawn line with a hammer to break away the front section. Save this large removed piece; it will become the main retaining wall for your spiral. -
Shape the Shards:
Take the large shard you just removed and break it further into smaller, relatively flat pieces. You need about 3-4 distinct flat-ish pieces to serve as the stair treads. -
Arrange the Retaining Wall:
Take the largest curved shard left over and insert it inside the main pot, vertically. It should act as an inner wall to hold the soil back, following the curve of the main pot but set back slightly to create depth. -
Fill the Foundation:
Fill the bottom of the main pot with soil, packing it firmly behind your inner retaining shard. Bring the soil level up to where you want your first (lowest) step to begin.
Soil Sliding Down?
If the dirt won’t hold the steps, the soil is too dry. Mist it with water until it’s damp and clumpable, like sandcastle sand, before building.
Step 2: Building the Staircase
-
Lay the First Step:
Place a flat shard into the soil at the very bottom opening to act as the ground floor or first step. Ensure it tilts slightly inward so water doesn’t run off too quickly. -
Build Up Soil:
Add more soil behind the first step, compacting it to create a sturdy mound that rises towards the back of the pot. -
Install the Second Step:
Press the next flat shard into the soil bank above the first one. I like to let it overlap the step below just a tiny bit to prevent soil erosion. -
Complete the Spiral:
Continue adding compacted soil and placing the remaining 2-3 shards, creating a spiral staircase that leads up to the top rim of the inner retaining wall. -
Secure the Steps:
Pack soil tightly around the edges of each step shard to lock them in place. The structure should feel stable before you add any decorations.
Moss Master Tip
Soak your dry sheet moss in a bowl of water for 30 seconds before applying. It becomes pliable and easier to tuck into tight crevices.
Step 3: Planting and Decorating
-
Plant the Top Tier:
In the soil pocket at the very top (behind the highest step), plant your largest succulents. Something with height, like an Aloe or tall Sedum, works beautifully here. -
Add Greenery to Steps:
Tuck small clumps of moss along the sides of the staircase where the shards meet the soil. This softens the edges and makes the steps look ancient. -
Create the Pebble Path:
Carefully pour the small white pea gravel onto the flat surfaces of your terracotta steps. Use your finger to guide the stones so they don’t fall off the edges. -
Add the Mini Pot:
Fill the small 2-inch pot with soil and a tiny succulent rosette. Place this pot at the base of your arrangement, slightly to the right, to anchor the scene. -
Extend the Pathway:
Pour a generous amount of white gravel at the bottom base, creating a path that flows from the bottom step out towards the mini pot. -
Place River Stones:
Arrange the larger grey river stones around the very bottom edge of the scene to create a natural border and keep the soil contained. -
Install Tiny Signage:
Glue two small twig pieces together to form a signpost. Once dry, stick it into the soil on the right side of the main pot to add a touch of storytelling. -
Final Cleanup:
Use a soft brush to gently sweep any stray soil off the terracotta shards and stones so the contrast between the orange clay and green moss is crisp.
Now you have a stunning miniature landscape that looks like a secret path into a fairy world