If you’ve got a stack of plain terra cotta pots, you’re already halfway to making the cutest little clay pot people ever. I love how a few pot sizes, some paint, and simple rope limbs can turn into characters that instantly make a porch, patio, or windowsill feel alive.
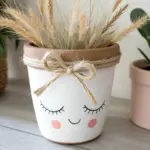
Sweet Clay Pot Couple Set
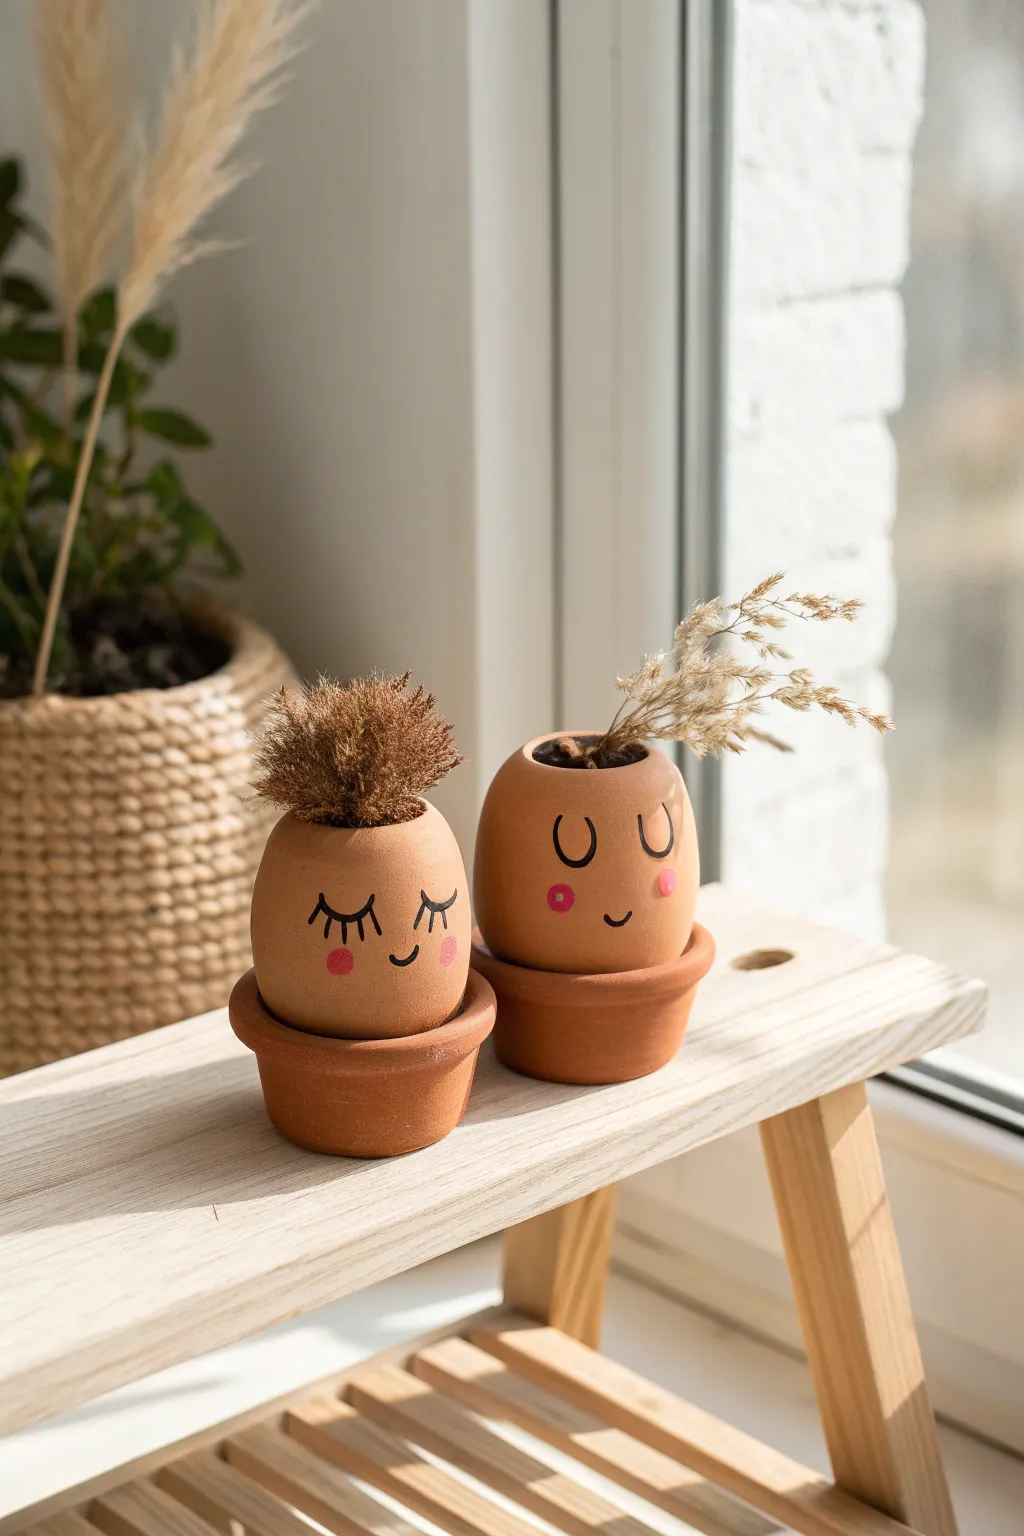
These adorable desktop companions bring a touch of whimsy to any sunny corner with their sleepy faces and rosy cheeks. Using simple terracotta shapes and dried florals, you’ll create a sweet couple that looks perfectly at home on a windowsill.
Step-by-Step
Materials
- 2 small, rounded terracotta pots (egg-cup shape)
- 2 matching mini terracotta saucers
- Black permanent marker (fine tip)
- Pink acrylic paint or paint pen
- Q-tip or small round paintbrush
- Dried pampas grass or bunny tail grass
- Dried oat grass or wispy floral stems
- Potting soil or floral foam
- Scissors
Step 1: Preparing the Pots
-
Clean the surface:
Begin by wiping down your terracotta pots with a damp cloth to remove any clay dust or oils. This ensures your marker and paint will adhere properly. -
Dry thoroughly:
Let the pots air dry completely. Terracotta is porous and holds moisture, which can cause marker ink to bleed if the surface is even slightly damp. -
Plan the faces:
Before committing with ink, lightly sketch your face designs with a pencil. Aim for the center of the rounded area so the features are clearly visible when displayed.
Step 2: Drawing the Features
-
Draw the first eyes:
On the first pot, draw two downward-curving arcs for sleepy eyes using your black permanent marker. Add three small, upward-flicking lashes to the outer corner of each eye. -
Add the smile:
Center a small, gentle ‘u’ shape between and slightly below the eyes to form a content smile. -
Draw the second pair:
For the partner pot, draw two simple ‘u’ shapes for open, happy eyes. Place them slightly wider apart for a different expression. -
Add the second nose/mouth:
Draw a tiny, simple smile centered below the eyes. -
Let the ink set:
Allow the black marker to dry for at least 10 minutes to prevent smudging during the next step.
Seal the Deal
To keep the marker from fading in direct sunlight, spray a thin coat of matte clear acrylic sealer over the faces before adding the plants.
Step 3: Adding the Rosy Cheeks
-
Prepare the pink paint:
Squeeze a tiny drop of pink acrylic paint onto a palette or scrap paper. You don’t need much at all. -
Apply the cheeks:
Dip a Q-tip or the back end of a paintbrush into the pink paint. Gently stamp a circular cheek just below the outer corner of each eye. -
Dry completely:
Let the paint dry fully. I usually give this about 20 minutes to ensure I don’t accidentally smear a cheek while handling the pots.
Bleeding Lines?
If the marker ink bleeds into the clay immediately, the terracotta is too porous. Prime the drawing area with clear matte heavy gel medium first.
Step 4: Creating the Hairstyles
-
Prepare the filling:
Fill the pots with either potting soil (if you plan to water occasionally) or a chunk of dried floral foam. -
Trim the ‘spiky’ hair:
Take a cluster of dried reddish-brown ornamental grass or pampas tops. Trim the stems short so only the fluffy heads remain visible above the rim. -
Insert the spiky hair:
Push the stems into the soil of the ‘sleepy’ pot, creating a dense, rounded textural look that mimics a short haircut. -
Trim the ‘wispy’ hair:
Select longer, delicate stems of dried oat grass or similar beige florals. Cut them so they will drape slightly to the side. -
Insert the wispy hair:
Arranging them in the second pot, angling them to one side to create a wind-swept, messy-bun aesthetic. -
Final assembly:
Place each finished head into its matching terracotta saucer to complete the look.
Now you have a sweet pair of personalities ready to brighten up your shelf


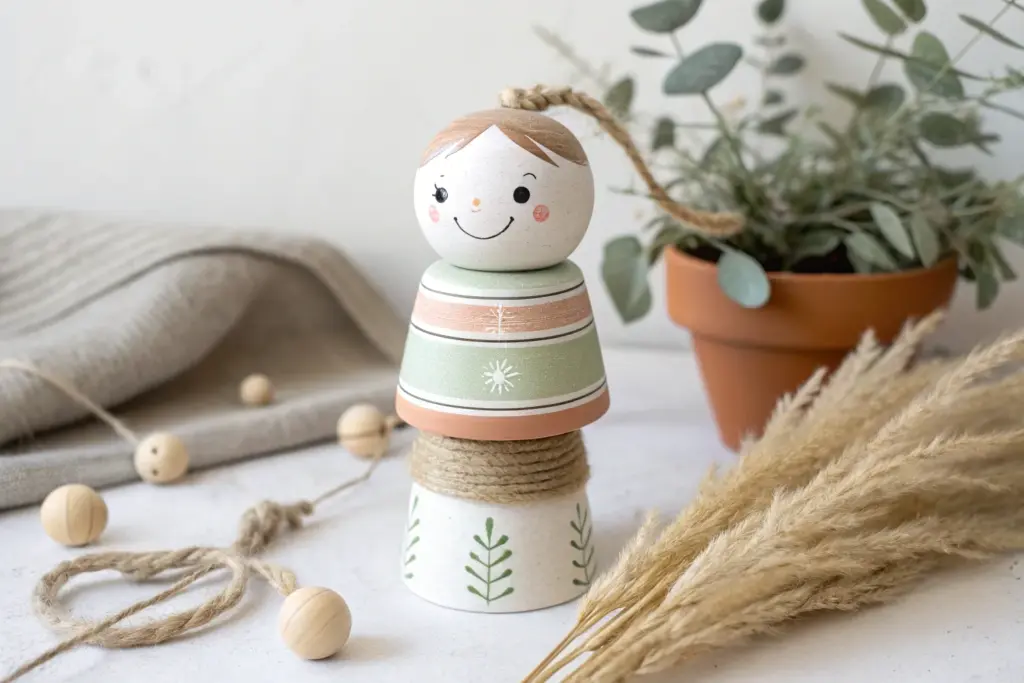
Extra-Long Dangling Legs Look
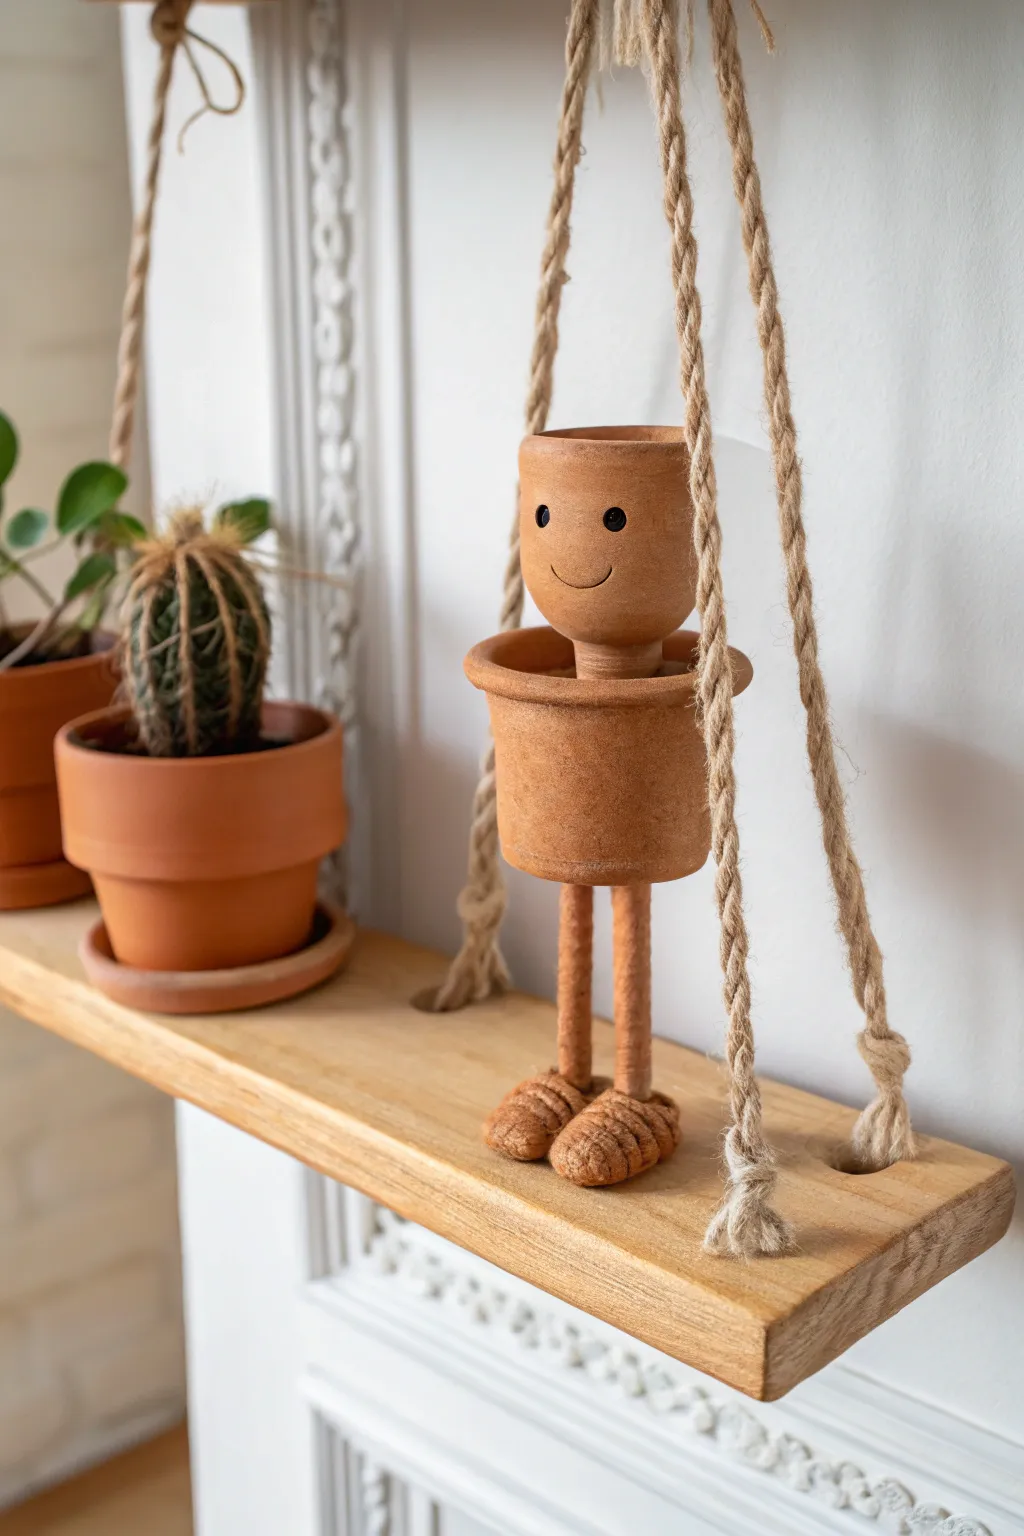
This minimalist clay creation brings a literal smile to your shelf with its charmingly simple design and textured rope feet. By combining standard terra cotta pots with dowels and jute, you’ll craft a perfectly poised little figure that looks like it’s swinging its legs from a perch.
Detailed Instructions
Materials
- One small terra cotta pot (approx. 2-3 inches, for the head)
- One medium terra cotta pot (approx. 4-5 inches, for the body)
- Two wooden dowels or thick cinnamon sticks (approx. 4-6 inches long)
- Thick jute twine or natural rope
- Strong craft glue (E6000 or a high-temp hot glue gun)
- Black acrylic paint
- Fine-point paintbrush or dotting tool
- Small piece of wood or strong cardboard (for foot base)
- Scissors
- Small cylinder block or spacer (optional, for neck)
Step 1: Assembling the Body
-
Clean your pots:
Before starting, wipe down your terra cotta pots with a damp cloth to remove any dust or manufacturing residue. Let them dry completely so the glue adheres properly. -
Prepare the neck connection:
The head pot sits slightly elevated inside the body pot. Find a small wooden block, a large bead, or even a scrap of cork that will fit inside the rim of the body pot to act as a spacer. -
Stack the pots:
Apply a generous amount of strong adhesive to your chosen spacer and glue it to the absolute bottom center (inside) of the larger body pot. Then, glue the bottom of the smaller head pot onto that spacer. -
Secure the head:
Ensure the head pot is centered and level. If you aren’t using a spacer, you can glue the bottom of the head pot directly to the inside bottom of the body pot, though the head will sit lower. -
Let the body cure:
Set the stacked pots aside to dry. If you are using E6000, I recommend letting this cure for several hours to ensure the head doesn’t slide around while you work on the legs.
Step 2: Crafting the Legs and Feet
-
Prepare the shoe bases:
Cut two oval shapes out of thick cardboard or scrap wood. These should be slightly wider than your dowels to form the base of the ‘shoes’. -
Attach dowels to shoes:
Glue one end of each wooden dowel (or cinnamon stick for texture) firmly onto the center of your shoe bases. Hold them vertical until the glue sets. -
Wrap the ankles:
Apply a dab of glue at the base of the dowel where it meets the shoe. Taking your jute twine, begin wrapping circles around the shoe base to build up volume. -
Form the shoes:
Continue wrapping and gluing the jute around the cardboard base, layering it over itself to create a rounded, woven ‘shoe’ look. Make sure the cardboard is completely hidden. -
Secure the twine end:
Once the shoe looks puffy and complete, tuck the end of the twine underneath and secure it with a final drop of glue. Repeat for the second leg. -
Attach legs to body:
Flip your pot body assembly upside down. Glue the top of the leg dowels to the underside of the body pot. Position them near the front edge so the legs can hang freely if placed on a shelf.
Leg Wobble Fix
If the legs feel flimsy where they attach to the pot, reinforce the joint with a generous ring of hot glue or epoxy putty around the top of the dowel.
Step 3: Adding the Personality
-
Paint the eyes:
Using black acrylic paint and a dotting tool (or the handle end of a paintbrush), place two solid black dots on the upper half of the head pot for eyes. -
Add the smile:
With a very fine liner brush, paint a simple, thin upward curve for the smile. I find it helps to practice the curve on a piece of paper first to get the swoosh just right. -
Create the eye shine:
Once the black eye paint is dry, use a toothpick to add a tiny white speck to the upper right corner of each eye. This ‘catchlight’ brings the character to life. -
Final drying time:
Allow all paint and glue to cure completely overnight before placing your new friend on a shelf.
Textured Leg Tip
Swap plain dowels for long cinnamon sticks. Their natural bark texture matches the rustic terra cotta vibe perfectly and smells great too.
Place your pot person on the edge of a shelf or mantelpiece and enjoy their cheerful company all year round


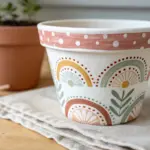
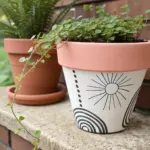
Big Smiley Face With Rosy Cheeks
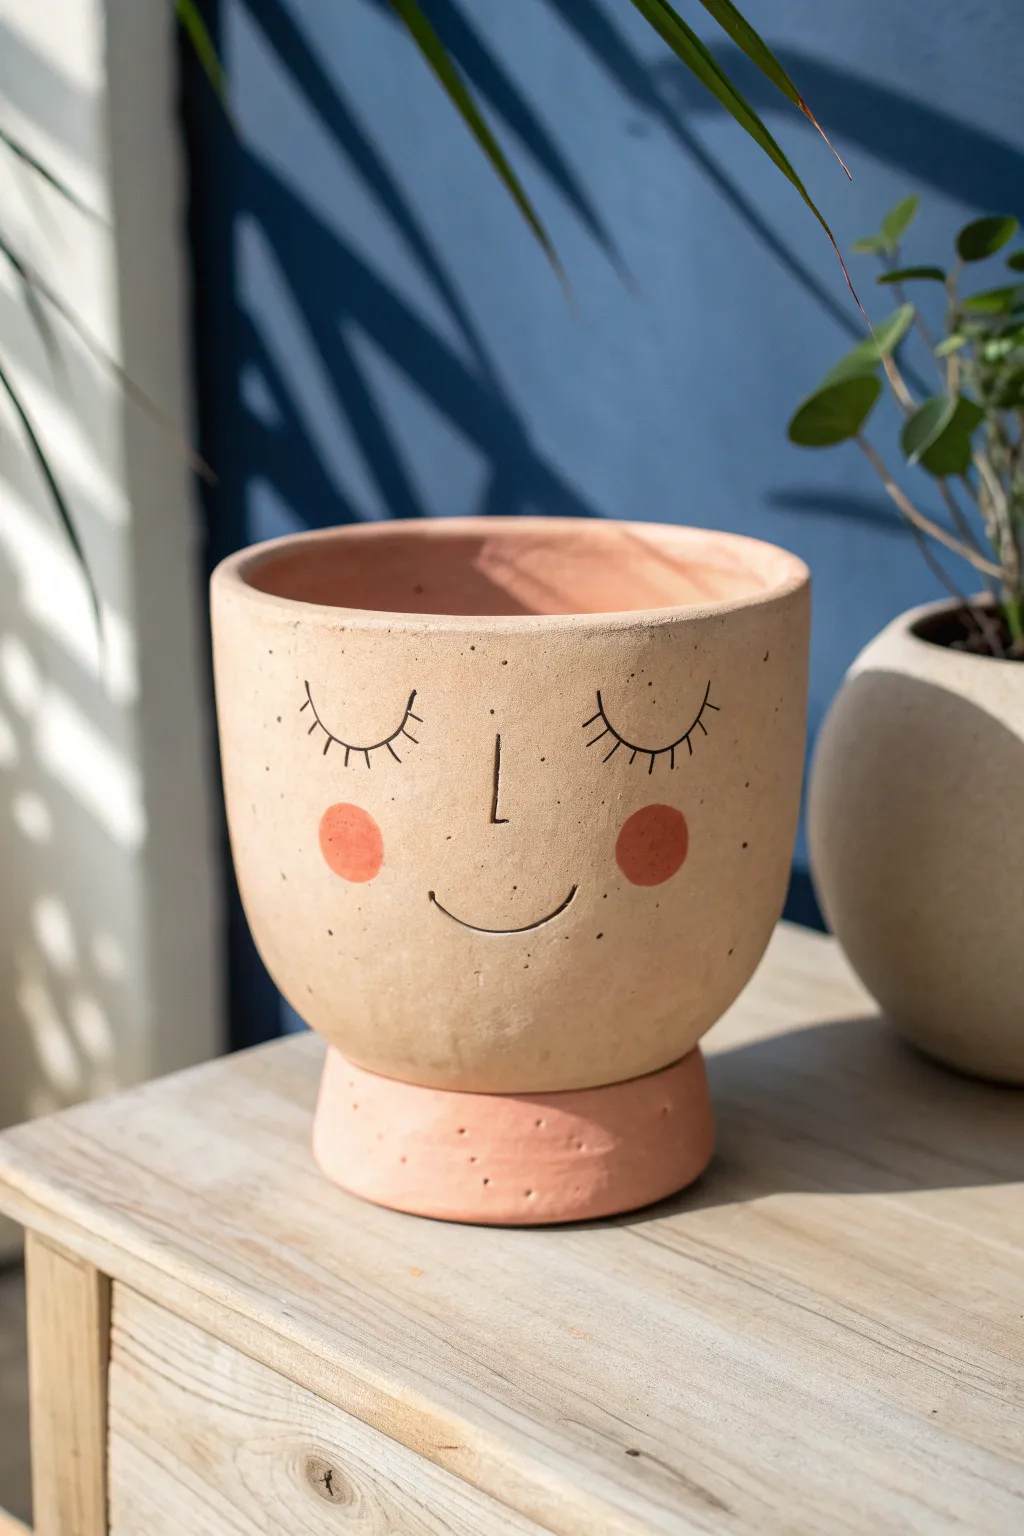
Transform a plain planter into a cheerful character with this simple yet charming face design. The minimalist features and rosy cheeks give the pot a sweet, sleeping expression that adds warmth to any corner of your home.
How-To Guide
Materials
- Terracotta pot with a rounded bottom (bowl shape)
- Matching terracotta saucer or a small clay bowl for the base
- Acrylic paint (black and coral pink)
- Fine liner paintbrush or black paint marker
- Small round paintbrush or sponge dauber
- Pencil
- Matte spray sealer (optional)
- Strong craft glue or E6000 (if attaching the base)
Step 1: Preparing the Base
-
Clean the surface:
Start by wiping down your terracotta pot and base with a damp cloth. Terracotta is porous and often dusty, so you need a clean surface for the paint to adhere properly. Let it dry completely. -
Choose your base color:
If your pot is already a nice natural beige or light terracotta like the one in the photo, you can leave it raw. If you want a more uniform look, apply a coat of diluted beige or flesh-tone acrylic paint to even out the surface tone. -
Create the stand:
This project works best if the pot has a pedestal look. Take your smaller clay bowl or saucer and flip it upside down. Test the fit of your main pot on top of it to ensure it sits securely. -
Gluing the base:
Apply a ring of strong craft glue or E6000 to the bottom rim of the bowl/saucer. Center the main pot on top and press down firmly. Allow the glue to cure according to the package instructions before moving on.
Step 2: Mapping the Face
-
Sketch lightly:
Using a pencil, lightly sketch the face onto the front of the pot. Visualizing the layout first is crucial. Start by marking the center point for the nose to keep everything symmetrical. -
Draw the nose:
Draw a simple ‘L’ shape for the nose right in the middle of the pot’s face area. Keep the vertical line slightly longer than the horizontal base. -
Mark the eyes:
Position the eyes about halfway down the pot’s height. Sketch two downward-curving arcs on either side of the nose. Try to keep them level with each other. -
Add the smile:
Below the nose, draw a wider upward-curving arc for the mouth. It should be centered under the nose and stretch almost as wide as the distance between the eyes.
Cheeky Circles
Make perfect circles for the cheeks by dipping the eraser end of a pencil into pink paint and stamping it onto the pot like a dotting tool.
Step 3: Painting the Features
-
Outline the eyes:
Using a fine liner brush dipped in black acrylic paint, or a black paint pen, trace over your pencil lines for the eyes. Use a steady hand to get a smooth curve. -
Add eyelashes:
From the top of the eye curve, paint or draw 5-7 short, straight lines fanning upwards. Vary the lengths slightly for a natural, whimsical look. -
Define the nose:
Trace over your ‘L’ shape nose with the black paint. Keep this line thin and delicate so it doesn’t overpower the face. -
Paint the smile:
Trace the smile line carefully. I like to make the ends of the smile slightly thinner than the middle to give it a soft expression. -
Create rosy cheeks:
Mix a coral or warm pink acrylic paint. Using a round paintbrush or a round sponge dauber, dab two circles just outside and slightly below the smile line. -
Adding texture:
If you want the speckled look shown in the image, dip an old toothbrush into diluted brown or black paint. Run your thumb across the bristles to flick tiny speckles onto the pot. Practice on paper first to control the spray.
Uneven Lines?
If you mess up a black line, let it dry completely, then gently scrape it off with a craft knife or paint over it with a skin-tone mix.
Step 4: Finishing Touches
-
Dry time:
Let all the paint dry completely. This usually takes about 30 minutes, but check that the cheek paint is fully set since it’s applied more thickly. -
Erase pencil marks:
Once the paint is bone dry, gently erase any visible pencil sketch lines. be careful not to rub the painted areas too hard. -
Seal the pot:
To protect your artwork from water damage when watering your plant, verify everything is dry and spray the entire exterior with a clear matte sealer. This locks in the design without making it too shiny. -
Pot your plant:
Once the sealer has cured, fill your new character pot with soil and your favorite greenery. A trailing plant or something with height often looks like funny hair.
Place your drowsy friend in a bright spot to enjoy the sunshine alongside your favorite plant


Winking Face With Painted Lashes
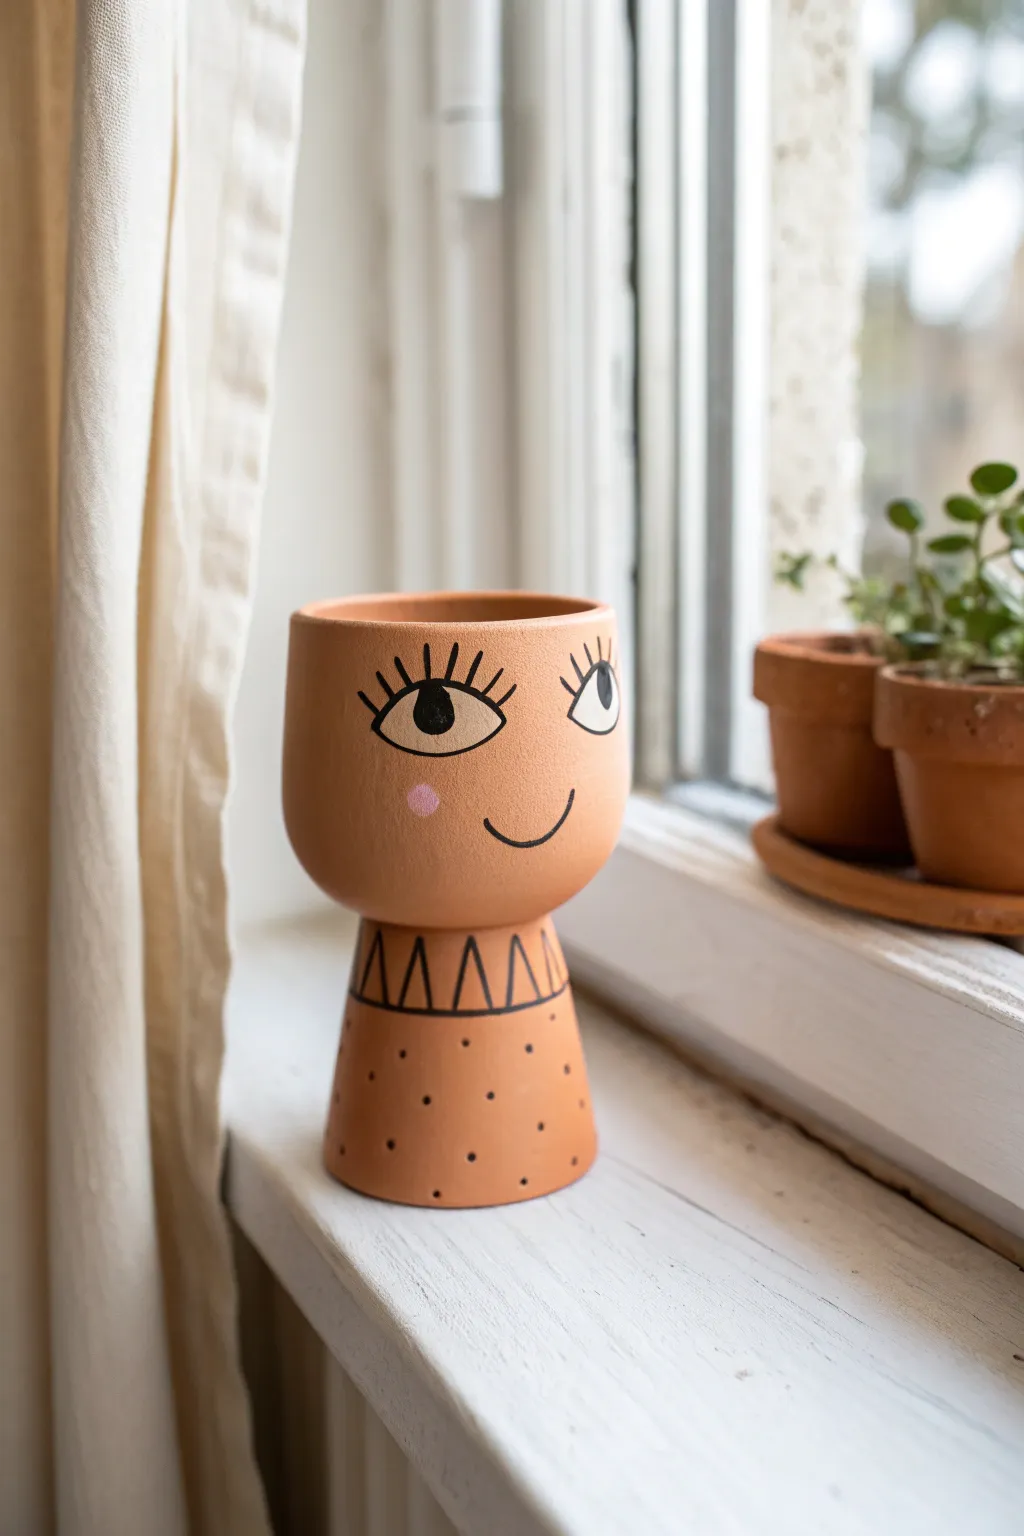
Transform a standard terracotta planter into a cheeky character with expressive eyes and a stylish geometric outfit using simple painting techniques. This project combines a rounded bowl planter with a smaller upturned pot base to create a unique pedestal silhouette perfect for your windowsill.
Detailed Instructions
Materials
- Small terracotta bowl planter (approx. 4-5 inches diameter)
- Small terracotta standard pot (smaller diameter than the bowl’s base)
- Strong craft adhesive (E6000 or similar)
- Acrylic paint (Black, White, Bubblegum Pink)
- Fine liner paintbrush (size 0 or 00)
- Small round paintbrush (size 2 or 3)
- Pencil with eraser
- Matte spray sealer (optional)
- Small circular foam dobber (optional for cheeks)
Step 1: Forming the Structure
-
Prepare the surfaces:
Wipe down both terracotta pots with a damp cloth to remove any dust or nursery grime. Let them dry completely, as moisture will prevent the paint and glue from sticking properly. -
Test the fit:
Turn the standard terracotta pot upside down so the wider rim is on the table. Place the bowl planter on top of the upturned pot’s base to check stability. The bowl should sit centered and secure. -
Glue the pieces:
Apply a generous ring of strong craft adhesive to the bottom (now top) of the upturned base pot. Press the bowl planter firmly onto the glue, ensuring it is perfectly centered. Let this cure for at least 24 hours before painting.
Steady Hand Trick
Rest your painting hand on a heavy book or block that is the same height as the area you are painting. This stabilizes your wrist for finer lines.
Step 2: Designing the Face
-
Sketch the features:
Using a pencil, lightly sketch the facial features onto the bowl part. Place the eyes about halfway down the bowl. Draw two large almond shapes for the eyes, positioned wide apart. -
Refine the gaze:
Inside the right almond shape, draw a large circle for the iris looking off to the side. For the left eye, you can match this or draw a curved line for a playful wink. -
Add the smile:
Sketch a simple, small ‘U’ shape centered below the eyes for the mouth. Keep the line thin and delicate. -
Paint the eye whites:
Using the white acrylic paint and a small round brush, fill in the almond shapes of the eyes. You may need two thin coats to get opaque coverage over the terracotta. Let dry completely. -
Outline the eyes:
With the black paint and your finest liner brush, carefully trace the outline of the eye shapes. I find steadying my pinky finger against the pot helps keep the lines crisp. -
Paint the pupils:
Paint a large black circle inside the white area of the eyes, positioning them towards the right to create a side-glance effect. Leave a tiny white dot unpainted (or add one later) for a highlight. -
Add the lashes:
Using the liner brush and black paint, add long, straight lashes radiating from the top of the eye outline. Make the center lashes the longest and taper the ones on the sides. -
Smile line:
Trace over your pencil smile sketch with the black paint and liner brush. Add tiny tick marks at the ends of the smile for extra character. -
Rosy cheeks:
Mix a soft pink paint or use the bubblegum pink directly. Using a round brush or a foam dobber, stamp or paint a soft circle on the cheek area just below the eyes.
Make it 3D
Glue small wooden beads or buttons onto the zig-zag collar points for added texture, or add a miniature fabric bow to the ‘hair’ area.
Step 3: Decorating the Base
-
Sketch the collar:
On the upper rim of the base (where it meets the head), lightly pencil a zig-zag pattern all the way around to create a geometric collar. -
Paint the zig-zags:
Trace the zig-zag pattern with black paint. Add a solid horizontal line below the triangles to define the bottom edge of the collar. -
Add the collar detail:
Inside the triangular spaces created by the zig-zags, you can add vertical stripes or leave them plain terracotta as shown in the inspiration. -
Create the polka dots:
Dip the blunt end of your paintbrush handle into black paint. Dot it randomly over the remaining surface of the base to create a scattered polka dot pattern. -
Clean up:
Check for any pencil marks that are still visible. Once the paint is bone dry, gently erase them. -
Seal:
If this planter will be near water or live plants, apply a coat of matte spray sealer to protect your paint job from moisture damage.
Your charming new friend is now ready to hold your favorite succulent or trailing vine

The Complete Guide to Pottery Troubleshooting
Uncover the most common ceramic mistakes—from cracking clay to failed glazes—and learn how to fix them fast.
Denim-Style Overalls Pot Person
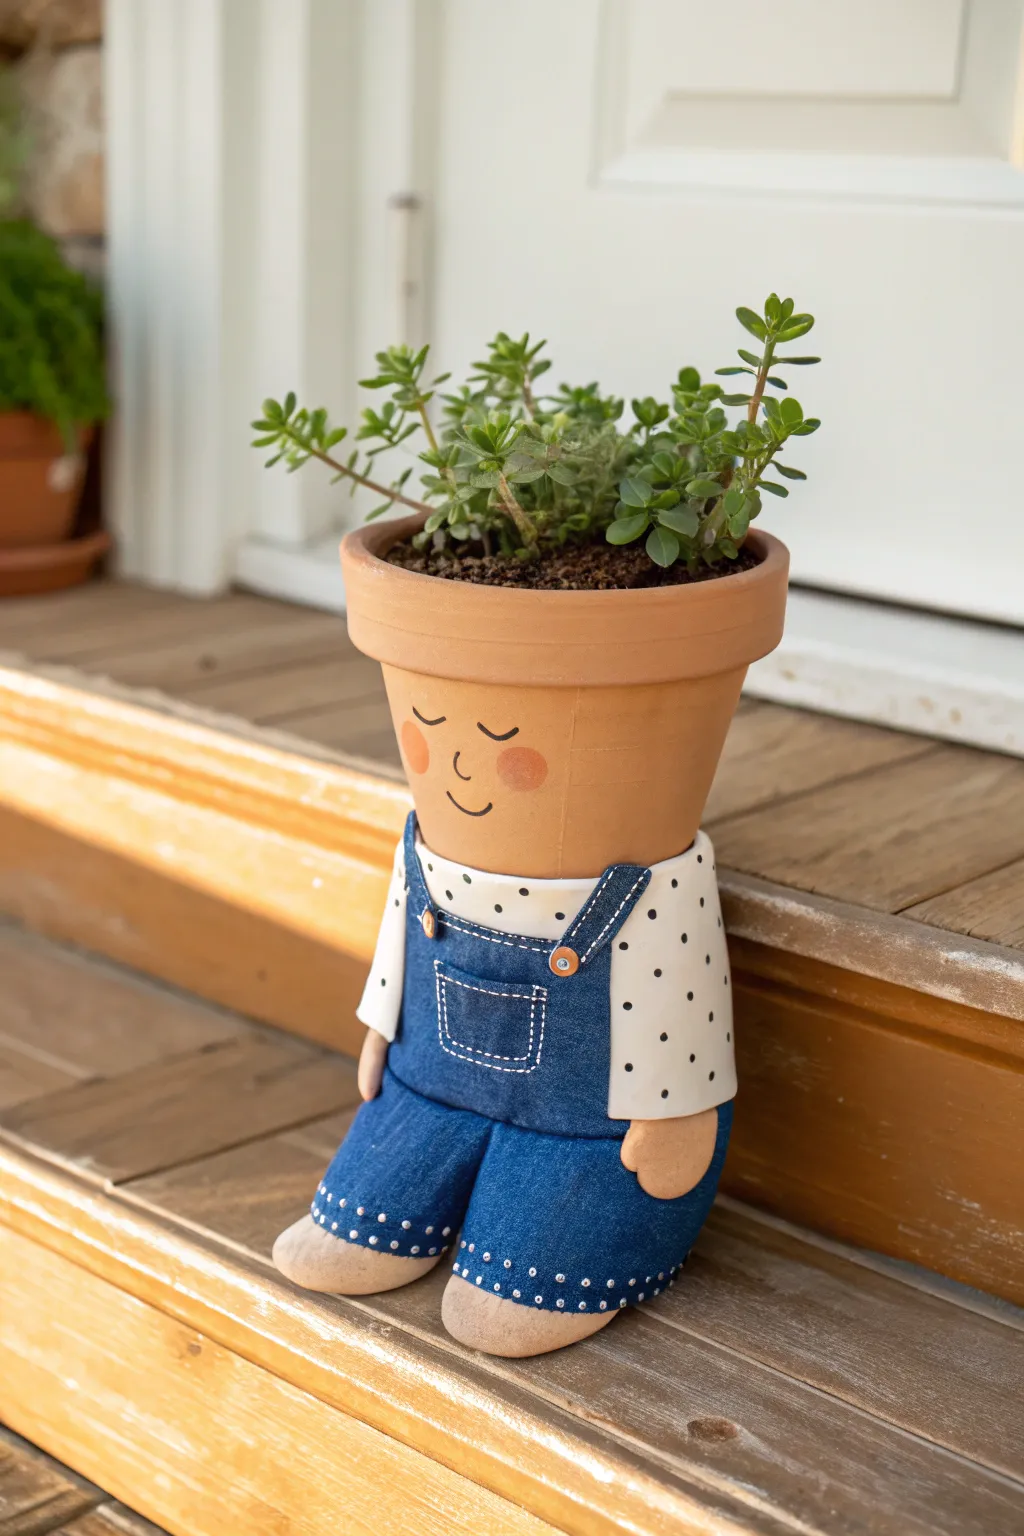
Transform ordinary terracotta into a charming little character that brightens up any porch or patio step. This adorable pot person features hand-painted denim overalls, a sweet sleepy face, and plenty of personality to hold your favorite succulent.
Step-by-Step Guide
Materials
- One 6-inch terracotta pot (head)
- One 5-inch terracotta pot (body)
- Two 2-inch or 3-inch terracotta pots (feet/shoes)
- Acrylic craft paints (peach/flesh tone, denim blue, white, black, brown)
- Paintbrushes (flat brush, fine liner brush, and a small round brush)
- Strong craft glue (E6000 or similar)
- Matte or satin spray sealer
- Pencil
- Plant and potting soil
Step 1: Painting the Head
-
Base coat the face:
Begin with the 6-inch pot. This will be the head. Paint the entire exterior with a flesh-toned acrylic paint that matches the natural clay or your preference. You may need two coats for opaque coverage. -
Draft the features:
Once the base coat feels completely dry to the touch, use a pencil to very lightly sketch a simple sleeping face. Draw two U-shapes for closed eyes, a tiny U for the nose, and a gentle curve for the smile. -
Paint the expression:
Using your finest liner brush and black paint, trace over your pencil lines. Keep your hand steady and use very little pressure to keep the lines thin and delicate. -
Add rosy cheeks:
Dip a small round brush or a sponge dauber into a slightly darker peach or pink paint. Remove most of the paint on a paper towel, then gently dab circular cheeks onto the face for a flushed look.
Texturize That Denim
For a worn denim look, dab a dry sponge lightly into white paint and blot it onto the dried blue areas. It creates a perfect faded fabric effect.
Step 2: Creating the Polka Dot Shirt
-
Invert the body pot:
Take the 5-inch pot and turn it upside down. This will serve as the torso. I find it helpful to place it on a jar or cup to hold it steady while painting. -
Paint the shirt base:
Paint the upper two-thirds of this inverted pot white. This will be the shirt area under the overalls. Extend the white paint down far enough so the ‘straps’ of the overalls can sit on top later. -
Add the polka dots:
Using the handle end of a paintbrush dipped in black paint, stamp small, random dots all over the white area to create a playful pattern. -
Define the arms:
Paint two small flesh-toned semicircles near the bottom rim on the sides. These represent the hands resting at the side of the body.
Seated Stance
Glue the feet pots slightly wider apart and angled outward. This makes the character look more relaxed and improves stability on uneven steps.
Step 3: Designing the Denim Overalls
-
Outline the bib:
Switch to denim blue paint. On the front of the white shirt area, paint a rectangular ‘bib’ shape for the overalls, along with two straps going up over the imaginary shoulders. -
Paint the pants:
Paint the bottom third of the inverted pot entirely blue to represent the pants portion of the overalls. Ensure this connects seamlessly with the bib you just painted. -
Add the stitching details:
This is crucial for the realistic denim look. Using a very fine brush and white paint, create dashed ‘stitch’ lines around the edges of the bib, the straps, and a small front pocket rectangle. -
Secure the buttons:
Paint two small copper or brown circles where the straps meet the bib. Add tiny black dots inside them to look like buttonholes.
Step 4: Painting the Feet
-
Shoe base:
Take the two smallest pots and turn them on their sides. Paint the rim area a beige or shoe color. -
Denim leg cuffs:
Paint the rest of these small pots (the bottom and sides) in the same denim blue as the overalls. -
Detail the hem:
Add white stitching dots around the edge where the blue paint meets the beige shoe area to mimic the hem of jeans.
Step 5: Assembly and Planting
-
Seal your work:
Before gluing, take all dried pieces outside and give them a coat of spray sealer. This protects your hard work from water damage during watering. -
Attach the feet:
Apply strong craft glue to the curved sides of the small foot pots and attach them firmly to the front bottom edge of the body pot (the inverted 5-inch pot). Propping them up against a wall while drying helps keep them in place. -
Stack the head:
Apply a ring of glue around the bottom rim of the head pot and set it directly onto the flat top (technically the bottom) of the body pot. -
Add greenery:
Once the complete structure is dry and stable (wait at least 24 hours for full cure), fill the top pot with soil and plant a spiky succulent or trailing ivy to give your new friend some wild ‘hair’.
Place your new denim-clad buddy on a sunny step and enjoy the whimsical company.
Polka-Dot Dress Pot Person
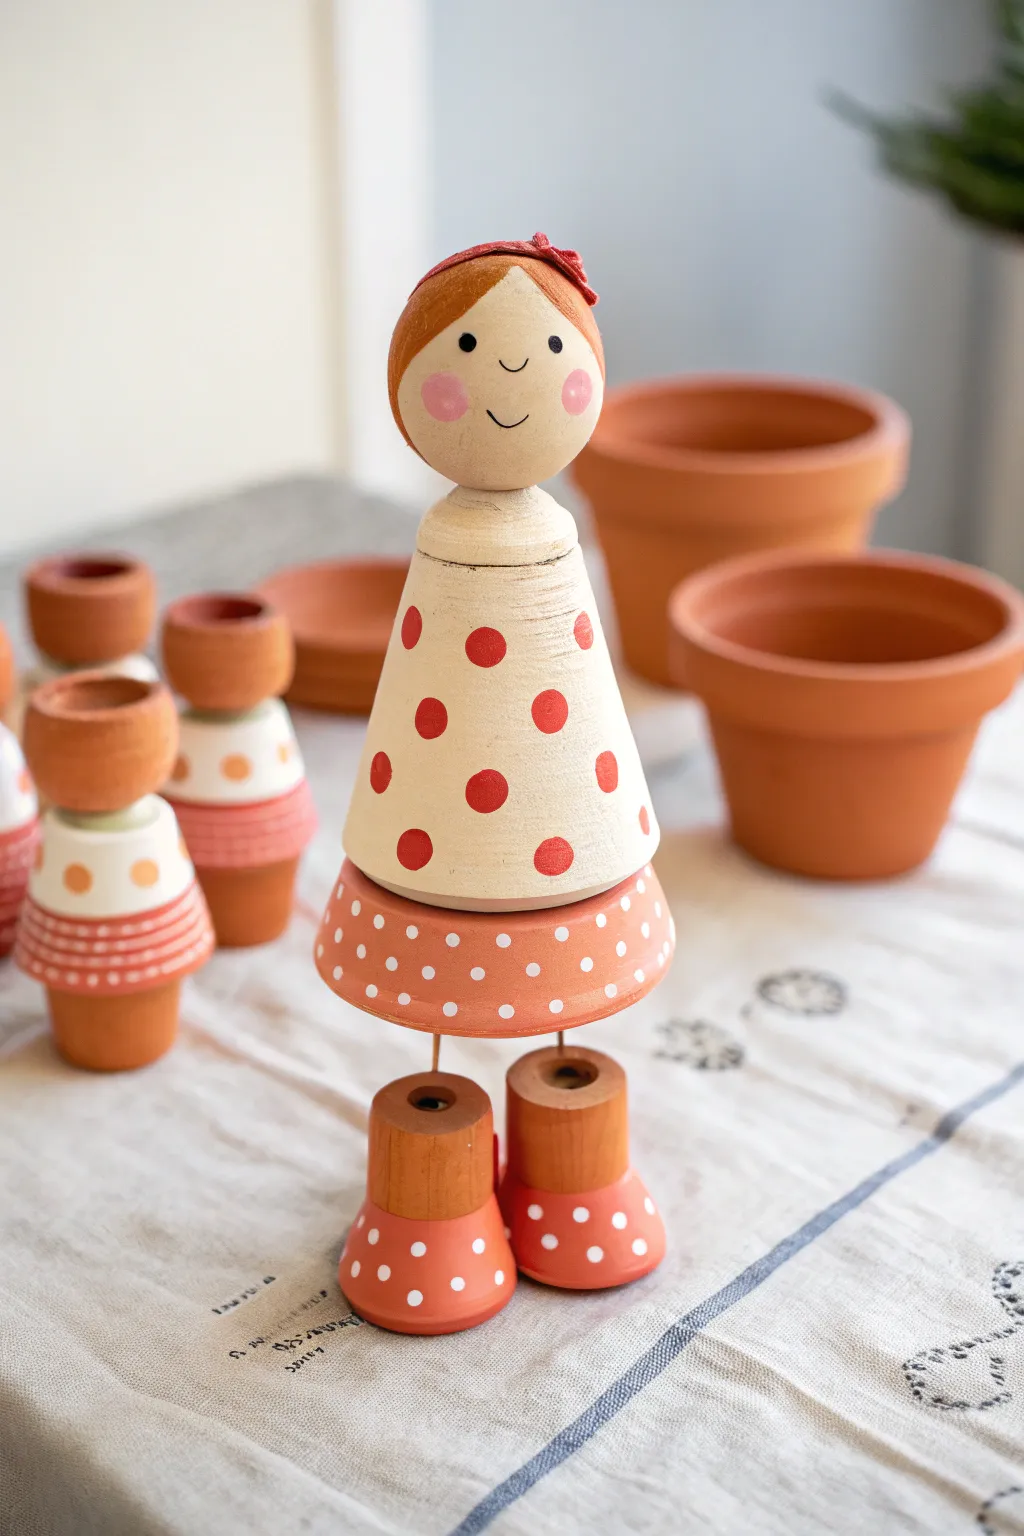
Create a charming garden character using simple terracotta pots and wooden shapes. This folk-art style doll features a sweet painted face, a dotted cream dress, and clever inverted-pot feet that give her plenty of personality.
Step-by-Step
Materials
- Small terracotta pots (approx. 2-inch diameter for legs)
- Medium terracotta saucer (for skirt)
- Wooden cone (approx. 4-5 inches tall) or inverted tall clay pot
- Wooden sphere (1.5-inch diameter) for the head
- Wooden cylinder blocks or thick dowel segments (for feet inside pots)
- Acrylic craft paint (cream, terracotta orange, red, black, pink)
- Strong craft glue (E6000 or similar)
- Fine detail paintbrush
- Medium flat paintbrush
- Dotting tool or the end of a paintbrush handle
- Red ribbon or fabric scrap
- Matte spray sealer
Step 1: Prepping and Base Coating
-
Select your pieces:
Gather your materials. You will need two small pots for the legs, one saucer for the skirt, a wooden cone for the torso, and a wooden sphere for the head. Ensure all surfaces are clean and dry. -
Paint the torso:
Using a flat brush, paint the entire wooden cone (or tall inverted pot) with a creamy off-white acrylic paint. Apply 2-3 coats for solid coverage, letting it dry between layers. -
Base coat the legs:
Take the two small terracotta pots and flip them upside down. Paint the bottom rim section (now the top) with a terracotta-orange paint to deepen the natural color. Paint the flared ‘skirt’ part of these small pots with a brighter red-orange. -
Paint the feet:
Paint your wooden cylinder blocks or dowel segments with the same terracotta-orange mix used on the upper part of the leg pots so everything coordinates. -
Prepare the skirt saucer:
Paint the underside of the medium terracotta saucer with the bright red-orange paint. This saucer will sit upside down between the legs and the torso.
Step 2: Adding Details and Assembly
-
Create the polka dots:
Once your cream torso is fully dry, use a medium-sized dotting tool or the back of a paintbrush to stamp large red polka dots randomly across the cone. -
Detail the skirt and boots:
Switch to a smaller dotting tool and white or cream paint. Add a row of tiny dots around the rim of the painted saucer and scattered dots on the red-orange section of the leg pots. -
Face painting:
On the wooden sphere, paint the upper third with brown or auburn paint to simulate hair, shaping bangs across the forehead. Let this dry completely. -
Facial features:
Using your finest detail brush or a toothpick, add two small black dots for eyes and a tiny curved line for a smile. Dip your finger or a dry brush in pink paint and dab lightly to create rosy cheeks. -
Attach the feet:
Glue the wooden cylinder blocks inside the inverted leg pots so they protrude slightly, acting as the shoes or feet. Let the glue set firmly. -
Construct the legs:
Place the two leg pots side-by-side. Apply glue to the top centers of the pots (the drainage hole area) and place the inverted saucer on top of them, bridging the two legs. -
Attach the body:
Apply a strong ring of glue to the center of the saucer’s bottom (now facing up). Press the cream polka-dot cone firmly onto this base. -
Crown the figure:
Glue the painted head firmly onto the point of the cone body. I usually hold this in place for a minute to ensure it doesn’t slide while the glue grabs. -
Final touches:
Tie a tiny bow from red ribbon or fabric and glue it to the side of the hair as a decorative accessory. -
Seal the project:
Once all paint and glue are cured, spray the entire figure with a matte clear coat to protect the finish, especially if she keeps watch near a sunny window.
Perfect Polka Circles
If you don’t have dotting tools, use the flat head of a nail, a pencil eraser, or a cotton swab dipped in paint to create perfectly uniform circles.
Make it a Pair
Create a companion doll using blue and green paints with a striped shirt pattern instead of dots for a charming garden duo.
Place your lovely polka-dot friend on a shelf or table where her sunny disposition can be enjoyed


What Really Happens Inside the Kiln
Learn how time and temperature work together inside the kiln to transform clay into durable ceramic.
Little Kid Clay Pot People Trio
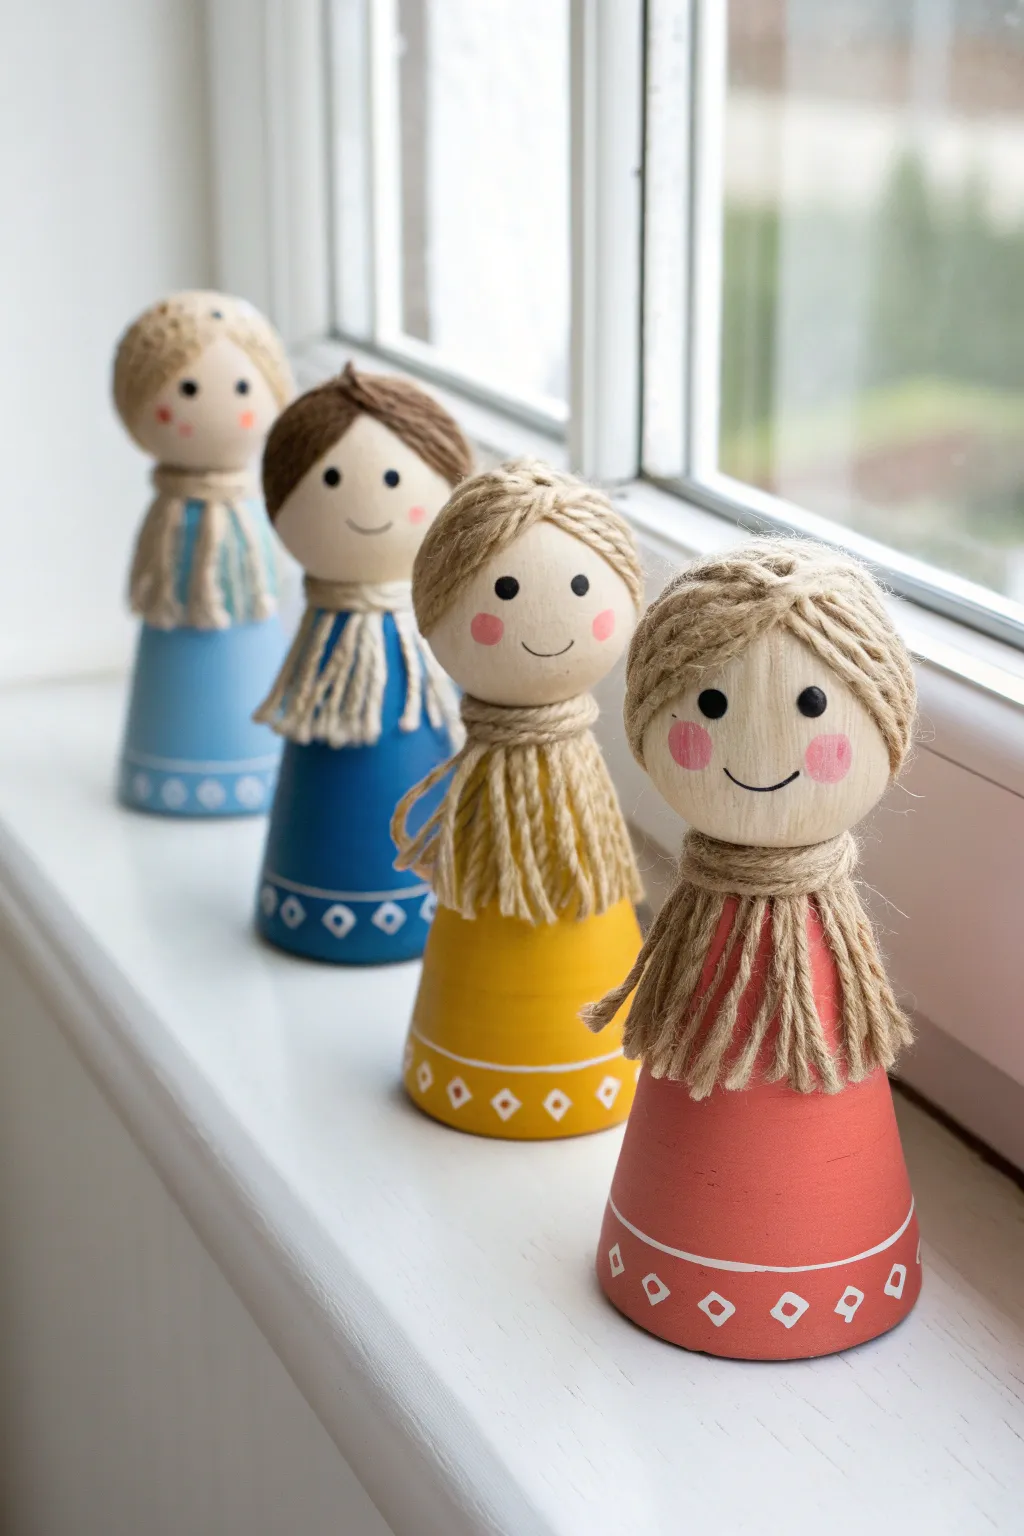
These charming little dolls turn ordinary terracotta pots and wooden beads into a sweet family of characters with yarn hair and painted details. Perfect for a windowsill display, they bring a touch of rustic whimsy to any room.
Step-by-Step Tutorial
Materials
- Small terracotta pots (approx. 2-3 inches)
- Small round wooden knobs or balls (sized to fit pot base)
- Acrylic craft paint (light blue, dark blue, yellow, red, white, black, pink)
- Jute twine or thick beige yarn
- Hot glue gun and glue sticks
- Paintbrushes (flat shader and fine detail)
- Scissors
- Pencil
Step 1: Base Preparation
-
Clean surface:
Wipe down your terracotta pots with a slightly damp cloth to remove any dust or debris, then let them dry completely so the paint adheres well. -
Base coat:
Flip the pots upside down. Using a flat brush, paint the entire exterior surface of each pot. Use a different color for each doll—like sky blue, deep blue, mustard yellow, and coral red. -
Second coat:
Allow the first layer of paint to dry for about 20 minutes. Apply a second coat to ensure solid, opaque coverage without streaks. -
Geometric details:
Once the base color is fully dry, take a fine detail brush and white paint. Carefully paint a thin horizontal line around the bottom rim of the pot. -
Adding patterns:
Just above or on the white line, add simple geometric patterns like small diamonds, triangles, or dots to create a decorative hem for the dresses.
Step 2: Creating the Faces
-
Secure the head:
Apply a ring of hot glue to the bottom (now the top) of the upside-down painted pot. Firmly press the wooden bead or knob onto the glue ensuring it is centered. -
Sketch features:
Lightly sketch the placement of the eyes and mouth on the wooden bead with a pencil to guide your painting. -
Paint eyes:
Dip the non-brush end of a paintbrush into black paint and dot two eyes onto the face. This creates perfectly round, uniform eyes. -
Add a smile:
Using your finest brush or a fine-tip black marker, draw a simple, gentle curve for the smile between and slightly below the eyes. -
Rosy cheeks:
I like to mix a tiny bit of red with white to get a soft pink. Use a dry brush or cotton swab to gently dab rosy circular cheeks next to the smile.
Clean Lines Hack
To get perfectly straight lines for the dress hem, wrap a rubber band around the pot as a painting guide before adding your white patterns.
Step 3: Hairstyling
-
Prepare hair strands:
Cut several lengths of jute twine or yarn, each about 4 inches long. You will need enough to cover the head and create the hanging braids. -
Create the crown:
Apply a dab of hot glue to the very top center of the wooden bead. Arrange the center of your twine strands in a radial pattern, like spokes on a wheel, gluing them down so they drape over the sides. -
Forming bangs:
Select the front few strands that fall over the face. Trim them shorter to create bangs, sweeping them slightly to the side if desired, and secure with a tiny dot of glue on the forehead so they stay put. -
Gathering pigtails:
Gather the remaining long strands on either the sides (for pigtails) or the back. For the style in the photo, let the strands hang loose down the sides like long straight hair. -
Creating the neck scarf:
Take a new piece of twine and wrap it snugly around the ‘neck’ area where the bead meets the pot. Knot it or glue it in place. -
Securing the hair:
This neck twine acts like a tie for the hair. Tuck the long side strands of hair under this neck loop or glue the hair down first and wrap the neck twine over it to cinch the hair against the body. -
Final trim:
giving the hair a final trim at the bottom to ensure the strands are even and reach just past the shoulders of the pot.
Seasonal Switch
Paint the pots in holiday colors (red/green) or pastels for Easter to create a seasonal decorative set for your mantel.
Set your finished trio on a sunny window ledge to enjoy their cheerful smiles every day
Team Jersey Style Pot Person
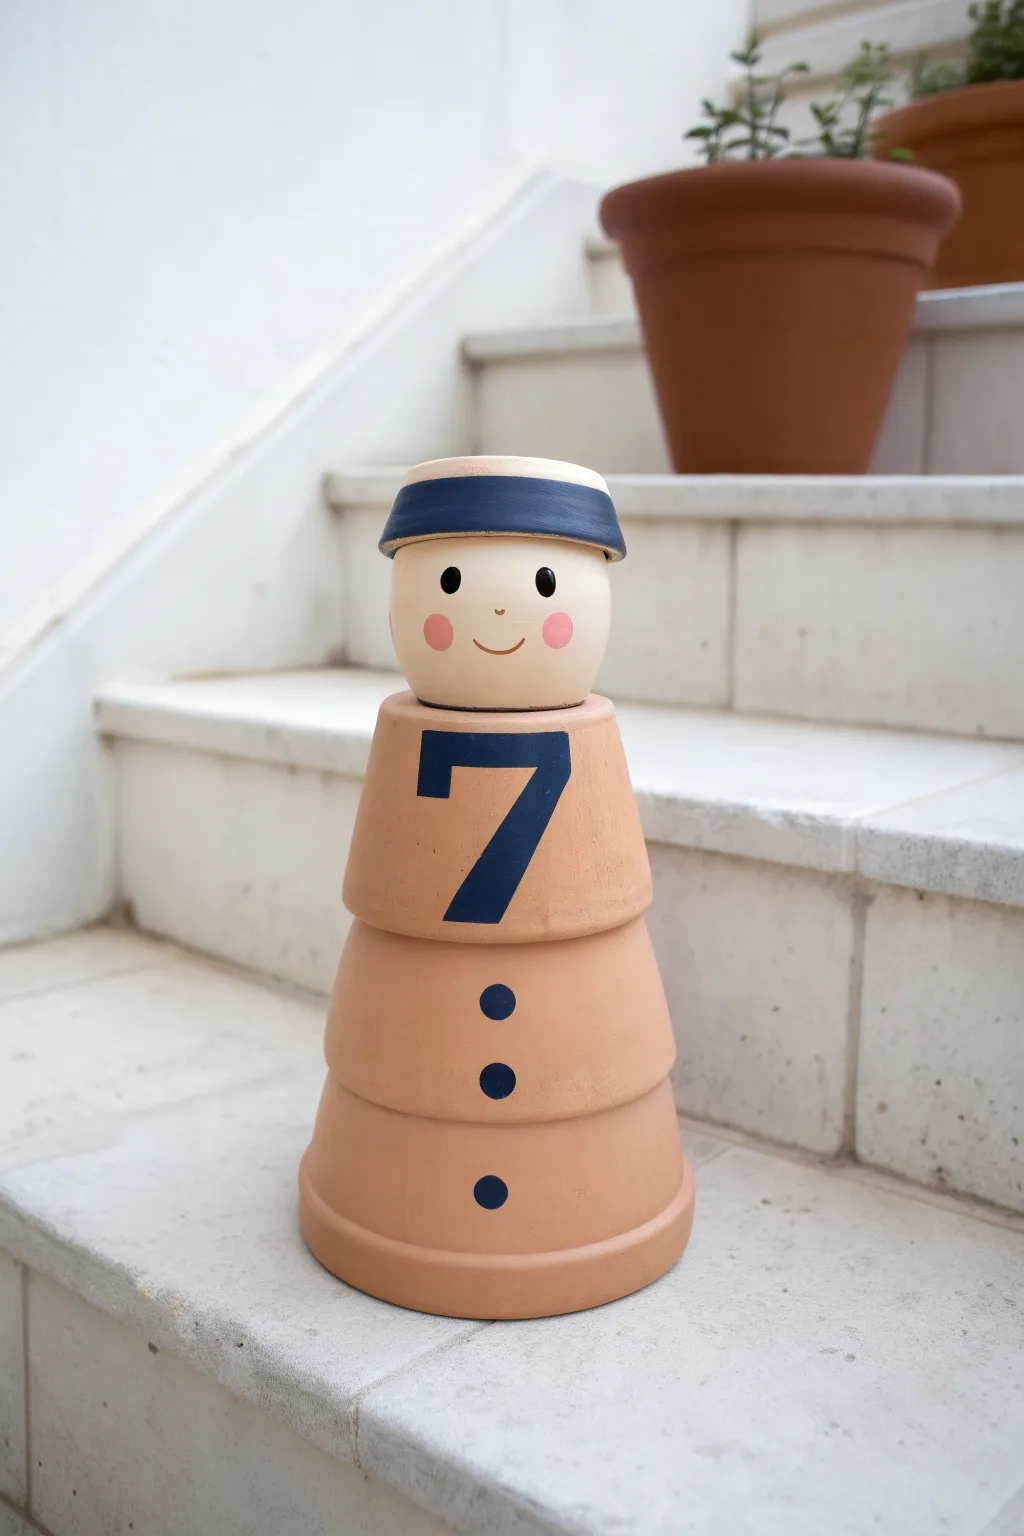
Show off your team spirit with this adorable athletic pot person, sporting a classic jersey number and a determined smile. Using stacked terra cotta pots creates a sturdy, charming figure perfect for greeting guests on your porch steps.
Step-by-Step
Materials
- 1 small terra cotta pot (for the head)
- 3 medium/large terra cotta pots (graduated sizes for the body)
- Acrylic craft paint (flesh tone, navy blue, pink)
- Clear outdoor sealer or varnish (spray or brush-on)
- Strong craft glue (E6000) or hot glue gun
- Paintbrushes (flat brush, fine round detail brush)
- Pencil
- Painter’s tape (optional)
Step 1: Base Preparation
-
Clean the pots:
Before starting, wipe down all your terra cotta pots with a damp cloth to remove any dust or loose clay particles. Let them dry completely. -
Test the stack:
Arrange your three body pots upside down, stacking the largest on the bottom, then the medium, then the smallest of the body set. Place the head pot right-side up on top to check proportions. -
Prime the surface (optional):
For a smoother look, you can apply a clear matte sealer to the raw pots now, which prevents the clay from absorbing too much paint later.
Step 2: Painting the Head
-
Paint the face base:
Take the smallest pot (the head) and paint the main body of it with your chosen flesh-tone acrylic paint. You may need 2-3 coats for solid coverage. -
Create the headband:
Paint the thick rim of this head pot in a bold navy blue. Go slowly around the edge to keep the line crisp where it meets the face color. -
Sketch the features:
Once the base coat is fully dry, lightly use a pencil to mark the position of the eyes, nose, mouth, and rosy cheeks. -
Add the eyes:
Using a small round brush or the handle end of a paintbrush, dip into black paint and dot two oval eyes. -
Small details:
Add a tiny white dot reflecting light in each black eye for liveliness, and paint a small, thin curve for the nose. -
Cheeks and smile:
Paint two soft pink circles for cheeks and a simple, curved line for the smile using a fine liner brush.
Clean Lines
If you struggle painting straight numbers, use painter’s tape to mark off the ‘7’ before painting. Peel it off while the paint is still slightly wet.
Step 3: Creating the Jersey Body
-
Visualize the jersey:
Take the top-most body pot (the one directly under the head). This will feature the jersey number. -
Draw the number:
Sketch a large, block-style number ‘7’ (or your favorite player’s number) on the front of this pot with a pencil. -
Paint the number:
Fill in the number carefully with the navy blue paint. Use a flat brush for the straight edges to keep them sharp. -
Add the buttons:
On the next two pots down (the middle and bottom sections), paint centered navy blue circles to look like jersey buttons or snaps. -
Let everything dry:
Allow all paint to cure completely for at least an hour to prevent smudging during assembly.
Stacking Wobble
If the pots don’t sit flat against each other, the clay might be uneven. Use a small amount of sandpaper to gently level the rims before gluing.
Step 4: Assembly
-
Glue the body stack:
Apply a ring of strong adhesive like E6000 to the bottom rim of the largest pot (which is currently upside down). Place the middle pot (upside down) onto it. -
Finish body assembly:
Repeat this process to glue the numbered pot (upside down) onto the middle pot. -
Attach the head:
Apply glue to the bottom of the painted head pot and press it firmly onto the flat base of the top body pot. -
Seal the project:
Once the glue has set overnight, I suggest spraying the entire figure with a clear outdoor sealer to protect the paint from weather.
Now your sporty creation is ready to cheer on the home team from your front steps

TRACK YOUR CERAMIC JOURNEY
Capture glaze tests, firing details, and creative progress—all in one simple printable. Make your projects easier to repeat and improve.
Scarecrow Clay Pot Person With Raffia Hair
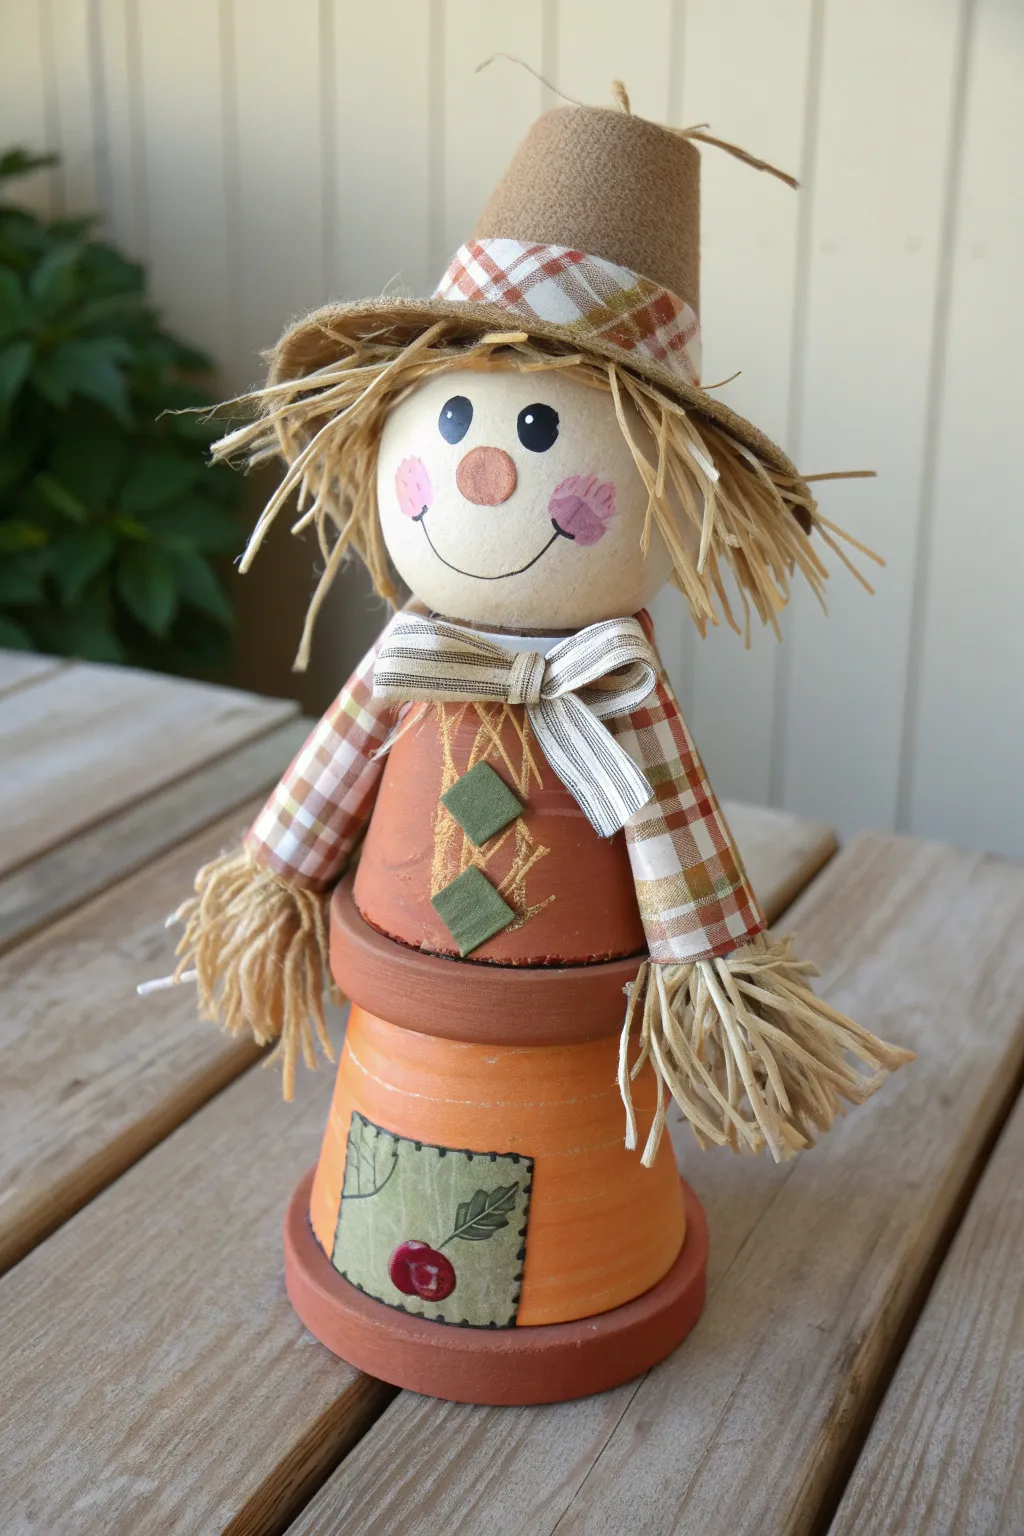
Transform humble garden pots into this charming autumn friend who brings a harvest smile to any porch or shelf. Using simple painting techniques and raffia accents, you will create a stacked-pot character full of rustic personality and warmth.
Step-by-Step Guide
Materials
- 2 small terracotta pots (approx. 3-4 inch rim diameter)
- 1 small terracotta saucer (slightly larger than pot base)
- 1 medium wooden ball or styrofoam ball (sized to fit top pot)
- Acrylic paints: Orange, Brown, Flesh tone, Black, Pink, Green, Dark Red
- Small paintbrush set (detail, shader, and flat brushes)
- Plaid fabric ribbon (brown/orange tones)
- Stiff burlap material or brown felt
- Natural raffia
- Hot glue gun and glue sticks
- Mod Podge or craft sealer
- Green felt or fabric scraps
- Scissors
- Black fine-tip marker or paint pen
Step 1: Preparing the Body
-
Base assembly:
Begin by cleaning your terracotta pots to ensure they are free of dust. Flip one pot upside down to serve as the bottom half of the body. -
Stacking the body:
Glue the terracotta saucer upside down onto the bottom of the first inverted pot. This creates the ‘belt’ line and stability. -
Adding the torso:
Glue the second pot right-side up onto the saucer. This creates the upper torso where the arms and head will attach. -
Painting the outfit:
Paint the top pot and the saucer rim with a warm brown acrylic paint to represent the shirt and belt area. -
Painting the pants:
Paint the bottom inverted pot with a bright orange acrylic paint. Apply a second coat if the terracotta still shows through. -
Adding texture details:
Once the orange paint is dry, use a very dry brush with a tiny amount of yellow or cream paint to lightly whisk ‘straw’ scratches onto the chest area for a rustic look. -
Patchwork accent:
Cut a small square of green patterned paper or fabric. Glue it to the front of the orange pants section. -
Detailing the patch:
Use a fine liner brush or black marker to draw ‘stitch’ marks around the green square. Paint a small red circle in the center to look like a berry or button. -
Chest patches:
Paint or glue two small diamond shapes onto the chest area using green felt or paint, adding similar stitch marks for consistency.
Step 2: Head and Accessories
-
Painting the face:
Paint the wooden or styrofoam ball with a flesh-tone acrylic paint. I usually do two thin coats here for a smooth finish. -
Drawing features:
Using the handle end of a paintbrush dipped in black paint, dot on two eyes. Paint a soft triangular orange nose and a stitched smile line. -
Cheeky details:
Dip a dry stiff brush into pink paint, dab almost all of it off, and gently stipple pink circles for cheeks. Add tiny white dot highlights to the eyes. -
Attaching the head:
Glue the finished head securely onto the rim of the top pot. -
Creating the arms:
Cut two lengths of plaid ribbon, about 4 inches each. Glue a bundle of raffia inside one end of each ribbon piece to look like straw hands. -
Attaching arms:
Glue the other end of the ribbon ‘sleeves’ to the sides of the top pot, near the neck area. -
Making the hat:
Form a cone shape from stiff brown felt or use a small paper mache cone. Glue a wide brim of burlap or felt to the bottom of the cone. -
Adding hair:
Glue generous bunches of raffia to the top of the wooden head, letting it hang down messy and wild. -
Crowning glory:
Place the hat over the raffia hair and glue it down. Tie a matching plaid bow around the neck to finish the look.
Clean Lines
Use masking tape or painter’s tape around the rim of the saucer when painting the different body sections to keep your color separation perfectly sharp.
Wobbly Head?
If the wooden ball doesn’t sit flat on the pot rim, use a small ring of hot glue or a washer as a stabilizer to keep the head from rolling off while the glue sets.
Now you have an adorable, customized scarecrow ready to greet the season.
Witchy Garden Pot Person With Pointy Hat
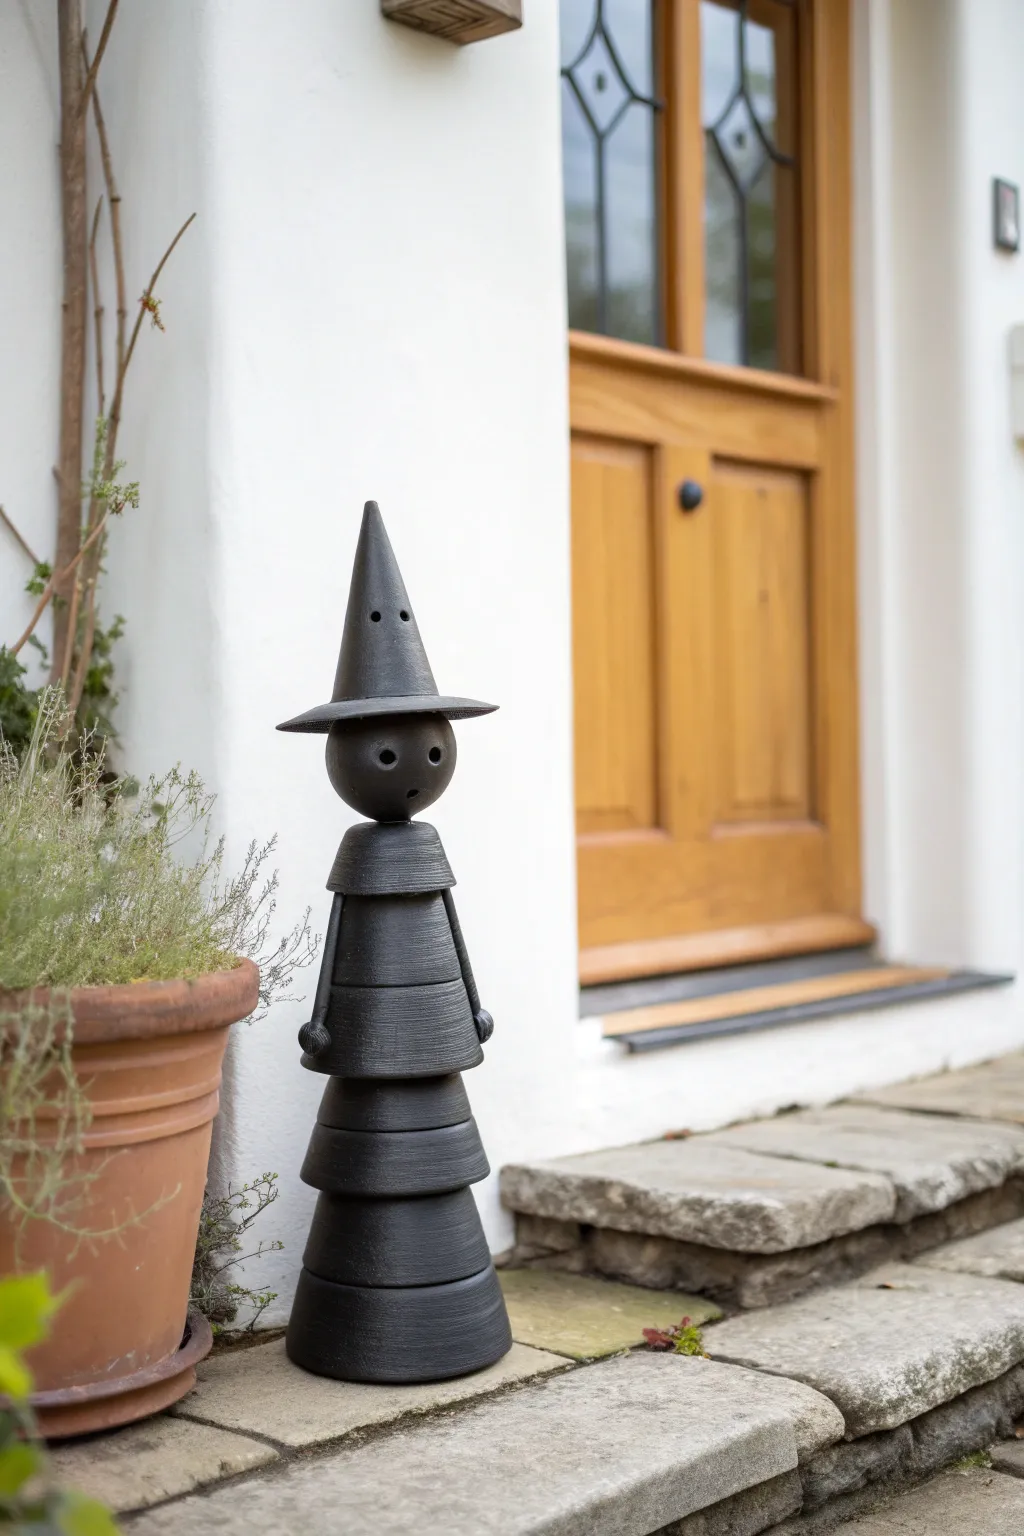
Bring a touch of modern magic to your doorstep with this sleek, all-black witch sculpture. Using simple stacked clay pots and a matte finish, this project creates a striking silhouette that looks sophisticated rather than scary.
Detailed Instructions
Materials
- 3 medium terra cotta pots (graduated sizes for the skirt)
- 2 small terra cotta pots (same size, for the torso)
- 1 large styrofoam or wooden ball (sized to fit the small pot rim)
- 1 small terra cotta saucer (for the hat brim)
- 1 tall cardboard or styrofoam cone (for the hat peak)
- Strong outdoor craft glue (e.g., E6000) or heavy-duty construction adhesive
- Matte black spray paint (outdoor rated)
- Black acrylic paint (for touch-ups)
- 2 wine corks or small wooden beads (for hands)
- Thick black crafting wire or shoelaces (for arms)
- Drill with masonry bit (optional, if connecting via rod)
- Wooden dowel or threaded rod (optional, for internal stability)
- Sandpaper
Step 1: Building the Layered Skirt
-
Prepare the pots:
Begin by cleaning all your terra cotta pots thoroughly to remove any dust or sticker residue. Let them dry completely, as moisture will prevent the paint from adhering properly. -
Arrange the base:
Take your three medium-sized pots intended for the skirt. Stack them upside down to test the fit. You want the largest on the bottom, the medium in the middle, and the smallest of this group on top to create a tapered dress shape. -
Glue the skirt layers:
Apply a generous ring of heavy-duty adhesive to the bottom rim (now facing up) of the largest pot. Center the medium pot upside down on top of it. Repeat this process to attach the third pot on top. -
Let the foundation set:
Press down firmly to ensure good contact between the clay surfaces or clay-to-plastic if using plastic pots. Allow this base stack to cure for at least an hour before moving it, so the heavy layers don’t slide.
Step 2: Constructing the Torso and Head
-
Create the torso:
For the upper body, take your two smaller pots. Glue the first one upside down directly onto the top of your skirt stack. This continues the vertical line. -
Add the second torso segment:
Glue the second small pot upside down on top of the previous one. This double-layer torso gives the witch a slightly elongated, elegant posture. -
Prepare the head:
Take your sphere (styrofoam or wood). If using styrofoam, I suggest lightly sanding it to smooth out the texture so it matches the smooth pots. -
Carve the features:
Carefully gouge out two circular eye holes and a smaller mouth hole into the sphere. If using a wooden ball, you can simply drill these divots or paint them on later for a smoother look, but actual indentations add nice depth. -
Attach the head:
Glue the head securely to the flat bottom of the top-most torso pot.
Wobbly Witch?
If your tower feels unstable, run a threaded metal rod or wooden dowel through the drain holes of all the pots. Secure it with washers and nuts at the very bottom and inside the top pot.
Step 3: Fashioning the Hat and Arms
-
Assemble the hat brim:
Take the small terra cotta saucer and glue it upside down onto the top of the sphere head. This creates the wide brim of the witch’s hat. -
Add the hat peak:
Glue your cone shape onto the center of the saucer. If the cone is styrofoam, you might want to poke two small holes near the base of it to mimic the ‘eyes’ seen in the inspiration photo. -
Prepare the arms:
Cut two lengths of thick black wire or stiff cord. These should be long enough to hang from the ‘shoulder’ area down to the top of the skirt. -
Attach the hands:
Glue small wooden beads or corks to the ends of your wire to serve as simple, stylized hands. Attach the tops of the arms to the seam between the top two torso pots.
Make it Glow
For a spooky effect, drill a hole through the back of the head and insert a small, battery-operated LED tea light. The light will shine eerily through the eye and mouth holes at night.
Step 4: The Midnight Finish
-
Prime the surface:
Since terra cotta is porous, do a very light first coat of spray paint. This acts as a primer. Don’t worry about full coverage yet; just seal the surface. -
Apply the matte black:
Apply 2-3 coats of matte black spray paint. Hold the can about 8-10 inches away and use sweeping motions to avoid drips. The matte finish is crucial for that ‘cast iron’ silhouette look. -
Detail the eyes:
If the spray paint didn’t get deep enough into the eye holes on the head or hat, use a small brush and black acrylic paint to darken the insides of the holes completely. -
Texture check:
Look at the pots. If you want that textured, brush-stroke look seen in the photo, lightly dry-brush some black acrylic paint horizontally around the pots before the final seal. -
Final seal:
Once dry, spray the entire sculpture with a deeply matte clear sealant to protect it from the elements without adding unwanted shine.
Set your stylish new guardian on the porch to welcome trick-or-treaters with silent charm
Starry Night Pot Person With Glow Details
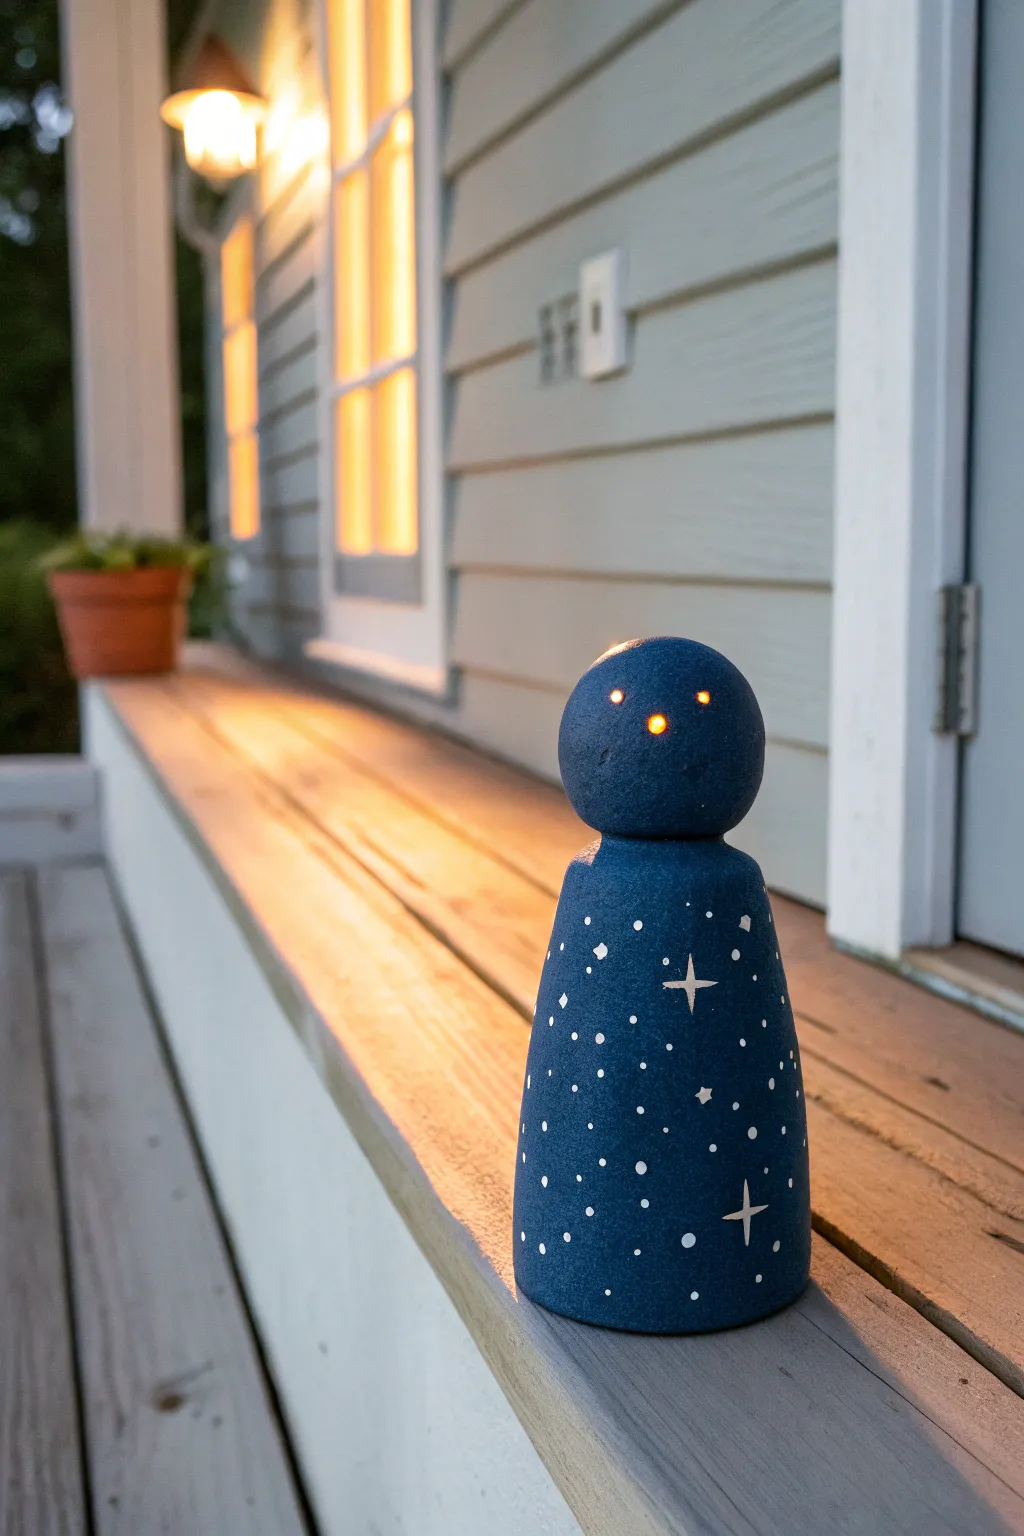
Transform a simple form into a celestial masterpiece with this elegant, starry design featuring glowing eyes. The deep midnight blue finish and delicate constellations create a peaceful, magical accent that looks beautiful on a porch railing or a windowsill at twilight.
Step-by-Step Guide
Materials
- Small terracotta clay pot (2-3 inch diameter)
- Wooden ball or doll head knob (sized to fit the pot’s bottom)
- Strong craft glue (E6000 or similar)
- Acrylic paint: Midnight Blue, Navy Blue, Titanium White
- Matte spray sealer or varnish
- Fine-grit sandpaper
- Small battery-operated LED tea light or fairy light string
- Drill with small bit (approx. 1/8 inch or 3mm)
- Pencil
- Fine detail paintbrush (0 or 00 size)
- Medium flat brush
- Toothpick or dotting tool
Step 1: Forming the Figure
-
Prepare the pot:
Turn your terracotta pot upside down. If there are any rough edges or sticker residue on the surface, gently sand them away with fine-grit sandpaper until the clay is smooth to the touch. -
Attach the head:
Apply a generous ring of strong craft glue to the rim of the pot’s base (which is now at the top). Press the wooden ball firmly onto the glue, ensuring it sits centered and level. -
Let it cure:
Allow the glue to dry completely according to the manufacturer’s instructions. I usually let this sit for at least an hour to ensure the head doesn’t slide around during painting.
Drilling Troubleshooting
If the wood begins to splinter while drilling the eyes, place a piece of masking tape over the area before drilling. This holds fibers in place for a cleaner hole.
Step 2: Creating the Glow Feature
-
Mark eye placement:
Lightly sketch two small circles for eyes on the wooden ball using a pencil. Place them somewhat wide apart for a sweet, whimsical character look. -
Drill the eyes:
Carefully drill through the marked spots on the wooden ball. Angle the drill slightly downward if possible, aiming into the hollow space of the pot below so the light can travel up. -
Check the holes:
Blow away any sawdust and ensure the holes are clean. You can twist a growing rolled-up piece of sandpaper inside the holes to smooth them out.
Step 3: Painting the Galaxy
-
Apply base coat:
Paint the entire figure (head and body) with a coat of navy blue acrylic paint. Let this layer dry completely before assessing if you need a second coat for opacity. -
Add depth:
Sponge or dab a slightly darker Midnight Blue onto the lower half of the body and the sides of the head to create a subtle gradient effect, simulating the depth of space. -
Protect the holes:
Double-check that paint hasn’t clogged your drilled eye holes. If it has, use a toothpick to clear them while the paint is still wet. -
Seal the base:
Give the blue base a quick spray with matte sealer. This prevents the dark blue paint from lifting or muddying the white stars you are about to add.
Cosmic Level Up
Mix a tiny amount of silver glitter into your matte sealer for the final coat to give the entire figure a subtle, shimmering quality in the sunlight.
Step 4: Adding Celestial Details
-
Paint major stars:
Using your finest detail brush and titanium white paint, create several four-pointed stars. Paint a vertical line, then a horizontal line crossing it, tapering the ends to sharp points. -
Add floating diamonds:
In the spaces between the large stars, paint small diamond shapes or tiny squares to represent distant stars that are brighter than mere dots. -
Create the star field:
Dip a toothpick or a dotting tool into white paint. Gently dot the remaining empty blue spaces with varying sizes of specks to fill out the galaxy. -
Create constellations:
If you like, connect a few of the dots with ultra-thin lines to suggest constellations, or keep it random like a snowy night sky. -
Final seal:
Once all paint is bone dry, spray the entire figure with a final coat of matte varnish to protect your artwork from the elements. -
Light it up:
Place a small LED tea light or a bundle of battery-operated fairy lights underneath the hollow pot. The light will shine up through the body and illuminate the drilled eyes.
Now you have a serene, starry guardian to watch over your garden or porch as the sun goes down