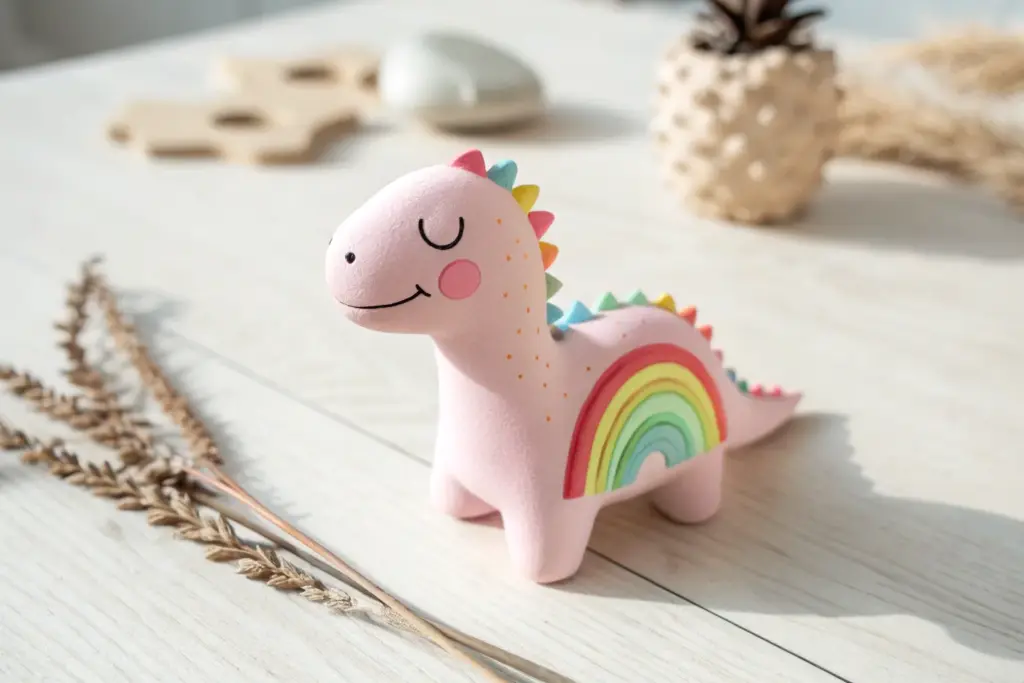
Whenever kids get their hands into clay, you can almost feel their imaginations switching on. Here are my go-to clay sculpting ideas that stay simple, cute, and totally doable with basic balls, coils, and slabs.
Cute Clay Animal Buddies
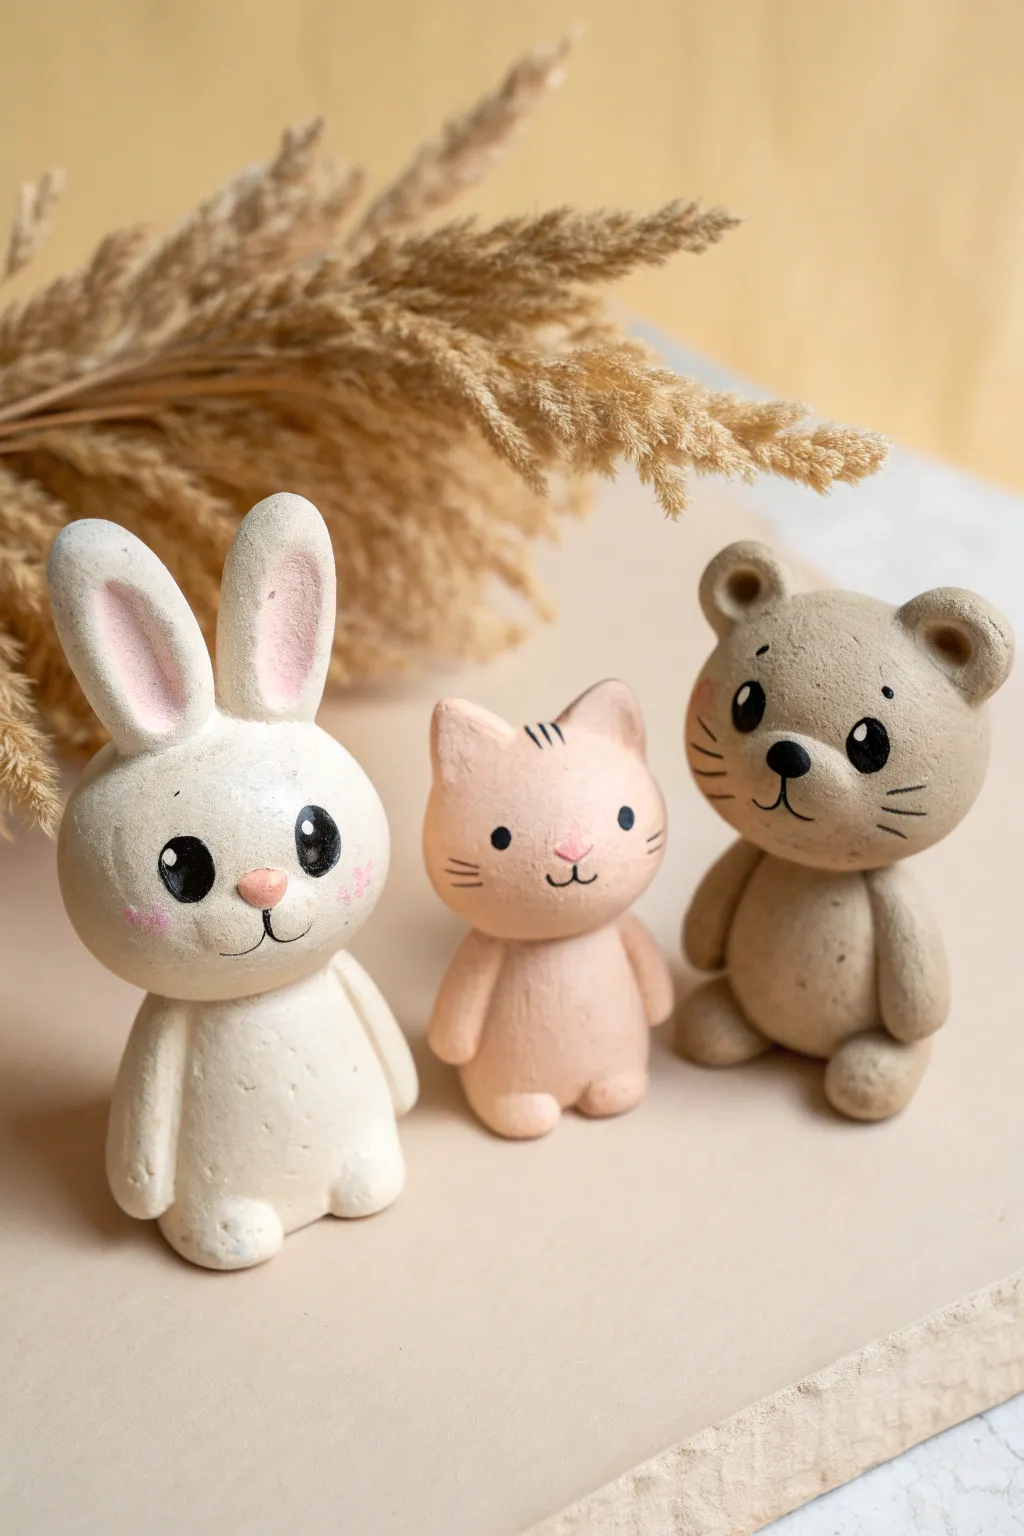
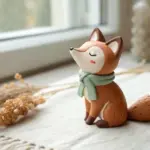
These adorable, minimalist clay figurines are perfect for beginners thanks to their simple, rounded shapes and sweet expressions. Whether you choose air-dry clay or polymer, you’ll create a charming trio featuring a white rabbit, a pink kitty, and a tan bear.
Detailed Instructions
Materials
- White air-dry clay or polymer clay
- Acrylic paints (pink, tan/brown, black)
- Small detail paintbrushes
- Wooden sculpting tools or distinct toothpicks
- Water cup (for smoothing)
- Clear matte varnish (optional)
- Rolling pin (optional)
Step 1: Prepping the Clay Bases
-
Divide the clay:
Start by separating your clay into three main portions. You will need the most clay for the white rabbit and the tan bear, and slightly less for the smaller pink cat. If using white clay for all, keep it clean; if using pre-colored polymer clay, mix your tan and pink shades now. -
Form the bodies:
Roll three balls of clay for the bodies. Instead of perfect spheres, gently roll them into stout oval or egg shapes that are slightly wider at the bottom so they stand up securely on their own. -
Create the heads:
Roll three slightly smaller spheres for the heads. The rabbit and bear heads should be rounder, while the cat’s head can be just slightly flattened. -
Join head to body:
Press a head onto each body firmly. If using air-dry clay, score the touching surfaces with a toothpick and add a dab of water to act as glue before pressing them together to ensure a strong bond.
Smooth Operator
Use a tiny bit of water on your finger to smooth out fingerprints while sculpting. Don’t use too much or the clay will become sludge.
Step 2: Sculpting the Features
-
Shape the bunny ears:
Roll two sausage shapes of white clay. Flatten them slightly and round off the tips. Press them onto the top of the rabbit’s head, smoothing the seam where the clay joins so it looks like one solid piece. -
Add the bear ears:
Make two small balls of tan clay. Create a small indentation in the center of each with a round tool or your pinky finger to create the inner ear, then attach them to the sides of the bear’s head. -
Form the cat ears:
Pinch two small, triangular pieces of pink clay. Attaching these requires a delicate touch; gently press them onto the top of the cat’s head, smoothing the base of the triangles into the skull. -
Attach arms and legs:
For all three animals, roll small ‘snake’ shapes for arms and press them vertically against the sides of the bodies. For the feet, roll tiny balls, flatten the bottoms, and attach them to the front base of the bodies so the animals look like they are sitting. -
Refine the snouts:
For the bunny and bear, add a tiny flattened oval of clay to the center of the face to build up the muzzle area. This gives the face more dimension before painting.
Make it a Set
Try making a tiny accessory for each animal, like a clay carrot for the bunny, a fish for the cat, or a honey pot for the bear.
Step 3: Painting & Finishing Details
-
Dry the clay:
Allow your figures to dry completely according to package instructions. Air-dry clay usually takes 24-48 hours depending on thickness. I usually rotate them halfway through so the bottoms dry evenly. -
Base coats:
If you used plain white clay, paint the cat a soft pastel pink and the bear a warm tan or light brown. Leave the bunny white. -
Paint the inner ears:
Using a small brush and light pink paint, fill in the center of the bunny’s tall ears. Adding a tiny touch of pink to the bunny’s cheeks creates a cute blush effect. -
Add facial features:
Using a very fine brush or a black paint pen, draw large, round black eyes on all three. Add small white dots inside the black circles to create a lively ‘sparkle’ in their eyes. -
Noses and mouths:
Paint a small pink triangle nose for the bunny and cat, and a black oval nose for the bear. Use a thin black line to draw the mouth curves—a ‘w’ shape works perfectly for the cat and bunny. -
Whiskers and details:
With the finest point you have, paint three short whiskers on each cheek of the cat and bear. Add three tiny stripes on the top of the cat’s head for extra personality. -
Seal the work:
Once all paint is fully dry, apply a coat of matte varnish to protect your new friends and give them a professional, finished look.
Let your little trio dry completely before placing them on a shelf to watch over your room


Turtles With Slab Shell Patterns
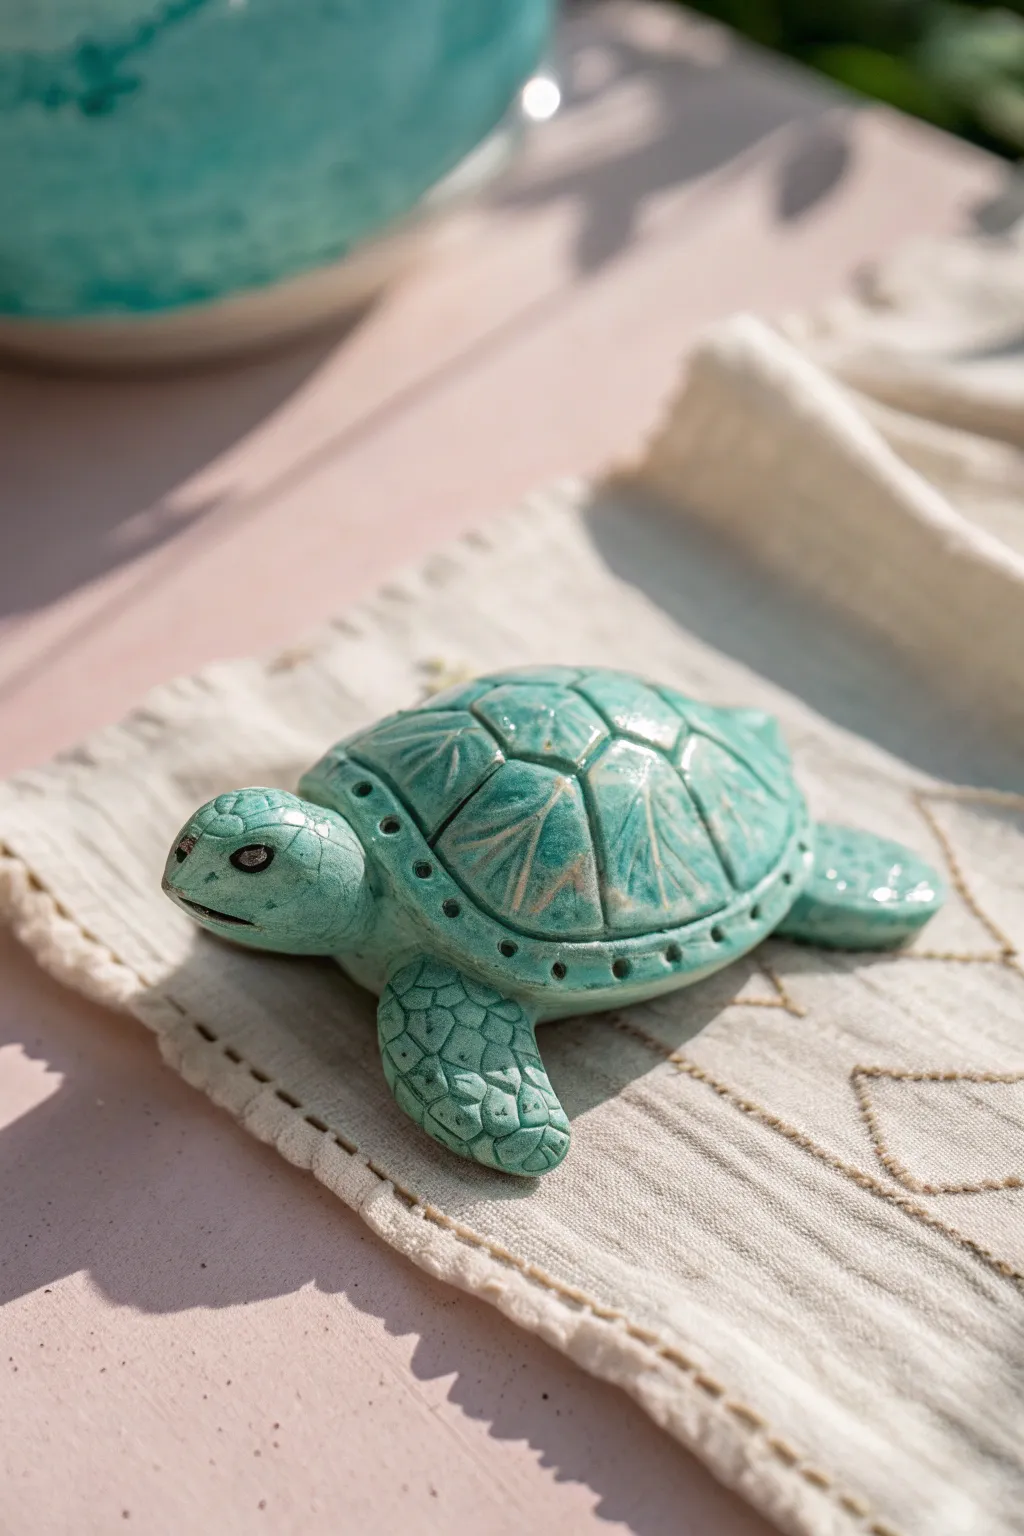
This elegant little turtle features a beautifully segmented shell created using clay slab techniques and detailed carving. The vibrant teal glaze settles into the incised lines, highlighting the texture and giving the creature a life-like, aquatic finish.
Step-by-Step Guide
Materials
- Air-dry clay or kiln-fire clay (white or light grey)
- Rolling pin
- Fettling knife or plastic clay tool
- Needle tool or toothpick
- Small loop tool or carving tool
- Slip (clay mixed with water) and scoring tool
- Sponge
- Teal or sea-green glaze (or acrylic paint + gloss)
- Small paintbrush
Step 1: Forming the Body
-
Prepare the base:
Start by rolling a ball of clay roughly the size of a tangerine for the body. Gently flatten the bottom against your work surface so it sits stable without rolling away. -
Shape the dome:
Round out the top of the body to comfortably support the shell later. You want a smooth, domed shape that resembles a river stone. -
Roll the shell slab:
Roll out a separate slab of clay to about 1/4 inch thickness. Use a bowl or circle cutter to cut a circle slightly larger than your turtle’s body dome. -
Drape the shell:
Gently drape this circular slab over the body dome. Smooth the edges down so it conforms to the shape underneath, creating a distinct ‘shell’ layer on top of the ‘body’ mass. -
Sculpt the head:
Roll a smaller ball of clay for the head. Pinch one side slightly to create a neck shape, and mold a gentle snout on the other end. -
Attach the head:
Score the neck area and the front of the body, apply a dab of slip, and press the head firmly into place. Blend the clay at the seam with your finger or a tool to ensure it won’t pop off.
Clean Lines
When carving the shell pattern, wait until the clay is ‘leather hard’ (firm but cool). The lines will be much cleaner and won’t foster jagged crumbs.
Step 2: Flippers and Feet
-
Create flipper shapes:
Form four teardrop shapes from your clay. Flatten them slightly to look like swimming flippers rather than walking legs. -
Attach the limbs:
Score and slip the underside of the body where the legs will go. Press the wide part of the teardrops under the shell so just the paddles stick out. -
Add a tail:
Make a tiny triangular spike for the tail. Attach it to the rear center of the underside, just barely peeking out from beneath the shell edge. -
Texture the skin:
Before the clay hardens, use a needle tool to scratch a scale-like pattern onto the flippers and the top of the head. I find varying the size of these scales makes it look more organic.
Cracking Seams?
If limbs start to separate as they dry, your joints were too dry. Use a wet paintbrush to re-moisten the seams and add a tiny coil of fresh clay to reinforce the gap.
Step 3: Detailing and Glazing
-
Carve the shell segments:
Using a needle tool or small knife, carve deep lines into the shell slab to resemble the scutes (plates) of a turtle shell. Draw lines radiating from the center or create a geometric pattern. -
Add rim details:
Use a small hollow tool or a straw to press tiny circles along the rim of the shell where it meets the body. This creates a decorative border. -
Refine the face:
Carve small almond shapes for eyes and add a slit for the mouth. You can add tiny pupils with a needle point for extra expression. -
Dry completely:
Let the sculpture dry slowly away from direct heat. If using kiln clay, fire it to bisque. If using air-dry, wait 24-48 hours until bone dry. -
Apply color:
Paint the entire turtle with a teal glaze or acrylic paint. Ensure the color gets deep into the carved lines and textured scales. -
Wipe back (optional):
If you want the texture to pop, gently wipe the surface with a damp sponge while the paint/glaze is still wet. This leaves darker color in the cracks and lighter color on the high points. -
Final finish:
Fire the glaze in a kiln, or seal your acrylic paint with a glossy varnish to give it that wet, just-out-of-the-ocean shine.
Place your finished turtle on a sunny shelf or in the garden to enjoy its peaceful vibe


Penguins Made From Two Balls
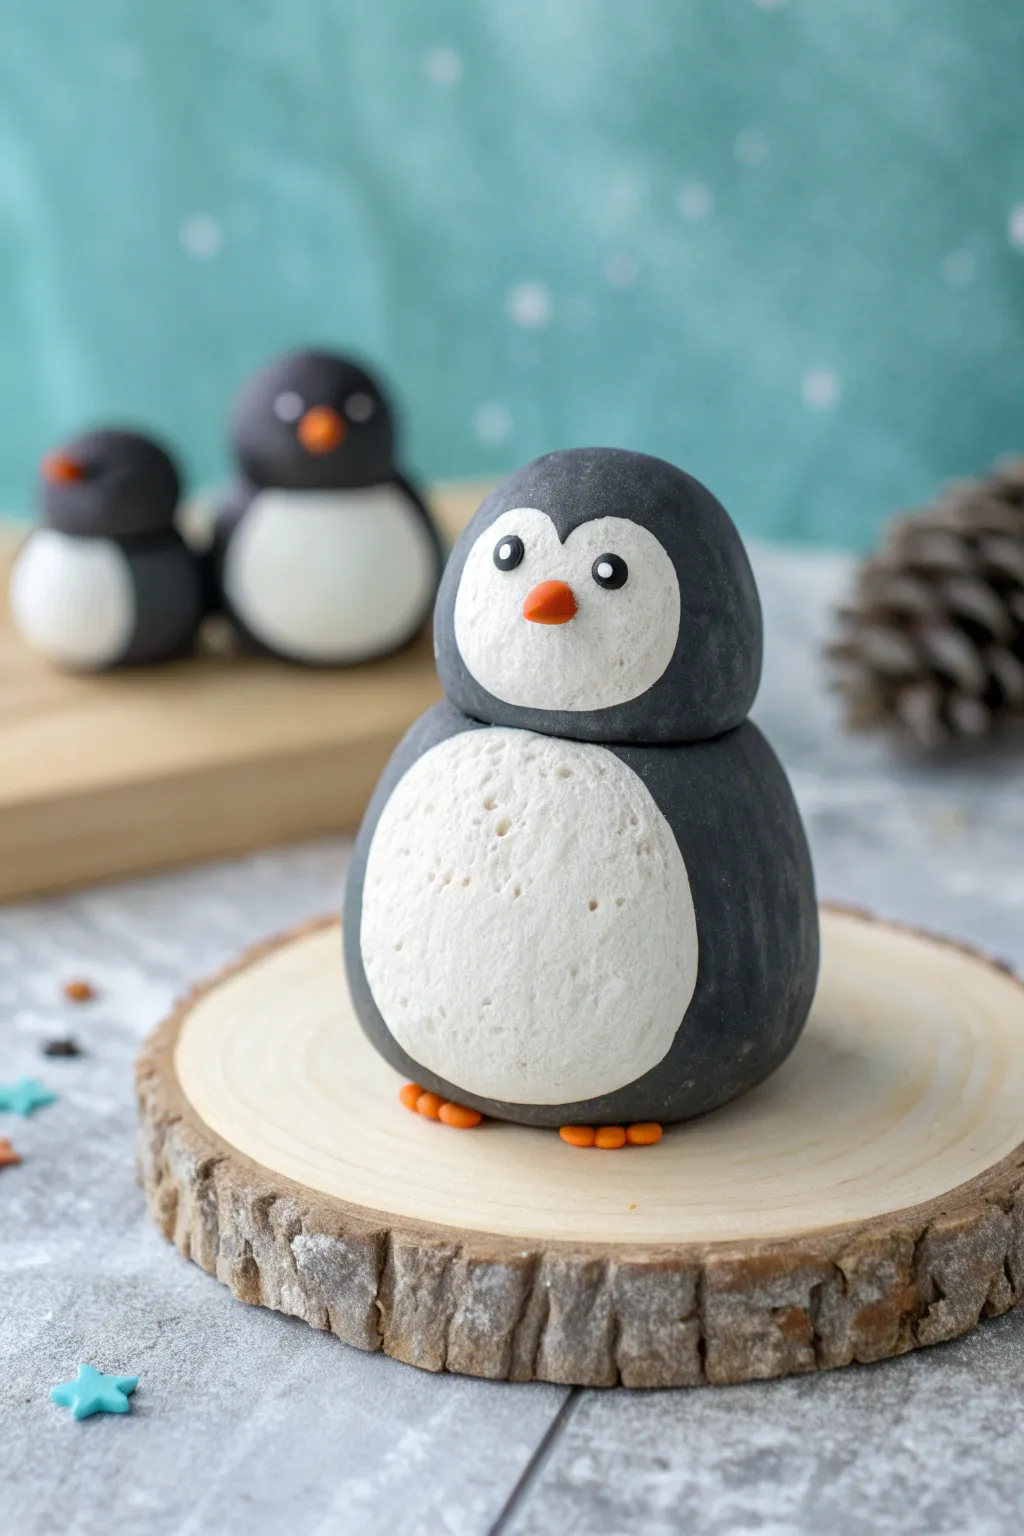
These adorable penguins are a perfect starting project for little hands, relying on simple shapes to create a winter buddy. The distinct separation between the head and body gives them a charming, chubby appearance that looks great displayed on a wooden slice.
Detailed Instructions
Materials
- Black modeling clay (polymer, air-dry, or plasticine)
- White modeling clay
- Orange modeling clay for beak and feet
- Small amount of black and white clay for eyes (or googly eyes)
- Rolling pin
- Small circle cutter (optional)
- Clay sculpting tool or toothpick
Step 1: Shaping the Base
-
Prepare the Body:
Start by taking a generous chunk of black clay and rolling it into a smooth ball. This will be the penguin’s body, so form it slightly larger than a golf ball. -
Form the Shape:
Gently press the ball onto your work surface to flatten the bottom. You want it to sit stable and upright without wobbling. -
Prepare the Head:
Take a second, slightly smaller piece of black clay. Roll this into a ball as well; it should be about two-thirds the size of the body. -
Join the Parts:
Place the head ball distinctively on top of the body ball. Press down gently to secure them together without completely blending the neck seam—that defined separation creates the cute ‘stacked’ look.
Clean Hands, Clean Clay
Black clay loves to stain white clay. Always wash your hands or use baby wipes thoroughly between handling the black body parts and shaping the white belly to keep it pristine.
Step 2: Adding the White Features
-
Flatten White Clay:
Roll out a piece of white clay until it is about 1/8 inch thick. -
Cut the Belly:
Using a circle cutter or just your fingers, shape a large white circle. This will become the penguin’s belly. -
Attach the Belly:
Press the white circle onto the front of the lower black ball. Gently tap the edges so it adheres to the curve of the body. -
Create Texture:
For a realistic touch, I like to use a toothbrush or a crumpled ball of foil to gently texture the white belly, giving it a fluffy appearance. -
Cut the Face Mask:
Shape a smaller piece of white clay into a kidney bean or heart shape (inverted). This will be the face mask. -
Attach the Face:
Place this white shape onto the front of the head ball. The two rounded tops of the heart shape will accommodate the eyes.
Winter Accessories
Give your penguin extra personality by sculpting a tiny red scarf or a knit cap using different colored clays. You can also add a small blue star or snowflake on the base.
Step 3: Details & Assembly
-
Make the Beak:
Roll a tiny piece of orange clay into a cone or teardrop shape. -
Place the Beak:
Attach the beak right in the center of the white face mask, pointing slightly downward. -
Form the Eyes:
Roll two minuscule balls of black clay. Press them onto the white face mask, just above the beak. -
Add Highlights:
To bring the character to life, add the tiniest speck of white clay to each black eye pupil as a reflection highlight. -
Create the Feet:
To make the feet, roll two small balls of orange clay and flatten them slightly into oval discs. -
Add Toes:
Use a toothpick or clay tool to press two small indentations into the front edge of each orange foot to suggest toes. -
Final Assembly:
Tuck the orange feet underneath the front of the belly so they just peek out. -
Set the Scene:
If using air-dry clay, let your penguin sit undisturbed for 24 hours. Placing it on a small wood slice creates a wonderful winter display.
Once dry or baked according to your clay type, you will have a charming little friend ready for the shelf


Frogs on Lily Pads
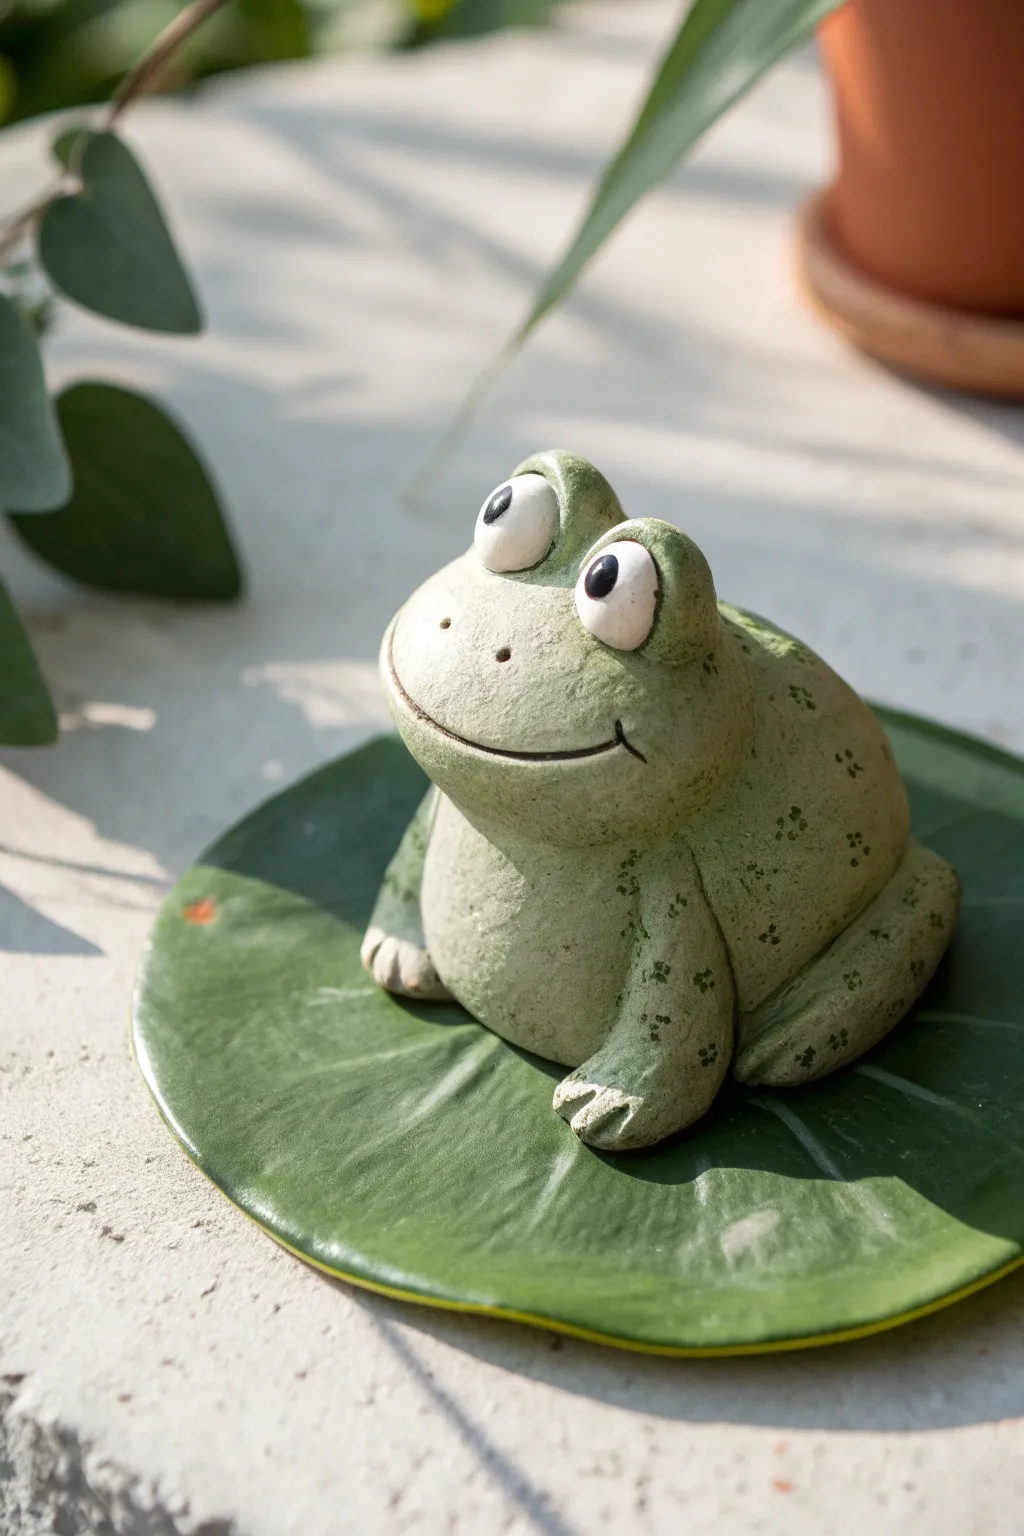
Sculpt a delightfully chubby frog resting on its very own lily pad with this simple yet charming project. The finished piece features a textured, earthy green finish that makes it look like it just hopped out of a garden pond.
How-To Guide
Materials
- Air-dry clay or polymer clay (white or light grey)
- Acrylic paints (olive green, dark green, cream/off-white, black)
- Small rolling pin
- Clay sculpting tools (needle tool, modeling tool)
- Circle cutter or a small bowl (approx. 4-5 inches)
- Small sponges for texture
- Paintbrushes (fine tip and flat)
- Small cup of water
- Clear sealant (optional)
Step 1: Sculpting the Lily Pad Base
-
Roll the base:
Start by taking a medium-sized ball of clay and rolling it out flat until it’s about 1/4 inch thick. Aim for an even thickness so it sits flat. -
Cut the shape:
Use your circle cutter or trace around a bowl to cut a perfect circle. Gently smooth the edges with a wet finger to remove any rough bits. -
Create the notch:
Cut a small ‘V’ shape out of one side of the circle to give it that classic lily pad look. -
Add leaf veins:
Use a needle tool or a dull knife to gently etch lines radiating from the center of the leaf out toward the edges. Don’t cut all the way through. -
Lift the edges:
I like to gently curl the edges of the leaf upward just slightly to give it a more natural, floating appearance.
Step 2: Forming the Frog Body
-
Make the main body:
Roll a larger ball of clay into a smooth, slightly flattened oval shape. This will be the frog’s chubby torso. -
Position on the pad:
Place the body onto the center of your lily pad. Press it down firmly so the clay bounds together. -
Create the hind legs:
Roll two thick sausage shapes and bend them into a ‘V’ or boomerang shape. Attach these to the sides of the body for the folded back legs. -
Add the front legs:
Roll two smaller logs for the front arms. Attach them vertically under the ‘chin’ area so they rest on the lily pad. -
Define the toes:
Use your needle tool to press indentations into the ends of all four legs to create distinct toes. -
Add the eyes:
Roll two small balls of clay. Attach them to the very top of the head, pressing them on so they protrude upward significantly.
Cracks Appearing?
If you see tiny cracks forming while the clay dries, mix a tiny bit of fresh clay with water to make a paste and smooth it into the cracks immediately.
Step 3: Details & Texture
-
Sculpt the mouth:
Use a modeling tool to carve a wide, curved smile across the face. Add tiny dimples at the corners for extra cuteness. -
Add nostrils:
Poke two small holes between the eyes for nostrils. -
Texture the skin:
Take a dry sponge or a crumpled ball of aluminum foil and gently press it all over the frog’s back and the lily pad to give it a stone-like texture. -
Dry thoroughly:
Let the sculpture dry completely according to your clay package instructions before painting.
Level Up: Glossy Eyes
After all the paint is completely dry, add a drop of clear nail polish or UV resin specifically to the eyes to make them look wet and shiny.
Step 4: Painting & Finishing
-
Base coat the frog:
Paint the entire frog with a light olive green. While the paint is wet, dab it with a paper towel for a mottled look. -
Paint the belly:
Mix a little cream or white with your green and paint the belly area and under the chin for a lighter shade. -
Body speckles:
Use a fine brush or a toothpick to add clusters of dark green dots on the back, legs, and sides. -
Paint the eyes:
Paint the eyeballs white. Once dry, add large black pupils looking slightly upward. -
Paint the lily pad:
Paint the leaf a deep, rich green. You can highlight the etched veins with a lighter green for contrast.
Your happy little frog acts as a perfect paperweight or shelf decoration to brighten your day

The Complete Guide to Pottery Troubleshooting
Uncover the most common ceramic mistakes—from cracking clay to failed glazes—and learn how to fix them fast.
Easy Fish With Fin Cutouts
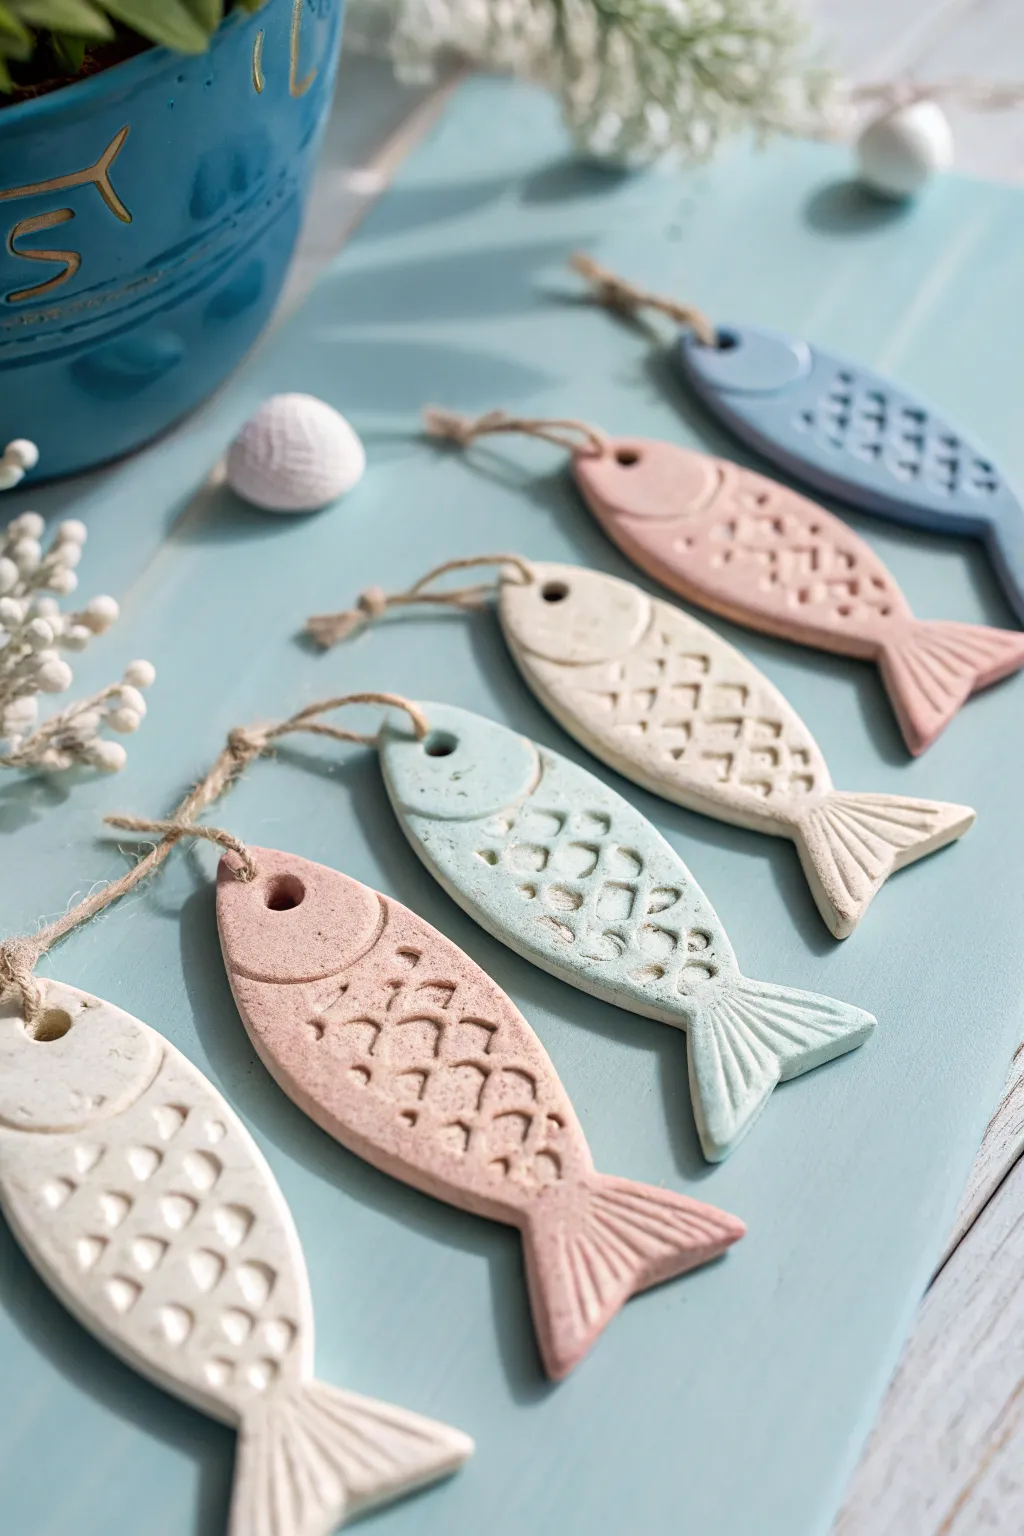
These charming, rustic fish ornaments are a perfect beginner project, featuring layered scale textures and soft pastel colors. The natural jute hangers and matte finish give them a lovely coastal farmhouse vibe that looks great hanging on a branch or wall.
Step-by-Step Tutorial
Materials
- Air-dry clay (white)
- Rolling pin
- Fish-shaped cookie cutter (or a knife and paper template)
- Drinking straw or small circular tool
- Clay sculpting tools (or a plastic knife)
- Acrylic paints (pastel pink, baby blue, white, cream)
- Small sponge or paintbrush
- Jute twine or rustic string
- Medium grit sandpaper
- Matte sealant spray (optional)
Step 1: Shaping the Base
-
Roll the clay:
Begin by kneading a ball of air-dry clay until it is soft and pliable. Roll it out on a flat surface to a thickness of about 1/4 inch (6mm), ensuring it’s even throughout so it dries without warping. -
Cut the shape:
Press your fish-shaped cookie cutter firmly into the clay. If you don’t have a cutter, I like to sketch a simple fish shape on cardstock, cut it out, place it on the clay, and trace around it with a knife. -
Smooth the edges:
Dip your finger in a little bit of water and gently run it along the cut edges of the fish to remove any jagged bits or crumbs. -
Make the hanging hole:
Use a drinking straw or a small circular cutter to punch a hole near the top edge of the fish’s back, just behind the head area. This creates a clean, perfect circle for the string later.
Clean Cuts Every Time
If your clay sticks to the cookie cutter, dip the cutter into cornstarch or flour before pressing it into the clay. The shape will release effortlessly.
Step 2: Adding Texture & Detail
-
Define the head:
Use a clay knife or modeling tool to gently press a curved line distinguishing the head from the body. Don’t cut all the way through; just make an indentation. -
Create the eye:
Press the end of a paintbrush handle or a small round tool into the head area to create a deep, circular indentation for the eye. -
Imprint the scales:
This is the fun part! Take a small U-shaped tool (the end of a bobby pin works great for this) or a small semi-circle cutter. Press rows of ‘U’ shapes into the body, starting from the tail and working toward the head to layer the scale pattern correctly. -
Detail the tail:
Use your knife tool to press straight, radiating lines into the tail fin to simulate the ribbed texture of a real fin. -
Dry the ornaments:
Place your finished clay fish on a wire rack or parchment paper. Let them dry completely for 24-48 hours, flipping them occasionally to ensure even drying on both sides.
Step 3: Painting & Finishing
-
Smooth the surface:
Once fully dry, lightly sand any rough edges with medium-grit sandpaper. Wipe away the dust with a dry cloth. -
Apply base color:
Mix your acrylic paints to get soft, matte pastels. Paint the entire fish in your chosen color (creamy white, pale pink, or soft blue). You might need two coats for opaque coverage. -
Distress the texture:
To make the scales pop, wait for the base coat to dry. Then, use a slightly damp sponge to lightly wipe over the raised areas, or dry-brush a tiny amount of lighter paint over the texture. -
Add speckling (optional):
For a rustic look, dip an old toothbrush in watered-down brown or grey paint. Run your thumb over the bristles to flick tiny speckles onto the fish. -
Seal the clay:
Spray a light coat of matte sealant over the fish to protect the paint and give it a finished professional look. -
Attach the hanger:
Cut a 6-inch length of jute twine. Thread one end through the hole you made earlier. -
Secure the knot:
Bring the ends of the twine together and tie a simple overhand knot. Trim the excess string to your desired length to finish the ornament.
Scented Ornaments
Knead a few drops of essential oil, like lavender or lemon, into the air-dry clay before rolling. Your fish will act as a subtle air freshener!
Hang your school of fish together to create a delightful mobile or use them individually as simple gift tags
Owl Figurines With Big Eyes
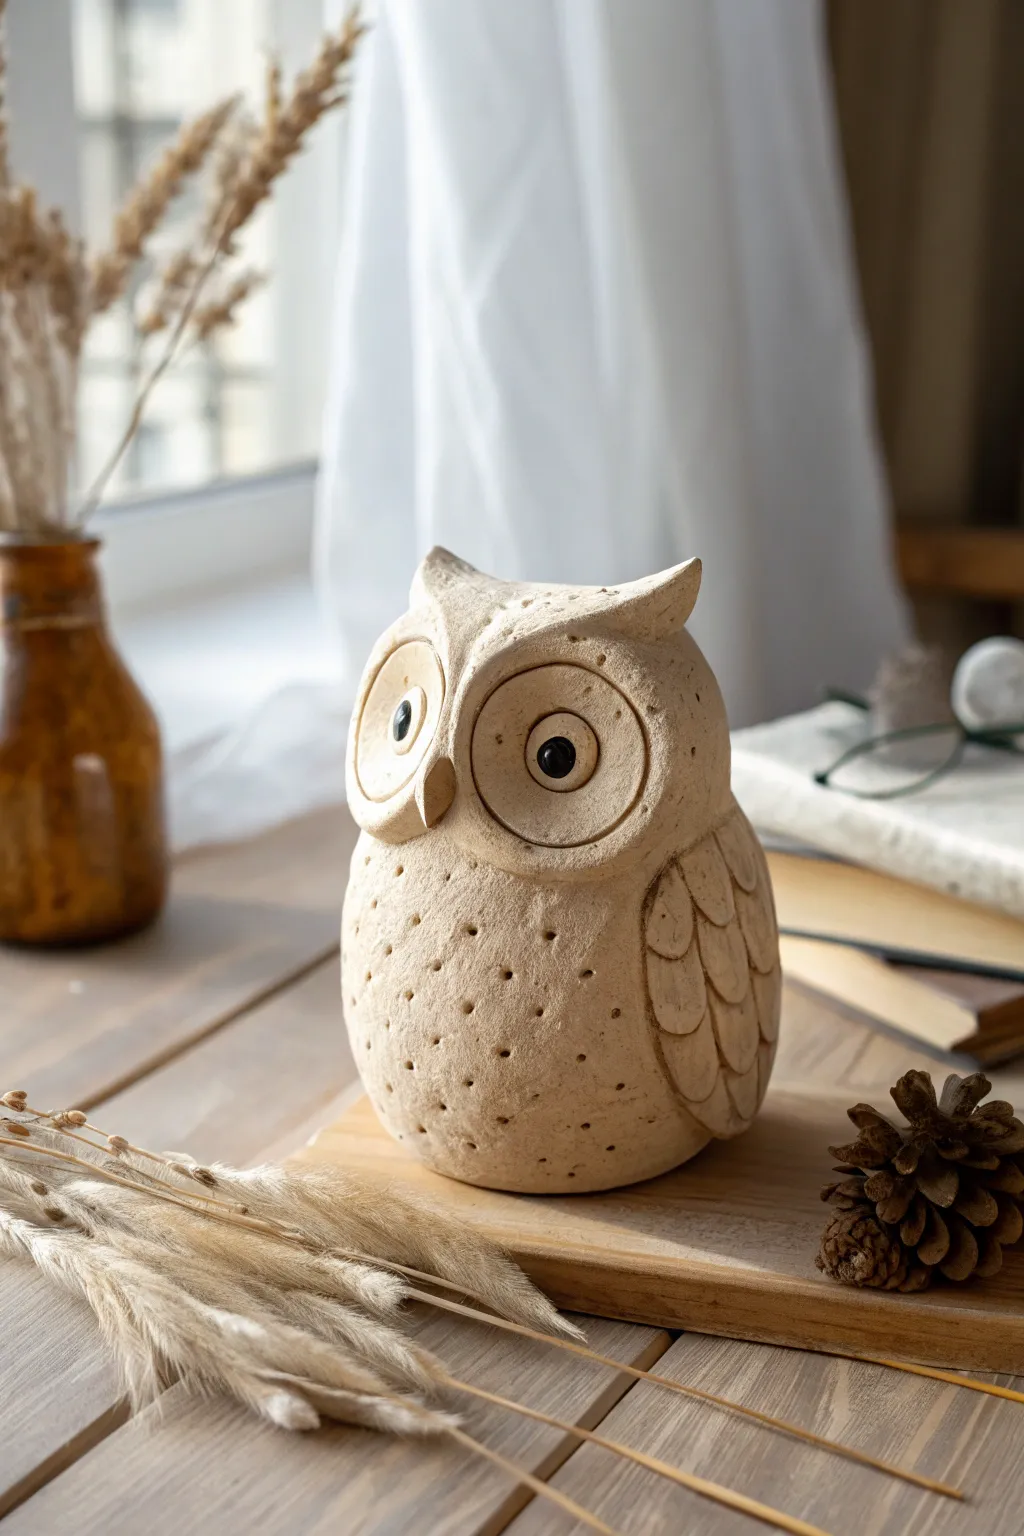
Sculpt a charming, wide-eyed owl with a natural faux-stone finish using simple air-dry or polymer clay. This figure features deep, expressive eye sockets and a delightful stippled texture that gives it a rustic, handmade feel.
Step-by-Step Guide
Materials
- Air-dry clay or polymer clay (stone or beige color)
- Aluminum foil (for armature)
- Clay sculpting tools (needle tool, ball stylus)
- Small rolling pin
- Pointed toothpick or skewer
- Small circular cutters (optional)
- Black acrylic paint
- Small paintbrush
- Water (for smoothing)
Step 1: Forming the Body
-
Create the core:
Crumple a piece of aluminum foil into an egg shape about the size of a lemon. This saves clay and keeps the figurine lightweight. -
Cover the armature:
Roll out a slab of your beige clay to about 1/4 inch thickness. Wrap it completely around the foil egg, smoothing the seams so the foil is hidden and the surface is uniform. -
Shape the silhouette:
Gently gently press the bottom of the egg on your work surface to flatten it so the owl stands stably. Pinch the top corners slightly to suggest ear tufts.
Step 2: Sculpting the Face
-
Define the eye sockets:
Roll two medium-sized balls of clay and flatten them into thick discs. Press these firmly onto the upper half of the face area. -
Add the recess:
Use a large ball tool or your thumb to press a deep, concave indentation into the center of each eye disc, leaving a raised rim around the edge. -
Refine the rims:
Use a modeling tool to smooth the outer edges of the eye discs into the main body so they look integrated rather than just stuck on. -
Add the beak:
Form a small, sharp cone or triangle of clay. Attach it securely between the lower part of the eyes, pointing downward. -
Create the eyeballs:
Roll two small balls of clay and place them deep inside the sockets. Gently press them to adhere.
Cracks appearing?
If air-dry clay cracks while drying, mix a tiny bit of fresh clay with water to make a paste (slip) and fill the cracks, then smooth over.
Step 3: Adding Wings and Texture
-
Outline the wings:
Use a needle tool to lightly sketch a curved wing shape on both sides of the body. -
Add feathers:
With a small curved tool or simply by pressing a U-shape, carve layers of scallops inside the wing outline to resemble overlapping feathers. -
Stipple the texture:
Take a toothpick or skewer and poke small holes randomly all over the owl’s belly and chest. Vary the depth slightly for organic interest. -
Add facial details:
Add a few smaller stipple dots around the forehead and cheeks, avoiding the smooth rims of the eyes. -
Smooth imperfections:
I like to dip my finger in a tiny bit of water and gently rub any harsh fingerprints away, especially on the top of the head.
Glow in the dark
Paint the inner eye sockets with glow-in-the-dark acrylic paint before adding the black pupils for a spooky night-time effect.
Step 4: Finishing Touches
-
Dry or bake:
If using air-dry clay, let the owl sit for 24-48 hours. If using polymer, bake according to the package instructions. -
Paint the pupils:
Once fully hardened, use a fine detail brush and black acrylic paint to carefully fill in the small central pupils. -
Add highlights:
Dip the very tip of a toothpick into white paint (optional) and add a tiny dot to one side of the black pupil for life-like sparkle. -
Seal (optional):
Apply a matte varnish if you want to protect the clay while keeping that natural stone look.
Place your finished owl on a bookshelf or windowsill to keep a watchful eye over your room


What Really Happens Inside the Kiln
Learn how time and temperature work together inside the kiln to transform clay into durable ceramic.
Rainbow Caterpillars From Tiny Balls
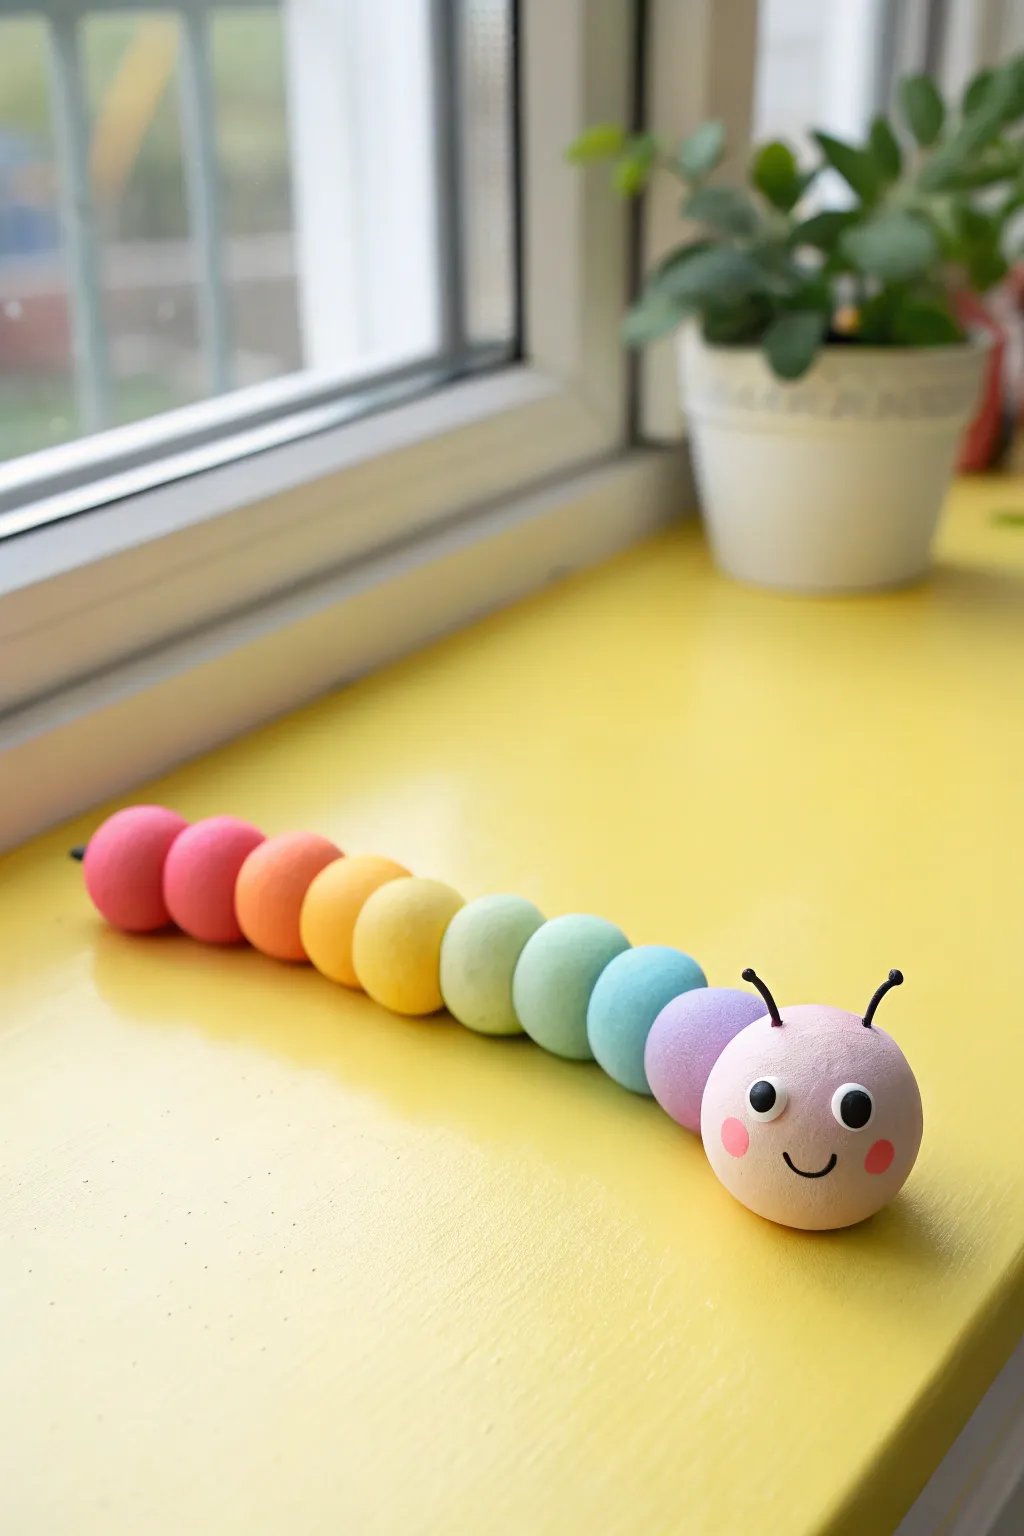
These cheerful little critters are perfect for practicing color gradients and basic sphere rolling techniques. The finished result is a delightful pastel-toned caterpillar with a friendly face that brightens up any windowsill.
Step-by-Step Tutorial
Materials
- Air-dry clay or polymer clay (white base plus assorted colors)
- Acrylic paints (if using white clay only)
- Black wire or thin crafting cord for antennae
- Googly eyes (small) or black and white clay
- Pink paint marker or pink clay for cheeks
- Small detail brush or black marker
- Toothpicks (optional, for internal structure)
- Glossy varnish (optional)
Step 1: Preparing the Colors
-
Plan your palette:
Observe the rainbow transition in the caterpillar. You will need roughly 10 distinct colors ranging from a deep magenta at the tail to a soft pink for the head. Lay out your clay portions in order. -
Mix your shades:
If you are using pre-colored clay, mix white into your primary colors to achieve a soft, pastel matte finish. Aim for a smooth gradient: magenta, coral, orange, golden yellow, pale yellow, lime green, mint green, sky blue, and lavender. -
Prepare the head color:
For the head, create a slightly larger portion of very pale, soft pink clay. Keep this separate so it doesn’t get stained by darker colors.
Smooth Seams
To barely hide the connection points, try using a damp brush (for air-dry) or baby oil (for polymer) to smooth the crevice where two balls meet.
Step 2: Forming the Body
-
Roll the tail segment:
Start with the magenta clay. Roll it between your palms to create a perfect, smooth sphere about the size of a large marble. -
Create the second segment:
Take your coral or red-orange clay and roll a second sphere of identical size. Gently press it against the first one so they adhere without smashing the shape. -
Continue the chain:
Proceed with the orange, yellow-orange, and yellow spheres. Line them up carefully, pressing each new ball gently into the previous one to form a straight line. -
Add the cool tones:
Continue adding the green, blue, and purple spheres. I like to double-check the straightness of the line after every few balls to keep him from looking too wiggly. -
Secure the connections:
If your clay feels too dry to stick on its own, score the contact points slightly with a texturing tool or add a tiny dab of water (for air-dry clay) or liquid clay (for polymer). -
Attach the head:
Take your reserved pale pink sphere, which should be slightly larger than the body segments. Attach it firmly to the front (purple) end of the body.
Step 3: Adding Personality
-
Place the eyes:
You can stick on small googly eyes, or for a more handmade look like the photo, press two tiny flattened discs of white clay onto the face, topped with smaller black clay pupils. -
Draw the smile:
Using a very fine black marker or a thin paintbrush with black acrylic, paint a small, simple ‘U’ shape smile right between the cheeks. -
Add rosy cheeks:
Dip a fingertip or a Q-tip into pink paint (or use a pink paint marker) and dab two soft circular blushes on either side of the smile. -
Insert antennae:
Cut two short pieces of black wire or stiff cord, about half an inch long. Poke them into the top of the head at a slight outward angle. -
Final shaping:
Gently gently press down on the entire caterpillar so the bottom flattens slightly; this ensures it will sit stable on a shelf without rolling away. -
Dry or bake:
Follow the specific instructions for your clay type. Let air-dry clay sit undisturbed for 24 hours, or bake polymer clay according to package directions.
Give it Legs
Make tiny matching spheres—two for every body segment—and attach them underneath to give your caterpillar whimsical little feet.
Now you have a colorful companion to brighten up your desk or bookshelf
Smiley Fruit Characters
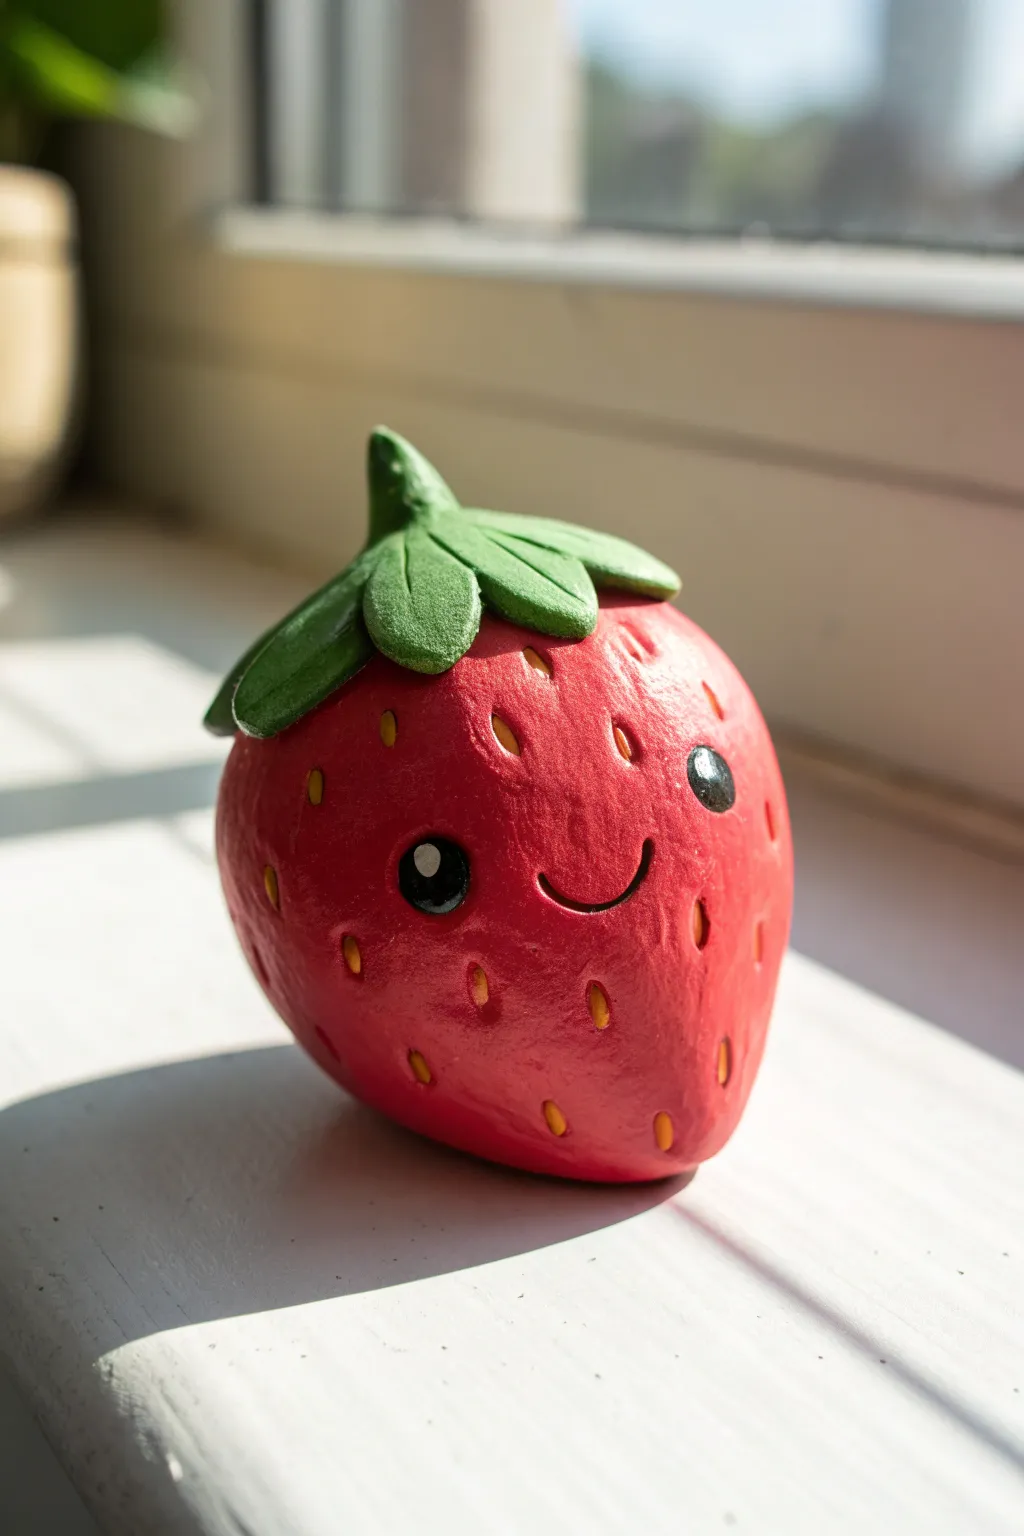
Sculpt a delightfully chubby strawberry friend with big, welcoming eyes and a bright green leafy hat. This polymer clay project captures a cheerful personality in a simple rounded form that sits perfectly on any windowsill.
How-To Guide
Materials
- Red polymer clay (approx. 2oz)
- Green polymer clay
- Yellow polymer clay (small amount)
- Black polymer clay (tiny amount)
- White polymer clay or white acrylic paint
- Sculpting tools (needle tool, ball stylus)
- Aluminum foil (optional, for core)
- Gloss glaze (optional)
Step 1: Forming the Berry Body
-
Condition the Clay:
Begin by kneading your red polymer clay until it is soft, pliable, and easy to work with. -
Create a Foil Core:
Roll a small ball of aluminum foil about the size of a walnut; this saves clay and helps the piece bake evenly. -
Wrap the Core:
Flatten your conditioned red clay into a pancake and wrap it completely around the foil ball, smoothing out any seams until the surface is flawless. -
Shape the Strawberry:
Gently roll the red ball between your palms, then apply slightly more pressure at the bottom to create a tapered, rounded point, resembling a plump strawberry shape. -
Flatten the Base:
Tap the tapered bottom gently against your work surface to create a small flat spot so your strawberry will stand up on its own without rolling away. -
Add Texture:
Using a ball stylus or a blunt tool, press small, shallow indentations all over the surface of the strawberry to mimic the pores where seeds sit.
Sticky Situation?
If the tiny yellow seeds keep falling off your tool before reaching the strawberry, lightly touch the tip of your tool to a bit of clay softener or water to help grab them.
Step 2: Adding the Seeds and Face
-
Prepare the Seeds:
Take a tiny pinch of yellow clay and roll it into a very thin snake. -
Cut Seed Segments:
Slice the yellow snake into tiny, rice-grain-sized pieces. -
Plant the Seeds:
Place a yellow seed into each indentation you made earlier, gently pressing them down so they stay put but still protrude slightly. -
Make Eye Sockets:
Use a larger ball tool to press two deep, round indentations where you want the face to be. -
Add the Eyes:
Roll two small balls of black clay, slightly flatten them, and press them firmly into the eye sockets. -
Create the Sparkle:
Add a tiny speck of white clay (or a dot of white paint after baking) to the upper right corner of each black eye to give it life. -
Sculpt the Smile:
Roll a very thin, short snake of black clay and curve it into a ‘U’ shape, pressing it onto the face between the eyes for a happy grin.
Step 3: Topping with Greenery
-
Shape the Stem Base:
Roll a small ball of green clay and flatten it slightly into a thick disk. -
Cut the Leaves:
Use a craft knife or plastic tool to cut triangular notches into the edge of the green disk, creating a star-like shape with five or six points. -
texture the Leaves:
I like to use a needle tool to gently score a central vein down the middle of each leaf point for realism. -
Attach the Calyx:
Place the green star shape on top of the red berry, pressing the center down firmly and draping the leaf points over the curved sides. -
Add the Stem:
Roll a small cone of green clay and attach it to the very center of the leaves, smoothing the connection point with a modeling tool. -
Texture the Body:
Give the red berry a final once-over with a stiff toothbrush or texture sponge to simulate a realistic, matte fruit skin texture, avoiding the eyes. -
Bake and Finish:
Bake according to your clay package instructions (usually 275°F for 15-30 minutes), let cool completely, and apply a gloss glaze if you want a shiny finish.
Make it a Family
Make a whole fruit bowl family by using blue clay for blueberries or oblong green shapes for grapes. Give them different expressions like winking or surprised faces.
Now you have a cheerful little companion to brighten up your desk space

TRACK YOUR CERAMIC JOURNEY
Capture glaze tests, firing details, and creative progress—all in one simple printable. Make your projects easier to repeat and improve.
Happy Mini Donuts and Cookies

These miniature donut-shaped cookies look good enough to eat but are actually made from polymer clay. With their soft matte finish and delicate icing details, they make adorable charms or dollhouse treats.
Step-by-Step Guide
Materials
- Polymer clay (beige/tan for the base)
- Polymer clay (pastel pink, mint green, white)
- Liquid polymer clay (Translucent or white)
- Small round cutters (or a straw and a smaller straw)
- Dotting tool or toothpick
- Soft pastel chalks (brown/orange) for shading
- Small paintbrush
- Gloss glaze (optional, for ‘wet’ looking icing)
- Baking sheet and parchment paper
- Ceramic tile or glass work surface
Step 1: Shaping the Base
-
Condition the Clay:
Start by warming up the beige or tan polymer clay in your hands until it is soft and pliable. Good conditioning prevents cracks later. -
Roll the Sheet:
Roll your beige clay out into a uniform sheet, approximately 1/4 inch thick. You want these to look plump. -
Cut the Circles:
Using a small round cutter (about 1 inch in diameter), punch out several circles. If you don’t have a cutter, you can roll balls and flatten them gently. -
Create the Centers:
Use a smaller straw or a tiny round cutter to remove the center of each circle, creating the classic donut shape. Save the centers to make mini donut holes later. -
Soften the Edges:
Gently tap the edges of your donuts with your finger to round them off so they look like baked dough rather than sharp-edged cutouts.
Sticky Situation?
If the clay gets too soft or sticky to handle, pop it in the fridge for 10 minutes. This firms it up and stops fingerprints from ruining the smooth surface.
Step 2: Realistic Baking Effects
-
Prepare the Pastels:
Scrape a little bit of brown and orange soft pastel chalk into a fine powder using a craft knife or sandpaper. -
Shade the Dough:
Dip a dry soft paintbrush into the pastel powder and gently brush it onto the edges and bottoms of your clay donuts. This gives them a perfectly ‘toasted’ look.
Clean Edges
Before baking, use a cotton swab dipped in rubbing alcohol to gently wipe away any dust or lint from the lighter colored clay.
Step 3: Icing and Decoration
-
Mix the Icing:
To make realistic icing, mix a small piece of your colored clay (pink, mint, or white) with liquid polymer clay until it reaches a sticky, frosting-like consistency. I like to do this in a small glass dish. -
Apply the Frosting:
Using a toothpick or a small tool, carefully spread the ‘icing’ mixture onto the top of each donut. Let it drip slightly over the sides for a natural look, or keep it neat for a dipped cookie style. -
Add Polka Dots:
For the polka-dot donuts, take a contrasting color of your icing mixture (like pink on white) and use a dotting tool to place tiny, even dots around the ring. -
Create Kawaii Faces:
For the character donuts, use a needle tool or very fine black clay to add two tiny eyes. Add simple pink cheeks using a tiny dab of pink pastel powder. -
Texture the Plain Ones:
If you are leaving some donuts ‘unfrosted’ (like the pink ones in the image), you can gently texture the surface with a toothbrush before baking to simulate a sugar-cookie texture. -
Add Sugar Sprinkles:
For a sugared look, you can sprinkle fine white glitter or shaved white clay crumbs over the wet liquid clay icing before baking.
Step 4: Baking and Finishing
-
Arrange on Tray:
Place all your finished creations on a piece of parchment paper on your baking sheet, ensuring they aren’t touching. -
Bake:
Bake according to your clay manufacturer’s instructions (usually around 275°F for 15-20 minutes). Keep an eye on them so the white icing doesn’t scorch. -
Cool Down:
Let the donuts cool completely on the tray. The liquid clay icing will harden as it cools. -
Optional Glaze:
If you want a shiny glazed look, brush a thin layer of satin or gloss varnish over just the icing part once the clay is fully cool.
Arranging these sweets on a tiny plate makes for a delightful display that won’t ever go stale
Mushroom Garden Minis
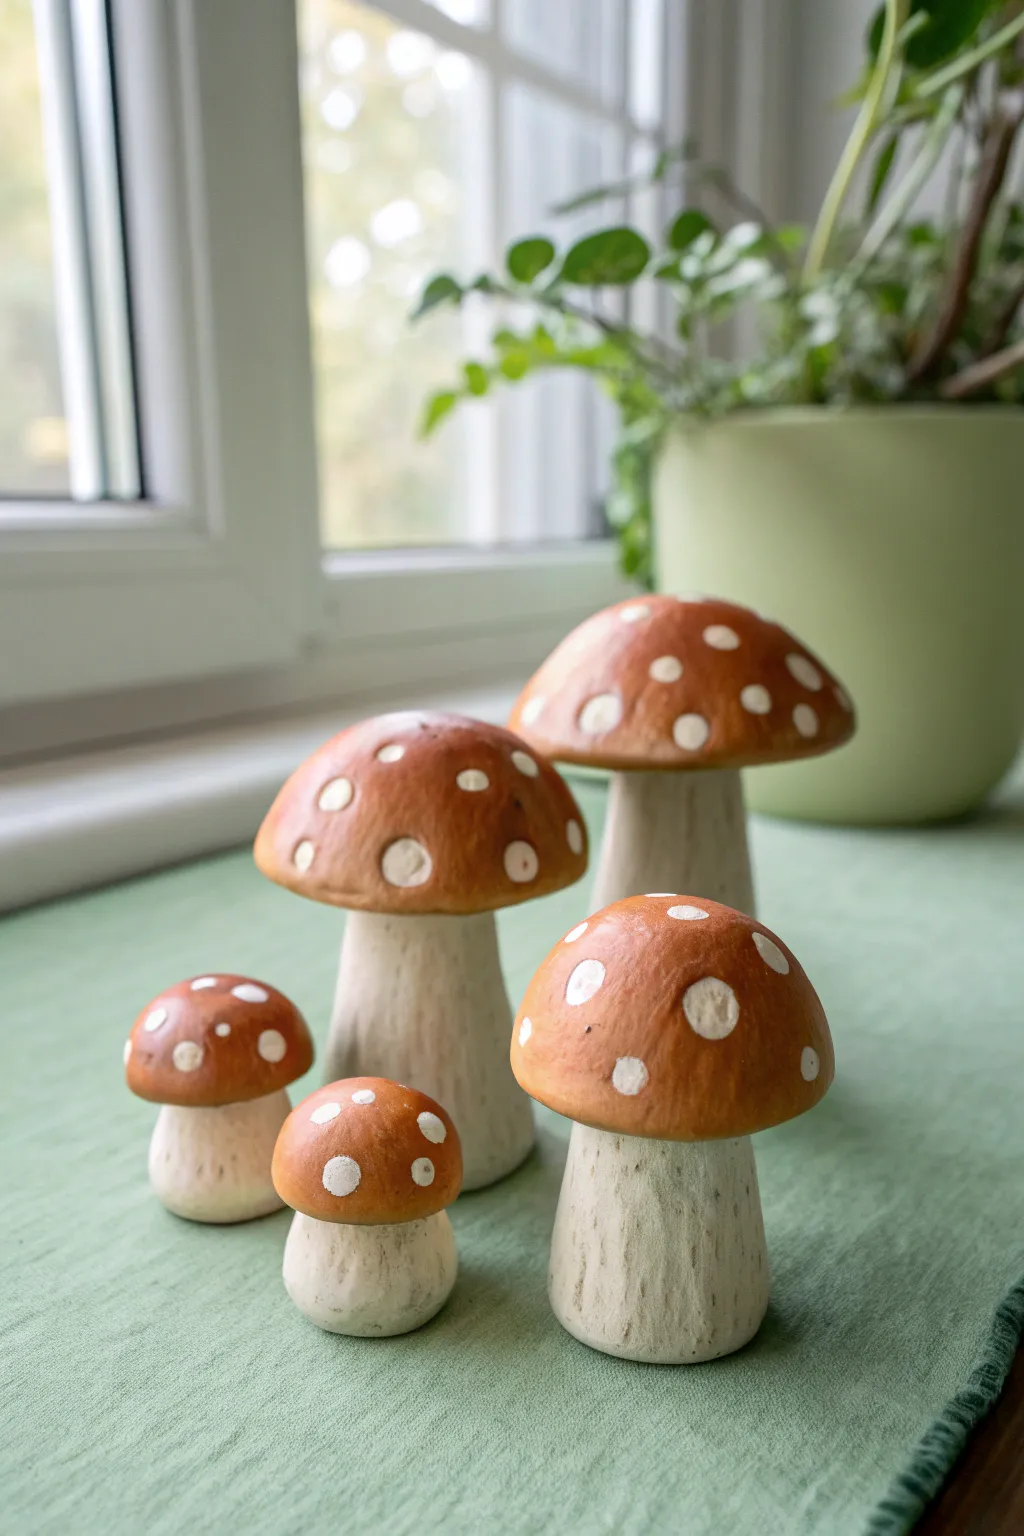
Create a whimsical forest floor scene with these charming clay mushrooms, featuring iconic russet-red caps and playful white speckles. Their sturdy, textured stems and varying sizes make them perfect as a delightful grouping on a shelf or windowsill.
Step-by-Step Guide
Materials
- Air-dry clay (white or natural stone color)
- Acrylic paints (Burnt Sienna or Russet Brown, Off-White/Cream, Pure White)
- Sculpting tools (needle tool or toothpick, small loop tool)
- Aluminum foil
- Medium paintbrush
- Small fine-point paintbrush
- Clear matte varnish (optional)
- Water cup
Step 1: Sculpting the Stems
-
Form the core:
Start by crumpling a small piece of aluminum foil into a cylinder shape. This saves clay and keeps the thicker stems lighter. -
Wrap the clay:
Roll out a thick slab of air-dry clay and wrap it fully around your foil core. -
Shape the base:
Roll the clay cylinder on your work surface to smooth it out. Gently flatten the bottom so the stem stands upright on its own without wobbling. -
Taper the top:
Pinch the top of the cylinder slightly to create a narrower neck where the cap will eventually sit. The base should remain wider for stability. -
Add bark texture:
Using a needle tool or toothpick, scratch vertical, slightly wavy lines up and down the length of the stem. I like to vary the pressure here to make some grooves deeper than others for a natural wood-grain look. -
Create variety:
Repeat this process to make 3-5 stems of different heights and thicknesses.
Step 2: Creating the Caps
-
Mold the cap shape:
Roll a ball of clay and flatten the bottom. Use your thumbs to gently hollow it out into a shallow bowl shape while keeping the top domed and smooth. -
Check the fit:
Place the cap onto one of your stems to ensure the proportions look right. The cap should overlap the stem generously. -
Attach the cap:
Score (scratch) the top of the stem and the underside of the cap. Add a dab of water or slip to the scratched areas and press them firmly together. -
Secure the seam:
Use a small modeling tool or your finger to smooth clay from the underside of the cap onto the stem so they fuse completely. -
Final smoothing:
Dip your finger in a little water and run it over the top of the cap to remove any fingerprints or cracks before letting the mushrooms dry completely (24-48 hours).
Smoother Surfaces
Before painting, you can use a fine-grit sandpaper to gently buff the mushroom caps. This ensures the red paint goes on silky smooth and hides any tiny bumps.
Step 3: Painting and Finishing
-
Base coat the stems:
Mix a warm off-white or cream color. Paint the entire stem, making sure to get paint into all those textured grooves. -
Add stem dimension:
While the cream paint is still slightly wet, mix a tiny drop of brown into your cream color and lightly brush over the raised areas of the texture to highlight the wood grain effect. -
Paint the caps:
Paint the mushroom caps with a rich Burnt Sienna or reddish-brown acrylic paint. You may need two coats for a solid, opaque finish. -
Dot the details:
Once the red paint is fully dry, dip the handle end of a paintbrush into pure white paint to stamp perfect circles onto the caps. -
Vary dot sizes:
Use different sized brush handles or toothpicks to make the white spots varied in size—some large, some tiny—for a organic look. -
Seal the work:
Allow the paint to dry completely, then apply a coat of clear matte varnish to protect your mini garden.
Tipsy Mushrooms?
If a mushroom keeps falling over while drying, insert a toothpick halfway into the stem and push the other half into a block of floral foam or styrofoam for support.
Arranging your completed mushrooms on a shelf creates an instant fairytale atmosphere