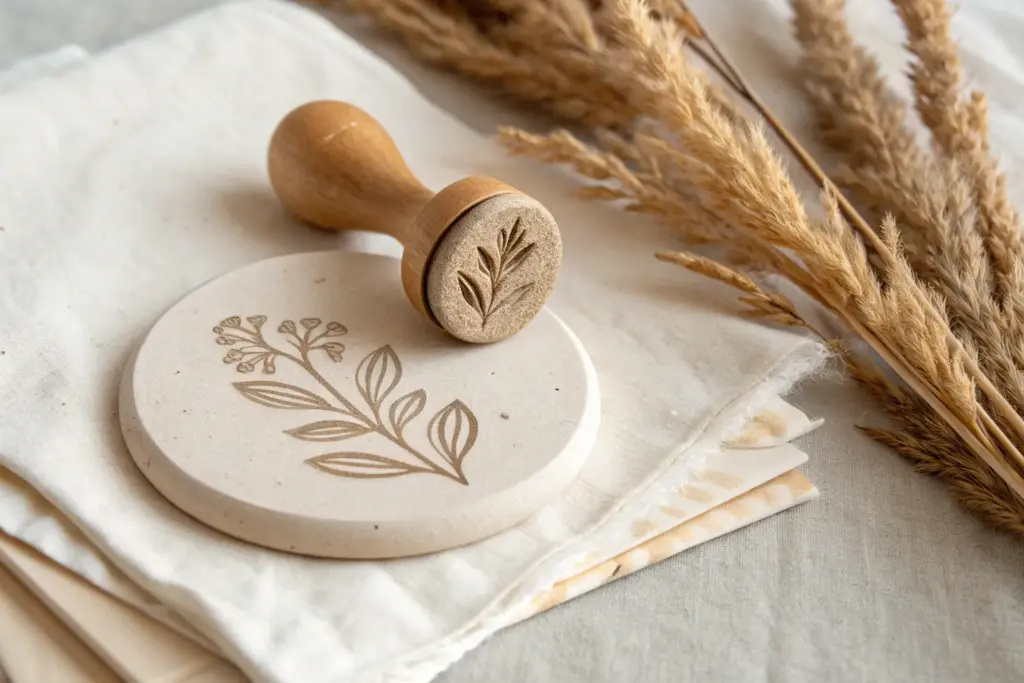
If you’ve ever pressed a stamp into fresh clay and felt that little thrill when the pattern pops, you’re my kind of maker. Here are my favorite clay stamp ideas—from classic textures you’ll use nonstop to a few weirder, studio-spark kinds of impressions that always get people asking, “How did you do that?”
Monstera Leaf Stamps for Bold Tropical Texture
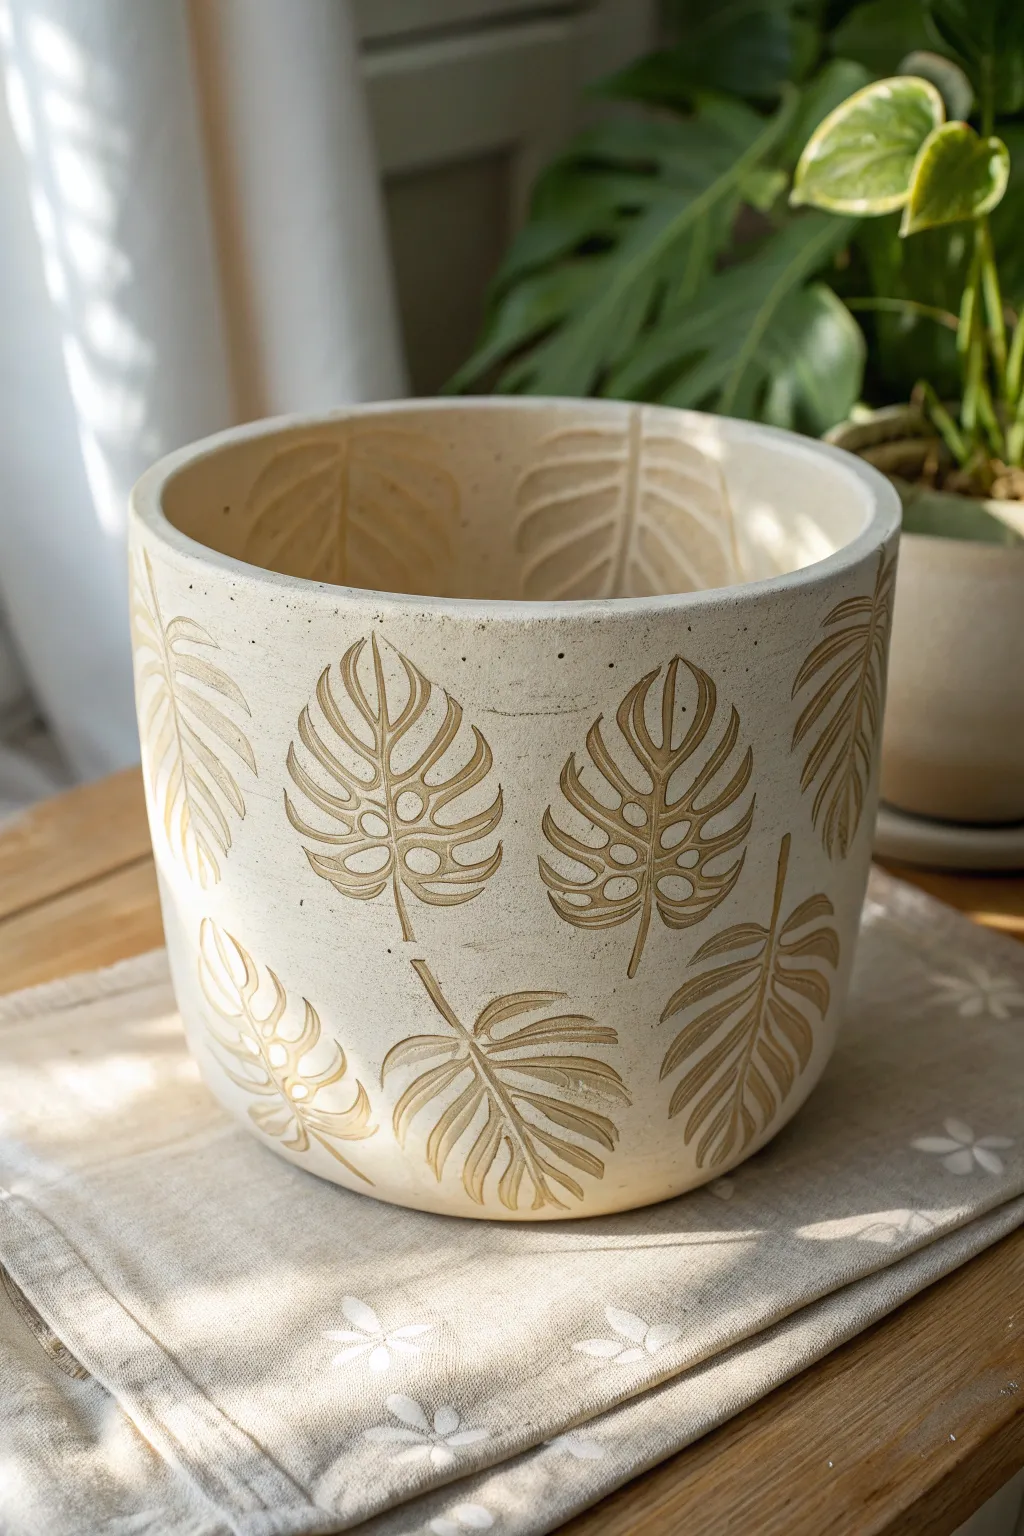
Bring the jungle indoors with this stunning ceramic planter featuring deep, textural Monstera leaf impressions. The natural clay body contrasts beautifully with the carved-style reliefs, creating a modern yet organic vessel perfect for your favorite houseplants.
Step-by-Step Guide
Materials
- Stoneware clay (buff or white groggy clay recommended)
- Monstera leaf clay stamp (or linocut tool to carve one)
- Wooden rolling pin
- Canvas work surface
- Cylindrical mold or slump mold (6-8 inch diameter)
- Potter’s knife or fettling knife
- Serrated rib or scoring tool
- Slip (clay and water slurry)
- Wooden modeling tool
- Sponge
- Clear matte glaze (optional)
- Kiln access
Step 1: Preparing the Slab
-
Wedge the Clay:
Begin by thoroughly wedging your stoneware clay to remove air bubbles and ensure a consistent texture, which is crucial for clean stamping results. -
Roll the Slab:
On your canvas surface, roll out a large slab of clay. Aim for a thickness of about 3/8 inch—you need it slightly thicker than usual to accommodate the deep impressions without piercing through. -
Smooth the Surface:
Take a rubber rib and compress the clay surface on both days. This aligns the clay particles and creates a pristine canvas for your botanical design. -
Measure and Trim:
Calculate the circumference of your mold (Diameter x 3.14) and add an inch for overlap. Cut a long rectangle based on these dimensions using your potter’s knife.
Clean Release Tip
Dust your clay stamp lightly with cornstarch before pressing it into the slab. This acts as a release agent and prevents the stamp from sticking or pulling up clay.
Step 2: Stamping the Design
-
Plan the Layout:
Before committing, lightly mark where you want your leaves to go. I find a random, scattered pattern looks more organic than rigid rows. -
Apply the Stamp:
Press your Monstera stamp firmly into the soft slab. Apply even pressure across the entire surface of the stamp to ensure the stems and fenestrations (leaf holes) impress clearly. -
Rock and Release:
Gently rock the stamp slightly side-to-side before lifting it straight up. This helps release the clay without tearing the edges of the impression. -
Repeat the Pattern:
Continue stamping across the slab, varying the rotation of the leaves. Ensure some leaves ‘fall off’ the top and bottom edges for a continuous, wallpaper-like effect. -
Touch Up Details:
If any stamp edges look rough, smooth them gently with a fingertip or a soft, damp brush. You can also deepen stem lines with a modeling tool if the stamp didn’t take perfectly.
Step 3: Constructing the Cylinder
-
Prepare the Edges:
Wait for the slab to stiffen slightly to ‘soft leather hard.’ Bevel the short ends of your rectangle at 45-degree angles to create a seamless overlap. -
Score and Slip:
Rough up the beveled edges with your serrated rib and apply a generous amount of slip. -
Form the Cylinder:
Wrap the slab around your cylindrical mold (or hand-form it if you are confident). Press the slipped seams together firmly. -
Blend the Seam:
Use a wooden tool to blend the clay across the seam on the inside and outside. Be careful not to smudge your beautiful Monstera impressions near the join. -
Add the Base:
Roll a separate small slab for the floor. Cut a circle matching the cylinder’s diameter, score and slip the bottom edge of the cylinder, and attach the base.
Level Up: Inlaid Color
After stamping, fill the impressions with a colored slip or underglaze. Once stiff, scrape the surface back to reveal a sharp, colorful design embedded in the clay.
Step 4: Refining and Finishing
-
Smooth the Rim:
Using a slightly damp sponge, round off the top rim of the pot. A sharp rim is prone to chipping, so a soft curve is functionally better. -
Slow Drying:
Cover the pot loosely with plastic to let it dry slowly over several days. Uneven drying can warp your cylinder or crack the base. -
Bisque Fire:
Once bone dry, fire the piece to bisque temperature (usually barely Cone 06 or 04). -
Glazing Strategy:
To mimic the look in the photo, wipe a very thinned-down oxide wash (like iron oxide) into the stamped recesses and sponge it off the high points. This highlights the texture. -
Final Firing:
Apply a clear matte glaze or leave the exterior raw clay if your clay body vitrifies fully. Fire to the final temperature required by your clay body.
Place your finished pot near a window where the sunlight can catch the relief textures and cast shadows across the leaves


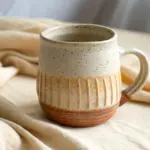
Simple Triangle Stamps for Modern Geometric Repeats
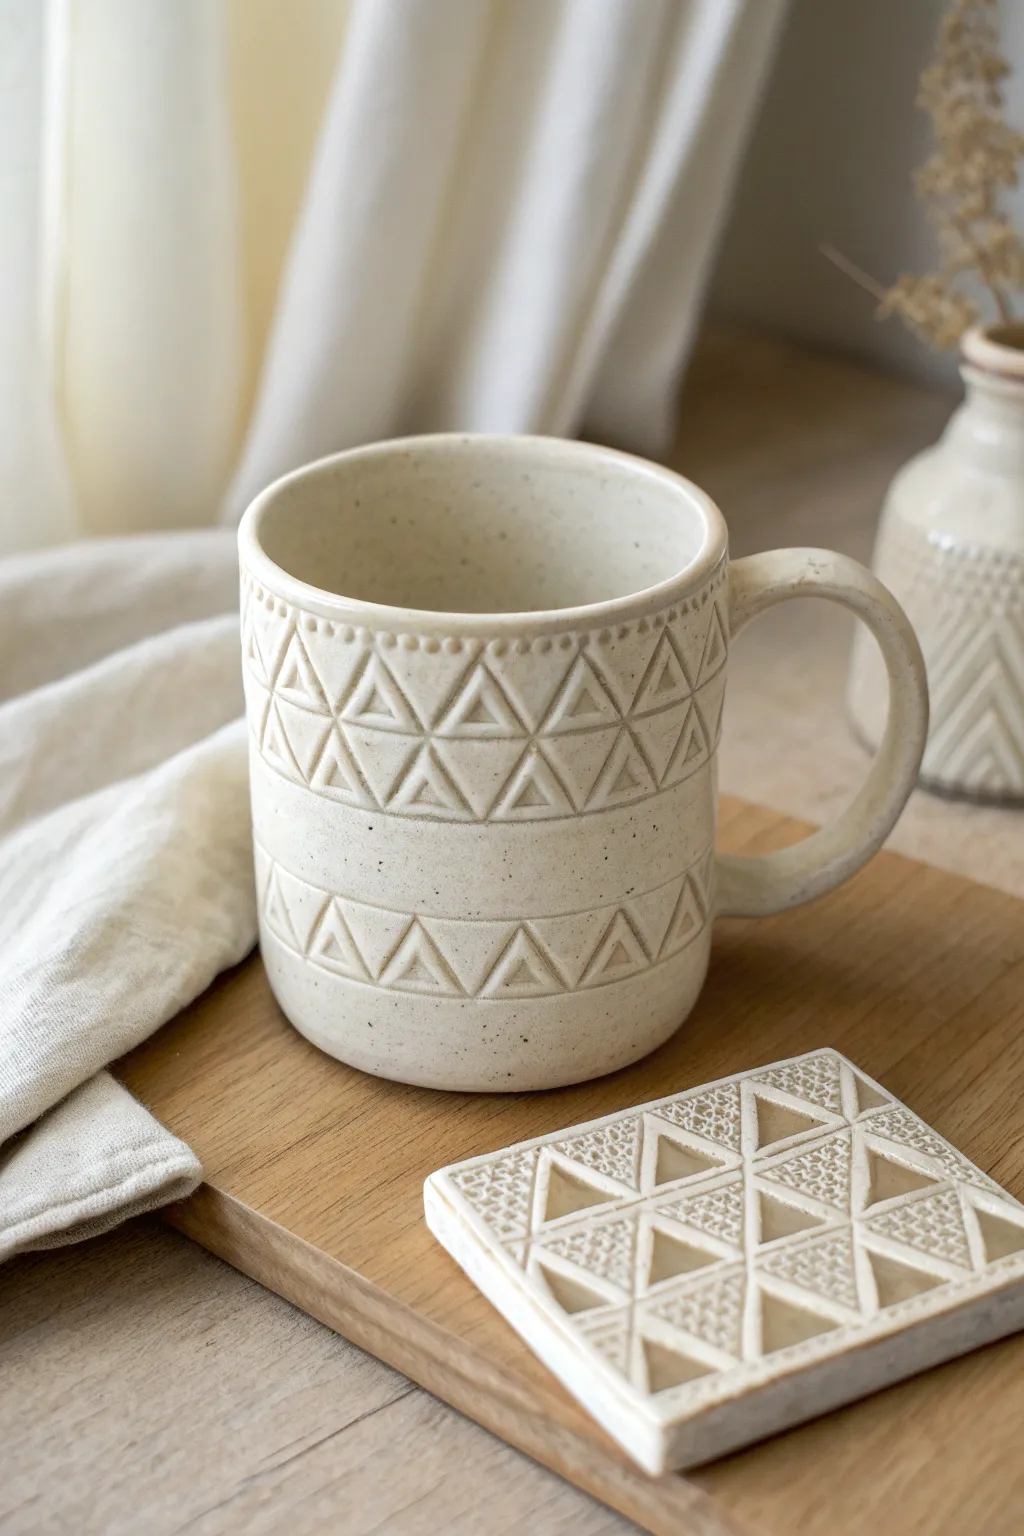
Embrace the timeless appeal of geometric patterns with this stamped ceramic set featuring repeating triangles. The speckled clay body and minimal glaze let the texture of your handmade stamps take center stage for a truly modern rustic feel.
Step-by-Step Tutorial
Materials
- Speckled buff stoneware clay
- Rolling pin and guide sticks (1/4 inch)
- Small block of bisque clay or wood (for making the stamp)
- Carving tools (needle tool, small loop tool)
- Fettling knife
- Slip and scoring tool
- Mug template (if slab building) or wheel
- Square cookie cutter or template (for coaster)
- Sponge
- Clear matte or satin glaze
Step 1: Carving the Triangle Stamp
-
Prepare your stamp blank:
Start by shaping a small piece of clay into a comfortable handle shape with a flat, square bottom face about 1 inch wide. Let this dry out completely, or fire it to bisque if you want it to last longer. -
Draw the design:
Using a pencil, draw two triangles on the face of your stamp blank. To match the photo, draw a larger outer triangle and a smaller inner triangle to create a nested effect. -
Carve the relief:
With a small carving tool, carefully dig out the clay around the heavy lines you drew. You want the lines of the triangles to be the highest point so they press into the fresh clay later. -
Refine the edges:
Clean up any burrs or crumbs on your stamp. Test it on a scrap piece of soft clay to ensure the impression is deep and clean before proceeding.
Stamp Release Trick
Dust your bisque stamp with a tiny bit of cornstarch before pressing it into sticky clay. This prevents the stamp from getting stuck and ruining the crisp lines.
Step 2: Forming the Mug Body
-
Prepare the mug cylinder:
Whether you are throwing on the wheel or slab building, create a cylinder roughly 4 inches high with steady, even walls. If slab building, be sure to compress your seam thoroughly. -
Smooth the surface:
Use a damp sponge or a flexible metal rib to remove any throwing lines or canvas texture. A smooth canvas is essential for the stamping to look crisp. -
Mark your guidelines:
Lightly score horizontal guidelines around the mug where you want your pattern bands to sit. The photo shows one band near the rim and one near the base. -
Stamping the top row:
Support the wall from the inside with one hand. With the other, press your custom triangle stamp firmly into the clay just below the rim. I find it helps to hold my breath for a second to keep my hand steady. -
Completing the pattern:
Continue stamping around the circumference, rotating the stamp 180 degrees every other time if you want an alternating pattern, or keep them upright for a uniform row like the photo. Repeat for the bottom band. -
Adding texture details:
Use a small, blunt tool to press tiny dots along the top edge of the upper triangle band for that delicate beaded border seen in the image.
Step 3: Handle & Coaster Construction
-
Pull or roll a handle:
Create a strap handle proportional to your mug. Attach it firmly using the score and slip method, ensuring the top attachment aligns nicely with your stamped border. -
Cut the coaster slab:
Roll out a fresh slab of clay to about 1/4 inch thickness. Use a square cutter or template to cut your coaster shape. -
Stamp the coaster layout:
Press your triangle stamp repeatedly into the coaster surface. Creating a ‘quilt’ pattern by rotating the triangles to face each other creates the dynamic geometric look shown in the example. -
Refine and dry:
Smooth the edges of both the mug and coaster with a damp sponge. Let them dry slowly under loose plastic to prevent warping, especially the flat coaster.
Warped Coasters?
Flat slabs like coasters love to warp. Dry them strictly between two pieces of drywall or wooden boards to keep them perfectly flat until they are bone dry.
Step 4: Glazing and Finishing
-
Bisque fire:
Once bone dry, fire your pieces to bisque temperature (usually cone 04) to prepare them for glazing. -
Apply clear glaze:
Dip or brush a clear matte or satin glaze over the entire piece. The clear glaze will seal the clay while allowing the natural speckles and your stamped shadows to remain visible. -
Wipe back (optional):
If you want to highlight the texture further, you can gently wipe the glaze off the high points with a damp sponge, leaving more glaze in the recesses. -
Final firing:
Fire the pieces to the maturity temperature of your clay body (likely cone 5 or 6 for stoneware). Be checking that the coaster remains flat in the kiln.
Using your own handmade stamps adds a personal signature that makes your morning coffee ritual feel special


Mandala and Rosette Stamps for Centerpiece Moments
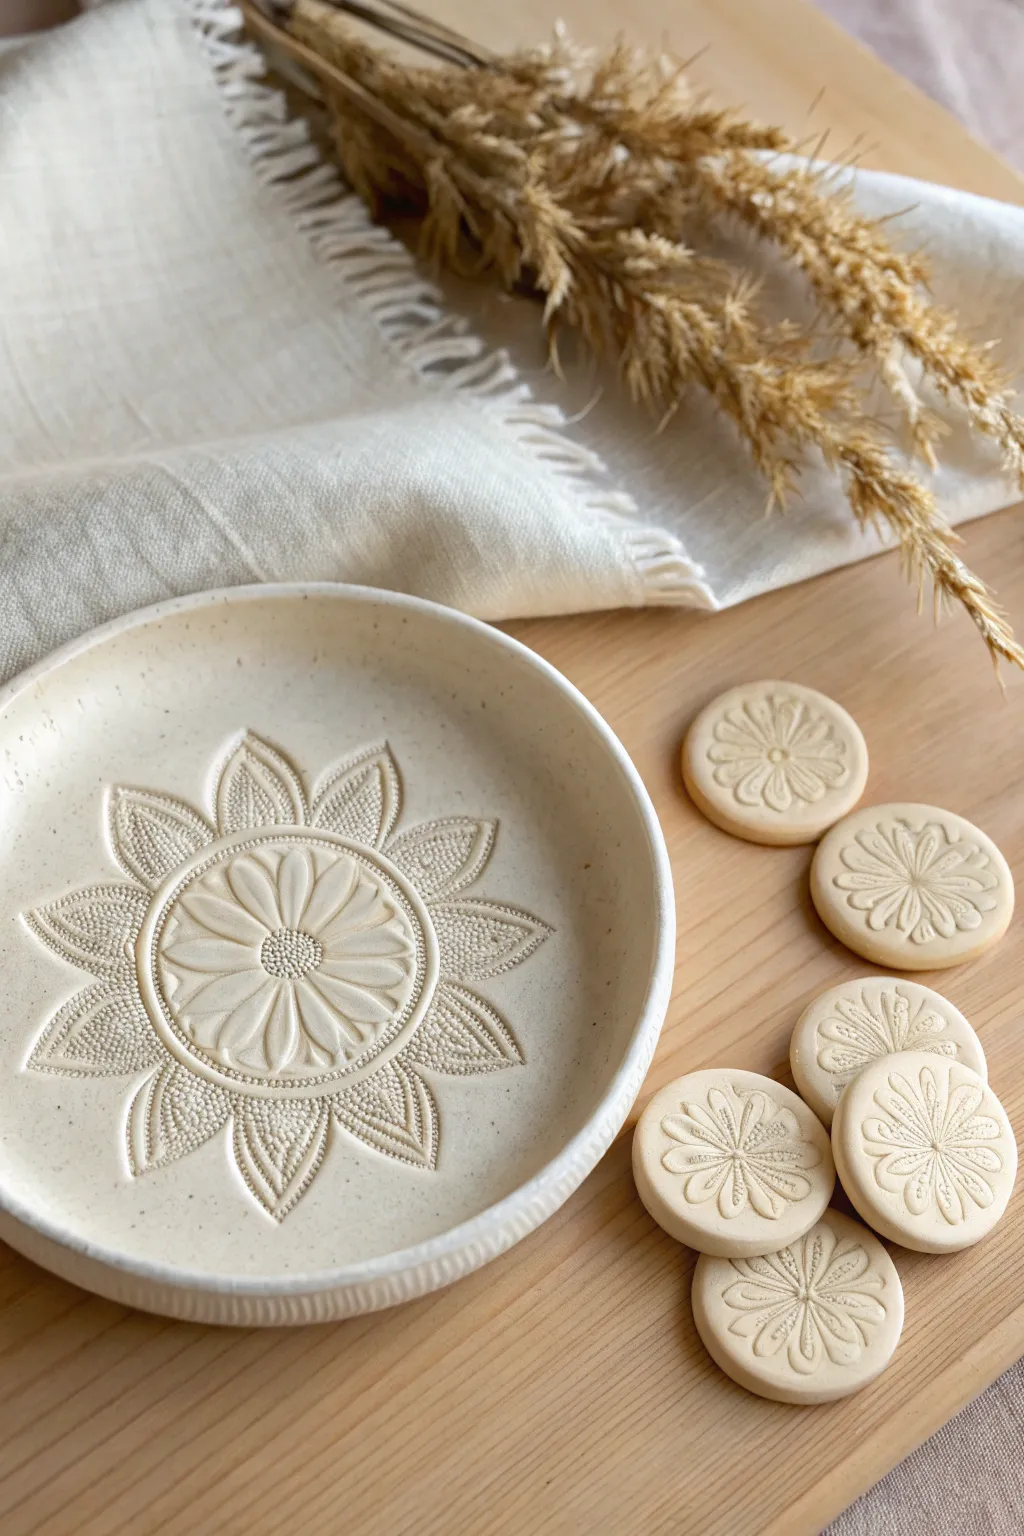
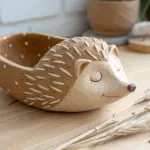
Embrace the soothing repetition of pattern making with this textured clay set, featuring a shallow trinket dish and matching decorative tokens. The natural, unglazed finish highlights the intricate shadows of the mandala stamp, creating a centerpiece that feels both earthy and elegant.
Detailed Instructions
Materials
- Light-colored stoneware clay (speckled or sandy texture recommended)
- Mandala or rosette clay stamp (silicone or bisque)
- Small round cookie cutter (approx. 1.5 inches)
- Rolling pin
- Canvas mat or slab roller
- Sponge
- Bowl of water
- Needle tool or fettling knife
- Rib tool (smooth wood or rubber)
- Shallow bowl or mold (for shaping the dish)
- Plastic wrap
Step 1: Preparing the Slab
-
Wedge the clay:
Begin by thoroughly wedging your clay to remove any air bubbles and ensure an even consistency. A speckled clay body adds beautiful dimension to the final piece without needing glaze. -
Roll out the slab:
On a canvas surface, roll out a slab of clay to an even thickness of about 1/4 inch. Roll in multiple directions to keep the clay particles aligned and prevent warping later. -
Smooth the surface:
Using a slightly damp sponge or a rubber rib, gently compress and smooth the surface of the slab. This removes canvas texture and prepares a pristine canvas for your stamping.
Stamp Stickiness?
If the clay sticks to your intricate stamp, lightly dust the clay surface with cornstarch or brush the stamp with a tiny amount of vegetable oil before pressing
Step 2: Creating the Centerpiece Dish
-
Cut the dish circle:
Use a large circle cutter or trace around a bowl (approx. 5-6 inches diameter) with your needle tool to cut out the base for your dish. -
Position the stamp:
Identify the exact center of your clay circle. I like to hover the stamp over the clay first to visualize the placement before committing to the impression. -
Impress the mandala:
Press your large mandala stamp firmly and evenly into the center of the slab. Apply pressure in a circular motion to ensure all outer petals impress deeply. -
Release the stamp:
Gently wiggle the handle or edge of the stamp to break the suction, then lift straight up to reveal the crisp design. -
Smooth the edges:
Run a damp finger or sponge along the cut rim of the circle to round off any sharp edges left by the cutting tool. -
Detailed edge texture:
For the fluted rim effect seen in the photo, use a small carving tool or the edge of a credit card to press tiny vertical lines all around the exterior edge of the slab. -
Shape the dish:
Drape your clay circle into a shallow bowl lined with plastic wrap (to prevent sticking). Gently press it down so it takes on a slight curve, lifting the rim.
Step 3: Making the Tokens
-
Cut the tokens:
Using the remaining slab and your small round cookie cutter, cut out several uniform circles. -
Soften the edges:
Pick up each token and gently smooth the sharp cut edges with your fingertip. This makes them pleasant to hold later. -
Stamp the centers:
Using a smaller rosette stamp (or the center part of your larger stamp if compatible), press a design firmly into the center of each token. -
Check for depth:
Ensure the impression is deep enough to catch light and shadow, but not so deep that it distorts the round shape of the token.
Make it a Diffuser
Leave the tokens unglazed and use them as essential oil diffusers. The porous bisque clay absorbs oil and releases scent slowly over time
Step 4: Drying and Finishing
-
Slow drying:
Let the dish dry slowly in the mold for at least a day until it is leather hard, then remove it to finish drying on a wire rack. Drying too fast can cause warping. -
Bisque fire:
Once bone dry, fire the pieces in a kiln to cone 04 (or according to your specific clay’s instructions). This sets the clay permanently. -
Finishing touch:
Leave the pieces unglazed to maintain that raw, matte stone look, or apply a very light clear matte glaze if you need the dish to be water-resistant.
Arrange your tokens alongside the dish for a cohesive display that celebrates texture and simplicity


Honeycomb Hexagon Stamps for Clean, Grid-Like Texture
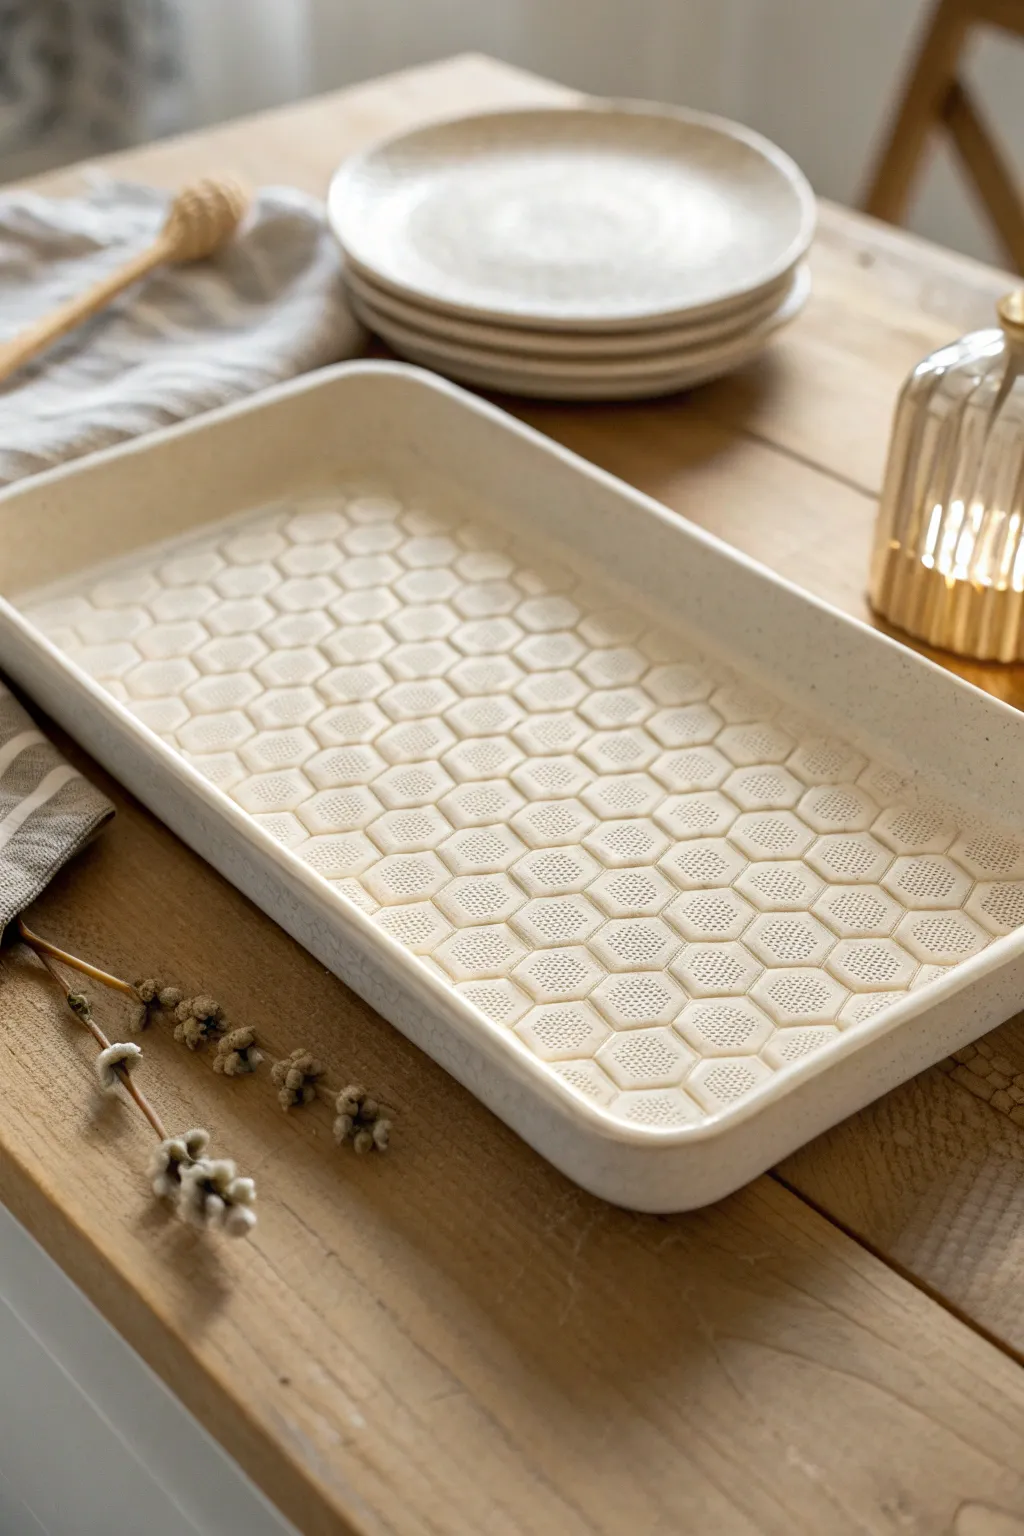
This project transforms a simple slab-built tray into a sophisticated piece of functional art using a hexagon stamp pattern. The repeating honeycomb grid adds tactile interest and a modern aesthetic to the interior surface, perfect for catching light and glazes.
Step-by-Step Guide
Materials
- Stoneware clay (speckled or white)
- Rolling pin
- Guide sticks or slab roller (approx. 1/4 inch thickness)
- Rectangular slump mold or wooden form
- Hexagon texture stamp (wood, bisqueware, or rubber)
- Fettling knife or clay cutter
- Rib tool (flexible metal or rubber)
- Sponge
- Cornstarch or non-stick spray (for release)
- Weighted bag or sandbag (for pressing)
Step 1: Preparing and Stamping the Slab
-
Roll the foundation:
Begin by wedging your clay to remove air bubbles, then roll out a consistent slab. Aim for a thickness of about 1/4 inch or slightly thicker to accommodate the stamping depth without weakening the floor. -
Smooth the canvas:
Using a flexible rib tool, compress the slab on both sides. This aligns the clay particles which helps prevent warping later, and creates a pristine surface for your pattern. -
Establish a starting point:
Identify the center of your slab. Lightly mark a straight reference line if needed, or simply trust your eye to begin the pattern centrally to ensure symmetry. -
Apply the first stamp:
Press your hexagon stamp firmly into the center of the slab. Rock it slightly to ensure all edges of the hexagon shape make a clear impression, but be careful not to adhere the stamp to the clay. -
Create the honeycomb grid:
Working outward from the center, stamp the next hexagon directly adjacent to the first, aligning the flat edges perfectly. The goal is to share walls between shapes, creating that tight ‘beehive’ effect. -
Continue the pattern:
Fill the estimated area of your tray floor with the texture. I find it helpful to stamp an area slightly larger than the final tray size to account for any shifting during the forming process. -
Refine the surface:
Once stamped, check for any sharp burrs of clay that may have lifted up around the stamp edges. Gently tap these down with a clean finger or a very slightly damp sponge.
Step 2: Forming the Tray
-
Cut the rough shape:
Measure your mold and cut your slab into a rectangle that is roughly 2 inches wider on all sides than the base of your mold to account for the walls. -
Prepare the mold:
Dust your slump mold or wooden form lightly with cornstarch to ensure the clay releases easily later. -
Drape and form:
Carefully lift your stamped slab and place it textured-side up into the mold. If using a drape mold (hump mold), you would place it textured-side down, but for this crisp interior detail, a slump mold works best. -
Define the corners:
Gently press the slab into the bottom corners of the mold. Ease the excess clay at the corners into faint folds or pleats, or cut vertical notches to create tailored seams. -
Trim the rim:
Once the clay is settled, use your fettling knife to trim the rim to an even height all the way around. Use the edge of the mold as your guide for a straight cut. -
Smooth the rim:
Run a damp chamois or sponge along the cut rim to round it off. A smooth, rounded lip is crucial for durability and feels much better to the touch on finished ware. -
Slow drying:
Cover the piece loosely with plastic. Because the stamped floor is thinner in spots, slow drying is essential to prevent the bottom from cracking as it shrinks. -
Bisque fire:
Once bone dry, fire the piece to bisque temperature. The honeycomb texture will now be permanent and ready for glazing.
Clean Release
If your stamp is sticking to the moist clay, dust the stamp surface lightly with cornstarch before each press. It burns off cleanly in the kiln.
Glaze Pooling
Use a translucent celadon or breaking glaze. These pool in the deep hexagon recesses and break over the ridges, highlighting the geometry naturally.
The result is a stunningly textured tray that balances organic warmth with precise geometry, ready for your favorite family meal

The Complete Guide to Pottery Troubleshooting
Uncover the most common ceramic mistakes—from cracking clay to failed glazes—and learn how to fix them fast.
Moon Phase Stamps for a Celestial Border or Band
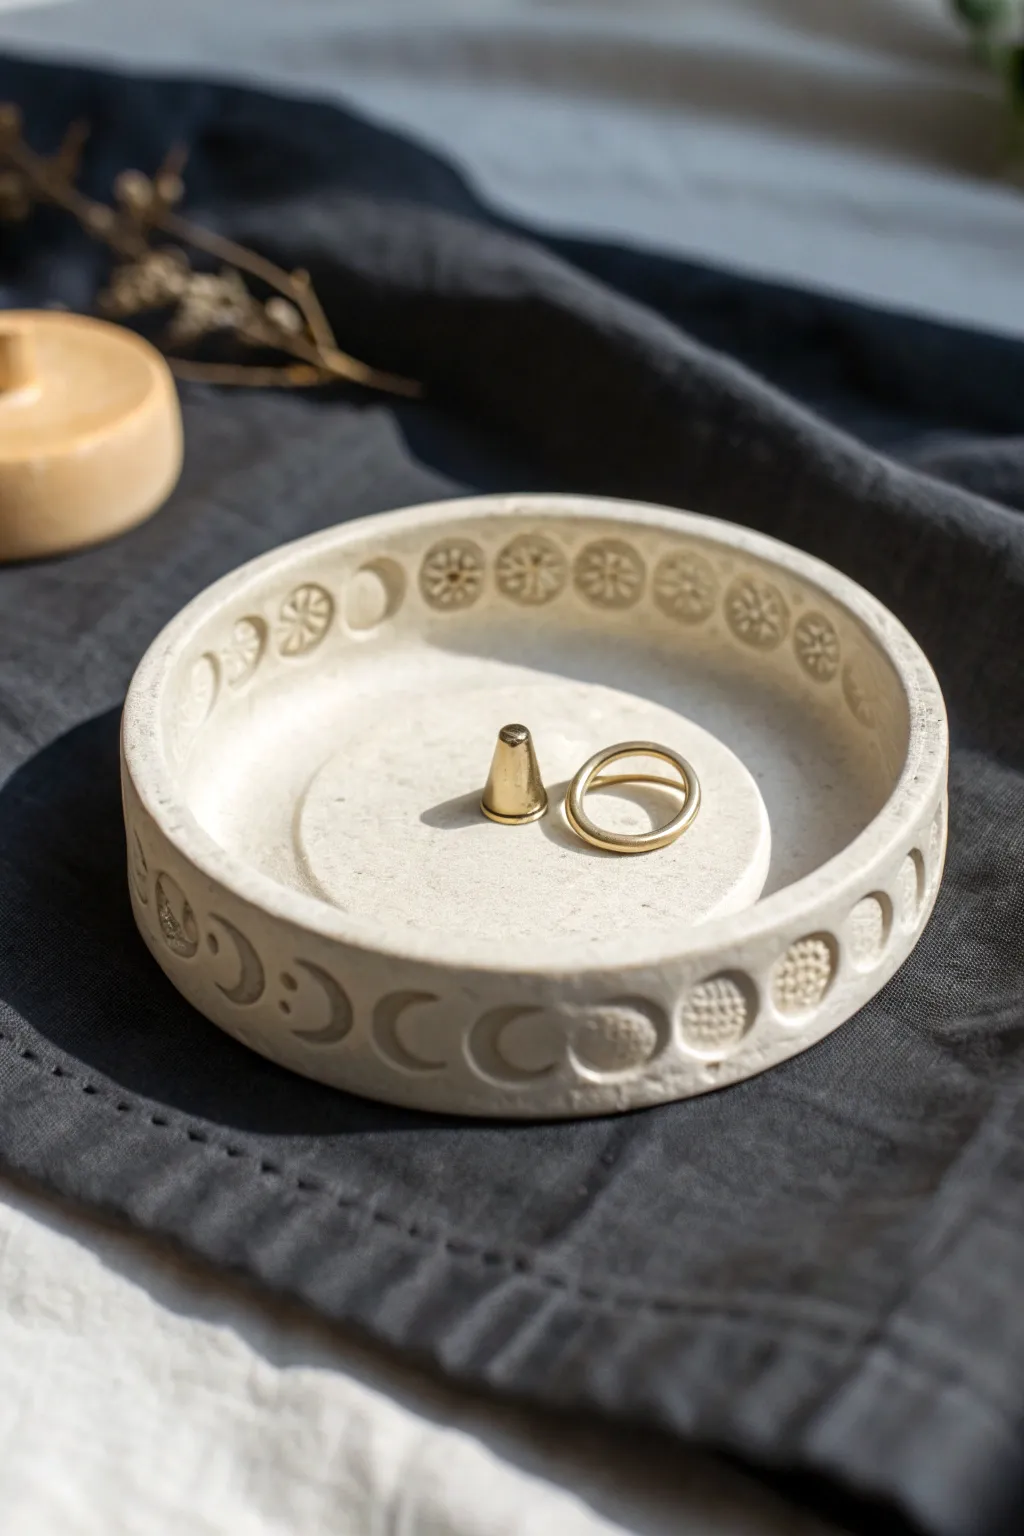
Bring the magic of the night sky into your home with this delicately stamped ring dish. Featuring a repeating cycle of moon phases and starbursts, this neutral-toned vessel is perfect for holding your most precious trinkets.
Detailed Instructions
Materials
- White or light beige air-dry clay (or polymer clay)
- Small rolling pin
- Circle cutters (approx. 4-inch and 2.5-inch diameter)
- Moon phase mini stamps (custom or handmade)
- Starburst or botanical mini stamp
- Small bowl of water
- Sponge
- Sandpaper (fine grit)
- Clear matte varnish or sealant
- Flat paintbrush
- Canvas or silicone work mat
Step 1: Preparing the Base
-
Condition the Clay:
Begin by taking a handful of your air-dry clay and kneading it thoroughly until it is soft, pliable, and free of cracks. -
Roll the Slab:
Place the clay on your work mat and use the rolling pin to flatten it into an even slab, aiming for a consistent thickness of about 1/4 inch. -
Cut the Base Circles:
Using your larger 4-inch cutter, press firmly into the clay to create the main base of the dish. -
Smooth the Edges:
Dip your finger slightly in water and run it along the cut edge of the circle to smooth out any roughness or loose bits of clay.
Uneven Impressions?
If your stamps are sticking or pulling the clay, lightly dust the stamp face with cornstarch or dip it in water before pressing it into the soft wall.
Step 2: Building the Form
-
Create the Sidewall:
Roll out a long snake of clay and flatten it into a strip roughly 1 inch tall and long enough to wrap around the circumference of your base. -
Attach the Wall:
Score (scratch) the outer edge of the base and the bottom of the strip. Apply a little water or slip, then press the strip onto the base to form the walls. -
Blend the Seams:
Use a modeling tool or your finger to smooth the clay where the wall meets the base, both inside and outside, until the seam is invisible. -
Form the Inner Platform:
Roll a smaller ball of clay and flatten it slightly. Use the 2.5-inch cutter to create a tidy circle. -
Attach the Raised Center:
Score the center of the dish and the bottom of the small circle. Press the small circle into the center of the dish to create the raised platform for jewelry.
Step 3: Stamping and Finishing
-
Plan the Layout:
Before stamping, visualize where your moon cycle will go. I find it helpful to lightly mark four quadrants first to keep spacing even. -
Stamp the Exterior:
On the outside vertical wall, gently press your moon phase stamps. Alternate between crescents, gibbous moons, and full moons to mimic the lunar cycle. -
Stamp the Interior Rim:
Repeat the stamping process on the *inside* upper rim of the wall. This adds a lovely detail that interacts with the shadows inside the bowl. -
Add Celestial Details:
Using the starburst or botanical stamp, fill in the spaces between the moon phases or use them to represent the full moon for a decorative touch. -
Refine the Shape:
The pressure of stamping might have warped the walls slightly. Gently reshape the bowl with your hands to ensure it is perfectly round again. -
Dry the Piece:
Set the dish aside in a cool, dry place. Let it air dry completely for 24-48 hours, turning it occasionally to ensure the bottom dries evenly. -
Sand for Smoothness:
Once fully dry, take your fine-grit sandpaper and gently buff the entire surface to remove any fingerprints or rough textures. -
Seal the Clay:
Apply a thin, even coat of clear matte varnish to the entire piece to protect the clay from moisture and give it a finished look.
Gilded Moon
Make the design pop by painting gold leaf or gold acrylic paint specifically into the recessed stamped areas after the initial drying phase.
Place your favorite rings on the center pedestal and enjoy your handmade piece of the cosmos
Sunburst Stamps for Radiating, Boho Texture
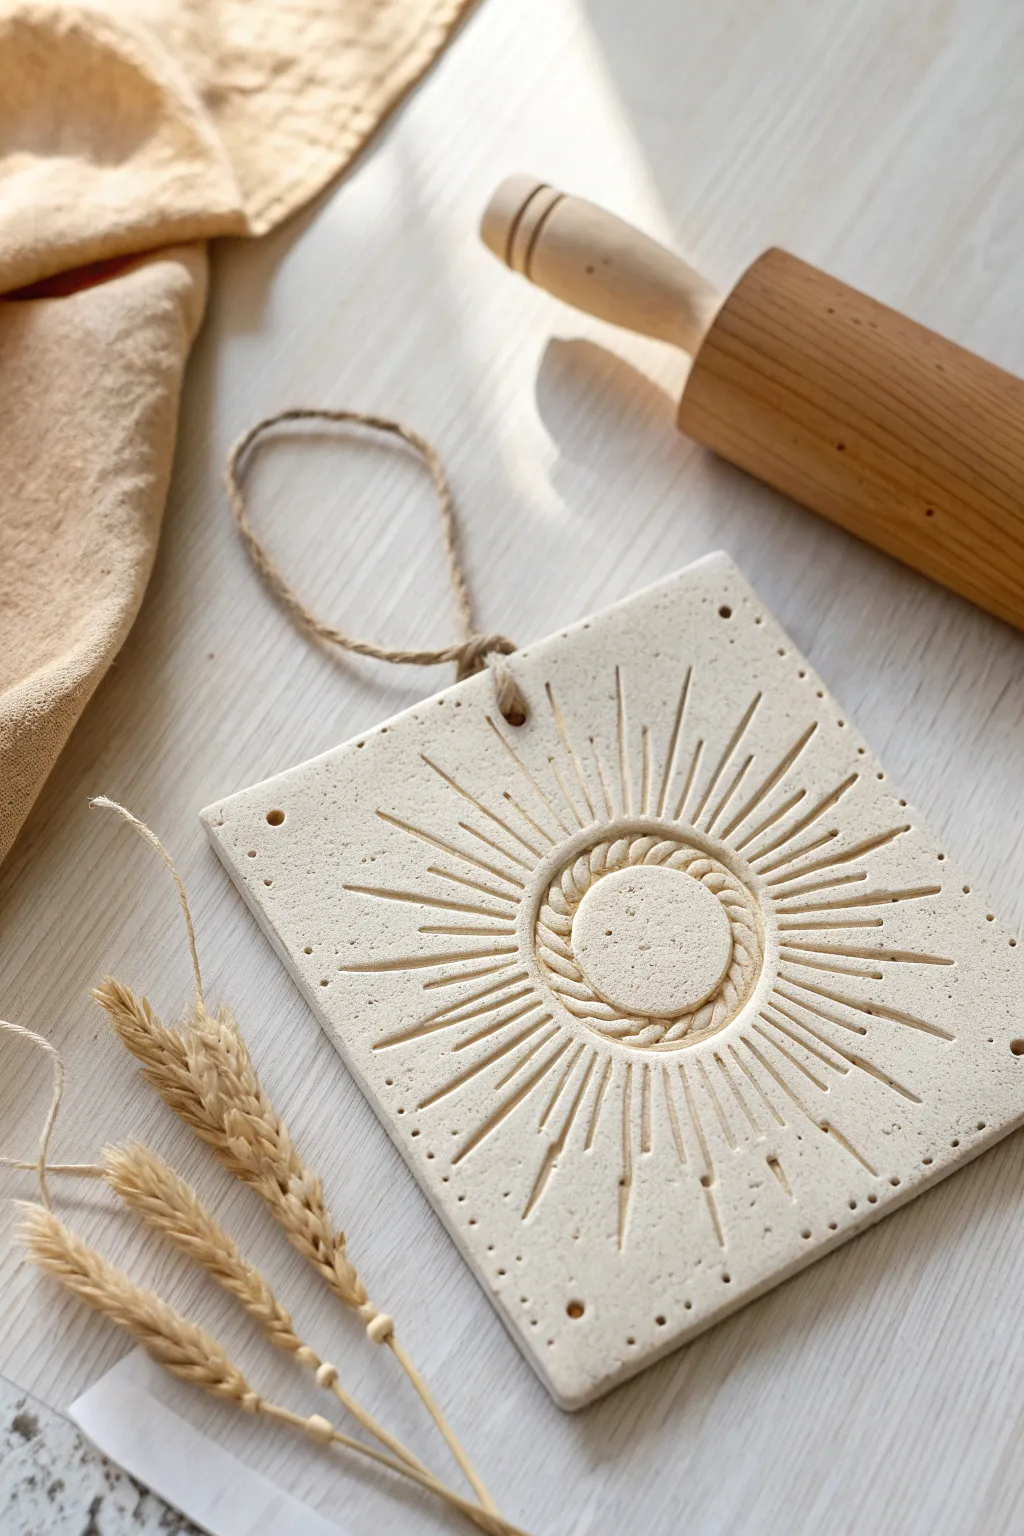
Capture the warmth of the sun in clay with this textured wall hanging that adds a perfect touch of boho charm to any nook. Using simple carving tools and speckled clay, you’ll create a radiating relief pattern that feels both organic and modern.
Step-by-Step Guide
Materials
- White speckled air-dry clay or polymer clay
- Rolling pin
- Square cookie cutter (approx. 4-5 inches) or knife and ruler
- Small round cutter or bottle cap (for the sun center)
- Needle tool or toothpick
- Ribbon carving tool or small U-gouge
- Twisted rope tool or textured stamp (for the inner circle)
- Jute twine
- Fine-grit sandpaper
- Straw or large skewer (for hole punching)
Step 1: Base Preparation
-
Condition the clay:
Begin by taking a handful of your speckled clay and kneading it in your hands until it’s warm, pliable, and free of cracks. This ensures a smooth surface later. -
Roll the slab:
Use your rolling pin to flatten the clay into an even slab. Aim for a thickness of about 1/4 inch—thick enough to maintain sturdiness but thin enough to hang lightly. -
Cut the square:
Press your square cutter firmly into the slab to create your main shape. If you don’t have a cutter, measure a perfect square with a ruler and slice cleanly with a craft knife. -
Smooth the edges:
Dip your finger in a tiny bit of water and run it along the cut edges of the square to soften any sharp corners or drag marks left by the blade.
Clean Lines Pro Tip
Before carving, wipe your clay slab with a slightly damp sponge. This lubricates the surface slightly, allowing your carving tool to glide without dragging or tearing the clay.
Step 2: Designing the Sun
-
Establish the center:
Gently press a small round cutter or a bottle cap into the exact center of the square. Don’t cut all the way through; just make a light impression to guide your design. -
Create the rope texture:
Using a rope-texture tool or by carefully pressing a twisted piece of twine into the clay, create a textured ring immediately surrounding that center circle impression. -
Clean the center:
Use a flat modeling tool to smooth out the very center circle inside the rope texture, ensuring it remains slightly raised or flat relative to the stamped ring. -
Mark the rays:
Take your needle tool and lightly sketch four guide lines radiating from the center to the compass points (North, South, East, West) to ensure symmetry before carving.
Level Up: Gold Accents
For a luxe boho look, paint inside the carved ray grooves with liquid gold leaf or metallic acrylic paint after the clay has fully dried, making the sunburst pop.
Step 3: Carving the Texture
-
Carve the primary rays:
Using a small ribbon tool or U-gouge, carve the long rays first. Press the tool into the clay near the center ring and drag outward, lifting pressure as you reach the edge to taper the line. -
Add secondary rays:
Between each primary ray, carve a slightly shorter line. I like to make these slightly thinner to create visual hierarchy. -
Fill with details:
Fill the remaining gaps with smaller, shorter dashes radiating outward. This density creates that beautiful ‘burst’ effect. -
Refine the grooves:
Check your carved lines for any ‘crumbs’ of clay. Use a soft, dry brush to sweep these away rather than picking them out, which can mar the surface. -
Add border accents:
Use a needle tool or the tip of a small paintbrush handle to press tiny dots into the four corners of the square, and occasionally between rays near the outer edge for added texture.
Step 4: Finishing
-
Punch the hanger hole:
Using a straw or a thick skewer, punch a clean hole centered near the top edge of the square. Twist the tool as you remove it to keep the hole crisp. -
Dry the piece:
Place the clay on a flat board or wire rack to dry. If using air-dry clay, loosely cover it with plastic wrap for the first 24 hours to prevent warping, then let it dry uncovered for another day or two. -
Sand imperfections:
Once fully cured and hard, gently run a fine-grit sandpaper block over the rough edges and the surface if needed to create a professional matte finish. -
Attach the twine:
Cut a length of jute twine, thread it through the top hole, and tie a secure knot to create a loop for hanging.
Hang your new sunburst tile in a bright spot to let the natural shadows highlight your beautiful carving work


What Really Happens Inside the Kiln
Learn how time and temperature work together inside the kiln to transform clay into durable ceramic.
Wave Pattern Stamps for Coastal, Flowing Texture
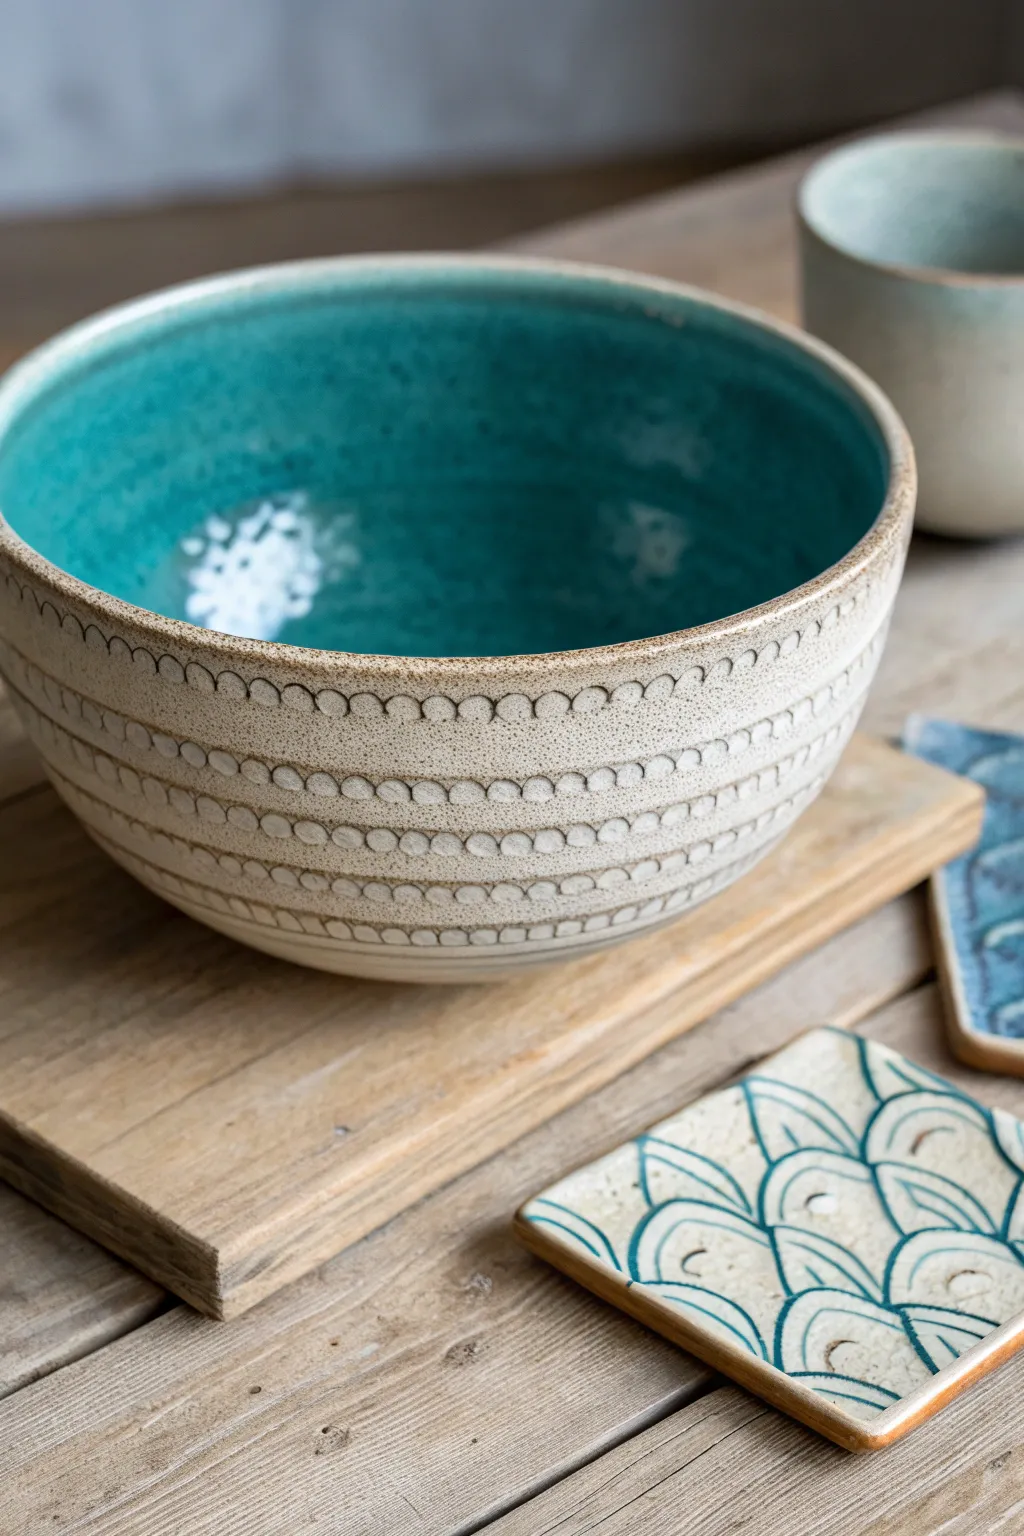
Capture the rhythm of crashing waves with this beautifully textured serving bowl, featuring repeating stamped scallops and a vibrant turquoise interior. The mix of raw, speckled clay on the outside and a glossy pool of glaze on the inside creates a stunning tactile contrast.
Detailed Instructions
Materials
- Speckled stoneware clay (buff or light brown)
- Pottery wheel (or slab roller/molds for handbuilding)
- Wooden throwing ribs
- Metal kidney tool
- Wire clay cutter
- Small semi-circle loop tool (or a custom U-shaped wire stamp)
- Needle tool
- Bisque firing kiln
- Glaze firing kiln
- Turquoise/Teal glossy glaze (food safe)
- Clear matte glaze (optional, for exterior)
- Wax resist
- Sponge and bucket of water
Step 1: Forming the Bowl
-
Prepare the Clay:
Start by thoroughly wedging about 2-3 pounds of speckled stoneware clay to remove air bubbles and ensure consistency. -
Center and Open:
Secure the clay on the pottery wheel bat. Center it using steady pressure and water, then open the form to create the floor of your bowl. -
Pull the Walls:
Pull up the cylinder walls, aiming for a consistent thickness. Since this bowl has a generous curve, ensure you leave enough clay near the base to support the shape. -
Shape the Curve:
Use a wooden rib on the inside and a flexible metal rib on the outside to gently push the clay out, forming a smooth, rounded bowl shape. -
Refine the Rim:
Compress the rim with a piece of chamois or your finger to prevent future cracking and give it a finished look. -
Leather Hard Drying:
Cut the bowl from the bat with a wire tool and let it dry until it reaches a leather-hard state—firm enough to handle without deforming, but soft enough to stamp. -
Trim the Foot:
Invert the bowl on the wheel head, secure it with clay lugs, and trim a neat foot ring. This lifts the form and adds elegance.
Step 2: Stamping and Texturing
-
Mark Guidelines:
While the bowl is still on the wheel (spinning slowly), use a needle tool to very lightly score horizontal parallel lines around the exterior. These will serve as guides for your stamp rows. -
Create the Stamp Tool:
You can use a small trimming loop tool or bend a piece of sturdy wire into a ‘U’ shape to create your stamp. -
Execute the First Row:
Starting just below the rim, press the curved tool into the clay to create a row of scallops. Try to keep the pressure consistent for uniform depth. -
Continue the Pattern:
Work your way down the bowl, row by row. I like to offset the scallops slightly from the row above to create a fish-scale or wave effect. -
Clean Up Burrs:
Once the stamping is complete, let the pot dry a little more. Then, gently rub the surface with a Scotch-Brite pad or a soft sponge to remove any sharp clay crumbs created by the stamping tool. -
Bisque Fire:
Allow the piece to dry completely to the bone-dry stage. Load it into the kiln for a bisque firing (usually to cone 04 or 06).
Stamp Pressure Tip
Support the bowl wall from the inside with one hand while stamping the outside with the other. This prevents the wall from caving in or warping.
Step 3: Glazing and Finishing
-
Wax the Exterior:
Using a brush or sponge, apply wax resist to the entire exterior of the bowl, including the foot ring. This protects the raw clay texture we worked so hard to create. -
Pour the Interior:
Pour a generous amount of liquid glossy turquoise glaze into the bowl. Roll the bowl around to coat the entire interior surface evenly, then pour out the excess. -
Clean the Rim:
Use a damp sponge to wipe any glaze drips off the waxed exterior or the very edge of the rim if you want the raw clay to show there. -
Optional Exterior Wipe:
If you want to highlight the texture, you can wipe a very thin wash of dark oxide over the stamps and sponge it off, darker lines will remain in the recesses. -
Final Fire:
Load the glazed bowl into the kiln for the final glaze firing (temperature depends on your specific clay and glaze, typically cone 5 or 6 for stoneware).
Make a Matching Set
Use the same U-shaped stamp tool to impress patterns into flat slabs of clay. Cut them into squares to create matching coasters for your new bowl.
Now you have a stunning vessel that brings a touch of coastal elegance to your table
Seashell and Coral Stamps for Reefy, Natural Detail
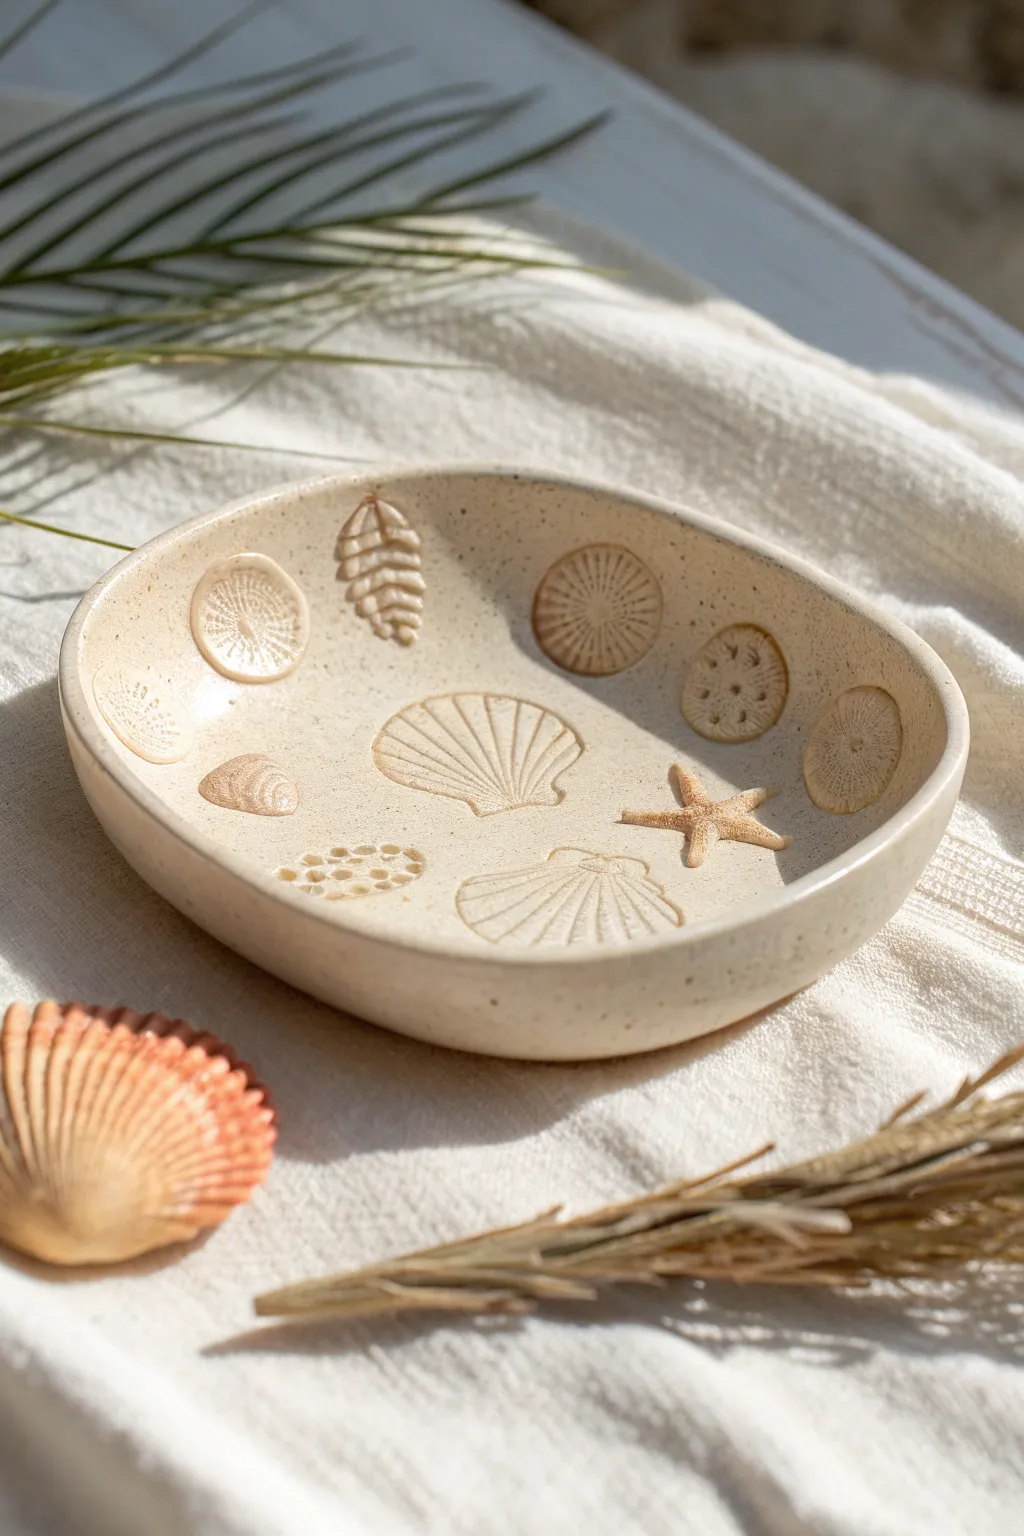
Capture the delicate textures of the seaside with this hand-built ceramic bowl, featuring imprinted fossil-like details. The natural speckled clay body enhances the organic feel, making it perfect for holding treasures or simply displaying as art.
Step-by-Step Guide
Materials
- Speckled stoneware clay (white or light beige)
- Small rolling pin
- Canvas or heavy cloth (for rolling)
- Rib tool (wooden or silicone)
- Sea-themed clay stamps (starfish, scallops, sand dollars, coral)
- Slump mold or a rounded bowl for shaping
- Sponge
- Fettling knife or needle tool
- Clear matte glaze (optional)
- Kiln access
Step 1: Preparing the Clay Slab
-
Wedge the clay:
Start by thoroughly wedging a ball of speckled stoneware clay to remove any air bubbles and ensure an even consistency. -
Roll out the slab:
Place the clay on a canvas surface. Using your rolling pin, roll the clay out into a slab about 1/4 inch thick. Aim for a thickness that feels substantial but not chunky. -
Compress the surface:
Run a rib tool firmly over the surface of your slab. This aligns the clay particles, preventing cracking later, and gives you a smooth canvas for stamping. -
Cut the shape:
Decide on the size of your bowl. You can freehand an organic oval or circle, or trace lightly around a template before cutting the excess clay away with a needle tool.
Stamp Release Trick
If using bisque stamps that stick to wet clay, dust the stamp face lightly with cornstarch before pressing. It burns out cleanly in the kiln.
Step 2: Stamping and Shaping
-
Plan your composition:
Before pressing anything down, hover your stamps over the clay to visualize the arrangement. I like to place larger shells first and fill gaps with smaller textures. -
Clean the stamps:
Ensure your ceramic or rubber stamps are clean and dry. If you are using actual shells, lightly dust them with cornstarch so they don’t stick to the wet clay. -
Press the center design:
Start in the center of your slab. Press the scallop shell stamp firmly and evenly to get a deep, crisp impression without pushing all the way through the slab. -
Add surrounding details:
Work your way outward, pressing the starfish, sand dollar, and coral stamps. Vary the pressure slightly to create depth, and rotate stamps so they don’t look too uniform. -
Smooth the edges:
After stamping, the edges of your slab might have distorted. Use a damp sponge to gently round over the rim so it’s smooth to the touch. -
Form the bowl:
Carefully lift your stamped slab and drape it *inside* a slump mold or a simple kitchen bowl lined with plastic wrap. This will give it that gentle curve. -
Refine the shape:
Gently press the clay into the curve of the mold. Be careful not to smudge your beautiful impressions while doing this.
Warping Woes?
If the bowl warps while drying, weight the center gently with a small sandbag while it’s in the leather-hard stage to keep the bottom flat.
Step 3: Drying and Finishing
-
Let it firm up:
Allow the clay to dry to a ‘leather hard’ state while still in the mold. This usually takes a few hours to overnight depending on humidity. -
Remove and clean:
Once rigid enough to hold its shape, remove the bowl from the mold. Use a slightly damp sponge to tidy up the rim or any rough spots on the underside. -
Bisque fire:
Let the bowl dry completely (bone dry) before loading it into the kiln for a bisque firing (usually Cone 04). -
Glazing decision:
For the look in the photo, you want to preserve the raw texture. Apply a very thin layer of clear matte glaze, or leave the exterior unglazed to show off the speckles. -
Enhancing the texture:
If you glaze, make sure the glaze doesn’t pool too thickly in the stamped indentations, or you’ll lose the definition of the fossil shapes. -
Final firing:
Fire the piece again to the maturation temperature of your specific clay body (e.g., Cone 5 or 6).
Now you have a permanent piece of the ocean to enjoy in your home

TRACK YOUR CERAMIC JOURNEY
Capture glaze tests, firing details, and creative progress—all in one simple printable. Make your projects easier to repeat and improve.
Butterfly Stamps for Light, Whimsical Impressions
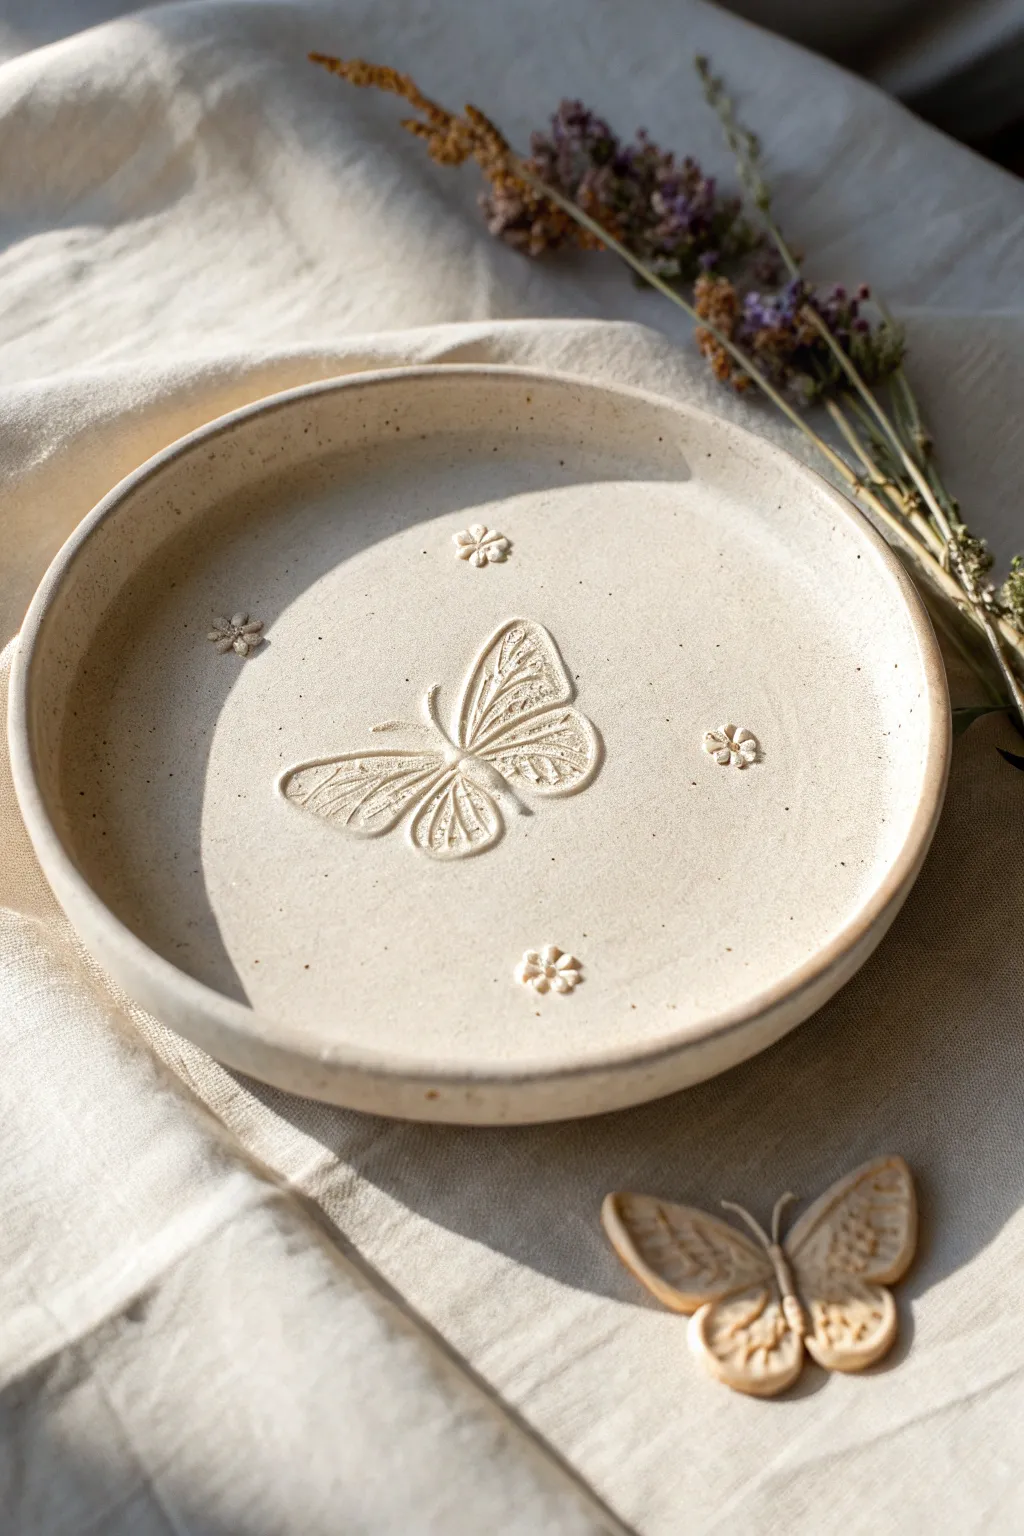
Capture the delicate beauty of nature with this rustic stoneware plate featuring a graceful butterfly relief. The speckled cream clay and subtle floral accents create an organic, airy aesthetic perfect for holding jewelry or serving treats.
Detailed Instructions
Materials
- Speckled stoneware clay (cream or light beige)
- Butterfly relief stamp (approx. 2-3 inches)
- Small daisy or floral stamp (approx. 0.5 inch)
- Rolling pin
- Canvas work surface or slab mat
- Circular plate mold or slump mold (approx. 6-8 inches)
- Potter’s needle tool or fettling knife
- Rib tool (soft kidney)
- Sponge
- Clear matte glaze or transparent semi-gloss glaze
- Kiln
Step 1: Preparing the Slab
-
Wedge the clay:
Start by thoroughly wedging a ball of speckled stoneware clay to remove air bubbles and ensure an even consistency. -
Roll the slab:
Place the clay on your canvas or mat. Using a rolling pin, roll out a smooth, even slab. Aim for a thickness of about 1/4 inch (approx. 6mm). -
Smooth the surface:
Take your rib tool and gently compress the clay surface on both sides. This aligns the clay particles to prevent warping and creates that silky finish we need for stamping.
Clean Release Tip
Dust your butterfly stamp with a tiny bit of cornstarch before pressing. It acts as a release agent, preventing the clay from sticking in the detailed crevices.
Step 2: Stamping the Design
-
Position the butterfly:
Locate the exact center of your slab. Press your large butterfly stamp firmly into the clay. Apply even pressure across the entire stamp to ensure the delicate wing veins transfer clearly. -
Add floral accents:
Using the small daisy stamp, press four distinct impressions around the butterfly. Arrange them symmetrically—top, bottom, left, and right—leaving plenty of negative space to keep the look airy. -
Cut the circle:
Place your circular template or mold gently over the design to visualize the framing. Use your needle tool to cut a clean circle around the stamped scene, ensuring the butterfly is centered. -
Refine the rim:
Run a damp sponge or your finger along the cut edge to smooth away any sharp burrs or roughness from the needle tool.
Stamp Not Deep Enough?
If the impression is too faint, don’t re-stamp exactly over it (it looks messy). Smooth the area with a rib to erase the mistake completely, then stamp again.
Step 3: Forming and Drying
-
Mold the plate:
Lift the clay circle and place it onto your slump mold or into a shallow bowl form. Gently press the clay down so it takes the shape of the mold, curving the edges upward to form a rim. -
Define the rim:
I like to gently press the outer rim with a damp sponge while spinning the mold to create a uniform, slightly rounded lip that feels nice to the touch. -
Dry slowly:
Cover the plate loosely with plastic to allow it to dry slowly to the leather-hard stage. This prevents the rim from drying faster than the center, which causes cracking. -
Bisque fire:
Once fully bone dry, fire the piece in the kiln to a bisque temperature (usually cone 04).
Step 4: Glazing and Finishing
-
Clean the bisque:
Wipe the bisque-fired plate with a damp sponge to remove any kiln dust before glazing. -
Apply clear glaze:
Dip the plate into a clear matte or satin glaze. A transparent glaze is crucial here so the natural speckles of the clay and the deep impressions of the stamp remain the focal point. -
Wipe the foot:
Clean off any glaze from the bottom foot of the plate to prevent it from sticking to the kiln shelf. -
Glaze fire:
Fire the plate a second time to the maturation temperature of your specific clay and glaze (typically cone 5 or 6 for stoneware).
Now you have a serene, nature-inspired piece that brings a touch of the garden into your home
Maker’s Mark Stamps for Signing the Bottom of Every Piece
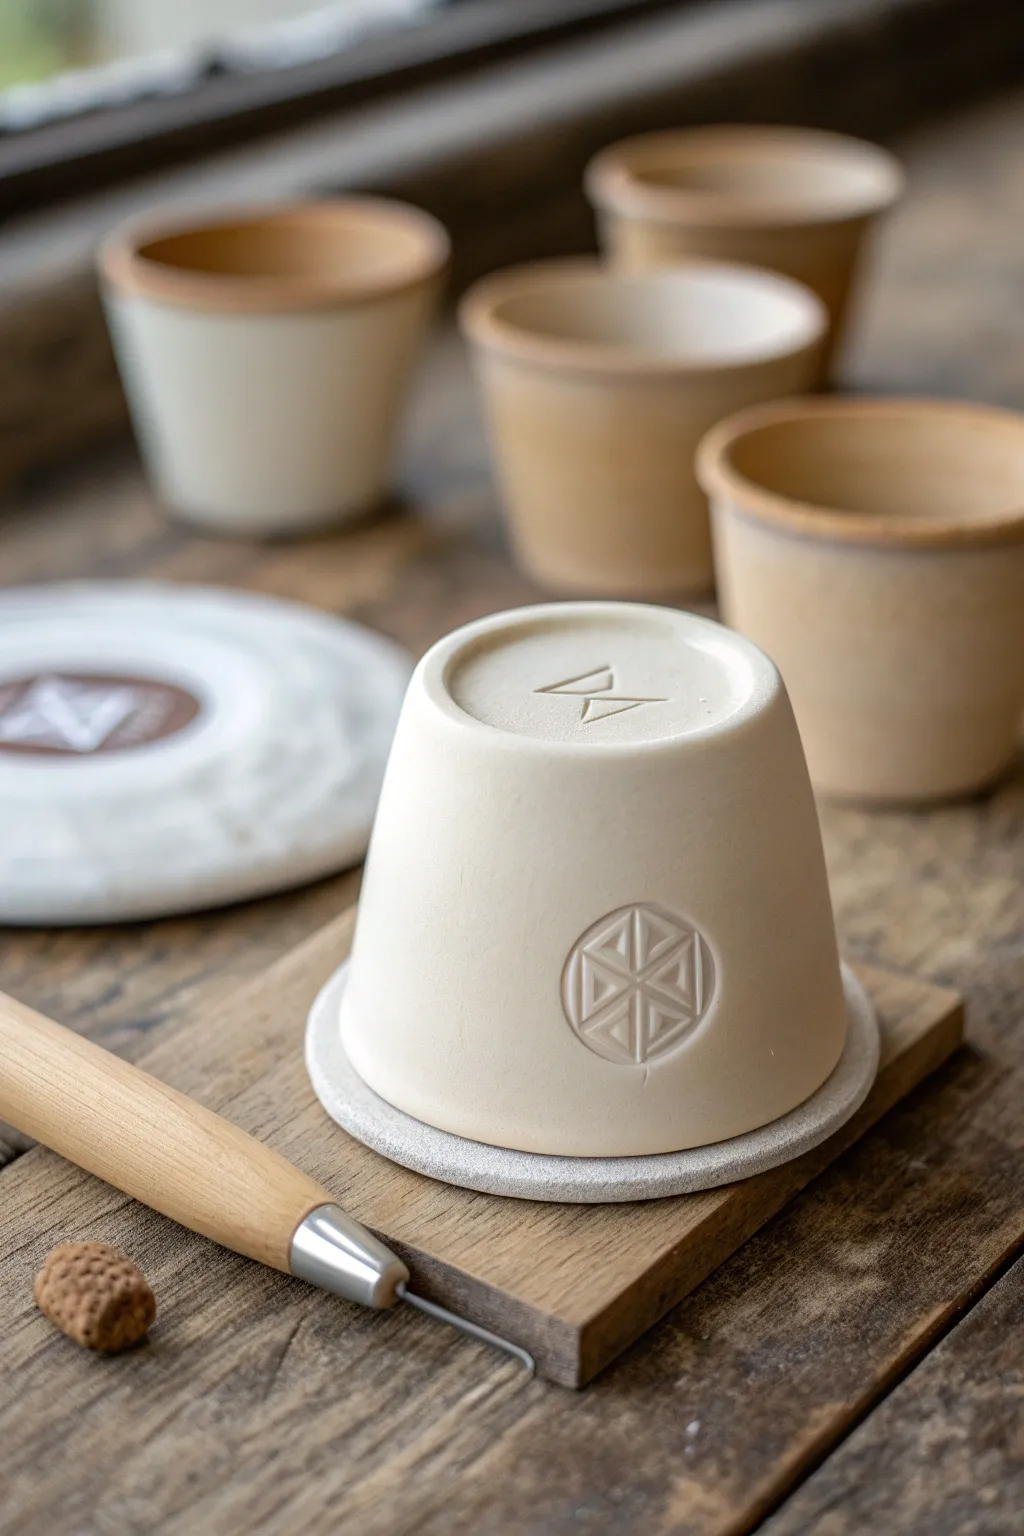
Elevate your pottery with a professional finish by incorporating custom maker’s marks into a sleek, wheel-thrown cup. This project focuses on the precise application of stamps to create a branded, minimalist vessel that looks right at home in a high-end studio.
Step-by-Step Tutorial
Materials
- Stoneware clay body (smooth, light-colored)
- Potter’s wheel
- Throwing tools (sponge, rib, wire cutter)
- Trimming tools (loop tool)
- Custom brass or 3D-printed stamp (side logo)
- Custom maker’s mark stamp (initials for foot)
- Small wooden bat or ware board
- Needle tool
- Chamois or soft plastic
Step 1: Throwing the Form
-
Center the clay:
Start with a manageable amount of clay, roughly 1 pound. Wedge it thoroughly to remove air bubbles, then slam it onto the wheel head. Use your palms to center the clay until it spins without wobbling. -
Open and pull:
Open the centered mound to create the floor of your cup. Keep the floor flat and relatively thick to allow for later trimming of the foot ring. Pull the walls up into a simple cylinder first, then gently collar it inwards to create a slightly tapered, conical shape. -
Refine the profile:
Use a metal or wooden rib to smooth the exterior walls. This removes throwing lines and creates the pristine, canvas-like surface necessary for a clean stamp impression later. -
Dry to leather hard:
Cut the pot from the wheel and let it dry slowly. You need the clay to reach a firm leather-hard stage—stiff enough to hold its shape when handled, but soft enough to accept an impression without cracking.
Clean Release
Dust your stamp lightly with cornstarch or baking soda before pressing. This acts as a release agent, preventing the clay from sticking to the intricate details of your logo.
Step 2: Trimming and Refining
-
Center for trimming:
Invert your leather-hard cup onto the wheel head. Use lugs of clay to secure it in place. -
Define the foot:
Using a sharp loop tool, trim away the excess clay from the bottom. Carve out a distinct foot ring, leaving a smooth, recessed area in the very center where your maker’s mark will essentially live. -
Smooth the surface:
After trimming, run a damp sponge or a smooth rib over the trimmed areas to erase any tool chatter marks. The surface needs to be flawless before stamping.
Uneven Impressions?
If one side of the stamp is deeper than the other, your clay might be unevenly hard. Try rocking the stamp gently in a circular motion while pressed to catch all edges.
Step 3: Stamping the Marks
-
Support the wall:
Hold the cup in one hand. Place your fingers on the *inside* of the cup directly behind where you plan to stamp the exterior side logo. This internal support is crucial to prevent the wall from collapsing. -
Apply the side logo:
Take your geometric side stamp and press it firmly into the exterior wall. Rock it ever so slightly top-to-bottom to ensure all edges of the design transfer, then pull it straight back. -
Clean up the impression:
If the stamp raised any jagged edges or displaced clay, gently tap them down with a fingertip or a soft rubber rib. Avoid smearing the design. -
Position the foot mark:
Invert the cup so the bottom is facing up. Locate the exact center of the trimmed foot ring. -
Press the maker’s mark:
Position your smaller initial stamp (the maker’s mark) in the center. I find it helps to stand up for this part to apply even, downward pressure. Press firmly, ensuring the letters are deep enough to remain visible after glazing. -
Final smooth:
Give the rim and foot ring one last pass with a chamois or slightly damp sponge to round off any sharp edges created during handling. -
Slow drying:
Place the finished cup on a ware board. Cover it loosely with plastic to ensure slow, even drying, which helps prevent the stamped areas from developing stress cracks.
Now your piece carries a permanent signature that marks it as truly yours