Any time I sit down at the pottery wheel and my mind goes blank, I fall back on a handful of shapes that are fun to throw and easy to personalize. These clay wheel ideas start with the classics you’ll actually use every day, then gradually wander into the more playful, “wait, you can do that on a wheel?” territory.
Everyday Wheel-Thrown Mug
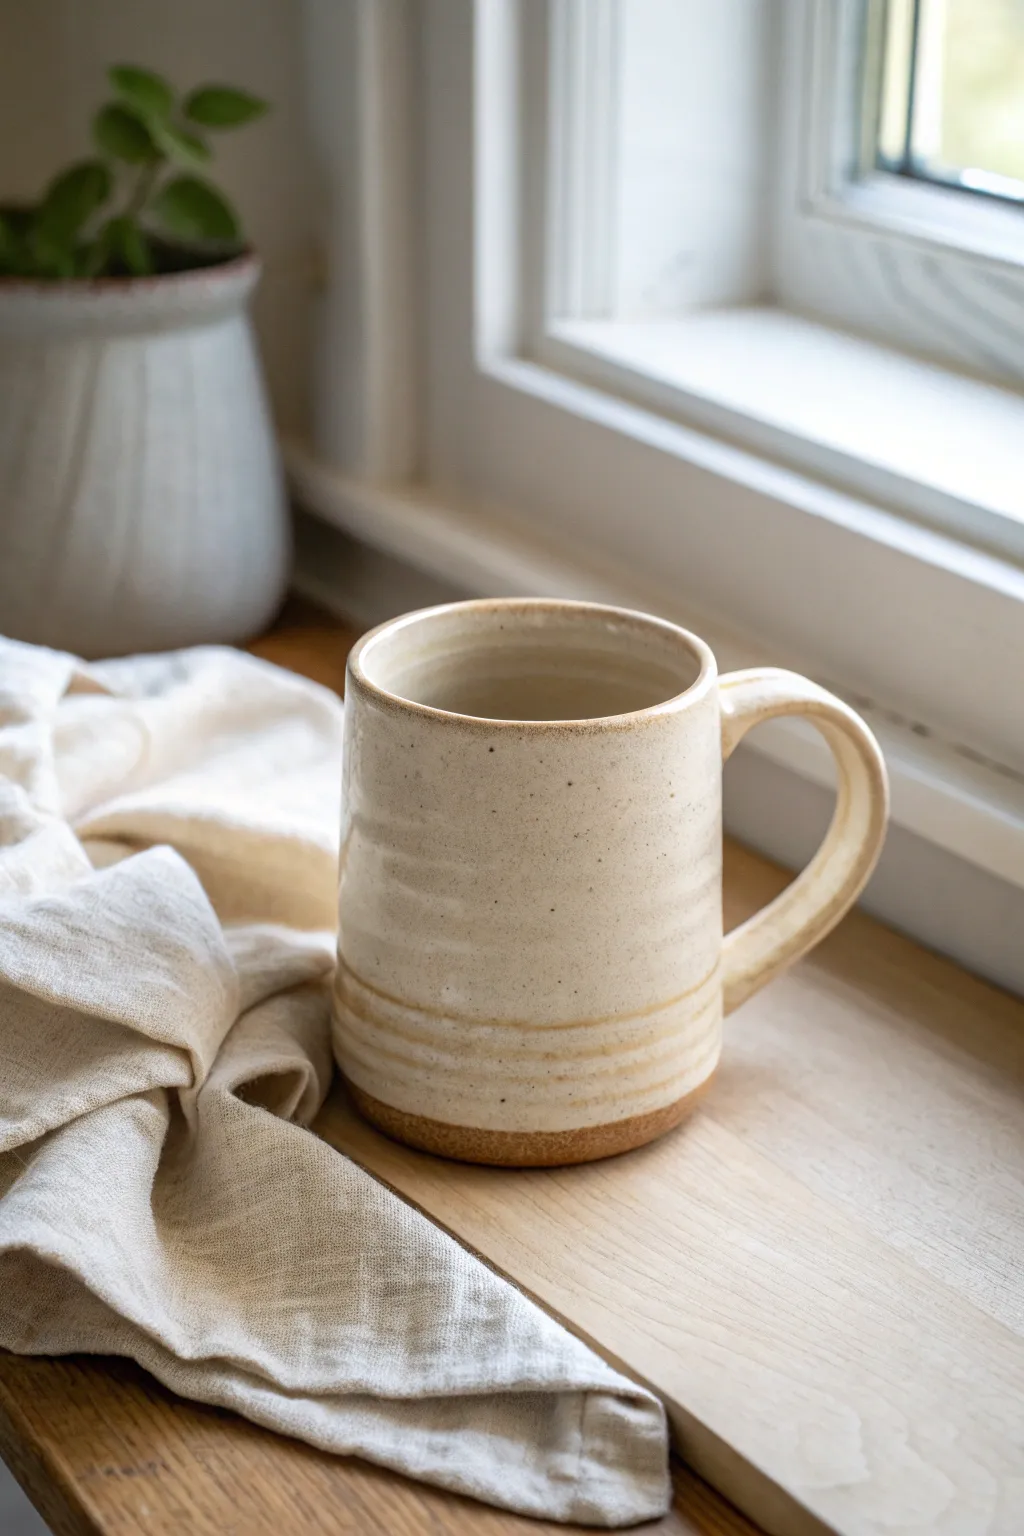
Embrace the rustic charm of handmade pottery with this classic wheel-thrown cylinder mug, featuring subtle throwing lines and comforting earthy tones. The design highlights the natural beauty of speckled clay, leaving the raw base exposed for a lovely textural contrast.
Step-by-Step
Materials
- Speckled stoneware clay (approx. 1 lb)
- Pottery wheel
- Medium sponge
- Pin tool
- Wooden rib tool
- Wire cutting tool
- Trimming tools (loop tool)
- Bucket of water
- Cream or oatmeal reactive glaze
- Kiln
Step 1: Throwing the Cylinder
-
Center the Clay:
Begin by firmly slamming your ball of speckled stoneware onto the center of the wheel batt. Wedge it up into a cone and press it back down into a puck shape several times until it spins perfectly smooth and centered. -
Open the Form:
Press your thumbs into the center of the puck, leaving about a quarter-inch of clay at the bottom for the floor. Gently pull the clay outward to establish the interior width of your mug. -
Compress the Floor:
Use your sponge or fingertips to run back and forth across the flat interior bottom. This compression step is crucial to prevent those dreaded S-cracks during drying. -
Pull the Walls:
With steady hands and moist fingers, pull the clay upward into a cylinder. Aim for even wall thickness from bottom to top, keeping the rim slightly thicker for comfortable sipping. -
Add Decorative Ridges:
While the wheel spins slowly, gently press your finger or a soft rib into the lower half of the cylinder’s exterior. Create three or four subtle horizontal grooves to give the mug tactile character. -
Shape the Rim:
Use a damp piece of chamois or your sponge to gently compress and round the rim. A smooth, rounded rim makes a huge difference in the finished drinking experience. -
Cut and Dry:
Run your wire tool under the base to separate the mug from the batt. Set the cylinder aside until it reaches leather-hard consistency.
Step 2: Trimming and Handle
-
Trim the Foot:
Once leather hard, center the mug upside down on the wheel. Use a loop tool to trim away excess weight from the bottom, creating a clean foot ring with a slight bevel. -
Pull a Handle:
Take a separate lug of clay and wet your hands. Use a pulling motion to stretch the clay into a long, tapered strip, slightly flattened rather than perfectly round. -
Shape the Curve:
Curve the pulled clay into a ‘C’ shape or ear shape that feels comfortable for gripping. I usually let this set up for about 15-20 minutes on a board so it holds its shape better during attachment. -
Attach the Handle:
Score the mug wall and the handle attachment points with a serrated tool. Apply vinegar or slip, press the handle firmly onto the mug, and smooth the seams with a damp sponge. -
Bisque Fire:
Allow the mug to dry slowly and completely (bone dry). Load it into the kiln for a bisque firing to cone 04.
Don’t Rush the Handle
Attach the handle when the mug body and handle are at the exact same moisture level (leather hard). If one is wetter, it will shrink more and crack away.
Step 3: Glazing and Finishing
-
Wax the Foot:
Apply wax resist to the bottom inch of the mug and the underside. This ensures the raw, speckled clay remains visible and prevents the glaze from running onto the kiln shelf. -
Apply Glaze:
Dip the mug into a bucket of cream or oatmeal-colored reactive glaze. Hold it upside down for a few seconds to let excess glaze drip off, ensuring an even coat. -
Final Cleanup:
Use a damp sponge to wipe away any stray droplets of glaze on the waxed area, ensuring a crisp, clean line where the glaze meets the raw clay. -
Glaze Fire:
Fire the mug again, this time to the maturity temperature of your clay body (likely cone 5 or 6). Let the kiln cool completely before opening.
Customize Your Ridges
Try using a chattering tool on the lower half instead of simple rings for a deeper, carved texture that the glaze will break over beautifully.
Once cooled, brew your favorite tea and enjoy the warmth of your custom handmade creation


Classic Cereal Bowl
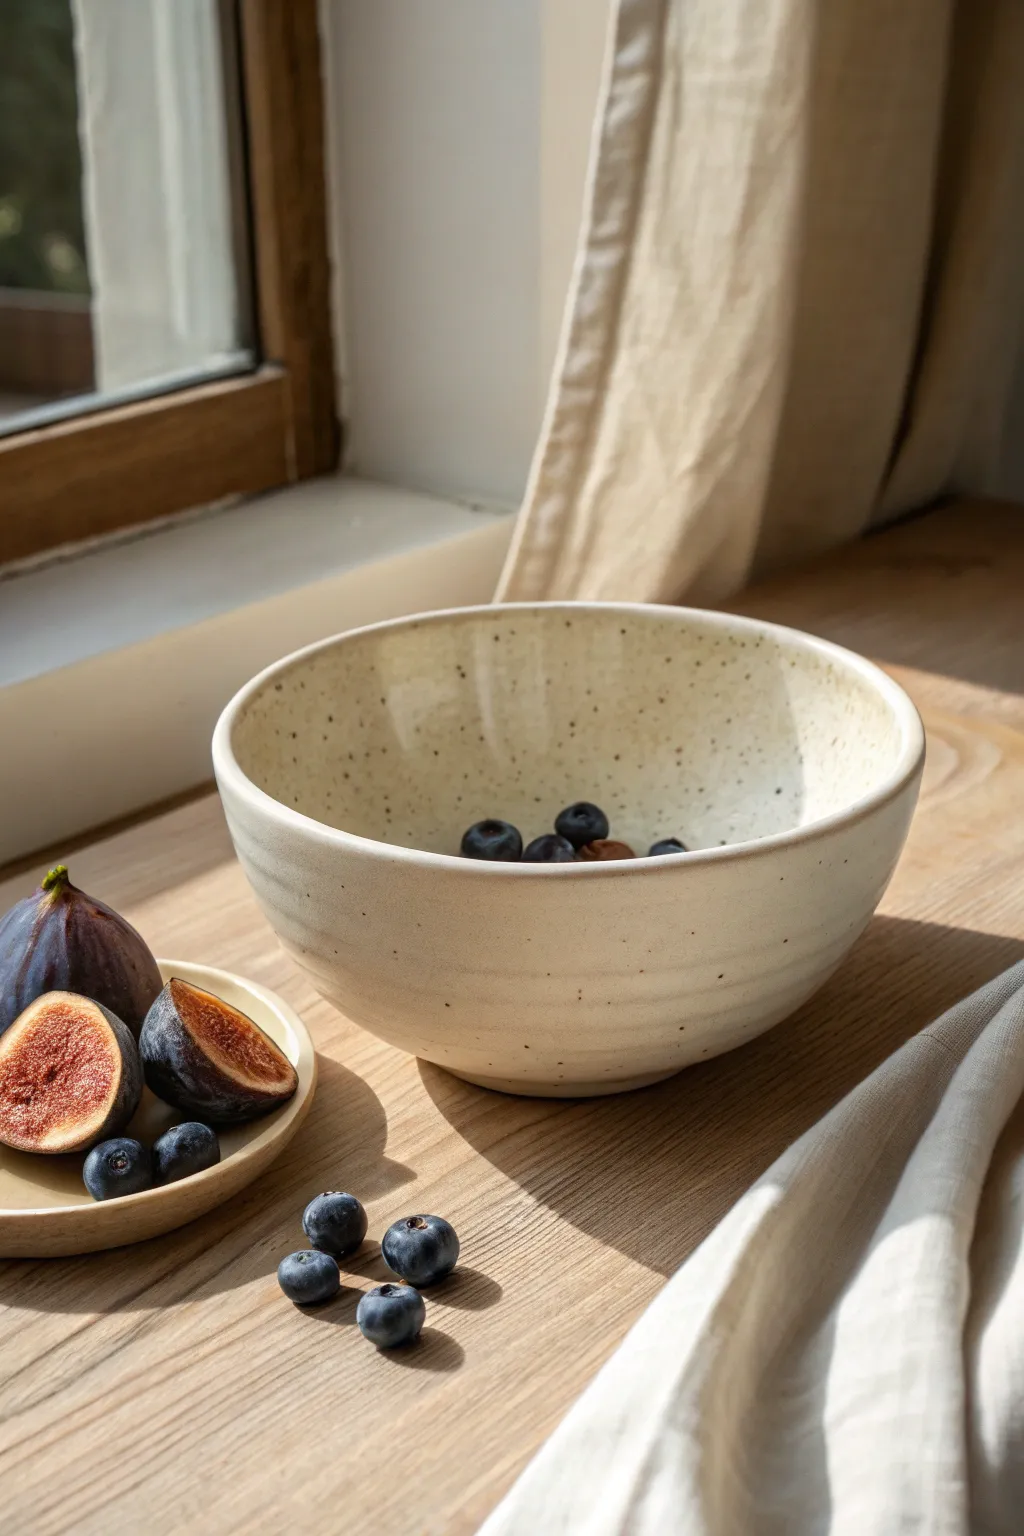
Embrace the beauty of simplicity with this deeply rounded cereal bowl, featuring a comforting speckled cream finish and subtle, tactile throwing rings. Its generous depth and sturdy rim make it the perfect vessel for everything from morning oats to evening soups.
Step-by-Step Guide
Materials
- Speckled clay body (such as a buff stoneware with manganese speckles)
- Pottery wheel
- Throwing sponge
- Wire cutter
- Wooden rib tool
- Metal kidney rib
- Needle tool
- Trimming tools (pear-shaped or loop tool)
- Chamois leather strip
- Glossy white or clear glaze (depending on clay body color)
- Kiln
Step 1: Throwing the Form
-
Wedge and center:
Begin with about 1.5 to 2 pounds of your speckled clay. Wedge it thoroughly to remove air pockets, then slam it onto the center of a clean wheel bat. -
Coning up and down:
With the wheel spinning at a medium-fast speed, cone the clay up and push it back down two or three times to ensure the particles are aligned and the mound is perfectly centered. -
Opening the hole:
Press your thumbs into the center of the mound, opening it down until you are about a quarter-inch from the bat. Avoid going too deep to ensure you have enough base for trimming later. -
Establishing the floor:
Pull the clay outward to create a curved floor. Unlike a cylinder, you want a continuous curve from the center to the wall, like a soup spoon, rather than a flat bottom meeting a sharp corner. -
First pull:
Slowing the wheel slightly, use your left hand inside and right hand outside to compress and lift the clay wall. Focus on bringing height up while maintaining a conical shape initially. -
Shaping the belly:
On your second and third pulls, begin to push gently from the inside to belly the wall out. I like to leave slight finger marks or ‘throwing rings’ on the exterior rather than smoothing them completely, as it adds character to the final glaze. -
Defining the rim:
When you reach your desired height, compress the rim gently with a chamois piece to round it off. Ensure the rim is a bit thicker than the walls for durability. -
Final ribbing:
Use a wooden rib on the inside only to remove slurry and define that perfect, spoon-friendly curve, leaving the exterior texture untouched. -
Cut underneath:
Use the wooden knife tool to undercut the base slightly, cleaning up excess clay near the bat. Slide your wire tool underneath to separate the pot, then set it aside to dry to leather-hard.
Leaving the Trace
Don’t use a metal rib on the outside wall. Letting your fingertips leave gentle spiral grooves creates a surface where the glaze can pool slightly, enhancing the handmade feel.
Step 2: Trimming and Finishing
-
Centering for trim:
Once leather-hard, invert the bowl onto the wheel head. Use soft lumps of clay (wads) to secure it in the center. Tap gently to check it’s level. -
Defining the foot:
Using a sharp loop tool, carve away the excess clay from the lower outer wall to match the curve of the interior. Define a distinct foot ring that elevates the bowl slightly. -
Refining the curve:
Smooth out the trimmed area with a metal kidney rib so the texture transitions naturally from the thrown upper section to the trimmed lower section. -
Bisque firing:
Allow the bowl to dry slowly and completely. Fire it to a bisque temperature (usually cone 04 or 06) to prepare it for glazing. -
Glazing:
Dip the bisqued bowl into a glossy white glaze (or a clear glaze if your clay is naturally light). Shake off excess drips immediately. -
Wiping the foot:
Use a damp sponge to meticulously wipe all glaze off the bottom of the foot ring. This prevents the bowl from fusing to the kiln shelf. -
Glaze firing:
Load the kiln and fire to the maturity temperature of your clay and glaze (often cone 5 or 6 for stoneware). The heat will draw the manganese speckles through the glaze.
Wobbly Rims
If the rim goes uneven near the end, don’t cut it off. Simply slow the wheel down and use your needle tool to trim just the very top millimeter, followed immediately by a chamois compress.
Now you have a durable, distinctively handmade bowl ready for your morning routine


Simple Plates That Stack
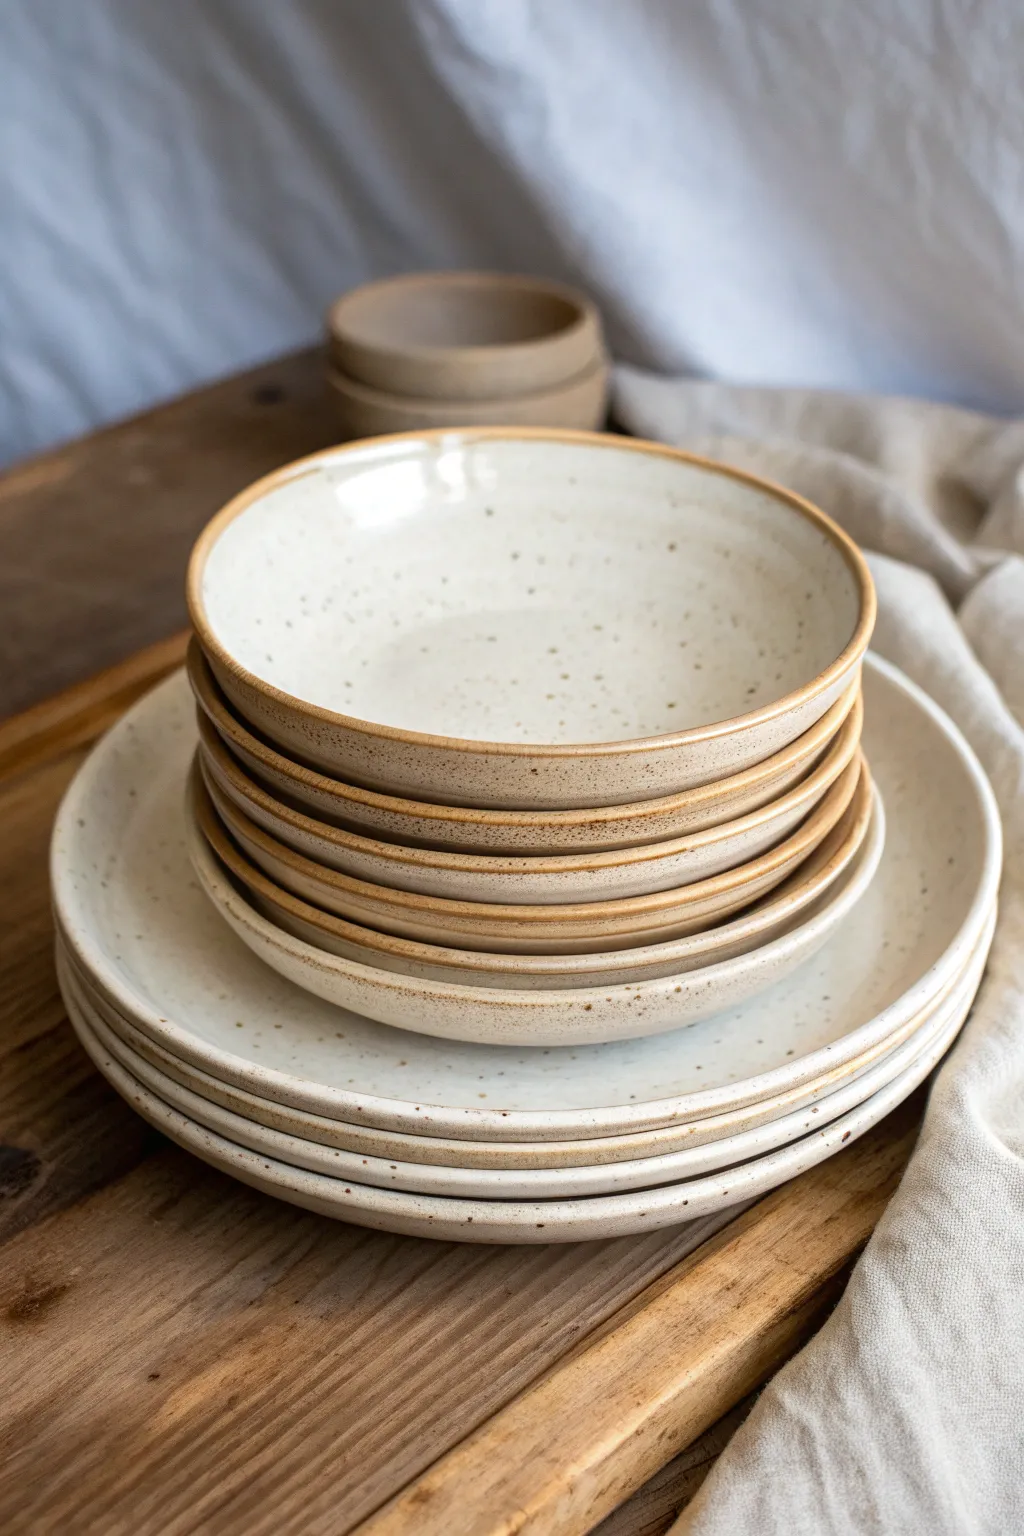
These wheel-thrown plates and bowls combine rustic charm with modern utility, featuring a creamy, speckled glaze that contrasts beautifully with a toasted, unglazed rim. Perfect for everyday meals, their uniform shape ensures they nest neatly in your cupboard.
Step-by-Step Tutorial
Materials
- Speckled stoneware clay (e.g., Laguna B-Mix with Speckles or similar)
- Pottery wheel
- Throwing bats
- Bucket of water and sponge
- Wire cutter
- Needle tool
- Ribs (wooden and metal)
- Loop trimming tools
- Creamy white dipping glaze (semi-opaque)
- Wax resist (optional)
Step 1: Throwing the Plates
-
Center the clay:
Begin with about 1.5 to 2 pounds of wedged speckled clay for a dinner plate. Slam it onto the wheel head and center it low and wide, focusing on keeping a stable base. -
Open the clay:
Open the mound by pressing your thumbs into the center and pulling outwards. Since these are plates, you want to pull horizontally rather than distinctively downwards, leaving a base about 1/4 to 3/8 inch thick. -
Compress the floor:
This is crucial for plates to prevent S-cracks. Use a wooden rib or your sponge to compress the flat bottom, moving from the center out to the rim several times. -
Establish the rim:
Pull the remaining clay at the outer ring upwards slightly to create a low wall. Gently angle this wall outwards to form the plate’s lip, keeping it defined but not too sharp. -
Refine the curve:
Use a metal rib on the interior to smooth the transition from the flat floor to the rising rim. I like to ensure there is a very gentle, continuous curve so utensils can scoop easily. -
Finish the lip:
Use a chamois or a piece of plastic to compress and round the rim. This creates that soft, finished edge seen in the photo that will remain unglazed later. -
Wire off:
Run your wire tool cleanly under the plate to separate it from the bat. Set the bat aside to let the plate dry to leather-hard.
Step 2: Throwing the Low Bowls
-
Adjust clay amount:
For the nesting bowls, use slightly less clay, around 1 to 1.25 pounds. Center the clay into a slightly taller mound than you used for the plates. -
Pull the walls:
Open the center and pull the walls upward. Unlike the flat plates, you want a continuous, gentle bowl curve starting from the center. -
Shape the stackable profile:
Use a kidney-shaped rib to shape the bowl so it is wider than it is tall. Check the diameter against your plates to ensure the aesthetic matches.
Warped Plates?
If rims warp during firing, the clay memory might be snapping back. Ensure you compress the rim thoroughly during throwing and dry the plates very slowly.
Step 3: Trimming and Finishing
-
Trim a foot ring:
Once leather hard, flip your pieces onto the wheel. Trim a definitive foot ring on the bottom. This lifts the piece and allows it to sit flat without rocking. -
Smooth the exterior:
Use a smooth potting rib or the back of a spoon to burnish the exterior leather-hard clay slightly if you want a smoother final texture under the glaze. -
Bisque fire:
Load your bone-dry pieces into the kiln and fire to Bisque (typically Cone 04 or 06). This makes them porous and ready for glazing.
Matching Sets
Use a simple gauge or calipers to measure the rim diameter while throwing. This ensures all plates are the exact same width for perfect stacking.
Step 4: Glazing
-
Clean the bisque:
Wipe down the bisque-fired pieces with a damp sponge to remove any dust, which can cause pinholes in the glaze. -
Wax the foot:
Apply wax resist to the foot ring and the bottom of the plate. This prevents glaze from sticking to the kiln shelf. -
Dip the interior:
Using a dipping motion or a ladle, coat the interior of the plate/bowl with the creamy white glaze. Pour out excess quickly to ensure an even coat. -
Clean the rim:
This is the signature look: immediately take a damp sponge and carefully wipe the glaze off the very top edge of the rim. This reveals the speckled clay body beneath. -
Glaze fire:
Fire the pieces to maturity (likely Step Cone 5 or 6, depending on your clay and glaze). The heat will draw the iron speckles through the creamy glaze.
Stack your fresh warm-toned set on the table and enjoy the satisfaction of eating off your own handiwork


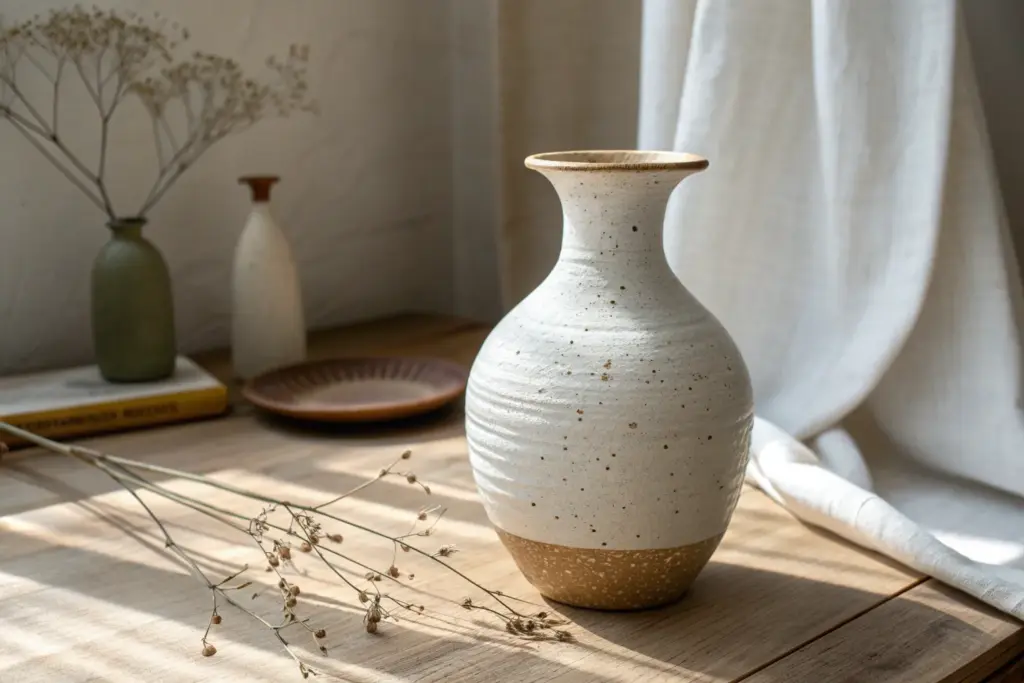
Bud Vase With a Tiny Neck
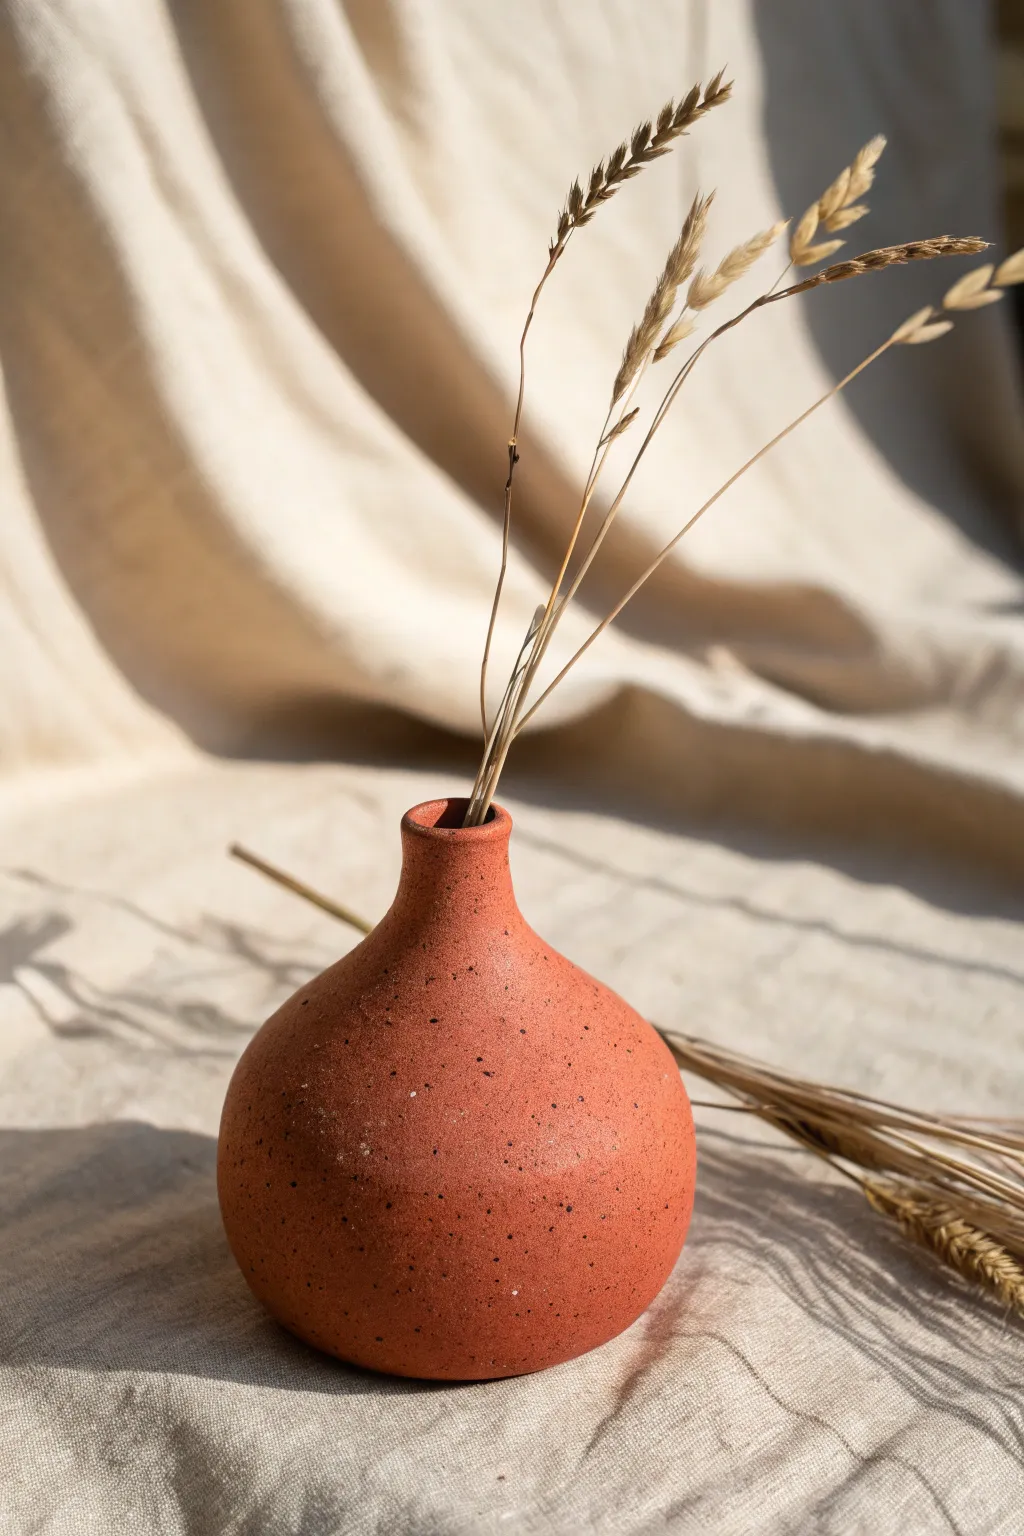
This charming, bulbous vessel features a warm, earthy terracotta hue speckled with iron spots for a rustic finish. Its dramatic silhouette combines a voluminous base with an exceptionally narrow neck, perfect for displaying just a few stems of dried grasses.
How-To Guide
Materials
- Speckled stoneware or terracotta clay (approx. 1 lb)
- Potter’s wheel
- Water bucket and sponge
- Pin tool
- Wooden rib tool
- Metal rib tool
- Wire cutter
- Trimming tools
- Clear matte glaze (optional)
- Small throwing bat
Step 1: Throwing the Base Form
-
Center the Clay:
Begin by wedging a small ball of clay, roughly the size of a large orange. Secure it firmly to the wheel head and center it using consistent pressure and water. -
Open the Mound:
Create an opening in the center, diving down until you are about a quarter-inch from the bat. Open up the floor narrowly, as you want the volume to come from the belly, not a wide base. -
Establish the Cylinder:
Use your sponge and fingers to pull up a short, thick cylinder. Keep the walls relatively thick at the top rim for now, as you will need that clay to collar in later. -
Belly Out:
From the inside, apply pressure outward to create the bulbous shape. Gently support the outside with your other hand. Push the belly out until it feels round and full, but be careful not to let the walls get too thin. -
Smooth the Profile:
Use a wooden rib on the exterior to refine the curve of the belly. This compresses the clay and removes finger ridges, giving it that smooth, taut look.
Neck Torque Trouble?
If the tiny neck starts twisting during collaring, your wheel speed is too slow or your hands are too dry. Speed up the wheel and keep the clay lubricated to reduce friction.
Step 2: Collaring the Neck
-
Begin Collaring:
With the wheel spinning at a moderate speed, encircle the top opening with both hands. Gently squeeze inward and pull upward simultaneously to narrow the opening. -
Compress the Rim:
After every collaring movement, compress the rim with your finger. This thickens the uneven top edge and prevents the clay from buckling. -
Narrow Further:
Repeat the collaring process several times. I like to take my time here to ensure the transition from the shoulder to the neck is smooth. Aim for an opening no wider than a finger. -
Refine the Neck Height:
Once the neck is sufficiently narrow, use your fingertips or a small tool to straighten it vertically. Keep the neck short—about an inch or less—to match the reference image. -
Final Shaping:
Use a metal rib to scrape away any slurry from the exterior, revealing the raw texture of the clay body. Clean up the base with a wooden tool. -
Cut Off:
Run a wire cutter underneath the pot to separate it from the wheel head or bat. Allow it to dry to leather-hard.
Level Up: Texture
Before the clay dries, gently tap the exterior with a stiff bristle brush or a rough sponge. This enhances the stone-like quality and catches light beautifully on the round form.
Step 3: Trimming and Finishing
-
Secure for Trimming:
Once leather-hard, center the vase upside down on the wheel. Because the neck is tiny, use a chuck or a thick coil of clay to hold it steady without crushing the rim. -
Trim the Foot:
Using a sharp trimming tool, remove excess weight from the bottom 1/3 of the pot. Carve a small foot ring or trim it flat, following the curve of the belly. -
Smooth the Surface:
Burnish the surface slightly with a soft rib or back of a spoon if you want a very smooth finish, or leave it slightly rough for texture. -
Bisque Fire:
Fire the piece in the kiln to cone 04 (or your clay’s specific bisque temperature). -
Glazing Decision:
To achieve the look in the photo, the exterior is likely unglazed to show off the clay body’s natural color and speckles. You can glaze the interior with a liner glaze to make it watertight. -
Final Firing:
Fire the piece to maturity (Cone 5, 6, or 10 depending on your stoneware). The heat will bring out the iron speckles in the clay.
Place a few dried stems inside your finished vase to complete the minimalist aesthetic

What Really Happens Inside the Kiln
Learn how time and temperature work together inside the kiln to transform clay into durable ceramic.
Low Planter With Attached Saucer
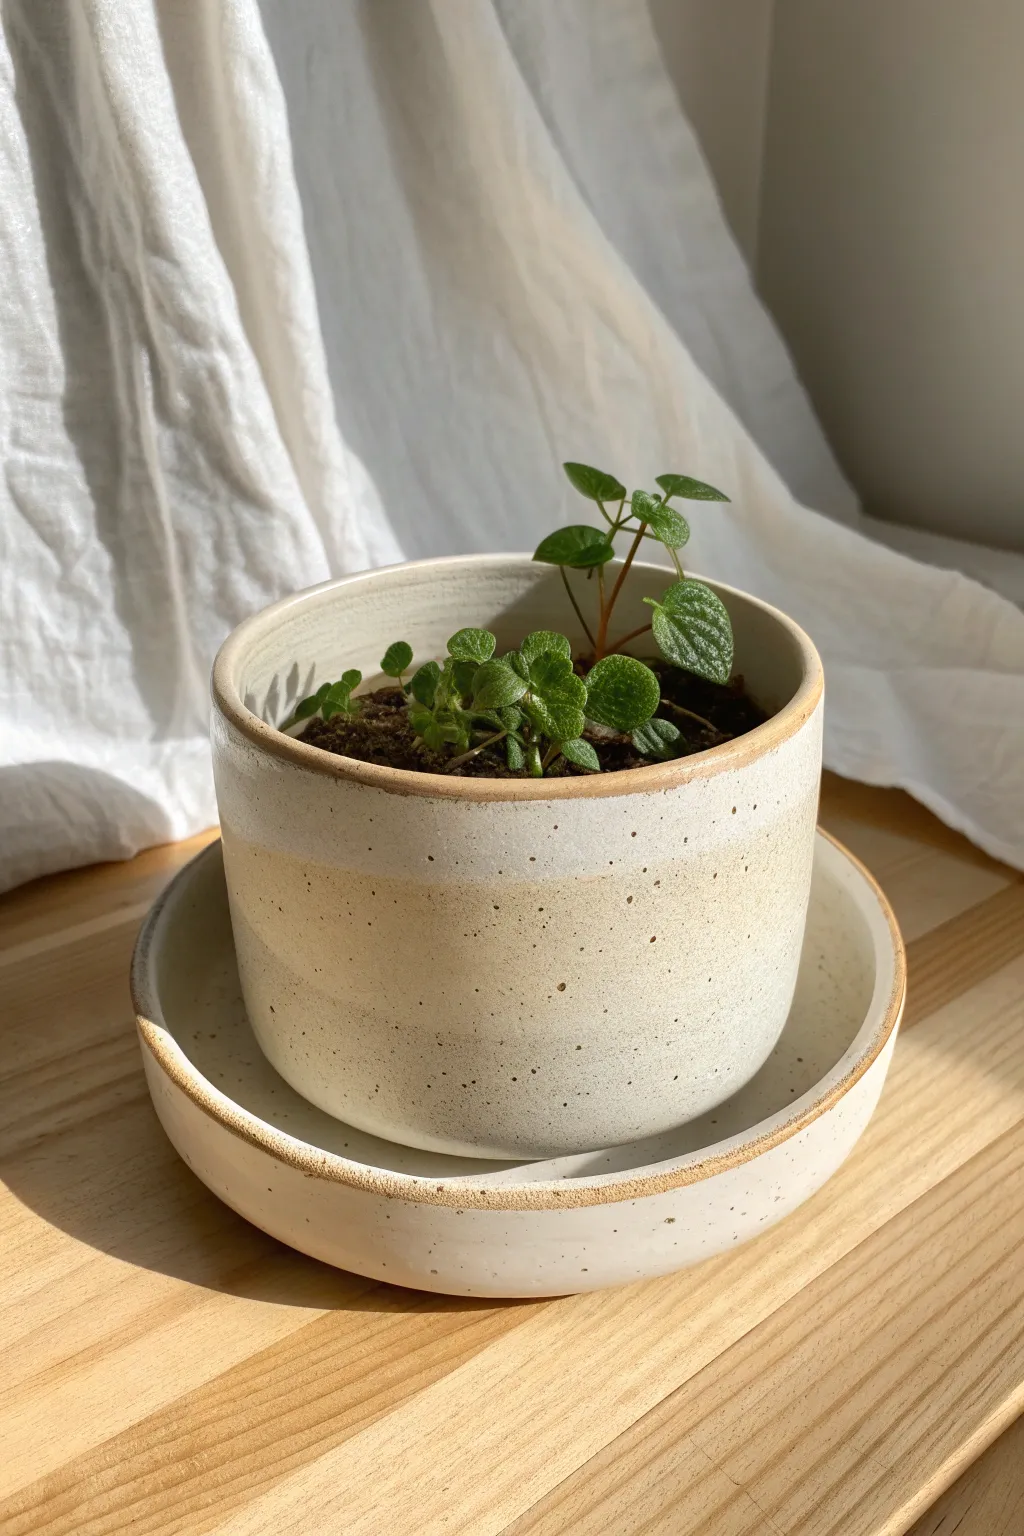
This elegant, functional planter solves the age-old problem of misplaced drainage trays by fusing the saucer directly to the pot. Featuring a speckled clay body and a subtle two-tone glaze, it offers a clean, modern home for your favorite small houseplants.
Detailed Instructions
Materials
- Speckled stoneware clay (approx. 2-3 lbs)
- Pottery wheel
- Throwing tools (sponge, metal rib, wooden knife)
- Wire cutter
- Trimming tools
- Needle tool
- Slip and scoring tool
- Clear or white satin glaze
- Bisque firing kiln
- Glaze firing kiln
Step 1: Throwing the Components
-
Prepare the clay:
Wedge your clay thoroughly to remove air bubbles. Divide the clay into two balls: one larger portion (about 1.5 lbs) for the main cylinder and a smaller portion (about 0.75 lbs) for the saucer. -
Center the main body:
Throw the larger ball onto the wheel head. Center it firmly, creating a wide, low puck shape rather than a tall cone, as we are aiming for a wide planter. -
Open and pull the cylinder:
Open the clay down to the bat, leaving about a 1/4 inch floor. Pull the walls straight up to create a vertical cylinder. Keep the walls consistent and straight, avoiding a belly in the form. -
Refine the rim:
Compress the rim with a chamois or your sponge to ensure it is smooth and durable. Use a metal rib to smooth the exterior walls and remove throwing lines. -
Cut and set aside:
Wire the cylinder off the bat and set it aside on a ware board to firm up to leather-hard. -
Throw the saucer:
Center the smaller clay ball. Flatten it into a wide disc that is roughly 1 inch wider in diameter than your cylinder. Raise a short rim, approximately 3/4 inch high, curving it gently inward. -
Measure for fit:
Before removing the saucer, use calipers to check that the interior diameter of your saucer will comfortably accommodate the foot of your cylinder, leaving room for drainage.
Airflow is Key
When attaching the pot to the saucer, make sure your drainage holes aren’t completely sealed against the saucer floor. Leave a tiny gap or carve small exit channels.
Step 2: Trimming and Assembly
-
Trim the cylinder:
Once leather-hard, center the cylinder upside down on the wheel. Trim the bottom to create a clean, flat foot ring. Crucially, poke 3-4 drainage holes in the bottom of the cylinder now. -
Trim the saucer:
Trim the underside of the saucer to define a neat foot. Ensure the saucer floor is flat so the pot sits level. -
Score and slip:
Identify the contact points where the cylinder will sit inside the saucer. Score these areas on the saucer floor and the bottom of the cylinder foot. Apply slip generously. -
Attach the pieces:
Press the cylinder firmly onto the saucer. I always double-check the vertical alignment here to ensure the pot isn’t leaning. Clean up any excess slip that squeezes out. -
Carve drainage channels:
Just before the join sets completely, use a small tool to ensure there is a small gap or channel at the very bottom of the join if you want water to flow out freely sideways, although simple holes in the pot bottom usually suffice if there is space. -
Slow drying:
Cover the assembled piece loosely with plastic. Because the connection point is thick, dry it slowly over several days to prevent cracking between the two shapes.
Step 3: Glazing and Finishing
-
Bisque fire:
Once bone dry, load the piece into the kiln for a bisque firing to roughly Cone 04. -
Wax overlap area:
Wax the exterior bottom and the rim of the saucer. For this specific look, leave the speckled clay raw on the bottom half of the cylinder. -
Apply the glaze:
Pour a white satin glaze into the interior of the pot and swirl to coat. Dip the top rim and upper half of the exterior into the white glaze, getting a crisp line. -
Second dip (optional):
To achieve the subtle cream transition seen in the photo, you might dip the very bottom section (saucer and lower pot) in a transparent or very thin wash of glaze, leaving the speckles visible. -
Final fire:
Clean up any glaze drips on the foot and fire to maturity (Cone 5/6 depending on your clay).
Dual-Tone Texture
Use a wax resist line around the middle of the pot before dipping. This creates a razor-sharp separation between the glazed top and the raw clay bottom.
Now you have a sleek, self-contained planter ready to show off your favorite Pilea or succulent.
Lidded Jar With a Clean Gallery
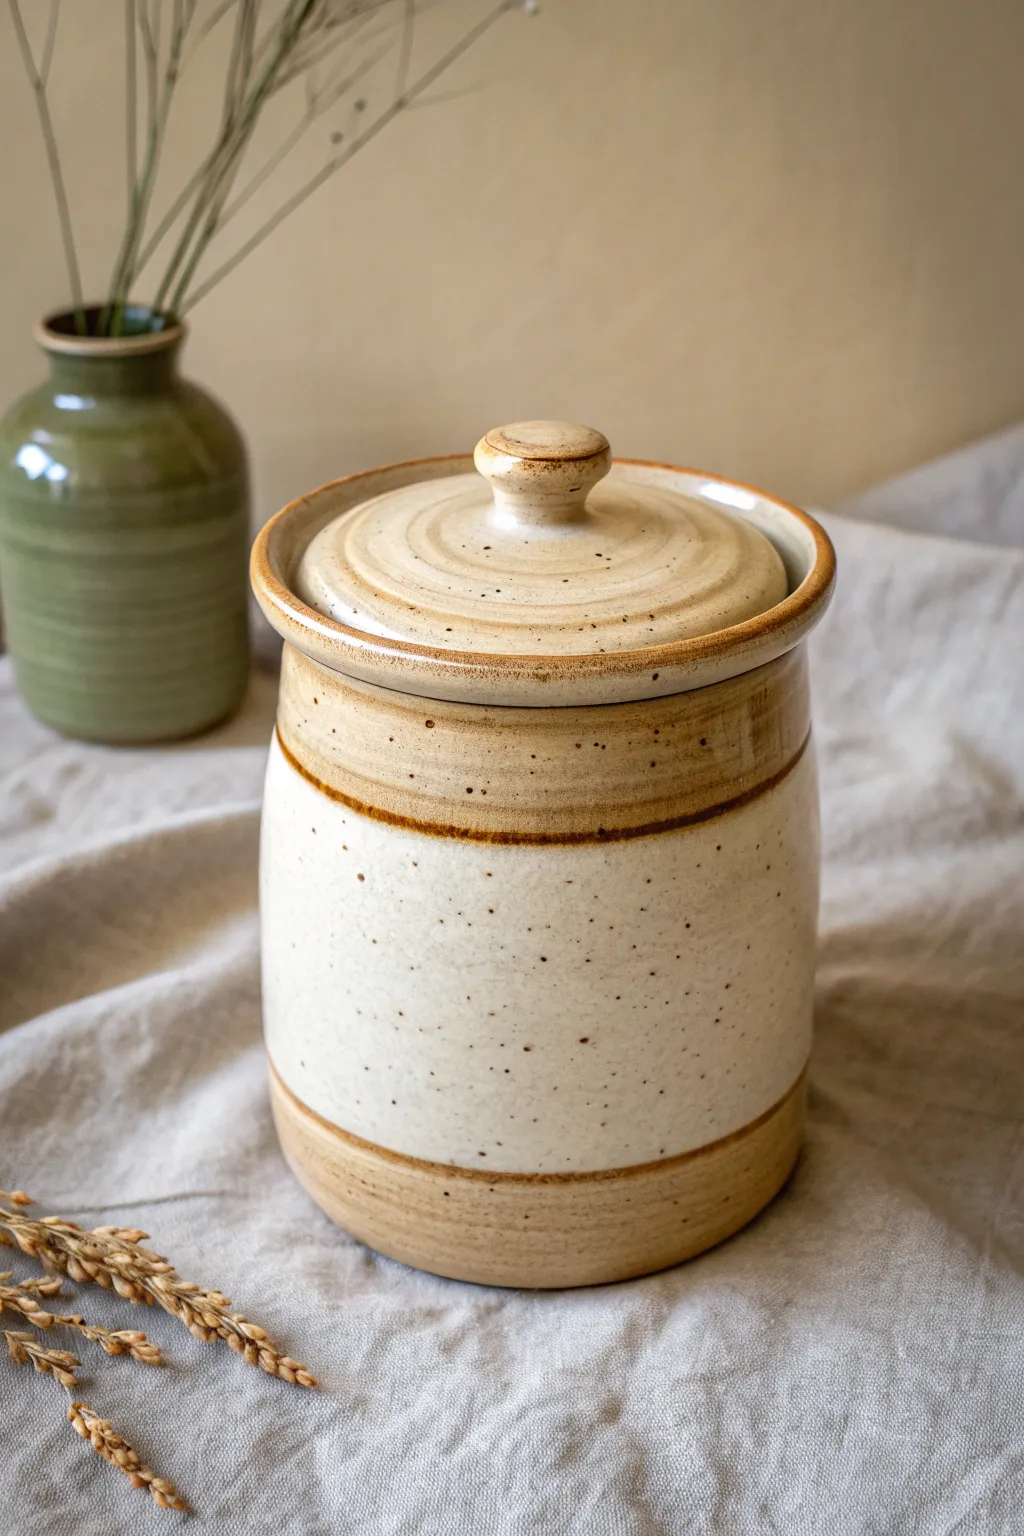
This charming lidded jar combines the earthy warmth of speckled stoneware with a clean, classic silhouette. The design features raw clay accents at the rim and foot that frame a creamy white center, perfect for storing everything from tea leaves to sourdough starter.
Step-by-Step Tutorial
Materials
- Speckled stoneware clay (approx. 3-4 lbs)
- Potter’s wheel
- Throwing sponges
- Wire cutting tool
- Wooden throwing ribs
- Trimming tools (loop tool)
- Calipers
- Needle tool
- Cream or oatmeal speckled glaze
- Wax resist
- Kiln
Step 1: Throwing the Body
-
Center and open:
Start with about 2.5 lbs of well-wedged speckled clay. Center it on the wheel head and open it up, aiming for a flat floor about 4 inches wide. Compress the floor well to prevent erratic cracking later. -
Pull the walls:
Pull the walls up into a straight cylinder first. Once you have height, gently shape it from the inside to create a slight belly, but keep the overall form relatively vertical and sturdy. -
Create the gallery:
At the rim, use a wooden tool or your thumb to split the clay slightly. Press the inner part down and horizontal to create a ‘gallery’ (a shelf) where the lid will sit. Ensure this shelf has a sharp 90-degree angle for a clean fit. -
Define the aesthetics:
Before taking it off the wheel, use a rib to smooth the outside. I like to press a subtle groove just below the rim and near the foot to define the areas that will remain raw clay later. -
Measure and cut:
Use calipers to measure the exact diameter of the gallery shelf you just made—don’t change this measurement! Wire cut the jar off the bat and set aside to firm up to leather hard.
Shrinkage Rates
Remember clay shrinks during drying and firing. If fitting a lid to a specific jar, always make them from the same bag of clay so they shrink at the exact same rate.
Step 2: Creating the Lid
-
Throw off the hump:
Using the remaining clay, center a cone on the wheel. It’s often easier to throw lids ‘off the hump’ (using the top of a large mound of clay) rather than centering a tiny ball. -
Shape the flange:
Form a low, flat disc. Check your caliper measurement against the outer edge of this disc; it needs to fit perfectly inside the gallery of your jar. -
Form the knob:
While the clay is still plastic, pull a small amount of clay from the center of your disc upwards to form a simple, mushroom-shaped knob. Smooth it with a wet sponge or chamois. -
Refine the surface:
Use a wooden modeling tool to add concentric spiral texture to the top of the lid if desired, matching the rustic feel of the reference image. -
Separation:
Carefully cut the lid from the hump using your needle tool or a thin wire. Set it on a board to dry alongside the jar base.
Step 3: Trimming and Finishing
-
Trim the base:
Once leather hard, center the jar upside down on the wheel. Trim the bottom to create a defined foot ring. This adds visual lift and separates the pot from the surface it sits on. -
Refine the lid:
Flip the lid upside down (you may need a chuck or a foam bat). Trim away excess weight from the underside, mirroring the curve of the top. -
Check the fit:
Gently test the fit of the lid on the jar. It should slide into the gallery easily but not rattle loosely. If it’s too tight, carefully trim the edge of the lid while it’s spinning. -
Bisque fire:
Let both pieces bone try completely. Load them into the kiln and bisque fire to Cone 04 (or your clay body’s specification).
Warped Lid?
If your lid wobbles after firing, the clay may have dried unevenly. Next time, dry the lid directly on the jar (with a piece of paper between them) to keep them mated perfectly.
Step 4: Glazing
-
Wax application:
This style relies on negative space. Apply wax resist to the bottom inch of the jar (the foot area) and the top rim/gallery area. Include the distinct bands seen in the photo where the glaze stops. -
Waxing the lid:
Wax the rim of the lid (where it touches the jar) and consider waxing the very top of the knob if you want that raw clay accent. -
Dip into glaze:
Holding the jar by the waxed foot, submerge it into a cream or oatmeal glaze. Pull it out and shake off excess. The wax will protect the raw bands, but wipe any stray droplets immediately with a damp sponge. -
Glaze the lid:
Dip the lid. Ensure the glaze isn’t too thick on the vertical surfaces, as you don’t want it running into your raw clay bands. -
Final fire:
Load into the kiln for the final glaze firing (usually Cone 5 or 6 for stoneware). Ensure the lid is not placed on the jar unless you have thoroughly waxed the contact points and are confident they won’t fuse.
Once cooled, fill your new handmade canister with your favorite kitchen staples and enjoy the blend of function and beauty.


The Complete Guide to Pottery Troubleshooting
Uncover the most common ceramic mistakes—from cracking clay to failed glazes—and learn how to fix them fast.
Creamer or Small Pouring Pitcher
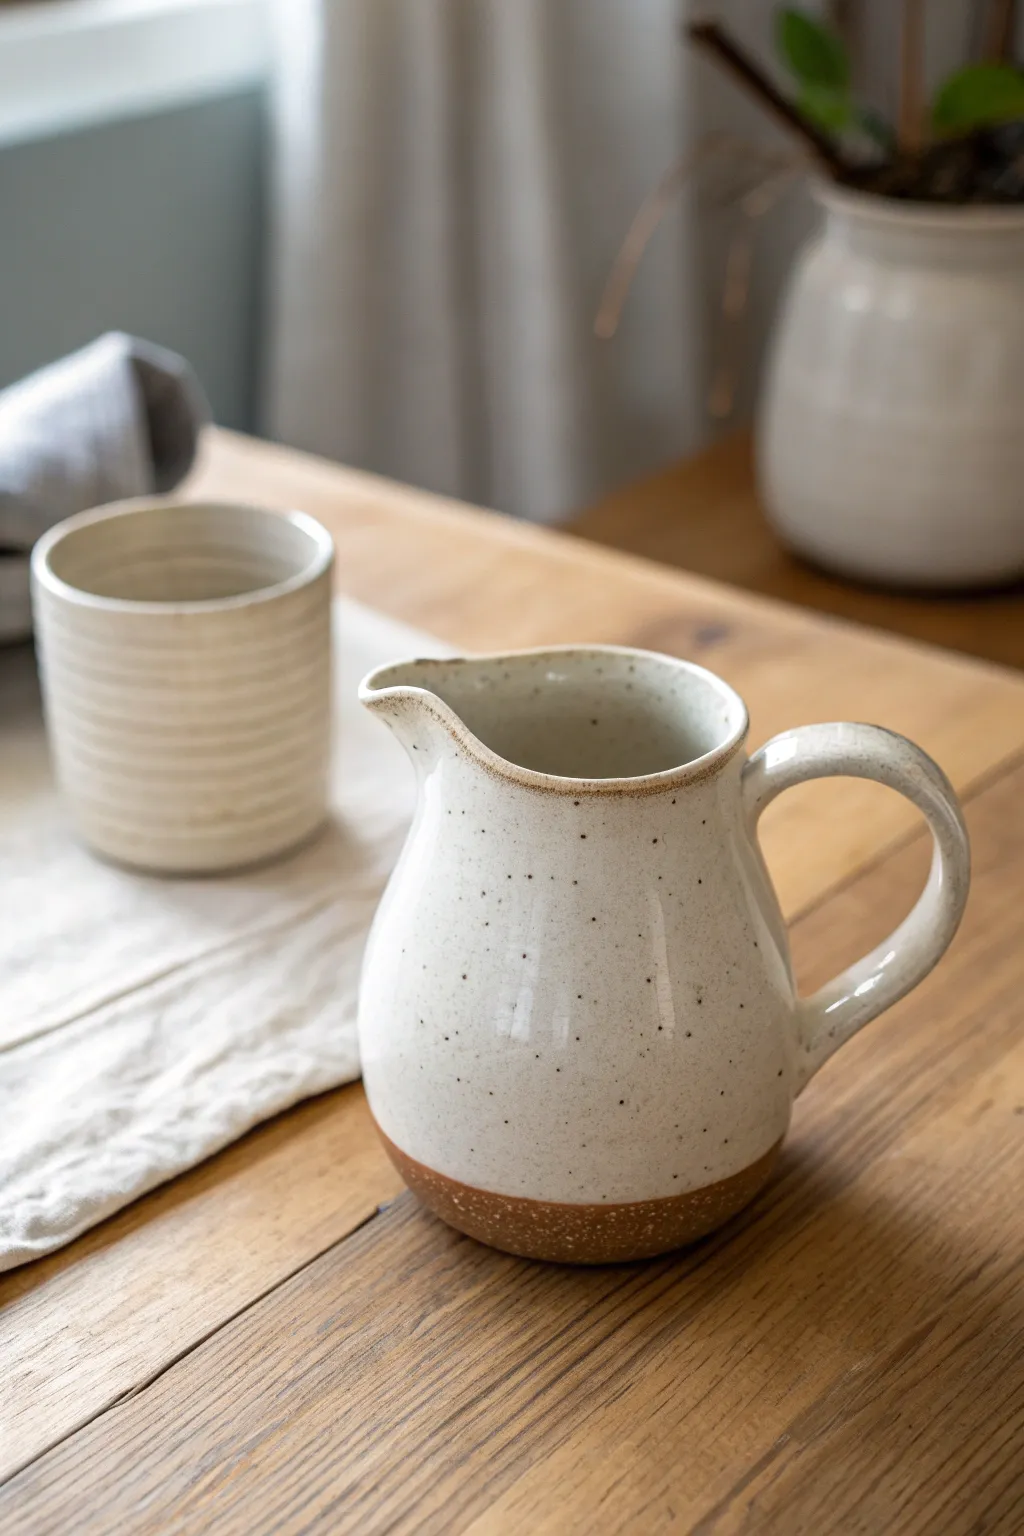
This charming, wheel-thrown creamer features a generous bellied form and a cozy, rustic aesthetic thanks to the exposed clay base. The speckled white glaze contrasts beautifully with the warm, toasted hues of the stoneware, making it a perfect addition to any breakfast table.
How-To Guide
Materials
- Speckled buff or reddish-brown stoneware clay (approx. 1 lb)
- Pottery wheel
- Throwing sponge and bucket of water
- Wooden throwing ribs
- Metal kidney rib
- Needle tool
- Wire cutter
- Trimming tools
- Bucket of water for pulling handles
- Satin or glossy speckled white glaze
- Wax resist (optional)
Step 1: Throwing the Form
-
Center the clay:
Start by wedging your clay thoroughly to remove air bubbles, then slam it onto the center of the wheel head. Cone the clay up and down to align the particles before centering it into a low, wide puck shape. -
Open the floor:
Create an opening in the center, leaving about a 1/4 inch of clay at the bottom. Pull the floor outwards until it’s about 2.5 to 3 inches wide, compressing the bottom well with your fingers or a flat tool to prevent S-cracks later. -
Pull the walls:
Begin pulling the walls upward into a cylinder. Keep your pulls steady and slow. For this specific shape, leave a little extra weight at the bottom of the wall to support the belly we will create next. -
Shape the belly:
Once you have your height, use a wooden rib on the outside and your hand on the inside to gently push the clay outward from the bottom. Create a bulbous, rounded curve that tapers inward as it moves up toward the rim. -
Collar the neck:
To define the pitcher shape, gently collar (squeeze) the clay in at the neck area, just below the rim. This emphasizes the wide belly and creates a sleek transition for the spout. -
Refine the surface:
Before stopping the wheel, use a metal kidney rib to smooth the outside curve, removing any slurry and refining the silhouette.
Step 2: Spout and Handle
-
Form the spout:
While the clay is still wet and on the wheel (or immediately after cutting it off), use your index finger and thumb to gently pull a section of the rim outward. Use a wet finger to smooth the curve of the spout so it pours cleanly rather than dribbling. -
Trim the base:
Let the piece dry to leather-hard. Secure it upside down on the wheel and trim away excess weight from the bottom. To match the image, create a clean separation line where the glaze will stop, leaving the foot smooth and rounded. -
Pull a handle blank:
Take a nugget of fresh clay and pull a tapered carrot shape using plenty of water. I like to pull handles directly off the pot for a seamless look, but you can also pull a strap separately and attach it. -
Attach and shape:
Score and slip the attachment points on the neck and belly of the pitcher. Attach the thick end of your handle to the top, then curve it into a graceful ‘ear’ shape and attach the tail to the belly. Ensure the loop is large enough for a finger or two. -
Dry slowly:
Cover the handle with plastic or wax resist to slow its drying, as handles tend to dry faster than the body. Let the whole piece dry slowly to the bone-dry stage.
Sharp Spout Secret
A sharp edge on the very tip of the spout cuts the flow of liquid. After shaping, run your finger vertically under the spout lip to sharpen that edge perfectly.
Step 3: Glazing and Firing
-
Bisque fire:
Load your bone-dry creamer into the kiln and bisque fire it to Cone 04 (or your clay’s specified bisque temperature). -
Apply wax resist:
To get that distinctive dipped look, apply liquid wax resist to the bottom inch of the pitcher. This ensures a crisp, straight line where the glaze ends and the raw clay begins. -
Prepare the glaze:
Stir your speckled white glaze thoroughly. If the glaze is too thick, the speckles might get hidden; if too thin, it may streak. -
Dip the pitcher:
Holding the pitcher by the foot (the waxed area), dip it upside down into the bucket of glaze. Hold it there for 3-4 seconds, then pull it out and give it a quick shake to remove drips. -
Clean the foot:
Even with wax resist, little beads of glaze can stick. Use a damp sponge to wipe the bare clay section completely clean to prevent it sticking to the kiln shelf. -
Glaze fire:
Fire the piece to maturity (likely Cone 6 or Cone 10, depending on your clay and glaze combination). Allow the kiln to cool completely before unloading.
Make it a Set
Create a matching sugar bowl by throwing a similar bellied form but cutting it lower and omitting the spout, adding a small gallery for a lid instead.
Once fired, fill your new pitcher with cream or milk and enjoy the handmade touch it brings to your morning coffee
Spoon Rest With a Thrown Dip
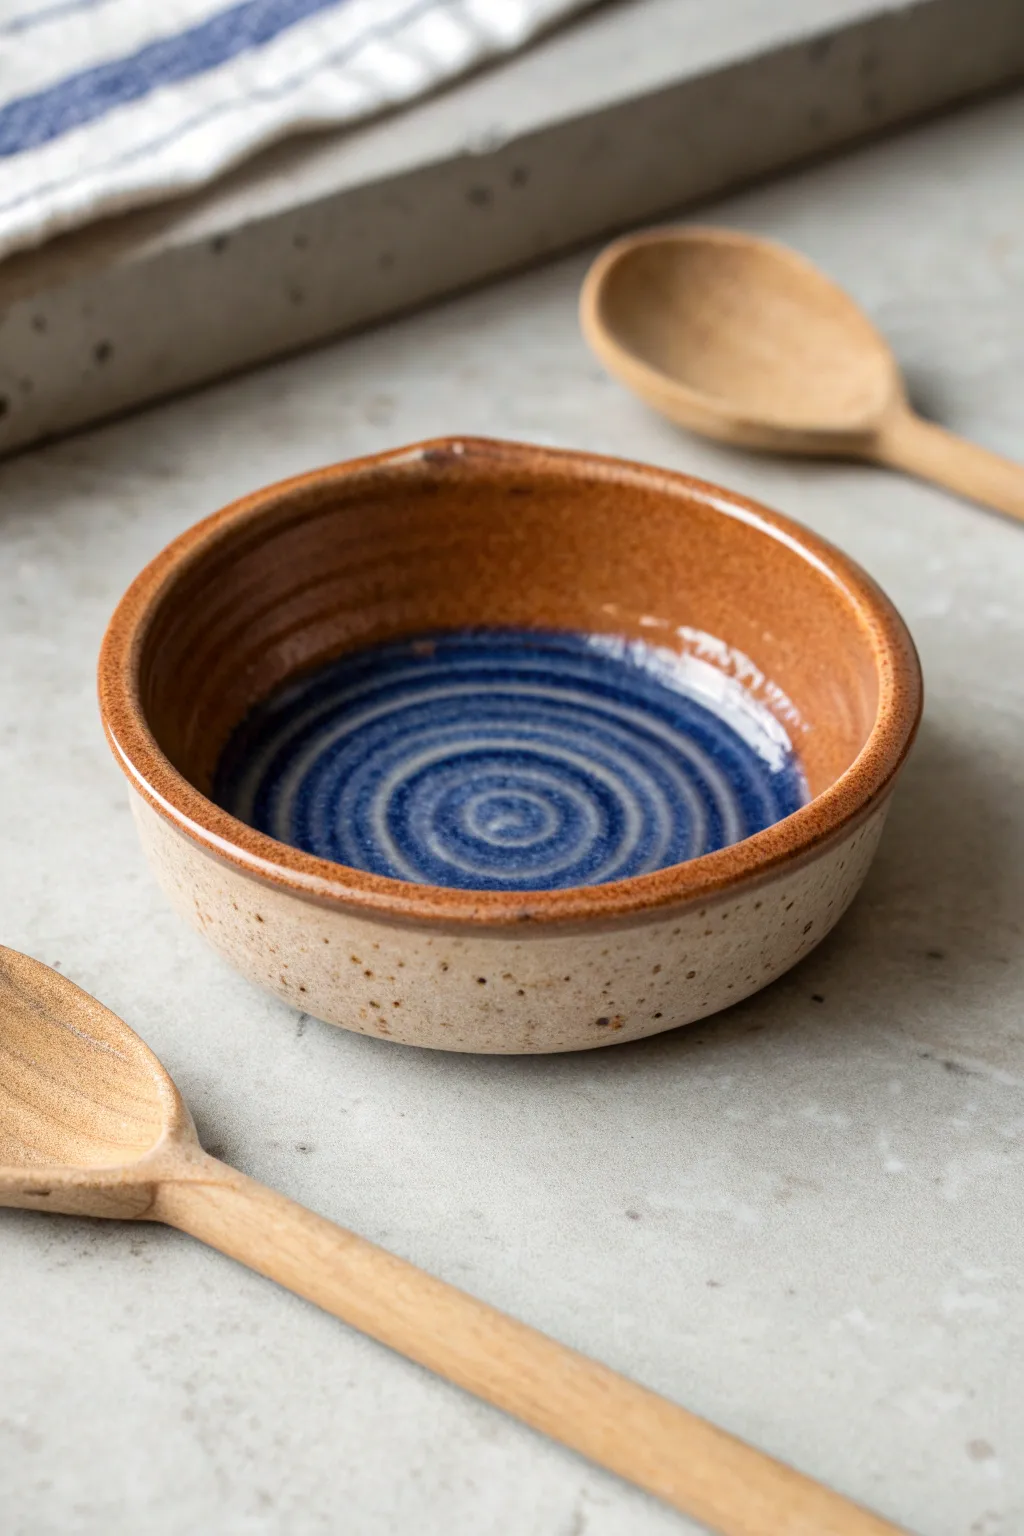
This charming, compact spoon rest features a deep caramel rim and a mesmerizing blue spiral at its center, perfect for catching drips while adding artistry to your counter. The form is a simple small bowl with a subtle pouring lip, showcasing raw speckled clay on the exterior for a rustic touch.
Detailed Instructions
Materials
- Speckled Stoneware Clay
- Pottery Wheel
- Medium Rib Tool
- Needle Tool
- Wire Clay Cutter
- Sponge
- Trimming Tools
- Cobalt Blue Glaze
- Caramel/Amber Glaze
- Clear Glaze (Optional)
- Small Paintbrush
- Wax Resist
Step 1: Throwing the Form
-
Prepare the Clay:
Begin by wedging about 1 pound of speckled stoneware clay. Since this is a small form, ensure your clay is well-compressed to avoid bottom cracks later. -
Center and Open:
Throw the ball onto the wheel head and center it assertively. Open the clay up to a width of about 3–4 inches, leaving the floor slightly thicker than a standard bowl to allow for later trimming. -
Pull the Walls:
Pull the walls up gently. You aren’t aiming for height here; a height of about 1.5 to 2 inches is sufficient. Keep the walls vertical or slightly tapered inward. -
Define the Rim:
Compress the rim with your chamois or sponge. I like to leave the rim slightly rounded and thick to withstand the tapping of spoons. -
Create the Spiral Texture:
This is the signature detail. With the wheel spinning at a medium-slow speed, press your finger or a rounded tool into the center of the floor and slowly drag it outward as the wheel turns, creating a continuous spiral ridge all the way to the wall. -
Add the Lip:
Stop the wheel. Gently press a small indentation into the rim with your finger to create a subtle spout or rest area for the spoon handle. -
Wire Off:
Run your wire tool underneath the pot to separate it from the bat, then set it aside to dry to leather-hard.
Spiral Definition
If your glaze is too thick, it will fill the spiral grooves completely and hide the texture. Thin your blue glaze slightly with water so it pools in the crevices but reveals the ridges.
Step 2: Trimming and Bisque
-
Center for Trimming:
Once leather-hard, place the bowl upside down on the wheel. Secure it with clay lugs or a chuck. -
Refine the Exterior:
Trim away excess weight from the bottom, creating a clean, vertical profile that transitions smoothly to the base. -
Carve the Foot:
Carve a shallow foot ring. This lifts the piece off the table and gives it a professional finish. -
Smoothing:
Burnish the exterior slightly with a damp sponge or a spoon to highlight the speckles in the clay body. -
Bisque Fire:
Allow the piece to dry completely (bone dry) before loading it into the kiln for a bisque firing to cone 04 or 06.
A Smoother Rest
When making the spout indentation, support the wall from the outside with one hand while pressing down with a finger from the top to prevent the wall from collapsing or warping.
Step 3: Glazing
-
Wax the Bottom:
Wipe the bisque ware clean with a damp sponge. Apply wax resist to the foot ring and the very bottom of the piece. -
Glaze the Spiral:
Pour a small amount of cobalt blue glaze into the center of the bowl. Swirl it quickly to ensure it settles into the spiral grooves, then pour out the excess. The deepest parts of the spiral will hold more glaze, creating the dark blue rings. -
Wipe Back Resist:
If any blue glaze splashed onto the upper walls where you want the brown to go, wipe it away carefully with a damp sponge. -
Glaze the Rim and Interior Walls:
Dip the top inch of the bowl into a caramel or amber glaze. Check that the amber glaze overlaps slightly with the blue bottom for a nice transition, but doesn’t completely obscure the blue floor. -
Leave the Exterior Raw:
Leave the lower exterior unglazed to show off the speckled clay body. If you accidentally got glaze there, wipe it clean. -
Final Fire:
Load the kiln for the final glaze firing (usually cone 5 or 6 depending on your clay and glaze). Ensure the spoon rest isn’t touching other pots.
Once cooled, your new spoon rest is ready to sit stove-side and keep your counters clean

TRACK YOUR CERAMIC JOURNEY
Capture glaze tests, firing details, and creative progress—all in one simple printable. Make your projects easier to repeat and improve.
Utensil Crock Tall Cylinder
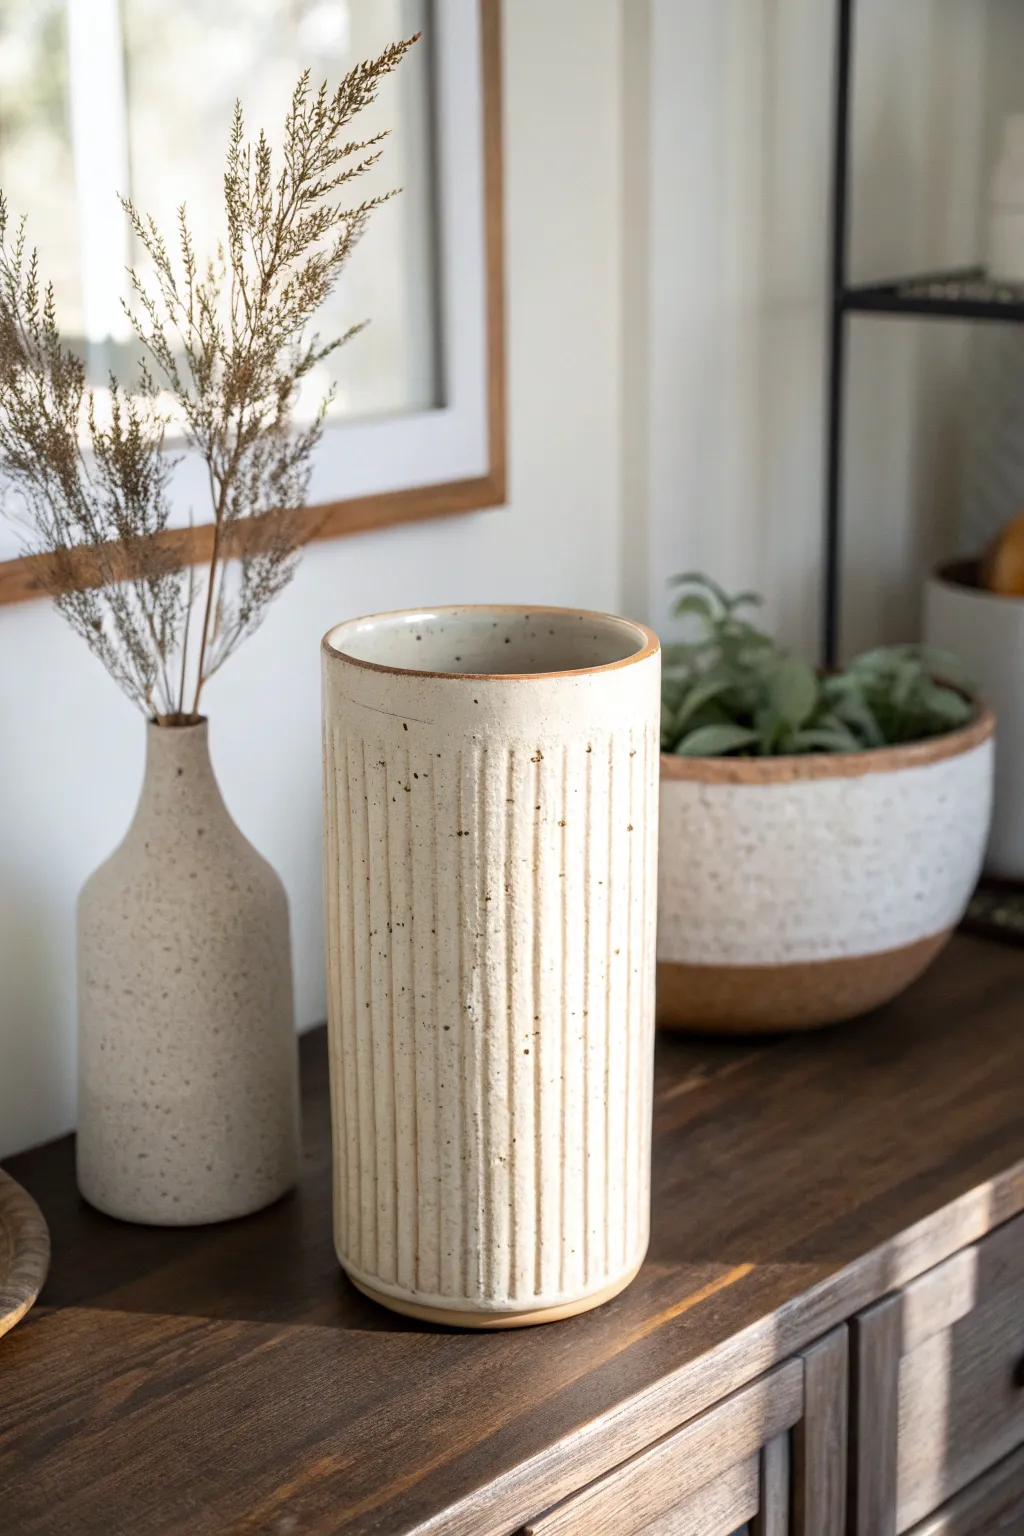
This tall, fluted cylinder brings rustic elegance to your kitchen counter with its speckled cream finish and raw clay accents. The vertical carving adds a beautiful tactile element while the sturdy form is perfect for holding your favorite wooden spoons and spatulas.
How-To Guide
Materials
- Stoneware clay (speckled or light buff)
- Pottery wheel
- Throwing sponge
- Wire cutter
- Rib tool (metal and wooden)
- Needle tool
- Loop tool or U-shaped carving tool
- Ruler or measuring tape
- Calipers (optional)
- Matte white or cream glaze
- Wax resist
Step 1: Throwing the Cylinder
-
Center the clay:
Start with a generous ball of wedged clay, about 3-4 pounds, centering it firmly on the wheel head to ensure a stable base. -
Open the floor:
Open the clay down to a depth of about half an inch. Compress the floor thoroughly with a rib or sponge to prevent S-cracks later during firing. -
Begin the pulls:
Pull the walls up vertically, focusing on height rather than width. You want a straight cylinder that stands roughly 8-9 inches tall. -
Establish the width:
Aim for a width of roughly 5-6 inches. Keep the walls evenly thick, perhaps slightly thicker than a drinking cup, to allow depth for carving later. -
Collar the rim:
Gently collar the very top inch inward slightly if the cylinder flares out, ensuring the visual line remains perfectly vertical. -
Define the rim:
Use a chamois or your sponge to compress and smooth the rim. I like to leave it slightly squared off to match the modern aesthetic of the final piece. -
Refine the surface:
Run a metal rib up the outside of the vessel while the wheel is spinning slowly to remove throwing lines and create a smooth canvas for carving. -
Trim the base:
Use a wooden modeling tool to undercut the base slightly, creating a shadow line where the pot meets the wheel head. -
Dry to leather hard:
Wire the pot off the bat and let it dry slowly until it reaches a sturdy leather-hard state. It needs to be firm enough to handle carving without warping.
Step 2: Carving and Finishing
-
Mark vertical guides:
With the pot stationary, use a ruler and needle tool to lightly mark vertical lines around the circumference. These will guide your carving tool to ensure straightness. -
Carve the flutes:
Using a U-shaped loop tool, carve vertical channels from just below the rim to just above the foot. Maintain steady, even pressure so the depth remains consistent. -
Refine the ridges:
The carving will leave sharp edges or ‘burrs’ of clay. Let these stiffen slightly, then gently rub them away with a barely damp sponge or your finger. -
Smooth the interior:
Check the inside of the pot for any debris or rough spots and smooth them out, as this surface will need to be clean for utensil storage. -
Bisque fire:
Once fully bone dry, load the cylinder into the kiln for a bisque firing to cone 04 (or your clay body’s specification).
Wobbly Walls?
If the cylinder twists while carving, the clay is too wet. Stop immediately and let it dry for another hour until it offers more resistance to the tool.
Step 3: Glazing
-
Wax the accents:
Apply wax resist to the very bottom foot ring and carefully along the top rim edge. This exposed raw clay creates the framing effect seen in the photo. -
Apply glaze:
Pour a speckled cream or matte white glaze inside the vessel, swirl to coat, and pour out. Then, dip the exterior or pour glaze over it to coat the carved texture. -
Clean the distinct lines:
If glaze dripped onto your waxed rim or foot, wipe it away cleanly with a sponge to ensure a sharp transition between the glaze and the bare clay. -
Final smooth:
Gently rub the glazed surface with a finger once dry to smooth out any pinholes or thick spots that might have pooled in the carved grooves. -
Glaze fire:
Fire the piece to maturity (likely cone 5 or 6 depending on your clay and glaze choice).
Make it Yours
Mix up the texture by using a V-tip tool for sharper grooves, or try carving swirling spiral lines instead of straight vertical ones.
Now you have a stunning, handmade vessel ready to organize your kitchen in style
Berry Bowl or Mini Colander
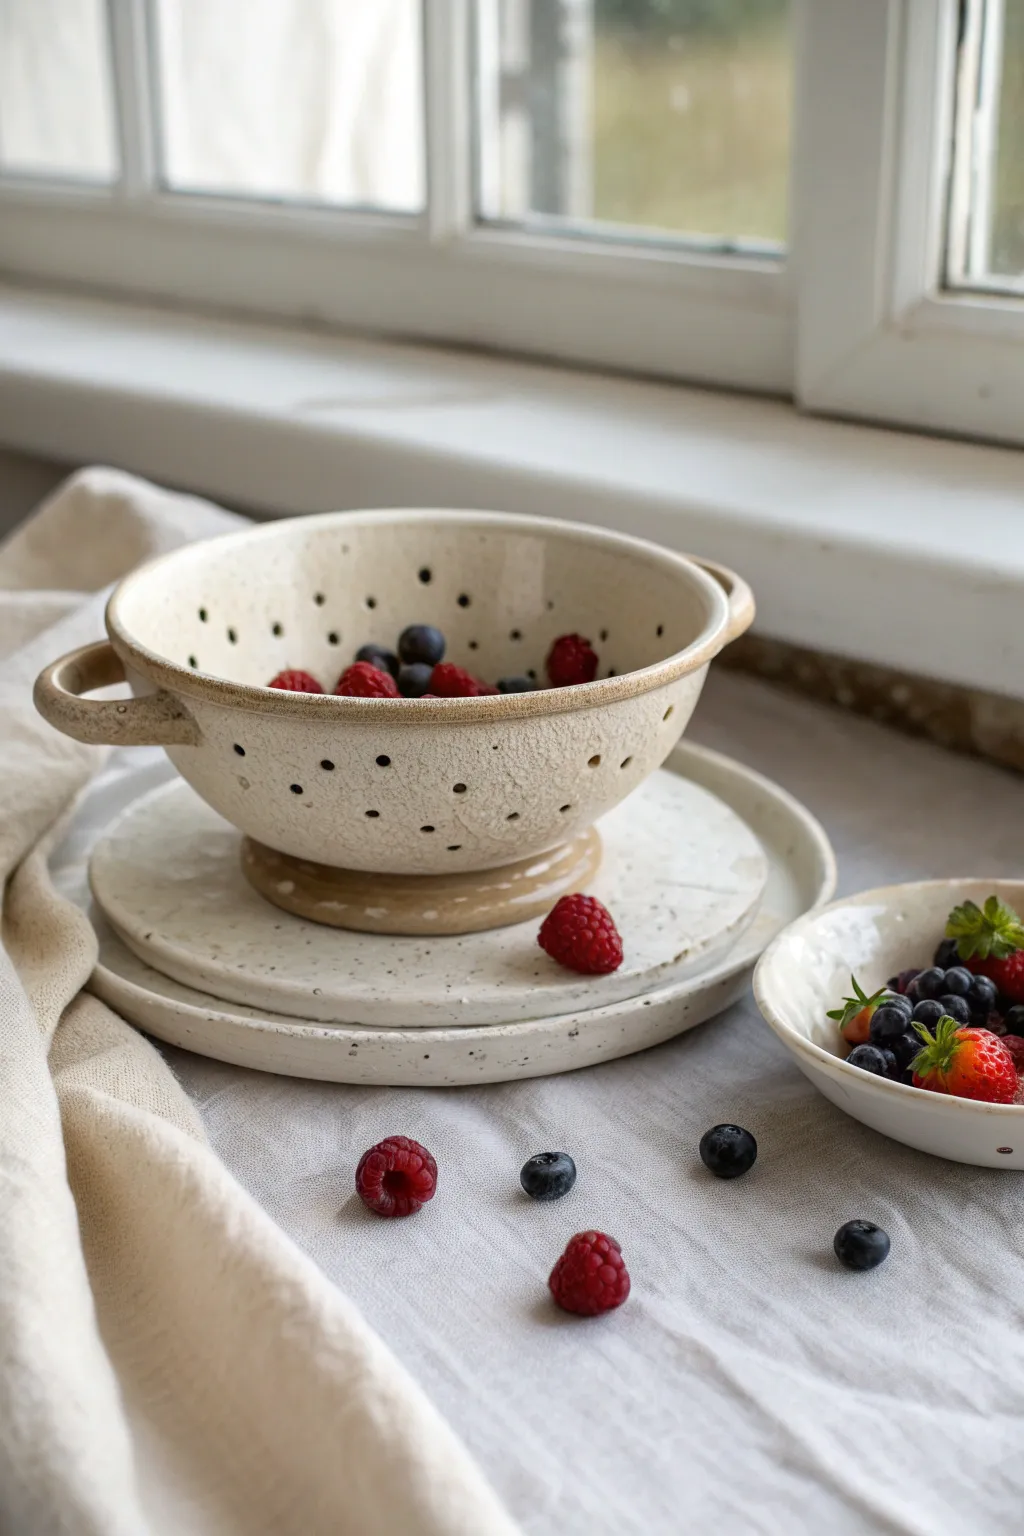
This rustic, functional berry bowl features a lovely speckled clay body and a warm, milky white glaze. With its sturdy foot ring and delicate drainage holes, it’s the perfect wheel-thrown project for your summer harvest.
Step-by-Step Guide
Materials
- Speckled stoneware clay (e.g., Lagunas Speckled Buff)
- Pottery wheel
- Throwing tools (sponge, rib, wire cutter)
- Pin tool or hole cutter tool
- Trimming tools
- Satin white or cream glaze
- Kiln
Step 1: Throwing the Bowl
-
Center and open:
Start with about 1.5 to 2 lbs of speckled clay. Center it on the wheel head and open it up, leaving the floor slightly thicker than a standard bowl to support the eventual foot trimming. -
Pull the walls:
Pull the walls up and out into a wide, shallow curve. Aim for a distinct U-shape rather than a steep V-shape so your berries have room to spread out. -
Refine the rim:
Compress the rim with your chamois or sponge. Create a slightly rounded, substantial lip that will feel good in the hands. -
Shape the curve:
Use a kidney rib on the inside of the bowl to smooth out throwing lines and perfect that continuous curve. This step is crucial for easy cleaning later. -
Cut form the wheel:
Wire the bowl off the wheel head but leave it on the bat or transfer it carefully to a ware board to stiffen up to leather-hard.
Warped Rim?
If your bowl warps when punching holes, your clay was too wet. Wait until it’s a stiff leather-hard. Use a sandbag on your lap to cradle the bowl while punching.
Step 2: Trimming and Handles
-
Center for trimming:
Once leather-hard, center the bowl upside down on the wheel. Secure it with clay lugs. -
Trim the foot:
Trim away the excess clay from the base. Carve a distinct, tall foot ring (about 1/2 inch high) to give the colander elevation for drainage. -
Smooth the surface:
After trimming, run a smooth rib over the exterior to compress the grog and create a nice canvas for the glaze. I like to sponge it lightly here to soften any sharp trimming marks. -
Pull handles:
Pull two small strap handles or create lug handles from a coil. They should be looped but compact. -
Attach handles:
Score and slip the sides of the bowl rim. Attach your handles securely, blending the clay well so they don’t pop off during firing.
Matching Set
Use the same clay and glaze to throw a simple flat plate. This acts as a drip catcher, allowing you to bring the wet berries straight from the sink to the table.
Step 3: Creating Drainage
-
Mark the pattern:
While the pot is still leather-hard (don’t wait until bone dry!), lightly mark where you want your holes. A radial pattern starting from the center looks best. -
Punch the holes:
Use a hole cutter tool or a straw to punch clean holes. Support the wall from the inside with your hand to prevent warping as you push through. -
Cleanup:
Once the clay is slightly drier, use a dry sponge or a soft scouring pad to gently smooth away the sharp burrs created by the hole punch on both the inside and outside.
Step 4: Glazing and Firing
-
Bisque fire:
Load the bone-dry piece into the kiln for a bisque firing (usually cone 04 or 06). -
Wax the foot:
Wax the bottom of your foot ring to prevent glaze adhesion to the kiln shelf. -
Apply glaze:
Dip or pour a satin white or cream glaze over the piece. The goal is a semi-opaque application that lets the iron speckles from the clay body burn through. -
Clear the holes:
Check every single drainage hole. If glaze has filled them, use a pin tool or twist a small drill bit by hand to clear the opening. -
Final fire:
Fire to the maturation temperature of your clay and glaze (likely Cone 5 or 6 for stoneware). Let the kiln cool completely before unloading.
Enjoy using your beautiful new berry bowl for washing fresh fruit or simply displaying produce on your counter
Throwing Off the Hump Mini Set
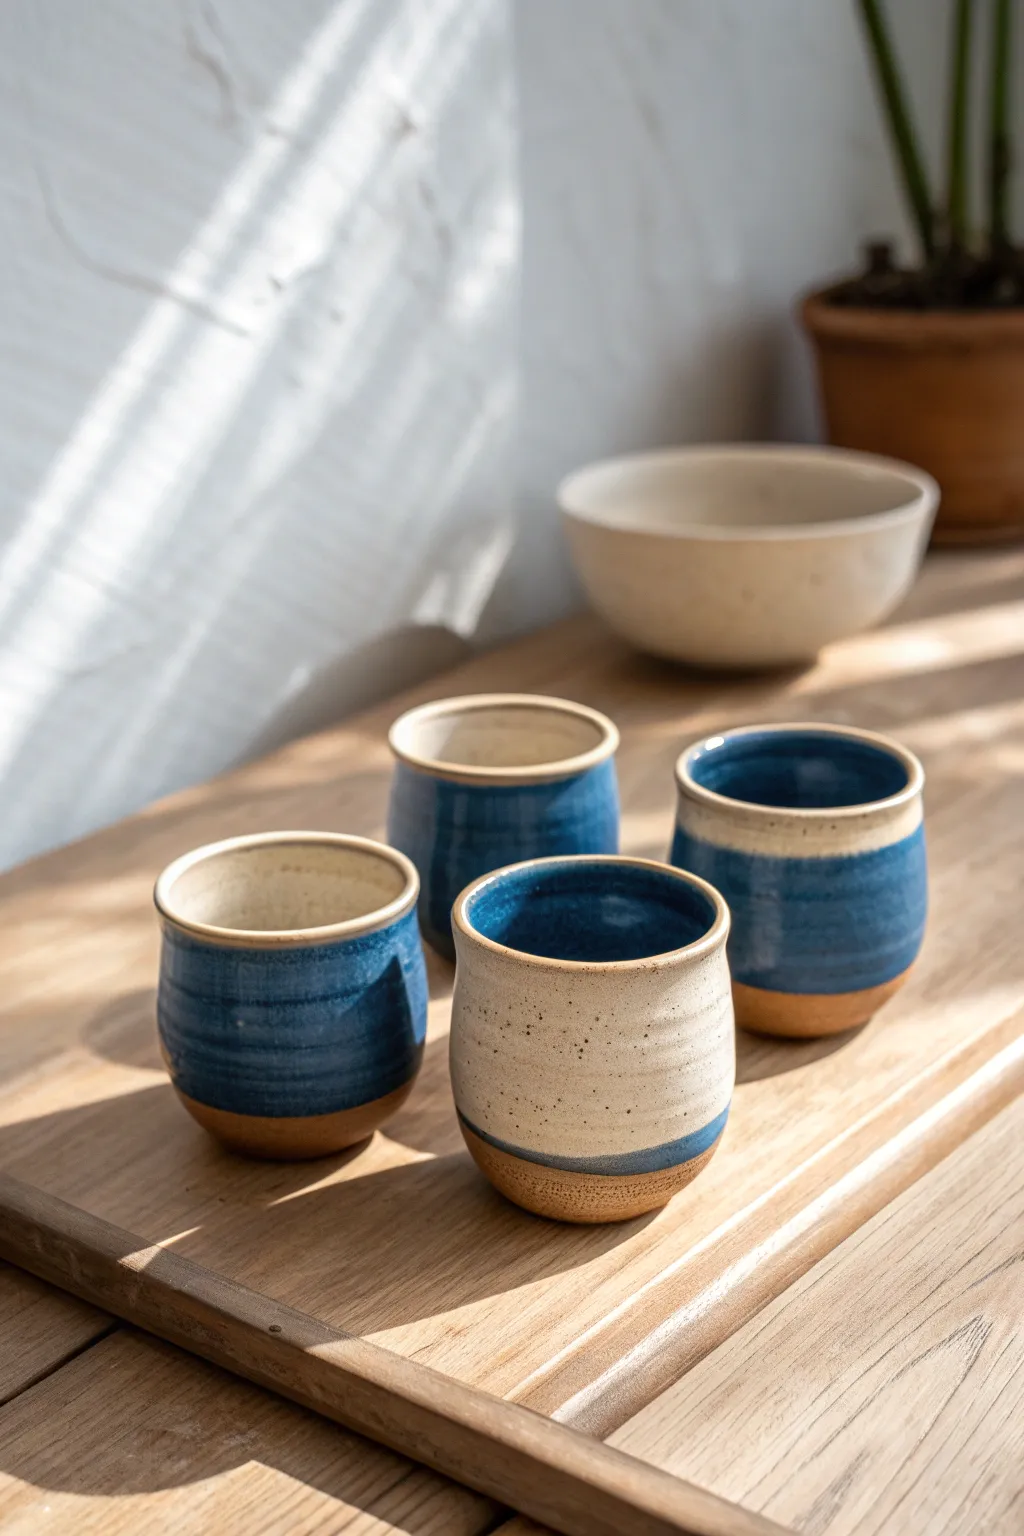
Embrace efficiency and consistency by creating this charming set of four speckled tumblers using the ‘off the hump’ technique. These palm-sized cups feature a beautiful contrast between raw clay bases and a rich blue glaze, making them perfect for espresso or sake.
Step-by-Step Tutorial
Materials
- Speckled Stoneware Clay (approx. 3-4 lbs)
- Pottery Wheel
- Bucket of Water & Sponge
- Needle Tool
- Wooden Modeling Tool / Throwing Stick
- Wire Clay Cutter
- Trimming Tools (Loop tool)
- Deep Blue Gloss Glaze
- White/Cream Speckled Glaze (optional for variety)
- Wax Resist
- Small Paintbrush for Wax
Step 1: Preparation & Centering
-
Wedge the Hump:
Begin by thoroughly wedging a large ball of speckled stoneware clay, aiming for about 3 to 4 pounds. This larger mass is essential for throwing multiple pieces consecutively. -
Center the Mass:
Secure the clay to the wheel head. Use strong, steady pressure to center the entire mound into a wide, tall cone shape. -
Isolate the Top:
Unlike standard throwing, you only need to center the very top portion (about the size of a tennis ball) perfectly. Use your hands to squeeze and lift just this top section into a knob.
Uneven Wall Thickness?
If walls are uneven, the top ‘knob’ wasn’t perfectly centered before opening. Always re-center the top of the hump before starting the next cup.
Step 2: Throwing the Forms
-
Open the Clay:
Drill your thumbs into the centered top knob to open the interior floor of your first cup. Keep the floor flat and relatively narrow. -
Pull the Walls:
Gently pull the walls upward. Since these are small tumblers, you only need about 2-3 inches of height. Maintain a slightly tapered cylinder shape that widens just a bit at the rim. -
Refine the Rim:
Compress the rim with a chamois or your finger to ensure it’s smooth and pleasant to drink from. A slightly thickened rim adds visual weight and durability. -
Define the Base:
Use your needle tool or a wooden stick to create a deep groove at the base of the cup, separating it from the rest of the hump. This marks where you will cut. -
Cut Off:
While the wheel is spinning slowly, slide your wire tool or a twisted fishing line into the groove and slice through horizontally to release the cup. -
Repeat the Process:
Lift the first cup off gently. Re-center the top of the remaining hump and repeat the steps to create three identical siblings.
Step 3: Trimming & Finishing
-
Leather Hard Stage:
Allow the cups to dry to a leather-hard state. They should be firm enough to handle without deforming but still cool to the touch. -
Trim the Foot:
Invert each cup on the wheel (using a chuck if necessary). Trim the bottom to create a clean, defined foot ring. Remove excess weight from the lower curve to match the interior shape. -
Smooth the Texture:
I like to run a smooth rib or a damp sponge over the exterior clay body to bring some of the grog or speckles to the surface before the first firing. -
Bisque Fire:
Fire the dried greenware to cone 04 (or your clay’s specific bisque temperature).
Level Up: Thumb Indents
While the clay is freshly thrown and soft, gently press your thumb into the side wall to create an organic ‘dimple’ for a more ergonomic grip.
Step 4: Glazing
-
Wax the Base:
Apply wax resist to the bottom half-inch of the cup and the entire foot ring. This ensures the clean, raw clay aesthetic seen in the photo. -
Dip the Interior:
Pour your deep blue glaze inside the cup, swirl it quickly to coat the entire interior, and pour it out. Wipe any drips off the rim immediately. -
Dip the Exterior:
Holding the cup by the foot, dip it straight down into the blue glaze. Stop just before you reach the wax line to create that crisp separation. Hold for 3 seconds and lift. -
Variation (Optional):
For the white variation shown in the set, dip one cup entirely in a cream glaze instead, or overlap the blue on top of white near the rim for a layered effect. -
Final Fire:
Load the kiln and glaze fire to maturity (likely cone 5 or 6 depending on your stoneware). Ensure the unglazed feet are clean so they don’t stick to the shelf.
Once cooled, these durable little cups are ready to anchor your morning coffee ritual with handmade warmth
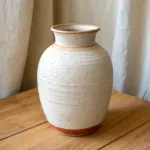
Altered Oval Vase From a Cylinder
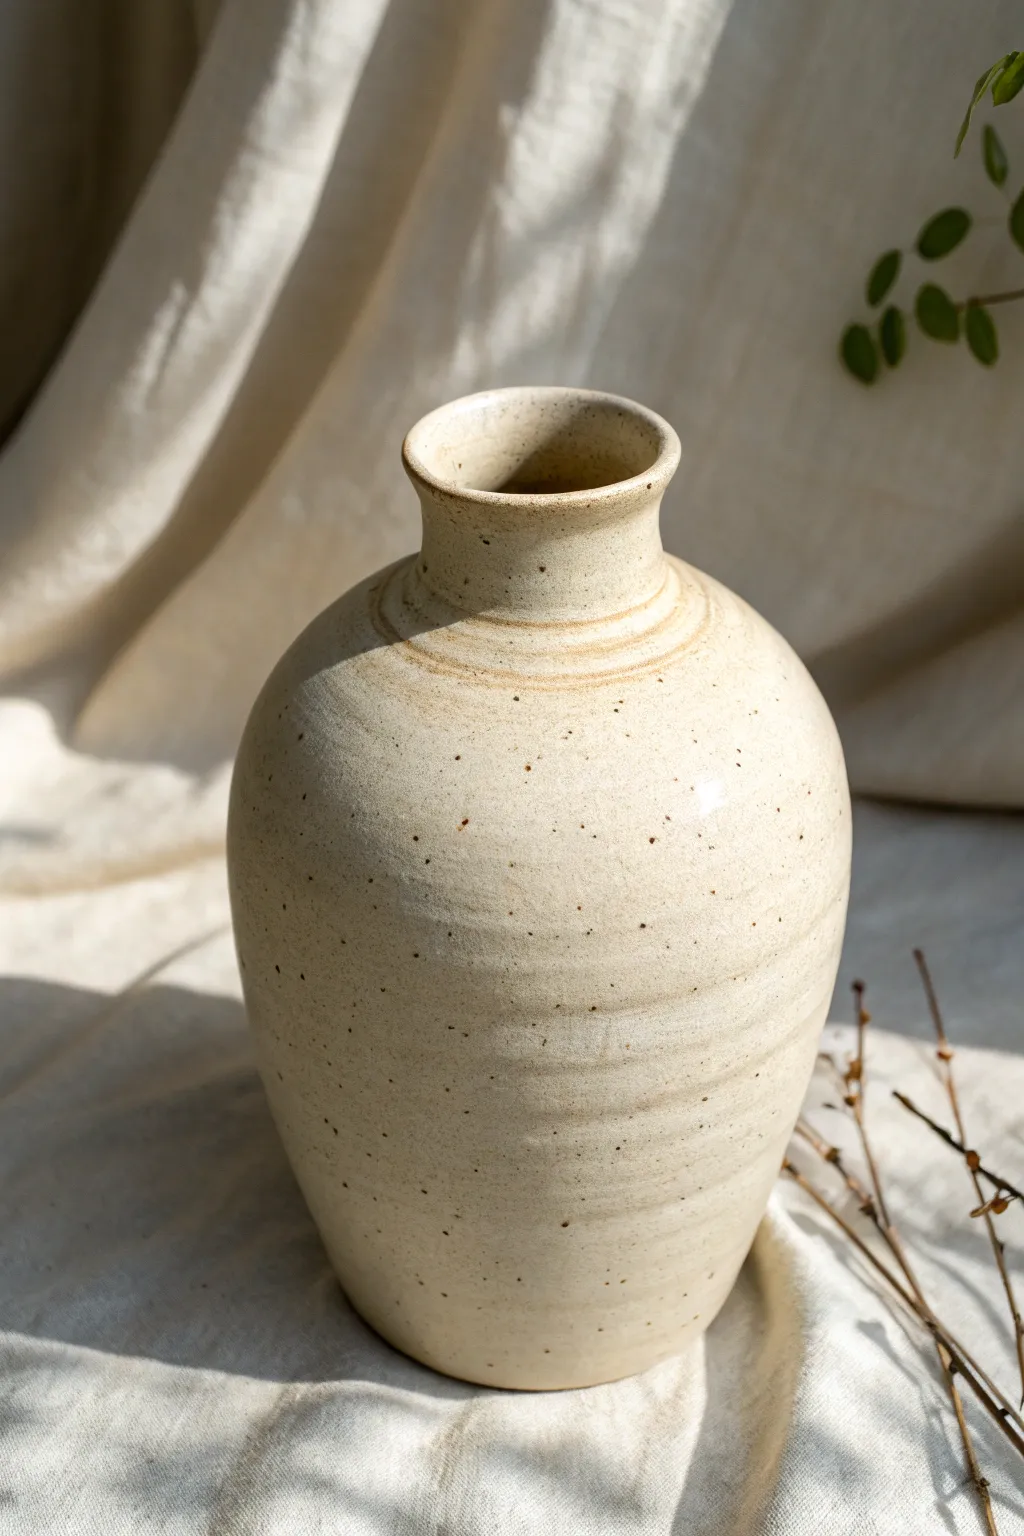
This elegant bottle vase features a timeless, bulbous silhouette and a warm, speckled beige finish. The subtle throwing rings left on the surface add a lovely tactile quality that catches the light beautifully.
Step-by-Step
Materials
- Speckled stoneware clay (approx. 2-3 lbs)
- Potter’s wheel
- Water bucket and sponge
- Pin tool
- Wooden or metal rib
- Wire cutter
- Chamois leather strip
- Trimming tools
- Transparent or glossy white glaze
Step 1: Throwing the Cylinder
-
Center the clay:
Start by firmly slapping your ball of speckled clay onto the wheel head. Cone the clay up and down to ensure it is perfectly centered before opening. -
Open the form:
Press your thumbs into the center to create the floor. Compress the bottom with a flat finger or a rib to prevent S-cracks later. -
Pull the walls:
Begin pulling the walls upward. For this bottle shape, you want a tall, relatively narrow cylinder to start. Establish an even thickness of about 1/4 inch. -
Keep the top narrow:
As you pull, collar the top slightly inward to keep the mouth from getting too wide. It’s much easier to widen a neck than to bring a wide one back in.
Step 2: Shaping the Belly
-
Belly out the form:
Using a sponge or rib inside the pot and your fingers outside, gently push the clay outward from the inside. Start low, just above the foot, to create the fullness of the vase. -
Refine the curve:
Continue expanding the belly, moving upward. Aim for a smooth, continuous curve that feels widest just below the midway point. -
Leave ridges visible:
Instead of smoothing the outside perfectly flat with a metal rib, allow your fingertips to leave subtle spiral ridges as you shape. This adds that handmade texture seen in the photo. -
Collar the shoulder:
As you reach the top third of the pot, use both hands on the outside to gently squeeze and collar the clay inward to form the shoulder.
Collaring Collapse?
If the wall buckles while narrowing the neck, you likely thinned the clay too much or collared too aggressively. Keep the top rim thick and speed up the wheel slightly when collaring.
Step 3: Finishing the Neck and Rim
-
Pull the neck:
Once the shoulders are defined, pull the remaining clay at the top upward to form a distinct vertical neck, about 1-1.5 inches tall. -
Flare the rim:
At the very top, gently press the rim outward to create a slight flare. This balances the visual weight of the belly. -
Compress the lip:
Use a strip of wet chamois leather held over the rim while the wheel spins to smooth and round off the drinking edge perfectly. -
Define the neck line:
Use the edge of a wooden tool or your fingernail to verify the transition line where the neck meets the shoulder, sharpening that detail slightly. -
Cut underneath:
Use a wooden modeling tool to remove excess clay from the foot of the pot, creating a slight undercut before using your wire tool to slice it off the bat.
Enhance the Speckle
To get more pronounced spots, try a ‘reduction’ firing if you have a gas kiln, or specifically buy clay bodies labeled ‘heavy speckled’ or ‘manganese speckle’ for electric kilns.
Step 4: Trimming and Glazing
-
Dry to leather hard:
Let the piece dry slowly under plastic until it reaches a leather-hard state. The clay should be firm enough to handle without deforming. -
Trim the foot:
Center the pot upside down on the wheel. Trim excess weight from the bottom and carve a neat foot ring. I like to mirror the curve of the inside wall on the outside for a balanced weight. -
Bisque fire:
Once bone dry, fire the vase in a bisque kiln according to your clay body’s specifications (usually Cone 04 or 06). -
Glaze application:
Dip or pour a translucent or semi-opaque white glaze over the piece. A thinner application allows the iron speckles in the clay to bleed through beautifully. -
Final firing:
Glaze fire the piece to maturity (often Cone 5/6 or Cone 10 for stoneware). This will melt the glaze and reveal the speckled character.
Now you have a stunning, minimal vessel ready to hold dried branches or fresh flowers
Faceted Tumbler With Crisp Planes
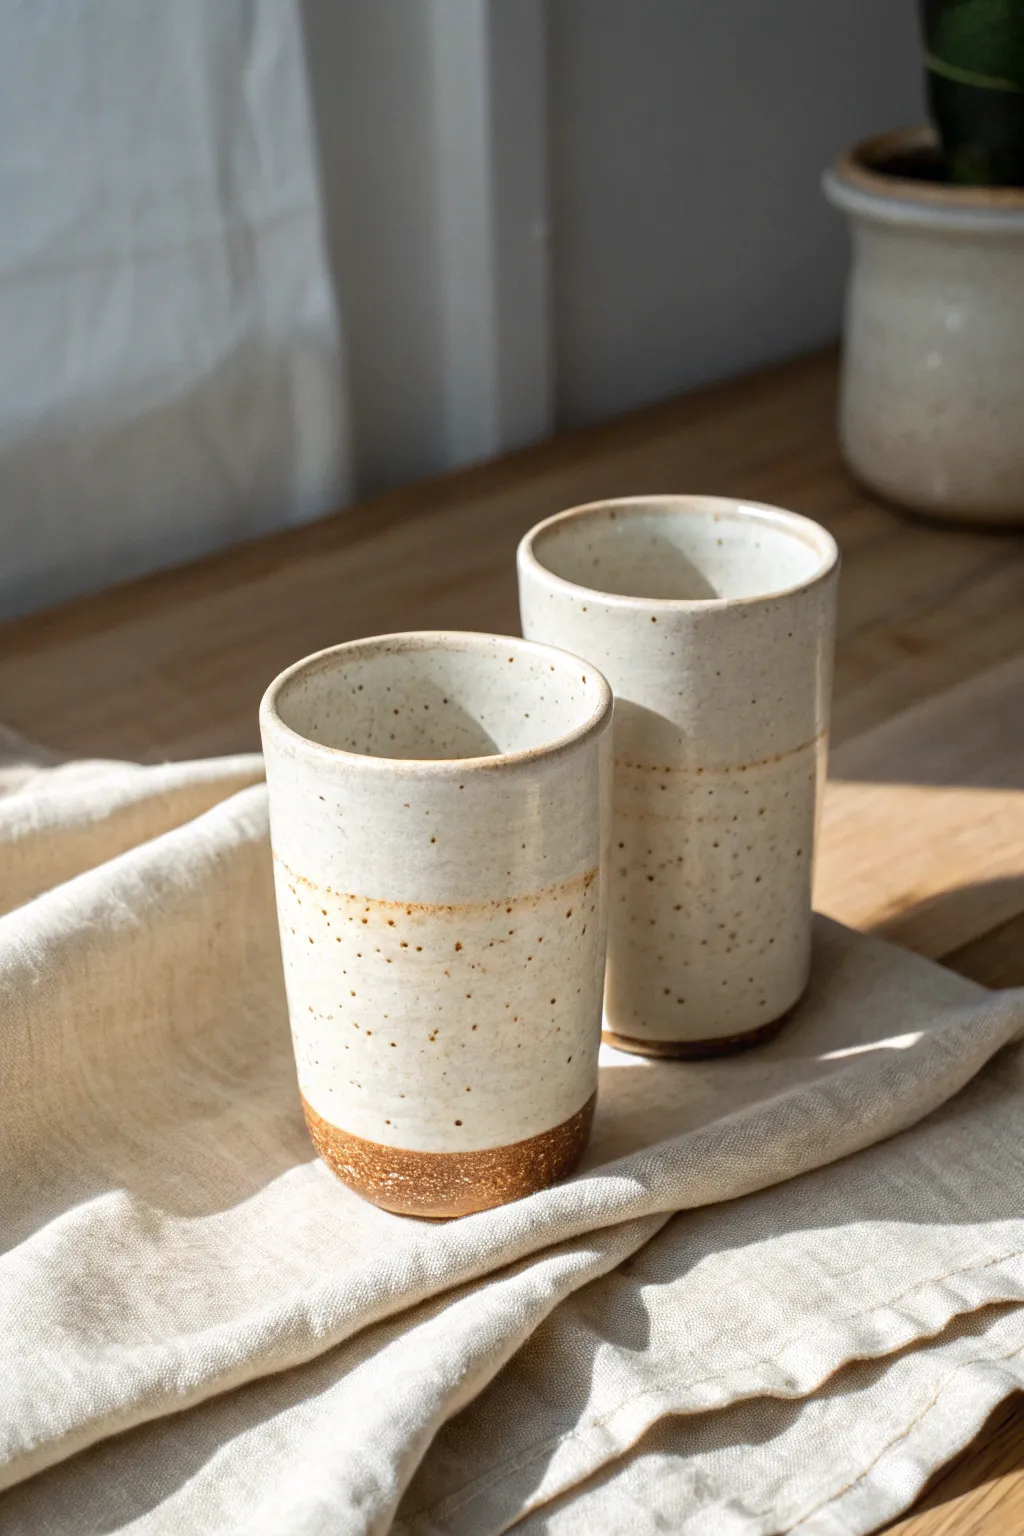
These elegant, minimalist tumblers showcase the natural beauty of speckled stoneware clay paired with a creamy semi-matte glaze. The design features a raw clay base that adds warmth and texture, contrasting beautifully with the smooth, speckled upper body.
Step-by-Step Guide
Materials
- Speckled stoneware clay body (e.g., Laguna Speckled Buff)
- Pottery wheel
- Throwing sponge
- Needle tool
- Wooden throwing rib
- Wire cutter
- Trimming tools (loop tools)
- Creamy white dipping glaze (semi-matte or satin)
- Wax resist (optional)
- Small sponge for cleanup
- Kiln for bisque and glaze firing
Step 1: Throwing the Cylinder
-
Wedging:
Begin by thoroughly wedging about 1 to 1.5 pounds of speckled stoneware clay to remove air bubbles and ensure consistency. -
Centering:
Secure the clay on the wheel head and center it using steady pressure and water for lubrication. -
Opening the Floor:
Open the centered clay to create the floor. Compress the bottom with a sponge or rib to prevent S-cracks during drying. -
Pulling the Walls:
Slowly pull the walls upward into a tall cylinder shape. Aim for even thickness from bottom to top, keeping the rim slightly thicker for strength. -
Refining the Shape:
Use a wooden rib inside the cylinder to straighten the walls and remove throwing lines if you prefer a smooth surface. -
Finishing the Rim:
Use a chamois or sponge to compress and round the rim, ensuring it is comfortable for drinking. -
Cutting Off:
Run a wire cutter under the base to separate the pot from the wheel head, then carefully lift it off or use bat pins to remove the bat.
Step 2: Trimming and Drying
-
Leather Hard Stage:
Allow the tumblers to dry slowly to a leather-hard state. They should be firm enough to handle without deforming but still cool to the touch. -
Centering for Trim:
Place the tumbler upside down on the wheel head and center it. Secure it with small wads of clay. -
Trimming the Base:
Using a loop tool, trim away excess clay from the bottom. Create a slight bevel at the foot to give the cup a visual lift. -
Smooth the Foot:
Smooth the trimmed area with a damp sponge or a rubber rib to erase tooling marks and reveal the clay’s groggy texture. -
Bisque Fire:
Let the tumblers dry completely until bone dry before loading them into the kiln for a bisque firing (usually Cone 04 or 06).
Uneven Glaze Line?
If your dip line looks shaky, skip the wax resist. Instead, dip the pot freely and then use a steady hand and a damp sponge to wipe the glaze back to a clean, straight line while it’s still powdery.
Step 3: Glazing and Finishing
-
Waxing the Foot:
For a sharp line, apply wax resist to the bottom inch of the tumbler. This will keep the glaze off the raw clay section shown in the photo. -
Prepping Glaze:
Mix your creamy white glaze thoroughly. I find that sieving the glaze helps prevent clumps and ensures a smooth application. -
Dipping:
Hold the tumbler by the foot (or use dipping tongs) and submerge it into the glaze bucket, stopping just above your wax line or about 1/4 up from the bottom. -
Drip Control:
Hold the piece upside down for a few seconds after dipping to let excess glaze drip off, then quickly flip it right side up. -
Cleanup:
Use a damp sponge to wipe away any stray glaze droplets on the raw clay section or bottom of the foot. -
Glaze Fire:
Load the glazed tumblers into the kiln and fire to the maturity temperature of your clay and glaze (typically Cone 5 or 6 for stoneware). -
Sanding:
Once fired and cooled, check the unglazed bottom. Lightly sand the raw clay with 400-grit wet/dry sandpaper to ensure it won’t scratch table surfaces.
Add Crisp Facets
To match the ‘Crisp Planes’ concept, use a wire cheese cutter when the clay is soft leather hard. Slice vertical facets down the sides before bisque firing for a geometric, modern grip.
Enjoy your beautiful new tumblers with a hot drink, admiring the contrast between the smooth glaze and the earthy clay
Agateware Swirl Vase
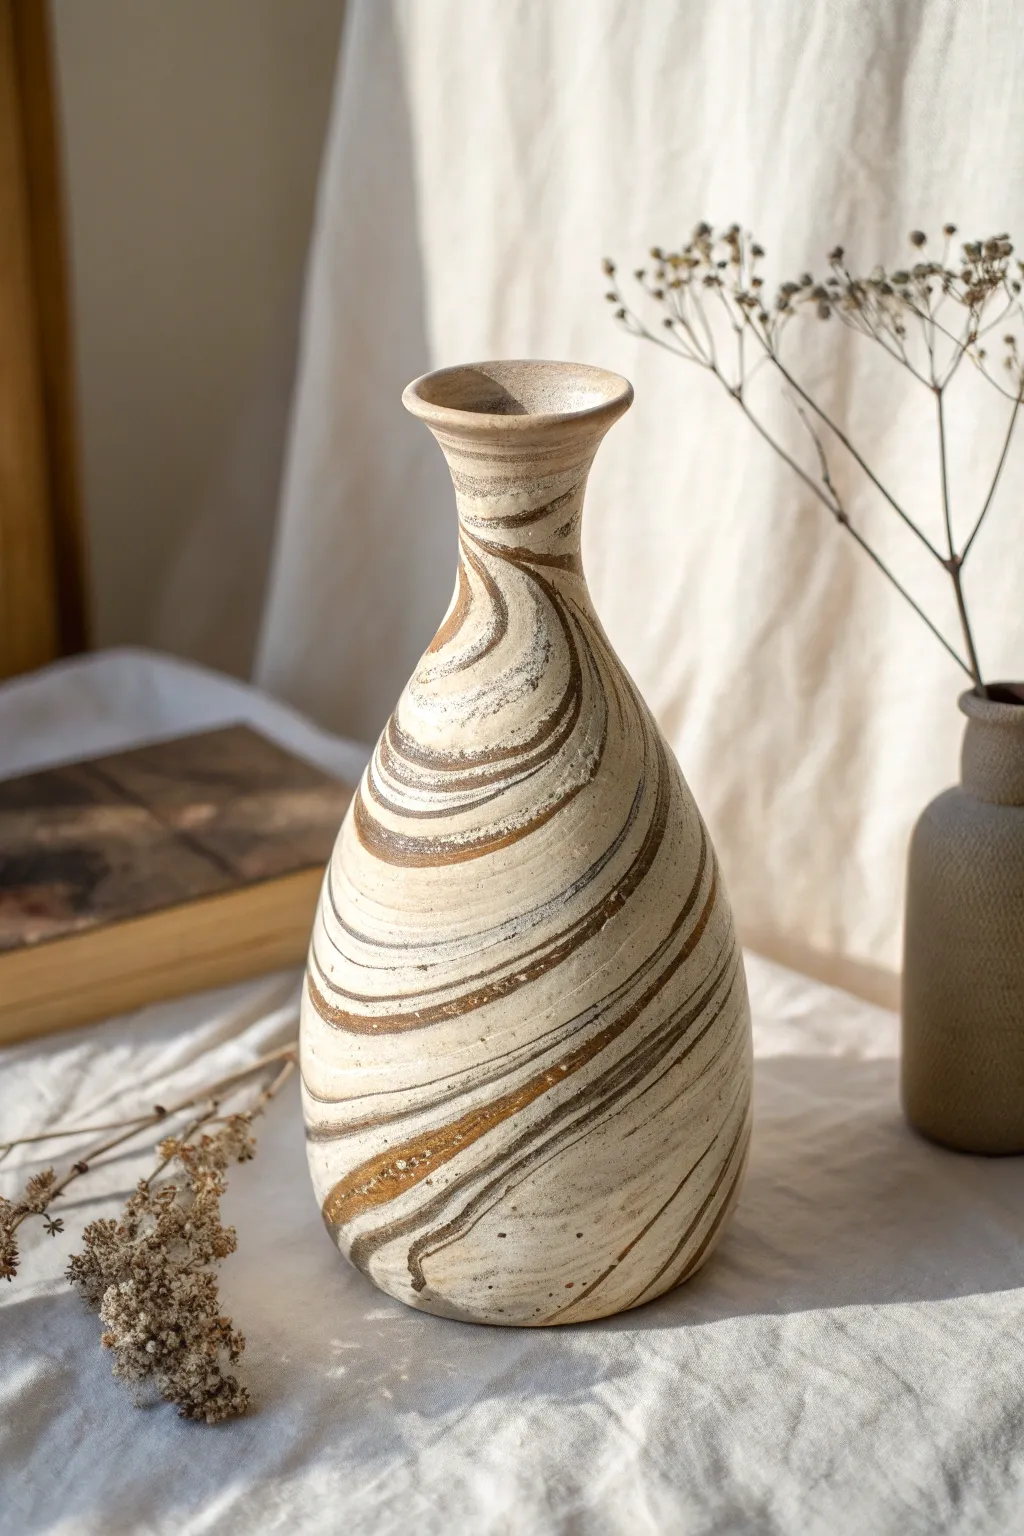
This project captures the mesmerizing beauty of geological strata right on your pottery wheel. By wedging together contrasting clay bodies—creamy stoneware and rich chocolate brown—you’ll create a slender, swirling bottle vase where the pattern is intrinsic to the clay itself, not just a surface application.
Detailed Instructions
Materials
- White or cream stoneware clay (smooth)
- Dark brown or red stoneware clay (smooth)
- Pottery wheel
- Wire cutter
- Metal rib tool (smooth edge)
- Wooden rib tool
- Sponge
- Trimming tools
- Clear matte or glossy glaze
Step 1: Preparing the Agateware Block
-
Prepare clay portions:
Cut off roughly 60% white clay and 40% dark clay. You want a total weight of about 2-3 lbs for a vase of this size. Keeping the white portion slightly larger ensures the vase feels light and airy rather than too heavy with dark tones. -
create layers:
Slice both clay blocks into thick slabs, roughly 1 inch thick. Stack them in an alternating pattern (white, dark, white, dark) to create a multi-colored loaf of clay. -
The minimal wedge:
This is crucial: gently wedge the stack only 3-5 times. Do not over-wedge, or the clays will blend into a muddy grey instead of distinct swirls. You want to twist the layers just enough to adhere them, spiraling the colors. -
Center carefully:
Place your marbled ball on the wheel head. Center the clay using consistent pressure, but try to center it as quickly as possible. Every rotation blends the clays further, so efficiency is key to maintaining sharp lines.
Cracking Seams?
Since different clay bodies shrink at different rates, cracks can open at the seams. Dry your vase very slowly under plastic for several days to equalize moisture.
Step 2: Throwing the Bottle Form
-
Open the clay:
Open the centered mound down to the bat, leaving about a half-inch floor thickness. As you open the clay, you might already see the striations appearing on the interior. -
Pull the cylinder:
Begin pulling up the walls. The exterior will look smeared with slurry—don’t worry, the pattern is hiding underneath. Focus on gaining height first, creating a tall, average-width cylinder. -
Shape the belly:
Once you have your height, push gently from the inside to belly out the lower two-thirds of the form. The vase in the example has a low center of gravity, so keep the widest point below the halfway mark. -
Collar the neck:
Slow the wheel down. Using both hands on the outside, gently squeeze (collar) the upper third inward to narrow the neck. I usually do this in several passes to avoid buckling the clay. -
Refine the rim:
Flare the very top edge outward slightly to create the trumpet-shaped rim seen in the photo. Compress the lip with a sponge or chamois strip for smoothness.
Carved Texture
Before firing, try faceting the sides or carving vertical flutes. The carving will slice through the layers, creating a topographical map effect with the marbling.
Step 3: Revealing the Swirls
-
Remove surface slurry:
While the pot is still rotating, take a flexible metal rib. Apply firm pressure to scrape away the outer layer of muddy slip. This is the ‘magic moment’ when the distinct brown and white marbling suddenly pops out. -
Clean the lines:
Continue ribbing the exterior until the surface is extremely smooth and the lines between the white and brown clays are crisp and defined. This also helps compress the wall. -
Wire off:
Run a wire tool under the base to separate it from the wheel head or bat. Allow the piece to dry to a leather-hard state.
Step 4: Trimming and Finishing
-
Trim the foot:
Once leather hard, center the vase upside down on the wheel (use a chuck if the neck is too narrow for standard lugs). Trim the excess weight from the bottom and carve a clean foot ring. -
Additional scraping:
If the trimming process muddied the pattern near the foot, use your metal rib again on the leather-hard clay to scrape the surface clean one last time. -
Bisque fire:
Load the vase into the kiln for a standard bisque firing once it is bone dry. Dry slowly to prevent cracks between the clay bodies. -
Clear glaze application:
To preserve the visual texture of the clay, dip the entire piece in a clear glaze. A matte clear looks particularly modern and stone-like, reducing glare so the pattern is the star. -
Final firing:
Fire to the maturation temperature of your specific stoneware blend (usually Cone 6 or 10).
Place your finished vase near a window where natural light can highlight the organic movement of the clay layers
Double-Wall Bowl or Chip-and-Dip Form
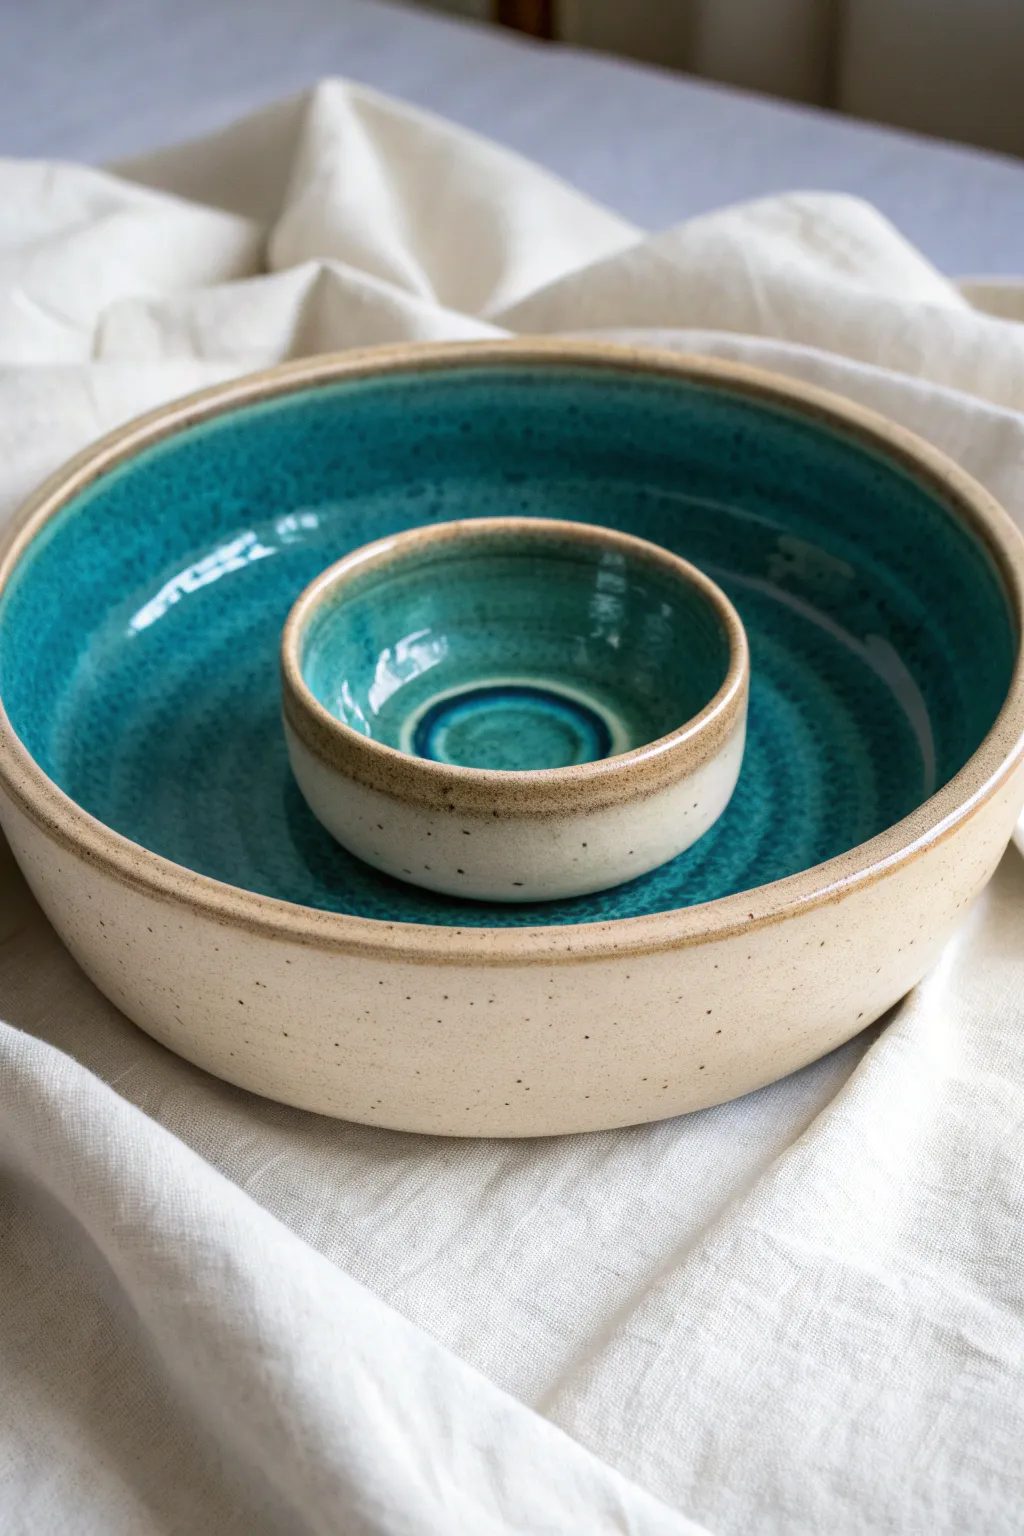
This elegant serving piece solves the age-old problem of sliding dip bowls by integrating the two forms into a single, cohesive unit. The rustic speckled clay contrasts beautifully with the deep, jewel-tone turquoise glaze, creating a functional centerpiece that feels both modern and handmade.
Step-by-Step Guide
Materials
- Speckled stoneware clay (approx. 3-4 lbs)
- Potter’s wheel
- Throwing sponge
- Needle tool
- Ribs (wooden and metal)
- Wire cutter
- Trimming tools
- Teal or turquoise glaze (cone 5/6 compatible)
- Clear glaze (optional for exterior)
- Wax resist
Step 1: Throwing the Form
-
Center the Clay:
Begin with a generous amount of speckled stoneware, centered firmly on the wheel head. You will be throwing this as one integral piece, so ensure your base is wide and stable. -
Open the Mound:
Open the clay, but instead of pulling the floor flat all the way across, create a ‘donut’ shape. Think of it as opening two distinct rings: a small inner mound and a thick outer ring. -
Define the Inner Bowl:
First, focus on the center mound. Treat it like a miniature bowl. Open it gently and pull up small walls, keeping the rim slightly thick and rounded for durability. Compress the rim with your chamois or sponge. -
Establish the Outer Ring:
Move to the outer ring of clay. This section needs to function as the ‘chip’ area. Pull the floor out widely from the base of the inner bowl until you reach your desired diameter, compressing the floor thoroughly to prevent S-cracks. -
Pull the Outer Wall:
Pull the outer wall straight up to a vertical profile. This style has a modern, cylindrical look, so focus on keeping the sides perpendicular to the wheel head rather than flaring them out. -
Refine the Connection Point:
Use a wooden rib or your finger to clean up the transition where the inner bowl meets the floor of the outer bowl. I like to create a crisp 90-degree angle here for cleaner glazing later. -
Final Shaping:
Use a metal rib on both the inner and outer walls to remove throwing lines and smooth the surface. Ensure the rim of the inner bowl is slightly lower than or level with the outer rim for easier stacking and storage. -
Cut and Dry:
Wire the piece off the bat but leave it in place until it firms up to leather hard, as moving a wide bowl like this while wet can warp the shape.
Step 2: Trimming and Finishing
-
Trim the Foot:
Once leather hard, center the piece upside down on the wheel. You may need to use a chuck or foam bat if the inner bowl rim is tall. Trim a clean foot ring that supports the wide base. -
Smooth the Exterior:
Use a smooth rib or a damp sponge to burnish the speckled clay on the exterior walls. This highlights the natural texture and prepares it to be left unglazed. -
Bisque Fire:
Let the piece dry slowly under plastic to ensure even shrinkage between the inner and outer walls. Bisque fire to your clay body’s specifications (usually Cone 04).
Throwing Tip
Can’t center that much clay? Throw the center bowl and the large outer bowl as two separate pieces. Trim the inner bowl footless and attach it to the center of the large bowl with slip.
Step 3: Glazing
-
Wax Resist Application:
Apply wax resist to the entire exterior wall, the foot ring, and the exposed rim of both the inner and outer bowls. The goal is to keep the raw, speckled clay visible on the outside. -
Pour the Glaze:
Pour your turquoise glaze into the center bowl, swirl to coat, and pour out. Then, pour a generous amount into the outer ‘chip’ ring. Tilt and rotate the bowl to coat the floor and inner walls evenly. -
Clean Up:
Use a damp sponge to wipe away any stray glaze droplets that landed on the waxed areas or the raw clay exterior. The line between glaze and clay should be crisp. -
Glaze Fire:
Fire the piece to maturity (Cone 5 or 6). Ensure the kiln is well-ventilated so the glaze develops that deep, glassy finish seen in the reference image.
Level Up: Texture
Before the clay dries, create a ‘chattering’ texture on the floor of the outer bowl using a trimming tool. The glaze will pool in the divots, creating a stunning variation in color depth like the photo.
Once fired, fill the center with your favorite homemade salsa and the outer ring with chips for a serving piece that is sure to spark conversation
Sectional Throw Tall Bottle Form
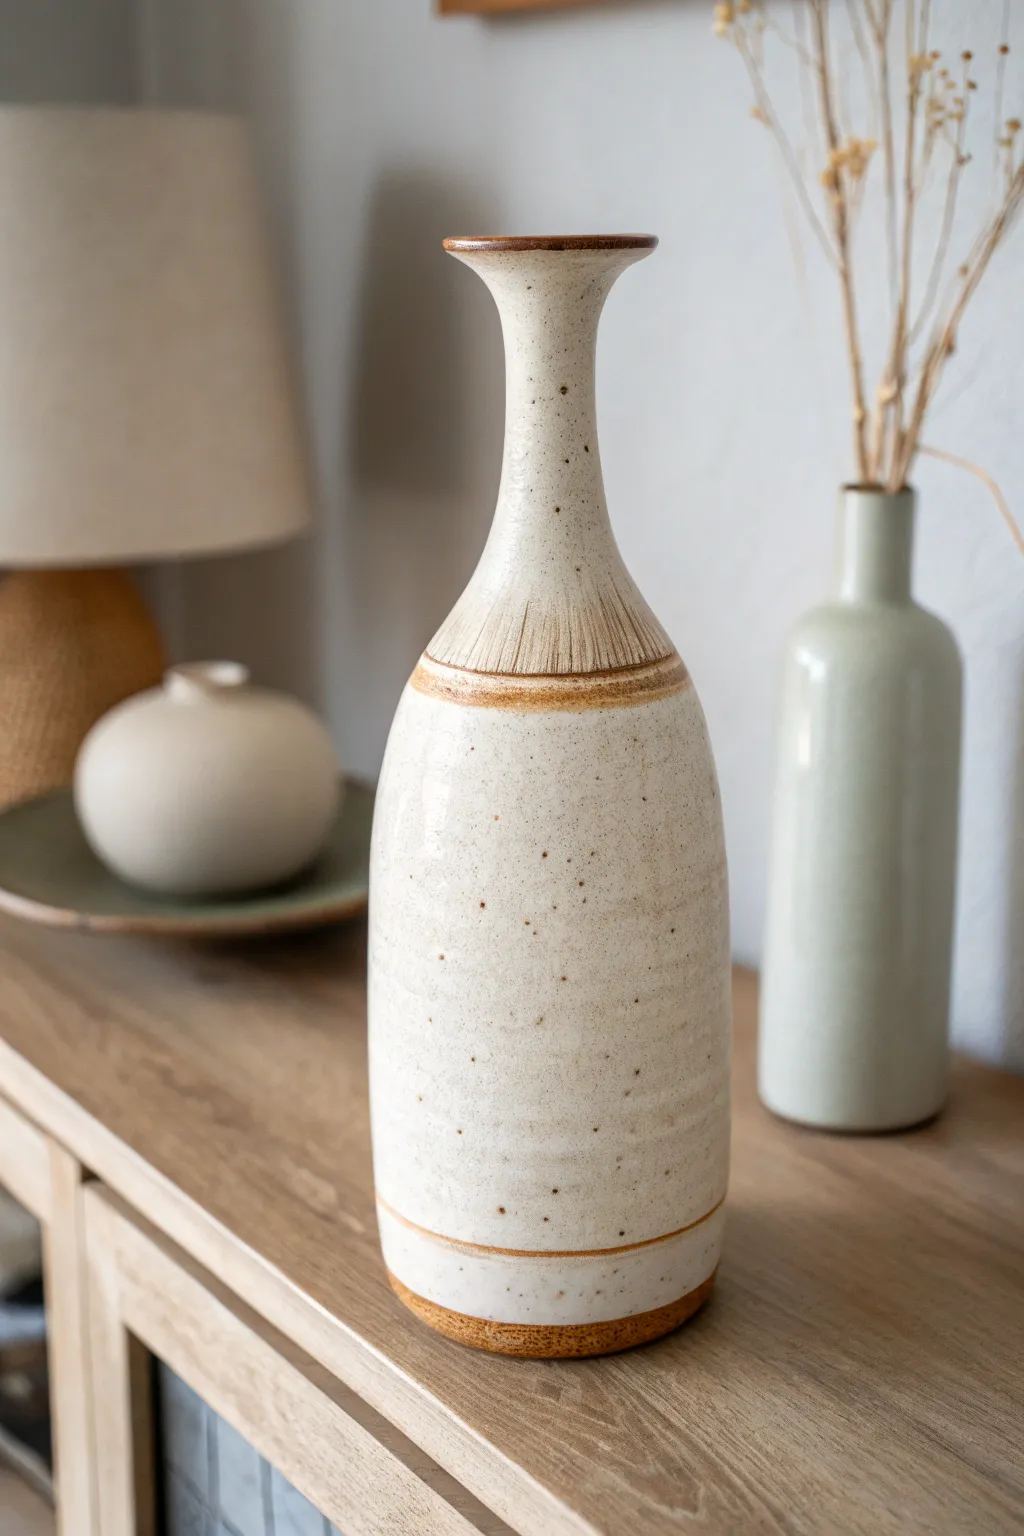
This elegant bottle form combines a classic long neck with a modern, speckled aesthetic, perfect for holding dried stems or standing alone as a sculptural piece. The design features raw clay accents at the rim, shoulder, and foot, highlighting the natural beauty of the toasted stoneware.
How-To Guide
Materials
- Speckled buff stoneware clay (approx. 4-5 lbs total)
- Pottery wheel
- Throwing bucket and sponge
- Wire cutter
- Wooden rib tool
- Metal kidney rib
- Needle tool
- Digital or sliding calipers
- Trimming tools (large loop and small detail tool)
- Scoring tool (serrated rib)
- Slip (made from the same clay body)
- Propane torch or heat gun (optional)
- Translucent satin white glaze
Step 1: Throwing the Base Section
-
Weigh and center the base:
Start with about 2.5 to 3 lbs of speckled clay. Slam it onto the wheel head and center it into a medium-width puck, roughly 4-5 inches wide. -
Open and lift:
Open the clay down to ¼ inch from the bat. Compress the floor well with your sponge. Pull the walls straight up into a cylinder, aiming for a height of about 7-8 inches. -
Shape the belly:
Using a wooden rib on the outside and your hand on the inside, gently belly out the form slightly, keeping the top rim slightly narrower than the base section for stability. -
Prepare the connection point:
Use your needle tool to trim the rim perfectly level. Then, angle the rim slightly inward. Measure the diameter of this rim carefully with your calipers—you will need this exact measurement for the top section. -
Set aside:
Wire the base off the wheel but leave it on the bat if possible, or carefully transfer it to a ware board to firm up to a ‘soft leather hard’ state.
Wobble Worries?
If the neck wobbles during assembly, the clay is too soft. Use a heat gun to stiffen the lower neck walls before attaching.
Step 2: Throwing the Neck Section
-
Center the second lump:
Take the remaining 1.5–2 lbs of clay and center it. This time, you are throwing a bottomless ring. -
Open to the bat:
Open the clay all the way down to the wheel head. Use your finger to clear the clay from the center so you have a donut shape. -
Pull the cone:
Pull this clay up into a tall, narrowing cone shape. This will become the long neck. Don’t worry about making it super thin yet; leave enough thickness to work with during assembly. -
Match the measurements:
Use the calipers set to the base’s measurement to check the bottom of your neck section. It needs to match perfectly. Adjust the width by collaring in or stretching out as needed. -
Firm up:
Use a heat gun or torch to stiffen the clay just enough that it can be handled without warping, or let it sit until it matches the stiffness of the base.
Pro Seam Hiding
Use a serrated rib over the exterior seam after joining. The cross-hatch texture blends the clay particles better than smoothing alone.
Step 3: Assembly and Refining
-
Score and slip:
Aggressively score the top rim of the base and the bottom rim of the neck section. Apply a generous amount of thick slip to both surfaces. -
Join the sections:
Invert the neck section and place it onto the base. Wiggle it slightly to lock the scored teeth together. Using your fingers (or a throwing stick if your hand doesn’t fit), smooth the seam on the inside first. -
Blend the exterior seam:
Spin the wheel slowly and use a metal rib to compress and smooth the outer seam where the two parts meet. You can choose to leave a slight ridge here for decoration, or smooth it completely flush. -
Throw the final shape:
With the sections joined, wet the clay slightly and do additional pulls on the neck to elongate and refine the curve. Collar the neck in to make it slender. -
Detail the rim:
Use a chamois or sponge to flare the very top rim outwards, creating a distinct, flat lip similar to the reference photo. -
Carve the texture:
My favorite step is adding texture while the clay is leather hard. Use a small carving tool to scratch vertical lines around the shoulder area, just below the neck transition. This adds visual interest where the glaze breaks.
Step 4: Glazing and Finishing
-
Trim the foot:
Once leather hard, flip the bottle into a chuck or use a tall gin to secure it. Trim a clean foot ring at the bottom. Define a distinct line where the glaze will stop. -
Wax resist application:
Apply wax resist to the foot ring and any areas you want to remain raw clay, specifically a band around the shoulder (over your texture) and the very top rim. -
Dip into glaze:
Dip the entire bottle into a satin white glaze. The wax will repel the glaze on the bands, revealing the speckled clay body -
Clean up:
Use a damp sponge to wipe any stray droplets of glaze off the waxed areas to ensure crisp, clean lines.
Fire your piece to cone 6 (or your clay’s maturity temperature) to reveal those lovely warm toast tones.