Whenever I need a quick win in the studio, I reach for coil bowls because a simple clay rope can turn into something seriously beautiful. These coil bowl ideas are the kind you can make your own fast—just tweak the shape, the coils, and the surface until it feels like you.
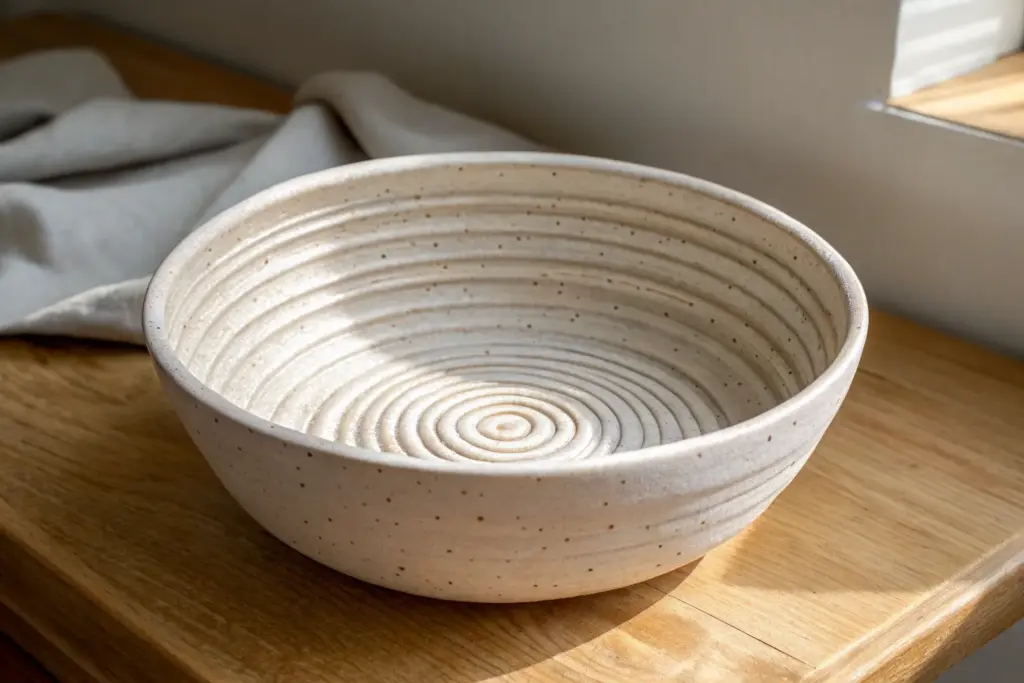
Classic Round Coil Bowl with Exposed Coils
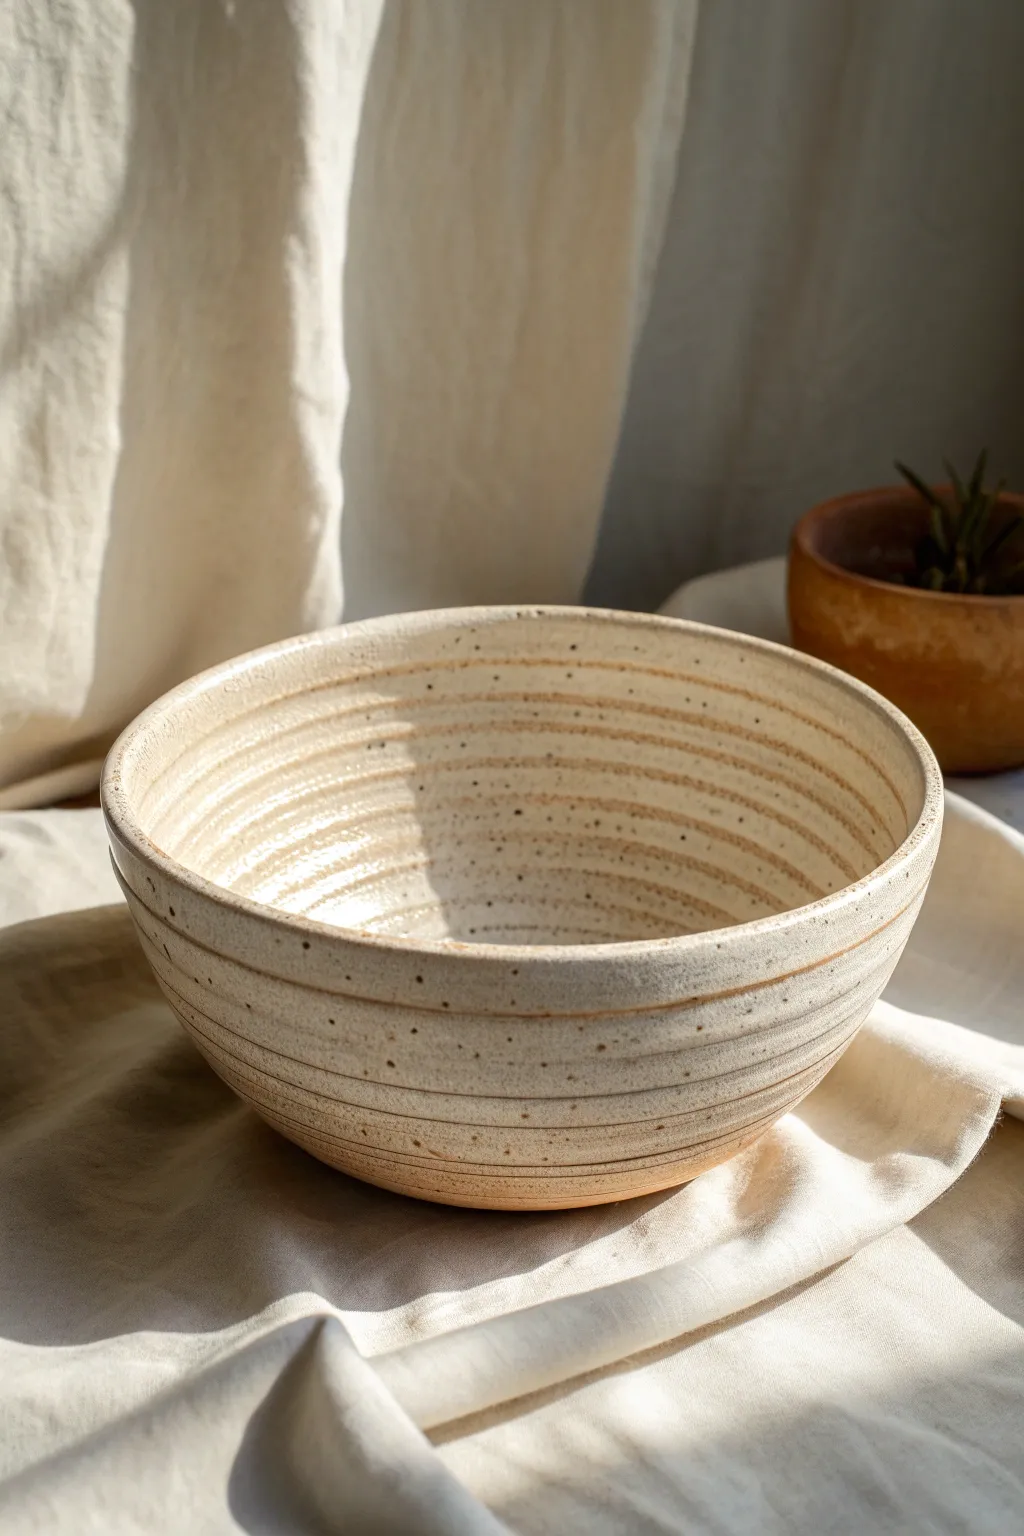
This project celebrates the humble coil technique by leaving those beautiful rhythmic lines visible rather than smoothing them away completely. The result is a sturdy, earthy vessel with a creamy, speckled finish that catches the light perfectly.
How-To Guide
Materials
- Stoneware clay (speckled or buff)
- Pottery wheel or banding wheel
- Rolling board or canvas mat
- Needle tool
- Scoring tool (serrated rib)
- Wooden rib tool
- Sponge
- Creamy white glaze (translucent or semi-opaque)
- Kiln access
Step 1: Base and Coil Preparation
-
Roll the base slab:
Begin by taking a handful of wedged clay and rolling it out into a flat slab about 1/4 inch thick. This will serve as the bottom of your bowl. -
Cut the circle:
Place a circular template or a small bowl on the slab and trace around it with a needle tool to cut a perfect circle, approximately 4-5 inches in diameter. -
Roll your coils:
Take fresh chunks of clay and roll them back and forth on your table to create long, snake-like coils. Aim for a thickness similar to your pinky finger. -
Keep them consistent:
Try to keep the pressure even as you roll so the coils don’t become lumpy. I like to roll out 4-5 coils at a time and keep them under plastic so they don’t dry out before I can use them.
Coil Consistency Tip
Use a flat board to roll coils rather than just your hands. This creates much more even pressure, preventing ‘lumpy snake’ syndrome.
Step 2: Building the Form
-
Score the base:
Using your serrated rib or needle tool, scratch up the outer rim of your circular base. Apply a small amount of slip or water to the scratched area. -
Attach the first coil:
Place your first coil directly on top of the scored rim. Gently press it down to ensure good contact. This first ring sets the foundation for the entire bowl. -
Blend the inside only:
To keep the coil texture visible on the outside, support the outside with one hand and use your thumb or a wooden tool to smear the clay downward on the *inside* of the bowl, blending the coil into the base. -
Stack and widen:
Score the top of the previous coil and add the next one. Place the coil slightly outward toward the edge of the previous ring to encourage the bowl shape to flare out. -
Continue building up:
Repeat the process: score, slip, attach, and blend only the inside. As you build height, check the profile to ensure your bowl is expanding evenly.
Cracks Between Coils?
If coils separate during drying, you didn’t blend enough on the inside. Score deeply and use plenty of slip next time to ensure a strong bond.
Step 3: Refining and Shaping
-
Smooth the interior:
Once you have reached your desired height, use a damp sponge or a flexible rib to thoroughly smooth the inside surface. It should be seamless and concave. -
Enhance the exterior lines:
On the outside, use a wet finger or a round wooden tool to gently run along the grooves between the coils. You aren’t blending them; you are just softening the sharp edges to create defined, rounded ridges. -
Check the rim:
The rim is often uneven in coil pots. Use your needle tool to trim the very top level if needed, or simply tap it gently with a flat paddle to level it out. -
Clean the foot:
Flip the bowl over carefully (if the clay is firm enough) and smooth out the transition where the wall meets the base. -
Dry slowly:
Cover the bowl loosely with plastic to let it dry very slowly. This prevents the coils from separating or cracking as the clay shrinks.
Step 4: Glazing and Finishing
-
Bisque fire:
Once bone dry, fire the piece to bisque temperature (usually cone 04) to prepare it for glazing. -
Wait:
Wait for the kiln to temperature to drop so you can pull your item out. -
Apply the glaze:
Dip or brush your creamy white glaze onto the bowl. A semi-translucent glaze is best here because it will pool in the coil grooves and break over the high points, accentuating the texture. -
Wipe the foot:
Use a sponge to wipe any glaze off the very bottom of the bowl so it doesn’t fuse to the kiln shelf. -
Glaze fire:
Fire the bowl a second time to your clay body’s maturity temperature (e.g., cone 6 for stoneware). The speckles in the clay will burn through the white glaze for that lovely vanilla-bean look.
Now you have a beautifully textured bowl ready for morning cereal or display.


Geometric Coil Bowl Made from Angled Coil Segments
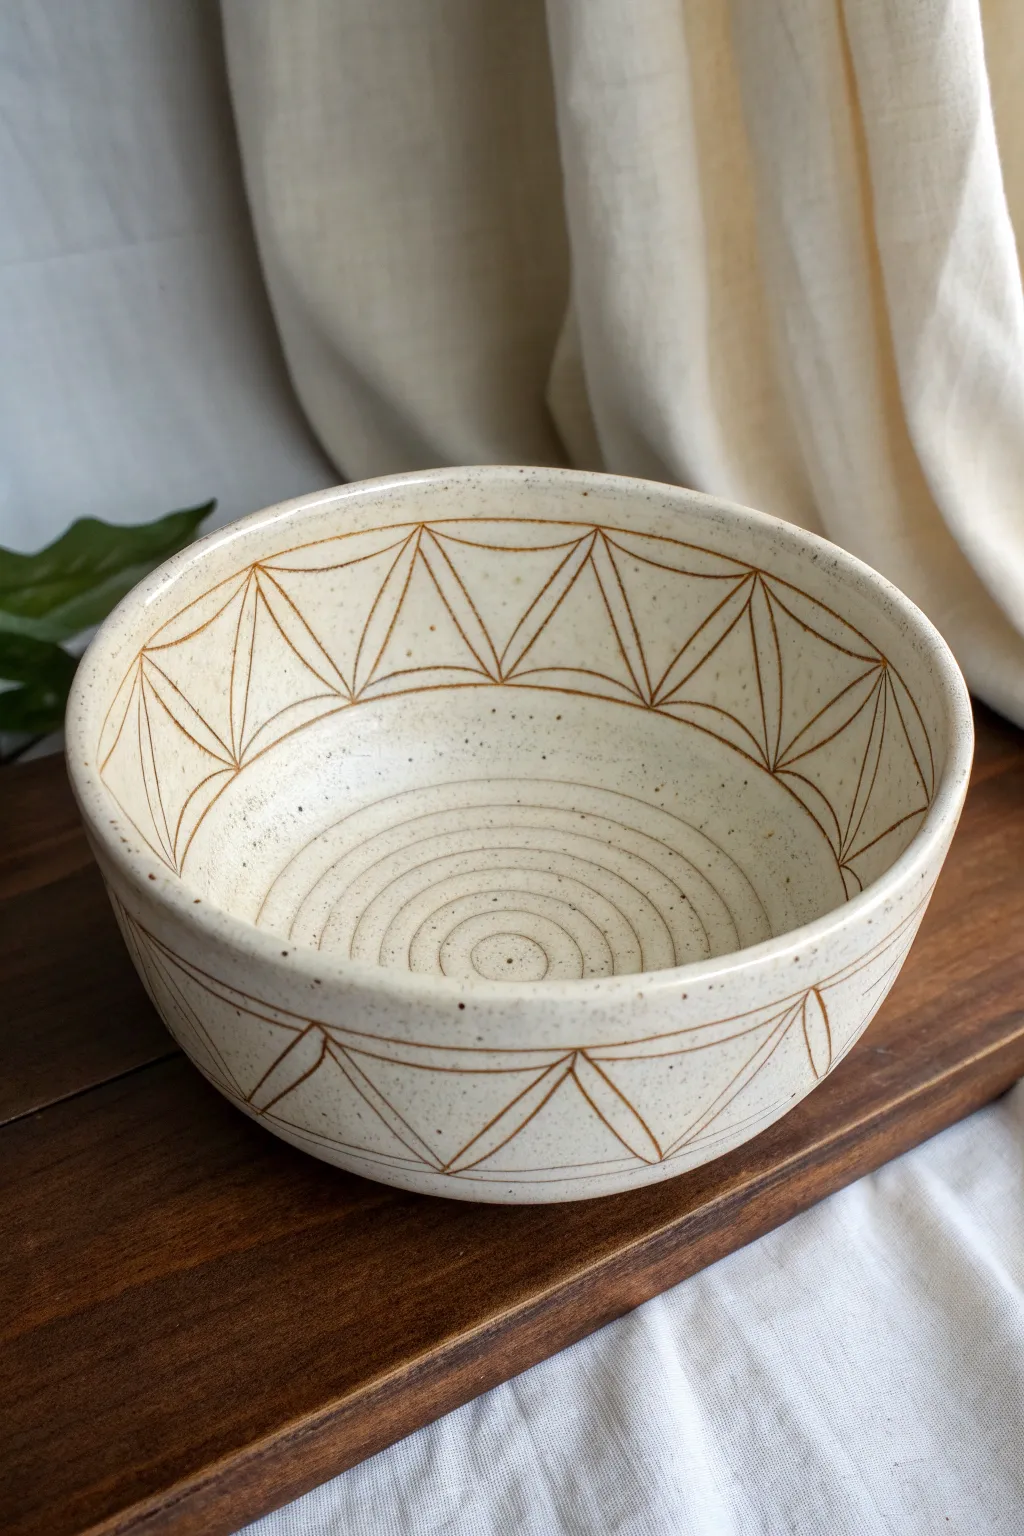
This elegant ceramic piece combines the organic warmth of speckled stoneware with striking geometric precision. The design features sharp, angular line work carved into a creamy glaze, revealing the raw clay body underneath in a technique that mirrors the structure of angled coil segments.
Step-by-Step
Materials
- Speckled stoneware clay
- Rolling pin and guide strips (canvas covered)
- Rib tool (metal or rubber)
- Needle tool
- Sponge
- Pottery wheel (optional, can be hand-built)
- Cream or off-white matte glaze
- Carving tool (sgraffito tool or fine loop tool)
- Clear glaze (optional for interior)
- Kiln
Step 1: Forming the Base
-
Prepare the Clay:
Begin by wedging your speckled stoneware clay thoroughly to remove air bubbles. Since the clay body itself is a star feature of this design, ensure your clay is free of debris but maintain its natural grit. -
Cylinder Construction:
The form itself is a simple, open bowl with steep sides. You can throw this on a wheel for perfect symmetry, or build it by rolling a slab and forming it into a cylinder over a mold, smoothing the seam invisible. -
Shaping the Profile:
Pull the walls up and slightly outward to create a gentle curve. Aim for a distinct separation between the floor of the bowl and the walls, creating a ‘corner’ on the inside rather than a continuous smooth scoop. -
Refining the Rim:
Compress the rim with a chamois or your finger to make it sturdy. Keep the rim fairly uniform but not mechanically perfect; a little wobble adds handmade character. -
Smooth the Surface:
Once leather hard, use a metal rib to burnish the exterior and interior walls until they represent a smooth canvas. Any large bumps will interrupt your geometric lines later. -
Trim the Foot:
Turn the bowl over and trim a neat foot ring. This elevates the form and gives a professional finish to the piece.
Use a Banding Wheel
Keep your hand steady and rotate the piece on a banding wheel when carving. This helps maintain consistent line weight better than moving your hand alone.
Step 2: Creating the Spiral Interior
-
Marking the Center:
With the bowl right-side up and centered on a banding wheel (or pottery wheel), find the exact center of the interior floor. -
Carving the Spiral:
Using a needle tool or a fine carving tool, create the concentric spiral on the floor of the bowl. Spin the wheel slowly and drag your tool from the center outward to create a tight, continuous groove, stopping just before the walls begin to rise.
Glaze Flaking Off?
If the glaze chips while carving, it was likely too dry or applied too thickly. Mist the surface lightly with water or add a small amount of gum solution to your glaze batch.
Step 3: Glazing and Carving
-
Bisque Fire:
Fire the piece to bisque temperature (usually cone 04 or 06) to prepare it for glazing. -
Apply the Base Glaze:
Mix a creamy, matte off-white glaze. Dip the entire bowl or pour the glaze to coat it evenly. The unexpected trick here is that we are carving *through* the glaze before firing, or you can apply wax resist lines (mishima), but sgraffito through glaze works best for this specific raw look. -
Dry to Touch:
Let the glaze dry until it is powdery to the touch but not bone dry. It needs to be stable enough to touch without smudging, but soft enough to carve. -
Map the Triangles:
Lightly scratch or mark a horizontal band around the midpoint of the interior wall. Then, mark equidistant points along the rim and along the floor’s edge to serve as vertices for your triangles. -
Carve the Diagonals:
Using a sharp Sgraffito tool, carve straight lines connecting your rim points to the midpoint band, and then down to the floor, creating a zigzag ‘mountain range’ pattern. -
Add Vertical Detail:
Bisect each triangle with a vertical line running from the peak to the base. This mirrors the look of structural segments. -
Repeat on Exterior:
Replicate this exact geometric pattern on the exterior of the bowl. Ensure the exterior lines align with the interior ones for a cohesive design. -
Clean Up Lines:
Use a soft brush or a puff of air to gently remove the glaze dust from your carved lines, revealing the raw bisque clay underneath. Be careful not to smudge the surrounding glaze. -
Final Fire:
Fire the bowl to the glaze’s maturity temperature (e.g., Cone 6 or 10). The glaze will melt and solidify, while the carved lines will remain as matte, toasted clay.
Once fired, fill your bowl with fruit or simply display it to highlight the beautiful contrast between the smooth glaze and the raw clay lines


Corrugated Pinched-Coil Bowl for Extra Grip and Drama
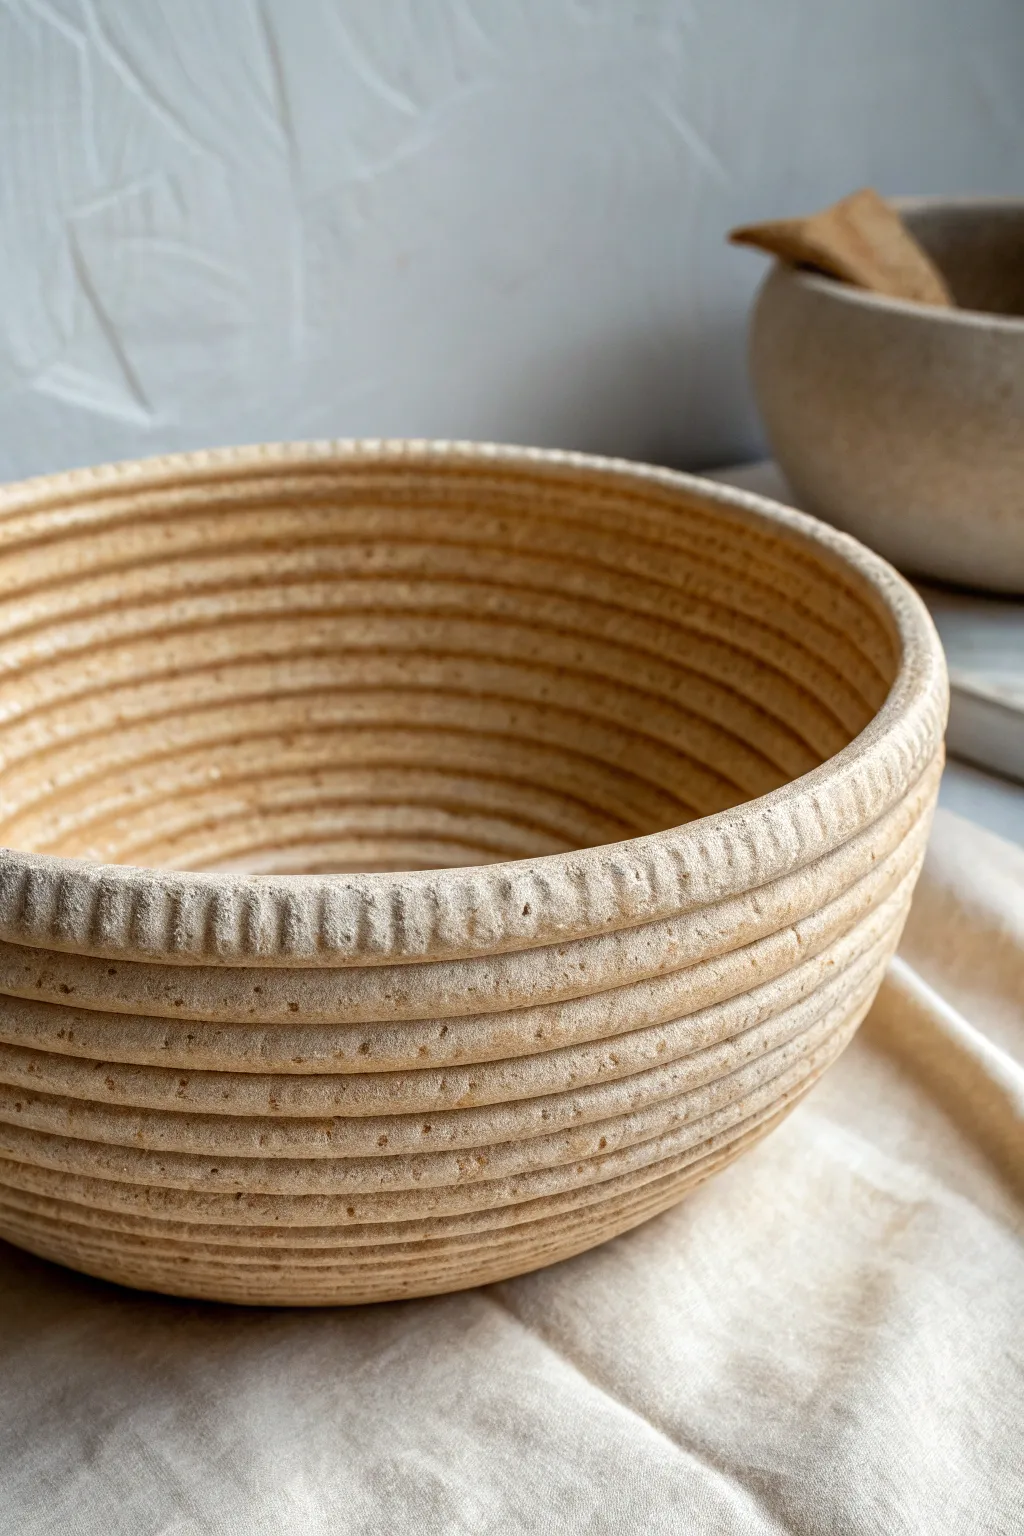
This project elevates the humble coil pot into a sophisticated vessel with stunning texture and visual weight. By adding corrugated ridges to your coils before stacking, you create a rustic yet modern bowl that feels incredible in the hands and catches the light beautifully.
How-To Guide
Materials
- Stoneware clay (buff or speckled)
- Scoring tool or serrated rib
- Slip (clay mixed with water)
- Wooden modeling tool
- Rolling pin or slab roller
- Sharp knife or needle tool
- Canvas work surface
- Circular bat or banding wheel
Step 1: Creating the Base
-
Roll the slab:
Begin by wedging your stoneware clay thoroughly to remove air bubbles. Roll out a small slab approximately 1/4 inch thick to serve as the bottom of your bowl. -
Cut the circle:
Place a circular template or a small bowl on the slab and cut around it with your needle tool. A 4 to 5-inch diameter serves as a perfect starting measurement for a medium-sized bowl like this one. -
Prepare the connection:
Place your circular base on a banding wheel or bat. Score the outer top edge of the circle aggressively with your serrated rib and brush on a generous amount of slip.
Step 2: Preparing Textural Coils
-
Roll primary coils:
Roll out several long, even coils of clay. Aim for a thickness of about 3/4 inch—slightly thicker than a standard coil pot because we will be manipulating the shape. -
Flatten the profile:
Gently press down on each coil with the palm of your hand or a small rolling pin to flatten it into a long, rectangular strap rather than a round rope. -
Add rigidity:
For that distinctive corrugated look, use the edge of a wooden tool or the side of a ruler to press vertical indentations along the outer face of the strip. Space them tightly together, mimicking the ridge pattern of a seashell. -
Dry check:
I like to let these textured strips stiffen up for just 10-15 minutes so they hold their vertical shape better when stacked.
Seam Safety
If your horizontal seams are cracking as they dry, your slip wasn’t wet enough. Gently compress the cracks with a rib and add a tiny amount of vinegar to the join site.
Step 3: Building the Walls
-
Lay the first ring:
Take your first textured strip and place it on the scored base. Cut the ends at a 45-degree angle where they meet to ensure a seamless join without a bulky overlap. -
Blend the interior:
Support the outside wall with one hand while using your thumb or a wooden tool to smear the clay downward on the *inside* only. This bonds the coil to the base without ruining the exterior texture. -
Score and slip:
Rough up the top edge of the first ring and apply slip. This surface preparation is crucial for structural integrity since we aren’t blending the outside. -
Stack upwards:
Place the next textured strip on top. Position it slightly outward if you want the bowl to widen, or directly vertically for straight sides. Press down firmly but gently to adhere the layers. -
Internal smoothing:
Continue to blend the coils together on the interior surface only. You can use a smooth rib tool here to compress the clay and remove fingertip marks, creating a clean inner bowl surface. -
Check symmetry:
Spin your banding wheel slowly. Look for any bulging areas or dips and gently nudge the walls back into concentric alignment while the clay is still plastic.
Glaze Strategy
When glazing, wipe the exterior with a damp sponge after dipping. This leaves glaze in the deep crevices while exposing the raw clay texture on the high points.
Step 4: Refining the Rim
-
Top layer detail:
For the final rim coil, pay extra attention to your corrugation marks. Ensure they are deep and clearly defined, as this is the most visible part of the vessel. -
Leveling:
If the rim height is uneven, gently paddle it down with a flat wooden board to ensure the top surface is perfectly horizontal. -
Soften edges:
Run a damp chamois or sponge very lightly over the top edge to remove any sharp burrs, but be careful not to erase the vertical texture marks you created.
Step 5: Finishing Touches
-
Define the gaps:
Using a wooden modeling tool, gently press into the horizontal seams between the coils on the outside. This deepens the shadow lines and emphasizes the stacked construction. -
Texture enhancing:
If any vertical ridges were smudged during construction, re-press them now with your tool while the clay is leather hard. -
Drying:
Cover the bowl loosely with plastic to let it dry slowly. Because the coils are thick and only joined on the inside, slow drying prevents cracking at the seams.
Once fired, the interplay of shadows on the ridges will make this bowl a standout piece on any table