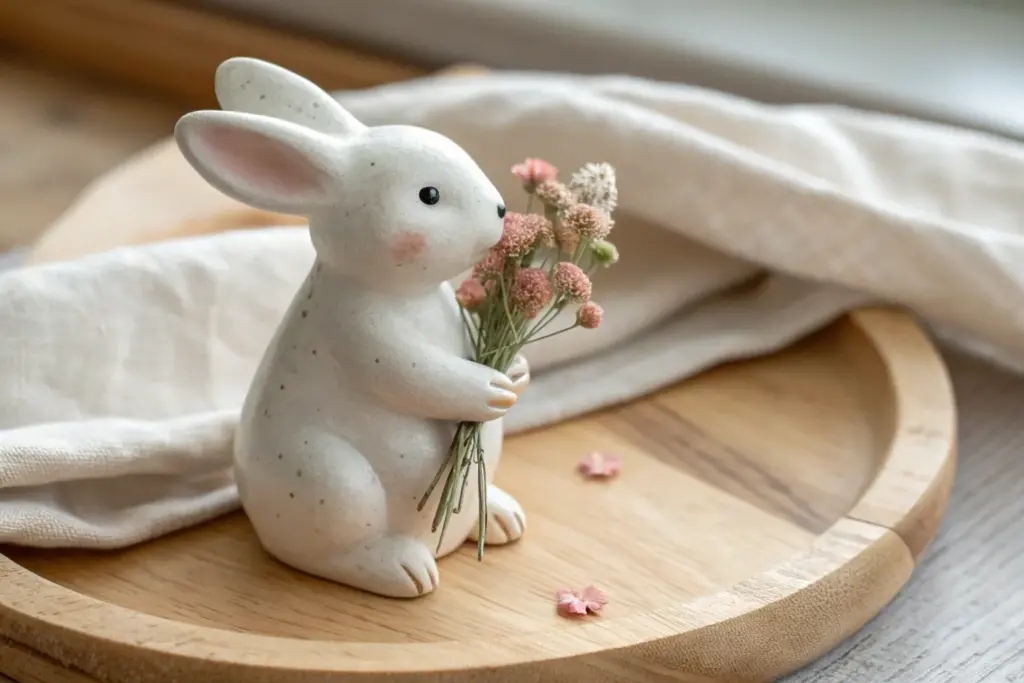
Cold porcelain is one of my favorite clays for tiny, crisp details and that smooth, almost porcelain-like finish once it air-dries. If you’re craving projects that feel delicate, giftable, and totally doable at your kitchen table, these cold porcelain clay ideas will keep your hands happily busy.
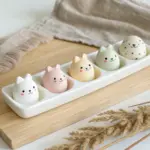
Mini Kawaii Animal Charms
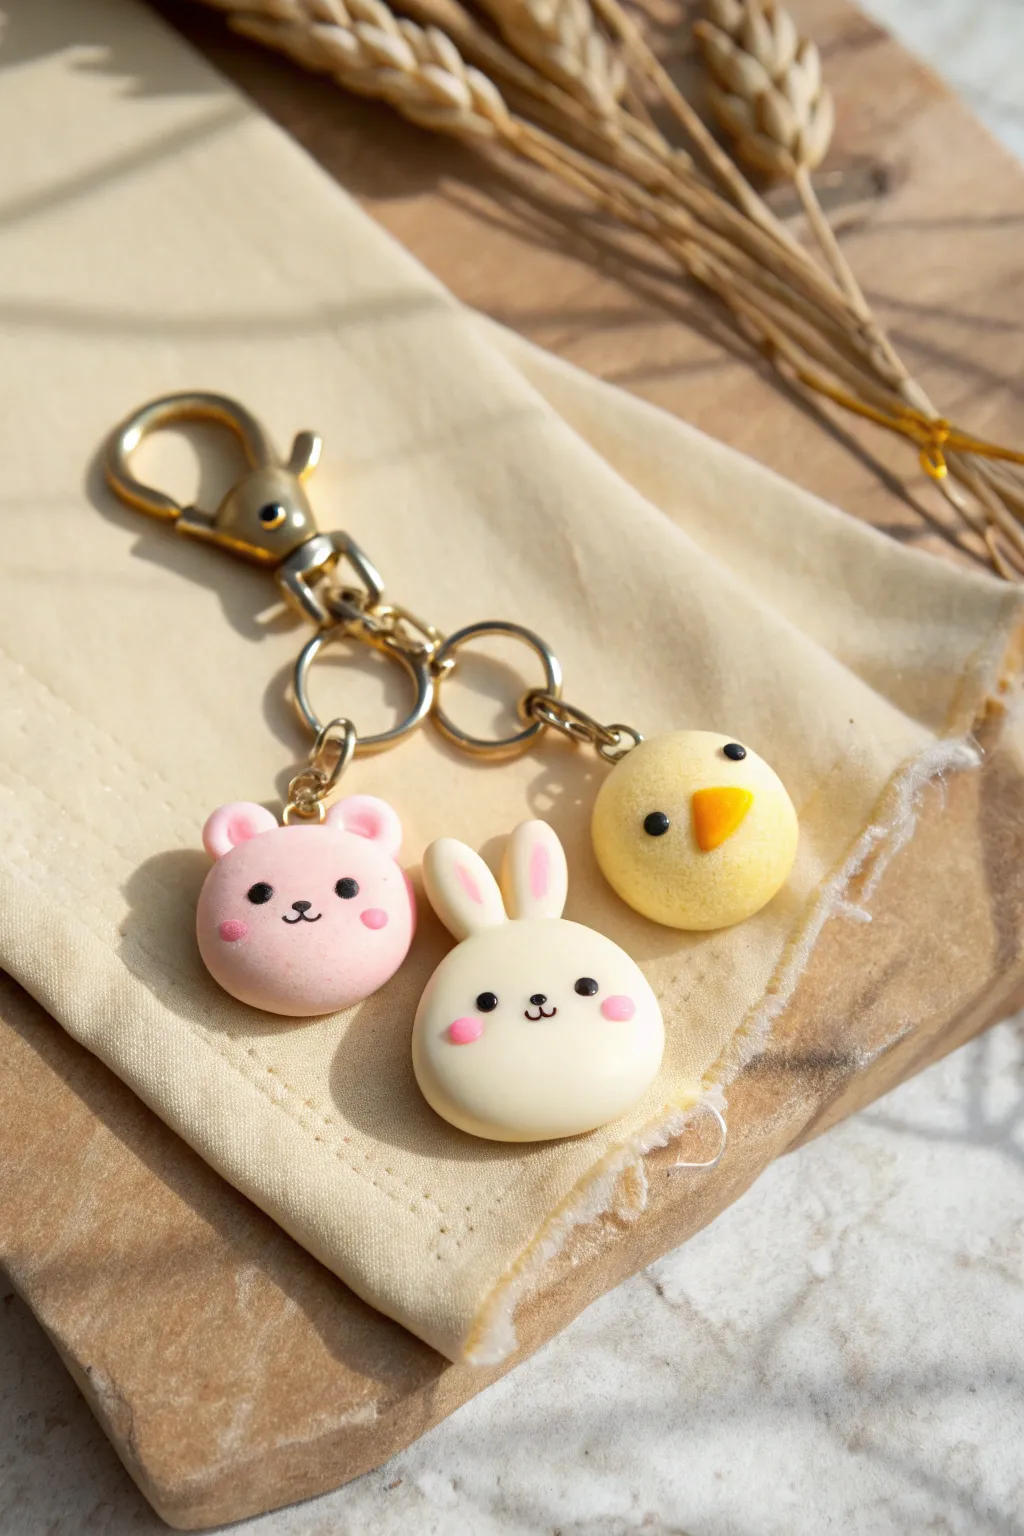
Create an adorable set of pocket-sized companions with this cold porcelain charm tutorial. This project features a sweet pink bear, a bouncy white bunny, and a tiny yellow chick, all soft-shaped and perfectly round for maximum cuteness.
Step-by-Step Guide
Materials
- Cold porcelain clay (white, pink, yellow, orange)
- Black acrylic paint or clay marker
- Ball stylus tool
- Needle tool or toothpick
- Eye screws (small, gold)
- Jump rings and gold keychain clasp
- PVA glue
- Varnish (matte or satin finish)
- Baby oil or lotion (to prevent sticking)
- Small blending sponge or pastel chalk (optional for cheeks)
Step 1: Shaping the Base Forms
-
Prepare the clay:
Begin by kneading your cold porcelain clay until it is smooth and pliable. If the clay feels too sticky, rub a tiny drop of baby oil onto your hands. -
Create the main spheres:
Roll three equal-sized balls of clay roughly the size of a large marble: one in pale pink (bear), one in white (bunny), and one in pastel yellow (chick). -
Flatten slightly:
Gently press each sphere down onto your work surface just enough to create a slightly flattened bun shape, often called a ‘macaron’ shape.
Smooth Surface Secret
Before drying, gently brush your clay with a damp finger or soft brush dipped in water to remove any fingerprints or dust for a flawless manufacturer finish.
Step 2: Sculpting the Bear
-
Form the ears:
Roll two tiny balls of pink clay. Attach them to the top left and right of the pink head using a dab of PVA glue for a secure hold. -
Indent the ears:
Use a small ball tool to press a gentle indentation into the center of each ear. -
Add inner ear details:
Take extremely small specks of white clay, flatten them, and press them into the indentations you just made. -
Paint the face:
Using a fine-tip tool dipped in black paint, dot two small eyes wide apart and draw a tiny nose and mouth in the center. -
Blush the cheeks:
Add two tiny flattened circles of darker pink clay under the eyes for cheeks, or dust softly with pink pastel chalk.
Make It Glossy
For an extra high-end look, apply UV resin or high-gloss varnish specifically to the eyes and noses after the matte sealer dries. It makes them look wet and alive.
Step 3: Sculpting the Bunny
-
Shape long ears:
Roll two small white logs of clay, slightly tapered at one end. Flatten them gently to form the bunny ears. -
Add pink centers:
Roll even thinner logs of pink clay and press them into the center of the white ears. -
Attach the ears:
Glue the wider ends of the ears to the top of the white head, securing them upright. -
Draw bunny features:
Like the bear, paint two wide-set black eyes. Draw a small ‘w’ shape for the mouth and a tiny nose. -
Add rosy cheeks:
Place two tiny pink clay dots on the cheeks to complete the sweet expression.
Step 4: Sculpting the Chick
-
Form the beak:
Roll a small piece of orange clay into a teardrop shape and flatten it slightly to create a triangular beak. -
Attach the beak:
Glue the beak to the center of the yellow head. -
Paint the eyes:
Add two black distinct dots for eyes on either side of the beak. -
Add blush:
If desired, dust the area under the eyes with a very subtle amount of pink chalk for a warm glow.
Step 5: Assembly and Finishing
-
Insert hardware:
While the clay is still soft, dip the threads of three eye screws in glue and insert one into the top center of each animal head. -
Drying time:
Allow the charms to dry completely. Cold porcelain shrinks as it dries, which will tighten around the eye screw. I usually wait at least 24 hours. -
Varnish:
Apply a coat of matte or satin varnish to protect the paint and clay from moisture. -
Connect to chain:
Use jump rings to attach each animal charm to the main gold keychain hardware, spacing them so they dangle freely.
Now you have a charming trio ready to brighten up your bag or keys


Dainty Stud Earrings and Pendants
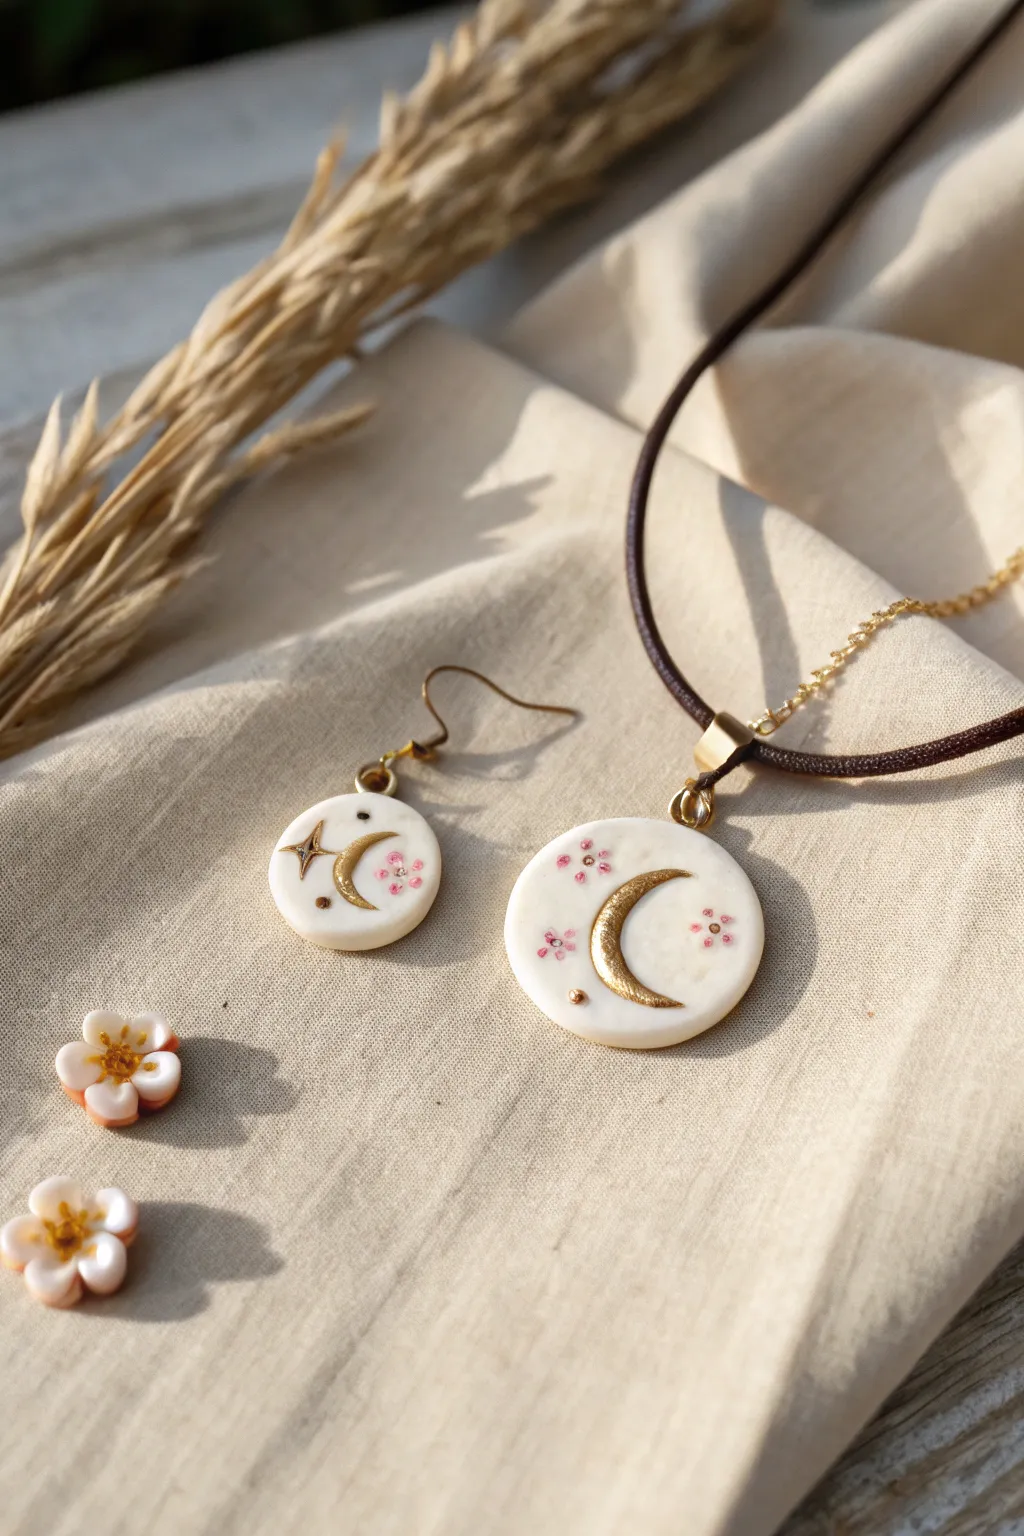
Capture the magic of a starry night with this delicate cold porcelain jewelry set featuring a golden crescent moon amidst tiny pink blossoms. The finished pieces have a dreamy, matte white finish that perfectly highlights the metallic gold details and soft floral accents.
Step-by-Step
Materials
- Cold porcelain clay (white)
- Round clay cutters (approx. 2cm and 3cm diameter)
- Rolling pin or pasta machine
- Gold acrylic paint or gold leafing pen
- Fine detail paintbrush (size 000)
- Pink acrylic paint (soft sakura shade)
- Small dotting tool or toothpick
- Small star-shaped stamp or sharp needle tool
- Jewelry findings: gold jump rings, earring hooks, necklace bail
- Brown cord or gold chain
- Clear matte varnish (optional)
- Sandpaper (fine grit)
Step 1: Shaping the Base
-
Condition the clay:
Start by kneading your white cold porcelain clay until it is smooth, pliable, and free of cracks. If it feels too dry, add a tiny drop of baby oil. -
Roll out the slab:
Roll the clay out to a uniform thickness of about 3-4mm. Aim for a consistently flat surface to ensure your jewelry hangs correctly. -
Cut the shapes:
Using your circle cutters, press firmly to cut out one larger circle for the pendant and two smaller circles for the matching earrings. -
Smooth the edges:
Dip your finger in a little water or cornstarch and gently rub the edges of the cut circles to remove any jagged bits or sharpness left by the cutter. -
Create holes:
Use a needle tool or a toothpick to carefully pierce a hole near the top edge of each circle for the jump rings. Insert the tool from front to back, then back to front to ensure a clean opening.
Step 2: Sculpting Details
-
Impress the moon:
You can either paint the moon later or create a relief now. To create a relief, lightly press a slightly smaller circle cutter or a curved tool into the center of the clay to indent a crescent moon shape without cutting all the way through. -
Add texture marks:
Use a needle tool or small star stamp to add tiny indentations for stars around the moon. Press a dotting tool gently into the clay where you plan to paint the flowers later. -
Dry completely:
Place the pieces on a piece of foam or a clean drying rack. Cold porcelain shrinks as it dries, so let them sit for at least 24-48 hours until they are rock hard and turn a deeper ivory white. -
Sand for perfection:
Once fully dry, lightly sand the edges and the surface with fine-grit sandpaper if there are any fingerprints or rough spots.
Smooth Operator
To avoid fingerprints on the wet clay, lightly dust your fingertips with cornstarch or use a smoothly glided piece of acetate sheet over the clay while rolling.
Step 3: Painting & Assembly
-
Gild the moon:
Using your fine brush and gold acrylic paint (or a leafing pen), carefully fill in the crescent moon shape. Two thin coats provide a richer metallic shine than one thick coat. -
Paint the blossoms:
Dip a dotting tool into the soft pink paint and create clusters of five tiny dots to form flower petals. I find it easiest to work in a circular pattern for each bloom. -
Add flower centers:
Once the pink paint is dry, add a microscopic dot of gold or dark pink in the very center of each flower. -
Detail the stars:
Paint tiny four-pointed stars or simple dots using the gold paint to fill the celestial spaces around the moon and flowers. -
Seal the work:
Apply a thin layer of clear matte varnish to protect the paint and clay from moisture, which is crucial for cold porcelain longevity. -
Attach the bail:
Open a gold jump ring using two pairs of pliers. Thread it through the hole of the large pendant disc, attach a bail, and close the ring securely. -
Finish the earrings:
Repeat the jump ring process for the smaller discs, attaching them directly to gold earring hooks. -
Final assembly:
Thread your brown cord or chain through the pendant bail to complete the necklace.
Crystal Accents
Before the clay dries, gently press tiny flat-back rhinestones or Swarovski crystals into the wet clay at the center of the stars for real sparkle.
Wear your celestial set with pride or gift it to someone who loves gazing at the night sky


Marbled Cold Porcelain Beads
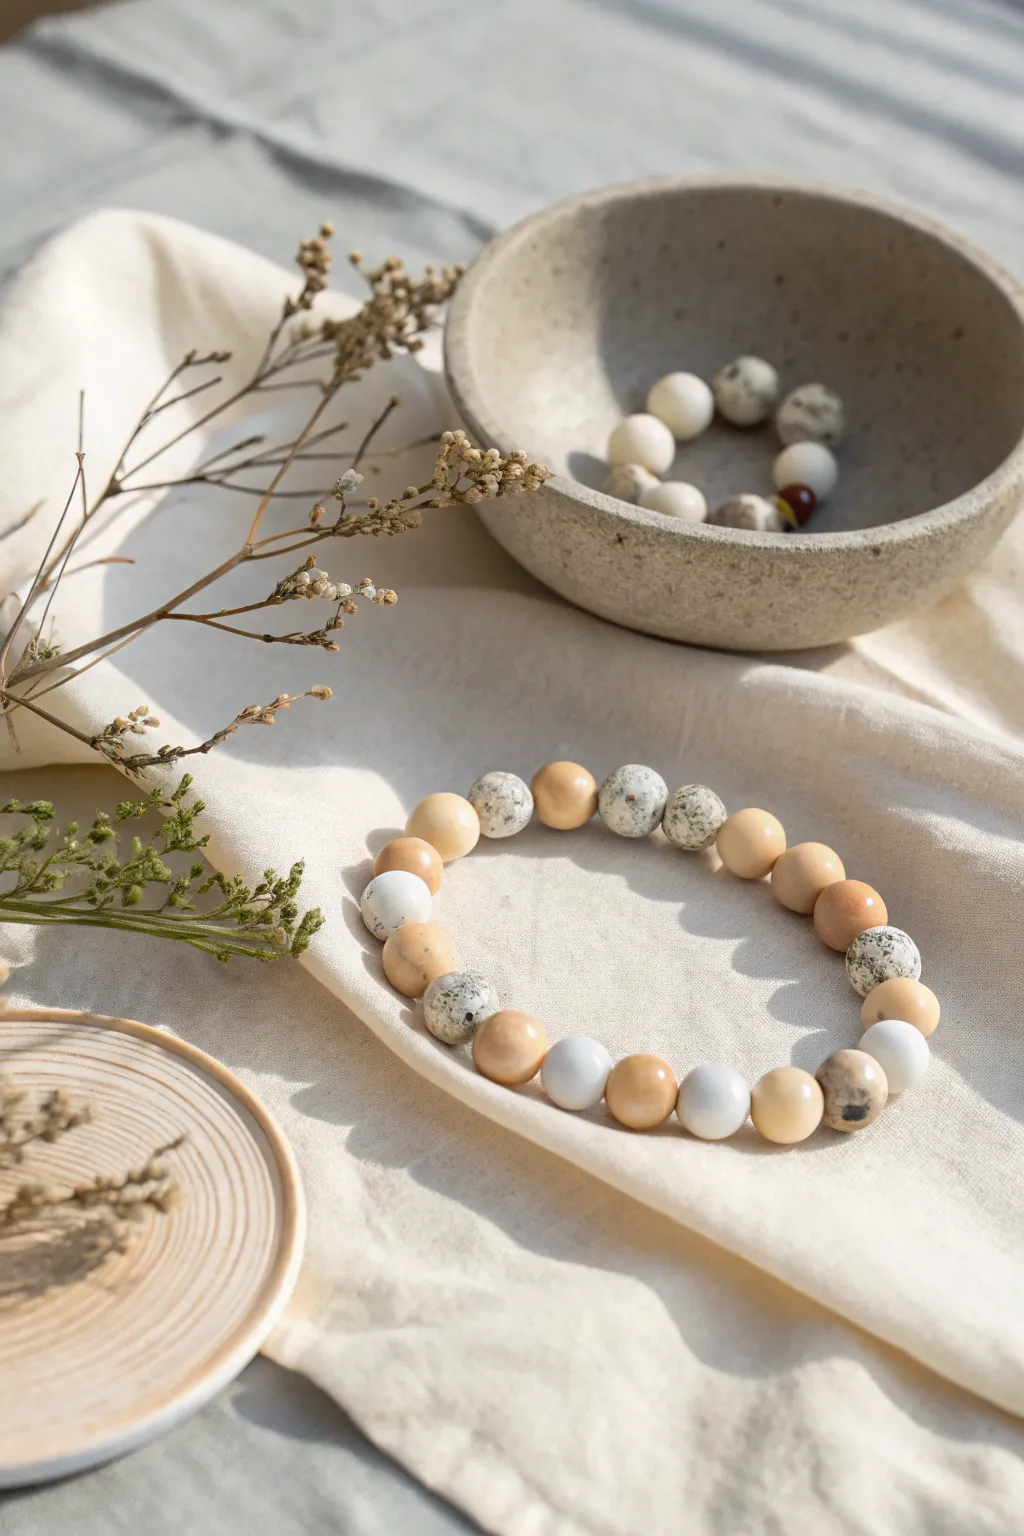
These elegant bracelets mimic the look of natural stone like jasper and granite using nothing but cold porcelain clay. With a soothing palette of cream, beige, and speckles, they create a sophisticated, organic accessory perfect for everyday wear.
Detailed Instructions
Materials
- Cold porcelain clay (store-bought or homemade)
- Acrylic paints (Titanium White, Burnt Umber, Yellow Ochre, Black)
- Conditioning oil or lotion (baby oil or ponds cream)
- Toothpicks or beading pins
- Styrofoam block or sponge (for drying)
- Fine grit sandpaper
- Clear matte varnish or sealant
- Elastic jewelry cord
- Super glue (gel type)
- Scissors
Step 1: Preparing the Clay Colors
-
Condition the base:
Begin by kneading a good amount of cold porcelain clay with a tiny drop of lotion or oil to make it pliable and smooth. -
Mix the cream tone:
Take a portion of white clay and tint it with a very small amount of Yellow Ochre and a dot of Titanium White to create a soft, warm cream color. -
Create the beige tone:
For the darker tan beads, mix another portion of clay with slightly more Yellow Ochre and a tiny touch of Burnt Umber until you achieve a caramel or latte hue. -
Prepare the speckle mix:
To make the granite-look beads, keep a portion of clay white. Separately, take a very tiny pea-sized bit of clay and mix it with black paint until it is pitch black. -
Allow to rest:
Let the colored clays sit for about 10-15 minutes wrapped in plastic to let the moisture stabilize, which makes rolling easier.
Shrinkage Warning
Cold porcelain shrinks 15-20% when drying. Make your raw beads slightly larger than the size you want the final result to be.
Step 2: Creating the Marbled Effect
-
Grate the black clay:
Take your tiny piece of black clay (ensure it is slightly dry or firm) and grate it against a fine sanding block or chop it into microscopic crumbs with a craft blade. -
Incorporate the flecks:
Take a ball of your white clay and sprinkle the black crumbs over it. Fold the clay over itself gently—do not over-knead, or the black will turn the whole ball gray. -
Check the pattern:
Tear the clay open to see if the distribution of ‘stone’ flecks looks natural inside.
Stone Texture
Before drying, gently roll your ‘stone’ beads over a piece of coarse sandpaper. This imitates the pitted texture of real rock.
Step 3: Shaping and Piercing
-
Portion the beads:
Roll your cream, beige, and speckled clays into a long snake each. Cut them into equal-sized segments to ensure your finished beads are uniform. -
Roll into spheres:
Take each segment and roll it between your palms. I find using a light circular motion with zero pressure creates the most perfect spheres. -
Pierce the holes:
While the bead is fresh, gently twist a toothpick through the center. Twist as you push to avoid squashing the round shape. -
Dry on pins:
Slide the pierced beads onto toothpicks and stick them into your styrofoam block. Let them dry completely, ideally for 24-48 hours depending on humidity.
Step 4: Finishing and Assembly
-
Refine the shape:
Once fully hard, check for any rough edges near the hole. Gently sand them away with fine-grit sandpaper. -
Seal the beads:
Apply a coat of matte varnish to protect the clay from moisture while keeping that natural stone look. Let this dry fully. -
String the pattern:
Cut a length of elastic cord about 10 inches long. String your beads, alternating between the solid beige, solid cream, and speckled granite beads in a random, organic pattern. -
Tie the knot:
Tie a surgeon’s knot (looping twice before pulling tight) and add a tiny drop of super glue to the knot for security. -
Hide the end:
Trim the excess cord and gently tug the knot inside one of the bead holes to hide it.
Enjoy styling these versatile, nature-inspired accessories with your favorite neutral outfits


Textured Trinket Dishes
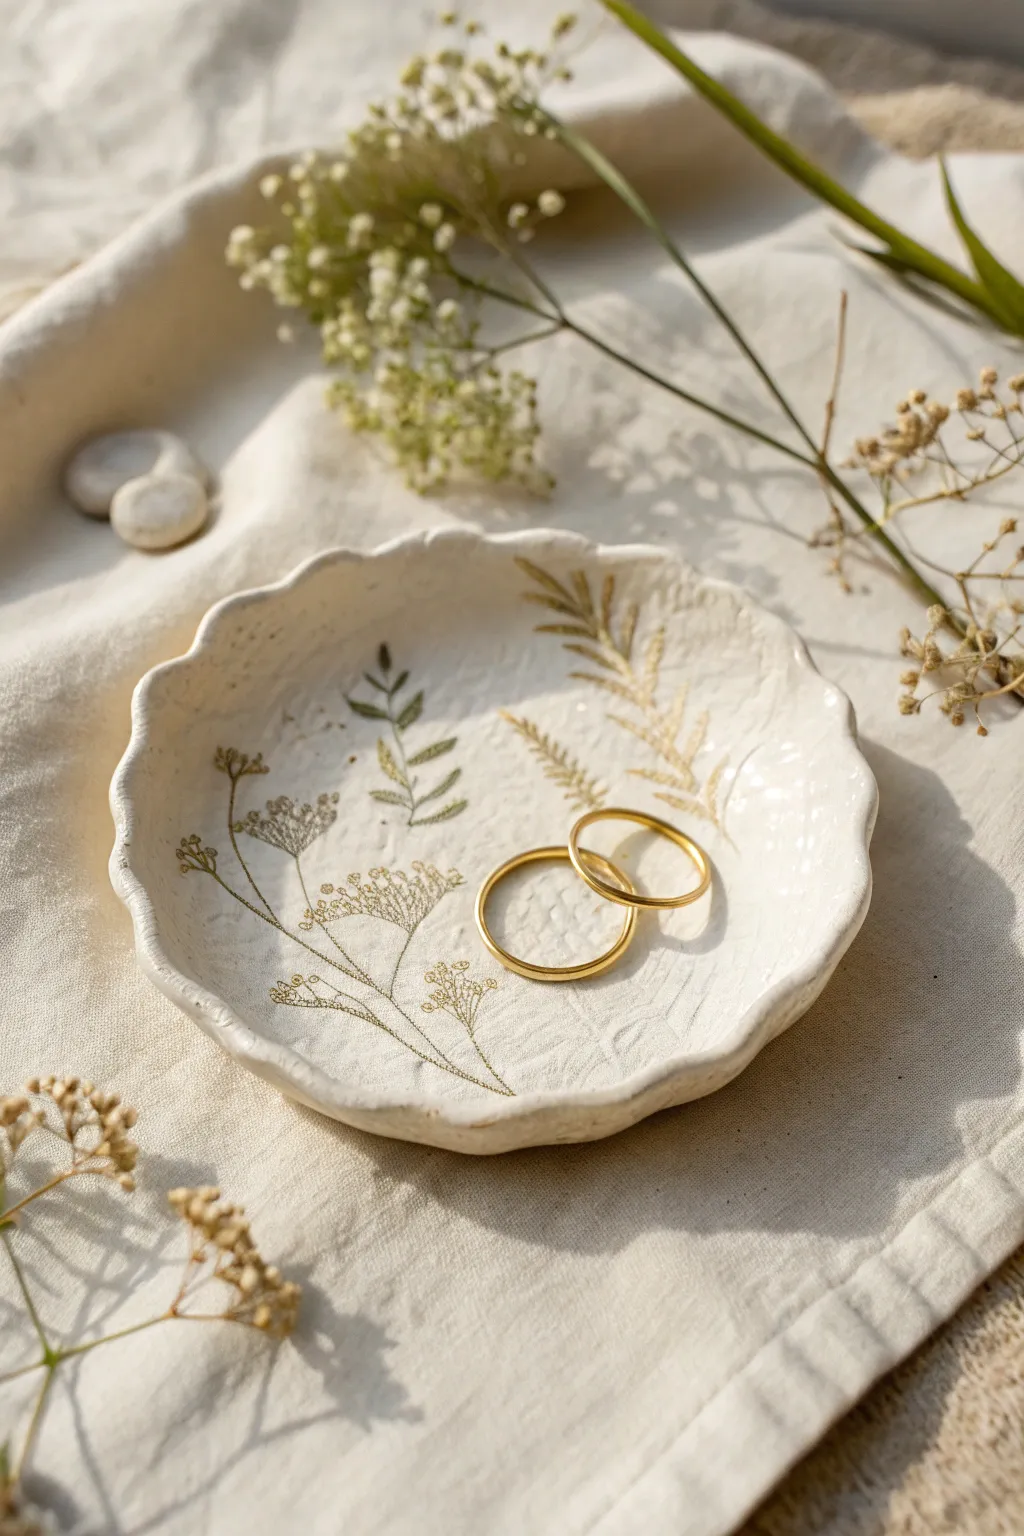
Capture the delicate beauty of nature with this elegant cold porcelain ring dish, featuring imprinted botanical stems and luxurious gold detailing. The soft, organic wavy rim and shimmering accents make it a perfect bedside catch-all for your favorite jewelry.
Step-by-Step Guide
Materials
- White cold porcelain clay (homemade or store-bought)
- Small rolling pin
- Various dried wildflower stems, leaves, or grasses (for texture)
- Small bowl (approx. 4-5 inches diameter) to use as a mold
- Sharp craft knife or circular cookie cutter
- Fine-grit sandpaper
- Metallic gold acrylic paint or liquid gold leaf
- Very fine detail paintbrush (size 0 or 00)
- Clear acrylic sealer or varnish (matte or satin)
- Parchment paper or non-stick mat
- Small sponge (optional)
Step 1: Prepping the Clay Canvas
-
Condition the Cold Porcelain:
Start by kneading a handful of cold porcelain clay until it is smooth, pliable, and free of cracks. If it feels too sticky, lightly dust your hands with cornstarch; if too dry, add a tiny drop of baby oil. -
Roll out the Slab:
Place the ball of clay onto parchment paper or a non-stick mat. Using your rolling pin, roll it out evenly to a thickness of about 1/4 inch (approx. 5-6mm). Try to keep the thickness consistent to prevent warping later. -
Cut the Circle:
Use a large circular cookie cutter or place a bowl upside down on the clay and trace around it with a craft knife to cut out a clean circle. Remove the excess clay.
Step 2: Adding Texture & Shape
-
Arrange Your Botanicals:
Lay out your dried flowers, thin twigs, and leaves onto the flat clay circle. Experiment with the composition before committing; I like to have stems originating from one side and curving inward for a natural look. -
Imprint the Design:
Once happy with the placement, gently roll over the botanicals with your rolling pin. Apply firm, even pressure to press them deep enough to leave a clear impression, but not so hard that you warp the circle’s shape. -
Reveal the Patterns:
Carefully lift and peel away the plant materials. Use tweezers for any stubborn bits of leaf that stick to the clay, ensuring the impressions remain crisp. -
Soften the Edges:
Dip your finger in a little water and gently run it along the cut edge of the circle to smooth out any sharpness or roughness left by the knife. -
Create the Wavy Rim:
Gently pinch and lift sections of the rim between your thumb and forefinger to create a soft, undulating ruffle effect. This gives the dish that organic, handmade charm seen in the photo. -
Form the Dish Shape:
Carefully lift the clay circle and place it inside your small bowl. Press it gently into the curve so it takes on a shallow dish shape. Let it dry in this position for at least 24 hours.
Clay Cracking?
Cracks usually mean drying happened too fast. Dry your piece in a cool, draft-free spot away from direct sun. If a crack appears, patch it with a dab of wet clay slurry.
Step 3: Refining and Gilding
-
Unmold and Dry Completely:
Once the surface feels dry to the touch, remove it from the bowl mold. Place it on a wire rack to allow the bottom to dry fully. This may take another 24-48 hours depending on humidity. -
Sand Imperfections:
When bone dry, inspect the edges. If there are any rough spots, use fine-grit sandpaper to gently buff them smooth. Wipe away dust with a dry cloth. -
Prepare the Gold Paint:
Shake your liquid gold leaf or mix your metallic acrylic paint well. You want a high-pigment load to ensure the lines stand out brightly against the white clay. -
Highlight the Botanicals:
Dip your fine detail brush into the gold. Carefully paint inside the depressions left by the plant stems and leaves. You don’t need to fill every tiny crevice; focusing on the main lines often looks more elegant. -
Feather the Details:
For the feathery parts of the plant imprints, use quick, light strokes to drag a tiny amount of gold paint outwards, mimicking delicate leaves. -
Seal the Project:
Allow the gold paint to cure completely according to the manufacturer’s instructions. Finally, apply a thin coat of clear varnish (matte or satin works best) to protect the clay from moisture and everyday wear.
Pro Tip: Depth Control
Use plants with woody or stiff stems (like dried lavender or wheat) rather than fresh soft petals. Harder materials leave deeper, sharper impressions that are easier to paint later.
Now your custom trinket dish is ready to hold your treasures or be wrapped up as a thoughtful handmade gift

The Complete Guide to Pottery Troubleshooting
Uncover the most common ceramic mistakes—from cracking clay to failed glazes—and learn how to fix them fast.
Cute Mushroom Minis
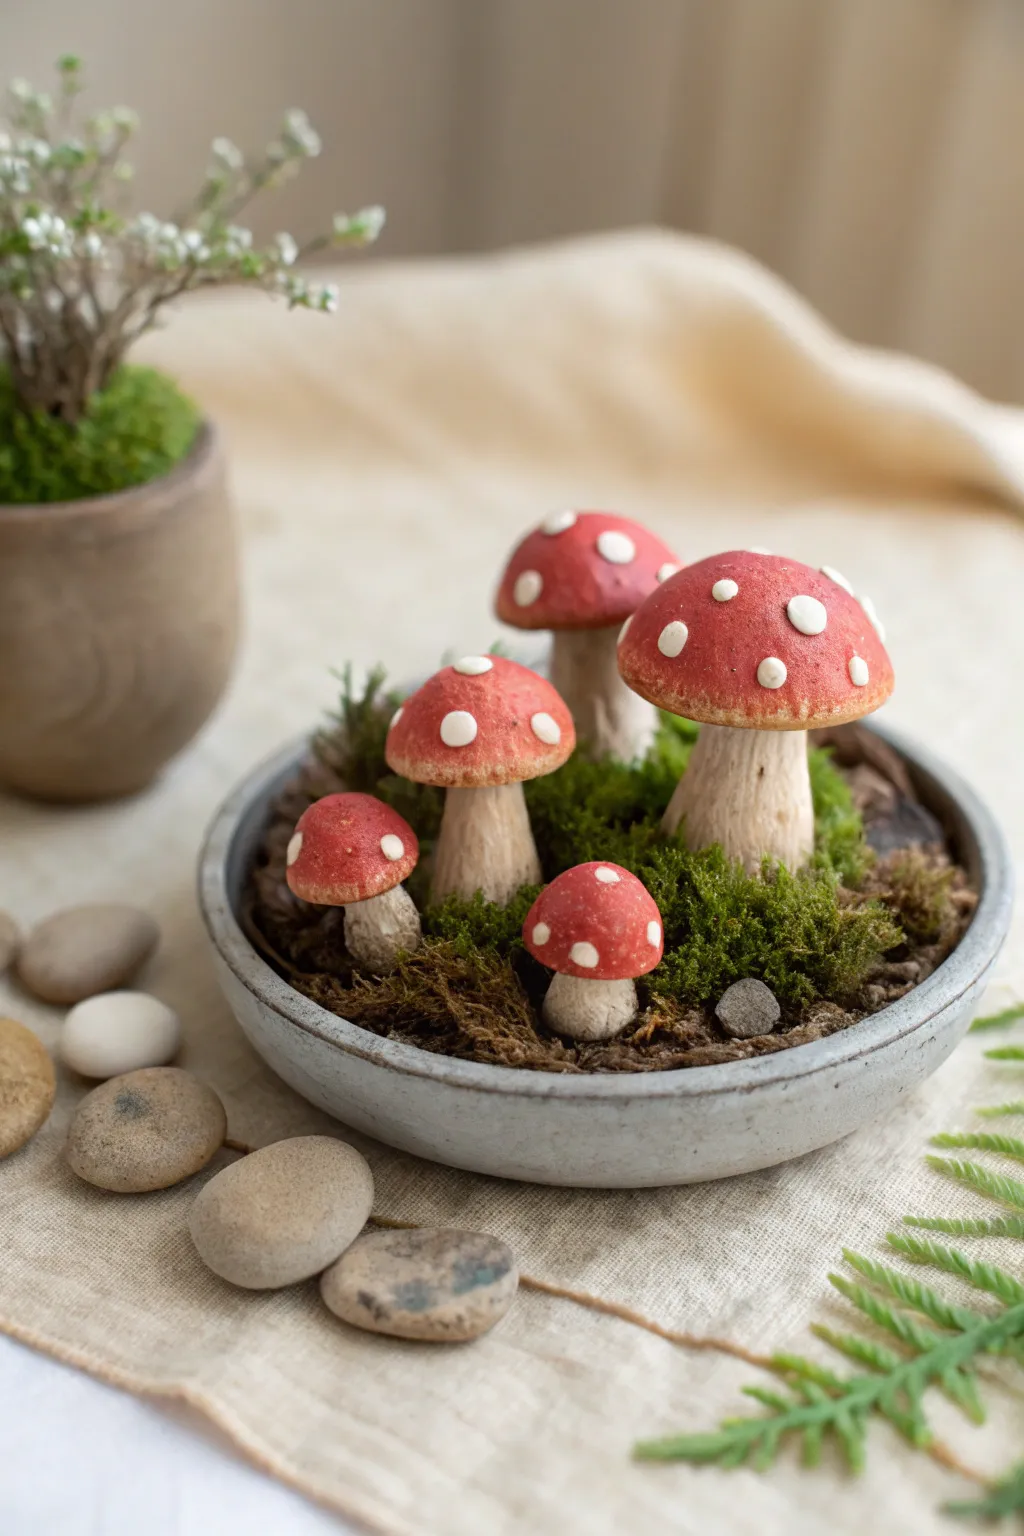
Bring a touch of woodland magic indoors with this charming miniature scene featuring distinct red-capped mushrooms nestled in lush moss. These cold porcelain creations capture the organic textures of nature, making them a perfect, everlasting desk companion.
Step-by-Step Tutorial
Materials
- Cold porcelain clay (homemade or store-bought)
- Acrylic paints (Red, White, Burnt Umber, Cream/Beige)
- White PVA glue
- Texture tools (old toothbrush, stiff paintbrush, needle tool)
- Aluminum foil
- Small shallow ceramic dish
- Preserved moss (Reindeer or Sheet moss)
- Dried tea leaves or coffee grounds (for soil effect)
- Small river stones
- Paintbrushes
- Matte varnish spray
Step 1: Shaping the Mushrooms
-
Prepare the stems:
Color a portion of your cold porcelain with a tiny amount of cream and burnt umber paint to achieve a natural, off-white bolete mushroom stem color. Roll various sizes of thick, sturdy cylinders—make them slightly wider at the base for stability and a cute, chubby look. -
Create stem texture:
Before the clay dries, take an old toothbrush or a stiff bristle brush and gently stipple the surface of the stems. This mimics the porous, organic texture of real fungi. -
Form the caps:
Color a new batch of clay with vibrant red acrylic paint. Roll spheres in varying sizes, then flatten the bottoms and gently curve the tops to create domes. I find that using a ball of aluminum foil as a core for the larger caps saves clay and reduces drying time. -
Attach cap to stem:
Apply a dab of PVA glue to the top of a stem and press the red cap firmly onto it. Use a modeling tool to smooth the seam slightly underneath, or leave it distinct for a different variety look. -
Add the spots:
Take tiny pinches of plain white clay and roll them into small, uneven flattened circles. Glue these randomly onto the red caps, pressing them down gently so they look integrated rather than just sitting on top. -
Dry thoroughly:
Allow your mushrooms to dry completely. Cold porcelain shrinks as it dries, so place them on a non-stick surface and rotate them occasionally to prevent flat spots.
Shrinkage Warning
Cold porcelain can shrink up to 20% when drying. Make your initial mushroom shapes slightly larger than you want the final result to be so they don’t end up too tiny.
Step 2: Painting and Finishing
-
Dry brushing texture:
Once fully dry, dip a dry brush into a small amount of beige or light brown paint, wipe most of it off on a paper towel, and lightly brush over the stems. This highlights the toothbrush texture you added earlier. -
Shading the caps:
For a realistic touch, dilute a tiny drop of burnt umber with water to make a glaze. Paint this lightly around the bottom rim of the red caps and wipe away the excess to create a subtle shadow. -
Spatter effect:
To mimic the dusty look of the reference, dip an old toothbrush in watered-down white paint and flick fine droplets over the caps and stems for a natural, earthy finish. -
Seal the work:
Spray the mushrooms with a matte varnish to protect the cold porcelain from humidity and seal the paint.
Step 3: Assembling the Scene
-
Prepare the base:
Fill your shallow ceramic dish with a layer of scrap clay or floral foam to create height, leaving space around the edges. -
Create the soil:
Coat the surface of your base layer generously with PVA glue. Sprinkle dried tea leaves or used (dried) coffee grounds over the glue to simulate dark, rich forest soil. -
Plant the mushrooms:
Glue the mushrooms into the dish, arranging them in clusters. Place the taller ones in the back and smaller ones in front for depth. -
Add greenery:
Tuck pieces of preserved moss around the base of the stems, covering any visible glue or gaps. Use different shades of green moss to add visual interest. -
Final details:
Nestle a small, smooth grey pebble into the moss near the front edge to complete the serene composition.
Glow Up
Mix glow-in-the-dark powder into the white clay used for the spots on the caps. Under blacklight or at night, your forest floor will transform into a magical glowing fairy garden.
Now you have a permanent slice of the forest floor to decorate your favorite shelf
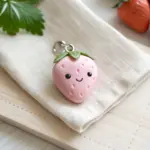
Tiny Faces and Expression Practice
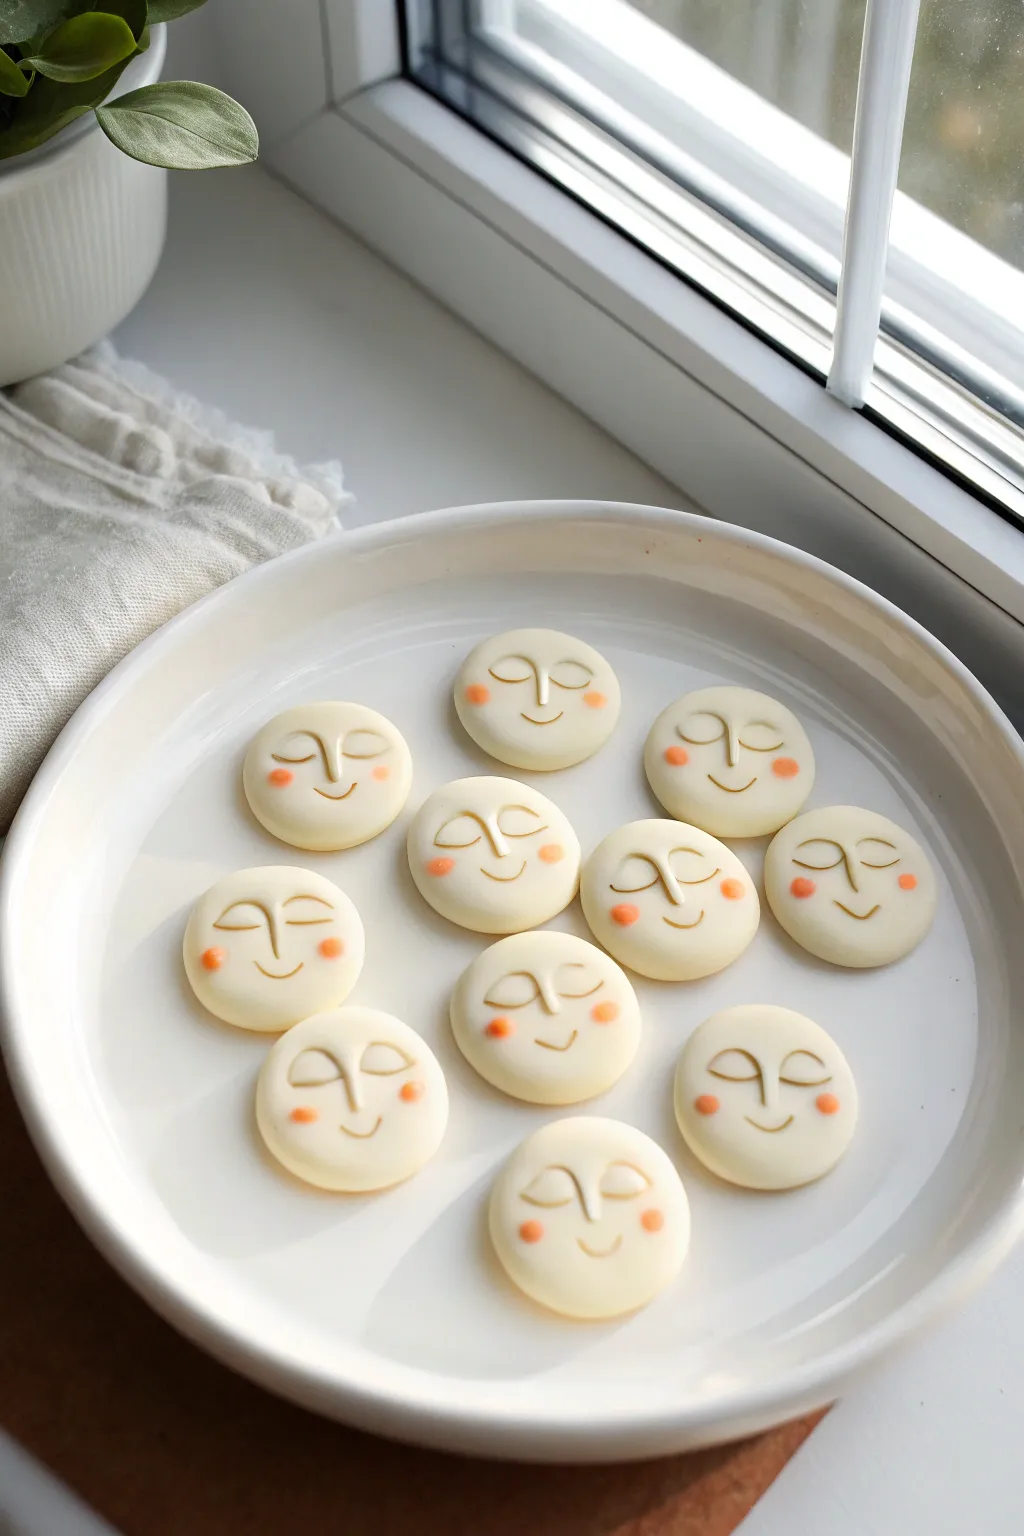
These soothing little tokens feature a minimalist, peaceful expression stamped onto smooth white clay. Perfect for practicing facial proportions or creating a collection of calming pocket charms, they capture a dreamy, moon-like aesthetic.
Step-by-Step
Materials
- Cold porcelain clay (white)
- Small round cookie cutter (approx. 1-1.5 inch)
- Non-stick rolling pin
- Parchment paper or non-stick work mat
- Thin sculpting needle tool or toothpick
- Small ball stylus tool
- Soft pastel chalk (orange or coral)
- Small soft paintbrush
- Clay glaze or matte varnish (optional)
Step 1: Prepping the Base
-
Condition the clay:
Take a handful of cold porcelain clay and knead it thoroughly until it is warm, pliable, and free of any cracks. -
Roll it out:
Roll the clay onto your non-stick surface to an even thickness of about 1/4 inch (6mm). You want these to be thick enough to hold their shape without warping. -
Cut the circles:
Press your round cutter firmly into the clay to create clean discs. Gently push them out of the cutter, smoothing any rough edges with your finger. -
Smooth the surface:
Lightly buff the surface of each disc with a tiny bit of water on your fingertip to ensure a flawless canvas for the face.
Smooth Moves
Use a tiny dab of baby oil or lotion on your tools before pressing into the clay. This prevents the tool from sticking and dragging the clay, keeping your lines crisp.
Step 2: Sculpting the Features
-
Mark the center:
Visually find the vertical center of the disc. This is where the nose line will sit. -
Create the nose:
Using the needle tool or a very fine piece of rolled clay, gently press a vertical line in the center. I like to curve the bottom slightly to the left or right to suggest a nostril, just like a letter ‘L’ or backwards ‘J’. -
Impress the eyes:
For the closed eyes, use the needle tool to press two curved, crescent shapes on either side of the nose bridge. Keep them symmetrical and curving downward for a sleeping look. -
Add eyelids (optional):
To add depth, you can very lightly trace a second, thinner arch just above the main eye line to suggest the crease of the eyelid. -
Shape the smile:
Press a small, gentle upward curve below the nose. Keep it subtle—a tiny smile looks softer and more serene than a large grin.
Make Them Wearable
Before the clay dries, poke a small hole at the very top of the disc. After drying, add a jump ring to turn your serene face into a pendant or keychain charm.
Step 3: Adding Color & Finishing
-
Prepare the blush:
Scrape a small amount of orange or coral soft pastel into a powder using a blade or sandpaper. -
Apply the cheeks:
Dip your soft paintbrush into the pastel powder and tap off the excess. Gently dab two round spots on the cheeks. -
Fade the edges:
Use a clean finger or the brush to lightly blend the edges of the blush spots so they look like a natural glow rather than paint dots. -
Defining the lines:
If you want the sculpted lines to stand out more, you can mix a tiny bit of brown pastel powder with water and use a fine liner brush to carefully darken the grooves of the eyes, nose, and mouth. -
Drying:
Allow the tokens to air dry completely on parchment paper. Cold porcelain shrinks as it dries, so flipping them occasionally helps them dry flat. -
Sealing:
Once fully cured (usually 24 hours), apply a thin coat of matte varnish to protect the pastel blush from rubbing off.
Now you have a collection of peaceful faces to display in a bowl or give as calming gifts


What Really Happens Inside the Kiln
Learn how time and temperature work together inside the kiln to transform clay into durable ceramic.
Miniature Succulents in Pots
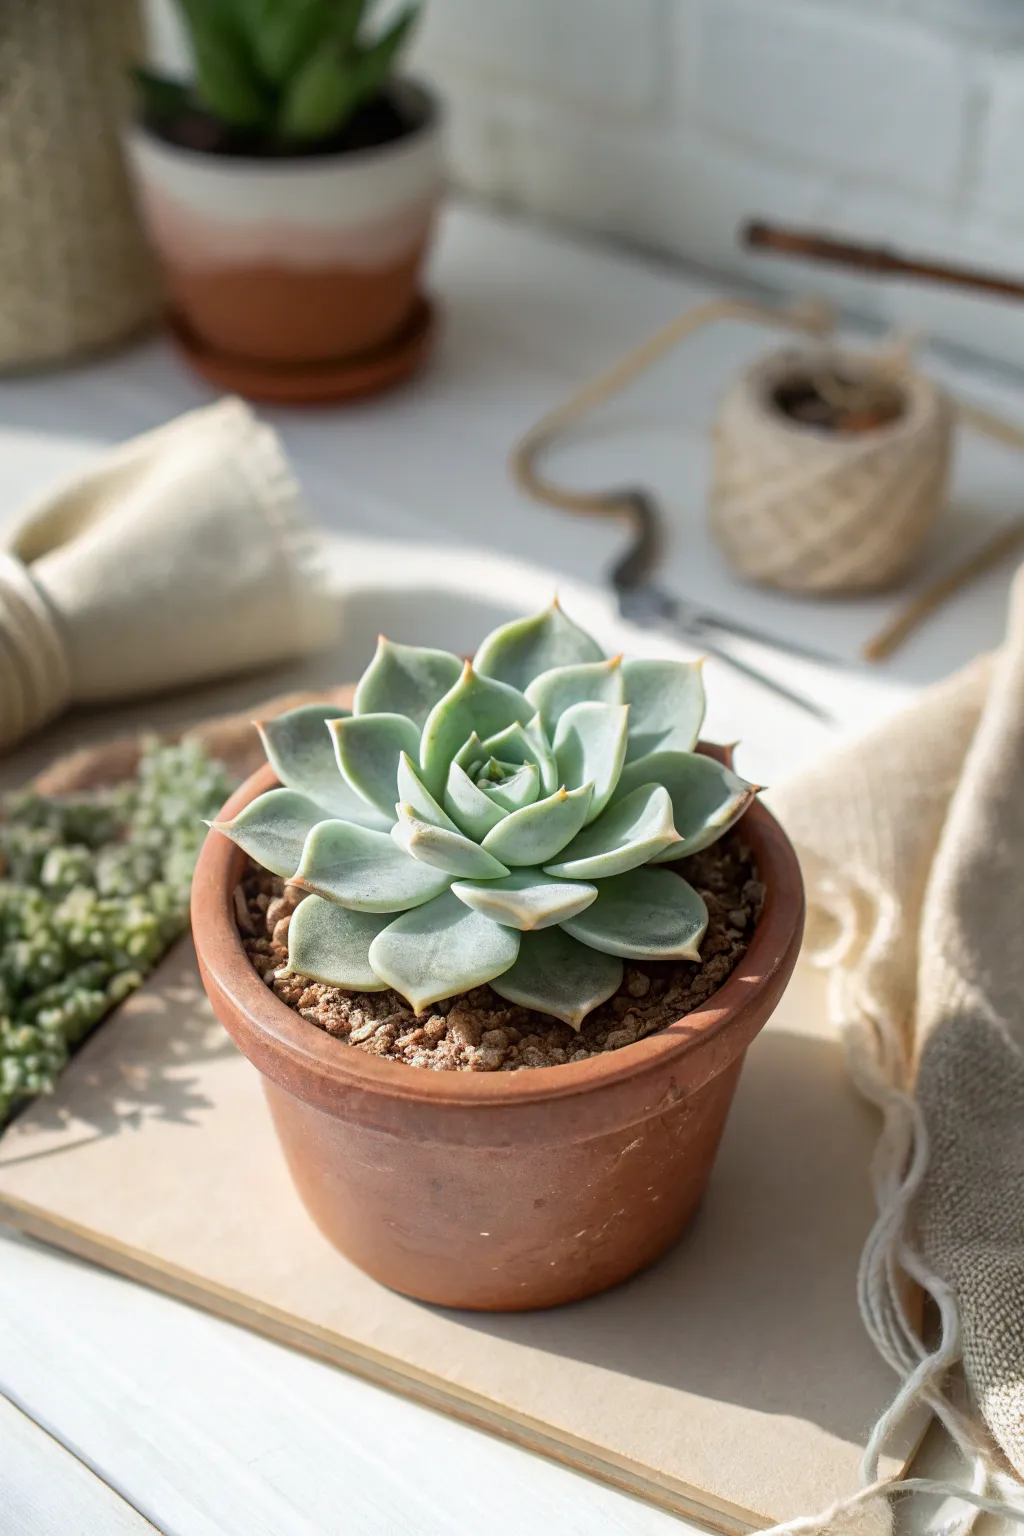
Capture the delicate beauty of desert flora with this lifelike cold porcelain Echeveria succulent. Its soft, powdery blue-green leaves and subtle rose-tinged tips make for a stunning miniature botanical display that never needs watering.
Step-by-Step Tutorial
Materials
- Cold porcelain clay (white)
- Oil paints (sap green, viridian, titanium white, raw umber, alizarin crimson)
- Small terra cotta pot (approx. 2-3 inches)
- White glue (PVA)
- Styrofoam ball (to fit inside pot)
- Detailed modeling tools (ball stylus, needle tool)
- Leaf vein mold or texture mat (optional but recommended)
- Dried tea leaves or faux soil grit
- Soft pastel chalks in light pink or reddish-brown
- Cornstarch (for dusting)
- Small paintbrush
- Wire cutters
- Floral wire (24 gauge)
Step 1: Preparing the Base
-
Tinting the Clay:
Begin by tinting a fist-sized ball of white cold porcelain with a mix of titanium white, a tiny dot of sap green, and a whisper of raw umber. You want a very pale, muted minty-green base color. -
Pot Preparation:
Cut your Styrofoam ball in half and glue the flat side down into the bottom of your terra cotta pot. Coat the top of the dome with white glue. -
Creating the Soil:
Sprinkle your ‘soil’ mixture—dried tea leaves, coffee grounds, or faux craft grit—over the wet glue until the Styrofoam is completely hidden. Press it down gently and let it set.
Leaves drooping?
If your outer leaves sag while gluing, prop them up with small bits of cotton or crumpled aluminum foil underneath until the glue sets firmly.
Step 2: Sculpting the Leaves
-
Forming the Teardrops:
Rolled small balls of your tinted clay, varying in size from large peas (for outer leaves) to tiny grains of rice (for the center). Shape each ball into a teardrop. -
Flattening:
Place a teardrop on your palm or a non-stick mat. Using your thumb or a large ball tool, flatten it gently, keeping the pointed tip intact but slightly thick in the center. -
Texturing:
If you have a leaf texture mold, press the flattened leaf onto it lightly to impart subtle veining. Otherwise, use a smooth tool to curve the leaf slightly inward, mimicking a spoon shape. -
Creating the Tip:
Pinch the very end of the leaf to create that characteristic Echeveria sharp point. I find gently curving the tip upward or slightly to one side adds realism. -
Making the Batch:
Repeat this process until you have about 25-30 leaves in graduated sizes. Let them air dry on a curved surface (like plastic spoons) for 30 minutes so they hold their shape.
Step 3: Assembly & Detailing
-
Starting the Center:
Insert a small piece of floral wire into the Styrofoam center to act as an anchor. Take your three smallest leaves and glue them tightly around the wire, overlapping them to form a closed bud. -
Building Outward:
Glue the next size of leaves around the bud in a spiraling pattern. Ensure each new leaf sits in the gap between the two leaves of the previous row. -
Adding Outer Layers:
Continue attaching strictly larger leaves as you move outward. For the final, largest row, position the leaves so they lay flatter against the soil surface, anchoring the plant visually. -
Smoothing Connections:
Use a small amount of water or fresh clay slip to blend the base of the leaves if any gaps appear near the center stem. -
Drying Time:
Allow the entire structure to dry for at least 24 hours. Cold porcelain shrinks slightly, tightening the assembly.
A dusty look
To mimic the ‘farina’ (powdery coating) of real succulents, lightly dust the entire finished plant with white cornstarch using a fluffy makeup brush.
Step 4: Final Touches
-
Blushing the Tips:
Once fully dry, shave some pink or reddish-brown pastel chalk into a powder. Use a soft, dry brush to gently dust just the very tips of the leaves. -
Enhancing the Center:
Apply a tiny amount of darker green pastel dust deep in the crevices of the center rosette to create depth and shadow. -
Protective Coat:
Since real succulents often look matte or waxy, avoid glossy varnishes. You can leave the cold porcelain bare or use a matte spray sealant to protect the pastels.
Place your completed pot on a sunny windowsill or a desk for a touch of greenery that lasts forever
Cold Porcelain Seasonal Ornaments
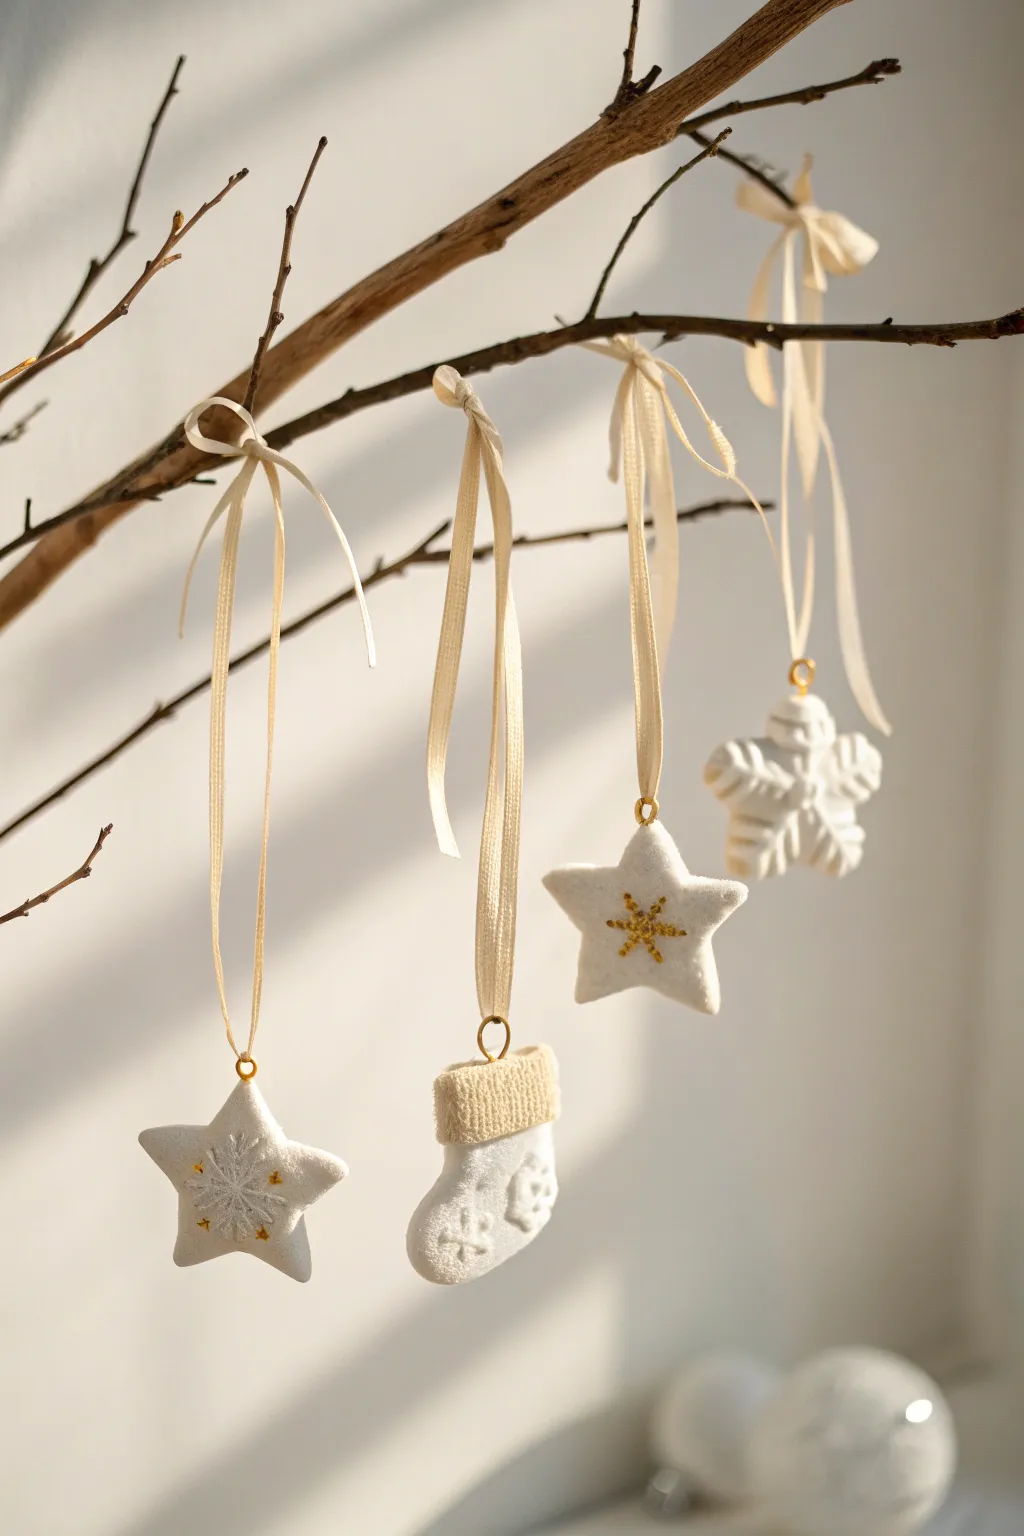
Capture the serene beauty of a snowy morning with these delicate cold porcelain ornaments. Featuring a unique sugar-coated texture and subtle gold accents, they bring an elegant, handcrafted touch to any winter display.
How-To Guide
Materials
- Cold porcelain clay (white)
- Small rolling pin
- Cookie cutters (star, stocking, snowflake)
- Textured rolling pin or fabric (optional, for stocking cuff)
- Small gold eye hooks or jewelry jump rings
- White or iridescent fine glitter
- White craft glue (PVA)
- Gold embroidery thread or metallic gold paint
- Fine-grit sandpaper
- Beige or cream satin ribbon (1/4 inch width)
- Small paintbrush
- Optional: White acrylic paint
Step 1: Shaping the Clay bases
-
Condition the clay:
Begin by kneading a handful of white cold porcelain clay until it is smooth, pliable, and free of cracks. If it feels too sticky, dust your hands lightly with cornstarch. -
Roll out the slab:
On a clean, non-stick surface, roll the clay out to a thickness of approximately 1/4 inch (6mm). You want them thick enough to hold hardware but not so heavy they drag down branches. -
Cut the shapes:
Use your cookie cutters to press out star, stocking, and snowflake shapes. Twist the cutter slightly before lifting to ensure a clean release. -
Add stocking details:
For the stocking ornament, roll a small separate strip of clay. Press a textured fabric or mesh against it to create a ‘knit’ pattern, then cut a small rectangle and adhere it to the top of the stocking as a cuff using a dab of water. -
Insert hardware:
While the clay is still soft, carefully screw a small gold eye hook into the top center of each ornament. Ensure it goes in straight and doesn’t pierce through the front or back faces. -
Smooth the edges:
Dip your finger in a little water and gently run it along the cut edges of each shape to soften any sharp ridges left by the cookie cutter. -
Initial drying:
Place the ornaments on a foam mat or parchment paper to dry. Flip them every few hours to prevent warping. Allow them to dry fully for 24-48 hours until hard.
Fixing Cracks
Cracks happen if cold porcelain dries unevenly. Fill hairline cracks with a paste made of fresh clay and water, smooth with a damp finger, and let re-dry.
Step 2: Texturing and Embellishing
-
Sand for perfection:
Once fully cured, use fine-grit sandpaper to briefly buff away any rough spots or fingerprints on the surface. -
Create the snowy texture:
This is the secret to that soft look: Mix a small amount of white acrylic paint with a little baking soda or fine texture paste. Dab this mixture firmly onto the main surfaces (avoiding the stocking cuff) to create a stucco-like finish. -
Apply glitter coat:
While the texture paste or paint is still wet, sprinkle a generous layer of fine white or iridescent glitter over the ornaments. Shake off the excess. -
Detail the first star:
For the star with the snowflake design, use a fine liner brush and white puff paint or thickened acrylic to hand-paint a simple snowflake in the center. Add tiny dots of gold paint at the tips of the snowflake arms. -
Create the gold star:
For the second star, use gold metallic paint or gold glitter glue to draw a six-pointed asterisk in the center. I like to layer the gold twice to make it really pop against the white. -
Define the stocking:
Leave the cuff of the stocking matte (or lightly textured) to contrast with the glittered body. You can use a stylus tool to press small snowflake impressions into the glittered area while it’s tacky.
Scented Clay
Knead a drop of cinnamon or pine essential oil into the clay before rolling. Your ornaments will release a subtle holiday scent as they warm up indoors.
Step 3: Final Assembly
-
Secure the hardware:
Check your eye hooks. If the clay shrank significantly and they feel loose, remove them, add a drop of superglue to the threads, and screw them back in. -
Prepare ribbons:
Cut lengths of beige satin ribbon, approximately 12-15 inches long depending on how low you want them to hang. -
Thread the ribbons:
Pass one end of a ribbon through the eye hook. Pull it through until the ends are even. -
Tie the bow at the top:
Instead of tying the bow right at the ornament, bring the two loose ends of the ribbon together and tie a knot or bow near the very top. This creates the long, elegant loop shown in the photo. -
Reinforce hanging loops:
For a cleaner look, you can tie a small knot just above the eye hook to stop the ornament from sliding around on the ribbon loop.
Hang these beauties on a branch or tree and enjoy the peaceful winter atmosphere they create

TRACK YOUR CERAMIC JOURNEY
Capture glaze tests, firing details, and creative progress—all in one simple printable. Make your projects easier to repeat and improve.
Personalized Name Tags and Gift Toppers
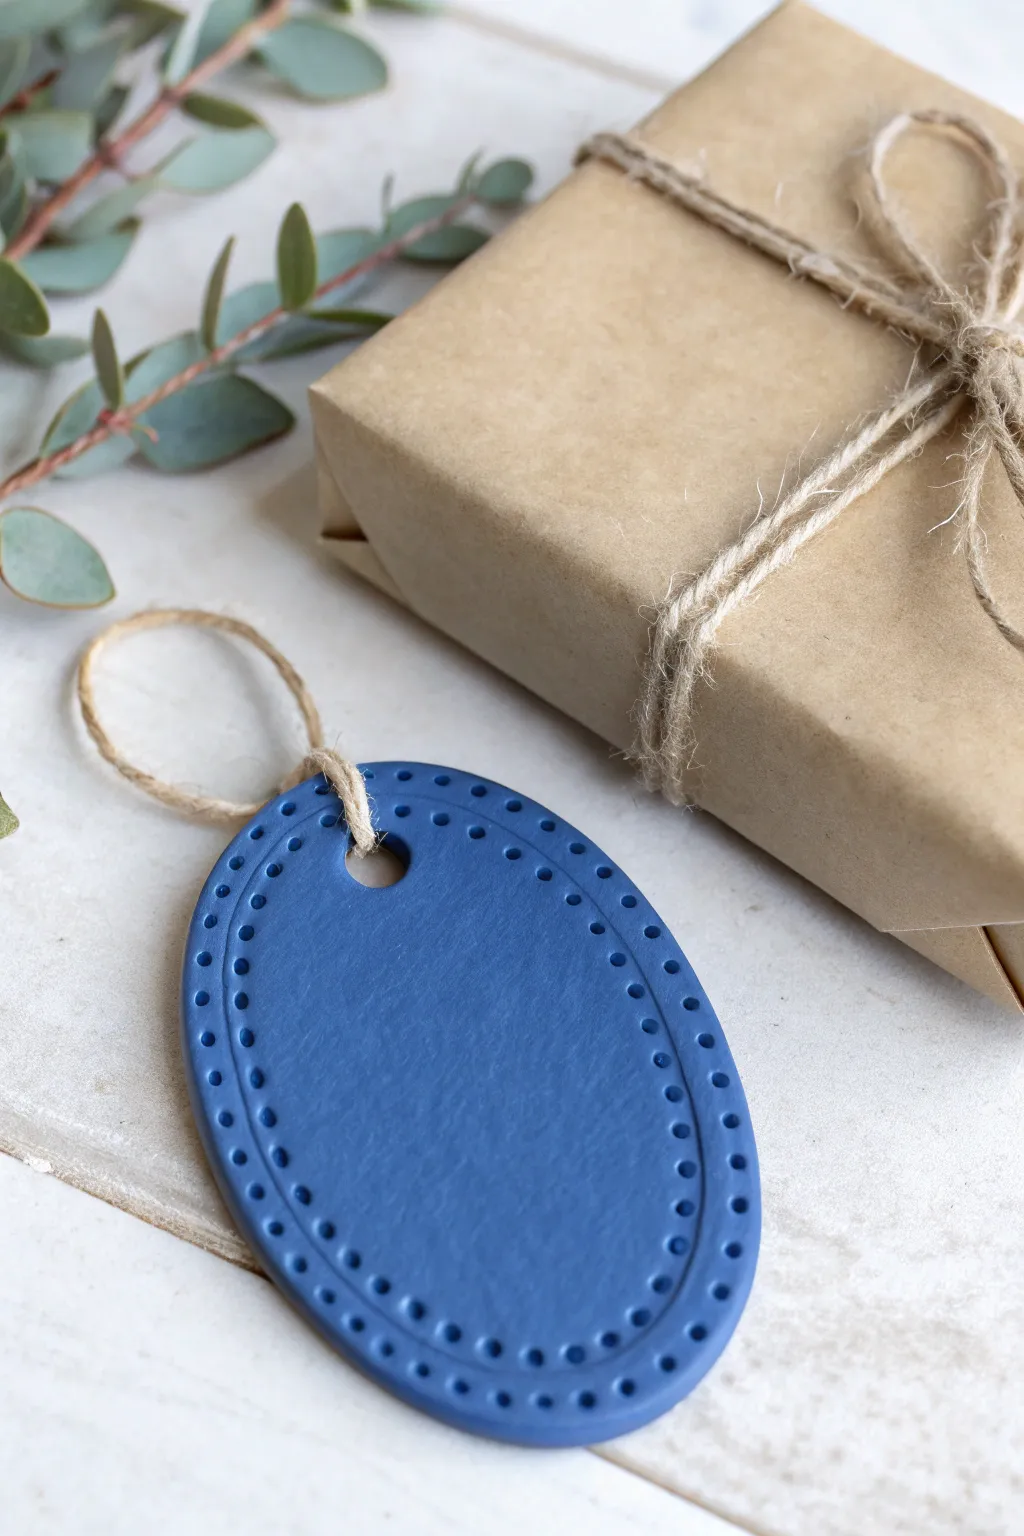
Elevate your gift wrapping with these sophisticated, minimalist oval tags made from cold porcelain. The deep indigo blue and precise dotted border give them a professional, ceramic-like finish that pairs beautifully with natural kraft paper and twine.
Step-by-Step Tutorial
Materials
- Cold porcelain clay recipe (cornstarch, white glue, baby oil, vinegar/lemon juice)
- Deep blue acrylic paint or gel food coloring (indigo/navy)
- Non-stick rolling pin
- Oval cookie cutter (approx. 3-4 inches tall)
- Plastic wrap or parchment paper
- Small dotting tool or toothpick with a blunt end
- Drinking straw or small circular cutter (for the hanging hole)
- Sandpaper (fine grit)
- Jute twine or rustic string
- Gloss or matte varnish (optional)
Step 1: Preparing the Clay
-
Mix the Color:
Begin with a ball of fresh cold porcelain clay about the size of a golf ball. Add a small dollop of deep blue acrylic paint or a few drops of gel coloring. Knead the color thoroughly into the clay until you achieve a consistent, solid shade. -
Adjust Intensity:
Remember that cold porcelain dries slightly darker than the wet clay appears. If you want that rich, matte denim look shown in the photo, aim for a medium-dark blue now. -
Rest the Clay:
Once colored, wrap the clay tightly in plastic wrap and let it rest for about 15-20 minutes. This allows the ingredients to settle and makes the clay less sticky and easier to roll smooth.
Warping Woes?
If your tag starts curling while drying, place a lightweight book on top of it (sandwich it between parchment paper first) once it’s semi-dry but still flexible to flatten it out.
Step 2: Shaping the Tag
-
Roll It Out:
Place your clay between two sheets of parchment paper or plastic wrap to prevent sticking. Use your rolling pin to flatten the clay to an even thickness of about 3-4mm (roughly 1/8 inch). -
Cut the Shape:
Position your oval cookie cutter over the smooth slab of clay. Press down firmly and evenly to cut the shape. If the clay sticks to the cutter, gently push it out from the edges. -
Smooth the Edges:
Check the perimeter of your cut oval. Dip your finger in a tiny bit of water or baby oil and gently run it along the cut edge to soften any sharp ridges left by the cutter. -
Punch the Hole:
Use a drinking straw to punch a clean hole near the top narrow end of the oval. Twist the straw slightly as you pull it out to remove the clay plug cleanly.
Step 3: Adding the Detail
-
Create the Outer Border:
Take your dotting tool or a blunt toothpick. Starting near the top, gently press vertical indentations into the clay about 2mm from the edge. Continue all the way around the perimeter, spacing the dots evenly. -
Add the Inner Border:
Create a second row of dots slightly inside the first row. Try to align these inner dots with the gaps between the outer dots for a subtle offset pattern, or align them directly for a grid look. -
Check Depth:
Ensure your impressions are deep enough to be visible but not so deep that they distort the oval shape or poke through the back. I find a light, consistent hand works best here.
Gilded Touch
After the blue clay dries, use a very fine brush to dab liquid gold leaf or gold paint into just the indented dots. This adds a luxurious sparkle that accents the deep blue beautifully.
Step 4: Drying and Finishing
-
Initial Drying:
Lay the tag on a clean sheet of parchment paper or a mesh drying rack. Avoid direct heat sources which can cause cracking. -
Flip regularly:
Cold porcelain shrinks as it dries. To keep the tag flat, flip it over every 2-3 hours for the first day. This ensures both sides dry at the same rate. -
Full Cure:
Allow the tag to dry completely for 24-48 hours. It will feel hard and cool to the touch when finished. -
Sand the Edges:
Once fully dry, inspect the edges. If there are any rough spots, lightly buff them with fine-grit sandpaper for a polished look. -
Seal (Optional):
For longevity, you can apply a thin coat of matte varnish. This will protect the blue color from fading and guard against humidity, though the raw matte finish is also beautiful. -
String It Up:
Cut a length of jute twine or rustic string. Fold it in half, push the loop through the tag’s hole, and pull the tails through the loop to secure it.
Now you have a stunning, reusable gift tag ready to add a personal touch to your next present
Mini Bird Couple on a Branch
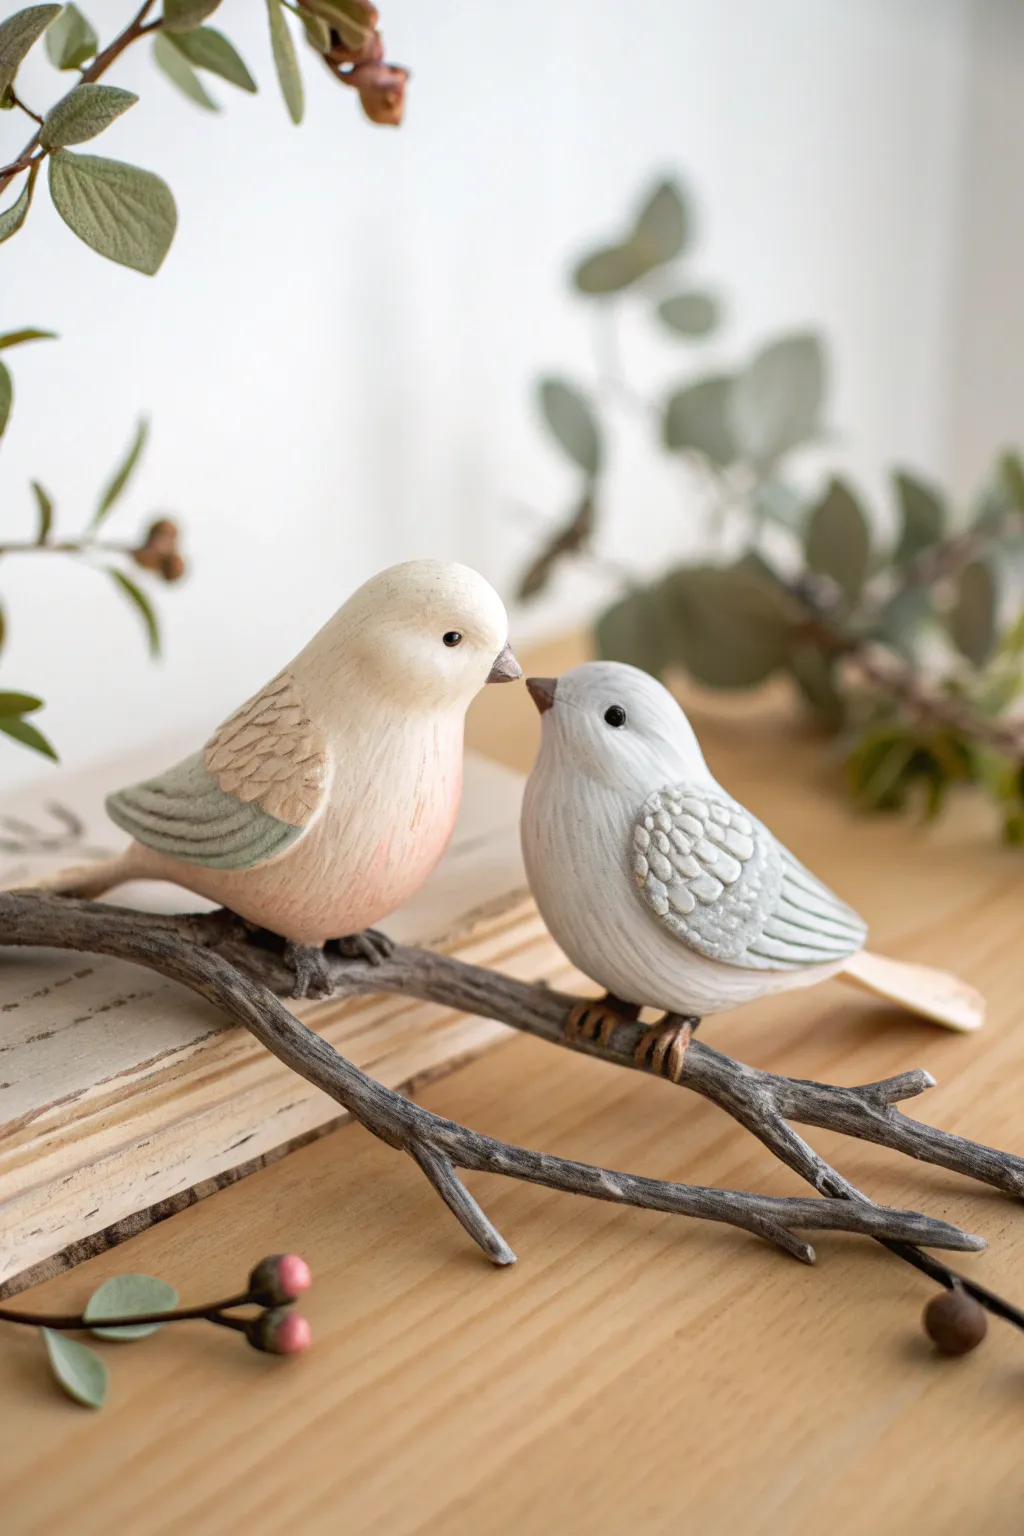
Capture the romance of nature with this charming pair of cold porcelain birds, perched sweetly on a rustic branch. The finish mimics the look of hand-carved wood, making it a timeless keepsake or a perfect wedding topper.
How-To Guide
Materials
- Cold porcelain clay (white)
- Acrylic paints (Titanium White, Buff Titanium, Burnt Umber, Soft Pink, Sage Green, Grey)
- Small styrofoam balls (optional, for armature)
- PVA glue or tacky glue
- Pointed sculpting tool or toothpick
- Small palette knife
- Fine grit sandpaper
- Dry natural twig or wire armature wrapped in floral tape
- Detail paintbrush
- Matte varnish
Step 1: Shaping the Bodies
-
Prepare the core:
Start by conditioning your cold porcelain clay until it is smooth and pliable. If you want lightweight birds, wrap a small ball of clay around a styrofoam ball core; otherwise, roll a solid ball of clay about the size of a tangerine. -
Form the teardrop:
Roll the clay into a smooth sphere, then gently elongate one side to form a fat teardrop shape. The rounded end will be the head and chest, while the tapered end becomes the tail. -
Define the head:
Using your thumb and forefinger, gently pinch and smooth the neck area to distinguish the head from the body. You want a subtle transition, not a deep groove, to maintain that smooth, carved aesthetic. -
Shape the beak:
Pinch a tiny amount of clay at the very front of the face to pull out a small, conical beak. Alternatively, attach a tiny triangle of clay with a dab of glue and blend the seams seamlessly with water.
Step 2: Adding Wings & Texture
-
Create the wings:
Roll two smaller teardrops of clay for the wings. Flatten them slightly and press them onto the sides of the bird’s body. Use a little PVA glue to ensure a strong bond. -
Initial etching:
This is where the magic happens. Using a pointed sculpting tool or a dull needle, begin etching fine, short lines across the wings to simulate feathers. I like to vary the pressure to create depth. -
Scalloped feathers:
For the upper wing area, press the side of your tool into the clay to create small, scalloped ‘u’ shapes. Overlap them slightly like roof shingles. -
Body texturing:
Lightly scratch vertical lines down the chest and belly. These should be much shallower than the wing feathers to mimic the grain of wood rather than distinct plumage. -
Insert the eyes:
Use a small ball tool to make indentations for the eyes. Insert tiny black beads or black peppercorns, pushing them deep enough so they look embedded. -
Drying time:
Set the birds aside to dry completely. Cold porcelain shrinks as it dries, so allow at least 24-48 hours depending on humidity. Rotate them occasionally to prevent flat spots.
Texturing Secret
Use an old toothbrush to gently stipple the wet clay on the bird’s belly. This creates a soft, pore-like texture that looks incredibly like sanded wood grain once the brown wash is applied.
Step 3: The Branch and Assembly
-
Prepare the perch:
Select a sturdy dry twig from your garden that has a nice fork or curve. If you can’t find one, twist craft wire together and coat it with brown clay to sculpt a faux branch. -
Sculpt feet:
Once the birds are dry, roll tiny snakes of brown clay for the feet. Wrap these over the branch where you want the birds to sit, creating three front toes. -
Mounting:
Apply strong glue to the top of the clay feet and the branch, then press the dried bird firmly onto the perch. Support the bird until the glue grabs hold.
Cracking Clay?
If you see cracks forming as the cold porcelain dries, smooth them immediately with a little water and fresh paste made from clay and glue. Cracking often happens if the clay layer is too thick.
Step 4: Painting the Faux Wood Finish
-
Base coat:
Paint the grey bird with a mix of white and a tiny drop of black. For the beige bird, use Buff Titanium mixed with a hint of Soft Pink. Let this base layer dry fully. -
Color blocking:
Paint the wings of the beige bird with a muted sage green and terracotta tone. For the grey bird, keep the wings cool white or light grey to contrast with the body. -
The wash technique:
Mix a very watery wash of Burnt Umber acrylic paint. Brush this over the entire bird, getting into all the etched grooves. -
Wipe away:
Immediately wipe the brown wash off the surface with a damp paper towel or sponge. The dark paint will stay in the crevices of your texture, instantly creating that antique wood-carved look. -
Dry brushing:
Dip a dry stiff brush into white paint, offload most of it on a paper towel, and lightly graze the raised areas of the wings and chest to highlight the texture. -
Final details:
Paint the beaks a dark grey-brown. Add a tiny dot of white highlight to the black eyes to bring them to life. -
Sealing:
Finish with a coat of matte varnish to protect the paint and reinforce the natural, non-glossy wood effect.
Place your finished sculpture on a shelf or mantelpiece to bring a touch of woodland serenity to your home
Translucent Petal Flowers
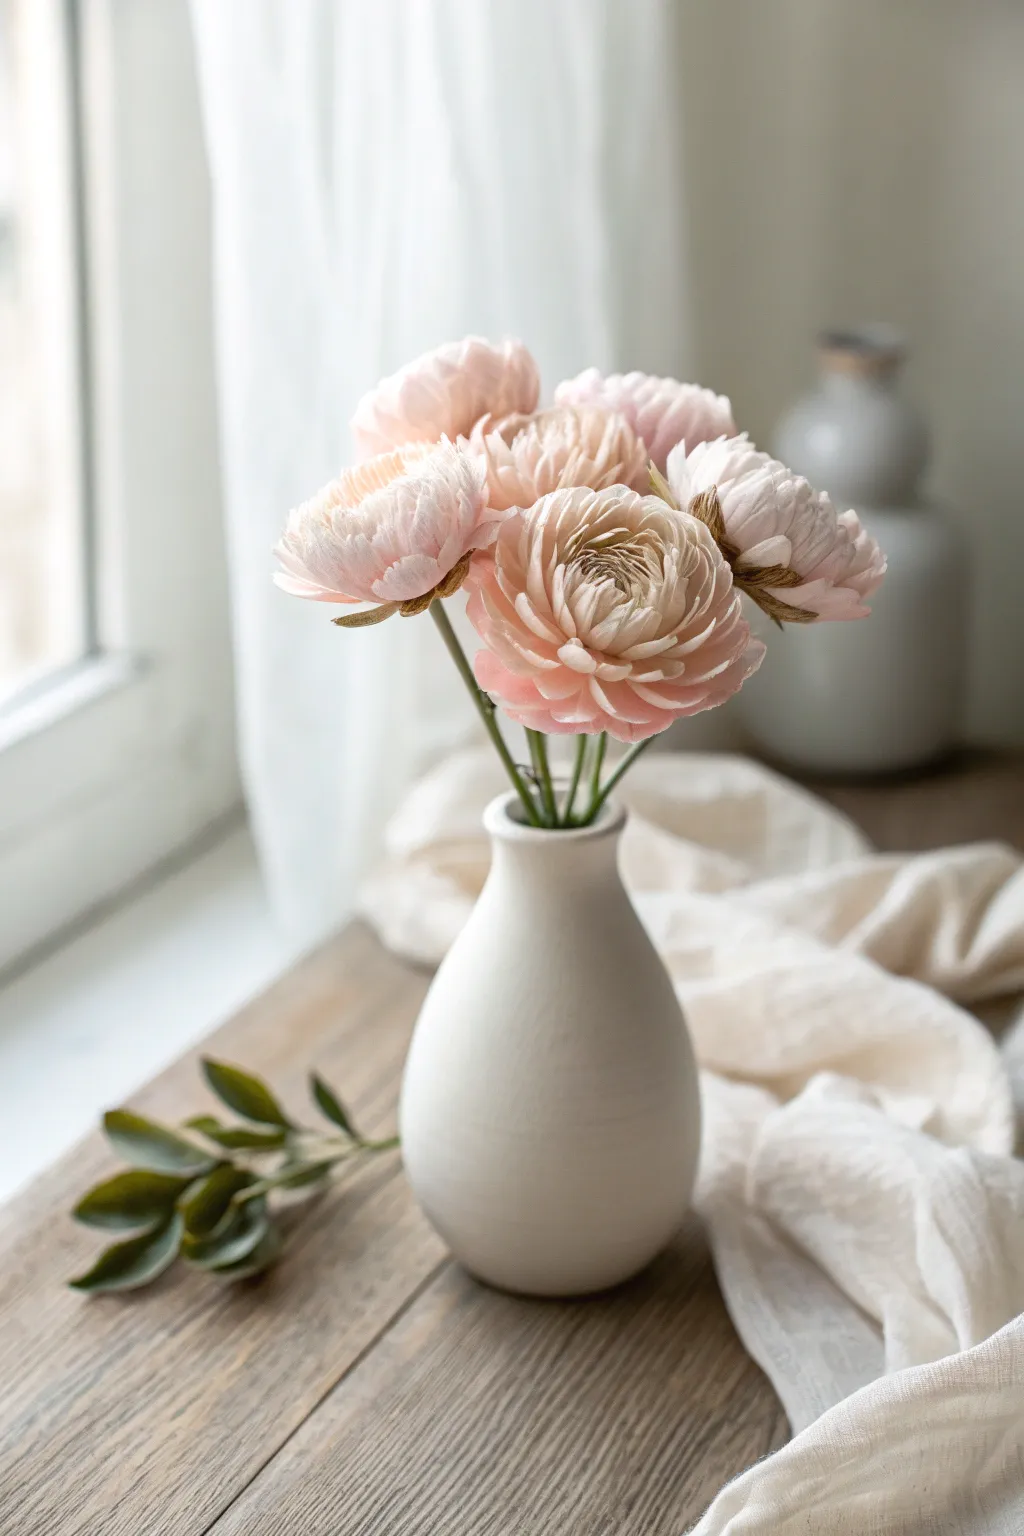
Capture the delicate beauty of spring with these incredibly realistic cold porcelain ranunculus blooms. Their multi-layered, translucent petals catch the light beautifully, creating a soft and romantic centerpiece that will never wilt.
Step-by-Step
Materials
- Cold porcelain clay (translucent or white base)
- Oil paints (Soft Pink, White, Yellow Ochre, Sap Green)
- Floral wire (18-gauge for stems, 24-gauge for leaves)
- Ball stylus tools (various sizes)
- Ranunculus petal cutters (set of 3-4 sizes)
- Veining mold (universal petal or ranunculus specific)
- White PVA glue
- Cornstarch or baby oil (for non-stick)
- Styrofoam ball (small, roughly 1 inch) for center
- Small scissors
- Green floral tape
Step 1: Creating the Center
-
Prepare the stem:
Take your 18-gauge floral wire and create a small hook at one end with pliers. Apply a dab of glue to the hook. -
Form the core:
Roll a small ball of clay tinted with pale green (mix Sap Green and White). Insert the glued hook into the ball and shape it into a tight, slightly flattened bud shape. -
Texture the center:
Using a small knife or razor tool, score the very center of your bud in a crisscross pattern to mimic the tightly packed inner petals of a ranunculus.
Stay Translucent
Mix a pea-sized amount of clear or ‘natural’ clay into your colored clay. This increases transparency, making petals look real when light hits them.
Step 2: Sculpting the Inner Petals
-
Tint the clay:
Color a portion of clay with a tiny amount of Soft Pink and White oil paint. You want a very pale, almost translucent blush tone. Keep the clay wrapped in plastic to prevent drying. -
Cut the smallest petals:
Roll out the clay very thinly on a cornstarch-dusted surface. Use your smallest petal cutter to cut out about 10-12 petals. -
Thin the edges:
Place a petal on your palm or a foam pad. Using a small ball tool, embrace the edges with circular motions to thin them out until they are paper-thin and slightly ruffled. -
Cup the petals:
Press the ball tool into the center of the petal to create a deep cup shape. This cupping is crucial for that closed, tight look of the inner bloom. -
Attach the first layer:
Apply a tiny amount of glue to the base of the petal. Attach it to the green center, curving it inwards so it almost completely covers the core. -
Build the inner bud:
Continue attaching the small, cupped petals in an overlapping spiral pattern. Keep them tight and closed, hugging the center.
Step 3: Adding Volume and Bloom
-
Cut medium petals:
Roll out more pink clay and use the medium-sized cutter to create roughly 15-20 petals. Keep the clay transparently thin for realism. -
Vein and shape:
Press each medium petal onto a veining mold to imprint delicacy texture. Then, use a larger ball tool to thin the edges and cup the center gently. -
Layering outwards:
Glue these petals around your growing flower. I like to start placing these slightly lower on the bud, allowing the tops to open up just a fraction more than the previous layer. -
Create large outer petals:
Cut 10-15 petals using your largest cutter. Thin the edges extensively until they look fragile. Allow these to air dry on a curved surface (like plastic spoons) for 10 minutes to hold their shape. -
Final assembly:
Attach the large petals to the flower base. Angle them outwards to simulate the flower fully opening. Ensure the layers overlap naturally, avoiding distinct rows.
Ombré Effect
Make the center petals a slightly deeper pink and graduate to nearly white outer petals. This gradient mimics the natural fading of a real bloom.
Step 4: Calyx and Finishing
-
Make the calyx:
Tint a small piece of clay green. Roll it out and cut a star shape or individual small sepals. Texture them slightly to look leafy. -
Attach sepals:
Glue the sepals to the very bottom of the flower head, blending the clay onto the wire stem with a little water for a seamless transition. -
Wrap the stem:
Once the calyx is dry, wrap the floral wire with green floral tape, stretching it as you go to release the adhesive. -
Adding foliage:
Create simple leaves on 24-gauge wire using green clay and a leaf mold. Tape these onto the main stem at varying heights for a natural look. -
Final blush:
Once the flower is completely dry (24 hours), use a dry brush to dust a tiny bit of darker pink pastel or powder into the deep crevices for depth.
Place your finished blooms in a simple ceramic vase to let their intricate layers take center stage
Cooked vs. Uncooked Clay Sample Swatches
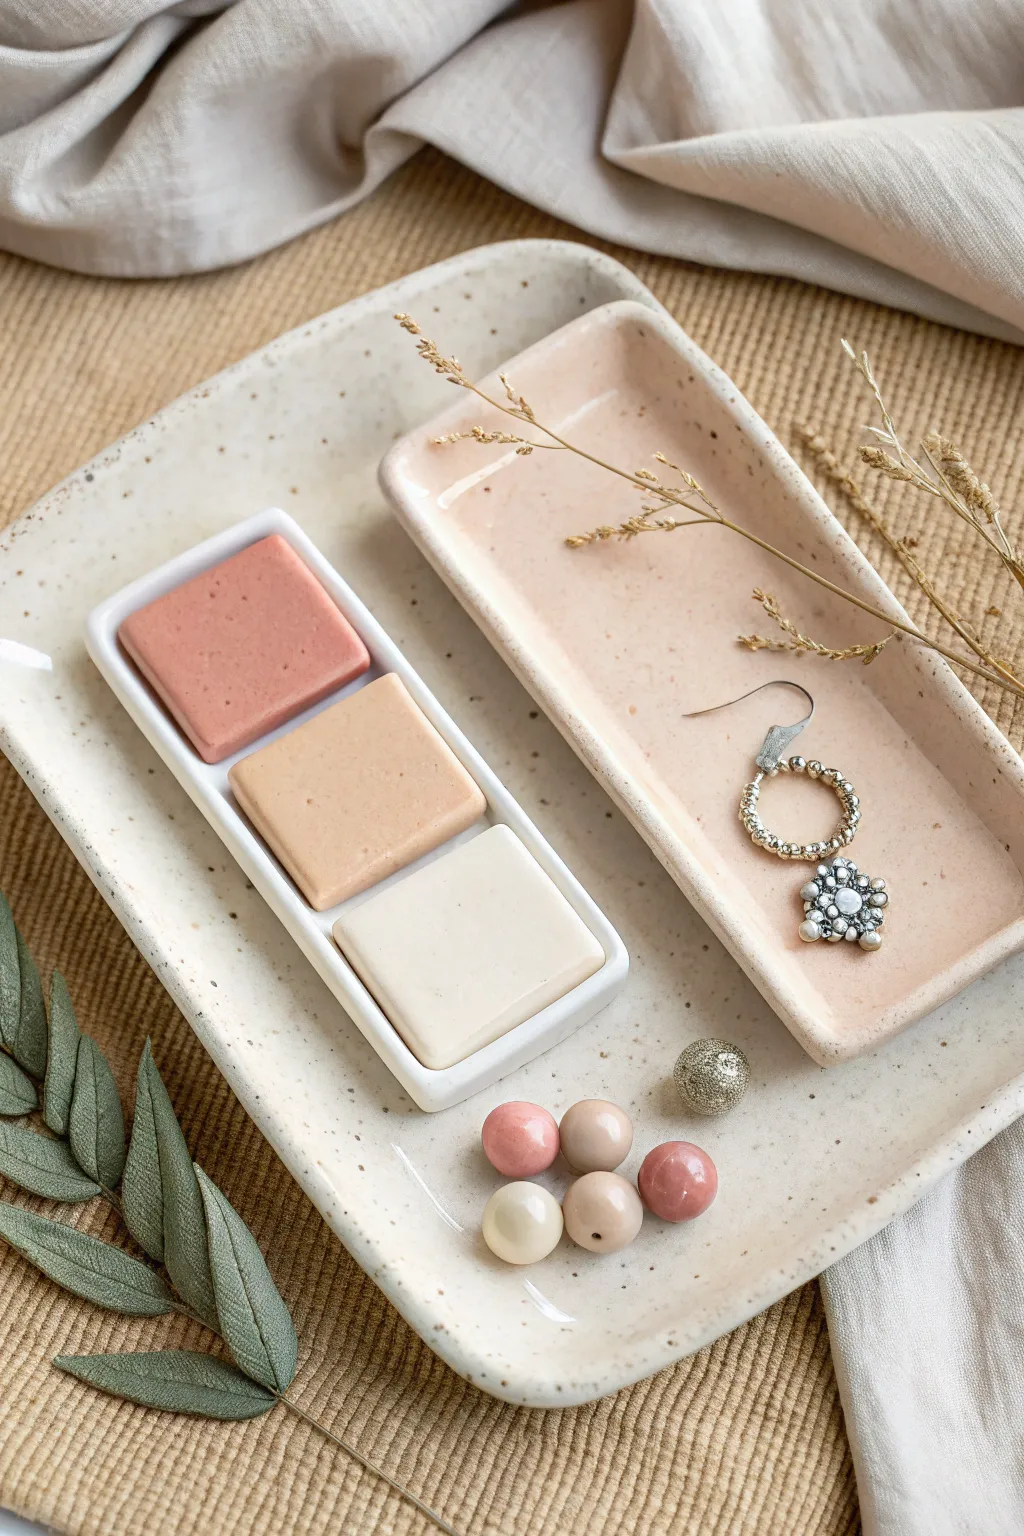
Learn to craft this elegant set of speckled ceramic-look trays and a practical color swatch organizer using homemade cold porcelain. The soft blush and cream tones, combined with a faux-speckle effect, give these pieces a high-end, modern studio aesthetic.
Detailed Instructions
Materials
- Cold porcelain clay (homemade or store-bought)
- Acrylic paints (White, Blush Pink, Tan/Ochre)
- Black pepper or dried coffee grounds (for speckling)
- Rolling pin
- sharp craft knife or blade
- Rectangular tray mold or shallow dish to shape
- Small rectangular cookie cutter (optional)
- Sandpaper (fine grit)
- Gloss or satin varnish
Step 1: Mixing the Clay Base
-
Prepare the dough:
Start with a fresh batch of cold porcelain clay. Ensure it is cool and kneaded until smooth and pliable. -
Create the base colors:
Divide your clay into three portions. Keep one large portion natural white. tint the second portion a soft blush pink using a tiny drop of acrylic paint, and the third a warm tan or beige. -
Add the speckled texture:
To achieve the ceramic look shown in the large tray, take the white clay portion and knead in a pinch of ground black pepper or dried coffee grounds. Distribute the specks evenly throughout the dough. -
Prepare the pink clay:
Repeat the speckling process with the pink clay if you want the smaller tray to match, or leave it solid for a smoother finish.
Faux Ceramic Look
For realistic pottery specks, use coarse ground pepper or spent, dry tea leaves. Knead them directly into the wet clay before rolling.
Step 2: Forming the Trays
-
Roll out the large tray:
Roll the speckled white clay out to approximately 1/4 inch thickness. Use a rolling pin guides to ensure even thickness across the slab. -
Shape the edges:
Cut a large rectangle using your craft knife. Gently lift the edges and curve them upwards to create a shallow rim. You can support the rising edges with rolled pieces of foil if they slump. -
Create the small tray:
Roll out the pink clay and cut a smaller, narrower rectangle. Curve the edges up just like the larger tray to create a matching accessory dish. -
Smooth the surfaces:
Dip your finger in a little water or oil and run it along the rims of both trays to smooth out any sharp cutting marks or cracks.
Make it Functional
Add magnets to the back of the swatch squares so you can swap them out of the holder, or attach felt pads to the bottom of the trays to protect surfaces.
Step 3: Creating the Swatch Holder
-
Form the swatch base:
Using plain white clay, roll a long, narrow strip that will serve as the holder for your color samples. Create dividers by pressing a thin tool or knife across the width at equal intervals, creating three distinct sections. -
Make the color tiles:
Take small amounts of your pink, tan, and white clay. Roll each out and cut small squares that fit perfectly inside the sections of your swatch holder base. -
Indent the tiles:
Gently press the square tiles into their compartments. You want them to sit snug but flat. -
Roll beads (optional):
With any leftover tinted clay, roll small spheres. Pierce them with a toothpick while wet if you intend to use them as beads later.
Step 4: Drying and Finishing
-
Allow to dry:
Place all pieces on a drying rack or mesh screen. Cold porcelain shrinks as it dries, so flip the pieces occasionally to prevent warping. -
Sand edges:
Once fully cured (which may take 24-48 hours depending on humidity), use fine-grit sandpaper to gently buff away any rough edges on the rims. -
Seal the pieces:
Apply a coat of satin or gloss varnish to seal the clay. This protects it from moisture and gives it that finished ceramic shine.
Arrange your beautiful new organization set on your desk to inspire your next color palette choice
Mixed-Media Cold Porcelain Shadowbox Scenes
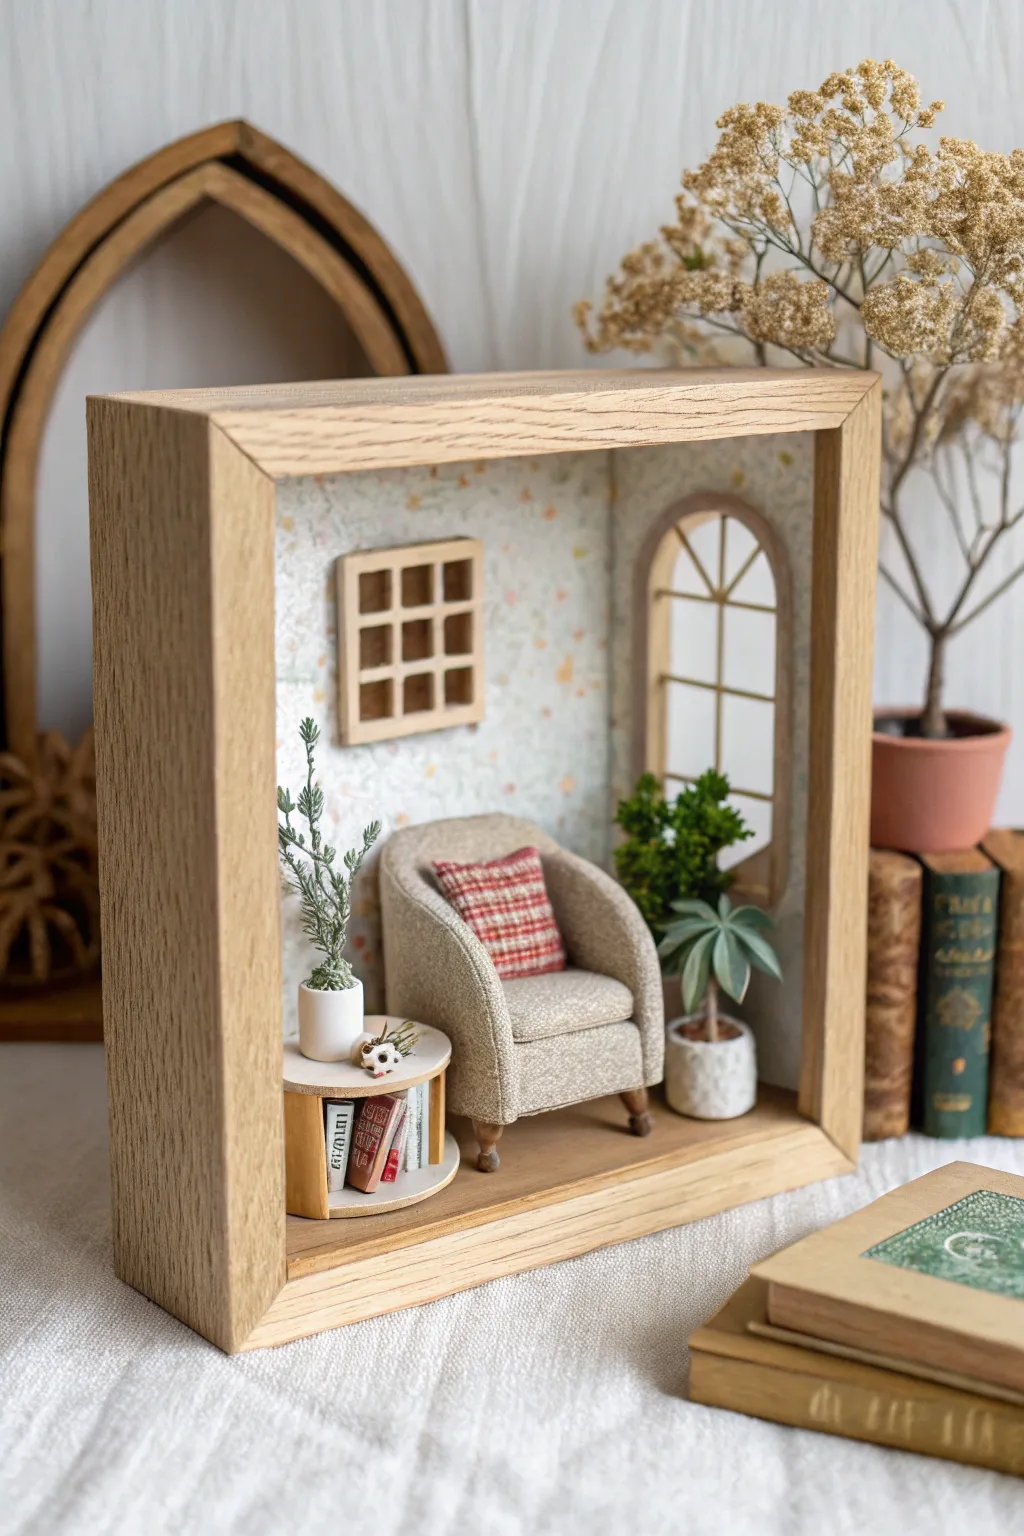
Capture the cozy essence of a reading nook in miniature with this delightful mixed-media shadowbox. By combining wood structuring with delicate cold porcelain details for the plants and decor, you’ll build a tiny, peaceful world that fits right on your bookshelf.
Step-by-Step Tutorial
Materials
- Deep wooden shadowbox frame (approx. 6×8 inches)
- Cold porcelain clay (white and green tinted)
- Balsa wood or basswood sheets and strips
- Scrapbook paper with small floral print
- Upholstery fabric scraps (beige linen and red plaid)
- Cardboard and foam core
- Acrylic paints (browns, greens, white)
- Wood glue and tacky glue
- Craft knife and cutting mat
- Fine-point sculpting tools
- Thin wire
Step 1: Setting the Scene
-
Prepare the box frame:
Start with a premade deep wooden shadowbox. If the wood is raw, give it a light sanding. You can stain it light oak to match the photo or leave it natural. -
Paper the walls:
Measure the interior back panel of your box. Cut a piece of floral scrapbook paper to size and adhere it smoothly to the back using a thin layer of glue to avoid bubbling. -
Construct the window frame:
Using thin balsa wood strips, cut an arched shape for the window frame. Add thin vertical and horizontal muntins to create the pane effect. Glue this to the right-hand inner wall of the box. -
Build the wall grid:
Create a small square grid (representing a shelf or window) from balsa strips. Glue this directly onto the floral wallpaper on the back wall, slightly off-center to the left.
Step 2: Furniture Assembly
-
Form the chair base:
Cut pieces of foam core creating a seat, backrest, and two curved armrests. Glue these together to form the rough shape of the armchair. -
Upholster the chair:
Cut your beige linen fabric into sections. Apply a thin layer of tacky glue to the foam and smooth the fabric over the curves, tucking raw edges completely out of sight underneath. -
Add chair legs:
Shape four small balls of brown-tinted cold porcelain into tapered legs or use tiny wooden beads stained brown. Glue these to the bottom corners of the chair. -
Sew a tiny pillow:
Cut a small rectangle of red plaid fabric. Fold it, glue or sew the edges, and stuff it lightly with a scrap of cotton or fabric before sealing. Place it on the chair. -
Build the side table:
Cut two semi-circles from balsa wood for the top and bottom shelves. Connect them with a vertical divider and rectangular back piece to create a small nook for books.
Mix It Up
Mix a tiny amount of oil paint into your cold porcelain for rich, translucent vibrant colors. The clay dries darker than it looks when wet, so mix lighter shades than needed.
Step 3: Cold Porcelain Details
-
Craft tiny books:
Roll thin sheets of white cold porcelain for pages and wrap them in tiny rectangles of colored clay or paper for covers. Arrange a stack of these inside the side table niche. -
Sculpt the tall plant:
Use green cold porcelain to form erratic, thin stems. Texture them slightly. Attach tiny, irregular bits of lighter green clay to mimic foliage, attaching the main stem to a wire for stability. -
Shape the broad-leaf plant:
Roll green clay very thin and cut out star-shaped leaf clusters. Use a sculpting tool to press a vein down the center of each leaf, giving them a slight curve. -
Create the pots:
Mold two simple cylinders from white cold porcelain. For the larger pot on the floor, gently press a textured tool or piece of fabric against the wet clay to create a patterned surface. -
Pot the plants:
Once the pots are semi-dry, fill them with a scrap of foam or brown clay ‘soil.’ Insert your wire-supported plants and let everything dry completely. -
Assemble the scene:
Glue the armchair centrally. Position the side table to its left and the potted plants to the right, creating a balanced composition. -
Final touches:
Add a tiny white cup or figurine made of cold porcelain to the top of the side table to make the scene look lived-in.
Oh No, Cracks!
If your cold porcelain cracks while drying, it usually means it dried too fast. Patch cracks with a tiny slurry of fresh clay and water, smoothing it out with a damp finger.
Now you have a permanent, peaceful little corner to admire whenever you need a moment of calm