
Every potter has opened a kiln to find a beloved piece marred by unexpected cracks, pinholes, or glaze defects. Understanding why these problems occur—and which stage of the process they originate from—transforms frustration into knowledge and helps you create stronger, more beautiful work.
Understanding S-Cracks: The Most Common Wheel-Thrown Problem

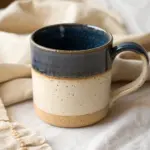
S-cracks appear as characteristic S-shaped fractures radiating from the base of wheel-thrown pieces, and they’re among the most misunderstood defects in pottery. I’ve seen countless beginners told that S-cracks result from insufficient compression during throwing. While compression matters, the real culprit is uneven drying between the base and walls of your piece.
When you throw a pot, the base often retains more moisture than the walls—either from pooled slip or from the throwing process itself. As the piece dries, clay shrinks. If the base dries or shrinks at a different rate than the walls, stress builds up and radiates outward in that distinctive S pattern. The crack may appear during drying or become more pronounced during bisque firing, but the damage occurs in the green state.
Preventing S-Cracks:
- Wipe out slip and excess water from the base while the wheel is spinning
- Compress the base carefully during throwing and trimming (but understand this alone won’t prevent the problem)
- Flip your pot upside down as soon as it reaches leather hard, allowing the base to dry at the same rate as the walls
- Ensure consistent wall thickness throughout the piece
For plates and wide forms, the challenge intensifies. The center of a plate dries last because moisture must travel farther to evaporate, while the rim dries quickly. Some experienced potters place a small piece of plastic over the center while leaving the rim exposed, balancing drying rates across the form.


Dunting: When Temperature Shock Causes Cracks

Dunting refers to cracks that appear during firing or cooling, typically caused by temperature shock. Unlike S-cracks that develop during drying, dunting occurs when different parts of your piece expand or contract at different rates during temperature changes.
The most common cause? Opening your kiln too early. That eagerness to see your finished work introduces cool air that rapidly contracts the outer surface while the interior remains hot and expanded. The stress from this temperature gradient causes cracks, often around the base or through thick sections.
Dunting also occurs at critical temperature points, particularly during quartz inversion—a phase change in the silica structure of clay that happens around 573°C (1063°F) during both heating and cooling. At this point, the clay body undergoes rapid expansion or contraction. If the temperature changes too quickly, especially in thick pieces where heat penetrates slowly, stress cracks develop.
Preventing Dunting:
- Program slow cooling rates into your firing schedule, especially through quartz inversion zones
- Never open the kiln until it has cooled to at least 200°C (392°F), preferably lower
- For thick or large pieces, use even slower cooling rates
- Ensure consistent wall thickness so temperature distributes evenly


Air Bubbles and Explosions: Separating Myth from Reality
There’s a persistent belief in ceramics that air bubbles trapped in clay cause kiln explosions. This isn’t quite accurate—and understanding the real mechanism helps you prevent disasters more effectively.
Bone-dry clay is naturally porous, full of tiny air pockets between clay particles. Air within clay isn’t problematic because it can move through these microscopic pathways. The real danger is trapped moisture. When water reaches boiling temperature (100°C at sea level), it converts to steam, expanding approximately 1500 times its original volume. This expansion happens rapidly and with tremendous pressure—enough to shatter your piece and damage everything around it in the kiln.
Air bubbles become problematic not because they trap air, but because they create humid pockets where moisture lingers longer during drying. If your piece isn’t completely dry when it reaches boiling temperature in the kiln, that trapped moisture converts to steam with explosive results.
Prevention Strategies:
- Wedge clay thoroughly before forming to eliminate large air pockets and distribute moisture evenly
- Keep clay thickness under 25mm when possible—thinner pieces dry more thoroughly and faster
- For hollow forms, always create a vent hole for steam escape using a needle tool while the clay is leather hard
- Test dryness before firing: place the piece against your cheek—if it feels cooler than room temperature, it still contains moisture; or place it on paper—if the paper wrinkles, moisture is still escaping
- Allow adequate drying time, which varies dramatically with climate—a week minimum in humid conditions, potentially weeks for thick pieces


Warping: When Forms Lose Their Shape

Warping frustrates potters at every skill level because it can occur during drying or firing, and multiple factors contribute. At its core, warping results from uneven stress—one part of your piece moves differently than another, causing distortion.
For slab work, insufficient compression is a primary cause. When you roll out a slab, compress both sides thoroughly using a rib. Then, after draping the slab over your form, compress again. Don’t remove the piece from its form too early—wait until it reaches stiff leather hard, firm enough that you can’t easily make an impression with your finger.
I’ve learned that longer forms warp more readily than wider ones. A rectangular tray that’s significantly longer than it is wide faces greater warping risk. Adding two foot rings instead of one helps support the middle and reduces warping in these vulnerable shapes.
During firing, warping can occur if your clay hasn’t been properly compressed or if the firing schedule is too aggressive for the form. Large flat pieces like platters are particularly vulnerable because they must support their own weight while the clay softens at peak temperature.
Bloating: When Clay Bodies Bubble and Swell

Bloating manifests as swelling or visible bubbles in the clay body itself—distinct from glaze blisters. This problem occurs during firing when gases become trapped within the clay structure as the body vitrifies and becomes dense.
Clay bodies contain organic materials and carbonates that break down during heating, releasing gases like carbon dioxide. If your firing schedule heats too quickly, the clay’s surface becomes dense and vitrified before these gases fully escape, trapping them inside. As firing continues, the trapped gases expand, creating bubbles or swelling the piece.
Poor mixing contributes to bloating. If flux materials like feldspar aren’t distributed evenly throughout the clay body, localized areas melt and create weak spots. Gases accumulate at these spots and rupture the ceramic structure.
Preventing Bloating:
- Use slower firing schedules, particularly through the carbon burnout phase (700-800°C)
- Ensure thorough mixing when preparing clay bodies
- Choose refined clay bodies with consistent particle sizes for critical work
- Improve kiln ventilation to help gases escape
- Avoid packing pieces too tightly in the kiln, which restricts airflow
Pinholes and Pitting: Surface Imperfections in Glaze

Pinholes and pits are small craters or holes in the glaze surface, ranging from barely visible to quite prominent. While they appear similar, pinholes generally originate from the clay body, while pits are often glaze-related.
The most common cause is insufficient carbon burnout. During bisque and glaze firing, organic materials and carbonates in the clay body release gases. If these gases escape after the glaze has begun to melt and seal the surface, they punch through the glaze layer, creating holes. Heavily speckled or impure clay bodies are particularly prone to this problem because they contain more gas-producing materials.
Glaze application plays a crucial role. Thicker glaze layers are more viscous and less able to heal surface disruptions. When I’ve struggled with pinholes, I’ve often found that larger pieces received thicker glaze simply because I dipped them for the same duration as smaller pieces—but their greater surface area absorbed more water, reducing the glaze thickness. Large pieces actually need longer dipping times to achieve appropriate coverage.
Solutions for Pinholes:
- Extend your firing schedule with a hold at 700-800°C to allow complete carbon burnout before the glaze melts
- Add a soak (hold) at peak temperature—holding at around 1120°C for 20-30 minutes gives the glaze time to heal surface defects
- Apply glaze more thinly and evenly, particularly on larger pieces
- Improve kiln ventilation to help gases escape before glaze sealing
- Consider switching to a cleaner clay body if problems persist with heavily speckled clays
- Use glazes formulated for your firing schedule—fast-fire glazes melt later, allowing more time for gas escape
Refiring can sometimes help heal minor pinholes, though results vary. Some pieces improve, others worsen, and some show no change. It’s a secondary solution when time and kiln space permit.


Blisters: Trapped Bubbles Under the Glaze
Blisters are larger than pinholes—raised bubbles in the glaze surface with intact or broken tops. They occur when gases become trapped under a viscous glaze that can’t release them.
Certain glaze materials are notorious blister-producers because they decompose late in the firing, releasing gases after the glaze has already melted: whiting (calcium carbonate), dolomite, talc, and coloring carbonates like copper and cobalt carbonate all release gases around 1000°C. If your glaze has already begun to melt and seal by this temperature, those gases push up through the molten glaze, creating blisters.
Glaze chemistry matters significantly. High-boron frits melt early, sealing the surface before body gases escape. Viscous glazes containing zirconium opacifiers struggle to heal surface disruptions because they remain stiff throughout the firing.
Preventing Blisters:
- Substitute problem materials: use wollastonite instead of whiting for calcium, frits instead of raw carbonates for magnesium, and oxide colorants instead of carbonates
- Choose glazes that melt later in the firing cycle, giving more time for gas escape
- Implement slower firing schedules with soak time at peak temperature—this allows the glaze viscosity to decrease enough to break and heal bubbles
- Avoid over-thick glaze application, which increases viscosity
- For existing blisters, grind them down and refire at a slightly lower temperature
Glaze Crawling: When Glaze Pulls Away from Clay
Crawling occurs when molten glaze withdraws into islands, leaving bare clay patches. The edges of these islands appear thickened and smoothly rounded. In severe cases, glaze forms beads and drips off onto kiln shelves.
The primary cause is excessive glaze shrinkage during drying. Glazes containing high percentages of raw clay (typically over 20% ball clay or kaolin) shrink significantly as they dry. This shrinkage creates cracks in the dried glaze layer—visible fault lines that provide starting points for crawling. During firing, the molten glaze pulls back from both sides of these cracks.
Fine-particled materials like zinc oxide, bone ash, and light magnesium carbonate also contribute to high drying shrinkage. Thick glaze application compounds the problem, particularly in inside corners where glaze naturally accumulates. The thicker the layer, the more water it contains and the more it shrinks during drying, increasing crack formation.
You might also encounter crawling from surface contamination. Dust, oils, or greasy fingerprints on bisque ware prevent proper glaze adhesion. The glaze slides away from contaminated areas during melting.
Preventing Crawling:
- Replace a portion of raw clay with calcined clay—aim for 10-15% raw clay and calcine the rest
- Use less plastic clays (kaolin instead of ball clay, or low-plasticity kaolin)
- Substitute problematic materials: use calcined zinc instead of raw zinc oxide, synthetic bone ash, or talc/dolomite for magnesia sources
- Lower the specific gravity of your glaze slurry to around 1.4—this reduces layer thickness while maintaining coverage
- Clean bisque ware thoroughly before glazing; handle pieces only by unglazed areas
- Apply thinner, more even glaze layers, especially in corners
For existing crawling, you can reapply glaze to bare spots and refire, though grinding rough areas first improves results for extensive damage.
Understanding Firing Temperatures: Your Compass for Success
Firing temperatures aren’t arbitrary numbers—they represent critical transformation points in clay and glaze chemistry. Understanding these ranges helps you match materials appropriately and avoid fundamental mistakes.
Low-Fire (Earthenware): Cone 06-1 / 1830-2109°F / 1000-1150°C
Low-fire clays remain porous after firing, continuing to absorb water. This makes them unsuitable for functional ware unless glazed with waterproof glazes. However, low-fire work offers brilliant, vibrant colors and requires less energy and lower-temperature kilns accessible to more potters. The clay remains relatively soft even after firing, making pieces more vulnerable to chipping and breaking.
Mid-Range (Stoneware): Cone 4-6 / 2124-2232°F / 1150-1240°C
Mid-range firing, particularly cone 6, represents a sweet spot for many contemporary potters. At these temperatures, clay bodies vitrify—the clay particles fuse together, creating a dense, glassy structure that’s waterproof and durable. Mid-range stoneware is strong enough for functional pottery while still accessible to most home studio kilns. The firing temperatures are high enough for full clay maturation but low enough to avoid the extreme energy costs of high-fire work.
High-Fire (Stoneware and Porcelain): Cone 8-10 / 2300-2400°F / 1240-1300°C
High-fire temperatures produce the densest, strongest pottery. Porcelain and high-fire stoneware reach complete vitrification, resulting in pieces that are essentially glass-like in their non-porosity. These temperatures also enable certain glaze effects impossible at lower ranges, particularly ash glazes and traditional reduction firing effects. However, they require robust kilns, substantial energy, and longer firing cycles.
Bisque Firing: The Essential First Step
Bisque firing typically occurs at lower temperatures than glaze firing—most commonly between cone 08-04 (1650-1945°F / 900-1063°C). This first firing removes chemically bonded water, transforms clay permanently into ceramic, and creates a porous surface that accepts glaze readily.
The bisque temperature should be lower than your final glaze firing to ensure the glaze bonds properly. For earthenware destined for cone 06 glaze firing, bisque to cone 016-06. For stoneware glazed at cone 6, bisque to cone 06-04.
Firing Schedules: The Critical Details
A firing schedule is more than just a target temperature—it’s a carefully programmed sequence of heating rates, hold times, and cooling rates that guide your kiln through the complex chemical and physical transformations that occur during firing.
Ramp Rates (Heating Rates)
Ramp rate refers to how quickly temperature increases, typically measured in degrees per hour. Bisque firing requires slower ramp rates than glaze firing because you’re driving off significant moisture and allowing organic materials to burn out without causing defects.
A typical bisque schedule might start slowly: 80°F per hour to 250°F (allowing final moisture escape), then increase to 200°F per hour to 1000°F, then slow again to 100°F per hour through 1100°F (during carbon burnout), before climbing faster to final temperature. These varied rates address specific chemical changes occurring at different temperature ranges.
Soak or Hold Time
A soak keeps the kiln at a constant temperature for a specified period. This extended time at temperature allows heat to penetrate thick pieces completely, enables glazes to mature fully, and gives glaze surfaces time to heal imperfections like pinholes and small blisters.
I’ve found that adding a 20-30 minute hold at peak temperature dramatically reduces pinhole problems, especially with speckled clay bodies. The hold allows the glaze viscosity to decrease just enough that surface tension can pull bubbles closed before cooling begins.
Cooling Rates
Controlled cooling prevents dunting and affects final glaze appearance. Most electric kilns cool naturally once turned off, but some firing schedules program specific cooling rates, particularly through critical temperature points like quartz inversion. Never open your kiln before it cools below 200°C—patience during cooling prevents temperature shock that can crack pieces at the very last moment.
Firing Duration
Firing times vary dramatically based on kiln size and program:
Bisque firing:
- Small kilns: 6-12 hours
- Medium kilns: 8-16 hours
- Large kilns: 12-24 hours
Glaze firing:
- Small kilns: 4-8 hours
- Medium kilns: 6-12 hours
- Large kilns: 8-16 hours
Remember to add cooling time—often 12-24 hours or more—before you can safely unload.
The Drying Process: Where Many Problems Begin
Most pottery problems originate during drying, long before pieces enter the kiln. Clay shrinks as moisture evaporates, and uneven moisture content creates uneven shrinkage—the root cause of most cracks and warping.
The Stages of Drying
Clay passes through distinct stages: plastic/workable when first formed, leather hard when partially dried (firm but still carvable), and bone dry when all mechanical water has evaporated. Only bone-dry clay is ready for bisque firing.
Testing for bone-dry: the piece feels room temperature when held against your cheek (wet clay feels cool), and placing it on paper causes no wrinkling.
Controlling Drying Speed
In humid climates or during winter, drying might take weeks. In dry summer conditions, pieces can dry in days—sometimes too quickly. Rapid drying increases cracking risk because moisture gradients form within the clay: the surface dries while the interior remains wet, creating stress.
Techniques to slow drying:
- Cover pieces loosely with plastic sheeting
- Spray pieces lightly with water before covering
- Use a damp box (enclosed container with wet sponges)
- Place a humidifier near drying work
- Avoid placing work near heating vents, in direct sunlight, or in drafty areas
Techniques to speed drying:
- Increase air circulation with fans (at a distance)
- Reduce humidity with dehumidifiers
- Keep work in warm areas
- For pieces with varying thicknesses, cover thick sections while exposing thin sections to air, balancing drying rates