A pinch pot is basically the easiest clay form ever, but it doesn’t have to look basic. Here are my favorite cool pinch pot ideas that turn that simple pinched bowl into something you’ll actually want to display, gift, or use every day.
Pinch Pot Trinket Bowl With Stamped Texture
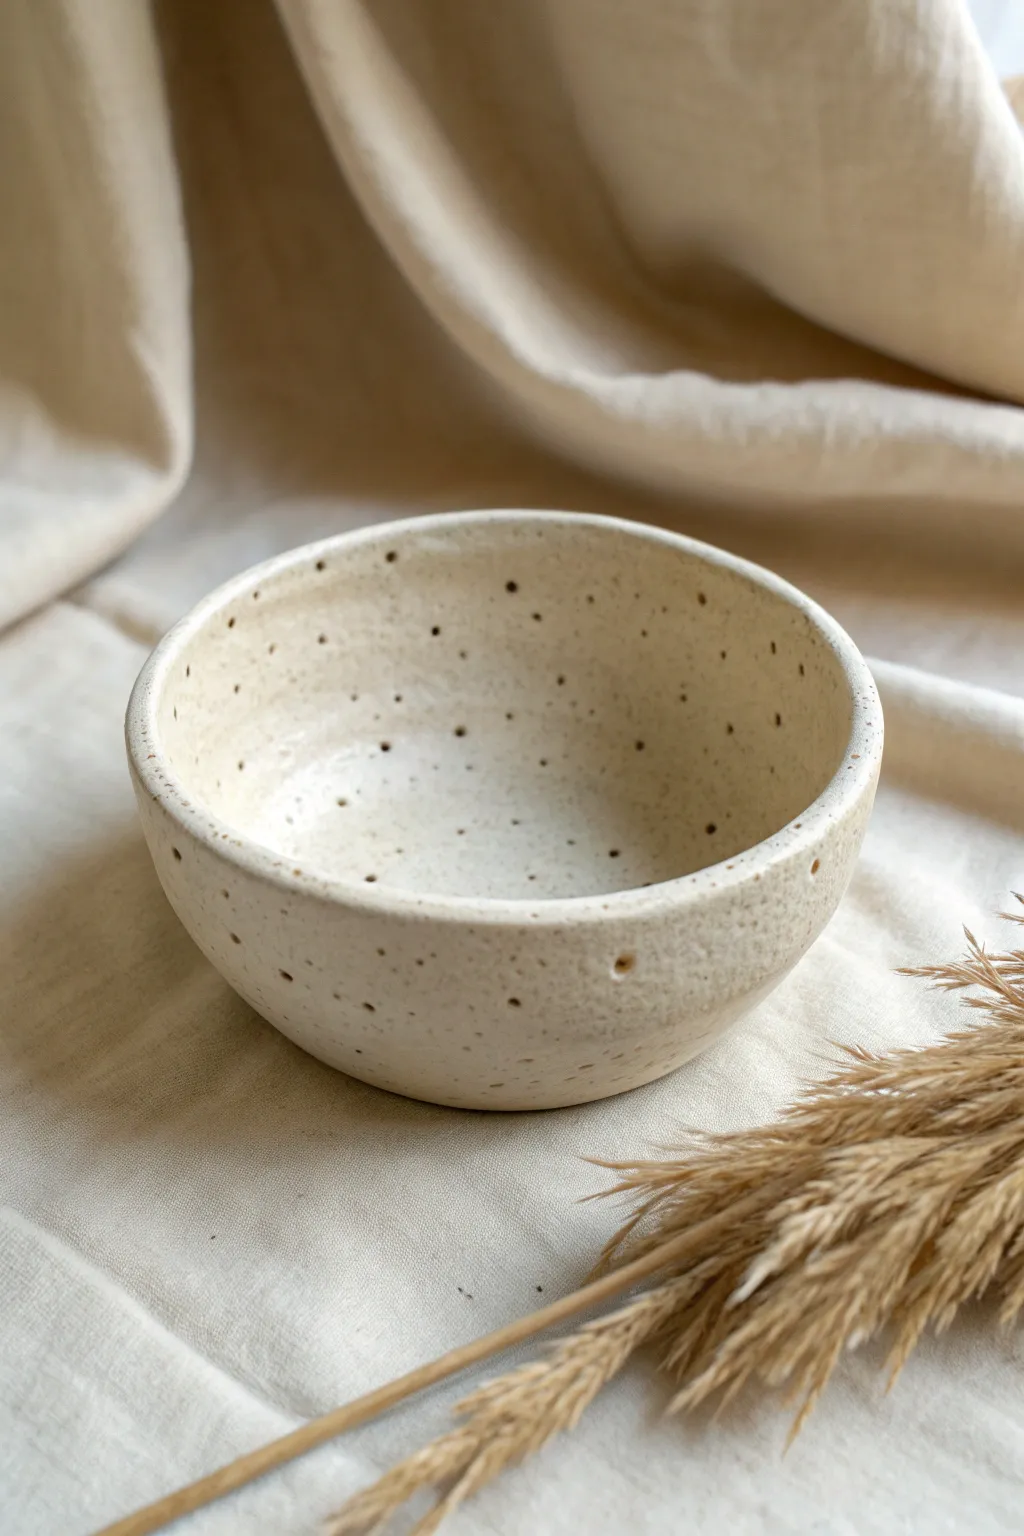
This charming little bowl features a classic pinch pot shape elevated with a simple, all-over pattern of tiny indentations. Its milky cream glaze allows the natural clay speckles to shine through, making it perfect for holding jewelry or dried herbs.
Step-by-Step Tutorial
Materials
- Speckled buff stoneware clay (or white clay with additions)
- Wooden sculpting tool or small dowel (for stamping)
- Cream or translucent white glaze
- Sponge
- Water cup
- Fettling knife or rib tool
- Kiln (or access to a firing service)
Step 1: Forming the Base
-
Prepare the Clay:
Cut a piece of speckled clay roughly the size of a tennis ball. Wedging it thoroughly is crucial to remove air bubbles, which could cause cracks later. -
Start the Shape:
Roll the wedged clay into a smooth, round sphere between your palms. -
Open the Pot:
Hold the sphere in one hand and gently press your thumb into the center, stopping about a half-inch from the bottom to leave enough base thickness. -
Pinch the Walls:
Begin pinching the clay between your thumb and fingers, rotating the ball as you go. Work from the bottom up to ensure even thickness. -
Refine the Curve:
Aim for a gentle, rounded curve rather than straight vertical walls. I usually spend a little extra time here smoothing the rim with a damp sponge to keep it soft and rounded, not sharp. -
Check Thickness:
Ensure the walls are roughly 1/4 inch thick throughout. If the bottom feels too heavy, pinch a bit more clay upward from the base.
Step 2: Adding Texture and Firing
-
Select a Tool:
Find a tool with a small, round tip. The end of a thin paintbrush handle or a small wooden dowel works perfectly for this specific dot pattern. -
Stamp the Exterior:
Support the wall with one hand from the inside. With the other, gently press the tool into the clay to create small divots. Random placement looks best here rather than a strict grid. -
Stamp the Interior:
Continue the pattern on the inside of the bowl. Be careful not to press too hard, or you might deform the bowl’s round shape. -
Smooth the Surface:
Once textured, lightly run a finger over the surface to knock down any sharp ridges created by the stamping tool. -
Dry Slowly:
Place the bowl loosely covered with plastic for a day, then uncover it to dry completely to the bone-dry stage. This usually takes 3-5 days. -
Bisque Fire:
Load the bone-dry piece into the kiln for a bisque firing (usually roughly Cone 04) to harden the clay for glazing. -
Apply Glaze:
Dip the bowl into a cream or translucent white glaze. Shake off excess drips immediately. This type of glaze is essential because it needs to be opaque enough to color the clay, but thin enough to pool slightly in the divots and let the speckles show. -
Wipe the Foot:
Use a damp sponge to completely wipe any glaze off the very bottom of the pot so it doesn’t fuse to the kiln shelf. -
Glaze Fire:
Fire the piece again to the maturity temperature of your clay body (likely Cone 5 or 6 for stoneware).
Uneven Drying?
If the rim dries faster than the base, it can warp. Place the pot upside down on a wooden board once the rim is sturdy enough; this helps the thicker base catch up.
Change the Stamp
For a different vibe, use found objects for texturing. The end of a dried flower stem, a screw head, or even a piece of coarse burlap pressed into the clay creates lovely variations.
Now you have a beautifully textured vessel ready to cradle your favorite small treasures


Pinch Pot Bowl With a Wavy Rim
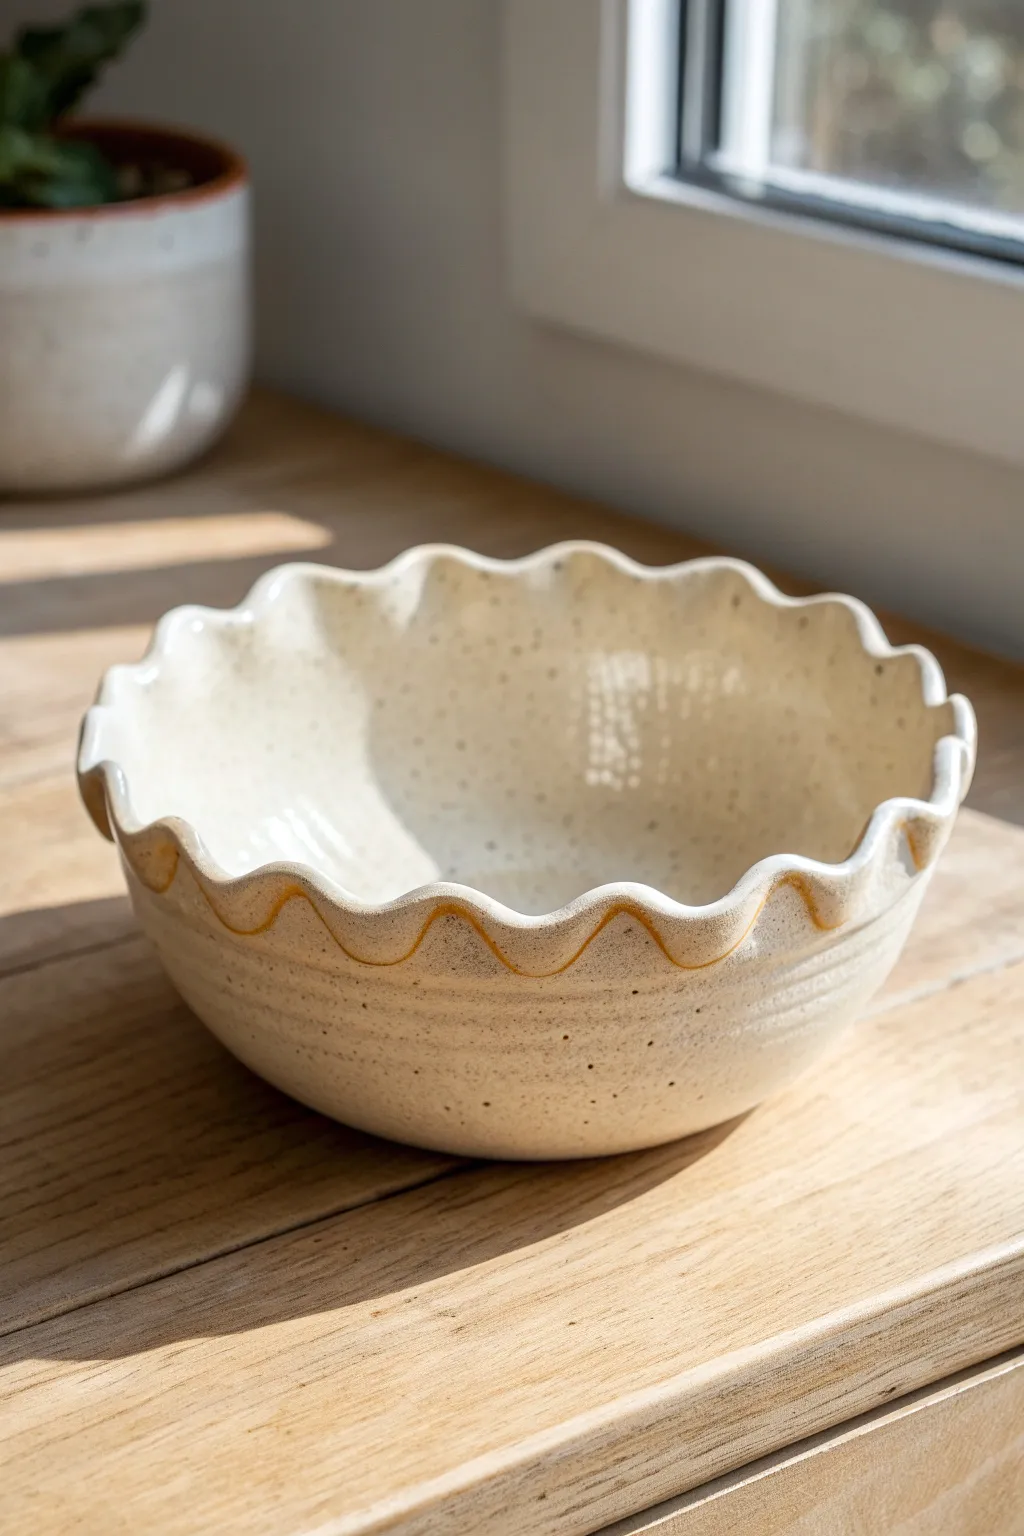
This charming ceramic bowl features a playful, undulating rim that adds movement and grace to a simple form. With a speckled cream glaze and warm, toasted accents in the grooves, it strikes the perfect balance between rustic and refined.
Step-by-Step
Materials
- Speckled stoneware clay (approx. 1-1.5 lbs)
- Pottery wheel (optional, can be hand-built)
- Sponge
- Pin tool or needle tool
- Wooden rib tool
- Wire cutter
- Transparent or cream dipping glaze
- Small round brush (for accents)
- Iron oxide wash or dark underglaze
Step 1: Forming the Base
-
Prepare the clay:
Begin by wedging your speckled stoneware clay thoroughly to remove any air bubbles. Form it into a smooth, round ball. -
Establish the center:
If using a pinch method, push your thumb into the center of the ball, leaving about a half-inch for the floor. If throwing, center the clay on the wheel and open it up. -
Raising the walls:
Gently pinch and pull the clay upwards and outwards to create a wide, open bowl shape. Aim for a consistent wall thickness of about a quarter-inch. -
Refining the curve:
Use a rib tool on the inside of the bowl to smooth out the curve, ensuring a seamless transition from the floor to the walls. Support the outside with your hand while doing this. -
Creating texture:
Leaving faint horizontal rings or finger marks on the lower exterior adds character. You can enhance this by running a serrated rib or just your fingertips lightly across the surface as the bowl spins or while you hold it.
Fixing Uneven Waves
If your scalloped rim looks lopsided, don’t overwork it while wet. Wait until it’s leather-hard, then gently use a rasp or sponge to even out the heights.
Step 2: Sculpting the Wavy Rim
-
Smooth the lip:
Before scalloping, ensure the rim is smooth and slightly rounded. Chamois cloth works wonders here to compress the edge and prevent future chipping. -
Mark the intervals:
Ideally, you want an even number of waves. Lightly mark the rim at regular intervals with your needle tool to guide where your peaks and valleys will go. -
Push and pull technique:
To create the scallop, support the clay with two fingers on the outside and gently push outward with one finger from the inside. Alternate this pattern: push out, push in, push out. -
Refining the waves:
Once the initial waves are formed, go back around and define the curves. Use a damp sponge to smooth the peaks so they aren’t sharp, giving them that soft, buttery look seen in the photo. -
Drying slowly:
Because the rim is thinner and manipulated, cover it loosely with plastic so it dries at the same rate as the thicker base. Let it dry to bone dry.
Step 3: Glazing and Finishing
-
Bisque fire:
Fire the bowl to bisque temperature (usually cone 04 or 06) to harden it for glazing. -
Sanding imperfections:
Lightly sand any sharp spots on the rim if necessary, wiping away dust with a damp sponge. -
Applying oxide accent:
Using a small brush, apply a thin line of iron oxide wash or a toasted orange underglaze into the deep valleys of the exterior rim waves. This highlights the scallop shape. -
Wiping back:
Wipe away excess wash with a sponge so the color sits primarily in the recesses and grooves, creating that warm definition. -
Dipping the glaze:
Dip the entire bowl into a glossy cream or transparent glaze. The speckles in the clay body will show through nicely. -
Checking the foot:
Wipe the bottom foot of the bowl clean of any glaze to prevent it from sticking to the kiln shelf. -
Final firing:
Fire the piece to the glaze maturity temperature of your clay (likely cone 5 or 6). Let the kiln cool completely before unloading.
Pro Tip: Consistency
Use the width of your index finger as a measuring tool for the gaps between waves. This helps keep the rhythm of the rim consistent all the way around.
Enjoy using your lovely new bowl for fruit or serving cozy meals


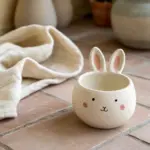

Tiny Footed Pinch Pot Dish

Elevate a simple pinch pot into a sophisticated decor piece with the addition of tiny feet and a faux-stoneware finish. This project mimics the organic charm of handmade ceramic pottery using accessible materials, resulting in a perfect catch-all for your jewelry.
Detailed Instructions
Materials
- White air-dry clay (or polymer clay)
- Acrylic paints (Cream/Off-white, Tan/Ochre, Black)
- Old toothbrush
- Small bowl of water
- Sponge or craft foam
- Gloss varnish or sealant
- Rolling pin (optional)
- Sandpaper (fine grit)
- Clay sculpting tool or butter knife
Step 1: Forming the Bowl
-
Prepare the Clay:
Start with a ball of clay roughly the size of a tangerine. Knead it in your warm hands for a minute until it feels pliable and smooth, removing any potential air bubbles. -
Pinch the Form:
Push your thumb into the center of the ball, leaving about a half-inch of thickness at the bottom. Slowly pinch and turn the clay between your thumb and fingers to thin out the walls. -
Shape the Walls:
Aim for an even thickness all around, gently curving the walls upward. Keep the rim slightly thick and rounded for that organic, hand-thrown ceramic look. -
Smooth the Surface:
Dip your finger in a little water and run it over the exterior and interior to smooth out severe fingerprints, but don’t overwork it—some texture adds character.
Cracking Up?
If you see small cracks as the clay dries, mix a tiny bit of fresh wet clay with water to make a paste and fill them in before painting.
Step 2: Adding the Feet
-
Create the Feet:
Roll three small balls of clay, each about the size of a marble. Gently tap them on your work surface to flatten the tops slightly. -
Score the Surfaces:
Use your sculpting tool or a toothpick to scratch up (score) the bottom of the bowl where the feet will go, and the flat tops of your clay balls. -
Attach and Blend:
Add a drop of water or moist clay ‘slip’ to the scored areas and press the feet firmly onto the base. Use your tool or finger to smudge the clay from the feet onto the bowl body so they are seamlessly joined. -
Level Check:
Flip the bowl right-side up and gently press it down onto your table. This ensures all three feet sit flat and the bowl is stable. -
Final Dry:
Let the piece dry completely. For air-dry clay, this usually takes 24-48 hours. I recommend flipping it over halfway through so the bottom dries evenly.
Step 3: Faux Ceramic Finish
-
Sand Imperfections:
Once bone dry, take fine-grit sandpaper to the rim and exterior to soften any sharp jagged edges. -
Base Coat:
Paint the entire bowl with a cream or off-white acrylic paint. You may need two coats for full opacity. -
Add the ‘Rim Stain’:
Mix a small amount of tan or ochre paint with water to make a thin glaze. Dab this along the rim of the bowl with a sponge, letting it settle into the natural divots for a rustic, fired look. -
Create the Speckles:
Dilute a tiny bit of black paint with water. Dip an old toothbrush into the mixture, aim it at the bowl, and run your thumb across the bristles to flick tiny speckles over the surface. -
Seal the Project:
Finish by applying a coat of gloss varnish across the entire piece. This not only protects the paint but mimics the shine of glazed stoneware.
Symmetry Check
Place the feet in a strict triangle formation rather than a line to ensure maximum stability and prevent wobbling.
Place your new ring dish on a bedside table to admire your handiwork daily


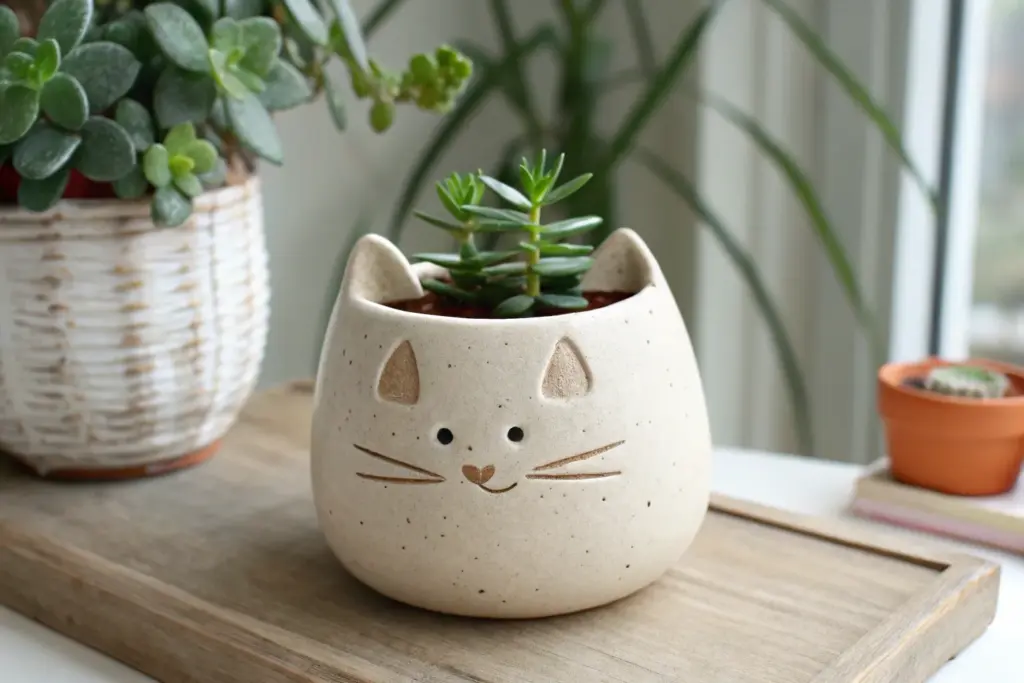
Minimal Face Pinch Pot Planter
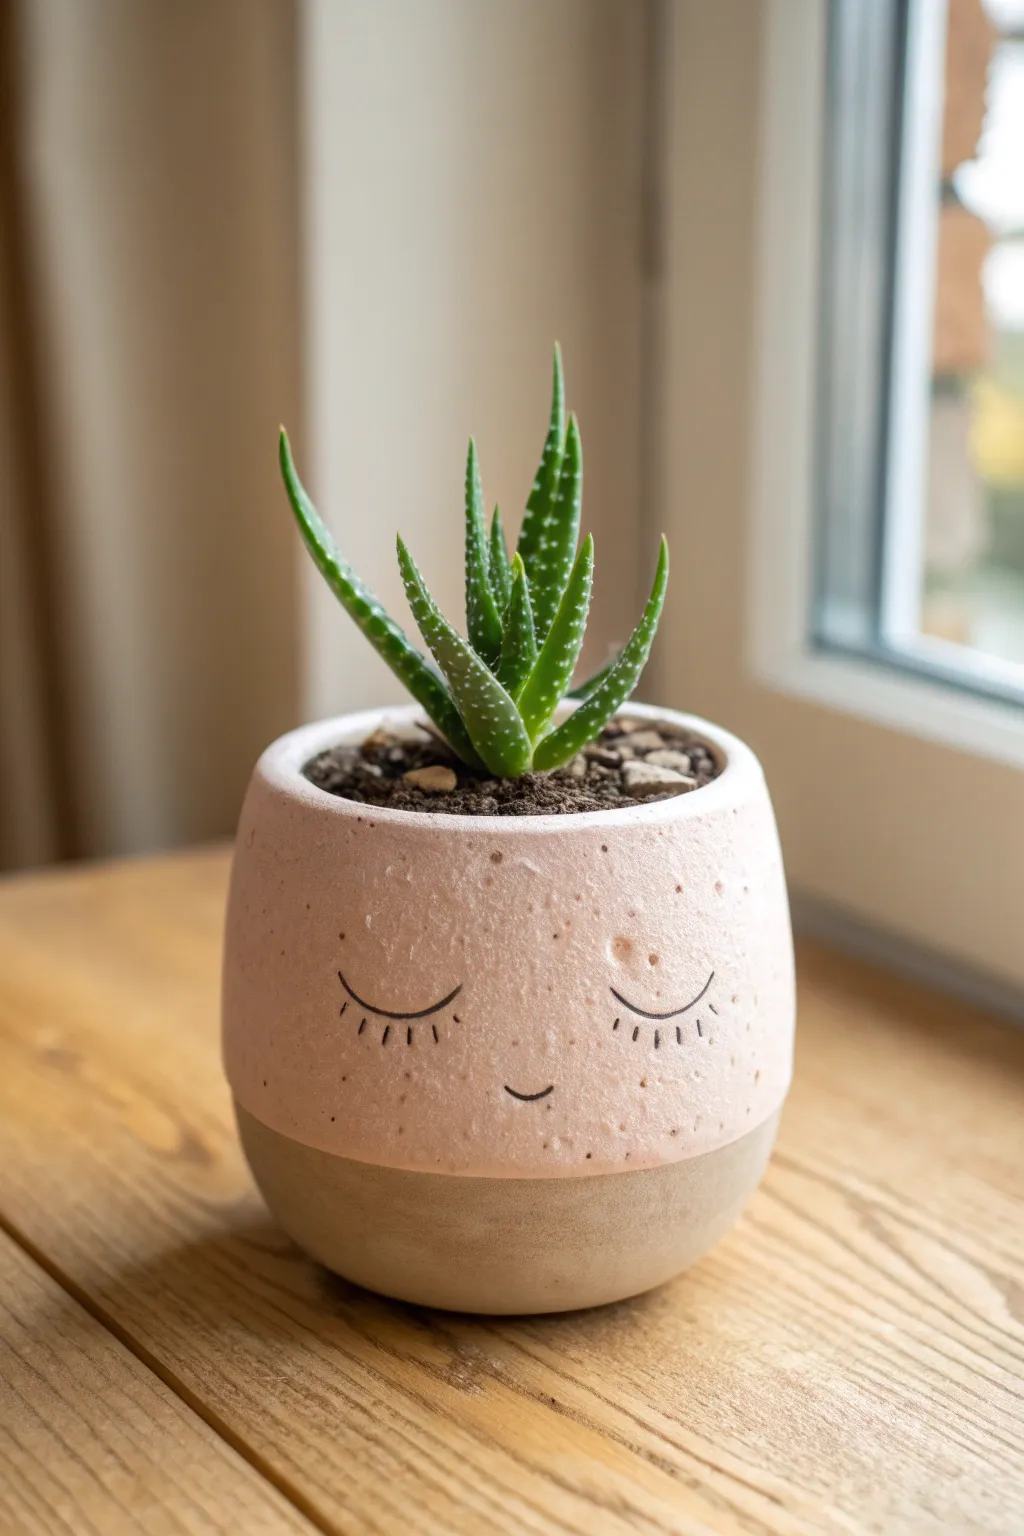
This charming little planter features a sweet, sleepy face and a gentle two-tone design that adds warmth to any windowsill. The speckled texture and matte finish give it a modern, handmade feel perfect for housing small succulents like Haworthia or Aloe.
Step-by-Step Tutorial
Materials
- White air-dry clay or polymer clay
- Rolling pin
- Clay carving tool or needle tool
- Sandpaper (fine grit)
- Acrylic paint (Dusty Pink, Beige/Tan, Black)
- Matte varnish or sealant
- Paintbrushes (flat and fine liner)
- Small bowl or cup (optional, for shaping)
- Water
Step 1: Shaping the Pinch Pot
-
Prepare the Clay:
Start with a ball of clay roughly the size of a large orange. Knead it in your hands until it’s soft, warm, and pliable to prevent cracking later. -
Form the Base:
Hold the ball in one hand and push your thumb into the center, stopping about half an inch from the bottom. This creates the initial hollow for your pot. -
Pinch the Walls:
Gently pinch the clay between your thumb and fingers, rotating the ball as you go. Work your way from the bottom up to thin out the walls evenly. -
Shape the Curve:
Aim for a rounded, bulbous shape that tapers slightly inward at the rim. You can gently tap the base on your table to flatten it so the pot sits securely. -
Smooth the Surface:
Dip your finger in a little water and run it over the exterior and interior to smooth out any fingerprints or cracks. I like to spend extra time here to get that professional finish. -
Dry Time:
Allow the pot to dry completely according to your clay’s instructions. For air-dry clay, this usually takes 24-48 hours. Rotate it occasionally for even drying.
Step 2: Refining and Painting
-
Sand for Texture:
Once fully dry, use fine-grit sandpaper to gently smooth any rough bumps. Don’t worry about making it perfectly glass-smooth; a little texture adds character. -
Mark the Color Line:
Lightly sketch a horizontal line around the circumference of the pot, creating a division about one-third of the way up from the bottom. -
Paint the Base:
Paint the bottom section with a beige or light tan acrylic paint. This mimics the look of raw, unglazed ceramic. -
Paint the Top:
Paint the upper two-thirds with a dusty pink shade. You might need two coats to get a solid, opaque color. -
Add Speckles:
To recreate the stoneware look, load an old toothbrush or stiff brush with slightly watered-down brown paint. Flick the bristles with your thumb to mist tiny speckles over the pink section. -
Draw the Face:
Using a very fine liner brush and black paint, or a black permanent maker, draw two curved U-shapes for closed eyes. -
Add Details:
Carefully add tiny, straight lashes pointing downwards from the closed eyes and a small, simple U-shape for a smile centered below them. -
Seal the Pot:
Finish with a coat of matte varnish. This seals the paint and protects the clay from moisture, which is crucial if you plan to put real plants inside.
Natural Speckles
Mix dried coffee grounds or cracked black pepper into your white clay before shaping. This creates authentic texture and speckling without needing paint later.
Cracked Edges?
If the rim cracks while drying, mix a tiny bit of fresh clay with water to make a paste (slip) and fill in the cracks, then smooth it over with a wet finger.
Pop in your favorite succulent and enjoy the peaceful vibe this little face brings to your space

The Complete Guide to Pottery Troubleshooting
Uncover the most common ceramic mistakes—from cracking clay to failed glazes—and learn how to fix them fast.
Animal Buddy Pinch Pot (Owl or Cat)
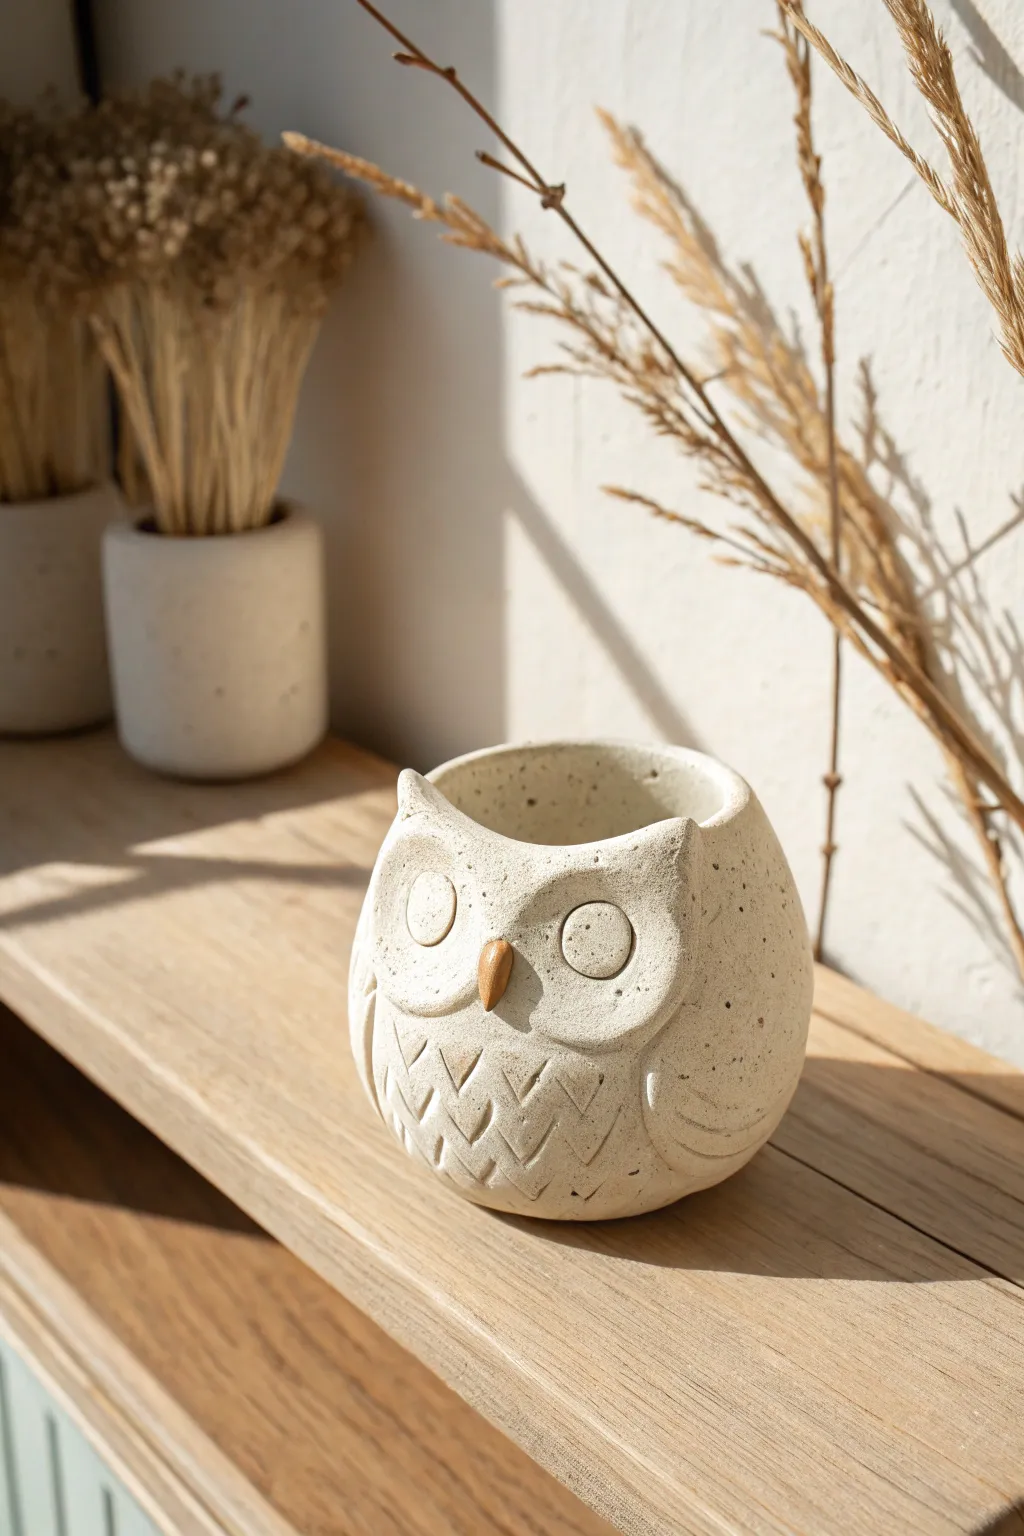
Create a charming, minimalist owl planter that adds a touch of woodland whimsy to any shelf. This project uses a textured clay or concrete mix to achieve a natural, speckled stone look, perfect for holding small succulents or air plants.
Step-by-Step
Materials
- Speckled stoneware clay or concrete crafting mix
- Wooden sculpting tool (or popsicle stick)
- Small rolling pin
- Needle tool or toothpick
- Small loop tool
- Water and sponge
- Small paintbrush
- Terracotta colored acrylic paint (or brown clay slip)
Step 1: Forming the Base
-
Start the pinch pot:
Begin with a ball of clay about the size of a large orange. Insert your thumb into the center and gently pinch the walls while rotating the ball in your hand. -
Shape the walls:
Continue pinching until you have an even wall thickness of about a quarter-inch. Aim for a slightly rounded, egg-like shape rather than a straight cylinder. -
Flatten the bottom:
Gently tap the pot on your work surface to create a flat, stable base so your owl won’t wobble. -
Smooth the rim:
Dampen your finger slightly and run it along the top rim to smooth out any cracks, keeping the overall shape rounded.
Stone Effect
If using plain clay, knead in some coffee grounds or coarse sand before sculpting. This adds beautiful speckles and texture that mimic real stone.
Step 2: Sculpting the Features
-
Create the ears:
Pinch the front part of the rim upward on the left and right sides to form two subtle points for the owl’s ears. -
Define the brow:
Dip your finger in water and smooth the area between the ears downwards slightly, creating a distinct ‘brow’ line where the face will go. -
Add the eyes:
Roll two small, flat discs of clay. Score the back of them and the pot surface with a needle tool, add a dab of water, and press them firmly onto the face area. -
detail the pupils:
Using a small loop tool or the back of a marker, gently press a circle into the center of each eye disc to define the pupils. -
Attach the beak:
Roll a tiny cone of clay. Score and slip it between the eyes, positioning it pointed downward. -
Smooth connections:
Use a small wooden tool to blend the seams of the eyes and beak onto the main body so they don’t look like stuck-on parts.
Make it a Planter
Don’t forget to poke a hole in the bottom center before drying! This drainage is crucial if you plan to plant a live succulent inside.
Step 3: Texturing and Finishing
-
Carve the wings:
On the sides of the pot, use a needle tool to lightly sketch a curved line representing the folded wing shape. -
Add feather details:
Inside the wing outline, press a small U-shaped tool or the end of a straw into the clay to create simple feather textures. -
Texture the chest:
Repeat the feather texturing process on the owl’s chest area using V-shaped carvings or small triangular impressions. -
Refine the surface:
Check the whole piece for rough burrs or sharp edges. I like to use a barely damp sponge to soften everything for that worn-stone look. -
Dry the piece:
Let the clay dry slowly under loose plastic for a day, then uncover it to dry completely before firing or sealing. -
Paint the beak:
Once dry (or fired), use a small brush to paint just the beak with a terracotta or warm brown color to make it pop.
Now you have a stoic little guardian ready to watch over your windowsill garden
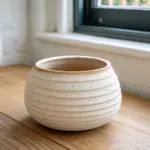
Cute Cactus Pinch Pot Set
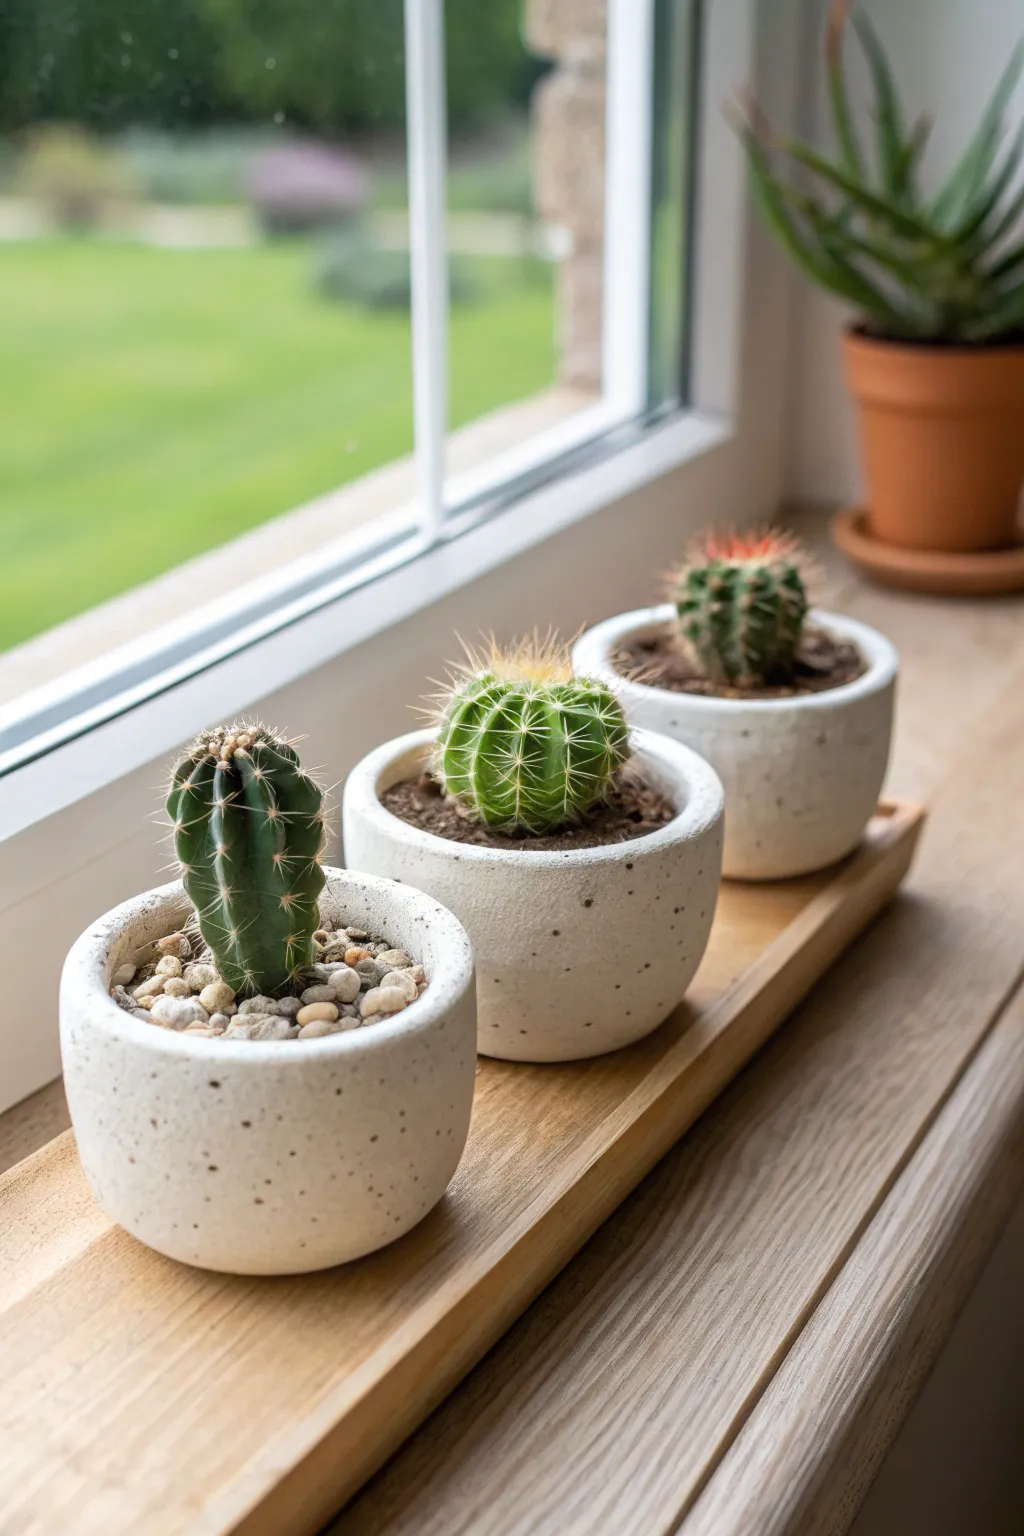
These charmingly simple mini-planters mimic the look of expensive ceramic ware using accessible air-dry or polymer clay. Their clean, cylindrical shape and faux-speckle finish create a modern, minimalist home for your favorite tiny succulents or cacti.
How-To Guide
Materials
- White air-dry clay or white polymer clay (approx. 1lb)
- Black pepper or dried coffee grounds (for the speckled effect)
- Modeling tools (or a butter knife)
- Rolling pin
- Small circular jar or cutter (approx. 2.5 inches wide for the base)
- Water (for smoothing)
- Sandpaper (fine grit)
- Matte white acrylic paint (optional)
- Clear matte varnish or sealant
- Small cacti and potting soil
- Small pebbles for top dressing
Step 1: Preparing the Speckled Clay
-
Condition the clay:
Start by kneading your white clay until it is soft, pliable, and free of any air bubbles. If using polymer clay, the warmth of your hands is essential here. -
Add the texture:
Sprinkle a generous pinch of coarse black pepper or well-dried coffee grounds onto the flattened clay. Fold the clay over and knead repeatedly to distribute the specks evenly throughout the white mass. -
Check density:
Inspect the clay to ensure you have a dispersed, random speckle pattern similar to vanilla bean ice cream. Add more grounds if you want a denser texture.
Step 2: Forming the Shape
-
Divide the clay:
Separate your speckled clay ball into three equal portions to ensure your trio of pots will be roughly the same size. -
Form the base ball:
Take one portion and roll it into a smooth, tight sphere between your palms. -
Start the pinch:
Press your thumb firmly into the center of the sphere, stopping about a half-inch from the bottom to create a thick, sturdy base. -
Pinch the walls:
Using your thumb on the inside and fingers on the outside, gently pinch and rotate the clay to raise the walls. Unlike a bowl shape, aim to keep the walls vertical to achieve that modern cylinder look. -
Flatten the bottom:
Tap the pot firmly against your table to create a flat bottom so it sits stable without wobbling. -
Refine the rim:
I find that using a wet finger to run along the top rim helps smooth out cracks and creates a nice, rounded lip. -
Smooth the exterior:
Use a little water (for air-dry clay) or baby oil (for polymer) to smooth away fingerprints on the outside walls.
Cracks Appearing?
If you see tiny cracks forming while pinching the walls, dip your finger in water (or clay softener) and rub the crack horizontally to seal it immediately.
Step 3: Finishing and Planting
-
Dry or bake:
Follow the instructions for your specific clay. Air-dry clay will need 24-48 hours to fully cure; polymer clay usually bakes at 275°F (135°C) for 15-30 minutes. -
Sand for smoothness:
Once fully cured and hard, use fine-grit sandpaper to gently buff out any remaining bumps or uneven spots on the rim and sides. -
Apply sealant:
Coat the inside and outside with a clear matte varnish. This is crucial for protecting the clay from moisture when watering your plants. -
Add drainage:
Since we didn’t poke holes, fill the bottom half-inch of the pot with small gravel or activated charcoal to act as a drainage layer. -
Plant the cacti:
Carefully place your small cactus into the pot and backfill the sides with cactus-specific potting soil. -
Top dressing:
For the finishing touch seen in the photo, add a layer of small, beige pebbles on top of the soil to cover the dirt completely.
Faux-Ceramic Look
For an even more realistic ceramic look, apply a high-gloss glaze only to the very top rim while keeping the body of the pot distinctively matte.
Now you have a stylish set of faux-stone planters ready to brighten up your window sill


What Really Happens Inside the Kiln
Learn how time and temperature work together inside the kiln to transform clay into durable ceramic.
Heart-Shaped Pinch Pot Ring Dish
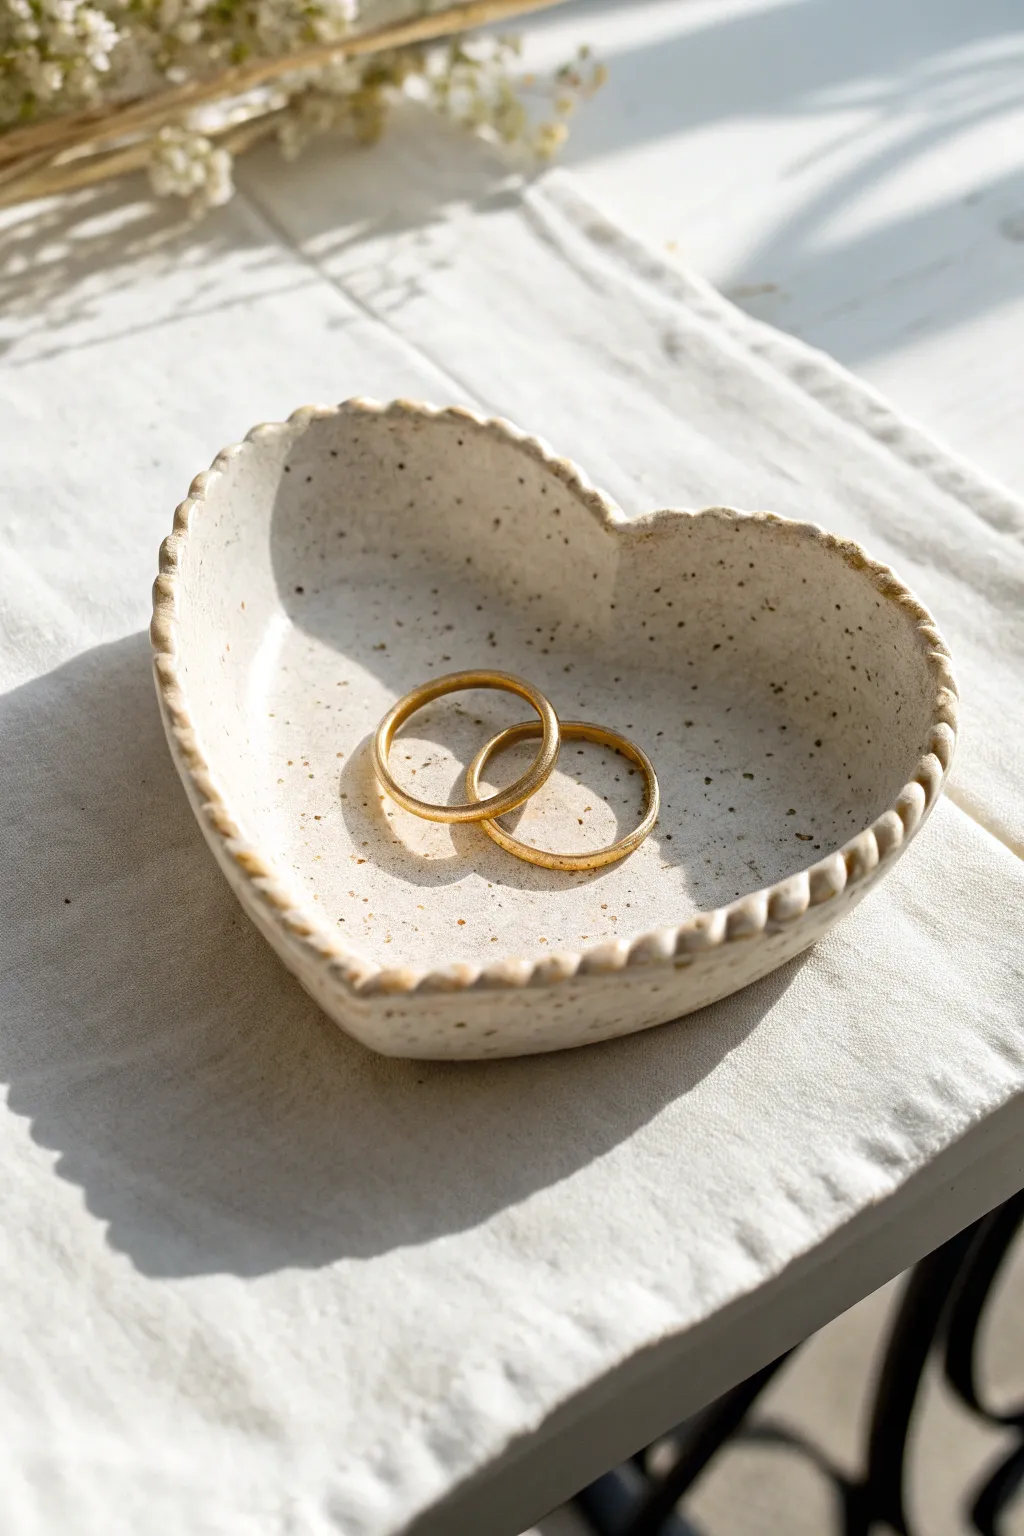
This charming, speckled heart-shaped dish makes a perfect bedside keeper for your most precious rings. With its delicate fluted rim and rustic finish, it balances handmade warmth with elegant simplicity.
Step-by-Step Tutorial
Materials
- White air-dry clay or polymer clay
- Dried coffee grounds or coarse black pepper (for speckling)
- Small bowl of water
- Rolling pin
- Needle tool or toothpick
- Sanding sponge (fine grit)
- Gloss varnish or clear sealant
- Soft paintbrush
Step 1: Preparing the Clay
-
Condition the clay:
Start with a ball of white clay about the size of a golf ball. Knead it in your hands until it is soft, warm, and pliable to prevent cracking later. -
Create the speckled effect:
Flatten the ball slightly and sprinkle a pinch of dried coffee grounds or coarse pepper onto the surface. Fold the clay over and knead repeatedly to distribute the specks evenly throughout the mass. -
Form the base sphere:
Roll your speckled clay back into a smooth, tight sphere. Check closely for any major air bubbles or cracks and smooth them out with your thumb.
Rim Perfection
For even rim spacing, mark the 12, 3, 6, and 9 o’clock spots first. This acts as a guide so your fluted pattern doesn’t get crowded at the end.
Step 2: Shaping the Heart
-
Start the pinch:
Hold the sphere in your non-dominant hand. Press your thumb into the center, stopping about a quarter-inch from the bottom. This sets your base thickness. -
Open the pot:
Gently pinch the clay between your thumb and fingers, rotating the ball as you go. Work from the bottom up to thin the walls evenly. -
Indent the top:
Once you have a basic round bowl, use the side of your index finger to press a deep indentation into the rim at the ’12 o’clock’ position to start forming the top of the heart. -
Point the bottom:
Directly opposite the indentation, pinch the clay gently to form a distinct point. Refine the overall shape by pushing the sides out slightly to create that classic heart fullness. -
Flatten the base:
Tap the bottom of the heart gently against your table surface. This creates a flat foot so the dish won’t wobble when holding your jewelry.
Gold Trim Upgrade
Once the varnish is dry, paint just the raised ridges of the rim with liquid gold leaf or metallic acrylic paint for a luxurious, gilded edge.
Step 3: Detailing and Drying
-
Smooth the interior:
Dip your finger in a tiny bit of water and run it smoothly inside the dish to remove fingerprints. Do the same for the exterior, but don’t over-wet the clay. -
Create the fluted rim:
Using the handle of a small paintbrush or a thin modeling tool, press gently onto the rim at an angle. Make these indentations close together, moving all the way around the edge. -
Refine the fluting:
I like to go back over the rim and gently pinch between the indentations to make the ridges slightly sharper, giving it that rope-like texture seen in the photo. -
Initial drying:
Set the piece aside in a cool, dry place away from direct sunlight. Let it air dry for about 24 to 48 hours until it is completely hard and turns a chalky white. -
Sand the edges:
Once fully dry, take a fine-grit sanding sponge and very gently smooth any sharp burrs on the rim or rough patches on the bottom. Wipe away the dust with a dry cloth.
Step 4: Finishing Touches
-
Seal the piece:
Apply a thin coat of gloss varnish to the inside of the dish. This mimics the look of a ceramic glaze and protects the speckles. -
Seal the exterior:
Flip the dish over and coat the outside and bottom. Ensure you get the varnish into the crevices of the fluted rim. -
Final cure:
Let the varnish cure completely according to the bottle instructions before placing any jewelry inside.
Place this lovely little dish on your dresser and enjoy a custom spot for your favorite rings
Leaf Imprint Pinch Pot Catchall
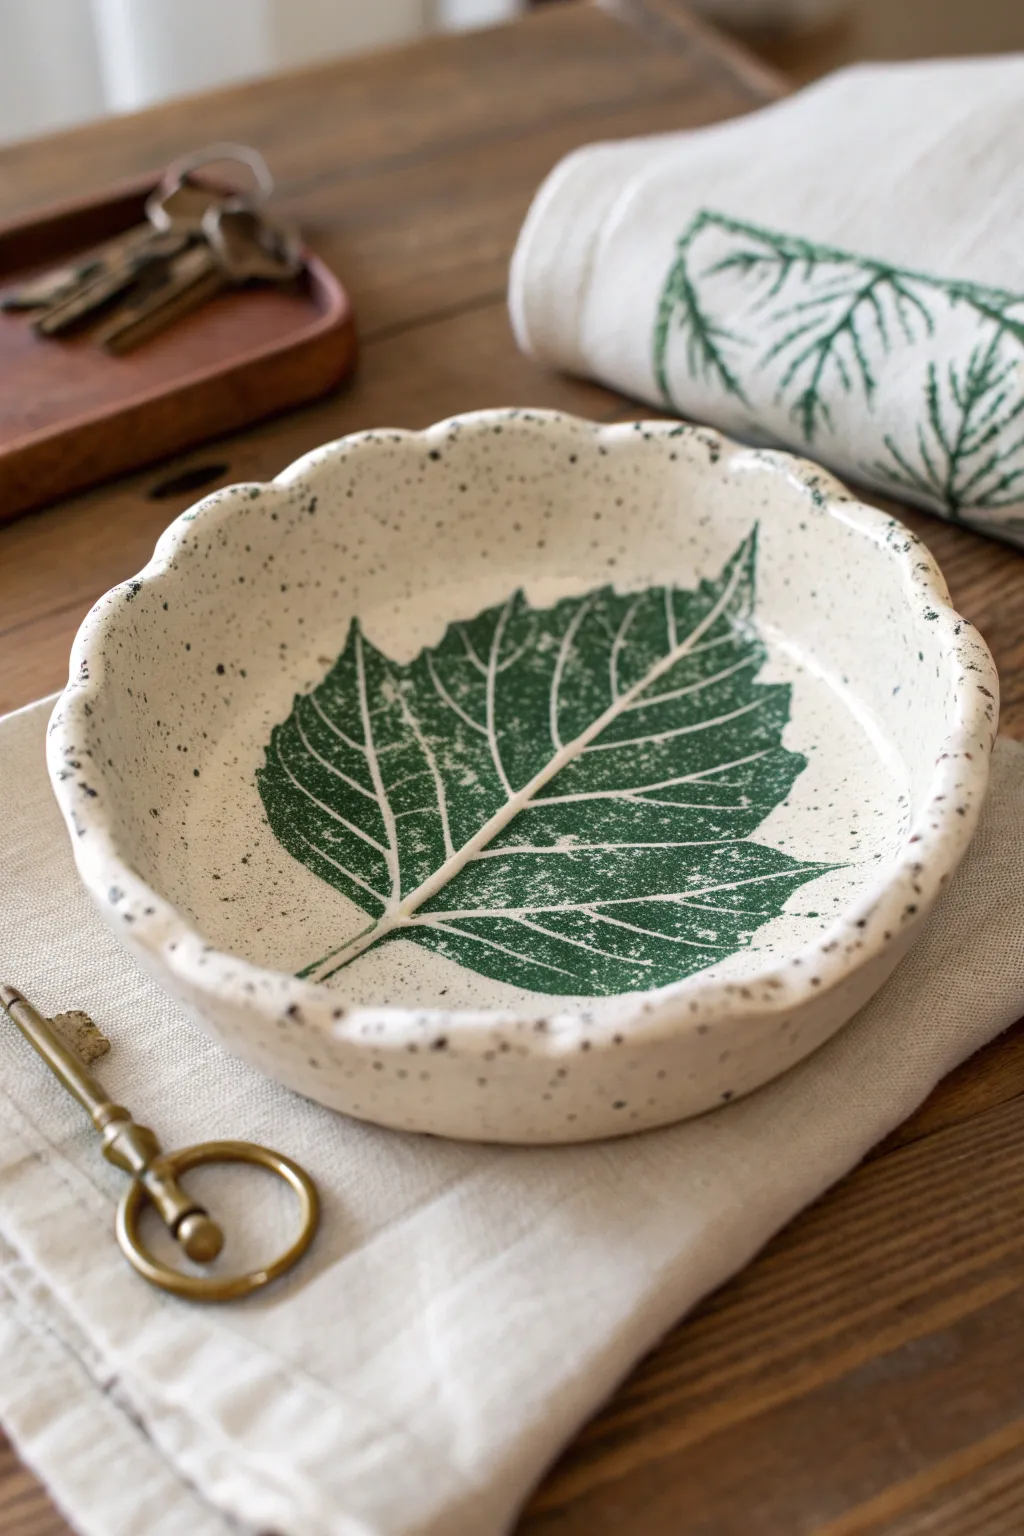
This charming, shallow catchall brings a touch of the forest floor indoors with its organic, scalloped edges and a striking green leaf imprint. The speckled clay body adds a natural, rustic texture that perfectly complements the detailed botanical design.
How-To Guide
Materials
- Speckled stoneware clay (white or light beige)
- Small rolling pin
- Large, fresh leaf with prominent veins (like maple or grape)
- Fettling knife or needle tool
- Rib tool (smooth wood or rubber)
- Dark green underglaze
- Clear transparent glaze
- Small flat paintbrush
- Carving tool or fine loop tool
- Sponge and water
- Rolling mat or canvas
- Kiln (or access to firing services)
Step 1: Forming the Dish
-
Prepare the Clay:
Start with a ball of speckled stoneware clay slightly larger than a tennis ball. Wedge it thoroughly to remove air bubbles and ensure the speckles are evenly distributed throughout the body. -
Roll the Slab:
Flatten the ball slightly with your palm, then use a rolling pin to create a slab that is roughly 1/4 to 1/3 inch thick. Aim for a consistent thickness, but don’t worry about a perfect circle just yet. -
Impress the Leaf:
Place your fresh leaf vein-side down onto the center of the slab. Use the rolling pin to firmly press the leaf into the clay. I find that going over it once with steady pressure works better than rolling back and forth, which can create ghost images. -
Trim the Excess:
Leaving the leaf embedded for a moment, use a needle tool or knife to cut a loose circle around the leaf, leaving about a 1.5-inch border of clay extending beyond the leaf’s edge. -
Shape the Rim:
Carefully peel away the leaf to reveal the impression. Gently lift the edges of the slab to create a shallow bowl shape. Pinch the rim between your thumb and forefinger to curve it upward. -
Create the Scallops:
To get that fluted look, use your thumb to press indentations into the rim at regular intervals, supporting the outside with your index finger. Smooth the very edge with a damp sponge so it isn’t sharp.
Sticky Leaf Issues?
If the leaf tears when peeling it off, let the clay dry for about 15 minutes with the leaf attached before trying again. This stiffens the clay slightly.
Step 2: Decorating and Glazing
-
Bisque Fire:
Allow the dish to dry slowly under plastic for a day, then uncovered until bone dry. Fire it in the kiln to cone 04 (bisque). -
Apply Underglaze:
Once bisqued, paint the leaf impression with 2-3 coats of dark green underglaze. Don’t worry if you go slightly outside the lines, but try to keep the general shape accurate. -
Sgraffito the Veins:
Wait until the underglaze is dry to the touch. Using a fine carving tool, gently scratch away the green underglaze along the raised vein lines of the impression to reveal the white clay body underneath. This creates that crisp, white contrast. -
Clean Up:
Use a slightly damp sponge to wipe away any underglaze dust or stray marks from the surrounding unpainted clay, keeping the speckled background clean. -
Clear Glaze:
Dip the entire piece into a clear, transparent glaze, or brush on three smooth coats. This will seal the clay and make the speckles pop. -
Final Fire:
Load the piece into the kiln for the final glaze firing (usually cone 5 or 6, depending on your clay body). Ensure the foot is wiped clean of glaze so it doesn’t stick to the shelf.
Speckle Strategy
Can’t find speckled clay? Knead granular manganese or coarse black sand into plain white clay to make your own custom speckled body.
Now you have a stunning, functional piece of nature to hold your keys or treasures

TRACK YOUR CERAMIC JOURNEY
Capture glaze tests, firing details, and creative progress—all in one simple printable. Make your projects easier to repeat and improve.
Apple Slice Pinch Pot Bowl
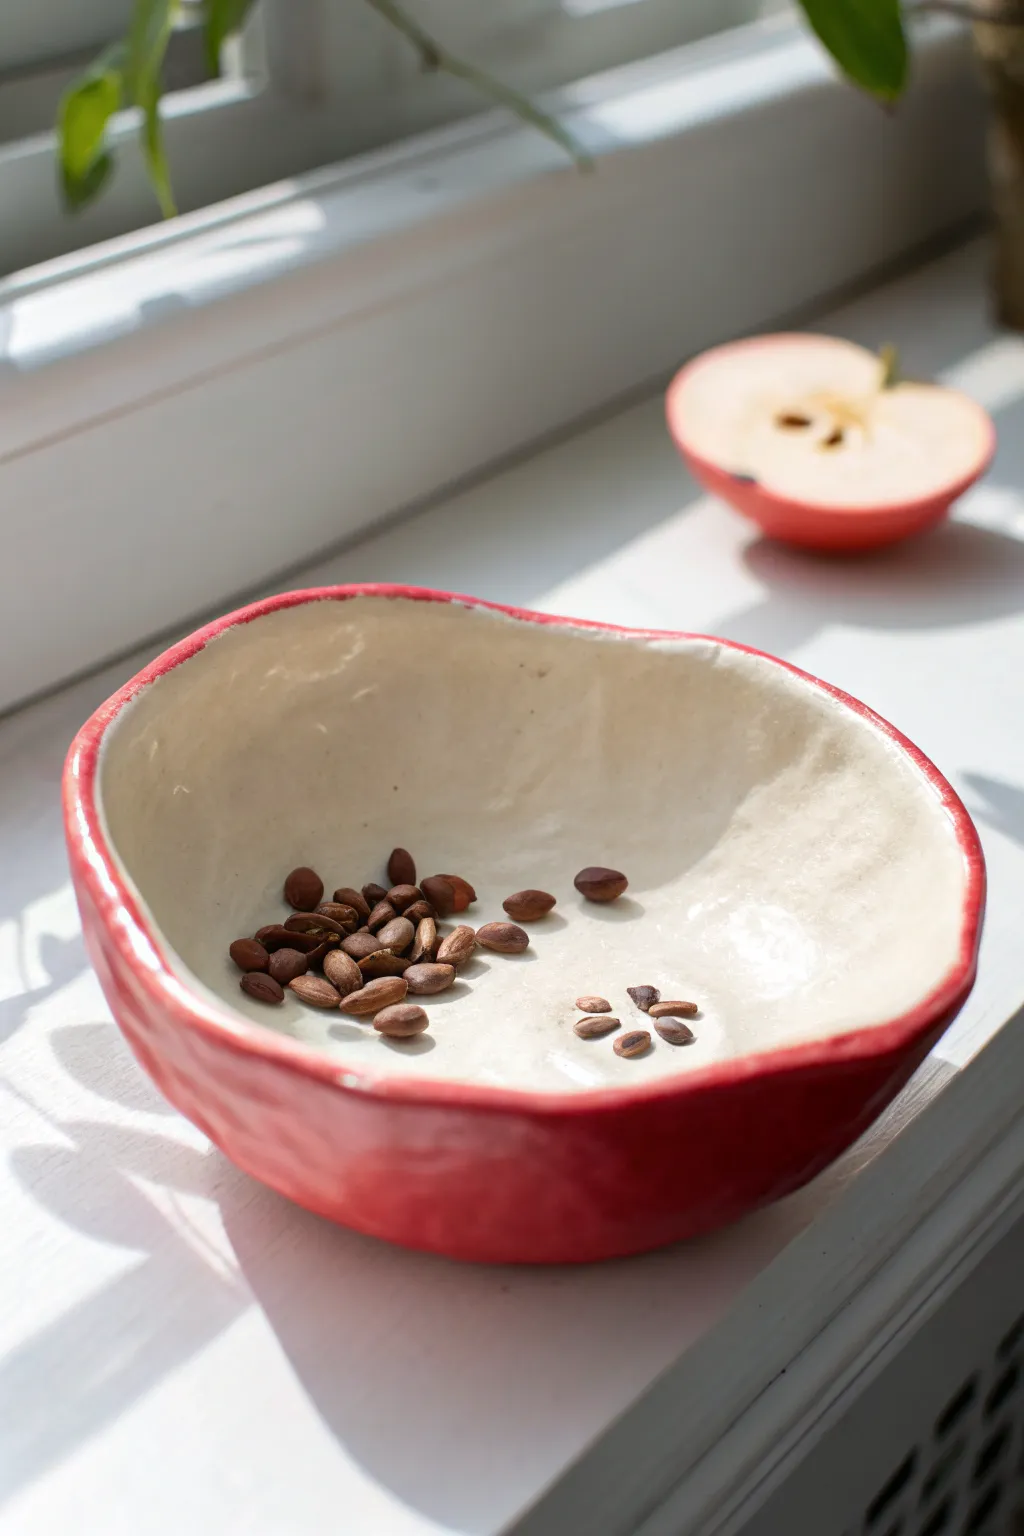
Capture the fresh, organic beauty of a sliced apple in this charming handmade ceramic bowl. The piece features a vibrant red exterior shell contrasting with a creamy white interior, mimicking the flesh of the fruit, complete with a gently undulating, natural rim.
Step-by-Step Tutorial
Materials
- White earthenware or stoneware clay
- Rolling pin
- Fettling knife or needle tool
- Small sponge
- Water cup
- Rib tool (optional)
- Underglaze (bright red)
- Clear glaze (food safe)
- Kiln (or access to a firing service)
- Paintbrushes (soft bristle)
Step 1: Forming the Bowl
-
Prepare the clay:
Begin with a ball of clay roughly the size of a large orange. Wedge it thoroughly to remove any air bubbles, which is crucial for preventing kiln explosions later. -
Begin the pinch:
Push your thumb into the center of the ball, leaving about a half-inch of thickness at the bottom. Start pinching the clay between your thumb and fingers, rotating the ball as you go to thin out the walls. -
Widen the form:
As you pinch upwards, gently pull the clay outward to create a wide, open bowl shape rather than a tall cup. Aim for a wall thickness of about 1/4 inch throughout. -
Shape the apple curve:
To mimic an apple slice, the bowl shouldn’t be a perfect circle. Gently squeeze opposite sides to elongate it slightly, creating a subtle oval or heart-like silhouette. -
Create the dip:
Use your finger to press a distinct indentation into the rim at one of the ‘top’ ends of the oval. This mimics the depression where the apple stem sits. -
Refine the rim:
Don’t smooth the rim perfectly flat. Instead, tap it lightly with your fingers to vary the height, giving it that organic, uneven look of a hand-sliced fruit. -
Smooth the interior:
Take your damp sponge or a flexible rib tool and smooth the inside of the bowl. You want to remove deep finger marks while keeping the handmade texture visible.
Cracking Up?
If you see small cracks forming on the rim while pinching, your clay is too dry. Dip your fingers in water and smooth the cracks immediately to rehydrate the clay.
Step 2: Drying and Refining
-
Slow drying:
Loosely cover your bowl with plastic and let it dry slowly to the leather-hard stage. This usually takes about a day depending on humidity. -
Exterior smoothing:
Once leather-hard, use a slightly damp sponge to wipe down the exterior. Smooth out any sharp ridges but keep the dimpled texture that resembles apple skin. -
Bone dry:
Remove the plastic and let the piece dry completely until it is bone dry. It will feel room temperature to the touch, not cool. -
Bisque fire:
Load the piece into the kiln for a bisque firing (usually Cone 04). This hardens the clay and prepares it for glazing.
Add a Stem
Roll a tiny coil of brown clay and attach it to the indentation in the rim before firing to create a realistic apple stem handle for your bowl.
Step 3: Glazing and Finishing
-
Clean the bisque:
Wipe the fired bisque ware with a clean, damp sponge to remove any kiln dust. This ensures the glaze adheres properly. -
Paint the exterior:
Apply 2-3 coats of bright red underglaze or glaze to the outside of the bowl. Bring the color just over the edge of the rim, creating a thin red line visible from the top. -
Glaze the interior:
Pour a creamy white or clear glaze into the interior. Swirl it around to coat the inside fully, then pour the excess back into your container. If you used underglaze outside, apply clear glaze over it now. -
Clean the foot:
Use a sponge to wipe away any glaze from the very bottom of the bowl where it will touch the kiln shelf. This prevents it from fusing to the shelf during firing. -
Final wipe:
Check the rim line. If the red glaze dripped too far into the white interior, gently wipe it back to keep a clean, thin border. -
Glaze fire:
Fire the piece again to the temperature required by your specific glaze (often Cone 05, 06, or 6). Let the kiln cool completely before opening. -
Styling note:
Once finished, I sometimes like to add real apple seeds or small brown pebbles inside for a playful trompe-l’œil effect.
Now you have a delightfully crisp piece of decor ready to hold your trinkets or snacks
Pumpkin Pinch Pot Candy Bowl
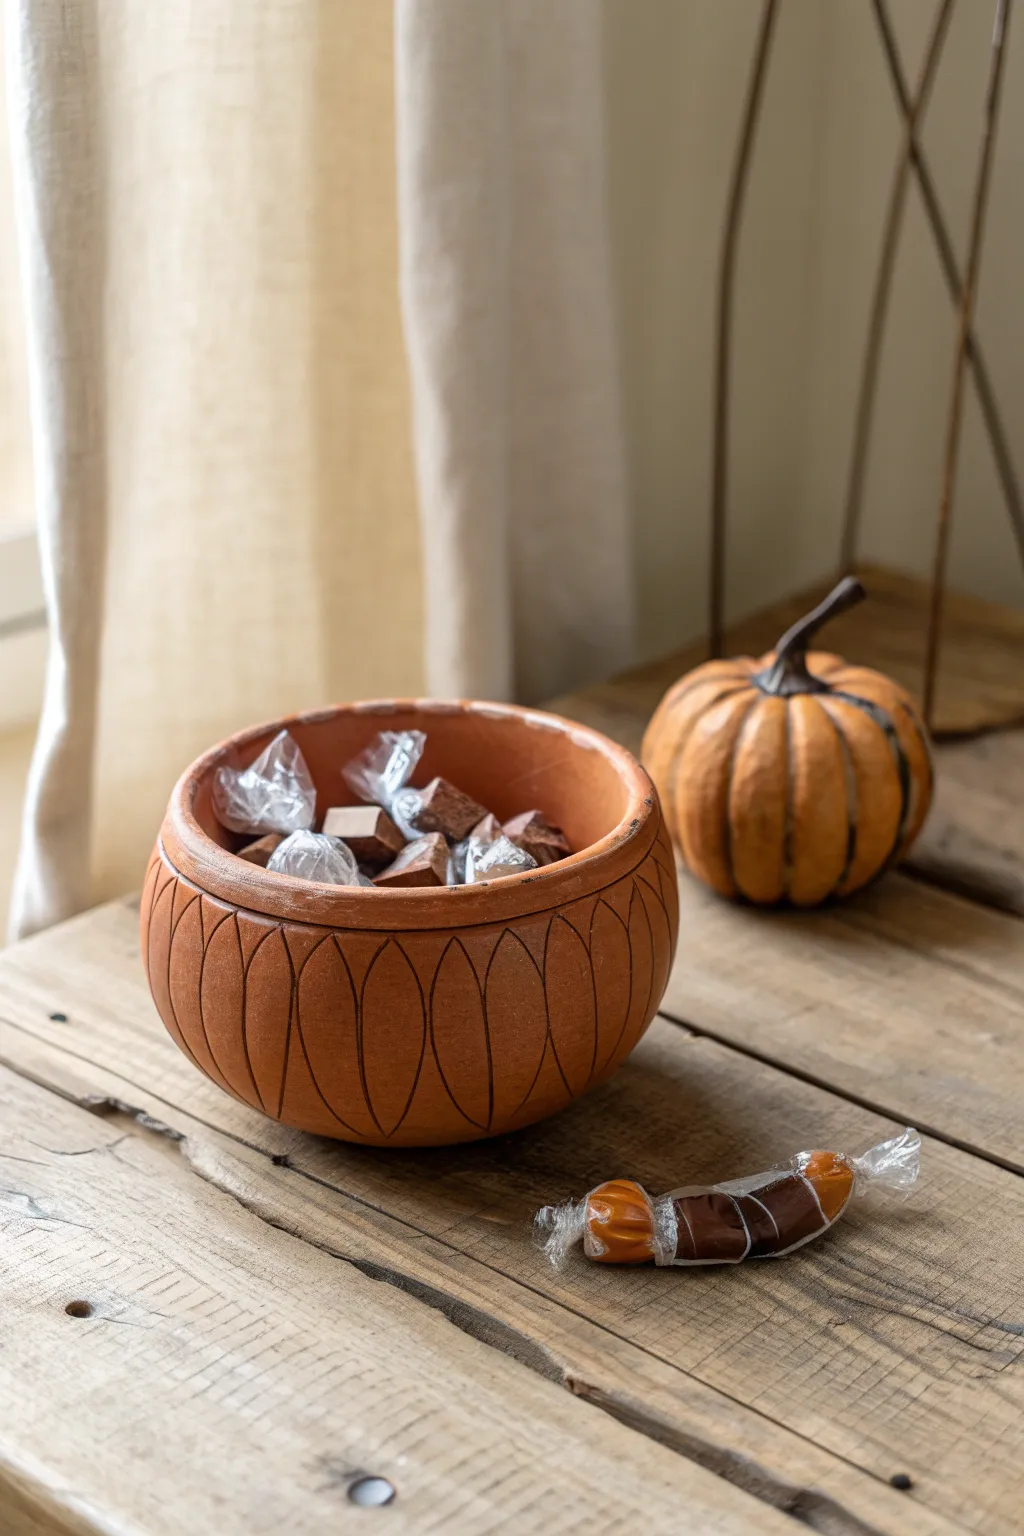
This rustic, terracotta-hued bowl brings a subtle hint of the pumpkin patch into your home decor without being overly literal. The simple carved ridges mimic the natural segments of a gourd, creating a charming vessel perfect for holding seasonal treats.
How-To Guide
Materials
- Terracotta-colored air-dry clay or polymer clay
- Rolling pin
- Small bowl of water (for smoothing)
- Needle tool or toothpick
- Loop tool or carving gouge
- Sponge
- Matte varnish or sealant
Step 1: Forming the Base
-
Prepare the clay:
Start with a large ball of terracotta clay, roughly the size of a grapefruit. Knead it well to remove air bubbles and ensure it is pliable. -
Begin the pinch:
Push your thumb into the center of the ball, stopping about half an inch from the bottom. This establishes the depth of your bowl. -
Shape the walls:
Rotate the ball in one hand while gently pinching the clay between your thumb and fingers with the other. Pull the clay upwards and outwards to thin the walls. -
Establish the curve:
Focus on creating a rounded, bulbous shape rather than straight sides. You want the middle of the bowl to be wider than the rim, similar to a pumpkin’s profile. -
Flatten the rim:
Once you have your desired shape, gently tap the rim against a flat surface or use a rolling pin to create a flat, uniform top edge. This gives the piece a more finished look. -
Smooth the surface:
Dip your finger or a small sponge into water and run it over the entire outside and inside surface to remove fingerprints and minor cracks.
Embrace the Texture
Don’t over-smooth the deeper grooves. Leaving a slight texture inside the carved lines creates shadow and depth, making the pumpkin segments look more realistic.
Step 2: Adding the Pumpkin Details
-
Mark vertical guides:
Using a needle tool, very lightly sketch vertical lines around the bowl to divide it into even segments. aim for about 12-16 sections depending on the bowl’s size. -
Carve the initial lines:
Take your loop tool or carving gouge and carve shallow grooves along your vertical guide lines. Start just below the rim and stop just before the bottom base. -
Create the enclosed shape:
At the top of each vertical groove, curve the line inward to meet its neighbor, creating a petal or arch shape near the rim. Repeat at the bottom to close the segment. -
Deepen the carving:
Go back over your carved lines to make them distinct. I find that going over them a second time really helps the pattern pop once the clay dries. -
Define the rim groove:
Carve a horizontal line all the way around the bowl, about a quarter-inch below the flat rim, separating the lip from the pumpkin body design. -
Clean up burrs:
Use a barely damp sponge or your fingertip to smooth down the rough clay burrs created by the carving process, being careful not to erase the lines.
Rim Cracking?
If the rim cracks while you pinch, your clay is likely too dry. Dip your fingers in water and smooth a little moisture back into the edge, compressing the clay together.
Step 3: Finishing Touches
-
Dry the piece:
Allow the clay to dry completely according to the package instructions. If using air-dry clay, turning it upside down halfway through helps the bottom dry evenly. -
Sand imperfections:
Once fully dry (or baked, if using polymer), use fine-grit sandpaper to gently buff the rim and any sharp edges. -
Clean dust:
Wipe the entire bowl with a dry cloth or soft brush to remove any clay dust from the sanding process. -
Apply sealant:
Brush on a coat of matte varnish. This seals the clay and deepens the terracotta color without making it look plasticky or shiny. -
Fill and enjoy:
Let the varnish cure fully before filling your new handmade bowl with wrapped candies.
This simple technique results in a sophisticated piece of seasonal decor that looks beautiful year after year
Flower Bloom Pinch Pot With Petal Rim
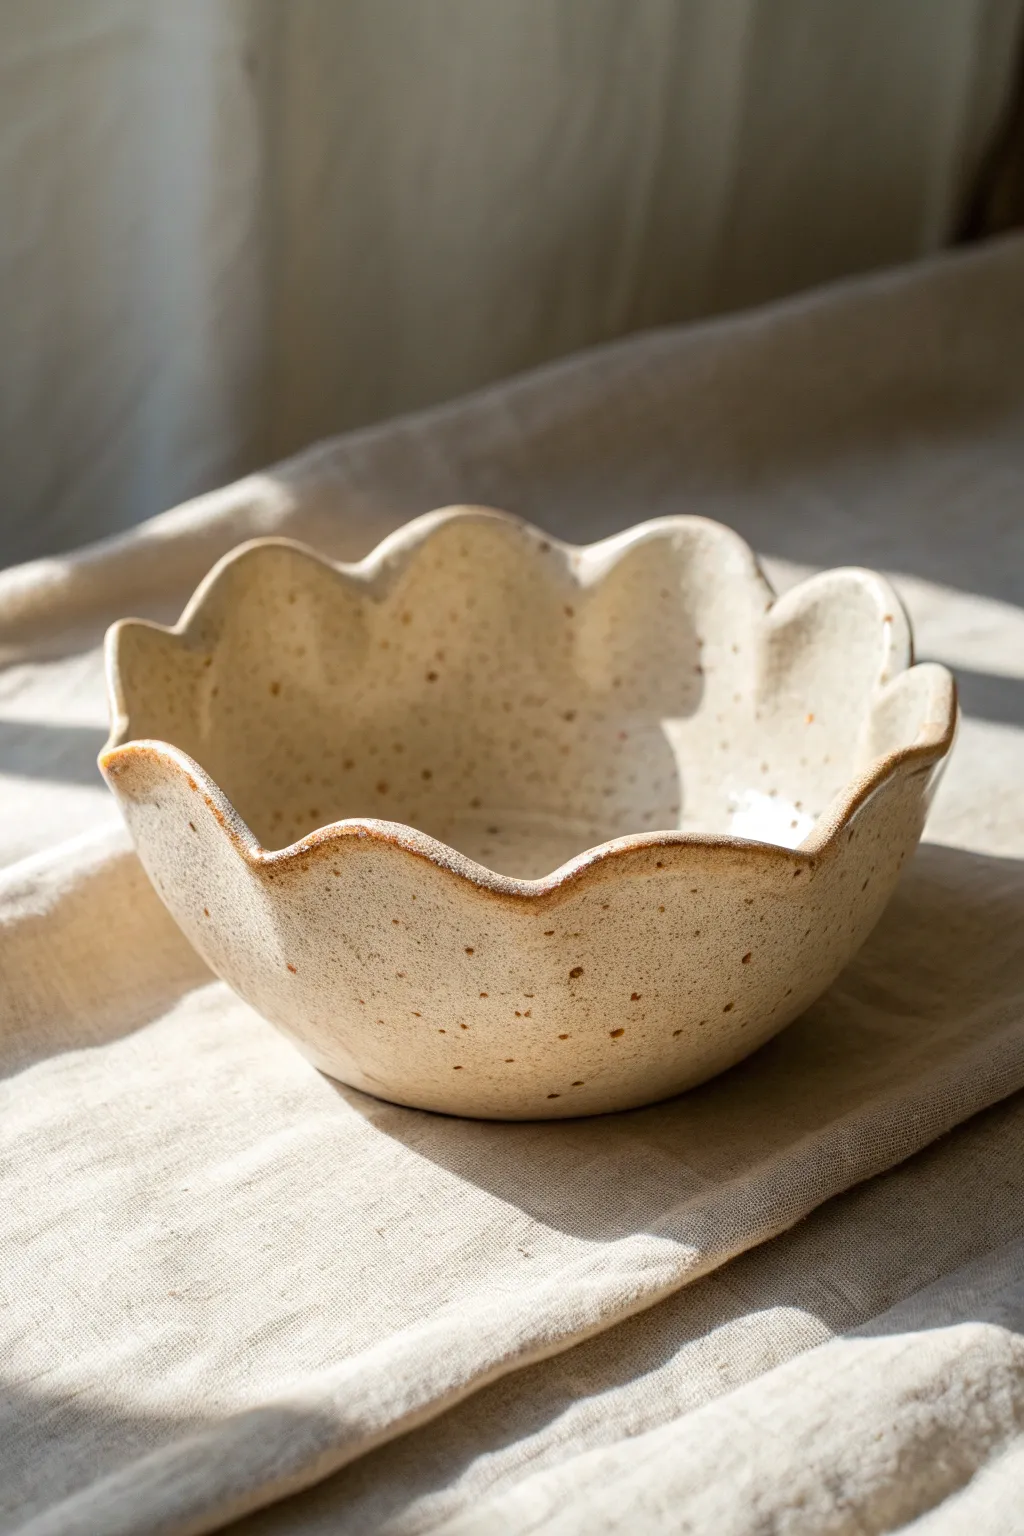
Embrace the organic beauty of hand-building with this charming flower-shaped bowl. Its gentle wavy rim and speckled creamy glaze mimic the delicate nature of a blooming white poppy, making it a perfect catch-all dish or decorative accent.
Step-by-Step
Materials
- Speckled buff stoneware clay (or polymer clay with faux speckles)
- Pottery sponge
- Modeling tool or wooden rib
- Needle tool
- Soft paintbrush
- Creamy white dipping glaze or brush-on glaze
- Iron oxide wash (optional, for rim definition)
- Kiln access (if using stoneware)
Step 1: Forming the Base
-
Create a sphere:
Begin with a ball of clay roughly the size of a large orange. Pat it firmly between your hands to compress the clay and ensure it is perfectly round. -
Open the pot:
Hold the ball in your non-dominant hand. Press your thumb into the center, stopping about a half-inch from the bottom to leave enough thickness for the base. -
Pinch the walls:
Rotate the ball slowly while rhythmically pinching the clay between your thumb (inside) and fingers (outside). Work from the bottom up, thinning the walls evenly. -
Widen the form:
As you pinch upward, gently pull the clay outward to create a wide, open bowl shape rather than a tall cup. Aim for walls that are roughly 1/4 inch thick throughout. -
Smooth the interior:
Use a barely damp pottery sponge to compress the inside floor and walls, smoothing out any deep fingerprints or cracks that formed during pinching.
Cracked Rim?
If the rim cracks while shaping the waves, the clay is too dry. Dab the crack with vinegar or slip, compress it back together, and smooth it over immediately.
Step 2: Sculpting the Petals
-
Mark the sections:
Lightly visualize or gently mark where your petals will go on the rim. Using your thumb on the inside and two fingers on the outside, gently push an indentation outward. -
Form the waves:
Between each outward push, use your index finger to gently press the rim inward. This alternating push-pull motion creates the undulating wave pattern of the flower. -
Refine the peaks:
Gently pinch the top of each ‘wave’ to slightly sharpen the petal tips, giving them distinct definition rather than a uniform zigzag. -
Flatten the base:
Tap the bowl gently on your work surface to create a small, flat foot so the bowl sits stable without rocking. -
Dry to leather hard:
Set the piece aside until it is firm enough to handle without warping, known as the leather-hard stage.
Step 3: Finishing and Glazing
-
Smooth the rim:
Once firm, use a damp sponge or your finger to run over the petal edges again, ensuring they are rounded and comfortable to the touch. -
Bisque fire:
Fire the piece in a kiln according to your clay body’s instructions (usually Cone 04 or 06) to prepare it for glazing. -
Apply base glaze:
Dip the bowl into a creamy, translucent white glaze. If brushing, apply 2-3 even coats, allowing each to dry slightly in between. -
Highlight the rim:
For that toasted edge look, carefully sponge away a tiny bit of glaze on the very rim, or lightly paint a diluted iron oxide wash along the crests of the waves. -
Glaze fire:
Load the kiln for the final glaze firing (often Cone 5 or 6). Ensure the foot is wiped clean of glaze so it doesn’t fuse to the kiln shelf.
Dual-Tone Magic
Use a darker clay body like a speckled brown stoneware. When dipping in white glaze, the dark clay will naturally ‘break’ through at the sharp rim edges.
Now you have a serene, organic vessel ready to hold your trinkets or simply catch the sunlight on a linen tablecloth
Handled Pinch Pot Mug
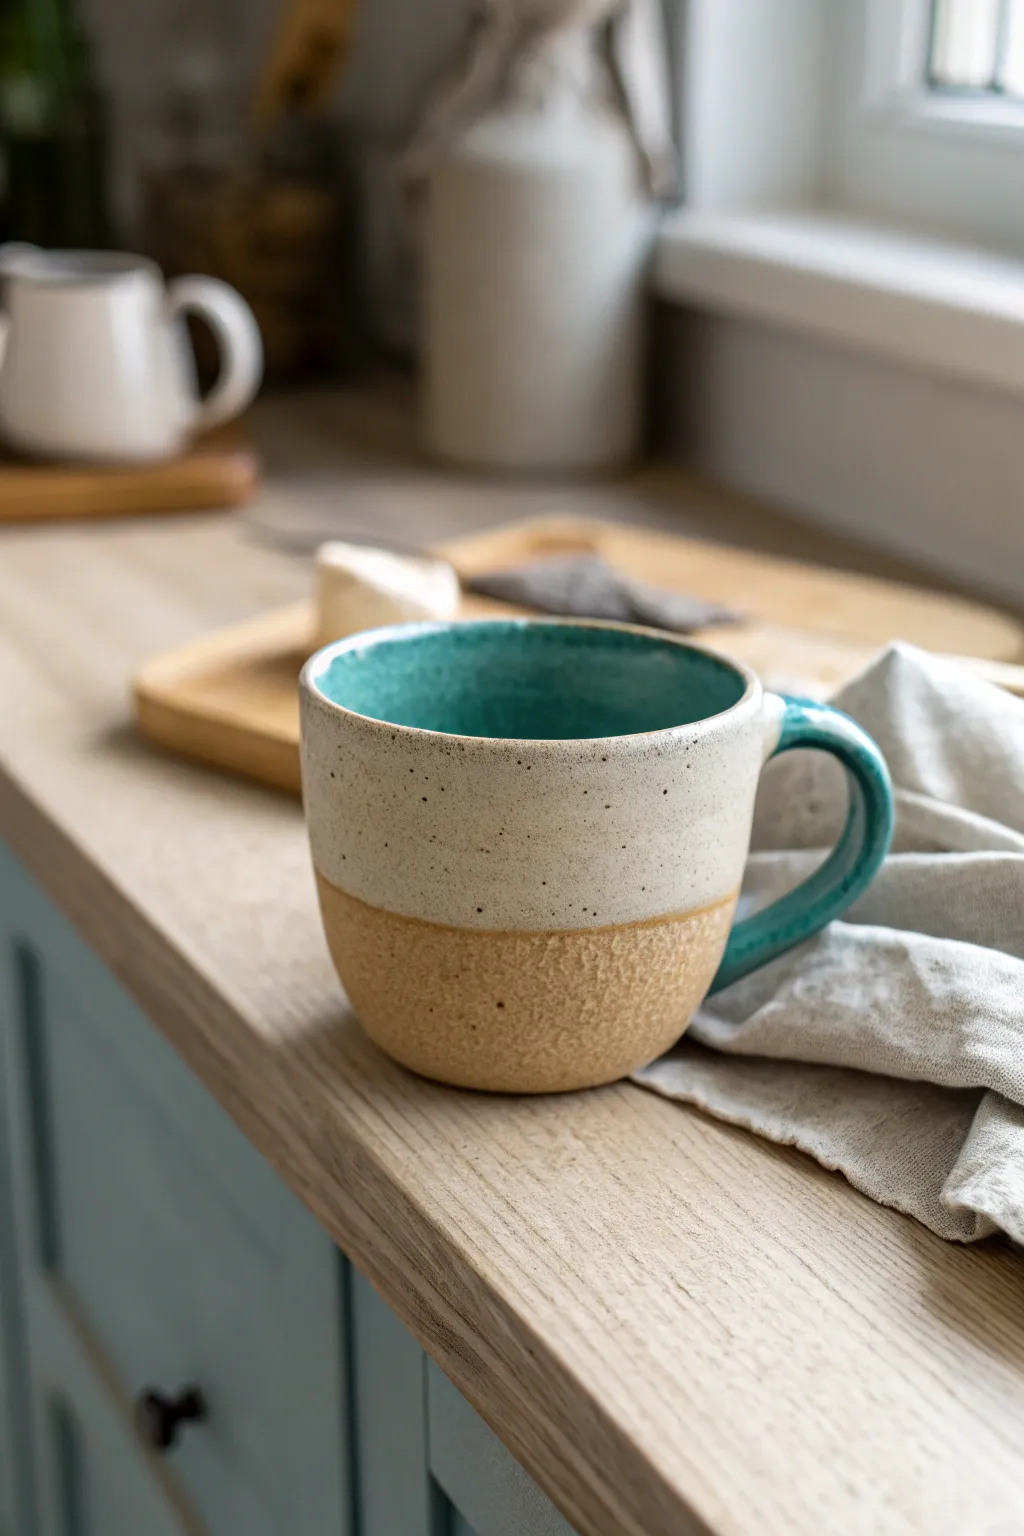
This charming mug combines the raw beauty of unglazed stoneware with a smooth, glossy pop of teal color. Its cozy, heavy-bottomed shape is formed using the pinch method, making it a perfect beginner-friendly project that looks impressively professional.
Step-by-Step Guide
Materials
- Speckled stoneware clay (mid-fire)
- Pottery wire
- Sponge
- Fettling knife
- Rib tool (wooden or silicone)
- Serrated metal rib or scoring tool
- Slip (clay mixed with water)
- Teal glossy glaze (food safe)
- White or clear matte glaze (optional)
- Wax resist
- Kiln access
Step 1: Forming the Body
-
Prepare the clay ball:
Cut a pound of speckled stoneware clay and wedge it thoroughly to remove air pockets. Pat it into a smooth, round ball shape in your hands. -
Open the pinch pot:
Hold the ball in your non-dominant hand. Press your thumb into the center, stopping about half an inch from the bottom. This thickness is crucial for that sturdy, heavy-bottomed feel. -
Pinch the walls:
Begin pinching the clay between your thumb and fingers, rotating the ball as you go. Work from the bottom upward, trying to keep the walls an even thickness. -
Create the cylinder shape:
Instead of letting the pot flare out wide like a bowl, gently collar the clay by squeezing inward as you pinch up to create vertical sidewalls. -
Refine the surface:
Once you have your basic shape, use a damp sponge to smooth the rim. I like to run a wooden rib straight up the outside to clean up lumpy finger marks while keeping that organic texture. -
Define the base:
Tap the bottom of the mug against your table to flatten it slightly for stability. You want a distinct break where the wall meets the floor.
Uneven Drying?
Handles dry faster than bodies, causing cracks. Wrap the handle tightly in plastic while leaving the body exposed for a few hours to equalize the moisture content before final drying.
Step 2: Adding the Handle
-
Pull a handle blank:
Take a separate small lump of clay and roll it into a thick carrot shape. Wet your hand and gently pull the clay downward to elongate it into a strap. -
Curve and dry:
Curve the strap into a ‘C’ shape or ear shape that fits your hand comfortably. Lay it on its side to stiffen up slightly until it is leather hard—firm but bendable. -
Score the attachment points:
Hold the handle up to the mug to check placement. Use your serrated tool to score (scratch) the mug surface and the ends of the handle where they will connect. -
Attach firmly:
Apply slip to the scored areas. Press the handle firmly onto the mug body. Wiggle it slightly to lock the clay particles together. -
Reinforce the join:
Use a small coil of clay or just your fingertip to smudge the clay from the handle onto the mug body, ensuring there are no cracks. -
Final smoothing:
Wipe down any rough edges with a barely damp sponge. Let the fully assembled mug dry slowly under loose plastic to prevent the handle from cracking away.
Textured Base
For extra tactile contrast, lightly press coarse sandpaper or a rasp against the bottom third of the leather-hard clay before bisque firing. This emphasizes the raw stone look.
Step 3: Glazing and Finishing
-
Bisque fire:
Once bone dry, fire the piece in the kiln to cone 04 (or your clay’s specific bisque temperature). -
Apply wax resist:
Paint liquid wax resist on the bottom third of the mug’s exterior. This will keep the raw, speckled clay exposed and create that beautiful straight line. -
Glaze the interior:
Pour your glossy teal glaze inside the mug, roll it around to coat the entire inner surface, and pour the excess back out. -
Dip the rim and handle:
Hold the mug by the base and dip the top two-thirds into the teal glaze. The wax resist will stop the glaze at your defined line -
Clean the foot:
Wipe any stray droplets of glaze off the unglazed bottom section and the very bottom foot ring with a damp sponge. -
Glaze fire:
Fire the mug a final time to the glaze temperature (usually Cone 5 or 6 for stoneware) to melt the glass and vitrify the clay.
Enjoy sipping your morning coffee from a vessel that feels as grounded and natural as the earth it came from
Lidded Pinch Pot Keepsake Jar
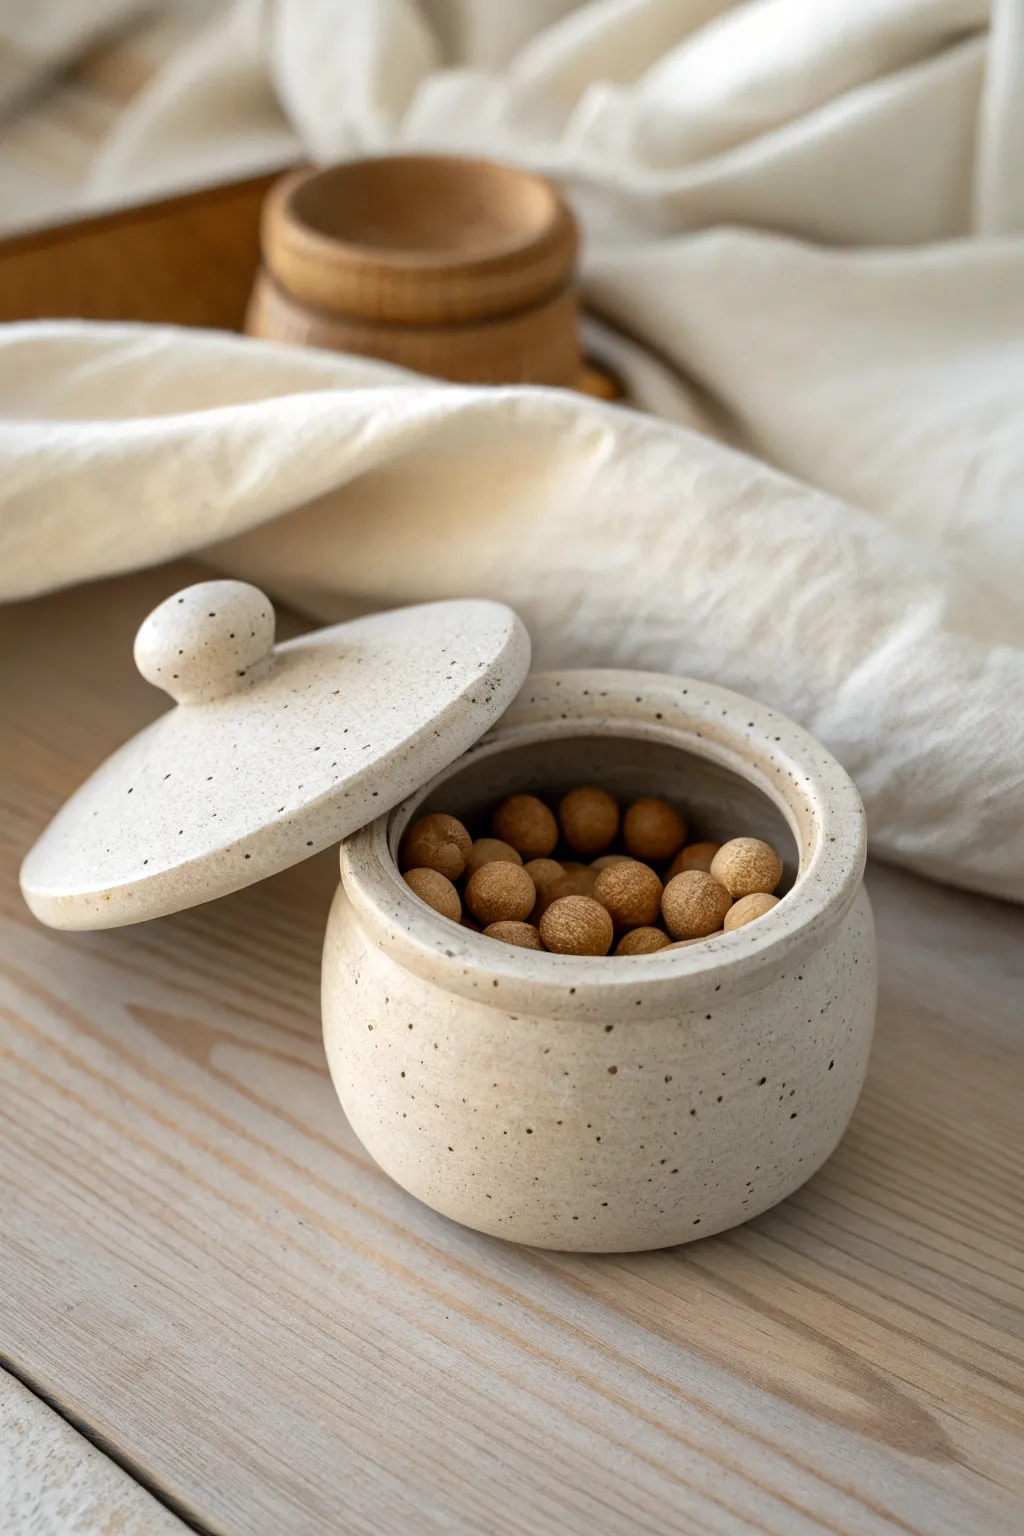
This charming, minimalistic jar combines the organic feel of hand-built pottery with a functional lid, perfect for storing tiny treasures or spices. The speckled finish mimics the look of high-fire stoneware, giving it a professional and earthy aesthetic right from your home workspace.
Step-by-Step Tutorial
Materials
- Speckled air-dry clay (or polymer clay with granite effect)
- Small bowl of water
- Pottery sponge
- Plastic card or rib tool
- Smoothing tool or wooden spoon
- Needle tool
- Fine-grit sandpaper
- Clear matte varnish or sealant
Step 1: Forming the Base
-
Prepare the Clay Ball:
Start by taking a fist-sized amount of speckled clay. Roll it firmly between your palms to create a smooth, tight sphere, ensuring there are no trapped air bubbles or large cracks. -
Open the Pot:
Hold the sphere in one hand and gently press your thumb into the center, stopping about a half-inch from the bottom. This thickness is crucial for a sturdy base. -
Pinch the Walls:
Using your thumb on the inside and fingers on the outside, begin pinching the clay walls. Rotate the clay slowly as you pinch, working from the bottom up to maintain an even thickness. -
Shape the Cylinder:
Aim for a vertical, cylindrical shape rather than a wide bowl. I find gently tapping the base on the table helps flatten the bottom and gives the walls a straight upward directory. -
Refine the Rim:
Once the walls are your desired height, use a damp sponge to smooth the rim. Tap the rim gently with a flat tool or paddle to ensure it is level, which is essential for the lid to sit correctly.
Wobbly Lid Fix
If the lid wobbles after drying, place a sheet of sandpaper flat on the table. Invert the pot and sand the rim in a circular motion until completely level.
Step 2: Creating the Lid
-
Measure the Opening:
Before making the lid, measure the diameter of your pot’s opening. You’ll need the lid to simply rest on top, slightly wider than the rim. -
Flatten a Slab:
Take a smaller ball of clay and flatten it into a thick disc. You can use a rolling pin or just press it with your palm until it is slightly larger than the pot’s opening. -
Shape the Lid Curvature:
Gently press the center of the disc to give it a very slight dome shape. Smooth the edges with a wet finger so they are rounded and durable. -
Make the Flange (Optional):
To keep the lid from sliding off, roll a thin coil of clay. Score and slip (scratch and wet) the underside of the lid and attach the coil in a circle that fits *inside* the pot’s rim. -
Form the Knob:
Roll a small, marble-sized ball of clay. Slightly flatten the bottom of it. -
Attach the Knob:
Score the top center of your lid and the bottom of the knob. Add a dab of water or slip, press them together firmly, and use a modeling tool to smooth the seam so the knob looks seamless.
Faux-Ceramic Look
Can’t find speckled clay? Mix used dried coffee grounds or black pepper into plain white air-dry clay before sculpting for an instant granite texture.
Step 3: Finishing Touches
-
Smooth the Surfaces:
Dip your sponge or finger in water and go over the entire surface of the pot and lid. This brings the fine grain of the clay to the surface and removes fingerprints. -
Add Texture Details:
If you want to enhance the speckled look, you can gently flick a toothbrush with diluted dark brown acrylic paint over the wet clay, or simply let the natural clay speckles shine. -
Slow Drying:
Place the lid loosely on the pot and cover the whole piece with a loose plastic bag for the first 24 hours. Drying it slowly prevents the clay from warping or cracking. -
Air Dry:
Remove the plastic and let the pieces dry completely for another 24-48 hours until the clay lightens in color and feels hard. -
Sanding:
Once bone dry, use fine-grit sandpaper to gently buff away any sharp edges or rough spots, especially around the rim and the knob. -
Seal the Jar:
Apply a coat of clear matte varnish. This protects the clay from moisture and gives it that finished, ceramic feel without making it too glossy.
Enjoy using your artisanal jar to hold small trinkets or simply as a serene decorative accent on your shelf
Nesting Pinch Pot Bowl Trio
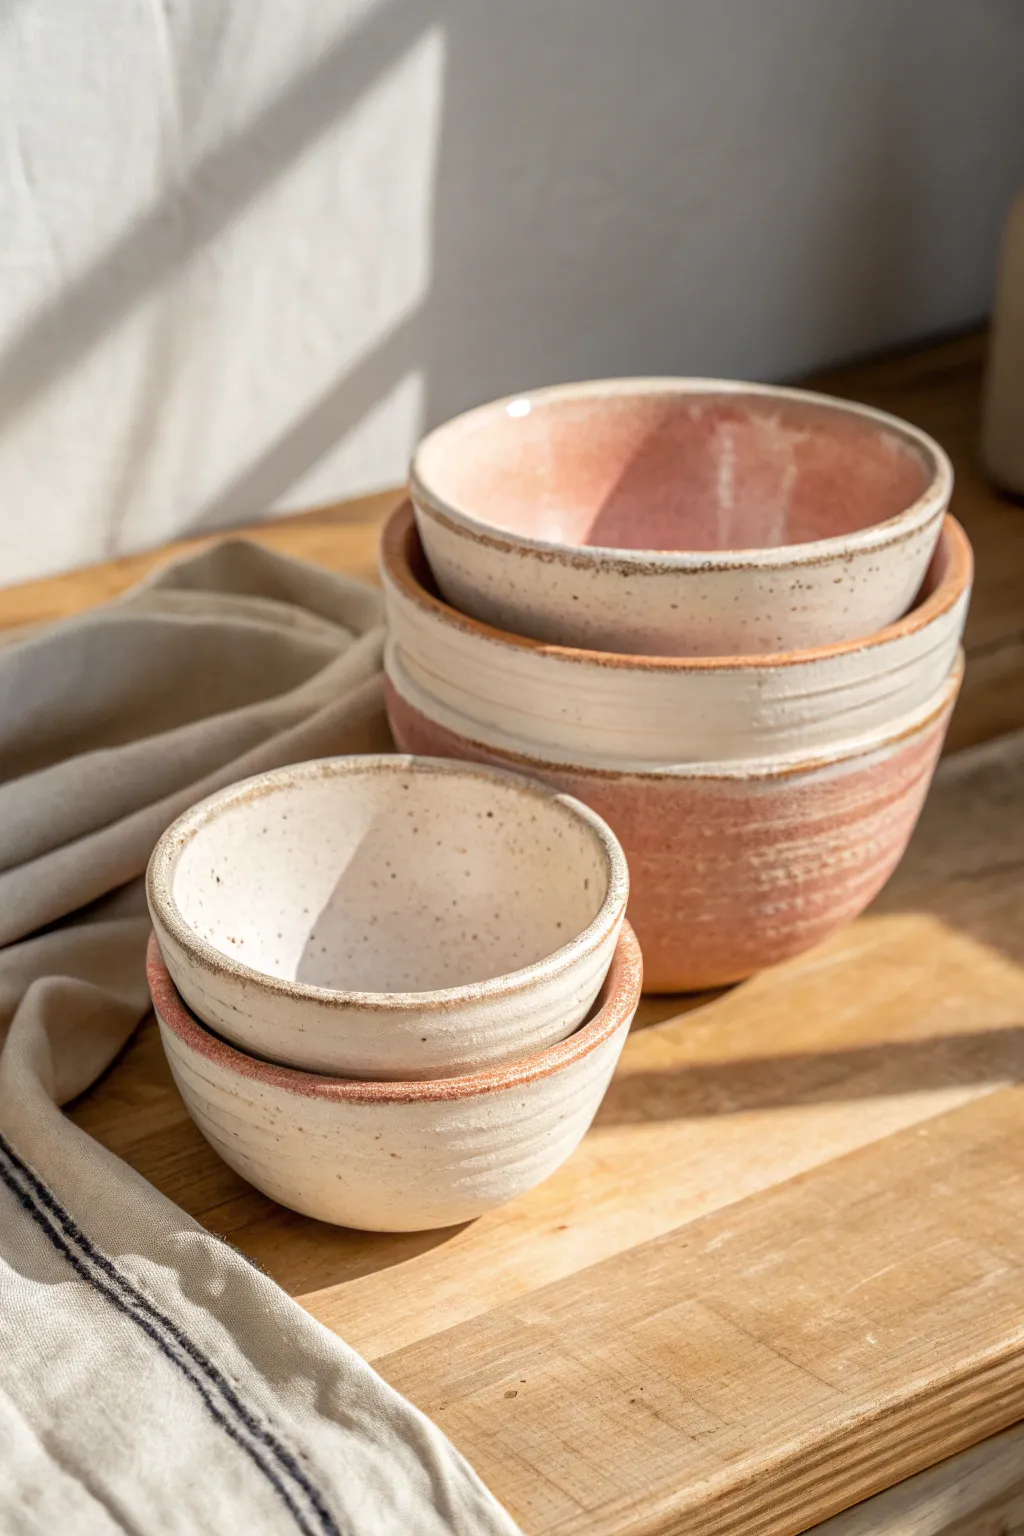
Create a charming set of nesting bowls that balances rustic texture with modern glazing. This project focuses on achieving consistent wall thickness and a beautiful speckled finish that looks perfect on any kitchen counter.
Detailed Instructions
Materials
- Speckled buff stoneware clay (about 3-4 lbs)
- Potter’s wire tool
- Rib tool (flexible metal or rubber)
- Sponge
- Bowl of water
- Needle tool
- Scoring tool (or serrated rib)
- Rolling pin (optional)
- Kiln (or access to a firing service)
- Speckled cream glaze
- Soft pink glaze (food safe)
Step 1: Prepping and Pinching
-
Portion the clay:
Cut your clay into three distinct sizes. You want a large, medium, and small ball, with about a 25-30% size difference between each to ensure they nest comfortably later. -
Shape the spheres:
Roll each portion into a smooth, tight sphere. Pat them firmly to remove any trapped air bubbles, as these can cause issues during firing. -
Open the clay:
Start with the largest ball. Hold it in your non-dominant hand and press your thumb deep into the center, stopping about a half-inch from the bottom base. -
Pinch the walls:
Using a rhythmic pinching motion, rotate the ball while pressing between your thumb and fingers. Work from the bottom up, thinning the walls gradually. -
Establish the curve:
As the bowl widens, focus on creating a gentle, upward curve rather than a flat plate shape. Keep the rim slightly thicker than the walls for better durability. -
Repeat for all sizes:
Form the medium and small bowls using the same technique. Periodically test-fit them inside the larger bowl to ensure the diameters are distinct enough to nest.
Keep it centered
When pinching, keep your elbows tucked into your ribs. This anchors your arms and helps you achieve a more symmetrical circle as you rotate the clay.
Step 2: Refining and Texturing
-
Refine the shape:
Once the clay has stiffened slightly to a leather-hard state, use a flexible rib tool to smooth the interior curve. I prefer to leave the exterior slightly textured for that handmade feel. -
Level the rims:
Place each bowl upside down on a flat surface. If there is a wobble or the rim is uneven, gently tap it against the table or use a needle tool to trim the high spots. -
Add texture lines:
For the grooved look seen on the larger bowls, place the bowl on a banding wheel (or rotate manually). Hold a loop tool or even a credit card edge against the exterior while spinning it to create horizontal grooves. -
Smooth the lips:
Run a damp sponge over the rim of each bowl. You want a rounded, soft edge that will feel comfortable to hold and drink from later. -
Dry thoroughly:
Cover the bowls loosely with plastic for a day to equalize moisture, then uncover and let them dry completely until they are bone dry and room temperature to the touch.
Step 3: Glazing and Firing
-
Bisque fire:
Fire the bone-dry greenware to Cone 04 (or your clay’s specific bisque temperature). This hardens the clay and prepares it for glazing. -
Wax the bottoms:
Apply a coat of wax resist to the bottom foot of each bowl and about 1/4 inch up the side. This prevents the glaze from fusing your bowl to the kiln shelf. -
Glaze the interiors:
For the larger bowls, pour a soft pink glaze into the interior, swirl it to coat the walls, and pour out the excess. For the smaller bowls, use the cream glaze for the inside. -
Dip the exteriors:
Hold the bowls by the foot and dip the exterior into a speckled cream or matte white glaze. Let the exterior glaze overlap slightly with the interior rim for a nice transition. -
Clean deeply:
Use a sponge to wipe away any stray glaze droplets on the waxed bottom. Any glaze left here will ruin your shelf. -
Glaze fire:
Load the kiln carefully, ensuring bowls aren’t touching. Fire to Cone 6 (or your glaze’s maturity temperature). Allow the kiln to cool naturally before unloading.
Uneven drying cracks?
If rims dry faster than thick bases, cracks form. Dry bowls upside down or loosely cover rims with plastic to slow their drying rate.
Now you have a stunning set of functional art ready for your next dinner party
Double Pinch Pot Snack-and-Dip Dish
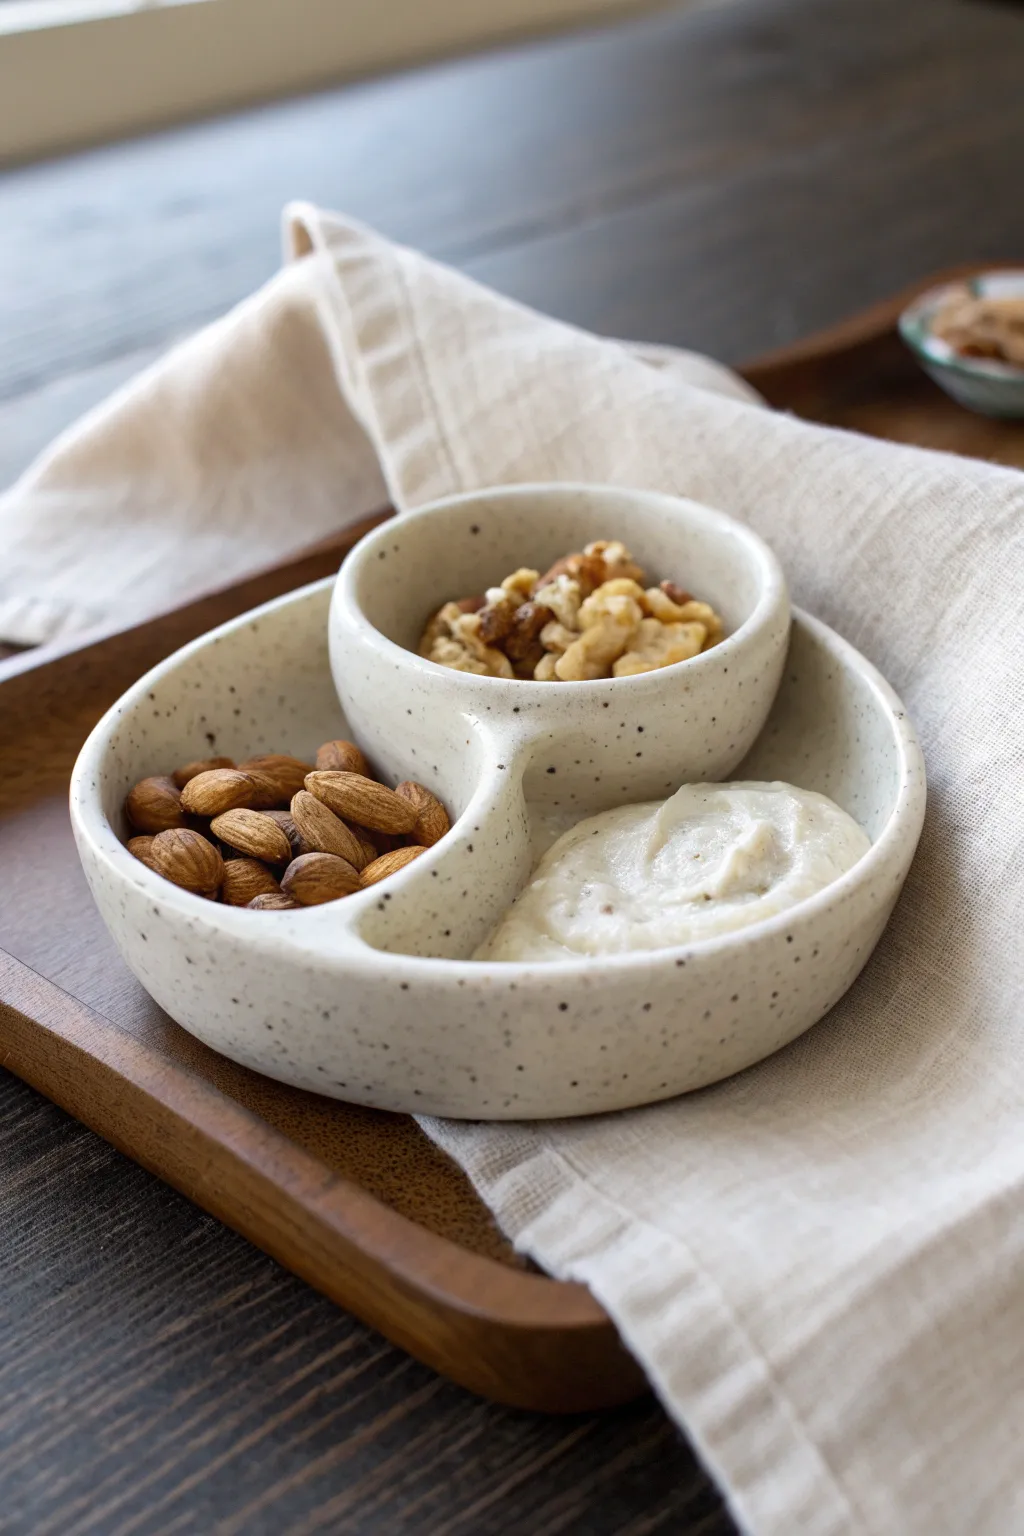
Elevate your snacking game with this cleverly designed serving dish that features distinct compartments for nuts, dips, and treats. The organic, speckled finish gives it a modern farmhouse aesthetic, while the connected pinch pot construction makes it a sturdy and satisfying project to build.
Step-by-Step
Materials
- Speckled stoneware clay (mid-fire)
- Needle tool
- Scoring tool (or serrated rib)
- Slip (clay and water slurry)
- Wooden modeling tool
- Yellow finishing sponge
- Smooth river stone or metal spoon (for burnishing)
- Clear matte or satin glaze
- Kiln access
Step 1: Forming the Base Pots
-
Prepare your clay:
Begin by wedging your speckled stoneware clay thoroughly to remove any air bubbles. Divide the clay into three balls: one large ball (about the size of a grapefruit) for the main body, and a slightly smaller ball (large orange size) for the dip cup. -
Open the large pinch pot:
Take the larger ball of clay and press your thumb deep into the center. Rotate the ball in your palm while gently pinching the walls between your thumb and fingers to open it up into a wide, shallow bowl shape. -
Create the smaller vessel:
Repeat the pinching process with the smaller ball of clay. create a slightly deeper, steeper-walled cup shape compared to the first wide bowl. Aim for a uniform wall thickness of about 1/4 inch on both pieces. -
Refine the rims:
Before joining, gently tap the rims of both pots against your work surface to ensure they are level. Smooth any cracks that may have formed during opening with a damp sponge.
Step 2: Joining and Shaping
-
Plan the connection:
Place the smaller pot inside or adjacent to the larger pot to visualize the layout. For the design in the photo, the smaller cup is nestled *into* the larger bowl, essentially dividing the larger bowl into two crescent sections. -
Modify the large form:
Gently press one side of the large bowl inward to create a “dent” or negative space where the smaller cup will sit. This transforms the large bowl from a circle into a kidney bean or crescent shape. -
Score the contact points:
Mark the areas where the two pots will touch. Use your scoring tool to vigorously scratch up the clay surface on both the outside of the small cup and the indented wall of the large bowl. -
Apply slip and attach:
Generously dab slip onto the scored areas. Press the two forms together firmly, wiggling them slightly to lock the clay particles together. -
Blend the seams:
Using a wooden modeling tool, drag clay from one pot across the seam to the other to physically merge them. Do this on all accessible sides of the join. I find using the rounded back of a spoon helps smooth this join line until it disappears. -
Reinforce the division:
The wall of the smaller cup now acts as a divider. Ensure the connection is seamless so it looks like one organic unit emerging from the clay, rather than two separate pots glued together.
Pro Tip: Consistent Thickness
Check wall thickness by using a needle tool to poke through the bottom. If it’s too thick (>1/2″), trim away excess clay with a loop tool once leather hard to reduce weight.
Step 3: Refining and Glazing
-
Smooth the interior:
Use a damp sponge to wipe down the interior walls, ensuring the transition between the compartments is smooth and easy to clean later. -
Level the rim:
Check the overall height. If the divider cup is much taller than the outer bowl, you may want to trim it slightly or gently pinch the outer walls up to match, creating a cohesive silhouette. -
Dry slowly:
Cover the piece loosely with plastic to let it dry slowly for a day or two. This prevents the joined areas from cracking as they shrink. -
Bisque fire:
Once bone dry, fire the piece in a kiln to the bisque temperature appropriate for your clay body (usually cone 04 or 06). -
Apply clear glaze:
Dip or brush a clear matte or satin glaze over the entire piece. The clear glaze is crucial as it allows the natural speckles of the clay body to shine through, just like in the reference image. -
Glaze fire:
Fire the piece a final time to the clay’s maturity temperature (likely cone 5 or 6 for stoneware). Ensure the bottom is wiped clean of glaze before firing.
Level Up: Texture Play
Before firing, leave the outside of the bowl unglazed raw clay for a rough texture, and only glaze the food-safe interior for a beautiful tactile contrast.
Now you have a stunning, minimal serving vessel ready for your next gathering
Carved Geometric Pinch Pot Pattern
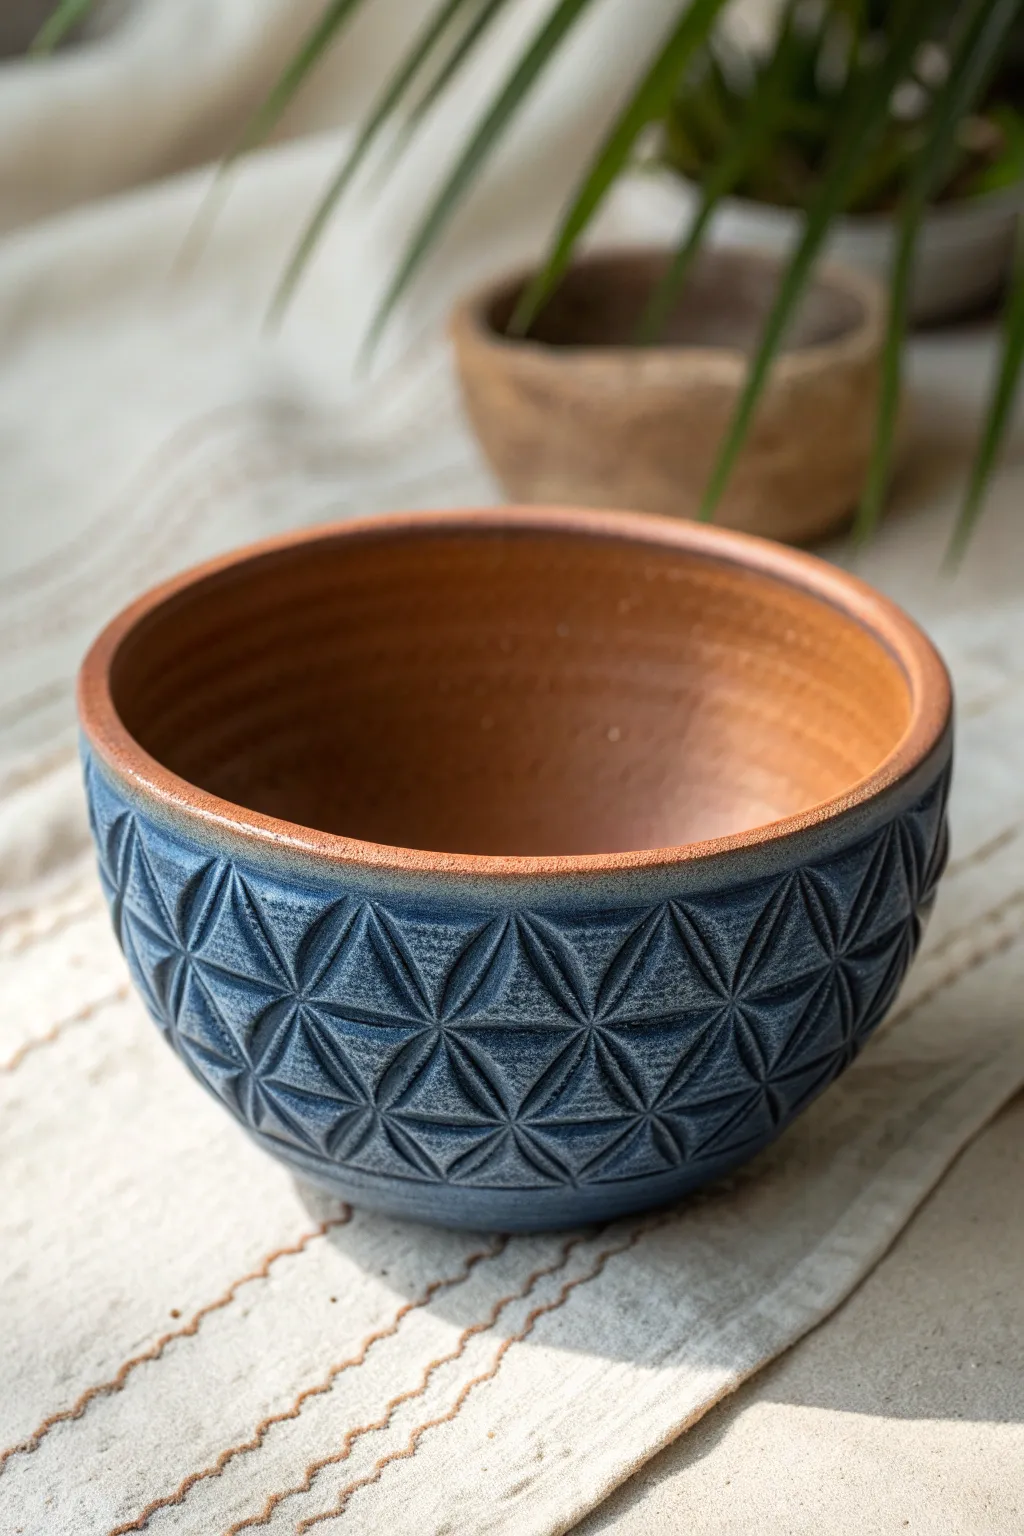
Transform a simple pinch pot into a mesmerizing piece of art with this intricate geometric design. The contrast between the deep, breaking blue glaze on the textured exterior and the warm, unglazed terracotta interior creates a stunning, tactile finish.
Detailed Instructions
Materials
- Red earthenware or terracotta clay
- Loop tool (small)
- Needle tool
- Flexible metal rib
- Sponge
- Ruler or measuring tape
- Compass (optional but helpful)
- Breaking blue stoneware glaze (or similar reactive glaze)
- Wax resist (optional)
Step 1: Forming the Base
-
Wedging the clay:
Begin with a ball of terracotta clay roughly the size of a large orange. Wedge it thoroughly to remove air bubbles and ensure the consistency is even throughout. -
Opening the pot:
Hold the ball in one hand and press your thumb into the center, stopping about a half-inch from the bottom. This establishes your base depth. -
Pinching the walls:
Using a rhythmic pinching motion with your thumb inside and fingers outside, rotate the clay. Gently squeeze the walls thinner, working from the bottom up to the rim. -
Refining the shape:
Continue pinching until you have a deep, hemispherical bowl shape. Aim for a wall thickness of about 3/8 inch to allow depth for carving later. -
Smoothing the surface:
Once the shape is set, use a flexible metal rib to scrape and smooth the exterior. You want to remove finger marks and create a clean canvas for your carving. -
Leather-hard drying:
Set the pot aside until it reaches a leather-hard state. The clay should be firm enough to hold its shape without warping but soft enough to carve into easily.
Crisp Carving Lines
If your clay drags or tears while carving, it’s too wet. Let it dry for another hour. If it crumbles or chips, it’s too dry—mist it lightly and wrap in plastic to rehydrate.
Step 2: Carving the Geometry
-
Marking the grid:
Lightly use a needle tool to scratch a horizontal guide line around the circumference of the pot. You can use a compass or ruler to mark equidistant points along this line where the pattern centers will be. -
Sketching the pattern:
Lightly sketch the six-pointed petal shapes (the ‘Flower of Life’ pattern) using the needle tool. The tips of the leaves should touch, creating a web of intersecting triangles. -
Initial carving:
Using a small, sharp loop tool, begin carving out the negative space inside the triangles formed by the intersecting petals. Keep your tool angle consistent. -
Deepening the relief:
Make a second pass to deepen the triangular indentations. I find it helpful to slope the cut inward, so the deepest part is in the center of each triangle. -
Refining edges:
Use a slightly damp sponge or a soft brush to gently smooth the sharp burrs created by carving, but be careful not to wash away the crisp lines of the pattern. -
Drying completely:
Allow the pot to dry very slowly to the bone-dry stage. Uneven drying can cause cracks, especially where walls are thinner due to carving.
Step 3: Glazing and Firing
-
Bisque fire:
Fire the piece in a kiln to cone 04 (or your clay body’s specific bisque temperature). -
Waxing the interior:
If you want to keep the interior unglazed like the example, carefully apply wax resist to the inside of the bowl and the very top edge of the rim. -
Applying the glaze:
Dip the exterior of the bowl into a breaking blue glaze. This type of glaze is crucial because it pools darkly in the carved recesses and breaks to a lighter color on the sharp ridges. -
Cleaning the foot:
Sponge off any glaze that may have dripped onto the bottom foot of the bowl to prevent it from sticking to the kiln shelf. -
Final wipe:
Use a damp sponge to wipe any stray glaze droplets off the rim where it meets the wax resist, ensuring a clean, crisp line between the blue and the terracotta. -
Glaze fire:
Fire the piece again to the maturation temperature of your glaze and clay body (typically cone 5 or 6 for this look).
Glaze Pooling
Choose a glaze labeled ‘breaking’ or ‘reactive’ translucent. Opaque glazes will hide your hard carving work, while reactive ones highlight the texture perfectly.
Once cooled, the light will catch the ridges of your carving, revealing the stunning depth of your handiwork
Monster Mouth Pinch Pot Sculpture
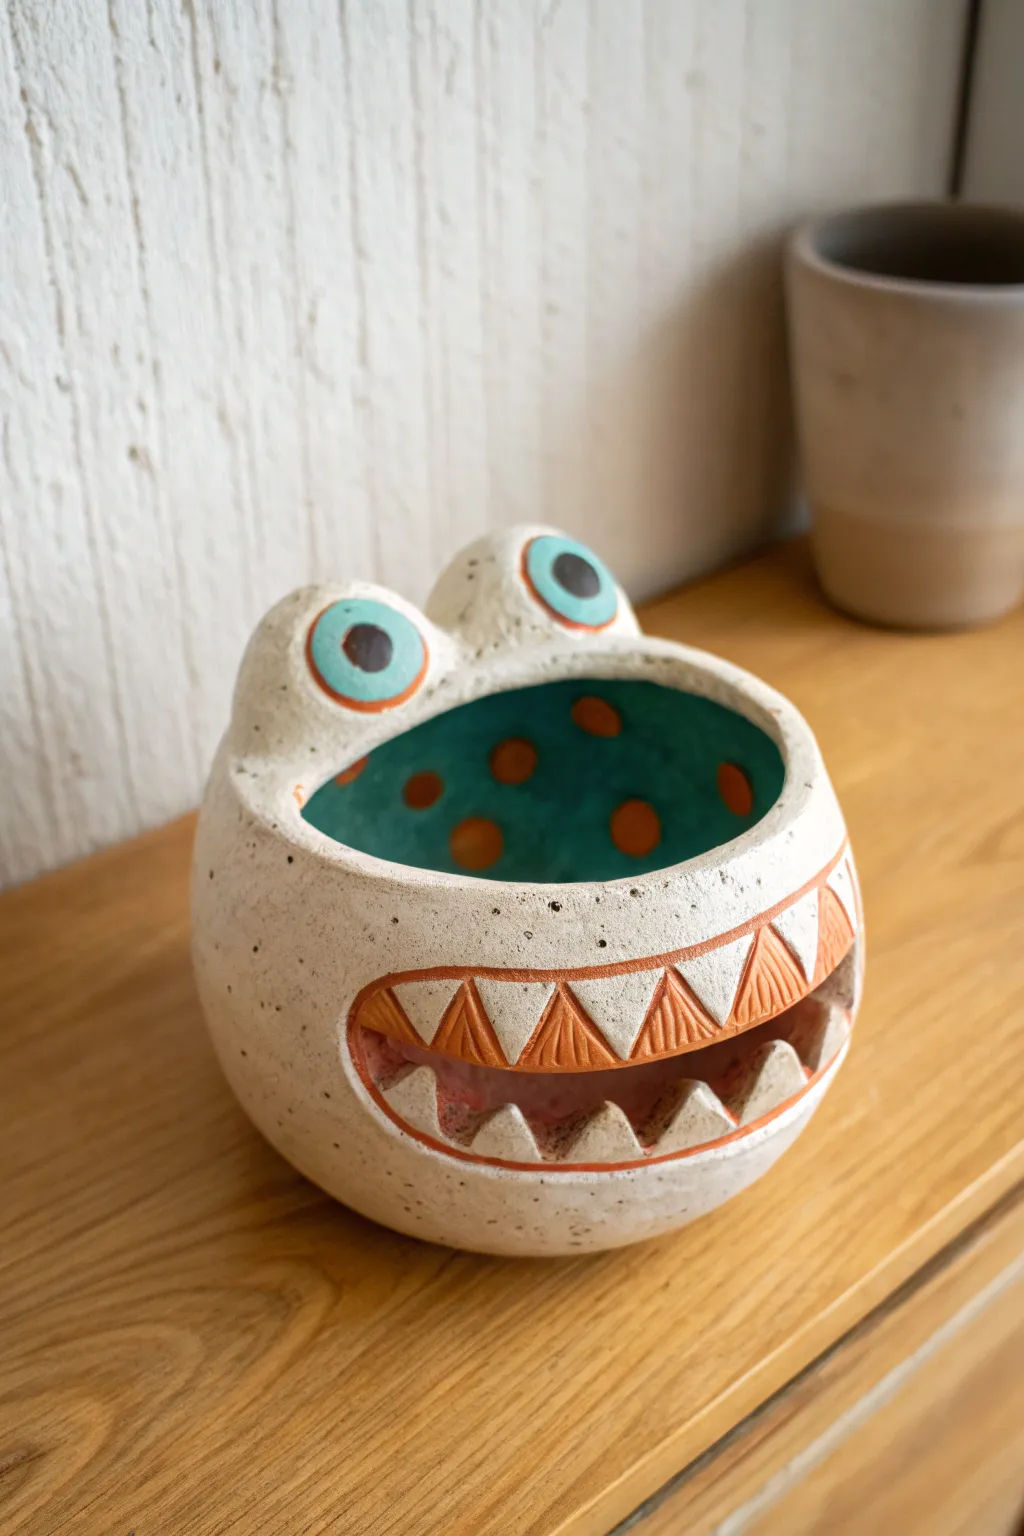
This whimsical ceramic creature serves double duty as a playful sculpture and a functional planter. With its teal-spotted interior, jagged teeth, and wide-eyed expression, it brings a dose of monster charm to any shelf.
Step-by-Step Guide
Materials
- Speckled stoneware clay (or white clay with groaned texture)
- Pottery tools (needle tool, rib tool, loop tool)
- Slip and scoring tool (or old toothbrush)
- Underglazes: Teal, Orange, White, Black
- Small stiff bristle brush
- Medium soft round brush
- Clear matte or satin glaze
- Small sponge
Step 1: Forming the Body
-
Start the pinch pot:
Begin with a ball of speckled clay about the size of a grapefruit. Press your thumb into the center and gently pinch the walls while rotating the ball, aiming for an even wall thickness of about 1/4 inch. -
Shape the sphere:
As you pinch, gently coax the walls upward and slightly inward at the rim to create a semi-closed spherical form, rather than an open bowl. -
Smooth the exterior:
Use a flexible rib tool or a slightly damp sponge to smooth out any heavy fingerprint marks on the outside, maintaining that nice round shape. -
Let it firm up:
Allow the pot to dry to a ‘leather hard’ state. This is crucial—if the clay is too soft, cutting the mouth in the next phase will collapse the form.
Mouth Collapse?
If the mouth opening collapses or sags when you cut it, the clay is too wet. Stuff the inside with crumpled newspaper to support the shape while it stiffens up.
Step 2: Sculpting the Features
-
Cut the mouth opening:
Using a sharp needle tool or fettling knife, carefully cut a wide, horizontal football shape from the side of the pot. Save the piece of clay you removed; we’ll use it for the eyes. -
Prepare the teeth:
Roll out a small slab of clay. Cut out several small triangles for the bottom teeth and slightly larger, connected jagged triangles for the top row. -
Attach the teeth:
Score the gum lines inside the mouth opening and the backs of your teeth. Apply slip and firmly press the teeth into place. Smooth the seams on the inside so they don’t pop off during firing. -
Add texture:
Use a needle tool or a small carving tool to etch vertical texture lines into the upper teeth, giving them a striped, bone-like appearance. -
Form the eyes:
Roll two small balls of clay. Tap them slightly on the table to create a flat bottom surface for easier attachment. -
Attach the eyes:
Score and slip the top rim of the pot (the main opening) and the flat bottoms of your eye balls. Attach them securely so they peek over the edge. -
Define the iris:
Flatten two tiny discs of clay and slip/score them onto the front center of the eyeballs to create the iris area.
Make it a Lantern
Before the clay dries, use a hole punch tool to create small scattered holes around the back. After firing, you can place a battery-operated tea light inside for a glowing effect.
Step 3: Painting and Finishing
-
Bisque fire:
Once the piece is bone dry, fire it to cone 04 (or according to your clay’s instructions) to prepare it for glazing. -
Paint the interior:
Apply 2-3 coats of teal underglaze to the entire interior of the pot. I usually use a long-handled brush to reach the bottom easily. -
Add the spots:
Load a round brush with orange underglaze and dab imperfect circles all over the dry teal interior. -
Detail the eyes:
Paint the main eyeball white (avoiding the speckled clay texture if you want that raw look, or painting over it for opacity). Paint the raised iris teal and add a black pupil in the center. -
Highlight the eyes:
Outline the teal iris with a thin ring of orange underglaze to make the eyes pop. -
Paint the teeth:
Carefully paint the upper textured teeth with orange underglaze, wiping it back slightly with a sponge if you want it to settle into the carved lines. -
Glaze and final fire:
Apply a clear matte or satin glaze over the entire piece (or just the interior if you prefer a raw clay exterior). Fire to the final temperature recommended for your specific clay body.
Fill your new monster friend with a spiky succulent or air plant to give him a wild hair-do