Whenever I’m making something sentimental, couple clay art is my go-to because it’s all about tiny details that feel big—shared outfits, a little lean-in, or hands that actually touch. These couple clay ideas are meant to be simple enough for a chill studio session, but still special enough to gift (or keep on your own shelf forever).
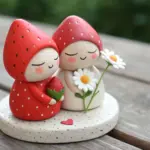
Chibi Hugging Couple Figurines
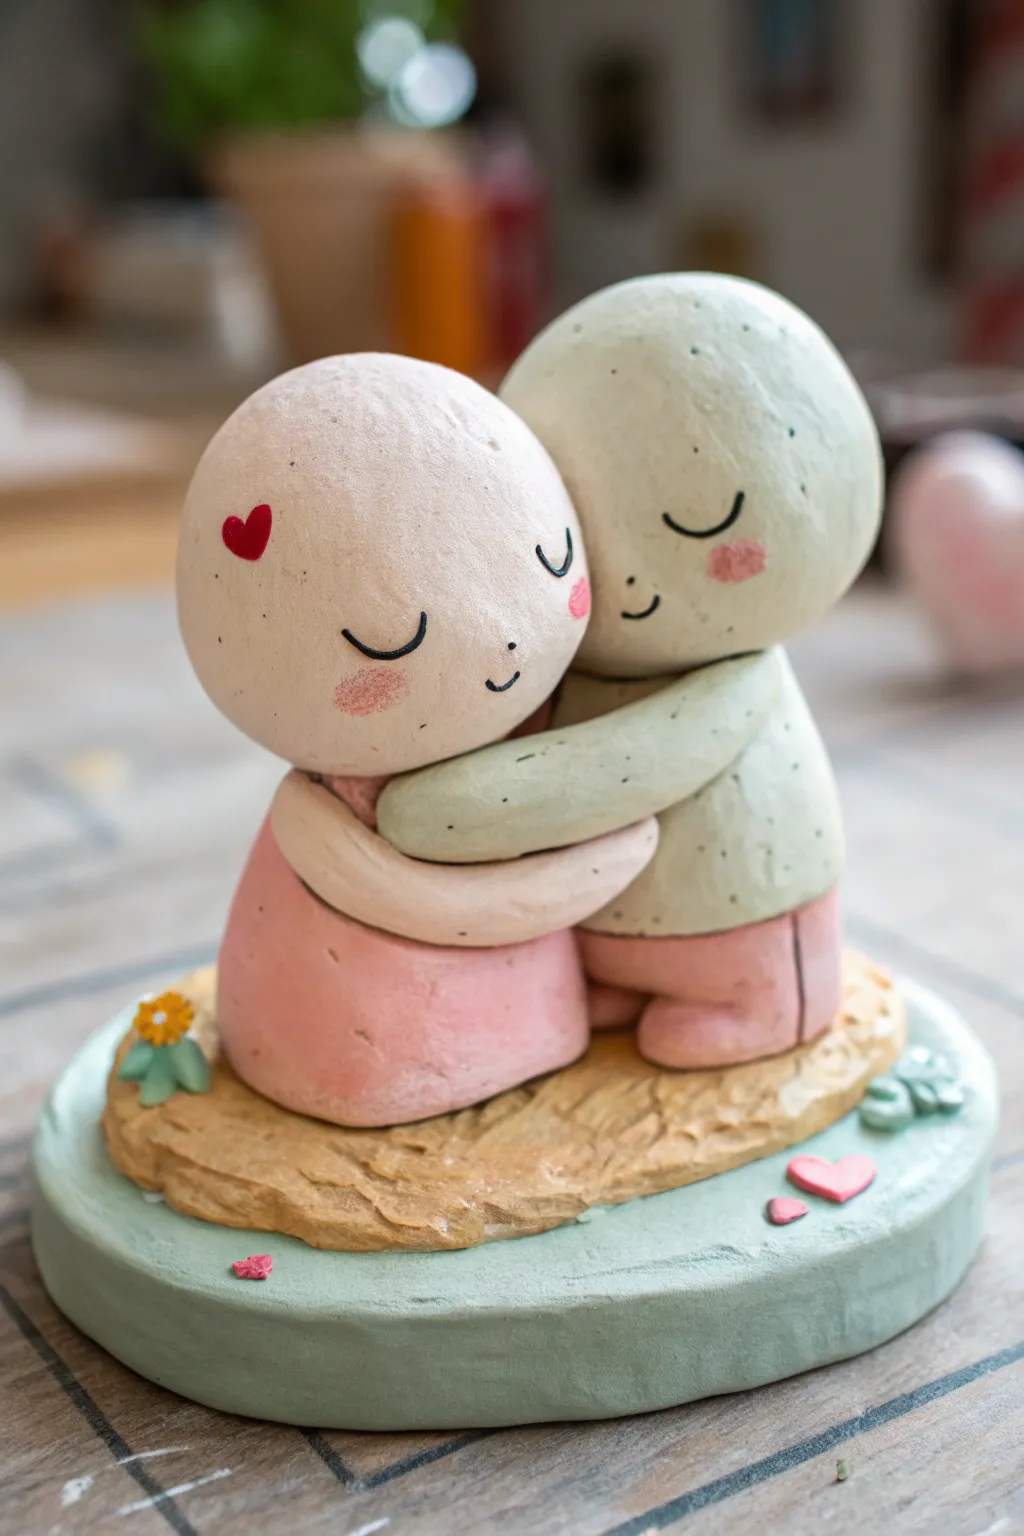
Capture a moment of pure tenderness with these adorable, oversized-head figurines locked in a sweet hug. The soft pastel pink and mint green color palette, combined with the gentle textured stone base, makes this a heartwarming keepsake or perfect handmade gift.
Step-by-Step Guide
Materials
- Polymer clay (Soft Pink, Mint Green, Beige/Sand, White)
- Acrylic paints (Black, Red, Pink)
- Fine detail paintbrush (size 000)
- Dotting tool or toothpick
- Aluminum foil
- Texturing tool or old toothbrush
- Rolling pin
- Circular cutter (approx. 4 inches)
- Oven for baking clay
Step 1: Sculpting the Base
-
Prepare the foundation:
Roll out a thick slab of Mint Green clay to create the main circular base. Use your circular cutter to get a clean edge, keeping it about half an inch thick. -
Add the sandy layer:
Take a portion of Beige/Sand clay and flatten it into an irregular oval shape. Place this on top of your green base, leaving a rim of green visible around the edges. -
Texturize the surface:
Using a texturing tool or the bristles of an old toothbrush, tap firmly across the beige clay to create a rough, earthy texture that contrasts with the smooth figures.
Step 2: Forming the Bodies
-
Create the armatures:
Crumple two small balls of aluminum foil, each roughly the size of a walnut. This saves clay and keeps the heads light. -
Shape the pink body:
Form a rounded, gumdrop-shaped mound of Soft Pink clay. Press it gently onto the beige base to flatten the bottom for stability. -
Shape the green body:
Mold a similar shape using Mint Green clay. Position it right next to the pink body, ensuring their sides are touching snugly. -
Add legs:
For the green figure, roll two short, thick logs of Soft Pink clay (matching the partner’s color for contrast) and attach them under the green tunic to look like pants or legs kneeling.
Smooth Seams
Before baking, use a drop of baby oil on your fingertip to gently rub away any fingerprints or harsh seam lines on the heads.
Step 3: Heads and Hugs
-
Cover the head armatures:
Take the foil balls you made earlier and cover the first one with a sheet of pale, skin-toned clay (mix White with a tiny dot of Pink/Orange). Smooth it until perfectly round and seamless. -
Make the second head:
Repeat the process for the second head, perhaps tinting this clay slightly greener or keeping it neutral depending on your preference. The image shows slightly textured surfaces, so don’t worry about mirror-smooth perfection. -
Attach the heads:
Place the heads onto their respective bodies. Crucially, tilt them inward so their foreheads touch gently. I like to use a small piece of wire or toothpick inside the neck for extra support. -
Sculpt the hugging arms:
Roll a long, snake-like cylinder for the pink figure’s arm. Wrap it around the green figure’s back. Repeat with a green arm wrapping around the pink figure, interlocking them.
Speckled Stone Effect
Knead black pepper or dry tea leaves into the head clay before rolling. This creates the organic, speckled stone look seen in the photo.
Step 4: Details and Finishing
-
Add nature elements:
Sculpt a tiny flower using yellow and orange clay bits, placing it on the base near the pink figure. Add a few green leaves. -
Scatter the hearts:
Create miniature hearts from pink clay and press them onto the base for a romantic touch. -
Bake the project:
Bake the entire sculpture according to your clay package instructions (usually 275°F/135°C for 15-30 minutes). Let it cool completely. -
Paint the faces:
Using your fine detail brush and black acrylic paint, carefully draw two U-shapes for closed, peaceful eyes on each face. Add a tiny U for the smiling mouths. -
Add blushing cheeks:
Dilute a tiny bit of red or pink paint with water to make a glaze, or use dry pastels, to dust rosy circles onto the cheeks. -
Final love note:
Paint a small, solid red heart floating near the pink figure’s forehead to signify love is in the air.
Place your finished hugging couple on a shelf where they can remind you daily of connection and warmth


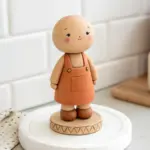
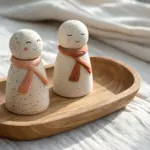
Hand-Holding Mini Couple Statue
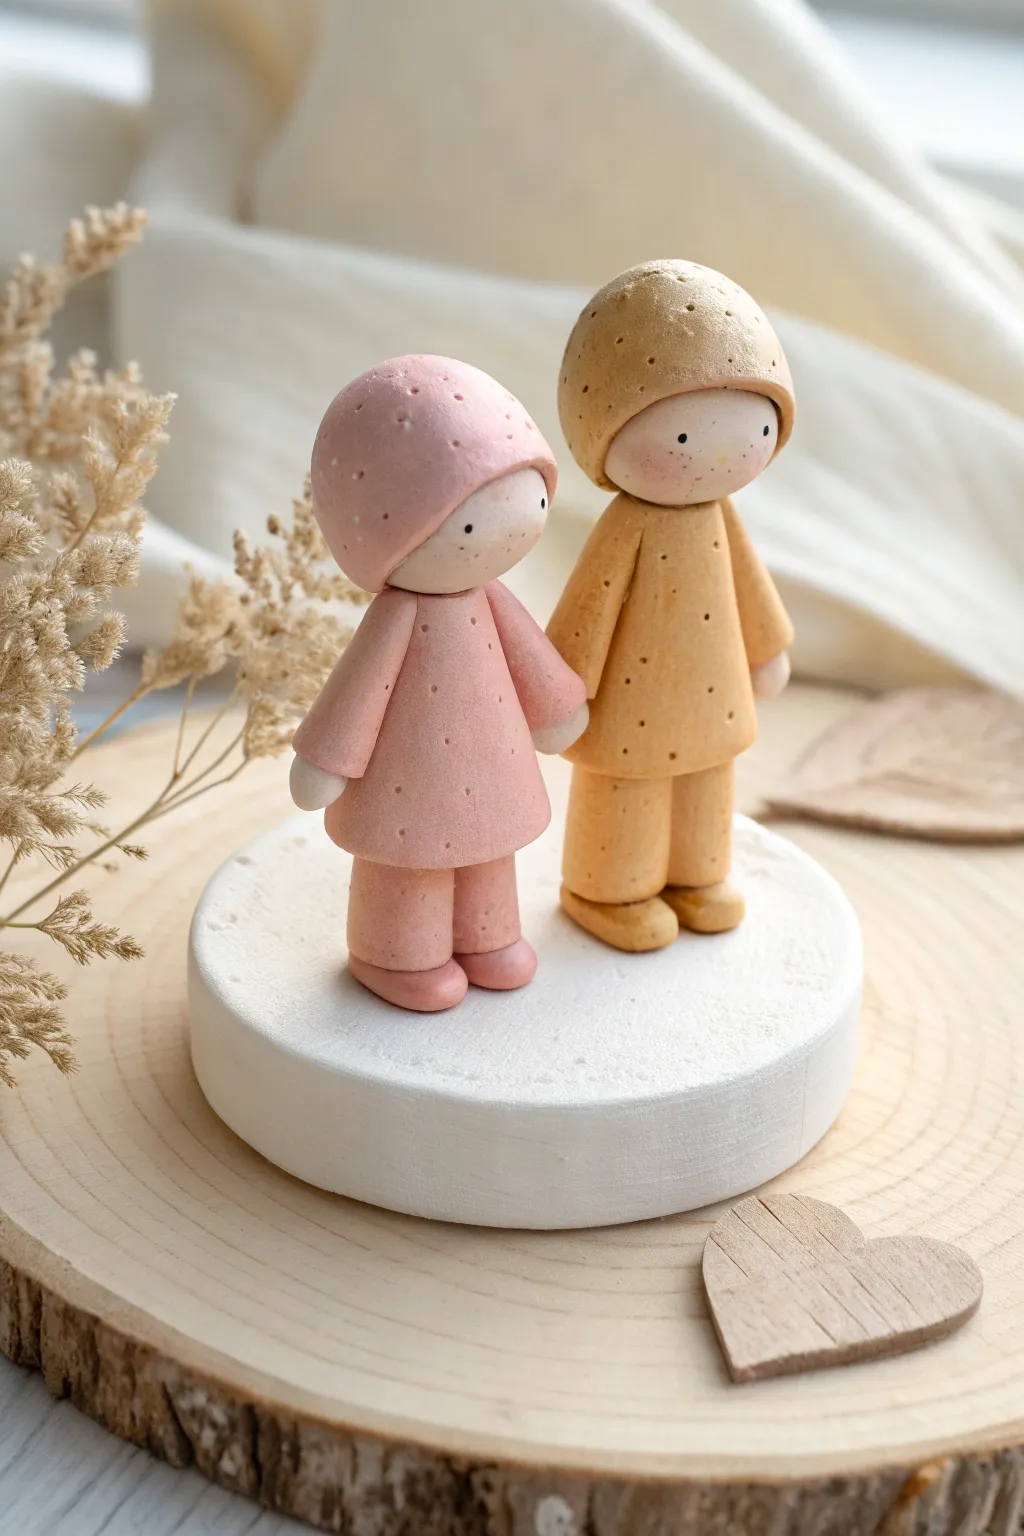
These adorable minimalist figures, dressed in textured pink and mustard yellow outfits, make for a heartwarming keepsake or cake topper. Their simple, faceless expressions and gently speckled finish give them a timeless, handcrafted charm that celebrates togetherness.
Detailed Instructions
Materials
- Polymer clay (flesh tone, dusty pink, mustard yellow)
- White acrylic paint (for speckling)
- Small stiff-bristle brush or old toothbrush
- Modeling tools (specifically a small ball tool and needle tool)
- Smooth rolling pin
- Black acrylic paint (fine detail)
- Blush chalk pastel or pink clay dust
- Soft brush for blushing
- Craft knife or scalpel
- Round wooden base (optional)
- White gesso or textured paint (for base)
Step 1: Shaping the Bodies
-
Mix the colors:
Start by conditioning your clay. If you don’t have the exact shades, mix white clay with tiny amounts of red and brown for the pink, and yellow with brown for the mustard tone to achieve that muted, earthy look. -
Form the torsos:
Roll two cylinders of clay, one in pink and one in mustard. Taper them slightly at the top to form a neck area. The pink figure serves as a dress or tunic shape, while the mustard figure needs a slightly longer torso. -
Create the legs:
For the pink figure, roll two small sausages of pink clay for pants and attach them to the bottom of the tunic. For the mustard figure, create longer legs and attach them seamlessly. -
Add shoes:
Roll tiny ovals of clay in the corresponding outfit colors. Press them gently onto the bottom of each leg, flattening the base so the figures can stand upright on their own.
Step 2: Sculpting Heads and Hoods
-
Roll the heads:
Using flesh-toned clay, roll two smooth spheres. These should be proportional to the bodies you just made. -
Create the hoods:
Roll out thin sheets of pink and mustard clay. Cut circles large enough to cover the back and top of each head. -
Attach the hoods:
Drape the clay circles over the heads, smoothing the seams at the back and gently curling the front edge slightly outward to frame the face. -
Connect head to body:
Insert a short piece of wire or toothpick into the neck of the torso for stability, then press the hooded head firmly onto the body.
Clean Clay Tip
Keep baby wipes nearby to clean your hands completely when switching between the pink and mustard clay. Darker lint shows up easily on these light pastels.
Step 3: Arms and Details
-
Form the sleeves:
Roll conical shapes for the arms in the respective outfit colors. Hollow out the wider end slightly with a ball tool. -
Add hands:
Roll tiny balls of flesh-toned clay for hands and press them into the hollowed sleeves. -
Attach the arms:
Press the arms onto the sides of the bodies. Position the inner arms so they meet in the middle, creating a ‘holding hands’ pose. -
Texture the outfits:
Using a needle tool, poke tiny, shallow holes all over the hoods and outfits. Keep the spacing random but even to create a subtle dotted texture.
Add Seasonal Flair
Customize the base for different occasions—glue dried flowers for spring, miniature pumpkins for fall, or sprinkle iridescent glitter on the white base for winter.
Step 4: Finishing Touches
-
Bake the figures:
Preheat your oven according to the clay manufacturer’s instructions. Place the figures on a baking tile or parchment paper and bake until cured. -
Add facial features:
Once cool, use a needle tip or ultra-fine brush dipped in black paint to make two tiny dots for eyes on each face. Keep them wide-set for a cute look. -
Apply blush:
Scrape a little pink chalk pastel into dust. Use a soft, dry brush to gently apply rosy cheeks to the figures. -
Create the speckled effect:
Load a stiff brush or toothbrush with slightly watered-down white acrylic paint. Flick the bristles to spray a fine mist of speckles over the entire figures to mimic a stone or ceramic texture. -
Prepare the base:
Take a round clay disc or a wooden base. Coat it with white gesso or textured paint to resemble snow or rough stone. -
Final assembly:
Glue the finished figures securely onto the white base.
Place your charming speckled couple on a shelf or desk where their sweet embrace can bring a smile to your day

Faceless Back-View Couple Portrait
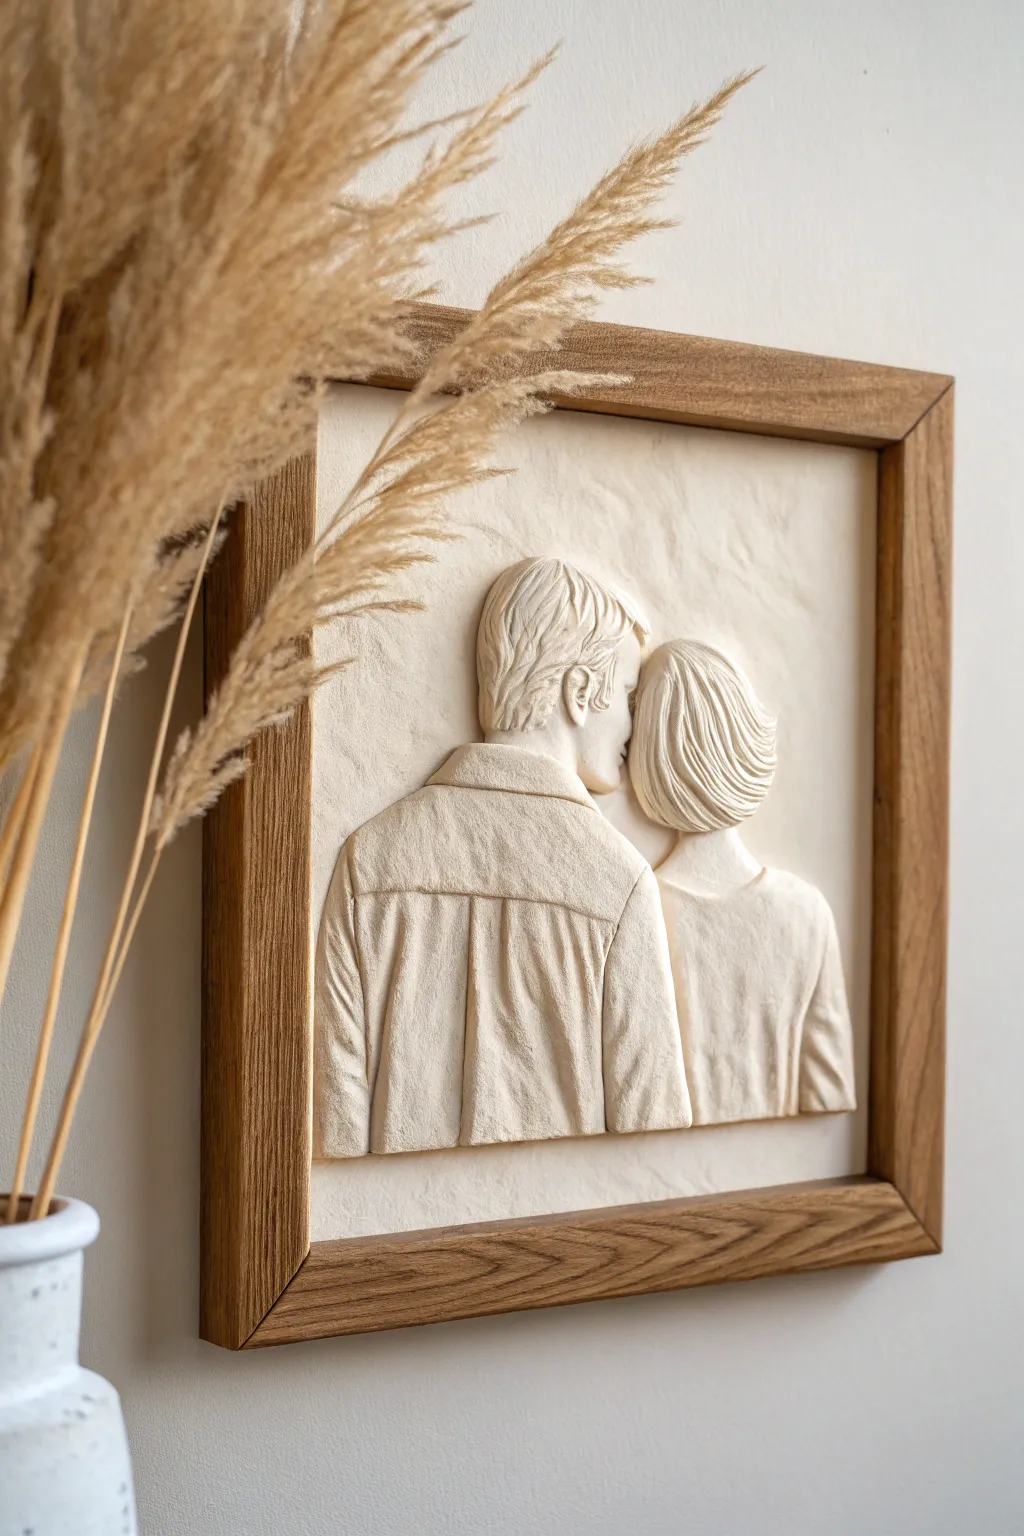
Capture a tender moment frozen in time with this elegant, monochromatic bas-relief sculpture. This project focuses on the subtlety of form and texture rather than color, creating a sophisticated piece of wall art that celebrates connection through simple, faceless storytelling.
Step-by-Step Tutorial
Materials
- Air-dry clay (white or cream)
- Square wooden board or sturdy canvas panel (approx. 10×10 inches)
- Clay modeling tools (specifically loop tools and needle tools)
- Rolling pin
- Water in a small cup
- Acrylic paint (cream/off-white) and matte sealer
- Fine-grit sandpaper
- Sponge or soft brush
- Square wooden frame (deep profile)
Step 1: Preparation and Base
-
Prepare the substrate:
Begin by selecting a sturdy backing board that fits your frame. If using wood, give it a quick sanding to ensure the clay adheres well. You can also apply a thin layer of PVA glue mixed with water to prime the surface. -
Roll the background sheet:
Roll out a large sheet of air-dry clay to about 1/4 inch thickness. This will serve as your ‘canvas.’ Carefully drape it over your backing board, pressing it down gently to remove air bubbles. Trim the excess clay from the edges using a craft knife. -
Texture the background:
Using a crumpled piece of foil or a textured sponge, lightly dap the surface of the background clay. This creates a subtle, organic plaster-like texture that contrasts nicely with the smoother figures later. -
Sketch the outline:
With a needle tool, very lightly sketch the outline of the couple onto the wet clay background. Focus on the position of the shoulders and the tilt of the heads. Since this is a back view, you don’t need to worry about facial features.
Step 2: Building the Figures
-
Form the torsos:
Roll out two slabs of clay, slightly thicker than your background. Cut out the rough shapes of the man’s shirt and the woman’s top. Score the backs of these pieces and the background area, apply a little water or slip, and press them firmly into place. -
Refine the clothing: The Man:
Add extra strips of clay to create the collar and the yoke across the shoulders of the man’s shirt. Use a modeling tool to carve deep vertical lines to suggest the folds and drape of the fabric. -
Refine the clothing: The Woman:
Smooth the clay for the woman’s top to appear softer. Add gentle folds near the waistline or shoulders to suggest movement, keeping the texture smoother than the man’s shirt for visual contrast. -
Add the necks:
Create small cylinders for the necks. Attach them securely to the torsos, blending the clay downwards so there are no visible seams. Ensure the angle suggests they are leaning slightly towards each other. -
Shape the heads:
Form two oval shapes for the heads. Flatten the back side slightly and attach them to the necks and background. The man’s head should be slightly turned to the right, and the woman’s slightly to the left, creating an intimate profile interaction.
Smooth Moves
Keep a damp sponge nearby while sculpting. Wiping your tools frequently prevents clay buildup, ensuring your hair texture lines remain crisp and clean rather than jagged.
Step 3: Detailing and Texture
-
Sculpt the man’s hair:
Add small patches of clay to the man’s head. Use a fine loop tool or a knife to carve short, layered strokes that mimic a short, textured haircut. Pay attention to the direction of hair growth near the ear and nape of the neck. -
Sculpt the woman’s hair:
For the woman’s bob, add a larger mass of clay. Carve long, sweeping lines to represent strands of hair curving inward at the nape. Keep the lines fluid to give the hair volume and softness. -
Refine the profiles:
Even though faces aren’t fully visible, you need to suggest the jawline and ear. Use a small tool to carefully define the ear on the man and the curve of the jaw on the woman where the hair parts. -
Smooth and verify:
Dip a soft brush in water and go over the figures to smooth out any unintentional fingerprints or rough burrs of clay. I like to take a step back here to check the proportions from a distance before the clay starts to set.
Shadow Play
After painting the base cream color, dry-brush a tiny amount of slightly darker beige into the deep folds of the clothing and hair to artificially enhance the 3D depth.
Step 4: Finishing Touches
-
Allow to dry:
Let the sculpture dry completely. This can take 24–48 hours depending on humidity. Keep it away from direct heat sources to prevent cracking. -
Sand imperfections:
Once bone dry, use very fine-grit sandpaper to gently smooth the highest points of the sculpture, such as the shoulders and the curve for the hair, achieving a porcelain-like finish. -
Paint for uniformity:
Apply a coat of cream or off-white acrylic paint over the entire piece, including the background. This unifies the different clay additions and mimics the look of a stone carving. -
Seal the work:
Brush on a matte varnish or sealer to protect the clay from moisture and dust. A matte finish is crucial here to maintain the soft, stone-like aesthetic. -
Frame the artwork:
Place your finished piece into the deep wooden frame. Secure it from the back, ensuring the relief doesn’t press against any glass (it’s best displayed without glass or with a spacer).
Hang your handcrafted relief where the light can catch the textures and bring the quiet romance to life


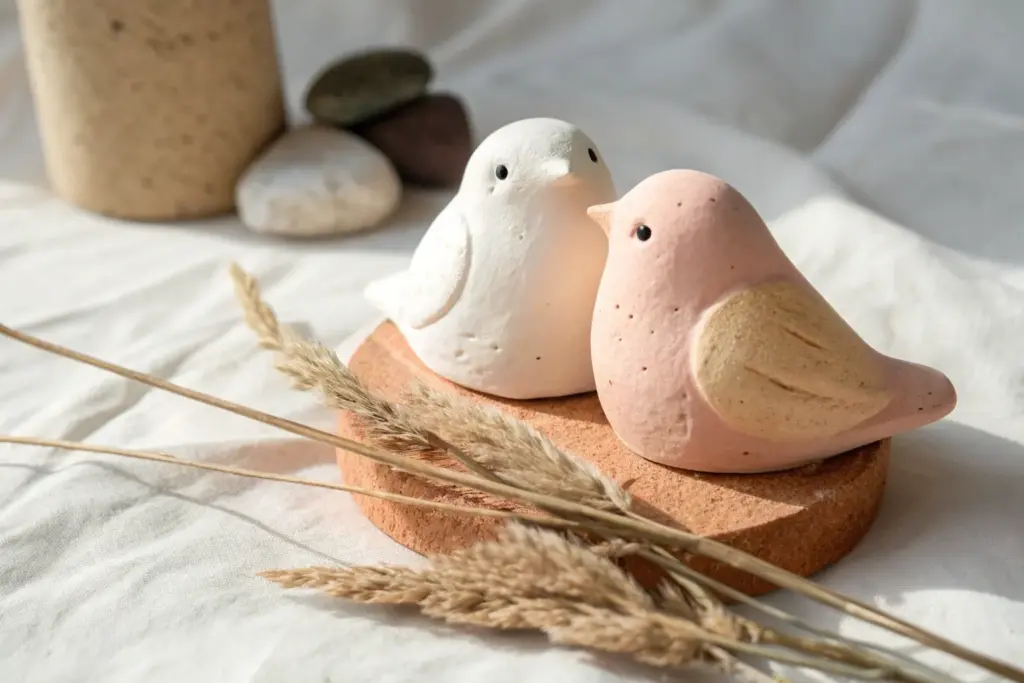
Split Heart Couple Keepsake
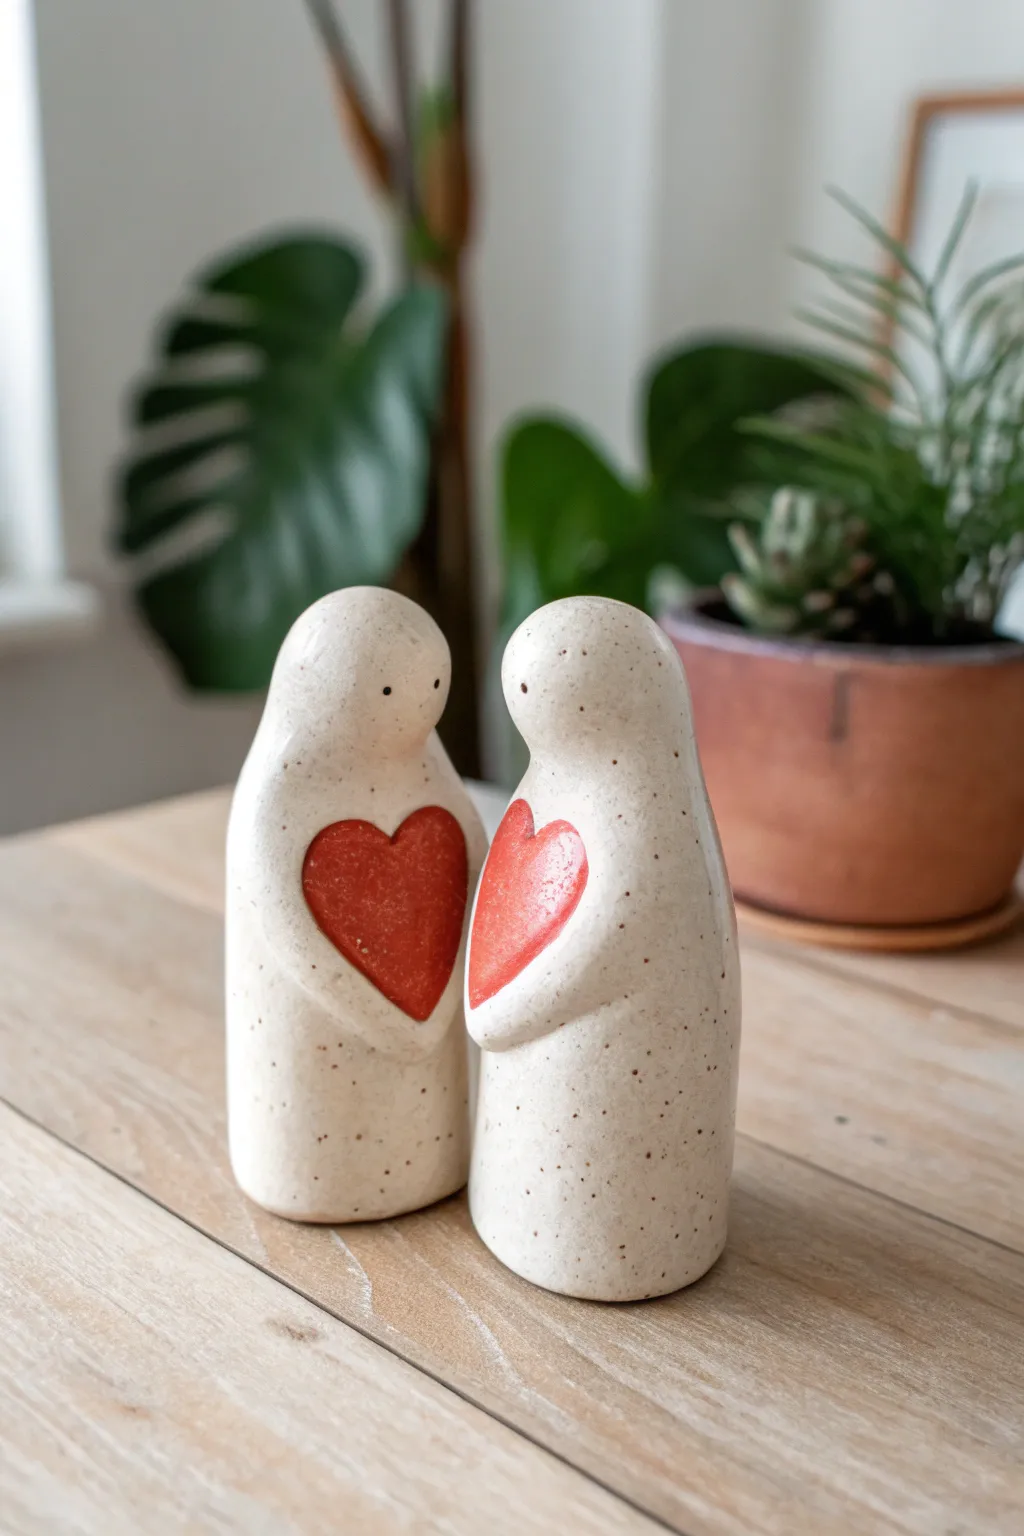
These charming minimalist figures make a touching display of connection, featuring two individual forms that come together to complete a single red heart. The speckled stoneware finish gives them a warm, organic feel perfect for a wedding gift or anniversary keepsake.
Step-by-Step Guide
Materials
- Speckled stoneware clay (or polymer clay with faux granite effect)
- Red underglaze (or red acrylic paint if using air-dry/polymer)
- Clear transparent glaze (or gloss varnish)
- Needle tool
- Rib tool or old credit card
- Small sponge
- Fine grit sandpaper
- Small paintbrush
- Knife or clay slicer
- Water slip (if using ceramic clay)
Step 1: Shaping the Bodies
-
Divide the clay:
Begin with two equal lumps of clay, roughly the size of a tangerine each. Roll them into tight balls in your palms to compress the clay and remove air bubbles. -
Form the cylinders:
Gently roll each ball on your work surface to create a thick cylinder shape. You want a stable base, so tap the bottom of each cylinder against the table to flatten it. -
Taper the necks:
Using your thumb and forefinger, gently squeeze the upper third of the cylinder to create a tapered neck area, pushing the clay upward to form a rounded, featureless head. Smooth the transition so it looks like a soft slope rather than a sharp indentation. -
Bend into posture:
Subtly bend the ‘head’ portion forward deeply. The figures should look like they are gazing downward or leaning in.
Heart Alignment
Before drying, press the two wet figures together one final time to ensure the two heart halves align perfectly to form the full shape.
Step 2: Creating the Connection
-
Align the pair:
Stand the two figures side-by-side, touching. Rotate them slightly inward so they face each other, mimicking a couple standing close. -
Draft the heart:
Take a small separate piece of clay, flatten it, and cut out a heart shape sized to fit between the two figures. This will act as your template. -
Mark the cutouts:
Place the clay heart exactly in the middle where the bellies of the figures touch. Lightly trace the outline of half the heart onto the left figure and the other half onto the right figure with your needle tool. -
Carve the relief:
Carefully crave out the half-heart shapes from each body. You aren’t cutting a hole through the figure; you are creating a recessed area about 3-4mm deep. -
Sculpt the arms:
Roll two small coils of clay. Attach one to each figure, starting at the ‘shoulder’ area and curving down to cup the bottom of the heart cutout. Blend the clay seamlessly at the shoulder so the arms look like they emerge naturally from the body.
Step 3: The Heart Insert
-
Form the heart halves:
Roll a small slab of clay and cut two shapes that match the recessed areas you carved earlier, but make them slightly puffy or domed. These will be the red hearts. -
Attach the hearts:
Score the back of the heart pieces and the inside of the recessed chest area. Apply slip (or liquid clay/glue depending on material) and press the heart halves firmly into place. They should bulge out slightly past the chest level. -
Refine the edges:
Use a small modeling tool to clean up the seam where the heart meets the body and where the hands cup the heart. The hands should look like they are gently holding the red shape.
Clean Seams
If the red paint or glaze smears onto the speckled body, scrape it off gently with a craft knife before the final firing or sealing layer.
Step 4: Finishing Touches
-
Smooth the surface:
Use a damp sponge (for ceramic clay) or baby oil (for polymer) to smooth out any fingerprints on the bodies. The speckled clay looks best when perfectly smooth. -
Add eyes:
Take your needle tool and make two tiny, shallow pricks for eyes on one of the figures. Based on the image, the left figure has eyes while the right one remains featureless, though you can customize this. -
Dry and fire (or bake):
If using ceramic clay, let the pieces dry slowly under plastic to prevent cracking before bisque firing. If using polymer clay, bake according to the package instructions. -
Adding color:
Once bisque fired (or baked and cooled), paint strictly the heart shapes with bright red underglaze or acrylics. Apply 2-3 coats for solid, opaque coverage. -
Glazing:
Dip or brush the entire piece in a clear gloss glaze to make the speckles pop and seal the red heart. If using polymer clay, a gloss varnish works perfectly here. -
Final Fire:
Fire the ceramic pieces one last time to the temperature required for your clear glaze. Ensure the two figures don’t touch in the kiln, or they will fuse together forever.
Once cooled, place your figures together to see that satisfying moment when the two halves become a whole.

The Complete Guide to Pottery Troubleshooting
Uncover the most common ceramic mistakes—from cracking clay to failed glazes—and learn how to fix them fast.
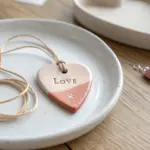
Couple Ring Dishes With Tiny Figures
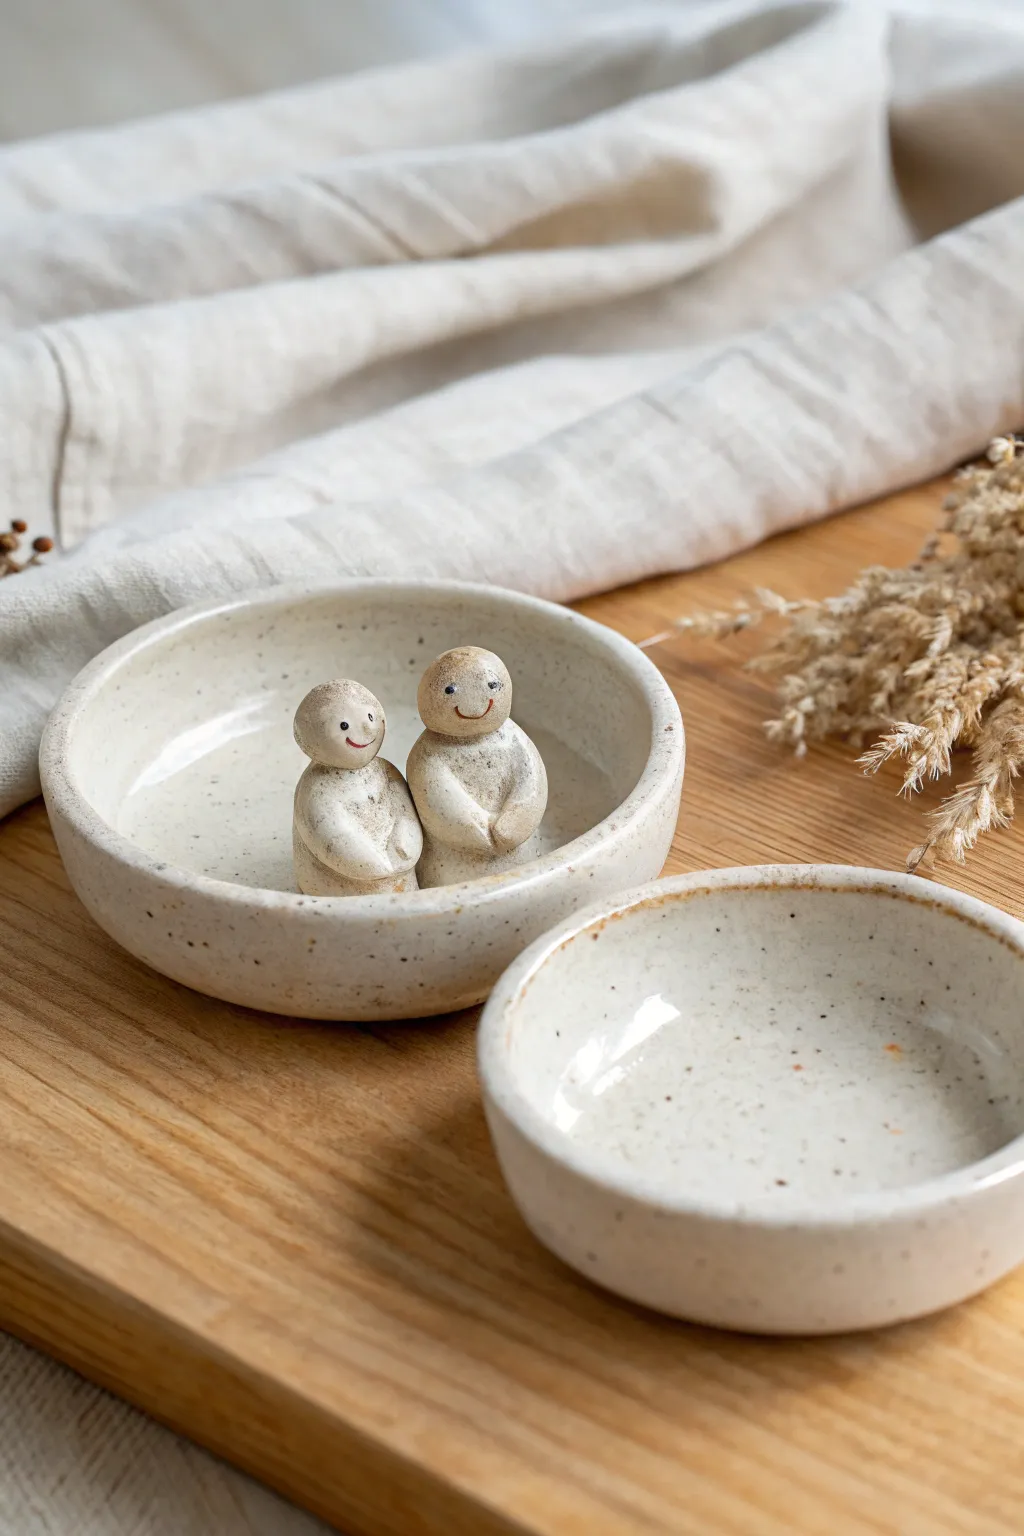
Create a charming keepsake with this speckled ceramic ring dish featuring two tiny, simplified figures nestled inside. The milky white glaze allows the clay’s natural speckles to shine through, giving the piece a cozy, organic feel perfect for holding jewelry.
Detailed Instructions
Materials
- Speckled stoneware clay (mid-fire recommended)
- Ceramic rolling pin
- Two 4-inch wooden slats (guide rails)
- Circular templates (approx. 4 inches diameter)
- Needle tool
- Small sponge
- Scoring tool or serrated rib
- Slip (clay mixed with water)
- Milky white or cream glossy glaze
- Fine detail brush
- Red and Black underglaze or ceramic pigment
Step 1: Forming the Dishes
-
Roll the slab:
Begin by wedging your speckled clay to remove air bubbles. Place the clay between two wooden slats and roll it out into a smooth, even slab about 1/4 inch thick. -
Cut the circles:
Place your circular template onto the slab and trace around it with a needle tool. Cut out two circles to serve as the bases for your dishes. -
Shape the walls:
Gently lift the edges of the clay circles to form shallow walls. You can pinch the clay upward with your fingers or slump the clay into a shallow mold if you have one. -
Refine the rim:
Use a damp sponge to smooth the rim of the dish, ensuring it is rounded and free of sharp edges. The walls should be roughly 1 inch high.
Step 2: Sculpting the Couple
-
Form the bodies:
Roll two small balls of clay, approximately the size of large marbles. Gently taper the top of each ball to create a rounded, pear-like shape for the torso and head combined. -
Create the arms:
Roll tiny coils of clay to serve as arms. Attach them to the sides of the bodies, wrapping them around the front as if the figures are holding their hands together or resting them in their laps. -
Smooth the seams:
Use a modeling tool or your finger to blend the clay where the arms attach, ensuring no seams are visible and the form looks continuous. -
Refine the heads:
Gently smooth the top area to distinguish the head slightly from the body, keeping the overall shape very abstract and minimalist. They shouldn’t have distinct necks.
Keep it Clean
Wipe the tiny faces with a slightly damp brush after glazing. This thins the glaze layer just enough to ensure the painted eyes and smiles pop through after firing.
Step 3: Assembly and Detail
-
Position the figures:
Place the two figures side-by-side inside one of the dishes to see how they fit. I prefer to place them slightly off-center for visual interest. -
Score and slip:
Mark the spot where the figures will sit. deep score the bottom of the figures and the spot on the dish with a serrated tool. Apply slip to both surfaces. -
Attach firmly:
Press the figures firmly into the dish. Use a small tool to blend the clay at the base of the figures into the floor of the bowl so they are securely attached. -
Add facial features:
Using the very tip of a needle tool or a fine brush with black underglaze, dot two tiny eyes on each figure. Add a small, curved smile with black or red underglaze. -
Dry slowly:
Cover the dishes loosely with plastic and let them dry slowly for several days to prevent the connection points from cracking.
Cracking Figures
If figures detach during drying, you likely didn’t score deep enough. In the bone-dry stage, try repairing with ‘paper clay’ slip or ceramic mender before bisque firing.
Step 4: Glazing and Firing
-
Bisque fire:
Once bone dry, fire the pieces in a kiln to bisque temperature (usually cone 04). -
Wax resist:
Apply a wax resist to the bottom of the dishes to prevent glaze from sticking to the kiln shelf. -
Pour the glaze:
Pour your milky white glaze inside the dish, swirling it around to coat the interior and the figures entirely. Pour out excess glaze. -
Dip the exterior:
Dip the exterior of the dish into the glaze or brush it on evenly. Ensure the glaze isn’t too thick on the tiny faces, or the details might get lost. -
Final wipe:
Use your finger to gently rub the glaze off the tiny eyes and mouths if the glaze is opaque, so the underglaze details show through clearly. -
Glaze fire:
Fire the piece again to the maturation temperature of your clay and glaze (likely cone 5 or 6 for stoneware).
Once cooled, your little ceramic couple will form a sweet centerpiece for your vanity or bedside table
Animal Avatar Couple With Heart
Celebrate love with this adorable pair of minimalist clay cats sharing a tender moment and a single heart. The smooth, matte white finish combined with simple painted details gives these figurines a charming, modern folk-art aesthetic that looks beautiful on any windowsill.
Step-by-Step
Materials
- White air-dry clay or polymer clay
- Rolling pin
- Small heart-shaped cutter (optional)
- Clay sculpting tools (needle tool, smoothing tool)
- Water slip (if using air-dry clay) or liquid polymer clamp
- Acrylic paints (terracotta orange, brown, black)
- Fine detail paintbrush
- Matte varnish or sealant
- Sandpaper (fine grit)
Step 1: Shaping the Bodies
-
Prepare the clay:
Begin with two equal-sized balls of white clay, roughly the size of a tangerine. Knead them well until soft and pliable to prevent cracking later. -
Form the base cone:
Roll one ball into a smooth cone shape. Flatten the bottom gently on your work surface so it stands upright securely. This will be the body of the first cat. -
Round the head:
Gently mold the top of the cone to be more rounded rather than pointy, creating a smooth transition from the body to the head area without a defined neck. -
Pinch the ears:
At the very top of the rounded head, use your thumb and forefinger to pinch two small triangles. Smooth the clay around them so they look integrated, not just stuck on. -
Repeat for the partner:
Create the second cat using the same method. Place them facing each other to ensure their heights match and their noses will align.
Step 2: Creating the Connection
-
Create the heart:
Roll out a small piece of clay and cut or hand-shape a chubby heart. It needs to be thick enough to be substantial, about half a centimeter. -
Position the figures:
Stand the two cats facing each other, slightly angled inward. Their noses should be just nearly touching. -
Form the arms:
Roll two small sausage shapes for each cat to serve as arms. Attach them to the sides of the bodies, blending the shoulder seam smoothly into the torso. -
Attach the heart:
Place the heart between the cats. Curve the arms you just attached so they look like they are holding the heart. Use slip or liquid clay to bond the hands to the heart securely. -
The nose boop:
Gently press the two figures together until their noses make contact. You might need to add a tiny dab of slip here to keep them connected for stability. -
Smooth everything:
Dip your finger in a little water (or baby oil for polymer) and smooth out any fingerprints, focusing on the connection points.
Seamless Smoothness
For a pro ceramic look without a kiln, use a damp sponge to wipe the raw clay before drying. This removes tiny lint and creates a flawless surface.
Step 3: Adding Details & Finishing
-
Let it dry or bake:
Follow the instructions for your specific clay. Air-dry clay needs 24-48 hours; polymer clay needs baking. Ensure it is fully cured before painting. -
Sand for texture:
Once hard, use fine-grit sandpaper to briefly buff the surface. This mimics the stone-like texture seen in the photo and removes any lingering bumps. -
Paint the heart:
Paint the central heart with a terracotta or dark orange acrylic paint. Keep the coverage somewhat washed or matte for a natural look. -
Paint the ear tips:
Using the same orange shade, carefully paint just the inner triangles or tips of the ears. -
Draw the faces:
With a very fine brush or a fine-tip marker and black paint, draw two curved lines for closed eyes and three simple whiskers on each cheek. -
The final touch:
Add a tiny dot of brown or dark orange for the nose tip where they meet. -
Seal the piece:
Apply a coat of matte varnish to protect the paint while maintaining that raw, ceramic feel.
Make It Personal
Imprint initials or a significant date on the bottom of the figurines or the back of the heart while the clay is still wet for a custom anniversary gift.
Place your finished feline couple on a sunny shelf where the light can catch their sweet expressions


What Really Happens Inside the Kiln
Learn how time and temperature work together inside the kiln to transform clay into durable ceramic.
Bench-Sitting Couple Diorama
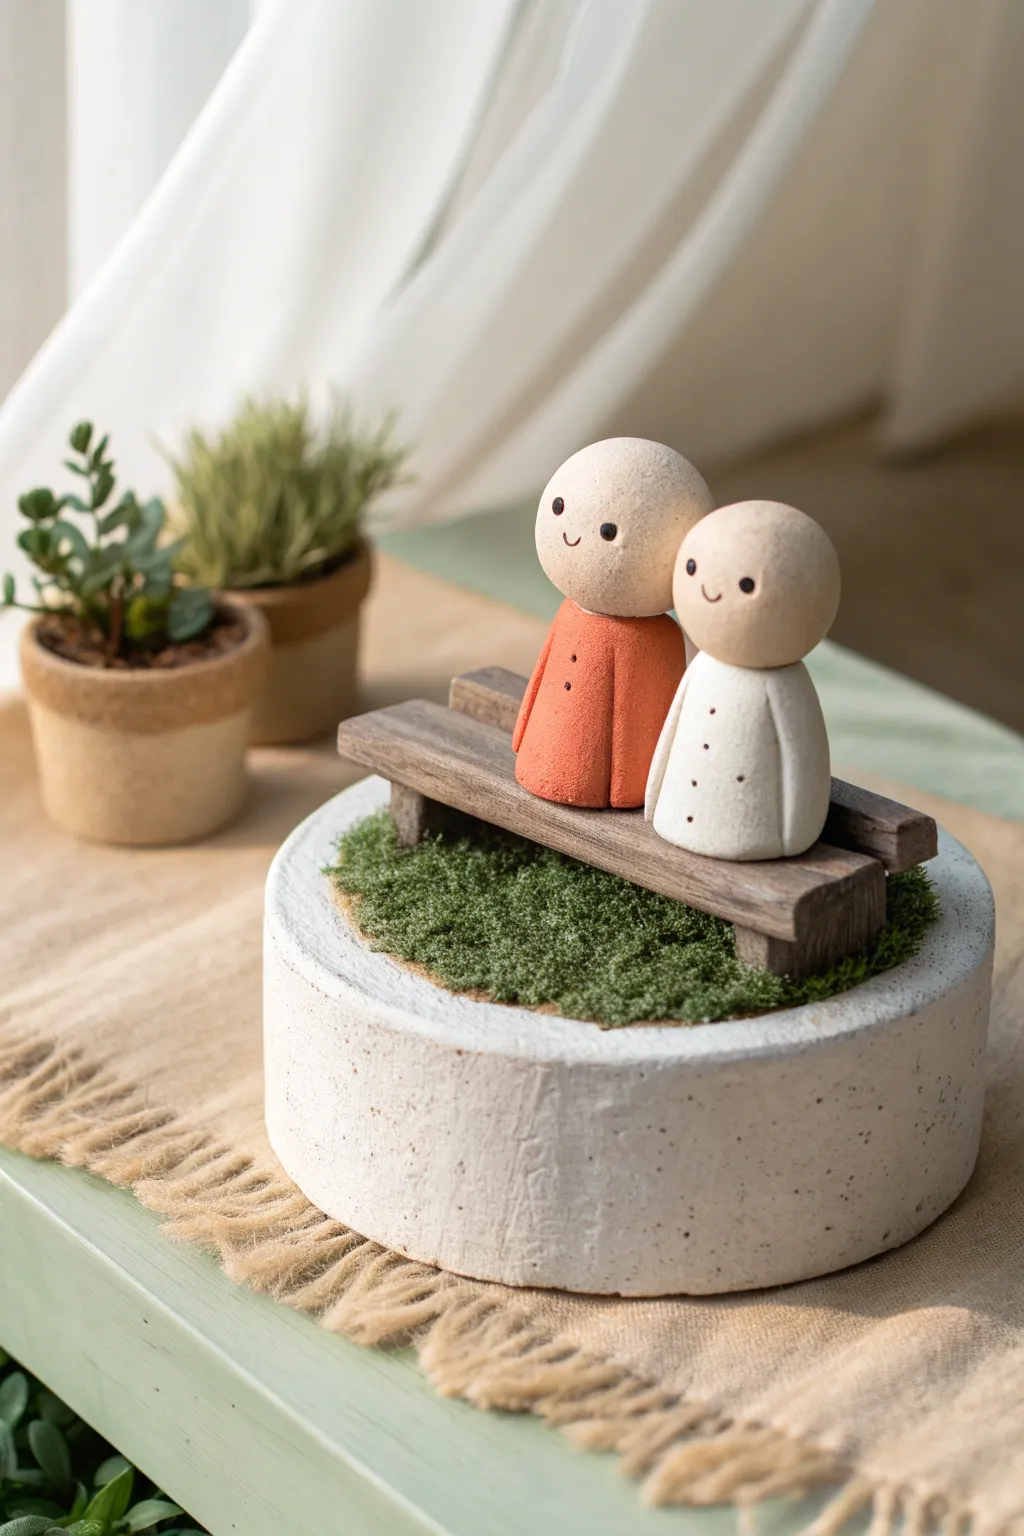
Capture a quiet moment of togetherness with this charming clay diorama featuring two stylized figures resting on a park bench. The project combines simple geometric modeling with textured elements to create a peaceful, minimalist scene perfect for a shelf or mantel.
Step-by-Step Guide
Materials
- Air-dry clay or polymer clay (White and Terracotta/Orange)
- Small wooden craft sticks or balsa wood scraps
- Circular foam or wood base (approx. 4-5 inches diameter)
- White texture paste or white acrylic paint mixed with baking soda
- Artificial moss or scenic turf
- Wood stain or watered-down brown acrylic paint
- Black acrylic paint and fine-point dotting tool
- Craft glue or strong adhesive
- Sandpaper
- Sculpting tools
Step 1: Sculpting the Figures
-
Shape the Bodies:
Start by rolling two equal-sized cones of clay for the bodies. Use terracotta clay for the left figure and white clay for the right figure. Gently flatten the bottoms so they stand stable but lean slightly backward as if seated. -
Form the Heads:
Roll two smooth spheres of beige or natural-color clay for the heads. Make sure they are proportional to the bodies—slightly oversized heads add to the cute, stylized aesthetic. -
Attach Components:
Score and slip (for air-dry clay) or press firmly (for polymer) to attach the heads to the tops of the bodies. Ensure the connection is secure but seamless. -
Add Facial Details:
Using a very fine dotting tool or a toothpick dipped in black paint, add two small, wide-set eyes and a tiny curved smile to each face. Keep the expressions minimalist. -
Detail the Clothing:
Use a needle tool or toothpick to gently poke three vertical buttons down the center of each figure’s chest. Let the figures dry or bake according to your clay manufacturer’s instructions.
Clean Clay Tip
Baby wipes are essential! Clean your hands thoroughly between switching from terracotta to white clay to prevent color transfer and staining.
Step 2: Building the Bench
-
Cut the Wood:
Cut your craft wood into three main pieces: one long slat for the seat and two shorter, thicker blocks for the support legs. Sand any rough edges until smooth. -
Assemble the Structure:
Glue the seat slat on top of the two support blocks. I prefer to position the legs slightly inward from the ends of the seat for a balanced look. -
Stain and Age:
Apply a coat of wood stain or diluted brown acrylic paint to the bench. For a weathered effect, wipe off some of the excess paint immediately with a paper towel, letting the wood grain show through.
Step 3: Creating the Base
-
Prep the Platform:
Take your circular base and coat the sides with white texture paste. If you don’t have paste, mix white acrylic paint with baking soda to create a thick, stone-like stucco texture. -
Texture the Top:
Apply a layer of glue to the center of the base’s top surface, leaving a small rim of white texture visible around the edge. -
Apply the Grass:
Sprinkle loose artificial moss or static grass onto the wet glue. Press it down gently to ensure it adheres, creating a soft, grassy mound.
Seasonal Switch
Swap the green moss for white felt or imitation snow powder to create a winter version, or add tiny clay flowers for a spring theme.
Step 4: Final Assembly
-
Position the Bench:
Once the base is dry, apply strong adhesive to the bottom of the bench legs and press the bench firmly into the mossy area, ensuring it sits level. -
Seat the Figures:
Glue the two clay figures side-by-side on the bench. Verify that they are touching slightly to emphasize their connection. -
Final Touches:
Check for any loose moss or paint touch-ups needed on the white base. Clean up the edges for a crisp, professional finish.
Place your finished diorama near a window where natural light can highlight the textures of the moss and stone base
Crescent Moon Couple Scene
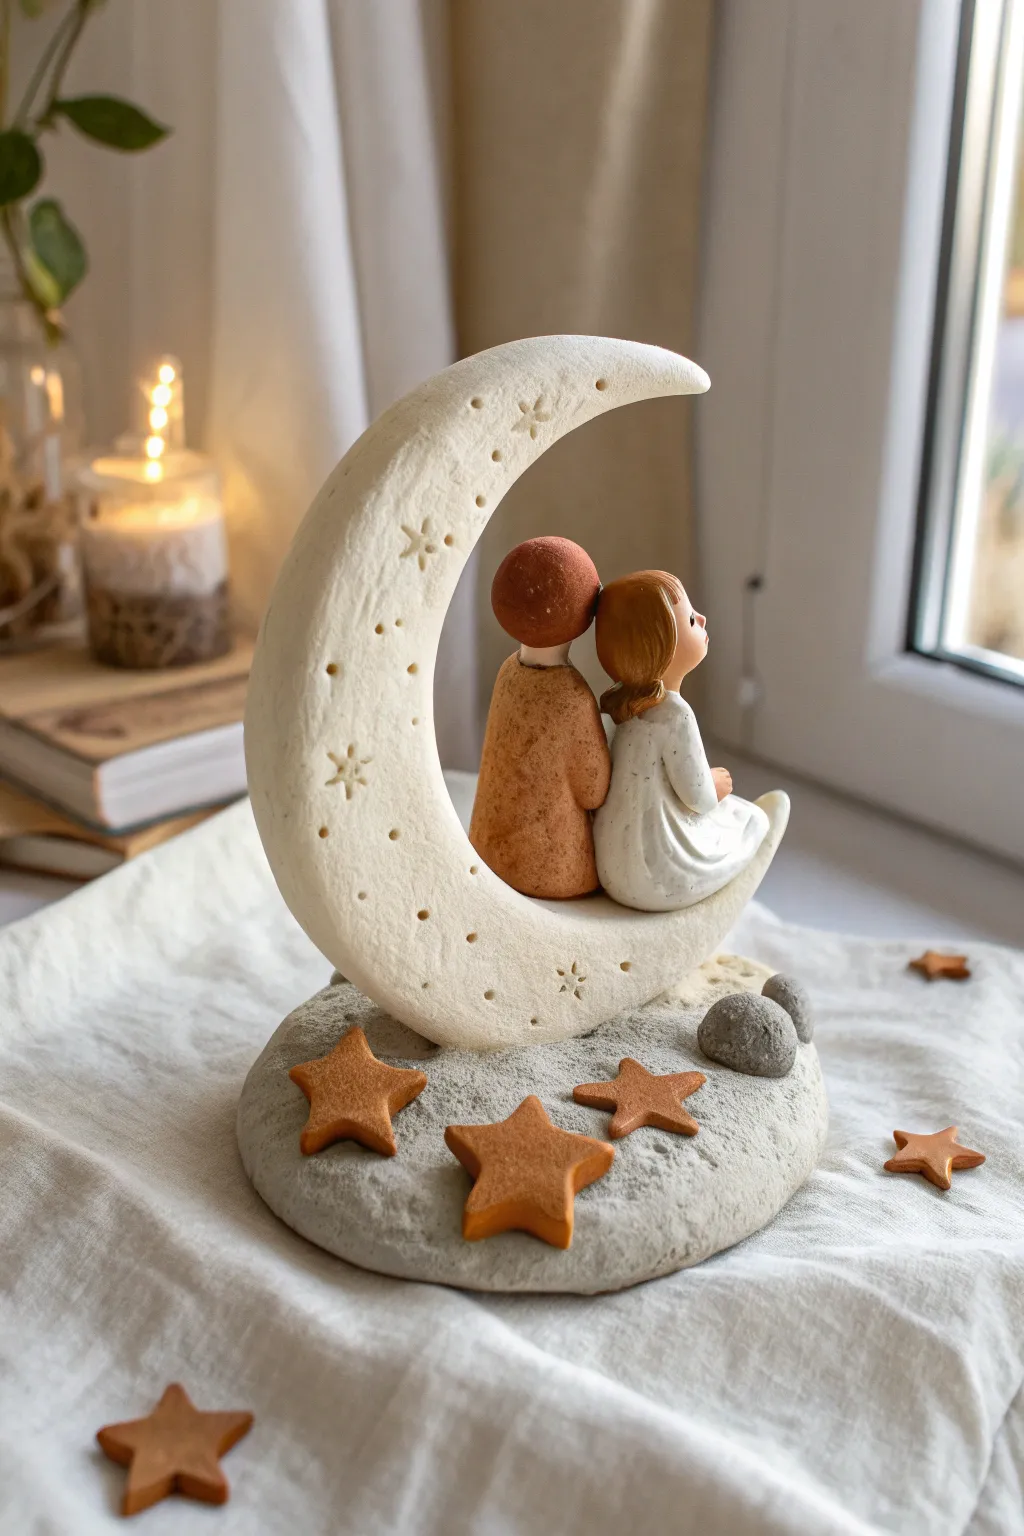
Capture a moment of quiet celestial intimacy with this charming clay sculpture featuring a couple seated on a textured crescent moon. The project combines simple figure modeling with rustic surface textures to create a heartwarming decorative piece perfect for a windowsill or shelf.
Step-by-Step
Materials
- Air-dry clay or polymer clay (white, terracotta/brown, beige)
- Rolling pin
- Circle cutter or bowl (approx. 5-6 inches diameter)
- Small star-shaped cookie cutter
- Sculpting tools (needle tool, ball stylus)
- Two small natural pebbles
- Texture sponge or toothbrush
- Acrylic paints (optional, if using white clay only)
- Strong craft glue or clay slip
- Aluminum foil (for armature support)
Step 1: Shaping the Celestial Base
-
Create the mound:
Begin by forming a substantial ball of grey or speckled clay for the base. Flatten it slightly into a rounded mound, roughly 4-5 inches wide, to serve as the stable ground for your scene. -
Add texture:
Use a rough sponge, a toothbrush, or a crumpled ball of aluminum foil to press texture into the entire surface of the base. This gives it a stony, lunar landscape appearance rather than a smooth finish. -
Embed the stones:
Choose two small, smooth pebbles and press them gently into the side of the base while the clay is still soft. This adds a realistic, mixed-media touch to the landscape.
Moon Stability Tip
Insert a toothpick or stiff wire inside the moon and down into the base during assembly. This acts as an internal spine, preventing the moon from leaning while drying.
Step 2: Sculpting the Crescent Moon
-
Cut the moon shape:
Roll out a slab of white or cream-colored clay to about 1/2 inch thickness. Use a large circle cutter or bowl to cut a round shape, then offset the cutter to slice out a thick crescent moon shape. -
Smoothing the edges:
Use your fingers and a bit of water to round off the sharp cut edges of the moon. It should look soft and puffy, not like a flat cookie. -
Adding celestial details:
With a needle tool or small stamp, imprint tiny stars and dots randomly across the surface of the moon. I find that varied sizes of dots create a more whimsical, magical effect. -
Attaching the moon:
Score the bottom point of the moon and the center of your base. Apply clay slip or liquid clay, then press the moon firmly upright onto the base. You may need to prop it up with something from behind while it firms up.
Cracks Appearing?
If small cracks appear while air-drying, mix a tiny bit of fresh clay with water to make a paste and fill them in immediately. Smooth over with a damp finger.
Step 3: creating the Clay Couple
-
Form the bodies:
Create two small cone shapes for the torsos. Use a terracotta or brown clay for the male figure and a white or grey clay for the female figure. slightly flatten the bottoms so they sit securely. -
Seat the figures:
Place the cones onto the inner curve of the crescent moon. Curve them slightly so they look like they are leaning comfortably against each other and the moon’s curve. -
Add the heads:
Roll two small balls of beige or skin-tone clay for heads. Attach these to the tops of the cone bodies. Tilt them slightly inward so they are touching, conveying intimacy. -
Sculpt the hair:
For the male figure, add a small textured cap of brown clay. For the female figure, add flattened teardrop shapes of brown clay to create longer hair flowing down her back. -
Refine the posture:
Gently press the figures together so there is no gap between their backs. You can use a sculpting tool to blend the clay slightly at the contact points for a stronger bond.
Step 4: Finishing Touches
-
Make the stars:
Roll out a thin sheet of brown or terracotta clay. Use your small star cutter to punch out three to five stars. -
Place the stars:
Attach three stars to the front of the textured base using slip or glue. You can scatter a few loose ones around securely if you wish. -
Check stability:
Do a final check to ensure the moon is standing straight and the figures are secure. If the moon leans, add a small wedge of clay behind it at the base for support. -
Dry properly:
Allow the piece to dry slowly away from direct heat to prevent cracking. If using polymer clay, bake according to the manufacturer’s instructions, usually around 275°F (130°C) for 15-30 minutes depending on thickness.
Once fully dry or baked, place your sculpture near a window to let the natural light highlight those lovely textures

TRACK YOUR CERAMIC JOURNEY
Capture glaze tests, firing details, and creative progress—all in one simple printable. Make your projects easier to repeat and improve.
Heart-Leaf Tree Shadow Box Couple
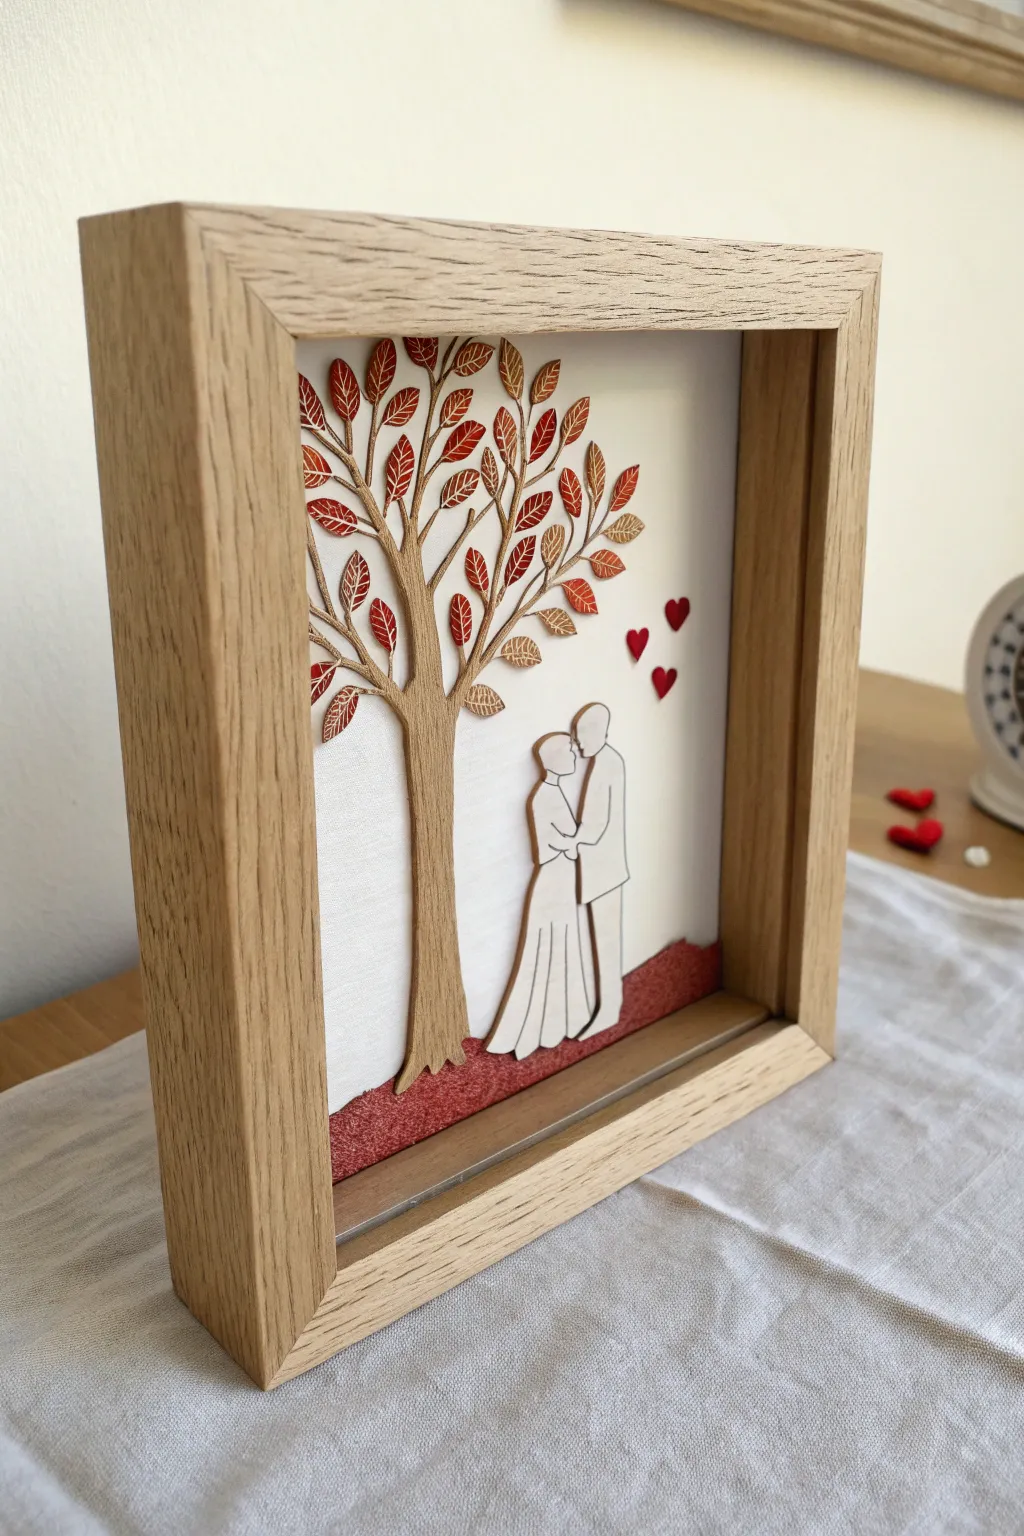
For a thoughtful anniversary or wedding gift, recreate this stunning shadow box art featuring a romantic silhouette couple beneath a vibrant autumnal tree. The piece combines natural wood textures with delicate paper layered elements for a beautiful 3D effect.
Step-by-Step Tutorial
Materials
- Deep shadow box frame (oak or light wood finish)
- Thick watercolor paper or cardstock (white)
- Wooden veneer sheet or thin balsa wood
- Air-dry clay or polymer clay (white or cream)
- Red textured handmade paper or felt (for the ground)
- Acrylic paints (metallic copper, red, orange, gold)
- Fine detail paintbrush
- Craft knife (X-Acto)
- Cutting mat
- Strong craft glue or hot glue gun
- Cardboard spacers or foam tape
- Small heart punch (optional)
Step 1: Preparing the Frame & Background
-
Disassemble the frame:
Carefully remove the backing board and glass from your shadow box frame. Clean the glass thoroughly to ensure no fingerprints remain on the inside surface. -
Create the base:
Cut a piece of thick white watercolor paper or cardstock to fit perfectly inside the back of the frame. This will be your neutral background that makes the colors pop. -
Lay the groundwork:
Tear a strip of the red textured paper or felt to create an uneven, organic horizon line. Glue this to the bottom of your white background card to represent the fallen leaves or ground.
Sticky Situation?
If small clay parts break while cutting, smooth them back together with a drop of water (air-dry) or liquid clay (polymer) before drying.
Step 2: Crafting the Tree
-
Sketch the trunk:
On your wood veneer or balsa sheet, lightly sketch a tree trunk that curves slightly to the left, with branches reaching out to cover the top third of the composition. -
Cut the trunk:
Using a sharp craft knife on a cutting mat, carefully cut out the tree silhouette. Take your time around the delicate branch tips to prevent snapping. -
Create the leaves:
Cut roughly 50-60 small almond or oval shapes from thick cardstock to serve as leaves. I find that varying the sizes slightly makes the tree look more natural. -
Paint the leaves:
Paint the cardstock leaves in a mix of autumn hues: metallic copper, deep red, and gold. Add fine vein details with a darker shade or a fine-tip pen once dry. -
Assemble the tree:
Glue the wooden trunk onto the left side of the background. Start gluing leaves onto the branches, overlapping some and letting others float slightly away for a wind-blown look.
Step 3: Sculpting the Couple
-
Roll the clay:
Roll out a thin slab of air-dry or polymer clay, about 3mm thick. It needs to be uniform so the figures look flat and stylized. -
Cut the silhouettes:
Using a printed template or freehand skill, cut out the silhouette of a groom and a bride. Combine them into a single piece where they touch to make handling easier. -
Define details:
Use a needle tool to gently scribe lines separating the groom’s jacket and the bride’s dress folds. Smooth the edges with a bit of water on your finger. -
Dry the figures:
Allow the clay figures to dry completely according to the package instructions. If using polymer clay, bake as directed and let cool. -
Position the couple:
Glue the couple onto the right side of the composition, placing their feet so they appear to be standing on the red textured ground layer.
Depth Trick
Use tiny foam tape squares behind the main tree trunk and the couple to lift them off the background, creating true shadow depth.
Step 4: Finishing Touches
-
Add floating hearts:
Cut or punch three tiny hearts from red cardstock or clay. Glue them vertically above the couple’s heads, spaced out as if floating upward. -
Reassemble frame:
Once all glue is completely dry, place the spacer frame (box insert) back in, followed by your artwork and the backing board. Secure the clips tightly.
Now you have a timeless keepsake that captures a moment of love within a frame
Couple Silhouette Relief Tile
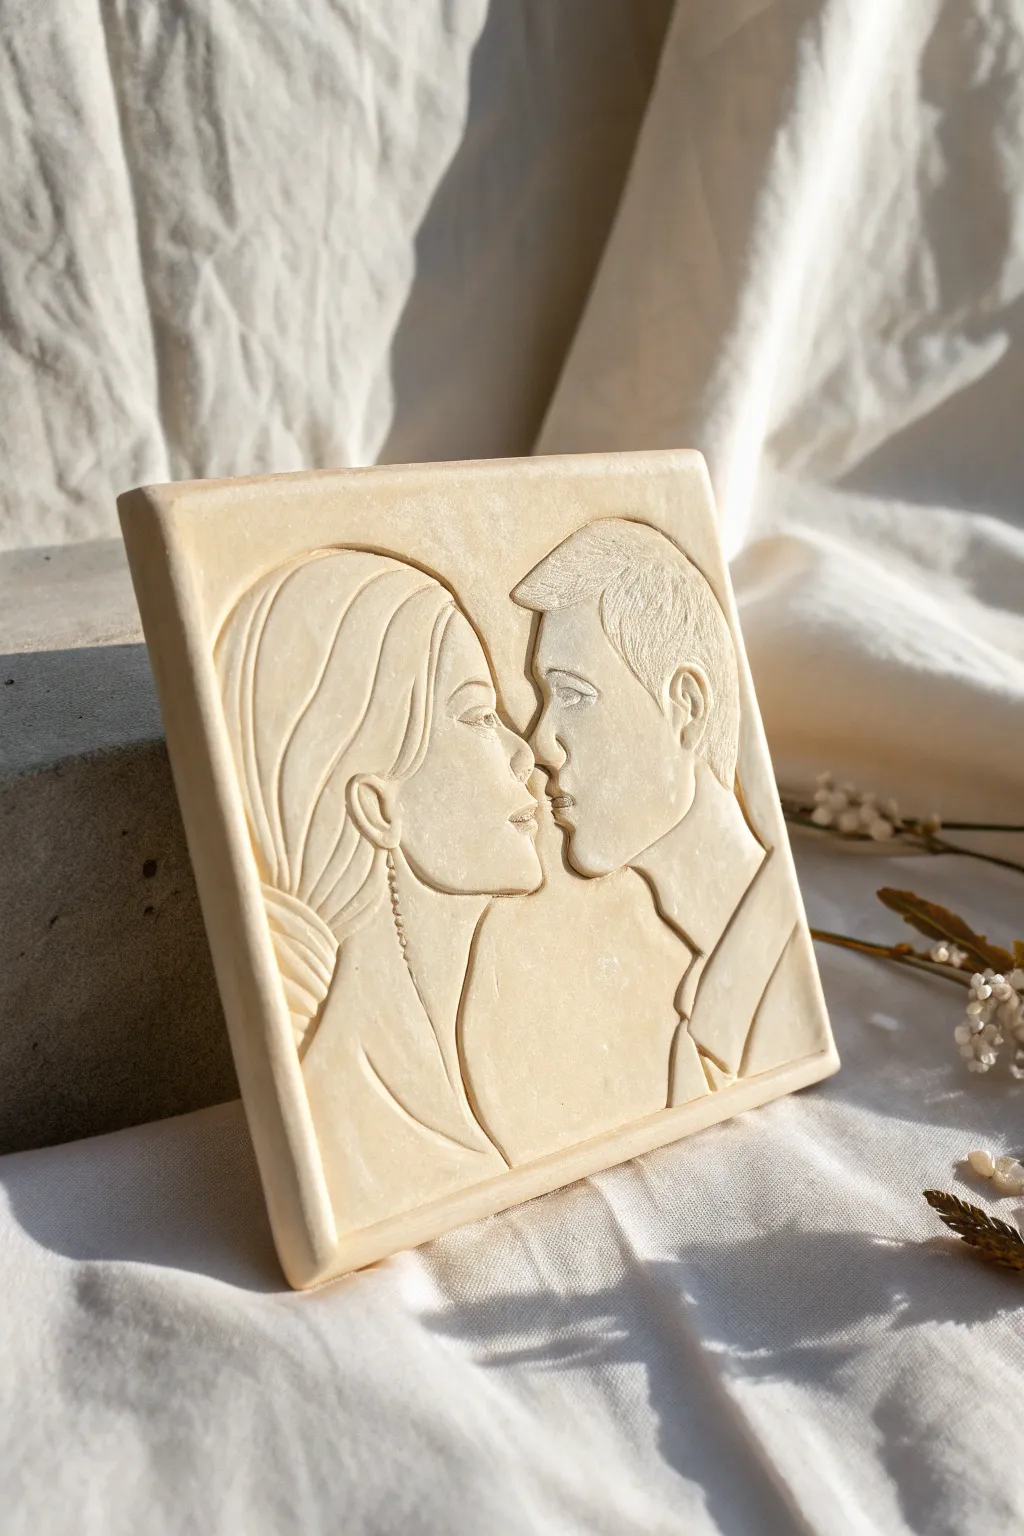
Capture the tender moment of a near-kiss with this sophisticated low-relief clay tile. Using a reductive sculpting technique, you’ll create a creamy, stone-like finish that turns a simple line drawing into an elegant keepsake.
Step-by-Step
Materials
- White or beige polymer clay (approx. 2-3 blocks)
- Square tile cutter (4-inch) or ruler and craft knife
- Rolling pin or pasta machine
- Profile line drawing of a couple (printed to size)
- Transfer paper or soft lead pencil (6B)
- Needle tool
- Small carving loop tools (or V-gouge)
- Silicone smoothing tool (rubber shaper)
- Fine grit sandpaper
- Parchment paper
Step 1: Preparation and Transfer
-
Condition the Clay:
Begin by thoroughly conditioning your polymer clay until it is warm and pliable. This prevents cracks during the carving process. -
Roll the Slab:
Roll the clay out into a thick, even slab, approximately 1/4 inch thick. A thicker slab gives the relief more depth and stability. -
Cut the Base:
Place your square cutter or use a ruler and knife to cut a perfect square tile. Smooth the edges with your finger to remove any sharp cutting marks. -
Prepare the Image:
If you don’t have transfer paper, trace your couple’s profile image on the back with a soft lead pencil. The lines should be simple and clean. -
Transfer the Design:
Place the paper image-side down onto the clay slab. Gently rub over the lines with a burnishing tool or spoon handle to transfer the graphite outline onto the smooth clay surface.
Clay Getting Sticky?
If the clay gets too soft while carving fine details like the nose, pop the tile in the fridge for 10 minutes. The firmer clay will hold sharp edges much better without dragging.
Step 2: Carving the Relief
-
Outline the Cut:
Using a needle tool, very lightly score over the transferred lines to make them more permanent before you start removing clay. -
Begin Excavation:
Use a small loop tool to carve away the background clay surrounding the faces. You want the couple to remain at the original height, while the negative space recedes. -
Define the Profiles:
Work carefully around the delicate areas like the nose, lips, and eyelashes. I prefer to use a smaller tool here to ensure I don’t accidentally slice off a feature. -
Carve Hair Textures:
Instead of removing the hair entirely, carve fluid lines into the elevated hair sections to suggest strands and movement, following the natural curve of the head. -
Refine the Details:
Use a V-gouge or needle tool to define the sharp connection points, such as where the chin meets the neck or the collar of the shirt. -
Level the Background:
Go back to the background areas you excavated. Try to get them relatively flat, but some tool marks are acceptable and add to the hand-carved stone aesthetic.
Step 3: Finishing Touches
-
Smooth the Edges:
Take a silicone smoothing tool or your finger dipped in a little baby oil to gently soften the sharp carved edges of the faces so they look rounded and organic. -
Add Decorative Borders:
Press a ruler or flat tool gently around the very perimeter of the tile to create a slight frame or raised lip, giving the piece a finished look. -
Bake the Piece:
Place the tile on parchment paper and bake according to your clay manufacturer’s instructions. A longer bake at lower temp often prevents scorching white clay. -
Sand for Stone Effect:
Once cool, lightly sand the surface with fine-grit sandpaper. This removes fingerprints and gives the clay a matte, stone-like texture. -
Clean Up:
Wipe the tile with a damp cloth or rinse it to remove any sanding dust, revealing the pristine sculpted finish.
Faux Stone Texture
Mix a tiny pinch of black pepper or translucent clay into your white block before rolling. This creates subtle speckles that mimic real limestone or marble.
Display your romantic relief on a small easel or mount it in a shadow box to create a timeless piece of wall art
You-and-Me Couple Magnet Set
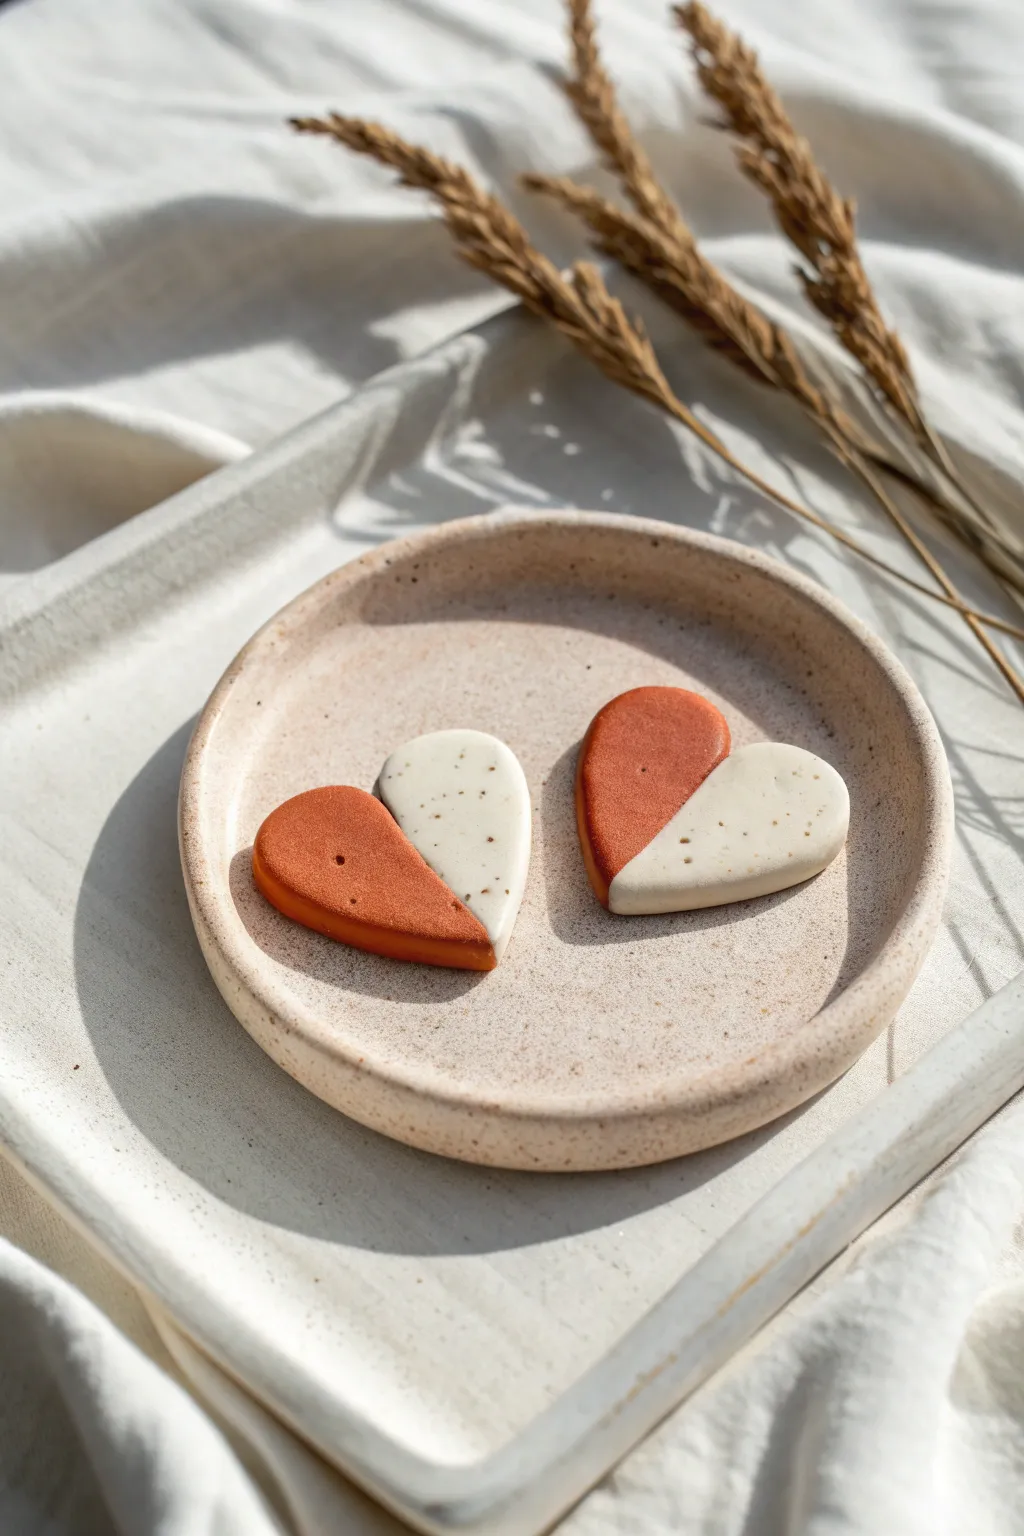
These charming clay magnets celebrate togetherness with a split design that unites two distinct colors into a single heart. The contrast between warm terracotta and speckled cream creates a modern, minimalist aesthetic perfect for holding up photos or notes.
Detailed Instructions
Materials
- Polymer clay (terracotta/rust color)
- Polymer clay (white or cream color)
- Black pepper or dried vanilla bean specks (optional for speckling)
- Heart-shaped clay cutter (medium size)
- Tissue blade or very sharp craft knife
- Acrylic rolling pin
- Ceramic tile or glass work surface
- Circular magnets (small but strong)
- Industrial strength glue (like E6000)
- Fine grit sandpaper (optional)
Step 1: Preparing the Clay
-
Condition the terracotta clay:
Begin by kneading the terracotta-colored clay in your hands until it is warm, soft, and pliable. This conditioning step is crucial to prevent cracks later on. -
Create the speckled white mix:
Condition the white or cream clay. To achieve the speckled look shown in the photo, I like to mix in a tiny pinch of ground black pepper or vanilla bean specks. Knead thoroughly until the specks are evenly distributed. -
Roll out the slabs:
Using your acrylic rolling pin, roll both clay colors out separately on your work surface. Aim for an even thickness of about 4mm to 5mm so the magnets feel substantial.
Clean Lines Pro-Tip
Before cutting your heart shape, place a piece of plastic wrap over the clay. This creates a soft, rounded beveled edge on the top of your heart rather than a sharp, flat cut.
Step 2: Constructing the Hearts
-
Cut the dividing lines:
Use your tissue blade to cut a straight edge on one side of both the terracotta and the speckled white clay slabs. This straight cut will form the seam where the colors meet. -
Join the seams:
Gently push the straight cut edge of the terracotta slab against the straight edge of the white slab. Press them together firmly enough to adhere, but gently enough not to distort the clay. -
Smooth the connection:
Lightly roll over the seam with your roller to ensure the two colors are leveled and bonded. You can also carefully smudge the back of the seam with your finger to strengthen the bond. -
Cut the heart shapes:
Position your heart-shaped cutter over the joined clay so that the seam runs diagonally or vertically through the heart, creating a two-tone effect. Press down firmly to cut out your shapes. -
Refine the edges:
Lift the hearts and gently smooth the cut edges with your fingertip to remove any loose bits or sharp angles left by the cutter.
Level Up: Texture
Before baking, gently press a piece of coarse sandpaper or a clean toothbrush onto just the terracotta half to give it a stone-like texture that contrasts with the smooth white side.
Step 3: Baking and Finishing
-
Bake the pieces:
Place your clay hearts on a parchment-lined baking sheet or ceramic tile. Bake according to your specific polymer clay’s package instructions—usually around 275°F (135°C) for 15-30 minutes. -
Cool completely:
Allow the hearts to cool completely before handling. Polymer clay is slightly soft when hot and achieves its final hardness only after cooling. -
Light sanding (optional):
If there are any fingerprints or rough spots, briefly sand the surface under running water using fine-grit sandpaper for an ultra-smooth finish. -
Attach the magnets:
Flip the hearts over. Apply a small dot of industrial-strength glue to the center of the back. -
Secure the backing:
Press a small circular magnet into the glue. Let the magnets sit undisturbed for at least 24 hours to ensure a permanent bond.
Once the glue has fully cured, your custom dual-tone hearts are ready to add a touch of warmth to your fridge or magnetic board
Wedding or Anniversary Couple Topper
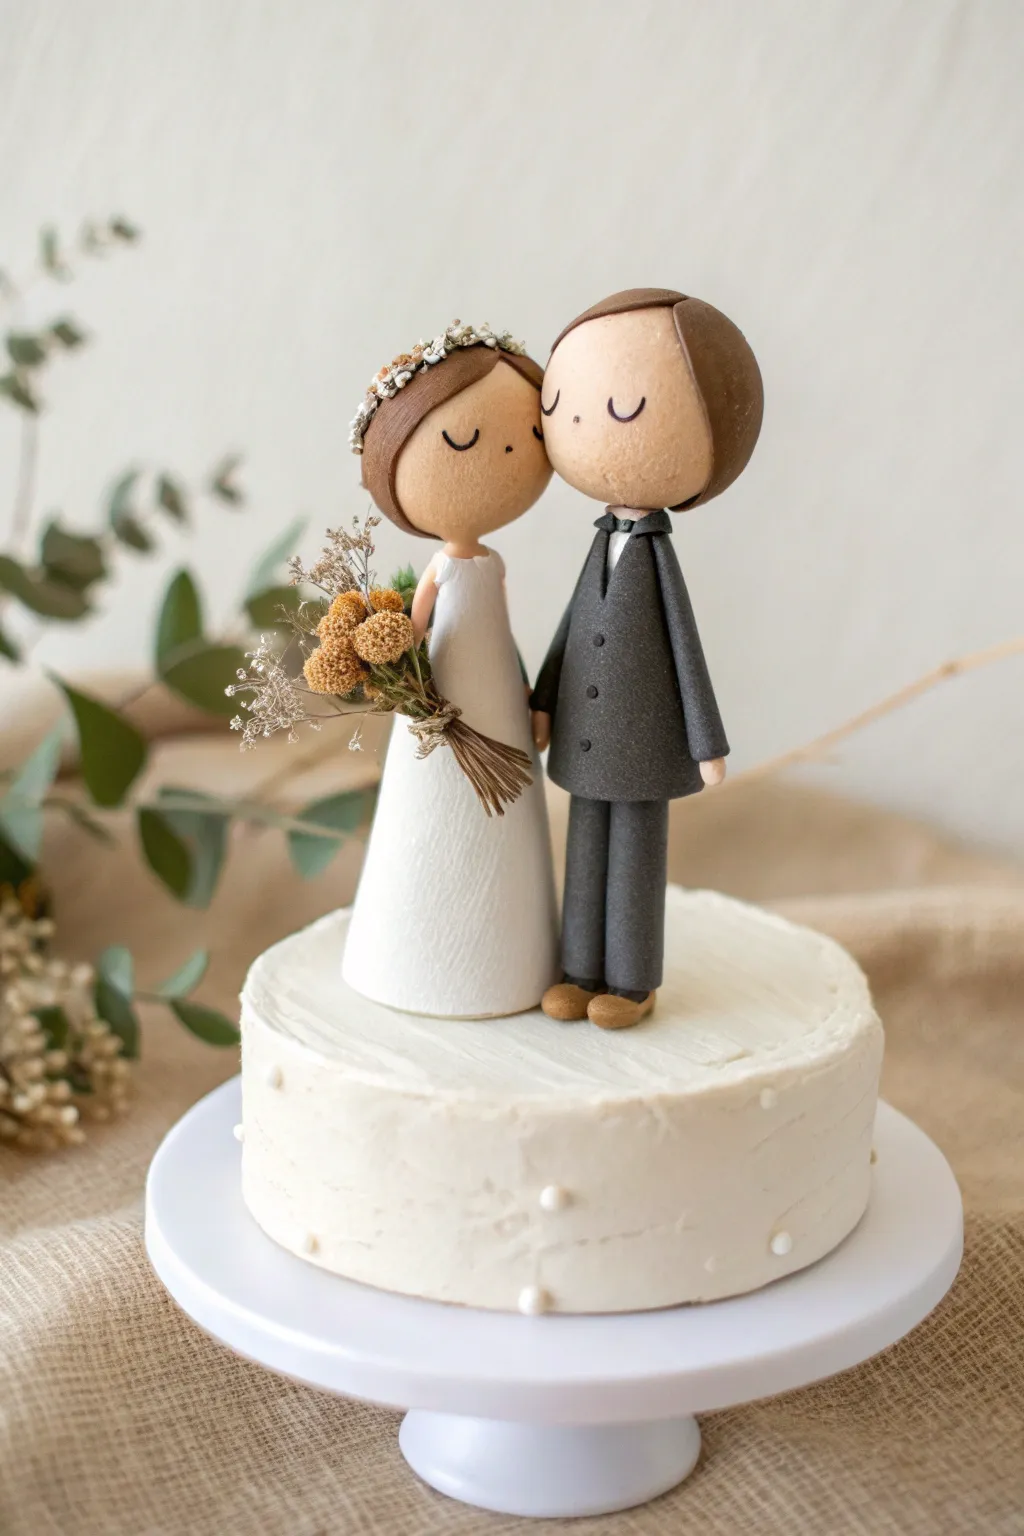
Capture the sweetness of a wedding day with this charmingly simple polymer clay cake topper. The figures feature clean lines, a gentle leaning pose, and a rustic miniature bouquet that adds a beautiful natural texture to the smooth clay.
Step-by-Step Guide
Materials
- Polymer clay (white, dark grey/black, skin tone, brown)
- Aluminum foil for core structure
- Pointed sculpting tool or toothpick
- Super glue or liquid clay
- Small dried flowers (baby’s breath, billy balls)
- Twine or thin wire
- Rolling pin or pasta machine
- Exacto knife or clay blade
- Baking sheet and oven
Step 1: Forming the Bodies
-
Create the structural cores:
Begin by tightly balling up two cone-shaped pieces of aluminum foil. These will act as the lightweight centers for the bodies, saving clay and reducing baking time. Make one slightly taller for the groom. -
Roll the bride’s dress:
Roll out a sheet of white clay to about 3mm thickness. Wrap this smoothly around the shorter foil cone, blending the seam at the back. Gently tap the bottom on a flat surface to create a stable base. -
Construct the groom’s suit:
Cover the taller foil cone with dark grey clay. Using a blade, gently indent a vertical line down the center for the jacket opening and add three tiny indentations for buttons. -
Add the legs:
Roll two cylinders of grey clay for the groom’s legs. Attach these to the bottom of the torso so they peek out. Add two small brown oval lumps for shoes at the base.
Fingerprint Fix
If you see fingerprints on your smooth clay, lightly brush the raw clay with a little baby oil or cornstarch before baking to smooth them out completely.
Step 2: Heads and Hair
-
Shape the heads:
Roll two smooth spheres of skin-tone clay. I prefer to gently press them into a slightly oval shape to match the minimalist style shown in the photo. -
Detail the faces:
Use a needle tool or toothpick to gently impress two ‘u’ shapes for closed, peaceful eyes on each face. Add a tiny dot for a nose on the bride. -
Style the groom’s hair:
Flatten a disk of brown clay and drape it over the groom’s head. Smooth it down, carving a sweeping side part with your tool to give it a sleek look. -
Style the bride’s hair:
Apply a similar brown clay layer to the bride, smoothing it back into a low bun shape. Keep the hairline neat around the face.
Customize It
Match the dried flowers in the clay figurine’s bouquet to the actual wedding flowers, or paint tiny patterns on the groom’s tie for a truly personal touch.
Step 3: Assembly and Finishing Touches
-
Connect heads to bodies:
Insert a short piece of wire or a toothpick into the top of each body, then gently press the heads down onto them. Angle the heads so they lean affectionately toward each other. -
Fashion the arms:
Roll thin snakes of skin-tone clay for the bride’s arms and attach them to the sides of her dress. For the groom, use the grey suit color for sleeves, adding tiny skin-tone balls for hands at the ends. -
Make the bridal crown:
Roll a very thin snake of white clay. Twist tiny bits of brown and white clay together to mimic small flowers and wrap this ‘crown’ around the bride’s head. -
Create the mini bouquet:
Take your real dried flowers and bundle a tiny arrangement. Tie it with thread and trim the stems short so the scale fits the figures. -
Attach the bouquet:
Once you are happy with the position, gently press the dried bouquet into the bride’s arms. You can use a dab of liquid clay to secure it before baking. -
Construct the base:
Roll out a thick white disk of clay to serve as the platform. Texture it if desired, or keep it smooth. -
Final assembly:
Press the figures firmly onto the white base. Ensure they are standing straight and leaning together properly. -
Bake the piece:
Bake according to your clay manufacturer’s instructions (usually 275°F for 15-30 minutes). Let it cool completely inside the oven to prevent cracking.
This lovely keepsake will stand as a sweet reminder of a special day for years to come
Soundwave Couple Message Relief
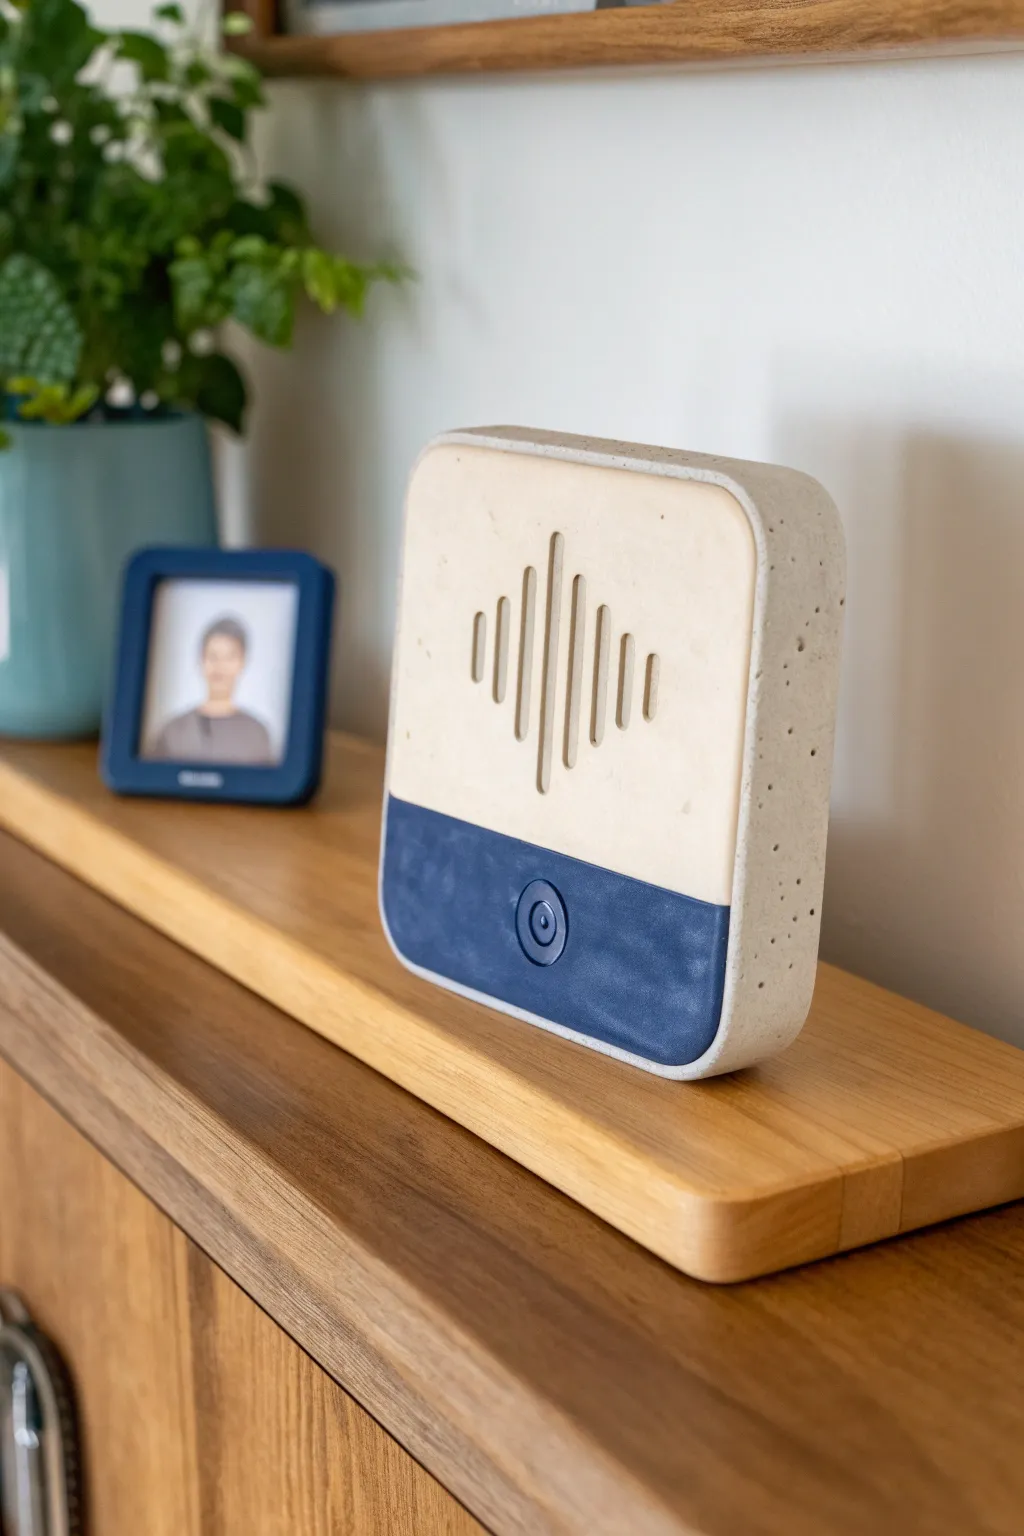
This modern, mixed-texture piece transforms a fleeting voice message into permanent art, featuring a geometric soundwave relief set against a sleek two-tone design. The combination of speckled stone-effect clay and a smooth, faux-leather style base creates a sophisticated keepsake perfect for capturing a partner’s ‘I love you’.
How-To Guide
Materials
- White or beige polymer clay (oven-bake)
- Blue polymer clay (navy or denim shade)
- Speckled granite effect polymer clay or fine sand
- Square clay cutter (approx. 4×4 inches)
- Small circular cutter (for the button)
- Craft knife or scalpel
- Rolling pin or pasta machine
- Ruler
- Computer and printer (for the soundwave template)
- Fine-grit sandpaper
- Liquid polymer clay (optional for bonding)
- Matte varnish
Step 1: Preparing the Pattern
-
Record your message:
Use a voice recording app on your phone to record a short message (like ‘I love you’ or a special date). Take a screenshot of the resulting soundwave visual. -
Create the template:
Print the screenshot on standard paper, resizing it so it fits within the upper two-thirds of your 4-inch square. Simplify the lines if they are too jagged. -
Cut the stencil:
Using your craft knife, carefully cut out the vertical bars of the soundwave from the paper to create a negative stencil.
Clean Lines Pro-Tip
Chill your clay slab in the fridge for 10 minutes before carving the soundwave. Firm clay cuts much cleaner and drags less under the knife.
Step 2: Constructing the Base
-
Mix the top clay:
Condition your white or beige clay. To achieve the speckled look seen in the photo, mix in a small amount of granite-effect clay or a pinch of clean, fine sand. -
Roll the slab:
Roll out the speckled clay to a substantial thickness, about 1/4 to 1/2 inch thick, to give the object visual weight. -
Cut the main shape:
Use your large square cutter to punch out the main body shape. Smooth the edges with your finger to round them slightly like a tumbled stone. -
Create the division:
Mark a horizontal line across the lower third of the square. Use a ruler and knife to slice this bottom section off completely; you will be replacing it with a different color.
Step 3: Adding the Soundwave Details
-
Apply the stencil:
Lay your paper stencil gently onto the beige top section. Lightly press it down so it doesn’t shift. -
Carve the relief:
Using a scalpel or a needle tool, carefully trace the soundwave cutouts. Carve these areas out to create deep grooves, imitating the speaker grill look. -
Smooth the grooves:
Use a rubber clay shaper or a cotton swab dipped in a little baby oil to smooth the inside edges of your carved soundwave lines.
Fixing Smudges
If blue clay smudges onto the beige section during joining, wipe it away immediately with a Q-tip dipped in rubbing alcohol before baking.
Step 4: Creating the Blue Accent
-
Condition the bottom section:
Roll out your blue clay to the exact same thickness as the top beige piece. -
Cut to fit:
Cut a rectangle that matches the dimensions of the piece you sliced off earlier. Ensure the width perfectly aligns with the top section. -
Texture the surface:
I like to gently press a piece of fine sandpaper or fabric against the blue clay to give it a matte, soft-touch texture resembling leather or fabric. -
Join the pieces:
Apply a thin line of liquid polymer clay to the cut edge of the beige top and the blue bottom. Press them together firmly on your work surface to bond them into a single square again. -
Add the button detail:
Use the small circular cutter to gently impress a ring in the center of the blue section. Don’t cut all the way through; just create an indentation. Add a tiny dot of clay in the center for the button.
Step 5: Finishing Up
-
Adding the rim:
Roll a long, flat strip of the speckled beige clay. Wrap this around the entire perimeter of the square to create a seamless frame that hides the join line on the sides. -
Bake:
Bake the piece according to your clay package instructions (usually 275°F for 15-30 minutes). Tent with foil to prevent the beige clay from yellowing. -
Sand and seal:
Once cool, lightly sand any rough edges. Finish with a matte varnish to protect the surface while keeping that natural, stony aesthetic.
Place your finished sculpture on a shelf as a beautiful, silent reminder of a shared voice