Whenever I’m stuck in a creative rut, I make a teapot—because it’s basically a tiny sculpture you can actually use. Here are my favorite creative teapot ideas that turn the classic pot-and-spout setup into something way more playful, expressive, and totally you.
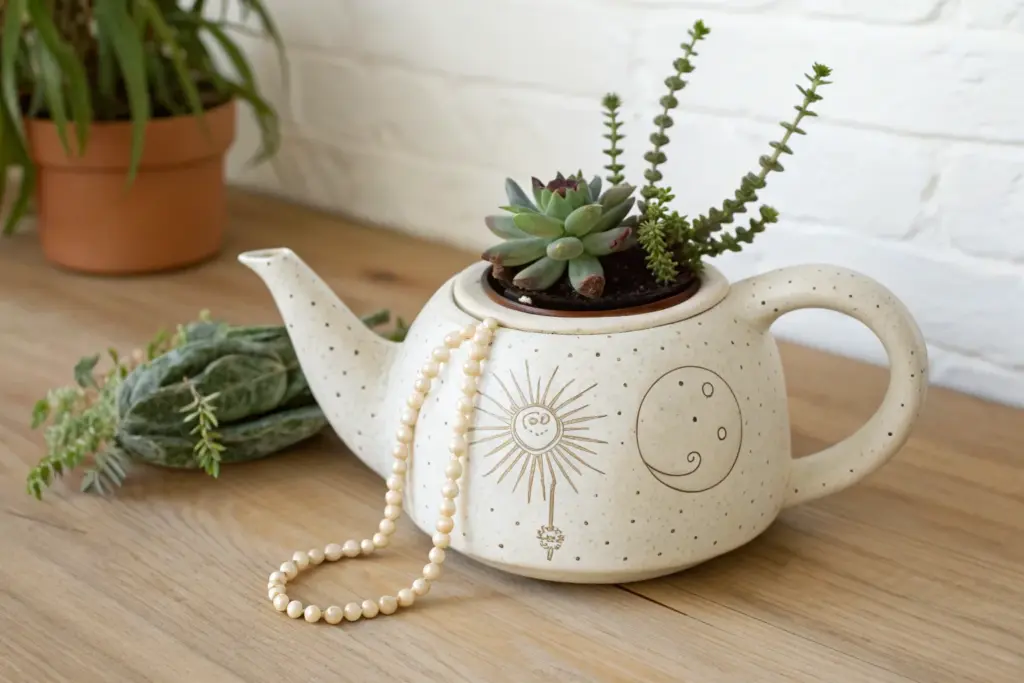
Classic Teapot With a Signature Twist
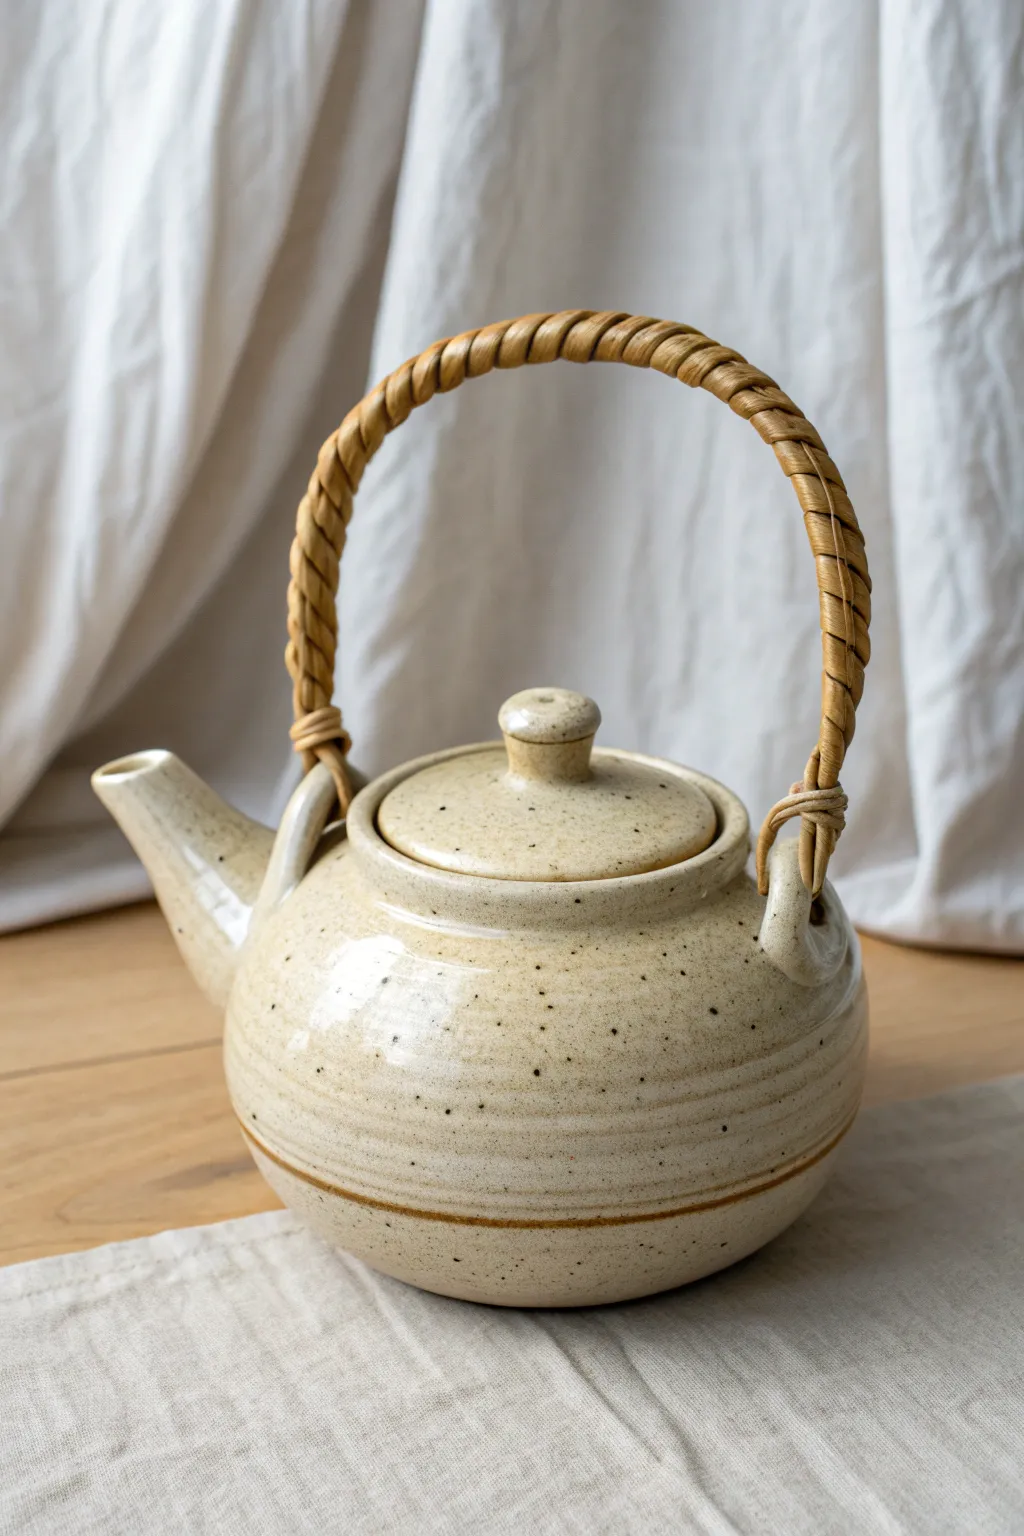
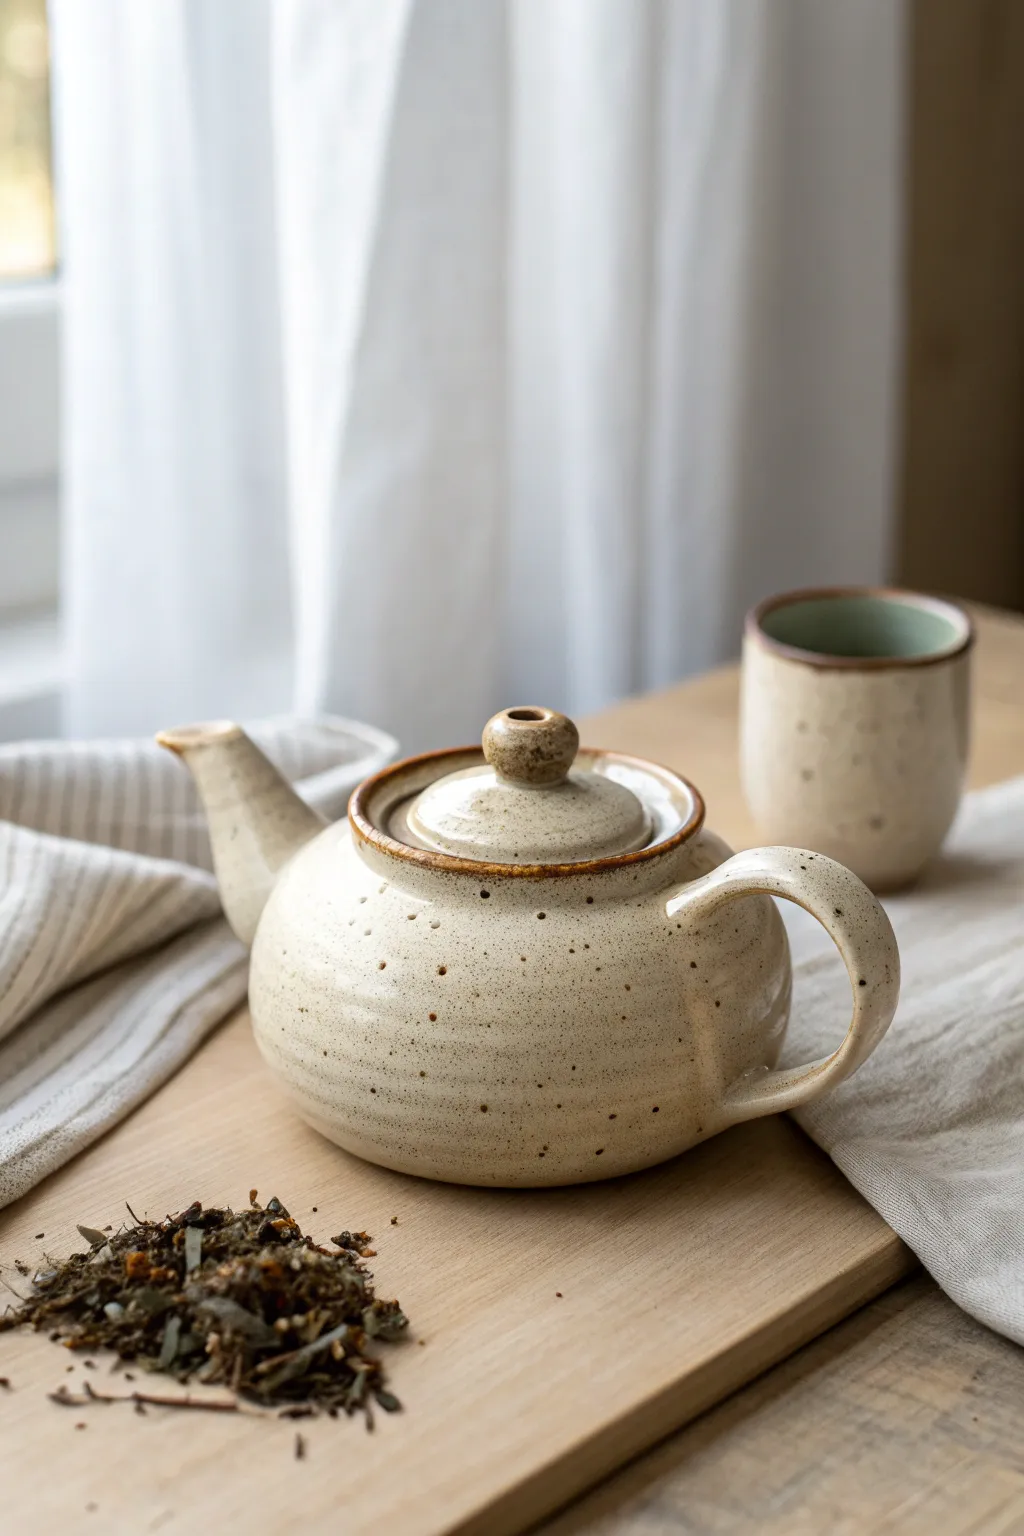
This rustic, wheel-thrown teapot balances traditional form with organic texture, featuring a creamy speckled glaze and a unique horizontal accent line. Its most defining characteristic is the hand-wrapped cane handle, which adds a warm, natural touch to the cool ceramic body.
Detailed Instructions
Materials
- Speckled stoneware clay (approx. 3-4 lbs)
- Potter’s wheel
- Throwing tools (sponge, metal rib, wooden rib, wire cutter)
- Trimming tools
- Needle tool
- Cream or oatmeal semi-opaque glaze
- Iron oxide wash
- Wax resist
- 2mm round rattan reed or cane (soaked)
Step 1: Throwing the Body and Lid
-
Center the clay:
Start by centering about 2.5 lbs of speckled stoneware clay on your wheel, compressing it well to ensure a strong base. -
Open and pull:
Open the clay and pull up the walls to form a bulbous, rounded belly shape, narrowing slightly as you reach the collar. -
Shape the gallery:
Using a wooden stick or your fingers, split the rim to create a recessed gallery where the lid will eventually sit. -
Create the signature groove:
While the wheel is spinning slowly, use the corner of a wooden rib or a modeling tool to press a distinct horizontal groove into the lower third of the pot’s belly. -
Throw the spout:
With a smaller lump of clay (about 0.5 lbs), throw a short, tapered spout; ensure the base is wide enough to attach securely to the body. -
Throw the lid:
Using a caliper to measure your gallery size, throw a simple doomed lid with a small, rounded knob on top.
Step 2: Assembling and Trimming
-
Trim the foot:
Once leather hard, flip the teapot body onto a chuck or foam bat and trim a clean, rounded foot ring. -
Attach the spout:
Hold the spout up to the pot to find the right angle, then mark the attachment area. Score and slip both surfaces before pressing the spout firmly onto the body. I like to smooth the seam with a small damp sponge to make it look seamless. -
Create the lugs:
Roll two small coils of clay and form them into loop lugs (ears). Attach these securely on opposite sides of the shoulder—these will anchor your woven handle later. -
Dry slowly:
Cover the teapot loosely with plastic to ensure all added parts dry at the same rate as the body, preventing cracks.
Soak Your Cane
Soak the rattan or cane in warm water for at least 20 minutes before weaving. This prevents snapping and ensures a tight fit as it dries and shrinks.
Step 3: Glazing and Finishing
-
Bisque fire:
Fire the assembled piece to cone 04 (or your clay’s specific bisque temperature). -
Accent the groove:
Apply a thin wash of iron oxide into the horizontal groove you created earlier, then wipe away the excess with a sponge so the color remains only in the recess. -
Apply wax resist:
Paint wax resist on the foot ring, the gallery where the lid sits, and the rim of the lid itself to prevent them from sticking during firing. -
Glaze the pot:
Dip the entire teapot and lid into a semi-opaque cream or oatmeal glaze that allows the clay’s natural speckles to show through. -
Stilt and fire:
Clean up any drips and fire to maturity (likely cone 5/6 or cone 10, depending on your clay).
Dual-Tone Detail
Leave the very bottom inch of the teapot unglazed (raw clay). This creates a textural contrast that complements the woven handle beautifully.
Step 4: Weaving the Handle
-
Prepare the core:
Create the core arch of the handle using 3-4 strands of thick rattan reed, bending them to bridge the gap between the two ceramic lugs. -
Anchor the weave:
Detailed weaving begins by taking a long, soaked strip of flexible cane and knotting it securely around one of the ceramic lugs. -
Wrap the arch:
Wrap the cane tightly around your core reeds in a spiral pattern, moving from one lug to the other. Keep the tension high so the handle feels solid. -
Secure the ends:
When you reach the opposite lug, wrap the cane around it multiple times to secure the arch, tucking the loose end back under the wrapping to hide it.
Pour yourself a cup of tea to celebrate your beautiful new handmade vessel


Floral Teapot With Hand-Sculpted Blooms
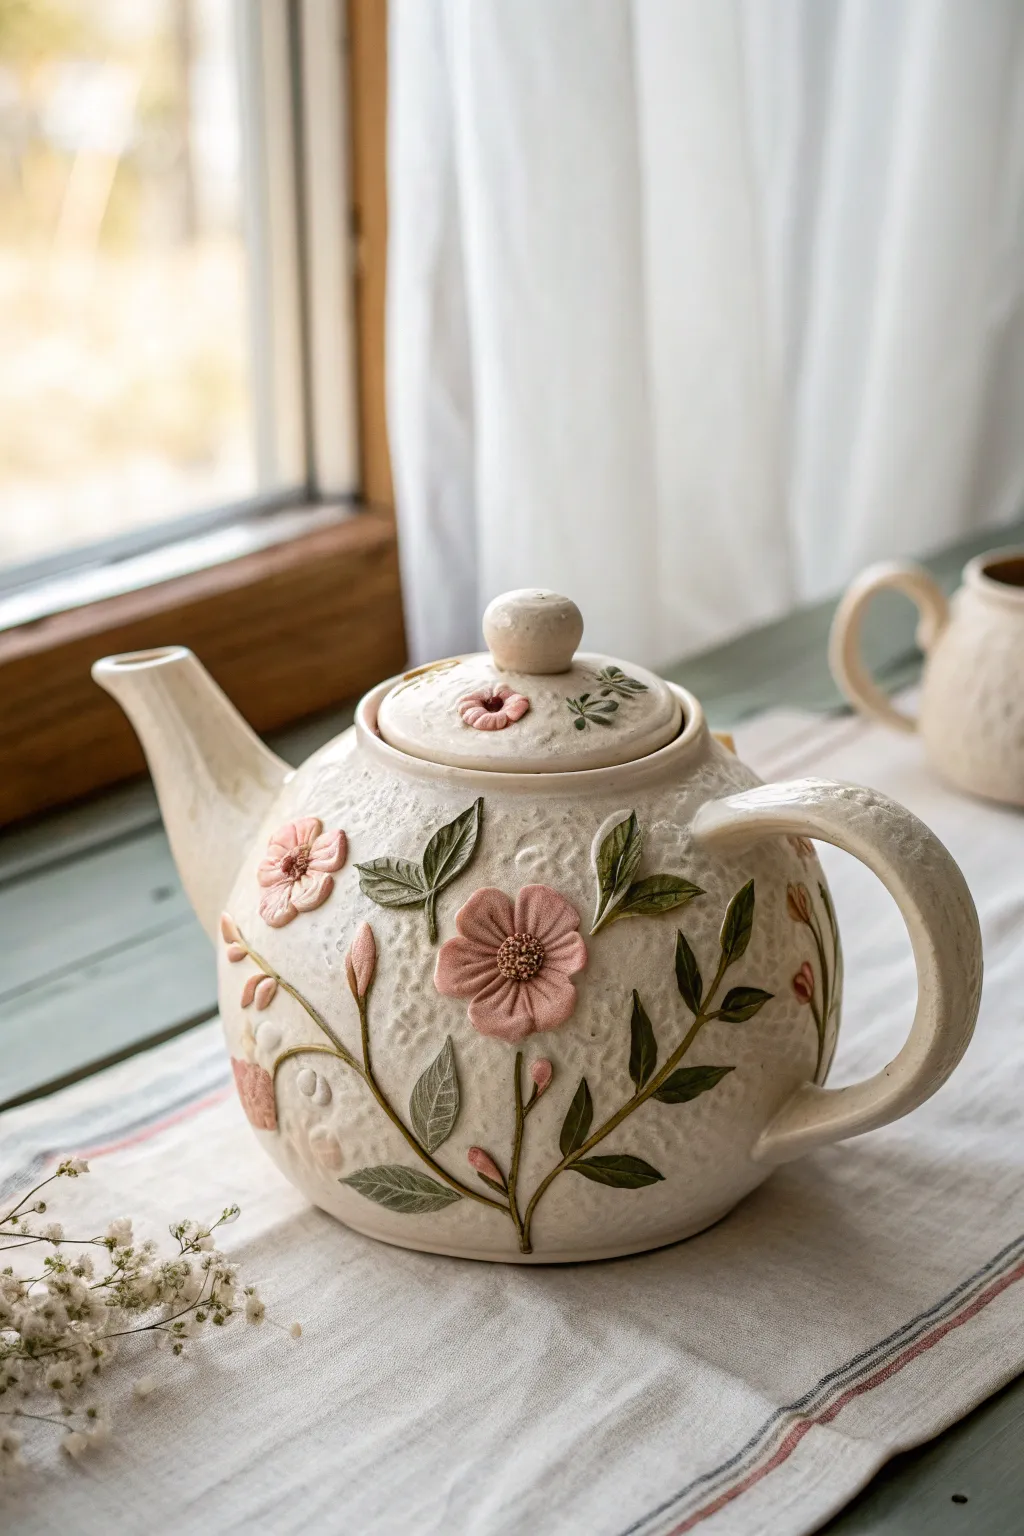
Transform a simple pottery project into a botanical masterpiece with this hand-built or wheel-thrown teapot featuring delicate hand-sculpted blooms. The textured cream body provides a rustic canvas for the raised pink flowers and trailing green vines, creating a piece that feels both organic and elegant.
Step-by-Step Guide
Materials
- White stoneware or porcelain clay body
- Underglazes (Soft Pink, Sage Green, Dark Green, Golden Brown)
- Clear or transparent satin glaze
- Pottery wheel (optional, for throwing the body)
- Rolling pin (if hand-building)
- Needle tool
- Scoring rib or serrated kidney tool
- Small painting brushes
- Slip (clay mixed with water)
- Sponge
- Modeling tools (wooden or rubber tipped)
Step 1: Creating the Base Form
-
Shape the body:
Begin by either throwing a round, bulbous shape on the wheel or using a pinch-pot method to create two hemispheres that you join together. Aim for a smooth, classic teapot curve. -
Add texture:
Before the clay reaches leather-hard, gently press a textured sponge or a crumpled piece of fabric against the entire exterior surface. This creates the subtle, stone-like pitted texture seen in the background. -
Attach the spout and handle:
Form a curved spout and a sturdy ear-shaped handle. Score and slip the contact points thoroughly before attaching them to the main body, blending the seams so they disappear into the form. -
Form the lid:
Create a simple domed lid that fits snugly into the gallery of your teapot opening. Don’t forget to add a small knob on top for easy lifting.
Clean Connections
Use a damp paintbrush to smooth clay seams around the dainty leaves immediately after attaching. This prevents messy slip marks.
Step 2: Sculpting the Botanicals
-
Roll small coils:
For the vines, roll out very thin, delicate coils of fresh clay. Keep them pliable by keeping them under plastic when not in use. -
Apply the vines:
Score the path where you want your vines to flow. Lay down the coil vines using slip, curving them naturally around the belly of the pot. I find it helpful to vary the thickness slightly for a more organic look. -
Shape the leaves:
Flatten tiny balls of clay into teardrop shapes. Use a needle tool to gently impress a central vein and small side veins into each leaf without cutting all the way through. -
Attach leaves:
Cluster the leaves along your vine paths using slip. Press them gently onto the body, ensuring the edges are securely attached but allowing the tips to curl up slightly for dimension. -
Create flower petals:
Roll five small balls of clay for the main bloom. Flatten them into ovals and pinch one end to create the attachment point. -
Assemble the blooms:
Arrange the petals in a circle directly on the teapot surface, scoring the attachment area first. Overlay the petal edges slightly to mimic a real flower. -
Add flower centers:
Take a tiny ball of clay, flatten it slightly, and press it into the center of your petals. Use a needle tool to stipple the texture, creating the look of pollen or stamens. -
Detail the lid:
Repeat the process with smaller leaves and a single small flower on the lid, ensuring the design coordinates with the main body.
Cracking Leaves?
If sculpted elements pop off during drying, the base was likely too dry. Score deeper and use vinegar-slip next time to improve adhesion.
Step 3: Glazing and Finishing
-
Bisque fire:
Allow the teapot to dry completely—this is crucial for the added sculptural elements—before bisque firing to cone 04. -
Paint the flowers:
Apply the Soft Pink underglaze to the petals. Use a slightly watered-down wash for the edges and a more saturated coat near the centers to create depth. -
Paint the foliage:
Use Sage Green for the leaves and vines. Add tiny accents of Dark Green near the veins or stem connections to define the shadows. -
Add definition:
Using a very fine brush, dab a touch of Golden Brown or a darker pink into the stippled centers of the flowers. -
Wax resist:
Apply wax resist carefully over your painted flowers and leaves if you want to keep the raw clay texture, or skip this if applying a clear glaze over everything. -
Final glaze:
Dip or brush a clear or transparent satin glaze over the entire piece. A satin finish works beautifully here to soften the look without making it too shiny. -
Final firing:
Fire the piece to the maturity temperature of your clay body (likely cone 5 or 6 for stoneware).
Once cooled, your teapot is ready to brew a comforting cup, complete with a garden view right on your table

Stamped Pattern Teapot Using Found Textures
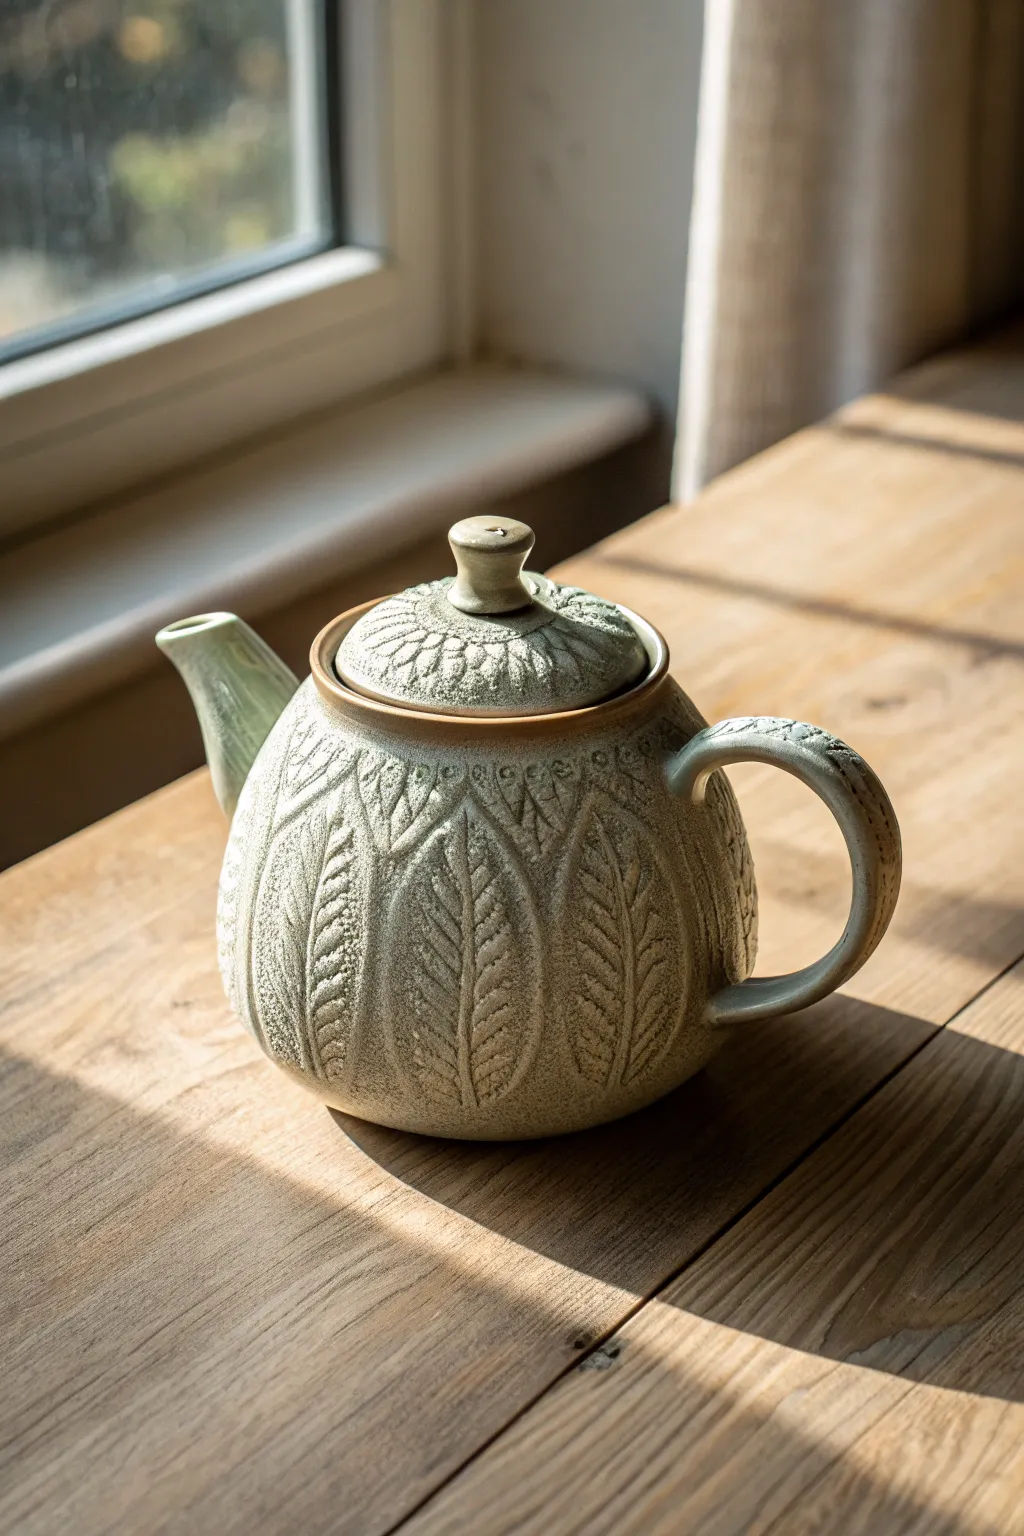
Embrace the beauty of nature with this tactile ceramic project using found textures. This teapot features a repeating leaf relief pattern, highlighted by a sage green glaze that breaks beautifully over the raised surfaces.
Step-by-Step Tutorial
Materials
- Stoneware clay (smooth or lightly groggy)
- Leaf stamps or actual sturdy leaves (e.g., sage, laurel, or artificial succulents)
- Pottery wheel (or slab roller/rolling pin for hand-building)
- Needle tool
- Rib tool (kidney)
- Scoring tool and slip
- Sponge
- Trimming tools
- Sage green breaking glaze
- Iron oxide wash (optional)
- Kiln
Step 1: Forming the Body
-
Prep the Clay:
Begin by thoroughly wedging about 2-3 pounds of stoneware clay to remove air bubbles. Center the clay on your wheel to prepare for throwing the main body. -
Throw the Base:
Open the clay and pull up the walls to create a bulbous, rounded form. Aim for a slightly thicker wall than usual (about 1/4 inch) to withstand the pressure of stamping later without collapsing. -
Collar the Neck:
Gently collar the top of the form inward to create a seat for the lid. Use a rib tool to smooth the exterior profile into a perfect curve, then cut the pot from the wheel using a wire tool. -
Form the Spout and Handle:
Throw or hand-build a curved spout and pull a sturdy C-shaped handle. Set these aside under plastic to stiffen up alongside the main body until they reach leather-hard consistency. -
Create the Lid:
throw a small, domed lid that fits the gallery of your teapot body. Add a small knob on top for easy lifting.
Step 2: Texturing and Assembly
-
Support the Form:
Once the body prevents fingerprints but is still malleable (soft leather-hard), gently stuff the interior with soft foam or newspaper. This supports the wall while you press against it from the outside. -
Map the Pattern:
Lightly trace vertical guidelines around the pot to ensure your leaf pattern stays straight. I like to mark four equidistant points first to keep the spacing symmetrical. -
Press the Leaves:
Press your leaf stamp or found natural leaf firmly into the clay. If using real leaves, roll a small pony roller over them to transfer the veins clearly. -
Detail the Stamps:
Repeat the stamping process around the entire belly of the teapot. Use a small modeling tool to deepen the center spine of each leaf if the impression is too shallow. -
Texture the Lid:
Apply a similar, smaller radial pattern to the lid, radiating outward from the knob. Ensure the textures match the flow of the main body. -
Attach Appendages:
Score and slip the areas where the spout and handle will attach. Press them firmly onto the body, blending the seams smooth so they look seamless. -
Clean the Spout:
Check the spout opening to ensure it isn’t blocked. Use a sponge to smooth the transition where the spout meets the textured body, being careful not to smudge your leaf prints. -
Dry Slowly:
Cover the entire teapot loosely with plastic. Allow it to dry very slowly over several days to prevent the handle or spout from cracking away from the body.
Sticky Stamps?
If your stamp or leaf is sticking to the clay, dust the surface lightly with cornstarch or baby powder before pressing. It acts as a release agent and burns off in the kiln.
Step 3: Glazing and Finishing
-
Bisque Fire:
Load the bone-dry greenware into the kiln and bisque fire according to your clay body’s specifications (usually Cone 04 or 06). -
Oxide Wash (Optional):
For extra depth, apply a watered-down iron oxide wash over the texture and wipe it back with a damp sponge. This leaves dark color in the deep veins of the leaves. -
Apply Glaze:
Dip or spray the teapot with a semi-transparent sage green glaze. Avoid thick opaque glazes, as they will fill in the texture and hide your hard work. -
Clean the Foot:
Wipe the bottom of the teapot and the gallery where the lid sits completely clean of glaze to prevent the lid fusing shut during firing. -
Glaze Fire:
Fire the teapot to the maturation temperature of your clay and glaze (typically Cone 5 or 6 for stoneware). Let the kiln cool completely before opening.
Pattern Depth
Make your impressions slightly deeper than you think necessary. Glaze naturally pools in recesses, and if the texture is too shallow, the surface will level out and look flat after firing.
Enjoy brewing your favorite tea in a vessel that feels as organic as the leaves steeping inside


Slip-Trailed Swirls for Raised Line Art
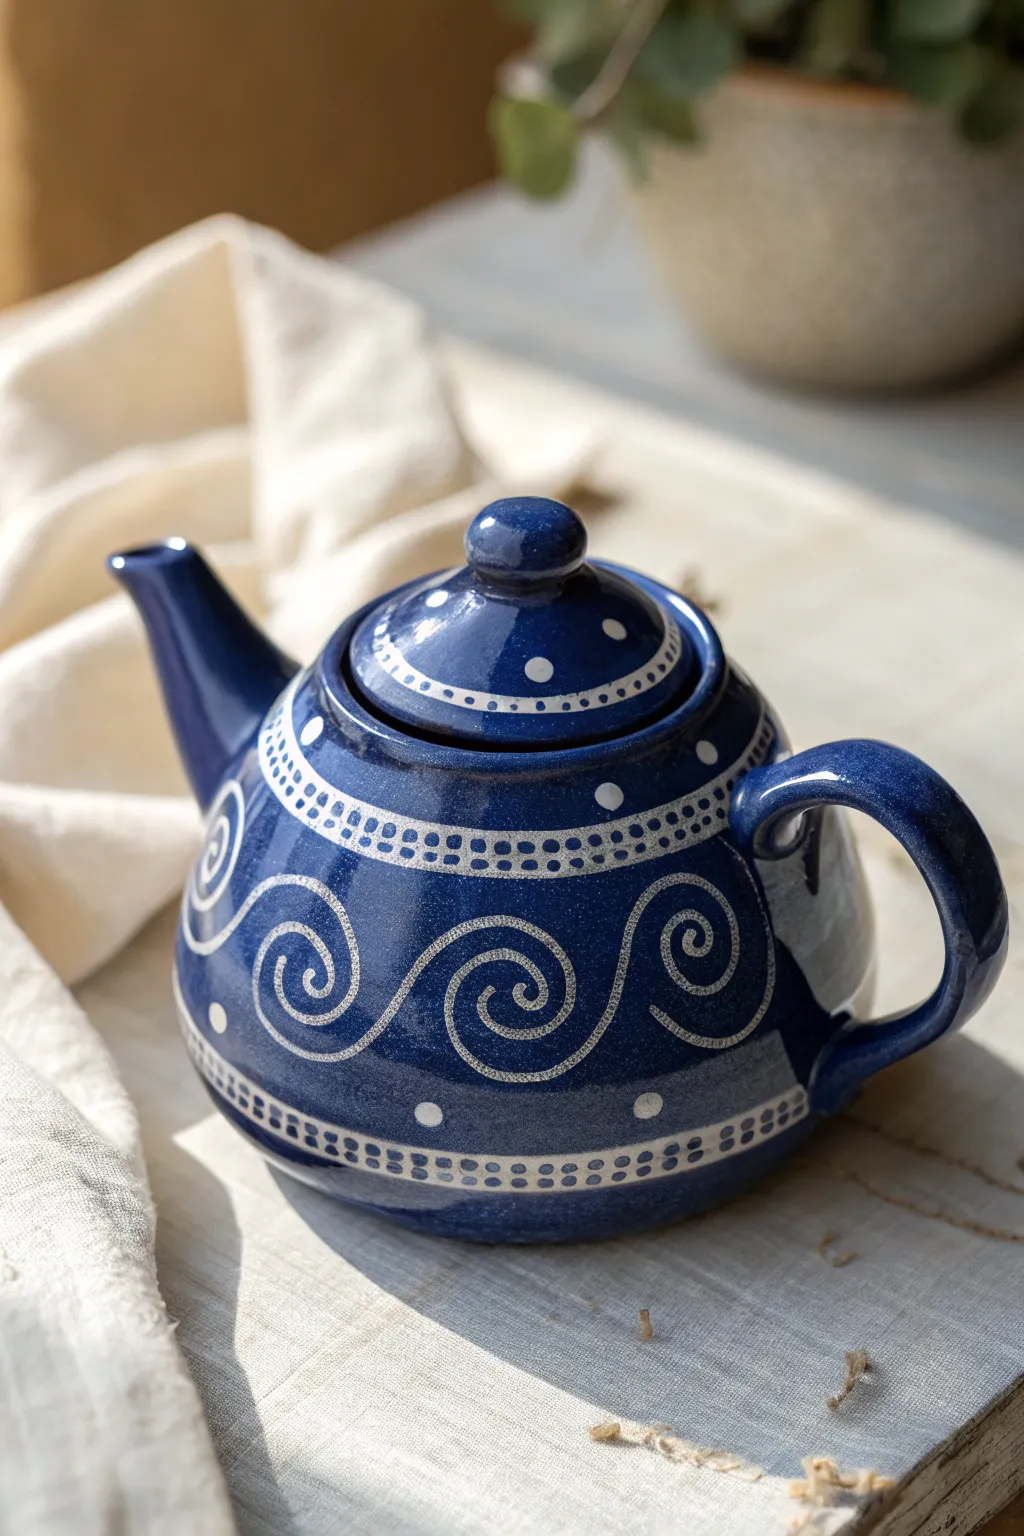
This stunning teapot features a deep indigo canvas brought to life with raised, slip-trailed white designs rooted in classic pottery traditions. The tactile spirals and precise dot work create a texture you’ll want to run your fingers over every time you pour a cup.
How-To Guide
Materials
- Bisque-fired ceramic teapot (clean and dust-free)
- Deep indigo blue underglaze or glaze (base color)
- White or light grey trailing slip (smooth consistency)
- Slip trailer bulb or precision squeeze bottle
- Assorted slip trailer tips (fine and medium gauge)
- Soft fan brush
- Needle tool (for cleanup)
- Clear transparent glaze (optional, if using underglaze base)
- Sponge and water
- Lazy Susan or banding wheel
Step 1: Base Preparation
-
Clean the bisque:
Wipe down your bisque-fired teapot with a damp sponge to remove any kiln dust or oils from handling. This ensures your base color adheres perfectly. -
Apply the base color:
Using a soft fan brush, apply three even coats of your deep indigo blue underglaze. I like to let each coat dry until it’s no longer shiny before applying the next to prevent streaking. -
Smooth the surface:
Once the final coat is dry to the touch, gently rub out any visible brush strokes with a clean, dry finger or a very soft cloth to create a flawless canvas.
Clogged Tip?
Keep a thin needle or paperclip nearby. Use it to clear the nozzle instantly if the flow stops. Rinsing the tip in warm water often also helps prevent dried clogs
Step 2: Strategic Mapping
-
Plan your zones:
Visualize the teapot in horizontal bands. You will have a bottom border, a main central band for the swirls, a top shoulder border, and the lid detail. -
Lightly sketch guides:
Place the teapot on a banding wheel. While spinning it slowly, lightly rest a pencil or charcoal stick against the surface to mark the horizontal lines where your decorative bands will sit. These lines will burn off in the kiln.
Level Up: Colored Slip
Instead of plain white, mix a mason stain into your slip for colored raised lines. A pale mint green or soft gold slip on the indigo base creates a unique twist
Step 3: Slip Trailing the Design
-
Prepare the slip trailer:
Fill your squeeze bulb with white trailing slip. Make sure there are no air bubbles by tapping it on the table; air bubbles will cause your lines to sputter. -
Test the flow:
Squeeze a test line onto a scrap surface or newspaper. You want a steady, even bead of slip that doesn’t flatten out immediately. -
Create the central swirls:
Start with the main attraction: the large wave-like spirals in the center band. Hold the tip slightly above the surface—don’t drag it—and let the slip lay down onto the pot as you move your hand in fluid, rhythmic loops. -
Define the borders:
Above and below your spirals, trail two parallel lines to create the boundaries for your dot work. Keep your pressure consistent to maintain line width. -
Add the dot repetition:
Between the parallel lines you just created, add a row of evenly spaced dots. Apply a quick pulse of pressure and lift straight up to leave a perfect little mound. -
Detail the lid:
Repeat the parallel line and dot motif around the rim of the lid. Add a few strategically placed larger dots on the lid’s dome for balance. -
Shoulder accents:
Add larger, singular dots in the negative space above the spiral waves on the teapot’s shoulder to fill the gaps without cluttering the design.
Step 4: Refining and Finishing
-
Clean up mistakes:
If you smudge a line, wait for the slip to dry to a stiff leather-hard state. Then, gently flick it off with a needle tool. Wiping it while wet will smear white slip into your blue background. -
Smooth the peaks:
Sometimes slip trailing leaves sharp peaks where you lifted the nozzle. Once the slip is firm but not bone dry, gently tap these peaks down with a clean finger to round them off. -
Drying time:
Allow the slip decoration to dry completely. It will turn a chalky white color when it is bone dry. -
Clear glazing (Optional):
If you used underglaze for the blue base, carefully dip or brush a clear transparent glaze over the entire piece. If you used a gloss glaze as a base, you can skip this step. -
Final wipe:
Wipe the foot of the teapot clean with a sponge to ensure no glaze sticks it to the kiln shelf. -
Final firing:
Fire the teapot according to the clay and glaze specifications (usually Cone 5 or 6 for stoneware) to melt the glaze and fuse the raised texture permanently.
Once fired, sit back with a hot cup of tea and enjoy the satisfying feel of your handmade raised designs

The Complete Guide to Pottery Troubleshooting
Uncover the most common ceramic mistakes—from cracking clay to failed glazes—and learn how to fix them fast.
Two-Tone Dipped Glaze Color Block Teapot
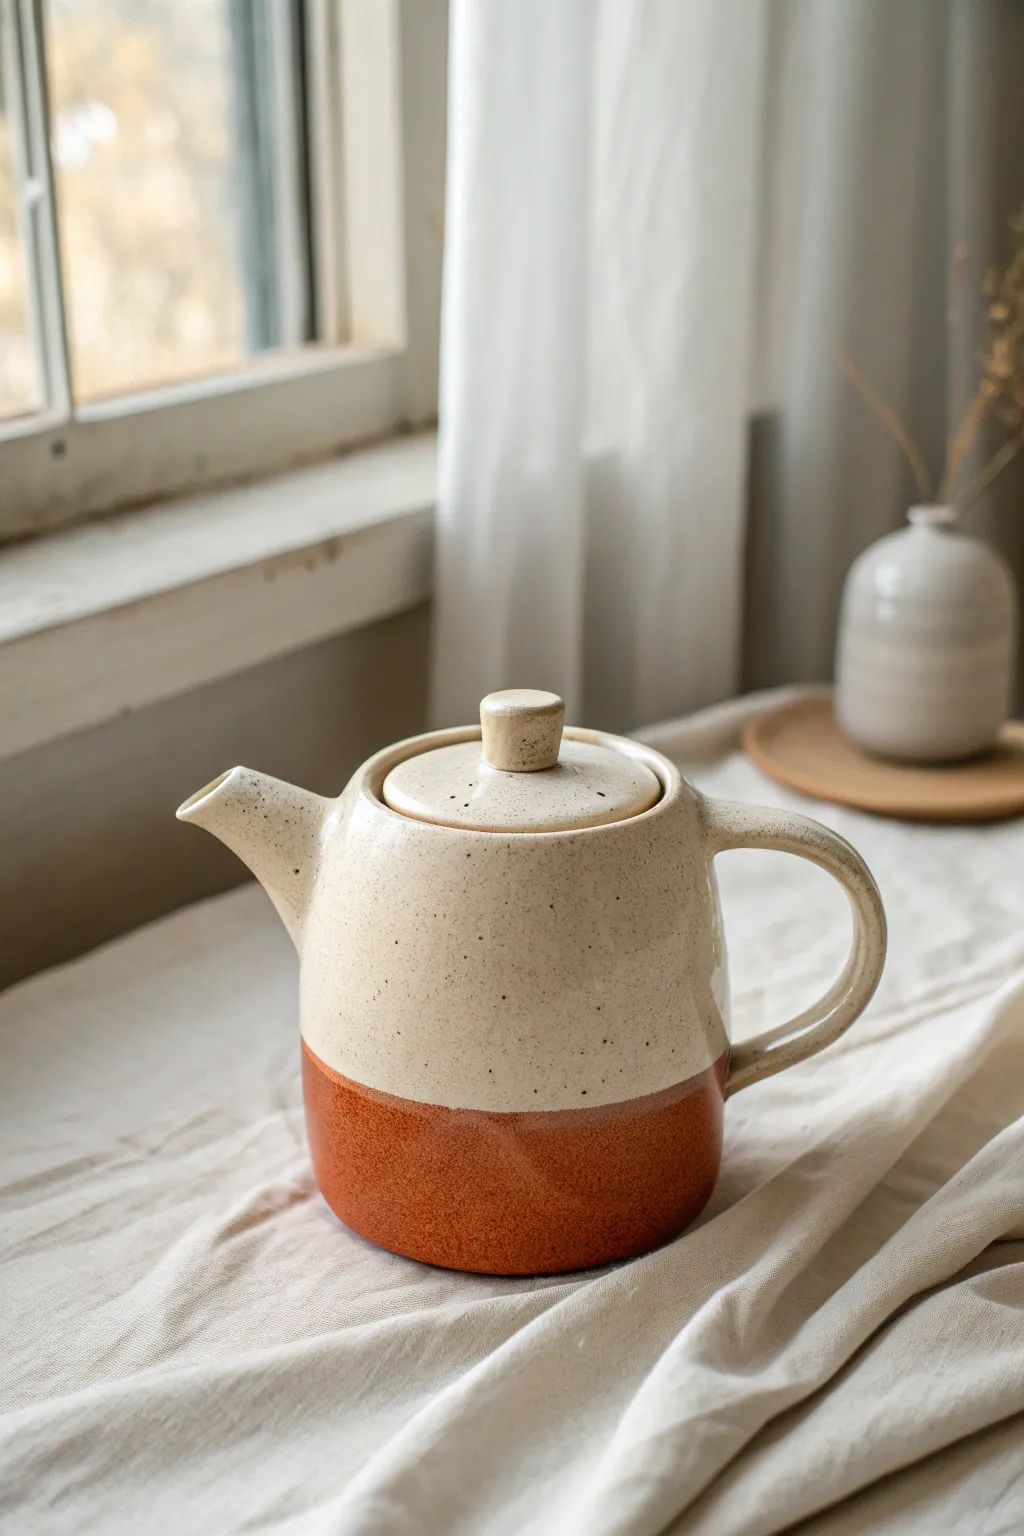
Embrace the warmth of modern ceramics with this stunning two-tone teapot project. By combining a creamy, speckled upper body with a rich terracotta base, you’ll create a piece that feels both earthy and elegant.
Step-by-Step
Materials
- High-quality stoneware clay (white or light buff)
- Pottery wheel
- Throwing tools (sponge, rib, wire cutter)
- Trimming tools
- Creamy matte speckled glaze
- Terracotta or rust-colored glossy glaze
- Wax resist
- Soft brush
- Kiln
Step 1: Throwing the Body and Lid
-
Center and open:
Begin with about 2-3 lbs of wedged clay on your wheel. Center it firmly and open the vessel, keeping the floor flat and about a half-inch thick to accommodate later trimming. -
Pull the walls:
Gently pull the cylinder walls upward, tapering slightly inward as you reach the top to create a gentle shoulder. Aim for a smooth, classic bell shape rather than a hard geometric cylinder. -
Form the gallery:
At the rim, use a wooden tool or your thumbnail to press a small ledge (gallery) into the inside of the rim. This is crucial for the lid to sit flush later. -
Throw the spout:
Using a smaller ball of clay (about 0.5 lb), throw a tall, narrow cone. Shape it so the base is wide enough to attach to the body, tapering to a fine pouring edge. -
Create the lid:
Throw a small, flat lid on a bat. Measure carefully with calipers to ensure it fits the gallery of your main pot perfectly. Add a small, simple knob in the center. -
Pull the handle:
Pull a strap handle from a lug of clay. I find that creating a slight taper—thicker at the attachment point and thinner at the curve—adds nice visual balance.
Clean Lines Pro Tip
For a razor-sharp transition line between the two colors, apply a band of creative tape or masking tape around the pot before dipping the second color, then peel it off immediately.
Step 2: Assembly and Bisque Firing
-
Trim the pieces:
Once the clay is leather-hard, trim the bottom of the teapot to create a clean foot ring. Trim the lid to fit snugly if necessary. -
Attach components:
Score and slip the spout and handle onto the main body. Ensure the spout tip is leveled with the rim so the teapot can be filled completely without spilling. -
Smooth connections:
Use a damp sponge or a soft rib to blend the attachment points seamless into the body. This prevents cracking and creates that sleek, modern silhouette. -
Dry slowly:
Cover the teapot loosely with plastic to let all parts dry evenly. Uneven drying is the enemy of handles and spouts. -
First firing:
Bisque fire the completely dry greenware to cone 04 (or your clay body’s specifications) to prepare it for glazing.
Texture Twist
Before the first firing, leave the bottom third unglazed raw clay instead of rust glaze. The contrast between smooth glaze and rough clay adds amazing tactile quality.
Step 3: Glazing the Two-Tone Design
-
Clean the bisque:
Wipe the fired pot with a designated damp sponge to remove any kiln dust, which can cause glaze defects. -
Wax the foot:
Apply wax resist to the very bottom foot ring to prevent the pot from sticking to the kiln shelf. -
Apply the top glaze:
Pour the creamy speckled glaze inside the teapot to coat the interior, then pour it out. Dip the top 2/3 of the exterior into the same glaze bucket. -
Clean the line:
While the glaze is still powdery but dry, use a damp sponge to wipe a perfectly straight horizontal line where the glaze ends, removing any drips. -
Dip the base:
Once the top glaze is dry, dip the bottom 1/3 of the teapot into the terracotta/rust glaze. Overlap the glazes slightly (about 1/8 inch) for a sealed transition, or keep them distinct. -
Tidy up:
Check the bottom again for any rogue glaze drips and wipe them clean. Glaze on the foot will ruin your kiln shelf. -
Final firing:
Glaze fire the piece to the maturity temperature of your clay and glazes (typically cone 5 or 6 for stoneware).
Once cooled, brew your favorite tea and enjoy the blend of textures in your hands
Carved Teapot With Subtle Surface Texture
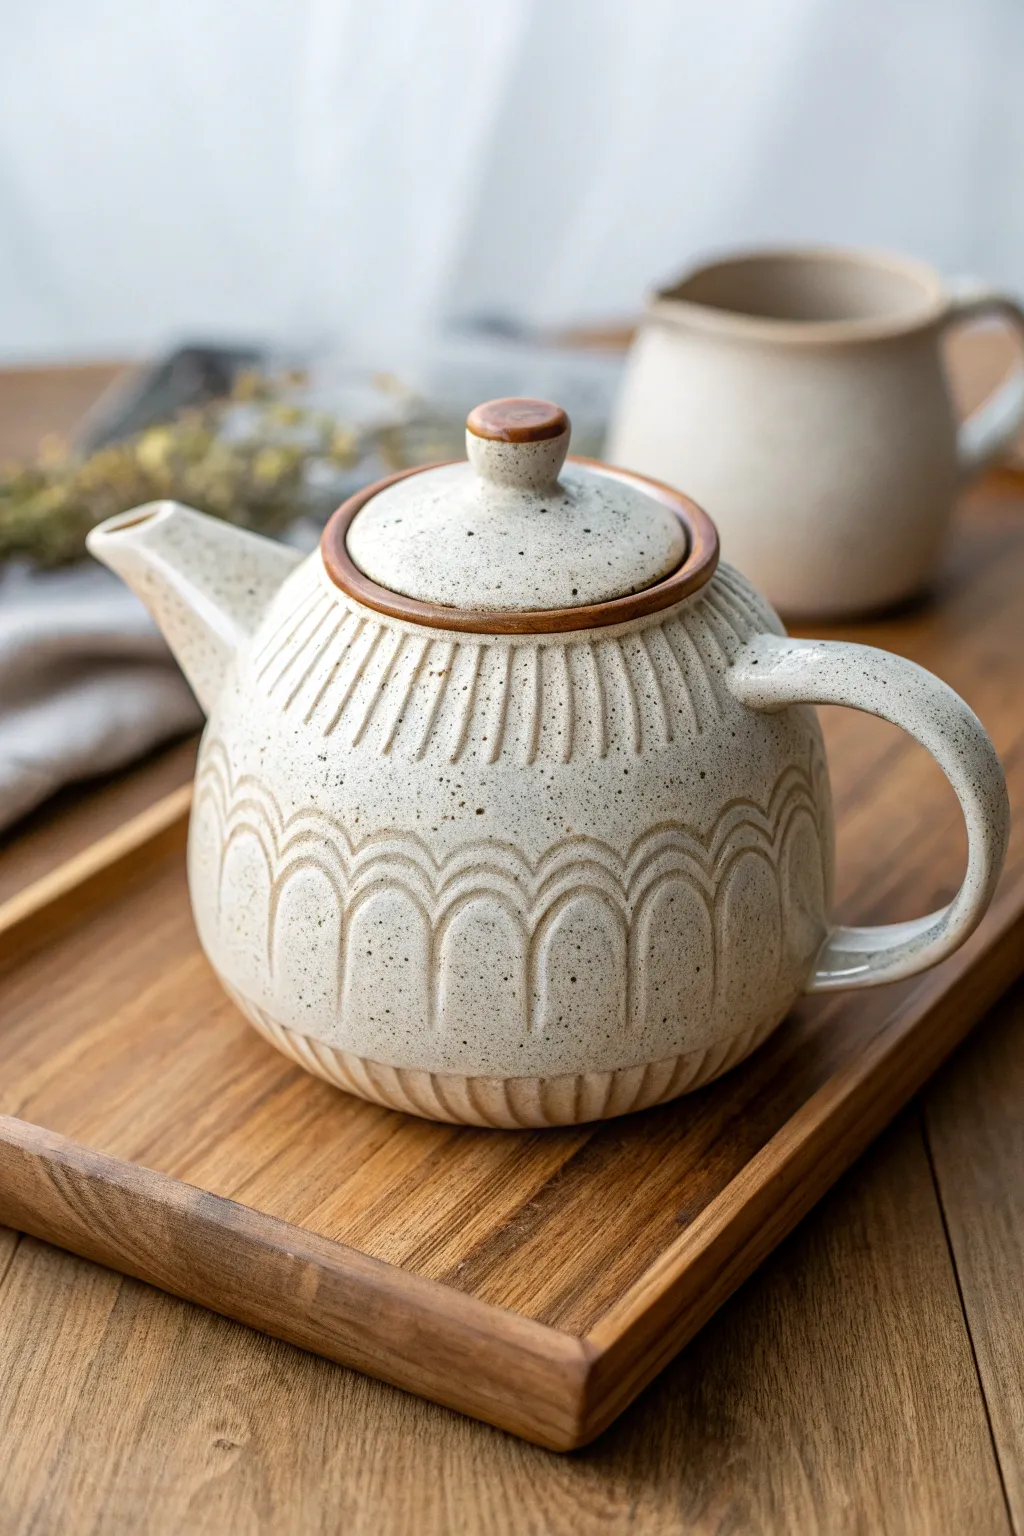
This elegant teapot combines the rustic charm of speckled stoneware with delicate, rhythmic carving. Its surface features vertical ribbing and gentle arches that create a tactile, visually soothing piece perfect for your calmest tea rituals.
Detailed Instructions
Materials
- Speckled buff stoneware clay
- Pottery wheel
- Throwing tools (sponge, ribs, wire)
- Calipers
- Trimming tools (large and small gentle loops)
- Carving tool (small U-gouge)
- Needle tool
- Soft clay rib (silicone or rubber)
- Scoring tool and slip
- Transparent or glossy cream glaze (food safe)
- Small brush for rim details
- Iron oxide wash (optional)
Step 1: Throwing the Body & Lid Gallery
-
Center and Open:
Begin with about 2-3 lbs of speckled buff clay. Center it firmly on the wheel and open the mound, leaving a base thickness of about 1/4 inch. -
Pull the Cylinder:
Pull the walls up into a cylinder, ensuring even thickness throughout. Aim for a slightly taller form initially, as we will belly it out next. -
Shape the Belly:
Using a rib on the inside and a sponge on the outside, gently push the walls outward to create a rounded, bulbous belly shape. Be careful not to let the walls get too thin, as you’ll be carving into them later. -
Form the Gallery:
At the rim, use a wooden tool or your fingers to press a gallery ledge inward. This is where the lid will sit. Ensure the rim above the gallery is smooth and slightly tapered. -
Measure for the Lid:
Before removing the pot from the wheel, use calipers to measure the exact diameter of the gallery seating. This measurement is crucial for a tight-fitting lid.
Smooth Moves
After carving the vertical lines, gently wipe the surface with a damp sponge. This softens sharp clay burrs and makes the texture pleasant to touch.
Step 2: Creating Components
-
Throw the Lid:
Using a smaller amount of clay (throw ‘off the hump’ if you are comfortable), create a domed lid that matches your caliper measurements. Add a small, straight-sided knob at the top center. -
Pull the Spout:
Throw a small, tapering cylinder for the spout. Ensure the base is wide enough to attach to the belly and the tip is sharp for a clean pour. Bend it slightly while wet if you prefer a subtle curve. -
Pull the Handle:
Pull a strap handle from a lug of clay. I find it helpful to let this stiffen slightly into a gentle curve that mimics the pot’s rounded profile before attaching.
Lid Lock
If your lid rattles after firing, apply a tiny amount of water-based grinding paste to the gallery and twist the lid back and forth to grind it into a perfect fit.
Step 3: Carving & Assembly
-
Leather Hard Stage:
Allow all pieces to dry to a leather-hard state. The clay should be firm enough to handle without deforming but soft enough to carve cleanly. -
Trim the Body:
Place the main pot back on the wheel (upside down) and trim the bottom to create a neat foot ring that mirrors the gallery rim. -
Map the Design:
Lightly sketch your carving lines with a needle tool. Draw two horizontal bands—one just below the neck and one near the foot. In the central band, sketch a series of repeating arches. -
Carve the Texture:
Using a small U-gouge, carve vertical lines inside the top and bottom bands. For the central section, carve deep, curved lines following your arch sketches to create distinct scallop shapes. -
Attach Spout and Handle:
Score and slip the attachment points. Cut a hole for the spout (or drill straining holes) and attach firmly. Attach the handle opposite the spout, blending the seams smoothly, though leaving the attachment points slightly distinct adds character. -
Detail the Lid:
Place the lid on the pot to check the fit. You can trim the lid’s edge slightly if it’s too tight. Smooth the knob with a soft rib.
Step 4: Finishing Touches
-
Bisque Fire:
Let the teapot dry slowly and evenly, preferably under loose plastic for a day, then fully uncovered. Fire to bisque temperature (usually Cone 06 or 04). -
Apply Glaze:
Dip or pour a translucent cream or clear glaze over the entire piece. The transparency is key to letting the natural iron specks in the clay show through. -
Accent the Rims:
Carefully paint a thin line of iron oxide wash or a slightly darker tan glaze along the rim of the lid, the knob, and the gallery edge to define the form. -
Final Fire:
Glaze fire the piece to the clay body’s maturity temperature (e.g., Cone 5/6). Ensure the lid is fired separately or with extensive wax resist/alumina hydrate to prevent sticking.
Once cooled, brew your favorite blend and enjoy the tactile comfort of your handmade vessel.


What Really Happens Inside the Kiln
Learn how time and temperature work together inside the kiln to transform clay into durable ceramic.
Mini Teapot for One Perfect Cup
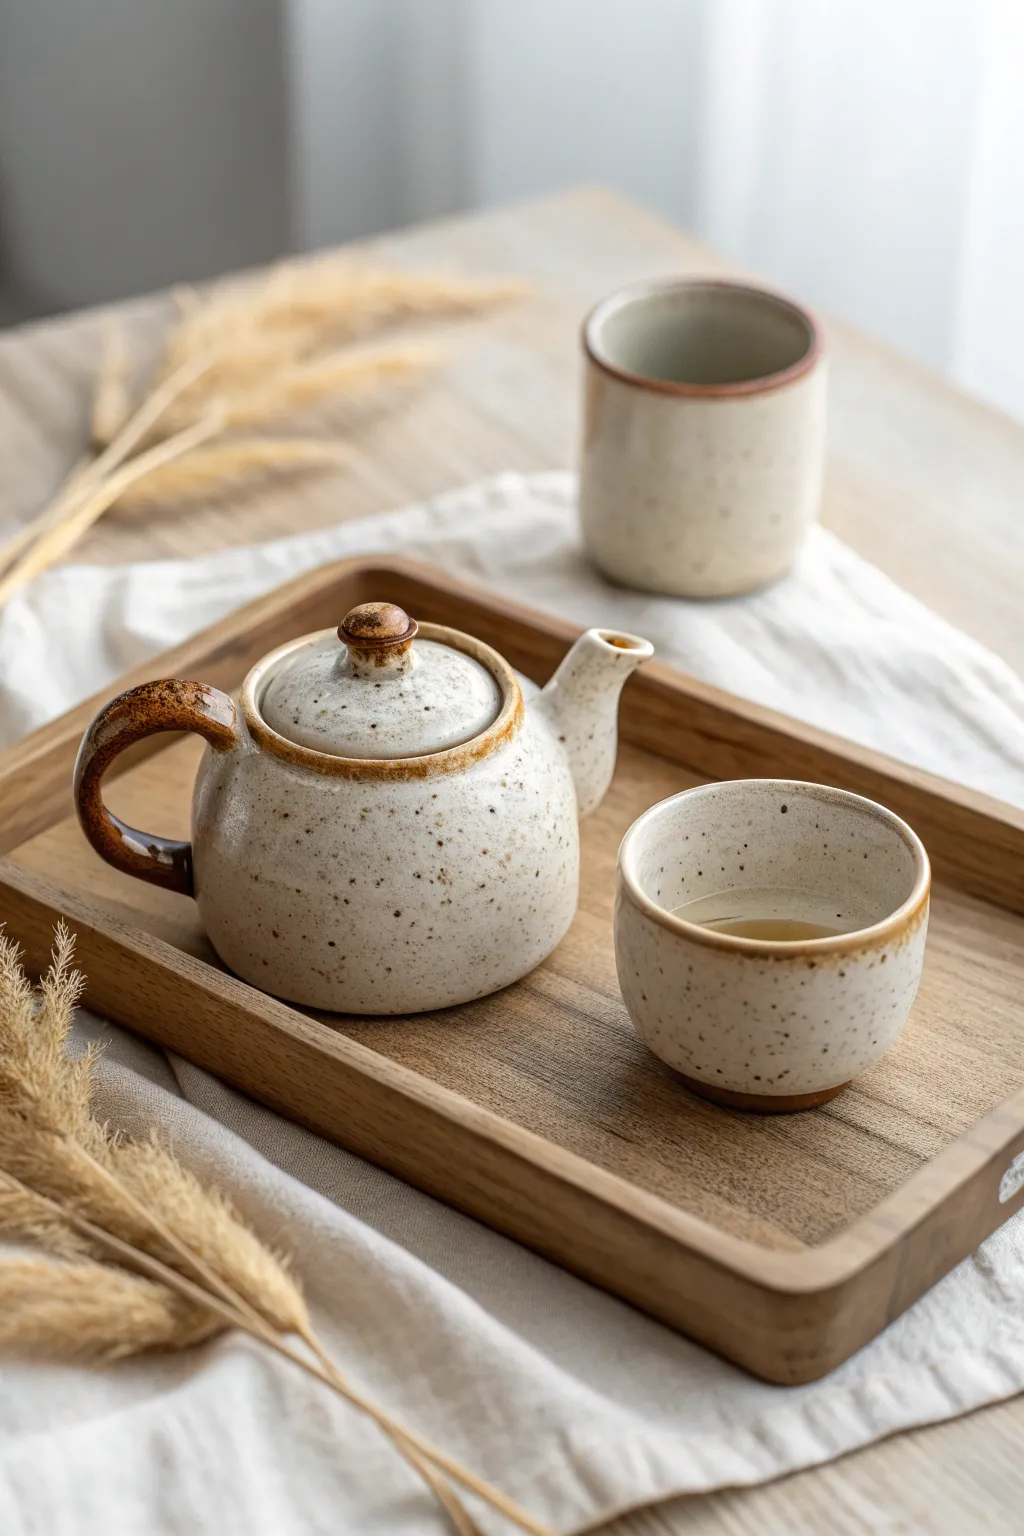
This project guides you through creating a charming, speckled ceramic tea set designed for contemplative solo sipping. The organic, creamy glaze and iron-rich clay body combine to create a rustic yet refined aesthetic perfect for your morning ritual.
How-To Guide
Materials
- Speckled stoneware clay (approx. 3 lbs)
- Pottery wheel
- Throwing tools (sponge, rib, needle tool, wire cutter)
- Trimming tools
- Small teapot handle extruded or pulled
- Creamy white matte glaze
- Wax resist
- Kiln
- Wooden bat
- Fettling knife
Step 1: Throwing the Forms
-
Center the clay:
Begin with about 1.5 lbs of wedged speckled stoneware clay for the teapot body. Secure it firmly to the center of your wheel head and use water to center the mound until it spins without wobbling. -
Open the teapot body:
Open the clay down to the base, leaving about a half-inch thickness for the bottom. Pull the walls outward to form a rounded, bulbous belly shape, keeping the opening at the top relatively narrow for the lid gallery. -
Shape and collar:
Refine the curve using a kidney rib to smooth the exterior. Gently collar the neck inwards to create a defined gallery rim where the lid will sit. Ensure the rim is level. -
Throw the spout and lid:
Use smaller balls of clay (approx. 0.25 lbs each) to throw a small, tapered spout and a lid. Measure the lid carefully with calipers to ensure it fits the teapot’s gallery snugly. -
Whittle out cups:
With the remaining clay, throw two small, cylindrical cups. Keep the walls thin and create a slight curve at the bottom for comfortable holding. I find a slight flare at the lip makes sipping more pleasant.
Clean Spouts
Use a twisted piece of paper towel to clear glaze from inside the spout tip just before firing to ensure a clean pour.
Step 2: Assembling the Teapot
-
Trim the pieces:
Once leather-hard, trim the bottoms of the teapot body and cups to create neat foot rings. Trim the excess weight from the lid and ensure the knob is shaped comfortably. -
Attach the spout:
Cut the spout at an angle that matches the curve of the pot. Score and slip both surfaces, then press the spout firmly onto the body. Check the alignment from above and the side. -
Create the strainer:
Before the spout is fully set, use a needle tool or small drill bit to poke several holes through the teapot body wall behind where the spout attaches, creating an internal strainer. -
Pull and attach handle:
Pull a small strap handle or use an extruder. Score and slip the attachment points on the back of the pot. Attach the handle with a pleasing curve that balances the visual weight of the spout. -
Smooth connections:
Use a damp sponge or modeling tool to clean up all attachment seams. Ensure the transition between the added parts and the body is seamless.
Step 3: Glazing and Firing
-
Bisque fire:
Load your bone-dry pieces into the kiln and bisque fire to approximately Cone 04. This prepares the clay to accept glaze. -
Wax resist application:
Apply wax resist to the foot rings of the cups and teapot, as well as the gallery where the lid touches the pot. This prevents the lid from fusing shut during firing. -
Glaze interior:
Pour a creamy white glaze into the interior of the teapot and cups, swirl to coat evenly, and pour out the excess. Wipe any drips from the rim immediately. -
Dip exterior:
Dip the exterior of the pieces into the same glaze. If you want the iron speckles to show through strongly, keep the application slightly thinner on the outside. -
Highlighting rims:
For that warm, toasted edge look, wipe back a tiny amount of glaze from the very edges of the rim and handle details, or apply a thin wash of iron oxide to these high points. -
Glaze fire:
Fire the pieces to maturity (likely Cone 5 or 6 depending on your clay). Allow the kiln to cool completely before opening to prevent thermal shock.
Lid Security
Add a tiny clay ‘catch’ or tab on the underside of the lid rim to prevent it from falling off when pouring tea at a steep angle.
Now brew your favorite loose leaf tea and enjoy the quiet satisfaction of using handmade ware
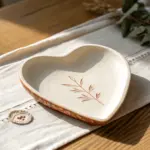
Heart-Forward Teapot Details
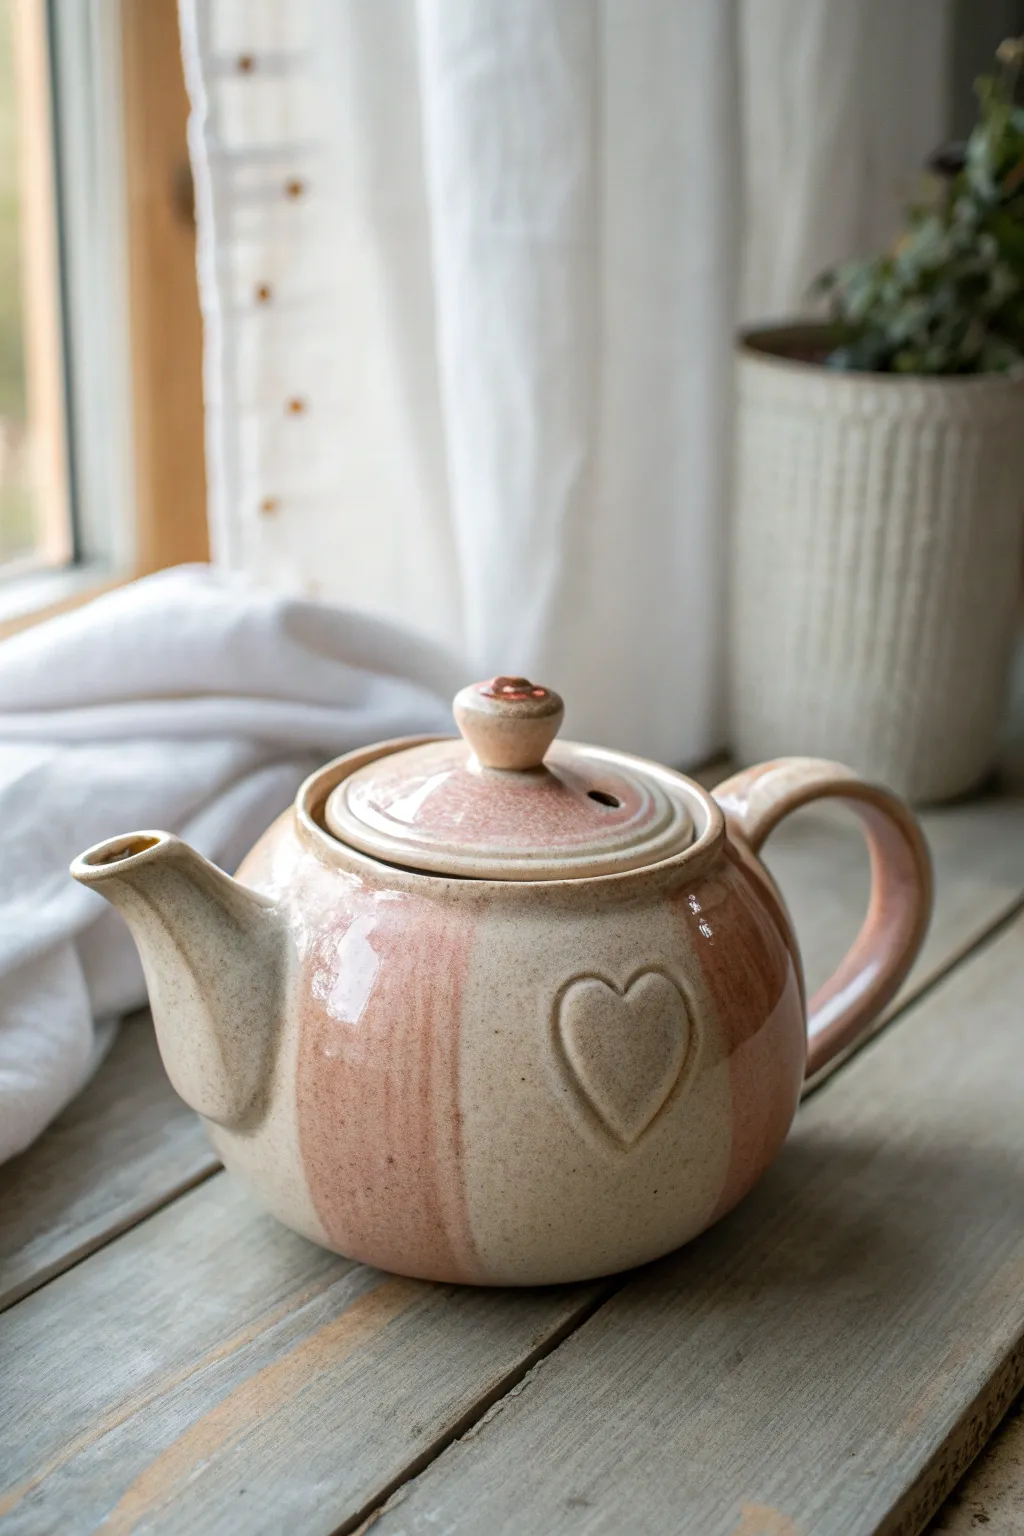
Embrace the warmth of handmade ceramics with this darling teapot project, featuring soft vertical stripes and a charming raised heart motif. The piece combines wheel-throwing techniques with hand-building details to create a cozy, rustic vessel perfect for your favorite brew.
Detailed Instructions
Materials
- Stoneware clay (speckled or buff preferred)
- Pottery wheel
- Throwing tools (sponge, needle tool, rib, wire cutter)
- Trimming tools
- Heart-shaped cookie cutter (small/medium)
- Scoring tool and slip
- Modelling tool or wooden skewer
- Soft fan brush
- Wax resist
- Cream or white glaze (glossy)
- Blush pink or coral glaze (glossy)
- Clear glaze (optional)
Step 1: Throwing and Trimming
-
Throw the body:
Begin by centering about 1.5 to 2 lbs of clay on the wheel. Open the center and pull up the walls, aiming for a rounded, bulbous belly shape. Neck in the top slightly to form a gallery for the lid to sit on. -
Shape the lid:
Using a smaller amount of clay (about 0.5 lb), throw a simple domed lid. Measure the gallery of your teapot body with calipers to ensure the lid fits snugly. Add a small knob to the center while throwing, or attach one later. -
Create the spout:
Throw a tall, tapered cylinder for the spout. I find it helpful to throw it a bit longer than needed so I can trim it to the perfect angle later. Cut it off the wheel and set all pieces aside to reach leather-hard stage. -
Trim the base:
Once leather hard, center the teapot body upside down on the wheel. Trim a clean foot ring, removing excess weight from the bottom curve. -
Attach the spout:
Cut the spout at an angle that complements the body’s curve. Hold it up to the pot to check the fit. Score both surfaces, apply slip, and firmly press the spout onto the body. Use a coil to reinforce the seam and smooth it out. -
Pull and attach handle:
Pull a strap of clay for the handle. Attach it opposite the spout, creating a comfortable curve that mirrors the spout’s flow. Ensure the attachment points are strong and blended seamlessly.
Clean Spout Pouring
When shaping the spout rim, pull the clay slightly downward just at the very tip to create a sharp ‘beak’. This breaks the surface tension and prevents the tea from dribbling down the pot.
Step 2: Adding the Heart Detail
-
Create the relief:
Roll out a small slab of clay to the same thickness as your teapot wall. Use your heart cutter to punch out a shape. Smooth the sharp edges of the heart gently with a damp finger. -
Attach the heart:
Position the heart on the belly of the teapot, ensuring it sits centrally between the spout and handle. Score the back of the heart and the spot on the pot deeply. Apply slip and press the heart on firmly. -
Refine the edges:
Use a modelling tool to blend the very back edge of the heart into the pot if you want a seamless look, or leave it distinct for a sharper applique effect. Run a damp sponge around it to clean up any slip ooze. -
Bisque fire:
Let the teapot dry slowly under plastic for several days to prevent cracking at the attachments. Once bone dry, bisque fire the piece to Cone 04 (or your clay’s specific bisque temperature).
Step 3: Glazing the Stripes
-
Wax the foot:
Apply wax resist to the bottom foot ring and the gallery rim where the lid touches to prevent sticking during firing. -
Base coat interior:
Pour your cream or white glaze inside the teapot body, swirl to coat, and pour out the excess. Wipe any drips off the rim. -
Mark stripe guides:
Lightly sketch vertical lines with a pencil on the bisque ware to plan your distinct wide stripes. Make sure the heart sits centered within one of the ’empty’ zones intended for the cream color. -
Apply the cream sections:
Using a soft brush, apply three coats of cream glaze to the vertical sections where the heart is located, and alternating sections around the pot. Carefully brush over the heart itself so it matches the background stripe. -
Apply the pink stripes:
Apply three coats of blush pink glaze to the remaining vertical sections. Use a steady hand to create a clean line where the pink meets the cream. Don’t worry if it’s slightly organic; that adds to the charm. -
Glaze the lid and handle:
Glaze the lid to match the pattern (perhaps a pink rim with a cream center). Glaze the handle in pink to contrast with the cream body section it attaches to. -
Final Fire:
Fire the teapot to Cone 5/6 (or your glaze’s maturation temperature). Allow the kiln to cool completely before removing your finished heart-forward vessel.
Glaze Crawling?
If your glaze pulls away from the heart applique during firing, it’s likely due to dust in the crevices. Wipe the bisque ware thoroughly with a damp sponge right before glazing to ensure adhesion.
Now brew a pot of your favorite tea and enjoy the cozy charm of your new handmade creation

TRACK YOUR CERAMIC JOURNEY
Capture glaze tests, firing details, and creative progress—all in one simple printable. Make your projects easier to repeat and improve.
Asymmetrical Teapot With Intentional Wonky Charm
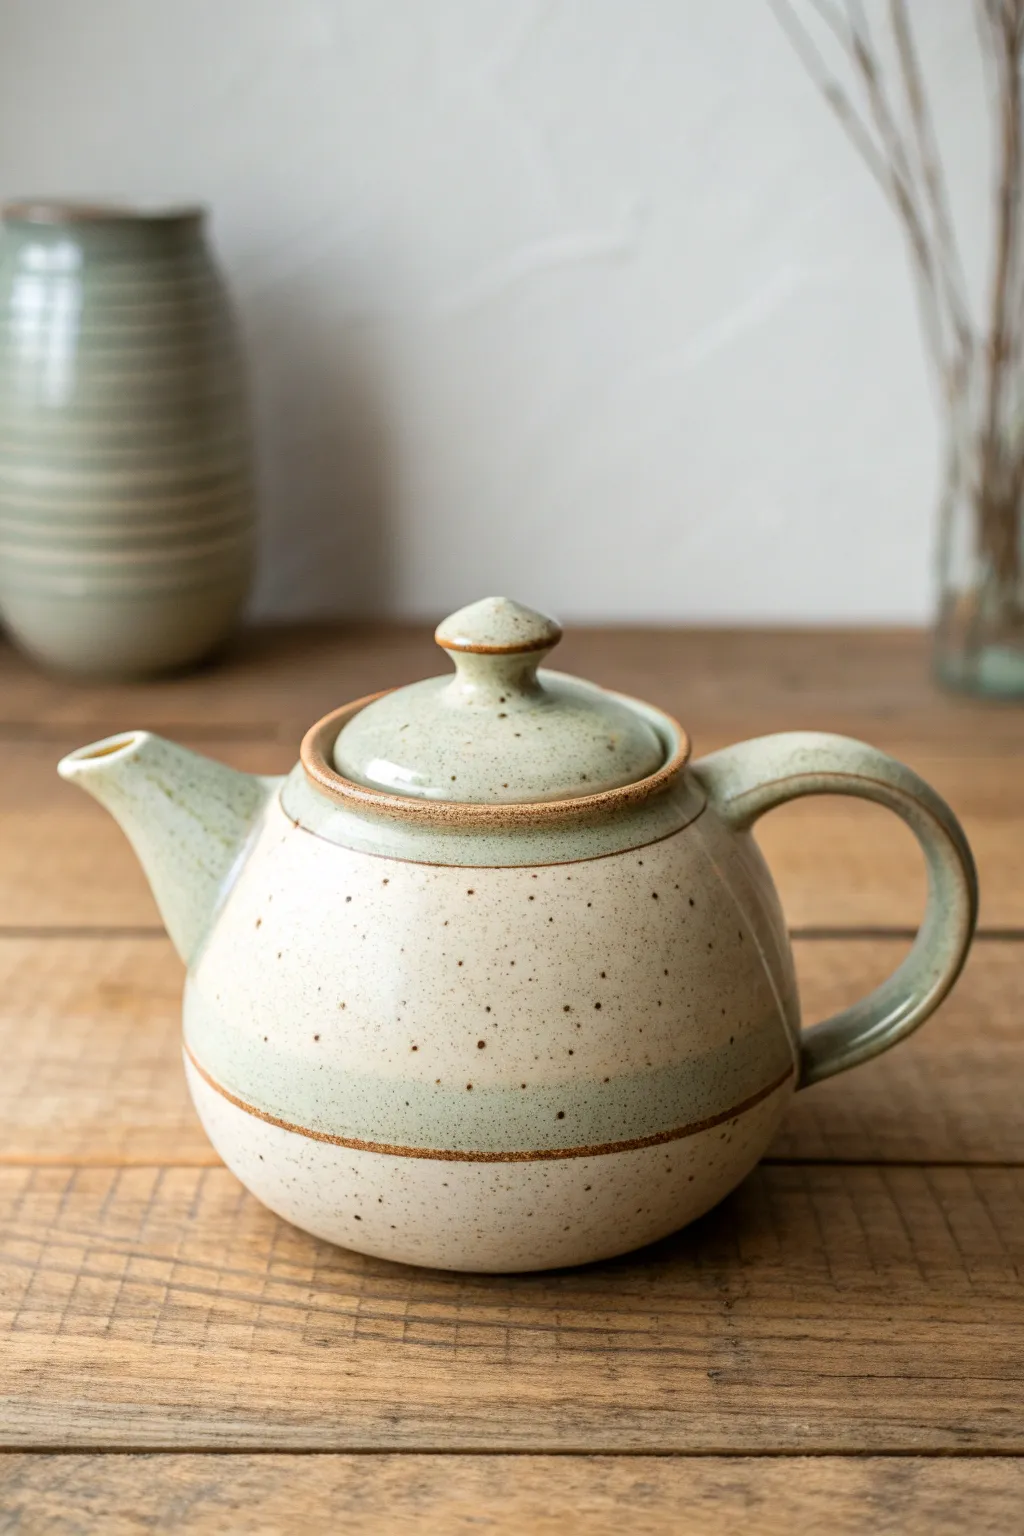
This project centers on creating a wheel-thrown teapot that balances rustic charm with clean, calming lines. The finished piece features a beautiful contrast between exposed speckled clay, creamy white glaze, and soft sage green accents.
How-To Guide
Materials
- Speckled stoneware clay (approx. 3-4 lbs)
- Pottery wheel
- Throwing tools (sponge, rib, wire cutter)
- Trimming tools
- Needle tool
- Serrated rib or scoring tool
- Slip
- Soft fan brush
- Cream matte glaze
- Sage green stoneware glaze
- Wax resist
Step 1: Throwing the Body and Lid
-
Center the clay:
Begin by centering about 2.5 lbs of well-wedged speckled stoneware clay on the wheel head. Ensure a solid, wide base to support the round belly of the teapot. -
Open and pull:
Open the clay and pull the walls up into a cylinder first. Once you have height, gently use a rib from the inside to push the belly out, creating that full, rounded spherical shape shown in the image. -
Form the gallery:
At the rim, carefully split the clay or compress it inward to create a distinct gallery (ledge) where the lid will sit. Use a chamois to smooth the lip for comfortable pouring later. -
Measure for the lid:
Before removing the body from the wheel, measure the gallery diameter with calipers so you can throw a perfectly fitting lid. -
Throw the lid:
Using a smaller amount of clay (approx. 0.5 lbs), throw the lid upside down or right-side up depending on your preference. Create a small, mushroom-cap knob at the center.
Spout Alignment Tip
When attaching the spout, ensure the tip is slightly higher than the rim of the pot. If it’s too low, tea will spill out of the spout before the pot is even full.
Step 2: Spout and Handle
-
Throw the spout:
Throw a small, tall cone shape for the spout. Ensure the base of the spout is wide enough to attach to the belly, and the tip narrows for a clean pour. Cut it off the wheel and let it stiffen. -
Pull the handle:
Pull a strap handle from a lug of clay. You want a medium thickness that feels sturdy but elegant. Curve it into a ‘C’ shape and let it set up until it holds its form. -
Trim the components:
Once the body is leather hard, trim a distinct foot ring at the bottom. This elevates the pot and adds to the professional look. Trim the lid to fit the gallery precisely. -
Cut the spout angle:
Slice the base of the spout at an angle that matches the curve of the teapot’s belly. Hold it up to the pot to check the angle; the tip of the spout should be level with the lid knob.
Step 3: Assembly
-
Create the strainer:
Hold the spout against the body and trace the attachment circle. Use a hole cutter or drill bit to create a cluster of strainer holes inside this circle. -
Attach the spout:
Score the attachment area and the base of the spout heavily. Apply slip and press the spout firmly into place, smoothing the seam with a modeling tool or small coil. -
Attach the handle:
Attach the handle directly opposite the spout. Score, slip, and blend the attachments. Ensure the loop is large enough for comfortable gripping. -
Refine surface:
Sponge away any rough clay crumbs or slip marks. I like to run a damp finger over the rim one last time to ensure everything feels soft to the touch. -
Bisque fire:
Allow the teapot to dry very slowly under loose plastic to prevent the attachments from cracking. Once bone dry, bisque fire to cone 04.
Lid Rattling?
If your fired lid rattles in the gallery, apply a tiny dab of water-based grinding paste to the contact points and twist the lid back and forth to sand it into a perfect, silent fit.
Step 4: Glazing
-
Wax resist lines:
Place the pot on a banding wheel. Apply thin lines of wax resist: one at the rim of the lid, one around the shoulder of the pot, and one near the bottom third. This creates the raw clay stripe effect. -
Apply cream glaze:
Pour cream matte glaze inside the teapot and swirl to coat the interior. Pour it out. Then, dip or brush the main belly section between your wax lines with the cream glaze. -
Apply sage accents:
Dip the spout, handle, lid, and the bottom band of the teapot into the sage green glaze. Wipe back any drips immediately. -
Clean the foot:
Wipe the foot ring completely clean of glaze to prevent it from sticking to the kiln shelf. -
Final firing:
Fire the piece to cone 6 (or your clay body’s maturation temperature) in an oxidation atmosphere to bring out the speckles.
Pour yourself a cup of tea and enjoy the warm, handmade feel of your new creation
Geometric Teapot With Faceted Planes
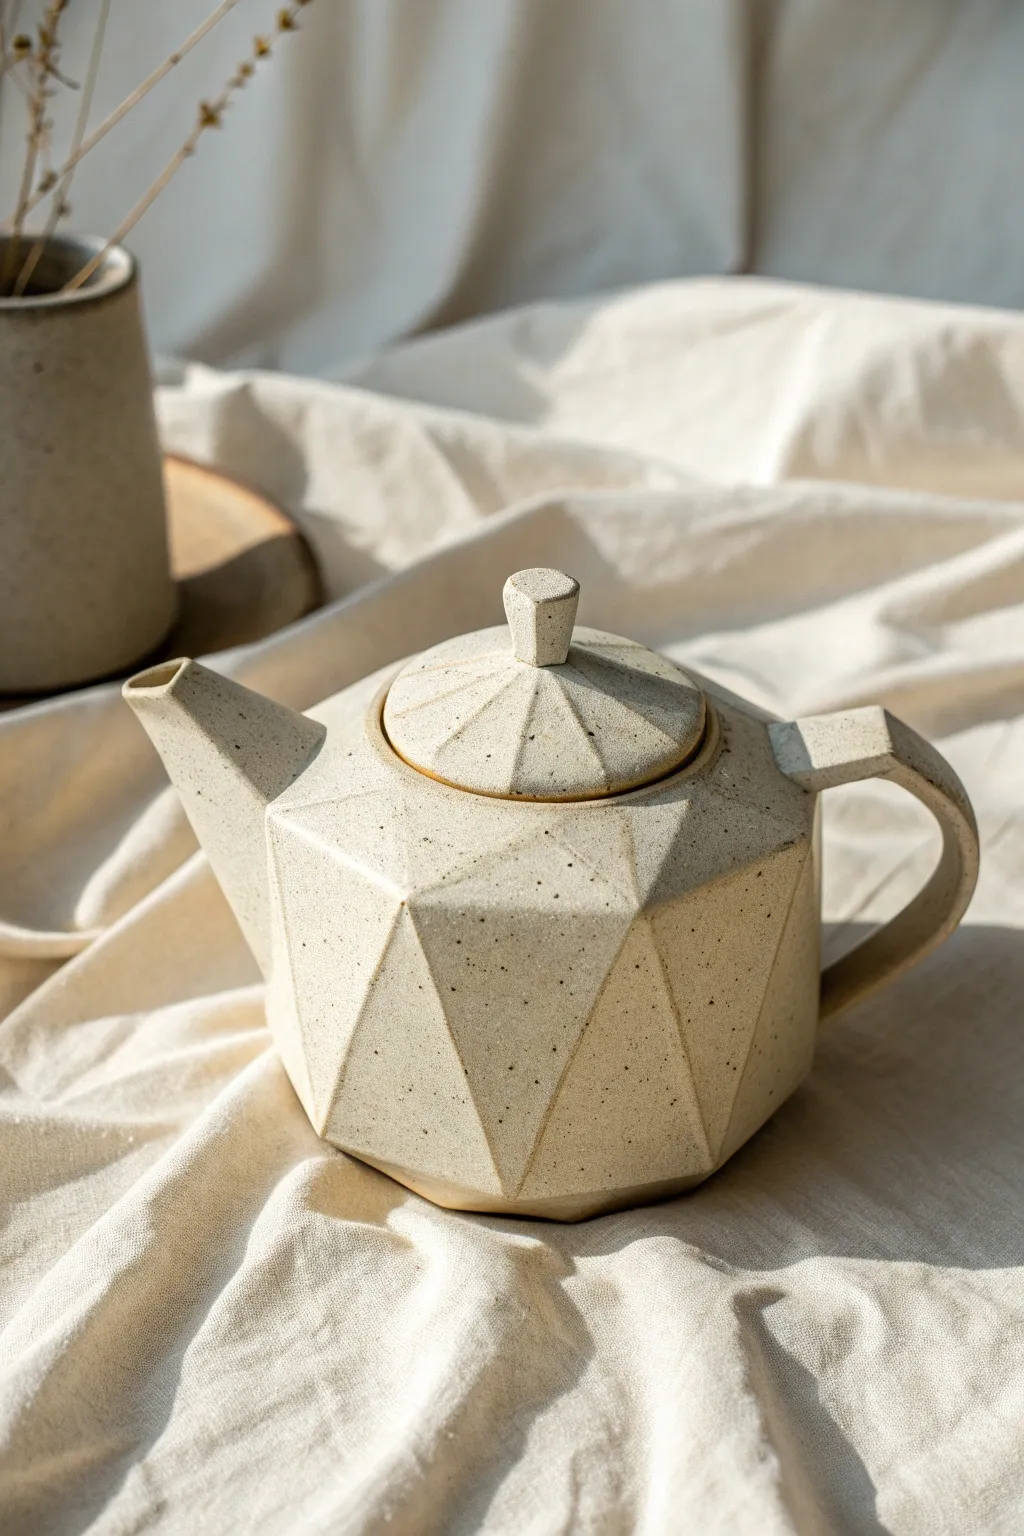
Embrace the beauty of sharp lines and shadows with this low-poly inspired ceramic teapot. Its unique, faceted surface catches the light beautifully, while the speckled clay body adds organic warmth to the severe geometric form.
Detailed Instructions
Materials
- Speckled stoneware clay (mid-fire)
- Plaster molds or template guides
- Rolling pin and guide sticks (slab sticks)
- Fettling knife or X-Acto knife
- Serrated rib and scoring tool
- Slip (thick slurry of your clay body)
- Soft styling sponge
- Drafting triangle or protractor (optional)
- Wooden paddle
- Clear matte glaze
Step 1: Designing and Rigid Slabs
-
Create your template:
Before touching clay, sketch out your geometric form on cardstock. This teapot relies on a truncated icosahedron or similar polyhedral shape. You will need triangular and trapezoidal templates for the body panels. -
Roll out the slab:
Roll your speckled stoneware clay into a large, even slab. For a piece this structural, I recommend a thickness of about 3/8 inch (approx. 1cm) to ensure the walls can support the angular stress. -
Leather hard transition:
This step is crucial: let the slab stiffen to a firm leather-hard stage. If the clay is too soft, your sharp facets will sag; too dry, and they won’t join. It should hold its shape perfectly when lifted but still take an impression from a fingernail. -
Cut the facets:
Using your cardstock templates and a sharp fettling knife, cut out the required number of geometric panels. Be precise—gaps in the seams ruin the illusion of a solid gemstone. -
Bevel the edges:
To make the angles join flush, bevel the edges of your panels at approximately 45 degrees. A chamfer tool can help, but a steady hand with a knife works just as well.
Cracking Seams?
If seams crack during drying, your clay may have been too dry during assembly. Make a ‘spackle’ of vinegar and dry clay dust to fill hairline cracks before bisque firing.
Step 2: Assembling the Form
-
Score and slip the base:
Start with your base polygon. Score the edges deeply and apply a generous amount of thick slip. Attach the first ring of side panels. -
Build upwards:
Continue attaching panels, scoring and slipping every single seam. As you close the form, you can use a wooden paddle to gently tap the faces, compressing the joints and sharpening the corners. -
Create the lid gallery:
Before closing the top completely, add a small interior flange or support ring inside the top opening. This will ensure your faceted lid sits securely without falling in. -
Construct the lid:
Using smaller triangular cuts, assemble the shallow cone shape of the lid. Add a small, hexagonal knob to the center, keeping the edges sharp to match the body. -
Fabricate the spout:
Roll a smaller slab and fold it into a tapered, faceted tube. This shouldn’t be round; maintain the angular aesthetic. Cut the attachment angle to match the slope of the pot’s shoulder. -
Attach handle and spout:
Cut a strip for the handle and manipulate it into a rigid, angular ‘C’ shape. Score and attach both the spout and handle. I find waiting until the main body is stiffest helps these heavy additions stay put.
Level Up: Hidden Geometry
Carve slight horizontal channels into the handle and spout before firing. This emphasizes the planes and gives the glaze a place to pool slightly.
Step 3: Refining and Finish
-
Clean the seams:
Once assembled, use a barely damp sponge to wipe away excess slip from the joints. Do not over-smooth; you want to preserve the crisp ‘sharp’ look of the edges. -
Dry slowly:
Cover the teapot loosely with plastic for several days. Because of the many seams, uneven drying can cause cracks. Let it dry very slowly before bisque firing. -
Bisque fire:
Fire the piece to Cone 04 (or your clay’s specific bisque temperature). -
Glazing:
Dip or spray the exterior with a clear matte glaze. A glossy glaze can obscure the sharp lines with reflection, but a matte finish emphasizes the shadows of the facets and lets the speckles shine through. -
Final wipe:
Ensure the foot of the teapot and the rim where the lid sits are wiped clean of glaze to prevent fusing during the final firing. -
The glaze fire:
Fire to the final maturity temperature of your clay (likely Cone 5 or 6 for stoneware). Allow the kiln to cool naturally.
Pour a cup of tea and admire how the light plays across the modern angles of your handmade vessel
Teapot With a Built-In Loose-Leaf Infuser
Embrace the calming ritual of tea with this handmade ceramic teapot, featuring a warm, speckled cream glaze and gentle earthy accents. The built-in gallery rim supports a removable infuser basket, making it perfect for your favorite loose-leaf blends.
Step-by-Step Tutorial
Materials
- Stoneware clay (speckled or buff)
- Pottery wheel
- Throwing tools (sponge, rib, wire cutter)
- Calipers
- Trimming tools
- Needle tool
- Scoring tool or fork
- Slip
- Cream/Oatmeal speckled glaze
- Iron oxide wash or dark brown slip
- Kiln
Step 1: Throwing the Body & Lid
-
Center and Open:
Begin with about 2-3 lbs of well-wedged clay. Center it on the wheel and open it wide enough to create a generous volume, keeping the floor flat but not too thin. -
Pull the Walls:
Pull the walls up into a cylinder first. Once you have height, use a rib on the outside and your hand on the inside to belly the form out into a round, classic teapot shape. -
Form the Gallery:
This is crucial for the infuser. At the rim, split the clay to create a deep ledge—a ‘gallery’—where the lid and the infuser basket will eventually sit. Use calipers to measure the diameter of this opening. -
Throw the Lid:
Using a smaller amount of clay (about 0.5 lb), throw a lid upside down. Measure it constantly with your calipers to ensure it fits the gallery measurement from the previous step perfectly. -
Throw the Spout:
Create a small, tapered cylinder for the spout. Ensure the base is wide enough to attach to the pot’s curve and the tip is sharp for a clean pour.
Lid Fit Issues?
If the lid shrinks too much after firing and wobbles, mix a tiny bit of epoxy with clay dust and sand it into the gallery rim to create a tighter, custom fit.
Step 2: Creating the Infuser & Handle
-
Throw the Infuser Basket:
Throw a deep, cylinder cup without a bottom (open cylinder) that fits inside the gallery rim. Add fine mesh or drill many small holes later. Alternatively, throw a cup shape with a bottom and drill holes. -
Pull the Handle:
While the thrown parts firm up to leather-hard, pull a strap handle from a lug of clay. Give it a nice curve that mimics the roundness of the pot body. -
Drill Infuser Holes:
Once the infuser basket is leather-hard, use a small drill bit or hole punch tool to create a pattern of holes around the sides and bottom. This allows water to flow through the tea leaves. -
Trim the Body:
Invert the teapot body onto a chuck or foam bat. Trim away excess weight from the bottom and crave a neat foot ring. This lifts the form visually.
Add Texture
Before the clay dries, gently roll the outside of the pot with a textured fabric or a corn cob to enhance that tactile, organic feel under the glaze.
Step 3: Assembly & Finishing
-
Attach the Spout:
Hold the spout against the body to check the angle. The tip should be level with the rim. Trace the outline, score the area, and cut a hole for the liquid. Score and slip to attach securely. -
Attach the Handle:
Score and slip the attachment points opposite the spout. Press the handle on firmly, smoothing the seams with a modeling tool or your finger for a seamless look. -
Add the Lid Knob:
Turn your trimmed lid right-side up. Attach a small ball of clay to the center and throw or hand-shape a comfortable knob, echoing the roundness of the main pot. -
Bisque Fire:
Allow the entire assembly (pot, lid, infuser) to dry slowly and completely. Load them into the kiln for a bisque firing to chemically harden the clay. -
Apply Oxide Detail:
Wipe a thin band of iron oxide or dark brown underglaze onto the rim of the lid, the gallery edge, and the tip of the spout to mimic the rustic wear shown in the image. -
Glaze Application:
Dip the pot, lid, and infuser into a cream or oatmeal speckled glaze. Make sure the glaze doesn’t pool in the infuser holes—blow them out gently if needed. -
Wipe the Feet:
Clean off any glaze from the foot ring and the gallery ledge where the lid sits to prevent fuse-welding during the firing. -
Glaze Fire:
Load the kiln carefully for the final glaze firing. Ensure the lid is fired separately or on a stilt if you glazed the contact points.
Now brew a fresh pot of tea and enjoy the warmth of your handcrafted vessel
Animal Teapot With a Character Face
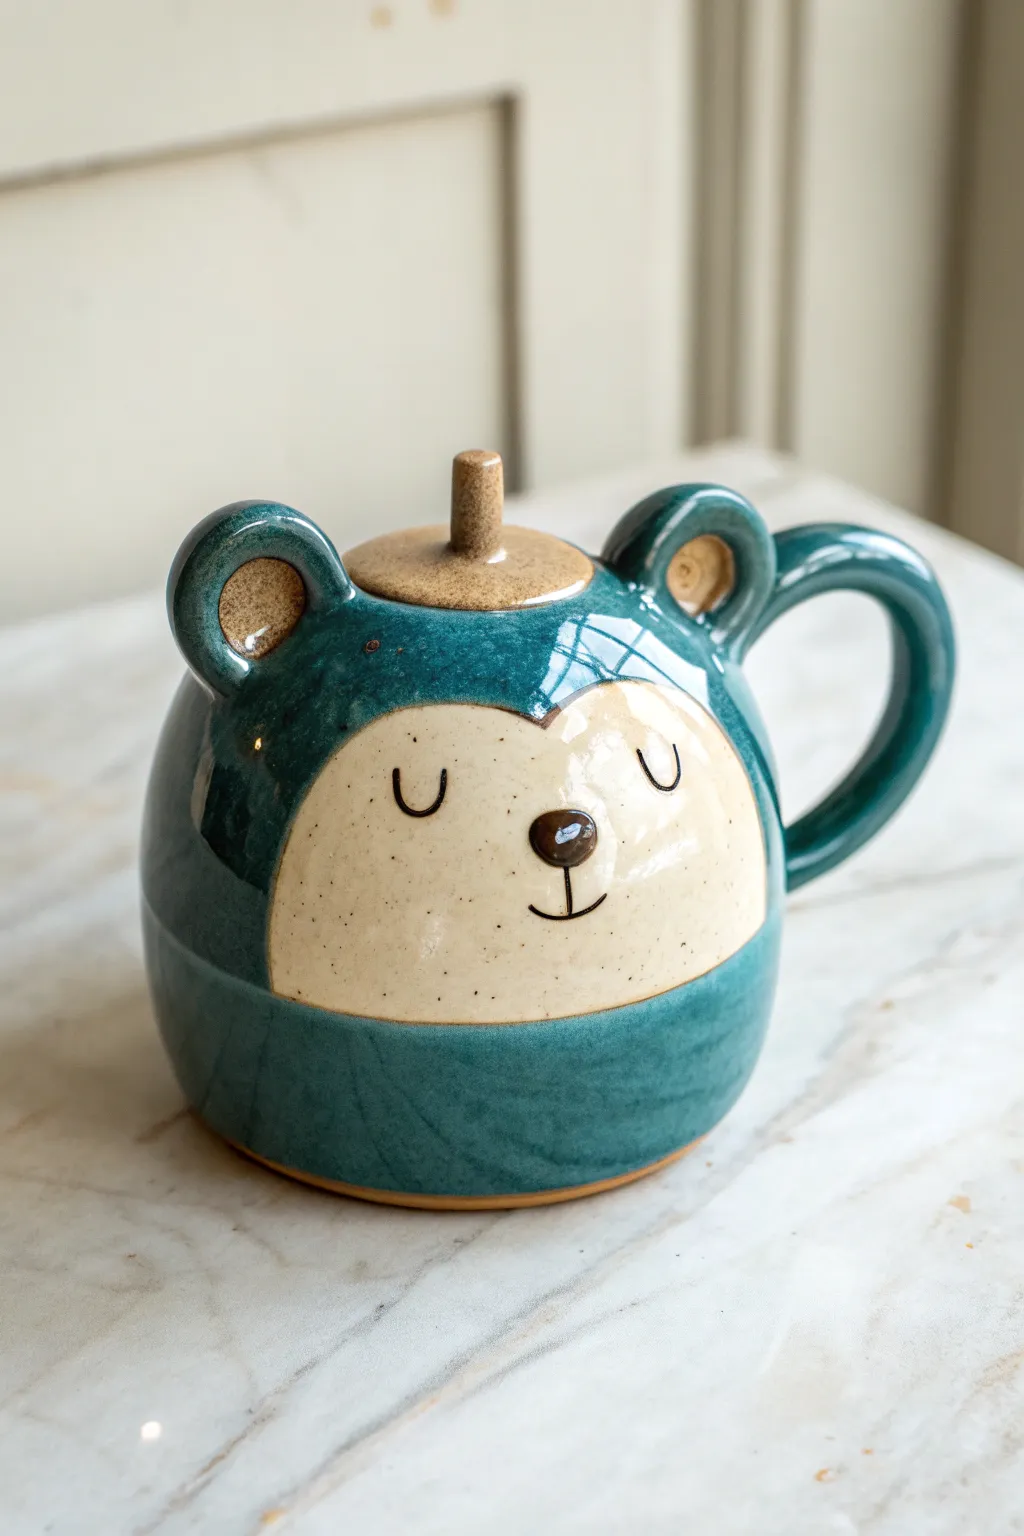
This charming, hand-thrown teapot features the sweet, sleepy face of a bear, bringing a sense of calm to your teatime rituals. Its rounded, huggable form combined with a glossy teal glaze and natural clay textures makes it a delightful character piece for any kitchen.
Step-by-Step
Materials
- Stoneware clay (speckled or buff)
- Pottery wheel
- Throwing tools (sponge, rib, wire cutter)
- Trimming tools
- Needle tool
- Scoring tool
- Slip
- Teal/Blue-green glaze (glossy)
- Clear glaze (optional)
- Black underglaze (for details)
- Fine detail brush
- Wax resist
Step 1: Throwing the Form
-
Center and open:
Begin with a substantial ball of speckled stoneware clay on the wheel. Center it firmly and open the clay, keeping a slightly narrower base than usual to encourage a rounded shape later. -
Raise the cylinder:
Pull the walls up into a cylinder, ensuring even thickness throughout. Don’t worry about the curve yet; height is your first priority. -
Shape the belly:
Using a rib tool on the outside and your hand on the inside, gently push the belly of the pot outward to create a spherical, ‘chubby’ form. Leave the rim slightly narrower to support a lid. -
Create the gallery:
At the rim, use a wooden tool or your thumb to press down and create a recessed gallery. This is where the lid will sit flush with the top of the bear’s head. -
Throw the lid:
Measure your gallery carefully with calipers. Throw a simple, flat-domed lid that fits these measurements perfectly. Add a small, cylindrical knob in the center.
Clean Lines
Use a damp sponge to wipe back the glaze edge around the face immediately after dipping. A crisp line between the glossy glaze and matte clay makes the design pop.
Step 2: Sculpting the Character
-
Trim the base:
Once the body is leather-hard, trim the excess clay from the bottom to define the foot ring and refine the spherical shape. -
Form the ears:
Roll two small balls of clay and pinch them into thick, rounded ear shapes. Use your thumb to create the inner ear indentation. -
Attach the ears:
Score and slip the top shoulders of the pot and the base of the ears. Attach them firmly, smoothing the seams so they look like they grew out of the form. -
Pull the handle:
Pull a thick, sturdy strap handle. Attach it opposite the potential spout area (or where the face will be, since this is a lidded jar style teapot). -
Create the nose:
Add a tiny, slightly flattened ball of clay to the center of the ‘face’ area for the nose, blending it seamlessly onto the surface.
Step 3: Detaling and Glazing
-
Outline the face:
Using a needle tool, lightly scratch a large oval or heart-shaped outline on the front. This line demarcates where the raw clay face meets the glazed fur. -
Bisque fire:
Allow the piece to dry completely, slowly, to avoid cracking. Fire to bisque temperature (usually cone 04). -
Wax the face:
Apply wax resist carefully to the face area (inside the scratched line), the inner ears, and the lid knob. This keeps the raw clay exposed. -
Glaze dip:
Dip the entire pot and lid into a glossy teal glaze. The wax will prevent the glaze from adhering to the specific character areas. -
Paint facial features:
Once the glaze is dry, clean off any beads on the wax. Use black underglaze and a fine brush to paint the sleepy ‘U’ shaped eyes and the small mouth line. -
Glaze the nose:
Dab a small drop of brown or black glaze onto the raised nose bump for a shiny finish. -
Final firing:
Fire the piece to handling temperature (cone 5/6 or 10, depending on your clay body). I always check the kiln shelves beforehand to ensure no glaze drips will ruin the piece.
Forest Friends
Create a whole set by altering the ear shapes and glaze colors. Pointy ears and orange glaze for a fox, or rounded ears and brown glaze for a classic teddy bear.
Now you have a cozy companion to keep your tea leaves warm and your kitchen cheerful
Fruit-Shaped Teapot With Leafy Lid
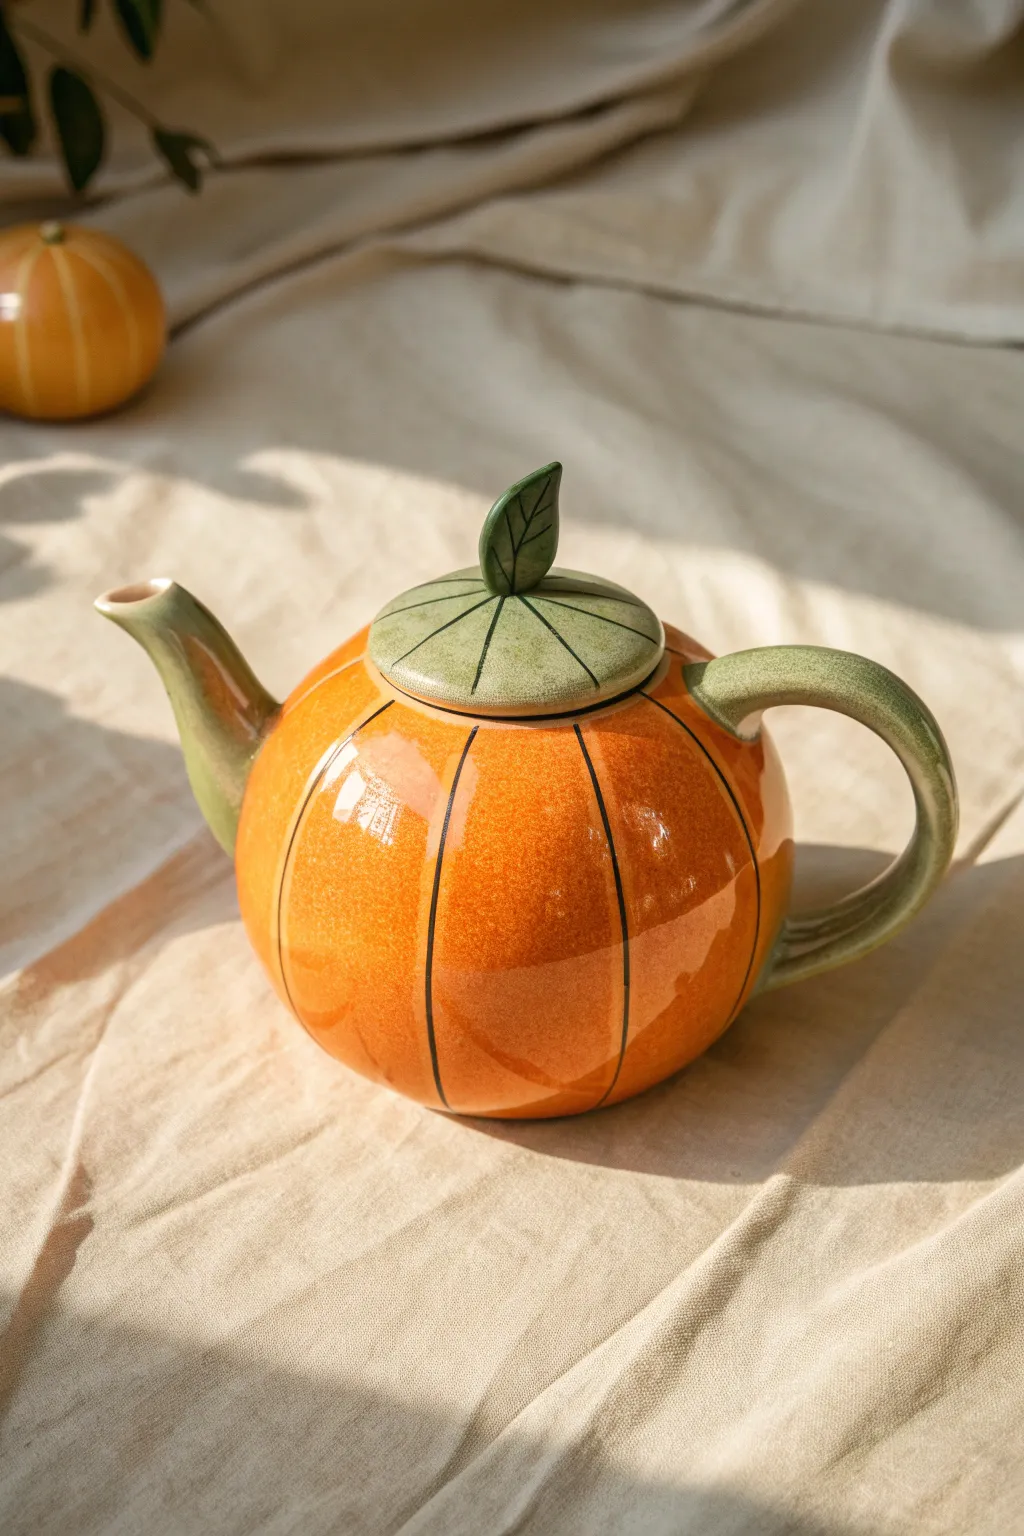
Bring the warmth of autumn to your tea time with this charming pumpkin-shaped vessel. This intermediate ceramic project combines wheel-thrown or hand-built elements with sculptural detailing to create a functional piece of art that looks fresh from the patch.
How-To Guide
Materials
- Stoneware clay (approximately 3-4 lbs)
- Pottery wheel (optional, can be hand-built)
- Needle tool
- Rib tool (wood or rubber)
- Scoring tool or serrated rib
- Slip (clay mixed with water)
- Underglazes (pumpkin orange, forest green, black)
- Clear glossy glaze
- Detail brushes
- Sponge
Step 1: Forming the Body
-
Create the base form:
Begin by throwing a round, bulbous sphere on the wheel, closing the top slightly but leaving an opening for the lid. Alternatively, pinch two large bowls and join them rim-to-rim to form a hollow sphere. -
Define the pumpkin shape:
While the clay is leather hard, gently press vertical indentations from top to bottom using a wide modeling tool or your fingers to create the pumpkin’s characteristic lobes. -
Trim the foot:
flip the pot over once it handles firmly and trim a distinct foot ring to lift the pumpkin slightly off the table surface. -
Measure the lid gallery:
Use calipers to measure the top opening create a recessed gallery inside the rim where the lid will sit securely.
Step 2: Adding Appendages
-
Pull the spout:
Pull a spout from a separate lump of clay, aiming for a curved shape that mimics a thick vine; ensure the base is wide enough to attach securely to the body. -
Form the handle:
Pull a C-shaped handle that tapers slightly, creating a comfortable grip that mirrors the curve of the spout. -
Attach the spout:
Score and slip the attachment point on the pot body, then press the spout firmly in place; smooth the transition with a modeling tool to look like a natural vine growth. -
Attach the handle:
Score and slip the opposite side, attaching the handle directly across from the spout. Blend the clay at the joints seamlessly. -
Create the strainer:
Use a hole cutter or drill bit to create multiple small holes inside the body wall behind where the spout is attached to act as an internal tea strainer.
Clean Lines Pro Tip
To get super crisp black lines without a shaky hand, paint the lines loosely first, then use a damp, stiff brush to ‘erase’ and tidy up the edges of the underglaze.
Step 3: Sculpting the Lid
-
Fit the lid:
Throw or hand-build a flat or slightly domed disc that fits perfectly into the gallery you trimmed earlier. -
Sculpt the leaf knob:
Model a small leaf shape by hand. Score the center of the lid and attach the leaf vertically to act as the knob handles. -
Add vein details:
Using a needle tool, gently carve vein lines radiating from the center of the lid outwards, matching the ‘stem’ aesthetic.
Glaze Troubleshooting
If your clear glaze looks cloudy after firing, it likely was applied too thickly. Next time, thin the glaze slightly with water or apply one less coat.
Step 4: Decorating and Glazing
-
Bisque fire:
Allow the entire piece to dry slowly and completely before firing it in the kiln to bisque temperature (usually cone 04). -
Apply base colors:
Paint three coats of bright orange underglaze onto the pumpkin body, and coats of sage green onto the spout, handle, and lid. -
Paint rib lines:
With a very fine liner brush and black underglaze, carefully paint thin vertical lines into the deep recesses of the pumpkin lobes to exaggerate the form. -
Detail the lid:
Paint the carved veins on the green lid with the same thin black lines to unify the design. -
Clear coat:
Once dry, dip or brush the entire exterior and interior with a food-safe clear gloss glaze. -
Final wipe:
I always use a damp sponge to wipe any glaze off the foot ring to prevent it from sticking to the kiln shelf. -
Glaze fire:
Fire the piece to the maturity temperature of your clay and glaze (typically cone 5 or 6 for stoneware).
Enjoy serving your favorite autumn blends in this one-of-a-kind seasonal centerpiece
Teapot House With Tiny Door and Windows
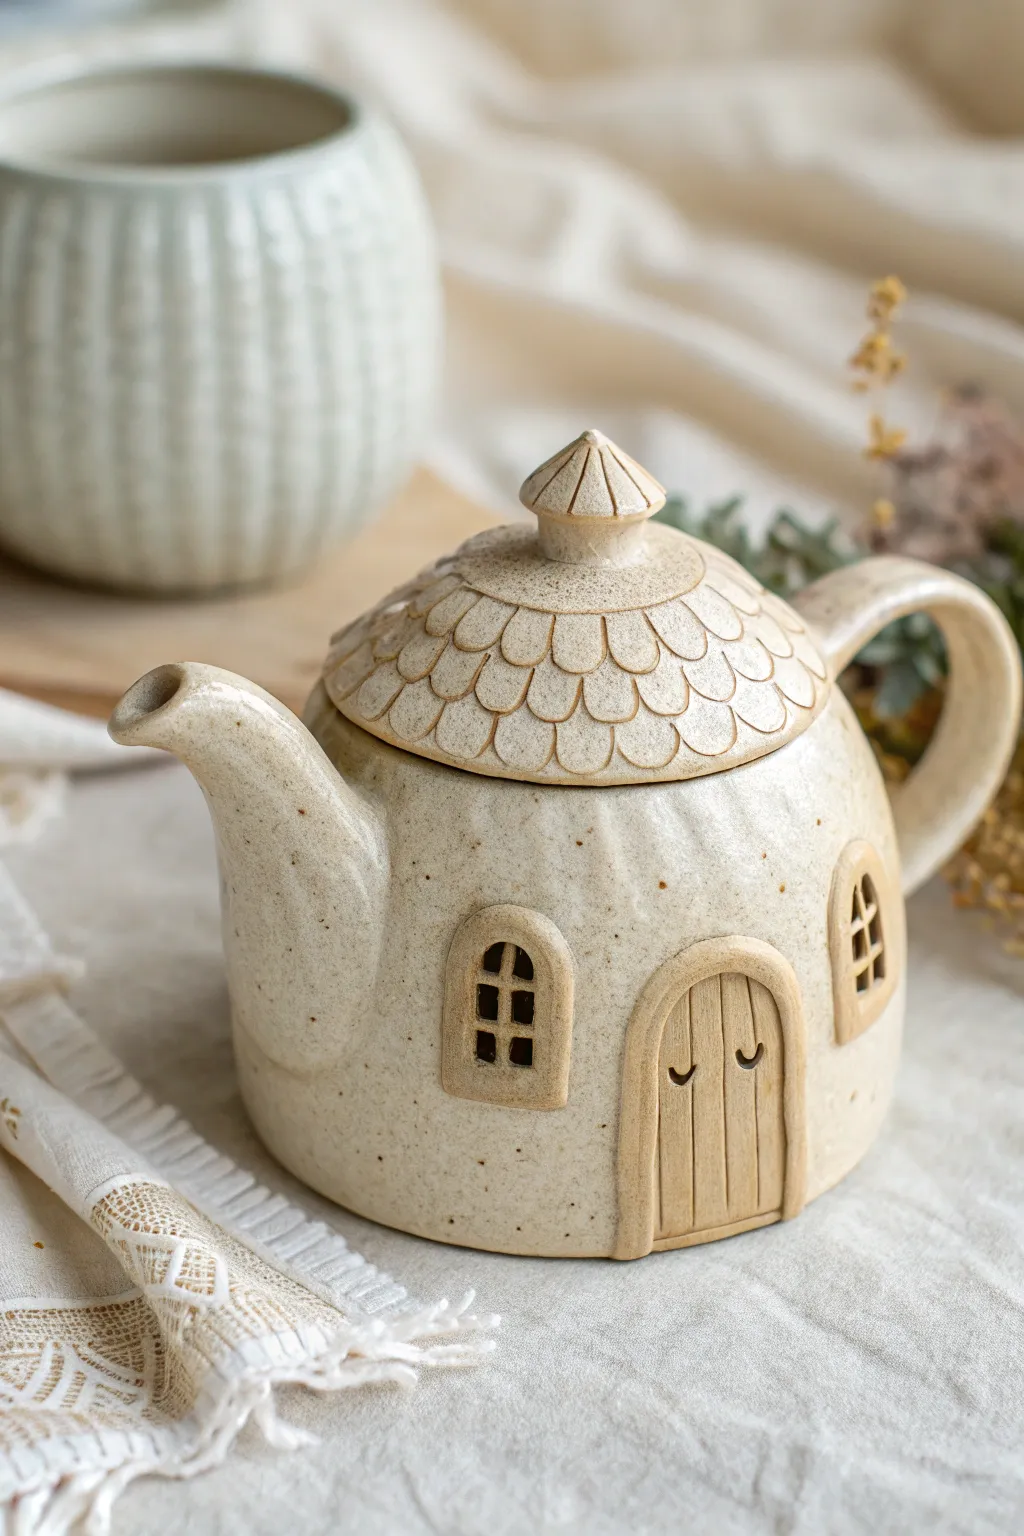
Transform your tea time into a fairytale with this enchanting ceramic teapot that doubles as a cozy little dwelling. This project involves hand-building techniques to create a charming house structure complete with a shingled roof lid, tiny arched windows, and a rustic wooden door.
Step-by-Step
Materials
- Stoneware clay (speckled or light buff)
- Pottery wheel (optional, can be hand-built)
- Rib tool
- Pin tool or needle tool
- Scoring tool or serrated rib
- Slip (clay slurry)
- Wooden modeling tools
- Small rolling pin
- Clay knife or fettling knife
- Sponge
- Clear or transparent decorative glaze
- Kiln
Step 1: Forming the Body and Lid
-
Create the base form:
Begin by throwing a medium-sized cylinder on the wheel, curving the walls outward to create a rounded, bulbous belly which will serve as the main house structure. Alternatively, coil-build a round pot if you prefer hand-building. -
Refine the shape:
Collar in the top opening slightly so it is narrower than the belly, creating a distinct ‘eaves’ line for where the roof will sit. Use a rib to smooth the exterior walls. -
Measure the lid:
Using calipers, measure the opening of your pot. Throw or hand-build a conical lid that fits snugly into the gallery of your pot. The lid should have a steeper slope to resemble a roof. -
Make the gallery:
Ensure the rim of the teapot body is split or shaped to support the lid securely. I find trimming a dedicated gallery shelf into the rim while the clay is leather hard often gives the best fit.
Clean Spouts Pour Best
Use a specialized hole cutter or drill bit to make the strainer holes inside the teapot body before attaching the spout. Clean these holes from the inside while the clay is leather hard.
Step 2: Adding Functional Elements
-
Pull the spout:
Pull a short, stout spout from a separate lump of clay. Attach it low on the belly of the pot, ensuring the tip pours higher than the lid line to prevent spilling. -
Attach the handle:
Pull a loop handle and attach it opposite the spout. Secure it firmly with scoring and slip, reinforcing the connection points for durability. -
Create the chimney knob:
Fashion a small, geometric finial that looks like a chimney or a tiny turret. Attach this securely to the very peak of your conical lid.
Step 3: Sculpting the details
-
Carve the door frame:
Roll out a small slab of clay and cut out an arch shape. Attach this to the side of the pot (between spout and handle) to form the door frame. -
Texture the door:
Inside the frame, lightly score vertical lines to mimic wood planks. Add two tiny, semi-circle indents for door handles or hinges. -
Install the windows:
Add small arched coils of clay for window frames. Use a needle tool to carefully crave out the negative space, leaving a cross (muntin) in the center of each window for a paneled look. -
Shingle the roof:
Using a small U-shaped carving tool or simply pressing with a rounded modeling tool, create overlapping scale patterns on the lid to simulate roof shingles. Work from the bottom edge up toward the finial. -
Detail the finial:
Add tiny vertical lines to the chimney knob to match the roof’s texture, giving it a cohesive architectural feel.
Chimney Steam Vent
Instead of a standard steam hole, drill a tiny hole right through your chimney knob. It releases steam vertically, adding a realistic ‘smoke’ effect to your cottage.
Step 4: Finishing and Firing
-
Smoothen surfaces:
Go over the entire piece with a damp sponge to remove any sharp burrs or rough clay crumbs, paying special attention to the spout and handle. -
Bisque fire:
Allow the teapot to dry slowly and completely before loading it into the kiln for the initial bisque firing. -
Apply glaze:
Dip or brush a transparent or semi-opaque glaze over the entire piece. A glaze that breaks over texture work is ideal, as it will highlight the shingles and window details. -
Final wipe:
Wipe the foot of the teapot clean to prevent it from sticking to the kiln shelf. -
Glaze fire:
Fire the piece to the temperature appropriate for your clay and glaze (likely Cone 5 or 6 for stoneware) to finish the ceramic process.
Now brew your favorite blend and enjoy pouring from your own handcrafted home
Garden Teapot With Mossy Mini Landscape
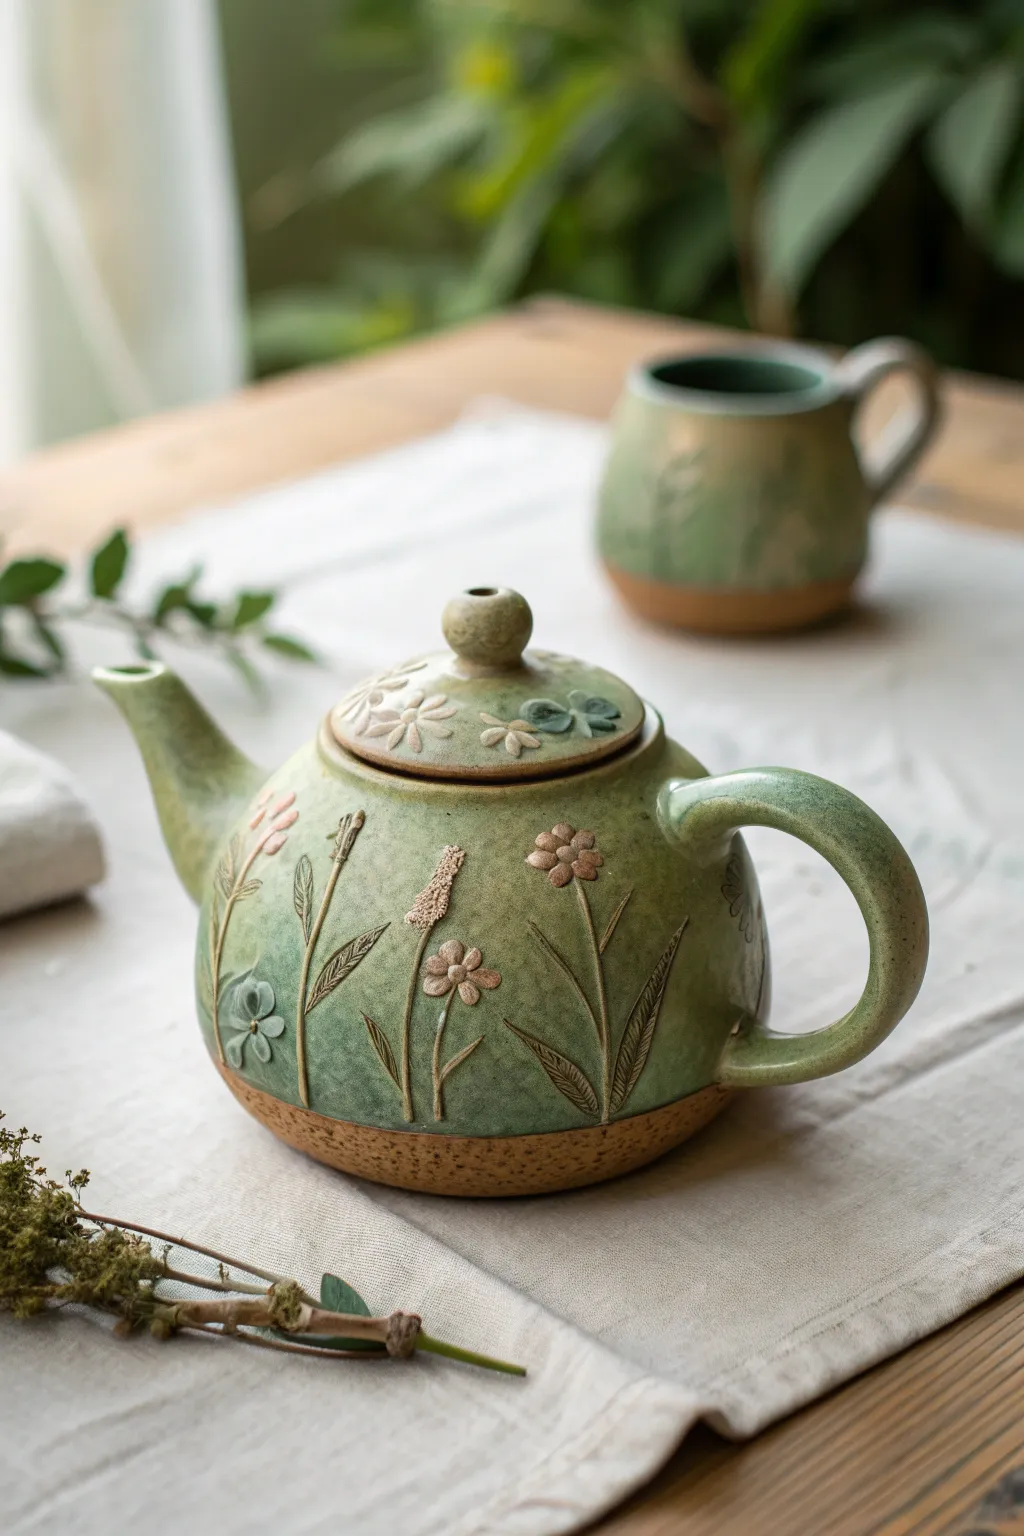
This rustic teapot captures the serenity of a meadow garden with its textured surface and delicate botanical relief. The speckled clay body peeping through a soft, matte green glaze creates an organic finish that feels wonderful in the hands.
Step-by-Step Tutorial
Materials
- Speckled stoneware clay (mid-fire)
- Pottery wheel (or slab roller for hand-building)
- Ribs (wooden and metal)
- Needle tool
- Loop tools for trimming
- Scoring tool and slip
- Modeling tools (small wooden or silicone tipped)
- Underglaze (brown, white, soft pink, faint blue)
- Wax resist
- Matte moss green glaze
- Sponge
- Kiln
Step 1: Forming the Body and Lid
-
Throwing the body:
Begin by centering about 2-3 pounds of speckled stoneware clay on the wheel. Open the clay and pull the walls up into a rounded, bulbous belly shape, narrowing slightly at the rim to form a gallery for the lid. -
Refining the shape:
Use a metal rib on the exterior while pushing out gently from the inside to smooth the curve and remove throwing lines. The goal is a smooth, continuous surface for your flower carvings. Leave the rim slightly thicker for strength. -
Making the lid:
Measure the gallery opening of your teapot body using calipers. Throw a small lid upside down on a bat, ensuring the flange fits your measurements precisely. Include a small knob in the center, shaping it into a rounded bud-like form. -
Trimming leather hard:
Once both pieces are leather hard, trim the bottom of the teapot to create a clean foot ring. This lifts the form and adds elegance. Trim the lid to remove excess weight and refine the knob’s profile.
Uneven Glaze?
If your glaze looks patchy on the textured areas, try thinning it slightly with water. A thinner application highlights the carving better than a thick coat that fills in the details.
Step 2: Spout and Handle
-
Creating the spout:
Ideally, throw a small tapered cylinder on the wheel for the spout. Alternatively, hand-build one by rolling a slab into a cone. Cut the base of the spout at an angle to fit the curve of the teapot belly. -
Pulling the handle:
Pull a strap of clay for the handle, tapering it slightly. I like to curve it into an ear shape and let it stiffen slightly on a board until it holds its arch before attaching. -
Assembly:
Hold the spout up to the body to check the angle; the tip must be level with or higher than the rim. Score and slip the attachment points heavily. Drill holes in the body where the spout attaches to act as a strainer, then press the spout firmly in place. -
Attaching handle:
Attach the handle opposite the spout using the score and slip method. Smooth the joins with a small wooden tool or your finger so they look seamless.
Smoother Pours
When attaching the spout, ensure the pour-edge is sharp and defined. A rounded lip on a spout causes dribbling; a sharp undercut edge breaks the flow cleanly.
Step 3: Creating the Botanical Relief
-
Sketching the design:
Lightly trace your stem and flower placement onto the leather-hard clay using a needle tool. Vary heights of the flowers to mimic a natural garden growth habit. -
Modeling the relief:
Take tiny pinch-pots or coils of fresh soft clay. Press them onto the surface where your flowers and leaves will go. Use a modeling tool to flatten and sculpt them into petals and leaf shapes, blending the edges onto the pot surface slightly so they don’t pop off. -
Adding texture:
Use a needle tool or small knife to incise veins into the leaves and separation lines between petals. For the centers of flowers, stipple the clay to create a pollen texture. Repeat this process on the lid. -
Drying:
Allow the entire teapot to dry very slowly under loose plastic. This prevents the handle and spout from cracking away from the body.
Step 4: Glazing and Finishing
-
Bisque firing:
Fire the piece to cone 04 (or your clay’s bisque temperature). -
Waxing the relief:
Carefully paint wax resist over the raised flower and leaf designs you created. This will prevent the main green glaze from covering them entirely, allowing for detail work later. -
Waxing the base:
Apply a band of wax resist to the bottom 1-2 inches of the teapot’s exterior. This creates the raw clay ‘dipped’ look at the base. -
Glazing the body:
Dip or pour your matte moss green glaze over the exterior and interior of the teapot. Wipe away any drips immediately. -
Detailing the flora:
Once the glaze is dry, you can gently wipe the wax off the relief areas if needed, or simply apply underglazes into the textured areas if your wax burns off cleanly. I prefer using oxide washes or underglaze (browns for stems, pinks/whites for petals) painted carefully onto the relief parts to highlight the textures. -
Final firing:
Glaze fire the piece to the maturity temperature of your clay and glaze (likely cone 5 or 6). Typically, you’ll want a medium-speed cooling cycle to encourage a nice matte finish.
Pour yourself a warm cup and enjoy the tactile beauty of your handmade garden teapot
Stacked Teapot Totem for a Whimsical Display

Transform a collection of individual ceramic vessels into a striking vertical sculpture that defies gravity while adding a rustic, stoneware aesthetic to your decor. This totem creates an eye-catching centerpiece by playing with muted earthy pastels and varying rounded forms.
How-To Guide
Materials
- 5 ceramic teapots (varying slightly in size)
- Small wooden or cork coaster discs (approx. 2-3 inches diameter)
- High-strength ceramic adhesive (e.g., E6000 or two-part epoxy)
- Leather cord or twine
- Garnish scissors
- Clean cloth and rubbing alcohol
- Cardboard or felt pieces (for leveling)
- Round wooden serving board or slice
- Bubble level (small)
Step 1: Preparation & Selection
-
Select your vessels:
Gather five round-bodied teapots. Aim for graduated sizes if possible, with the largest, sturdiest pot for the base and slightly smaller ones for the top. A matte, speckled ceramic finish unifies the look. -
Clean surfaces:
Wipe down the lids and the bottom of each teapot with rubbing alcohol and a clean cloth. This removes oils and dust that could compromise the glue bond later. -
Dry fit the stack:
Stack your teapots without glue first to determine the most stable arrangement. I like to swap the colors around until the palette flows nicely—for instance, alternating the greens and pinks. -
Check for flatness:
Ensure the bottom of each pot sits relatively flat on the lid of the one below it. If there’s a wobble, note where it is so you can address it with adhesive padding.
Step 2: Constructing the Totem
-
Prepare the spacer discs:
To protect the lids and create a flat gluing surface, use small wooden or cork discs. Ensure they are smaller than the teapot base so they remain hidden or look like subtle wooden accents. -
Base layer adhesive:
Apply a ring of high-strength ceramic adhesive to the center of the bottom-most teapot’s lid. Press your first wooden spacer disc firmly into place. -
First connection:
Apply adhesive to the top of that wooden spacer. Carefully center the second teapot (the olive green one in our example) on top. -
Leveling check:
Immediately place a small bubble level on the rim of the second teapot. If it leans, tuck a tiny sliver of cardboard or felt under the low side into the glue bed to level it out. -
Allow initial set:
Let this first pair dry for 15–20 minutes until the glue grabs. Rushing this step is the most common mistake; patience ensures a straight tower. -
Continue stacking:
Repeat the process: Glue a spacer to the lid of the current top pot, apply glue to the spacer, and set the next pot (pink) on top. Always align the handles in opposite directions or a spiral pattern for visual balance. -
The upper layers:
Add the fourth (sage green) and final (beige) teapots using the same spacer method. Ensure the very top teapot has its lid glued shut securely if you don’t intend to use it for storage.
Wobbly Pots?
If a teapot lid has a high handle that prevents stacking, use a thicker wooden block or a small inverted terracotta saucer as the spacer to bridge the gap.
Step 3: Finishing Touches
-
Secure the lids:
For extra stability, dab a small amount of clear epoxy under the rim of each lid to glue them permanently to their respective pots, preventing rattling. -
Add texture:
Cut short lengths of leather cord or rustic twine. Tie them loosely around the handle or lid knob of the top two teapots for a mixed-media touch. -
Final cure:
Leave the entire stack undisturbed for at least 24 hours to reach full cure strength. Do not attempt to lift it until fully set. -
Prepare the display base:
Place your wooden serving board on a stable surface. You can use a dab of removable museum putty on the bottom of the lowest teapot to anchor the totem to the wood without permanent damage.
Make it a Fountain
Drill holes through the centers and run plastic tubing up the middle to turn this sculpture into a functioning recirculating water feature for a garden.
This sculptural stack brings a sense of serenity and homespun charm to any kitchen corner or dining table
Industrial-Inspired Teapot With Faux Hardware Details
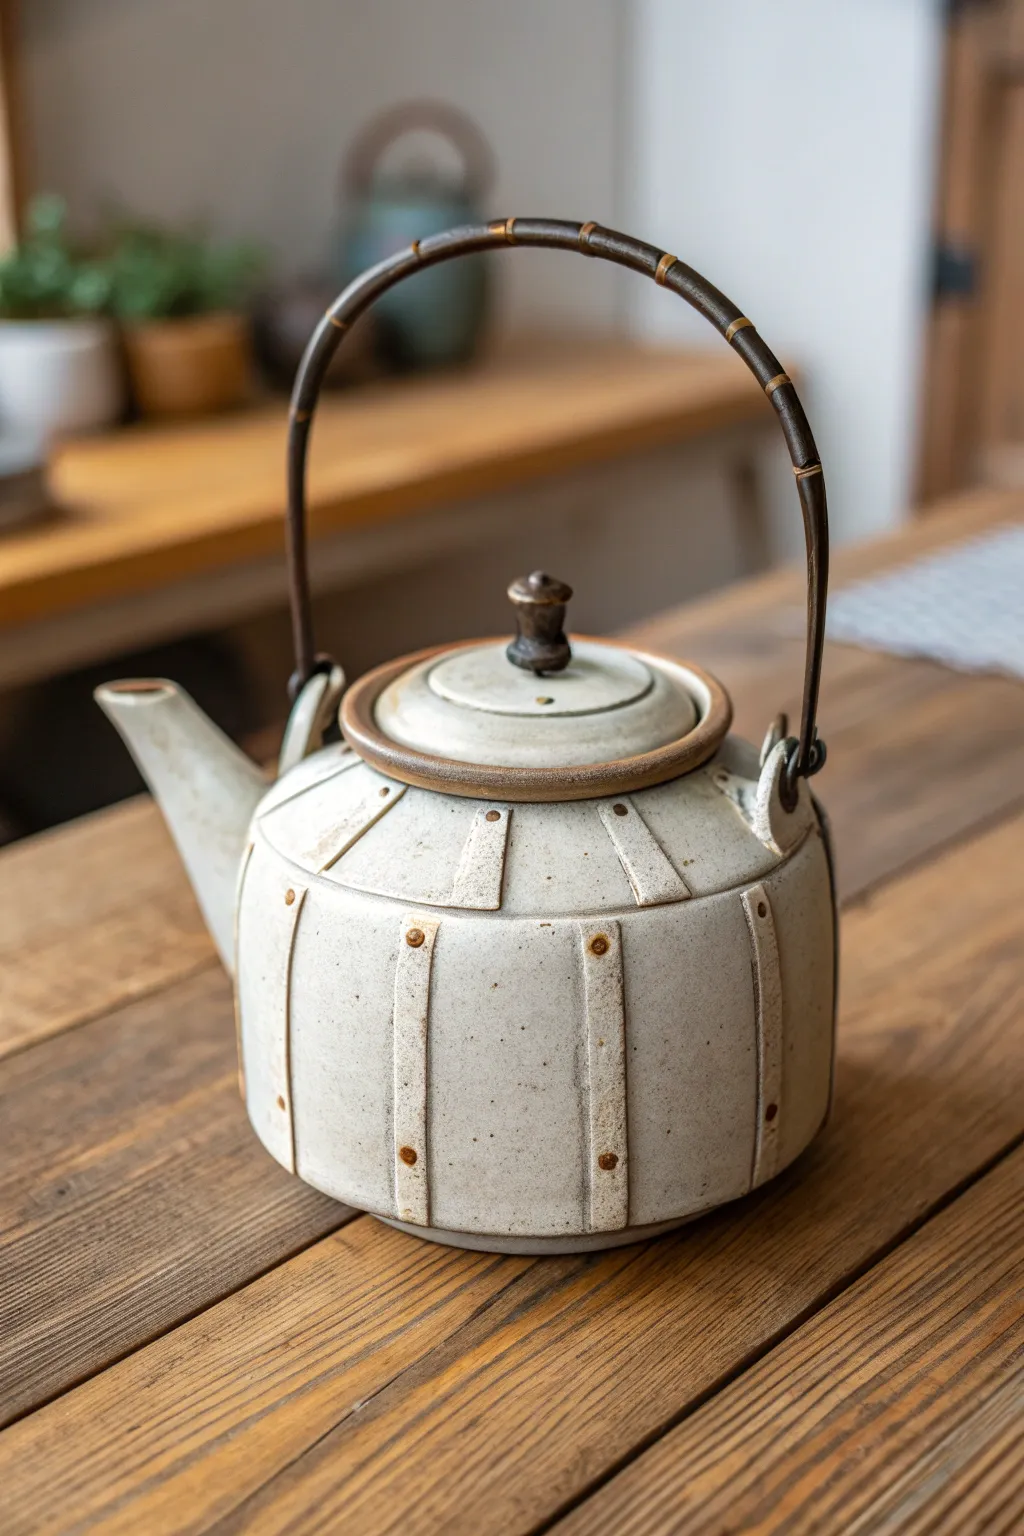
This unique ceramic project mimics the look of a sturdy, riveted boiler or industrial tank, complete with faux metal straps and bolt details. The speckled white glaze contrasts beautifully with raw clay accents, creating a piece that feels both rustic and modern.
Detailed Instructions
Materials
- Stoneware clay (speckled or buff)
- Pottery wheel
- Throwing tools (rib, sponge, wire)
- Loop tool for trimming
- Fettling knife
- Score and slip tool
- Small dowel or hole punch tool
- Underglaze (brown or iron oxide wash)
- Matte white speckle glaze
- Cane or bamboo teapot handle (pre-made)
- Strong craft wire or copper wire
Step 1: Throwing the Body
-
Center and open:
Begin with about 2-3 lbs of clay on the wheel. Center it firmly and open the vessel wide to create a flat bottom inside. -
Pull the walls:
Pull the walls upward, aiming for a stout, cylindrical shape. Gently collar the neck in as you reach the top to create a distinct shoulder for the lid to rest on. -
Refine the shape:
Use a metal or wooden rib to smooth the exterior. You want a very vertical, drum-like profile for the main body to support the industrial aesthetic. -
Measure the lid gallery:
Use calipers to measure the opening of your pot. Throw a separate lid with a flange that fits these measurements perfectly.
Clean Connections
When attaching the vertical strips, use a damp brush to smooth the edges down immediately. You want them to look like appliqued metal, not just stuck-on clay.
Step 2: Adding the Spout and Lugs
-
Throw the spout:
Throw a small, tapering spout on the wheel. It should be relatively short and straight to match the sturdy look of the pot. -
Trim and assemble:
Once the body and spout are leather hard, trim the spout’s base at an angle. Attach it to the body using the score and slip method. -
Create handle lugs:
Roll two small coils of clay into loops. Attach these securely to the shoulder of the pot on opposite sides. These will hold the cane handle later. -
Make the lid knob:
Hand-build or throw a small, tiered knob that resembles a finial or machine part. Attach this to the center of your lid.
Step 3: Sculpting the Hardware
-
Roll flat strips:
Roll out a slab of clay to about 1/8 inch thickness. Cut vertical strips about 1/2 inch wide to serve as the ‘metal’ bands. -
Attach vertical bands:
Score the surface of the pot vertically. Attach the strips at even intervals around the body, pressing them firmly so they look integrated but slightly raised. -
Add shoulder details:
Cut shorter trapezoidal pieces from your slab. Arrange these around the shoulder of the pot, bridging the gap between the vertical bands and the neck. -
Create faux rivets:
Roll tiny balls of clay or purchase a small bolt-head mold. Press these ‘rivets’ into the strips at the top and bottom of each vertical band using a dab of slip. -
Refine the lid rim:
Create a thin coil and attach it to the outer rim of the lid to mimic a metal sealing ring. I like to keep this edge sharp to look like machined metal.
Rust Effect
For a truly weathered look, lightly sponge a tiny bit of diluted iron oxide on the white glaze around the rivets before the final firing to simulate rust drips.
Step 4: Glazing and Finishing
-
Bisque fire:
Allow the entire piece to dry slowly to prevent cracking around the added strips. Bisque fire to cone 04. -
Apply oxide wash:
Paint an iron oxide wash or brown underglaze onto the rivets, the rim of the lid, and the knob. Wipe away any excess with a damp sponge, leaving color in the recesses to define the ‘hardware’. -
Wax resist:
Apply wax resist over the brown ‘hardware’ areas (lid rim, rivets, and knob) so the main glaze won’t adhere to them. -
Dip in glaze:
Dip the entire tea pot into a matte white speckled glaze. The wax will protect your faux-metal details, letting the raw clay or oxide show through. -
Final firing:
Fire the piece to cone 6 (or your clay body’s temperature). The glaze should break over the raised strips, highlighting the construction. -
Attach the handle:
Once fully cool, thread the wire hooks of your pre-made bamboo handle through the clay lugs. Secure them tightly with pliers.
Serve your favorite brew in this robust vessel and enjoy the fusion of industrial strength and handmade warmth