If you’re craving a quick project that feels both practical and totally adorable, cute clay coasters are my go-to. They’re small enough to finish in a sitting, but you can pack in so much personality with air-dry clay or polymer clay.
Pastel Marble Swirl Coasters
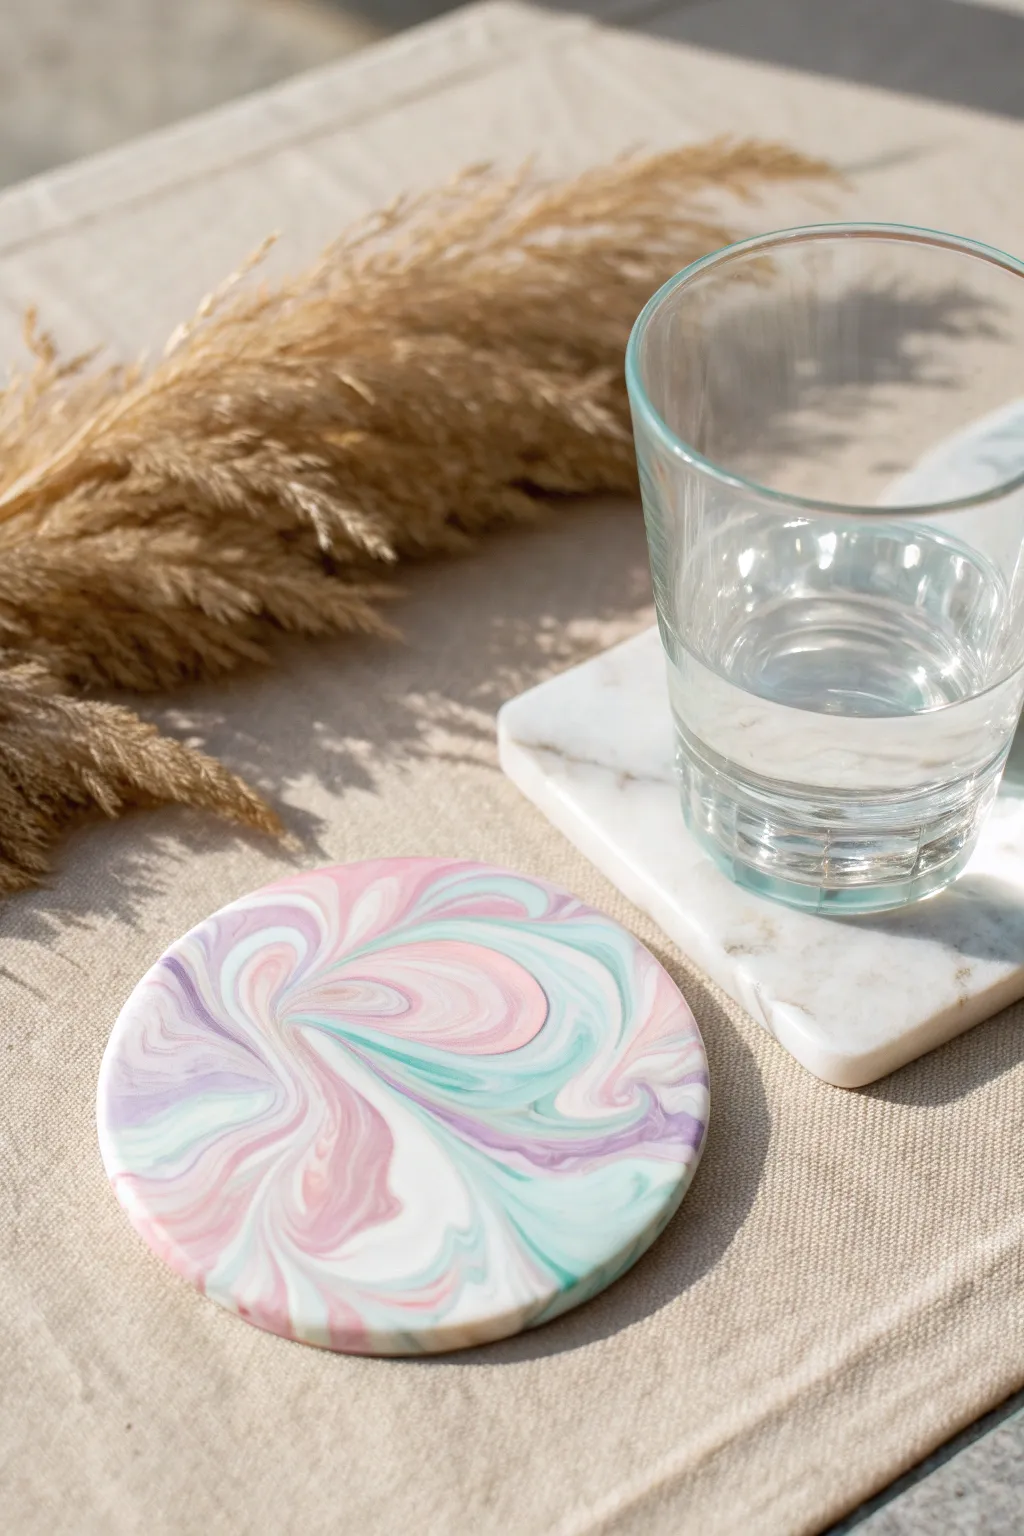
Bring a soft, dreamy aesthetic to your table setting with these mesmerizing marbled clay coasters. The delicate blend of teal, pink, violet, and white creates a fluid, stone-like effect that looks incredibly high-end but is simple to achieve at home.
Detailed Instructions
Materials
- Polymer clay (White, Pastel Pink, Pastel Teal/Mint, Lavender)
- Acrylic roller or rolling pin
- Round cookie cutter (approx. 4 inches) or a craft knife and a bowl
- Parchment paper or a silicone craft mat
- Ceramic tile or baking sheet
- Sandpaper (fine grit, 400-600)
- Gloss glaze or matte varnish (optional)
Step 1: Preparing the Clay
-
Condition the White Base:
Start by taking a large block of white polymer clay. Knead it thoroughly in your hands until it becomes warm, soft, and pliable. This white portion should be roughly double the amount of the colored clays combined to ensure a bright, airy background. -
Prep the Pastel Colors:
Repeat the conditioning process for your pastel pink, teal, and lavender clays. Roll each color into a thin ‘snake’ or log shape, keeping them separate for now. -
Create the Color Bundle:
Roll your conditioned white clay into a thicker log. Take your colored snakes and lay them lengthwise along the white log. You don’t need to be precise here; placing them randomly around the white core helps create a more organic pattern later.
Muddy Colors?
If your colors are blending into a brown mess, you’ve over-mixed! Stop twisting sooner next time. The distinct streaks of white maintain the fresh pastel look.
Step 2: Creating the Marble Effect
-
Twist and Roll:
Gently pick up the combined log and begin twisting it like a candy cane. Once twisted, roll it on your work surface to smooth it back into a single cylinder shape. -
Fold and Repeat:
Fold the twisted log in half, bringing the two ends together. Twist the clay again and roll it out into a log shape once more. I like to repeat this fold-twist-roll process about three or four times; stopping too early leaves the colors blocky, but over-mixing will turn everything grey. -
Form a Ball:
Once you see fine streaks of color running through the clay, roll the entire log into a smooth ball. This compresses the layers and prepares them for the final reveal. -
Flatten the Clay:
Place the ball on your parchment paper or silicone mat. Using your acrylic roller, gently press down and roll the clay out. Aim for an even thickness of about 1/4 inch (6mm). As you roll, you’ll see the beautiful swirled pattern emerge.
Step 3: Shaping and Finishing
-
Cut the Circle:
Position your round cookie cutter over the section of the clay with the most pleasing swirl pattern. Press down firmly to cut the shape. If you don’t have a cutter, place a small bowl upside down and trace around it carefully with a craft knife. -
Smooth the Edges:
Gently lift away the excess clay scrap. Pick up your clay disc and use your finger to lightly smooth the rim, rubbing away any sharp edges or tiny burrs left by the cutter. -
Bake:
Transfer the coaster onto a ceramic tile or a parchment-lined baking sheet. Bake according to your polymer clay package instructions—usually around 275°F (130°C) for 15-30 minutes depending on thickness. -
Cool Down:
Allow the coaster to cool completely on the baking sheet to ensure it hardens properly and stays flat. -
Sand for Smoothness:
Once cool, grab your fine-grit sandpaper. Lightly wet the sandpaper and buff the edges and top surface in circular motions to achieve a professional, glass-smooth finish. -
Seal (Optional):
For extra protection against drink spills, apply a thin coat of gloss glaze or matte varnish. Let it dry completely before using your new creation.
Gold Leaf Glam
Press small flakes of gold leaf onto the clay surface *before* you do the final rolling out. It adds a chic, metallic vein to the marble pattern.
Enjoy your stylish new coaster that looks just like real artisanal stone

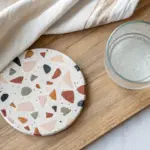


Terrazzo Confetti Dot Coasters
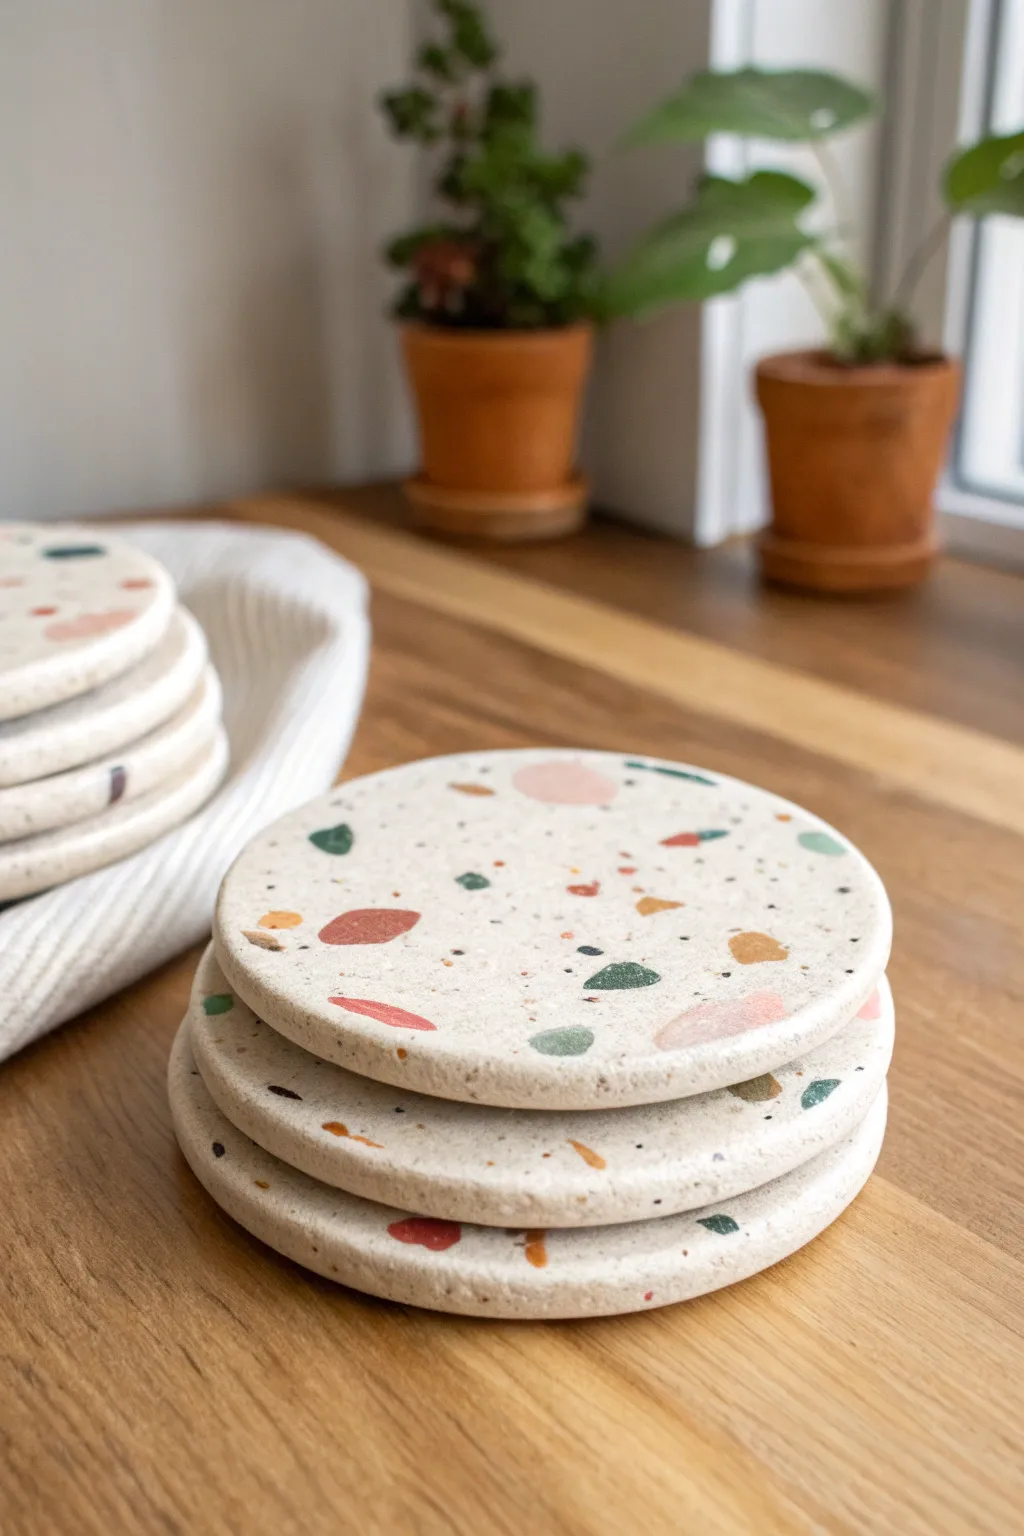
Bring a splash of modern art to your coffee table with these delightful terrazzo-style coasters. Featuring a creamy white base speckled with organic, multi-colored chips, they offer a playful yet sophisticated look that mimics real stone without the need for concrete.
How-To Guide
Materials
- Polymer clay (white or ecru for the base)
- Polymer clay (various colors: terra cotta, sage green, mustard yellow, dusty pink, charcoal)
- Acrylic rolling pin
- Circle cutter (approx. 3.5 to 4 inches)
- Parchment paper or silicone baking mat
- Craft knife or slicing blade
- Baking sheet
- High-grit sandpaper (400, 600, 800 grits)
- Matte varnish or sealant (optional)
Step 1: Preparing the Confetti Chips
-
Roll the color sheets:
Begin by conditioning your colored clays individually until they are soft and pliable. Roll each color out into a very thin sheet, roughly 1/16 of an inch thick or even thinner for delicate specks. -
Create organic shapes:
Using your craft knife or simply tearing with your fingers, rip the thin colored sheets into tiny, irregular pieces. Aim for a mix of sizes—some tiny specks and some slightly larger ‘chunks’ like real terrazzo aggregate. -
Bake the chips (Part A):
Place these little clay scraps onto a parchment-lined baking sheet. Bake them for about 10-15 minutes at the temperature recommended on your clay package. Hardening them now is the secret to keeping their sharp, jagged edges later. -
Final chop:
Once the baked chips have cooled completely, chop them up further with a sharp blade if any pieces look too large. You want a coarse, confetti-like mixture.
Uneven surface?
If chips are poking out after baking, you didn’t roll firmly enough. Use heavy-grit sandpaper (like 200) to level the surface aggressively before moving to finer grits.
Step 2: Forming the Base
-
Condition the base clay:
Take your large block of white or ecru clay. Condition it thoroughly by kneading until it is warm and completely smooth to prevent cracking later. -
Initial rolling:
Roll the white clay into a thick slab, approximately 1/4 inch thick. Don’t worry about the shape just yet, as long as it’s wide enough for your cutters. -
Adding the confetti:
Scatter your pre-baked colored chips generously over the top of the raw white slab. Press them down gently with your fingers to help them stick initially. -
embedding the chips:
Use your acrylic roller to roll over the slab again. Apply firm pressure to force the hard, baked chips into the soft raw clay until the surface is level and the chips are fully embedded. -
Check the underside:
I always like to flip the slab over and add a few chips to the bottom side as well, just so the coasters look finished from every angle, then roll flat again.
Level Up: Gold Leaf
Add flecks of gold leaf along with your colored clay chips before the final roll-out. The metallic shine adds an elegant, high-end contrast to the matte stone texture.
Step 3: Shaping and Finishing
-
Cut the circles:
Place your circle cutter onto the slab. Press down firmly and twist slightly to get a clean cut. Remove the excess clay from around the circles. -
Smooth the edges:
Gently run your finger along the cut edge of each circle to soften the sharp lip created by the cutter. This makes the final coaster feel much more professional in the hand. -
Final Bake:
Transfer your raw coasters to the baking sheet. Bake according to the manufacturer’s instructions for the thickness of your base clay (usually 30-45 minutes to ensure durability). -
Cooling down:
Allow the coasters to cool completely on a flat surface. Do not handle them while warm, as polymer clay serves best when fully cured and cooled. -
Sanding for the terrazzo effect:
This is the most crucial step. Wet sand the surface of the coasters starting with 400 grit sandpaper, moving to 600, then 800. Sanding reveals the full shape of the colored chips and creates that smooth, stone-like finish. -
Buff and seal:
Wipe away any sanding dust with a damp cloth. You can leave them raw for a matte stone feel, or apply a thin layer of matte varnish to protect them from coffee stains.
Stack your new set on the coffee table and enjoy the chic, handmade texture under your favorite mug


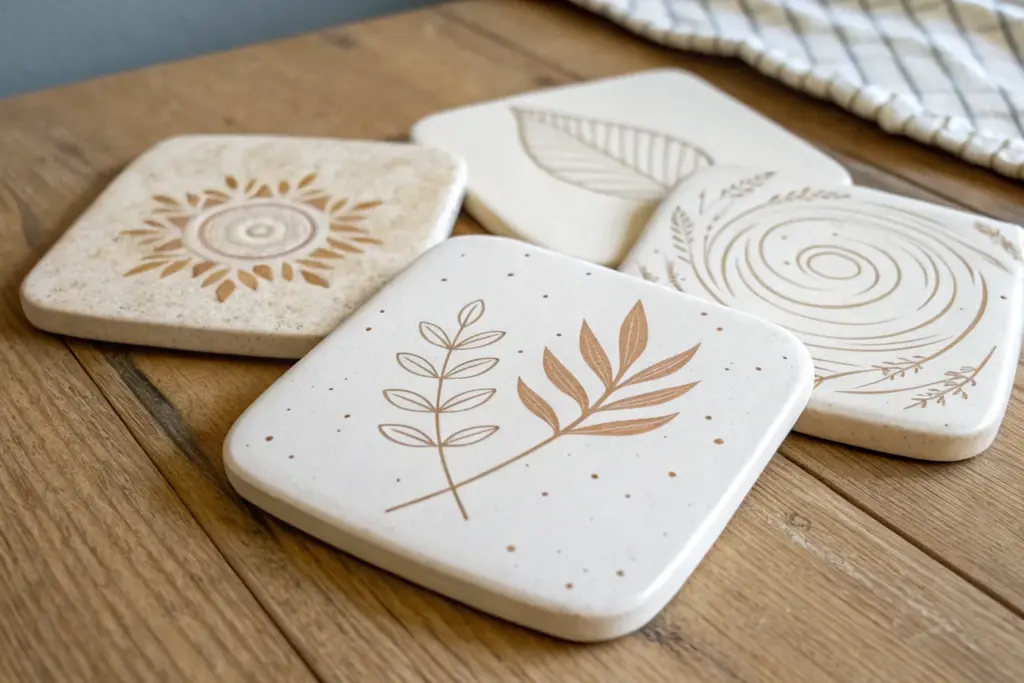
Leaf-Imprint Botanical Coasters
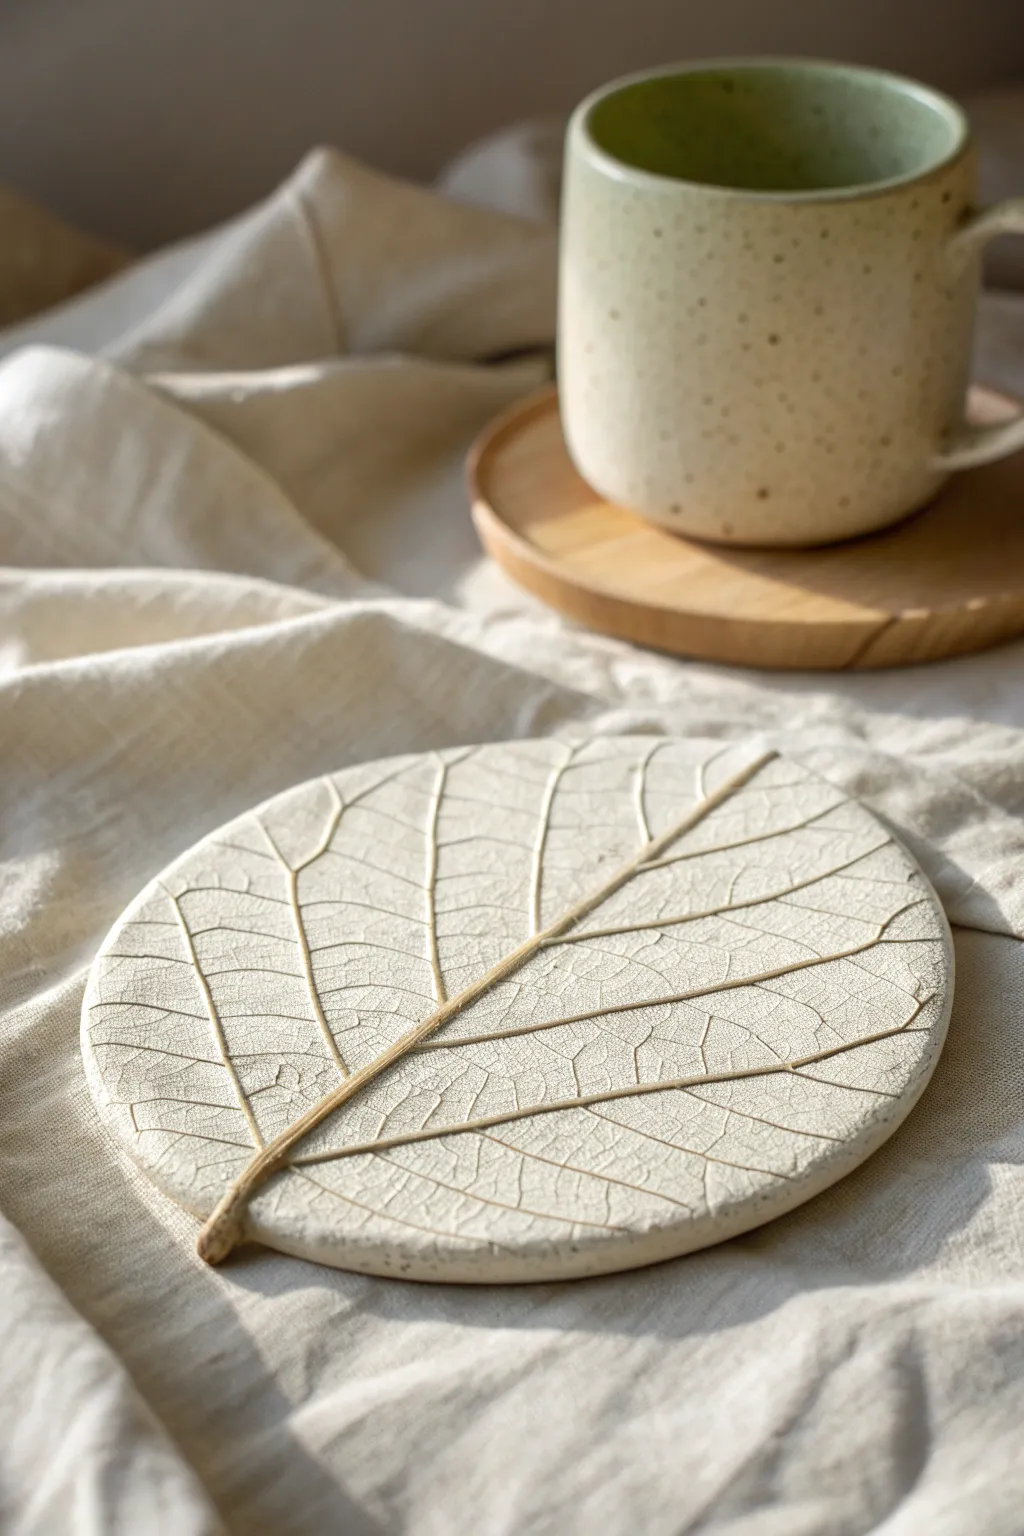
Capture the delicate details of nature forever with these elegant botanical coasters. Using a simple imprint technique, you’ll create a sophisticated, textured piece that looks like a preserved fossil found on a forest floor.
Step-by-Step Guide
Materials
- Air-dry clay (white or cream)
- Fresh leaves with prominent veins (hydrangea, hosta, or fig work well)
- Rolling pin
- Circular cookie cutter or jar lid (approx. 4 inches)
- Detailed craft knife or needle tool
- Sandpaper (fine grit)
- Brown acrylic paint or antique wax
- Water and paper towels
- Clear matte varnish or sealant
- Rolling guides (optional, like two wooden rulers)
Step 1: Preparing the Impression
-
Condition the Clay:
Begin by taking a handful of air-dry clay and kneading it in your hands until it becomes soft, pliable, and free of cracks. If the clay feels too dry, dip your fingers in a tiny bit of water. -
Roll the Slab:
Place your clay on a smooth, non-stick surface or canvas mat. Use a rolling pin to flatten it into an even slab about 1/4 inch thick. I find using rolling guides on either side helps keep the thickness perfectly consistent. -
Select and Prep the Leaf:
Choose a fresh leaf with thick, sturdy veins on the backside. Ensure the leaf is clean and dry throughout. -
Position the Leaf:
Lay the leaf vein-side down onto your clay slab. Think about composition here—you might want the center stem running diagonally for visual interest. -
Press the Design:
Gently roll your rolling pin over the leaf once or twice. applying firm, even pressure to embed the veins deep into the clay surface without distorting the slab’s shape too much. -
Reveal the Texture:
Find the stem of the leaf and carefully peel it back to reveal the imprint. This is the most satisfying part, seeing all those tiny capillaries transferred to the clay.
Vein Definition Tip
Use a rolling pin specifically over the leaf rather than just pressing with hands. The uniform pressure ensures even the tiniest micro-veins are transferred clearly.
Step 2: Shaping and Refining
-
Cut the Shape:
Position your circular cutter over the most interesting part of the leaf print. Press down firmly to cut out your coaster shape. -
Clean the Edges:
Remove the excess clay from around the circle. Use a damp finger to gently smooth the cut edges, softening any sharp rim left by the cutter. -
Dry Completely:
Place the coaster on a wire rack or between two pieces of drywall to dry. Air-dry clay takes 24-48 hours to cure fully. Flip it occasionally to prevent warping. -
Sand for Smoothness:
Once fully bone dry, take fine-grit sandpaper and lightly sand the edges and the top surface (avoiding the deep leaf grooves) to create a stone-like finish.
Step 3: Finishing Touches
-
Apply the Wash:
Dilute a small amount of brown acrylic paint with water to create a thin wash. Brush this over the entire textured surface, ensuring it gets into all the deep vein crevices. -
Wipe Back:
Immediately use a damp paper towel or sponge to wipe the paint off the raised surface. The dark color will remain in the pressed veins, highlighting the pattern beautifully. -
Detail the Stem:
If the main stem impression looks a bit pale, use a fine brush to add a slightly more concentrated brown paint specifically to that deep groove to mimic a real twig. -
Let Dry:
Allow the paint wash to dry completely, which should only take about 20 minutes. -
Seal:
Apply a coat of matte varnish or clear sealant to protect the clay from moisture, which is essential for a functional coaster.
Add a Speckled Look
Before sealing, flick a stiff toothbrush dipped in diluted brown paint over the coaster. This creates a speckled ceramic pottery effect.
Once sealed and dried, pour yourself a warm drink and enjoy the natural serenity your new coaster brings to the table


Simple Color-Block Coasters
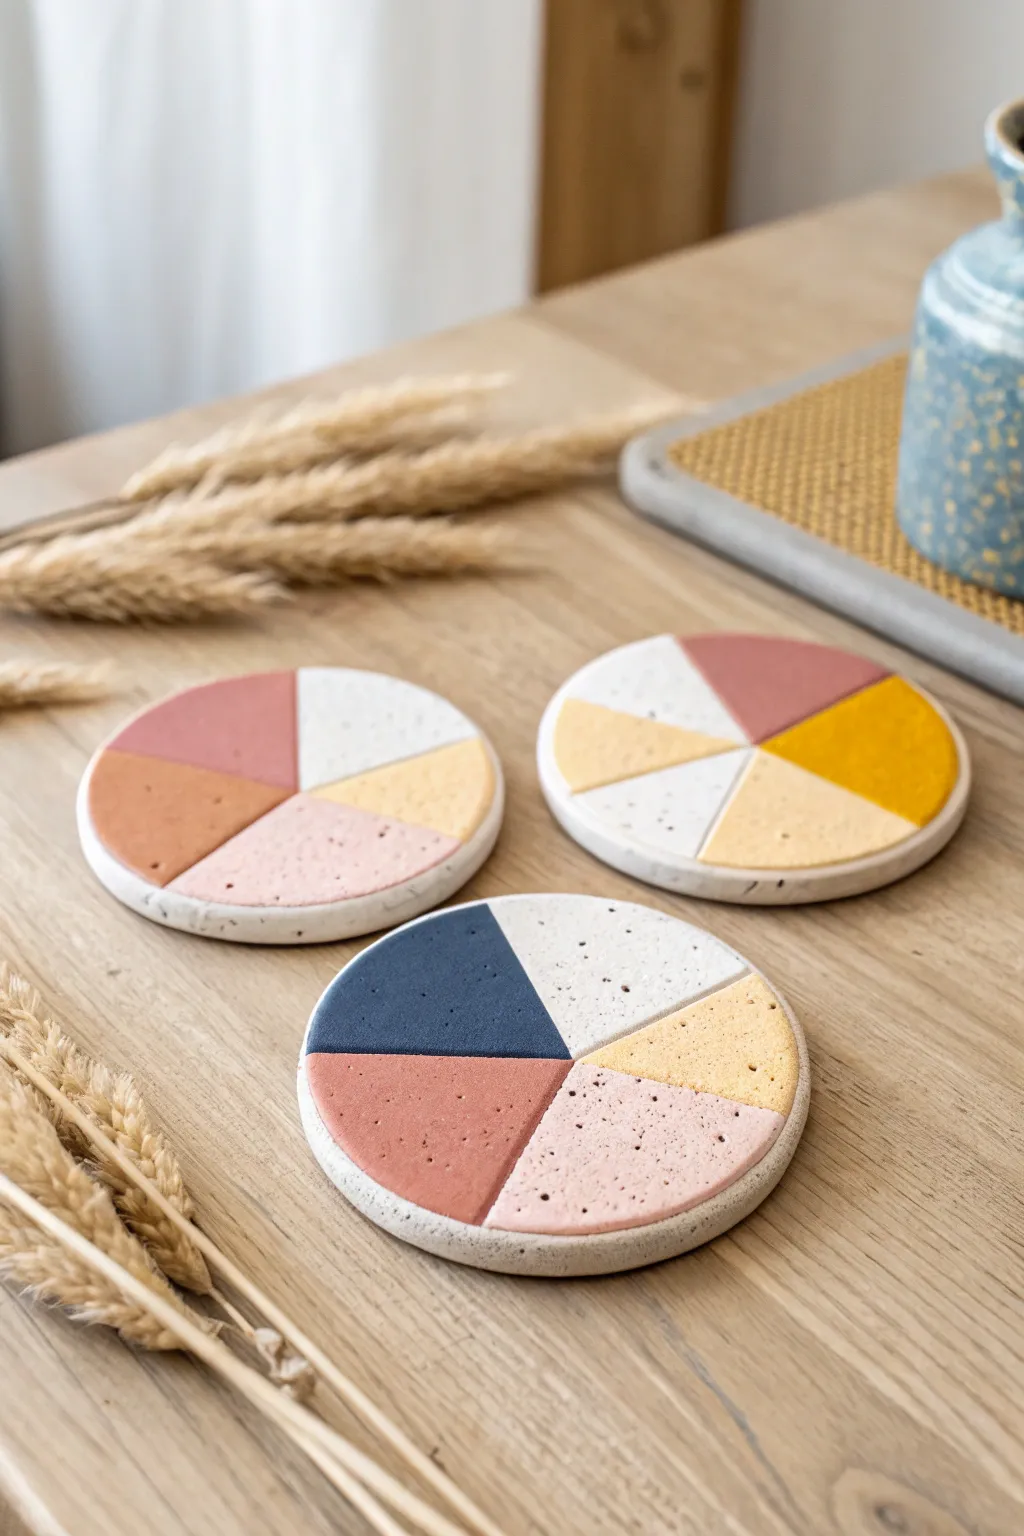
These delightful coasters combine the fun of geometric design with a soft, modern color palette. Using polymer clay, you’ll create a segmented, pie-chart style look that features a speckled terrazzo-like texture for an artisanal finish.
Detailed Instructions
Materials
- Polymer clay (white, dusty pink, terracotta, mustard yellow, navy blue)
- Black pepper or dried coffee grounds (for speckling)
- Acrylic rolling pin
- Round cookie cutter (approx. 4 inches)
- X-Acto knife or clay blade
- Parchment paper
- Ceramic tile/baking sheet
- Fine-grit sandpaper (400 and 800 grit)
- Matte varnish or sealant (optional)
Step 1: Prepping and Mixing the Clay
-
Condition the white base:
Start by conditioning a large block of white clay. Knead it in your hands until it becomes soft and pliable, ensuring there are no air bubbles trapped inside. -
Create the color palette:
Prepare your colored clays. You will need small amounts of dusty pink, terracotta, mustard yellow, and navy blue. If the colors are too vibrant, mix in a tiny bit of white or beige to mute them slightly for that earthy look. -
Add the speckles:
To achieve the stone-like texture seen in the image, flatten each color of clay slightly. sprinkle a pinch of coarse black pepper or dried coffee grounds onto the clay, then fold and knead it until the speckles are evenly distributed throughout the material. -
Roll out the slabs:
Roll each color out onto parchment paper to a uniform thickness of about 1/4 inch. I find using depth guides or wooden dowels on either side of the roller guarantees an even surface.
Seamless Seams
To ensure your pie wedges bond tightly, slightly bevel the edges of each slice before pressing them together. This creates a stronger join during the rolling phase.
Step 2: Cutting and Assembling
-
Cut the wedges:
Using your clay blade or X-Acto knife, cut triangular wedges from your colored slabs. Vary the sizes—some should be wide slices, others narrow slivers—to create an asymmetrical, modern pie chart effect. -
Arrange the pattern:
Lay out a piece of parchment paper. Arrange your colored wedges into a rough circle. Fit them together like a puzzle, ensuring the sides of the wedges touch cleanly without gaps. -
Merge the seams:
Once your circle is formed, gently press the seams together. Place a fresh sheet of parchment paper over the top and use your acrylic roller to roll over the entire assembly. This bonds the pieces together and creates a smooth, unified surface. -
Cut the final shape:
Position your 4-inch round cutter over the best part of your assembled clay pattern. Press down firmly to cut out the perfect circle coaster shape. -
Smooth the edges:
Remove the excess clay from around the circle. Use your fingertip, dipped slightly in water or baby oil, to gently smooth the cut edge of the coaster so it isn’t sharp. -
Repeat the process:
Gather your leftover scraps. You can re-roll them to make more wedges or marbelize them for a different coaster design. Continue until you have a full set of coasters.
Level Up: Terrazzo Chips
Instead of ground pepper, bake thin sheets of colored clay first, chop them into tiny bits, and knead these ‘chips’ into white clay for an authentic terrazzo look.
Step 3: Baking and Finishing
-
Bake the coasters:
Transfer the coasters (still on their parchment paper) to a ceramic tile or baking sheet. Bake according to your polymer clay package instructions—usually around 275°F (135°C) for 30 minutes. -
Cool down under weight:
As soon as you remove the hot coasters from the oven, place a heavy book or flat cutting board on top of them while they cool. This prevents the clay from warping and ensures perfectly flat coasters. -
Initial sanding:
Once fully cool, wet your 400-grit sandpaper and sand the surface and edges of the coaster in a circular motion. This reveals more of the speckled texture and removes any fingerprints. -
Final polishing:
Switch to the 800-grit sandpaper for a smoother finish. Rinse the coaster under water to remove the clay dust and pat dry with a lint-free towel. -
Seal the surface:
For extra durability against moisture, apply a thin layer of matte varnish using a soft brush. Let it dry completely before using your new coasters.
Enjoy styling your coffee table with these geometric beauties knowing you made them yourself

The Complete Guide to Pottery Troubleshooting
Uncover the most common ceramic mistakes—from cracking clay to failed glazes—and learn how to fix them fast.
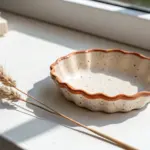
Tiny Heart Corner Coasters
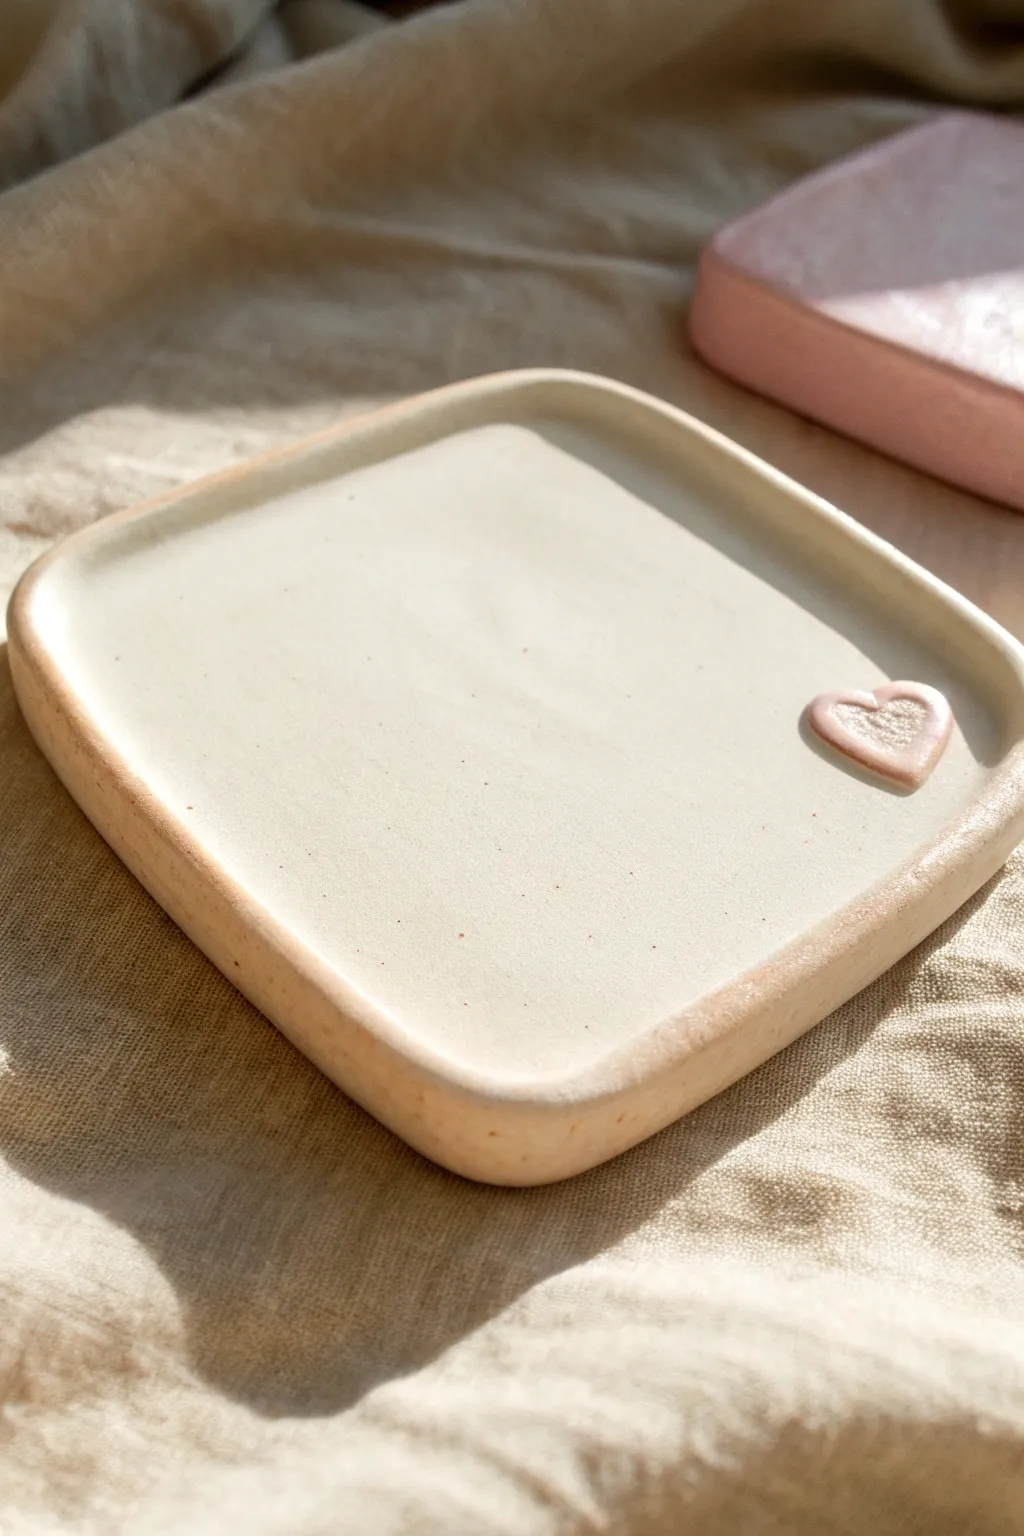
This minimalist coaster combines the rustic charm of speckled stoneware with a delicate touch of sweetness. The subtle matte finish and tiny pink heart accent make it a perfect, understated accessory for your bedside table or desk.
Step-by-Step
Materials
- Speckled stoneware clay (white or light beige)
- Small amount of pink polymer clay or pink underglaze
- Rolling pin
- Two 1/4-inch wooden guide strips (optional)
- Square cookie cutter (approx. 4 inches) or ruler and knife
- Small heart stamp or tiny heart cutter
- Pottery sponge
- Smoothing tool or rib
- Clear glaze (matte or satin finish)
- Kiln (if using stoneware) or oven (if adapting for polymer clay)
Step 1: Shaping the Base
-
Prep your clay:
Start by wedging a ball of speckled stoneware clay to remove air bubbles. Ensure it’s pliable and smooth before you begin working. -
Roll the slab:
Place your clay between two wooden guide strips to ensure even thickness. Roll it out until it is a uniform slab, roughly 1/4 inch thick. -
Cut the square:
Using your square cutter or a ruler and craft knife, cut out a clean 4-inch square from the slab. -
Soften the corners:
Instead of leaving the corners sharp, use your finger or a smoothing tool to gently press them inward, creating a soft, rounded radius on all four points. -
Smooth the surface:
Run a slightly damp sponge over the surface to remove any canvas texture or fingerprints, ensuring a pristine, flat area for your cup.
Step 2: Creating the Rim
-
pinch the edges:
Gently pinch the outer edge of the square, lifting it slightly upwards to create a shallow rim. This doesn’t need to be high—just enough to catch condensation. -
Refine the lip:
Use your thumb to smooth the inside curve where the rim meets the flat base. I like to keep this transition gradual rather than a sharp 90-degree angle. -
Check for symmetry:
Look at the coaster from eye level to ensure the rim height is consistent all the way around. Adjust any low spots by gently pushing clay from the underside.
Warping Worries?
Flat distinct shapes like coasters love to warp. Dry them slowly under plastic, and place a small weight (like a beanbag) on the center while drying.
Step 3: Adding the Heart Detail
-
Create the heart impression:
In one corner of the coaster floor, gently press a small heart stamp into the clay. Don’t press too deep; you just want a clear outline. -
Add the relief:
Take a tiny pinch of clay and shape it into a heart that perfectly matches your indentation. If you are using stoneware, score and slip the back of this tiny heart before placing it into the depression so it bonds permanently. -
Smooth the join:
Use a small tool to gently blend the very bottom edge of the heart into the coaster base so it looks integrated rather than just stuck on top. -
Dry slowly:
Place the coaster on a ware board and cover it loosely with plastic. Let it dry slowly to the bone-dry stage to prevent warping.
Polymer Clay Mod
No kiln? Use granite-effect polymer clay. Bake according to package instructions, then paint the heart with pink acrylics and seal with varnish.
Step 4: Firing and Glazing
-
Bisque fire:
Fire the piece in the kiln to a bisque temperature (usually barely cone 04) to prepare it for glazing. -
Color the heart:
Carefully paint just the raised heart with a pale pink underglaze. You might need two thin coats for opaque coverage. -
Apply clear glaze:
Dip or brush the entire coaster in a clear matte or satin glaze. This will seal the clay and make the speckles pop without adding unwanted shine. -
Wipe the bottom:
Use a sponge to wipe any glaze off the bottom foot of the coaster so it doesn’t fuse to the kiln shelf. -
Final fire:
Fire the piece again to the maturation temperature of your specific clay body (e.g., cone 5 or 6 for most stoneware).
Once cooled, your coaster is ready to protect your surfaces with a little bit of love
Scalloped Edge “Cookie” Coasters

Transform humble polymer clay into an irresistibly sweet-looking coaster that captures the cozy charm of a frosted gingerbread cookie. With a scalloped edge and a realistic textured “icing” top, this durable piece protects your table while adding a touch of bakery-fresh whimsy to your coffee break.
Step-by-Step Guide
Materials
- Polymer clay (terracotta or gingerbread brown)
- White liquid polymer clay
- Solid white polymer clay (small amount)
- Coarse sandpaper or clean toothbrush
- Scalloped round cookie cutter (approx. 4 inches)
- Real ground cinnamon or nutmeg (for speckling)
- Rolling pin or pasta machine
- Sharp craft knife
- Oven and baking sheet
- Clay gloss glaze (optional)
Step 1: Creating the Cookie Base
-
Condition the base clay:
Start by warming up your brown polymer clay in your hands until it becomes soft and pliable. If the color is too flat, I like to mix in a tiny pinch of translucent clay to give it a more realistic dough-like depth. -
Add texture inclusions:
Sprinkle a very small amount of real ground cinnamon, nutmeg, or even black pepper onto the flattened clay. Fold the clay over and knead it thoroughly to distribute these specks, which mimics the texture of real baked goods. -
Roll out the slab:
Roll your speckled clay out to a consistent thickness of about 1/4 inch (6mm). Using depth guides or playing cards stacked on either side of your roller ensures the coaster sits perfectly flat. -
Cut the shape:
Press your large scalloped cookie cutter firmly into the clay slab. Wiggle it slightly to ensure a clean cut completely through the slab, then lift the excess clay away. -
Texture the edges:
Before releasing the clay from the cutter (or immediately after), gently tap the sides with a stiff toothbrush or coarse sandpaper. This removes fingerprints and creates that iconic baked crumb texture along the rim. -
Bake the base:
Place the clay ‘cookie’ on a tile or parchment-lined baking sheet. Bake according to your specific clay package directions (usually around 275°F/135°C for 30 minutes) and let it cool completely.
Uneven Icing Flow?
If the liquid clay is too runny and drips off the edge, let it sit exposed to air for 20 mins to thicken slightly, or mix in more solid soft clay to stiffen the ‘frosting’ body.
Step 2: Applying the Icing
-
Prepare the frosting mix:
In a small glass bowl or cup, mix liquid white polymer clay with a very small chunk of solid white clay. Mash them together until you have a thick paste resembling royal icing. -
Add speckled detail:
Just like with the base, add a tiny pinch of your spices or black pepper to the white mixture. This creates the speckled vanilla bean look seen in the reference photo. -
Pour the center:
Pour a dollop of your liquid clay mixture onto the center of the cooled, baked coaster. It should be viscous enough to hold its shape but fluid enough to spread slowly. -
Spread to the edges:
Use a toothpick or a dotting tool to guide the white clay toward the scalloped edges. leave a consistent border of the brown ‘cookie’ showing, following the curves of the scallops. -
Refine the surface:
If surface tension creates a dome, gently tap the coaster on the table to level the liquid clay. Pop any air bubbles immediately with a needle tool. -
Dust the surface (Optional):
For an extra matte, sugary finish, you can lightly dust the wet liquid clay with a tiny bit of cornstarch before baking, though leaving it plain yields a smoother glaze. -
Final Bake:
Return the coaster to the oven for a second bake, usually for about 15-20 minutes, to set the liquid clay layer. Ensure you don’t over-brown the base.
Texturing Secret
Use a ball of aluminum foil rolled over the unbaked brown clay surface for an incredibly realistic, pitted cookie texture before you add the icing layer.
Step 3: Finishing Touches
-
Cool down:
Allow the coaster to cool completely inside the oven with the door cracked; this gradual cooling prevents thermal shock and cracking. -
Seal the piece:
If you plan to use this for very hot drinks, apply a coat of waterproof polyurethane varnish to protect the clay from moisture rings over time. -
Add bottom protection:
Glue a circle of cork or felt to the underside of the coaster to ensure it doesn’t scratch your furniture and sits softly on surfaces.
Now you have a charming spot for your morning mug that looks good enough to eat but is built to last


What Really Happens Inside the Kiln
Learn how time and temperature work together inside the kiln to transform clay into durable ceramic.
Cloud-Shaped Coasters
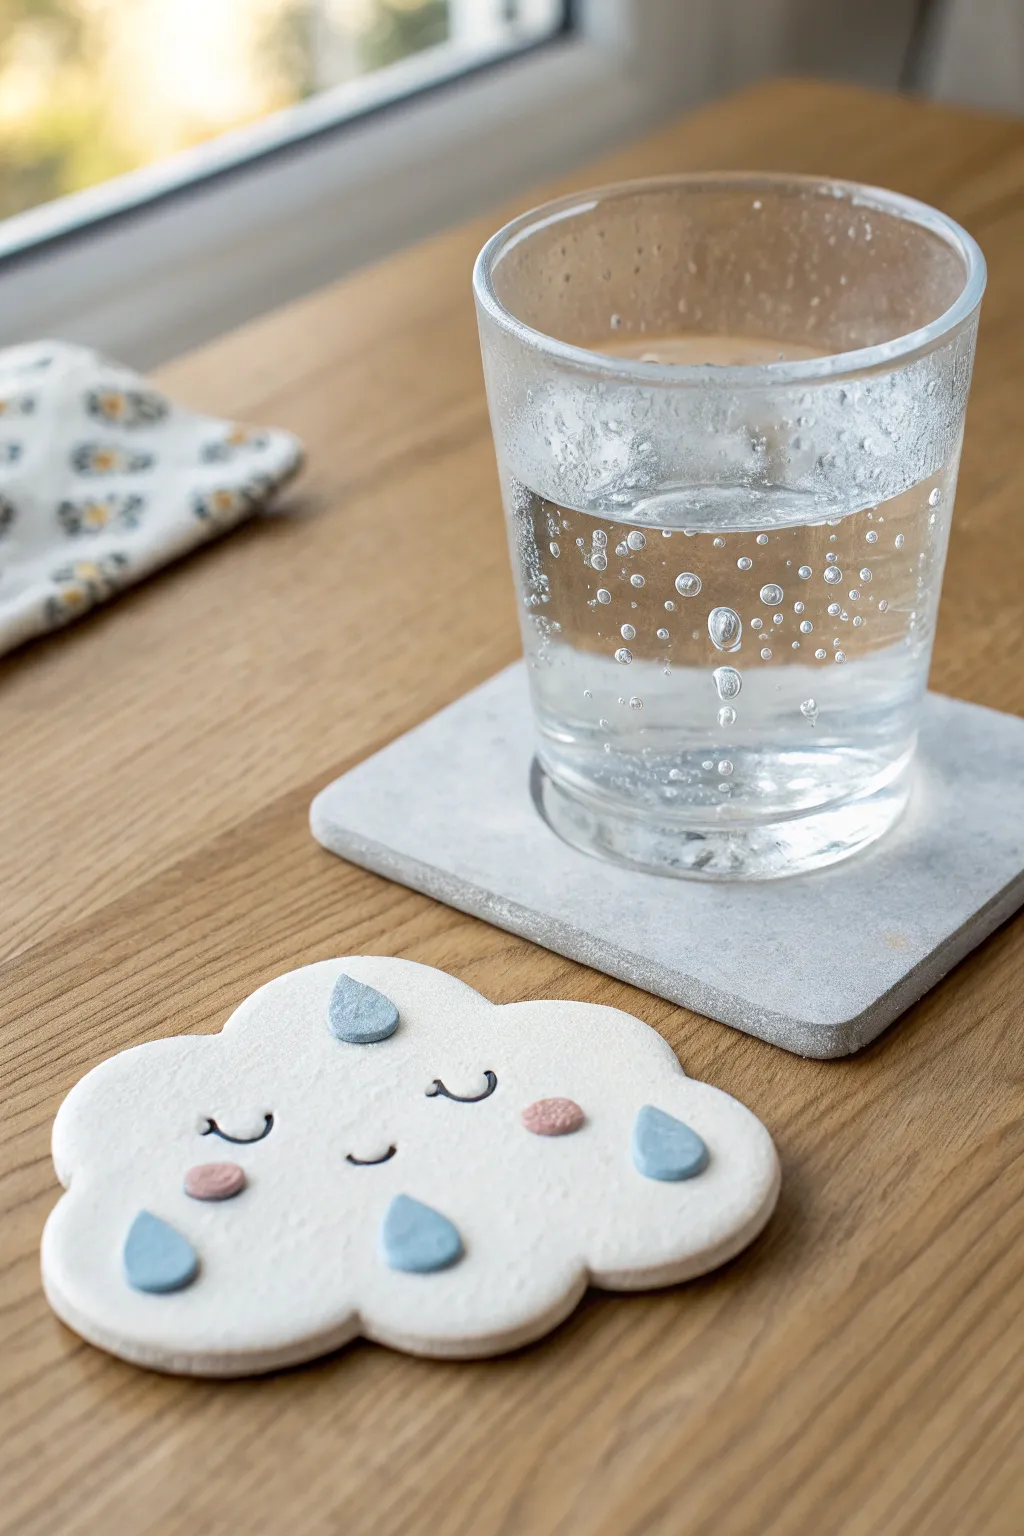
Bring a little piece of the sky to your coffee table with this adorable cloud-shaped coaster. Made from air-dry clay, it features whimsical teardrop details, sweet blush marks, and a happy little face that’s sure to brighten your day.
Step-by-Step
Materials
- White air-dry clay (or polymer clay)
- Rolling pin
- Cloud cookie cutter (or sharp craft knife and paper template)
- Small teardrop cutter (optional)
- Acrylic paints: light blue, pastel pink, and black
- Fine detail paintbrush (size 00 or 0)
- Small round tool or toothpick (for sculpting eyes)
- Sandpaper (fine grit)
- Matte varnish or sealant for clay
- Small bowl of water (for smoothing)
- Craft glue
- Parchment paper or craft mat
Step 1: Shaping the Cloud Base
-
Condition the clay:
Begin by taking a handful of white air-dry clay and kneading it in your hands until it becomes soft, pliable, and free of cracks. -
Roll it out:
Place the clay on a sheet of parchment paper. Use your rolling pin to flatten it to an even thickness of about 1/4 inch (6mm). This thickness ensures the coaster is sturdy enough for daily use. -
Cut the shape:
Press a cloud-shaped cookie cutter firmly into the clay. If you don’t have a cutter, I like to lightly sketch the shape onto the clay using a needle tool and then carefully cut it out with a craft knife. -
Smooth the edges:
Dip your finger in a little bit of water and run it along the edges of the cloud to smooth out any roughness from the cutting process.
Step 2: Creating the 3D Details
-
Make the raindrops:
Roll out a small, separate piece of clay slightly thinner than the base. Cut out four small teardrop shapes using a mini cutter or by hand-shaping tiny balls into points. -
Create the cheeks:
Roll two very small balls of clay and flatten them gently into discs. These will become the rosy cheeks. -
Attach the details:
Score the back of the raindrops and cheeks (make tiny scratches) and add a dab of water or slip. Press them firmly onto the cloud base in the arrangement shown in the photo. -
Sculpt the face:
While the clay is still wet, use a needle tool or a very fine object to gently impress the curved lines for the closed eyes and the happy mouth directly into the surface.
Cracks Appearing?
If you see tiny cracks forming while the clay dries, mix a tiny bit of fresh clay with water to make a paste and fill them in before sanding.
Step 3: Drying and Refining
-
Let it dry:
Place the coaster on a flat surface away from direct heat. Let it dry completely for 24-48 hours. Flipping it over halfway through helps prevent warping. -
Sand the surface:
Once fully cured, use fine-grit sandpaper to gently buff the edges and surface, removing any fingerprints or bumps for a professional finish. -
Dust off:
Wipe the coaster down with a dry cloth or soft brush to remove all the clay dust before painting.
Make It Sparkle
Mix a small amount of fine iridescent glitter into your varnish before the final coat to give the cloud a magical, shimmering finish.
Step 4: Painting and Sealing
-
Paint the raindrops:
Using a small brush, carefully paint the raised teardrop shapes with a soft, pastel blue acrylic paint. You may need two coats for full opacity. -
Add the blush:
Paint the two round cheek circles with a soft pastel pink. -
Define the face:
Use your finest detail brush and black acrylic paint to carefully trace the indented lines of the eyes and smile. Using the indentations as a guide makes this much easier. -
Seal the coaster:
To protect your coaster from moisture damage, apply 2-3 coats of a matte varnish or waterproof sealant, allowing each layer to dry fully in between.
Now you have a charming place to rest your drink that looks rain or shine
Cat Face Coasters
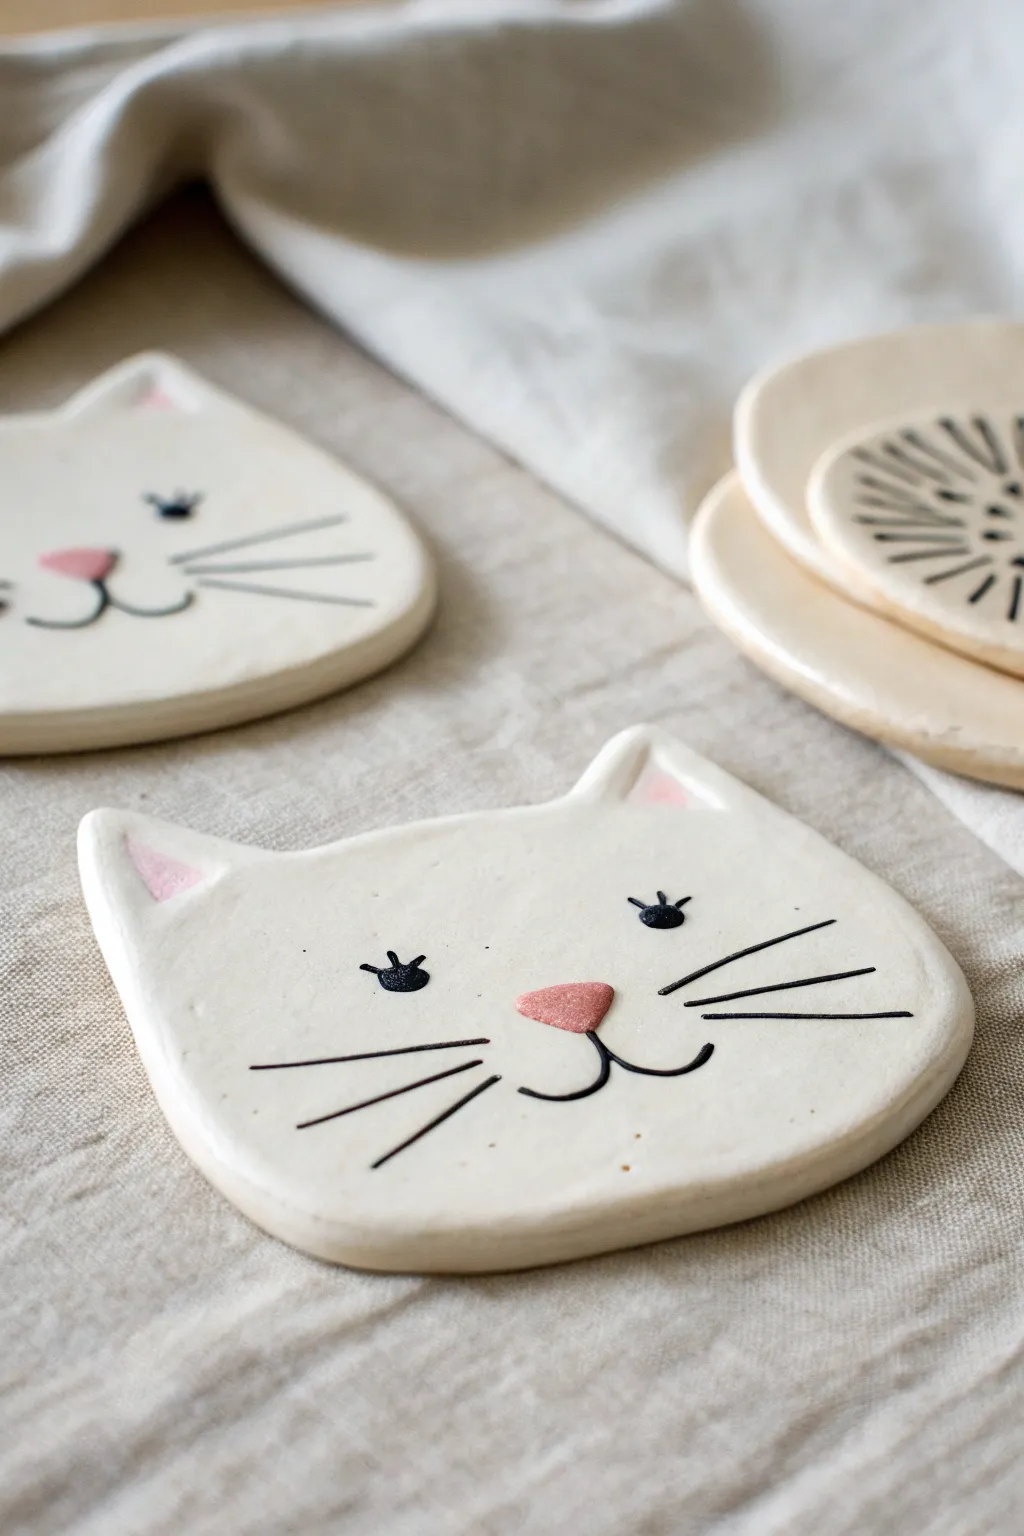
Add a touch of feline charm to your coffee table with these adorable, minimalist cat face coasters. Made from smooth air-dry clay and featuring sweet painted details like pink noses and blushing ears, they offer a perfect surface for your favorite mug.
Step-by-Step Guide
Materials
- White air-dry clay (or polymer clay)
- Rolling pin
- Parchment paper or silicone mat
- Cat face cookie cutter (optional) or cardstock template
- Craft knife or scalpel
- Small bowl of water
- Fine-grit sandpaper (220-400 grit)
- Acylic paint (Black, Soft Pink)
- Fine detail paintbrushes (Size 0 and 00)
- Matte or satin waterproof varnish/sealer
- Sponge or paper towel
Step 1: Shaping the Clay Base
-
Prepare the workspace:
Lay down a sheet of parchment paper or a silicone mat to prevent sticking. Take a handful of white air-dry clay and knead it gently until it is warm and pliable. -
Roll it out:
Using your rolling pin, flatten the clay to an even thickness of about 1/4 inch (6mm). If you want perfect uniformity, place two guide sticks of equal thickness on either side of the clay as you roll. -
Cut the shape:
If you have a large cat-head cookie cutter, press it firmly into the clay. If not, draw a simple cat silhouette (oval head with two triangles for ears) on cardstock, cut it out, place it on the clay, and trace around it with a craft knife. -
Smooth the edges:
Dip your finger into a small bowl of water and run it gently along the cut edges of the clay cat. This softens the sharp cuts and rounds the corners for a professional finish. -
Check surface smoothness:
Lightly stroke the surface with a damp finger to erase any fingerprints or texture left by the rolling pin. The surface should be as pristine as possible before drying. -
Let it dry:
Place your clay cats on a clean, flat surface to dry. Turn them over carefully every 12 hours ensuring they dry evenly on both sides to prevent warping. This usually takes 24-48 hours depending on humidity. -
Sand for perfection:
Once bone dry, take fine-grit sandpaper and gently buff the edges and surface. Focus on the curve of the ears and the chin to ensure they are perfectly smooth.
Warped Clay?
If your clay starts curling while drying, place a heavy book on top of it (sandwich the clay between parchment paper first) once it’s semi-dry to flatten it back out.
Step 2: Painting the Features
-
Start with the nose:
Mix a soft, warm pink acrylic paint. Using a small, flat brush, paint an inverted triangle in the center of the face for the nose. Soften the top corners slightly so it isn’t too sharp. -
Add the ear details:
Using the same pink, paint triangular shapes inside the clay ears. Leave a small border of white clay visible around the pink to create dimension. -
Paint the eyes:
Switch to black acrylic paint and a very fine detail brush. Paint two small semi-circles or ovals for eyes. Add three tiny lashes to the top of each eye for that sweet, sleepy expression seen in the photo. -
Draw the mouth:
Starting from the bottom point of the pink nose, paint a thin black line straight down, then curve it outward to the left and right to form the classic ‘W’ cat mouth shape. -
Add the whiskers:
With a steady hand, paint three long, thin whiskers on each cheek area. Try to flick the brush quickly at the end of each stroke so the line tapers off naturally. -
Let the paint set:
Allow the painted features to dry completely. This is crucial before sealing to avoid smearing your hard work.
Step 3: Sealing and Protecting
-
Apply the first coat:
Using a soft, wide brush, apply a thin layer of waterproof matte or satin varnish over the entire top surface. Brush lightly to avoid dragging the black paint. -
Seal the edges:
Don’t forget to coat the sides and edges of the coaster, as these areas are prone to absorbing spills. -
Final coat:
Apply a second or third coat of sealer for durability, letting each layer dry in between. I always double-check the ‘chin’ area where drips might collect.
Upgrade Your Coaster
Glue a piece of circular cork or felt to the bottom of the finished coaster. This prevents scratching your furniture and gives the piece a professional weight.
Now you have a charming set of handmade coasters ready for your next tea break

TRACK YOUR CERAMIC JOURNEY
Capture glaze tests, firing details, and creative progress—all in one simple printable. Make your projects easier to repeat and improve.
Paw Print Coasters
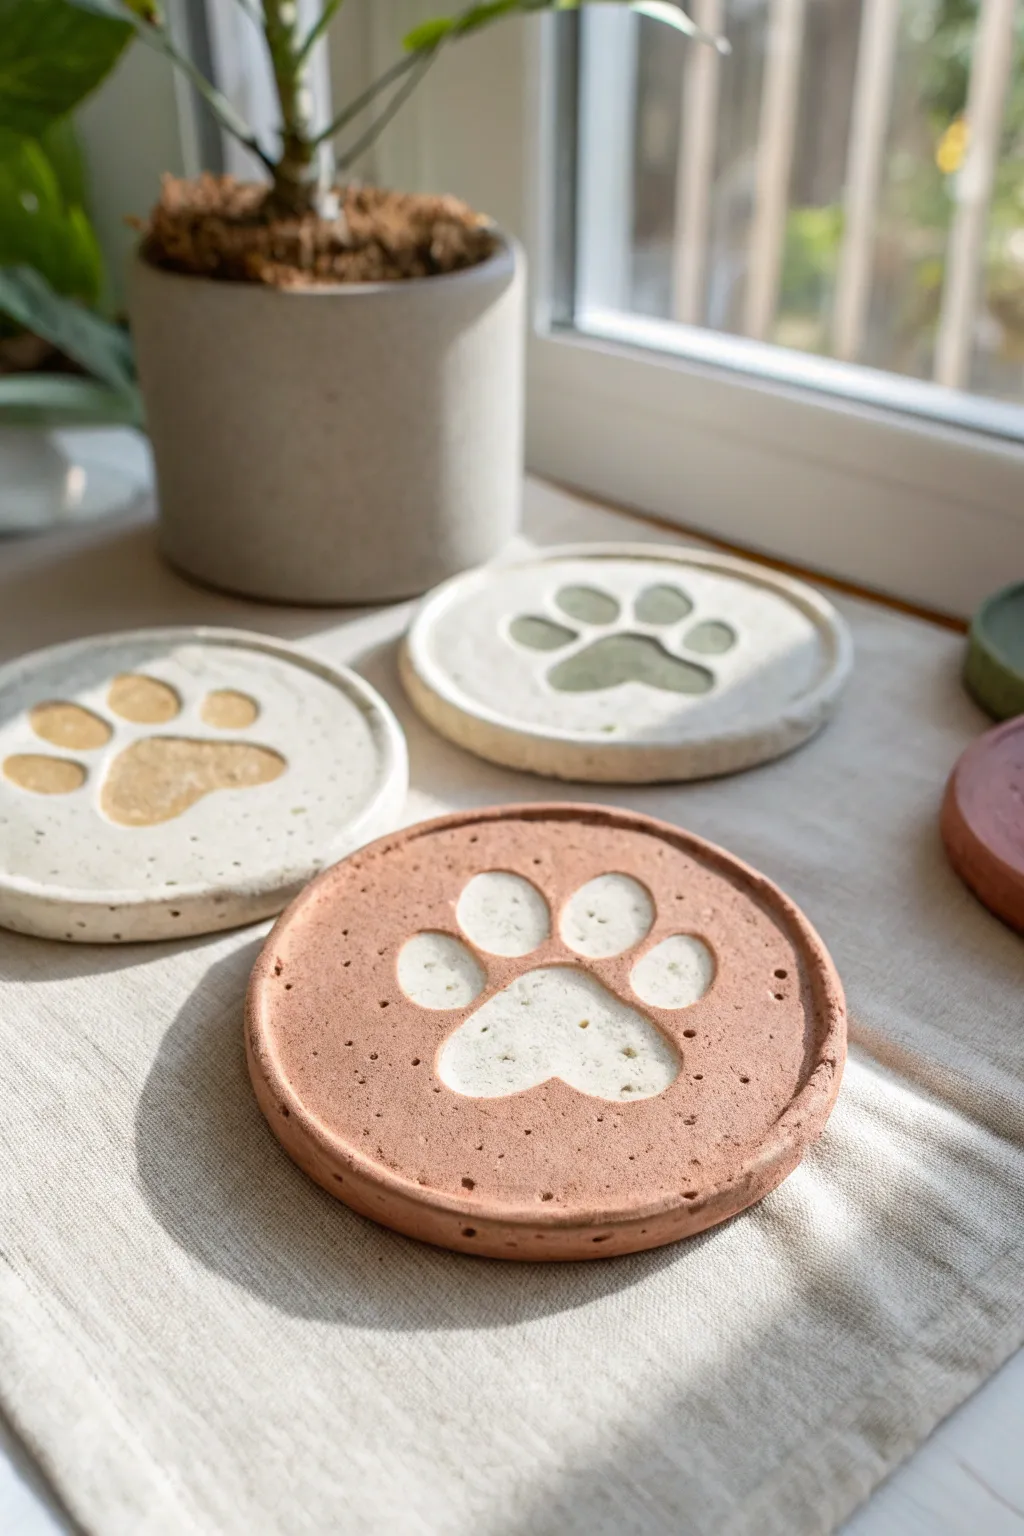
Immortalize your love for furry friends with these charming minimalist coasters featuring a distinct inlaid paw print design. With their matte, stone-like texture and contrasting two-tone palette, they add a modern yet cozy touch to any coffee table setup.
How-To Guide
Materials
- Air-dry clay (terra cotta and stone white colors)
- Small round silicone mold (approx 4-inch diameter)
- Small paw print cutter or stamp tool
- Rolling pin
- Fine-grit sandpaper (220 and 400 grit)
- Clay smoothing tool or sponge
- Sealer (polyurethane or acrylic varnish)
- Craft knife
Step 1: Planning and Prep
-
Condition the clay:
Start by taking a handful of your base color clay—let’s use the terracotta shade for the main coaster body first. Knead it thoroughly in your hands until it is warm, pliable, and free of cracks. -
Roll the base:
Use your rolling pin to flatten the terracotta clay to a thickness of about 1/4 inch. Ensure the surface is even, as dents here will show up in the final casting. -
Cut the shape:
If you aren’t using a silicone mold, use a circular cutter or trace a bowl to cut a perfect circle from your rolled slab. If using a mold, press the clay firmly into the bottom, ensuring it reaches the edges.
Air bubble trouble?
If your clay has too many unwanted holes, fill them with a mix of clay dust and water (slip), let dry, then sand again.
Step 2: Creating the Inlay
-
Stamp the design:
Take your paw print stamp and press it firmly into the center of your wet clay circle. You want a depression that is distinct and deep enough to hold the second color, about 2-3mm deep. -
Clean the edges:
Carefully remove the stamp. If the clay pulled up slightly around the edges of the print, use a slightly damp finger or the flat side of a craft knife to gently push those ridges back down flat. -
Prepare secondary clay:
Knead a small amount of the contrasting clay color (the stone white). Roll it into small balls corresponding to the pads of the paw print. -
Fill the indentation:
Press the white clay bits into the paw print indentations. You want to slightly overfill them, so the white clay sits just proud of the terracotta surface. This ensures no gaps remain after sanding. -
Merge the colors:
Use your rolling pin to gently roll over the entire coaster again. This compresses the white clay into the terracotta base, creating a single, unified surface level.
Make it terrazzo
Mix tiny chips of dried colored clay into your wet base clay before rolling for a trendy speckled terrazzo effect.
Step 3: Finishing Touches
-
Initial slow dry:
Place your coaster on a clean, flat surface away from direct sunlight. To prevent warping, I like to place a light book on top (with parchment paper in between) once the surface isn’t tacky. -
Full cure:
Allow the project to dry completely for 24 to 48 hours. The clay will lighten in color and feel hard to the touch when ready. -
Sanding the surface:
Once fully dry, take your 220-grit sandpaper and sand the top surface in circular motions. This reveals the crisp lines between the two clay colors and smooths out the texture. -
Refine the texture:
Switch to 400-grit sandpaper for a final polish. Don’t worry if small air pockets or ‘pockmarks’ remain; they add to that organic, stone-cast aesthetic shown in the photo. -
Dust off:
Wipe the coaster down with a slightly damp cloth to remove all fine clay dust before sealing. -
Apply sealer:
Brush on a thin coat of matte water-resistant sealer. This protects the clay from condensation from your cold drinks. -
Final cure:
Let the sealer dry according to the bottle instructions before using your new decor.
Enjoy the satisfaction of resting your morning coffee on your handmade creation
Smiley Face Coasters
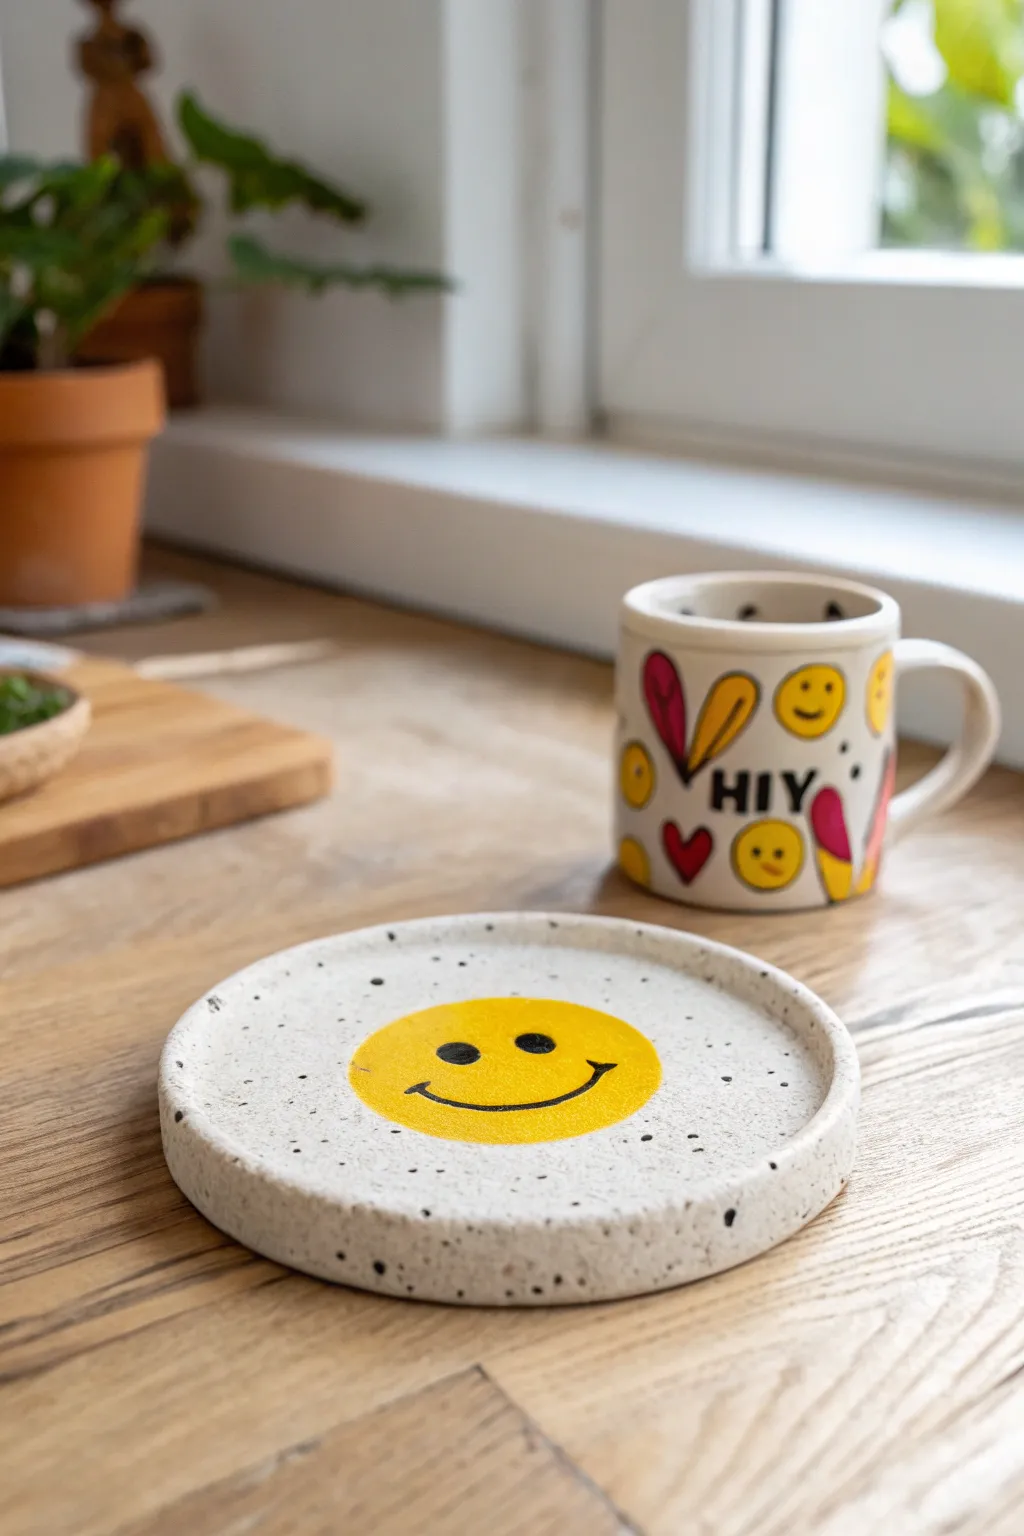
Bring a little joy to your coffee table with this charming speckled clay coaster featuring a classic happy face. Its raised rim design isn’t just stylish; it keeps condensation contained while adding a delightful pop of yellow to your decor.
Step-by-Step Guide
Materials
- White creative paper clay or air-dry clay (preferably with speckled effect, or add black pepper/sand)
- Acrylic rolling pin
- Circle cookie cutter or bowl (approx. 4 inches)
- Small sponge
- Water
- Fine grit sandpaper
- Yellow acrylic paint
- Black acrylic paint or fine tip Posca marker
- Small flat paintbrush
- Fine detail paintbrush
- Glossy varnish or sealant (waterproof)
Step 1: Shaping the Clay Base
-
Prepare the clay:
Start with a handful of clay. If you can’t find pre-speckled clay, a great trick I use is to knead in a pinch of course black pepper or dark sand into plain white clay to achieve that authentic granite look. -
Roll it out:
Roll the clay onto a smooth, non-stick surface until it is about 1/4 inch thick. Try to keep the thickness consistent so the coaster sits flat. -
Cut the shape:
Use your circle cutter or place a small bowl upside down on the clay and trace around it with a craft knife to create a perfect circle. -
Create the rim:
To form the raised edge, gently pinch the outer perimeter of the circle upwards. Work your way around the circle slowly, pressing and smoothing the clay to creating a small lip about 1/8 inch high. -
Smooth the edges:
Dip your finger or a small sponge in a little water and run it along the rim and the surface to remove any cracks or fingerprints. The smoother it is now, the less sanding you’ll do later. -
Dry completely:
Place the coaster on a flat board to dry. Flip it over occasionally to ensure even drying and prevent warping. Let it sit for 24-48 hours until fully hardened.
Smooth Surface Secret
Use a slightly damp makeup sponge to smooth the clay before it dries. It removes fingerprints better than your hands and leaves a flawless, professional finish.
Step 2: Adding the Design
-
Sand for smoothness:
Once bone dry, take fine-grit sandpaper and gently buff the surface and the rim. Wipe away the dust with a slightly damp tack cloth. -
Paint the sun:
Dip a small flat brush into bright yellow acrylic paint. Paint a solid circle right in the center of the coaster. You likely won’t need a stencil—freehanding adds to the handmade charm. -
Layer the color:
Let the first coat of yellow dry, then add a second layer to ensure the color is opaque and vibrant against the speckled background. -
Draw the features:
Using a fine detail brush with black paint, or a Posca paint marker for easier control, add two small oval eyes near the top of the yellow circle. -
Add the smile:
Paint a wide, thin U-shape curve below the eyes. Add little ‘cheeks’ or slight upturning curves at the ends of the smile line for extra cuteness.
Matching Set
Create a matching mug by using ceramic paint markers on a plain mug, mimicking the smiley face and adding abstract shapes in matching colors.
Step 3: Sealing and Finishing
-
Apply varnish:
Once the paint is completely cured, use a clean brush to apply a coat of waterproof varnish or glossy sealant. -
Coat the rim:
Don’t forget to seal the sides and the raised rim to protect against drips. -
Final cure:
Allow the sealant to cure according to the manufacturer’s instructions before resting a mug on it. -
Add protection:
Optional: Glue a small circle of felt or cork to the bottom of the coaster to protect your furniture from scratches.
Now you have a cheerful spot to rest your morning coffee that is sure to start your day with a smile
Fruit Slice Coasters
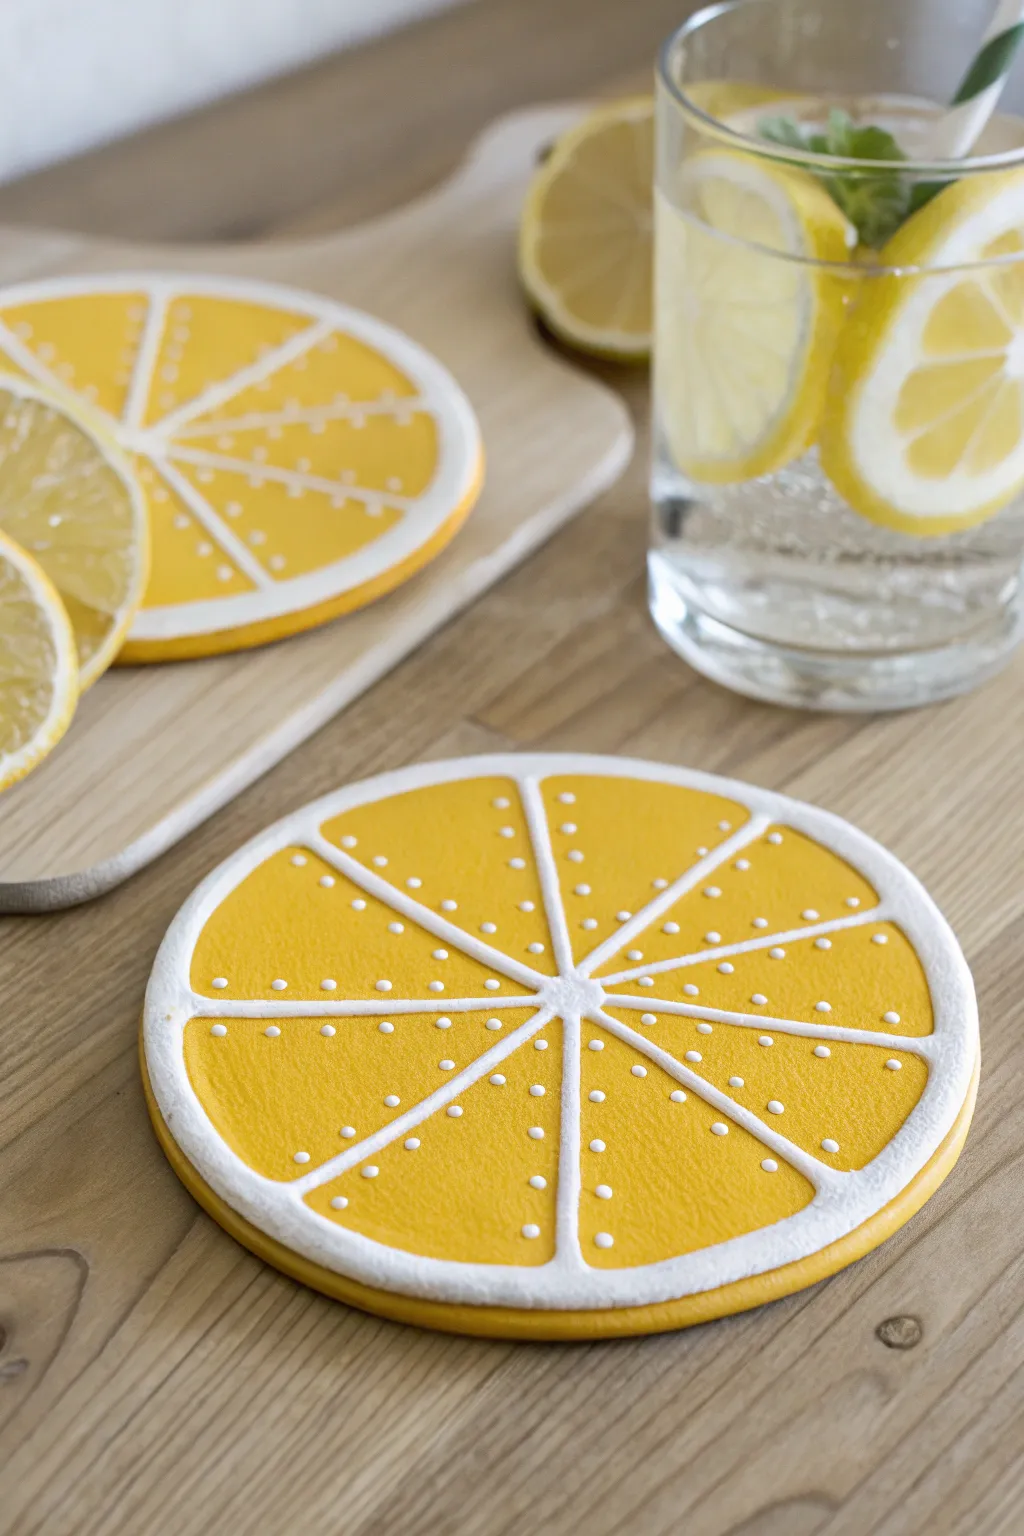
Brighten up your coffee table with these cheerful lemon slice coasters that look almost good enough to eat. With their sunny yellow hue and realistic textured pith, they bring a refreshing splash of summer fun to your home decor.
Step-by-Step Tutorial
Materials
- Polymer clay (bright yellow and white)
- Circle cookie cutter (approx. 4 inches)
- Acrylic rolling pin
- Clay knife or craft blade
- Texture tools (sandpaper, toothbrush, or stiff brush)
- Liquid polymer clay (white)
- Needle tool or toothpick
- Oven and baking sheet
- Gloss or matte varnish (optional)
Step 1: Creating the Base
-
Condition the clay:
Start by thoroughly conditioning your yellow polymer clay until it is soft, pliable, and free of cracks. -
Roll out the slab:
Using your acrylic rolling pin, flatten the yellow clay into an even slab about 1/4 inch thick. You want it substantial enough to protect your table. -
Cut the circles:
Press your large circle cutter firmly into the clay slab to cut out your coaster shapes. Create as many bases as you need, plus maybe a spare for testing. -
Smooth the edges:
Gently rub the edges of each circle with your finger to soften any sharp cuts left by the cutter, creating a slightly rounded rim.
Step 2: Texturing the Fruit
-
Establish the segments:
Lightly sketch eight equal pie-slice segments onto the yellow circle using a needle tool, leaving a small untouched circle in the exact center. -
Create citrus texture:
Now for the fun part: take a stiff brush, toothbrush, or a piece of coarse sandpaper and press it repeatedly into the yellow clay segments. -
Refine the texture:
Rotate the brush as you press to avoid a uniform pattern. You want the deep, pitted look of real citrus pulp. -
Clean the lines:
If your texturing blurred your guide lines, gently re-trace the segment divisions with your needle tool so you know where to pipe later.
Clean Lines Hack
If you don’t have liquid clay, roll extremely thin snakes of soft white solid clay for the segments. Use a tiny bit of liquid bake-and-bond to help them stick.
Step 3: Adding the Pith Details
-
Prepare the rim:
Take your white polymer clay and roll a long, thin snake. This will become the outer pith of the lemon peel. -
Attach the outer rim:
Wrap this thin white snake around the very edge of your yellow circle. Press it down gently so it adheres, but try to keep it slightly raised for dimension. -
Add the yellow peel:
Roll an even thinner snake of yellow clay and wrap it around the outside of the white rim you just placed, completing the peel effect. -
Pipe the segments:
Using white liquid polymer clay in a applicator bottle with a fine tip, carefully pipe lines over your segmented guide marks. -
Connect the center:
Allow the liquid clay lines to meet in the middle, creating a small pool of white in the center of the coaster. -
Dot the details:
To mimic juice vesicles or seeds, pipe tiny, deliberate dots of white liquid clay scattered within each yellow segment.
Make a Full Set
Switch up the clay colors to make a whole citrus basket! Use orange clay for oranges, bright green for limes, and a blush pink heavy with zest for grapefruits.
Step 4: Baking and Finishing
-
Bake the coasters:
Place your creations on a baking sheet lined with parchment paper. Bake according to your clay manufacturer’s instructions (usually 275°F for 15-30 minutes). -
Cool down:
Let the coasters cool completely on the baking sheet. Keep them flat so they don’t warp while the clay hardens. -
Optional sealing:
If you want extra protection against drink spills, brush on a thin layer of matte or satin varnish.
Enjoy your refreshing new decor piece alongside an ice-cold drink
Daisy Flower Coasters
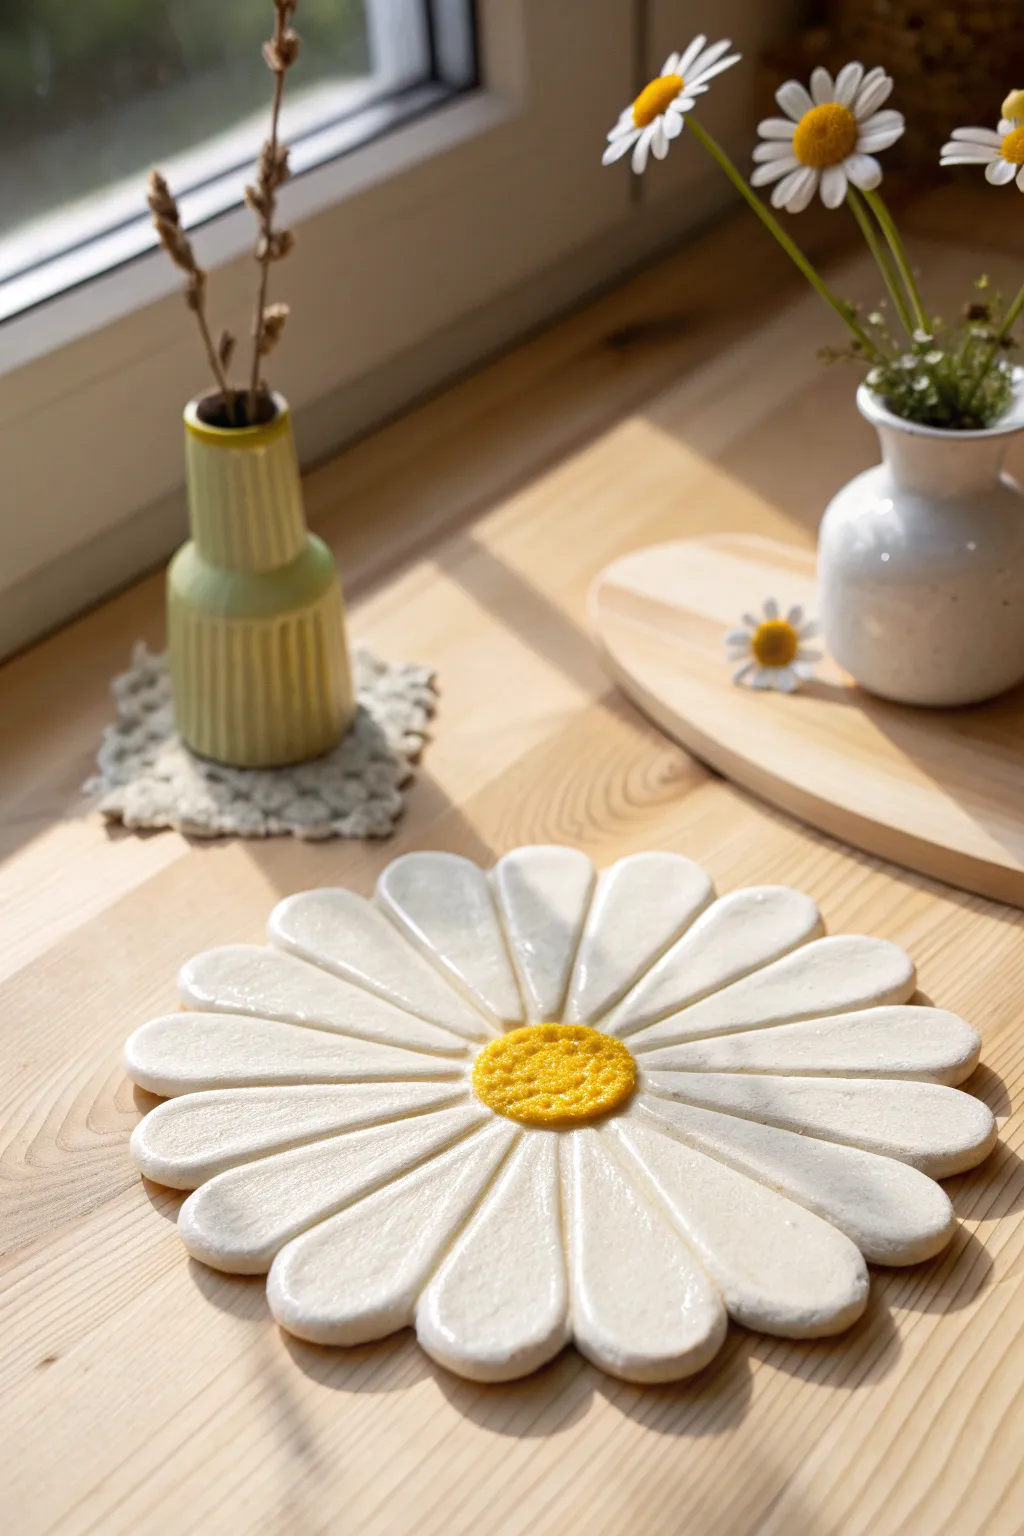
Bring a touch of eternal spring to your coffee table with this charming daisy coaster. Modeling the subtle ridges of the petals and adding a glossy finish gives it a convincing ceramic look without needing a kiln.
Step-by-Step
Materials
- Air-dry clay (white)
- Acrylic rolling pin
- Parchment paper or clay mat
- Circle cutter (approx. 4-5 inches diameter) or template
- Modeling tool (rounded tip or butter knife)
- Fine-grit sandpaper
- Acrylic paints (White, Sunny Yellow, Mustard Yellow)
- Glossy varnish or UV resin
- Texture sponge or stiff brush
- Small paintbrush
Step 1: Shaping the Flower Base
-
Roll the clay:
Begin by conditioning a large ball of white air-dry clay in your hands until it is smooth and pliable. Roll it out on parchment paper to an even thickness of about 1/4 inch, ensuring there are no air bubbles. -
Cut the circle:
Use a large circle cutter or trace around a bowl to cut out your main coaster shape. This circle defines the outer limit of your petal tips. -
Mark the center:
Lightly press a smaller circle object (like a bottle cap) into the very center of your clay slab. Do not cut through; just leave a light indentation to mark where the yellow center will be. -
Divide the petals:
Using a knife tool, make light marks radiating from the center circle to the outer edge to divide the clay into equal sections. Aim for about 12 to 14 sections for a realistic daisy look. -
Cut the petals:
Cut along your guide marks, stopping just before you reach that inner center circle indentation so the flower stays connected as one piece. -
Round the edges:
Use your fingers or a smoothing tool to gently round off the sharp corners of each petal tip. You want them to look soft and organic, not like geometric pie slices.
Petals curling up?
Clay shrinks as it dries, causing curling. Dry your coaster slowly away from heat, and place a light book on top (with parchment paper in between) once it’s semi-dry to keep it flat.
Step 2: Sculpting Details
-
Create petal grooves:
Take a rounded modeling tool and press it gently down the center length of each petal. This creates a subtle concave shape that catches the light beautifully later on. -
Refine the connections:
Smooth the clay where the petals meet the center. If slight gaps appeared while cutting, gently push the clay back together near the base of the petals. -
Add the center texture:
Roll a small ball of fresh clay and flatten it slightly to fit into the center depression. Press it in firmly. -
Stipple the center:
Using a stiff brush or a crumpled piece of aluminum foil, tap repeatedly over the center clay mound to create a rough, pollen-like texture. -
Dry completely:
Let the coaster dry on a flat surface for 24-48 hours. I like to flip it over halfway through to ensure the bottom dries evenly and doesn’t warp.
Resin for durability
For a truly waterproof, glass-like finish that withstands hot mugs, swap the gloss varnish for a layer of two-part epoxy resin or UV resin.
Step 3: Painting and Glazing
-
Sand for smoothness:
Once fully dry, lightly sand the edges of the petals to remove any rough burrs. Wipe away the dust with a slightly damp cloth. -
Prime with white:
Even if your clay is white, apply a coat of white acrylic paint to the petals. This creates a uniform, bright base and seals the porous clay. -
Paint the center:
Mix a sunny yellow with a tiny drop of mustard or orange. Dab this onto the textured center, ensuring the paint gets into all the little crevices. -
Seal the deal:
Apply a thick, even coat of high-gloss varnish over the entire top surface. This step is crucial for achieving that shiny, ceramic-like finish seen in the photo. -
Verify coverage:
Check closely for missed spots or bubbles in the varnish while it is still wet, popping any bubbles with a pin. Let it cure fully according to the bottle instructions.
Now you have a durable, bright floral rest for your favorite morning beverage
Pastel Checkerboard Coasters

Bring a touch of cottagecore charm to your coffee table with this delightful checkerboard coaster. Featuring soft sage, dusty rose, and speckled cream tones, this project uses polymer clay to create a faux-tile effect that looks polished yet handmade.
How-To Guide
Materials
- Polymer clay (Sage Green, Dusty Rose/Pink, Speckled Cream/Beige)
- Acrylic rolling pin or pasta machine
- Square clay cutter (approx. 4 inches) or rigid blade
- Small square grid cutter (approx. 0.75 inch) or ruler and craft knife
- Ceramic tile or glass sheet (for baking surface)
- Liquid polymer clay (optional, for bonding)
- Fine-grit sandpaper (400-600 grit)
- Matte finish varnish (optional)
- Oven
Step 1: Prepping the Clay
-
Condition the clay:
Begin by thoroughly conditioning each color of polymer clay—sage green, dusty rose, and the speckled cream—kneading them until they are soft and pliable. -
Roll out sheets:
Using your acrylic roller or pasta machine on a medium-thick setting (about 4mm or 1/6 inch), roll each color into a flat, even sheet. -
Create the base:
Cut a large 4×4 inch square from scrap clay or a solid sheet of the cream color. This will serve as the foundation for your tiles, ensuring the coaster is sturdy.
Step 2: Creating the Tiles
-
Cut the squares:
Using a small square cutter or a sharp blade and ruler, cut numerous small squares from each of your three colored sheets. You will need 25 small squares total for a 5×5 grid. -
Plan your pattern:
Arrange the small squares on your work surface before attaching them. I like to lay them out loosely first to ensure the colors are distributed evenly without clustering. -
Refine the edges:
Gently tap the sides of each small square with your finger to soften the sharp cut edges just slightly, making them look more like tumbled stone tiles.
Uneven Tiles?
If your tiles look different heights after assembly, place a piece of parchment paper over the top and gently roll over the entire coaster once to level the surface.
Step 3: Assembling the Design
-
Apply the first row:
If using liquid clay, brush a very thin layer onto your base square. Place your first row of 5 small tiles along the bottom edge, pressing them gently onto the base. -
Check alignment:
Ensure the tiles are touching but not squished together; the natural seam between them creates the realistic grout-line look. -
Continue the grid:
Work your way up, row by row, placing the contrasting colors according to your planned pattern until the entire base is covered. -
Trim excess:
If the base clay peeks out significantly or the edges are uneven, use your long rigid blade to slice off a thin sliver from the outer perimeter, creating a clean, straight border. -
Soften the perimeter:
Run your finger along the cut outer edges to round them off slightly so the final coaster feels comfortable to hold.
Level Up: Cork Bottom
Cut a sheet of self-adhesive cork slightly smaller than your finished coaster and stick it to the underside. This prevents slipping and protects your table.
Step 4: Finishing
-
Texture check:
Lightly brush the surface with a piece of denim or coarse fabric if you want to enhance the stone-like texture and remove fingerprints. -
Bake:
Place the coaster on your ceramic tile and bake according to your clay manufacturer’s instructions (usually 275°F/135°C for 30 minutes). -
Cool down:
Allow the piece to cool completely in the oven or on a wire rack before handling. -
Sand:
Once cool, use fine-grit sandpaper to buff away any sharp corners or uneven spots on the sides. -
Seal (Optional):
For extra durability against moisture, apply a thin coat of matte varnish, though bare polymer clay is naturally water-resistant.
Now you have a charming place to rest your morning coffee that looks like a miniature tiled floor
Patchwork Quilt-Inspired Coasters

Bring the cozy charm of a handmade quilt to your coffee table with this clever clay technique. By piecing together small triangles of muted, earth-toned clay and adding faux-stitch details, you’ll create a durable coaster that looks soft enough to snuggle.
Step-by-Step Guide
Materials
- Polymer clay in 5-6 muted colors (terracotta, sage green, cream, mustard, dusty blue, peach)
- Clay rolling pin or acrylic roller
- Sharp clay blade or X-Acto knife
- Ruler
- Needle tool or toothpick
- Square cookie cutter (approx. 3.5 – 4 inches)
- Parchment paper or ceramic tile (for baking surface)
- Oven (for baking polymer clay)
Step 1: Planning and Prepping
-
Condition the clay:
Begin by thoroughly kneading each color of polymer clay until it is soft and pliable. This prevents cracking and ensures smooth seams later on. -
Roll out sheets:
Roll each color into a flat sheet, aiming for a consistent thickness of about 1/8 inch (3mm). Using depth guides or playing cards stacked on either side of your roller can help maintain evenness. -
Cut the base:
Roll out a separate sheet of clay (you can use scrap clay or one of your base colors) to be slightly thicker. Use your large square cutter to create the solid backing foundation for your coaster.
Gaps appearing?
If you see gaps between triangles while assembling, don’t stretch the clay to fit. Instead, gently nudge the surrounding pieces inward or cut a tiny sliver of matching clay to fill the void.
Step 2: Creating the Quilt Pattern
-
Cut squares first:
From your colored clay sheets, cut small, identical squares. A 1-inch square cutter is perfect for this, or you can measure and cut with your blade. -
Transform into triangles:
Cut each small square diagonally in half to create two right-angled triangles from every color. -
Arrange the layout:
Before attaching anything, lay out your triangles on your work surface to plan the pattern. Aim for an “improv quilt” look by scattering colors randomly rather than creating a rigid pattern, but try not to let two of the same color touch. -
Assemble the center:
Pick up four triangles and arrange them in the very center of your square backing piece so their right angles meet in the middle. Press them gently onto the backing. -
Fill the surface:
Continue placing triangles outward from the center, fitting them together like a puzzle until the entire backing square is covered. It’s okay if they hang over the edges for now. -
Smooth the surface:
Once covered, place a piece of parchment paper over the coaster and gently roll over it with your roller. This helps bond the triangles to the backing and to each other without distorting the shapes too much. -
Trim the edges:
Use your large square cutter (or a ruler and blade) to trim away the excess overhanging triangles, leaving you with a perfectly crisp square edge.
Make it matte
After baking, avoid glossy varnishes. The charm of this project is the matte, fabric-like finish. If you want protection, use a specialized matte polymer clay sealer.
Step 3: Adding the Faux Stitches
-
mark the stitch lines:
Using your needle tool, begin creating the ‘thread’ marks. Press the tool gently into the clay along the seams where the triangles meet. Make the marks perpendicular to the seam line. -
Vary the texture:
For a realistic look, don’t make the stitches perfectly uniform. I find that varying the spacing slightly makes it look more like hand-stitching. -
Detail the border:
Don’t forget to add stitch marks along the connection points near the outer edge of the coaster, giving the impression that the ‘fabric’ is hemmed. -
Clean up:
Check for any lint or fingerprints. You can dip a Q-tip in a tiny bit of rubbing alcohol and lightly brush it over the surface to smooth away imperfections.
Step 4: Baking and Finishing
-
Bake carefully:
Preheat your oven according to the manufacturer’s instructions on your specific brand of clay (usually around 275°F or 135°C). Place the coaster on a ceramic tile or baking sheet lined with parchment paper. -
Tent the clay:
To prevent the light colors (like the cream and peach) from scorching or yellowing, create a foil tent over the coaster before putting it in the oven. -
Cool down:
Bake for approximately 30-45 minutes to ensure durability. Allow the coaster to cool completely inside the oven with the door slightly ajar; this slow cooling helps prevent warping. -
Sand edges (optional):
If your edges feel sharp after baking, gently sand them with high-grit wet/dry sandpaper under running water for a smooth, professional finish.
Enjoy your charming new coaster that combines the warmth of textiles with the durability of clay
Mini Charm-Topped Coasters
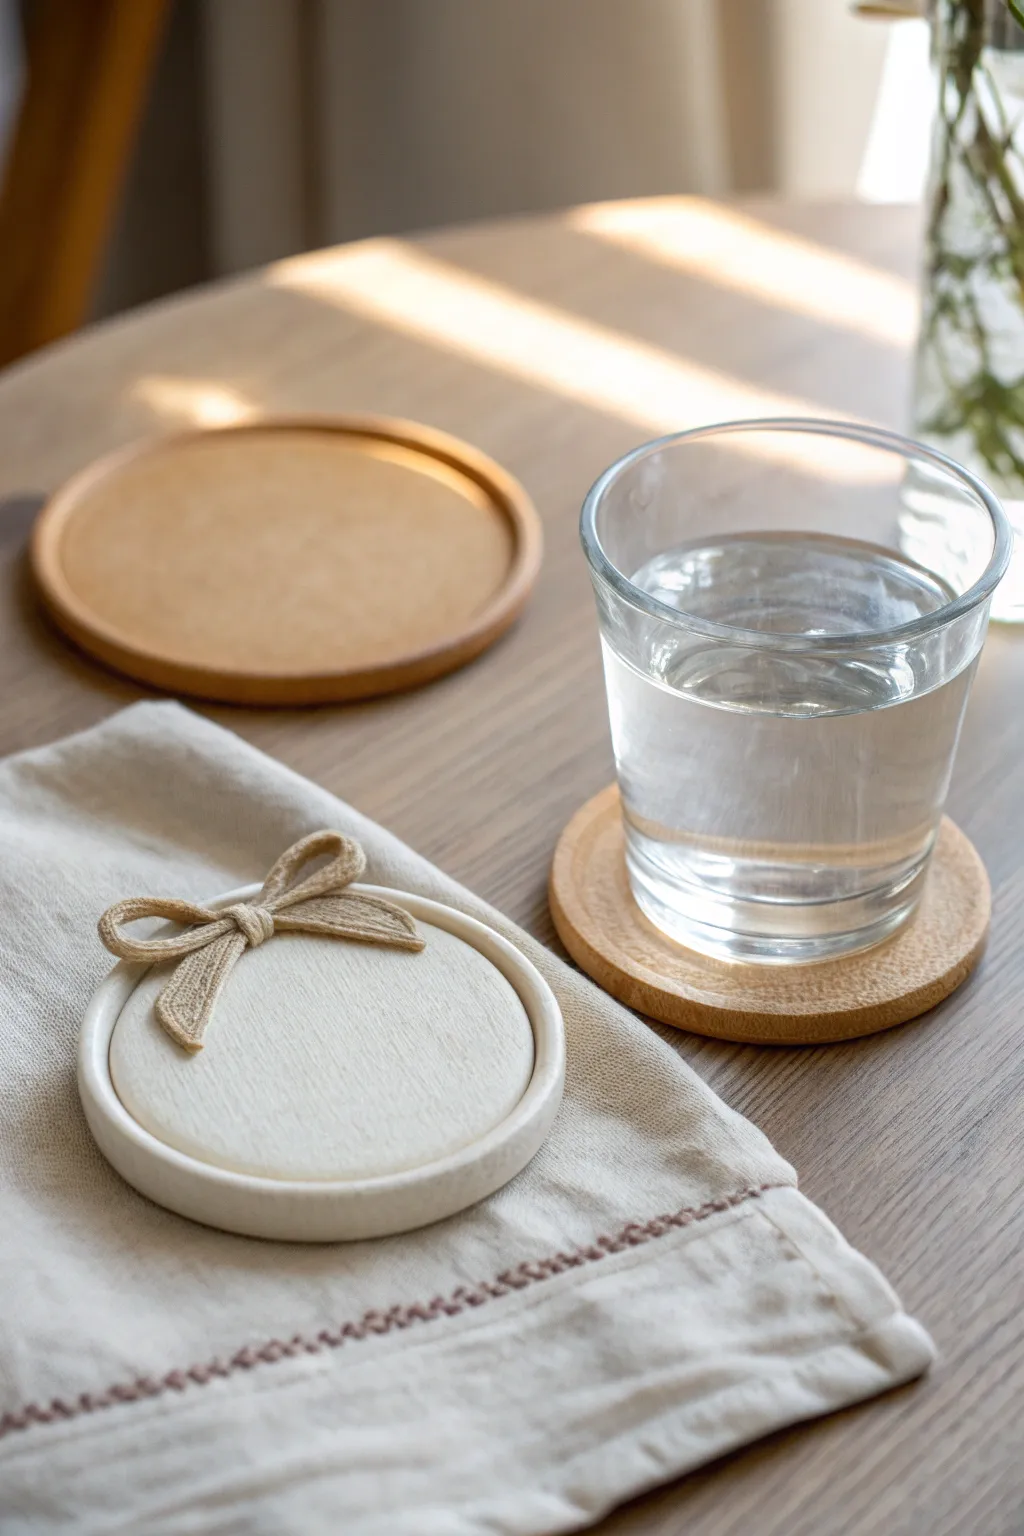
This charming coaster combines minimalist design with a touch of whimsy, featuring a pristine white clay base adorned with a tiny, textured bow. It’s the perfect understated accessory for your coffee table, adding a sweet, handmade feel without overwhelming your decor.
How-To Guide
Materials
- White air-dry clay or polymer clay
- Rolling pin
- Circle cutters (two sizes: approx. 3.5″ and 4″)
- Clay sculpting tools (needle tool, small spatula)
- Small piece of textured fabric or canvas (for imprinting)
- Fine-grit sandpaper
- Clear matte varnish or sealant
- Small brush
- Water (for smoothing)
Step 1: Shaping the Base
-
Prepare the Clay:
Start by conditioning your white clay until it is soft and pliable. If you are using air-dry clay, knead it with a slightly damp hand to prevent cracking. -
Roll the Slab:
Roll out the clay to an even thickness of about 1/4 inch. Ensure the surface is smooth and free of air bubbles. -
Cut the Base:
Using the larger circle cutter (approx. 4 inches), punch out a clean circle from the rolled slab. This will form the main body of your coaster. -
Create the Rim:
Roll a long, thin snake of clay, ensuring it is even in thickness along its entire length. This coil will become the raised edge of the coaster. -
Attach the Rim:
Score the outer edge of your clay circle lightly with your needle tool and dab a tiny amount of water or liquid clay on the scored area. Place the coil on top, following the circumference perfectly. -
Smooth the Seams:
Using a modeling tool or your finger, blend the inside and outside seams of the coil into the base so it looks like one solid piece rather than two attached parts. I like to use a tiny bit of water here to get a seamless transition.
Step 2: Crafting the Bow Detail
-
Texture the Clay:
Take a small scrap of clay and press your textured fabric or canvas firmly onto it. Peel the fabric back to reveal a subtle, woven texture imprinted on the clay surface. -
Cut Strips:
Use a sharp blade or knife to cut three very thin, narrow strips from this textured clay—one short strip for the center knot and two longer ones for the loops. -
Form the Loops:
Gently fold the two longer strips into loop shapes, bringing the ends together in the middle. Pinch them slightly to secure the shape without squashing the texture. -
Add the Center Knot:
Wrap the short strip around the center point where the two loops meet. This creates the ‘knot’ of the bow and hides the join. -
Shape the Tails:
Cut two small angled pieces for the ribbon tails and attach them beneath the loops, pressing gently to secure them. -
Attach to Coaster:
Score a spot on the coaster rim where you want the bow to sit. Apply a dot of slip or liquid clay and press the finished bow gently onto the rim.
Smooth Moves
Use a baby wipe or a finger dipped in cornstarch to smooth fingerprints off polymer clay before baking to save sanding time later.
Step 3: Finishing Touches
-
Dry or Bake:
If using polymer clay, bake according to the package instructions. For air-dry clay, let it sit in a cool, dry place for at least 24-48 hours until fully hardened. -
Sand Imperfections:
Once fully cured or dry, inspect the edges. Use fine-grit sandpaper to gently smooth out any roughness or fingerprints on the rim and base. -
Clean Dust:
Wipe the coaster down with a slightly damp cloth or a soft brush to remove all sanding dust before sealing. -
Seal the Coaster:
Apply a thin, even coat of clear matte varnish to the entire coaster. This protects the clay from moisture, which is crucial for a drink coaster. -
Second Coat:
allow the first coat to dry completely, then apply a second coat for extra durability. Let it cure fully before use.
Color Pop
Paint just the bow with gouache or acrylics in a pastel shade like blush pink or mint green for a cute, contrasting detail.
Now you have a delightfully sweet spot to rest your morning glass of water