If you’re craving a project that’s quick, sweet, and ridiculously satisfying, cute clay crafts are the best kind of studio day. I’m sharing my go-to ideas that keep things beginner-friendly while still giving you that “I made this and it’s adorable” feeling.
Mini Clay Earrings in Simple Shapes
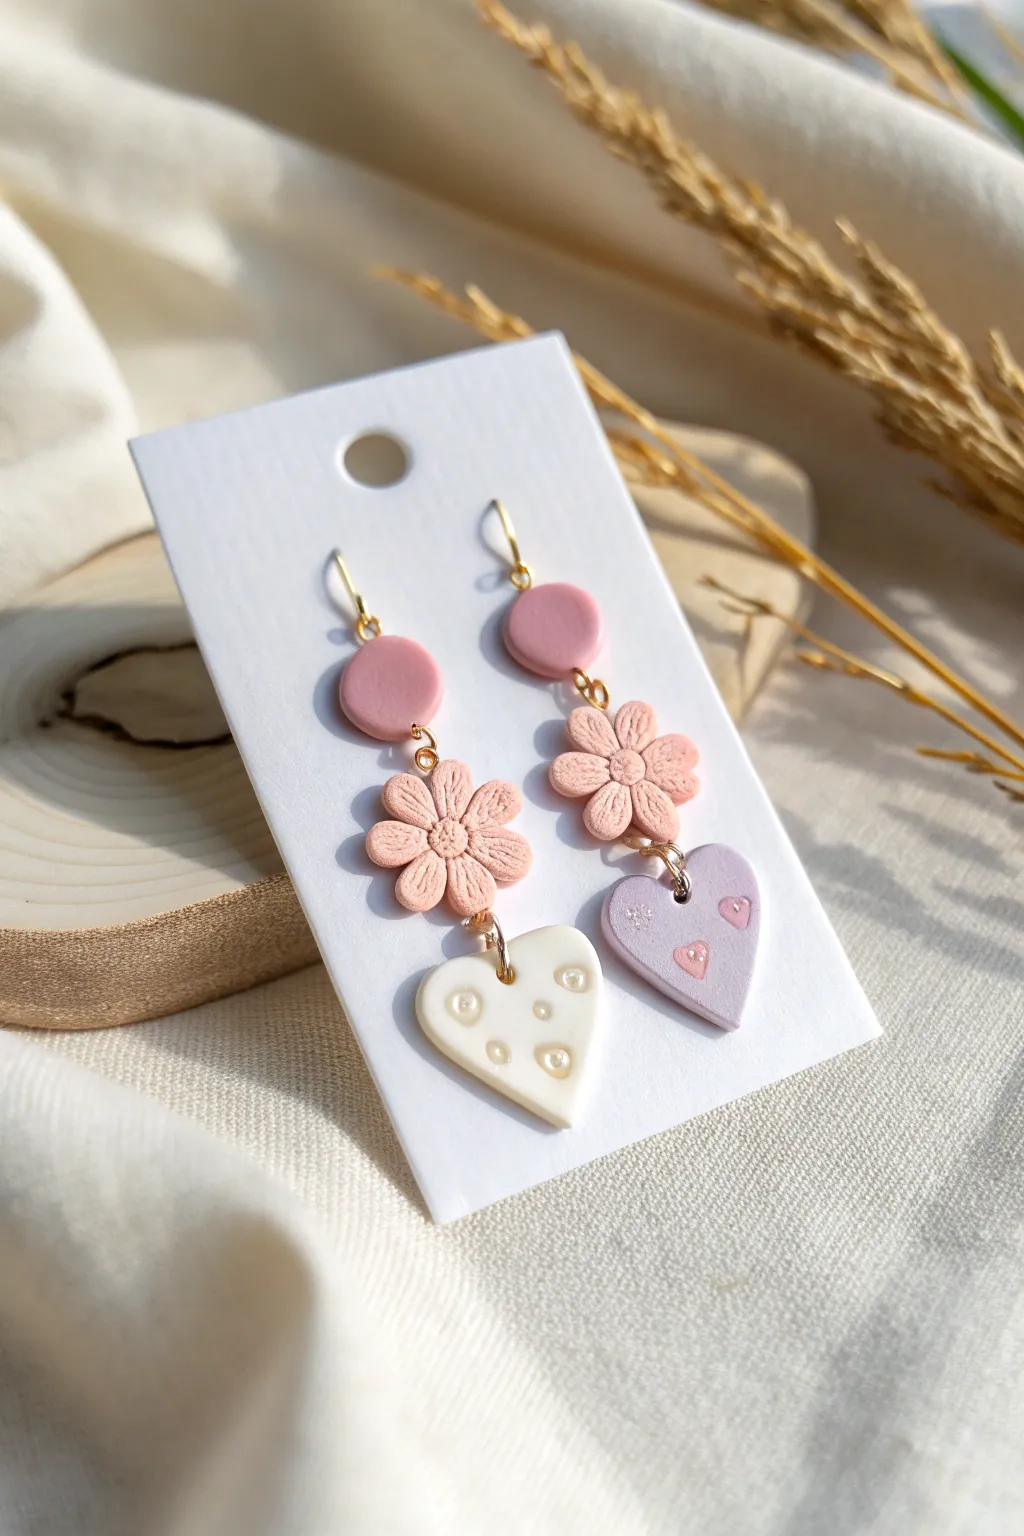
These sweet three-tiered earrings combine soft pinks, dusty rose, and creamy white for a romantic, everyday look. Featuring a simple circle stud, a textured daisy, and a dangling heart charm, they offer plenty of movement and gentle charm.
Step-by-Step
Materials
- Polymer clay (dusty rose, light peach-pink, white, lavender/lilac)
- Acrylic rolling pin or pasta machine
- Small circle cutter (approx. 8-10mm)
- Flower cutter (daisy shape)
- Heart cutter
- Needle tool or toothpick
- Dotting tool or ball stylus
- Gold jump rings (4mm and 6mm)
- Earring hooks (gold)
- Flat nose pliers
- Jewelry drill or pin vise (optional)
- Oven baking sheet and parchment paper
Step 1: Prepping the Shapes
-
Condition the Dusty Rose Clay:
Begin by kneading your dusty rose clay until it is soft and pliable. Roll it out to a thickness of about 3mm using your acrylic roller or pasta machine. -
Cut the Basic Circles:
Use your small circle cutter to punch out two discs. These will serve as the top stud connectors. Smooth the edges gently with a fingertip if they look sharp. -
Prepare the Flower Clay:
Clean your roller, then condition and roll out the light peach-pink clay to the same 3mm thickness. -
Cut the Flowers:
Press your daisy cutter into the peach-pink clay two times. Twist slightly before lifting to ensure a clean cut. -
Texture the Flowers:
Using a needle tool, gently press lines into each petal to create vein details. Use a small dotting tool to texture the center of the flower with tiny stippling motions to mimic pollen. -
Cut the Hearts:
Roll out your white clay and your lavender clay. Cut one heart from the white sheet and one heart from the lavender sheet. -
Create Holes for Assembly:
Use a needle tool to carefully pierce holes where the jump rings will go. For the circles: one hole at the bottom (and one at the top if not gluing posts). For flowers: one top, one bottom. For hearts: one at the top center.
Clean Edges Trick
Before baking, dip your finger in a little cornstarch and rub it gently along the cut edges of the clay. This smooths out any harsh cutter lines for a polished finish.
Step 2: Adding Details
-
Prepare Detail Colors:
Take a tiny amount of leftover pink clay and roll it into a super thin snake. -
Decorate the Lavender Heart:
Slice tiny bits off the pink snake and press them onto the lavender heart in little ‘v’ shapes to create mini hearts. Flatten them gently so they fuse with the base. -
Texture the White Heart:
For the white heart, use a larger ball stylus or dotting tool to impress circular indentations randomly across the surface. -
Fill the Indentations:
Roll tiny balls of creamy or pearlescent white clay and press them into the centers of the indentations on the white heart for a subtle relief effect. -
Final Inspection:
Check all holes to ensure they are open and haven’t closed up during the decorating process. Smooth away any fingerprints with a bit of cornstarch or baby oil.
Customize It
Try swapping the hearts for teardrops or stars to change the vibe. You can also mix metallic gold leaf into the clay for a bit of sparkle.
Step 3: Baking and Assembly
-
Bake the Pieces:
Arrange all pieces on a parchment-lined baking sheet. Bake according to your brand of polymer clay instructions (usually 275°F/135°C for 15-30 minutes). I like to let them cool completely in the oven to prevent cracking. -
Drill (If Needed):
If your holes closed up during baking, use a handheld jewelry drill to gently reopen them. -
Attach Components:
Using two pairs of pliers, twist open a jump ring laterally. Connect the bottom of the rose circle to the top of the flower. Close the ring securely. -
Add the Hearts:
Use another jump ring to connect the bottom of the flower to the top of the heart charm. -
Attach Earring Hooks:
Finally, attach the gold earring hook to the top of the rose circle using a small jump ring.
Wear your mismatched or matched pastel creations with pride and enjoy the gentle sway of your new accessories


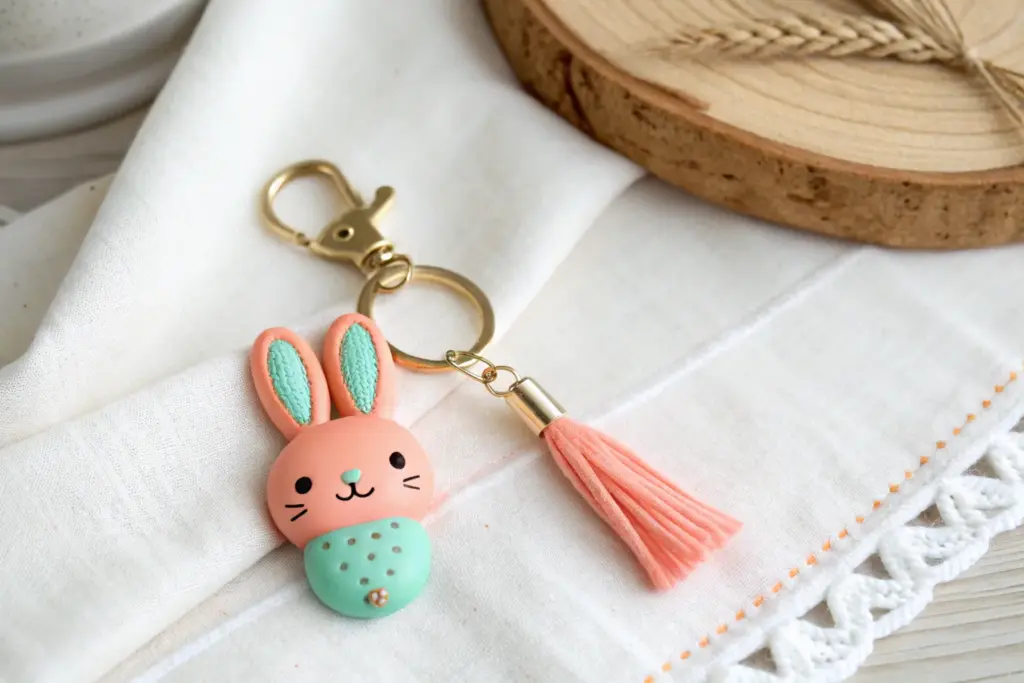
Cute Charm Keychains You Can Mix and Match
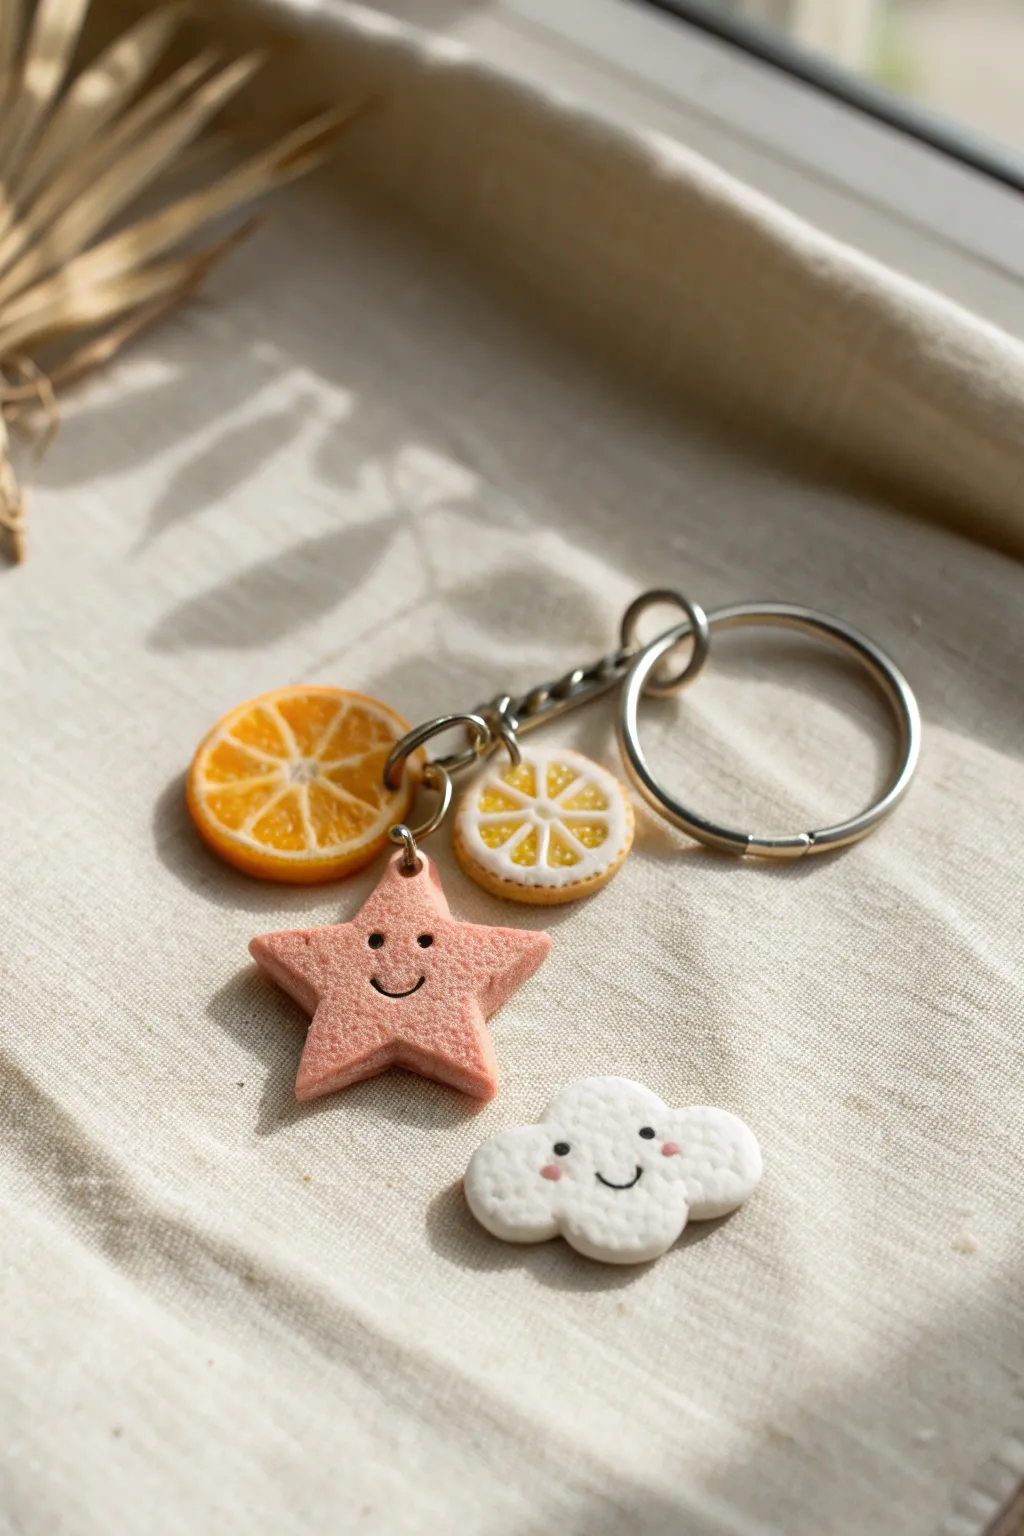
Brighten up your keys with this adorable collection of polymer clay charms. Featuring realistic citrus slices and kawaii-faced celestial shapes, this project is perfect for customizing your own mix-and-match keychain.
Step-by-Step Guide
Materials
- Polymer clay (translucent white, orange, yellow, pink, solid white, black)
- Eye pins (silver tone)
- Jump rings (silver tone)
- Keychain ring with chain
- Liquid polymer clay (optional, for securing)
- Needle tool or toothpick
- Small circle cutter (approx. 1 inch)
- Star cookie cutter (small)
- Cloud cookie cutter (optional, or hand-sculpt)
- Dotting tool or ball stylus
- Soft pastel chalks (pink) for blush
- X-acto knife or craft blade
- Texturing tool (sandpaper or toothbrush)
- Oven for baking
Step 1: Citrus Slices
-
Mix Translucent Colors:
Start by mixing a small amount of translucent clay with orange clay, and separately with yellow clay. You want a semi-transparent look for the fruit flesh to make it realistic. -
Form the Segments:
Roll the orange (or yellow) mix into a thick log. Wrap this log in a very thin sheet of white clay. Cut this log into 8 equal wedges using your blade to form the triangular fruit segments. -
Reassemble the Cane:
Arrange the 8 wedges into a circle, placing a very thin snake of white clay in the center to fill the gap. Ensure the white rind lines separate the segments evenly. -
Wrap the Rind:
Wrap the entire assembled circle in a thicker sheet of white clay (the pith), followed by a thin sheet of the solid orange or yellow skin color. Gently roll the cane to compress it. -
Texture the Skin:
Before slicing, roll the outside of the cane gently over sandpaper or tap with a toothbrush to give the peel a realistic, pitted texture. -
Slice Cookies:
Use your sharp blade to slice thin ‘cookies’ from your cane. Each slice will be one charm. You can make them as thick or thin as you prefer, but 3-4mm is distinct and sturdy. -
Detail the Flesh:
Take a needle tool and gently poke and scratch the translucent colored sections of each slice. This creates the juicy texture of citrus pulp.
Uneven Slicing?
If your citrus cane squishes while cutting, put it in the fridge for 20 minutes. Firm clay slices much cleaner and keeps the round shape.
Step 2: Celestial Friends
-
Cut the Shapes:
Roll out a sheet of pink clay (textured with sandpaper/toothbrush for a sandy look) and one of white clay. Use your small star cutter on the pink and cloud cutter on the white. -
Check Thickness:
Ensure your shapes are roughly the same thickness as your citrus slices so the keychain feels balanced. -
Add Smile Indentations:
Using a small ball tool or the tip of a detailing tool, press two tiny divots where the eyes will go. Use a needle tool to gently curve a smile into the clay. -
Insert Eyes:
Roll extremely tiny balls of black clay. I find it easiest to pick them up with a needle tip and settle them into the eye divots you created. -
Apply Blush:
Scrape a little pink chalk pastel into powder. Use a small brush or q-tip to gently dust pink ‘cheeks’ onto the cloud and star.
Step 3: Assembly
-
Insert Hardware:
Insert a silver eye pin into the top of each charm. For the citrus, go through the rind; for the star, through the top point. A dab of liquid clay on the pin helps it stick. -
Bake:
Bake all pieces according to your polymer clay package instructions (usually 275°F/135°C for 15-30 minutes). Let them cool completely before handling. -
Attach to Chain:
Open a jump ring with pliers, loop it through the eye pin of a charm, and attach it to the chain links of your keychain ring. -
Arrange:
Attach the remaining charms, staggering them on different links so they bunch together nicely without tangling.
Add Sparkle
Mix a tiny pinch of mica powder or fine glitter into the translucent citrus flesh clay for a shimmering, juicy effect that catches the light.
Clip this sweet cluster onto your bag and enjoy the summery vibes all year round


Sweet Animal Figurines With Rounded Shapes
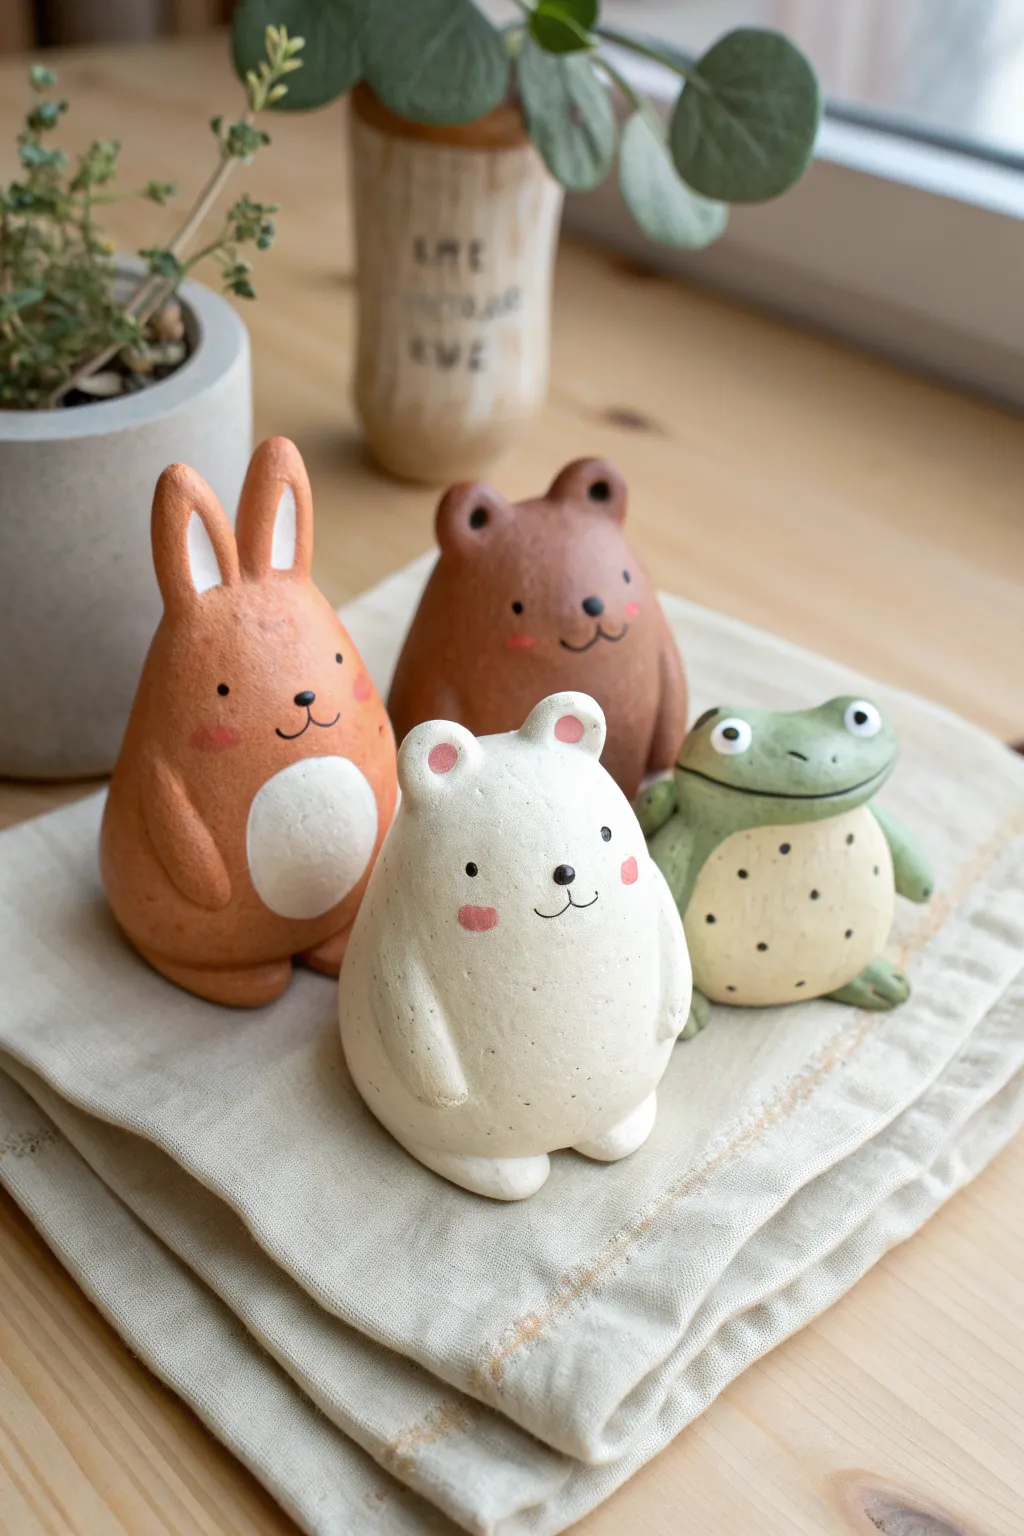
These adorable, round-bellied figurines bring a touch of woodland whimsy to any shelf or desk. With their simplified, egg-like shapes and gentle painted expressions, this set of four—a rabbit, brown bear, polar bear, and frog—make for a perfect beginner-friendly sculpting project.
Step-by-Step Guide
Materials
- Polymer clay (terracotta, white, brown, green)
- Acrylic paints (black, white, pink, brown)
- Fine detail paintbrush (size 0 or 00)
- Dotting tool or ball stylus
- Aluminum foil (for armature core)
- Clay sculpting tools (needle tool, smoothing tool)
- Matte varnish or sealant
- Baking sheet and parchment paper
- Oven (for curing polymer clay)
Step 1: Forming the Bases
-
Prepare the foil cores:
To save clay and keep the figurines light, tightly scrunch four pieces of aluminum foil into egg shapes. Aim for a size slightly smaller than a hen’s egg for the bears and rabbit, and a flatter, wider oval for the frog. -
Condition the clay:
Warm up your polymer clay by kneading it thoroughly in your hands until it’s soft and pliable. Start with the lightest colors (white) first to avoid color transfer. -
Cover the cores:
Flatten sheets of clay—white for the polar bear, terracotta for the rabbit, brown for the bear, green for the frog. Wrap these sheets around your foil cores, smoothing the seams gently with your thumbs until you have four seamless, smooth shapes. -
Refine the silhouettes:
For the bears and rabbit, gently tap the bottom of the shape on your work surface to create a flat base so they stand upright. The frog needs to be squatter, so press it down gently to flatten the ‘egg’ shape slightly.
Cracks while baking?
If you see tiny cracks after baking, use a bit of liquid polymer clay or white glue mixed with paint to fill them, then sand gently once dry.
Step 2: Adding Features
-
Sculpt the ears:
For the rabbit, roll two long, tapered logs of terracotta clay and attach them to the top of the head; blend the seams downward. For the bears, make small balls of matching clay, press a small indentation into the center, and attach them. The frog doesn’t need external ears, just slight ridges above the eyes. -
Attach the limbs:
Roll small sausage shapes for arms. Attach these to the sides of the bodies, blending the shoulder area into the main torso so they look like one piece. Curve the ends slightly forward to rest on their bellies. -
Create the feet:
Form small, flat ovals for feet. Place them under the front bottom edge of the figurines so they peek out. For the frog, ensure you shape little toes or webbing details. -
Detail the frog eyes:
Since the frog has bulging eyes, roll two balls of white clay and place them on top of the green head slightly apart. Smooth the bottom edge where the white meets the green. -
Smooth everything out:
I usually take a moment here to use a very lightly oiled finger or a clay shaper to buff away any fingerprints before baking. Texture is key for that smooth, ceramic finish. -
Bake the figures:
Follow the temperature instructions on your specific brand of polymer clay. Bake them on a parchment-lined sheet for the recommended time (usually 15-30 minutes per 1/4 inch of thickness). Let them cool completely before painting.
Step 3: Painting & Finishing
-
Paint the tummies:
Using white acrylic paint, paint a large oval on the stomach of the rabbit and a smaller one for the frog’s belly area. The frog’s belly can be a pale yellow-cream mix. Let this layer dry fully. -
Add frog speckles:
Once the frog’s cream belly is dry, use your smallest brush or a toothpick to add tiny black dots scattered across the belly area. -
Paint the faces:
Using a dotting tool dipped in black paint, create the eyes. Use a fine liner brush to paint the simple ‘w’ shape for mouths and small triangular noses. -
Add blush details:
Dilute a tiny drop of pink paint or use a dry-brush technique to add soft, rosy cheeks to the bears and rabbit. This gives them that sweet, innocent character. -
Highlight the ears:
Paint the inner ears of the rabbit white. For the white bear, add pink inside the ears. The brown bear gets dark brown innards. -
Seal the work:
Finish by applying a coat of matte varnish. This protects the acrylic paint and gives the clay a unified texture that looks like professionally fired ceramic.
Make it functional
Before baking, slice a deep slot into the top of the head or back to turn these figurines into adorable photo or place card holders.
Now you have a charming set of woodland creatures ready to brighten up any corner of your home.


Smiley Magnets for Fridge or Locker
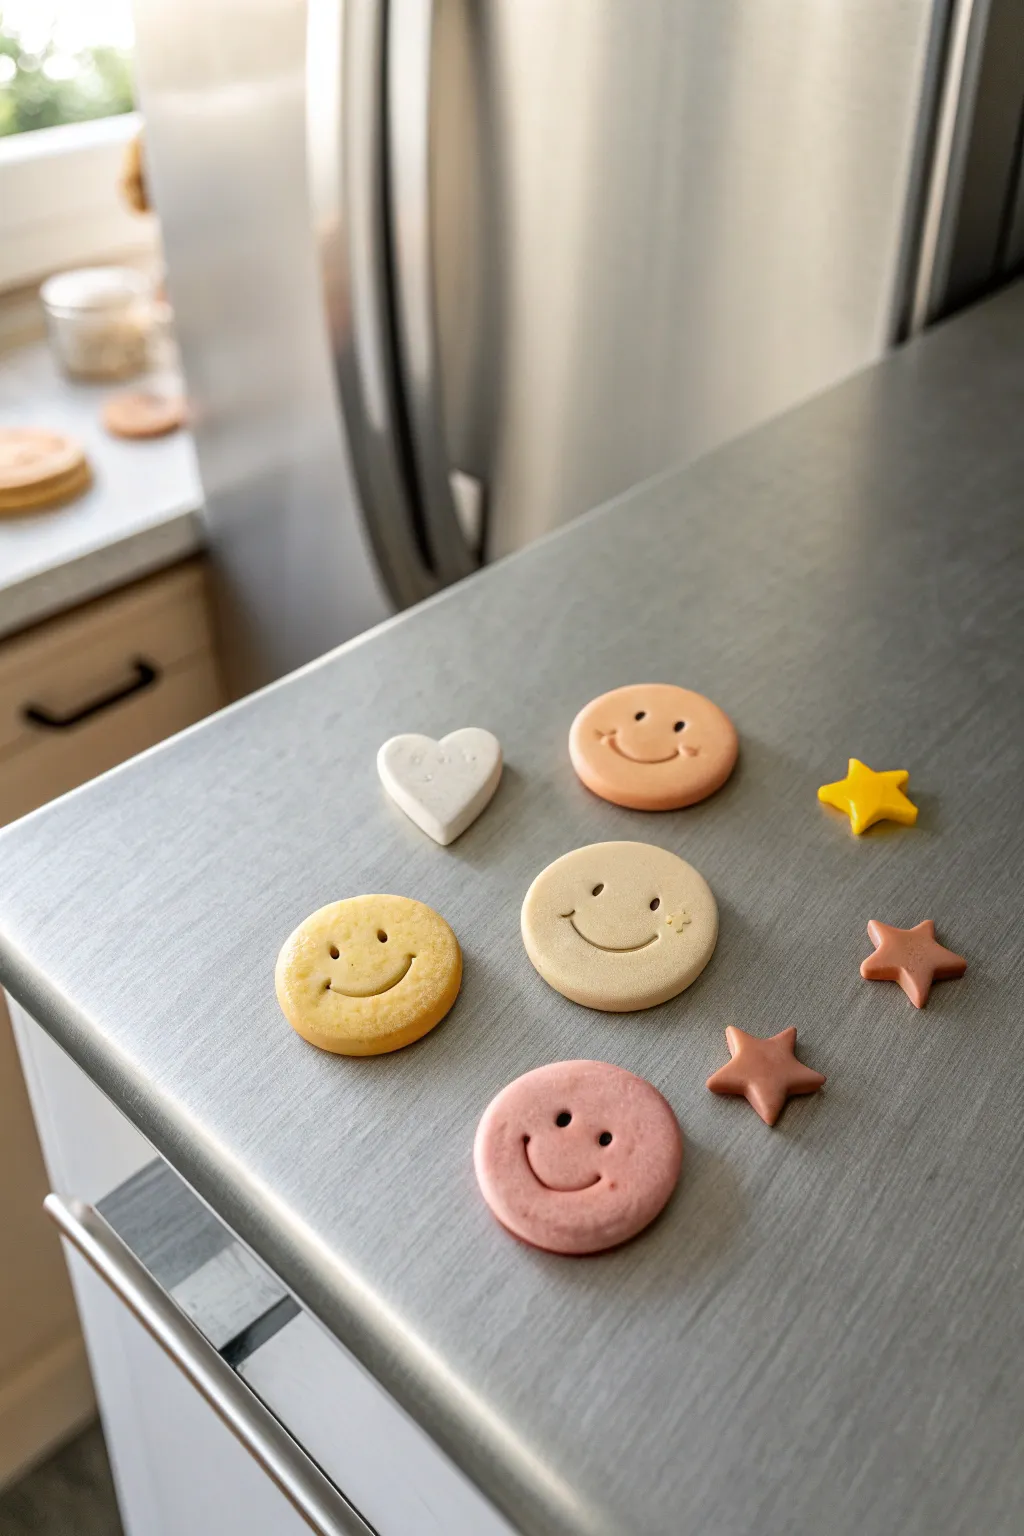
Brighten up your kitchen or locker with these cheerful, minimalist smiley face magnets. Made from polymer clay in soft, muted tones, they add a touch of playful charm to any magnetic surface.
Step-by-Step Tutorial
Materials
- Polymer clay in various colors (white, beige, peach, yellow, dusty rose)
- Small round cookie cutter or a small glass
- Small star-shaped cookie cutter
- Small heart-shaped cookie cutter (optional)
- Rolling pin (acrylic or wooden)
- Small ball tool or a toothpick
- Curved tool or a drinking straw cut in half
- Strong round magnets
- Super glue or E6000 adhesive
- Parchment paper
- Baking sheet
Step 1: Shaping the Base
-
Condition the clay:
Start by kneading your chosen clay colors until they are soft and pliable. If you want custom shades like the dusty rose or light beige shown, mix small amounts of white clay with your primary colors to soften them. -
Roll it out:
Place the clay on a piece of parchment paper to prevent sticking. Roll it out to an even thickness of about 1/4 inch (6mm). You want them thick enough to hold the magnet but not too heavy. -
Cut the shapes:
Using your small round cutter, press firmly into the rolled clay to create perfect circles. Gently push them out of the cutter if they stick. -
Create accessory shapes:
For variety, cut out a few small stars and hearts using separate colors like bright yellow or white. These will act as accent magnets to accompany the smileys. -
Smooth the edges:
I like to gently run my finger around the cut edge of each circle to soften any sharp ridges left by the cutter, giving the magnet a more finished, rounded look.
Clay Too Soft?
If your clay gets too sticky or soft to hold the smile shape, pop it in the fridge for 10 minutes to firm it up before cutting.
Step 2: Adding the Faces
-
Mark the eyes:
Take a small ball tool or the blunt end of a toothpick. Press straight down into the upper half of the circle to create two distinct eye indentations. Make them deep enough to be visible but don’t poke all the way through. -
Form the smile:
Use a curved sculpting tool, a small spoon edge, or a drinking straw cut lengthwise to create the smile. Press the curved edge into the clay below the eyes, rocking it slightly to make a clean, happy curve. -
Refine the expression:
Check the symmetry of the face. You can add tiny dimples at the corners of the mouth with a needle tool for extra character. -
Add texture (optional):
If you notice a slight sparkly texture on the yellow smiley in the photo, you can achieve this by lightly brushing the unbaked clay with a little mica powder or using a textured sponge. -
Clean up:
Before baking, do a final check for fingerprints. Lightly buff them away with a drop of baby oil on your finger if needed.
Smooth Finishes
Work on a ceramic tile or glass sheet. You can bake the clay directly on it to avoid moving the pieces and distorting their round shape.
Step 3: Baking and Assembly
-
Prepare for baking:
Transfer the parchment paper with your clay pieces onto a baking sheet. Ensure they aren’t touching each other. -
Bake:
Bake according to your clay package instructions. Typically, this is around 275°F (135°C) for 15-30 minutes, but check your specific brand. -
Cool down:
Let the pieces cool completely on the baking sheet. They will be slightly soft when hot but will harden as they cool. -
Test the magnets:
Once cool, flip the clay pieces over. Check that your magnets fit well on the back without peeking out from the sides. -
Glue firmly:
Apply a small dab of super glue or fierce adhesive to the back of the clay piece. Press the magnet firmly into the glue and hold for 10-20 seconds. -
Dry time:
Allow the glue to cure fully—usually 24 hours for maximum strength—before sticking them onto your fridge.
Once the glue sets, your friendly new magnets are ready to hold up your grocery lists and favorite photos

The Complete Guide to Pottery Troubleshooting
Uncover the most common ceramic mistakes—from cracking clay to failed glazes—and learn how to fix them fast.
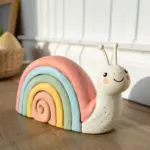
Soft-Color Ornaments That Look Like Little Toys
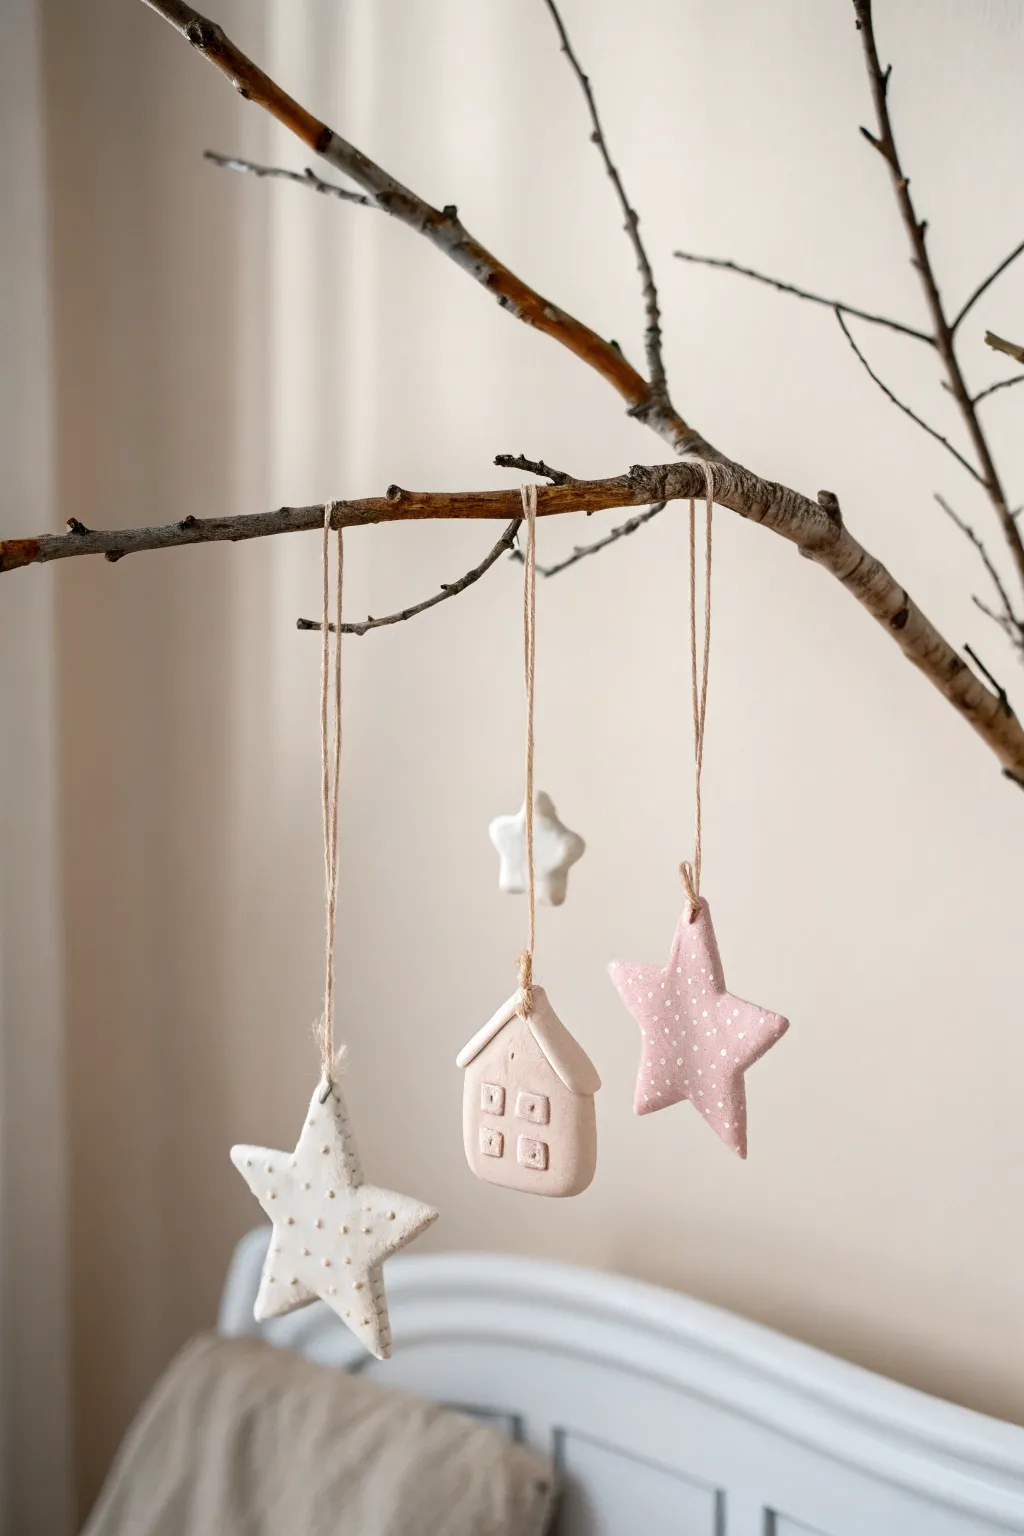
These delicate, soft-hued ornaments bring a gentle touch of magic to any nursery or cozy corner. By creating simple shapes like stars and tiny houses, you can craft a lovely mobile or festive decor that feels both nostalgic and modern.
Detailed Instructions
Materials
- Air-dry clay (white)
- Acrylic paints (pale pink, warm beige/sand, white)
- Rolling pin
- Cookie cutters (star and house shapes)
- Fine-point needle tool or toothpick
- Jute twine or natural hemp cord
- Small paintbrush
- Sandpaper (fine grit)
- Parchment paper
- Water cup
Step 1: Shaping the Clay
-
Prepare your workspace:
Lay down a sheet of parchment paper to protect your table and prevent the clay from sticking. This also makes moving the wet pieces much easier. -
Condition the clay:
Take a handful of air-dry clay and knead it in your hands until it becomes soft, warm, and pliable. Remove any air bubbles to prevent cracking later. -
Roll it out:
Use your rolling pin to flatten the clay into an even slab. Aim for a thickness of about 1/4 inch (6mm)—thick enough to be sturdy but light enough to hang. -
Cut the shapes:
Press your star and house-shaped cookie cutters firmly into the clay. Wiggle them slightly before lifting to get a clean cut. -
Smooth the edges:
Dip your finger in a little bit of water and gently run it along the cut edges of your shapes to smooth out any roughness or jagged bits from the cutter.
Cracked Clay?
If small cracks appear while drying, don’t panic. Mix a tiny bit of fresh clay with water to make a paste and fill the crack, then smooth it over.
Step 2: Adding Details & Drying
-
Add hanging holes:
Using a toothpick or a needle tool, pierce a hole at the top of each ornament. Make sure it’s large enough for your twine to thread through later. -
Create the texture:
For the stars, use the blunt end of your needle tool to gently poke small indentations across the surface to create a dotted pattern. Don’t go all the way through. -
Design the house:
For the house shape, gently press a square outline for windows and add four small dots inside to mimic window panes. I like to keep these impress marks quite subtle for a softer look. -
Let them dry:
Place your clay pieces on a clean sheet of parchment paper in a dry area. Let them air dry for 24-48 hours, flipping them halfway through to ensure even drying. -
Sand imperfections:
Once fully hard and white, use fine-grit sandpaper to gently buff away any remaining rough edges or uneven textures on the sides.
Step 3: Painting & Assembly
-
Mix your colors:
Prepare your palette with soft, muted tones. Mix white with a tiny drop of pink for a blush color, and white with a dot of brown/yellow for a sandy beige. -
Paint the first star:
Paint one star completely in the soft blush pink. Use a small brush to get into the little indented dots, or keep the brush somewhat dry so the dots remain lighter for contrast. -
Paint the house:
Apply the sandy beige mixture to the house ornament. Ensure the paint settles slightly into the window indentations to highlight the design. -
Paint the white star:
For the white star, you can either leave the natural clay color or apply a coat of white acrylic for a more polished, matte finish. If painting, dab the recessed dots with a slightly darker cream for definition. -
Dry the paint:
Allow the paint to dry completely. Since acrylic dries fast, this should only take about 15-20 minutes. -
Attach the twine:
Cut lengths of jute twine (approx. 8-10 inches). Thread one end through the hole of an ornament and tie a secure knot at the clay’s edge. -
Create loops:
Tie a loop at the other end of the twine at varying lengths so the ornaments will hang at different heights when displayed.
Pro Tip: Texture Trick
To highlight the poked dots, gently wipe the surface with a damp cloth immediately after painting. This removes paint from the top but leaves it in the holes.
Now hang your charming creations on a branch or in a window to enjoy their peaceful, handmade beauty
Hanging Clay Mobile With Stars and Moons

Bring the magic of the night sky indoors with this charming mobile, featuring rustic clay moons and stars suspended from a natural wood hoop. The textured, raw finish of the clay combined with simple twine creates a calming, bohemian piece perfect for a nursery or bedroom corner.
Step-by-Step Tutorial
Materials
- Air-dry clay (white or natural stone color)
- Rolling pin
- Cookie cutters (crescent moon and star shapes in varying sizes)
- Parchment paper or silicone mat
- Wooden embroidery hoop (inner ring only) or bamboo ring (approx. 8-10 inches)
- Jute twine or heavy natural cotton cord
- Small wooden beads (unfinished/natural)
- Drinking straw or skewer
- Fine-grit sandpaper
- Scissors
- PVA glue or craft glue (optional)
Step 1: Shaping the Celestial Bodies
-
Prepare your workspace:
Lay out a sheet of parchment paper or a silicone mat. Take a generous handful of air-dry clay and knead it briefly until it’s pliable and smooth. -
Roll the clay:
Roll the clay out to an even thickness, aiming for about 1/4 inch (6mm). If it’s too thin, the shapes might be brittle; too thick, and they’ll be heavy. -
Cut the shapes:
Press your moon and star cutters firmly into the clay. To get the variety seen in the photo, create roughly 5-6 crescent moons and 8-10 stars of mixed sizes. -
Add texture (optional):
If you want that slightly weathered, rustic look shown in the image, lightly dab the surface with a crumpled piece of foil or a stiff-bristled brush while the clay is still wet. -
Create hanging holes:
Using a straw or a skewer, poke a hole through each shape. For vertical hanging chains (like the ones shown), you’ll need a hole at both the top and bottom of most pieces, except for the ones that will be at the very bottom of the string. -
Smooth the edges:
Dip your finger in a little water and run it gently along the cut edges to smooth out any roughness. -
Drying time:
Place all shapes flat on a clean surface to dry. I like to flip them over halfway through the drying process to ensure they don’t curl. Allow at least 24-48 hours depending on humidity.
Step 2: Assembling the Frame
-
Sand the shapes:
Once fully dry, use fine-grit sandpaper to buff away any remaining sharp edges or imperfections for a professional finish. -
Prepare the hoop:
Take your wooden hoop. Cut three or four long lengths of twine (about 25 inches each) to serve as the main hangers. -
Attach hanger strings:
Tie these strings equidistantly around the wooden hoop. Gather the loose ends at the top, ensuring the hoop hangs level, and knot them together securely to create the main suspension point.
Cracked Clay?
Mix a tiny amount of fresh clay with water to make a paste (slip). Fill any cracks, smooth with a finger, and let it dry again.
Step 3: Stringing the Mobile
-
Cut vertical strings:
Cut 6-8 lengths of twine for the hanging ornaments. Vary the lengths to create visual interest—some shorter, some longer. -
Start stringing:
For each vertical strand, thread the twine through the top hole of your first clay shape. Secure it with a knot. You can hide the know inside the hole or make it a feature. -
Add wooden beads:
Thread a small wooden bead onto the twine just above the clay shape for a decorative touch. You can also add knots in the twine a few inches above a shape to hold a bead in place floating in mid-air. -
Connect multiple shapes:
To attach a second shape below the first, thread the twine emerging from the bottom hole of the upper shape, add a bead if desired, and tie it to the top hole of the lower shape. Leave about 2-3 inches of space between them. -
Complete the strands:
Continue this pattern until you have several completed strands. Some might just have one moon, others a chain of stars and moons. -
Attach to hoop:
Tie the top of each completed ornament strand onto the wooden hoop. Space them evenly around the circumference. -
Center strand:
For extra depth, tie a final strand directly to the center knot where the main hanger strings meet, so it hangs down through the middle of the hoop. -
Final balance check:
Lift the mobile by the top loop. If it tilts, slide the knots on the hoop slightly or trim excess string until it hangs perfectly level.
Pro Tip: Hidden Knots
To hide knots at the bottom of a strand, tie the knot, put a dab of glue on it, and pull it gently back up into the hole of the clay star so it disappears.
Hang your beautiful mobile near a window or crib and watch the shadows dance