Whenever I’m making something for my boyfriend, I want it to be equal parts adorable and actually meaningful. These cute clay ideas are all about sweet little keepsakes you can personalize so it feels like “us,” not just “a craft.”
Split Heart Keychains With Initials
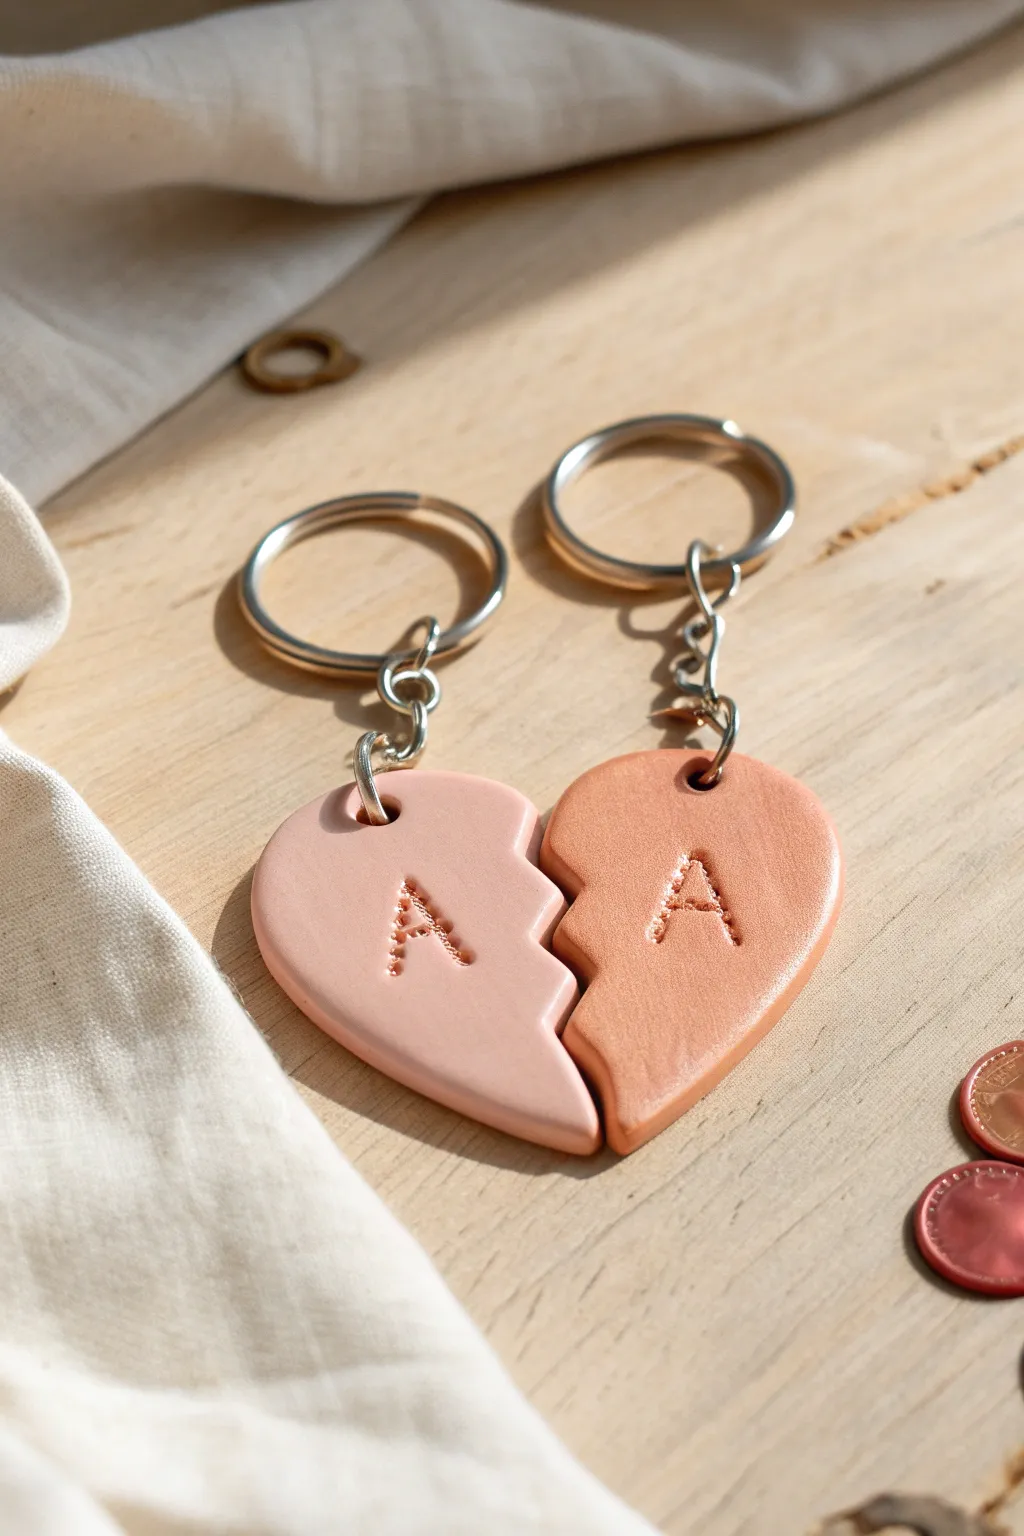
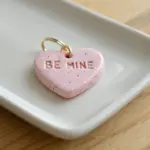
Create a charming keepsake for you and your partner with these interlocking clay heart keychains. Each half features a stamped initial and fits perfectly with the other, symbolizing your unique bond.
Detailed Instructions
Materials
- Polymer clay in two complementary skin-tone or pastel shades (e.g., beige and blush pink)
- Small heart-shaped cookie cutter (approx. 2 inches wide)
- Rolling pin or acrylic roller
- X-acto knife or clay blade
- Small alphabet stamps
- Toothpick or small drinking straw
- Two keychain rings with chains and jump rings
- Needle-nose pliers
- Baking sheet and parchment paper
- Fine-grit sandpaper (optional)
- Matte polymer clay varnish (optional)
Step 1: Preparation & Shaping
-
Condition the Clay:
Begin by taking a small amount of each color of polymer clay. Knead them separately in your hands until they are soft, pliable, and free of cracks. -
Roll Out the Slab:
Roll out the first color of clay on a smooth surface to an even thickness of about 1/4 inch (6mm). Repeat this process with the second color, ensuring both slabs are equally thick. -
Cut Out the Hearts:
Use your heart-shaped cookie cutter to punch out a complete heart from each color slab. You now have two solid hearts. -
Create the Jagged Split:
Using your X-acto knife, carefully cut a zig-zag or jagged line down the center of each heart. Try to make the cuts distinct so they look like puzzle pieces. -
Swap the Halves:
Separate the halves. Take the left side of the blush pink heart and pair it with the right side of the beige heart (or vice versa). You can make two complete bi-color sets, but for the specific look in the photo, you just need two separate matching halves. -
Refine the Edges:
Gently tap the cut edges of your chosen halves with your finger to soften any sharp corners created by the knife, but keep the jagged shape distinct so they still interlock.
Step 2: Detailing & Baking
-
Add the Initials:
With your alphabet set, firmly press an ‘A’ (or your desired initial) into the center of each heart half. Rock the stamp slightly to ensure a deep, clear impression. -
Punch the Hole:
Use a toothpick or a small straw to create a hole at the top of each heart lobe. Ensure the hole is large enough for your jump ring but not too close to the edge to prevent tearing. -
Smooth Imperfections:
Inspect the clay for fingerprints. I lightly brush the surface with a tiny bit of cornstarch or baby oil before baking to smooth out any unwanted texture. -
Bake the Clay:
Place the pieces on a parchment-lined baking sheet. Bake according to your clay manufacturer’s instructions, typically around 275°F (135°C) for 15-30 minutes. -
Cool Down:
Remove the tray from the oven and let the clay cool completely. It will harden fully as it returns to room temperature.
Stamp Fixes
If your stamped initial isn’t deep enough, don’t press again over the old mark (it creates a ghost image). Flip the clay, roll it smooth, and re-cut the shape.
Step 3: Assembly & Finishing
-
Sand the Edges:
Once cool, use fine-grit sandpaper to gently buff the outer edges if there are any rough spots from the cookie cutter. -
Seal (Optional):
If you want extra durability, apply thin coat of matte varnish. This protects the clay from dirt while maintaining that natural, unglossed look. -
Attach the Jump Rings:
Open a jump ring with your pliers by twisting it sideways. Loop it through the hole you created in the clay heart. -
Connect the Keychain:
Before closing the jump ring, slide on the last link of the keychain chain. Use the pliers to twist the jump ring closed securely. -
Final Test:
Hold the two keychains together to ensure your jagged puzzle edges still line up delightfully, creating a complete heart when united.
Add Gold Accents
After baking, use a fine-tip paintbrush and gold acrylic paint to carefully fill in the stamped initials for a touch of elegant contrast.
Give one half to your favorite person and keep the other for a subtle reminder of your connection wherever you go


Matching Couple Keychains in Your Colors
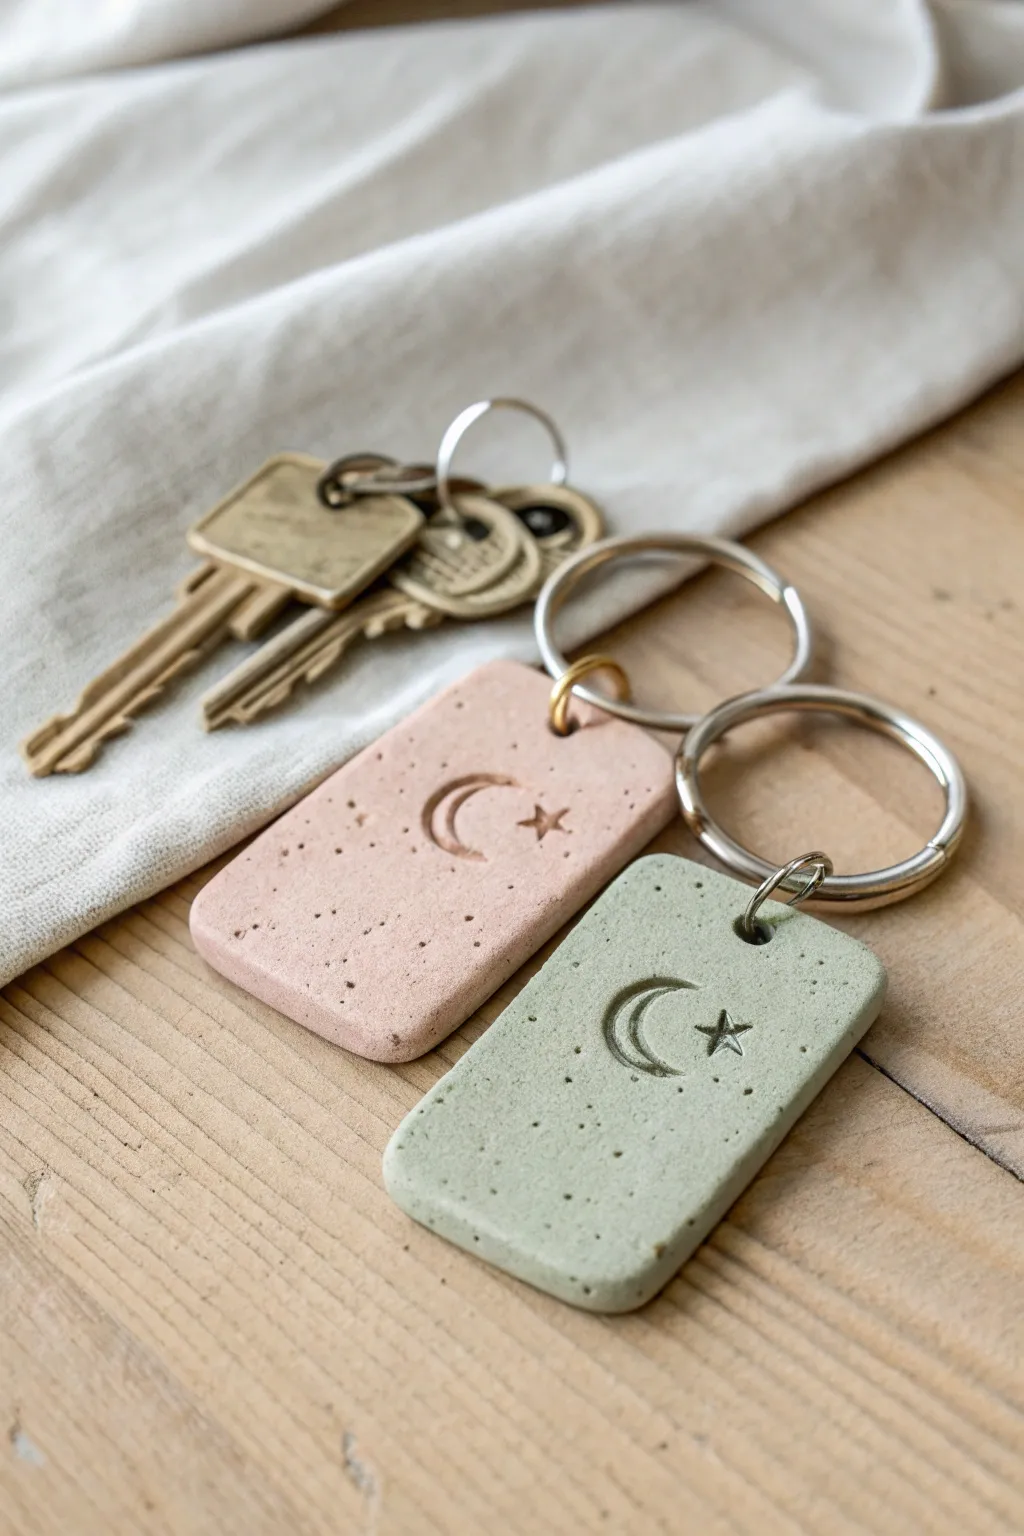
These understated matching keychains feature earthy tones and delicate celestial symbols, perfect for keeping a piece of your partner close. The soft, speckled polymer clay gives them a sophisticated, stone-like texture that feels modern and minimalist.
Step-by-Step
Materials
- Polymer clay (pale pink and sage green)
- Black pepper or dried coffee grounds (for speckling)
- Acrylic roller or rolling pin
- Small rectangular clay cutter (approx. 1.5 inch)
- Small moon and star stamps
- Toothpick or small awl
- Jump rings (gold and silver)
- Keyring hardware
- Pliers
- Oven and parchment paper
- Fine grit sandpaper
Step 1: Preparing the Clay
-
Condition the clay:
Start by warming the polymer clay in your hands to soften it. Knead the pink and green blocks separately until they are pliable and smooth. -
Create the speckled effect:
To achieve that organic texture seen in the photo, sprinkle a very small pinch of ground black pepper or dried coffee grounds onto each color. Fold the clay over and knead it until the specks are evenly distributed. -
Roll it out:
Place the clay on a clean, flat surface. Using your acrylic roller, roll the clay out to an even thickness of about 4mm or 1/4 inch. I like to use depth guides or popsicle sticks on either side to ensure it’s perfectly level.
Step 2: Shaping and Stamping
-
Cut the shapes:
Press your rectangular cutter firmly into the clay. Give it a tiny wiggle to ensure it cuts all the way through, then lift it away. Repeat for the second color. -
Smooth the edges:
Gently pick up the rectangles. Run your finger lightly along the cut edges to soften any sharpness left by the cutter, creating that nice rounded look. -
Position the stamps:
Plan where you want your symbols. Place the crescent moon stamp slightly off-center to the left, and the star stamp to the right. -
Make the impression:
Press the stamps down gently but firmly. You want a clear recess without distorting the overall rectangle shape. If the clay sticks, you can dust the stamp with cornstarch first. -
Pierce the hole:
Using a toothpick or a small awl, poke a hole at the top center of each rectangle. Make sure the hole is big enough for your jump rings to fit through later, accounting for slight shrinkage.
Stamp trouble?
If you don’t have metal stamps, use a small bottle cap for the moon curve and draw the star with a needle tool.
Step 3: Baking and Assembly
-
Bake the pieces:
Place your clay pieces on a parchment-lined baking sheet. Bake according to the specific temperature and time directions on your polymer clay package (usually around 275°F for 15-30 minutes). -
Cool down:
Once baked, turn off the oven and open the door slightly. Let the pieces cool completely before handling them to prevent warping. -
Sand for perfection:
If there are any rough spots, wet sand the edges gently with fine-grit sandpaper under running tepid water. -
Open the jump rings:
Use two pairs of pliers to twist your jump rings open sideways (never pull them apart outward) to preserve their circle shape. -
Attach the hardware:
Thread an open jump ring through the clay hole. Attach the large keyring loop onto the jump ring before closing it. -
Secure the closure:
Use the pliers to twist the jump ring back into place until the ends meet perfectly flush. Repeat for the second keychain.
Gilded Details
Before sealing, carefully paint the recessed moon and star grooves with gold or copper acrylic paint for extra shine.
Enjoy your lovely handmade tokens of affection


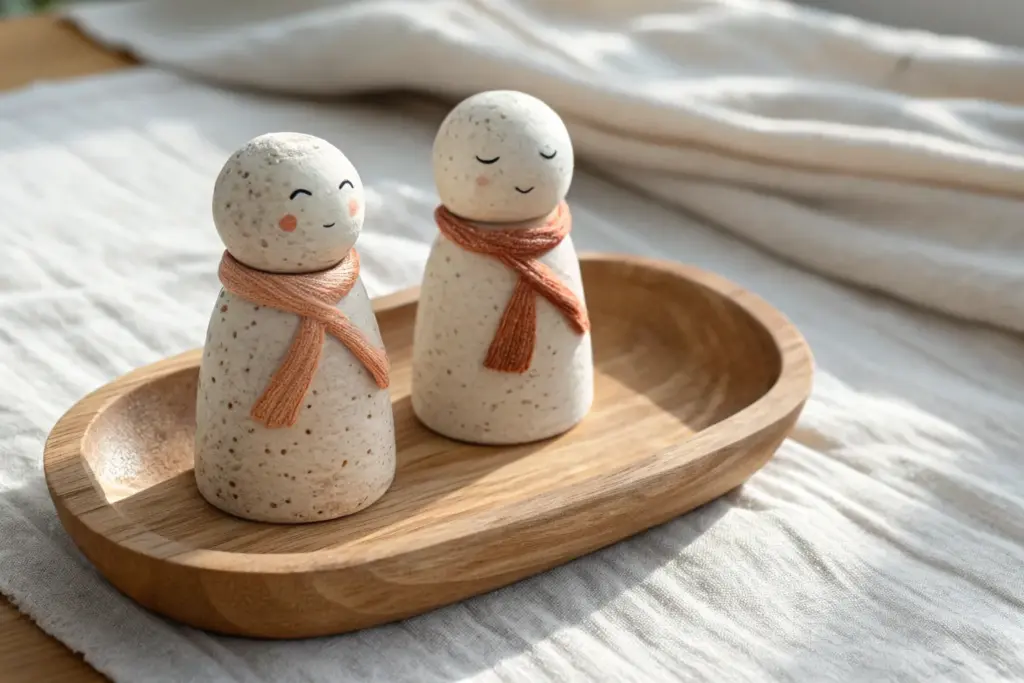
Mini-Me Couple Figurines
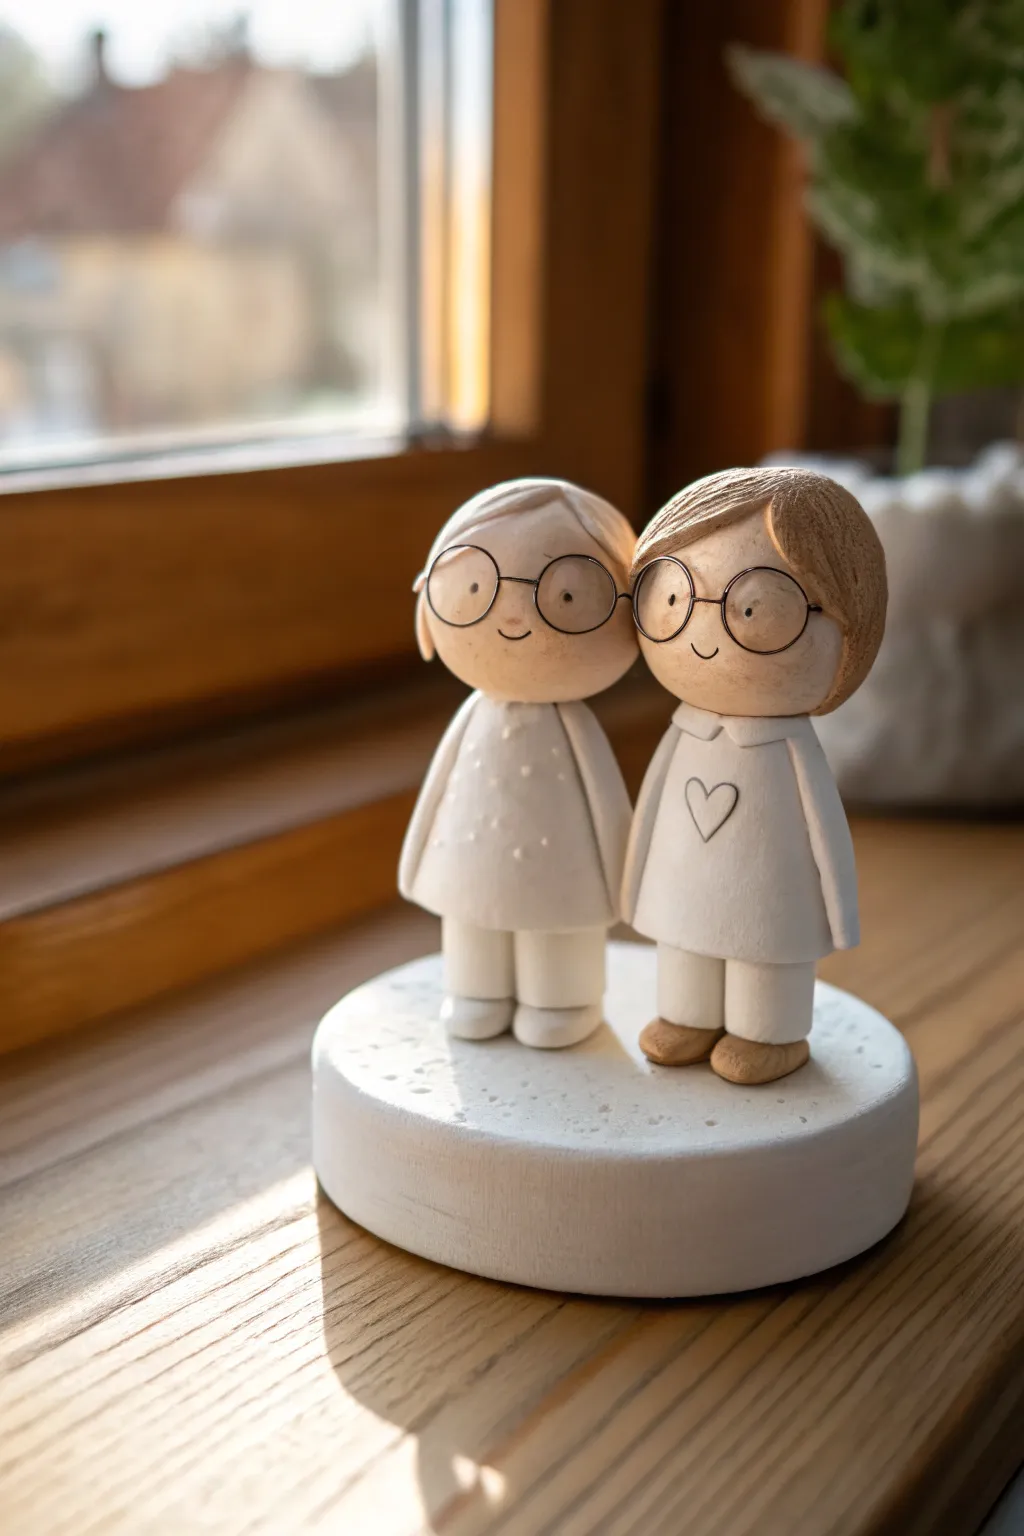
These adorable minimalist figurines capture your likeness in a sweet, stylized way, perfect for a personalized gift. With their charming wire glasses and simple white outfits, they make a heartwarming keepsake to display by a sunny window.
Detailed Instructions
Materials
- White polymer clay (approx. 2-3 blocks)
- Beige/Skin tone polymer clay
- Light brown or textured textured clay (for hair)
- Thin black craft wire (20-24 gauge) for glasses
- Sculpting tools (needle tool, ball stylus)
- Round cookie cutter (approx. 3-4 inches)
- Wire cutters and round nose pliers
- Liquid polymer clay (Bake and Bond)
- Acrylic rolling pin
- Aluminum foil (for armature core)
- Oven and baking tray
Step 1: Base and Body Basics
-
Create the platform:
Roll out a thick slab of white clay, roughly 1/2 inch thick. Use your round cookie cutter to punch out a clean circle for the base. Smooth the edges with your finger to soften the cut. -
texture the base:
Before the base hardens or is baked, gently tap the surface with a ball of crumpled aluminum foil or a stiff brush to give it a subtle, stone-like texture. -
Form the torsos:
Roll two cylinders of white clay for the bodies. These should be slightly tapered at the top for the neck area. Gently flatten the bottom so they stand securely. -
Add pant legs:
For the taller figure (right), create two small white logs for legs and attach them to the bottom of the torso. For the figure on the left, the dress or tunic style goes all the way down, but create two small white shoes peeking out from underneath. -
Attach the feet:
Roll small ovals of clay for shoes. Use light brown for the figure on the right and white for the figure on the left. Press them firmly onto the legs to ensure stability.
Wire Safety Tip
When making the tiny glasses, leave extra straight wire on the ‘arms’ of the frames. Poke these straight ends directly into the side of the clay head for a secure, glue-free fit.
Step 2: Heads and Hair
-
Shape the heads:
Roll two spheres of skin-tone clay. I always like to roll them simultaneously to compare sizes and ensure they look balanced next to each other. -
Create the nose:
Take a tiny pinch of skin-tone clay, roll it into a minuscule ball, and press it gently onto the center of the face. Blend the edges slightly so it doesn’t look stuck on. -
Sculpt the mouth:
Use a needle tool or a small curved blade to press a tiny, gentle smile into the clay below the nose. -
Add the hair cap:
Flatten a disk of light brown or textured clay. drape it over the back of the head sphere, smoothing it down to form the base of the hair. -
Detail the hairstyle – Left Figure:
For the left figure, add a flattened piece for bangs swept to the side. Use a needle tool to scratch in fine lines for hair texture. -
Detail the hairstyle – Right Figure:
For the right figure, add slightly thicker, shorter chunks of clay for a cropped look. Texture heavily with your needle tool to mimic the rougher finish seen in the photo.
Make It Personal
Customize the accessories! Add tiny clay headphones, a favorite book, or a miniature pet sitting on the base between the figures to represent your unique relationship.
Step 3: Assembly and Details
-
Connect head to body:
Insert a short piece of wire or a toothpick into the neck of the body, leaving half exposed. Push the head onto this support. Add a drop of liquid clay at the join for a permanent bond. -
Sculpt the arms:
Roll thin snakes of white clay for arms. Attach them to the sides of the bodies. For a cute touch, angle them slightly inward or have them holding hands. -
Add the collar:
For the figure on the right, create a tiny flat strip of white clay and wrap it around the neck area to create a shirt collar. -
Engrave the heart:
On the chest of the right figure, use a needle tool to gently etch a simple heart outline. Keep the lines clean and minimal. -
Craft the glasses:
Using round nose pliers, wrap the thin black wire around a cylindrical object (like the handle of a paintbrush) to make two loops. Connect them with a small bridge of wire. -
Attach glasses:
Gently press the wire glasses into the clay face. Depending on the clay softness, the wire ends can be pushed slightly into the hair or behind the ears to hold them in place. -
Decorate the dress:
If desired, use a small dotting tool to add subtle texture or tiny dots to the dress of the left figure for contrast. -
Final assembly:
Place both completed figures onto the round base. Press their feet firmly into the textured surface to ensure they stand upright during baking. -
Bake:
Bake the entire piece according to your polymer clay package instructions (usually 275°F/130°C for 15-30 minutes). Let it cool completely before moving.
Place your finished mini-couple on a desk or shelf to bring a daily smile to your favorite person


Back-View Couple Shelf Sitter

Capture a tender moment of connection with this Willow Tree-inspired shelf sitter, featuring two figures sharing a quiet embrace. The distinctively textured finish and muted color palette give this piece a timeless, rustic charm perfect for sitting on a bookshelf edge.
How-To Guide
Materials
- Polymer clay (white or beige base)
- Aluminum foil
- Wire armature (16 or 18 gauge)
- Pliers
- Sculpting tools (needle tool, blending tool, rubber shaper)
- Stiff bristle brush (e.g., old toothbrush or stippling brush)
- baking sheet and parchment paper
- Acrylic paints (muted coral/terracotta, slate blue/teal, beige)
- Matte varnish or sealant
Step 1: Building the Armature
-
Create the wire skeleton:
Cut two lengths of armature wire, each roughly 6 inches long. Bend them into L-shapes to mimic a seated posture, ensuring the vertical part (torso) is slightly shorter than the horizontal part (legs) since they will be sitting on an edge. -
Join the figures:
Position the two L-shaped wires side-by-side, leaving a tiny gap between them. Wrap a thinner gauge wire or masking tape around the hips to hold them together securely as a single unit. -
Add bulk with foil:
Crumple aluminum foil tightly around the wire frames to create the core shape of the bodies and heads. This saves clay and ensures even baking. Keep the foil slightly smaller than your desired final size.
Hack: Wood Effect
To get that specific chiseled look, use a sharp hobby knife to actually slice away thin slivers of the raw clay surface before texturing, mimicking whittled wood.
Step 2: Sculpting the Forms
-
Cover the base with clay:
Condition your polymer clay until soft, then roll it into a thin sheet. Wrap the foil armatures completely, smoothing the seams with your thumbs to create a unified surface. -
Shape the torsos:
Add more clay to refine the torsos. For the figure on the left, create a soft, A-line dress shape that drapes down. For the figure on the right, sculpt a simple shirt back that looks slightly more rectangular. -
Form the heads:
Roll two balls of clay for the heads. Attach them to the necks, blending the clay downward so there are no visible seams. Keep facial features absent—the charm lies in the faceless, gestural style. -
Add the hair texture:
Add small flattened pads of clay to the heads to suggest hair volume. I typically use a needle tool to scratch in short, directional lines to mimic hair strands, keeping the styling simple like a bob cut for one and a short cut for the other. -
Sculpt the embrace:
Roll a snake of clay for the right figure’s arm. Attach it across the back of the left figure, flattening the hand gently onto their shoulder. Blend the shoulder seam seamlessly into the blue shirt area. -
Refine the posture:
Before texturing, test the sculpture on the edge of a table or block to ensure it sits flat and the legs dangle or tuck under correctly without tipping over.
Step 3: Texturing and Finishing
-
Create the signature texture:
Take a stiff bristle brush or a crumpled ball of aluminum foil and gently press it all over the clothing surfaces. This creates the carved, wood-like dimpled texture seen in the inspiration image. -
Add carving marks:
Use a sculpting tool to create vertical, slightly carved indentations down the back of the clothes to simulate drapery and fabric folds. These shouldn’t be perfect; rougher marks look more authentic. -
Bake the sculpture:
Place your piece on a parchment-lined baking sheet using a block of wood or oven-safe bowl to support the seated position. Bake according to your clay package instructions (usually 275°F/135°C for 15-30 minutes). -
Cool down:
Allow the sculpture to cool completely in the oven with the door cracked open to prevent cracking.
Make it Personal
Carve initials inside a small heart on the sole of one of the feet or the bottom of the sculpture for a hidden romantic message only he will know is there.
Step 4: Painting
-
Base coat wash:
Mix a very watery beige or light tan acrylic paint. Brush it over the entire sculpture and wipe it back almost immediately with a paper towel. The paint will settle into your texture marks, enhancing that wood-carved look. -
Paint the dress:
Mix a muted coral or terracotta color. Apply it to the left figure using a dry-brush technique—dip your brush, wipe most of it off, and lightly drag it over the surface so the texture remains visible. -
Paint the shirt:
Using a similar dry-brush method, apply a slate blue or teal color to the right figure’s shirt and the arm wrapping around the shoulder. -
Paint the hair:
Use a light brown or sandy beige for the hair, keeping the application light to highlight the strand texture you carved earlier. -
Seal the work:
Once the paint is fully dry, apply a coat of matte varnish to protect the surface without adding unnatural shine.
Place this sweet reminder of your bond on a prominent shelf and enjoy the handmade warmth it brings to the room

The Complete Guide to Pottery Troubleshooting
Uncover the most common ceramic mistakes—from cracking clay to failed glazes—and learn how to fix them fast.
Personalized Message Token Pocket Charm
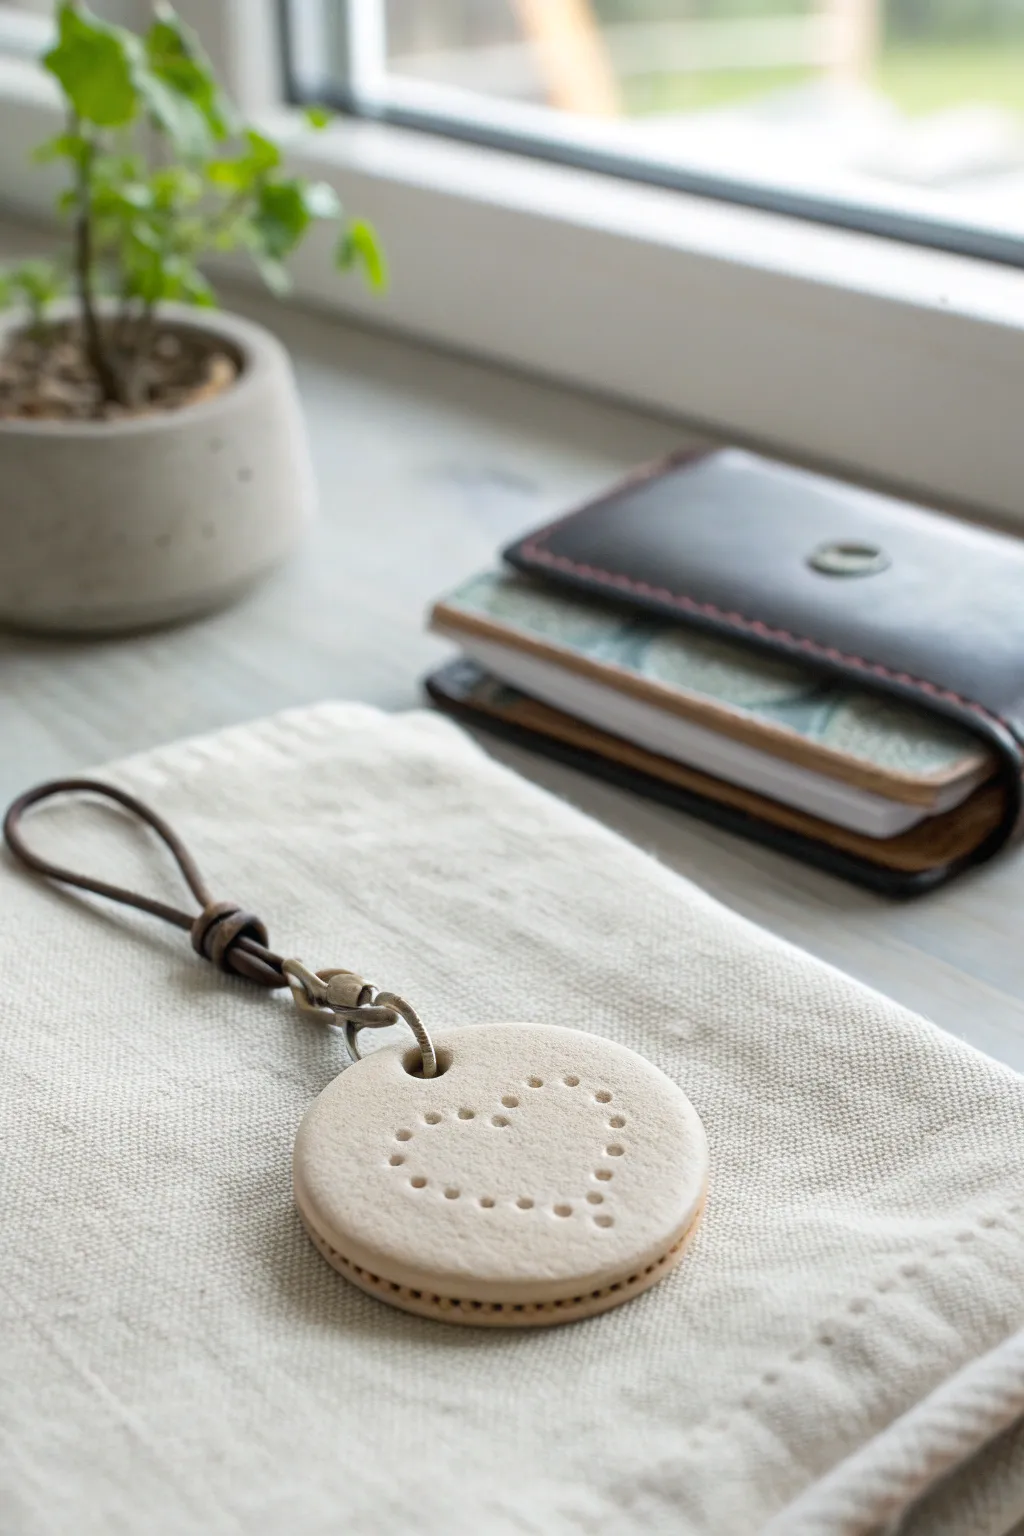
This charming, personalized pocket token combines the soft texture of vegetable-tanned leather with a simple, sweet design. It’s a tactile keepsake perfect for carrying a subtle reminder of love right in your pocket or attached to a set of keys.
Step-by-Step Guide
Materials
- Vegetable-tanned tooling leather (thick, approx. 3-4mm)
- Circle template or compass
- Sharp craft knife or round leather punch (large diameter)
- Small leather awl or 1/16″ hole punch
- Water in a small spray bottle
- Sturdy metal jump ring
- Leather cord or lace
- Groover tool (optional, for edge detailing)
- Sanding stick or fine-grit sandpaper
- Burnishing tool (or canvas cloth)
- Mallet
Step 1: Shaping the Base
-
Trace the Shape:
Begin by tracing a perfect circle onto your leather using a template or compass. A diameter of about 1.5 to 2 inches works perfectly for a pocket-sized charm. -
Cut the Circle:
Carefully cut out your circle. If you have a round leather die cutter, that’s ideal for a clean edge. If used a knife, go slowly to ensure the curve is smooth and continuous without jagged corners. -
Case the Leather:
Lightly mist the surface of the leather with water. This process, called ‘casing,’ softens the fibers just enough to make tooling and punching crisp and permanent without cracking. -
Add Edge Detail:
While the leather is damp, use an edge groover or a pair of wing dividers to score a decorative line about 1/8th of an inch from the outer edge. This frames the piece beautifully.
Uneven Punches?
If your heart holes look uneven, re-insert the awl into the shallow ones and gently wiggle it in a circular motion to widen them slightly.
Step 2: Creating the Design
-
Mark the Heart:
Using a stylus or a very dull pencil, lightly sketch a heart shape in the center of the circle. Don’t press too hard; you just need a faint guide for your punches. -
Plan Hole Spacing:
Mark small dots along your heart outline where you intend to punch holes. Keep them evenly spaced, roughly 3-4mm apart, to maintain a clean, recognizable shape. -
Punch the Heart:
Place your leather on a protective cutting mat. Using your small awl or the smallest hole punch you have, press firmly into each marked dot to create the stippled heart effect. I like to hold the tool perfectly vertical here for uniform depth. -
Create the Loop Hole:
Punch a larger, functional hole at the very top of the circle, centered above the heart. This needs to be wide enough to accommodate your metal jump ring.
Step 3: Finishing Touches
-
Sand the Edges:
Once the leather is dry, use fine-grit sandpaper or a sanding stick to smooth out any roughness around the perimeter of the circle. -
Burnish:
Rub the edge briskly with a burnishing tool or a piece of canvas cloth. The friction heats natural waxes in the leather, turning the fuzzy raw edge into a smooth, glossy rim. -
Attach Hardware:
Twist open your metal jump ring using two pairs of pliers. Thread it through the top hole of the leather token and close it securely. -
Knot the Cord:
Cut a length of leather cord. Fold it in half, pass the loop through the jump ring, and pull the tails through the loop (a lark’s head knot), or simply tie a sturdy overhand knot to secure it.
Secret Message
Before sealing or attaching hardware, use letter stamps to imprint initials or a date on the smooth back side for a hidden surprise.
This sturdy little token will weather beautifully over time, gaining character the longer it stays in his pocket
Thumbprint Heart Keepsake Pebble
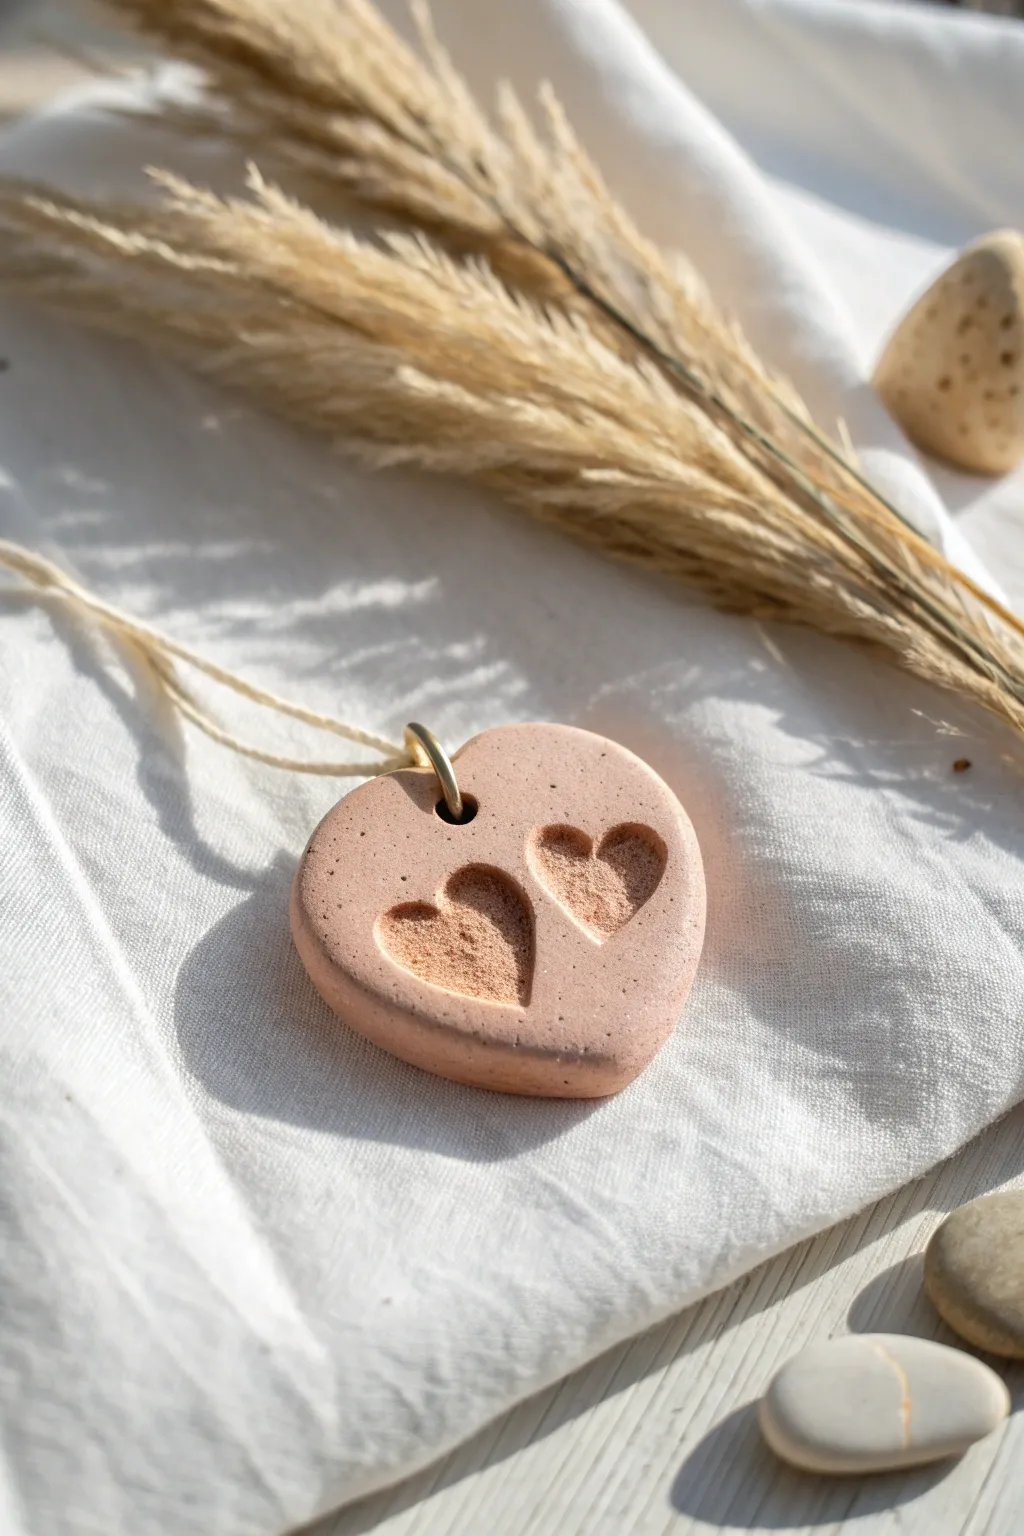
Create a sweetly sentimental token for your boyfriend with this textured clay pebble, featuring two unique heart imprints. Its natural, stone-like finish and minimalist design make it a perfect, understated keepsake he can carry anywhere.
Detailed Instructions
Materials
- Polymer clay (terracotta or granite effect)
- Small heart-shaped cutter or stamp
- Rolling pin or acrylic roller
- Sandpaper (fine grit)
- Gold jump ring (8mm or 10mm)
- Thin cord or twine
- Toothpick or needle tool
- Parchment paper
- Oven (for baking)
Step 1: Shaping the Pebble
-
Condition the clay:
Begin by warming a small chunk of polymer clay in your hands. Knead it thoroughly until it is soft, pliable, and free of cracks. -
Form a ball:
Roll the conditioned clay into a smooth, tight ball. Aim for a size roughly slightly larger than a walnut. -
Flatten into a pebble:
Place the ball on your parchment paper and gently press straight down with your palm or a flat object. You want a thick, organic shape, not a thin pancake—about 1/4 inch thickness is ideal. -
Refine the heart shape:
Using your fingers, gently pinch the bottom of the disc to form a point and press the top center inwards to create a soft, rounded heart silhouette. Smooth the edges so they feel worn and stone-like.
Fixing Cracks
If tiny cracks appear while shaping, dip your finger in a tiny drop of baby oil or clay softener and gently rub the area until smooth before baking.
Step 2: Adding Details
-
Create the indentations:
Take your small heart cutter or a custom stamp. Press it firmly into the center of the clay heart twice, slightly offset from each other, to create deep, clean recessed hearts. -
Add texture:
To mimic the stone look in the photo, gently tap the surface of the clay with a stiff toothbrush or a crumpled ball of aluminum foil. Avoid the inside of the heart indentations to keep them smooth. -
Piercing the hole:
Use a toothpick or needle tool to poke a hole near the top center of the heart. Wiggle it slightly to ensure the opening is wide enough for your jump ring. -
Check the back:
Flip the piece over and smooth out any rough clay displaced by the piercing tool to ensure the back is comfortable against the skin.
Step 3: Finishing Touches
-
Bake the clay:
Transfer the parchment paper to a baking sheet. Bake exactly according to your specific clay brand’s manufacturer instructions, usually around 275°F (135°C) for 15-30 minutes. -
Cool down:
Allow the clay ‘pebble’ to cool completely in the oven with the door cracked slightly. This helps prevent thermal shock and brittleness. -
Sand for realism:
Once cool, lightly sand the surface and edges with fine-grit sandpaper. This removes fingerprints and enhances the matte, stone-like quality. -
Rinse and dry:
Wash off the sanding dust with water and dry the piece thoroughly with a soft cloth. -
Attach hardware:
Open a gold jump ring using pliers (twist sideways, don’t pull apart). Thread it through the hole you created and close it securely. -
Add the cord:
Thread a piece of natural twine or thin cord through the jump ring to complete the necklace or ornament.
Texturizing Hack
Mix black pepper or used coffee grounds into plain beige clay before shaping. This creates a realistic speckled granite effect without buying special clay.
Now you have a durable, personalized keepsake that captures a sweet sentiment in stone


What Really Happens Inside the Kiln
Learn how time and temperature work together inside the kiln to transform clay into durable ceramic.
Couple Initials Desk Paperweight
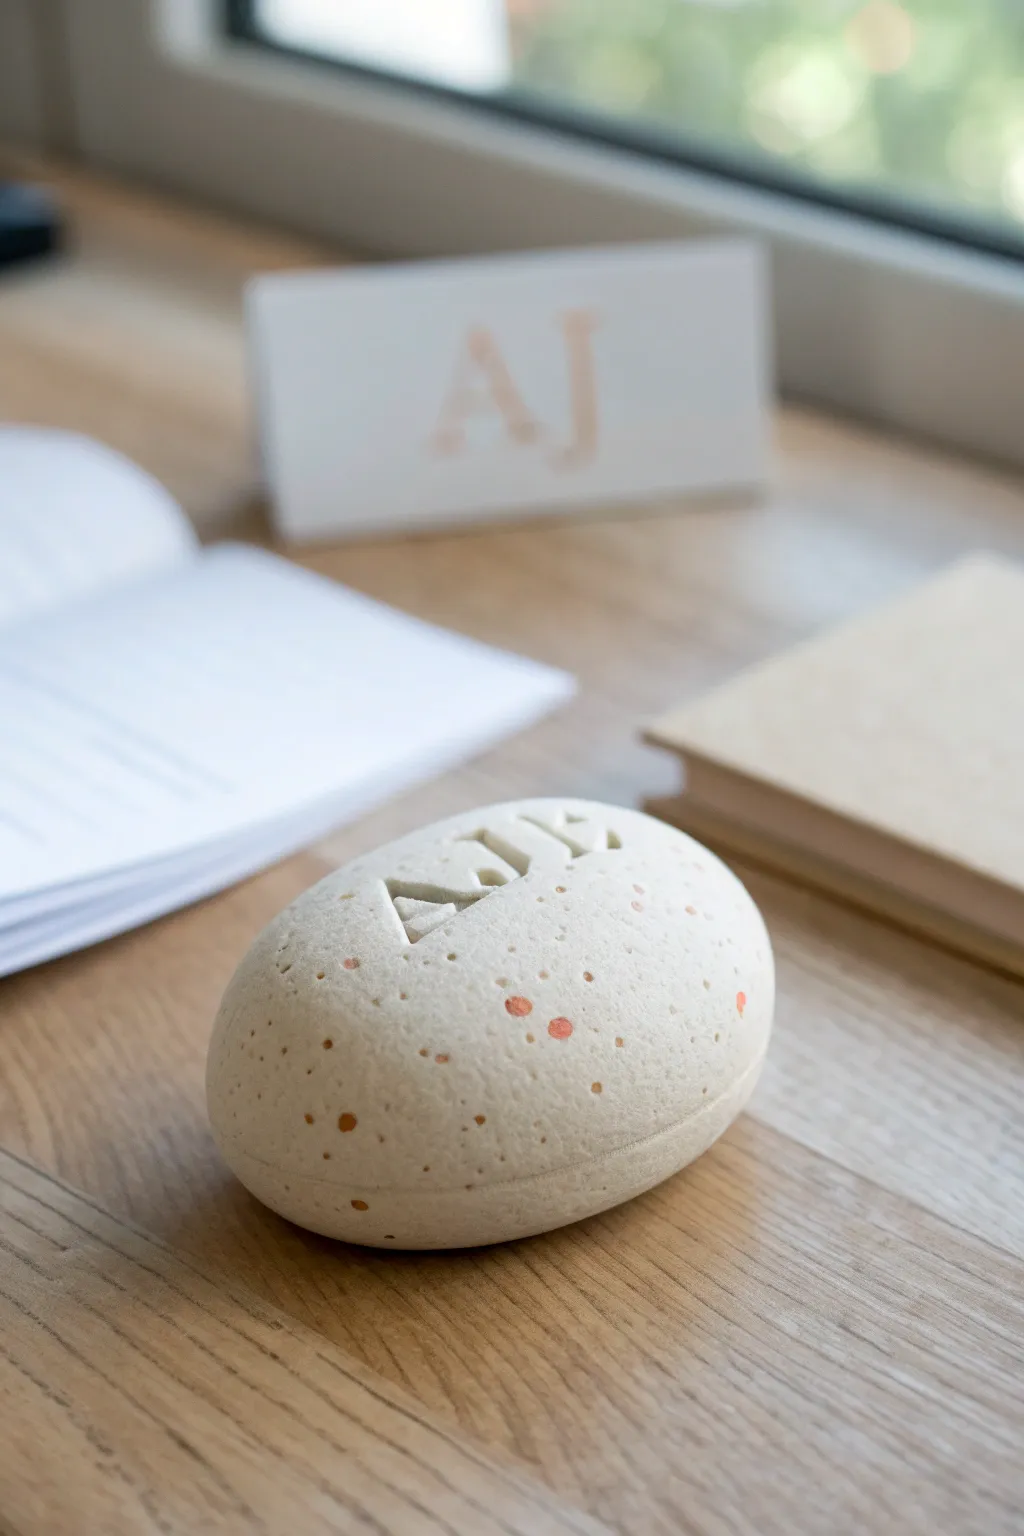
For the boyfriend who loves a tidy workspace, this solid, egg-shaped paperweight is a subtle and modern way to keep you on his mind. The natural stone look with delicate orange speckles and deeply debossed initials creates a minimalist piece that feels both organic and personalized.
Step-by-Step Guide
Materials
- White polymer clay (approx. 2-3 blocks)
- Small amount of translucent polymer clay (optional, for stone effect)
- Coarse black pepper or dried coffee grounds (tiny amount)
- Acrylic paint (muted orange/terracotta)
- Small stiff-bristled brush or old toothbrush
- Carving tools or alphabet letter stamps
- Fine-grit sandpaper (400 and 600 grit)
- Baking sheet and parchment paper
- Oven
Step 1: Prepping the Clay Base
-
Condition the clay:
Start by warming up your white polymer clay in your hands. Knead and roll it until it is completely soft and pliable, ensuring there are no cracks or air bubbles trapped inside. -
Add texture (optional):
If you want a true faux-stone look, I like to mix in a tiny pinch of coarse black pepper or even a small chunk of translucent clay now. Knead it thoroughly so the specks are evenly distributed but subtle. -
Form the shape:
Roll the clay into a smooth ball between your palms. -
Refine the pebble:
Gently press the ball onto your work surface to flatten the bottom so it won’t roll away. Then, gently taper the top and sides to create an organic, rounded river-stone or egg shape. Smooth out any fingerprints with a drop of baby oil or water.
Paint Smudges?
If you flick a large globs of paint by accident, don’t wipe it! Let it dry, then gently intricate scrape it off with a craft knife or sand it away after baking.
Step 2: Carving and Speckling
-
Plan your placement:
Decide exactly where the initials will go. Since the surface is curved, aim for the highest, flattest point of the gentle dome. -
Deboss the initials:
Using alphabet stamps or a fine carving tool, press the initials ‘A’ and ‘J’ (or your chosen letters) deep into the clay. If carving by hand, use a needle tool to outline first, then scoop out the clay to create a clean, recessed letter. -
Clean the edges:
The carving process might raise the clay edges slightly. Gently tap these down or slice them off with a craft knife for a sharp, graphic finish. -
Prepare the speckle paint:
Dilute a small drop of terracotta or muted orange acrylic paint with water until it has an inky consistency. -
Flick the paint:
Dip a stiff brush or toothbrush into the paint mixture. Hold it a few inches from the clay and run your thumb across the bristles to flick tiny splatters onto the surface. -
Control the pattern:
Aim for a random distribution. You want tiny mist-like dots combined with a few larger distinctive spots, just like natural speckled eggshells. Let the paint dry completely before baking.
Adding Weight
To make it heavier, wrap your clay around a clean, crumpled ball of aluminum foil or a small, smooth rock before shaping. This makes it feel substantial.
Step 3: Baking and Finishing
-
Bake the piece:
Place your paperweight on a parchment-lined baking sheet. Bake according to your clay manufacturer’s instructions (usually 275°F/135°C for 15-30 minutes depending on thickness). -
Cool down:
Let the paperweight cool completely in the oven with the door cracked open. This gradual cooling helps prevent cracks in thicker clay pieces. -
Sand the surface:
Once cool, use 400-grit sandpaper under running water to gently sand the surface. This removes any lint or rough fingerprint ridges. -
Final polish:
Move to 600-grit paper for a smoother finish. Be careful not to sand off your painted speckles; focus on the unpainted areas or use a very light touch. -
Buff (optional):
Rub the piece briskly with a piece of denim or a soft cotton cloth to give it a natural, low-sheen matte finish without using any glossy varnish.
Place this on his desk next to his favorite books for a constant, loving reminder of you while he works
Mini Photo Frame Magnet for His Fridge
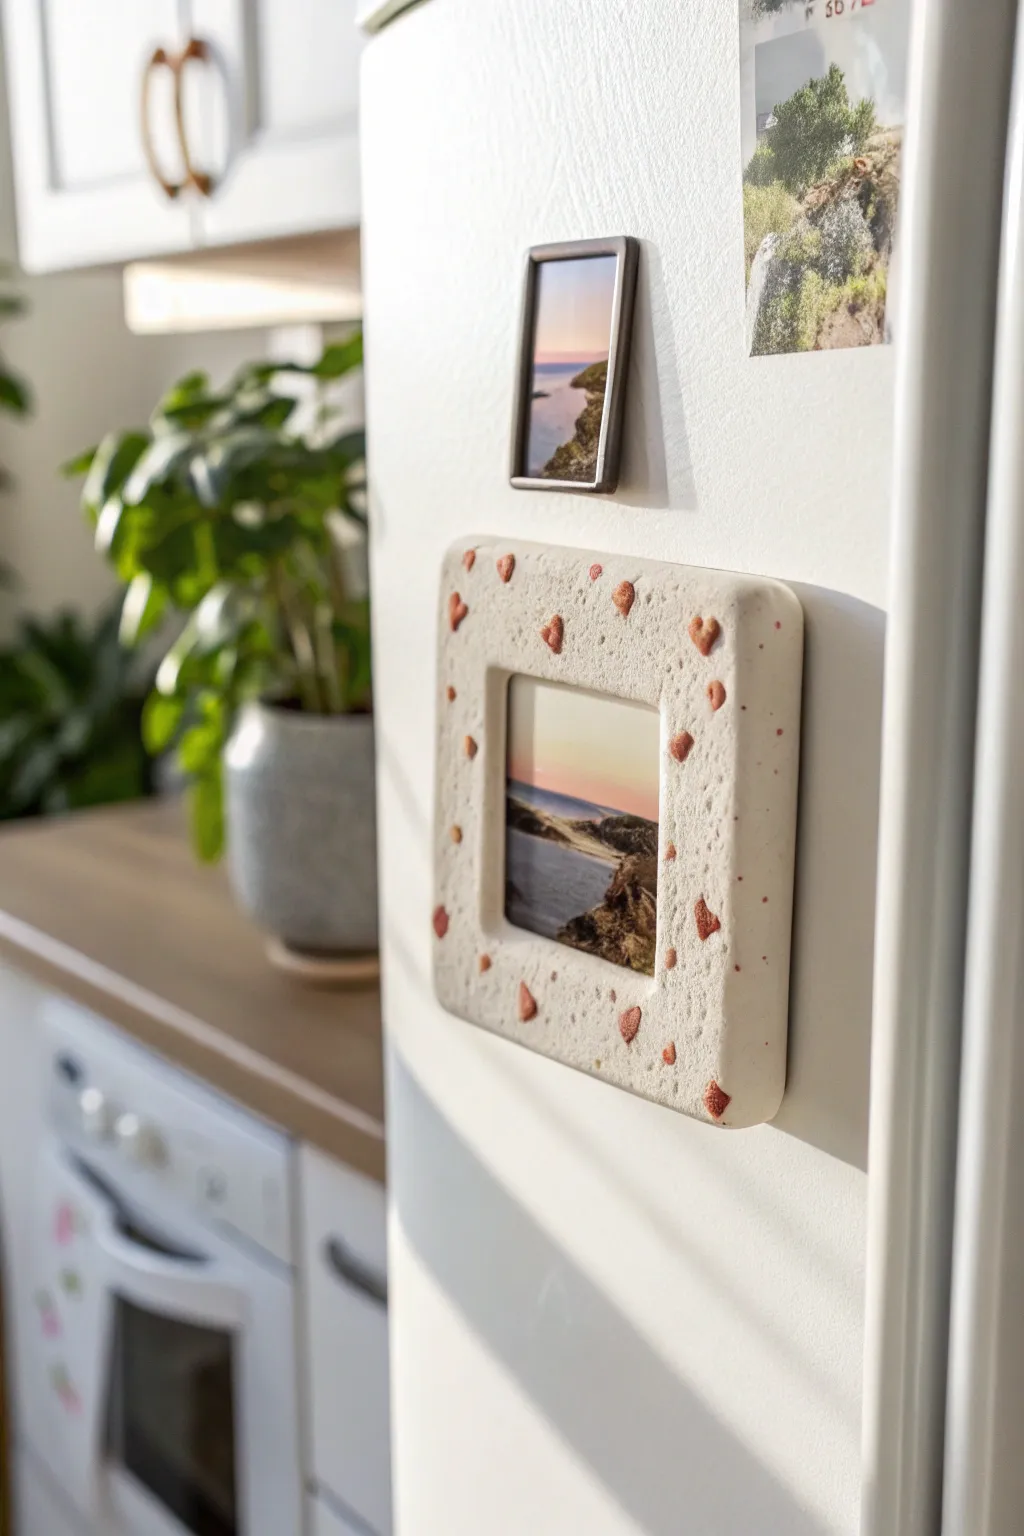
Create a sweet, personalized spot for his favorite memory with this rustic clay magnet frame. With its chunky white base and embedded terracotta-colored hearts, it adds a textured, handmade touch to any kitchen appliance.
Step-by-Step Tutorial
Materials
- White air-dry clay or polymer clay
- Terracotta-colored clay (or acrylic paint to color white clay)
- Rolling pin
- Square cookie cutter (approx. 3-4 inches)
- Smaller square cutter (for the photo window)
- Craft knife or clay blade
- Strong craft glue (E6000 or similar)
- Strong round ceramic magnet or magnetic sheet
- Fine-grit sandpaper
- Gloss or matte varnish (optional)
- Photo printed to size
Step 1: Preparing the Clay Base
-
Condition the white clay:
Start by kneading a generous amount of white clay until it is soft and pliable. You want a smooth consistency without cracks. -
Roll the slab:
Roll out the white clay to a substantial thickness, about 1/4 to 1/2 inch thick. This chunky look is key to the frame’s aesthetic. -
Round the edges:
Once rolled, gently pat down the corners and edges with your finger to soften them. The goal is a pillowy, soft square rather than sharp geometric angles. -
Cut the outer shape:
Use your larger square cutter to define the outer shape, or freehand cut a square with rounded corners using your clay blade. -
Create the window:
Center the smaller square cutter in the middle of your slab and press down firmly to remove the center. Save this scrap clay for another project. -
Smooth the interior:
Dip your finger in a little water (for air-dry clay) or baby oil (for polymer) and smooth the inner cut edges so they look finished and neat.
Step 2: Adding the Heart details
-
Prep the accent color:
Take a very small amount of terracotta or rust-colored clay. If you don’t have colored clay, mix a dab of acrylic paint into a small ball of white clay until the color is uniform. -
Form tiny hearts:
Pinch off minuscule pieces of the colored clay. Roll them into tiny balls, then flatten slighty and press an indentation into the top with a needle tool or fingernail to suggest a heart shape. -
Embed the pattern:
Randomly press these tiny clay hearts into the surface of your white frame. I like to push them deep enough so they are flush with the surface, creating an inlaid terrazzo effect. -
Add speckles:
For extra texture, take even tinier crumbs of the rust clay and sprinkle them into the empty white spaces, pressing them flat. -
Final smooth over:
Gently run your rolling pin over the top one last time to ensure all the colored bits are fully embedded and the surface is level.
Clean Cuts Pro Tip
To avoid distorting your square shape when lifting it off the table, roll your clay out on a piece of parchment paper or a ceramic tile so you can move the whole surface without touching the wet clay.
Step 3: Finishing and Assembly
-
Dry or bake:
If using air-dry clay, let it sit in a cool, dry place for 24-48 hours, flipping occasionally. If using polymer, bake according to the package instructions. -
Sanding:
Once fully cured, use fine-grit sandpaper to buff the surface. This helps reveal the crisp edges of your inlaid hearts and removes any fingerprints. -
Seal the piece:
Apply a thin coat of matte or gloss varnish to protect the clay from kitchen grease and dust. -
Attach the magnet:
Flip the frame over. Apply a strong dab of glue to the back and press your magnet firmly into place. Let the glue cure completely. -
Insert the photo:
Trim your photo slightly larger than the window opening. Tape or glue it to the back of the frame, ensuring the best part of the image is centered.
Cracking Issues?
If you notice small cracks appearing as your air-dry clay hardens, don’t panic. Simply mix a tiny bit of fresh clay with water to make a paste and fill in the cracks, then sand smooth once dry.
Now you have a charming, sturdy frame ready to display a favorite shared memory right at eye level

TRACK YOUR CERAMIC JOURNEY
Capture glaze tests, firing details, and creative progress—all in one simple printable. Make your projects easier to repeat and improve.
Coordinates Plaque of Your Spot
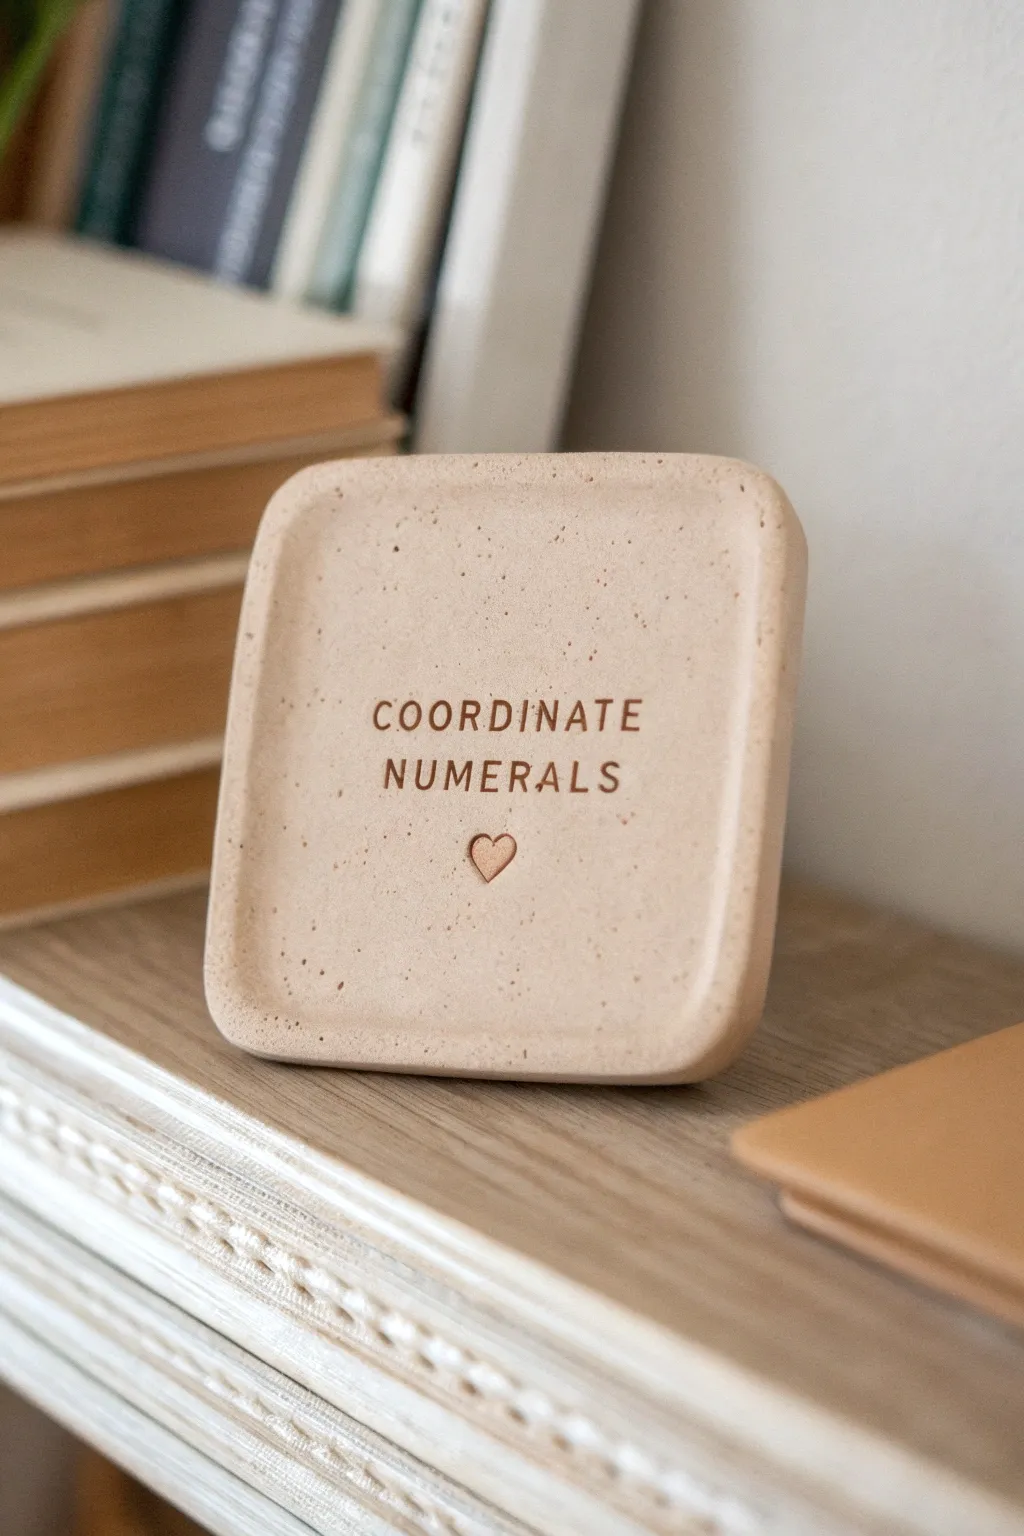
Immortalize a special location with this minimalist clay plaque feauturing stamped text and a sweet heart detail. The speckled stone effect gives it a modern, high-end ceramic look without needing a kiln.
Step-by-Step Guide
Materials
- Beige polymer clay (e.g., Fimo or Sculpey)
- Black pepper or fine dried coffee grounds (for speckles)
- Rolling pin or acrylic roller
- Square cookie cutter (approx. 4 inches) or craft knife
- Letter stamp set (small font)
- Small heart stamp or tool
- Sandpaper (fine grit)
- Brown acrylic paint (optional)
- Paper towel
- Matte varnish or sealant
Step 1: Preparing the Clay Body
-
Condition the clay:
Start by taking a block of beige or light tan polymer clay. Knead it thoroughly in your hands until it becomes soft, pliable, and warm to the touch. -
Create the speckled effect:
Flatten the conditioned clay slightly. Sprinkle a pinch of coarse black pepper or very fine dried coffee grounds onto the surface. Fold the clay over to enclose the spices. -
Incorporate the texture:
Continue kneading and folding the clay repeatedly. You want the specks to be distributed evenly throughout the entire lump, mimicking the look of natural stoneware. -
Roll it out:
Place the speckled clay on a smooth work surface. Use your rolling pin to roll it into an even slab, aiming for a thickness of about 1/4 inch to ensure durability.
Step 2: Shaping and Stamping
-
Cut the square:
Use a square cookie cutter to press out your main shape. If you don’t have a cutter, measure a 4×4 inch square and carefully cut it out using a ruler and craft knife. -
Soften the corners:
The example has lovely rounded corners. Gently press and smooth each corner with your fingertip to round off the sharp 90-degree angles. -
Create the lip:
To give it a slight dish or plaque feel, gently press your thumb along the very edge of the square, pushing slightly inward and upward to create a subtle raised rim. -
Plan your text:
Before stamping, lightly mark where you want your words to go. You can use a piece of tape as a guideline to keep your letters straight. -
Stamp the letters:
Load your letter stamps into their holder or use them individually. Firmly press ‘COORDINATE’ into the center-upper portion of the clay. Below that, stamp ‘NUMERALS’. -
Add the heart:
Center your small heart stamp below the text and press it into the clay. I find rocking the stamp very slightly helps get a clean impression. -
Smooth imperfections:
Check the surface for any accidental fingerprints. Lightly buff them away with a drop of baby oil on your finger or a soft brush.
Clean Stamp Trick
Place a piece of plastic wrap over the clay before stamping. This prevents the clay from getting stuck in the stamp crevices and creates softer, pillowy edges to your letters.
Step 3: Finishing Touches
-
Bake the piece:
Transfer your clay onto a baking sheet lined with parchment paper. Bake according to your specific clay brand’s instructions (usually 230°F – 275°F for 15-30 minutes). -
Cool down:
Let the piece cool completely inside the oven with the door slightly ajar. This gradual cooling prevents cracking. -
Sand edges:
Once cool, take a fine-grit sandpaper and gently sand the edges to remove any roughness or sharp bits left from cutting. -
Highlight the text (Optional):
If you want the letters to pop, dilute a tiny bit of brown acrylic paint with water. Brush it into the grooves of the letters and heart. -
Wipe away excess:
Immediately wipe the surface with a damp paper towel. The paint will stay in the recessed letters but wipe off the high points, making the text legible. -
Seal:
Finish by applying a thin coat of matte varnish to protect the surface and seal in the spices without making it look glossy or plastic.
Level Up: Gilded Love
Instead of brown paint, fill the stamped heart indentation with liquid gold leaf or metallic gold paint for a subtle, romantic shimmer that catches the light.
Now you have a gorgeous, personalized decor piece that commemorates a place close to your heart
Our Song Lyric Coaster
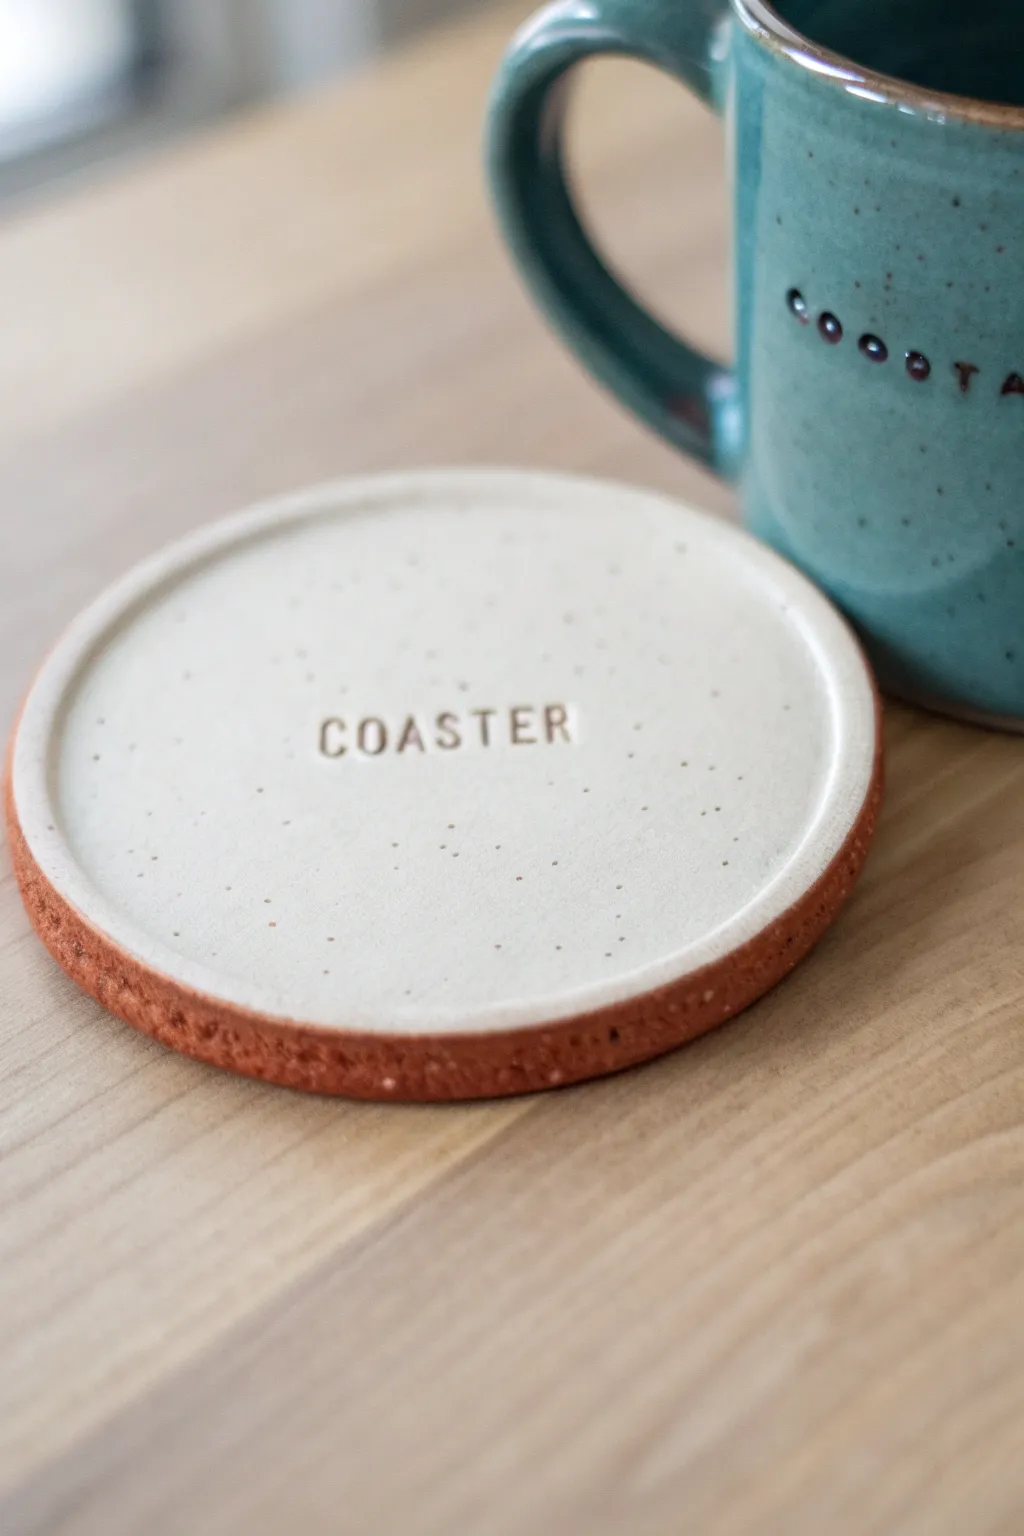
Immortalize a line from “your song” or a simple sweet message with this lovely two-tone coaster project. The design mimics professional pottery with a raw clay edge and a smooth, speckled creamy center for a modern, earthy look.
Step-by-Step
Materials
- Terracotta colored polymer clay (approx. 2 oz)
- White or cream polymer clay
- Speckled clay inclusions (or fine black pepper/sand)
- Liquid polymer clay (translucent or white)
- Circle cutter (approx. 3.5 – 4 inches)
- Smaller circle cutter (approx. 3 – 3.5 inches)
- Acrylic rolling pin
- Small letter stamp set
- Parchment paper
- Oven
- Fine grit sandpaper (400-600 grit)
- Matte polyurethane varnish (optional)
Step 1: Creating the Base
-
Condition the terra cotta clay:
Begin by warming up your terracotta-colored polymer clay in your hands until it is soft and pliable. This prevents cracking later on. -
Roll out the slab:
Use your acrylic rolling pin to roll the clay into an even slab, aiming for a thickness of about 1/4 inch. -
Cut the main circle:
Place your larger circle cutter on the slab and press down firmly to cut the base shape. Remove the excess clay. -
Smooth the edges:
Gently run your finger along the cut edge of the circle to smooth out any harsh lines or burrs left by the cutter.
Uneven Stamping?
If your letters imprint at different depths, try taping your stamps together side-by-side to create a single rigid block before pressing them into the clay.
Step 2: Mixing the Speckled Cream
-
Prepare the cream clay:
Condition a piece of white or cream polymer clay. I prefer mixing a tiny dot of brown into white to get that warm off-white tone. -
Add the speckles:
If you don’t have pre-speckled clay, knead in a small pinch of special clay inclusions, fine black sand, or even coarse black pepper to achieve the granite look. -
Roll the top layer:
Roll this speckled mixture out very thinly—think 1/16th of an inch or roughly the thickness of cardstock. -
Cut the inner circle:
Using your smaller circle cutter, cut a disc from the speckled clay.
Step 3: Assembly and Stamping
-
Apply liquid adhesive:
Smear a very thin layer of liquid polymer clay onto the center of your terracotta base. This acts as the glue between the layers. -
Position the top layer:
Carefully center the speckled cream disc on top of the terracotta base. There should be an even rim of terracotta showing all around. -
Smooth the transition:
Gently press the cream layer down, starting from the center and working outward to adhere it fully and release any trapped air bubbles. -
Prepare your text:
Select the letters for your chosen lyric or word from your stamp set. Double-check the spelling before you press. -
Stamp the clay:
Press the stamps firmly into the center of the cream clay. Don’t push all the way through; just deep enough to make a clean impression. -
Clean up edges:
If the clay distorted slightly during stamping, gently nudge the coaster back into a perfect circle shape.
Add a Color Pop
Make the letters stand out by rubbing a tiny bit of brown acrylic paint into the stamped grooves after baking, then wiping the surface clean.
Step 4: Baking and Finishing
-
Bake the coaster:
Place the coaster on parchment paper and bake according to your clay manufacturer’s instructions (usually 275°F for 15-30 minutes). -
Cool completely:
Let the coaster cool down fully in the oven or on a wire rack. It needs to be uniformly cool before sanding. -
Sand the rim:
Using fine-grit sandpaper, lightly sand the terracotta rim to expose the raw clay texture, mimicking unglazed pottery. -
Seal the top (optional):
For extra durability against spills, brush a thin coat of matte polyurethane varnish over the top cream section only.
Now you have a sentimental, personalized landing spot for his morning coffee cup
Tiny Hobby Charm for His Keys
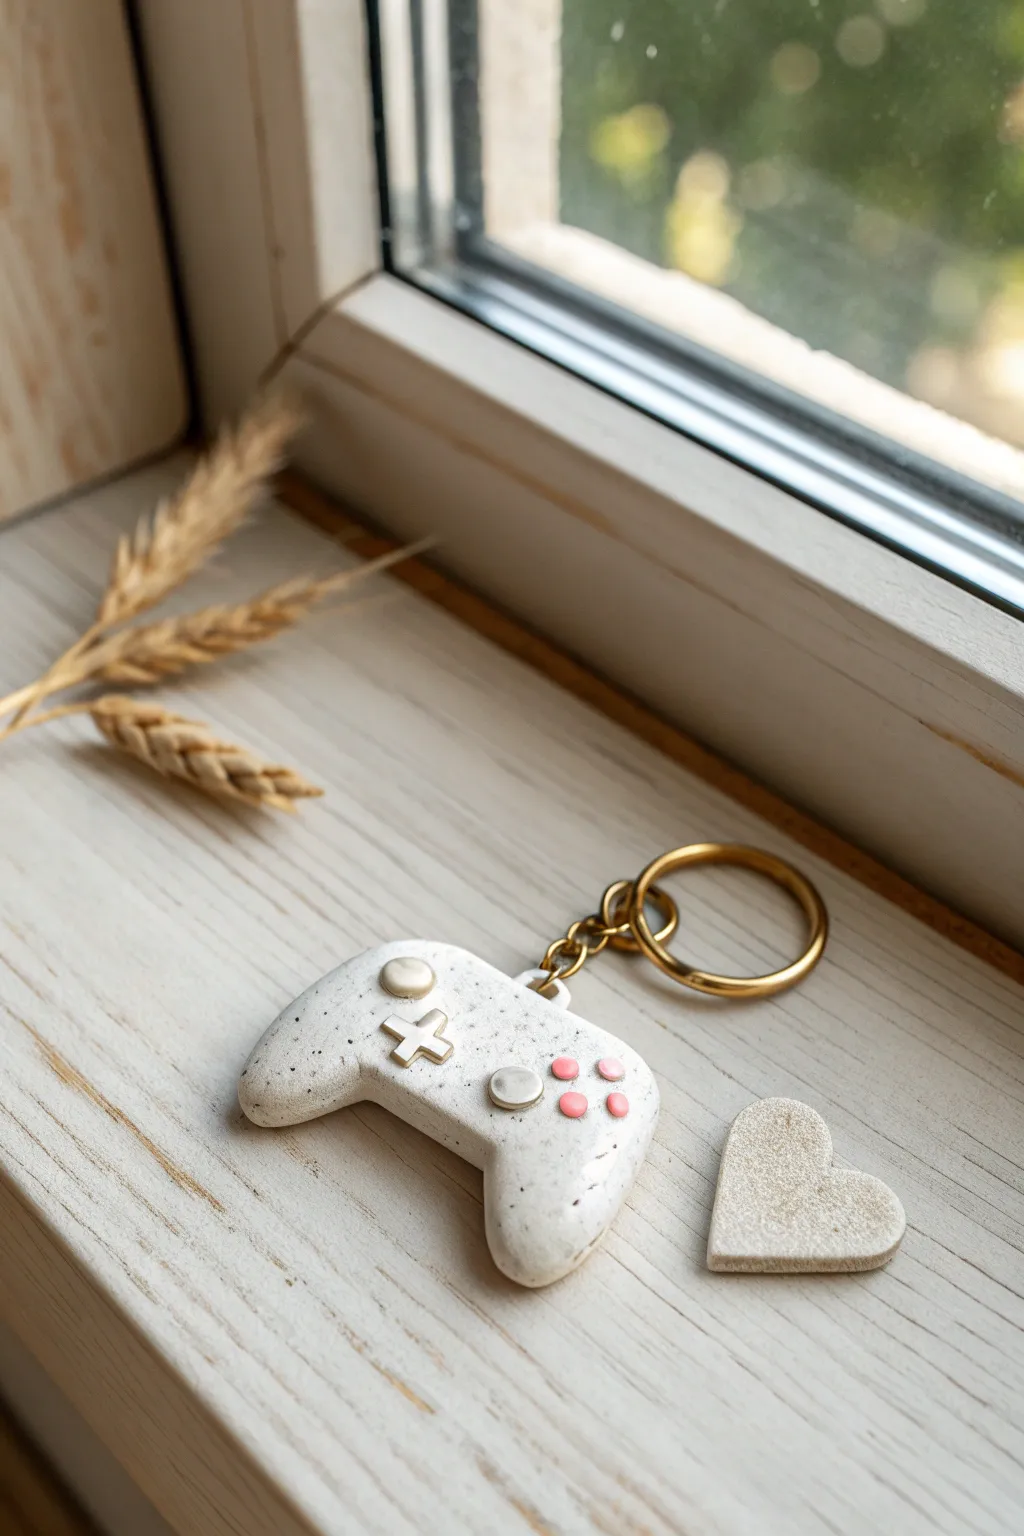
Surprise your favorite player with this adorable miniature game controller keychain, featuring a trendy speckled stone finish and elegant gold accents. It’s sturdy enough for daily use but personalized enough to show you care about his hobbies.
How-To Guide
Materials
- Polymer clay: White (granite/speckled effect) or plain white mixed with black pepper
- Polymer clay: Scrap clay for bulk (optional)
- Polymer clay: Small amount of pink or red
- Gold metallic acrylic paint or gold gilding leaf
- Fine detail paintbrush (size 0 or 00)
- Small dotting tool or toothpick
- X-Acto knife or clay blade
- Gold screw eye pin
- Gold keychain ring and jump rings
- Oven for baking
- Gloss glaze or UV resin (optional for protection)
- Sandpaper (fine grit)
Step 1: Base Shaping
-
Prepare the Clay:
Condition your speckled white clay until it’s soft and pliable. If you don’t have pre-speckled clay, mix a pinch of ground black pepper or black embossing powder into plain white clay for that faux-stone look. -
Form the Basic Shape:
Roll a medium-sized ball of clay, roughly the size of a walnut. Flatten it slightly into a thick oval. -
Indent the Top:
Using your finger or a large modeling tool, press gently into the center of the top edge to create the slight dip found on controllers. -
Pull the Handles:
Gently pull and taper the bottom corners of your oval downwards to form the two distinct ergonomic grips or ‘handles’ of the controller. -
Smooth and Refine:
Use your fingertip to smooth out the transition between the handles and the main body, ensuring the surface is rounded and comfortable to hold.
Fixing “Fingerprints”
If you see fingerprints on your raw clay, lightly brush them with a little baby oil or cornstarch before baking to smooth them out instantly.
Step 2: Adding Details
-
Make the Joysticks:
Roll two very small, identical balls of the same speckled clay. Flatten them slightly and press them onto the controller face—one on the left, one on the right, slightly offset if mimicking a specific console style. -
Create the D-Pad:
Roll out a tiny snake of clay and cut two very short, equal pieces. Cross them over each other to form a ‘plus’ sign. Press this gently onto the left side of the controller face. -
Add Action Buttons:
Switch to your pink clay. Roll four miniscule balls. Arrange them in a diamond cluster on the right side of the controller face. -
Secure the Details:
I like to use a tiny drop of liquid clay or bake-and-bond on the back of these small parts before pressing them down to ensure they don’t pop off later. -
Insert Hardware:
Carefully screw the gold eye pin into the top center of the controller. If the clay distorts, reshape it gently. Remove the pin, add a dab of superglue or liquid clay to the threads, and reinsert it for a permanent bond. -
Bonus Heart Charm:
With leftover speckled clay, cut or mold a small, simple heart shape to accompany the controller.
Step 3: Finishing Touches
-
Bake:
Bake the clay pieces according to the manufacturer’s instructions (usually 275°F/135°C for 15-30 minutes depending on thickness). Let them cool completely before handling. -
Paint the Accents:
Using a fine detail brush, carefully paint the D-pad and the two joystick tops with gold metallic acrylic paint. You may need two thin coats for solid coverage. -
Seal (Optional):
For extra durability on a keychain, coat the entire piece in UV resin or a polymer clay gloss glaze. This protects the gold paint from chipping. -
Assembly:
Once dry, use pliers to open a jump ring and attach the controller (and the heart charm) to the main gold keyring.
Make it Personal
Use a needle tool to lightly carve his initials or a special date into the back of the controller before baking for a hidden romantic message.
Now he has a durable, handmade reminder of your affection that goes wherever he does
Coupon Tokens for Date Night Trades
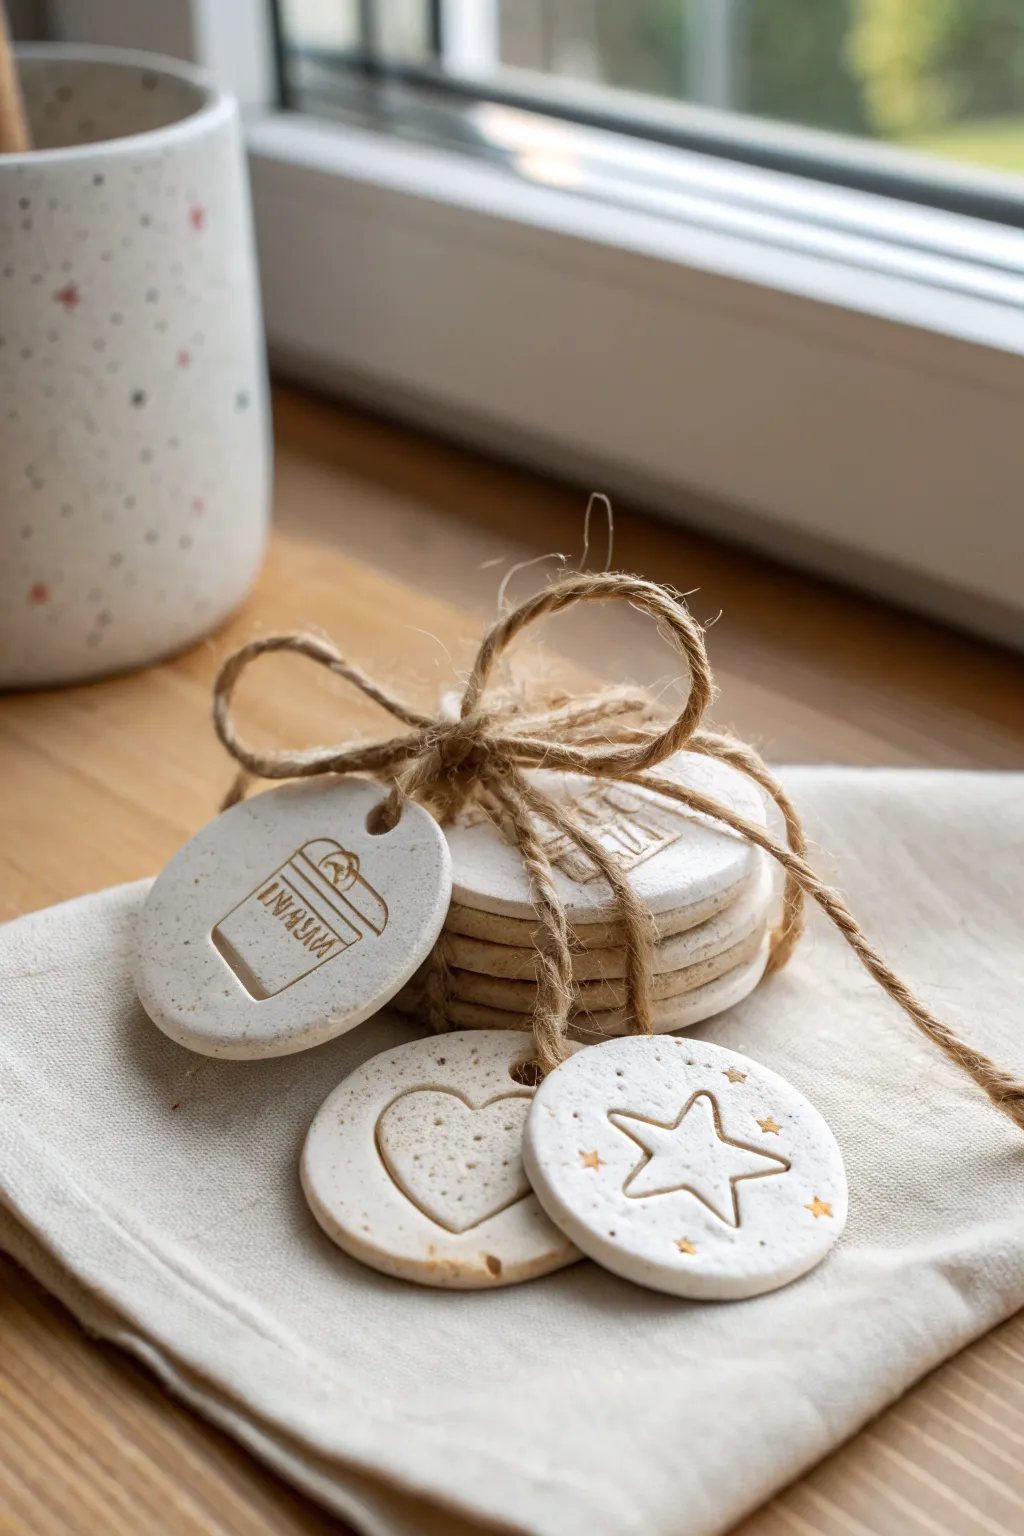
These charming, speckled clay tokens serve as a tactile and reusable way to gift experiences like movie nights or endless cuddles. Their rustic, matte finish and simple stamped designs give them a timeless, handcrafted appeal perfect for a thoughtful gift.
How-To Guide
Materials
- White speckled air-dry clay (or polymer clay with granite effect)
- Rolling pin
- Round cookie cutter (approx. 2 inches)
- Small hole punch or straw
- Small fondant stamps (heart, star, popcorn bucket)
- Letter stamp set (small)
- Fine-grit sandpaper
- Jute twine
- Gold metallic paint or marker (optional)
- Clear matte varnish (optional)
- Parchment paper or non-stick mat
Step 1: Shaping the Base
-
Prepare the Clay:
Begin by kneading a fist-sized ball of speckled clay until it is soft and conditioned. The specks in stone-effect clay add great texture, but plain white clay works too if you prefer a cleaner look. -
Roll it Out:
Place the clay on a sheet of parchment paper to prevent sticking. Use a rolling pin to flatten the clay to an even thickness of about 1/4 inch (6mm). You want them thick enough to be sturdy but thin enough to stack neatly. -
Cut the Circles:
Press your round cookie cutter firmly into the rolled clay to create your discs. Cut out as many tokens as you plan to gift—usually 5 to 7 is a good number for a bundle. -
Smooth the Edges:
Gently lift the cut circles. Dip your finger in a little water and run it around the circumference of each disc to smooth down any rough or jagged edges left by the cutter. -
Create the Loop Holes:
Use a straw or a small circular tool to punch a hole near the top edge of each token. Make sure the hole is at least 3mm from the edge so the clay doesn’t crack later.
Step 2: Stamping and Designing
-
Select Your Designs:
Choose stamps that represent the ‘coupon’ activity. For example, use a popcorn bucket for a movie night, a large heart for affection, or a star for a general wish. -
Stamp the Center Image:
Press the main image stamp firmly into the center of the clay disc. Apply even pressure so the impression is deep and clear, but be careful not to push all the way through the clay. -
Add Text Details:
If your design includes words like on the movie token, align your small letter stamps carefully. I find it helpful to start with the middle letter to keep the word centered. -
Add Decorative Accents:
For the star token shown, press a large star in the center and use a tiny star stamp to add accents around the perimeter. Vary the pressure slightly for a more organic look.
Clay Cracking?
If edges crack while drying, you can fill them with a wet slurry of clay and water, let dry, and sand smooth. Avoid drying directly in hot sun.
Step 3: Drying and Finishing
-
Let Them Dry:
Lay the tokens flat on a clean surface. Allow air-dry clay to cure for 24-48 hours, flipping them over halfway through to ensure the bottoms dry evenly. -
Sand Imperfections:
Once fully hard, take a piece of fine-grit sandpaper and very gently buff the edges or surface if there are any unwanted bumps. -
Add Gold Accents:
Dip the tip of a toothpick or a very fine brush into gold metallic paint. Carefully fill in just the tiny star impressions or specific details on the other tokens to make them pop. -
Seal (Optional):
To protect against moisture and handling, apply a thin coat of clear matte varnish. This will keep the ‘raw clay’ look while adding durability. -
Assemble the Bundle:
Cut a long length of jute twine. Thread the twine through the hole of one token, then stack the next one on top, threading it through as well. -
Tie the Bow:
Once all tokens are threaded and stacked, pull the twine tight and tie a secure knot. Finish with a generous, floppy bow on top as shown in the inspiration photo.
Color Wash Effect
Dilute acrylic paint with water and brush over the dried tokens, then wipe off quickly. Paint stays in the stamped grooves for high contrast.
Now you have a rustic, personalized gift set ready to be redeemed for fun memories.
Mini Love Capsule Jar Set
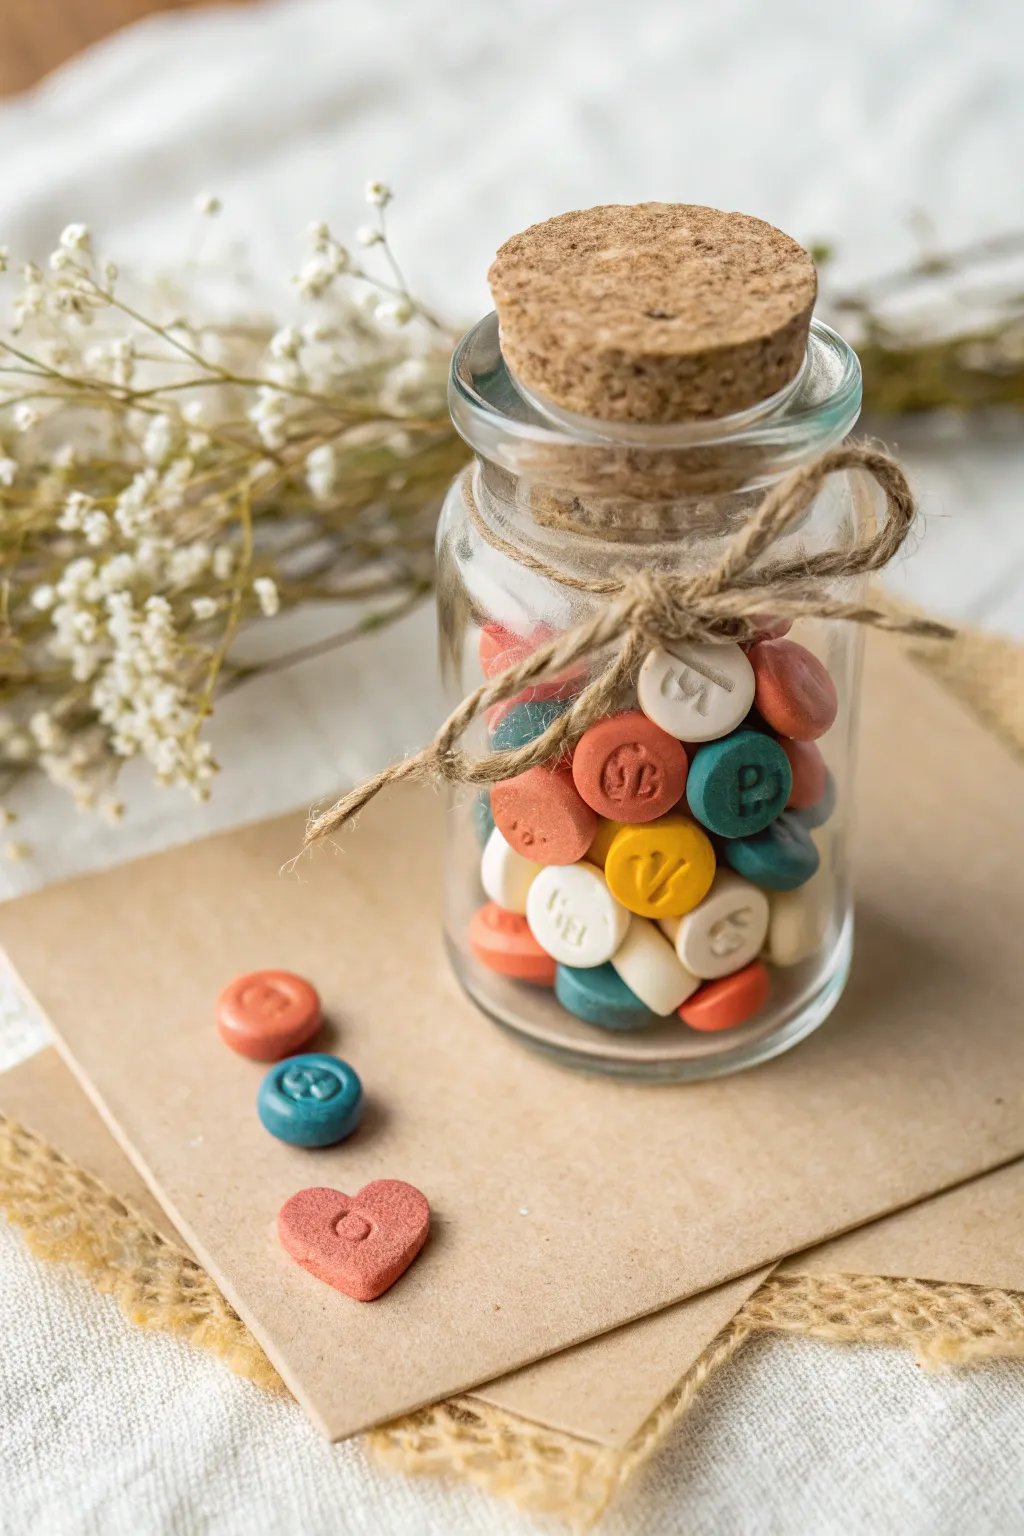
Create a heartfelt keepsake with these adorable, miniature clay ‘pills’, each stamped with a secret letter or symbol. Packed into a tiny corked vial, they spill out to reveal a hidden message or simply a collection of sweet sentiments.
Step-by-Step Tutorial
Materials
- Polymer clay (white, coral/orange, teal/blue, yellow)
- Small glass jar with cork stopper
- Small alphabet stamps or leather stamping tools
- Rolling pin or clay roller
- Small circular cutter (e.g., a straw, pen cap, or tiny cutter)
- Heart-shaped mini cutter (optional)
- Baking sheet and parchment paper
- Jute twine
- Needle tool or toothpick
- Oven (for baking clay)
Step 1: Mixing and Forming the Base
-
Condition the clay:
Start by warming up your polymer clay in your hands. Knead the white, coral, yellow, and teal clays separately until they are soft and pliable. If the colors are too bright, mix in a tiny bit of white to achieve the softer pastel matte look seen in the photo. -
Create a uniform sheet:
Roll out your first color of clay on a smooth surface. Aim for a thickness of about 3-4mm. This thickness is crucial because it needs to be substantial enough to look like a pill but thin enough to dry or bake evenly. -
Cut the circles:
Using your small circular cutter, punch out as many rounds as you need. If you don’t have a professional cutter, the cap of a pen or a stiff plastic straw works perfectly for this scale. Gently push the clay out of the cutter if it sticks. -
Shape the heart:
For a special touch, hand-shape a small piece of pink or red clay into a heart, or use a tiny heart cutter. Flatten it slightly to match the thickness of the circular pills. -
Smooth the edges:
Pick up each cut circle and gently tap the edges with your finger to round them off. You want them to look smooth like tumbled stones or medicine tablets, not sharp and mechanical.
Stamp Clarity Trick
Dust your stamps with cornstarch before pressing into the clay. This prevents sticking and ensures crisp, clean lettering without dragging the edges.
Step 2: Stamping and Baking
-
Plan your message:
Decide what letters or symbols you want to include. You might spell out ‘LOVE YOU’, initials, or just random sweet symbols. Arranging them mentally first helps ensure you don’t miss a letter. -
Imprint the clay:
Take your alphabet stamps and gently press them into the center of each clay circle. Press deep enough to make a clear impression, but be careful not to squish the overall shape of the circle. -
Add detail texture:
If you want a more rustic feel, you can lightly texture the sides of a few pieces with a toothbrush or sandpaper before baking, though smooth is classic for this look. -
Prepare for baking:
Arrange the finished clay pieces on a baking sheet lined with parchment paper. Make sure they aren’t touching each other. -
Bake the batch:
Bake according to your polymer clay package instructions. This is typically around 275°F (135°C) for 15-30 minutes, but brands vary significantly. -
Cool down:
Allow the pieces to cool completely on the baking sheet. They harden as they cool; handling them while hot might warp the shapes.
Hidden Message Idea
Paint inside the impressed letters with white or gold acrylic paint after baking, then wipe the surface clean to make the letters pop.
Step 3: Assembly and Finishing
-
Clean the jar:
While the clay cools, ensure your glass jar is clean and dry. A quick wipe with rubbing alcohol removes any fingerprints from the glass. -
Fill the capsule:
Drop the cooled clay pills into the jar one by one. Mix up the colors as you go so you have a nice distribution of teal, yellow, white, and coral visible from the outside. -
Fill to the top:
Continue filling until the jar is pleasantly full but not packed so tight that the pieces can’t move. Put the cork stopper firmly in place. -
Add the twine:
Cut a length of jute twine. Wrap it around the neck of the jar two or three times to create a rustic band. -
Tie the bow:
Finish the twine with a simple bow knot. Trim the ends so they hang down slightly but don’t drag too long. -
Presentation:
For the final gift presentation, place the jar on a piece of kraft paper or a card, perhaps leaving one or two special pills (like the heart or initials) sitting outside the jar as a teaser.
This charming jar is ready to sit on a desk or shelf as a constant reminder of affection
Cheeky Animal Butt Bookmark
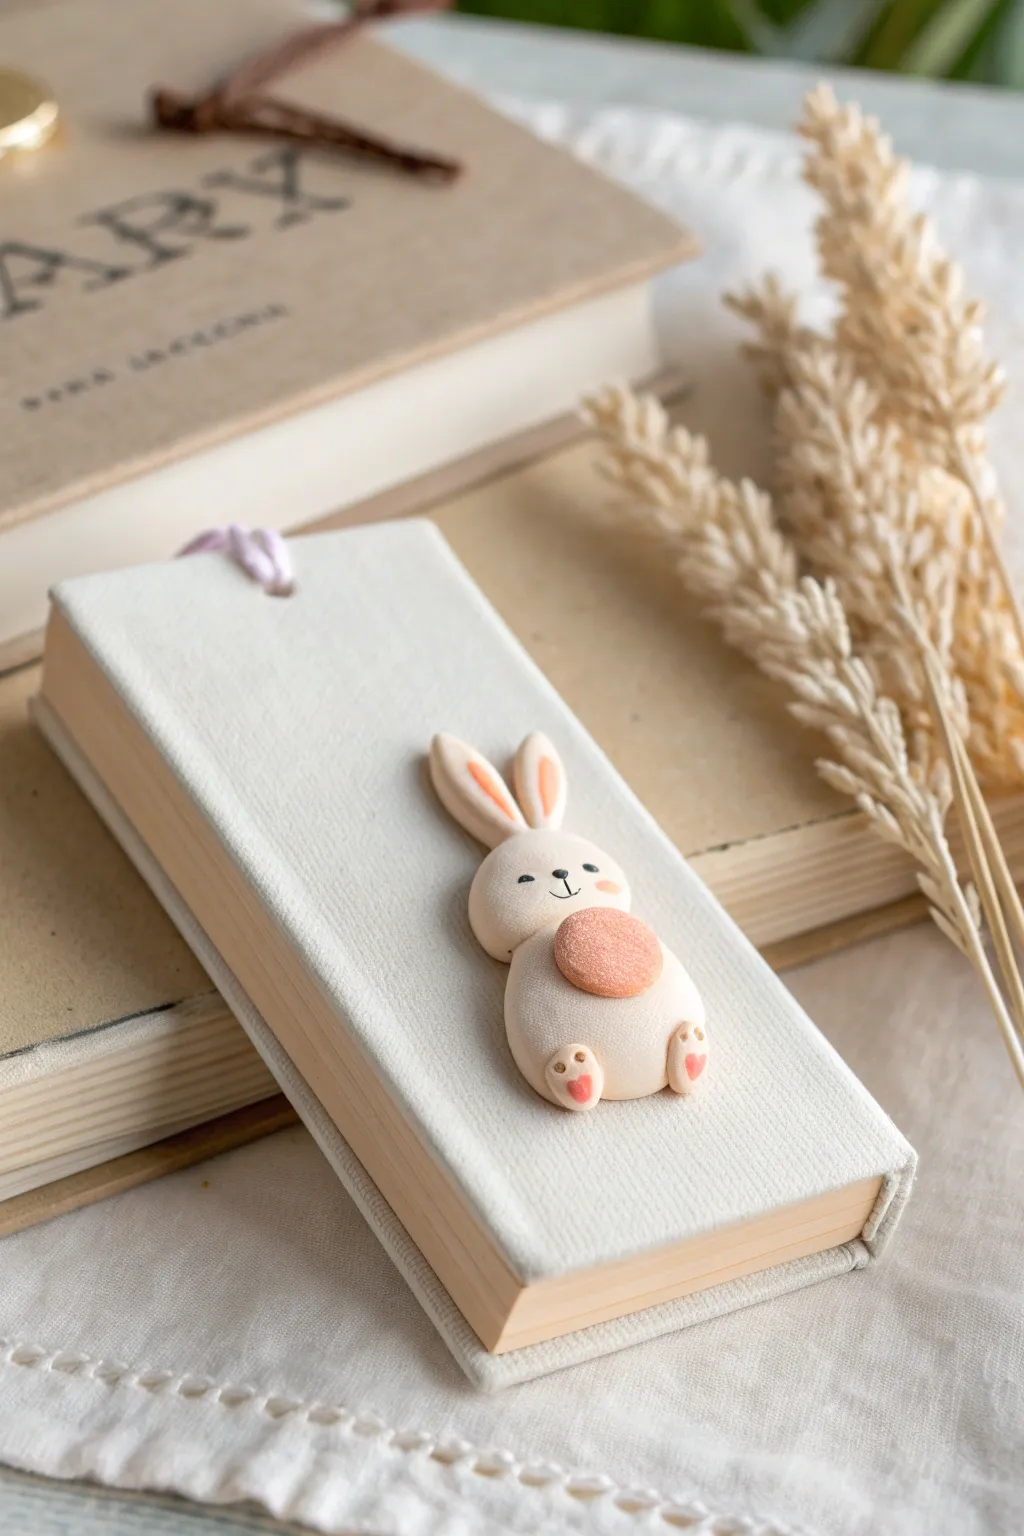
This adorable bookmark features a flattened clay bunny attached to a fabric-wrapped base, perfect for keeping a page in style. With its blushing cheeks and tiny paw pads, it’s a sweet, handcrafted gift that will make anyone smile every time they open their book.
Detailed Instructions
Materials
- White polymer clay
- Light pink or peach polymer clay
- Stiff cardboard or mat board (approx. 2 inches wide)
- White linen or cotton fabric
- Craft glue or strong fabric glue
- Sculpting tools (needle tool, small ball tool)
- Black acrylic paint and fine detail brush
- Rolling pin
- Pink ribbon or twine
- Baking sheet and parchment paper
- Oven
Step 1: Creating the Bookmark Base
-
Cut the Base:
Cut a rectangular strip of stiff cardboard or mat board. A good size is roughly 2 inches wide by 6 inches long, but you can adjust this to fit a specific book size. -
Wrap with Fabric:
Cut a piece of white linen fabric slightly larger than your cardboard strip. Apply a thin layer of craft glue to the front of the cardboard and smooth the fabric over it, ensuring there are no air bubbles. -
Secure the Back:
Fold the excess fabric edges over to the back of the cardboard and glue them down tightly. To make it look neat, you can glue a second, smaller strip of cardstock or heavy paper over the raw fabric edges on the back. -
Add the Ribbon:
If you want a tassel or pull tab, punch a hole at the top center or glue a small loop of pink ribbon or twine between the fabric and the backing layer before sealing it.
Clean Clay Tip
Keep baby wipes or hand sanitizer nearby when working with white clay. Dust and lint show up easily, so clean your hands and tools often to keep the bunny bright white.
Step 2: Sculpting the Bunny
-
Form the Body:
Condition your white clay until soft. distinct. Roll a smooth ball about the size of a large grape and flatten it gently into a thick oval. This will be the bunny’s main body. -
Create the Head:
Roll a slightly smaller ball of white clay for the head. Flatten it slightly and press it gently onto the top of the body oval. The clay should be somewhat flat so the bookmark fits inside a book without being too bulky. -
Shape the Ears:
Roll two small logs of white clay and taper the ends. Flatten them to create bunny ears. Use a small tool to press a slight indentation into the center of each ear. -
Add Ear Details:
Take tiny snakes of pink clay and press them into the indentations you made in the white ears. Attach the finished ears to the top of the head using a small dot of liquid clay or by blending the seams carefully. -
Sculpt the Feet:
Roll two small balls of white clay for the feet. Press them onto the bottom of the body. They should look like little nubs sticking out. -
Add Toe Beans:
Using the pink clay, roll tiny balls and press them onto the bottom of the white feet to make paw pads. Create a larger heart shape or oval for the main pad if you like extra detail. -
Attach the Tail/Belly:
Since this bunny is lounging, create a prominent round circle of pink clay. Press this onto the center of the body. I like to texture this slightly with a toothbrush to make it look fuzzy. -
Create the Face:
Use a needle tool or small ball tool to mark where the eyes will go. You can embed tiny black clay beads for eyes now, or wait to paint them later. -
Add Cheeks:
Apply a very light dusting of pink pastel chalk or a tiny smear of pink clay to the cheeks for a blushing effect.
Step 3: Finishing Touches
-
Bake the Clay:
Place your clay bunny on a parchment-lined baking sheet. Bake according to the package instructions (usually 275°F for about 15-20 minutes depending on thickness). Let it cool completely. -
Paint Details:
Once cool, use a fine brush and black acrylic paint to draw the eyes, a tiny nose, and a smiling mouth. Let the paint dry thoroughly. -
Assemble the Bookmark:
Apply a strong adhesive (like E6000 or super glue) to the back of the clay bunny. Press it firmly onto the center of the fabric-covered base. -
Final Set:
Allow the glue to cure fully—usually 24 hours for maximum strength—before sliding it into your favorite book.
Magnetic Upgrade
Make it functional! Instead of gluing the bunny to a board, embed magnets into the clay and a separate backing piece so it clips onto the page magnetically.
This charming little bunny is now ready to hold your place for your next reading adventure
Constellation Tile of Your Anniversary Sky
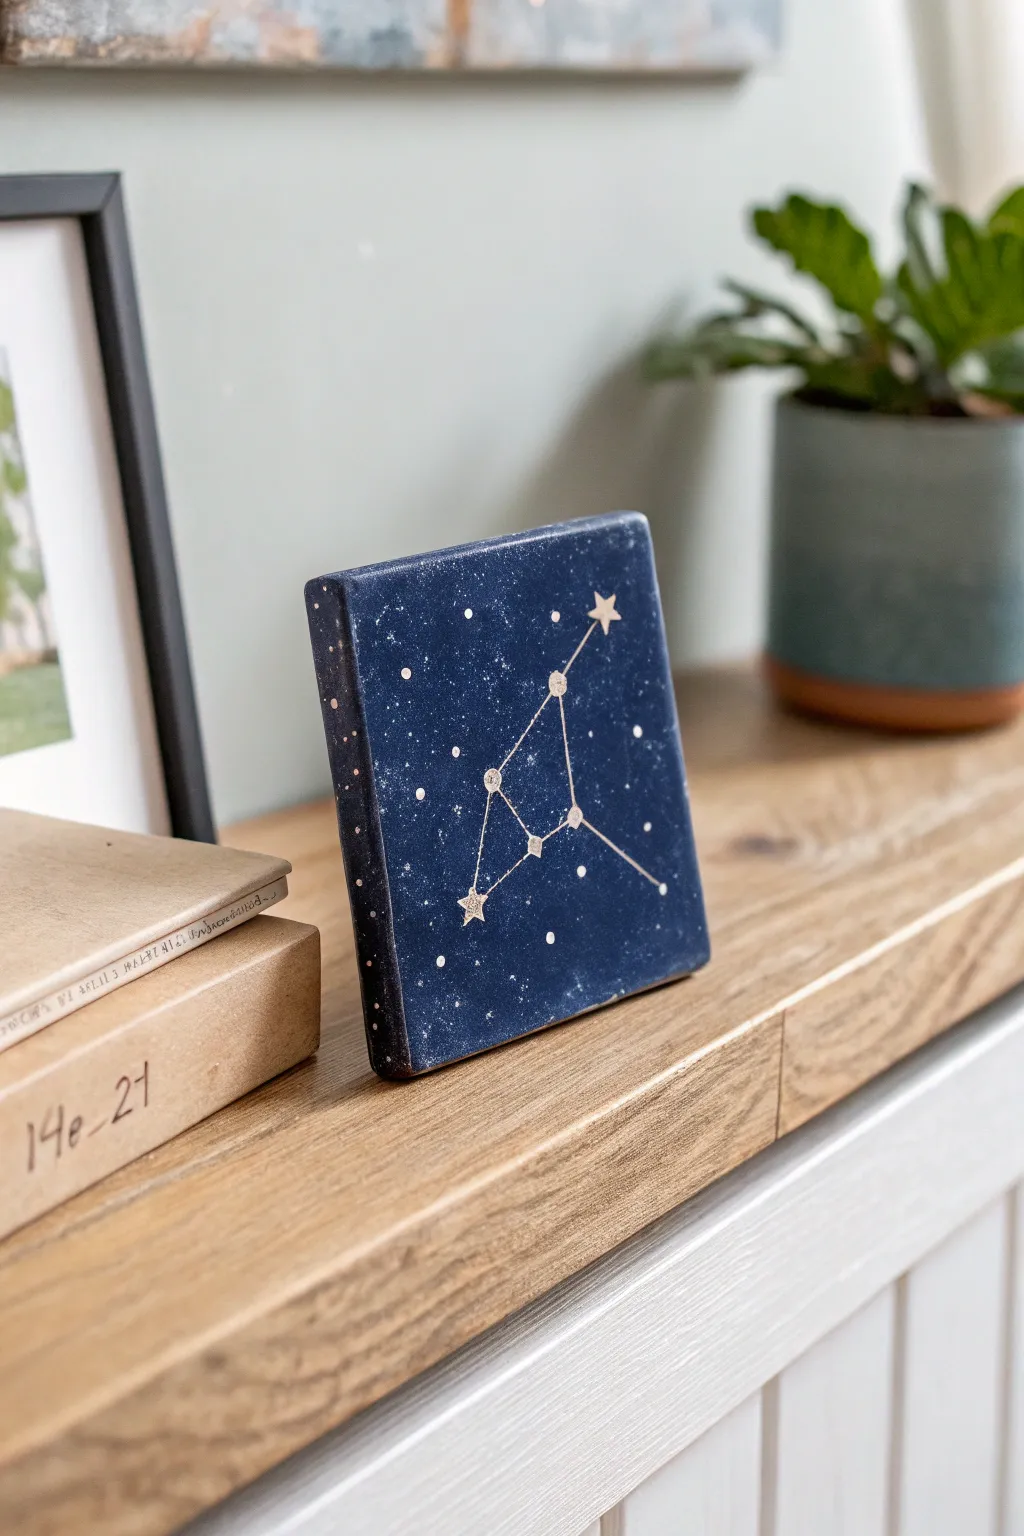
Capture the exact moment your story began with a stunning midnight blue clay tile featuring your special constellation. This starry keepsake mimics the look of a polished ceramic slab, complete with glittering stars and a deep cosmic background.
Step-by-Step Guide
Materials
- White air-dry clay or polymer clay (approx. 500g)
- Square cookie cutter or craft knife
- Rolling pin
- Fine-grit sandpaper
- Acrylic paints: Navy blue, black, ultramarine
- Metallic gold or silver paint pen (fine tip)
- Small round paintbrush
- Old toothbrush (for splattering)
- White acrylic paint
- Matte or satin sealant spray
- Ruler
- Printed reference of your constellation
Step 1: Shaping the Base
-
Condition the Clay:
Begin by warming up your clay in your hands, kneading it until it is soft, pliable, and free of air bubbles or cracks. -
Roll the Slab:
Roll the clay out on a smooth surface to a thickness of about 1.5 cm. You want a chunky, substantial look for this tile, so avoid making it too thin. -
Cut the Square:
Use a large square cookie cutter or measure a perfect square (approx. 10×10 cm) with a ruler and slice cleanly with a craft knife. -
Soften the Edges:
Dip your finger in a little water and gently run it along the cut edges to smooth out any sharp corners or drag marks from the knife. -
Dry Completely:
Set the tile aside to dry. If using air-dry clay, this may take 24-48 hours. I like to flip it over halfway through to ensure the bottom dries evenly.
Uneven Drying?
If your tile starts warping as it dries, place a heavy book on top of it (sandwiching the clay between parchment paper) once the surface is dry to the touch to flatten it back out.
Step 2: Painting the Cosmos
-
Sand for Smoothness:
Once fully cured, lightly sand the face and edges of the tile with fine-grit sandpaper to create a silky surface for the paint. -
Mix the Base Color:
Create a deep midnight shade by mixing navy blue with a touch of black and a hint of ultramarine. You want a color that feels like infinite space. -
Apply Base Coat:
Paint the entire tile, including sides and back, with your custom dark blue mix. Let it dry and apply a second coat for full opacity. -
Sponge Texture (Optional):
To add depth, lightly sponge a slightly lighter blue in random cloudy patches, blending it out so it’s barely visible against the dark background.
Pro Tip: Galaxy Depth
Mix a tiny drop of purple into your black/blue paint base. It adds a rich, realistic dimension to the ‘night sky’ color that standard navy blue just can’t match.
Step 3: Adding the Stars
-
Create the Star Field:
Dip an old toothbrush into slightly watered-down white paint. Run your thumb across the bristles to flick tiny speckles onto the dry blue tile to mimic distant galaxies. -
Draft the Constellation:
Using your printed reference, lightly mark the position of the main stars with a pencil. Make sure the scaling fits nicely within the square. -
Draw Star Points:
Using the metallic gold or silver paint pen, draw small five-point stars or simple dots over your pencil marks. Vary the sizes slightly to show star brightness. -
Connect the Lines:
Carefully draw thin, straight lines connecting the stars to form the constellation shape. A ruler can help, but a steady freehand line looks more organic. -
Add Decorative Dots:
For extra detail, you can dot the edges or sides of the tile with the metallic pen, framing the artwork subtly. -
Seal the Project:
Once the paint layout is completely dry, spray the entire tile with a matte or satin sealant to protect the finish and prevent the paint from chipping.
Now you have a timeless piece of the heavens ready to gift to your favorite person