If you’re making something from clay for Mother’s Day, you want it to feel sweet, personal, and actually useful on her dresser or kitchen counter. These cute clay ideas are my go-tos when I want that handmade “I made this just for you, Mom” kind of magic without getting overly complicated.
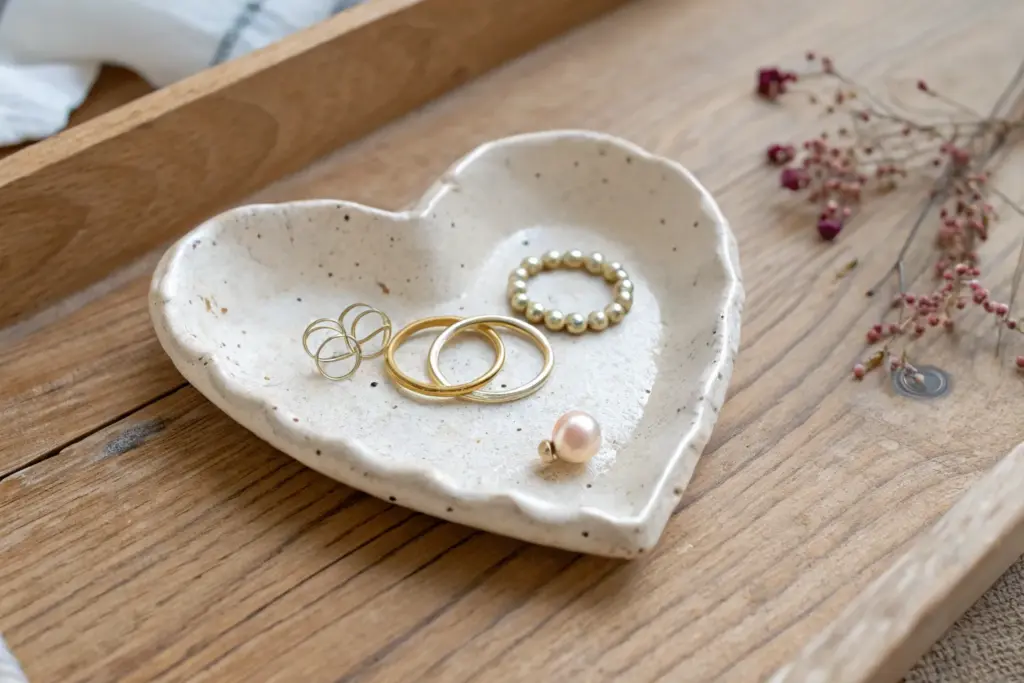
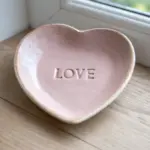
Heart-Shaped Trinket Dish
This charming, handmade trinket dish features a soft pink glaze with delicate speckles and a slightly organic, uneven rim that adds character. It’s the perfect bedside companion for keeping rings and earrings safe, making it a thoughtful and practical gift for Mom.
Step-by-Step
Materials
- Air-dry clay (white) or polymer clay
- Rolling pin
- Heart-shaped cookie cutter (large) or paper template and craft knife
- Small bowl or sponge (for drying)
- Sandpaper (fine grit)
- Acrylic paints (pale pink, brown/black)
- Glossy varnish or sealant (like Mod Podge or a clay-specific glaze)
- Paintbrushes (flat for glaze, stiff bristle for speckling)
- Water cup
- Palette or paper plate
Step 1: Shaping the Form
-
Prepare the clay:
Start by taking a handful of white air-dry clay or polymer clay. Knead it in your hands until it becomes soft, warm, and pliable to prevent cracking later. -
Roll it out:
Place the clay on a clean, flat surface. Use a rolling pin to flatten it to an even thickness of about 1/4 inch. If the clay sticks, you can put it between two sheets of parchment paper. -
Cut the heart:
Press a large heart-shaped cookie cutter firmly into the clay. If you don’t have a cutter, place a paper heart template on the clay and carefully trace around it with a craft knife. -
Smooth the edges:
Dip your finger in a little bit of water (for air-dry clay) or baby oil (for polymer clay) and gently run it along the cut edges to smooth out any roughness or sharp debris. -
Create the curve:
To give the dish its concave shape, gently lift the clay heart and place it inside a shallow bowl. Press it lightly so it takes on the curve of the bowl. -
Dry or Bake:
Allow the clay to dry completely according to package instructions. For air-dry clay, this usually takes 24-48 hours. If using polymer clay, bake it in the oven as directed by the manufacturer.
Fixing Cracks
If air-dry clay cracks while drying, mix a tiny bit of fresh clay with water to make a paste (slip). Fill the cracks, smooth over, and let dry again.
Step 2: Painting and Finishing
-
Sand imperfections:
Once fully cured and hard, remove the heart from the bowl. Use fine-grit sandpaper to gently smooth down the rim or any bumps on the surface for a professional finish. -
Mix the base color:
On your palette, mix white acrylic paint with a tiny drop of red to create a very soft, pastel pink. You want a milky, almost translucent look, so keep the color light. -
Apply the base coat:
Paint the entire top surface of the dish with your pink mixture. I like to continuously smooth out the brushstrokes while the paint is wet to ensure an even, ceramic-like look. Let this dry. -
Add the rim detail:
Mix a slightly darker, brownish-pink shade. Using a fine detail brush, paint a very thin, slightly imperfect line along the very top edge of the rim to mimic the look of fired pottery. -
Prepare the speckles:
Dilute a small amount of dark brown or black acrylic paint with water until it has an inky consistency. -
Splatter effect:
Dip a stiff-bristled brush (or an old toothbrush) into the diluted dark paint. Hold it over the dish and run your thumb across the bristles to flick tiny speckles onto the pink surface. -
Control the spray:
Practice the splatter on a piece of paper first to gauge the density. Aim for a randomized, natural distribution of dots. -
Seal the dish:
Once all paint is completely dry, apply two coats of a high-gloss varnish. This replicates the shiny look of ceramic glaze seen in the photo and protects the jewelry dish from scratches.
Gold Rim Upgrade
Instead of the brown rim, use liquid gold leaf paint on the edge for a more luxurious, elegant finish that catches the light beautifully.
Wrap this delicate piece in tissue paper for a gift presentation that rivals any boutique pottery


Handprint Jewelry Dish Keepsake
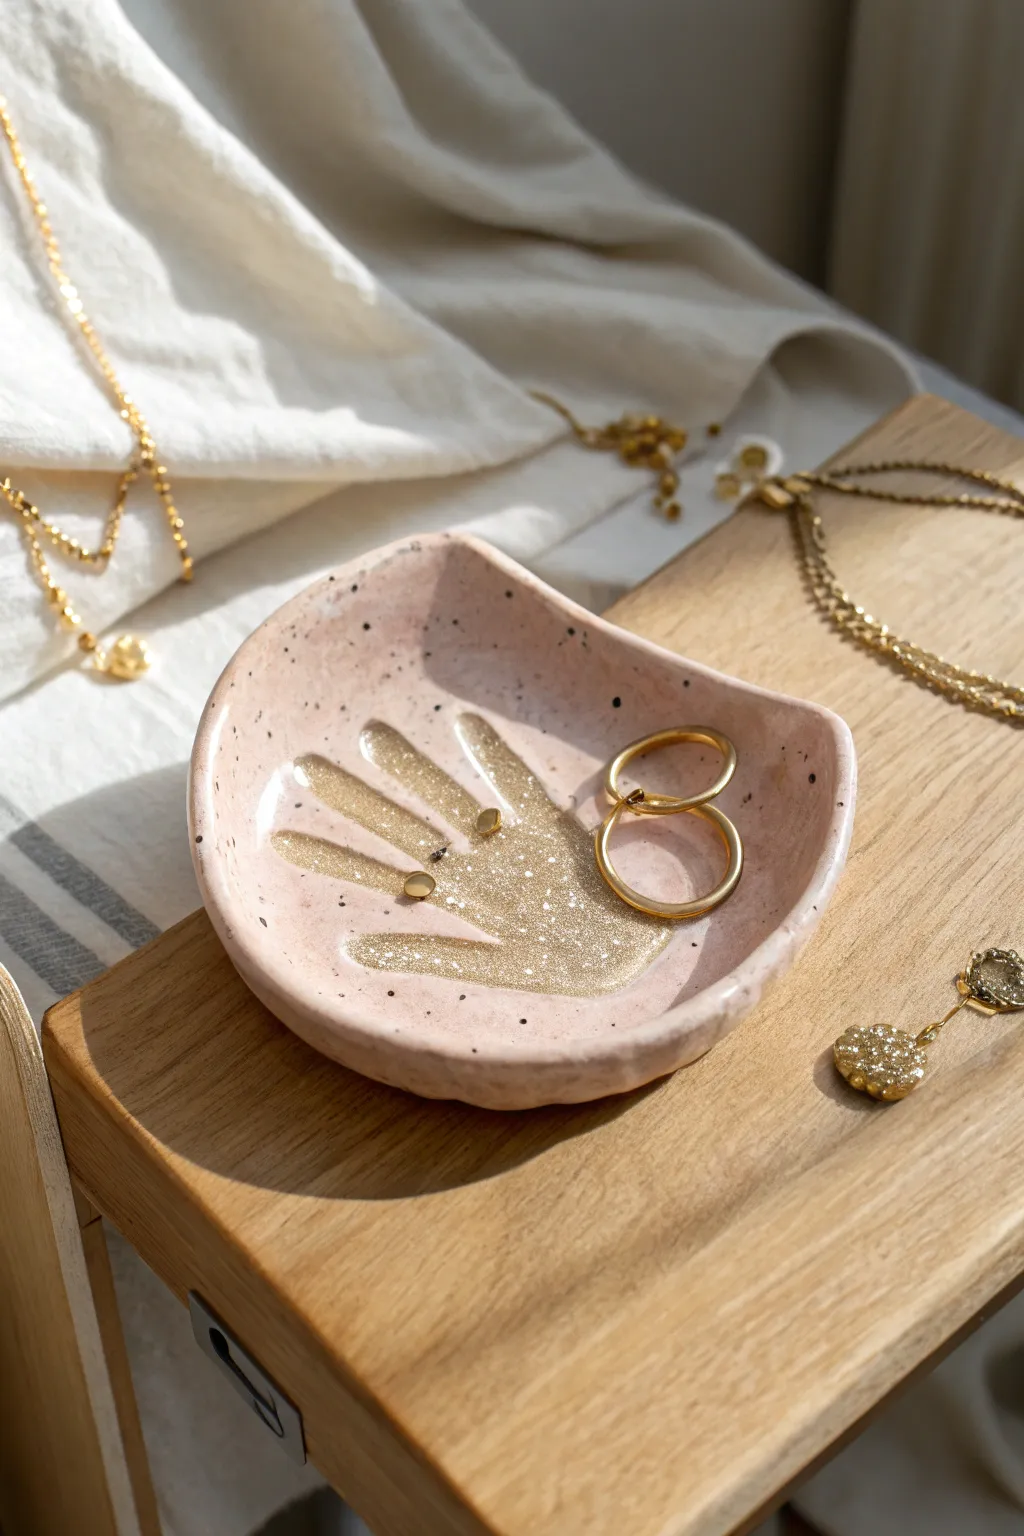
This elegant keepsake takes the classic handprint craft and elevates it into a chic jewelry holder. With its speckled pink finish and glittering golden palm, it’s a sophisticated way to capture a moment in time while giving mom a practical place for her favorite rings.
How-To Guide
Materials
- Air-dry clay (white or terracotta)
- Pink acrylic paint (soft pastel shade)
- Black acrylic paint (for speckling)
- Gold glitter glue or fine gold glitter mixed with Mod Podge
- Rolling pin
- Craft knife or clay tool
- Small bowl (oven-safe if using polymer clay, otherwise any bowl)
- Fine-grit sandpaper
- Paintbrushes (flat brush and a stiff bristle brush)
- Gloss varnish or clear sealant
- Child’s hand (for tracing) or a paper template
Step 1: Shaping the Clay
-
Roll it out:
Start by kneading your clay until it’s pliable and smooth. Roll it out on a non-stick surface or parchment paper to an even thickness of about 1/4 inch. -
Capture the print:
Place your child’s hand gently onto the clay. Instead of pressing deeply for an indented print, we are just lightly tracing the outline. Use a dull pencil or a clay tool to carefully trace around the fingers and palm. -
Cut the shape:
Remove the hand and use a craft knife to cut along your traced line. Smooth out any jagged edges with a little water on your fingertip to get that refined look. -
Form the dish:
Gently lift your clay hand and drape it inside a small bowl. This will give it the curved, dish-like shape as it dries. Ensure the palm area is centered at the bottom. -
Let it dry:
Allow the clay to dry completely according to the package instructions. I usually leave mine for at least 24-48 hours to ensure it’s rock hard before moving on. -
Sand for smoothness:
Once fully dry, remove the hand form the bowl. Use fine-grit sandpaper to gently smooth the rim and any rough patches on the surface.
Oops, it cracked!
Mix a tiny bit of fresh clay with water to create a slip paste. Fill the crack, smooth it over, and let it dry again before sanding.
Step 2: Painting and Decorating
-
Base coat:
Paint the entire dish—front and back—with a soft pastel pink acrylic paint. You may need two coats for full, opaque coverage. -
Add the speckles:
Water down a tiny drop of black acrylic paint. Dip a stiff-bristle brush or an old toothbrush into it, and flick the bristles with your thumb to splatter tiny speckled dots over the pink surface. -
Outline the interior:
To recreate the distinct hand shape inside the dish, lightly sketch a smaller hand shape in the center of the palm area using a pencil. -
Apply the glitter:
Fill in this inner hand sketch with gold glitter glue. Make sure the layer is thick enough to catch the light but not so thick it drips. -
Add floating details:
For that artistic touch seen in the photo, add a few small, floating gold circles or dots around the fingers using the gold glitter or gold paint. -
Seal the deal:
Once all paint and glitter are completely dry, coat the entire dish with a gloss varnish. This protects the finish and gives it that professional ceramic shine.
Make it luxe
Paint the very rim of the dish with metallic gold leaf paint to frame the artwork and match the glittering center hand.
Wrap this sparkling dish in tissue paper for a gift that preserves a memory forever


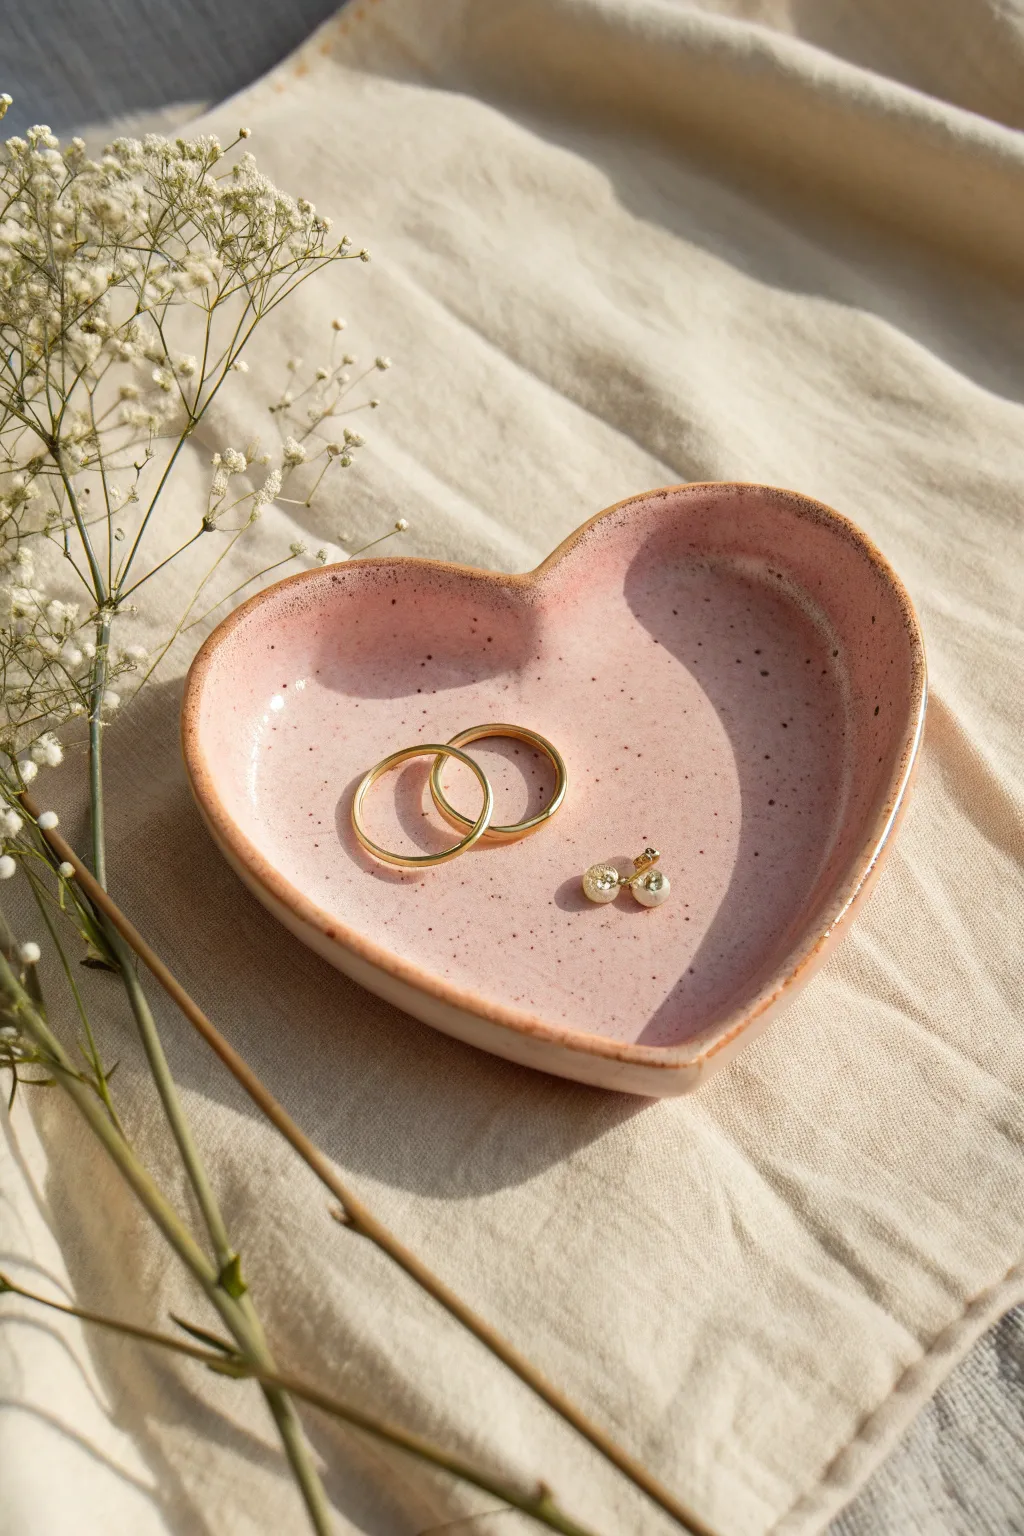
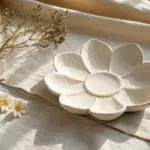
Floral Petal Ring Dish
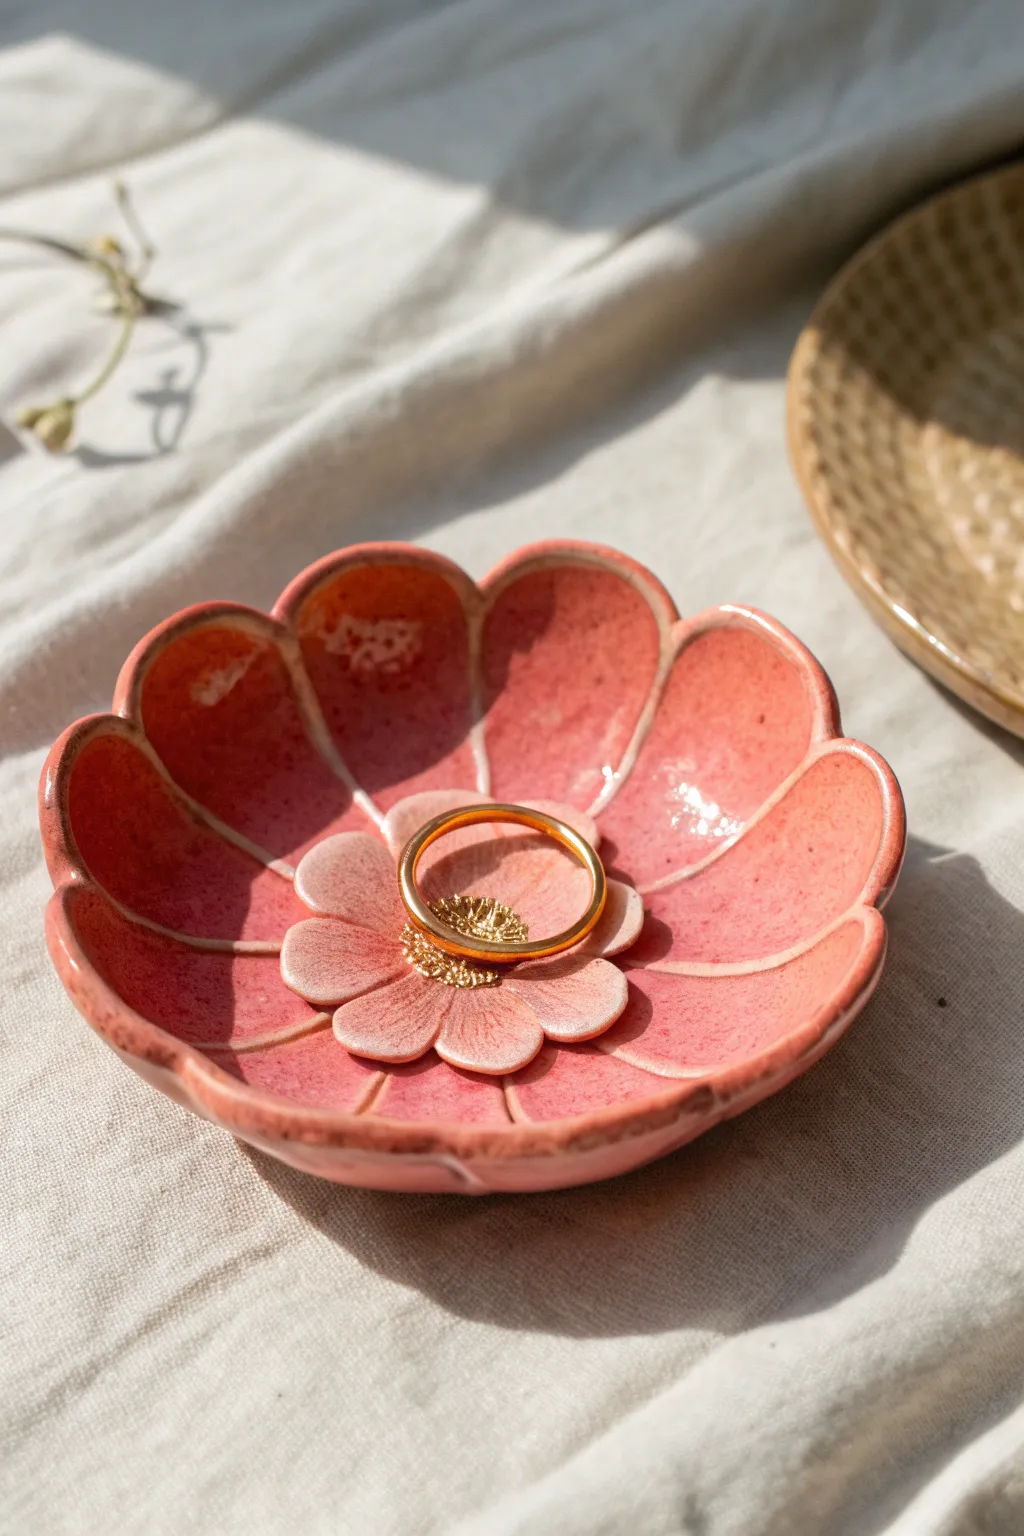
Give Mom a sweet place to rest her treasures with this handcrafted flower dish featuring a unique double-layer design. The soft pink glaze and delicate golden center create a beautiful contrast that feels both organic and elegant.
Step-by-Step
Materials
- White air-dry clay or polymer clay
- Rolling pin
- Large flower cookie cutter (approx 4 inches)
- Small flower cookie cutter (approx 1.5 inches)
- Small bowl (for shaping)
- Clay tools (needle tool, sponge)
- Pink ceramic glaze or acrylic paint
- Clear gloss varnish (if using paint)
- Gold leaf paint or metallic gold acrylic
- Water and paintbrush
- Fine grit sandpaper
Step 1: Shaping the Base
-
Roll the clay:
Begin by conditioning your clay until it’s pliable, then roll it out on a smooth surface to an even thickness of about 1/4 inch. If the clay is sticky, dusting your surface with a little cornstarch helps immensely. -
Cut the main flower:
Use your larger flower cutter to stamp out the base shape. If you don’t have a cutter, you can print a template and trace around it with a needle tool for a freehand look. -
Smooth the edges:
Dip your finger in a tiny bit of water and run it along the cut edges of the flower petals to remove any harsh lines or burrs left by the cutter. -
Form the curve:
Gently lift your large clay flower and place it into a small bowl. Press it down lightly so the petals curve upward, mimicking the natural cupped shape of a bloom.
Cracked Clay Crisis?
If air-dry clay cracks while drying, mix a tiny bit of fresh clay with water to make a paste. Fill the crack, smooth it with a wet finger, and let it dry again.
Step 2: Creating the Center
-
Cut the inner bloom:
Roll out a fresh piece of clay—slightly thinner this time—and cut out your smaller flower shape. -
Soften the petals:
Use a ball tool or your thumb to gently press into the center of each small petal, giving them a slightly concave, natural shape. -
Score and slip:
Use a needle tool to scratch up the bottom of the small flower and the center of the large base flower. Add a dab of water (or liquid clay if using polymer) to join them securely. -
Add texture:
Take a very small ball of clay and press it into the absolute center of the small flower. Use a needle tool to poke many tiny holes into this ball, creating a textured stamen effect. -
Define the layers:
Use a modeling tool to verify the separation between the top and bottom petals, ensuring the top flower looks like it is resting naturally inside the larger one. -
Dry thoroughly:
Allow the piece to dry completely in the bowl form. For air-dry clay, this usually takes 24-48 hours; for polymer which requires baking, follow the package instructions.
Step 3: Painting and Finishing
-
Sand imperfections:
Once fully dry (and cool, if baked), lightly sand any rough edges with fine-grit sandpaper for a professional finish. -
Apply base color:
Paint the entire dish with a soft, warm pink. I like to dilute the paint slightly with water for the first coat to simulate a semi-transparent ceramic glaze look. -
Add depth:
While the pink is still tacky, you can dab a slightly darker rose color into the crevices between the petals to enhance the visual depth. -
Highlight the edges:
Using a very dry brush with a lighter pale pink or white, gently sweep over the rims of the petals to create a highlighted, stoneware effect. -
Paint the center:
Using a fine detail brush, carefully paint the textured center stamen with metallic gold paint. Let the gold drip slightly into the texture holes. -
Seal the piece:
Apply two coats of high-gloss varnish to the entire piece (excluding the gold center if you want that matte, though sealing it is fine too). This gives it that wet, ceramic shine.
Glazing Pro Tip
To mimic the speckled look of fired pottery, flick a toothbrush loaded with diluted brown paint over the pink base before adding the glossy varnish topcoat.
Now this lovely bloom is ready to hold cherished rings and brighten up any bedside table


Mini Bud Vase for Mother’s Day Blooms
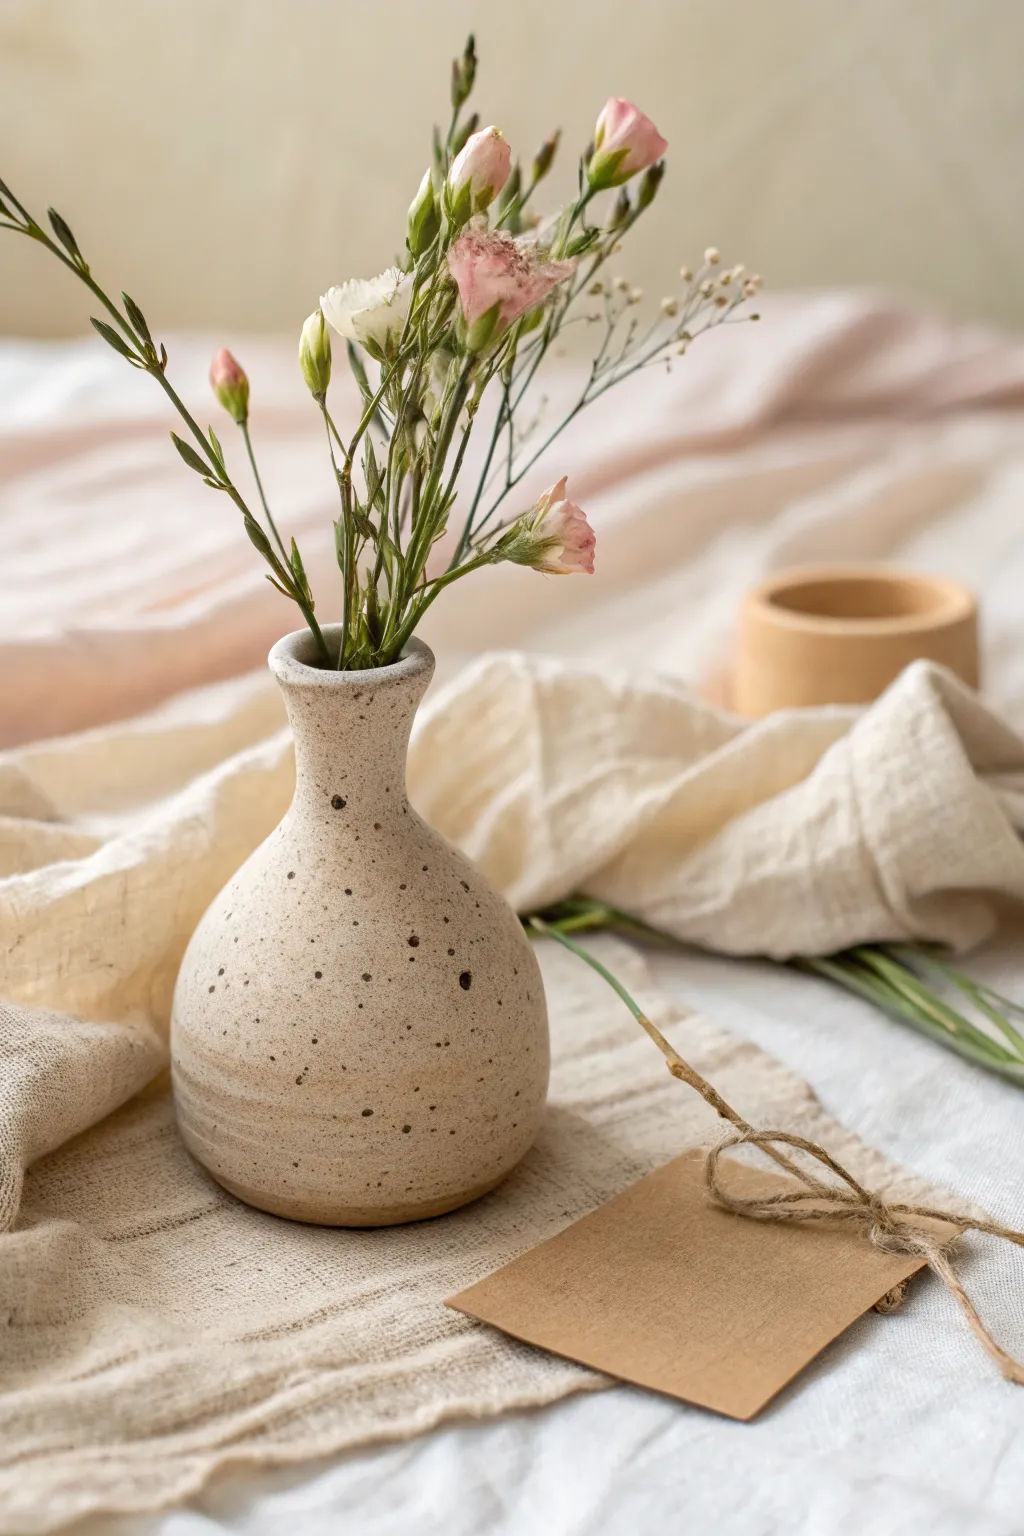
This charming little vase features a classic bulbous form with a speckled, matte finish that feels earthy and organic. It creates the perfect minimalist vessel for showcasing a few delicate stems of dried flowers or fresh wildflowers for Mom.
Step-by-Step Tutorial
Materials
- Speckled stoneware clay (about 1 lb)
- Pottery wheel (or banding wheel for hand-building)
- Sponge
- Wire clay cutter
- Wooden modeling tool
- Metal rib or scraper
- Pin tool
- Matte clear glaze (optional)
- Small kiln
Step 1: Shaping the Form
-
Center the clay:
Begin by securing your ball of speckled clay onto the wheel head. Use your palms and consistent pressure to center the clay until it spins without wobbling. -
Open the mound:
Push your thumbs into the center of the spinning clay to create an opening, leaving about half an inch of clay at the bottom for the base. -
Pull the walls:
Gently pull the clay upward to create a cylinder. Don’t worry about the curve yet; focus on getting an even wall thickness from bottom to top. -
Belly it out:
From the inside of the cylinder, gently press outward with your fingers while supporting the outside with your other hand. Gradually shape a round, bulbous bottom section. -
Collar the neck:
Place both hands around the upper part of the cylinder and gently squeeze inward as the wheel spins. This ‘collaring’ technique narrows the clay to form the elegant, slender neck. -
Refine the curve:
Use a metal rib on the exterior to smooth the transition between the round belly and the narrow neck, removing any finger marks for a clean silhouette.
Clay Body Choice
To get the exact look in the photo, buy ‘Speckled Buff’ or ‘Speckled Stoneware’ clay. The spots are iron or manganese mixed directly into the clay body.
Step 2: Finishing and Trimming
-
Flare the rim:
The rim needs a soft touch. Gently press the very top edge outward with your finger to create a slight flare, which helps support flower stems beautifully. -
Cut from wheel:
Run a wire cutter underneath the vase to separate it from the wheel head, then carefully set it aside on a ware board. -
Dry to leather hard:
Let the vase dry slowly under plastic until it reaches a leather-hard state. I find this usually takes about a day, depending on humidity. -
Trim the foot:
Place the vase upside down on the wheel (you may need a chuck or a foam bat). Trim away excess weight from the bottom and crave a neat foot ring to give the piece a ‘lifted’ look. -
Smooth the surface:
Wipe the exterior with a barely damp sponge to smooth any trimming marks and expose the natural speckles in the clay body.
Step 3: Firing and Glazing
-
Bisque fire:
Load the bone-dry vase into the kiln and bisque fire it to cone 04 (or according to your clay’s specifications) to prepare it for glazing. -
Prepare the glaze:
For this project, we want the natural speckled clay to shine. Use a matte clear glaze, or simply leave the exterior raw if the clay is vitreous enough. -
Glaze the interior:
Pour liquid glaze inside the vase, swirl it around to coat the inner walls completely, and pour out the excess. This ensures it holds water effectively. -
Glaze the exterior (optional):
If you prefer a sealed surface, dip the exterior quickly into a matte transparent glaze, wiping the foot ring clean with a sponge afterward. -
Final wipe down:
Check the bottom one last time to ensure no glaze remains on the foot, which would fuse the pot to the kiln shelf. -
Glaze fire:
Fire the piece a final time to the maturity temperature of your clay (typically cone 5 or 6 for stoneware) to finish the piece.
Gift Tag Addition
While the clay is leather hard, use a needle tool to pierce a tiny hole near the rim. After firing, you can tie a personalized Kraft paper tag directly to the vase.
Now you have a timeless, handcrafted gift that will look stunning on any windowsill

The Complete Guide to Pottery Troubleshooting
Uncover the most common ceramic mistakes—from cracking clay to failed glazes—and learn how to fix them fast.
Cute Flower-Topped Ring Cone

This charming ring cone combines minimalist design with a touch of vintage flair, making it a perfect keepsake for Mother’s Day. Its creamy texture and metallic accents create an elegant display piece that keeps precious jewelry safe and organized.
Step-by-Step Guide
Materials
- Air-dry clay or polymer clay (white or cream)
- Small rolling pin
- Cone form (paper or cardboard)
- Parchment paper
- Small flower cutter (approx. 1 inch)
- Sculpting tools or a dull knife
- Silver bead or small ball bearing
- Metallic silver or antique gold acrylic paint
- Fine detail paintbrush
- Strong craft glue (e.g., E6000)
- Sandpaper (fine grit)
- Gloss varnish (optional)
Step 1: Creating the Cone Base
-
Prepare the workspace:
Lay down a sheet of parchment paper to protect your surface and prevent the clay from sticking. Tape it down if necessary to keep it flat. -
Roll out the clay:
Take a generous handful of clay and condition it in your hands until it’s pliable. Use a rolling pin to roll it into a smooth slab about 1/4 inch thick. -
Form the paper cone:
Create a temporary mold by rolling a piece of stiff paper or cardstock into a cone shape. Secure it firmly with tape so it holds its structure. -
Wrap the clay:
Wrap your clay slab around the paper cone mold. Carefully trim away the excess clay where the edges overlap using a knife or sculpting tool. -
Seal the seam:
Gently press the seam together with your fingers. Use a little water (for air-dry clay) to slip and score the edges, smoothing them until the join is invisible. -
Smooth and finish:
Stand the cone upright on your work surface to flatten the base. Use damp fingers to smooth out any fingerprints or uneven texture on the cone’s surface.
Step 2: Sculpting the Flowers
-
Cut the top flower:
Roll out a small piece of fresh clay. Use your small flower cutter to punch out a five-petal shape. If you don’t have a cutter, you can hand-mold five small teardrop shapes. -
Shape the petals:
Gently press the center of each petal with a rounded tool to give them a slightly cupped, natural look. Place this flower directly onto the very tip of your cone. -
Add the center bead:
Take a silver bead and press it firmly into the center of the top flower. Push it deep enough so the clay grips it securely as it dries. -
Create the base flower:
Repeat the cutting process to make a second flower for the lower section. I like to make the petals on this one slightly thinner and flatter for contrast. -
Attach the lower decorative element:
Score the back of the second flower and a spot near the bottom of the cone. Apply a dab of water or liquid clay and press the flower onto the cone. -
Detail the lower flower center:
Roll a tiny ball of clay and press it into the center of the lower flower. Use a needle tool to add a small indentation or texture to this center dot.
Cracked Clay Solution
If tiny cracks appear while drying, don’t panic. Mix a small amount of fresh clay with water to make a paste and fill the cracks, then smooth over.
Step 3: Finishing Touches
-
Allow to dry:
Let the cone sit undisturbed for at least 24-48 hours. Drying time will vary depending on the humidity and the type of clay used. -
Sand for smoothness:
Once fully cured, gently sand the surface of the cone with fine-grit sandpaper to remove any roughness, being careful around the delicate petals. -
Paint the accent flower:
Using a fine detail brush, paint the entire lower flower with metallic silver or antique gold paint. This mimics the look of a metal charm embedded in stone. -
Optional varnishing:
If you want a glossy finish or extra durability, apply a thin coat of varnish over the entire piece, or just on the flower details to make them pop.
Vintage Look Secret
After painting the metallic flower, wipe it immediately with a paper towel. This leaves paint only in the crevices for an aged, antique effect.
Now you have a beautiful, handmade display piece ready to hold mom’s favorite rings
Thumbprint Heart Ornament
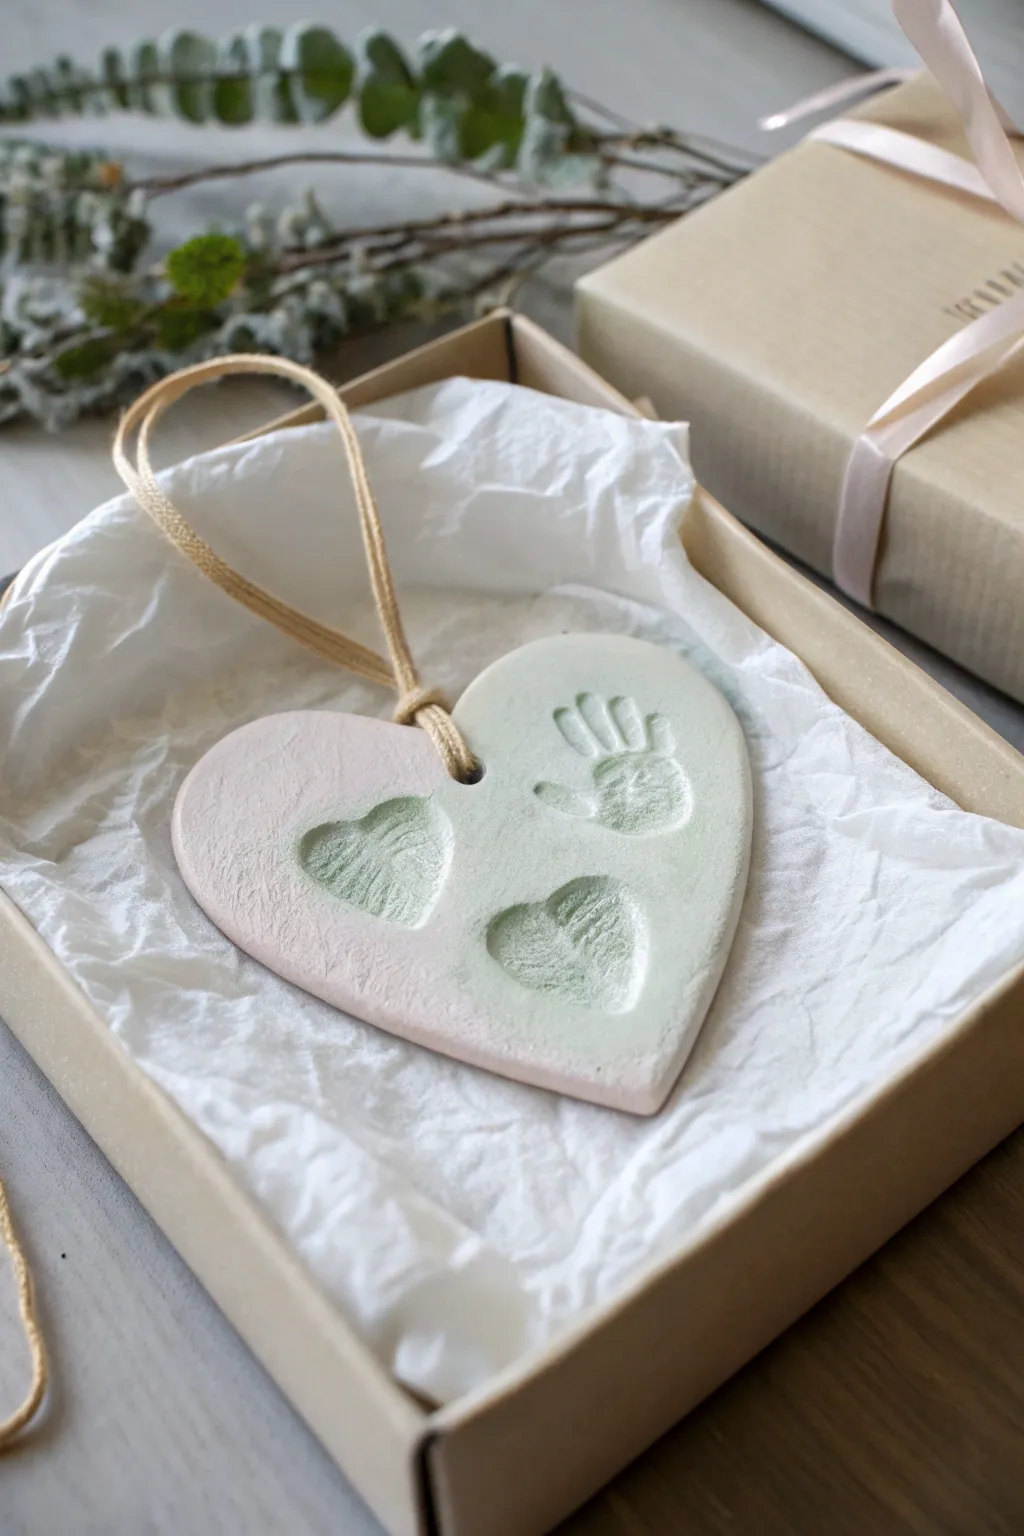
Capture the fleeting moments of childhood with this delicate heart-shaped keepsake featuring tiny hand and thumbprints. The soft, two-tone pastel finish gives it a modern, elegant look that perfectly complements the sentimental value of the prints.
How-To Guide
Materials
- Air-dry clay (white)
- Acrylic rolling pin
- Heart-shaped cookie cutter (large)
- Fine-grit sandpaper
- Pastel pink acrylic paint
- Pastel sage green acrylic paint
- Small sponge or foam pouncer
- Clear matte sealant spray
- Natural twine or ribbon
- Straw or skewer (for the hole)
- Parchment paper
Step 1: Shaping the Base
-
Condition the clay:
Begin by taking a handful of white air-dry clay and kneading it in your hands until it becomes soft, pliable, and free of any cracks. -
Roll it out:
Place the clay on a sheet of parchment paper. Use an acrylic rolling pin to roll the clay out to a consistent thickness of about 1/4 inch (6mm). -
Smooth surface:
Check the surface for any imperfections or air bubbles. If you see any, gently smooth them out with a little water on your fingertip. -
Cut the heart:
Press your large heart-shaped cookie cutter firmly into the clay. Remove the excess clay from around the outside before lifting the cutter to keep the shape undistorted. -
Refine edges:
Dip your finger in a tiny bit of water and run it along the cut edges of the heart to round them off slightly and remove any sharpness.
Cracks Appearing?
If small cracks appear while drying, mix a tiny bit of fresh clay with water to make a paste and fill them in gently.
Step 2: Adding Impressions
-
Create the hole:
Use a straw or a wooden skewer to poke a hole near the top center of the heart. Make sure the hole is large enough for your twine to pass through later, keeping in mind clay shrinks slightly as it dries. -
Position the handprint:
Decide on the layout. For this design, we want a small handprint on the right side. Gently press the child’s hand into the clay, ensuring the palm and fingers leave a clear impression. -
Add thumbprint hearts:
To create the thumbprint hearts on the left, press two thumbs into the clay at opposing angles so the prints connect at the bottom, forming a V-shape. -
Clean up prints:
Inspect the impressions. If the edges of the prints raised the clay too much, gently pat them down with a damp finger to smooth the transition. -
Completely dry:
Allow the ornament to dry completely for 24-48 hours. I suggest flipping it over halfway through the drying process to ensure the back dries evenly and prevents curling.
Make it Sparkle
While the paint is still wet, sprinkle ultra-fine iridescent glitter into the handprint indentations for a magical touch.
Step 3: Finishing and Painting
-
Sand edges:
Once fully dry, take a piece of fine-grit sandpaper and very lightly sand the edges and surface to remove any rough spots or fingerprints. -
Prepare paints:
Squeeze a small amount of pastel pink and sage green paint onto a palette or paper plate. -
Sponge the green:
Dip a foam pouncer or small sponge into the sage green paint. Lightly dab off excess paint, then pounce the color onto the right side of the heart, fading it out as you reach the middle. -
Sponge the pink:
Using a clean sponge, apply the pastel pink to the left side of the heart. Blend it gently where it meets the green in the center to create a soft, seamless gradient. -
Highlight impressions:
Make sure the paint gets into the deep crevices of the prints. You can use a dry brush to wipe slightly over surface afterwards to let the deeper parts hold more color if desired. -
Seal the piece:
In a well-ventilated area, spray the ornament with a clear matte sealant. This protects the clay from moisture and preserves the paint colors. -
String it up:
Cut a length of natural twine or ribbon. Fold it in half, push the loop through the hole, and thread the ends through the loop to secure it.
Now you have a timeless keepsake that beautifully preserves a moment in time.


What Really Happens Inside the Kiln
Learn how time and temperature work together inside the kiln to transform clay into durable ceramic.
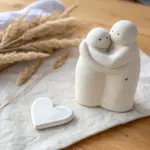
“Mom and Baby” Animal Figurine
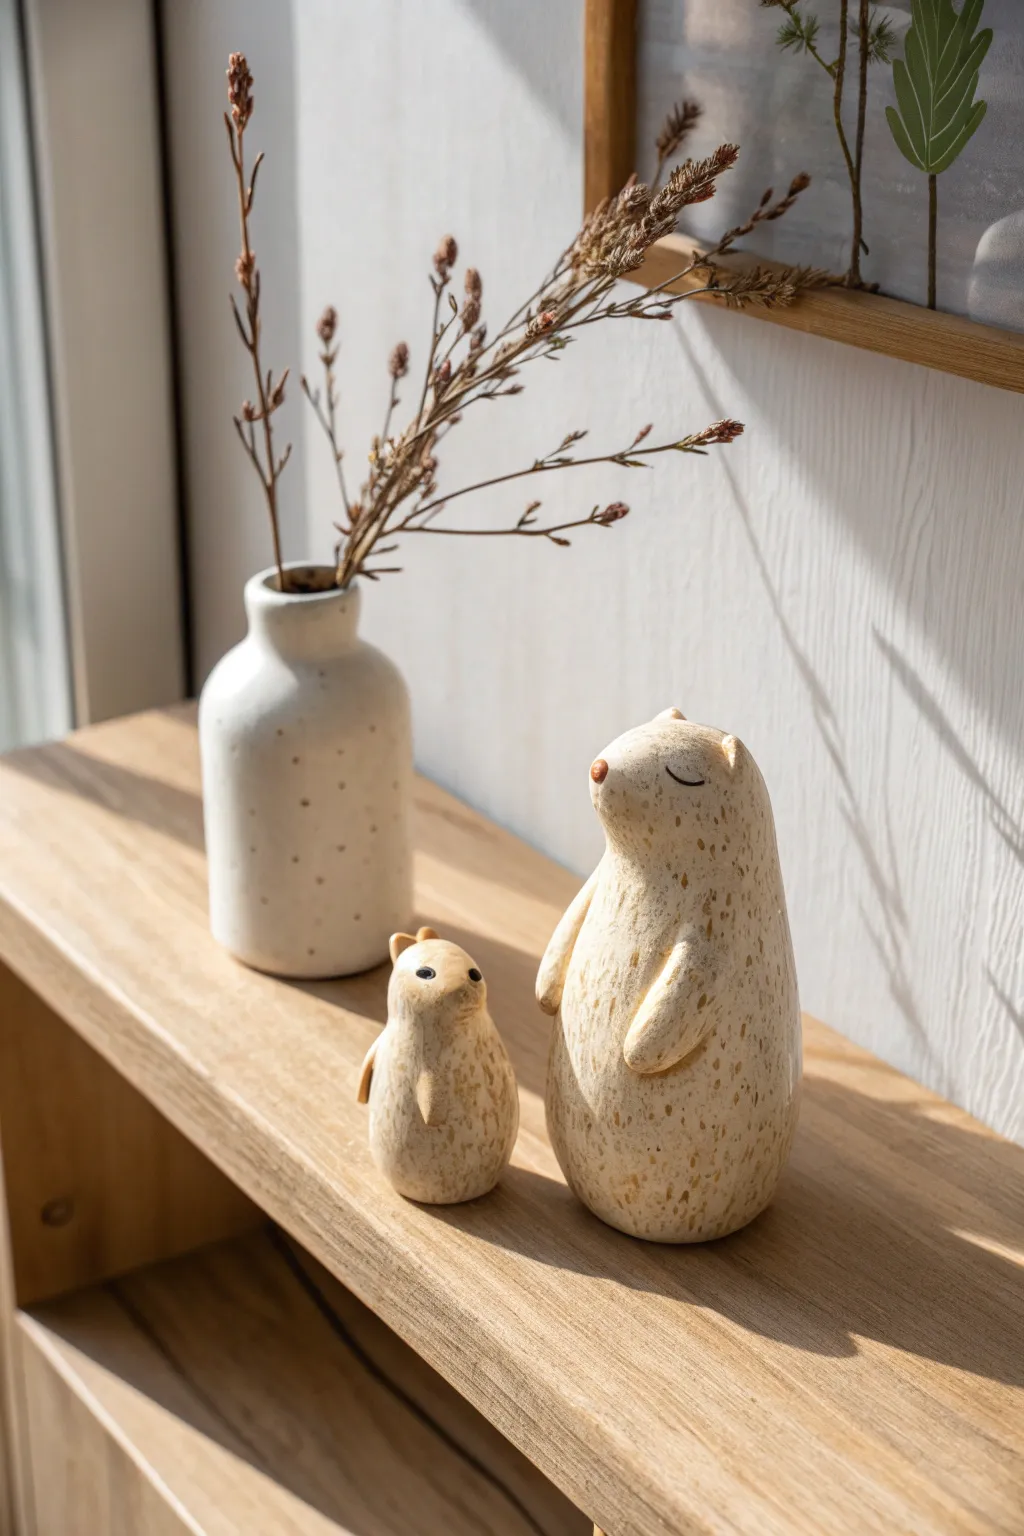
Celebrate the bond between mother and child with these minimalist, rounded animal figurines that radiate calm and tenderness. Their speckled cream finish and simplified forms give them a modern, gallery-worthy ceramic look without needing a kiln.
Step-by-Step Tutorial
Materials
- Air-dry clay (white or light cream)
- Acrylic paint (warm cream, beige, light brown)
- Small paintbrush (detail brush)
- Old toothbrush (for speckling technique)
- Water and small sponge
- Sandpaper (fine grit)
- Sculpting tools (or a toothpick)
- Top coat varnish (matte or satin)
Step 1: Sculpting the Mother Bear
-
Establish the Base Form:
Start with a generous handful of air-dry clay, rolling it into a smooth, solid cylinder. Gently taper the top third to create a seamless transition from the body to the head, ensuring the bottom is flat and stable so it stands upright. -
Shape the Slope:
Using your thumbs, gently press into where the neck would be to create a subtle curve, giving the figure a slight backward lean or ‘looking up’ posture. The silhouette should remain continuous and fluid, avoiding sharp angles. -
Add the Ears:
Pinch two very small, rounded triangles of clay for the ears. Score the top of the head and the bottom of the ears with a needle tool, add a tiny bit of water, and press them firmly into place, blending the seams until invisible. -
Form the Arms:
Roll two small sausage shapes for the arms. They should be slightly thicker at the shoulder and thinner at the paws. Attach them to the sides of the body, curving them gently forward over the belly. -
Refine the Surface:
Dip your finger in a little water and smooth out the entire figure. Pay special attention to the area around the arms and ears to ensure the clay looks like one solid piece. -
Define the Face:
The face remains very simple. You just need to pull the clay slightly forward at the very front to suggest a snout area, but keep it rounded.
Splatter Safety
Before doing the toothbrush splatter technique, place your figures inside a cardboard box. This catches the stray spray and keeps your surrounding furniture paint-free.
Step 2: Creating the Little One
-
Shape the Baby Body:
Taking a much smaller amount of clay (about 1/4 the size of the mother), roll a fat, teardrop shape. Flatten the bottom so it sits securely. -
Attach Tiny Appendages:
Create tiny nubs for ears and attach them high on the head. For the arms—or wings, as this little one resembles a penguin or chick—flatten small ovals of clay and blend them onto the sides. -
Dry Completely:
Set both figures aside in a dry, room-temperature area. I usually rotate them every few hours to ensure the bottom dries evenly. Let them cure for at least 24-48 hours depending on humidity.
Make it Weighted
For a sturdier feel, wrap a small, smooth rock in the center of your clay ball when you start forming the base. It adds a satisfying weight to the final piece.
Step 3: Falk-Ceramic Finish
-
Sand for Smoothness:
Once bone dry, take fine-grit sandpaper and gently buff the entire surface. This removes fingerprints and creates that professional ceramic texture. -
Base Coat Application:
Mix a warm cream acrylic paint. Apply two to three thin coats to both figures, letting each layer dry completely. This creates a solid, opaque background. -
The Speckling Technique:
Dilute a small amount of light brown or beige paint with water. Dip an old toothbrush into this mixture. Hold the brush a few inches away from the figures and run your thumb across the bristles to flick tiny specks of paint onto the surface. -
Controlling the Texture:
Rotate the figures as you flick the paint to ensure even coverage. If you get a splatter that is too big, quickly dab it with a paper towel or blend it out. -
Paint the Details:
Using your smallest detail brush and black or dark brown paint, carefully draw a simple horizontal curve for the sleeping eye on the mother. Add a tiny dot for the nose. -
Finalize the Baby’s Face:
For the baby figure, paint two small round eyes and a tiny line for the mouth or nose. Keep the expression minimal to match the modern aesthetic. -
Seal and Protect:
Finish with a coat of matte varnish. This seals the paint, protects the clay from moisture, and unifies the sheen of the speckles and the base coat.
Now you have a serene duo that captures the quiet warmth of a mother’s love, ready to be gifted or displayed
Pressed Leaf Catchall for Garden Moms
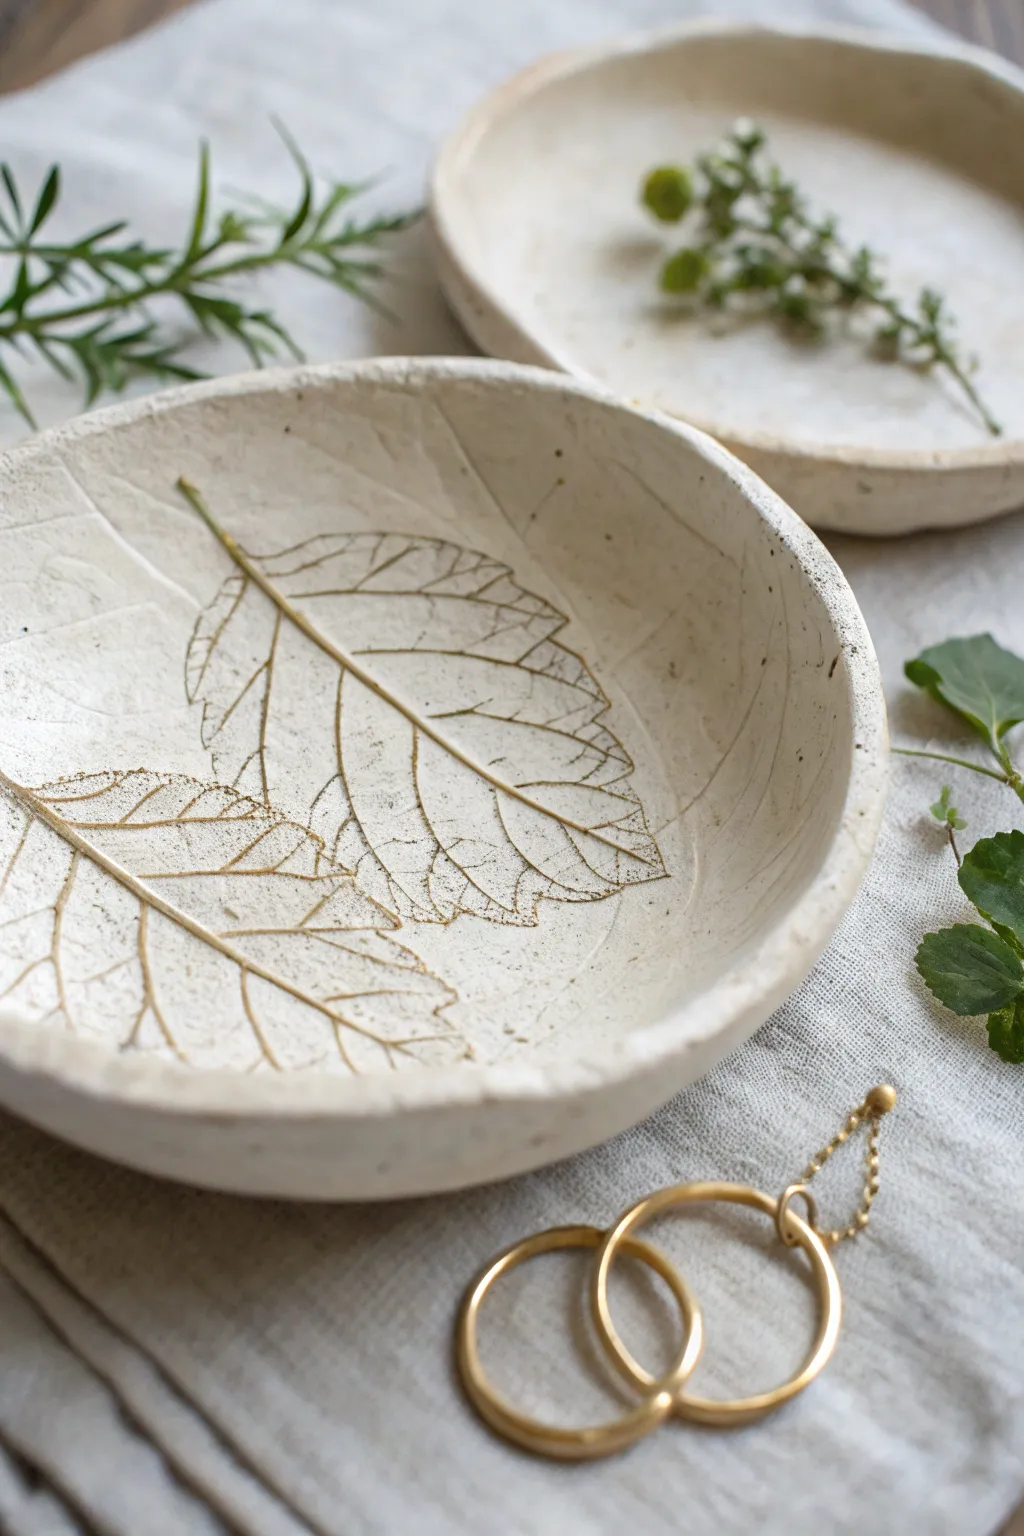
Immortalize mom’s favorite garden foliage with this beautifully textured trinket dish. The subtle organic shape and highlighted leaf veins give it a rustic, handcrafted charm perfect for holding rings or daily treasures.
Detailed Instructions
Materials
- Air-dry clay (white or light grey)
- Fresh leaves with prominent veins (like hydrangea, sage, or mint)
- Rolling pin
- Small bowl (to use as a mold)
- Craft knife or clay cutter
- Fine-grit sandpaper
- Brown watercolor paint or watered-down acrylic
- Paper towels
- Matte varnish or sealant
- Sponge or paintbrush
Step 1: Shaping the Clay
-
Prepare the workspace:
Lay down a piece of parchment paper or a silicone mat to prevent stickiness. Take a ball of air-dry clay roughly the size of a large orange and condition it by kneading it slightly until it feels smooth and pliable. -
Roll the slab:
Using your rolling pin, flatten the clay ball into an even circle. Aim for a thickness of about 1/4 inch—too thin and it might crack, too thick and it will look chunky. -
Select your leaves:
Choose fresh leaves that are sturdy and not too dry. Place them vein-side down onto your clay slab. I prefer to arrange two or three overlapping slightly for a natural, drifting look. -
Imprint the texture:
Gently roll over the leaves with the rolling pin. Apply firm, even pressure to push the veins deep into the clay surface, but be careful not to make the slab too thin in these spots. -
Remove the foliage:
Carefully peel the leaves away by the stem. Use a needle tool or tweezers if the tips get stuck, revealing the intricate vein pattern left behind. -
Cut the circle:
Place a bowl or a circle template over the patterned area to frame your design. Trace around it with a craft knife to cut out a perfect circle, removing the excess clay.
Muddy Impressions?
If the paint stains the white clay too much, wipe it faster or seal the clay with a light spray of matte sealer *before* doing the paint wash step.
Step 2: Forming and Refining
-
Shape the curvature:
Lift your clay circle and gently place it inside a small bowl lined with plastic wrap. Press it down softly so it takes the curved shape of the bowl bottom. -
Soften the edges:
Dip your finger in a little water and run it along the rim of the clay to smooth out any sharp cutting marks. You can leave it slightly uneven for that organic, handmade look seen in the photo. -
Let it dry:
Allow the clay to dry completely in a cool, dry place. This usually takes 24-48 hours depending on humidity. Rotate it occasionally for even drying. -
Sand the surface:
Once fully cured and hard, remove the clay from the mold. Use fine-grit sandpaper to gently smooth the rim and any rough patches on the underside.
Step 3: Finishing Touches
-
Apply the wash:
Mix a small amount of brown watercolor or watered-down acrylic paint. Brush this wash liberally over the leaf imprints, ensuring the pigment gets into the deep creases. -
Wipe back:
Immediately wipe the surface with a damp paper towel. This removes the paint from the high points of the clay while leaving the dark color trapped in the veins, creating an antiqued effect. -
Clean the edges:
Check the rim and the non-imprinted areas. If the wash smudged where you don’t want it, use a clean, damp sponge to wipe those areas back to the original white clay color. -
Seal the piece:
Once the paint is dry, apply a coat of matte varnish or sealant to protect the dish from moisture and wear.
Gilded Edges
For a luxe upgrade, paint the rim of the dried bowl with liquid gold leaf or metallic acrylic paint to make the organic edge pop.
Wrap this delicate catchall in tissue paper for a gift mom will use every day

TRACK YOUR CERAMIC JOURNEY
Capture glaze tests, firing details, and creative progress—all in one simple printable. Make your projects easier to repeat and improve.
Terrazzo-Style Mother’s Day Vase
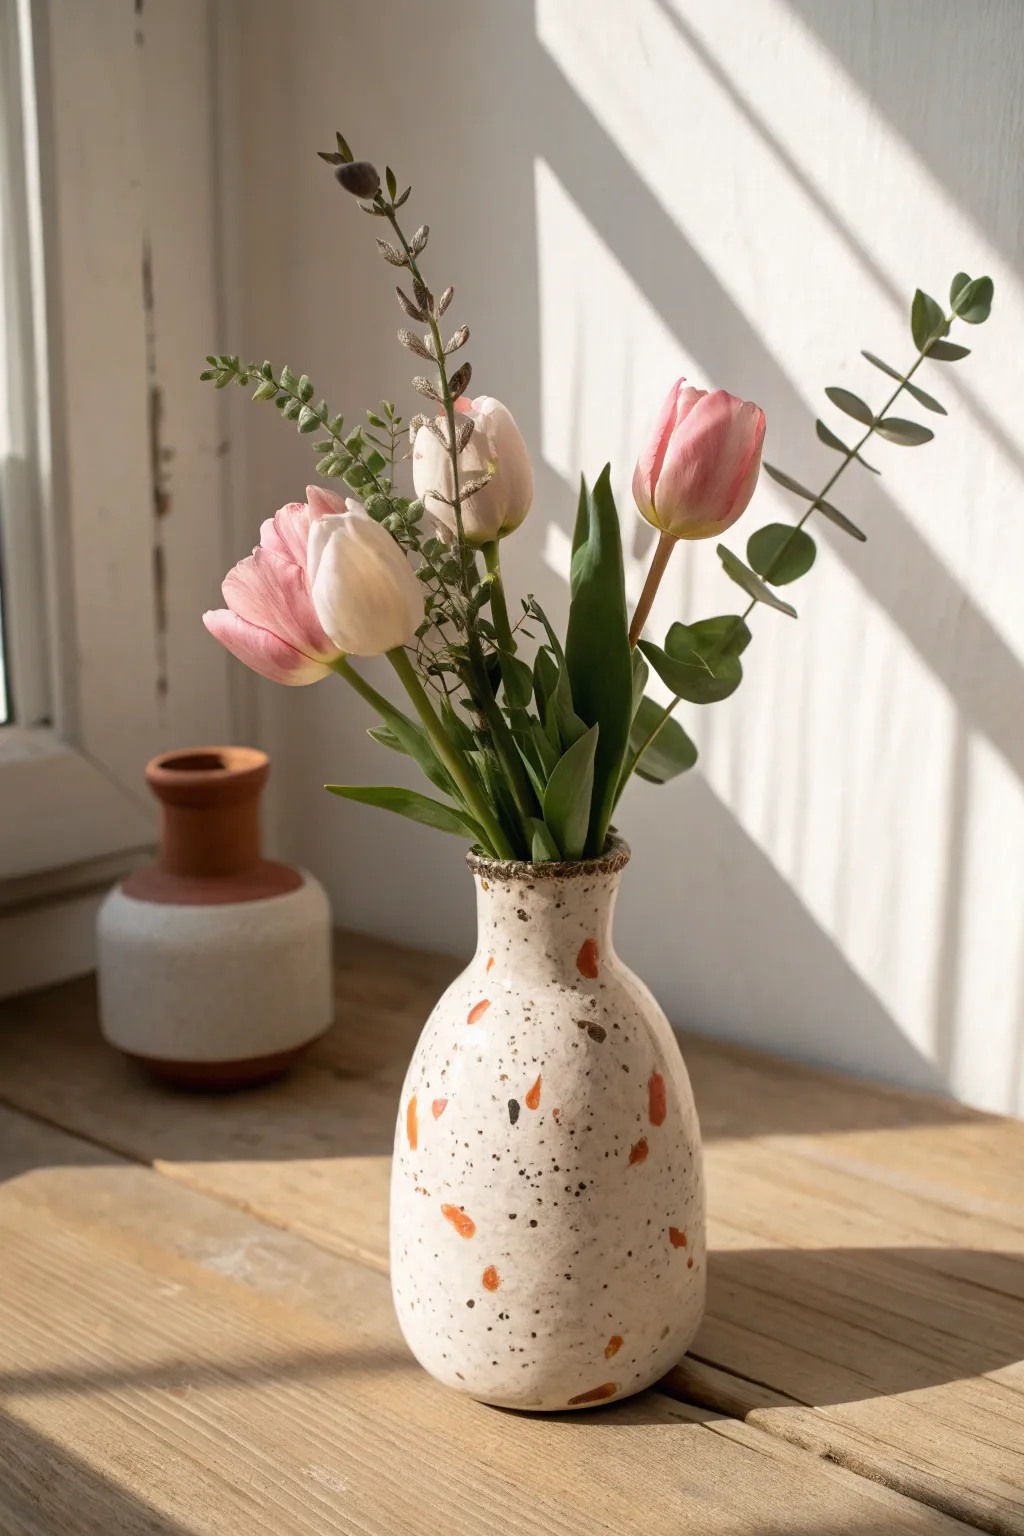
Brighten Mom’s day with this charming, rustically shaped vase featuring organic orange terrazzo flecks and delightful speckles. This project uses air-dry clay to create a warm, textured vessel that perfectly mimics high-end ceramic finishes without needing a kiln.
How-To Guide
Materials
- White air-dry clay (approx. 1kg)
- Small rolling pin
- Clay sculpting tools or a butter knife
- Sponge and water bowl
- Acrylic paints (Warm White/Cream, Black, Burnt Orange/Terracotta)
- Old toothbrush (for splattering)
- Fine detail paintbrush
- Medium flat paintbrush
- Gloss or satin varnish (mod podge or polyurethane)
- Sandpaper (fine grit)
- Glass bottle or jar insert (optional, for holding water)
Step 1: Shaping the Vessel
-
Prepare the base:
Start by taking a handful of air-dry clay and rolling it into a smooth ball. Flatten this slightly against your work surface to create a thick, stable disc about 3-4 inches wide. This will serve as the sturdy bottom of your vase. -
Build the body:
Roll out several thick coils or ‘snakes’ of clay. Begin stacking these coils on top of the outer edge of your base, pressing them down firmly to adhere. Continue stacking until you reach the start of the neck section. -
Blend the seams:
Using your thumb or a modeling tool, drag the clay from the upper coil down into the lower one, smoothing out the lines both on the inside and outside. I find wetting my fingers slightly helps blend the clay seamlessly. -
Form the tapered neck:
As you build higher, start making your coils slightly smaller in circumference to taper the shape inward. Gently pinch and smooth the clay upward to create that elegant, narrow bottle neck seen in the photo. -
Create the flared rim:
For the very top, add a final small coil and gently flare it outward with your thumbs. Smooth the lip so it is rounded and uneven for an organic, handmade feel. -
Refine the surface:
Take a slightly damp sponge and wipe down the entire exterior of the vase. This will smooth out major bumps and fingerprints, giving you a cleaner canvas for painting later. -
Drying time:
Let your vase dry completely for at least 24-48 hours. Turn it occasionally to ensure airflow reaches the bottom. The clay should turn pure white and feel room temperature (not cold) when fully dry. -
Sand for smoothness:
Once bone dry, take fine-grit sandpaper and gently buff the surface. Focus on any sharp ridges left from coiling, but leave some texture to maintain the rustic charm.
Step 2: Painting the Terrazzo Effect
-
Base coat application:
Mix a warm white or cream acrylic paint. Apply two even coats over the entire exterior of the vase, allowing the first coat to dry before applying the second. -
Painting the rim:
Using a smaller brush, dab a dark brown or speckled grey color right along the flared rim. Don’t make it a perfect line; let it look slightly roughly applied to mimic distinct stoneware clay. -
Adding terrazzo shapes:
Mix a burnt orange or terracotta color. Using a small detail brush, paint random, irregular geometric shapes scattered across the vase. Think triangles, trapezoids, and blobs—keep them spaced out comfortably. -
Refining the chips:
You can add a second coat to your orange shapes if the white base is showing through. Vary the sizes of these ‘chips’ so some are tiny and others are more prominent. -
Preparing the speckle:
Dilute a small amount of black or dark brown acrylic paint with water until it has an inky consistency. This is crucial for getting fine droplets rather than big blobs. -
Splatter technique:
Dip an old toothbrush into your diluted black paint. Hold it near the vase and run your thumb across the bristles to flick a fine mist of paint specks onto the surface. -
Controlled splattering:
Rotate the vase and repeat the splatter process. Aim for a dense, random coverage of tiny dots. If you get a dot that is too large, quickly dab it with a paper towel or paint over it with cream later. -
Protecting the finish:
Once all paint layers are completely dry, apply a coat of satin or gloss varnish. This seals the paint and gives the vase a finished, ceramic-like sheen. -
Waterproofing tip:
Since air-dry clay isn’t waterproof, insert a small glass jar or plastic tube inside the vase if you plan to use fresh flowers. Alternatively, stick to dried eucalyptus or faux tulips like in the image.
Uneven Coverage?
If your splatter effect looks clumpy rather than fine, your paint is likely too thick. Add water drop by drop until it flows like ink but holds its dark color.
Pro Tip: Hidden Insert
Measure your glass jar insert before you start building. Mold the clay directly around the jar (leaving it inside) to ensure a perfect waterproof fit for fresh blooms.
Now you have a stunning, artisanal vase ready to gift to Mom
Cute “Best Mom” Coaster Set
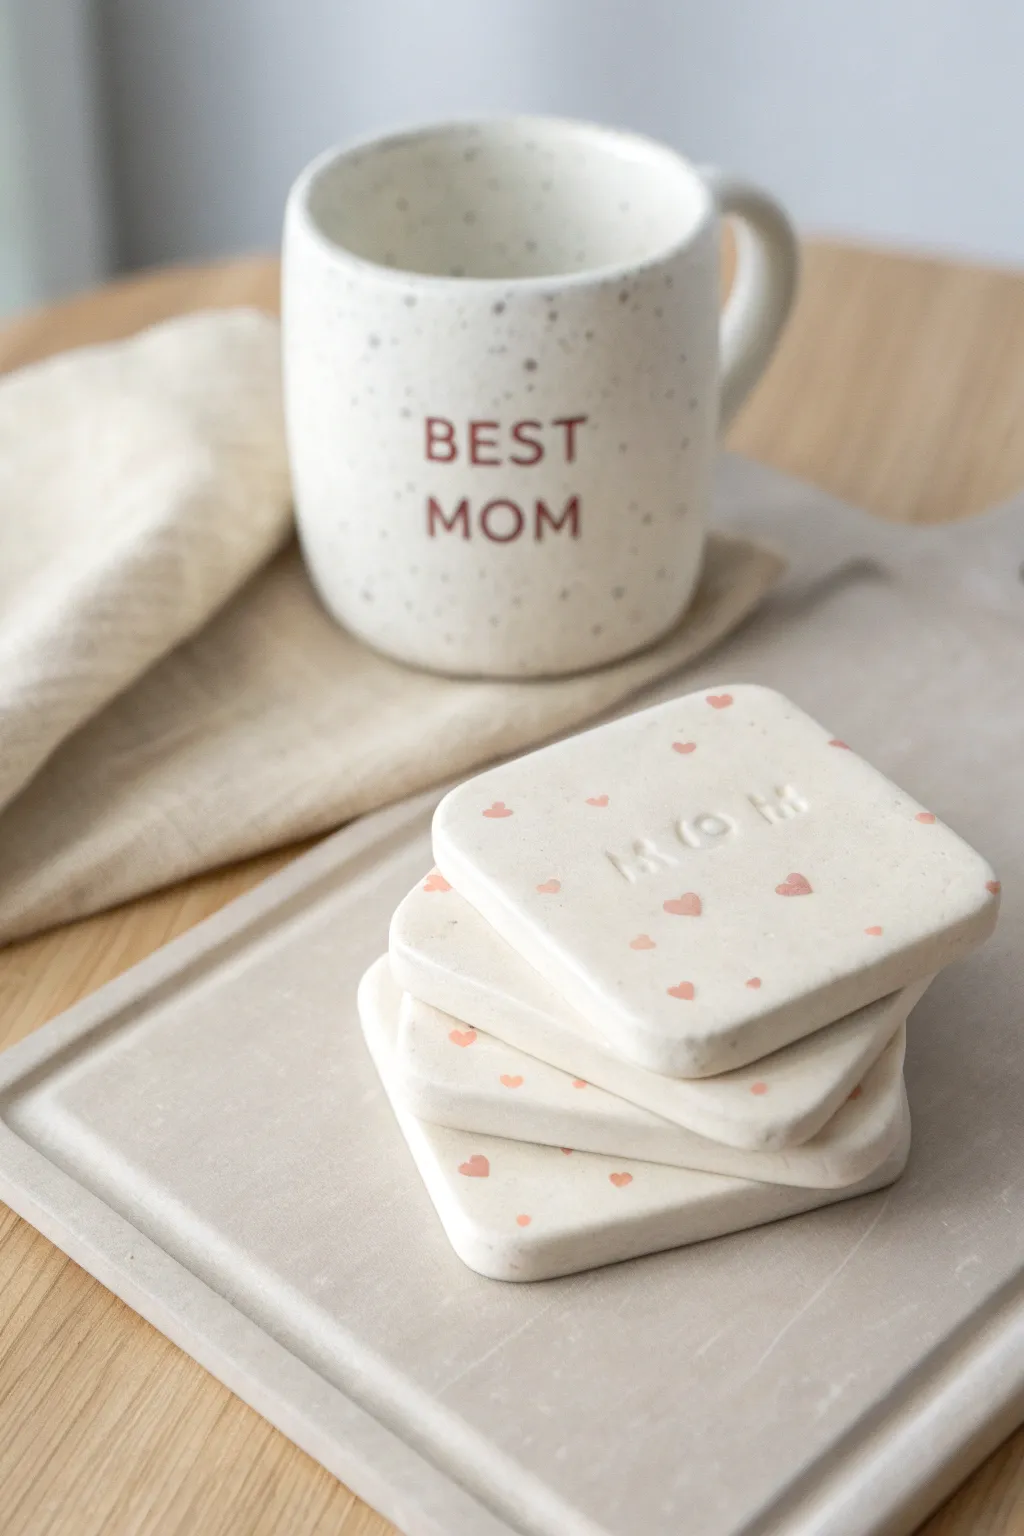
Treat mom to a morning coffee upgrade with these minimalist, heartfelt coasters. Using simple clay techniques and delicate pink accents, you’ll create a durable and sweet set that pairs perfectly with her favorite mug.
Step-by-Step
Materials
- White or cream polymer clay (or air-dry clay)
- Rolling pin
- Square cookie cutter (approx 3.5 – 4 inches)
- Alphabet stamp set (small size)
- Small heart stamp (or a fine paintbrush)
- Soft pink acrylic paint
- Sandpaper (fine grit)
- Clear matte or satin sealant (waterproof)
- Parchment paper or baking mat
- Optional: two wooden dowels (for thickness guides)
Step 1: Shaping the Clay
-
Condition the clay:
Start by taking a generous chunk of your white or cream clay. Knead it thoroughly in your hands until it becomes warm, soft, and pliable, which prevents cracking later. -
Set up your workspace:
Lay down a sheet of parchment paper or a silicone baking mat to protect your work surface and prevent sticking. -
Roll it out:
Place the ball of clay on the mat. I like to place two wooden dowels on either side of the clay to act as rails; this ensures an even thickness of about 1/4 inch when you roll. -
Smooth the surface:
check the surface of your rolled clay for any lint or fingerprints. Lightly smooth them away with your fingertip or a damp sponge if using air-dry clay. -
Cut the squares:
Press your square cookie cutter firmly into the clay to cut out four identical coaster shapes. If you don’t have a cutter, you can gently trace a square template and cut it with a craft knife. -
Soften the edges:
After lifting the squares away from the excess clay, gently tap the sharp edges with your finger to round them off slightly for a softer, more finished look.
Clean Impressions
Dust your rubber stamps with a tiny bit of cornstarch or baby powder before pressing into the clay. This prevents the clay from sticking inside the detailed letters.
Step 2: Stamping & Decorating
-
Stamp the sentiment:
Take your alphabet stamps and arrange the letters M-O-M. Press them firmly into the center of one (or all) of the coasters to create a deep impression. -
Add the hearts:
If you have a tiny heart stamp, press it randomly across the surface of the coasters. If not, don’t worry—we will paint freehand hearts later. -
Bake or dry:
Follow the instructions for your specific clay. For polymer clay, bake on a lined sheet at the recommended temperature (usually around 275°F/135°C). For air-dry clay, let them sit undisturbed for 24-48 hours. -
Sand for smoothness:
Once fully cured and cooled, take a piece of fine-grit sandpaper and lightly buff the edges and surface to remove any imperfections or bumps. -
Clean the surface:
Wipe the coasters down with a slightly damp cloth to remove all the sanding dust before you start painting.
Make It a Set
Make 4 coasters, but stamp different words on each: ‘MOM’, ‘LOVE’, ‘XOXO’, and ‘HUGS’ for a complete customized gift set.
Step 3: Painting & Finishing
-
Paint the text:
Dip a very fine brush into white or transparent glaze to seal just the letters, or leave them raw for a subtle embossed look as shown in the inspiration. -
Paint the hearts:
Using the soft pink acrylic paint and a fine-tip brush, verify your pattern. If you stamped hearts earlier, fill in the impressions. If not, paint tiny, delicate hearts freehand scattered across the surface. -
Let the paint dry:
Allow the acrylic paint to dry completely. This usually takes about 15 to 20 minutes since the hearts are quite small. -
Apply the first coat of sealant:
Brush a thin, even layer of waterproof sealant over the entire top and sides of the coaster. Since these will hold drinks, waterproofing is crucial. -
Seal the bottom:
Once the top is dry to the touch, flip the coasters over and seal the bottom as well to protect surfaces from condensation. -
Final cure:
Apply a second coat to the top for extra durability and let the coasters cure for the full time recommended on your varnish bottle before using them.
Now wrap these beauties in a ribbon and get ready to see her smile
Heart Spoon Rest for Mom’s Kitchen
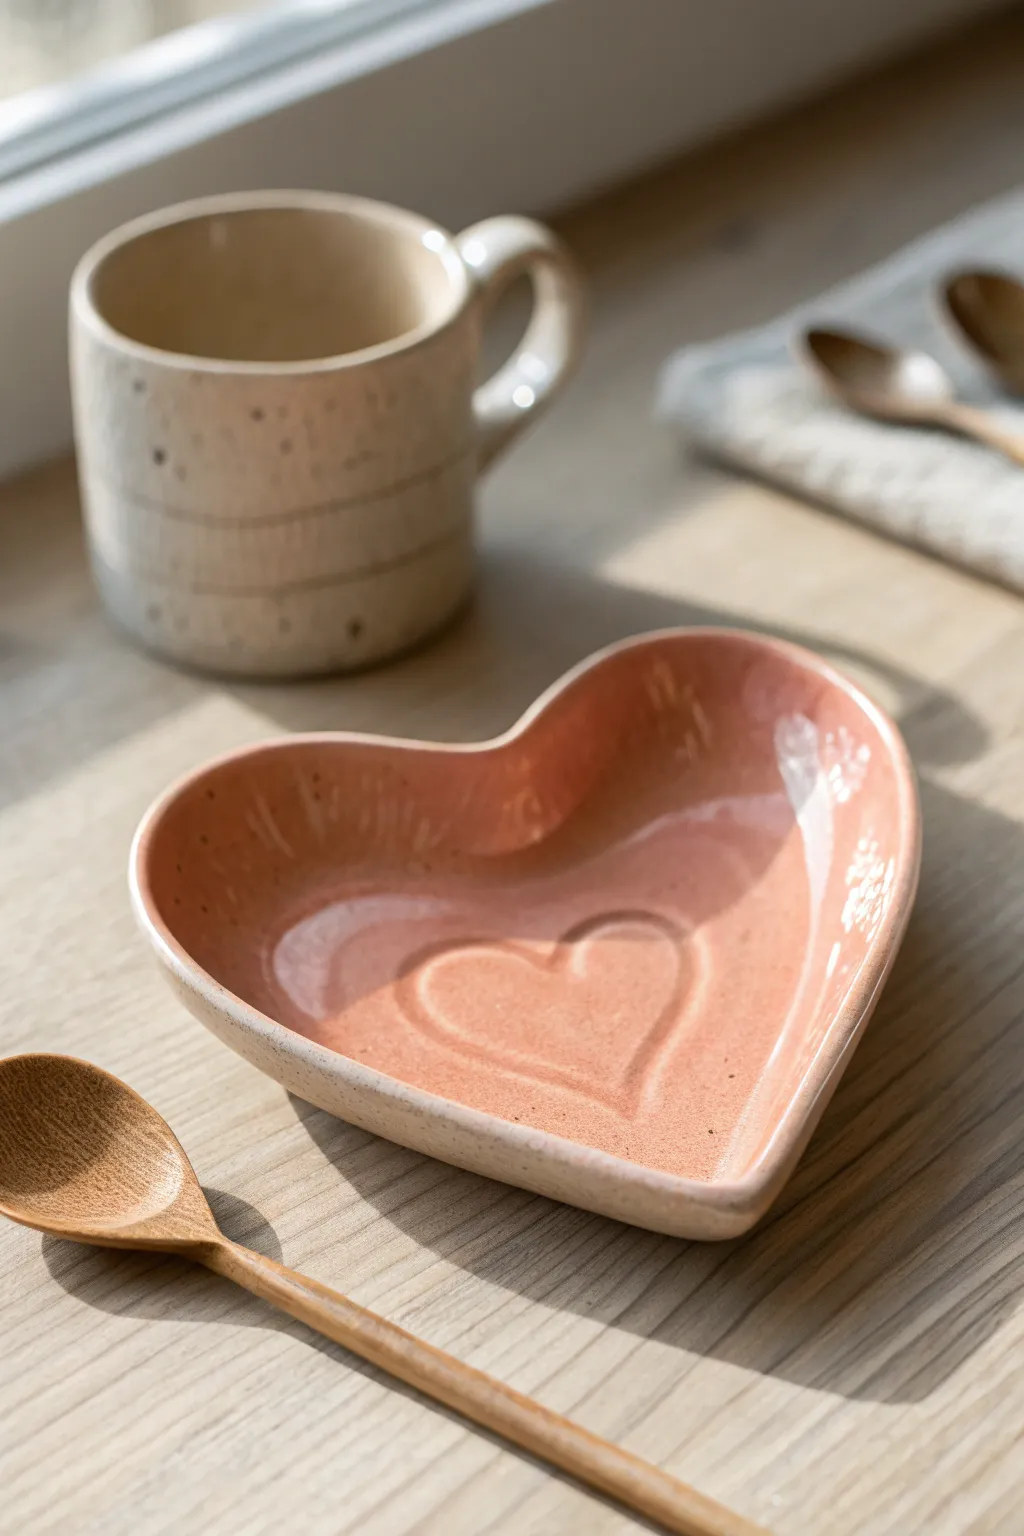
This charming, glazed heart-shaped dish makes the perfect spoon rest for a busy kitchen or a sweet jewelry catchall for Mom’s nightstand. Crafted from speckled clay and finished with a warm pink glaze, it features a subtle interior heart embossment that adds a lovely hidden detail.
Detailed Instructions
Materials
- Speckled stoneware clay (1 lb)
- Heart-shaped cookie cutter (large, approx. 4-5 inches)
- Heart-shaped cookie cutter (small, approx. 1-2 inches)
- Rolling pin
- Canvas mat or guide strips (1/4 inch thickness)
- Sponge
- Rib tool or old credit card
- Carving tool or needle tool
- Soft paintbrush
- Food-safe pink glaze (glossy finish)
- Small bowl of water
Step 1: Shaping the Clay
-
Prepare the slab:
Begin by taking a ball of speckled stoneware clay and smashing it down onto your canvas mat. -
Roll to thickness:
Using your rolling pin and guide strips, roll the clay out into a smooth slab. You are aiming for an even 1/4 inch thickness to ensure durability for a spoon rest. -
Rib the surface:
Before cutting, take a damp rib tool or credit card and gently drag it across the surface of the clay slab. This compresses the clay particles and creates that perfectly smooth canvas we need for glazing later. -
Cut the main shape:
Press your large heart-shaped cookie cutter firmly into the slab. If you don’t have a cutter large enough, you can layout a paper template and trace around it with a needle tool. -
Smooth the edges:
Remove the excess clay. dampen a small sponge and run it along the cut edge of your heart to soften that sharp corner, rounding it slightly so it won’t chip easily after firing.
Step 2: Adding Details & Form
-
Create the inner heart:
Take the smaller heart cutter and position it in the direct center of your clay heart. -
Press the relief:
Gently press the small cutter down, but only go about halfway through the slab do not cut all the way through. Wiggle it slightly and lift straight up to leave a clean impression. -
Soften the impression:
Use your fingertip, dipped slightly in water, to smooth the sharp ridges created by the inner impression. The glaze will pool nicely here, so you want smooth transitions. -
Lift the edges:
Place the heart on a piece of foam or cup it in your hand. Gently curl up the outer edges of the large heart to create a shallow bowl shape. This curved rim will keep messy spoons from sliding off. -
Dry slowly:
Set the piece aside to dry slowly under a loose sheet of plastic. Drying too fast can warp the heart shape, so patience is key here.
Glaze Pooling
Apply the glaze slightly thicker in the center heart impression. During firing, the glaze will pool there, creating a darker, lovely accent outline.
Step 3: Glazing & Finishing
-
Bisque fire:
Once bone dry, fire the piece in a kiln to bisque temperature (usually Cone 04) to prepare it for glazing. -
Clean surface:
Wipe the bisque-fired heart with a damp sponge to remove any kiln dust, which helps the glaze adhere properly. -
Apply interior glaze:
Pour a small amount of pink glaze into the center of the heart. Swirl it around to coat the interior walls and the embossed heart impression, then pour out the excess. -
Brush the rim:
I like to use a soft fan brush to tidy up the rim, ensuring the pink glaze comes right up to the edge but doesn’t drip down the outside. -
Leave exterior bare:
Leave the outside and bottom of the dish unglazed to show off the natural speckled clay texture, just like in the reference photo. If any pink got on the outside, wipe it off cleanly with a sponge. -
Final fire:
Fire the piece again to the recommended temperature for your specific glaze and clay body (typically Cone 5 or 6 for stoneware).
Add a Message
Before the clay dries, use a small alphabet stamp set to press ‘Mom’ or a date into the backside of the spoon rest for a sentimental hidden touch.
Wrap this heartfelt creation in tissue paper for a gift that will remind Mom of your love every time she cooks
Photo Card Holder With a Sweet Message
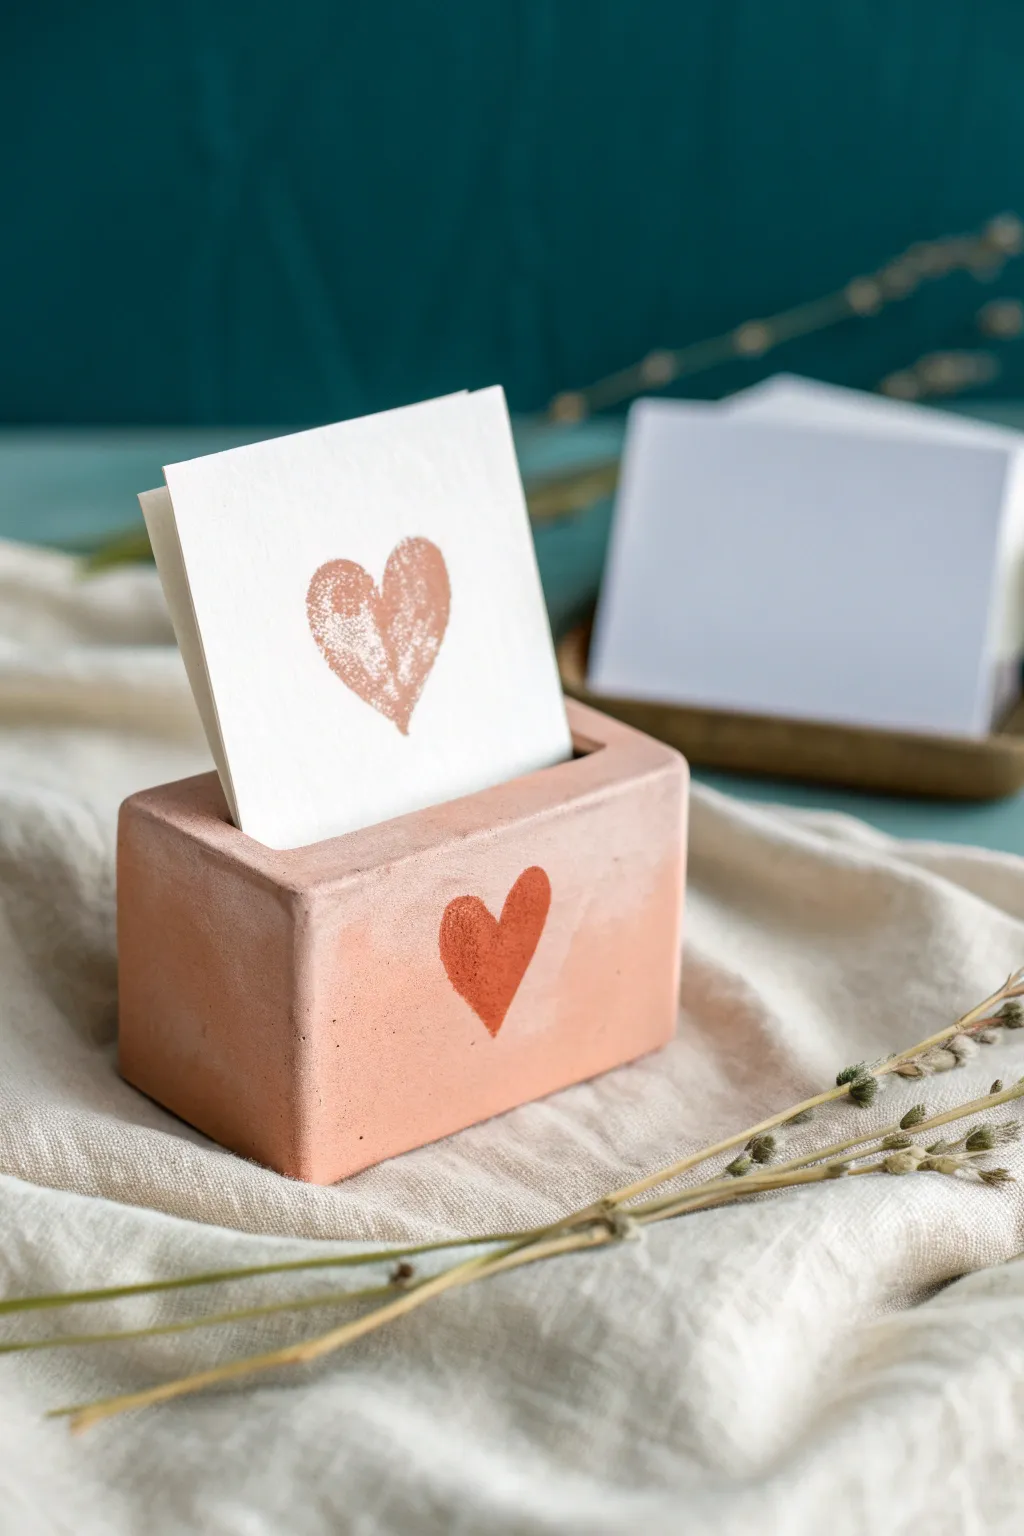
This minimalist card holder blends a rustic, handmade texture with a sweet, block-printed heart motif. It is the perfect size for displaying a sentimental note or a favorite photograph and adds a warm, personalized touch to any desk or mantelpiece.
Step-by-Step Guide
Materials
- Air-dry clay (terra cotta or white)
- Rectangular soap mold OR small cardboard box
- Rolling pin
- Sharp crafting knife or clay blade
- Sanding block or fine-grit sandpaper
- Acrylic paints (soft pink, terracotta red)
- Small foam pouncer or stencil brush
- Small paintbrush
- Heart-shaped stamp (or carving rubber/potato)
- Cardstock for the note
- Water and sponge
- Ruler
Step 1: Shaping the Block
-
Condition the Clay:
Begin by taking a handful of air-dry clay and kneading it thoroughly in your hands until it becomes warm, soft, and pliable, which helps prevent cracks later on. -
Form the Base Shape:
Shape the clay into a solid rectangular block. You can press it into a rectangular soap mold to get sharp corners, or shape it by hand, tapping it against your work surface to flatten each of the six sides. -
Refine the Edges:
Use a straight ruler or a smooth flat object to gently press against the sides to ensure they are even and the block stands perfectly stable on its own. -
Create the Slot:
Using a crafting knife or a thin ruler, carefully press a slot into the top center of the block. Make it deep enough to hold a card securely (about 1.5 cm) but ensure you don’t cut all the way through. -
Widen the Opening:
Gently wiggle the tool used to make the slot back and forth slightly to widen the opening just enough for cardstock to slide in easily without bending. -
Smooth Imperfections:
Dip your finger or a small sponge in water and run it over the clay to smooth out any fingerprints, cracks, or rough textures. -
Dry Completely:
Set the block aside to dry. This usually takes 24-48 hours depending on thickness; flip it occasionally to ensure the bottom dries evenly.
Step 2: Decorating and Finishing
-
Sand the Surface:
Once the block is bone dry, use a fine-grit sanding block to buff away any remaining uneven spots, focusing on softening the sharp corners just a little for a finished look. -
Mix the Base Color:
Mix a soft, peachy-pink acrylic paint. I find that mixing a tiny bit of white into terracotta paint creates that lovely, muted clay tone seen in the example. -
Apply the Base Coat:
Paint the entire block with your mixed color. You may need two thin coats for full coverage, letting the first one dry completely before applying the second. -
Prepare the Heart Stamp:
If you don’t have a heart stamp, you can easily carve a simple heart shape out of a rubber eraser or even a potato for a more rustic texture. -
Stamp the Block:
Lightly load your stamp with a darker terracotta or red acrylic paint. Press it firmly onto the front center of the clay block to create the heart motif. -
Create the Card:
While the block dries, cut a piece of thick watercolor paper or cardstock to size (approx. 3×3 inches). -
Decorate the Card:
Use the same stamp and paint color to place a matching heart in the center of the paper card. -
Add Texture (Optional):
For a distressed look on the card, lightly dap a mostly dry brush around the heart, creating a faded, vintage effect. -
Final Assembly:
Once everything is fully dry, verify the slot is clear of paint drips and slide your card into place to complete the display.
Clean Lines Hack
To get perfectly sharp edges on your clay block without a mold, use two same-height books as guide rails for your rolling pin, then slice the sides clean with a long blade.
Uneven Drying?
If the clay block warps while drying, the bottom dried slower than the top. Weigh it down gently with a heavy book during the final drying hours to flatten the base again.
This charming little holder is now ready to showcase your sweetest message or favorite memory
Cute Flower and Heart Magnet Set

Create a charming collection of earthy, pastel magnets that celebrate Mom with sweet floral shapes and delicate hearts. This set uses a soft color palette including sage, terracotta, and blush to achieve a trendy, matte finish that looks professional yet handmade.
Step-by-Step Tutorial
Materials
- Polymer clay in calm shades (sage green, terracotta, blush pink, cream/white)
- Small round clay cutters (approx. 1 inch)
- Small heart-shaped cutter
- Detailed flower petal cutter or a craft knife
- Ball stylus tool
- Needle tool or toothpick
- Smooth acrylic roller or pasta machine
- Parchment paper or ceramic tile (for baking)
- Strong craft glue (E6000 or similar)
- Small round magnets
- Oven (for baking)
Step 1: Prepping the Clay
-
Condition the Clay:
Begin by warming up your polymer clay in your hands. Knead each color—sage, terracotta, blush, and cream—separately until they are soft and pliable to prevent cracking. -
Roll Smooth Sheets:
I like to use an acrylic roller to flatten each color to a uniform thickness, about 1/8 to 1/4 inch thick. Aim for consistency across all colors for a cohesive set.
Sticky Situation?
If clay sticks to your cutter, dip the cutter in cornstarch or water before slicing. It creates a barrier and helps the clay release cleanly every time.
Step 2: Creating the Hearts
-
Cut the Bases:
Using your small round cutter, punch out several circles from the sage, cream, and blush clay sheets. -
Cut the Heart Inserts:
From contrasting colors, cut out small heart shapes. For example, cut a pink heart for a white circle base, or a terracotta heart for a sage base. -
Embed or Overlay:
Gently press the heart cutouts onto the center of the circle bases. You can simply lay them on top for a raised effect, or gently roll over them once to embed them flush with the surface. -
Indent details:
For the simple indented hearts seen on the terracotta circle, use a clay tool to gently embrace an outline of a heart directly into the clay without adding a second color.
Step 3: sculpting the Flowers
-
Shape Individual Petals:
For the flowers, you can use a flower-shaped cutter, but forming them by hand adds charm. Roll five or six small balls of clay of equal size for the petals. -
Assemble the Flower:
Press the small balls together in a circle, flattening them slightly. Use your finger to smooth the connections where they touch in the center. -
Add a Center:
Roll a tiny ball of contrasting clay (like white on a terracotta flower) and press it firmly into the center of the petal ring. -
Detail the Petals:
Using a needle tool or the back of a craft knife, gently press a line down the center of each petal to create texture and realism. -
Create Texture:
For the white textured daisies, use a needle tool to scratch delicate patterns or loops onto the petals before baking.
Matte Magic
To get that ultra-matte finish, gently sand the baked pieces with high-grit sandpaper, then buff with denim. Avoid gloss glazes to keep the earthy look.
Step 4: Finishing Touches
-
Smooth Imperfections:
Before baking, gently rub out any fingerprints with a tiny bit of cornstarch or baby oil on your fingertip. -
Bake:
Place your pieces on parchment paper or a ceramic tile. Bake according to your brand of clay’s instructions (usually around 275°F for 15-30 minutes). Do not overbake. -
Cool Down:
Allow the clay pieces to cool completely. They are fragile when hot but will harden as they return to room temperature. -
Attach Magnets:
Flip the cooled clay pieces over. Apply a dab of strong craft glue to the back of each flower or circle. -
Secure the Backing:
Press a small round magnet into the glue. Let them dry undisturbed for at least 24 hours to ensure a secure bond.
Now wrap these lovely little magnets in a cute box for a thoughtful gift that Mom will see every time she visits the fridge
Heart Cutout Candle Holder
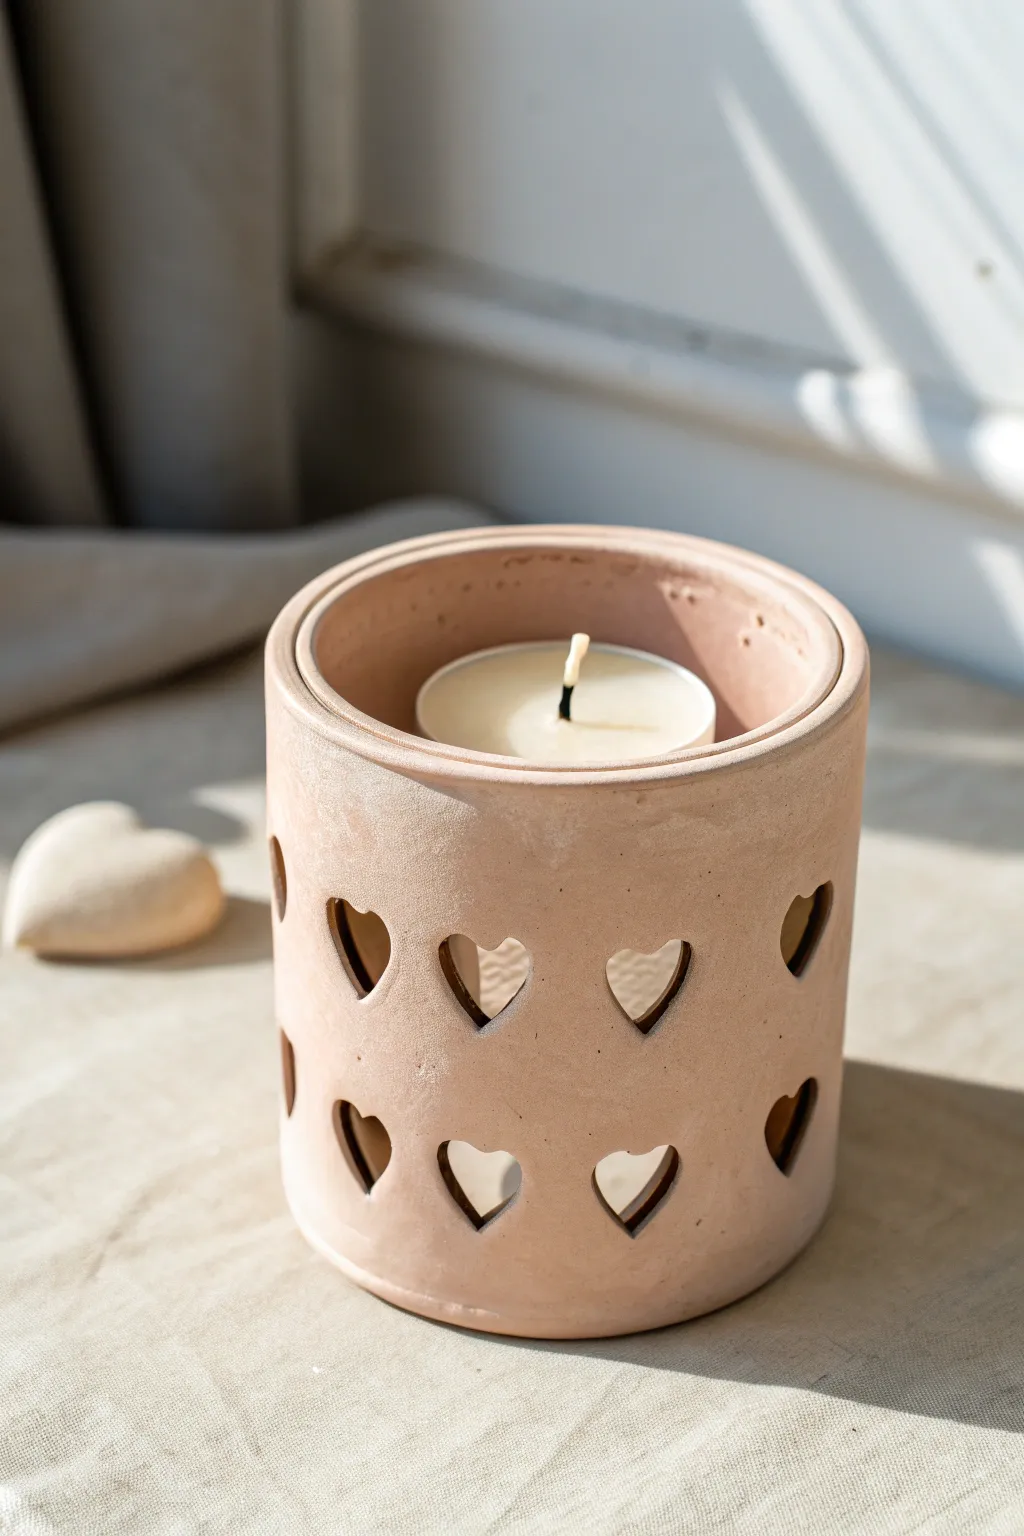
This charming candle holder radiates warmth literally and figuratively, featuring a double row of sweetheart cutouts that cast beautiful shadows when lit. Its natural, earthy finish gives it a timeless feel perfect for a cozy Mother’s Day gift.
How-To Guide
Materials
- Air-dry clay (terra cotta color) or polymer clay
- Rolling pin
- Cylindrical mold (e.g., a glass jar or sturdy can)
- Small heart-shaped cookie cutter (approx. 1 inch)
- Craft knife or scalpel
- Ruler
- Parchment paper
- Small bowl of water
- Sponge or smoothing tool
- Fine-grit sandpaper
- Tea light or small votive candle
Step 1: Preparing the Clay Slab
-
Condition the Clay:
Begin by kneading your clay thoroughly until it’s soft, pliable, and free of cracks. If you are using natural air-dry clay, ensure your hands are slightly damp. -
Roll it Out:
Place the clay between two sheets of parchment paper to prevent sticking. Roll it out into a long, rectangular slab. Aim for a consistent thickness of about 1/4 inch (6mm) to ensure the walls stand up straight. -
Measure the Cylinder:
Take your chosen cylindrical mold (a jar or can) and wrap a piece of paper around it to measure the circumference. Add about half an inch to this measurement for the overlap seam. -
Cut to Size:
Using a ruler and craft knife, trim your clay slab into a precise rectangle based on your circumference measurement. The height should be tall enough to hide a tea light, roughly 3 to 4 inches.
Clean Cuts Pro-Tip
If the clay sticks inside the cookie cutter, place a thin sheet of plastic wrap over the clay slab before pressing the cutter down. This creates rounded, soft edges instantly.
Step 2: Creating the Design
-
Plan the Hearts:
Before cutting, lightly mark two horizontal lines across the clay slab with a ruler to guide where your heart rows will go. This ensures they stay straight. -
Cut the First Row:
Press your small heart cutter into the clay along the bottom guideline. Space them evenly apart, leaving about an inch of clay between each heart for structural integrity. -
Cut the Second Row:
Repeat the process for the top row. For a pleasing look, try to align these hearts directly above the ones in the bottom row, or offset them slightly like bricks depending on your preference. -
Clean the Edges:
Gently lift the cut-out hearts away. Dip your finger in water and smooth the raw inside edges of each heart cutout to remove any burrs or rough clay crumbs.
Level Up: Speckled Effect
Mix dried coffee grounds or black pepper into the wet clay before rolling. When you sand the finished piece, speckles will appear, mimicking natural stoneware.
Step 3: Assembly and Finishing
-
Prepare the Mold:
Wrap your glass jar or can in a layer of parchment paper. This is crucial so you can slide the clay off later without it getting stuck. -
Form the Cylinder:
Carefully lift your clay rectangle and wrap it around the parchment-covered mold. Bring the two ends together. -
Seal the Seam:
Score the touching edges (make little scratches) and add a dab of water or slip. Press the ends firmly together. I like to use a modeling tool to blend the clay across the seam until the line disappears completely. -
Smooth the Rim:
Run a damp sponge or finger along the top rim of the cylinder to round it off and fix any distortion that happened during wrapping. -
Create the Base:
Roll out a small separate circle of clay slightly larger than your cylinder’s diameter. Place your cylinder on top of it. -
Attach the Base:
Blend the excess clay from the base circle up onto the walls of the cylinder using a smoothing tool, ensuring a tight seal at the bottom. -
Initial Drying:
Let the clay sit on the mold for about an hour until it stiffens slightly, then carefully slide the mold out. Leaving it on too long can cause cracking as the clay shrinks. -
Full Cure:
Allow the piece to dry completely according to package directions (usually 24-48 hours). Turn it upside down halfway through so the bottom dries evenly. -
Final Sanding:
Once fully dry and hard, take fine-grit sandpaper and gently buff the exterior and the rim for a professional, matte finish.
Place a tea light inside and watch the hearts glow for a truly heartwarming display
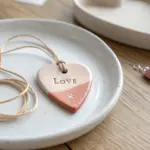
Essential Oil Diffuser Charm for Mom
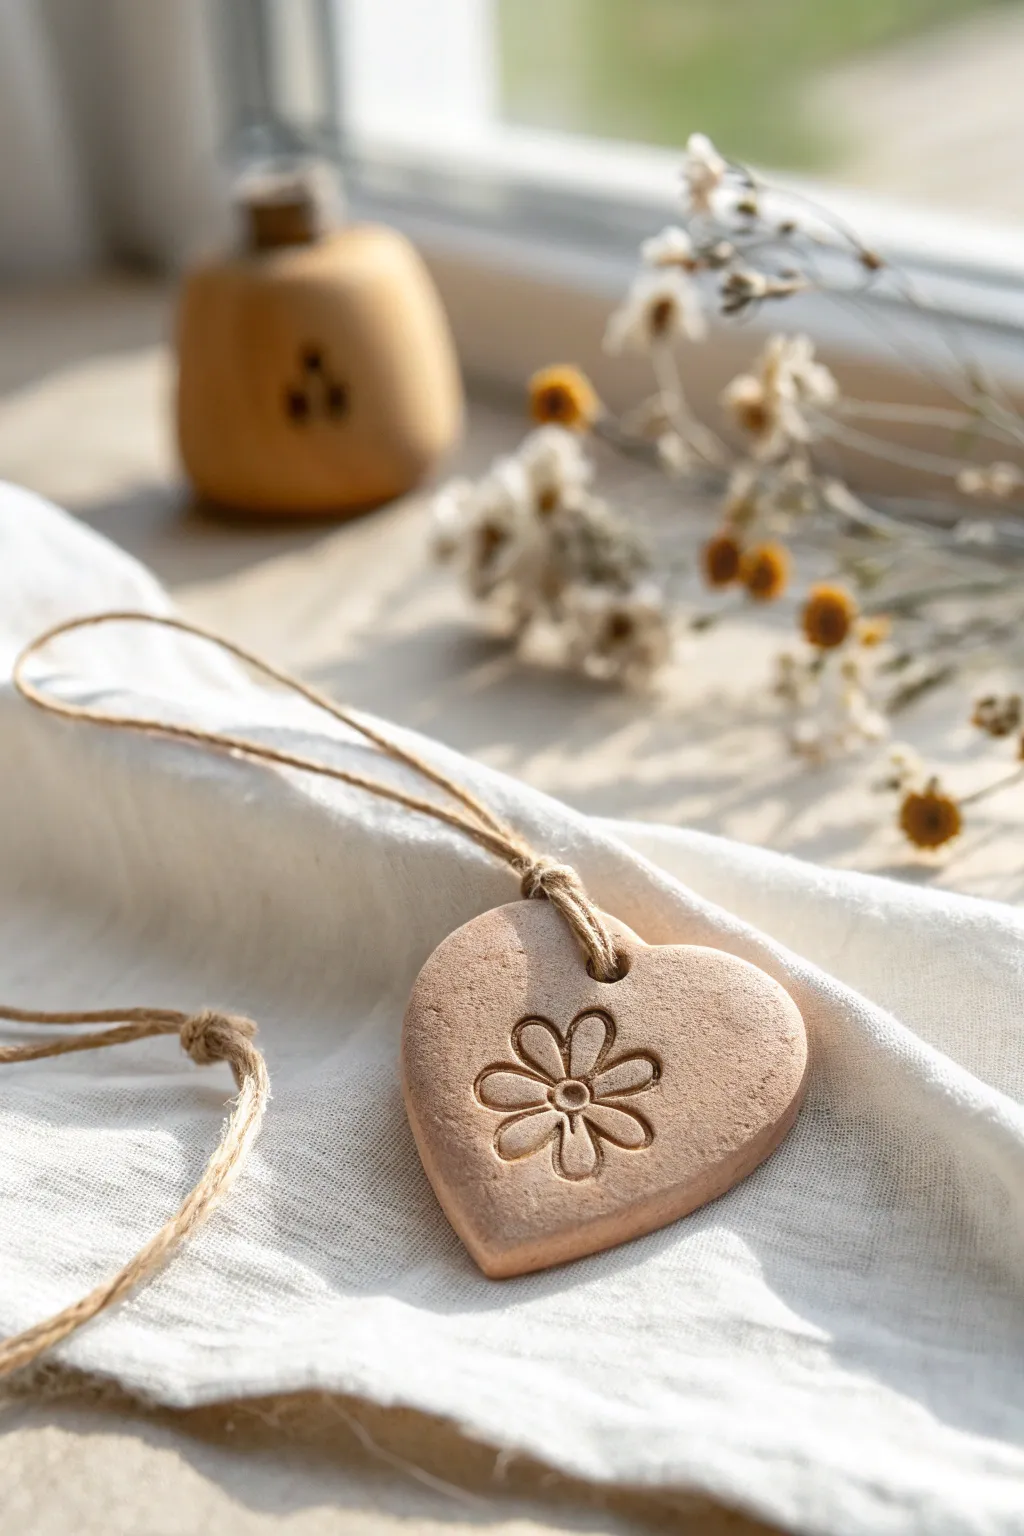
Create a heartfelt, functional gift for Mom with this simple terracotta-style essential oil diffuser charm. This rustic heart features a stamped floral design and hangs on natural twine, perfect for adding a gentle scent to a car, closet, or cozy nook.
Step-by-Step
Materials
- Terracotta air-dry clay (or polymer clay if preferred)
- Heart-shaped cookie cutter (medium size)
- Small flower stamp or embossing tool
- Rolling pin
- Parchment paper or canvas work mat
- Straw or cocktail stick
- Fine-grit sandpaper (optional)
- Natural jute twine
- Scissors
- Essential oils (for gifting)
Step 1: Shaping the Clay
-
Prepare your workspace:
Lay down a piece of parchment paper or a canvas mat to prevent the clay from sticking to your table. Take a ball of terracotta air-dry clay about the size of a golf ball. -
Condition the clay:
Knead the clay in your hands for a minute or two until it feels warm and pliable. This helps prevent cracks from forming later as it dries. -
Roll it out:
Place the clay ball on your mat and use the rolling pin to flatten it. Aim for a thickness of about 1/4 inch (6mm)—thick enough to be sturdy but not heavy. -
Check for bubbles:
Inspect the surface for any air bubbles. If you see any, gently pop them with a needle tool and smooth over the area with your finger. -
Cut the shape:
Press your heart-shaped cookie cutter firmly into the clay. Give it a tiny wiggle to ensure a clean cut, then lift the cutter. Peel away the excess clay from the outside. -
Smooth the edges:
Dip your finger in a tiny bit of water and gently run it along the cut edges of the heart to soften any sharp ridges left by the cutter.
Step 2: Adding Details & Finishing
-
Create the hanging hole:
Use a drinking straw or a thick cocktail stick to punch a hole near the top center of the heart. Make sure it isn’t too close to the edge to prevent breaking. -
Stamp the design:
Position your flower stamp exactly in the center of the heart. Press down firmly and evenly, but not so hard that you distort the overall heart shape. Lift the stamp straight up. -
Clean up the impression:
If the stamp pulled up any tiny jagged bits of clay, gently pat them down with a smooth tool or your fingertip. -
Texturizing (Optional):
For that rustic, stone-like look seen in the photo, you can lightly tap the surface with a piece of crumpled aluminum foil or a stiff-bristled brush, avoiding the stamped flower area. -
Drying time:
Place the heart on a clean sheet of parchment paper in a cool, dry place. I usually flip the piece over after about 12 hours to ensure both sides dry evenly and prevent warping. -
Check dryness:
Allow the clay to dry completely according to the package instructions, typically 24-48 hours. The color will lighten as moisture evaporates. -
Sanding:
Once fully dry, use fine-grit sandpaper to briefly gently buff any rough spots on the edges or back of the charm. -
Cut the twine:
Cut a length of natural jute twine, approximately 12-15 inches long, depending on where Mom might want to hang it. -
Attach the hanger:
Fold the twine in half and thread the loop end through the hole in the heart from front to back. -
Secure the knot:
Pull the loose ends of the twine through the loop and tighten gently to create a lark’s head knot directly on the charm. -
Tie the ends:
Bring the two loose ends together and tie a simpler overhand knot at the very top to close the loop.
Stamp trick
Dust your flower stamp with a tiny bit of cornstarch before pressing it into the clay. This acts as a release agent and prevents the clay from getting stuck in the intricate details.
Scent it up
Gift this with a small bottle of lavender or citrus oil. Instruct Mom to apply just 1-2 drops to the BACK of the charm (unsealed clay absorbs oil best) to diffuse the scent.
Now wrap this lovely little token in tissue paper for a handmade gift that smells as sweet as it looks