If you’re craving a clay project that’s equal parts practical and adorable, a cute clay piggy bank is the sweetest little win. I love how a simple round body plus a charming face can turn into a keepsake you’ll actually want to keep on your shelf.
Classic Round Pig With Button Snout
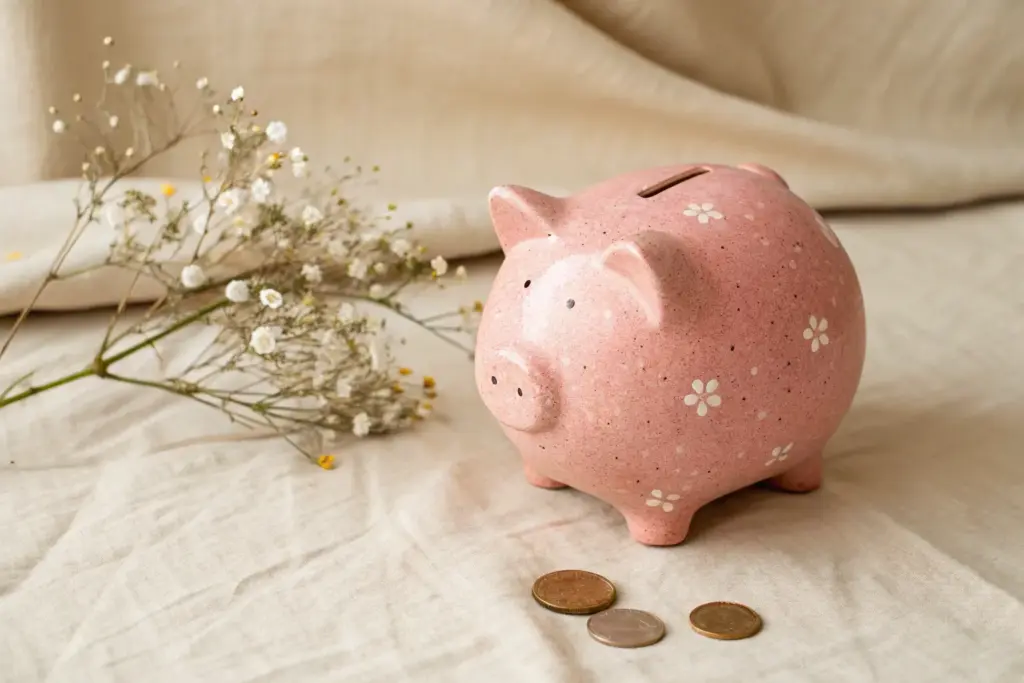
This timeless design captures the essence of childhood savings with its satisfyingly round belly, classic button snout, and soft, glossy pink finish. It is the perfect beginner sculpture project to practice creating smooth structural forms and clean, minimalist details.
How-To Guide
Materials
- Light-colored stoneware clay or air-dry clay (approximately 2-3 lbs)
- Potter’s needle tool
- Fettling knife
- Rubber kidney tool or soft sponge
- Scoring tool (or an old toothbrush)
- Slip (clay mixed with water)
- Rolling pin
- Wooden modeling tool
- Pale pink underglaze or acrylic paint (depending on clay type)
- Black underglaze or acrylic paint (for details)
- Clear high-gloss glaze or varnish
- Small round detail brush
Step 1: Forming the Body
-
Divide the clay:
Begin by separating your clay. Set aside a small portion (about the size of a lemon) for the legs, ears, and snout. The larger portion will shape the main body. -
Pinch pot method:
Divide the large portion of clay in half. Roll each half into a smooth ball. Push your thumb into the center of one ball and gently pinch the walls while rotating until you have a uniform bowl shape. -
Repeat and join:
Repeat the previous step with the second ball to create a matching bowl. Score the rims of both bowls (scratch hatch marks) and apply slip generously. -
Seal the sphere:
Press the two bowl rims together firmly. Smooth the seam completely using a wooden tool or your thumb, dragging clay across the join until the sphere is seamless. -
Trapped air safety:
Important: The hollow sphere now has trapped air, which provides structural support while you work, like an inflated balloon. Do not pierce it yet. -
Shape the oval:
Gently paddle or roll the sphere on your work surface to elongate it slightly into a chubby oval shape, establishing the pig’s torso.
Step 2: Adding Appendages
-
Create the legs:
From your reserved clay, roll four equal-sized cylinders. Tap them on the table to flatten the tops and bottoms, creating stout little stumps. -
Attach the legs:
Score and slip the bottom of the body where the legs will go. Press the legs on firmly and blend the clay upwards into the body so no seams remain visible. -
Make the snout:
Roll a small ball of clay and flatten it slightly into a thick disk. Attach this to the front of the face, blending the edges smoothly into the head to create a raised button snout. -
Form the ears:
Shape two triangles from flattened clay. Gently curve them forward to give them a perky look. Attach them near the top-front of the head, blending the base thoroughly. -
Refine the surface:
Use a damp sponge or a rubber kidney tool to smooth out the entire surface. This is crucial for that polished, ceramic look; remove any fingerprints or bumps now.
Saggy Belly Syndrome?
If the hollow body starts slumping while you work, the clay is too soft. Let it sit and stiffen for 30-60 minutes before attaching the heavy legs.
Step 3: Detailing and Finishing
-
Cut the coin slot:
Once the clay has stiffened slightly (leather hard), carefully cut a rectangular slot in the center of the back using a fettling knife. Clean up the edges with a damp sponge. -
Vent hole:
If you are firing this in a kiln, puncture a small non-visible hole in the belly to allow expanding air to escape during firing so it doesn’t explode. -
Initial drying or firing:
Let the piece dry slowly under plastic to prevent cracks. If using ceramic clay, bisque fire it once completely dry. If using air-dry clay, wait until it’s bone dry. -
Base color application:
Apply 2-3 coats of a soft, pale pink glaze (or acrylic paint). Ensure even coverage for that manufactured sleekness. -
Facial features:
Using a very fine brush and black paint/underglaze, dot two small eyes wide apart on the face. Add two smaller dots on the snout for nostrils. -
Final coat:
Finish with a clear gloss glaze (fired) or a high-gloss varnish (air-dry) to achieve the shiny, durable finish seen in the inspiration image.
Personalize It
Before the final gloss coat, paint small flowers, polka dots, or a name on the piggy’s side to customize it as a gift.
Start saving your loose change in your charming new handmade creation


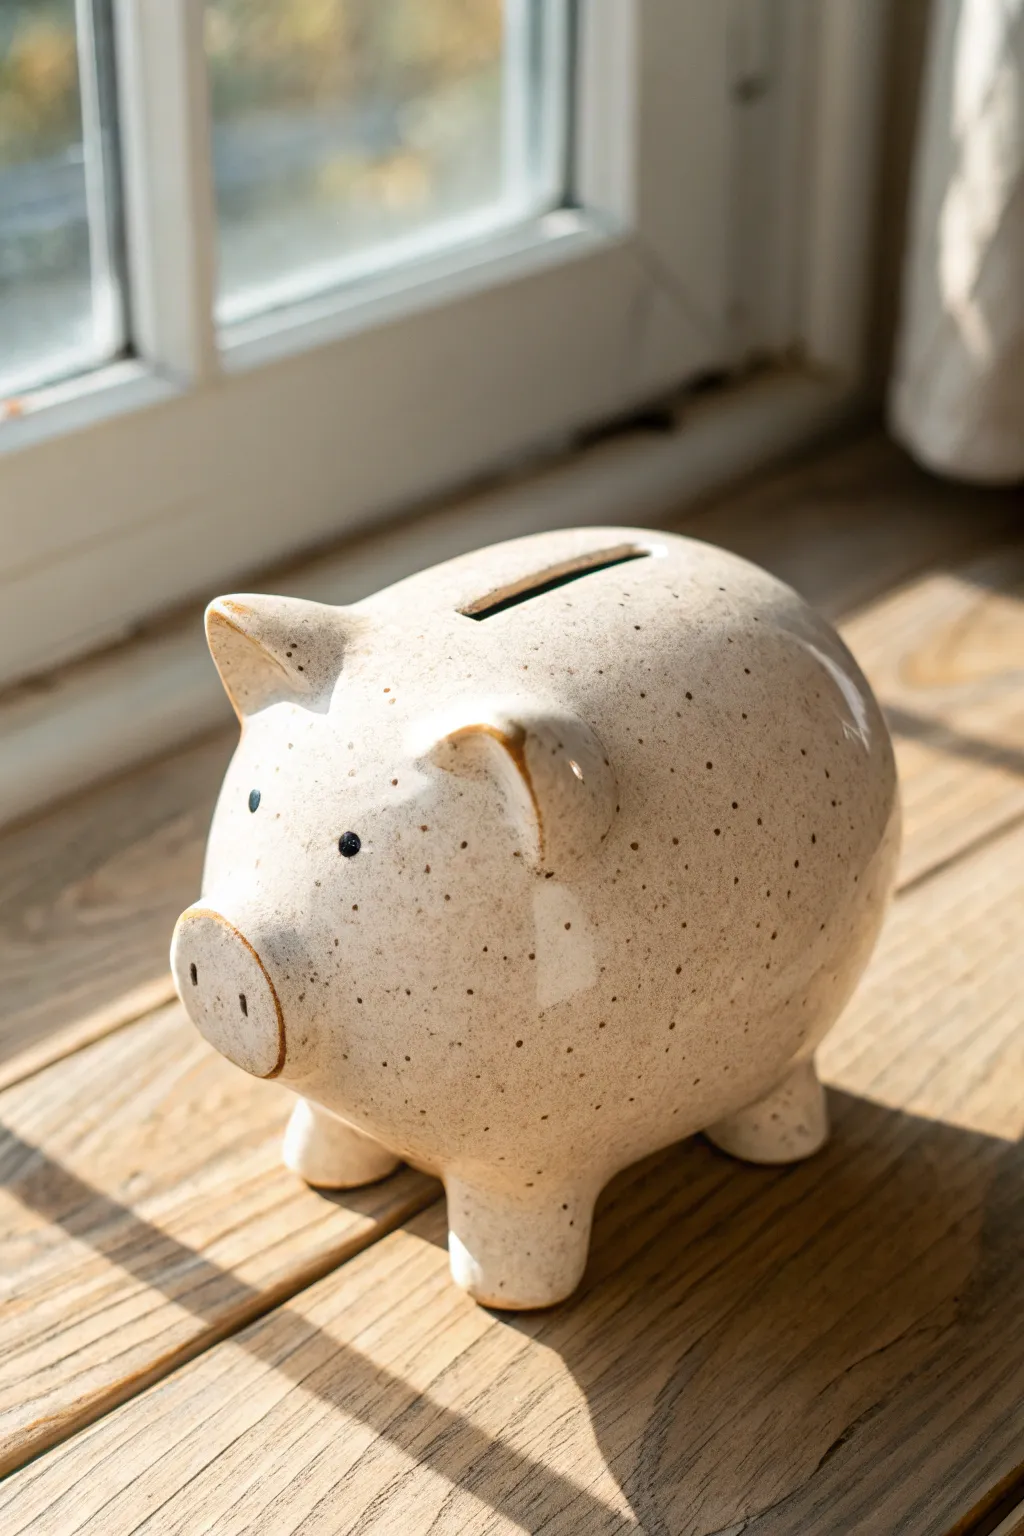
Sleepy-Eyed Pig With Blushing Cheeks
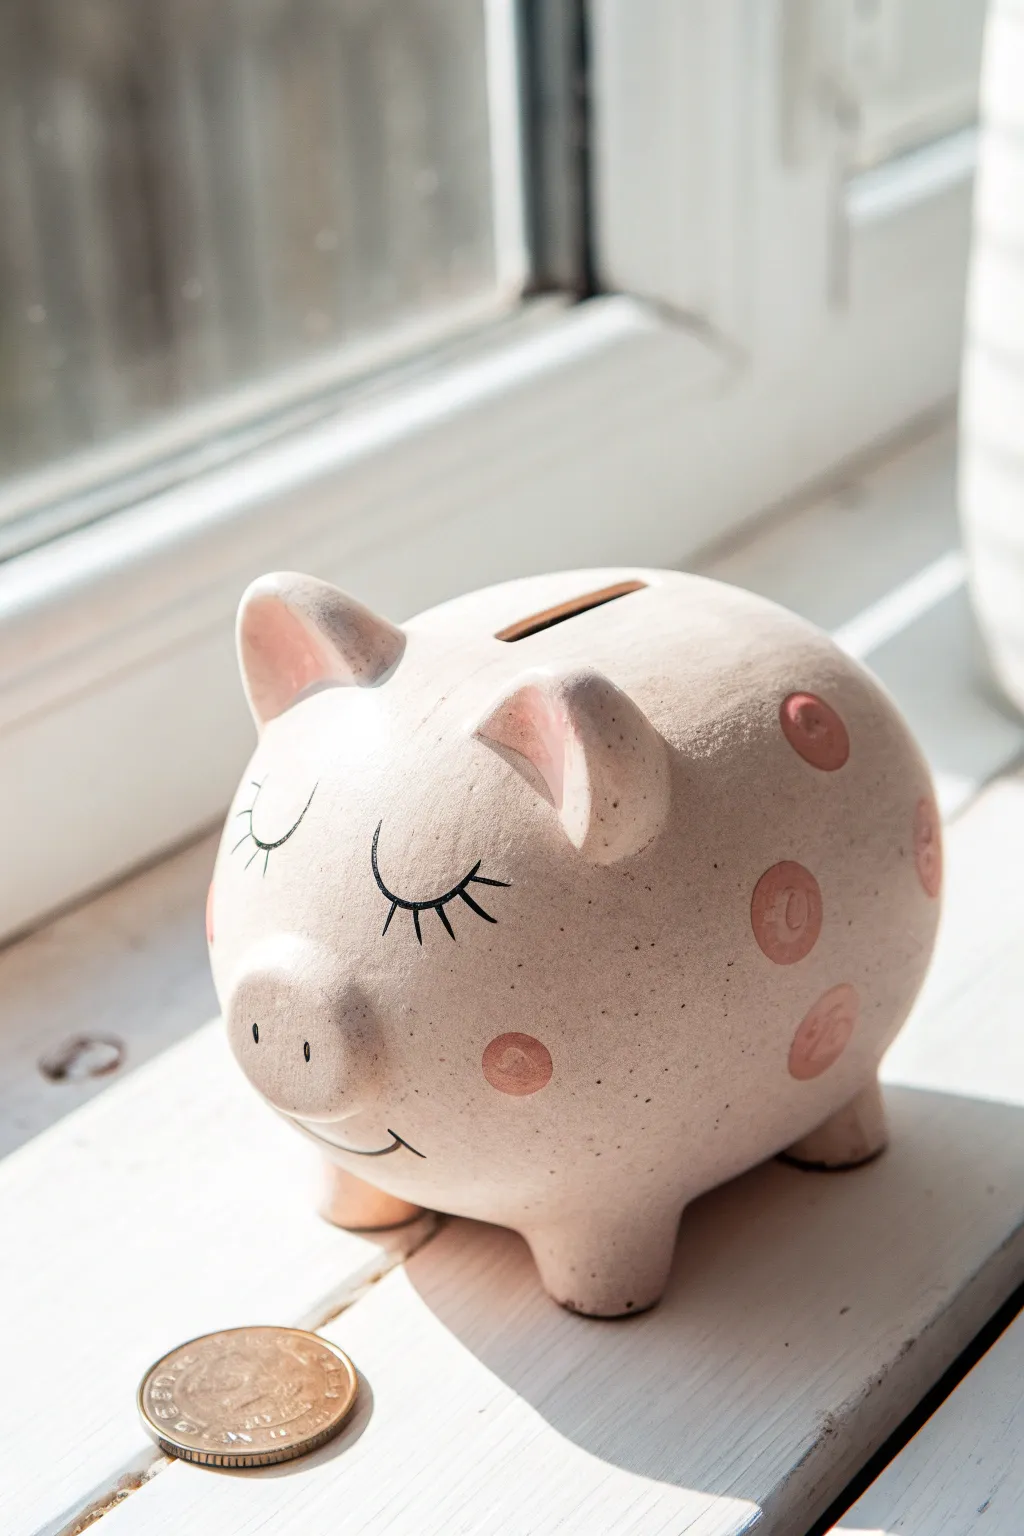
This charming project transforms a plain clay or ceramic piggy bank into a sleepy, blushing friend with a trendy speckled finish. Its soft beige tones and simple painted details make it a perfect minimalist addition to a nursery or bookshelf.
Step-by-Step Tutorial
Materials
- Unfinished ceramic or air-dry clay piggy bank
- Acrylic paints: warm beige/pale pink, rose pink, black
- Stiff bristle brush (e.g., old toothbrush)
- Fine detail brush (size 0 or 00)
- Medium round brush
- Small sponge dauber or round foam brush
- Matte finish sealant spray
- Water cup and palette
- Paper towels
Step 1: Base Coat and Texture
-
Surface Prep:
Begin by wiping down your ceramic pig with a slightly damp cloth to remove any dust or oils. If you are using a smooth glazed pig, you may want to lightly sand it first to help the paint adhere. -
Mixing the Base Tone:
Mix a warm beige color with just a hint of pale pink. You want a very natural, almost skin-tone hue rather than a bright bubblegum pink. -
Applying the Base:
Paint the entire pig with your base mixture using a medium brush. Apply smooth, even strokes. Let the first coat dry completely for about 20 minutes. -
Second Coat:
Apply a second coat to ensure full coverage, making sure no original ceramic shows through. Allow this to dry fully before moving on. -
The Speckled Effect:
Dilute a tiny amount of black or dark brown paint with water until it’s fluid. Dip a stiff bristle brush (a toothbrush works wonders here) into the mixture. -
Splattering:
Hold the brush a few inches away from the pig and run your thumb across the bristles to flick tiny specks onto the surface. Rotate the pig to get even coverage, but keep it subtle.
Step 2: Features and Details
-
Mixing the Spot Color:
Create a muted rose color for the cheeks and spots. It should be darker than the base coat but still soft and earthy. -
Cheek Placement:
Using a small sponge dauber or a round brush, gently press a circle onto each cheek. This creates that sweet blushing look. -
Body Spots:
Continue using the same rose color to add random circular spots across the pig’s body. Don’t worry about perfect symmetry; these should look organic. -
Painting the Ears:
Take a small brush and paint the inner part of the ears with the same rose mixture used for the spots. -
Drafting the Face:
If you’re nervous about freehanding, lightly sketch the eyes and mouth with a pencil first. The eyes should be two wide U-shapes. -
Eyelashes:
With your finest detail brush and black paint, trace over the U-shapes for the closed eyelids. Add three to four distinct lashes angled downwards on each eye. -
Nose and Mouth:
Paint two small vertical dashes on the snout for nostrils. Then, paint a simple curved line for a slight smile. -
Cleaning Up:
If any lines look shaky, use a clean damp brush to gently correct edges before the paint sets.
Uneven Circles?
If your hand-painted circles look wobbly, use the end of a round pencil eraser dipped in paint as a stamp for perfectly even spots.
Step 3: Finishing Touches
-
Protecting the Finish:
Once all paint is bone dry—I usually give it at least an hour—take the pig to a well-ventilated area for sealing. -
Spraying:
Apply a light, even coat of matte sealant spray. This protects the paint from chipping when coins are dropped in and keeps that velvety ceramic look intact.
Splatter Control
Practice your flicking technique on a scrap piece of paper first to ensure your paint isn’t too watery, which causes drips instead of specks.
Your adorable sleepy piggy is now ready to guard your savings on the windowsill


Big-Eyed Cartoon Pig With Perky Ears
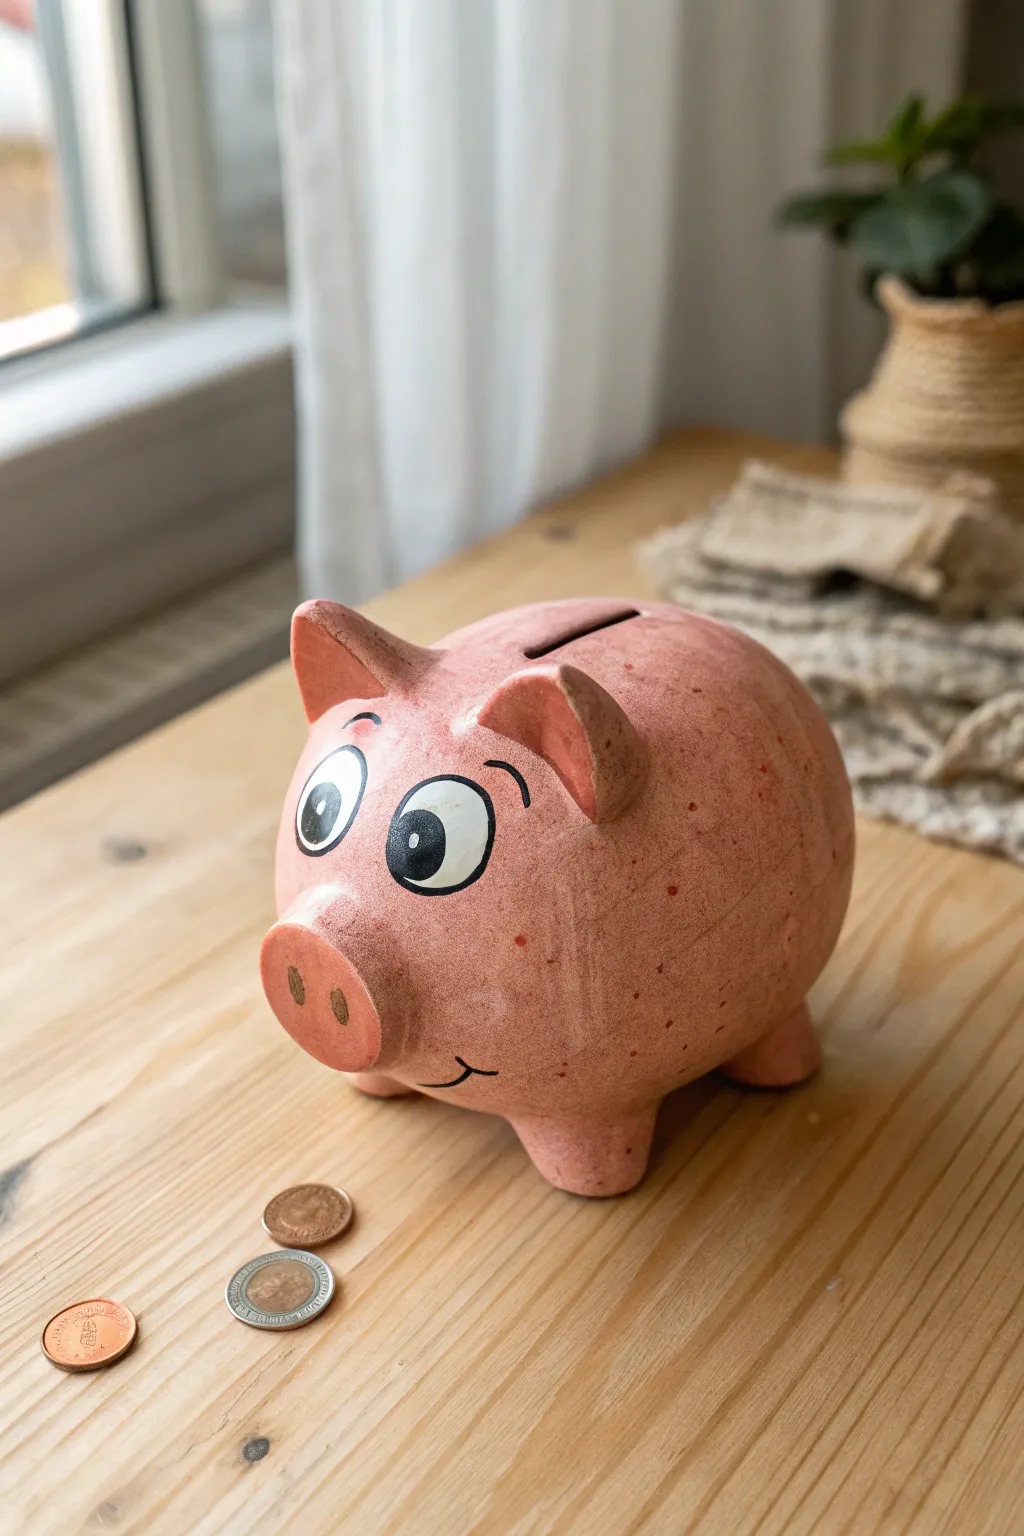
This charming piggy bank combines a classic rounded shape with delightfully exaggerated cartoon features that give it a friendly personality. With its wide, expressive eyes and scattered freckles, this hand-built clay project is as fun to display as it is useful for saving loose change.
Detailed Instructions
Materials
- Air-dry clay or polymer clay (approx. 2 lbs)
- Acrylic paints (pink, white, black, dark brown)
- Pottery sponge
- Modeling tools (or a butter knife)
- Rolling pin
- Paintbrushes (medium flat brush and fine detail brush)
- Water cup
- Clear matte or satin varnish
Step 1: Shaping the Base Body
-
Form the main sphere:
Start by taking a large lump of clay and rolling it into a solid, smooth ball. If you want a hollow bank, you can form two pinch pots and join them together, smoothing the seam completely until invisible. Aim for an elongated oval shape rather than a perfect circle. -
Create the snout:
Roll a smaller ball of clay and flatten it slightly into a thick disc. Score the back of the disc and the front of the body where it will attach, add a little water (slip), and press firmly to join. Smooth the edges of the snout onto the face area. -
Add nostrils:
Using the back of a paintbrush or a rounded modeling tool, press two distinct oval indentations into the front of the snout to create the nostrils. -
Sculpt the ears:
Form two triangles of clay. Gently pinch and curve them to create a concave inner ear shape. Attach these to the top of the head, blending the clay downwards at the base so they look seamless and perky. -
Stabilize with feet:
Roll four small, equal-sized stumpy cylinders for the legs. Turn the pig over and attach these to the bottom, spacing them out to ensure stability so the pig doesn’t wobble. -
Cut the coin slot:
While the clay is still leather-hard (firm but not dry), carefully use a knife or clay cutting tool to slice a rectangular slot in the top center of the back. Make sure it’s wide enough for your largest coin. -
Smoothing:
Take a slightly damp sponge and gently wipe over the entire surface to remove any fingerprints or rough textures. -
Drying:
Allow the sculpture to dry completely. For air-dry clay, this usually takes 24-48 hours depending on thickness. I like to let this dry away from direct sunlight to prevent cracking.
Fixing Clay Cracks
If you see hairline cracks while drying air-dry clay, mix a tiny bit of fresh clay with water to make a paste and fill them in immediately.
Step 2: Painting and Detailing
-
Base coat:
Mix a warm, dusty pink color using pink, a touch of white, and a tiny dot of brown to tone it down. Paint the entire pig with this shade. You may need two coats for full coverage. -
Shading the nose:
Mix a slightly darker, rosier pink. Gently dab this onto the flat front of the snout to make it stand out from the rest of the face. -
Painting the eyes:
Using white paint, create two large, slightly slanted ovals above the snout. Let this layer dry completely before moving to the pupils. -
Adding pupils and expression:
Paint large black circles inside the white ovals, positioned slightly cross-eyed or looking sideways for a goofy character look. Add a tiny white reflection dot in each black pupil to bring the eyes to life. -
Outlining features:
With a very fine brush and black paint, carefully outline the white of the eyes. Paint thin, arched eyebrows floating above the eyes and a small, curved smile line under the snout. -
Adding freckles:
Load an old toothbrush or a stiff brush with diluted ruddy-brown paint. Run your thumb across the bristles to splatter tiny speckles creates texture across the pig’s skin. -
Highlighting the ears:
Use the darker pink mix from the nose to paint the inside curve of the ears, giving them depth. -
Sealing:
Once all paint is visibly dry, apply a coat of matte or satin varnish to protect the finish and give the pig a finished, ceramic look.
Curly Tail Upgrade
Use a thin coil of clay wrapped around a pencil to create a spiral tail. Attach it to the rear before drying for extra charm.
Now you have an adorable spot to keep your spare change safe while brightening up your room


Tiny Hooves and Little Trotter Legs
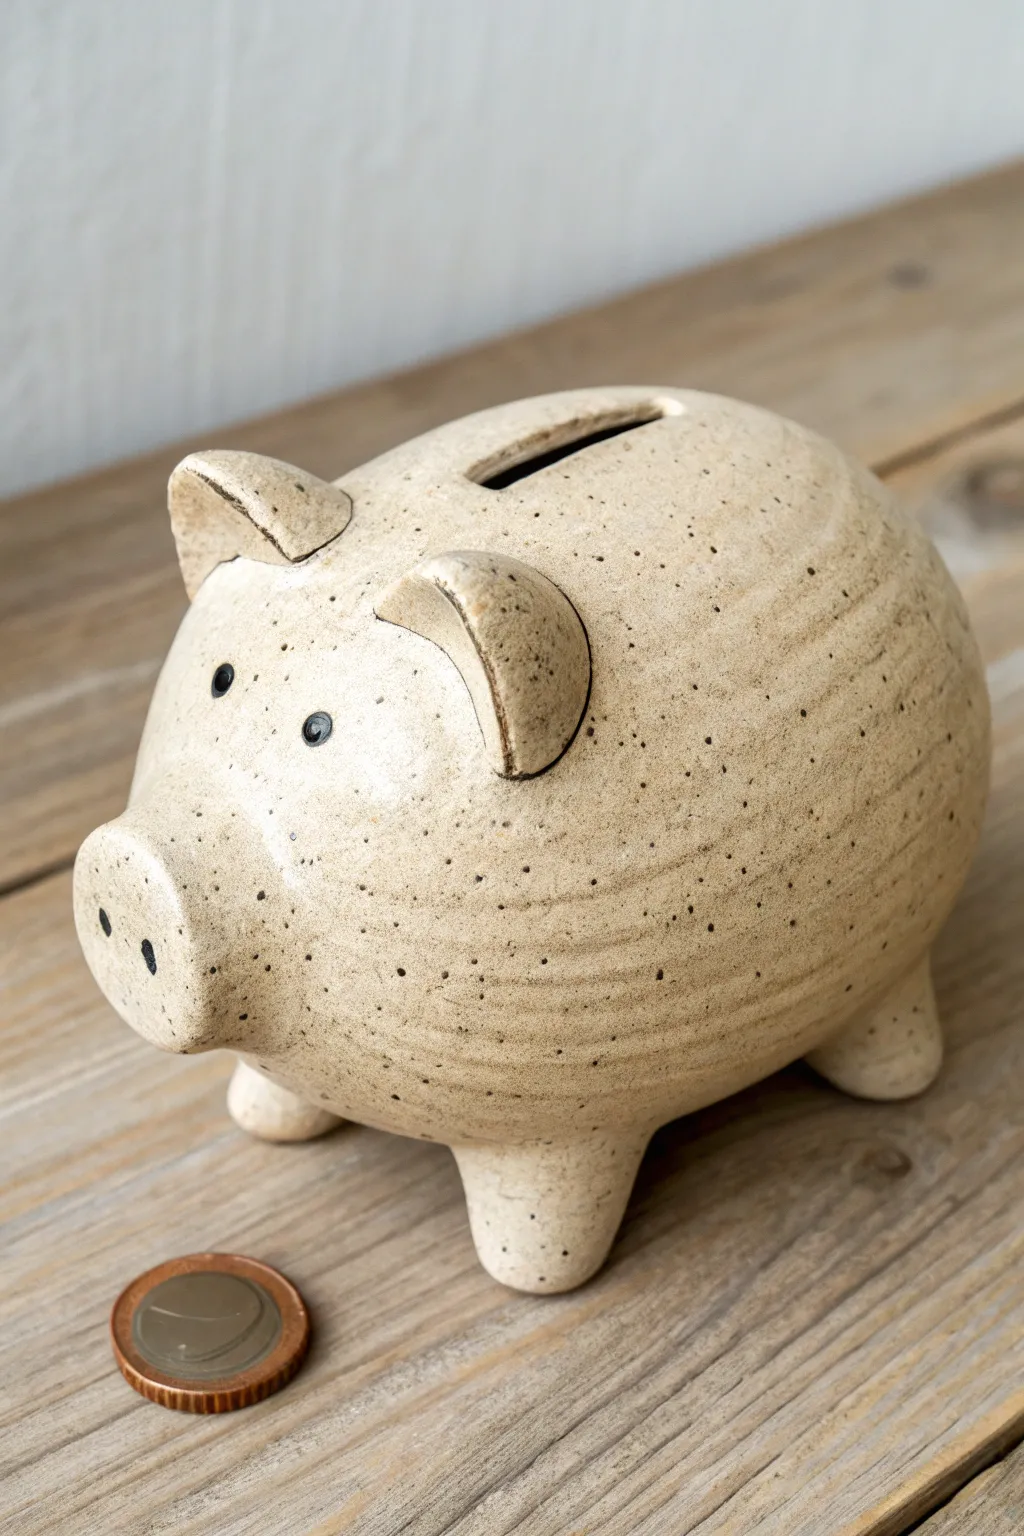
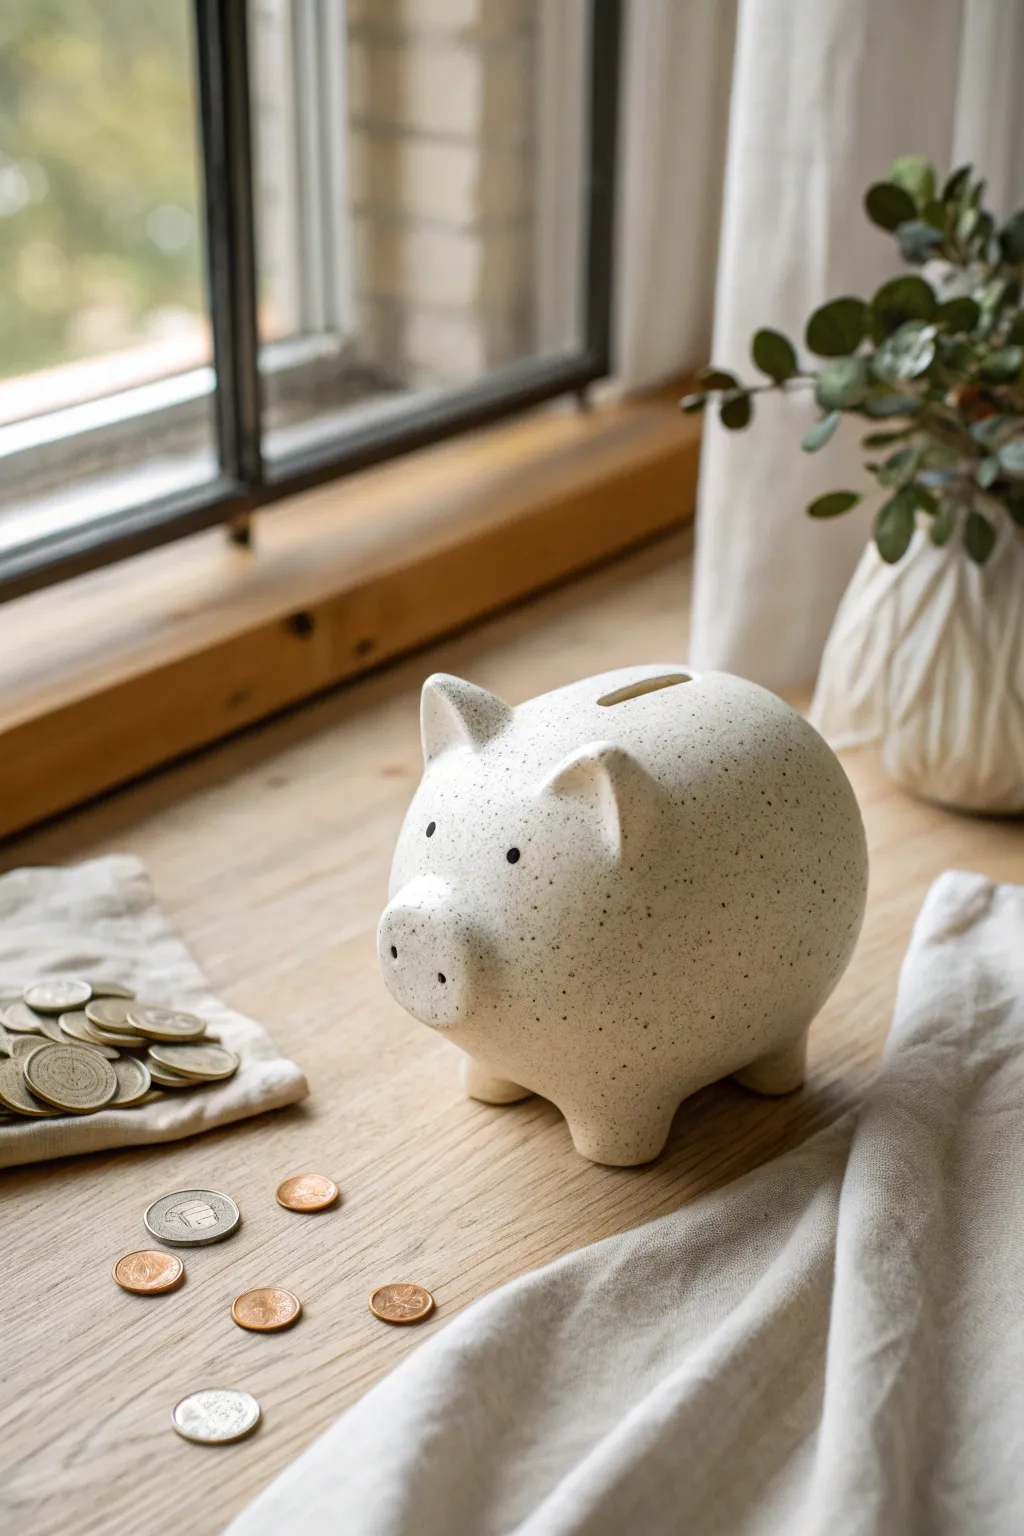
This charming, rustic piggy bank features a lovely speckled cream glaze and adorable stubby legs that give it a sturdy, grounded look. Its minimalist design and natural finish make it a timeless keepsake that fits beautifully on any windowsill or shelf.
Step-by-Step Tutorial
Materials
- White or light-colored earthenware clay (approx. 2-3 lbs)
- Speckled cream or ‘oatmeal’ ceramic glaze
- Underglaze in black (for eyes)
- Pottery sponge
- Needle tool
- Rib tool (kidney)
- Scoring tool or serrated rib
- Slip (clay and water mixture)
- Fettling knife
- Rolling pin
- Kiln access
Step 1: Forming the Body
-
Prepare the Clay:
Begin by wedging your clay thoroughly to remove any air bubbles. This is crucial to prevent the piece from cracking or exploding during firing. -
Create Pinch Pots:
Divide your clay into two equal balls. Insert your thumb into the center of one ball and gently pinch the walls while rotating the clay to create a uniform bowl shape. Repeat with the second ball to make a matching half. -
Join the Halves:
Score the rims of both pinch pots using a serrated rib or needle tool. Apply a generous amount of slip to the scored areas. -
Seal the Seams:
Press the open ends of the pinch pots together firmly. Use your thumb or a wooden tool to smudge the clay across the seam line until the two halves are completely unified into a single hollow sphere. -
Trap Air:
Ensure the sphere is sealed tight; the trapped air inside acts like a balloon, providing internal support while you shape the body. -
Smooth and Shape:
Using a rib tool or slightly damp sponge, smooth out the seam line completely. Gently pat and shape the sphere into an elongated oval to form the pig’s torso.
Step 2: Adding Features
-
Create the Legs:
Roll four equal-sized cylinders of clay, slightly tapered at the bottom, for the legs. They should be stout and sturdy to support the body. -
Attach the Legs:
Score and slip the contact points on the underside of the body and the tops of the legs. Press them on firmly, blending the clay upwards onto the belly to ensure a strong bond. -
Check Balance:
Gently tap the pig onto the table to flatten the bottom of the feet slightly, ensuring it stands stable and level. -
Form the Snout:
Roll a small ball of clay and flatten it slightly into a disc. Attach this to the front of the face using the score and slip method. Use a smooth tool to poke two nostrils into the snout. -
Add Ears:
Shape two small triangles of clay for the ears. Attach them near the top of the head, gently curving the tips forward for a perky expression. -
Cut the Coin Slot:
Wait until the clay is leather-hard (firm but still cool to the touch). Use a fettling knife to carefully cut a rectangular slot along the spine, wide enough for large coins. -
Refine the Surface:
Once the piece is bone dry, sponge it down gently to remove any fingerprints or rough edges. This is a good time to ensure the leg joints look seamless.
Air Escape Vent
Before the clay dries too much, puncture a tiny, hidden hole (perhaps near the tail or belly) to let expanding air escape during firing, preventing cracks.
Step 3: Glazing and Firing
-
Bisque Fire:
Fire the piece in the kiln to cone 04 (or according to your clay’s specifications) to harden it into bisque ware. -
Apply Base Glaze:
Dip the pig into your speckled cream glaze or brush on three even coats. I prefer dipping for a smoother application, but brushing works if you cross-hatch your strokes. -
Add Detail and Clean:
Using a fine brush, dot two small circles of black underglaze for the eyes. Then, carefully wipe any glaze off the bottom of the feet with a damp sponge so it doesn’t stick to the kiln shelf. -
Final Fire:
Fire the glazed piece again to the temperature recommended for your specific glaze (typically cone 5 or 6 for stoneware).
Rough Seams?
If the seam between your pinch pots is visible after smoothing, add a thin coil of soft clay over the line and blend it out with a rib tool.
Once cooled, your sturdy little piggy is ready to start guarding your loose change

The Complete Guide to Pottery Troubleshooting
Uncover the most common ceramic mistakes—from cracking clay to failed glazes—and learn how to fix them fast.
Polka Dot Pig With Sweet Personality
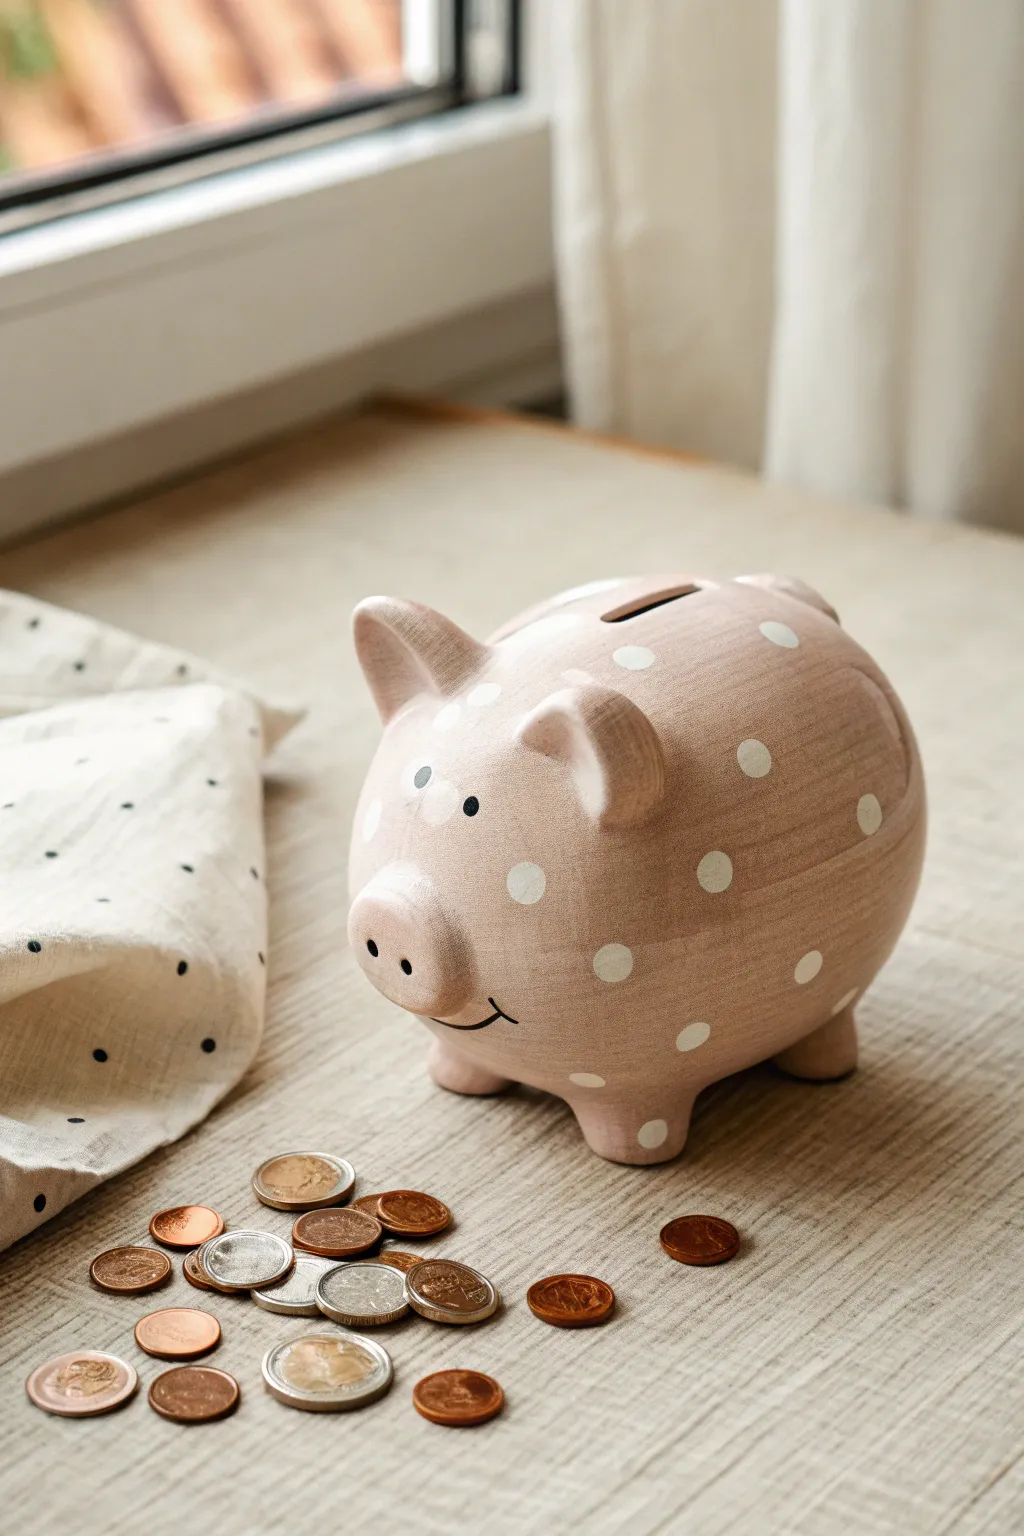
Transform a plain ceramic or clay piggy bank into a charming, natural-looking treasure keeper with this softly textured design. The combination of a faux-wood wash and classic white polka dots gives this piece a timeless, sweet personality perfect for any nursery or shelf.
Step-by-Step Guide
Materials
- Unfinished ceramic or bisque piggy bank
- Light peach or blush pink acrylic paint
- Light brown or tan acrylic paint (for the wash)
- White acrylic paint
- Black acrylic paint
- Medium flat brush
- Small round detail brush
- Round foam pouncer (or cork)
- Clean rag or paper towels
- Water cup
- Matte finish sealant spray
Step 1: Base Coat & Texture
-
Prepare the surface:
Wipe down your piggy bank with a slightly damp cloth to remove any ceramic dust. Let it dry completely before starting to ensure the paint adheres properly. -
Apply the base color:
Mix your blush pink paint with a tiny drop of brown to muddy it slightly, creating a more earthy, less candy-colored pink. Paint the entire pig with an even coat. Let this dry fully for about 20 minutes. -
Create the wood-grain wash:
Dilute the light brown paint with water until it has the consistency of ink or watercolor. You want it translucent, not opaque. -
Apply the wash:
Working in sections (like just the back or just the head), brush the watery brown mixture over the pink base coat. -
Wipe back:
Before the wash dries, gently wipe over the surface with a lint-free rag in horizontal strokes. This leaves paint in the tiny pores of the ceramic and creates that streaky, faux-wood texture visible in the photo. -
Repeat if necessary:
If the texture is too subtle, apply a second layer of the brown wash and wipe it back again. I like to leave slightly more brown around the ears and feet for definition. Allow the pig to dry completely, ideally for an hour.
Pro Tip: Perfect Circles
If your stamped dots look patchy or uneven, let them dry, then go back in with a small brush to fill the centers with fresh white paint for a crisp, solid look.
Step 2: Adding the Personality
-
Prepare the dots:
Dip your round foam pouncer or a wine cork into the white acrylic paint. Tap off the excess on a paper plate to prevent globs. -
Stamp the main body:
Begin stamping polka dots on the main body of the pig. Space them randomly but evenly, leaving roughly an inch between each dot. -
Handle the curves:
As you move to the rounded areas like the belly and legs, rock the pouncer gently to ensure the full circle transfers to the curved surface. -
Add detail dots:
For smaller areas like the ears or face, you might want to switch to the back end of a paintbrush handle dipped in paint to create smaller, proportional dots. -
Dry the pattern:
Let the white dots dry thoroughly. Because the paint is thicker here, give it at least 30-40 minutes. -
Paint the eyes:
Using your smallest detail brush and black paint, add two small, solid black circles for the eyes. Place them wide apart for that cute, innocent look seen in the reference. -
Add the snout details:
Paint two small vertical ovals on the flat part of the snout for nostrils. Keep them small and dainty. -
Create the smile:
With the very tip of your detail brush and thinned black paint, draw a simple curved line for the smile. Add a tiny tick mark at the end of the line to suggest a cheek crease. -
Protect your work:
Once all paint is cured (wait 24 hours to be safe), take the pig outside and apply a coat of matte sealant spray. This protects the finish without making it look shiny or plastic.
Level Up: Tail Customization
Rather than just painting the ceramic curly tail, wrap a small piece of jute twine or pink ribbon around it and secure with glue for a mixed-media 3D effect.
Now you have a charming, rustic-style piggy bank ready to collect coins for your next big adventure
Mud-Splashed Farm Pig Look
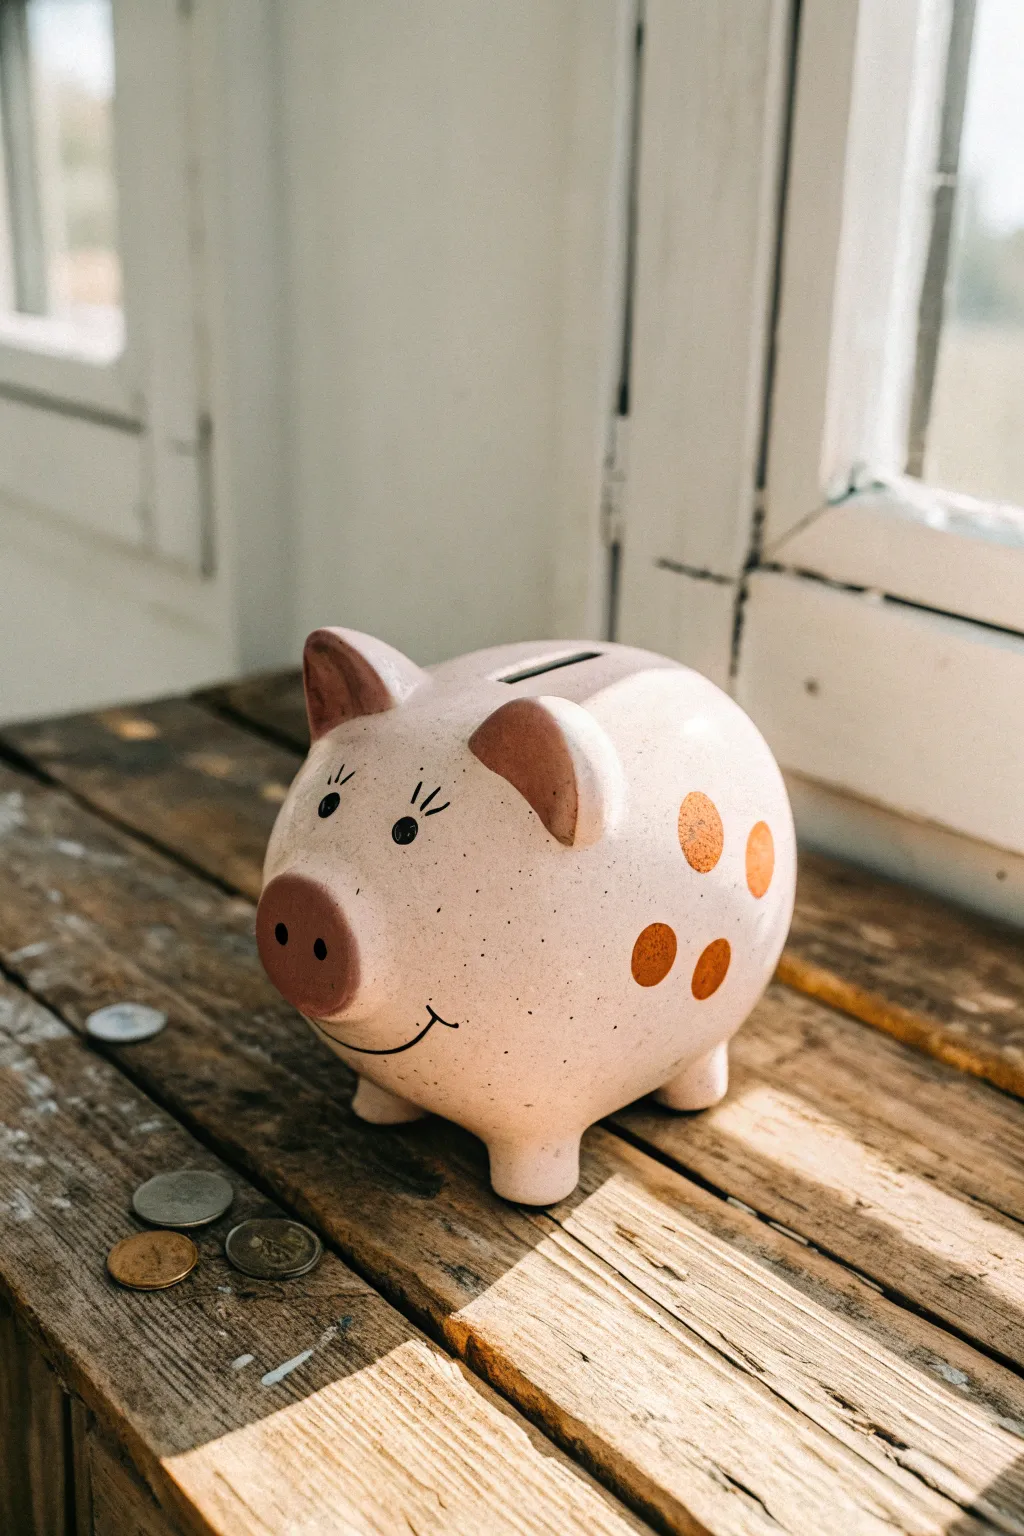
Embrace rustic charm with this adorable farm-inspired piggy bank that looks like it’s been rolling in happy mud puddles. The speckled clay finish combined with playful orange spots creates a warm, handmade aesthetic perfect for a country-style shelf.
Step-by-Step Tutorial
Materials
- Bisque ceramic piggy bank or air-dry clay pig form
- Acrylic paint: Pale Blush Pink
- Acrylic paint: Terracotta or Burnt Orange
- Acrylic paint: Dark Rose Pink
- Acrylic paint: Black
- Acrylic paint: Dark Grey or Brown (for speckling)
- Medium flat paintbrush
- Small round detail brush
- Old toothbrush (for splatter technique)
- Matte sealant spray or Mod Podge
Step 1: Base Coat & Texture
-
Clean the surface:
Begin by wiping down your ceramic or clay pig form with a damp cloth to remove any dust or oils. Let it dry completely to ensure the paint adheres smoothly. -
Apply the base color:
Using a medium flat brush, coat the entire pig with the Pale Blush Pink paint. You may need two to three thin coats to get full, opaque coverage, allowing about 15 minutes of drying time between layers. -
Prepare the speckle mix:
Dilute a small dollop of dark grey or brown paint with water until it has an inky consistency. This will be used to create the stone-like texture. -
Splatter the texture:
Dip an old toothbrush into your diluted paint mix. Hold it a few inches away from the pig and run your thumb across the bristles to flick tiny speckles onto the surface. Rotate the pig to get even coverage. -
Let the texture set:
Allow the speckled layer to dry completely for at least 30 minutes. If you rush this steps, the dots might smear during the next phases.
Natural Speckle Hack
Before flicking the toothbrush, test the splatter on a piece of paper first. This clears excess paint from the brush and prevents large, unintentional globs from landing on your pig’s face.
Step 2: Adding Character & Mud Pattern
-
Paint the snout:
Mix a little of the Dark Rose Pink with your base pink to create a soft, slightly darker shade. Paint the flat oval of the snout with this color. -
Define the nostrils:
Once the snout is dry, take a very small dotting tool or the back of a paintbrush handle. Dip it in black paint to stamp two distinct oval nostrils onto the snout. -
Color the inner ears:
Using the same Dark Rose Pink mix from the snout, carefully paint the inside curvature of the ears to give them depth and warmth. -
Paint the outer ears:
Create a slightly darker version of your pink/terracotta blend and paint the tips and backs of the ears. This mimics the natural coloration of a pig. -
Outline the mud spots:
With a small round brush and Terracotta paint, lightly sketch rough circles or ovals on the pig’s flank. Don’t worry about perfect circles; irregular shapes look more organic. -
Fill in the spots:
Fill in your outlined spots with the Terracotta paint. I prefer to dab the paint on rather than strobe it, as this adds a bit of texture to the ‘mud’ look. -
Add spot details:
If you want the spots to look worn, wait for the paint to get tacky and lightly blot the center of each spot with a paper towel to lift a tiny bit of pigment.
Step 3: Facial Features & Finishing
-
Draw the eyes:
Using your finest detail brush and black paint, paint two small vertical ovals for the eyes just above the snout height. -
Add eyelashes:
Paint three small, flicked lines extending upwards from the top of each eye oval. Keep a light hand here to keep the lashes delicate. -
Paint the eyebrows:
Add tiny, floating eyebrows above the lashes to give the pig a surprised or happy expression. -
Create the smile:
Paint a simple, thin curved line extending from under the cheek area, hooking upward at the end. A slight smile is key to the cute factor. -
Apply sealant:
Once all paint is cured (usually after 24 hours), spray the entire project with a matte sealant to protect the finish without adding too much shine.
Wobbly Lines?
If painting the face freehand feels scary, sketch the features lightly with a pencil first. If you still make a mistake with the paint, quickly wipe it away with a damp Q-tip before it dries.
Now your piggy bank is ready to collect savings while adding a touch of farmhouse joy to your room


What Really Happens Inside the Kiln
Learn how time and temperature work together inside the kiln to transform clay into durable ceramic.
Pastel Pig With Glossy Finish

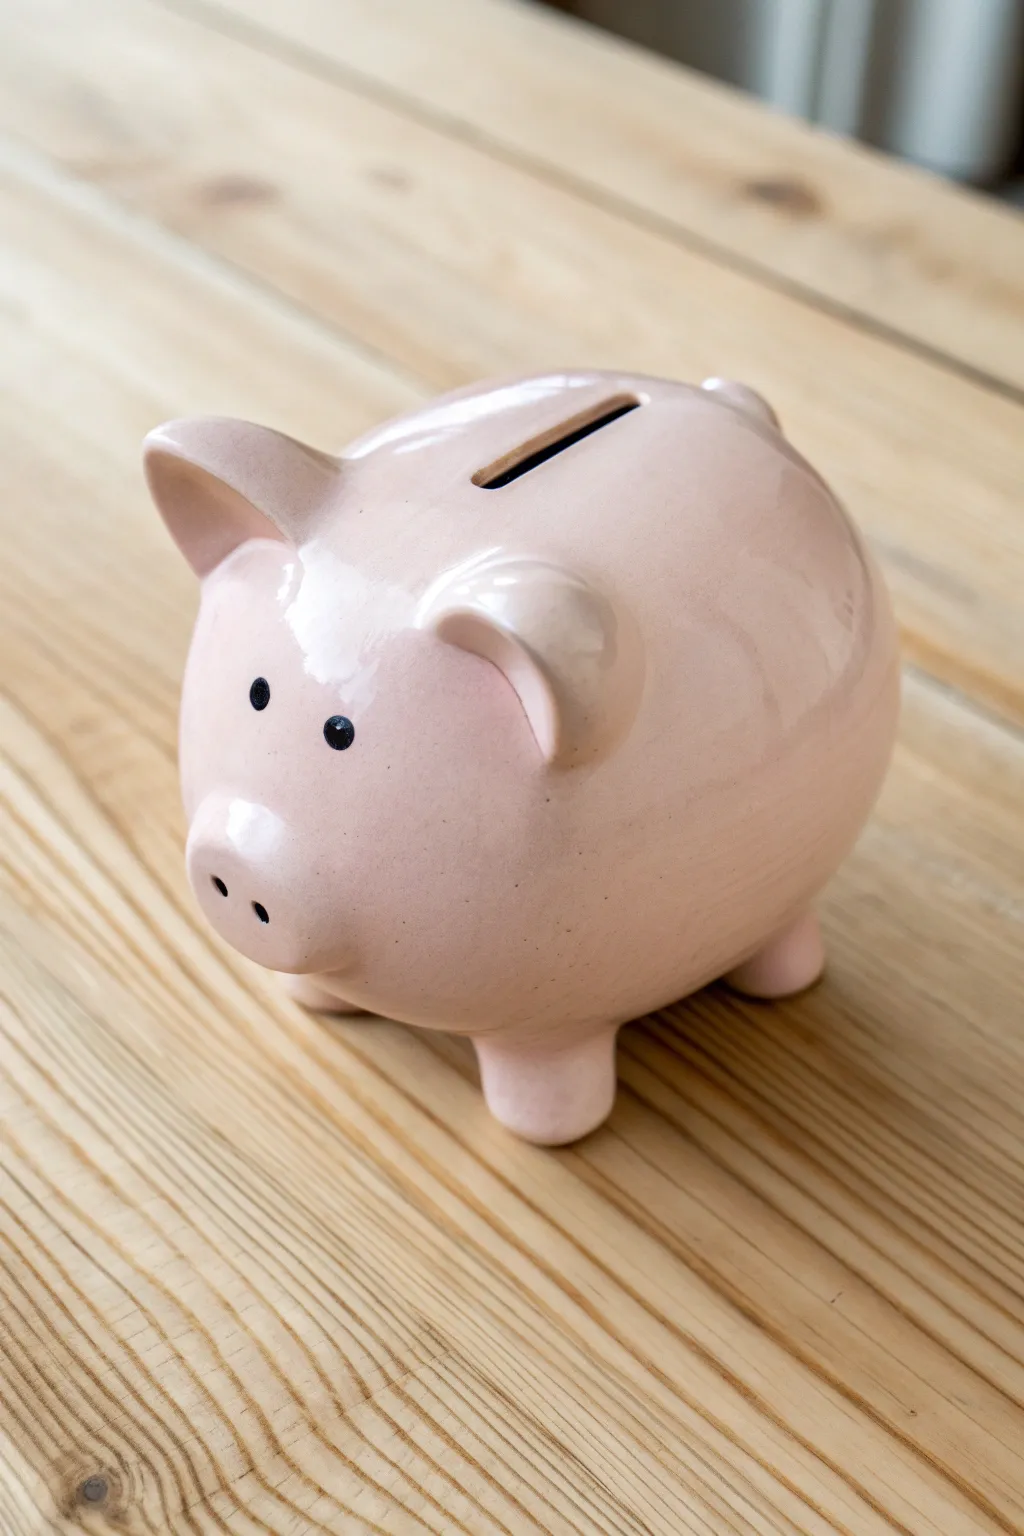
Achieve a high-end ceramic look with this minimalist clay project, featuring a soft blush pink hue and an ultra-glossy finish that catches the light beautifully. The simple, rounded form and understated painted details give it a modern, sophisticated charm perfect for any windowsill.
Step-by-Step Guide
Materials
- Air-dry clay (white) or polymer clay
- Rolling pin
- Aluminum foil (for armature)
- Clay sculpting tools (smoothing tool, needle tool)
- Water and sponge (for smoothing)
- Sandpaper (fine grit)
- Acrylic paint: Blush pink/pastel pink
- Acrylic paint: Black (for eyes)
- High-gloss varnish or polyurethane sealer
- Soft synthetic paintbrushes
- Craft knife
Step 1: Sculpting the Base Form
-
Create the Armature:
Begin by crushing a large ball of aluminum foil into a distinct oval shape. This core saves clay and keeps the piggy bank lightweight. -
Roll the Clay:
Roll out a thick sheet of white air-dry clay, aiming for about 1/4 inch thickness to ensure durability. -
Cover the Core:
Wrap the clay sheet fully around the foil armature. Pinch the seams together tightly and smooth them out so they disappear completely. -
Smooth the Surface:
Dip your fingers or a sponge in a little water and rub the entire surface to remove fingerprints and bumps. Getting this base perfectly smooth now is key to that eventual glossy reflective look.
Milk Jug Smoothness
Dip your finger in water (for clay) or baby oil (for polymer) to buff the raw clay until it’s glass-smooth before drying. This reduces sanding time later.
Step 2: Adding Features
-
Form the Snout:
Roll a small ball of clay and flatten it slightly into a disc. Attach this to the front of the oval for the snout. -
Blend the Seams:
Use a sculpting tool to drag the clay from the edge of the snout onto the body, then smooth the connection with water so it looks like one continuous piece. -
Indent Nostrils:
Use the rounded end of a paintbrush handle or a ball stylus to press two distinct, vertical-oval indentations into the snout disc. -
Shape the Ears:
Form two small triangles of clay. Gently curve them forward slightly to give the pig an attentive expression. -
Attach the Ears:
Score the top of the head and the bottom of the ears (scratch cross-hatch marks), add a dab of water, and press the ears firmly in place. Blend the seams thoroughly again. -
Add Legs:
Create four short, stout cylinders of clay. Turn the pig over carefully and attach these to the bottom to act as feet, ensuring the pig stands level. -
Cut the Coin Slot:
Use a sharp craft knife to carefully slice a rectangular slot into the top center of the pig’s back. Widen it slightly so a coin can fit through easily. -
Final Smoothing:
Do one last pass with a damp sponge over the entire piece, paying special attention to the areas where you just attached appendages. -
Drying Time:
Allow the clay to dry completely. Depending on humidity and thickness, this usually takes 24 to 48 hours. Don’t rush this step.
Step 3: Finishing and Painting
-
Sanding:
Once fully dry, use fine-grit sandpaper to gently buff away any remaining unevenness. Wipe away the dust with a barely damp cloth. -
Base Coat:
Paint the entire pig with your chosen blush pink acrylic paint. I like to apply two thin coats rather than one thick one to avoid brush strokes. -
Detailing the Eyes:
Using a very small detail brush or a dotting tool, dab two small black dots for the eyes. Keep it simple and minimalist. -
Highlight the Snout:
If desired, you can add a slightly lighter shade of pink inside the nostril indentations, or leave them natural shadow for depth. -
Gloss Application:
This is the most critical step for the look. Apply a high-gloss varnish or polyurethane sealer. Use broad, confident strokes to minimize texture. -
Second Gloss Coat:
Let the first coat dry completely, then apply a second or even third coat of gloss. This builds up that thick, ceramic-like ‘glazed’ appearance that reflects the light.
Cracking Clay?
If small cracks appear while drying, mix a tiny bit of fresh clay with water to make a paste (slip) and fill the cracks, then sand smooth once dry.
Now you have a charming, minimalistic piggy bank ready to save up your coins
Minimalist Pig With Clean Lines
Embrace the charm of simplicity with this adorable clay project that features a soothing, speckled cream finish and a wonderfully round form. This minimalist design strips away unnecessary details, focusing on clean lines and a soft, matte texture that fits perfectly in modern home decor.
Step-by-Step
Materials
- Air-dry clay (white or light cream)
- Acrylic paint (warm white or unbleached titanium)
- Black acrylic paint
- Old stiff-bristle toothbrush
- Pottery sponge
- Clay sculpting tools (knife tool, hole cutter or straw)
- Water cup
- Sandpaper (fine grit)
- Matte varnish or sealant
Step 1: Shaping the Base Body
-
Form the main sphere:
Begin with a large handful of air-dry clay. Knead it well to remove air bubbles, then roll it into a smooth, even ball on your work surface. This will be the main body of your pig. -
Elongate slightly:
Gently press and roll the ball into a subtle oval shape. You don’t want a long sausage, just a slightly elongated sphere to give the pig a natural body shape. -
Create the legs:
Roll four small, equal-sized balls of clay about the size of large marbles. Flatten the tops slightly to create a mounting surface. -
Attach the legs:
Score the bottom of the body and the tops of the leg pieces with a crosshatch pattern. Apply a dab of water (or slip) and press the legs firmly onto the underside of the body. Smooth the seams with your finger or a tool until the join is invisible. -
Check for stability:
Set the pig upright on its new legs. Press down gently to ensure it stands level. I like to tap it lightly on the table to flatten the bottoms of the feet just enough for good balance.
Step 2: Adding Features
-
Form the snout:
Roll a medium ball of clay and flatten it into a thick disc. Attach this to the front of the face using the score-and-slip method, blending the edges smoothly into the main body so it looks like part of the form, not just stuck on. -
Detail the snout:
Using a small sculpting tool or the end of a paintbrush, press two distinct, round indentations into the flat front of the snout to create the nostrils. -
Craft the ears:
Create two small triangles with rounded tips. Pinch them slightly at the base to give them a curved, cupped shape. -
Attach the ears:
Position the ears near the top front of the head. Score, slip, and blend the clay at the base of the ears so they stand upright but slightly angled forward. -
Refine the surface:
Take a slightly damp sponge and wipe over the entire pig to smooth out fingerprints and tool marks. Aim for a velvety, uniform texture. -
Cut the coin slot:
Use a clay knife or a fettling tool to carefully cut a rectangular slot along the spine of the pig. Make sure it is wide and long enough for your largest coin. Smooth the raw edges of the cut with a wet finger. -
Dry completely:
Allow the clay to dry fully. Depending on the thickness and your climate, this can take 24 to 48 hours. Turn the pig occasionally to ensure air reaches the belly.
Cracking Issues?
If small cracks appear while drying, mix a tiny bit of fresh clay with water to make a paste (slip) and fill the cracks. Sand smooth once dry.
Step 3: Decorating and Finishing
-
Sand imperfections:
Once fully dry, use fine-grit sandpaper to gently buff away any remaining rough spots or bumps, paying attention to the area around the legs and ears. -
Apply base color:
Paint the entire pig with a warm white or cream acrylic paint. Apply 2-3 thin coats for full opacity, letting each coat dry before the next. -
Create the speckles:
Dilute a small amount of black or dark grey paint with water until it’s inky. Dip an old toothbrush into the mixture, then run your thumb across the bristles to flick tiny specks of paint onto the pig. Practice on paper first to control the spray. -
Paint the eyes:
Using the handle end of a paintbrush or a dotting tool, dip into black paint and place two simple, solid dots for the eyes. Position them wide apart and relatively low for that cute, minimalist look. -
Seal the project:
Finish with a coat of matte varnish. This seals the paint and gives the pig that ceramic-like, non-shiny finish shown in the photo.
Make it Functional
Before drying, cut a large hole in the belly and fit it with a rubber stopper or cork so you can retrieve your savings without breaking the bank.
Place your new speckled friend on a shelf to start saving coins in style

TRACK YOUR CERAMIC JOURNEY
Capture glaze tests, firing details, and creative progress—all in one simple printable. Make your projects easier to repeat and improve.
Pinch-Pot Pig With Handmade Texture
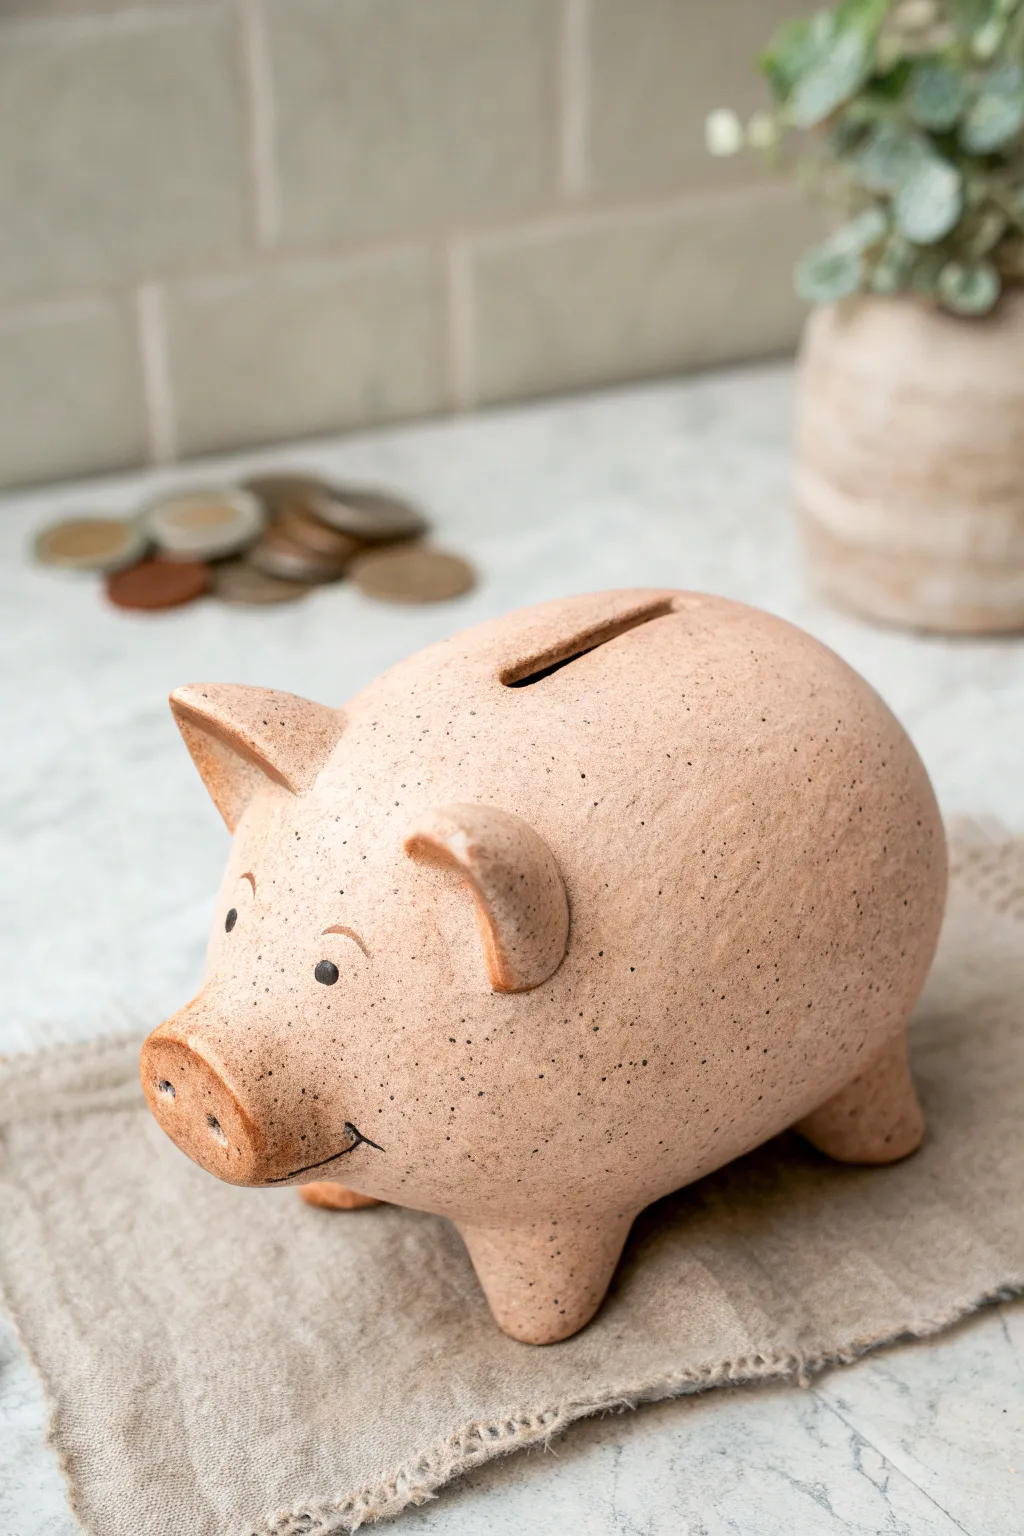
This charming, rustic piggy bank brings a natural, minimalist aesthetic to your shelves with its sandy, speckled finish. Created using simple hand-building techniques, its gentle curves and friendly face make saving money a delightful experience.
Detailed Instructions
Materials
- Speckled clay (stoneware or polymer clay with granite effect)
- Scoring tool or needle tool
- Slip (if using ceramic clay) or liquid clay (if using polymer)
- Wooden modeling tool
- Fettling knife
- Small sponge
- Rolling pin
- Black underglaze or acrylic paint
- Fine detail brush
- Kiln (for ceramic) or oven (for polymer)
Step 1: Forming the Body
-
Create two pinch pots:
Start with two equal-sized balls of speckled clay, each about the size of a large orange. Press your thumb into the center of one ball and pinch the walls evenly while rotating to create a bowl shape. Repeat with the second ball. -
Join the halves:
Score the rims of both pinch pots using a needle tool or serrated scraper to roughen the surface. Apply slip (or liquid clay) to the scored areas. -
Seal the sphere:
Press the two rims together firmly to form a hollow sphere. Use a wooden tool or your thumb to drag clay across the seam, merging the two halves completely so the join line disappears. -
Shape the torso:
Gently paddle or roll the sphere on your work surface to elongate it slightly into an oval shape, resembling a bloated egg. Smooth the surface with a damp sponge or your fingers.
Trapped Air Warning
When joining two pinch pots into a hollow sphere, ensure you poke a tiny pinhole somewhere inconspicuous before firing. This lets trapped hot air escape so your pig doesn’t explode in the kiln.
Step 2: Adding Features
-
Form the feet:
Roll four small, equal balls of clay. Flatten the tops slightly and score the attachment points on the bottom of the pig body. Score the top of each foot and attach them securely using slip. -
Blend the feet:
Use a modeling tool to smooth the clay from the feet onto the body, ensuring a strong bond. Tap the pig gently on the table to flatten the bottoms of the feet so it stands stable. -
Create the snout:
Roll a medium ball of clay and flatten it into a thick disc. Attach this to the front of the face area using the score-and-slip method. Smooth the edges onto the face to make it look integrated, not just stuck on. -
Make the ears:
Roll two small triangles of clay. Gently curb them to give them a natural, cupped ear shape. Attach these to the top of the head, blending the base of the ears smoothly into the skull. -
Detail the snout:
Using the back of a paintbrush or a small round tool, press two indentations into the front of the snout to create nostrils. -
Cut the coin slot:
carefully slice a rectangular slot in the center of the pig’s back using a fettling knife. Widen it slightly and smooth the raw edges with a damp finger so coins won’t get stuck.
Curly Tail Addition
Don’t forget the back! Roll a thin ‘snake’ coil of clay and twist it into a corkscrew shape. Attach it to the pig’s rear for that classic curly tail silhouette.
Step 3: Finishing Touches
-
Smooth the surface:
Go over the entire piece with a damp sponge (for ceramic) or a little baby oil (for polymer) to remove fingerprints and refine the texture. This highlights the natural speckles in the clay. -
Initial firing or baking:
If using ceramic clay, bisque fire the piece in a kiln. If using polymer clay, bake according to the package instructions and let it cool completely. -
Paint the face:
Using a fine detail brush and black underglaze (or acrylic paint for polymer), paint two small dots for eyes. Add tiny arched eyebrows above them for expression. -
Add the smile:
Paint a thin, curved line starting from under the snout to create a subtle, happy smile. I find keeping the line slightly asymmetrical adds more character. -
Final glaze or seal:
For ceramics, apply a clear matte glaze and fire again to seal the surface while keeping the rustic look. For polymer clay, apply a matte varnish to protect the paint.
Once fired and finished, your speckled piggy is ready to guard your coins with a smile
Coil-Built Pig With Chunky Cute Shape
This charming piggy bank embraces the natural texture of coil-built pottery, giving it a rustic and handcrafted feel. The speckled clay body and simple features make it a timeless piece perfect for saving pennies.
Step-by-Step
Materials
- Speckled buff stoneware clay
- Pottery wheel (optional, for base)
- Serrated rib tool
- Wooden modeling tool
- Needle tool
- Synthetic sponge
- Slip (clay mixed with water)
- Black underglaze
- Small round paintbrush
- Clear transparent glaze
Step 1: Building the Body
-
Create the Base:
Start by rolling out a small slab of clay, about 1/4 inch thick. Cut a circle roughly 3-4 inches in diameter to serve as the bottom of your bank. Alternatively, you can throw a small plate on the wheel to start. -
Roll Coils:
Roll out several long, even coils of clay. They should be roughly the thickness of your pinky finger. Try to keep them consistent so your walls build up evenly. -
Establish the Walls:
Score the edge of your base and apply slip. Attach your first coil, blending the clay downward on the inside surface only to secure it. This leaves the coil texture visible on the outside. -
Build Upward:
Continue stacking coils one on top of another. As you add height, gradually widen the diameter of your rings to create the bulbous belly of the pig. -
Taper the Shape:
Once you reach the widest point of the belly, begin placing your coils slightly inward with each layer. This will start to close the form towards the top. -
Smooth the Interior:
Don’t forget to smooth the coils together on the inside as you go. I usually use a wooden rib or my thumb to ensure the walls are strong and leak-proof. -
Create the Coin Slot:
As you get near the very top, instead of closing the form completely, leave a rectangular gap in your final coil layer. Refine this opening with a modeling tool to ensure a coin fits through easily.
Smooth Seams Inside
Use a long-handled wooden spoon to smooth the interior coils as the form gets taller and the opening gets smaller. This ensures structural integrity.
Step 2: Adding Features
-
Close the Form:
Finish closing the top of the pig around the coin slot. Gently paddle the outside if needed to refine the overall oval shape, but try to preserve those lovely coil ridges. -
Form the Legs:
Roll four small balls of clay and flatten them slightly into tapered nubs. Score and slip the bottom of the pig’s belly, and attach these four legs, blending the clay well so they don’t pop off. -
Add the Snout:
Create a small, flat circle of clay for the nose. Attach this to the front of the pig’s face. Use the rounded end of a paintbrush handle to press two nostrils into the snout. -
Shape the Ears:
Cut two small triangles from a leftover slab. Curve them slightly to give them a cupped shape. Score and slip the placement area on the head, then press the ears on firmly.
Sagging Walls?
If the belly starts to slump while building, pause and let the lower section stiffen up slightly with a hair dryer or heat gun before adding more coils.
Step 3: Finishing and Glazing
-
Refine the Surface:
Once the clay is leather hard, use a damp sponge to smooth any sharp edges around the ears, snout, or coin slot. Avoid scrubbing away the coil texture on the body. -
Bisque Fire:
Let the pig dry completely (slow drying is best to prevent cracks). Fire the piece to cone 04 (or your clay’s bisque temperature). -
Paint Eyes and Details:
Using a small brush and black underglaze, dot two eyes onto the face. You can also deepen the nostrils with a touch of black if desired. -
Apply Clear Glaze:
Dip the entire pig into a clear transparent glaze. This will seal the clay and make the speckles in the clay body pop without hiding your coil work. -
Final Firing:
Fire the pig again to cone 5 or 6 (check your clay specifications) to vitrify the stoneware and melt the glaze into a glossy finish.
Start saving your loose change in your adorable new pottery creation
Pig With Heart Nose and Soft Details
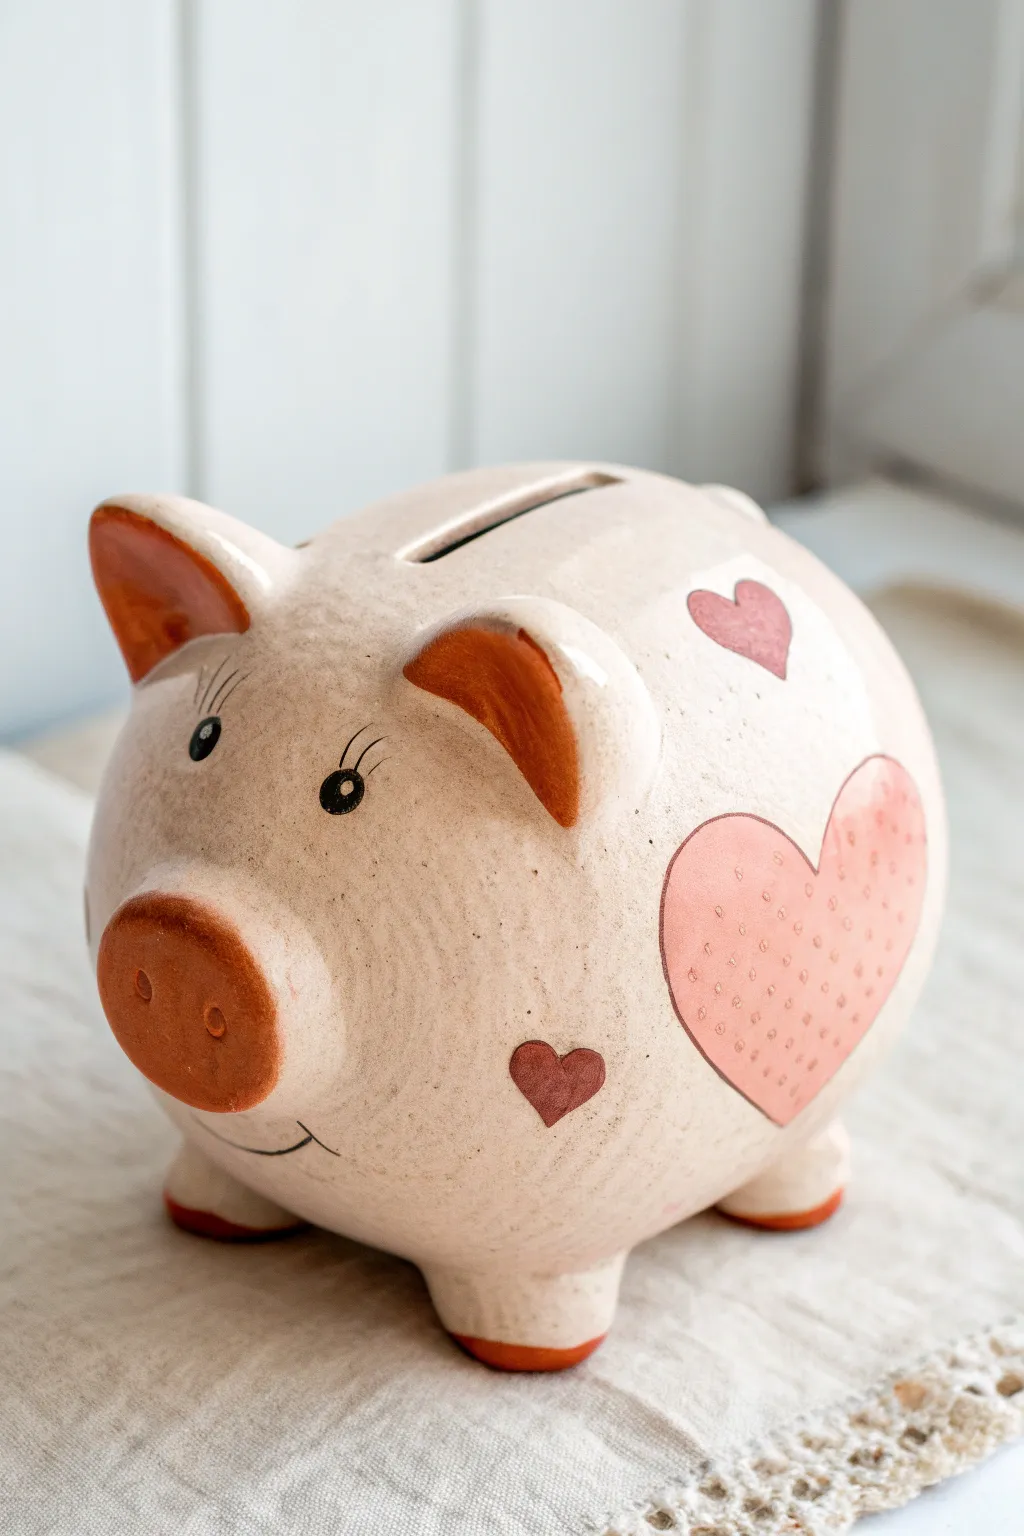
Create a charming, rustic savings companion with this handmade clay project featuring soft curves and classic heart motifs. The warm, speckled beige body contrasted with terracotta red accents gives this piggy bank a timeless, lovable pottery feel.
How-To Guide
Materials
- Light-colored earthenware or stoneware clay (beige/off-white firing)
- Terracotta colored underglaze or slip
- Glossy clear glaze
- Black underglaze pencil or fine brush
- Pottery tools (rib, needle tool, sponge)
- Rolling pin
- Newspaper or paper towels
- Knife or cutting tool
Step 1: Shaping the Base Form
-
Form the pinch pots:
Start by taking two equal balls of your light stoneware clay, roughly the size of softballs. Using your thumbs, press into each ball and rotate to create two even pinch pot bowls. -
Join the pots:
Score the rims of both pinch pots thoroughly with a needle tool. Apply slip, then press the rims together firmly to form a hollow sphere. This will be the main body. -
Smooth the seam:
Roll a small coil of soft clay and press it into the seam where the pots join. Using a rib tool or your thumb, smooth this clay until the seam completely disappears and the body is a nice, continuous oval shape. -
Refining the shape:
Gently paddle the sphere with a wooden spoon or flat hand to elongate it slightly into a horizontal egg shape, perfect for a pig’s body.
Step 2: Adding Piggy Features
-
Create the feet:
Roll four small, equal-sized balls of clay. Flatten them slightly into stout cylinders. Score and slip the bottom of the pig body and attach these legs, ensuring the pig stands level and stable. -
Sculpt the snout:
Form a flattened oval disk of clay for the nose. Attach it to the front face of the pig using the score and slip method. Use the handle of a creative tool or a large dowel to press two distinct circular nostrils into the front. -
Attach the ears:
Cut two triangle shapes from a slab of clay. Curve them slightly to give them dimension. Score the attachment points on top of the head and secure the ears, bending the tips forward slightly for character. -
Cut the coin slot:
Once the clay has stiffened slightly to leather-hard, carefully use a fettling knife to cut a rectangular slot in the very top of the back. Make it wide enough for your thickest coin.
Uneven Leg Wobble?
If your pig rocks after attaching legs, gently drop it straight down onto a flat board a few times while the clay is soft to flatten the feet bottoms evenly.
Step 3: Decorating and Glazing
-
Bisque firing:
Allow your pig to dry completely (this may take several days). Fire it to bisque temperature according to your clay’s specifications. -
Paint the red accents:
Using a terracotta-colored underglaze, paint the snout, the hooves/feet, and the insides of the ears. I find two coats usually give the best solid coverage here. -
Add the heart motifs:
Paint a large heart shape on the side flank of the pig using the same terracotta underglaze. Add smaller floating hearts around it or on the other side for balance. -
Dot details:
If you want the textured look on the large heart shown in the reference, dip the wrong end of a brush into a lighter version of the red (or wipe away small dots) to create a stippled pattern inside the heart. -
Draw the face:
Use a black underglaze pencil or a very fine liner brush with black underglaze to draw the eyes. Add three distinct eyelashes to each eye and draw a simple, curved line for a smiling mouth. -
Final clear glaze:
Once the underglaze is dry, dip the entire pig into a clear glossy glaze. Be sure to shake off excess drips. -
Glaze firing:
Fire the pig again to the maturity temperature of your glaze and clay body to seal it and give it that brilliant shine.
Make it Retrieveable
Cut a large circular hole in the belly before firing. After the final firing, plug it with a standard rubber cork so you can access savings without breaking it.
Your finished pig is now ready to guard your coins with a smile
Flower-Crowned Piggy Bank

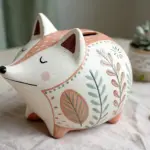
Transform simple polymer or air-dry clay into an enchanting keepsake with this speckled piggy bank wearing a delicate flower crown. The rustic, stone-like texture paired with soft pink roses creates a charming balance between earthy and sweet.
Step-by-Step Tutorial
Materials
- Polymer clay (white or beige)
- Speckled clay (or black glitter/sand for mixing)
- Pink polymer clay (light and medium shades)
- Green polymer clay (muted olive tone)
- Acrylic paints (black, white, soft pink)
- Clay sculpting tools (ball tool, needle tool)
- Aluminum foil
- Rolling pin
- Liquid clay or bake-and-bond
- Satin or matte varnish
Step 1: Sculpting the Base Form
-
Create the armature:
Ball up a significant amount of aluminum foil into a large, sturdy oval shape to serve as the core of the pig’s body. Press it firmly to remove air pockets and ensure it is dense. -
Prepare the speckled clay:
Condition your white or beige clay. To get that lovely stone effect shown in the image, mix in a small amount of pre-speckled clay or knead in a pinch of fine black pepper or black sand until evenly distributed. -
Cover the body:
Roll the clay into a sheet about 1/4 inch thick. Drape it over your foil armature, smoothing the seams together carefully so the foil is completely hidden. -
Add the snout:
Roll a small flattened cylinder of clay and attach it to the front center of the face. Blend the edges seamlessly into the main body using a modeling tool or your finger. -
Detail the snout:
Use a large ball tool or the handle of a paintbrush to impress two vertical oval nostrils into the snout. -
Form the legs:
Create four stout, short cylinders from your clay. Attach these to the bottom of the body, blending the clay upwards to secure them. Tap the whole pig gently on the table to flatten the feet and ensure stability. -
Attach the ears:
Shape two triangles with slightly rounded tips. Attach them near the top sides of the head. Fold the top tip of each ear slightly forward to give the pig a relaxed, listening expression. -
Cut the coin slot:
Using a sharp blade or needle tool, carefully cut a rectangular slot into the top center of the pig’s back, ensuring it’s wide enough for your largest coins.
Step 2: Crafting the Floral Crown
-
Make the base vine:
Roll a very thin snake of green clay and drape it across the pig’s forehead, curving slightly between the ears. Secure it with a dab of liquid clay. -
Create rose petals:
Using the pink clays, flatten tiny balls into thin, delicate circles. You’ll need about 5-7 petals per rose. -
Assemble the roses:
Roll the first petal into a tight spiral for the center. Wrap subsequent petals around this core, flaring the edges slightly outward. Make 3 to 5 roses of varying sizes. -
Attach the flowers:
Press the roses onto the green vine base you created earlier, clustering them slightly off-center for a natural look. -
Add leaves:
Shape tiny teardrops from the green clay. Flatten them and use a needle tool to impress a central vein. Tuck these leaves under and around the roses to fill gaps. -
Add filler buds:
Roll tiny balls of darker pink or reddish clay and attach them near the ends of the floral arrangement to mimic small berries or buds.
Sticky Situation?
If your clay gets too soft and fingerprints are showing, pop the pig in the fridge for 15 minutes. Cooling firms the clay, making it easier to smooth out imperfections.
Step 3: Finishing Touches
-
Create the eyes:
Use a small ball tool to make indentations for the eyes. Insert small balls of black clay, or plan to paint them after baking. -
Texture the surface:
If your clay isn’t naturally textured enough, gently tap a stiff toothbrush or a crumpled ball of foil over the non-floral parts of the pig to enhance the stone-like look. -
Bake the project:
Bake horizontally on a baking sheet according to your clay manufacturer’s instructions. I suggest tenting foil over the flowers to prevent the delicate petals from scorching. -
Final details:
Once cool, paint the eyes black with a tiny white highlight if you didn’t use clay. Finish with a coat of matte varnish for a natural ceramic feel, or satin if you want a slight sheen.
Make It Personal
Swap the roses for tiny succulents or daisies to match a specific room theme. You can also paint the pig’s name in gold script on the side for a custom gift.
Now you have an adorable, handcrafted guardian for your savings that looks great on any shelf
Strawberry Pig With Seed Speckles

This delightful fusion of farm animal and fruit basket favorite creates a whimsical savings vessel that looks good enough to eat. With its glossy red finish and meticulously placed seeds, this strawberry pig adds a pop of summer sweetness to any windowsill.
Step-by-Step
Materials
- Earthenware or stoneware clay (low-fire white preferred)
- Pottery wheel (optional, can be hand-built)
- Pottery rib and sponge
- Fettling knife
- Loop tool
- Slip and scoring tool
- Underglazes: Bright Red, Leaf Green, Pale Pink/Tan, Black, Sunny Yellow
- Clear glossy glaze
- Kiln
- Fine detail brushes
- Medium wash brush
Step 1: Forming the Body
-
Create the base:
Start by forming a hollow orb. If using a wheel, throw a closed form sphere. If hand-building, create two pinch pots and join them securely, smoothing the seam until invisible. -
Refine the shape:
Gently paddle the sphere while the clay is leather-hard to create a slightly squat, organic shape that resembles a plump strawberry. -
Add the feet:
Roll four small, equal-sized balls of clay. Flatten them slightly and score and slip them onto the bottom of the body to act as sturdy feet. -
Sculpt the snout:
Form a small oval of clay for the nose. Score the back of it and press it onto the front face of the pig, blending the edges smooth with a modeling tool. -
Shape the ears:
Cut two triangles from a slab of clay. Curve them slightly to create depth, then score and slip them onto the top sides of the head. -
Add the leafy crown:
Roll out a small slab and cut a multi-pointed leaf shape. Drape this over the very top of the pig’s head (the ‘stem’ area) and secure it with slip. -
Create the stem:
Roll a tiny coil for the stem and attach it to the center of your leaf cluster. -
Carve the slot:
Carefully cut a coin slot into the top back of the pig, just behind the leaves. Ensure the opening is wide enough for large coins. -
Dry and bisque:
Allow the piece to dry slowly to avoid cracking, then bisque fire it according to your clay body’s specifications.
Step 2: Painting and Glazing
-
Base coat the red:
Apply three even coats of bright red underglaze to the entire body, avoiding the ears, snout, and leaves. Let each coat dry fully before the next. -
Detail the extremities:
Paint the snout and the inner ears with a pale pink or tan underglaze. I find a flat shader brush works best here for crisp edges. -
Paint the greens:
Use a medium green underglaze for the leafy top and stem. You can add subtle dark green veins for extra realism if desired. -
Add the seed droplets:
Using a fine-point brush and yellow underglaze, paint small teardrop shapes all over the red body in a regular pattern to mimic strawberry seeds. -
Define the face:
Paint two vertical lines on the snout for nostrils. Add small round black eyes, and don’t forget the tiny white reflection dot in each eye for life. -
Apply clear glaze:
Once all underglaze is bone dry, carefully dip the pig into a clear glossy glaze or brush on three coats, ensuring you don’t smudge the details. -
Final wipe:
Wipe the bottom of the feet clean with a damp sponge to prevent the pig from sticking to the kiln shelf. -
Glaze fire:
Fire the piece a second time to the temperature required for your glaze to achieve that high-gloss, juicy fruit finish.
Seed Spacing Trick
To keep the strawberry seeds uniform, visualize a diamond grid pattern as you paint. Start with one seed, paint the next row offset in the middle gaps, and continue down.
Berry Texture
Before the first firing, gently press a small, teardrop-shaped loop tool into the leather-hard clay where each seed will go. This adds tactile texture beneath the glaze.
Now you have a sweet spot to stash your spare change that brightens up the room
Marbled Swirl Pig for a Wow Finish
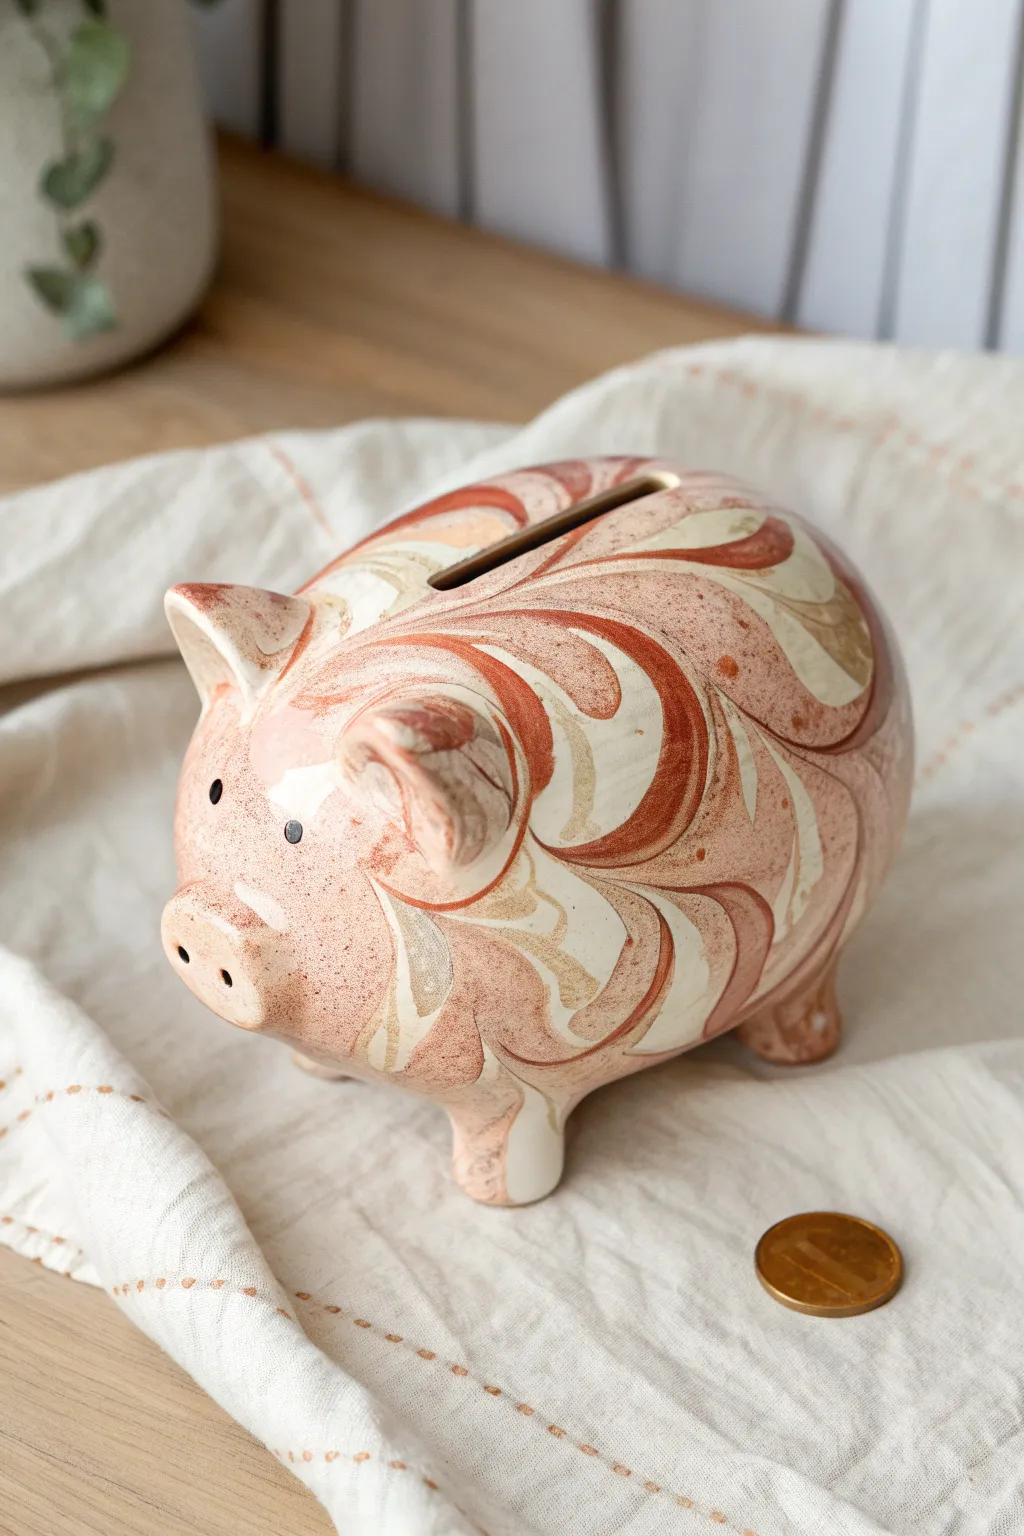
Transform a plain ceramic or clay base into a mesmerizing art piece with this sophisticated marbling technique. The swirling ribbons of terracotta, cream, and dusty pink create a fluid, organic look that feels both modern and timeless.
How-To Guide
Materials
- Bisque ceramic piggy bank or smooth air-dry clay pig form
- Acrylic pouring medium
- Acrylic paints (terracotta, warm cream, dusty rose, white)
- Small plastic cups for mixing
- Large plastic tub or bin (deep enough to dip the pig)
- Stir sticks
- Latex or nitrile gloves
- Clear high-gloss varnish or spray sealer
- Plastic drop cloth
- Dying rack or clean jars for support
Step 1: Preparation & Mixing
-
Clean the surface:
Wipe down your piggy bank form with a damp cloth to remove any dust or oils. If you are using a homemade clay form, ensure it is fully dry and sanded smooth before beginning. -
Set up the dipping station:
Place your large plastic tub on a drop cloth. Fill the tub with enough water to fully submerge the pig, leaving about two inches of space at the top to prevent displacement overflow. -
Prepare the pour medium:
In separate small cups, mix each acrylic paint color with the pouring medium according to the manufacturer’s ratio (usually 1:1). The consistency should be fluid like warm honey, dripping easily from a stir stick. -
Test the consistency:
It is crucial all colors have the same density. Dip a stick into each cup; if one runs faster than the others, adjust with a tiny bit more paint or medium until they match perfectly.
Paint Sinking?
If your paint drops sink to the bottom instead of floating, your water tension is too low or paint is too heavy. Use colder water or add a tiny drop of silicone oil to the paint.
Step 2: Creating the Marble Pattern
-
Drop the colors:
Gently drip your paint mixtures onto the surface of the water in the tub. Start with the lighter cream color as a base, then alternate with drops of terracotta and dusty rose. -
Swirl the surface:
Using the handle of a stir stick or a skewer, very gently drag through the floating paint. Create ‘S’ curves or figure-eights to marble the colors together, being careful not to over-mix into a muddy brown. -
Check coverage:
Ensure the spread of floating paint is wide enough to cover the entire surface area of the pig when dipped.
Step 3: The Dip Technique
-
Glove up:
Put on your gloves. This part can get messy, and you don’t want finger oils interfering with the paint adhesion. -
Hold securely:
Grip the pig securely. Depending on the size, you might hold onto the feet or use a sturdy tool inserted into the coin slot or bottom plug hole for stability. -
Dip the form:
Slowly and steadily lower the pig into the water at a 45-degree angle. Submerge it completely in one continuous motion to let the paint film wrap around the curves. -
Clear the surface:
While the pig is underwater, gently blow on the water’s surface or use your other hand to sweep away the remaining floating paint. This prevents a double layer of paint from ruining the pattern as you pull it out. -
Remove and inspect:
Lift the pig out of the water. Inspect the swirl pattern immediately; it should look seamless and organic.
Gilded Snout
After the marbling dries, use a small brush and liquid gold leaf to paint just the snout or the tips of the ears for a chic, mixed-material look.
Step 4: Finishing Touches
-
Drip dry:
Place the pig on a drying rack or balance it on jars so air can circulate underneath. Let it dry completely for at least 24 hours. -
Clean the eyes:
If paint covered the eye area, use a cotton swab dampened with water (if paint is wet) or a tiny bit of alcohol to carefully wipe the eyes clean. Alternatively, repaint small black dots for eyes once dry. -
Seal the deal:
Once the paint is fully cured, apply a clear high-gloss varnish. I find a spray sealer works best here to avoid brush strokes disrupting the delicate marble pattern. -
Final cure:
Allow the sealer to cure according to the can’s instructions before handling or inserting the bottom stopper.
Now you have a stunning, one-of-a-kind piggy bank that is ready to start holding your savings.
Pig With Belly Stopper for Easy Access

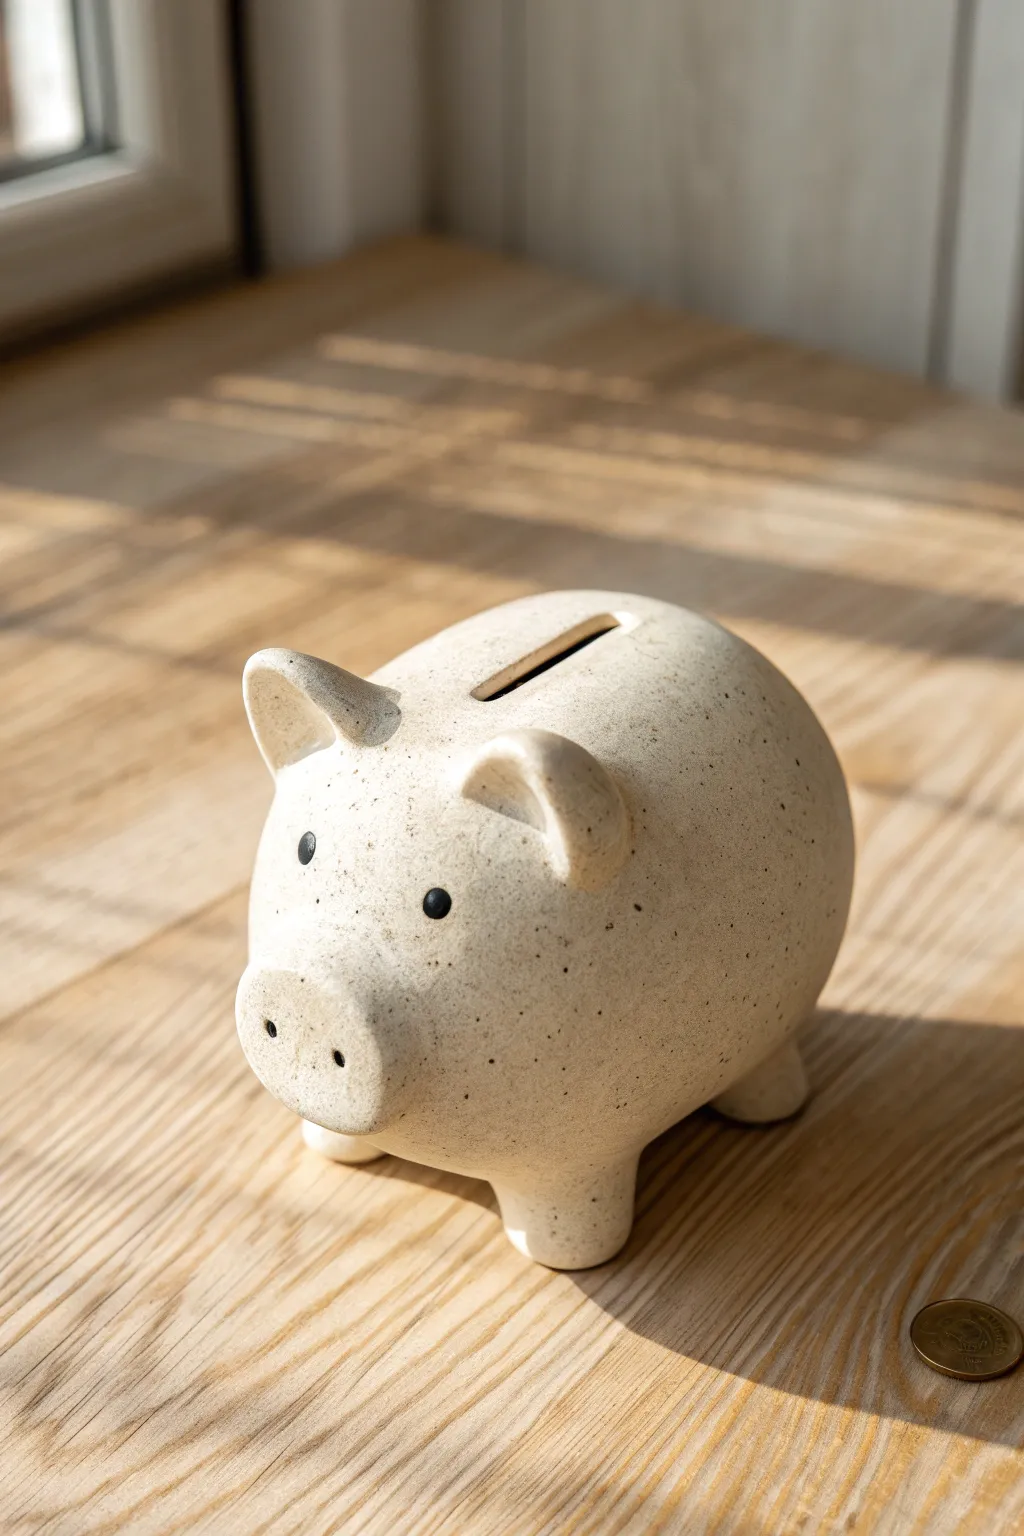
Recreate the charm of a traditional savings jar with this smooth, matte-finished clay piggy bank characterized by its warm terracotta hue. This project focuses on building a simple, rounded form with a coin slot on top and creating a hidden access point underneath so you never have to break the bank.
Detailed Instructions
Materials
- Air-dry clay or earthenware clay (terracotta color recommended)
- Plastic or rubber stopper (approx. 1.5 inch diameter)
- Wooden sculpting tools
- Small sponge
- Bowl of water
- Rolling pin
- Needle tool
- Fettling knife
- Acetate rib or smooth metal rib
- Fine-grit sandpaper
- Matte acrylic sealant (spray or brush-on)
- Black acrylic paint (for eyes)
Step 1: Forming the Body
-
Prepare the stopper hole:
Start by taking a ball of clay roughly the size of a grapefruit. Flatten the bottom slightly and use your fingers or a circle cutter to create a clean hole in the base that exactly fits your rubber stopper. Test the fit now. -
Hollow out the form:
Using the pinch pot method, open up the clay ball from that bottom hole, pushing the walls outward to create a hollow, spherical void inside while keeping the exterior round. -
Close and shape:
Once the walls are an even thickness (about 1/4 inch), gently refine the classic oval pig shape. Ensure the bottom hole remains perfectly round for the stopper. -
Smooth the surface:
Take a metal or acetate rib and run it over the exterior to remove fingerprints and lumpy areas. I like to keep the surface slightly rustic but generally uniform.
Stopper Fitting Trick
Make the bottom hole slightly larger than the stopper initially. Clay shrinks as it dries (especially firing clay), ensuring a snug fit later.
Step 2: Adding Features
-
Create the snout:
Roll a small ball of clay, slightly flatten it into a thick disc, and score and slip it onto the front of the body. -
Detail the nose:
Blend the back edges of the snout onto the face so it looks attached seamlessly. Use a tool handle to press two distinct nostril indentations into the front flat surface. -
Make the ears:
Cut two small triangles from a slab of clay. Gently curb them to give them a cupped shape. -
Attach the ears:
Score the top of the head and the base of the ears. Press them firmly into place, blending the clay downwards into the head for a strong bond. -
Add the legs:
Roll four short, stout cylinders of equal height. Attach these to the underside of the belly, ensuring they are spaced wide enough for stability. -
Level the pig:
Gently tap the pig onto the table to flatten the bottom of the feet so it stands without wobbling. -
Cut the coin slot:
Once the leather-hard stage is reached (firm to touch but still damp), use a fettling knife to cut a rectangular slot in the very top of the back. Widen it slightly with a flat modeling tool.
Tail Variation
Roll a thin ‘snake’ of clay and coil it into a spring shape. Attach it to the rear for a cute, curly tail detail.
Step 3: Finishing Touches
-
Final smoothing:
Use a slightly damp sponge to wipe down the entire piece, softening any sharp edges around the ears, snout, and coin slot. -
Allow to dry:
Let the piece dry completely. If using air-dry clay, this may take 24-48 hours; turn it occasionally for even drying. -
Sanding:
Once bone dry, take fine-grit sandpaper and gently buff the surface to achieve that ultra-smooth texture seen in the photo. -
Paint eyes:
Dip the smooth end of a paintbrush handle into black acrylic paint and dot two simple eyes just above the snout. -
Seal the surface:
Apply a coat of matte acrylic sealant. This protects the clay without making it shiny, preserving that raw, earthy aesthetic. -
Insert the stopper:
Once the sealant is fully cured, push your rubber stopper into the bottom hole to complete the bank.
Now you have a timeless place to store your coins that looks great on any windowsill
Mama Pig With Mini Piglet Companion Bank
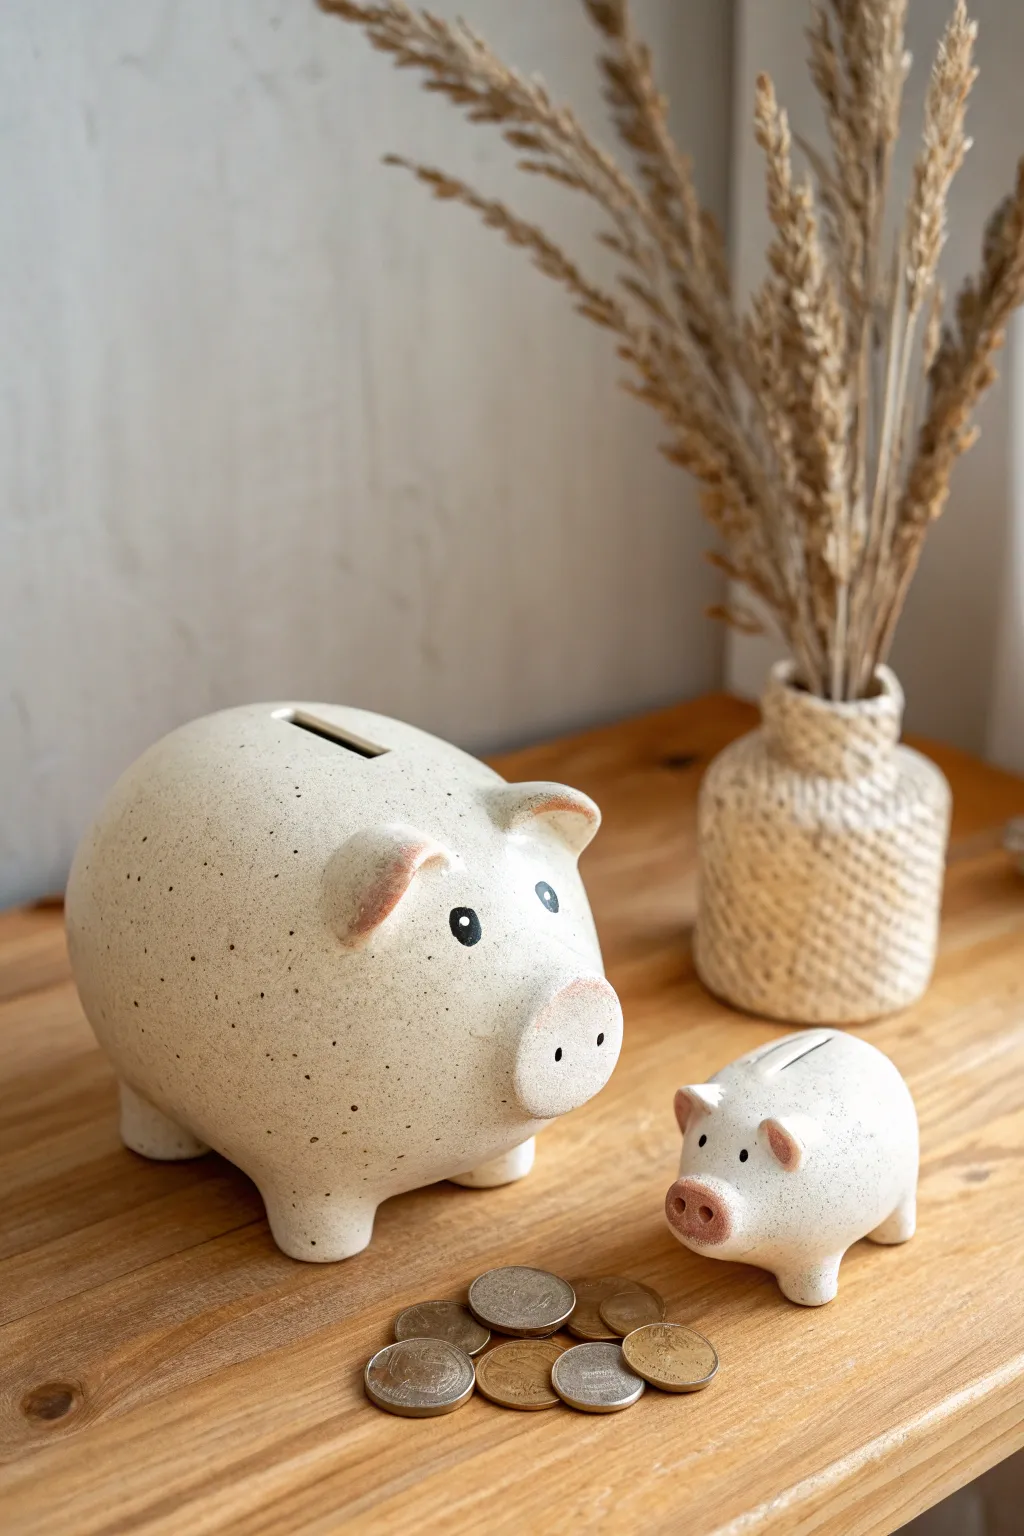
Create this adorable parent-and-child set of piggy banks using air-dry clay or polymer clay for a charming, rustic addition to your shelf. Finished with a creamy glaze and delicate speckles, this pair mimics the look of high-end ceramic stoneware without needing a kiln.
Step-by-Step Tutorial
Materials
- Air-dry clay (white) or polymer clay
- Rolling pin
- Aluminum foil
- Clay sculpting tools (needle tool, smoothing tool)
- Small bowl of water (for smoothing)
- Acrylic paints (cream/off-white, soft pink, black)
- Old toothbrush (for splattering)
- Medium and fine paintbrushes
- Gloss varnish or sealant
- Sponge or fine sandpaper
Step 1: Forming the Body Bases
-
Create the armatures:
Start by crumpling aluminum foil into two distinct oval shapes—one large (about the size of a grapefruit) for the mama pig and one small (about the size of a lime) for the piglet. Compact them tightly so they are firm. -
Prepare the clay slabs:
Roll out your clay to a consistent thickness of about 1/4 inch. If you are using polymer clay, condition it well first so it doesn’t crack. -
Cover the armatures:
Drape the clay sheets over your foil armatures. Trim away the excess and gently knead the seams together until the foil is completely encased. -
Smooth the surface:
Dip your finger in a little water (for air-dry clay) or baby oil (for polymer) and rub out any seams or fingerprints until you have two smooth, egg-like ovals.
Ceramic Look Pro Tip
For a true stoneware look, mix a tiny bit of baking soda into your cream base paint. It adds a subtle texture that mimics real clay pottery.
Step 2: Sculpting the Features
-
Add the legs:
Roll four small, squat cylinders for the mama pig and four tiny ones for the baby. Score and slip (scratch the surface and add water/clay slurry) to attach them to the bottom of the bodies so the pigs stand stable. -
Form the snouts:
Create a flattened oval of clay for each snout. Attach these to the front of the faces, blending the edges smoothly onto the main body so it looks like one continuous piece. -
Shape the ears:
Cut out triangle shapes from your rolled clay. Gently pinch the corners to soften them, then curve them slightly forward. Attach them near the top of the head, blending the base of the ears onto the body. -
Refine the details:
Use a small ball tool or the end of a paintbrush to press shallow indentations into the snouts for nostrils. Check the symmetry of both pigs from the front. -
Cut the coin slots:
Using a sharp craft knife or needle tool, carefully cut a rectangular slot into the top center of each pig’s back. Ensure it is wide enough for your thickest coin to pass through. -
Dry or bake:
If using air-dry clay, let the pigs dry for 24-48 hours until completely hard. If using polymer clay, bake according to the package instructions. Once dry, sand any rough spots lightly with fine sandpaper. -
Remove foil (optional):
If you want fully functional banks, carefuly dig out the aluminum foil through the coin slot using a hooked wire tool, or cut a larger hole in the belly with a craft knife (before drying) to remove it and add a stopper later.
Step 3: Painting and Finishing
-
Base coat:
Paint both pigs entirely with a creamy off-white acrylic paint. You may need two coats to get a solid, opaque finish that hides the clay color underneath. -
Add pink accents:
Mix a very soft, diluted pink wash. Gently dab this onto the tips of the ears, the front of the snouts, and faintly on the cheeks. Blending it while wet helps keep the transition subtle. -
Paint the eyes:
Using a fine detail brush and black paint, add two simple solid black circles for eyes on each pig. Place them fairly wide apart for a cute, innocent look. -
Create the speckled effect:
Dilute a small amount of dark brown or grey paint with water until it is inky. Dip an old toothbrush into this mixture. -
Splatter the texture:
Hold the toothbrush near the pigs and run your thumb across the bristles to flick tiny speckles over the bodies. I prefer to test this on paper first to control the spray density. -
Seal the project:
Once the paint is fully dry, apply a coat of gloss varnish. This gives the pigs that shiny, glazed ceramic look and protects the paint.
Fixing Cracks
If small cracks appear in air-dry clay while drying, mix a loose paste of clay and water (slip) and fill the cracks, then sand smooth once dry.
Set your finished duo on a shelf where they can start collecting coins and compliments alike
Piggy Bank With Little Wings for Fantasy Vibes
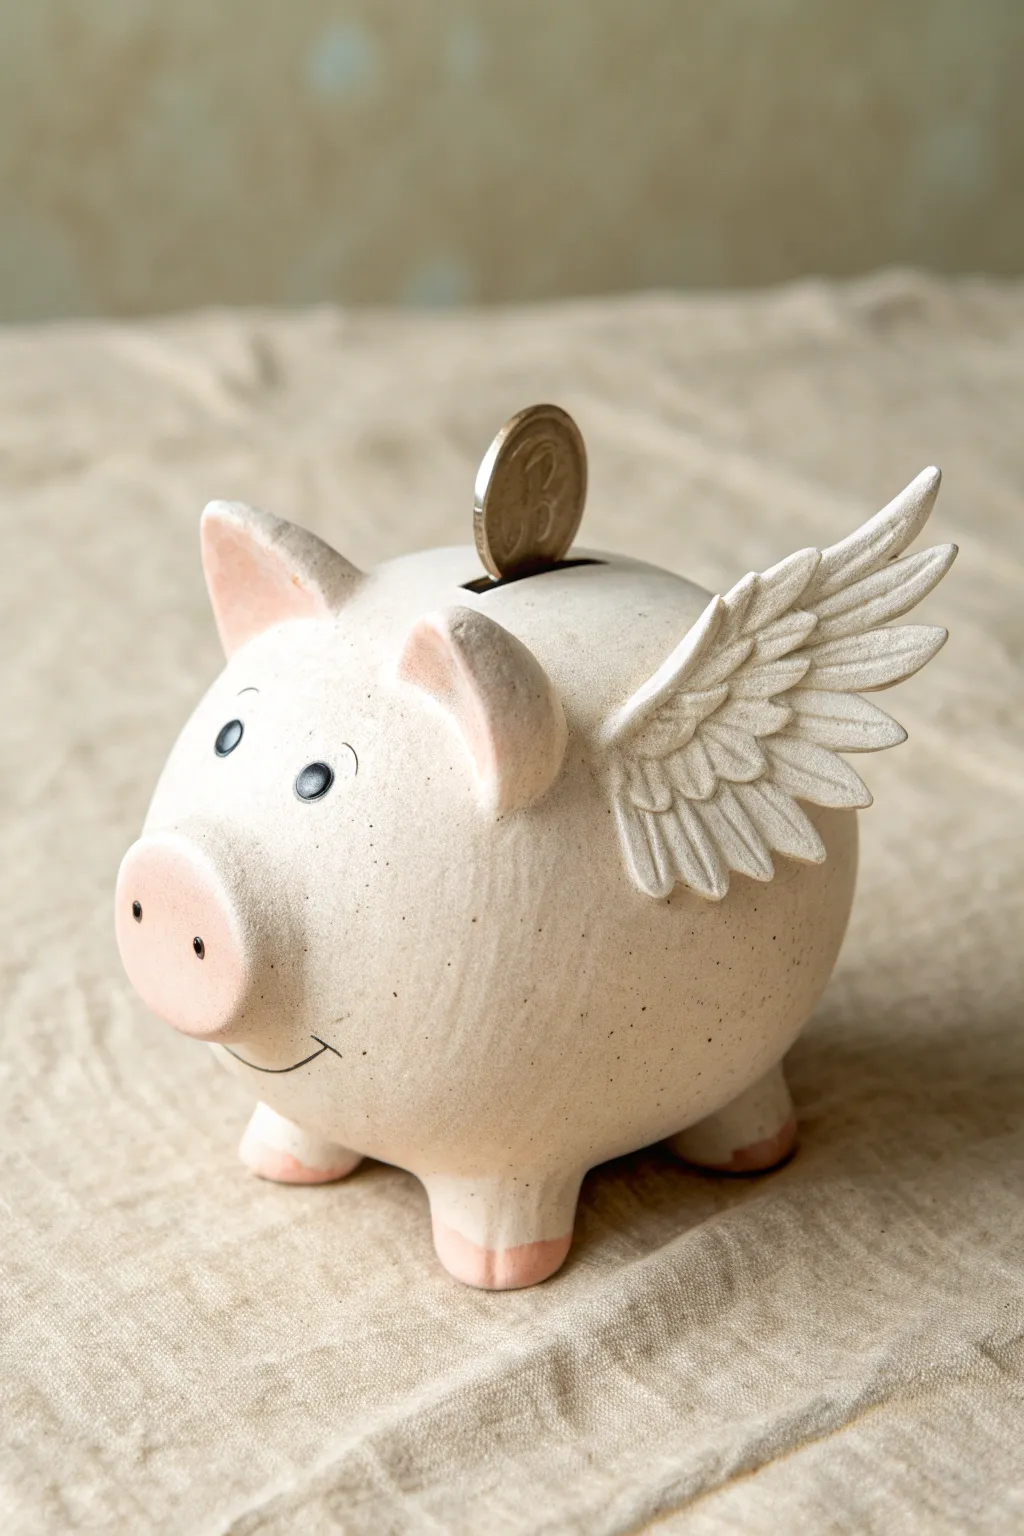
Transform a lump of clay into this adorable flying pig, complete with intricate feather details and a charming speckled finish. This project combines classic hand-building techniques with sculpting to create a magical place for your savings.
Detailed Instructions
Materials
- White speckle stoneware clay (or polymer clay with faux speckles)
- Potter’s needle tool
- Rolling pin
- Slip and scoring tool (if using ceramic clay)
- Small sponge
- Modelling tools (wood or plastic)
- Pink underglaze or acrylic paint (soft pastel pink)
- Black underglaze or acrylic paint
- Fine detail brush
- Clear glaze (matte or satin finish)
- Kiln access (or oven if using polymer)
Step 1: Shaping the Body
-
Form the Base:
Start with a softball-sized ball of clay. Gently pat and roll it between your palms until you have a smooth, symmetrical oval shape that mimics a pig’s chubby body. -
Hollow the Form:
If working with ceramic clay, slice the oval in half, pinch out the insides to create two hollow pinch bowls, and score and slip them back together. With polymer clay, create a solid core with aluminum foil and cover it with a layer of clay to save material. -
Smooth the Seams:
Use a rib tool or your thumb to aggressively smooth over the join line. The surface needs to be perfectly round and seamless before adding features. -
Create the Coin Slot:
While the clay is leather-hard (or firm), carefully cut a rectangular slot at the very top of the back using a fettling knife or needle tool. Make sure it’s wide enough for your thickest coin.
Wing Droop Fix
If wings sag while drying, prop them up with rolled sponges or crumpled paper towels until the clay stiffens enough to hold its own weight.
Step 2: Adding Facial Features & Feet
-
Sculpt the Snout:
Roll a small ball of clay and flatten it slightly into an oval disk. Score and attach this to the front of the face, blending the edges smoothly into the main body. -
Add Snout Details:
Use a small dotting tool to press two nostril indentations into the snout disk. Keep them spaced widely for a cuter look. -
Attach the Ears:
Shape two small triangles of clay. Gently curve them forward to create a cupped shape. Score and attach them high on the head, just behind where the eyes will go. -
Form the Legs:
Roll four short, stout cylinders of clay. Taper them slightly toward the bottom. Attach these to the underside of the body, ensuring the pig stands level and doesn’t rock. -
Engrave the Smile:
Use a needle tool to lightly incise a curved smile line below the snout. I like to add a tiny tick mark at the end of the smile for extra character.
Golden Touch
Paint the tips of the feather wings with liquid gold leaf or luster after final firing for a magical, deluxe fantasy appearance.
Step 3: Crafting the Wings
-
Cut the Wing Shape:
Roll out a slab of clay about 1/4 inch thick. Cut out two matching teardrop shapes that curve upward at the tip. -
Texture the Feathers:
Starting at the bottom edge of the wing, press a small U-shaped tool or modeling stick into the clay to create rows of feathers. Overlap the rows as you move upward toward the top of the wing. -
Refine the Edges:
Smooth the outer edges of the wings so they look aerodynamic rather than sharp. Use a damp brush to soften any harsh tool marks on the feathers. -
Attach the Wings:
Score the side of the pig’s body and the base of each wing heavily. Press the wings firmly onto the sides, blending the clay at the attachment point so they appear to grow from the skin.
Step 4: Finishing Touches
-
Initial Drying/Baking:
Allow the piece to dry slowly under plastic if using ceramic clay, then bisque fire. If using polymer, bake according to package instructions. -
Painting Pink Accents:
Dilute a soft pink paint or underglaze. Gently wash color onto the snout, the tips of the feet, and the insides of the ears. Wipe back slightly with a sponge for a faded, natural look. -
Define the Eyes:
Using a fine brush, paint two small black circles for eyes. Add tiny white highlight dots once the black is dry to bring the expression to life. -
Final Glaze:
Apply a clear satin or matte glaze over the entire piece to seal it. If you used speckled clay, this creates that lovely stone texture shown in the photo.
Pop your first coin in the slot and enjoy your handcrafted fantasy bank
Surprise Animal “Piggy” Bank With Pig Snout
Embrace a minimalist aesthetic with this charming, rounded piggy bank that mimics the look of high-end speckled stoneware. Its simple features and soft, mushroom-colored speckles give it a timeless, modern feel perfect for any shelf.
Step-by-Step
Materials
- White polymer clay (approx. 2-3 standard blocks) or air-dry clay
- Granitex or speckled clay effect additive (like dried coffee grounds or black pepper)
- Aluminum foil
- Rolling pin
- Smoothing tool or blending sponge
- Ball stylus tool (medium and large)
- Black acrylic paint
- Satin acrylic varnish
- Craft knife or clay blade
- Water (if using air-dry clay)
- Sandpaper
Step 1: Forming the Base
-
Prepare the foil core:
Create a tightly packed oval armature using aluminum foil. This keeps the piggy bank lightweight and uses less clay. Aim for a shape slightly smaller than a grapefruit. -
Prepare the clay:
If using plain white clay, knead in a tiny pinch of dried coffee grounds or coarsely ground black pepper to achieve that realistic speckled ceramic look. Condition the clay until it’s pliable and the speckles are evenly distributed. -
Cover the armature:
Roll your speckled clay into a sheet about 1/4 inch thick. Drape it over the foil ball, gently pressing it down to conform to the shape without trapping air bubbles. -
Seal the seams:
Trim excess clay with your blade and pinch the seams together. Use a little water (for air-dry) or liquid clay (for polymer) to blend the joins until the surface is completely smooth and continuous. -
Refine the shape:
Roll the ball gently on your work surface to ensure it is perfectly round but stable. You can flatten the bottom ever so slightly so it won’t roll away.
Cracks Appearing?
If using air-dry clay, minor cracks can appear while drying. Mix a tiny bit of fresh clay with water to make a paste and fill them in, then sand smooth.
Step 2: Sculpting the Features
-
Add the snout:
Roll a small ball of clay, flatten it slightly into a thick disk, and press it onto the front center of the body. Blend the edges seamlessly into the main body so it looks like one cohesive piece. -
Create nostrils:
Using the medium ball stylus or the back of a paintbrush, press two deep indentations into the snout disk to create the classic pig nose. -
Form the ears:
Shape two small triangles of clay. Gently curve them forward to give them a perky alertness. -
Attach the ears:
Score the clay slightly where the ears will go (top of the head, spaced widely). Press the ears on and blend the clay at the base downward onto the head so they are securely attached. -
Add the feet:
Create four identical small, stout cylinders. Flip the pig over and attach these to the bottom to create secure legs. I find pressing the pig gently down onto a flat surface helps level them out so it stands straight. -
Cut the coin slot:
Using a sharp craft knife, carefully cut a rectangular slot at the very top of the back. Ensure it is wide enough for your largest coin to pass through comfortably. -
Smooth everything:
Go over the entire sculpture with a slightly damp sponge or finger to remove fingerprints and harsh tool marks.
Step 3: Finishing Touches
-
Dry or bake:
If using polymer clay, bake according to the package instructions. If using air-dry clay, allow it to dry fully for 24-48 hours until hard. -
Sand for texture:
Once hardened, lightly sand the surface with fine-grit sandpaper. This enhances the matte, stone-like texture and removes any rogue bumps. -
Paint the eyes:
Dip a small dotting tool or the end of a toothpick into black acrylic paint. Dot two small, widely spaced eyes just above the snout line. -
Seal the piece:
Apply a coat of satin varnish to the entire pig. This protects the finish and gives it that slight sheen associated with fired ceramics. -
Final cure:
Let the varnish dry completely before handling or depositing your first coin.
Make it Retrievable
Before adding clay, cut a large hole in the bottom of your foil core. Insert a rubber stopper, then build the clay around it so you can empty the bank later.
Start saving your pennies in your beautiful new handmade piggy bank