If you’ve got a stack of plain terracotta pots and a few bottles of acrylic paint, you’re basically holding endless cute decor in your hands. These are my go-to cute painted pots ideas for turning simple planters into little characters and happy pops of color.
Simple Smiley Face Pots
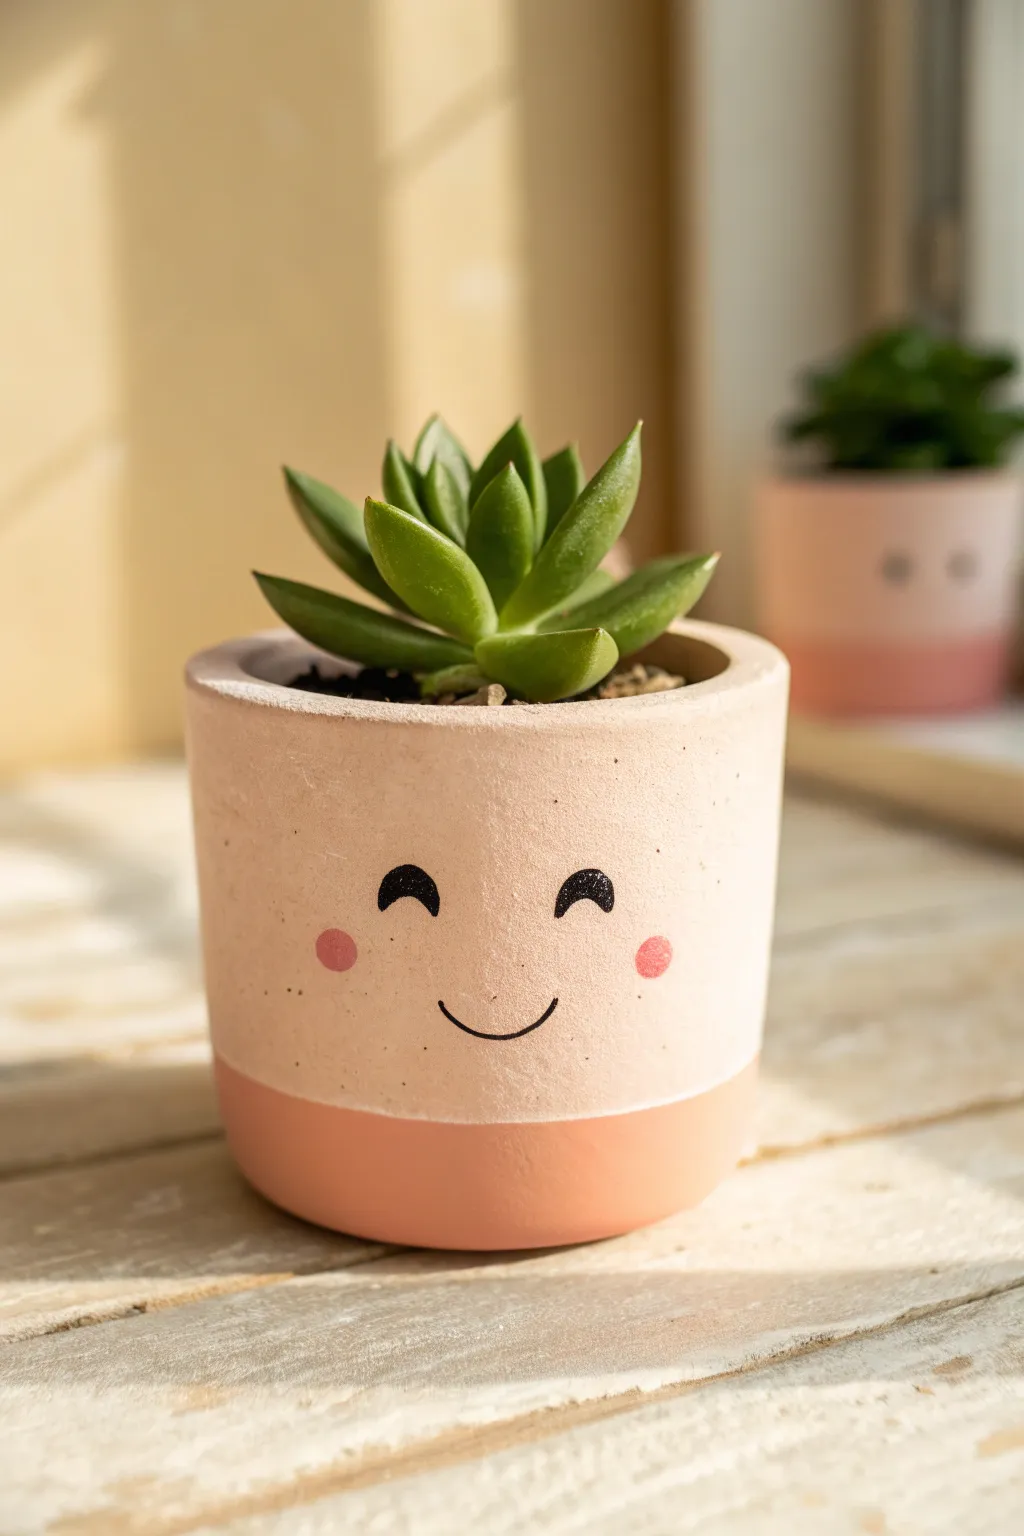
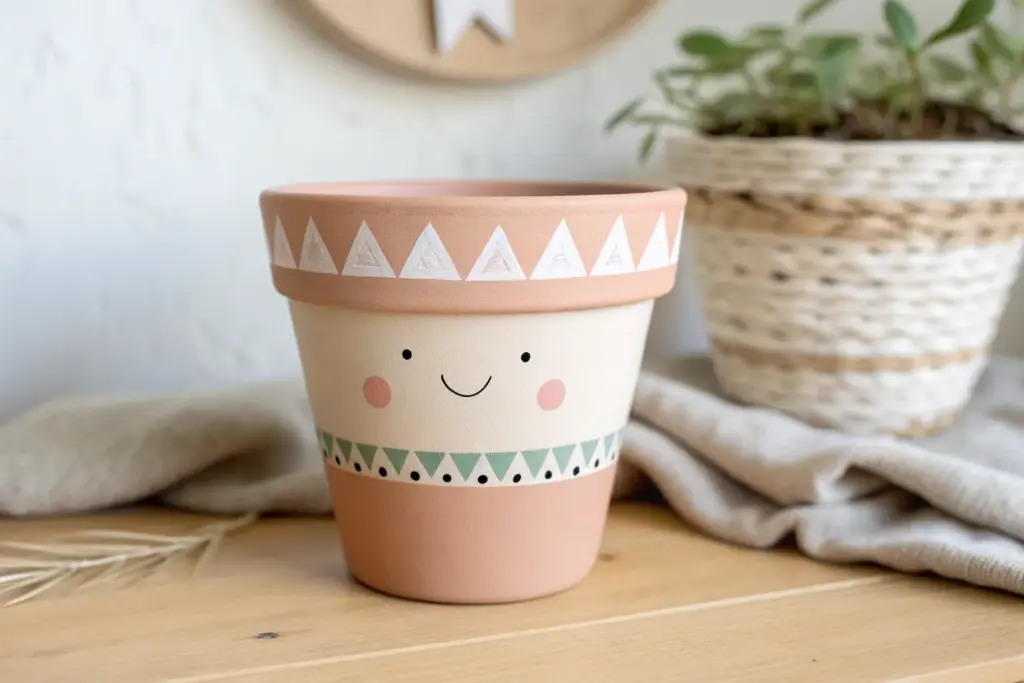
Bring instant cheer to your windowsill with this adorable, two-toned blushing pot design. The soft pastel pinks combined with that simple, contented smile make it the perfect home for your favorite little succulent.
Step-by-Step
Materials
- Small terracotta pot (about 3-4 inches)
- White acrylic paint (as primer)
- Light blush pink acrylic paint
- Coral or salmon pink acrylic paint
- Black acrylic paint or paint pen
- Medium pink acrylic paint (for cheeks)
- Flat paintbrush (medium width)
- Small detail brush or dotting tool
- Painter’s tape or masking tape
- Matte sealant spray or Mod Podge
- Small succulent and potting soil
Step 1: Preparation & Base Coat
-
Clean surface:
Begin by wiping down your terracotta pot with a damp cloth to remove any dust or debris, then let it dry completely to ensure the paint adheres well. -
Prime the pot:
Apply a coat of white acrylic paint all over the exterior of the pot. This step is crucial because terracotta is porous and dark; the white primer makes your pastel colors pop later. -
Dry and repeat:
Allow the white base coat to dry for about 20 minutes. If you can still see the orange clay heavily through the paint, add a second coat of white.
Clean Lines Hack
After applying tape, paint a thin layer of the BASE color (white) over the tape edge first. This seals the gap, so any bleed-through matches the base.
Step 2: Creating the Two-Tone Effect
-
Tape the line:
Place a strip of painter’s tape horizontally around the bottom third of the pot. Press the edges down firmly with your fingernail to prevent paint from bleeding under the tape. -
Paint the bottom section:
Using your flat brush, paint the exposed bottom area (below the tape) with the coral or salmon pink paint. I find that brushing away from the tape edge helps keep the line crisp. -
Paint the top section:
Paint the upper section of the pot with your light blush pink shade. Be sure to paint over the top rim and just a little bit inside the pot for a finished look. -
Apply second coats:
Let both colors dry to the touch, then apply a second coat to each section to get that smooth, opaque matte finish seen in the photo. -
Remove tape:
Carefully peel off the painter’s tape while the paint is still slightly tacky—this often results in a cleaner line than waiting for it to be rock hard.
Add Texture
Mix a teaspoon of baking soda into your acrylic paint before applying. This creates a trendy, textured ‘ceramic’ look that feels stone-like to the touch.
Step 3: Adding the Personality
-
Map the face:
Lightly sketch the face placement with a pencil if you’re nervous about freehanding. The eyes should sit roughly in the middle of the light pink section. -
Paint the eyes:
Using a small detail brush or a black paint pen, draw two small semicircles arching upward for the happy, closed eyes. Make the lines slightly thick for a bold, cute look. -
Draw the smile:
Paint a simple, shallow U-shape centered below the eyes to create a gentle smile. -
Add cheeks:
Dip the handle end of a paintbrush or a dotting tool into the medium pink paint. Press it gently onto the pot just outside and slightly below the eyes to create perfect circular rosy cheeks.
Step 4: Finishing Touches
-
Seal the work:
Once the face is completely dry, apply a coat of matte sealant or Mod Podge over the entire exterior to protect your artwork from water damage. -
Prepare for planting:
Add a small layer of gravel or mesh at the bottom of the pot to help with drainage, which keeps the terracotta breathable. -
Plant the succulent:
Fill the pot with succulent soil and gently nestle your plant inside, brushing off any stray dirt from the painted rim.
Now you have a cheerful little companion ready to brighten up your desk space


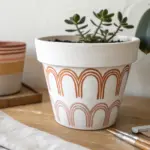
Blushing Bunny Face Pots
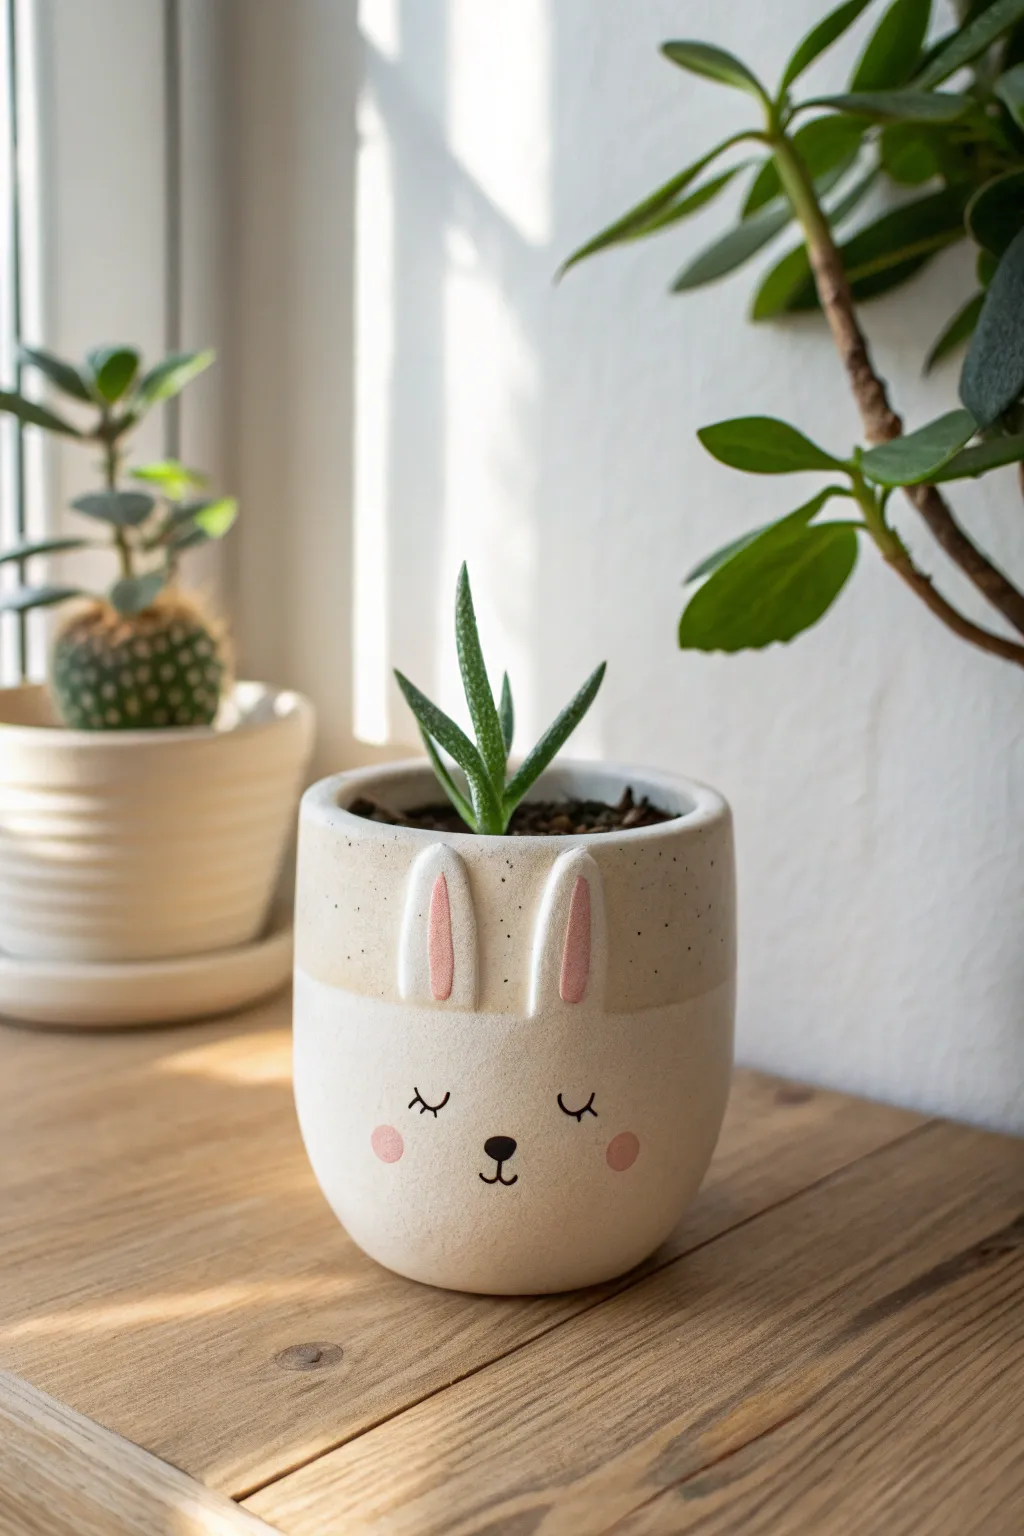
Transform a plain pot into an adorable sleeping bunny with this simple yet charming DIY project. The design features a two-tone speckled finish, sweet modeled ears, and a minimalist face that adds instant warmth to any windowsill.
Detailed Instructions
Materials
- Small white ceramic cylinder pot (approx 3-4 inches)
- Air-dry clay (white)
- Strong craft glue (e.g., E6000) or super glue gel
- Sandpaper (fine grit)
- Acrylic paints: Cream/Off-White, Beige/Tan, Soft Pink, Black
- Small flat paintbrush
- Fine detail paintbrush (0 or 00 size)
Step 1: Sculpting the Ears
-
Shape the clay:
Pinch off two small pieces of air-dry clay, each about the size of a marble. Roll them into balls and then flatten them slightly into elongated oval shapes to form the bunny ears. Make sure they are proportional to your specific pot size. -
Create the inner ear:
Using the rounded end of a paintbrush or your pinky finger, gently press an indentation into the center of each oval. This creates the ‘inner ear’ texture where the pink paint will eventually go. -
Curve the profile:
While the clay is still pliable, gently curve the ears so they will match the curvature of the pot’s rim. Test the fit frequently against the pot itself. -
Dry and refine:
Set the ears aside to dry completely according to the manufacturer’s instructions. Once hard, use fine-grit sandpaper to smooth out any fingerprints or rough edges, creating a porcelain-like finish. -
Attach the ears:
Apply a strong craft glue to the bottom edge of each ear and press them firmly onto the top rim of the pot. Hold them in place for a minute to ensure a secure bond.
Use a Template
Make one ear first, trace it on paper, and use that as a template for the second. This helps keep them symmetrical without guessing.
Step 2: Painting the Base
-
Paint the bottom section:
Using your flat brush, paint the bottom two-thirds of the pot with the plain Cream/Off-White acrylic paint. You may need two coats for opaque coverage, allowing the first to handle-dry before applying the second. -
Paint the rim section:
Mix a small amount of Beige/Tan paint. Carefully paint the top third of the pot and the outer edges of the clay ears. I find it helpful to freehand a slightly uneven, organic line where the beige meets the cream to mimic dipped pottery. -
Add the speckles:
To achieve the stone-effect texture on the beige section, dip an old toothbrush or stiff bristle brush into watery dark brown or black paint. Test on scrap paper first, then flick tiny speckles onto the dry beige paint. -
Fill the inner ears:
Using a clean small brush, fill the indented centers of the ears with Soft Pink paint. This pop of color really brings the character to life.
Step 3: Adding the Face Details
-
Draft the face:
Lightly sketch the position of the eyes, nose, and cheeks with a dull pencil. The eyes should sit roughly in the middle of the cream section. -
Paint the nose:
Using the fine detail brush and black paint, create a small, inverted triangle for the nose. Round the corners slightly for a softer look. -
Draw the mouth:
Paint a very small vertical line extending down from the nose, splitting into a tiny ‘w’ shape for the bunny’s mouth. -
Create the sleepy eyes:
Paint two widely spaced, downward-curving arcs for the closed eyes. Add three tiny outward-flicking lashes to the outer corner of each eye. -
Add rosy cheeks:
Dip the rounded end of a brush handle or a cotton swab into the Soft Pink paint. Dab two perfect circles onto the cheeks, placing them slightly lower and wider than the eyes. -
Seal the work:
Once all paint is thoroughly dry, apply a coat of matte spray varnish to protect your artwork from water damage when watering your plant.
Add Texture
Mix baking soda into the beige rim paint before applying. This creates a genuine gritty texture that looks and feels like expensive stoneware.
Pop in a small succulent or aloe vera to complete your sweet new bunny friend


Kitty Whisker Face Pots
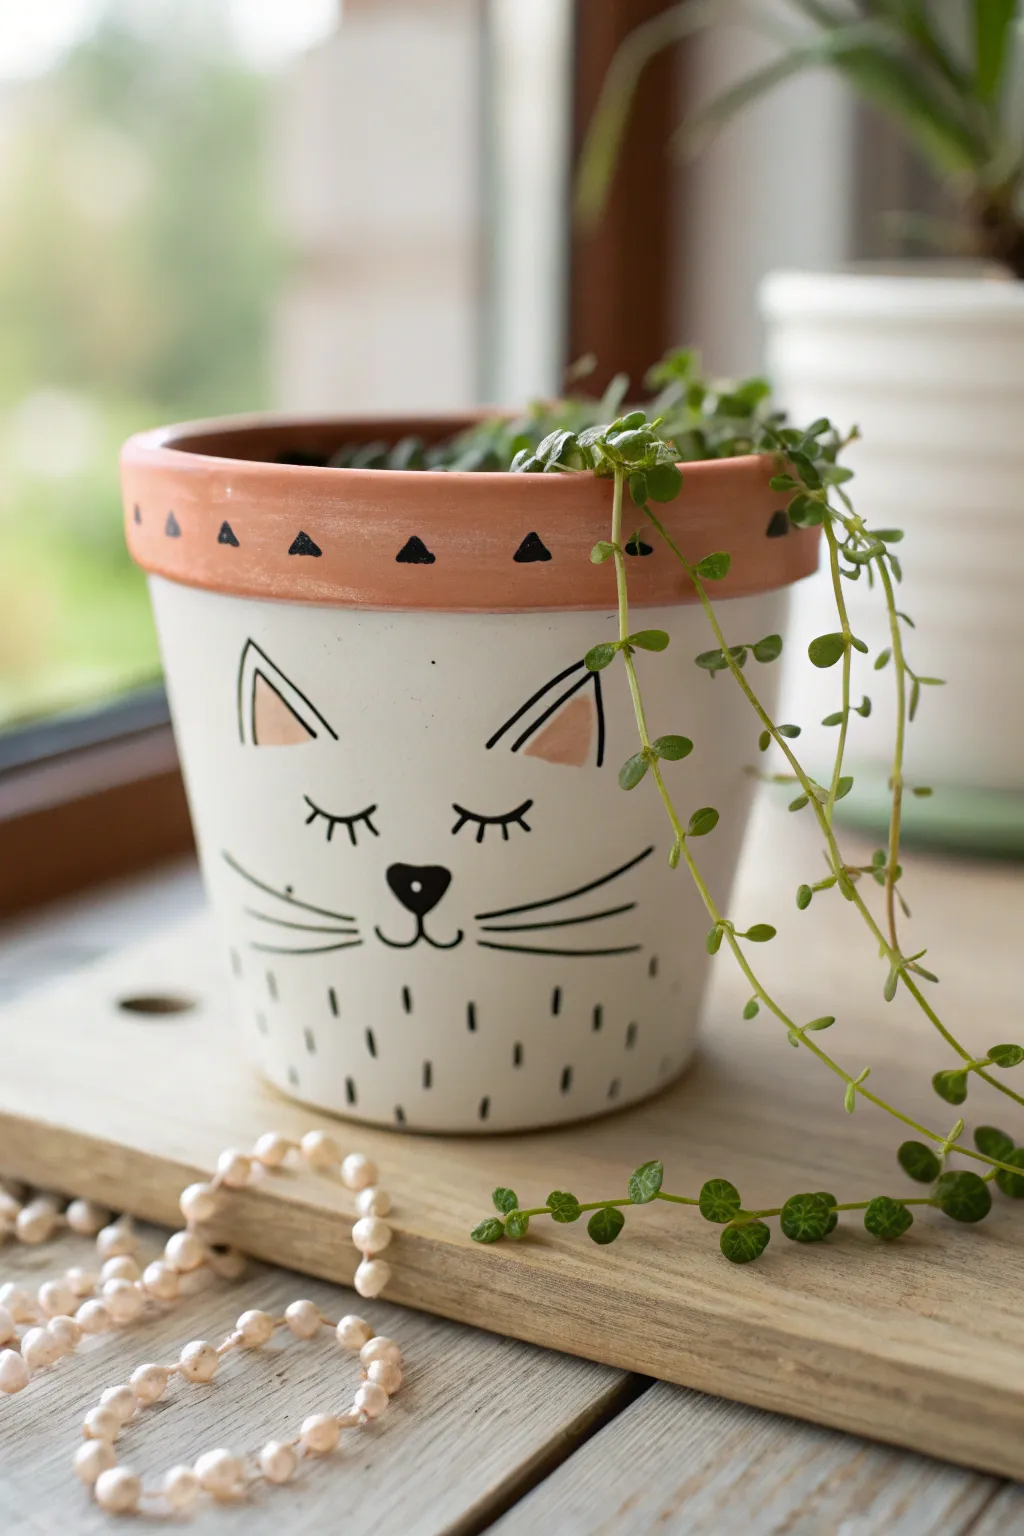
Transform a plain terra cotta pot into a charming feline friend with this sweet and simple painting project. The design features a smooth white base, a sleeping kitty face with delicate lashes, and a decorative patterned rim that adds a warm pop of color.
Step-by-Step Guide
Materials
- Terra cotta pot (standard size)
- White acrylic paint (outdoor multi-surface preferred)
- Peach or light coral acrylic paint
- Black acrylic paint or black paint pen (fine tip)
- Flat paintbrush (medium width)
- Small detail brush
- Pencil with soft lead
- Water cup and paper towels
- Clear matte sealer spray (optional)
Step 1: Base Coat and Rim
-
Clean the surface:
Before starting, ensure your terra cotta pot is free of dust and stickers. Wipe it down with a damp cloth and let it dry completely so the paint adheres properly. -
Apply the white base:
Using your medium flat brush, paint the main body of the pot white. You will likely need 2-3 coats for opaque coverage, allowing about 15 minutes of drying time between each layer. -
Avoid the rim:
As you paint the white body, be careful to keep a clean line just under the lip of the pot. It’s okay if it’s not perfect, but try to keep the rim area bare terra cotta for now. -
Paint the rim color:
I like to use a soft peach or light coral shade for the rim. Paint the entire upper band of the pot with this color, extending slightly over the top lip. -
Second coat for the rim:
Apply a second coat of peach paint to the rim to ensure rich, consistent color. Let the entire pot dry completely for at least an hour before moving to the detail phase.
Smooth Lines Tip
If brushwork makes you nervous, use an ultra-fine tip black Posca paint pen for the whiskers and eyes. It offers much better stability than a traditional brush.
Step 2: Drawing the Face
-
Sketch the ears:
Using a pencil, lightly draw two large triangular ears near the top of the white section. Space them apart so the face feels balanced. -
Draw the sleeping eyes:
Sketch two small, curved arcs for the closed eyes. Position them centered below the ears about halfway down the pot’s face. -
Add the nose and mouth:
Draw a small inverted triangle or heart shape for the nose between the eyes. Extend a small vertical line down from the nose, splitting into two curves for the mouth. -
Review the sketch:
Take a step back and look at your pencil marks. If the symmetry looks off, lightly erase and adjust until the kitty’s expression looks just right.
Step 3: Adding Details
-
Paint the inner ears:
Using the small detail brush and the same peach color from the rim, paint smaller triangles inside the pencil ear outlines you drew earlier. -
Outline the features:
Switch to your black paint and a very fine brush, or a black paint pen for easier control. Carefully trace over the ear outlines, the eye arcs, and the nose. -
Add eyelashes:
Paint three small, distinct lashes extending from the outer corner and center of each eye arc to give the kitty a sleepy look. -
Fill the nose:
Fill in the small nose shape with solid black paint. Connect the mouth lines below it smoothly. -
Draw the whiskers:
Add three long, sweeping lines on each cheek area for the whiskers. Keeping your hand loose creates a more natural curve.
Patchy White Paint?
White paint over dark clay often looks streaky. Apply thin layers and let them dry fully between coats. Thick globs will peel, but thin layers build opacity.
Step 4: Decorative Accents
-
Rim pattern:
On the peach rim, paint small, evenly spaced black triangles. Orient them pointing upward for a geometric Aztec-style look. -
Bottom texture:
Create the fur texture effect by painting small vertical dashes scattered around the bottom third of the white section. -
Final touches:
Check for any smudges or uneven lines. Use a tiny bit of white paint to clean up errors once the black is dry. -
Seal the pot:
Once the paint has cured for 24 hours, spray a light coat of clear matte sealer over the entire project to protect it from moisture and dirt.
Pop in a trailing plant like a String of Turtles or Ivy to give your new kitty pot a lush green hairstyle


Panda-Inspired Black-and-White Pots
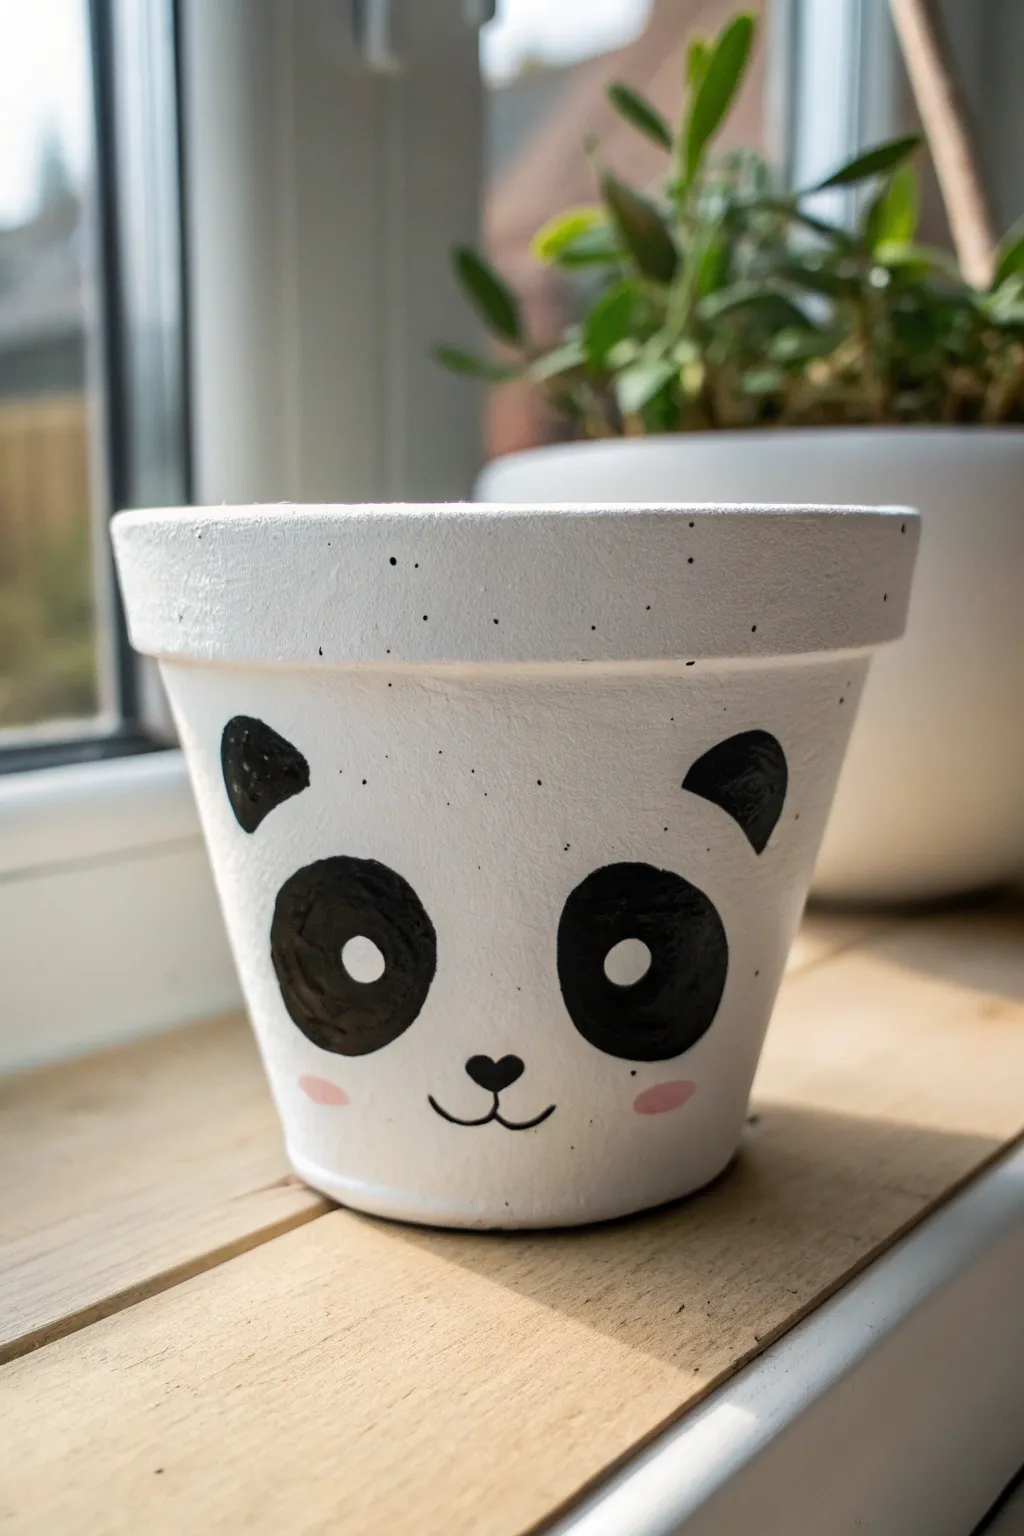
Transform a standard terra cotta pot into an adorable black-and-white companion for your succulents or herbs. This minimalist panda design combines simple shapes with charming details like rosy cheeks and a subtle speckled finish for added texture.
Step-by-Step Tutorial
Materials
- Small terra cotta pot (clean and dry)
- White acrylic paint (outdoor or multi-surface)
- Black acrylic paint
- Soft pink acrylic paint
- Flat paintbrush (medium size)
- Small round detail brush
- Pencil (HB or lighter)
- Stiff-bristled toothbrush (for splattering)
- Clear matte or satin sealant spray or varnish
- Paper plate or palette
- Water cup and paper towels
Step 1: Preparation & Base Coat
-
Clean surface:
Ensure your terra cotta pot is completely clean and dry. Wipe away any dust with a damp cloth and let it air dry so the paint adheres properly. -
First white layer:
Using your medium flat brush, apply a coat of white acrylic paint to the entire exterior of the pot, including the rim. Don’t worry if it looks streaky at first; terra cotta is very absorbent. -
Paint inside rim:
Paint the inside of the rim, going down about an inch deep. This ensures the raw clay won’t show once soil is added. -
Dry and repeat:
Allow the first coat to dry completely for about 20-30 minutes. Apply a second and possibly a third coat until the orange clay is fully hidden and the finish is opaque solid white.
Uneven Speckles?
If the splatter technique creates blobs that are too large, quickly blot them up with a damp paper towel corner before they dry, or paint over them with white once dry.
Step 2: Designing the Panda Face
-
Sketch the layout:
Once the white base is bone dry, lightly sketch the panda’s face using a pencil. Start by placing two large oval shapes for the eye patches in the lower half of the pot. -
Add feature guides:
Draw the semi-circle ears just under the rim. Mark a small heart shape for the nose between the eyes, and a simple curved ‘w’ shape for the mouth below it. -
Paint the eye patches:
Switch to a smaller round brush and black acrylic paint. Carefully outline the eye patch ovals you sketched, then fill them in with solid black color. -
Add ears:
Paint the semi-circle shapes near the rim black for the ears. I find it helpful to anchor my pinky finger on the pot for stability while painting these curved lines. -
Create the nose:
Using the very tip of your detail brush, paint the small heart-shaped nose in black. -
Detail the mouth:
With a steady hand and very little paint on your brush, trace the thin mouth line extending from the bottom of the nose.
Step 3: Bringing it to Life
-
Add eye highlights:
Dip the handle end of a paintbrush into white paint. Dot a highlight onto the upper part of each black eye patch to make the character look awake and cute. -
Paint rosy cheeks:
Mix a tiny bit of water into your pink paint to make it sheer. Dab two small oval cheeks just outside the eye patches for a soft blush effect. -
Prepare splatter paint:
Dilute a pea-sized amount of black paint with a few drops of water on your palette until it has an inky consistency. -
Apply speckles:
Dip a stiff toothbrush into the watery black paint. Hold it near the pot and run your thumb across the bristles to flick tiny speckles over the surface. Go lightly—less is more here. -
Final drying time:
Let the entire project sit for at least an hour to ensure the thickest parts of the black paint are fully cured. -
Seal the pot:
Apply a coat of clear matte or satin sealer over the entire painted surface. This protects your hard work from water damage during watering.
Smoother Base Coat
Sand the terra cotta lightly with fine-grit sandpaper before painting. This removes bumps and helps you achieve that paralyzed porcelain look for the panda’s face.
Pop in your favorite succulent or small fern to give your new panda friend some fun green hair

The Complete Guide to Pottery Troubleshooting
Uncover the most common ceramic mistakes—from cracking clay to failed glazes—and learn how to fix them fast.
Pig, Cow, and Chick Farm Pots
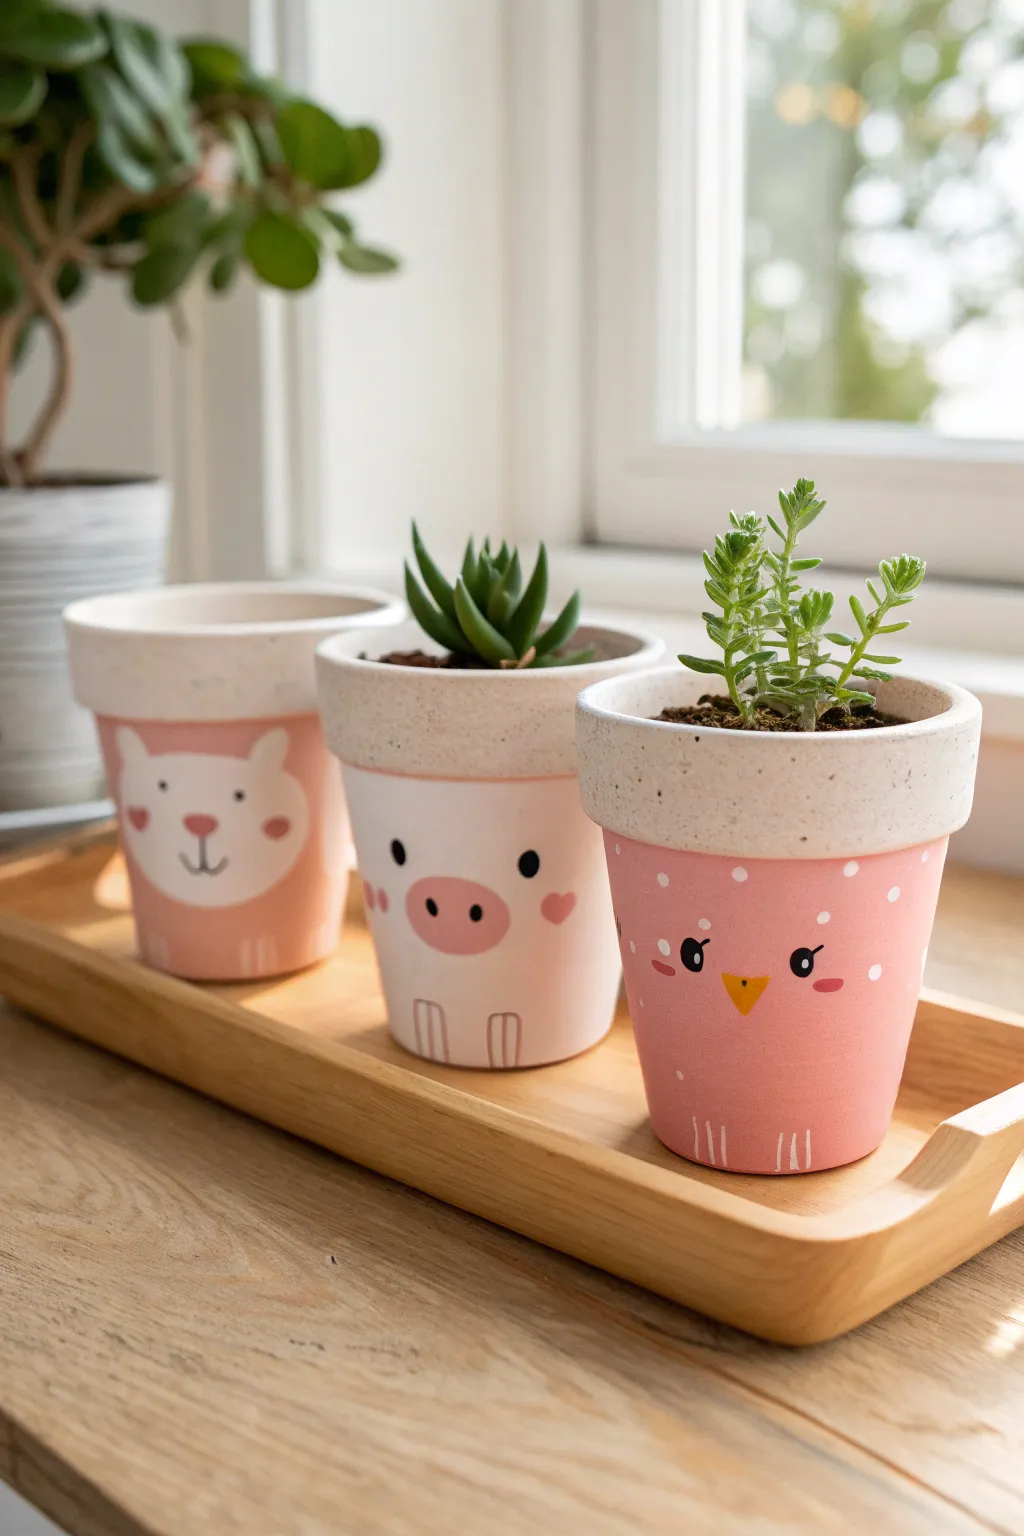
Bring a touch of whimsy to your windowsill with these adorable hand-painted animal pots featuring a cow, pig, and chick. Using soft pink hues and simple geometric shapes, you can transform plain terracotta into a charming little plant family.
Detailed Instructions
Materials
- 3 small terracotta pots (approx. 3-4 inches)
- White acrylic paint (priming and mixing)
- Pink acrylic paint (pale pink and bright pink)
- Black acrylic paint or fine-tip paint pen
- Yellow/Orange acrylic paint
- Foam brushes or small flat brushes
- Detail brushes (fine round)
- Painter’s tape
- Clear matte sealant spray
- Small succulents or herbs for planting
Step 1: Base Preparation
-
Clean and Dry:
Start by wiping down your terracotta pots with a damp cloth to remove any dust or debris. Let them dry completely, as moisture will trap bubbles under your paint. -
Tape the Rim:
Apply painter’s tape just below the rim of each pot. The design relies on leaving the chunky upper rim mostly unpainted or lightly textured, creating a nice contrast with the smooth animal faces below. -
Base Coat:
Mix a small amount of white paint with a drop of pink to create a very pale, creamy base. Paint the body of the left pot (the cow) completely solid. For the pig (center) and chick (right), you can leave the background raw terracotta or paint it white. -
Rim Texture:
For that speckled, stone-like look on the rims shown in the photo, dab a sponge with a mix of white and a tiny bit of grey or beige paint lightly onto the rims. Let everything dry for at least 30 minutes.
Step 2: Painting the Cow Pot (Left)
-
Shape the Face:
Using your pale pink mixture, paint the main body of the pot again if needed for opacity. Then, create a large white semi-circle shape in the center for the snout area. -
Adding Ears:
With white paint, add two small rounded shapes near the top edge of the pink area to suggest ears peeking up. -
Facial Features:
Once the white snout is dry, use a reddish-brown or dark pink paint to add a small nose shape and a vertical line for the mouth. Add two small red hearts on the cheeks. -
Final Details:
Use a black paint pen or fine brush to dot the eyes and draw small vertical lines at the bottom for paws.
Clean Lines Pro-Tip
For perfectly round eyes or cheeks, use the flat end of a drill bit or a pencil eraser as a stamp. Dip it in paint and press straight down for a crisp circle.
Step 3: Painting the Pig Pot (Center)
-
Main Color Block:
Paint the body of the middle pot a soft, creamy white or very pale pink, covering the area below the rim. -
The Snout:
Mix a vibrant bubblegum pink. Paint a prominent oval in the center of the pot for the pig’s nose. -
Nostrils and Hearts:
Using a dark brown or black paint, add two large dots inside the pink oval for nostrils. I like to add two sweet pink hearts on either side of the face for cheeks. -
Eyes and Paws:
Place two wide-set black dots for eyes just above the snout height. Finish with simple outlined “U” shapes at the bottom for hooves.
Level Up: Tail Details
Don’t forget the back! Paint a curly tail for the pig, a fluffy tail for the chick, or a spotted tail for the cow on the reverse side.
Step 4: Painting the Chick Pot (Right)
-
Pink Background:
Paint the entire body of the third pot with a bright, cheerful pink acrylic paint. It may need two coats for full coverage. -
Polka Dots:
Dip the back end of a paintbrush into white paint and stamp random dots all over the upper half of the pink area to create a speckled pattern. -
The Beak:
Paint a small, sharp inverted triangle in the center using orange or golden-yellow paint. -
Expressive Eyes:
Paint two black circles for eyes. This time, add tiny white highlights inside the black dots and paint small eyelashes for extra character. -
Finishing Touches:
Add pink cheek ovals just under the eyes and draw simple white lines at the bottom for the feet.
Step 5: Sealing
-
Remove Tape:
Carefully peel off the painter’s tape from the rims. If any paint bled through, you can gently sand it off with fine-grit sandpaper. -
Protective Coat:
Spray all three pots with a clear matte sealant. This protects the acrylic from water damage when you water your plants.
Fill your new animal friends with succulents and enjoy your miniature farm!
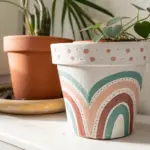
Watermelon Slice Rim Pots
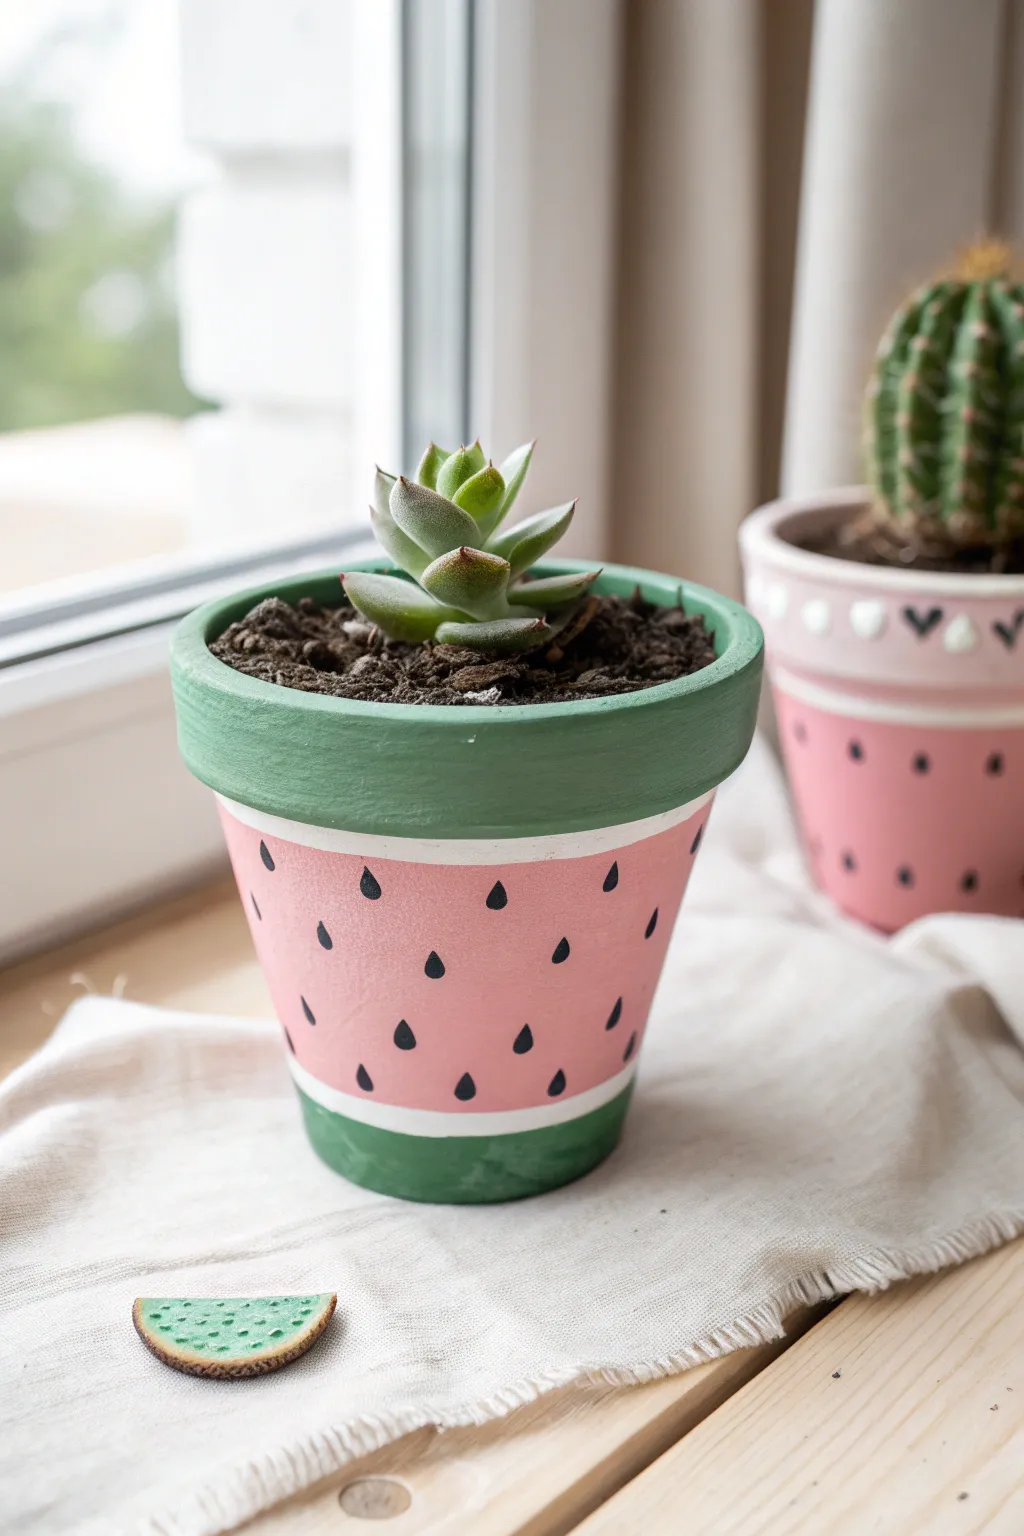
Transform a simple terracotta pot into a refreshing slice of summer with this vibrant watermelon design. By mimicking the rind on the rim and the juicy flesh on the body, you create a playful home for your favorite succulents.
Step-by-Step Tutorial
Materials
- Small terracotta pot (clean and dry)
- Acrylic paints: deep green, light pink (coral pink), white, black
- Medium flat paintbrush
- Small angular or detail paintbrush
- Masking tape or painter’s tape
- Water cup and paper towels
- Clear matte sealant spray (optional)
- Pencil
Step 1: Painting the Rind
-
Prepare the Base:
Ensure your terracotta pot is completely clean and free of dust. If the surface feels rough, give it a very light sand with fine-grit sandpaper to ensure smooth paint application. -
Tape the Rim:
Apply a strip of masking tape directly underneath the pot’s rim. Wrap it all the way around, pressing down firmly on the edge to prevent paint bleeding onto the body section below. -
Apply the Base Green:
Load your medium flat brush with the deep green acrylic paint. Paint the entire rim of the pot with even, horizontal strokes. -
Second Coat:
Let the first layer of green dry for about 10-15 minutes. Apply a second coat to ensure the terracotta color doesn’t show through, creating a solid, rich rind color. -
Paint the Bottom Rind:
Using the same deep green, paint a band around the very bottom edge of the pot, about half an inch high. You can freehand this or use tape again for a crisp line.
Step 2: Creating the Fruit Flesh
-
Paint the Body:
Once the green sections are dry to the touch, switch to your light pink or coral paint. Fill in the large middle section of the pot between the top rim and bottom green stripe. -
Layering Pink:
Terracotta absorbs paint quickly, so you will likely need 2-3 coats of pink. Allow distinct drying time between layers to avoid lifting the previous paint. -
Adding the White Rind:
Using a smaller flat brush and white paint, carefully add a thin white stripe right below the green rim. This mimics the pale inner rind of a real watermelon. -
Bottom White Stripe:
Repeat the white stripe process at the bottom, painting a thin line right above the bottom green band. It acts as a separator between the rind and the pink fruit. -
Clean Up Lines:
If your white lines look a bit shaky, go back in with the pink (or adjacent green) and a tiny detail brush to tidy up the edges.
Uneven Lines?
If your white stripe keeps getting messy, use a thin strip of washi tape as a guide. It’s less sticky than masking tape and won’t peel up your base layers.
Step 3: Adding the Seeds
-
Draft the Placement:
Lightly sketch the position of your seeds using a pencil directly on the dry pink paint. Aim for a randomized, scattered pattern rather than perfect rows. -
Painting Teardrops:
Dip a fine detail brush into black acrylic paint. Carefully paint over your pencil marks, creating small teardrop shapes with the point facing upward. -
Final Touches:
Check the pot from all angles to ensure the seeds are evenly distributed. Add a few more small seeds near the edges if any areas look too empty. -
Seal the Pot:
Once everything is completely dry (I prefer to wait a few hours or overnight), spray the entire pot with a clear matte sealant. This protects the paint from water damage when you water your plant.
Seed Pro-Tip
Instead of a brush, use the tip of a black permanent marker for the seeds. It offers way more control and dries instantly, making the detail work much faster.
Now you have a refreshing, fruity planter ready to be filled with your favorite succulent


What Really Happens Inside the Kiln
Learn how time and temperature work together inside the kiln to transform clay into durable ceramic.
Strawberry Seeded Pots
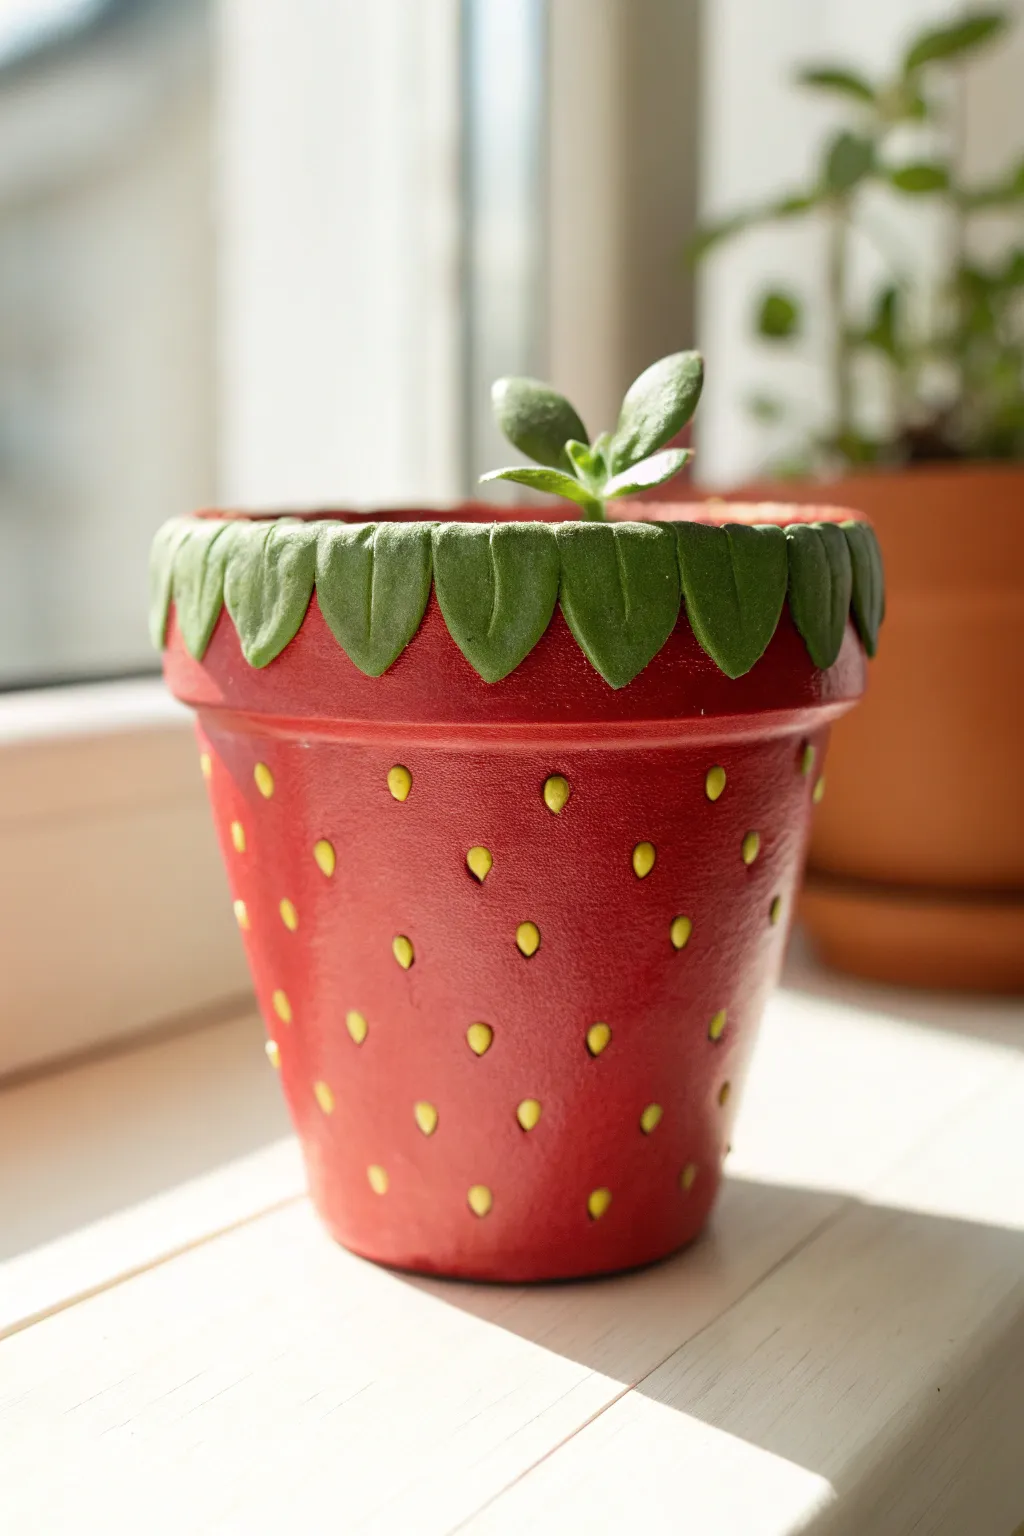
Transform a plain terra cotta pot into a juicy summer delight with this charming strawberry design. Featuring 3D clay leaves along the rim and delicate yellow seeds, this planter adds a pop of playful color to any windowsill garden.
Step-by-Step Guide
Materials
- Small terra cotta pot (approx. 4-inch)
- Air-dry modeling clay
- Acrylic paint: Bright red, leaf green, sunny yellow
- Paintbrushes: Large flat brush, small detail brush
- Water and paper towels
- Clear acrylic sealer (matte or satin)
- Clay sculpting tool or butter knife
Step 1: Sculpting the Leaf Rim
-
Prep the clay:
Pinch off a small amount of air-dry clay and knead it in your hands until it becomes pliable and smooth. -
Form the leaves:
Roll small balls of clay, roughly the size of a marble. Flatten each ball into a teardrop or petal shape to create individual strawberry leaves. -
Attach to the rim:
Press the wide end of each clay leaf over the top rim of the pot, letting the pointed end hang down onto the pot’s body. I like to use a tiny dab of water on the back of the clay to help it adhere better. -
Texture the leaves:
Using a clay tool or the back of a knife, gently press a central vein line down the middle of each leaf for added realism. -
Complete the circle:
Continue adding leaves all the way around the rim until they overlap slightly, creating a continuous leafy crown. -
Allow to dry:
Let the clay dry completely according to the package instructions. This usually takes about 24 hours depending on humidity.
Clay Cracking?
If the clay leaves crack slightly while drying, simply mix a tiny bit of fresh clay with water to make a paste and fill in the cracks before painting.
Step 2: Painting the Base
-
Base coat the body:
Using a flat brush, paint the entire body of the pot below the clay leaves with bright red acrylic paint. -
Paint the rim:
Carefully paint the clay leaves green. Take your time near the red paint to keep the edges crisp. -
Second coat:
Apply a second coat of both red and green paint to ensure solid, opaque coverage without streaks. -
Dry time:
Allow the paint to fully dry before moving on to the details.
Pro Tip: Better Adhesion
Before attaching the clay, rough up the terra cotta rim slightly with sandpaper. The textured surface gives the clay something to grip onto securely.
Step 3: Adding Details
-
Create the seeds:
Dip a fine detail brush or the handle end of a paintbrush into yellow paint. -
Dot the pot:
Gently press yellow teardrop shapes onto the red section. To make them look like real sunken seeds, press slightly harder at the top and lift off quickly at the bottom. -
Shadowing the seeds:
For extra depth, mix a tiny drop of brown into your red paint. Paint a tiny ‘c’ shape shadow underneath each yellow seed once they are dry. -
Highlight the leaves:
Dry brush a lighter shade of green very lightly over the raised veins of the clay leaves to make the texture pop. -
Seal the deal:
Apply a clear acrylic sealer over the entire pot, inside and out. This protects your artwork from water damage when you water your plant.
Fill your new strawberry pot with a succulent or a small herb to complete the look
Citrus Segment Color-Block Pots
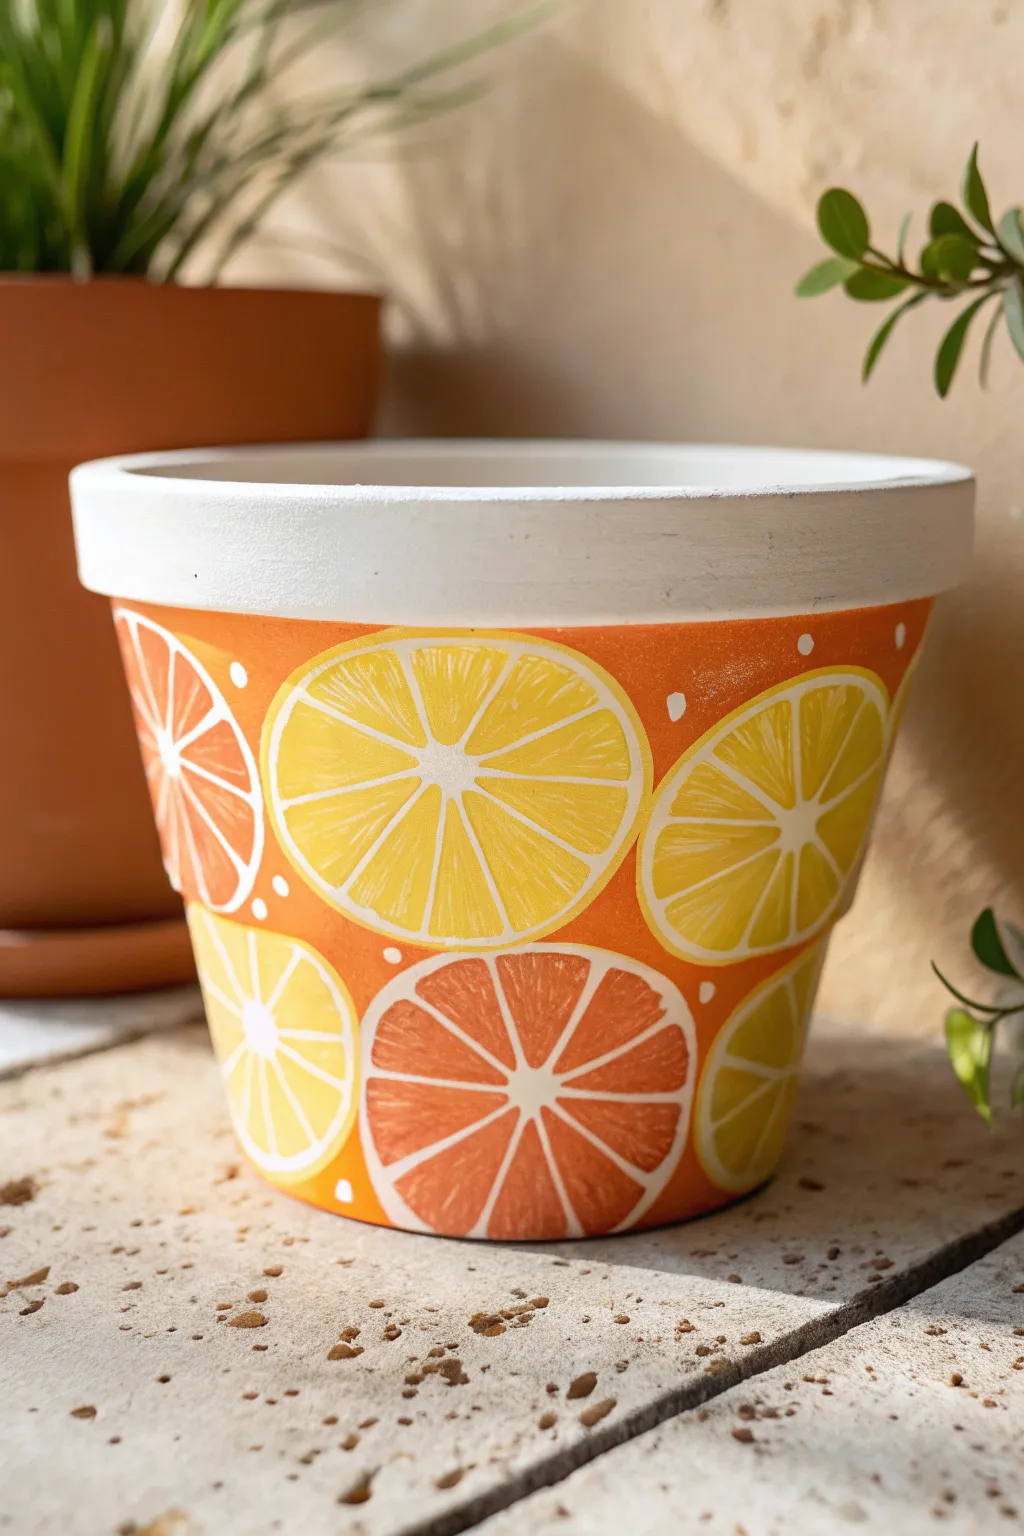
Bring a burst of everlasting sunshine to your plant collection with this refreshing citrus-themed planter. Featuring vibrant orange, lemon, and blood orange slices against a warm terracotta backdrop, this hand-painted design adds a juicy pop of color to any shelf.
Detailed Instructions
Materials
- Terracotta pot (standard size)
- White acrylic paint (heavy body or multi-surface)
- Acrylic paints: Bright yellow, Tangerine orange, Deep red-orange
- Flat shader brush (medium size)
- Round detail brush (size 1 or 2)
- Pencil
- Palette or paper plate
- Water cup and paper towels
- Clear matte or satin sealant spray
Step 1: Base Preparation
-
Clean the pot:
Start by ensuring your terracotta pot is completely clean and dry. Wipe away any dust with a damp cloth and let it air dry so the paint adheres properly. -
Paint the rim:
Using a flat shader brush, apply a coat of white acrylic paint to the thick rim of the pot. You will likely need two to three coats to get a solid, opaque white finish. Allow each coat to dry fully before adding the next. -
Paint the background:
Paint the body of the pot below the rim with a bright tangerine orange paint. This creates a warm, cohesive base for the fruit slices. Apply two coats for even coverage.
Uneven Segments?
Don’t stress if your fruit segments act symmetrical. Real citrus slices are rarely perfect! Slightly wonky lines actually make the painted fruit look more organic and natural.
Step 2: Mapping the Fruit
-
Sketch the circles:
Once the base coat is bone dry, use a pencil to lightly sketch various circles all around the pot. Draw some large circles and some half-circles getting ‘cut off’ by the top or bottom edges to create a natural pattern. -
Divide into segments:
Find the center of each circle. Lightly draw lines radiating outward like wheel spokes or a pizza, dividing the circle into about 8 to 10 triangular segments. Don’t worry about them being perfectly equal; slight variation looks more organic.
Use a Template
To get perfectly round fruit shapes, trace the bottom of a small cup, a spice jar, or a bottle cap directly onto the pot before painting the segments.
Step 3: Painting the Slices
-
Fill the lemon slices:
Choose a few circles to be lemons. Mix a bright yellow paint and use your round brush to fill in the triangular segments, leaving a thin gap between them (where the pith lines will be) and a border around the outer edge. -
Paint the orange slices:
For the standard orange slices, use a slightly lighter or darker orange than your background color to create contrast. Fill in those segments similarly, being careful to leave the background color showing for the ‘pith’ lines. -
Create blood oranges:
Select a remaining few circles for variety. Mix your deep red-orange paint and fill these segments. This darker tone adds wonderful depth to the overall design. -
Refine the rind:
Using your detail brush and the respective fruit color (yellow for lemon, etc.), paint a thin ring around the outside edge of each fruit slice. This defines the colored rind separate from the white pith.
Step 4: Adding Details
-
Add white highlights:
This is the crucial step for realism. Take your finest brush with white paint. If your background lines got messy, re-draw the thin white lines separating the fruit segments. -
Texture the pulp:
Mix a tiny amount of white with your fruit colors to make a pastel version. Lightly streak faint, curved lines inside the juicy part of each segment to mimic pulp texture. -
Add floating seeds:
Dip the very tip of your small brush or the back end of the brush in white paint. Dot tiny ‘seeds’ or juice droplets in the empty orange spaces between the big fruit slices to fill the gaps. -
Clean up edges:
Look closely at the junction where the white rim meets the painted body. If the orange paint smeared onto the white rim, touch it up with fresh white paint for a crisp line.
Step 5: Finishing Up
-
Dry completely:
Let the pot sit for at least an hour or two until all paint layers are completely dry to the touch. -
Seal the work:
Take the pot to a well-ventilated area and spray it with a clear matte or satin sealant. This protects your artwork from water damage when you water your plants.
Now you have a refreshing, summer-ready home for your favorite green friend

TRACK YOUR CERAMIC JOURNEY
Capture glaze tests, firing details, and creative progress—all in one simple printable. Make your projects easier to repeat and improve.
Ice Cream Cone Painted Pots
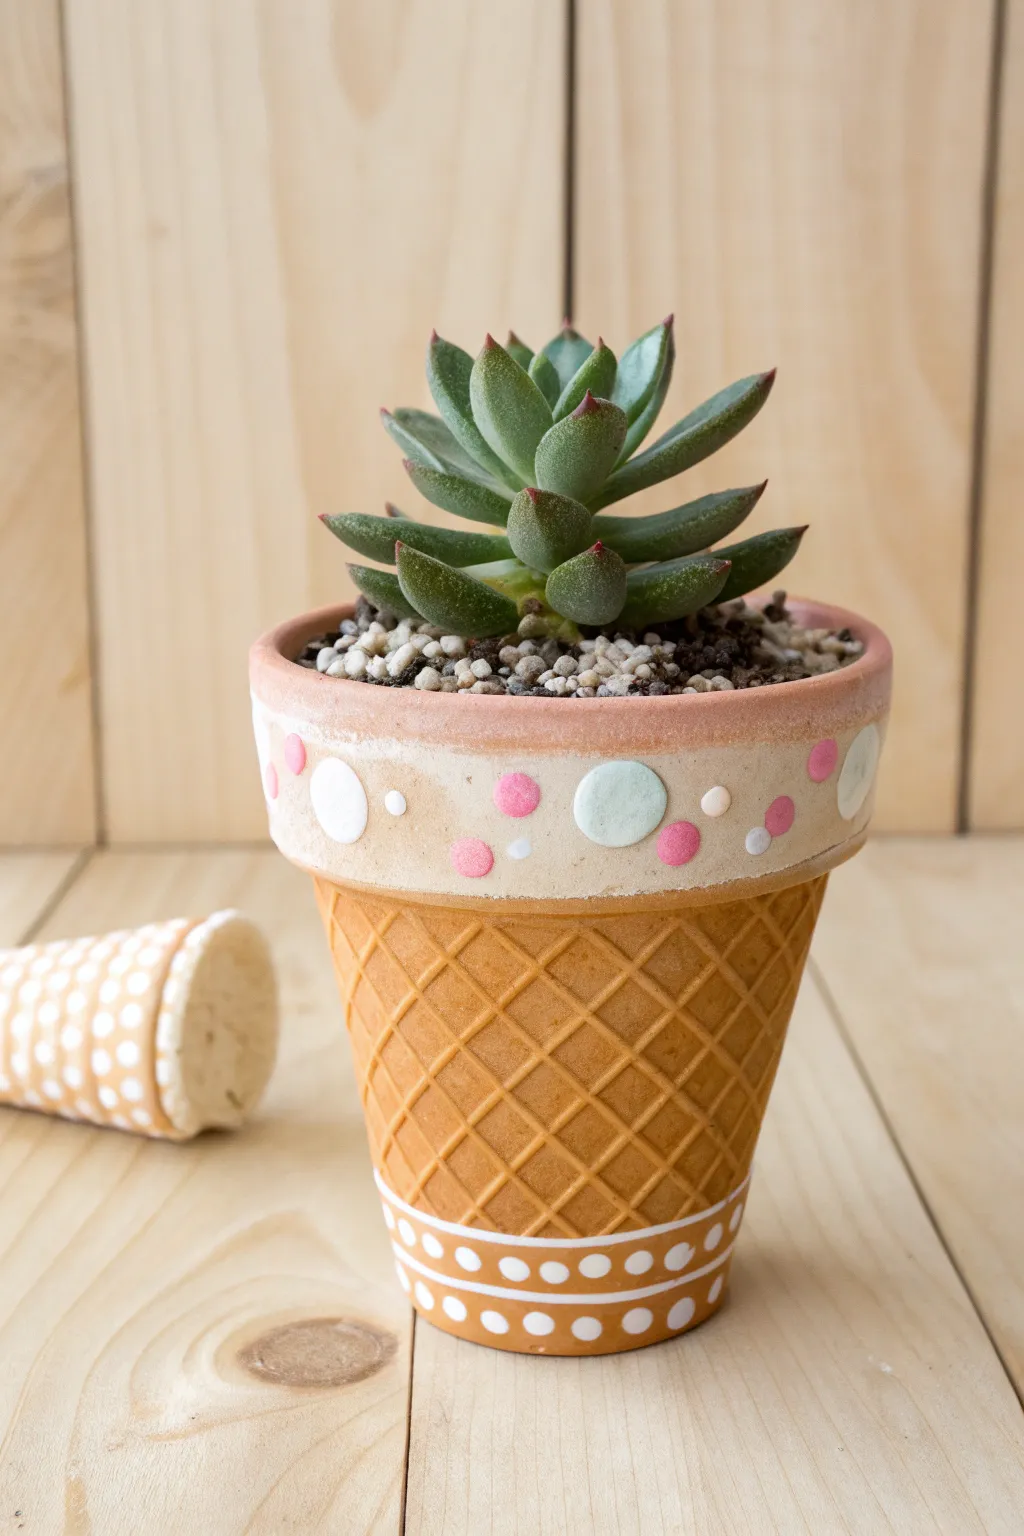
Transform a standard terracotta pot into a delightful summer treat with this ice cream cone design. The textured waffle cone pattern and pastel sprinkle accents make this the perfect home for your favorite rosette-shaped succulent.
Step-by-Step
Materials
- Small terracotta pot (approx. 4-inch)
- Acrylic paints: Ocher/Tan, Darker Brown, Cream/Off-White, Pastel Pink, Pastel Blue
- Fine-point paintbrush
- Flat shader paintbrush
- Small foam pouncer or round sponge applicator
- Washi tape or painter’s tape
- Ruler
- Pencil
- Clear matte sealer spray
Step 1: Creating the Waffle Base
-
Base Coat:
Start by painting the entire body of the pot below the rim with your ocher or tan acrylic paint. You want a warm, baked-dough color for the cone. -
Rim Foundation:
While the base dries, paint the entire rim of the pot with a cream or off-white color. This will act as the creamy ‘ice cream’ or frosting layer sitting on top of the cone. -
Grid Mapping:
Once the tan base is fully dry, use a ruler and pencil to lightly draw a diagonal grid pattern on the pot’s body to mimic a waffle cone texture. -
Painting Lines:
Using a fine-point brush and a darker brown paint (slightly watered down for flow), carefully trace over your pencil grid lines. -
Refining the Grid:
Don’t worry if lines aren’t perfectly straight; real waffle cones have imperfections. Go over any faint sections again to ensure the grid stands out against the tan background.
Uneven Grid Lines?
If painting straight lines on a curved surface is tricky, use thin strips of masking tape as a guide. Paint between the tape lines, peel while wet, and touch up any edges.
Step 2: Adding Sweet Details
-
Bottom Accents:
Paint a thick horizontal stripe of darker brown around the very bottom edge of the pot. -
Decorative Dots:
Inside that bottom brown stripe, use the tip of your brush handle or a very small dotting tool to add a row of white dots for a cute border detail. -
Rim Wash:
Return to the rim. If the cream paint looks streaky, add a second coat now to ensure opaque coverage. -
Pastel Polka Dots:
Using a small round foam pouncer or a medium brush, paint large pastel polka dots (pink, blue, and white) randomly around the cream-colored rim. -
The Cherry on Top:
Paint a thin strip of pink or reddish-brown along the very top edge lip of the pot to frame the design. -
Sealing:
Allow all paint to cure for at least 24 hours. Then, spray the entire pot with a clear matte sealer to protect your artwork from water damage when watering your plant.
Step 3: Bonus: Mini Cone Accessory
-
Prep the Cork:
Grab a champagne cork or a small cone-shaped craft foam piece to create the mini accessory shown in the photo. -
Pattern Matching:
Paint the bottom two-thirds tan and the top third white, matching your pot’s color scheme. -
Mini Details:
Use a toothpick to add tiny white polka dots all over the tan section for a whimsical reverse-pattern look.
Crisp Circles Hack
For perfectly round pastel dots on the rim without buying special tools, dip the eraser end of a new pencil into the paint and stamp it directly onto the surface.
Pop in your favorite succulent and enjoy this adorable, calorie-free summer treat on your windowsill
Sprinkle Confetti Party Pots
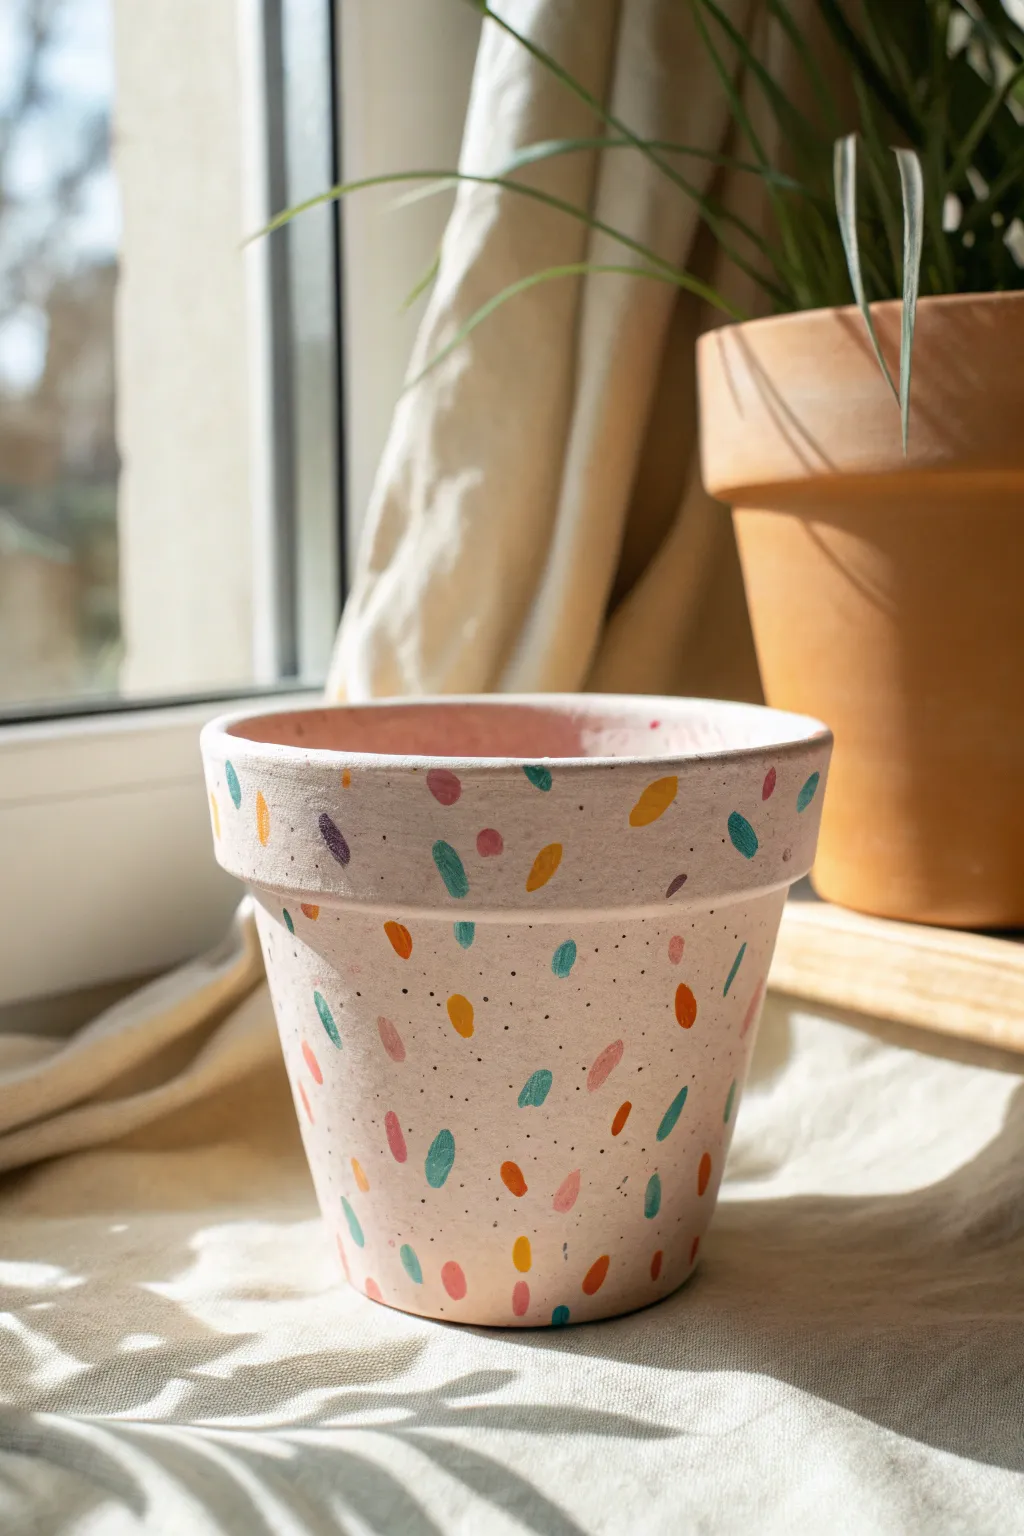
Transform a plain terracotta vessel into a celebration of color with this playful confetti-style design. The soft, creamy base makes the vibrant brushstrokes pop, while tiny speckles add a modern terrazzo-inspired finish.
Step-by-Step Tutorial
Materials
- Terracotta pot (clean and dry)
- Acrylic paint white/cream/slight pink tint (base)
- Acrylic paints in confetti colors (teal, coral, mustard yellow, purple, orange)
- Black acrylic paint
- Small flat brush (approx. size 4-6)
- Small round brush or toothbrush (for speckling)
- Paper plate or palette
- Water cup and paper towels
- Matte or satin sealant spray
Step 1: Prepping the Base
-
Clean the surface:
Ensure your terracotta pot is completely free of dust and dirt. Wipe it down with a damp cloth and let it dry fully before starting. -
Mix the base color:
Create a soft, off-white base color. I like to mix a large dollop of white with just a tiny drop of pink or beige to warm it up, avoiding a stark sterile look. -
Apply the first coat:
Paint the entire exterior of the pot, including the rim and just inside the top edge. Use smooth horizontal strokes to minimize visible brush lines. -
Let it dry:
Allow the first layer to dry completely. Terracotta absorbs paint quickly, so this shouldn’t take too long. -
Apply the second coat:
Add a second layer of your base color to ensure full opacity so the orange clay doesn’t show through. Let this dry thoroughly before moving to the fun part.
Step 2: Painting the Confetti
-
Prepare your palette:
Squeeze dime-sized amounts of your teal, coral, mustard, orange, and purple paints onto your palette. -
Start with the first color:
Dip your small flat brush into the first color (e.g., teal). Paint short, oval-shaped dashes randomly around the pot. -
Vary the angles:
Make sure your dashes are oriented in different directions—some vertical, some diagonal, some horizontal—to create movement. -
Extend to the rim:
Don’t forget to paint dashes on the rim of the pot as well, creating a seamless pattern. -
Clean and switch:
Rinse your brush thoroughly and switch to the next color (e.g., coral). Fill in the empty spaces with similar oval strokes. -
Continue layering colors:
Repeat this process with the mustard, orange, and purple paints. Aim for an even distribution so no single area looks too heavy with one color. -
Check for gaps:
Step back and look at the pot. If there are large empty spaces of the cream base showing, add a few more confetti dashes to balance it out.
Brush Technique Tip
For perfect confetti shapes, press the flat brush down firmly at the start of the stroke and lift up quickly at the end to create a tapered oval.
Step 3: The Finishing Specs
-
Dilute black paint:
Mix a very small amount of black paint with water until it reaches a fluid, ink-like consistency. -
Load the brush:
Dip your small round brush or a toothbrush into the watery black paint. -
Flick the specks:
Using your finger, gently flick the bristles towards the pot to spray tiny black dots over the surface. These should be subtle, like pepper. -
Dry completely:
Let the confetti dashes and black specks dry for at least an hour. -
Seal the deal:
Ideally outdoors or in a ventilated area, spray the entire pot with a clear matte sealant to protect your design from water damage.
Level Up: Texture
Mix baking soda into your base paint color before applying it. This creates a grainy, ceramic-like texture that mimics actual stoneware.
Your vibrant new pot is ready to bring a daily dose of party energy to your windowsill garden
Big Happy Daisy Pots
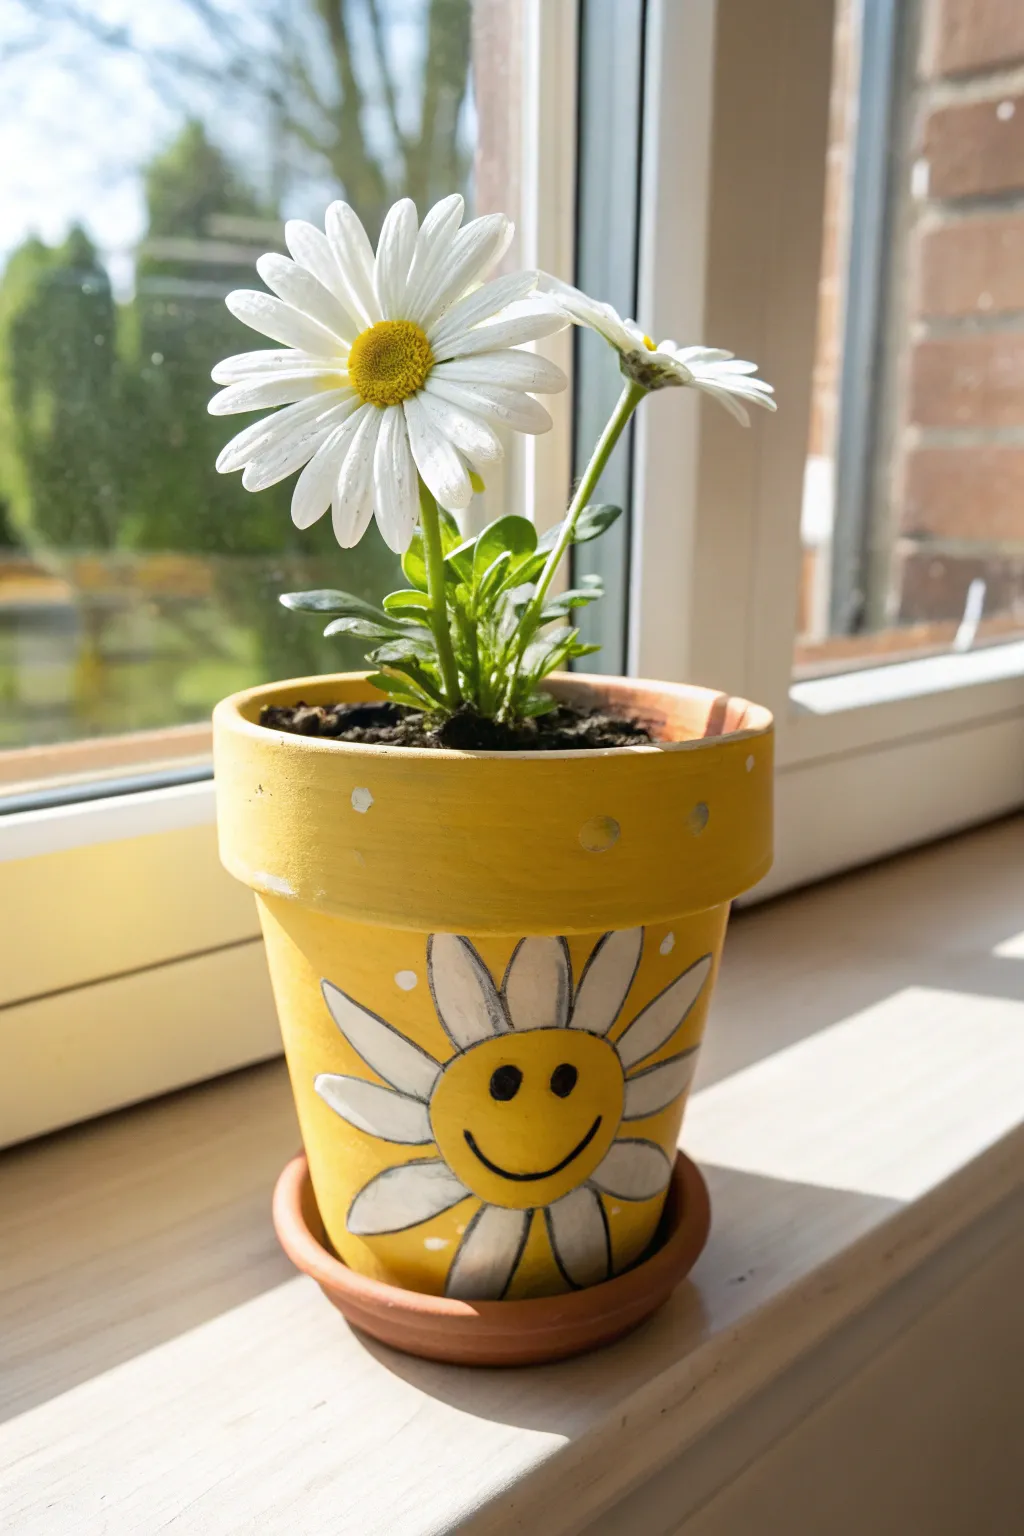
Brighten up your windowsill with this cheerful yellow planter featuring a happy daisy face that’s guaranteed to make you smile. This beginner-friendly project transforms a standard terracotta pot into a sunny home for your favorite blooms.
Step-by-Step Guide
Materials
- Standard terracotta pot (4-6 inch diameter) with saucer
- Yellow acrylic craft paint (matte or satin)
- White acrylic craft paint
- Black acrylic craft paint or black paint pen
- Flat paintbrush (approx. 1 inch)
- Small round paintbrush (size 2 or 4)
- Fine liner brush
- Pencil
- Water cup and paper towels
- Clear acrylic sealer spray (optional but recommended)
Step 1: Base Coat Preparation
-
Clean the surface:
Before starting, wipe down your terracotta pot and saucer with a damp cloth to remove any dust or debris, then let it dry completely so the paint adheres properly. -
Apply the first yellow coat:
Using your flat paintbrush, apply a generous layer of yellow acrylic paint to the entire exterior of the pot, including the rim. Don’t forget to paint the outer edge of the saucer as well. -
Paint the inner rim:
Extend the yellow paint about an inch down the inside of the pot; this ensures that once filled with soil, only the yellow color is visible at the top. -
Let it dry and repeat:
Allow the first coat to dry for about 20 minutes. Apply a second coat—and possibly a third—until you have a solid, opaque yellow finish without streaks.
Color Pop Tip
For a brighter yellow that really pops on terracotta, paint a coat of white primer first before applying your yellow layers.
Step 2: Sketching the Design
-
Position the center:
Once the base coat is fully dry to the touch, lightly sketch a large circle in the lower-middle section of the pot using a pencil. This will be the smiley face center. -
Draw the petals:
Sketch long, oval-shaped petals radiating outward from your center circle. Let them extend up toward the rim and curve slightly with the shape of the pot. -
Sketch the face:
Inside the center circle, lightly draw two small ovals for eyes and a wide, U-shaped smile.
Step 3: Painting the Daisy
-
Fill in the petals:
Use the small round brush and white acrylic paint to fill in the petal shapes you sketched. You might need two layers of white to cover the yellow background completely. -
Paint the center face:
Since the background is already yellow, you don’t need to paint the center circle unless you want a slightly different shade. If the yellow base looks good, leave it as is. -
Outline the petals:
Using a fine liner brush and black paint, carefully outline each white petal. Keep your hand steady and try to make the lines relatively thin for a crisp look. -
Outline the center:
Paint a black outline around the central yellow circle to separate it from the white petals. -
Add the facial features:
Using the liner brush or a black paint pen, fill in the two eye ovals and trace over the smile line. I find a paint pen offers a bit more control here for clean edges.
Fixing Streaks
If your yellow paint looks streaky, sand it very lightly with fine-grit sandpaper between dried coats to smooth out the brush textures.
Step 4: Final Touches
-
Create polka dots:
Dip the handle end of a paintbrush into your white paint. Press it gently onto the yellow rim and scattered areas of the background to create perfect little polka dots. -
Add highlights:
Once the black paint on the eyes is dry, add a tiny dot of white to the top corner of each eye to bring the character to life. -
Clean up mistakes:
If any lines are wobbly, wait for the paint to dry and use a small brush with the background yellow color to touch up the edges. -
Seal the pot:
After curing for 24 hours, spray the pot with a clear acrylic sealer to protect your artwork from water damage and fading. -
Pot your plant:
Place your daisy plant or chosen flower into the pot, ensuring the soil level sits just below the painted inner rim.
Place your happy creation in a sunny spot and enjoy the double dose of flower power
Tiny Cherry Print Pots
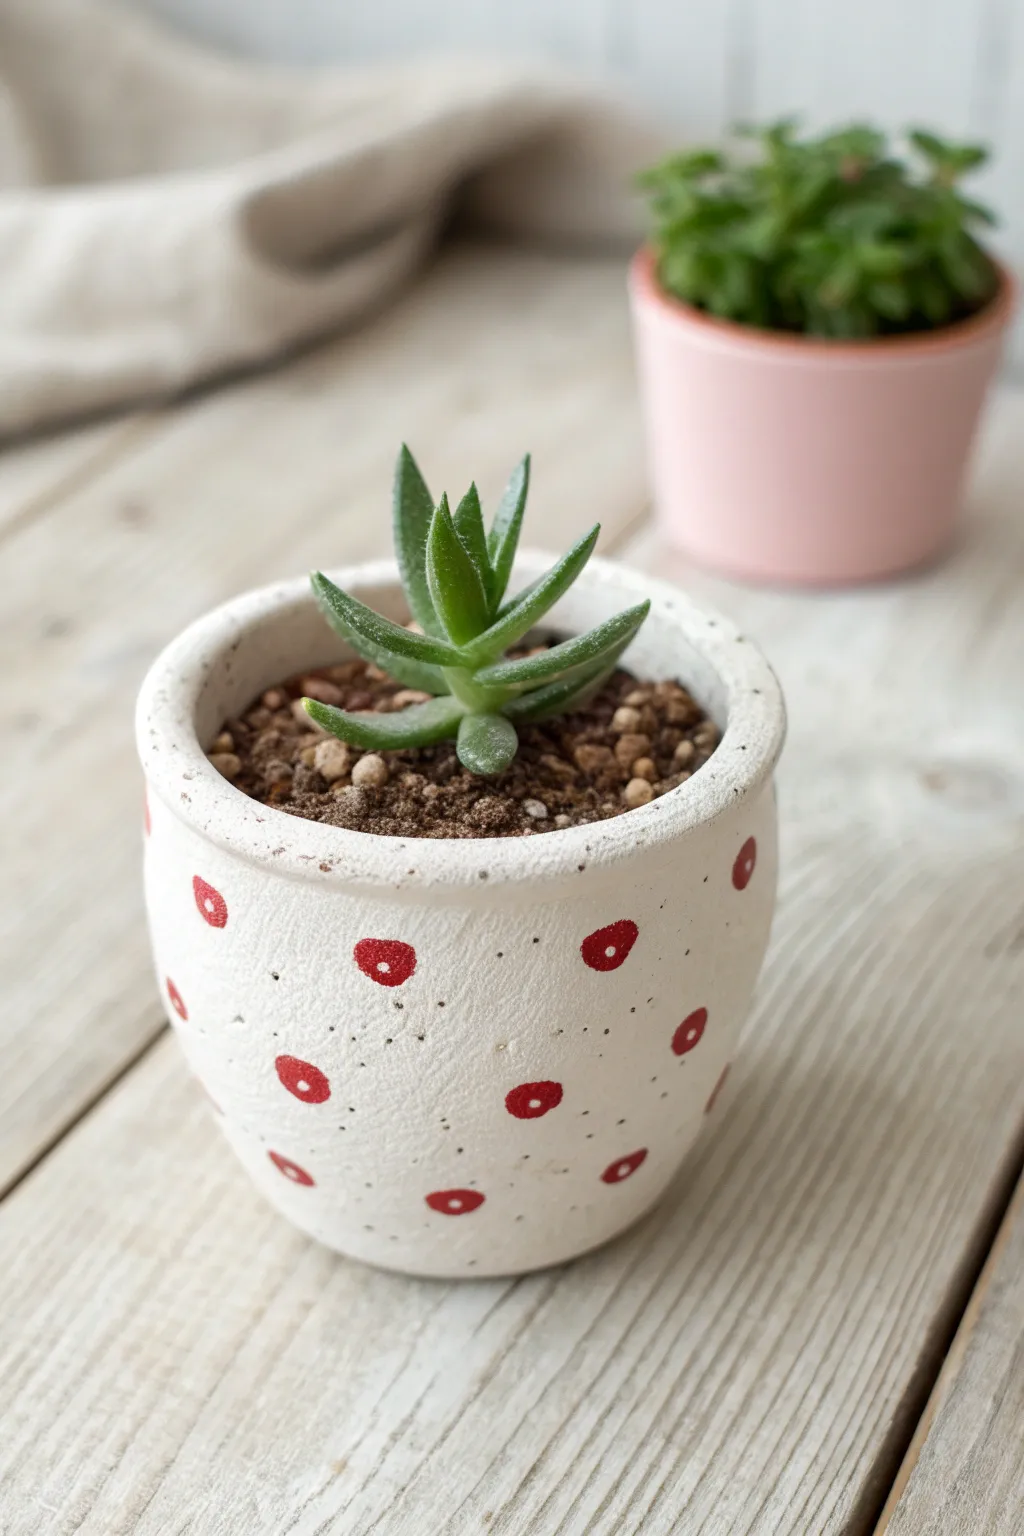
Transform a plain miniature planter into a sweet home for your succulents with this minimalist cherry-inspired design. The charming combination of a textured white base and playful red accents creates a fresh, modern look that perfectly frames small greenery.
Step-by-Step
Materials
- Small terracotta or ceramic pot (2-3 inches diameter)
- White chalk paint or matte acrylic paint
- Bright red acrylic paint
- Small flat paintbrush (size 4 or 6)
- Small round paintbrush (size 0 or 1)
- Toothpick (optional)
- Matte clear sealant spray
- Paper palette or paper plate
- Water cup and paper towels
Step 1: Preparing the Base
-
Clean surface:
Begin by wiping down your pot with a damp cloth to remove any dust or oils. Let it dry completely. -
Base coat application:
Apply a generous coat of white chalk paint to the entire exterior of the pot. Chalk paint is excellent here because it mimics the matte, textured ceramic look in the photo. -
Rim coverage:
Don’t forget to paint the top rim and about half an inch down into the inside of the pot so the terracotta color doesn’t peek through once soil is added. -
Drying time:
Allow this first coat to dry for about 20-30 minutes. The matte finish should look even and chalky. -
Second coat:
Apply a second layer of white paint to ensure opacity. If you want more texture, dab the brush slightly rather than using smooth strokes. -
Full cure:
Let the white base coat dry completely for at least an hour before moving onto the detailed work.
Uneven Circles?
Don’t strive for perfection! The ‘wobbly’ edges and slight transparency in the center of the red dots effectively mimic the look of block printing or stamped clay.
Step 2: Painting the Cherries
-
Mix your red:
Squeeze a small amount of bright red acrylic paint onto your palette. If the red is too translucent, mix in the tiniest drop of white to make it opaque without turning it pink. -
Planning placement:
Visualize a scattered, random pattern. You don’t want the dots to be in perfect rows; aim for an organic look with varying spacing. -
Painting the first shape:
Using your small round brush, paint a small, slightly imperfect circle. These create the ‘cherry’ shape—they shouldn’t be perfect geometric polka dots. -
Adding the center detail:
While the red paint is still wet, you can tap the center gently with a clean dry brush to lift a tiny bit of pigment, creating that subtle ring effect seen in the photo. -
Continuing the pattern:
Rotate the pot and continue adding red shapes. I like to keep about an inch of space between each main motif. -
Varying the sizes:
Keep most shapes roughly the same size, but allow natural variation in how round or oval they look to maintain the hand-painted charm. -
Creating tiny speckles:
Dip a toothpick or the very tip of your detail brush into the red paint. -
Applying micro-dots:
Gently dot the spaces between the larger red circles. These tiny speckles add depth and texture to the overall design. -
Rim details:
Paint a few partial red circles going over the rim or fading off the bottom edge to make the pattern feel continuous. -
Final drying:
Allow the red accents to dry completely to the touch.
Step 3: Finishing Touches
-
Sealing the work:
Take the pot to a well-ventilated area and spray it lightly with a matte clear sealant. This protects the paint from water damage when you water your plants. -
Potting:
Once the sealant is dry, fill with succulent mix and plant your tiny succulent.
Add Dimension
Mix a tiny amount of baking soda into your white base paint. This creates a gritty, stone-like texture that feels more high-end than smooth acrylic.
Your adorable speckled pot is now ready to brighten up any windowsill or desk area
Rainbow Stripe Rim Pots
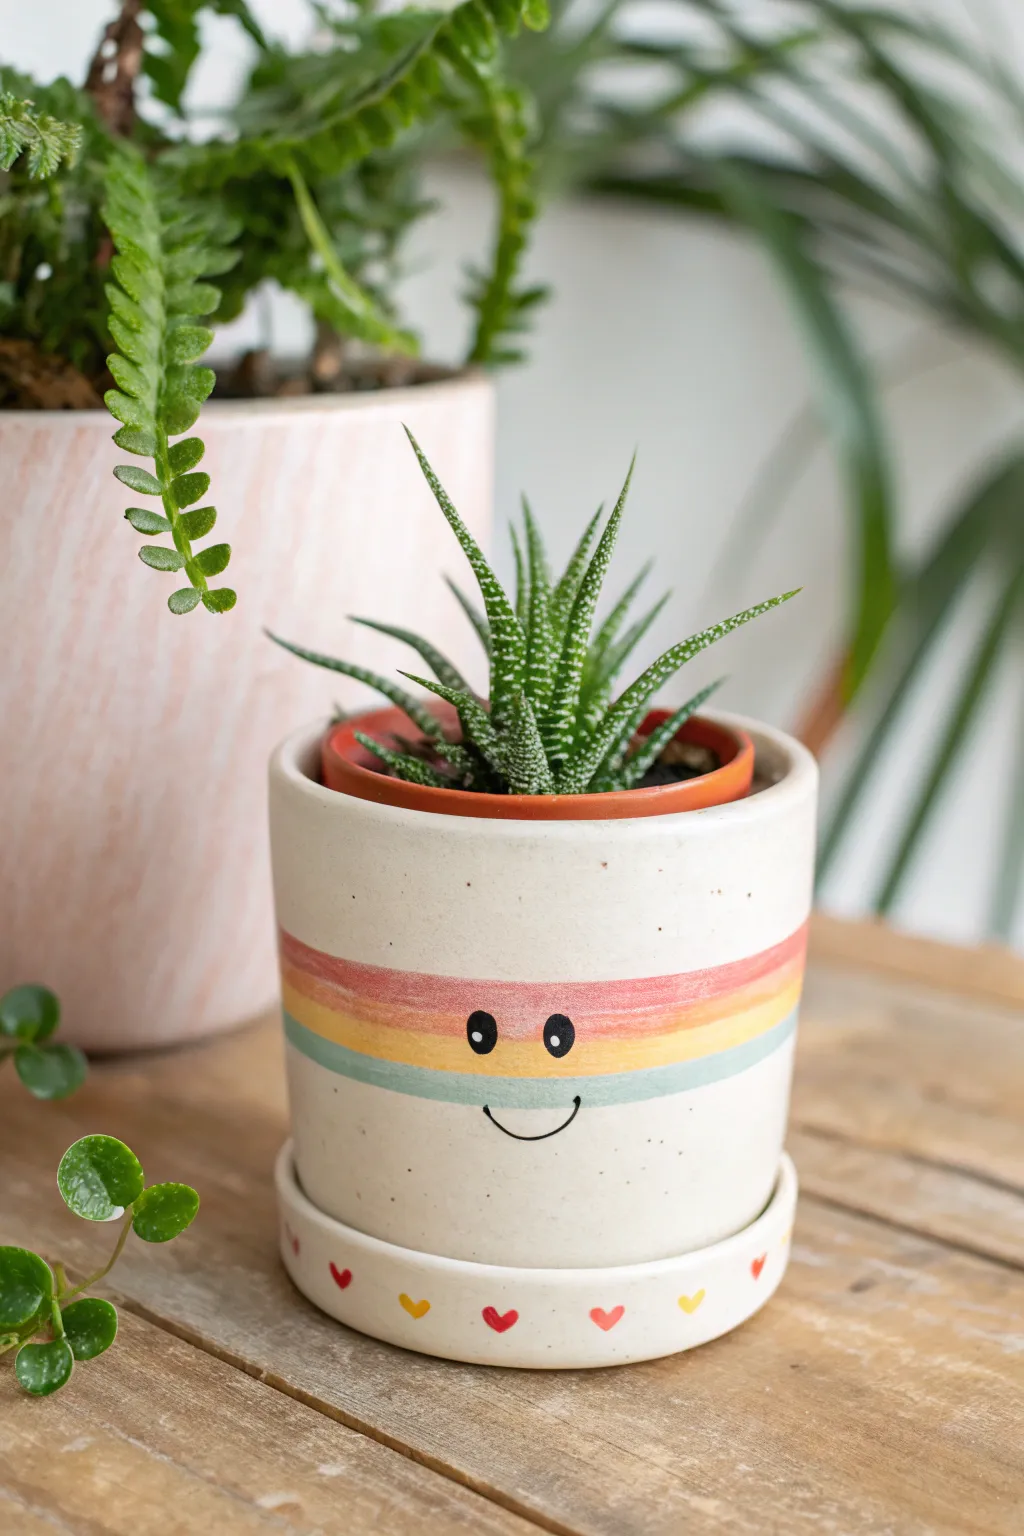
Brighten up your indoor garden with this adorable, minimalist pot that features gentle pastel stripes and a cheerful face. It’s a simple project that transforms a plain ceramic planter into a happy little character perfect for housing small succulents.
How-To Guide
Materials
- Small white ceramic pot with matching saucer
- Acrylic paints (muted coral/pink, butter yellow, mint green, black, red)
- Flat shader paintbrush (size 6 or 8)
- Small round detail brush (size 0 or 1)
- Painter’s tape or masking tape (optional)
- Pencil
- Spray gloss or matte sealer
Step 1: Preparing the Base
-
Clean the surface:
Start by wiping down your ceramic pot and saucer with a damp cloth or rubbing alcohol to remove any dust or oils. Let it dry completely to ensure the paint adheres smoothly. -
Plan your placement:
Look at the pot and decide where you want the face to be. The stripes will sit right in the middle, acting like a little headband for the eyes. You can lightly mark the center point with a pencil if it helps.
Step 2: Painting the Rainbow Stripes
-
Paint the top stripe:
Load your flat brush with the muted coral or pink paint. Carefully paint a horizontal band around the upper-middle section of the pot. I find rotating the pot on a turntable or lazy Susan helps keep the line steady. -
Add the middle stripe:
Once the pink stripe is dry to the touch, rinse your brush and switch to butter yellow. Paint a second band directly underneath the first one, letting them touch just slightly to create a seamless transition. -
Finish with the bottom stripe:
Complete the rainbow band with the mint green paint. Apply this stripe right below the yellow one. Don’t worry if the edges have a slightly hand-painted, uneven look—it adds to the charm. -
Let the stripes cure:
Allow the three colored bands to dry completely before moving on to the face details. This prevents the black paint from bleeding into the wet colors.
Wobbly Lines?
If freehand painting is tricky, place rubber bands around the pot to act as guides for your stripes. Just paint between the bands for straighter edges.
Step 3: Drawing the Face
-
Sketch the features:
Using a pencil very lightly, sketch two oval eyes sitting right on the line between the yellow and green stripes. Sketch a simple curved smile below the green stripe. -
Paint the eyes:
Dip the handle end of a paintbrush into black paint to use as a dotting tool, or use your small round brush. carefully fill in the oval eye shapes. Leave a tiny speck of white unpainted for a highlight, or add a white dot later. -
Paint the smile:
Using your finest detail brush and black paint, trace over your pencil line for the smile. Keep the line thin and delicate.
Pro Detail Tip
For perfectly uniform hearts on the saucer, dip the tip of a toothpick in paint and stamp two dots side-by-side, then drag them down to meet at a point.
Step 4: Decorating the Saucer
-
Paint the hearts:
On the rim of the saucer, we’ll create a pattern of tiny hearts. Use the small round brush to paint small V-shapes or dots that meet to form hearts. -
Alternate colors:
Switch between red and yellow paint for the hearts as you go around the rim. Leave about an inch of space between each heart for a clean, uncluttered look. -
Add speckles (optional):
If you want that speckled ceramic look shown in the photo, dilute a tiny bit of brown or black paint with water. Dip an old toothbrush in it and gently flick the bristles to spray fine specks over the pot.
Step 5: Finishing Touches
-
Final dry time:
Let the entire project sit for at least an hour or two so the paint hardens. -
Seal the deal:
Take the pot outside or to a well-ventilated area and apply a coat of clear spray sealer. This protects your artwork from water damage when you water your plants.
Now you have a cheerful new home for your favorite succulent that will smile back at you every day
Pastel Polka Dot Cuties
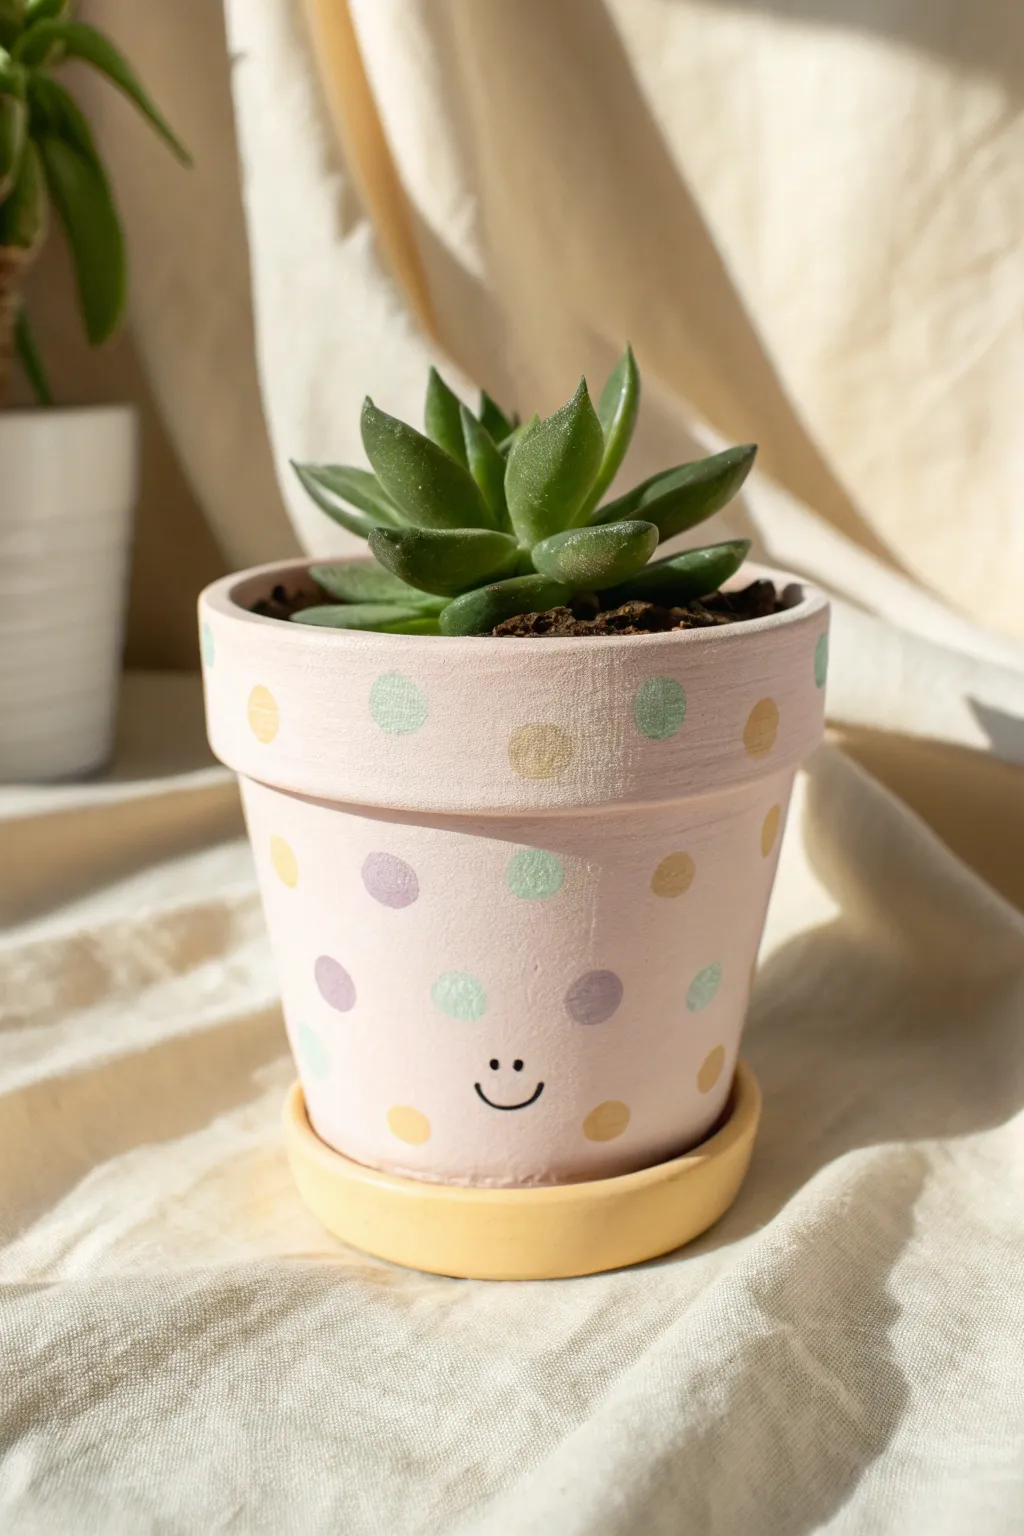
Transform a standard terracotta planter into a ray of sunshine with this cheerful painting project. Featuring a soft chalky pink base, bubbly pastel dots, and an adorable smiley face, this pot is the perfect home for your favorite succulent.
Step-by-Step Guide
Materials
- Small terracotta pot and saucer (4-inch size recommended)
- White gesso or primer
- Chalky finish acrylic paint (pale pink)
- Acrylic paints (lavender, mint green, soft yellow)
- Black fine-tip paint pen or permanent marker
- Flat paintbrush (medium size)
- Foam pouncer or round sponge applicator (small size)
- Small detail brush
- Matte spray sealer or varnish
- Palette or paper plate
Step 1: Base Prep
-
Clean the surface:
Before you begin, wipe down your terracotta pot and saucer with a damp cloth to remove any dust or debris. Let them dry completely, as moisture can prevent the paint from adhering properly. -
Prime the exterior:
Apply a coat of white gesso or primer to the entire outside of the pot and the inside rim. Terracotta is very porous and will soak up your colored paint if you skip this step. -
Let it cure:
Allow the primer to dry fully according to the bottle instructions. This usually takes about 20-30 minutes.
Clean Circle Tip
No foam pouncer? No problem. The flat eraser on the end of a new pencil makes the perfect stamp for small, consistent polka dots.
Step 2: Color Application
-
Paint the saucer:
While the pot dries, paint the entire saucer with your soft yellow acrylic paint. You may need two coats to get an opaque, sunny finish. -
Apply the pink base:
Using a flat paintbrush, cover the primed area of the pot with the pale pink chalky finish paint. Smooth out your brushstrokes as you go. -
Check for coverage:
Let the first pink coat dry. Depending on the brand of paint, you might need a second coat to ensure the terracotta color doesn’t peek through. -
Dry thoroughly:
Ensure the pink base coat is bone dry before moving on to the dots. If it’s tacky, the sponge applicator might lift the base paint.
Uneven Circles?
If your sponge slides and smears a dot, wait for it to dry completely. Touch it up with the base pink color, let dry, and re-stamp over the mistake.
Step 3: Polka Dot Fun
-
Prepare your palette:
Dispense small amounts of your lavender, mint green, and soft yellow paints onto your palette. I like to keep them spaced out so the colors remain crisp. -
Load the pouncer:
Dip your foam pouncer or round sponge into one of the pastel colors. Dab it lightly on the palette first to remove excess paint, which helps prevent globs. -
Stamp the dots:
Press the foam pouncer gently onto the pot to create perfectly round circles. Twist slightly as you lift it off for a clean edge. -
Space them out:
Continue stamping dots around the pot, leaving enough varied space for the other colors. Don’t forget to add a few dots to the rim. -
Switch colors:
Clean your pouncer or switch to a fresh one, then repeat the process with your remaining two pastel colors until the pattern looks balanced. -
Touch ups:
If any dots look a little translucent, use a small detail brush to carefully fill them in with a second layer of paint.
Step 4: The Finishing Smile
-
Plan the face:
Locate a relatively open space near the bottom center of the pot where the face won’t overlap too many dots. -
Draw the features:
Using a black fine-tip paint pen, draw a small, simple ‘U’ shape for the smile. Add two small dots directly above it for the eyes. -
Seal the deal:
Once all paint and marker ink is completely cured (wait at least an hour), spray the entire pot and saucer with a matte sealer. This protects your artwork from water damage when you water your plant.
Pop in a small succulent and enjoy your cheerful new desk accessory
Little Mountain-and-Sky Scene Pots
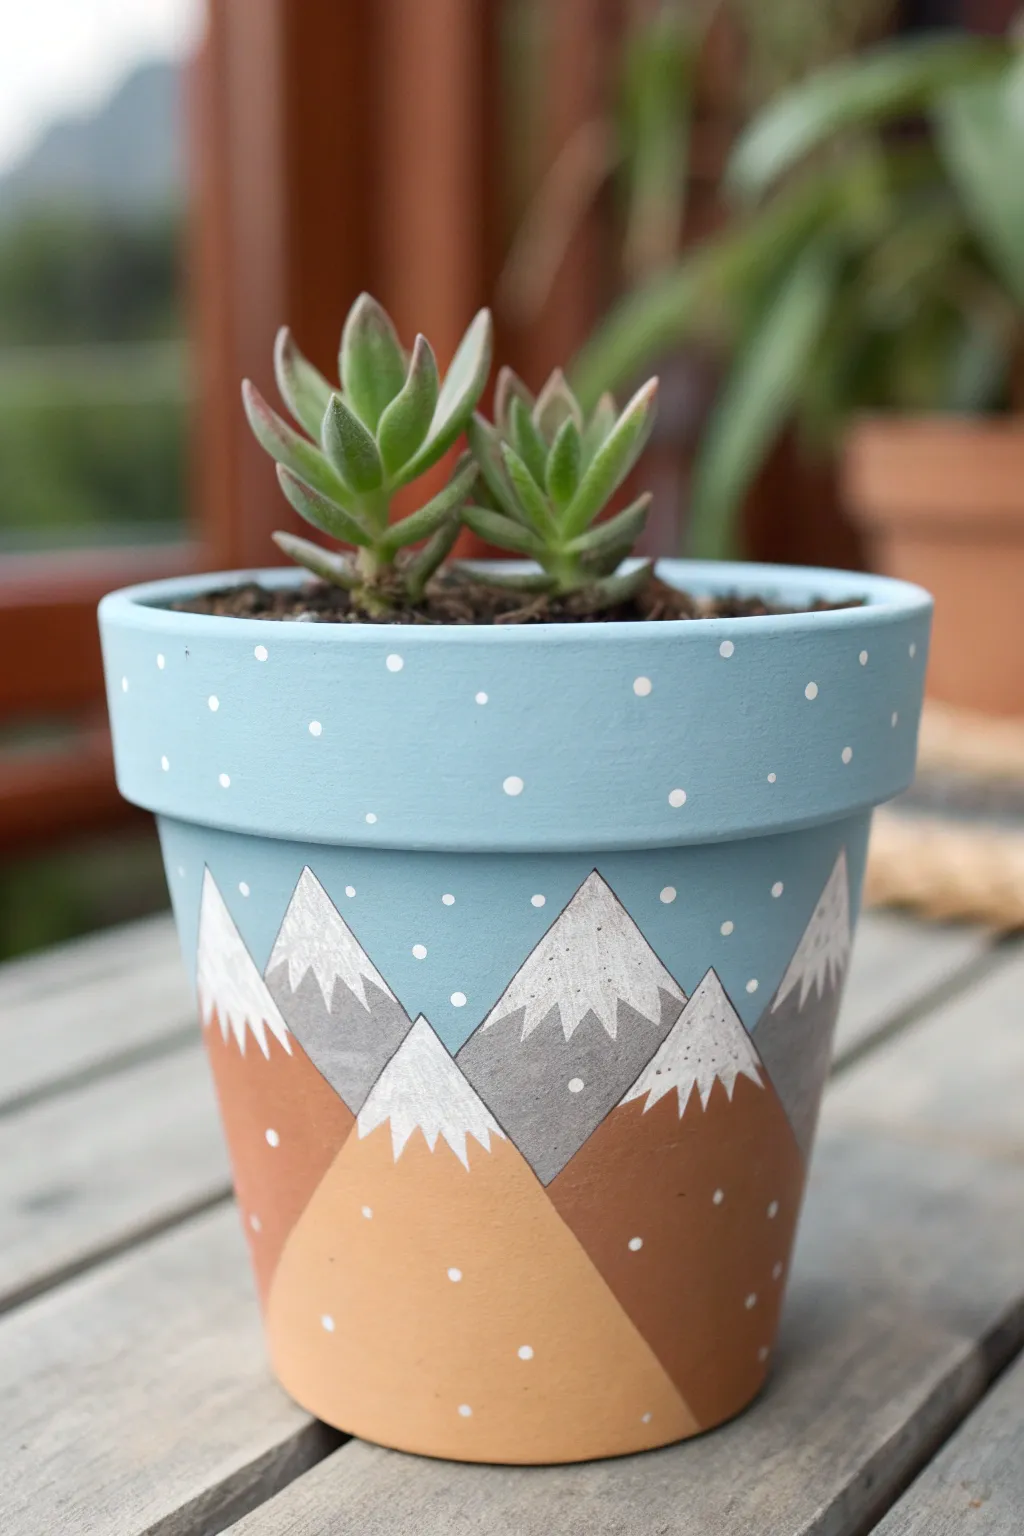
Transform a basic terracotta planter into a cozy alpine landscape with this serene mountain design. Using earthy tones and a soft blue sky, you’ll create a layered range of peaks capped with snow and sprinkled with falling flakes.
How-To Guide
Materials
- Clean terracotta pot (standard size)
- Acrylic paints: Light blue, white, grey, burnt sienna/terracotta, beige/sand
- Flat paintbrushes (medium and small)
- Fine detail paintbrush (for outlines and dots)
- Pencil
- Palette or paper plate
- Water cup and paper towels
- Clear acrylic sealant (matte or satin spray)
Step 1: Base Coat and Sky
-
Prep the pot:
Start by ensuring your terracotta pot is clean, dry, and free of any dust or price sticker residue. Wipe it down with a damp cloth if necessary and let it air dry completely. -
Mix the sky color:
Create a calming light blue by mixing a standard blue acrylic with plenty of white. You want a soft, pastel shade that resembles a clear winter sky. -
Paint the rim:
Using a medium flat brush, apply the light blue paint to the entire rim of the pot. Don’t forget to paint about an inch down into the inside of the rim, just in case the soil level settles later. -
Paint the upper body:
Continue painting the light blue down the body of the pot. You don’t need to go all the way to the bottom—just cover the top half to two-thirds where the sky will be visible. -
Apply a second coat:
Terracotta is porous and soaks up paint quickly. Once the first layer is dry to the touch, apply a second coat of blue to get a solid, opaque finish without streaks.
Step 2: Drafting the Mountains
-
Establish the horizon:
Visualize where your mountain range will sit. Using a pencil, lightly sketch a series of overlapping triangles around the lower half of the pot. -
Vary the peaks:
Make sure to vary the height and width of your triangles. Some should be tall and narrow ‘background’ mountains, while others should be wider and shorter to sit in the foreground. -
Add snow caps:
Lightly sketch a jagged, zig-zag line near the top of each triangle. This defines where the snow ends and the rock begins.
Uneven Coverage?
Terracotta is thirsty! If your paint looks splotchy, don’t just pile on thick blobs. Apply multiple thin layers, letting each one dry fully in between, for the smoothest finish.
Step 3: Painting the Landscape
-
Paint the foreground peak:
Identify your largest, lowest central mountain. Paint the body of this triangle (below the snow line) with a warm beige or sand color to make it pop forward. -
Paint the mid-ground:
Select two or three mountains that flank the center. Paint these bodies with a classic burnt sienna or reddish-brown color, which complements the natural terracotta tones nicely. -
Paint the background:
For the tallest peaks tucked in the back, use a medium grey paint. This change in color value helps add a sense of depth to the scene. -
Fill the snow caps:
Switch to a smaller brush and fill in all the jagged triangular tips with pure white paint. You might need two layers here to ensure the blue or brown underneath doesn’t show through. -
Refine the edges:
At this stage, I like to use a very fine liner brush and a dark grey or black paint thinned slightly with water to outline the mountains. This gives the graphic illustration style a crisp, finished look.
Crisp Lines Hack
Struggling with straight mountain edges? Use pieces of washi tape or painter’s tape to mark out your triangles before painting. Peel it off while paint is slightly wet for sharp lines.
Step 4: Snowy Details and Finishing
-
Start the snowfall:
Dip the handle end of a small paintbrush or a toothpick into white paint. Gently dot the blue sky area to create snowflakes. -
Vary dot placement:
Place some dots randomly over the mountains themselves, particularly on the darker grey and brown sections, to make the scene feel cohesive. -
Add rim details:
Continue the dot pattern onto the rim of the pot. Spacing them out a bit more here keeps the design from looking too cluttered. -
Dry completely:
Allow the entire pot to dry for several hours or overnight. Acrylics dry fast on the surface but need time to cure. -
Seal the artwork:
Take the pot to a well-ventilated area and spray it with a clear matte or satin sealant. This protects your hard work from water damage when you water your plants.
Now your pot is ready to be the perfect home for a hardy succulent or cactus
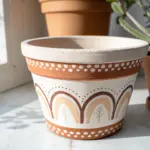
Patchwork Quilt Pattern Pots
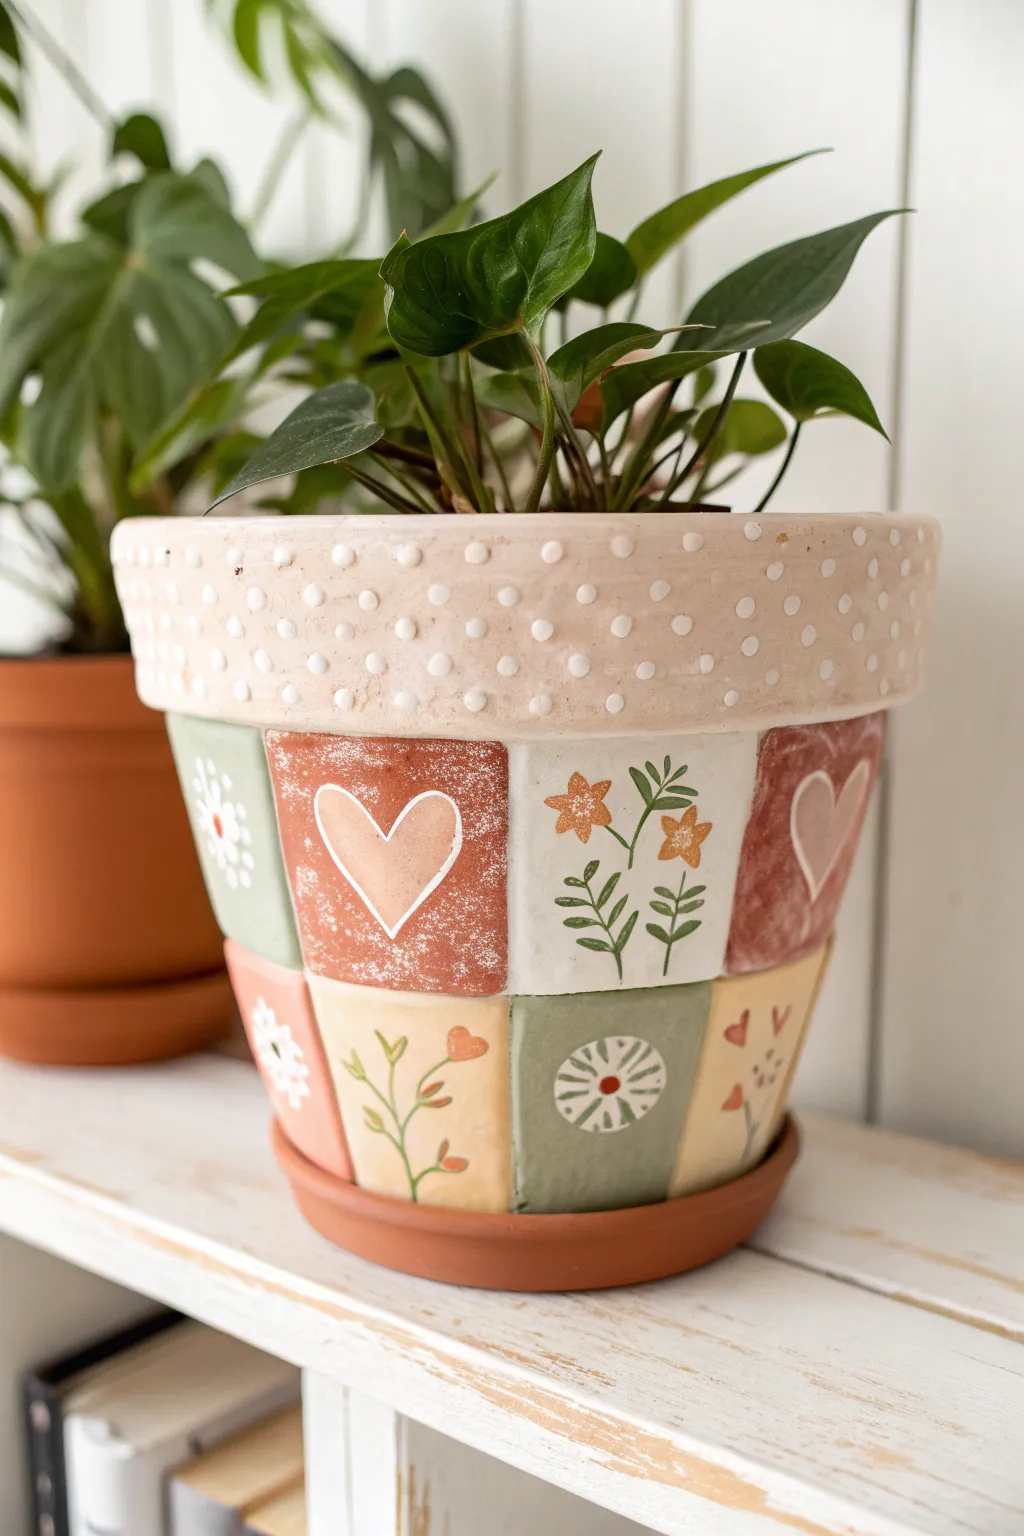
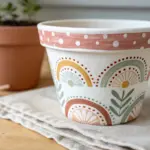
Transform a plain terracotta pot into a charming piece of home decor with this cozy patchwork design. Using a palette of sage, rust, and cream, you’ll create a grid of hand-painted squares featuring sweet folk-art motifs like hearts and botanicals.
Step-by-Step
Materials
- Terracotta pot with saucer
- Acrylic craft paints (sage green, rust/terracotta, cream/off-white, pale yellow)
- White paint marker or fine detail brush
- Flat shader brush (medium width)
- Small round detail brush
- Ruler or measuring tape
- Pencil
- Sealer (matte or satin finish)
- Painter’s tape (optional)
Step 1: Preparation & Base Grid
-
Clean surface:
Begin by wiping down your terracotta pot with a damp cloth to remove any dust or debris. Let it dry completely to ensure the paint adheres well. -
Measure the grid:
Using a flexible measuring tape and pencil, measure the circumference of your pot beneath the rim. Divide this number to create equal-sized squares (about 2-3 inches wide depending on pot size). -
Sketch the lines:
Lightly sketch vertical lines down from the rim to the base. Then, draw horizontal rings around the pot to form a grid of squares or rectangles. Don’t worry if they aren’t perfectly uniform; a little irregularity adds to the handmade quilt look. -
Paint the rim:
Paint the entire rim of the pot with a solid coat of cream or pale beige paint. This separates the detailed body from the top and provides a clean canvas for the dots later. -
Color blocking:
Start filling in your penciled grid squares with your base colors. Alternate between rust, sage green, cream, and pale yellow. -
Check placement:
Try not to place two squares of the exact same color heavily touching each other; imagine you are sewing real fabric scraps together. I find it helpful to paint all the green squares first, then wash the brush and move to the rust ones. -
Second coats:
Acrylics often need a second layer on terracotta. Apply a second coat to your colored squares once the first is dry for opaque, solid coverage.
Step 2: Adding Motifs
-
Sketch designs:
Once the color blocks are fully dry, lightly sketch your motifs into the centers of the squares. Plan for a mix of simple hearts, floral sprigs, and geometric circles. -
Paint hearts:
For the rust or green squares, paint a contrasting heart in the center using cream or pale pink. Keep the shape simple and slightly rustic. -
Paint botanicals:
On the cream or yellow squares, use your green paint and a fine liner brush to create stems and leaves. Add small orange or rust-colored flowers to the tips of the stems. -
Abstract circles:
Create variety by painting a wagon-wheel or sunburst design in one of the green squares using cream paint. A central dot with radiating lines works perfectly here. -
Outline details:
Using a white paint pen or a very fine brush with white paint, add outlines to your hearts to make them pop. You can add stitch marks or simple dots inside the shapes.
Fuzzy Edges?
If your hand-painted squares have messy edges, don’t stress. Go back over the grid lines with a white paint pen to create ‘sashing’ that hides any uneven borders.
Step 3: Finishing Touches
-
Divide the squares:
To emphasize the ‘quilt’ effect, distinct lines are needed between the color blocks. You can leave the natural terracotta showing between shapes if you were careful, or paint thin grid lines in a neutral cream or grey to separate them. -
Rim texture:
Return to the rim. Dip the handle end of a paintbrush into white or cream paint and dot it over the painted rim to create a raised, textured patterns. -
Paint the saucer:
Paint the rim of the saucer in a solid rust color to ground the design. -
Seal the work:
Protect your artwork with a spray or brush-on sealer. A matte finish looks best for this style, keeping the look earthy and natural.
Add Faux Stitching
Use a fine-tip black or brown marker to draw tiny dashes along the grid lines where the squares meet. This mimics thread and sells the patchwork fabric illusion.
Once dry and sealed, your pot is ready to house a leafy green plant that complements those earthy tones