Whenever I’m craving a feel-good project, I reach for pink clay because it instantly makes everything look softer, sweeter, and extra charming. These ideas are all about beginner-friendly shapes, kawaii faces, and that dreamy pastel pink vibe you can totally pull off at your kitchen table.
Tiny Pink Heart Charms
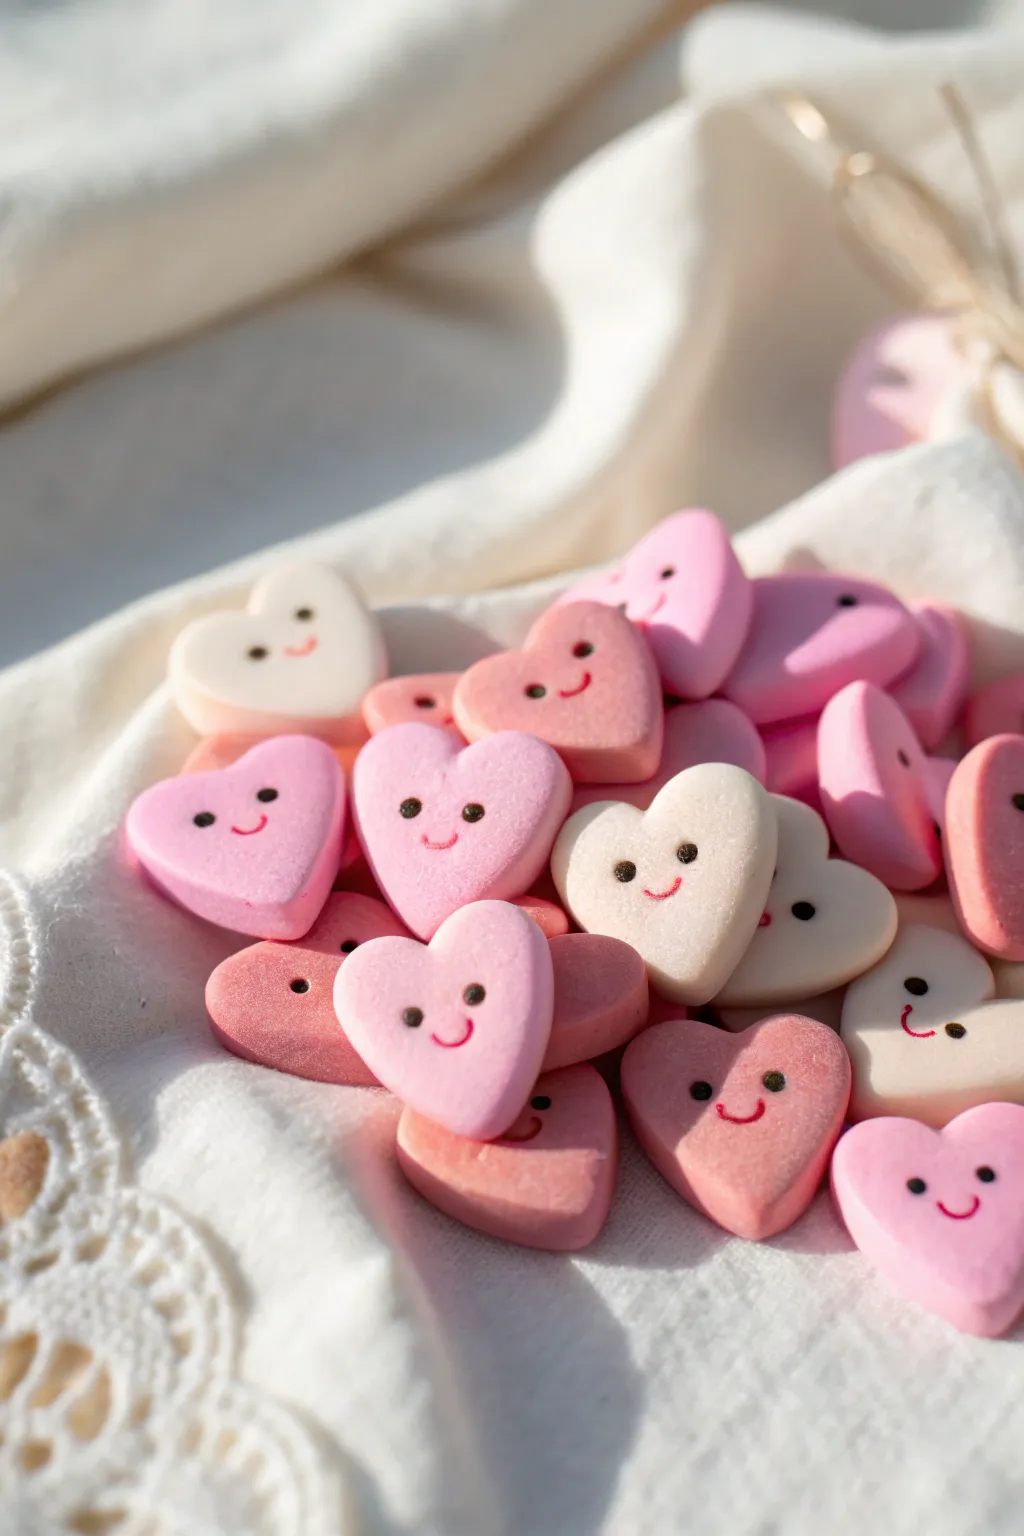
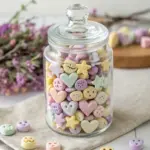
These adorable tiny heart charms are sure to bring a smile to anyone’s face with their soft pastel hues and cheerful expressions. Crafted from polymer clay, they feature a smooth matte finish and delicate hand-painted details that make each one unique.
How-To Guide
Materials
- Polymer clay (white, baby pink, rose pink)
- Small heart-shaped cutter (approx. 1 inch)
- Acrylic rolling pin or pasta machine
- Dotting tool or ball stylus (small size)
- Needle tool
- Black acrylic paint
- Fine detail paintbrush (size 000 or smaller)
- Red or deep pink acrylic paint
- Ceramic tile or baking sheet
- Parchment paper
- Oven for baking
Step 1: Preparing the Clay
-
Condition the clay:
Start by warming up your polymer clay in your hands. Knead the white, baby pink, and rose pink clays separately until they are soft and pliable, which prevents cracking later. -
Mix custom shades:
To achieve the varied palette seen in the photo, mix small amounts of white into your pinks to create different gradients. Aim for at least three distinct shades: a creamy white, a very pale blush, and a soft bubblegum pink. -
Roll out sheets:
Using your acrylic roller or a pasta machine on a medium setting, roll out each color into an even sheet. You want the clay to be about 1/4 inch thick so the hearts feel substantial and chubby.
Eye Spacing Secret
To maximize cuteness, place the eyes lower down on the heart—roughly halfway down the shape—and keep them far apart. This creates a sweet, innocent expression.
Step 2: Shaping the Hearts
-
Cut the shapes:
Place your clay sheets on a smooth surface. Press your small heart cutter firmly into the clay to cut out your shapes. Wiggle slightly before lifting to ensure a clean cut. -
Soften the edges:
After cutting, the edges might be sharp. Gently run your finger along the rim of each heart to smooth and round off the edges for a softer, pillowy look. -
Refine the form:
If the cutter distorted the shape slightly, gently pat the sides to restore the classic heart silhouette. -
Add texture (optional):
For a matte, stone-like texture similar to the photo, you can lightly tap the surface with a piece of sandpaper or a toothbrush, though leaving them smooth is perfectly fine too.
Step 3: Baking
-
Prepare for baking:
Transfer your hearts onto a ceramic tile or a baking sheet lined with parchment paper. Leave a little space between each one to ensure even heat distribution. -
Bake the clay:
Bake the hearts according to the manufacturer’s instructions for your specific brand of clay. Typically, this is around 275°F (135°C) for 15-30 minutes. -
Cool down:
Once baked, turn off the oven and let the hearts cool completely inside or on a wire rack. They must be fully cool before painting.
Make Them Wearable
Insert a small metal eye pin into the top center of the heart before baking. Once baked, secure it with a dab of superglue to turn your hearts into necklace pendants.
Step 4: Adding the Faces
-
Mark the eyes:
Dip your smallest dotting tool or the tip of a toothpick into black acrylic paint. Carefully placing two small dots on each heart for the eyes. Keep them widely spaced for that cute ‘kawaii’ aesthetic. -
Paint the smiles:
Using your finest detail brush and red or deep pink paint, draw a tiny, shallow ‘U’ shape between and slightly below the eyes. I find resting my pinky on the table creates a steady anchor for these tiny lines. -
Let the paint dry:
Allow the painted faces to dry completely. Acrylic paint dries fast, usually within 10-15 minutes.
Step 5: Finishing Touches
-
Clean up mistakes:
If a smile goes wonky, quickly wipe it away with a damp Q-tip before the paint sets, or scratch it off gently with a needle tool once dry. -
Seal the charms (optional):
The image shows a very matte finish. If you want to protect the paint without adding shine, use a matte varnish. Apply a very thin layer and let it cure.
Gather your tiny creations in a small bowl or pouch to admire your handiwork


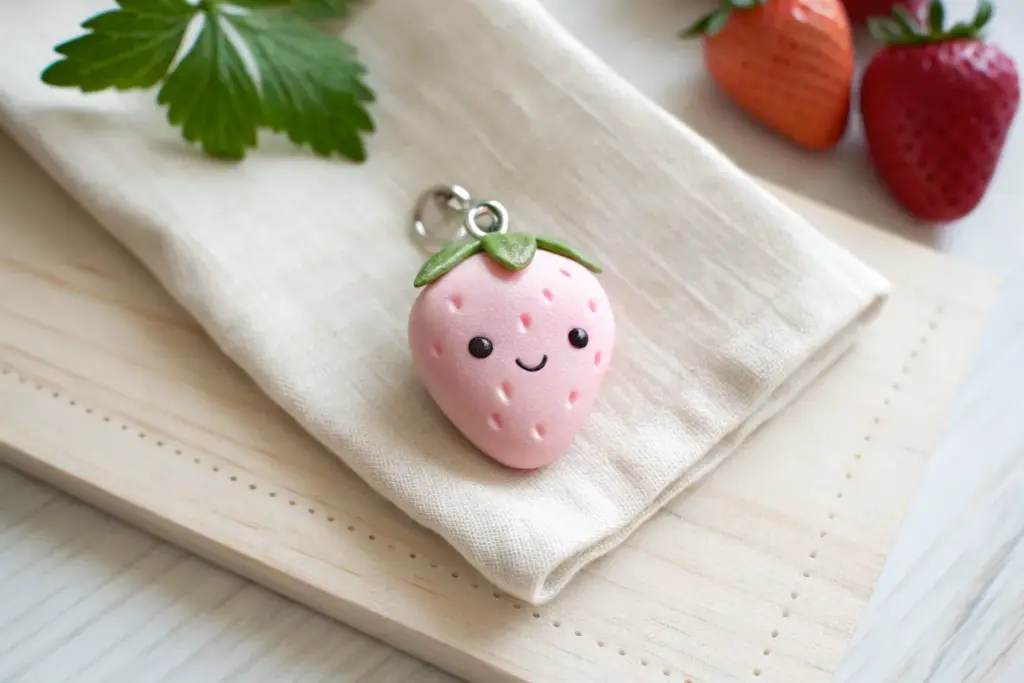
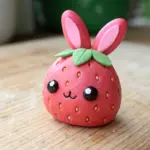
Strawberry Smiley Charms
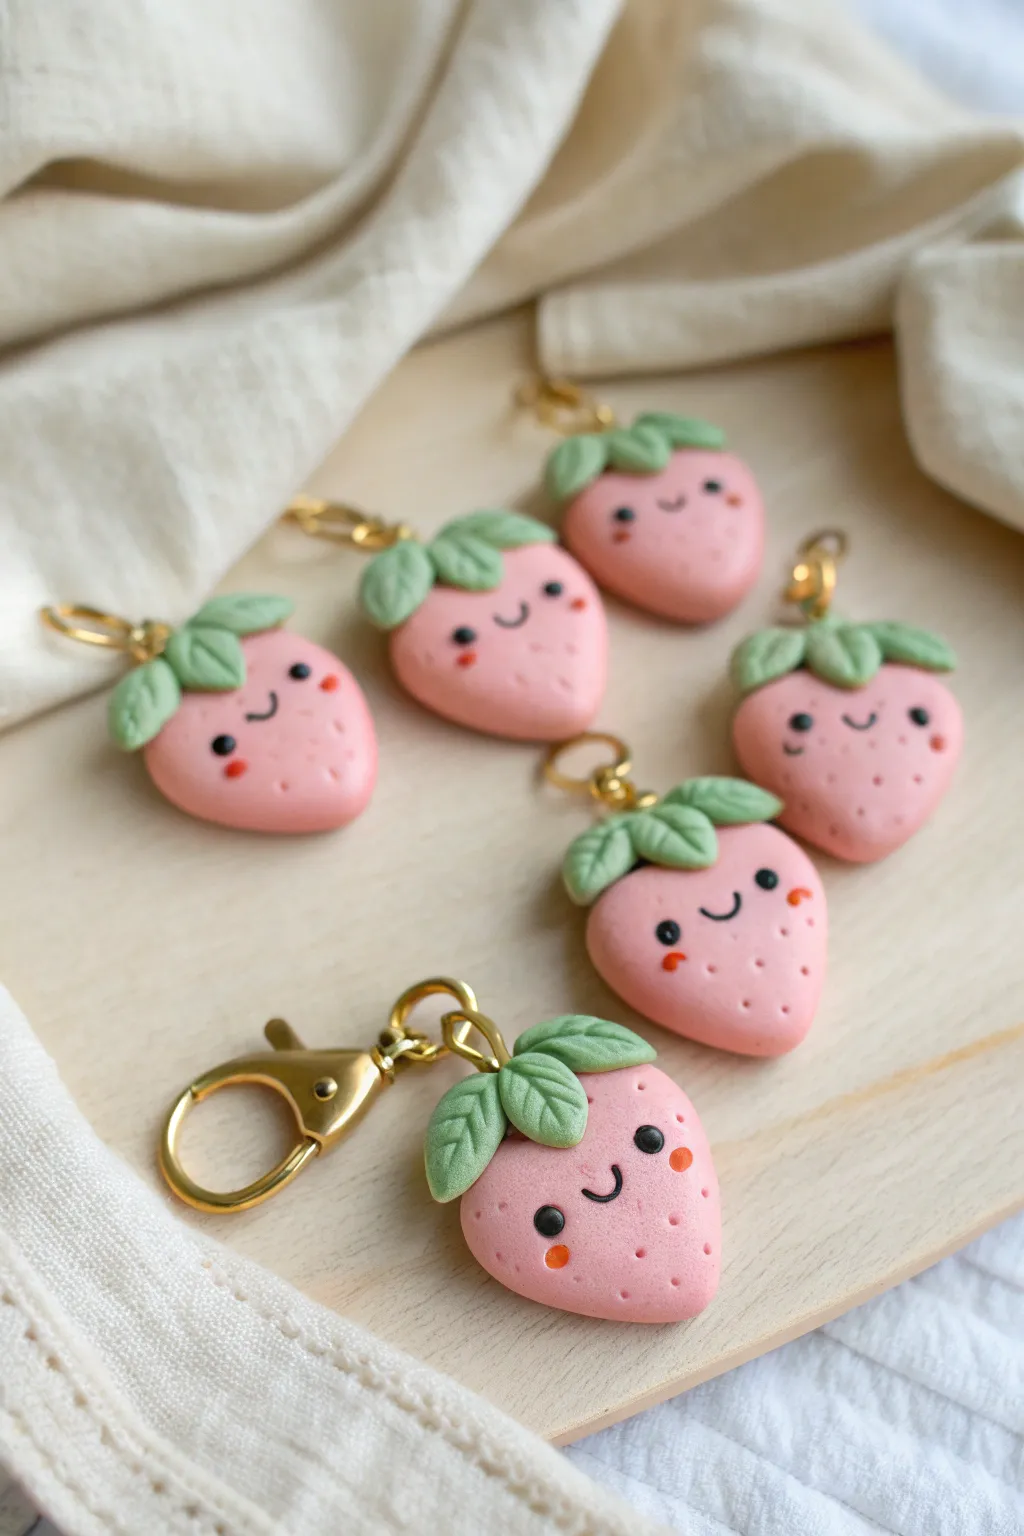
These adorable blushing strawberries are the perfect introduction to polymer clay sculpting, featuring soft pastel pink bodies and cheerful little faces. Finished with gold hardware, they make delightful stitch markers, zipper pulls, or charm bracelets.
Step-by-Step Tutorial
Materials
- Polymer clay in pastel pink, leaf green, and black
- Soft artist pastels (red or dark pink)
- Small paintbrush
- Pointed sculpting tool or toothpick
- Needle tool
- Gold screw-eye pins
- Gold lobster clasps and jump rings
- Gloss glaze (optional)
- Small round cutter or circle stencil (approx. 1 inch)
Step 1: Sculpting the Base
-
Condition the clay:
Begin by kneading your pastel pink clay until it is soft and pliable. This prevents cracks and makes shaping much easier. -
Form the strawberry shape:
Roll a small ball of pink clay, about the size of a large marble, and then gently taper one end to create a soft, rounded triangular strawberry shape. -
Flatten slightly:
Place the shape on your work surface and press down gently with your palm to flatten it into a thick, puffy cookie-like form rather than a fully 3D fruit. -
Add texture:
Using a needle tool or a toothpick, press tiny dots all over the surface of the pink clay to mimic strawberry seeds, leaving the center area smooth for the face.
Step 2: The Leafy Crown
-
Create the leaves:
Condition your green clay and roll three small teardrop shapes for each strawberry. These will become the individual leaves. -
Attach the greenery:
Press the three teardrops onto the top (wider end) of the strawberry, arranging them so they overlap slightly and curve over the top edge. -
Detail the veins:
Use your needle tool or a dull knife tool to press a central vein down the middle of each green leaf for a realistic texture. -
Add the stem:
Roll a tiny cylinder of green clay and place it right in the center where the leaves meet to form the stem. -
Secure the hardware:
Insert a gold screw-eye pin directly through the green stem and into the pink body. I find twisting it in gently helps grip the clay better.
Clean Clay Tip
Keep baby wipes handy! Clean your hands thoroughly between colors, especially before handling the pastel pink, to avoid transferring dark lint or green smudges.
Step 3: Bringing it to Life
-
Roll the eyes:
Take the tiniest pinch of black clay and roll two microscopic balls for the eyes. Place them strategically on the smooth center area of the face. -
Create the smile:
Roll a very thin snake of black clay. Cut a tiny ‘U’ shaped segment and press it gently between the eyes to form a happy smile. -
Add blush:
Shave a small amount of red or dark pink chalk pastel into a powder. Use a small, dry paintbrush to dab rosy cheeks onto the clay just below the eyes. -
Bake the charms:
Preheat your oven according to the polymer clay manufacturer’s instructions (usually around 275°F/135°C). Bake the charms on a dedicated baking sheet for about 15-20 minutes. -
Cool down:
Allow the pieces to cool completely inside the oven or on the tray before handling them to ensure durability.
Make it Sparkle
For a magical touch, brush a tiny amount of pearl mica powder over the pink clay before baking to give the strawberries a shimmer.
Step 4: Assembly
-
Glaze (Optional):
If you want a shiny finish, apply a thin coat of polymer clay gloss glaze to the cooled charm, paying attention to the eyes to make them sparkle. -
Open the jump ring:
Using two pairs of pliers, twist a gold jump ring open (twist sideways, don’t pull apart). -
Connect the clasp:
Loop the open jump ring through the screw-eye pin on the strawberry and attach a gold lobster clasp. -
Final closure:
Twist the jump ring back into a closed position, ensuring the ends meet perfectly flush.
Clip these cheerful berries onto your favorite bag and enjoy your handmade accessory


Blush Bunny Figurines
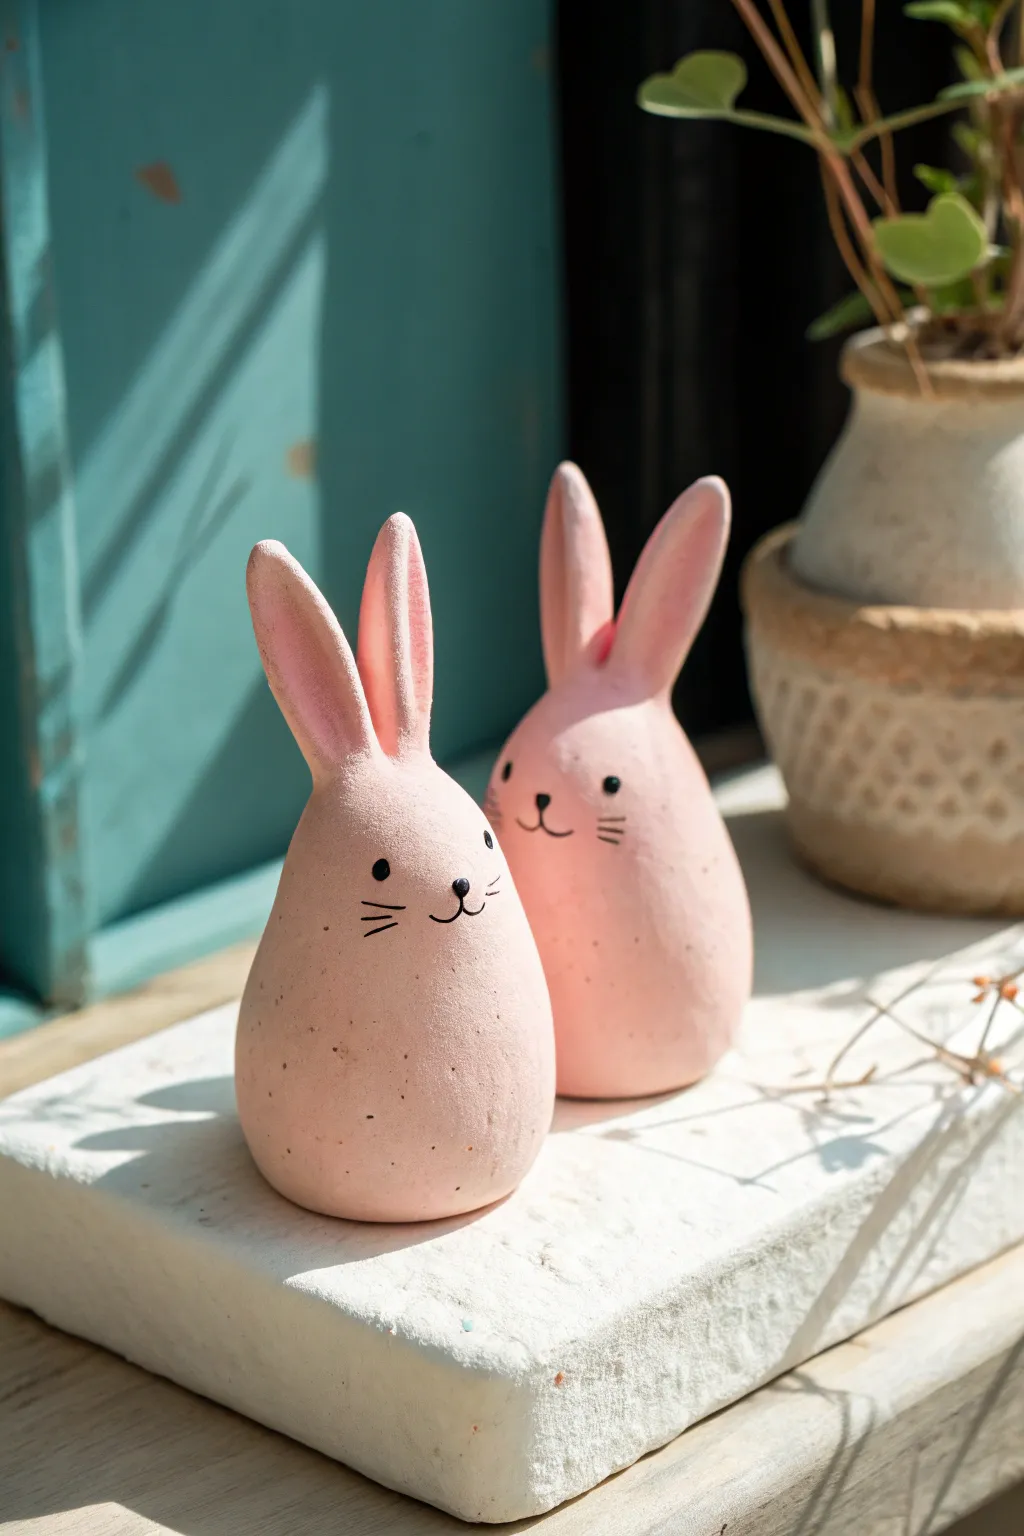
These delightfully minimalist bunnies bring a touch of sweetness to any shelf with their soft pink hue and egg-shaped simplicity. Their smooth, rounded forms and delicate painted faces make them a perfect beginner-friendly clay project that radiates charm.
Step-by-Step Tutorial
Materials
- Polymer clay (white or pre-colored pale pink)
- Acrylic paint (blush pink, black)
- Matte varnish or sealant
- Fine grit sandpaper (400-600 grit)
- Fine-point paintbrush or black technical pen
- Toothbrush or stiff bristle brush
- Aluminum foil (for armature)
- Clay sculpting tools (smoothing tool, needle tool)
- Brown acrylic paint (optional for speckling)
Step 1: Sculpting the Base
-
Create the core:
Start by crumpling a small amount of aluminum foil into a dense, egg-shaped ball. This saves clay and keeps the figurine lightweight. -
Condition the clay:
Take a portion of white or pale pink polymer clay and knead it thoroughly in your hands until it becomes soft, warm, and pliable. -
Cover the core:
Flatten the conditioned clay into a sheet about 1/4 inch thick and wrap it completely around your foil egg. -
Smooth the body:
Roll the clay-covered egg gently between your palms to remove seams and fingerprints. Aim for a shape that is slightly wider at the bottom, tapering gently toward the top like a teardrop. -
Flatten the base:
Tap the bottom of the egg shape firmly against your work surface. This creates a flat base so your bunny will stand upright without wobbling.
Smooth Operator
Before baking, brush your raw clay heavily with cornstarch. It acts like a super-fine sandpaper, letting you smooth out fingerprints effortlessly.
Step 2: Adding the Ears
-
Form the ears:
Roll two smaller ropes of clay, tapering them at both ends. Flatten them slightly to create long, surfboard-like shapes for the ears. -
Attach the ears:
Press the wider end of each ear onto the top of the body. I find using a small blending tool helps to merge the clay seams seamlessly so the ears look like they grew naturally from the head. -
Refine the shape:
Gently pinch and smooth the ears. You can position them straight up for an alert look or tilt one slightly for a curious expression. -
Final smooth:
Give the entire piece a once-over with a fingertip dipped in a tiny bit of baby oil or clay softener to remove any lingering fingerprints. -
Bake:
Bake the figurines according to your polymer clay package instructions. usually around 275°F (135°C) for 15-30 minutes depending on thickness.
Step 3: Painting and Finishing
-
Sand for texture:
Once fully cooled, lightly sand the surface with fine-grit sandpaper. This gives the clay a stone-like matte finish and helps the paint adhere better. -
Apply base color:
Paint the entire bunny with a soft blush pink acrylic paint. You may need two coats for opaque coverage. Let it dry completely between layers. -
Add speckles:
Dilute a tiny drop of brown paint with water. Dip a toothbrush into it, then run your thumb across the bristles to flick tiny speckles onto the bunny for a ceramic effect. -
Paint the features:
Using a very fine detail brush or a black paint pen, carefully dot two small eyes and draw a tiny ‘Y’ shape for the nose and mouth. -
Add whiskers:
Draw three short, horizontal lines on each cheek for whiskers. Keep your hand steady and light for thin, delicate lines. -
Seal the work:
Finish by applying a coat of matte varnish. This protects the paint and unifies the sheen, giving it that high-quality store-bought ceramic look.
Cotton Tail Upgrade
Glue a tiny white pom-pom or a small ball of felt to the back of the dried figurine for a fluffy, three-dimensional tail.
Place your finished bunnies near a sunny window or pant pot to show off their sweet expressions


Pink Piggy Pocket Pal
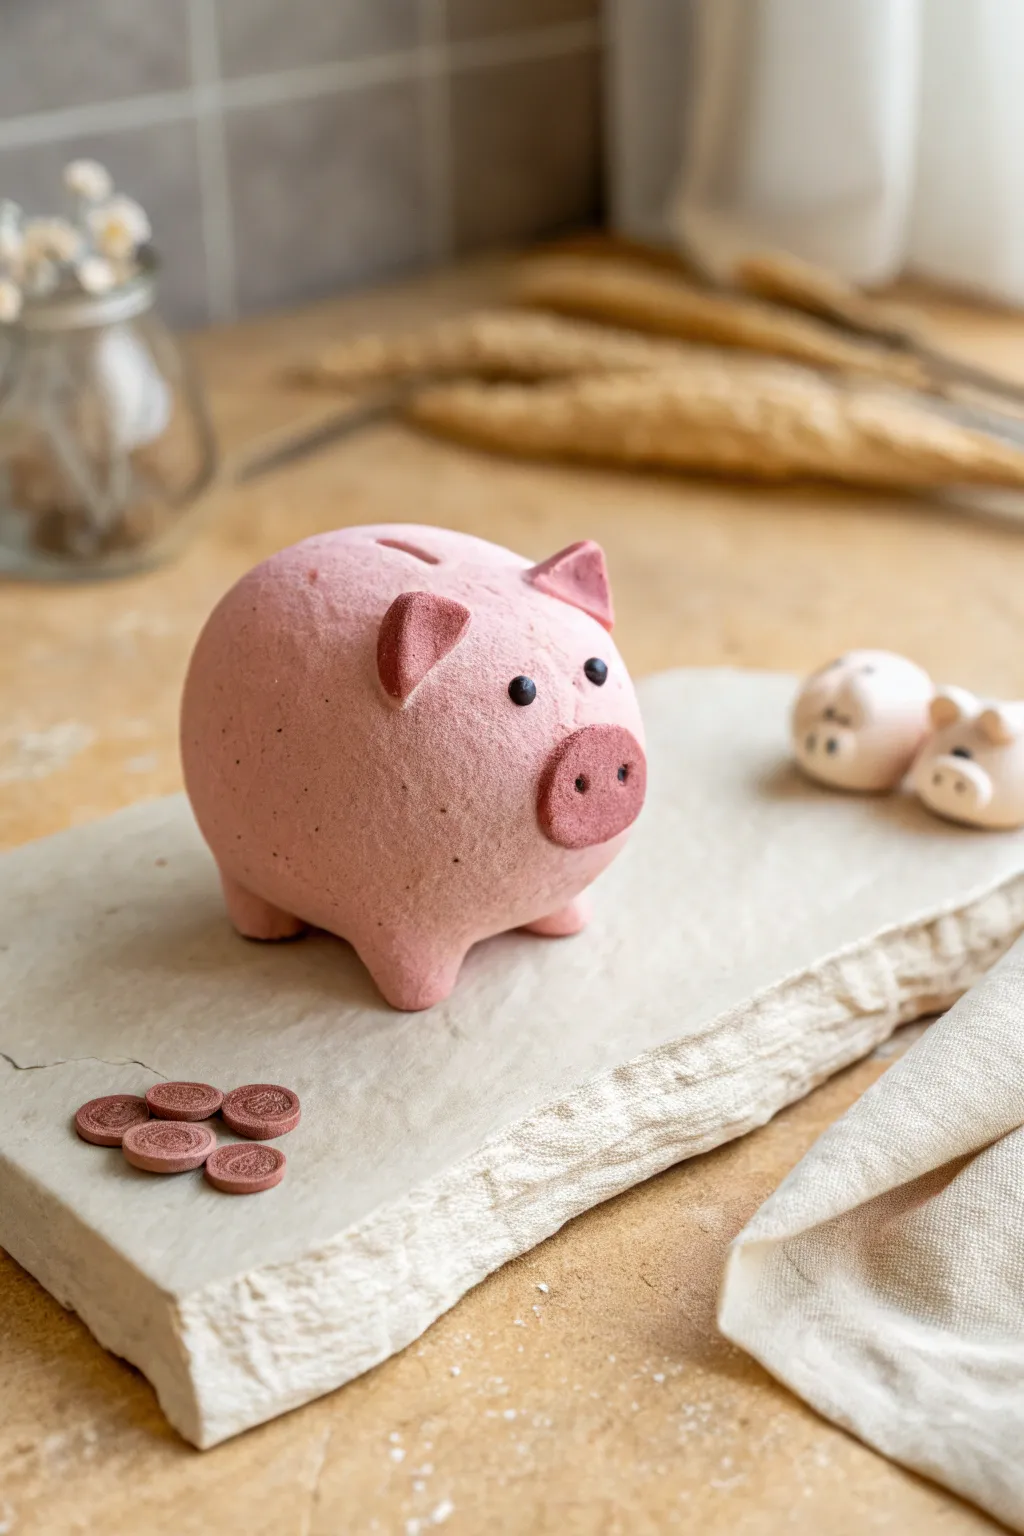
Create an adorable miniature pig figurine with a distinctively rustic, textured finish that looks like classic stoneware. This charming project features a soft pink body, sweet darker accents, and tiny accompanying clay coins for a complete piggy bank vibe.
Detailed Instructions
Materials
- Polymer clay or air-dry clay (light pink)
- Polymer clay (darker rose/dusty pink)
- Black glass beads or black clay (very small)
- Toothbrush or balls of tin foil (for texturing)
- Clay sculpting tools (needle tool, ball stylus)
- Rolling pin
- Circle cutters (very small)
- Blending tool or rubber shaper
- Optional: Pink pastel chalk for shading
Step 1: Shaping the Piggy’s Core
-
Form the Body:
Start by conditioning a substantial amount of the light pink clay until it is soft and pliable. Roll it into a smooth, slightly flattened sphere to create the main body shape. It should look like a chubby egg on its side. -
Pull the Legs:
Instead of attaching separate legs, gently pinch and pull four small nubs directly from the bottom of the body. Shape them into short, stout legs ensuring the piggy stands level on a flat surface. -
Add Texture:
To achieve that signature stone-like look, gently tap the entire surface of the body with an old toothbrush or a crumpled ball of tin foil. Press lightly to poke tiny pores into the clay without deforming the overall shape. -
Carve the Coin Slot:
Using a clay knife or a flat sculpting tool, carve a rectangular slot into the top center of the pig’s back. Smooth the edges of the cut so they look soft and worn rather than sharp.
Step 2: Adding Character Details
-
Create the Ears:
Take two small balls of the light pink clay and shape them into triangles. Using the darker rose clay, create slightly smaller triangles and press them onto the front of the ears for the inner detail. -
Attach the Ears:
Press the ears onto the top of the head, slightly forward of the coin slot. Use a blending tool to seamlessly merge the back of the ears into the head, keeping the front distinction clear. -
Form the Snout:
Roll a small oval of the darker rose clay. Flatten it slightly and press it onto the front center of the face. This creates a cute, contrasting nose. -
Add Snout Details:
Use a small ball stylus or the end of a paintbrush to make two distinct nostrils in the snout. Ensure they are spaced evenly for a symmetrical face. -
Texture the Add-ons:
Don’t forget to lightly texture the ears and snout with your toothbrush or foil tool so they match the rustic finish of the body. -
Place the Eyes:
Press two tiny black glass beads deeply into the clay above the snout. If you don’t have beads, firmly roll tiny bits of black clay and press them in. I find pressing them in slightly deeper gives a sweeter expression.
Uneven Texture?
If the texture looks too uniform or mechanical, try rotating your texturing tool (toothbrush or foil) as you stamp. Varying the pressure helps create a more organic, stone-like surface.
Step 3: The Tiny Currency
-
Prepare Coin Clay:
Mix a small amount of the darker rose clay with a tiny bit of brown or grey to give it an old copper or bronze tone. -
Cut the Coins:
Roll this clay out into a thin sheet. Use a small straw or a makeshift cutter to punch out several small circles. -
Stamp the Coins:
Gently press a textured fabric or a stamp into the surface of the coins to give them a minted appearance. You can simply scratch a symbol into them with a needle tool. -
Arrangement:
Scatter the clay coins near the pig’s feet before baking or drying, or stack a few together.
Make it a Trio
Scale down the proportions to create smaller piglets using lighter shades of pink clay. Group them together for a complete family scene just like in the background of the photo.
Step 4: Finishing Up
-
Final Inspection:
Check the figurine from all angles. Smooth out any unintentional fingerprints, but leave the deliberate texturing. -
Bakery or Drying:
If using polymer clay, bake according to the manufacturer’s instructions (usually around 275°F/130°C for 15-30 minutes). If using air-dry clay, leave it in a dry spot for 24-48 hours. -
Optional Shading:
Once hardened and cool, you can brush a little dry pink pastel dust into the textured crevices to enhance the depth, though the natural texture looks great on its own.
Place your little clay piggy on a shelf or desk for a touch of handmade charm that saves your spare smiles

The Complete Guide to Pottery Troubleshooting
Uncover the most common ceramic mistakes—from cracking clay to failed glazes—and learn how to fix them fast.
Cherry Blossom Trinket Dish
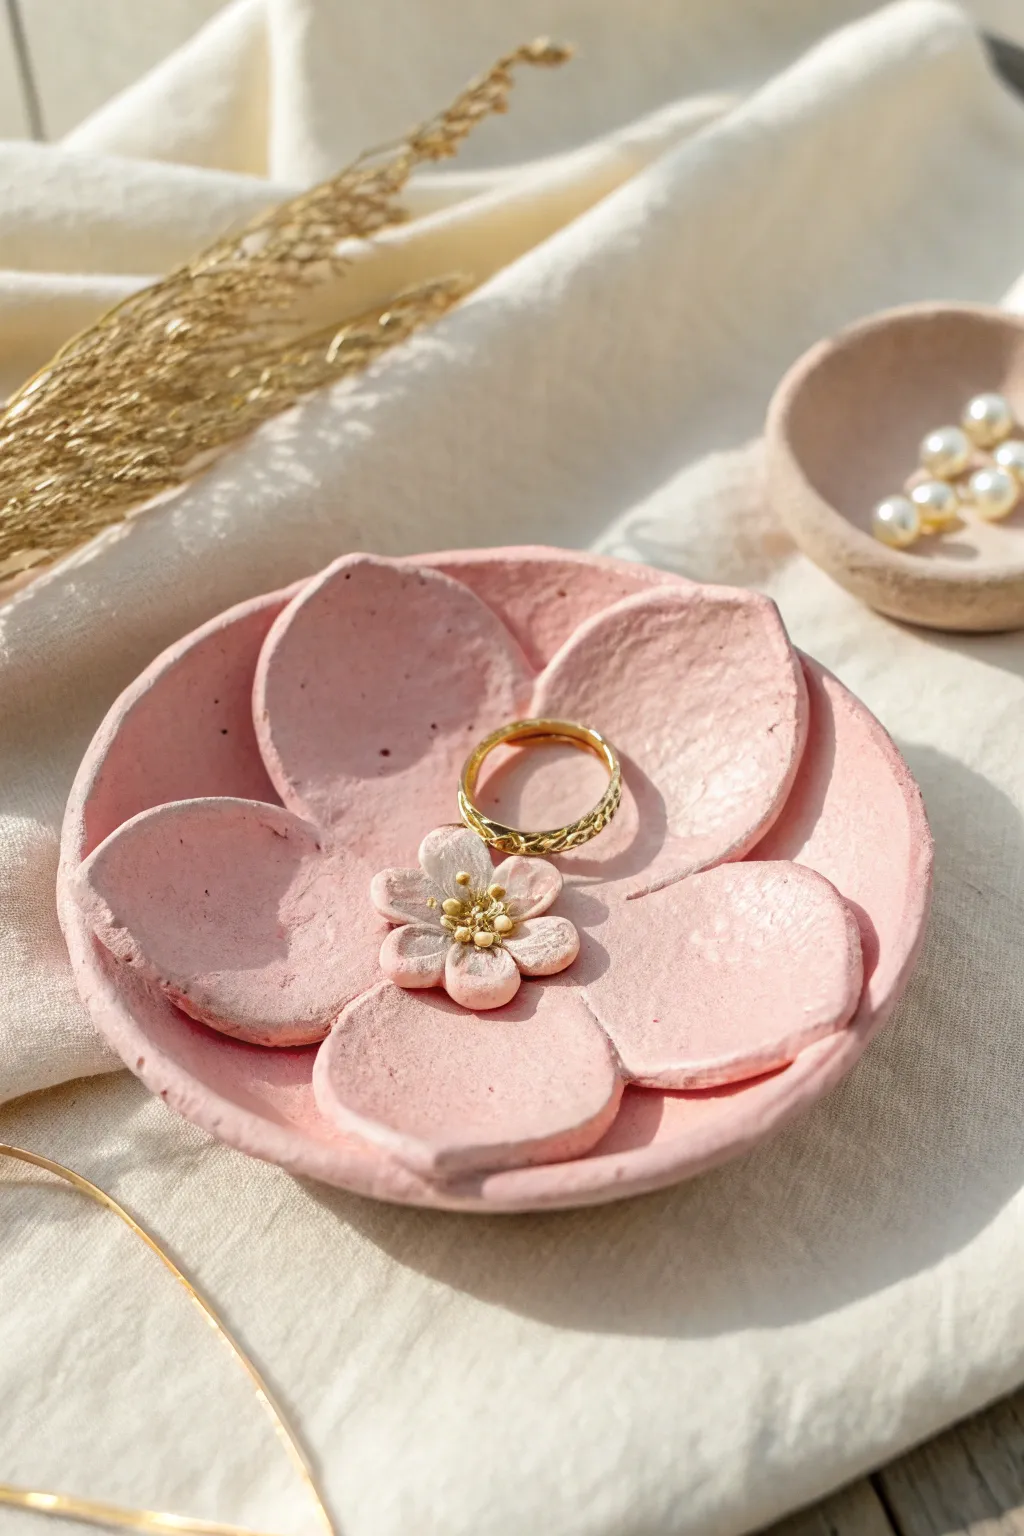
Capture the delicate beauty of spring with this soft pink cherry blossom trinket dish. With its textured finish and sweet central floral detail, it is the perfect spot to rest your favorite rings and studs.
Step-by-Step
Materials
- Air-dry clay or polymer clay (white)
- Acrylic paint (pastel pink, darker pink, gold)
- Rolling pin
- Modeling tools (or a toothpick)
- Small round bowl (for shaping)
- Fine grit sandpaper
- Small paintbrush
- Gloss or matte varnish (optional)
- Water (for smoothing)
Step 1: Creating the Base
-
Condition the clay:
Start with a ball of clay about the size of a tangerine. Knead it in your hands until it is warm, pliable, and free of cracks. -
Roll it out:
On a clean, flat surface, roll the clay into an even slab approximately 1/4 inch thick. If you want a perfectly round base, you can use a large round cookie cutter or a bowl rim as a guide, but a slightly organic shape works well here too. -
Form the petals:
Using a modeling tool or a knife, gently cut five wide, rounded petal shapes out of your slab. They should remain connected at the center. -
Shape the edges:
Dip your finger in a little water and smooth down all the cut edges so they aren’t sharp. Gently press the center of each petal edge inward slightly to create that notch characteristic of cherry blossoms. -
Add texture:
To mimic the rustic look in the photo, take a toothbrush or a crumpled ball of aluminum foil and lightly tap it over the surface of the clay to give it a stone-like texture. -
Curve the dish:
Carefully lift your clay flower and place it inside a small bowl. Gently press it down so the petals curve upward, creating a cup shape that will hold jewelry securely.
Clean Texture
To smoothen fingerprints without losing the intentional stone texture, lightly brush the raw clay with a little baby oil or water before drying.
Step 2: Adding Details
-
Make the center flower:
Roll five tiny balls of clay, each about the size of a peppercorn. Flatten them into small teardrops to form the petals of the inner blossom. -
Assemble the center:
Arrange these five tiny petals in the direct center of your large dish. Use a dab of water or liquid clay (for polymer) to secure them in place. -
Create the stamens:
Roll several extremely thin, short snakes of clay or tiny balls for the very center. Cluster these inside the small flower to create the pollen stamens. -
Dry or bake:
If using air-dry clay, leave the dish in the bowl to dry for 24-48 hours. If using polymer clay, bake according to the manufacturer’s instructions while it rests in an oven-safe bowl to keep its shape.
Step 3: Painting & Finishing
-
Initial sanding:
Once fully cured and cool, remove the dish from the bowl. Use fine grit sandpaper to gently smooth any rough edges on the rim, being careful not to sand away your surface texture. -
Base coat:
Mix a soft, pastel pink acrylic paint. Apply an even coat over the entire dish, front and back. I find two thin layers often look better than one thick one. -
Highlight the center:
Mix a slightly lighter shade of pink (add a touch of white) and dry brush it onto the small central flower petals to make them pop against the background. -
Darken the details:
Use a darker pink wash (paint diluted with water) and let it settle into the crevices around the small center flower to add depth. -
Add the gold:
Using a very fine detail brush, dab metallic gold paint onto the tiny stamens in the very center of the flower. -
Seal the piece:
Protect your work with a layer of matte or satin varnish. This is especially important for trinket dishes to prevent scratches from metal jewelry.
Speckled Effect
Mix dried tea leaves or black pepper heavy-texture paint into the clay before sculpting to create a natural, speckled ceramic pottery look.
Your lovely cherry blossom dish is now ready to bloom on your vanity
Pink Cow Face Trinket Tray
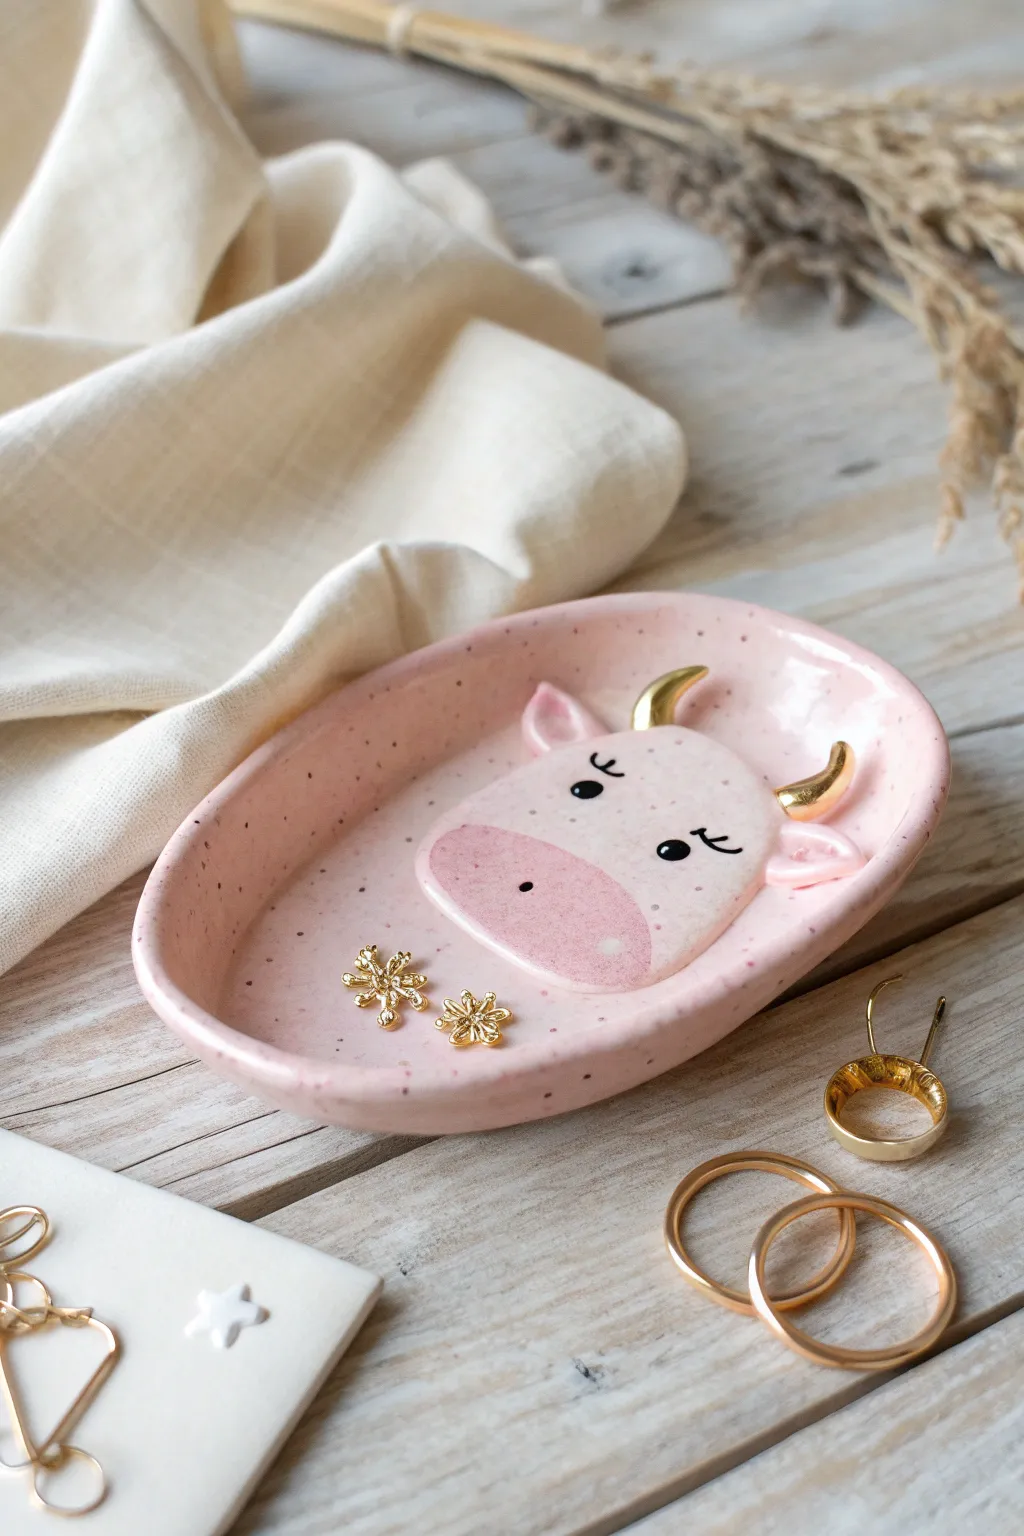
This adorable oval trinket dish features a gentle cow face emerging from the surface, complete with golden horns and a speckled finish. It’s the perfect sweet spot for holding your favorite earrings or rings on a bedside table.
Step-by-Step Guide
Materials
- Polymer clay (light pink, translucent/granite effect optional)
- Polymer clay (white, dark pink/magenta)
- Acrylic paints (black, gold)
- Sculpting tools (ball styluses, needle tool)
- Rolling pin or pasta machine
- Oval cutter or oval paper template
- Sandpaper (fine grit)
- Gloss varnish or UV resin
- Small paintbrush
- Toothbrush (for speckling)
- Baking sheet and parchment paper
Step 1: Forming the Base
-
Prepare the Clay:
Condition your light pink polymer clay until it is soft and pliable. If you want the speckled look shown in the photo, mix in a tiny amount of black pepper or granite-effect clay, or plan to paint speckles later. -
Roll the Slab:
Roll the clay out to a thickness of about 1/4 inch (6mm). You want it substantial enough to hold the shape of a dish without warping. -
Cut the Oval:
Use a large oval cookie cutter to stamp out the base shape. Alternatively, place a paper oval template on the clay and carefully cut around it with a craft knife. -
Shape the Dish:
Use your fingers to gently curve the edges of the oval upwards to create a shallow rim. Smooth out any fingerprints inside the bowl using a little baby oil or water.
Oops, cracking?
If you see cracks after baking, fill them with a mix of liquid clay and solid clay, smooth over, and re-bake briefly to repair.
Step 2: Sculpting the Cow
-
Create the Head Shape:
Flatten a separate piece of light pink clay into a soft, rounded rectangle or bean shape. Place this in the center-right of your dish to form the main cow head. -
Add the Muzzle:
Take a piece of darker pink clay and shape it into a wide oval. Press this onto the lower half of the head shape to create the nose area. -
Sculpt the Ears:
Form two small teardrop shapes from light pink clay. Attach one to each side of the head. Add a tiny indentation in the center of each ear with a ball tool for depth. -
Attach the Horns:
Roll two small cones of clay. Gently curve them and attach them to the top of the head, between the ears. Blend the seams carefully at the base so they don’t pop off later. -
Refine the Details:
Use a needle tool or small ball tool to indent two nostrils on the dark pink muzzle. Check that all pieces are firmly adhered to the base.
Make it a Set
Create a companion dish with a pig or sheep face to build a whole barnyard collection for your dresser.
Step 3: Baking and Decorating
-
Bake the Piece:
Place your tray on a parchment-lined baking sheet. Bake according to your clay package instructions (usually 275°F/135°C for 15-30 minutes). Let it cool completely. -
Sand the Edges:
Once cool, use fine-grit sandpaper to smooth any rough edges around the rim of the dish for a professional finish. -
Paint the Face:
Using a fine detail brush and black acrylic paint, carefully draw two small curved eyes with lashes. Add two tiny dots for nostrils if you didn’t sculpt them deep enough. -
Gild the Horns:
Apply metallic gold acrylic paint to the horns. You might need two coats to get a rich, solid gold look. -
Apply Speckles:
Dip an old toothbrush into watered-down reddish-brown paint. Run your thumb over the bristles to flick tiny speckles across the entire dish to mimic a ceramic glaze effect. -
Seal the Dish:
Finish by applying a coat of high-gloss varnish or UV resin over the entire piece. This protects the paint and gives it that shiny ceramic look.
Enjoy using your new sweet little tray to keep your treasures safe


What Really Happens Inside the Kiln
Learn how time and temperature work together inside the kiln to transform clay into durable ceramic.
Pink Ice Cream Bar Keychain
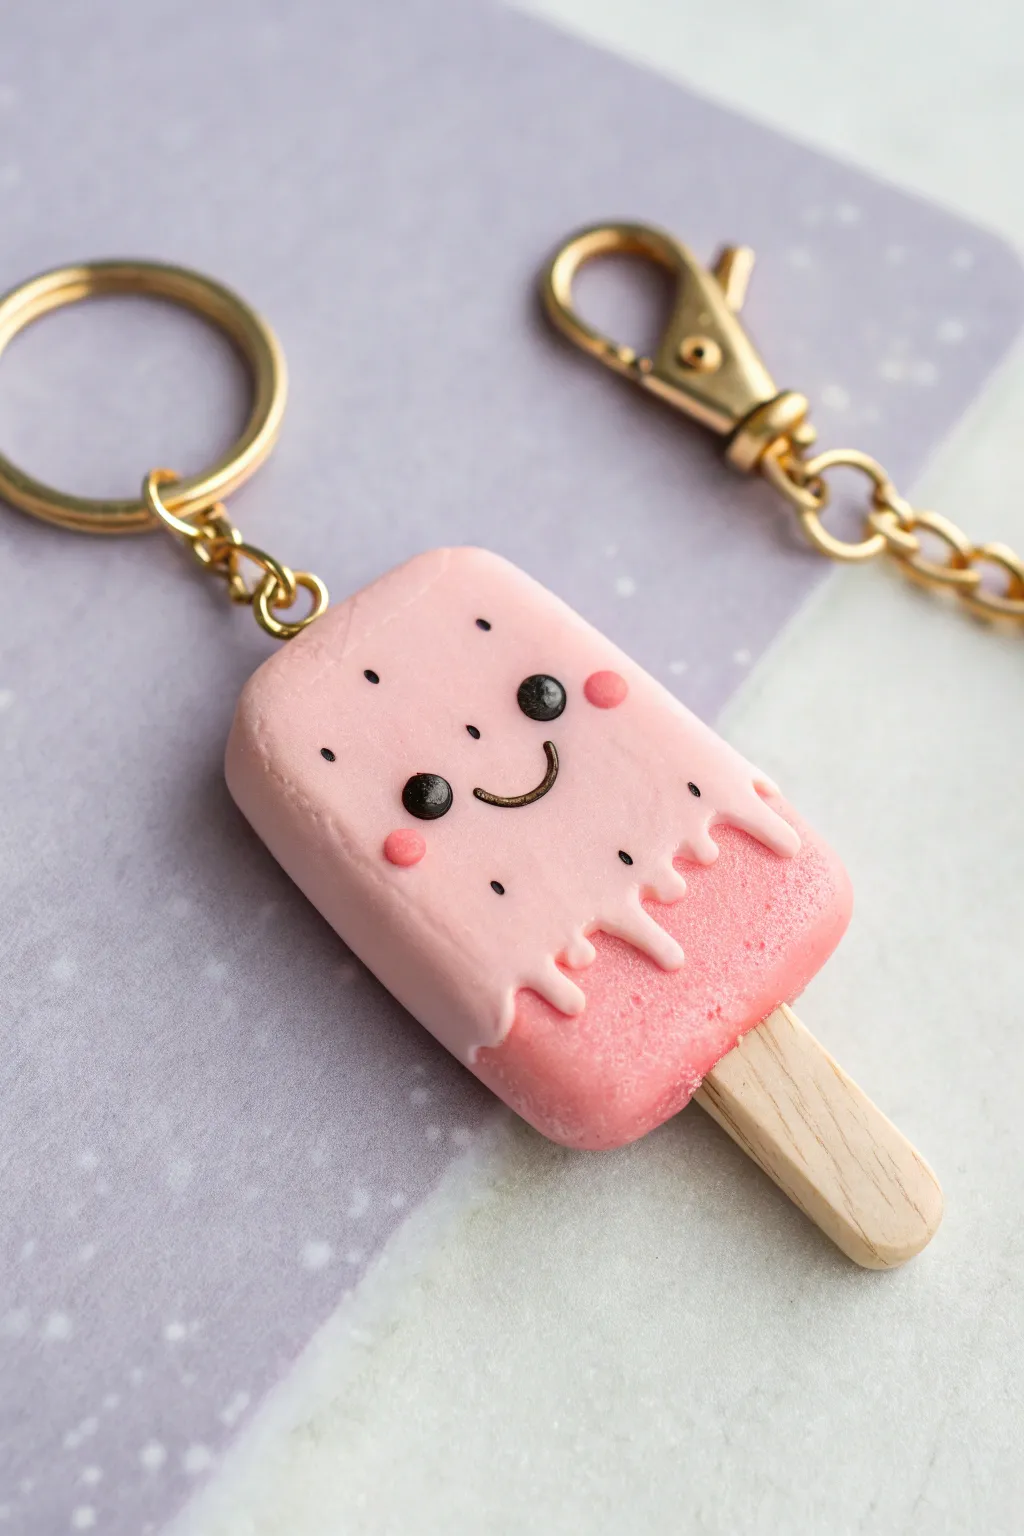
This adorable ice cream bar charm features a soft pink drippy coating over a textured sorbet base, complete with a sweet smiling face. It’s the perfect blend of summer vibes and everyday cuteness to brighten up your keys or backpack.
How-To Guide
Materials
- Polymer clay (light baby pink, slightly darker strawberry pink, black)
- Small wooden craft stick or popsicle stick
- Liquid polymer clay (translucent or white)
- Black acrylic paint (optional, alternative for eyes)
- Gold screw eye pin
- Gold keychain hardware with jump rings
- Needle tool or toothpick
- Dotting tool
- X-acto knife or craft blade
- Gloss glaze or UV resin
- Small paintbrush
- Old toothbrush (for texturing)
Step 1: Shaping the Base
-
Mix the Sorbet Color:
Start by conditioning the darker strawberry pink clay until it is soft and pliable. If you don’t have the exact shade, mix a little translucent clay into red to get a jelly-like sorbet look. -
Form the Rectangle:
Shape the clay into a smooth, thick rectangle with rounded corners, mimicking the classic shape of an ice cream bar. It should be about 1.5 to 2 inches tall. -
Insert the Stick:
Cut a small wooden craft stick to size so just a short handle remains. Carefully push it into the bottom center of the clay rectangle. I like to add a dab of liquid clay to the wood before inserting it to ensure a strong bond after baking. -
Add Texture:
Using an old toothbrush or a stiff brush, gently tap the surface of the pink rectangle to create a realistic, slightly porous ice cream texture.
Clean Clay Tip
Baby pink clay easily picks up dust. Always wash your hands thoroughly before handling lighter colors, and keep a stash of baby wipes nearby to clean your tools between steps.
Step 2: Creating the Drippy Coating
-
Prepare the Drippy Layer:
Roll out a thin sheet of the lighter baby pink clay. Use your blade to cut a wavy, irregular line across one side to represent melting drips. -
Apply the Coating:
Place the light pink sheet over the textured base, wrapping it over the top and sides gently. Use your fingers to smooth the seams so it looks like a seamless coating of chocolate or yogurt. -
Enhance the Drips:
Use a silicone tool or your finger to smooth and round off the bottom edges of the ‘drips’ so they look fluid and soft against the darker base layer. -
Attach Hardware:
Insert the gold screw eye pin into the very top center of the popsicle. To make it secure, twist it in, pull it out, add a dab of liquid clay or glue, and twist it back in.
Step 3: Adding the Kawaii Face
-
Mark the Placement:
Use a needle tool or toothpick to lightly mark where you want the eyes and mouth to go. Keeping them centered on the upper half creates that cute ‘chibi’ proportion. -
Create the Eyes:
Roll two tiny balls of black clay and press them flat onto your marked spots. Alternatively, use a dotting tool to create small indentations to fill with paint later. -
Make the Smile:
Roll an extremely thin snake of black clay for the mouth and shape it into a ‘U’. Gently press it onto the face between the eyes with your needle tool. -
Add Cheeks:
Take two minuscule pieces of the darker strawberry pink clay, roll them into balls, and flatten them just under the eyes for blushing cheeks. -
Add Sprinkles (Optional):
To mimic the speckled look in the image, use a needle tool to add tiny, shallow pricks or dots around the face area, or paint tiny black specks after baking.
Add a Bite
Before texturing the base, use a small round cutter or a scalloped cookie cutter to remove a chunk from one of the top corners for a whimsical ‘bitten’ effect.
Step 4: Finishing Up
-
Bake:
Bake the piece according to the instructions on your specific brand of polymer clay. Usually, this is around 275°F (135°C) for 15-30 minutes. -
Cool Down:
Let the popsicle cool completely before handling. It will be slightly soft when hot but hardens as it cools. -
Glaze:
Apply a coat of gloss glaze or UV resin over the light pink ‘coating’ area to give it a wet, melted shine, while leaving the wooden stick matte. -
Assemble Keychain:
Once the glaze is fully dry or cured, use pliers to open the jump ring on your keychain hardware and attach it securely to the eye pin.
Now you have a sweet little accessory ready to hang on your bag or gift to a friend
Pink Cloud And Star Earrings Set
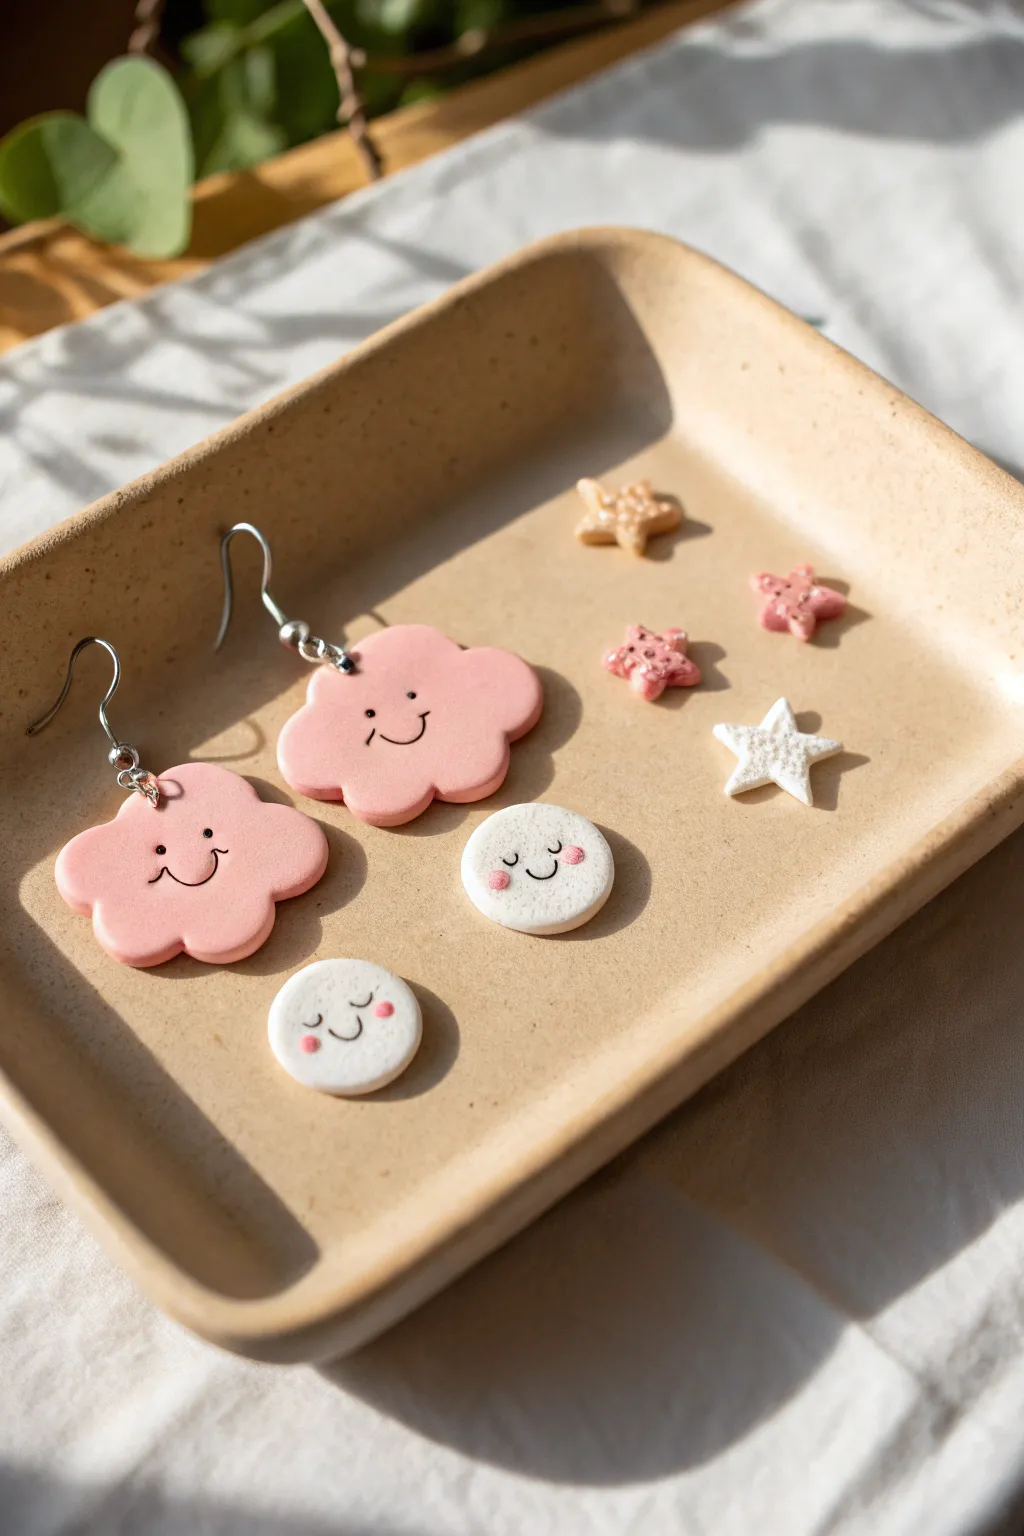
These adorable polymer clay pieces radiate pure happiness with their soft pink hues and sweet smiling faces. This tutorial guides you through creating a charming set featuring dangly cloud earrings, mini moon-face studs, and decorative scatter stars.
How-To Guide
Materials
- Polymer clay (Soft pink, White, Beige/Tan, darker pink/glitter mix)
- Rolling pin or pasta machine
- Cloud shaped cutter (approx. 1 inch)
- Small circle cutter (approx. 0.5 inch)
- Mini star cutter (tiny size)
- Needle tool or toothpick
- Ball stylus tool
- Black acrylic paint or fine detail marker
- Thin detail paintbrush
- Earring hooks (silver)
- Jump rings (silver)
- Jewelry pliers
- Small eye pins (optional, if embedding hooks)
- Gloss glaze or UV resin (optional for coating)
Step 1: Prepping and Cutting
-
Condition the pink clay:
Start by warming the soft pink clay in your hands until it becomes pliable. Roll it out into a smooth sheet about 3mm thick. I like to use playing cards on either side of my roller as guides to keep the thickness even. -
Cut the cloud shapes:
Using your cloud cutter, punch out two identical cloud shapes from the pink sheet. Gently push them out of the cutter if they stick, being careful not to distort the fluffy edges. -
Create the white rounds:
Clean your workstation to avoid color transfer, then condition and roll out a small amount of white clay. Use the small circle cutter to create two round discs for the moon-face studs. -
Make the mini stars:
Roll out scraps of beige clay, sparkly pink clay, and white clay. Use the tiny star cutter to punch out several miniature stars. For texture, gently press a piece of sandpaper or a toothbrush onto the stars before baking.
Step 2: Adding Details
-
Pierce holes for hardware:
While the clay is still raw, use a needle tool to poke a small hole at the very top center of each pink cloud. Ensure the hole is big enough for your jump rings. -
Smooth the edges:
Dip your finger in a tiny bit of cornstarch or baby oil and gently run it along the cut edges of all your pieces to soften any sharp ridges left by the cutters. -
Bake the pieces:
Arrange all your clay pieces on a parchment-lined baking sheet or a ceramic tile. Bake according to your brand’s specific instructions (usually 275°F/135°C for 15-30 minutes). -
Cool down completely:
Let the pieces cool fully before handling. Clay is fragile when warm, so patience here ensures you don’t accidentally warp a cloud.
Fixing Smudges
Mess up a painted smile? Don’t panic. Dip a cotton swab in rubbing alcohol or acetone and gently wipe away the mistake before trying again.
Step 3: Painting Faces
-
Paint the smiles:
Using a very fine detail brush and black acrylic paint, carefully draw a wide U-shape smile on the pink clouds and a smaller, gentle smile on the white rounds. -
Dot the eyes:
Add two small black dots for eyes on the clouds. For the white rounds, try painting small curved lines for sleepy, closed eyes to give them a dreamy look. -
Add rosy cheeks:
Dip a ball stylus or the non-brush end of a paintbrush into pink paint. Gently dab small dots at the ends of the smiles to create cute, rosy cheeks. -
Seal the design:
Once the paint is totally dry, apply a thin layer of gloss glaze or UV resin over the painted areas (or the whole piece) to protect the details from scratching off.
Textured Stars
For a sugary look like the white star, mix translucent liquid clay with fine white glitter and coat the baked clay, then re-bake briefly to set it.
Step 4: Assembly
-
Attach jump rings:
Use pliers to twist open a silver jump ring. Thread it through the hole you made in the pink cloud. -
Add earring hooks:
Before closing the jump ring, slide on the loop of your earring hook. Twist the jump ring closed securely so there is no gap. -
Finish the studs:
For the white round faces and stars, use strong jewelry glue (like E6000) to attach flat-back earring posts to the back side. Let the glue cure completely.
Wear your cheerful sky-themed creations and brighten up even the gloomiest days

TRACK YOUR CERAMIC JOURNEY
Capture glaze tests, firing details, and creative progress—all in one simple printable. Make your projects easier to repeat and improve.
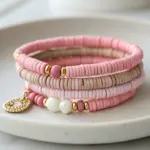
Rosey Marble Pink Beads
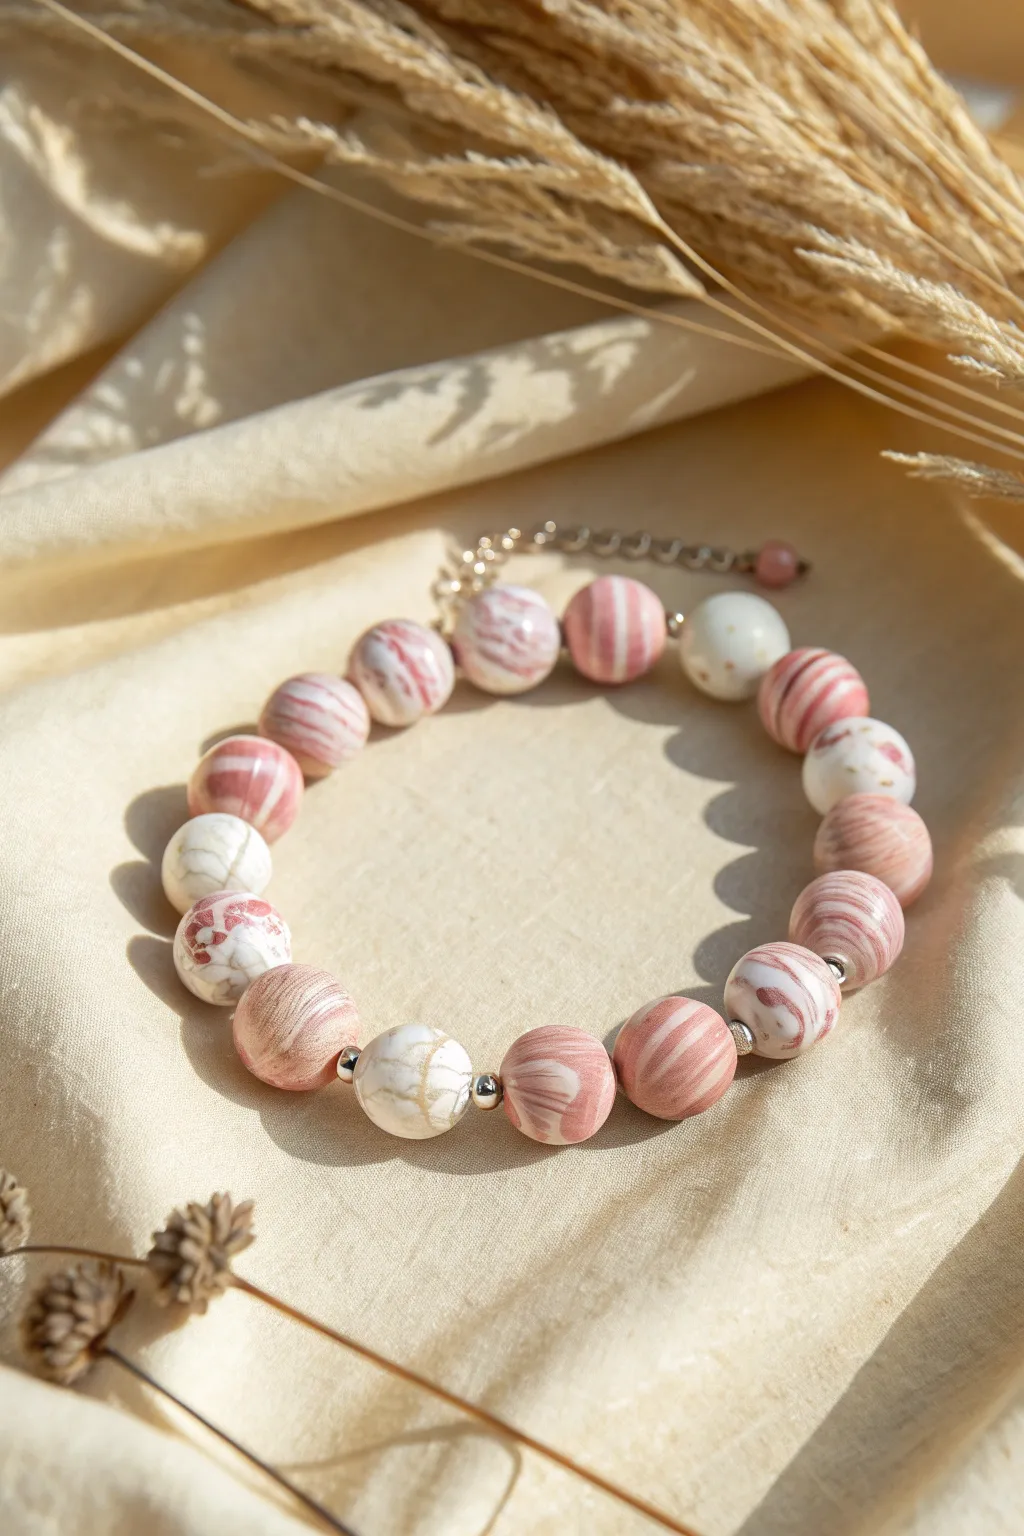
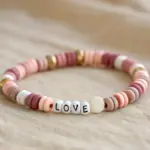
Achieve the look of polished semiprecious stones using simple polymer clay techniques with this elegant bracelet project. The design features soft, organic swirls of rose pink and translucent white, punctuated by delicate silver accents for a professional finish.
Step-by-Step Tutorial
Materials
- Polymer clay (Rose pink, opaque white, and translucent white)
- Small silver spacer beads (approx. 3-4mm)
- Silver crimp beads
- Jewelry wire or strong elastic cord
- Lobster claw clasp and jump rings
- Extension chain with a decorative bead drop (optional)
- Bead reamer or piercing tool
- Acrylic roller or pasta machine
- Clay slicer blade
- Wet/dry sandpaper (400 to 1000 grit)
- Jewelry pliers (round nose and flat nose)
- Gloss varnish or resin (optional)
Step 1: Preparing the Clay Marble
-
Condition the clay:
Start by warming up your clay. You will need separate portions of rose pink, opaque white, and translucent white. Knead each color individually until it is soft and pliable. -
Form snakes:
Roll each color into a long snake or log shape. Depending on the dominance of color you want, adjust the thickness. For the look in the photo, make the pink and white logs roughly equal in size. -
Twist together:
Gather your three snakes and twist them together into one large rope. Fold this rope in half and twist again. I usually repeat this twist-and-fold process about 3-4 times. -
Stop mixing early:
Be careful not to over-twist. You want distinct ribbons of color, not a blended solid pink. Stop when you see nice striations. -
Create a smooth log:
Roll this twisted bundle on your work surface to smooth it out into a uniform cylinder, approximately the thickness you want your final beads to be.
Smooth Operator
To avoid fingerprints entirely, wear latex gloves while rolling your final spheres, or lightly dust your palms with cornstarch before shaping.
Step 2: Shaping and Baking
-
Slice segments:
Using your clay slicer, cut the cylinder into equal-sized segments. Try to make them as consistent as possible so your beads are uniform. -
Roll spheres:
Take each segment and roll it between your palms. Use a gentle circular motion to form a perfect sphere. Check the marble pattern; if you don’t like it, you can give it a slight pinch and re-roll to shift the swirls. -
Create variation:
For the specific look in the image, you can leave some beads mostly white with just a hint of pink marble, creating a nice rhythm. -
Pierce holes:
While the clay is raw, carefully pierce a hole through the center of each bead using a needle tool or bead pin. Rotate the bead as you push the needle through to avoid flattening the shape. -
Bake the beads:
Place your beads on a baking tile or in a bed of cornstarch (to prevent flat spots). Bake according to your clay manufacturer’s instructions, usually around 275°F (135°C) for 30 minutes. -
Cool down:
Allow the beads to cool completely before handling them again.
Step 3: Finishing and Assembly
-
Sand and buff:
Dip your beads in water and sand them lightly with wet/dry sandpaper, moving from 400 to 1000 grit. This removes fingerprints and creates a silky smooth stone-like feel. Buff them dry with a soft cloth. -
Optional glaze:
If you prefer a high-shine look like polished agate, apply a thin coat of gloss varnish. For a natural matte stone look, skip this step. -
Prepare the wire:
Cut a length of jewelry wire about 9 inches long. Attach a crimp bead and one half of your clasp to one end, securing it tightly with pliers. -
String the pattern:
Begin threading your beads. Alternate between your handmade clay beads and the small silver spacer beads. The spacers elevate the design significantly. -
Close the loop:
Once you have reached your desired bracelet length, add a final crimp bead and the jump ring or extension chain. -
Add the dangler:
Create a small decorative dangle using a headpin and one small pink bead. Attach this to the end of the extension chain for that extra detail shown in the photo. -
Secure everything:
Flatten the final crimp bead securely, trim any excess wire, and double-check all your connections.
Muddled Marble?
If your colors turn into a solid muddy pink, you twisted too much. Stop mixing while the distinct color lines are still clearly visible.
Now you have a stunning piece of jewelry that looks like genuine stone but carries the personal touch of handmade art.
Bubblegum Pink Bow Cabochons
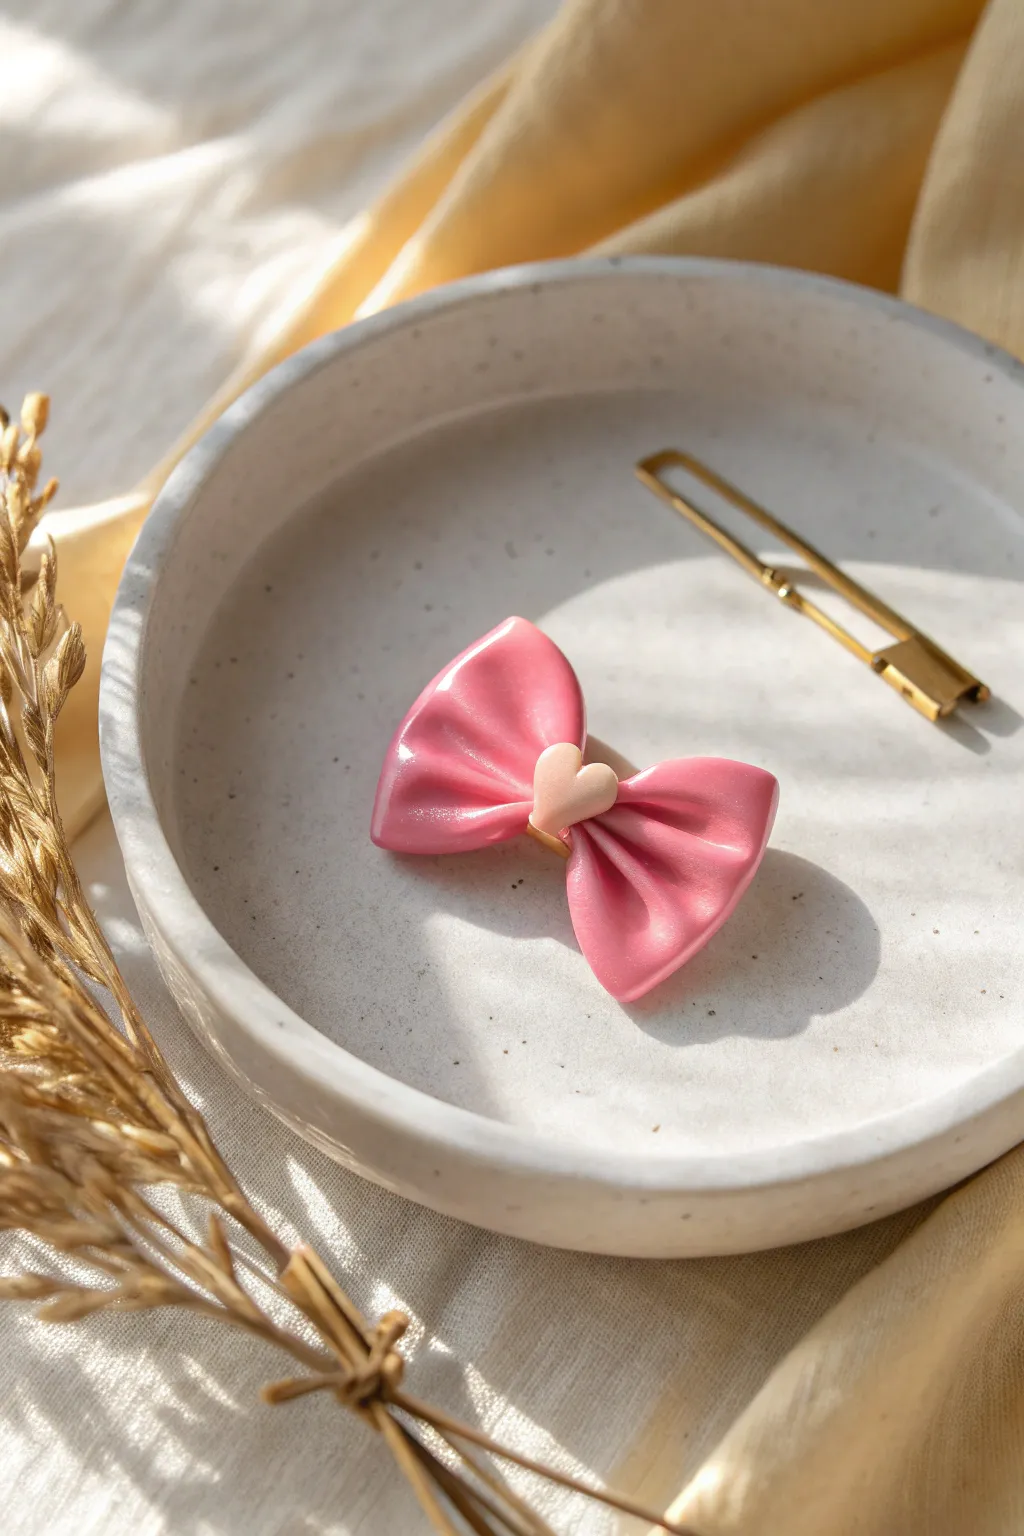
These high-shine bubblegum pink bows are the perfect accessory for adding a touch of sweetness to any hair clip or jewelry piece. With their soft, fabric-like folds and delicate heart center, they look deceptively complex but are simple to sculpt with just a few tools.
Step-by-Step Guide
Materials
- Polymer clay (Bubblegum Pink)
- Polymer clay (Pale Blush/Light Pink)
- Small heart cutter (approx. 5mm)
- Needle tool or toothpick
- Ball stylus tool
- Flexible clay blade
- Rolling pin
- Gloss glaze or UV resin
- Small paintbrush
- Ceramic tile or glass work surface
- Oven for baking
Step 1: Forming the Base Bow
-
Condition the Clay:
Start by thoroughly kneading your bubblegum pink polymer clay until it is soft and pliable. This prevents cracks during the folding process. -
Roll out a Sheet:
Using your rolling pin, roll the pink clay out on your work surface to a thickness of about 3mm. You want it sturdy but not chunky. -
Cut the Rectangle:
Use your flexible blade to cut a clean rectangle from the sheet, approximately 1.5 inches long and 0.5 inches wide. -
Pinch the Center:
Gently lift the rectangle. Place your finger in the direct center of the back side to support it, then gently pinch the top and bottom edges towards the middle to create the initial gather. -
Refine the Folds:
Using your fingers, accentuate the two outer creases on each side of the center pinch. Wiggle the clay gently to encourage it to drape naturally. -
Create Depth:
Take your needle tool or a dull toothpick and gently press into the valleys of the folds on the front of the bow. This deepens the shadow lines and makes the bow look more like fabric. -
Secure the Shape:
Press the very center pinch point firmly together so the clay bonds to itself. You might want to trim away a tiny bit of excess bulk from the back if it’s too thick.
Softer Folds
Dust your fingers lightly with cornstarch before shaping the bow folds. This prevents your fingerprints from transferring to the clay and ruining the smooth ‘fabric’ illusion.
Step 2: Adding the Heart & Finishing
-
Prepare the Center Detail:
Condition a very small amount of the pale blush pink clay so it contrasts slightly with the main bow. -
Cut the Heart:
Flatten the blush clay into a small pancake and use your tiny heart cutter to punch out a shape. If you don’t have a cutter, hand-sculpt a tiny heart shape. -
Smooth the Edges:
Gently tap the edges of the tiny clay heart with your finger to soften any sharp cutting ridges. -
Attach the Heart:
Place the heart directly over the pinched center of the bow. Press it down gently but firmly to bond the raw clay layers without squishing the bow’s folds. -
Final Shaping:
Look at the bow from all angles. Use your ball stylus to gently nudge the loops up if they have flattened, giving the bow a perky, dimensional look. -
Bake:
Transfer the piece to a ceramic tile or baking sheet. Bake according to your specific clay manufacturer’s instructions (usually around 275°F/135°C for 15-30 minutes). -
Cool Down:
Allow the piece to cool completely before handling. Polymer clay is fragile while hot. -
Glaze Preparation:
Wipe the surface of the cooled bow with a lint-free cloth or a baby wipe to remove any dust or fingerprints. -
Apply Gloss:
Using a soft brush, apply a generous coat of gloss glaze or UV resin over the entire front surface. This gives it that plastic, candy-like shine seen in the photo. -
Cure or Dry:
Let the glaze air dry fully, or cure the UV resin under a UV lamp for 2-3 minutes until hard and tack-free.
Sticky Glaze?
If your glaze feels tacky after drying, you may have applied it too thickly or in high humidity. Apply thin coats, letting each dry fully, or wipe resin with alcohol.
Now you have a darling candy-colored embellishment ready to be glued onto a hair clip or pin back
Cute Pink Kitty Cubes
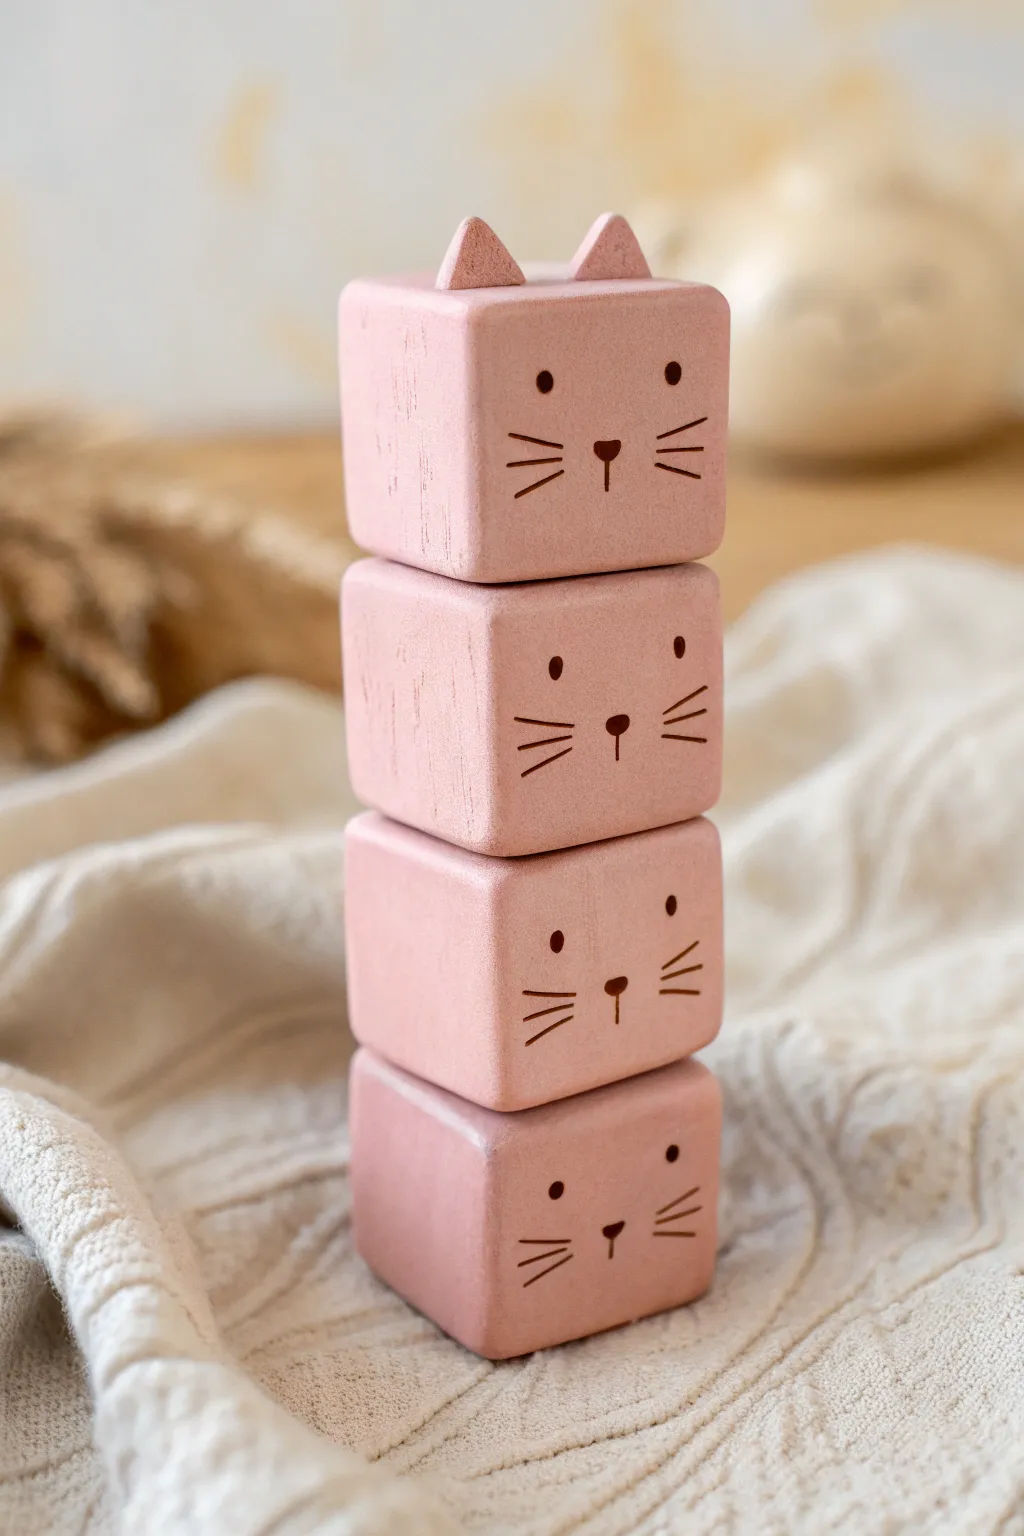
Create this adorable tower of feline friends using pink polymer clay and simple geometric shapes. These minimalist cubes feature sweet, hand-painted faces and make for a charming desk ornament or nursery decoration.
Step-by-Step
Materials
- Pink polymer clay (matte finish preferred)
- Blade or clay slicer
- Rolling pin or acrylic roller
- Square clay cutter (approx. 1-1.5 inches)
- Sandpaper (fine grit)
- Brown acrylic paint
- Fine detail paintbrush (size 0 or 00)
- Oven for baking
- Parchment paper
- Ruler
Step 1: Shaping the Cubes
-
Condition the Clay:
Begin by kneading your pink polymer clay thoroughly until it is soft, pliable, and free of air bubbles or cracks. -
Form a Log:
Roll the conditioned clay into a thick, square log shape. I find tapping the log against a flat surface on all four sides helps establish sharp, clean corners. -
Measure and Cut:
Using a ruler, measure equal segments along the log to create perfect cubes. You will need four cubes for this specific stack. -
Slice the Cubes:
Use your rigid blade to slice straight down through the log at your measured marks. Try to cut in one swift motion to prevent distorting the square shape. -
Refine the Shapes:
Gently press each cube against your work surface to flatten any bulging sides. Use your fingers to smooth out fingerprints while keeping the edges relatively crisp.
Step 2: Adding Details
-
Create Ear Triangles:
Take a small scrap of the remaining pink clay and roll it flat to about 3mm thickness. -
Cut the Ears:
Cut two small equilateral triangles for the ears. These should be proportional to the size of your cubes. -
Attach Ears to Top Cube:
Select the cube with the smoothest top surface. Place the two triangles on the top edge, spacing them slightly apart. -
Blend the Seams:
Use a clay sculpting tool or the back of your fingernail to gently blend the base of the ears into the cube so they are securely attached. -
Final Smoothing:
Give all four cubes one last inspection, smoothing any stray marks before baking.
Smooth Surface Secret
Before baking, lightly brush the raw clay with a little baby oil or clay softener. It melts away fingerprints and creates a silky finish.
Step 3: Baking and Finishing
-
Bake the Clay:
Arrange the cubes on a baking sheet lined with parchment paper. Bake according to your customized clay package instructions (usually around 275°F/135°C for 15-30 minutes per 1/4 inch of thickness). -
Cool Down:
Allow the cubes to cool completely inside the oven with the door slightly ajar to prevent cracking from thermal shock. -
Sand for Texture:
Once cool, lightly sand the surfaces with fine-grit sandpaper. This mimics the matte, slightly rustic texture seen in the photo and helps the paint adhere better. -
Wipe Clean:
Wipe away any sanding dust with a slightly damp cloth or baby wipe.
Mix & Match Personalities
Give each cube a different expression! Try one winking, one sleeping with closed curved eyes, or one with a tiny pink tongue sticking out.
Step 4: Painting the Faces
-
Mix Your Paint:
Prepare a small amount of dark brown acrylic paint. Using brown instead of black keeps the look soft and warm. -
Paint the Eyes:
Using your finest detail brush, paint two small dots for eyes on each cube. Place them incorrectly wide-set positions for a cute look. -
Add the Nose:
Paint a small, inverted triangle or heart shape centered below the eyes for the nose. -
Draw the Whiskers:
Carefully paint three thin, straight lines radiating outward from each side of the face. Keep your hand steady and use very little pressure. -
Add the Mouth Line:
Paint a tiny vertical line extending downward from the bottom point of the nose. -
Stack and Display:
Once the paint is fully dry, stack your cubes with the ear-cube on top to complete your tower.
Now you have a charming stack of clay kitties ready to brighten up your shelf
Whipped Cream Strawberry Sundae Charm
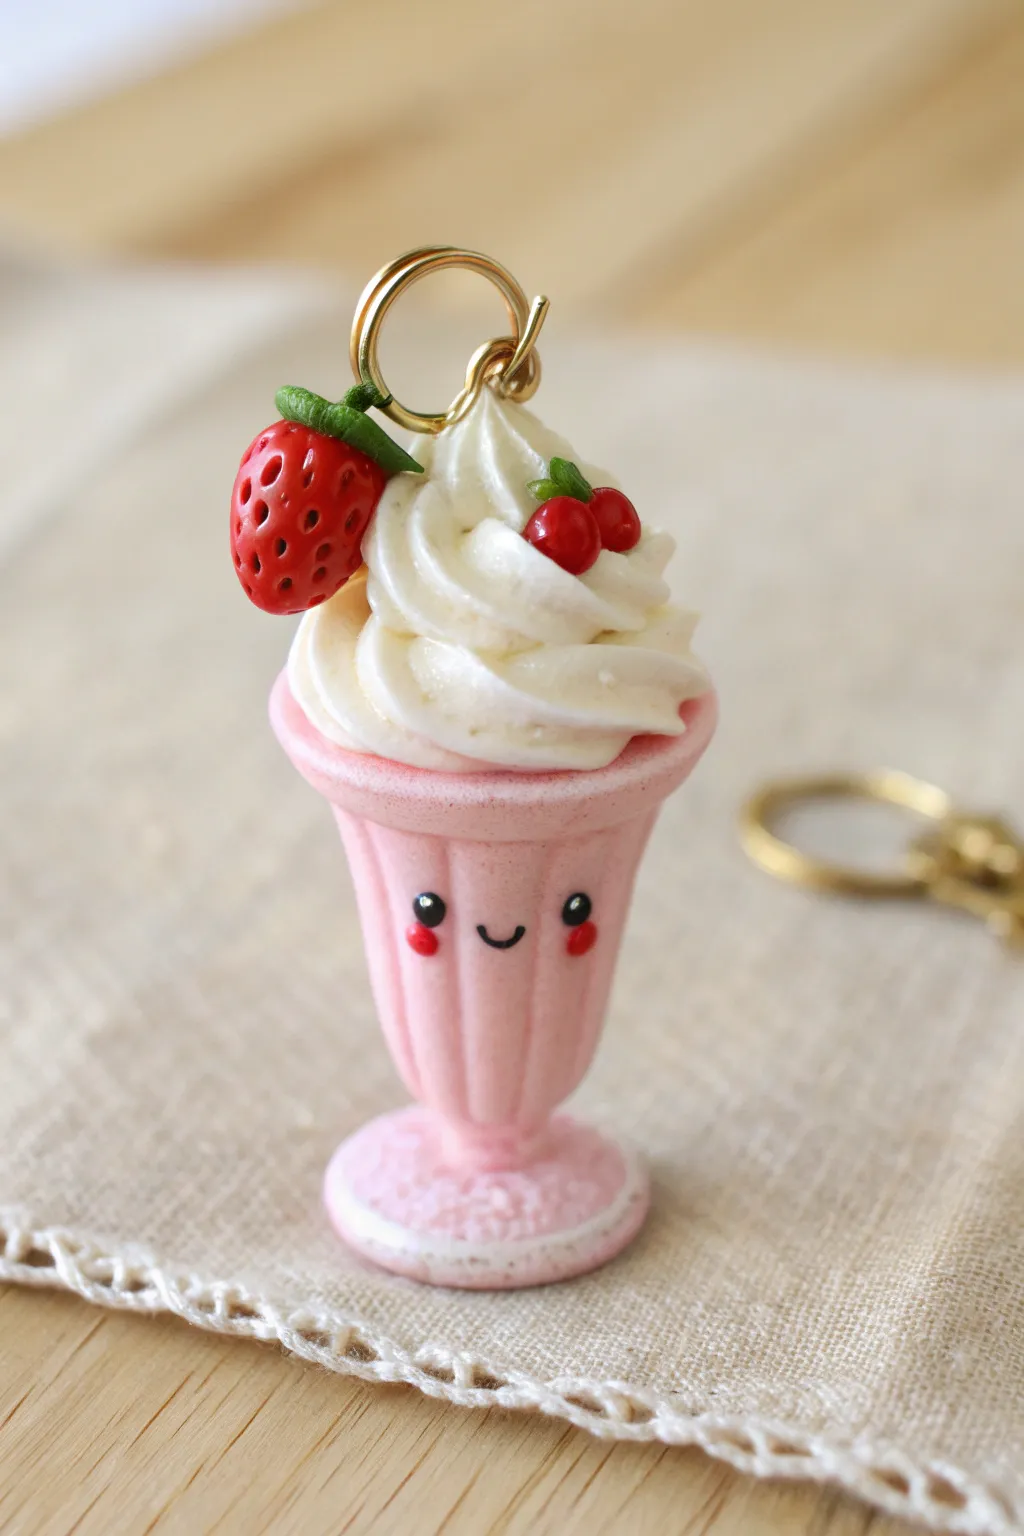
This adorable polymer clay charm captures the sweetness of a classic diner treat in miniature form. With its blushing kawaii face and realistic whipped cream topping, it makes for a perfect necklace pendant or keychain accessory.
Step-by-Step Guide
Materials
- Polymer clay (baby pink, white, red, green, black)
- Liquid polymer clay (translucent or white)
- Star piping tip (small metal or plastic tip)
- Dotting tools or ball stylus
- Detail needle tool
- Gloss glaze (polyurethane or resin)
- Gold screw eye pin and jump ring
- Soft pastel chalks (pink)
- Clay blade or craft knife
- Oven for baking
Step 1: Sculpting the Cup
-
Form the base shape:
Start by conditioning a ball of baby pink clay until it’s soft and pliable. Roll it into a smooth cylinder that is slightly wider at the top than the bottom, resembling a traditional sundae glass shape. -
Add the rim:
Roll a small snake of the same pink clay and wrap it around the top edge of your cylinder to create a flared rim. Blend the bottom edge of this rim into the cup seamlessly using a silicone tool or your finger, keeping the top edge distinct. -
Create the fluted texture:
Using a needle tool or the back of a knife, gently press vertical indentations at regular intervals around the body of the cup. Smooth these lines slightly with your finger to create soft, fluted ridges rather than sharp cuts. -
Add the pedestal base:
Flatten a small ball of pink clay into a disc for the foot of the glass. Press the bottom of your cup onto this disc, blending them together underneath so the join is strong but the seam is hidden.
Sad, Droopy Cream?
If your whipped cream melts in the oven, your clay mix was too soft. Mix in more solid white clay or let the piped piece sit in the fridge for 20 mins before baking to firm up the shape.
Step 2: Adding the Kawaii Face
-
Create eye sockets:
Use a small ball stylus to gently press two indentations into the front of the cup where you want the eyes to sit. This helps the clay eyes sit flush against the surface. -
Insert the eyes:
Roll two impossibly tiny balls of black clay. carefully place them into the indentations you just made, pressing gently to secure them without flattening them completely. -
Add the tiny smile:
Roll a microscopic snake of black clay. Cut a tiny ‘U’ shape from it and place it centered between the eyes. I find a needle tool is essential here to nudge the smile into the perfect curve. -
Apply blushing cheeks:
Using a very small dotting tool, place two small dots of red or dark pink clay just below the outer edges of the eyes. Alternatively, you can brush on a tiny bit of dry pink pastel dust for a softer look.
Step 3: The Toppings
-
Prepare the whipped cream:
Mix white polymer clay with liquid clay in a small cup until you reach a frosting-like consistency. It should be firm enough to hold peaks but soft enough to pipe. -
Pipe the cream:
Place your clay mixture into a piping bag (or a sturdy plastic bag with a hole) fitted with a small star tip. Pipe a generous swirl of cream onto the top of the pink cup, spiraling upward to a peak. -
Sculpt the strawberry:
Shape a small teardrop of red clay. Using a needle tool, poke tiny holes all over the surface to mimic seeds. Fashion tiny green leaves from green clay and attach them to the wider end. -
Form the cherries:
Roll two small balls of red clay. Create tiny green stems and leaves, attaching them so the cherries look like a pair. Gently press both the strawberry and the cherries into the wet whipped cream clay.
Sparkle Upgrade
Mix ultra-fine iridescent glitter into your pink cup clay before sculpting, or dust the wet whipped cream with clear glitter before baking for a sugary, frosted effect.
Step 4: Finishing Touches
-
Insert hardware:
Carefully screw a threaded eye pin into the top of the swirl, ensuring it goes deep enough to be secure once baked. You can add a dab of liquid clay to the threads for extra grip. -
Bake carefully:
Bake the piece according to your clay manufacturer’s instructions (usually around 275°F/130°C for 15-30 minutes). Because of the delicate cream, you might want to tent foil over it to prevent browning. -
Cool and obscure:
Let the piece cool completely inside the oven if possible to prevent thermal shock cracks. The whipped cream will harden to a plastic finish. -
Glaze and assemble:
Apply a coat of gloss glaze to the fruit and the eyes to make them shine. Leave the cup matte or use a satin glaze if preferred. Once dry, attach your gold jump ring to the eye pin.
Now you have a sweet little charm that looks good enough to eat
Pink Octopus Couple Charms
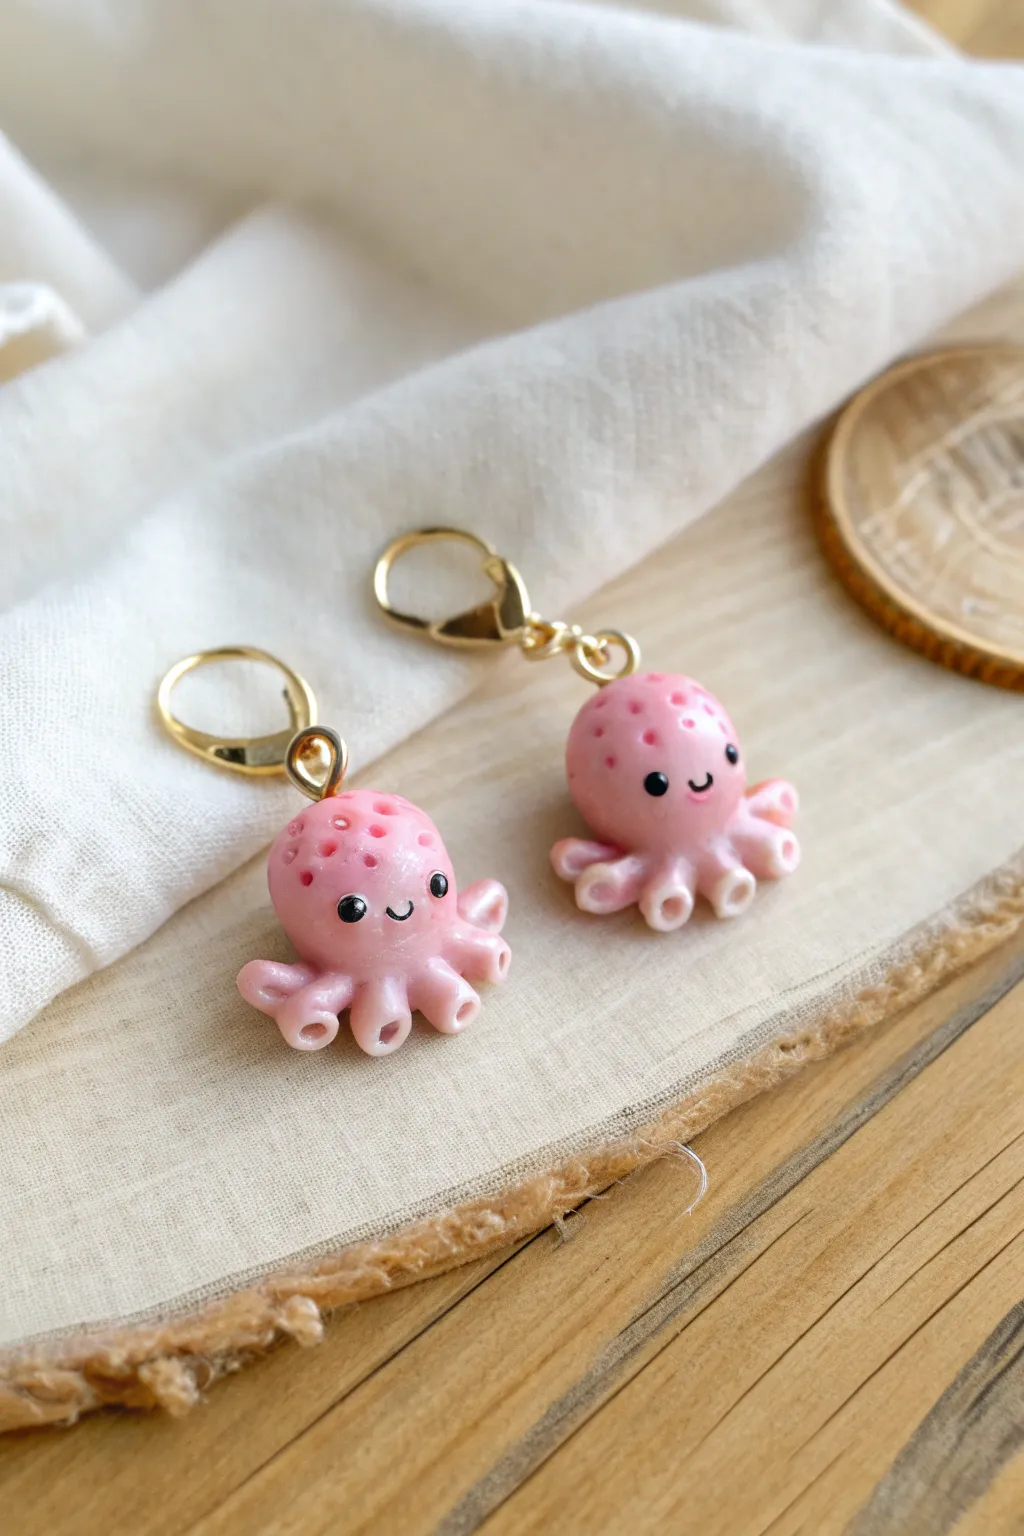
These adorable little sea creatures make the perfect stitch markers or charm accessories, featuring a gentle rosy pink hue and sweet, smiling faces. With their bubbly textured heads and curled tentacles, they add a touch of whimsy to any knitting bag or charm bracelet.
Step-by-Step
Materials
- Polymer clay in light pink
- Polymer clay in black (very small amount)
- Gloss glaze or UV resin (for the shiny finish)
- Gold lobster clasp findings with jump rings
- Gold screw eye pins
- Dotting tool or ball stylus (small)
- Needle tool or toothpick
- Blade or craft knife
- Clean work surface (tile or glass mat)
- Oven (for baking according to clay instructions)
Step 1: Shaping the Base
-
Condition the Clay:
Start by taking a small amount of your light pink polymer clay. Knead it thoroughly in your hands until it becomes soft, warm, and pliable to prevent cracking later. -
Form the Head:
Roll the pink clay into a smooth ball about the size of a marble or a large blueberry. Make sure there are no seams or fingerprints visible. -
Tentacle Preparation:
Take another piece of pink clay and roll it into a thin log or snake. It should be slightly thinner than the diameter of the head. -
Cutting Segments:
Slice the log into six to eight small, equal segments. These will become the legs. Roll each small segment into a tiny ball first, then slightly elongate them into teardrop shapes. -
Attaching Legs:
Press the teardrop shapes onto the bottom of the main head ball. Arrange them in a circle so they flare outward like a skirt. -
Adding Detail:
Use your needle tool or a small ball tool to press a tiny indentation into the center of each tentacle tip. This mimics the look of suction cups and adds cute detail. -
Refining the Shape:
Gently smooth the seam where the legs meet the body using a clay shaper or your fingertip, blending the clay so it looks like one solid piece.
Step 2: Adding Personality
-
Texturing the Head:
Using a small ball tool or a dotting tool, gently press random indentations all over the top dome of the octopus’s head. Vary the pressure slightly to create different sizes of ‘pores’ or texture spots. -
Creating Eye Sockets:
Choose a spot for the face and press two small, shallow indents where the eyes will go. This helps the eyes sit securely rather than just resting on the surface. -
Adding the Eyes:
Roll two minuscule balls of black clay. They should be tiny specks. Carefully place them into the eye sockets you just created and press gently to adhere. -
The Smile:
Roll an incredibly thin thread of black clay—thinner than a hair if possible. Cut a tiny u-shaped segment and place it centered between the eyes for a happy grin. -
Adding Hardware:
Insert a gold screw eye pin into the very top center of the head. I find dipping the tip in a tiny bit of liquid clay or bake-and-bond helps it stay secure permanently.
Clean Clay Pro-Tip
Keep a pack of baby wipes or rubbing alcohol nearby to clean your hands before rolling the light pink clay. Dust and lint show up easily on light colors!
Step 3: Finishing Touches
-
Baking:
Place your octopuses on a ceramic tile or baking sheet. Bake them according to the specific temperature and time directions on your package of polymer clay. -
Cooling:
Allow the pieces to cool completely inside the oven or on a cooling rack. Do not handle them while hot, as the clay is still fragile. -
Glazing:
Once cool, brush a coat of gloss glaze or UV resin over the entire piece to give it that wet, sea-creature shine and protect the face details. Cure or dry as needed. -
Assembly:
Open a jump ring using two pairs of pliers. Thread it through the loop of the screw eye pin on the octopus head. -
Adding the Clasp:
Before closing the jump ring, slide on the gold lobster clasp. Close the jump ring securely so there is no gap.
Level It Up
Make a “galaxy” octopus by mixing glitter into dark blue clay, or create a tiny bow tie from colored clay to place under the smile for a dapper look.
Now you have a charming aquatic companion ready to decorate your favorite zipper or keychain
Pastel Pink Checker Coasters With Hearts
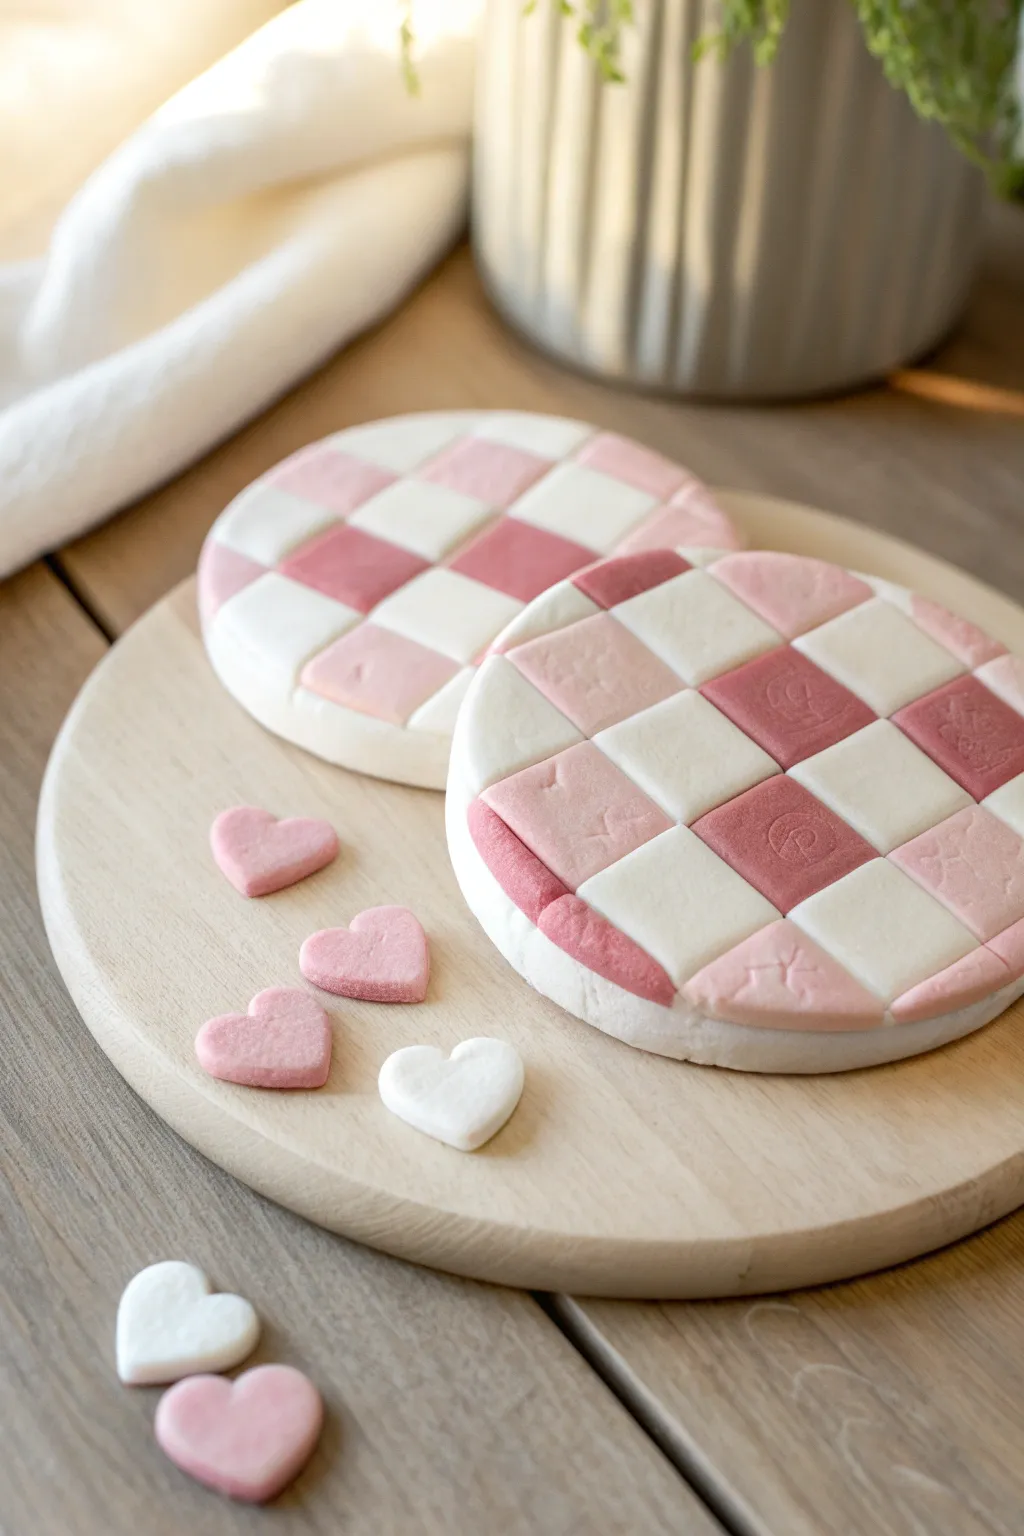
These adorable coasters bring a touch of sweetness to any table setting with their soft geometric design. The classic checkerboard pattern gets a romantic update using shades of blush, rose, and crisp white clay for a polished, modern look.
How-To Guide
Materials
- Polymer or air-dry clay (White, Light Pink, Dark Pink)
- Rolling pin or pasta machine
- Large circle cookie cutter (approx. 3.5 – 4 inches)
- Small heart-shaped cutter
- sharp craft knife or clay blade
- Ruler
- Parchment paper or clay work mat
- Sandpaper (fine grit)
- Gloss or matte varnish (optional)
Step 1: Preparing the Base
-
Roll the base:
Begin by conditioning a large chunk of white clay until it is soft and pliable. Roll it out on your parchment paper to an even thickness of about 1/4 inch; you want it thick enough to be sturdy. -
Cut the circle:
Place your large circle cutter onto the white clay slab and press down firmly to cut out the base for your coaster. Carefully remove the excess clay around the edges. -
Smooth the edges:
Dip your finger in a little water (if using air-dry clay) or baby oil (if using polymer) and gently run it along the cut edge to smooth out any harsh lines or burrs.
Step 2: Creating the Checkered Pattern
-
Roll colored sheets:
Roll out pieces of white, light pink, and dark pink clay separately. These sheets should be slightly thinner than your base, roughly 1/8 inch thick. -
Cut strips:
Using a ruler and your sharp blade, cut long, even strips from each color sheet. Aim for strips that are about 1/2 inch to 3/4 inch wide, ensuring they are all consistent. -
Cut squares:
Turn your strips horizontally and cut vertically at the same width interval to create uniform squares in all three colors. -
Plan the layout:
Before attaching anything, I find it helpful to lay the squares out on your work surface in your desired pattern to ensure the colors are distributed nicely. -
Attach center squares:
Start placing the squares onto the white circle base, beginning near the center and working your way out. Press them down gently so they adhere to the base layer. -
Trim the edges:
As you reach the edge of the circle, the squares will overhang. Flip the coaster over and use your blade to trim the excess clay flush with the round base for a clean finish. -
Smooth the surface:
Place a piece of parchment paper over the checkered top and gently roll over it with your rolling pin. This bonds the squares to the base and levels the surface.
Pro Tip: Seamless Joins
To get super tight seams between squares without distorting them, chill your clay strips in the fridge for 10 minutes before cutting them into squares.
Step 3: Making the Hearts & Finishing
-
Utilize scraps:
Gather the leftover scraps from your pink and white strips. Re-roll them to about 1/8 inch thickness. -
Cut hearts:
Use the small heart cutter to punch out several mini hearts. These make cute confetti for photos or can be glued to other crafts later. -
Texture option:
If you want a rustic look like the example, you can lightly press a uniform texture or stamp onto a few random squares before baking or drying. -
Cure the clay:
If using polymer clay, bake according to the package instructions (usually 275°F for 15-30 minutes). If using air-dry clay, let it sit in a dry spot for 24-48 hours. -
Sand edges:
Once fully cured and hard, use fine-grit sandpaper to gently smooth the outer rim of the coaster, blending the top layer with the base layer seamlessly. -
Seal:
Apply a thin layer of matte or gloss varnish to protect the clay from moisture, which is especially important for coasters.
Troubleshooting: Gaps Appearing
If gaps appear between squares after baking/drying, fill them with a mix of liquid clay (or white glue) and scrap clay shavings, then smooth and re-cure.
Enjoy your charming new drink coasters and the sweet handmade touch they add to your home
Smiley Pink Mini Planter
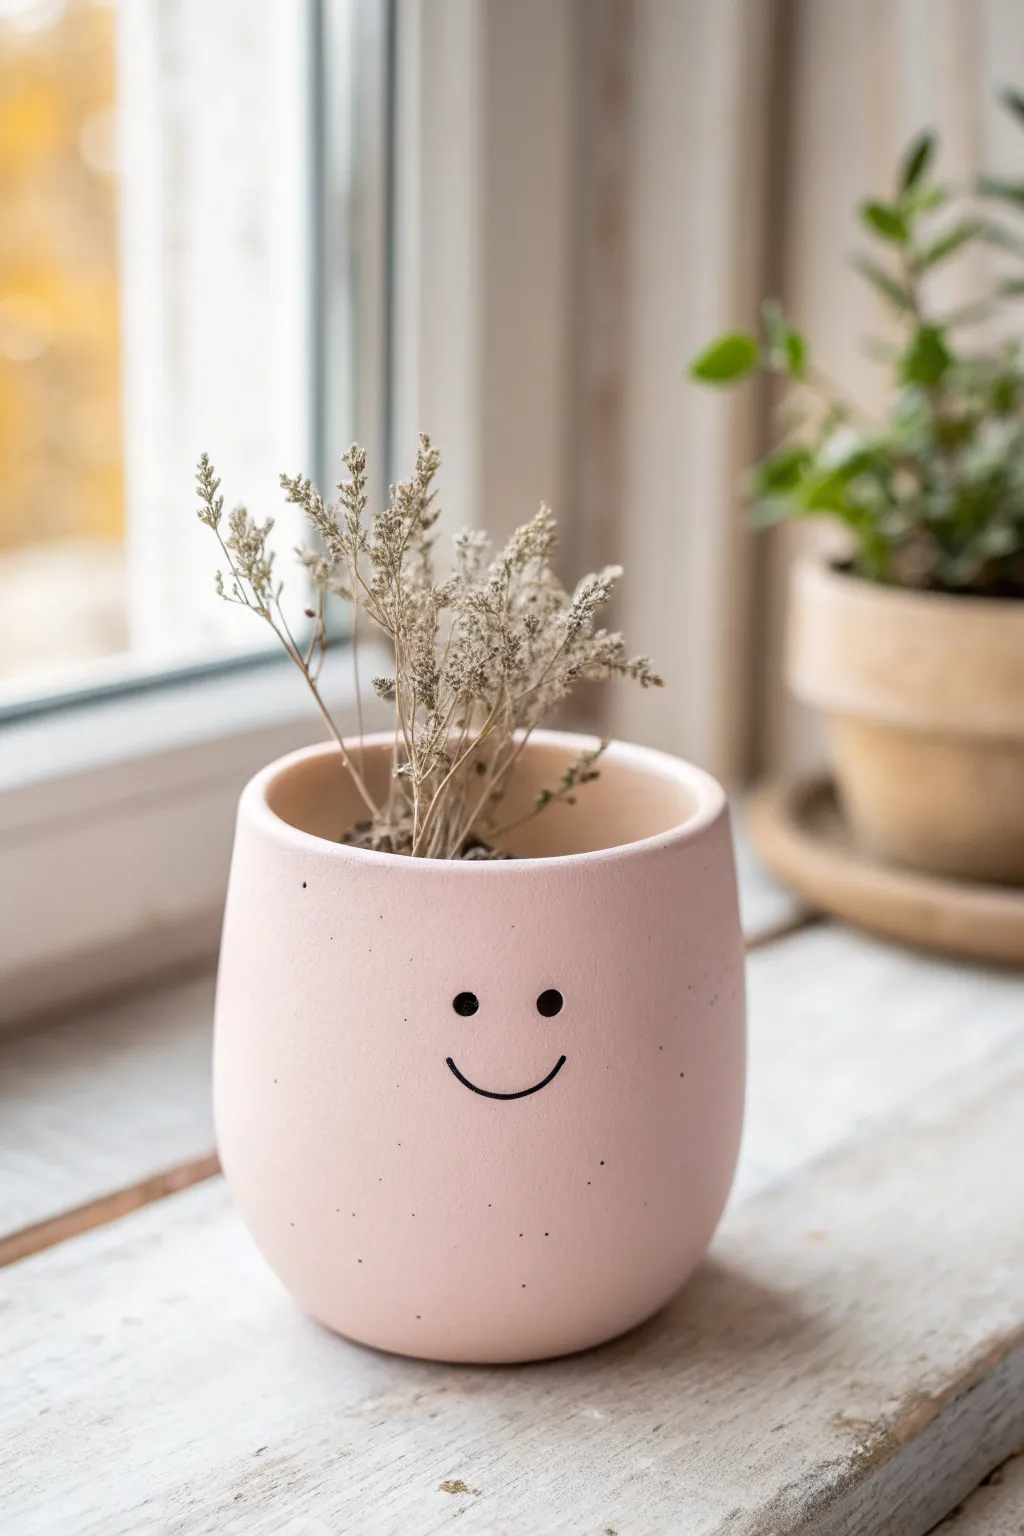
This joyful little project combines the soft charm of matte pink clay with a minimalist, hand-drawn expression that adds instant cheer to any windowsill. The finish feels modern and earthy, perfect for holding dried stems or small succulents.
Step-by-Step Guide
Materials
- Pink polymer clay (matte/pastel shade)
- Small rolling pin
- Circle cutter or a small round bowl (approx. 4 inches diameter)
- Craft knife
- Smoothing tool or old spoon
- Oven-bake clay adhesive (optional)
- Black acrylic paint
- Fine-point paintbrush or black paint marker
- Fine-grit sandpaper
- Oven
Step 1: Shaping the Base
-
Prepare the clay:
Start by conditioning your pink polymer clay until it is soft and pliable. Warm clay prevents cracking later on, so take your time kneading it in your hands. -
Roll out the slab:
Roll a portion of the clay into a flat slab about 1/4 inch thick. This will be used for the base of your pot. -
Cut the base:
Use a circle cutter or press the rim of a small glass into the slab to cut out a perfect circle. Set this aside on your baking surface.
Step 2: Building the Walls
-
Create a coil:
Roll the remaining clay into a thick, long snake. Try to keep the thickness consistent, roughly matching the thickness of your base. -
Flatten the wall:
Instead of coiling the snake, gently flatten it with your rolling pin into a long rectangular strip. Trim the edges with your craft knife to make it neat. -
Form the cylinder:
Wrap the rectangular strip around the circumference of your circular base. Where the two ends meet, slice through both layers at an angle for a cleaner seam. -
Blend the seams:
Use your smoothing tool or finger to gently blend the clay from the wall down onto the base on the outside. Repeat this process on the inside to ensure a watertight seal. -
Create the curve:
To get that slightly rounded, egg-like shape shown in the photo, gently cup the pot in your hands and smooth the walls upward, encouraging them to curve slightly inward near the top rim. -
Smooth the surface:
Run your finger or a little water over the entire surface to remove fingerprints. I find that lightly buffing with a piece of paper works wonders for a matte finish. -
Bake carefully:
Bake the pot according to the manufacturer’s instructions on your clay package. Let it cool completely inside the oven to prevent thermal shock cracks.
Cracked Clay?
If small cracks appear during smoothing, apply a tiny bit of baby oil or clay softener to your finger and massage it into the crack until it disappears.
Step 3: Adding the Personality
-
Sand for texture:
Once cool, lightly sand the outside with fine-grit sandpaper. This mimics the speckled, stone-like texture seen in the image and gives the paint something to grip. -
Draft the face:
Using a pencil, very lightly sketch where you want the eyes and smile to sit. Aim for the center-bottom third of the pot for that cute ‘chibi’ look. -
Paint the eyes:
Dip the handle end of a paintbrush into black acrylic paint. Press it gently onto your pencil marks to create two perfectly round dots for eyes. -
Draw the smile:
Using a fine-point brush or a paint marker, draw a simple, thin ‘U’ shape between the eyes. Keep the line steady and uniform. -
Add faux speckles:
To achieve the stone effect, flick a stiff toothbrush dipped in slightly watered-down gray or brown paint at the pot, or dot them on randomly with a needle tool. -
Seal (optional):
If you plan to use real plants with water, coat the inside with a waterproof varnish. For dried flowers, leaving it raw maintains that lovely matte clay texture.
Pro Tip: Weighted Base
Make the base circle slightly thicker than the walls. This adds weight to the bottom and prevents the pot from tipping over when you add tall dried flowers.
Now pop in some dried baby’s breath or sage stems and enjoy your new smiling companion
Cute Pink Mini Chess Set
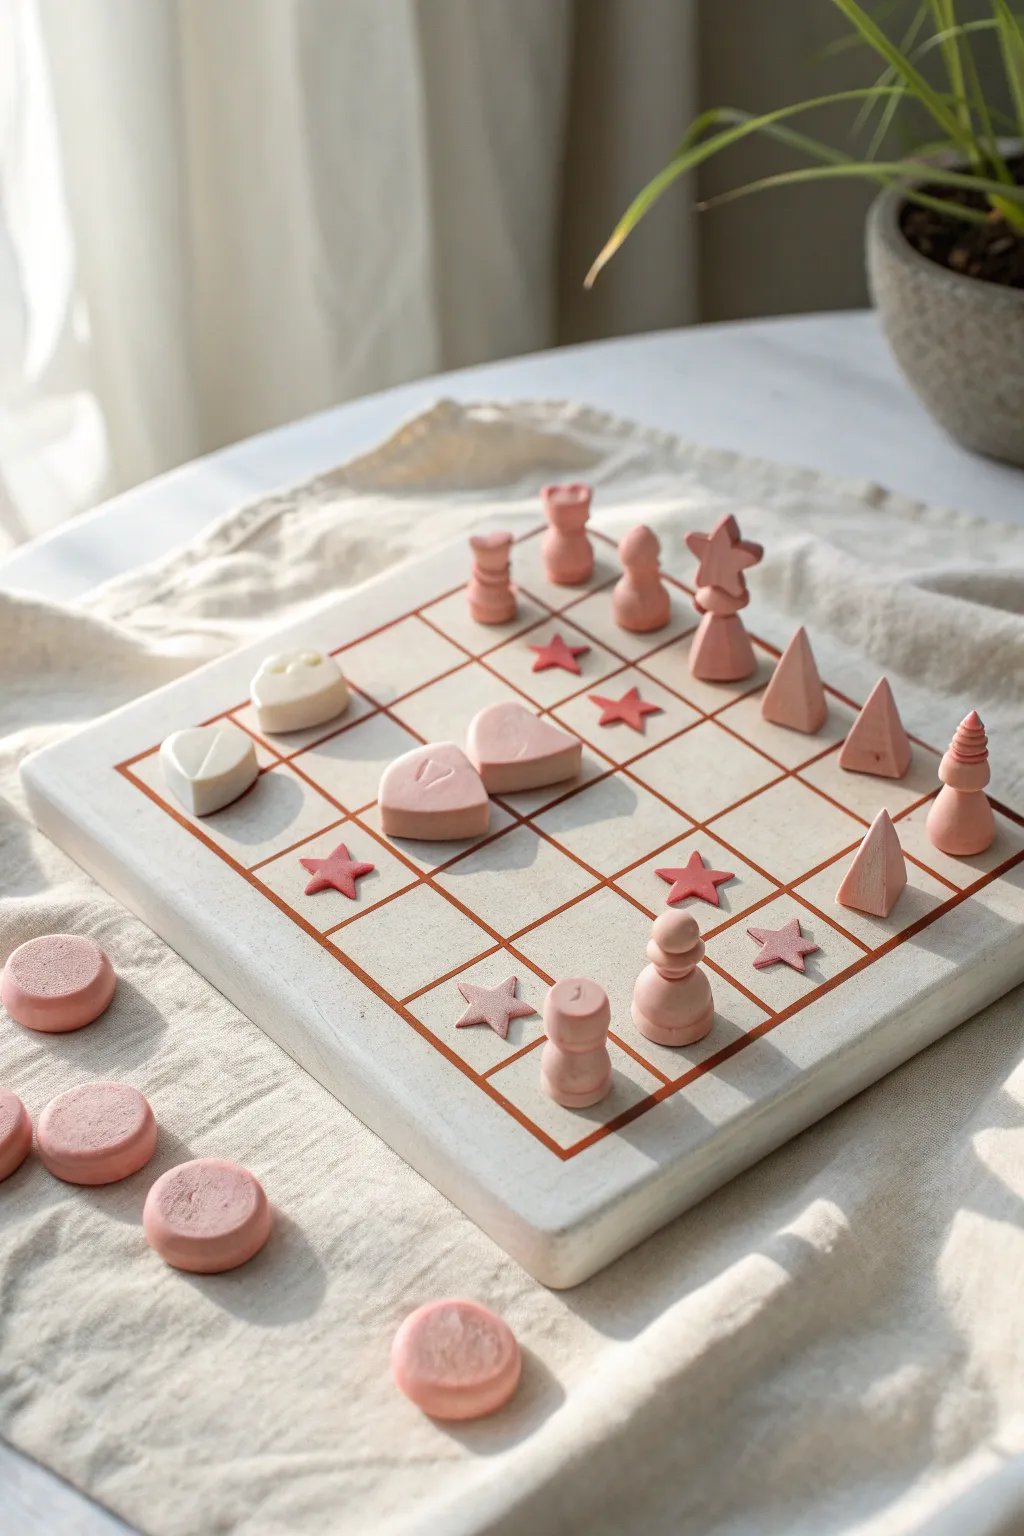
This adorable mini chess set combines soft pink and cream tones with simple, whimsical geometric shapes for a truly unique gaming experience. The minimalist design features hearts, stars, and cones set upon a chunky, grid-lined slab board.
Step-by-Step
Materials
- Polymer clay (white, beige, and pastel pink/rose)
- Acrylic rolling pin or clay machine
- Square clay cutter or craft knife
- Ruler
- Small heart shape cutter
- Small star shape cutter
- Needle tool or toothpick
- Terracotta or warm brown acrylic paint (fine tip marker works too)
- Fine liner brush
- Glaze or varnish (matte or satin finish)
- Sandpaper (fine grit)
Step 1: Creating the Board Base
-
Condition the base clay:
Start by mixing white polymer clay with a tiny bit of beige or grey to create a concrete-like off-white stone color. Condition it thoroughly until it is soft and pliable. -
Form the slab:
Roll the clay out into a thick, uniform slab. You want it substantial, about 1/2 inch to 3/4 inch thick, to give the board weight and presence. -
Cut the square:
Use a large square cutter or a ruler and craft knife to cut a perfect square. The size depends on how ‘mini’ you want it, but 6×6 inches is a good starting point. -
Smooth the edges:
Gently rub the sides and corners with your finger or a bit of cornstarch to soften the sharp cut edges, giving it a molded, ceramic look. -
Incise the grid:
Using a ruler and a needle tool, lightly score a 5×5 or traditional 8×8 grid into the surface. Don’t cut all the way through; just create clean channels for the paint later.
Keep it Straight
Use a playing card or a rigid piece of cardstock to smooth the sides of your slab board before baking. This ensures perfectly vertical edges.
Step 2: Sculpting the Geometric Pieces
-
Mix your pinks:
Prepare your pink clay. You might want two shades: a solid matte pink for the main pieces and a lighter cream-pink for the opponents. -
Make the Pawn cones:
For the pawns, roll small balls of pink clay and shape them into simple pyramids or cones. Smooth the sides so they are sharp and geometric. -
Create the Heart pieces:
Roll out a slab of pink clay to about 1/4 inch thickness. Use a small heart cutter to punch out two shapes. Smooth the bottom edges so they stand upright easily. -
Carve details:
On one of the hearts, I like to use a needle tool to gently carve a small initial or symbol, like a ‘V’ or ‘K’, into the top surface for extra texture. -
Form the Star pieces:
Roll out a slightly thinner slab of pink paint. Use a star cutter. For stability, attach these stars to a small conical base or cylinder so they stand tall. -
Sculpt the Royalty:
For the King and Queen equivalents, stack simple shapes. Try a cylinder base, a sphere in the middle, and a cone or spiral on top. Blend the seams or leave them distinct for a stacked-toy look. -
Create the opposing set:
Repeat these shapes with your second clay color (cream or white) to create the opposing team’s pieces. -
Make flat markers:
Create several flat, round discs and small flat stars. These can be used as checkers pieces or board decorations.
Texture Play
Before baking, gently press a piece of coarse sandpaper or a toothbrush onto the surface of the board to give it a realistic stone or concrete texture.
Step 3: Finishing Touches
-
Bake everything:
Arrange the board and all pieces on a tile or baking sheet. Bake according to your polymer clay brand’s specific temperature instructions (usually around 275°F for 15-30 minutes). -
Cool and sand:
Let the pieces cool completely. If there are any fingerprints, lightly buff them away with fine-grit sandpaper. -
Paint the grid lines:
Take your fine liner brush and the warm brown paint. Carefully paint into the scored lines on the board. The grooves will help guide your brush. -
Clean up paint:
If paint spills over the line, quickly wipe the surface with a damp paper towel or baby wipe, leaving paint only deep in the crevices. -
Seal the project:
Apply a thin coat of matte or satin varnish to the pieces and the board to protect the clay and give it a unified, professional finish.
Set up your new pastel pieces and enjoy a stylish game on your handmade board