If you’ve got a little stash of polymer clay and a craving to make something adorable, necklaces are such a satisfying place to start. Here are my favorite cute necklace ideas that feel playful, personal, and totally doable at your own table.
Tiny Heart Charm Pendant
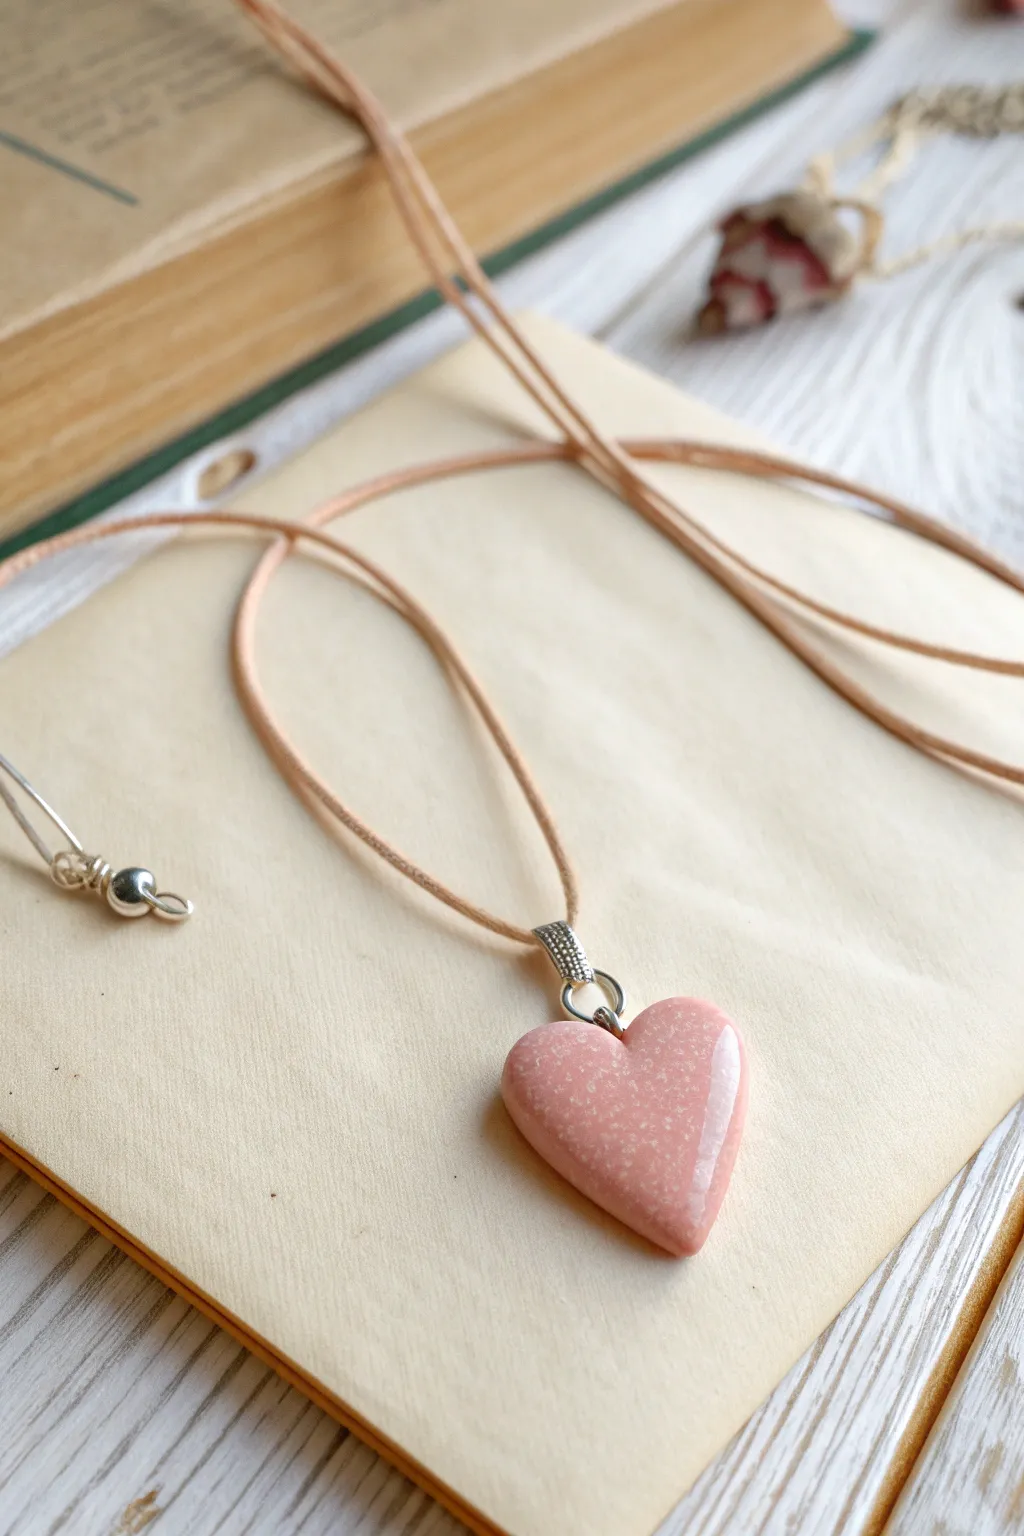
This charming project captures the soft, romantic look of polished rose quartz using simple polymer clay techniques. Suspended on a natural cord, the speckled pink heart makes a sweet, minimalistic accessory perfect for everyday wear.
Step-by-Step
Materials
- Polymer clay (translucent white)
- Polymer clay (pink or red)
- White acrylic paint or white pastel chalk
- Liquid polymer clay (optional)
- Glossy polyurethane varnish or UV resin
- Heart-shaped clay cutter (approx. 1 inch)
- Jewelry bail (glue-on or pinch style)
- Jump ring (silver)
- Waxed cotton cord or suede lace (beige/peach)
- Jewelry clasp and crimp ends
- Fine-grit sandpaper (400-800 grit)
- Needle tool or small drill bit
- Ceramic tile or glass work surface
- Wet wipes
Step 1: Mixing the Faux Stone Clay
-
Condition the base:
Start by conditioning a block of translucent white polymer clay until it is soft and pliable. This translucency is key to achieving a stone-like depth rather than a flat plastic look. -
Add the color:
Mix in a very small amount of pink clay. You want a soft, milky strawberry shade, so add the pigment gradually until you reach the desired hue. -
Create the speckle effect:
To mimic natural inclusions, shave some dry white pastel chalk into fine dust or use tiny flecks of white acrylic paint that has been allowed to dry slightly on a palette. Fold these specks into your pink clay. -
Final mix:
Knead the clay just enough to distribute the specks, but don’t over-mix or the white might blend completely into the pink. I like to stop as soon as the distribution looks even.
Step 2: Shaping and Baking
-
Roll the slab:
Roll your mixed clay out on a ceramic tile to a thickness of about 4mm to 5mm. A slightly thicker heart feels higher quality and more like a real stone charm. -
Cut the shape:
Press your heart-shaped cutter firmly into the clay. Give it a tiny wiggle to ensure it separates cleanly from the surrounding slab, then lift the cutter. -
Soften the edges:
Gently rub the edges of the heart with your finger to round them off. Natural stones rarely have sharp, cookie-cutter edges, so this doming step creates a much more organic finish. -
Insert hardware (Option A):
If you plan to use a jump ring directly through the clay, use a needle tool to pierce a hole near the top center or slightly to the side of the lobe now. -
Bake the piece:
Bake the heart according to your package instructions—typically 275°F (130°C)—for about 30 minutes. Let it cool completely inside the oven to prevent cracking.
Sticky Fingerprints?
If you find fingerprints on your raw clay, brush a tiny amount of baby oil or cornstarch over the surface before baking to smooth them out effortlessly.
Step 3: Finishing and Assembly
-
Sand for smoothness:
Once cool, wet-sand the heart using fine-grit sandpaper. Dip the heart in water and sand in circular motions to remove any fingerprints or lint. -
Buff surface:
After sanding, rub the piece vigorously with a piece of denim or a soft cotton cloth to bring out a natural sheen. -
Apply the glaze:
For that wet, glassy look seen in the photo, apply a coat of gloss varnish or UV resin. If using resin, cure it under a UV lamp for 2-3 minutes. -
Attach the bail:
If you didn’t pierce a hole, use a small dab of superglue or E6000 to attach a silver glue-on bail to the back or top of the heart. -
Connect the jump ring:
Open a silver jump ring using two pliers (twist, don’t pull). Thread it through the bail loop or the hole in the clay, then close it securely. -
Measure the cord:
Cut a length of beige waxed cotton cord or suede lace. A length of 18-20 inches works well for a standard pendant drop. -
String the pendant:
Slide the heart pendant onto the cord so it sits in the center. -
Add fasteners:
Attach metal crimp ends to both raw ends of the cord. Squeeze them tight with pliers, then attach your clasp components to the loops on the crimp ends.
Pro Tip: Faux Quartz
Add a sprinkle of ultra-fine glitter or embossing powder into the translucent mix. It won’t look glittery, but will catch the light like mineral deposits inside quartz.
Now you have a lovely, handcrafted stone-effect necklace ready to gift or keep for yourself
Pastel Terrazzo Dot Disc
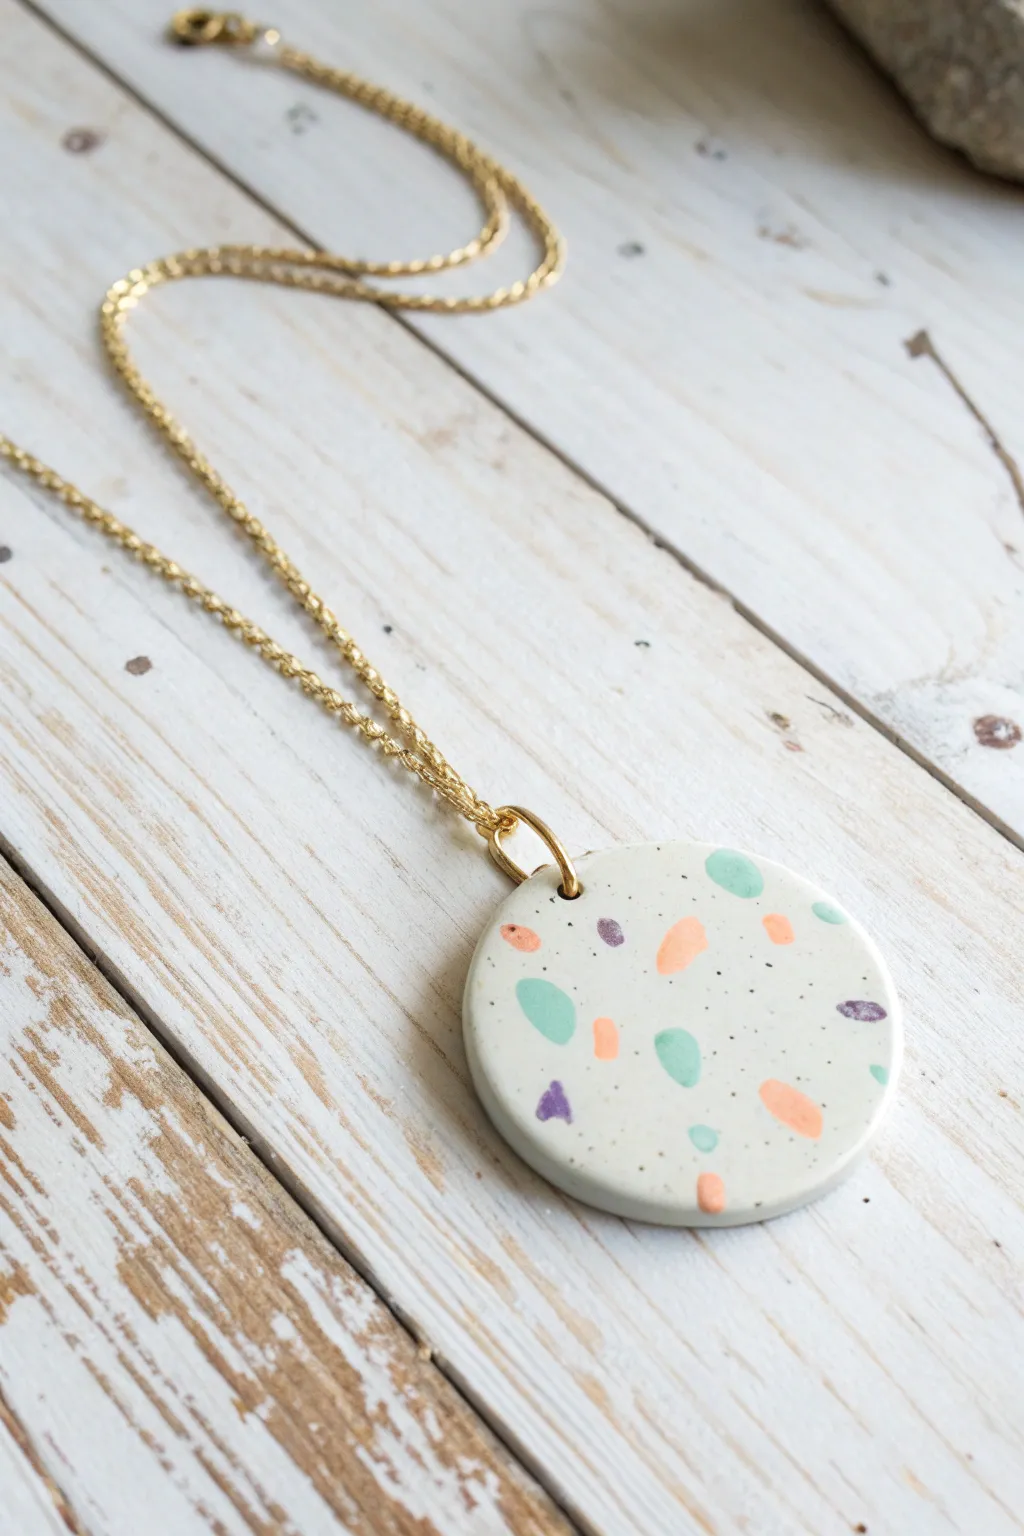
Capture the trendy terrazzo aesthetic with this sweet and simple pendant design. Featuring a creamy white base speckled with pastel chips and faux-granite flecks, it makes for a modern accessory that’s surprisingly easy to achieve.
Detailed Instructions
Materials
- White polymer clay (approx. 1/2 block)
- Small amounts of pastel polymer clay (mint green, peach/coral, light purple)
- Finely ground black pepper or black embossing powder
- Rolling pin or pasta machine
- Round clay cutter (approx. 1.5 – 2 inches)
- Sharp craft knife or tissue blade
- Small jump ring (gold tone)
- Gold tone chain necklace
- Pliers (chain nose)
- Small drill bit or toothpick
- Parchment paper or ceramic tile
Step 1: Preparing the Base
-
Condition the white clay:
Start by thoroughly kneading your white polymer clay until it is soft and malleable. This is crucial to prevent cracks later on. -
Add the speckles:
Flatten the white clay slightly and sprinkle a small pinch of finely ground black pepper onto the surface. You can also use black embossing powder for a similar effect. -
Incorporate the flecks:
Fold the clay over to trap the pepper inside and knead it repeatedly. Continue this until the black specks are evenly distributed throughout the white dough. -
Roll out the slab:
Using your acrylic roller or pasta machine on a medium-thick setting (about 3-4mm), roll the speckled white clay into a smooth, even sheet. Place this on your parchment paper or work tile.
Unwanted Bubbles?
If you see air bubbles after rolling the chips in, use a sharp needle to gently pierce the bubble, then smooth the air out with your finger and roll flat again.
Step 2: Creating the Terrazzo Pattern
-
Prepare pastel colors:
Condition your mint, peach, and purple clays separately. Roll each one into a very thin sheet, much thinner than your base slab. -
Create the chips:
Tear the thin pastel sheets into tiny, irregular scraps. Aim for a variety of shapes and sizes, but keep them generally small, around 2-4mm across. -
Arrange the pattern:
Gently place these colored scraps onto your white base slab. Space them out randomly, leaving plenty of the white background visible between them. -
Embed the chips:
Cover the slab with a piece of parchment paper to prevent sticking. Gently roll over the surface with your roller to press the colored chips flush into the white base. -
Check surface level:
Remove the paper and run your finger over the clay. If you can still feel the bumps of the colored chips, roll it again slightly until the surface is completely unified and smooth.
Make It Shine
Add a coat of UV resin or glossy polyurethane varnish after baking. This protects the clay and gives the terrazzo pattern a polished, ceramic-like finish.
Step 3: Cutting and Finishing
-
Cut the shape:
Position your round cutter over the section of the pattern you like best. Press down firmly and give it a little wiggle to ensure a clean cut, then lift the cutter away. -
Create the hole:
Use a small straw, tool, or toothpick to punch a hole near the top edge of the circle. Make sure the hole is big enough for your jump ring but not too close to the edge. -
Smooth the edges:
Dip your finger in a little bit of water or cornstarch and gently rub the raw edges of the circle to smooth out any fingerprints or rough spots from the cutter. -
Bake the piece:
Bake the pendant according to the temperature and time instructions on your specific brand of polymer clay packaging. I usually suggest tenting foil over it to prevent the white clay from yellowing. -
Cool and inspect:
Once baked, let the piece cool completely. If there are any rough edges remaining, you can lightly sand them with fine-grit wet sandpaper. -
Add hardware:
Open your gold jump ring using two pairs of pliers. Twist the ends sideways (don’t pull them apart) to open the loop. -
Attach the chain:
Thread the open jump ring through the hole in your clay pendant, then loop your gold chain through the jump ring as well. -
Close the ring:
Use your pliers to twist the jump ring back into a closed position, ensuring the ends meet perfectly flush so the chain doesn’t slip out.
Now you have a chic, custom piece of jewelry ready to wear or gift to a friend

Marbled Swirl Moon Pendant
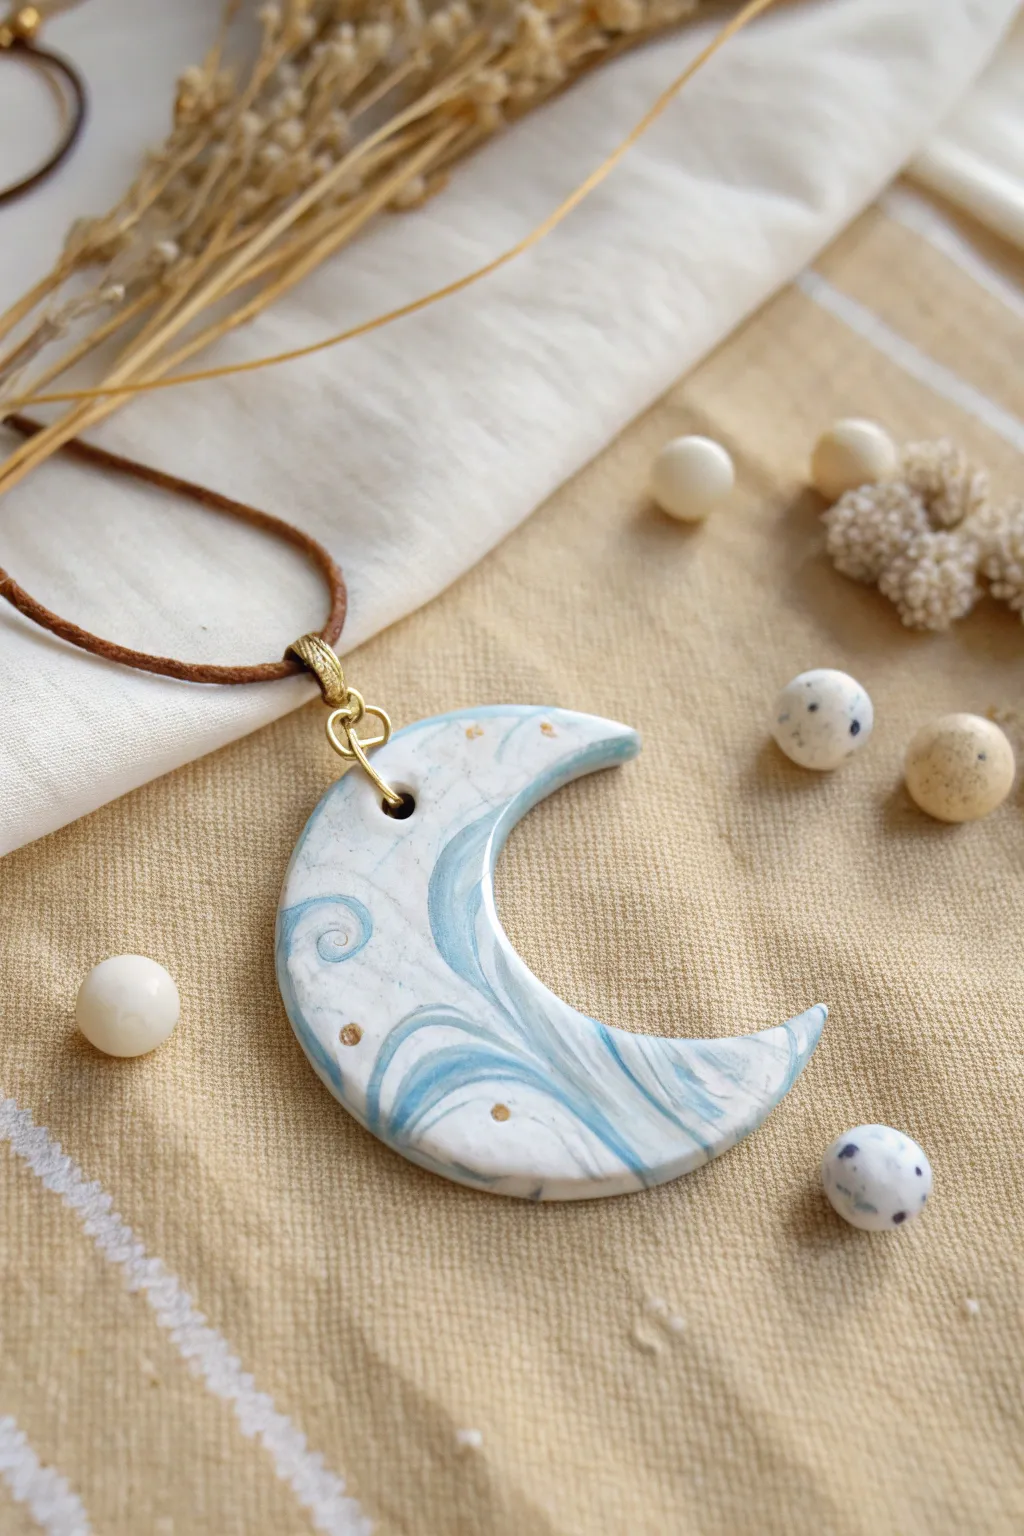
Capture the magic of the night sky with this ethereal crescent moon pendant. Featuring soft, marbled swirls of blue and white accented by flecks of gold, this piece makes for a dreamy, bohemian accessory.
Step-by-Step Guide
Materials
- White polymer clay
- Light blue or aqua polymer clay
- Gold acrylic paint or gold leaf flakes
- Clay roller or pasta machine
- Crescent moon clay cutter (approx. 2 inches)
- Needle tool or toothpick
- Small gold paintbrush (if using paint)
- Wide sandpaper or nail file/buffing block
- 7mm gold jump rings (2)
- Jewelry pliers
- Brown suede or faux leather cord
- Oven (for baking clay)
- Parchment paper or ceramic tile
Step 1: Creating the Marble
-
Condition the clay:
Start by warming up a chunk of white clay and a smaller piece of light blue clay in your hands until they are soft and malleable. -
Form snakes:
Roll both colors into long, thin snake shapes. The white snake should be thicker than the blue one, as we want white to be the dominant base color. -
Twist together:
Twist the two snakes together like a candy cane. Then, fold the twisted rope in half and twist it again. -
Marbling process:
Roll the twisted clay into a ball, then into a snake again. Repeat the twisting and folding process 2-3 times. Be careful not to over-mix, or the distinct swirls will turn into a solid light blue color. -
Flatten the slab:
Once you are happy with the marbling pattern, press the clay into a ball and roll it out flat using an acrylic roller. Aim for a thickness of about 1/4 inch (6mm).
Step 2: Shaping and Detailing
-
Cut the shape:
Position your crescent moon cutter over a section of the slab that has the nicest swirl pattern. Press down firmly to cut the shape. -
Smooth edges:
Gently gently lift the moon from the surface. Use your finger to lightly smooth the raw edges where the cutter might have left a sharp ridge. -
Add texture:
Using a needle tool, gently add a subtle spiral or swirl indentation into the clay surface to mimic the wind or clouds shown in the design. -
Create gold accents:
Take a tiny tool or the back of a needle and press small, random indentations into the surface. These will be filled with gold later. -
Pierce the hole:
Use a straw or a tool specifically for bead holes to punch a clean hole at the top tip of the crescent. Ensure the hole is large enough for your jump ring.
Muddy colors?
If your blue and white are blending into a solid pastel instead of distinct swirls, you have over-mixed. Stop twisting sooner next time, or add fresh white chunks before rolling flat.
Step 3: Finishing Touches
-
Bake carefully:
Place the pendant on a ceramic tile or parchment paper. Bake according to your brand’s specific package instructions (usually 275°F/135°C for 15-30 minutes). -
Cool and clean:
Let the piece cool completely. If any fingerprints remain, gently buff the surface with fine-grit sandpaper or a buffing block. -
Apply gold:
Using a very fine brush and gold acrylic paint, carefully dab paint into the small indentations you made earlier. Wipe away excess surface paint quickly if it spills over. -
Attach hardware:
Using two pairs of pliers, twist open a jump ring. Loop it through the hole in the moon pendant. -
Add the bail:
Attach a second jump ring or a specific jewelry bail to the first ring if needed, ensuring the moon hangs flat against the chest. -
Thread the cord:
Thread your brown suede cord through the jump ring or bail. Tie the ends of the cord with a simple knot or attach decorative cord ends for a polished finish.
Level Up: Celestial Sparkle
For extra magic, mix a pinch of translucent clay with glitter into your white base before marbling. It adds a subtle, starry shimmer when the light hits it.
Wear your celestial creation with pride and enjoy the calming vibes of your handmade art.


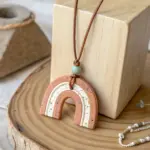
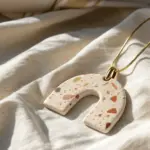
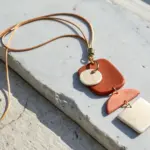
Mini Rainbow Arch Necklace
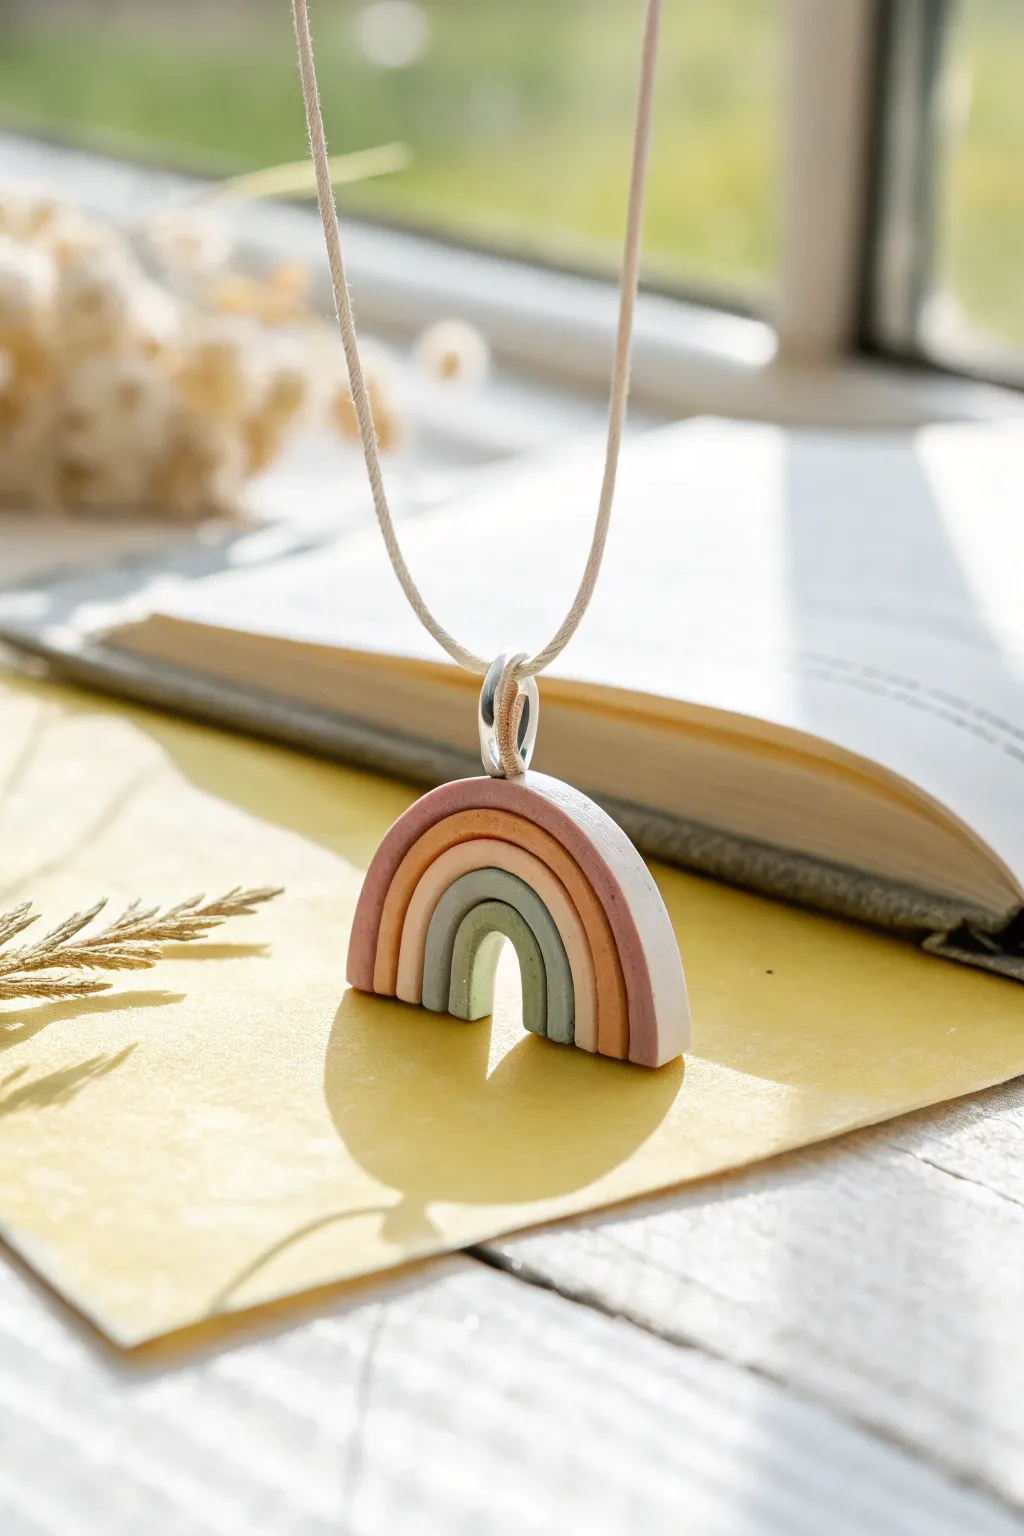
Capture the magic of a gentle rainbow with this muted, earth-toned arch pendant. The soft, matte finish and staggered layers create a modern, minimalist piece that pairs beautifully with your favorite cozy sweaters.
Detailed Instructions
Materials
- Polymer clay in five colors: dusty rose, terracotta, beige, sage green, and white
- Rolling pin or pasta machine
- Precision craft knife or flexible tissue blade
- Circle cutter (approx. 1 inch diameter) or a round object to trace
- Liquid polymer clay (Translucent or White)
- Silver pendant bail
- Beige cord or thin leather string
- Ceramic tile or baking sheet with parchment paper
- Fine grit sandpaper (400-600 grit)
- Small round tool or toothpick (to help smooth seams)
Step 1: Preparing the Palette
-
Condition the Clay:
Begin by thoroughly conditioning each of your colored clays (dusty rose, terracotta, beige, sage green) and the white clay until they are soft and pliable. This prevents cracking later. -
Create the Snakes:
Roll a small portion of each of the four colored clays into long, even ropes or ‘snakes.’ Aim for a uniform thickness of about 3-4mm for each color. -
Prepare the White Snake:
Repeat this process with the white clay, ensuring it matches the thickness of the colored ropes. This will act as the outer framing layer.
Fixing Gaps
If you see gaps between your rainbow arches before baking, gently push the clay ropes together from the outer edges inward. Don’t press down; press sideways.
Step 2: Forming the Arch
-
Start from the Center:
Take your sage green rope (the smallest inner arch) and gently curve it into a tight U-shape on your ceramic tile. Try to keep the inner curve smooth. -
Add the Second Layer:
Apply a tiny amount of liquid polymer clay to the outer edge of the green arch to act as glue. Press the beige rope gently against it, following the curve. -
Build the Rainbow:
Repeat the bonding process with the terracotta rope, and finally the dusty rose rope, ensuring each layer touches the previous one without distorting the shape. -
Add the Outer Frame:
Finish the arch construction by adhering the white clay rope to the very outside of the dusty rose layer. This creates a clean, defining border. -
Smooth the Seams:
Once all layers are combined, gently press the top surface with your finger or a flat tool to ensure they are level. I find rolling lighter over the top helps unify them.
Make it Sparkle
Before baking, lightly brush gold mica powder over just one specific arch color (like the beige one) to add a subtle metallic shimmer to the matte design.
Step 3: Refining and Baking
-
Trim the Base:
Using your flexible blade or craft knife, specific a straight horizontal cut across the bottom of the rainbow legs so they stand perfectly flat and even. -
Attach the Bail:
Carefully press the looped end of your silver bail into the top center of the white outer arch. You may need to create a small indentation or secure it with a dot of liquid clay. -
Final Shape Check:
Inspect the rainbow for any fingerprints or lint. You can wipe it very gently with a bit of baby oil or acetone on a cotton swab if needed. -
Bake:
Bake the piece according to your specific brand of polymer clay instructions (usually around 275°F/135°C for 15-30 minutes). -
Cool Down:
Allow the pendant to cool completely on the baking sheet before handling it, as hot clay is fragile.
Step 4: Finishing Touches
-
Sand for Smoothness:
Once cool, use fine-grit sandpaper under running water to smooth out any rough edges on the sides or back, giving it a professional matte finish. -
Add the Cord:
Thread your beige cord through the silver bail loop. Tie a simple knot or add cord ends depending on your preferred closure style.
Wear your new handmade pendant with pride or wrap it up as a thoughtful gift for a color-loving friend

The Complete Guide to Pottery Troubleshooting
Uncover the most common ceramic mistakes—from cracking clay to failed glazes—and learn how to fix them fast.
Cute Mushroom Charm Necklace
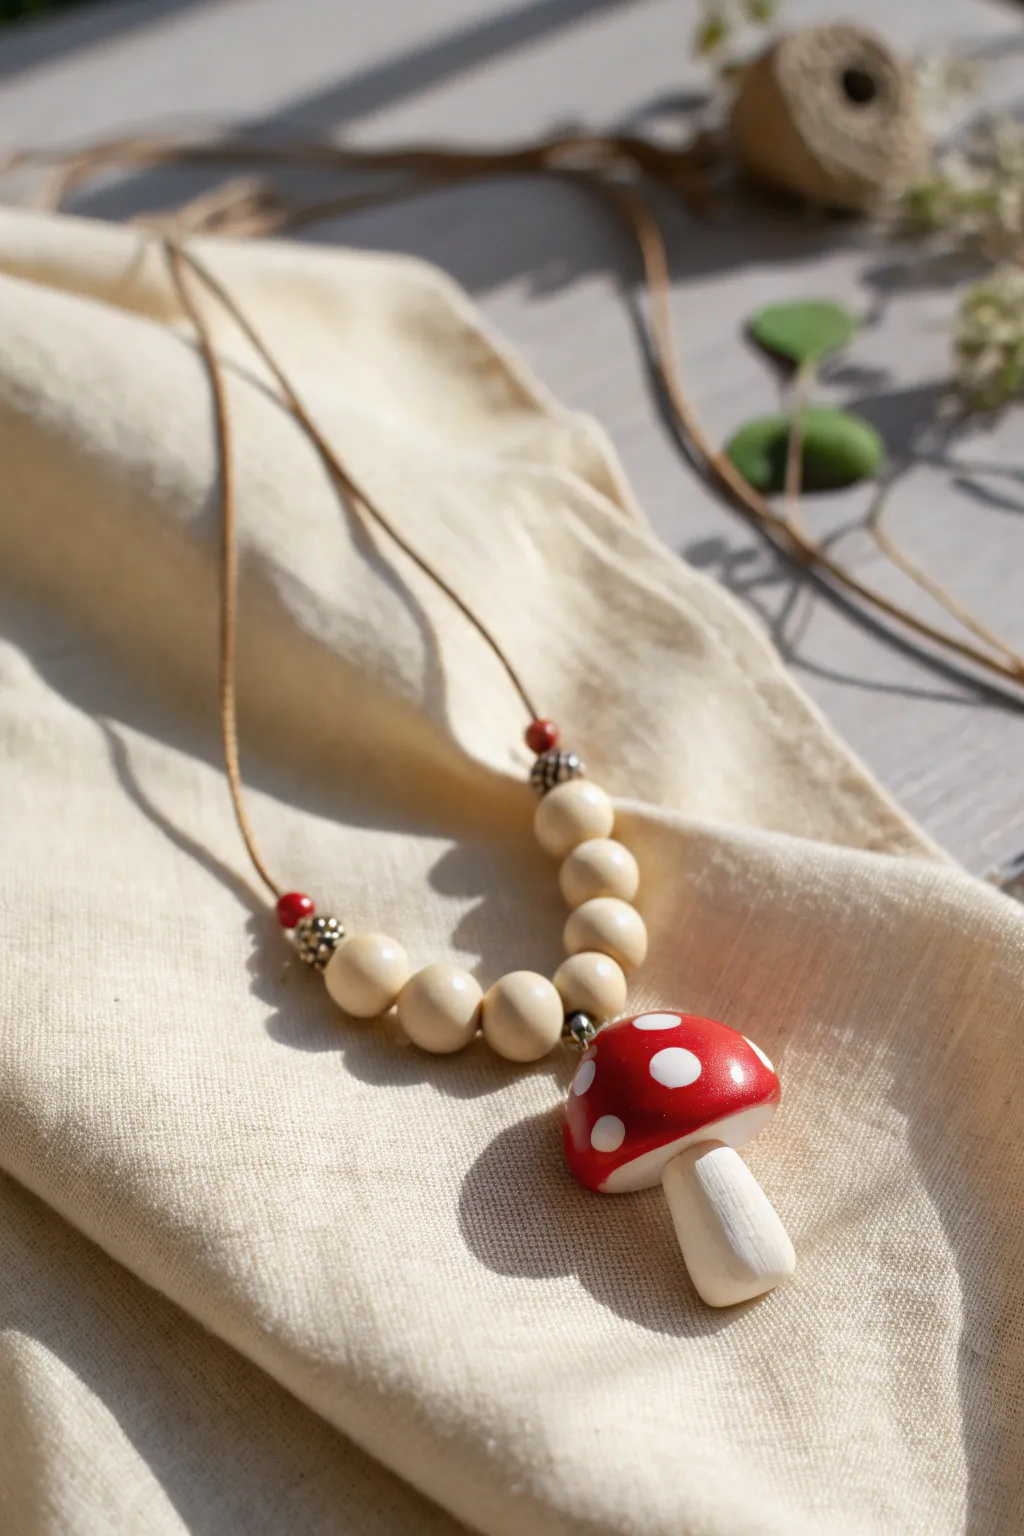
Bring a touch of forest charm to your wardrobe with this handcrafted necklace featuring a classic red toadstool pendant. Strung with natural wooden beads and finished on a rustic leather cord, this project perfectly balances earthy textures with bright, cheerful color.
Step-by-Step Guide
Materials
- Red polymer clay (e.g., Fimo or Sculpey)
- White or cream polymer clay
- Translucent liquid clay or bake-and-bond
- Small eye pin (silver tone)
- 6-8 large round wooden beads (approx. 10-12mm)
- 2 small red accent beads (approx. 4mm)
- 2 ornate silver spacer beads
- Thin leather or waxed suede cord (approx. 1-2mm thick)
- Acrylic rolling pin or clay machine
- Ball stylus tool or toothpick
- Sculpting tools
- Gloss glaze (optional)
Step 1: Sculpting the Mushroom Stem
-
Condition the clay:
Start by kneading the white or cream polymer clay until it is soft, pliable, and free of cracks. -
Shape the base:
Roll a piece of clay into a thick cylinder, approximately 1 inch long. Slightly taper one end to be narrower, as this will connect to the cap, while leaving the bottom slightly rounded and wider for a natural stem look. -
Add texture:
Using a needle tool or a stiff brush, you can add very faint vertical lines to the stem to mimic organic growth textures, though keeping it smooth works beautifully for a stylized toy-like finish.
Sticky Situation?
If your white clay is getting stained by the red clay residue on your hands, clean your hands and tools with a baby wipe or alcohol before switching colors.
Step 2: Creating the Cap
-
Form the cap:
Take a larger ball of red clay and flatten the bottom against your work surface. Gently mold the top into a smooth dome shape, ensuring it’s wide enough to overhang the stem significantly. -
Attach the stem:
Press the tapered end of your white stem into the center of the underside of the red cap. I like to add a tiny drop of liquid clay or bake-and-bond here to ensure a permanent connection. -
Smooth the seam:
Use a silicone styling tool or your finger to gently smooth the connection point underneath so the transition looks seamless. -
Insert the hardware:
Trim an eye pin to about half an inch long. Push it gently into the very top center of the red mushroom cap until only the loop is visible.
Step 3: Adding the Polka Dots
-
Prepare the dots:
Roll out a very thin sheet of white clay. Use a small round cutter or a straw to punch out several tiny circles. -
Apply the dots:
Place the white circles randomly onto the red cap. Press them down gently so they flatten slightly and adhere well to the curved surface. -
Final shaping:
Give the entire mushroom a very gentle roll in your palm if you want the dots to be completely flush with the surface, or leave them slightly raised for dimension.
Pro Tip: Eye Pin Security
Before inserting the straight eye pin, bend the submerged end into a slight zigzag or hook shape. This acts like an anchor inside the clay so it won’t pull out after baking.
Step 4: Baking and Assembly
-
Bake the pendant:
Place your mushroom on a baking sheet lined with parchment paper. Bake according to your clay manufacturer’s instructions (usually around 275°F/135°C for 15-30 minutes). Let it cool completely. -
Glaze (Optional):
If you want a shiny, ceramic-like finish, apply a coat of gloss glaze to the red cap and let it dry. Leave the stem matte for a nice textural contrast. -
Prepare the cord:
Cut a length of leather cord to your desired necklace length, adding a few extra inches for knots. -
String the beads:
Thread the cord through the eye hook of your mushroom pendant, centering the mushroom. -
Arrange the pattern:
On the right side of the cord, thread 3 or 4 large wooden beads. Repeat this on the left side so the mushroom sits in the center of the bead structure. -
Add accent beads:
Above the wooden beads on each side, thread one silver spacer bead followed by one small red accent bead. -
Secure the beads:
Tie a simple overhand knot in the leather cord tightly above the final red bead on both sides. This keeps the bead arrangement fixed in place near the pendant. -
Finish the necklace:
Tie the two loose ends of the leather cord together using an adjustable sliding knot or a simple bow if you prefer a rustic closure.
Now you have an adorable forest accessory ready to wear on your next nature walk
Sweet Bow Pendant
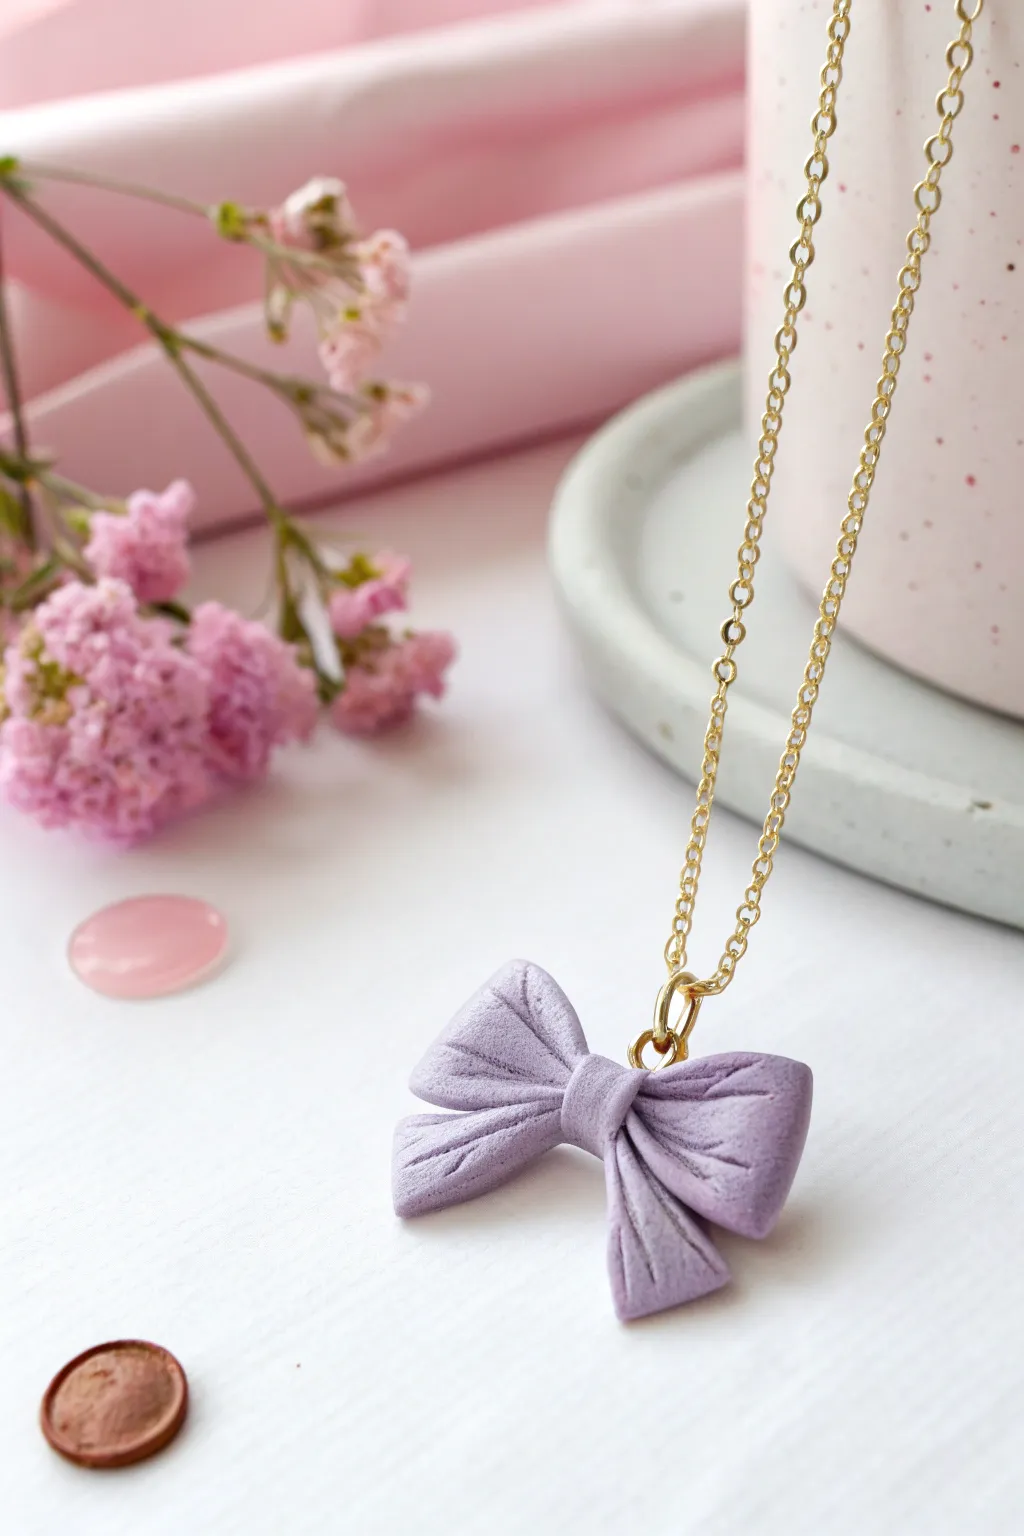
This delicate purple bow pendant captures the soft look of fabric with a subtle, shimmering texture that catches the light beautifully. Suspended on a gold chain, it makes a charming accessory that adds a touch of sweetness to any outfit.
Step-by-Step
Materials
- Polymer clay (light purple or lilac)
- White pearlescent mica powder or white glitter dust
- Gold jewelry chain (fine link)
- Two gold jump rings (4mm or 5mm)
- Jewelry pliers (round nose and flat nose)
- Clay blade or craft knife
- Needle tool or toothpick
- Rolling pin or pasta machine
- Soft brush for applying powder
- Eye pin (gold)
Step 1: Prepping the Clay
-
Condition the clay:
Begin by thoroughly conditioning your purple polymer clay. Knead it in your hands until it becomes soft, pliable, and free of cracks. If the clay is too stiff, you can add a tiny drop of clay softener or baby oil. -
Add the shimmer:
Before shaping, brush a healthy amount of pearlescent mica powder or fine glitter dust onto the raw clay. Fold the clay and knead it again to incorporate the shimmer throughout, or simply brush it heavily on the surface once rolled out for a more intense velvet effect. -
Roll it out:
Roll the clay into a flat sheet, approximately 2mm to 3mm thick. Aim for an even thickness so the bow loops will be sturdy but delicate. -
Cut the strip:
Using your clay blade, cut a clean, long rectangular strip. A good size is about 1 cm wide and 8 cm long, though you can adjust this depending on how large you want your final bow to be.
Make it Sparkle
For that extra frosty texture seen in the photo, lightly press a piece of coarse sandpaper or a toothbrush onto the clay surface before baking.
Step 2: Forming the Bow
-
Fold the ends:
Take the two ends of your strip and fold them inward to meet in the exact center, creating two loops. Press the ends gently down onto the center of the strip to secure them. -
Pinch the center:
Gently pinch the center of the bow where the ends meet. This creates the classic cinched look. -
Add texture lines:
Using a needle tool or toothpick, carefully press indentations into the loops, radiating from the center outward. I like to make these slightly irregular to mimic the natural folds of fabric. -
Make the tails:
Cut a second strip of clay, slightly shorter than the bow width. Cut a V-shape notch into each end to create ribbon tails. -
Attach the tails:
Place the bow loops on top of the tail piece. Gently press the center to fuse them together. You can add a drop of liquid clay here for a stronger bond. -
Create the center knot:
Roll a small, thin strip of clay to act as the center knot. Wrap this strip vertically around the pinched center of the bow, covering the join where the loops and tails meet. -
Refine the shape:
Use your fingers or a tool to fluff up the loops so they aren’t flat. Ensure the center knot looks tight and neat.
Drooping Loops?
If your bow loops are sagging during sculpting, tuck small balls of tissue paper inside the loops to hold their shape while you bake. Remove after cooling.
Step 3: Assembly and Baking
-
Insert the eye pin:
Trim a gold eye pin so the stem is short (about 5mm). Dip the end in liquid clay or glue and insert it vertically into the top of the center knot loop. -
Final texture check:
Inspect your bow for any fingerprints. If needed, lightly brush a bit more mica powder over the surface to smooth it out and enhance the ‘velvet’ texture. -
Bake the piece:
Place the bow on a ceramic tile or baking sheet lined with parchment paper. Bake according to your clay manufacturer’s instructions (usually around 275°F/130°C for 15-30 minutes). -
Cool down:
Allow the piece to cool completely before handling. The clay is fragile while warm. -
Attach the chain:
Open a jump ring using your pliers. Thread it through the loop of the eye pin you baked into the bow. -
Finish the necklace:
Slide your gold chain through the jump ring before closing it securely. Ensure the jump ring is flush so the chain doesn’t slip out.
Now you have a sweet, handmade keepsake to wear or gift to a friend


What Really Happens Inside the Kiln
Learn how time and temperature work together inside the kiln to transform clay into durable ceramic.
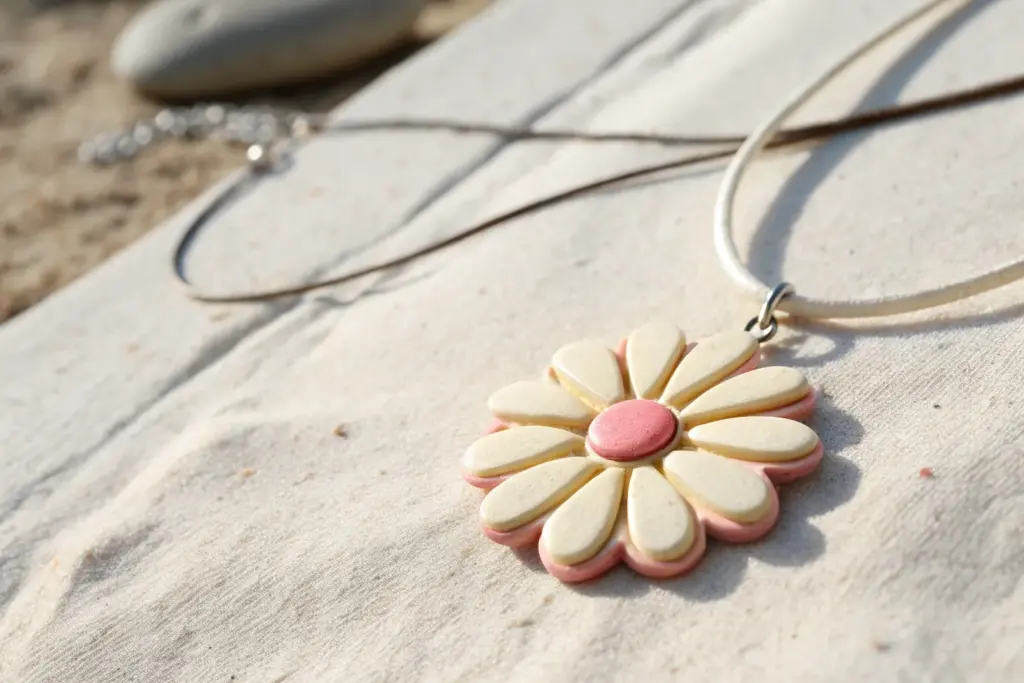
Daisy Flower Bead Necklace
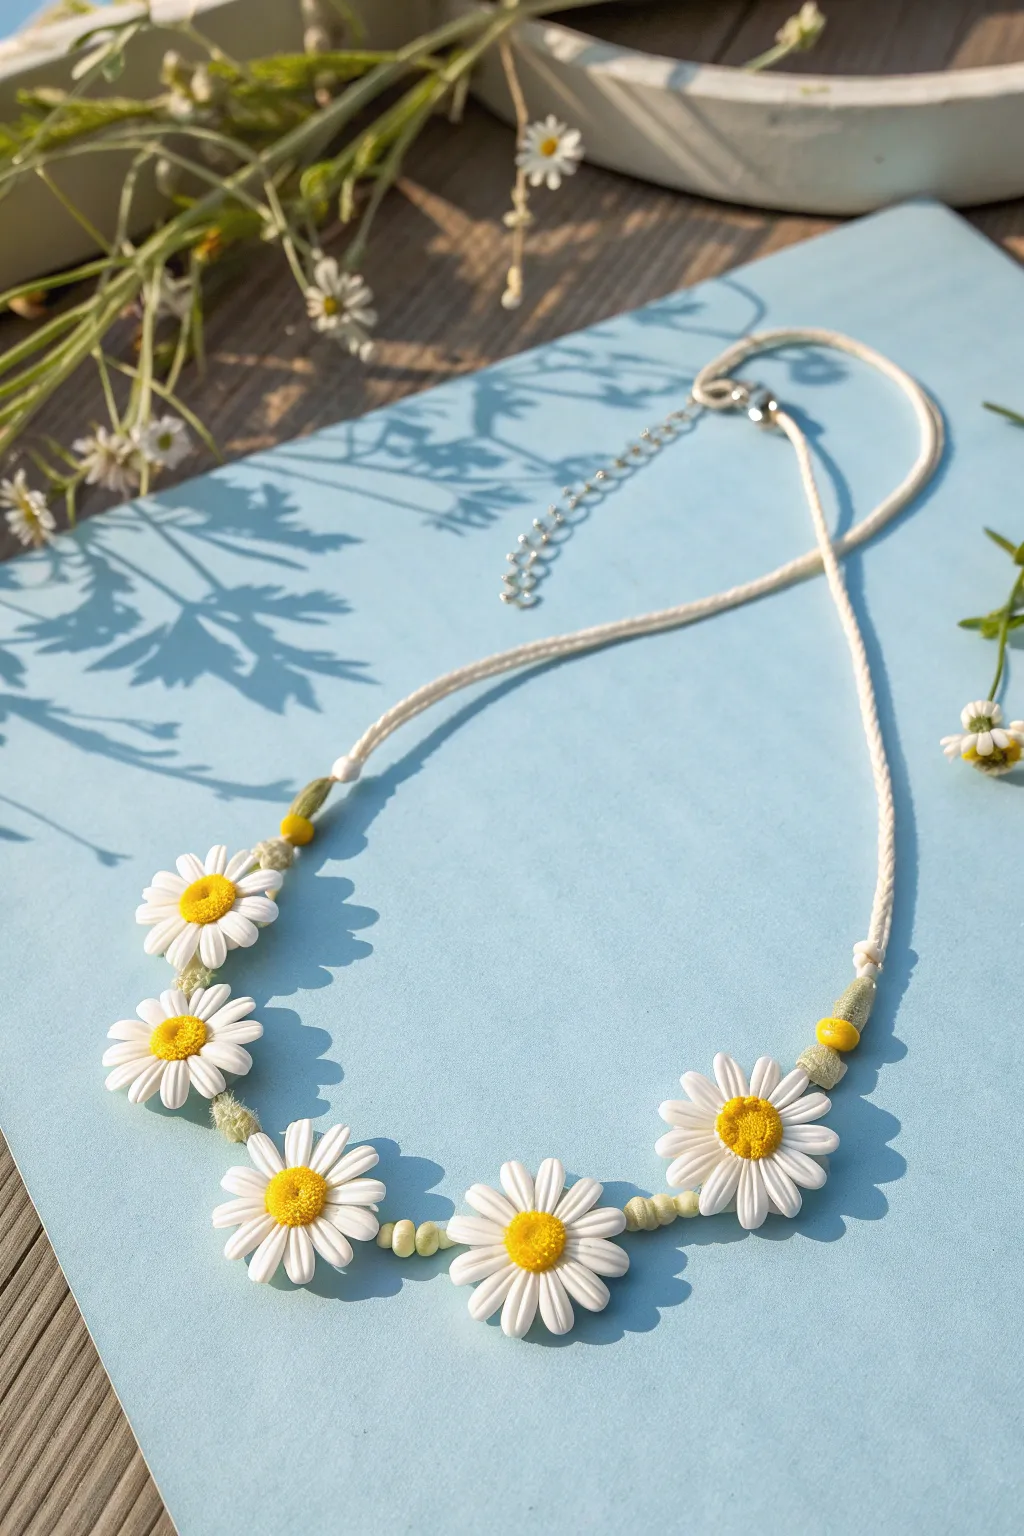
Capture the essence of a bright summer day with this charming daisy chain necklace. Featuring five handcrafted polymer clay blooms and simple knotting techniques, it brings a fresh, nature-inspired touch to any outfit.
Detailed Instructions
Materials
- White polymer clay (approx. 1/2 block)
- Yellow polymer clay (small amount for centers)
- White waxed cotton cord or hemp cord (approx. 24 inches)
- 1mm green seed beads or glass spacer beads
- 2 small yellow wooden or glass beads (approx. 4-6mm)
- Needle tool or toothpick
- Small dotting tool or stiff toothbrush
- Flexible clay blade
- Oven for baking
- Jewelry clasp (lobster claw) and jump rings
- Extension chain (optional)
- Super glue or jewelry adhesive
Step 1: Sculpting the Daisies
-
Prepare the petals:
Condition the white polymer clay until soft. Roll it into a thin log about 1/4 inch thick. Cut the log into roughly equal small segments—you will need about 12-14 segments per flower to create the petals. -
Form teardrop shapes:
Take each small white segment and roll it into a ball, then flatten it slightly and pinch one end to form a teardrop shape. These will be your individual petals. -
Assemble the flower base:
On a clean work surface or tile, arrange the white teardrops in a circle, with the pointed ends meeting in the center. Use your needle tool to gently press the joined points together to secure them. -
Add texture to petals:
To give the petals a realistic look, use a needle tool or the back of a knife to impress two or three shallow lines down the length of each petal, radiating from the center. -
Create the center:
Roll a small ball of yellow clay for the flower center. Flatten it into a dome shape and press it firmly onto the center of your petal ring, covering the join points. -
Texture the pollen:
Take a stiff toothbrush or a stippling tool and gently tap the surface of the yellow dome repeatedly. This creates a textured, pollen-like appearance characteristic of daisies. -
Create the heavy channel:
Flip the flower over carefully. Using a needle tool, press a horizontal channel or groove across the back of the upper petals. This is where the cord will eventually glue in, allowing the flower to sit flat. -
Repeat and bake:
Repeat this process to make five daisies total. Bake them according to your clay package instructions (typically 275°F/135°C for 15-30 minutes). Let them cool completely.
Step 2: Stringing the Necklace
-
Prepare the cord:
Cut your white cord to your desired length plus 4 inches for knotting. Fold the cord in half if you are using a thinner string, or keep it single if using a thick cord like in the photo. -
Attach the center flower:
Find the center point of your cord. Apply a generous drop of super glue into the channel on the back of your first daisy. Press the cord into the channel and let it set until firmly attached. -
Add spacers:
Thread 3-4 small green seed beads onto the cord on either side of the center flower. These act as little stems or leaves between the blooms. -
Attach remaining flowers:
Glue the next two flowers onto the cord on either side of the seed beads. Repeat the seed bead step, and then attach the final two outer flowers. Ensure the spacing is symmetrical. -
Secure the ends:
Once all five flowers are glued and spaced with beads, string a slightly larger section of green seed beads (about 0.5 inches) on the far left and right sides of the flower chain. -
Add accent beads:
Place one yellow accent bead after the last section of green beads on each side. Tie a secure simple overhand knot right after this yellow bead to hold everything in place. -
Finish with hardware:
Attach crimp ends or tie the cord ends directly to a jump ring on one side and a lobster clasp on the other. If you like adjustable lengths, attach an extension chain to the jump ring side.
Drooping Daisies?
If flowers flip over when worn, glue a small strip of felt or a second flat piece of baked clay over the cord on the back. This ‘sandwich’ method keeps them facing forward on your chest.
Add Some Sparkle
Before baking, lightly brush the white petals with white mica powder or pearl ex pigment. This gives the petals a soft, shimmery finish that catches the sunlight beautifully.
Now you have a blooming accessory perfect for welcoming the warm weather
Fruit Slice Charm Trio
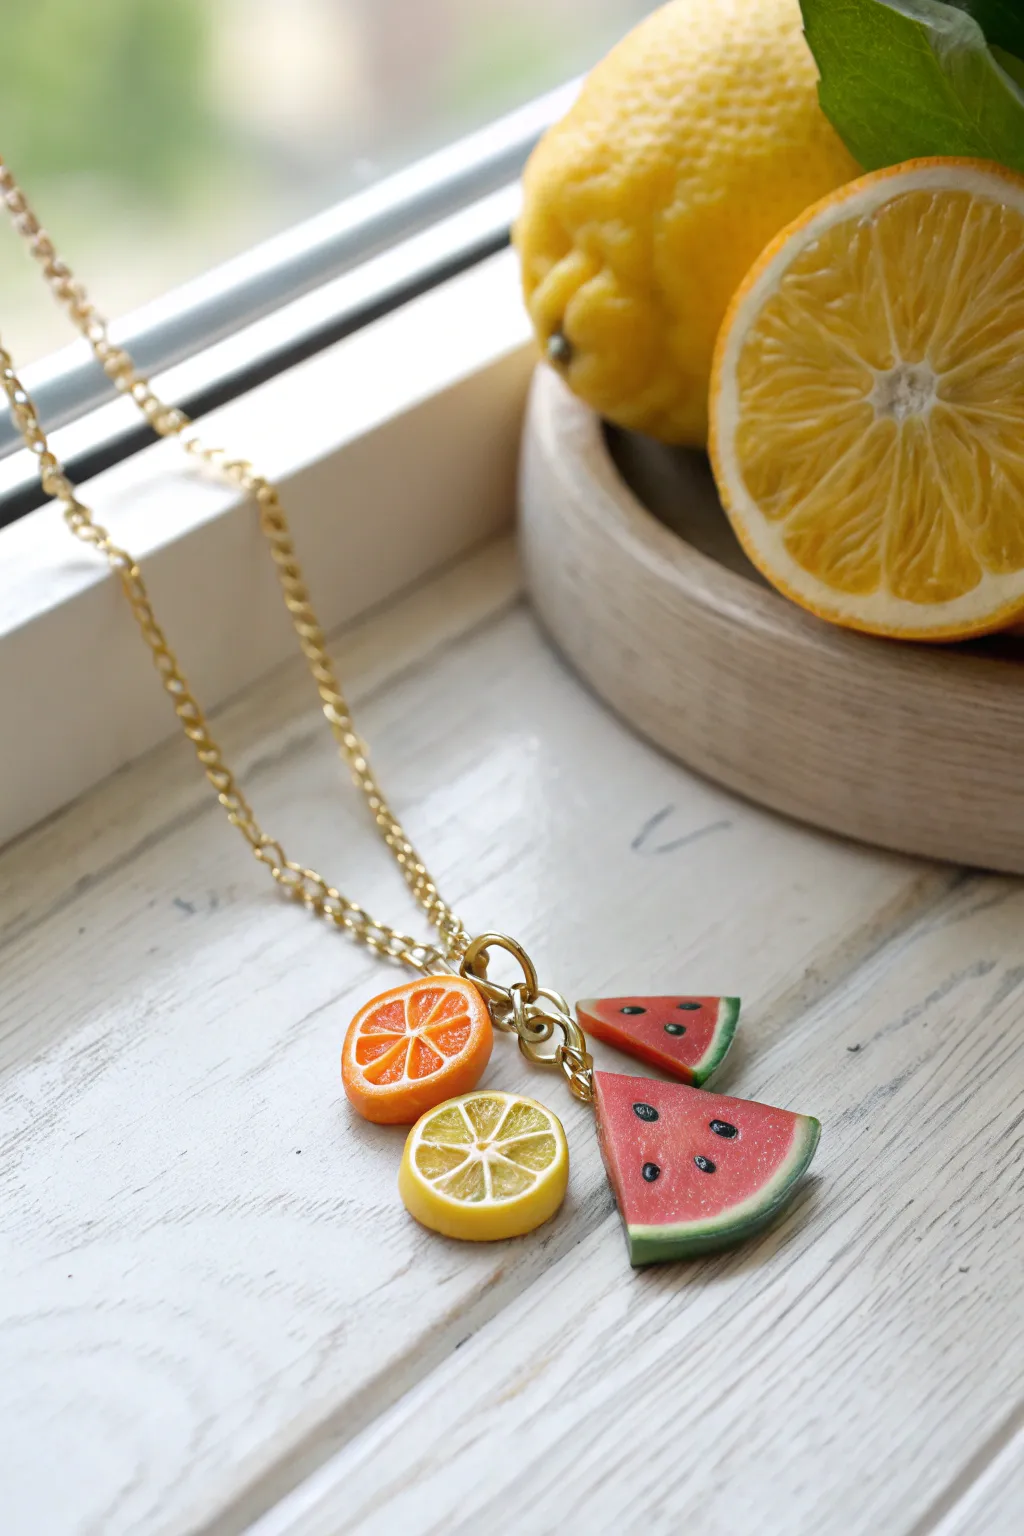
Brighten up any outfit with this deliciously vibrant charm trio featuring citrus and melon slices. Using translucent clay layers and tiny painted details creates a realistic, juicy effect that looks good enough to eat.
How-To Guide
Materials
- Polymer clay: translucent orange, translucent yellow, white, opaque orange, opaque yellow, red, translucent red, green, dark green
- Glossy polymer clay glaze or UV resin
- Gold chain necklace with clasp
- Large gold jump rings (approx. 8-10mm)
- Small gold jump rings (approx. 4-6mm)
- Eye pins (gold)
- Needle tool or toothpick
- Acrylic paint (black and potentially white)
- Fine detail paintbrush
- Create-your-own cane method tools (rolling pin, blade)
Step 1: Creating the Citrus Canes
-
Prepare the translucent pulp:
Start by mixing translucent clay with a tiny bit of orange pigment (or use pre-colored translucent orange clay). Do the same for yellow. Roll each color into a log about 1 inch thick. -
Wrap for the pith:
Roll out a thin sheet of white clay. Wrap this sheet around your orange and yellow logs completely, trimming away excess so the seams meet perfectly. -
Form the segments:
Gently squeeze and elongate the wrapped logs until they are much thinner. Cut the log into 8 equal lengths. Pinch one side of each length to create a teardrop cross-section shape. -
Assemble the fruit center:
Arrange the 8 teardrop logs in a circle, with the narrow (pinched) ends meeting in the center. Place a very thin snake of white clay in the absolute center to act as the core. -
Add the rind:
Wrap this clustered cylinder with a layer of white clay sheet. Then, wrap that with a final layer of opaque orange (for the orange) or yellow (for the lemon) to create the skin. -
Reduce to size:
Gently roll and squeeze the entire cane to reduce its diameter to about 1.5 cm. Slice off your fruit rounds—you’ll need one distinct slice of each citrus. -
Texture the pulp:
Use a needle tool to gently poke and texture the translucent fleshy parts of your slices. This small detail mimics real juice vesicles.
Smudged Cane Fix
If your cane slices look smudged after cutting, chilling the cane in the fridge for 20 minutes before slicing helps keep the layers crisp and distinct.
Step 2: Creating the Watermelon Cane
-
Form the flesh:
Mix a small amount of translucent red clay with opaque red to get a semi-translucent watermelon hue. Roll this into a thick log. -
Layer the rind:
Wrap the red log with a sheet of white clay. Next, wrap it with a sheet of light green clay. Finally, add thin stripes of dark green clay on top of the light green to mimic the watermelon pattern, then roll smooth. -
Reduce and slice:
Elongate the cane just like the citrus ones until it’s the desired diameter. Slice a round, then cut that round in half (or into thirds) to create wedge shapes. -
Texture the surface:
Using an old toothbrush or a stiff brush, tap the surface of the red clay gently to give it a porous, fruity texture.
Step 3: Assembly & Finishing Details
-
Insert eye pins:
Before baking, carefully insert a short gold eye pin into the top of each fruit slice. Ensure the loop is facing the direction you want the charm to hang. -
Bake the charms:
Place your clay pieces on a tile or parchment paper. Bake according to your brand of clay’s instructions (usually 275°F/135°C for 15-30 minutes). Let them cool completely. -
Paint the seeds:
Using a fine detail brush and black acrylic paint, carefully dab small teardrop shapes onto the watermelon wedges to create seeds. -
Glaze for juiciness:
Apply a coat of gloss glaze or UV resin to the fruit flesh areas only. This makes the translucent clay pop and gives that wet, fresh-cut look. Cure or let dry. -
Prepare the jump rings:
Twist open a large jump ring. Thread the eye pins of the orange and lemon slices onto this large ring. -
Attach the watermelon:
For variety, I like to attach the watermelon slices using slightly smaller jump rings that then connect to the main large ring, creating a clustered effect. -
Connect to chain:
Slide the main large jump ring (now holding all your fruit charms) directly onto your gold chain.
Pro Tip: Translucency
To check if your translucent clay is thin enough to show light, hold a test slice up to a lamp before baking. The thinner the slice, the ‘juicier’ it looks.
Wear your fresh fruit necklace with a sundress for the ultimate summer vibe

TRACK YOUR CERAMIC JOURNEY
Capture glaze tests, firing details, and creative progress—all in one simple printable. Make your projects easier to repeat and improve.
Simple Cat Face Pendant
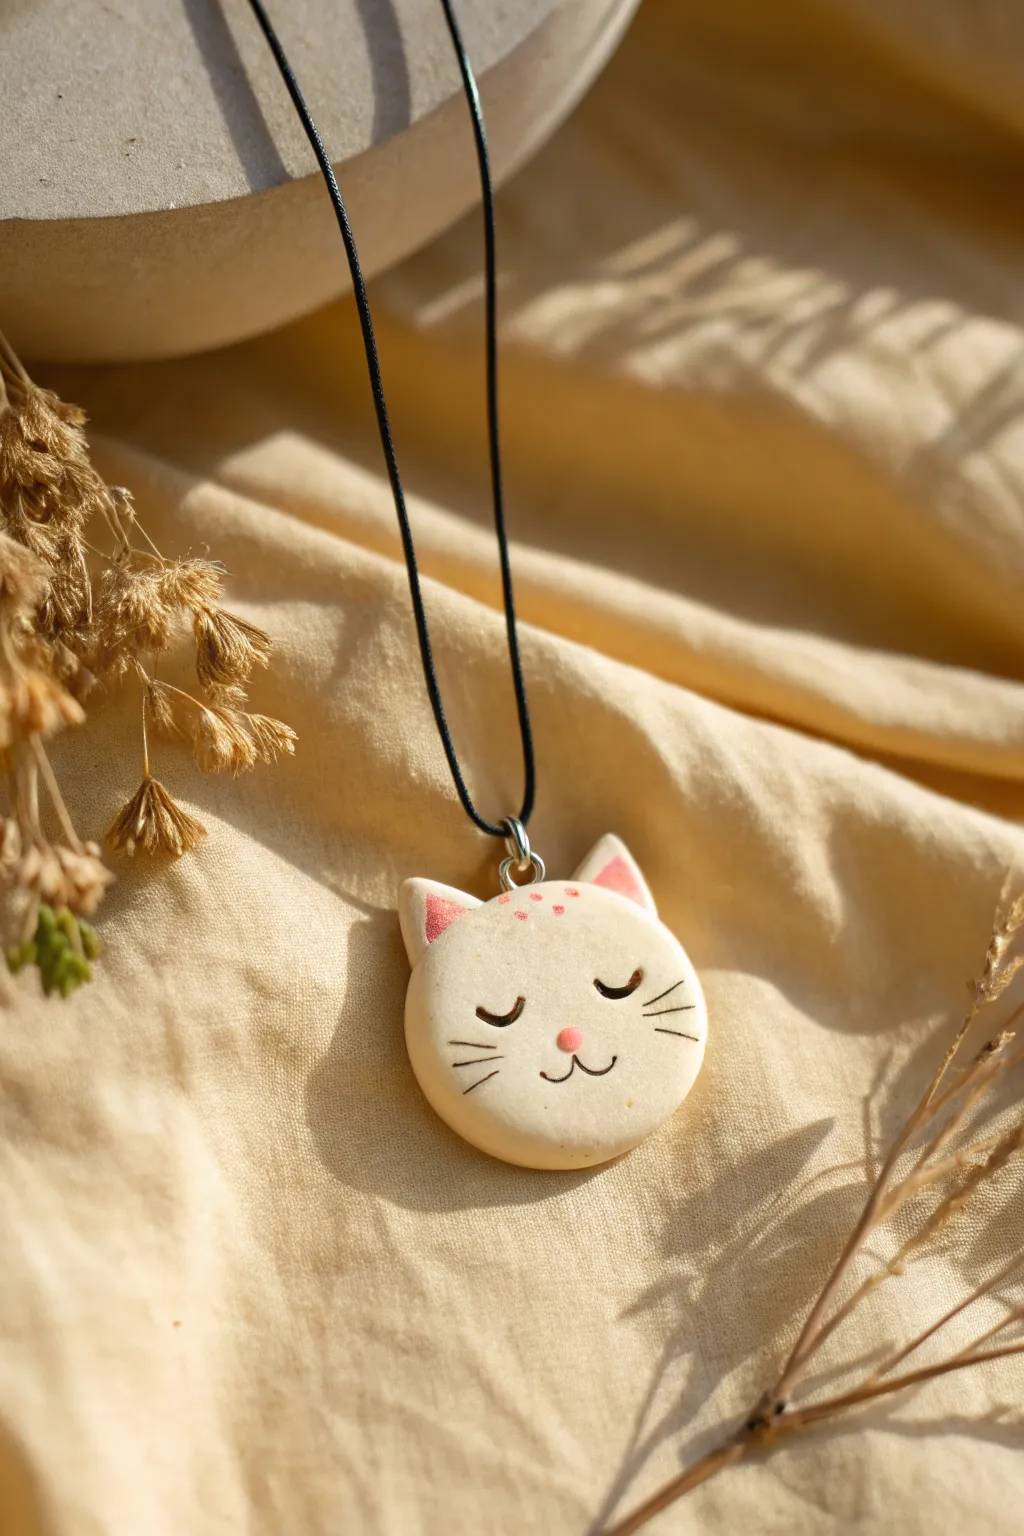
Capture the serenity of a snoozing kitten with this minimalist polymer clay pendant. The design features soft, rounded edges and delicate painted details on a creamy white base, creating a charming accessory perfect for everyday wear.
Step-by-Step Guide
Materials
- White polymer clay (optionally mixed with a tiny bit of translucent for a porcelain look)
- Pink soft pastel chalk or blush powder
- Black acrylic paint
- Pink acrylic paint
- Fine detail paintbrush (size 000 or a needle tool)
- Small fluffy paintbrush
- Craft knife or clay blade
- Headpin or eye pin
- Black cord necklace
- Gloss or matte varnish (optional)
- Rolling pin or pasta machine
- Round cutter (approx. 1-1.5 inches)
Step 1: Shaping the Base
-
Prepare the Clay:
Start by conditioning your white polymer clay until it is soft and pliable. If you want a slightly softer, less stark white, mix in a tiny pinch of beige or translucent clay. -
Form the Face:
Roll the clay into a smooth ball, free of cracks, and then flatten it gently into a thick disc. Aim for a thickness of about 4-5mm to ensure durability. -
Refine the Shape:
You can leave it as a perfect circle using a cookie cutter, or gently press the sides to make it slightly oval, resembling a rounded bun shape. Smooth the edges with your finger so they are nice and rounded. -
Create the Ears:
Take two small, equal-sized pieces of white clay and roll them into tiny balls. Flatten them slightly and pinch the top of each to form a triangle shape. -
Attach the Ears:
Press the triangular ears onto the top left and right of the main head circle. Use a sculpting tool or your finger to blend the seams on the back so they are securely attached. -
Insert the Eye Pin:
Carefully insert a metal eye pin or headpin directly into the center top of the head, between the ears. I find it helps to add a tiny dab of liquid clay or bake-and-bond to the pin to stop it from sliding out after baking.
Smooth Operator
Before baking, use a brush dipped in a little baby oil or rubbing alcohol to lightly smooth over fingerprints on the white clay.
Step 2: Adding Details & Baking
-
Blushing the Ears:
Scrape a little pink pastel chalk into a powder. Using a small, dry brush, gently dust the inside of the triangular ears to give them a soft pink gradient. -
Forehead Details:
Using the very tip of a brush or a large dotting tool, apply three tiny dots of pink chalk or diluted pink paint to the forehead area for a whimsical touch. -
Baking:
Place your kitty on a ceramic tile or baking sheet lined with parchment paper. Bake according to your clay package instructions (usually 275°F/135°C for 15-30 minutes). -
Cooling Down:
Allow the piece to cool completely before moving on to the painting phase. The clay hardens fully as it cools.
Step 3: Painting the Features
-
Drawing the Eyes:
Using your finest detail brush and black acrylic paint, paint two closed, curved eyelids. They should look like little ‘U’ shapes placed horizontally. -
Painting the Nose:
Mix a soft pink acrylic paint color. Paint a small, inverted triangle or oval shape in the center of the face, slightly below the level of the eyes. -
Creating the Mouth:
With the black paint, draw a small anchor shape or a ‘w’ shape extending down from the pink nose to form the smiling mouth. -
Adding Whiskers:
Paint three very fine, short horizontal lines on each cheek for the whiskers. Keep your hand steady and use barely any pressure on the brush. -
Drying Time:
Let the acrylic paint dry completely. This usually takes about 10-15 minutes depending on how thick the paint is. -
Sealing (Optional):
To protect the paint, you can apply a thin coat of matte or satin varnish over the face. This prevents the acrylics from scratching off over time. -
Assembly:
Once everything is dry and the varnish is cured, thread a jump ring through the eye pin loop and attach it to a simple black cord necklace.
Shaky Hands?
If painting fine lines is difficult with a brush, use an extra-fine tip permanent marker or archival ink pen after the clay is baked.
Now you have a sweet, handmade companion to keep you company throughout the day
Love Note Envelope Charm
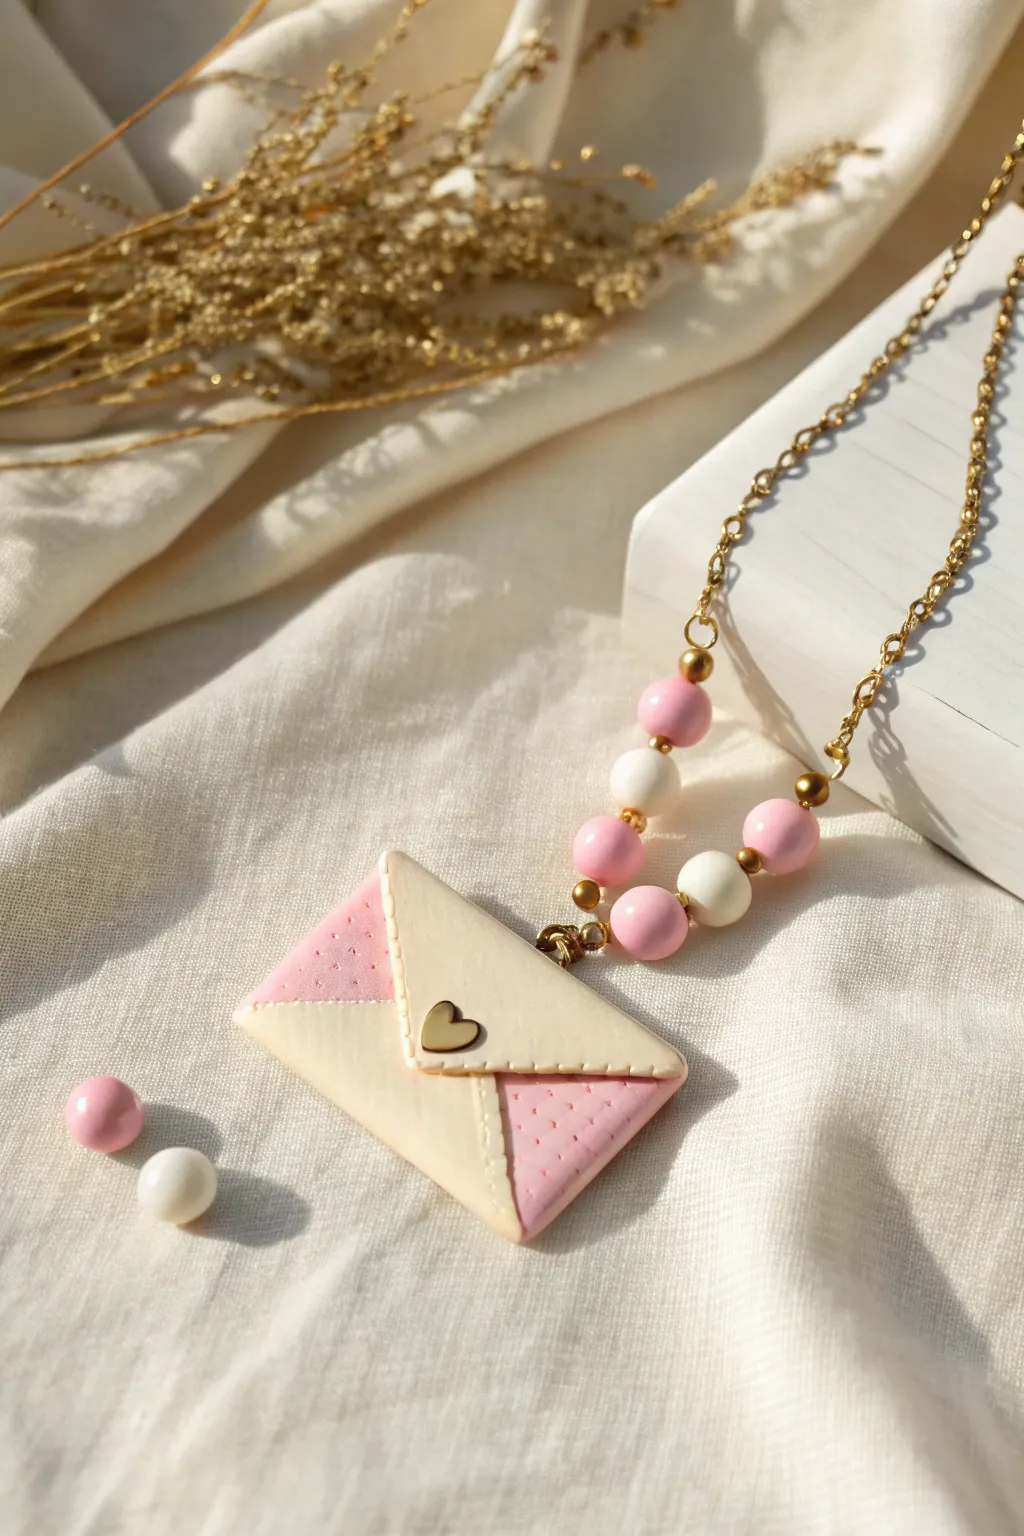
Capture the sweetness of a secret admirer with this adorable polymer clay envelope necklace. Featuring soft pastels, faux-stitch detailing, and a tiny golden heart seal, this charm is the perfectly romantic accessory.
Step-by-Step Tutorial
Materials
- Polymer clay (cream and light pink)
- Tiny heart-shaped metal charm or stud (gold)
- Clay roller or pasta machine
- Sharp craft blade
- Needle tool or toothpick
- Gold finish eye pin
- Assorted pink and white beads (6-8mm)
- Gold seed beads or spacer beads
- Gold chain and jump rings
- Jewelry pliers
- Baking tile or parchment paper
- Oven
Step 1: Sculpting the Envelope Base
-
Condition the Clay:
Start by thoroughly kneading your cream and light pink polymer clay separately until they are soft, pliable, and free of air bubbles. -
Roll Flat Sheets:
Roll out both the cream and pink clay into flat sheets of even thickness, approximately 3mm thick. A clay machine is great here, but a rolling pin works perfectly too. -
Cut the Base Rectangle:
Using your sharp craft blade, cut a clean rectangle from the cream clay. This will form the back and the main body of your envelope. -
Creating the Triangles:
From the pink sheet, cut two right-angled triangles that fit comfortably on the sides of your cream rectangle to simulate the side flaps of an envelope. -
Adding Texture:
Before attaching the pink triangles, use a needle tool to gently poke rows of small, evenly spaced dots across their surface for a cute quilted or perforated look. -
Assembly:
Press the pink triangles onto the lower corners of the cream rectangle. Ensure the edges align perfectly with the sides and bottom of the base.
Sticky Situation?
If your clay gets too warm and sticky while handling, pop it in the fridge for 10 minutes. This firms it up, making precise cutting and detailing much easier.
Step 2: Adding Details and Hardware
-
Forming the Top Flap:
Cut a smaller triangle from the remaining cream clay sheet. This will be the closing flap of the envelope. -
Attaching the Flap:
Place the cream triangle at the top so it overlaps the pink sections slightly, pointing downwards. -
Stitching Detail:
Using your needle tool, create a faux stitch line along the very edge of the cream top flap. Press lightly to make small indentations without dragging the clay. -
Adding the Seal:
Take your tiny gold heart charm and press it gently but firmly into the center point where the top flap meets the bottom sections. If it doesn’t have a backing, a dot of liquid clay or glue after baking helps secure it. -
Insert the Eye Pin:
Carefully trim a gold eye pin to size and insert it into the top center edge of the envelope. I find gently twisting it as it goes in helps prevent the clay from distorting. -
Baking:
Place your charm on a baking tile. Bake according to your brand of polymer clay instructions (usually 275°F/130°C for 15-30 minutes). Let it cool completely.
Clean Edges
Minimize fingerprints by lightly dusting your fingertips with cornstarch before handling the light-colored cream clay pieces.
Step 3: Jewelry Assembly
-
Beaded Connector:
Create a beaded link using a new eye pin. Thread on a pattern: gold spacer, pink bead, white bead, pink bead, gold spacer. -
Creating Loops:
Using round-nose pliers, bend the excess wire at the top of your beaded pin into a closed loop. -
Linking Components:
Open the loop at the bottom of your beaded link and attach it to the eye pin emerging from your baked envelope charm. -
Attaching the Chain:
Open the top loop of your beaded section and slide your gold chain through it before closing the loop securely.
Wear this charming love note necklace to add a whimsical narrative to your everyday outfit
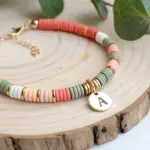
Stamped Initial Tag Necklace
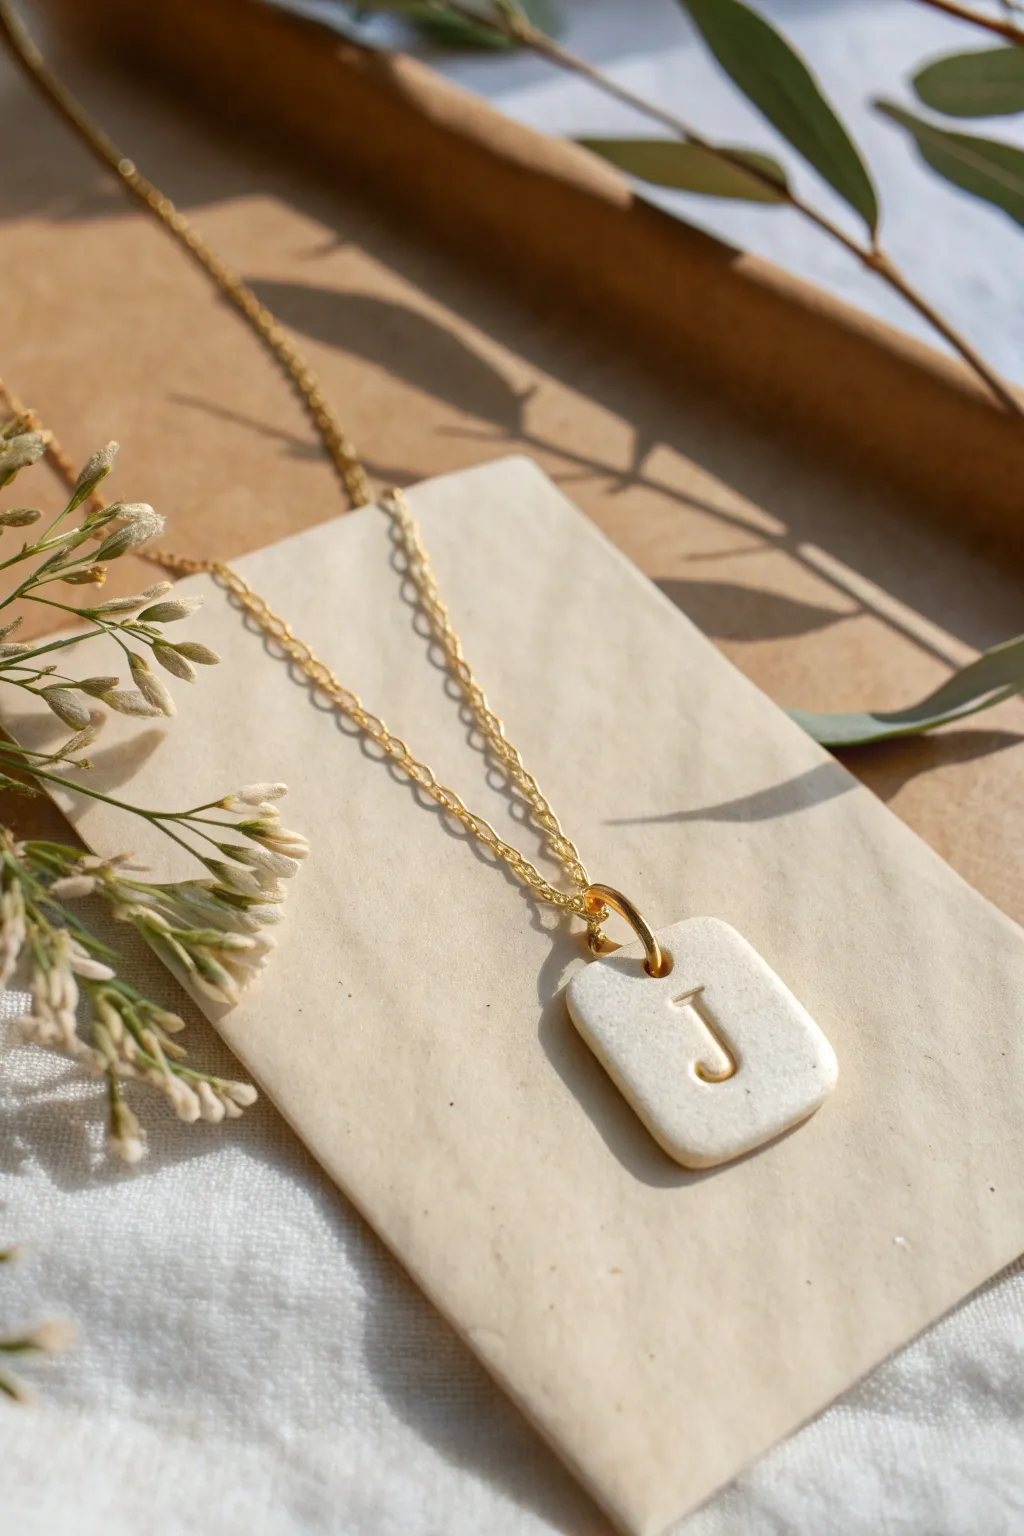
Create a sophisticated and personalized piece of jewelry with this minimalist clay tag necklace. The creamy white clay paired with a gold inlay initial offers a timeless look that is surprisingly simple to achieve at home.
Step-by-Step
Materials
- White or translucent white polymer clay (e.g., Fimo or Sculpey)
- Small square or rectangular clay cutter (approx. 1 inch)
- Letter stamp set
- Gold acrylic paint or gold gilding wax
- Fine-grit sandpaper (400 to 1000 grit)
- Golden jump ring (6-8mm)
- Gold chain necklace
- Needle tool or toothpick
- Rolling pin or pasta machine
- Ceramic tile or baking sheet
- Gloss glaze (optional)
Step 1: Shaping the Base
-
Condition the clay:
Start by kneading a small amount of white polymer clay until it is soft and pliable. If you want a slightly speckled ceramic look like the photo, you can mix in a tiny pinch of beige or translucent clay, but pure white works beautifully too. -
Roll it out:
Use your rolling pin or pasta machine to flatten the clay. Aim for a thickness of about 3mm to 4mm—thick enough to be sturdy but thin enough to look delicate. -
Cut the shape:
Press your rectangular cutter firmly into the clay. If you don’t have a cutter, use a sharp craft blade to cut a freehand rectangle, roughly 1 inch tall by 0.75 inches wide. -
Soften the edges:
Gently tap the edges of the rectangle with your finger to round off the sharp corners. You want the final piece to look organic and like tumbled stone rather than a sharp geometric block. -
Create the hole:
Use a needle tool or toothpick to pierce a hole near the top center of the rectangle. Ensure the hole is large enough to fit your jump ring comfortably, wiggling the tool slightly to widen it.
Fixing Smudges
If gold paint stains the white surface and won’t wipe off, wait update it to dry fully, then lightly sand the top surface again with fine-grit sandpaper to remove the pigment.
Step 2: Stamping and Baking
-
Prepare the stamp:
Select the initial you wish to use from your stamp set. Clean the surface of the stamp to ensure no old debris gets transferred to your pristine white clay. -
Make the impression:
Press the letter stamp firmly into the center of the clay rectangle. Push deep enough to create a clear groove for hold the gold paint later, but be careful not to distort the overall shape of the tag. -
Smooth imperfections:
If the stamping caused any clay to bulge slightly around the letter, gently pat it back down with your fingertip. I find a light touch here saves sanding time later. -
Bake the piece:
Place your clay tag on a ceramic tile or baking sheet lined with parchment paper. Bake according to the manufacturer’s instructions on your clay package (usually around 275°F/130°C for 15-30 minutes). -
Cool down:
Let the piece cool completely before handling. The clay is fragile when hot and needs to harden fully as it returns to room temperature.
Step 3: Finishing Touches
-
Sand the surface:
Once cool, use fine-grit sandpaper to buff the edges and surface. This removes any fingerprints and gives the piece that smooth, matte pottery texture seen in the photo. -
Apply the gold:
Paint gold acrylic paint or rub gold gilding wax directly into the stamped letter groove. Don’t worry about being neat; it’s okay if paint gets on the surface. -
Wipe away excess:
Before the paint dries completely, take a damp paper towel or a baby wipe and gently swipe across the surface. This removes the gold from the top face but leaves it deposited perfectly inside the indented letter. -
Seal (optional):
If you want extra protection, apply a very thin coat of matte varnish. However, leaving it raw maintains that natural stone aesthetic. -
Attach hardware:
Use jewelry pliers to open your gold jump ring. Thread it through the hole in the clay tag. -
Add the chain:
Before closing the jump ring, loop your gold chain onto it. Close the jump ring securely so there is no gap.
Stone Effects
Mix black pepper or dried used coffee grounds into your white clay before rolling. This creates a realistic speckled granite or ceramic effect for added texture.
Now you have a chic, custom initial necklace perfect for layering or gifting
Best Friends Split Cookie Pendant
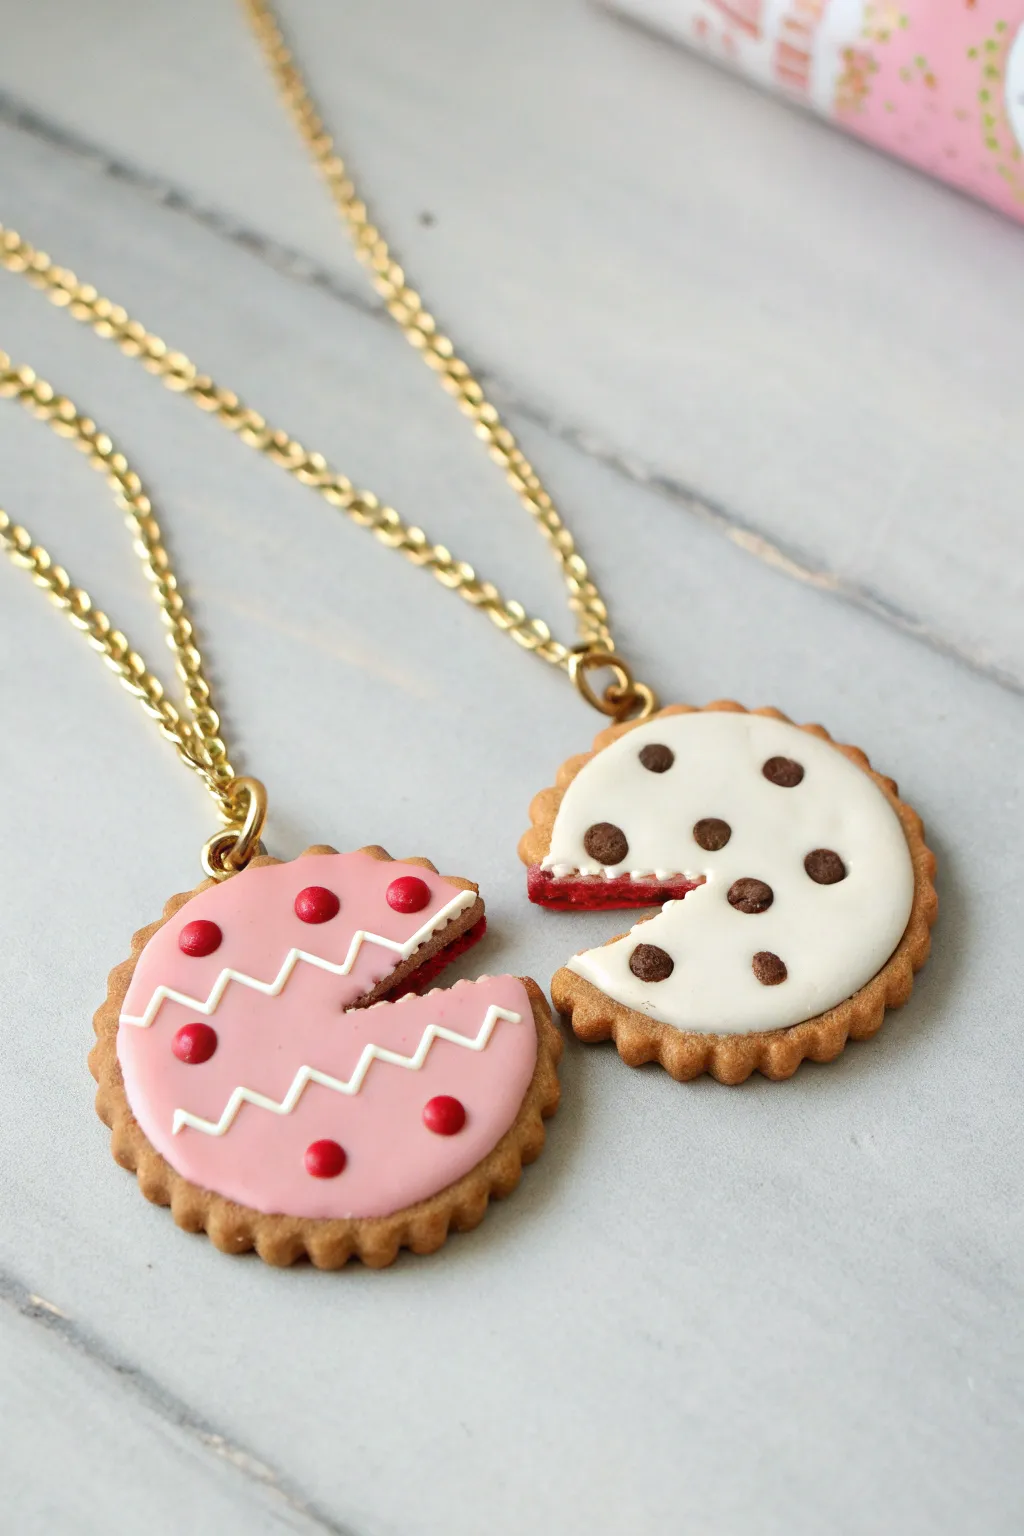
Celebrate friendship with these adorable matching biscuit pendants that fit perfectly together like two halves of a delicious puzzle. The design features one strawberry-frosted half and one chocolate chip half, creating a sweet and sentimental accessory set.
Step-by-Step Guide
Materials
- Polymer clay (tan/biscuit color, pink, white, chocolate brown, red, translucent)
- Liquid polymer clay (translucent or white)
- Round scalloped cookie cutter (approx. 1.5 – 2 inches)
- X-Acto knife or clay blade
- Dotting tools or toothpicks
- Texturing tool (toothbrush or stiff brush)
- Needle tool
- Chalk pastels (orange, brown)
- Paintbrush
- 2 large jump rings
- 2 necklace chains
- Gloss glaze (optional)
Step 1: Creating the Cookie Base
-
Condition the clay:
Start by conditioning your tan or biscuit-colored clay until it’s soft and pliable. Roll it out into a sheet about 1/4 inch thick; you want it sturdy enough to be a pendant. -
Cut the shape:
Use your scalloped round cutter to punch out a perfect circle. If the clay sticks to the cutter, gently push it out from the edges. -
Texture the surface:
Gently tap the surface and edges of the clay circle with a toothbrush or texturing tool to create a realistic baked cookie texture. -
Add baked shading:
Scrape some orange and brown chalk pastel into a fine dust. Use a soft paintbrush to lightly dust the scalloped edges of the cookie to simulate a golden-brown baked look. -
Divide the cookie:
Using your blade, cut a zig-zag line down the center of the cookie to separate it into two interlocking halves. Gently pull them apart. -
Refine the break:
Use a needle tool or the tip of your blade to texture the inside of the cut edges, making them look crumbly rather than smooth.
Step 2: Adding the Frosting
-
Prepare the frosting mix:
Mix a small amount of liquid polymer clay with solid clay (pink for one half, white for the other) until you have a thick, spreadable ‘frosting’ consistency. -
Apply base layer:
Carefully spread the pink mixture onto one half and the white mixture onto the other, leaving a rim of the biscuit showing around the edge. -
Smooth the cut edge:
Ensure the frosting goes right up to the zig-zag cut line, keeping the distinctive shape clean. -
Create the jam filling:
Mix a tiny bit of red clay with translucent liquid clay. Carefully apply a thin line of this ‘jam’ along the vertical zig-zag edge of the biscuit where the two halves would meet.
Texturing Tip
For ultra-realistic crumbs on the cut edge, save tiny scraps of baked tan clay, chop directly, and mix into liquid clay to apply.
Step 3: Decorating & Assembly
-
Detail the pink half:
Roll extremely thin snakes of white clay. Carefully lay them in a zig-zag pattern across the pink frosting. Trim the excess at the edges. -
Add red dots:
Roll tiny balls of red clay and press them gently into the pink frosting in the spaces between the white zig-zags. -
Detail the white half:
Roll tiny balls of chocolate brown clay to make chips. Press them randomly into the white frosting, making sure to flatten them slightly so they look embedded. -
Insert hardware:
Insert a large jump ring directly into the top of each cookie half, ensuring it goes deep enough into the clay to be secure. -
Bake:
Bake the pieces according to your specific clay brand’s instructions (usually 275°F for 15-30 minutes). I recommend tenting them with foil to prevent scorching. -
Cool and finish:
Let the cookies cool completely. If desired, apply a coat of gloss glaze to the ‘jam’ area for a wet look. -
Attach chains:
Thread your necklace chains through the baked-in jump rings to complete the set.
Soft Clay?
If your frosting details are getting mushy/distorted, put the piece in the fridge for 10 minutes before adding the next layer.
Give one half to your best friend and keep the other for a shared connection wherever you go
Stacked Pebble Ombre Necklace
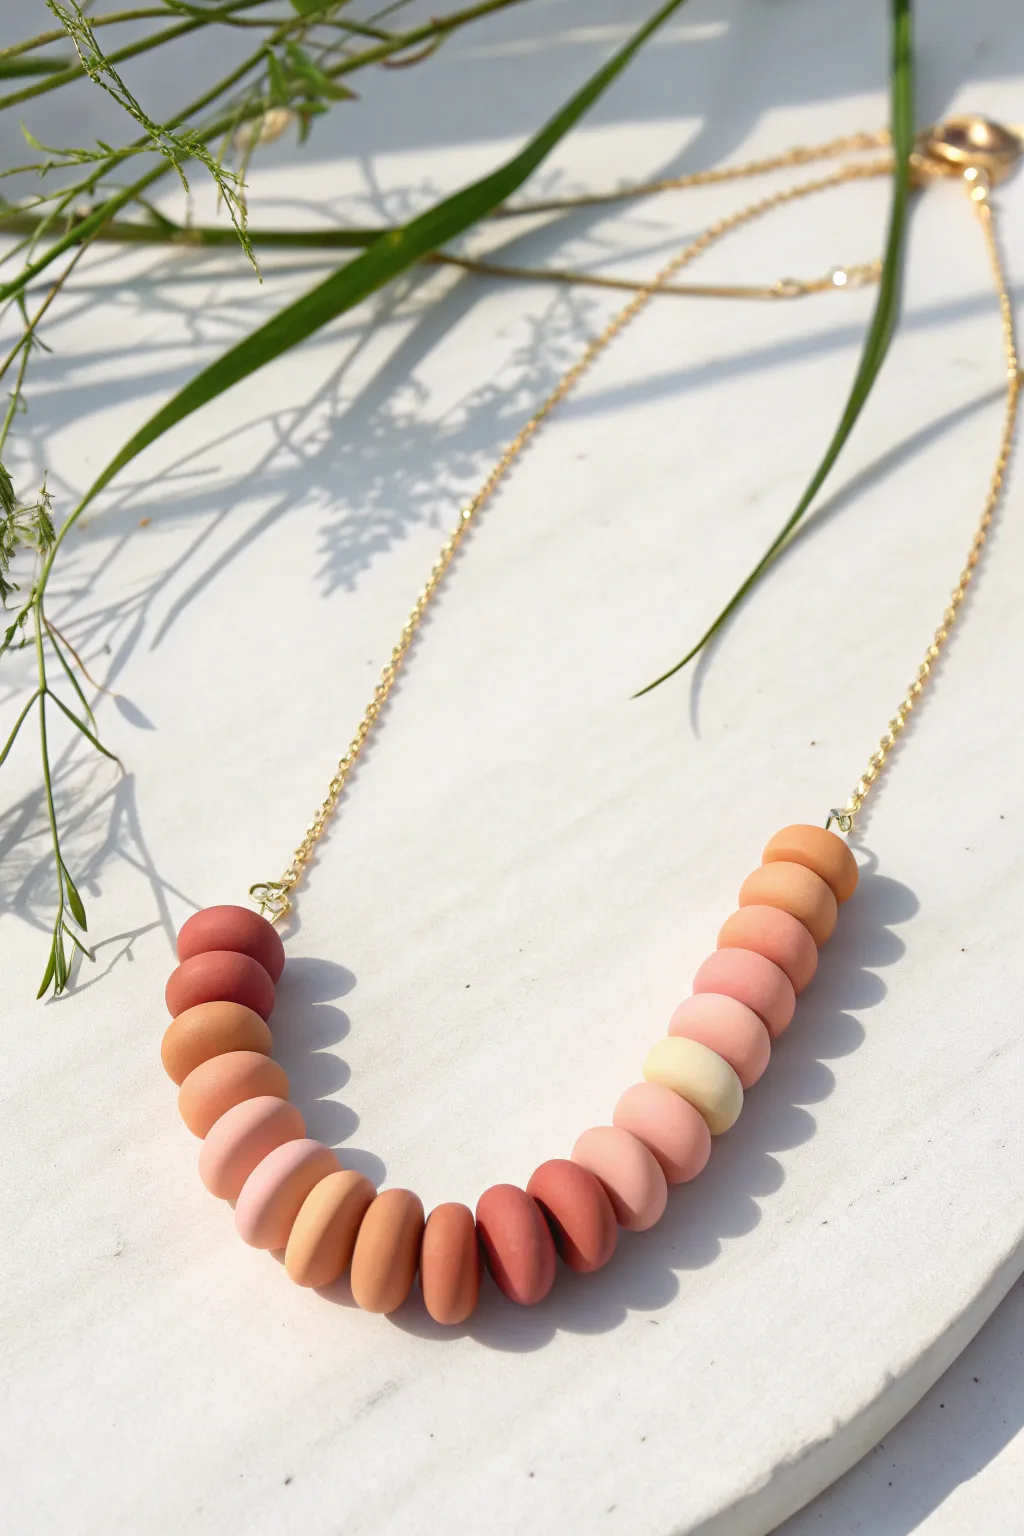
Capture the warmth of a setting sun with this stunning stacked pebble necklace. Using simple polymer clay techniques, you’ll create an organic, earthy gradient that feels modern yet timeless.
How-To Guide
Materials
- Polymer clay in 4-5 shades (terracotta, peach, blush pink, cream, rust)
- Acrylic rolling pin or pasta machine
- Small circle cutter (approx. 1 cm diameter)
- Needle tool or thick toothpick
- Gold finish chain (approx. 18-20 inches)
- 4 jump rings (gold)
- Jewelry pliers (flat nose and round nose)
- Lobster clasp
- Baking sheet and parchment paper
- Wet/dry sandpaper (400-800 grit)
Step 1: Preparing the Clay Pebbles
-
Color Mixing:
Start by conditioning your clay. If you don’t have pre-mixed gradation colors, mix your darkest rust color with varying amounts of white or cream clay to create a seamless ombre palette ranging from deep terracotta to pale cream. -
Rolling:
Roll out a sheet of each color. You want these to be relatively thick for that chunky pebble look—aim for about 3mm to 4mm thickness. -
Cutting Circles:
Using your small circle cutter, punch out roughly 20 to 24 circles total. To recreate the image’s specific pattern, cut 2-3 circles of each shade. -
Softening Edges:
The cutter leaves sharp edges, but we want organic pebbles. Gently press and smooth the edges of each circle with your fingertips to round them off, creating a soft, stone-like shape. -
Creating the Hole:
Take your needle tool or a thick toothpick and pierce a hole directly through the center of the flat side of each bead. Twist the tool gently as you push through to prevent distortion. -
Refining the Hole:
Flip the bead over and pierce through the exit hole again to ensure the opening is clean and wide enough for your jump rings.
Smoothie Operator
To erase fingerprints before baking, lightly brush the raw clay beads with a tiny drop of baby oil or cornstarch.
Step 2: Baking and Finishing
-
Arranging for Bake:
Place your beads on a parchment-lined baking sheet. I find it helpful to arrange them in their final color order now, just to double-check the gradient looks balanced before committing. -
Baking:
Bake the clay according to the manufacturer’s instructions on the package (usually around 275°F/135°C for 15-30 minutes). Be careful not to burn the lighter colors. -
Cooling:
Allow the beads to cool completely on the baking sheet before handling them, as the clay is fragile while hot. -
Sanding (Optional):
If you have any fingerprints or rough spots, lightly sand the beads under running water using wet/dry sandpaper for a professional matte finish.
Texture Twist
Before baking, gently roll the raw beads over coarse sandpaper or a clean stone to give them a realistic, pitted rock texture.
Step 3: Assembly
-
Chain Preparation:
Cut your gold chain into two equal lengths. The length depends on where you want the necklace to sit, but 7-8 inches per side is standard. -
Stringing the Ombre:
Thread your beads onto a headpin or directly onto a piece of wire if you prefer a rigid bar, but for the flexible look in the photo, simple stringing works well. Actually, looking closely at the design, the beads are strung directly onto the chain or a dedicated wire curve. -
Alternative Stringing:
For the specific look in the photo, cut a 4-inch piece of gold wire or use a long eye-pin. Thread the beads in your ombre order: Darkest, medium tones, lightest center, back to medium, back to dark. -
Creating Loops:
Once all beads are on the wire, use your round nose pliers to create a secure loop at both ends of the beaded section, tucked tightly against the end beads. -
Attaching the Chain:
Open a jump ring, slide on one end of your beaded section and one length of chain, then close securely. Repeat on the other side. -
Adding the Clasp:
On the loose ends of the chain, attach a jump ring and lobster clasp to one side, and a simple jump ring to the other side to finish the closure.
Now you have a sophisticated statement piece ready to wear with your favorite summer outfits
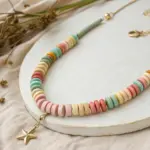
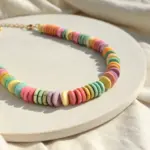
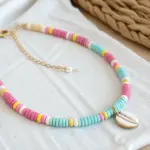
Chunky Lentil Bead Strand
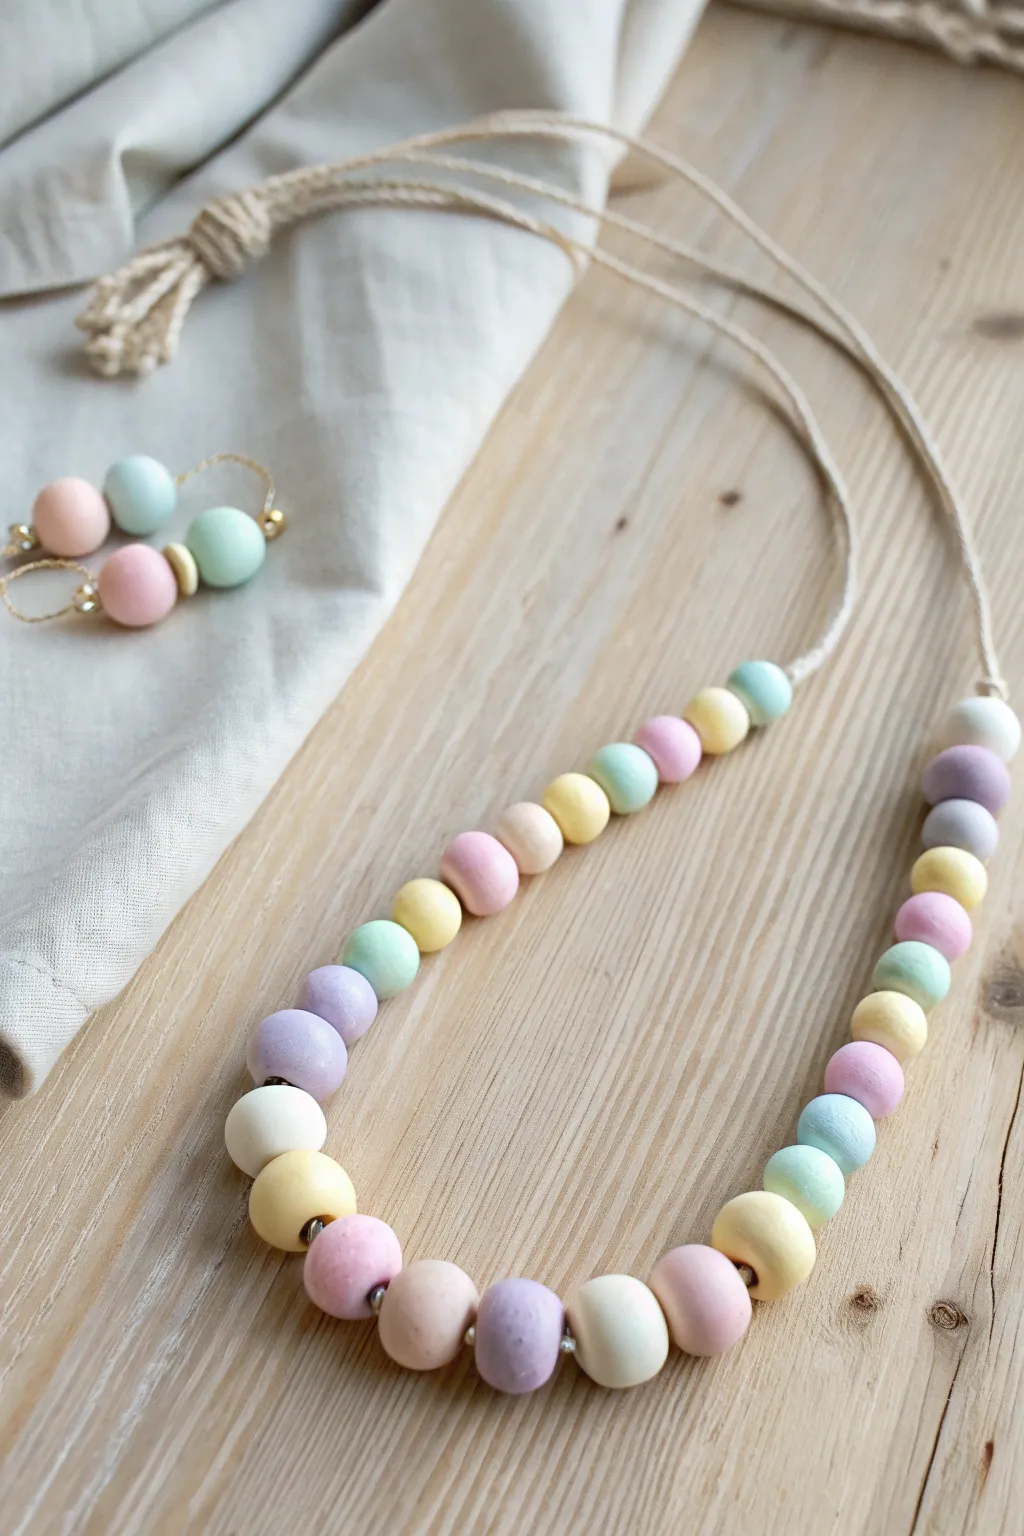
Embrace soft, dreamy hues with this simple yet statement-making necklace featuring matte, candy-colored beads. Its natural cord and gentle pastel palette give it a modern bohemian vibe perfect for brightening up a neutral outfit.
Step-by-Step
Materials
- Polymer clay in pastel colors (baby pink, mint green, lavender, lemon yellow, cream, pale peach)
- Acrylic roller or pasta machine
- Circle cutters (various small sizes, approx. 1-1.5 cm diameter)
- Bead piercing pins or a thick needle
- Baking sheet with parchment paper
- Fine-grit sandpaper (optional, for smoothing)
- Natural twisted cotton or hemp cord (beige/cream)
- Scissors
- Masking tape (for cord ends)
Step 1: Shaping the Beads
-
Condition the Clay:
Begin by thoroughly conditioning each color of polymer clay until it is soft and pliable. Wash your hands or wipe them with a baby wipe between colors to keep the pastels pure and free of transfer. -
Roll Logs:
Roll each color into a thick log or snake, keeping them roughly the same thickness to ensure your beads end up uniform in size. -
Portion Control:
Cut equal-sized segments from your clay logs. I find that aiming for pieces about the size of a large marble works best for this chunky style. -
Roll Spheres:
Roll each segment into a smooth, perfect ball between your palms. -
Flatten Slightly:
Place the ball on your work surface and gently press down with the palm of your hand or an acrylic block to flatten it slightly into a rondelle or fat lentil shape. Don’t flatten it too much; you want it chunky. -
Repeat:
Repeat this process until you have approximately 25-30 beads in a mix of your chosen pastel shades.
Clean Start
Pastel clay shows every speck of dust. Wipe your hands and work surface with rubbing alcohol before starting, and specifically between color changes.
Step 2: Drilling and Baking
-
Pierce the Beads:
Using a bead piercing pin or a thick needle, carefully poke a hole through the center of the flattened side of each bead. To avoid distorting the shape, pierce halfway through, then flip the bead and meet the hole from the other side. -
Widen the Hole:
Gently wiggle the tool to widen the hole slightly, ensuring it will be large enough for your specific cord to pass through later. -
Check for Fingerprints:
Smooth out any fingerprints lightly with your finger or a little cornstarch before baking. -
Bake:
Arranges the beads on a parchment-lined baking sheet and bake according to the manufacturer’s instructions for your specific brand of clay (usually around 275°F/130°C for 15-30 minutes). -
Cool Down:
Let the beads cool completely on the baking sheet before handling them. -
Sand and Finish (Optional):
If you want a super smooth, matte look like the photo, lightly sand the beads under running water with fine-grit sandpaper to remove any lint or rough edges.
Step 3: Assembly
-
Prepare the Cord:
Cut a length of natural cotton cord, approximately 30-36 inches long depending on your desired hanging length. -
Tape the Tip:
Wrap a small piece of masking tape tightly around one end of the cord to create a makeshift ‘needle’ to stop the cord from fraying while stringing. -
Plan Your Pattern:
Lay your cooled beads out on a table to design your color sequence. The example uses a random mix, but you can create repeating patterns if you prefer. -
String the Beads:
Thread the beads onto the cord one by one following your planned sequence. -
Knot the Sequence:
Once all beads are on, tie a simple overhand knot tightly against the first and last bead to keep them centered on the cord. -
Finish the Ends:
Tie the two loose ends of the cord together in a secure double knot or a sliding knot if you want the length to be adjustable. Trim any excess cord.
Hole Distortion
If your beads squash when piercing them, let the raw clay sit in the fridge for 10 minutes to firm up before poking the holes.
Now you have a charming, candy-colored accessory ready to wear
Faux Jade Nugget Pendant
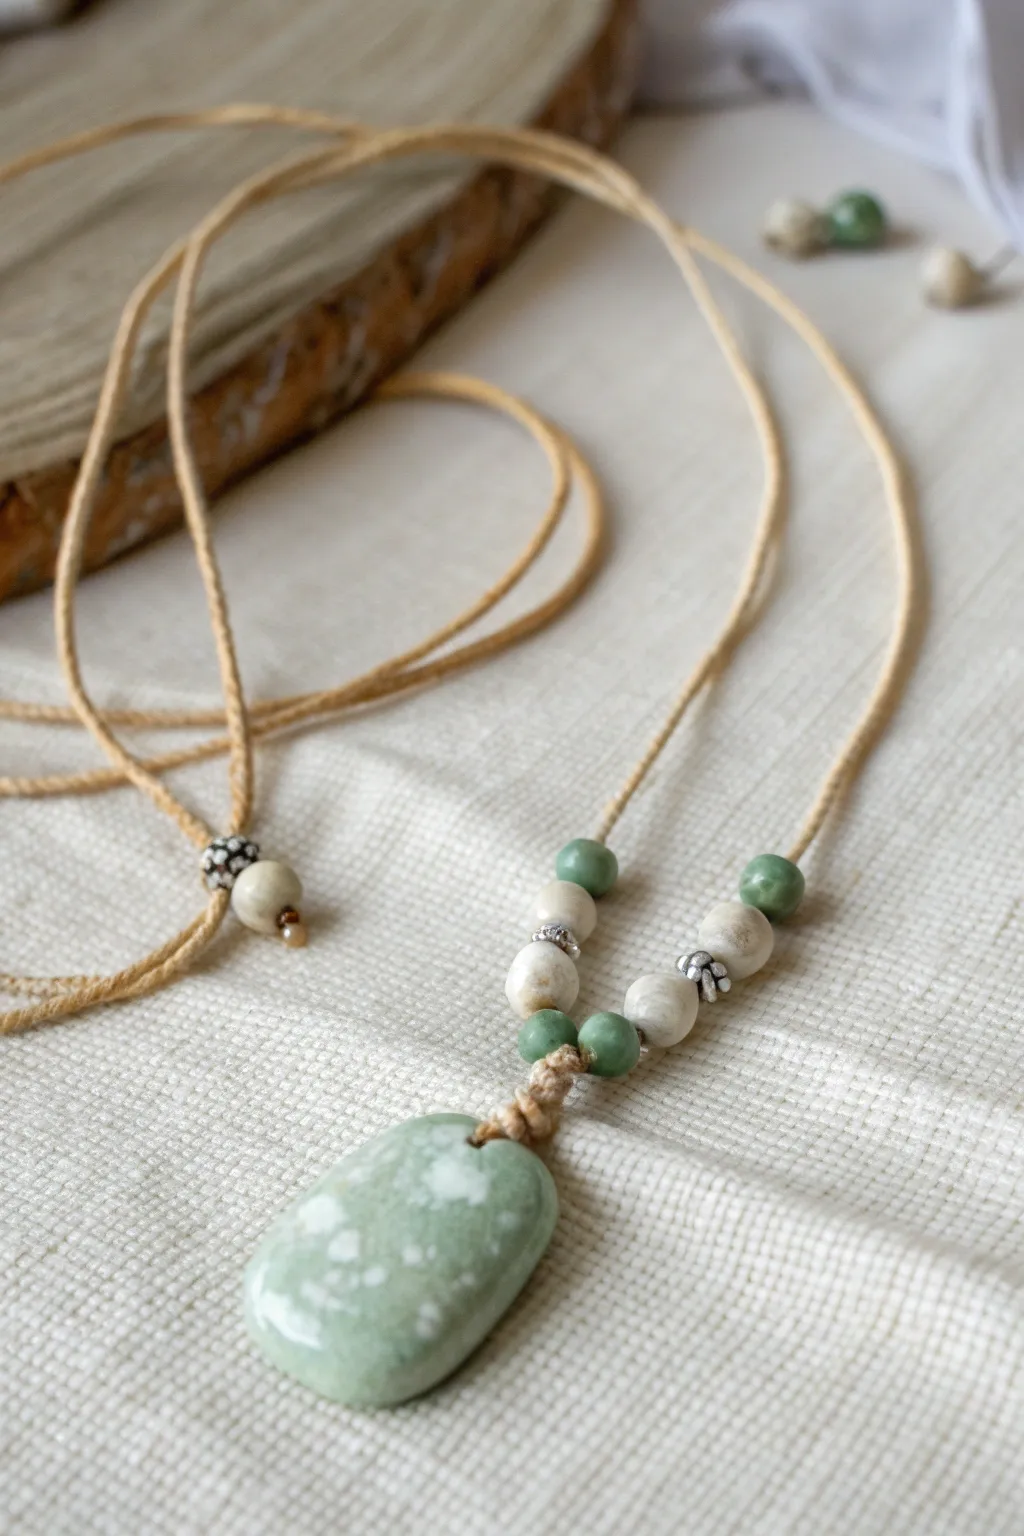
Capture the serene beauty of natural stone with this remarkably realistic faux jade pendant. Using a simple mottling technique with polymer clay, you’ll create a soothing green centerpiece strung on an earthy cord for a bohemian-chic accessory.
Step-by-Step Guide
Materials
- Translucent polymer clay (2 oz)
- White polymer clay (small amount)
- Green alcohol ink or oil paint (thalo green or emerald)
- Acrylic roller or pasta machine
- Tissue blade
- Sandpaper (various grits from 400 to 1200)
- Buffing wheel or denim cloth
- Hand drill or needle tool
- 1mm or 2mm light tan waxed cotton cord or leather cord
- Silver spacer beads (daisy style)
- Small wooden or bone beads (optional, to match the cream beads in the photo)
- Gloss varnish (optional)
Step 1: Mixing the Faux Jade
-
Prepare the Translucent Base:
Condition a block of translucent polymer clay until it is soft and pliable. Flatten it into a sheet. -
Tinting the Clay:
Add a very small amount of green alcohol ink or a tiny dab of green oil paint to the translucent clay. You want a pale, milky green color, not a solid opaque green, so start with less than you think you need. -
Knead the Color:
Mix the color thoroughly into the clay until you achieve a uniform, soft celadon shade. This translucency is key to the jade look. -
Adding Inclusions:
Finely chop a small amount of white polymer clay into tiny crumb-like bits. You don’t want large chunks, just little flecks. -
Combine for Mottling:
Sprinkle the white crumbs over the green sheet. Fold the clay over and pass it through the pasta machine or roll it out. Fold and roll repeatedly until the white streaks are stretched and swirled naturally within the green, mimicking the inclusions in real stone.
Too Opaque?
If your jade looks like solid plastic, you used too much paint. Chop it up and mix in more fresh translucent clay to dilute the color back to a milky semi-transparent state.
Step 2: Shaping the Beads
-
Form the Pendant:
Take a large portion of your mixed clay and shape it into a rough, organic nugget. It shouldn’t be a perfect oval; slightly irregular edges look more authentic. Smooth the surface with your finger to remove fingerprints. -
Roll Accent Beads:
Use leftover faux jade clay to roll four small, round beads (approx. 6-8mm). Keep them relatively uniform in size. -
Create Cream Beads:
If you aren’t using wooden spacer beads, condition some plain white or ecru clay. Roll four slightly larger beads (approx. 8-10mm) and texturize them slightly with sandpaper for a matte bone look. -
Piercing:
Using a needle tool, carefully pierce a hole through the top third of your large nugget pendant. Pierce holes through the center of all your smaller round beads. Ensure the holes are wide enough for your cord.
Step 3: Baking and Finishing
-
Bake:
Arrangement your beads on a tile or baking sheet. Bake according to the manufacturer’s instructions for your specific brand of clay—usually 275°F (130°C) for about 30 minutes. -
Quench (Optional):
I like to drop the hot gemstone pieces directly into a bowl of ice water immediately after baking. This ‘shocking’ process increases the clarity of the translucent clay. -
Wet Sanding:
Once cool, wet sand the large nugget bead. Start with a 400 grit to smooth any bumps, then work your way up to 1200 grit for a silky smooth finish. -
Buffing:
Buff the faux jade pieces vigorously with a piece of denim or a buffing wheel. This brings out a natural, waxy sheen characteristic of real jade without making it look like plastic.
Level Up: Antique Look
Rub a tiny bit of burnt umber acrylic paint into the crevices of the beads and the pendant’s inclusions, then wipe it off creates an aged, unearthed artifact appearance.
Step 4: Assembly
-
Stringing the Pendant:
Cut a long length of tan cord (about 30 inches). Fold it in half and thread the folded loop through the hole in your pendant nugget. -
Securing the Pendant:
Pull the cord ends through the loop to create a lark’s head knot, securing the nugget at the bottom center. -
Knotting the Base:
Tie a simple overhand knot with both cords together, right above the lark’s head knot, to stabilize the pendant. -
Adding Beading Order:
On each side of the central knot, thread beads in this order: one small jade bead, one cream/bone bead, a silver spacer, another cream bead, and a final jade bead. -
Securing the Beads:
Once the beads are in place on both sides, tie an overhand knot on each cord to keep the beads from sliding up the necklace. -
Finishing the Ends:
Add a bead to the very ends of the cord if adjustable, or simply tie the two ends together at your desired length to complete the necklace.
Wear your new stone-inspired creation with pride or gift it as a unique lucky charm.
Faux Geode Slice Pendant
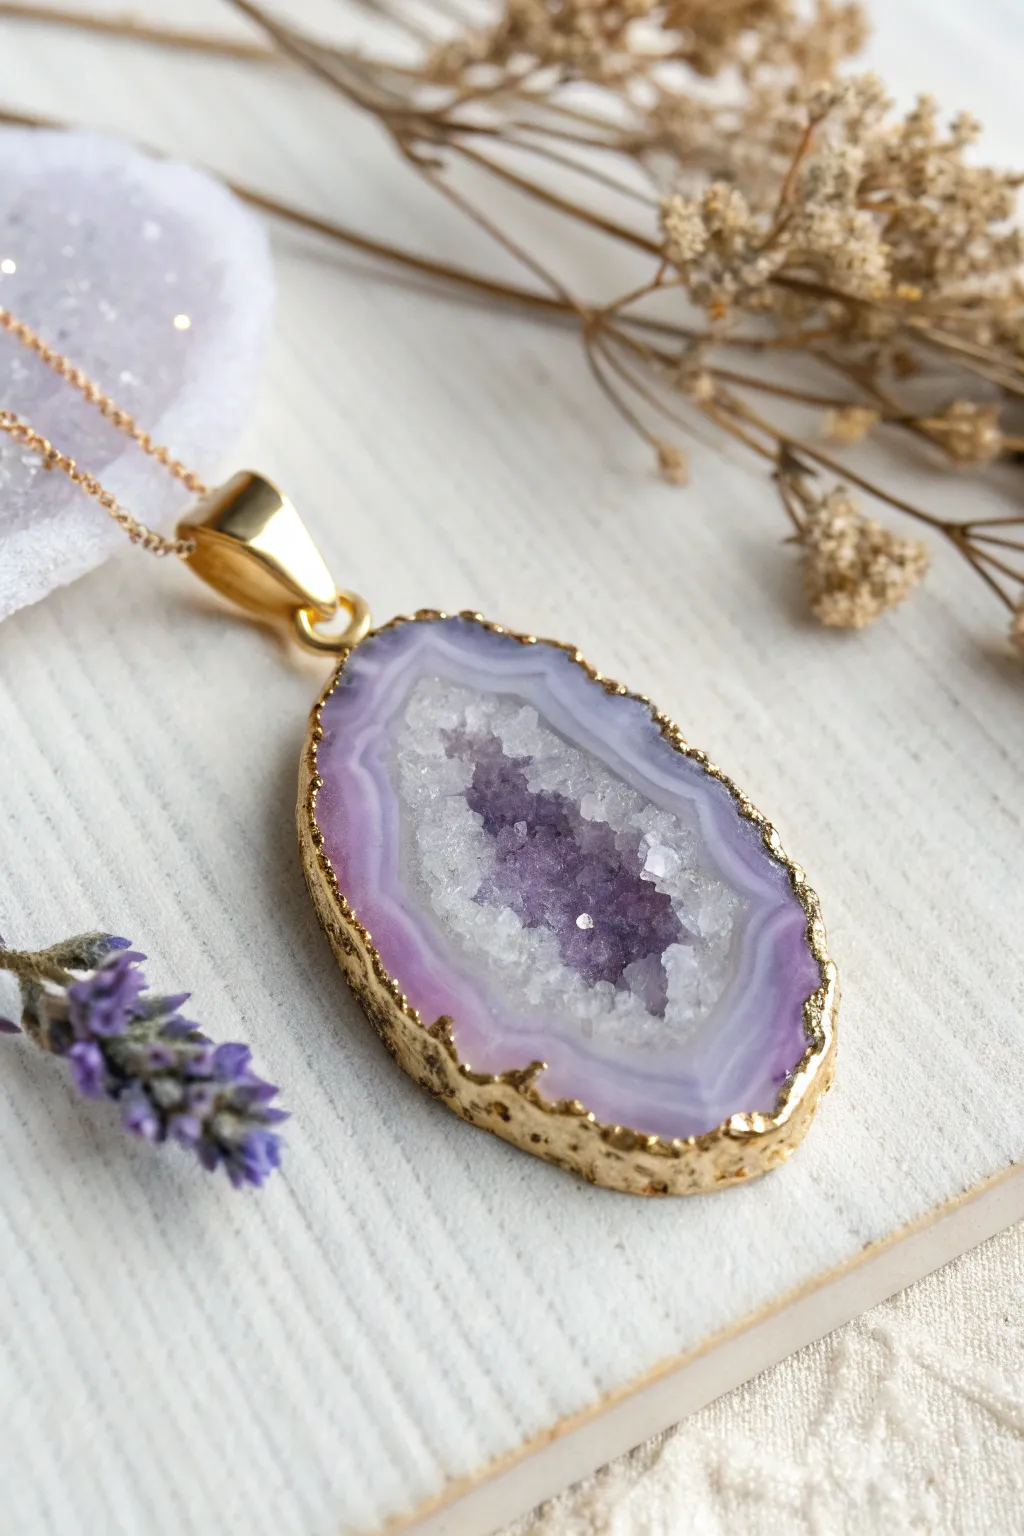
Capture the organic beauty of natural stone with this stunning faux geode pendant made entirely from polymer clay and crystals. The design features realistic translucent agate banding and a glittering crystalline center, framed by an elegant gold leaf edge.
Step-by-Step Tutorial
Materials
- Translucent polymer clay
- Purple alcohol ink or clay dye
- Liquid polymer clay (translucent)
- Small clear quartz crystals, crushed glass, or chunky glitter
- Gold leaf or gold metallic paint
- High-gloss varnish or UV resin
- Rolling pin or pasta machine
- Exacto knife or irregular oval cutter
- Paintbrushes
- Gold bail and jump ring
- Chain
Step 1: Creating the Agate Cane
-
Mix your colors:
Start by conditioning your translucent polymer clay. Divide it into three portions. Keep one portion pure translucent. Mix a tiny drop of purple alcohol ink into the second to create a pale lavender, and a bit more into the third for a medium purple. -
Layer the sheets:
Roll each color into a flat sheet. Stack them in an ombré pattern: medium purple, pale lavender, plain translucent, and repeating if you want more intricate banding. The layers don’t need to be perfectly even; irregularity adds to the natural look. -
Form the bullseye:
Roll the stacked sheets into a thick log or cylinder. This is your ‘cane’. Compress it gently so the layers fuse together without trapping air bubbles. -
Add a darker rind:
Roll a thin sheet of the medium purple clay and wrap it around the outside of your cylinder to create the outer ‘skin’ of the stone.
Pro Tip: Depth Effect
Mix a tiny speck of purple glitter into the translucent clay backing layer. When seen through the front, it adds subtle sparkle deep inside the stone without overwhelming the surface crystals.
Step 2: Shaping the Geode Slice
-
Cut the slice:
Slice a section off your cane, about 4-5mm thick. It should look like a round target. -
Distort the shape:
Gently pull and pinch the slice into an organic oval or teardrop shape. Avoid making it a perfect circle; natural geodes are rarely symmetrical. -
Create the hollow center:
Use an Exacto knife or a small tearing tool to cut out an irregular hole in the very center of the translucent layers. The edges of this cutout should be jagged, not smooth. -
Prepare the base:
Roll a very thin sheet of translucent clay to act as a backing plate. Place your open ring shape onto this backing sheet and press gently to seal the seams.
Step 3: Adding the Crystalline Heart
-
Fill the cavity:
Fill the center hollow with liquid translucent polymer clay. It should pool evenly but not overflow onto the banded sides. -
Embed the crystals:
Carefully sprinkle your crushed glass, quartz chips, or chunky glitter into the liquid clay. Push the larger pieces towards the edges of the pool and keep smaller bits in the center for depth. -
Texture the exterior:
Use a needle tool or a crumpled ball of foil to texture the outer rim of the pendant, giving it a rough, rock-like surface where the gold will eventually go. -
Bake the piece:
Bake according to your clay manufacturer’s instructions. Usually, this is around 275°F (130°C) for 30 minutes. Since we used translucent clay, plunging it into ice water immediately after baking can increase transparency.
Troubleshooting: Cloudy Clay
If your translucent clay looks milky after baking, you likely overcooked it or didn’t get it hot enough. Use an oven thermometer to ensure precise temperature, and try the ice water plunge immediately.
Step 4: Finishing and Gilding
-
Seal the crystals:
Once cool, apply a thin layer of UV resin or high-gloss varnish over the crystal center and the banded clay face to make the colors pop and secure the stones. -
Gild the edges:
Apply a liquid gilding adhesive or a bit of liquid clay to the rough outer edge. Carefully pat on gold leaf flakes, letting them wrap slightly over the front lip of the ‘stone’ for that electroplated look. -
Seal the gold:
If using gold leaf, seal it with a coat of varnish to prevent tarnishing or flaking. -
Attach hardware:
Drill a small hole at the top of the geode or glue a bail to the back. Attaching a shiny gold bail complements the gilded edge perfectly. -
Final assembly:
Thread your chain through the bail and your faux geode is ready to wear.
Enjoy styling your new sophisticated piece of jewelry that looks like a high-end gemstone find
Lava Lamp Bubble Bead Necklace
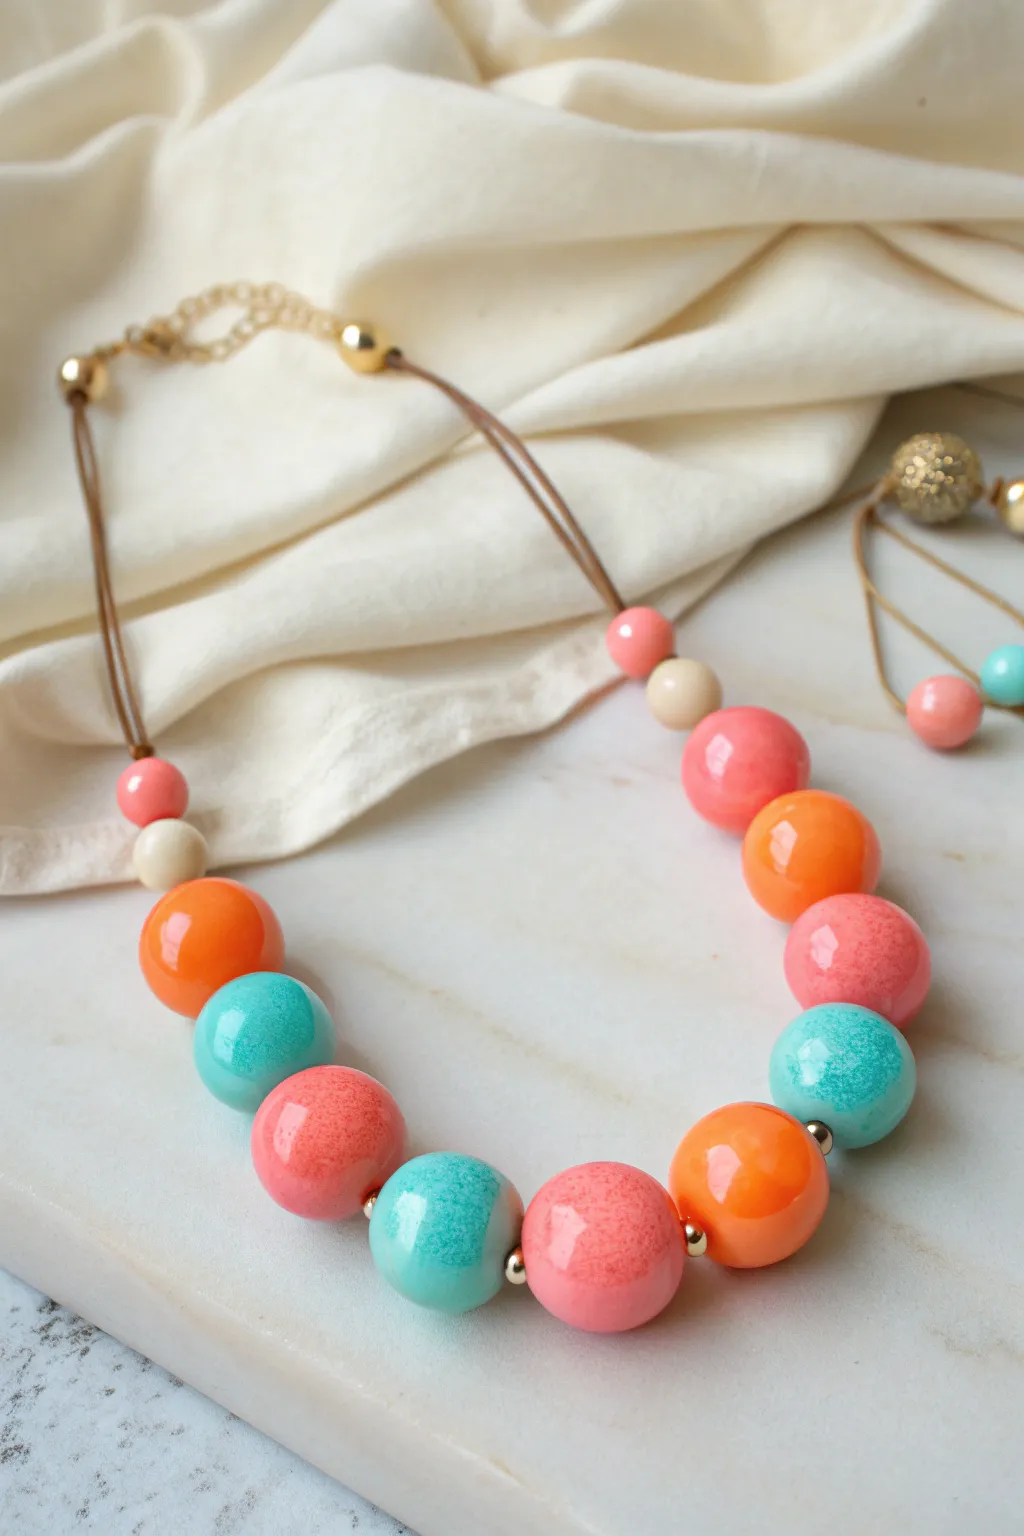
Channel groovy 70s vibes with this chunky statement necklace featuring oversized beads that mimic the mesmerizing flow of a lava lamp. The high-gloss finish and marbled color combinations create a playful accessory that pop against any neutral outfit.
Step-by-Step
Materials
- Polymer clay (Bright Orange, Coral Pink, Turquoise, Translucent White)
- Fimo Liquid or liquid polymer clay (optional but helpful for binding)
- Acrylic roller or pasta machine
- Bead piercing pins or toothpicks
- Wet/dry sandpaper (400, 600, 1000 grit)
- UV resin or high-gloss polyurethane varnish
- Brown waxed cotton cord or leather cord (1.5mm – 2mm)
- Jewelry findings: crimp ends, jump rings, lobster clasp, extension chain
- Gold spacer beads (small)
- UV lamp (if using resin)
- Ceramic tile or glass work surface
- Oven for baking
Step 1: Creating the Lava Lamp Effect
-
Condition the clay:
Start by thoroughly kneading each color of polymer clay until soft and pliable. You’ll need four distinct colors: bright orange, coral pink, turquoise, and a translucent white. -
Create the ‘lava’ mix:
To achieve that speckled, cloudy interior look, take a small chunk of your colored clay (e.g., turquoise) and mix it with an equal amount of translucent clay. Don’t blend fully; stop when it looks marbled. -
Form the base spheres:
Roll balls of scrap clay (or solid color clay) to create the inner cores of your beads. Aim for about 2cm diameter for the large beads. This ensures uniform size before adding the decorative layer. -
Apply the pattern:
Take your marbled translucent mix and flatten it into a thin sheet. Tear small majestic, irregular shapes and press them onto your solid colored base balls. Overlap them slightly to create depth. -
Roll smooth:
Once the base ball is covered in patches of solid color and translucent mix, roll the bead vigorously between your palms. The heat and pressure will smooth the seams and blur the lines between opaque and translucent, creating that fluid lava look. -
Make the accent beads:
Create smaller, solid-colored beads for the ends of the necklace strand. Roll two small cream beads (approx 1cm) and two small coral beads to act as graduated spacers near the cord.
Step 2: Baking and Finishing
-
Pierce the holes:
Using a bead piercing pin, carefully bore a hole through the center of each bead. Twist the pin as you push to avoid squashing the sphere. Make sure the hole is wide enough for your cord. -
Bake the beads:
Place your beads on a ceramic tile or baking rack. Bake according to the manufacturer’s instructions for your specific brand of clay—usually around 230°F to 275°F (110°C – 135°C) for 30-45 minutes. -
Cool and sand:
Allow the beads to cool completely. Once hard, use wet sandpaper to smooth out any fingerprints or bumps. Start with 400 grit and work up to 1000 grit for a silky touch. -
Glaze for shine:
To truly mimic wet glass or wax, apply a generous coat of UV resin to each bead. Cure under a UV lamp for a durable, glass-like finish. Alternatively, two coats of gloss varnish work well, though I find resin gives the best depth.
Fixing Cloudy Resin
If your resin finish looks milky or cloudy after curing, wipe it with rubbing alcohol. If that fails, the humidity was likely too high; sand lightly and re-coat in a dry room.
Step 3: Assembly
-
Cut the cord:
Cut a length of brown cord approximately 24 inches long (or your desired length plus extra for knots). -
String the beads:
Thread your beads onto the cord. Follow the pattern in the image: small coral, small cream, then alternate your large lava beads (Orange, Turquoise, Coral, Turquoise, Coral, etc.) with tiny gold spacer beads between the central large ones. -
Secure the ends:
Use crimp ends to secure the leather cord on both sides. Place the cord tip inside the crimp finding and squeeze tightly with pliers. -
Attach the clasp:
Using jump rings, attach a lobster clasp to one crimp end and an extension chain to the other. This allows you to adjust the necklace length depending on your neckline.
Level Up: Glow in the Dark
Mix glow-in-the-dark powder into your translucent clay combination. In daylight it looks standard, but it will actually glow like a real lamp in the dark
Wear your new bubbly creation with a simple white tee to let those juicy colors really take center stage
Starry Sky Galaxy Pendant
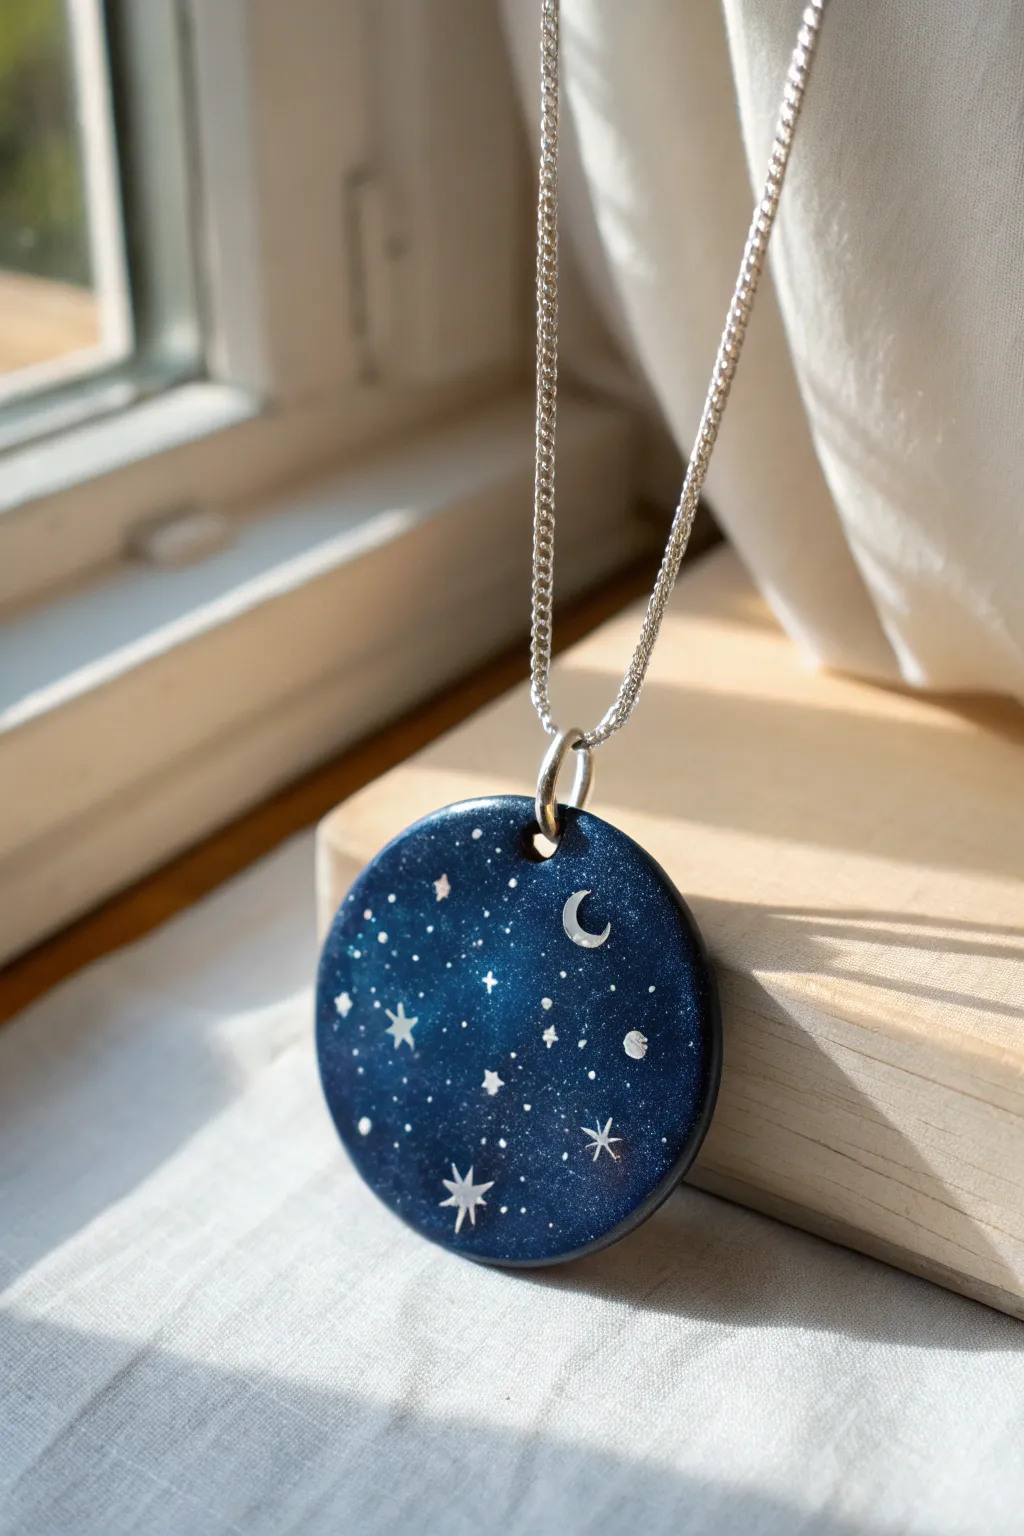
Capture the magic of a clear midnight sky in a wearable piece of art. This deep, shimmering blue pendant features a delicate constellation of silver stars and a crescent moon, perfect for stargazers and dreamers alike.
How-To Guide
Materials
- Navy blue polymer clay
- Translucent polymer clay
- Fine silver glitter or mica powder
- Silver metallic acrylic paint or a fine-tip silver paint pen
- Small dotting tool or toothpick
- Fine detail paintbrush (size 000)
- Circle clay cutter (approx. 1.5 inches)
- Rolling pin or acrylic roller
- Silver jump ring (large)
- Glossy UV resin or polyurethane varnish
- UV lamp (if using resin)
- Needle tool or hand drill
- Silver necklace chain
- Baking tile or parchment paper
- Oven
Step 1: Creating the Base
-
Condition the Clay:
Begin by conditioning the navy blue polymer clay until it is soft and pliable. Warm clay prevents cracking later on, so take your time kneading it between your fingers. -
Add the Sparkle:
Mix a small amount of fine silver glitter or mica powder into the blue clay. Alternatively, mix a little translucent clay with the blue to give it depth, then add your sparkles. Knead until the glitter is evenly distributed but still looks like a deep, starry expanse. -
Roll out the Slab:
Using your acrylic roller, roll the clay out to a uniform thickness, about 1/4 inch thick. Make sure the surface is smooth and free of fingerprints. -
Cut the Shape:
Press your circle cutter firmly into the clay to cut out your pendant shape. Lift away the excess clay carefully so you don’t distort the perfect circle. -
Smooth the Edges:
Gently run your finger around the edge of the circle to smooth out any sharpness left by the cutter. A smooth edge gives the piece a professional, finished look. -
Create the Hanging Hole:
Use a needle tool or a small straw to punch a hole near the top edge of the circle. Make sure the hole is large enough to accommodate your jump ring post-baking.
Starry Mistakes?
If you mess up a painted star, don’t panic! Use a wet cotton swab to gently wipe away wet acrylic paint, or scratch off dry paint with a toothpick.
Step 2: Painting the Galaxy
-
Bake the Base:
Pre-bake the clay circle according to the manufacturer’s instructions. Usually, this is around 275°F (130°C) for 15-30 minutes. Let it cool completely before painting. -
Draft Your Design:
Lightly visualize where your main elements will go. I like to place the largest moon or star cluster off-center for a balanced composition. -
Paint the Moon:
Using the fine detail brush and silver acrylic paint, carefully paint a small crescent moon shape near the upper right quadrant. -
Add Major Stars:
paint a few four-pointed or five-pointed stars scattered across the surface. These should be larger than the background stars to create focus. -
Dot the Background Stars:
Dip a dotting tool or the tip of a toothpick into the silver paint. Gently tap tiny dots unevenly across the dark background to mimic distant stars and clusters. -
Add Micro Details:
For the tiniest stars, loading your brush with slightly watered-down paint and gently flicking the bristles can create a spray of microscopic specks, though hand-dotting offers more control. -
Let it Dry:
Allow the paint to dry completely. Acrylics dry fast, but give it at least 20 minutes to ensure no smudging occurs during sealing.
More Dimension
Before baking, embed tiny clear or iridescent rhinestones into the clay where the brightest stars will be for actual sparkle that catches the light.
Step 3: Sealing and Assembly
-
Apply the Finish:
Coat the surface with a layer of UV resin or glossy varnish. This protects the paint and deepens the blue background. -
Cure the Sealant:
If using UV resin, place the piece under a UV lamp for 2-3 minutes until hard and tack-free. If using varnish, let it air dry according to the bottle instructions. -
Attach Hardware:
Open a large silver jump ring using two pairs of pliers. Thread it through the hole you made earlier and close it securely. -
Final Polish:
Thread your silver chain through the jump ring. Your galaxy pendant is now ready to wear.
Enjoy wearing your personal piece of the universe or gift it to someone special.
Leaf Imprint Charm Necklace
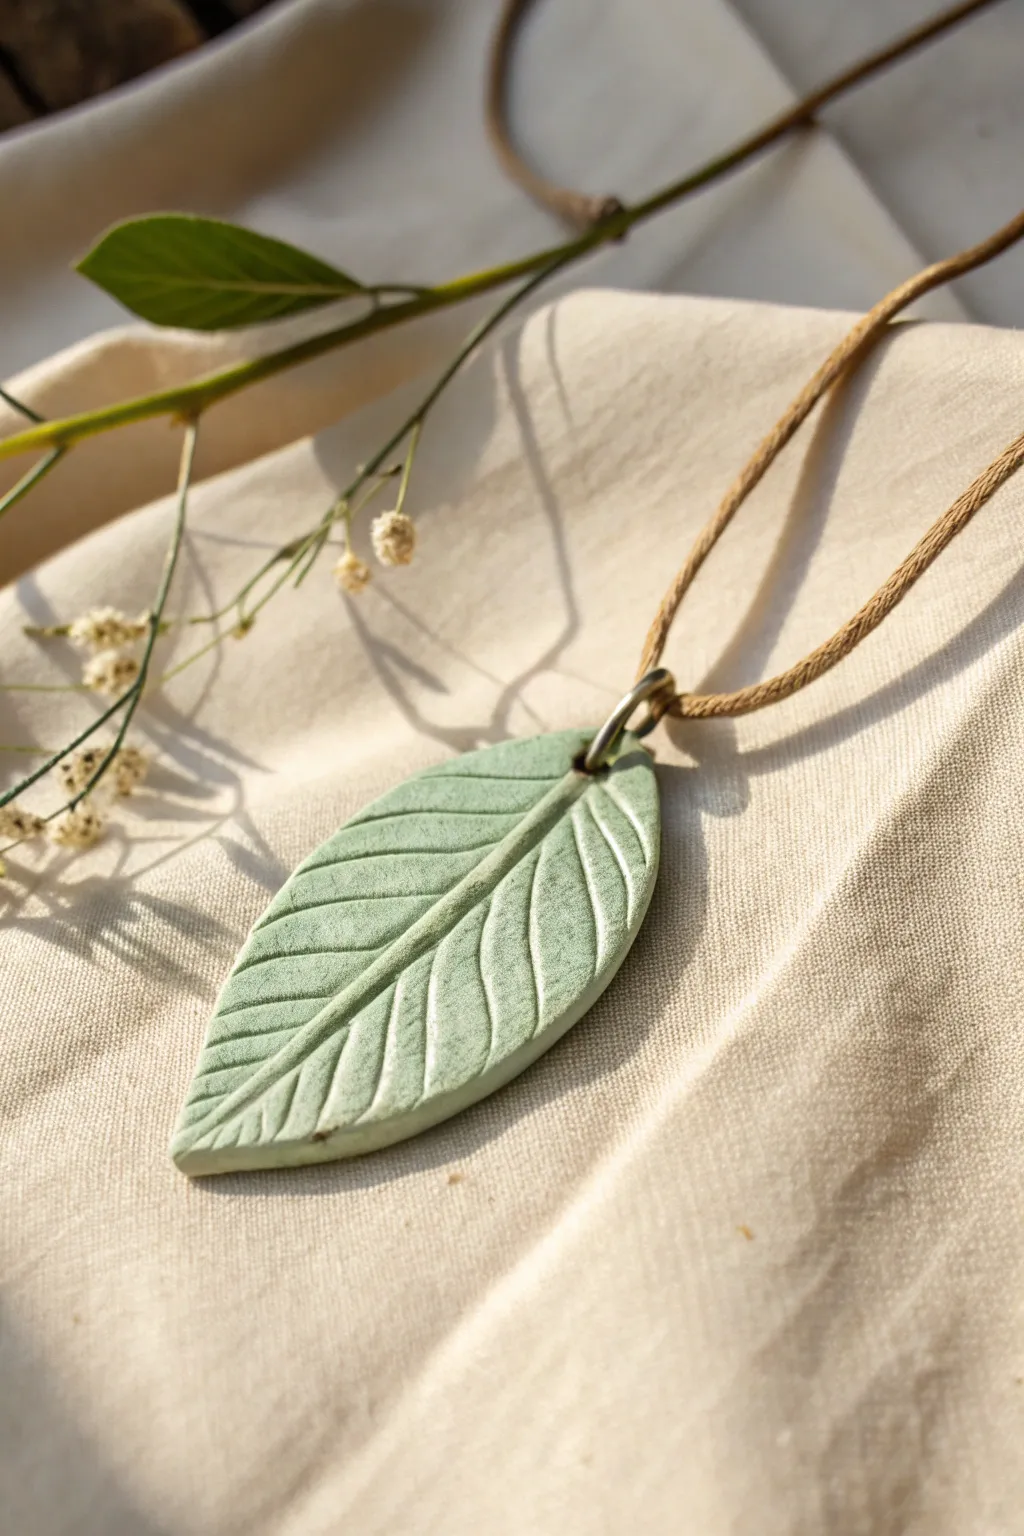
Capture the delicate details of nature with this serene, pale green pendant stamped with a real leaf. The soft, matte finish and organic texture make this necklace a perfect accessory for bringing a touch of the outdoors to any outfit.
Detailed Instructions
Materials
- Polymer clay (pale mint or sage green)
- Real leaf with prominent veins (e.g., hydrangea, mint, or rose)
- Acrylic rolling pin or clay machine
- Craft knife or scalpel blade
- Large jump ring (bronze or antique brass)
- Faux suede cord or leather cord
- Needle tool or toothpick
- Cornstarch or baby powder (for release)
- White acrylic paint (optional)
- Paper towel or cloth
- Fine grit sandpaper (400-600 grit)
- Oven for baking
Step 1: Preparing the Impression
-
Condition the Clay:
Begin by warming your polymer clay in your hands. Knead it thoroughly until it is soft, pliable, and free of any air bubbles or cracks. -
Roll a Slab:
Flatten the conditioned clay using an acrylic roller. You want an even slab that is roughly 3mm to 4mm thick. If you have a pasta machine, a medium setting works perfectly here. -
Select Your Leaf:
Choose a fresh leaf from the garden. Look for one that is sturdy and has very raised, distinct veins on the backside because this is the side you will press into the clay. -
Dust for Release:
Lightly dust the surface of your clay slab with a tiny bit of cornstarch or baby powder. This acts as a release agent so the leaf doesn’t stick and tear the clay. -
Make the Impression:
Place the leaf vein-side down onto the clay. Gently roll over it with your acrylic roller, applying firm, even pressure to ensure all the tiny vascular details are transferred.
Step 2: Shaping and Refining
-
Remove the Leaf:
Carefully peel the leaf away from the clay to reveal the pattern. -
Cut the Shape:
Using a sharp scalpel or craft knife, cut around the outline of the leaf imprint. I prefer to leave a very small border of smooth clay around the edge for a cleaner look. -
Smooth the Edges:
Dip your finger in a little bit of water (or cornstarch) and gently run it along the cut edges of the clay to smooth out any sharpness or jagged bits left by the knife. -
Add a Hole:
Use a needle tool or toothpick to pierce a hole at the top of the stem area. Verify that your jump ring will fit through this hole; wiggle the tool slightly to widen it if necessary. -
Create a Curve:
For a more natural look, you can gently drape the unbaked leaf over a curved surface, like a soda can or a piece of cardstock, to give it a slight, organic bend.
Clay sticking?
If the real leaf is sticking too much despite the cornstarch, try placing the clay and leaf in the fridge for 10 minutes before peeling. The cold stiffens the clay, making removal easier.
Step 3: Finishing Touches
-
Bake the Clay:
Place your pendant on a baking sheet lined with parchment paper. Bake according to the manufacturer’s instructions for your specific brand of clay (usually around 275°F/135°C). -
Cool Down:
Allow the piece to cool completely in the oven or on a wire rack before handling it further. -
Highlight the Texture (Optional):
To enhance the veins like the example photo, dilute a tiny drop of white acrylic paint with water. Brush it over the textured surface. -
Wipe Back:
Immediately wipe the surface with a damp paper towel. The white paint will stay in the deep recesses of the veins while cleaning off the high points, creating a soft, weathered look. -
Light Sanding:
Once the paint is dry, use fine-grit sandpaper to buff the edges and surface lightly if you want an ultra-smooth, matte stone finish. -
Assembly:
Open your large jump ring using pliers and thread it through the hole in the pendant. Close the ring securely. -
Stringing:
Thread your suede or leather cord through the jump ring and tie it off at your desired length to complete the necklace.
Pro Tip: Vein Pop
Choose leaves with stiff, woody veins (like mint or raspberry leaves) rather than soft ones (like spinach). Stiff veins act like a deep stamp, giving you much crispier definition.
Now you have a permanent botanical botanical keepsake that captures the fleeting beauty of a fresh leaf