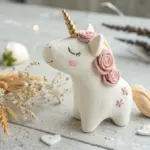
Whenever I want a quick clay win, I reach for air dry clay and make something tiny and adorable I can finish in an afternoon. These cute small ideas are perfect for little gifts, desk buddies, and those “I just need to make something” moments in the studio.
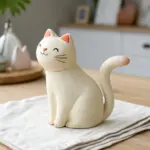
Chubby Mini Cat Figurines
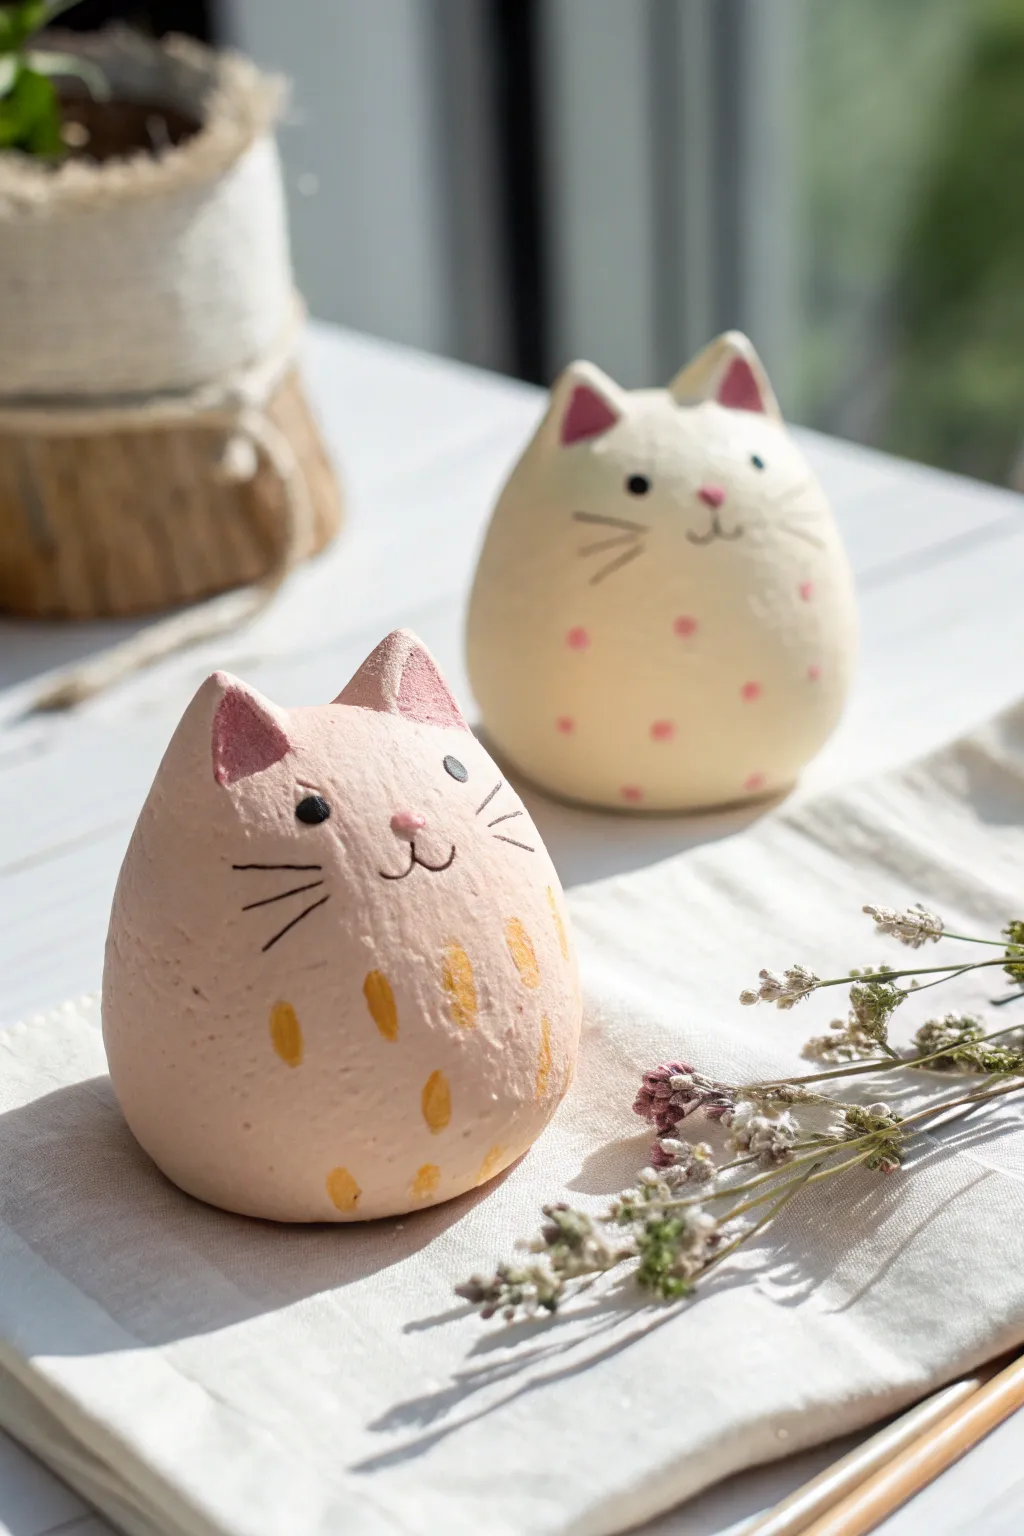
These delightfully round feline figurines are the perfect desk companions, featuring minimal faces and soft pastel details. Their simple, egg-like shape makes them incredibly approachable for beginners, while the hand-painted accents give them a sweet personality.
Step-by-Step
Materials
- White air dry clay
- Acrylic paints (pink, yellow-orange, black, white)
- Fine detail paintbrush (size 0 or 00)
- Small cup of water
- Palette or mixing surface
- Sandpaper (fine grit)
- Clear matte varnish or sealant (optional)
- Modeling tool or toothpick
Step 1: Shaping the Base
-
Prepare the Clay:
Start by conditioning a chunk of white air dry clay in your hands. Knead it until it’s soft, pliable, and free of cracks. -
Form the Body:
Roll the clay into a smooth ball about the size of a tangerine or a large egg. Gently flatten the bottom against your work surface so it stands upright securely without wobbling. -
Refine the Shape:
Smooth the sides upwards to create a slightly tapered, egg-like dome. You want the body to remain chubby and round at the base, narrowing just slightly toward the top of the head. -
Add the Ears:
Pinch off two very small, pea-sized pieces of clay. Shape them into tiny triangles. -
Attach the Ears:
Score the bottom of the ears and the top of the head with a toothpick (make small scratches), add a tiny dab of water, and press the ears firmly in place. Smooth the seam with your finger or a modeling tool so the ears look seamless.
Smooth Seams
Keep a small dish of water nearby. If the clay starts to crack while shaping, wet your finger and smooth it immediately. Water acts as the ‘glue’ for air dry clay.
Step 2: Smoothing and Drying
-
Check Surface:
Dip your finger in a little water and run it over the entire surface of the cat to smooth out any fingerprints or join lines. The smoother it is now, the less sanding you’ll need later. -
Let it Dry:
Set your cat aside to dry completely. Depending on humidity and clay thickness, this usually takes 24 to 48 hours. Turn it occasionally so the bottom dries evenly. -
Sand Imperfections:
Once fully hard, gently sand any rough spots or bumps with fine-grit sandpaper until the surface feels like smooth porcelain. Wipe away the dust with a slightly damp cloth.
Tail Variation
Before drying, roll a small snake of clay and attach it to the back to create a curled tail, pressing it flat against the body so it doesn’t break off easily.
Step 3: Painting and Details
-
Base Color (Optional):
For the pink cat, mix a tiny dot of red or pink into white acrylic paint to get a pale pastel shade. Paint the entire body seamlessly. For the cream cat, you can leave the clay natural or paint it an off-white color. -
Paint the Inner Ears:
Using a slightly darker shade of pink than the body, paint the inside triangles of the ears. -
Add the Nose:
With your fine detail brush, paint a tiny, soft pink oval or inverted triangle in the center of the face for the nose. -
Draw the Mouth:
Using black paint and a very steady hand (or a fine-tip paint pen), draw a small ‘w’ shape connected to the bottom of the nose to form the mouth. -
Add Eyes and Whiskers:
i like to keep the eyes simple, just two small black dots wide apart. Add two or three thin lines on each cheek for whiskers. -
Patterning the Pink Cat:
If making the pink version, mix a golden-yellow ochre color. Paint small, vertical oval dashes around the belly area to mimic tiger stripes. -
Patterning the Cream Cat:
For the cream version, use a soft pink paint to add small polka dots scattered randomly across the lower half of the body. -
Seal (Optional):
Once the paint is totally dry, apply a thin coat of matte varnish to protect your work.
Place your adorable duo on a shelf or windowsill to bring a touch of handmade cheer to your room


Tiny Dino Best-Friend Pair
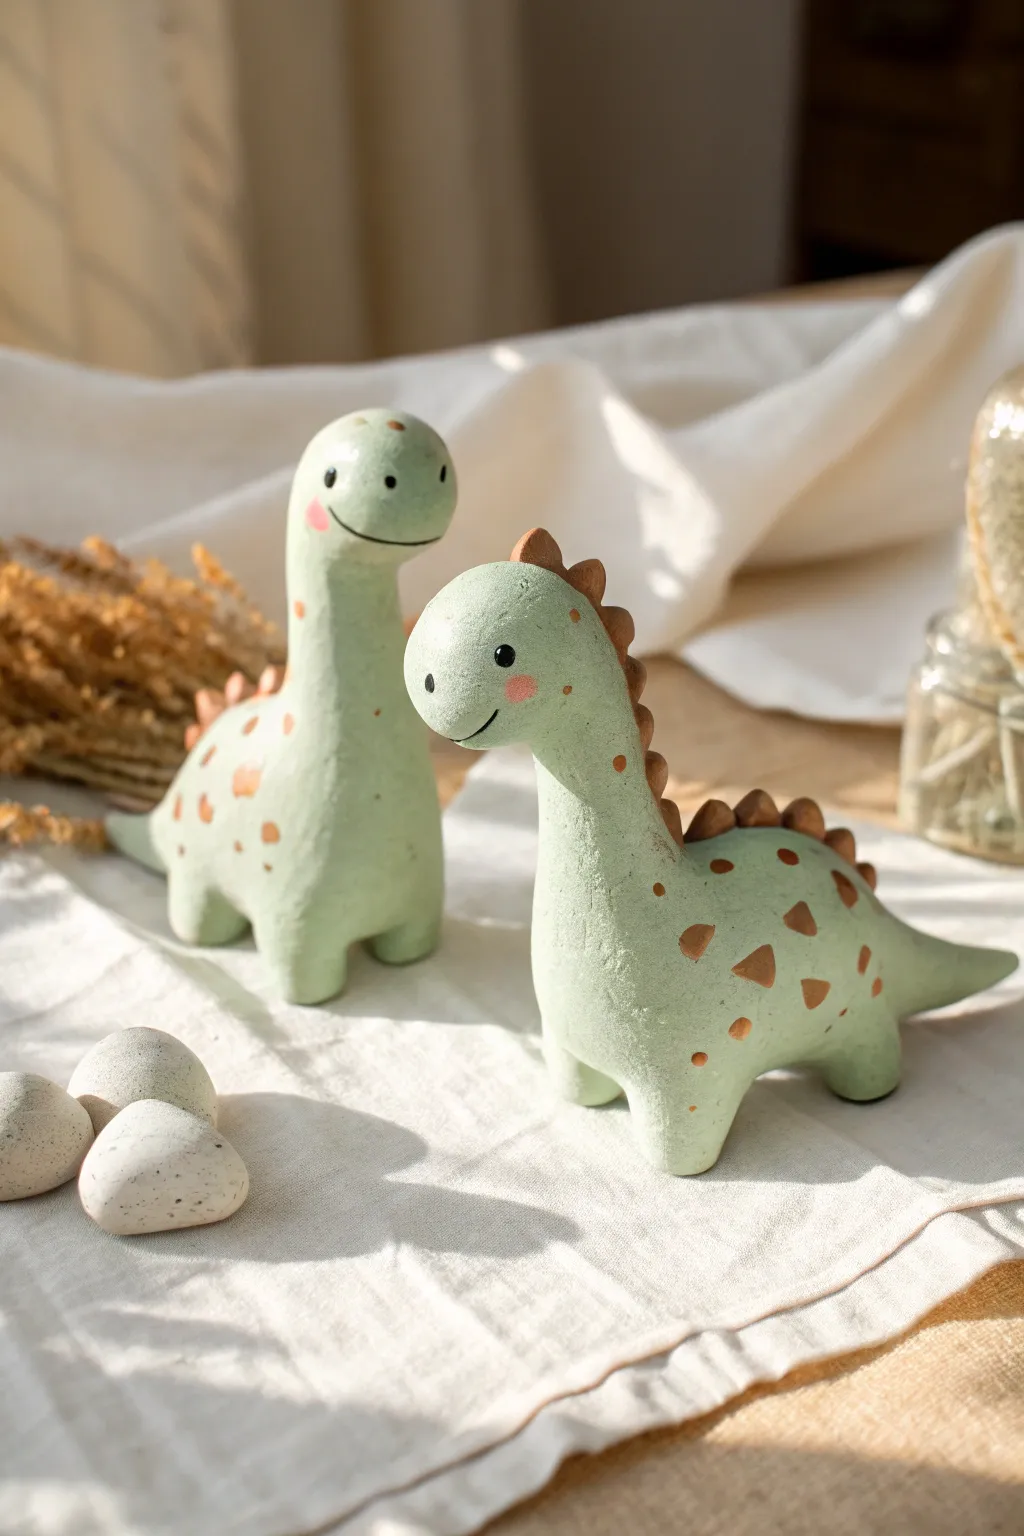
Sculpt these adorable long-necked best friends that bring a touch of the Jurassic era to your desk or shelf. Their soft mint green color and rustic brown spots give them a gentle, handmade charm that is perfect for beginning sculptors.
Step-by-Step Tutorial
Materials
- Air dry clay (white or stone color)
- Acrylic paints (mint green, warm brown, pink, black, white)
- Small paintbrush (round tip)
- Detail paintbrush (fine liner)
- Cup of water
- Aluminum foil (optional, for armature)
- Toothpicks (for support)
- Clay sculpting tools (or just a butter knife and a needle tool)
- Sandpaper (fine grit)
- Matte varnish or sealant
Step 1: Shaping the Bodies
-
Prepare the base:
Start by conditioning a chunk of air dry clay until it is soft and pliable. If you want larger dinos, crumple a small ball of aluminum foil to use as a core, or just work with solid clay for smaller figures. -
Form the torso:
Roll a smooth ball of clay about the size of a tangerine for the body. Gently elongate it into a thick oval or egg shape, tapping the bottom against your work surface so it sits flat. -
Create the legs:
Pull four small knobs of clay from the bottom of the body to form the legs. Instead of attaching separate pieces, I find that pinching and pulling the legs directly from the body mass creates a stronger, seam-free bond. Smooth them into stubby cylinders. -
Add the tail:
From the back of the body, pull and taper a section of clay to form the tail. Keep it relatively short and pointed, curving specifically to the side or straight out depending on the pose you want. -
Sculpt the long neck:
Roll a separate log of clay for the neck. It should be thick enough to support the head. Insert a toothpick halfway into the neck and halfway into the body to act as internal reinforcement, using a little slip (clay mixed with water) to glue the joint. -
Attach the head:
Roll a smaller ball for the head and attach it to the top of the neck, blending the clay downwards with your thumb or a modeling tool until the seam disappears completely. Gently flatten the face slightly for the snout.
Seamless Joints
When attaching the neck or spikes, dipping your finger in water and ‘smearing’ the clay across the joint is crucial. If you don’t blend the clay, the pieces will likely pop off once they shrink during drying.
Step 2: Adding Details
-
Spike the spine:
Pinch off tiny, equal-sized bits of clay and roll them into small cones or triangles. You will need about 6-8 of these depending on your dinosaur’s size. -
Attach dorsal plates:
Score (scratch) the back of the dinosaur and the bottom of each spike. Add a dab of water or slip and press the spikes in a row running down the back. Smooth the edges slightly so they don’t fall off. -
Define the mouth:
Use a needle tool or the edge of a thin blade to carefully press a curved line into the snout for a smile. Do this on both sides if you want them to be admired from any angle. -
Dry partially:
Let the figures sit for about 24-48 hours out of direct sunlight. Halfway through drying, check for clear cracks and smooth them over with a slightly damp finger.
Make Them Useful
Before the clay dries, gently press a small air plant or succulent into the dinosaur’s back to create a custom hollow divot, turning your sculpture into a mini planter.
Step 3: Painting and Finishing
-
Sand for smoothness:
Once fully dry and hard, take a piece of fine-grit sandpaper and gently buff out any fingerprints or rough bumps. Wipe away the dust with a barely damp cloth. -
Base coat application:
Mix a soft, uneven mint green using white and a touch of green acrylic. Apply two coats over the entire dinosaur, letting the first coat dry completely before adding the second for opaque coverage. -
Paint the spots:
Using a warm brown paint and a small round brush, paint random triangular or soft diamond shapes on the sides and back. Vary the sizes to keep the look organic. -
Color the spikes:
Carefully paint the dorsal spikes with the same warm brown color used for the spots. -
Add facial features:
Use a fine detail brush or a toothpick dipped in black paint to make small, round eyes. Add smaller white dots inside the black for a ‘sparkle’ effect. -
Blush the cheeks:
Mix a very watery pink or use dry pastel dust. Dab it gently on the cheeks right behind the smile to give them a sweet, rosy glow. -
Protective seal:
Finish the project by brushing on a coat of matte varnish. This will protect the paint from chipping and give the clay a unified, professional finish.
Place your tiny prehistoric duo together on a shelf and enjoy their timeless friendship


Mini Penguin Pocket Buddy
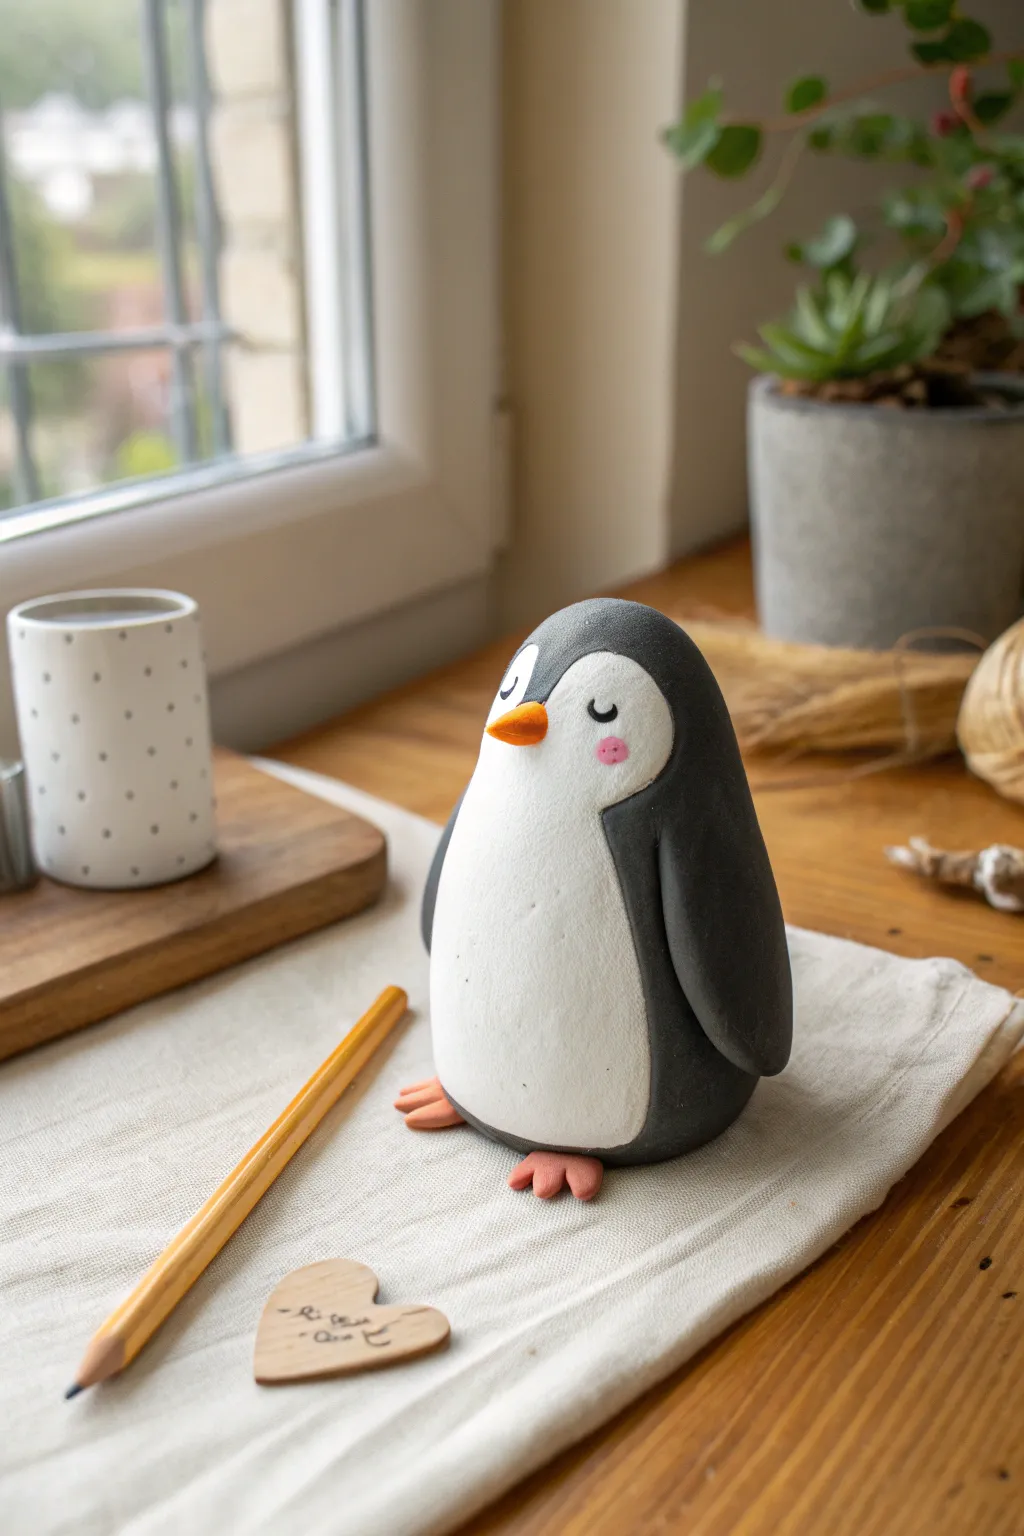
This adorable little penguin pocket buddy brings a sense of calm to any desk or shelf with its sweet, sleepy expression. Crafted from smooth air dry clay, its simple rounded forms and soft matte finish make it the perfect beginner project for a relaxing afternoon.
Step-by-Step
Materials
- Air dry clay (white)
- Acrylic paints (black, white, orange, pink)
- Fine grit sandpaper
- Small paintbrush (fine tip)
- Clay sculpting tools or a toothpick
- Cup of water
- Matte varnish (optional)
Step 1: Shaping the Base
-
Form the Body:
Start with a ball of clay roughly the size of a kiwi fruit. Roll it between your palms until it is perfectly smooth, removing any cracks. -
Create the Egg Shape:
Gently taper the top of the ball to create an egg-like shape. The bottom needs to be slightly wider and flatter so the penguin stands stably on its own. -
Flatten the Tummy:
Press your thumb gently against the front of the shape to create a very subtle flattened area where the white belly patch will eventually go. This helps define the separation between the wings and the chest.
Step 2: Adding Features
-
Sculpt the Wings:
Take two smaller pieces of clay and flatten them into teardrop shapes. Attach them to the sides of the body using a little water to blend the seams at the shoulder area. -
Shape the Curve:
Gently curve the tips of the wings inward so they hug the penguin’s rounded sides. I like to smooth the join until it looks like one solid piece rather than an attachment. -
Create the Beak:
Roll a tiny, rice-sized cone of clay. Attach this to the center of the face area, keeping it slightly pointed slightly downward. -
Make the Feet:
Form two small, flat ovals for the feet. Use a knife tool or toothpick to press two indentations into the front edge of each oval to create webbed toes. -
Attach the Feet:
Slip the feet under the front edge of the body. Press down firmly so the body bonds with the feet, ensuring the figurine is still balanced and sitting flat.
Fixing Cracks
If small cracks appear while drying, mix a tiny bit of fresh clay with water to make a paste (slip). Fill the cracks, smooth with a finger, and let dry again.
Step 3: Finishing and Painting
-
Dry Completely:
Let the sculpture dry for at least 24 to 48 hours. It should feel hard and room temperature to the touch, not cold. -
Sand for Smoothness:
Once dry, gently use fine-grit sandpaper to buff away any fingerprints or rough bumps, particularly around the head and wings. -
Paint the Body:
Paint the back, head, and wings with matte black acrylic paint. Carefully outline a heart-shaped curve around the face to leave the front white. -
Paint the White Details:
If your clay isn’t bright white, paint the belly and face area with white acrylics. You may need two coats for a solid, opaque look. -
Add Beak and Feet Color:
Paint the small beak and feet with a bright, matte orange. Use a very small brush to avoid getting orange on the white tummy. -
Draw the Face:
Using your finest brush or a black paint pen, draw two small ‘U’ shapes for the closed, sleeping eyes. -
Add Rosy Cheeks:
Mix a tiny amount of pink paint (or watercolor) and dab two soft circular spots under the eyes for a blushing effect. -
Seal (Optional):
For protection, apply a coat of matte varnish. Avoid glossy finishes to keep the soft, cozy look seen in the photo.
Winter Wear
Before the clay dries, sculpt a tiny scarf or a beanie hat to give your penguin extra character and seasonal flair.
Place your new serene friend near a window or plant to enjoy its calming presence


Teeny Food Charms With Faces
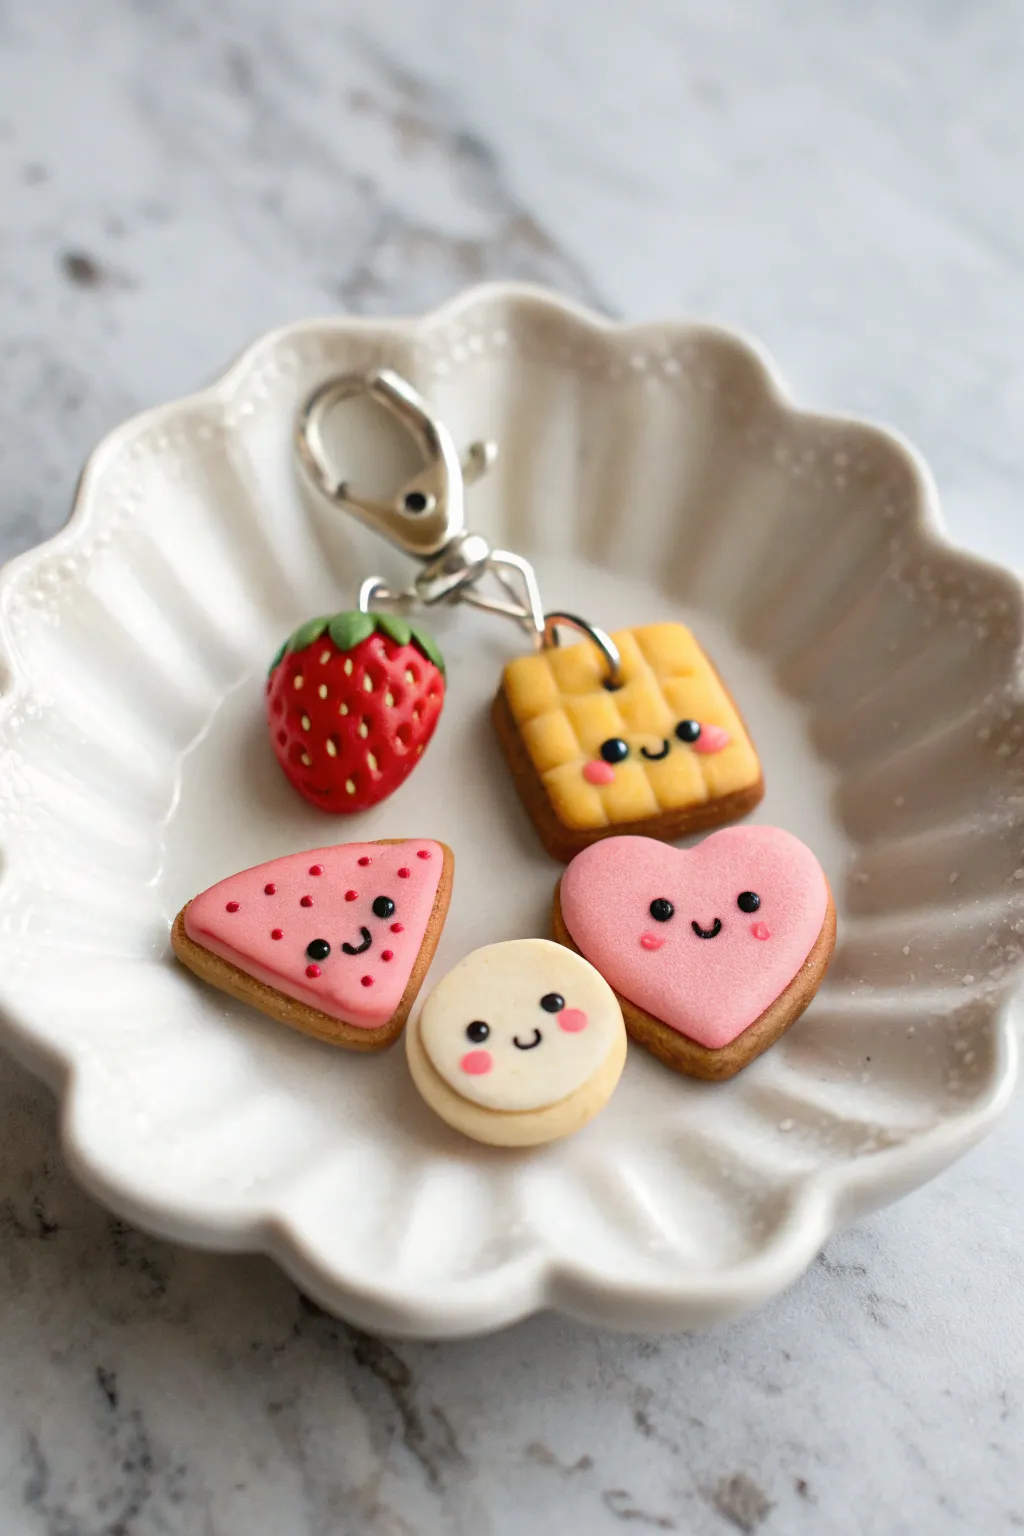
These delightfully tiny clay charms feature cheerful faces and realistic bakery textures that will brighten up any keyring or zipper. You’ll learn to sculpt miniature treats including a waffle, a strawberry, and various iced cookies, all perfectly sized for a charm bracelet.
Detailed Instructions
Materials
- Air dry clay (white)
- Acrylic paints (red, yellow ochre, golden brown, pink, black, white, green)
- Gloss glaze or varnish
- Fine-tipped paintbrush (000 size)
- Dotting tool or toothpick
- Small metal eye pins
- Jump rings and lobster clasp
- Needle tool
- Rolling pin
- Texture tool (clean toothbrush or sandpaper)
- Small cookie cutters (heart and circle) or craft knife
Step 1: Sculpting the Shapes
-
Mix the dough color:
Start by tinting a bulk portion of your white clay with a tiny drop of yellow ochre and golden brown paint. Knead thoroughly until the color is uniform and resembles a light cookie dough. -
Form the strawberry:
Take a small ball of plain white clay (or pre-tinted red clay) and roll it into a teardrop shape. Using a needle tool, poke tiny indents all over the surface for seeds. Sculpt small green leaves from clay and attach them to the top. -
Create the waffle square:
Flatten a small piece of dough-colored clay into a square cushion shape. Use the side of a ruler or a dull knife blade to press a grid pattern into the top surface, creating the classic waffle texture. -
Cut the cookie bases:
Roll out the rest of your dough-colored clay to about 1/4 inch thickness. Use small cutters or a craft knife to cut out a heart shape, a circle, and a triangle (for the watermelon slice). Soften the sharp edges with your finger. -
Texturing:
Gently tap a clean toothbrush or piece of sandpaper against the sides and bottoms of the waffle and cookies to give them a realistic baked texture. -
Add eye pins:
While the clay is still wet, carefully insert a metal eye pin into the top of each charm. You may need to trim the pin if it’s too long. -
Let them dry:
Place all pieces on a drying rack or parchment paper. Allow them to dry completely according to your clay package’s instructions, usually 24-48 hours.
Step 2: Painting & Decorating
-
Base coats for fruit:
Creating the colors layer by layer is key here. Paint the strawberry bright red and the leaves green. For the watermelon cookie, paint a pink triangle on the surface, leaving a ‘crust’ rim visible. -
Toast the edges:
Using a dry brush technique with golden brown paint, lightly dust the edges of the waffle and the cookie crusts to make them look perfectly baked. -
Paint the icing:
Paint the surface of the heart cookie pink and the round cookie white to simulate smooth royal icing. I find doing two thin coats looks smoother than one thick one. -
Add strawberry details:
Once the red base is dry, use a tiny brush to dab yellow or tan paint into the seed indentations you made earlier. -
Watermelon seeds:
Using a toothpick or fine brush, add tiny black or dark brown dots to the pink area of the watermelon triangle to represent seeds.
Sticky Situation?
If your eye pins keep sliding out of the air dry clay as it shrinks, remove them, add a dab of superglue to the pin shaft, and reinsert them into the existing hole.
Step 3: Bringing Them to Life
-
Adding the faces:
This is the most important step for the ‘kawaii’ look. Use a dotting tool dipped in black paint to stamp two small, wide-set eyes on each charm. -
Painting the mouths:
With your finest brush (000 size), paint a tiny ‘U’ shape between the eyes for a smile. -
Cheeky details:
Dip a toothpick in pink paint and add tiny blush marks under the eyes of each character. -
Eye highlights:
Once the black eyes are fully dry, add a microscopic white dot to the upper corner of each eye. This spark of life makes a huge difference. -
Seal and assemble:
Coat each charm with a gloss glaze to protect the paint and give it a ceramic-like shine. Once dry, attach them to your keychain or necklace using jump rings.
Pro Tip: Smooth Finish
Before painting, dip your fingertip in a tiny amount of water and gently rub the clay surface to smooth out fingerprints or cracks for a professional porcelain look.
Now you have an adorable collection of custom charms ready to gift or keep

What Really Happens Inside the Kiln
Learn how time and temperature work together inside the kiln to transform clay into durable ceramic.
Mini Heart Trinket Dish

This charming little trinket dish features a soft pastel pink glaze and a delicate organic rim that gives it a handmade feel. It is perfectly sized for holding your favorite rings and studs on a bedside table.
Step-by-Step Guide
Materials
- Air dry clay (white)
- Small rolling pin
- Heart-shaped cookie cutter (medium size)
- Small bowl of water
- Fine grit sandpaper
- Acrylic paint (pale cool-toned pink)
- Acrylic paint (gold or bronze)
- Gloss varnish or sealant
- Soft synthetic paintbrushes
- Rolling mat or parchment paper
Step 1: Shaping the Clay
-
Condition the clay:
Begin by taking a handful of air dry clay and kneading it in your hands until it feels warm, pliable, and smooth. This prevents cracks later. -
Roll it out:
Place the clay on a rolling mat or sheet of parchment paper. Roll it out to an even thickness of about 1/4 inch (approx. 5-6mm). -
Cut the shape:
Press your heart-shaped cookie cutter firmly into the clay. Give it a tiny wiggle to ensure it cuts all the way through, then lift away the excess clay from the outside. -
Soften the edges:
Dip your finger into a little water and gently run it along the cut edge of the heart to smooth out any sharpness or crumbs left by the cutter. -
Create the curve:
Pick up the clay heart and gently cup it in your palm. Press the center down slightly with your thumb while curving the edges upward to create a shallow bowl shape. -
Refine the rim:
I like to use my fingertips to pinch the rim slightly, making it look a bit uneven and organic rather than perfectly machine-made. Ensure the walls stand up enough to hold a ring. -
Check the bottom:
Set the dish down on a flat surface and press gently on the inside bottom to make sure it sits flat and doesn’t wobble. -
Let it dry:
Leave the dish to dry in a safe spot for 24-48 hours. Flip it over gently halfway through so the bottom dries completely.
Step 2: Painting and Finishing
-
Sand for smoothness:
Once fully dry and hard, use fine grit sandpaper to gently buff away any rough spots on the rim or surface. Wipe away the dust with a barely damp cloth. -
Mix the base color:
Prepare your palette with a pale pink acrylic paint. If your pink is too bright, mix in a generous amount of white to achieve that soft, milky pastel hue seen in the image. -
Apply the base coat:
Paint the entire inside of the dish with the light pink mix. Use long, smooth strokes to minimize texture. -
Coat the outside:
Once the inside is touch-dry, paint the outside and bottom of the dish with the same pink shade. You may need two coats for full opacity. -
Paint the rim:
Dip a fine detail brush into your metallic gold or bronze paint. Carefully run the brush along the very top edge of the rim. -
Add vintage character:
Don’t worry about a perfect line. Allow the gold to naturally dip slightly onto the inner or outer walls in a few spots to mimic the look of rustic glazed pottery. -
Seal the piece:
Finish by applying a coat of high-gloss varnish over the entire dish. This gives it that ceramic-like shine and protects the paint from scratching.
Smooth Operator
To get a glassy ceramic finish without a kiln, use a self-leveling gloss medium or a thick coat of UV resin as your final topcoat instead of standard varnish.
Speckled Finish
Before adding the gold rim, use an old toothbrush to flick tiny specks of watered-down brown paint onto the pink base for a trendy speckled stoneware effect.
Place your new dish on your dresser to keep your daily jewelry safe and stylish
Little Cloud Ring Holder
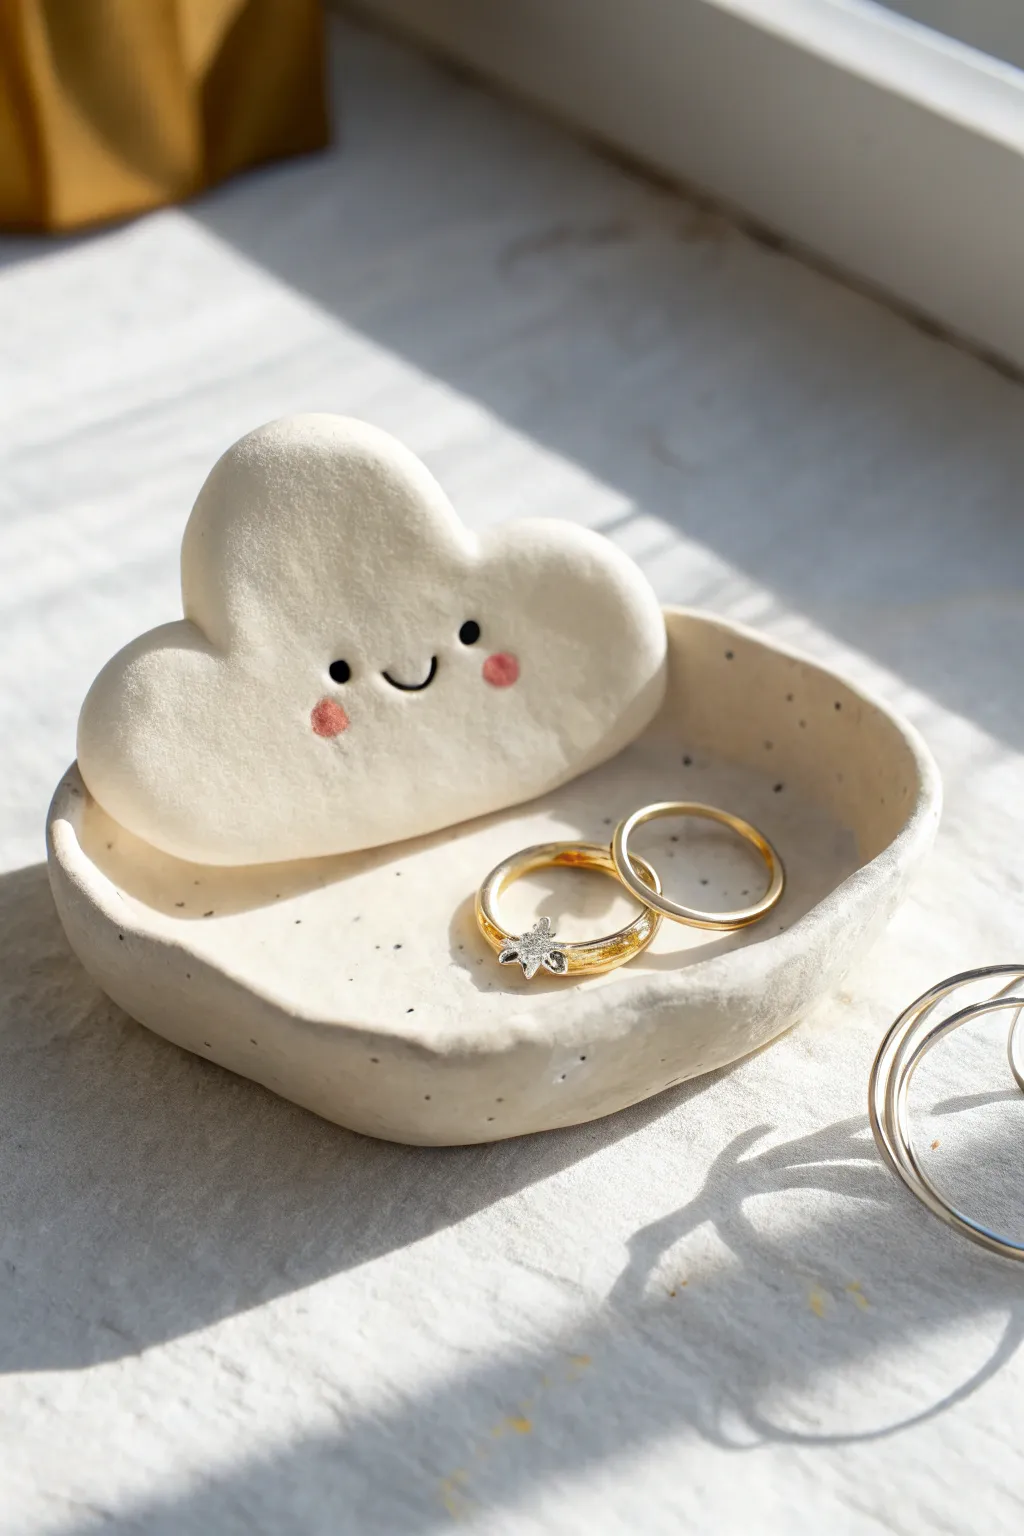
Keep your favorite rings safe in this whimsical speckled dish featuring a cheerful cloud companion. The simple shapes and charming facial expression make this a perfect beginner project that adds a touch of sweetness to any dresser.
Step-by-Step
Materials
- White air-dry clay
- Rolling pin
- Exacto knife or clay craft knife
- Small bowl of water
- Sponge or fine-grit sandpaper
- Black fine-tip acrylic marker or paint
- Pink acrylic paint
- Small detail brush or dotting tool
- Gloss varnish or sealant
- Optional: Black pepper or dried tea leaves (for speckled effect)
Step 1: Shaping the Base
-
Condition the clay:
Start by kneading a golf-ball-sized amount of white clay until it is soft and pliable. If you want the speckled look shown in the photo, knead in a pinch of ground black pepper or dried tea leaves at this stage. -
Roll the slab:
Roll your clay out on a smooth surface to an even thickness of about 1/4 inch (6mm). -
Cut the base circle:
Use a round cookie cutter or trace around a small jar lid to cut a circle approximately 3-4 inches in diameter. -
Form the rim:
Gently pinch up the edges of the circle with your fingertips to create an organic, raised rim. Smooth out any finger marks with a little water as you go. -
Check the shape:
Ensure the rim walls are roughly even in height, though a slightly wavy, handmade look adds to the charm.
Seamless Smoothing
Use a clean, slightly damp makeup sponge to smooth the raw clay before it dries. It works better than fingers for erasing prints and reduces sanding time later.
Step 2: Creating the Cloud
-
Sketch the cloud:
On a scrap piece of paper, draw a simple, chubby cloud shape that will fit inside your dish—roughly 2 inches wide is ideal. -
Cut the cloud shape:
Roll out a second smaller piece of clay, slightly thicker than the base (about 1/3 inch) for stability. Place your paper template on top and cut around it with your craft knife. -
Soften the edges:
Dip your finger in water and run it along the cut edges of the cloud to round them off. You want the cloud to look puffy, not sharp or angular. -
Prepare the connection:
Score the bottom edge of the cloud (make little hatch marks with your knife) and the spot inside the dish where you want the cloud to sit. -
Attach the cloud:
Apply a dab of water or clay slip to the scored areas. Press the cloud firmly onto the base. -
Reinforce the seam:
Roll a very thin snake of clay and wrap it around the base of the cloud where it meets the dish. Blend this clay upwards into the cloud and downwards into the dish using a modeling tool or your finger to create a seamless, invisible join.
Step 3: Refining and Decorating
-
Full drying time:
Let your piece dry completely. This usually takes 24 to 48 hours depending on humidity. Flip it gently halfway through if possible to help the bottom dry evenly. -
Sand for smoothness:
Once bone dry, use fine-grit sandpaper or a damp sanding sponge to buff away any bumps or fingerprints, focusing on the rim and the curves of the cloud. -
Map the face:
Lightly mark where you want the eyes and mouth using a pencil. Placing the features lower on the cloud shape creates a cuter, ‘kawaii’ aesthetic. -
Paint the eyes and mouth:
Use a fine-tip black acrylic marker or a very thin brush to paint two small dots for eyes and a small ‘u’ shape for the smile. -
Add the blush:
Dip a dotting tool or the handle end of a paintbrush into pink acrylic paint. Dab two rosy cheeks just outside and slightly below the eyes. -
Seal the piece:
Finish by applying a coat of gloss varnish. This protects the clay from moisture and gives the eyes and cheeks a lovely shine.
Golden Lining
Paint the very top edge of the dish rim with metallic gold paint for an elegant, high-end finish that complements gold jewelry perfectly.
Now your happy little cloud is ready to keep your treasures organized and safe


The Complete Guide to Pottery Troubleshooting
Uncover the most common ceramic mistakes—from cracking clay to failed glazes—and learn how to fix them fast.
Small Sleepy-Face Air Plant Pot
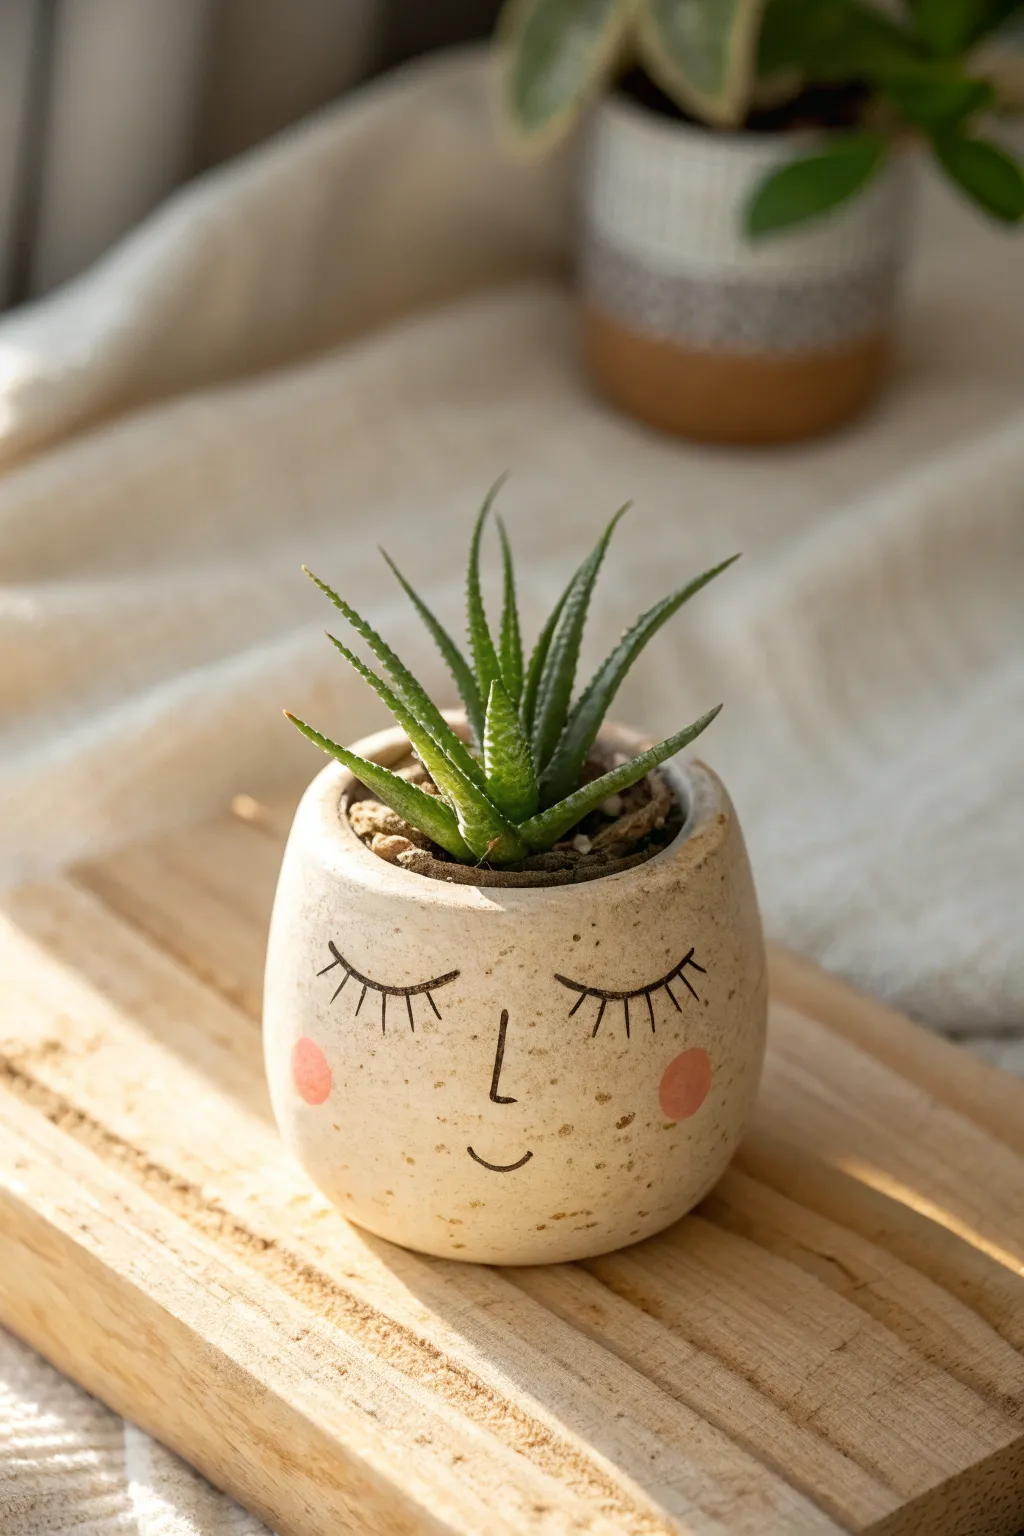
Bring a touch of whimsy to your windowsill with this adorable, sleepy-faced planter crafted from air dry clay. Its speckled, natural finish and sweet painted expression make it the perfect cozy home for a small succulent or air plant.
How-To Guide
Materials
- White or natural air dry clay (approx. 200g)
- Small rolling pin
- Craft knife or clay cutter
- Small bowl of water
- Sponge or sandpaper (fine grit)
- Acrylic paints (black, beige/cream, soft pink)
- Old toothbrush (for speckling)
- Fine detail paintbrush (size 0 or 00)
- Matte varnish or sealant
- Optional: Small succulent or artificial plant
Step 1: Sculpting the Base
-
Prepare the clay:
Start with a ball of clay roughly the size of a tennis ball. Knead it in your hands for a minute until it’s warm, pliable, and free of any air bubbles. -
Form the pinch pot:
Push your thumb into the center of the ball, stopping about a half-inch from the bottom. This will serve as the base of your pot. -
Shape the walls:
Using your thumb and fingers, gently pinch and turn the clay, working your way up the sides to thin out the walls. Aim for an even thickness of about 1/4 inch all around. -
Refine the shape:
Once the walls are raised, gently tap the bottom of the pot on your work surface to flatten it so it sits stably. Use your fingers to smooth out the transition from the base to the walls, creating a soft, rounded curve. -
Smooth the lip:
Dip your finger in a little water and run it along the rim of the pot. You want a slightly rounded, organic edge rather than a sharp cut, to match the cozy aesthetic. -
Surface smoothing:
Dip a sponge lightly in water and wipe down the exterior and interior to remove fingerprints. Let the pot dry for 24-48 hours until completely hard and white.
Water Tolerance Tip
Since air dry clay dissolves in water, never plant directly into it. Coat the inside with multiple layers of waterproof varnish or simply use it as a ‘cachepot’ to hold a plastic nursery pot.
Step 2: Painting and Details
-
Sand for perfection:
If there are any bumps after drying, gently sand the surface with fine-grit sandpaper. Wipe away the dust with a slightly damp cloth. -
Apply the base coat:
Mix a creamy beige acrylic paint. I usually add a tiny drop of brown to white paint to get that natural stone look. Paint the entire outside of the pot and let it dry. -
Create the speckles:
Mix a watery brown or grey paint. Dip an old toothbrush into it, and using your thumb, flick the bristles to spray fine speckles over the pot. Test on a piece of paper first to control the density. -
Sketch the face:
Once the speckles are dry, use a pencil to very lightly sketch the placement of the eyes, nose, and mouth. Locate the eyes roughly halfway down the pot for a cute proportion.
Add Some Texture
Before the clay dries, gently press a piece of rough linen or canvas into the surface. This imitates a woven ceramic texture that looks fantastic once the speckled paint is applied.
Step 3: Bringing it to Life
-
Paint the lashes:
Using your finest detail brush and black paint, carefully trace over your pencil lines for the closed eyelids. Add 5-6 small, vertical strokes downward for the eyelashes. -
Add the nose and mouth:
Paint a simple ‘L’ shape for the nose and a small upward curve for the smile. Keep the lines thin and delicate. -
Rosy cheeks:
Dip the tip of your pinky finger or a round sponge dabber into soft pink paint. Dab off the excess, then gently press circle cheeks onto the pot on either side of the face. -
Seal the work:
Protect your paint job with a coat of matte varnish. This is crucial if you plan to put a real plant inside versus a faux one. -
Final planting:
Fill with a small succulent or air plant to finish the look. If using a real plant without a drainage hole, keep the plant in its plastic nursery pot inside your clay creation.
Place your little sleepy friend in a sunny spot to enjoy its peaceful vibe
Tiny Scalloped Pinch Bowl
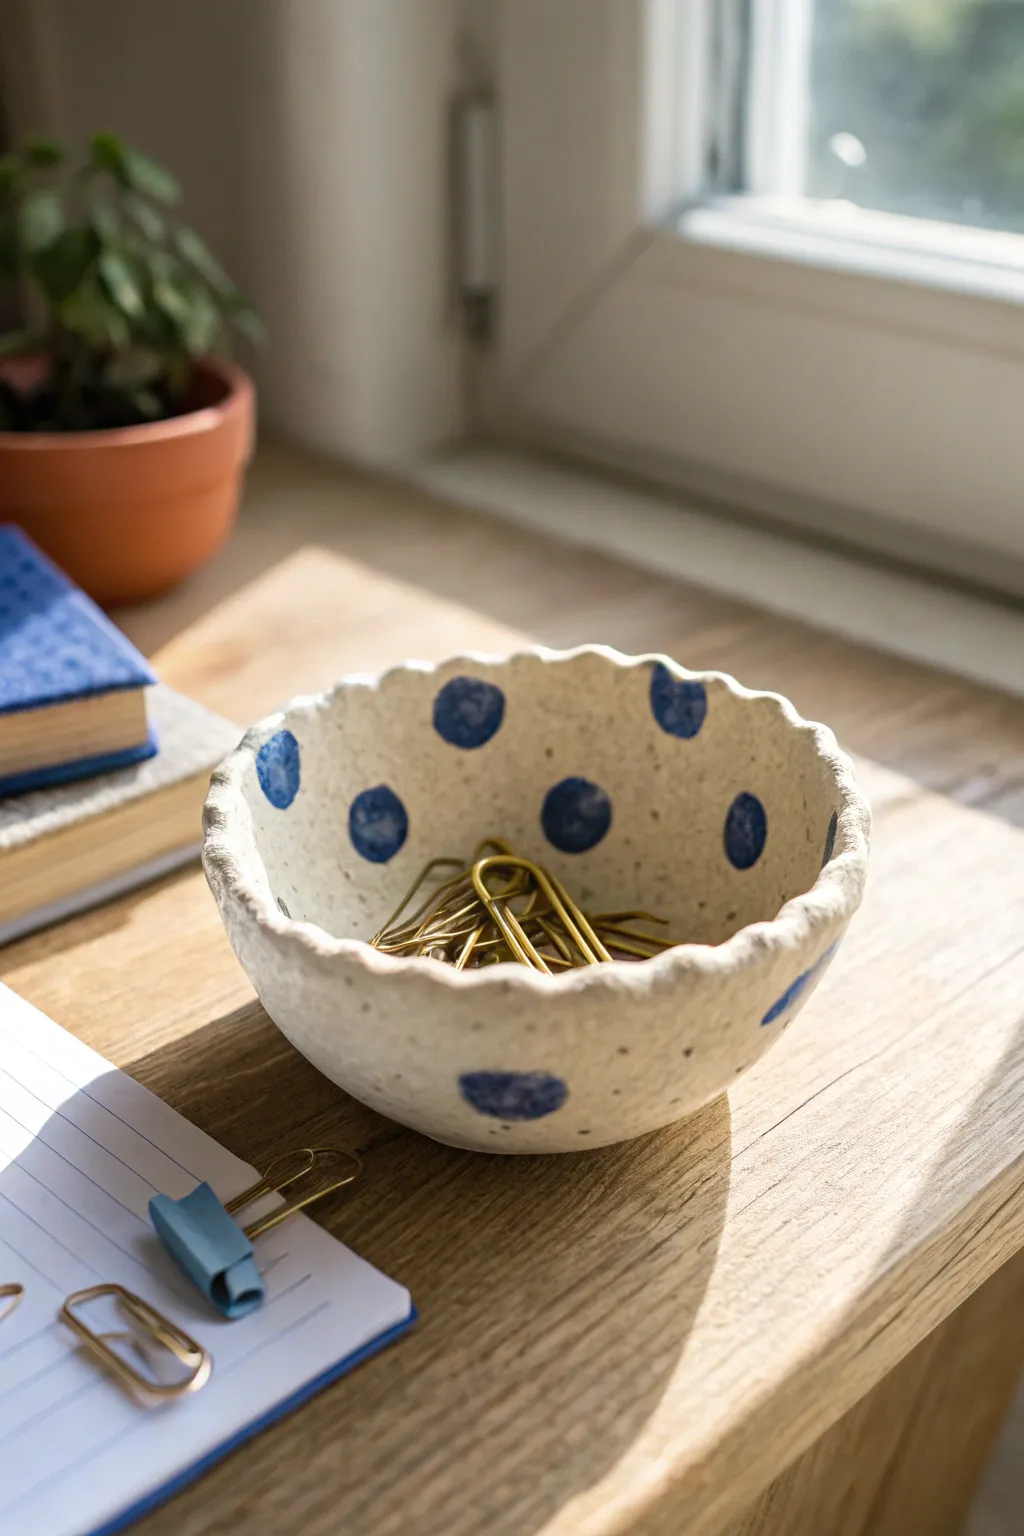
This charming little pinch bowl adds a touch of handmade warmth to any desk with its organic shape and playful blue polka dots. Its scalloped edge and stone-like speckled finish make it the perfect vessel for holding paper clips, jewelry, or other tiny treasures.
Step-by-Step Guide
Materials
- White air dry clay
- Rolling pin
- Small bowl or sphere (for molding shape)
- Speckled pottery glaze or acrylic paint (stone effect)
- Blue acrylic paint
- Small round paintbrush
- Clay sculpting tool or butter knife
- Water cup
- Fine grit sandpaper
- Gloss or matte varnish (optional)
Step 1: Shaping the Base
-
Prepare your clay:
Start by taking a handful of white air dry clay and kneading it in your hands until it becomes soft, pliable, and free of cracks. -
Form a ball:
Roll the clay between your palms to create a smooth, tight sphere about the size of a tangerine. -
Begin the pinch pot:
Gently press your thumb into the center of the sphere, stopping about half an inch from the bottom to create the base thickness. -
Pinch the walls:
Rotate the ball in one hand while using the thumb and fingers of your other hand to pinch the clay walls, slowly moving from the bottom up to thin them out evenly. -
Refine the shape:
Continue pinching and turning until you have a hemispherical bowl shape. I like to keep the walls slightly thicker than usual to give it that rustic, pottery feel. -
Smooth the surfaces:
Dip your finger in a little bit of water and run it over the interior and exterior to smooth out any large fingerprints or cracks.
Step 2: Adding the Details
-
Mark the scallops:
Using a clay tool or the blunt edge of a knife, lightly mark where you want your scallops to be along the rim to distract uneven spacing. -
Create the scalloped edge:
Use your thumb and index finger to gently press down between the marks, pinching the high points to form a soft, wavy rim. -
Soften the rim:
The sculpted edge might look sharp, so use a damp finger to gently round over the peaks and valleys of the scallops for a softer look. -
Preliminary drying:
Let the bowl sit for about 24-48 hours until it is bone dry and turns a chalky white color. Place it somewhere with good airflow.
Perfect Scallops
Use the side of a marker cap or a round spoon handle to press the indentations into the rim. This ensures every scallop is uniform in size and depth.
Step 3: Decoration & Finishing
-
Sand the imperfections:
Once fully dry, take a piece of fine grit sandpaper and lightly buff away any rough patches or sharp jagged bits on the rim. -
Apply the base texture:
Paint the entire bowl, inside and out, with a speckled stone-effect paint or a creamy white acrylic mixed with tiny flakes of dried clay or sand for texture. -
Let the base coat dry:
Allow the base layer to dry completely according to the paint bottle instructions before moving on to the pattern. -
Paint the dots:
Load a small round brush with deep blue acrylic paint. Paint organic, slightly imperfect circles randomly across the inside and outside of the bowl. -
Check the spacing:
Ensure the dots are spaced casually—some near the rim, some lower down—to maintain the loose, hand-painted aesthetic. -
Dry the pattern:
Let the blue dots dry fully to avoid smudging them during the sealing process. -
Seal the piece:
Apply a coat of varnish to protect the paint and give the bowl a finished ceramic look.
Cracks Appearing?
If small fissures appear while drying, mix a tiny bit of fresh clay with water to make a paste (slip) and fill the cracks, then smooth over with your finger.
Enjoy using your new speckled bowl to organize your favorite little items

TRACK YOUR CERAMIC JOURNEY
Capture glaze tests, firing details, and creative progress—all in one simple printable. Make your projects easier to repeat and improve.
Mini Ladybug Pebble Magnets
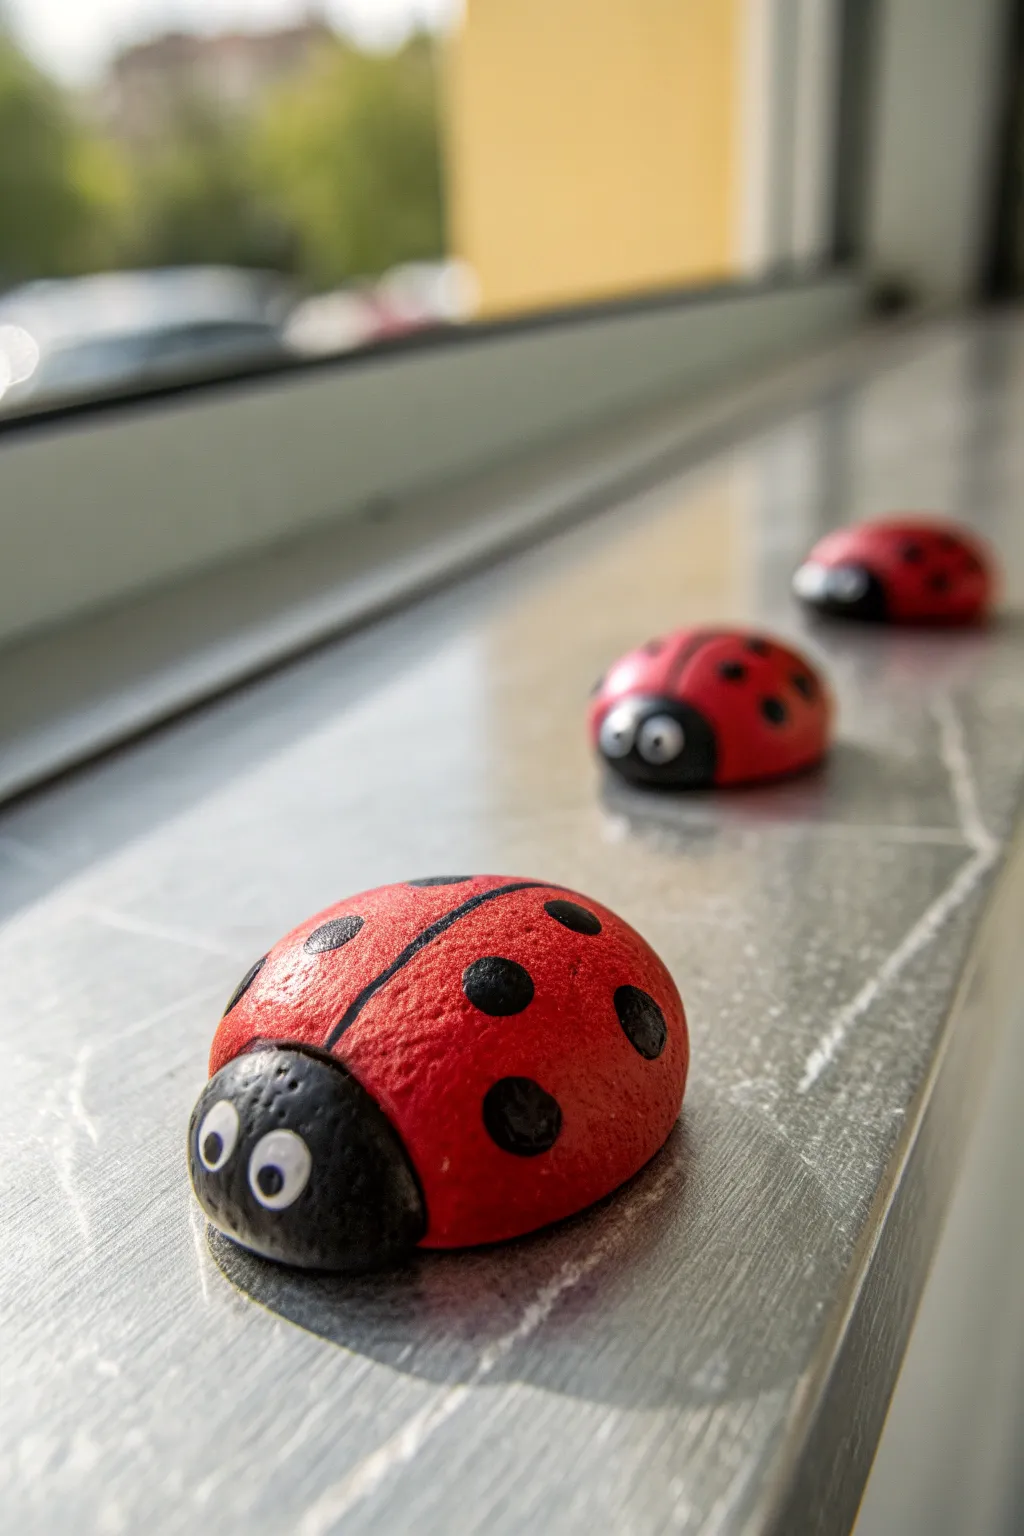
Transform smooth garden pebbles into adorable spotted beetles with just a little paint and creativity. These cheerful little ladybugs make perfect fridge magnets or tiny desk companions to brighten up your workspace with their glossy red shells and wide-eyed expressions.
Step-by-Step
Materials
- Small, smooth oval stones or pebbles (approx. 1-2 inches)
- Acrylic paint (bright red and black)
- Small flat paintbrush
- Fine detail brush or dotting tool
- Small googly eyes
- Strong craft glue or hot glue gun
- Small round ceramic or neodymium magnets
- Clear acrylic sealer or varnish (gloss finish)
- Water cup and paper towels
Step 1: Base Coating
-
Clean the pebbles:
Start by washing your stones thoroughly with warm soapy water to remove any dirt or garden dust. Rinse them well and let them dry completely, as moisture will prevent the paint from sticking. -
Paint the red shell:
Using your flat brush, paint the top surface of the stone with bright red acrylic paint. Leave about one-quarter of the front unpainted for the head. -
Apply second coat:
Acrylic paint can be semi-transparent on dark rocks, so let the first layer dry to the touch and apply a second coat of red for a vibrant, solid finish. -
Paint the head:
Once the red paint is dry, use black paint to fill in the front section of the stone to create the ladybug’s face. Create a slight curve where the black meets the red to mimic the shape of the pronotum.
Step 2: Adding Details
-
Draw the center line:
With a fine detail brush and black paint, draw a thin straight line down the center of the red back, starting from the black head and going to the tail end. -
Create the spots:
This satisfies the classic ladybug look: paint small black circles on either side of the center line. I find that varying the size of the spots slightly makes them look more natural. -
Refine the edges:
Check the edges where the red meets the bare stone underneath. You can bring the paint slightly down the sides so no bare rock shows when viewing the magnet from the side. -
Dry completely:
Allow all paint layers to dry fully. This is crucial before moving to the next step to prevent smearing your nice crisp lines.
Paint Slipping?
If the paint streaks or peels off the smooth stone, prime the rock first with a mixture of PVA glue and water, or use a specific multi-surface acrylic primer.
Step 3: Finishing Touches
-
Apply varnish:
Coat the entire painted surface with a clear gloss acrylic sealer. This not only protects the paint from chipping but gives the ladybugs that realistic, shiny ‘bug shell’ appearance. -
Attach the eyes:
Once the varnish is tacky or dry, use a tiny drop of craft glue to attach two small googly eyes to the black head section. Position them close together for a cute expression. -
Flip and prep:
Turn the stone over gently onto a soft towel so you don’t scratch the fresh sealer. -
Attach magnet:
Apply a strong dab of glue to the center of the flat underside of the stone and press the magnet firmly into place. -
Final cure:
Let the glue cure completely according to the manufacturer’s instructions before sticking your new friend to a metal surface.
Level Up: Flying Style
Paint small white triangles under the wing casing line to make it look like the wings are just starting to open for flight.
Enjoy arranging your little colony of beetles on your fridge or filing cabinet
Cute Smiley Face Mini Magnets
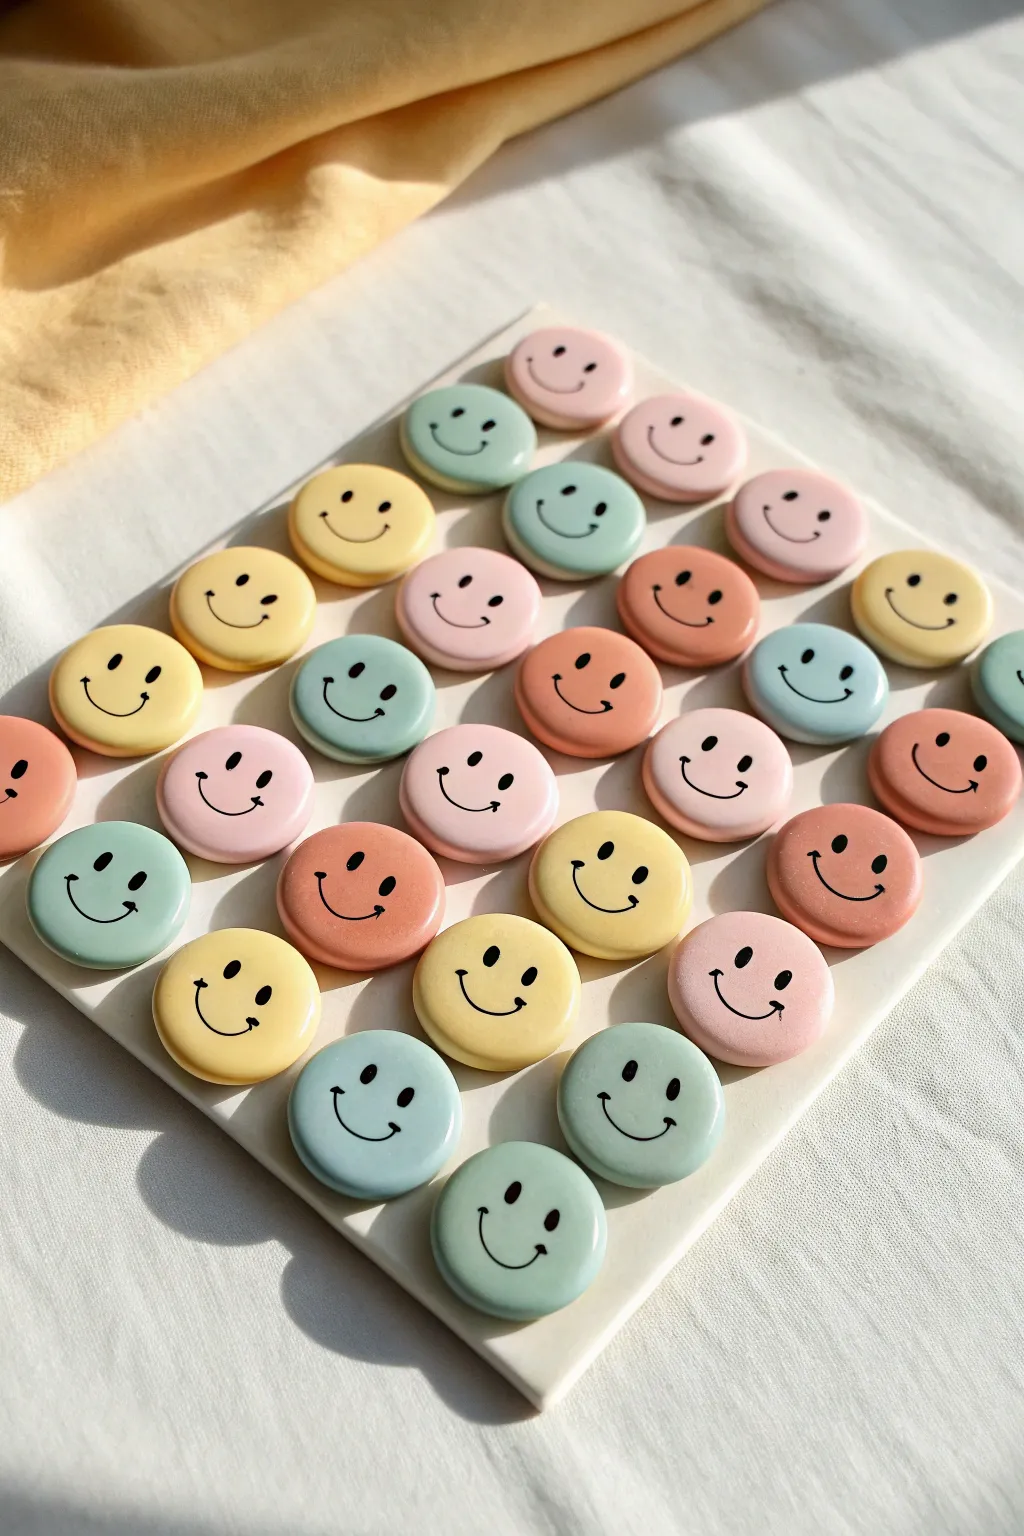
Brighten up your fridge or whiteboard with this grid of delightfully soft, pastel-colored smiley magnets. These smooth, circular charms feature a minimal happy face design that brings a cheerful and trendy aesthetic to any magnetic surface.
Step-by-Step Guide
Materials
- Air dry clay (white)
- Acrylic paints (pastel yellow, pink, sage green, blue, peach)
- Black acrylic paint or fine-tip black paint pen
- Rolling pin
- Small circle cookie cutter (approx. 1 inch)
- Fine grit sandpaper
- Small round magnets
- Strong craft glue (E6000 or super glue)
- Gloss or matte varnish (optional)
- Wax paper or non-stick mat
Step 1: Shaping the Bases
-
Condition the clay:
Begin by taking a chunk of white air dry clay and kneading it in your hands until it becomes warm, pliable, and free of cracks. -
Tint the clay (Method A):
For integral color, divide your clay into small balls. Add a tiny drop of acrylic paint to each ball and knead it thoroughly until the color is uniform. Aim for soft, muted pastel shades rather than vibrant primaries. -
Roll it out:
Place your colored clay on a non-stick surface or wax paper. Use a rolling pin to flatten the clay to an even thickness of about 1/4 inch (6mm). -
Cut the circles:
Using your small circle cutter, punch out as many circles as you can from the rolled slab. If the clay sticks to the cutter, dip the cutter in a little cornstarch first. -
Smooth the edges:
Dip your finger in a little bit of water and gently run it around the cut edge of each circle to soften any sharp ridges left by the cutter. This gives them that smooth, store-bought finish. -
Create a batch:
Repeat the process with different colors of clay—yellows, sage greens, light blues, and blushes—until you have a pleasing variety of discs. -
Let them dry:
Lay the circles flat on a clean surface to dry. I like to flip them over after about 12 hours so the bottom gets air exposure too. Allow them to dry completely for 24-48 hours.
Smooth Operator
To get that flawlessly smooth surface seen in the photo, use a slightly wet finger to ‘polish’ the top of the wet clay circles immediately after cutting them out.
Step 2: Painting & Finishing
-
Sand for perfection:
Once fully dry, check for any rough spots. Lightly sand the edges or surface with fine-grit sandpaper if needed to get them perfectly smooth. -
Paint (Method B):
If you didn’t tint the clay beforehand, now is the time to paint your white clay circles. Apply 2-3 coats of pastel acrylic paint, letting each layer dry before adding the next. -
Draft the face:
Before committing to paint, you might want to lightly mark the eyes and smile placement with a pencil to ensure they are centered and symmetrical. -
Paint the eyes:
Using a very fine detail brush dipped in black acrylic paint, or a black paint pen, create two small oval dots for the eyes. Keep them spaced fairly wide apart for a cuter look. -
Add the smile:
Draw a simple, thin U-shaped curve beneath the eyes. A steady hand is key here; try resting your pinky finger on the table for stability as you draw the curve. -
Seal the surface:
To protect the paint and give the magnets a finished look, apply a thin coat of matte or gloss varnish over the front and sides. -
Attach the magnet:
Flip the dry clay pieces over. Apply a dot of strong craft glue to the center of the back and press a small round magnet firmly into place. -
Final cure:
Allow the glue to cure completely according to the manufacturer’s instructions before placing them on your fridge.
Make it 3D
Instead of painting the faces on, try rolling tiny thin snakes of black clay for the mouth and little balls for eyes, pressing them gently into the wet clay base before drying.
Now you have a charming collection of faces ready to organize your notes with a smile
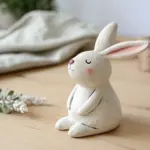
Tiny Animal Head Charms
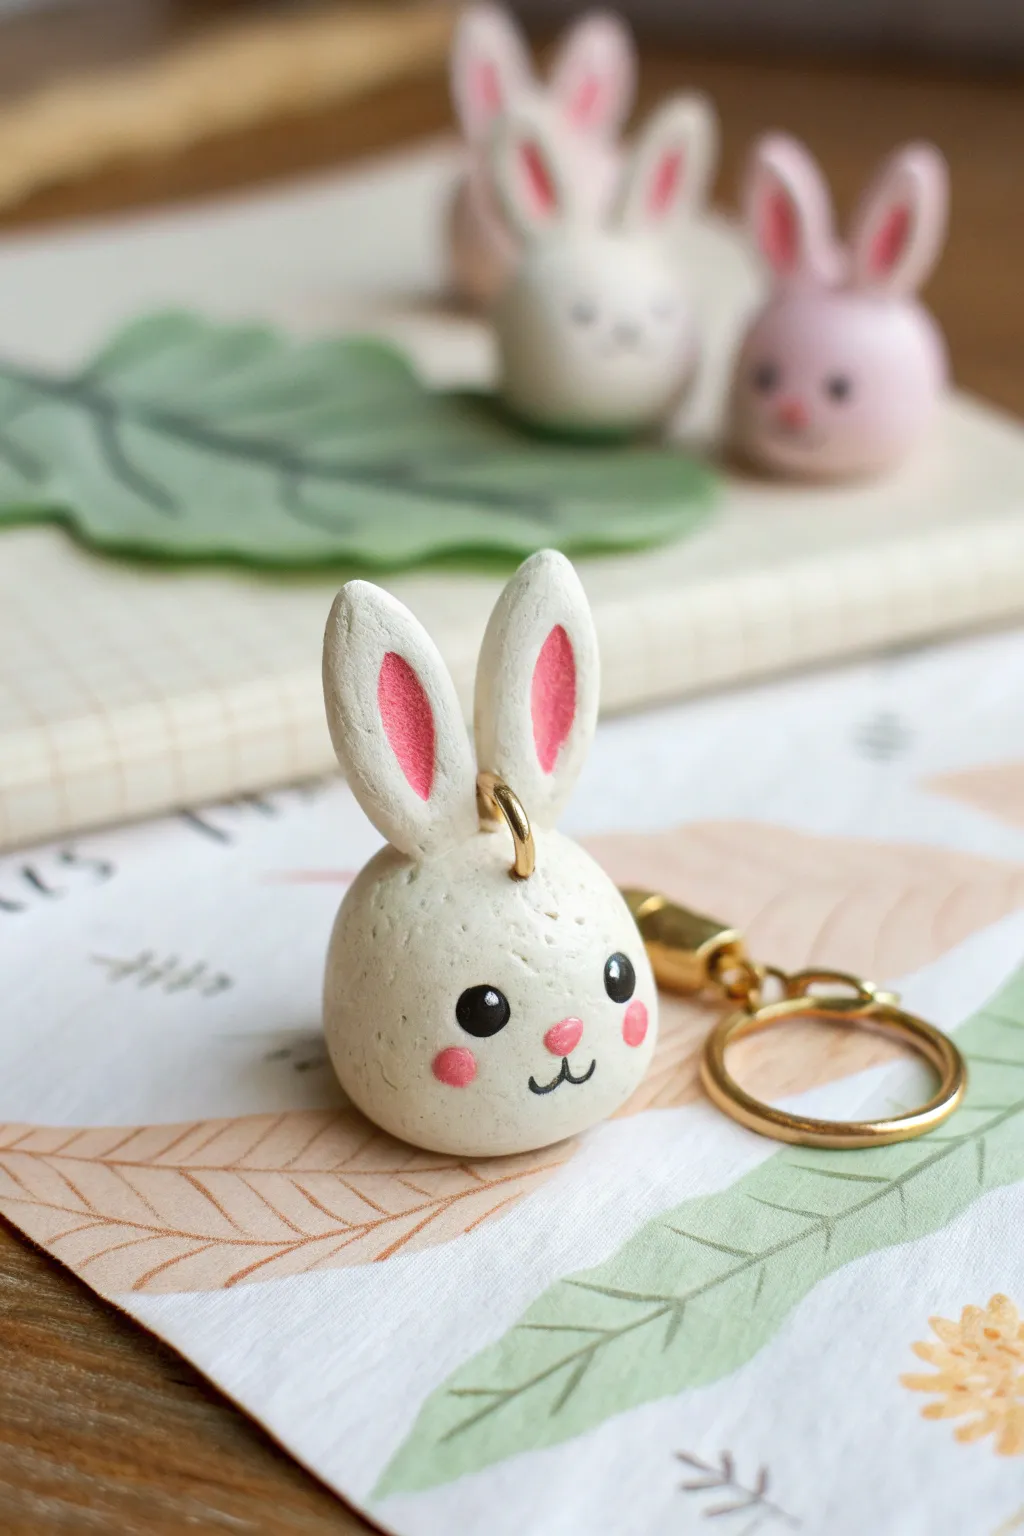
Create an adorable companion for your keys with this spherical bunny head charm. Its simple, round shape and sweet painted expression make it a perfect beginner project that results in a professional-looking accessory.
How-To Guide
Materials
- White air-dry clay
- Acrylic paints (black, pink, white)
- Small paintbrush (detail size 0 or 00)
- Dotting tool or toothpick
- Gold screw eye pin
- Gold jump ring and keychain attachment
- Super glue (optional)
- Clear matte or gloss varnish
- Water cup for smoothing
Step 1: Shaping the Base
-
Condition the Clay:
Begin by taking a chunk of white air-dry clay roughly the size of a walnut. Knead it in your hands until it is soft, pliable, and free of any lumps. -
Form the Head:
Roll the clay between your palms to create a smooth, perfect sphere. If you notice any cracks, dip your finger in a tiny bit of water and gently smooth them over until the surface is seamless. -
Flatten Slightly:
Set the sphere down on your work surface and press very gently on the top to create a barely noticeable flat spot at the bottom so it doesn’t roll away while you work.
Smoother Surfaces
Is your clay cracking while drying? Monitor the humidity. If it’s very dry, loosely cover the bunny with plastic wrap to slow the drying process and prevent fissures.
Step 2: Adding the Ears
-
Create Ear Shapes:
Take two smaller pieces of clay, each about the size of a pea. Roll them into balls first, then roll them into elongated teardrop or log shapes. -
Indent the Ears:
Using a modeling tool or the back of a small paintbrush, press gently into the center of each teardrop to create a long indentation where the inner ear color will go later. -
Attach the Ears:
Score the bottom of the ears and the top of the head slightly with a needle tool or toothpick to roughen the surface. Apply a tiny dab of water and press the ears firmly onto the top of the head. -
Blend the Seams:
Use a sculpting tool or your fingertip to blend the clay at the base of the ears downward into the head so they are securely attached and look like one solid piece.
Step 3: Hardware and Drying
-
Insert the Eye Pin:
While the clay is still wet, carefully screw or push the gold eye pin into the center top of the head, right between the ears. I find adding a tiny dot of super glue to the thread helps it grip better once dry. -
Smooth the Hardware Area:
If the clay puffed up around the pin insertion point, gently smooth it back down with a damp finger. -
Let it Dry:
Place your bunny in a safe, dry spot. Depending on your humidity and clay brand, this will need to dry for 24 to 48 hours until it is fully hard and chalky white.
Texture Twist
Before the clay dries, gently tap the surface with a stiff toothbrush. This creates a subtle ‘furry’ texture that looks amazing when glazed.
Step 4: Painting and Finishing
-
Paint the Inner Ears:
Mix a soft pink acrylic paint. Using a fine detail brush, carefully fill in the indented area of the ears. -
Add the Eyes:
Dip a large dotting tool or the round end of a paintbrush handle into black paint. Stamp two wide-set eyes onto the face. -
Eye Highlights:
Once the black dots are dry, use a much smaller tool or toothpick to add a tiny white reflection dot to the upper right corner of each eye. -
Nose and Cheeks:
Using the same pink from the ears, paint a small oval nose in the center. Add two rosy circular cheeks under the eyes using a technique similar to the eye stamping, just slightly softer. -
Draw the Mouth:
With your finest brush and thinned black paint (or a fine-tip black marker), draw a small ‘w’ shape connecting to the bottom of the pink nose. -
Seal the Charm:
Allow all paint to dry completely. Apply a coat of clear varnish—matte looks natural, while gloss gives a ceramic look—to protect your work from moisture and scratches. -
Assemble Keychain:
Finish by using pliers to open a jump ring, thread it through the eye pin on the bunny’s head, and attach your keyring hardware.
Now you have a sweet little friend to guard your keys wherever you go
Mini Star And Flower Earrings
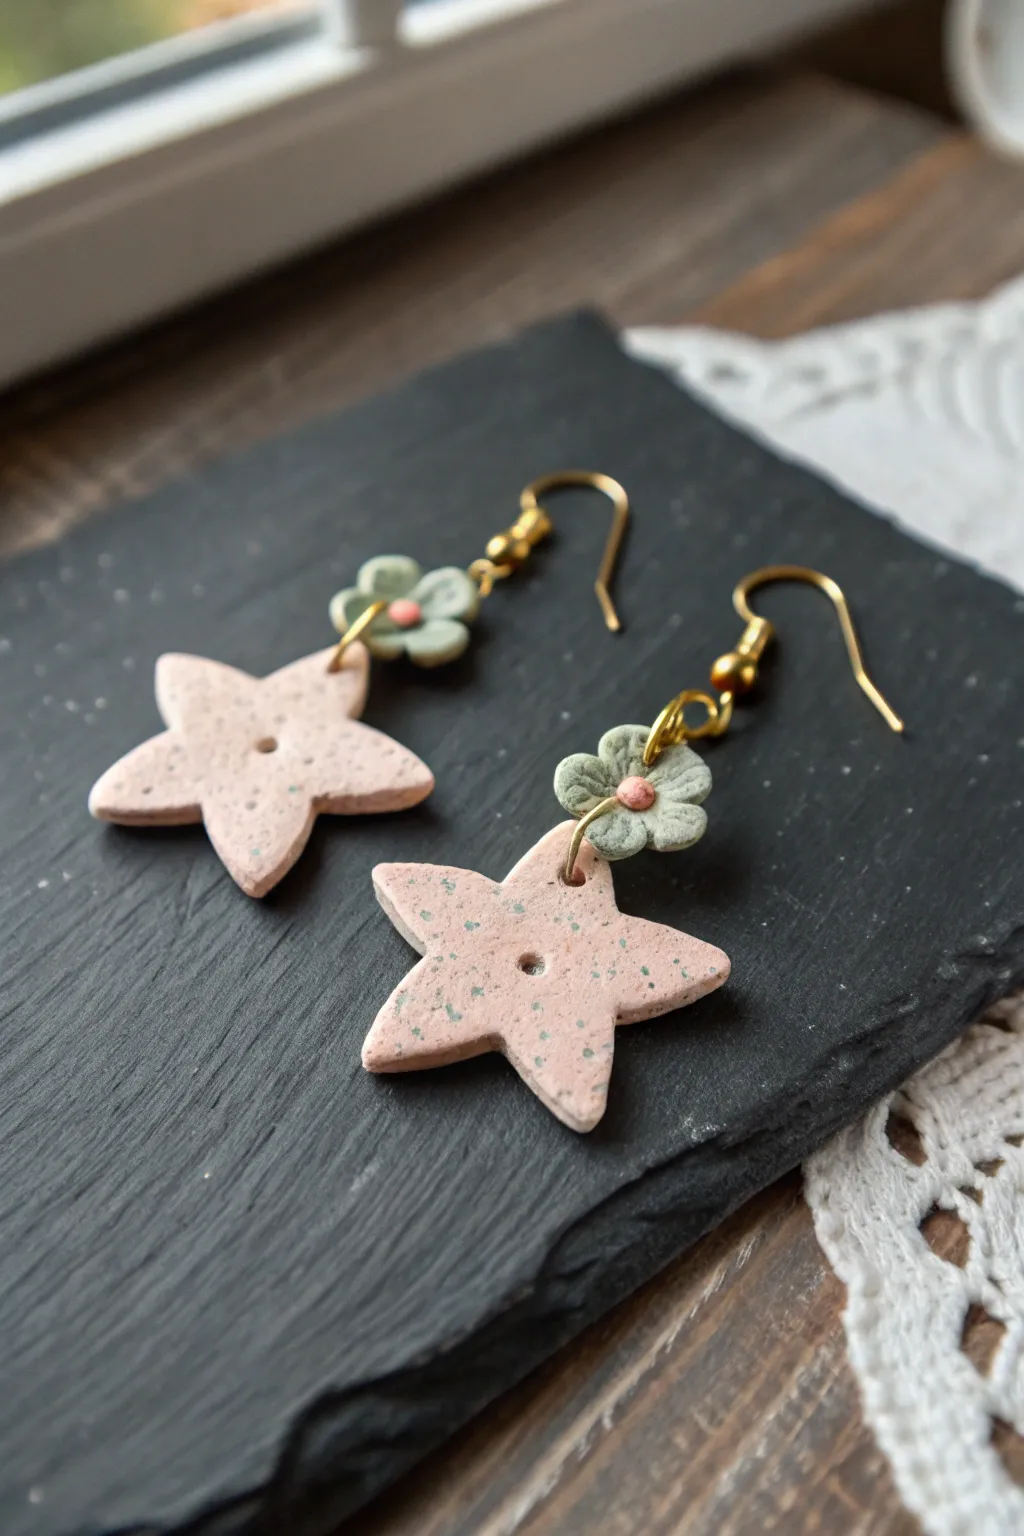
These charming earrings combine a soft, speckled star with a delicate sage green flower for a whimsical, handmade look. The textured finish and sweet pastel colors make them perfect for adding a touch of cottagecore style to any outfit.
Step-by-Step Tutorial
Materials
- Air dry clay (white)
- Acrylic paints (pale pink, sage green, dark green/teal, dark pink)
- Small star cookie cutter (approx. 1 inch)
- Small flower silicone mold or cutter (approx. 0.5 inch)
- Rolling pin
- Parchment paper or clay mat
- Toothpick or needle tool
- Old toothbrush (for speckling)
- Jewelry pliers (round nose and flat nose)
- 2 Gold earring hooks (fishhook style)
- 2 Gold eye pins or head pins
- Gold jump rings (small)
- Gloss or matte varnish (optional)
- Fine grit sandpaper
Step 1: Shaping the Clay Components
-
Prepare the star color:
Mix a very small amount of pale pink acrylic paint into a ball of white air dry clay. Knead it thoroughly until the color is uniform and pastel. -
Roll out the stars:
Place the pink clay on parchment paper and roll it out to an even thickness of about 3-4mm. Aim for a sturdy but not chunky feel. -
Cut the star shapes:
Use your star cutter to press out two identical star shapes. Carefully push them out of the cutter if they stick, smoothing any rough edges with a fingertip dipped in water. -
Create the center hole:
Use a toothpick or a small straw to punch a clean hole directly in the center of each star. Wiggle it slightly to ensure the hole is large enough for jump rings later. -
Make the flower clay:
Mix a separate, smaller ball of clay with sage green paint. Knead well until you have a lovely muted green tone. -
Form the flowers:
Press the green clay into a small flower silicone mold for the most detail, or use a tiny cutter. You’ll need two flowers. If using a mold, flex it gently to pop the flowers out without squashing the petals. -
Pierce the flowers:
Carefully poke a hole through the center of each flower using your needle tool. This hole needs to be vertical through the flower center if you plan to stack it, or horizontal through a petal if hanging differently; looking at the image, the wire runs through the center. -
Add the flower centers:
Take a tiny pinch of clay, mix it with a darker pink, and roll two minuscule balls. Press these gently into the center of each green flower, being careful not to block the hole you just made.
Fixing Warped Clay
If your stars curl up while drying, lightly mist the concave side with water and weigh them down under a heavy book overnight to flatten them back out.
Step 2: Detailing and Assembly
-
Let it dry completely:
Place all clay pieces on a flat surface to dry. I usually wait at least 24 hours, flipping them once halfway through to ensure even drying. -
Refine the edges:
Once fully hard, gently sand any rough edges on the stars or flowers using fine-grit sandpaper for a professional finish. -
Create the speckled effect:
Dilute a drop of dark green or teal acrylic paint with water. Dip an old toothbrush into this mixture, pointing it at your star pieces, and run your thumb across the bristles to flick tiny speckles onto the clay. -
Seal the pieces:
Apply a thin coat of matte or gloss varnish to protect the paint and clay. Let this dry fully before handling. -
Prepare the flower link:
Take a gold eye pin and thread it through the center hole of your green flower. The loop of the eye pin should sit at the bottom (or top depending on preference), acting as a stopper or connection point. -
Create a loop:
Trim the excess wire sticking out of the flower to about 1cm. Use round nose pliers to curl this end into a secure loop, trapping the flower on the wire segment. -
Connect the star:
Open a large jump ring with your pliers. Thread it through the center hole of the pink star and through the bottom loop of the wire holding the flower. Close the jump ring securely. -
Attach the hook:
Open the loop at the base of your earring hook. Slide the top loop of the flower wire component onto it and close the loop. -
Final check:
Repeat the assembly steps for the second earring, ensuring both dangle at the same length and the speckles face forward.
Gold Leaf Accent
Before varnishing, dab a tiny bit of glue on the star tips and apply flecks of gold leaf. This adds a chic sparkle that matches the gold hardware gorgeously.
Now you have a lovely pair of custom earrings ready to wear or gift to a friend
Tiny Bow-Shaped Hair Clips
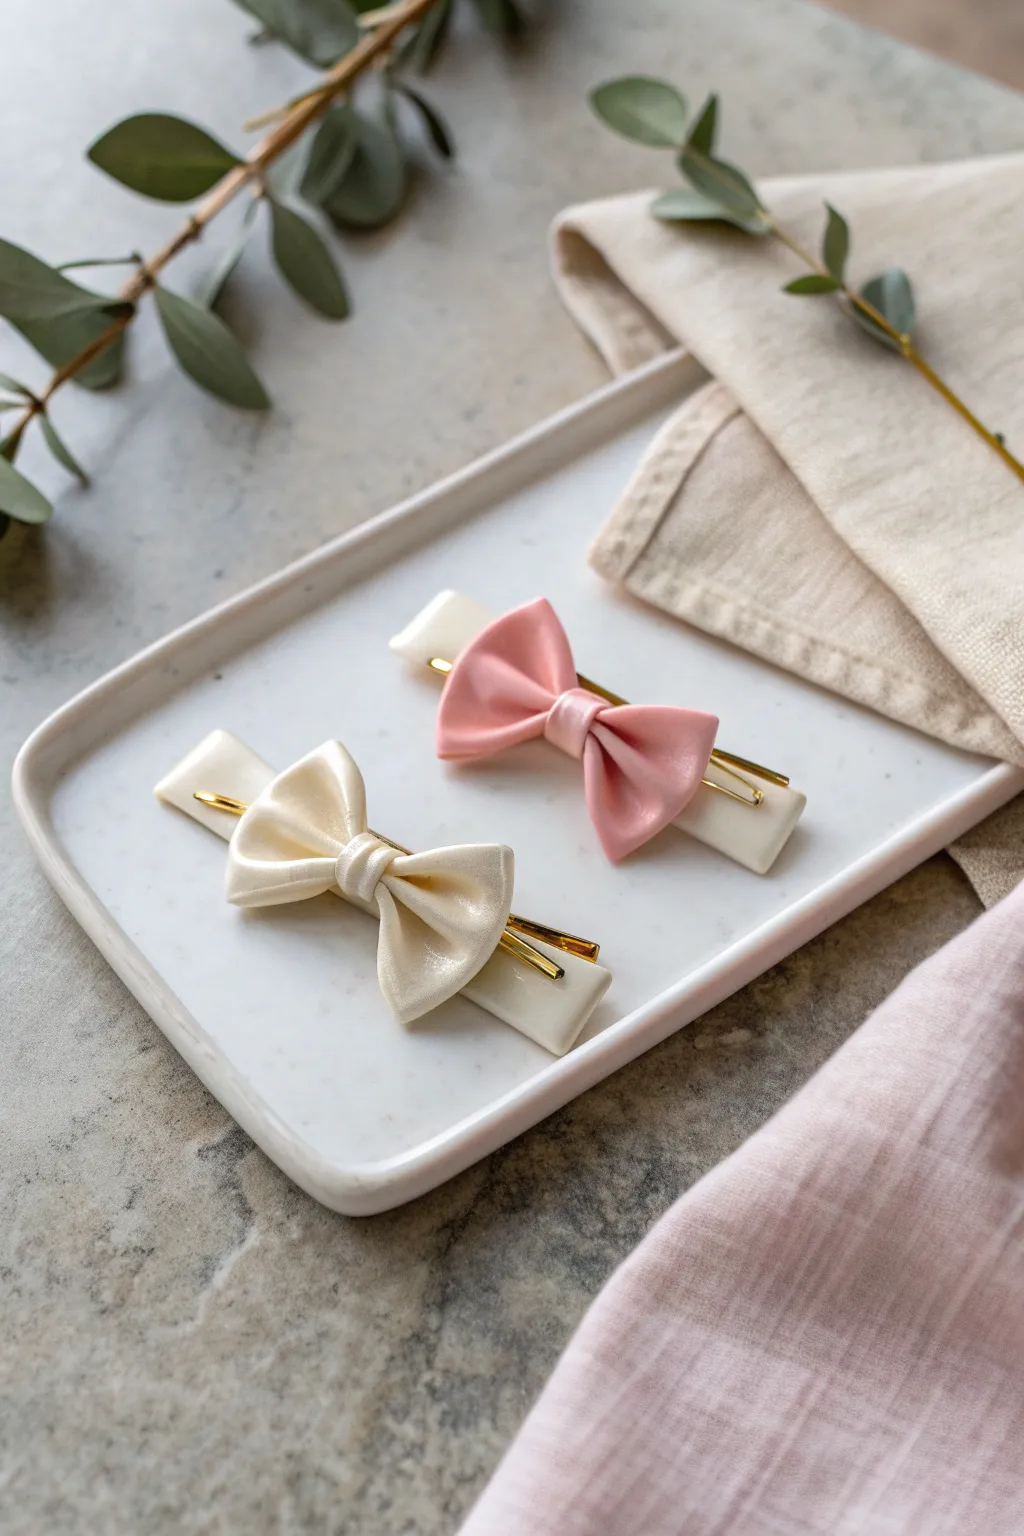
These charming hair clips feature delicate, glossy bows mounted on a sleek barrette base, creating a polished accessory perfect for any occasion. By combining air-dry clay with simple gold hardware, you can craft a boutique-worthy piece that looks surprisingly professional.
How-To Guide
Materials
- White air-dry clay (smooth texture recommended)
- Pink acrylic paint (optional, for coloring clay)
- Small rolling pin
- X-acto knife or clay blade
- Gold tone barrette hair clip blanks (approx. 2-3 inches)
- High-gloss varnish or sealant
- Super glue or E6000 adhesive
- Sandpaper (fine grit)
- Small paintbrush
- Ruler
Step 1: Prepping the Clay Base
-
Condition the clay:
Begin by taking a small amount of white air-dry clay and kneading it in your hands until it becomes warm, pliable, and free of cracks. -
Roll out the slab:
Use your small rolling pin to flatten the clay into a smooth, even sheet that is approximately 3-4mm thick. -
Measure the hardware:
Place your gold barrette blank gently on top of the clay to gauge the size needed. You want the clay base to be slightly wider and longer than the metal clip. -
Cut the rectangles:
Using an X-acto knife and a ruler for guidance, cut neat rectangles that are just larger than your metal clips. Smooth the sharp cut edges gently with your fingertip and a drop of water. -
Initial drying phase:
Set these rectangular bases aside on a flat surface to begin drying while you work on the decorative bows.
Smooth Operator
To erase fingerprints before drying, lightly brush the raw clay with a very soft paintbrush dipped in a tiny amount of water or baby oil.
Step 2: Sculpting the Bows
-
Select your color:
For the pink bow variant, mix a tiny dot of pink acrylic paint into a ball of white clay until the color is uniform. For the cream version, use the plain white clay. -
Form the bow strip:
Roll out a thin strip of clay, about 2mm thick. Cut a long, narrow rectangle approximately 3 inches long and 0.5 inches wide. -
Create the loops:
Fold both ends of the strip toward the center so they meet in the middle, forming two loops. Press the ends down gently in the center to secure them. -
Add the center knot:
Cut a very small, thin strip of clay to act as the ‘knot’. Wrap this strip around the center where the two loops meet, covering the seam completely. -
Shape the fabric folds:
To make the bow look realistic, use the back of your knife or a sculpting tool to gently press indentations into the center of the loops, mimicking the drape of fabric. -
Attach bow to base:
Apply a tiny amount of water or liquid clay to the center of your rectangular clay base. Press the finished clay bow firmly onto the center of the base. -
Full drying time:
Allow the entire assembled clay piece to dry completely. This usually takes 24-48 hours depending on humidity; flip them carefully halfway through to ensure the bottom dries too.
Step 3: Finishing Touches
-
Sand edges:
Once fully dry and hard, use fine-grit sandpaper to gently smooth any rough edges on the rectangular base or the sides of the bow. -
Apply gloss varnish:
Paint a layer of high-gloss varnish over the entire clay surface. This gives it that ceramic-like shine and protects it from moisture. Let this coat dry completely. -
Expose the glued area:
Flip the clay piece over. If you varnished the back, lightly sand the spot where the metal clip will attach to ensure the glue adheres properly. -
Glue the hardware:
Apply a strong adhesive like E6000 to the top of the metal barrette blank. Press it firmly onto the back of the clay rectangle. -
Final cure:
Let the glue cure for the time recommended on your adhesive package before unclipping or wearing the accessory.
Make It Sparkle
Before the varnish dries, sprinkle very fine iridescent glitter over the bow, or paint the center ‘knot’ with metallic gold paint for extra glam.
Now you have a set of custom, chic hair accessories ready to style or gift to a friend
Mini Photo Holder Mountains
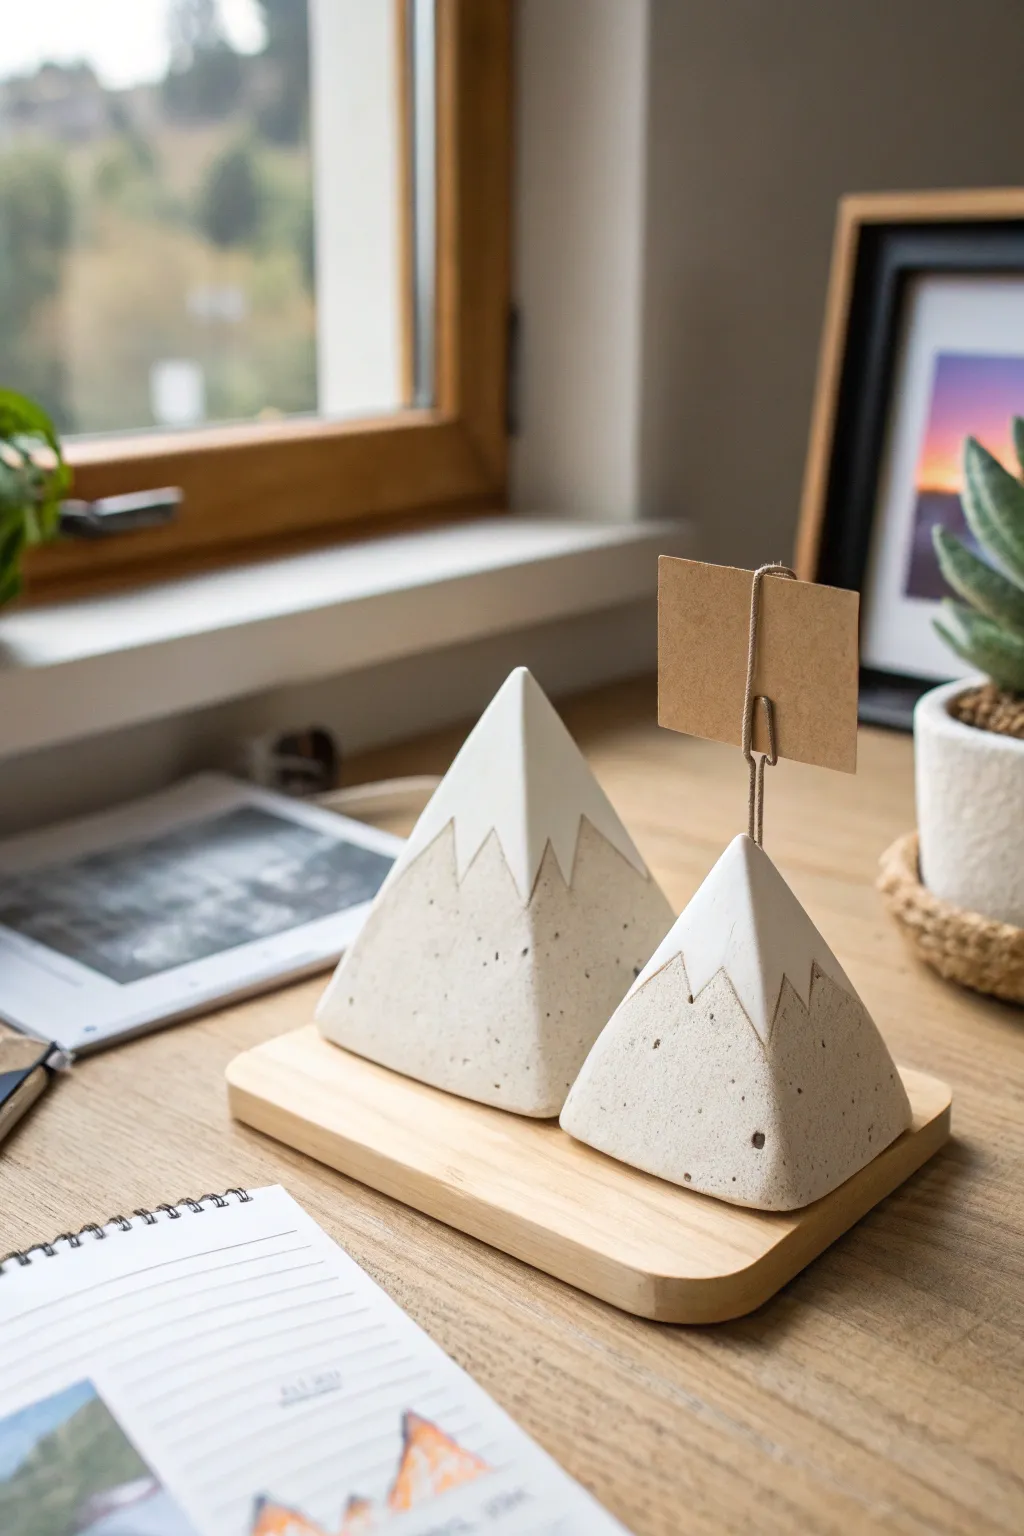
These charming, geometric mountain peaks bring a breath of fresh air to your desk while holding your favorite memories or important notes. With their stone-like texture and snow-capped tips, they strike the perfect balance between rustic nature and modern minimalism.
Detailed Instructions
Materials
- Air dry clay (white or grey)
- Acrylic paint (white and black/grey)
- Floral wire or 16-gauge crafting wire
- Rolling pin
- Sharp craft knife
- Ruler
- Fine-grit sandpaper
- Small paintbrush
- Old toothbrush (optional for texture)
- Needle nose pliers
- Cardboard or cardstock (for making a template)
Step 1: Shaping the Mountains
-
Create a Template:
Cut a triangle from cardstock to use as a template for your pyramid faces. An equilateral triangle (all sides equal) works best for a symmetrical look, roughly 2-3 inches tall. -
Prepare the Clay:
Knead a large ball of air dry clay until it is smooth and pliable. If you want that speckled stone look shown in the photo, try mixing in a tiny pinch of dried coffee grounds or black sand directly into the clay now. -
Roll It Out:
Roll the clay into a thick slab, approximately 1/4 inch thick. You want it sturdy enough to stand but not so thick it takes weeks to dry. -
Cut the Sides:
Using your cardstock template and a craft knife, cut out four triangles for the large mountain and four smaller triangles for the small mountain. Use a ruler to keep your lines crisp. -
Assemble the Pyramid:
Stand the triangles up and press their edges together to form a pyramid shape. I like to score the edges (scratch them up a bit) and add a dab of water before pressing them together to ensure a strong bond. -
Smooth the Seams:
Gently rub your finger over the seams where the triangles meet to blend the clay together. You want the edges to look seamless, as if the mountain was carved from a single block. -
Fill the Base (Optional):
If your pyramid feels flimsy, you can roll a small ball of clay and shove it gently inside the hollow space for support, or create a square base piece to seal the bottom.
Collapsing Pyramids?
If the clay walls keep sagging inward, crinkle up a small ball of aluminum foil or paper and place it inside the pyramid as an internal armature while shaping.
Step 2: Adding the Wire Holder
-
Cut the Wire:
Cut a piece of wire roughly 4-5 inches long using your wire cutters. -
Form the Clip:
Using round nose pliers, create a double loop or a tight spiral at one end of the wire. This is where your photo or note will slide in. -
Insert the Wire:
While the clay is still wet, carefully push the straight end of the wire down through the peak of the pyramid. Insert it about an inch deep so it stays secure. -
Final Shaping:
Do a final check of your shape. If inserting the wire distorted the peak, gently pinch it back into a sharp point around the wire base. -
Let it Dry:
Set your mountains aside to dry completely. This usually takes 24-48 hours depending on humidity. Rotate them occasionally so the bottom dries evenly.
Level Up: Wooden Base
Glue your finished mountains onto a simple rectangular piece of balsa wood or pine to create a unified tray or desk organizer set like the one in the photo.
Step 3: Painting & Finishing
-
Sand the Surfaces:
Once fully bone-dry, use fine-grit sandpaper to smooth out any fingerprints or rough bumps on the flat sides of the pyramid. -
Create Stone Texture:
If you didn’t add speckles into the wet clay, mix a very watered-down grey paint. Flick it onto the mountains using an old toothbrush to create a speckled, faux-stone effect. -
Mark the Snow Line:
Look at your mountain and decide where the snow cap should begin. Lightly sketch a jagged, zigzag line around the top third of the pyramid. -
Paint the Snow Caps:
Using white acrylic paint, fill in the area above your zigzag line. You might need two coats to get a solid, opaque white that contrasts well with the ‘stone’ base. -
Seal (Optional):
For extra durability, coat the entire piece with a matte varnish. This prevents the white paint from chipping and protects the clay from moisture. -
Display:
Once dry, slide a cute photo or a motivational card into the wire clip and arrange your mountain range on your desk.
Enjoy the view of your own personal mountain range right from your workspace
Little Rainbow Arch Decor
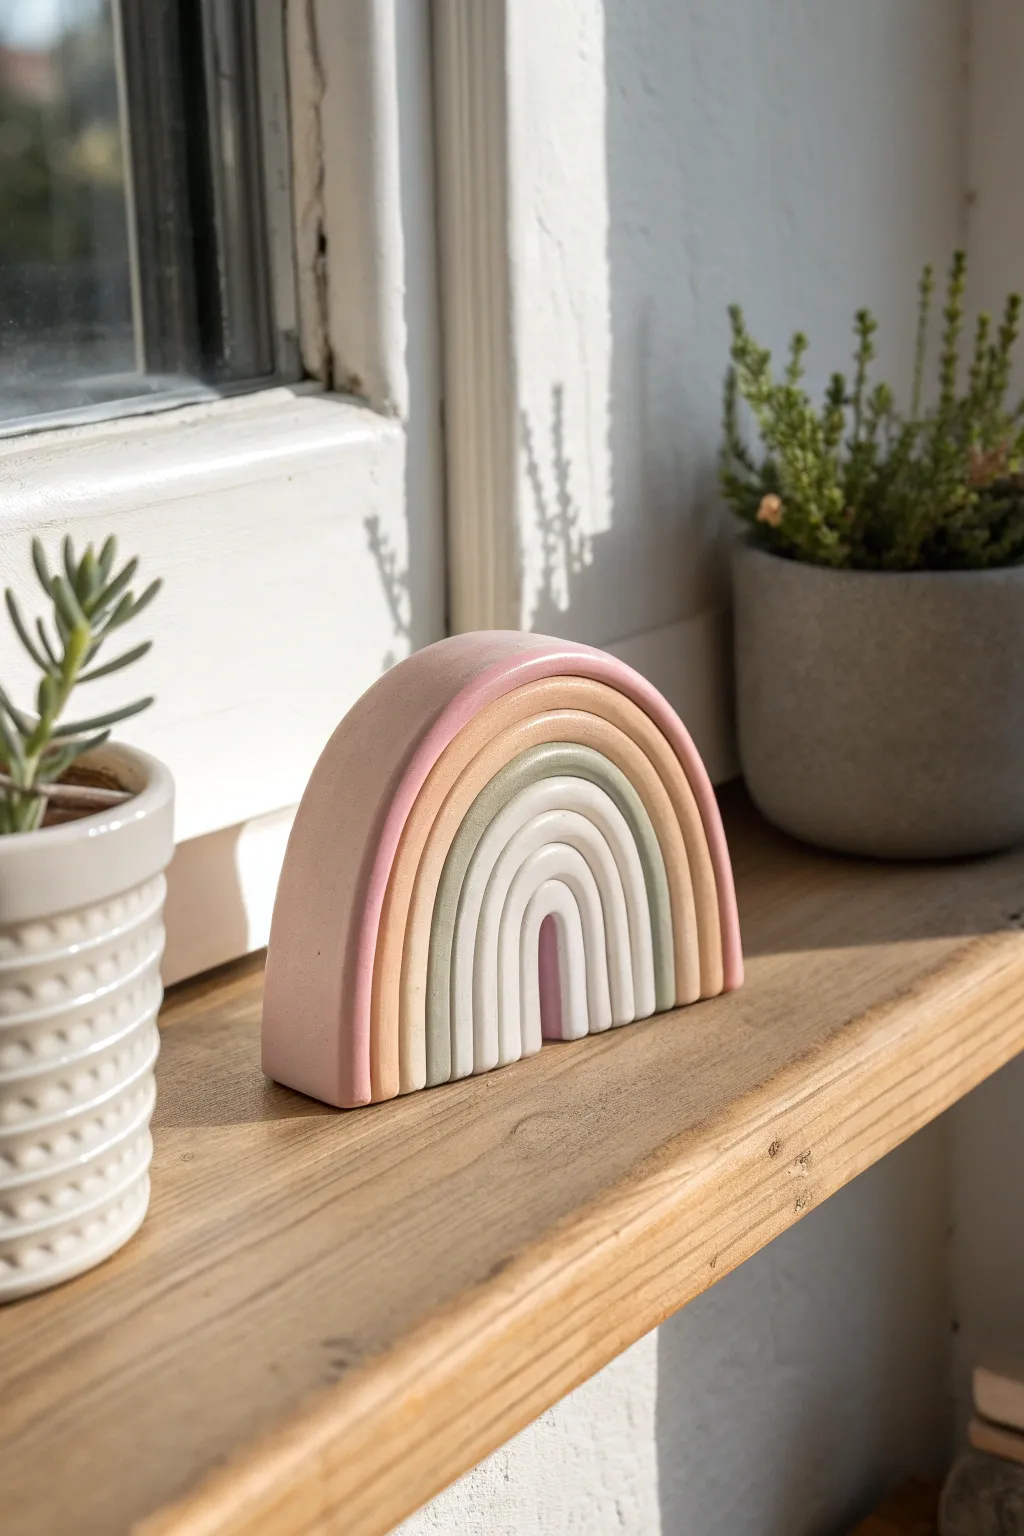
Create a serene, Scandinavian-inspired decor piece with this muted rainbow arch made from air dry clay. Its soft curves and gentle pastel palette make it perfect for brightening up a windowsill or bookshelf without overwhelming the space.
How-To Guide
Materials
- Air dry clay (white)
- Acrylic paints (dusty pink, peach, sage green, white)
- Rolling pin
- Sharp craft knife or clay slicer
- Sandpaper (fine grit)
- Paintbrushes (small and medium flat)
- Water and small sponge
- Clear matte varnish (optional)
Step 1: Forming the Arches
-
Condition the clay:
Begin by grabbing a large chunk of air dry clay and kneading it in your hands until it becomes warm, soft, and pliable. This prevents cracking later on. -
Roll huge coils:
Divide your clay into four portions used to make the arches. On a smooth surface, roll each portion into a long, even snake or coil. Aim for a thickness of about 1/2 to 3/4 inch. -
Flatten deeply:
Unlike traditional round coils, the rainbow in the photo has flat faces. Gently use your rolling pin to flatten the coils into thick, rectangular strips rather than round tubes. -
Build the center:
Start with the smallest, innermost arch. Bend one of your flattened strips into a tight U-shape. This will be the foundational piece that defines the height. -
Layer up:
Take the next strip and drape it directly over the first arch. Press them gently together so they mold to each other’s shape without losing their distinct separation. -
Repeat the layering:
Continue this process with the remaining two strips, ensuring the outer arch is the largest. I find it helpful to smooth the joining surfaces with a tiny bit of water to help them nestle perfectly. -
Slice the base:
Once all four arches are stacked, use a long, sharp blade to slice straight across the bottom. This creates a perfectly flat base so the rainbow stands upright. -
Separate for drying:
Carefully separate the arches from one another before drying. If you dry them stuck together, painting the sides between the arches will be impossible later. -
Dry thoroughly:
Lay the pieces flat on a clean surface and let them dry completely. This usually takes 24-48 hours. Flip them halfway through to ensure even drying on both sides.
Step 2: Sanding and Refining
-
Check for imperfections:
Once bone dry, inspect your arches. Look for any rough edges or uneven spots on the flat faces. -
Sand smooth:
Using fine-grit sandpaper, gently buff the surface of each arch. Focus on rounding off the sharp corners slightly to achieve that soft, matte look seen in the photo. -
Clean dust:
Wipe away all clay dust with a slightly damp sponge or cloth. You want a pristine surface for the paint to adhere to.
Smooth Operator
Use a tiny bit of water on your finger to smooth out cracks while the clay is wet. Don’t over-wet it or the clay may become slimy and weak.
Step 3: Painting and Assembly
-
Mix custom colors:
To match the reference, mix your acrylics with plenty of white. You need a dusty rose for the outer arch, a soft peach/terracotta for the second, a muted sage green for the third, and keep the center creamy white. -
Paint the outer arch:
Apply the dusty rose color to the largest arch. Use smooth strokes to avoid brush marks. Paint all sides, including the inner curve where it will touch the next piece. -
Paint the middle layers:
Paint the second arch in your peach tone and the third in sage green. Since air dry clay is porous, you might need two thin coats for opaque coverage. -
Paint the center:
Paint the smallest arch a soft, creamy white or very light grey. Let all pieces dry completely. -
Reassemble:
Once the paint is dry, nest the arches back together. You can leave them loose for interactive decor or use a strong craft glue between the layers to fix them permanently. -
Seal surface:
Finish with a light coat of clear matte varnish if you want to protect the paint from chipping, though leaving it raw maintains that lovely chalky texture.
Warp Speed Prevention
If your arches start curling while drying, place a light book on top of them (with parchment paper in between) to keep them perfectly flat.
Place your finished rainbow near a sunny window to enjoy the soft shadows it casts throughout the day
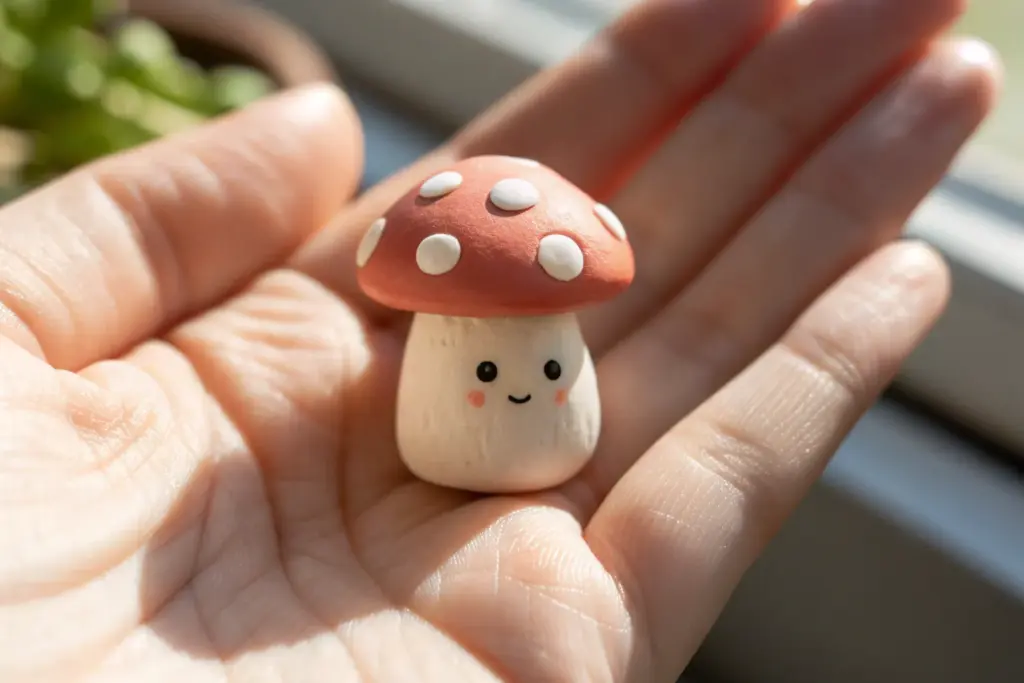
Tiny Mushroom Miniature Set
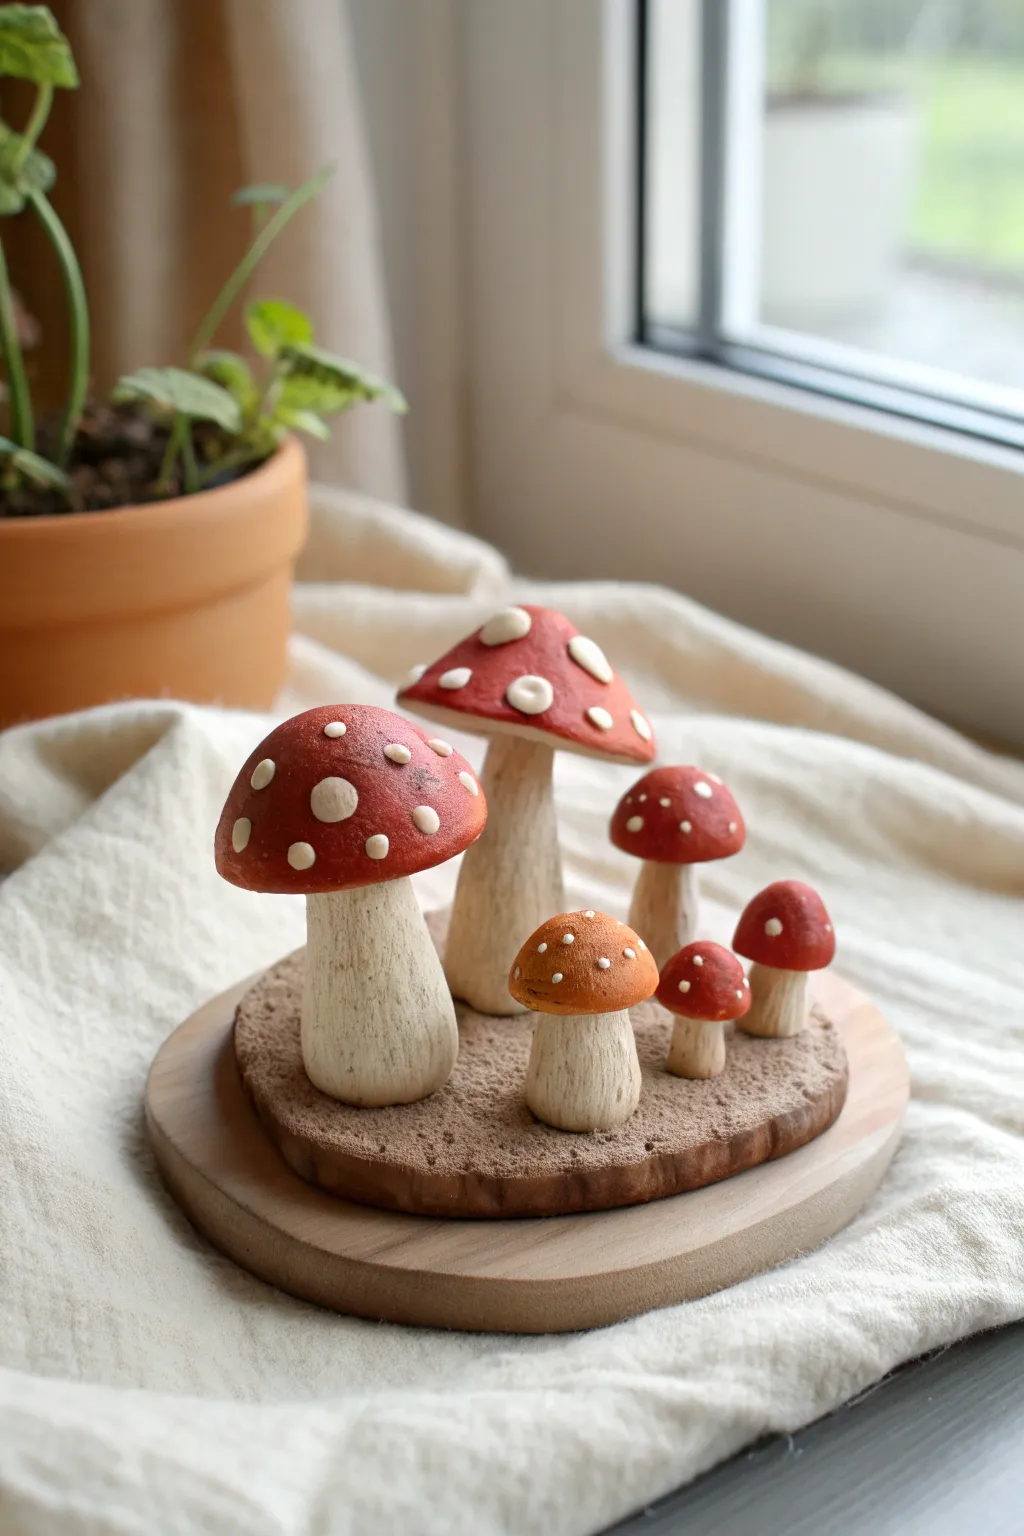
Create your own enchanted forest floor with this charming set of miniature toadstools. Featuring textured stems and vibrant red caps specked with white, this little clay scene brings a touch of fairytale magic to any windowsill or shelf.
Step-by-Step Guide
Materials
- White air dry clay
- Acrylic paints: warm white, beige/tan, classic red, burnt umber
- Small paintbrush (flat and detail)
- Texture tools: needle tool, old toothbrush, or a stiff bristle brush
- Wooden base or a round piece of cardboard
- Craft glue or PVA glue
- Matte or satin varnish
- Sandpaper (optional)
- Ball stylus tool
Step 1: Sculpting the Stems
-
Portion the clay:
Start by pulling off six pieces of clay in varying sizes for the stems. You want a mix of heights and thicknesses to create a natural, organic grouping. -
Roll the cylinders:
Roll each piece into a thick cylinder shape. Keep the base slightly wider than the top for stability and a realistic mushroom look. -
Texturize the surface:
Take your needle tool or a stiff brush and drag it vertically down the sides of each stem. This creates those distinctive striations found on mushroom stalks. I like to be fairly messy here; perfection isn’t nature’s way. -
Refine the tops:
Flatten the very top of each stem slightly so the caps will have a good surface to sit on later. Set these aside to firm up while you work on the caps.
Natural Texture Hack
For realistic dirt texture on the base, press a piece of real sandpaper or a rough stone into the wet clay before attaching the mushrooms.
Step 2: Creating the Caps
-
Form the cap bases:
Roll six balls of clay corresponding to the sizes of your stems. Flatten them into dome shapes—some can be taller and pointier, while others can be flatter and wider. -
Hollow underneath:
Use your thumb or a ball tool to gently indent the underside of each cap. This helps it fit snugly onto the stem later. -
Join cap to stem:
Apply a tiny dab of water or slip (clay mixed with water) to the top of a stem and press the matching cap firmly on top. Smooth the seam slightly underneath if needed, but the overhang hides most imperfections. -
Add the spots:
Roll tiny little bits of clay into balls and flatten them onto the red caps. Vary the sizes and placement so they look random and organic, not like a polka-dot pattern. -
Create the base:
Take a larger lump of clay and flatten it into a rough, organic disc shape to serve as the ground. This will hold your mushroom family together. -
Assembly:
Press your mushroom stems into the base while the clay is still soft. Use a tool to blend the bottom of the stems into the ground for a seamless transition. -
Dry thoroughly:
Allow the entire sculpture to dry completely. Depending on the thickness and your climate, this usually takes 24 to 48 hours.
Step 3: Painting and Finishing
-
Base coat the stems:
Paint the stems and the underside of the caps with a mixture of warm white and a tiny drop of beige. You want an off-white, creamy bone color. -
Enhance the texture:
Once the base coat is dry, mix a watery wash of burnt umber paint. Brush it over the stems and immediately wipe it back with a paper towel. The dark paint will stay in the textured grooves, highlighting the realistic detail. -
Paint the caps:
Carefully paint the caps with classic red acrylic paint. Use a detail brush to paint around the raised white spots so they remain the clean white color of the clay. -
Refine the spots:
If you accidentally got red paint on the spots, just dab a little fresh white paint over them once the red is dry to make them pop. -
Paint the ground:
Paint the clay base with a soil color—dark browns mixed with some textured tan dabs can simulate dirt beautifully. -
Mount and seal:
Glue the finished clay piece onto a wooden disc for a polished presentation. Finally, coat the mushrooms with a matte or satin varnish to protect the paint and give them a subtle sheen.
Mossy Details
Glue tiny bits of dried crafty moss or green turf flocking around the base of the stems to make the scene look like it was just plucked from the forest.
Now you have a permanent piece of autumn nature to enjoy year-round
Cute Mini Incense Rest
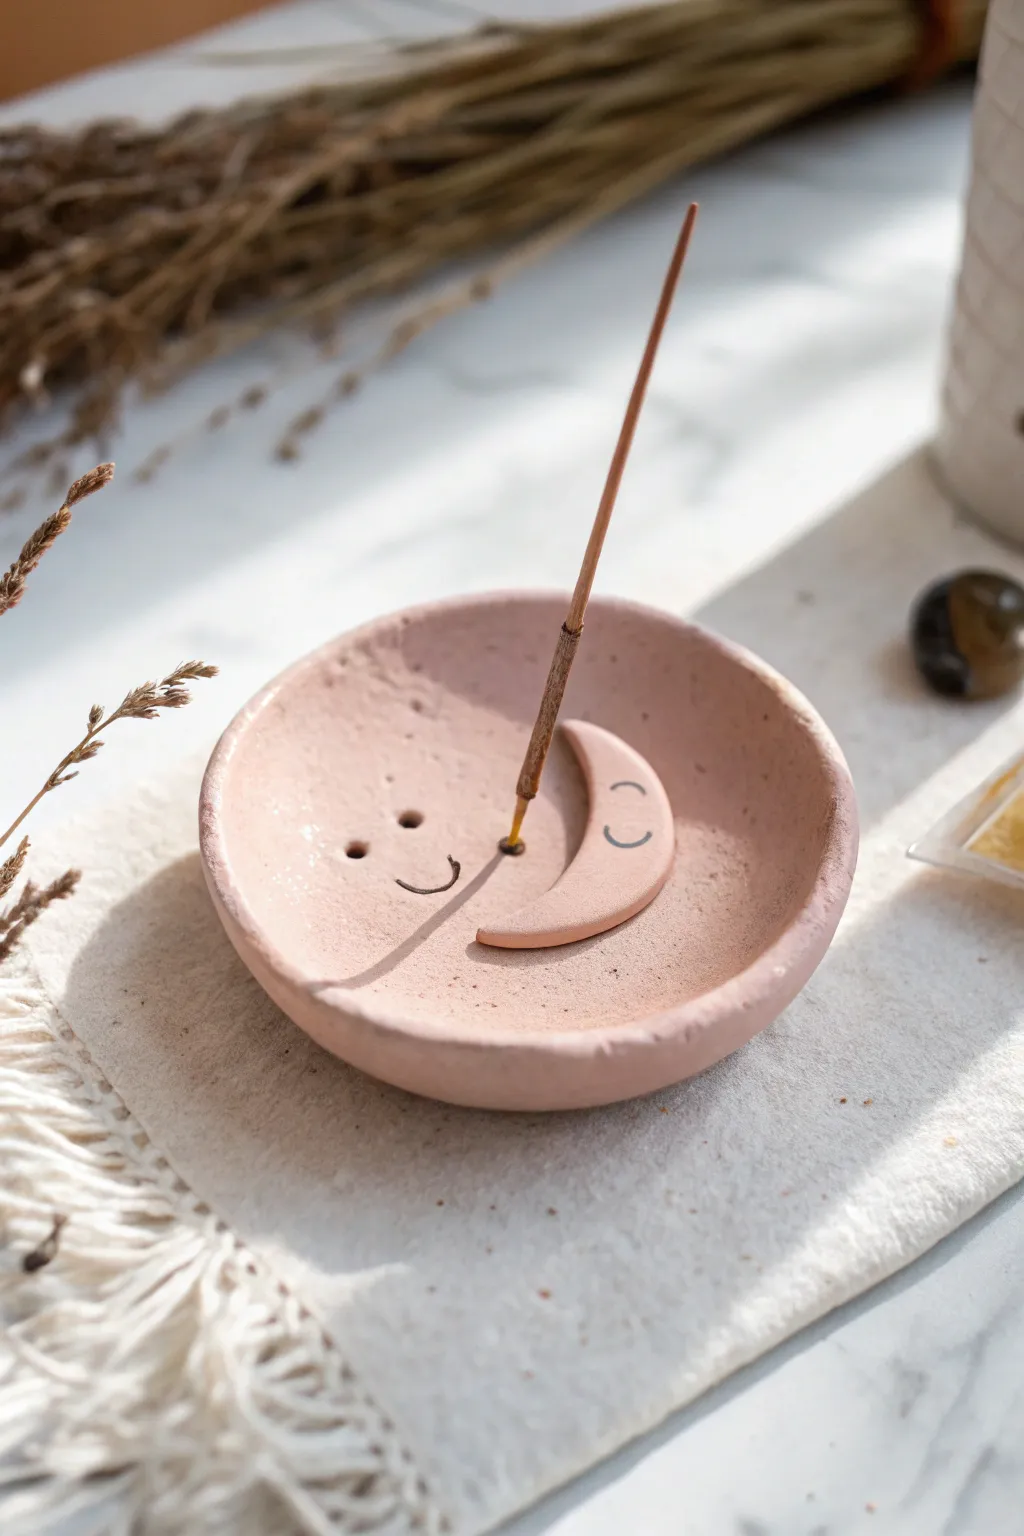
This adorable incense holder features a gentle terracotta hue and sweet, minimalist smiley faces that bring a touch of personality to your space. It combines a simple shallow dish shape with a raised crescent moon element, perfectly sized to catch ash while holding your favorite stick.
Detailed Instructions
Materials
- Air-dry clay (white or terracotta)
- Acrylic paint (terracotta/dusty pink, black)
- Rolling pin
- Circle cutter or a round bowl rim (approx. 3-4 inch diameter)
- Small knife or clay tool
- Small bowl or sponge (for shaping)
- Sandpaper (fine grit)
- Water and small brush
- Incense stick (for sizing holes)
- Matte varnish or sealant
Step 1: Creating the Base
-
Prepare the Clay:
Start by kneading a ball of air-dry clay until it is soft, pliable, and free of cracks. If you are using white clay and want the base color to be integral, you can mix a small amount of acrylic paint into the clay now, or plan to paint it later. -
Roll the Slab:
Roll out the clay on a flat surface to an even thickness of about 1/4 inch (5-6mm). Make sure it’s not too thin, or it might crack when drying. -
Cut the Circle:
Use your circle cutter or place a small bowl upside down on the clay to cut out a perfect circle. Peel away the excess clay and smooth the edges with a slightly damp finger. -
Form the Dish:
Gently lift the edges of the circle to create a shallow curve. I like to rest the clay circle inside a slightly larger bowl lined with plastic wrap, or on a curved foam sponge, so it holds a saucer shape while drying.
Cracks Appearing?
If small hairline cracks appear while drying, don’t panic. Mix a tiny bit of fresh clay with water to make a paste (slip) and fill the cracks, then smooth over.
Step 2: Adding the Moon & Details
-
Cut the Crescent:
Roll out a smaller piece of clay, slightly thinner than your base. Use the same circle cutter to cut an edge, then move the cutter inward to cut a crescent moon shape. -
Refine the Moon:
Smooth the sharp cut edges of the crescent moon with your finger to give it a soft, rounded look similar to the base dish. -
Add the Smiley Faces:
Before attaching anything, use a needle tool or small toothpick to gently impress the eyes and smile onto the left side of the dish base. Do the same for the crescent moon piece. -
Attach the Moon:
Score the back of the moon and the spot on the dish where it will sit (the right side). Apply a tiny dab of water or clay slip, then press the moon firmly into place. -
Punch the Incense Hole:
Take an actual incense stick (the wooden end) and press a hole into the center of the dish, near the moon. Rotate it slightly to ensure the hole is wide enough for the stick to fit after the clay shrinks slightly during drying.
Make it Sparkle
For a magical night-sky effect, use a metallic gold paint pen to add tiny stars or freckles around the smiley faces after the base coat is dry.
Step 3: Finishing Touches
-
Let it Dry:
Allow the piece to air dry completely for 24-48 hours. Keep it in a cool, dry place away from direct sunlight to prevent warping. -
Sand Smooth:
Once bone dry, use fine-grit sandpaper to gently smooth out any rough edges on the rim or the moon. -
Paint the Base Color:
If you didn’t pre-color your clay, mix a dusty pink or terracotta acrylic shade. Paint the entire dish, ensuring you get into the crevices around the moon. -
Highlight the Features:
Using a very fine detail brush or a black fine-tip paint pen, carefully fill in the impressed eyes and smiles with black ink to make them pop. -
Seal the Holder:
Finish by applying a coat of matte varnish or sealant. This protects the clay from ash marks and makes it easier to wipe clean.
Now you have a charming little spot to burn your favorite scents and brighten your decor with a smile
Teeny Book Page Holder Creature
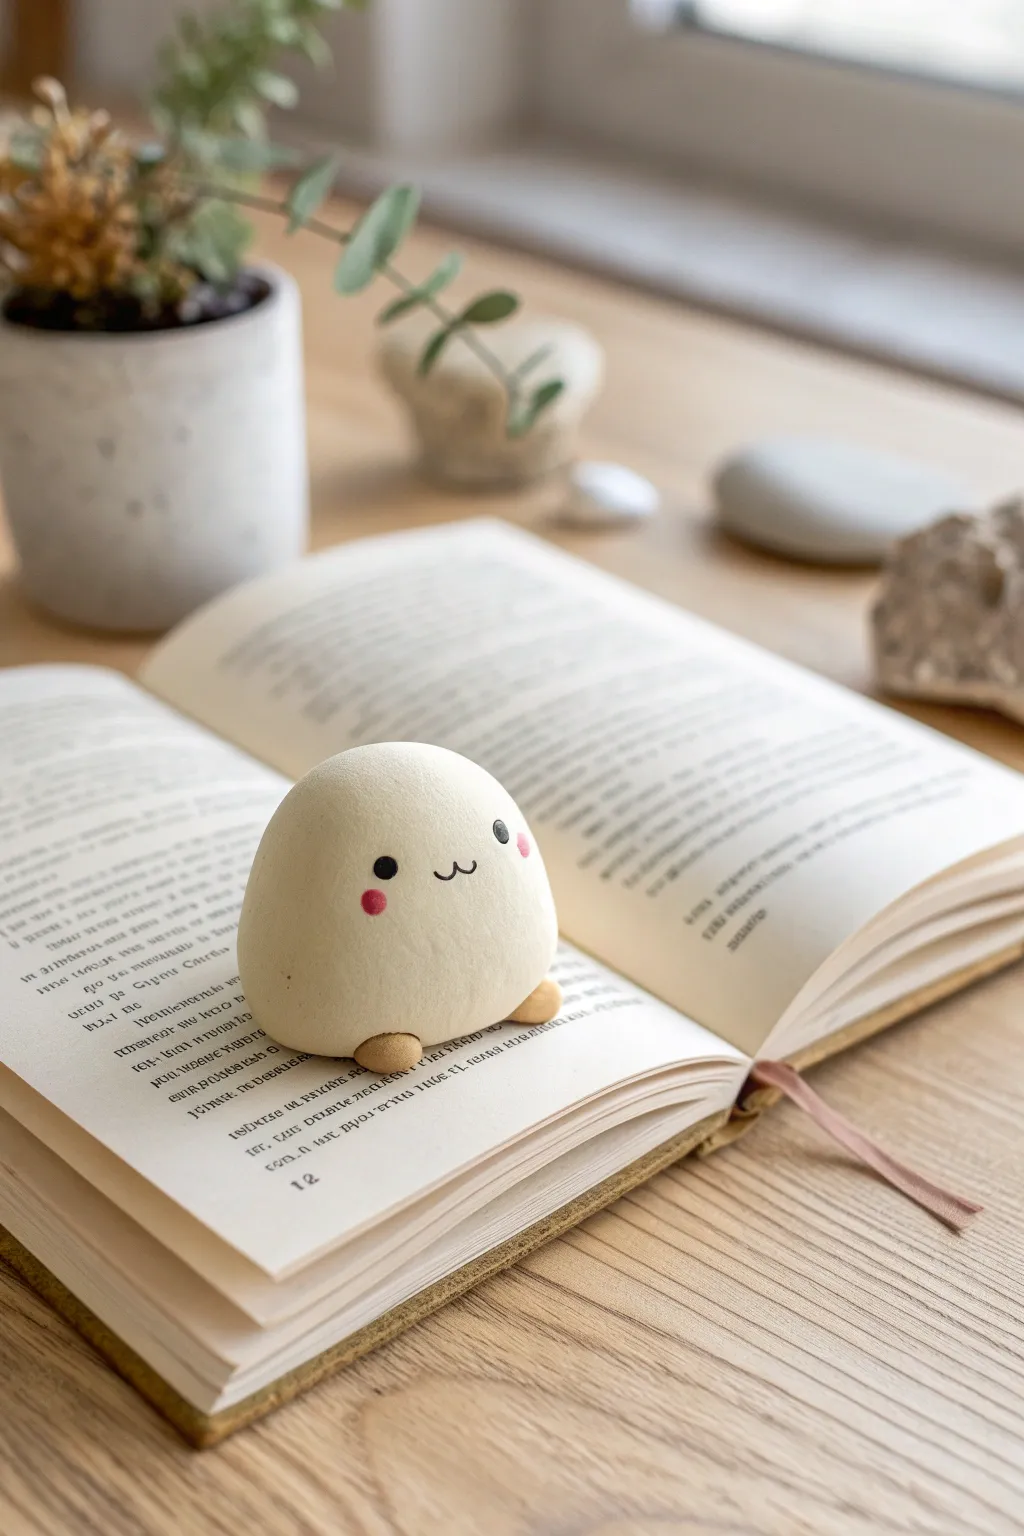
Keep your favorite novel open hands-free with this adorable, marshmallow-like friend. Its simplified, rounded shape and tiny paws make it the perfect beginner project that adds a touch of whimsy to your reading nook.
How-To Guide
Materials
- White air-dry clay (smooth texture preferred)
- Tan or light brown air-dry clay (or acrylic paint to tint)
- Black acrylic paint
- Pink acrylic paint
- Fine-point paintbrush or dotting tool
- Matte varnish or sealant
- Small bowl of water
- Smooth work surface
Step 1: Shaping the Main Body
-
Condition the white clay:
Start with a lump of white air-dry clay roughly the size of a tangerine. Knead it in your hands for a minute until it is warm, pliable, and free of any lumps. -
Roll a smooth sphere:
Roll the clay between your palms to create a perfect ball. If you see any cracks, dip your finger in a tiny bit of water and smooth them out gently. -
Form the gumdrop shape:
Place the ball on your work surface. Gently press and cup the sides with your hands to slightly flatten the bottom and elongate the top, creating a soft, rounded dome shape similar to a gumdrop or mochi. -
Refine the surface:
Check the surface for any fingerprints. Dip your finger in water again and lightly buff the surface until it is completely seamless and matte-looking. -
Check the weight:
Since this needs to hold a book open, ensure the body feels substantial. If it feels too light, you can hide a small, clean tumbling stone inside the center of the clay ball before reshaping.
Step 2: Adding the Details
-
Prepare the foot color:
Take a tiny amount of tan clay. If you don’t have colored clay, mix a speck of brown paint into a pea-sized ball of white clay until the color is uniform. -
Create two small spheres:
Divide the tan clay into two equal pieces, each about the size of a small pea or a peppercorn. -
Attach the feet:
Position the two tan balls at the very bottom edge of the white body, slightly spaced apart. Press them gently so they adhere to the white clay without squishing their round shape completely. -
Blend the seams:
I like to use a small clay tool or the back of a paintbrush to gently smudge the back of the feet into the underside of the body, ensuring they won’t pop off later. -
Let it dry completely:
Set your creature aside in a clean, dry spot. Depending on your humidity and the brand of clay, allow it to air dry for 24 to 48 hours. Turn it over halfway through so the bottom dries evenly.
Cracks Appearing?
If you see hairline cracks while drying, mix a tiny bit of fresh clay with water to make a paste (slip). Rub this into the cracks with your finger to fill and smooth them out.
Step 3: Painting the Face
-
Plan the face:
Before painting, visualize where the face will go. It should be centered vertically on the dome. Keeping the features small and close together enhances the ‘cute’ factor. -
Paint the eyes:
Dip a dotting tool or the handle end of a paintbrush into black acrylic paint. Stamp two small, solid black circles for eyes. -
Draw the mouth:
Using your finest paintbrush and black paint, carefully paint a small ‘w’ shape right between the eyes. Keep the lines thin and delicate. -
Add the cheeks:
Dip a clean dotting tool into pink paint. Stamp two rosy cheeks just outside and slightly below the eyes. -
Apply varnish:
Once the paint is totally dry, apply a coat of matte varnish over the entire piece. This protects the clay from handling and keeps the finish soft and velvety.
Accessorize Him
Give your page holder extra character by sculpting a tiny clay leaf or flower to place on its head, or paint a pattern on its back like a little dinosaur or ladybug.
Now your adorable reading buddy is ready to hold your place in your next adventure
Mini Fairy Door Keepsake
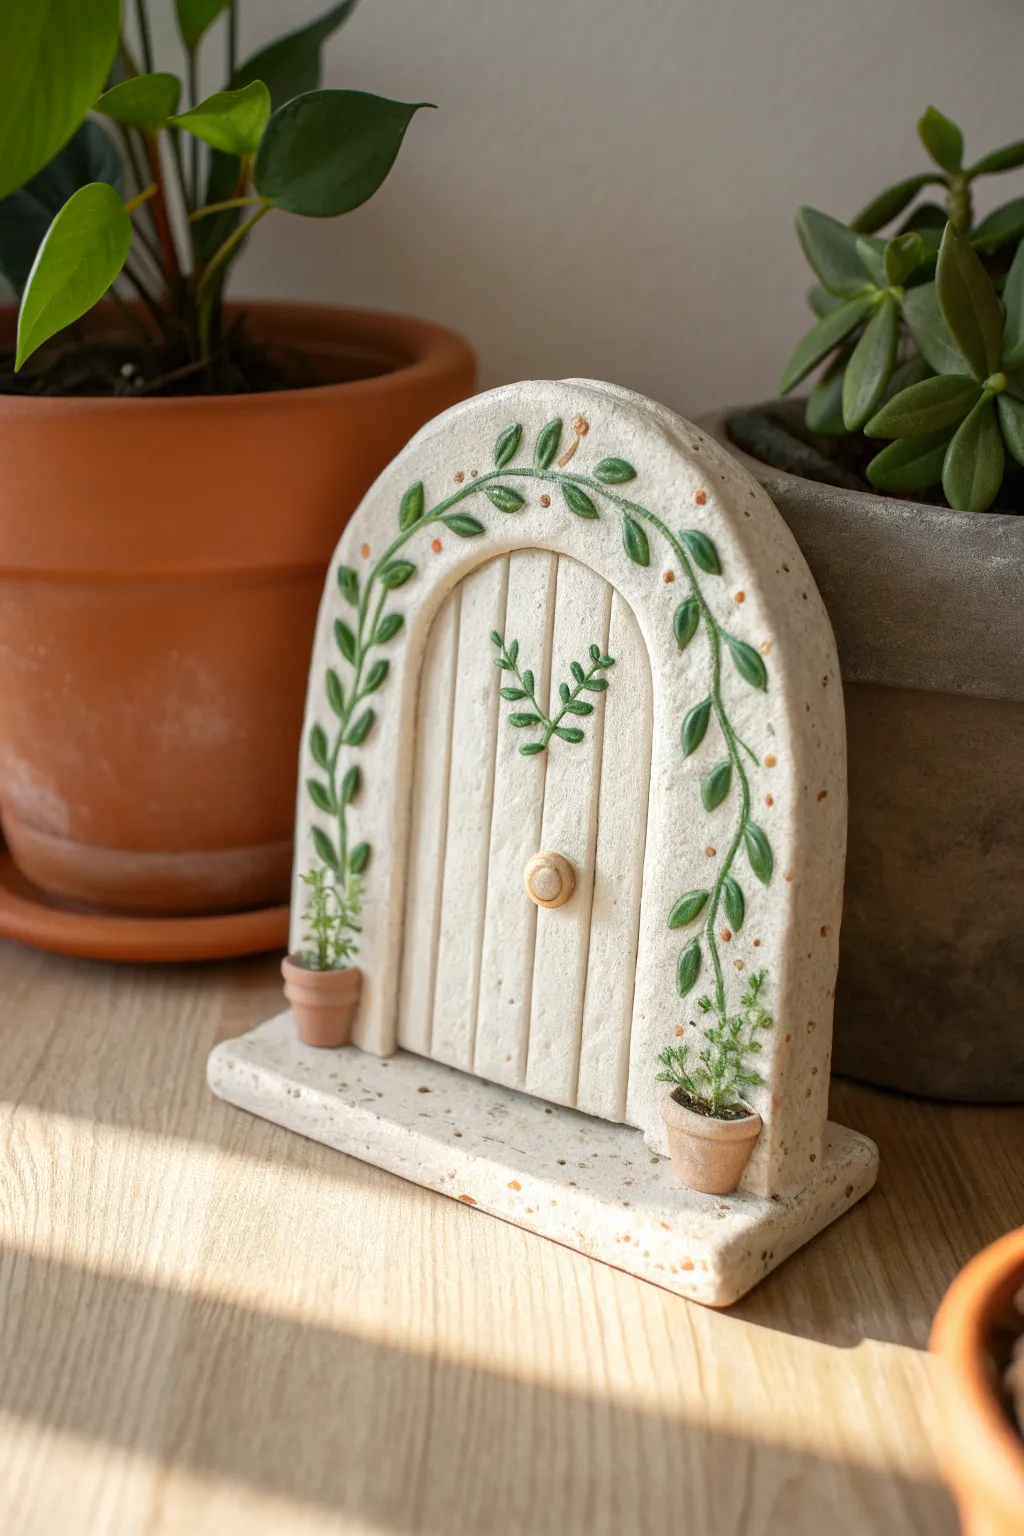
Create a magical portal for your home’s tiniest visitors with this charming ceramic-style fairy door. The speckled clay effect and delicate climbing vines give it an earthy, organic look perfect for nestling among your potted plants.
Step-by-Step
Materials
- Air dry clay (preferably white or a stone color)
- Speckled clay additive or dried coffee grounds/sand
- Rolling pin
- Precision craft knife or clay tool
- Small round clay cutter or bottle cap
- Acrylic paints (sage green, forest green, terracotta, light brown)
- Fine detail paintbrush (size 00 or 0)
- Toothpick or needle tool
- Sandpaper (fine grit)
- Matte varnish or sealant
Step 1: Prepping the Clay Base
-
Texture the clay:
Start by conditioning your air dry clay. To achieve that beautiful stone-like look in the photo, kneed in a very small amount of speckled additive, coarse sand, or even dried used coffee grounds until evenly distributed. -
Roll the slab:
Roll out a thick slab of your textured clay, aiming for about 1/2 inch thickness. You want it substantial enough to stand upright on its own once dry. -
Cut the arch shape:
Use a template or freehand a tall arch shape for the main door frame. Cut this out cleanly with your craft knife. Smooth the cut edges with a bit of water on your finger. -
Create the base:
Roll out a separate, rectangular strip of clay that is slightly wider and deeper than your arch. This will be the doorstep base.
Step 2: Sculpting Details
-
Carve the inset:
Instead of cutting out a separate door, create the illusion of depth by gently carving away a thin layer of clay in an arch shape, leaving a raised border around the edge. -
Add wood grain:
Use a needle tool or the back of your knife to score vertical lines into the recessed door area to mimic wooden planks. Vary the pressure slightly for a natural look. -
Attach the doorknob:
Roll a tiny ball of clay and flatten it slightly. Score the back of the ball and the spot on the door where it will go, add a dab of water, and press it firmly into place. -
Assemble the structure:
Score the bottom of the arch and the top of the rectangular base. Apply water slip (clay mixed with water) and press the arch firmly onto the base. Smooth the seam at the back so it becomes one solid unit.
Cracking Up?
If you see hairline cracks forming while drying, don’t panic. Mix a small amount of fresh clay with water to make a paste and fill the crack. Smooth it over and let it dry again.
Step 3: Adding the Miniature Pots
-
Form the pots:
I usually make the tiny pots separately. Roll two tiny pea-sized balls of clay, flatten the tops, and indent the centers with the end of a paintbrush handle to create a pot shape. -
Add greenery:
Form extremely thin, tiny snakes of clay and cluster them inside the pots to look like little sprouts or herbs. -
Secure to base:
Using the score-and-slip method again, attach one pot to the left and one to the right of the door on the rectangular base. -
Drying:
Let the entire piece dry completely. For a thick piece like this, allow at least 24-48 hours. Turn it occasionally to ensure even drying and prevent warping.
Pro Tip: Texture
For realistic stone texture, gently press an old toothbrush or a piece of crumpled aluminum foil against the clay surface of the arch frame before it begins to dry.
Step 4: Painting and Finishing
-
Sand imperfections:
Once bone dry, use fine-grit sandpaper to gently smooth any sharp edges on the arch or the base, being careful not to sand off your wood texture. -
Paint the vines:
Using a fine detail brush and forest green paint, carefully paint a winding vine climbing up the archway. Add small leaf shapes coming off the vine. -
Highlight the leaves:
Mix a little white or yellow into your green to make a sage color. Add tiny highlights to the leaves and paint a small sprig in the center of the door for extra charm. -
Paint the pots:
Paint the tiny pots with a terracotta color. Use a very light hand to paint the tiny sprouts green. -
Add warmth:
Dilute some light brown paint with water to make a wash. Lightly brush this over the doorknob and into the grooves of the wood planks to define them, then wipe away excess with a paper towel. -
Seal:
Finish with a coat of matte varnish to protect your work and seal in those speckles without making it look plasticky.
Place your finished door on a shelf or near a window to invite a little magic into your daily routine
Tiny Mystery Charm Grab Bag
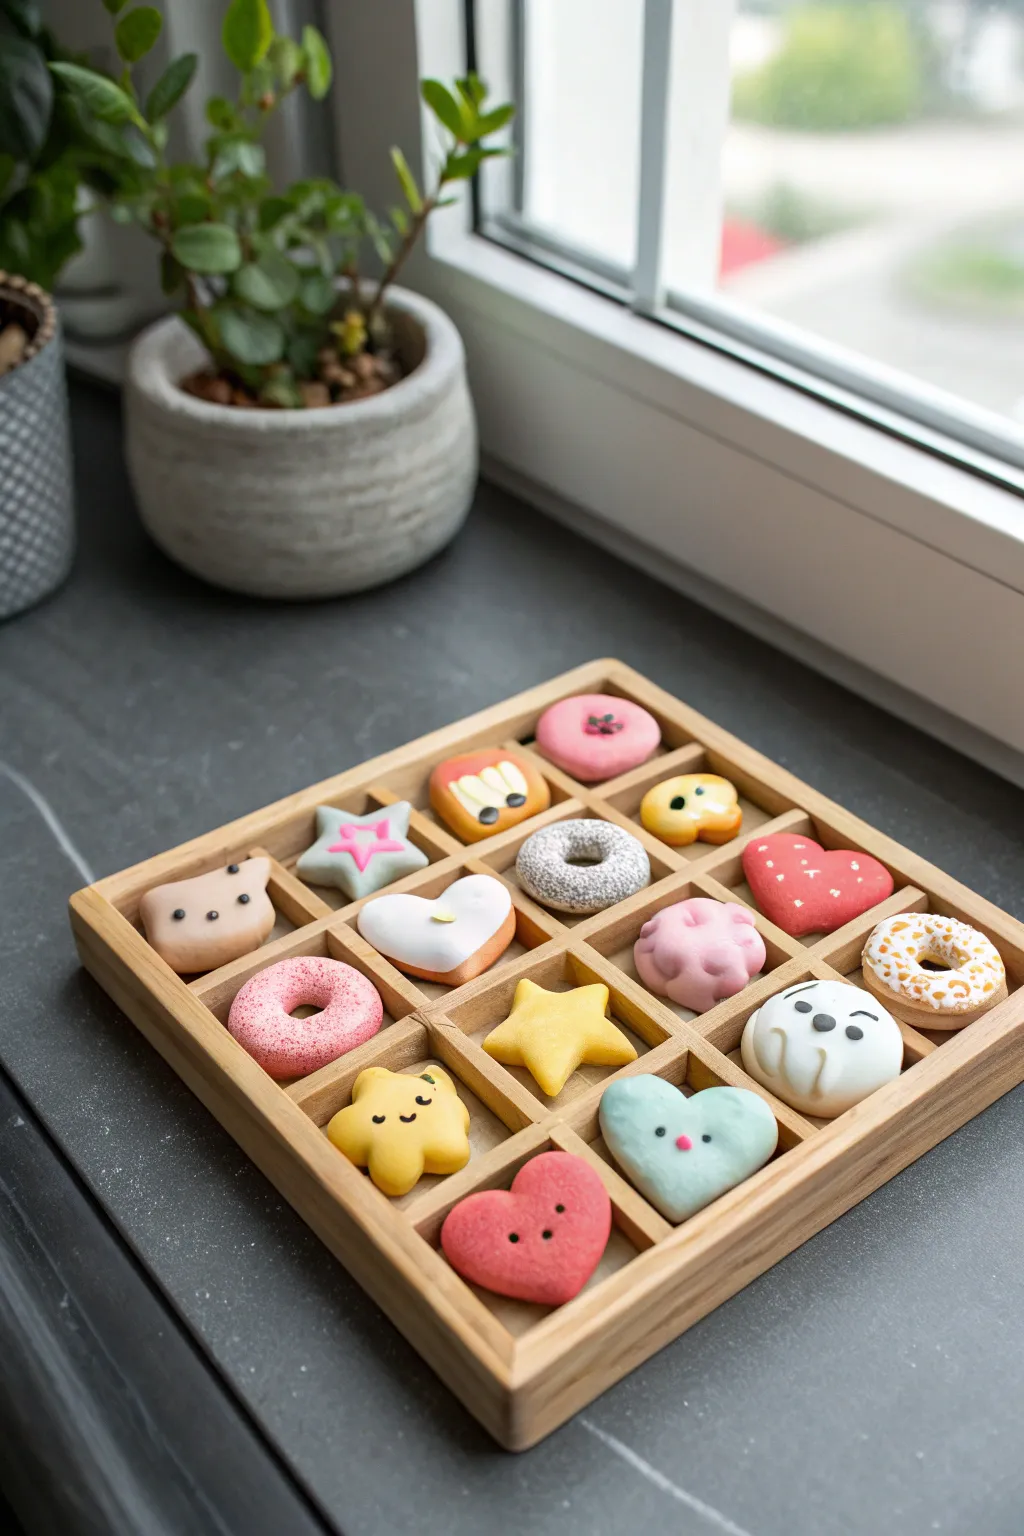
Create your own delightful assortment of kawaii miniatures perfect for a grab bag or jewelry making. This project guides you through shaping an adorable grid of pastel donuts, hearts, stars, and tiny animal faces using smooth air-dry clay.
Detailed Instructions
Materials
- White air-dry clay (smooth texture)
- Acrylic paints (pastels: pink, blue, yellow, mint, light brown)
- Fine detail paintbrushes (size 0 and 00)
- Clay sculpting tools (ball tool, needle tool)
- Small rolling pin
- Glossy varnish or UV resin (for finishing)
- Sandpaper (fine grit)
- Palette for mixing colors
Step 1: Prepping and Coloring the Base
-
Condition the clay:
Begin by taking small portions of white air-dry clay and kneading them warm in your hands until they are soft, pliable, and crack-free. -
Mix your pastel palette:
Separate the clay into several balls. Mix a tiny drop of acrylic paint into each ball—pink, light blue, butter yellow, and light brown—kneading thoroughly until the color is uniform and streak-free. Keep one portion white. -
Keep clay moist:
While working on one color, keep the other balls covered with plastic wrap or a damp cloth to prevent them from drying out prematurely.
Step 2: Sculpting the Shapes
-
Shape the donuts:
Roll small spheres of pink, white, or brown clay. Flatten them slightly into a thick disc, then use the handle of a paintbrush or a ball tool to poke a hole through the center. Smooth the edges to keep them rounded. -
Form the hearts:
Roll a small ball and flatten it slightly. Use a needle tool to press an indentation into the top center, then tap and refine the bottom into a point to create a puffy heart shape. -
Create star shapes:
Take yellow or blue clay, flatten it into a disc, and use a knife tool to make five equally spaced cuts. Pinch the sections into points to form a star, softening the tips with your finger. -
Mold the animal faces:
For the bear or cat shapes, roll a smooth ball and flatten it slightly into a cushion shape. Pinch tiny triangles of clay for ears and attach them firmly to the top corners using a dab of water. -
Make the mystery squares:
Form small rounded squares or rectangles (like the TV or envelope shapes). Smooth the sides against a flat surface to get clean edges while keeping the corners soft.
Smooth Operator
If your dried clay has rough spots, use a fine-grit nail file or sandpaper to gently buff the surface perfectly smooth before painting.
Step 3: Refining and Drying
-
Smoothing imperfections:
Dip your finger in a tiny bit of water and gently rub out any fingerprints or cracks on your sculpted pieces. This step is crucial for that professional, smooth finish. -
Adding texture:
For the ‘sugar’ donut, gently tap the surface with an old toothbrush or stiff brush to create a baked texture before it dries. -
Let them dry:
Place all your charms on a clean sheet of parchment paper. Allow them to dry completely for 24–48 hours, flipping them halfway through to ensure the bottoms dry evenly.
Magnet Magic
Glue tiny neodymium magnets to the back of your finished charms to turn them into an adorable set of fridge magnets or planner clips.
Step 4: Painting and Finishing
-
Paint base details:
Using a fine brush, paint details like the white frosting on a heart or the inner lighter star on a star shape. I like to use a very steady hand here to keep lines crisp. -
Add cute faces:
Use a size 00 brush or a dotting tool to add tiny black eyes and simple mouth lines to the animal shapes and stars. Simple dots often look the cutest. -
Sprinkle details:
Paint tiny colored dashes on the donuts to represent sprinkles, or add small white dots to the eyes for a ‘kawaii’ sparkle effect. -
Seal it up:
Once the paint is fully dry, coat each charm with a layer of glossy varnish or UV resin. This protects the paint and gives them a ceramic-like shine.
Enjoy arranging your new collection of tiny treasures or packaging them up for a friend to discover