If you’re craving a cozy date night that actually leaves you with something cute to keep, mini clay projects are my go-to. I love ideas that feel low-pressure, look adorable even if they’re a little wonky, and come out as a matching set you can display at home.
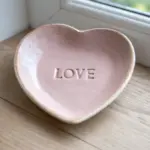
Matching Heart Trinket Dishes
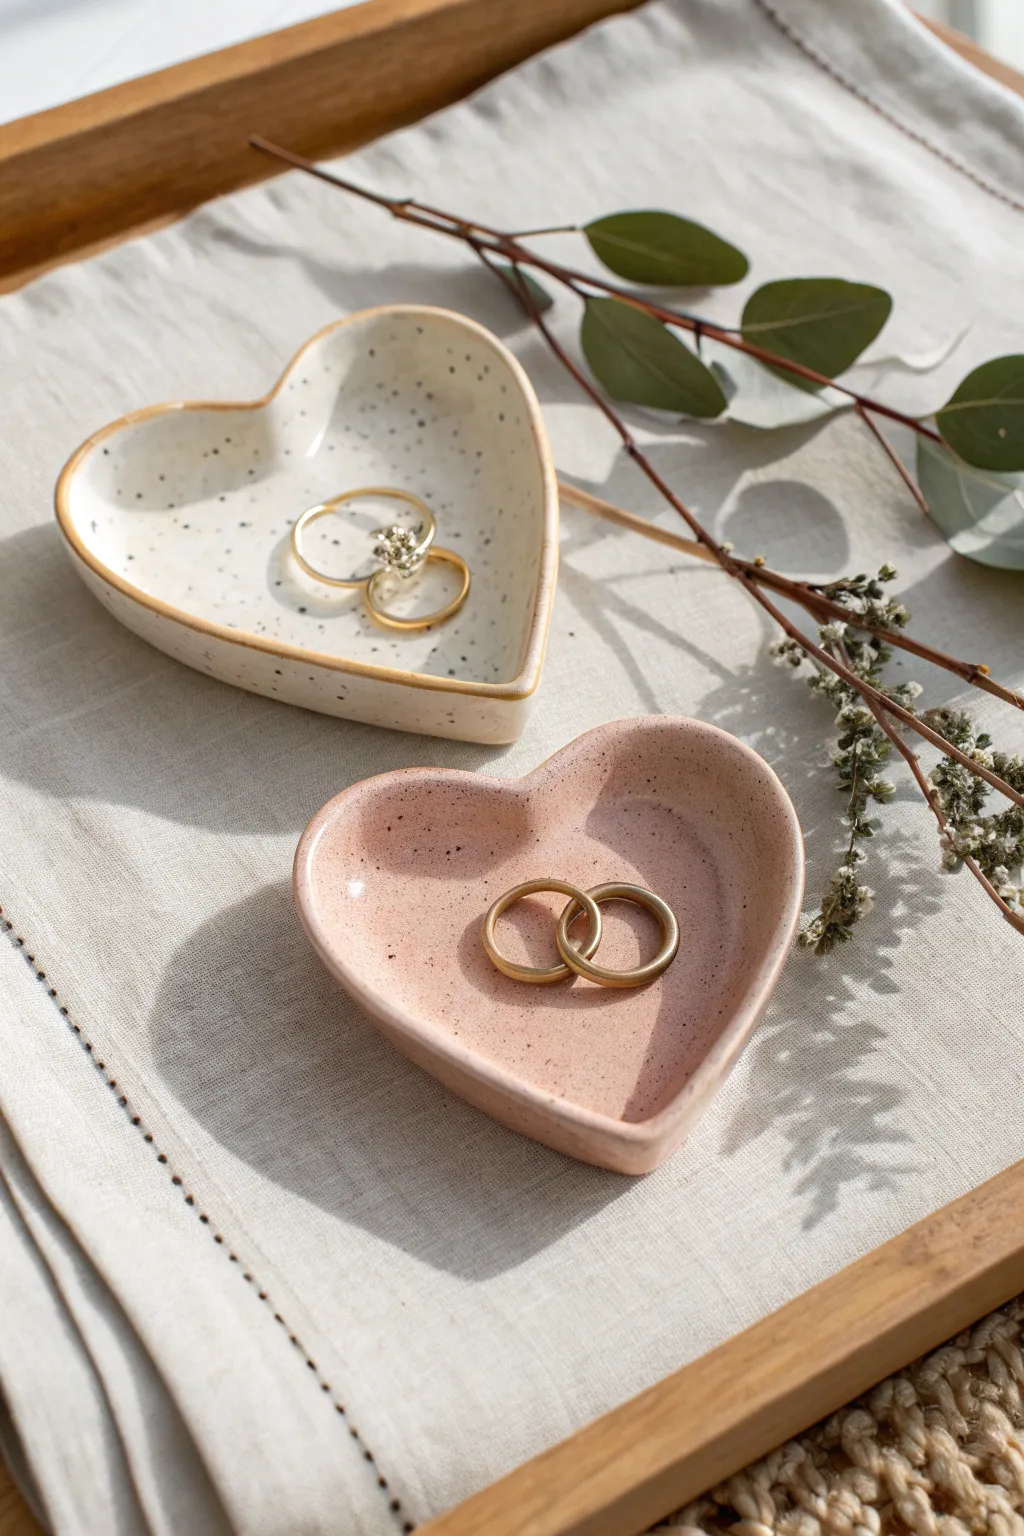
Create a pair of charming heart-shaped trinket dishes that perfectly nestle your rings and earrings. These speckled beauties have a high-end ceramic look but are easily crafted at home with simple clay techniques and a touch of paint.
Detailed Instructions
Materials
- White polymer clay or air-dry clay
- Rolling pin or acrylic roller
- Parchment paper or craft mat
- Heart-shaped cookie cutter (medium size)
- Sandpaper (fine grit)
- Acrylic paint (cream/off-white and dusty pink)
- Toothbrush or stiff bristle brush
- Brown acrylic paint (for speckles)
- Gold metallic paint (optional for rims)
- Gloss varnish or glaze
- Paintbrushes
- Small bowl of water
Step 1: Shaping the Hearts
-
Condition the Clay:
Begin by taking a chunk of your white clay and kneading it in your hands until it becomes soft, pliable, and free of cracks. Warm hands help speed up this process. -
Roll the Slab:
Place the conditioned clay on a piece of parchment paper to prevent sticking. Use your rolling pin to roll it out into an even slab, aiming for about 1/4 inch thickness. -
Cut the Shape:
Press your heart-shaped cookie cutter firmly into the clay slab. Wiggle it slightly before lifting to ensure a clean cut, then remove the excess clay around the shape. -
Soften the Edges:
If there are any rough or sharp edges from the cutter, dip your finger in a little water (or use cornstarch for polymer clay) and gently smooth the rim of the heart. -
Create the Curve:
To give the dish its concave shape, gently lift the edges of the heart upwards with your fingertips. I like to pinch the corners slightly to define the heart shape while curving the center downwards. -
Smooth the Interior:
Inspect the inside of the bowl for fingerprints. Use a smoothing tool or a damp finger to buff out any imperfections so the surface is perfectly sleek. -
Repeat the Process:
Follow the same steps to create your second heart dish, ensuring they are roughly similar in depth if you want a matching set. -
Final Cure or Dry:
If using polymer clay, bake according to the package instructions (usually 275°F for 15-30 mins). If using air-dry clay, let them sit undisturbed for 24-48 hours until fully hardened.
Clean Lines
To get the smoothest possible surface before painting on polymer clay, wipe the raw clay with a little nail polish remover (acetone) on a cotton pad to melt away fingerprints.
Step 2: Decorating & Finishing
-
Sanding:
Once fully cured and cooled, take fine-grit sandpaper and gently rub the edges and surface to remove any remaining bumps or roughness. -
Base Color Application:
Paint the first heart with a creamy off-white color. You may need two thin coats for full coverage, letting the first coat dry completely before applying the second. -
Second Color Application:
Paint the second heart with a dusty pink shade. Again, apply in thin, even layers to avoid globs or brushstrokes. -
Prepare the Speckle Paint:
Dilute a small amount of dark brown acrylic paint with a few drops of water. You want a watery, ink-like consistency. -
Splatter Technique:
Dip an old toothbrush into the watered-down brown paint. Hold it over the dishes and run your thumb across the bristles to flick tiny specks onto the clay. -
Controlled Splatter:
Practice the flicking motion on a scrap piece of paper first to control the size of the dots. Aim for a random, organic distribution across both hearts. -
Gilded Edge (Optional):
For the white heart, use a fine detail brush and metallic gold paint to carefully line the very top rim of the dish for an elegant finish. -
Sealing the Clay:
Once all paint layers are completely dry, apply a coat of gloss varnish or glaze. This protects the paint and gives the dishes that fired ceramic shine. -
Final Drying Time:
Allow the glaze to set fully according to the bottle’s instructions, usually overnight, before placing any jewelry inside.
Personalized Embossing
Before baking or drying the clay, use small alphabet stamps to press initials or a date into the center of the heart for a personalized anniversary gift.
Place these lovely dishes on your nightstand or vanity to keep your everyday jewelry safe and stylish


Tiny Initial Keychain Charms
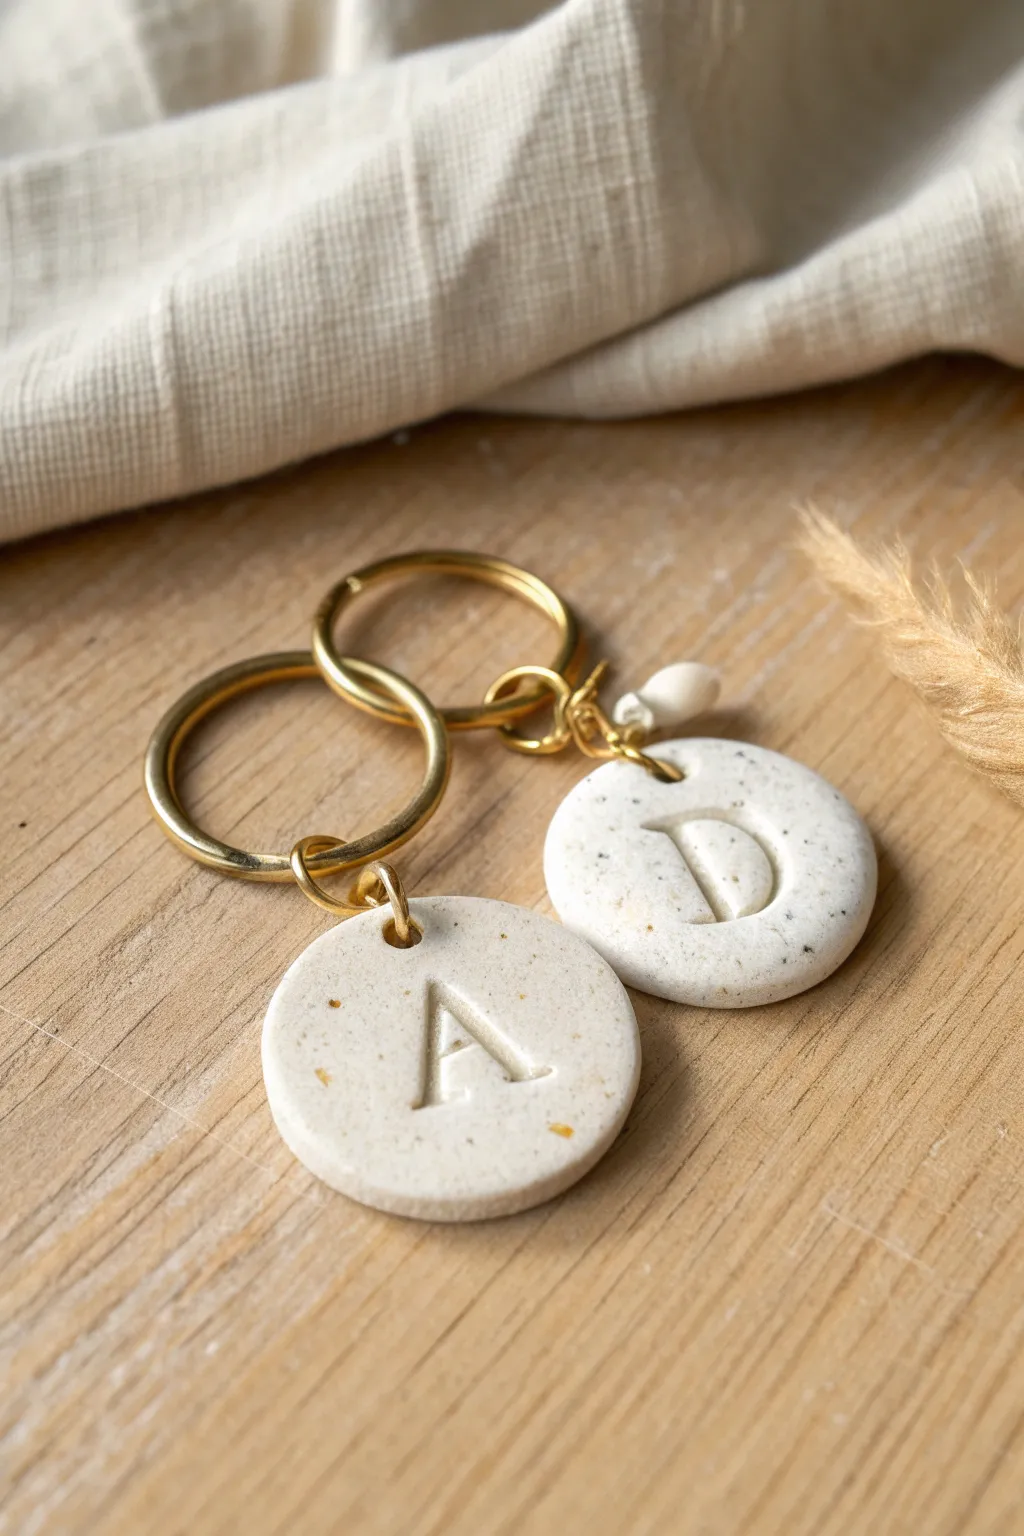
These minimalist keychains have a sophisticated faux-stone look that pairs perfectly with warm gold hardware. Using speckled polymer clay and simple letter stamps, you can create a personalized token that feels both modern and timeless.
Step-by-Step Guide
Materials
- White or cream speckled polymer clay (e.g., ‘granite’ or ‘sand’ effect)
- Gold foil flakes
- Rolling pin or acrylic clay roller
- Small circle cutter (approx. 1.5 inch)
- Letter stamps (serif font recommended)
- Gold jump rings (6mm or 8mm)
- Gold circle keyrings
- Hand drill or cocktail stick
- Pliers (flat nose and round nose)
- Oven and baking sheet
- Sandpaper (optional, fine grit)
Step 1: Prepping the Clay
-
Condition the clay:
Start by warming the speckled clay in your hands. Knead it thoroughly until it becomes soft, pliable, and easy to shape without cracking. -
Add gold flair:
Take a very small pinch of gold foil flakes. Gently mix them into the clay body so they are distributed throughout, but not completely pulverized—you want visible flecks. -
Roll it out:
Place the clay on a smooth, clean work surface. Use your acrylic roller to flatten the clay into an even slab. Aim for a thickness of about 4-5mm so the keychain feels substantial.
Stamp Stuck?
If your stamp sticks to the raw clay, lightly dust the stamp face with cornstarch or dip it in water before pressing it down. This acts as a release agent.
Step 2: Shaping and Stamping
-
Cut the circles:
Press your circle cutter firmly into the clay slab. Give it a tiny wiggle before lifting to ensure a clean cut, then carefully remove the excess clay from around the circles. -
Smooth the edges:
Pick up each clay disc gently and use your fingertip to lightly smooth the sharp edges created by the cutter. This gives it a more finished, stone-like appearance. -
Position the stamp:
Hover your chosen letter stamp over the center of the clay disc. Take your time to eyeball the alignment carefully before committing. -
Impress the letter:
Press the stamp straight down with firm, even pressure. You want a deep impression, but be careful not to push all the way through the clay. Lift the stamp straight up to avoid dragging the clay. -
Create the hole:
Use a cocktail stick or a straw to punch a hole near the top edge of the circle (above the letter). Make sure the hole is large enough to fit your jump ring comfortably.
Polished Stone Look
After baking, wet-sand the edges and surface with fine-grit sandpaper (1000+) under running water. Buff with a denim cloth for a smooth, professional sheen.
Step 3: Baking and Assembly
-
Bake firmly:
Transfer your clay pieces to a baking sheet lined with parchment paper. Bake according to your specific polymer clay package instructions (usually around 275°F/130°C for 15-30 minutes). -
Cool down:
Once baked, remove the tray from the oven and let the pieces cool completely. The clay hardens as it cools, so don’t test for firmness while it’s hot. -
Open the jump ring:
Using two pairs of pliers, grip a gold jump ring on either side of the split. Twist one hand forward and one backward to open the ring sideways (never pull it apart outwards). -
Attach to clay:
Slide the open jump ring through the hole you made in the clay disc. -
Connect the keyring:
Before closing the jump ring, slide the larger gold keyring onto it as well. I sometimes add a secondary smaller ring here for extra movement. -
Seal the ring:
Use your pliers to twist the jump ring back into a closed position, ensuring the two ends meet perfectly flush so the charm doesn’t slip off.
Now you have a chic, personalized accessory ready to gift or keep for your own keys


Mini Pinch Pots for Snacks
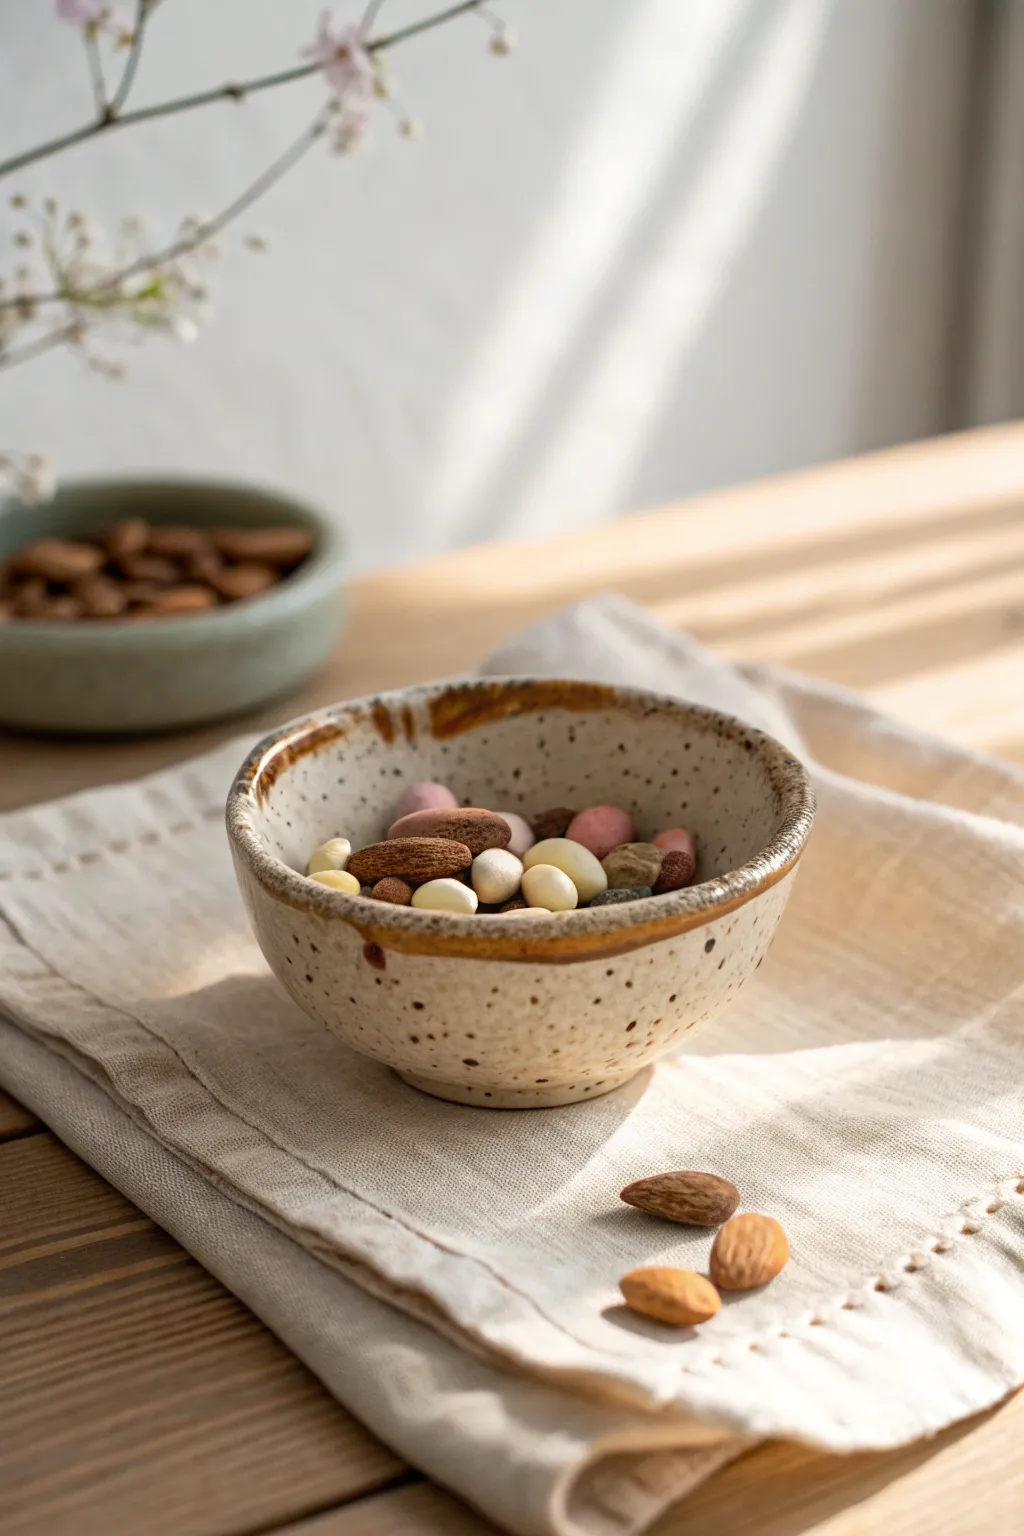
These charming mini pinch pots have a rustic, hand-thrown feel with their organic shape and warm, earthy glaze details. The speckled cream finish paired with a raw amber rim creates a cozy aesthetic perfect for holding small treats during your next movie night.
Step-by-Step
Materials
- White air-dry clay or polymer clay
- Rolling pin
- Canvas mat or parchment paper
- Small bowl of water
- Sponge
- Acrylic paints: cream/off-white, dark brown, caramel/amber
- Old toothbrush
- Fine detail paintbrush
- Gloss varnish or resin (food-safe if actually using with food packaging)
Step 1: Forming the Pinch Pot
-
Prepare the clay:
Start with a ball of white clay about the size of a tangerine. Knead it in your hands until it becomes warm and pliable to prevent cracking later. -
Start the pinch:
Hold the clay ball in one hand and press your thumb into the center, stopping just before you push through the bottom. -
Shape the walls:
Gently pinch the clay between your thumb and fingers, rotating the ball as you go to thin out the walls evenly. -
Widen the form:
Focus on pulling the walls outward slightly to create a gentle bowl shape rather than a tall cup. The rim should be slightly uneven for that organic look. -
Smooth the surface:
Dip your finger in a little water and run it over the exterior and interior to smooth out any distinct fingerprints, though leaving some texture adds character. -
Create the base:
Tap the bottom of the pot gently against your work surface to flatten it so the bowl sits stable and upright. -
Refine the rim:
Use a damp sponge to soften the top edge of the rim, ensuring it isn’t sharp or jagged. -
Dry thoroughly:
Let the clay dry completely according to package instructions. I like to flip it over halfway through the drying process to ensure the bottom dries evenly.
Splatter Control
Test your toothbrush splatter technique on a piece of scrap paper first to gauge how much water create the perfect fine mist versus large blobs.
Step 2: Glazing and Detailing
-
Base coat:
Paint the entire bowl, inside and out, with a creamy off-white acrylic paint. You may need two coats for full opacity. -
Prepare the speckle:
Dilute a small amount of dark brown paint with water until it’s fluid but not dripping. -
Apply speckles:
Dip an old toothbrush into the diluted brown paint. Hold it near the bowl and run your thumb across the bristles to flick tiny specks onto the surface. -
Control the density:
Rotate the bowl as you splatter, aiming for an even but random distribution. Wipe off any large accidental blobs with a damp paper towel immediately. -
Paint the rim:
Mix a caramel or amber color. Using a fine detail brush, paint a slightly thick, uneven line around the very top rim of the bowl. -
Add rim variation:
Let some of the rim color drip down the interior or exterior just a millimeter or two in random spots to mimic a melting glaze. -
Darken the rim:
If desired, tap a tiny bit of darker brown mainly on the very edge of the amber rim to add depth and a burnt-sugar look. -
Seal the piece:
Once all paint is bone dry, apply a high-gloss varnish to the entire piece. This mimics ceramic glaze. -
Final cure:
Allow the varnish to cure fully before placing any items inside. If using air-dry clay, remember this is for dry snacks only.
Faux Ceramic Texture
Mix a tiny pinch of sand or baking soda into your cream base paint to give the bowl a gritty, stoneware texture before sealing it.
Enjoy styling your new handmade bowl with colorful treats for a cozy evening in


Two-Part Puzzle Piece Charms

These two coordinating puzzle piece charms are the perfect symbol of connection, fitting together seamlessly just like you and your partner. Crafted from polymer clay in complementary cream and terracotta tones, they feature delicate faux-stitching details and elegant gold hardware.
Step-by-Step Guide
Materials
- Polymer clay (cream/beige)
- Polymer clay (terracotta or reddish-brown)
- Rolling pin or clay machine
- Puzzle piece cookie cutter (or a printed template and craft knife)
- Needle tool or toothpick
- Small dotting tool or ball stylus
- Gold rolling tool or textured wheel (optional, for stitching lines)
- Small round cutter (for jump ring hole)
- Two gold keychains with chains
- Four gold jump rings (large enough to fit the clay thickness)
- Jewelry pliers
- Baking sheet and parchment paper
- Sandpaper (fine grit, optional)
- Gloss or matte varnish (optional)
Step 1: Preparation & Cutting
-
Condition the clay:
Begin by thoroughly kneading your cream and terracotta clay blocks separately until they are soft, pliable, and free of any air bubbles. Hand warmth helps speed this up. -
Roll out slabs:
Roll each color of clay into a smooth, even slab about 1/4 inch (6mm) thick. You want them thick enough to be durable as keychains but not clumsy. -
Cut the shapes:
Use your puzzle piece cutters to press into the clay. If you don’t have a cutter, print a puzzle template on paper, place it over the clay, and carefully trace around it with a sharp craft knife. -
Ensure fit:
Before texturing, gently slide the two clay pieces together on your work surface to ensure they interlock correctly. Adjust any edges with your finger if necessary. -
Smooth the edges:
Use your fingertip, dipped slightly in cornstarch or water, to gently round off the sharp cut edges of the clay for a more finished, professional look.
Clean Cuts Pro Tip
Place a sheet of plastic wrap over the clay before using your cutter. This creates a beautifully domed, rounded edge instantly, saving you time simply smoothing them later.
Step 2: Adding Texture & Detail
-
Create the stitch lines:
Using a needle tool or a specialized texture wheel, press a line of small dashes across the surface of the puzzle pieces to mimic fabric stitching. -
Add geometric patterns:
On the cream piece, create triangular patterns using the needle tool. Press gently to indent the clay without dragging through it. -
Detail with dots:
Take your small dotting tool and press tiny circles into the corners or along the stitch lines for added visual interest. -
Pierce the hardware hole:
Use a small straw or a tiny round cutter to create a hole near the top edge of each piece. Make sure not to place it too close to the edge to prevent breakage later. -
Final inspection:
Check your work for any accidental fingerprints. I like to lightly brush the surface with a soft brush specifically to smooth these out before baking.
Step 3: Baking & Assembly
-
Bake the clay:
Place your pieces on a parchment-lined baking sheet. Bake according to your specific brand’s package instructions (usually around 275°F/135°C for 15-30 minutes). -
Cool down:
Let the pieces cool completely on the tray. Polymer clay is slightly soft when hot and hardens as it cools. -
Sand edges (optional):
If there are any rough spots on the sides, gently sand them with fine-grit wet/dry sandpaper under running water. -
Seal (optional):
For extra durability, you can apply a thin coat of matte or gloss varnish, though the raw clay finish has a lovely, natural stone look. -
Open the jump rings:
Using two pairs of jewelry pliers, twist the jump rings open laterally (front to back, never pulling apart). -
Attach the hardware:
Thread a jump ring through the hole in the clay piece, then loop the keychain end onto the ring before closing it securely with the pliers.
Avoid Distortions
If your puzzle pieces warp while lifting them, bake them directly on the tile or glass work surface you cut them on. Moving soft clay often ruins the precise fit.
Now you have a charming set of keepsakes ready to share on your next date night

The Complete Guide to Pottery Troubleshooting
Uncover the most common ceramic mistakes—from cracking clay to failed glazes—and learn how to fix them fast.
Mini Photo Holder Stands
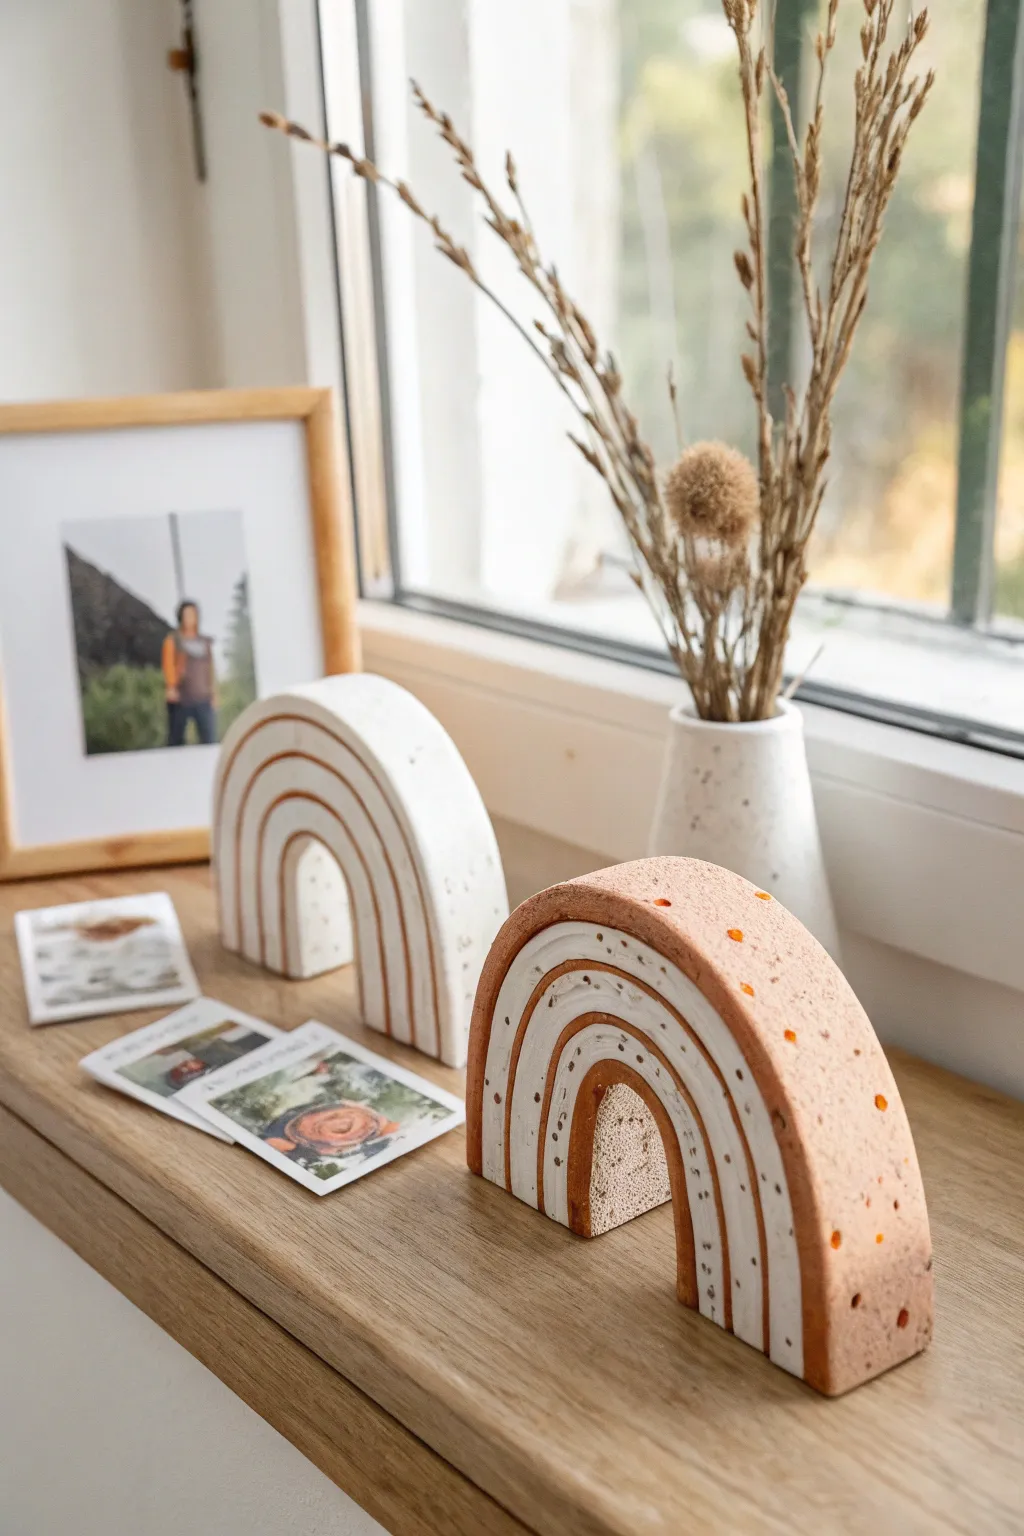
These charming, earthy rainbows double as minimalist photo holders or standalone bookshelf decor. With their organic textures and subtle speckled patterns, they bring a warm, handcrafted feel to any vignette.
Step-by-Step Tutorial
Materials
- Air-dry clay (white and terracotta/red tones)
- Rolling pin
- Clay knife or craft blade
- Small bowl/jar (as a cutting template)
- Texturing tools (toothpick, old toothbrush, or needle tool)
- Fine-grit sandpaper
- Acrylic paints (white, rust brown, mustard)
- Fine detail paintbrush
- Small sponge (optional)
- Water cup
Step 1: Shaping the Arches
-
Roll the slab:
Begin by rolling out a thick slab of air-dry clay, aiming for approximately 1 inch in thickness. This substantial width allows the rainbow to stand upright securely without tipping over. -
Cut the outer shape:
Use a round bowl or jar as a guide to cut a clean semi-circle for the top of your rainbow. Use your clay knife to cut straight down the sides to form the legs of the arch. -
Create the inner arch:
Use a smaller circular object or freehand a smaller semi-circle at the bottom center to create the negative space of the rainbow legs. -
Smooth the edges:
Dip your finger in a little water and run it along all cut edges to soften sharpness. Since air-dry clay can be brittle, smoothing cracks now prevents issues later. -
Make the second arch:
Repeat the process with a contrasting clay color (or the same color if painting later) to make a pair. Varying the height slightly adds visual interest to the set. -
Create the photo slot:
Using a knife or a thin ruler, press a slot into the very top center of the arch. Ensure it is deep enough to hold a photo but not deep enough to split the clay.
Cracking Up?
If cracks appear while drying, don’t panic. Mix a tiny bit of fresh clay with water to make a ‘slip’ paste and fill the cracks, then sand smooth once dry.
Step 2: Adding Texture & Dots
-
Incise the lines:
While the clay is still damp, use a needle tool or the back of a knife to gently carve concentric arched lines into the face of the sculpture, mimicking rainbow stripes. -
Add dimpled texture:
For the rust-colored arch, take a rounded tool end or a toothpick and press small, random divots all over the outer ‘stripe’ and the sides. This creates that lovely porous look. -
Sponge texture:
I find using a dry, coarse sponge pressed gently onto the clay surface gives it a fantastic stone-like grit, especially on the lighter-colored arch. -
Dry completely:
Place the arches upright on a wire rack to dry. Depending on thickness and humidity, this can take 24 to 48 hours. Rotate them occasionally for even drying.
Level Up: Note Holder
Embed a coiled wire alligator clip into the top of the wet clay instead of cutting a slot. This holds photos higher up and adds a fun mixed-media element.
Step 3: Refining & Painting
-
Sand imperfections:
Once fully dry, lightly sand the bottom to ensure it sits perfectly flat. You can also smooth out any rough burs on the curved edges. -
Paint the stripes:
Using a fine detail brush, paint inside the carved grooves. Use white paint on the rust clay for high contrast, and a warm brown on the white clay. -
Highlight the dots:
For the rust arch, dip a toothpick into bright orange or mustard paint and fill in the small dimples you pressed earlier to make them pop. -
Add speckles:
Mix a little brown paint with water. Dip a stiff brush (like a toothbrush) in it and flick the bristles to spray fine speckles over the white arch for a ceramic glaze effect. -
Paint the inner arch:
Paint the recessed inner wall of the small arch cutout in a contrasting color—like rust on the white rainbow—to add depth. -
Seal (Optional):
If you want a polished look, apply a matte varnish. However, leaving the clay raw preserves that beautiful, chalky texture seen in the photo.
Slide your favorite polaroid into the slot and enjoy your custom display piece
Stamped Love Note Tiles
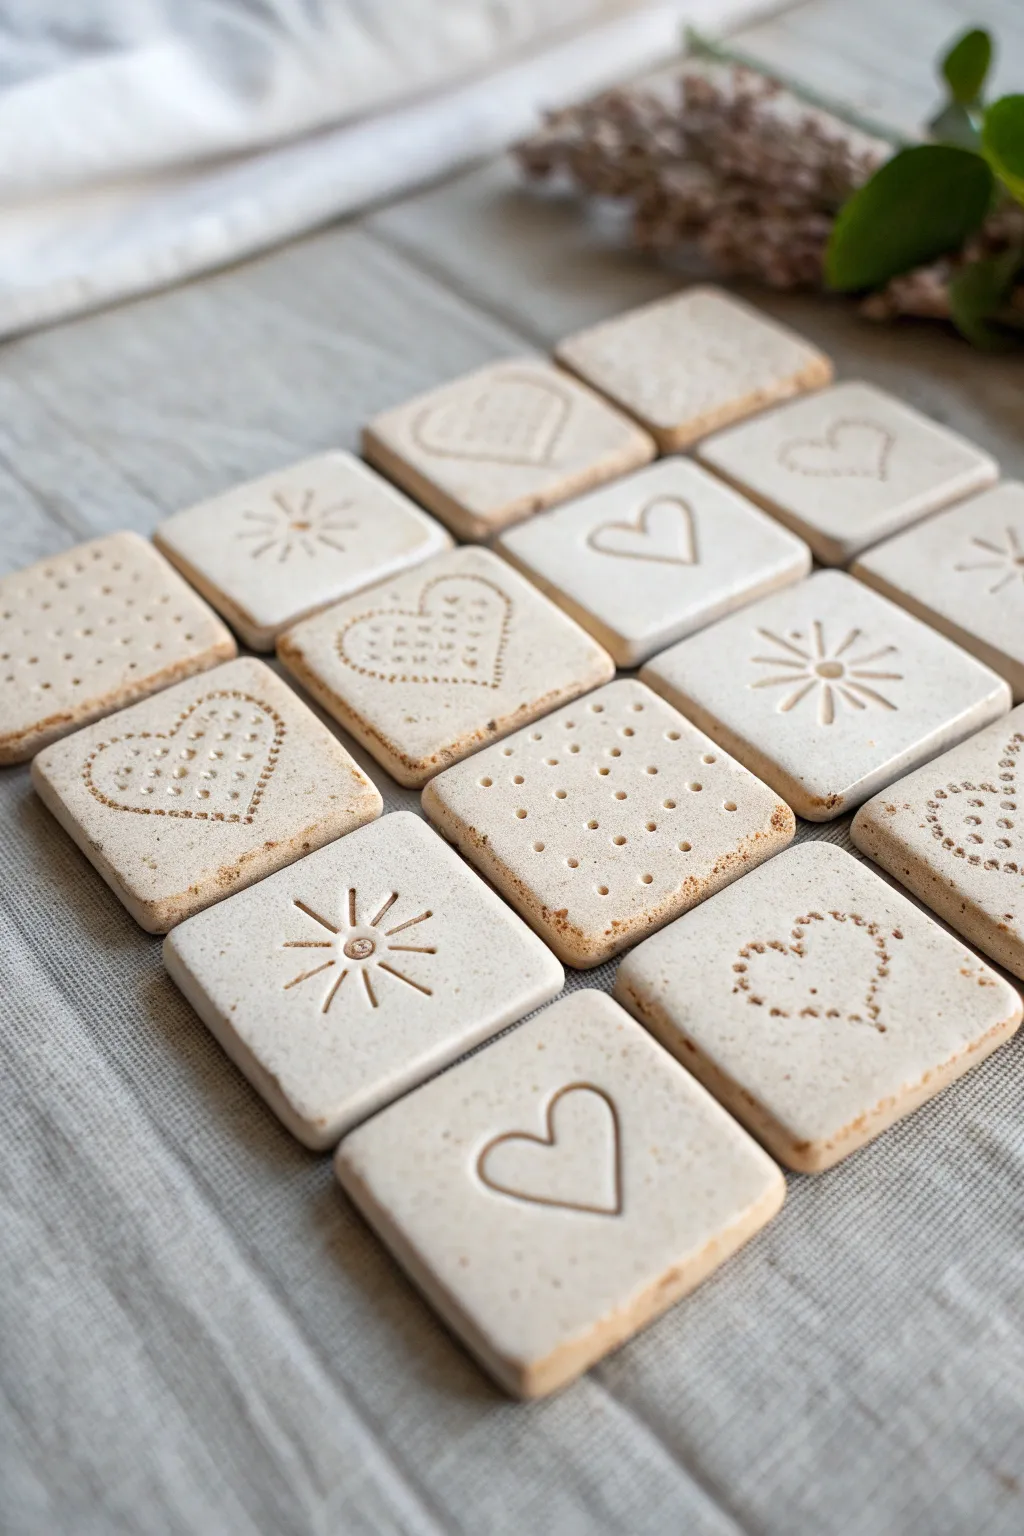
Create a tactile collection of rustic, memory-keeping love tokens that feel like artifacts from your relationship. These stoneware-style clay tiles feature simple, heartwarming symbols stamped directly into their surface, forming a beautiful grid of shared moments.
Step-by-Step Guide
Materials
- White or speckled air-dry clay (or polymer clay)
- Rolling pin
- Square cookie cutter (approx. 1.5 – 2 inches)
- Texture stamps (wooden block stamps work best)
- Toothpick or skewer
- Fine-grit sandpaper
- Brown acrylic paint or antique wax (optional for distressing)
- Matte spray sealant
- Clean work surface or silicone mat
Step 1: Preparation & Cutting
-
Condition the Clay:
Start by taking a manageable chunk of your clay. Knead it in your hands for a few minutes to warm it up and ensure it’s pliable and free of air bubbles. -
Roll to Thickness:
Place the clay on your work surface. Using the rolling pin, roll the clay out into an even slab. Aim for a thickness of about 1/4 inch (6mm) to give the tiles a substantial, high-quality feel. -
Cut Squares:
Using your square cookie cutter, firmly press down into the slab to cut out your shapes. Make as many as you can fit. -
Refine Edges:
Gently lift the squares. If the edges are ragged, smooth them lightly with your finger or a slightly damp sponge to round them off just a touch.
Cracked Edges?
If clay cracks while stamping, it’s too dry. Dip your fingertip in water and smooth the crack, or spritz the slab before cutting.
Step 2: Stamping Designs
-
Test Pressure:
Before stamping your good tiles, test your stamps on a scrap piece of clay to determine how hard you need to press to get a crisp impression. -
Create Sunbursts:
For the sunburst design, use a stamp or manually create the look. Press a small circle tool in the center, then use the edge of a credit card or a knife to gently indent radiating lines. -
Stamp Outlines:
Press a heart-shaped outline stamp firmly into the center of several tiles. Ensure the impression is deep enough to catch shadows. -
Dotted Technique:
For the dotted hearts, lightly sketch the heart shape with a needle tool first. Then, use a blunt toothpick to press purposeful dots along that guide line, spacing them evenly. -
Dot Grids:
Create the grid pattern by gently pressing the toothpick into the clay in straight rows. I find using a ruler as a visual guide helps keep these rows tidy without marking the clay.
Step 3: Finishing Touches
-
Dry Completely:
Arranged the stamped tiles on a flat board lined with parchment paper. Let them air dry for 24-48 hours, flipping them once halfway through to prevent warping. -
Sand Smooth:
Once bone dry, take fine-grit sandpaper and very gently buff the edges and surface to remove any burrs or sharp points. -
Optional Aging:
To mimic the speckled, toasted look in the photo, dilute a tiny drop of brown paint with water. Flick a toothbrush dipped in this mixture over the tiles for a speckled effect. -
Highlight Texture:
You can also rub a small amount of antique wax or diluted brown paint into the stamped grooves, then wipe the surface clean immediately with a damp cloth, leaving the color only in the recesses. -
Seal:
Finish by spraying a light coat of matte sealant over the tiles. This protects the clay from moisture and gives them a professional, ceramic-like finish.
Make Them Magnetic
Glue round ceramic magnets to the back of the finished, dry tiles to turn your love tokens into a custom refrigerator art installation.
Display your collection on a coffee table or keep them in a small pouch for a sentimental game


What Really Happens Inside the Kiln
Learn how time and temperature work together inside the kiln to transform clay into durable ceramic.
Mini Food Magnets You Share
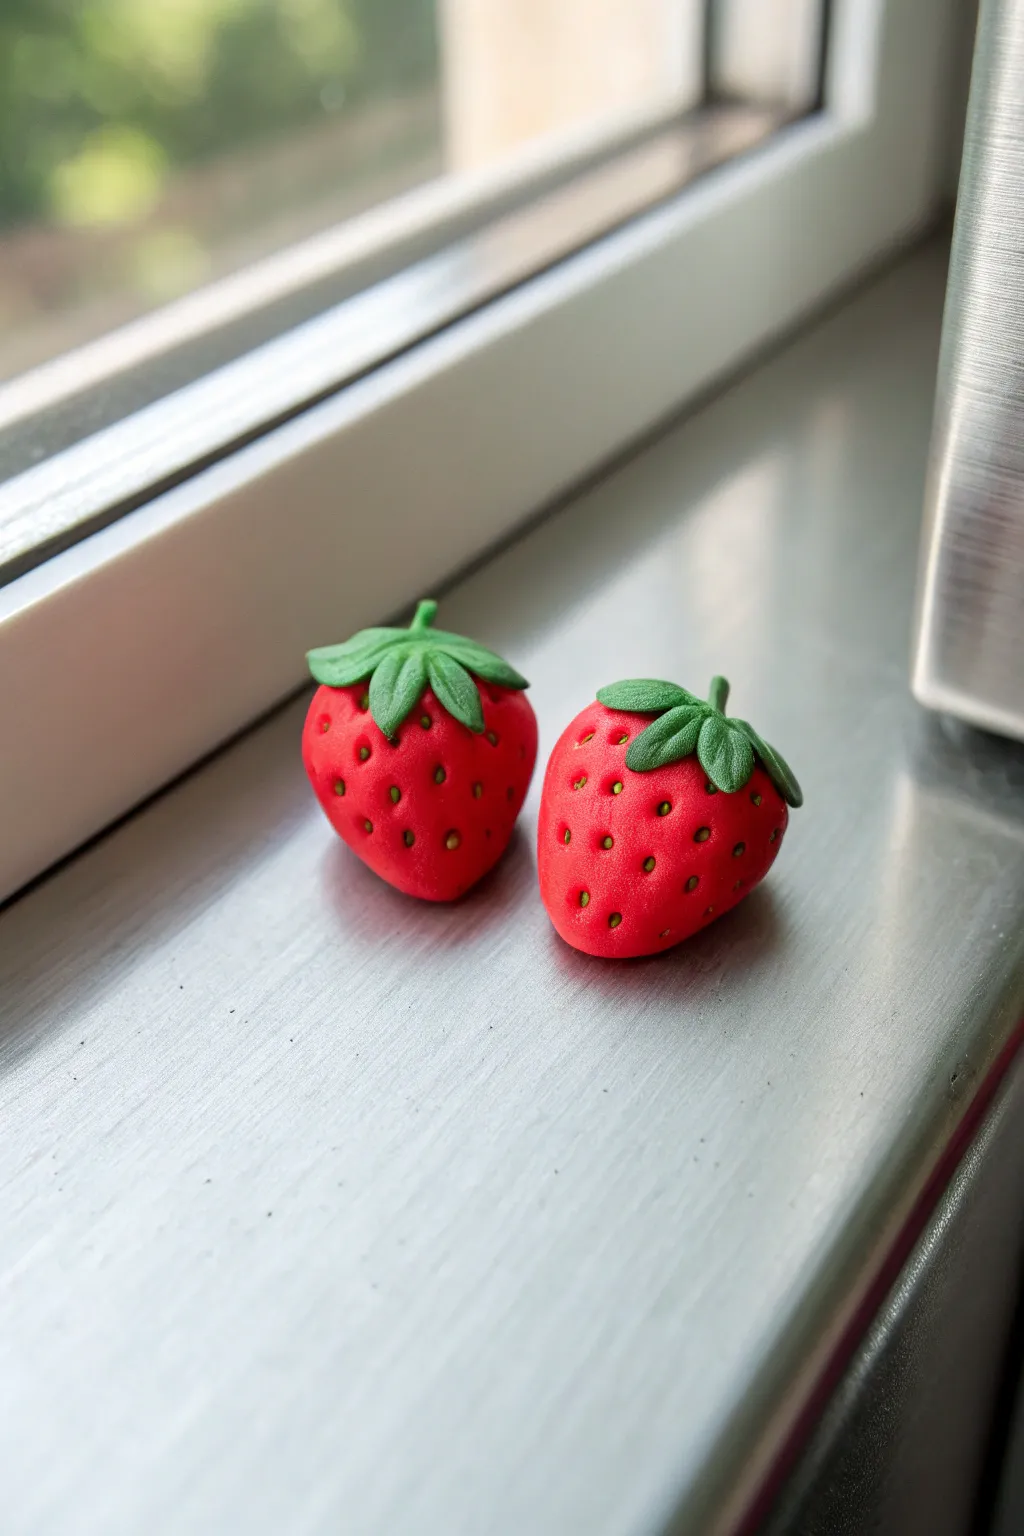
These charming little strawberry magnets are the perfect bite-sized project for a creative date night. Their vibrant red finish and delicate green leaves offer a realistic touch that will brighten up any fridge or magnetic board.
Step-by-Step Tutorial
Materials
- Red polymer clay
- Green polymer clay
- Liquid polymer clay (optional, for adhesion)
- Needle tool or toothpick
- Small dotting tool
- Acrylic rolling pin
- Yellow or light green acrylic paint
- Small magnets
- Super glue (cyanoacrylate)
- Gloss glaze (optional)
Step 1: Shaping the Berry Body
-
Condition the clay:
Start by warming up your red polymer clay in your hands. Knead it thoroughly until it is soft, pliable, and free of cracks. -
Form the basic shape:
Divide the clay into two equal portions about the size of a large marble. Roll each piece into a smooth ball between your palms. -
Refine the strawberry shape:
Gently pinch one side of the ball while rolling it to create a tapered bottom, forming a rounded cone or teardrop shape. Flatten the top slightly where the leaves will sit. -
Flatten the back:
Press the back of each strawberry gently against your work surface. Since these will be magnets, you need a flat, stable surface for the magnet to attach to later.
Step 2: Adding Seeds and Texture
-
Create seed indentations:
Using a needle tool or a very small dotting tool, gently press tiny holes all over the surface of the red clay. Avoid the very top where the leaves will go. -
Refine the seed placement:
Try to stagger the indentations rather than placing them in straight rows; a random but evenly distributed pattern looks more organic and natural. -
Soften the edges:
If the clay displaced by the needle created tiny raised ridges, very lightly tap them down with your fingertip so the surface remains smooth.
Seed Tip
Make your seed indentations slightly deeper than you think necessary. Glaze can pool in shallow holes and obscure the texture later.
Step 3: Crafting the Calyx (Leaves)
-
Prepare the green clay:
Condition a small amount of green clay. Roll it flat using your acrylic rolling pin until it is quite thin, about 1-2mm. -
Cut the leaf shapes:
You can use a tiny star cutter if you have one, or simply use a craft knife or needle tool to freehand cut small star shapes with 5 or 6 points. -
Texture the leaves:
Before attaching them, press the side of your needle tool into the center of each leaf point to create a subtle central vein texture. -
Shape the stem:
Roll a tiny snake of green clay for the stem. Cut a very short segment, just a few millimeters long, to attach to the center of the leaves.
Make it a Gift
Create a whole basket’s worth and package them in a mini wooden berry crate. It makes an adorable housewarming gift.
Step 4: Assembly and Finishing
-
Attach the leaves:
Place the green star shape onto the broad top of your red strawberry. Gently press the center down so it adheres. -
Drape the leaves:
Curving the leaf tips down onto the red body gives it a ripe look. A tiny dab of liquid clay can help them stick securely if the clay feels dry. -
Attach the stem:
Place your tiny stem segment right in the center of the leaves, blending it slightly at the base with your needle tool so it doesn’t fall off. -
Bake the clay:
Bake the strawberries according to your clay manufacturer’s instructions (usually around 275°F or 130°C for 15-30 minutes). Let them cool completely. -
Paint the seeds:
For extra realism, dab a tiny amount of watered-down yellow or light green paint into the seed indentations, then wipe the surface clean with a damp paper towel so paint only remains in the holes. -
Magnitize:
Once any paint is dry, use super glue to attach a strong magnet to the flat spot on the back of each strawberry. -
Add a glossy finish:
I prefer to brush a coat of gloss glaze over just the red part of the fruit to make it look juicy, leaving the leaves matte for contrast.
Now you have a pair of sweet, everlasting strawberries to hold your favorite photos on the fridge
Tiny Succulent Buddy Planters
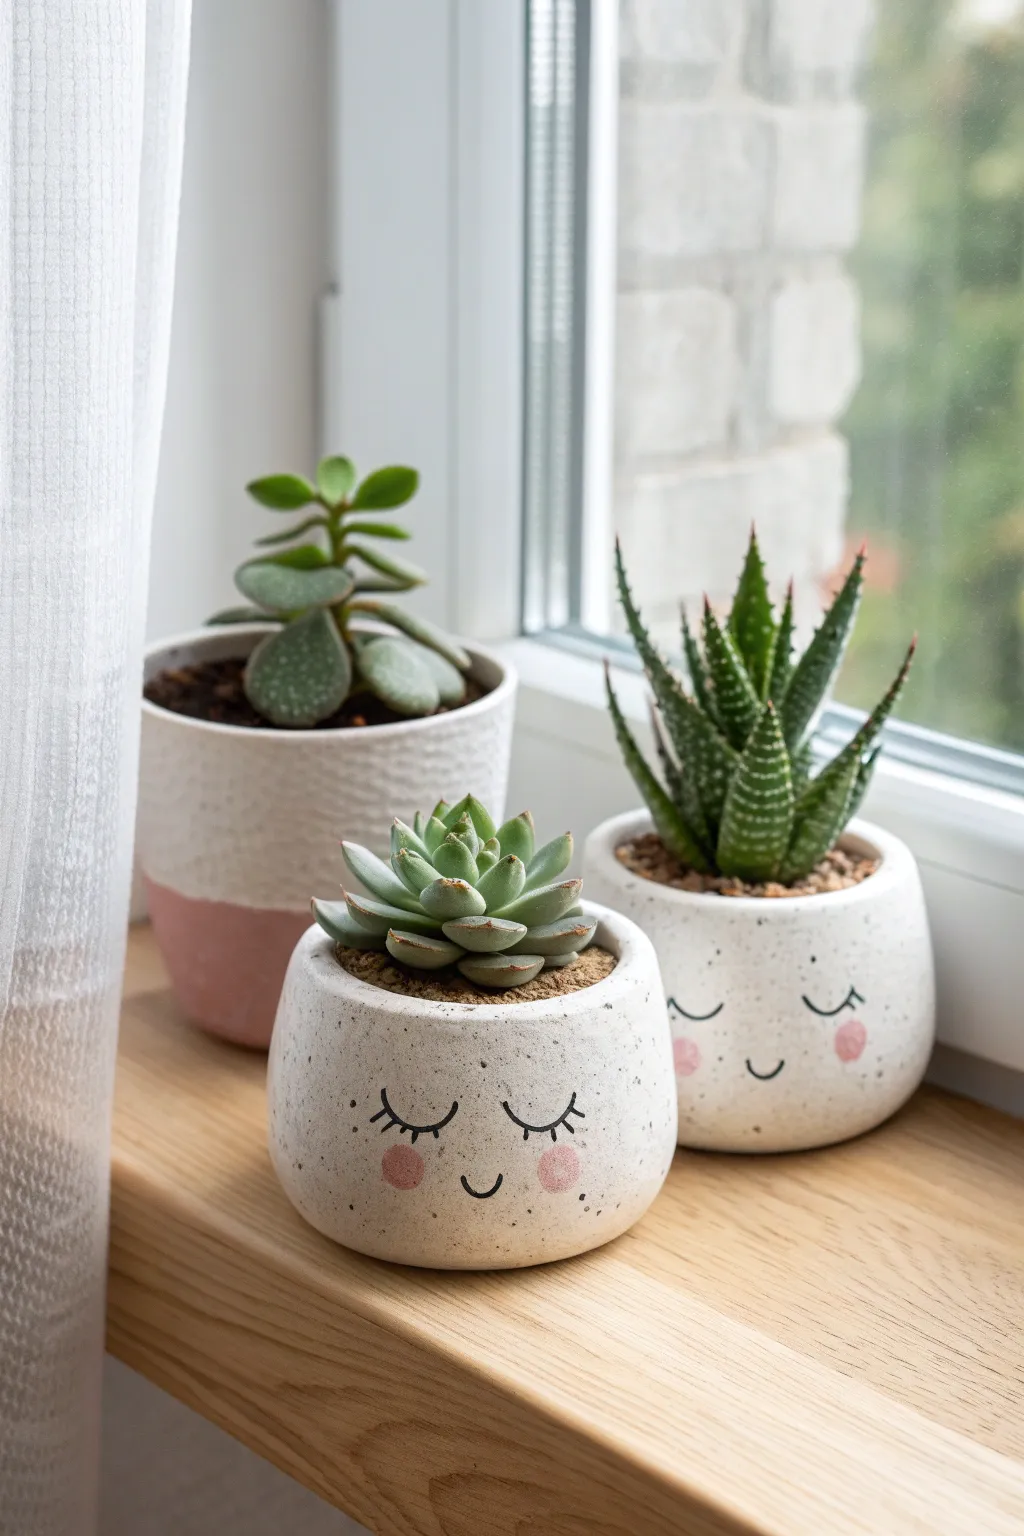
Transform plain mini planters into charming little characters with just a few simple painted details. These sweet, speckled pots with sleepy faces add a touch of whimsy to any succulent collection and make for a perfect, low-stress date night project.
Step-by-Step
Materials
- Small rounded ceramic pots (white or cream)
- Black acrylic paint or fine-point multi-surface marker
- Pink acrylic paint
- Grey or taupe acrylic paint
- Old toothbrush
- Small round sponge applicator or cotton swab
- Fine detail paintbrush
- Clear matte sealant spray
- Newspaper or drop cloth
- Paper palette or cardboard scrap
- Water cup and paper towels
Step 1: Preparation & Texture
-
Clean surface:
Begin by wiping down your ceramic pots with a damp cloth to remove any dust or oils. Let them dry completely, as paint won’t adhere well to a damp surface. -
Prepare the speckle mix:
Squeeze a small amount of grey or taupe acrylic paint onto your palette. Add a few drops of water to thin it down until it reaches an inky consistency. -
Load the tool:
Dip just the tips of an old toothbrush into your thinned paint. Tap off the excess on a paper towel; you don’t want it dripping wet. -
Apply the speckles:
Hold the toothbrush about 6 inches away from the pot. Run your thumb across the bristles to flick tiny droplets of paint onto the ceramic. I like to rotate the pot slowly to ensure even coverage. -
Dry time:
Let the speckled texture dry completely before moving on to the faces. This usually takes about 10-15 minutes.
Step 2: Painting the Faces
-
Draft the face:
Lightly sketch the position of the eyes and mouth using a pencil. Aim for the lower third of the pot to give it that cute, chubby look. -
Draw the lashes:
Using a fine detail brush loaded with black paint (or a multi-surface marker), carefully paint two U-shaped curves for closed eyes. -
Add details:
Add three small ticks to the outer corner of each eye curve to create sleepy eyelashes. -
Create the smile:
Paint a small, simple U-shape centered between and slightly below the eyes for a content little smile. -
Prepare cheek color:
Mix a soft pink acrylic paint. If the pink is too bright, tone it down with a tiny dot of white or the leftover taupe from your speckles. -
Apply cheeks:
Dip a round sponge applicator or a cotton swab into the pink paint. Blot off the excess on paper first to prevent a glob. -
Stamp the blush:
Press the sponge gently onto the pot, just outside and slightly below the eyes, to create rosy cheeks. Use a dab-and-lift motion rather than wiping. -
Clean up:
If you made any mistakes with the cheeks, quickly wipe them away with a damp Q-tip before the paint sets.
Uneven Speckles?
If you get a large blob of paint while flicking the toothbrush, wipe it away instantly with a wet cloth and retry. Practice flicking on paper first.
Step 3: Finishing
-
Final dry:
Allow the painted faces to dry for at least an hour to ensure the acrylic is fully set. -
Seal the art:
In a well-ventilated area, spray the pots with a thin coat of clear matte sealant. This protects the paint from water damage when you water your plants. -
Planting:
Once the sealant is dry, gently re-pot your succulents into their new homes, adding fresh cactus soil if needed.
Customize It
Give your planters personality by painting tiny glasses on one, or adding freckles across the nose area using a brown fine-tip marker.
Enjoy the calm atmosphere these little planter buddies bring to your windowsill or desk

TRACK YOUR CERAMIC JOURNEY
Capture glaze tests, firing details, and creative progress—all in one simple printable. Make your projects easier to repeat and improve.
Mini Tea Light Holders
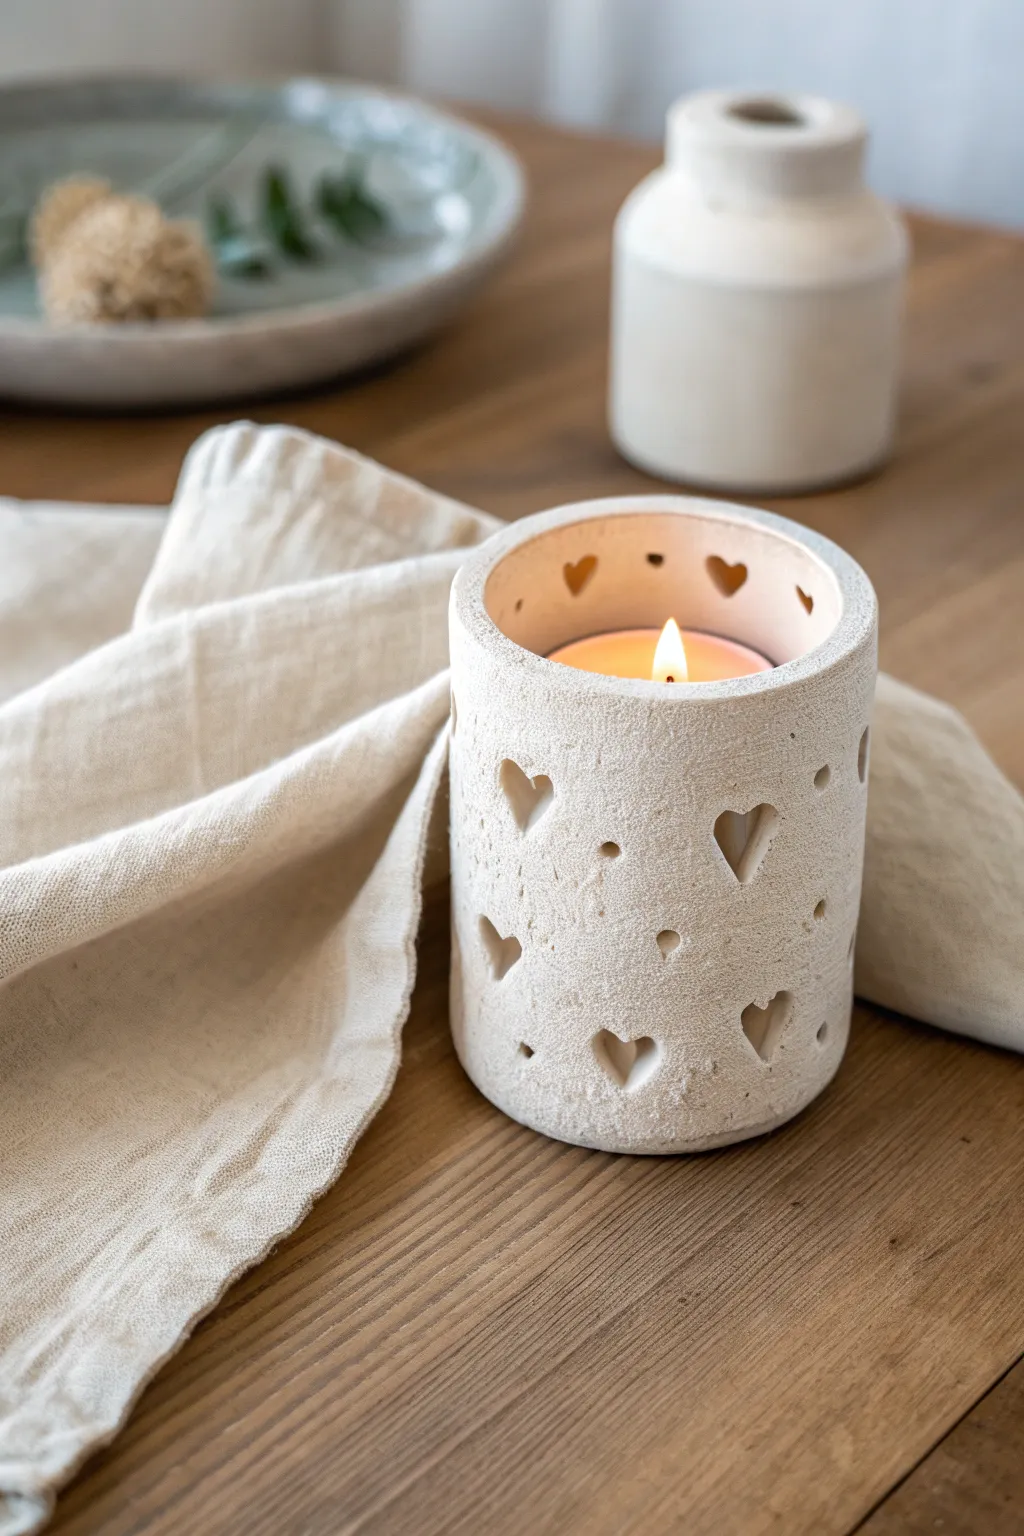
Create a cozy amosphere with this textured, stone-effect tea light holder featuring delicate heart cutouts. This simple slab-building project results in a charmingly rustic vessel that casts romantic shadows perfect for date night.
How-To Guide
Materials
- White or cream air-dry clay (or polymer clay with stone effect)
- Rolling pin
- Parchment paper or canvas mat
- Sharp craft knife or scalpel
- Small heart-shaped cutter (approx. 0.5 inch)
- Drinking glass or cylinder mold (approx. 3-inch diameter)
- Texture tool (old toothbrush or coarse sandpaper)
- Small straw or cocktail stick
- Ruler
- Slip (water mixed with clay) or clay glue
- Fine sandpaper
- Matte sealant or varnish
Step 1: Preparing the Slab
-
Condition the clay:
Begin by kneading your clay until it is soft, pliable, and free of cracks. If the clay feels too dry, add a tiny drop of water to your hands. -
Roll it out:
Roll the clay onto your parchment paper to an even thickness of about 1/4 inch (6mm). Using depth guides or rulers on either side of the clay helps keep the thickness consistent. -
Add texture:
Before cutting the shape, use an old toothbrush, a piece of coarse sandpaper, or a crumpled ball of aluminum foil to gently tap texture into the surface. This gives it that lovely stone-like finish shown in the photo. -
Measure and cut:
Wrap a piece of paper around your cylinder mold to determine the circumference needed. Lay this paper template on your clay and cut a rectangular strip. Add an extra 1/4 inch to the length for the overlap seam.
Slumping Clay?
If the walls sag when you stand the cylinder up, the clay is too wet. Let the flat slab sit for 15-20 minutes to firm up (leather hard) before rolling it into a tube.
Step 2: Creating the Design
-
Plan the hearts:
Lay the clay strip flat. Gently press your heart cutter onto the surface just enough to leave an impression, arranging them randomly but evenly spacing them out. -
Make the cutouts:
Press the heart cutter all the way through the clay slab. If the clay sticks inside the cutter, gently push it out. Clean up any rough edges with a damp finger or a clay tool. -
Add detail holes:
Using a small straw or the blunt end of a skewer, punch small circular holes in the empty spaces between the hearts to add variety to the light pattern. -
Smooth the edges:
Run a damp finger along the top and bottom edges of your rectangle to soften the sharpness before assembly.
Step 3: Assembly and Finishing
-
Score the ends:
Use your craft knife to make cross-hatch scratches (scoring) on the two short ends of the rectangle where they will join—one side on the front, one side on the back. -
Apply slip:
Dab a little clay slip or water onto the scored areas to act as glue. -
Form the cylinder:
Carefully lift the clay strip and wrap it around your glass or mold. If sticking to the mold is a concern, wrap the mold in parchment paper first. -
Seal the seam:
Press the overlapping ends together firmly. I like to use a wooden modeling tool to blend the clay across the seam so it becomes invisible. Re-texture this area to match the rest of the holder. -
Create the base:
Cut a circle of clay slightly smaller than the cylinder’s diameter. Place the cylinder on top of this circle and blend the clay from the outside wall down onto the base to secure it. -
Refine the rim:
Check the top rim is level. If needed, gently tap the inverted holder on a flat table to straighten the top edge. -
Allow to dry:
Let the piece dry slowly away from direct heat for 24-48 hours. Turn it occasionally so it dries evenly.
Clean Cuts
dip your cutters in cornstarch or baby powder before pressing into the clay. This prevents sticking and ensures crisp, sharp edges without distortion.
Step 4: Final Touches
-
Sand imperfections:
Once fully dry and hard, use fine-grit sandpaper to smooth any sharp burrs around the heart cutouts or the rim. -
Seal the piece:
Apply a coat of matte varnish or sealant to protect the clay and enhance the stone texture. Let this cure completely before placing a tea light inside.
Light a candle inside and enjoy the warm glow of your handmade creation
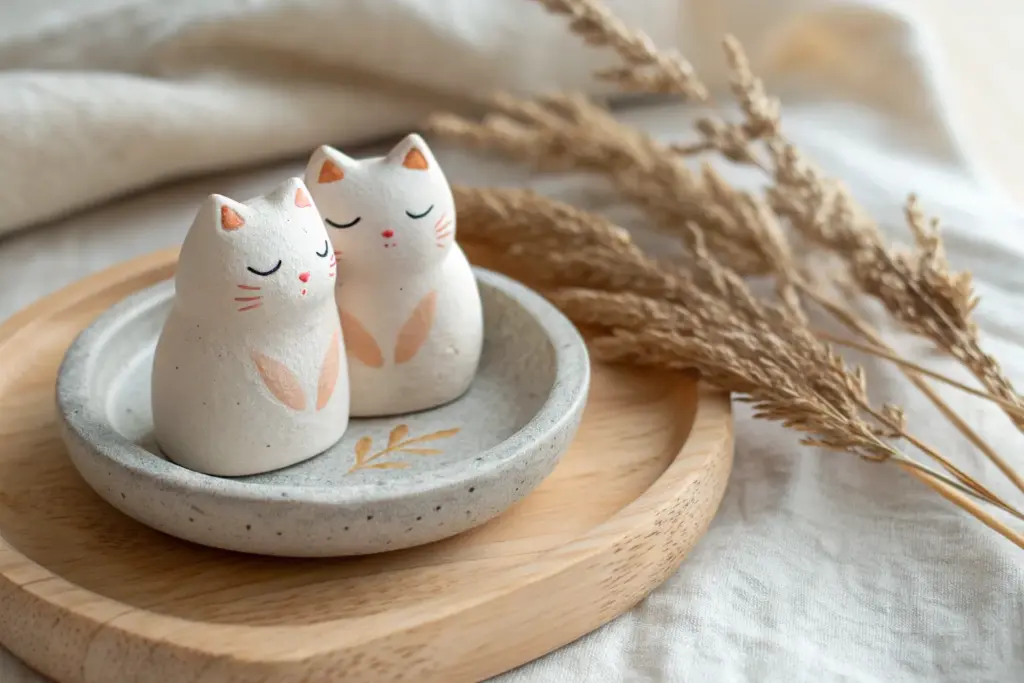
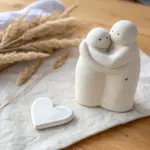
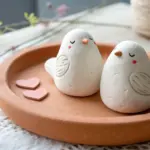
Cute Couple Animal Minis
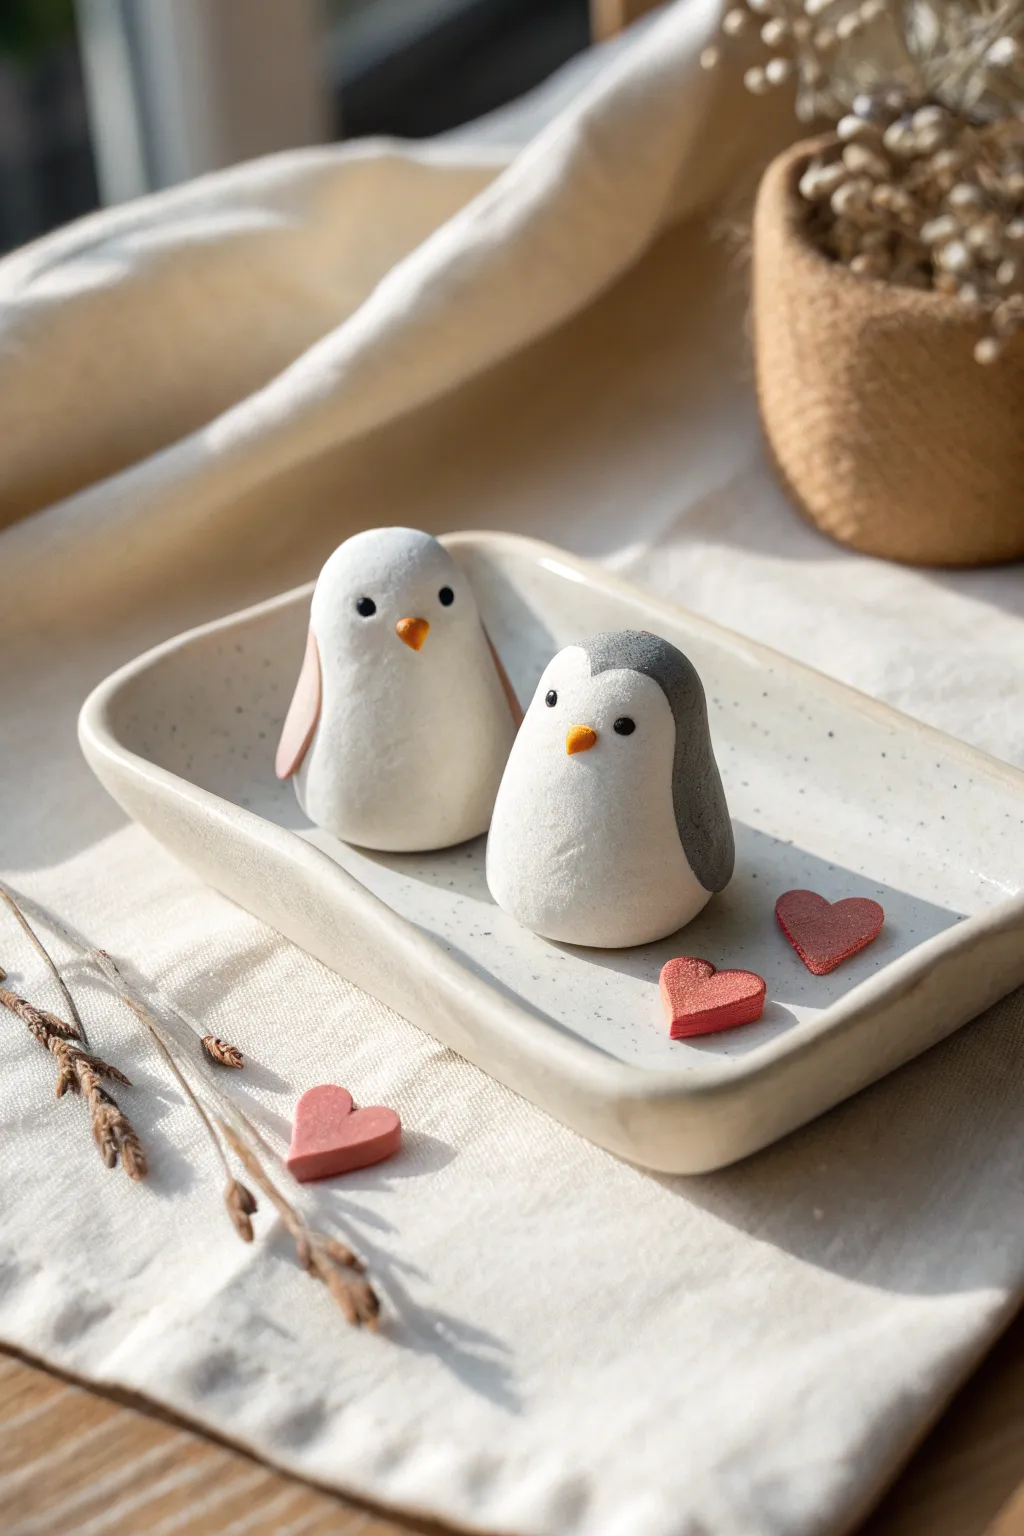
Craft a heartwarming pair of minimalist clay penguins nestled in their own shallow dish, creating a sweet keepsake for your next date night. These matte-finish figures feature simple, rounded forms and tiny heart accents that make for perfectly adorable desk decor.
Detailed Instructions
Materials
- White air-dry clay or polymer clay
- Grey or black clay (or acrylic paint)
- Orange clay (or acrylic paint)
- Red clay (or acrylic paint)
- Small rolling pin
- Needle tool or toothpick
- Ball stylus tool
- Small flat brush
- Sandpaper (fine grit)
- Matte spray sealant
Step 1: Sculpting the Penguins
-
Forming the bases:
Start by rolling two balls of white clay, roughly the size of a walnut. Shape them gently into upright, rounded cones with a wide, stable base so they don’t tip over. -
Smoothing the bodies:
Using your thumb, smooth out any cracks or seams on the surface of the cones to create that sleek, minimalist look essential for this modern style. -
Creating the grey hood:
For the right-hand penguin, roll a thin sheet of grey clay. Cut a teardrop shape that is large enough to cover the back and top of the penguin’s head, curving inward to frame the face. -
Attaching the hood:
Gently press the grey clay onto the white body. Blend the edges very carefully with a smoothing tool or your finger so it looks like a seamless part of the bird rather than a separate layer. -
Creating the wings:
Shape small distinct wings. For the left penguin, use pale pink or white clay; for the right penguin, use grey clay to match its hood. Press these flat against the sides of the bodies. -
Adding tiny beaks:
Roll two miniscule cones of orange clay. Press them gently onto the center of each face. I find it helpful to use a needle tool to position these without squashing them. -
Detailing the eyes:
Use a small ball stylus or the round end of a paintbrush dipped in black paint (or tiny balls of black clay) to create two small, widely spaced eyes on each penguin.
Seamless Blending
To merge the color patches (like the grey hood) smoothly without bumps, use a tiny bit of baby oil (for polymer) or water (for air-dry) on your finger.
Step 2: Crafting the Accessories
-
Making the dish base:
Roll out a slab of white clay about 1/4 inch thick. Cut out a rectangular shape with rounded corners, sized comfortably to hold both penguins. -
Raising the rim:
Gently lift the edges of the rectangle upward to create a shallow lip. Smooth the rim with water (if using air-dry clay) to soften the edges. -
Texturing the dish:
To mimic the speckled pottery look in the photo, you can flick a toothbrush with diluted grey paint over the raw clay dish, creating tiny decorative splatters. -
Creating the hearts:
Roll out a small amount of red or dusty rose clay. Use a tiny heart cutter or a knife to shape three small, flat hearts to scatter around the birds.
Cracks Appearing?
If air-dry clay cracks while drying, mix a small amount of fresh clay with water to make a paste (slip) and fill in the gaps, then sand smooth once dry.
Step 3: Finishing Touches
-
Allowing to dry or bake:
If using polymer clay, bake according to package instructions. For air-dry clay, let the pieces sit undisturbed in a dry, cool area for at least 24-48 hours. -
Sanding for smoothness:
Once fully cured, use fine-grit sandpaper to buff away any fingerprints or rough textures on the white bodies, achieving that soft, stone-like finish. -
Matte finishing:
Spray the entire set with a matte sealant. This protects the clay while maintaining the soft, non-glossy aesthetic shown in the reference image. -
Final arrangement:
Place your finished penguins into the dish and scatter the hearts near their feet. You can use a dab of glue if you want them permanently fixed in place.
Now you have a charming little keepsake that captures the sweetness of your time together
Zodiac Sign Pocket Tokens
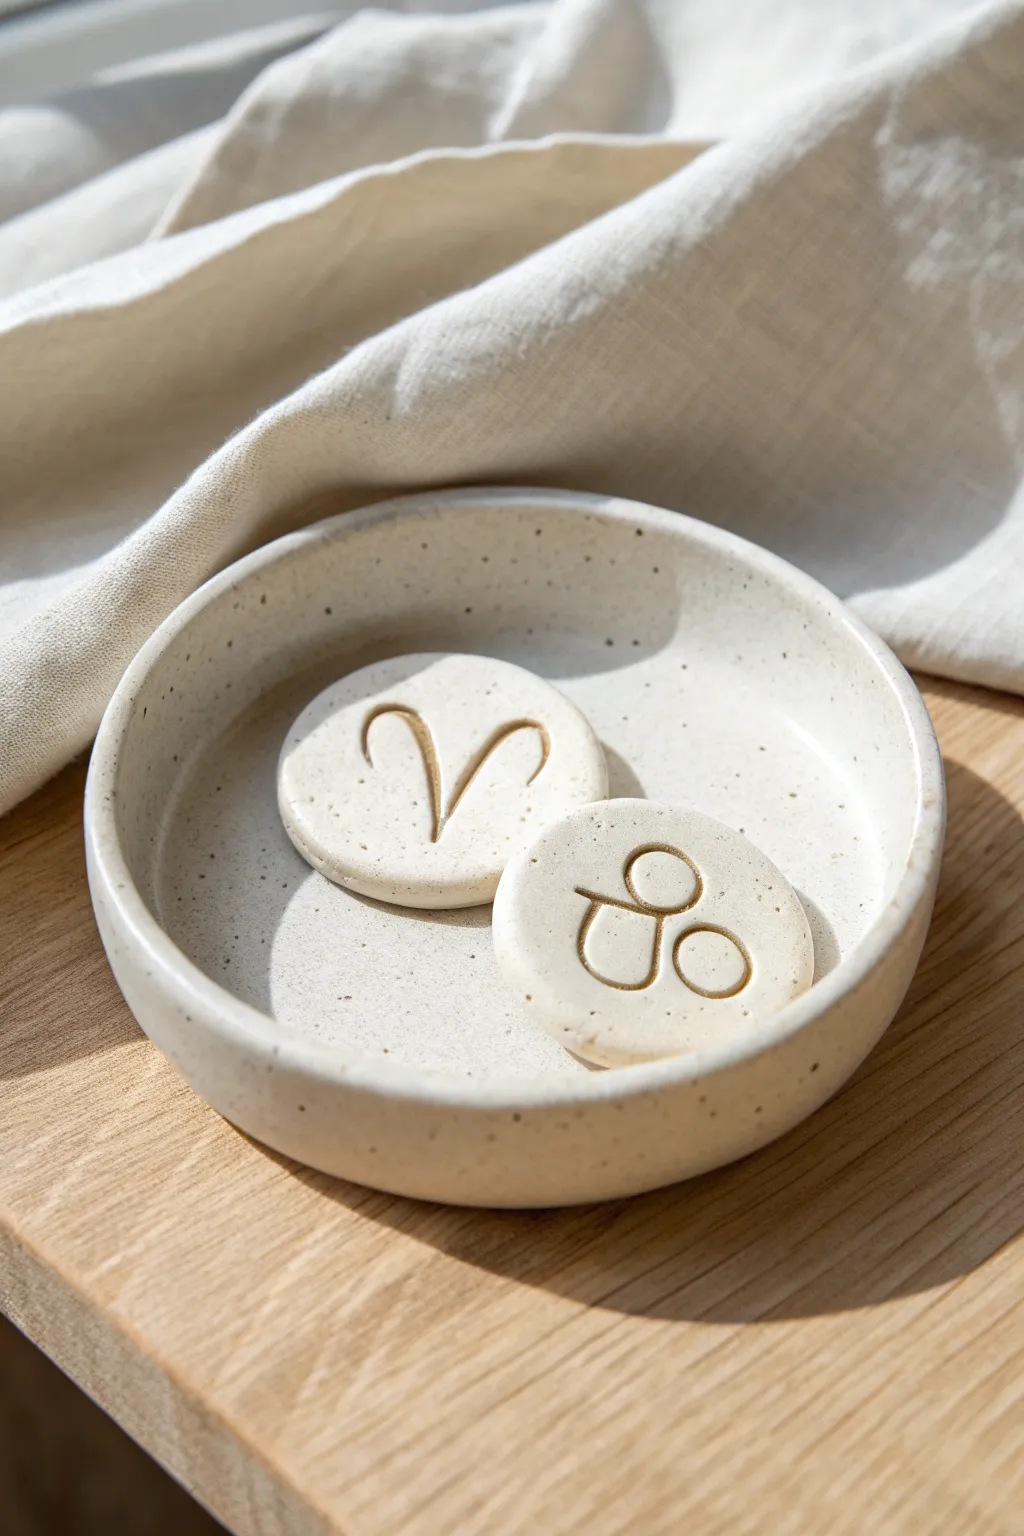
These minimalist pocket charms are crafted from speckled clay to mimic natural stone, featuring debossed zodiac symbols for a personal touch. Simple yet elegant, they make perfect keepsakes for a date night crafting session.
Step-by-Step Tutorial
Materials
- Speckled polymer clay (e.g., Fimo Effect Granite or Premo Granite)
- Small round cutter (approx. 1.5 inches)
- Acrylic roller or smooth jar
- Ball stylus tool or blunt needle tool
- Medium grit sandpaper
- Parchment paper or baking tile
- Reference images of zodiac symbols
Step 1: Shaping the Clay
-
Condition the clay:
Begin by warming the speckled clay in your hands. Knead it thoroughly until it is pliable and soft, which prevents cracking later. -
Roll out a slab:
Place the conditioned clay on a piece of parchment paper. Use your acrylic roller to flatten it into a slab about 1/4 inch thick. I prefer a slightly thicker slab for these tokens to give them a substantial, stone-like weight. -
Cut the circles:
Press your round cutter firmly into the clay to create perfect circles. Give the cutter a slight twist before lifting to ensure clean edges. -
Soften the edges:
Gently pick up each circle. Use your fingertip to lightly smooth and round over the sharp cut edges, creating a worn, pebble-like contour.
Step 2: Carving Symptoms
-
Sketch lightly:
Look at your zodiac reference. Use a very light touch with a needle tool to faintly scratch the outline of the symbol onto the clay surface as a guide. -
Deepen the lines:
Switch to a small ball stylus tool. Press firmly and trace over your guide lines to create a deep, smooth channel. The ball tip helps burnish the groove as you press, avoiding messy clay crumbs. -
Refine the groove:
Go over the lines a second time to ensure uniform depth. If the clay bulges up on the sides of the groove, gently tap it back down with your finger. -
Clean up debris:
Check the grooves for any loose bits of clay. Carefully lift them out with the tip of your needle tool. -
Final smoothing:
Do one last pass over the surface with your finger to remove any fingerprints left during the carving process.
Clean Lines Tip
Place a sheet of plastic wrap over the clay before cutting your circle. This creates a naturally domed, pillowy edge instead of a sharp, vertical cut.
Step 3: Baking and Finishing
-
Prepare for baking:
Place your tokens on a ceramic tile or a baking sheet lined with plain paper. -
Bake:
Bake according to your specific clay manufacturer’s instructions (usually 230°F – 275°F for 15-30 minutes). Do not rush this step; proper curing ensures durability. -
Cool down:
Allow the tokens to cool completely in the oven or on a wire rack before handling them further. -
Sanding:
Once cool, dip the sandpaper in water and gently sand the edges and back of the token to remove any remaining imperfections or shine. -
Adding contrast (optional):
To make the darker grooves pop like the image, the shadows naturally do a lot of work, but you can also run a tiny bit of darker brown acrylic paint into the groove and wipe the surface clean immediately. -
Rinse and dry:
Wash off any sanding dust or paint residue with cool water and dry with a soft cloth.
Fixing Smudges
If you smudge your carving while working, use a drop of baby oil on your finger to gently buff out the error before re-carving the line.
Now you have a set of personalized celestial tokens perfect for gifting or display
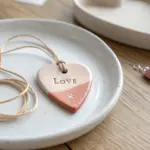
Mini “Our Song” Ornament Tags
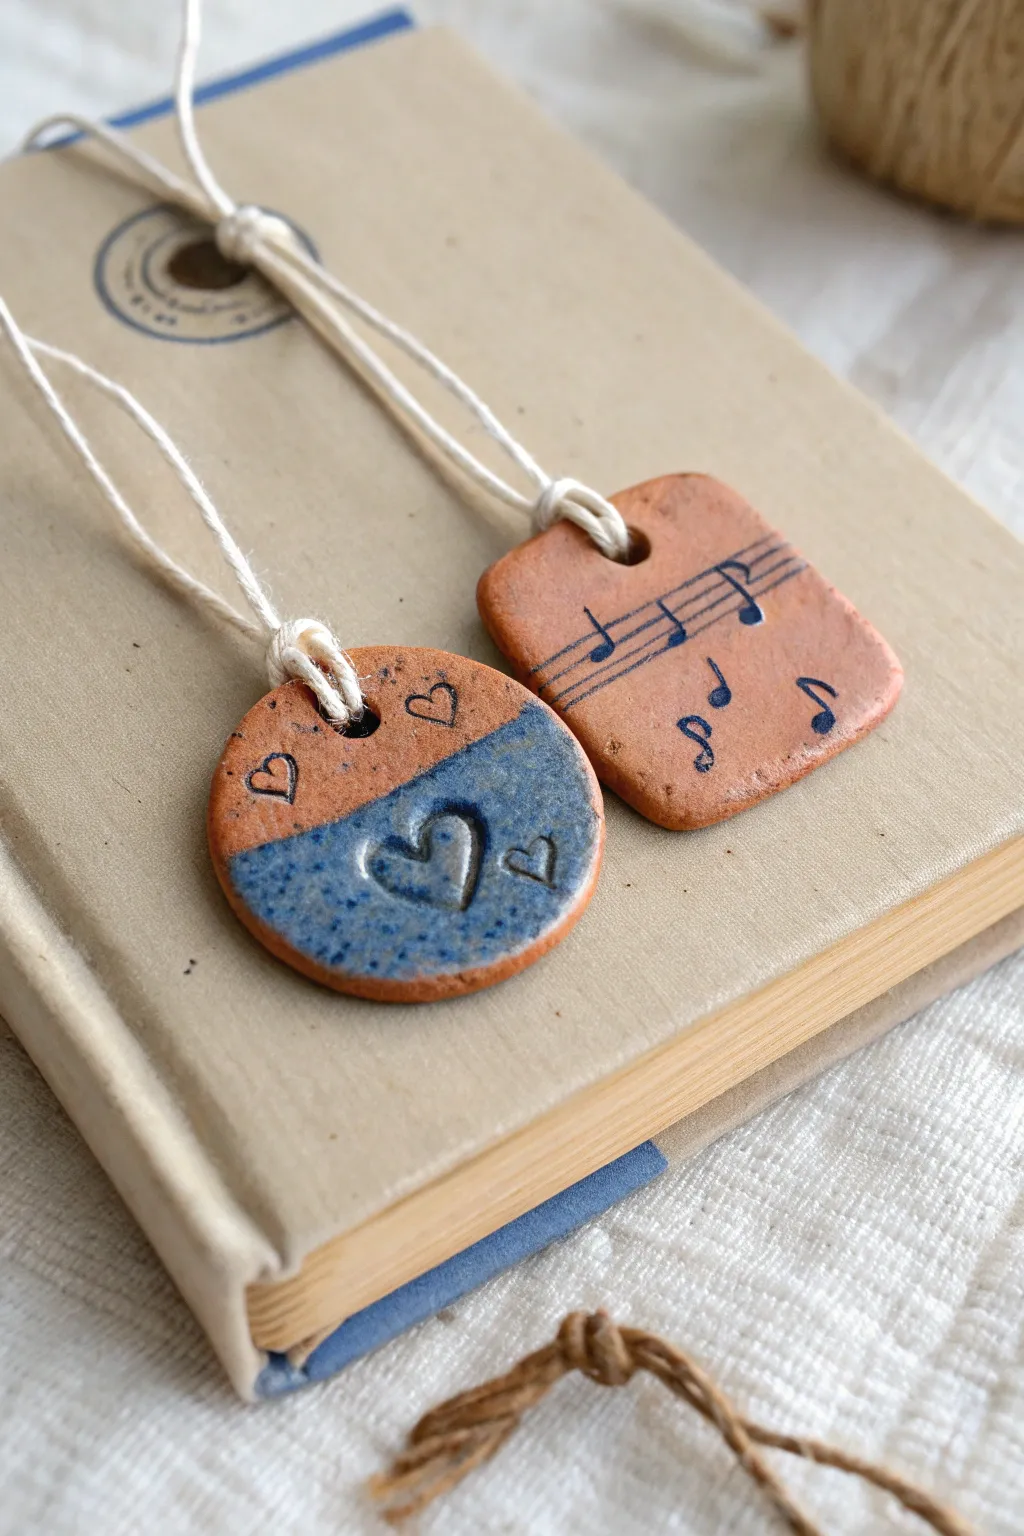
Celebrate your special connection or favorite tune with these charming, rustic clay tags. The half-dipped glaze on the heart charm and the hand-painted musical notes create a perfect, personalized duo for gift wrapping or keepsakes.
How-To Guide
Materials
- Air-dry clay (terra cotta color)
- Small rolling pin
- Round cookie cutter (approx. 1-1.5 inch)
- Square cookie cutter (approx. 1-1.5 inch) or craft knife
- Straw or small circular tool (for holes)
- Blue acrylic paint or ceramic glaze
- Fine-point black permanent marker or ink pen
- Thin stylus tool or toothpick (for carving)
- Small paintbrush
- Sandpaper (fine grit)
- White cotton twine or string
- Matte sealant or varnish (optional)
Step 1: Shaping the Base
-
Roll out the clay:
Begin by conditioning a small amount of terra cotta air-dry clay until it is soft and pliable. Roll it out on a smooth surface to an even thickness of about 1/4 inch. -
Cut the shapes:
Using your cutters, press out one circle and one square shape. If you don’t have a square cutter, simply use a craft knife to trim a rectangle into a soft-edged square. -
Soften the edges:
Dip your finger in a little water and gently run it around the cut edges of both shapes to smooth out any roughness or sharp corners. -
Create the hanging hole:
Use a straw or a small circular tool to punch a hole near the top edge of each shape. Ensure the hole is large enough for your twine to pass through later.
Ink Bleeding Info
If your marker ink bleeds into the clay, seal the clay with a clear matte sealer *before* drawing. Let it dry, then draw the notes on top.
Step 2: Adding Texture & Detail
-
Carve the main heart:
On the circular tag, use your stylus or toothpick to carve a deep, prominent heart shape in the bottom center. Press firm enough to create an indentation, not just a scratch. -
Add smaller hearts:
Above the main heart and toward the top edges, lightly scratch or carve tinier heart outlines. These should look more like sketches compared to the deep main heart. -
Dry the clay:
Set both clay pieces aside to dry completely according to your package instructions. This usually takes 24-48 hours. Flipping them halfway through helps prevent curling. -
Sand for smoothness:
Once fully dry and hard, lightly sand the edges and surface with fine-grit sandpaper to remove any fingerprints or imperfections.
Step 3: Decorating & Finishing
-
Outline the dip zone:
For the round tag, lightly mark a horizontal line across the middle, just above the large carved heart. This is your guide for the ‘dipped’ look. -
Apply the faux glaze:
Paint the bottom half of the circle blue. Use a stippling motion (dabbing the brush up and down) to get color into the deep heart carving, creating a speckled, stoneware effect. -
Create the music lines:
Moving to the square tag, use a fine-point black marker to draw five parallel horizontal lines across the upper middle section. -
Add the treble clef and notes:
Carefully draw a treble clef on the left side of the staff, and add a few music notes (like eighth notes) along the lines. Add free-floating notes below the staff for a whimsical touch. -
Seal the pieces:
I like to protect the ink and paint by applying a thin layer of matte varnish over both tags. Let this dry completely before handling. -
Attach the twine:
Cut two lengths of white cotton twine, each about 8 inches long. Fold a piece in half to create a loop. -
Create a lark’s head knot:
Push the folded loop through the hole from front to back. Pull the loose ends through the loop and tighten gently to secure the string to the tag.
Level Up: Actual Song
Look up the sheet music for your actual “couple’s song” and replicate the real notes on the square tag for a hidden meaning
tie these onto a journal or gift to add a sentimental, handcrafted touch
Secret Message Capsule Charms

These minimalist clay earrings feature a charming two-tone design that mimics the look of a tiny message capsule. With their organic speckles and soft pink-and-white palette, they make a sweet, subtle accessory for your next romantic outing.
Step-by-Step
Materials
- White polymer clay
- Soft pink or terracotta polymer clay
- Ground black pepper or dried coffee grounds (for speckling)
- Acrylic rolling pin or glass jar
- Small circle cutter (approx. 1cm diameter) or a straw
- Craft blade or tissue blade
- Toothpick or needle tool
- Earring hooks (antique bronze or silver)
- Jump rings (optional, if hooks don’t attach directly)
- Pliers for jewelry assembly
- Sandpaper (fine grit)
- Oven for baking
Step 1: Preparing the Clay
-
Condition the base:
Begin by kneading the white polymer clay in your hands until it becomes soft and pliable. This conditioning prevents cracks during baking. -
Mix the faux granite:
Take your pink or terracotta clay and flatten it slightly. Sprinkle a pinch of ground black pepper or finely dried coffee grounds onto the surface. -
Blend the speckles:
Fold the pink clay over the speckles and knead thoroughly until the particles are evenly distributed throughout the clay, creating a stone-like texture. -
Roll the cylinders:
Roll both the plain white clay and the speckled pink clay into two separate
Seams cracking apart?
If the two colors separate, apply a tiny dab of liquid polymer clay or ‘Bake and Bond’ between the segments before pressing them together.
Step 2: Shaping the Capsules
-
Cut the segments:
Using your craft blade, cut two equal segments of white clay (about 1.5 cm long) and two equal segments of the speckled pink clay (also about 1.5 cm long). -
Join the halves:
Take one white segment and one pink segment. Press the flat cut ends firmly together to create a single cylinder. Repeat for the second earring. -
Smooth the seam:
Gently roll the combined cylinder on your work surface to smooth out the seam where the two colors meet. I like to use a light touch here so the cylinder doesn’t get too thin. -
Refine the shape:
Stand the cylinders up and gently pressing the ends against the table to flatten them slightly, or use your fingertips to round off the edges for a softer, organic look. -
Pierce the hole:
Use a toothpick or needle tool to carefully pierce a hole through the top (white) section of the capsule. Ensure the hole goes all the way through and is wide enough for your earring hardware. -
Double-check symmetry:
Place both earrings side-by-side to ensure they are roughly the same length and width before baking.
Step 3: Finishing Up
-
Bake the clay:
Place your pieces on a baking sheet lined with parchment paper. Bake according to your polymer clay package instructions (usually around 275°F/135°C for 15-30 minutes). -
Cool down:
Allow the clay pieces to cool completely inside the oven or on a wire rack. They will be fragile while hot. -
Sand for smoothness:
Once cool, use fine-grit sandpaper to gently buff away any fingerprints or rough edges, paying special attention to the bottom curve. -
Attach the hardware:
Using pliers, open the loop on your earring hook (or a jump ring if using one). Slide it through the hole you created in the white section. -
Secure the loop:
Gently twist the loop closed with your pliers. Repeat for the second earring to complete the set.
Clean white clay
White clay picks up dust easily. Wipe your hands and work surface with a baby wipe or alcohol swab before handling the white portion.
Wear these adorable mini-capsules on your next date to carry a secret sense of style
Mini Shelf Bud Vases as a Set
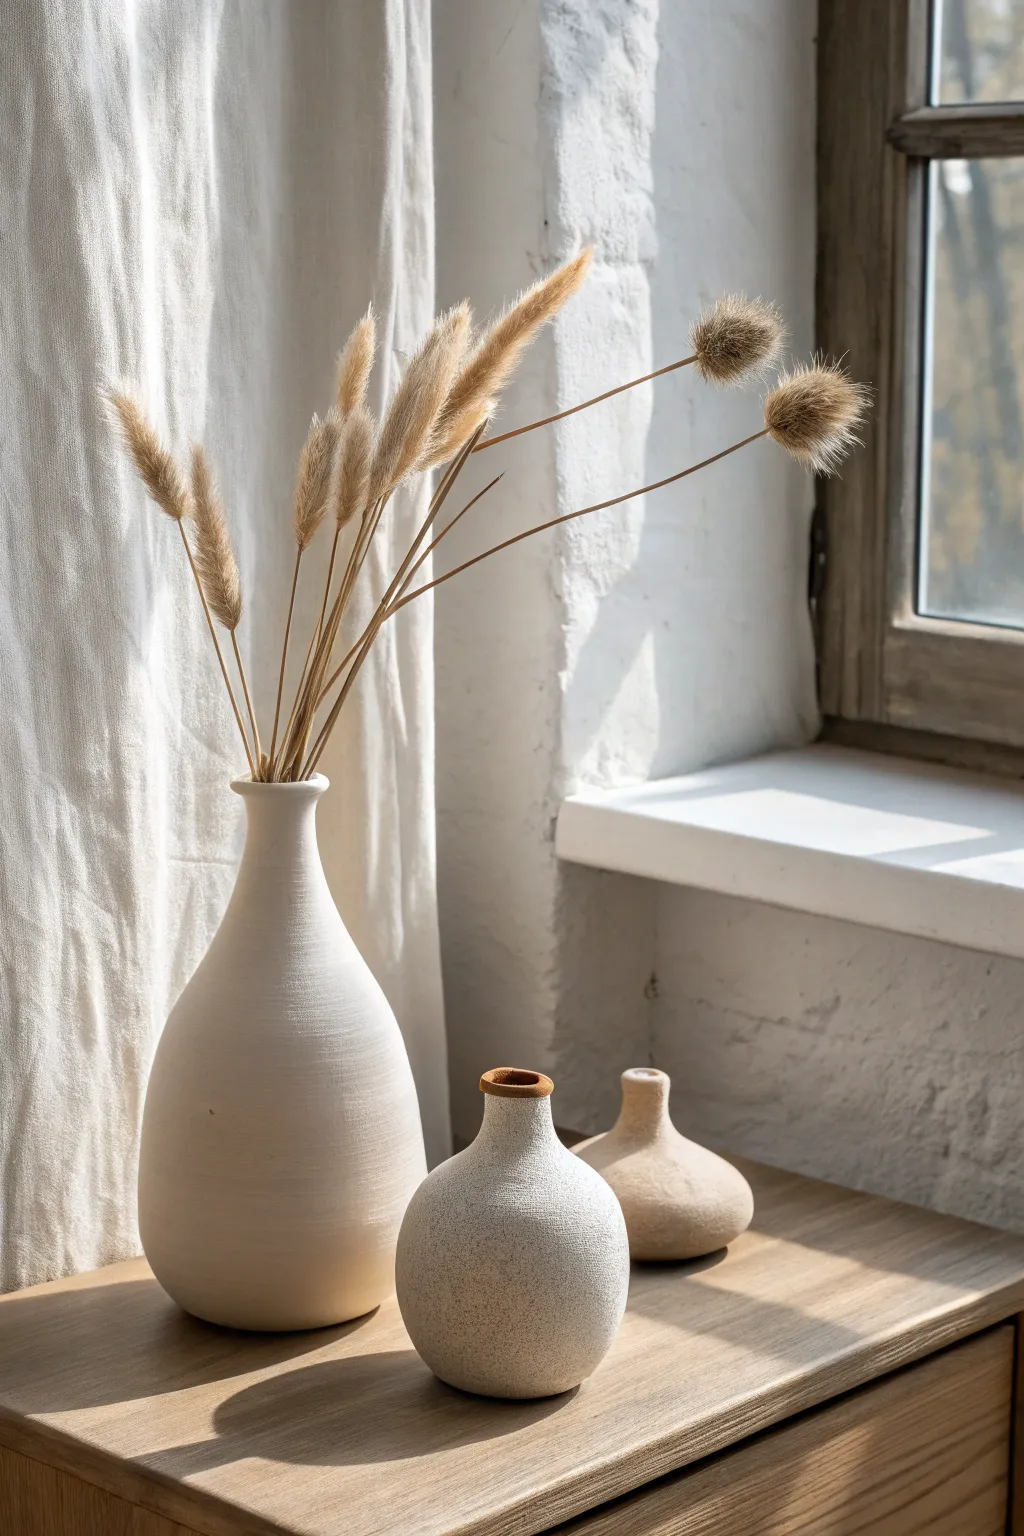
These elegant, matte-finish vessels bring a serene, organic warmth to any corner of your home. The set features a tall, slender bud vase alongside two charmingly stout mini-pots, all unified by a beautiful speckled stoneware texture.
How-To Guide
Materials
- Air-dry clay (white or light grey)
- Speckled clay additive or coarse sand (for texture)
- Small rolling pin
- Clay knife or fettling tool
- Small sponge
- Bowl of water
- Potter’s needle tool
- Fine-grit sandpaper
- Matte sealant spray or matte acrylic varnish
- Optional: Terracotta acrylic paint (for the rim detail)
Step 1: Prepping the Clay
-
Mix your texture:
Begin by taking a large chunk of air-dry clay. To achieve that organic, speckled look, knead in a small amount of textured sand or specialty dried clay speckles. Fold the clay repeatedly until the texture is evenly distributed. -
Divide the portions:
Separate your clay into three uneven balls. You’ll need one large portion for the tall vase, and two smaller portions for the round bottom-heavy vessels.
Crack Control
If small hairline cracks appear while drying, mix a tiny bit of vinegar into your clay scraps to make a paste (slip) and fill the cracks immediately.
Step 2: Sculpting the Tall Vase
-
Create the base:
Take the largest ball of clay and roll a small amount flat to create a circular base about 2 inches in diameter. Score the edges with your needle tool. -
Build the body with coils:
Roll long, even snakes of clay slightly thicker than a pencil. Begin stacking these coils on top of the base, blending the clay downwards on both the inside and outside to join them seamlessly. -
Shape the silhouette:
As you build upward, widen the coils slightly to create the belly of the vase, then gradually use smaller rings to taper the neck inward. Smooth the walls constantly with a damp sponge. -
Form the neck:
Once the tapered shoulder is formed, build a straight, narrow neck about 2-3 inches high. Keep the opening small—just wide enough for a few stems. -
Refine the surface:
Use a rib tool or an old credit card to scrape the sides smooth, removing bumpy coil lines while preserving the grainy texture of the clay.
Faux Ceramic Look
Mix baking soda into white acrylic paint and dab it on the finished dry vases. This creates a gritty, stone-like texture that looks like expensive ceramic.
Step 3: Creating the Mini Pots
-
Pinch pot method:
For the two smaller vessels, I find the pinch pot technique works best. Take a ball of clay, push your thumb into the center, and gently pinch the walls while rotating the ball in your palm. -
Create the bulbous shape:
Focus on keeping the bottom rounded and wide. Don’t flatten the base too much; you want that heavy, grounded look. -
Close the form:
Gently collar the top opening by encircling it with your thumb and forefinger and squeezing slightly as you rotate. This creates the narrow shoulder. -
Add the neck detail:
Add a very small coil to the top opening to create a distinct, slightly flared lip. Smooth this connection thoroughly so it looks like one single piece. -
Vary the sizes:
Repeat this process for the third vase, but aim for a slightly different height or width to ensure the set looks curated, not identical.
Step 4: Finishing Touches
-
Slow drying:
Let your pieces dry slowly away from direct sunlight for 24-48 hours. Drape a plastic bag loosely over them for the first night to prevent cracking. -
Sand for smoothness:
Once bone dry, use fine-grit sandpaper to gently smooth any rough fingerprints or uneaven areas. Be careful not to sand away the speckled texture you added. -
Clean the dust:
Wipe the vessels down with a slightly damp cloth or a dry soft brush to remove all sanding dust. -
Add the rim detail:
If you want to mimic the exact look of the middle pot in the image, carefully paint just the top rim of one small vase with a terracotta or dark rusted orange acrylic paint. -
Seal the set:
Finish by applying two coats of a matte sealant spray. This protects the clay while maintaining that raw, unglazed aesthetic.
Arrange your new trio on a sunny windowsill filled with dried bunny tails or grasses for an instant style upgrade