
If you’ve got a stack of plain terracotta pots and a few colors of acrylic paint, you’re basically holding a whole afternoon of happy, low-pressure creativity. Here are my go-to DIY clay pot painting ideas—starting with the classics everyone loves and ending with a few studio “how did you do that?” favorites.
Classic Stripes and Color Blocks

Transform a plain terracotta pot into a chic, bohemian accent piece with this simple striped design. The muted palette of peach, teal, and cream creates a relaxed, earthy vibe perfect for succulents and small houseplants.
Step-by-Step
Materials
- Terracotta pot (cleaned and dried)
- Acrylic craft paints: Cream/Off-White, Muted Peach/Terracotta color, Muted Teal/Sage Green
- Flat paintbrush (approx. 1 inch width)
- Small round paintbrush for touch-ups
- Painter’s tape (optional, for masking)
- Palette or paper plate
- Clear matte sealant spray (optional)
- Drop cloth or newspaper
Step 1: Preparation
-
Clean the surface:
Before you begin, ensure your terracotta pot is completely clean and dry. Wipe it down with a damp cloth to remove any dust or debris, which helps the paint adhere better. -
Set up your workspace:
Lay down newspaper or a drop cloth to protect your table. Squeeze out a generous amount of your Cream, Peach, and Teal paints onto your palette so they are ready to go.
Step 2: Painting the Base Stripes
-
Start with the rim:
Using your flat brush, paint the thick rim of the pot with the cream color. Don’t worry about making it perfectly smooth; visible brushstrokes add to the rustic, handmade texture. -
Paint the first peach stripe:
Directly below the rim, paint a horizontal band of the muted peach color. This band should be roughly the same width as the rim itself. -
Follow with a cream stripe:
Paint the next stripe in cream below the peach one. Try to keep your hand steady as you rotate the pot. -
Add the teal accent:
Below the second cream stripe, paint a band of the muted teal color. I find that loading the brush well helps get a continuous line without too much stopping. -
Finish the bottom:
Paint the final section at the very bottom of the pot with the peach color again to balance the design.
Texturizing Tip
Mix a tiny pinch of baking soda into your acrylic paint before applying. This creates a grainy, ceramic-like texture that mimics aged pottery.
Step 3: Refining the Look
-
Let the first coat set:
Allow the paint to dry to the touch, which usually takes about 15-20 minutes depending on your paint thickness. -
Apply second coats:
Go over each colored stripe again. Terracotta is porous and soaks up paint, so a second coat will make the colors opaque and vibrant while keeping that nice matte finish. -
Create the organic edges:
Once the main blocks are solid, don’t stress about perfectly straight lines. The charm of this pot is the slightly painterly, uneven transition between colors. You can use a smaller brush to gently neaten big mistakes, but let the lines wobble a little. -
Dry completely:
Let the pot dry fully for at least an hour.
Go Geometric
Instead of freehand stripes, use thin washi tape to mask off diagonal lines or triangles over your dry base stripes for a funky, modern geometric pattern.
Step 4: Finishing Touches
-
Detail the inside rim:
Paint just the inner top edge of the pot with the cream color. This gives a finished look even when soil is added. -
Seal the pot (optional):
If you plan to plant directly into the pot, spray the outside with a clear matte sealant. This protects your stripes from water damage when watering your plant. -
Plant your greenery:
Once everything is cured, fill your beautiful new pot with a succulent or leafy plant like the ones shown here.
Now you have a charming custom planter ready to brighten up your windowsill


Playful Polka Dots in Mixed Sizes
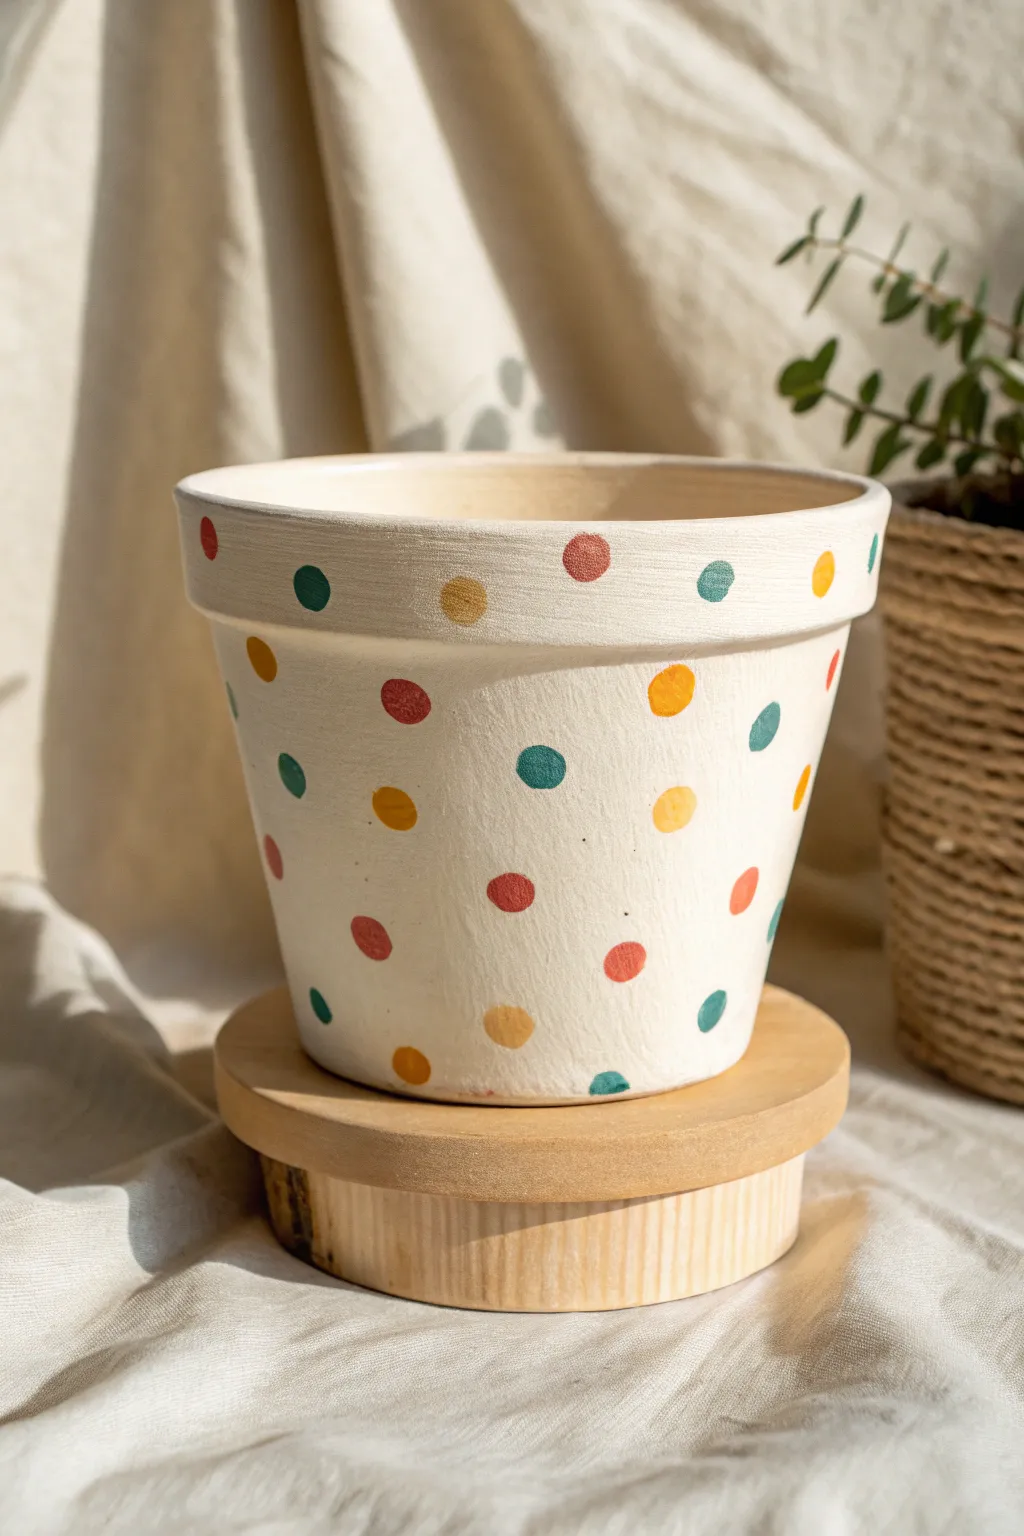
Transform a standard clay pot into a piece of modern, playful decor with this easy polka dot design. The bright white background makes the cheerful mix of teal, ochre, coral, and red dots pop, giving your houseplants a sunny new home.
How-To Guide
Materials
- Terracotta pot (clean and dry)
- Acrylic paint (White or Cream)
- Acrylic paints (Teal/Dark Green, Ochre/Mustard Yellow, Coral/Red, Terracotta/Brown)
- Foam sponge pouncers (small circular sponges on sticks) or round stencil brushes
- Detailed paintbrush (small round tip)
- Palette or paper plate
- Water cup and paper towels
- Clear acrylic sealer spray (matte finish)
Step 1: Base Coat Preparation
-
Clean the surface:
Before you begin, ensure your terracotta pot is completely clean. Wipe away any dust or grit with a slightly damp cloth and let it dry fully so the paint adheres properly. -
Apply the first coat of white:
Squeeze a generous amount of white or cream acrylic paint onto your palette. Using a larger brush or a foam brush, cover the entire exterior of the pot, including the rim. -
Let it dry completely:
Allow this initial layer to dry for about 20-30 minutes. Terracotta is porous and will soak up the first layer quickly. -
Add a second coat:
Apply a second layer of white paint to ensure solid, opaque coverage. If you can still see the orange clay through the paint, a third coat might be necessary for that crisp, clean look. -
Paint the inner rim:
Don’t forget to paint just inside the top rim of the pot (about an inch down). This ensures the finished look is polished even when soil is added.
Clean Circle Tip
If using a brush handle or pouncer, twist it slightly as you press down and lift off. This helps deposit the paint evenly and keeps the edges of your circle sharp.
Step 2: Creating the Polka Dots
-
Prepare your colors:
Dispense nickel-sized amounts of your teal, ochre, coral, and terracotta/brown paints onto your palette. I like to keep them spaced out so I don’t accidentally mix them on my applicator. -
Select your tool:
For the most uniform dots, use a foam pouncer. Alternatively, the handle end of a paintbrush can work well for smaller, solid dots. -
Start with the dominant color:
Dip your pouncer into the teal paint first. Press gently but firmly onto the pot surface to create a crisp circle. Lift the pouncer straight up to avoid smearing. -
Space them randomly:
Place a few teal dots around the pot, ensuring they are scattered at different heights. Leave plenty of white space between them for the other colors. -
Add the warm tones:
Clean your tool or switch to a fresh one, then dip into the coral/red shade. Add these dots in the empty spaces, sometimes placing them near the rim and sometimes near the base. -
Layer in the yellow:
Repeat the process with the ochre/mustard yellow paint. Focus on areas that look a bit empty, keeping the spacing random and playful rather than grid-like. -
Finish with tiny accents:
Finally, use the terracotta/brown paint. You might want to use a slightly smaller tool for this color to add variation in dot size, or keep them consistent depending on your preference. -
Check for balance:
Step back and rotate the pot. Look for any large white patches that feel unbalanced and add a dot there if needed.
Smudged a Dot?
Don’t panic if you smear a dot. Let it dry completely, paint over it with your base white color, let that dry, and then try the colored dot again.
Step 3: Finishing Touches
-
Touch up any imperfections:
If any dots look uneven or have thin coverage, use a small detail brush to carefully fill them in or round out the edges once the first layer is dry. -
Allow thorough drying:
Let the polka dots dry completely. Because some dots might have thicker paint, give this at least an hour to be safe. -
Seal the pot:
Take the pot to a well-ventilated area. Spray a light, even coat of matte clear acrylic sealer over the entire painted surface. This protects the paint from water damage when you water your plants.
Now your pot is ready to add a splash of playful color to your favorite sunny windowsill


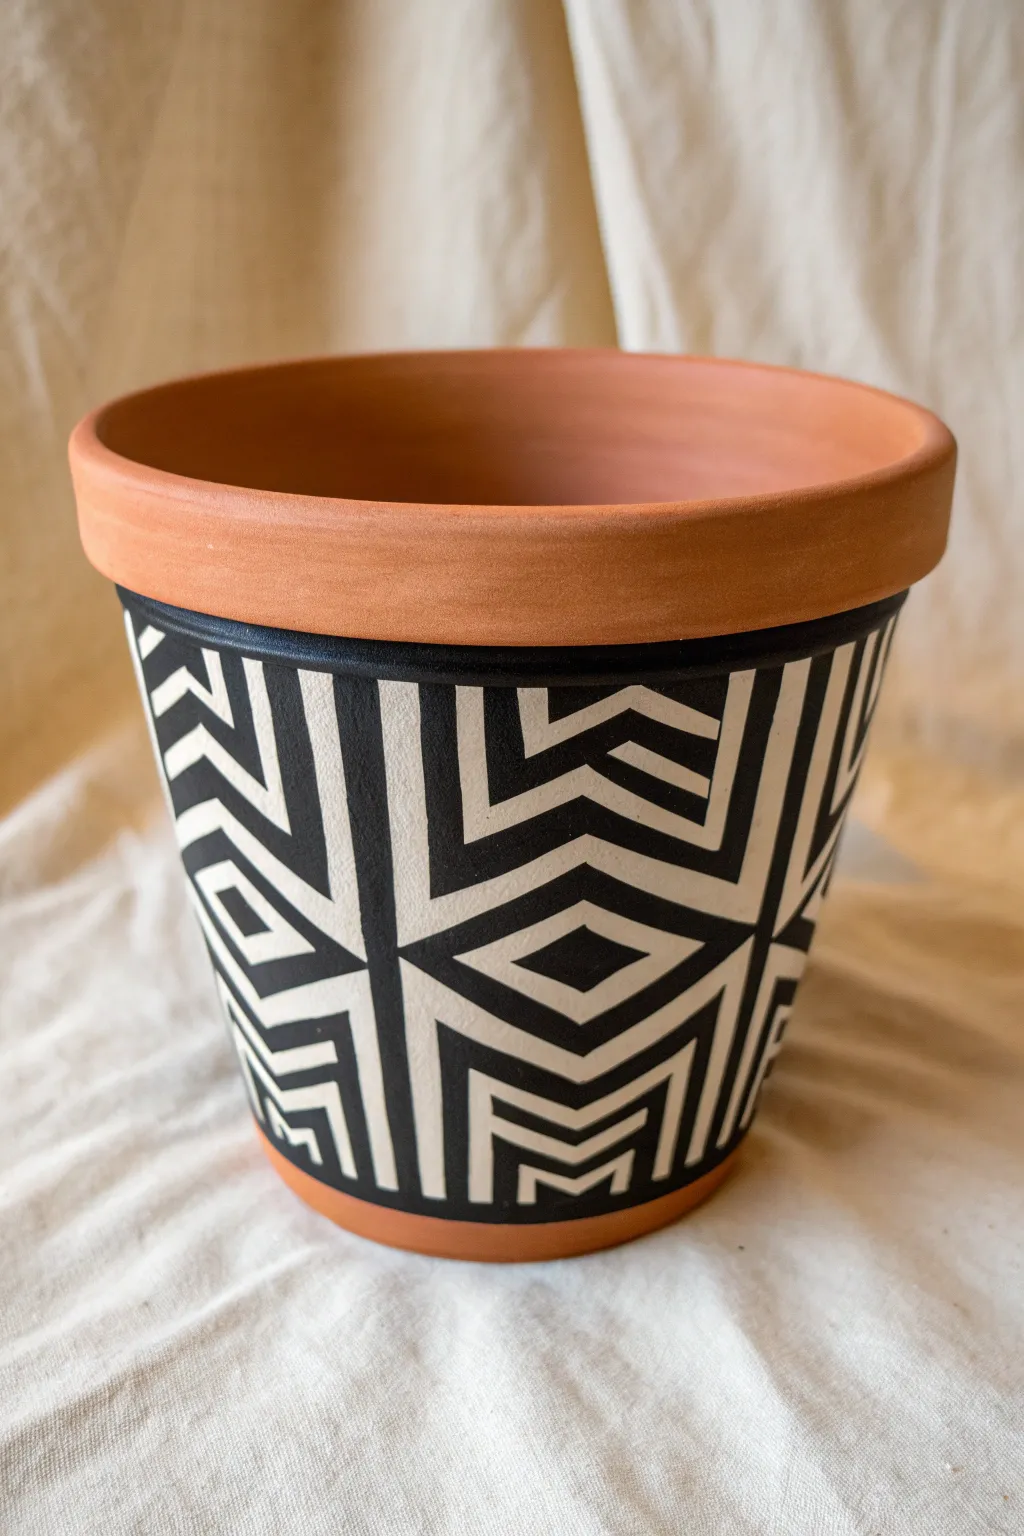
Clean Geometric Tape Patterns
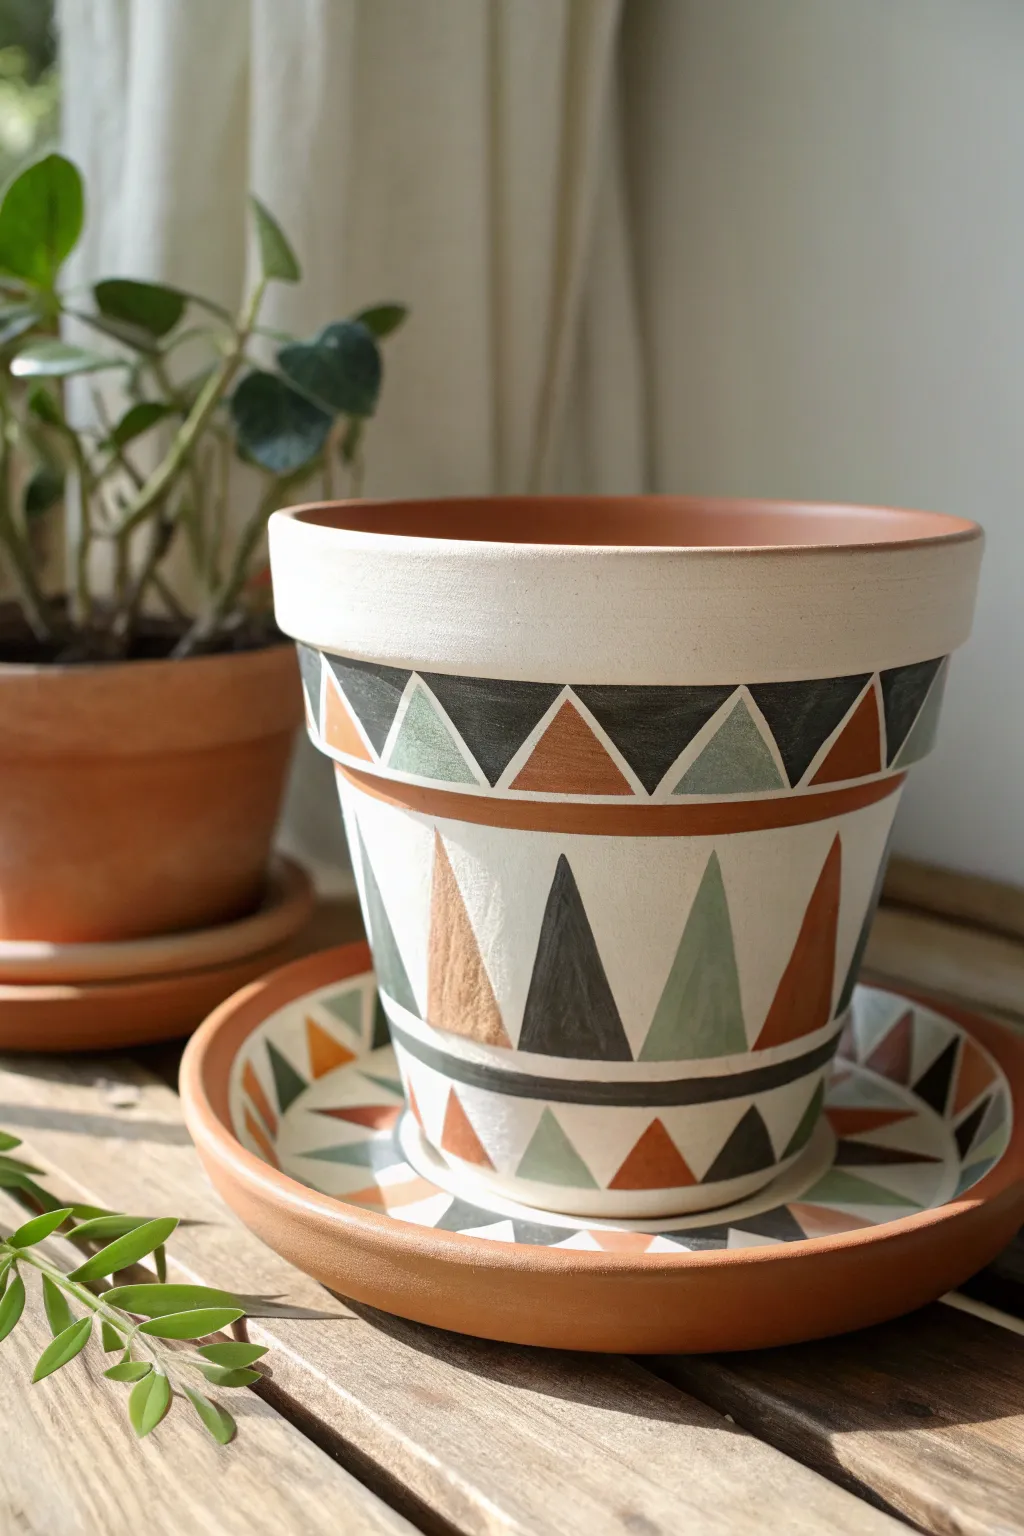
Transform a standard terracotta planter into a stylish décor piece using clean lines and earthy tones. This design features repeating triangle motifs in burnt orange, charcoal, and sage green against a crisp white background for a modern Southwest feel.
Step-by-Step Guide
Materials
- Terracotta pot and matching saucer (cleaned and dried)
- White acrylic paint or chalk paint (base coat)
- Acrylic craft paints: Burnt Orange, Charcoal Grey/Black, Sage Green
- Painter’s tape (various widths, ideally 0.5 inch and 1 inch)
- Flat paintbrushes (medium and small)
- Small detail brush
- Pencil
- Ruler or measuring tape
- Matte spray sealer or clear coat
Step 1: Preparation & Base Coat
-
Clean surface:
Ensure your terracotta pot is completely clean and dry. Wipe away any dust with a damp cloth and let it air dry for at least an hour to ensure paint adhesion. -
Apply white base:
Paint the entire exterior of the pot, the rim, and the top surface of the saucer with your white acrylic or chalk paint. You likely need 2-3 coats for solid, opaque coverage. -
Dry thoroughly:
Allow the white base coat to dry completely overnight or for several hours. This is crucial because if the base is tacky, the tape we use later will peel up the paint.
Tape Trick
Before painting your color, brush a tiny amount of the WHITE base paint over the tape edge. This seals the gap and ensures your colored lines remain razor sharp.
Step 2: Mapping the Design
-
Mark horizontal bands:
Using a pencil and ruler, lightly mark horizontal guidelines around the pot. You need a band just under the rim for the small triangles, a large central area for the tall triangles, and a lower band near the bottom. -
Add separating lines:
Paint thin horizontal stripes in Burnt Orange or Charcoal to separate your main design sections. I find using a steady hand and a flat brush works well, or you can tape off these lines for razor-sharp precision. -
Sketch the triangles:
Lightly pencil in your triangle patterns within the bands you created. The rim section uses small equilateral triangles, while the main body features elongated, tall isosceles triangles.
Step 3: Painting the Geometric Patterns
-
Tape the large triangles:
For the cleanest lines on the large central triangles, apply painter’s tape along the pencil lines on the outside of the shapes you intend to paint first. Press the edges of the tape down firmly. -
Paint first colors:
Fill in the taped triangles with your Sage Green and Charcoal paint. Alternate colors based on your pattern preference, ensuring you don’t paint two adjacent wet sections at once. -
Remove tape immediately:
Peel off the tape while the paint is still slightly wet to prevent chipping. Let these first triangles dry completely before taping off the adjacent Burnt Orange ones. -
Finish large triangles:
Once dry, tape off and paint the remaining large triangles in the body section with Burnt Orange. -
Paint the rim border:
Moving to the rim, use a smaller flat brush to paint the smaller triangle row. Since these are smaller, you might find it easier to freehand them if taping is too fiddly. -
Detail the bottom:
Repeat the small triangle pattern near the base of the pot, mirroring the colors used on the rim (Charcoal, Sage, Burnt Orange).
Level Up: Texture
Mix a teaspoon of baking soda into your acrylic paints before applying. This creates a grainy, ceramic-like texture that makes the pot look like expensive stoneware.
Step 4: Sawtooth Saucer Design
-
Mark the saucer:
On the flat rim of the saucer, pencil in a sawtooth (triangle) pattern that points outward. -
Paint saucer triangles:
Fill in these triangles alternating your three main colors. Use a small detail brush to keep the points sharp. -
Refine lines:
Once all paint is dry, use a very small brush with white paint to touch up any smudges or uneven lines between the geometric shapes. -
Seal the project:
Finish by applying a clear matte spray sealer over the entire pot and saucer. This protects the paint from water damage and UV fading.
Place your favorite houseplant inside and enjoy the modern touch this adds to your windowsill


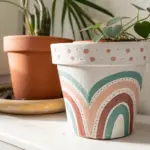
Soft Ombre Color Fade
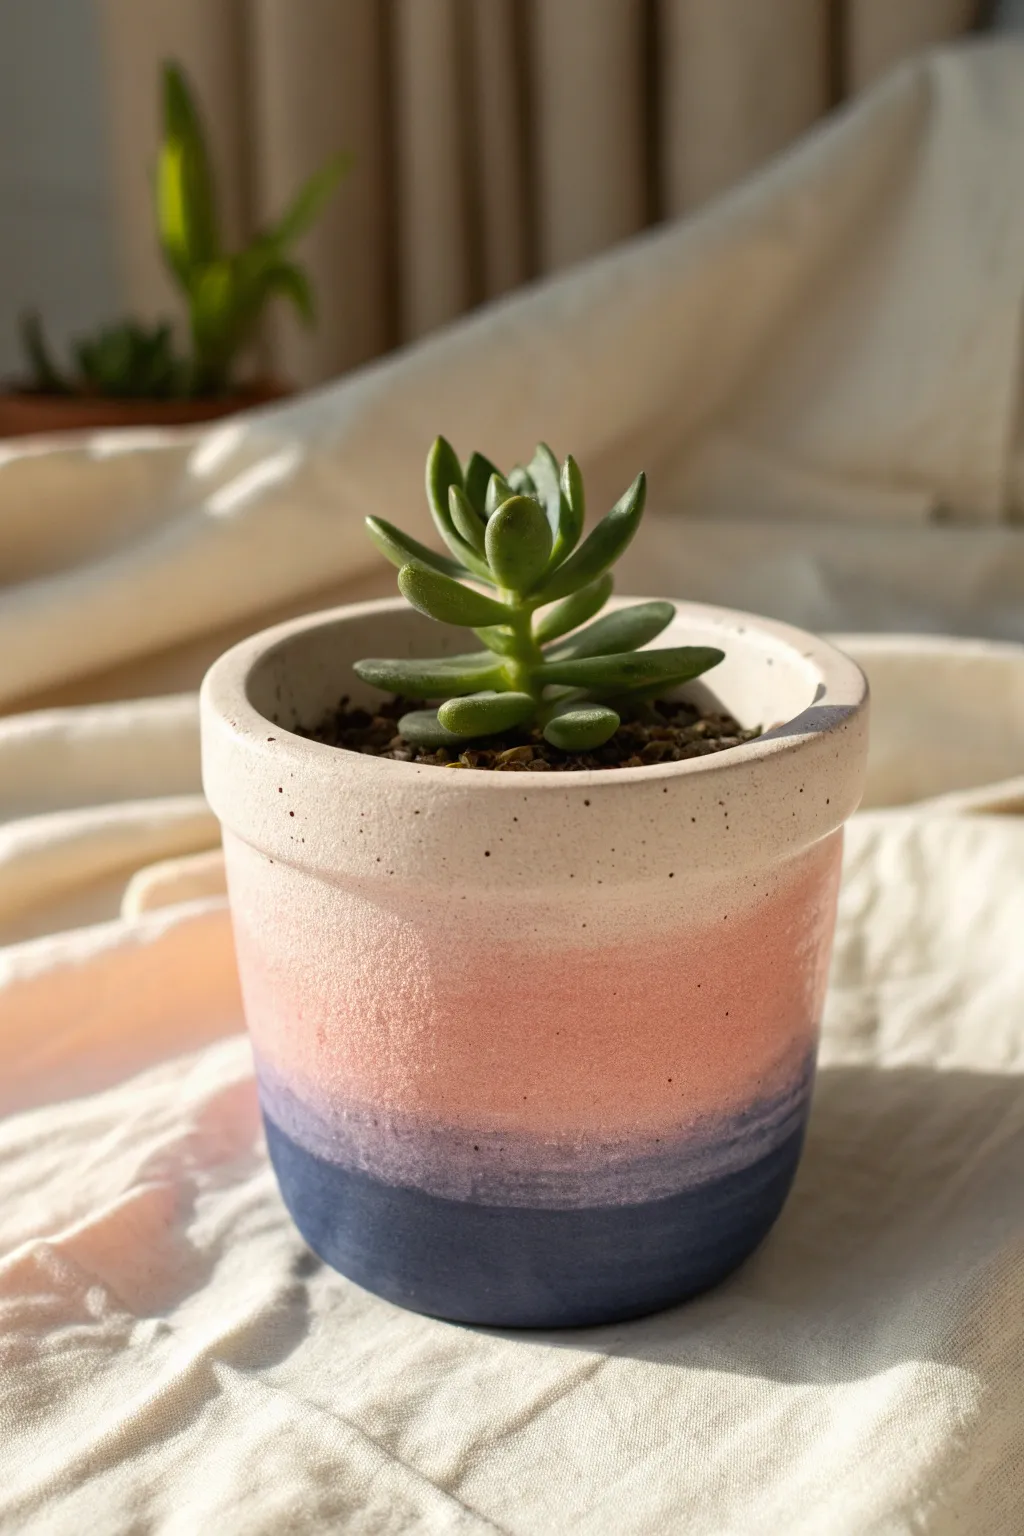
Capture the serene beauty of twilight on your windowsill with this soft, tri-tone gradient design. The gentle transition from creamy white to dusty pink and finally deep indigo creates a calming, modern look that perfectly complements succulent greenery.
Step-by-Step Tutorial
Materials
- Small terracotta or ceramic pot (cylindrical shape preferred)
- White acrylic paint (base coat)
- Dusty pink acrylic paint
- Deep indigo or navy blue acrylic paint
- Medium flat paintbrush
- Makeup sponge or blending sponge
- Paper plate or palette
- Water cup
- Matte spray sealer (optional)
Step 1: Preparation and Base Coat
-
Clean surface:
Begin by wiping down your pot with a damp cloth to remove any dust or oils. This ensures your paint adheres smoothly to the surface. -
Apply white base:
Using your flat brush, paint the entire exterior of the pot with white acrylic paint. Don’t forget to paint the top rim and a little bit inside the top edge for a finished look. -
Layer up:
Let the first coat dry completely. If the terracotta color is still peeking through, apply a second coat of white until you have a solid, opaque finish. -
Dry thoroughly:
Allow the base coat to dry fully before moving on to the colors. This is crucial so your blending doesn’t pull up the base layer.
Step 2: Creating the Ombre Gradient
-
Map the sections:
Visualize your pot in roughly three horizontal sections. The top third will remain white, the middle will be pink, and the bottom will be blue. -
Apply the middle tone:
Pour some dusty pink paint onto your palette. Dip your sponge into the paint and dab off the excess. -
Sponge the pink layer:
Start sponging the pink paint around the middle section of the pot. Don’t worry about perfect lines; a textured, dappled edge is what we’re aiming for. -
Fade upward:
As you move toward the white top section, use less paint on your sponge. Lightly tap the sponge to create a soft, speckled transition where the pink meets the white. -
Apply the dark tone:
Now, pour your deep indigo paint onto the palette. Using a clean side of the sponge (or a fresh one), pick up the blue paint. -
Sponge the bottom layer:
Apply the indigo paint to the bottom third of the pot. Ensure you cover right down to the bottom edge for a grounded look. -
Blend the transition:
Work your way up toward the pink section. Gently tap the blue sponge over the lower part of the pink area to start merging the colors. -
Refine the blend:
To get that seamless fade, I often go back in with a tiny bit of pink paint on a sponge and tap lightly over the line where blue meets pink. This softens any harsh boundaries. -
Add speckles (optional):
The pot in the image has a lovely speckled texture. You can mimic this by lightly flicking a toothbrush dipped in diluted black or dark brown paint over the finished gradient.
Sponge Secrets
For the softest gradient, dampen your sponge slightly before dipping it in paint. This thins the pigment just enough to make blending effortless.
Step 3: Finishing Touches
-
Let it set:
Allow your ombre masterpiece to dry completely. Acrylics dry fast, but giving it an hour ensures the layers are solid. -
Seal the deal:
If you plan to keep this pot outdoors or in a humid area, spray it with a clear matte sealer. This protects your beautiful gradient from water damage. -
Plant:
Once dry, fill your pot with soil and add your favorite succulent to complete the look.
Fixing Harsh Lines
If a color transition looks too like a stripe, wait for it to dry. Then, dry-brush a tiny amount of the lighter color over the edge to feather it out.
Your new ombre pot is ready to bring a touch of sunset calm to your home decor

The Complete Guide to Pottery Troubleshooting
Uncover the most common ceramic mistakes—from cracking clay to failed glazes—and learn how to fix them fast.
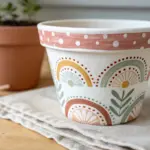
Easy Floral Sprigs and Vines
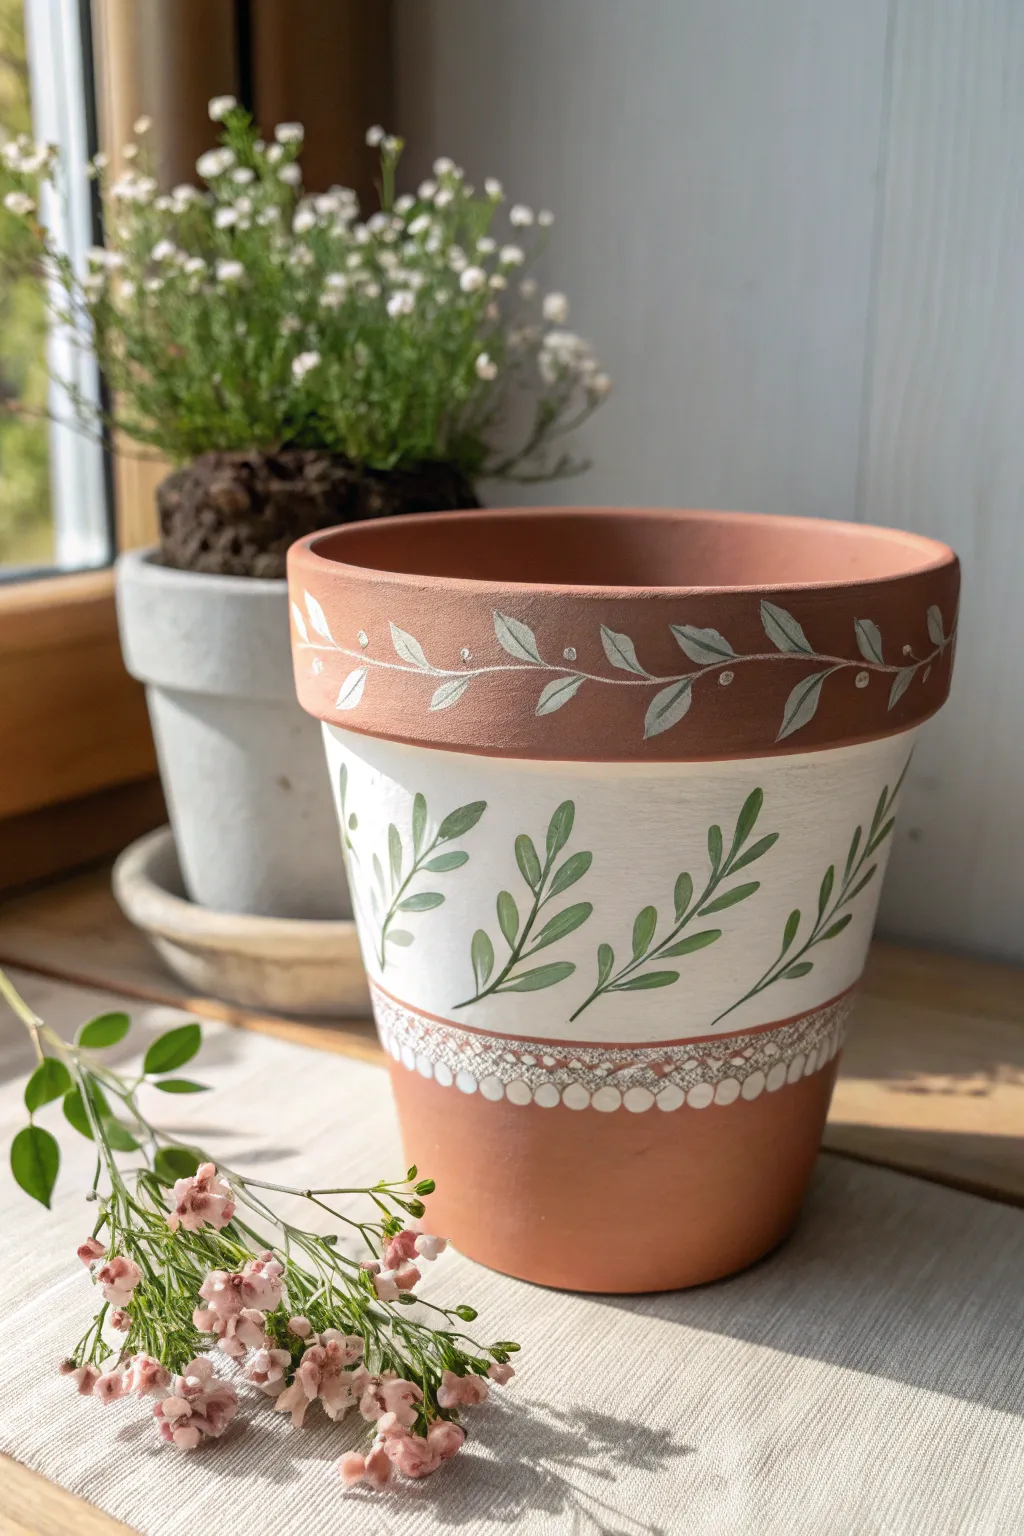
This charming design combines the raw beauty of terracotta with crisp white bands and fresh greenery. The delicate vine work on the rim and the leafy sprigs around the body create a perfect home for your favorite indoor plants.
Step-by-Step
Materials
- Terracotta pot (standard size)
- White acrylic paint (matte finish)
- Sage green acrylic paint
- Forest green acrylic paint
- Small flat brush (1/2 inch)
- Fine liner brush (size 0 or 00)
- Round detail brush (size 2)
- Painter’s tape or masking tape
- Water cup and palette
- Clear matte sealer spray
Step 1: Creating the Base
-
Clean the surface:
Before starting, wipe down your terracotta pot with a damp cloth to remove any dust or loose clay particles. Let it dry completely so the tape adheres properly. -
Tape the boundaries:
Apply a strip of painter’s tape just under the protruding rim of the pot. Apply a second strip of tape about two inches below that, creating a defined band around the middle of the pot’s body. -
Paint the white band:
Using your flat brush, fill in the area between the two tape lines with white acrylic paint. You will likely need 2-3 coats for full opacity; allow the paint to dry to the touch between coats. -
Remove tape:
Carefully peel away the painter’s tape while the final coat is still slightly tacky to ensure a crisp, clean edge.
Paint Bleeding?
If paint bleeds under your tape, wait for it to dry completely. Then, gently scrape the excess away with a craft knife or touch it up with a small brush and the background color.
Step 2: Detailing the Rim
-
Start the vine stem:
Mix a tiny amount of white paint with a drop of water to improve flow. Using your fine liner brush, paint a continuous, wavy line horizontally around the center of the terracotta rim. -
Add first leaves:
Along the white vine stem, paint small, single-stroke leaves using the liner brush. Imagine them flowing with the direction of the vine. -
Layer with sage:
Once the white skeleton is dry, take a very small amount of sage green on your liner brush. Carefully paint inside the white leaves, leaving a thin white outline visible for contrast. -
Add berries:
Using the handle end of a brush or a stylus, dot tiny white circles periodically along the vine for delicate berries.
Add Texture
Mix a pinch of baking soda into your white paint for the middle band. This creates a ceramic-like texture that contrasts beautifully with the smooth leaves.
Step 3: Painting the Green Sprigs
-
Mark spacing:
Lightly mark the center of the white band with small pencil dots at equal intervals where you want your green sprigs to sit. -
Paint main stems:
Mix your forest green and sage green paints to get a medium botanical green. Using the round detail brush, paint curved, upward-sweeping stems starting from the bottom of the white band. -
Add leaflets:
Paint pairs of oval-shaped leaves extending from the stems. Press down with the belly of the round brush and lift up as you drag out to create a tapered leaf shape. -
Vary the direction:
Alternate the curve of the stems—have some lean left and some lean right—to create a natural, organic rhythm around the pot.
Step 4: The Bottom Border
-
Create the delicate band:
Just below the main white section, paint a very thin horizontal stripe using the liner brush and white paint. I prefer to steady my hand against the table surface for this. -
Add cross-hatching:
Beneath that thin stripe, paint a slightly wider band (about 1/4 inch). Once dry, use a fine liner brush with watered-down brown or grey paint to create tiny cross-hatch marks for a textured look. -
Paint the scallop trim:
Below the textured band, paint a row of small, connecting semicircles (scallops) in white. -
Finish with dots:
Fill the inside of each scallop with a solid white circle or dot to complete the lace-like border effect. -
Seal the pot:
Allow the entire project to cure for at least 24 hours. Finish by spraying the pot with a clear matte sealer to protect your detailed work from moisture and soil.
Place your favorite herb or succulent inside to bring your painted garden to life
Mandala Dot Rings Around the Rim
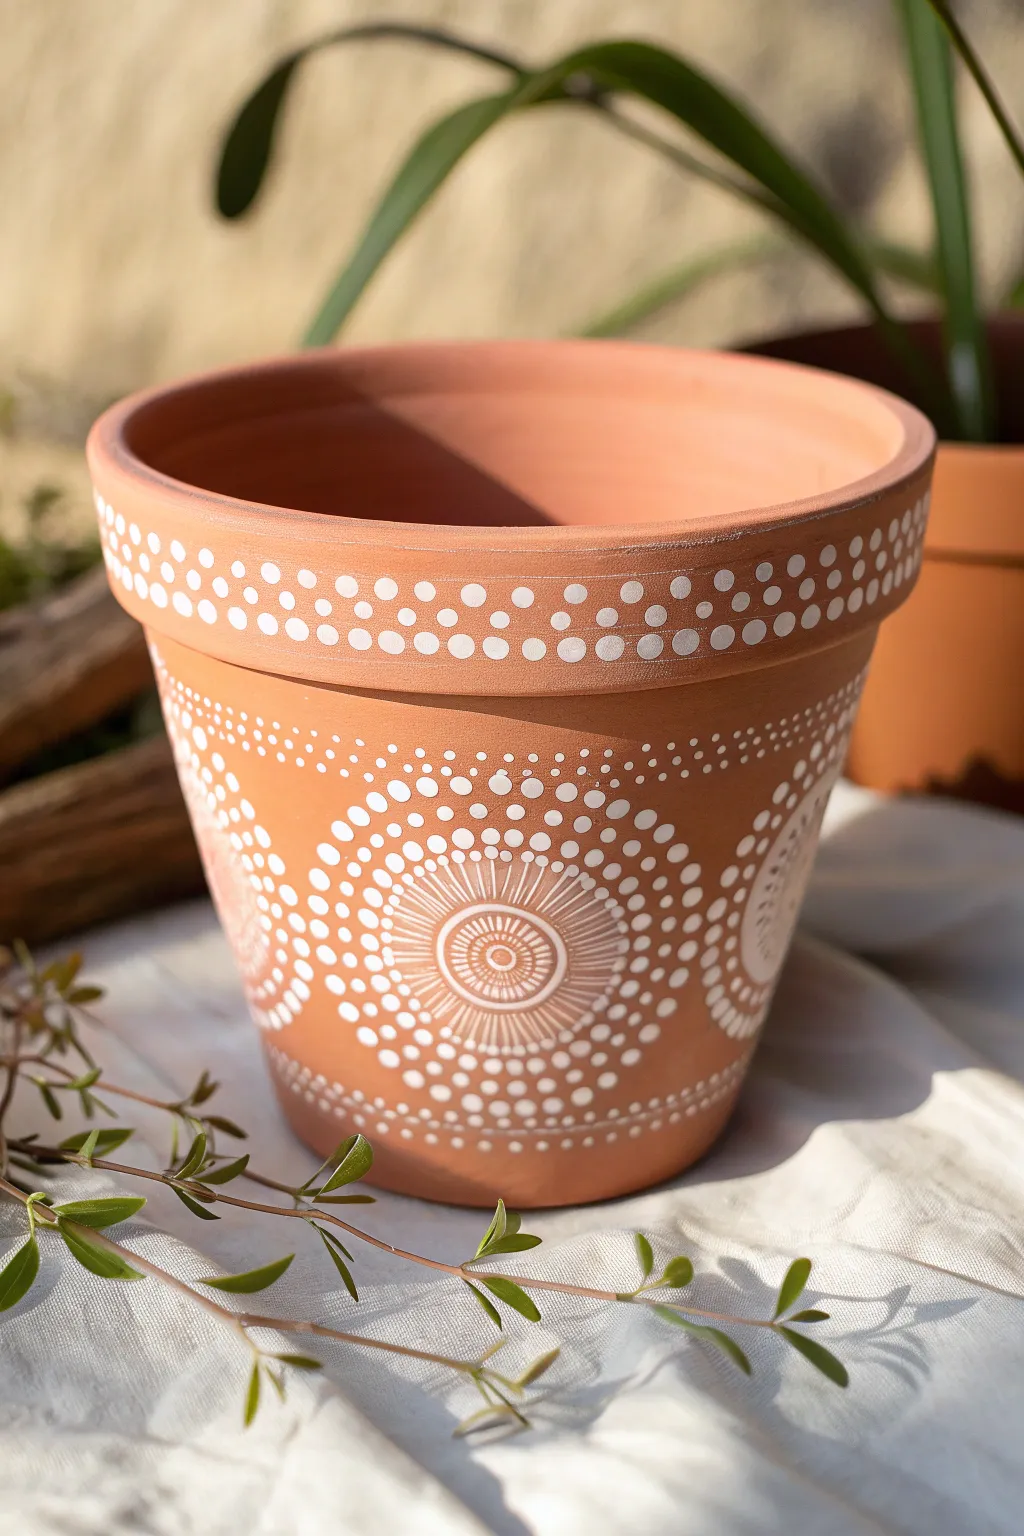
Transform a plain terracotta vessel into a bohemian masterpiece featuring striking white mandala patterns that mimic radiant sunbursts. The contrast of crisp white acrylic against the warm clay creates a timeless, earthy look perfect for succulents or herbs.
How-To Guide
Materials
- Clean terracotta pot (standard rim style)
- White acrylic craft paint (outdoor/multi-surface preferred)
- Dotting tool set (various sizes)
- Small fine-liner detail brush (size 0 or 00)
- Damp cloth or paper towel
- Clear matte or satin sealant spray
- Palette or small dish for paint
Step 1: Painting the Rim Pattern
-
Clean surface:
Begin by wiping the terracotta pot thoroughly with a damp cloth to remove any dust or debris, then let it dry completely so the paint adheres properly. -
Load your paint:
Pour a small amount of white acrylic paint onto your palette. It should be creamy but not too runny—add a drop of water only if it’s very thick. -
Start the rim dots:
Select a medium-sized dotting tool. Dip it into the paint and create a row of dots along the upper edge of the rim, spacing them evenly apart. -
Add the second row:
Using the same tool, place a second row of dots directly below the first set. Try to align them so they sit in the gaps between the upper dots (staggered) or directly below, depending on your preferred spacing. -
Complete the band:
Continue this dot pattern all the way around the rim, reloading your tool frequently to keep the dots consistent in size and opacity.
Consistent Circles
If you struggle with freehand circles, trace a bottle cap or coin lightly with a pencil first to guide your brush work and ensure perfect rounds.
Step 2: Creating the Main Sunburst Medallions
-
Establish the centers:
Decide where you want your main medallions to sit on the pot’s body. Use a large dotting tool to place a prominent central dot for each medallion, spacing these main focal points equally around the pot. -
Draw the inner rings:
Switch to your fine-liner brush. Carefully paint two concentric circles around the central dot. Keep the lines thin and delicate. -
Add the sun rays:
Using the fine-liner brush again, paint thin, straight lines radiating outward from the outermost circle you just painted. These lines represent the sun’s rays. -
Enclose the rays:
Paint a clean, thin circle that connects the tips of all your radiant lines, enclosing the sunburst shape.
Step 3: Adding the Dot Mandalas
-
First ring of large dots:
Choose a medium-large dotting tool. Place a ring of dots around the outside of your sunburst circle. I find it easiest to place four ‘compass point’ dots first (top, bottom, left, right) to ensure even spacing before filling in the gaps. -
Second ring of medium dots:
Switch to a slightly smaller tool. Add a second ring of dots outside the first one, placing each new dot in the ‘valley’ between two previous dots. -
Third ring of small dots:
Using an even smaller tool, create a third expanding ring. This gradient of dot sizes adds depth and draws the eye inward. -
Final tiny outer ring:
Finish the medallion with a final ring of very small, delicate dots using your smallest tool or the tip of a toothpick.
Level Up: Color Pop
Instead of pure white, try an ombré effect for the dot rings using shades of turquoise or coral to give the design a vibrant, sunset feel.
Step 4: Connecting and Finishing Details
-
Connect the medallions:
Repeat the sunburst and dotting process for all medallions around the pot. If they touch or overlap slightly, that adds to the cohesive pattern. -
Fill empty spaces:
Inspect the areas between the large medallions. Use your smallest dotting tool to add simple swoops or lines of tiny dots to bridge the gaps and connect the design visually. -
Top border definition:
Paint a thin line of tiny dots just under the rim of the pot, acting as a border between the rim decoration and the main body pattern. -
Bottom border definition:
Create a similar border near the base of the pot with a horizontal line of small to medium dots to ground the design. -
Let it dry:
Allow the paint to dry completely for at least 24 hours. Terracotta is porous, so ensure no moisture remains in the paint layers. -
Seal the deal:
Spray the entire pot with a clear matte or satin sealant. This protects your artwork from watering and soil moisture.
Place your favorite green plant inside and enjoy the handmade charm of your new patterned pot


What Really Happens Inside the Kiln
Learn how time and temperature work together inside the kiln to transform clay into durable ceramic.
Negative Space With Raw Terracotta
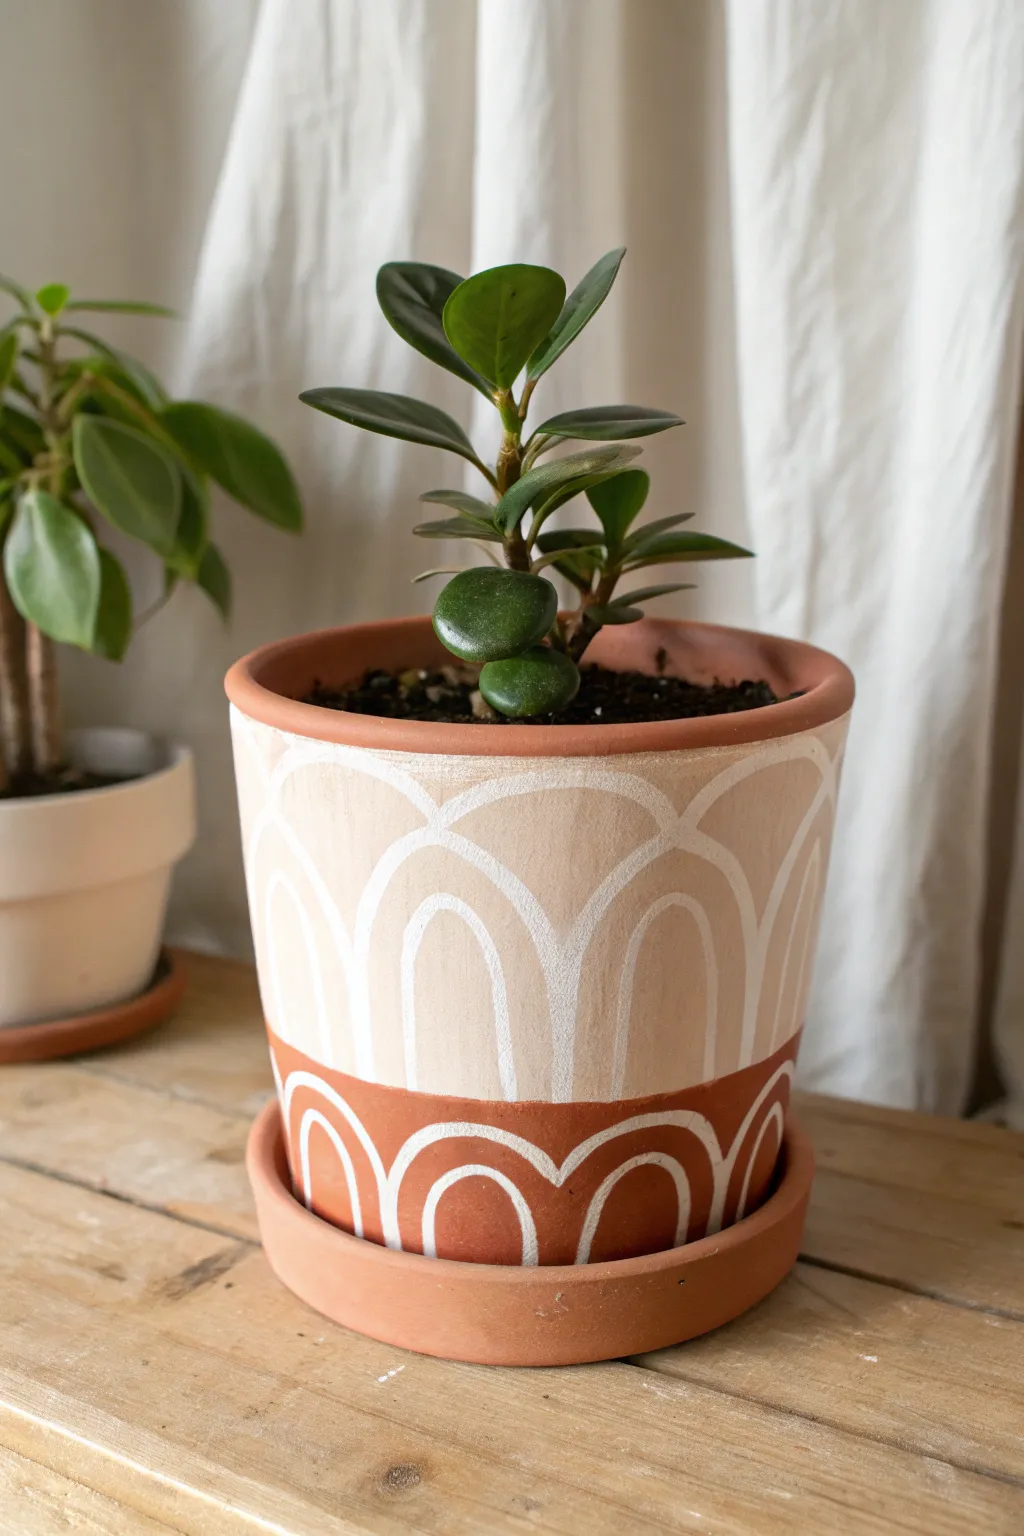
Embrace the natural warmth of unglazed clay by incorporating it directly into your design with this modern bohemian arched pattern. The contrast between the raw terracotta and the soft blush top creates a grounded yet airy look, perfect for housing your favorite houseplants.
Step-by-Step Guide
Materials
- Standard terracotta pot (4-inch or 6-inch)
- Matching terracotta saucer
- Acrylic craft paint (blush pink/sand color)
- White paint pen (medium tip)
- White paint pen (fine tip) – optional
- Painter’s tape or washi tape
- Medium flat paintbrush
- Pencil
- Eraser
- Clear matte sealer (spray or brush-on)
- Ruler or measuring tape
Step 1: Preparation & Mapping
-
Clean surface:
Begin by thoroughly wiping down your terracotta pot and saucer with a damp cloth to remove any dust or debris that might prevent paint adhesion. -
Dry completely:
Allow the clay to dry fully before you start painting; terracotta is porous and holds moisture, which can bubble your paint if rushed. -
Establish the horizon line:
Decide where you want the color split to happen. In this design, the painted section occupies the top two-thirds, while the raw clay remains at the bottom third. -
Apply tape guide:
Wrap a piece of painter’s tape around the circumference of the pot at your chosen height to create a crisp, straight line for the painted upper section. -
Seal the tape edge:
Press down firmly along the top edge of the tape with your fingernail or a credit card to prevent paint from bleeding underneath.
Uneven Paint Lines?
If paint bleeds under the tape, wait for it to dry completely. Then, use a fine-grit sandpaper to gently scrape away the unwanted drip from the raw terracotta section.
Step 2: Painting the Base
-
Mix your shade:
If you don’t have the perfect blush-sand color, mix a little white into a basic terra cotta or peach acrylic paint to achieve that soft, earthy tone. -
Apply first coat:
Using a medium flat brush, paint the entire area above the tape line with your chosen color. Don’t worry if it looks streaky at first. -
Paint inside rim:
Don’t forget to paint the inner rim (about an inch down) so the unpainted clay doesn’t show when soil is added. -
Let it dry:
Wait about 15-20 minutes for the first coat to dry to the touch. -
Apply second coat:
Apply a second layer of paint for opaque, solid coverage. I usually find two coats are sufficient, but add a third if needed. -
Remove tape:
Carefully peel off the painter’s tape while the final coat is still slightly tacky to ensure a clean, sharp line.
Pattern Advice
Use a round object like a small jar lid or a bottle cap to trace your initial pencil arches. This guarantees they are all uniform in size before you commit with ink.
Step 3: Drawing the Design
-
Sketch the pattern:
Once the base paint is fully cured, lightly sketch the arch pattern with a pencil. Start with a row of semi-circles along the bottom raw section, then mirror them on the painted top section. -
Outline main arches:
Shake your medium-tip white paint pen well and trace over your pencil lines to create the primary arch shapes. -
Add inner arches:
Draw a smaller arch inside each larger arch to create the double-rainbow effect seen in the project image. -
Connect the peaks:
Draw a curved line connecting the peaks of the top arches to create a scalloped effect near the rim of the pot. -
Refine lines:
Go over any thin lines a second time with the paint pen to make the white pop against the background. -
Clean up:
Once the paint marker is completely dry, gently erase any visible pencil marks. -
Seal the pot:
Finish by applying a clear matte sealer over the entire pot (inside and out) to protect your artwork from water damage when watering your plant.
Now you have a stylish, custom planter that perfectly highlights your greenery without overpowering it
Speckled Terrazzo-Inspired Finish
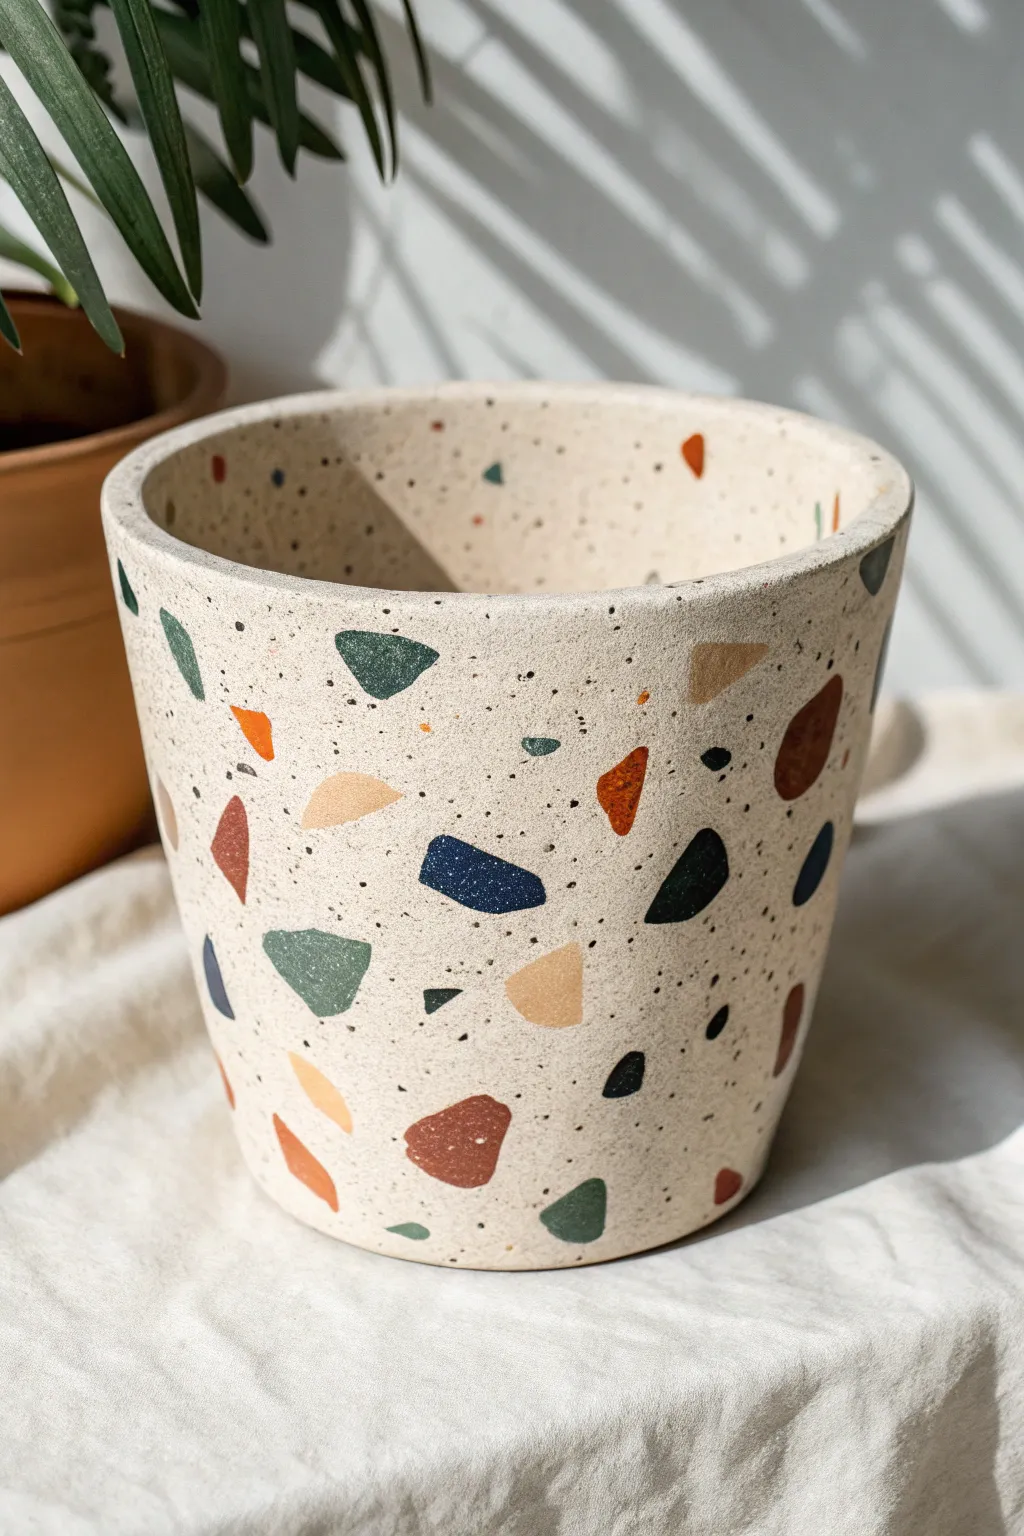
Transform a plain planter into a trendy, high-end decor piece with this surprisingly simple painting technique. The result is a creamy, stone-like finish scattered with colorful, organic shapes that mimics the look of authentic terrazzo without the weight or cost.
Step-by-Step
Materials
- Terracotta pot (clean and dry)
- White or cream acrylic paint (matte)
- Baking soda (optional, for texture)
- Assorted acrylic craft paints (navy blue, burnt orange, mustard yellow, forest green, terracotta)
- Small flat brush
- Old toothbrush
- Cardboard or palette
- Clear matte sealer spray
Step 1: Base Coat Prep
-
Clean surface:
Begin by wiping down your terracotta pot with a damp cloth to remove any dust or oils. Let it dry completely. -
Mix textured paint:
To achieve that realistic stone feel, mix your cream acrylic paint with baking soda. I like to use a 1:1 ratio, but aim for a fluffy, mousse-like consistency. -
Apply first layer:
Brush the baking soda mixture all over the exterior of the pot. Don’t worry about brush strokes; the texture is part of the charm. -
Paint the rim:
Don’t forget to paint the top rim and a few inches inside the pot so the soil line looks finished. -
Add second coat:
Once the first layer is dry to the touch (usually 15-20 minutes), apply a second coat for solid, opaque coverage.
Step 2: Creating the Chips
-
Plan your palette:
Squeeze dime-sized amounts of your colored acrylics—navy, burnt orange, mustard, deep green, and terracotta—onto your palette. -
Paint large shards:
Using a small flat brush, paint random, angular shapes on the pot. Think triangles, trapezoids, and irregular polygons rather than perfect circles. -
Rotate the pot:
Work around the pot, spacing out the colors so two shapes of the same color aren’t right next to each other. -
Vary sizes:
Make some shapes large (thumbnail size) and others quite tiny to mimic the random aggregate found in real terrazzo. -
Wrap the pattern:
Continue painting shapes over the rim and slightly inside the top edge for a continuous look. -
Let shapes dry:
Allow the painted shapes to dry completely before moving to the speckling phase to avoid smearing.
Keep it Clean
Practice your toothbrush splattering on a piece of cardboard first to get the feel for the distance and pressure needed for fine mists versus big globs.
Step 3: The Speckled Finish
-
Prepare splatter paint:
Water down a small amount of black or dark grey paint until it is inky and fluid. -
Load the toothbrush:
Dip an old toothbrush into the watered-down paint, tapping off any excess drips. -
Splatter technique:
Hold the toothbrush a few inches from the pot and run your thumb across the bristles to flick tiny specks of paint onto the surface. -
Control density:
Rotate the pot as you splatter to ensure even coverage, adding more density in some areas for a natural stone look. -
Final drying:
Let the entire pot cure for at least 24 hours to ensure the thick base coat is hardened. -
Seal the deal:
Finish with a clear matte spray sealer to protect your artwork from water damage and scratches.
Color Coordination
For a cohesive look, choose paint colors for your ‘chips’ that match the undertones of the room where the plant will live, or pull colors from nearby textiles.
Now your custom planter is ready to house your favorite greenery

TRACK YOUR CERAMIC JOURNEY
Capture glaze tests, firing details, and creative progress—all in one simple printable. Make your projects easier to repeat and improve.
Marble Swirls and Paint Pour Waves
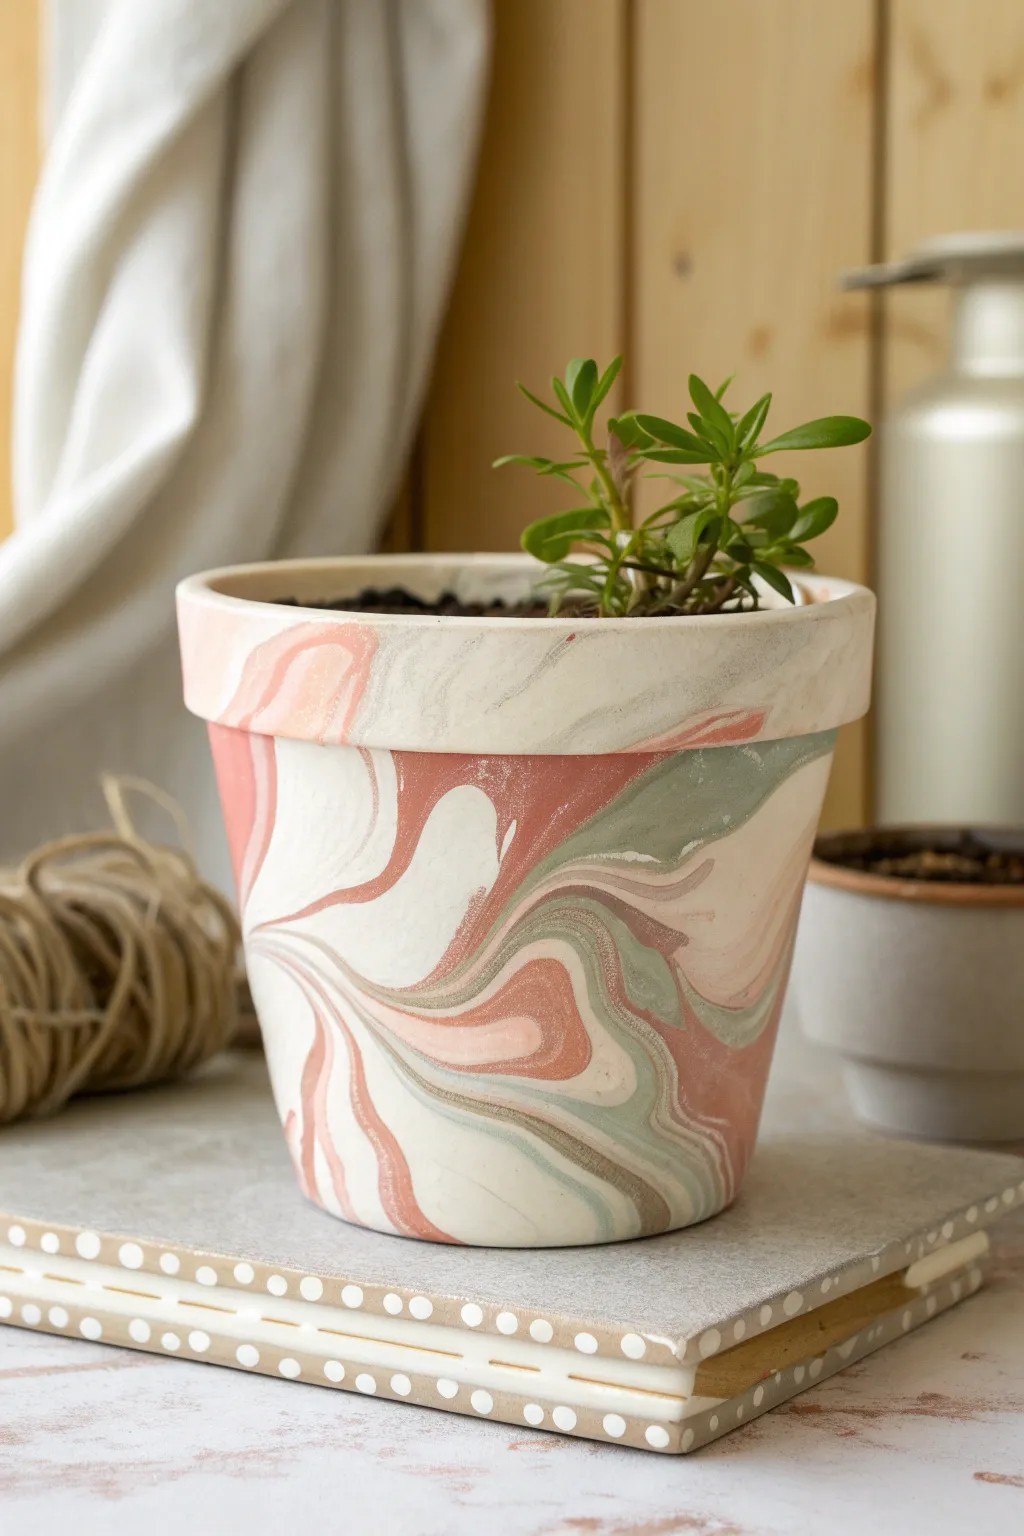
Transform a basic terracotta pot into a chic, marble-effect masterpiece using delicate pastel tones. This hydro-dipping technique creates organic swirls of sage green, peach, and cream that make every single planter completely unique.
Step-by-Step Guide
Materials
- Terracotta pot (4-6 inch size)
- White acrylic craft paint or primer
- Spray paints (matte finish preferred) in: Cream/Off-White, Sage Green, Muted Peach/Terracotta, Grey-Brown
- Large plastic bin or bucket (deep enough to submerge the pot)
- Water
- Disposable gloves
- Painter’s tape
- Bamboo skewer or toothpick
- Clear matte sealer spray
- Cardboard or drop cloth
Step 1: Preparation & Base Coat
-
Clean the surface:
Wipe your terracotta pot down thoroughly with a damp cloth to remove any dust or manufacturing residues. Let it dry completely before starting, as moisture can trap bubbles under the paint. -
Apply the base coat:
Using a brush or sponge, apply a solid coat of white acrylic paint or primer to the entire exterior of the pot, including the inner rim. This ensures the pastel colors you dip later will pop rather than sinking into the orange clay. -
Let it cure:
Allow the base coat to dry fully. If the terracotta color is still showing through, add a second coat for a pristine, blank canvas. -
Protect the inside:
Use painter’s tape to seal off the drainage hole from the inside and cover the interior walls of the pot if you want to keep them clean. I usually just tape the hole to prevent water from rushing in too quickly.
Water Temperature Tip
Use lukewarm water (around 70-75°F). Cold water causes the paint to clump instantly, while hot water creates a gummy film. Room temp keeps the paint fluid longer.
Step 2: Creating the Marble Dip
-
Prepare the water bath:
Fill your large plastic container with lukewarm tap water. The temperature matters—if it’s too cold, the paint creates a film too quickly; room temperature works best. -
Spray the primary color:
Shake your spray cans vigorously. Start by spraying your lightest color—the cream or off-white—generously onto the center of the water’s surface. -
Add accent colors:
Immediately spray the sage green into the center of the white paint circle, followed by the peach/terracotta shade. -
Create contrast:
Finish by adding small bursts of the grey-brown paint. Don’t overdo this dark shade; just a quick spritz adds necessary depth to the pattern. -
Swirl the pattern:
Working quickly before the paint films over, use a bamboo skewer to gently drag through the floating paint. Create marble-like veins, but don’t over-mix or the colors will become muddy.
Gilded Edges
After the marble design is dry, use a small detail brush to paint the very top rim of the pot with liquid gold leaf for a high-end, modern finish.
Step 3: Dipping & Finishing
-
The dip technique:
Put on your gloves. Hold the pot by the inside rim (or mount it on a sturdy bottle/jar) and slowly lower it into the water at a 45-degree angle. Rotate the pot slowly as you submerge it to wrap the paint around the sides. -
Clear the surface:
Once the pot is fully submerged, blow gently on the remaining surface paint to push it away, or swipe it aside with a piece of cardboard before pulling the pot back up through the clean water. -
Identify gaps:
Inspect the pot immediately. If you missed a spot or want more swirls in a specific area, you can do a second, targeted dip once the first layer is dry to the touch. -
Remove water drops:
Gently shake off excess water. If large water droplets are sitting on the paint, very carefully dab them with the corner of a paper towel so they don’t leave water marks as they dry. -
Dry time:
Place the pot upside down on a protected surface or propped up on a bottle. Let it dry completely for at least 24 hours to ensure all moisture trapped between the paint and clay evaporates. -
Seal the deal:
Once fully cured, take the pot outside and spray it with a clear matte sealer. This protects the delicate paint from water damage when you eventually water your plant.
Now you have a stunning, artisanal vessel ready to house your favorite succulents or herbs
Starry Night Sky Constellations
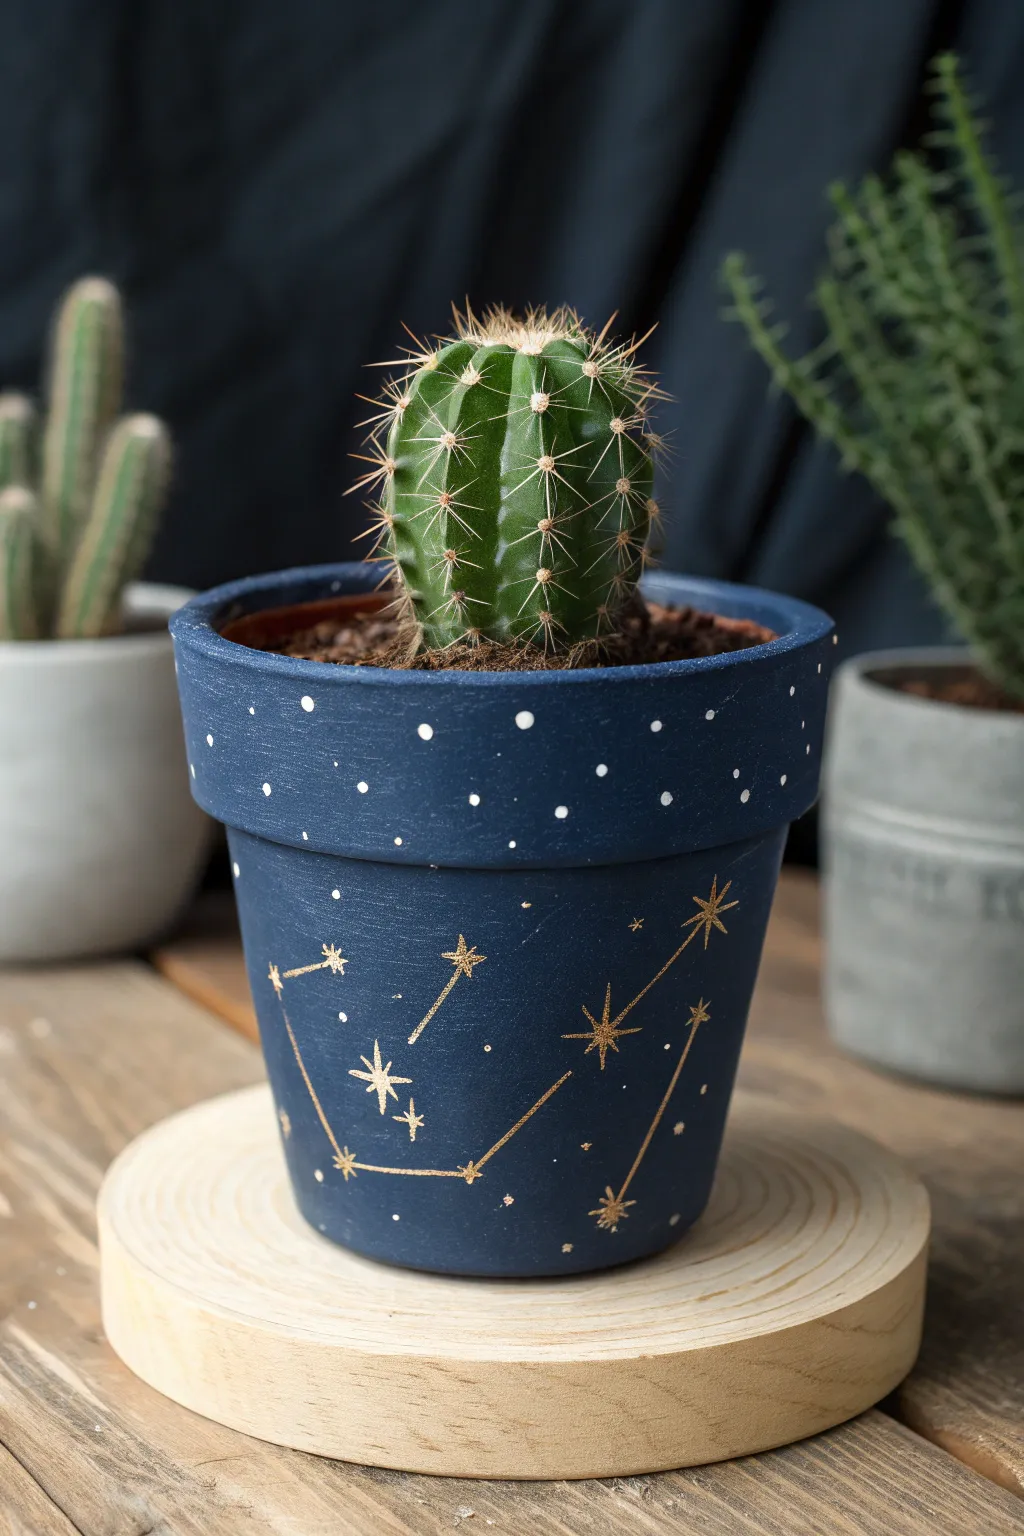
Transform a basic terracotta pot into a piece of the night sky with this elegant celestial design. The deep matte navy background provides the perfect contrast for shimmering gold constellations and delicate white star-specks.
Step-by-Step
Materials
- Terracotta pot (4-6 inch diameter)
- Navy blue acrylic paint (matte finish)
- Metallic gold paint or gold paint pen (fine tip)
- White acrylic paint
- Small flat paintbrush
- Fine liner brush or toothpick
- Pencil
- Clean toothbrush (optional)
- Clear acrylic sealer (spray or brush-on)
- Paper plate or palette
Step 1: Base Coat Preparation
-
Clean the Pot:
Start with a clean, dry terracotta pot. Wipe away any dust or debris with a damp cloth and let it dry completely to ensure the paint adheres well. -
Apply First Coat:
Squeeze some navy blue acrylic paint onto your palette. Using the flat paintbrush, apply a smooth, even coat over the entire exterior of the pot, including the top inch of the inner rim. Don’t worry if it looks streaky yet. -
Let Dry:
Allow the first coat to dry for about 20-30 minutes. Terracotta absorbs paint quickly, so this shouldn’t take long. -
Apply Second Coat:
Apply a second layer of navy paint to achieve a solid, opaque finish. Painting in a cross-hatch direction (perpendicular to your first strokes) helps eliminate brush marks.
Galaxy Depth
Sponge a tiny bit of lighter blue or purple paint behind the constellations before adding gold to create a nebula effect.
Step 2: Creating the Starry Rim
-
Prepare White Paint:
While the base coat finishes drying, put a tiny drop of white paint on your palette. You want a very small amount for delicate details. -
Dot the Rim:
Using the tip of a fine liner brush or the end of a toothpick, gently dab small white dots around the upper rim of the pot. Vary the spacing to keep it looking organic. -
Vary Dot Sizes:
To make the stars look more realistic, press slightly harder for some dots and lighter for others, creating a mix of larger ‘planets’ and tiny distant stars. -
Splatter Technique (Optional):
If you feel adventurous, dip a clean toothbrush in slightly watered-down white paint and flick the bristles with your thumb to spray a fine mist of stars. I prefer to do this just on the rim, masking off the bottom section.
Step 3: Mapping the Constellations
-
Sketch the Design:
Once the blue base is bone dry, lightly sketch your constellation lines with a pencil. You can look up real constellations like Cassiopeia or the Big Dipper, or simply invent your own geometric star patterns. -
Draw Connection Lines:
Using a gold paint pen or a fine liner brush dipped in metallic gold paint, trace over your pencil lines to create the thin connectors between stars. -
Add Main Stars:
At the intersection points of your lines, paint small x-shapes or simple 5-point stars in gold. These represent the major stars in the constellation. -
Emphasize Bright Stars:
Select two or three ‘major’ stars to highlight. Make these slightly larger or give them longer rays to create a twinkling effect. -
Fill the Void:
Add tiny gold dots randomly in the empty navy spaces around your constellations to fill out the galaxy without overcrowding the design.
Paint Peeling?
Terracotta is porous and holds moisture. Always seal the *inside* of the pot with a waterproofing spray before painting the outside to stop bubbling.
Step 4: Finishing Up
-
Dry Completely:
Let all the paint work dry for at least 6-12 hours so the gold details set fully. -
Seal the Project:
Apply a clear acrylic sealer over the entire painted surface. A matte sealer keeps the velvety look of the night sky, while a gloss sealer will make the gold pop more. This step is crucial to protect the paint from water damage when you water your plant.
Place your favorite cactus inside to complete this stellar display
Chalkboard Panels for Plant Labels
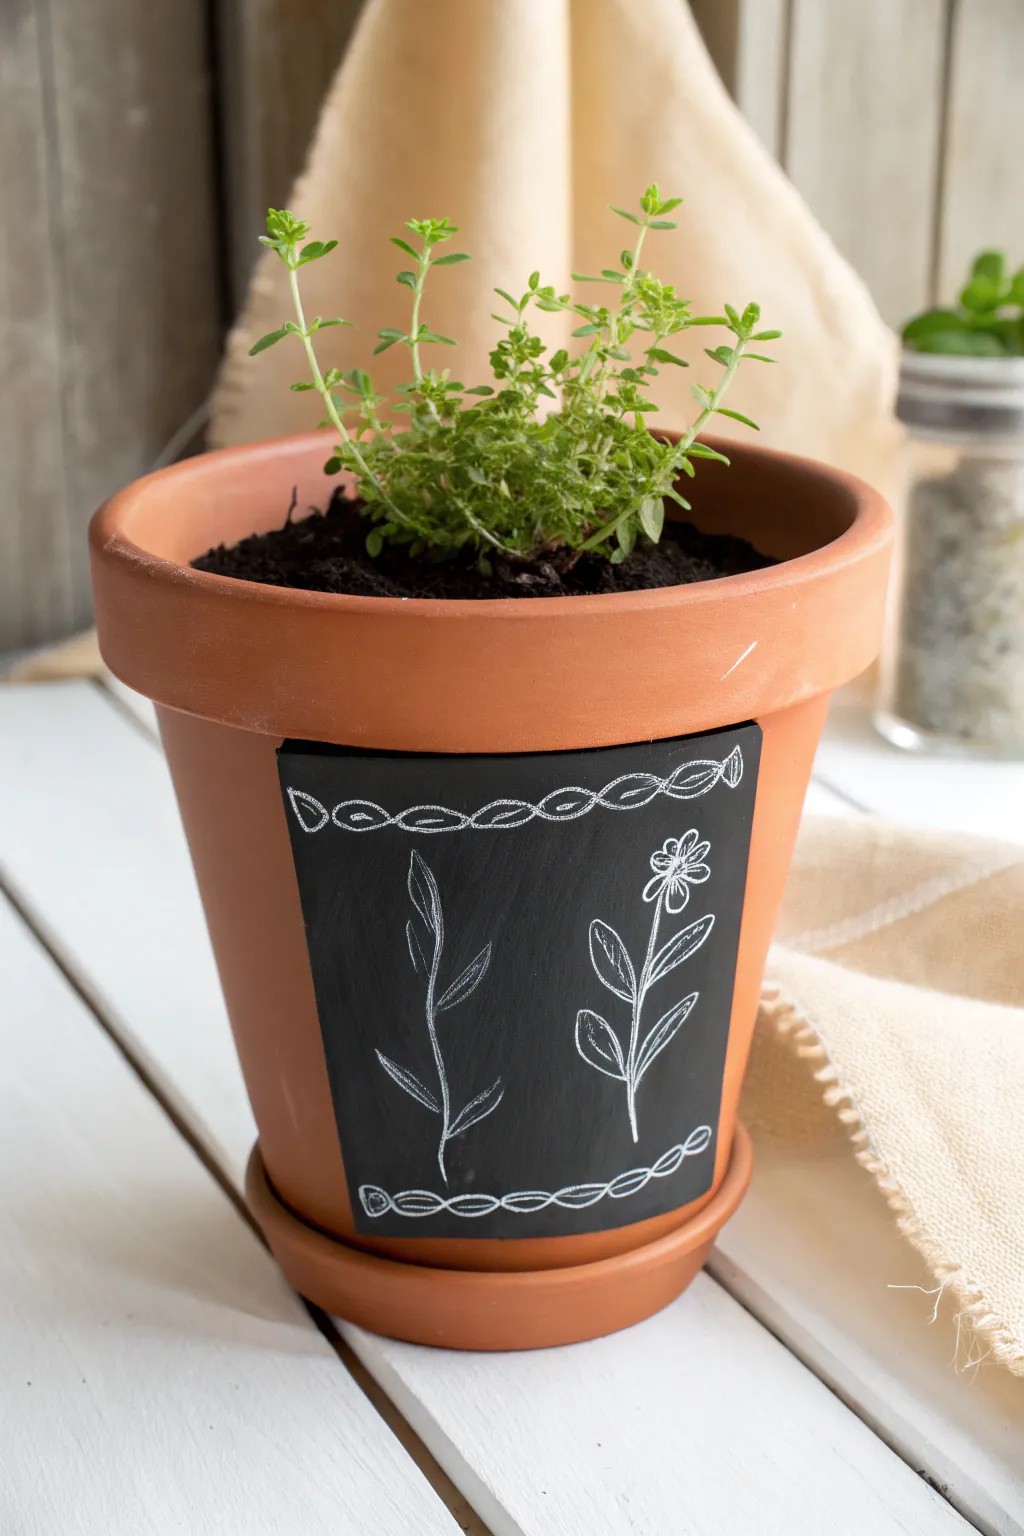
Transform a standard terracotta pot into a customizable piece of decor with a simple painted chalkboard panel. This classic look combines rustic clay tones with a functional surface perfect for doodling plant illustrations or writing herb names.
Detailed Instructions
Materials
- Standard terracotta pot (cleaned)
- Painter’s tape or masking tape (approx. 2 inch width)
- Black chalkboard paint
- Flat paintbrush (medium size)
- White liquid chalk marker or traditional chalk
- Rubbing alcohol
- Paper towel
Step 1: Preparation & Masking
-
Clean surface:
Ensure your terracotta pot is completely clean and dry. A quick wipe with rubbing alcohol on a paper towel removes unseen oils that might prevent the paint from sticking. -
Define the width:
Decide how wide you want your chalkboard panel to be. Cut two vertical strips of painter’s tape and place them on the pot to mark the left and right boundaries of your rectangle. -
Define the height:
Cut two horizontal strips of tape. Place the top strip just below the pot’s rim and the bottom strip just above the base, bridging the gap between your vertical tapes to form a clear rectangular window. -
Seal the edges:
Press down firmly along all inner edges of the tape frame with your fingernail or a credit card. This prevents the black paint from bleeding under the tape and ensures crisp lines.
Bleeding Edges?
If paint seeped under the tape, wait for it to dry fully, then gently scrape the excess off the bare terracotta with an X-Acto knife or a sandpaper block.
Step 2: Painting the Panel
-
First coat:
Dip your flat paintbrush into the chalkboard paint. Apply a thin, even layer inside the taped rectangle, using horizontal strokes. Don’t worry if the terracotta shows through slightly; thin layers are best. -
Dry time:
Let this first coat dry for at least one hour. If you rush this part, the second coat might pull up the first one. -
Second coat:
Apply a second layer of chalkboard paint. This time, try using vertical strokes to create a cross-hatch pattern, which creates a stronger surface for writing. -
Final dry:
Allow the paint to cure completely. Most chalkboard paints require 24 hours to fully harden before you can write on them, so patience is key here. -
Remove tape:
Carefully peel away the painter’s tape while the paint is fully dry. Pull the tape away from the painted area at a sharp 45-degree angle to keep the edges sharp.
Step 3: Illustration & Styling
-
Prime the surface:
I like to take a piece of regular chalk and rub the side of it over the entire black panel, then wipe it off with a dry tissue. This ‘reasons’ the board so your first marks don’t leave permanent ghosts. -
Draw the top border:
Using a white chalk marker or sharpened chalk, draw a horizontal line across the top of the black rectangle. Add a second parallel line just below it. -
Detail the border:
Draw small ovals or loops inside your parallel lines to create a chain-link or braided effect. -
Repeat for bottom:
Recreate the same border design at the very bottom of the panel to frame your artwork. -
Sketch the left plant:
Draw a slightly wavy vertical line on the left side. Add simple, elongated leaves coming off the stem in alternating pairs. -
Sketch the right flower:
On the right side, draw another stem. Top it with a simple daisy-like flower head and add two larger leaves near the base of the stem. -
Clean up:
If you made any smudges, use a slightly damp cotton swab to erase specific small areas and sharpen your lines.
Make it Permanent
Love your drawing and want it to stay forever? Swap the chalk for a white acrylic paint pen. It mimics the chalkboard look but won’t smudge when watered.
Now you have a custom planter ready to showcase your favorite kitchen herbs
Metallic-Look Rim Dip Accent
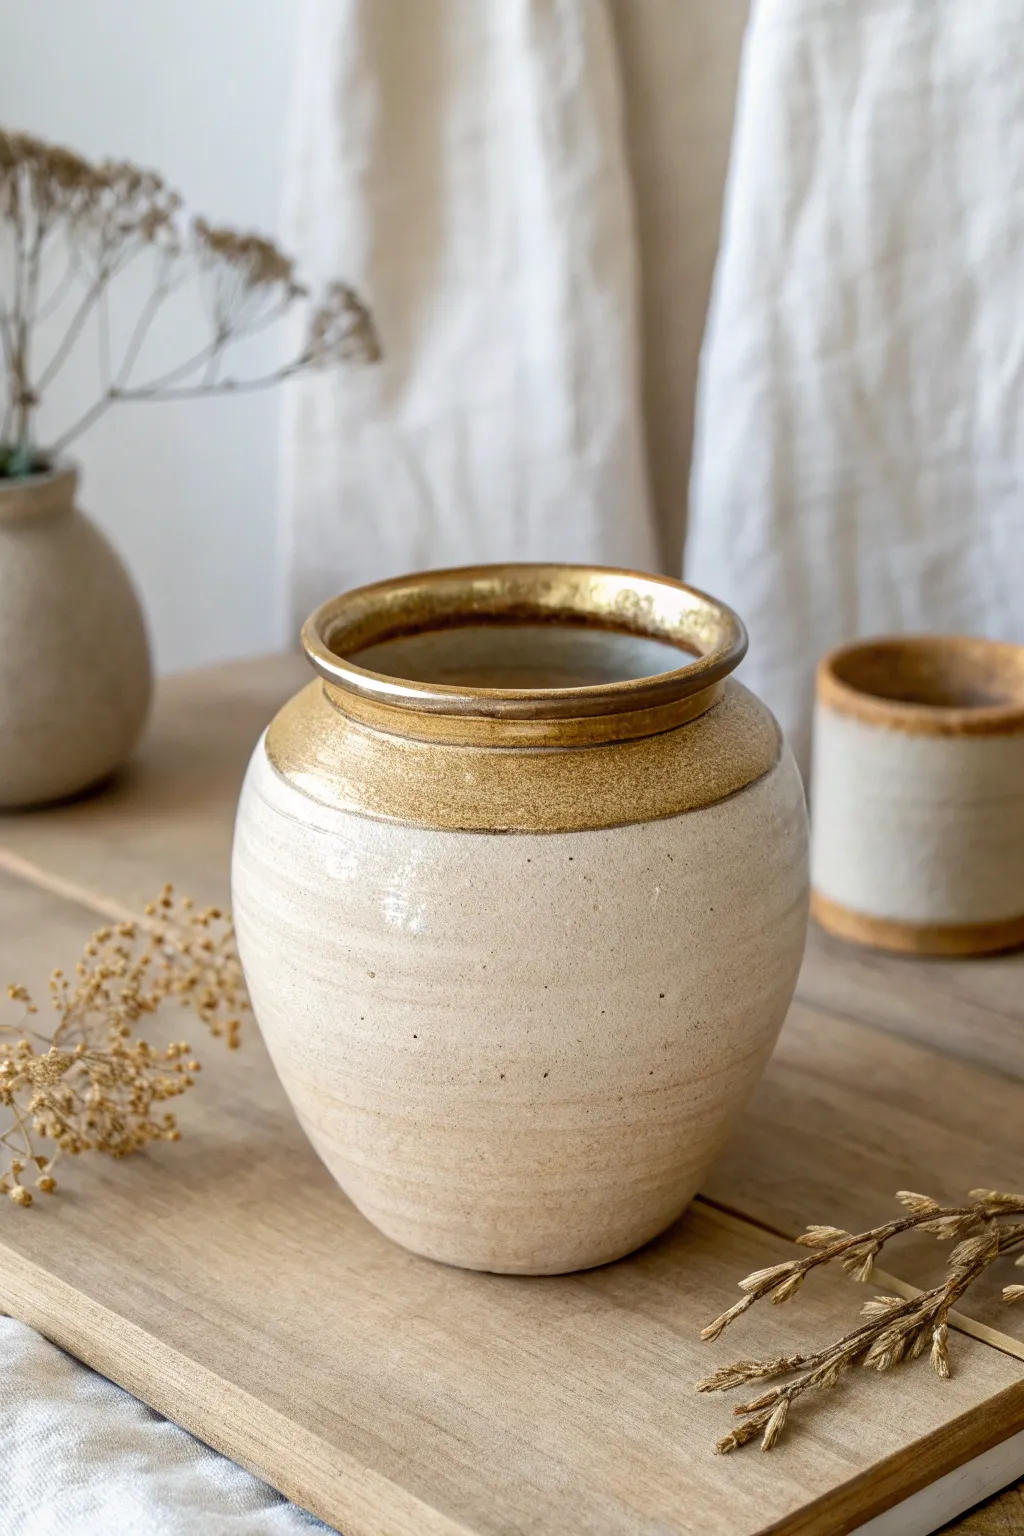
Turn an ordinary terra cotta or smooth ceramic vessel into a high-end stoneware lookalike with this easy layering technique. The combination of a textured, matte cream base with a striking metallic rim creates a beautiful blend of rustic warmth and modern elegance.
Step-by-Step Tutorial
Materials
- Round terra cotta pot or smooth ceramic vase
- Cream or off-white chalk paint
- Baking soda (for texture)
- Liquid gold leaf or high-gloss metallic gold acrylic paint
- Soft synthetic paintbrush (medium size)
- Small foam pouncer or sponge
- Fine grit sandpaper (220 grit)
- Matte sealer spray
- Painters tape (optional)
Step 1: Creating the Faux Stoneware Base
-
Prep the Surface:
Begin by cleaning your pot thoroughly to remove any dust or oils. If you are using a slick ceramic vase, give it a quick scuff with fine-grit sandpaper to help the paint adhere better. -
Mix the Texture:
In a small disposable cup, mix your cream chalk paint with baking soda. Start with a ratio of roughly 1 part baking soda to 2 parts paint. You want a consistency that feels like fluffy mousse or thick batter. -
Apply the First Base Coat:
Using a paintbrush, apply this textured mixture all over the exterior of the pot, stopping just below the inner rim. Don’t worry about being smooth; horizontal brush strokes add to the hand-thrown pottery look. -
Stipple for Detail:
While the paint is still wet, take your foam pouncer or a dry sponge and gently dab the surface. This knocks down heavy brush marks and creates that realistic, grainy stone texture. -
Let it Dry:
Allow this first thick coat to dry completely. Because of the baking soda, it may take 1-2 hours. It should feel hard and chalky to the touch. -
Add a Second Layer:
Apply a second coat of the paint-baking soda mixture. I find this second layer builds the necessary depth to hide the original material of the pot completely. -
Smooth the High Points:
Once fully dry, take a piece of sandpaper and very lightly graze it over the surface. You aren’t sanding the paint off, just knocking down any overly sharp peaks of texture for a naturally worn feel. -
Seal the Base:
Spray the entire pot with a clear matte sealer. This is crucial because the baking soda mixture is porous and will absorb the metallic paint if not sealed first.
Paint Peeling off?
If the baking soda paint flakes off, you likely added too much powder. Remove loose bits, prime the spot, and re-apply a mix with more paint and less soda.
Step 2: The Metallic Dipped Rim
-
Define the Rim Area:
Decide how far down you want the gold accent to go. For the look in the photo, stick to the top architectural lip of the vessel. You can use painter’s tape for a crisp line, or go freehand for an organic feel. -
Apply Gold Base:
Load a clean, soft brush with your liquid gold leaf or metallic paint. Start painting the inside of the rim first, going down about one inch so the original pot color doesn’t show from the top view. -
Paint the Top Lip:
Carefully paint the very top edge of the rim. Ensure broad, smooth coverage here as this catches the most light. -
Create the exterior band:
Paint the exterior band of the rim. Use long, horizontal strokes to mimic the direction of the pottery wheel. If you are going freehand, allow the bottom edge to be slightly imperfect for character. -
Assess and Recoat:
Liquid gold leaf is usually opaque in one coat, but if you are using acrylic metallic paint, you will likely need 2-3 coats. Let each layer dry for 20 minutes before adding the next. -
Add subtle distressing:
For an aged look, mix a tiny drop of brown paint with water to make a thin wash. Dab a paper towel into this and very lightly spot it onto the gold in random areas to simulate tarnishing. -
Soften the Transition:
If the line between the gold and the cream feels too stark, you can use a dry brush with a tiny amount of gold to lightly feather the edge downward, blending it slightly into the texture. -
Final Cure:
Liquid gold leaf is often oil-based and distinct from the water-based chalk paint, so allow the finished piece to cure for a full 24 hours in a well-ventilated area to eliminate fumes and set the finish.
Vintage Patina
Rub a dark wax or diluted brown paint into the cream textured section before sealing. Wipe away excess immediately to leave shadow in the crevices.
Place your newly transformed vessel on a wooden shelf and enjoy the sophisticated, handmade charm it adds to your space
Fruit-Themed Pots Using the Pot Shape
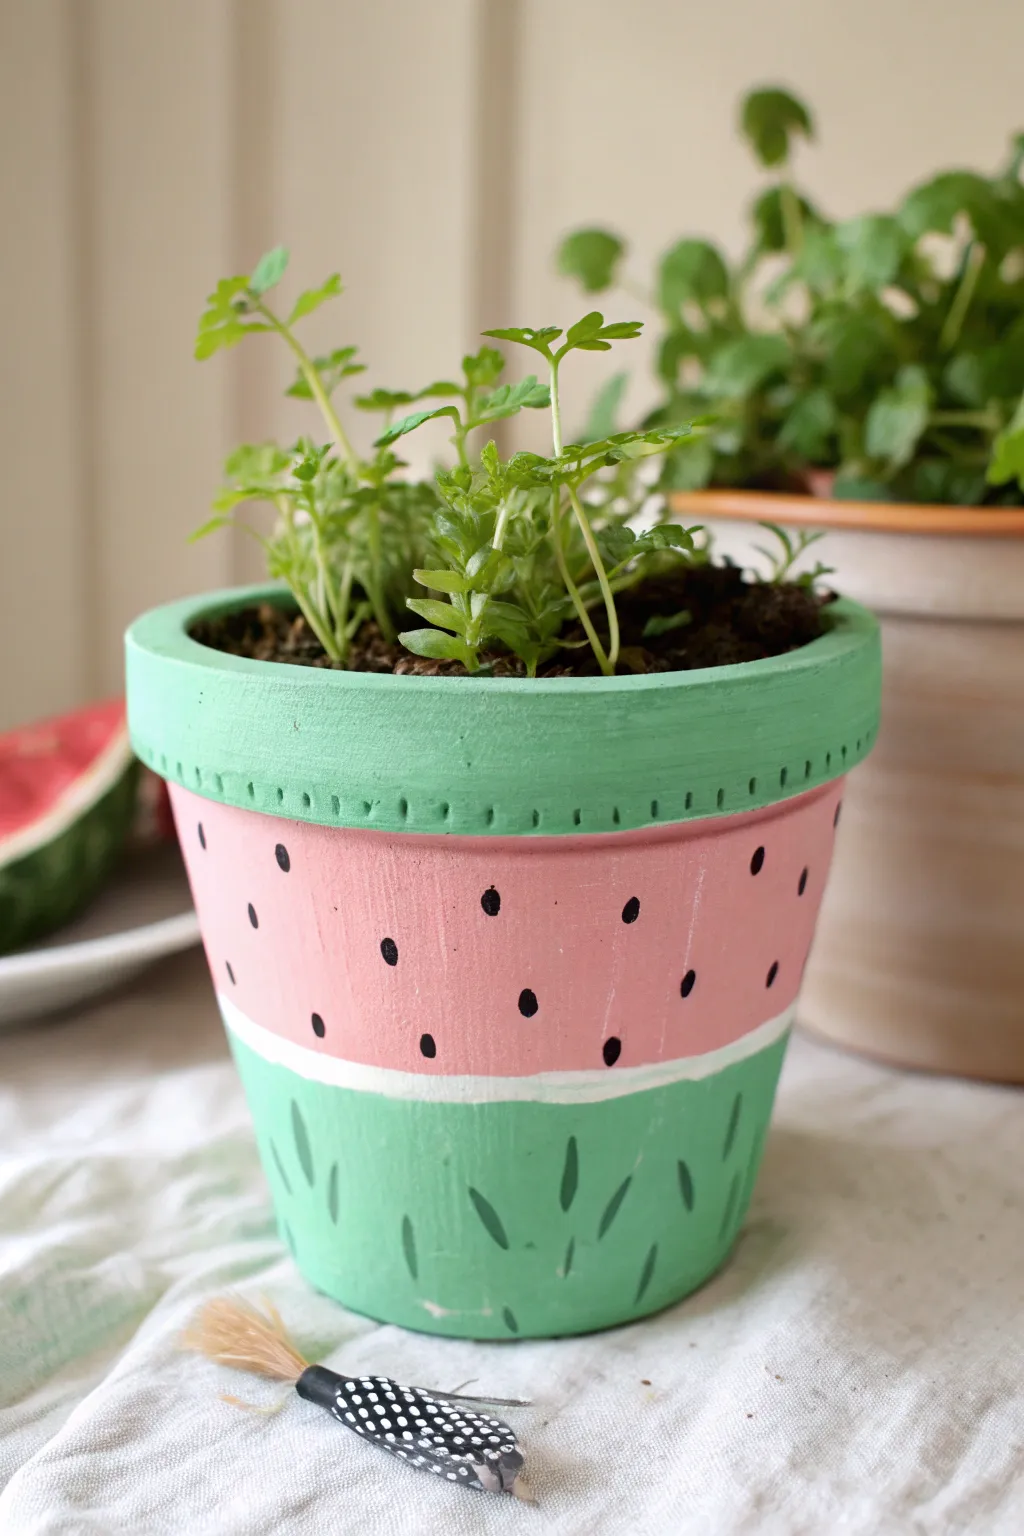
Transform a plain terracotta pot into a refreshing slice of summer with this adorable watermelon design. By using the natural shape of the pot’s rim, you can easily mimic the layers of rind and fruit for a playful, sweet addition to your indoor garden.
Detailed Instructions
Materials
- Terracotta pot (standard shape with rim)
- Acrylic paints: Bright pink/melon color, light mint green, medium green, dark green, white, black
- Flat paintbrushes (medium and large)
- Small round detail brush
- Water cup for rinsing
- Paper towels
- Palette or paper plate
- Sealant spray (clear matte or gloss)
Step 1: Painting the Fruit Flesh
-
Base coat preparations:
Begin by wiping down your terracotta pot with a damp cloth to remove any dust or debris, which ensures the paint adheres smoothly. -
Painting the body pink:
Using a large flat brush, paint the main body of the pot below the rim with your bright pink or melon-colored acrylic paint. -
Adding coverage:
Terracotta is porous and absorbs paint quickly, so let the first coat dry for about 10-15 minutes and apply a second coat of pink for full, opaque coverage. -
Painting the inner rim:
Don’t forget to paint the very top edge of the pot’s rim with a medium green to start distinguishing the rind, and carry this color just slightly inside the pot where soil won’t cover it.
Seed Spacing Tip
Don’t overthink the seed placement! Real watermelon seeds are random. Practice the teardrop shape on a scrap paper first.
Step 2: Creating the Rind
-
Painting the outer rim:
Switch to your medium green paint and cover the entire outer surface of the rim band. -
Adding texture detail:
If your pot has a textured pattern on the rim like the one shown, use a smaller brush to gently dab darker green into the crevices or impressions to make them pop. -
Painting the bottom section:
Paint the bottom third of the pot (below the pink section) with the same medium green used on the rim. You want to leave a small gap of unpainted space between the pink and green sections if possible, or just paint right up to the line. -
Defining the white rind:
Using a steady hand and a medium flat brush, paint a clean white stripe separating the pink fruit body from the green bottom section. This represents the inner white rind.
Fixing Wobbly Lines
If your white rind line isn’t straight, wait for it to dry, then use the pink or green paint to touch up and straighten the edges.
Step 3: Adding Seeds and Stripes
-
Painting the seeds:
Dip a small round detail brush into black paint. Create the watermelon seeds on the pink section by pressing down lightly and lifting up quickly to form a teardrop shape. -
Spacing the seeds:
Scatter the seeds randomly around the entire circumference of the pot, pointing the narrower end of the teardrops upward slightly. -
Adding outer rind stripes:
On the bottom green section, use a small brush and dark green paint to create vertical, slightly wavy dashes. -
Creating pattern variety:
Vary the length and angle of these dark green dashes to mimic the organic pattern found on real watermelon skin. -
Drying completely:
Allow the entire pot to dry completely, ideally for at least an hour, to prevent any wet paint from smearing during the sealing process.
Step 4: Finishing Up
-
Sealing the pot:
Take the pot to a well-ventilated area and spray it with a clear acrylic sealer. I prefer a matte finish for a natural look, but gloss works too. -
Waterproofing inside (optional):
If you plan to plant directly into the pot, consider sealing the inside as well to prevent moisture from bubbling the exterior paint over time. -
Planting:
Once fully cured (usually 24 hours), fill with potting soil and add a leafy green plant like cilantro or parsley to complete the look.
Now your juicy new planter is ready to add a pop of color to your windowsill or patio.
Whimsical Mushroom and Toadstool Pots
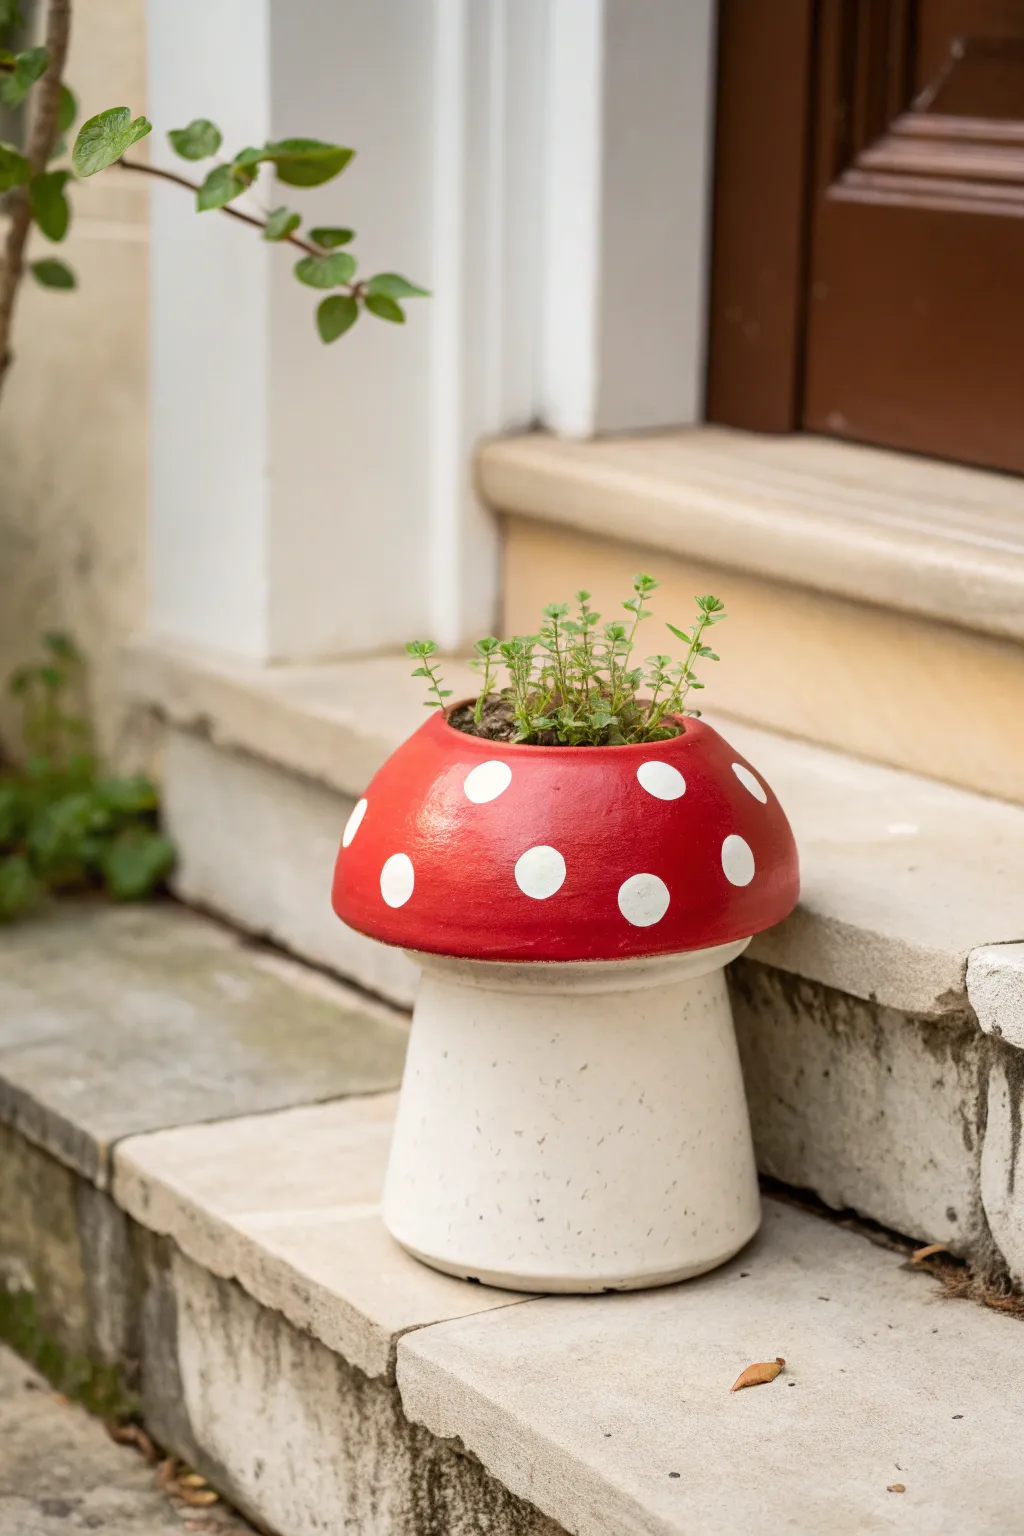
Transform a standard clay pot into a fairytale toadstool with this charming painting project. The bright red cap and creamy speckled stem create an adorable home for small herbs or cascading succulents.
How-To Guide
Materials
- One terra cotta pot (standard shape)
- One terra cotta saucer (slightly wider than the pot’s base)
- Sandpaper (medium grit)
- Outdoor acrylic craft paint: bright red
- Outdoor acrylic craft paint: creamy off-white or beige
- Outdoor acrylic craft paint: pure white
- Small amount of brown or grey paint (for speckling)
- Foam brushes and small detail brushes
- Round foam pouncer (for the dots)
- Strong waterproof adhesive (e.g., E6000 or heavy-duty construction adhesive)
- Outdoor clear sealant spray (matte or satin)
- Old toothbrush
Step 1: Preparation and Base Assembly
-
Clean the surfaces:
Begin by thoroughly cleaning your terra cotta pot and saucer to remove any dust or sticker residue. Let them dry completely before starting. -
Smooth the texture:
Lightly sand the exterior of both the pot and saucer to create a smoother surface for the paint to grip. -
Invert the pot:
Turn the terra cotta pot upside down. This will serve as the thick ‘stem’ of your mushroom. -
Dry fit the cap:
Place the saucer, also upside down, on top of the inverted pot’s base to ensure the fit looks proportional. The saucer acts as the mushroom cap. -
Glue the pieces:
Apply a strong waterproof adhesive like E6000 to the bottom rim of the inverted pot. Press the center of the underside of the saucer firmly onto the glue. Allow this to cure fully according to the glue manufacturer’s instructions, usually overnight.
Step 2: Painting the Stem
-
Base coat the stem:
Using a foam brush, paint the ‘stem’ (the inverted pot body) with your creamy off-white or beige paint. You will likely need 2-3 coats for solid coverage. -
Texture the stem:
To mimic the organic look of a real mushroom stalk, create a speckled texture. Dip an old toothbrush into a small amount of watered-down brown or grey paint. -
Flick the paint:
Run your thumb over the bristles to gently flick tiny specks of paint onto the dry beige stem. Practice on a paper towel first to control the spray.
Paint Peeling?
Terracotta is porous and absorbs moisture from soil, which pushes paint off. Always seal the INTERIOR of the planting area with a waterproof sealant before adding soil.
Step 3: Creating the Cap
-
Paint the cap red:
Paint the entire top surface of the saucer (the mushroom cap) with bright red outdoor acrylic paint. Extend the color slightly under the rim for a clean finish. -
Apply second coat:
Let the first coat dry, then apply a second layer of red to ensure a vibrant, opaque color without streaks. -
Prepare the dots:
Once the red paint is fully dry to the touch, get your round foam pouncer and pure white paint ready. -
Add the polka dots:
Press the foam pouncer into the white paint, blot excess on paper, and stamp firm, circular dots onto the red cap. Simple, random placement looks best here. -
Touch up dots:
If the white paint looks translucent against the strong red background, carefully hand-paint a second layer of white over the dots using a small brush once the first layer dries.
Make It Glow
Mix glow-in-the-dark powder into your white paint for the polka dots. Your mushroom cap will magically illuminate your garden path at night.
Step 4: Finishing Touches
-
Seal the project:
Take the project outside and spray the entire mushroom with a clear outdoor sealant. I find a satin finish gives it a nice, subtle sheen without looking too plastic. -
Drill drainage (optional):
Since the original drainage hole is now glued shut, use a masonry bit to carefully drill small holes in the saucer if you plan to plant directly inside, or simply use it as a cachepot. -
Add plants:
Fill the saucer ‘bowl’ with soil and add creeping plants like thyme or sedum to complete the look.
Now you have a charming piece of garden art that looks like it popped right out of a storybook
Ladybugs, Bees, and Cute Garden Bugs
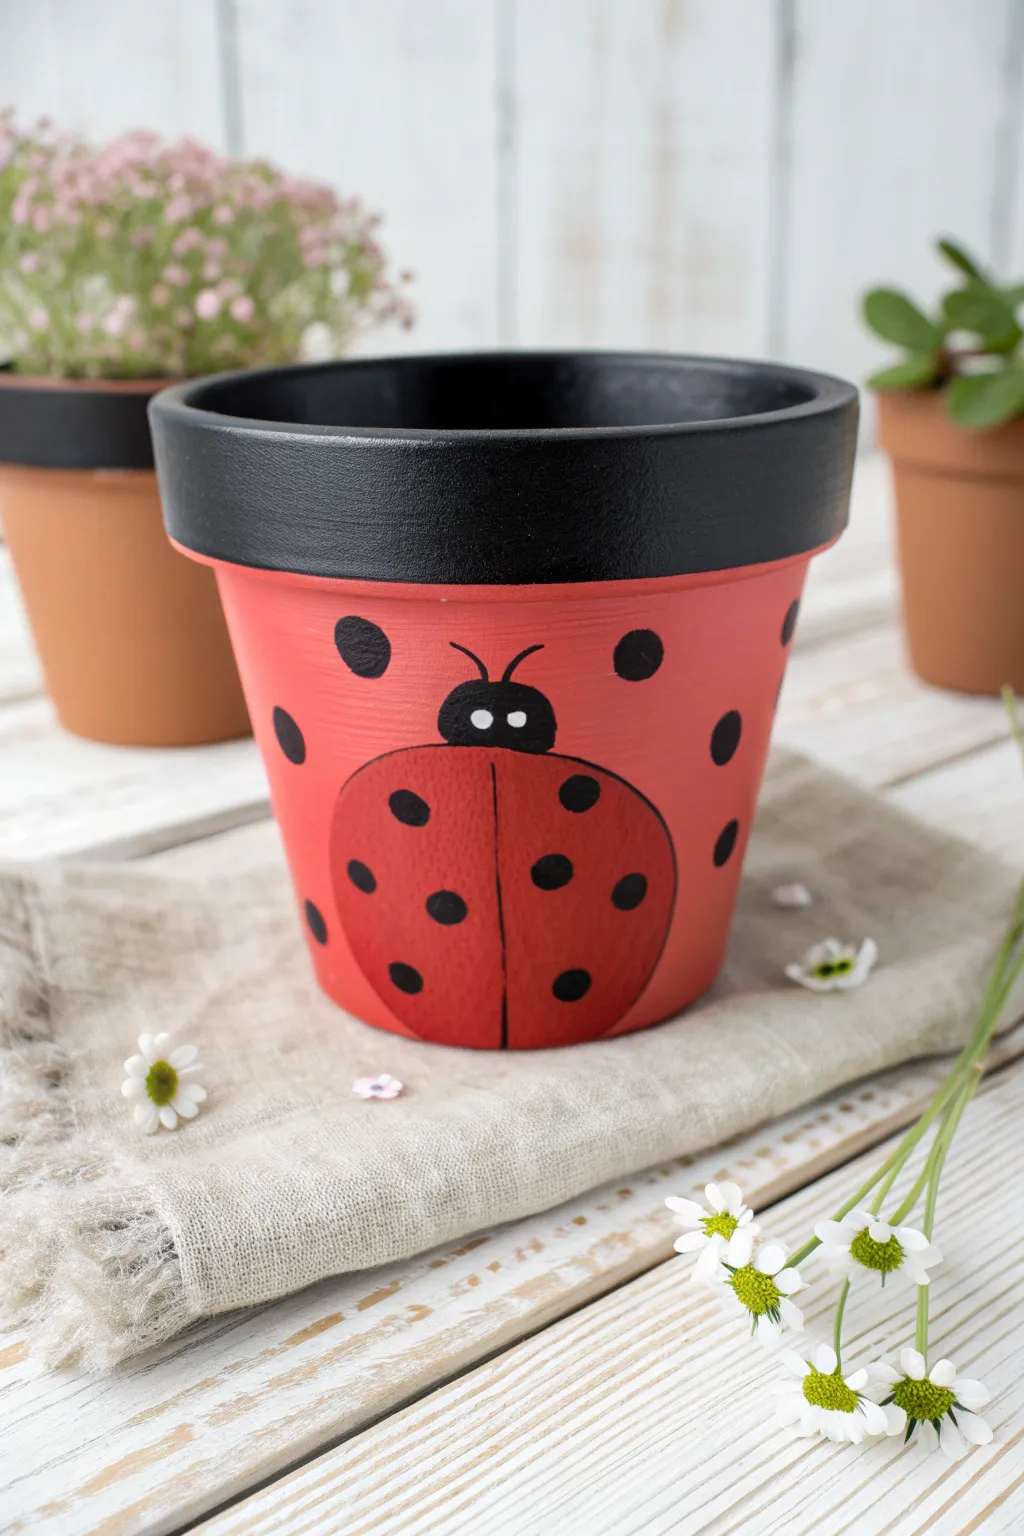
Transform a plain terracotta pot into a charming garden accent with this vibrant ladybug design. The bold black rim frames a cheerful red base, featuring a whimsical painted ladybug that will brighten up any windowsill or patio.
Detailed Instructions
Materials
- Terracotta pot (standard size)
- Acrylic craft paint (red, black, white)
- Medium flat paintbrush
- Small round paintbrush
- Fine detail brush or paint pen
- Pencil for sketching
- Sealer (Mod Podge or spray acrylic)
- Water cup and paper towels
Step 1: Base Preparation
-
Clean surface:
Before you begin, ensure your terracotta pot is clean, dry, and free of any dust or stickers. A quick wipe with a damp cloth usually does the trick. -
Paint the rim:
Using your medium flat brush, apply black acrylic paint to the entire rim of the pot. Don’t forget to paint the top edge and just inside the lip for a finished look. -
Paint the body:
Switch to a clean brush and paint the entire body of the pot below the rim with bright red acrylic paint. Be careful to create a crisp line where the red meets the black rim. -
Apply second coat:
Terracotta is porous and soaks up paint, so I like to let the first coat dry completely and then apply a second coat of both black and red for solid, opaque coverage.
Step 2: Painting the Design
-
Sketch the ladybug:
Once the red base is bone dry, lightly sketch a large oval shape for the ladybug’s body in the center of the pot using a pencil. -
Outline the body:
Using a small round brush and red paint (or a slightly deeper red if you want contrast, though the original uses the same red), go over your oval sketch to define the ladybug’s shape clearly. -
Add the head:
At the top of the oval, paint a semi-circle in black for the ladybug’s head. Make sure the bottom of the semi-circle overlaps the top of the red body slightly. -
Draw the center line:
Take a fine detail brush with black paint and draw a thin vertical line straight down the center of the ladybug’s red body to create the wings. -
Add wing spots:
Dip a small round brush or the handle end of a paintbrush into black paint to create uniform dots on the ladybug’s wings. Place about three to four distinct dots on each side of the center line. -
Add background spots:
To tie the theme together, paint random black polka dots all around the rest of the red surface of the pot, spacing them out evenly.
Use a Paint Marker
Struggling with the fine antennae lines? Swap your brush for a fine-tip black acrylic paint pen. It gives much better control for thin lines and won’t drip.
Step 3: Finishing Touches
-
Paint the antennae:
With your finest detail brush or a black paint pen, carefully draw two curved antennae coming out from the top of the black head. -
Create eyes:
Dip the handle of a small brush into white paint and dot two eyes onto the black head. This technique creates perfect circles every time. -
Add pupils:
Once the white dots are dry, use a toothpick or a very fine tool to add tiny black dots in the center of the eyes for pupils. -
Dry completely:
Allow the entire pot to sit undisturbed until all paint layers are fully cured. This usually takes a few hours depending on humidity. -
Seal the pot:
Apply a coat of clear sealer or Mod Podge over the entire exterior. This protects your artwork from water damage and fading when you water your plants.
Uneven Coverage?
Terracotta is thristy! If your red looks streaky or the clay color shows through, apply a coat of white primer first before painting the red layer.
Pop in your favorite succulent or flowering plant to complete this adorable garden project
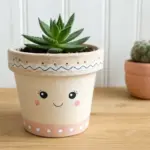
Face Planters With Leafy “Hair”

Transform a plain pot into a peaceful, dozing friend with just a few simple brushstrokes. The minimalist black line art combined with soft rosy cheeks creates an adorable expression that pairs perfectly with trailing plants acting as wild, green hair.
How-To Guide
Materials
- White or cream ceramic/terracotta pot (matte finish works best)
- Black acrylic paint or black medium-point paint marker
- Soft pink or coral acrylic paint
- Small round paintbrush (size 2 or 4)
- Foam pouncer or sponge brush (small round size)
- Pencil with eraser
- Matte spray sealer (optional)
- Trailing plant like Creeping Jenny or String of Hearts
- Potting soil
Step 1: Preparation & Planning
-
Clean surface:
Begin by wiping down your pot with a damp cloth to remove any dust or oils. This ensures your paint adheres properly. Let it dry completely before starting. -
Draft the face:
Using a pencil, lightly sketch the location of the eyes and mouth. Place the eyes slightly above the horizontal center line of the pot, leaving enough space below for the mouth and cheeks. -
Check symmetry:
Step back and look at your pencil sketch. The eyes should be gentle downward curves, evenly spaced. Don’t worry if they aren’t mathematically perfect; a little variation adds character.
Step 2: Painting the Features
-
Outline the lashes:
If using a paint marker, shake it well. Trace over your pencil arc for the left eye first. Draw the downward curve slowly to keep the line steady. -
Add the fringe:
Add three to four vertical ‘lashes’ extending upwards from the main eye curve. Repeat this process for the right eye, trying to match the length and angle of the lashes. -
Paint the smile:
Trace the small ‘u’ shape for the smile. Keep it petite and centered below the eyes. If you are using a brush and acrylic paint instead of a marker, use a very light hand to keep the line thin. -
Clean up sketch lines:
Once the black paint is fully dry to the touch (usually 10-15 minutes), gently erase any visible pencil marks. Be careful not to scrub too hard over the painted areas.
Fixing Smudges
Paint landed where it shouldn’t? Use a wet q-tip immediately to wipe away fresh mistakes. If dried, scrape gently with a craft knife or paint over with white.
Step 3: Adding the Blush
-
Prepare the pink:
Pour a small amount of pink or coral paint onto a palette or paper plate. You want a soft, muted tone rather than a neon pink. -
Load the pouncer:
Dip your round foam pouncer into the paint. Dab the excess off onto a paper towel; you want the sponge to be loaded but not dripping. -
Apply the cheeks:
Press the foam pouncer straight down onto the pot surface, positioned slightly below and outside the eyes. Give it a gentle twist if you want a solid circle, or just a dab for a textured look. -
Alternative method:
I prefer using my fingertip if I don’t have a pouncer handy. Just dip your pinky finger in paint, blot it, and press it onto the pot for a perfectly imperfect round cheek. -
Let it cure:
Allow the pink paint to dry completely. This usually takes about 20 minutes depending on how thick the application was.
Add Freckles
Give your planter more personality by adding tiny tan or brown dots across the nose area using the tip of a toothpick for cute faux freckles.
Step 4: Finishing & Planting
-
Seal the art:
If you plan to keep this pot outdoors or water it heavily, spray a light coat of matte clear sealer over the painted face to protect your work. -
Add drainage:
Ensure your pot has a drainage hole or add a layer of pebbles at the bottom for healthy roots. -
Fill with soil:
Add potting mix to the pot until it is about three-quarters full. -
Plant the ‘hair’:
Remove your trailing plant from its nursery pot. Gently loosen the root ball and place it into your painted pot. -
Arrange the strands:
Fill in the gaps with more soil and water lightly. Arrange the trailing vines to hang down the sides, framing the face like long, messy hair.
Now you have a charming piece of living decor that looks like it’s enjoying a sunny nap on your windowsill
Optical Illusion 3D Lines and Shapes
Transform a standard terracotta planter into a piece of modern art with this bold optical illusion design. The mix of raw clay texture and crisp black-and-white lines creates a striking 3D effect that feels both retro and contemporary.
Step-by-Step Tutorial
Materials
- Terracotta pot (clean and dry)
- White acrylic paint (matte or satin)
- Black acrylic paint (matte or satin)
- Pencil and eraser
- Ruler or flexible measuring tape
- Flat shader brush (medium width)
- Small round or liner brush (for details)
- Painter’s tape
- Clear sealant spray (optional)
Step 1: Preparation and Base Layer
-
Clean the surface:
Before starting, wipe down your terracotta pot with a damp cloth to remove any dust or debris, which ensures the paint adheres properly. -
Tape the rims:
Apply a strip of painter’s tape just below the top rim ridge. Then, apply a second strip of tape around the very bottom edge of the pot, leaving about a half-inch of raw clay exposed. -
Prime the canvas:
Paint the entire area between the tape strips with a solid coat of white acrylic paint. This creates a bright, high-contrast background for your black lines. -
Apply a second coat:
Terracotta is porous and absorbs the first layer quickly, so let it dry for 20 minutes and add a second coat of white for full, opaque coverage.
Grid Master Tip
Make a paper template of one section of the design. Trace this template repeatedly around the pot using transfer paper to ensure every geometric section is identical.
Step 2: Mapping the Grid
-
Mark vertical divisions:
Use your flexible measuring tape to find the circumference of the pot. Divide that number by an even number (like 4 or 6) to determine the spacing for your vertical ‘pillar’ lines. -
Draw the main verticals:
With a pencil, lightly draw these vertical lines from the top taped edge down to the bottom taped edge. These will become the thick black vertical bars seen in the design. -
Establish the V-points:
In the center of the white space between each vertical line, mark a small dot halfway down the pot’s height. This is the central point where your chevron shapes will converge. -
Sketch the pattern:
Lightly sketch the concentric diamond or V-shapes radiating out from that center point toward the vertical lines. Don’t worry about perfection; pencil lines can be erased later.
Wobbly Line Fix
If your straight lines look shaky, use thin strips of painter’s tape or washit tape to mask off the individual V-shapes, ensuring razor-sharp edges every time.
Step 3: Painting the Optical Illusion
-
Paint the vertical pillars:
Using your flat shader brush and black paint, fill in the vertical dividing lines first. Make these lines fairly thick and solid to anchor the design. -
Outline the chevrons:
Switch to your smaller liner brush. Carefully paint the outlines of the nested V-shapes you sketched earlier. I find it helpful to brace my pinky finger against the pot for stability. -
Fill the black sections:
Once outlined, use a slightly larger brush to fill in the alternating black stripes. The pattern should go: black stripe, white space, black stripe. -
Refine the edges:
Go back with a fine brush and touch up any wobbly edges. You can use white paint to clean up black smudges and black paint to sharpen the corners. -
Create the center diamonds:
Ensure the very center of your pattern forms a complete diamond or joined V-shape to maximize the optical illusion effect.
Step 4: Finishing Touches
-
Remove the tape:
Once the black paint is touch-dry, carefully peel off the painter’s tape from the top and bottom rims. Pull slowly at a 45-degree angle to prevent paint peeling. -
Clean any bleed-through:
If any paint seeped under the tape onto the raw terracotta, gently scrape it away with a craft knife or sand it lightly with fine-grit sandpaper. -
Let it cure:
Allow the pot to dry completely overnight before potting any plants. -
Seal for longevity:
If the pot will be outdoors or exposed to heavy moisture, mist the painted area with a clear matte sealant spray to protect your hard work.
Now you have a striking geometric planter ready to highlight your favorite greenery