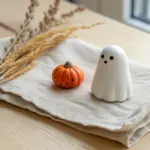
When I’m craving a quick seasonal craft, DIY Halloween clay ideas are my go-to because you can make something adorable (or spooky) in a single sitting. Whether you’re using polymer clay or air-dry clay, these small projects are beginner-friendly and ridiculously fun to batch-make.
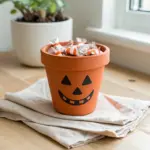
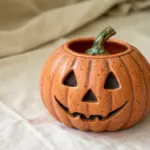
Mini Jack-o’-Lantern Pinch Pots
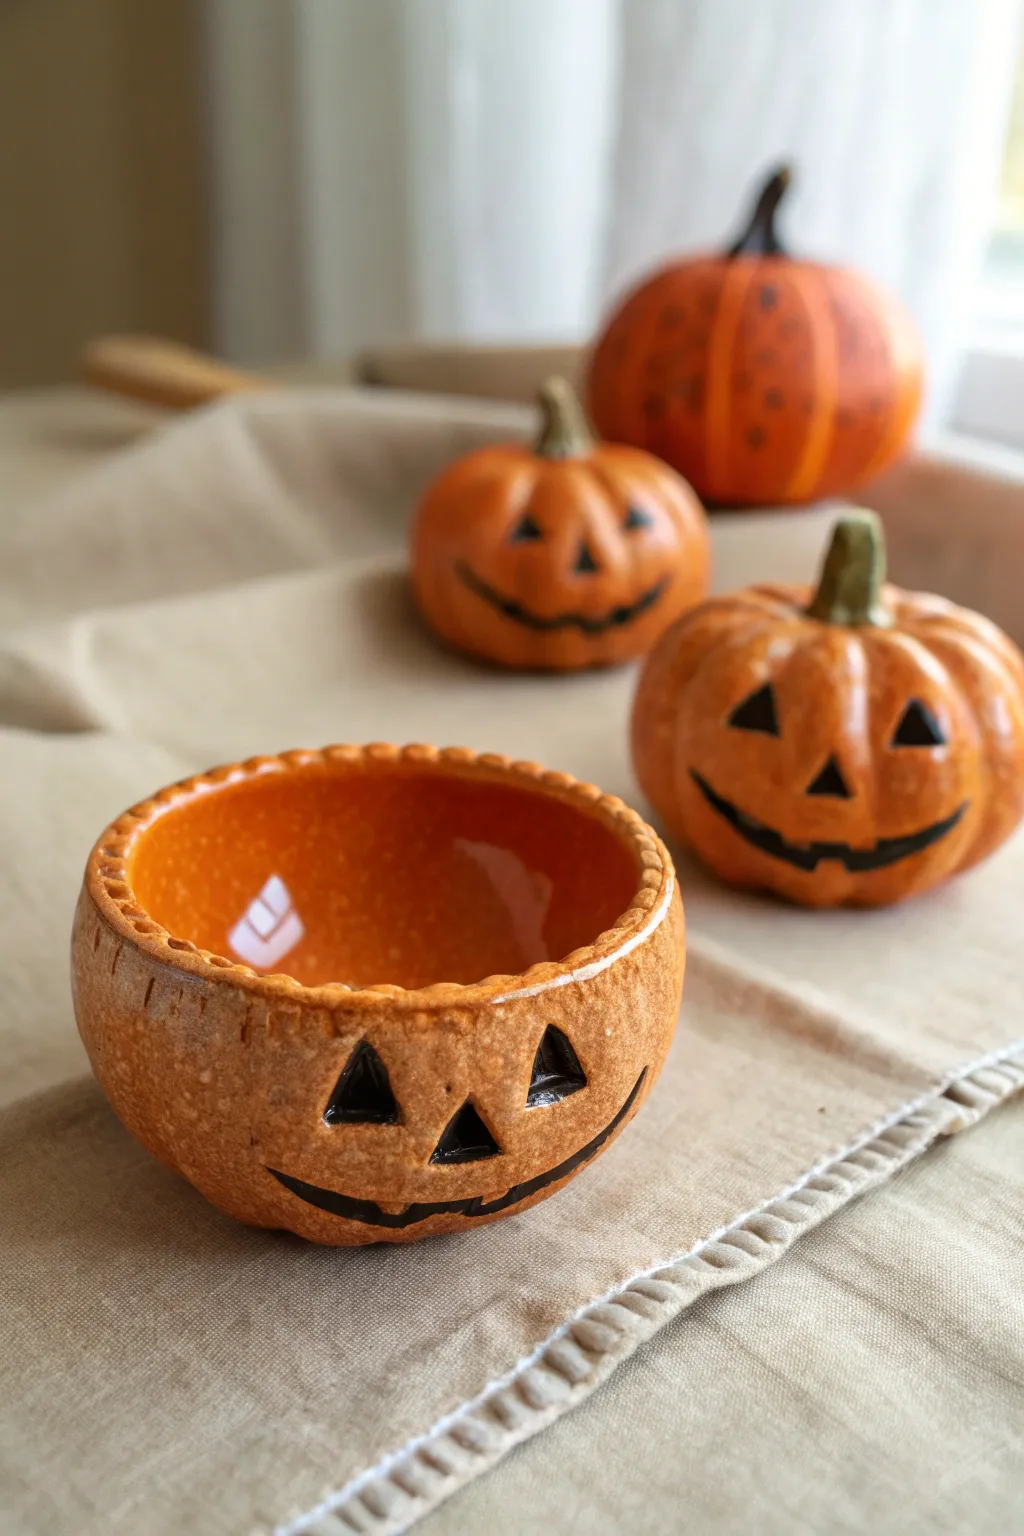
These adorable little pumpkin bowls are the perfect beginner pottery project to bring a festive touch to your table. Featuring a hand-pinched rim and a classic spooky face, they are just the right size for holding holiday candies.
Step-by-Step Tutorial
Materials
- Air-dry clay or kiln-fire clay (terra cotta looks great)
- Pottery sponge
- Small bowl of water
- Loop tool or clay knife
- Needle tool
- Orange acrylic paint or glossy ceramic glaze
- Black acrylic paint or black underglaze
- Fine detail paintbrush
- Clear sealant (if using air-dry clay)
- Sandpaper (fine grit)
Step 1: Forming the Pot
-
Prepare your clay ball:
Start with a ball of clay about the size of a tennis ball. Roll it firmly between your palms to smooth out any cracks and ensure it is a nice, even sphere. -
Open the center:
Hold the ball in one hand and gently press your thumb into the center, stopping about a half-inch from the bottom. This establishes the base thickness of your bowl. -
Pinch the walls:
Using your thumb on the inside and fingers on the outside, gently pinch and rotate the clay. Work your way from the bottom up to thin out the walls evenly. -
Round the shape:
As you pinch, try to encourage a rounded, pumpkin-like belly by pushing the walls slightly outward rather than straight up. I find cupping the outside with my palm helps maintain the curve. -
Flatten the base:
Gently tap the bottom of your pot against your work surface. This creates a small, flat foot so your pumpkin bowl will sit steadily without wobbling.
Fixing Cracks
If small cracks appear on the rim while drying, mix a tiny bit of clay with water to make a paste (slip) and fill them in with a brush before painting.
Step 2: Adding Texture and Features
-
Refine the rim:
Take your needle tool or a small modeling stick and gently press vertical indentations all around the top rim. This creates a subtle ribbed or scalloped effect that mimics the texture of a pumpkin stem area. -
Smooth the surfaces:
Dip your sponge lightly in water and wipe down the interior and exterior of the bowl to remove fingerprints and rough spots. -
Carve the face outlines:
Using a needle tool, lightly sketch two triangles for eyes, a smaller triangle for the nose, and a curved line for the mouth on the side of the pot. -
Deboss the features:
Instead of cutting all the way through, use a loop tool to gently carve out the clay within your sketched lines. You want to create recessed areas for the eyes, nose, and mouth that are about 1-2mm deep. -
Refine the edges:
Use a slightly damp brush or your finger to smooth the edges of your carved features so they aren’t sharp or jagged. -
Let it dry:
Allow your pot to dry completely. For air-dry clay, this usually takes 24-48 hours. If using kiln clay, follow your specific firing schedule.
Spooky Glow
Paint the inside of the bowl with glow-in-the-dark paint instead of plain orange. When the candy is gone, the interior will emit a ghostly glow at night.
Step 3: Painting and Finishing
-
Sand imperfections:
Once bone dry, take fine-grit sandpaper and lightly sand any rough patches, paying extra attention to the rim. -
Apply base color:
Paint the entire bowl, inside and out, with a bright pumpkin orange. You may need two or three coats to get a solid, opaque coverage. -
Paint the recessed features:
Using a fine detail brush and black paint, carefully fill in the carved depressions for the eyes, nose, and mouth. The recessed carving makes it easier to stay within the lines here. -
Add a glossy finish:
If using air-dry clay, seal the entire piece with a glossy varnish or Mod Podge to mimic the look of glazed ceramic. Seeing that shine appear is my favorite part of the process.
Fill your new creation with treats and enjoy the handmade halloween charm


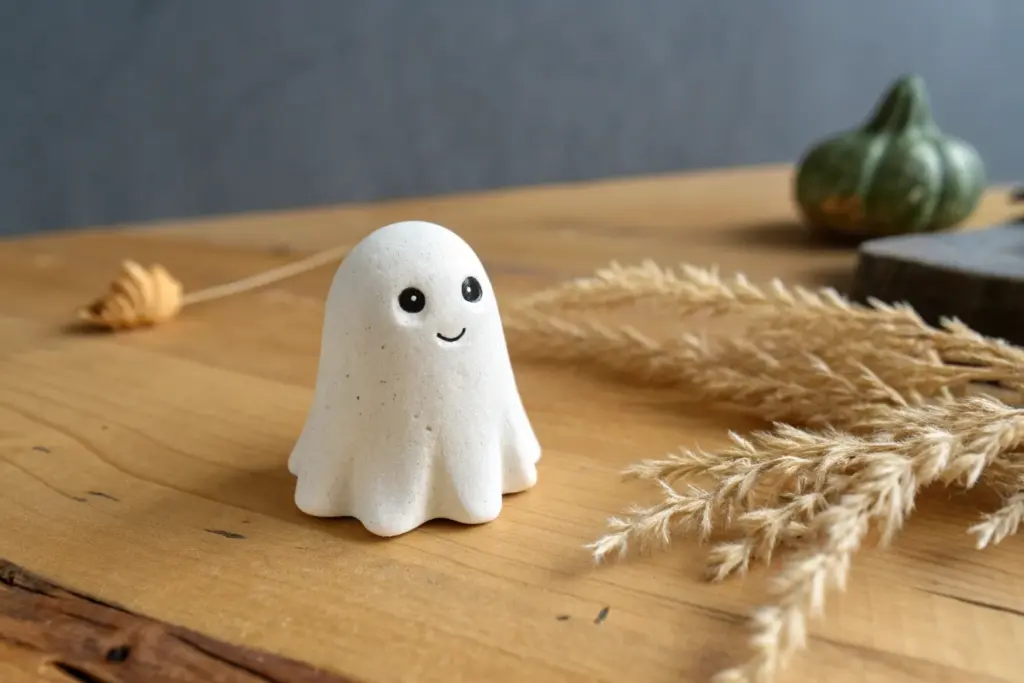
Cute Ghost Tea Light Covers
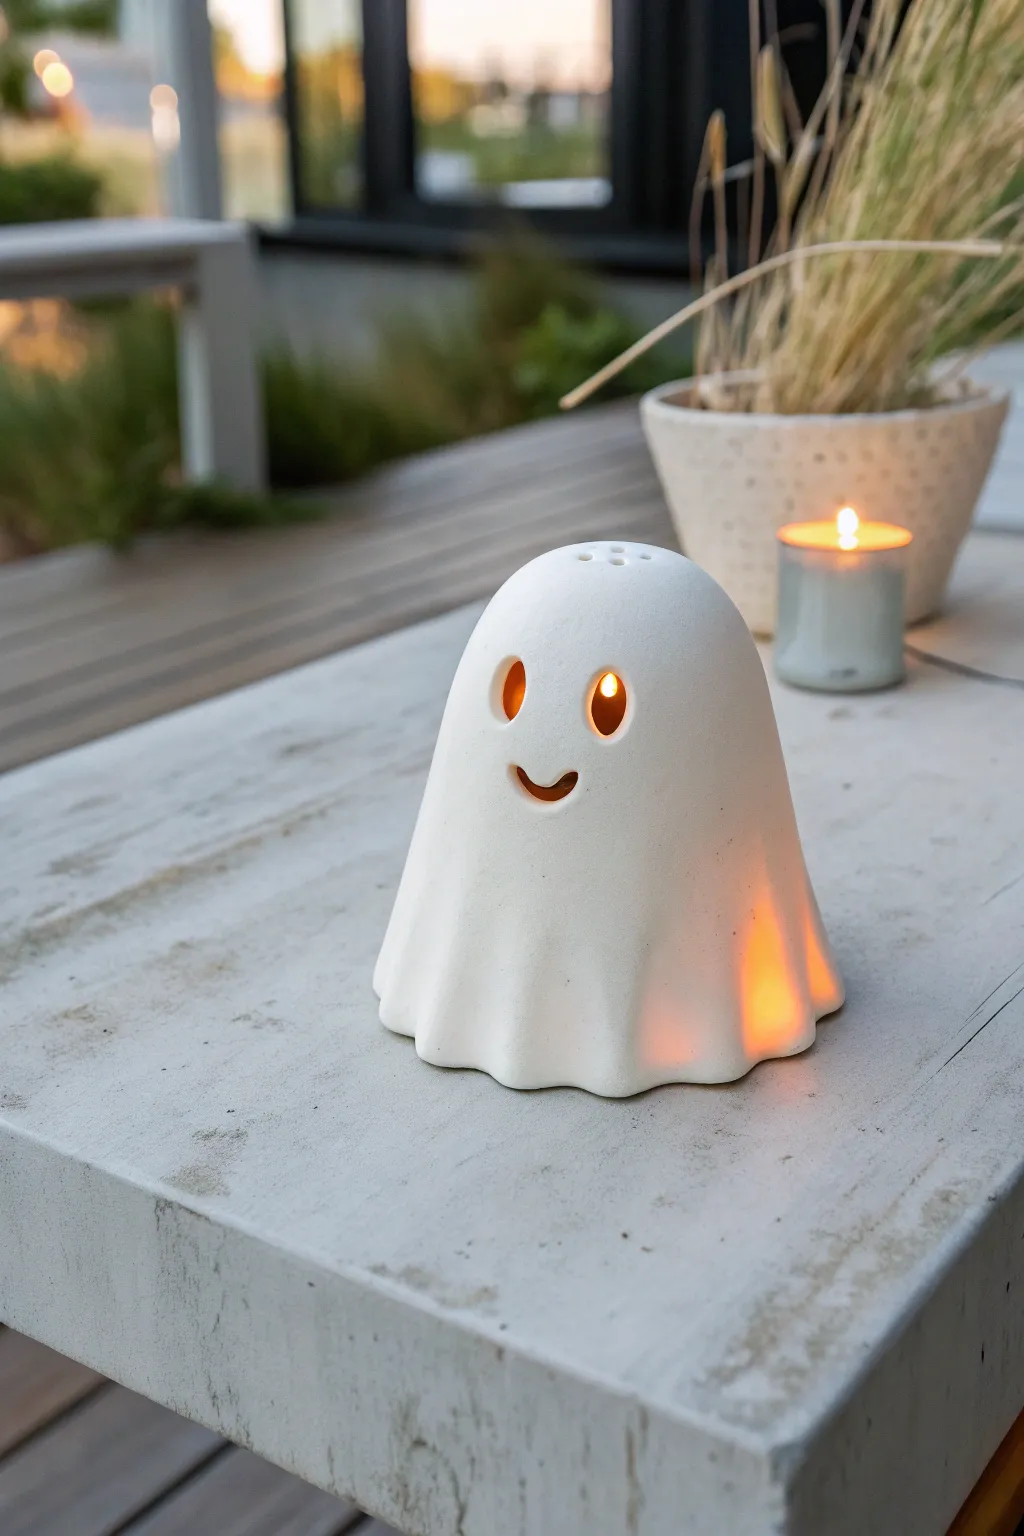
This adorable ghost tealight holder brings a soft, spooky warmth to your Halloween decor with its smooth, ceramic-like finish and friendly face. The clay is shaped to look like a draping sheet, allowing the candlelight to glow invitingly through its eyes and smile.
Step-by-Step
Materials
- Air-dry clay (white)
- Small rolling pin
- Rolling mat or parchment paper
- Small bowl or cup (for draping)
- Clay knife or craft knife
- Small round piping tip or straw (for eye holes)
- Water in a small cup
- Sanding sponge (fine grit)
- Matte acrylic varnish (optional)
- LED tealight
Step 1: Shaping the Base Form
-
Prepare the workspace:
Set up your rolling mat or parchment paper to prevent sticking. Take a large handful of air-dry clay and knead it briefly until it is pliable and smooth. -
Roll out the clay:
Use your rolling pin to flatten the clay into a circle. Aim for a consistent thickness of about 1/4 inch (6mm) to ensure sturdiness without being too heavy. -
Prepare the mold:
Find a small, upside-down cup or a ball of foil that matches the height and rounded shape you want for your ghost. Cover it lightly with plastic wrap so the clay doesn’t fuse to it. -
Drape the clay:
Gently lift your rolled clay circle and drape it over your prepared form. Allow the excess clay to hang down naturally. -
Create the signature folds:
Use your fingers to gently guide the clay into soft, wavy folds at the bottom, creating that classic ‘sheet ghost’ silhouette. Ensure the bottom edge is wide enough to conceal a tealight later.
Cracks Appearing?
If you see hairline cracks while drying, mix a tiny bit of fresh clay with water to make a paste (slip) and fill them in immediately. Smooth with a damp finger.
Step 2: Adding Details and Refining
-
Trim the hem:
While the clay is still on the mold, use your craft knife to trim the bottom edge into a wavy, uneven line. This mimics the look of a floating fabric hem. -
Smooth the surface:
Dip your finger in a little water and run it over the entire surface of the ghost. Smooth out any fingerprints, cracks, or rough textures to achieve that clean, ceramic look. -
Cut the eye holes:
Using a small round piping tip or a straw, punch two oval-shaped holes near the top third of the front for the eyes. Gently wiggle the tool to slightly widen them vertically for a surprised, cute expression. -
Carve the smile:
With your craft knife or a clay needle tool, carefully carve a shallow, U-shaped mouth. Clean up any rough clay burrs from the edges of the cut. -
Add vent holes:
Poke three or four tiny holes at the very top of the ghost’s head. This is crucial for heat escape if you ever use a real candle, though LEDs are safer. -
Dry the ghost:
Let the ghost sit on the mold for about 1-2 hours until it holds its shape on its own. Then, carefully remove the mold and let the piece dry completely for 24-48 hours.
Step 3: Final Finish
-
Sand for perfection:
Once the clay is bone dry, take a fine-grit sanding sponge and gently buff the entire surface. Focus on the bottom rim and the edges of the eye holes to make them perfectly smooth. -
Dust off debris:
Wipe the ghost down with a slightly damp cloth or a dry brush to remove all the white clay dust generated from sanding. -
Seal (optional):
To get a true unglazed ceramic feel, you can leave it raw. However, applying a layer of matte varnish will protect it from dust and fingerprints while keeping the natural look. -
Light it up:
Place an LED tealight on your table and set the finished ghost over it to see the warm glow shine through the face.
Smoother Cuts
Coat your cutting tool or straw with a tiny bit of oil or lotion before piercing the clay. This helps the tool slide out cleanly without dragging the clay edges.
Now you have a charming little companion ready to haunt your halloween display


Bat Wing Trinket Dishes
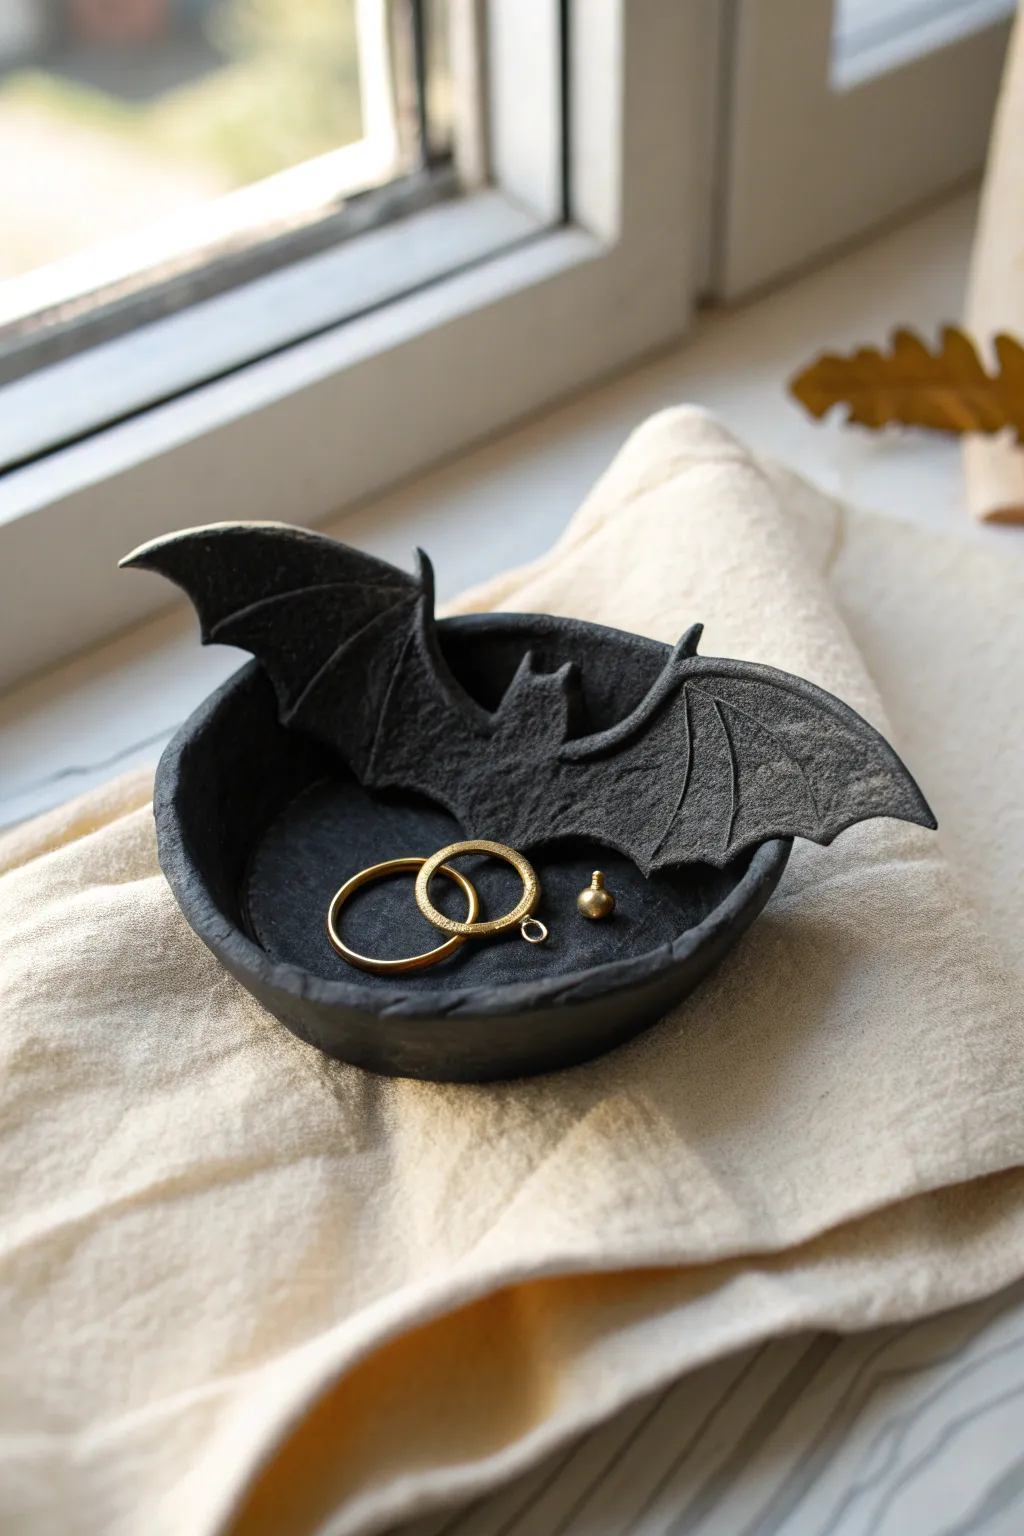
Embrace the spooky elegance of Halloween with this handcrafted trinket dish, perfectly sized for rings and small treasures. The design merges a simple bowl with a striking bat silhouette, finished in a matte, charcoal-black texture that looks like it came straight from a gothic manor.
Detailed Instructions
Materials
- Air-dry clay (black or white)
- Small rolling pin
- Circle cutter or small bowl (for template)
- X-Acto knife or clay sculpting tool
- Small bowl (for shaping)
- Printed bat silhouette template (3-4 inches wide)
- Sandpaper (fine grit)
- Black acrylic paint (matte finish)
- Sea sponge or stiff bristle brush
- Matte spray varnish
Step 1: Preparation & Base
-
Prepare the Clay:
Begin by taking a handful of air-dry clay and kneading it in your hands until it becomes warm and pliable. This prevents cracks later on. -
Roll the Slab:
Roll the clay out on a smooth surface to an even thickness of about 1/4 inch. If the clay sticks, you can use a little bit of parchment paper underneath. -
Cut the Base:
Place your circle cutter or a small upside-down bowl (about 3-4 inches in diameter) onto the clay slab and cut out a perfect circle. This will form the trinket dish itself. -
Form the Bowl:
Gently lift the clay circle and drape it into your shaping bowl. Press it lightly against the bottom and sides to curve it, creating a concave shape. -
Smooth the Edges:
Dip your finger in a tiny bit of water and run it along the rim of the clay bowl to smooth out any rough cutting marks or cracks.
Wing Support Hack
Use balled-up plastic wrap under the wings while drying. It supports the weight but won’t stick to the clay like paper towels might.
Step 2: Sculpting the Bat
-
Cut the Silhouette:
Roll out a second piece of clay, slightly thinner than the bowl base. Place your bat paper template on top and trace around it carefully with your X-Acto knife or needle tool. -
Refine the Edges:
Remove the excess clay and lift your bat shape. Use your fingertips or a smoothing tool to round off the sharp cut edges so they look organic rather than sliced. -
Add Wing Detail:
Using a needle tool or a blunt knife, gently score lines into the wings to mimic the bone structure of a bat. Press lightly so you create texture without cutting all the way through. -
Texture the Body:
I like to tap the body of the bat lightly with a stiff paintbrush or toothbrush to give it a slightly fuzzy, stony texture distinct from the smooth bowl. -
Attach to Bowl:
Score the underside of the bat’s body and the two spots on the bowl rim where the wings will touch. Add a dab of water or clay slip to these scored areas. -
Secure the Shape:
Press the bat gently onto the rim of the bowl. You may need to prop up the wingtips with small balls of scrap clay or paper towel so the bat maintains a curved, flying shape while it dries.
Gilded Edges
Once the black paint is dry, lightly brush the very edges of the wings and rim with gold leaf paint for a luxurious, high-contrast look.
Step 3: Finishing Touches
-
Dry Completely:
Set the piece aside in a safe, dry place. Allow it to air dry for at least 24-48 hours until the clay turns a lighter color and feels hard to the touch. -
Sand Imperfections:
Once fully dry, lightly sand any rough spots on the rim or underside of the dish using fine-grit sandpaper. Wipe away the dust with a damp cloth. -
Apply Base Coat:
Paint the entire dish, inside and out, with black matte acrylic paint. Ensure you get into the crevices of the wing details. -
Create Texture:
For that stone-like finish seen in the photo, use a sea sponge to dab a second layer of thick black paint (or a very dark charcoal grey) onto the surface. This adds depth. -
Seal the Piece:
Finish with a coat of matte spray varnish to protect the paint and clay from moisture, especially if you plan to store metal jewelry in it.
Place this eerie little dish on your vanity or windowsill to hold your favorite rings and bring a touch of gothic charm to your space
Candy Corn Charm Set
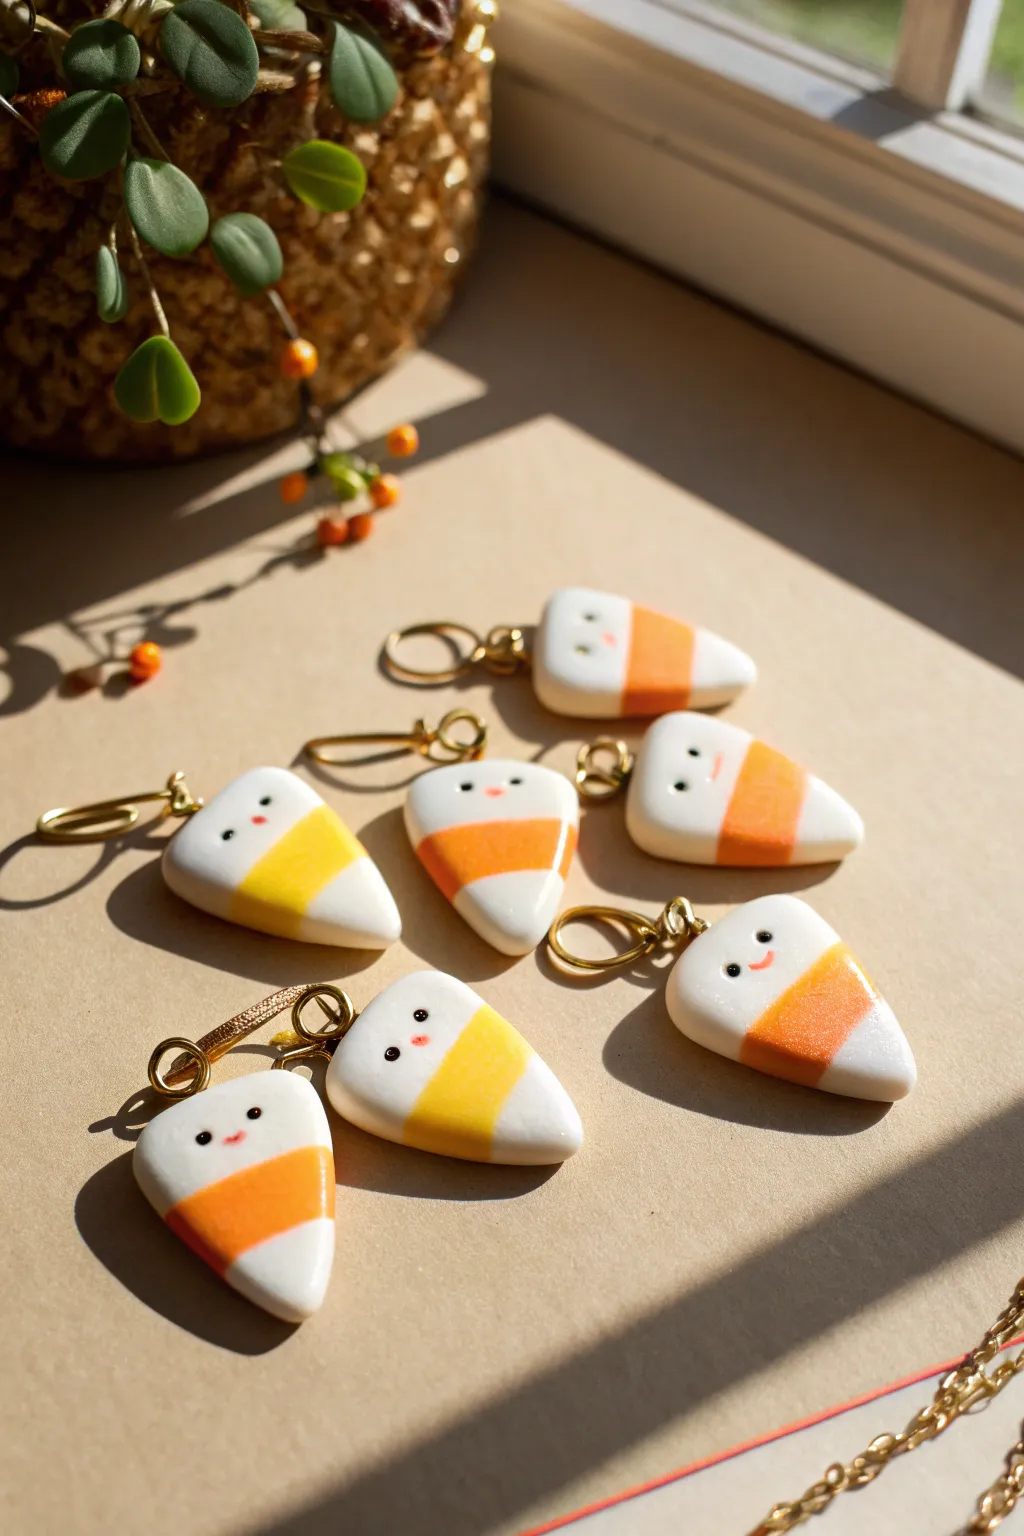
These adorable little candy corn charms are a sweet, non-edible treat perfect for Halloween jewelry or stitch markers. With their glossy resin finish and tiny smiling faces, they turn a controversial candy into a universally lovable accessory.
Step-by-Step Guide
Materials
- White polymer clay
- Yellow polymer clay
- Orange polymer clay
- Gold-plated eye screws
- Gold jump rings
- Black acrylic paint
- Pink acrylic paint
- Fine detail paintbrush or dotting tool
- UV resin or gloss glaze
- Needle nose pliers
- UV lamp (if using UV resin)
- Small blade or clay knife
- Ceramic tile or baking sheet
Step 1: Shaping the Candy Body
-
Condition the clay:
Start by kneading your white, yellow, and orange polymer clay separately until each one is soft and pliable. This conditioning step is crucial to prevent cracks later on. -
Roll the logs:
Roll each color into a long, even snake or log. Try to keep them roughly the same thickness, about half an inch in diameter. -
Stack and join:
Place the three logs side-by-side, pressing them gently together along their lengths. The order doesn’t strictly matter for these stylized charms, but traditional candy corn is white-orange-yellow; here, we see variations, so feel free to mix up the striping order. -
Compress the slab:
Gently roll over the joined logs with an acrylic roller to flatten them into a single slab. You want the colors to fuse without becoming muddy. -
Cut triangular shapes:
Using your clay blade, cut the stripe slab into triangles. Aim for rounded, soft triangles rather than sharp geometric ones to keep the look cute and chubby. -
Soften the edges:
Pick up each triangle and use your fingertip to gently tap down any sharp cut edges. Smooth the corners so the charm feels like a little pebble.
Step 2: Adding Hardware & Baking
-
Pre-drill for hardware:
Take a needle tool or a spare eye screw and make a small pilot hole in the top center of each candy corn. -
Insert eye screws:
Twist your gold eye screws into the holes you simple made. I find dipping the tip of the screw in liquid clay or bake-and-bond helps secure it permanently. -
Clean up fingerprints:
Before baking, give the white sections a quick wipe with a bit of rubbing alcohol on a brush or Q-tip to remove any lint or orange smudges. -
Bake the charms:
Place your charms on a ceramic tile or parchment-lined baking sheet. Bake according to your customized clay brand’s instructions—usually 275°F (135°C) for about 15-20 minutes. -
Cool completely:
Let the charms cool down completely before moving to the next step. Painting on hot clay will result in messy, clumping paint.
Smoother Surfaces
Before baking, lightly brush the raw clay with baby oil or cornstarch. This helps remove fingerprints and creates a velvety texture.
Step 3: Bringing Them to Life
-
Paint the eyes:
Using a very fine dotting tool or the tip of a toothpick dipped in black acrylic paint, place two small dots on the white section of the candy corn for eyes. -
Add the mouth:
With a fine liner brush and pink or red paint, paint a tiny, shallow ‘u’ shape directly between and slightly below the eyes for a smile. -
Rosy cheeks:
Dip a toothpick into pink paint, dab most of it off onto a paper towel, and gently press tiny blush marks next to the smile. -
Allow paint to dry:
Wait until the acrylic paint is fully dry to the touch. If you rush this, the resin in the next step will smear your faces.
Cloudy Resin?
If your resin finish looks cloudy or sticky after curing, wipe it with an alcohol wipe and cure under the lamp for another 60 seconds.
Step 4: Glazing & Assembly
-
Apply resin coating:
Squeeze a drop of UV resin onto the front of the charm. Use a toothpick to spread it to the edges, creating a domed effect over the clay. -
Cure the resin:
Place the resin-coated charms under a UV lamp for 2-4 minutes until the surface is hard, glassy, and tack-free. -
Attach jump rings:
Open a gold jump ring using two pairs of pliers (twist sideways, don’t pull apart). Thread it through the eye screw. -
Close the ring:
Twist the jump ring closed securely. Your charm is now ready to be attached to a keychain, earring hook, or bracelet chain.
Enjoy your sweet new collection of smiling autumn charms

The Complete Guide to Pottery Troubleshooting
Uncover the most common ceramic mistakes—from cracking clay to failed glazes—and learn how to fix them fast.
Witch Hat Ring Cones

These sleek, cone-shaped sculptures bring a subtle touch of Halloween magic to your vanity while keeping your favorite rings organized. The matte black finish and natural wood base create a modern, mystical aesthetic that looks beautiful year-round.
Detailed Instructions
Materials
- Air-dry clay (black or white)
- Small rolling pin
- Craft knife or clay cutter
- Water in a small cup
- Fine-grit sandpaper (220-400 grit)
- Black acrylic paint (matte finish)
- Soft synthetic paintbrush
- Small wood slice or coaster
- Strong craft glue (e.g., E6000)
- Clear matte sealant spray (optional)
Step 1: Sculpting the Cone
-
Prepare the Clay:
Pinch off a ball of air-dry clay roughly the size of a golf ball. Knead it in your hands for a minute until it feels warm and pliable, which helps prevent future cracking. -
Roll a Ball:
Roll the clay between your palms to create a smooth sphere. Try to eliminate any major seams or lines at this stage. -
Form the Cone Base:
Place the ball on your work surface. Using the heel of your hand and a slight rolling motion, begin to taper one side of the ball to start forming a cone shape. -
Shape the Point:
Continue rolling the clay back and forth, focusing pressure on just one end to elongate it into a sharp point. Aim for a height of about 3 to 4 inches. -
Flatten the Bottom:
Pick up the cone and gently tap the wide bottom against a flat surface. This ensures the cone will stand up straight and creates a stable base. -
Smooth Imperfections:
Dip your finger into a little bit of water and run it over the surface of the cone. Gently smooth out any fingerprints, bumps, or ridges to get a uniform texture. -
Dry Completely:
Set the cone upright in a safe place to dry. Air-dry clay typically takes 24-48 hours to cure fully; I like to rotate it occasionally so the bottom dries evenly.
Smoother Shaping
Does your cone look lumpy? Instead of rolling it on the table, try rolling the cone between two flat items (like two hardcover books) to keep the taper consistent and perfectly round.
Step 2: Finishing Touches
-
Sand for Smoothness:
Once fully dry and hard, use fine-grit sandpaper to gently buff the surface. This step is crucial for achieving that high-end, store-bought look. -
Wipe Clean:
Use a barely damp paper towel or a dry cloth to wipe away all the clay dust from sanding. The surface needs to be dust-free for the paint to adhere properly. -
Apply First Coat:
Paint the entire cone with black matte acrylic paint. Use long, vertical strokes starting from the tip down to the base to minimize brush marks. -
Add Second Coat:
Let the first coat dry for about 20 minutes, then apply a second coat if needed for opaque, solid coverage. Don’t forget to paint the bottom surface too. -
Optional Highlight:
For a bit of dimension, you can lightly stipple a tiny bit of gold paint near the base, resembling a hat gold band, though solid black is classic. -
Seal (Optional):
If you plan to use this in a humid bathroom, give the painted cone a quick spray with a matte clear sealant to protect the finish. -
Prepare the Base:
Take your small wood slice coaster. If it is rough, give the top surface a quick sanding so the glue makes good contact. -
Glue the Assembly:
Apply a generous dab of strong craft glue to the center of the wood slice. Firmly press the painted cone into the glue. -
Final Cure:
Let the glue set according to the package instructions (usually at least a few hours) before placing any jewelry on your new display.
Cracking Issues?
If small cracks appear while drying, mix a tiny bit of fresh clay with water to make a paste (slip). Fill the cracks with this paste, smooth it over with a finger, and let it dry again.
Now you have a beautifully subtle piece of decor that keeps your rings safe and ready to wear
Black Cat Mini Figurines
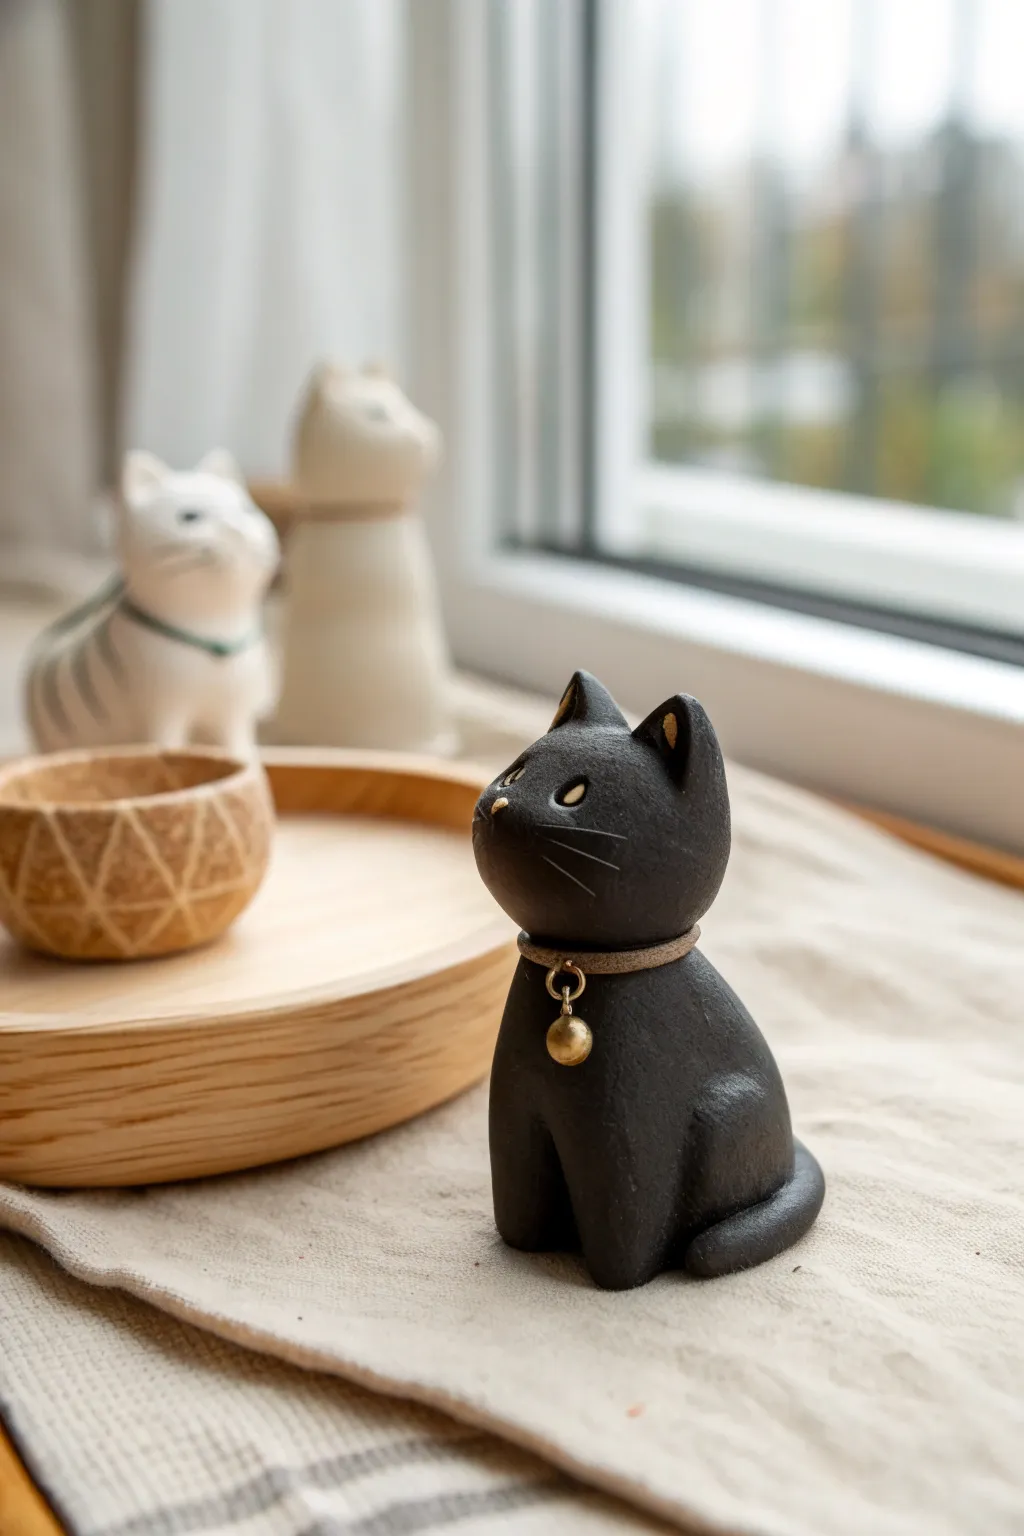
Embrace the Halloween spirit with this charmingly minimalist black cat figurine that looks like it just stepped off a witch’s mantle. With its sleek black finish, golden bell detail, and inquisitive expression, this little feline makes a perfect subtle decoration for your windowsill.
Step-by-Step Guide
Materials
- Black polymer clay (or white air-dry clay)
- Acrylic paint: Black, Gold, White
- Sculpting tools (needle tool, ball stylus)
- Thin wire or aluminum foil (for armature)
- Gold jewelry wire (thin gauge)
- Small gold bead or bell
- Thin cord or leather strip (tan/beige)
- Fine grit sandpaper
- Matte varnish/sealer
- Super glue
Step 1: Shaping the Base
-
Prepare the armature:
Start by scrunching a small piece of aluminum foil into a pear shape. This will be the core of your cat’s body, helping to save clay and keep the figurine lightweight. -
Condition the clay:
Warm up your black polymer clay in your hands until it is soft and pliable. If you are using air-dry clay, knead it briefly to remove air bubbles. -
Form the body:
Wrap the foil core completely in a sheet of clay. Roll it between your palms to smooth out any seams, shaping it into a seated teardrop form with a flat bottom so it sits securely. -
Create the head:
Roll a smaller ball of clay for the head. It should be proportional to the body but slightly flattened at the bottom where it will attach. I like to press it gently onto the body to check the tilt before joining. -
Join body and head:
Insert a short piece of wire into the neck of the body and press the head onto it. Blend the clay at the seam lightly with a sculpting tool to secure the bond, or leave it distinct for a stylized look.
Cracks while drying?
If you see hairline cracks appearing as your air-dry clay cures, mix a tiny bit of fresh clay with water to create a paste (slip) and fill them in immediately.
Step 2: Sculpting Details
-
Add the ears:
Pinch two tiny triangles of clay. Attach them to the top of the head, blending the back edges into the skull while keeping the front of the ears crisp. -
Sculpt the legs:
Roll two small sausage shapes for the front legs. Attach them vertically to the front of the body, blending the upper portion so they emerge naturally from the chest. -
Form the haunches:
For the rear legs, make two flattened ovals and press them onto the lower sides of the body to suggest seated haunches. -
Attach the tail:
Roll a tapered rope of clay. snake it around the base of the cat, curving it around the side of the haunch to create a neat, tucked-in tail. -
Refine the surface:
Use a damp sponge or your finger to smooth out fingerprints. If you want that stone-like texture from the photo, gently dab the surface with a stiff toothbrush. -
Carve facial features:
Using a needle tool, gently etch three whiskers on each cheek. Use a ball stylus to make indentations for the eyes and a tiny triangle divot for the nose. -
Bake or dry:
Follow your clay package instructions to bake (for polymer) or dry (for air-dry). Allow the piece to cool or cure completely before proceeding to the next phase.
Step 3: Finishing Touches
-
Paint the base coat:
If you used white clay, paint the entire figure with two coats of matte black acrylic paint. If you used black clay, skip this step unless you want a more uniform finish. -
Highlight the eyes:
Carefully paint the eye indentations white. Once dry, add a black vertical slit for the pupil and a tiny gold accent in the corner. -
Add gold accents:
Use a fine detail brush to paint the inside of the ears gold. Add a tiny dot of gold paint to the tip of the nose. -
Create the collar:
Cut a thin strip of tan leather cord or twine to fit around the cat’s neck. Secure it at the back with a tiny dab of super glue. -
Make the bell:
Thread a small gold bead or actual miniature bell onto a tiny gold jump ring. Attach this ring to the front of the leather collar. -
Seal the work:
Apply a coat of matte varnish to the entire cat to protect the paint and give it a finished, professional look.
Make it a rough finish
Mix baking soda into your black acrylic paint before applying coat #2. This creates a gritty, cast-iron texture that looks authentically vintage.
Set this little guardian near a pumpkin or candle to watch over your Halloween festivities


What Really Happens Inside the Kiln
Learn how time and temperature work together inside the kiln to transform clay into durable ceramic.
Spooky Skull Beads

These delightfully primitive skull beads bring an earthy, ancient vibe to your Halloween decor. By combining simple round beads with progressively detailed skulls, you create a unique strand perfect for a spooky mantle or a statement necklace.
How-To Guide
Materials
- White or translucent white polymer clay (or air-dry clay)
- Small amount of tan or beige clay (to mix for bone color)
- Needle tool or toothpick
- Ball stylus tool (small)
- Thick jute twine or hemp cord
- Brown and black acrylic paint
- Paper towels or soft rag
- Clear matte varnish
- Clay roller or pasta machine
- Oven (for polymer clay)
Step 1: Clay Preparation
-
Mix the perfect bone shade:
Start by conditioning your white clay until it is soft and pliable. To achieve that aged bone look, mix in a tiny pinch of tan or beige clay. You want an off-white, creamy color rather than a stark, bright white. -
Portion the clay:
Roll your mixed clay into a long log of even thickness. Slice the log into equal segments to ensure your beads are generally the same size. For the garland shown, you’ll need about 15-20 portions. -
Roll spheres:
Take each segment and roll it briskly between your palms to create smooth spheres. Don’t worry if they aren’t mathematically perfect; a little organic texture adds to the primitive look.
Step 2: Sculpting the Skulls
-
Shape the skull base:
Select about half of your spheres to transform into skulls. For each one, gently pinch the lower half of the sphere to create a slightly tapered jawline, giving it a subtle pear shape. -
Create the eye sockets:
Using a small ball stylus or the rounded end of a paintbrush, press two deep indentations into the upper half of the face. Press firmly and slightly twist to widen the sockets. -
Form the nose cavity:
Use a needle tool or toothpick to press an upside-down ‘V’ or triangle shape just below the eyes. I find wiggling the tool slightly helps open up the nose cavity for better definition. -
Carve the teeth:
Use your needle tool to score vertical lines across the jaw area to represent teeth. You can press deeper vertical lines for the gaps and faint horizontal lines to separate top and bottom teeth. -
Add cracks and details:
Lightly scratch the surface of the skulls and the plain round beads with your needle tool. These tiny scratches will catch the paint later and make the bone look weathered. -
Pierce the holes:
Carefully push a thick needle or skewer through the sides of each skull (temple to temple) and through the center of the round beads. Make sure the hole is wide enough for your jute twine.
Holes closing up?
If bead holes shrink during baking, gently re-drill them with a small hand drill or twist a craft knife blade inside while the clay is still slightly warm.
Step 3: Finishing and Assembly
-
Bake the beads:
Arrange all beads on a parchment-lined baking sheet. Bake according to your clay package instructions (usually 275°F/135°C for 15-30 minutes for polymer clay). Let them cool completely. -
Apply the antiquing wash:
Mix a dab of brown and a tiny dot of black acrylic paint with a few drops of water to create a thin wash. Brush this liberally over every bead, ensuring it gets into the eye sockets, nose, and teeth crevices. -
Wipe away excess:
Before the paint dries, quickly wipe the surface of the beads with a damp paper towel or rag. The paint will stay trapped in the recessed areas and texturing, revealing the details. -
Seal the beads:
Once the paint is fully dry, apply a coat of clear matte varnish. This protects the finish and eliminates any plasticky sheen without making them look glossy. -
String the garland:
Cut a length of jute twine. Tie a knot at one end, then thread your beads. A nice pattern creates a visual rhythm: try grouping the full skulls in the center and tapering off with the round ‘bone’ beads on the ends. -
Secure the ends:
Tie a secure knot after the last bead to keep them in place. Leave extra length on the twine if you plan to tie this onto a wreath or hang it.
Smoother blending
Use a drop of baby oil on your finger to smooth out fingerprints on the skulls before baking. It acts like a solvent and polishes the clay surface instantly.
Now you have a brilliantly creepy strand of skulls ready to haunt your home
Spiderweb Coaster Set
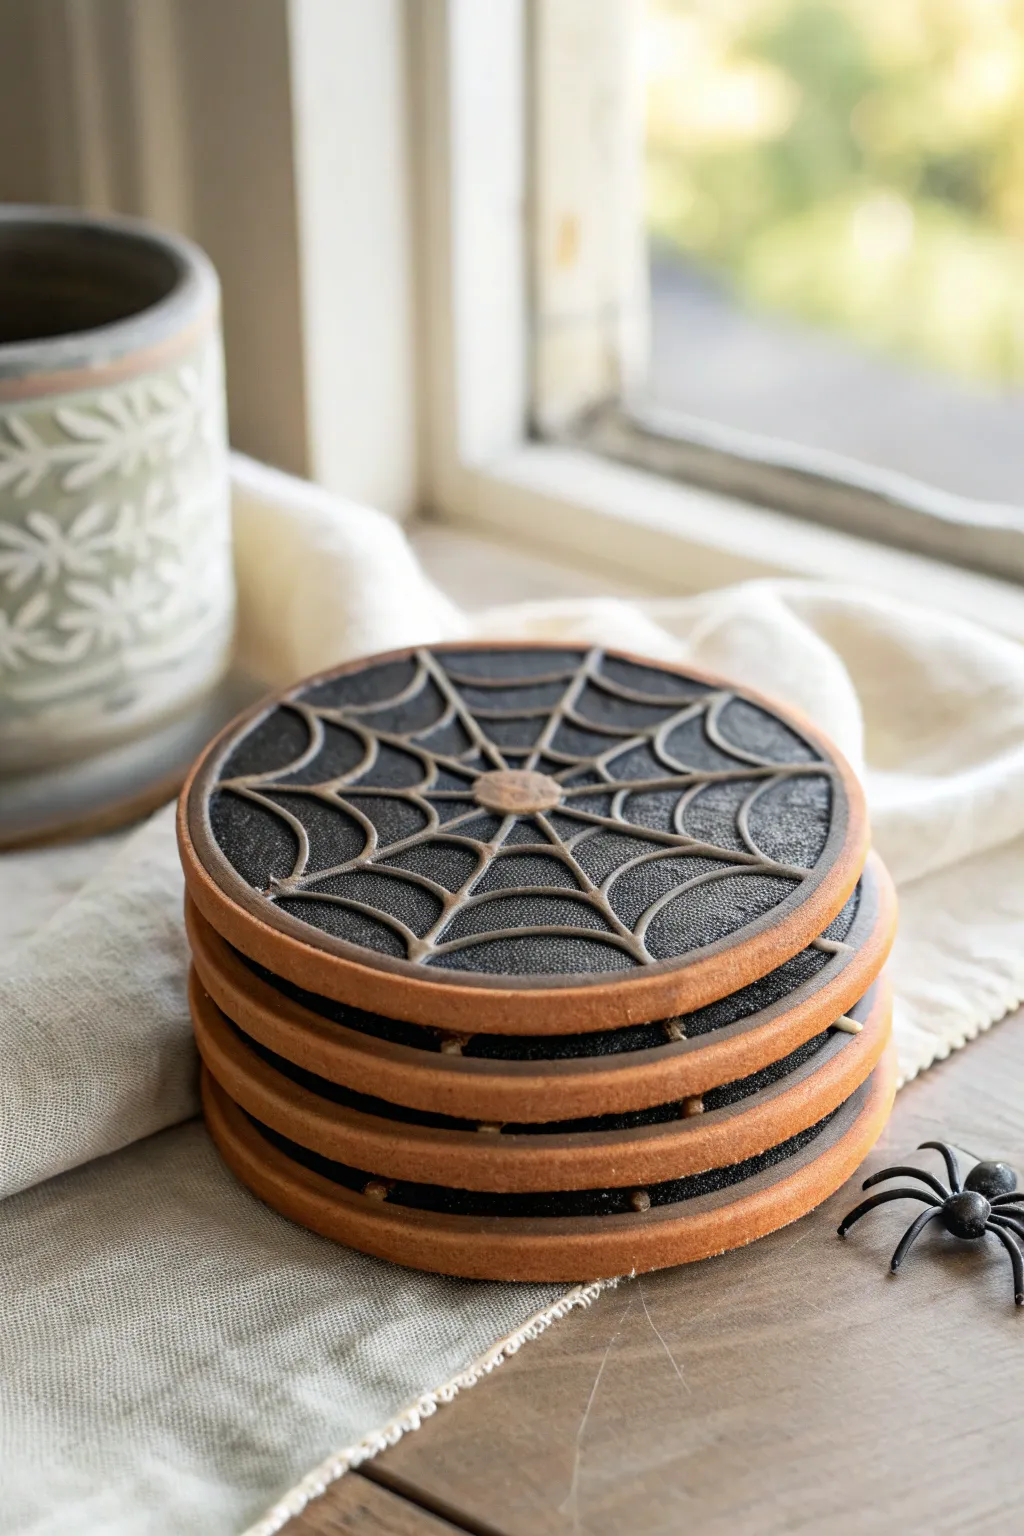
Add a touch of gothic elegance to your Halloween decor with these textured spiderweb coasters. The raised web design against a dark, stone-like background creates a striking contrast that is both spooky and sophisticated.
Detailed Instructions
Materials
- Polymer clay (terracotta or orange-brown finish)
- Black polymer clay (or black acrylic paint)
- Round cookie cutter (approx. 3.5 – 4 inches)
- Small circle cutter (approx. 0.5 inch)
- Clay roller or pasta machine
- Texture sponge or coarse sandpaper
- Extruder tool with small round disc (or steady hands for rolling coils)
- Needle tool or toothpick
- Liquid polymer clay (Bake & Bond)
- Matte sealant or varnish
- Baking sheet and parchment paper
- Oven
Step 1: Creating the Base
-
Condition the clay:
Start by conditioning your terracotta-colored polymer clay until it is soft and pliable. If you want a specific custom shade like the one in the photo, you might need to mix a little brown into standard orange clay. -
Roll the slab:
Roll out the terracotta clay to a uniform thickness of about 1/4 inch. I like to use depth guides or playing cards on either side of my roller to ensure the slab is perfectly even. -
Cut the circles:
Use your large round cookie cutter to punch out four circles for your coaster bases. Gently smooth the edges with your finger to remove any stray clay bits. -
Pre-bake the bases (Optional):
To prevent warping while you work on the intricate top, you can bake these bases for 10-15 minutes at the temperature recommended on your clay package. Let them cool completely before proceeding.
Uneven Webbing?
Draw a guide on paper first and place it under a sheet of glass or plastic. Build your web on the glass using the guide, then carefully transfer the pieces to the coaster.
Step 2: Building the Background
-
Prepare the black insert:
Condition your black polymer clay and roll it out much thinner than the base, approximately 1/8 inch or even slightly less. -
Texture the surface:
Before cutting, press a coarse texture sponge, a piece of sandpaper, or even a crinkled ball of aluminum foil into the black clay sheet. This gives it that gritty, cast-iron look visible in the photo. -
Cut the inner circles:
Using a cutter that is slightly smaller than your base cutter (or by hand-trimming), cut four black circles. These should leave a nice terracotta rim visible when placed on top of the base. -
Attach the background:
Apply a thin layer of liquid polymer clay to the center of your terracotta base. Place the textured black circle on top, pressing gently from the center outward to avoid trapping air bubbles.
Step 3: Designing the Web
-
Create the center hub:
Use your smallest circle cutter to cut a tiny disc from the terracotta clay. Place this directly in the center of the black background. -
Make the spokes:
Extrude or hand-roll very thin, even snakes of terracotta clay. These will be the structural lines of your web. -
Lay the radial lines:
Cut 8 equal lengths of your clay snake. Attach them extending from the center hub to the outer orange rim, spacing them like slices of a pie. Use a dab of liquid clay if the pieces aren’t sticking well. -
Form the webbing:
Roll even thinner snakes for the connecting web lines. Create small, curved ‘U’ shapes and place them between the radial spokes. -
Connect the layers:
Start with the innermost ring of webbing near the hub and work your way outward. You typically want about three concentric rings of webbing for a balanced look. -
Blend the seams:
Where the web lines meet the spokes, gently press them down with a needle tool or a rubber-tipped shaper to merge the clay slightly so it looks like one cohesive structure. -
Clean up:
Check the outer rim. If any web lines extend past the black area onto the terracotta rim, trim them neatly with a craft knife for a polished edge.
Smoother Extrusions
If you don’t own an extruder, warm your clay slightly in your hands before rolling snakes. Use an acrylic block to roll back and forth for perfectly even thickness.
Step 4: Finishing
-
Final bake:
Place your finished coasters on a parchment-lined baking sheet. Bake according to the manufacturer’s instructions (usually 275°F/135°C) for at least 30 minutes to ensure durability. -
Cool down:
Allow the coasters to cool slowly in the turned-off oven or on a wire rack. Sudden temperature changes can sometimes cause cracking. -
Seal (Optional):
While polymer clay is naturally water-resistant, a coat of matte polyurethane varnish can help protect the intricate web details from wear and tear.
Now you have a durable and decorative set of coasters ready to hold your favorite autumn beverages

TRACK YOUR CERAMIC JOURNEY
Capture glaze tests, firing details, and creative progress—all in one simple printable. Make your projects easier to repeat and improve.
Mummy Wrap Mini Jars
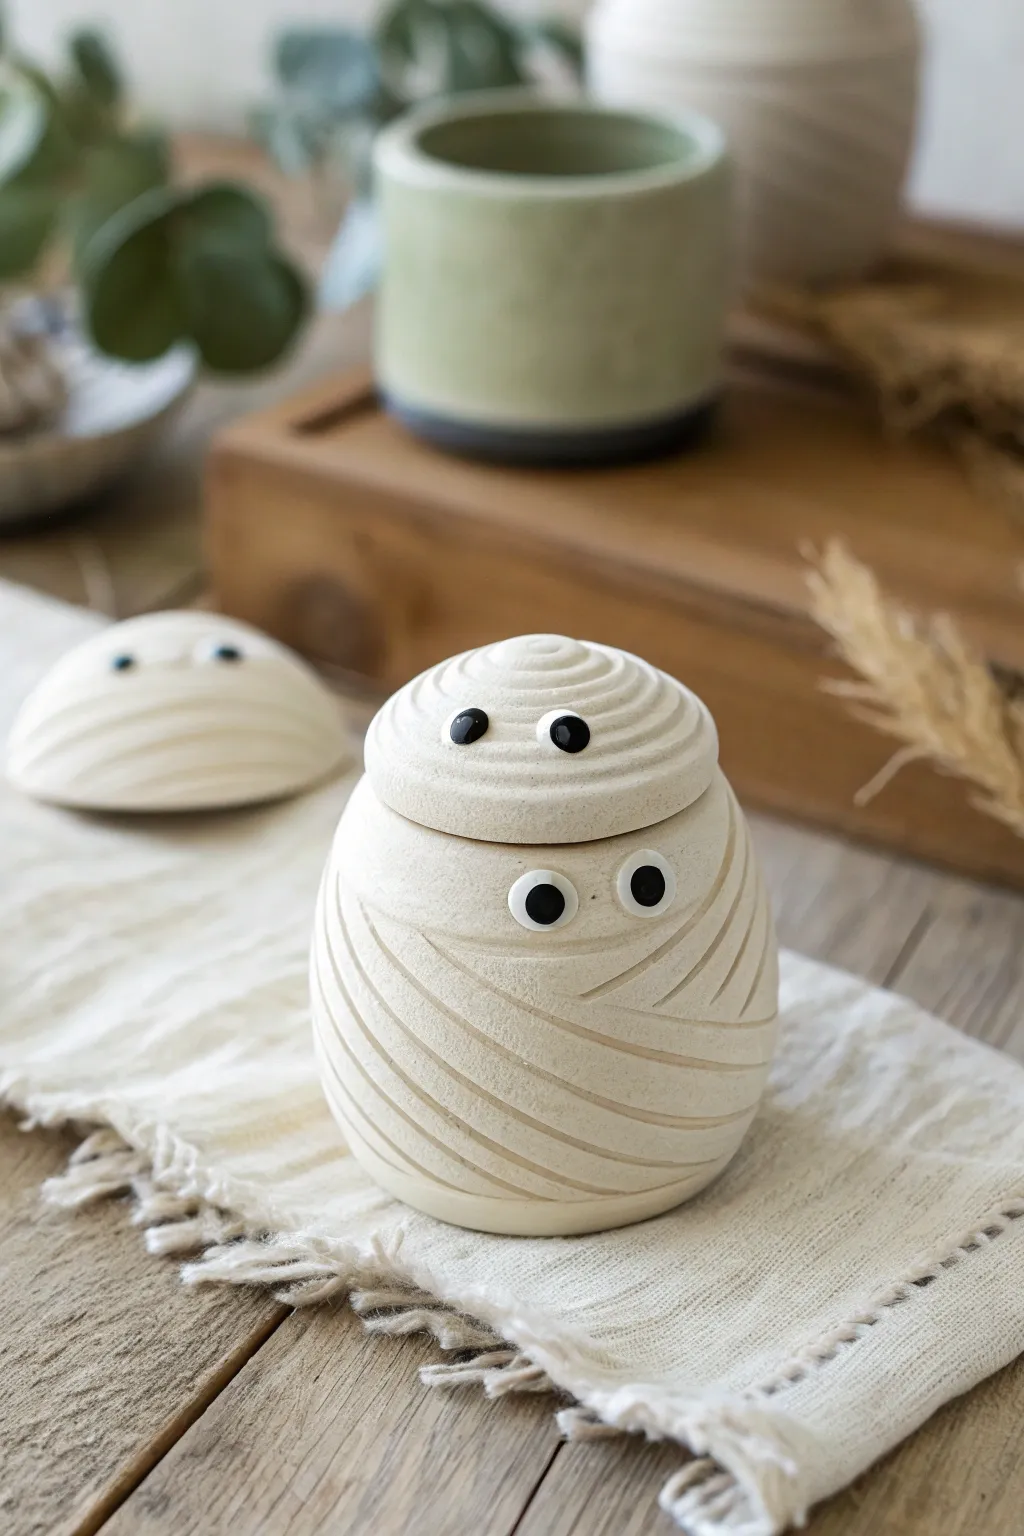
These adorable little jars are the perfect touch of spooky-sweet for your Halloween decor. Sculpted with diagonal bandage grooves and googly-eyed charm, they make excellent containers for tiny treats or just sitting cute on a shelf.
How-To Guide
Materials
- Air-dry clay (white or cream)
- Small jar or canister form (for shaping)
- Clay sculpting tools (needle tool/knife tool)
- Acrylic paint (black and extra white)
- Fine detail paintbrush
- Rolling pin
- Water and sponge
- Clear matte sealant spray
Step 1: Forming the Jar Base
-
Roll your slab:
Begin by rolling out a smooth, even slab of air-dry clay, aiming for about 1/4 inch thickness. Ensure the surface you’re working on is clean so no dust gets embedded. -
Prepare your form:
Lightly wrap your jar or canister form in cling wrap or parchment paper so the clay doesn’t stick to it permanently. -
Wrap the clay:
Cut a rectangular strip of clay wide enough to wrap around your form. Gently wrap it around, joining the seam by scoring the edges, adding a touch of water, and smoothing them together with your fingers. -
Add the bottom:
Cut a circle for the base and attach it to the bottom of your clay cylinder using the same score-and-slip method. Smooth the transition so it looks like one solid piece. -
Shape the silhouette:
While the clay is still pliable, gently curve the top and bottom edges inwards slightly to give the jar a rounded, barrel-like appearance rather than a straight cylinder.
Step 2: Sculpting the Lid
-
Form the lid dome:
Roll a ball of clay and flatten it slightly into a dome shape that fits perfectly atop your jar opening. -
Create the lip:
On the underside of the lid, add a small ring of clay or carve out a groove so the lid sits securely inside the jar rim without sliding off.
Smoother Seams Tip
Use a tiny bit of vinegar on your finger instead of water when smoothing clay seams. It breaks down the clay surface slightly, creating a stronger bond and invisible join.
Step 3: Adding the Mummy Details
-
Carve the bandages:
Using a knife tool or a flat modeling tool, carve diagonal, grooves all around the jar body. Vary the angles slightly so they overlap like real wrapped fabric. -
Add natural texture:
I find that gently dabbing a textured sponge over the clay surface softens the sharp carving lines and mimics the texture of ancient cloth. -
Detail the lid:
Don’t forget to continue the carving pattern onto the lid. The grooves should spiral or wrap around the dome shape. -
Prepare the eye sockets:
Use a small ball tool to make two small indentations on the lid and two larger indentations on the body where the eyes will go. This helps the paint sit better later. -
Dry completely:
Let your pieces dry fully. This usually takes 24-48 hours depending on humidity. Rotate them occasionally to ensure even drying.
Cracking Clay?
If small cracks appear while drying, mix a tiny amount of clay with water to make a paste (slip) and fill the cracks. Smooth it over and let it dry again.
Step 4: Painting and Finishing
-
Base coat (optional):
If you want a brighter finish, paint the entire jar and lid with a coat of cream or off-white acrylic paint. If you like the natural clay color, you can skip this. -
Paint the eyes:
Using a fine detail brush, paint small black ovals in the indentations on the lid, and larger white circles with black pupils in the indentations on the body. -
Add highlights:
A tiny dot of white paint inside the black pupils brings the character to life. -
Seal the work:
Finish by spraying the jar and lid with a clear matte sealant. This protects the clay from moisture and gives it a finished ceramic look.
Now fill your little mummy with Halloween candy or keep him on your desk as a spooky companion
Stitched Monster Face Magnets
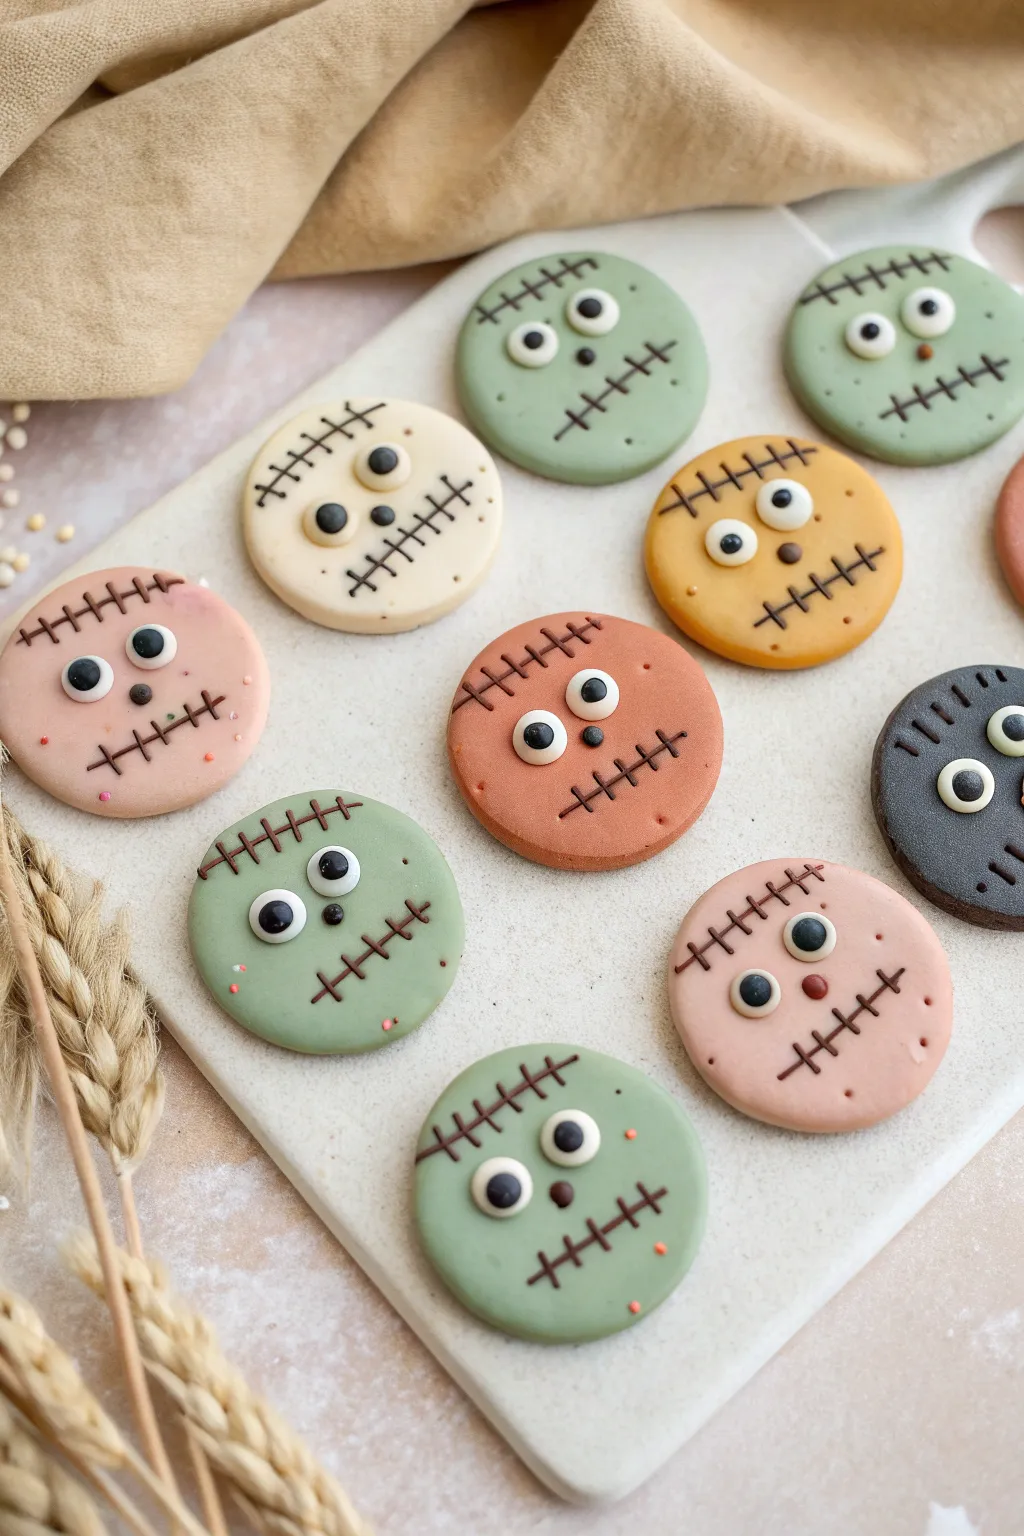
Transform simple clay circles into adorable little Frankenstein-inspired monsters with these quirky magnets. Their pastel-muted patchwork faces, complete with stitching details and varied expressions, make for charmingly spooky fridge decor.
Detailed Instructions
Materials
- Polymer clay (muted green, light pink, cream, rust orange, grey, black, and white)
- Round cookie cutter (approx. 1.5 – 2 inches)
- Rolling pin or acrylic roller
- Brown acrylic paint or a thin brown clay snake for stitching
- Fine detail paintbrush (if using paint)
- Small round dotting tools or ball stylus
- Strong craft magnets
- Superglue or E6000
- Baking sheet and parchment paper
- Matt varnish (optional)
Step 1: Creating the Base
-
Prepare Your Palette:
Begin by conditioning your polymer clay blocks. Mix custom shades if needed—I like adding a tiny bit of brown or grey to bright greens and pinks to achieve that muted, vintage Halloween look seen in the photo. -
Roll Out the Clay:
Roll your various colored clays onto a smooth surface to a uniform thickness of about 1/4 inch (6mm). You want them substantial enough to hold a magnet but not too heavy. -
Cut the Circles:
Using your round cookie cutter, punch out circles from each clay color. Smooth down any rough edges with your finger to give the ‘cookie’ a clean, soft finish. -
Texture the Surface (Optional):
For a more organic look, lightly tap the surface of the clay with a toothbrush or crumpled foil to remove fingerprints and add a subtle texture.
Uneven Eyes?
If your white eye circles aren’t uniform, don’t restart! Varied eye sizes make the monsters look wacker and more distinct. Embrace the asymmetry.
Step 2: Adding the Faces
-
Make the Eyes:
Roll tiny balls of white clay and flatten them gently onto the monster faces. Vary the placement—some wide apart, some close together—to give each monster a unique personality. -
Add Pupils:
Roll even smaller balls of black clay and press them into the center (or slightly off-center for a goofy look) of the white marshmallows. Use your smallest dotting tool to secure them without squishing. -
Create the Noses:
Add a tiny speck of clay—either matching the skin tone or a contrasting dark brown—centered below the eyes to serve as a small button nose. -
Bake the Pieces:
Place your decorated circles on a parchment-lined baking sheet. Bake according to your specific brand of clay’s instructions (usually around 275°F/135°C for 15-30 minutes). Let them cool completely.
Glow Up
Use glow-in-the-dark polymer clay for the white parts of the eyes. When the lights go out, your magnet army will stare back from the fridge.
Step 3: The Stitched Details
-
Mixing the Stitch Color:
While the clay cools, prepare a dark brown acrylic paint. You want a consistency that flows easily off a fine brush but isn’t watery. -
Painting the Forehead Scar:
Paint a horizontal or slightly curved line across the upper forehead area on each monster. It doesn’t need to be perfectly straight; a little wobble adds character. -
Cross-Stitching:
Carefully paint small vertical hash marks across your forehead line to resemble stitches. -
Painting the Mouth:
Draw another line lower on the face for the mouth. You can make some slanted or straight. Add the vertical stitch marks across the mouth line just like you did for the forehead. -
Adding Freckles:
Using a tiny dotting tool or the tip of a toothpick, add just a few tiny specks of color on the cheeks for texture. I find this subtle detail really ties the whole look together. -
Sealing (Optional):
If you want extra durability, apply a thin coat of matte varnish over the painted areas once dry.
Step 4: Assembly
-
Attach the Magnet:
Flip the cooled and dry monsters over. Apply a strong dab of E6000 or superglue to the back of a magnet. -
Secure and Set:
Press the magnet firmly onto the center of the back of the clay piece. Let them cure for at least 24 hours before sticking them to your fridge.
Now you have a delightfully creepy collection of faces to hold your important notes
Potion Bottle Pendants
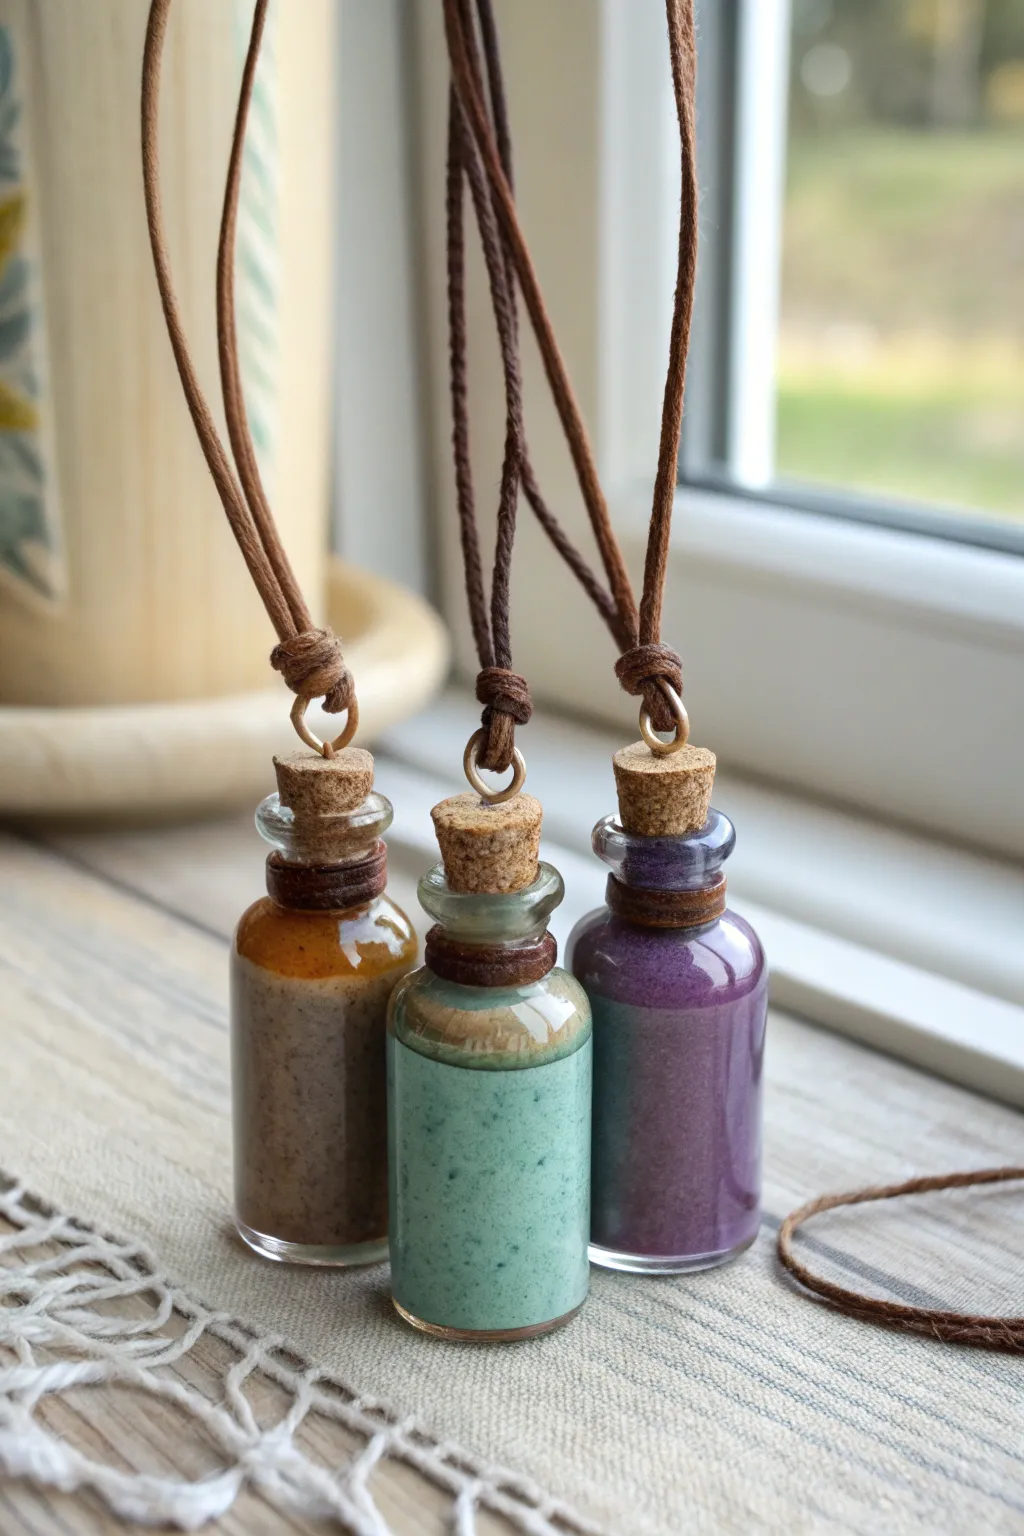
These enchanting miniature bottles hold mysterious, colorful contents that look like magical powders and liquids straight from a wizard’s shelf. By using textured polymer clay and simple jewelry findings, you can wear your favorite spell ingredients around your neck.
Step-by-Step Guide
Materials
- Small glass bottles with cork stoppers (approx. 1-2 inches tall)
- Polymer clay (translucent, purple, teal, and brown/gold)
- Liquid polymer clay (Fimo Liquid or similar)
- Pastel chalks or mica powders (gold, purple, white)
- Eye screws (small, gold or bronze tone)
- Brown waxed cotton cord or leather cord
- Strong craft glue (E6000 or similar)
- Needle tool or toothpick
- Small rolling pin
- Heat gun or standard oven
Step 1: Creating the Potion Fillings
-
Prepare the clay base:
Start by conditioning your polymer clay. For the ‘liquid’ look, mix a small amount of solid colored clay (teal or purple) with translucent clay in a 1:2 ratio. This gives the potion a semi-transparent, magical depth rather than a solid, flat look. -
Add texture and sediment:
To mimic the suspended particles seen in the teal and brown bottles, grate a tiny bit of baked clay or dry pastel chalk into your unbaked clay mix. Knead it gently so the specks remain visible. -
Fill the bottles:
Roll your clay into thin snakes that fit easily through the bottle neck. Drop small pieces inside and use a needle tool or toothpick to compress them down. I like to press the clay against the glass walls to ensure there are no air gaps showing on the outside. -
Create layers:
For the brown bottle, alternate between a darker muddy brown and a golden-speckled layer. Pack the layers firmly but unevenly to simulate natural settling. Fill the bottles up to the neck line. -
Top off the potion:
To create the distinct ‘meniscus’ or surface line, add a final thin layer of liquid polymer clay mixed with a drop of alcohol ink or chalk dust on top of the solid clay. This gives the illusion of a wet surface inside the glass. -
Bake the bottles:
Follow the baking instructions for your specific brand of clay. Since the clay is inside glass, you can place the open bottles directly into the oven. Support them upright in a small bowl of baking soda or rice so they don’t tip over.
Bubbling Effect
Mix varying sizes of clear glass microbeads into your translucent clay before filling the bottle. These will catch the light and look like suspended bubbles frozen in time.
Step 2: Sealing and Assembly
-
Prepare the corks:
While the bottles cool, take your cork stoppers. If they are too long, trim the bottom slightly with a craft knife so they sit snugly without sticking out too far. -
Insert the hardware:
Twist a small gold eye screw into the center of the top of each cork. If the cork feels crumbly, remove the screw, add a tiny dab of super glue to the hole, and screw it back in for a secure hold. -
Seal the bottle:
Apply a ring of strong craft glue (like E6000) around the rim of the glass bottle neck. Insert the cork firmly. This is crucial so your pendant doesn’t separate while you’re wearing it. -
Add decorative binding:
Cut a short strip of leather or brown clay rolled very thin. Wrap it around the neck of the bottle, just below the glass rim. If using clay, bake the bottle again briefly or heat set it with a heat gun. -
String the pendant:
Cut a length of brown waxed cotton cord (about 24-30 inches). Fold it in half to find the center point. -
Attach to the eye screw:
Thread the folded loop of the cord through the eye screw. Pull the loose ends of the cord through this loop to create a lark’s head knot, securing the bottle to the cord. -
Create the friction knot:
To make the necklace adjustable, grasp the two loose ends. Tie a sliding knot (like a double fisherman’s knot or a simple adjustable bead slide) so you can vary the length. -
Final polish:
Wipe the outside of the glass with a little rubbing alcohol to remove any fingerprints or clay residue, leaving the glass sparkling clean against the matte clay inside.
Clay Won’t Stick?
If the clay pulls away from the glass inside after baking, causing ‘silvering,’ try coating the inside of the bottle with a thin layer of liquid clay before packing in the solid clay.
Now you have a set of mystical potion pendants ready to add a touch of magic to your everyday attire
Tiny Cauldron Planters
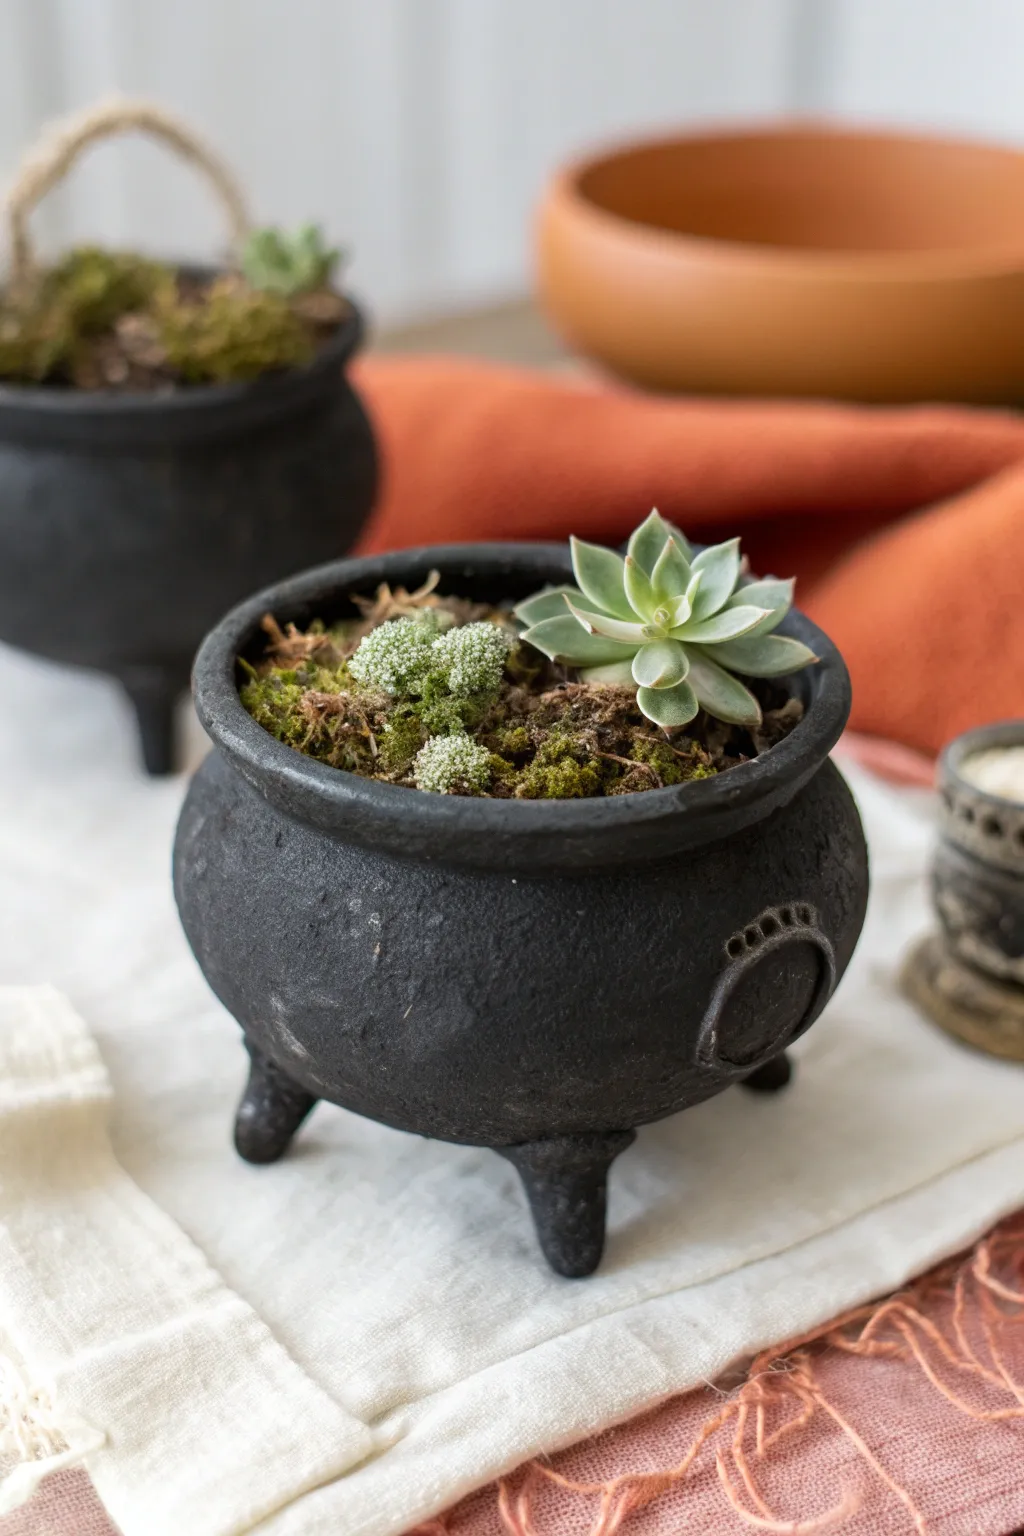
Transform simple clay into enchanting miniature cauldrons perfect for housing tiny succulents. With their textured, cast-iron finish and adorable tripod legs, these planters add a subtle touch of magic to your Halloween decor without being overpowering.
Step-by-Step Tutorial
Materials
- Air-dry clay or polymer clay (black or dark grey)
- Small spherical object for molding (like a tennis ball or styrofoam ball)
- Rolling pin
- Clay sculpting tools (or a butter knife and toothpick)
- Black acrylic paint (matte)
- Baking soda or texture medium
- Paintbrush (sponge brush works well)
- Small succulent plants
- Potting soil
- Dried moss
- Water bowl (for smoothing clay)
Step 1: Sculpting the Cauldron Base
-
Prepare the clay:
Begin by conditioning your clay. Knead a palm-sized amount until it feels warm and pliable, removing any air bubbles that might cause cracks later. -
Create the base form:
Roll approximately two-thirds of your clay into a smooth ball. Using your thumb, press into the center to create a pinch pot, or gently mold the clay over your spherical object to create a rounded bottom shape. -
Build the walls:
Work the clay upwards to form the sides of the cauldron. You want a bulbous shape that is wider at the bottom and slightly narrows toward the opening. -
Form the rim:
Roll a separate snake of clay, about the thickness of a pencil. Attach this to the top opening of your pot using a bit of water to score and slip the pieces together. -
Smooth the lip:
Blend the snake coil into the main body slightly on the inside, but leave a distinct, rolled lip on the outside to mimic a heavy iron rim.
Cracked Clay?
If air-dry clay cracks while drying, mix a small amount of fresh clay with water to make a ‘slip’ paste. Fill the cracks, smooth over, and let dry again.
Step 2: Adding Details & Feet
-
Shape the feet:
Roll three small, equal-sized balls of clay. Gently tap them into short, stubby cylinders or slightly tapered cones to serve as the cauldron’s legs. -
Attach the legs:
Flip your bowl upside down. Score the bottom of the cauldron and the tops of the legs, add a dab of water, and press the legs firmly in a triangle formation. Smooth the seams with your finger or a sculpting tool. -
Check stability:
Turn the pot right-side up and gently press it down onto your table. This ensures the feet are level and the cauldron won’t wobble. -
Add handle details:
Roll extremely thin coils of clay to create raised circles or mock handle rings on the side of the pot. Attach these decorative elements near the widest part of the belly. -
Create surface texture:
Use a crumpled ball of aluminum foil or a stiff-bristled brush to tap texture all over the smooth clay. This gives it the pitted, rustic look of old cast iron. -
Dry or bake:
Follow the instructions for your specific clay. If using air-dry clay, let it sit undisturbed for 24-48 hours. If using polymer, bake according to package directions.
Step 3: Finishing the Look
-
Mix textured paint:
Mix black acrylic paint with a teaspoon of baking soda. This mixture creates a gritty, matte texture that looks incredibly like real iron. -
Apply the base coat:
Paint the entire cauldron, inside and out (or at least down to where the soil line will be). I like dab the paint on rather than stroking it to enhance the rough texture. -
Dry and touch up:
Allow the first coat to dry completely. If you missed any spots in the texture, dab on a second coat to ensure solid coverage. -
Planting:
Once fully dry, fill the bottom with a little gravel for drainage, then add potting soil. Gently nestle your succulent into the center. -
Final touches:
Tuck small bits of dried moss around the base of the succulent to cover the soil and add a pop of contrasting green color.
Make it hangable
Before drying, use a wooden skewer to poke holes in the rim. After painting, thread rustic jute twine through to create a hanging planter.
Enjoy finding the perfect spooky spot to display your new miniature garden
Haunted House Luminary Tiles
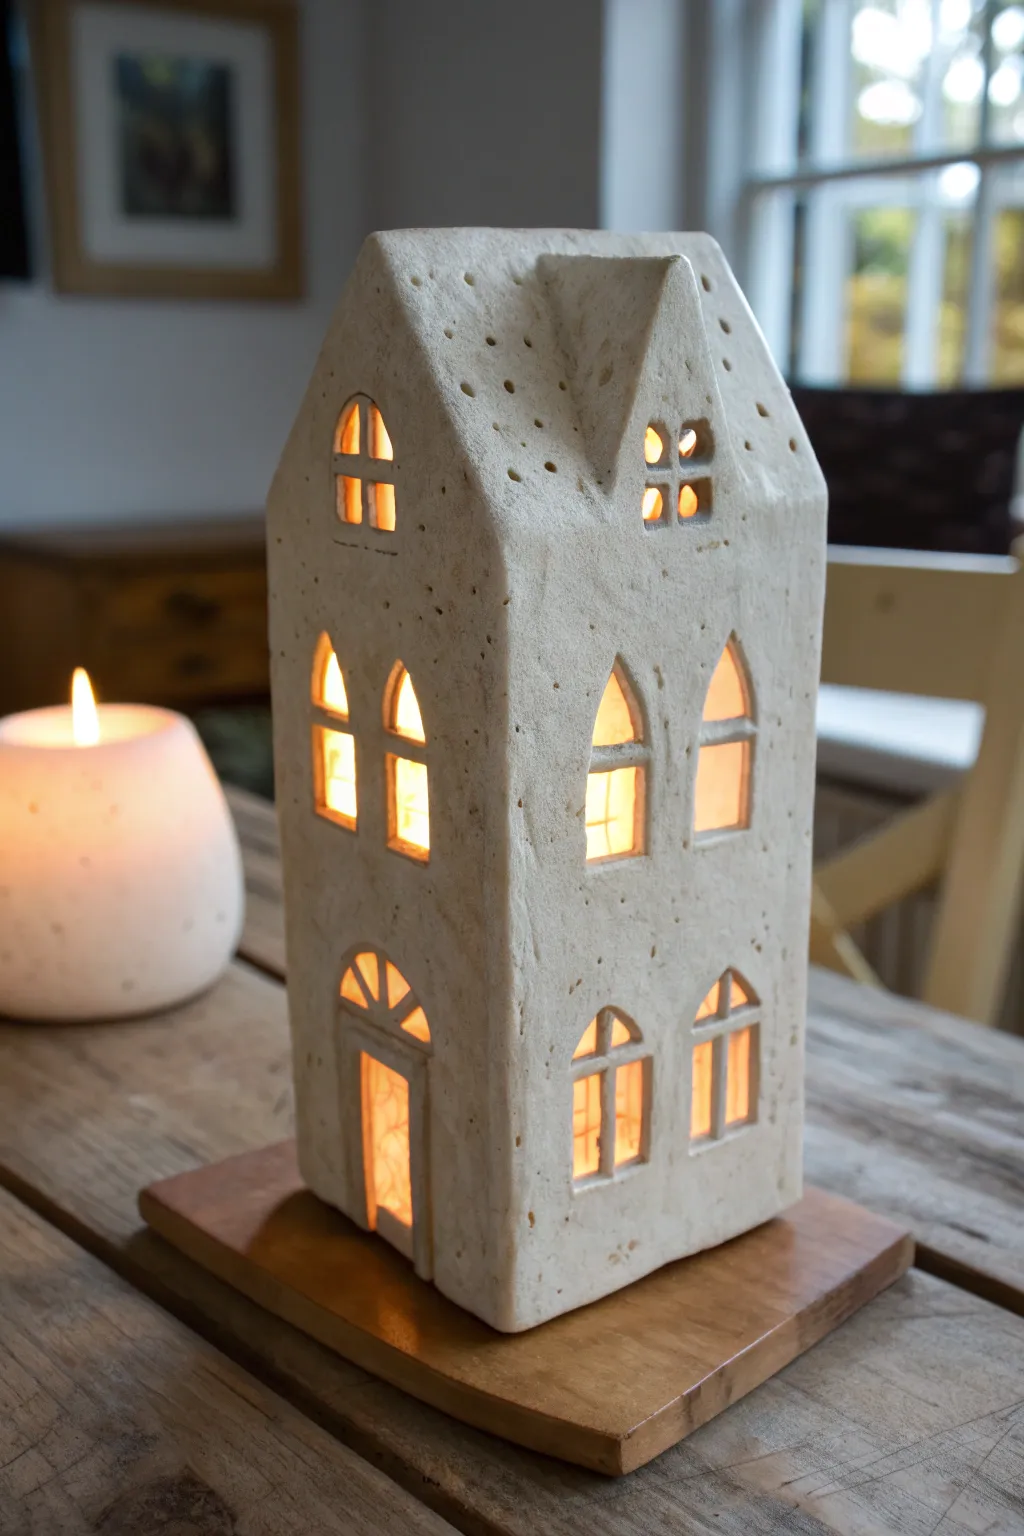
Bring a ghostly glow to your seasonal decor with this charming 3D clay house luminary, featuring arched gothic windows and a textured stone-like finish. This project uses air-dry or polymer clay to construct a tall, narrow house that radiates warmth when lit from within.
Step-by-Step Guide
Materials
- Air-dry clay (stone or white color) or polymer clay
- Rolling pin
- Craft knife or X-Acto knife
- Ruler
- Paper template (make your own)
- Small square cookie cutters (optional)
- Clay slip or liquid clay (for joining)
- Needle tool or toothpick
- Sponge
- Fine-grit sandpaper
- Rolling guides or wooden slats (approx. 1/4 inch thick)
- Wooden base (optional for display)
Step 1: Preparation & Cutting
-
Draft your blueprints:
Begin by sketching a template on paper for your house walls. You will need a tall front piece with a peaked roof, a matching back piece, and two narrower rectangular side panels. Don’t forget to include a small dormer window shape for the roof. -
Roll the slab:
Roll out your clay on a smooth surface to an even thickness of about 1/4 inch. I like to use wooden slats on either side of the rolling pin to ensure the thickness is perfectly uniform, which is crucial for structural stability. -
Add heavy texture:
Before cutting your shapes, dab the surface of the clay vigorously with a rough sponge, crumpled foil, or a stiff brush. This creates the weathered, porous stone effect that gives the house its character. -
Cut the walls:
Place your paper templates onto the textured clay. Using a sharp craft knife and a ruler for guidance, carefully cut out the front, back, and side panels. Save the excess clay for the roof details later. -
Carve the windows:
Freehand or use a small cutter to remove the clay for the windows. Create tall arched windows on the sides and upper levels, and cut a squared opening for the front door. Use your needle tool to tidy up any rough edges inside the frames. -
Create window panes:
Roll thin ‘snakes’ of clay to act as mullions (the crossbars in windows). Gently press these into the open window spaces from the backside, securing them with a little slip so they stay put without smearing the front texture.
Step 2: Assembly & Detailing
-
Bevel the edges:
For a cleaner corner joint, carefully slice the vertical edges of your wall panels at a 45-degree angle. This miter cut allows the walls to meet seamlessly at a 90-degree corner. -
Score and slip:
Score (scratch) the beveled edges with your needle tool and apply a generous amount of clay slip (or liquid clay if using polymer). This acts as the glue for your structure. -
Construct the box:
Stand the walls up and press the corners together. Use a tool or your finger to smooth the inside seams for strength. On the outside, gently paddle the corners so the joint disappears into the stone texture. -
Add the roof slabs:
Cut two rectangular slabs for the roof. Attach them to the peaked tops of the front and back walls using the score and swipe method, ensuring they meet at the top ridge. -
Install the dormer:
Form a small triangular dormer window and attach it to the front slope of the roof. Use a blending tool to merge the seams so it looks like it was carved from the same piece of stone. -
Poke ventilation holes:
Use a needle tool or toothpick to poke small, random holes across the roof surface. These add decorative texture and also help with heat release if you plan to use a real candle.
Clean Cuts Pro Tip
Let the clay slab dry for about 15-20 minutes after rolling but before cutting the windows. Leathery clay holds sharp lines much better than soft, wet clay.
Step 3: Finishing Touches
-
Final drying phase:
Let the house dry very slowly away from direct heat or sunlight to prevent warping. If using polymer clay, bake according to the manufacturer’s package instructions. -
Sand and refine:
Once fully cured and dry, use fine-grit sandpaper to smooth out the bottom edge so the house sits perfectly flat. You can also lightly sand any sharp corners if desired. -
Optional color wash:
If your clay is plain white, you can apply a watered-down wash of beige or grey acrylic paint. Wipe it back immediately with a cloth so the color only remains in the textured pits. -
Mounting:
Though the house stands on its own, placing it on a small wooden coaster or plinth protects your table surfaces and completes the rustic look.
Level Up: Vellum Glass
Glue pieces of yellow tracing paper or vellum behind the windows after the clay is finished. It diffuses the candlelight for a softer, warmer glow.
Place a battery-operated tea light inside your new haunted cottage and watch the shadows dance across the table
Eyeball Pocket Stones
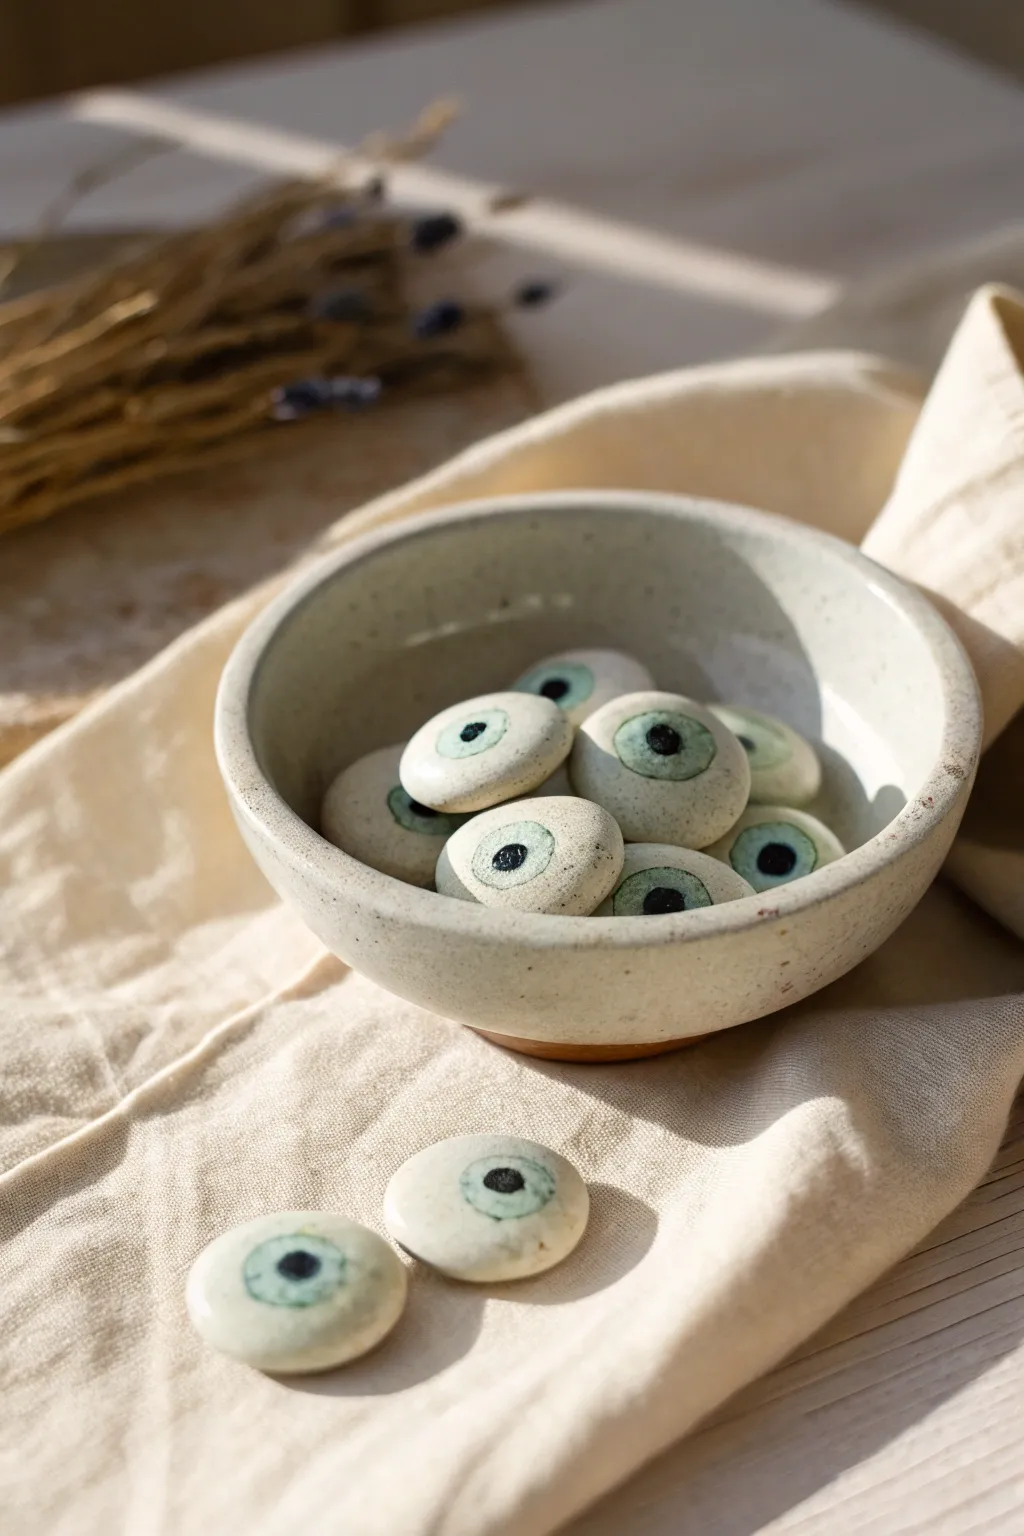
These delightfully creepy tokens combine the satisfying weight of smooth river stones with the spooky fun of Halloween. Their minimalist design and cool ceramic finish make them perfect for pocket fidgets or mystical bowl fillers.
Step-by-Step Tutorial
Materials
- Air-dry clay (white or light grey) or polymer clay
- Acrylic paints (pale teal/mint green, black, white)
- Fine grit sandpaper
- High-gloss varnish or UV resin
- Small round brushes
- Dotting tool or end of a paintbrush handle
- Bowl of water (for smoothing)
- Parchment paper
Step 1: Shaping the Stones
-
Portion the clay:
Begin by breaking off small chunks of your clay, roughly the size of a walnut. You want enough to create a substantial stone feel, but not so big that they become heavy paperweights. -
Roll smooth spheres:
Roll each chunk in your palms until you have a perfectly smooth ball. Take your time here to eliminate any major cracks or seams, as these will show up in the final stone. -
Flatten into pebbles:
Gently press the sphere between your palms or against your work surface to flatten it into a disc. Aim for an organic, slightly irregular ‘pebble’ shape rather than a perfect circle. -
Soften the edges:
Dip your finger in a little water and run it around the circumference of the clay disc. Gently round off the edges so the stone looks worn and tumbled rather than sharp. -
Dry completely:
Place your formed stones on parchment paper to dry. If using air-dry clay, let them sit for 24-48 hours until fully hardened and white. If using polymer clay, bake according to package instructions.
Uneven Surfaces?
If your dried clay has dips or dents, mix a slurry of clay dust and water to fill the gaps. Let it dry, then sand it flush before painting.
Step 2: Painting the Eye
-
Sand for smoothness:
Once dry (or baked and cooled), inspect your stones. Use fine-grit sandpaper to buff away any fingerprints or rough textures, wiping away the dust with a damp cloth afterward. -
Mix the iris color:
Prepare your palette by mixing a soft, muted teal. I like to mix a drop of green into white, then add just a touch of blue and grey to get that vintage ceramic glaze look. -
Paint the iris base:
Using a small round brush, paint a circle in the center of the stone. Don’t worry if it’s not mathematically perfect; a slight wobble makes it look more hand-crafted. -
Add translucent layers:
For a watercolor effect, water down your paint slightly. Apply a second, sheer layer over the teal circle to build depth without making it look like a sticker. -
Create the pupil:
Dip a dotting tool or the back of a paintbrush into black acrylic paint. Press it firmly into the center of the dry teal circle to create a bold, solid pupil. -
Add the catchlight:
It’s a tiny detail, but crucial: dip a thin pin or fine brush in white paint. Add a microscopic white dot near the edge of the black pupil to make the eye look wet and alive.
Glazed Look Trick
Use UV resin only on the painted iris area and cure with a lamp. This creates a raised, glassy lens effect against the matte stone texture.
Step 3: Finishing Touches
-
Speckle the surface:
To mimic the look of stoneware pottery seen in the photo, dilute some grey or brown paint on a toothbrush. Run your thumb over the bristles to flick tiny speckles across the entire stone. -
Seal the deal:
Once the paint is bone dry, apply a coat of high-gloss varnish. Focus extra gloss on the painted eye area to enhance the ‘wet’ look, or coat the whole stone for a polished finish. -
Let cure:
Allow the varnish to cure completely in a dust-free area before handling or stacking them in a bowl.
Scatter these unblinking little observers around a room to quietly watch over your Halloween guests
Tombstone Place Card Holders
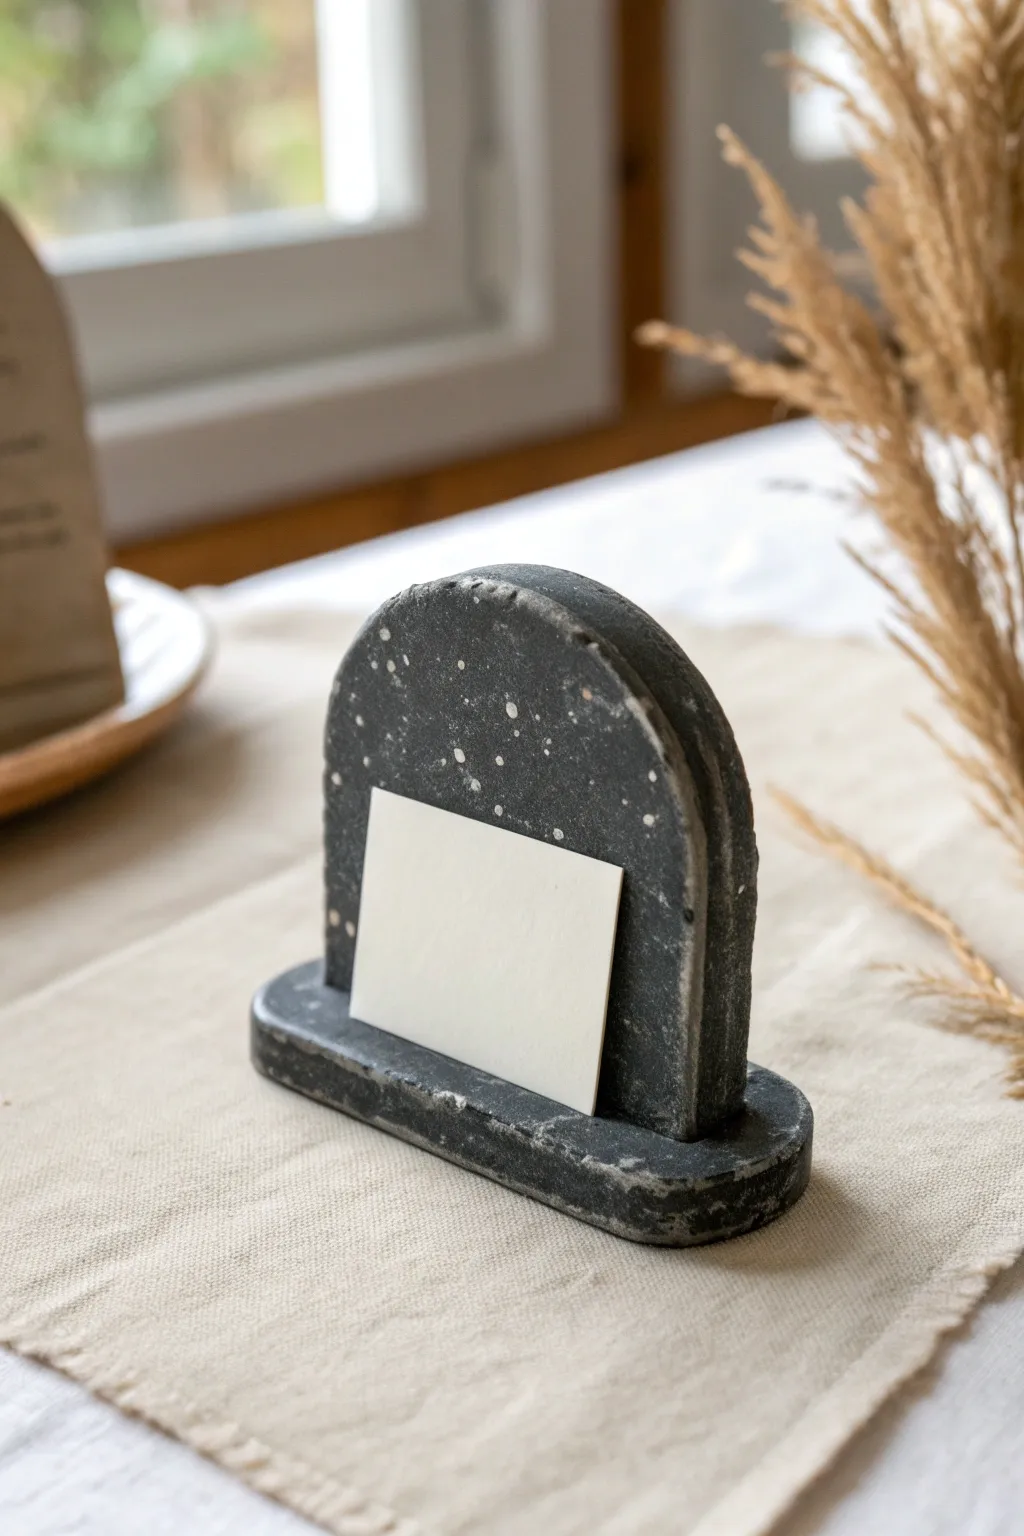
Add a touch of elegant macabre to your Halloween tablescape with these faux-stone tombstone card holders. Their dark, speckled finish mimics granite perfectly, creating a sophisticated yet spooky way to guide guests to their seats.
How-To Guide
Materials
- Black polymer clay (or air-dry clay)
- White acrylic paint
- Stiff bristle toothbrush
- Rolling pin
- Clay knife or craft blade
- Ruler
- Arch-shaped cookie cutter (or paper template)
- Rough sandpaper or a textured stone/rock
- Strong craft glue (e.g., E6000)
- Baking sheet and parchment paper (if using polymer clay)
- Small white cardstock for the name cards
Step 1: Shaping the Tombstones
-
Prepare the Clay:
Condition your black clay by kneading it until it is soft and pliable. If you want a more natural stone color, you can knead in a tiny amount of white or grey clay, but don’t mix it fully to keep a marbled effect. -
Roll the Slab:
Roll out the clay on a clean surface to a thickness of approximately 1/4 inch. You want it thick enough to be sturdy but not so heavy that it tips over. -
Texture the Surface:
Before cutting your shapes, press a rough stone or a piece of crumpled sandpaper gently into the surface of the clay. This creates natural pockmarks and imperfections found in real stone. -
Cut the Arches:
Using an arch-shaped cutter or a paper template you’ve sketched, cut out the main tombstone shape. You will need one arch for each place setting. -
Smooth the Edges:
Dip your finger in a little water (or clay softener) and run it along the cut edges of the arch to remove any sharp burrs or jagged bits. -
This is the Base:
Roll out a separate piece of clay, slightly thicker than the arch (about 1/3 inch). Cut this into long ovals or rectangles with rounded corners. The base needs to be slightly wider and longer than the bottom of your arch for stability. -
Check the Fit:
Place the arch on top of the cut base to ensure the proportions look right. The base should extend about 1/4 inch past the arch on all sides.
Step 2: Creating the Speckled Finish
-
Bake or Dry:
Follow the manufacturer’s instructions for your specific clay. If using polymer clay, bake on a parchment-lined sheet. Let pieces cool completely before moving on. -
Assemble the Structure:
Once hard and cool, use a strong adhesive to glue the arch vertically onto the center of the base. Hold it in place for a few minutes until the glue grabs. -
Prepare the Splatter:
Pour a small amount of white acrylic paint onto a palette or paper plate. You want the paint slightly watered down so it flicks easily. -
Apply the Flecks:
Dip a stiff toothbrush into the white paint. Hold the brush near the tombstone and run your thumb across the bristles to spray fine droplets onto the black surface. -
Vary the Pattern:
I like to do a heavy splatter in some areas and lighter in others to make it look organic. Let the paint dry completely. -
Optional Distressing:
For an aged look, you can lightly sand some of the edges after the paint is dry to make the stone look worn.
Stone Texture Pro-Tip
Mix dried coffee grounds or coarse black pepper directly into the clay before baking. This adds grit and genuine texture that paint alone can’t replicate.
Step 3: The Final Detail
-
Card Holder Hack:
Since we didn’t cut a slit in the clay, we use a simple trick. Attach a small adhesive glue dot or a tiny loop of double-sided tape to the lower center of the tombstone. -
Attach the Card:
Press a small, rectangular piece of white cardstock onto the adhesive. This ‘floating’ look adds a modern touch to the spooky design.
Wobbly Tombstone?
If the arch won’t stand straight while gluing, prop it up with small household items like spice jars on either side until the adhesive cures fully.
Now just add your guests’ names and set the table for a captivating dinner party
Trick-or-Treat Mini Buckets
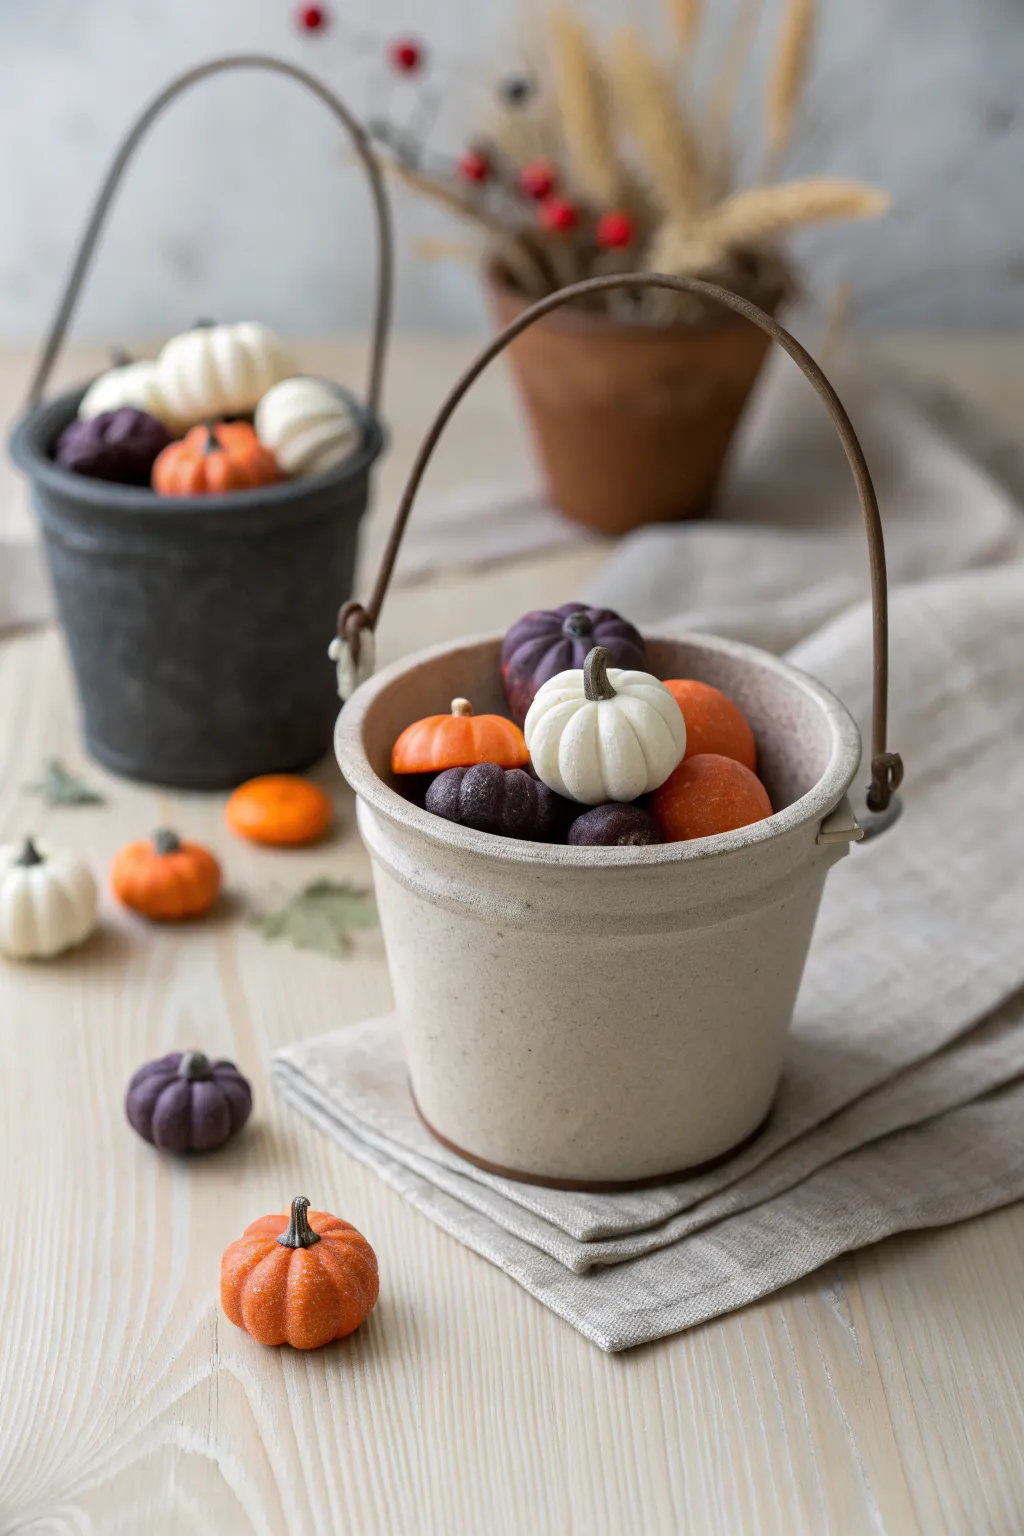
These adorable miniature buckets, brimming with tiny handcrafted pumpkins, make for a charming Halloween display or dollhouse accessory. The project combines sculpting tiny gourds with creating realistic-looking buckets from polymer clay.
Step-by-Step Tutorial
Materials
- Polymer clay (white, orange, dark purple, beige/cream, dark gray, brown)
- Acrylic paints (burnt umber, black, cream)
- Wire (20-gauge for handles)
- Needle tool or toothpick
- Small ball stylus tool
- Soft pastel chalks (orange, brown) or mica powder
- Matte varnish
- Small round cutter or bottle cap (approx. 1.5 inch diameter)
- Sculpting blade
- Liquid polymer clay (optional)
- Textured sponge or foil ball
Step 1: Sculpting the Buckets
-
Prepare the Base:
Start by conditioning the beige clay for the lighter bucket. Roll it out to a medium thickness (about 3mm). Use your small round cutter to punch out a circle for the bucket’s base. -
Form the Walls:
Roll a rectangular strip of the same clay, tall enough for your desired bucket height (approx. 2 inches) and long enough to wrap around the base. I find that beveling the short edges helps create a seamless join. -
Assemble the Bucket:
Wrap the strip around the circular base, sitting it on top of the circle’s edge. Smooth the seam where the strip meets itself and where the wall meets the floor using a sculpting tool to blend the clay together invisibly. -
Add the Rim:
Roll a thin snake of clay and wrap it around the top outer edge of the bucket. Blend the bottom of this snake into the wall, leaving the top rounded to create a sturdy lip. Gently flare the opening slightly for a realistic shape. -
Create Handle Lugs:
Make two tiny flattened rectangles of clay. Attach them to opposite sides of the bucket, just below the rim. Poke a hole through each one using a needle tool; these will hold the wire handle later. -
Texture the Surface:
To mimic an earthenware or concrete texture, gently tap the entire exterior surface with a piece of textured sponge or a crumpled ball of aluminum foil. Repeat this entire process with dark gray clay for the second bucket.
Wire Woes?
If the wire handle keeps popping out of the clay lugs before you can curl it, secure the wire tip with a tiny dab of superglue inside the hole, wait for it to dry, then bend.
Step 2: Creating the Mini Pumpkins
-
Portion the Clay:
Roll small balls of orange, white, and dark purple clay. Vary the sizes from pea-sized to slightly larger marble-sized for a natural assortment. -
Shape the Ribs:
Take a ball and slightly flatten it. Use a needle tool to press vertical lines from the top center down to the bottom center, creating the pumpkin’s ribs. Rock the tool slightly to widen the grooves. -
Refine the Shape:
Gently press your finger on the top and bottom to squat the pumpkin slightly. Use a small ball tool to make an indentation at the top center for the stem. -
Add Stems:
Roll a very thin snake of brown clay. Cut tiny segments and insert them into the top indentations. You can curve the tips slightly or give them a twisted texture with your needle tool. -
Create ‘Candy’ Pumpkins:
For the flatter, candy-corn style pumpkins seen in the bucket, roll a ball, flatten it significantly into a disc, and impress softer, wider rib lines. Keep these smooth without stems if mimicking candy, or add stems for variety. -
Shading:
Before baking, use a soft brush to dust a little brown pastel chalk into the crevices of the orange and white pumpkins to add depth and an aged look.
Step 3: Assembly and Finishing
-
Bake:
Arrange the buckets and all pumpkins on a tile or baking sheet. Follow your clay manufacturer’s instructions for temperature and time (usually 275°F for 15-30 minutes). Let them cool completely. -
Wire Handles:
Cut a length of 20-gauge wire for each bucket. Bend it into a U-shape. thread the ends through the lug holes you made earlier and curl the very tips upward with pliers to secure them. -
Distress the Handles:
For a rustic look, dab a tiny bit of brown acrylic paint onto the wire handle to simulate rust. Wipe most of it off immediately so it just sits in the texture of the wire. -
Paint Wash (Optional):
If the gray bucket looks too flat, apply a watery wash of black acrylic paint and wipe it off quickly, letting the dark color remain only in the sponge texture. -
Fill the Buckets:
Fill the buckets with your baked pumpkins. If you want them permanently fixed, use a drop of super glue or liquid clay (rebaking required for liquid clay) to hold them in place. -
Scatter the Excess:
Arrange the remaining loose pumpkins around the base of the buckets to complete the scene.
Texture Twist
Mix black pepper or dried used coffee grounds into the beige clay before sculpting the bucket to create a realistic speckled stoneware pottery effect.
Now you have a harvest of miniature pumpkins ready to decorate your seasonal display
Spellbook Lidded Box
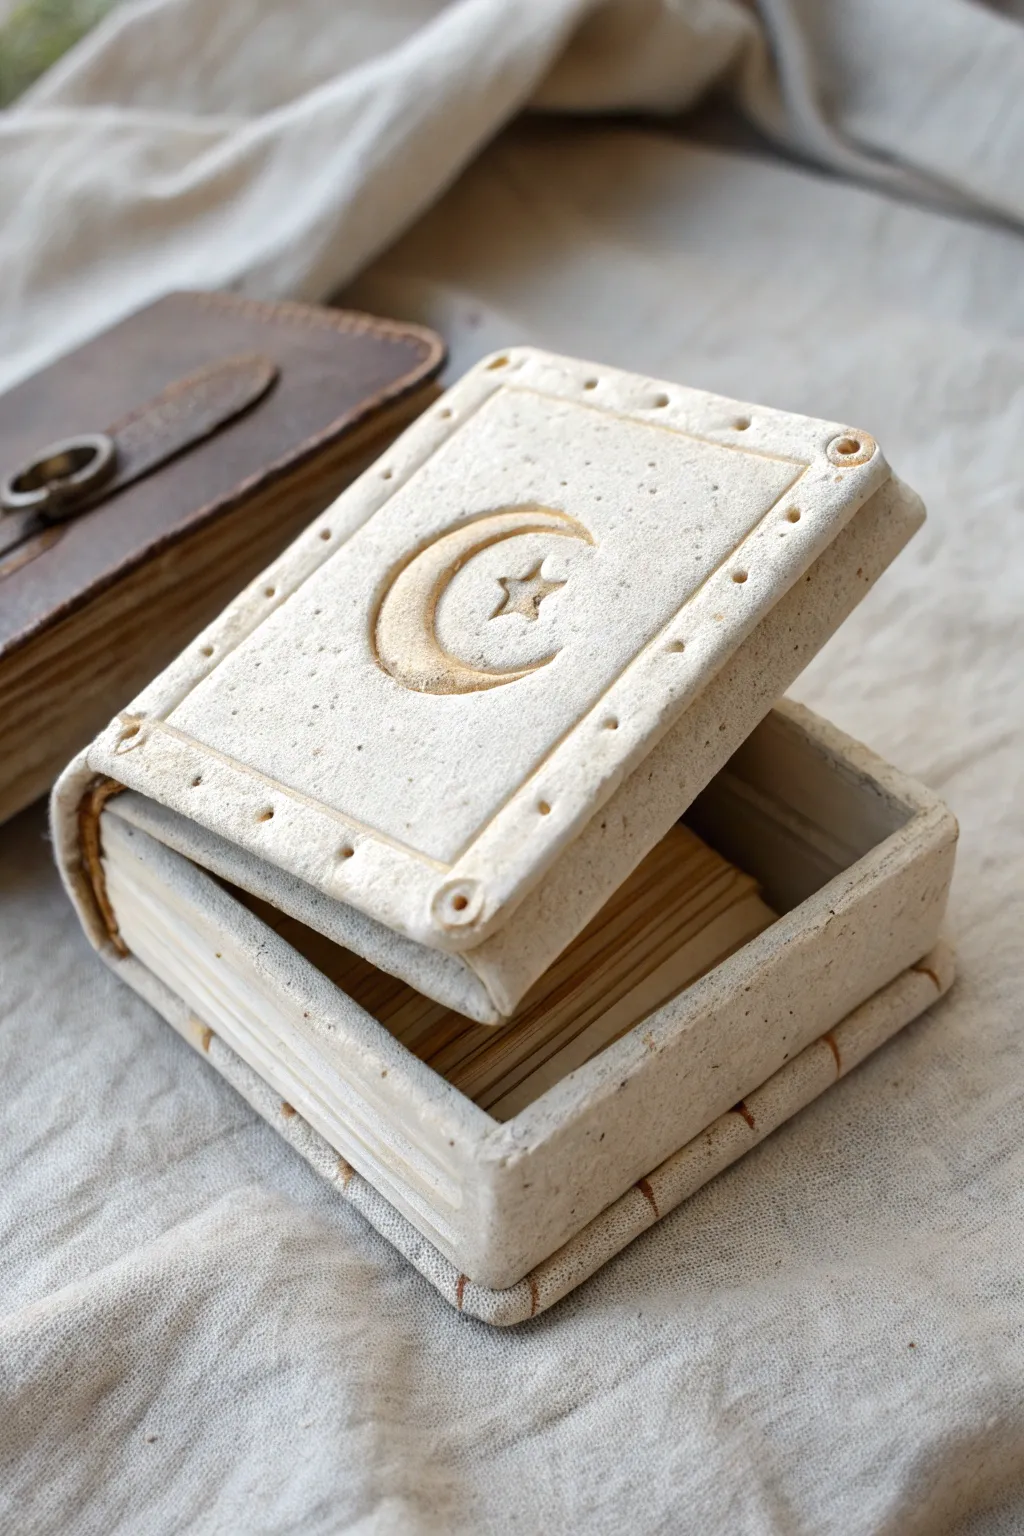
Transform simple clay into a charming, ancient-looking grimoire that doubles as a secret hiding spot. With its speckled stone texture and celestial embossing, this lidded box is perfect for storing crystals, jewelry, or tiny Halloween trinkets.
How-To Guide
Materials
- Air-dry clay (stone or speckled finish preferred)
- Rolling pin
- sharp craft knife or scalpel
- Ruler
- Needle tool or toothpick
- Small star-shaped clay cutter (optional)
- Round cookie cutter (small size)
- Water and a small sponge
- Brown acrylic wash or diluted brown ink
- Matte varnish
- Sandpaper (fine grit)
Step 1: Shaping the Cover and Base
-
Roll the clay:
Start by conditioning your clay and rolling it out to an even thickness of about 1/4 inch. If you want that lovely speckled look shown in the photo, use a clay variety that already has grit or flecks in it. -
Cut the main slabs:
Using your ruler and craft knife, cut two identical rectangles. These will serve as the front cover (lid) and the back cover (base) of your book. -
Detail the cover:
Take one of the rectangles destined to be the lid. Gently scribe a rectangular border about half an inch from the edge using a ruler and a dull tool to create an embossed frame effect. -
Add corner details:
Use the back of a small paintbrush or a dotting tool to press small indentations into the corners of your frame border. Space these evenly along the lines to mimic rivets or decorative tooling. -
Create the celestial motif:
In the center of the lid, press a small round cutter gently into the clay to mark a circle, then offset it slightly and press again to create a crescent moon shape. Use a knife to carve out the excess or simply impress the shape deeply. Add a star next to it using a small cutter or by hand-carving.
Step 2: Building the Book Block
-
Form the walls:
Roll out a long strip of clay, slightly thicker than your covers. Cut three strips: one long strip for the spine side and two shorter ones for the top and bottom edges of the book’s ‘pages’. -
Texture the pages:
Take a needle tool or a stiff bristle brush and drag it horizontally along the outside of these three strips. This scoring creates the illusion of stacked paper pages. -
Assemble the box:
Score and slip the edges of your bottom rectangular base. Attach the three wall strips (spine, top, bottom) to create an open box shape. I usually smooth the inside seams with a little water on my finger for extra stability. -
Add the spine curve:
Roll a small coil of clay and blend it onto the designated ‘spine’ side of the box to give it a slightly rounded, bound book appearance compared to the ‘page’ sides.
Stone Texture Trick
Mix dried tea leaves or cracked black pepper into plain white clay before rolling. This creates instant organic speckling that looks like ancient stone without painting.
Step 3: Finishing the Lid
-
Create the lid rim:
To ensure the lid stays on, you need a stopper. Roll a thin square snake of clay and attach it to the underside of the lid, inset about 1/4 inch from the edge. This inner rim will sit inside the box walls to keep the lid from sliding off. -
Test the fit:
Gently place the lid onto the wet box base to check the fit. If it’s too tight, trim the inner rim slightly. Don’t leave it on too long or the clay might fuse; remove it to dry separately.
Hidden Hinge
Embed two small magnets into the clay—one in the box wall and one in the lid—before drying. This creates a satisfying magnetic ‘snap’ closure or acts as a hidden hinge.
Step 4: Refining and Aging
-
Dry completely:
Let all pieces air dry for at least 24-48 hours. Flip them occasionally to prevent warping. -
Sand the edges:
Once bone dry, use fine-grit sandpaper to smooth any sharp edges on the lid and base, giving it a worn, handled feel. -
Apply a wash:
Mix a very watery brown acrylic paint or ink. Brush it over the entire piece, making sure it gets into the ‘page’ grooves and the moon indentation. Immediately wipe away the excess with a damp cloth, leaving pigment only in the deeper textures. -
Seal the piece:
Finish with a coat of matte varnish to protect the clay while maintaining that dry, stony aesthetic.
Now you have a mystical vessel ready to guard your smallest secrets on your Halloween altar.
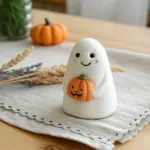
Halloween Animal Hybrids
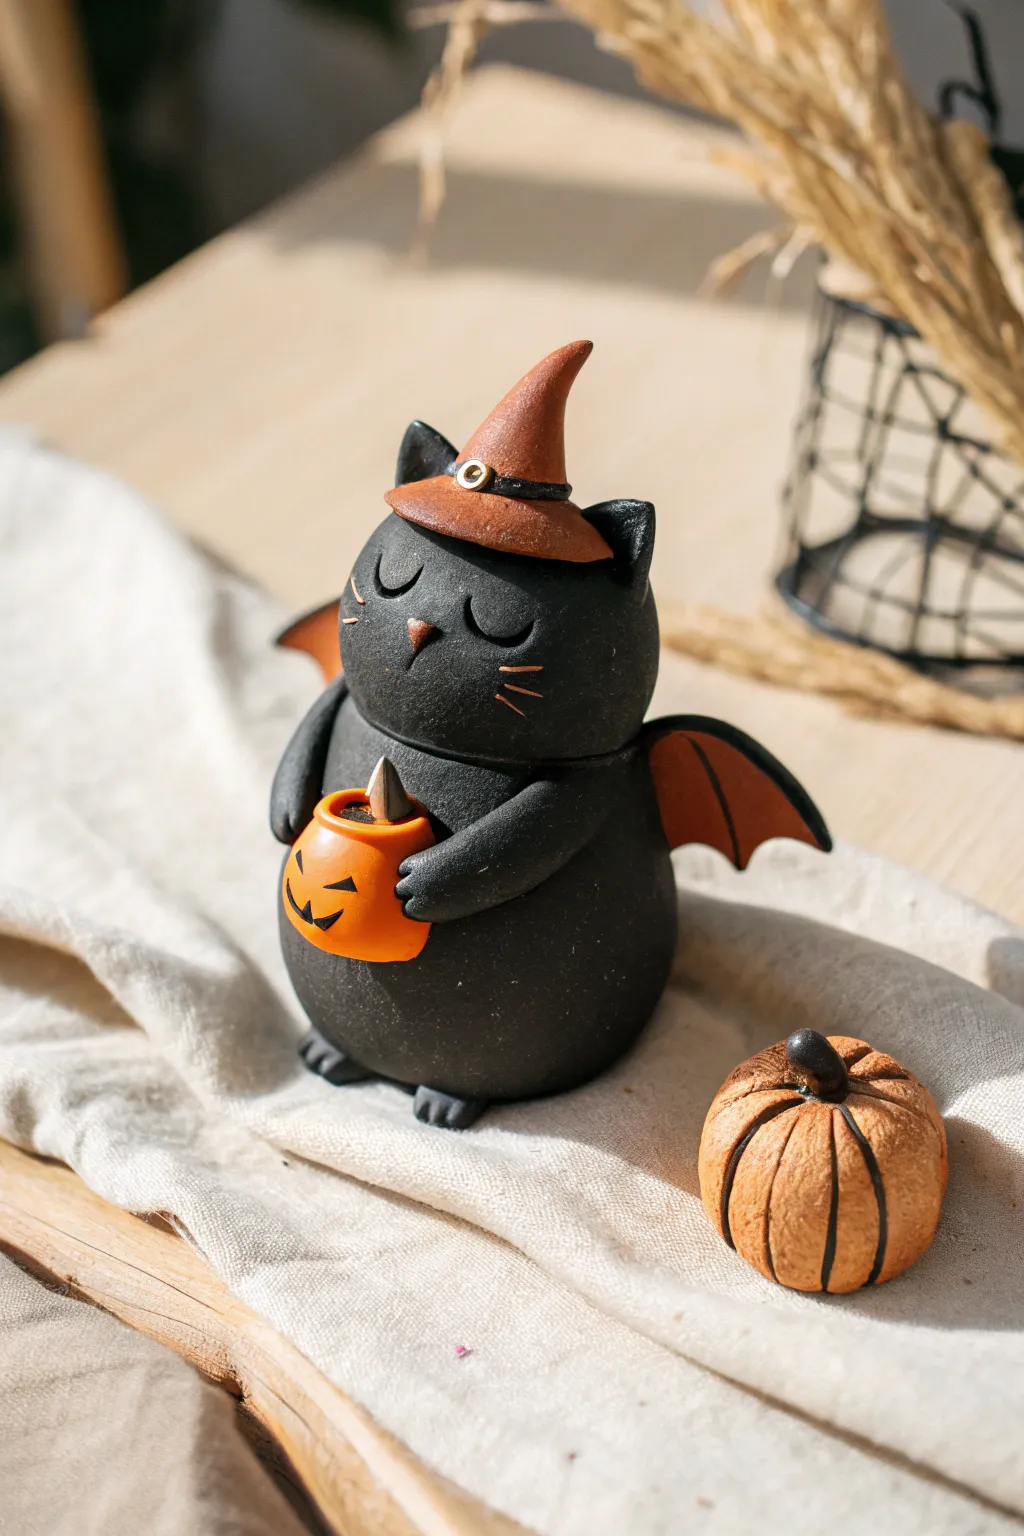
Craft an enchanting Halloween companion with this round, winged cat sculpture. With its cozy matte finish, tiny witch hat, and bright pumpkin lantern, this figurine perfectly balances spooky and sweet for your seasonal decor.
Step-by-Step
Materials
- Black polymer clay (preferably stone or speckled effect)
- Orange polymer clay (terracotta or pumpkin shade)
- Brown polymer clay
- Sculpting tools (needle tool, ball stylus)
- Small rolling pin
- Blade or craft knife
- Gold or brass wire (for hat buckle)
- Aluminum foil (for core)
- Matte varnish or sealant
- Black acrylic paint (optional details)
Step 1: Shaping the Base
-
Create the core:
Start by crumpling a small ball of aluminum foil into a roughly egg-shaped form. This saves clay and keeps the figurine lightweight. -
Form the body:
Condition a large portion of black clay until soft. Flatten it into a thick sheet and wrap it completely around your foil core. Roll it gently between your palms to smooth out any seams until you have a perfect, chubby egg shape. -
Add stability:
Gently tap the bottom of the egg shape onto your work surface to create a flat base so the cat stands securely. -
Sculpt the ears:
Pinch two small triangles of black clay. Attach them to the top of the head, blending the clay downwards with your finger or a modeling tool so they become part of the body without visible seams.
Tiny Texture Trick
To mimic the stone-like texture in the photo, gently tap the surface of the unbaked black clay with an old toothbrush or a piece of crumpled aluminum foil.
Step 2: Adding Character Details
-
Form the arms:
Roll two small sausages of black clay. These should be thicker at the shoulder end and slightly tapered at the paw. -
Attach the arms:
Press the arms onto the sides of the body, curving them forward as if the cat is cradling something. Use a rubber shaping tool to blend the shoulders seamlessly into the body. -
Make the feet:
Create two small ovals of black clay, flatten them slightly, and use a needle tool to press in three lines for toe indentations. Attach these to the bottom front of the body. -
Sculpt the face:
Using a needle tool or small blade, gently carve two curved, U-shaped lines for sleeping eyes. Add three short whiskers on each cheek by lightly scoring the surface. -
Add a nose:
Take a tiny speck of brown clay, roll it into a triangle, and press it right between the eyes for a cute little nose.
Incense Upgrade
Make the pumpkin bucket functional by sizing the hollow top perfectly to hold a standard cone incense burner, turning your cute figurine into an incense holder!
Step 3: Accessories and Wings
-
Create the pumpkin bucket:
Roll a ball of bright orange clay. Flatten the bottom slightly. Use a ball tool to indent the top deeply to make it hollow. -
Detail the pumpkin:
Use a sharp needle tool or blade to carve a tiny jack-o’-lantern face. Roll a minuscule cone of brown clay (or silver/grey if simulating a candle) and place it inside the bucket. -
Position the bucket:
Place the pumpkin bucket securely between the cat’s paws. Gently press the paws against the sides of the bucket to look like they are holding it. -
Form the wings:
Roll out a sheet of brown or dark orange clay. Cut out two bat wing shapes. I prefer to curve the edges slightly to make them look more organic. -
Attach the wings:
Press the wings onto the back of the cat. Blend the attachment point into the body clay carefully so they don’t fall off during baking.
Step 4: The Witch’s Hat
-
Base of the hat:
Flatten a small circle of brown clay for the hat brim. Place it on the cat’s head, slightly tilted for personality. -
Cone of the hat:
Form a cone from brown clay. Before attaching, gently twist the tip to give it a crooked, whimsical look. -
Assemble the hat:
Attach the cone to the brim. Roll a very thin snake of black clay to wrap around the base of the cone as a hatband. -
Add the buckle:
Bend a tiny piece of gold wire into a circle or square and press it into the hatband for a metallic detail. -
Bake the piece:
Bake your figurine according to your clay manufacturer’s instructions (usually 275°F/130°C for 15-30 minutes). -
Finish:
Once cool, apply a matte varnish to protect the surface and unify the sheen.
Place your little witch cat on a shelf to guard your candy stash with magical cuteness