There’s something ridiculously satisfying about turning a simple pinch pot into a little clay dog with a real personality. Here are my favorite dog pinch pot ideas—starting with the classic crowd-pleasers and ending with a few playful twists you can totally pull off at the kitchen table.
Classic Puppy Face Pinch Pot
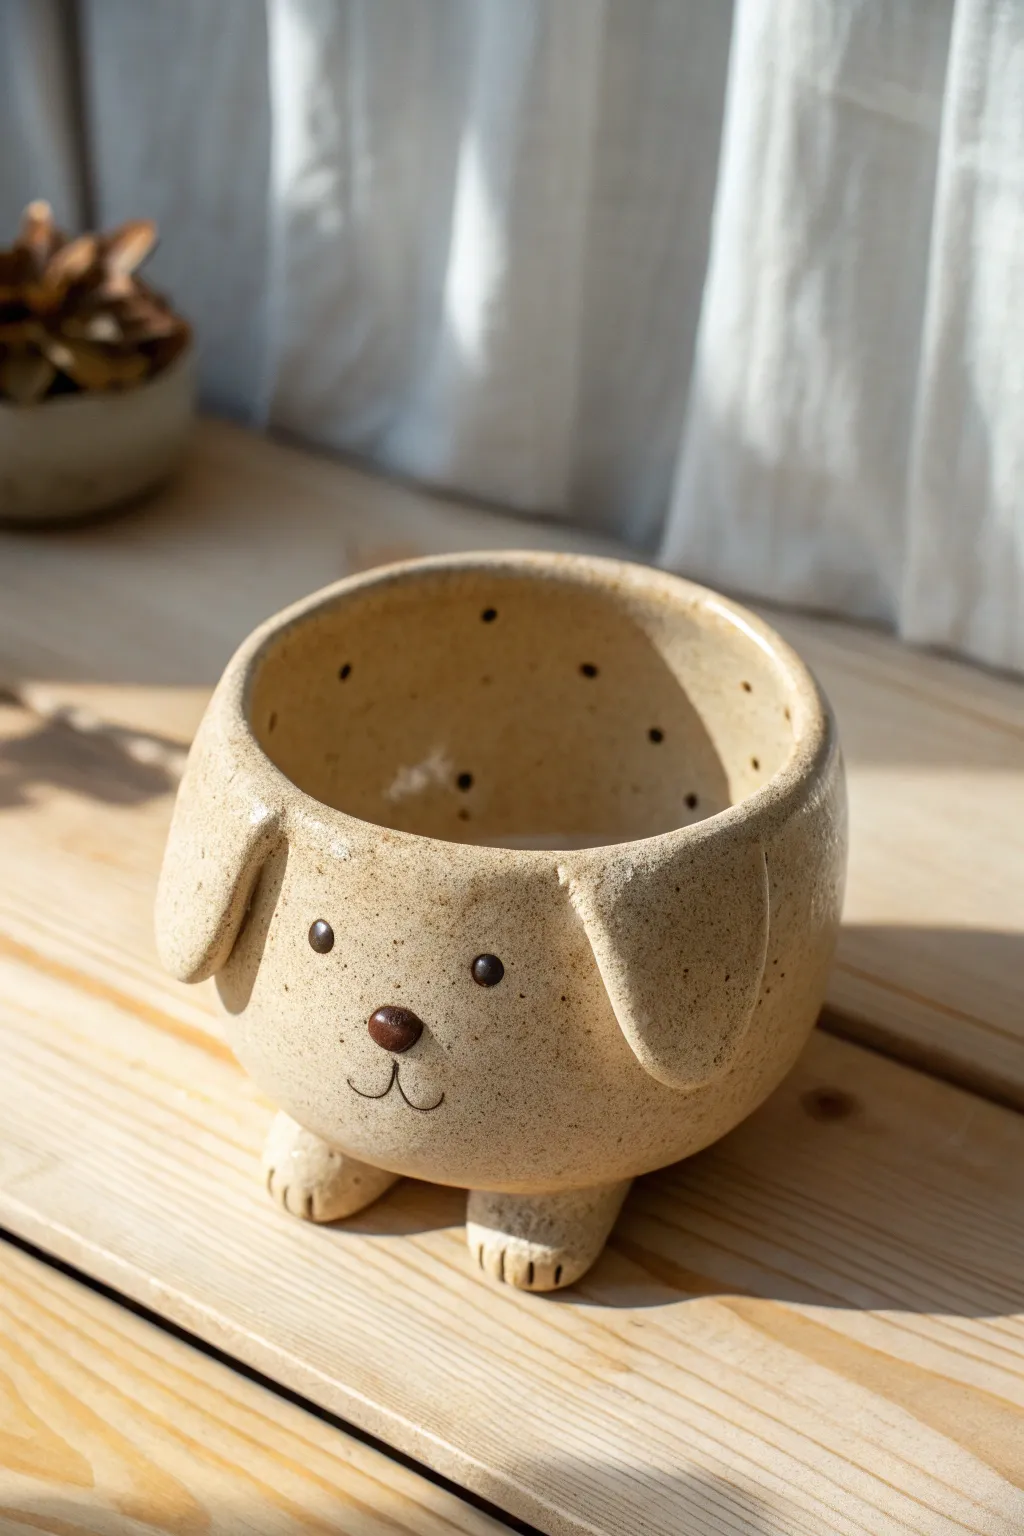
This adorable planter combines the classic simplicity of a pinch pot with charming sculptural details. Featuring a speckled beige glaze, distinct floppy ears, and tiny paws, it’s the perfect beginner-friendly project to hold your favorite succulent.
How-To Guide
Materials
- Speckled buff stoneware clay (or similar mid-fire clay)
- Small rolling pin
- Pin tool or needle tool
- Scoring tool (or an old fork)
- Slip (clay mixed with water)
- Wooden modeling tool or spoon back
- Sponge
- Underglaze (Dark Brown or Black)
- Clear or transparent matte glaze
Step 1: Forming the Base
-
Ball preparation:
Start with a ball of clay roughly the size of a large orange. Pat it firmly between your hands to ensure it is round and free of air bubbles. -
Opening the pot:
Push your thumb into the center of the ball, stopping about half an inch from the bottom. This thickness is crucial for attaching the feet later without poking through. -
Pinching the walls:
Gently pinch the clay between your thumb and fingers, rotating the ball as you go. Aim for an even wall thickness of about 1/4 inch, keeping the shape rounded and somewhat bulbous rather than flaring it out like a bowl. -
Smoothing the rim:
Once the walls are raised, use a damp sponge or your finger to smooth the rim. It should be rounded and soft, not sharp.
Clean Eye Contact
When glazing the eyes, wipe the very tip of the tiny clay balls with a damp sponge after dipping/brushing the clear glaze. This keeps the dark underglaze sharp.
Step 2: Adding the Features
-
Making the ears:
Roll out a small slab of clay (about 1/4 inch thick). Cut out two oval teardrop shapes for the ears. They should be large enough to hang down slightly past the middle of the pot. -
Checking ear placement:
Hold the ears up to the pot to find the sweet spot. Place them slightly high on the sides so they drape naturally. -
Attaching the ears:
Score the side of the pot and the back of the ear where they will connect. Apply slip, press firmly, and smooth the seam on the *inside* of the ear connection so it looks seamless, but leave the bottom flap loose. -
Shaping the feet:
Create two small, slightly flattened balls of clay for the paws. The front of the balls should be a bit wider than the back. -
Attaching the feet:
Flip the pot gently to access the bottom front area. Score and slip the feet, attaching them right at the front edge so they peek out. I find using a wooden tool helps blend the back of the foot into the pot’s base for stability. -
Carving the toes:
Use a needle tool or a dull knife to press two vertical lines into each paw to suggest toes.
Step 3: Face & Finishing
-
Refining the surface:
Once all attachments are secure, smooth the entire surface with a slightly damp sponge to remove fingerprints and crate that soft, organic texture. -
Adding the nose:
Roll a very tiny, flattened oval of clay. Score and slip it right in the center of the face, slightly lower than the ears. -
Creating the eyes:
To make the eyes pop, add two tiny balls of clay for a 3D effect rather than just painting them. Score and slip them symmetrically above the nose. -
Drawing the mouth:
Use your needle tool to carefully incise a ‘J’ shape and a backwards ‘J’ shape starting from the bottom of the nose to create the classic puppy muzzle smile. -
Initial Drying:
Let the piece dry slowly under plastic for a day to equalize moisture, then uncover to bone dry. -
Bisque Firing:
Fire the piece to bisque temperature (usually cone 04) based on your clay’s instructions.
Tail Wags
Don’t forget the back! Roll a tiny tapered coil and attach it to the rear of the pot as a little tail. Curve it upward so it looks like it’s wagging.
Step 4: Glazing
-
Painting the details:
Using a small detail brush, paint the nose and the 3D clay eyes with dark brown underglaze. You can also carefully trace the incised mouth line with a very thin wash of brown to accentuate it. -
Glazing the body:
Dip or brush the entire pot with a transparent oatmeal or speckled matte glaze. This allows the natural clay spots (if using speckled clay) to show through. -
Final Fire:
Glaze fire to maturity (usually cone 5 or 6). Once cool, the clay body will define the dog’s color.
Once fired, you will have a loyal little companion ready to hold your favorite greenery


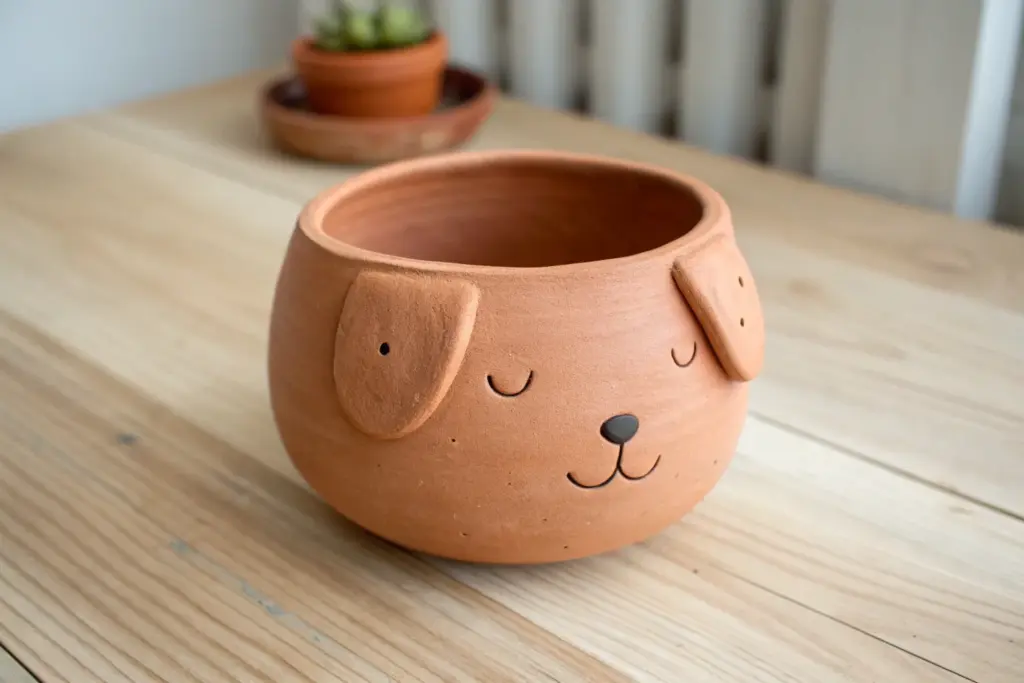
Pointy-Ear Pup Planter
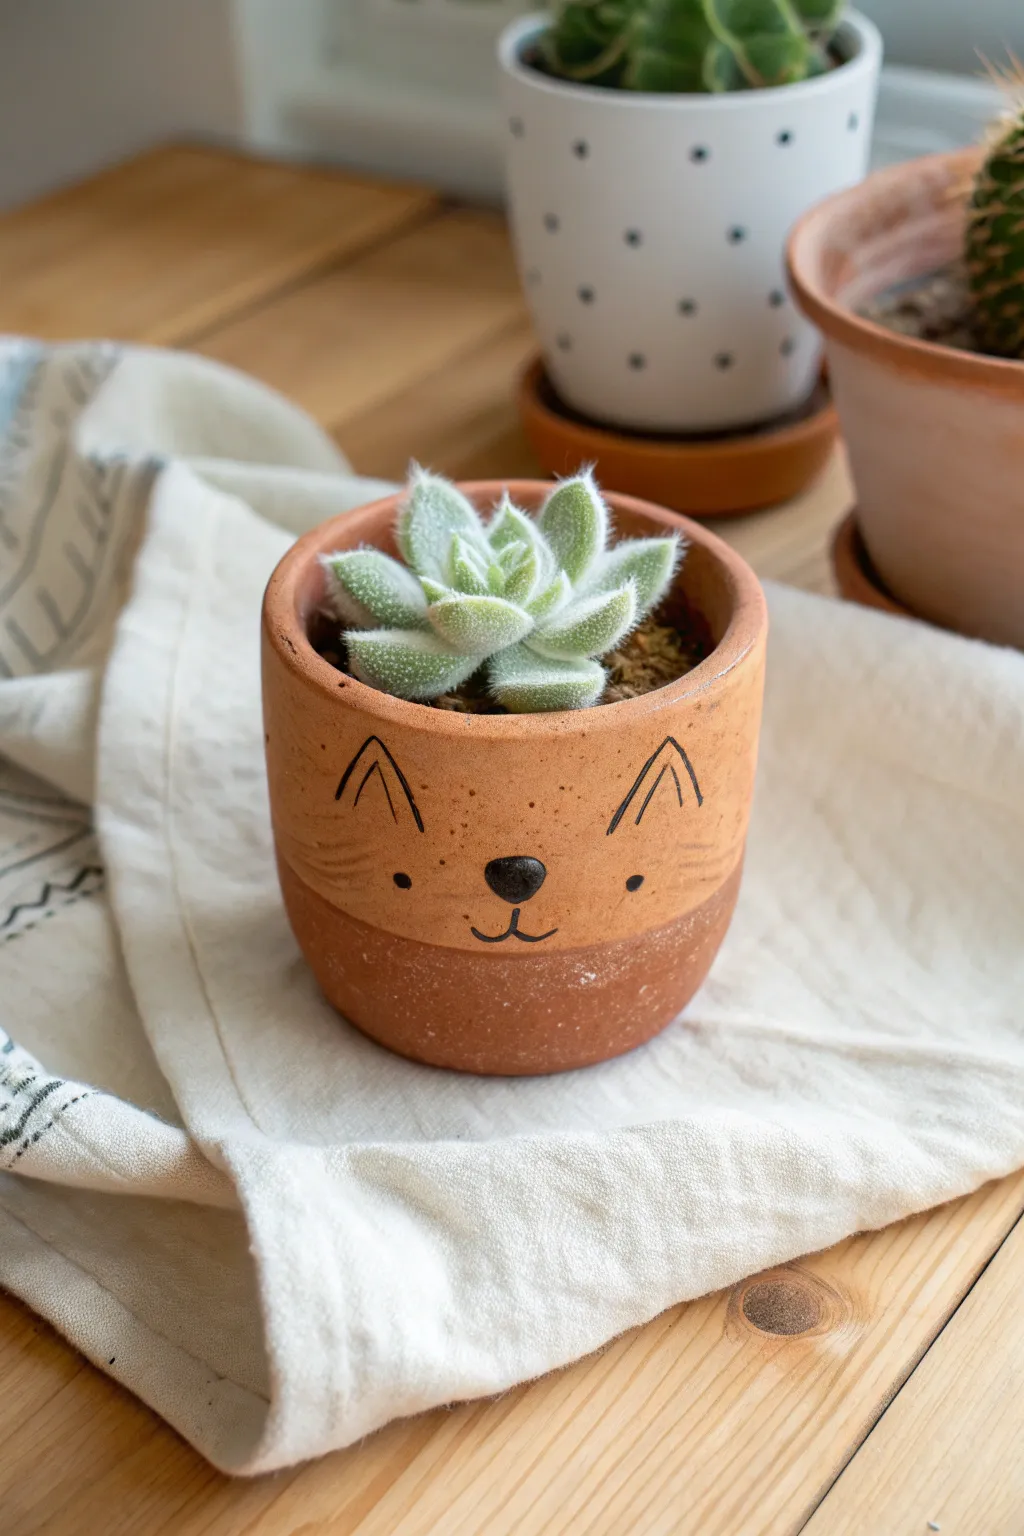
This charming little planter brings a friendly face to your windowsill with its simple line-drawn features and warm terracotta tones. The design uses negative space at the bottom to create a dipped look, highlighting the natural clay texture against the painted canine character.
Detailed Instructions
Materials
- Air-dry clay or kiln-fire clay (terracotta color recommended)
- Acrylic paint (warm vibrant orange/tan, black)
- Small flat paintbrush
- Fine-point detail brush or black paint marker
- Matte spray varnish or sealant
- Small bowl of water
- Sponge
- Potting soil and small succulent
Step 1: Creating the Pinch Pot Base
-
Form the initial sphere:
Begin with a ball of clay roughly the size of a tennis ball. Roll it between your palms until it is smooth and round, aiming for a consistent texture without large cracks. -
Open the pot:
Hold the ball in one hand and gently press your thumb into the center, going about three-quarters of the way down. Be careful not to push through the bottom. -
Pinch the walls:
Using your thumb on the inside and fingers on the outside, gently pinch and rotate the clay. Work your way from the bottom up to thin out the walls evenly. -
Shape the cylinder:
Aim for a straight-sided cylinder shape rather than a bowl. I like to gently tap the base against the table to create a flat, stable bottom while keeping the walls vertical. -
Smooth the surfaces:
Dip your finger or a small sponge in water and smooth away any fingerprints or cracks on the exterior. The smoother the surface now, the cleaner your painted design will look later. -
Dry the clay:
Allow your pot to dry completely according to your clay package instructions. If using kiln clay, fire it to bisque; if using air-dry, wait 24-48 hours until it’s fully hard and light in color.
Use Tape for Crisp Lines
For a sharper boundary between the raw clay bottom and painted top, wrap masking tape around the pot before painting. Peel it off while the paint is still slightly wet.
Step 2: Painting the Character
-
Mix the base color:
Mix an orange-tan acrylic paint that mimics a lighter, warmer terracotta shade. It should offer a subtle contrast to the raw clay bottom. -
Paint the upper section:
Paint the top two-thirds of the pot with your mixed color, creating a horizontal line where the paint stops. Don’t worry about making this line perfectly straight; a slightly organic edge adds charm. -
Add a second coat:
Let the first layer dry to the touch, then apply a second coat to ensure solid, opaque coverage where the face will go. -
Outline the ears:
Using a very fine detail brush and black paint, or a paint marker, draw two triangular ear outlines near the top rim. Inside each triangle, add a smaller inverted ‘V’ for detail. -
Add the nose:
Paint a small, solid black oval in the center of the painted section for the nose. Position it slightly lower than the eyes will be. -
Draw the mouth:
Starting from the bottom center of the nose, draw a tiny vertical line down, then curve outward to the left and right to create a classic ‘w’ shaped mouth. -
Dot the eyes:
Place two small black dots on either side of the nose area for eyes. Keep them relatively wide-set for a cute, puppy-like expression. -
Whisk in the details:
Add three thin, short whisker lines on each cheek area. Keep your hand light to ensure the lines remain delicate. -
Seal the pot:
Once all paint is bone dry, spray the entire pot (inside and out) with a matte varnish. This is crucial for protecting the paint from moisture when watering your plant.
Step 3: Planting
-
Prepare for planting:
Add a small layer of gravel or pebbles at the very bottom if your pot doesn’t have a drainage hole, then fill halfway with succulent potting mix. -
Position the succulent:
Gently remove your chosen fuzzy succulent from its nursery pot and nestle it into the soil. Adding a fuzzy plant like the Echeveria ‘Frosty’ shown mimics the fur of the dog character perfectly.
Add 3D Ears
Before drying the clay, pinch two small triangles of clay onto the rim to create actual 3D ears, then paint the inner details on them later.
Now your adorable pointy-eared pup is ready to brighten up any corner of your home


Tongue-Out Silly Dog Pot
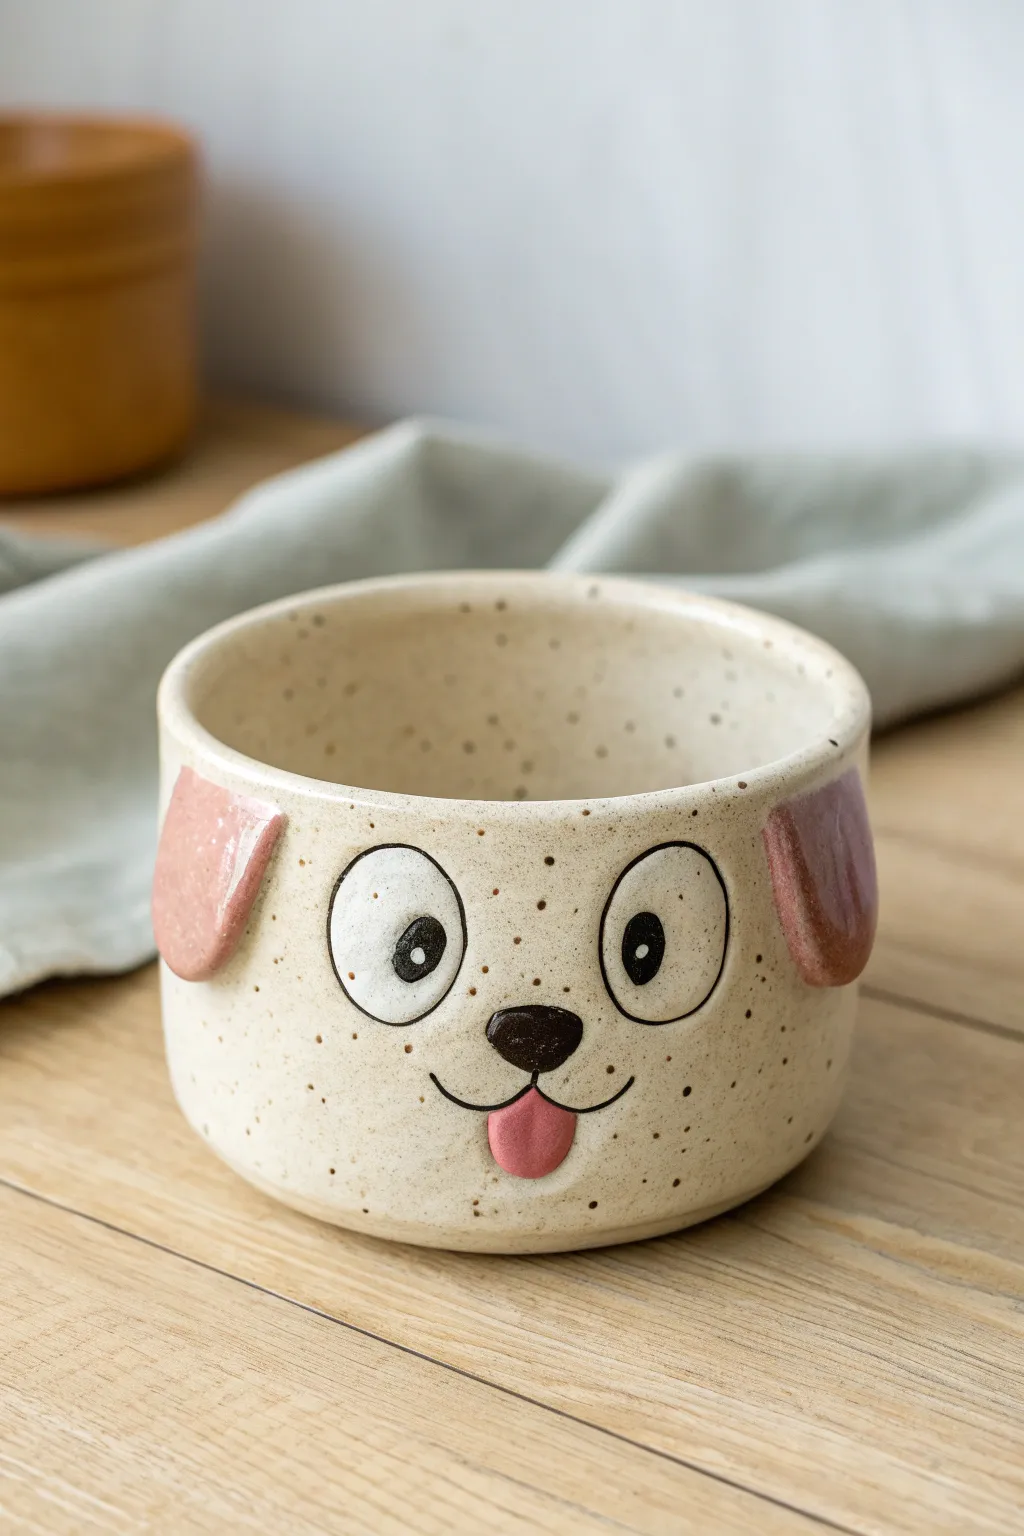
Capture the playful spirit of your favorite pup with this charming speckled pinch pot featuring a goofy expression. With cute floppy ears and a signature pink tongue sticking out, this handmade vessel is perfect for holding small trinkets or succulents.
Step-by-Step
Materials
- Speckled playful stoneware clay (cone 5 or 6)
- Black underglaze
- Pink underglaze
- Clear transparent glaze
- Pottery sponge
- Needle tool
- Scoring tool or old fork
- Small paintbrush (detail brush)
- Slip (clay mixed with water)
- Wooden modeling tool
Step 1: Forming the Base
-
Prepare your clay:
Start with a ball of speckled clay about the size of a large orange. Wedging it well beforehand ensures there are no air bubbles trapped inside. -
Open the pot:
Push your thumb into the center of the ball, stopping about a half-inch from the bottom. This establishes the floor thickness. -
Pinch the walls:
Gently pinch the clay between your thumb and fingers, rotating the ball as you go. Work your way from the bottom up to create even walls, aiming for a consistent cylinder shape rather than a bowl. -
Smooth the surfaces:
Use a slightly damp sponge to wipe down the interior and exterior walls. You want the surface to be relatively smooth so the facial features stand out later. -
Flatten the rim:
Turn the pot upside down and gently tap it on your table to level the rim, or paddle it with a wooden spatula for a crisp, flat edge.
Step 2: Adding the Features
-
Shape the ears:
Roll two small balls of clay and flatten them into teardrop shapes. These should be roughly the size of a coin but slightly thicker. -
Attach the ears:
Score the sides of your pot and the back of the clay ears. Apply slip to the scored areas and press the ears firmly onto the sides of the pot, smoothing the seams so they don’t pop off during firing. -
Create the tongue:
Form a small, flat oval of clay for the tongue. It needs to be thin enough to look delicate but sturdy enough not to break. -
Attach the tongue:
Find the center of where the face will be. Score and slip the back of the tongue and press it onto the pot, gently curving the bottom tip outward for a 3D effect. -
Dry partially:
Let the pot dry to a leather-hard state. This makes painting the underglaze much easier as the clay won’t be as sticky or absorbent.
Uneven Drying?
If ears dry faster than the pot, they might crack off. Lightly wrap the attachments in plastic or wax resist the seams to slow their drying time.
Step 3: Painting and Glazing
-
Outline the eyes:
Using a very fine brush and black underglaze, paint two large oval outlines for the eyes. The lines should be thin and expressive. -
Fill in the details:
Paint the pupils black, leaving a tiny unpainted circle or adding a white dot later for the ‘glint’ in the eye. Color the nose in a soft triangle shape just above the tongue. -
Add the mouth and specks:
Paint a thin smile line extending from under the nose. If your clay isn’t naturally speckled, you can flick a toothbrush loaded with thinned brown underglaze to create artificial speckles. -
Color the ears and tongue:
Fill in the ear shapes and the tongue with pink underglaze. I find that doing two coats here ensures the pink stays vibrant after the high heat of the kiln. -
Bisque fire:
Once bone dry, fire the piece in a kiln to cone 04 (bisque firing). -
Apply clear glaze:
Dip the entire pot into a clear transparent glaze or brush it on evenly. This will make the clay body shine and seal the underglaze details. -
Final firing:
Fire the piece again, this time to the maturity temperature of your clay (usually cone 5 or 6 for stoneware).
Underglaze Tip
If your black lines look streaky, wait for the first layer to dry completely before adding a second thin layer for solid, opaque coverage.
Now you have a delightfully goofy companion ready to brighten up your desk or windowsill


Pug-Inspired Round Pup Bowl
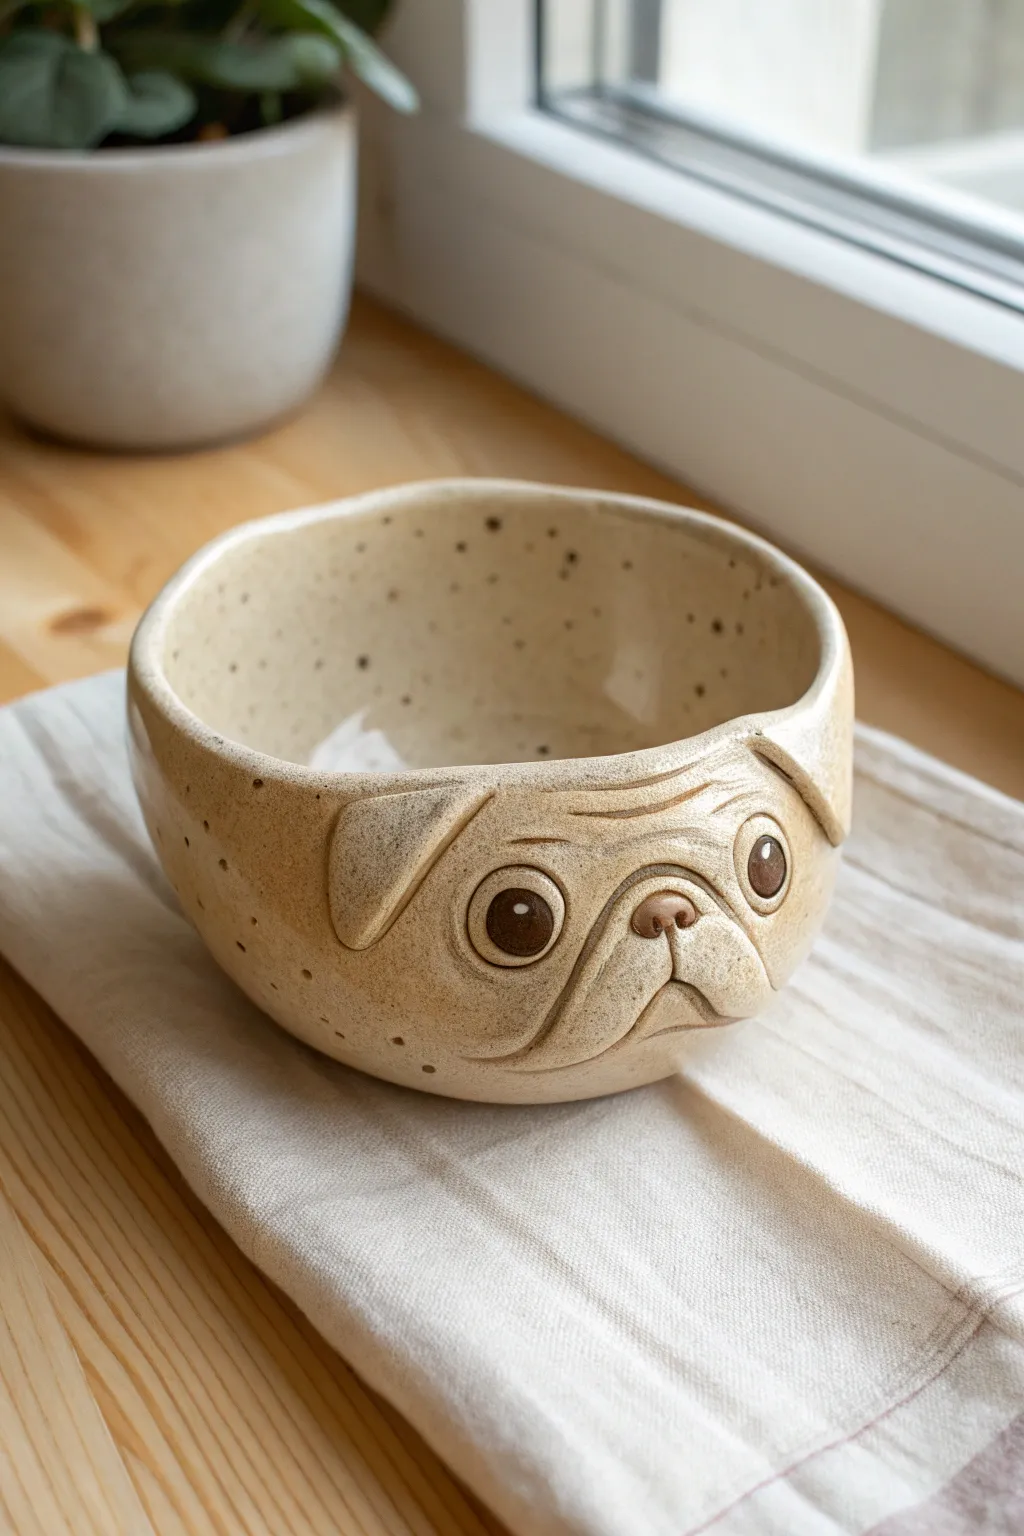
Capture the irresistible charm of a pug in functional form with this round, hand-built bowl featuring expressive wrinkles and a soulful gaze. The piece uses a speckled clay body to add natural texture, finished with simple underglaze details that bring the character to life.
Detailed Instructions
Materials
- Speckled stoneware clay (mid-fire)
- Pottery sponge
- Pin tool (needle tool)
- Scoring tool (or serrated rib)
- Slip (clay mixed with water)
- Modeling tool (wooden or rubber tipped)
- Small loop tool
- Dark brown underglaze
- Pink/terracotta tinted underglaze
- Small liner brush
- Clear transparent glaze (food safe)
Step 1: Forming the Base
-
Prepare the Clay:
Wedge a ball of speckled clay roughly the size of a large orange. Ensure all air bubbles are removed to prevent explosions in the kiln and create a uniform consistency. -
Open the Pinch Pot:
Hold the clay ball in one hand and press your thumb into the center, stopping about a half-inch from the bottom. Gently pinch and rotate the clay between your thumb and fingers to open up the bowl shape. -
Even the Walls:
Continue pinching rhythmically from bottom to top until you have an even wall thickness of about 1/4 inch. The shape should be roughly hemispherical but slightly wider at the top. -
Refine the Rim:
Gently tap the rim against your work surface to level it, or use a damp sponge to smooth and compress the lip. This prevents future cracking and makes the bowl pleasant to use.
Step 2: Sculpting the Features
-
Map the Face:
Lightly trace where the eyes, muzzle, and ears will go using your needle tool. The pug’s face should be centered on one side of the exterior wall. -
Create the Muzzle Pad:
Form a small, flattened oval of clay for the muzzle area. Score the back of this piece and the corresponding spot on the bowl, apply slip, and press it firmly onto the lower center of the face. -
Define the Mouth:
Use a modeling tool to carve the inverted ‘V’ shape of the mouth into the muzzle pad. Deepen the corners slightly to give that classic grumpy-cute pug expression. -
Attach the Ears:
Roll two triangular slabs of clay. Attach them near the rim on either side of the head using the score-and-slip method. Fold the tips downward so they flop forward, blending the upper seam seamlessly into the rim. -
Sculpt the Eyes:
Roll two small spheres of clay and flatten them slightly into discs. Attach these above the muzzle. They should be relatively large to mimic the breed’s prominent eyes.
Wrinkle Reality
Make the forehead wrinkles vary in depth. Deeper lines in the center and shallower ones near the ears create a more realistic, fleshy appearance.
Step 3: Adding Details
-
Carve the Wrinkles:
This is the crucial step for personality. Use a small loop tool or a wooden modeling tool to carve deep, curved lines across the forehead (between the ears) and around the muzzle. -
Detail the Nose:
Add a tiny triangular piece of clay to the top of the muzzle pad for the nose. Use a needle tool to create two nostril indentations. -
Smooth the Transitions:
Take a damp sponge or a soft brush with a little water to smooth out any sharp edges on your added clay pieces. You want the wrinkles to look soft, not jagged. -
Slow Dry:
Cover the pot loosely with plastic to let the added features dry at the same rate as the main bowl. Once bone dry, bisque fire the piece according to your clay’s specifications.
Cracking Seams?
If the added ears or muzzle start cracking away during drying, your clay was likely too dry when attaching. Score deeper and use more slip next time.
Step 4: Glazing and Finishing
-
Paint the Eyes:
Using a fine liner brush, paint the pupils with dark brown underglaze. Leave a tiny circle of unpainted clay (or add a white dot later) to create a ‘catchlight’ or reflection. -
Accent the Features:
Apply the dark brown underglaze into the deep wrinkle crevices and around the outline of the eyes to make them pop. Sponge away any excess on the high points. -
Tint the Nose:
Dab a small amount of pinkish-brown underglaze onto the nose area for a touch of warmth. -
Apply Clear Glaze:
Once the underglaze is dry, dip the entire bowl into a clear, food-safe glaze. This will seal the clay and allow the speckles in the clay body to show through. -
Final Fire:
Load into the kiln for the glaze firing. Ensure the foot (bottom) is wiped clean of glaze to prevent it from sticking to the kiln shelf.
Your finished pug bowl will be ready to hold your morning cereal or favorite snacks after it cools from the final firing

The Complete Guide to Pottery Troubleshooting
Uncover the most common ceramic mistakes—from cracking clay to failed glazes—and learn how to fix them fast.
Corgi Butt Pinch Pot Planter
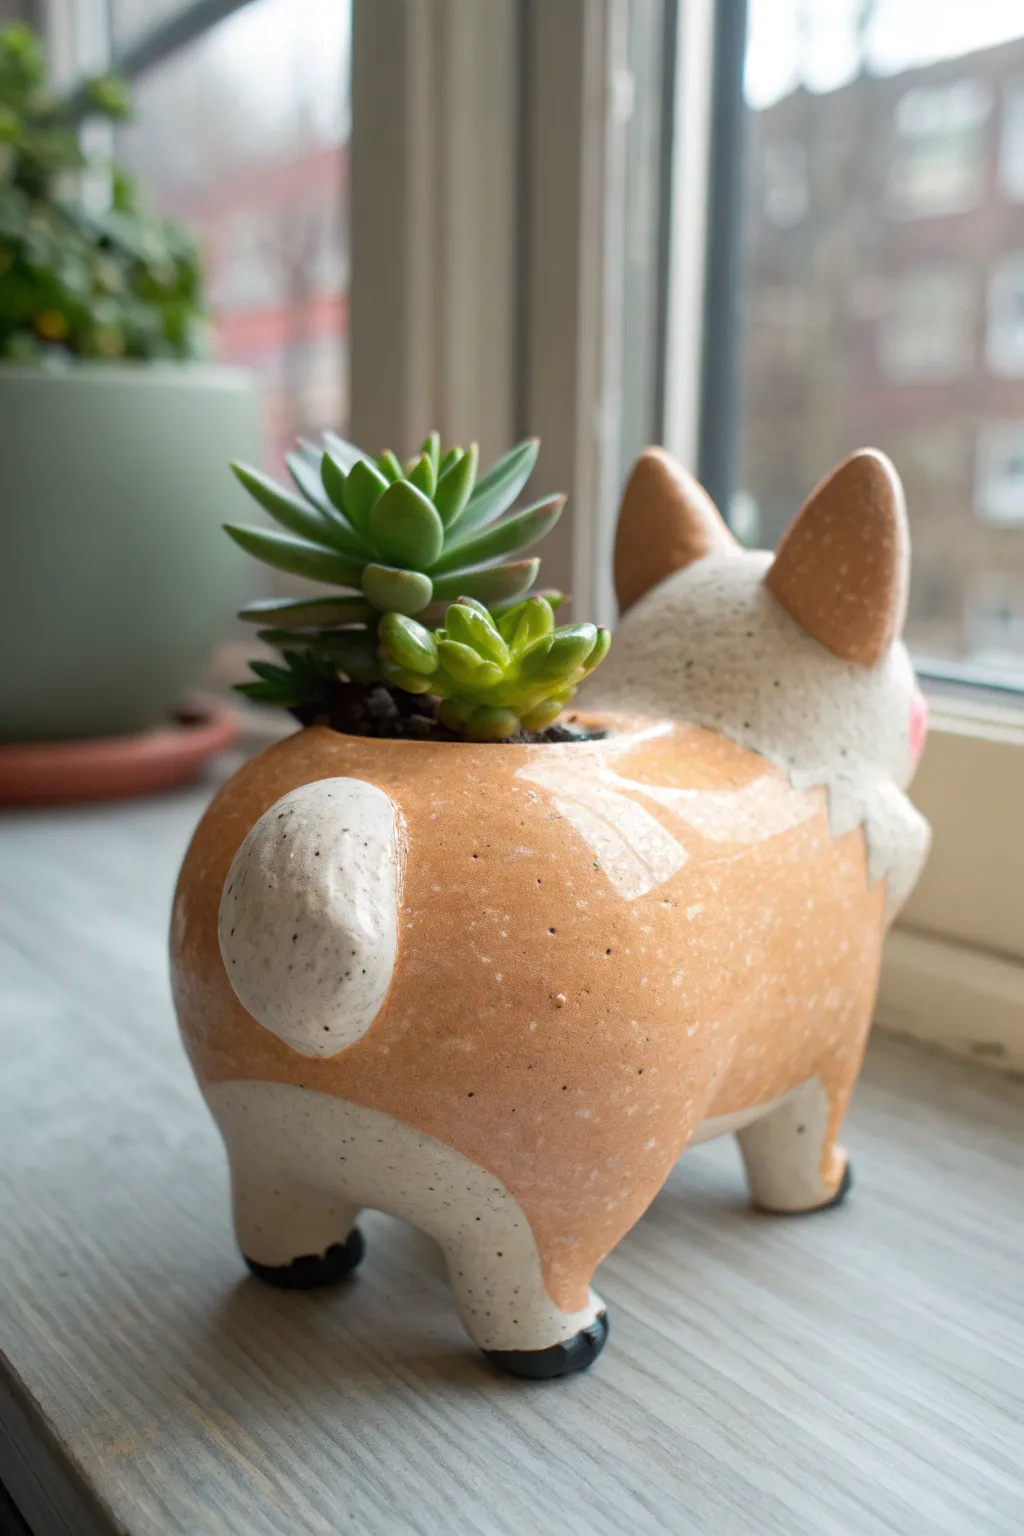
This adorable planter captures the classic ‘corgi sploot’ pose perfectly, complete with perky ears and a delightfully round derrière. The finished piece features a warm, glossy orange finish contrasted with speckled white details, making it a playful home for your favorite small succulents.
How-To Guide
Materials
- Polymer clay (terracotta/orange, white, and black)
- Clay sculpting tools (needle tool, blending tool)
- Small rolling pin
- Aluminum foil for armature (optional)
- Gloss glaze or varnish
- Soft paintbrush
- Oven for baking
- Small succulents and potting mix
Step 1: Forming the Body
-
Start the Base:
Begin by conditioning a large ball of terracotta-colored clay until it is soft and pliable. Pinch and gently stretch the clay to form an elongated oval shape that is thicker at the back end to create that signature round bottom. -
Hollow the Center:
Use your thumb or a large ball tool to press a deep indentation into the top center of the oval. Widen this opening gently to create the cavity where the plant will eventually sit, ensuring the walls remain about a quarter-inch thick for stability. -
Add the Legs:
Roll four short, stout cylinders from white clay for the legs. Attach two to the front and two to the back underside of the body, blending the seams upward into the orange clay so they are securely attached. -
Create the Tail:
Form a small, rounded nub of white clay for the tail. Press this onto the center of the corgi’s rear end, blending the edges so it looks integrated rather than just stuck on.
Step 2: Sculpting the Head & Details
-
Form the Head:
Roll a medium-sized ball of white clay and slighty taper one side to form a snout. Attach this to the front of the body, angling it slightly upward. -
Add the Ears:
Shape two triangles from the terracotta clay, rounding the tips slightly. Attach these firmly to the top of the white head piece, using a blending tool to smooth the connection points so they stand upright. -
Layer the Fur Pattern:
Roll a thin sheet of terracotta clay and cut ragged, zig-zag edges to mimic fur texture. Drape this over the back of the head and upper body, blending it down to overlap the white base, creating the corgi’s dual-tone coat. -
Refine the Paws:
Use a small amount of black clay to create tiny oval pads. Press these onto the bottom of the white legs to form the feet. -
Detail the Face:
Add a tiny pink triangle for the tongue peeking out if desired, though the main focus here is the back view. Ensure the ears have a slight curve to mimic the alert nature of the breed.
Don’t Squish the Middle
While smoothing the fur layers, place a ball of crumpled foil inside the plant cavity. This acts as a support and prevents the walls from collapsing inward while you work on the outside details.
Step 3: Finishing Touches
-
Texture the Surface:
Gently gently roll a toothbrush or stiff bristled brush over the surface of the clay. I find this helps hide fingerprints and gives the piece a nice, organic stone-like texture. -
Add Speckles:
To mimic the ceramic look in the photo, you can flick tiny bits of black or brown paint (or use watered-down liquid clay) onto the surface before baking, or poke tiny shallow random holes with a needle tool. -
Bake the Clay:
Place your creation on a baking sheet and bake according to your specific clay brand’s temperature and time instructions. Let it cool completely inside the oven to prevent cracking. -
Glaze:
Once cool, apply two coats of high-gloss glaze or varnish to the entire piece. This not only seals the clay but gives it that shiny, finished ceramic appearance. -
Planting:
Fill the cavity with specialized succulent soil. Carefully nestle a small rosette succulent or sedum into the opening to complete the look.
Custom Colors
Try a tri-color corgi by adding black clay patches over the back, or make a ‘fluffy’ corgi by using a needle tool to scratch deeper fur textures into the white chest area before baking.
Place your new friendly planter on a sunny windowsill and enjoy those cheerful vibes
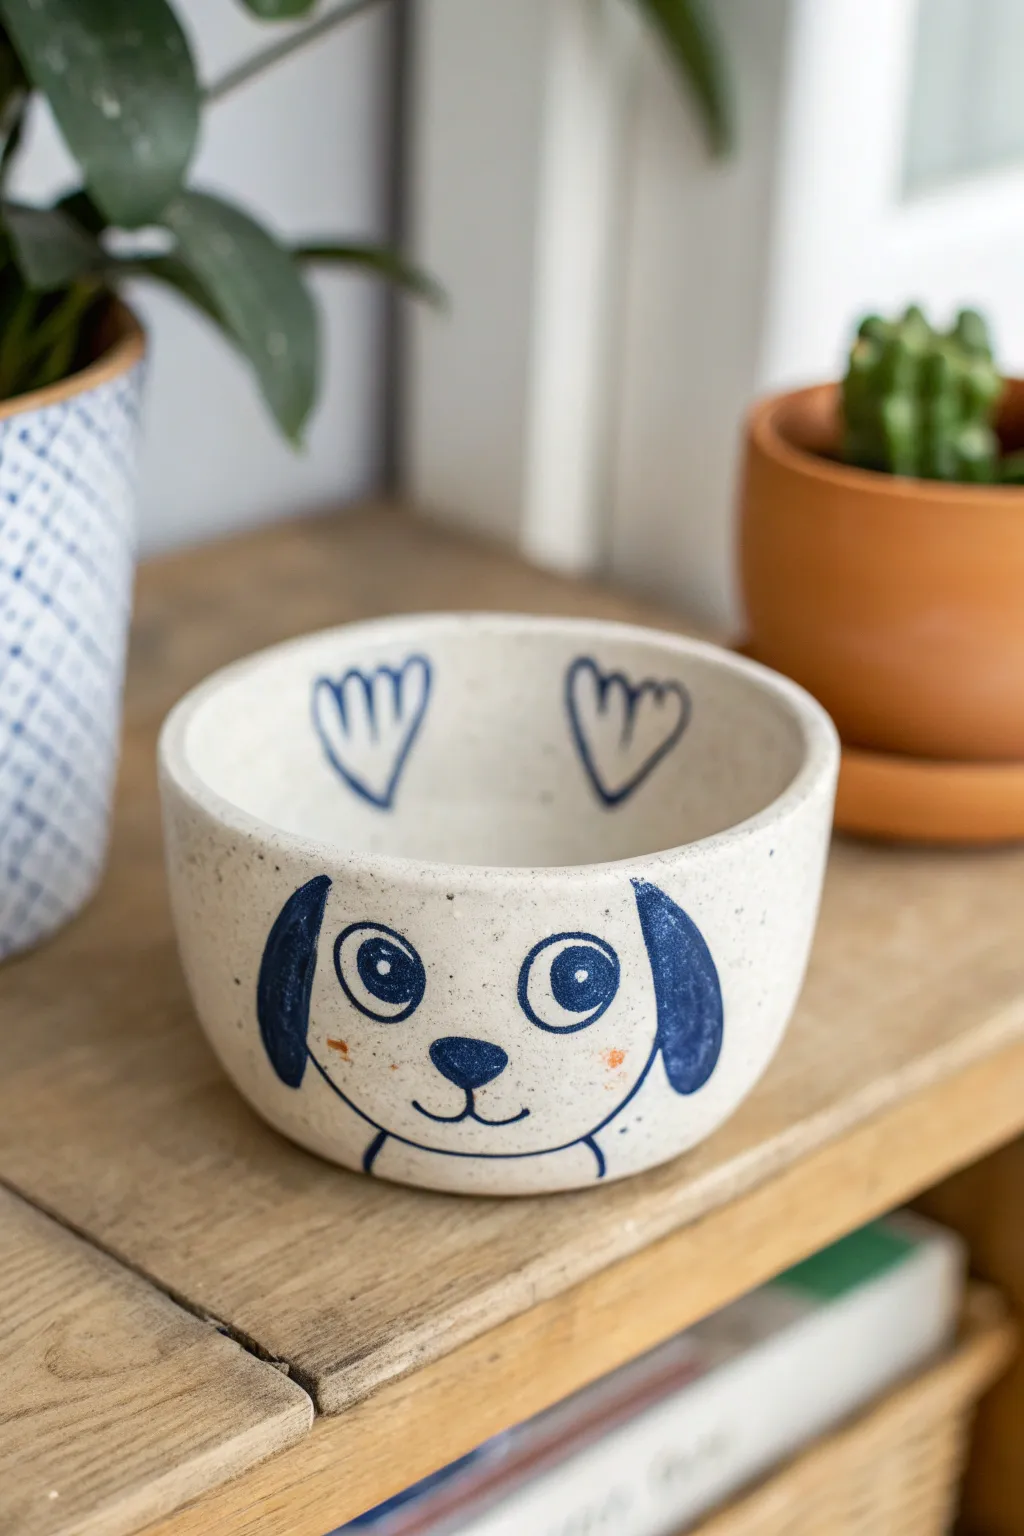
Open-Mouth Dog Treat Bowl
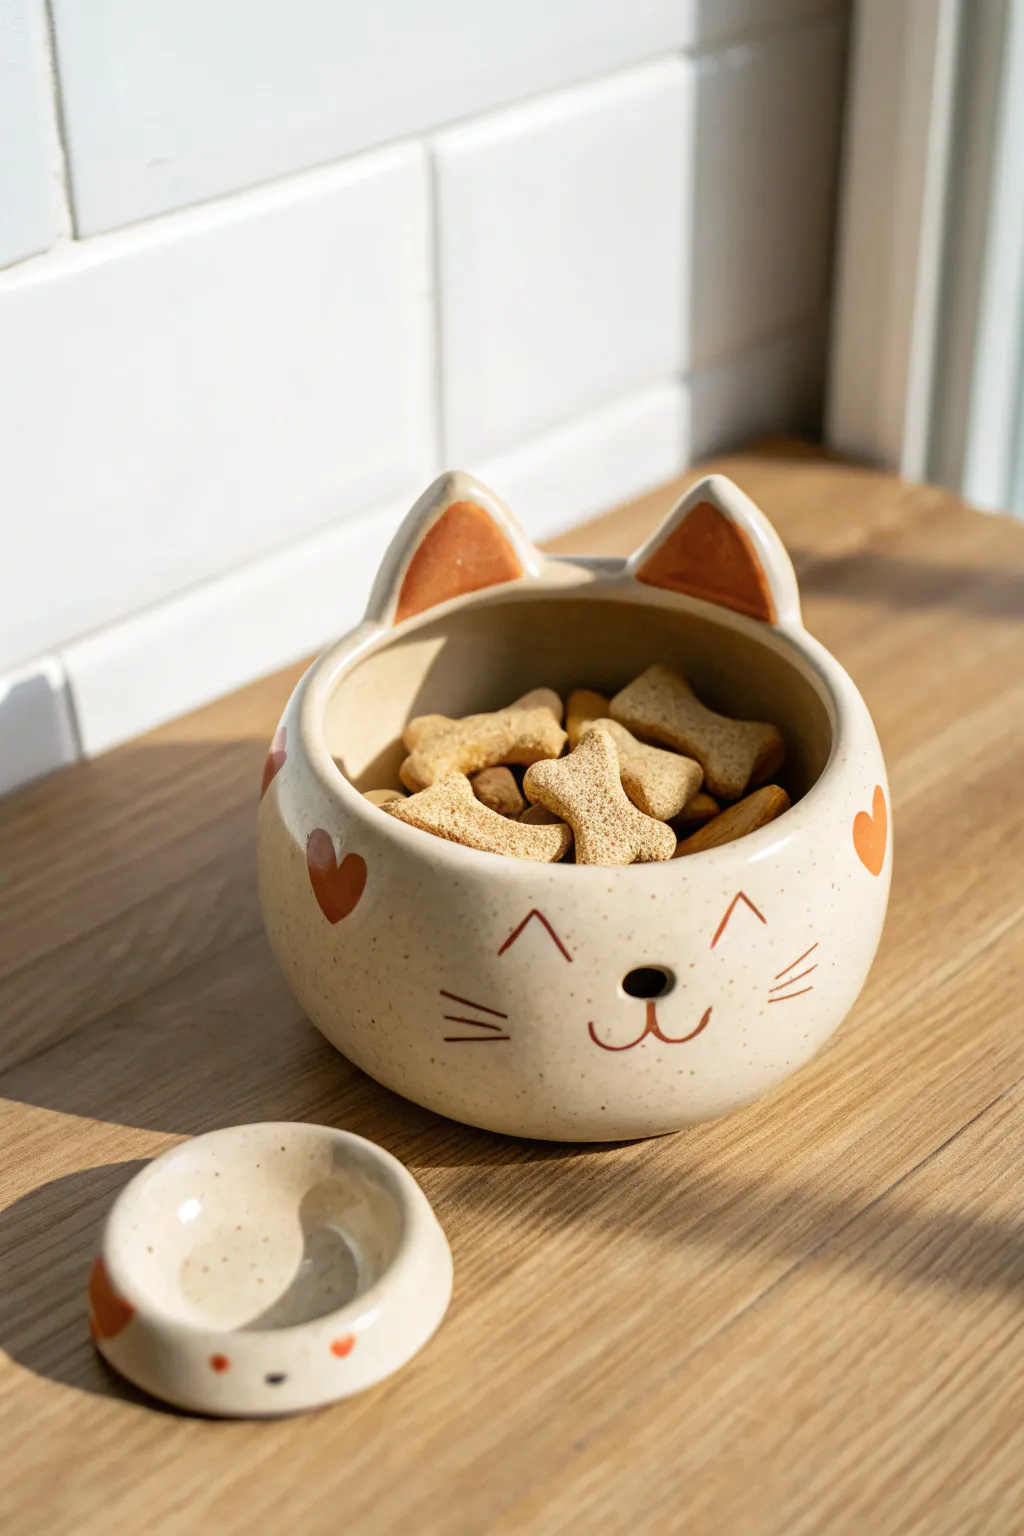
Keep your pup’s favorite snacks handy in this adorable, wide-mouthed ceramic vessel. Featuring perky ears, a sweet painted face, and a speckled finish, this pinch pot project is as functional as it is charming.
Step-by-Step Tutorial
Materials
- White earthenware or stoneware clay
- Pottery tools (needle tool, rib tool, scoring tool)
- Slip (clay mixed with water)
- Sponge
- Underglazes (orange-brown, dark brown/black)
- Small paintbrushes
- Clear glaze (food safe)
- Rolling pin
- Canvas mat or work board
- Small bowl relative to the size of your clay ball (optional)
Step 1: Forming the Base
-
Prepare the Clay:
Start by wedging a baseball-sized amount of white clay to remove air bubbles. This ensures your pot won’t crack during firing. -
Create the Pinch Pot:
Form the clay into a smooth ball. Push your thumb into the center, stopping about half an inch from the bottom. Gently pinch the walls between your thumb and fingers, rotating the ball as you go to thin the walls evenly. -
Shape the Opening:
Continue pinching upwards until you have a deep bowl shape. Gently gently curl the rim inward slightly to create a spherical, enclosed feeling rather than a flaring bowl. -
Smooth the Surface:
Use a flexible rib tool or a slightly damp sponge to smooth out any finger marks on the exterior and interior walls. The surface should be uniform and clean.
Smooth Seams
When attaching ears, use the back of a paintbrush or a clay modeling tool to drag clay across the seam line, blending the two pieces into one solid unit.
Step 2: Adding the Features
-
Create the Ears:
Roll out a small slab of clay about 1/4 inch thick. Cut out two matching triangles with slightly rounded corners for the ears. -
Attach the Ears:
Score the bottom edge of the ears and the corresponding spots on the rim of the bowl. Apply slip to both areas and press the ears firmly onto the back rim. Smooth the seams joining the clay together so they look seamless. -
Form the Nose:
For the nose, you can either paint it on later or add a tiny button of clay now. If adding clay, score and slip a small oval right in the center of the face area. -
Refine the Shape:
Check the ears from the front. Gently curve them forward just a tiny bit to give the dog an alert, listening expression. -
Create the Lid (Optional):
The image shows a separate small dish alongside. To make this, create a tiny pinch pot from a walnut-sized ball of clay, flatten it slightly, and smooth the rim. This can serve as a tasting dish or lid.
Texture It
Before the clay dries, gently press a real dog biscuit into the exterior side to leave a subtle embossed bone pattern as a hidden detail.
Step 3: Painting and Finishing
-
Bisque Fire:
Allow your piece to dry slowly and completely (leather hard, then bone dry) before its first firing in the kiln. -
Apply Base Speckles:
If your clay isn’t naturally speckled, dilute a tiny bit of brown underglaze on a toothbrush and flick the bristles to spray fine speckles across the white surface. -
Paint the Ears:
Use an orange-brown underglaze to paint triangles on the inner part of the ears, leaving a white border around the edges. -
Paint Hearts and Cheeks:
Using the same orange-brown color, paint small heart shapes on the cheeks or sides of the bowl for a loving touch. -
Detail the Face:
With a very fine liner brush and dark brown or black underglaze, carefully paint two inverted ‘V’ shapes for closed eyes. Add a small oval for the nose and a ‘W’ shape for the mouth below it. -
Add Whiskers:
Paint three thin, horizontal lines on each cheek area to represent whiskers. -
Glaze and Final Fire:
Once the underglaze is dry, dip the entire bowl into a clear, food-safe glaze. Ensure the bottom is wiped clean of glaze before firing it for the final time.
Now you have a custom, food-safe container perfect for rewarding your furry best friend


What Really Happens Inside the Kiln
Learn how time and temperature work together inside the kiln to transform clay into durable ceramic.
Paw-Print Rim Dog Bowl
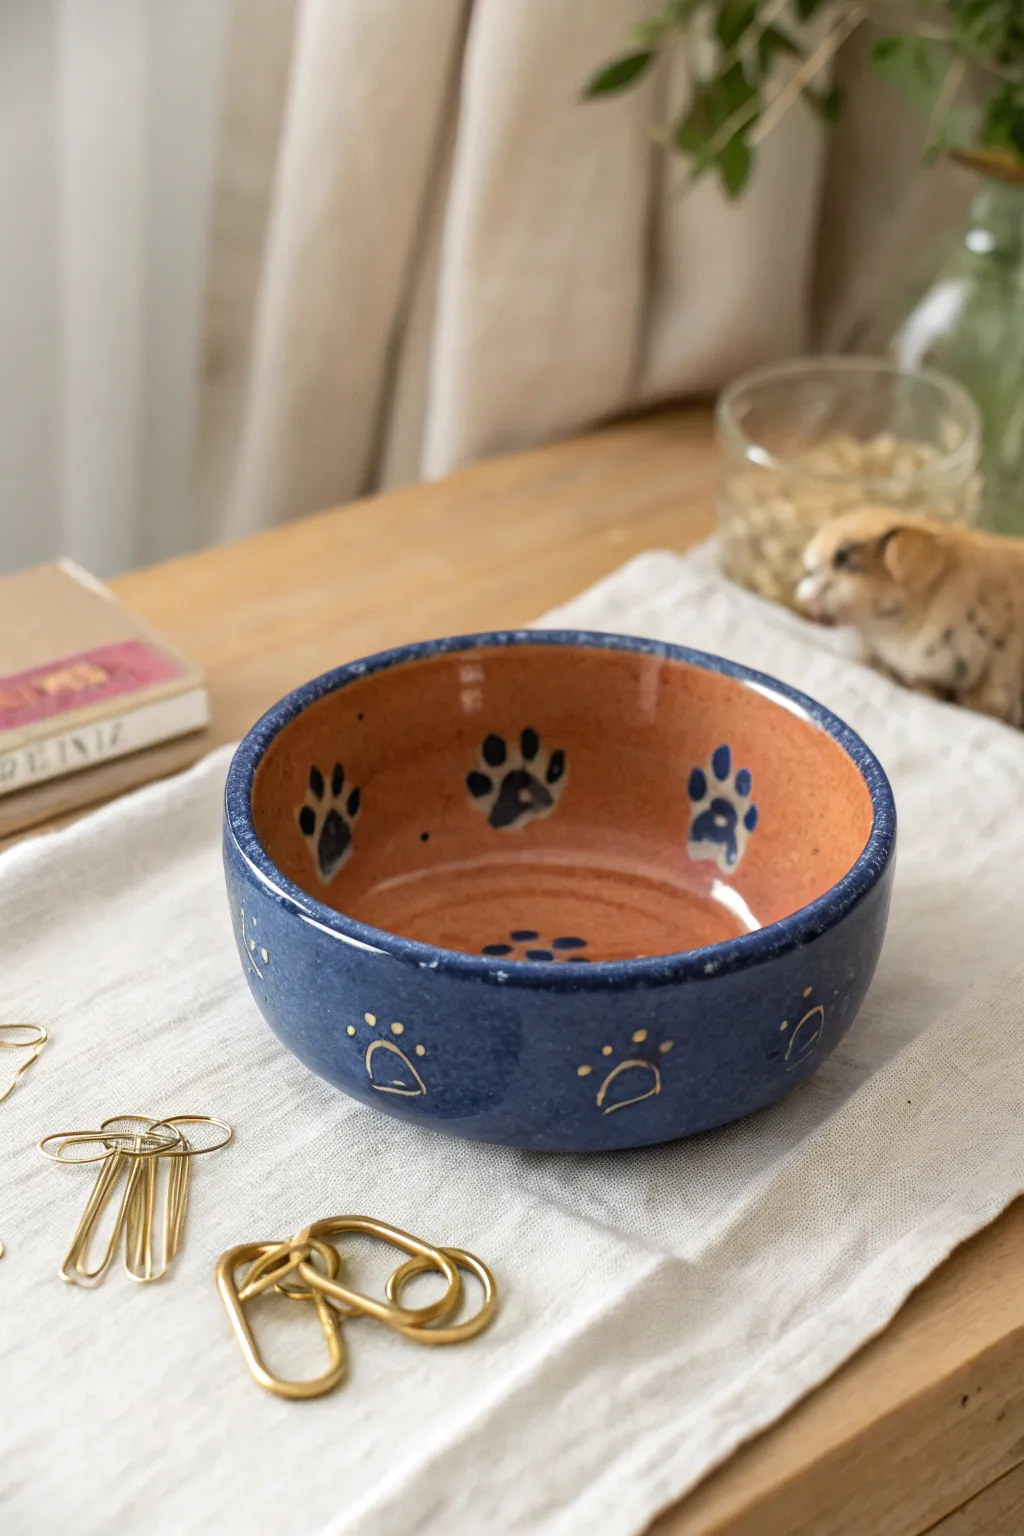
This charming ceramic bowl combines a rustic terracotta interior with a striking deep blue glazed exterior. The design features playful paw prints stamped on the inside and elegant, stylized paw motifs carved into the outer rim, perfect for your furry friend.
Step-by-Step
Materials
- Earthenware or stoneware clay (terracotta color recommended)
- Pottery wheel (optional, or use hand-building tools)
- Rib tool and sponge
- Loop carving tool
- Underglaze (dark blue/black for interior paws)
- Deep blue gloss glaze (for exterior)
- Clear glaze (food safe)
- Small round paintbrush
- Wax resist
- Kiln access
Step 1: Forming the Bowl
-
Prepare the Clay:
Start with a ball of clay about the size of a large grapefruit. Wedge it thoroughly to remove air bubbles and ensure even consistency. -
Open the Form:
If using a wheel, center the clay and open it up. If hand-building, start with a classic pinch pot technique by pressing your thumb into the center and pinching walls evenly. -
Shape the Walls:
Pull the walls upwards and slightly outwards to create a wide, stable bowl shape. Aim for a thickness of about 1/4 inch throughout. -
Refine the Rim:
Use a damp sponge or chamois to smooth the rim. It should be rounded and comfortable, not sharp. -
Smooth the Surface:
Before the clay dries, run a rib tool over the interior and exterior surfaces to compress the clay and remove any finger marks. -
Leather Hard Stage:
Allow the bowl to dry slowly until it reaches a leather-hard state—firm enough to handle without deforming, but still carveable.
Clean Lines
After waxing your designs, use a damp sponge to wipe any stray glaze droplets off the wax immediately. This ensures your carved lines remain crisp and unclouded after firing.
Step 2: Decorating the Exterior
-
Plan the Pattern:
Lightly mark even intervals around the bottom half of the exterior where your stylized paw designs will go. -
Carve the Arches:
Using a small loop tool or a carving needle, scratch in a semi-circle or arch shape at each interval. These represent the main pad of the paw. -
Add the Dots:
Carve three small circles or dots above each arch to represent the toes. Keep the lines relatively thin but deep enough to hold their shape under glaze. -
Clean Up Burrs:
Gently brush away any clay crumbs or burrs created by the carving tool using a soft, dry brush.
Step 3: Painting and Glazing
-
Bisque Fire:
Fire the piece in the kiln to cone 04 (or your clay’s specific bisque temperature) to prepare it for glazing. -
Paint Interior Paws:
Using a dark blue or black underglaze and a small round brush, hand-paint paw prints randomly around the interior walls of the bowl. -
Sponge Decoration:
I like to add a subtle speckled effect by dipping a small sea sponge into the underglaze and lightly dabbing the center bottom of the bowl. -
Apply Wax Resist:
Carefully paint wax resist over your exterior carved designs (the arches and dots) and the interior painted paw prints. This prevents the top glaze from obscuring your artwork. -
Glaze the Exterior:
Once the wax is dry, brush or dip the exterior of the bowl in a deep blue gloss glaze. Wipe away any glaze that beads up on the waxed carved areas. -
Glaze the Interior:
Pour a clear, food-safe glaze into the interior, swirl it to coat everything, and pour out the excess. This seals the terracotta color and the painted paws. -
Final Fire:
Fire the bowl again to the maturity temperature of your glaze and clay (typically cone 5 or 6 for stoneware).
Wobbly Bowl?
If the bowl rocks on the table, the bottom isn’t flat. At the leather-hard stage, turn it over and gently tap the bottom with a wooden paddle to flatten it, or trim a foot ring.
Now you have a sturdy, personalized bowl ready for your pet’s next meal
Textured Fur Dog Pinch Pot
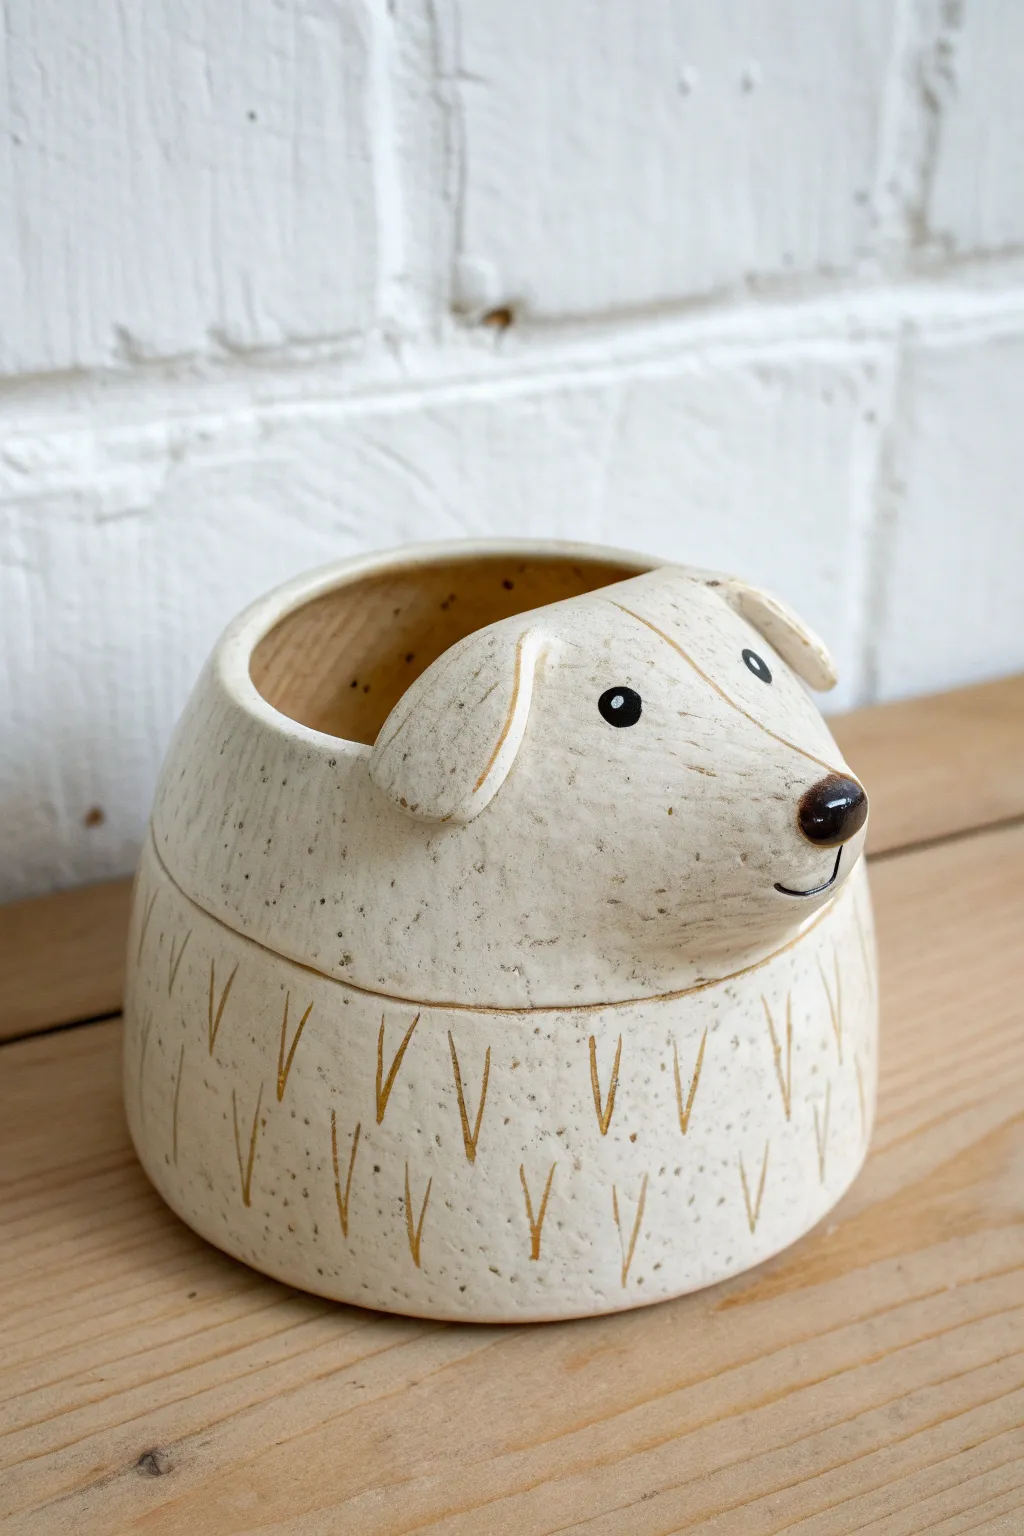
This charming ceramic pinch pot projects a warm, handmade feel with its speckled clay body and minimal, illustrative features. The design cleverly separates the dog’s head from a textured patterned body, making it a perfect functional piece for small succulents or trinkets.
Step-by-Step Tutorial
Materials
- Speckled cream clay body (stoneware recommended)
- Pottery tools (needle tool, rib tool, scoring tool)
- Slip (clay mixed with water)
- Black underglaze
- Brown/Gold luster or underglaze pencil
- Sponge
- Clear matte glaze
- Small paintbrush
- Kiln access
Step 1: Forming the Base
-
Pinch the body:
Start with a ball of speckled clay about the size of a large orange. Insert your thumb into the center and gently pinch the walls while rotating the ball to create a deep, rounded bowl shape. -
Refine the walls:
Work up the sides of the pot, ensuring an even thickness of about a quarter-inch throughout. Gently tap the bottom on your work surface to create a flat, stable base. -
Shape the inward slope:
As you reach the top third of the pot, gently curve the walls inward. This creates the ‘shoulder’ of the dog where the head will eventually sit.
Clean Lines Pro-Tip
For the dark nose, apply wax resist over the black underglaze before dipping in the clear overglaze. This prevents the black from smearing or bleeding during the final dipping process.
Step 2: Sculpting the Head
-
Create the head form:
Take a smaller ball of clay (roughly 1/3 the size of your base) and pinch it into a shallow dome or cup shape that matches the curvature of your base pot. -
Pull the snout:
Gently pull and pinch one side of this dome outwards to form a conical snout. Keep the transition from forehead to nose smooth rather than abrupt. -
Join the pieces:
Score the top rim of your base and the bottom rim of your head piece. Apply slip generously to both scored areas. -
Blend the seams:
Press the head firmly onto the body. Using a wooden tool or your thumb, smooth the clay across the seam on the *inside* to secure it. On the outside, leave the seam visible to act as a ‘collar’ line, or smooth it slightly if you prefer a seamless look. -
Shape the ears:
Roll two small, flat ovals of clay. Attach them to the sides of the head using the score-and-slip method, folding them slightly downward for a relaxed, floppy look. -
Add the nose:
Roll a tiny pea-sized ball of clay and attach it to the very tip of the snout. Flatten it slightly to create an oval nose button.
Level Up: Gold Accent
Instead of brown underglaze for the ‘V’ fur patterns, allow the piece to finish firing, then apply gold luster overglaze to the marks and re-fire for a metallic, high-end finish.
Step 3: Refining and Decorating
-
Smooth the surface:
Once the clay is leather hard, use a slightly damp sponge to wipe down the entire piece, revealing the natural speckles in the clay and smoothing out fingerprints. -
Carve the mouth:
Use a needle tool to incise a small, curved smile just under the snout. Keep the line clean and simple. -
Bisque fire:
Allow the piece to dry completely (bone dry) before firing it in the kiln for a bisque firing. -
Paint the details:
Apply black underglaze carefully to the eyes and the nose button. You want a solid, opaque coverage here. -
Apply the fur texture:
Using a brown underglaze pencil or a fine brush with brown underglaze, draw repeating ‘V’ shapes on the lower body section to simulate fur texture. Keep the spacing random but balanced. -
Glaze application:
Dip the entire pot into a clear matte glaze. This will seal the clay and make it food safe while preserving the natural speckled look. -
Final wipe:
Wipe the bottom of the pot with a sponge to ensure no glaze is on the foot, which would stick to the kiln shelf. -
Glaze fire:
Fire the piece again according to your clay and glaze specifications (usually Cone 5 or 6 for stoneware).
Once the kiln cools, you’ll have an adorable, speckled companion ready to hold your favorite plant

TRACK YOUR CERAMIC JOURNEY
Capture glaze tests, firing details, and creative progress—all in one simple printable. Make your projects easier to repeat and improve.
Spotty Dog Pinch Pot Pattern
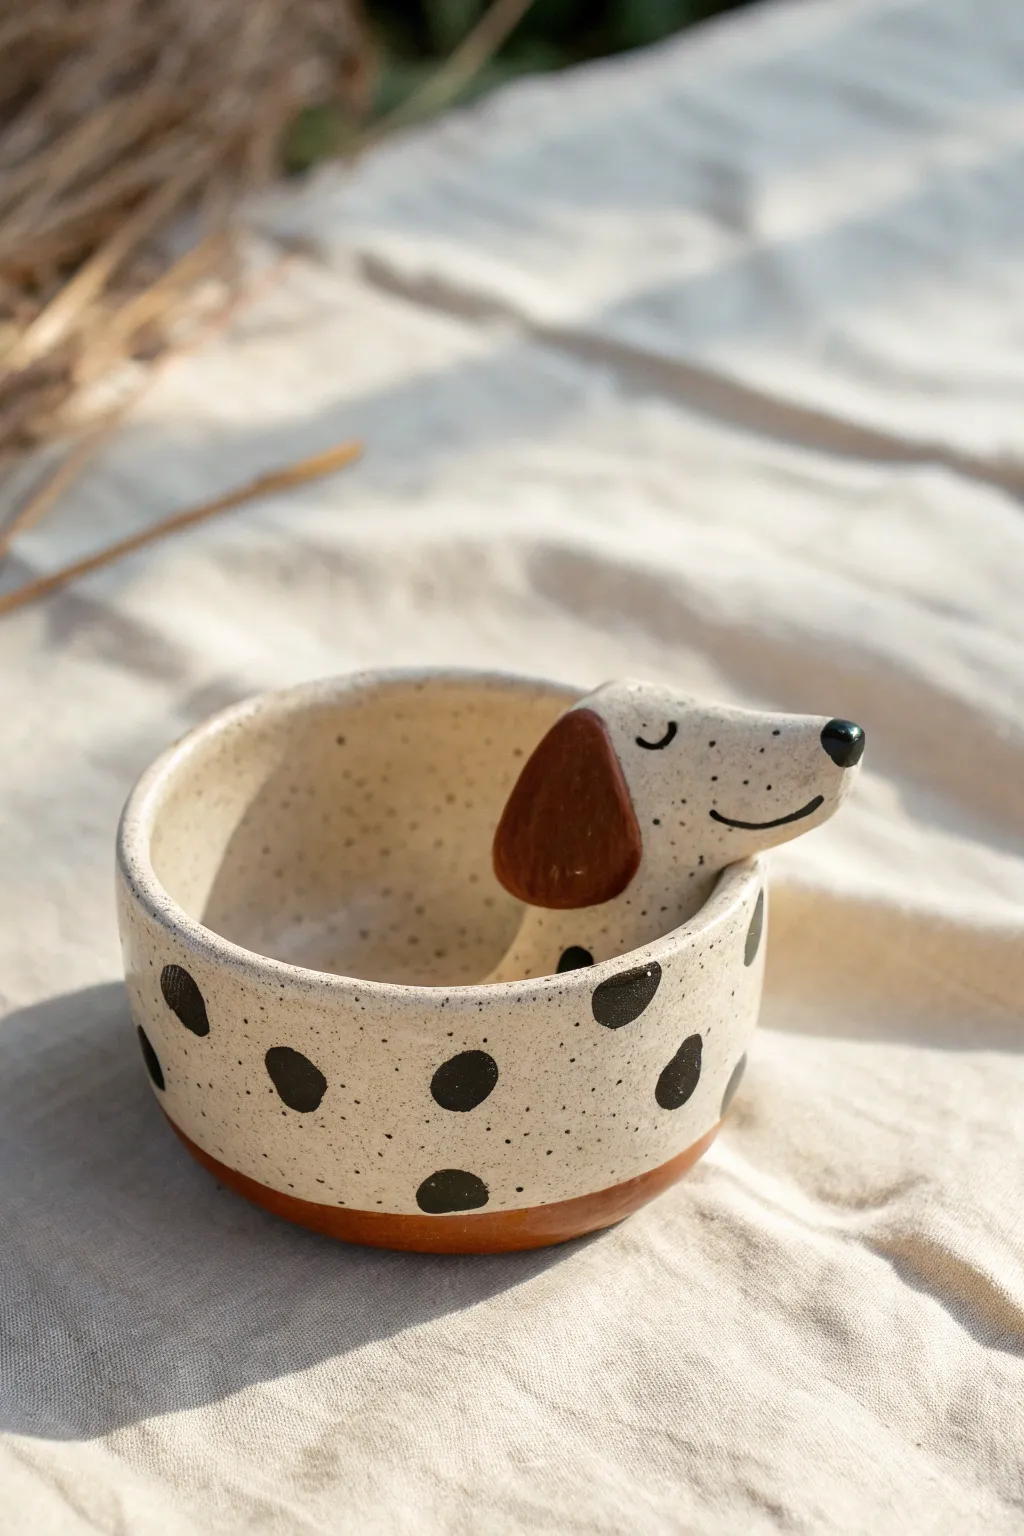
This charming ceramic piece combines a functional pinch pot with an adorable sculpted character. The finished bowl features a speckled cream finish, bold black dots, and a sweet dog head resting on the rim, perfect for holding trinkets or snacks.
How-To Guide
Materials
- Light-colored stoneware clay (speckled clay recommended)
- Pottery tools: needle tool, scoring tool, rib tool
- Slip (liquid clay)
- Sponge and water cup
- Ceramic underglazes: Black, Chocolate Brown
- Ceramic glaze: Clear or Transparent Speckled (if using plain clay)
- Small round paintbrush
- Kiln access
Step 1: Forming the Pinch Pot Base
-
Prepare the Clay:
Start with a ball of clay roughly the size of a large orange. Wedge it well to remove air bubbles, then pat it into a smooth, round sphere. -
Open the Pot:
Hold the sphere in your non-dominant hand. Push your thumb into the center, stopping about a half-inch from the bottom. This thickness is crucial for the stability of the base. -
Pinch the Walls:
Gently pinch the clay between your thumb and fingers, rotating the ball as you go. Work from the bottom up, aiming for an even wall thickness of about 1/4 inch throughout. -
Refine the Shape:
Once the basic bowl shape is formed, tap the bottom gently on your table to create a flat, stable foot. Use a rib tool or a damp sponge to smooth the interior and exterior surfaces.
Step 2: Sculpting the Character
-
Shape the Head:
Take a separate, smaller piece of clay and roll it into a thick, elongated teardrop shape. This will become the dog’s head and snout. -
Add the Ears:
Form two small, flat tear-drop shapes for ears. Attach them to the sides of the head using the score and slip method, blending the seams completely so they look seamless. -
Attach the Head:
Choose a spot on the rim of your bowl. Score both the underside of the dog’s neck and the rim area heavily. Apply slip and press the head firmly onto the rim, ensuring the chin rests over the edge. -
Blend the Neck:
On the inside of the bowl, smooth the clay from the neck down into the bowl wall. I like to use a wooden modeling tool here to make the transition invisible.
Smooth Seams
When attaching the head, use a tiny coil of clay around the join area. Smearing this coil creates a much stronger bond than just slip alone.
Step 3: Decorating and Glazing
-
Bisque Fire:
Allow your piece to dry slowly and completely (greenware stage). Once bone dry, fire it in the kiln to bisque temperature (usually Cone 04). -
Paint the Base Details:
Using chocolate brown underglaze, paint a distinct band around the bottom exterior of the bowl. Also, paint the dog’s ears solid brown to match. -
Add Facial Features:
With a fine-point brush and black underglaze, paint a small round nose at the tip of the snout. Carefully paint two curved lines for sleeping eyes and a gentle curve for the smile. -
Create the Spots:
Load a round brush with black underglaze. Dab irregular, organic circles all around the exterior of the bowl to create the Dalmatian-like spots. -
Apply Clear Glaze:
Once the underglaze is dry, dip the entire piece in a clear transparent glaze. If you didn’t use speckled clay, choose a clear glaze that has speckles suspended in it. -
Final Firing:
Wipe the foot of the bowl clean with a sponge so it doesn’t stick to the kiln shelf. Fire the piece again to the maturation temperature of your specific clay and glaze (often Cone 5 or 6).
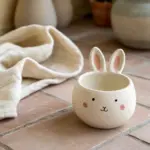
Make it a Set
Create a matching smaller bowl with cat ears and whiskers to make a ‘raining cats and dogs’ serving duo.
Now you have a loyal little ceramic companion ready to brighten up your table or desk
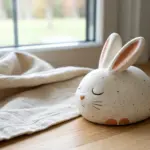
Minimal Modern Dog Planter
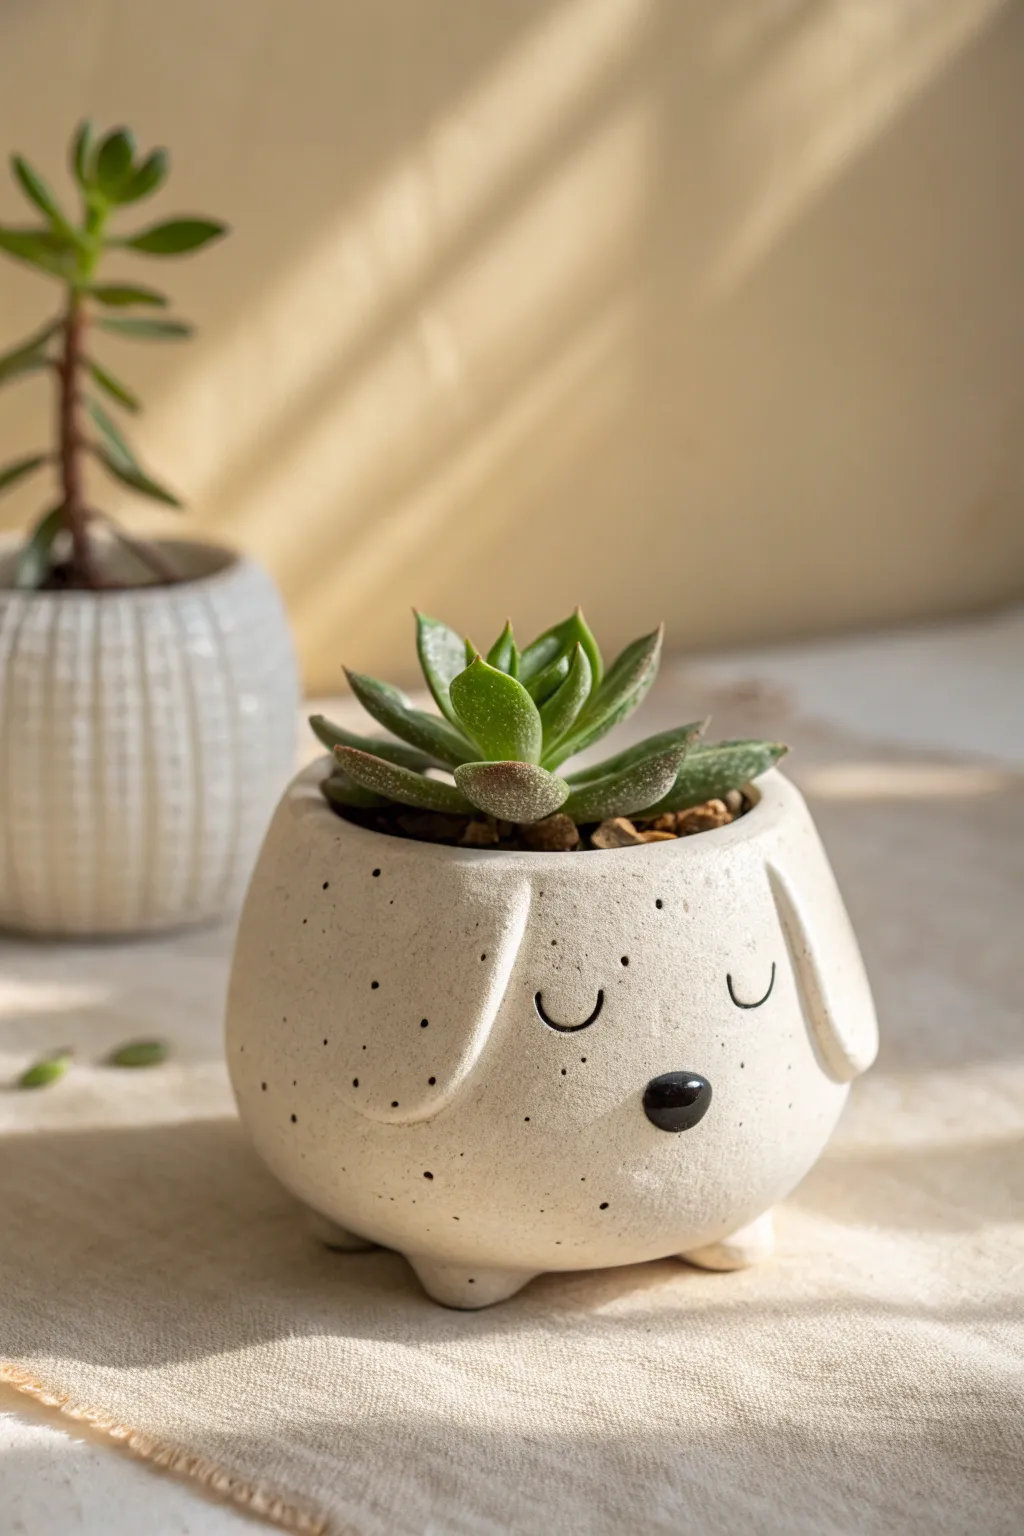
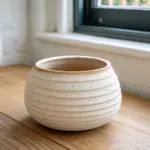
This charming, sleepy dog planter brings a touch of modern whimsy to any succulent collection with its minimalist face and speckled finish. Crafted from a simple pinch pot base, its clean lines and subtle textures make it a perfect beginner-friendly clay project.
Step-by-Step
Materials
- White air-dry clay or ceramic clay
- Basic clay tools (needle tool, sponge)
- Small bowl of water
- Slip (clay mixed with water)
- Rolling pin
- Sandpaper (fine grit)
- Black acrylic paint
- Fine detail brush
- Matte spray sealant
- Optional: Black glass bead or small distinct clay ball for the nose
Step 1: Shaping the Base
-
Start the pinch pot:
Begin with a ball of white clay roughly the size of a tennis ball. Insert your thumb into the center and gently pinch the walls while rotating the ball to create an even, cup-like shape. -
Refine the form:
Continue pinching until the walls are about 1/4 inch thick. Gently paddle the outside with a flat wooden tool or your hand to smooth the surface and create a slightly more structured, less lumpy sphere. -
Close the shape slightly:
Curve the upper rim inward just a bit so the opening is smaller than the widest part of the pot. This gives the dog’s head a nice, rounded, chubby appearance. -
Add the feet:
Roll four tiny balls of clay, roughly marble-sized. Score and slip the bottom of your pot and attach these four feet in a square formation to ensure the planter stands stable and slightly elevated. -
Smooth the feet connections:
Use a modeling tool or your finger to blend the clay of the feet seamlessly into the body of the pot so they look like little nubs rather than attached balls.
Uneven Drying?
If you see cracks forming while drying, your clay might be drying too fast. Cover the pot loosely with a plastic bag to slow down the process.
Step 2: Adding Features
-
Create the ears:
Roll out a small slab of clay to about 1/4 inch thickness. Cut two elongated oval shapes for the ears—think of a long, soft teardrop shape. -
Attach the ears:
Score the side of the pot where the ‘temples’ would be. Bend the top of the clay ear slightly and attach it securely with slip, smoothing the top seam completely. Let the rest of the ear hang down naturally against the cheek. -
Form the nose:
Roll a very small, slightly flattened oval of clay for the nose. Score the center of the face area and attach it firmly. Alternatively, if you plan to paint a nose or use a bead later, you can skip this, but a raised clay nose adds nice dimension. -
Refine the surface:
Dip a sponge in water and wring it out well. Gently wipe the entire surface of the pot to remove fingerprints, smooth out tiny cracks, and soften the edges of the ears. -
Create the speckled texture:
To mimic the stone-like look, take a stiff toothbrush or a needle tool and gently stipple tiny indentations over the surface, or flick a tiny amount of diluted black paint/slip onto the wet clay if using ceramic methods. For air dry clay, we can paint speckles later. -
Dry the piece:
Let your planter dry completely. If using air-dry clay, this usually takes 24-48 hours. Turn it occasionally so the bottom dries evenly.
Tail Wagging Detail
Add a tiny, curled nub of clay to the back of the pot for a tail. It’s a hidden detail that makes the planter cute from every angle.
Step 3: Finishing Touches
-
Sand for smoothness:
Once fully dry (and fired, if using ceramic clay), use fine-grit sandpaper to buff away any remaining rough spots, paying attention to the rim and the ear connections. -
Draw the sleepy eyes:
Using a fine detail brush and black acrylic paint, paint two simple ‘U’ shapes for the closed, sleeping eyes. Keep them symmetrical and spaced widely for that cute, modern look. -
Paint the nose:
Paint the raised clay nose solid black. I like to add a tiny dot of white or clear gloss varnish to the nose later to make it look wet and shiny like a real dog’s nose. -
Add speckles (if needed):
If you didn’t add texture earlier, dilute some black acrylic paint with water. Dip an old toothbrush in it and run your thumb across the bristles to flick tiny speckles across the white surface. -
Seal the planter:
Finish with a coat of matte spray sealant to protect the paint and clay. If you are using this for real plants with air-dry clay, ensure you use a waterproof varnish on the inside.
Pop in your favorite succulent and enjoy your serene new desk companion
Derpy Big-Eyed Dog Pinch Pot
This charming, slightly wonky pup brings instant joy with its oversized eyes and goofy smile. Made from speckled clay, it features simple but expressive underglaze illustrations that continue from the outside to the inside.
Step-by-Step Tutorial
Materials
- Speckled stoneware clay (white base)
- Pottery tools (sponge, rib tool, needle tool)
- Dark blue underglaze
- Light orange or peach underglaze
- Fine detail paintbrush
- Clear transparent glaze
- Kiln access
Step 1: Forming the Pot
-
Wedge the clay:
Start with a ball of clay roughly the size of a large orange. Wedge it thoroughly to remove air bubbles and ensure particle alignment, which prevents cracking later. -
Open the center:
Hold the clay ball in one hand and press your thumb into the center, stopping about a half-inch from the bottom. This base thickness needs to be sufficient to support the walls. -
Pinch the walls:
Using your thumb on the inside and fingers on the outside, gently rhythmic pinches while rotating the ball. Aim to pull the clay upwards and outwards to create a bowl shape. -
Shape the cylinder:
Unlike a standard bowl, keep the walls of this pot fairly upright and cylindrical rather than flared out. I like to keep the walls about a quarter-inch thick for durability. -
Refine the surface:
Once the shape is set, use a damp sponge or a flexible rib tool to smooth the outside and inside surfaces, erasing your fingerprints unless you prefer that very rustic texture. -
Flatten the bottom:
Gently tap the pot on your work surface to create a flat, stable base so it won’t wobble.
Uneven Walls?
If one side is thicker, don’t just pinch that spot. Gently push clay from the thick area toward a thinner area to redistribute the mass smoothly.
Step 2: Initial Drying and Drawing
-
Let it firm up:
Allow the pot to dry to a ‘leather hard’ state. It should be firm to the touch and no longer tacky, but still cool and grayish. -
Plan the face:
Before painting, lightly sketch the dog’s features onto the clay using a pencil. The graphite will burn off in the kiln, so don’t worry about erasing mistakes. -
Sketch the interior ears:
Don’t forget the fun surprise inside! Sketch two heart-shaped paw prints or ‘floppy ear tips’ on the interior upper rim, aligning them generally above where the exterior ears will be.
Level Up
Make it a planter! Poke a drainage hole in the bottom during the leather-hard stage before firing so you can plant a real succulent inside.
Step 3: Painting the Details
-
Outline the drooping ears:
Using a fine detail brush and dark blue underglaze, paint two elongated oval shapes on the exterior sides for the dog’s drooping ears. Fill them in completely with blue. -
Paint the big eyes:
Draw two large circles for eyes. Inside, paint large pupils, leaving a small white dot of unpainted clay (or paint it white) in each to create that ‘sparkle’ of life. -
Add the nose and mouth:
Paint a soft, rounded triangular nose below the eyes. Draw a simple anchor shape or ‘w’ shape connecting to the nose for the mouth, giving it a slight smile. -
Paint the cheeks:
Switch to your light orange or peach underglaze. Dab two very faint, small spots on the cheeks just outside the smile lines for a blushing effect. -
Detail the interior:
Using the blue underglaze again, outline the heart-shaped paw/ear shapes you sketched on the inside rim earlier. -
Paint the collar line:
Add a thin curved line near the bottom of the pot to suggest the dog’s neck or collar area.
Step 4: Firing and Glazing
-
Bisque fire:
Let the piece dry completely until bone dry. Fire it in the kiln to bisque temperature (usually cone 04) to set the shape and underglaze. -
Apply clear glaze:
Once the bisque piece is cool, wipe it with a damp sponge to remove dust. Dip the entire pot into a clear, transparent glaze. This allows the speckles of the clay to show through. -
Wipe the foot:
Use a sponge to wipe all glaze off the very bottom of the pot so it doesn’t fuse to the kiln shelf. -
Final smooth firing:
Fire the piece again to your clay body’s maturity temperature (likely Cone 5 or 6 for stoneware) to finish the piece.
Now you have a brilliantly quirky little bowl ready to hold snacks or small trinkets.
Stacked Puppies Pinch Pot Set
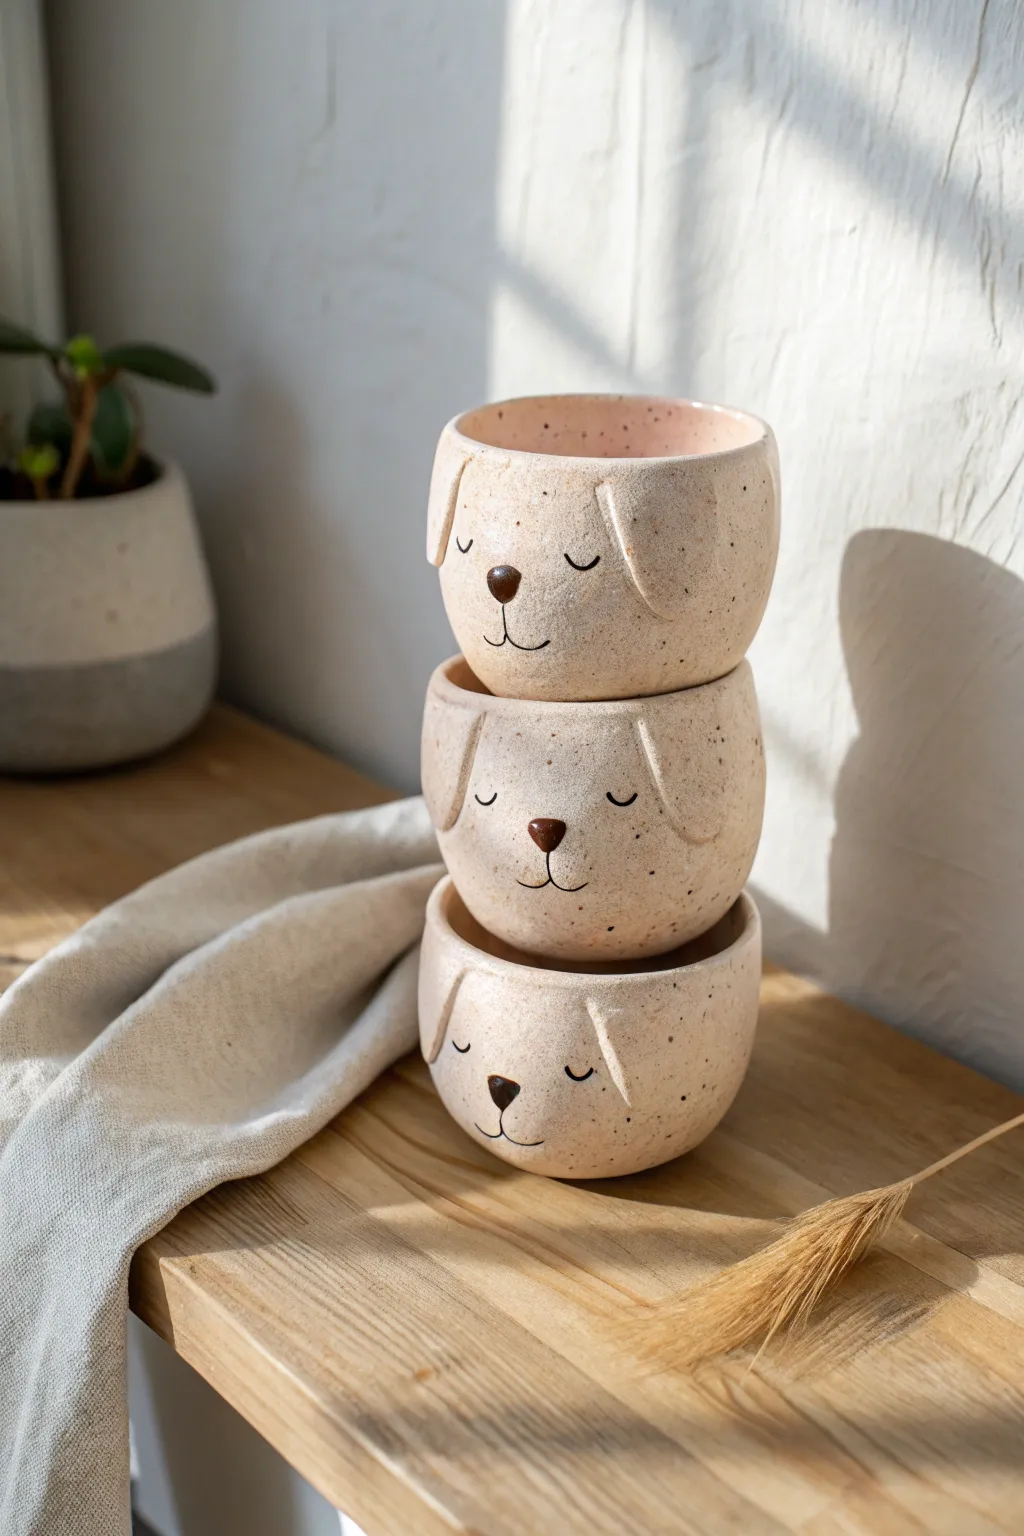
These charming, stackable ceramic bowls feature sweet puppy faces with floppy ears and speckled clay bodies. They make perfect succulent planters or treat bowls, bringing a cozy, handmade touch to any shelf.
Step-by-Step Guide
Materials
- Speckled buff stoneware clay
- Pottery tools (needle tool, rib tool, scoring tool)
- Small sponge
- Slip (clay and water mixture)
- Underglaze (black and dark brown)
- Clear dipping glaze or brush-on clear glaze
- Rolling pin
- Canvas work surface
- Kiln (or access to a firing service)
Step 1: Creating the Bowl Base
-
Wedge the clay:
Begin with three equal-sized balls of speckled buff clay, each about the size of a large orange. Wedge them thoroughly to remove air bubbles and ensure even consistency. -
Form the pinch pot:
Hold one ball in your non-dominant hand. Press your thumb into the center, stopping about a half-inch from the bottom. Gently pinch and turn the clay between your thumb and fingers to open up the walls. -
Refine the shape:
Continue pinching upward to create a deep, U-shaped bowl. Aim for even wall thickness throughout. Use a rib tool on the outside to smooth the surface and compress the clay. -
Flatten the rim:
Gently tap the rim of the pot upside down on your canvas to level it comfortably. Flip it back over and smooth the rim with a damp sponge so it’s rounded and soft rather than sharp. -
Repeat for the set:
Repeat this process for the other two clay balls. To ensure they stack well, standardizing the rim diameter is key, so measure them against each other as you work.
Trouble Stacking?
If the bowls wobble when stacked, wait until the leather-hard stage and gently press the bottom of one pot into the rim of another to create a custom-fitted seat.
Step 2: Adding Puppy Features
-
Shape the ears:
Roll out a small slab of clay to about 1/4 inch thickness. Cut out six teardrop shapes for the ears—two for each pot. Smooth the edges of each ear with a damp finger. -
Attach the ears:
Score the side of the pot where the ear will attach and score the back of the ear piece. Apply slip, press firmly, and smooth the seam. I like to let the bottom of the ear hang loose slightly to create that floppy look. -
Create the nose:
Roll a tiny, triangular nugget of clay for the nose. Score and slip the center of the ‘face’ area and attach the nose securely. Use a modeling tool to verify the connection is strong so it doesn’t pop off in the kiln. -
Refine the surface:
Once all attachments are made, go over the entire piece with a slightly damp sponge to smooth out any fingerprints or rough tooling marks.
Step 3: Detailing and Firing
-
Bisque fire:
Allow the pots to dry slowly and completely (bone dry). Load them into the kiln for a bisque firing to cone 04 (or your clay’s specification). -
Paint the face details:
Using a fine detail brush and black underglaze, paint two small U-shapes for closed, sleeping eyes. Paint a small anchor shape extending down from the nose for the mouth. -
Glaze the nose:
Apply a dark brown underglaze or glaze specifically to the raised nose bump to make it stand out against the speckled clay. -
Apply clear glaze:
Dip the entire pot into a clear glaze (or brush on three even coats). This will seal the clay and make the natural speckles pop after the final firing. -
Final wipe down:
Wipe the bottoms of the pots with a damp sponge to remove any glaze, preventing them from sticking to the kiln shelf. -
Glaze fire:
Fire the pieces a final time to the maturity temperature of your clay (typically cone 5 or 6 for stoneware). Let them cool completely before stacking.
Level Up: Tail Handle
Add a small, curled distinctive ‘tail’ to the back of each pot. It acts as a cute handle and adds 360-degree character to your sculpture.
Once fired, stack these adorable puppies on your sill to catch the morning light.
Surprise Inside Puppy Pinch Pot
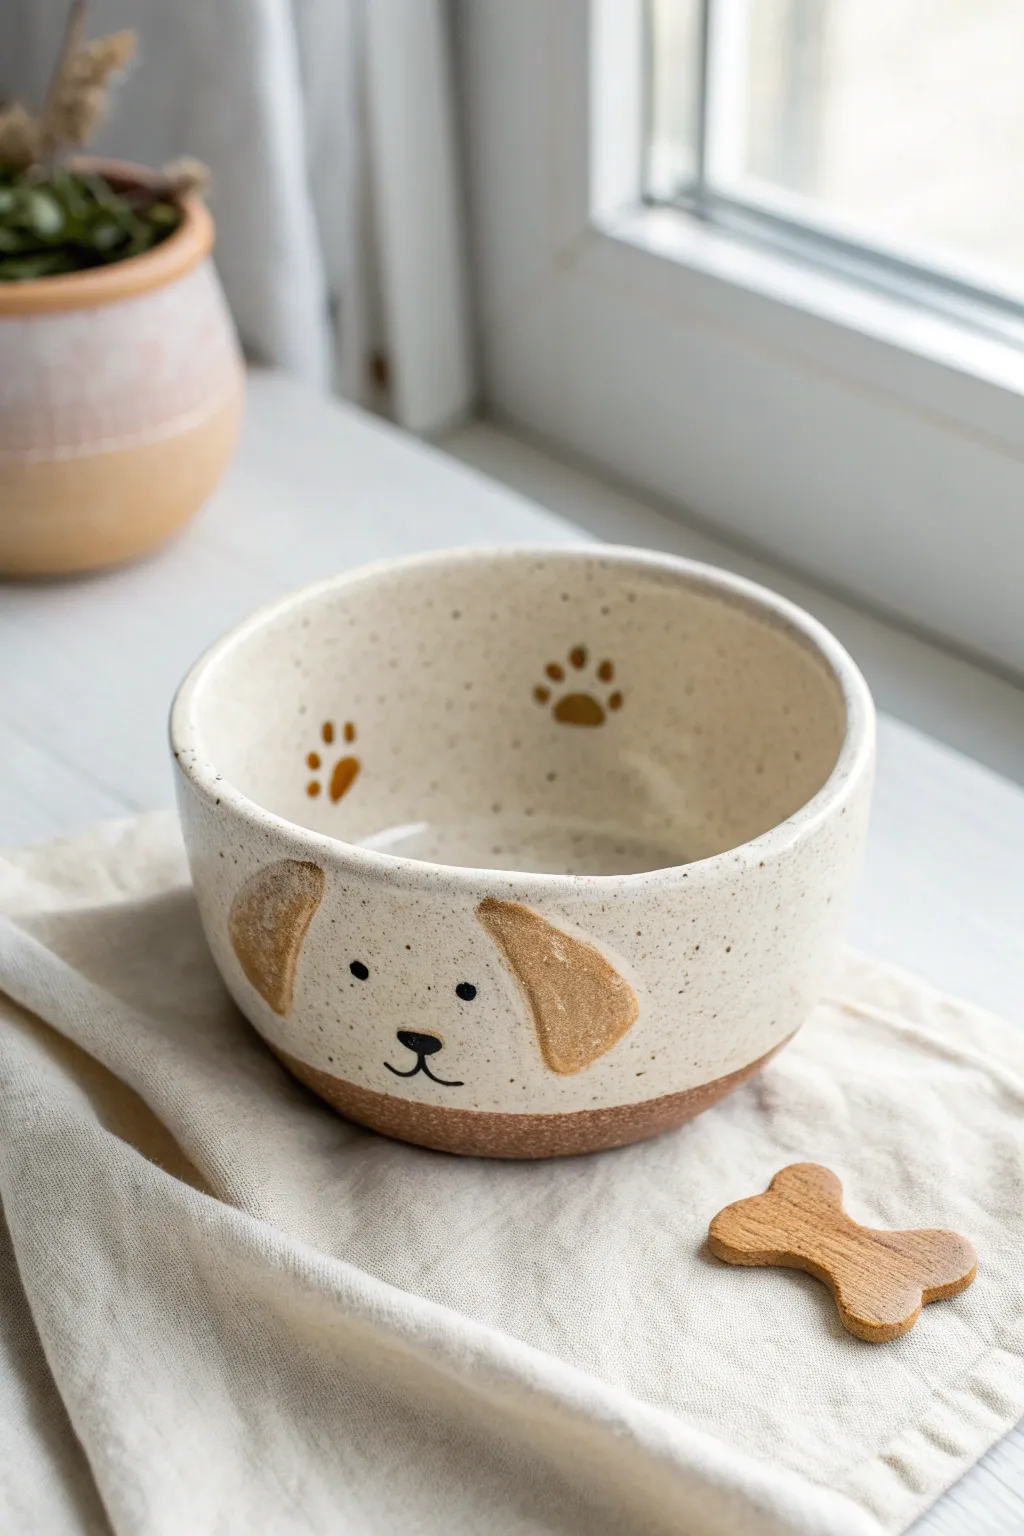
This adorable ceramic bowl features a charming dog face on the outside and playful paw prints hidden within, perfect for storing little trinkets or serving snacks. The speckled cream glaze contrasts beautifully with the raw clay base and golden-brown ears for a warm, handcrafted feel.
How-To Guide
Materials
- Speckled cream clay (stoneware)
- Pottery wheel or slab mat (optional, for pinch pot base)
- Modeling tools (rib, needle tool)
- Underglazes: Black, Golden Brown/Tan
- Clear or Cream Speckled Glaze (food safe)
- Small round paintbrush
- Sponge
- Kiln access
Step 1: Forming the Bowl
-
Prepare the Clay:
Start with a ball of speckled stoneware clay about the size of a large orange. Wedge it thoroughly to remove air bubbles and ensure an even consistency. -
Open the Pinch Pot:
Push your thumb deep into the center of the ball, stopping about half an inch from the bottom. This will become the floor of your bowl. -
Pinch the Walls:
Using your thumb on the inside and fingers on the outside, gently pinch and rotate the clay to thin out the walls. Aim for a consistent thickness of about 1/4 inch from bottom to rim. -
Shape the Profile:
As you pinch, guide the wails upward to create a deep, U-shaped bowl rather than a wide plate. I like to use a kidney rib tool here to smooth the inside curve and compress the clay particles. -
Refine the Rim:
Smooth the lip of the bowl with a damp chamois or your finger. Ensure it is level and rounded for a finished look. -
Define the Base:
Tap the bottom of the pot gently on your work surface to create a flat, stable foot. -
Let it Firm Up:
Allow the pot to dry to a ‘leather hard’ stage. This means it is firm enough to handle without deforming but still holds moisture.
Use Wax Resist Wisely
If you don’t have wax resist, you can achieve the two-tone look by carefully brushing your glaze around the design, though wax makes clean lines much easier.
Step 2: Adding the Dog Details
-
Outline the Ears:
Using a needle tool, very lightly sketch the placement of the floppy ears on the exterior. They should start near the rim and droop downward. -
Paint the Ears:
Fill in the ear shapes using a golden-brown or tan underglaze. Apply 2-3 coats for solid opacity, letting each coat dry briefly in between. -
Add the Face:
With a fine-point brush and black underglaze, carefully paint two small dots for eyes and a rounded triangle for the nose. Draw a simple anchor shape connecting to the nose for the mouth. -
Paint Interior Paws:
Inside the bowl, paint small paw prints using the same golden-brown underglaze used for the ears. Place them randomly, as if the puppy walked across the clay. -
Bisque Fire:
Once the underglaze is fully dry and the pot is bone dry, fire it in the kiln to bisque temperature (usually cone 04).
Wobbly Pot?
If your pinch pot rocks on the table, the bottom isn’t flat. While leather hard, gently tap the pot vertically on a table to flatten the base perfectly.
Step 3: Glazing and Finishing
-
Apply Wax Resist:
Paint liquid wax resist over the brown painted dog ears and the paw prints inside. This technique, called wax resist, prevents the main glaze from covering your detailed painting. -
Wax the Base:
Apply a clear line of wax resist around the bottom third of the exterior. This creates the distinct unglazed ‘dipped’ look at the base. -
Dip into Glaze:
Using tongs or your hand, dip the entire bowl into a creamy, speckled white glaze (or a clear glaze if your clay body provides the speckles). The wax will repel the glaze from the base and the painted details. -
Clean Up:
Use a damp sponge to wipe away any stray droplets of glaze that may be sitting on top of the waxed areas. -
Final Fire:
Fire the piece again to the maturation temperature of your specific clay and glaze (typically cone 5 or 6 for stoneware).
Enjoy using your new faithful friend for snacks or as a sweet decor piece