I’m always amazed at how air-dry clay can give you that cozy, handmade pottery feel without any kiln drama. If you’re craving fresh dry clay ideas that look cute on a shelf and actually get used, you’re going to have so much fun with this list.
Simple Air-Dry Clay Trinket Dishes
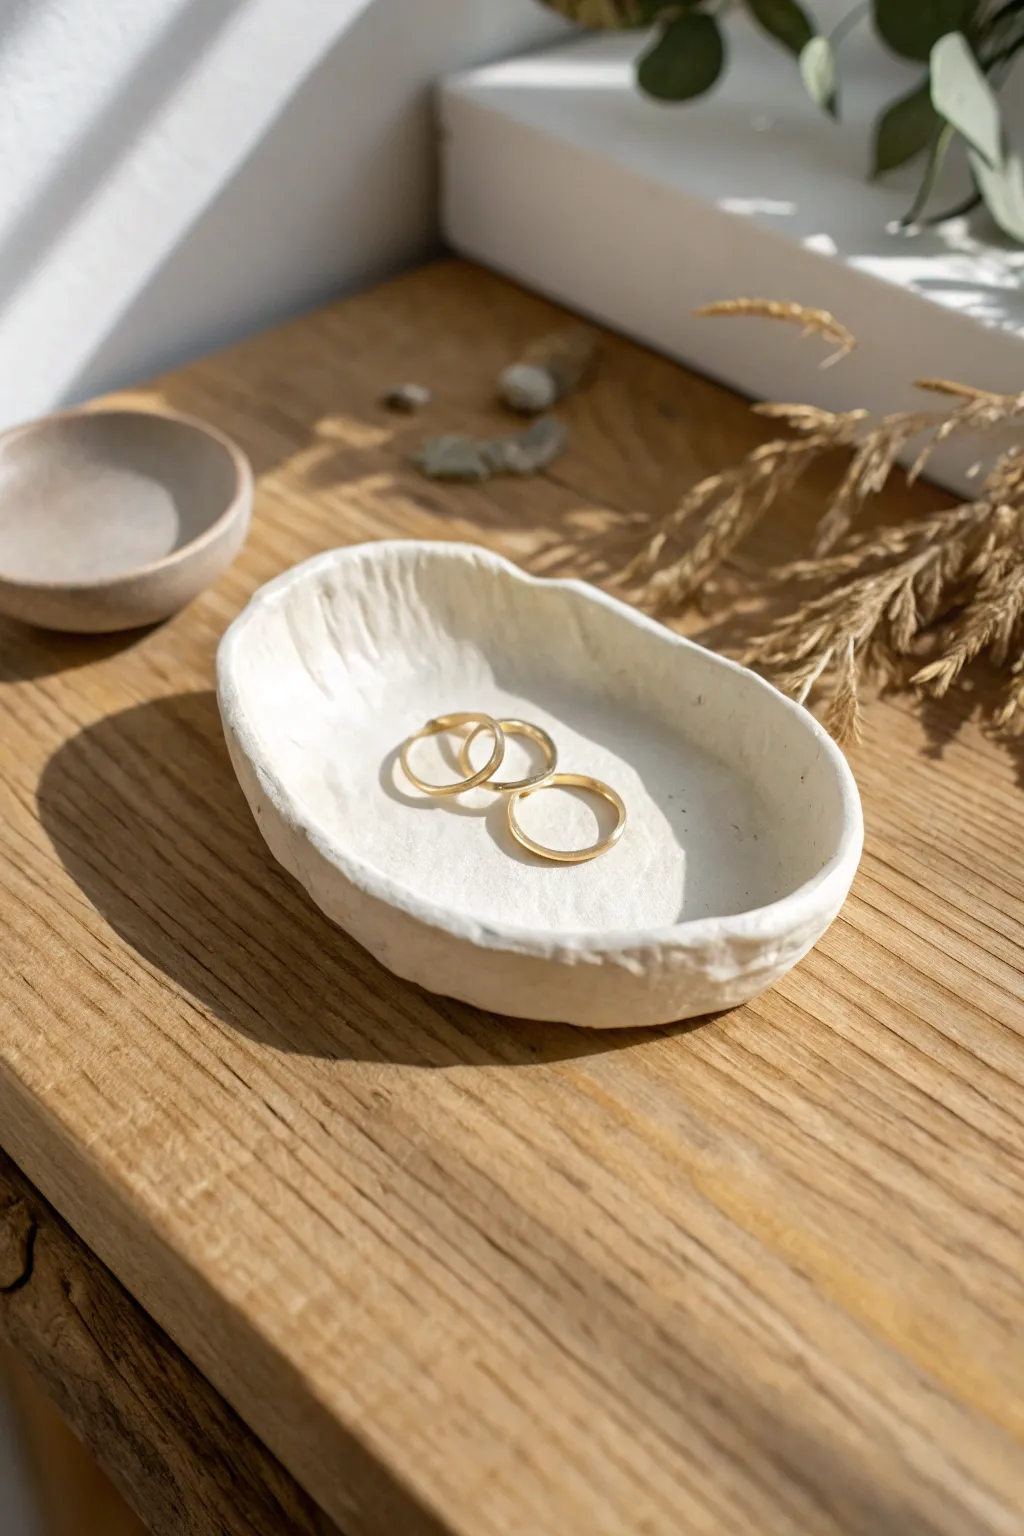
Embrace the beauty of imperfection with this lovely, hand-formed trinket dish that looks like it came straight from a boutique pottery studio. The raw edges and gentle texture give it an earthy, minimalist vibe perfect for holding your favorite gold bands.
Step-by-Step Guide
Materials
- White air-dry clay (like DAS or Crayola Air Dry)
- Small rolling pin or smooth glass jar
- Small bowl of water
- Piece of canvas or parchment paper (to work on)
- Sandpaper (fine grit)
- White acrylic paint (matte finish)
- Clear matte varnish or sealant
- Paintbrush
Step 1: Shaping the Form
-
Condition the clay:
Start by grabbing a handful of air-dry clay about the size of a large lemon. Knead it in your hands for a minute until it feels soft, warm, and pliable. -
Create a slab:
Place the clay onto your canvas or parchment paper. Use a rolling pin to flatten it out, aiming for a consistent thickness of about 1/4 inch. -
Cut the rough shape:
Instead of using a perfect circle cutter, use a dull knife or just your fingers to tear away the excess clay, creating a rough, organic oval shape. I find tearing leads to more interesting edges. -
Smooth the cut:
Dip your finger lightly in water and run it along the jagged edges to soften them slightly, but don’t over-smooth; you want to keep that handmade character. -
Pinch up the sides:
Begin gently pinching the edges of the slab upwards to create a raised rim. Work your way around the oval, lifting the sides about half an inch. -
Refine the walls:
Use your thumb on the inside and your forefinger on the outside to pinch and compress the walls, making sure they are securely attached to the base. -
Add vertical texture:
To mimic the texture in the photo, use your thumbpad to drag gently upwards along the inside walls, creating subtle vertical grooves or ridges. -
Check the rim:
Look at the top edge of your dish. It should be uneven and wavy rather than perfectly flat. If it looks too uniform, gently press down in random spots.
Step 2: Drying and Refining
-
Initial drying:
Set the dish aside in a safe, dry spot away from direct sunlight. Let it air dry for at least 24 to 48 hours. The clay will turn from grey to white as it dries. -
Inspect for cracks:
Once fully dry, check for any small cracks. If you find any, mix a tiny bit of fresh clay with water to make a paste and fill them in. -
Light sanding:
Take your fine-grit sandpaper and very gently sand any extremely sharp points on the rim or rough patches on the bottom. Do not sand away the vertical thumb textures you created earlier. -
Wipe clean:
Use a dry cloth or a soft brush to remove all the clay dust from sanding. This is crucial for a smooth paint application.
Smoother Surfaces
Work with slightly damp fingers throughout the shaping process. The water acts as a lubricant, melting away fingerprints and small cracks as you sculpt.
Step 3: Finishing Touches
-
Paint the base coat:
Squeeze out some white matte acrylic paint. Coat the entire top surface of the dish, working the paint into the nooks and crannies of the texture. -
Paint the underside:
Once the top is dry to the touch, flip the dish over and paint the bottom and sides to ensure an even, opaque white finish. -
Apply a second coat:
If the clay color is still showing through, apply a second layer of white paint for a crisp, clean look. -
Seal the piece:
Once the paint is completely dry, apply a thin layer of matte varnish or sealant. This protects the dish from moisture and gives it that finished ceramic feel. -
Final cure:
Let the sealant cure according to the bottle’s instructions before placing any jewelry inside.
Speckled Pottery Look
Mix dried coffee grounds or cracked pepper into the wet clay before rolling it out. When dry, this mimics the look of expensive speckled stoneware clay.
Now you have a chic, custom-made spot to keep your everyday jewelry safe and organized


Cone-Shaped Air-Dry Clay Ring Holders

Create a sleek and functional jewelry display with this simple air-dry clay project. The clean white cone stands tall in a warm wooden base, offering a modern home for your favorite rings.
Step-by-Step
Materials
- White ai-dry clay
- Small wooden round dish or coaster (approx. 4 inches diameter)
- Strong craft glue (e.g., E6000)
- Rolling pin
- Craft knife
- Fine-grit sandpaper
- Small bowl of water
- Parchment paper or silicone mat
- Ruler
Step 1: Shaping the Cone
-
Condition the clay:
Start by taking a handful of air-dry clay and kneading it in your hands until it becomes soft, pliable, and free of cracks. -
Form a cylinder:
Roll the clay into a smooth cylinder, roughly the thickness you want the base of your cone to be. -
Shape the peak:
Place the cylinder upright on your work surface. Gently use your fingers to taper the top end, pinching and smoothing it upwards to create a point. -
Roll for symmetry:
Lay the rough cone shape on its side and gently roll it back and forth on your table with the palm of your hand, applying more pressure at the top and less at the base to refine the conical shape. -
Flatten the base:
Stand the cone up and firmly tap the bottom against the table to ensure it stands perfectly straight and the base is flat. -
Check sizing:
Place a test ring over the top to make sure the taper is gradual enough to hold rings at different heights without them sliding all the way to the bottom too quickly. -
Smoothing:
Dip your finger in a little bit of water and run it over the entire surface of the cone to smooth out any fingerprints or uneven bumps. -
Drying:
Set the finished cone on a piece of parchment paper to dry. I find that rotating it every few hours helps it dry evenly and prevents one side from flattening. -
Wait time:
Allow the clay to dry completely, which usually takes 24 to 48 hours depending on humidity and thickness.
Smooth Operator
To get a perfectly seamless finish, use a slightly damp sponge instead of just fingers during the wet smoothing stage.
Step 2: Refining and Assembly
-
Sand imperfections:
Once fully dry, take fine-grit sandpaper and gently buff the surface of the cone to achieve a matte, porcelain-like finish. -
Prepare the base:
Clean the center of your wooden dish with a dry cloth to ensure there is no dust or debris that could interfere with adhesion. -
Apply adhesive:
Squeeze a generous dot of strong craft glue onto the bottom flat surface of your clay cone. -
Positioning:
Carefully place the cone into the exact center of the wooden dish. -
Secure the bond:
Press down firmly for about 30 seconds to engage the glue. -
Curing:
Let the glue cure according to the manufacturer’s instructions before placing any jewelry on the holder. -
Optional sealing:
If you want extra protection, you can brush a coat of matte varnish over the clay cone, although leaving it raw preserves that lovely stone texture.
Marbled Effect
Knead a small drop of grey or black acrylic paint into the white clay but stop before it blends fully for a faux-marble look.
Now you have a chic, modern display piece ready to organize your everyday treasures


Flower and Round Air-Dry Clay Coasters
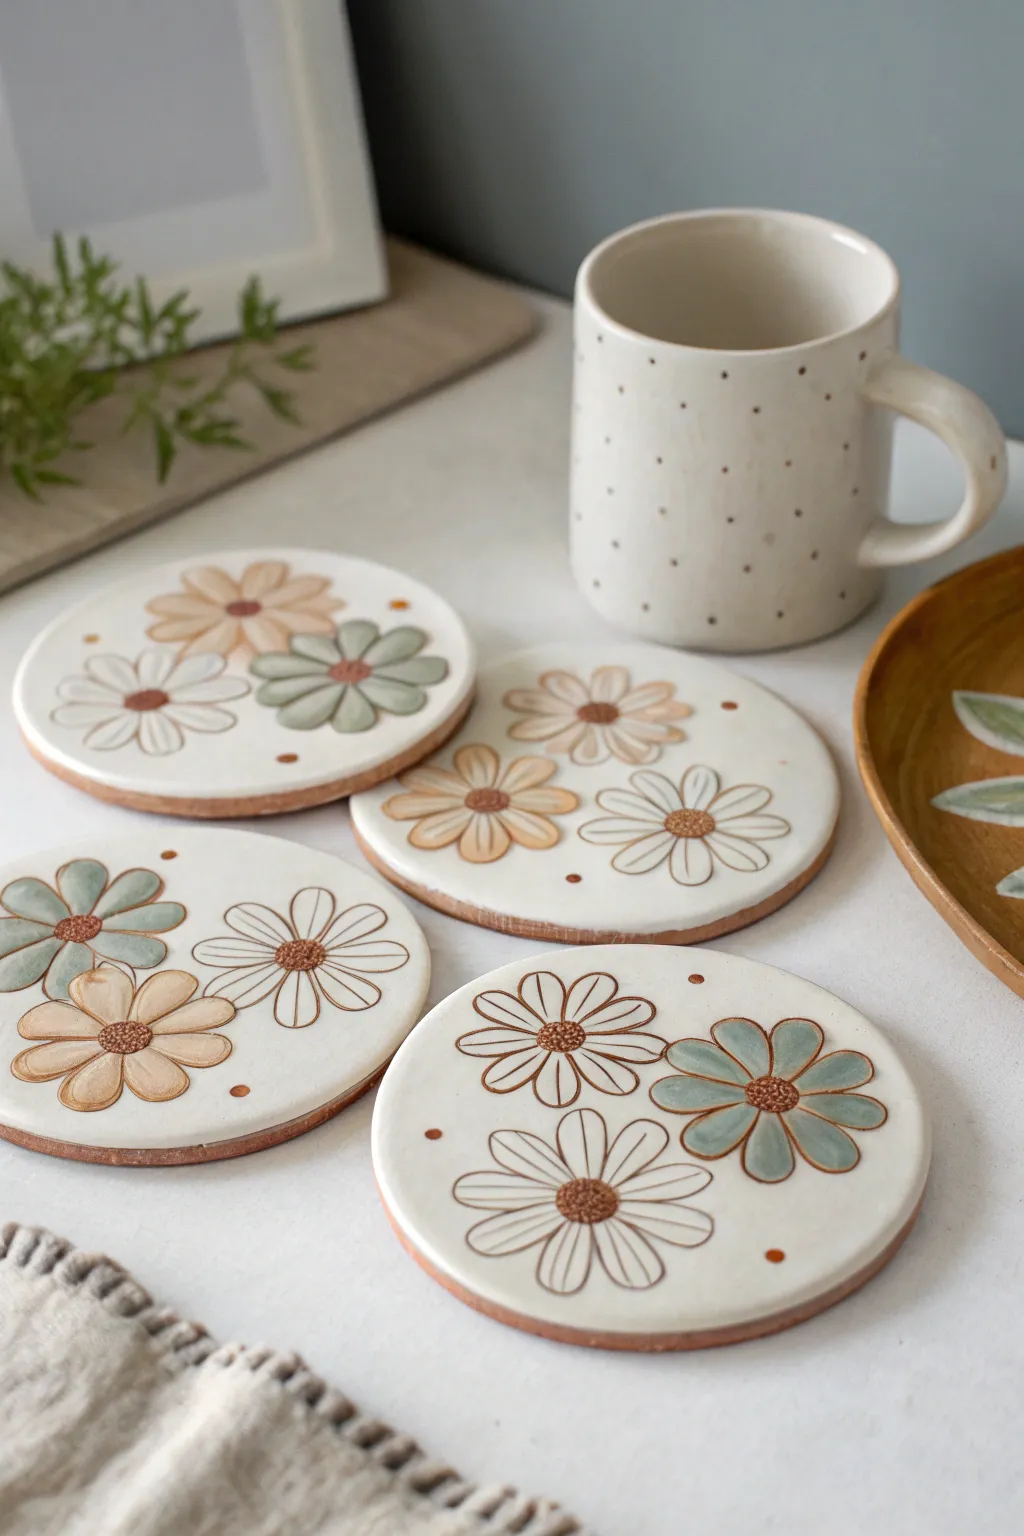
These simple yet elegant coasters bring a touch of earthy charm to your coffee table with their muted pastel daises and glossy finish. The project combines classic air-dry clay techniques with freehand painting for a functional piece of art that looks like custom ceramic ware.
How-To Guide
Materials
- White air-dry clay (approx. 500g)
- Rolling pin
- Circular cookie cutter or jar lid (approx. 4 inches diameter)
- Wooden guide sticks (optional, for even thickness)
- Sandpaper (fine grit)
- Sponge and water
- Acrylic paints (Cream/White, Terracotta, Sage Green, Beige, Dark Brown)
- Fine detail paint brushes
- Water-based varnish or gloss sealant (like Mod Podge or clear acrylic sealer)
- Parchment paper
Step 1: Shaping the Base
-
Prepare your workspace:
Lay down a sheet of parchment paper to prevent sticking. Knead the clay well until it is soft and pliable, ensuring there are no air bubbles trapped inside. -
Roll out the slab:
Place your clay between two wooden guide sticks or simply roll it out carefully to an even thickness of about 1/4 inch (6mm). This thickness is crucial for durability. -
Cut the circles:
Using your circular cutter or a jar lid, press firmly into the clay to cut out four circles. Remove the excess clay from around the shapes. -
Smooth the edges:
Dip your finger in a little water and run it along the cut edges to smooth out any roughness or sharp corners left by the cutter. -
Create the subtle rim:
With a wet finger, gently press down the center area of the circle or pinch up the very edge to create a barely-there raised rim. This catches condensation and adds a professional look. -
Let it dry completely:
Place the coasters on a flat surface to dry for 24-48 hours. I suggest flipping them over halfway through the drying process to prevent curling.
Preventing Curling
Air-dry clay shrinks as water evaporates. To stop edges from curling up, place a light book on top of them (with parchment in between) once they are semi-dry.
Step 2: Refining and Painting
-
Sand for smoothness:
Once fully dry and hard, lightly sand the edges and surface with fine-grit sandpaper to remove any fingerprints or bumps. Wipe away the dust with a slightly damp sponge. -
Apply the base coat:
Paint the entire top surface and rim with a creamy white acrylic paint. You may need two thin coats for opaque coverage, letting the first dry before applying the second. -
Draft the layout:
Lightly sketch three large daisies on each coaster using a pencil. Arrange them so they touch or slightly overlap, varying their orientation. -
Paint the first flower (Beige):
Mix a soft beige or light peach tone. Paint the petals of one flower, keeping the center empty for now. Use quick, teardrop-shaped strokes for a natural petal look. -
Paint the second flower (Sage):
Using a muted sage green, paint the petals of the second flower. Don’t worry if the strokes aren’t perfectly uniform; the handmade feel is part of the charm. -
Paint the third flower (Outline style):
For the third bloom, do not fill in the petals with color. Instead, wait for the outlining step to define it. -
Add the centers:
Using a terracotta or darker brown paint, dab a small, textured circle in the center of all three flowers. Stippling with the brush tip creates a pollen-like texture.
Waterproof Pro Tip
For true water resistance, skip craft varnish and use a two-part resin or a dishwasher-safe sealant like Dishwasher Mod Podge. Regular varnish might get tacky with hot mugs.
Step 3: Detailing and Sealing
-
Outline the designs:
Using a very fine brush and thinned dark brown paint, carefully outline all the petals. This defines the colored flowers and creates the shape of the uncolored ‘outline style’ flower. -
Add detail lines:
Paint a single straight line down the center of each petal to give the flower dimension. Keep your hand steady but relaxed. -
Include decorative dots:
dipping the handle end of a paintbrush into the terracotta or brown paint, add small dots in the empty spaces between flowers to fill out the composition. -
Final drying time:
Allow the paint to cure completely for at least an hour to ensure no moisture is trapped under the sealant. -
Seal the coaster:
Apply 2-3 coats of a high-gloss waterproof varnish or Mod Podge. This step is vital to protect the clay from moisture from mugs.
Stack your finished coasters on the coffee table and enjoy the cozy, handmade vibe they bring to your next tea time


Minimalist Air-Dry Clay Catchall Tray
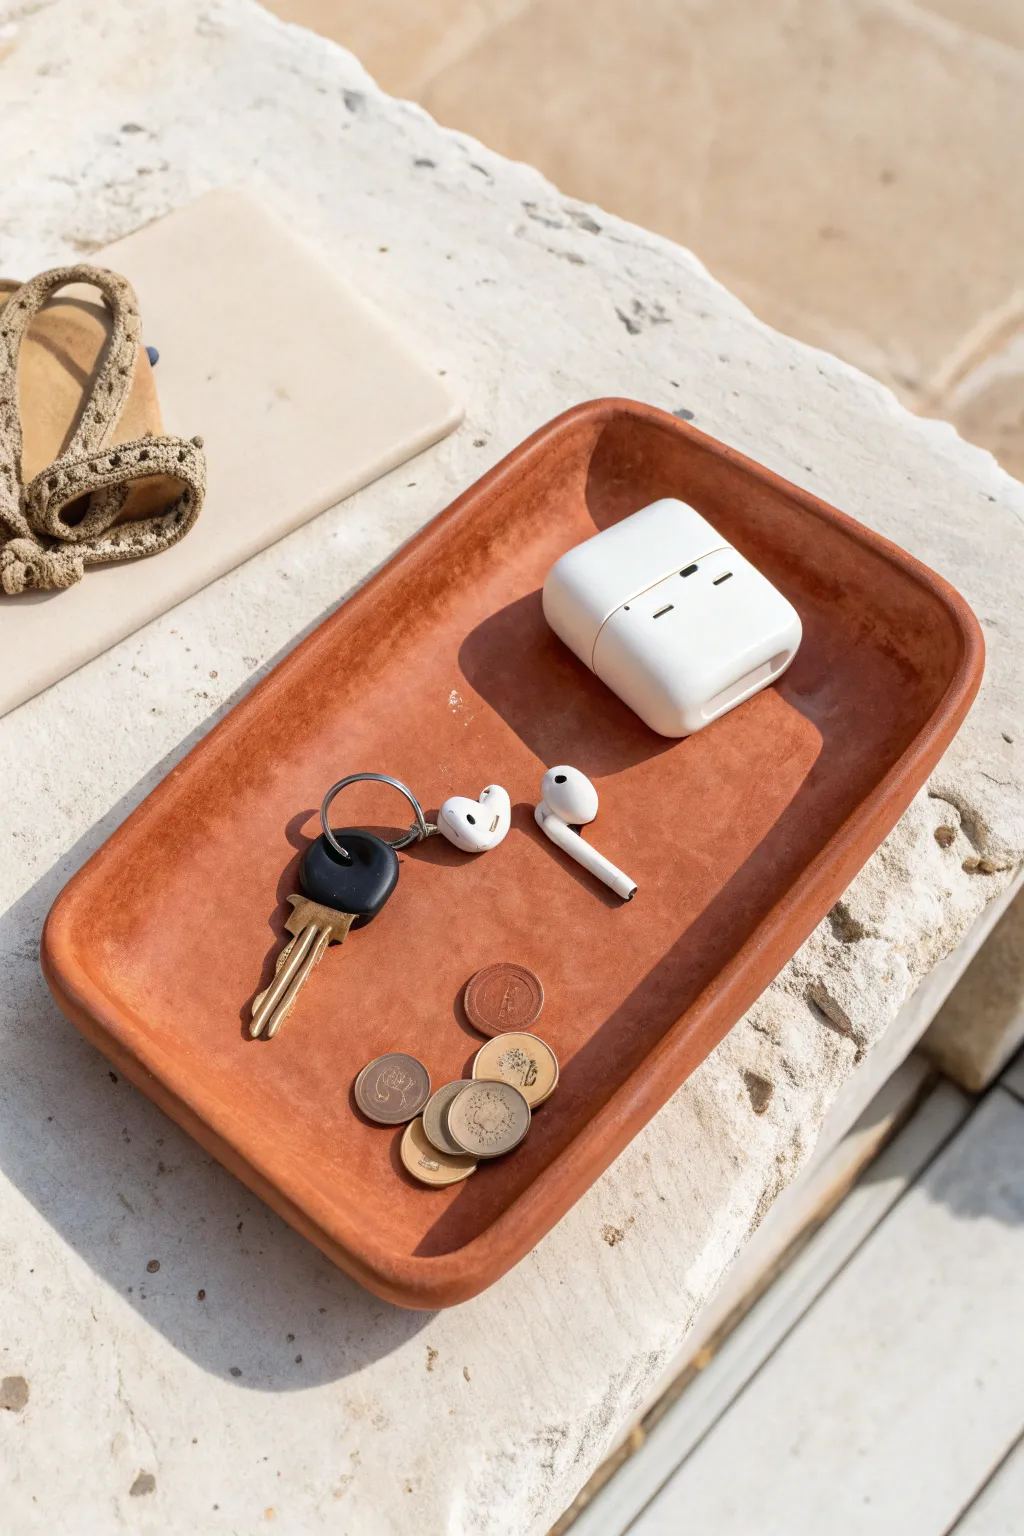
Embrace the warmth of earthy tones with this simple, rectangular catchall tray that keeps your entryway organized in style. It features a smooth, matte finish that mimics the look of fired terracotta without needing a kiln.
Detailed Instructions
Materials
- Air-dry clay (terra cotta color or white)
- Acrylic rolling pin
- Wooden guide strips (1/4 inch thick)
- Craft knife or clay cutter
- Small bowl of water
- Sponge
- Fine-grit sandpaper (220-400 grit)
- Matte acrylic varnish or sealant
- Ruler
Step 1: Shaping the Base
-
Condition the clay:
Begin by kneading a large handful of air-dry clay. Work it in your hands until it feels warm, pliable, and free of any air bubbles. -
Roll out the slab:
Place your wooden guide strips on either side of your clay ball on a smooth work surface. Roll the clay out into an even slab, aiming for about 1/4 inch thickness. -
Cut the rectangle:
Using a ruler and a craft knife, cut a neat rectangle from your slab. A size of roughly 5×8 inches works well for essentials like keys and earbuds. -
Smooth the edges:
Dip your finger in a little water and run it along the cut edges of the rectangle to soften the sharpness and smooth out any crumbs.
Step 2: Building the Rims
-
Create coils:
Roll out long, even snakes of clay, approximately the thickness of a pencil. You will need enough length to go around the entire perimeter of your rectangular base. -
Score and slip:
Use your needle tool or knife to make small hatch marks (scoring) along the outer edge of the base. Dab a small amount of water or clay slurry (slip) onto the scored area. -
Attach the coil:
Place the clay coil on top of the scored edge. Press it down gently but firmly to ensure it adheres to the base without trapping air pockets. -
Blend the inside:
Using a modeling tool or your thumb, drag the clay from the coil down onto the base on the inside of the tray. Smooth the transition until the seam disappears completely. -
Blend the outside:
Repeat the blending process on the outside wall of the tray. I find that supporting the inner wall with one hand while smoothing the outside with the other prevents the wall from collapsing. -
Shape the rim:
Use a damp sponge to smooth the top lip of the rim. Gently press and mold the corners so they are rounded and soft rather than sharp 90-degree angles. -
Initial smoothing:
Do a final pass over the entire tray with a slightly damp sponge to remove fingerprints and ensure the surface is uniform.
Cracking Up?
If small cracks appear while drying, don’t panic. Mix a tiny bit of fresh clay with water to make a paste, fill the crack, let it dry, and sand it smooth
Step 3: Refining and Finishing
-
Let it dry completely:
Place the tray on a wire rack or a piece of cardboard to dry. Depending on humidity, this can take 24 to 48 hours. Flip it halfway through to ensure the bottom dries evenly. -
Sand for perfection:
Once fully dry and hard, use fine-grit sandpaper to buff away any remaining uneven spots, rough edges, or bumps. Wipe away the dust with a dry cloth. -
Color correction (Optional):
If you used white clay, now is the time to paint it. Mix burnt sienna, orange, and a touch of brown acrylic paint to achieve that rich terracotta hue seen in the reference, applying two even coats. -
Seal the piece:
Apply a coat of matte acrylic varnish or sealant. This protects the clay from moisture and gives it a finished, professional look without adding unwanted gloss. -
Final cure:
Allow the sealant to cure according to the bottle instructions before placing any metallic items like keys or coins inside to prevent scratching.
Make It Personal
Before the clay dries, stamp a word, initials, or a small decorative pattern into the center or the bottom of the tray for a customized touch
Now you have a beautifully understated spot to drop your daily essentials

What Really Happens Inside the Kiln
Learn how time and temperature work together inside the kiln to transform clay into durable ceramic.
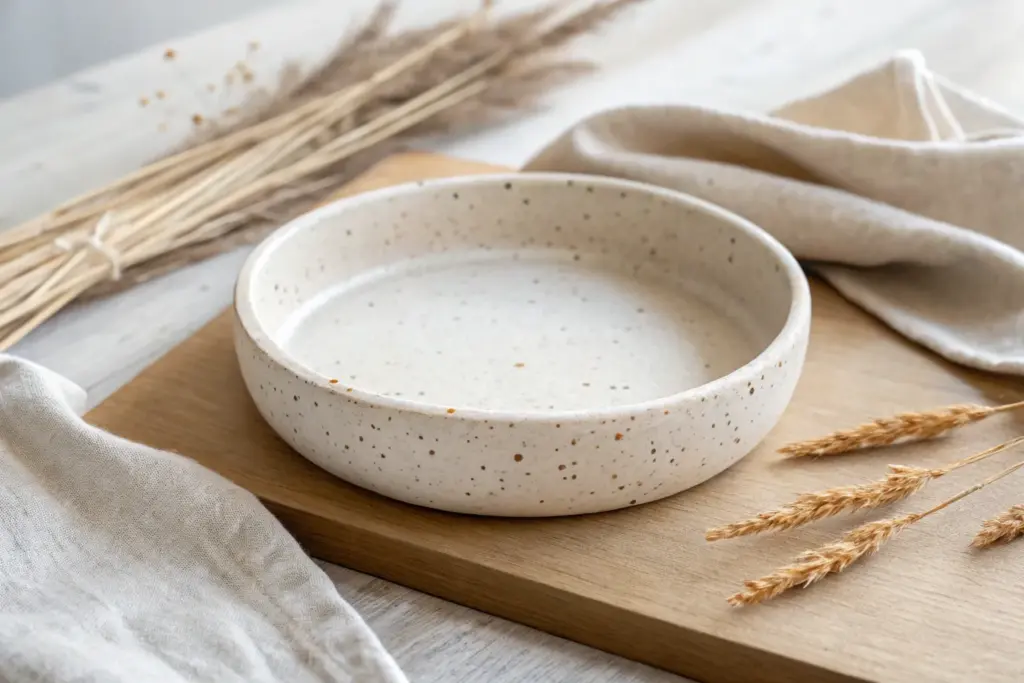
Air-Dry Clay Bud Vases for Dried Stems
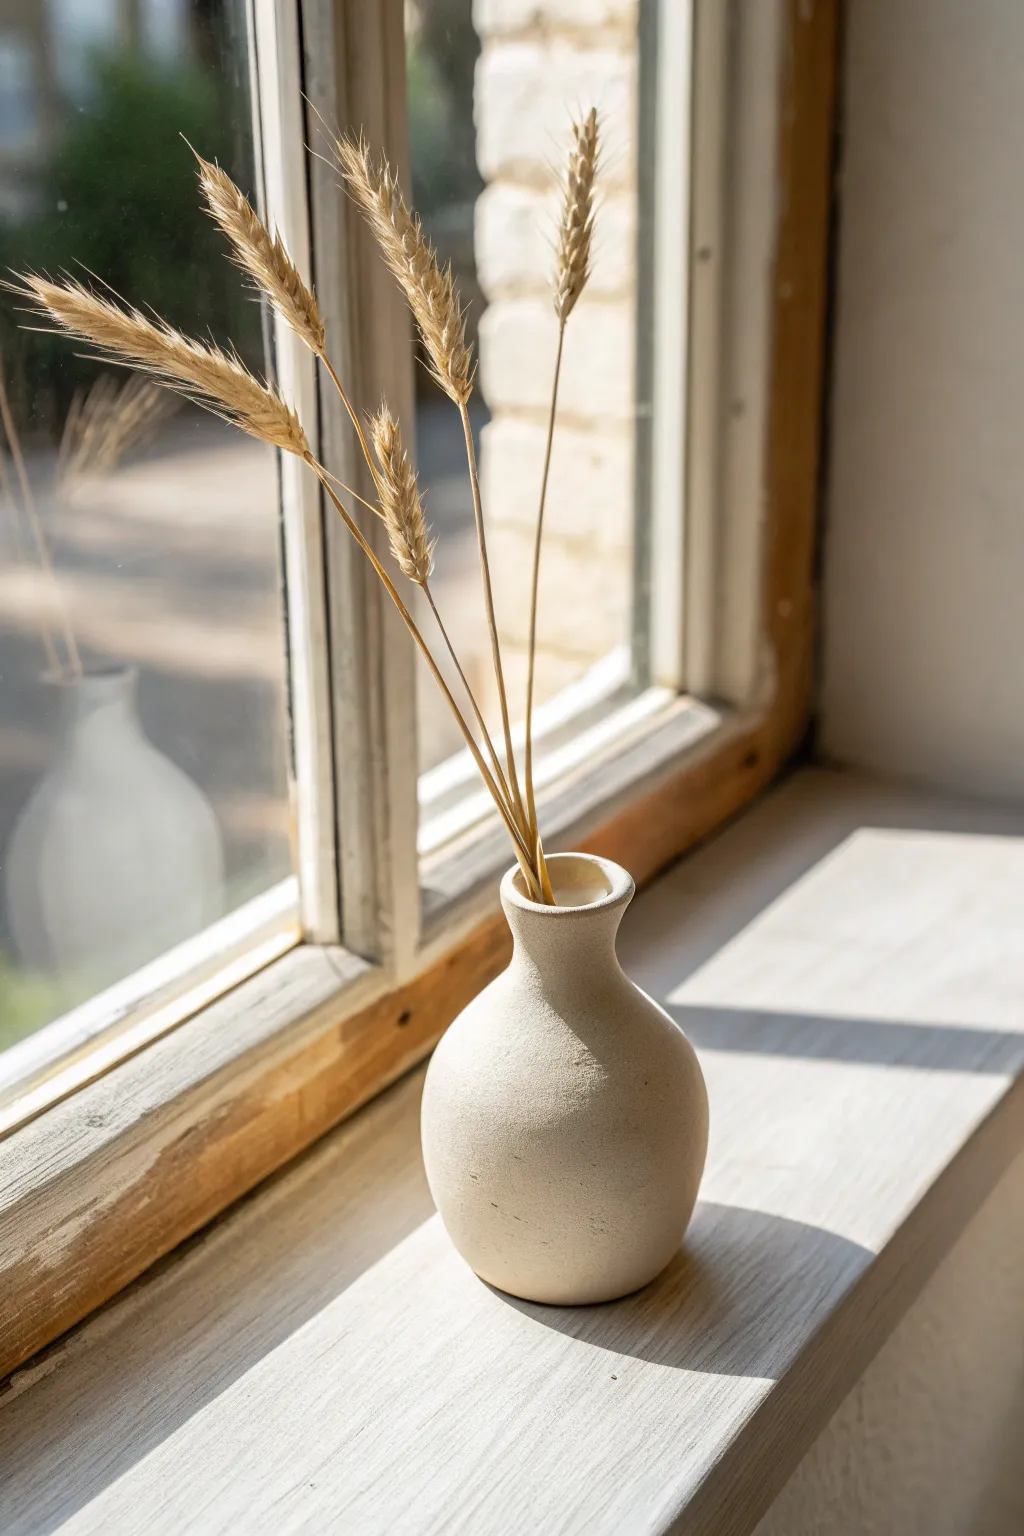
Embrace the beauty of imperfection with this small, textured bud vase, designed specifically to hold delicate dried stems like wheat. Its creamy, raw finish and organic pinch-pot shape bring a touch of warm minimalism to any windowsill.
Step-by-Step Guide
Materials
- White or natural air-dry clay (stone effect optional)
- Small cup of water
- Sponge
- Modeling tools or a butter knife
- Sandpaper (fine grit)
- Clear matte varnish or sealant (optional)
- Dried wheat or flower stems
Step 1: Forming the Base
-
Prepare the clay:
Start with a ball of clay roughly the size of a tangerine. Keep your hands slightly damp to prevent cracking, but avoid soaking the clay. -
Open the center:
Hold the ball in your non-dominant hand. Press your thumb into the center of the ball, stopping about half an inch from the bottom to create a solid base. -
Begin pinching:
Using your thumb on the inside and fingers on the outside, gently pinch and rotate the clay. Work from the bottom upward to thin out the walls evenly. -
Shape the belly:
Push the clay slightly outward from the inside as you work up the middle section. This creates the rounded, bulbous belly of the vase shown in the photo. -
Check symmetry:
Set the pot on a flat surface and rotate it. Tap the bottom gently against the table to flatten it so the vase stands securely without wobbling.
Natural Speckles
Mix dried coffee grounds or black pepper into your wet clay before shaping. This recreates the speckled, stone-like texture seen in the photo perfectly.
Step 2: Refining the Neck
-
Collar the top:
As you reach the top third of the vase, change your motion. Instead of pinching outward, gently squeeze the clay inward to narrow the opening. -
Smooth the transition:
Use your thumb to smooth the exterior clay where the belly transitions into the neck. Aim for a gentle curve rather than a sharp angle. -
Extend the height:
If you need more height for the neck, you can add a small coil of clay to the rim. Score and slip the connection, then blend the clay downwards seamlessly. -
Flare the rim:
Once the neck is narrow enough to support a few stems, gently press your thumb against the very top edge to flare it out slightly, creating a soft lip.
Step 3: Finishing Touches
-
Smooth the surface:
Dip a sponge in a little water and run it over the entire exterior. This removes fingerprints and creates that matte, unified look. -
Create texture:
For the specific stone-like texture seen in the image, I like to dab the semi-wet clay with a dry, coarse sponge or a crumpled ball of foil. -
Let it dry:
Place the vase in a cool, dry spot away from direct sunlight. Let it dry slowly for 24-48 hours. Rotate it occasionally so the bottom dries evenly. -
Sand imperfections:
Once completely bone dry and white, use fine-grit sandpaper to gently smooth any sharp edges on the rim or rough patches on the bottom. -
Dust off:
Wipe away all sanding dust with a dry cloth or soft brush to reveal the pure clay color. -
Seal (Optional):
To protect against humidity, apply a thin coat of matte varnish. This vase is for dried flowers only, so it doesn’t need to be waterproof. -
Arrangement:
Place three to five stems of dried wheat or grasses into the opening, letting them fan out naturally.
Cracks Appearing?
If you see hairline cracks while drying, make a thick paste of clay and water (slip) and fill them in immediately, then smooth over with a damp finger.
Place your finished vase in the sunlight to admire the natural shadows on your handmade form
Small Air-Dry Clay Succulent Planters
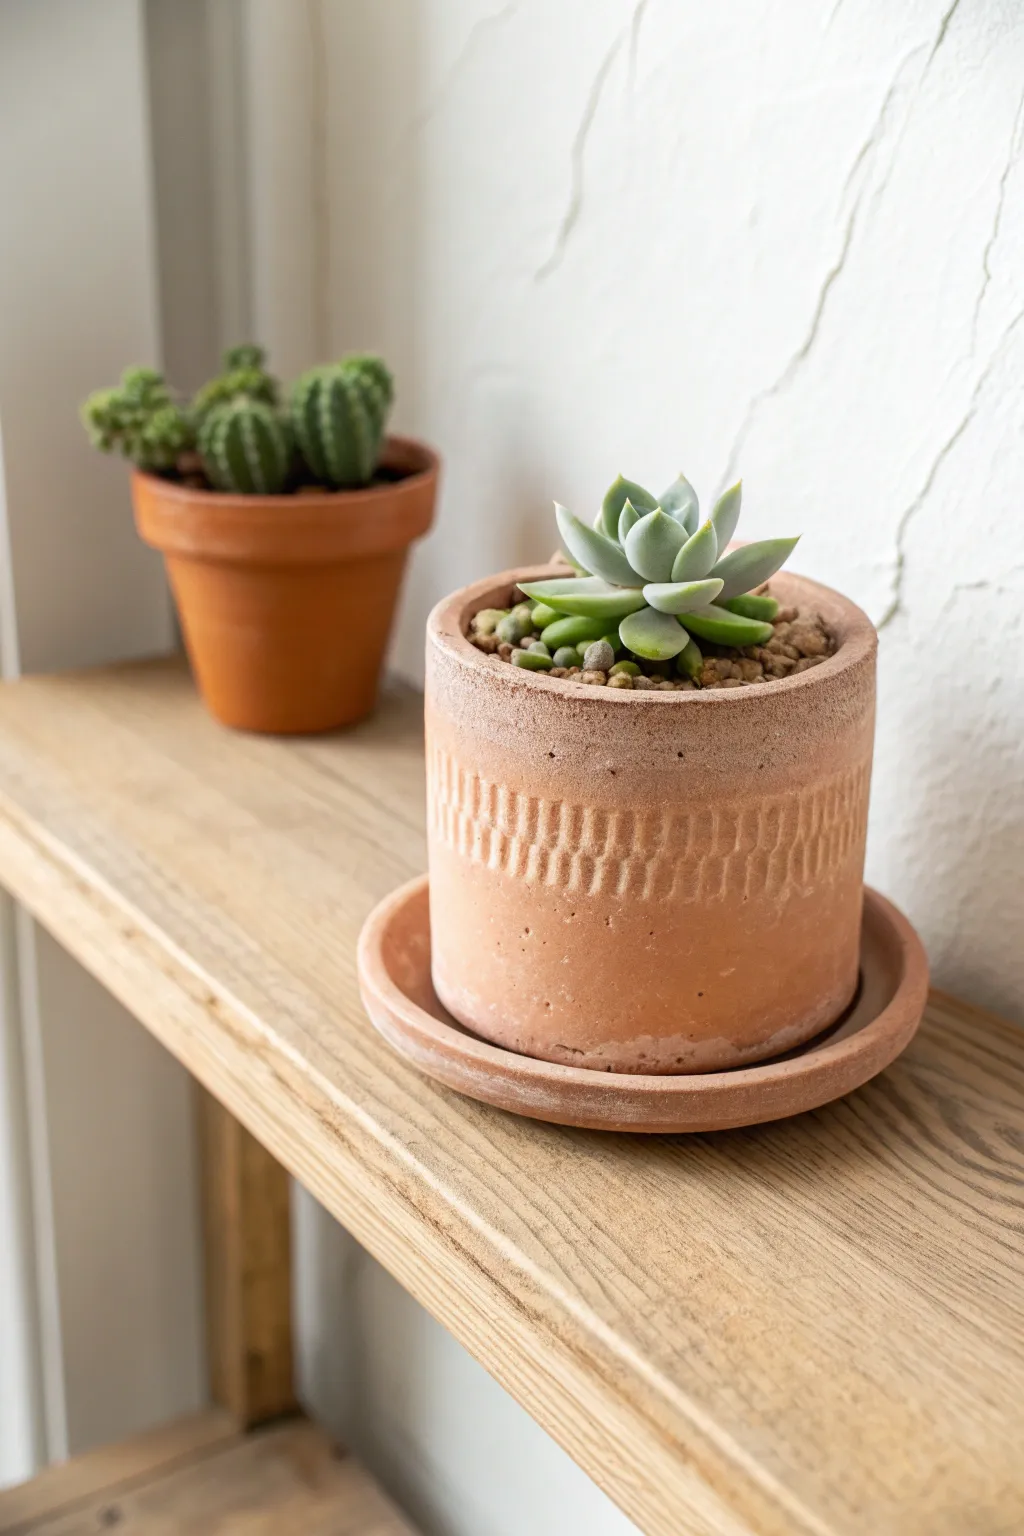
Recreate the rustic charm of fired terracotta without a kiln using this satisfying air-dry clay project. This petite cylinder planter features a delightful band of vertical grooves, giving it an artisanal look perfect for showcasing small succulents.
Step-by-Step Tutorial
Materials
- Terracotta-colored air-dry clay (or white clay + terracotta acrylic paint)
- Small rolling pin
- Circle cutter or template (approx. 3-inch diameter)
- Craft knife or clay trimming tool
- Texture tool (small sculpting spatula or back of a butter knife)
- Small bowl of water
- Sanding sponge (fine grit)
- Matte varnish or sealant
- Optional: Cardboard tube for shaping
Step 1: Forming the Base and Walls
-
Roll the slab:
Begin by rolling out your clay to an even thickness of about 1/4 inch. If you are using white clay, realize you will need to paint it later, but using pre-colored terracotta clay saves that step. -
Cut the base:
Use your circle cutter or a jar lid to cut a perfect circle for the bottom of the pot. Set this aside on a piece of parchment paper. -
Measure the wall:
Cut a long rectangular strip from the remaining slab within your rolled clay. The length should be equal to the circumference of your base, plus a little overlap, and the height should be roughly 3 to 4 inches. -
Join the seam:
Wrap the rectangular strip into a cylinder shape. Score (scratch) the edges where they meet, apply a little water, and press them firmly together to create a seamless cylinder. -
Attach to base:
Score the bottom edge of your cylinder and the outer edge of your circular base. Join them together, using your thumb to smooth the clay from the wall down onto the base for a strong seal.
Wrap It Up
To get a perfectly round cylinder, wrap your clay rectangle around a cardboard tube or soda can covered in parchment paper while forming. Remove it carefully before drying.
Step 2: Texturing and Refining
-
Smooth the exterior:
Dip your finger in water and smooth out the exterior surface. You want the main body to look clean, but a few subtle imperfections add to that handmade stone look. -
Create the texture band:
Identify where you want your textured band to be—about midway down the pot works well. Using a sculpting tool or the blunt edge of a knife, gently press vertical indentations into the clay. -
Repeat the pattern:
Continue pressing these indentations all the way around the circumference. Try to keep them evenly spaced and roughly the same height, creating a ‘chattered’ effect. -
Refine the rim:
Check the top rim of your pot. I like to gently tap it upside down on the table to flatten it slightly, ensuring a nice even lip. -
Create the saucer:
Roll out a small amount of extra clay and cut a circle slightly larger than your pot base. Gently curse the edges upward to create a shallow saucer dish. -
Initial dry:
Let both the pot and saucer sit in a cool, dry place away from direct sunlight. To prevent warping, cover them loosely with a plastic bag for the first 12 hours.
Crack Control
If small cracks appear during drying, make a ‘slip’ paste mixture of clay and water. Fill the cracks with this paste, smooth it over, and let it dry again slowly.
Step 3: Finishing Touches
-
Sand the surface:
Once completely dry (usually 24-48 hours), gently sand the smooth parts of the pot to remove any sharp ridges or fingerprints. Avoid sanding down your beautiful texture band. -
Create the speckled look:
If your clay is plain, mix a tiny amount of brown or black paint with water. Dip an old toothbrush in it and flick the bristles to spatter tiny specks onto the pot, mimicking real stone. -
Seal the interior:
This step is crucial for planters. Apply two coats of waterproof varnish or sealant to the *inside* of the pot to protect the clay from moisture during watering. -
Seal the exterior:
Apply a matte sealant to the outside. A matte finish is better here to maintain that raw, earthy terracotta aesthetic. -
Fill and display:
Once the sealant is cured, add your soil and succulent. Don’t forget to use the saucer underneath to catch any drips.
Now you have a charming, water-safe home for your favorite succulent that brings a touch of nature indoors


The Complete Guide to Pottery Troubleshooting
Uncover the most common ceramic mistakes—from cracking clay to failed glazes—and learn how to fix them fast.
Modern Arch Air-Dry Clay Incense Holders
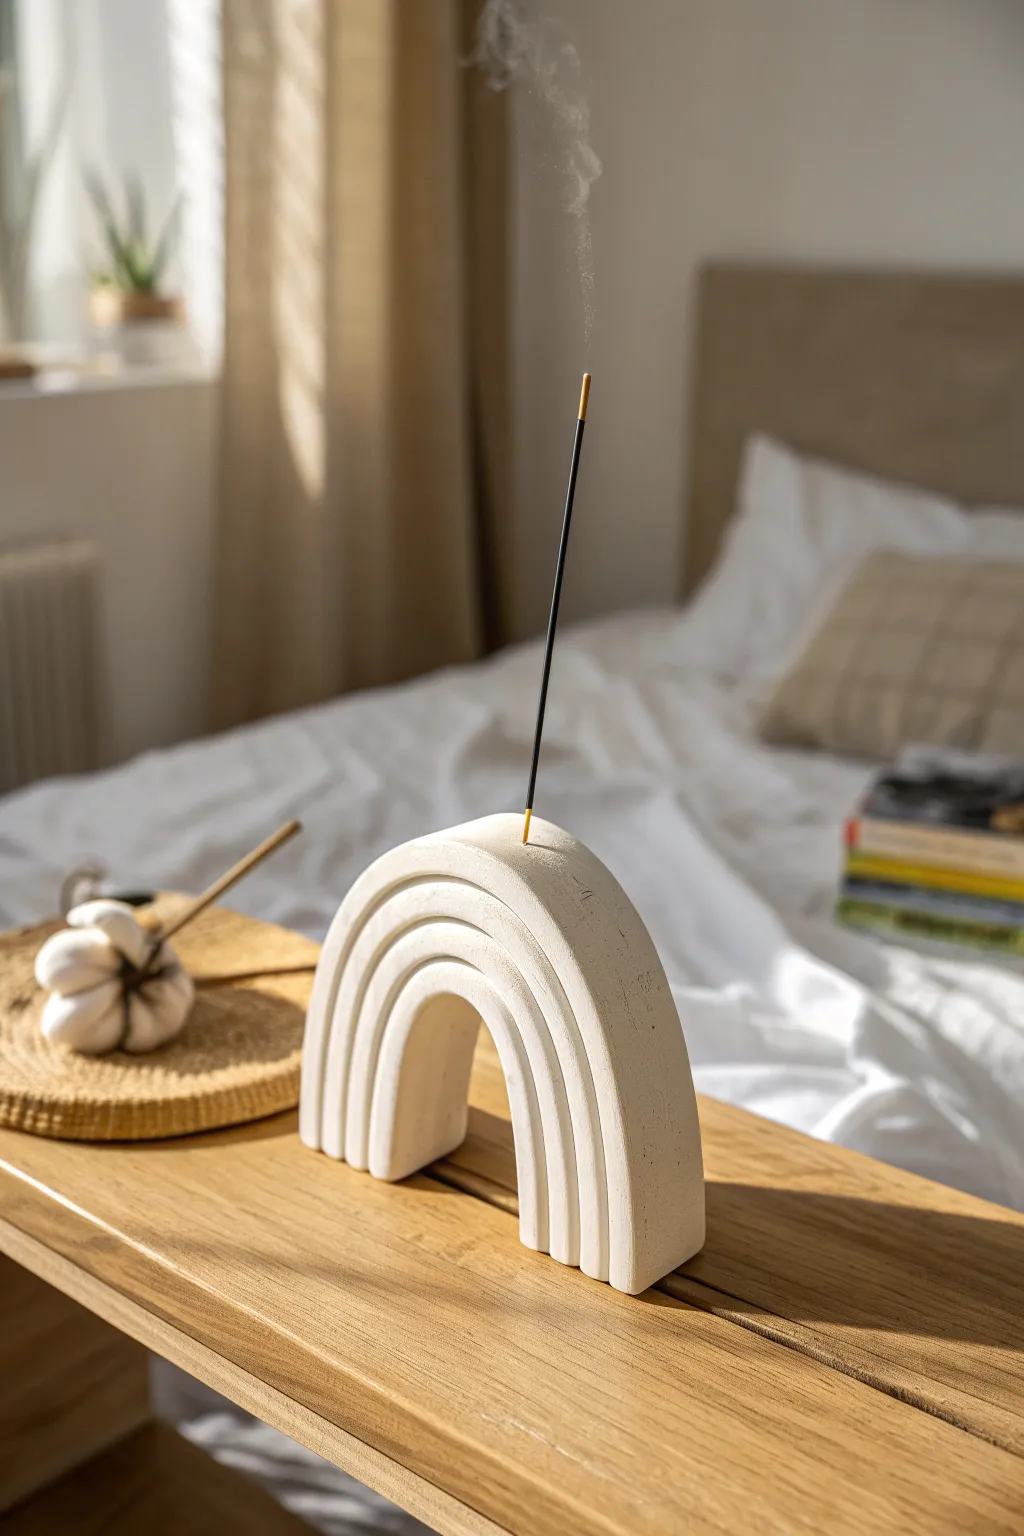
Bring a sense of calm to your space with this layered, rainbow-arch incense holder. The modern, unglazed finish highlights the natural texture of the clay, creating a sculptural piece that is both functional and decorative.
Step-by-Step
Materials
- White or sandstone air-dry clay
- Rolling pin
- Sharp craft knife or clay slicing tool
- Ruler
- Small bowl or water cup
- Incense stick (for sizing)
- Fine-grit sandpaper (220-400 grit)
- Cardboard or parchment paper
Step 1: Preparing the Clay Slabs
-
Condition the Clay:
Begin by taking a substantial chunk of air-dry clay and kneading it in your hands until it becomes soft, pliable, and free of air bubbles. -
Rest the Clay:
I like to let the kneaded clay sit covered with a damp cloth for about five minutes to ensure the moisture is evenly distributed before rolling. -
Roll Out the Slab:
Place your clay on a piece of parchment paper or a canvas mat. Use your rolling pin to flatten it into an even slab, aiming for a consistent thickness of about 1/4 inch (6mm) to 1/3 inch (8mm). -
Check Consistency:
Run your fingers lightly over the surface to check for any dips or mounds. Use the rolling pin again lightly to correct uneven areas, as consistent thickness is key for the stacked look.
Clean Lines Hack
To get super crisp edges without sanding forever later, wipe your craft knife blade with a damp sponge after every single cut you make through the clay.
Step 2: Cutting the Arches
-
Create a Template:
Sketch a simple U-shaped arch on a piece of cardstock to serve as your master guide. This largest arch will determine the overall height of your holder. -
Cut the First Arch:
Place the template on your clay slab. Using a sharp craft knife held vertically, carefully trace around the template to cut out your first, largest arch. -
Cut Subsequent Arches:
For the layered effect, you need multiple identical arches. Move your template to a fresh section of the slab and cut out 4 to 5 more arches of the exact same size. -
Smooth the Edges:
Before assembling, dip your finger in a little water and gently run it along the cut edges of each arch piece to remove any jagged clay crumbs.
Cracking Issues?
If small cracks appear while drying, mix a tiny bit of fresh clay with water to make a paste and fill them in. Smooth with a wet finger and let dry again.
Step 3: Assembling the Form
-
Score the Surfaces:
Take your first arch and lay it flat. Use your knife or a needle tool to scratch cross-hatch marks (scoring) onto one face. Do the same to the face of the second arch that will attach to it. -
Apply Slip:
Dab a small amount of water or liquid clay (slip) onto the scored areas. This acts as the glue that bonds the layers together strongly. -
Stack the Layers:
Press the two scored faces together firmly but gently, ensuring the edges align perfectly. Repeat the score-and-slip process for all remaining arches until you have a thick, solid block. -
Blend the Seams (Optional):
If you want a seamless look, you can smear clay across the join lines. However, for the specific style in the image, keep the seams visible to emphasize the layered, ribbed texture.
Step 4: Adding Functionality & Finishing
-
Create the Incense Hole:
While the clay is still wet, carefully push the wooden end of an incense stick into the very top center of the arch. Wiggle it slightly to make the hole just a hair larger than the stick to account for shrinkage. -
Initial Drying:
Stand the arch upright on a piece of parchment paper in a cool, dry place away from direct sunlight. Rotate it every few hours for the first day to encourage even drying. -
Full Cure:
Let the piece dry completely for 24 to 48 hours. The clay will turn a lighter white or bone color and feel hard to the touch when ready. -
Sanding:
Once bone dry, take your fine-grit sandpaper and gently buff the flat faces and rounded top. Focus on softening any sharp corners while maintaining the distinct ribbed profile. -
Dusting Off:
Use a dry, soft brush or a tack cloth to wipe away all the sanding dust to reveal the clean, matte finish.
Place your favorite incense stick in the top and enjoy the serene atmosphere created by your handmade scupture
Chunky Air-Dry Clay Candle Holders
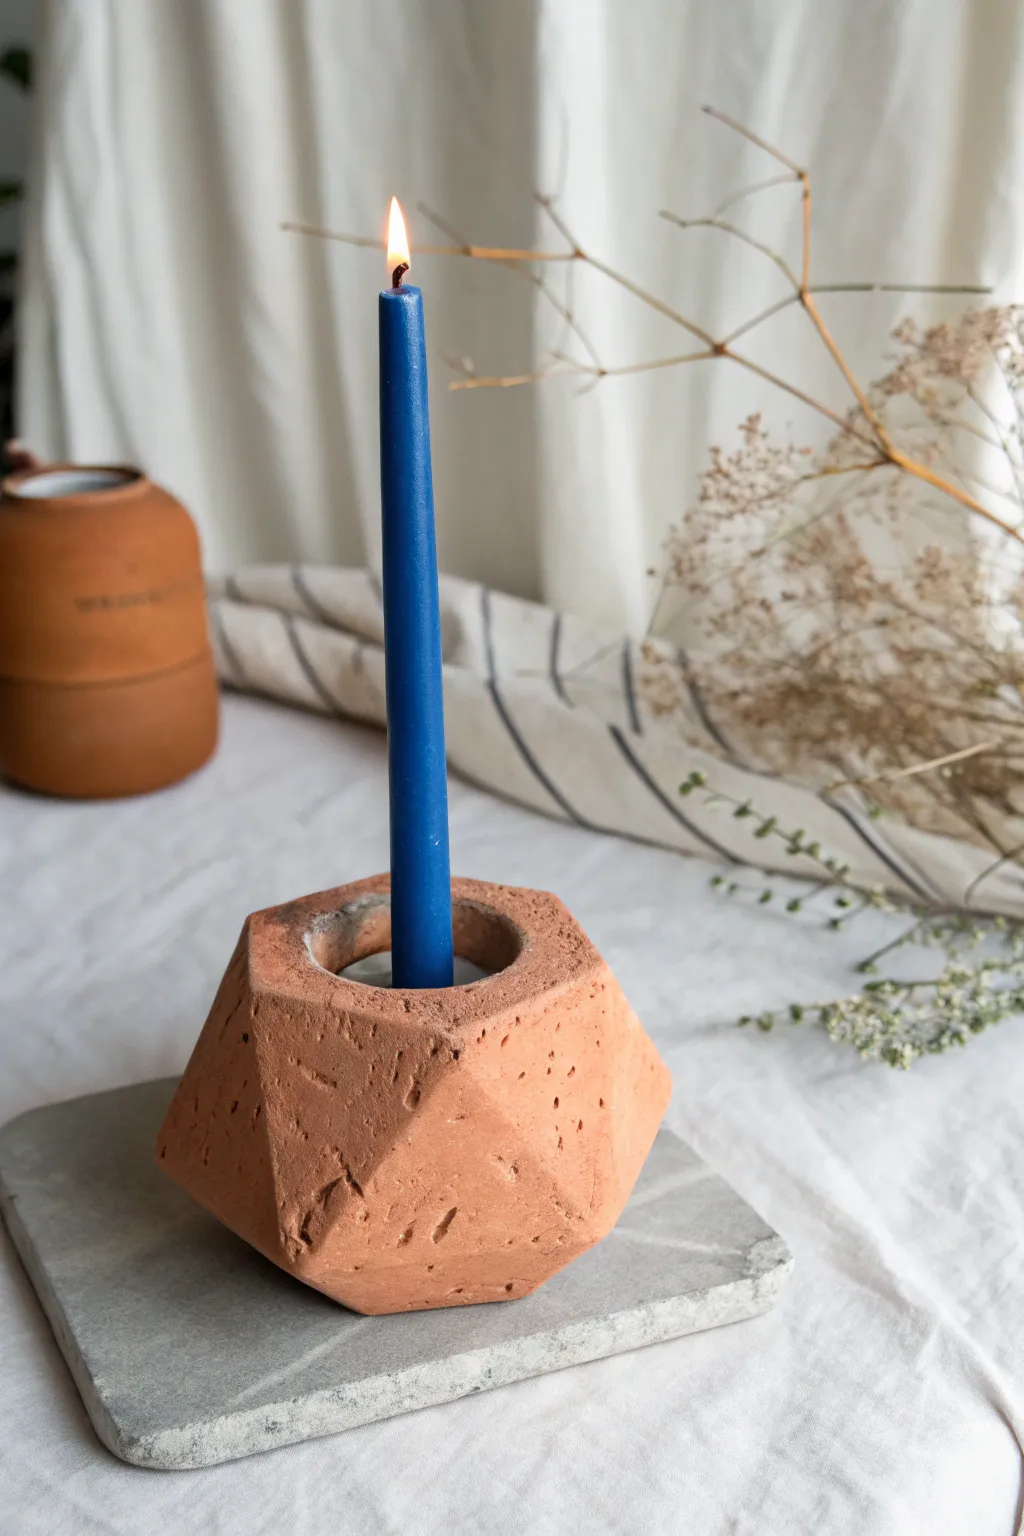
Bring an earthy warmth to your table setting with this robust, geometric candle holder that celebrates the raw beauty of terracotta. Its faceted, gem-like shape provides a modern contrast to the organic texture of the clay.
How-To Guide
Materials
- Terracotta air-dry clay (approximately 500g)
- Taper candle (to size the hole)
- Sharp crafting knife or clay wire
- Rolling pin
- Small bowl of water
- Sponge
- Parchment paper or texture mat
- Craft ruler (optional)
- Fine-grit sandpaper
Step 1: Shaping the Base
-
Prepare your clay:
Start with a generous handful of terracotta air-dry clay. Knead it thoroughly in your hands to warm it up and remove any trapped air bubbles, which helps prevent cracks later. -
Form a ball:
Roll the kneaded clay into a tight, smooth sphere. You want a solid mass without major seams, roughly the size of a large orange or a grapefruit depending on how chunky you want the final piece. -
Flatten the bottom:
Place the ball onto your parchment paper. Gently press it down against the table to create a flat, stable base so the holder won’t wobble. -
Flatten the top:
Using your palm or a flat tool, press the top of the sphere down to create a flat plateau. This is where your candle will eventually sit.
Shrinkage Hack
Wrap the bottom of your test candle in a layer of cling film before pressing it in. Leave the candle in place for the first hour of drying to maintain the shape.
Step 2: Carving the Facets
-
Initial cuts:
Take your sharp crafting knife or clay wire. Slice off a section of the rounded side at an angle to create your first flat facet. Don’t worry about being perfectly symmetrical; the charm lies in the irregularity. -
Create the geometry:
Rotate the clay and continue slicing off facets around the entire circumference. Vary the angles slightly so some planes face upward and some face outward. -
Refine the edges:
Go back around the shape and clean up any ragged edges where your cuts meet. You can use a damp finger to smooth tiny imperfections, but try to keep the sharp geometric lines intact. -
Check the silhouette:
Step back and look at the holder from eye level. Ensure it still looks balanced and substantial, making additional small cuts if one side looks too heavy.
Step 3: Finalizing the Details
-
Create the candle well:
Take your taper candle and gently press the base into the center of the flat top section. Twist it slightly back and forth to work it down about an inch into the clay. -
Widen the opening:
Remove the candle. Because air-dry clay shrinks as it dries, you need to widen this hole slightly. Use your finger or a carving tool to expand the diameter by just a millimeter or two. -
Smooth the lip:
Dip your finger in a little water and run it around the rim of the candle hole to smooth out any cracks that formed during the pressing process. -
Add texture (optional):
If you like the rustic, pitted look seen in the photo, you can use a stiff bristle brush or a crumpled ball of foil to tap texture onto specific facets. -
Initial drying:
Let the piece sit undisturbed for 24 hours. I usually cover mine loosely with plastic wrap for the first night to slow drying and prevent cracking. -
Full cure:
Remove the plastic and let it air dry for another 24-48 hours until the clay lightens in color and feels hard to the touch. -
Sanding:
Once fully dry, take fine-grit sandpaper and lightly sand the sharpest corners if they feel too jagged, or leave them raw for an industrial feel.
Level Up: Color Wash
Dilute white acrylic paint with water (1:1 ratio) and brush it over the dried clay. Before it dries, wipe it back with a rag to leave white pigment in the textures.
Enjoy the glowing ambiance of your handmade faceted masterpiece

TRACK YOUR CERAMIC JOURNEY
Capture glaze tests, firing details, and creative progress—all in one simple printable. Make your projects easier to repeat and improve.
Air-Dry Clay Desk Organizers and Pencil Cups
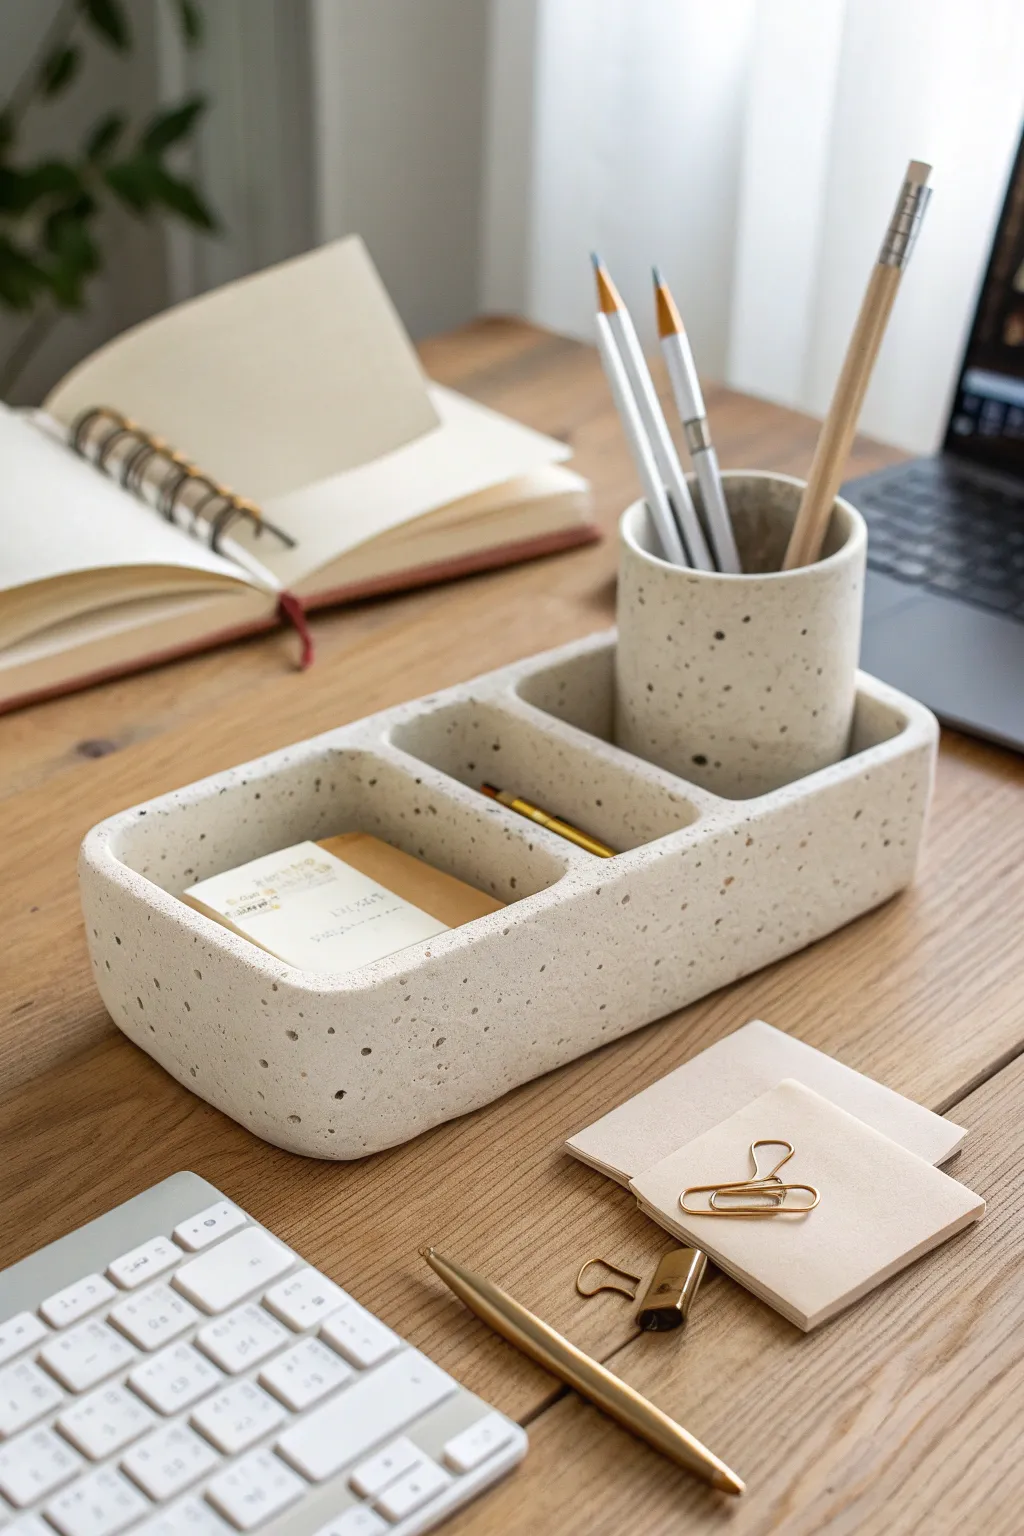
Elevate your workspace with this sleek, minimalist desk organizer that mimics the look of high-end speckled stoneware. Featuring a partitioned base tray and a matching removable pencil cup, this functional piece brings a touch of modern calm to any desk.
Step-by-Step
Materials
- White or light grey air-dry clay (approx. 1kg)
- Rolling pin
- Clay knife or craft scalpel
- Ruler
- Cardboard or cardstock (for making templates)
- Water in a small bowl
- Sponge or small brush for smoothing
- Course black pepper or dried used coffee grounds
- Sandpaper (medium and fine grit)
- Matte sealant or varnish
Step 1: Preparation & Texturing
-
Create the speckled mix:
Before rolling out your clay, take a large chunk and knead in a generous pinch of coarse black pepper or dried coffee grounds. This creates the faux-stone speckled texture seen in the photo without needing paint later. -
Roll the base slab:
Roll out a large slab of your textured clay to a consistent thickness of about 5mm. This will serve as the floor for your organizer.
Step 2: Constructing the Main Tray
-
Cut the base:
Using a ruler and knife, cut a rectangle approximately 25cm by 10cm. I always round the corners slightly with my fingertips now to match the soft, organic look of the finished piece. -
Prepare the walls:
Roll out more clay and cut long strips for the outer walls, keeping them about 4cm high. You will need enough length to wrap around the entire perimeter. -
Score and slip:
Score (scratch) the edges of your base and the bottom of your wall strips. Apply a little water or liquid clay (slip) to act as glue. -
Attach the outer walls:
Press the wall strips firmly onto the base. Where the ends meet, blend the clay together smoothly on both the inside and outside so the seam disappears. -
Reinforce the seams:
Roll a very thin snake of clay and press it into the bottom inside corner where the wall meets the floor. Smooth this out with a damp finger to ensure a watertight bond. -
Add the dividers:
Cut two shorter strips of clay to fit across the width of the tray. Place them to create three equal-sized compartments, using the score and slip method to secure them to the floor and side walls. -
Smooth the rims:
Dip your finger in water and run it along the top edges of the walls and dividers to soften them. The goal is a rounded, soft edge rather than a sharp, machined one.
Natural Texture Hack
Mix dried tea leaves or sand into your clay instead of pepper for different stone effects. The ‘inclusions’ create depth that paint alone can’t mimic.
Step 3: Crafting the Pencil Cup
-
Form the cup base:
Cut a circle of rolled clay that is slightly smaller than one of your tray compartments. This ensures the cup will nestle inside comfortably. -
Create the cylinder wall:
Cut a rectangular strip of clay. The length should be the circumference of your base circle, and the height should be taller than the tray walls—around 9-10cm. -
Assemble the cylinder:
wrap the strip around the circular base, scoring and slipping the contact points. Blend the vertical seam carefully so the cup looks seamless. -
Check the fit:
Gently place the cup into one of the tray compartments to ensure it fits. Do not leave it there to dry, or it might get stuck; remove it once you’ve confirmed the size.
Cracking Issues?
If small cracks appear while drying, mix a tiny amount of clay with water to make a thick paste (slip) and fill the cracks, then sand smooth once dry.
Step 4: Refining & Finishing
-
Initial drying phase:
Let both pieces dry slowly away from direct sunlight for 24-48 hours. Turn them occasionally if possible to prevent warping. -
Sanding for perfection:
Once bone dry, use medium-grit sandpaper to level out any uneven bumps on the walls. Follow up with fine-grit sandpaper for a buttery smooth finish. -
dust removal:
Wipe the entire piece down with a slightly damp cloth or a dry tack cloth to remove all sanding dust. -
Sealing the surface:
Apply a coat of matte varnish or sealant. This protects the clay and seals in the pepper/coffee grounds so they do not mold or flake off. -
Final cure:
Allow the varnish to dry completely according to the manufacturer’s instructions before placing your stationery inside.
Enjoy the satisfaction of organizing your desk with a piece that looks like custom ceramic ware
Wall-Hanging Air-Dry Clay Air Plant Pockets
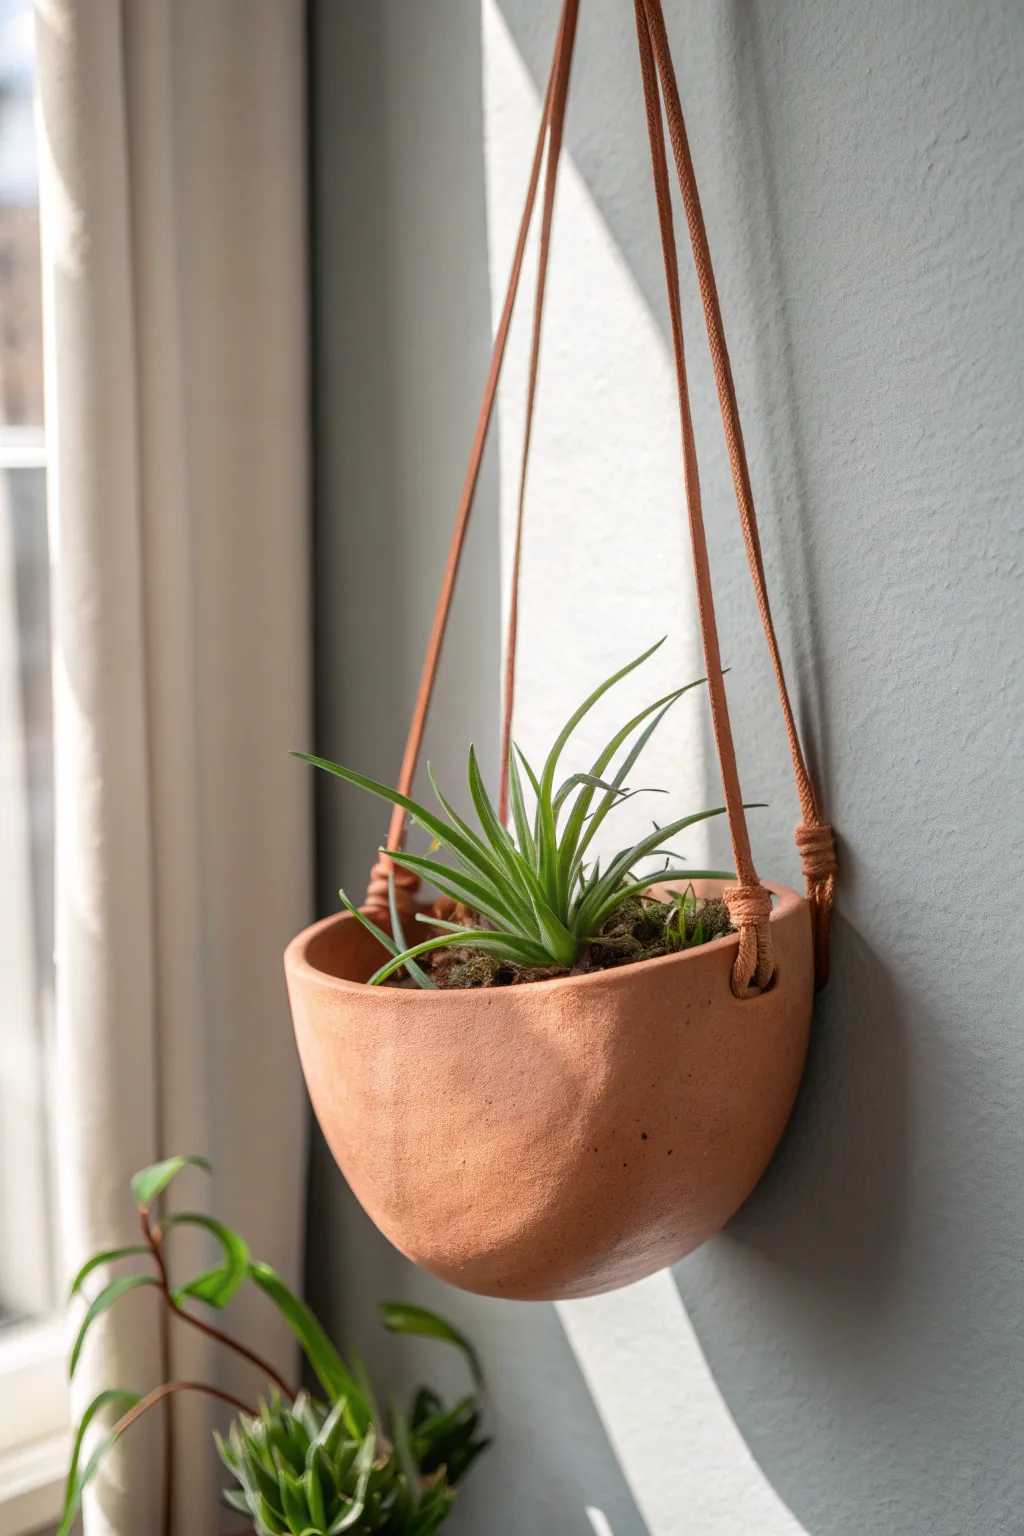
Bring a touch of desert warmth to your vertical spaces with this earthy, wall-mounted air plant pocket. Crafted to mimic the organic texture of natural stone, this faux-terracotta vessel cradles your greenery in a simple yet striking suspension system.
Step-by-Step Guide
Materials
- Air-dry clay (white or natural earth tone)
- Faux-terracotta acrylic paint (or burnt sienna mixed with a little orange)
- Leather or suede cord (approx. 2mm thick)
- Rolling pin
- Bowl (small, approx. 4-5 inches diameter) to use as a mold
- Plastic wrap
- Craft knife or clay tool
- Drinking straw or skewer
- Fine-grit sandpaper
- Matte sealant spray or Mod Podge
- Moss and air plants for styling
Step 1: Shaping the Vessel
-
Preparation:
Begin by covering the outside of your small bowl with plastic wrap. This will act as your mold and prevent the clay from sticking, ensuring an easy release later. -
Roll the clay:
Take a generous handful of air-dry clay and condition it by kneading slightly. Roll it out on a flat surface until it is about 1/4 inch thick. You want it substantial enough to be sturdy but not too heavy. -
Form the shape:
Drape the rolled slab over the plastic-covered bowl. Gently press the clay against the bowl’s curve, smoothing it down with your palms. -
Trim the edge:
Using a craft knife, trim the excess clay around the rim of the bowl to create a clean, even edge. If you want the organic look from the photo, don’t worry about making it perfectly level; a slight wave adds character. -
Create the flat back:
Since this hangs against a wall, slice off a portion of the rounded clay ‘dome’ to create a flat back surface. Alternatively, simply press the rounded form against a flat board while the clay is still soft to flatten one side. -
Remove from mold:
Once the basic shape is established but the clay is still workable, carefully lift the clay form off the bowl. The plastic wrap should help it slide right off. -
Refine the surface:
Dip your finger in a little water and smooth out any harsh cracks or fingerprints. For that textured look in the reference, you can gently pat the surface with a crumpled ball of aluminum foil or a stiff brush.
Natural Texture Hack
Mix a teaspoon of baking soda into your acrylic paint before applying. It creates a fluffy, gritty texture that mimics real aged terra cotta perfectly.
Step 2: Adding Hardware Holes
-
Mark the spots:
Identify where the hanging cords will attach. You need two holes on opposite sides of the rim, roughly centered on the rounded front section. -
Pierce holes:
Use a drinking straw or a thick skewer to punch clean holes through the clay. Make sure these are about a half-inch below the rim so the clay doesn’t crack under weight later. -
Add drainage (optional):
If you plan to mist your plants heavily, add a small hole at the very bottom. However, for air plants, a solid bottom is usually safer for your walls.
Level Up: Color Block
Create a modern dip-dye effect by taping off the bottom third of the dried pod and painting it white or gold for a geometric contrast against the terracotta.
Step 3: Finishing and Assembly
-
Dry thoroughly:
Set the pod aside to dry completely. This usually takes 24-48 hours depending on humidity. Rotate it occasionally to ensure airflow reaches all sides. -
Sand edges:
Once bone dry, use fine-grit sandpaper to soften the rim and the inside of the cord holes. Remove any sharp burs that might damage the leather cord. -
Paint application:
Apply your faux-terracotta acrylic paint. Use a sponge brush for a textured, stippled effect rather than smooth strokes. I find two coats usually gives the best depth of color. -
Seal the piece:
Spray or brush on a matte sealant. This is crucial for air-dry clay as it protects the material from ambient humidity and occasional misting. -
Cut the cord:
Cut a long length of leather cord (about 3-4 feet long). Fold it in half to find the center loop—this is where it will hang from the wall hook. -
Threading:
Thread one tail of the cord through the left hole (inside to outside) and the other tail through the right hole (inside to outside). -
Knotting:
Tie a secure overhand knot on the outside of each hole. Adjust the length so the pod hangs level, then tighten the knots firmly against the clay. -
Final wrap:
For the decorative wrapped look on the cord shown in the photo, take a smaller piece of cord and wrap it tightly around the knot area, securing it with a dot of glue. -
Style it:
Tuck a bed of preserved moss into the bottom of the pod and nestle your air plant inside.
Now you have a stylish, minimalist home for your air plants that looks perfectly sun-baked
Air-Dry Clay Suncatchers and Window Hangings
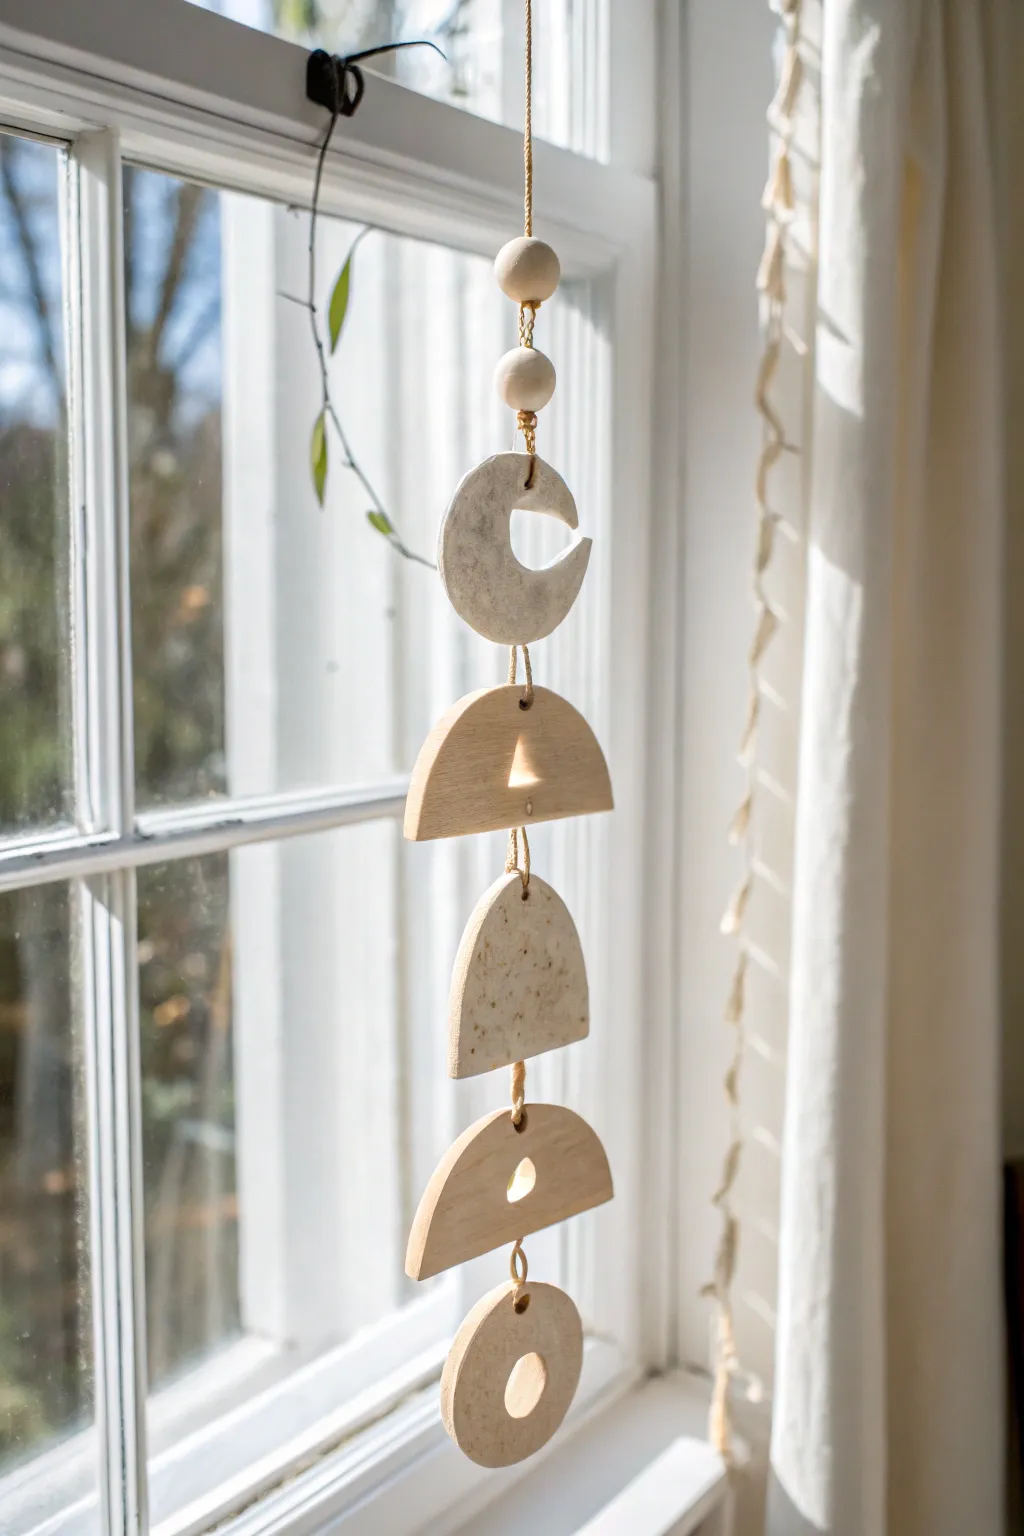
Bring a touch of the cosmos into your living space with this minimalist window hanging. The project uses the natural, matte texture of air-dry clay to create a sequence of celestial shapes that look lovely against the sunlight.
Step-by-Step
Materials
- White or speckled air-dry clay
- Rolling pin
- Parchment paper or canvas mat
- Clay knife or X-Acto blade
- Circle cookie cutters (various sizes)
- Small straw or toothpick (for holes)
- Natural jute twine or hemp cord
- Two wooden geometric beads (round)
- Sandpaper (fine grit)
- Bowl of water (for smoothing)
- Clear acrylic sealant (optional)
Step 1: Shaping the Clay Elements
-
Prepare your workspace:
Lay down parchment paper or a canvas mat to prevent sticking. Take a handful of air-dry clay and knead it briefly until it is pliable and smooth. -
Roll the slab:
Using a rolling pin, roll the clay out to an even thickness of about 1/4 inch. If you want a uniform look, you can place two pencils on either side of the clay as guides while rolling. -
Cut the crescent moon:
Use a medium-sized circle cutter to stamp a round shape. Then, shift the cutter slightly off-center and cut again to create a crescent moon shape. Save the excess sliver for another project. -
Create the semi-circles:
Cut two large circles. Using your clay knife, slice each circle directly in half to create four semi-circles. You will need three of these for the main design layout shown. -
Form the bottom ring:
Cut another medium circle. Use a much smaller circle cutter (or a bottle cap) to punch a hole slightly off-center near the bottom, creating an eccentric ring shape. -
Add decorative cutouts:
Take two of your semi-circles and use a mini cutter or knife to remove a small triangle or teardrop shape from the center. This lets light peek through when it hangs.
Fixing Cracks
If small cracks appear as the clay dries, make a ‘slip’ by mixing a tiny bit of clay with water into a paste. Rub this into the cracks, let dry, and sand smooth.
Step 2: Refining and Assembly Preparation
-
Smooth the edges:
Dip your finger in a little water and run it along the cut edges of every piece to soften any sharpness or jagged bits. This gives it that professional, finished look. -
Pierce holes for hanging:
Use a straw or a skewer to poke holes for the twine. The moon needs holes at the top and bottom tips. The semi-circles need holes in the center of their flat and round sides. -
Double-check hole size:
Make sure your holes are slightly larger than your twine, as clay shrinks slightly when drying. -
Let them dry:
Place all pieces on a drying rack or flat surface. Allow them to dry for 24-48 hours, flipping them occasionally to ensure even drying and prevent warping. -
Sand for perfection:
Once fully dry and bone-white, use fine-grit sandpaper to gently buff out any remaining rough spots or fingerprints. -
Seal (Optional):
If hanging in a humid window, I recommend applying a thin coat of matte clear acrylic sealer to protect the clay from moisture.
Add Some Sparkle
Mix gold leaf flakes into your clay before rolling, or paint the edges of your dried pieces with metallic gold paint for a sun-catching shimmer.
Step 3: Stringing the Mobile
-
Start at the top:
Cut a long piece of jute twine (about 3 feet to be safe). Fold it in half to create a loop at the top for hanging, and tie a knot. -
Add top beads:
Thread both loose ends of the twine through two wooden beads. Tie a sturdy knot underneath the second bead to hold them in place. -
Attach the moon:
Thread the twine through the top hole of the crescent moon and knot it securely. Run the twine down the back of the moon and through the bottom hole. -
Connect the first semi-circle:
Leave about an inch of spacing, tie a knot, and thread the twine through the top (curved side) of a solid semi-circle, exiting through the flat bottom. -
Add the middle piece:
Repeat the process with the second semi-circle (the one with the cutout), maintaining consistent spacing between the clay pieces. -
Attach lower tiers:
Continue adding the final semi-circle and then the bottom ring piece, tying knots inside or behind the holes to keep them positioned correctly. -
Final trim:
Tie a final secure knot at the very bottom of the last piece and trim any excess twine close to the knot.
Hang your creation in a sunny window and enjoy the play of light and shadow throughout the day
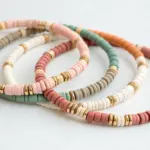
Faux Terrazzo Air-Dry Clay Trinket Sets
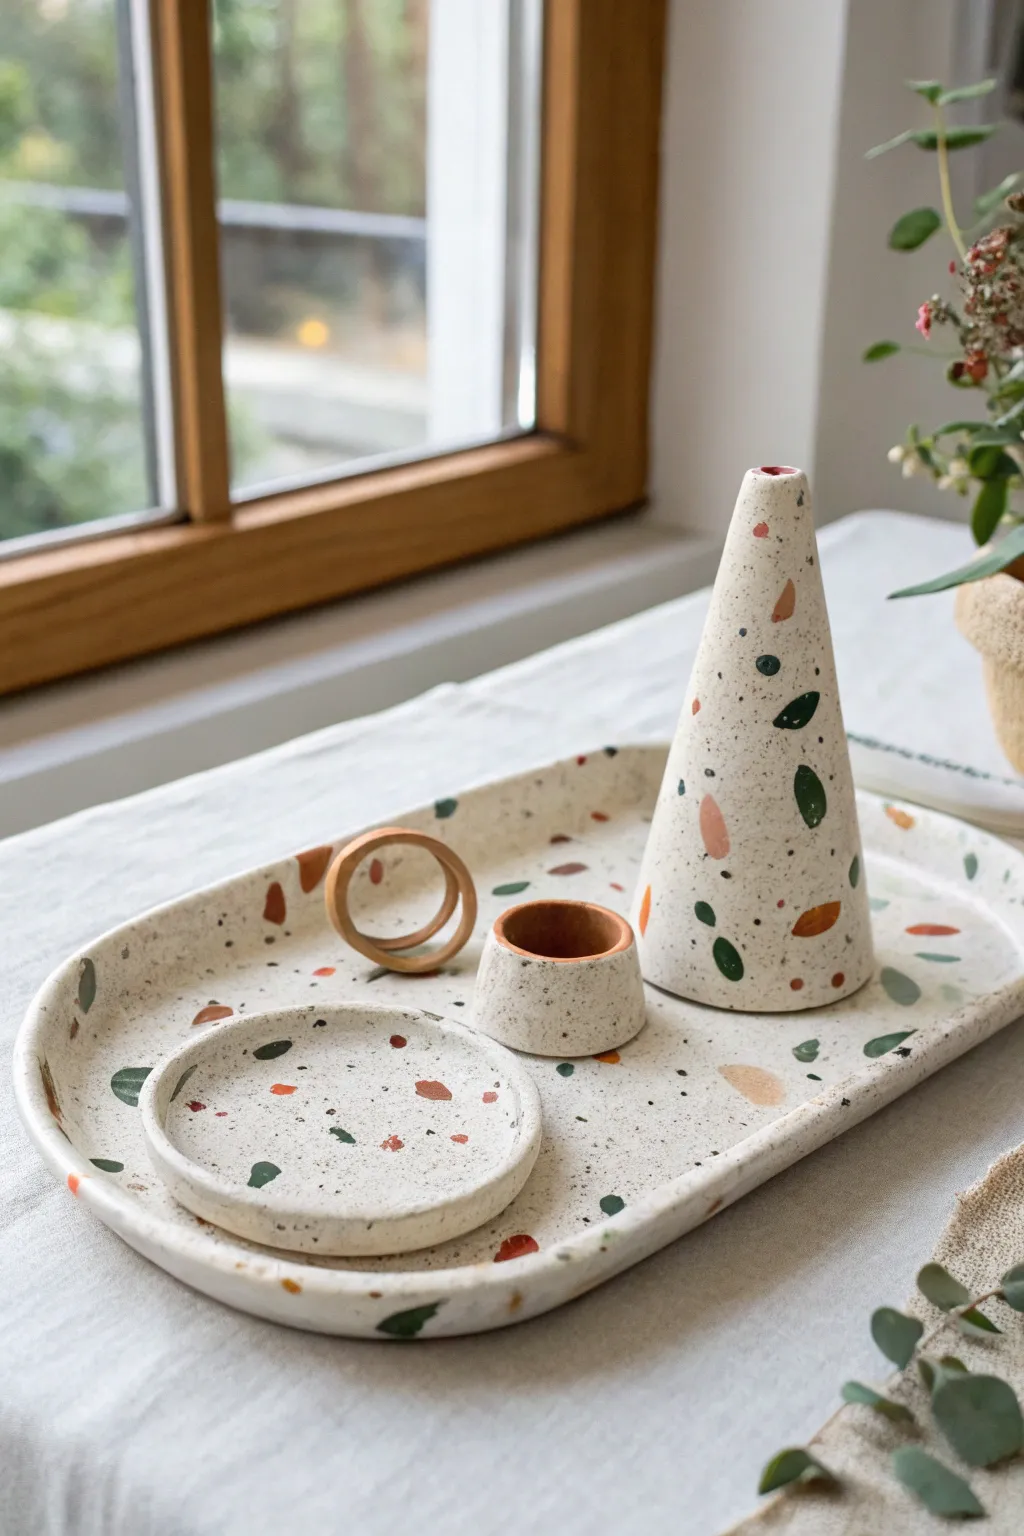
Embrace the speckled charm of terrazzo without the heavy concrete or difficult sanding. This air-dry clay set features a large tray, trinket dish, and sculptural organizers in a soothing palette of cream, rust, and forest green.
Detailed Instructions
Materials
- White air-dry clay (approx. 1kg)
- Acrylic paints (Rust/Terracotta, Forest Green, Cream/Beige/Black)
- Rolling pin
- Clay knife or craft scalpel
- Sandpaper (fine and medium grit)
- Small bowl relative to your desired dish size (for molding)
- Rolling mat or parchment paper
- Cardstock or thick paper (to make a cone template)
- Small paintbrush
- Clear varnish or sealant (matte or satin finish)
- Water in a spray bottle (optional)
Step 1: Creating the Terrazzo Chips
-
Mix your colors:
Pinch off two small balls of white clay, roughly the size of walnuts. Knead rust-colored acrylic paint into one and forest green into the other until the color is solid and uniform. Wear gloves if you want to keep your hands clean. -
Flatten and dry:
Roll these colored clay balls out very thinly, almost paper-thin. Set them aside on parchment paper to dry completely. This usually takes about 30-60 minutes since they are so thin. -
Crush the chips:
Once hardened, break the colored sheets into irregular, jagged chips. Aim for a variety of sizes—some tiny specks and some larger, distinctive shards. Keep the colors separate for now.
Step 2: Preparing the Base
-
Prepare the main body:
Take a large portion of white clay for your main tray. I like to knead in a tiny drop of beige or cream paint to take the stark white edge off, giving it a more natural stone look. -
Embed the chips:
Sprinkle your colored clay chips onto your work surface. Take your ball of base clay and press it firmly onto the chips, folding the clay over and kneading gently to distribute the chips throughout the entire mass. Add more chips as you go. -
Roll the slab:
Roll out the chip-filled clay to a thickness of about 5-7mm. If you want more visible terrazzo on the surface, press extra chips directly into the top of the slab and give it one final gentle roll to embed them flush with the surface.
Clean Cuts
Work the sandpaper in circular motions. Wiping the piece with a slightly damp sponge periodically helps remove dust so you can check your terrazzo reveal progress.
Step 3: Shaping the Items
-
Cut the oval tray:
Use a light pencil sketch or a paper template to trace a large oblong shape onto your slab. Cut cleanly around the shape with your clay knife. -
Form the tray lip:
Roll a long, thin snake of pure white or terrazzo clay. Score the edge of your oval base and wet it slightly with a finger. Press the snake onto the edge to create a rim, blending the seam down with a modeling tool or your thumb until it’s seamless. -
Create the small dish:
Cut a circle from your remaining slab. Gently press this circle into a shallow bowl or saucer to curve the edges upward. Let it dry inside the bowl to maintain the shape. -
Form the ring cone:
Make a cone template from cardstock and wrap a slab of clay around it, smoothing the seam. Alternatively, form a solid cone by hand-rolling a ball of clay against your table, focusing pressure on one side to create the taper. -
Sculpt the ring holders:
For the small cup, form a thick cylinder and press your thumb into the center to hollow it out. For the decorative ring, roll a short snake and join the ends to form a circle, smoothing the joint completely.
Make it Match
Add a few broken bits of dried gold leaf into your terrazzo chip mix before kneading. When sanded later, the metallic flakes will catch the light beautifully.
Step 4: Finishing Touches
-
Speckling details:
If your surface looks too plain, mix a tiny amount of black or dark grey paint with water. Use an old toothbrush to flick a very fine mist of specks over the damp clay to simulate fine grit. -
Slow drying:
Place all pieces on a flat board to dry. Cover them loosely with a plastic bag or plastic wrap for the first 24 hours to prevent curling or cracking. Let them air dry fully for 2-3 days. -
Reveal the pattern:
Once bone dry, the surface will look hazy. Sand the pieces thoroughly, starting with medium grit and finishing with fine grit. This is the magic step that reveals the sharp edges of the colored chips inside. -
Detail painting:
Use your rust paint to carefully color the inside of the hollow cup and the inner rim of the freestanding ring, adding a nice pop of contrast. -
Seal:
Apply 1-2 coats of matte or satin varnish to protect the clay and deepen the colors of the terrazzo chips.
Arrange your handmade vanity set on your dresser and enjoy the modern, architectural vibe you’ve created