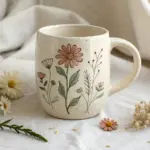
Easter is basically the perfect excuse to pull out soft colors, sweet little critters, and all the cozy spring vibes in clay. I love how Easter pottery can be both adorable and actually useful on your table—so you’re not making “just decor” unless you want to.
Bunny Ear Egg Cups
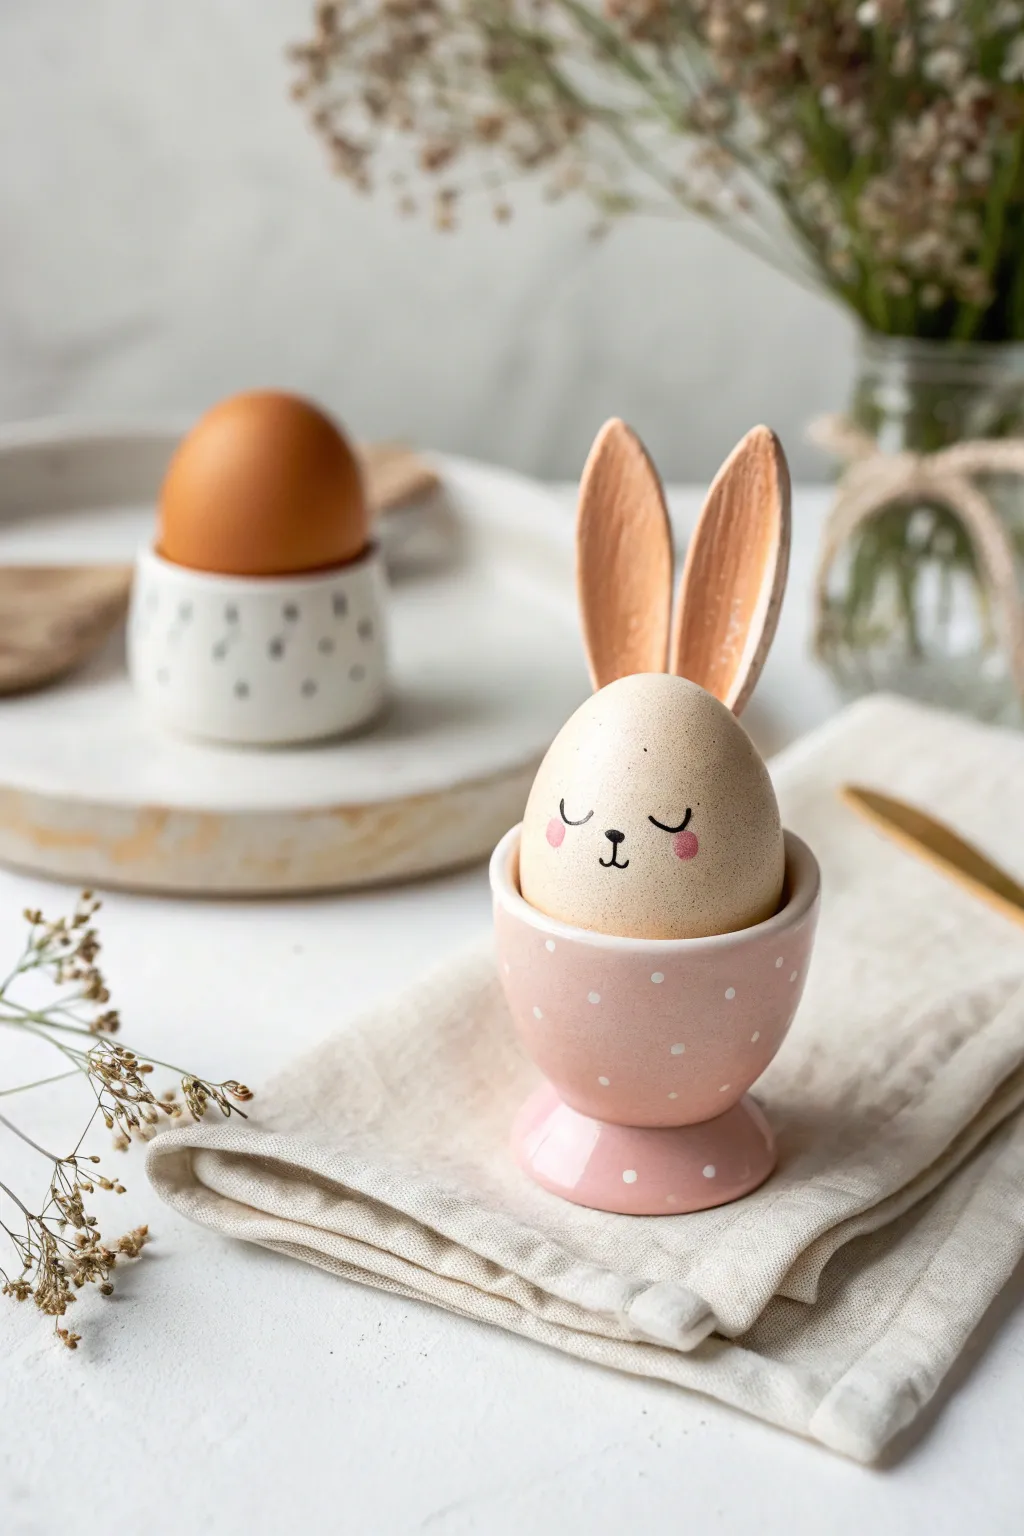
Transform a simple breakfast staple into a whimsical Easter centerpiece with this charming pottery project. By adding sculptural ears and delicate underglaze details, you’ll create a sweet, polka-dotted character that brings instant joy to your holiday table.
Step-by-Step Guide
Materials
- White stoneware clay
- Rolling pin
- Egg (for sizing) or egg-shaped mold
- Needle tool
- Scoring tool and slip
- Soft rib tool
- Pink underglaze
- Black underglaze fine-liner or applicator bottle
- White underglaze
- Small paintbrush
- Clear transparent glaze
- Sponge
Step 1: Forming the Egg Cup Base
-
Create the pinch pot:
Start with a ball of clay roughly the size of a golf ball. Gently push your thumb into the center and pinch the walls evenly while rotating the ball in your hand to create a smooth, round cup shape. -
Check the size:
Use a real egg to test the fit of your pinch pot. The egg should settle comfortably inside without being swallowed up; aim for the rim to hit slightly below the egg’s midpoint. -
Shape the pedestal:
For the foot, roll a small coil of clay into a ring. Score and slip the bottom of your cup and the top of the ring, then press them firmly together to elevate the cup. -
Smooth the connection:
Use a small modeling tool or your finger to smooth the clay where the ring meets the cup, ensuring a seamless transition. A damp sponge can help refine the shape.
Floppy Ears?
If ears droop while wet, prop them up with small pieces of foam or crumpled paper towel until the clay becomes leather-hard and can support itself.
Step 2: Sculpting the Ears
-
Roll out a slab:
Roll a small amount of clay into a flat slab, about 1/4 inch thick. This will be used for the bunny ears. -
Cut the ear shapes:
Using your needle tool, cut out two elongated teardrop shapes. I like to make them slightly wider at the top and tapered at the bottom where they will attach. -
Refine the edges:
Smooth the sharp cut edges of the ears with a damp finger or sponge to give them a soft, rounded pottery look. -
Add texture (optional):
If you want a wood-like texture as seen in some variations, gently drag a stiff brush or tool vertically down the clay ears before they dry.
Texture Twist
Before glazing, leave the outside of the ears unglazed (raw clay) for a matte, textured contrast against the shiny, glazed pink cup.
Step 3: Assembly and Decoration
-
Attach the ears:
This is a pottery illusion: the ears aren’t attached to the cup, but rather serve as ‘props’ behind the egg, or can be attached to the back rim of the cup itself. For this specific look, score and slip the bottom of the ears and attach them firmly to the *inside back rim* of the cup so they peek up behind the egg. -
Curve the ears:
While the clay is still plastic, gently curve the ears slightly forward or inward to give them a natural, perky appearance. -
Bisque fire:
Allow your piece to dry slowly and completely before loading it into the kiln for a bisque fire. -
Apply pink base:
Once bisque fired, brush 2-3 coats of soft pink underglaze onto the egg cup base. Let each coat dry slightly before applying the next for solid coverage. -
Add polka dots:
Using a small detail brush or the end of a paintbrush handle dipped in white underglaze, dot small, random spots all over the pink cup. -
Paint the inner ears:
Paint the front center of the ears with a peach or light terracota underglaze to mimic the inner ear color. -
Decorate the egg (The Face):
For the display, you’ll paint the face on a real egg (blown or hard-boiled). Use a fine black marker or paint to draw sleepy curved eyes, a tiny nose, and a mouth. Add pink cheeks with a dab of paint. -
Glaze and final fire:
Dip your ceramic cup in a clear transparent glaze and wipe the foot clean. Fire the piece again to glaze temperature.
Place your decorated egg into the finished cup for a delightful breakfast surprise


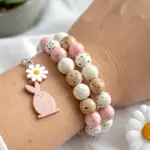
Ceramic Egg Ornaments for Branches
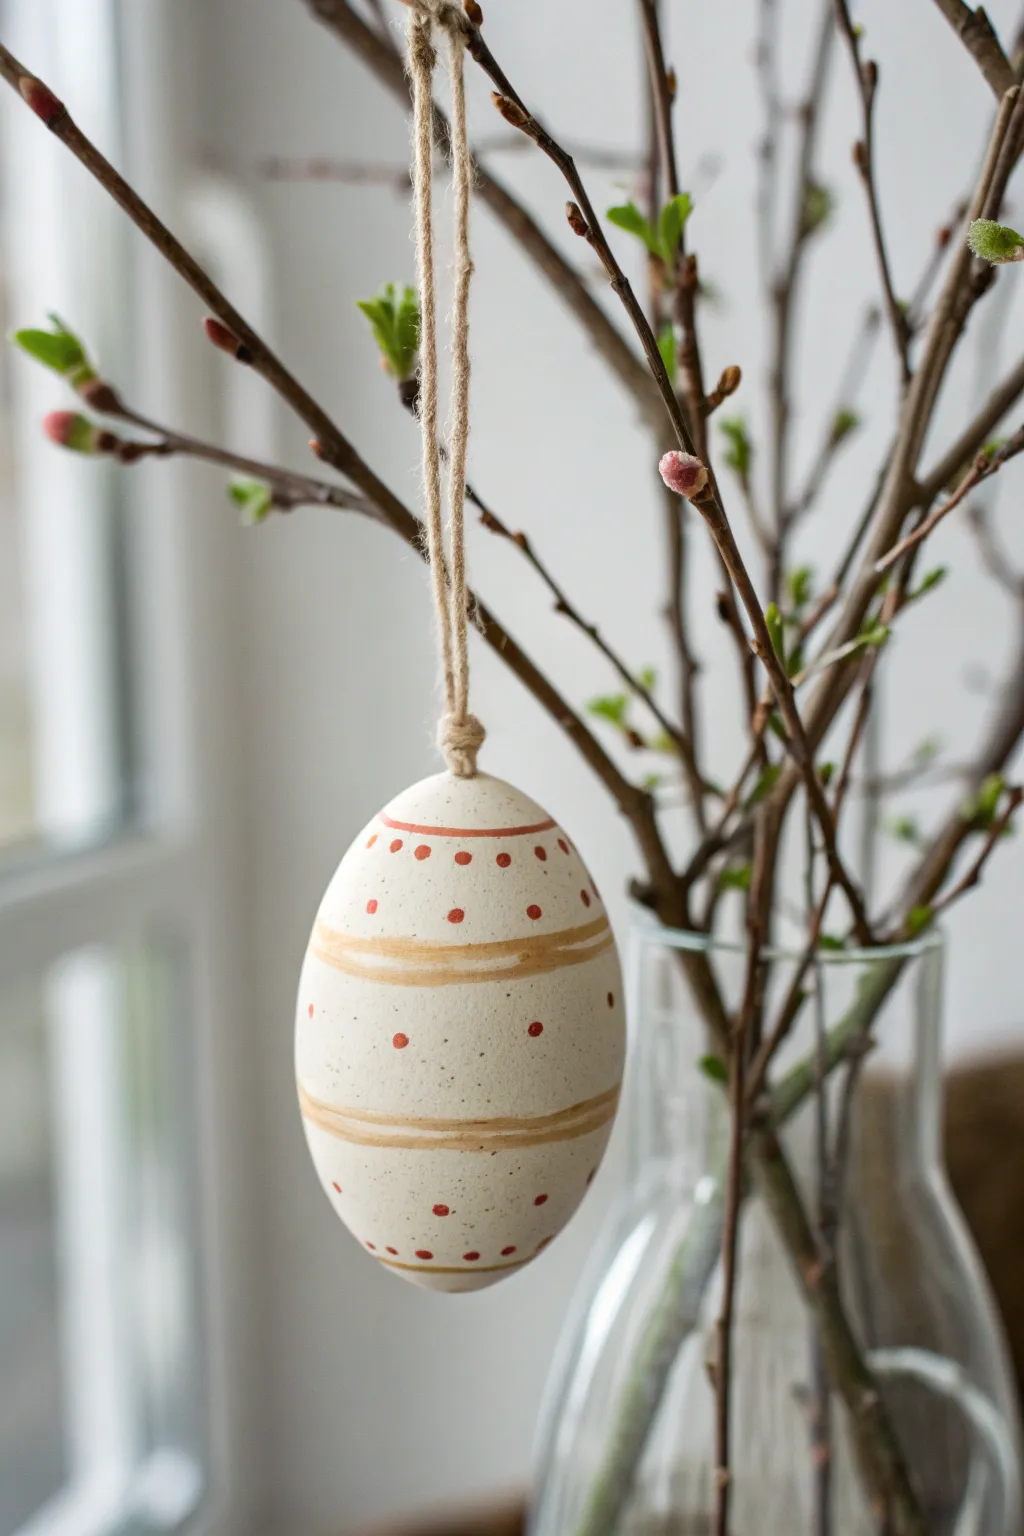
Embrace the simplicity of spring with this understated, handcrafted ornament that brings a touch of farmhouse charm to your seasonal decor. The creamy matte finish, punctuated by earthy bands and delicate dots, creates a serene focal point for any budding branch display.
How-To Guide
Materials
- White or cream stoneware clay (low-fire or mid-fire)
- Plaster mold for egg shapes (or hand-building skills)
- Underglazes in Terra Cotta (reddish-brown) and Ochre (golden-brown)
- Clear matte glaze (or leave unglazed for a raw finish)
- Small round paintbrush (size 0 or 1)
- Flat shader brush (size 4)
- Needle tool or small drill bit
- Sponge
- Kiln
- Natural jute twine
Step 1: Forming the Egg
-
Prepare the Clay:
Begin by wedging your stoneware clay thoroughly to remove any air bubbles, which is critical for a hollow form. You want a smooth, consistent texture before you begin shaping. -
Methods of Formation:
If you are using a plaster press mold, press slabs of clay into both halves, score and slip the edges, and join them to create a hollow egg. If hand-building, pinch two small bowls of clay and join them, gently paddling the form into an oval shape. -
Refine the Surface:
Once the egg is formed and leather-hard, use a damp sponge or a metal rib to smooth away any seam lines or fingerprints. The surface needs to be pristine since the design is so minimal. -
Create the Hanging Hole:
While the clay is still leather-hard but firm, carefully use a needle tool to pierce a hole through the very top center of the egg. Wiggle the tool slightly to widen the hole enough to accommodate your jute twine later. -
Bisque Fire:
set your egg aside to dry slowly and completely. Once bone dry, load it into the kiln for a bisque firing to Cone 04 (or per your clay body’s instructions).
Step 2: Painting the Design
-
Clean the Bisqueware:
After the firing, wipe the egg down with a barely damp sponge to remove any kiln dust. This ensures your underglaze adheres properly without crawling. -
Painting the Bands:
Load your flat shader brush with the Ochre (golden-brown) underglaze. I find that resting my hand on a table while rotating the egg helps keep the lines steady. Paint two distinct bands: one slightly above the center and one near the bottom third. -
Adding Definition:
Using the same Ochre color but slightly watered down, paint a thinner shadow line right next to your main bands to give them a bit of depth and an organic, hand-painted feel. -
Dotting the Details:
Switch to your small round brush and the Terra Cotta underglaze. Carefully adhere a row of small dots just along the upper rim of the top golden band. -
Spacing the Dots:
Continue adding dots in the negative space between the two bands. Keep the spacing somewhat irregular to maintain the rustic aesthetic—perfect symmetry isn’t the goal here. -
Lower Accents:
Finish the painting phase by adding a final row of terra cotta dots near the very bottom of the egg, mirroring the top design.
Sticky Situation?
If you glazed the entire egg, ensure it sits securely on a kiln stilt with metal pins. If it rolls off during firing, it will fuse to your shelf
Step 3: Finishing Touches
-
Glazing Options:
For the look in the photo, you want a matte finish. You can either apply a clear matte glaze over the entire piece or, if your clay body is vitrified and smooth enough, leave the outside unglazed for a stony texture. -
Final Firing:
Fire the egg again to the maturity temperature of your clay and glaze (likely Cone 5 or 6 for stoneware). Make sure to use a stilt so the egg doesn’t stick to the kiln shelf. -
Cut the Twine:
Cut a length of natural jute twine, approximately 8 to 10 inches long. The rough texture of jute complements the raw ceramic finish beautifully. -
Loop and Knot:
Fold the twine in half to create a loop. Push the folded end through the hole in the top of the egg from the outside in (or use a classic lark’s head knot if preferred, but a simple loop is cleaner). -
Securing the Hanger:
Tie a bulky overhand knot at the loose ends of the twine. Pull the loop back up so the knot catches inside the egg, securing it invisibly.
Level Up: Texture
Before the clay dries, gently press a coarse fabric or linen onto the surface. The subtle woven texture will catch the glaze and add antique depth.
Hang your finished egg on a blooming branch to instantly bring the freshness of spring indoors
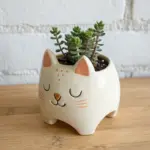


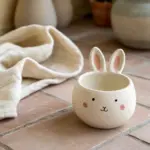
Bunny Planter for Spring Succulents
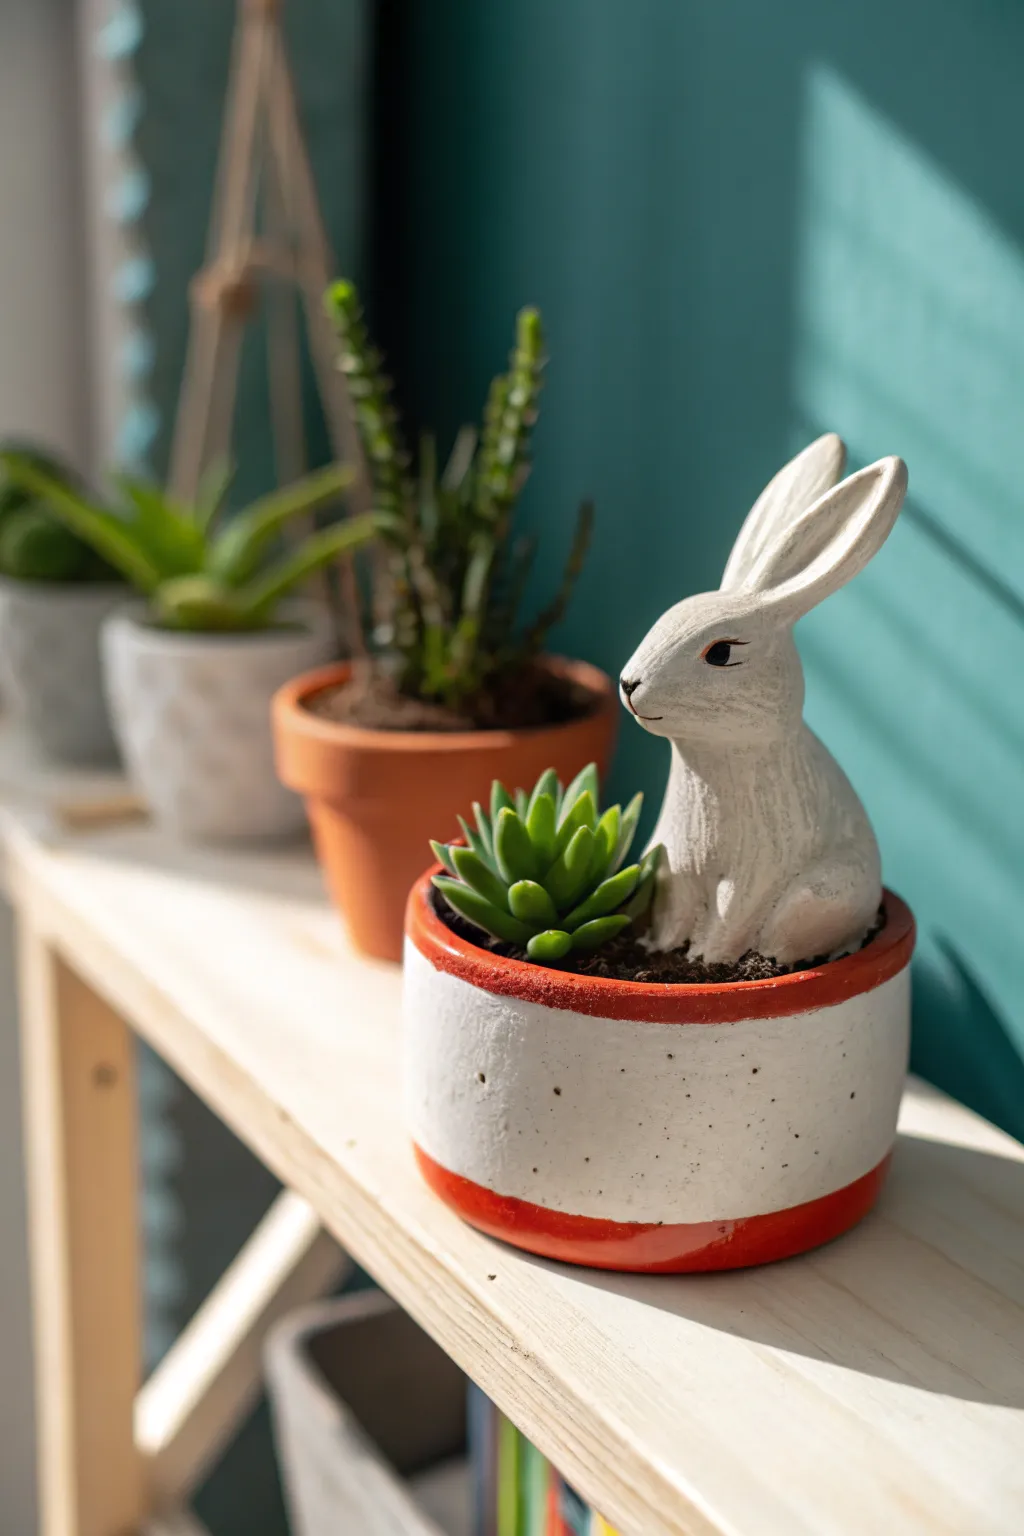
Bring a touch of whimsical spring charm to your windowsill with this adorable planter featuring a curious white rabbit. This project combines simple pottery molding or ceramic casting with bright, clean glazing to create a cozy home for your favorite small succulent.
Step-by-Step
Materials
- White clay (low-fire earthenware or polymer clay depending on kiln access)
- Small rabbit silicone mold or sculpting tools
- Rolling pin
- Circle cutter or template (approx. 4-inch diameter)
- Clay knife or needle tool
- Slip and scoring tool (if using ceramic clay)
- White glaze (glossy or matte)
- Orange-red underglaze or acrylic paint
- Small flat paintbrush
- Fine-grit sandpaper
- Potting soil and small succulent
Step 1: Sculpting the Base Form
-
Roll the slab:
Begin by rolling out a smooth slab of white clay to an even thickness of about 1/4 inch. Ensure there are no air bubbles trapped inside by compressing the clay slightly before rolling. -
Cut the base:
Cut a perfect circle for the base of your pot using a circle cutter or a jar lid as a template. Set this aside on a ware board. -
Cut the walls:
Measure the circumference of your base circle. Cut a long rectangular strip of clay that matches this length plus a little overlap, with a height of about 2 to 2.5 inches. -
Assemble the cylinder:
Score the edges of your base and the bottom edge of your rectangular strip. Apply a little slip (liquid clay) to the scored areas. -
Secure the join:
Wrap the strip around the base, pressing firmly where the scored edges meet. Blend the seam on the side of the pot until it disappears completely, smoothing it with a rib tool or your finger. -
Refine the surface:
Use a damp sponge to smooth the top rim and the exterior walls. The surface should be slightly textured but clean, giving it a rustic, handcrafted feel.
Step 2: Creating the Rabbit
-
Form the body:
Shape a lump of clay into a rounded, pear-like shape for the rabbit’s body. It needs to be sized so it will sit comfortably inside the pot without overwhelming the space for the plant. -
Shape the head:
Roll a smaller ball for the head and attach it to the body. Gently pinch and pull the clay upwards to form two long ears, slightly varied in angle to give the bunny a lively expression. -
Add facial details:
Use a needle tool or small sculpting tool to carve out eye sockets and define the nose. Keep the features simple and stylized. -
Dry and fire:
Let both the pot and the rabbit figurine dry slowly to the bone-dry stage. Once dry, bisque fire them in the kiln according to your clay’s specifications.
Rim Painting Tip
To get perfectly straight lines for the orange rims, place your pot on a banding wheel. Hold your brush steady in one spot while slowly spinning the wheel.
Step 3: Glazing and Assembly
-
Base coat the pot:
Dip or brush the main body of the pot with a creamy white glaze. I prefer a matte finish here to mimic the look of stone or biscuit ware. -
Paint the rims:
Using a steady hand and an orange-red underglaze or glaze, paint a band around the very top rim and the very bottom edge of the pot. The band should be about a 1/4 inch thick. -
Glaze the rabbit:
Coat the rabbit entirely in the same white glaze used for the pot. Use a tiny detail brush to add a dot of black underglaze for the eyes and nose if desired, or leave it solid white for a modern look. -
Final firing:
Glaze fire all pieces. Ensure the bottom of the pot is wiped clean of glaze to prevent it from sticking to the kiln shelf. -
Planting setup:
Once cooled, fill the pot three-quarters full with succulent-specific potting soil. -
Position the bunny:
Nestle the ceramic rabbit into the soil on one side of the pot. Push it down slightly so it feels grounded and stable. -
Add greenery:
Plant a small rosette succulent (like an Echeveria) in the remaining space next to the rabbit. -
Top dressing:
Finish by adding a thin layer of dark soil or small pebbles around the plant and rabbit to cover the roots and complete the look.
Level It Up
Instead of a plain white finish, sponge on a little grey watered-down acrylic after firing and wipe it back. This adds an ‘antiqued’ texture to the bunny’s fur.
Now you have a charming little garden guardian ready to brighten up your Easter decor


Little Chick Mini Bud Vases
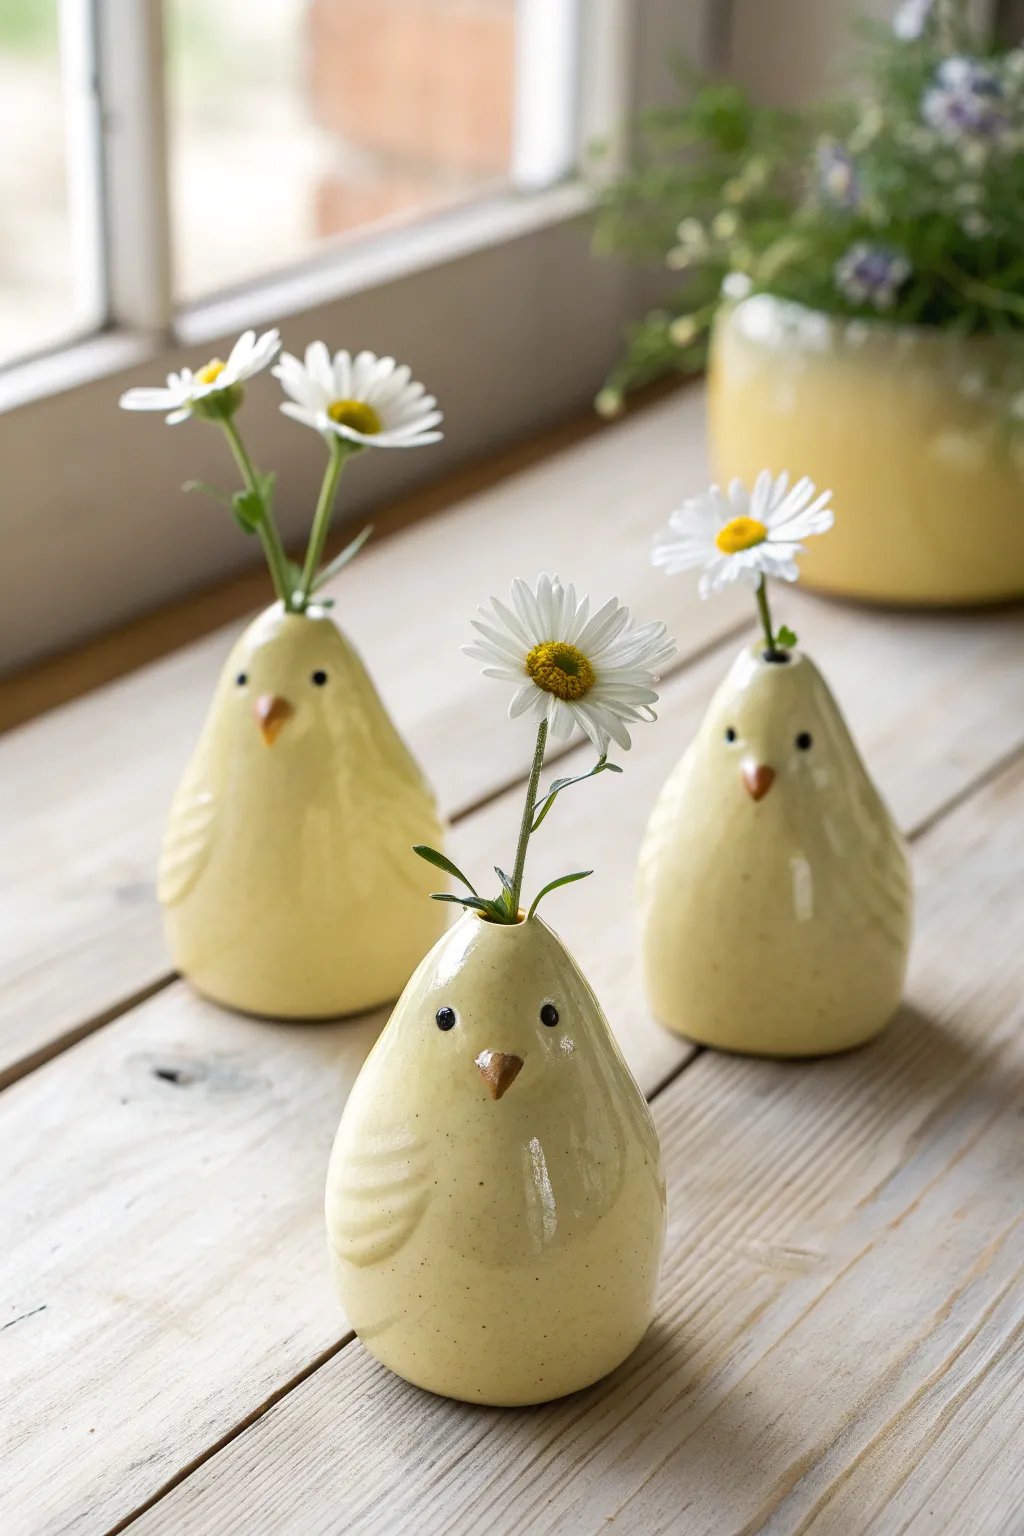
Bring springtime cheer to your windowsill with these adorable, minimalist chick vases that are perfect for holding single stems. Using simple pinch pot techniques, you’ll create organic, rounded forms finished with a glossy yellow glaze and sweet facial details.
Step-by-Step Guide
Materials
- White earthenware or stoneware clay (approx. 1/2 lbs per chick)
- Pottery tools: needle tool, small sponge, rib tool
- Loop tool (small)
- Slip (clay mixed with water)
- Underglaze (black and orange/terracotta)
- Glossy pale yellow glaze
- Clear glaze (optional over details)
- Detail brush
- Fan brush or dipping tongs
- Kiln access
Step 1: Forming the Body
-
Prepare the Clay:
Start by wedging your clay to remove any air bubbles. Divide the clay into balls about the size of a large tangerine or small orange for each chick. -
Start the Pinch Pot:
Hold a ball of clay in your non-dominant hand and press your thumb into the center, stopping about a half-inch from the bottom. Gently pinch the walls while rotating the ball to open it up. -
Shape the Form:
Continue pinching upwards, but start to curve the walls back inward as you reach the top to create a teardrop or pear shape. You want a wider base and a tapered top for the head. -
Close the Top:
Gently collar the clay at the very top to narrow the opening. Don’t close it completely; leave a small opening about the width of a pencil for the flower stem. -
Refine the Surface:
Use a flexible rib tool to smooth the exterior walls, removing your fingerprints and ensuring the curve is continuous and organic. I like to gently tap the bottom on the table to create a flat, stable base.
Uneven Drying?
If the beak or wings crack off during drying, you likely attached clay with different moisture levels. Wrap the piece tightly in plastic for 24 hours to equalize moisture before unwrapping.
Step 2: Adding Details
-
Sculpt the Beak:
Take a very tiny pinch of fresh clay and roll it into a small cone. Score and slip the spot on the ‘face’ area and attach the cone, smoothing the seams so it looks integrated. -
Create the Wings:
Roll two small, flat ovals of clay. Attach them to the sides of the body using the score and slip method. Press them down gently so they are slightly raised but streamlined against the body. -
Texture the Wings:
Use a modeling tool or the edge of a credit card to press two or three simple curved lines into each wing to suggest feathers. -
Refine the Opening:
Use a damp sponge or your finger to smooth the rim of the bud vase opening. It should be round and clean, without any sharp edges. -
Dry and Bisque Fire:
Allow your chicks to dry slowly under plastic for a day, then uncover until bone dry. Fire them to bisque temperature (usually cone 04) according to your clay body’s specifications.
Pro Tip: Weighted Base
Since these are bud vases, leave the bottom floor of the pinch pot slightly thicker (about 1/2 inch). This adds weight to the bottom and prevents the heavy flower stem from tipping the chick over.
Step 3: Glazing and Finishing
-
Wipe Down:
Once bisque fired, wipe the chicks with a damp sponge to remove any dust that might prevent the glaze from adhering properly. -
Paint the Details:
Using a fine detail brush and underglaze, paint the beak orange or terracotta. Use black underglaze to make two small dots for eyes. Let this dry completely. -
Wax Resist (Optional):
If you are worried about the eyes smearing, apply a tiny dot of wax resist over the dry underglaze eyes and beak. -
Apply Base Glaze:
Dip the entire chick into a bucket of glossy pale yellow glaze, or brush on 3 coats using a fan brush. Ensure the glaze doesn’t pool too thickly in the feather grooves. -
Clean the Vent/Opening:
Make sure the hole at the top isn’t clogged with glaze. Use a needle tool to clear it if necessary. -
Wipe the Foot:
Clean off any glaze from the flat bottom of the chick so it doesn’t stick to the kiln shelf. -
Glaze Fire:
Fire the pieces again to your clay’s maturity temperature (e.g., cone 5/6). Once cool, they are ready for water and wildflowers.
These sweet little chicks look wonderful grouped together as a festive centerpiece or scattered individually along a window ledge

The Complete Guide to Pottery Troubleshooting
Uncover the most common ceramic mistakes—from cracking clay to failed glazes—and learn how to fix them fast.
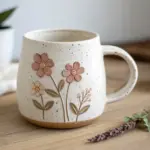
Bunny Face Mugs With Simple Features
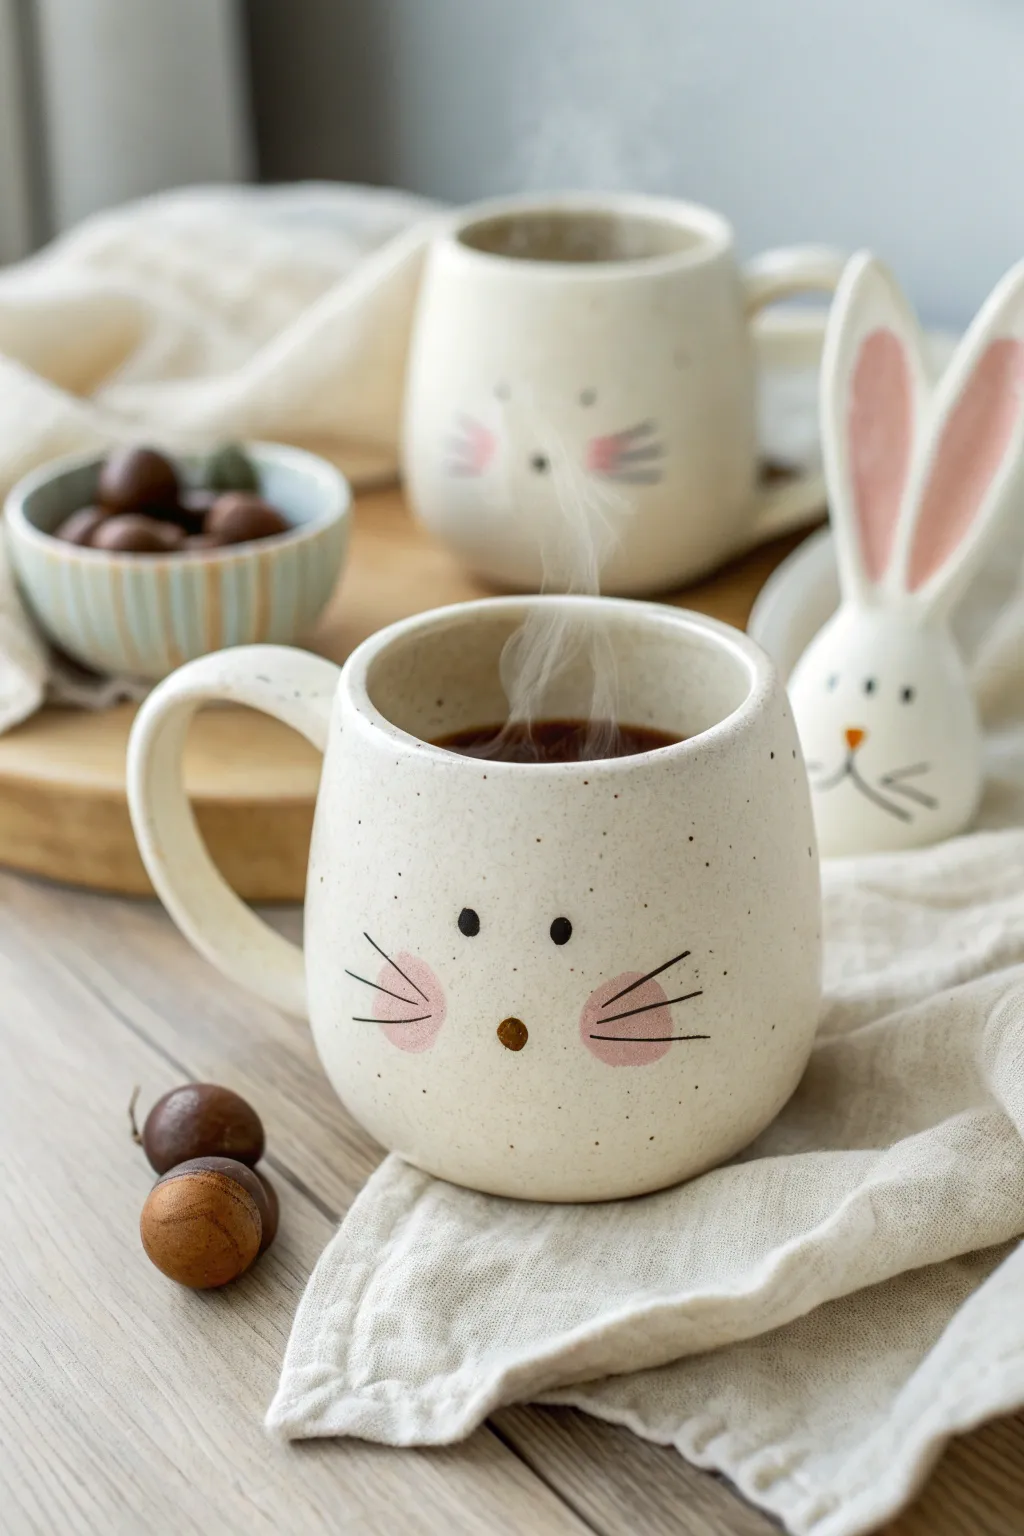
Embrace the charm of spring with this adorable hand-thrown mug featuring a minimalist bunny face. Its creamy speckled finish and sweet pink cheeks make it a cozy vessel for your morning coffee or hot chocolate.
Step-by-Step Tutorial
Materials
- White stoneware clay (speckled works best)
- Pottery wheel
- Throwing tools (sponge, wire cutter, rib, needle tool)
- Trimming tools
- Slip and scoring tool
- Underglaze (black and light pink)
- Small round detail brush
- Clear or transparent glossy glaze
- Kiln
Step 1: Throwing and Shaping
-
Prepare the Clay:
Begin by wedging about 1 to 1.5 pounds of white stoneware clay. If you want that natural speckled look shown in the photo, choose a clay body that already contains manganese speckles. -
Center and Open:
Throw the ball of clay onto your wheel head and center it securely. Open up the center, ensuring you leave at least a quarter-inch of thickness for the floor. I like to double-check the depth with a needle tool here. -
Pull the Walls:
Pull the walls up into a cylinder. Aim for a slightly rounded, bellied shape rather than a straight cylinder to give the bunny face a cute, chubby canvas. -
Shape the Belly:
From the inside, use your fingers or a rib to gently push the clay outward near the bottom and middle, creating a soft curve that tapers slightly inward at the rim to trap heat. -
Refine the Rim:
Use a chamois or a damp sponge to compress and smooth the rim, making it comfortable for drinking. -
Cut and Dry:
Wire the mug off the wheel and set it aside to dry until leather-hard. This is when the clay is firm enough to handle without deforming but still has moisture.
Pro Tip: Speckle Hack
If you don’t have speckled clay, mix a tiny amount of granular ilmenite or manganese into your regular white slip and flick it onto the pot with a toothbrush before bisquing.
Step 2: Trimming and Handles
-
Trim the Foot:
Once leather-hard, center the mug upside down on the wheel. Trim away excess weight from the bottom and crave a neat foot ring. -
Pull a Handle:
Using a small lump of clay, pull a handle that is proportionate to your mug. The handle in the image is a classic C-shape with a comfortable thickness. -
Attach the Handle:
Score the attachment points on both the mug and the handle aggressively. Apply slip, press the handle firmly into place, and smooth the seams with a damp sponge or modeling tool.
Step 3: Painting the Bunny Face
-
Plan the Face:
Before painting, visualize where the features will go. The eyes should be wide-set, sitting roughly in the middle vertical band of the mug. -
Paint the Cheeks:
Dip a brush into light pink underglaze. Paint two soft, oval circles for cheeks. Don’t worry if they aren’t perfect circles; the organic shape adds character. -
Add Whiskers:
Using a very fine liner brush and black underglaze, paint three thin whiskers extending outward from the center of each pink cheek. -
Dot the Eyes:
With the black underglaze, add two small, solid dots for eyes above the cheeks. Space them widely apart to enhance the cute factor. -
Add the Nose:
Paint a small, inverted triangle or oval in brown or dark beige between and slightly below the eyes to serve as the nose. -
Bisque Fire:
Allow the mug to dry completely (bone dry) before loading it into the kiln for a bisque firing (usually Cone 04 or 06).
Level Up: 3D Tails
Attach a small ball of clay to the back of the mug opposite the face. Texture it with a needle tool to create a fluffy 3D cottontail before firing.
Step 4: Glazing and Finishing
-
Wax Resist (Optional):
If you want the underglaze features to remain crisp without interference, you can apply a dab of wax resist over the painted face, though a stable clear glaze usually works fine without it. -
Dip in Clear Glaze:
Dip the entire mug into a transparent or clear glossy glaze. This will seal the clay and make the speckles and underglaze pop. -
Glaze Fire:
Fire the mug again to the glaze temperature recommended for your specific clay and glaze (often Cone 5 or 6 for stoneware). -
Final Polish:
After the kiln cools, unload your mug. Sand the bottom foot ring lightly if there are any rough spots to protect your tabletops.
Enjoy sipping your favorite warm beverage from your charming new bunny mug
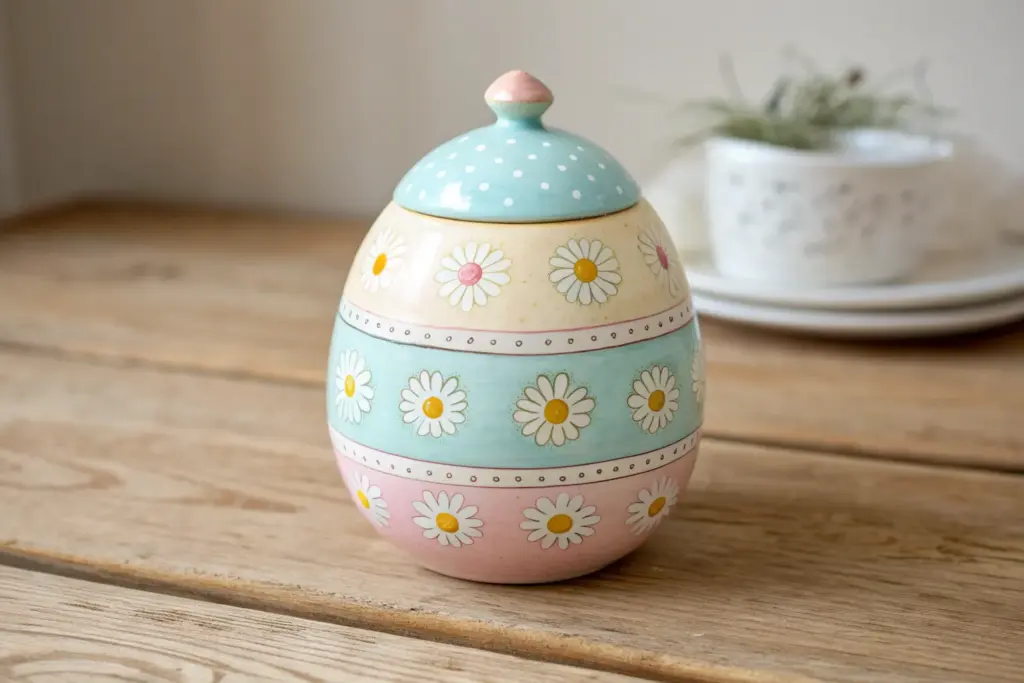
Abstract Modern Easter Totem Stack
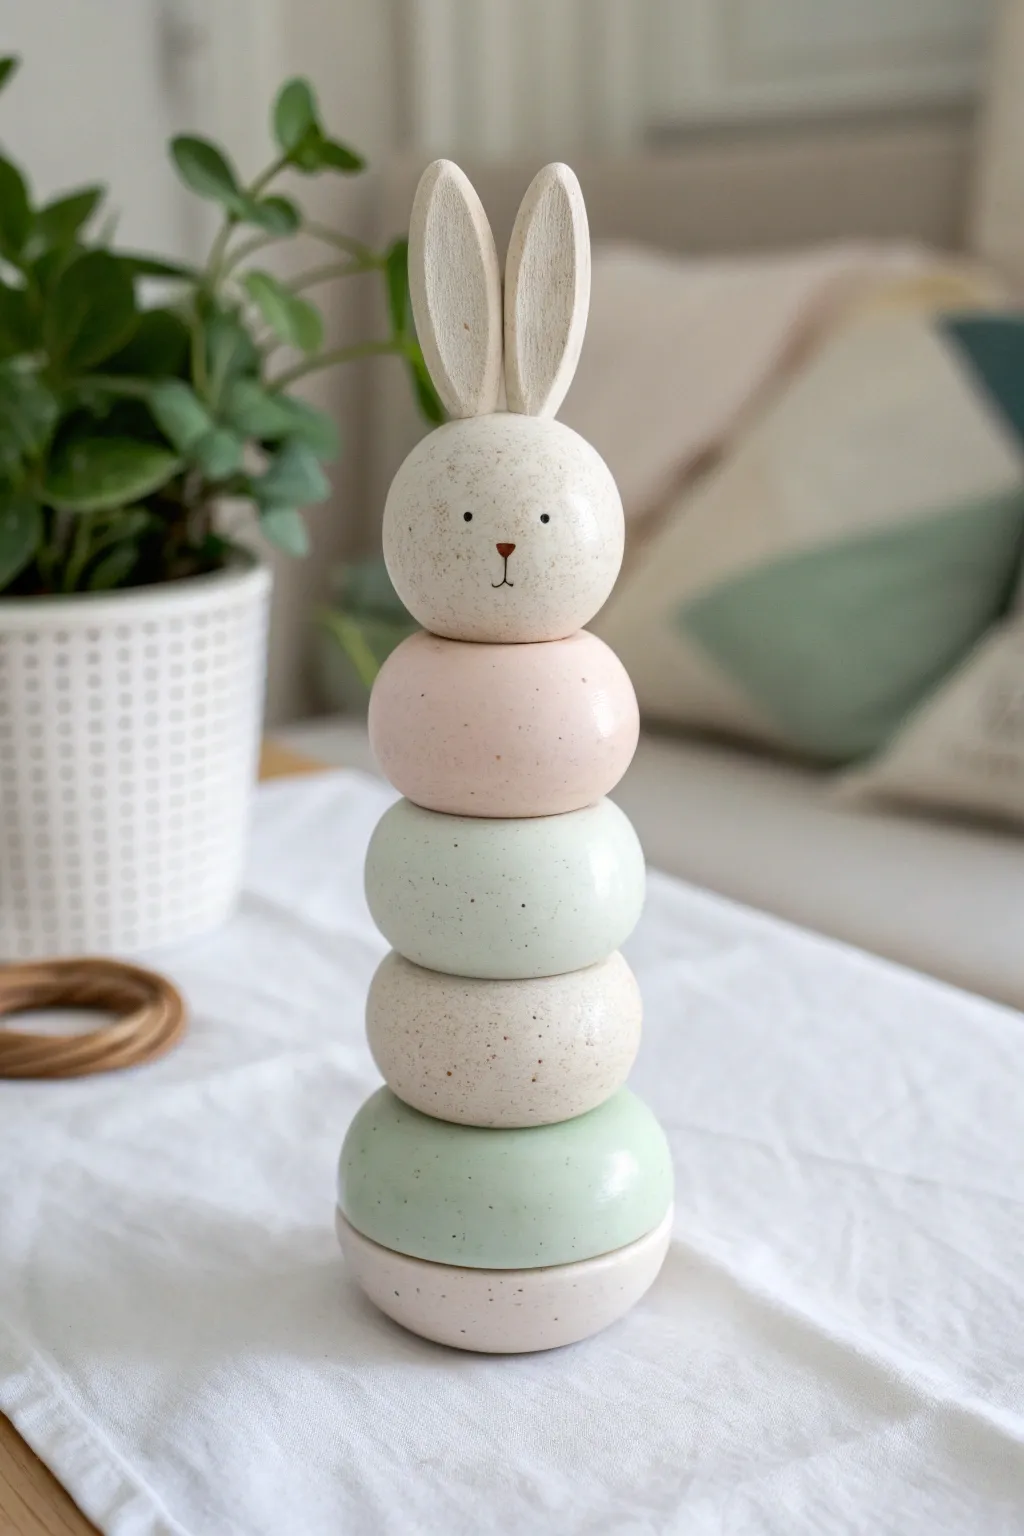
Bring a touch of modern whimsy to your holiday decor with this delightful stacked bunny sculpture. Featuring soft pastel hues, rounded organic shapes, and a speckled ceramic finish, this totem creates a serene focal point for your Easter table.
How-To Guide
Materials
- Air-dry clay or polymer clay (white)
- Acrylic paints (antique white, pale pink, mint green, dark brown)
- Speckle medium or a stiff brush/toothbrush for splattering
- Rolling pin
- Aluminum foil (for armatures)
- Wooden skewer or dowel (for stability)
- Fine-grit sandpaper
- Matte spray varnish
- Clay sculpting tools
- Water cup and sponge
Step 1: Sculpting the Base Forms
-
Prepare the core:
To keep the sculpture lightweight and save clay, crumple aluminum foil into five flattened sphere shapes of varying sizes. The base piece should be the widest but flattest, while the middle pieces should be slightly rounder. -
Establish the armature:
Pierce your wooden skewer through the center of each foil ball to create a vertical hole. Remove them for now; this pre-drilled path will make threading them onto the final support much easier later. -
Cover the base:
Roll out a sheet of clay to about 1/4 inch thickness. Wrap your largest, flattest foil puck completely, smoothing the seams with a little water until the surface is seamless. This is your foundation stone. -
Create the body segments:
Repeat the wrapping process for the next three foil balls. Aim for a graduated look where they slightly taper or vary in roundness, mimicking stacked Zen stones. Keep the clay surface smooth and organic. -
Sculpt the head:
For the bunny’s head, wrap the final, roundest foil ball in clay. Ensure the top is smooth, as this is where the ears will attach. Insert the skewer through all pieces to check the fit, then separate them to dry.
Clean Speckling
Before speckling, test your flicking technique on a piece of paper first. Large blobs can ruin the scale, so aim for a fine mist of dots.
Step 2: Ears and Refinements
-
Shape the ears:
Form two long, teardrop shapes from solid clay. Flatten them slightly but leave them thick enough to stand upright. I like to curve them just a tiny bit for personality. -
Attach ears to head:
Score and slip the bottom of the ears and the top of the head piece. Press firmly to join them, blending the clay downwards so there is no visible seam. Let the ears stiffen slightly if they droop. -
Dry completely:
Allow all components to dry fully according to your clay’s instructions—usually 24 to 48 hours for air-dry clay. Don’t rush this, or cracks may appear. -
Sand for smoothness:
Once bone dry, use fine-grit sandpaper to buff away any fingerprints or lumps. The goal is a surface that looks like smooth, tumbled river stone.
Weighted Balance
For better stability, use a slightly larger or heavier ball of foil for the absolute bottom piece, or embed a heavy washer in the clay base.
Step 3: Painting and Assembly
-
Base coat colors:
Paint the head and the second-from-bottom stone in a warm antique white. Paint the neck piece (below the head) and bottom base piece in a very pale pink. Paint the large middle stone and the bottom-most stacked layer in a soft mint green. -
Apply second coats:
Let the first layer dry, then add a second coat to ensure opaque, solid coverage. Chalky finish paints work best here to mimic ceramic bisque. -
Create the speckles:
Mix a small amount of dark brown paint with water until it’s inky. Dip a stiff brush or toothbrush into it, and flick the bristles with your thumb to spray fine speckles over all the pieces. -
Paint the face:
Using a very fine detail brush and dark brown paint, add two small dots for eyes widely spaced apart. Paint a tiny inverted triangle for the nose and a small vertical line for the mouth. -
Assemble the totem:
Thread the dry, painted pieces onto your wooden skewer or dowel. You can use a dab of strong glue between each layer if you want the sculpture to be permanent. -
Seal the piece:
Finish with a light misting of matte spray varnish to protect the paint without adding an unnatural glossy shine.
Place your charming bunny totem on a shelf or mantle to enjoy the soft, handcrafted vibe it brings to the room