When I’m planning easy clay time for preschoolers, I always lean into big shapes, bold colors, and that “process over perfect” vibe. These ideas are made for little hands—quick wins, lots of squish, and adorable results you’ll actually want to keep.
Pinch-Pot Snack Bowls
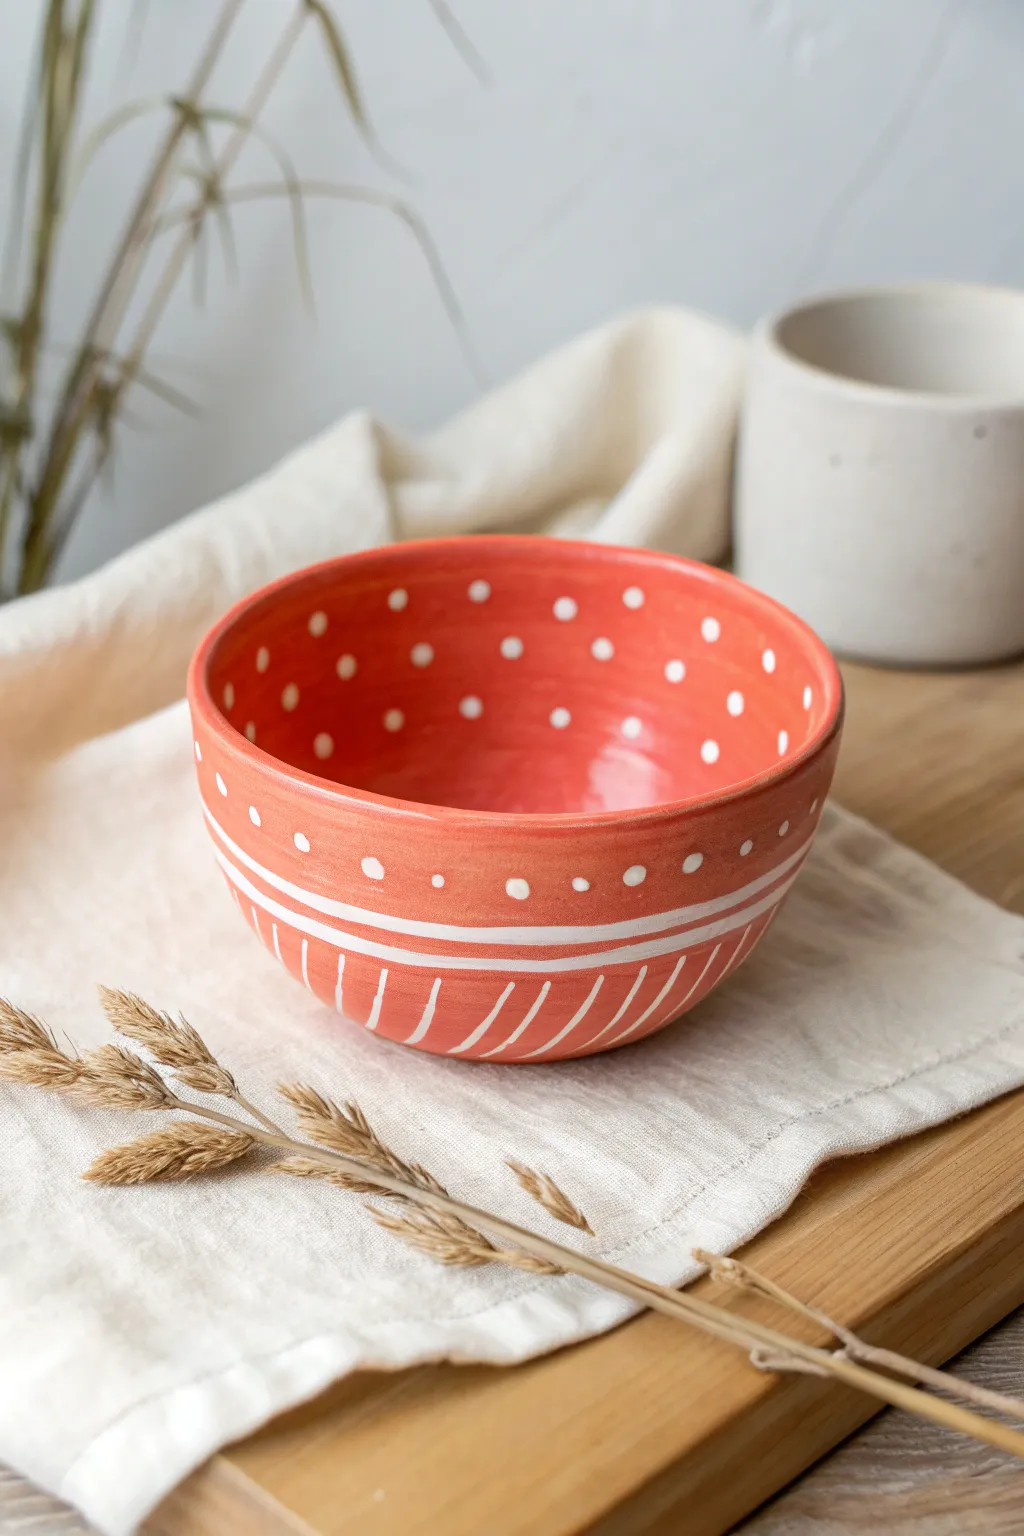
These cheerful, hand-formed bowls are the perfect size for little hands to hold snacks in. With their bright coral-red glaze and whimsical white patterns, they add a splash of handmade charm to any snack time.
Detailed Instructions
Materials
- Air-dry clay or polymer clay (white or terracotta)
- Coral-red acrylic paint (if using air-dry clay)
- White puff paint or a fine-tip white paint pen
- Clear sealant or varnish (food-safe if actually using for food)
- Small sponge or wide paintbrush
- A small bowl of water
- Plastic placemat or wax paper
Step 1: Forming the Bowl
-
Prepare the clay:
Start with a ball of clay about the size of a tennis ball. Knead it in your hands for a minute to warm it up and make it pliable so it doesn’t crack easily. -
Create the opening:
Hold the ball in one hand and push your thumb deep into the center, but be careful not to poke all the way through to the bottom. -
Pinch the walls:
With your thumb still inside, use your fingers on the outside to gently pinch the clay walls. Rotate the ball slowly as you pinch to expand the hole evenly. -
Shape the curve:
Work your way from the bottom up to the rim, aiming for a wall thickness of about a quarter-inch everywhere. Try to keep the bowl shape nice and round. -
Smooth the surfaces:
Dip your finger in a tiny bit of water and rub it over any cracks or bumps on both the inside and outside of the bowl to create a smooth canvas for painting later. -
Flatten the base:
Gently tap the bottom of the bowl on your table or placemat. This creates a flat spot so your bowl sits sturdily without wobbling. -
Let it dry:
Set the finished bowl aside to dry completely. If using air-dry clay, this might take 24-48 hours; follow the package directions for your specific clay type.
Step 2: Adding Color & Pattern
-
Base coat application:
Once the clay is fully hard, paint the entire bowl—inside and out—with a bright coral or reddish-orange acrylic paint. You may need two coats for full coverage. -
Dry the base color:
Allow the red paint to dry completely to the touch. I usually wait about 20 minutes between coats to ensure the finish is smooth. -
Plan the stripes:
Using a white paint pen or a fine brush with white paint, draw two parallel horizontal lines around the outside of the bowl, roughly halfway down the side. -
Fill the stripes:
Carefully fill in the space between your two lines to create a thick, solid white band circling the bowl. -
Add diagonal dashes:
Below the thick white band, paint short, diagonal white lines that slant downward toward the base, spacing them evenly apart. -
Paint the bottom dots:
Just above the white band, add a row of small white polka dots around the circumference. -
Decorate the interior:
Move to the inside of the bowl. Paint random white polka dots all over the red interior surface for a playful, confetti-like look. -
Seal the project:
Once all paint is perfectly dry, apply a coat of varnish. If you plan to put dry snacks like crackers in it, ensure you use a certified food-safe sealant.
Smooth Moves
To fix a jagged rim, flip the wet clay bowl upside down and gently rotate it against the table to naturally level the top edge.
Stamp Instead of Paint
Instead of painting dots later, use the end of a straw or a marker cap to stamp texture circles into the wet clay before it dries.
Enjoy using your happy new bowl for holding trinkets or pretzels


Rainbow Coil Snakes
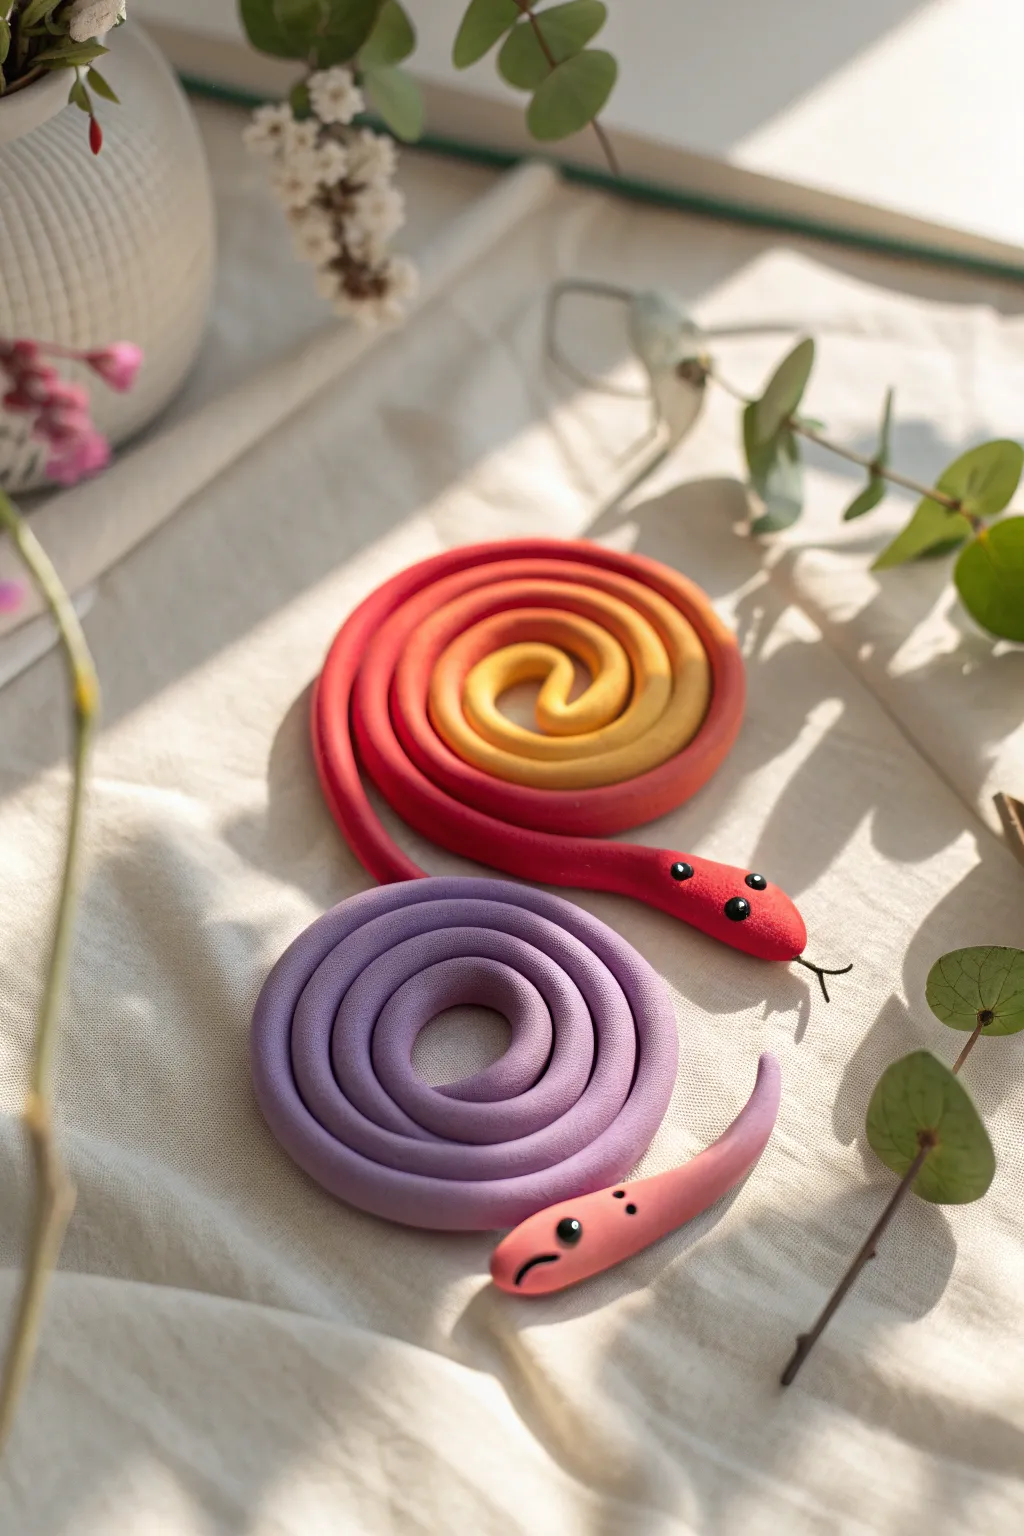
These charming, coiled serpents are a fantastic introduction to color blending and basic sculpting forms. By rolling simple coils, you can create ombre-effect snakes that look beautiful resting on a desk or shelf.
How-To Guide
Materials
- Polymer clay or air-dry modeling clay (Red, Orange, Yellow, Purple, Pink, Black)
- Clay roller or smooth rolling pin
- Clean work surface (glass or silicone mat)
- Small blending tool or toothpick
- Short length of black wire or black thread (optional, for tongue)
Step 1: Planning the Gradient Snake
-
Prepare the colors:
For the warm-toned snake, start by conditioning three separate balls of clay: one deep red, one bright orange, and one sunny yellow. Knead them until they are soft and pliable. -
Create transition shades:
To make a smooth gradient, pinch off a small piece of red and mix it with a piece of orange. Do the same with orange and yellow. You should now have five distinct balls of clay ranging from dark to light. -
Form the segments:
Roll each color ball into a thick, short log roughly the same diameter. Line them up in color order: red, red-orange mix, orange, orange-yellow mix, yellow.
Step 2: Rolling the Coil
-
Connect the logs:
Press the ends of your short logs together firmly to create one long, multi-colored rope. Squish the joins slightly so they stick well. -
Roll it out:
Using the palm of your hand or a smooth tool, gently roll this connected rope back and forth on your work surface. As it lengthens, the colors will stretch and blur slightly at the seams. -
Taper the tail:
Identify the yellow end as the tail. Roll this section with a bit more pressure on the very end to create a tapered point. -
Smooth the body:
Continue rolling the entire snake until it is a long, even cylinder, smoothing out any lumps where the colors joined. Aim for a thickness of about a finger’s width.
Cracking Clay?
If your clay cracks while rolling the coil, it’s likely too dry. Add a tiny drop of water (air-dry) or baby oil (polymer) and knead it well before rolling again.
Step 3: Shaping and Detailing
-
Create the coil:
Starting with the yellow tail, begin wrapping the clay around itself in a tight spiral. Keep the coil flat against the table so it sits nicely. -
Position the head:
Once you have coiled most of the body, gently lift the red ‘head’ section so it rests on top of the outer ring, slightly elevated, looking forward. -
Shape the head:
Gently press the sides of the head to make it slightly wider than the neck, giving it a soft, rounded triangle shape. -
Add the eyes:
Roll two extremely tiny specks of black clay into balls. Press them gently onto the sides of the head. I find using the tip of a toothpick helps place them accurately without squishing the face.
Make it Shine
After your snakes are fully cured or dried, coat them with a water-based glossy varnish or a thin layer of clear nail polish to make them look wet and shiny.
Step 4: Making the Purple Variation
-
Prepare the purple body:
For the second snake, roll a long, solid purple rope. Taper one end significantly to form a long, thin tail. -
Attach the head segment:
Take a piece of pink clay and attach it to the thicker end of the purple rope, blending the seam thoroughly so it looks like one continuous piece. -
Coil loosely:
Roll this snake into a spiral just like the first one, but leave the center slightly open for a different look. -
Finish the face:
Add tiny black eyes to the pink section. You can also use a toothpick to gently press a small frown or smile into the clay.
Step 5: Final Touches
-
Insert the tongue:
Cut a tiny piece of black wire or roll a microscopic thread of black clay. Press it into the front of the red snake’s face to create a forked tongue. -
Final smooth:
Check your snakes for fingerprints. You can lightly brush them with a teeny bit of baby oil (if using polymer clay) or water (if using air-dry) to smooth them out perfectly. -
Cure:
Bake your polymer clay according to package directions, or let air-dry clay sit undisturbed for 24 hours until hard.
Once dry, these colorful sculpted reptiles are ready to guard your desk treasures


Ladybug Clay Discs
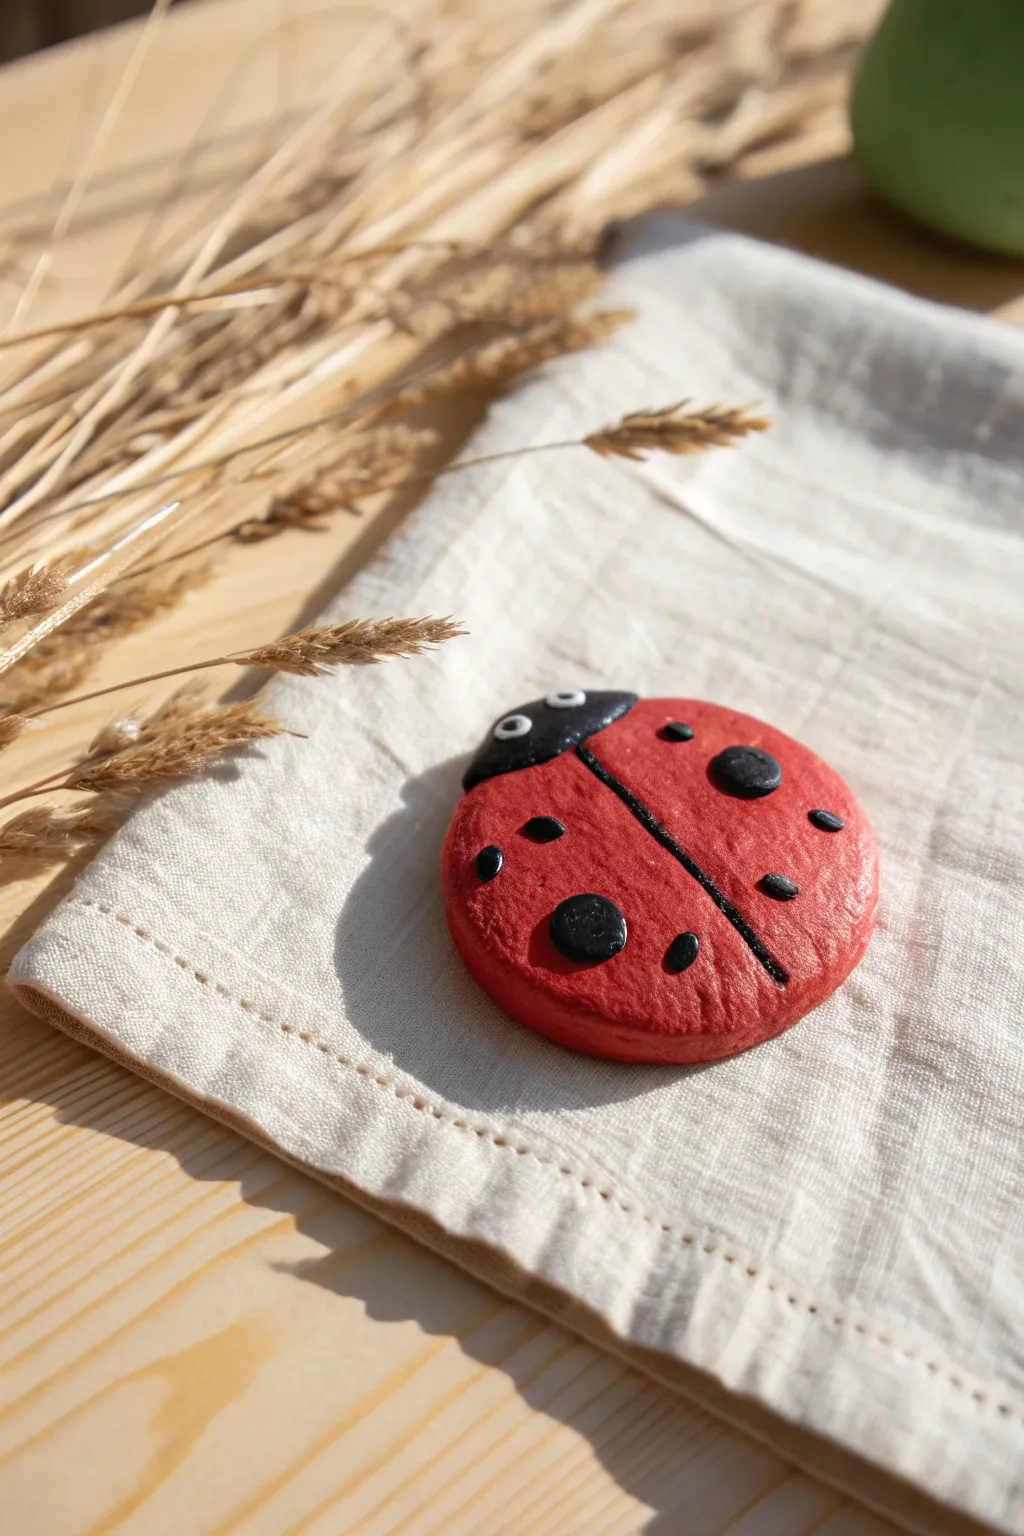
Bring a touch of nature indoors with this adorable, rounded ladybug charm. Perfectly imperfect and full of character, this simple clay project captures the bright red shell and friendly spots of our favorite garden visitor.
Step-by-Step Tutorial
Materials
- Air-dry clay or salt dough
- Circle cookie cutter (approx. 2-3 inches)
- Red acrylic paint
- Black acrylic paint
- White acrylic paint
- Paintbrushes (small and medium)
- Rolling pin
- Toothpick or sculpting tool
- Clear varnish or sealant (optional)
Step 1: Shaping the Base
-
Prepare the clay:
Start by taking a handful of your clay or dough. Knead it in your warm hands for a minute or two until it feels soft, pliable, and free of cracks. -
Roll it out:
Place the clay on a clean, flat surface. Use a rolling pin to flatten it out. -
Check thickness:
Aim for a thickness of about a quarter-inch (approx. 6mm). You want it substantial enough to be sturdy but thin enough to dry evenly. -
Cut the circle:
Press your circle cookie cutter firmly into the clay to create a perfect round shape. Lift away the excess clay. -
Smooth the edges:
Gently run your finger around the cut edge of the circle to soften any sharp corners left by the cutter. -
Mark the dividing line:
Using a toothpick or a small sculpting tool, gently impress a curved line across the top quarter of the circle. This separates the head area from the wings. -
Create the wings:
From the center of that curved line, draw a straight line down to the bottom edge of the circle. Press lightly so you make a groove without cutting all the way through. -
Dry completely:
Set your clay disc aside in a warm, dry spot. Follow the manufacturer’s instructions for drying times; salt dough may need baking, while air-dry clay usually needs 24-48 hours.
Step 2: Painting the Details
-
Base coat the wings:
Once dry, load a medium brush with bright red acrylic paint. Paint the large bottom section (the wings), being careful to stay below the curved head line. -
Paint the head:
Switch to black paint and fill in the top curved section for the ladybug’s head. -
Define the center:
Using a thin brush and black paint, carefully trace over the vertical groove you created earlier to distinctively separate the two wings. -
Add the spots:
Dip the handle end of a paintbrush into black paint to create perfect dots. Stamp several spots onto the red wings, varying their placement for a natural look. I usually add about 3-4 spots per wing. -
Paint the eyes:
Clean the handle end of your brush or use a new toothpick. Dip it in white paint and add two small dots on the black head section for the eyes. -
Add pupils:
Let the white dots dry for a moment, then add a tiny speck of black to the center of each white dot to finish the eyes. -
Seal (optional):
If you want your ladybug to have a glossy finish and extra protection, apply a coat of clear varnish once all the paint is completely dry.
Stamp Master
Use different sized items for dots! A pencil eraser makes large spots, while a cotton swab makes medium ones. This variety adds tons of character.
Garden Magnet
Before the clay dries, press a small, strong magnet into the back. Once painted, it becomes a cheerful fridge magnet for holding artwork.
Now you have a charming little garden friend to brighten up your desk or shelf


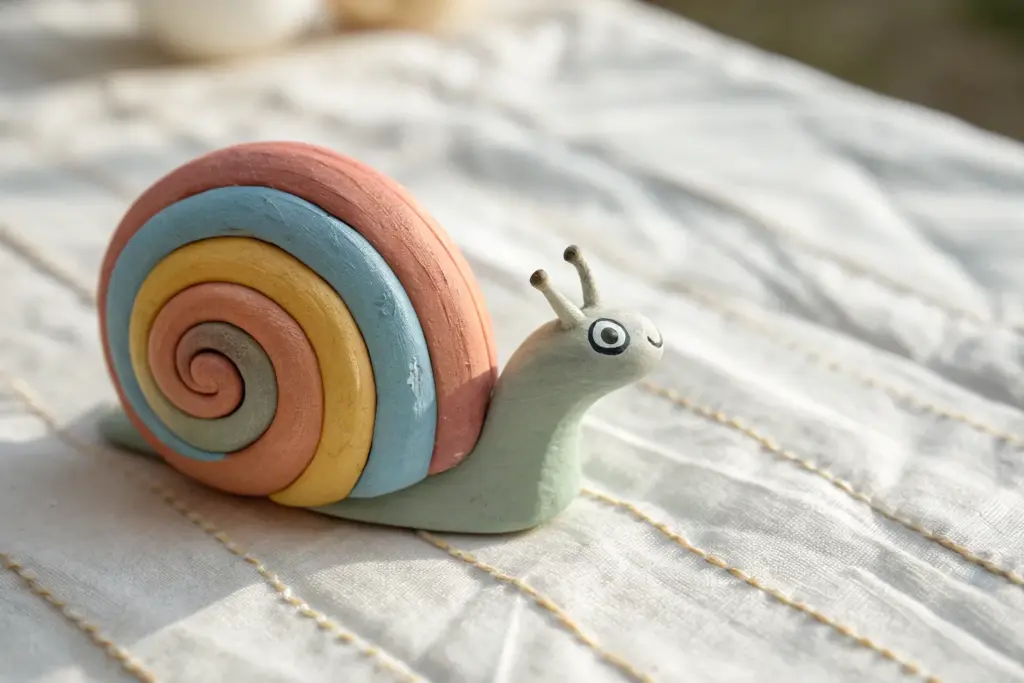
Snails With Coiled Shells
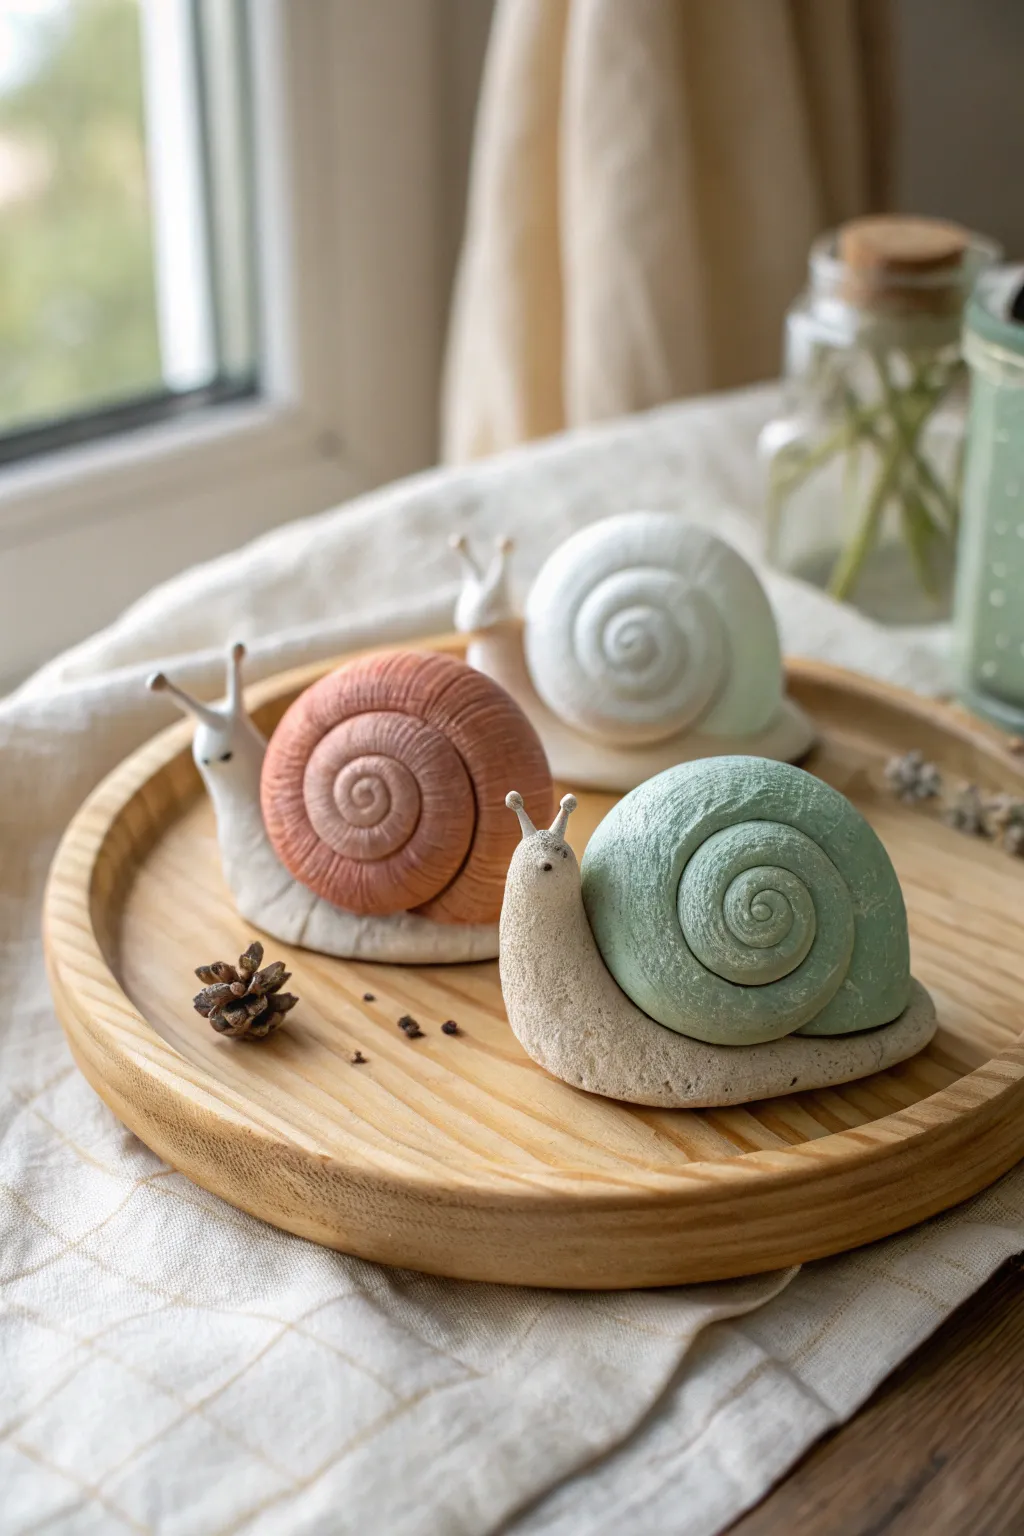
These charming garden snails feature simple, spiraled shells and friendly, textured bodies that are perfect for little hands to shape. With their soft matte colors and sweet expressions, they make adorable decorations for a windowsill or a fairy garden.
How-To Guide
Materials
- Air-dry clay (white or light grey)
- Acrylic paints (sage green, terracotta, white)
- Matte spray varnish or sealer
- Small paintbrush
- Toothpick or sculpting tool
- Old toothbrush (for texture)
- Small cup of water
- Parchment paper (to protect work surface)
Step 1: Shaping the Bodies
-
Portion the clay:
Start by dividing your clay into two main lumps for each snail. You will need a larger piece for the shell and a slightly smaller, elongated piece for the body. -
Roll the body:
Take the smaller lump and roll it into a thick log shape. Gently taper one end to create a tail and leave the other end slightly thicker and lifted for the head area. -
Curve the form:
Place the body on your work surface and gently curve it into an ‘L’ shape so the head points upward. Flatten the bottom slightly so the snail sits securely without tipping over. -
Add texture:
Using an old toothbrush or a stiff brush, gently tap the surface of the clay body. This stippling creates a realistic, stone-like texture that looks great once painted. -
Form the antennae:
Roll two very tiny, thin snakes of clay. Attach them to the top of the head using a tiny drop of water to help them stick. -
Blend the seams:
Use your finger or a sculpting tool to smooth the base of the antennae into the head so they look like one continuous piece. -
Add eyes:
Use a toothpick to poke two very small indentations properly placed below the antennae for the eyes.
Step 2: Creating the Shells
-
Roll a long snake:
Take your larger lump of clay and roll it into a long, even snake. The length determines how big the spiral will be, so aim for at least 8-10 inches. -
Coil the spiral:
Starting at one end, tightly roll the snake inward on itself like a cinnamon roll. Keep the coil tight so there are no gaps between the layers. -
Shape the dome:
As you coil, gently press the center outward to create a slightly domed, 3D shape rather than a completely flat pancake. This gives the shell volume. -
Connect to the body:
Score the side of the snail body and the bottom of the shell (make tiny scratches). Add a dab of water to the scratched areas and press the shell firmly onto the back of the body. -
Refine the spiral:
Once attached, use your sculpting tool to deepen the spiral grooves if they got squished during assembly. -
Let it dry:
Allow your snails to dry completely. For air-dry clay of this thickness, I like to let this dry for at least 24 to 48 hours to prevent cracking.
Cracking Issues?
If slight cracks appear during drying, make a ‘slurry’ by mixing a tiny bit of clay with water. Smooth this paste into the cracks with your finger and let dry again.
Step 3: Painting and Finishing
-
Mix your colors:
To achieve the soft, pastoral lock shown, mix your acrylics with a tiny bit of white. You want a dusty sage green and a muted terracotta pink. -
Paint the shells:
Carefully paint the coiled shell, getting the brush into the grooves of the spiral. Leave the body of the snail unpainted (or paint it a creamy off-white). -
Use a dry brush technique:
Once the base coat is dry, lightly dip a dry brush into white paint, wipe most of it off, and gently brush over the spiral ridges. This highlights the texture beautifully. -
Paint the eyes:
Dip the very tip of a toothpick into black or dark brown paint and gently dot the indentations you made earlier for the eyes. -
Seal the work:
Finish by spraying the snail with a matte varnish. This protects the paint and gives it a finished, ceramic look without making it too shiny.
Glitter Trail
For a magical touch, paint a thin layer of glitter glue along the bottom edge of the snail body to mimic a sparkling slime trail.
Now you have a trio of slow-moving friends ready to explore your shelves

The Complete Guide to Pottery Troubleshooting
Uncover the most common ceramic mistakes—from cracking clay to failed glazes—and learn how to fix them fast.
Turtles With Textured Shells
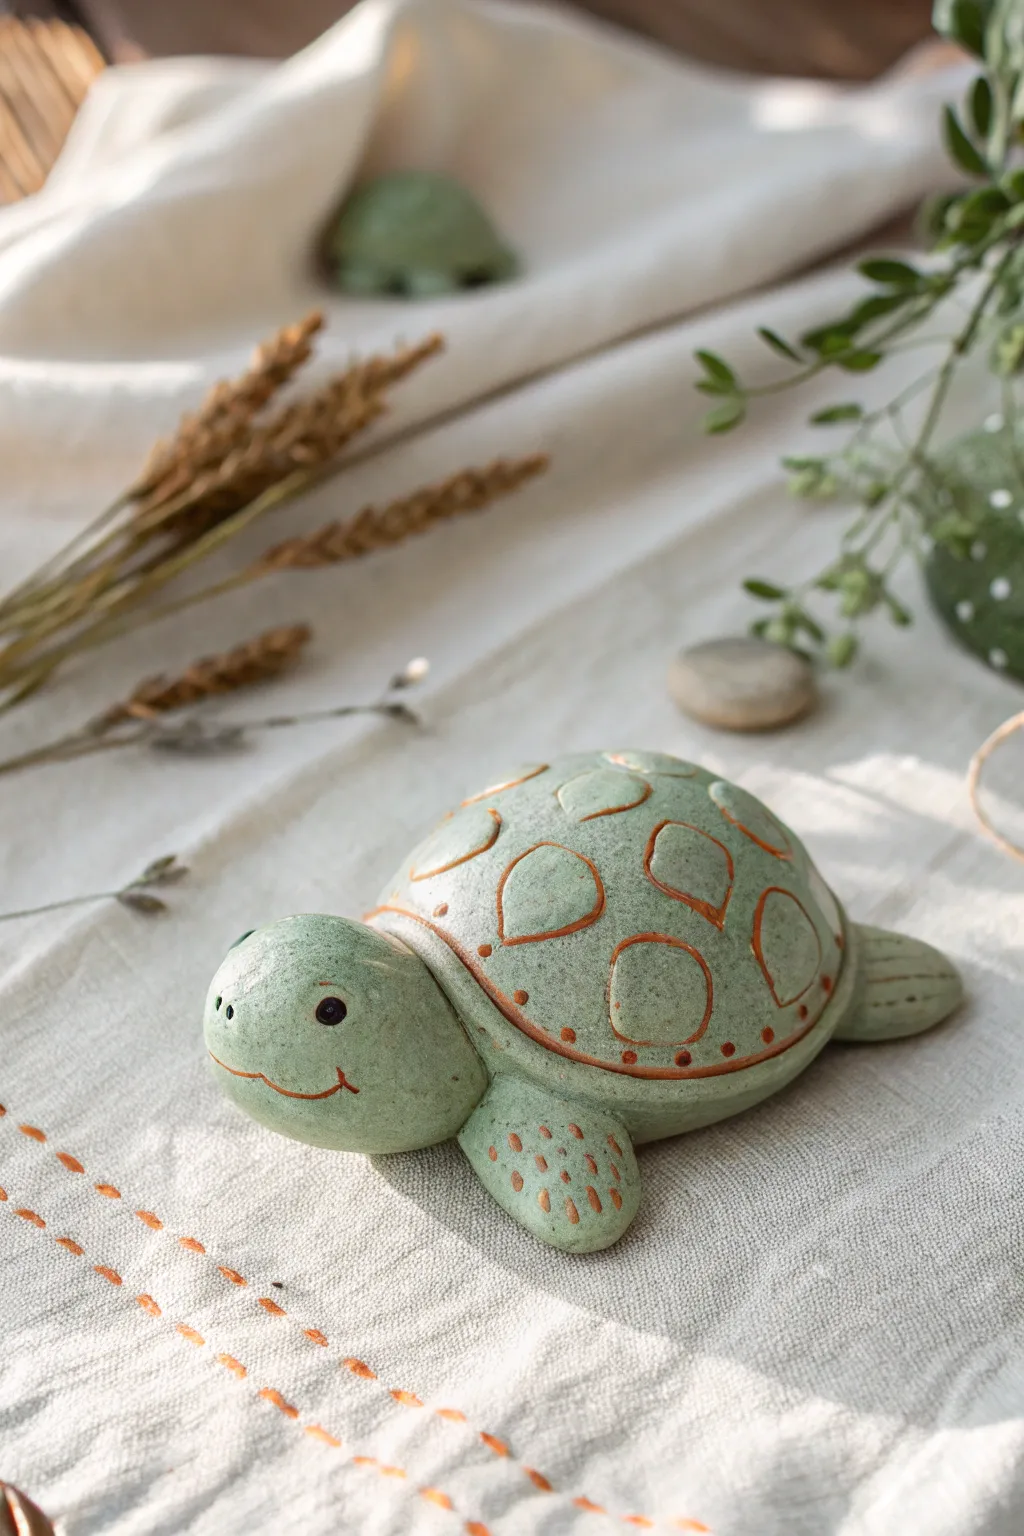
Create a charming, nature-inspired friend with a uniquely textured shell and a gentle smile. This project combines simple round shapes with stamped details, resulting in a smooth, speckled green finish that looks fantastic on any shelf.
Step-by-Step Guide
Materials
- Air-dry clay (or polymer clay)
- Acrylic paints (pale sage green, terracotta orange, black)
- Small paintbrush
- Pointed sculpting tool or toothpick
- Rolling pin
- A small bowl of water (for smoothing)
- Clear matte varnish (optional)
Step 1: Shaping the base
-
Roll the shell:
Start by taking a medium-sized lump of clay and rolling it into a smooth ball. Gently press it down against your work surface until you have a smooth dome shape for the turtle’s shell. -
Form the head:
Roll a smaller ball of clay, about a third of the size of the shell. Slightly elongate it into an oval shape to create the head. -
Attach the head:
Score (scratch) the back of the head and the front of the shell where they will meet. Add a dab of water (or slip) to the scored areas and press the head firmly onto the shell. -
Blend the seam:
Using your finger or a smoothing tool, gently blend the clay from the neck onto the underside of the shell so the connection is seamless and strong.
Crack Prevention
If using air-dry clay, cracks can happen if it dries too fast. Drape a slightly damp paper towel over your turtle for the first few hours of drying.
Step 2: Adding limbs and details
-
Create the flippers:
The legs on this turtle are stylized like flippers. Roll four small, equal-sized balls of clay. Flatten each one into a thick, rounded teardrop shape. -
Attach the flippers:
Attach two flippers near the front (tucked under the shell slightly) and two at the back. Blend the clay on the underside just like you did with the neck. -
Carve the shell pattern:
Using a pointed sculpting tool or a toothpick, lightly carve large, rounded teardrop shapes onto the shell. Create a central shape on top and surround it with a ring of similar shapes. -
Define the shell rim:
Carve a gentle line horizontally around the bottom edge of the shell to separate the dome from the underbelly. -
Add facial features:
Use a small, round tool to press indentations for the eyes. Use your sharp tool to carve a simple, curved smile. -
Texture the flippers:
Press tiny, short lines or dashes into the tips of the flippers to suggest toes or texture. -
Dry completely:
Allow your turtle to dry fully. Depending on the clay used, this may take 24 to 48 hours. I find placing it on a wire rack helps the bottom dry faster.
Step 3: Painting and finishing
-
Base coat:
Paint the entire turtle with a pale sage green acrylic paint. You might need two layers for opaque coverage. -
Create the speckled look:
To mimic the stone-like texture in the photo, dilute a tiny bit of darker green or grey paint. Load an old toothbrush or stiff brush and flick tiny speckles over the dried green base. -
Highlight the shell lines:
Use a very fine brush and terracotta orange paint to carefully trace inside the carved grooves on the shell. -
Paint the rim and toes:
Continue using the terracotta orange to paint the rim line around the shell and to fill in the little dash marks on the flippers. -
Brighten the face:
Paint the carved smile line with the orange paint to match the shell. -
Finish the eyes:
Paint the eye indentations solid black. Once dry, add a tiny white dot to each eye for a reflective glint. -
Seal the work:
Once all paint is bone dry, apply a coat of matte varnish to protect the finish without making it too shiny.
Level Up: Glossy Shell
For extra contrast, use a high-gloss varnish only on the patterned shapes of the shell, keeping the rest of the turtle matte for a mixed-texture look.
Now you have a tranquil little reptile ready to decorate your desk or garden area
Thumbprint Fish and Sea Shapes
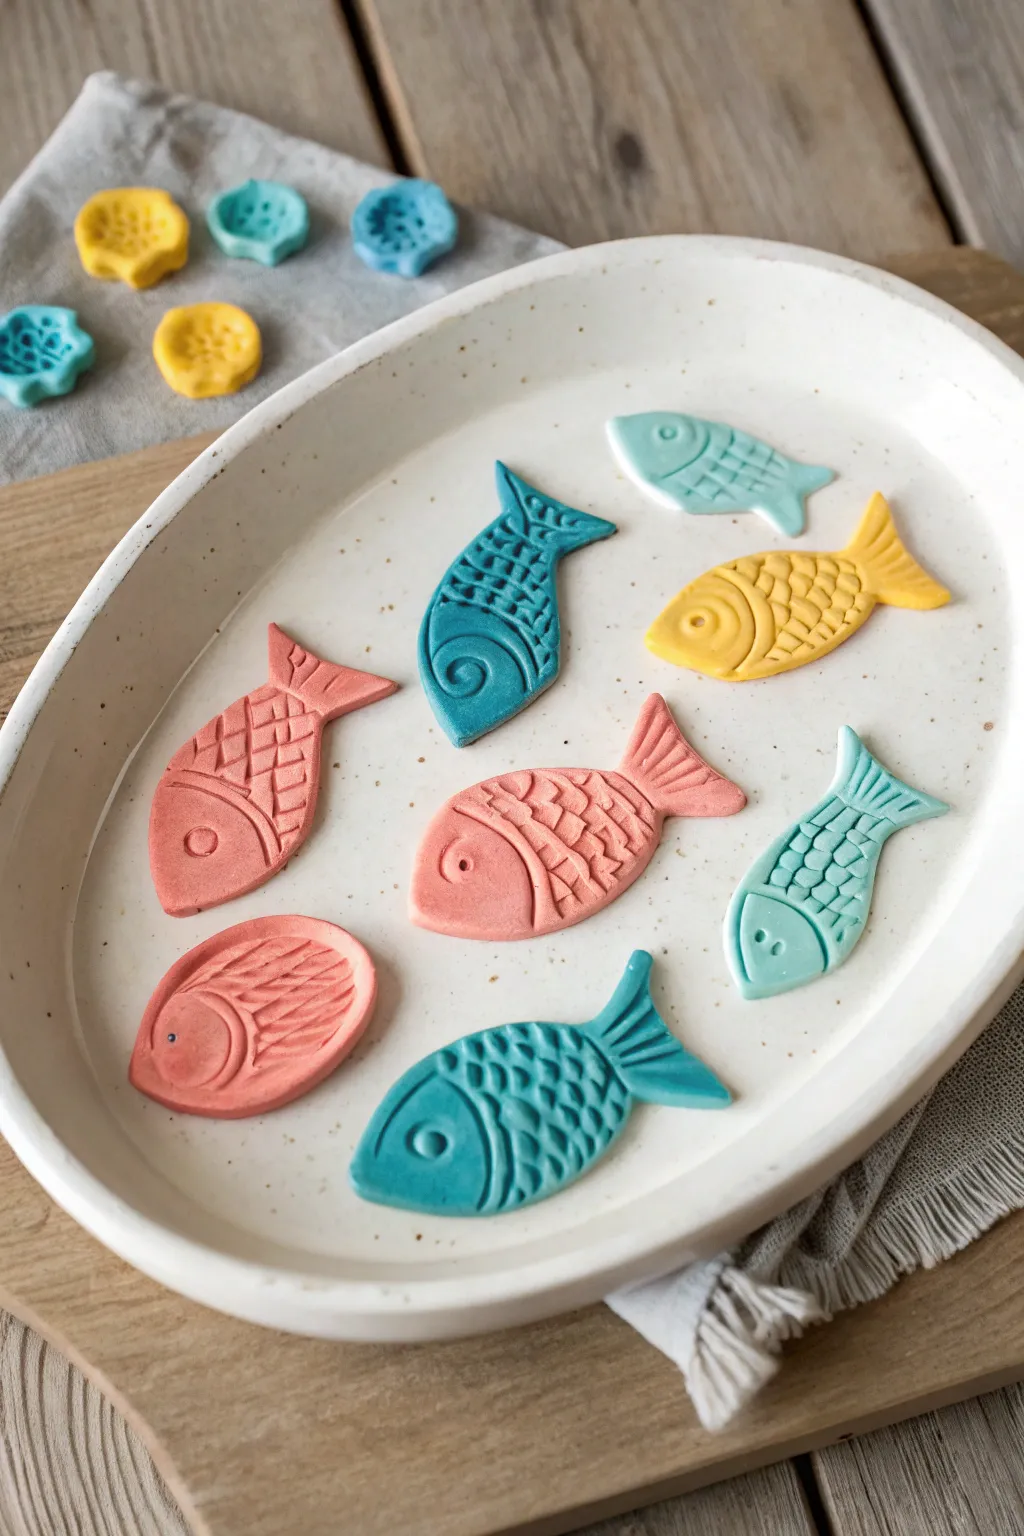
These charming sea creatures are made by pressing tools into soft clay to create tactile patterns. With soft pastel colors and varied textures, this project is perfect for exploring shapes and motor skills with young artists.
Detailed Instructions
Materials
- White air-dry clay or polymer clay
- Acrylic paints (pink, teal, yellow, blue)
- Plastic knife or clay cutter
- Rolling pin
- Drinking straw
- Toothpick or skewer
- Parchment paper
- Small bowl of water
Step 1: Preparing the Colors
-
Divide the clay:
Start by separating your white clay into four distinct balls, one for each color of fish you plan to make. -
Add color:
Press a small indentation into the center of a clay ball and add a pea-sized drop of acrylic paint. -
Knead thoroughly:
Fold the clay over the paint and knead it repeatedly until the color is uniform and pastel-like. Repeat this for all your color choices. -
Roll it out:
Place a colored ball on the parchment paper and roll it flat with the rolling pin until it is about 1/4 inch thick.
Flatness Pro-Tip
To keep your fish flat as a pancake while drying, flip them over gently after the first few hours so the bottom side gets airflow too.
Step 2: Shaping the Fish
-
Cut the outlines:
Using a plastic knife, freehand cut simple fish shapes. A basic oval with a triangle for a tail works perfectly. -
Vary the silhouettes:
Try creating different body shapes; create some that are long and slender, and others that are rounder or curved like a jumping fish. -
Smooth the edges:
Dip your finger lightly in the bowl of water and run it along the cut edges to remove any roughness or loose crumbs of clay. -
Create the eyes:
Take your drinking straw and press the open end gently into the head area of each fish to stamp a perfect circle for the eye. -
Make the pupil:
Use a toothpick to poke a smaller dot inside the circle you just made for a detailed eye look.
Cracking Issues?
If you see tiny surface cracks forming while you work, your clay is getting dry. Simply wet your fingertip and buff the crack until it disappears.
Step 3: Adding Texture
-
Pattern 1: The Net:
On one fish, use the plastic knife to gently press diagonal lines across the body in one direction, then cross them in the other direction to create a diamond pattern. -
Pattern 2: Half-Moon Scales:
For a scaled look, take the tip of a spoon or a small curved tool and stamp repeated ‘U’ shapes in rows, moving from the tail toward the head. -
Pattern 3: Deep Grooves:
I prefer to use a thicker modeling tool or the back of a knife to press bold, widely spaced vertical curved lines on one of the yellow fish. -
Pattern 4: Spiral Design:
On a blue fish, use a toothpick to draw a decorative swirl or spiral near the belly for a more artistic, tribal touch. -
Define the fins:
For all the fish, use the knife edge to stamp straight, fanned lines onto the tail and dorsal fins to simulate texture. -
Final smoothing:
Do one last check for any accidental fingerprints and smooth them away gently before setting the fish aside. -
Bonus shapes:
Use leftover scraps of clay to form small circles or flower shapes to accompany your school of fish. -
Drying time:
Arrange the finished pieces on parchment paper and let them air dry completely, which usually takes 24 to 48 hours depending on thickness.
Once dry, these colorful textured fish make wonderful play pieces or cheerful decorations for a room.


What Really Happens Inside the Kiln
Learn how time and temperature work together inside the kiln to transform clay into durable ceramic.
Goofy Monster Face Tiles
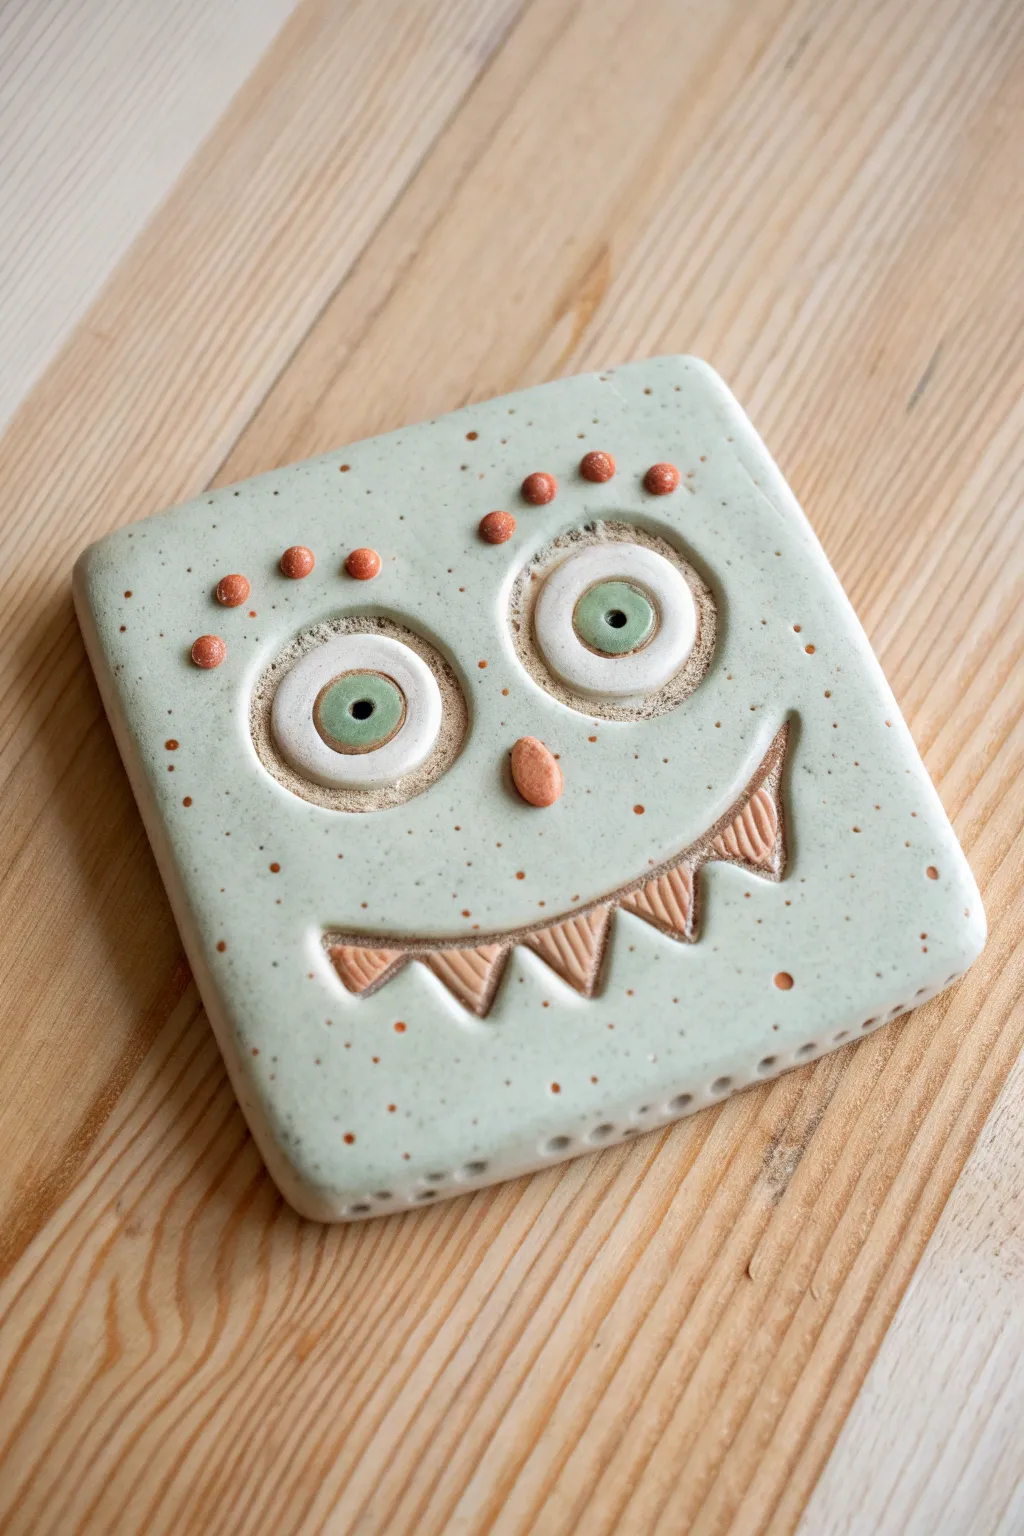
These charming ceramic tiles transform a simple slab of clay into a friendly monster with wide eyes and a toothy grin. The speckled green glaze and textured details make this a tactile and visually engaging project for little hands.
Step-by-Step Guide
Materials
- White earthenware or stoneware clay
- Rolling pin
- Two wooden guide strips (approx. 1/4 inch thick)
- Square cookie cutter or ruler and needle tool
- Small circular cutters (various sizes)
- Clay scoring tool or old toothbrush
- Slip (clay mixed with water)
- Small wooden modeling tool or popsicle stick
- Pale green speckled glaze (glossy)
- Clear glaze (optional)
- Orange/terracotta underglaze or slip
Step 1: Shaping the Base
-
Prepare the slab:
Begin by wedging a ball of white clay to remove air bubbles. Place it between two wooden guide strips on a canvas mat. -
Roll it out:
Use a rolling pin to flatten the clay until the roller rests on the guide strips, ensuring an even thickness of about 1/4 inch. -
Cut the square:
Using a square cookie cutter or a ruler and needle tool, cut out a perfect square shape for your tile base. Smooth the edges with a damp finger to remove any sharp burrs.
Clean Edges
Before firing, run a damp sponge or finger along every cut edge. Sharp clay becomes razor-sharp ceramic after firing, so smoothing now saves fingers later.
Step 2: Creating Facial Features
-
Form the eyes:
Roll two medium-sized balls of clay and flatten them slightly into thick discs. These will be the whites of the eyes. -
Make the pupils:
Roll two smaller balls of clay. Press a small tool or the end of a paintbrush into the center of each to create the pupil indentation. -
Attach the eyes:
Score the back of the large discs and the spots on the tile where they will go. Apply a dab of slip and press firmly. Repeat this process to attach the pupils onto the whites. -
Add the nose:
Roll a small, oval-shaped piece of clay for the nose. Score, slip, and attach it vertically in the center of the face, just below the eyes. -
Sculpt the mouth:
Roll a long, thin snake of clay. Curve it into a wide U-shape for the smile. I like to taper the ends slightly so they blend better into the face. -
Attach the smile:
Score and slip the mouth area, then press the clay snake onto the tile. Use a modeling tool to blend the top edge of the lip into the face, leaving the bottom edge defined. -
Insert the teeth:
Cut small triangles from a leftover slab or hand-shape them. Score the inside of the mouth smile and attach the teeth so they point downward, pressing them securely into the lip.
Magnet Madness
Make these tiles smaller (about 2 inches) and glue a strong magnet to the back after the final firing. They make adorable refrigerator art holders.
Step 3: Details and Glazing
-
Texture the eyebrows:
Roll tiny spheres of clay—three or four for each side. Attach them in an arch above the eyes to create bumpy eyebrows. -
Add finishing textures:
Using a needle tool or a stiff brush, gently stipple the area immediately surrounding the eyes. This creates a rough texture that contrasts with the smooth skin. -
Poke ventilation holes:
If you plan to hang this or if the clay is thick, use a needle tool to poke a few small holes along the bottom edge or back, which aids in even drying. -
Bisque fire:
Allow the clay to dry slowly and completely. Once bone dry, fire the piece in a kiln to the bisque stage. -
Apply underglaze:
Paint the nose, eyebrow dots, and triangular teeth with a terracotta or orange underglaze. Also, add a dot of green or black inside the pupil indentation. -
Glaze the face:
Dip or brush the main face area with a pale green speckled glaze. Be careful to paint around the white parts of the eyes and the teeth if you want them to remain raw or white. -
Wipe the details:
If glaze covers the textured eyebrow dots or nose, gently wipe the top surface with a damp sponge so the orange color shows through the speckles. -
Final firing:
Fire the tile a second time according to the glaze manufacturer’s temperature guidelines to achieve that glossy, durable finish.
Once the kiln cools, you’ll have a permanent, goofy friend to brighten up your wall or shelf
Animal Face Medallions
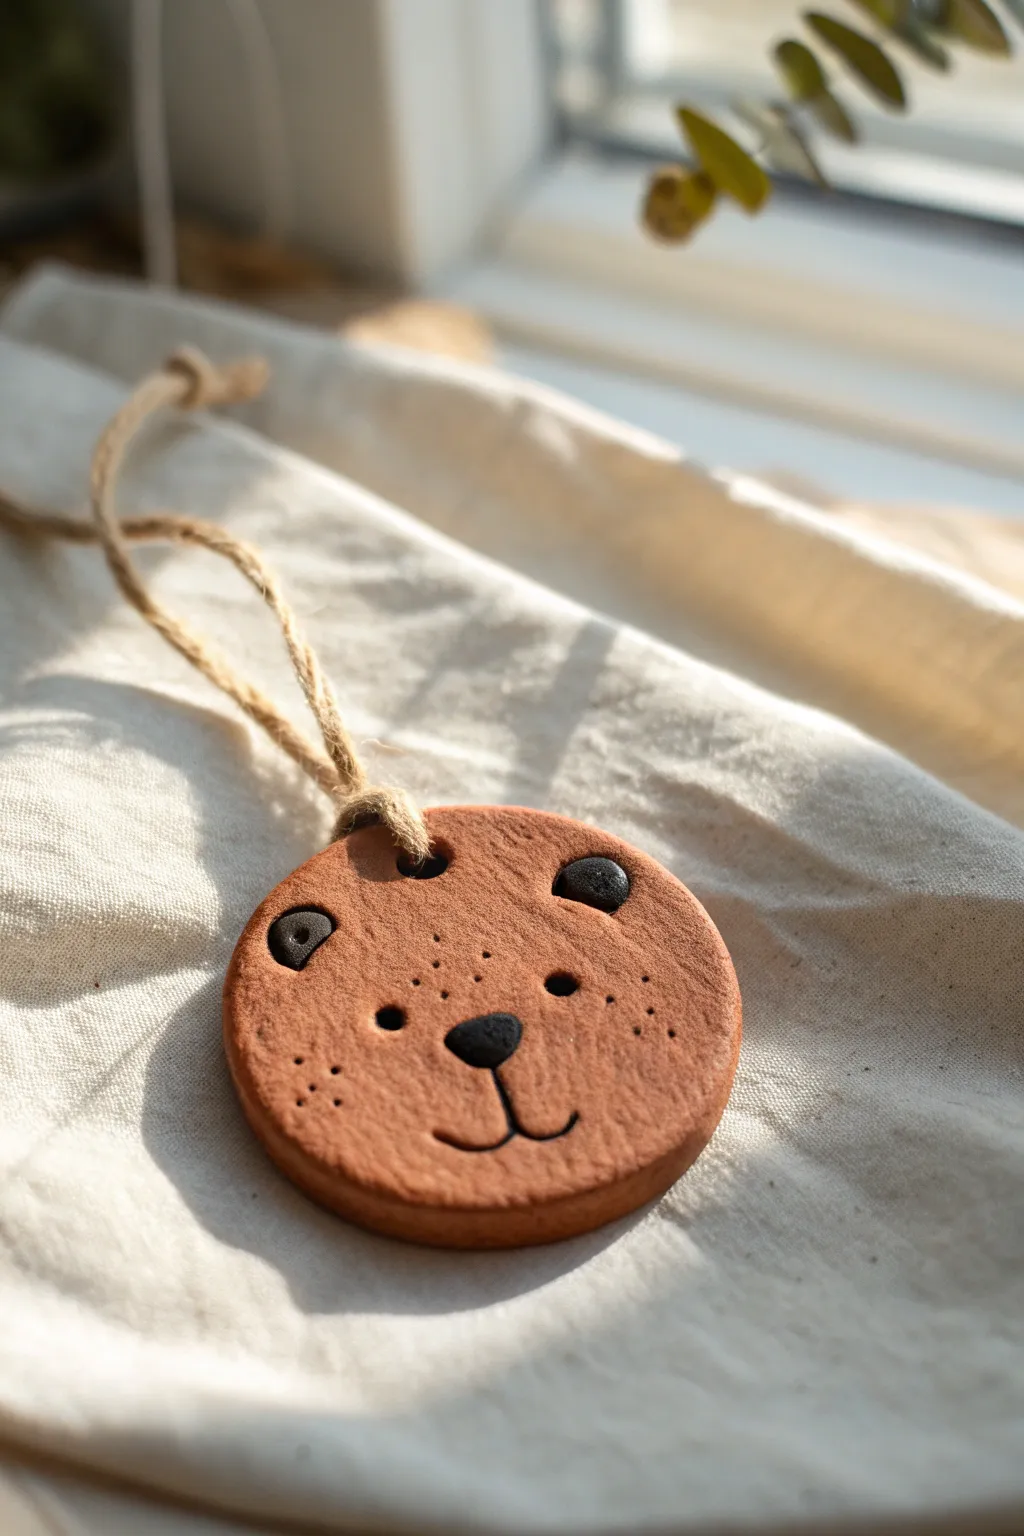
This rustic medallion captures the sweet expression of a bear using natural-toned clay and simple shapes. It makes for a lovely backpack charm, holiday ornament, or a simple keepsake to hang in a child’s room.
Step-by-Step
Materials
- Terracotta-colored air dry clay (or polymer clay)
- Black clay (air dry or polymer to match base)
- Round cookie cutter (approx. 2-3 inches)
- Rolling pin
- Jute twine or hemp cord
- Straw or skewer (for poking holes)
- Toothpick or needle tool
- Small dab of water (for attaching pieces)
Step 1: Shaping the Base
-
Condition the clay:
Start by kneading a golf-ball-sized amount of terracotta clay until it is soft, pliable, and free of cracks. -
Roll it out:
Use your rolling pin to flatten the clay into a slab that is about 1/4 inch thick. You want it substantial enough so it won’t crack easily. -
Cut the circle:
Press your round cookie cutter firmly into the clay to create a perfect circle. Gently push the clay out of the cutter. -
Smooth the edges:
Dip your finger in a tiny bit of water and run it around the circumference of the circle to smooth down any rough cutting burrs. -
Create the hanging hole:
Use a straw or a skewer to punch a hole near the top edge of the circle. Make sure it isn’t too close to the edge, or the clay might break later.
Cracked Clay?
If tiny cracks appear while drying, mix a small amount of clay with water to make a paste (slip) and smooth it over the cracks with your finger.
Step 2: Adding the Features
-
Make the eyes:
Take two tiny pieces of black clay and roll them into small balls. Flatten them slightly with your fingertip. -
Imprint eye sockets:
Use the rounded end of a paintbrush handle or your pinky finger to press two shallow indentations into the face where the eyes will go. -
Attach the eyes:
Press the black flattened balls into the indentations you just made. The pressure should be enough to stick them, but add a dot of water if the clay feels dry. -
Add reflection:
Using a needle tool or toothpick, gently poke a tiny hole into the center of each black eye to create a pupil or reflection like the bear in the photo. -
Form the nose:
Roll a slightly larger piece of black clay into a soft triangle or oval shape for the nose. -
Place the nose:
Position the nose in the center of the face, slightly lower than the eyes, and press it down firmly. -
Sculpt the mouth:
Use a toothpick or a clay sculpting tool to lightly carve a vertical line coming down from the nose. -
Smile lines:
At the bottom of that vertical line, carve two curved lines going outward to form the classic anchor-shaped animal mouth. -
Add freckles:
Take your toothpick and gently poke a cluster of small dots on either cheek area to simulate whisker spots or freckles.
Step 3: Finishing Touches
-
Create the ears:
Wait—this bear’s ears are actually negative space. Use a small round tool or the end of a straw to impress two half-circles into the top edge of the medallion. -
Alternative ears:
If you prefer the look in the photo, roll two very small balls of black clay and press them flat into the top left and right corners of the face instead of carving them. -
Final drying:
Set the medallion in a safe, dry place. If using air-dry clay, let it sit for 24-48 hours. If using polymer, bake according to package instructions. -
Thread the string:
Cut a length of jute twine. Fold it in half and push the loop through the hole from front to back. -
Secure the loop:
Pull the loose ends of the twine through the loop and tighten it to create a lark’s head knot. -
Tie it off:
Tie the loose ends together at your desired length to finish the hanger.
Make it a Gift
Before the clay dries, stamp the child’s name or the year on the back of the medallion to turn this cute craft into a personalized keepsake.
Hang your charming bear friend in a sunny window or on a bag zipper to enjoy your handiwork

TRACK YOUR CERAMIC JOURNEY
Capture glaze tests, firing details, and creative progress—all in one simple printable. Make your projects easier to repeat and improve.
Texture-Stamp Pattern Cookies
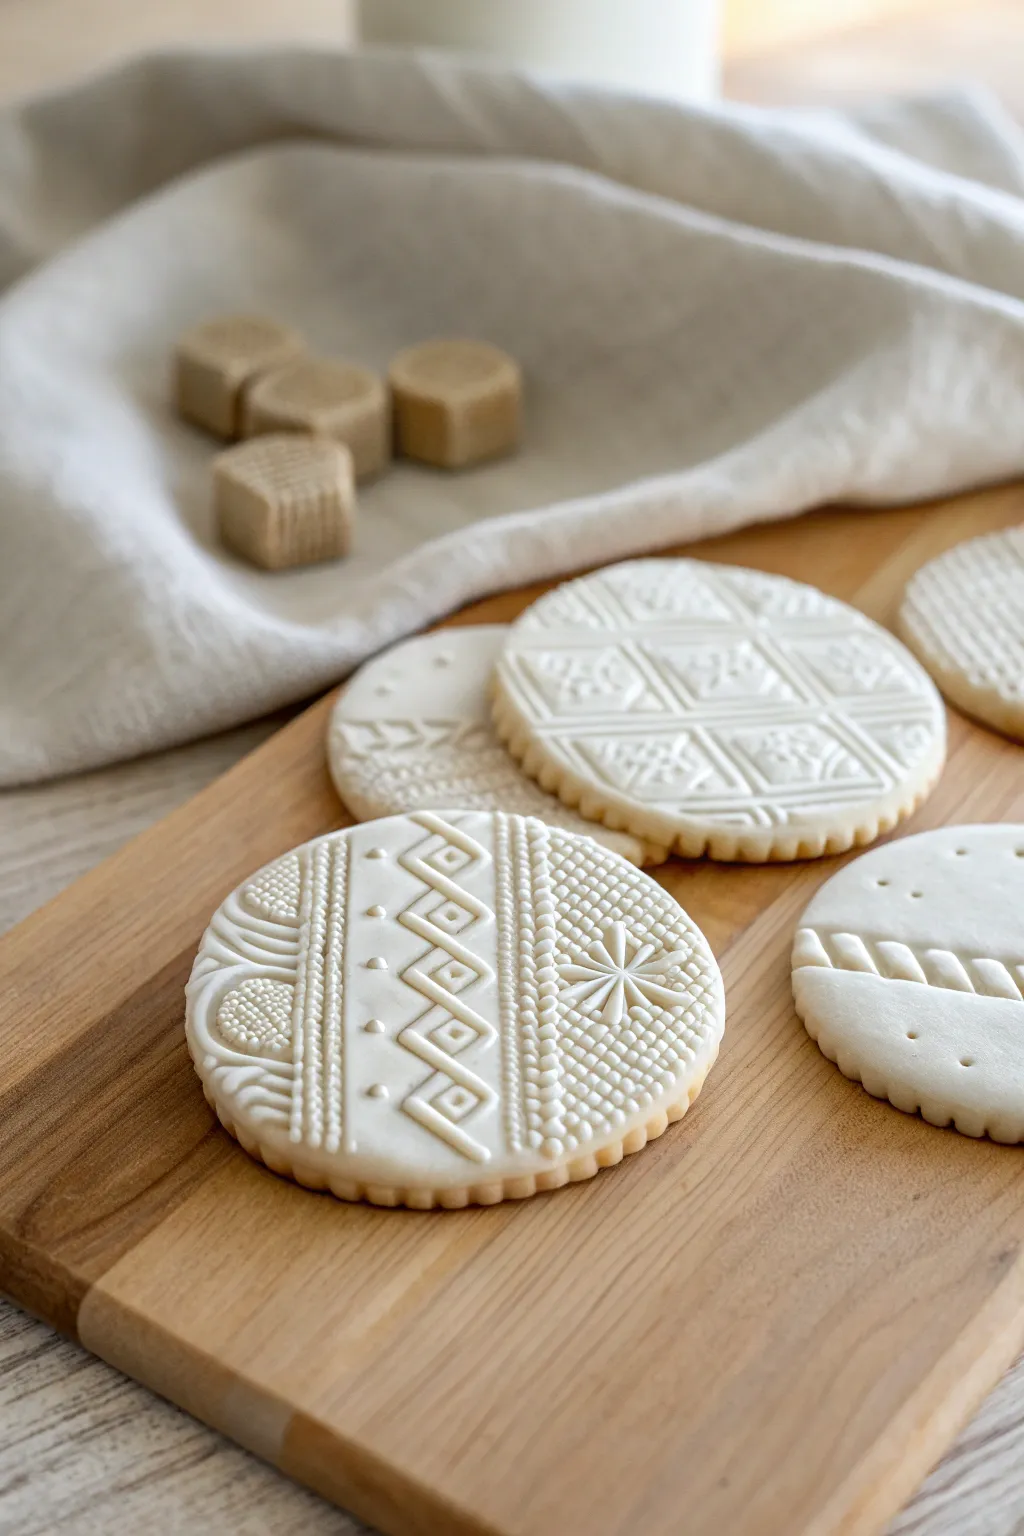
These delightful faux cookies are a perfect tactile experience for little hands, turning simple white clay into intricate works of art. Using everyday objects to stamp patterns, you’ll create beautiful, keepsake-worthy discs that look almost good enough to eat.
How-To Guide
Materials
- White air-dry clay (or salt dough)
- Round cookie cutter (approximately 3 inches)
- Rolling pin
- Parchment paper or non-stick craft mat
- Assorted texture tools (patterned fabric scrap, lace, fork, lego brick)
- Fine-point stylus or toothpick
- Small geometric stamps (optional)
- Sandpaper (fine grit)
Step 1: Preparing the Base
-
Condition the clay:
Start by taking a handful of white air-dry clay. Knead it in your hands until it becomes soft, pliable, and free of cracks. If it feels too sticky, you can dust your hands lightly with cornstarch. -
Roll it out:
Place the ball of clay onto a sheet of parchment paper or a non-stick craft mat. Use a rolling pin to flatten the clay evenly. -
Check thickness:
Aim for a uniform thickness of about 1/4 inch. If it’s too thin, the impressions won’t be deep enough; too thick, and it will take forever to dry. -
Cut the shapes:
Press your round cookie cutter firmly into the rolled clay to cut out your circles. Gently peel away the excess clay from around the circles. -
Smooth the edges:
Dip your finger in a tiny bit of water and run it along the cut edge of each circle to smooth out any roughness or fraying from the cutter.
Sticky Situation?
If clay sticks to your stamps, lightly dust the stamp surface with cornstarch or baby powder before pressing it into the soft clay.
Step 2: Designing the Patterns
-
Plan your design zones:
Visualize the cookie in sections. Using a toothpick or plastic knife, lightly mark vertical or horizontal lines to divide the circle into bands where different patterns will go. -
Create a focal point:
For the geometric design shown, press a diamond-shaped tool or the corner of a square block into the center band to create a repeating zig-zag or diamond pattern. -
Add detail with dots:
Use a small stylus or a dull pencil tip to press small dots inside the geometric shapes or along the dividing lines. Varying the pressure changes the dot size. -
Texture the side bands:
On the flanking bands, press a piece of textured fabric, a specialized clay texture sheet, or the bottom of a sneaker into the clay to create a grid-like or knobby background. -
Stamp a feature element:
If you have a small snowflake or starburst stamp, press this firmly into one of the textured sections to create a highlighted motif. -
Refine the lines:
Using a tool with a straight edge, gently re-define the separation lines between your patterned zones. For a special touch, I like to press a continuous line of tiny dots along these borders to mimic stitching. -
Check for depth:
Look at the patterns from the side. Ensure the impressions are deep enough to be seen clearly, but not so deep that they warp the circle shape.
Step 3: Finishing Up
-
Add edge detail:
To mimic a scalloped cookie edge, use a small, round stick or the side of a toothpick to press vertical indentations all around the outer rim of the circle. -
Begin drying:
Leave the clay discs on the parchment paper in a flat, dry area. Avoid direct sunlight which can cause cracking. -
Flip periodically:
After about 12 hours, greatly turn the cookies over. This helps the bottom dry and prevents them from curling up at the edges. -
Final sand:
Once fully cured (usually 24-48 hours depending on humidity), take a piece of fine-grit sandpaper and very gently buff any sharp burrs on the edges. -
Seal (optional):
If you want these to last longer, apply a thin coat of matte varnish or mod podge to seal the surface.
Pro Tip
Don’t have fancy tools? Look in the kitchen! Meat tenderizers and cut crystal glass bottoms make incredible geometric patterns.
Enjoy displaying your beautifully textured faux cookies as decorations or using them for play
Leaf-Imprint Nature Keepsakes
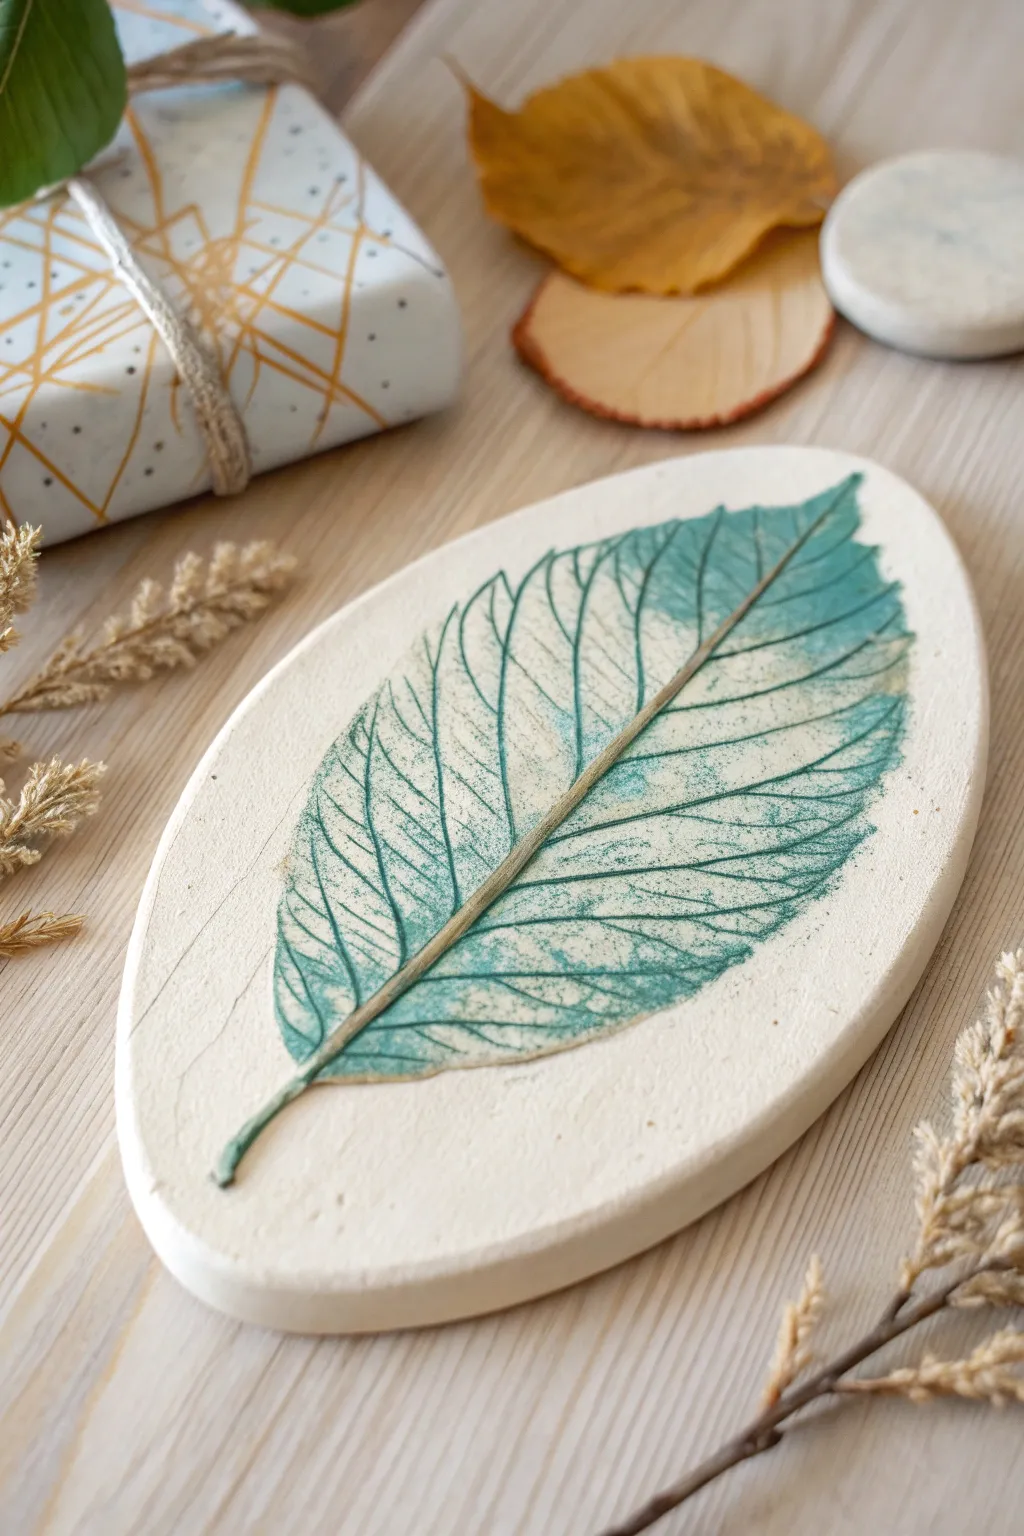
Capture the delicate details of nature with this elegant clay keepsake that highlights the intricate vein structure of a real leaf. The finished piece features a smooth, bone-white base with a beautifully tinted, fossil-like imprint that makes a perfect gift or decorative tray.
Step-by-Step
Materials
- Air-dry clay (white)
- Small rolling pin
- Fresh leaf with prominent veins (like Elm or Birch)
- Oval cookie cutter or butter knife
- Acrylic paints (Teal, Forest Green, White)
- Small flat paintbrush
- Wax paper or parchment
- Small bowl of water
- Fine-grit sandpaper (optional)
- Clear matte acrylic sealer (optional)
Step 1: Preparing the Clay Base
-
Condition the clay:
Take a handful of air-dry clay and knead it in your hands until it becomes soft, pliable, and free of cracks. -
Roll it out:
Place the clay on a sheet of wax paper to prevent sticking. Use your rolling pin to flatten it into a smooth slab about 1/4 inch thick throughout. -
Smooth the surface:
Dip your finger lightly in water and run it over the surface of the clay to smooth out any small wrinkles or fingerprints. -
Cut the shape:
Press a large oval cutter into the clay. If you don’t have a cutter, use a butter knife or clay tool to freehand a gentle oval shape, then peel away the excess clay.
Cracked Clay?
If small cracks appear while drying, mix a tiny bit of fresh clay with water to make a paste and smooth it into the cracks with your finger.
Step 2: Creating the Imprint
-
Position the leaf:
Select your fresh leaf and place it vein-side down onto the center of your clay oval. The vein side is usually the back of the leaf and provides the best texture. -
Roll to impress:
Gently roll your rolling pin over the leaf with firm, even pressure. You want to push the leaf flush into the clay without making the slab too thin. -
Reveal the veins:
Carefully find the stem of the leaf and slowly peel it back to reveal the imprint. Do this slowly so you don’t tear the clay edges. -
Initial drying:
Allow the clay to dry according to the package instructions, usually 24-48 hours. Flip it over halfway through to ensure the bottom dries evenly. -
Smooth the edges (Optional):
Once fully dry, check the edges for roughness. I like to lightly sand the rim with fine-grit sandpaper for a professional finish.
Try a Wash Effect
Instead of green, try an antique brown or metallic gold paint wash to make the leaf look like a real fossil or a vintage artifact.
Step 3: Painting and Finishing
-
Mix the wash:
Mix a small amount of teal and forest green paint, then dilute it with water until it has the consistency of thin milk or heavy watercolor. -
Apply the color:
Generously brush the watery paint mixture over the entire leaf impression, making sure it pools deeply into the crevices of the veins. -
Wipe back:
Immediately take a damp paper towel or sponge and gently wipe the surface of the clay. This removes paint from the high points but leaves the color trapped in the imprinted lines. -
Adjust contrast:
If the color is too light, repeat the wash and wipe process. If it’s too dark, use a clean wet sponge to scrub a bit more pigment away until the veins stand out clearly. -
Paint the stem:
Use a small detail brush with undiluted, slightly darker green paint to carefully trace just the central stem line for added definition. -
Seal the piece:
Once the paint is completely dry, apply a thin coat of clear matte sealer to protect the surface from dust and moisture.
Display your botanical art on a shelf or use it to hold small treasures
Flower Thumbprint Trinket Dishes
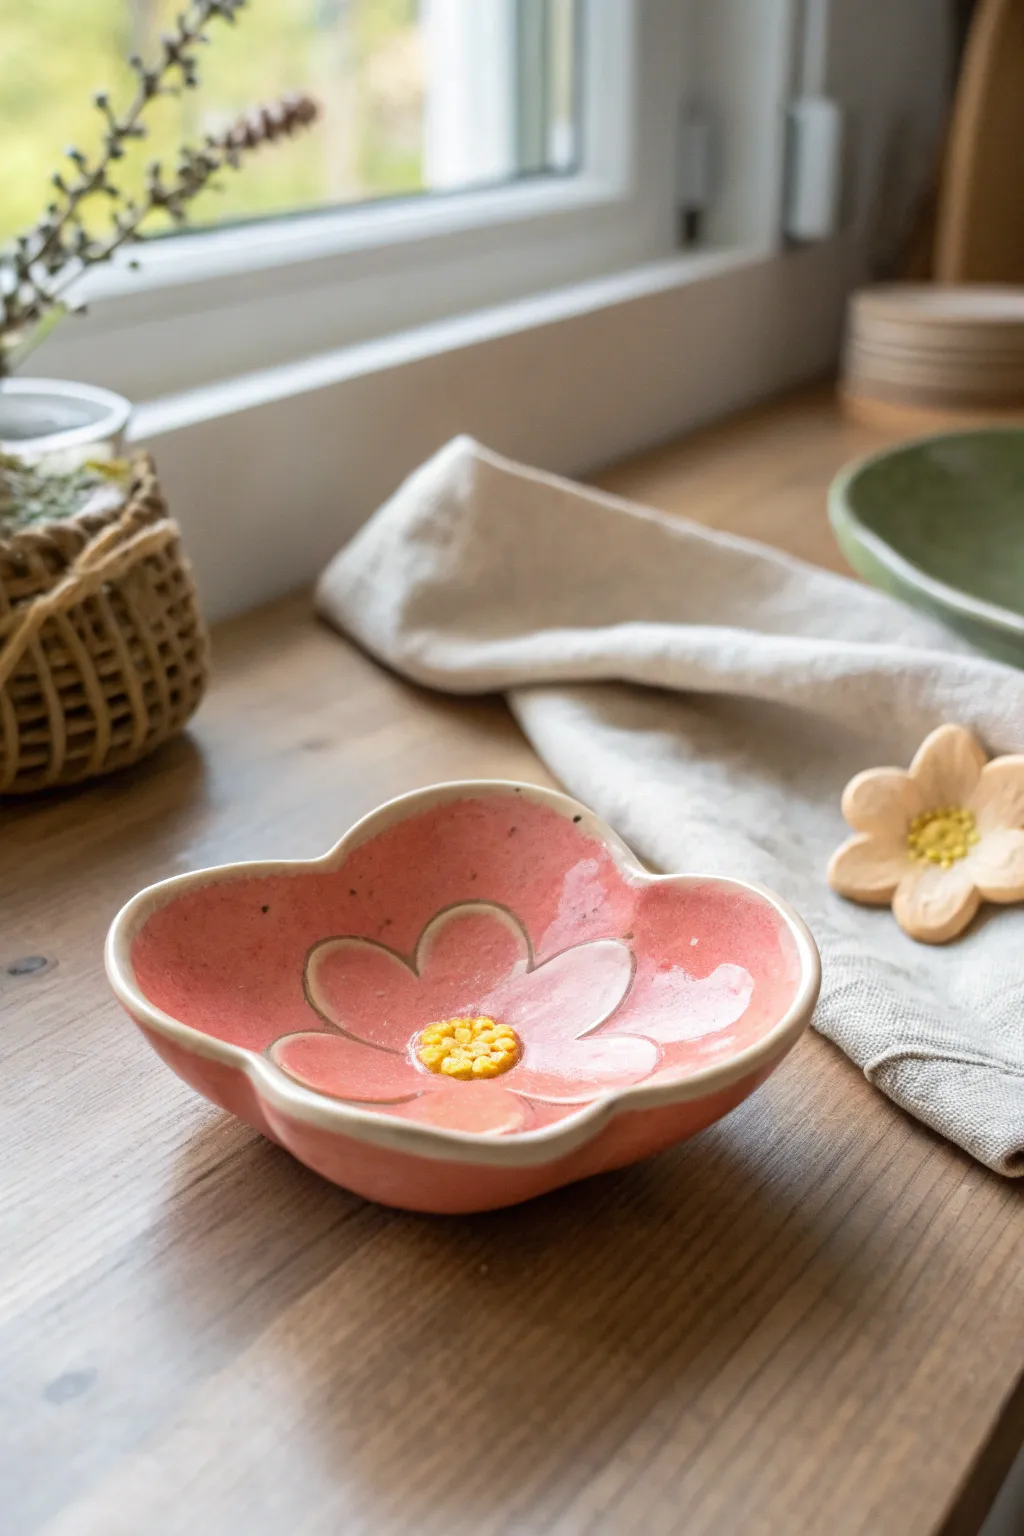
This charming flower dish captures the soft beauty of a cherry blossom with its gentle pink glaze and sunny yellow center. Perfect for holding dainty rings or loose change, its organic shape and textured pollen make it a sweet addition to any bedside table.
How-To Guide
Materials
- White specialized air-dry or polymer clay (gloss finish preferred)
- Small rolling pin
- Flower cookie cutter (medium size, approx. 4 inches)
- Clay sculpting tool or wooden skewer
- Small sponge
- Pink acrylic paint (soft rosy shade)
- Yellow acrylic paint (deep sunny shade)
- White acrylic paint (for details)
- Fine detail paintbrush
- Gloss varnish or sealant (food-safe if needed)
- Small bowl or cup (for shaping)
Step 1: Shaping the Flower
-
Roll the clay:
Start by kneading your white clay until it is soft and pliable. Roll it out on a smooth surface to a thickness of about 1/4 inch, ensuring the surface is even. -
Cut the shape:
Press your flower-shaped cookie cutter firmly into the rolled clay. If you don’t have a cutter, you can hand-cut a five-petal flower shape using a safe plastic knife. -
Smooth the edges:
Gently lift the flower shape. Dip your finger in a little bit of water and run it along the cut edges to smooth out any roughness or stray clay bits. -
Create the curve:
Place your clay flower inside a small bowl or cup, gently pressing it down so the petals curve upward to form a shallow dish shape. Don’t press too hard; just let gravity help form the curve. -
Define the center:
Take a small pinch of fresh clay and roll it into a tiny ball, then flatten it slightly into a disc. Press this firmly into the very center of your flower dish to create the base for the pollen. -
Texture the pollen:
Using a blunt tool or the end of a paintbrush, indent the center disc repeatedly to create a bumpy, seed-like texture. -
Dry completely:
Allow the clay to dry fully according to the package instructions. This usually takes 24-48 hours. I like to leave it in the bowl for the first half of drying so it holds its cupped shape.
Cracked Clay Fix
If you see small cracks appearing as the clay dries, mix a tiny bit of fresh clay with water to make a paste and smooth it into the cracks with your finger.
Step 2: Painting and Glazing
-
Base coat:
Paint the entire flower surface (except the textured center) with a soft rosy pink acrylic paint. Depending on your paint’s opacity, you might need two thin coats for even coverage. -
Paint the center:
Carefully paint the textured center disc with a deep sunny yellow paint. Use a dabbing motion to get the color into all the little crevices. -
Add petal definitions:
Once the pink and yellow layers are dry to the touch, mix a tiny bit of water into your white acrylic paint to improve flow. -
Outline the petals:
Using your finest detail brush, paint delicate white loops on the inside of the petals. These shouldn’t trace the edge exactly but rather create a smaller flower shape inside the pink area. -
Create distressing (optional):
To mimic the handmade look in the photo, you can leave the very rim of the dish unpainted or lightly sand roughly painted edges later to reveal the white clay underneath. -
Speckle effect:
For that earthy ceramic look, flick a tiny amount of diluted brown or darker pink paint onto the dish using an old toothbrush. Keep this very subtle. -
Seal the dish:
Once all paint is completely dry, apply a coat of gloss varnish. This gives the dish that shiny, ceramic-like finish and protects the paint from chipping. -
Final cure:
Let the varnish cure for the recommended time before placing any jewelry or trinkets inside.
Smoother Finish Idea
Before painting, lightly sand the dried clay with fine-grit sandpaper. This removes fingerprints and makes the surface ultra-smooth for a professional glaze look.
Enjoy using your new handmade dish to keep your tiny treasures safe and organized
Dinosaur Footprint Fossils
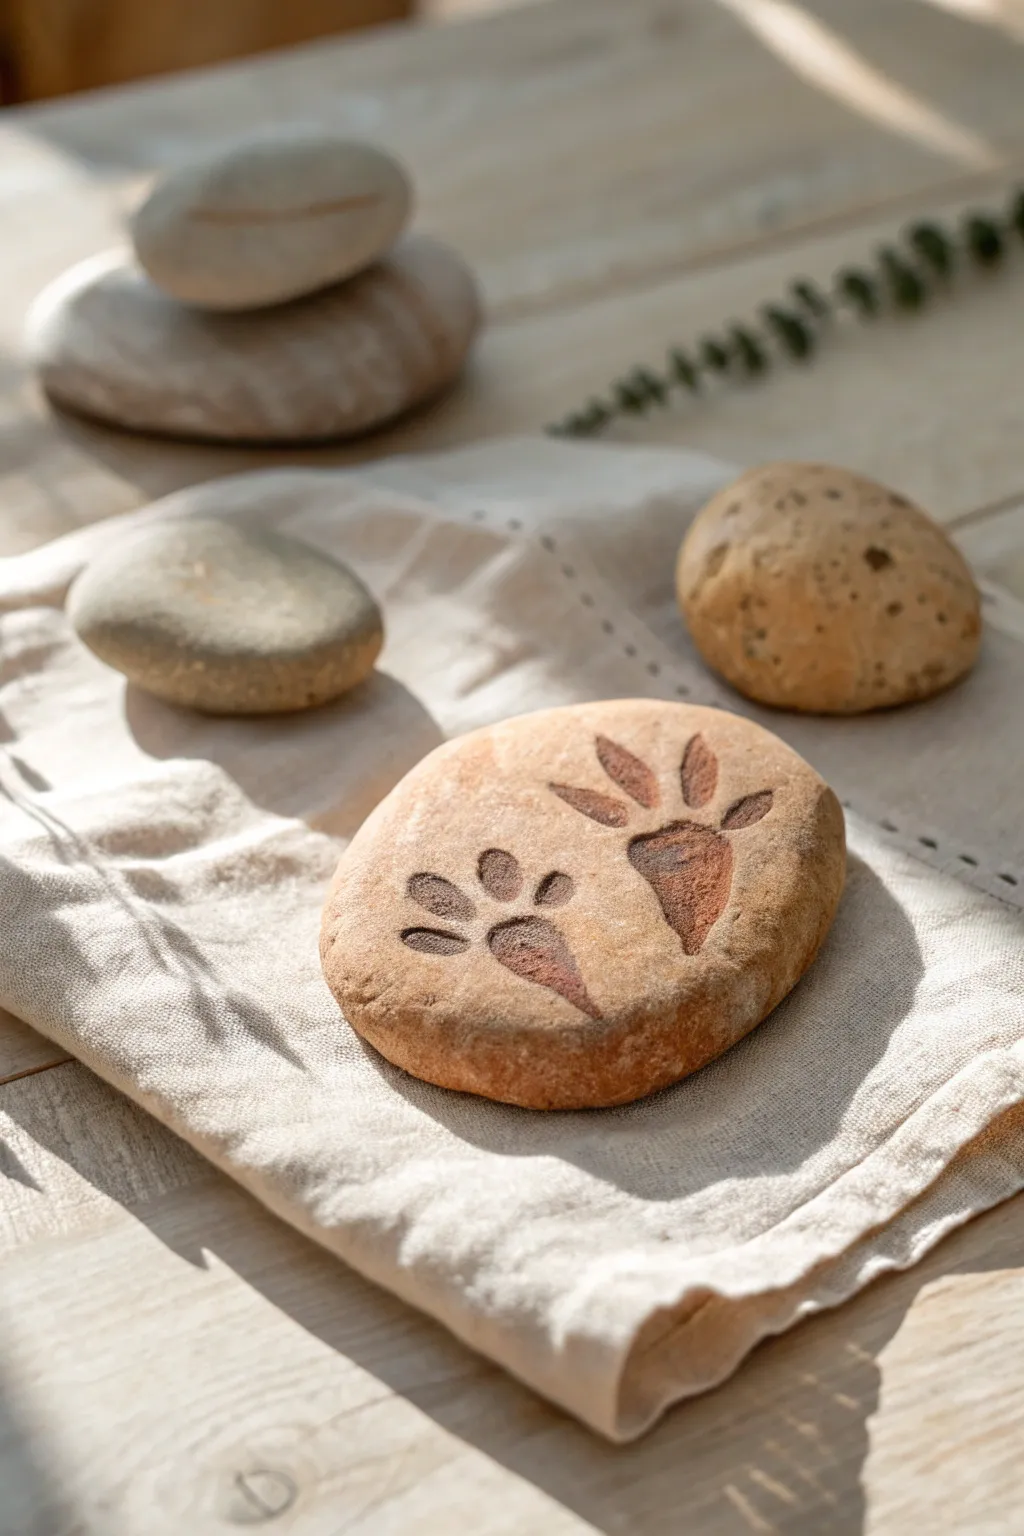
Step back in time with these delightful dinosaur footprint fossils, perfect for little hands to shape and stamp. The finished project features a smooth, stone-like texture with realistic three-toed tracks that look like they’ve been preserved for millions of years.
Step-by-Step
Materials
- Air-dry clay (terracotta or white)
- Acrylic paint (tan, beige, and dark brown)
- Small sponge
- Fine-grit sandpaper
- Matte finish sealant spray
- Carving tool or plastic knife
- Rolling pin (optional)
- Small paintbrush
- Water in a small cup
Step 1: Shaping the Stone
-
Condition the Clay:
Start by taking a handful of air-dry clay roughly the size of a tennis ball. Knead it thoroughly in your hands until it becomes warm, pliable, and free of any stiff lumps. -
Form a Ball:
Roll the conditioned clay between your palms to create a smooth, round sphere. Try to smooth out any major cracks as you roll. -
Flatten into a Disc:
Gently press the ball down onto your work surface using the palm of your hand. You want a thick, flattened oval shape akin to a river stone, about 3/4 of an inch thick. -
Smooth the Edges:
Dip your finger in a little bit of water and run it along the perimeter of the clay disc. This helps erase fingerprints and small fissures, giving the piece a weathered stone appearance.
Step 2: Creating the Tracks
-
Outline the Footprint:
Using a carving tool or a safe plastic knife, lightly trace the outline of a dinosaur foot directly onto the wet clay heavily. A classic theropod print has a V-shaped heel and three distinct toes. -
Press the Impressions:
Gently press down inside your traced lines to create depth. You want the print to look like a heavy creature stepped into mud, so make the center deeper than the edges. -
Refine the Toes:
Use the rounded end of a paintbrush handle or your pinky finger to smooth out the inside of the toe impressions, ensuring they are distinct and rounded at the tips. -
Add a Second Print:
Repeat the process for a second footprint nearby, perhaps angled slightly differently to suggest movement. I like to make one slightly overlapping the other if space allows, but distinct placement works great too. -
Final Smoothing:
Check the surface one last time. If the carving created jagged little bits of clay, smooth them down with a damp finger before setting the piece aside. -
Dry Completely:
Place the fossil in a dry, ventilated area. Allow it to air dry for 24 to 48 hours, flipping it over halfway through to ensure the bottom dries evenly.
Crack Control
If you see cracks forming while the clay dries, mix a tiny bit of fresh clay with water to make a paste (slip) and fill the cracks, then smooth over.
Step 3: Finishing Touches
-
Sand for Texture:
Once fully dry and hard, lightly rub the surface with fine-grit sandpaper. This mimics the texture of real sedimentary rock. -
Base Coat:
Mix a light beige or tan acrylic paint. Use a sponge to dab this color all over the stone, covering the clay completely but keeping the layer thin to preserve texture. -
Darken the Prints:
While the base is drying, mix a darker brown paint with a tiny drop of water to create a wash. Use a small brush to paint this into the recessed footprint areas. -
Wipe Back Excess:
Immediately after painting the dark recession, take a paper towel and lightly wipe across the top produced surface. This leaves the dark paint in the deep ‘shadows’ of the print while keeping the top light. -
Add Speckles:
Dip an old toothbrush or stiff brush into diluted brown or grey paint. Run your thumb across the bristles to flick tiny speckles onto the stone for a realistic mineral look. -
Seal the Artifact:
Finish by spraying a light coat of matte sealant over the entire piece to protect the paint and prevent the clay from absorbing moisture.
Natural Stone Texture
Before drying, gently press a real rock or a piece of crumpled aluminum foil onto the clay surface to imprint realistic rock textures instantly.
Display your ancient artifacts on a shelf or hide them in the sandpit for a fun paleontological dig
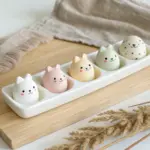
Color Sorting Clay Balls

These delightfully smooth, tactile clay balls are not only satisfying to make, but they also double as a wonderful educational toy for color sorting games. Their matte finish and gentle color palette evoke a lovely vintage feel perfect for tiny hands.
Step-by-Step Tutorial
Materials
- White air-dry clay (or polymer clay)
- Acrylic paints (various colors: red, blue, yellow, orange, cream, teal)
- Parchment paper or wax paper
- Small bowls for mixing
- Disposable gloves (optional to keep hands clean)
- Fine-grit sandpaper (optional)
- Matte spray varnish
Step 1: Prepping and Mixing Color
-
Portion the clay:
Start by pulling off small chunks of your white air-dry clay. Aim for pieces that are roughly the size of a large walnut; you will need one chunk for each color you plan to create. -
Condition the clay:
Knead each white chunk in your hands until it feels soft, warm, and pliable. This prevents cracks from forming later. -
Add the first color:
Flatten one piece of clay into a small pancake. Add a pea-sized drop of acrylic paint into the center. I prefer starting with a small amount of paint, as you can always add more for intensity later. -
Knead in the pigment:
Fold the clay over the paint to trap it inside, then knead thoroughly. The color will stripe at first, but keep folding and pressing until the hue is completely uniform. -
Repeat for all colors:
Wash your hands or change gloves, then repeat this mixing process for each of your desired colors—blue, red, orange, yellow, teal, and cream. Create a beautiful palette of pastel or muted tones.
Smooth Surface Secret
To avoid flat spots while drying, place the wet clay balls on a piece of soft foam or a dedicated bead drying rack instead of a hard table surface.
Step 2: Shaping the Spheres
-
Divide colored clay:
Take your ball of colored clay—let’s say the blue one—and pinch off smaller pieces. Each piece should be about the size of a large marble or a small bouncy ball. -
Initial rolling:
Place a piece of clay between your palms. Roll your hands in a circular motion to form a rough sphere. -
Smooth the surface:
Inspect the ball for any cracks or seams. Gently smudge these out with your fingertip, using a tiny drop of water if the clay feels dry. -
Perfect the roundness:
Roll the ball again, this time with lighter pressure, to get it perfectly spherical. Place it gently on a sheet of parchment paper so it doesn’t stick to your table. -
Repeat rolling:
Continue this process for all your colored clay portions until you have a large collection of multi-colored spheres.
Texture Twist
Before drying, gently roll distinct textures onto some balls using burlap or lace to add a sensory element to the color sorting game.
Step 3: Finishing Touches
-
Air dry completely:
Allow the clay balls to sit undisturbed on the parchment paper. They will need at least 24 to 48 hours to dry fully, turning them over once halfway through so the bottoms dry evenly. -
Sand for smoothness:
Once fully hard, check for any flat spots or bumps. Lightly buff the surface with fine-grit sandpaper to make them incredibly smooth and pleasant to touch. -
Dust off:
Wipe each ball with a slightly damp cloth or a dry soft brush to remove any clay dust created by sanding. -
Seal the surface:
Take the balls outside or to a well-ventilated area. Apply a light coat of matte spray varnish to protect the color from transferring and to give them durability without making them shiny. -
Final cure:
Let the varnish urge completely according to the can’s instructions before using them for sorting games.
Now you have a charming set of handmade manipulatives ready for endless learning activities
Big-Hole Clay Beads

These delightfully chunky, textured beads are perfect for little hands to shape and string. Their matte, porous finish gives them an earthy look that pairs beautifully with natural hemp cord for a simple yet stylish accessory.
Detailed Instructions
Materials
- Air-dry clay (white or terra cotta)
- Acrylic paints (pastel blue, yellow, coral/red, cream)
- Old toothbrush or stiff bristle brush
- Thick skewer or chopstick (for making holes)
- Hemp cord or jute twine
- Small wooden beads (optional, for the ends)
- Scissors
Step 1: Shaping the Beads
-
Portion the clay:
Start by dividing your air-dry clay into equal chunks, roughly the size of a large grape or a bouncy ball. You’ll need about 9-10 pieces for a bracelet like the one shown. -
Roll into spheres:
Have your little artist roll each chunk between their palms to create a smooth, round ball. Don’t worry if they aren’t perfect spheres; organic shapes add charm. -
Add texture:
Before the clay hardens, take an old toothbrush or a stiff brush and gently tap the surface of each bead. This stippling motion creates the realistic, porous stone texture visible in the photo. -
Create the holes:
Using a thick skewer or chopstick, carefully poke a hole straight through the center of each bead. Rotate the skewer gently to widen the hole; since we are using thick cord later, the hole needs to be quite large. -
Let them dry:
Set the beads aside on a sheet of parchment paper to dry completely. Depending on the brand of clay, this usually takes 24 to 48 hours. Rotate them occasionally so they dry evenly.
Smoother Stringing
Wrap a small piece of masking tape tightly around the end of your hemp cord to create a stiff ‘needle.’ This prevents fraying and makes threading the chunky beads much easier for kids.
Step 2: Painting the Colors
-
Mix your palette:
Prepare your acrylic paints. You’ll need a soft pastel blue, a sunny yellow, a coral-like red, and a speckled cream color. If you only have primary colors, mix white into them to soften the tones. -
Paint the first coat:
Paint the beads one by one. I find it helpful to put the bead back on a skewer while painting to reach all sides without getting fingerprints on the wet paint. -
Create the speckled look:
For the cream-colored bead, you might want to flick a tiny bit of brown paint onto it using a toothbrush to mimic a natural stone even further. -
Dry the paint:
Allow the paint to dry fully. Since the clay is porous, the first coat might soak in quickly, so apply a second coat if you want a more opaque color.
Step 3: Assembly
-
Prepare the cord:
Cut a length of hemp cord or jute. It should be long enough to wrap around the wrist plus about 6 inches extra on each side for tying and decoration. -
String the beads:
Thread your painted, dry beads onto the cord. You can follow the pattern in the image: alternate colors like blue, yellow, coral, cream, and repeat until the strand is full. -
Add spacing knots (optional):
If you want the beads to stay apart slightly, you can tie a simple overhand knot in the cord between each bead, though stringing them tightly together works great too. -
Secure the ends:
Once all beads are on, tie a secure knot at both ends of the beaded section to keep them in place. -
Create the closure:
Take the two loose tail ends of the cord and create a sliding knot mechanism, or create a loop on one side and a large knot on the other for a simple toggle. -
Finish the tails:
Thread a small coordinating bead (like a tiny blue wooden bead) onto the very end of each cord tail. -
Knot and trim:
Tie a small knot below the finishing bead to secure it and trim any excess cord for a neat finish.
Scented Jewelry
Before painting, add a drop of essential oil to the dry clay beads. The porous clay acts as a natural diffuser, turning this craft into a delightful aromatherapy bracelet.
Now you have a beautiful, chunky piece of wearable art that looks just like polished volcanic stone
Clay Dot Collage Pictures

Bring a tactile twist to your next craft session with this delightful clay dot collage, perfect for little hands developing fine motor skills. Using pre-rolled clay balls and flat discs, you can create a textured sun and stunning flowers that pop right off the page.
Step-by-Step Tutorial
Materials
- Air-dry clay or modeling dough (orange, yellow, pink, dusty rose, dark green, light green)
- Thick cardstock or canvas board (cream or white)
- PVA glue or tacky glue
- Rolling pin (optional)
- Small wooden sculpting tool or toothpick
- Parchment paper (for rolling clay)
- Small bowl (for holding clay balls)
Step 1: Preparation & Clay Rolling
-
Prep the workspace:
Lay down parchment paper to keep your surface clean and place your cardstock or canvas board in the center. -
Roll tiny balls:
Start by pinching off tiny pieces of orange, yellow, pink, and dusty rose clay. Roll these between your palms to create many pea-sized spheres. -
Create center discs:
For the middle of the sun and flowers, roll slightly larger balls of orange and yellow clay, then gently flatten them into discs about the size of a large coin. -
Flatten the dots:
Gently press down on half of your pea-sized spheres to turn them into small flat dots, keeping the other half as round spheres for variety. -
Make the stems:
Roll small balls of dark green clay for the flower stems. You will need roughly 10-15 for the tall flower.
Pro Tip: Stickability
If the clay is fresh and sticky, you might not need glue. However, a dab of white school glue ensures the pieces stay put permanently after drying.
Step 2: Building the Sun
-
Place the sun’s core:
Apply a dab of glue to the upper left corner of your paper and press down the large orange disc you made earlier. -
Layout the rays:
Using tiny orange clay balls, create lines radiating outward from the central disc. I like to arrange them dry first to ensure the spacing looks right before gluing. -
Secure the rays:
Once you are happy with the pattern, lift each tiny ball, add a speck of glue, and press it back into place firmly.
Level Up: Pattern Play
Mix two colors of clay together before rolling your balls to create a beautiful marbled effect on the flower petals.
Step 3: Creating the Flowers
-
Start the tall flower:
On the right side of the paper, glue down a textured beige or light brown disc for the flower center. Use a tool to gently imprint a grid pattern on it. -
Add petals:
Surround the center with two rings of flattened clay dots. Use alternating shades of pink and rose to create depth. -
Build the stem:
create a line of small green clay balls descending from the flower head. Flatten them slightly as you press them onto the paper to resemble a segmented stem. -
Add leaves:
Shape green clay into elongated ovals, flatten them, and score lines with your wooden tool to mimic leaf veins. Attach these to the stem. -
Create the lower flower:
Repeat the flower process lower down on the page, using a yellow textured center surrounded by reddish-pink flat dots. -
Texture the center:
Use the rounded end of a paintbrush or tool to poke tiny indentations into the yellow center of the lower flower for a seeded look. -
Make a unique stem:
For this flower, try using tiny spherical green balls stacked in a vertical line for the stem, rather than flattened ones.
Step 4: Adding the Grass
-
Roll grass blades:
Roll thin, worm-like snakes of light green clay. Taper the ends so they look sharp like blades of grass. -
Arrange the lawn:
Glue these strips along the bottom edge of the paper, varying their lengths and angles to make the grass look natural and wind-blown. -
Review and refine:
Check for any loose pieces and gently press everything down one last time to secure the bond. -
Dry thoroughly:
Set the artwork aside in a safe, flat place to dry completely. This usually takes about 24 hours depending on the thickness of the clay.
Display this cheerful textured scene on a shelf or wall to brighten up any room
Garden Pebble Buddy Faces
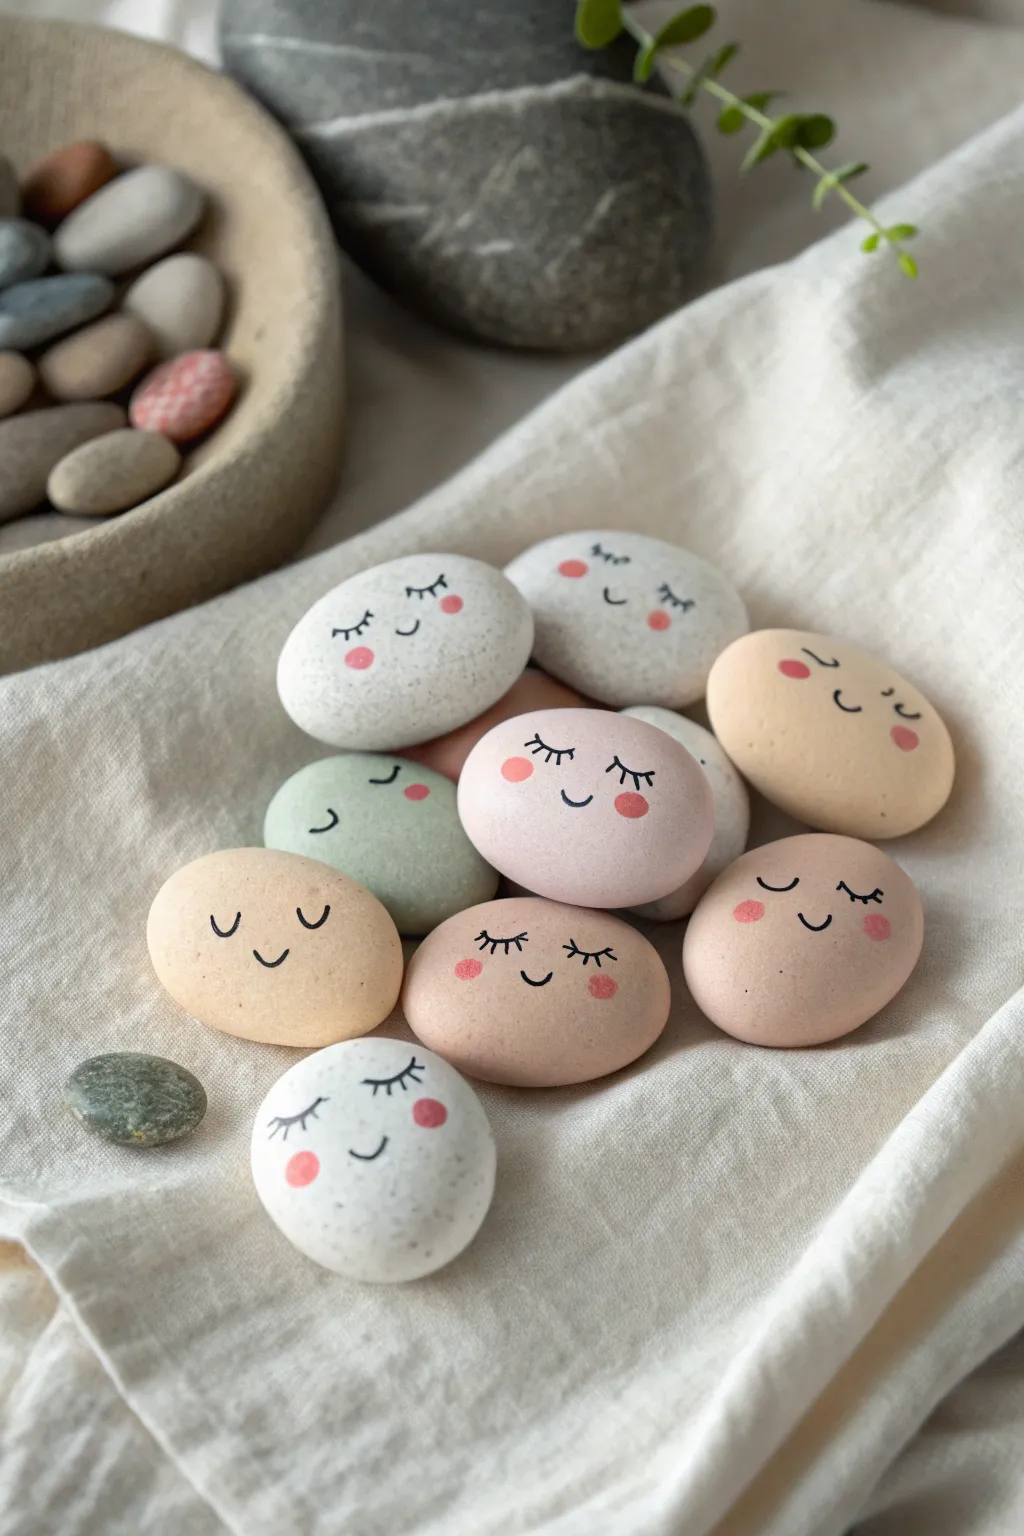
Create a serene collection of sleeping stone friends that bring a sense of calm to any garden or windowsill. These smooth, pastel-colored buddies feature simple, sleepy expressions that are perfect for little hands to practice fine motor skills.
How-To Guide
Materials
- Air-dry clay (white or light grey) OR smooth, flat river stones
- Acrylic paints (white, beige, peach, soft pink, sage green)
- Fine-point black permanent marker or fine liner paint pen
- Small round paintbrush
- Pink posca paint pen or small sponge dabber (optional)
- Matte clear sealant spray or mod podge
- Wax paper or craft mat
Step 1: Preparing the Base
-
Shape the clay:
If using air-dry clay, pinch off a golf-ball-sized amount and roll it into a smooth sphere between your palms. -
Form the pebble:
Gently press the sphere down onto your workspace to flatten it into an oval, pebble-like shape about 1/2 inch thick. -
Smooth the edges:
Dip your finger in a tiny bit of water and run it along the edges to smooth out any cracks or bumps, ensuring a nice surface for painting later. -
Create variation:
Make 6-8 pebbles, varying the sizes and shapes slightly so some are rounder and others are more oblong, just like real river rocks. -
Let it dry:
Allow the clay pebbles to dry completely according to the package instructions, usually for 24-48 hours. I like to flip them over halfway through so the bottoms dry evenly.
Step 2: Adding Color
-
Mix pastel shades:
Prepare your palette by mixing white acrylic paint with tiny drops of peach, sage green, and beige to create very soft, muted pastel tones. -
Apply the base coat:
Paint the entire top surface of each pebble. Leave some pebbles natural white or cream, and paint others in your soft peach, beige, and green mixtures. -
Smooth coverage:
Apply a second coat if necessary to get solid, opaque color coverage, ensuring no brush streaks remain. -
Dry completely:
Let the paint dry fully to the touch before moving on to the faces, otherwise the marker might bleed.
Ink Smearing?
If your black marker smears when you apply the sealant, try spraying a very light mist of hairspray over the rocks first to ‘set’ the ink before brushing on the heavy sealer.
Step 3: Painting the Faces
-
Draw the eyes:
Using a fine-point black marker or paint pen, draw two small downward-curving arcs near the center of the pebble for sleeping eyes. -
Add eyelashes:
carefully add three tiny vertical dashes to the top of each arc to create delicate eyelashes. -
Draw the smile:
Place a small, simple ‘u’ shape between and slightly below the eyes for a contented little smile. -
Rosy cheeks:
Dip the back end of a paintbrush into pink paint (or use a pink paint marker) to stamp two perfect circles on either side of the smile. -
Seal the work:
Once the faces are totally dry, apply a thin coat of matte sealer or Mod Podge to protect the paint from chipping.
Glittery Dreams
Mix a tiny pinch of fine iridescent glitter into your final clear sealant coat. It gives the sleeping buddies a magical, morning-dew shimmer without overpowering the face.
Now you have a handful of peaceful friends ready to nap in your garden pots
Easy Hanging Clay Shapes Mobile

This charming, nature-inspired mobile combines warm earth tones with simple geometric shapes for a calming piece of nursery or playroom decor. Using air-dry clay and natural twine, you will create a floating arrangement of stars, hearts, and trees that looks surprisingly professional.
Step-by-Step Tutorial
Materials
- Air-dry clay (white or terracotta)
- Wooden dowel rod (approx. 12-16 inches)
- Natural jute twine
- Rolling pin
- Cookie cutters (star, heart, circle, semicircle/arch, christmas tree)
- Small round piping tip or straw (for punching holes)
- Acrylic paints (terracotta, mustard yellow, sage green, blush pink)
- Paintbrushes
- Sandpaper (fine grit)
- Wooden beads (assorted sizes)
Step 1: Shaping the Clay Elements
-
Roll out fluidly:
Begin by rolling out your air-dry clay on a clean, smooth surface until it is universally about 1/4 inch thick. Aim for an even thickness so all pieces dry at the same rate and hang straight. -
Cut primary shapes:
Using your cookie cutters, press out the main shapes needed: two stars, two hearts (one classic, one with a cutout), a fir tree shape, and a semicircle. -
Craft the ring:
To make the green ring at the bottom right, cut a larger circle first, then use a smaller circle cutter in the very center to remove the middle. Smooth the edges immediately with a damp finger. -
Create hanging holes:
While the clay is still wet, use a straw or a small piping tip to punch a clean hole through the top of every single shape. For the shapes that will hang in the middle of a string (like the star and semicircle), punch a hole at the bottom as well. -
Let them cure:
Place all your clay pieces on a flat surface, flipping them over gently halfway through the drying process to prevent curling. Allow them 24-48 hours to fully harden.
Step 2: Adding Color and Texture
-
Smooth the edges:
Once fully dry, take a moment to lightly sand any rough edges or bumps for a professional finish. Wipe away the dust with a slightly damp cloth. -
Mix your palette:
Prepare your acrylic paints. You want a matte, earthy palette: mix a deep terracotta, a soft sage green, a muted mustard yellow, and a pale blush pink. -
Paint the stars:
Paint the top star with the terracotta shade and the bottom star with the mustard yellow. Apply two thin coats rather than one thick one for smoother coverage. -
Paint the hearts:
Coat the solid heart in pale blush pink and the open-center heart in a deeper terracotta or rustic red tone. -
Finish the remaining shapes:
Paint the tree shape yellow, the semicircle sage green, and the bottom ring sage green. Don’t forget to paint the side edges of the clay for a finished look from every angle.
Cracked Clay Fix
If you see small cracks as the clay dries, mix a tiny bit of fresh wet clay with water to make a paste and fill the gaps. Smooth it over with your finger.
Step 3: Assembly
-
Prepare the dowel:
Cut a long piece of jute twine and tie it to both ends of your wooden dowel to create the main hanging loop. Wrap the twine securely around the center of the dowel if you want extra stability. -
Cut suspension strings:
Cut five long lengths of twine for your vertical strands. These should vary slightly in length to create visual interest. -
Thread the first strand:
Starting with the far left strand, thread a small wooden bead, then tie on the yellow tree shape. Add a larger wooden bead towards the top before tying the string to the dowel. -
Assemble the center strand:
For the middle strand, thread the twine through the top hole of the terracotta star, pull it through, and knot it so the star sits high. Continue the thread down to the bottom hole, add a bead or a painted oval piece, and tie off the blush heart at the bottom. -
Build the ring strand:
For the far right strand, thread the twine through the large bead, then the open heart, and finally tie the green ring at the very bottom. I like to tie a small wooden ring inside the green clay ring for extra detail as shown. -
Secure all strands:
Tie all five finished strands to the wooden dowel, spacing them evenly. Ensure the knots are tight and trim any excess twine. -
Final balance check:
Lift the mobile by the top loop to check the balance. If it tilts, gently slide the strands left or right along the dowel until it hangs perfectly straight.
Texture Twist
Before the clay dries, gently press a piece of lace, a leaf, or textured fabric into the surface to create subtle patterns before painting.
Hang your new creation near a window where the natural light can highlight those beautiful earthy colors