If you’re craving easy Halloween clay ideas that actually feel doable in one cozy crafting session, you’re in the right place. These projects are all about simple shapes, cute details, and that satisfying “I made this!” moment—without complicated sculpting.
Chubby Little Ghost Figurines
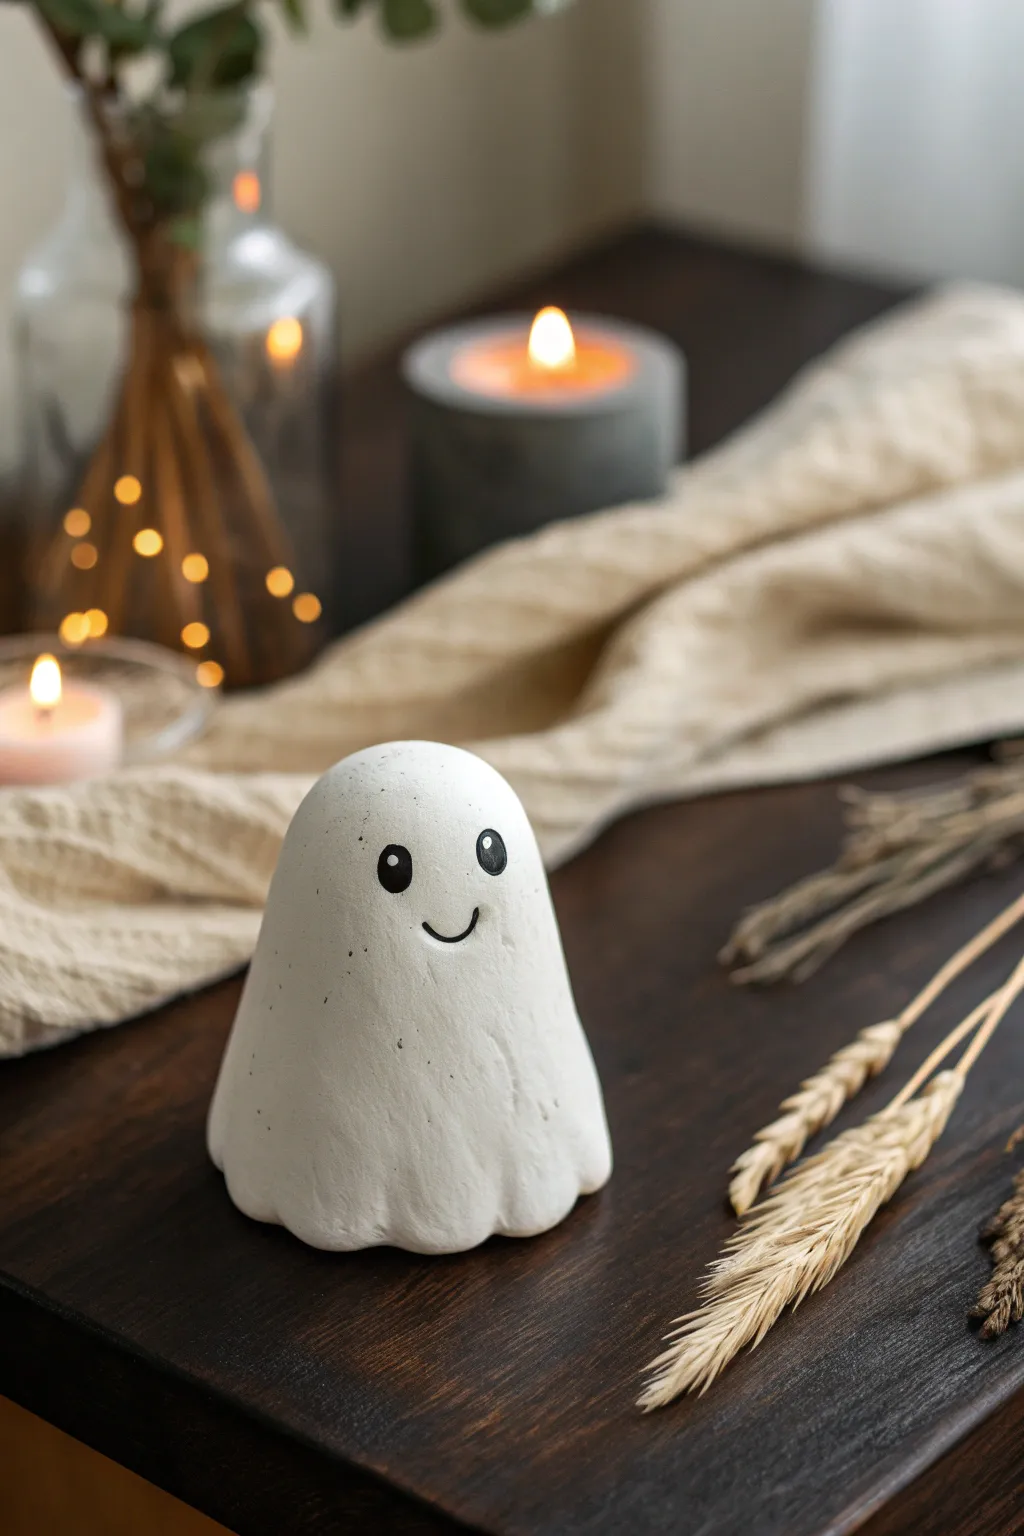
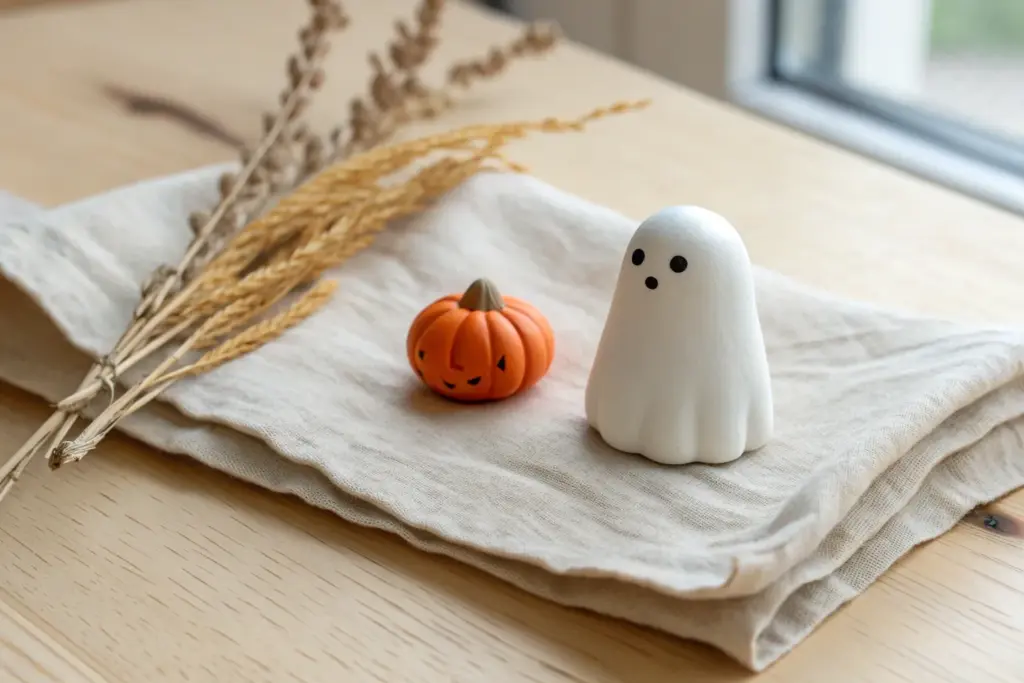
These adorable, stout little specters are the perfect minimalist Halloween decoration, bringing a friendly spirit rather than a fright. With their smooth, bell-shaped bodies and charmingly simple faces, they are incredibly easy for beginners to sculpt.
Detailed Instructions
Materials
- White air-dry clay or white polymer clay
- Rolling pin or smooth jar
- Small round cutter or glass (optional)
- Black acrylic paint
- Fine-point paintbrush or toothpick
- Cup of water (for smoothing)
- Fine-grit sandpaper (optional)
- Aluminum foil (for armature core)
Step 1: Forming the Body
-
Create a core:
Crumple a small piece of aluminum foil into a gumdrop shape about 2 inches tall. This saves clay and helps the ghost dry faster without cracking. -
Prepare the clay:
Take a handful of white clay and knead it until it’s soft and pliable. If you are using air-dry clay, keep your hands slightly damp to prevent sticking. -
Roll a sheet:
Roll out the clay on a flat surface until it is about 1/4 inch thick. You want it substantial enough to drape without tearing. -
Drape the ghost:
Place your foil core on the table and gently drape the sheet of clay over it. Smooth the clay down the sides, covering the foil completely. -
Shape the silhouette:
Using your palms, gently cup the clay to form a smooth, rounded dome shape at the top. I find cupping my hands helps create that perfectly chubby, seamless look. -
Create the folds:
At the base of the ghost, pinch the excess clay gently to create thick, wavy ruffles. This mimics the look of a sheet pooling on the floor. -
Smooth the surface:
Dip your finger in a little water and run it over the entire surface of the ghost to remove fingerprints or cracks. The smoother the better for that spectral look. -
Add texture (optional):
For a rustic look like the example, dab the clay lightly with a toothbrush or sponge to give it a stone-like texture, or leave it perfectly smooth for a modern finish.
Cracks acting up?
If small cracks appear while drying, don’t restart. Mix a tiny bit of fresh clay with water to make a paste (slip) and fill those cracks, then smooth over.
Step 2: Drying and Detailing
-
Let it dry:
Allow your ghost to dry completely naturally. For air-dry clay, this usually takes 24-48 hours. Don’t rush it with heat or it might crack. -
Sand imperfections:
Once fully rock-hard, use fine-grit sandpaper to gently buff away any rough spots or sharp edges on the base. -
Plan the face:
Lightly sketch the position of the eyes and mouth with a pencil. Place them slightly lower on the face to increase the ‘cute’ factor. -
Paint the eyes:
Using a fine-point brush and black acrylic paint, create two oval shapes for the eyes. Start small; you can always make them bigger. -
Add the smile:
Paint a small, simple ‘u’ shape between the eyes for a joyful expression. A toothpick dipped in paint works great for this thin line if you don’t have a tiny brush. -
Highlight the eyes:
Once the black paint is dry, add a tiny white dot to the top corner of each black eye. This ‘catchlight’ brings the character to life. -
Add speckles:
To mimic the stone look in the photo, dip an old toothbrush in watered-down black paint and gently flick it (splatter technique) over the ghost for faint speckles.
Make it glow
Instead of a solid clay body, mold the clay over a hollow cardboard cone. Once dry, remove the cone and place a battery-operated tea light underneath.
Set your new little friend on a shelf or mantle to add a touch of friendly haunting to your home decor


Jack-o’-Lantern Faces Made Simple
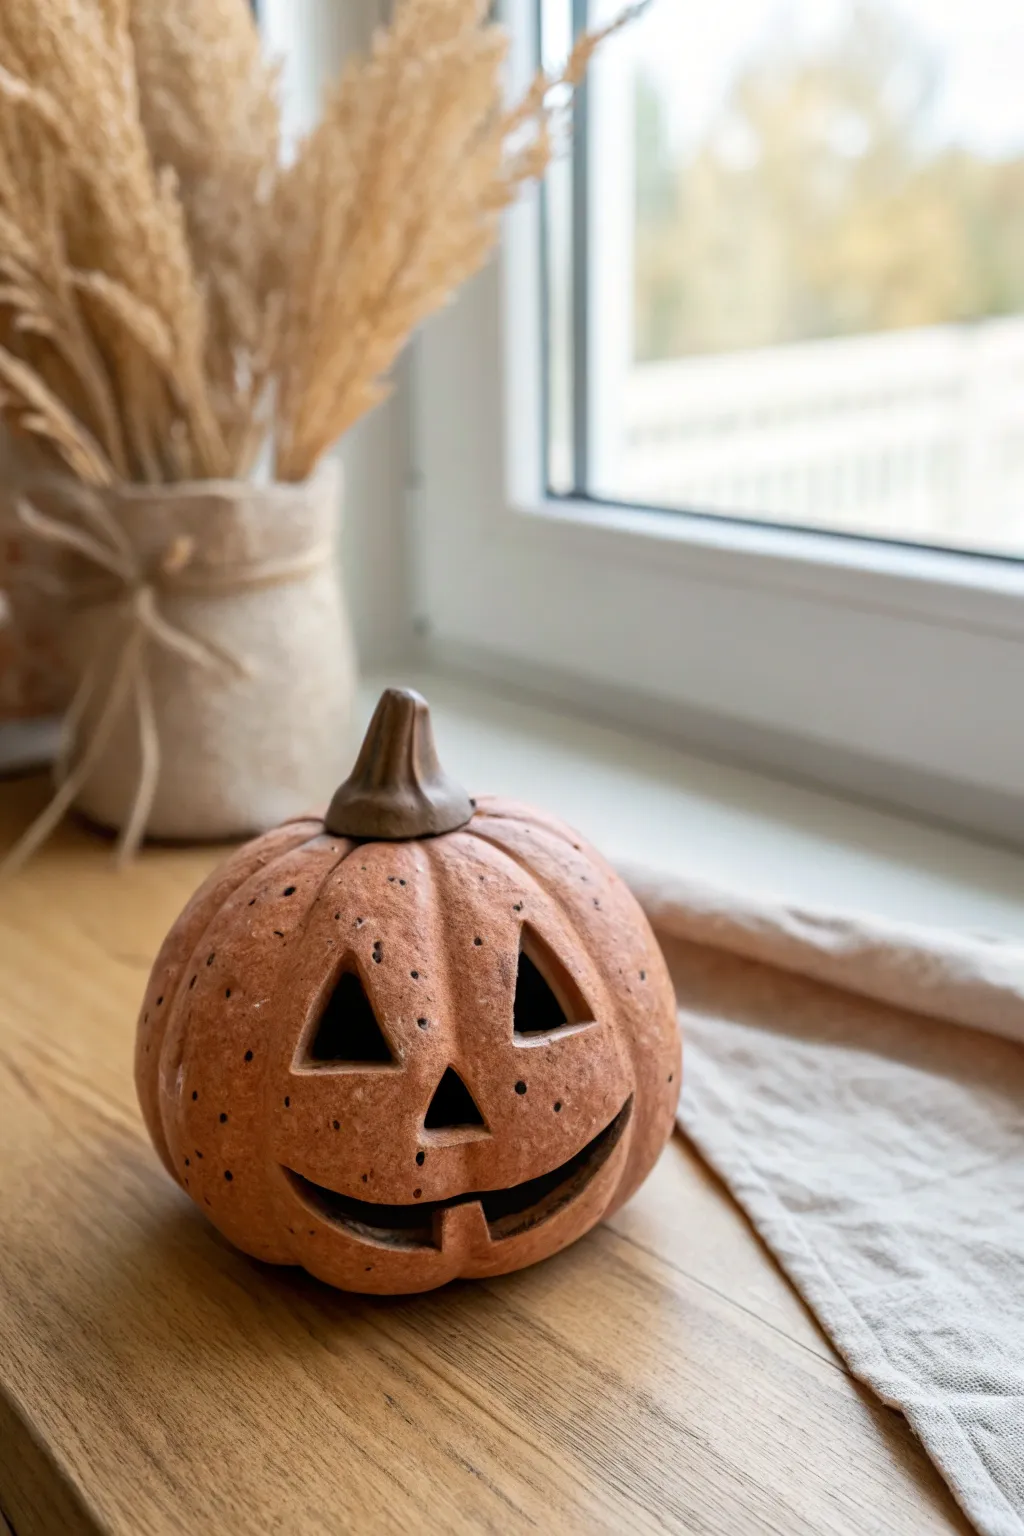
Embrace the imperfect charm of autumn with this handcrafted clay pumpkin. Its textured orange skin, whimsical carved face, and dark speckling give it a delightfully aged, farmhouse-style appearance that looks fantastic on a windowsill.
How-To Guide
Materials
- Air-dry clay (terra cotta color or paintable white)
- Acrylic paints (burnt orange, brown, black)
- Small sculpting tools or a butter knife
- Toothbrush or splatter brush
- Water cup and sponge
- Rolling pin (optional)
- Small paintbrush
Step 1: Shaping the Base
-
Form the sphere:
Start by taking a fist-sized ball of clay and rolling it between your palms until it forms a smooth, round sphere. It doesn’t need to be mathematically perfect; a little unevenness adds character. -
Flatten slightly:
Gently tap the bottom of the sphere against your work surface to create a flat base so the pumpkin sits stably without rolling. -
Create the ribs:
Using the side of a sculpting tool or a dull knife, press vertical lines from the top center down to the bottom to create the pumpkin’s ribs. Space them evenly around the circumference. -
Soften the edges:
Dip your finger in a little water and run it over the indented rib lines to smooth out any sharp ridges, making the segments look pillowy and natural. -
Make the stem depression:
Press your thumb firmly into the very top center of the pumpkin to create a small well where the stem will eventually sit.
Step 2: Carving the Face
-
Outline the features:
Before cutting, lightly sketch your face design into the clay with a needle tool or toothpick. For this look, draw two triangles for eyes, a smaller triangle nose, and a wide, curved smile. -
Cut the eyes:
Carefully cut out the triangular eye shapes. Keep your blade vertical to ensure clean, straight walls inside the openings. -
Carve the nose:
Remove the small triangle for the nose. I find it helpful to lift the clay bit out with the tip of the knife rather than pushing it inward. -
Sculpt the mouth:
Slice along your smile lines. Add a small, rectangular tooth protruding from the bottom lip upwards to give it that classic goofy grin. -
Smooth the cuts:
Use a damp brush or finger to smooth the rough edges of your cutouts so the clay doesn’t look ragged.
Cracking Issues?
If small cracks appear while the clay dries, mix a tiny bit of fresh clay with water to make a paste and fill them in before painting.
Step 3: Adding the Stem
-
Form the stem:
Roll a small snake of clay, tapering one end. Twist it slightly to mimic organic growth and flatten the bottom. -
Attach firmly:
Score (scratch) the bottom of the stem and the depression on the pumpkin top. Add a dab of water or slip, then press the stem firmly into place. -
Blend the seam:
Use a small tool to blend the clay at the base of the stem downward into the pumpkin so it looks like one continuous piece.
Light It Up
Instead of painting the insides black, cut a hole in the bottom while the clay is wet so you can place a battery-operated tea light underneath.
Step 4: Painting and Finishing
-
Dry completely:
Let the sculpture dry fully according to package directions—usually 24 to 48 hours—before painting. -
Base coat:
Paint the pumpkin body with a warm, spiced orange acrylic. Apply two coats if necessary for opacity. -
Paint the stem:
Use a dark brown paint for the stem, bringing the color slightly down onto the very top of the pumpkin for a ripened look. -
Add texture:
Mix a little water with black or dark brown paint. Dip a toothbrush into this mixture and flick the bristles with your thumb to splatter tiny speckles over the entire pumpkin. -
Darken the insides:
Use a small brush with black paint to carefully fill in the carved holes of the eyes, nose, and mouth, creating the illusion of hollow depth. -
Final seal:
Once dry, apply a matte varnish to protect your work and lock in that rustic, earthy finish.
Place your finished pumpkin near a window to catch the autumn light


Tiny Witch Hat Toppers
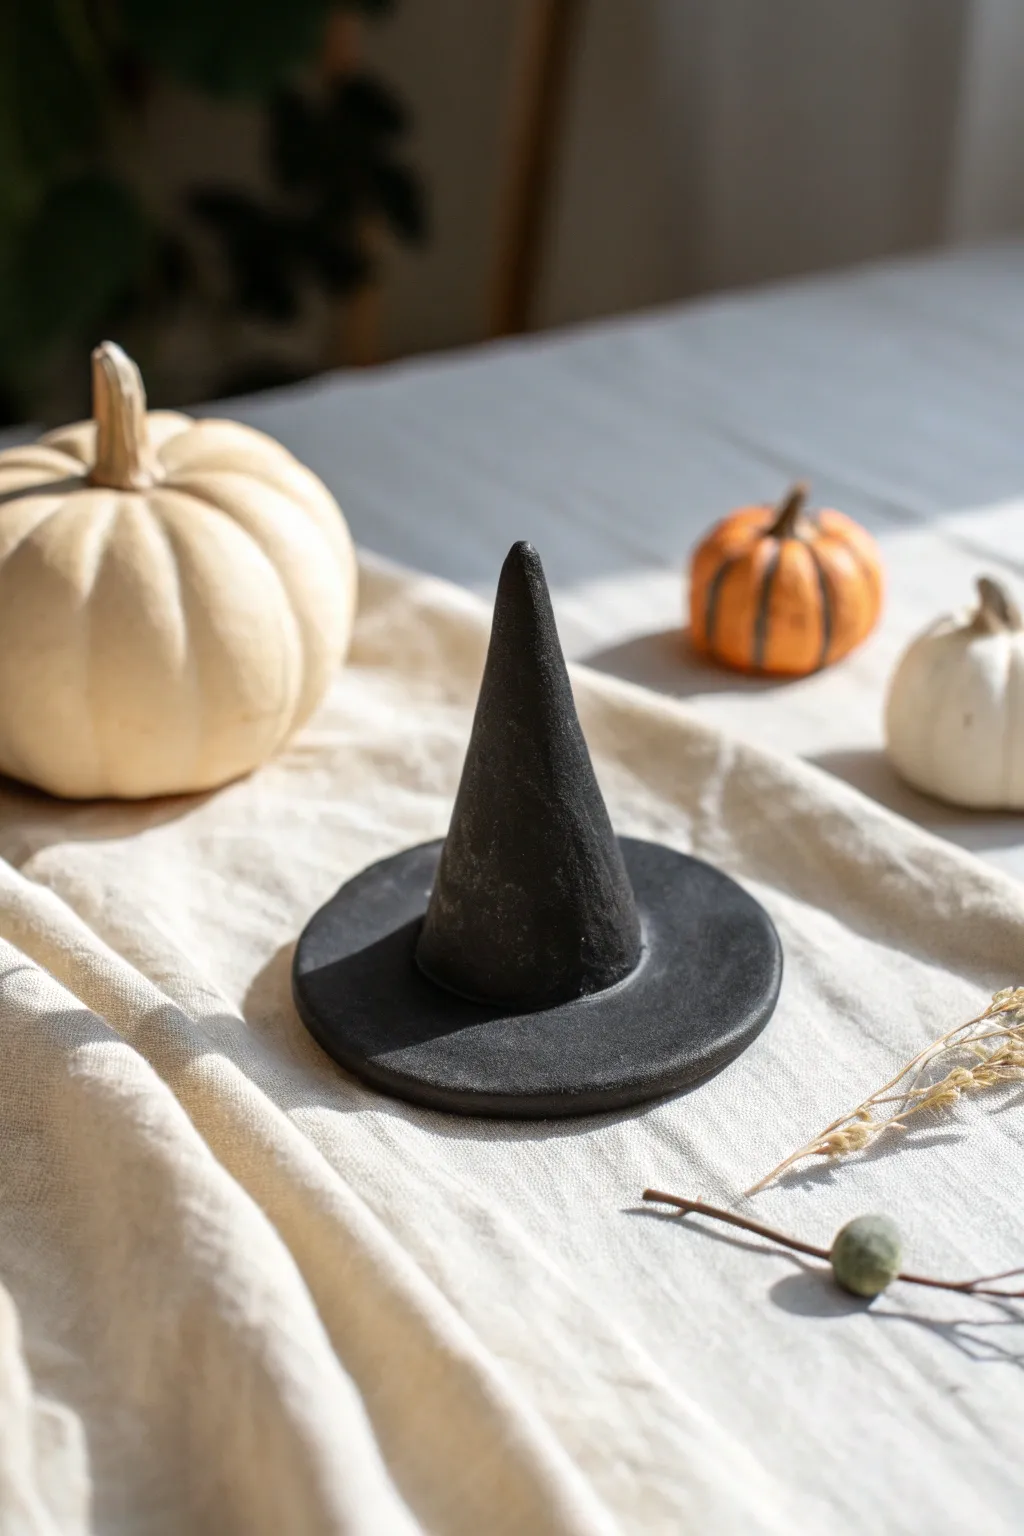
Simple yet striking, these matte black witch hat toppers add a touch of modern spookiness to your Halloween decor. Their velvet-like texture and minimal silhouette make them perfect for styling tablescapes or perched atop pumpkins.
Detailed Instructions
Materials
- Black polymer clay or air-dry clay
- Acrylic roller or rolling pin
- Circle cutter (approx. 2-3 inches)
- Black acrylic paint (matte finish)
- Baking soda (for texture)
- Small paintbrush
- Clay sculpting tool or butter knife
- Sandpaper (fine grit)
- Water
Step 1: Forming the Base
-
Condition the Clay:
Begin by warming up a chunk of black polymer clay in your hands. Knead it thoroughly until it creates a smooth, pliable ball without cracks. -
Roll the Brim:
Take about half of your clay and roll it flat onto your work surface until it is roughly 1/4 inch thick. A consistent thickness ensures stability. -
Cut the Circle:
Use your circle cutter to punch out a perfect round shape. This will serve as the brim of your witch hat. -
Smooth the Edges:
Gently run your finger along the circumference of the cut circle to soften the sharp edge left by the cutter.
Step 2: Sculpting the Cone
-
Shape the Cone:
Take the remaining clay and roll it locally into a thick snake, then manipulate one end to be wider than the other, forming a cone shape. -
Adjust Height:
Roll the cone between your palms to elongate it. Aim for a height that feels proportional to your brim—usually slightly taller than the brim’s width. -
Check the Fit:
Place the cone in the center of your brim circle to test the proportions. I like to make the base of the cone slightly smaller than the brim so there is a nice rim visible. -
Attach the Pieces:
Score the bottom of the cone and the center of the brim with a sculpting tool to rough up the surfaces. -
Blend the Seam:
Press the cone firmly onto the brim. Use a sculpting tool or your thumb to drag a tiny bit of clay from the cone down onto the brim to lock them together smoothly. -
Add Character:
Don’t worry about perfect symmetry. Gently bend the very tip of the cone slightly to the side for a whimsical, worn-in look.
Seamless Merges
If you struggle to blend the cone to the brim, use a tiny drop of baby oil (for polymer) or water (for air clay) on your finger to smooth the seam invisible.
Step 3: Finishing Touches
-
Bake or Dry:
Follow the manufacturer’s instructions for your specific clay. If using polymer, bake on a foil-lined sheet. If using air-dry, let it sit for 24-48 hours. -
Prepare the Paint:
Mix a small amount of black acrylic paint with a pinch of baking soda. The baking soda acts as a texturizing agent to create that stone-like, matte finish. -
Apply First Coat:
Paint the entire hat with your textured mixture. Use dabbing motions rather than long strokes to enhance the gritty look. -
Let Dry:
Allow the first coat to dry completely. The baking soda mixture tends to dry faster than plain paint. -
Apply Second Coat:
Add a second layer if you can still see the clay underneath. This ensures a deep, opaque black color. -
Final Sanding (Optional):
Once fully dry, you can very lightly scuff the surface with fine-grit sandpaper if the texture feels too rough, or leave it as is for a rustic appearance.
Drooping Cone?
If the hat tip starts to wilt while working, insert a toothpick or a small cone of aluminum foil inside the clay structure for internal support.
Place these charming little hats around your home for an instant festive upgrade


Friendly Bat Charms With Big Ears
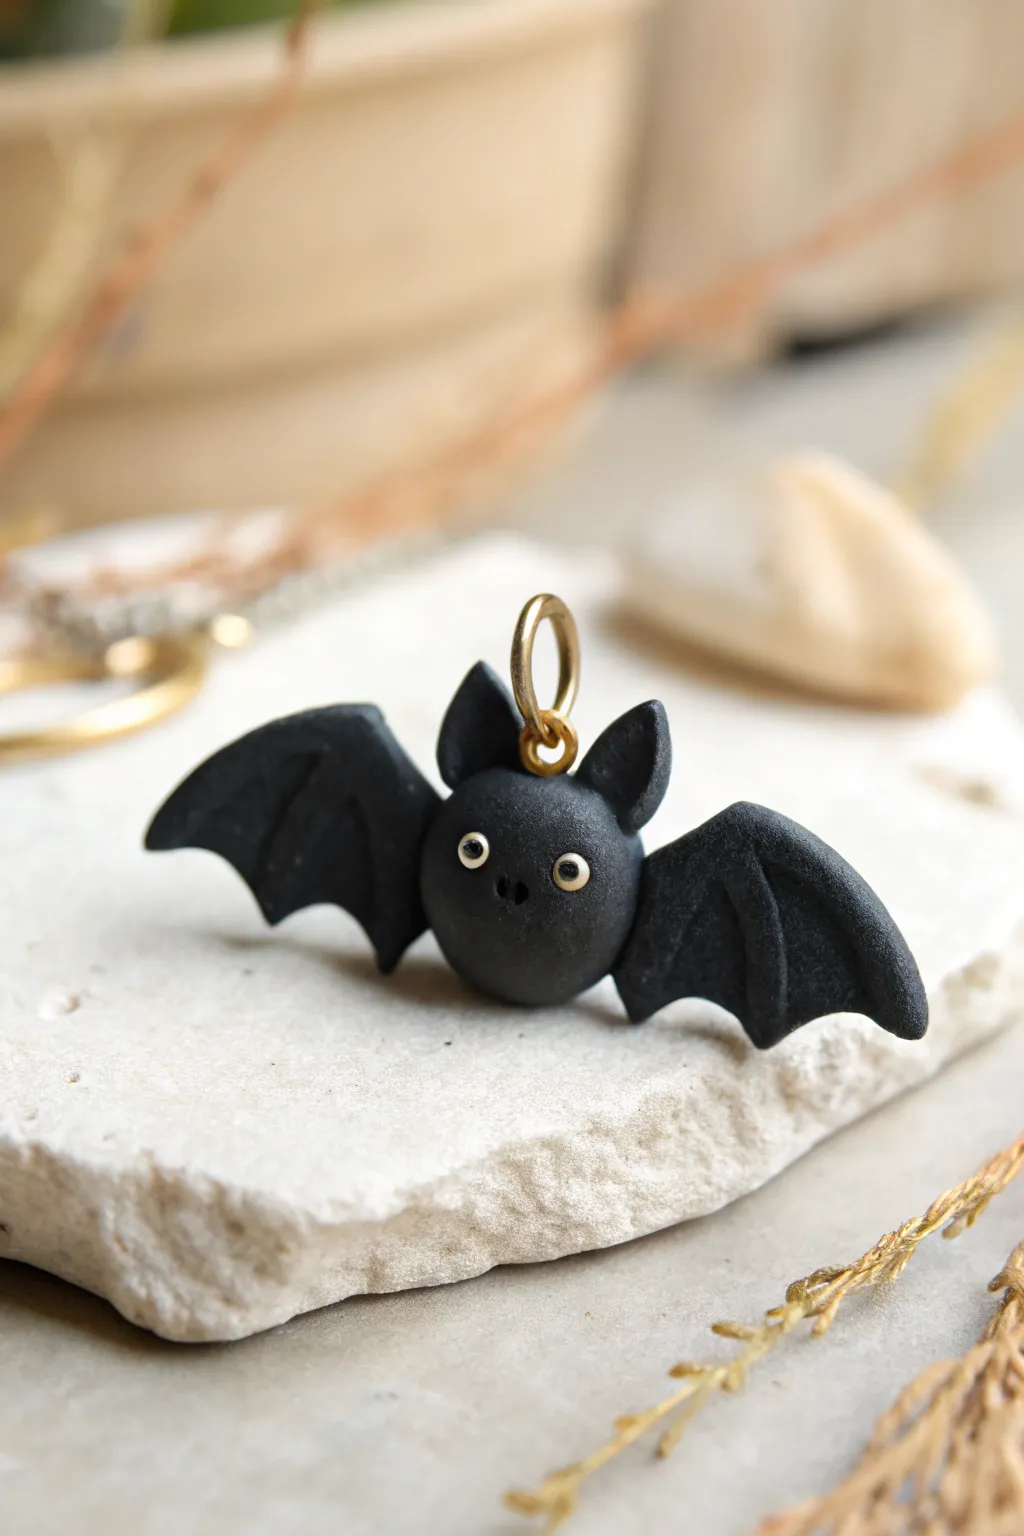
These adorable little bats are more sweet than spooky, featuring oversized ears and wide-set eyes that give them an irresistible personality. This polymer clay project is perfect for making dangly earrings, a necklace pendant, or even a cute zipper pull for your bag.
Step-by-Step Guide
Materials
- Black polymer clay
- Small amount of white polymer clay
- Polymer clay tools (dotting tool, needle tool)
- Small gold eye screw or jump ring
- Jewelry pliers
- Oven for baking
- Parchment paper or baking tile
- Gloss glaze (optional)
Step 1: Shaping the Bat Body
-
Condition the Clay:
Start by taking a chunk of black polymer clay and kneading it in your hands until it becomes soft, pliable, and warm. This prevents cracking later on. -
Form the Head:
Roll a small ball of the conditioned black clay, roughly the size of a large pea or a small marble. Ensure it is perfectly round and smooth. -
Shape the Ears:
Create two small teardrop shapes from black clay. These should be fairly large relative to the head to get that specific ‘big-eared’ look. -
Attach the Ears:
Press the rounded bottom of each teardrop onto the top of the head ball. Gently blend the clay where they meet using a smoothing tool or your finger so they are one solid piece. -
Define the Inner Ear:
Use a small ball tool or the rounded end of a paintbrush handle to press a gentle indentation into the center of each ear, giving them dimension and a concave shape. -
Position the Ear Tips:
Pinch the tips of the ears slightly to make them pointed, ensuring they perk up cheerfully.
Sticky Situation?
If the clay gets too soft and sticky while you work, put it in the fridge for 5-10 minutes. This firms it up, making it easier to handle without leaving fingerprints
Step 2: Crafting the Wings
-
Create Wing Base:
Roll two equal-sized balls of black clay, slightly larger than the ear pieces. -
Flatten and Shape:
Flatten these balls into thick pancakes, then shape them into rough triangles. Use your fingers to curve the top edge into an arch. -
Detail the Edges:
On the bottom edge of the triangle, use a round tool or your finger to push the clay inward in two spots, creating the scalloped, bat-wing shape. -
Add Wing Texture:
Take a needle tool or a dull knife and press shallow lines radiating from the ‘shoulder’ area down to the points of the scallops to simulate wing bones. -
Attach Wings to Body:
Press the wings firmly onto the sides of the body ball. I like to blend the clay at the attachment point slightly on the back side to ensure a strong bond. -
Shape the Curve:
Gently curve the wings forward just a tiny bit so the bat looks like it is hugging the air; this adds a nice sense of movement.
Spooky Sparkle
Mix a tiny pinch of fine silver or purple glitter into the black clay before shaping the wings. It creates a subtle, magical shimmer perfect for Halloween night
Step 3: Adding the Face and Hardware
-
Create Eye Sockets:
Use a very small dotting tool to make two shallow indents on the face where the eyes will sit. Space them somewhat wide apart for a cuter look. -
Place the Whites:
Roll two tiny, microscopic balls of white clay. Carefully place them into the eye sockets and flatten them gently. -
Add Pupils:
Roll two even tinier bits of black clay and press them into the center of the white circles. -
Make the Snout:
Use the very tip of a needle tool to poke two tiny nostrils between and slightly below the eyes. -
Insert Eye Screw:
Use your jewelry pliers to hold the gold eye screw. Insert it directly into the top center of the head, between the ears. Twist gently to secure it. -
Bake:
Place your bat on parchment paper or a ceramic tile. Bake according to your specific polymer clay package instructions (usually around 275°F or 135°C for 15-30 minutes). -
Cool and Finish:
Once baked, let the charm cool completely before handling. If desired, you can brush a little gloss glaze over the eyes to make them shine.
Now your flying friend is ready to be hung on a chain or hook

The Complete Guide to Pottery Troubleshooting
Uncover the most common ceramic mistakes—from cracking clay to failed glazes—and learn how to fix them fast.
Mini Skull Beads With Cute Faces
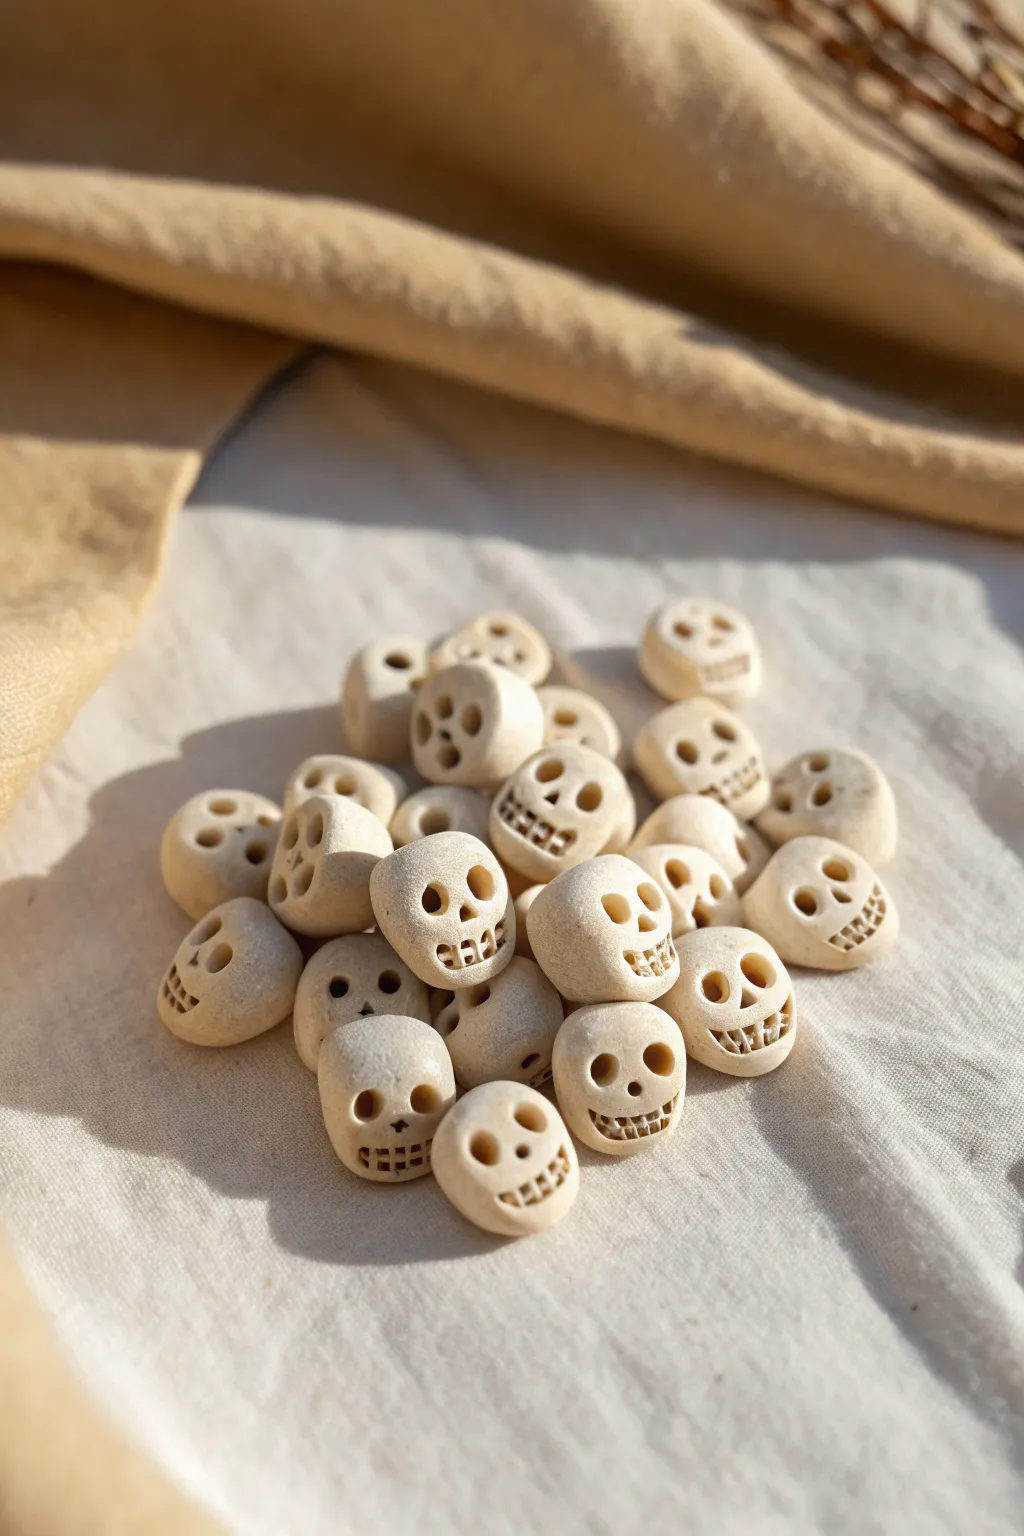
These charming, slightly spooky skull beads add a perfect handmade touch to Halloween jewelry or décor. Their rough, natural finish and simple carved expressions give them a rustic appeal that isn’t too scary for little ones.
How-To Guide
Materials
- Beige or off-white polymer clay (or air-dry clay)
- Needle tool or toothpick
- Small ball stylus or drinking straw
- Hobby knife or craft blade
- Baking sheet with parchment paper (if using polymer clay)
- Bamboo skewer (for making the bead holes)
- Fine-grit sandpaper (optional)
- Brown acrylic paint (optional for antiquing)
Step 1: Shaping the Skulls
-
Condition the Clay:
Begin by warming a chunk of beige clay in your hands. Knead it thoroughly until it is soft, pliable, and free of cracks. -
Create Uniform Portions:
Roll the clay into a long snake about the thickness of your thumb. Use your craft blade to slice the log into equal segments, each about the size of a large pea or small marble. -
Roll into Balls:
Take each segment and roll it between your palms to form a smooth, round sphere. -
Form the Skull Shape:
Gently pinch the lower third of the sphere to slightly flatten the sides, creating a jawline. The top should remain rounded like a cranium, while the bottom becomes a bit blockier. -
Flatten the Face:
Press the front of the shape lightly against your work surface or use your thumb to flatten the face area just a little, giving you a surface to carve.
Squashed Faces?
If the clay deforms when you punch the holes, let the beads rest in the fridge for 10 minutes to firm up before piercing them.
Step 2: Carving the Details
-
Punch the Eyes:
Using a small ball stylus or the end of a paintbrush, press two deep indentations into the upper half of the face for eyes. Use a slight circular motion to widen them if needed; larger eyes make them look cuter. -
Add a Nose:
With a needle tool or toothpick, press a small, inverted ‘V’ shape or a simple triangular dot between and slightly below the eyes to form the nose cavity. -
Carve the Mouth Area:
Use your needling tool to draw a horizontal line across the lower jaw area for the mouth. Try curving it up slightly at the ends for a grin, or keep it straight for a neutral expression. -
Detail the Teeth:
To make the teeth pop, use the very tip of your knife or needle tool to press vertical lines across the horizontal mouth line. I find that making these lines slightly irregular adds to the skeletal charm. -
Create the Bead Hole:
Iserts a bamboo skewer or thick needle tool through the side of the skull, going in near the ‘ear’ area and exiting the other side. Rotate the tool gently as you push to prevent squishing the face.
Step 3: Finishing Up
-
Refine the Shape:
After piercing the hole, the shape might be slightly distorted. Gently press the skull back into its proper form, smoothing out any accidental fingerprints. -
Texture (Optional):
If you want that stony, bone-like look seen in the photo, lightly tap the surface with an old toothbrush or a crumpled ball of foil to remove the synthetic smoothness. -
Bake or Dry:
Arrange the beads on a parchment-lined baking sheet. Bake according to your clay manufacturer’s instructions (usually around 275°F/135°C for 15-30 minutes per 1/4 inch thickness). If using air-dry clay, let them sit for 24-48 hours. -
Cool Down:
Allow the beads to cool completely before handling them. They are fragile while warm. -
Antique (Optional Step):
To make the details pop, water down some brown acrylic paint and brush it over the skull. Immediately wipe it off with a paper towel, leaving paint only in the deep crevices of the eyes and teeth.
Glow Up
Use glow-in-the-dark polymer clay for the base to create spooky skull beads that illuminate when the lights go out.
String them onto hemp cord or elastic to create your own spooky-season accessories
Easy Spiders With Ball Bodies
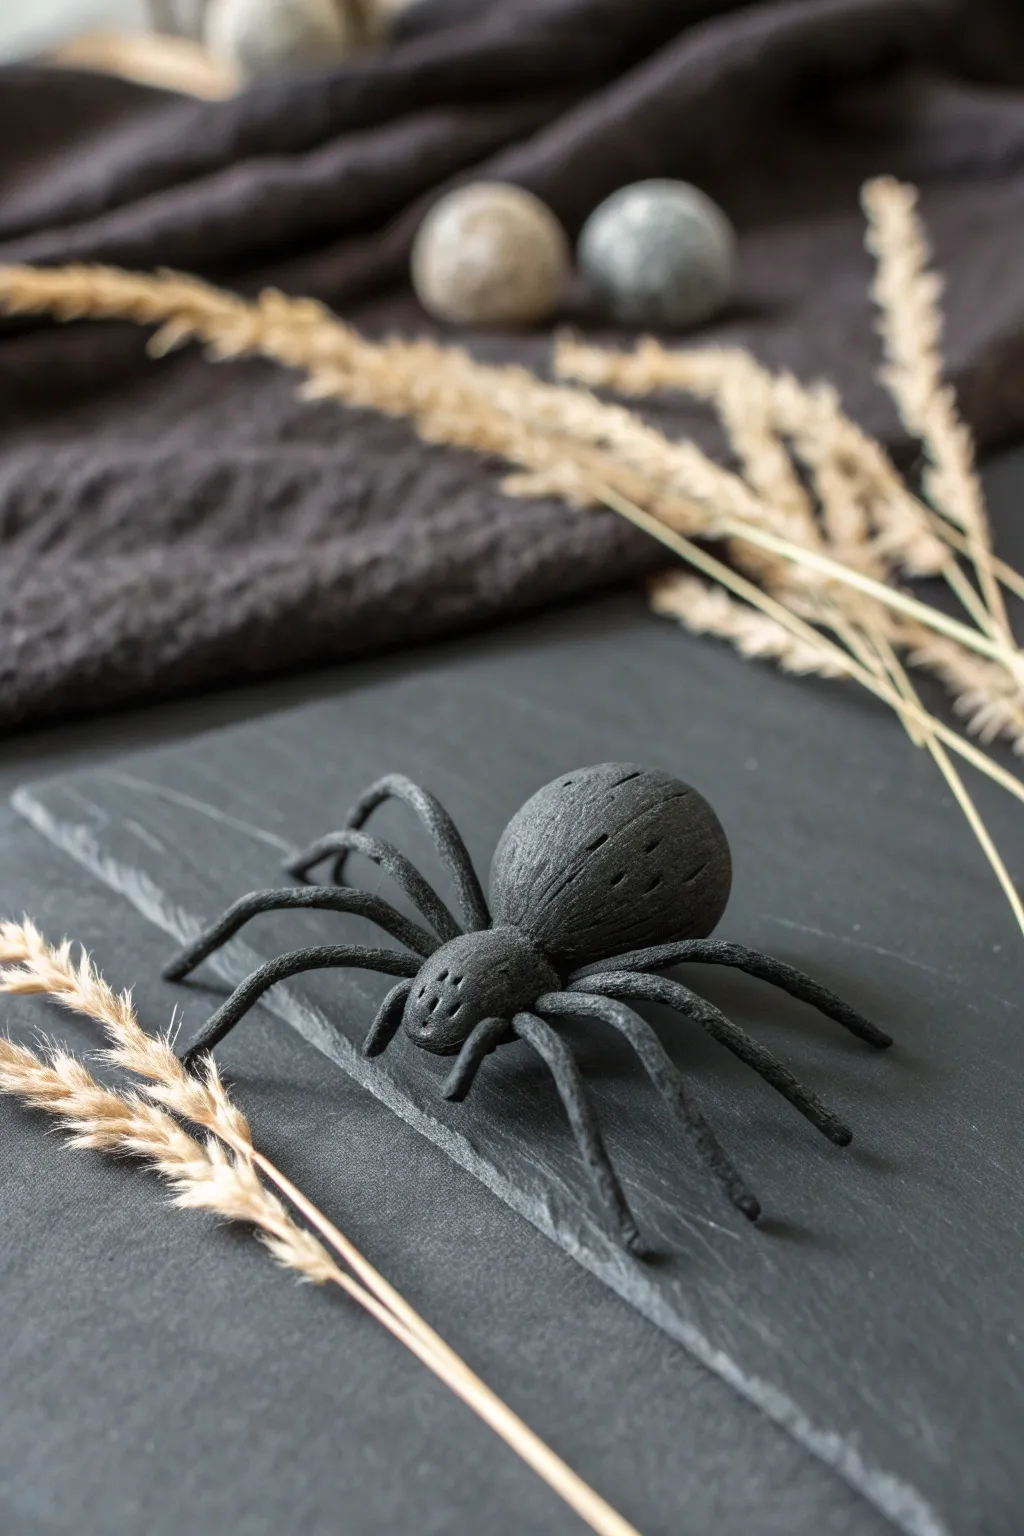
Create a sophisticated, matte-finish spider that looks more like a modern art piece than a spooky toy. With a textured black surface and realistically segmented legs, this clay project brings an elegant touch to your Halloween decor.
Step-by-Step Guide
Materials
- Black polymer clay (or air-dry clay painted black)
- Aluminum foil
- Wire armature (thin gauge)
- Needle tool or toothpick
- Texture sponge or toothbrush
- Craft knife
- Black acrylic paint (if using air-dry clay)
- Matte varnish (optional)
Step 1: Sculpting the Body
-
Create the core:
Crumple a small piece of aluminum foil into a tight ball, roughly the size of a walnut. This will act as the core for the spider’s abdomen, saving clay and keeping the creation lightweight. -
Cover the abdomen:
Condition your black clay until it’s soft and pliable. Roll it into a flat sheet and wrap it completely around the foil ball, smoothing out any seams with your thumb until you have a perfect oval shape. -
Form the head:
Roll a smaller solid ball of black clay, about one-third the size of the abdomen. This will be the cephalothorax. -
Connect the parts:
Press the smaller ball firmly against the front of the abdomen. Use a sculpting tool or your finger to blend the clay slightly at the connection point underneath so they stick together securely. -
Add texture:
Gently tap a texture sponge or an old toothbrush over the entire surface of the body. You want a subtle, organic texture rather than a perfectly smooth plastic look. -
Carve details:
Using a needle tool, lightly scratch a few vertical, slightly curved lines down the back of the abdomen to mimic natural markings. -
Detail the eyes:
Press four or six tiny indentations into the front of the head section using the tip of your needle tool to represent the spider’s eyes.
Step 2: Attaching the Legs
-
Prepare the wire:
Cut eight pieces of thin wire, each about 3 inches long. These will support the legs and allow you to pose them. -
Insert wires:
Insert four wires into each side of the smaller head section (cephalothorax). Space them evenly, ensuring they go deep enough to be secure. -
Coat the legs:
Roll out eight thin snakes of black clay. These should be slender and tapered at one end. -
Sheath the wire:
Carefully slide the clay snakes over the wires, smoothing the clay down to meet the body. I find it easiest to twist the clay slightly as I push it onto the wire to prevent air pockets. -
Segment the joints:
Use a craft knife or the edge of a credit card to gently press indentations into the legs where the ‘knees’ should be. This creates realistic segmentation. -
Pose the spider:
Bend each leg at the joint marks you just made. Arch the legs upward near the body and then down toward the surface, giving the spider a creeping stance. -
Final texture check:
Look over the legs and retouch any areas where your fingerprints might have smoothed out the texture too much. Tap lightly with your tool to match the body.
Droopy Legs?
If the clay is too heavy and the legs sag before baking, prop the spider’s body up on a small box or folded foil so the legs can hang down naturally while they harden.
Step 3: Finishing Touches
-
Bake or dry:
If using polymer clay, bake according to the package instructions (usually 275°F for 15-30 minutes). If using air-dry clay, let it sit undisturbed for 24-48 hours. -
Paint (optional):
If you used air-dry clay, paint the entire sculpture with a high-quality matte black acrylic paint once fully dry. -
Dry brush effect:
To highlight the texture, you can very lightly dry brush a dark grey over the raised areas. Wipe almost all the paint off your brush first so the effect is barely visible.
Make it Fuzzy
Before baking, lightly dust the clay with black embossing powder or flocking powder. This gives the spider a velvety, tarantula-like texture that looks great.
Place your sleek arachnid on a piece of slate or a mantle for a touch of dark elegance this season


What Really Happens Inside the Kiln
Learn how time and temperature work together inside the kiln to transform clay into durable ceramic.
Monster Heads With Blocky Shapes
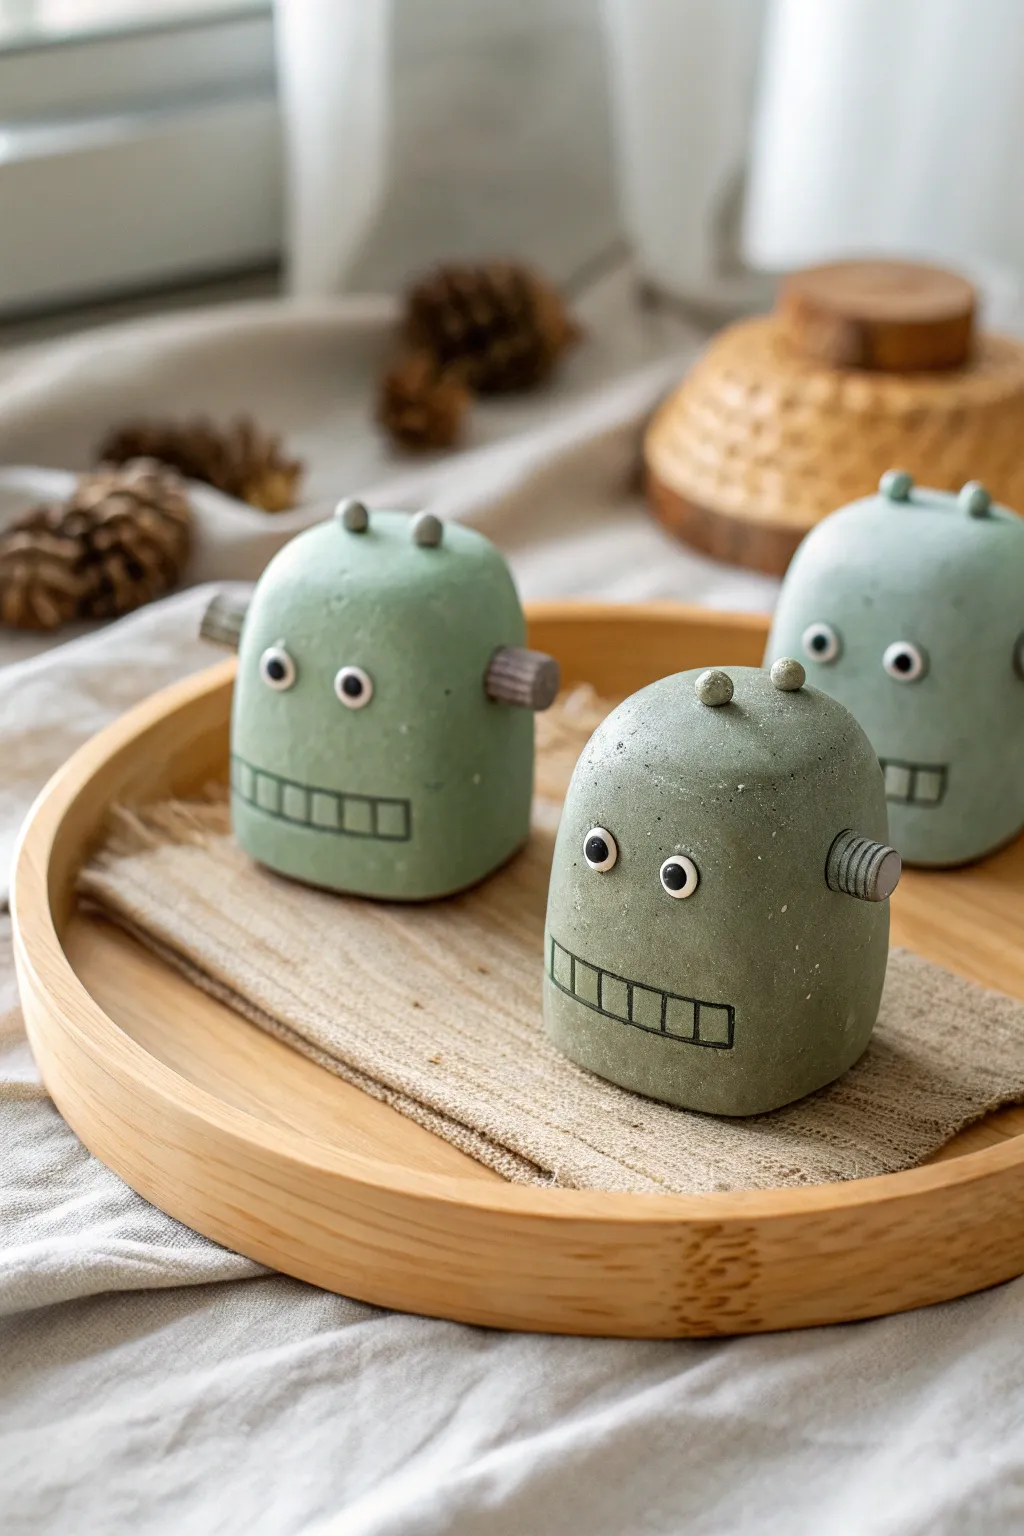
These adorable, chunky robot figures combine a minimalist industrial aesthetic with cute monster vibes. With their blocky, rounded bodies and simple features, they are a perfect beginner project that mimics the look of cast concrete.
Step-by-Step Tutorial
Materials
- Grey or sage green polymer clay (or air-dry clay)
- Black acrylic paint
- White acrylic paint
- Small dotting tool or toothpick
- Fine detail paintbrush
- Aluminum foil (for armature core)
- Hobby knife or clay blade
- Sandpaper or scouring pad (for texture)
- Matte varnish or sealant
Step 1: Shaping the Body
-
Create a core:
Start by scrunching a piece of aluminum foil into a tight, slightly elongated oval shape. This reduces the amount of clay needed and helps with baking or drying time. -
Condition the clay:
Knead your chosen clay until it is soft and pliable. If you want that specific speckled stone look shown in the image, try mixing a tiny pinch of black pepper or black embossing powder into grey or sage green clay. -
Cover the core:
Flatten a sheet of clay and wrap it completely around your foil core. Smooth out any seams with your thumb so the surface is continuous. -
Refine the shape:
Roll the covered form on your work surface to create a smooth, rounded cylinder. Then, gently tap the bottom on the table to flatten it so the figure stands stably. -
Square it off slightly:
While keeping the corners rounded, gently press the front and back to give it a slightly rectangular ‘blocky’ profile rather than a perfect circle. -
Add texture:
To mimic the stone-like texture in the photo, lightly press a scouring pad or coarse sandpaper against the surface of the clay. You don’t want deep scratches, just a subtle matte finish.
Stone Texture Secret
Mix old, dry tea leaves or black pepper into your clay before sculpting. It creates an amazingly realistic speckled granite effect without any painting.
Step 2: Adding Robot Features
-
Roll mechanical ears:
Create two small cylinders of clay for the side bolts or ‘ears.’ These can be the same color as the body or a contrasting grey. -
Detail the ears:
Use your knife to gently press ridges around the circumference of these cylinders to make them look like threaded screws or bolts. -
Attach the ears:
Press one cylinder firmly onto each side of the robot’s head. If using polymer clay, a dab of liquid clay helps bond them; for air-dry, use a little water/slip. -
Form the antennae:
Roll two very tiny balls of clay for the top antennae. Press them gently onto the top of the head spaced slightly apart. -
Final smooth:
Give the entire piece a once-over to remove any accidental fingerprints, re-applying your texture if needed. -
Bake or dry:
Follow the instructions for your specific clay type. For polymer clay, bake at the recommended temperature. For air-dry clay, let it sit for 24-48 hours until fully hardened.
Step 3: Painting and Finishing
-
Paint the eyes:
Once the figure is cool and dry, use a dotting tool dipped in white acrylic paint to create two distinct eye circles on the face. -
Add pupils:
When the white paint is dry, add a smaller dot of black paint in the center of each white circle to complete the eyes. -
Draft the mouth:
I like to lightly sketch the mouth line with a pencil first to ensure it’s straight. -
Paint the mouth grid:
Using a very fine detail brush and black paint, draw a long horizontal rectangle near the bottom. Divide it with vertical lines to create the gritty robot teeth look. -
Seal the work:
Apply a coat of matte varnish to protect your paint. A matte finish is crucial here to maintain that stone/concrete illusion.
Wobbly Eyes?
If you struggle to paint perfect circles, press small googly eyes into the raw clay to make indentations, then glue them in after baking for a 3D look.
Arrange your trio of clay bots on a shelf for a uniquely understated decoration
Mummy Wrap Minis Using Clay Strips
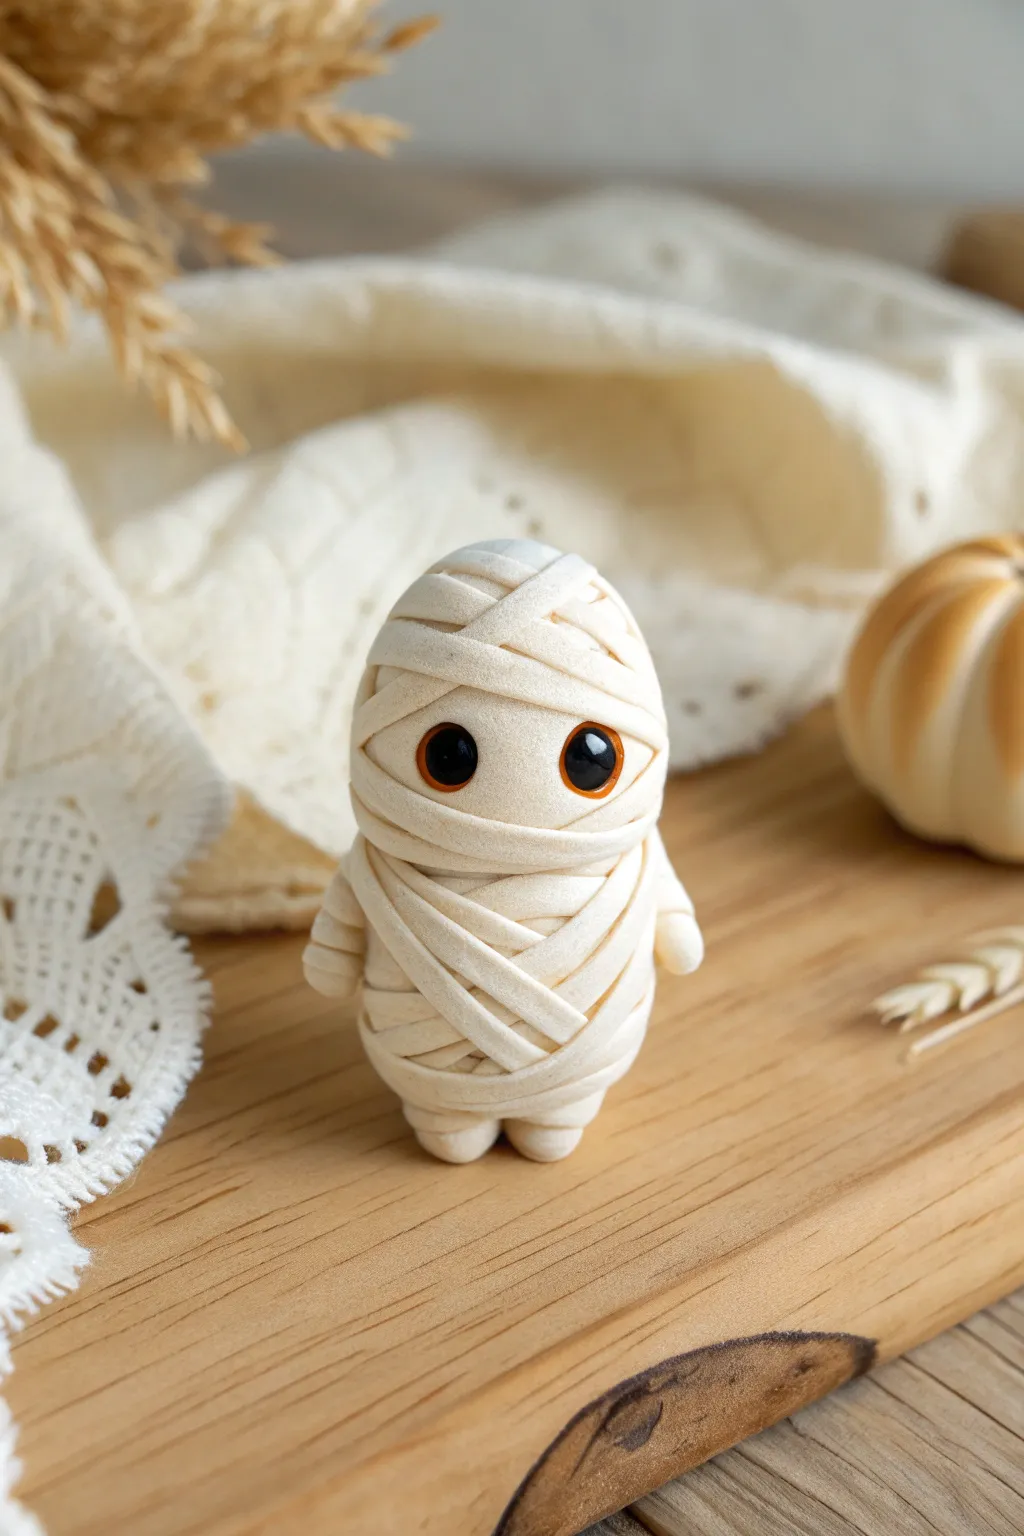
This adorable little mummy figurine packs a surprising amount of charm into a tiny package, featuring oversized eyes and intricate-looking wraps. Despite its detailed appearance, the secret lies in a simple layering technique using flattened strips of clay to create that classic tomb-dweller texture.
How-To Guide
Materials
- White or cream-colored polymer clay
- Small amount of black polymer clay
- Tiny amount of translucent orange or amber clay (optional, for eye highlights)
- Clay roller or pasta machine
- Craft knife or scalpel
- Ball stylus tool
- Gloss glaze or UV resin
- Oven for baking polymer clay
Step 1: Forming the Base
-
Create the core body:
Start by taking a chunk of your white or cream clay roughly the size of a walnut. Roll it into a smooth ball first, then gently elongate it into a pill shape or a rounded cylinder. This will be the main body underneath the wraps. -
Shape the limbs:
Create two tiny, bean-sized balls of white clay for the feet and press them gently onto the bottom of your cylinder body so it can stand upright on its own. Roll two small sausage shapes for the arms but don’t attach them just yet.
Sticky Strips?
If your thin clay strips are sticking to your work surface or knife, dust a tiny amount of cornstarch on your blade and work mat. This helps them lift cleanly without stretching.
Step 2: Preparing the Bandages
-
Roll out a sheet:
Condition your remaining white clay until it is soft and pliable. Roll it out into a very thin, even sheet. If using a pasta machine, setting 4 or 5 is usually perfect; if rolling by hand, aim for about 1-2mm thickness. -
Cut the strips:
Use your craft knife to slice the sheet into long, narrow strips. They don’t need to be perfectly uniform—slight variations in width actually add to the ragged mummy look—but aim for about 3-4mm wide.
Pro Tip: Dirty Mummy
For a more ancient look, brush fine brown soft pastel powder into the crevices of the bandages before baking. It creates instant depth and makes the mummy look aged.
Step 3: Applying the Wraps
-
Wrap the feet first:
Take short segments of your clay strips and wrap the tiny feet first. Smooth the seams where they meet the underside so the figure remains stable. -
Attach the arms:
Press the arm shapes onto the sides of the body now. You want them attached securely before the main wrapping begins so they look integrated rather than stuck on top. -
Begin the body wrap:
Pick up a clay strip and start wrapping from the bottom up. Angle the strips diagonally, crossing them over each other occasionally to create that distinctive crisscross pattern. -
Layering upwards:
Continue adding strips, working your way up the torso. Make sure to wrap over the shoulders and let the strips naturally drape over the arms to secure them further. -
Forming the head area:
As you reach the top rounded part of the cylinder, continue the crisscross pattern. Leave a small, clear horizontal gap about one-third of the way down from the top—this ‘window’ is where the eyes will go. -
Smooth the back:
Check the back of the figure. Any loose ends of strips should be gently smoothed down into the underlying clay so they don’t pop off during baking.
Step 4: Adding the Face
-
Make the eye sockets:
In the gap you left among the bandages, use a large ball stylus to press two distinct indentations. This helps seat the eyes properly so they don’t look like they are popping out too far. -
Create the eyes:
Roll two small balls of black clay. They should be sized to fit snugly into the indentations you just made. Press them in gently. -
Add highlights:
For that soulful look seen in the photo, flatten a microscopic amount of translucent amber or orange clay into a thin ring or crescent and apply it to the outer edge of the black eye. -
Refining the face wraps:
Carefully add one or two final thin strips just above and below the eyes. I find this helps ‘tuck’ the eyes in, making it look like the mummy is peeking out from deep within the bandages.
Step 5: Baking and Finishing
-
Texture check:
Before baking, give the figure a once-over. If the clay looks too smooth, you can lightly press a piece of fabric or sandpaper against the strips to give them a fabric-like texture. -
Bake the figure:
Bake the figurine according to your specific polymer clay manufacturer’s instructions (usually around 275°F/135°C for 15-30 minutes). -
Cool down:
Let the figure cool completely in the oven before removing it to prevent any thermal shock cracks. -
Glazing the eyes:
Once cool, create that wet, shiny look on the eyes by applying a drop of gloss glaze or UV resin. Cure or let dry completely while keeping the rest of the bandages matte.
Place your finished little mummy on a shelf to add a whimsical touch to your spooky décor

TRACK YOUR CERAMIC JOURNEY
Capture glaze tests, firing details, and creative progress—all in one simple printable. Make your projects easier to repeat and improve.
Black Cat Minis With Pumpkin Friends
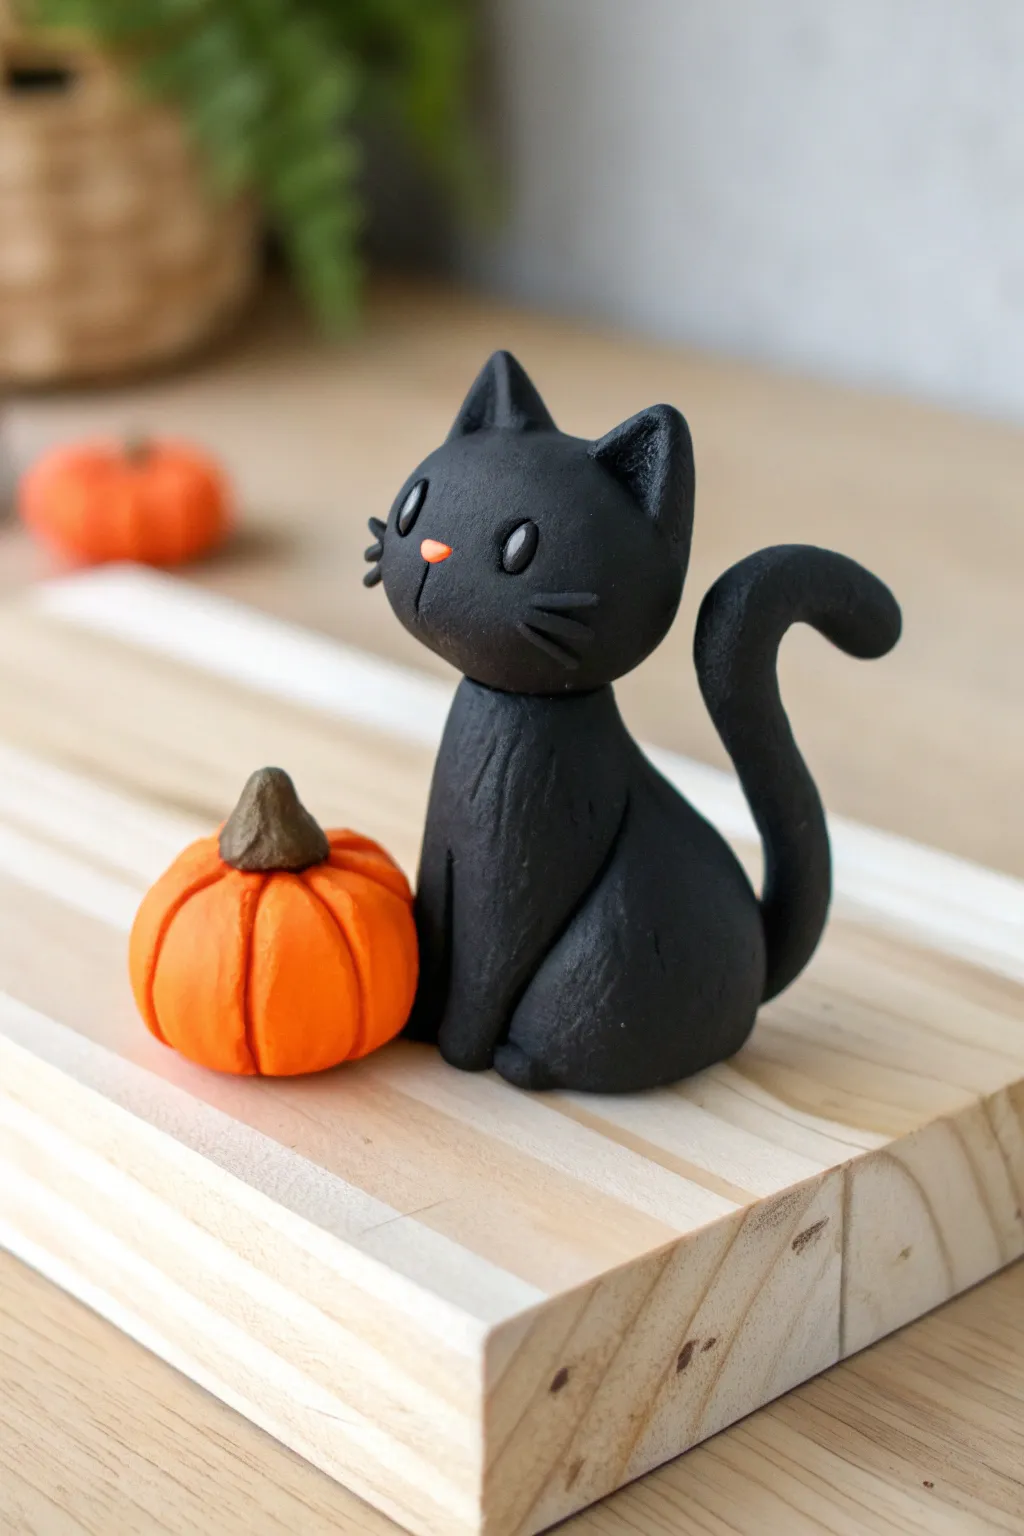
These adorable black cat miniatures make the perfect Halloween desk buddy or tiered tray accent. With their simplified shapes and sweet expressions, they are a fantastic project for beginners to practice basic clay modeling techniques.
Detailed Instructions
Materials
- Black polymer clay
- Orange polymer clay
- Brown polymer clay (small amount)
- Needle tool or toothpick
- Ball stylus tool
- Small blade or craft knife
- Baking sheet with parchment paper
- Oven (if using polymer clay)
Step 1: Sculpting the Cat Body
-
Form the base:
Start by conditioning your black clay until it’s soft and pliable. Roll a walnut-sized ball for the body and shape it into a rounded teardrop or pear shape, flattening the bottom so it sits securely. -
Create the head:
Roll a slightly smaller ball for the head. Press it gently onto the top of the body piece. You can insert a small piece of toothpick or wire between the two for extra stability if you like. -
Add the ears:
Form two very small triangles of black clay. Gently press them onto the top of the head, blending the back seam downward with your finger or a tool so they attach seamlessly. -
Attach the tail:
Roll a snake of black clay that tapers slightly at one end. Curl it into a gentle S-shape or question mark shape and press the thicker end against the back side of the body. -
Shape the legs:
For the front legs, roll two small logs of clay. Attach them vertically to the front of the body, blending the upper portion into the chest so they look integrated rather than just stuck on. -
Add texture:
Using a needle tool, scratch very light, short lines onto the chest and side of the body to mimic the look of fur texture.
Sticky Fingerprints?
If you see fingerprints on your raw clay, lightly brush the surface with a little baby oil or cornstarch before baking to smooth them out effortlessly.
Step 2: Detailing the Face
-
Indent eye sockets:
Use a ball stylus to make two small indentations on the face where the eyes will go. This helps the small clay pieces sit flush. -
Add the eyes:
Roll two tiny specks of black clay into balls (or use glossy black beads if you prefer). Press them into the sockets. Add microscopic white specks as highlights to bring them to life. -
Create the nose:
Take a tiny crumb of orange clay (or pink) and roll it into a triangle. Press this into the center of the face, just below the eyes. -
Whiskers and mouth:
Finally, use your needle tool to gently score three short whisker lines on each cheek. Add a tiny vertical line below the nose for the mouth cleft.
Make it a Charm
Before baking, insert a screw eye pin into the top of the cat’s head. Once baked, you can attach it to a keychain or turn it into cute seasonal jewelry.
Step 3: Crafting the Pumpkin
-
Shape the pumpkin body:
Roll a ball of orange clay about half the height of your cat. Flatten it slightly at the top and bottom to create a squat, pumpkin shape. -
Create the ridges:
Using the side of a toothpick or a dull blade tool, press vertical indentations all around the orange ball, starting from the center top and going down to the bottom to create segments. -
Add the stem:
Form a small cone from brown clay. Twist the top slightly to give it a withered, organic look, and press the base onto the center top of the pumpkin. -
Final assembly:
Place the pumpkin next to your cat on your baking tile. Check that they are scaled nicely together before baking. -
Bake the project:
Bake your pieces according to your specific clay package instructions, usually around 275°F (130°C) for 15-30 minutes depending on thickness. Let them cool completely before handling.
Once cooled, these little companions are ready to guard your desk or bookshelf for the season
Potion Bottle Charms With Simple Labels

Create a delightfully spooky accessory with this miniature potion bottle charm that mimics the look of ancient cast iron or dark ceramic. These tiny vessels are perfect for Halloween jewelry or as mystical decorative accents.
How-To Guide
Materials
- Black polymer clay (or air-dry clay painted black)
- Miniature cork stopper (approx. 10-15mm)
- Screw eye pin (silver or antique silver finish)
- Textured sponge or stiff-bristled toothbrush
- Baking sheet and parchment paper (if using polymer clay)
- Oven (if using polymer clay)
- Gloss or satin polyurethane varnish (optional)
- Small circle of craft paper or thin wood veneer for the tag
- Silver wire or jump ring
- Needle tool or toothpick
Step 1: Shaping the Bottle Body
-
Condition the Clay:
Begin by warming a small amount of black polymer clay in your hands. Knead it until it is soft, pliable, and free of any cracks. -
Form the Base:
Roll the clay into a smooth ball regarding the size of a large marble or a walnut, depending on how big you want your final charm to be. -
Flatten the Bottom:
Gently tap the ball against your work surface to create a flat bottom so the bottle can stand upright on its own without rolling. -
Create the Neck:
Pinch the top portion of the sphere and gently pull upward to create a neck. Roll the neck between your fingers to smooth it out, keeping it proportional to the body. -
Flare the Rim:
Use your thumb and forefinger to slightly flatten and flare the very top of the neck, creating a distinct lip where the cork will eventually sit.
Cork Won’t Stay?
If the cork pops out after gluing, the air pressure inside might be pushing it. Poke a tiny, invisible pinhole in the bottom of the bottle before baking to let air escape.
Step 2: Adding Texture and Details
-
Open the Potion:
Take the handle of a paintbrush or a specialized ball tool and press it vertically into the neck to create the opening. Ensure it is wide enough to accommodate your mini cork. -
Test the Fit:
Insert your cork briefly to check the size. I prefer to make the opening slightly snug, as clay doesn’t shrink much, but a tight fit is better for security. -
Add Cast Iron Texture:
To achieve that stony, cast-iron look, gently tap a textured sponge or a stiff toothbrush over the entire surface of the bottle. Don’t press too hard; you just want surface pitting. -
Refine the Shape:
If the texturing process distorted your bottle’s shape, gently reshape the round belly and the rim with your fingers.
Pro Tip: Dusty Finish
Before baking, brush a tiny amount of cornstarch or baby powder lightly over the textured clay. This settles into the pits and enhances the ancient, stony effect.
Step 3: Baking and Assembly
-
Bake the Clay:
Place your bottle on a parchment-lined baking sheet. Bake according to the manufacturer’s instructions for your specific brand of clay (usually around 275°F/135°C for 15-30 minutes). -
Cool Down:
Allow the bottle to cool completely before handling. This ensures the clay hardens fully and prevents fingerprints. -
Prepare the Cork:
While the bottle cools, take your mini cork and carefully twist a metal screw eye pin into the center of the top. -
Create the Label:
Cut a tiny circle from craft paper, cardstock, or thin wood veneer. Punch a small hole near the edge for attachment. -
Attach the Label:
Thread a small piece of silver wire or a jump ring through the label’s hole and attach it to the eye pin on the cork. -
Seal the Bottle:
Apply a tiny dab of strong glue (like E6000 or superglue) to the bottom half of the cork and press it firmly into the bottle’s neck. -
Optional Finish:
For a slight sheen that mimics polished stone, you can brush a very thin layer of satin varnish over the botte, though leaving it matte looks great too.
Enjoy wearing or displaying your tiny vessel of mystery
Ghost Lantern Covers for Tea Lights
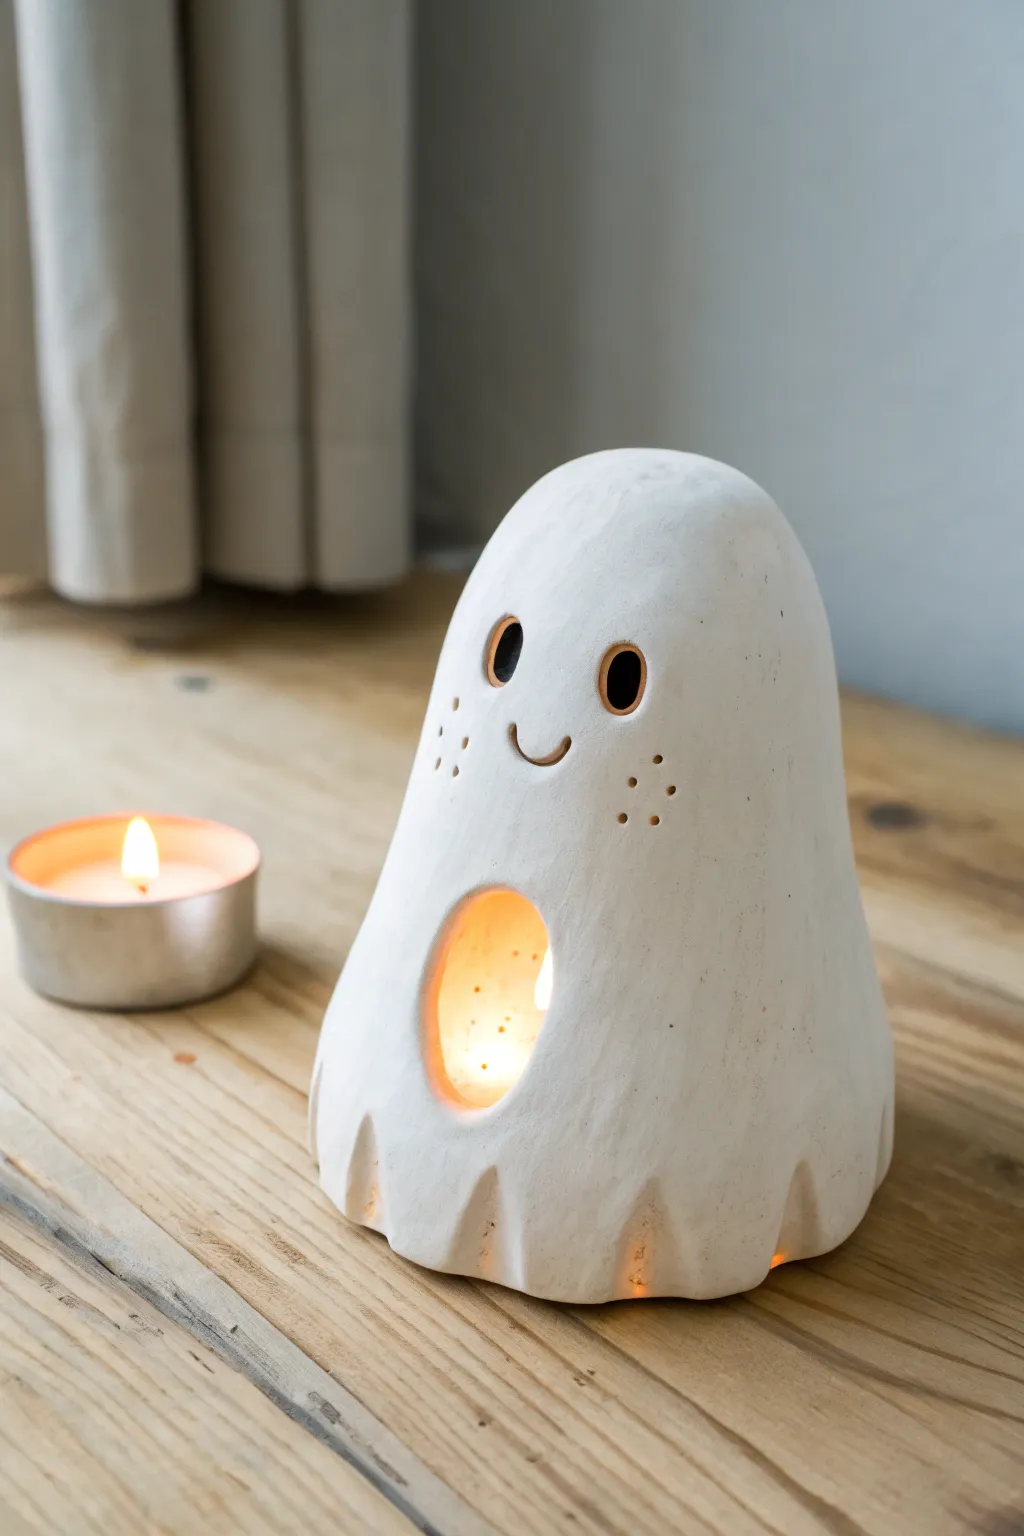
Illuminate your Halloween decor with this charming ghost tea light cover, featuring a smooth matte finish and a warm, inviting glow. Its friendly face and clever scalloped base make it perfect for adding a touch of whimsy to any mantle or table.
Detailed Instructions
Materials
- White air-dry clay (approximately 500g)
- Small rolling pin
- Small kitchen knife or clay needle tool
- Drinking glass or cylindrical object (for form)
- Small circle cutter or straw
- Medium circle cutter (about 1.5 inches)
- Sponge and water
- Fine-grit sandpaper
- LED tea light
- Clay carving tools (loop tool and sculpting tool)
- Aluminum foil
Step 1: Forming the Base Shape
-
Prepare the foil core:
Crumple aluminum foil into a cone-like dome shape that is slightly smaller than you want your finished ghost to be. This will act as a support structure while the clay dries. -
Roll out the clay:
Take a large handful of white air-dry clay and knead it until soft. Roll it out into a slab about 1/4 inch thick. Aim for an even thickness to prevent cracking later. -
Drape the clay:
Gently lift your clay slab and drape it over the foil form. Use your hands to smooth the clay down the sides, ensuring it covers the form completely. -
Shape the silhouette:
Trim away excess clay at the bottom with a knife. Gently squeeze and shape the top to create a rounded, slightly tapered head. -
Create the scalloped hem:
At the bottom edge of the ghost, press your thumb or a rounded modeling tool into the clay at regular intervals to create the wavy, floating sheet effect seen in the photo.
Clean Cuts Pro-Tip
When cutting out the eyes or belly hole, let the clay dry for 20 minutes first. Slightly firmer clay cuts much cleaner than fresh, sticky clay.
Step 2: Adding Features and Details
-
Mark the face placement:
Lightly sketch where you want the eyes and mouth to go using a needle tool. I find placing the eyes slightly wider apart makes the face look cuter. -
Carve the eyes:
Use a small loop tool or a knife to carefully cut out two oval shapes for the eyes. Smooth the inner edges of the holes with a damp finger. -
Sculpt the smile:
Using a curved sculpting tool, impress a small smile below the eyes. Don’t cut all the way through; just press deep enough to create a shadow. -
Cut the belly window:
Use your medium circle cutter or a knife to remove a large oval from the lower center of the ghost’s body. This is where the candlelight will shine through brightest. -
Add freckles:
Using a toothpick or a small needle tool, poke clusters of three small dots onto the cheeks for adorable freckles.
Glow Up Idea
Paint the inside of the ghost with gold or copper acrylic paint. When lit, the metallic interior will reflect a much warmer, richer light.
Step 3: Refining and Drying
-
Texture the surface:
Instead of smoothing it perfectly, gently dab the surface with a slightly textured sponge. This gives it that handmade, stone-like appearance. -
Initial drying phase:
Let the ghost sit on the foil form for about 2-3 hours until it feels leather-hard. It needs to be stiff enough to hold its own weight. -
Remove the form:
Carefully remove the foil structure from underneath. This is crucial so the inside can dry properly and air can circulate. -
Smooth the edges:
Check the bottom rim and the cutout window for any sharp bits. Dip your finger in water and run it along these edges to soften them. -
Full dry time:
Allow the piece to dry completely for 24-48 hours. Keep it away from direct heat sources to prevent warping. -
Sand for perfection:
Once fully dry and white, use fine-grit sandpaper to gently buff away any unwanted bumps, paying special attention to the eye holes.
Place a battery-operated tea light inside and enjoy the cozy atmosphere your handcrafted ghost brings to the room
Trick-or-Treat Bucket Mini Planters
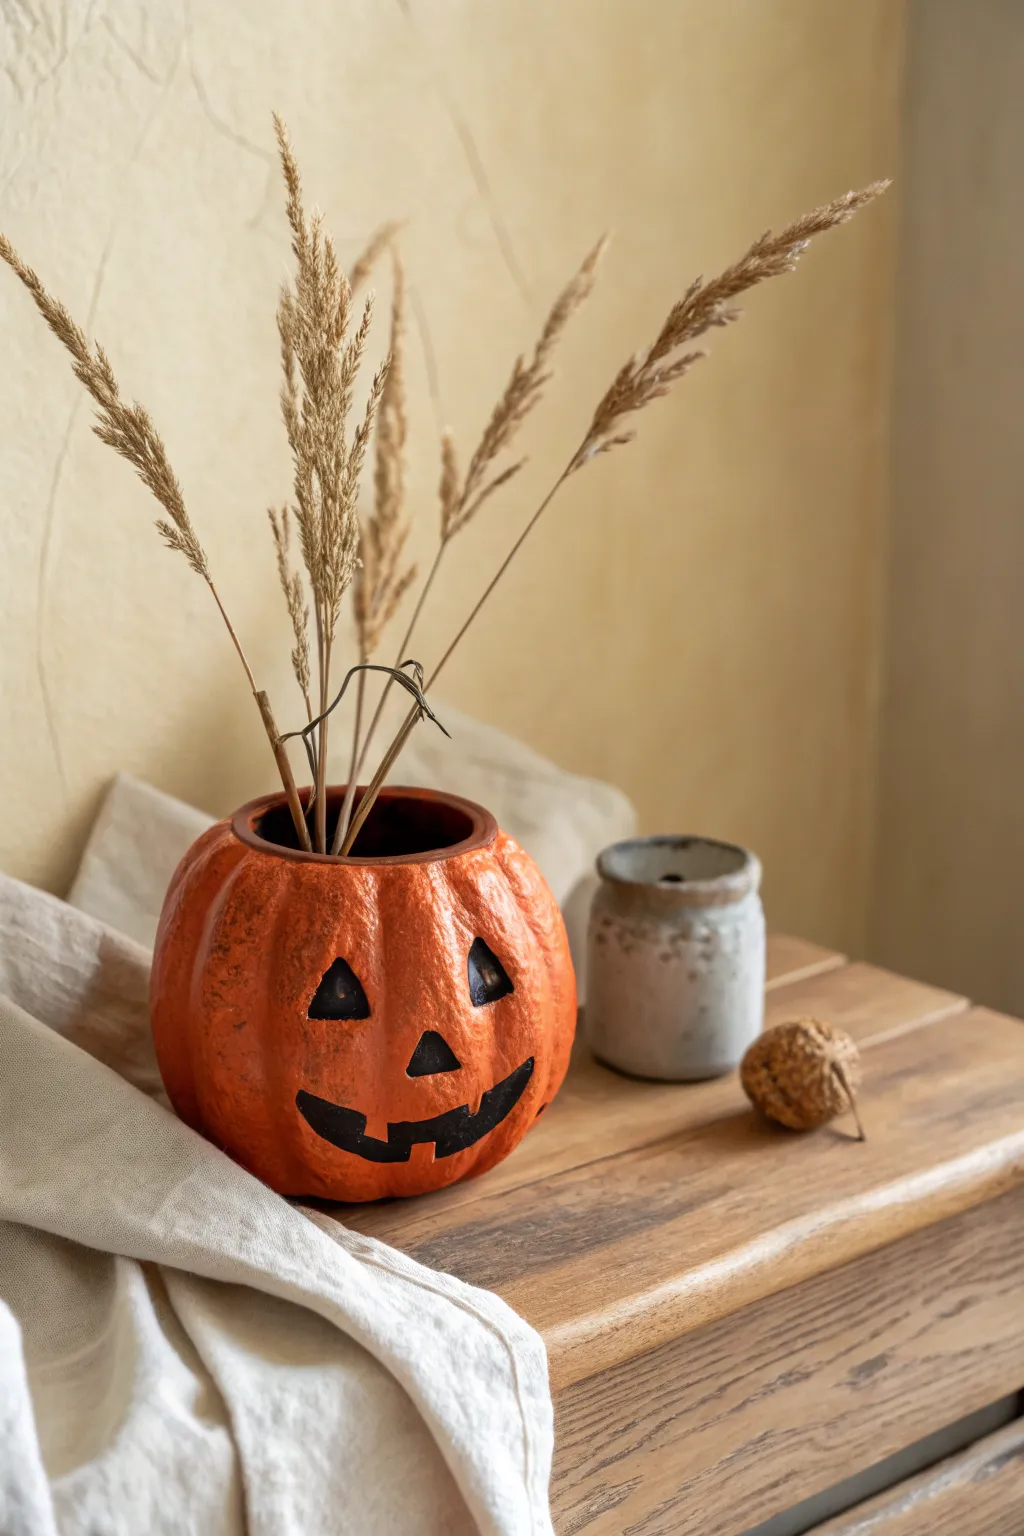
Bring a touch of autumn charm into your home with this rustic, handcrafted pumpkin planter that looks like a vintage trick-or-treat bucket. The textured orange clay and classic jack-o’-lantern face create a cozy, nostalgic vibe perfect for dried grasses or spooky succulents.
Step-by-Step Tutorial
Materials
- Air-dry clay (terra cotta color or white)
- Acrylic paint (burnt orange, black, and dark brown)
- Small rolling pin
- Clay sculpting tools (knife, rounded tool)
- Small bowl for water
- Paintbrushes (detail brush and medium flat brush)
- Sponge or textured cloth
- Matte sealant or varnish
- Fine-grit sandpaper
- Dried decorative grasses
Step 1: Sculpting the Base
-
Prepare the Clay:
Start by conditioning a large ball of air-dry clay in your hands until it warms up and becomes pliable without cracking. -
Form the Sphere:
Roll the clay into a smooth sphere, roughly the size of a grapefruit, ensuring there are no major seams or air pockets. -
Create the Opening:
Gently press your thumb into the center of the sphere and begin pinching the walls outward to create a hollow pot shape. Aim for an even thickness of about a quarter-inch all around. -
Shape the Pumpkin:
Place the pot on your work surface and press down slightly to flatten the bottom so it sits stably. -
Add Vertical Ribs:
Using a rounded sculpting tool or the handle of a paintbrush, press vertical indentations from the bottom to the rim at regular intervals to mimic pumpkin ribs. -
Refine the Shape:
Smooth the clay between the ribs with a wet finger to create the puffed-out sections of the pumpkin segments. -
Texture the Surface:
Take a coarse sponge or a crumpled piece of foil and gently tap it all over the outside surface. I find this creates that wonderful organic, pitted texture seen in the photo. -
Define the Rim:
Smooth out the top rim with a little water, creating a slightly flattened, neat edge where the lid would have been cut.
Cracks happen!
If small hairline cracks appear while drying, don’t panic. Mix a small amount of fresh clay with water to create a paste (slip) and fill the crack, then smooth over.
Step 2: Carving and Drying
-
Sketch the Face:
Lightly trace your desired jack-o’-lantern face onto the clay with a needle tool. Triangles for eyes and a jagged grin work best for this classic look. -
Carve the Features:
Carefully carve out the eyes, nose, and mouth recessions. You don’t need to cut all the way through; imply a relief carving rather than a hole. -
Cleanup Edges:
Use a damp brush to smooth any jagged bits of clay around your carved features. -
Air Dry:
Set the pumpkin aside to dry completely. This usually takes 24-48 hours depending on humidity; turn it occasionally for even drying.
Step 3: Painting and Finishing
-
Base Coat:
Paint the entire exterior with a coat of burnt orange acrylic paint. Let it dry fully. -
Add Dimension:
Mix a tiny bit of brown into your orange paint and dry-brush it into the vertical grooves to accentuate the shadowed areas. -
Paint the Face:
Using a fine detail brush and black acrylic paint, fill in the carved eyes, nose, and mouth to make the expression pop. -
Vintage Wash:
For a weathered look, dilute some dark brown paint with water and wash it over the pot, immediately wiping most of it off with a paper towel so it stays only in the texture pits. -
Seal the Project:
Apply a matte sealant to protect the paint and give the surface a finished, cohesive sheen. -
Style and Display:
Once sealed and dry, arrange a bundle of dried wheat or grasses inside to complete the harvest aesthetic.
Try a handle
Make two small holes near the rim before drying. After painting, attach a rusted wire handle to transform this planter into a hanging pail.
Enjoy your charming little pumpkin pot on a windowsill or mantle for the entire autumn season
Mix-and-Match Halloween Charm Grab Bag
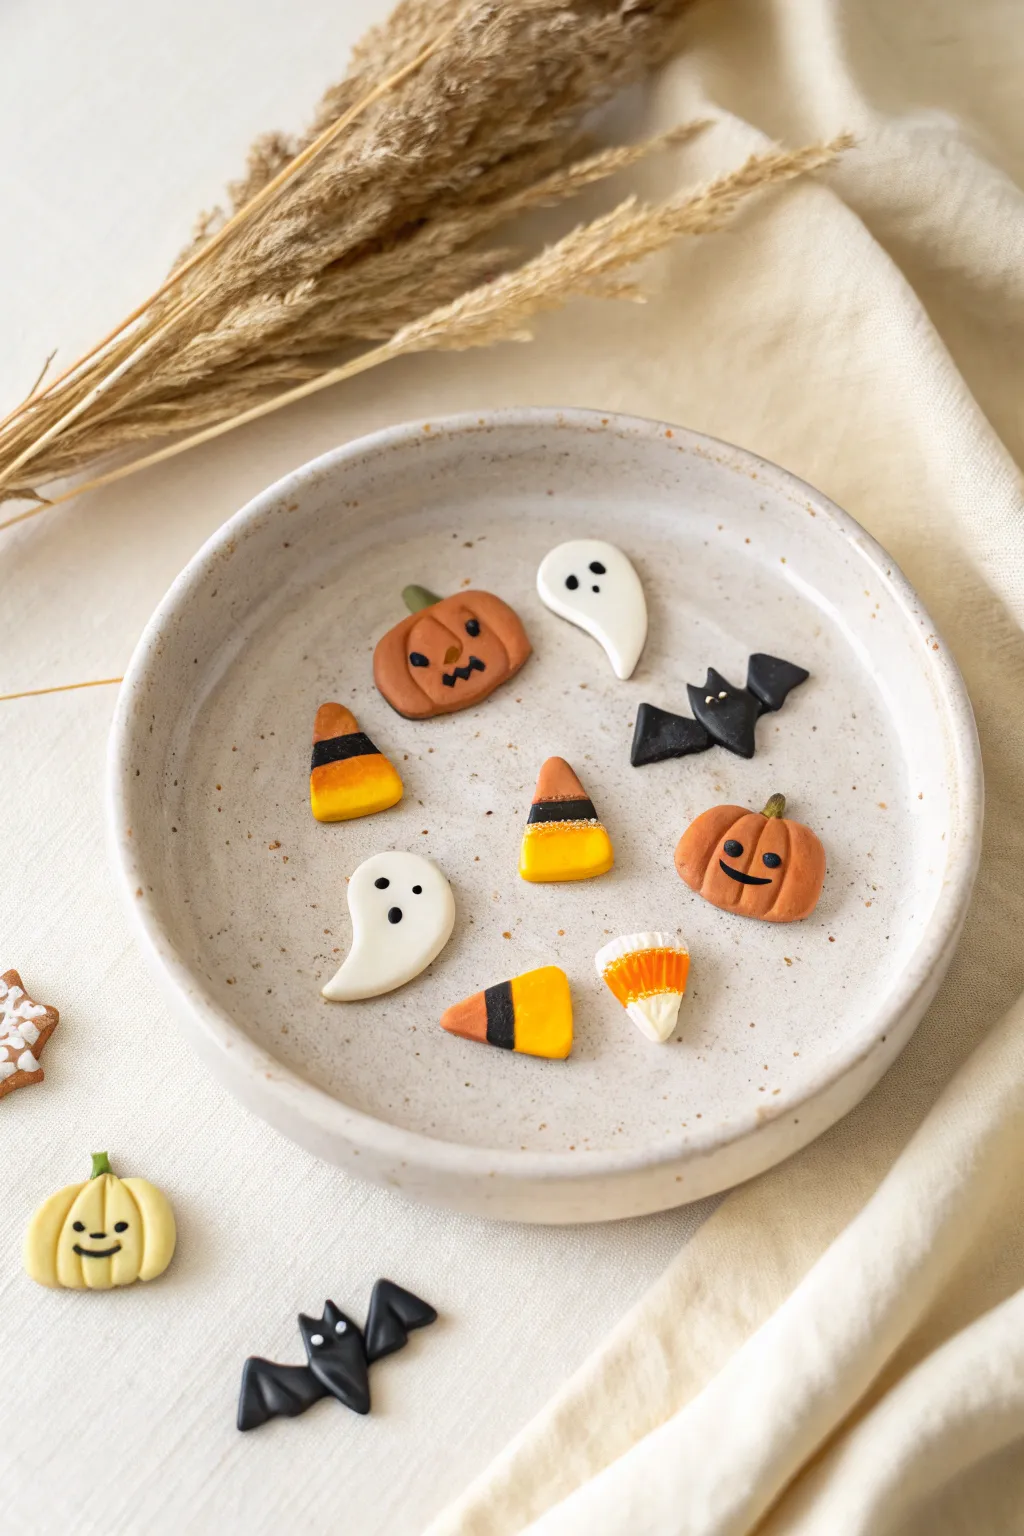
Create your own miniature Halloween collection with these adorable clay charms, featuring pumpkins, ghosts, bats, and candy corn. These tiny, mix-and-match pieces are perfect for jewelry making, magnet sets, or simply scattering as festive table confetti.
Step-by-Step Guide
Materials
- Polymer clay (white, black, orange, yellow, green)
- Clay carving tools or a toothpick
- Small rolling pin
- Baking sheet with parchment paper
- Oven (for baking)
- Clear glaze or varnish (optional)
Step 1: Shaping the Pumpkins
-
Form the base:
Start with a small ball of orange clay, about the size of a marble. Slightly flatten it into a squat, round shape to mimic a classic pumpkin silhouette. -
Indent the ribs:
use a dull carving tool or the side of a toothpick to press vertical lines down the sides of the pumpkin, creating the segments or ribs. -
Add a stem:
Roll a tiny speck of green or brown clay into a thin log. Press it gently into the center top of your pumpkin. -
Create the face:
For a carved look, gently press tiny bits of black clay onto the pumpkin for eyes and a mouth. Alternatively, use a needle tool to etch a zig-zag mouth directly into the orange clay.
Step 2: Crafting the Ghosts
-
Shape the body:
Roll white clay into a teardrop shape. Flatten it gently with your thumb. -
Curve the tail:
Gently pull the pointed end of the teardrop to the side to give the ghost a swooping, flying motion. -
Make the face:
Roll three miniscule balls of black clay. Press two onto the head for eyes and one slightly larger oval for a howling mouth.
Fingerprint Fixer
If you see fingerprints on your raw clay, lightly brush the surface with a tiny amount of baby oil or cornstarch before baking to smooth it out.
Step 3: Building Candy Corn
-
Layer the colors:
Create three small, thick ropes of clay: one yellow, one orange, and one white. -
Stack and slice:
Press the ropes together horizontally—yellow on the bottom, orange in the middle, white on top—so they stick firmly. Using a blade, slice a triangle shape out of this striped block. -
Refine the edges:
Gently tap the cut edges with your finger to soften any sharp corners and create the rounded look of candy.
Turn Them into Charms
Insert a metal eye pin into the top of each piece before baking. Once baked, you can easily attach them to earrings, bracelets, or necklace chains.
Step 4: Bat Assembly
-
Wing shapes:
Roll out a small sheet of black clay. Cut two triangular wings, using a small round tool to scallop the bottom edges for that classic bat look. -
Form the body:
Roll a small oval for the body and a smaller circle for the head. Press these together gently. -
Attach wings and ears:
Press the wings onto the back of the body. Add two tiny triangles to the top of the head for ears. -
Add details:
Using a needle tool, poke two small indentations for eyes to give it texture.
Step 5: Baking and Finishing
-
Arrange for baking:
Place all your finished charms on a baking sheet lined with parchment paper, ensuring they aren’t touching. -
Bake:
Bake according to your specific polymer clay package instructions (usually around 275°F or 135°C for 15-30 minutes). I personally check them a few minutes early to ensure the white ghost clay doesn’t scorch. -
Cool and glaze:
Let the charms cool completely. For extra shine and durability, brush on a thin layer of gloss glaze.
Enjoy displaying your spooky miniature collection all season long