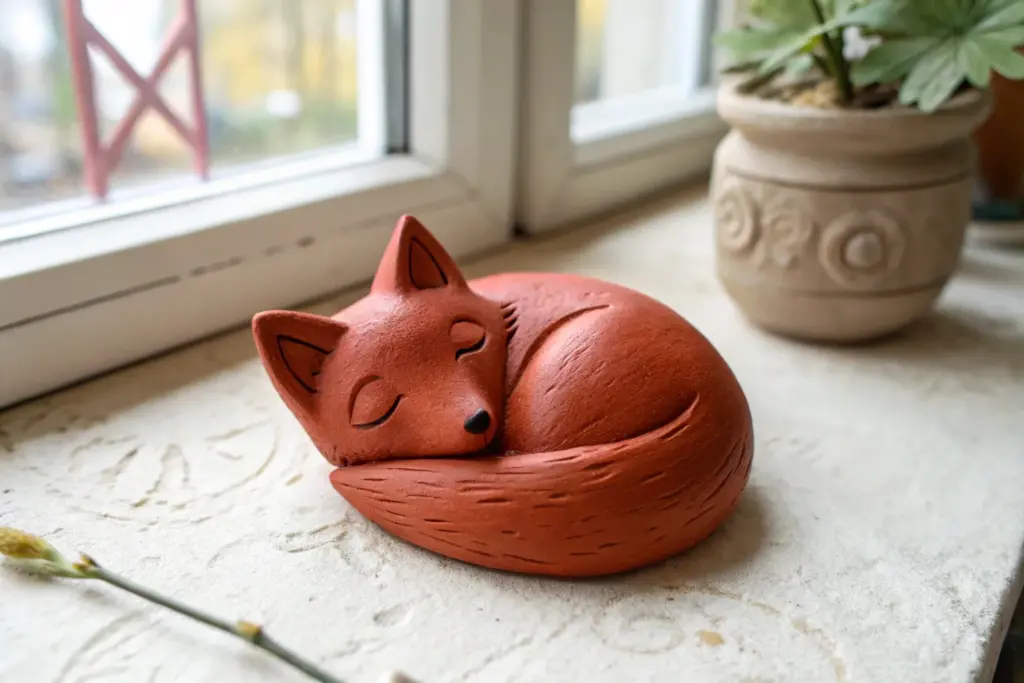
When I want a quick win at the clay table, I reach for red clay because it looks bold and finished even with super simple shapes. These ideas are all about easy forms, cozy texture, and letting that rich natural color do the heavy lifting.
Classic Pinch Pot Trinket Bowl
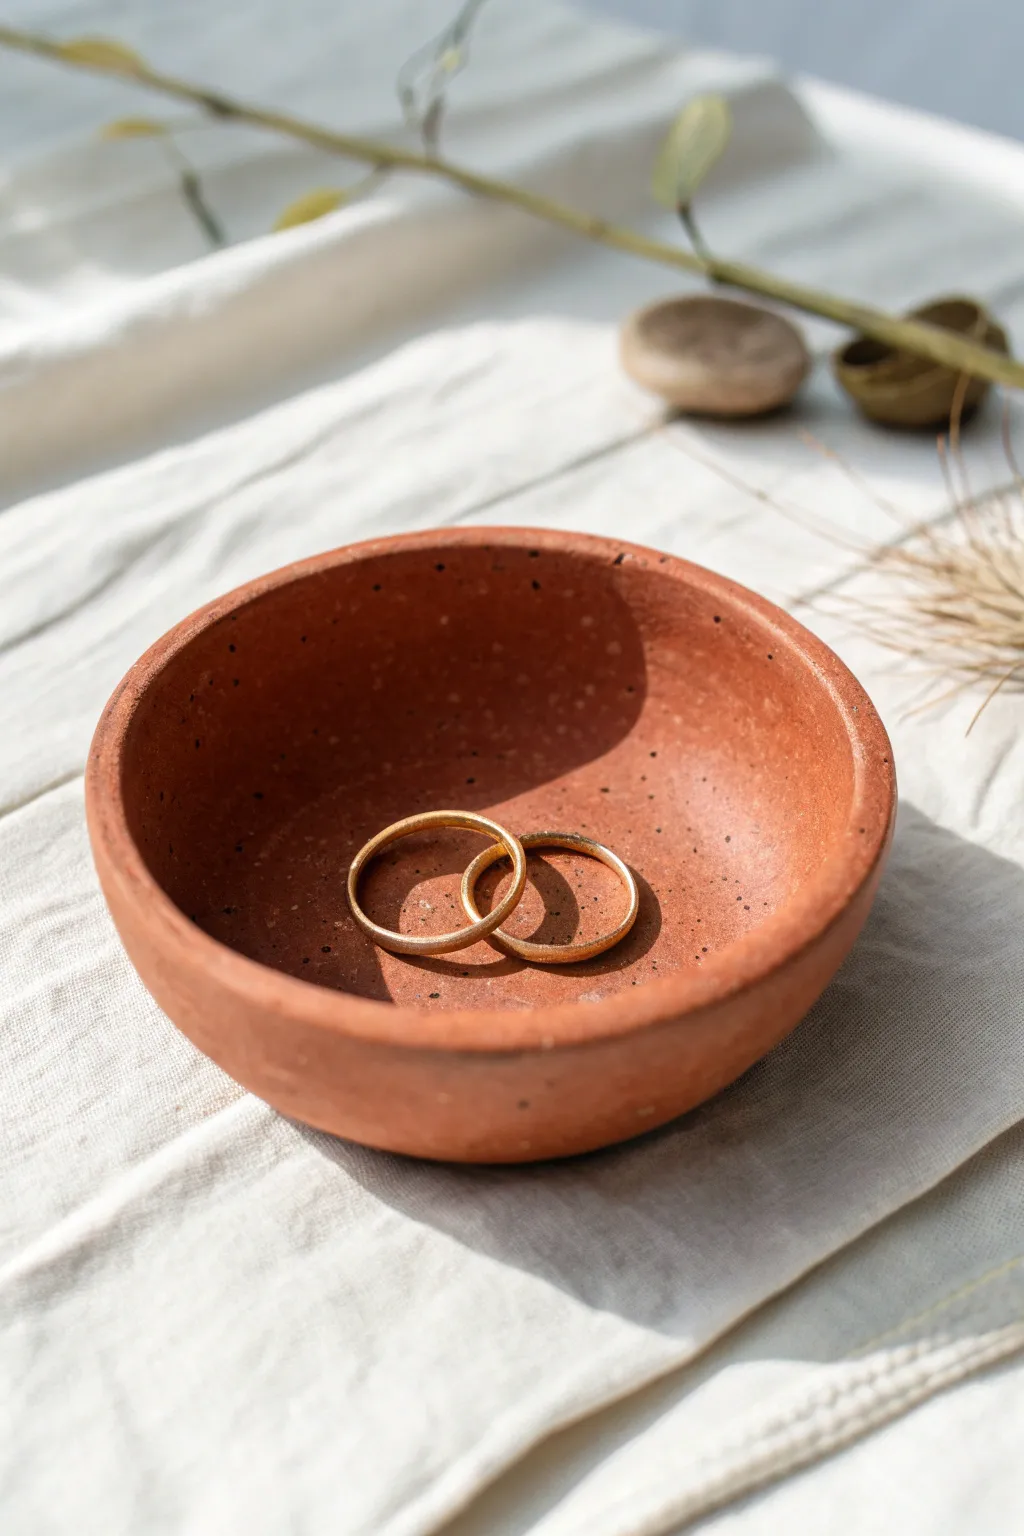
This charming, earthy trinket bowl captures the warmth of traditional terracotta with a simple, handmade aesthetic. Its shallow, open form and speckled red clay body make it the perfect resting place for your daily jewelry.
Step-by-Step
Materials
- Red earthenware clay or terracotta air-dry clay
- Small bowl of water
- Sponge
- Needle tool or toothpick
- Fine-grit sandpaper (grade 220 or higher)
- Matte clear sealant (acrylic or varnish)
Step 1: Forming the Base
-
Prepare the Clay:
Start by grabbing a lump of clay about the size of a tennis ball. Knead it in your hands briefly to warm it up and ensure there are no air bubbles trapped inside. -
Roll a sphere:
Roll the clay between your palms until you have a smooth, round sphere. Aim for symmetry here, as this dictates the final shape of your bowl. -
Create the opening:
Hold the sphere in your non-dominant hand. With your dominant thumb, press gently but firmly into the center of the ball, stopping about a half-inch from the bottom. -
Pinch the walls:
Begin pinching the clay between your thumb (inside) and fingers (outside). Rotate the ball slightly after each pinch to ensure even thickness all the way around.
Step 2: Refining the Shape
-
Widen the bowl:
Continue the pinching motion, moving from the bottom center upwards and outwards. Gradually widen the opening until you achieve a shallow, open bowl shape like the one in the photo. -
Check thickness:
Feel the walls of your pot. They should be roughly uniform in thickness—about a quarter-inch is ideal for a sturdy trinket dish. -
Tap the base:
To make sure the bowl sits flat on a table, gently tap the bottom of the pot against your work surface once or twice to create a flat foot. -
Smooth the rim:
Run a damp finger along the rim of the bowl to compress the clay and smooth out any small cracks that may have formed during stretching.
Cracking Up?
If you see hairline cracks forming on the rim while shaping, your clay is likely too dry. Dip your fingers in water and smooth the cracks immediately to rehydrate the area.
Step 3: Adding Texture & Finishing
-
Refine the surface:
Use a slightly damp sponge to wipe the interior and exterior walls. This removes prominent fingerprints but leaves the natural, organic texture of the clay visible. -
Add speckles (Optional):
If your clay is very smooth but you want that groggy, speckled look from the photo, gently press coarse sand or dried coffee grounds into the surface now. -
Let it dry:
Set the bowl aside in a draft-free area. Allow it to dry slowly to the touch (leather hard) before moving to the final smoothing step. -
Burnish inner curve:
Using the back of a spoon, gently rub the interior curve of the bowl. This compresses the clay particles and gives that soft, slight sheen seen in the shadows. -
Final drying:
Let the piece dry completely. If using kiln-fire clay, it’s ready for the kiln. If using air-dry clay, wait 24-48 hours until it turns a lighter, chalky color. -
Sanding:
Once bone dry, take your fine-grit sandpaper and lightly buff the rim to make it perfectly flat and uniform. -
Seal or Fire:
Finish your project by firing it or, for air-dry clay, applying a coat of matte sealant. This protects the porous material from oils on your jewelry.
Make it Shine
For a luxe contrast, paint just the rim of the bowl with gold leaf paint after it has dried. This creates a beautiful connection with the gold jewelry you plan to store inside.
Place your favorite rings inside and enjoy the simple elegance of your handcrafted creation

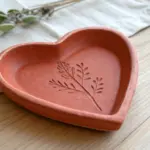


Heart-Shaped Red Clay Jewelry Dish
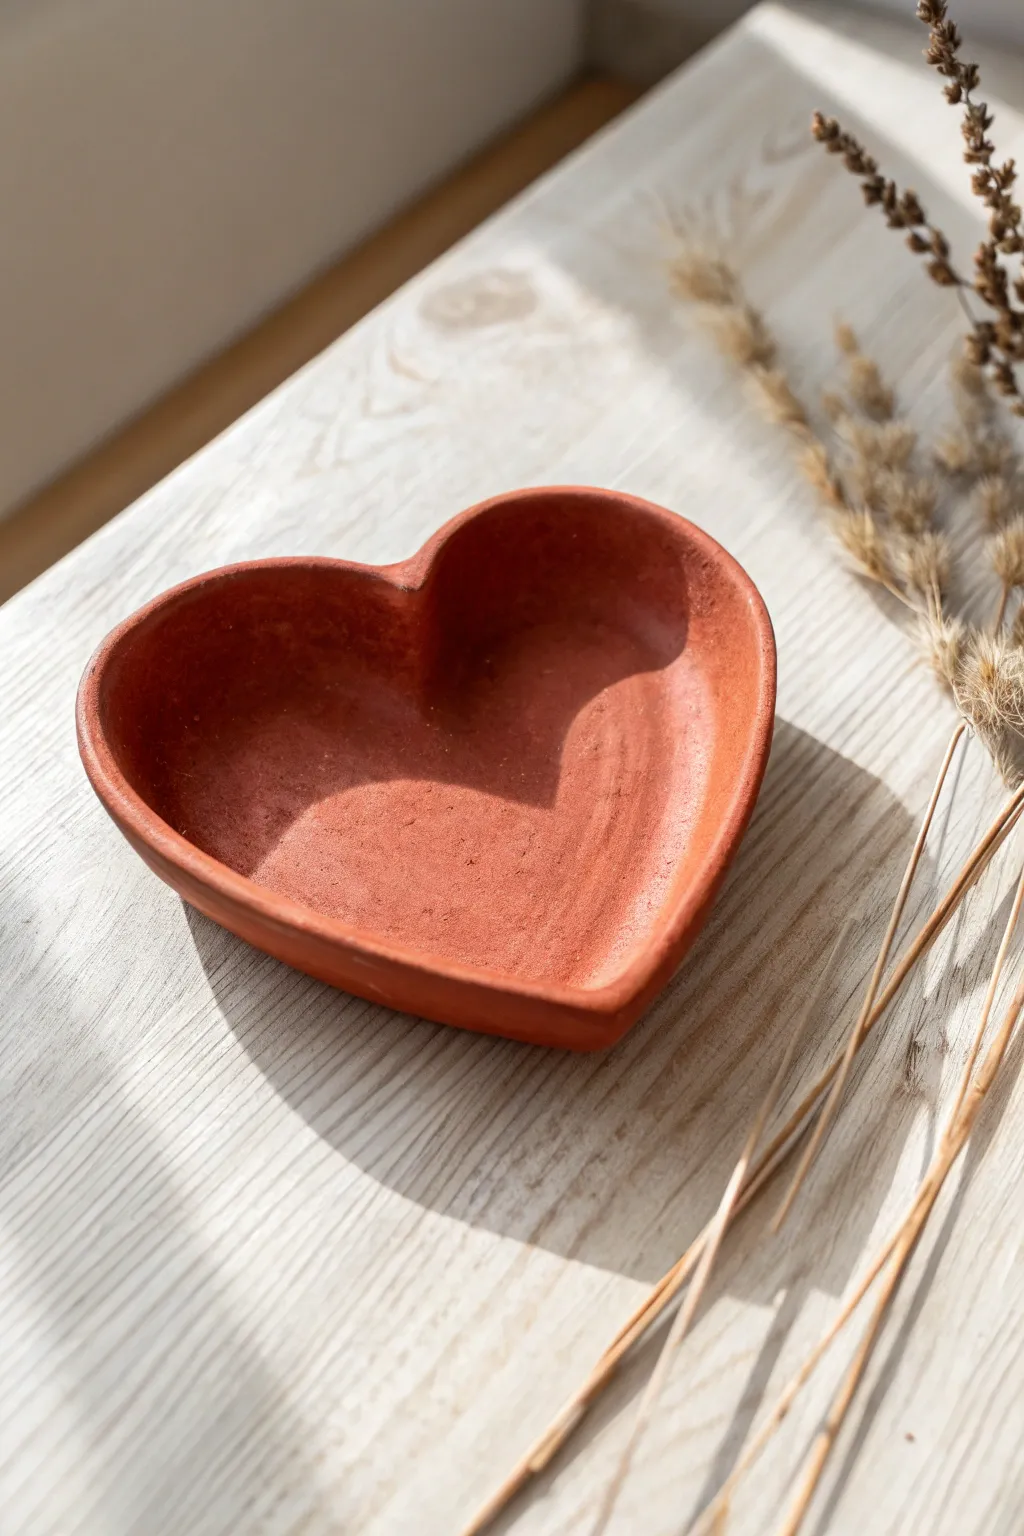
Embrace the natural warmth of red clay with this charming heart-shaped jewelry dish. Its simple, hand-formed edges and earthy texture make it a perfect bedside catch-all or a thoughtful handmade gift.
Step-by-Step Tutorial
Materials
- Red air-dry clay (or terracotta modeling clay)
- Heart-shaped paper template
- Rolling pin
- Fettling knife or craft knife
- Small bowl of water
- Sponge
- Sandpaper (fine grit)
- Matte finish clear sealant or varnish
Step 1: Preparation & Shaping
-
Prepare your clay:
Start by taking a handful of red clay and kneading it in your hands to warm it up. This conditioning makes the clay more pliable and prevents cracks from forming later. -
Roll the slab:
Place your clay on a flat, smooth surface. Using your rolling pin, roll the clay out evenly until it is approximately 1/4 inch thick. Aim for a consistent thickness to ensure even drying. -
Create the heart shape:
Place your paper heart template gently on top of the rolled clay slab. Using a fettling knife or craft knife, trace around the template to cut out your heart shape. -
Remove excess clay:
Determine which clay is outside the heart shape and carefully pull it away, setting it aside for future projects. You should be left with a clean, flat clay heart. -
Begin lifting the edges:
Starting at the bottom point of the heart, gently use your fingers to curl the edges upward. You aren’t pinching them thin, but rather lifting the border to create a wall. -
Form the curves:
Work your way up the sides of the heart, continuing to curve the clay upward. Pay special attention to the two rounded tops of the heart; cup these areas in your palm to keep the curve organic. -
Define the dip:
At the top center indentation of the heart, allow the clay wall to dip slightly inward, ensuring the ‘V’ shape remains distinct and doesn’t get smoothed over.
Use Water Sparingly
Don’t over-wet the clay while smoothing. Too much water weakens the structure and can lead to cracking as it evaporates during the drying phase.
Step 2: Refining & Finishing
-
Smooth the edges:
Dip your finger into your small bowl of water. Run your damp finger along the top rim of the dish to smooth out any sharp cuts left by the knife. -
Refine the surface:
I like to use a slightly damp sponge to gently wipe the interior and exterior surfaces. This removes fingerprints and creates that soft, matte texture seen in the photo. -
Adjust the depth:
Press gently into the center of the dish with your thumbs while supporting the outside with your fingers to ensure the basin is deep enough to hold rings or trinkets. -
Initial drying:
Place the dish on a flat piece of paper or cardboard to dry. Avoid direct heat sources which can cause cracking. -
Flip for even drying:
After about 12 hours, carefully flip the heart upside down. This allows the bottom to dry completely and prevents the edges from warping upward. -
Check for hardness:
Let the piece dry for another 24 to 48 hours until the clay turns a lighter shade and feels hard and room temperature to the touch. -
Sand imperfections:
Once fully dry, take your fine-grit sandpaper and lightly buff away any rough spots on the rim or the bottom. Be gentle to maintain the rustic look. -
Seal the piece:
Apply a thin coat of matte clear sealant or varnish to the entire dish. This deepens the red color slightly and protects the clay from moisture and oils.
Add Subtle Texture
Before drying, gently press a piece of linen or canvas into the wet clay surface to give the dish a woven texture that catches the light beautifully.
Now you have a timeless, earthy vessel ready to hold your favorite jewelry pieces


Easy Red Clay Ring Cone
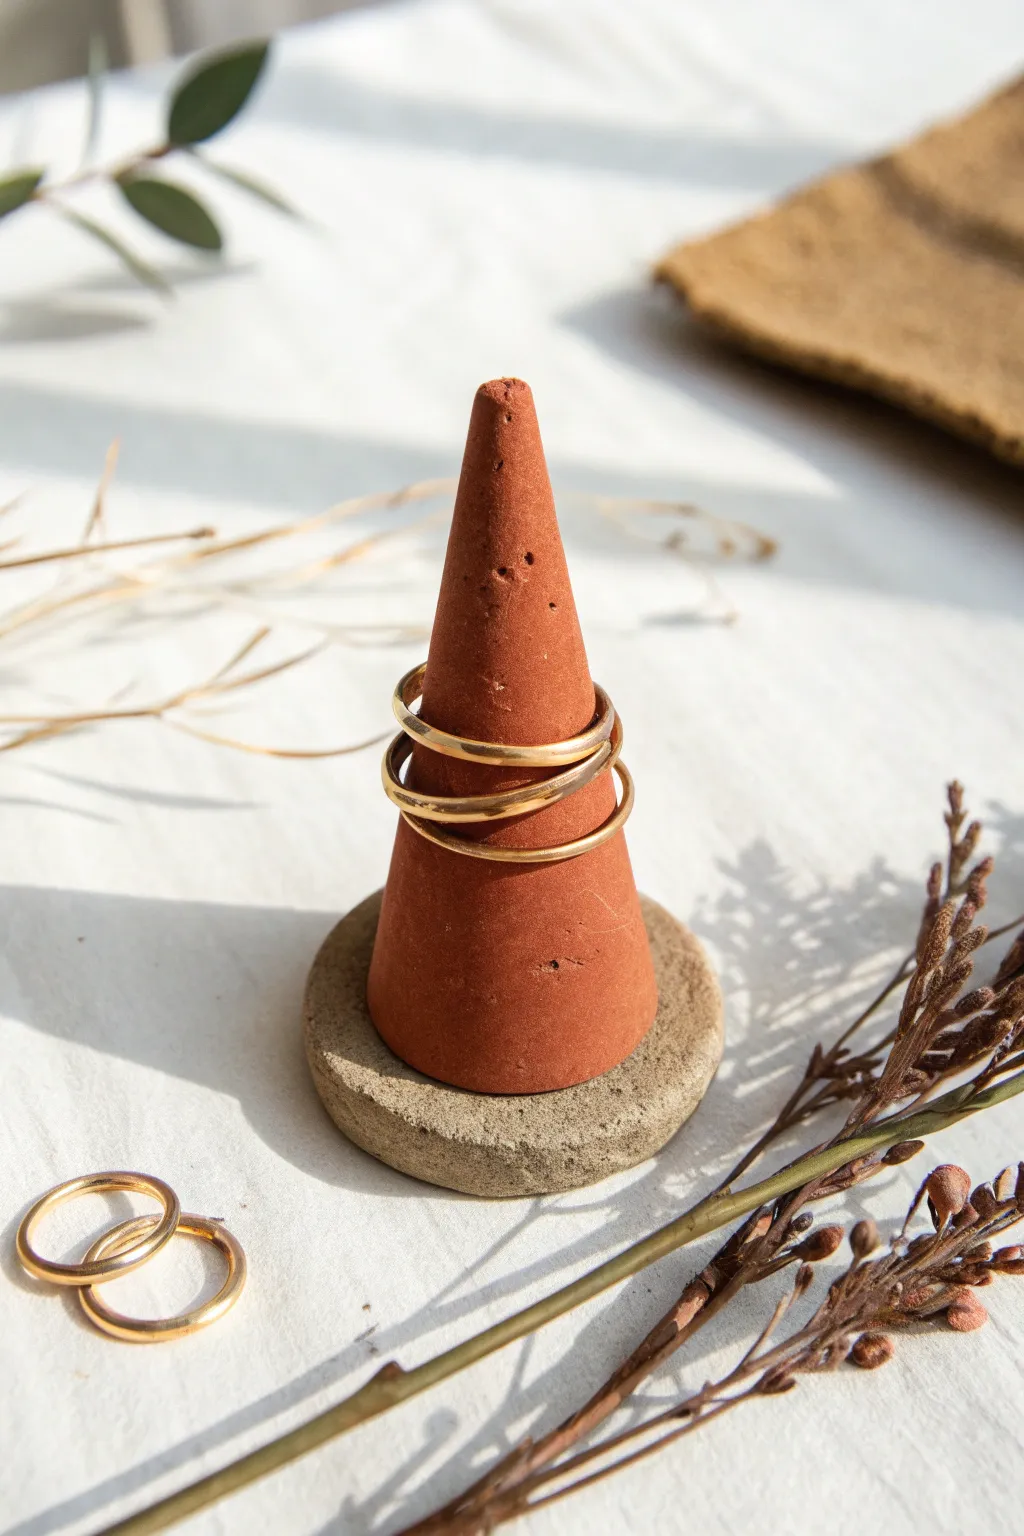
This minimalist ring holder combines the earthy warmth of red clay with a cool, stone-like base for a modern, grounded look. It’s a functional piece of art that keeps your favorite jewelry organized while adding a touch of organic texture to your vanity.
Step-by-Step Guide
Materials
- Red air-dry clay or terracotta polymer clay
- Grey stone clay or concrete-effect paste
- Rolling pin
- Craft knife or scalpel
- Water bowl
- Sandpaper (fine grit)
- Small sponge
- Strong craft glue (E6000 or similar)
- Matte varnish (optional)
Step 1: Shaping the Cone
-
Condition the Clay:
Begin by taking a chunk of your red clay, about the size of a golf ball. Knead it thoroughly in your hands until it becomes warm, pliable, and free of any air bubbles. -
Form a Cylinder:
Roll the clay ball between your palms or on a clean work surface to create a thick, even cylinder shape. -
Taper the Top:
Focus your rolling on just one end of the cylinder. Apply more pressure to one side as you roll back and forth to begin creating a cone shape. -
Establish the Base:
Tap the wider end of your cone firmly against your table to flatten the bottom. This ensures it will stand straight later. -
Refine the Shape:
Continue rolling and smoothing the cone with your fingers. Aim for a height of about 3-4 inches, keeping the taper gradual so rings can slide down easily but stop at various heights. -
Smooth Imperfections:
Dip your finger or a small sponge lightly in water. Gently rub the surface of the clay to erase any fingerprints or cracks. I like to be very thorough here because sanding later can be dusty. -
Dry the Cone:
Set the cone aside to dry completely. If using air-dry clay, this may take 24-48 hours. If using polymer clay, bake according to the package instructions now.
Step 2: Creating the Stone Base
-
Prepare Grey Clay:
Take a portion of grey stone clay or standard air-dry clay mixed with a little grey acrylic paint. -
Flatten the Base:
Roll the grey clay into a ball, then press it flat on your work surface to create a disc about 0.5 inches thick and slightly wider than the base of your red cone. -
Texture the Edges:
Don’t smooth the edges of this disc too perfectly. Pinch or tap the sides gently to create a raw, stone-hewn look that contrasts with the smooth red cone. -
Slight Indent:
Press the dried red cone gently into the center of the grey disc just enough to create a shallow impression, then remove it. This ensures a perfect fit later. -
Dry the Base:
Allow the grey base disc to dry completely or bake it if using polymer clay.
Cracking Up?
If small cracks appear as the red clay dries, mix a tiny bit of fresh clay with water to make a paste (slip) and fill them in, then sand smooth once dry.
Step 3: Assembly and Finish
-
Sand the Cone:
Once dry, lightly sand the red cone with fine-grit sandpaper to remove any remaining bumps and achieve a velvet-matte finish. -
Wipe Clean:
Use a barely damp cloth to wipe away all sanding dust from both the cone and the base. -
Apply Glue:
Add a generous dab of strong craft glue into the indentation you made on the grey base. -
Attach the Cone:
Press the red cone firmly into place on the base. Hold it for a minute to let the glue grab. -
Final Cleanup:
Check for any glue seeping out the sides. Wipe it away immediately with a toothpick or damp cloth before it sets. -
Optional Sealing:
For durability, you can brush on a coat of matte varnish. This will slightly deepen the red color but protects the clay from oils and moisture.
Speckled Stone Effect
Mix dried tea leaves or used coffee grounds into the grey base clay before shaping to create realistic, granite-like speckles and texture.
Now you have a stylish spot to park your rings every evening


Leaf-Stamped Red Clay Catchall
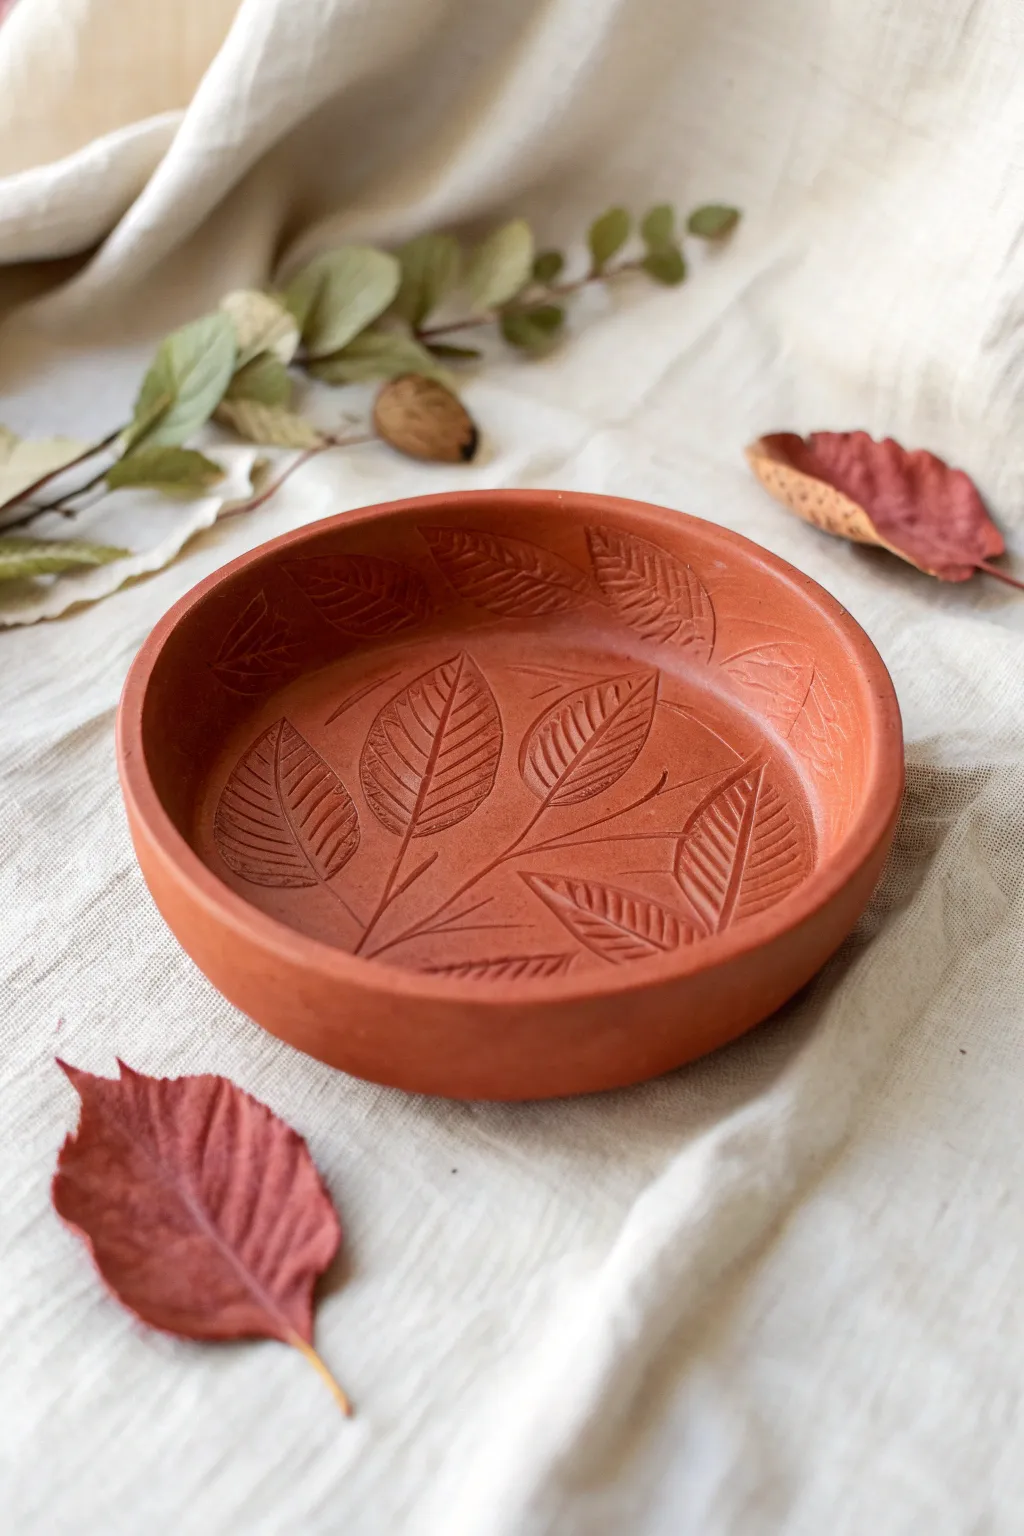
Capture the beauty of autumn foliage forever with this warm, earthy red clay dish. The natural leaf impressions create a delicate fossil-like texture that makes this catchall perfect for holding keys, jewelry, or simply displaying as rustic decor.
Step-by-Step
Materials
- Red air-dry clay or low-fire terracotta clay
- Rolling pin
- Canvas mat or parchment paper
- Fresh leaves with prominent veins (beech or elm work well)
- Small bowl or circle template (approx. 6 inches)
- Sharp craft knife or needle tool
- Small sponge
- Bowl of water
- Fine grit sandpaper (optional)
- Matte varnish or sealant
Step 1: Preparation & Rolling
-
Gather your greenery:
Before touching the clay, head outside and collect a few leaves. Look for ones that are still flexible but have very sturdy, raised veins on the back, as these will leave the crispest impressions. -
Prepare the workspace:
Lay down your canvas mat or parchment paper. This prevents the red clay from staining your table and ensures the slab doesn’t stick while you work. -
Condition the clay:
Take a grapefruit-sized ball of red clay and knead it in your hands to warm it up. This ensures the texture is uniform and free of air bubbles. -
Roll out the slab:
Using your rolling pin, flatten the clay ball into a smooth, even slab. Aim for a thickness of about 1/4 inch—too thin and it might crack; too thick and it will look chunky. -
Smooth the surface:
Dip your finger slightly in water and gently rub it over the surface of the clay slab to remove any canvas texture or rolling pin marks, creating a pristine canvas for your leaves.
Stuck Leafbits?
If tiny pieces of leaf get stuck in the clay after peeling, wait for the clay to dry completely. The organic matter will shrink and can be brushed out easily with a stiff dry brush.
Step 2: Creating the Design
-
Arrange the composition:
Place your chosen leaves onto the clay slab. I like to arrange them in a slightly overlapping or fanned-out pattern, aiming for the center where the bottom of the bowl will be. -
Press the leaves:
Gently roll your rolling pin over the leaves once or twice with firm, even pressure. This pushes the veins deep into the soft clay. -
Review the impression:
Carefully peel back one edge of a leaf to check the depth. If the impression is faint, place it back down and press harder with your thumb along the main stem lines. -
Remove the foliage:
Using a needle tool or tweezers, carefully lift the leaves away from the clay to reveal the intricate skeleton patterns left behind. -
Cut the shape:
Place your circle template or bowl upside down over your design. Use a sharp craft knife held vertically to cut cleanly around the perimeter. -
Soften the rim:
Dip your sponge in a little water and run it along the cut edge to smooth out any sharpness or burrs left by the knife.
Step 3: Shaping & Finishing
-
Form the sides:
To turn this flat disc into a shallow bowl, gently lift the edges of the circle. Pinch and curve them upwards evenly all the way around. -
Refine the wall:
You want a vertical lip that is about 1 inch high. Use your thumbs on the inside and fingers on the outside to smooth the walls into a consistent thickness. -
Add side details:
If you have extra small leaves, you can press them gently into the interior side walls now, linking the bottom design to the rim. -
Initial drying:
Let the bowl dry slowly away from direct heat or sunlight to prevent warping. If using air-dry clay, cover it loosely with plastic wrap for the first 12 hours. -
Sanding:
Once fully dry (and brittle), inspect the rim. If there are rough spots, gently buff them away with fine-grit sandpaper. -
Sealing:
Apply a coat of matte varnish to protect the clay and deepen the rich red color, giving it a finished, professional look.
Highlight the Veins
For higher contrast, do a ‘black wash.’ Dilute black acrylic paint with water, brush it over the texture, and wipe the surface immediately with a rag. The dark paint stays in the veins.
Enjoy the simple elegance of bringing nature’s textures into your home with this timeless piece

The Complete Guide to Pottery Troubleshooting
Uncover the most common ceramic mistakes—from cracking clay to failed glazes—and learn how to fix them fast.
Simple Red Clay Coasters
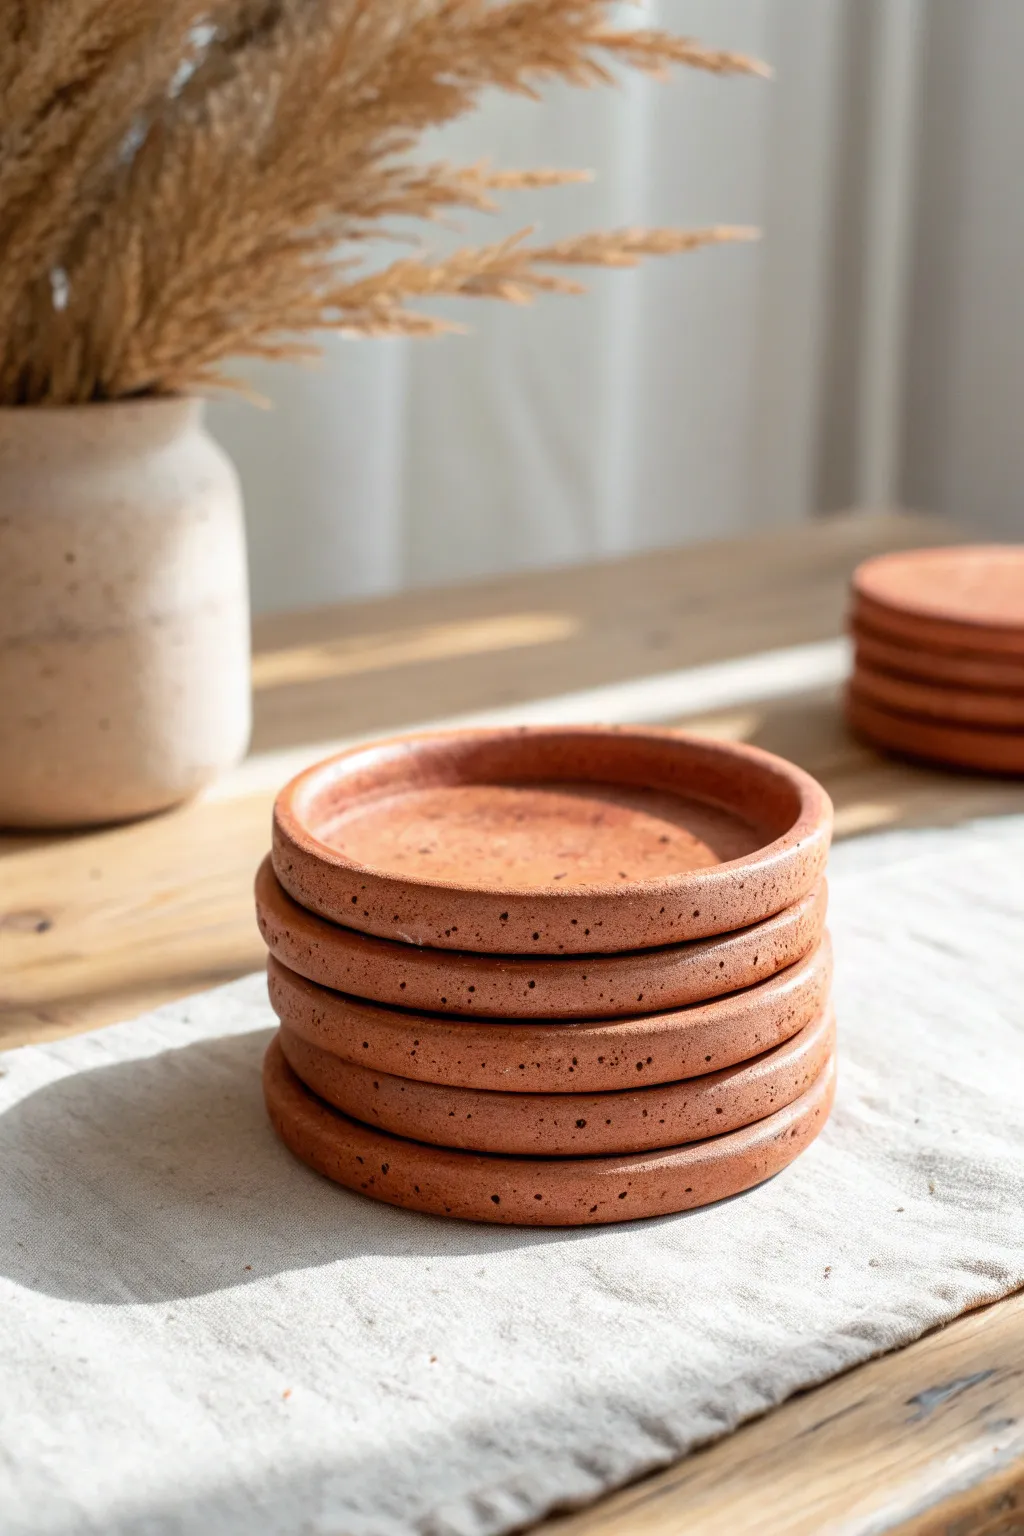
These simple, stackable coasters bring a warm, earthy touch to any coffee table, featuring a natural terracotta look with a subtle speckled texture. The raised rim design is not only stylish but practical, helping to catch condensation from your favorite cold drinks.
Step-by-Step Tutorial
Materials
- Red air-dry clay or terracotta polymer clay
- Rolling pin
- Round cookie cutter (approx. 4 inches)
- Small bowl or jar lid (slightly smaller than cutter)
- Pottery sponge
- Clay smoothing tool or old credit card
- Sandpaper (fine grit)
- Dried espresso grounds or black pepper (for speckling)
- Matte spray sealant or acrylic varnish
- Parchment paper or canvas mat
Step 1: Preparing the Clay
-
Condition the clay:
Begin by taking a handful of your red clay and kneading it thoroughly in your hands until it becomes warm and pliable. This prevents cracks later on. -
Add texture:
To achieve that speckled pottery look seen in the photo, sprinkle a small pinch of dried espresso grounds or coarse black pepper onto the clay ball. -
Incorporate the speckles:
Knead the clay again for another minute to distribute the specks evenly throughout the material so they look like natural mineral deposits.
Step 2: Shaping the Base
-
Roll it out:
Place your clay ball on a piece of parchment paper or canvas texturing mat. Use your rolling pin to flatten it to an even thickness of about 1/4 inch. -
Cut the circle:
Press your large round cookie cutter firmly into the clay to create a clean circle. Peel away the excess clay from the outside. -
Smooth the edges:
Dip your finger in a little water (or use a smooth dry finger for polymer clay) and gently run it along the cut edge to soften any sharp corners.
Cracking Up?
If you see small surface cracks while drying, mix a tiny bit of fresh clay with water to make a paste and fill them in before sanding.
Step 3: Forming the Rim
-
Create the indent:
Take your smaller bowl or jar lid—roughly a half-inch smaller than your base—and center it carefully on the clay circle. -
Press down:
Apply gentle, even pressure to the object to create an indentation. You want to compress the center without cutting all the way through. -
Refine the wall:
Remove the object. You should now have a raised outer rim. Use your thumb to gently smooth the transition between the rim and the depressed center. -
Shape the lip:
Pinch the raised rim gently all the way around to make it slightly rounded and uniform in height, mirroring the organic look in the example.
Waterproof Warrior
For true waterproofing, swap the acrylic varnish for a dishwasher-safe sealant like Mod Podge Dishwasher Safe Gloss.
Step 4: Refining and Drying
-
Sponge smooth:
Take a slightly damp pottery sponge and wipe the entire surface very specifically to remove fingerprints and reveal more of the speckled texture. -
Initial dry:
Allow the coasters to air dry for 24 to 48 hours. I find turning them over halfway through the drying process helps prevent the edges from curling up. -
Check for dryness:
The color will lighten significantly when they are fully dry. They should feel room temperature to the touch, not cold. -
Sand imperfections:
Once fully cured, use fine-grit sandpaper to buff away any rough spots on the rim or underside for a professional finish. -
Clean dust:
Wipe the coaster down with a dry cloth or tack cloth to remove all sanding dust before sealing.
Step 5: Sealing
-
First coat:
Apply a thin layer of matte spray sealant or acrylic Varnish. This is crucial for protecting the clay from moisture. -
Dry and repeat:
Let the first coat dry completely according to the bottle instructions, then apply a second coat for extra durability. -
Final cure:
Let the sealant cure for at least 24 hours before placing any beverages on your new coaster set.
Stack your finished set on the table and enjoy the organic warmth they bring to your decor
Mini Red Clay Planter
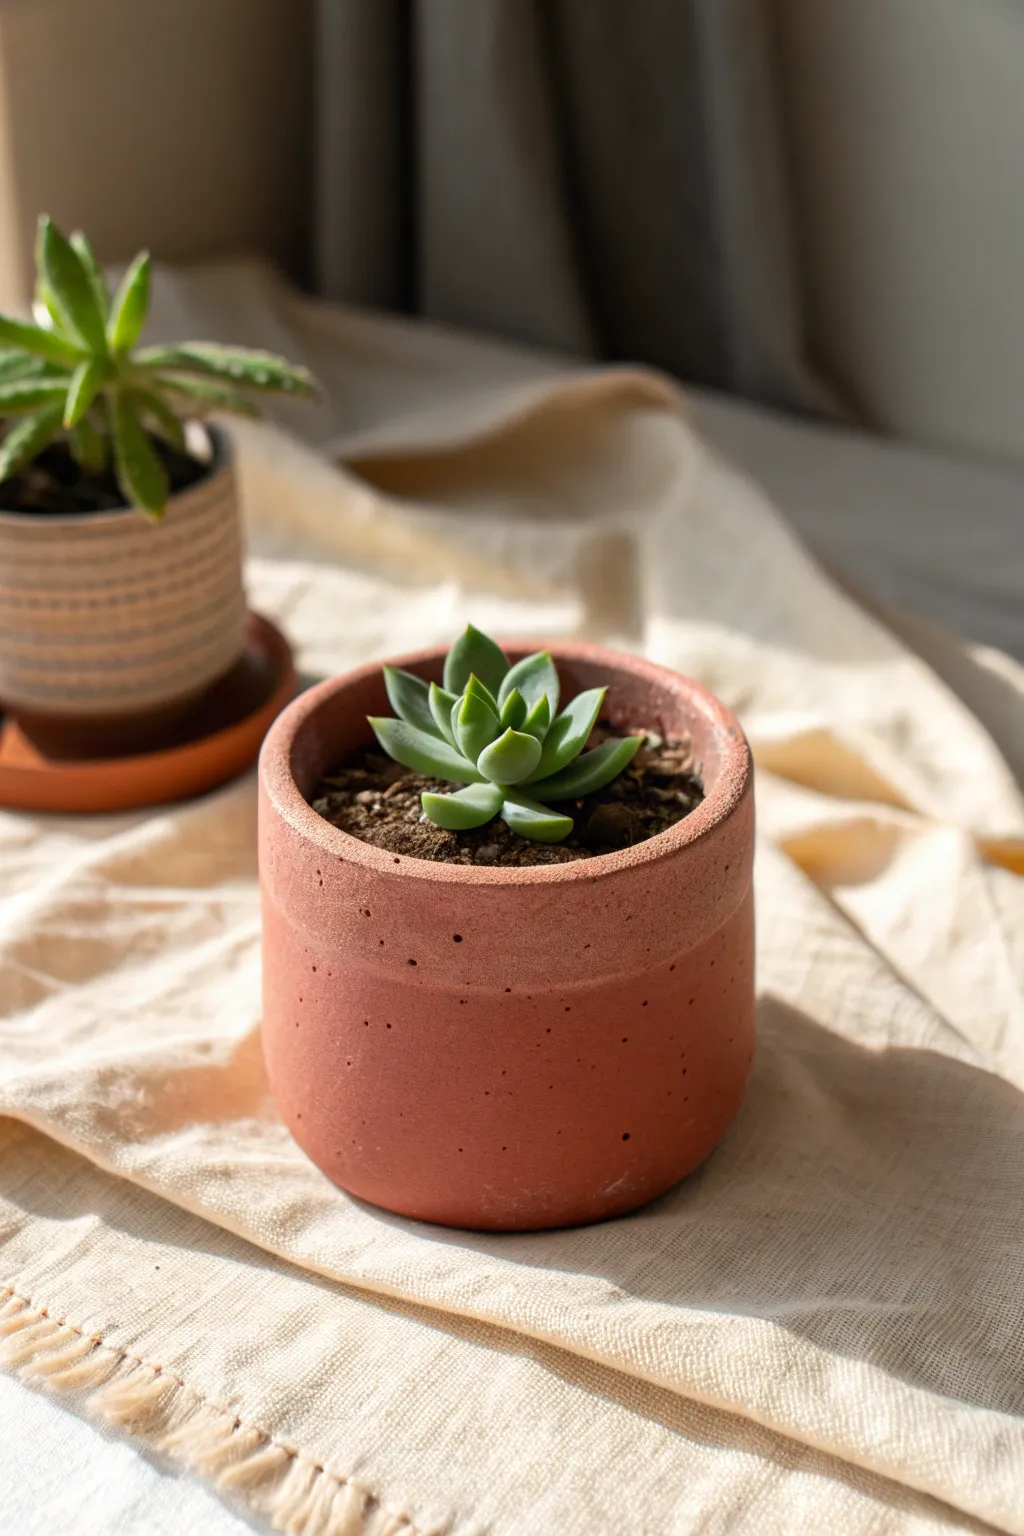
Craft a sleek, modern home for your favorite succulents using standard red air-dry or polymer clay. This project features a clean cylindrical shape with a subtle, textured rim that highlights the natural beauty of the earthy material.
How-To Guide
Materials
- Red air-dry clay (or terracotta oven-bake clay)
- Rolling pin
- Circle cutter or round template (approx. 3-4 inches)
- Ruler
- Craft knife or clay slicer
- Small cup or jar (to use as a mold)
- Parchment paper
- Rough sponge or sandpaper
- Small bowl of water
- Clay scoring tool (or a toothpick)
Step 1: Prepping the Base Shape
-
Roll the slab:
Begin by conditioning your clay until it is pliable, then roll it out on a piece of parchment paper to an even thickness of about 1/4 inch. -
Cut the base:
Use your circle cutter or round template to cut a perfect circle from the slab. This will be the bottom of your pot. -
Measure the walls:
Determine the circumference of your base circle. You can do this by wrapping a string around the edge or doing a quick calculation. -
Cut the clay strip:
Cut a long rectangular strip from your remaining rolled clay. The length should match your circumference measurement plus a tiny bit for overlap, and the height should be about 2.5 to 3 inches. -
Create the texture:
Before assembling, lightly tap the surface of the clay strip with a rough sponge to give it that natural, stone-like pitted texture seen in the photo.
Seamless Finish
To make the vertical seam disappear completely, roll the joined cylinder gently on a flat surface before removing the inside mold.
Step 2: Assembling the Cylinder
-
Prepare the mold:
Wrap a layer of parchment paper around your jar or cup mold to prevent the clay from sticking to it during the forming process. -
Wrap the clay:
Carefully lift the clay strip and wrap it around the parchment-covered mold. Bring the two short ends together. -
Score and slip:
Score (scratch) the edges where they meet, add a drop of water, and press them firmly together to create a seam. Smooth the seam with your finger or a tool until it is invisible. -
Attach the base:
Score the bottom edge of your cylinder wall and the outer edge of your circular base. Press the cylinder onto the base. -
Blend the bottom seam:
Here I prefer to use a flat modeling tool to drag a little clay from the wall down onto the base to ensure a watertight bond, then smooth it out completely.
Cracking Clay?
If you see tiny cracks forming while bending the clay, apply a small amount of water to your finger and smooth them over immediately.
Step 3: Refining and Finishing
-
Define the rim:
Using a ruler or a steady hand with a modeling tool, gently press a horizontal line around the top circumference, about 1/2 inch down from the lip. This creates the subtle ‘band’ effect. -
Smooth the lip:
Dip your finger in water and run it along the very top edge of the pot to round it off slightly, removing any sharp angles from cutting. -
Add character:
If the handling smoothed out your texture too much, gently re-dab the surface with your rough sponge, especially around that top band. -
Poke drainage holes:
If you plan to plant directly inside, use a straw or tool to poke a few drainage holes in the bottom while the clay is still soft. -
Remove the mold:
Once the clay has stiffened up slightly (usually after an hour or so for air-dry), carefully slide the inner jar mold out, leaving the parchment paper if needed for support. -
Initial drying:
Let the pot sit until it is leather-hard. At this stage, you can gently peel away the parchment paper from the inside. -
Final cure:
Allow the pot to dry completely according to your clay package instructions (24-48 hours for air-dry, or bake as directed for polymer). -
Sanding:
Once fully cured, use fine-grit sandpaper to smooth any rough spots on the rim or base, leaving the main body textured. -
Sealing:
Apply a matte varnish or sealant to the inside and outside to protect the clay from moisture, preserving that raw terracotta look.
Your modern red clay planter is now ready to host a bright green succulent


What Really Happens Inside the Kiln
Learn how time and temperature work together inside the kiln to transform clay into durable ceramic.
Red Clay Bead Bracelet Set
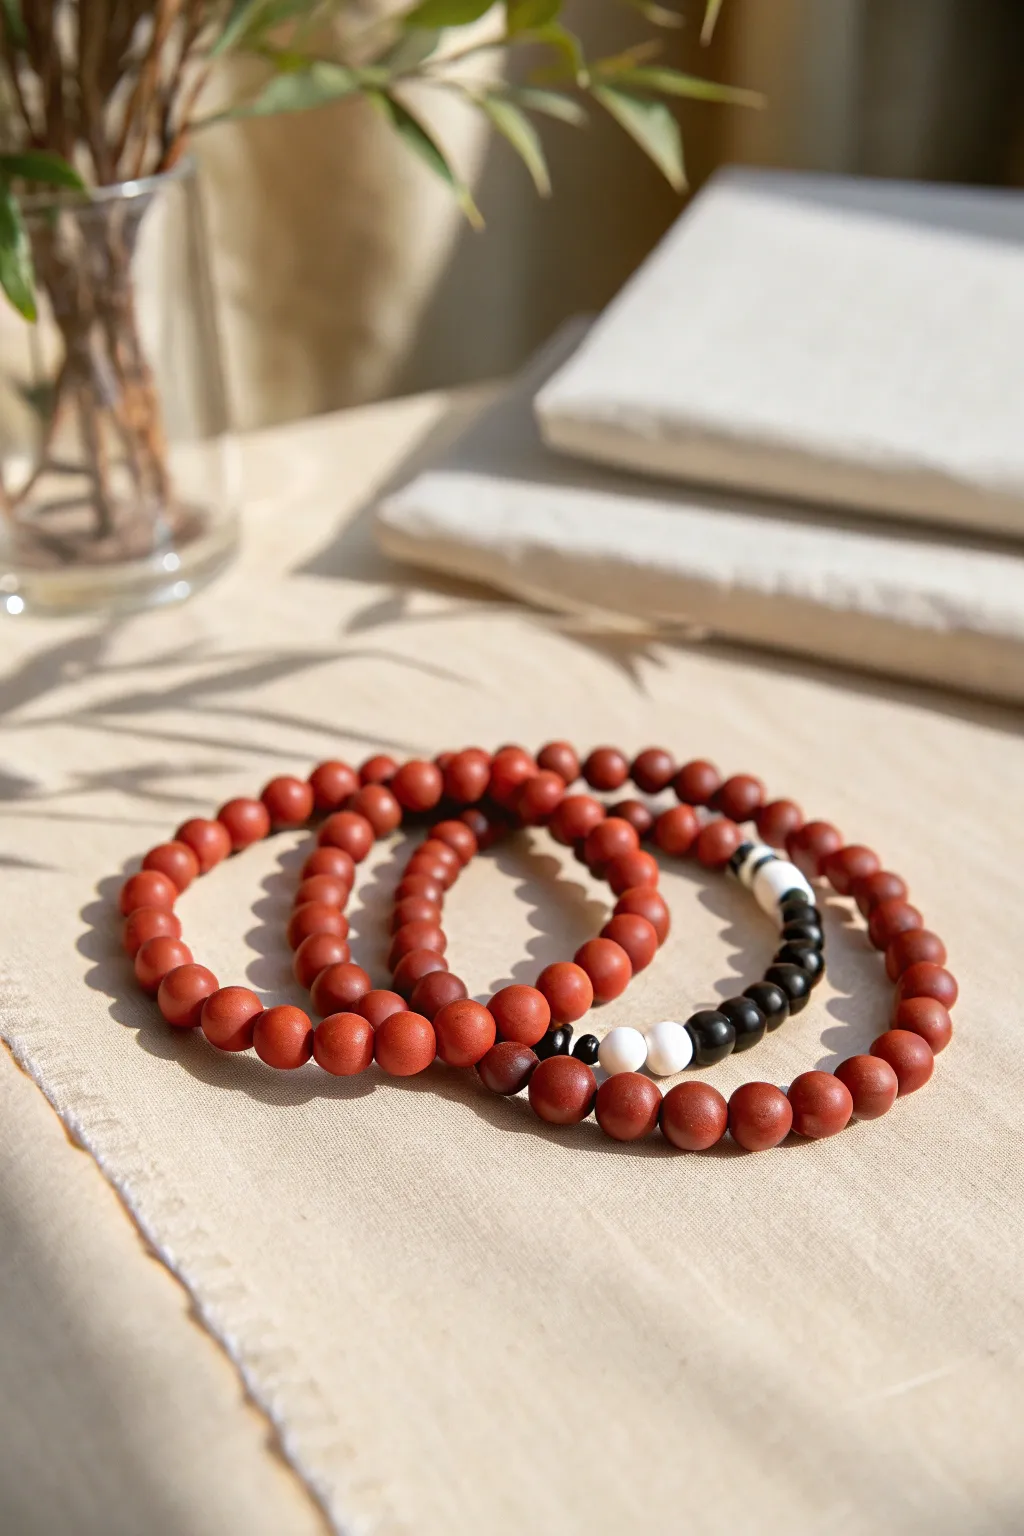
This project transforms simple red air-dry or polymer clay into a stunning set of three coordinating bracelets with a natural, matte finish. The combination of warm terracotta tones with striking black and white accents creates a sophisticated, bohemian look perfect for everyday wear.
Step-by-Step
Materials
- Red-brown polymer clay or air-dry clay (terracotta color)
- Black polymer clay
- White polymer clay
- Elastic beading cord (0.7mm or 0.8mm)
- Bead roller tool (optional, for uniformity)
- Toothpick or bead reamer
- Super glue or jewelry adhesive
- Baking sheet and parchment paper (if using polymer clay)
- Fine-grit sandpaper (optional)
- Scissors
Step 1: Shaping the Beads
-
Prepare your clay:
Condition your red-brown clay by kneading it in your hands until it is soft, pliable, and free of any cracks. -
Portion the clay:
Pinch off small pieces of the red clay. Aim for pieces that are roughly the size of a small pea to ensure your beads aren’t too heavy. -
Roll the spheres:
Roll each piece between your palms or using a bead roller to create smooth, even spheres. You will need about 60-70 red beads total for three bracelets, depending on your wrist size. -
Create accent beads:
Repeat the rolling process with the black clay to make roughly 10-12 beads, and the white clay to make 2 beads. Keep these the same size as your red ones. -
Pierce the holes:
Hold a bead gently between your thumb and forefinger. Using a toothpick, carefully pierce a hole through the center. I find twisting the toothpick slightly as you push helps prevent the bead from squishing. -
Double-check openings:
Once the toothpick is through, flip the bead and insert the toothpick from the other side to ensure the hole is clean and wide enough for your cord.
Step 2: Curing and Refining
-
Bake the beads:
Arrange your beads on a baking sheet lined with parchment paper. Bake according to the specific temperature and time instructions on your package of polymer clay. -
Cool down:
Allow the beads to cool completely before handling them. They harden fully as they cool. -
Sand for texture:
If you want that ultra-matte, stone-like finish seen in the photo, lightly buff the surface of each bead with fine-grit sandpaper after they are cured.
Clean Edges
Fingerprints on raw clay? Lightly brush your uncured beads with a little cornstarch or baby powder before baking to smooth them out instantly.
Step 3: Assembly
-
Measure the cord:
Cut three lengths of elastic cord, adding about 3 extra inches to your actual wrist measurement to make tying knots easier. -
Design the first bracelet:
For the all-red bracelet, simply thread your terracotta beads onto the first cord until it fits comfortably around your wrist. -
Design the second bracelet:
For the second strand, thread mostly red beads, but intersperse about 5 or 6 black beads randomly within a small section to create an asymmetric focal point. -
Design the third bracelet:
For the final strand, string red beads for the majority of the length. In the center, add a pattern: 3 black beads, 2 white beads, and 3 black beads. -
Check the fit:
Wrap each strand around your wrist one last time to ensure they aren’t too tight or too loose before securing. -
Tie the knot:
Tie a secure surgeon’s knot (right over left, left over right) for each bracelet. Pull the elastic tight to secure it. -
Secure and trim:
Place a tiny drop of super glue on the knot. Let it dry for a few seconds, then trim the excess cord close to the knot. You can gently tuck the knot inside a bead hole to hide it.
Stone Effect
Mix some coarse black pepper or dried tea leaves into your red clay before rolling. This creates a speckled, faux-stone granite look similar to real pottery.
Stack these beautiful handmade bracelets together to add a warm, artisanal touch to any outfit
Tiny Red Clay Pendant Charms
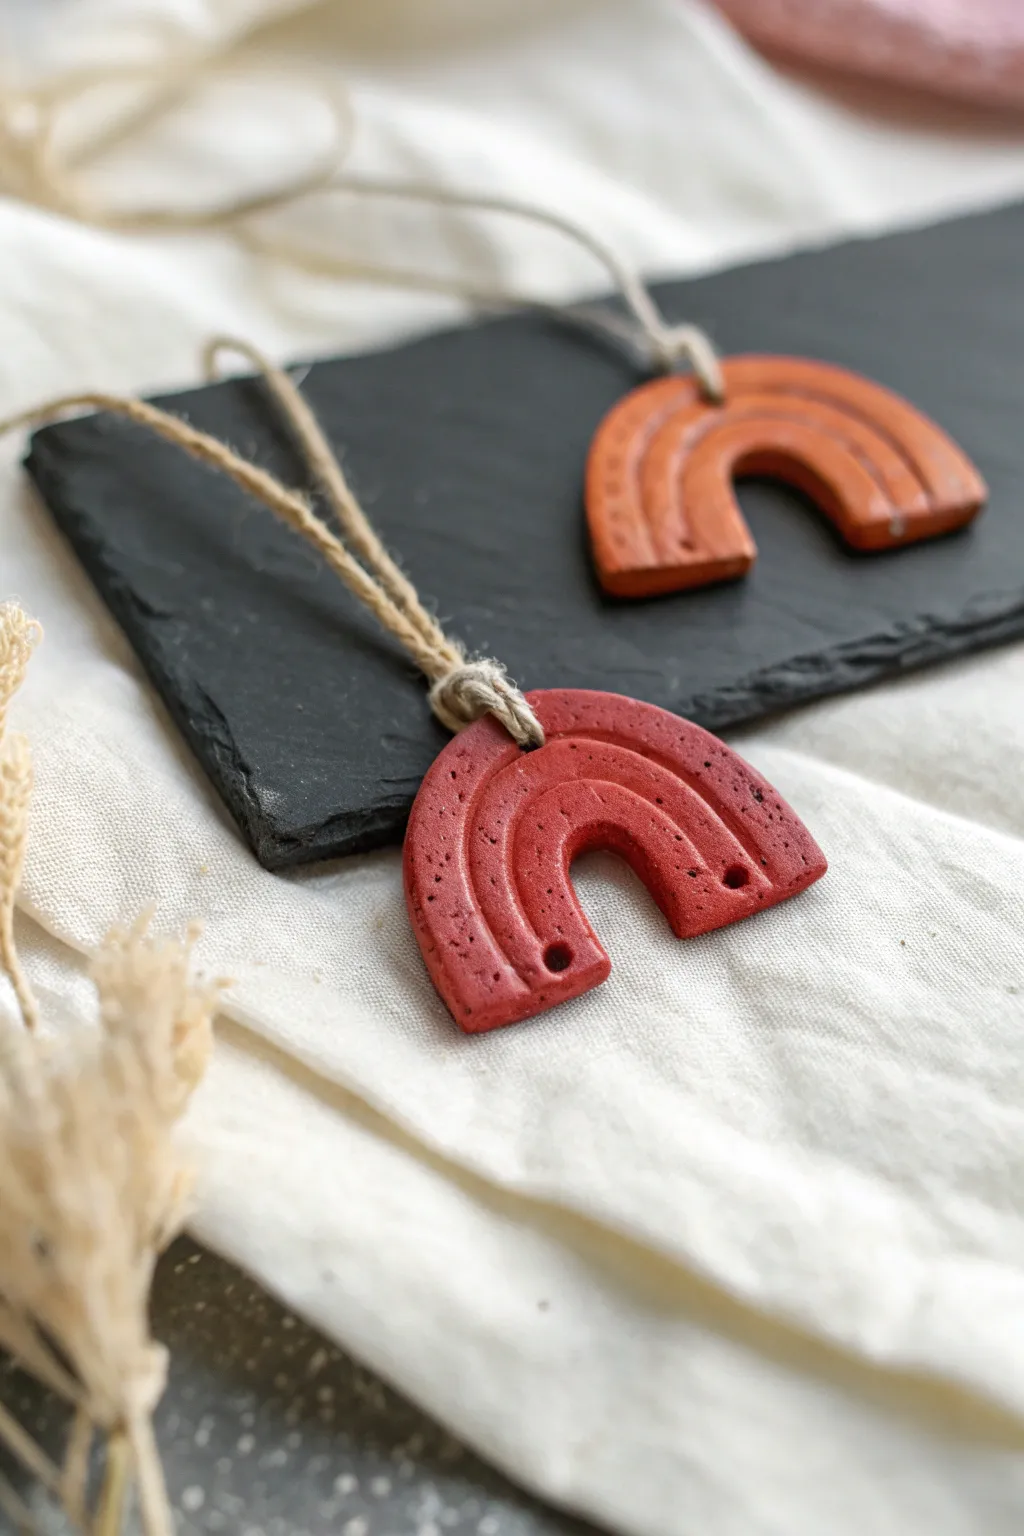
These earthy, minimalist clay charms showcase the natural beauty of terracotta with a simple arched rainbow design. Finished with natural jute twine, they make perfect hanging ornaments, necklace pendants, or rustic gift toppers that feel both modern and timeless.
Step-by-Step Tutorial
Materials
- Terracotta colored polymer clay or air-dry clay
- Rolling pin or acrylic roller
- U-shaped clay cutter (or a craft knife)
- Needle tool or toothpick
- Jute twine or hemp cord
- Sandpaper (fine grit)
- Optional: Clean toothbrush for texturing
Step 1: Shaping the Base
-
Condition the clay:
Start by warming a small block of your terracotta clay in your hands. Knead it thoroughly until it is soft, pliable, and free of any air bubbles. -
Roll out a slab:
Flatten the conditioned clay on a clean work surface. Use your rolling pin to create an even slab that is approximately 1/4 inch (6mm) thick. You want it substantial enough to be sturdy but not too heavy. -
Cut the arch shape:
If you have a U-shaped or arch cutter, press it firmly into the clay. Alternatively, gently sketch an arch shape with a needle tool and carefully cut it out using your craft knife. -
Clean the edges:
After cutting, dip your finger in a little water (for air-dry clay) or baby oil (for polymer clay) and smooth out any rough edges along the perimeter of the arch.
Cracking Clay?
If using air-dry clay and you see cracks forming as it dries, mix a tiny amount of fresh clay with water to make a paste and fill the cracks, then smooth over.
Step 2: Adding Details
-
Mark the bands:
Using a needle tool, lightly score two curved lines across the face of the arch to divide the shape into three equal ‘rainbow’ bands. Don’t cut all the way through; just create a visible groove. -
Create the center hole:
Using a tool with a slightly larger diameter, like a skewer or a small straw, poke a hole through the very top center of the arch. This will be for the hanger. -
Texture the surface:
To mimic the speckled, stone-like texture seen in the photo, take an old toothbrush or a stiff bristle brush and gently tap it against the clay surface. Focus especially on the outer bands. -
Add distinctive markings:
For the specific look in the example, use your needle tool to poke small, random dots along the outer band and the inner band. Be spontaneous with the placement to keep it organic. -
Refine the grooves:
Go back over your separating lines with the needle tool to ensure they are defined and haven’t been lost during the texturing process.
Creating Specs
To get realistic ‘speckles’ without paint, mix a tiny pinch of dried coffee grounds or black pepper into your clay before rolling it out.
Step 3: Finishing Up
-
Bake or dry:
If using polymer clay, bake according to the manufacturer’s instructions (usually around 275°F for 15-30 minutes). If using air-dry clay, set it in a dry spot for 24-48 hours until completely hard. -
Sand for smoothness:
Once fully cured or dry, inspect the edges. If there are any sharp bits, gently sand them down with fine-grit sandpaper for a professional finish. -
Prepare the twine:
Cut a length of jute twine or hemp cord, about 8 to 10 inches long. -
Create a hanging loop:
Fold the twine in half. Push the folded loop end through the hole at the top of the charm from front to back. -
Secure the knot:
Pull the loose ends of the twine through the loop you just pushed through the hole (a cow hitch knot) and pull tight to secure it against the clay. -
Final tie:
Tie the two loose ends of the twine together in a simple overhand knot at your desired hanging length.
Hang your new rustic charms near a window or bundle them onto a gift for a personalized touch

TRACK YOUR CERAMIC JOURNEY
Capture glaze tests, firing details, and creative progress—all in one simple printable. Make your projects easier to repeat and improve.
Quick Red Clay Rosebuds
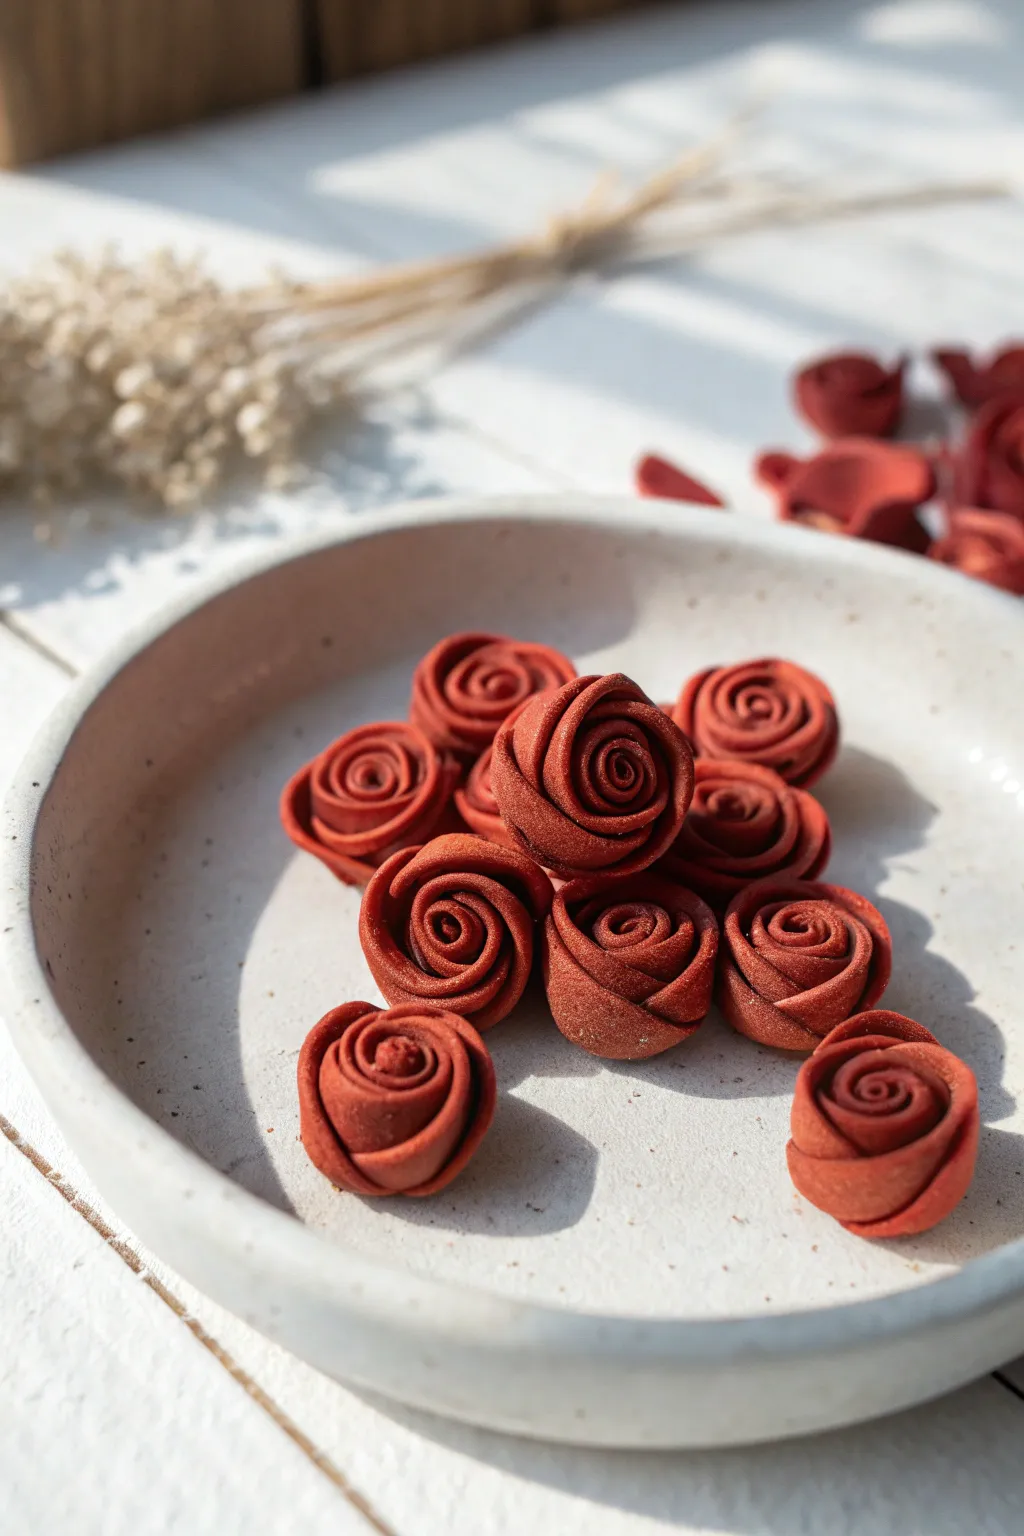
These charming miniature rosebuds are deceptively simple to create, relying on a basic rolling technique rather than sculpting individual petals. The result is a collection of uniform, deep red blooms with a lovely matte texture that look beautiful displayed in a small dish.
Step-by-Step
Materials
- Red polymer clay or air-dry clay (terracotta color)
- Clay rolling pin or acrylic roller
- sharp craft knife or clay blade
- Small circle cutter (optional)
- Parchment paper or silicone work mat
- Soft brush (for texturing)
- Oven (if using polymer clay)
Step 1: Preparing the Clay Strip
-
Condition the clay:
Begin by kneading your red clay in your hands until it becomes soft, pliable, and warm. This prevents cracking later on. -
Roll it out:
Place the ball of clay on your work surface or parchment paper. Use your roller to flatten it into a long, even sheet about 1/8 inch thick. -
Create a straight edge:
Take your craft knife and trim the bottom edge of your clay sheet so it is perfectly straight. This flat edge will become the base of your rose so it can stand upright. -
Cut the strip:
Cut a long strip of clay roughly 1 inch wide. The length will determine the size of the bloom, but 4 to 5 inches is a good starting point for buds this size.
Step 2: Forming the Rosebud
-
Thin the top edge:
Using your fingertips, gently pinch and thin out the top, irregular edge of the strip. This makes the ‘petals’ look delicate while keeping the base sturdy. -
Fold the start:
Take one end of the strip and fold a tiny corner inward to create the tight center coil of the rose. -
Begin rolling:
Start rolling the strip up like a sleeping bag. Keep the straight bottom edge aligned with itself as you go. -
Flaring the petals:
As you continue to roll, occasionally pleat or twist the clay strip slightly outward. This prevents the rose from looking like a cinnamon roll and gives it organic fullness. -
Secure the end:
When you reach the end of the strip, gently press the final flap of clay against the body of the rose to blend it in. -
Refine the shape:
I prefer to gently tap the flat base of the rose on the table to ensure it stands up straight without wobbling.
Fingerprint Fix
If your fingerprints are visible on the smooth clay, lightly dust the raw clay with cornstarch or baby powder before rolling to smooth them out.
Step 3: Finishing Touches
-
Adjust the petals:
Using your finger or a sculpting tool, gently push the outer layers of the roll open just a bit to simulate a blooming flower. -
Add texture:
To get that slightly sandy, natural look seen in the photo, lightly dab the surface with a dry, stiff brush before the clay hardens. -
Make a bouquet:
Repeat the process to create as many roses as you need to fill your display dish. -
Curing:
If using polymer clay, bake according to the package instructions (usually 275°F for 15-30 minutes). If using air-dry clay, leave them in a cool, dry place for 24 hours. -
Cooling:
Let the roses cool completely on the baking tray before handling, as the clay is fragile when hot.
Scented Decor
If you use an absorbent air-dry clay or terracotta, add a few drops of rose essential oil to the finished bottoms for a scented potpourri bowl.
Arrange your garden of clay roses in a shallow ceramic bowl for a timeless piece of decor
Chili Pepper Minis With Green Stems
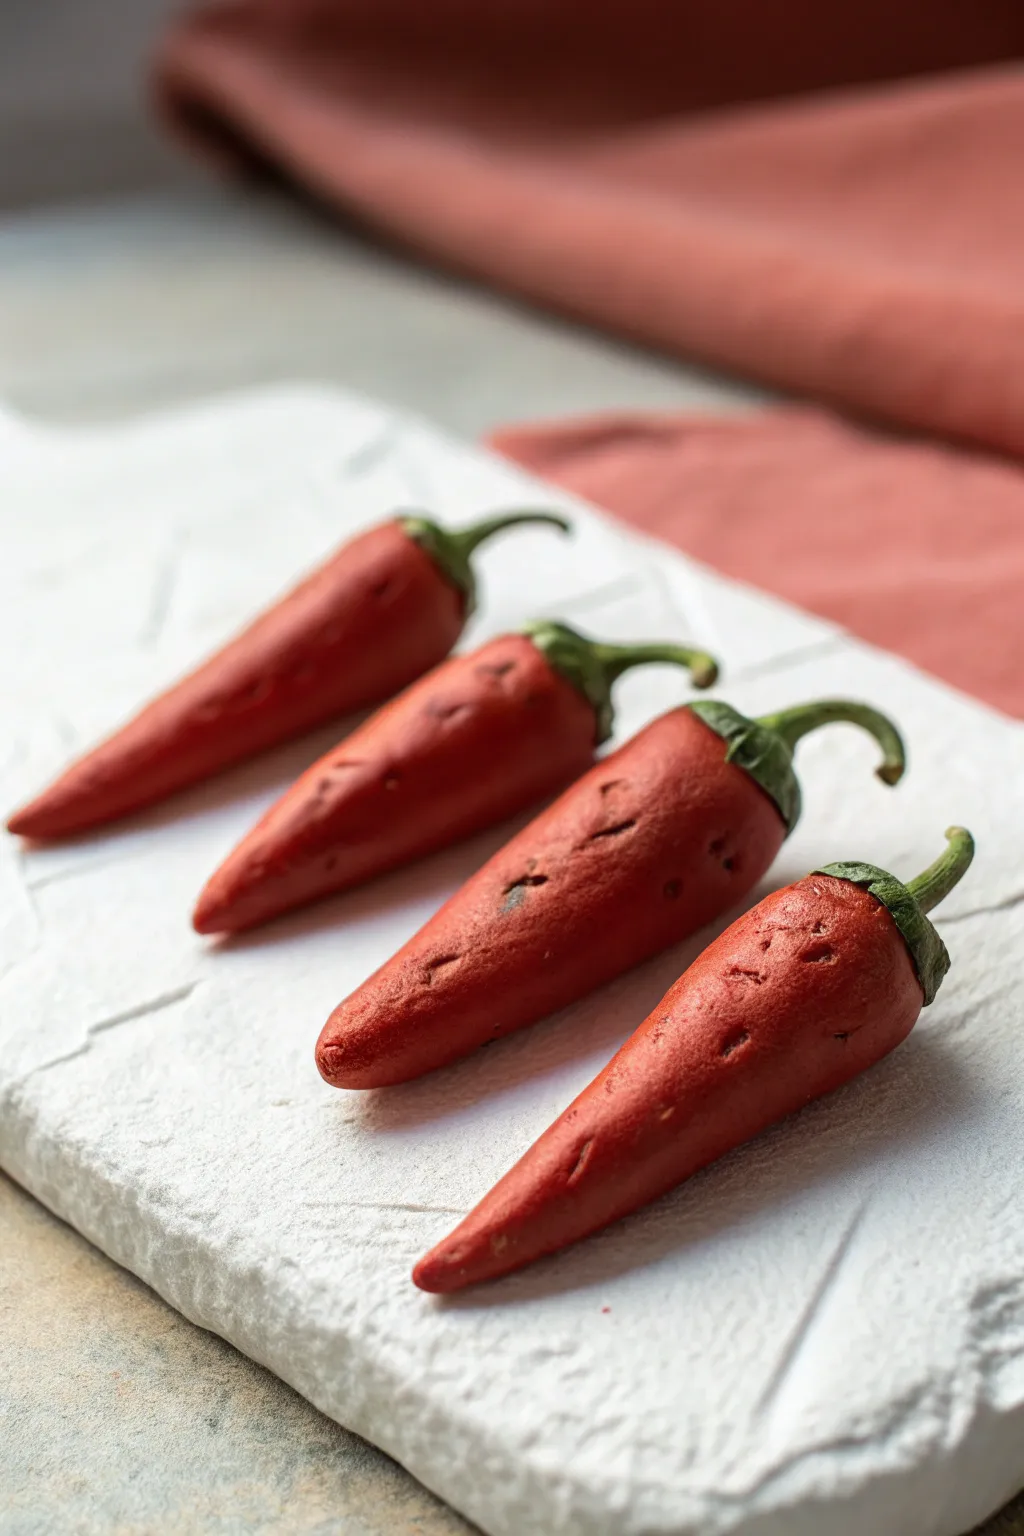
Create a sizzling set of realistic miniature red chili peppers that look good enough to heat up any scene. These clay creations feature convincing textures and subtle shading that mimic the organic imperfections of fresh produce.
Step-by-Step Guide
Materials
- Red polymer clay (e.g., Fimo or Sculpey)
- Green polymer clay (dark leafy shade)
- Translucent liquid clay or bake-and-bond
- Acrylic paints (dark brown, black, burnt umber)
- Needle tool or toothpick
- Ball stylus tool
- Texture sponge or toothbrush
- Small paintbrush
- Matte varnish
- Wire cutters (for armature if used, optional)
- Baking sheet/tile
Step 1: Shaping the Bodies
-
Condition the clay:
Begin by kneading your red polymer clay in your hands until it becomes soft, pliable, and free of cracks. Warm clay is essential for smooth surfaces. -
Portion control:
Break off four equal-sized pieces of red clay, roughly the size of a large bean or marble, depending on how large you want your peppers. -
Roll the cones:
Roll each piece into a teardrop or elongated cone shape. One end should be fairly blunt and rounded (the shoulder), tapering down to a slightly pointed or rounded tip. -
Add character:
Take each cone and gently bend or twist it slightly. Real peppers are rarely perfectly straight, so giving them a subtle curve adds life. -
Refine the surface:
Use your fingertip to burnish away any fingerprints. The clay needs to look smooth and waxy before we add texture.
Step 2: Stems and Texture
-
Prepare the stems:
Roll out a tiny snake of dark green clay. Cut four small pieces for the stem stalks and four small flattened discs for the ‘calyx’ (the leafy cap). -
Attach the calyx:
Place a green clay disc onto the blunt end of a red pepper. Use a needle tool to gently drag the green edges down onto the red clay, creating irregular, leafy points. -
Create the stalk:
Attach the small green stalk pieces to the center of the calyx. Curve the stem hook-like, just like a pepper fresh off the vine. -
Blend seams:
Use a small ball tool or the smooth side of your needle tool to blend the green clay securely onto the red. I find adding a tiny dot of liquid clay here helps adhesion. -
Initial texturing:
Using a needle tool, poke very tiny, shallow holes or dents into the red skin randomly. Focus slightly more near the bottom or where the pepper bends. -
Create imperfections:
Use a toothbrush or a rough texture sponge to lightly tap parts of the pepper’s surface. This shouldn’t be deep, just enough to break the plastic-like smoothness. -
Add creases:
Press the side of a needle tool into the red clay to create a few organic creases or wrinkles, suggesting the pepper is drying slightly.
Authentic Imperfection
Don’t make indentations perfectly round! Drag the needle tool slightly sideways when poking holes to create scarred, elongated marks like real produce skin.
Step 3: Baking and Antiquing
-
Bake the clay:
Place your peppers on a baking tile. Follow the temperature and time instructions on your specific brand of polymer clay packaging. Let them cool completely. -
Prepare a wash:
Mix a small amount of dark brown and black acrylic paint with water until it’s very thin and ink-like. -
Apply the wash:
Brush this dark wash over the entire pepper, ensuring it gets into all the tiny needle holes, creases, and texture marks you made. -
Wipe away excess:
Immediately use a paper towel or damp cloth to wipe the paint off the surface. The dark pigment should remain only in the crevices, highlighting the texture spots. -
Adjust shadows:
If corners look too clean, dab a tiny bit of burnt umber paint into the deepest creases for extra depth. -
Seal the piece:
Once the paint is totally dry, apply a thin coat of matte varnish to protect the paint and give the peppers a natural, vegetable sheen.
Make it a Necklace
Before baking, insert a tiny metal eye pin deeply into the top of the green stem. Once baked, you can string a single pepper onto a chain for a quirky charm.
Display your spicy miniatures on a small board or glue them into a shadow box for a vibrant kitchen decoration.
Cute Ladybug Pebble Sculptures
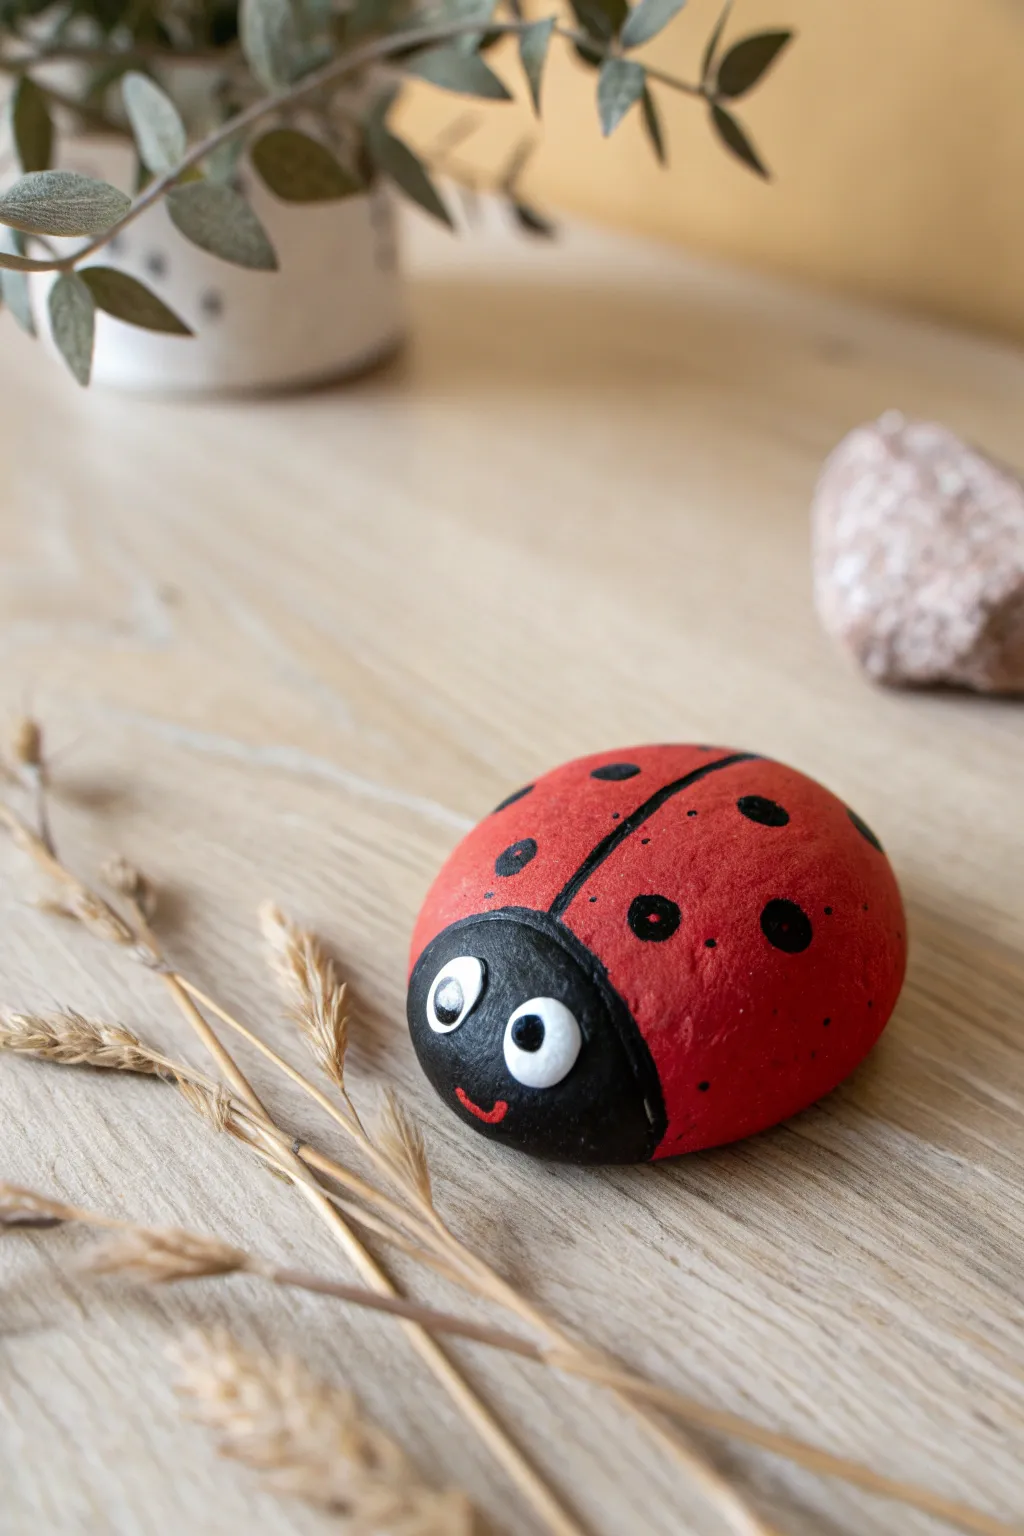
Transform a simple garden stone into a cheerful little companion with just a few vibrant colors. This charming ladybug features a smooth red shell, playful polka dots, and an adorable smiling face that is sure to brighten up any desk or windowsill.
How-To Guide
Materials
- Smooth, oval-shaped river rock or pebble
- Red acrylic paint
- Black acrylic paint
- White acrylic paint
- Flat paintbrush (medium size)
- Small round detail brush (size 0 or 1)
- Dotting tool or the handle end of a paintbrush
- Clear acrylic sealer (matte or gloss)
- Palette or paper plate
- Cup of water and paper towels
Step 1: Base Coating
-
Clean the canvas:
Begin by thoroughly washing your chosen stone with soap and water to remove any dirt or grit. Let it dry completely before starting, as moisture can prevent the paint from adhering properly. -
Prime the surface:
If your rock is very dark, you might want to apply a coat of white paint first to make the colors pop. Since I usually pick lighter stones, I often skip this, but it definitely helps with vibrancy. -
Apply the red base:
Using your flat paintbrush, cover about three-quarters of the rock with bright red acrylic paint. This will be the ladybug’s shell. -
Let it dry:
Allow the red layer to dry fully. If the rock’s natural color shows through, apply a second coat for a solid, opaque finish. -
Create the head:
Paint the remaining front quarter of the rock with black acrylic paint. Use a rounded stroke where the black meets the red to create a curved separation between the head and the wings.
Step 2: Wing Details
-
Draw the center line:
Once both base colors are dry to the touch, use your small detail brush and black paint to draw a straight line down the center of the red back, starting from the black head section. -
Start the spots:
Dip a dotting tool or the handle end of your paintbrush into black paint to create perfect circles. Place large spots symmetrically on either side of the center line. -
Vary spot sizes:
Add smaller black dots in the empty spaces using a smaller tool or just the tip of your detail brush to give the shell a more natural, organic look. -
Add tiny speckles:
For extra texture, you can gently tap the very tip of your detail brush to add microscopic black specks between the larger dots.
Perfect Circles
If you don’t have a dotting tool, dip the flat head of a nail or the end of a chopstick into paint. Press straight down on the rock and lift straight up for a flawless dot.
Step 3: Bringing it to Life
-
Paint the eye whites:
On the black head section, paint two medium-sized white ovals or circles. These should be spaced slightly apart. -
Wait for the eyes:
It is crucial to let the white paint dry completely; otherwise, the black pupils you add next might bleed into the white. -
Add the pupils:
Dip the handle end of a small brush into black paint and dot it onto the dried white circles. Placing the pupils slightly inward or looking up gives it a cute, curious expression. -
Paint the smile:
Using your finest detail brush and a tiny amount of red paint, carefully draw a small curved line below the eyes to give your ladybug a friendly smile. -
Add highlights:
For a sparkling effect, add a tiny white dot on the black pupil of each eye. This ‘catchlight’ makes the character look much more alive. -
Seal the artwork:
Once all paint is thoroughly dry (give it at least an hour), apply a coat of clear acrylic sealer. This protects the paint from chipping and gives the ladybug a nice finished sheen.
Garden Family
Create a whole family by using different sized rocks. Try painting yellow or orange ladybugs for variety, or add thin wire antennae using strong glue for extra 3D detail.
Place your finished ladybug on a shelf or hide it in a plant pot to surprise a friend
Simple Red Clay Crab Magnet
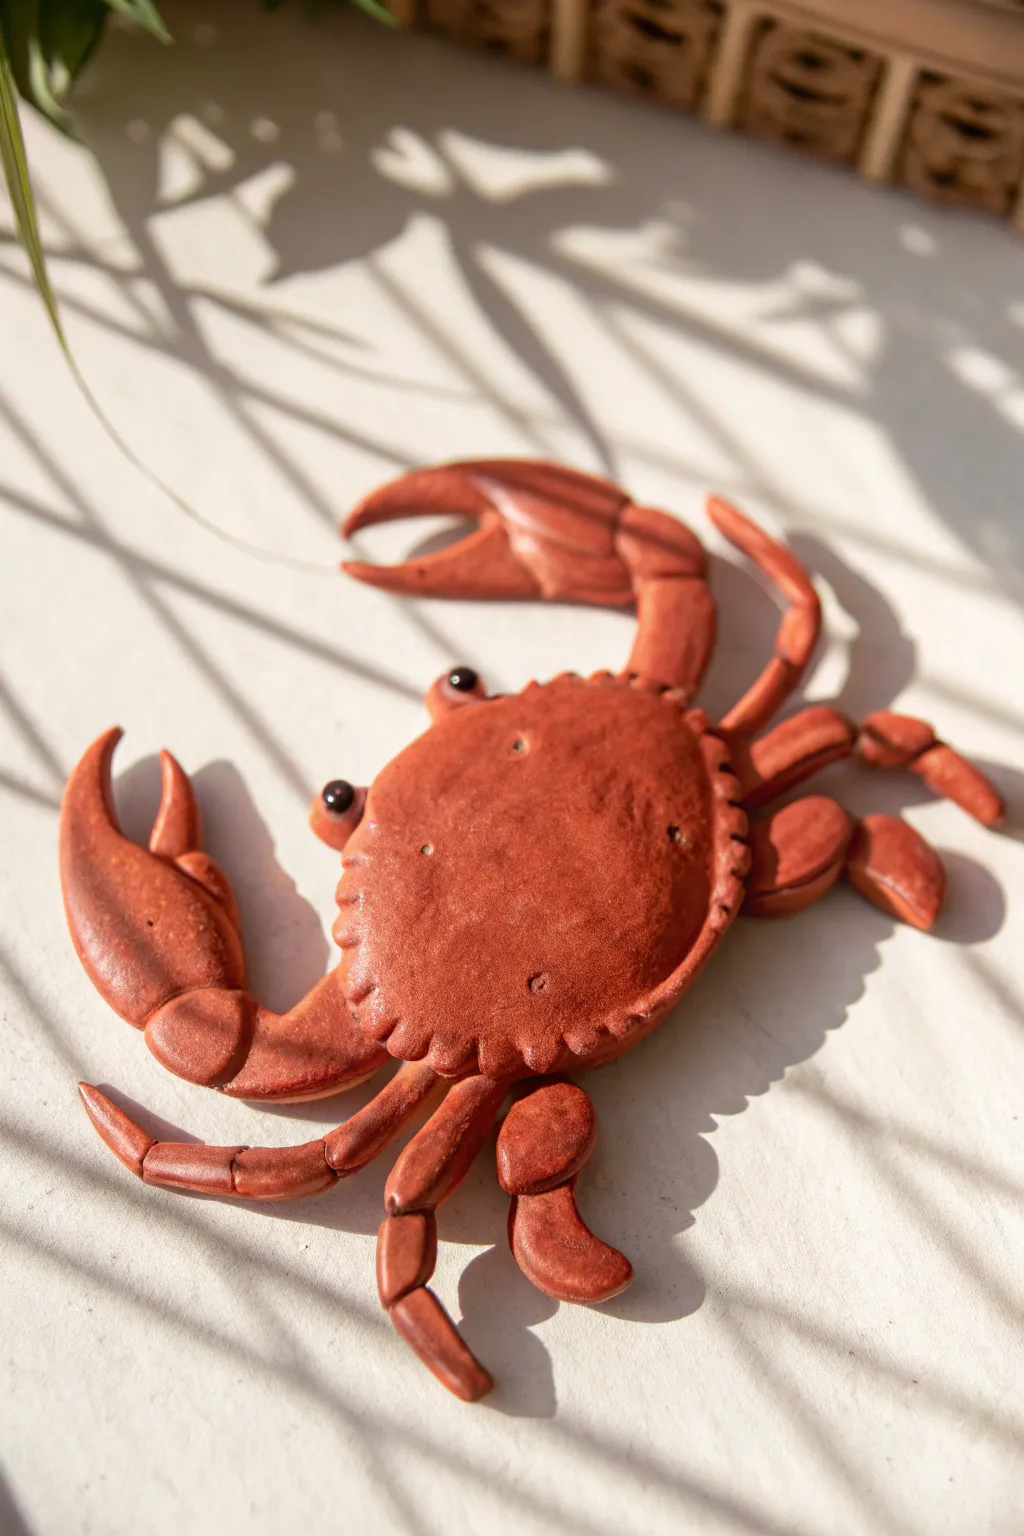
Bring a touch of the seaside into your home with this charming, rustic crab magnet. It features a warm, terracotta-like finish and expressive little black eyes, perfect for clamping notes onto your fridge.
Detailed Instructions
Materials
- Red polymer clay (e.g., terracotta or brick red)
- Black glass seed beads (for eyes)
- Sculpting tools (needle tool, ball stylus)
- Strong craft glue or E6000
- Round magnet
- Rolling pin or pasta machine
- Texturing sponge or sandpaper
- Clear matte varnish (optional)
Step 1: Forming the Body
-
Prepare the Clay:
Begin by conditioning your red clay until it is soft and pliable. Roll a medium-sized ball, roughly the size of a walnut, to serve as the main body. -
Shape the Carapace:
Flatten the ball gently into an oval dome shape. It shouldn’t be perfectly flat like a pancake—keep a nice curve on top to mimic a crab shell. -
Add Texture:
Lightly press a coarse sponge or a piece of sandpaper against the surface of the shell. This gives it that organic, realistic crab texture rather than a smooth, plastic look. -
Detail the Edge:
Using a needle tool or a small knife, make small, evenly spaced indentations all along the outer rim of the oval to simulate the jagged edge of the shell. -
Create Eye Sockets:
Use a small ball stylus to press two tiny indentations near the front center edge of the shell where the eyes will eventually go.
Step 2: Crafting the Claws
-
Form the Claw Base:
Roll two smaller logs of clay for the front arms. Attach one end of each log to the underside of the shell near the front. -
Sculpt the Pincers:
Create the actual pincers by shaping two teardrop pieces of clay. Flatten them slightly and use your knife tool to slice halfway down the middle of the ‘fat’ end to create the opening of the claw. -
Refine the Claw Shape:
Gently pull the split sections apart to open the claws. Smooth the edges so they look organic, making one side of the pincer slightly larger and curvier than the other. -
Attach the Claws:
Join the sculpted pincers to the arm logs you attached earlier. Use a blending tool to smooth the seam so it looks like one continuous limb. -
Segment the Arms:
Press the side of your needle tool into the arm segments to create ‘joints’ where the crab’s limbs would naturally bend.
Droopy Claws?
If the heavy claws keep sagging while you sculpt, prop them up with crumpled aluminum foil or small bits of polyester batting until the clay is baked hard.
Step 3: Legs and Finishing Touches
-
Make the Back Legs:
Roll out smaller, thinner snakes of clay for the walking legs. You will need three legs for each side (six total). -
Shape the Legs:
Tap the ends of these legs to flatten them slightly, mimicking the paddle-like feet some crabs have. Arrange them in bent positions to suggest movement. -
Attach Legs:
Press the legs firmly onto the underside of the body. I find it helpful to flip the crab over onto a piece of parchment paper to ensure the underside connections are secure. -
Insert the Eyes:
Push two black glass seed beads into the eye sockets you made earlier. Push them in deep enough so they won’t pop out after baking. -
Add Surface Details:
Use your needle tool to add tiny dots or scratches on the main shell for extra realism, focusing on the center area. -
Bake:
Bake the clay according to the manufacturer’s instructions for the specific brand you are using. Let it cool completely. -
Magnetize:
Once cool, flip the crab over and glue a strong round magnet to the flat underside completely securely.
Beach Weathered Look
After baking, dilute white acrylic paint with water and do a ‘whitewash’ over the textured shell. Wipe it off quickly to leave white reside in the cracks.
Now you have a cute crustacean friend to hold up your favorite photos or grocery lists
Tomato “Food Friend” Figurines
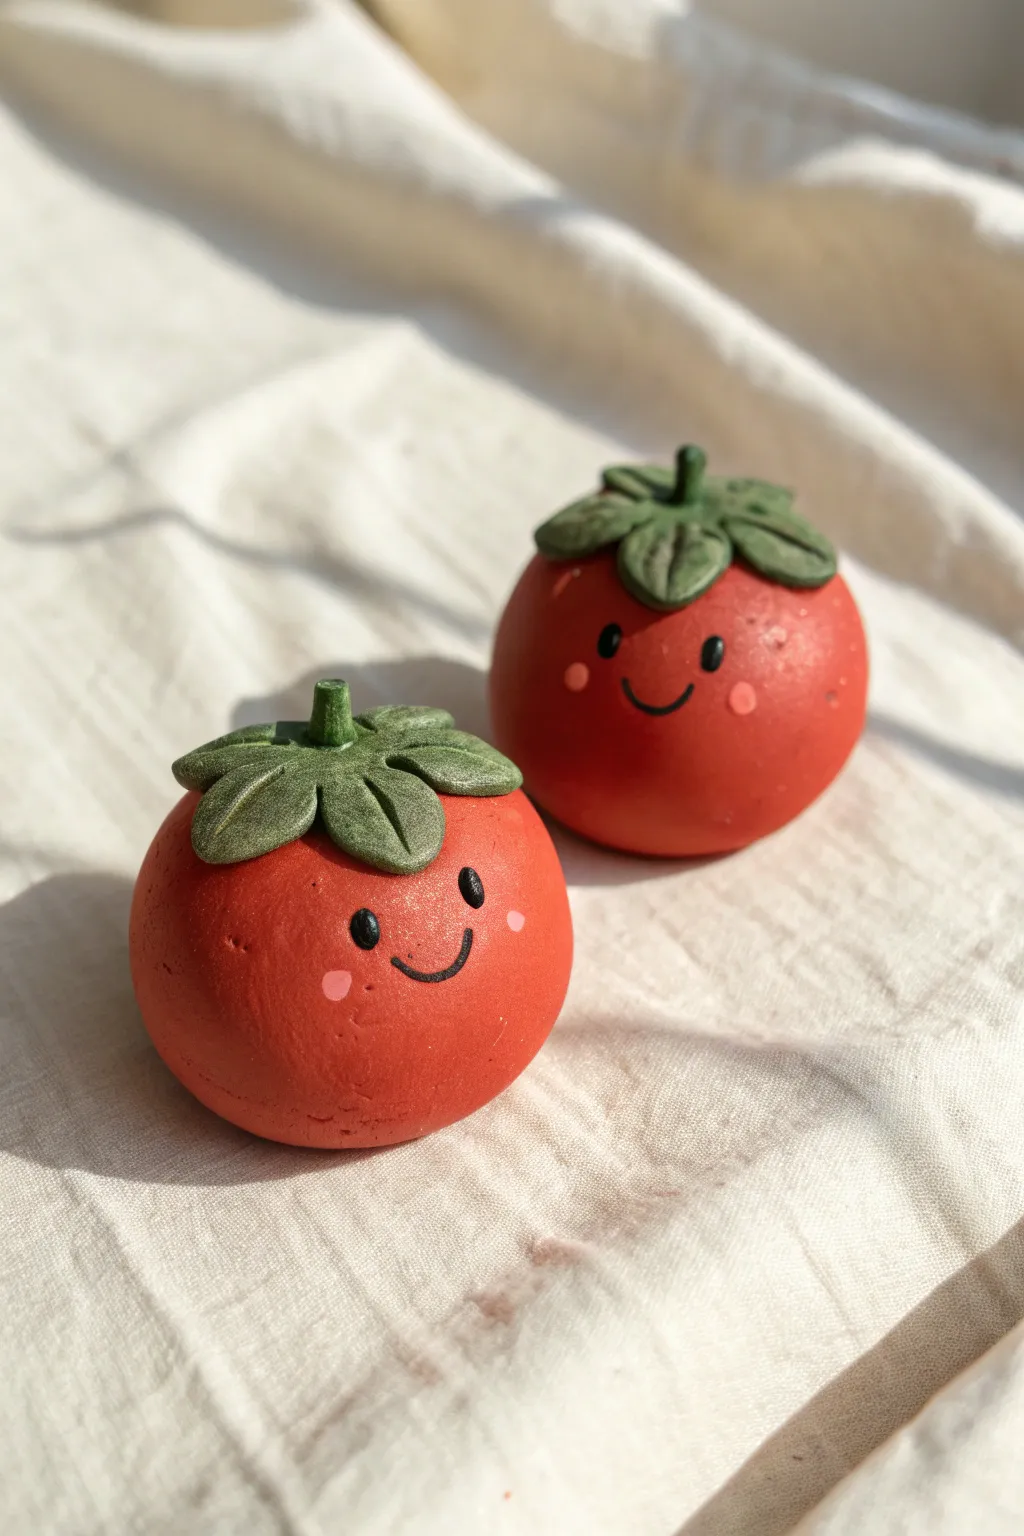
These cheerful tomato figurines are guaranteed to bring a smile to your face with their simple shapes and adorable expressions. Using basic red clay and some careful sculpting, you’ll create a duo of food friends perfect for a kitchen shelf or a desk mascot.
Step-by-Step Tutorial
Materials
- Red polymer or air-dry clay
- Green polymer or air-dry clay
- Small ball stylus tool
- Needle tool or toothpick
- Black acrylic paint
- Pink or light red acrylic paint
- Very fine detail paintbrush
- Matte varnish (optional)
Step 1: Shaping the Base
-
Prepare the red clay:
Start by conditioning your red clay until it is soft and pliable. If you are using polymer clay, warm it in your hands; if using air-dry clay, ensure it’s moist but not sticky. -
Form the body:
Roll a chunk of the red clay into a smooth, even ball about the size of a golf ball or a small tangerine. Make two of these to match the image. -
Create a stable bottom:
Gently tap the bottom of the ball against your work surface to create a slightly flat spot. This prevents your tomatoes from rolling away once they are finished. -
Add texture (optional):
For a more organic look like the photo, you can gently dab the surface with a sponge or a crumpled piece of foil to give the skin a subtle, earthy texture instead of being perfectly smooth.
Step 2: Sculpting the Foliage
-
Prepare the green clay:
Condition a smaller amount of green clay. You want a deep, leafy green shade for this part. -
Make the stem:
Roll a tiny cylinder of green clay to act as the central stem. Place this right in the center top of your red tomato ball. -
Form the leaves:
Create 5-6 small teardrop shapes from the green clay. Flatten them slightly between your fingers to create leaves. -
Attach the leaves:
Arrange these flattened teardrops in a star pattern around the base of the central stem, pressing them gently onto the red surface so they curve downward. -
Detail the veins:
Using a needle tool or toothpick, carefully dragging a line down the center of each leaf to create a vein. Add tiny diagonal lines branching off the center vein for realism.
Fixing Cracks
If you see cracks forming as your air-dry clay sets, dip your finger in a tiny bit of water and slurry (wet clay paste) and smooth over the fissure gently
Step 3: Drying and Finishing
-
Cure or dry the clay:
If using polymer clay, bake according to the package instructions (usually around 275°F/130°C for 15-30 minutes). If using air-dry clay, let the pieces sit undisturbed for 24-48 hours until fully hard. -
Cool down:
Allow the figurines to cool completely before attempting to paint. Painting on warm clay can make the acrylics dry too strictly or unevenly. -
Paint the eyes:
Dip a small ball stylus or the handle end of a paintbrush into black acrylic paint. Dot two oval eyes onto the front of the tomato slightly apart from each other. -
Paint the smile:
Using your finest detail brush and black paint, carefully draw a small ‘U’ shape between and slightly below the eyes to create a cheerful smile. -
Add the cheeks:
Mix a tiny bit of red with white, or use pink paint. Dip a clean stylus or brush handle into the paint and place two soft dots outside the corners of the mouth for cheeks. -
Seal the work:
Once the paint is fully dry, I like to apply a coat of matte varnish. This protects the paint and unifies the sheen of the clay.
Make a Bunch
Vary the sizes and shapes to create heirlooms! Try making a slightly taller, oval-shaped pear tomato or a tiny cherry tomato to add variety to your patch
Place your happy new food friends in a sunny spot to brighten your day
Small Candle Holder With Easy Cutouts
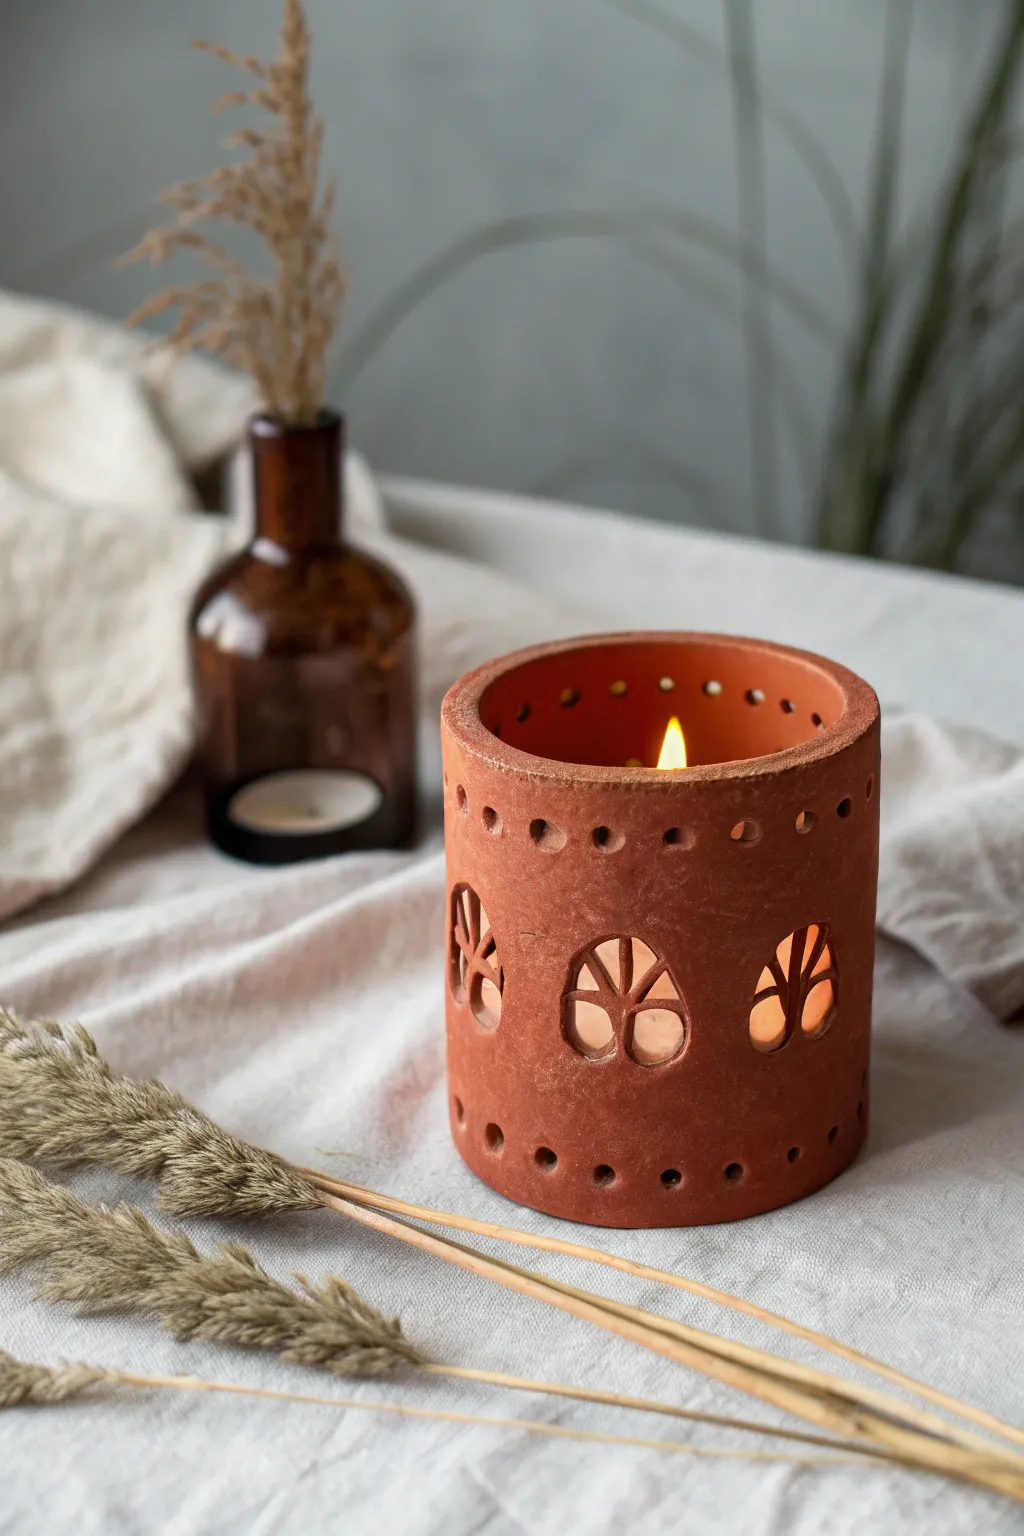
Bring a warm, earthy glow to your space with this simple terracotta slab-built luminary. The rustic red clay and stylized tree cutouts create beautiful dancing shadows when a candle is lit inside.
Detailed Instructions
Materials
- Red pottery clay (air-dry or kiln-fire)
- Rolling pin
- Two guide sticks (approx. 1/4 inch thick)
- Ruler
- Fettling knife or craft knife
- Cylindrical form (like a sturdy can or PVC pipe) wrapped in paper
- Small circular clay cutter or a straw
- Pointed needle tool or small carving tool
- Sponge
- Slip (clay and water slurry)
- Scoring tool or fork
- Sandpaper (optional for finishing)
Step 1: Preparing the Cylinder
-
Roll the slab:
Begin by wedging your red clay to remove air bubbles, then place it between two guide sticks. Roll the clay out into an even slab about 1/4 inch thick, ensuring it’s long enough to wrap around your chosen cylinder form. -
Measure and cut:
Calculate the circumference of your form and add a small overlap amount. Use a ruler and knife to cut a precise rectangle. A height of about 4-5 inches works well for a standard tealight holder. -
Texture preparation:
Before assembling, lightly smooth the surface with a damp sponge or a rubber rib to remove canvas marks or imperfections from rolling. -
Join the seam:
Wrap the slab around your paper-covered form. Where the edges meet, score both sides thoroughly and apply slip. Press the edges together firmly to create a seam, smoothing the clay over the join so it becomes invisible.
Clean Cuts
When cutting the circular holes, twist your straw or cutter as you pull it out. This removes the clay cleanly rather than dragging it.
Step 2: Cutting the Design
-
Initial stiffening:
Let the clay cylinder sit for a short while until it becomes leather-hard. It needs to be firm enough to hold its shape during cutting but soft enough to carve easily. -
Mark the spacing:
Lightly dedicate spots for your three tree motifs using a needle tool. Ensure they are evenly spaced around the mid-section of the cylinder. -
Carve the tree outlines:
Draw an arched window shape for the tree canopy first. Carefully cut this outline using your knife, but don’t remove the clay piece yet. -
Create the branches:
Inside the arched window, sketch a central trunk line and two branching lines. Carefully cut out the negative space between these branches, leaving the clay ‘tree’ structure intact while removing the background. -
Punch the border details:
Use a small circular cutter or a sturdy straw to punch holes along the top and bottom rims. I like to space them about half an inch apart for a consistent look. -
Clean the edges:
Once all cuts are made, remove the clay crumbs. Use a slightly damp paintbrush or your finger to smooth the sharp edges of your cutouts.
Add a Base
Cut a clay circle the size of your cylinder’s diameter and attach it to the bottom for a contained lantern, rather than an open sleeve.
Step 3: Finishing Touches
-
Remove the form:
Carefully slide the cylinder form out from the clay. If the paper sticks, you can gently peel it away now or wait until the clay is drier. -
Check the shape:
If the cylinder warped slightly during removal, gently pat it back into a perfect circle. -
Dry slowly:
Market the pot to dry away from direct heat or drafts to prevent warping. Cover it loosely with plastic for the first day to ensure even drying. -
Final smoothing:
Once bone dry, use fine-grit sandpaper to gently buff away any remaining rough spots or sharp burrs around the cutouts. -
Fire or seal:
If using kiln clay, bisque fire it to cone 04. If using air-dry clay, apply a matte sealant once fully dry to protect the finish.
Place a tea light inside and enjoy the tranquil shadows cast by your new creation
Whitewashed Red Clay Texture Tiles
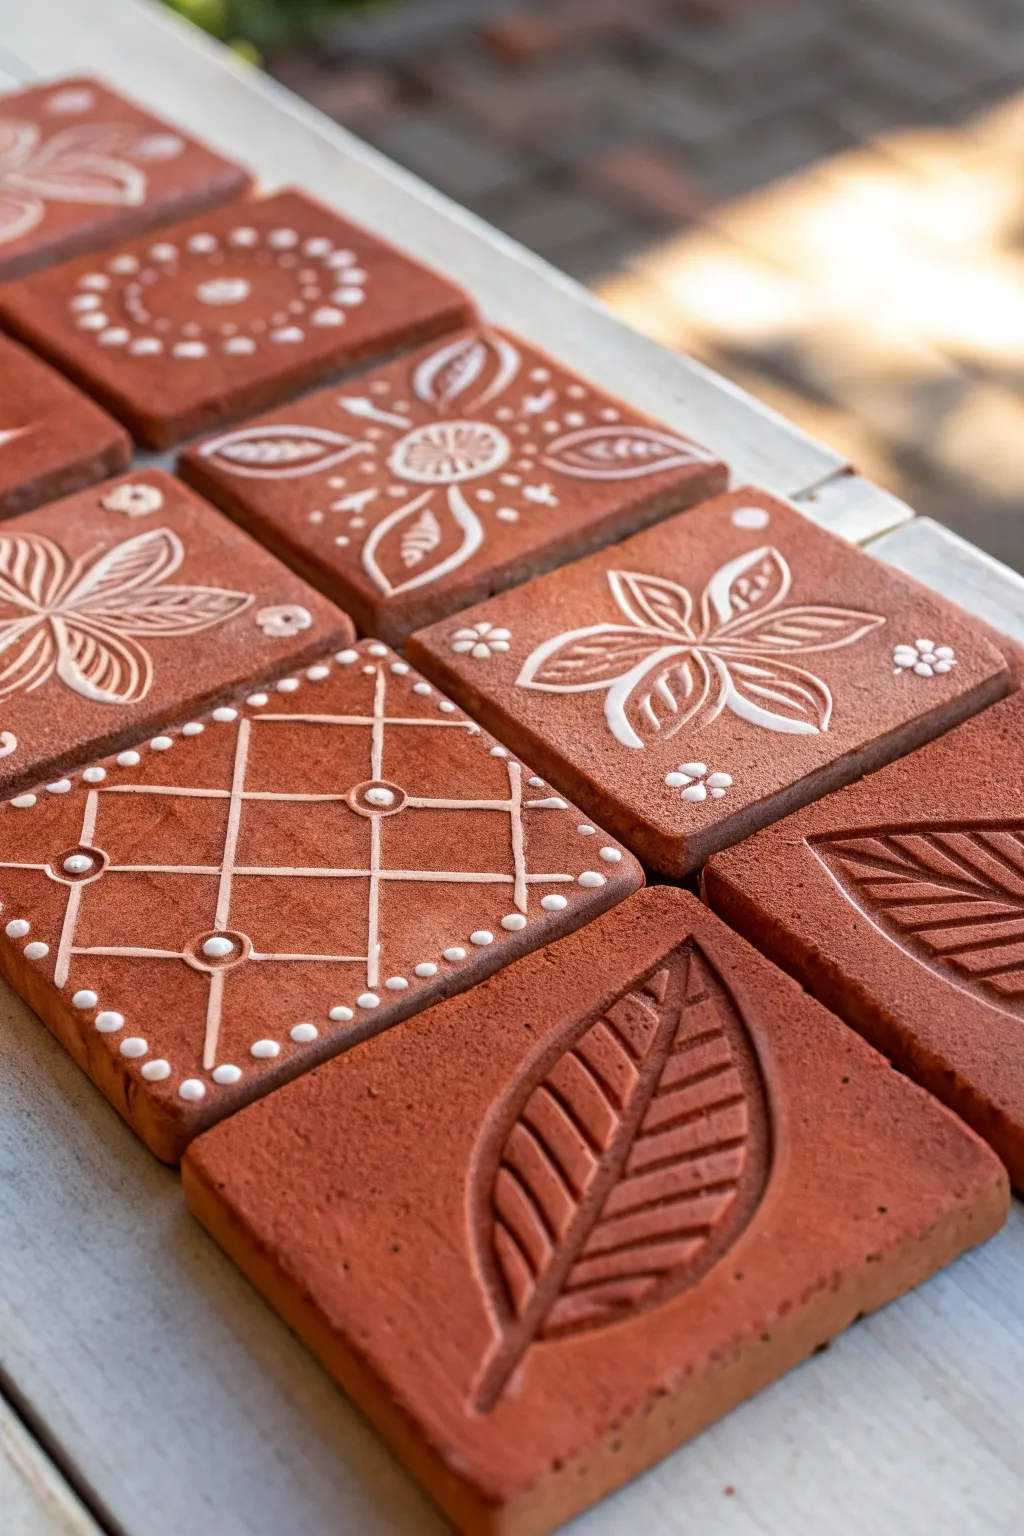
These charming terracotta tiles combine the rustic warmth of red clay with crisp white geometric and botanical designs. The technique uses a simple whitewash method to highlight etched and stamped textures, resulting in a set of cohesive yet unique decorative pieces.
How-To Guide
Materials
- Red air-dry clay or polymer clay (terracotta color)
- Square cookie cutter (approx. 3-4 inches) or ruler and knife
- Rolling pin
- Parchment paper or canvas mat
- Texture tools: clay carving tools, ball stylus, stamps, or household items (like lace or doilies)
- White acrylic paint
- Small paintbrush
- Paper towels or soft cotton rag
- Fine-grit sandpaper (optional)
- Matte spray sealant
Step 1: Shaping the Base
-
Prepare the Clay:
Begin by kneading your red clay until it is soft, pliable, and free of air bubbles. If you are using natural air-dry clay, keep a small bowl of water nearby to smooth out any cracks that appear while working. -
Roll It Out:
Place the clay on parchment paper or a canvas mat to prevent sticking. Roll it out to an even thickness of about 1/4 inch. Using rolling guides or spacers on either side of your rolling pin helps ensure a perfectly uniform slab. -
Cut the Squares:
Using a square cookie cutter or a sharp knife with a ruler, cut out several identical squares. Clean up the edges with your finger or a damp sponge to remove any burrs or roughness.
Paint Wiping Off Too Fast?
If the paint wipes out of the grooves completely, let it sit for 30-60 seconds longer before wiping, or use a slightly drier cloth so it doesn’t ‘scoop’ the wet paint out.
Step 2: Adding Texture & Design
-
Carve the Leaf:
For the leaf design, use a needle tool or small carving loop to gently excavate the outline of a leaf shape. Press a bit deeper to create the central vein, then carve angled lines on either side for the leaf veins, removing small strips of clay. -
Create the Grid:
For the geometric tile, lightly score a grid pattern using a ruler. Use a ball stylus to press distinct dots at the intersections of your lines to create focal points within the lattice. -
Etch Floral Patterns:
Draw petal shapes starting from a center point. You can create a relief effect by pressing down the clay surrounding the petals, or simply etch deep lines for the floral details. Add small stamped flowers or dots in the corners for balance. -
Stamp Repeating Patterns:
If you have clay stamps or interesting buttons, press them firmly into the surface of other tiles to create mandates or border designs. Varry the pressure to see which depth looks best. -
Dry Completely:
Allow the tiles to dry fully according to the package instructions. For air-dry clay, this usually takes 24-48 hours. Turn them over halfway through the drying process to prevent curling.
Make Them Functional
Glue a square of cork sheet or felt backing to the underside of your dried tiles. This turns decorative art pieces into fully functional, non-scratch coasters for your table.
Step 3: Whitewashing & Finishing
-
Sand Roughly:
Once bone dry, you can lightly sand the edges if they are sharp, but leave the top texture rough to catch the paint. -
Apply White Paint:
Dilute your white acrylic paint slightly with water so it flows easily. Brush a generous coat over the textured areas, ensuring the paint gets into all the carved grooves and impressed dots. -
Wipe Away Excess:
Wait just a few seconds; I like to wipe before it gets tacky. Using a damp paper towel or rag, gently wipe the surface of the tile. This removes paint from the raised areas while leaving white pigment trapped in the recessed lines. -
Refine the Look:
If you wiped away too much, re-apply paint to the specific groove and wipe again. For the leaf tile, you might choose to leave it unpainted for contrast, or whitewash it very subtly. -
Add Painted Details (Optional):
For the grid tile, you can use a fine brush to re-paint the connecting lines with solid white if the wipe-away method left them too faint. -
Seal the Work:
Spray the finished pieces with a matte sealant to protect the clay and the paint finish, especially if these will be used as coasters.
Arranging these tiles together creates a beautiful gallery wall effect or a stunning set of handmade coasters
Burnished Red Clay for Natural Shine
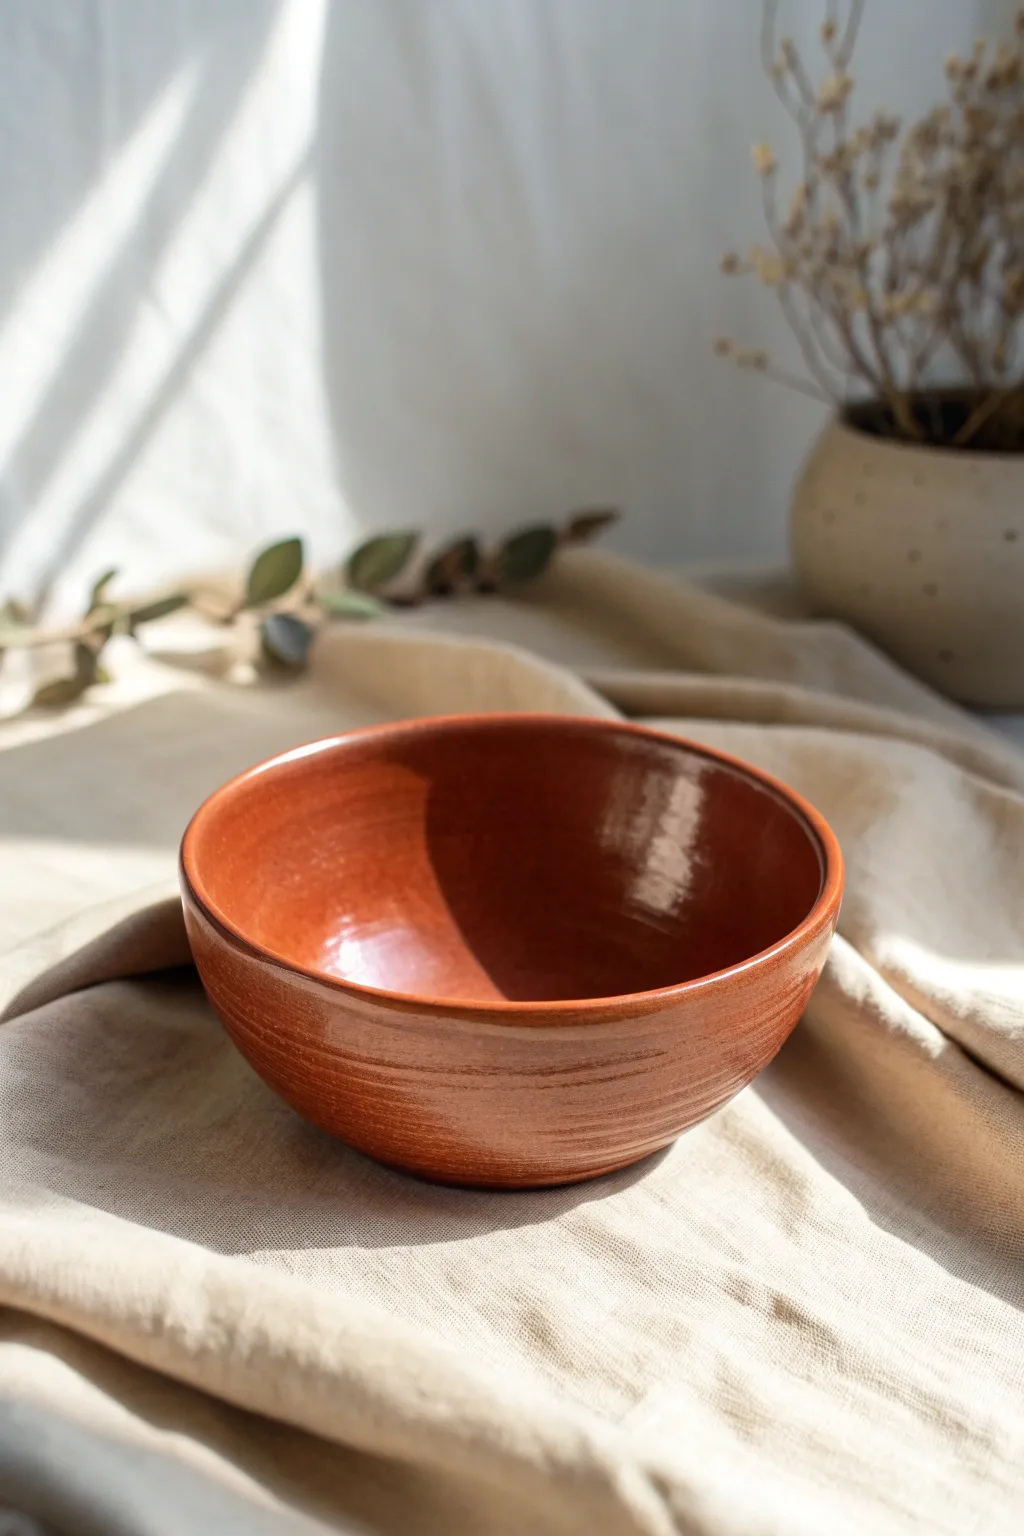
Eschewing glaze for the natural warmth of red clay, this burnished bowl achieves a reflective, organic shine purely through friction and patience. The result is a stunning, warm-toned vessel that highlights the inherent beauty of the earth itself.
Step-by-Step Guide
Materials
- Red earthenware clay (groggless/smooth)
- Pottery wheel (or materials for coil building)
- Wooden rib tool
- Metal kidney scraper
- Sponge
- Cutting wire
- Smooth polishing stone or the back of a spoon
- Soft cloth or chamois leather
- Oil (vegetable or baby oil)
- Plastic bag (for drying)
Step 1: Throwing the Form
-
Prepare the Clay:
Begin by thoroughly wedging your red earthenware clay. It is crucial to use a clay body with no grog (sand), as gritty particles will drag across the surface later and ruin the burnished finish. -
Center on the Wheel:
Secure your clay ball to the wheel head and center it using wet hands. Focus on creating a wide, low mound rather than a tall cylinder. -
Open the Clay:
Open the mound gently, pulling the clay outward to establish the floor of the bowl. Compress the floor with a wooden rib to prevent cracking later. -
Pull the Walls:
Pull the walls up and outward into a gentle curve. Aim for an even thickness of about a quarter-inch throughout the wall. -
Shape the Curve:
Use a kidney tool on the inside while supporting the outside with your hand to push the belly of the bowl out, creating that rounded, inviting shape seen in the image. -
Refine the Rim:
Compress the rim with a piece of chamois or your sponge to make sure it is smooth and rounded, not sharp. -
Cut and Wait:
Run your wire tool under the base to release it, but leave the bowl on the bat. Let it dry to a ‘leather-hard’ state—firm enough to hold its shape but still cool to the touch.
Step 2: Trimming and Refining
-
Trim the Foot:
Once leather-hard, flip the bowl over and center it on the wheel. Trim away excess clay from the base to create a defined foot ring. -
Smooth the Exterior:
While the wheel spins slowly, use a metal kidney scraper to remove any turning marks or water slurry. The surface needs to be pristine before we start burnishing. -
Add Subtle Texture:
If you like the faint horizontal lines shown in the photo, lightly drag a soft rubber rib or your finger across the exterior while the wheel turns very slowly.
Stone Selection
Use a polished river rock or an agate burnisher. The smoother your tool, the glassier your final surface will be.
Step 3: The Burnishing Process
-
First Polish:
Apply a very tiny amount of oil to the surface of the clay. Taking your smooth stone or the back of a spoon, rub the clay in small circles. Support the wall from the other side so you don’t warp the shape. -
Directional Rubbing:
Work your way around the entire bowl. You will see the clay color deepen and darken as the particles compress and align. -
Dry Slightly:
Let the bowl dry for a few hours. The shine often dulls as water evaporates, which is normal. -
Second Polish:
Go over the surface again with your stone or spoon. I find this second pass is where the real mirror-like depth begins to appear. -
Buff with Cloth:
Once you have a consistent sheen, switch to a soft cloth or plastic bag wrapped around your finger. Rub briskly to bring out a high gloss. -
Slow Drying:
Cover the bowl loosely with plastic to ensure it dries very slowly. Fast drying can ruin the shine.
Terra Sigillata
Apply a coat of terra sigillata (super-finely refined clay slip) before burnishing for an even silkier, higher-gloss finish.
Step 4: Firing
-
Low Fire Only:
Bisque fire the bowl to a low temperature (around Cone 06 or 04). High firing can cause the clay to become porous again and lose its sheen. -
Final Inspect:
Once cool, the bowl is ready for display. Remember, unglazed burnished ware is generally decorative and not food safe for wet liquids.
Place your finished bowl in a spot where the sunlight can catch those beautiful, hand-rubbed reflections