Fairy gardens are basically a tiny stage where your clay can tell a whole magical story in just a few inches. I love how a handful of mini clay accessories can turn a plain pot or patch of soil into a little “did you see that?” moment.
Classic Spotted Toadstool Mushrooms
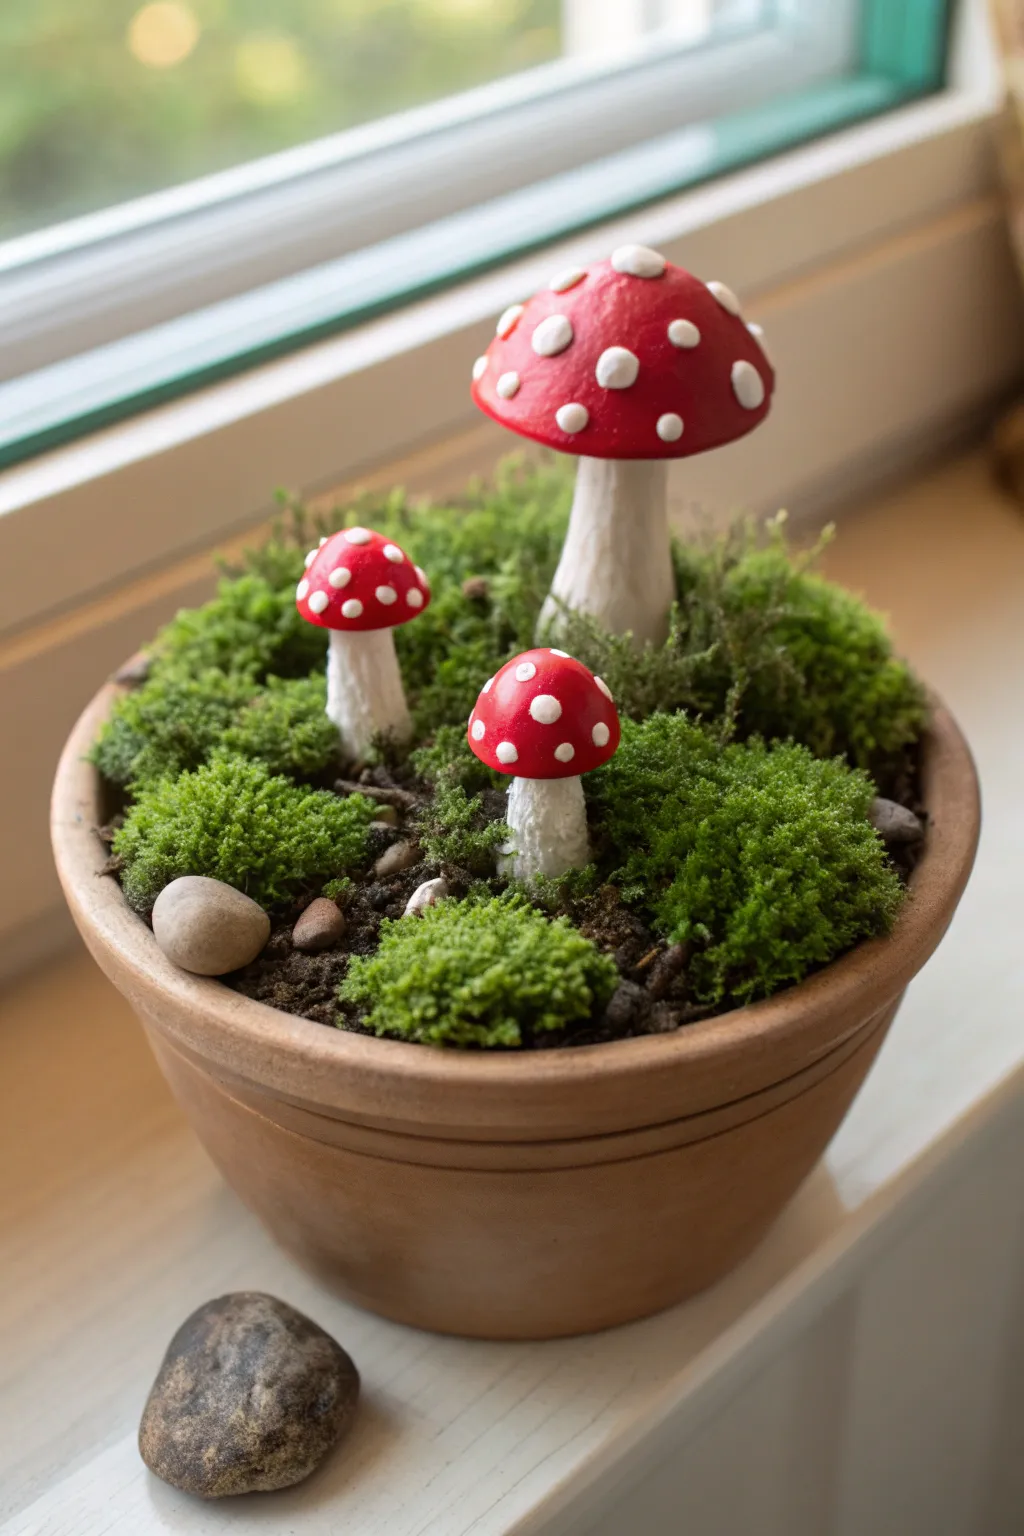
Bring a touch of woodland magic to your windowsill with these charming clay toadstools nestled in a mossy bed. The vibrant red caps with classic white spots create an enchanting focal point against the natural textures of moss and terracotta.
Step-by-Step Guide
Materials
- Polymer clay (white and red)
- Small terracotta pot (approx. 4-6 inches)
- Aluminum foil
- Liquid polymer clay or bake-and-bond adhesive
- Sculpting tools (needle tool, small ball stylus)
- Potting soil or dry floral foam
- Live moss or preserved craft moss
- Small garden pebbles
- Acrylic paint (optional, for shading)
- Gloss varnish (water-based)
Step 1: Sculpting the Stems
-
Prepare the Armature:
Begin by crumpling small pieces of aluminum foil into tight cones. You will need one larger cone for the main mushroom and two smaller ones for the companions. This saves clay and strengthens the structure. -
Cover with White Clay:
Condition your white polymer clay until soft. flatten a sheet and wrap it completely around your foil cones, smoothing the seams with your fingers. -
Texture the Stalks:
Take a needle tool or a stiff bristled brush and drag it vertically up the stems. This creates delicate striations that mimic the organic look of a real mushroom stalk. -
Shape the Skirt:
Roll a very thin snake of white clay and wrap it around the upper third of the stem. Use a blending tool to smooth the top edge into the stem while leaving the bottom edge slightly ragged to resemble the annulus or ‘skirt’ of the fungus.
Clean Clay Tip
Red clay can easily stain white clay. Wash your hands thoroughly or use baby wipes between sculpting the red caps and touching the white stems to keep the white pure.
Step 2: Creating the Caps
-
Form the Base Caps:
Roll balls of red clay corresponding to the size of your stems. Gently press and flatten them into domes. I like to hollow out the underside slightly so they sit securely on the stems. -
Attach Caps to Stems:
Apply a drop of liquid clay or bake-and-bond to the top of each white stem. Press the red caps firmly into place. -
Add the Dots:
Roll tiny, varied sizes of white clay into balls. Press these onto the red caps, flattening them completely so they look like part of the skin rather than raised bumps. -
Refine the Shape:
Once assembled, give each mushroom a final check. You might want to tilt one cap slightly for a more playful, natural personality. -
Bake the Clay:
Place your mushrooms upright on a baking sheet or ceramic tile. Bake according to your specific clay manufacturer’s instructions (usually 275°F/130°C for 15-30 minutes per 1/4 inch of thickness). -
Cool and Seal:
Allow the pieces to cool completely. Apply a coat of gloss varnish to the red caps to make them look wet and fresh, but leave the white stems matte for contrast.
Step 3: Assembling the Garden
-
Prepare the Pot:
Fill your terracotta pot. If using live moss, use potting soil. If using preserved craft moss, you can use floral foam or dry dirt as a base. -
Plant the Mushrooms:
Insert the base of each baked mushroom stem into the soil. Arrange them in a triangle formation, with the largest mushroom in the back and the two smaller ones angled in the front. -
Lay the Moss Bed:
Tuck clumps of moss tightly around the mushroom stems. Ensure the soil is completely covered to create a lush, green carpet effect. -
Add Stone Accents:
Place a smooth grey river stone near the front left edge, and perhaps a smaller pebble on the right side to balance the composition. -
Final Adjustments:
Use a soft brush to sweep away any loose soil crumbs from the white mushroom stems to keep them pristine.
Glow Up
For a magical night-time effect, mix a small amount of glow-in-the-dark powder into the white clay used for the spots before pressing them onto the red caps.
Now you have a perfect little patch of eternal forest floor to brighten up your desk or shelf


Tiny Fairy Doors With Wood-Grain Texture
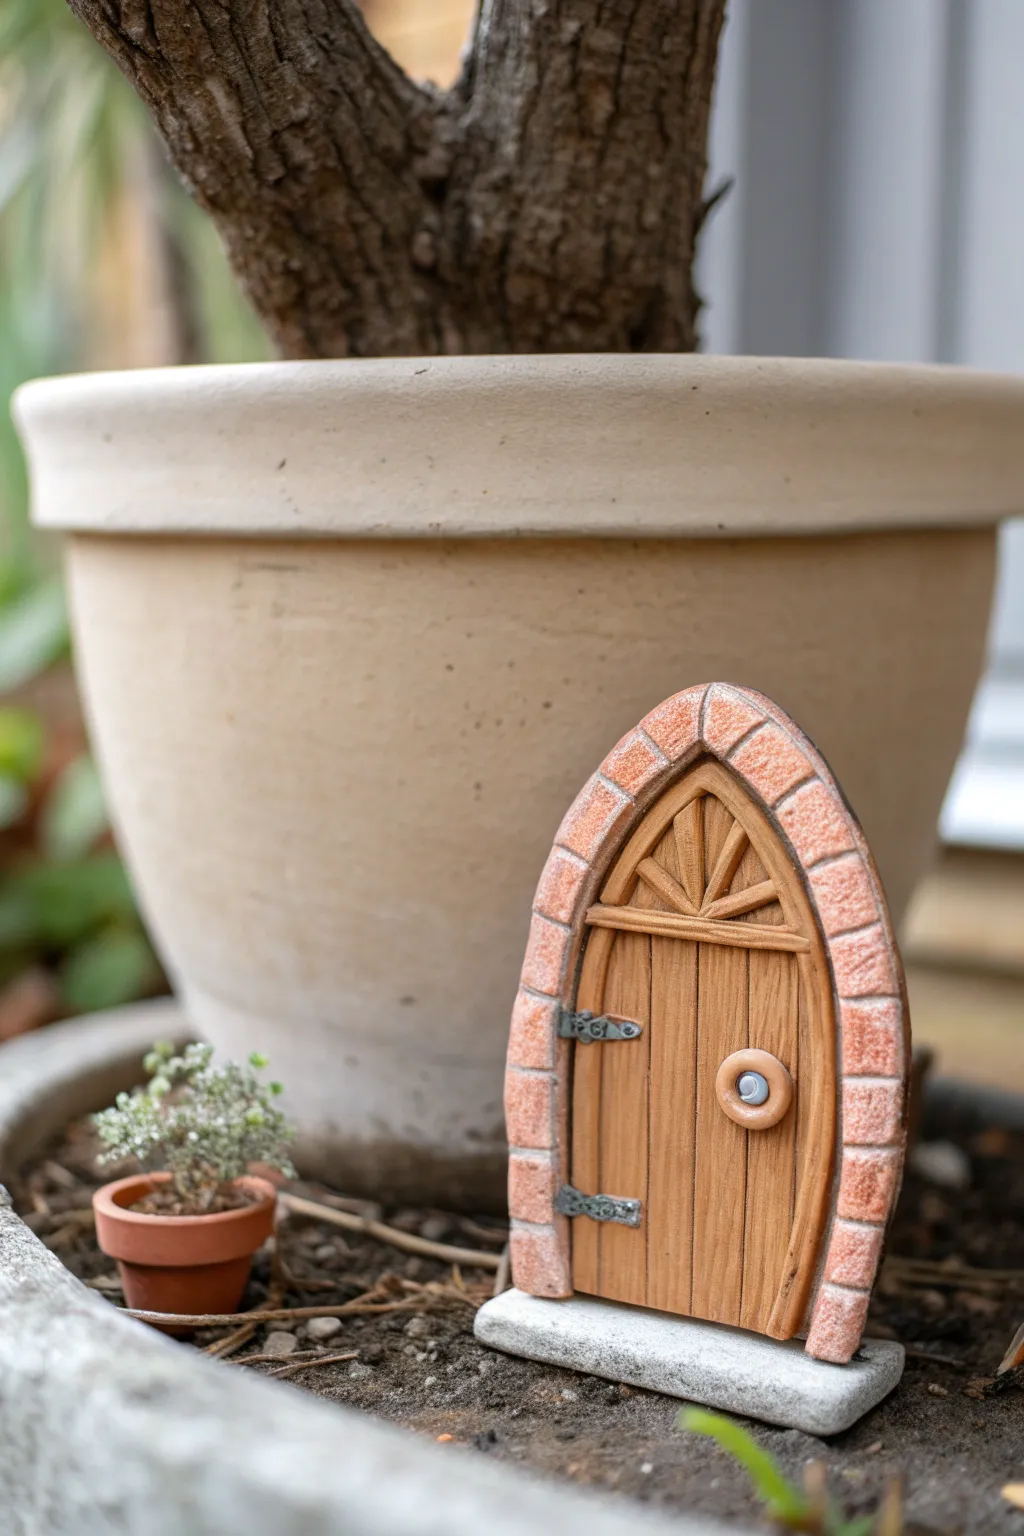
Transform simple clay into a magical entryway with this detailed fairy door project. Featuring realistic wood grain textures and a charming brick archway, this piece adds an instant touch of enchantment to any potted plant or garden nook.
Step-by-Step
Materials
- Polymer clay (brown, terracotta/red, grey, silver)
- Clay roller or pasta machine
- Pointed sculpting tool or toothpick
- Texture sheet or stiff brush (optional for stone texture)
- Liquid clay (Bake & Bond)
- Acrylic paints (dark brown wash, white)
- Small paintbrush
- Craft knife
- Oven
- Gloss glaze (optional)
Step 1: Forming the Base and Door
-
Roll the base slab:
Start by conditioning your brown clay until it is soft and pliable. Roll it out into a flat slab approximately 4-5mm thick. This will serve as the main structure and background for the entire door. -
Cut the arch shape:
Using a craft knife, cut out a tall, arched shape from the brown slab. You can sketch the shape on paper first to use as a template if you want perfect symmetry, or freehand it for a rustic look. -
Engrave the wood grain:
With a needle tool or the tip of a toothpick, gently score vertical lines down the length of the door to simulate planks. Vary the pressure to create depth and character. -
Add wood details:
Enhance the wood effect by drawing occasional knots and swirls within your vertical lines. I like to add tiny horizontal cracks at the ends of the ‘planks’ for a weathered appearance. -
Create the upper window frame:
Roll a thin snake of brown clay and flatten it slightly. Press this horizontally across the upper third of the door to create a frame. Add vertical and diagonal strips above it to mimic a sunburst window design.
Step 2: Building the Arch and Threshold
-
Prepare the brick clay:
Take your terracotta or reddish clay and roll it into a long, flat strip about 1cm wide. This strip should be long enough to wrap around the entire curved edge of your door. -
Attach the arch frame:
Apply a tiny amount of liquid clay along the curved edge of your brown door base. Gently press the terracotta strip along the curve to frame the door. -
Texture the bricks:
Use your knife to gently press indents into the terracotta strip at regular intervals, creating individual brick shapes. Use a stiff brush or a textured sponge to dab the surface, giving the bricks a rough, stony feel. -
Form the threshold:
Condition a piece of grey clay and shape it into a rectangular block slightly wider than the door. Press the texture tool or a real clean rock into it to create a concrete or stone texture. -
Mount the door:
Place the assembled door onto the grey threshold block. Press down firmly to ensure they bond, using a little liquid clay if necessary to secure the connection.
Sticky Situation
If your clay is too soft and sticky to hold detail, leach it by placing the rolled slab between two sheets of plain printer paper for 30 minutes to absorb excess oil.
Step 3: Adding Hardware and Finishing
-
Sculpt the hinges:
Roll very tiny pieces of silver or metallic grey clay into flattened teardrop shapes. Press two of these onto the left side of the door to act as hinges. -
Detail the hinges:
Use a needle tool to poke tiny holes or indents into the hinges to represent nails or screws. -
Create the doorknob:
Roll a small ball of light brown or beige clay and flatten it slightly into a disc. Add a tiny silver dot in the center for the hardware, then press this assembly onto the right side of the door. -
Bake the project:
Preheat your oven according to the polymer clay package instructions (usually 275°F/135°C). Place the door on a ceramic tile or parchment-lined baking sheet and bake for the recommended time, typically 15-30 minutes per 1/4 inch of thickness. -
Cool down:
Once baked, turn the oven off and let the door cool completely inside or on a wire rack before handling to prevent cracking. -
Apply an antique wash:
Dilute dark brown acrylic paint with water. Brush this wash over the entire door, letting it settle into the wood grain grooves and brick textures. -
Wipe back:
Quickly wipe the surface with a damp paper towel or cloth. This removes paint from the high points while leaving dark shadows in the crevices, instantly revealing the texture. -
Dry brush highlights:
Dip a dry brush into a tiny amount of white paint and wipe most of it off. Very lightly brush over the bricks and stone threshold to highlight the texture.
Glow Up
Mix glow-in-the-dark powder into the clay for the window panes or the doorknob. Your fairy door will magically light up at night in the garden!
Now your charming little portal is ready to invite magic into your favorite planter or garden spot


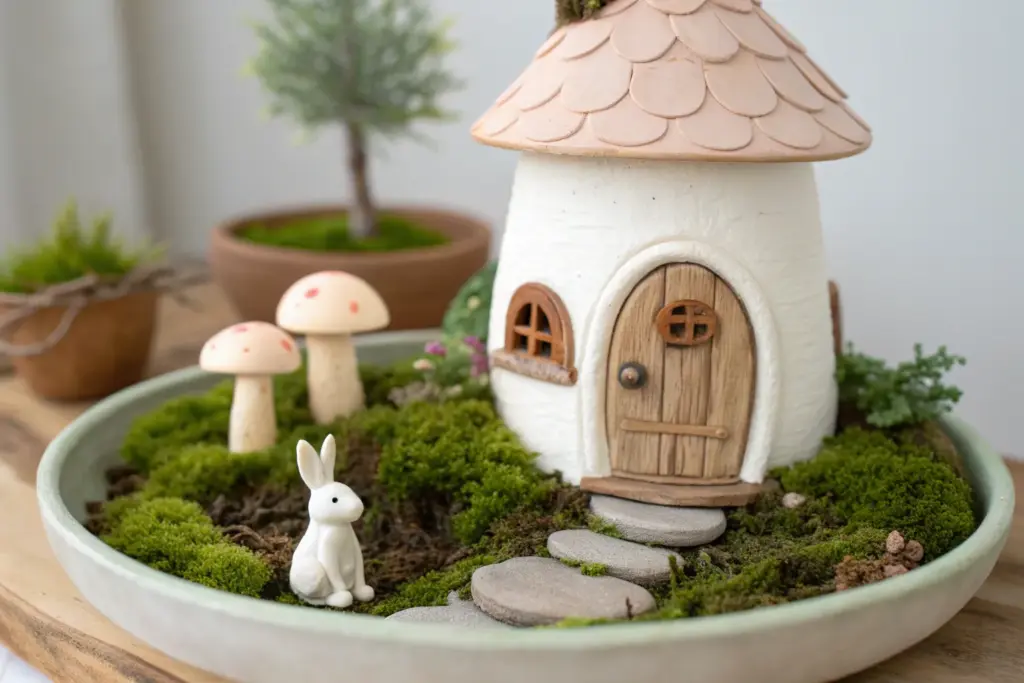
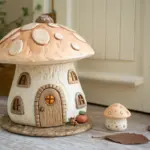
Mini Fairy Houses for Teacups and Planters
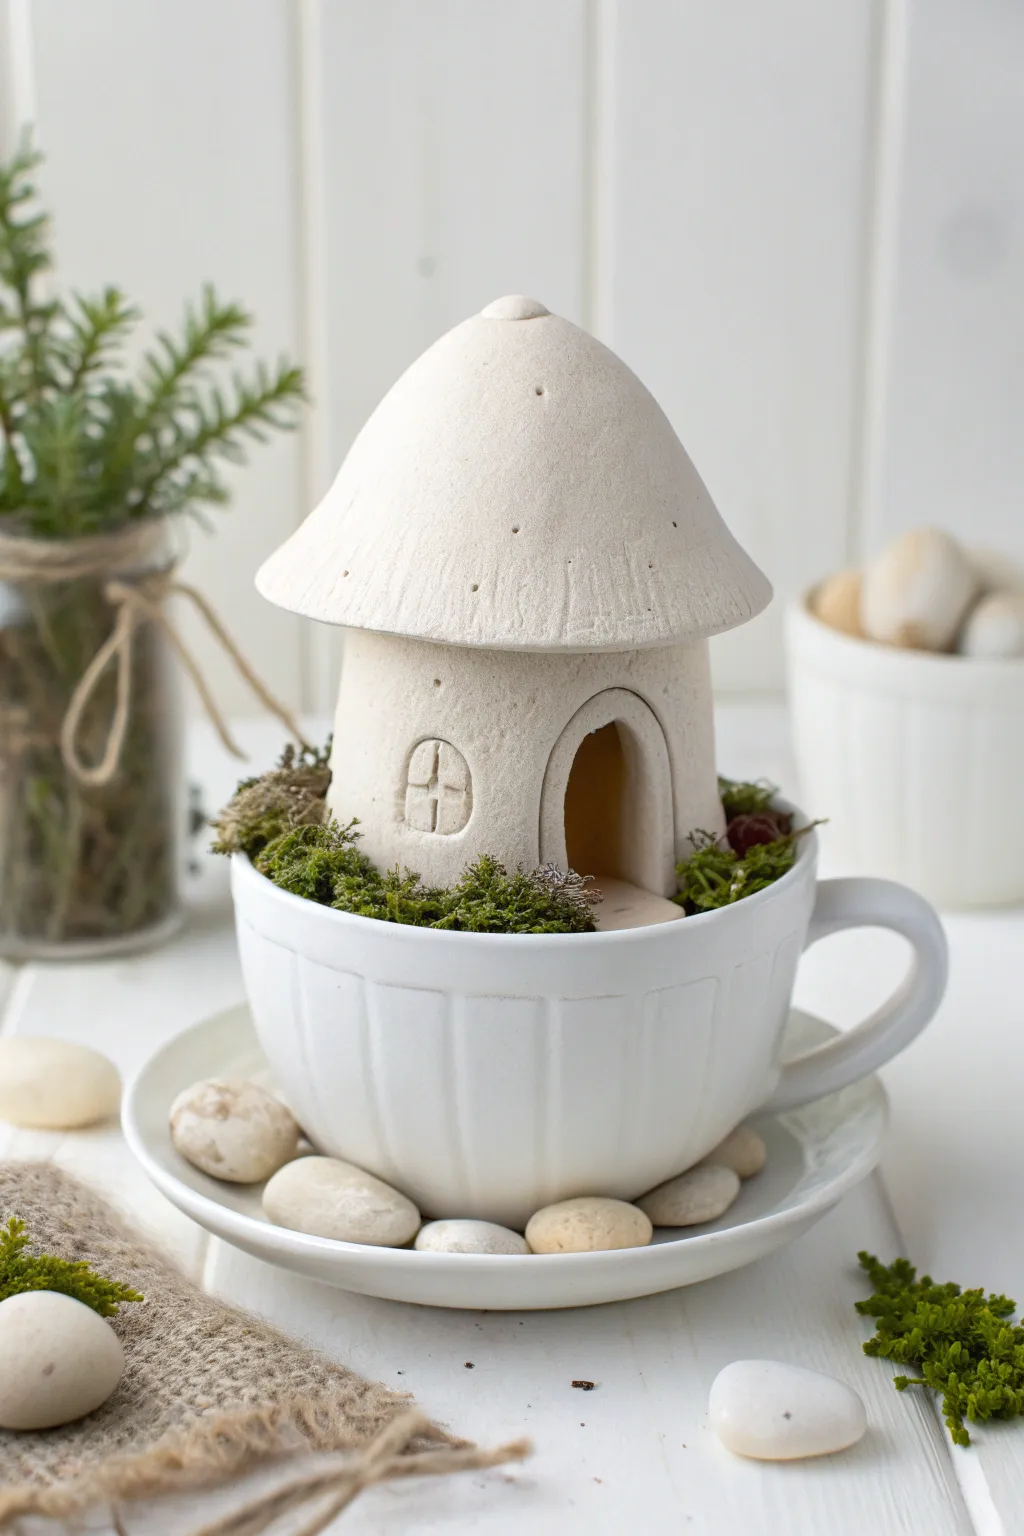
Capture the whimsy of a woodland fairytale with this sleek, minimalist clay mushroom house nestled perfectly inside a vintage teacup. The clean white finish and natural moss accents create a serene, modern take on traditional fairy gardening that fits beautifully on any windowsill.
How-To Guide
Materials
- Air-dry clay (white) or polymer clay (white)
- White ceramic teacup and matching saucer
- Rolling pin
- Clay carving tools (needle tool, small loop tool)
- Small circle cutter (or a small bottle cap)
- Aluminum foil
- Water (for smoothing)
- Fine grit sandpaper
- Dried preserved moss (sheet moss or reindeer moss)
- Small white pebbles or river stones
- Hot glue gun and glue sticks
- Acrylic matte varnish (optional)
Step 1: Sculpting the Base Structure
-
Create the foil armature:
Begin by crumpling a piece of aluminum foil into a cylinder shape that fits comfortably inside your teacup. This will form the core of the house and save on clay. -
Roll out the clay:
Roll your white clay out to an even thickness, roughly 1/4 inch thick. You want it substantial enough to hold its shape but not too bulky. -
Wrap the base:
Cut a rectangular strip of clay and wrap it around your foil cylinder. Blend the seam together using your fingers and a little water until it’s invisible. -
Form the mushroom cap:
Roll a ball of clay and flatten it slightly into a cone or dome shape. Hollow out the underside slightly with your thumbs so it sits securely on top of your cylinder base purely for fitting purposes—don’t attach it permanently just yet.
Smooth Operator
Keep a small bowl of water and a dedicated soft paintbrush nearby. Brushing water over the raw clay smooths imperfections better than fingers alone.
Step 2: Adding Details & Texture
-
Carve the door:
Use a needle tool or small knife to cut an arched doorway into the base cylinder. You can either remove the clay entirely for a hollow look or recess it deeply. -
Create the window:
Use a small circle cutter or freehand an oval shape for a window. Gently press a cross shape into the clay window to simulate panes. -
texture the roof:
Take your mushroom cap and use a needle tool to poke tiny, random holes scattered across the surface. This adds a lovely organic porosity to the minimalist finish. -
Add rim texture:
Along the bottom edge of the mushroom cap, drag your tool upwards slightly to create faint vertical lines, simulating the gills or texture of a real mushroom. -
Assemble the pieces:
Score the top of the base and the underside of the cap (scratch cross-hatch, roughed-up lines). Apply a dab of water or liquid clay (if using polymer) and press the cap firmly onto the base. -
Final smoothing:
Dip your finger in water and run it over the entire surface to erase any fingerprints. I find this step crucial for achieving that smooth, ceramic-like appearance.
Step 3: Finishing & Assembly
-
Drying or baking:
If using air-dry clay, let the piece sit undisturbed for 24-48 hours until fully hard. If using polymer clay, bake according to the package instructions. -
Sand for perfection:
Once fully cured, use fine-grit sandpaper to gently buff away any remaining rough spots or sharp edges. -
Prepare the teacup:
Fill the bottom of your teacup with a small amount of crumpled foil or styrofoam to act as a false bottom, saving on moss. -
Position the house:
Place your clay house into the cup. Use a dab of hot glue on the bottom of the house to secure it to your filler material so it doesn’t wobble. -
Tuck in the moss:
Take small clumps of preserved green moss and tuck them tightly around the base of the house, filling the cup completely to the brim. -
Arranging the saucer:
Place the teacup on its saucer. Surround the base of the cup with smooth white pebbles. -
Final touches:
Add a few smaller pebbles onto the moss inside the cup for continuity, or perhaps a tiny twig near the door to act as a step.
Make it Glow
Cut a hole in the bottom of the house and the foil armature. Place a battery-operated LED tea light inside the cup before adding the house for a warm glow.
Place your miniature dwelling on a sunny shelf and enjoy the peaceful charm it brings to your space

Stepping-Stone Paths and Pebble Walkways
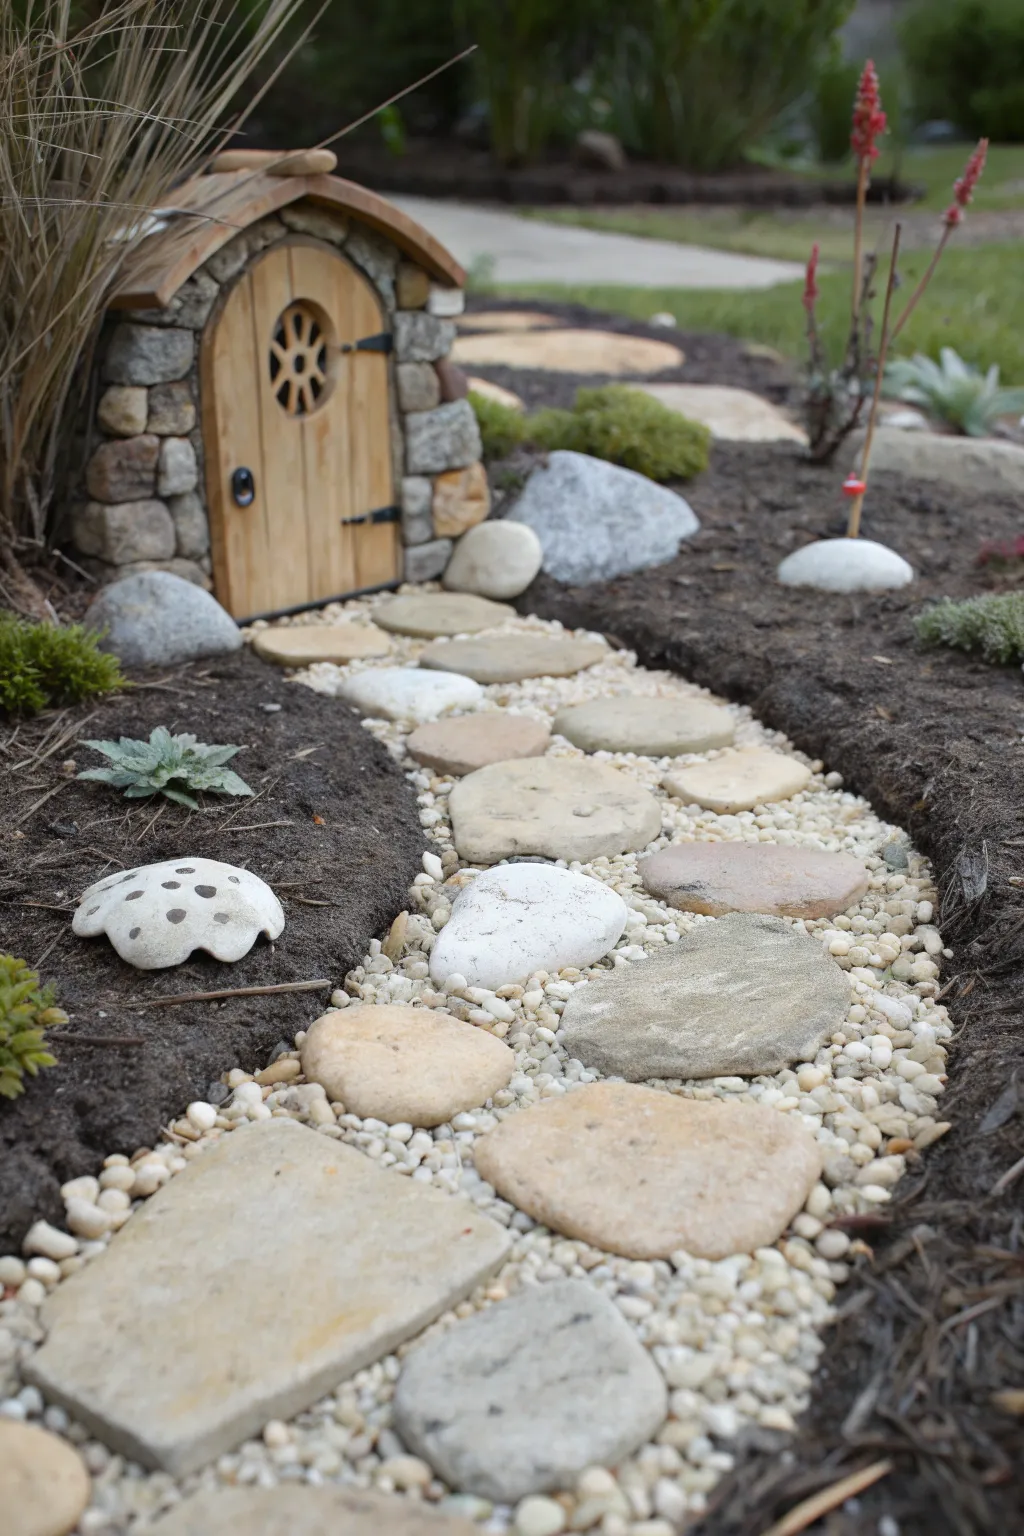
Transform a patch of dirt into an inviting entrance for your garden sprites with this charming mixed-media pathway. By combining natural stone textures with polymer clay accents, you’ll create a durable, winding road that looks like it has been trodden by tiny feet for centuries.
Detailed Instructions
Materials
- Polymer clay (white, beige, and terracotta)
- Flat river rocks or smooth stones (assorted sizes)
- Small white aquarium gravel or pea gravel
- Potting soil or prepared garden bed
- Acrylic paints (brown, black, moss green)
- Clear outdoor sealant or varnish
- Sculpting tools (ball stylus, needle tool)
- Small trowel or spoon
- Fairy house (for staging the destination)
Step 1: Crafting the Clay Accents
-
Sculpt the Mushroom Cap:
Warm up a ball of white polymer clay in your hands until it is pliable. Flatten it into a thick disc, then gently gently pull the edges downward to create a dome shape resembling a toadstool cap. -
Add Texture Details:
Using your thumb, press uneven indentations onto the surface to give it an organic, weathered look. A perfect mushroom looks unnatural, so embrace the lumps and bumps. -
Create the Spots:
Roll tiny balls of dark clay or use a small circular tool to press indentations into the white cap. You can fill these indentations with a contrasting clay color later or simply paint them after baking. -
Bake the Clay:
Follow the manufacturer’s instructions for your specific brand of clay—usually baking at 275°F (135°C) for 15-30 minutes. Let the piece cool completely before handling. -
Paint and Seal:
Once cool, paint the indented spots a dark grey or brown for depth. Finish with a coat of outdoor sealant to protect the clay from moisture when it sits in the garden soil.
Step 2: Preparing the Terrain
-
Clear the Path:
Identify where your fairy door or house will sit. Using a small trowel or a sturdy spoon, clear a winding path leading away from the entrance, about 3-4 inches wide. -
Create a Trench:
Dampen the soil slightly to make it workable. Dig a shallow trench along your planned path, only about half an inch deep. This helps keep the gravel contained and prevents it from washing away during rain. -
Tamp the Soil:
Use the back of your trowel or your hand to firmly press down the soil at the bottom of the trench. A firm base prevents your stepping stones from sinking too deep over time. -
Build Soil Banks:
Pile the excavated soil lightly along the edges of the path to create a sunken effect. This adds dimension and makes the walkway look established and cozy.
Scale It Right
Keep scale in mind: larger stones at the start of the path create a forced perspective, making the fairy house seem further away.
Step 3: Laying the Stones
-
Select Your Pavers:
Sort through your river rocks to find the flattest ones. I prefer using a mix of larger ‘anchor’ stones and smaller filler stones to create a natural, puzzle-like aesthetic. -
Place the Main Stones:
Begin placing the largest flat stones down the center of your path. Leave about a half-inch of space between each stone to allow room for the gravel grout. -
Check for Stability:
Press each stone firmly into the dirt base. Wiggle them slightly to ensure they don’t rock back and forth; adjust the soil underneath if needed until they sit solid. -
Level the Surface:
Step back and look at the path from eye level. Ensure the tops of the stones are roughly even with each other to create a smooth walking surface for your imaginary guests.
Loose Stones?
If stones wobble after adding gravel, lift them and add a pinch of damp sand underneath, then re-seat firmly before replacing gravel.
Step 4: Adding the Gravel Grout
-
Pour the Gravel:
Take a handful of small white aquarium gravel. Carefully sprinkle it into the gaps between your river stones, filling the spaces completely. -
Spread and Smooth:
Use a dry finger or a small dry paintbrush to sweep stray gravel off the tops of the large stones and into the crevices. The gravel helps lock the larger stones in place. -
Edge the Path:
Add a thin line of gravel along the outer edges of the stones where they meet the soil banks. This creates a clean visual border between the hardscape and the garden bed. -
Position the Accessories:
Nestle your baked clay mushroom into the soil alongside the path. Bury the base slightly so it looks like it sprouted naturally from the earth. -
Final Wash Down:
Using a spray bottle with a mist setting, gently wet the entire path. This settles the dust on the gravel and helps compact the soil around the stones without washing the design away.
Now your garden has a welcoming trail ready for magical visitors to explore

The Complete Guide to Pottery Troubleshooting
Uncover the most common ceramic mistakes—from cracking clay to failed glazes—and learn how to fix them fast.
Mini Garden Gates and Entry Arches
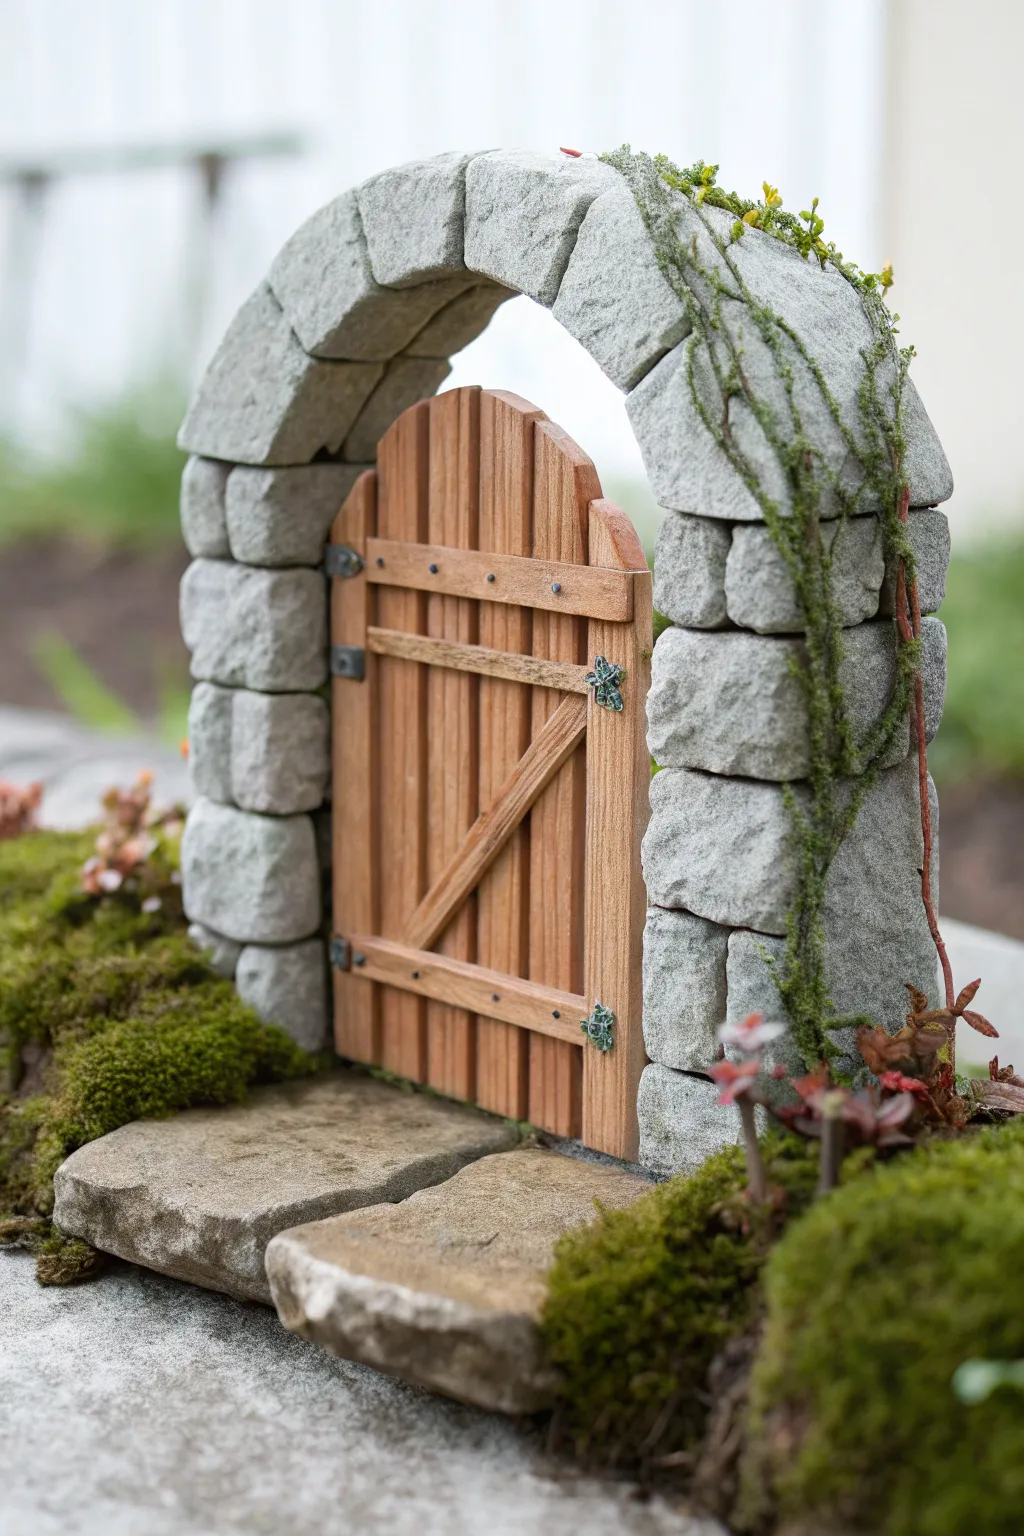
Welcome fairies into your garden with this enchanting stone archway surrounding a rustic wooden gate. The realistic stonework and weathered wood texture create a magical portal that looks like it has stood for centuries.
Step-by-Step Guide
Materials
- Polymer clay (stone gray, granite, and wood brown)
- Popsicle sticks or balsa wood strips (optional, for structure)
- Aluminum foil
- Texture tools: Toothbrush, crumpled foil ball, needle tool
- Acrylic paints: Black, white, dark brown, moss green
- Paintbrushes: Fine detail brush and dry fluff brush
- Craft knife
- Liquid clay or strong craft glue
- Matte varnish
Step 1: Forming the Stone Arch
-
Create the armature:
Begin by crumpling aluminum foil into a thick snake shape, bending it into a sturdy arch. This saves clay and keeps the structure light. -
First clay layer:
Roll out a sheet of gray polymer clay (about 1/4 inch thick) and wrap it completely around your foil arch, smoothing the seams so no foil is visible. -
Marking the stones:
Using a needle tool or a dull knife, score deep lines across the arch to define individual blocks. Make two vertical columns of stones for the pilasters and wedge-shaped voussoirs for the top curve. -
Shaping the blocks:
Gently press and round the edges of each ‘stone’ with your fingers to make them look distinct and tumbled, rather than a solid flat wall. -
Texturing the stone:
This is where the magic happens; press a crumpled ball of aluminum foil or a stiff toothbrush firmly against the clay surface to create a realistic, pitted rock texture.
Natural Texture Hack
Press a real rough stone or a piece of bark directly onto your raw clay. It transfers an incredibly realistic pattern that’s hard to sculpt by hand.
Step 2: Crafting the Wooden Gate
-
Cut the planks:
Roll out brown clay into a thin sheet. Use a craft knife to cut vertical strips for the door planks and horizontal strips for the cross-braces. -
Wood grain texture:
Drag a needle tool or stiff brush down the length of each strip to carve deep wood grain lines. Don’t be afraid to add a few ‘knots’ for character. -
Assemble the door:
Lay the vertical planks side-by-side, shaping the top into a gentle curve that matches the arch. Press the horizontal cross-braces across them to bond the planks together. -
Add the diagonal brace:
Cut a diagonal clay strip to fit between the horizontal braces, completing the classic ‘Z’ barn door pattern. -
Hardware details:
Roll tiny balls of dark gray or black clay, flatten them slightly, and press them onto the cross-braces to simulate iron bolts or hinges. Use a needle tool to poke tiny screw holes.
Step 3: Assembly and Finish
-
Initial fit check:
Before baking, gently place the door inside the arch opening to ensure it fits perfectly. Trim any edges if necessary. -
Baking:
Bake the pieces according to your clay manufacturer’s instructions (usually 275°F for 15-30 minutes). Let them cool completely. -
Applying the wash:
Mix a very watery black acrylic paint. Brush it over the entire stone arch, letting it seep into the cracks, then immediately wipe the surface with a paper towel. This highlights the crevices. -
Dry brushing stone:
Dip a dry brush into white paint, wipe off almost all of it, and lightly drag it over the raised surfaces of the stones to make the texture pop. -
Aging the wood:
Apply a dark brown wash to the door planks to deepen the grain lines, giving the wood a weathered, outdoor look. -
Adding organic details:
Mix a dab of green paint or use tiny bits of green clay to sponge ‘moss’ onto the cracks of the stones and the corners of the door. -
Creating vines:
Roll ultra-thin snakes of green clay (or mix green with brown) and twist them delicately over the archway to simulate climbing vines. -
Final assembly:
Glue the door into the archway using strong craft glue or two-part epoxy. If you want the door to actually swing, use small pieces of wire for hinges. -
Sealing:
Coat the entire piece with a matte varnish to protect it from outdoor elements if you plan to place it in a real garden.
Door Won’t Fit?
Clay shrinks slightly baking, but rarely enough to ruin the fit. If the door is too tight after baking, carefully sand the edges with an emery board.
Start scouting the perfect mossy patch in your garden for this charming new gateway
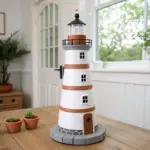
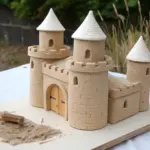
Lanterns and Lamp Posts for Fairy Lighting

Bring a warm, inviting glow to your miniature garden with this charming clay lantern house. Featuring arched windows and a textured faux-stone finish, this handcrafted piece serves as the perfect cozy dwelling for your garden fairies.
Detailed Instructions
Materials
- Polymer clay (white or light beige granite effect)
- Rolling pin or clay machine
- Sharp crafting knife or scalpel
- Square cookie cutter (approx. 2-3 inches)
- Small arch-shaped cutter or template
- Small circular cutter or straw (for roof vents)
- Texture sponge or rough sandpaper
- Thick cardboard or cardstock (for making a template)
- Slip (liquid clay) or scoring tool
- Ruler
- Fine-grit sandpaper
- Battery-operated LED tea light
Step 1: Preparing the Walls and Roof
-
Roll out the clay:
Begin by conditioning your polymer clay until it is pliable. Roll it out into a uniform slab approximately 1/4 inch thick. A consistent thickness ensures the lantern stands sturdily. -
Cut the wall panels:
Using a square cookie cutter or a ruler and craft knife, cut out four identical square panels for the walls of the house. -
Create the roof triangles:
Cut out four triangular pieces for the roof. The base of each triangle should match the width of your wall panels exactly. -
Cut the windows:
On each wall panel, carefully cut out two small arched windows. You can use a tiny cutter or create a paper template to trace around with your knife. Ensure the windows are aligned at the same height on all panels. -
Add window details:
For extra detail, cut thin strips of clay to create a crossbar within each window arch, or simply carve a horizontal line across the opening to simulate window panes. -
Ventilate the roof:
Take your four roof triangles. On two opposite triangles, punch out a pattern of small holes near the peak using a small circular cutter or the end of a straw. This allows light to escape and creates a decorative touch.
Slumping Walls?
If the clay is too soft and the walls bow inward, bake the four wall panels flat first for 10 minutes to stiffen them, then assemble the box with fresh clay and bake again.
Step 2: Assembling the Lantern Structure
-
Texture the surfaces:
Before assembling, gently press a texture sponge or rough sandpaper onto the exterior side of all clay pieces to mimic a porous stone surface. -
Score the edges:
Score the vertical edges of your wall panels with a needle tool and apply a small amount of liquid clay or water (depending on your clay type) to act as glue. -
Build the base:
Join the four wall panels together to form a box. Press the seams firmly but gently from the inside to secure them. I like to use a square block or small box inside to help hold the shape while working. -
Smooth the seams:
Use a clay sculpting tool or your finger to blend the seams on the outside corners so they disappear into the stone texture. -
Assemble the roof:
Join the four roof triangles together separately to form a pyramid. Be sure to reinforce the inside seams so the roof is strong. -
Attach the roof:
Place the roof pyramid onto the assembled wall box. Score and slip the contact points, then smooth the connection between the walls and the roof overhang. -
Final shaping:
Check the entire structure for symmetry. If the clay has slumped, gently reshape the walls and peak.
Step 3: Finishing Touches
-
Create the hanger loop:
Roll a very small coil of clay and attach it to the very peak of the roof to create a tiny loop. This mimics the heavy ring found on real stone lanterns. -
Refine the texture:
Go over any areas where the texture was smoothed out during handling, re-dabbing with your sponge to ensure a uniform stone look. -
Bake the project:
Bake your clay lantern according to the manufacturer’s instructions for the specific brand you are using. Usually, this is at a low temperature for 15-30 minutes. -
Sanding and cleanup:
Once fully cooled, lightly sand the bottom edges so the house sits perfectly flat. Remove any sharp burs from the window cutouts. -
Lighting it up:
Place a battery-operated tea light on your garden surface and set the clay house over it to illuminate the windows.
Mossy Effect
After baking, dab watered-down green acrylic paint into the textured crevices and wipe the surface clean to create an aged, moss-covered stone appearance.
Nestle your new lantern into a bed of soft moss and watch the magic unfold as twilight sets in


What Really Happens Inside the Kiln
Learn how time and temperature work together inside the kiln to transform clay into durable ceramic.
Fairy Garden Benches and Tiny Chairs
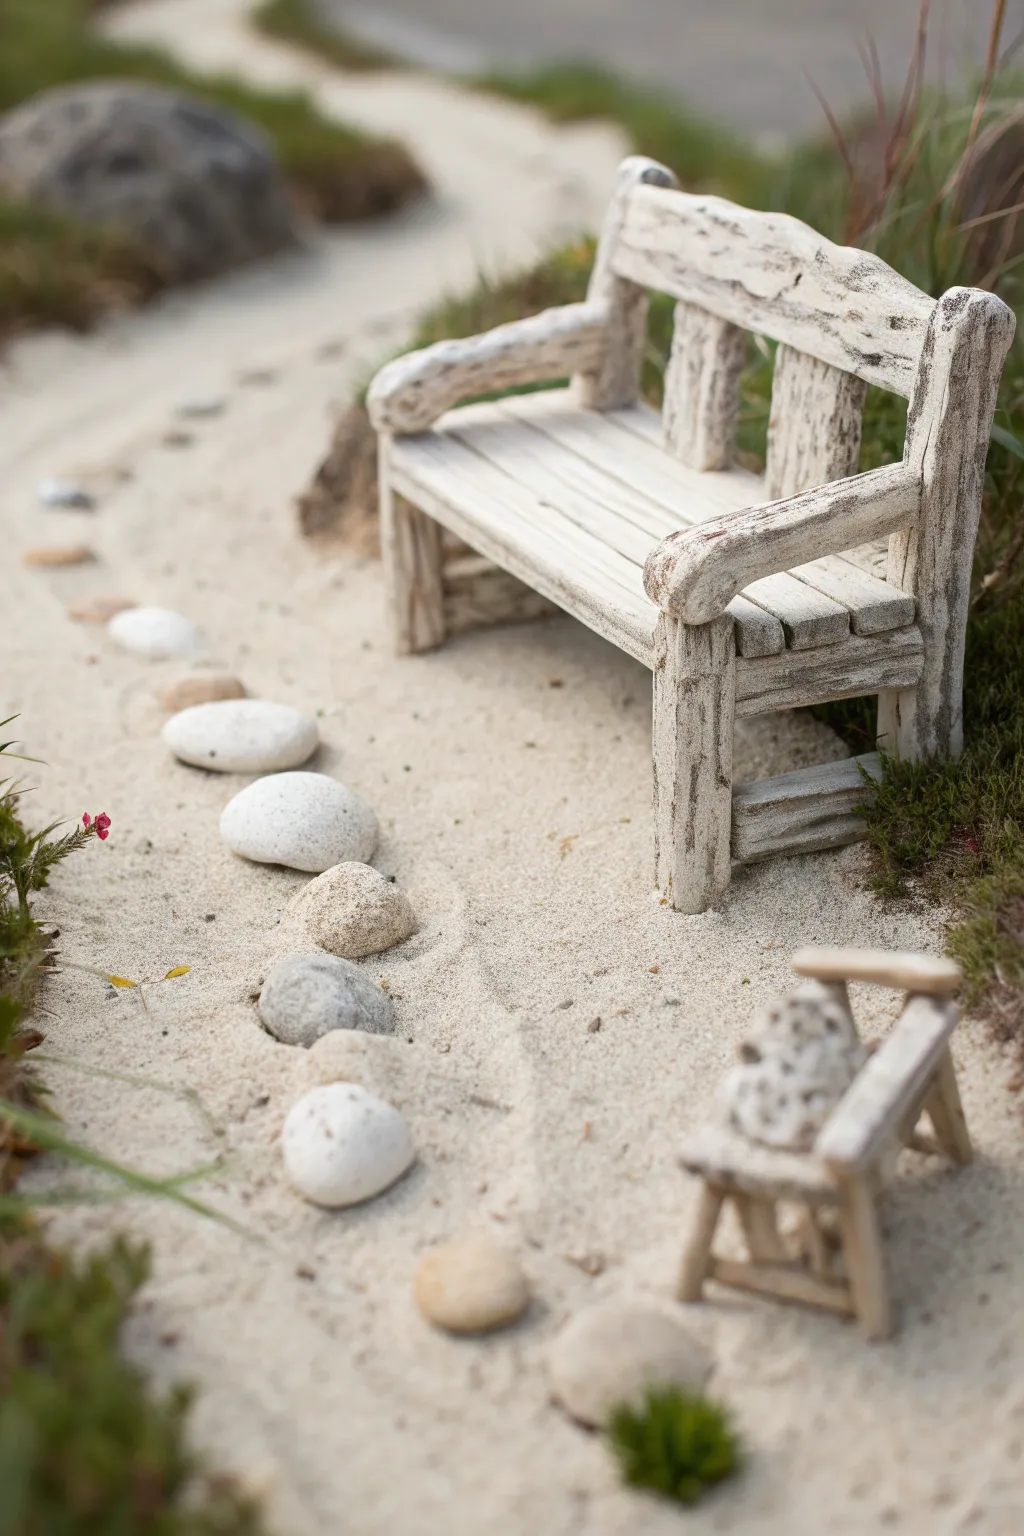
Create a peaceful resting spot for your garden fairies with this charming miniature bench that mimics the texture of sun-bleached driftwood. Using polymer clay and careful texturing, you can craft a piece that looks perfectly weathered and aged by the elements.
Step-by-Step
Materials
- White or beige polymer clay
- Aluminum foil (for armature)
- Sculpting tools or a toothpick
- Wire brush or old toothbrush
- Acrylic paints (white, beige, gray, brown)
- Paintbrushes (fine detail and flat brush)
- Strong craft glue or liquid clay
- Small rolling pin
Step 1: Forming the Structure
-
Prepare the base:
Start by conditioning your clay until it is soft and malleable. Roll out a slab about 1/4 inch thick to serve as the seat of the bench. Cut it into a rectangle approximately 2 inches long and 1 inch deep. -
Texturing the seat:
Before assembling, use a sculpting tool to draw deep, uneven lines lengthwise across the seat slab to simulate individual wooden planks. Don’t worry about being too perfect; wobbly lines add charachter. -
Creating the rough grain:
Take a wire brush or a stiff old toothbrush and press it firmly into the clay surface. Drag it slightly along the grain of your ‘planks’ to create a realistic, splintery wood texture. -
Shaping the backrest:
Roll two small snakes of clay for the vertical back supports and flatten them slightly. Create a top horizontal rail that mimics a natural bent branch. Attach these pieces together on your work surface first. -
Adding texture to the back:
Apply the same wood grain texture to your backrest pieces. For the top rail, use a needle tool to carve deeper cracks and knots, giving it that authentically aged driftwood appearance I love to see in miniatures.
Step 2: Assembly and Baking
-
Making the legs:
Form four stout legs from clay logs. Texture them heavily to look like rough stumps. Make the front two legs slightly taller to accommodate armrests if desired, or keep them equal height to the seat. -
Attaching the seat:
Place the seat slab onto the four legs. Use a small amount of liquid clay or thoroughly blend the seams underneath with a sculpting tool to ensure a secure bond. -
Adding the backrest:
Carefully attach your pre-made backrest assembly to the rear of the seat. You may need to prop it up with a small ball of foil while the clay is soft to keep it from sagging. -
Crafting armrests:
Create two curved, branch-like shapes for armrests. Attach one end to the back support and the other to the top of the front leg, blending the clay at the joints for strength. -
Final detailing:
Go over all joints to make sure they look seamless and organic. Re-apply texture to any areas that got smoothed out during handling. -
The bake:
Bake the piece according to your clay manufacturer’s instructions. Usually, this is around 275°F (135°C) for 15-30 minutes, but check your package. Let it cool completely before painting.
Use Nature’s Tools
Press a real piece of rough bark or a textured stone directly into the raw clay to get an instant, organic surface pattern that looks incredibly realistic.
Step 3: Painting the Weathered Look
-
Base coat:
Paint the entire bench with a base coat of beige or light tan acrylic paint. Ensure you get the paint deep into all the textured crevices. -
The dark wash:
Mix a very watery dark brown or gray paint. Brush this wash over the entire bench and immediately wipe the surface gently with a paper towel. The dark paint will stay in the grooves, highlighting the wood grain. -
Dry brushing white:
Dip a dry, flat brush into white paint and wipe most of it off on a paper towel. Lightly sweep the brush across the raised surfaces of the bench. -
Adding age:
Repeat the dry brushing process with a light gray color, focusing on the edges and corners where ‘wood’ would naturally bleach in the sun. -
Sealing:
Once the paint is fully dry, apply a matte varnish to protect your work from moisture, especially if it will live in a real garden with damp soil.
Clay Too Soft?
If your bench keeps sagging while you build, bake it in stages. Bake the seat and legs first, then attach the backrest and bake again to secure it.
Now your tiny garden visitors have a beautiful, weathered place to sit and enjoy the view
Sweet Little Clay Ladders for Tree Roots
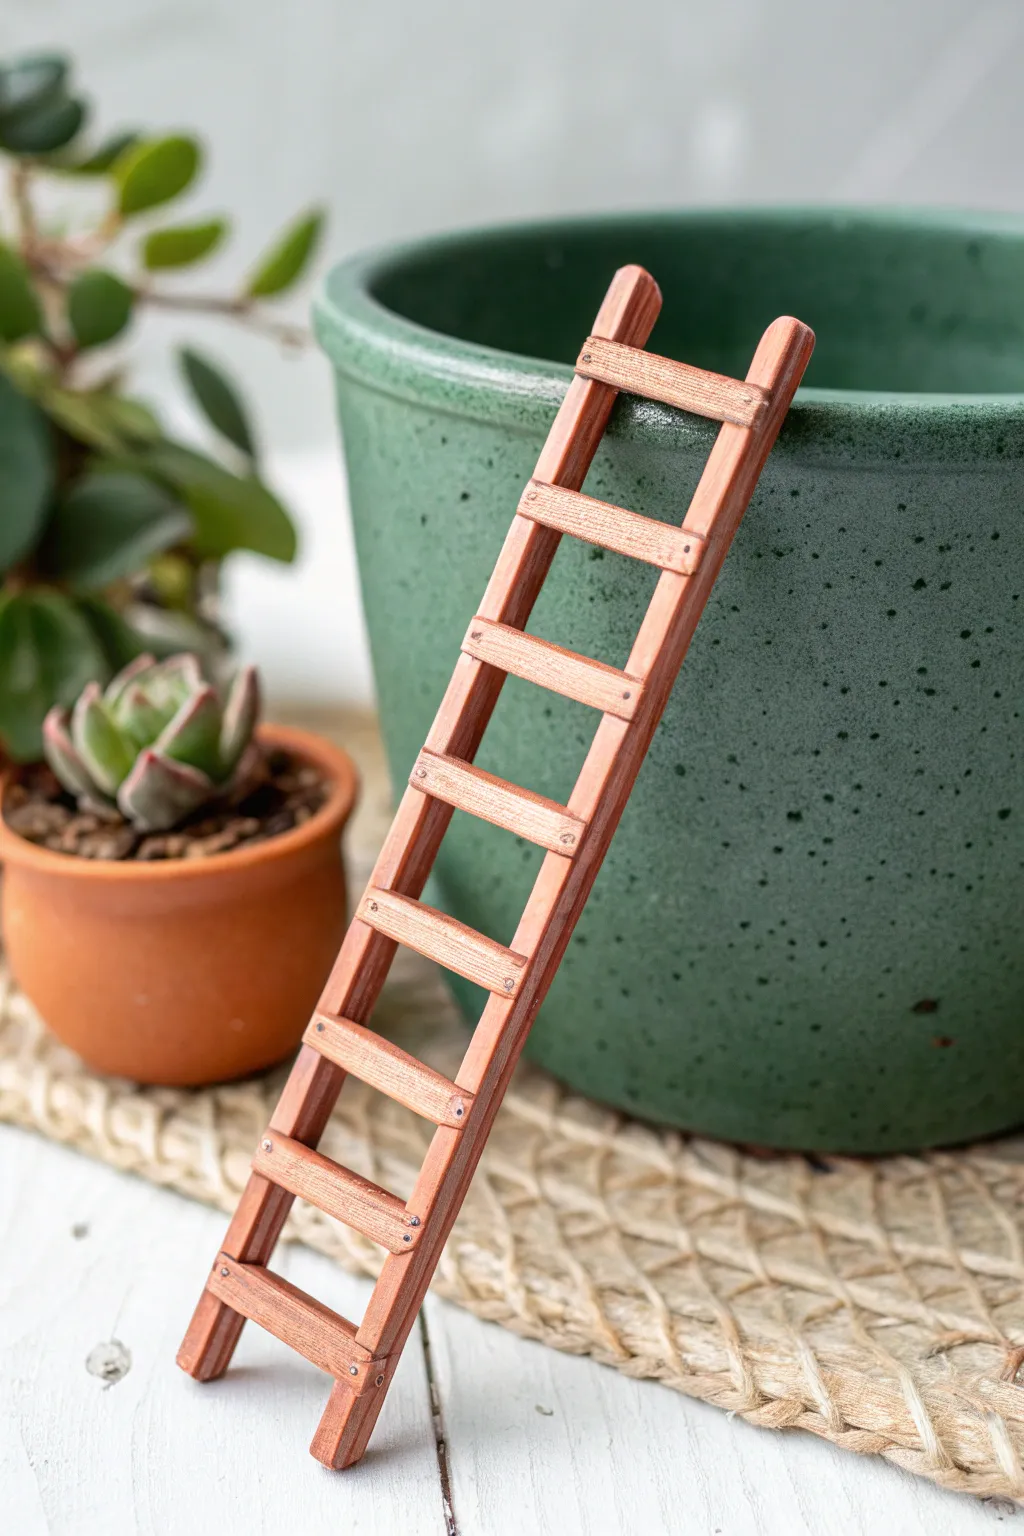
Add vertical interest to your fairy garden with this incredibly realistic miniature ladder that looks just like aged timber. Modeled from durable polymer clay and textured to perfection, it’s the perfect size for leaning against pots or bridging small gaps in your landscape.
How-To Guide
Materials
- Brown polymer clay (medium brown base)
- Acrylic craft paints (dark brown, burnt sienna, black)
- Needle tool or toothpick
- Coarse sandpaper or a stiff bristle brush
- Clay roller or pasta machine
- X-Acto knife or craft blade
- Ruler
- Piece of parchment paper or ceramic tile
Step 1: Prepping the ‘Timber’
-
Condition the Clay:
Begin by kneading your brown polymer clay until it is soft and pliable. If the clay is too stiff, add a drop of clay softener or baby oil to make it workable. -
Roll the Rails:
Roll out a slab of clay to approximately 1/8 inch thickness. Using your craft blade and ruler, cut two long strips about 5-6 inches long and 1/4 inch wide. These will be the vertical rails of your ladder. -
Cut the Rungs:
From the same slab, cut 8-10 shorter strips for the rungs. They should be slightly narrower than the rails, perhaps 3/16 inch wide, and about 1.5 inches long. -
Add Wood Texture:
Before assembling, create the wood grain effect. Take your coarse sandpaper or stiff brush and press it firmly into all surfaces of the clay strips to create tiny scratches. -
Deepen the Grain:
For more pronounced grain lines, lightly drag a needle tool down the length of the strips in wobbly, parallel lines. Vary the pressure to make it look organic rather than manufactured.
Fixing Warped Rails
If your ladder comes out of the oven slightly bent, reheat it with a hairdryer until warm, press it flat under a heavy book, and let it cool completely.
Step 2: Assembly & Detailing
-
Position the Rails:
Lay the two long rails parallel on your baking surface (parchment paper or tile), spacing them about 1.25 inches apart. Ensure they are straight. -
Attach the Rungs:
Place the short rungs across the rails, starting from the bottom and working up. Space them evenly, leaving about 1/2 inch between each rung. -
Secure the Joints:
Gently press down where the rungs overlap the rails. You don’t want to squash the texture, but you need the clay to bond. I find a tiny dot of liquid polymer clay or ‘Bake & Bond’ here ensures they never pop off later. -
Trimming Edges:
If the rungs overhang the rails messily, use your blade to trim them flush with the outside edge of the vertical rails for a clean carpentry look. -
Add Nail Holes:
Using the tip of your needle tool, poke two tiny holes at each connection point where the rung meets the rail. This mimics the nails used in real wooden ladders. -
Final Shape Check:
Give the ladder a final inspection. If the rails bowed during assembly, use the side of your ruler to gently push them back into straight lines.
Mossy Accents
For an aged garden look, dab tiny bits of glue in the corners of the rungs and sprinkle on fine faux turf powder or green flocking to simulate moss growth.
Step 3: Finishing Touches
-
Bake the Clay:
Bake the ladder according to your specific clay package’s instructions—usually around 275°F (135°C) for 15-20 minutes. Let it cool completely before moving to the next step. -
Apply a Dark Wash:
Mix a small amount of dark brown and black acrylic paint with water until it’s thin and runny. Brush this liberally over the entire ladder. -
Wipe Back:
Immediately wipe the paint off with a paper towel or rag. The dark paint will stay stuck in the texture lines and nail holes you created, while the raised areas remain lighter. -
Dry Brushing:
Dip a dry brush into a tiny bit of burnt sienna or a lighter tan paint. Wipe most of it off on a paper towel, then lightly whisk it over surface to highlight the ‘wood’ edges. -
Seal (Optional):
If your ladder acts as a plant trellis and will be exposed to moisture, coat it with a matte outdoor varnish to protect the paint job.
Prop your finished ladder against a pot to create a charming pathway for the tinier inhabitants of your garden

TRACK YOUR CERAMIC JOURNEY
Capture glaze tests, firing details, and creative progress—all in one simple printable. Make your projects easier to repeat and improve.
Chubby Frog Guardian by the Pond Corner
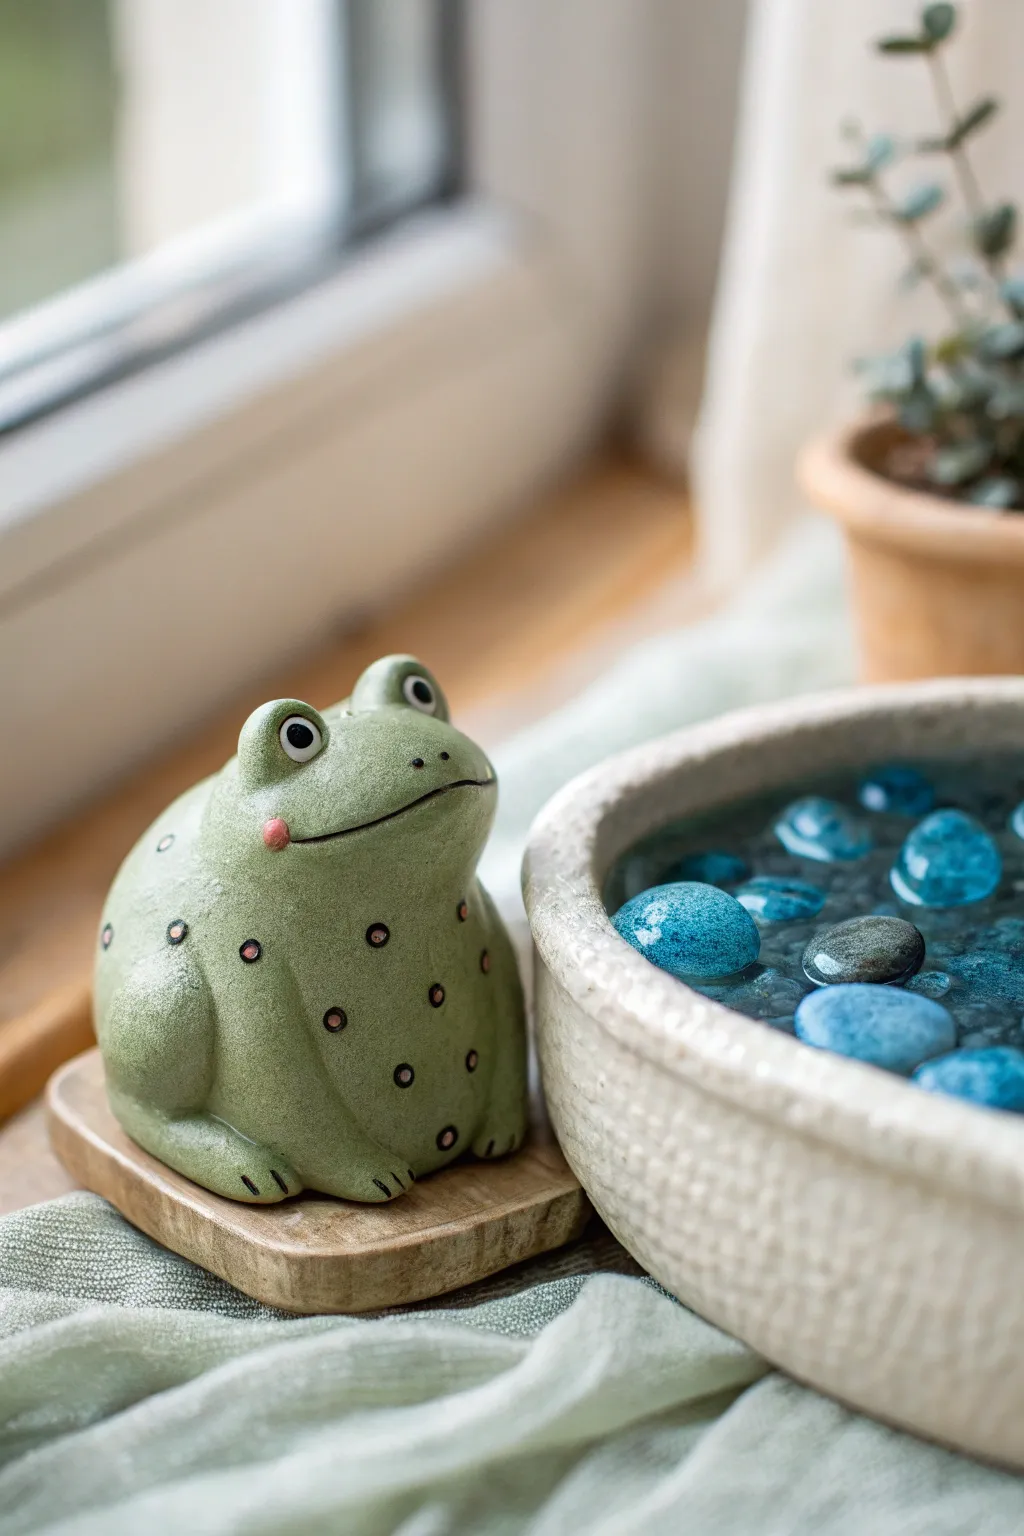
Sculpt a delightfully round amphibian friend to watch over your miniature pond setup. With its speckled skin and cheerful expression, this polymer clay creation adds a touch of whimsy to any windowsill fairy garden.
How-To Guide
Materials
- Polymer clay (Sage Green for body, Black for eyes, Pink for cheeks)
- Acrylic paint (Black, Brown, White)
- Small square wooden coaster or scrap wood
- Clear matte varnish
- Sculpting tools (ball styluses, needle tool, rubber shapers)
- Aluminum foil (for armature)
- Detail brush (size 00 or 000)
- Oven for baking
Step 1: Sculpting the Base Form
-
Prepared the Core:
Crumple a small piece of aluminum foil into a tight ball about the size of a golf ball. Compressing this tightly helps save clay and prevents thick areas from cracking during baking. -
Condition the Clay:
Take your sage green polymer clay and knead it thoroughly until it is soft and pliable. Roll it into a smooth sheet about 1/4 inch thick. -
Cover the Armature:
Wrap the green clay sheet around your foil ball. Smooth the seams completely by rubbing them gently with your thumb until you have a seamless, slightly pear-shaped lump. -
Refine the Shape:
Gently press the clay form onto your work surface to flatten the bottom so it sits stable. Push the top in slightly to create a subtle separation between the head and the body, keeping it very chubby.
Step 2: Adding Frog Fearures
-
Form the Legs:
Roll two thick logs of green clay for the hind legs. Press them onto the sides of the body, blending the upper edges into the torso while leaving the rounded thigh shape distinct. -
Create the Front Feet:
Attach two smaller sausage shapes to the front of the body for the forelegs. Use a rubber shaper to blend the tops into the chest area seamlessly. -
Detail the Toes:
Using a needle tool or a small knife, gently press three indentations into the bottom of each foot to suggest toes. Don’t cut all the way through; just make distinct lines. -
Make the Eye Prominences:
Roll two small balls of green clay and place them on top of the head. Blend the bottom edges downwards onto the scalp so they look like hills rather than stuck-on marbles. -
Add the Eyes:
Press a small indentation into each eye hill with a ball tool. Insert a tiny ball of white clay, followed by a smaller black pupil in the center. Add a microscopic dot of white for a highlight. -
The Smile:
Use a needle tool or the edge of a clay knife to carve a wide, gentle curve for the mouth. Slightly deepen the corners to ensure a happy expression. -
Cheeky Details:
Take a tiny amount of pink clay, flatten it into a small disk, and press it gently onto the cheek area right at the corner of the smile.
Clay Cracking?
If you see cracks after baking, fill them with a mix of liquid clay and regular clay, smooth it out, and re-bake for a short time.
Step 3: Finishing Touches
-
Add Texture:
Before baking, lightly tap the entire surface of the frog with a stiff bristle brush or a piece of crumpled foil to give the skin a natural, stone-like texture. -
Bake the Piece:
Bake the frog according to your clay manufacturer’s instructions (usually 275°F/135°C for 15-30 minutes). Let it cool completely in the oven. -
Paint the Spots:
Using a fine detail brush and brown acrylic paint, carefully paint small, open circles scattered across the body. These imitate the decorative speckles seen in the reference. -
Fill the Spots:
Once the brown rings are dry, I like to mix a slightly lighter pink-beige tone and fill inside the rings for a dimensional look. -
Seal the Work:
Apply a coat of clear matte varnish over the entire frog to protect the paint and give it a finished ceramic appearance. -
Prepare the Base:
Sand the edges of your small wooden coaster to soften them. If you don’t have a coaster, a slice of driftwood or a flat river stone works perfectly. -
Final Assembly:
Use a strong adhesive like E6000 to glue the finished frog securely to the wooden base. Place him next to your water bowl fairy garden feature.
Level Up: Water Effect
Coat the frog’s back with UV resin instead of matte varnish to make him look freshly emerged from the pond.
Now your little green guardian is ready to peacefully supervise your fairy garden pond
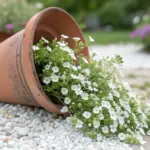
Mini Flower Stakes and Giant Fairy Blooms
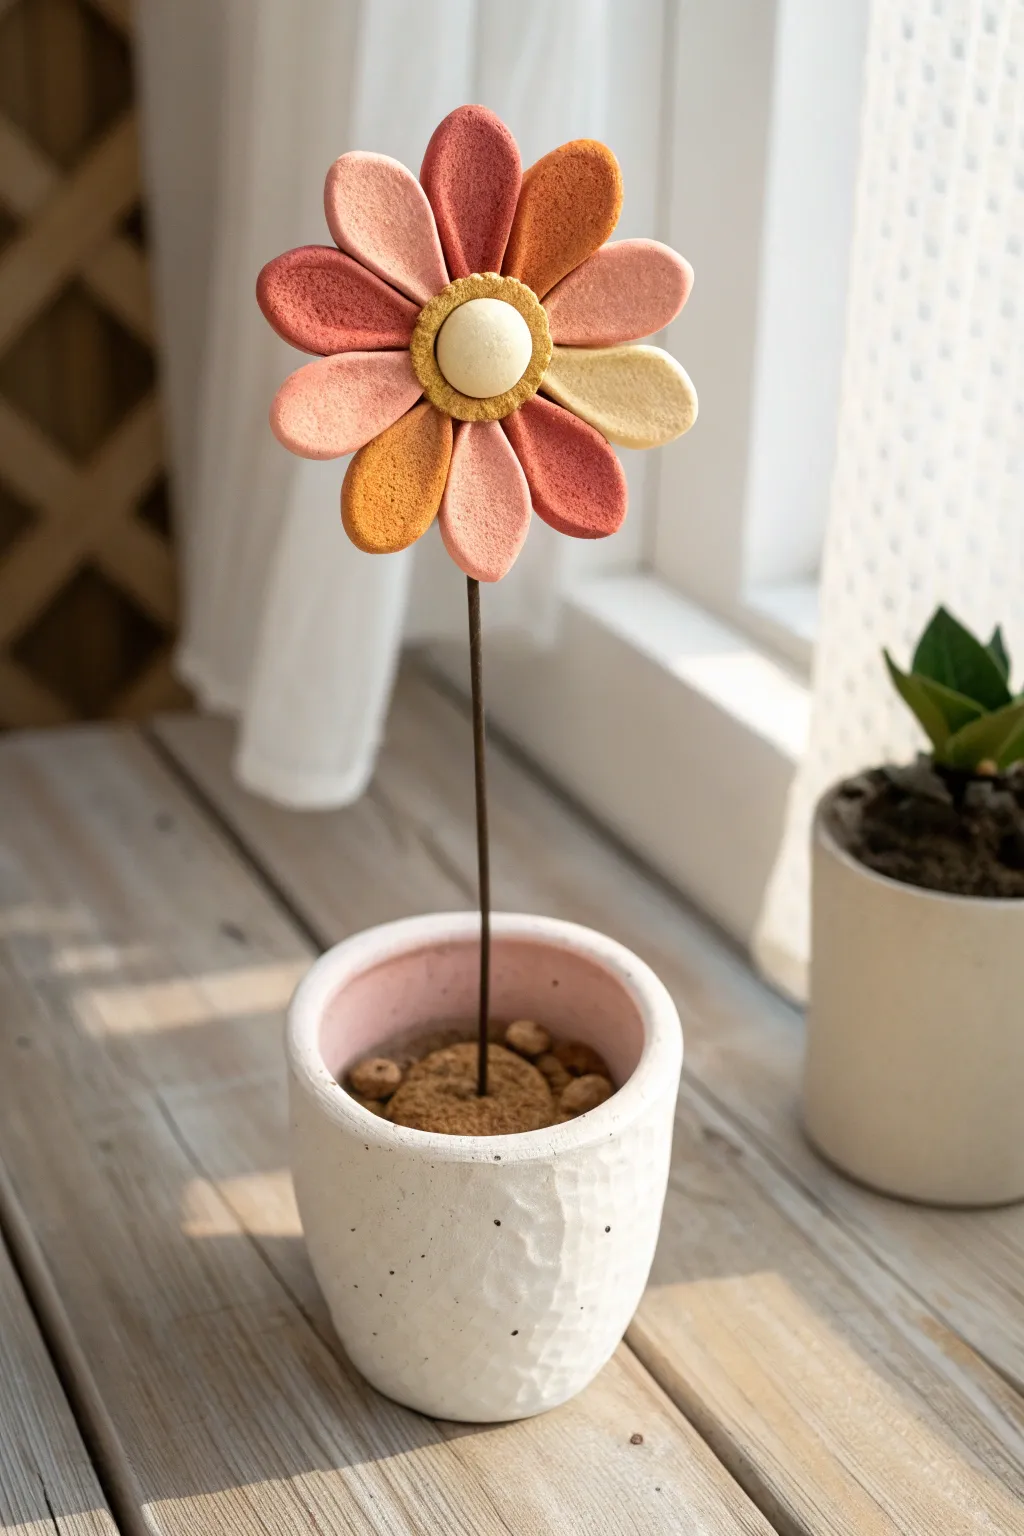
Bring a touch of everlasting spring to your fairy garden or windowsill with this delightful clay flower stake. Featuring textured petals in warm sunset gradients and a simple potting method, it’s the perfect cheerful accent piece.
Step-by-Step
Materials
- Polymer clay (shades: terracotta, coral, peach, cream, mustard yellow)
- Floral wire (18-gauge or similar thick wire)
- Small textured sponge or toothbrush (for texture)
- Small rolling pin or acrylic roller
- Circle cutters (various sizes) or a craft knife
- Liquid polymer clay or bake formatting glue
- Small white ceramic or clay pot
- Floral foam or Styrofoam block (to fit inside pot)
- Dried coffee grounds or brown decorative sand (for ‘dirt’)
- Wire cutters
- Oven for baking
Step 1: Shaping the Petals
-
Prepare your palette:
Begin by conditioning your polymer clay blocks. You want a harmonious gradient, so if necessary, mix your terracotta with a bit of white to create softer coral and peach shades. You’ll need about four distinct warm tones for the petals. -
Roll the clay:
Roll out each color of clay to an even thickness, approximately 1/4 inch thick. You want them substantial enough to hold their shape but not too heavy. -
Cut the shapes:
Cut out teardrop shapes for the petals. You will need roughly 8-9 petals total. I vary the petal colors so no two identical shades are next to each other. -
Soften the edges:
Using your fingertips, gently smooth the cut edges of each petal to remove any sharp angles, giving them a soft, organic look. -
Add texture:
This is crucial for that ‘sugared’ look in the photo. Gently press a clean, textured sponge or an old toothbrush over the surface of each petal to create a porous, stone-like texture.
Drooping Petals?
If petals sag while raw, prop them up with crumpled aluminum foil or cornstarch piles during baking. This supports the shape until the clay hardens in the oven.
Step 2: Assembling the Flower Head
-
Create the center base:
Roll a small ball of mustard yellow clay and flatten it into a thick disk about the size of a quarter. This will be the back plate where petals attach. -
Attach the petals:
Arrange your petals in a circle on top of the yellow disk, pressing the narrow ends into the center. Use a dot of liquid polymer clay for extra adhesion. -
The center detail:
Create a second, slightly smaller yellow disk and texture it heavily. Place this over the joined petal tips. -
The final focal point:
Roll a smooth, round ball of cream-colored clay. Press this firmly into the very center of your yellow textured disk. -
Insert the stem:
Cut your floral wire to your desired height (about 6-8 inches). Poke a hole into the bottom of the flower assembly while the clay is still raw, then remove the wire for baking. This ensures a perfect fit later.
Step 3: Baking and “Planting”
-
Bake the flower:
Place your flower on a parchment-lined baking sheet. Bake according to your specific clay package instructions (usually 275°F for 15-30 minutes). Let it cool completely. -
Secure the stem:
Once cool, dip the tip of your wire into super glue or strong craft adhesive and re-insert it into the pre-made hole in the flower head. -
Prep the pot:
Cut a piece of floral foam to fit snugly inside your small white pot. It should fill the pot almost to the rim. -
Plant the flower:
Push the wire stem firmly into the center of the foam. Adjust the angle so the flower faces forward slightly. -
Add the soil:
Brush a layer of craft glue over the top of the floral foam. Generously sprinkle dried coffee grounds or brown sand over the glue to completely conceal the foam. -
Add final details:
For extra realism, you can glue a few tiny clay pebbles or rocks onto the ‘soil’ surface around the base of the stem.
Make it Sparkle
Before baking, lightly brush the textured petals with mica powder or crushed pastel chalks to highlight the sponge texture and add subtle dimension.
Now you have a charming, permanent bloom that requires absolutely no watering
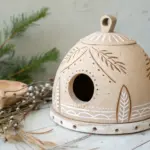
Acorn-Style Birdhouses With Clay Details
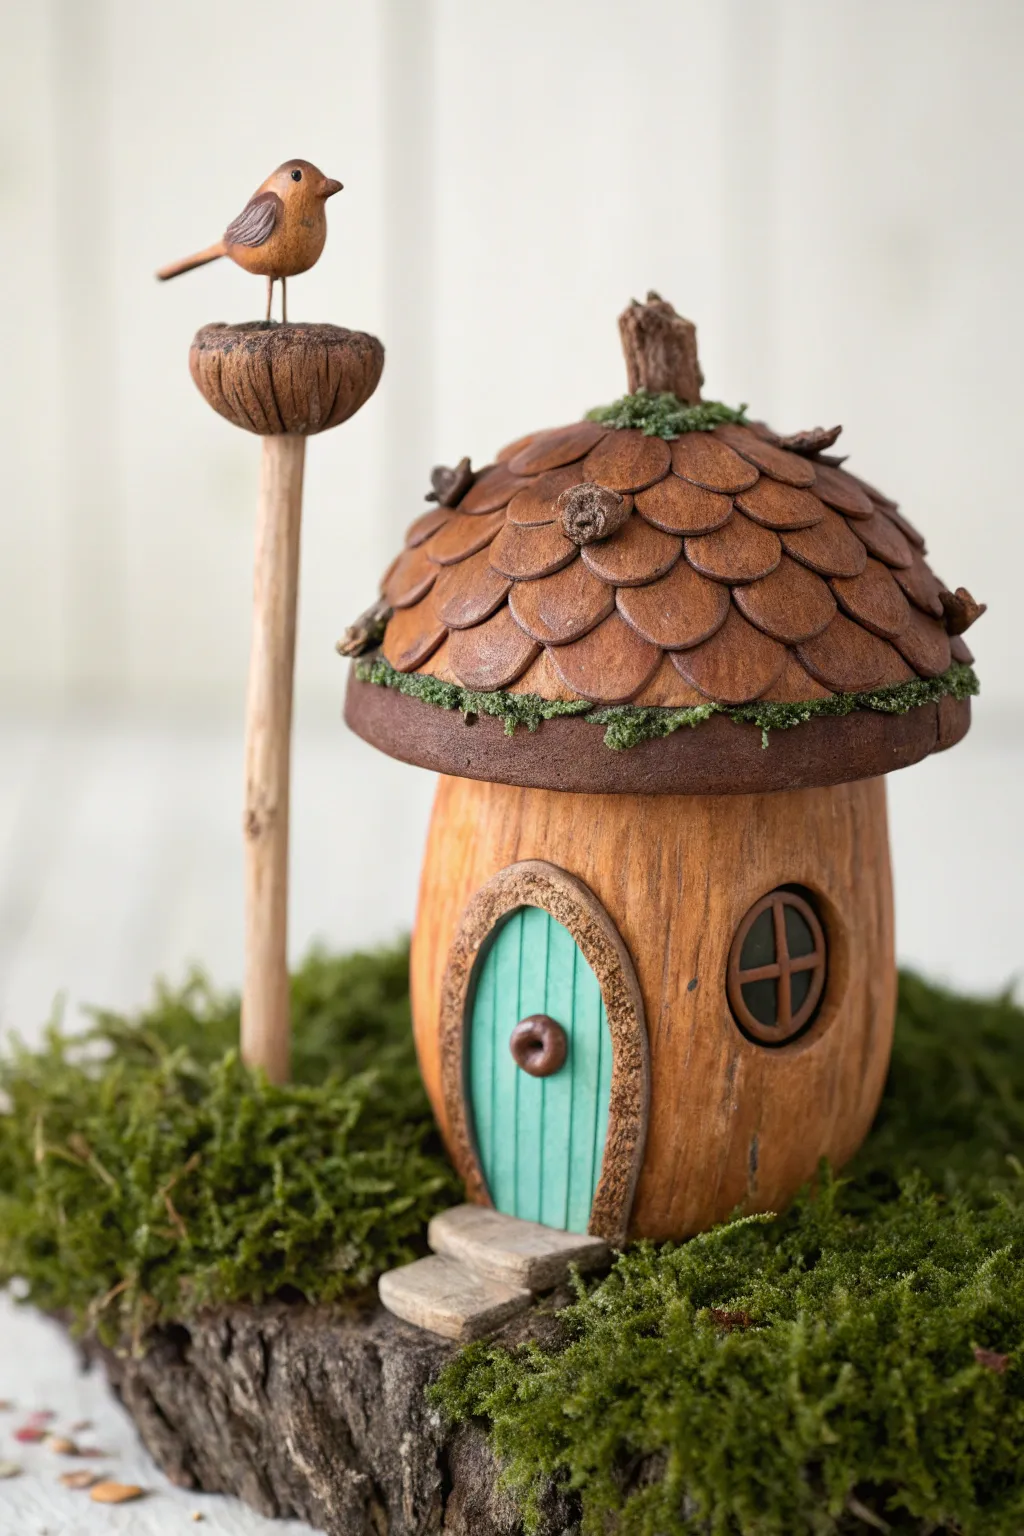
Transform simple materials into a magical woodland dwelling that looks like a giant acorn nestled in moss. This miniature house features a textured clay roof, a faux-wooden body, and a sweet little bird perched high on a lookout post.
Step-by-Step Guide
Materials
- Polymer clay (terracotta, brown, tan, green, teal)
- Aluminum foil (for the core)
- Wooden dowel (approx. 1/4 inch thick)
- Wooden block or thick bark slice (for the base)
- Textured rolling pin or coarse sandpaper
- Sculpting tools (needle tool, ball stylus)
- Preserved moss
- Acrylic paints (browns, black wash)
- Strong craft glue (e.g., E6000) or hot glue
- Matte varnish
Step 1: Forming the Base Structure
-
Create the core:
Crumple a large ball of aluminum foil into an elongated oval shape, flattening the bottom so it stands upright securely. This saves clay and keeps the house lightweight. -
Cover the body:
Condition tan or light brown polymer clay and roll it into a sheet about 1/4 inch thick. Wrap this sheet fully around your foil core, trimmed at the top where the cap will go. -
Add wood texture:
Use a needle tool or a stiff brush to drag long, vertical lines down the clay body. Vary the pressure to mimic deep wood grain grooves. -
Apply a wash:
To enhance the ‘wood’ look before baking, I like to brush on a very thin layer of dark brown pastel powder or diluted acrylic paint into the grooves, wiping away the excess on the surface.
Step 2: Sculpting the Acorn Cap Roof
-
Shape the cap base:
Roll a thick disk of dark brown clay and place it on top of your house body. Mold it downwards slightly to create an overhang, smoothing the underside against the walls. -
Make the shingles:
Roll out a sheet of terracotta or reddish-brown clay. Use a small round cutter or a knife to cut many small semi-circles for the roof scales. -
Layer the roof:
Starting at the bottom edge of the roof cap, press the scales onto the dark brown base, overlapping them as you work your way up toward the center peak. -
Add the stem:
Form a small, twisted stump from dark brown clay. Texture it heavily with a needle tool to look like old bark and attach it firmly to the very top center of the roof. -
Mossy details:
Press bits of green clay along the transition line where the roof meets the house body, using a needle tool to stipple it for a mossy texture.
Natural Texture Hack
Use a real crumpled ball of aluminum foil to press texture onto the acorn cap shingles. It gives a perfectly organic, non-uniform surface.
Step 3: Adding Charming Details
-
Create the door frame:
Roll a thin snake of brown clay and flatten it into an oval shape on the front of the house. Use a piece of coarse sandpaper or a rock to press a rough texture into this frame. -
Insert the door:
Cut a teal or mint green slab of clay to fit inside your frame. Use a knife to score vertical plank lines and add a tiny brown ring for a doorknob. -
The round window:
Press a small circle of dark clay onto the side of the house. Frame it with a thick brown clay ring and add a cross shape for the window panes. -
Sculpt the steps:
Form two small rectangular slabs from grey or beige clay to look like stone steps. Attach these directly below the front door.
Glaze Trouble?
If your varnish looks sticky or milky, you likely applied it too thick. Apply multiple ultra-thin coats, letting each dry fully, for a clear finish.
Step 4: The Bird Lookout & Assembly
-
Make the bird perch:
Take a small ball of brown clay and form a shallow cup shape. Texture the outside vertically to match the main roof. Insert your wooden dowel into the bottom of this cup. -
Sculpt the bird:
Create a tiny teardrop shape for the body and a smaller sphere for the head using brown clay. Add a tiny beak and attach wire legs if desired, then place it on the perch. -
Bake everything:
Bake the main house and the bird-on-dowel structure separately according to your clay package instructions. Let them cool completely. -
Base assembly:
Glue natural moss liberally over your wooden base or bark slice. Nestle the finished house into the moss bed. -
Final touch:
Drill a small hole in the base next to the house (or glue directly) to secure the wooden dowel post, standing tall beside the acorn home.
Now you have a cozy, textured dwelling ready to welcome the tiniest garden inhabitants
Mini Veggie Patch With Baskets and Tools
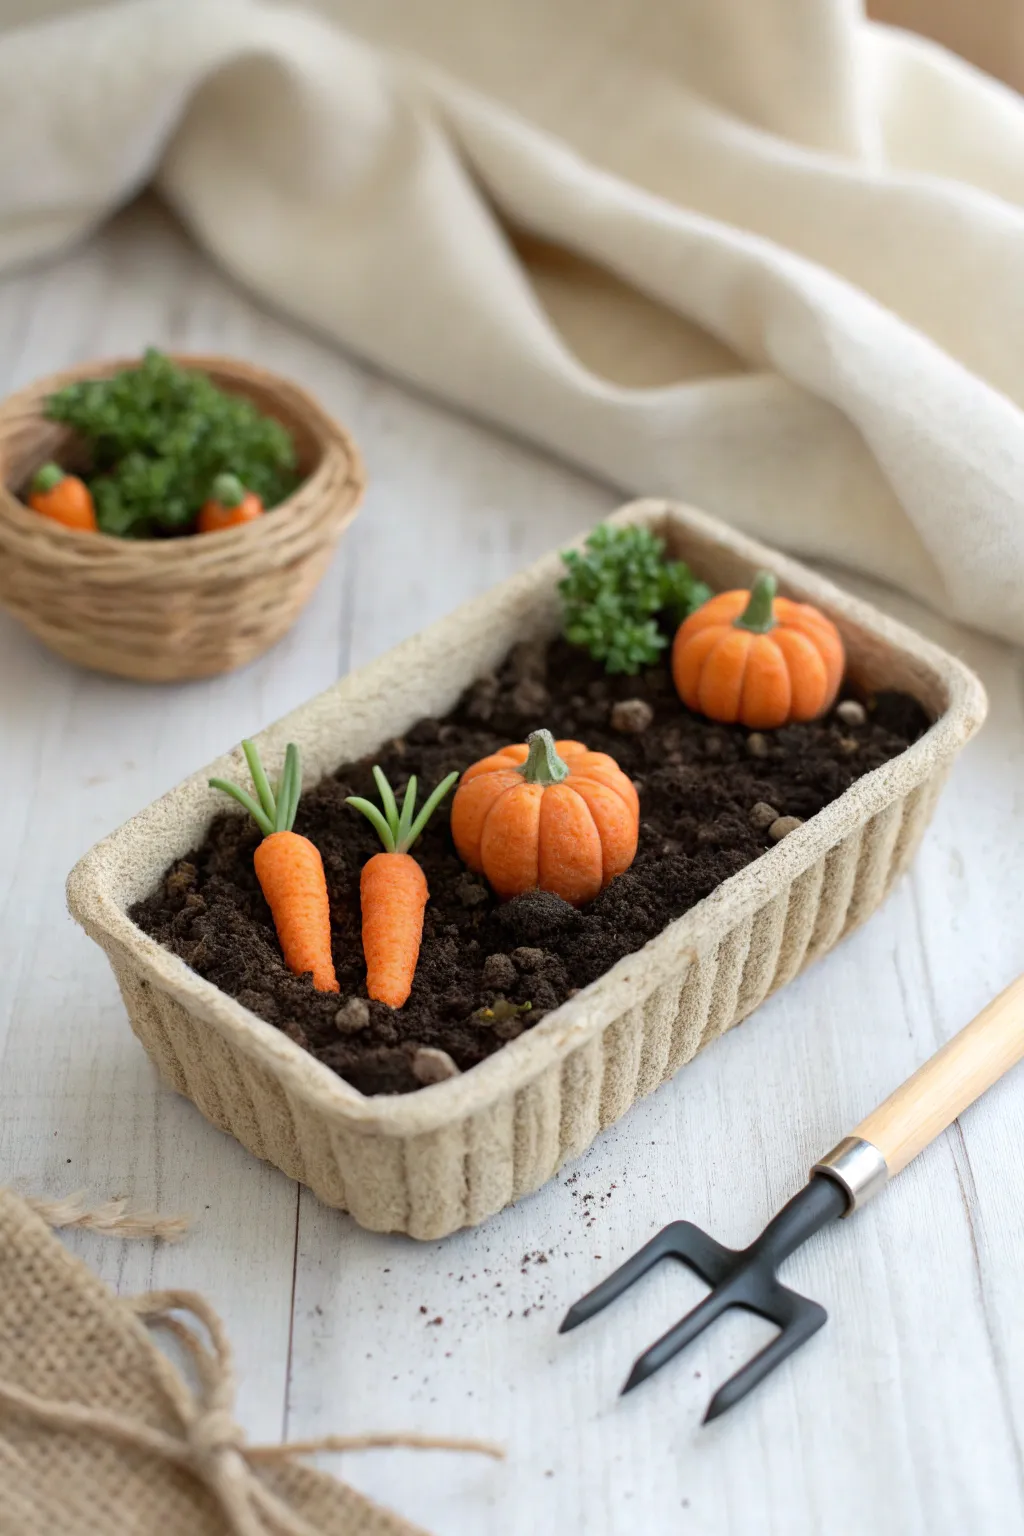
Bring the charm of an autumn harvest into your fairy garden with this adorable, realistic vegetable patch. Featuring tiny textured pumpkins and carrots nestled in faux soil, this project adds a vibrant pop of color and storytelling to any miniature scene.
Step-by-Step Tutorial
Materials
- Polymer clay (orange, green, light brown/beige)
- Textured tool (sandpaper, stiff toothbrush, or dedicated clay texturing tool)
- Needle sculpting tool
- Dried coffee grounds or dark brown tea leaves
- Tacky glue or PVA glue
- Pastel chalks (deep orange, brown) for shading
- Small paintbrush
- Rectangular cardboard mold or thick cardstock
- Brown acrylic paint
- Miniature garden fork (optional prop)
Step 1: Crafting the Planter Box
-
Form the Base:
Start by creating a rectangular shape using your light brown polymer clay. You can either sculpt a solid block and hollow it out, or roll out slab sheets to build a box structure. Aim for a size about 3 inches long by 1.5 inches wide. -
Add Texture:
To mimic the look of a biodegradable fiber pot, press a piece of coarse sandpaper or a stiff toothbrush against the exterior clay. Do this before baking while the clay is soft. -
Create Ribbing:
Use the side of a needle tool or a dull knife to gently press vertical indentations along the sides of the planter, creating a ribbed effect. -
Pre-Bake:
Bake the customized planter box according to your clay package instructions to set the shape before filling it.
Loose Soil?
If your coffee grounds keep falling off after drying, spray the finished ‘dirt’ surface with a matte fixative or a watered-down layer of matte Mod Podge to seal it all in tight.
Step 2: Sculpting the Vegetables
-
Shape the Pumpkins:
Roll small balls of orange clay, about the size of a marble. Flatten them slightly at the top and bottom to create a squat, pumpkin shape. -
Detail the Pumpkins:
Using a needle tool, press vertical lines from the top center down to the bottom to create the segments. Soften the ridges with your finger so they look organic, not sharp. -
Add Stems:
Roll a very tiny snake of green clay. Attach a small segment to the center of each pumpkin, blending the clay at the base slightly for a natural connection. -
Form the Carrots:
Roll orange clay into small tapered cones. I like to make them slightly irregular so they look like homegrown root vegetables. -
Texture the Roots:
Gently roll the carrot cones over rough sandpaper or lightly scratch horizontal lines with a tool to give them a realistic, rough skin texture. -
Create Carrot Tops:
Extrude or roll tiny green snakes for the foliage. Cluster 3-4 strands together and attach them firmly to the top of each carrot. -
Shade with Pastels:
Before baking, use a brush to dust a little brown pastel chalk into the crevices of the pumpkins and the texture of the carrots to create depth and an earthy look. -
Final Bake:
Bake all your vegetable pieces. Since they are small, keep a close eye on the oven to prevent scorching.
Weathered Look
Dry-brush a tiny amount of white or grey acrylic paint onto the raised ribs of the fiber pot. This highlights the texture and makes it look sun-bleached and aged.
Step 3: Assembly & Soil
-
Prepare the Bedding:
Fill your baked planter box with a scrap piece of clay or foil to bulk up the bottom, leaving about a half-inch of space at the top. -
Apply Adhesive:
Coat the top of the filler material generously with tacky glue. This needs to be thick enough to hold your ‘soil’ texture. -
Add the Earth:
Sprinkle dried coffee grounds or dark tea leaves onto the glue. Press them down gently to ensure they adhere, covering the entire surface. -
Plant the Veggies:
While the glue is still wet, nestle your pumpkins on top of the soil. For the carrots, use a tool to poke a small hole through the grounds and glue the carrot tip inside so it looks like it’s emerging from the dirt. -
Add Greenery:
If desired, tuck small bits of preserved moss or green clay scraps near the pumpkins to simulate vines or leaves. -
Final Touches:
Allow the glue to dry completely (often overnight) before displaying. Place the miniature fork nearby to complete the hardworking gardener aesthetic.
Your miniature garden now has a bountiful harvest ready to be admired.
Mason Jar Fairy House Facade
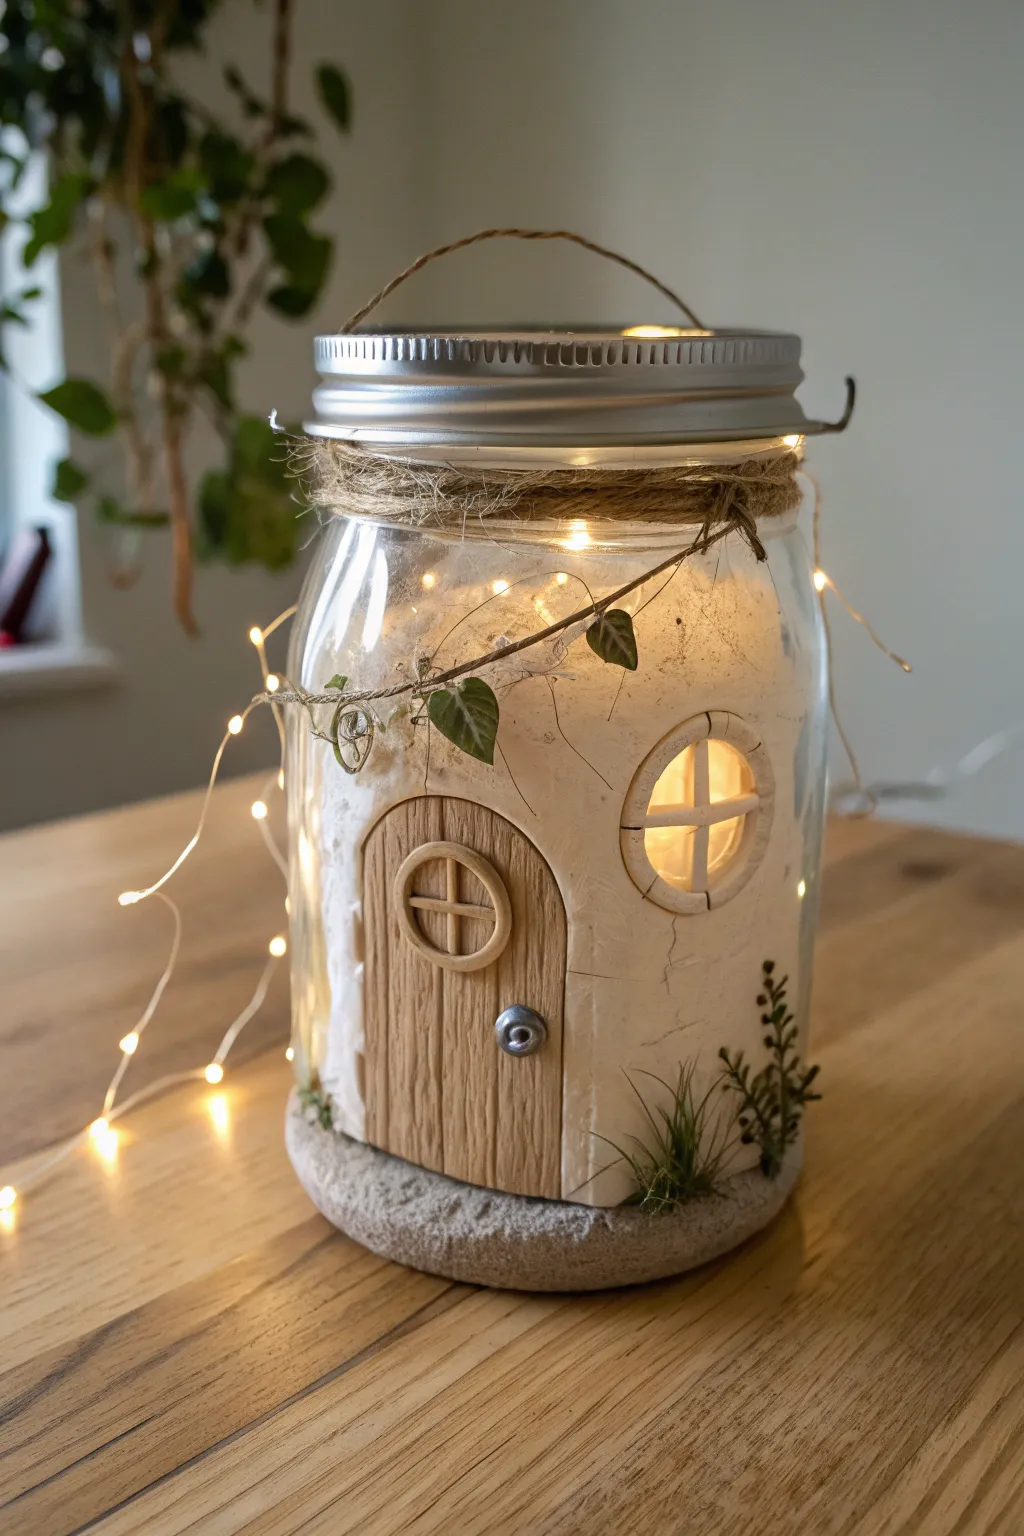
Transform a simple mason jar into an enchanting, glowing fairy dwelling using clay. This project features a rustic facade with a textured wooden door and warm interior lighting, perfect for a cozy nightlight or garden accent.
Detailed Instructions
Materials
- Large, wide-mouth mason jar with lid
- Air-dry clay (white or light grey)
- Acrylic paints (browns, creams, stone grey)
- Battery-operated LED wire fairy lights (warm white)
- Rolling pin
- Clay sculpting tools (needle tool, small knife)
- Texture tools (toothbrush or sandpaper)
- Strong craft glue or E6000
- Faux moss and tiny artificial greenery vines
- Twine or jute string
- Small piece of clear plastic (from packaging) for windows
- Silver bead or brad (for doorknob)
Step 1: Preparing the Base Structure
-
Clean the jar:
Start by thoroughly washing and drying your mason jar to ensure the clay adheres properly to the interior glass surface. -
Insert the lights:
Before sculpting, coil the fairy lights inside the jar. Tape the battery pack to the underside of the lid so it’s hidden but accessible. Let the wire lights fill the space naturally behind where the facade will sit. -
Create the rough shape:
Roll out a slab of air-dry clay about 1/4 inch thick. Cut it into a rectangular shape that will fit inside the jar, curving slightly to mimic the jar’s wall. This will be the main wall of your cottage.
Clay Cracking?
If the clay cracks while drying inside the jar, fill the cracks with a paste made of clay scraps and water, then smooth it out before painting.
Step 2: Sculpting the Details
-
Carve the openings:
Using a knife tool, cut out an arched doorway and a circular window opening from your clay slab. Keep the cutout pieces; you’ll modify the door piece to create the actual door. -
Texture the walls:
Gently press a toothbrush or crumpled foil onto the surface of the wall slab to give it a rough, stucco-like texture. Smooth the edges of your window and door frames with a little water. -
Create the wooden door:
Take the arched clay piece you cut out earlier. Use a needle tool to score deep vertical lines to resemble wood planks. Add shorter, lighter scratches for wood grain texture. -
Add door features:
Sculpt a small circular window frame for the upper part of the door. Use thin strips of clay to create a cross within the circle. Press a small silver bead or brad into the clay to serve as the doorknob. -
Make the main window:
Roll thin snakes of clay to create a crossbar for the main circular window opening on the wall. Attach these securely to the inside edges of the circle. -
Dry fit and curve:
Carefully place the wet clay slab inside the jar to ensure it fits the curve. I find it safest to let the clay dry while inside the jar so it retains the correct shape, but be careful not to trap it if the opening is narrow.
Step 3: Assembly and Painting
-
Dry the clay:
Allow all clay components to dry completely according to the package instructions (usually 24-48 hours depending on thickness). -
Paint the door:
Paint the door with a base of medium brown. Once dry, dry-brush a lighter tan over the raised wood grain texture to highlight the details. -
Paint the walls:
Paint the wall section a creamy off-white or light stone color. Keep the application slightly uneven to enhance the rustic, aged look. -
Install window glazing:
Cut small pieces of clear rigid plastic slightly larger than your window openings. Glue these to the back of the clay wall and door to create ‘glass’ panes. -
Final assembly:
Apply strong glue to the back edges of your clay facade. Carefully insert it into the jar and press it against the front glass. Ensure the fairy lights are positioned behind it to shine through the windows.
Frosted Effect
Spray the clear plastic window pieces with a matte sealer before gluing them in. This diffuses the LED light for a softer, glowing effect.
Step 4: Finishing Touches
-
Create the floor:
Mix a small amount of clay with sand or paint it grey to create a stone base. Press this into the bottom of the jar in front of the door to anchor the scene. -
Add greenery:
Glue tiny sprigs of faux plants and moss around the base of the house and draping over the door frame to make it look overgrown and lived-in. -
Hang the vine:
Take a delicate strand of faux vine and drape it across the front of the clay facade. Secure it with tiny dots of glue so it looks like it’s creeping across the wall. -
Decorate the lid:
Wrap jute twine around the neck of the jar several times and tie it off. You can also add a wire handle to the lid for a lantern effect.
Place your jar on a shelf and watch the warm light bring your miniature world to life
Hidden Tree-Trunk Door for Outdoor Nooks
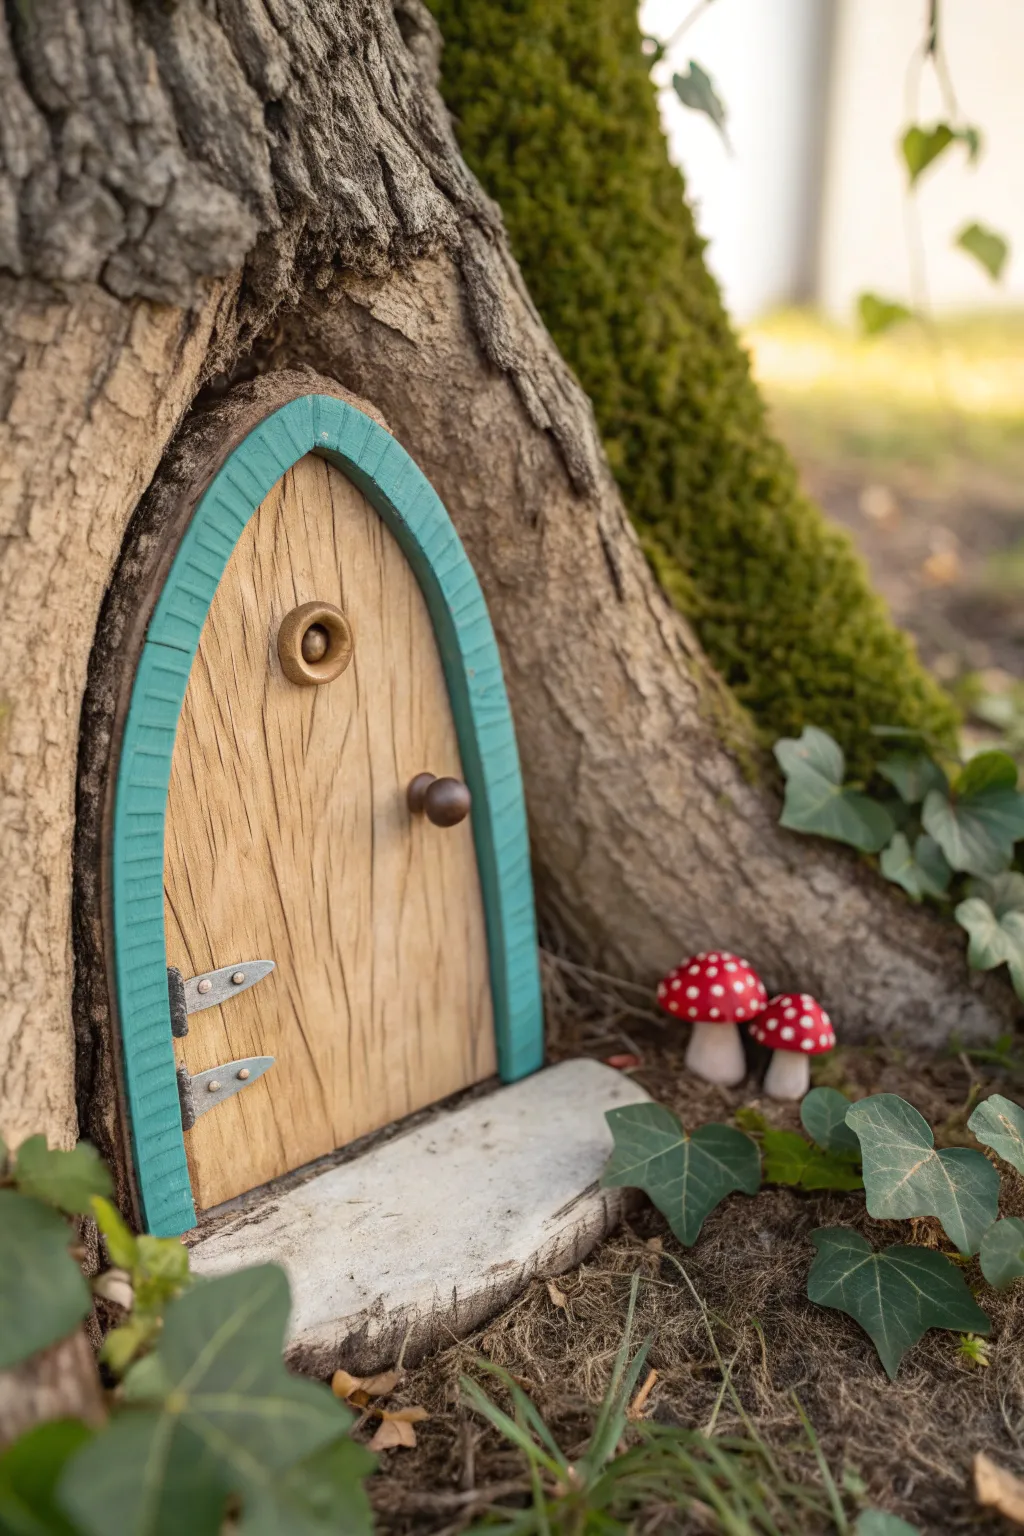
Transform a hidden nook in your garden into a magical entrance with this charming clay fairy door. Featuring a textured wood-grain finish, a bold teal frame, and tiny mushrooms, this delightful project invites wonder into any outdoor space.
How-To Guide
Materials
- Polymer clay (brown, teal, white, red, silver, gold)
- Clay roller or pasta machine
- Pointed sculpting tool or toothpick
- Texture tools (coarse sandpaper or stiff bristle brush)
- Small circle cutter
- Liquid clay adhesive (Bake & Bond)
- Aluminum foil
- Acrylic sealer (matte or satin)
- Super glue (optional external mounting)
Step 1: Shaping the Door Base
-
Create the core:
Start by conditioning your brown clay until it is pliable. Roll out a slab approximately 1/4 inch thick. Cut out a tall arch shape that will serve as the main door; narrow arches tend to look more whimsical and fit better between tree roots. -
Add wood grain texture:
Using a pointed sculpting tool, drag long, slightly wavy vertical lines down the entire surface of the brown arch to mimic wooden planks. -
Detail the grain:
Go back over your ‘planks’ with lighter pressure, adding smaller, intricate scratches and knots to enhance the realistic wood effect. I find that deepening the grooves between the main planks helps the clay look like separate boards later. -
Form the door frame:
Roll a snake of teal clay and flatten it gently with your roller to create a long, ribbon-like strip slightly wider than the door’s edge. -
Attach the frame:
Apply a thin line of liquid clay adhesive to the outer edge of your brown door. Wrap the teal strip around the curved top and sides, pressing gently to bond it without squishing the shape. -
Texture the frame:
Use a knife tool to press small, evenly spaced horizontal lines all the way around the teal frame to give it a decorative, carved appearance.
Uneven Texture?
If the wood grain looks too messy, lightly drag a baby wipe over the raw clay. This smoothes sharp ridges while keeping the deep grooves intact.
Step 2: Adding Hardware & Accessories
-
Create the peephole:
Mix a small amount of gold clay. Roll a tiny ball, flatten it into a disc, and press a smaller indentation into the center. Attach this ‘peephole’ to the upper center of the door using a dot of liquid clay. -
Install the doorknob:
Roll a small ball of brown or bronze clay for the doorknob. Attach it halfway down the door on the right side, pressing firmly so it adheres. -
Fabricate the hinges:
Roll out a tiny amount of silver clay very thin. Cut two small, pointed triangle shapes. Attach these to the left side of the door frame, overlapping onto the wood door itself to look like functional hinges. -
Add hinge bolts:
Using the tip of a needle tool or toothpick, prick two tiny holes into each silver hinge to simulate the nails or bolts holding them in place. -
Form the doorstep:
Take a larger piece of white or grey granite-effect clay and shape it into a rough, flat stone slab that matches the width of the door base. Texture the edges with a foil ball for a stony look.
Glow in the Dark
Use glow-in-the-dark clay for the mushroom spots and the peephole center. Your fairy door will magically light up when the sun goes down!
Step 3: Sculpting the Mushrooms
-
Make the stems:
Roll two thick, short cylinders of white clay. Slightly flare the bottoms so they stand upright easily. -
Shape the caps:
Roll two balls of bright red clay, flattening the bottoms to create mushroom caps. Press them firmly onto the white stems. -
Add the spots:
Roll tiny specks of white clay into microscopic balls. Press these randomly all over the red caps to create the classic toadstool look.
Step 4: Baking and Finishing
-
Pre-bake alignment:
If you plan to place the door permanently against a specific tree root, you can gently press the raw clay door against the bark (using a layer of plastic wrap to protect the clay) to curve the back slightly for a flush fit. -
Bake the project:
Place the door, doorstep, and mushrooms on a ceramic tile or baking sheet. Bake according to your polymer clay package instructions (usually 275°F for 15-30 minutes depending on thickness). -
Cool and seal:
Allow the pieces to cool completely. Brush on a coat of matte or satin acrylic sealer to protect the colors from outdoor elements. -
Final assembly:
Once sealed and dry, set your door and mushrooms in the garden. If you want them fixed in place, use a dab of strong outdoor glue to attach the doorstep to a flat stone or the door back to the tree.
Nestle your new creation into the ivy and wait for the garden magic to begin
Underwater Fairy Garden With Mermaid Touches
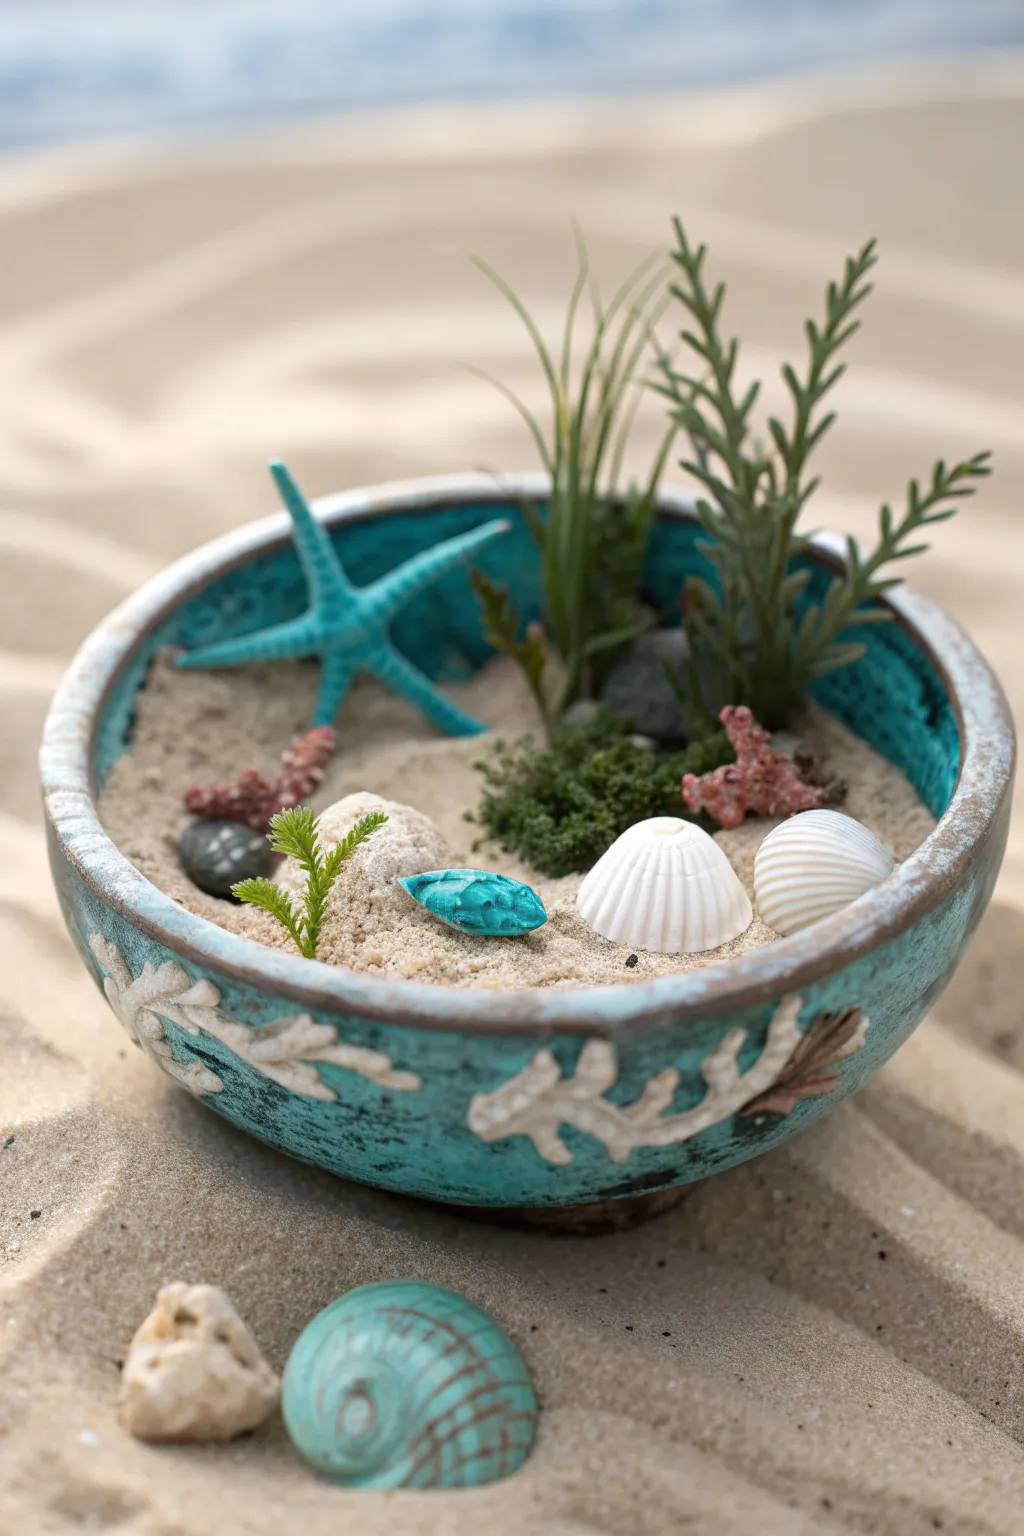
Bring the calming vibes of a tropical reef to your desk or shelf with this miniature underwater oasis. This project combines simple clay sculpting on an existing vessel with thoughtful arrangement to create a permanent slice of paradise.
Step-by-Step Guide
Materials
- Shallow ceramic bowl (similarly shaped to the image)
- Air-dry clay (white)
- Turquoise acrylic paint
- Dark teal acrylic paint (for antiquing)
- White acrylic paint
- Matte sealant spray
- Fine play sand or decorative white sand
- Miniature faux succulents or plastic aquarium plants
- Small white seashells (scallop shape)
- Miniature starfish (or blue polymer clay to make one)
- Small pebbles (smooth dark gray)
- Faux moss or dried lichen
- Small pink decorative coral pieces
- Small teal decorative shell or stone
- Gesso (optional, for priming)
- Sponge dabber or old cloth
- Paintbrushes (various sizes)
Step 1: Transforming the Vessel
-
Prepare the bowl:
Begin with a clean, dry ceramic bowl. If the surface is very glossy, lightly sand it to help your clay and paint adhere better. -
Sculpt the relief details:
Roll small snakes of white air-dry clay. Press them onto the exterior of the bowl in branching patterns to mimic coral or driftwood. -
Add texture:
Use a toothpick or a texture tool to gently stipple the surface of your clay branches, giving them a rough, organic look. Let the clay dry completely according to package instructions. -
Base coat painting:
Paint the entire bowl—including the inside rim and your new clay details—with a solid coat of turquoise acrylic paint. You may need two coats for full coverage. -
Direct the depth:
Once the base is dry, mix a diluted wash of dark teal or black paint. Brush this into the crevices of your clay coral and wipe the excess off the raised areas immediately with a damp cloth to create an antiqued shadow effect. -
Highlight the relief:
Using a dry brush technique, lightly brush white paint strictly over the raised clay branches. This makes them pop against the turquoise background like bleached coral. -
Seal the work:
Spray the entire bowl with a matte sealant to protect the paint and clay from moisture.
Loose Sand?
To make the arrangement permanent, mix your sand with diluted white glue before filling the bowl. It will dry rock-hard and hold everything in place.
Step 2: Setting the Scene
-
Lay the foundation:
Fill the bowl about three-quarters full with fine sand. Shake the bowl gently to level the surface. -
Plant the backdrop:
Place your tallest faux grass or succulent stems towards the back right of the bowl. Burying the base slightly in the sand adds stability. -
Add larger rocks:
Nestle a few smooth, dark grey pebbles near the base of the plants to anchor the visual weight of the arrangement. -
Introduce texture:
Tuck small clumps of dark green moss or lichen around the base of the plants and rocks to simulate seaweed growth. -
Install the starfish:
Place the blue starfish (or your painted clay version) on the left side, leaning it slightly against the rim so it’s partially submerged in the ‘seabed’. -
Position the shells:
Arrange two white scallop shells in the foreground on the right. I usually tilt them slightly so their ridges catch the light. -
Sprinkle coral accents:
Add the small pink coral pieces near the mossy area to introduce a warm contrast color. -
Final flourish:
Place a small sprig of green succulent on the left side near the dark pebbles, and add a single teal shell or stone in the center front to tie the color scheme together.
Glow Up
Hide a tiny waterproof LED light under the moss clump or inside a large shell to give your underwater garden a magical, bioluminescent night glow.
Enjoy the serene splash of color this unique decorative bowl brings to your space